COVID-19 continues to negatively impact various aspects of social, school, and business life. Speaking of business, the pandemic has contributed to the rise in cyber attacks aimed at enterprise computing systems, especially the cloud-based ones, such as Microsoft Teams.
In response to such threats, London-based NTT Data announced plans to deliver a security solution for Microsoft Teams users in physical offices and virtual workplaces.
Microsoft Teams security solution by NTT
The use of remote working or collaborative tools rose sharply a few months after the onset of COVID-19.
Of course, as we speak, organizations are now planning for life back in physical offices. Nonetheless, many have discovered new possibilities with remote workforce collaboration.
So, we don’t expect a sharp decline in the use of platforms like Microsoft Teams once workers return to physical offices. Instead, you’ll most likely witness the rise of the distributed workforce.
A recent NTT survey of workers backs this notion up. According to the study, 56% of office-based workers expect remote working to remain an option even after physical offices reopen.
That’s why companies like NTT Data are building security solutions for physical office use cases and remote working in Teams.
There is currently unprecedented demand for Microsoft Teams expertise as companies have transitioned to remote working. The next step is to build infrastructure to support the future workplace, a framework that will allow companies to return to the office and seamlessly blend remote working with working in the office.
Since Teams is a Microsoft 365-based app, it comes with several security features out of the box. These include at-rest and in-transit data encryption and Advanced Threat Protection.
However, enterprises may opt to engage third-parties to help with the implementation or reinforcement of Microsoft Teams security. This is where providers like NTT come in.
Is your organization ready for the transition to a distributed workforce? Let us know how well prepared you are in the comments box below.
Reading tweets on your timeline, you must have come across tweets that are unavailable.
Unlike the Twitter internal server error, the tweet is unavailable placeholder message is mostly not an issue with your account or the tweet.
In most cases, the message is Twitter protecting your privacy or that of the Twitter user who sent the tweet.
What does this message mean and how do you make tweets available? Read this article to the end to find out.
Why does the tweet is unavailable error appear?
You are trying to view a deleted tweet
The most common instance when you see this tweet is unavailable placeholder message is when the tweet has already been deleted.
Twitter doesn’t just delete the tweet; users will know that something was tweeted but won’t know what it was.
The poster of the tweet blocked you
Another instance when Twitter hides a tweet from you is when you’re blocked by the Twitter account from which the tweet was sent.
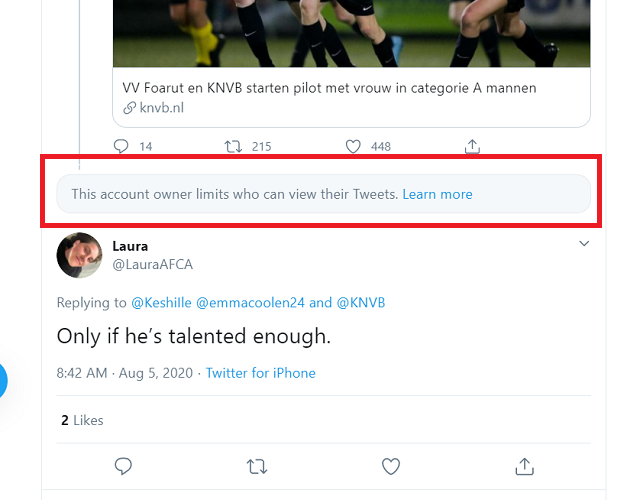
When the Twitter user blocks you, the placeholder message says This account owner limits who can view theirTweets.
Unlike in the case of Facebook blocks, you can find their profile, but that’s as far as you can go.
You blocked the poster of the tweet
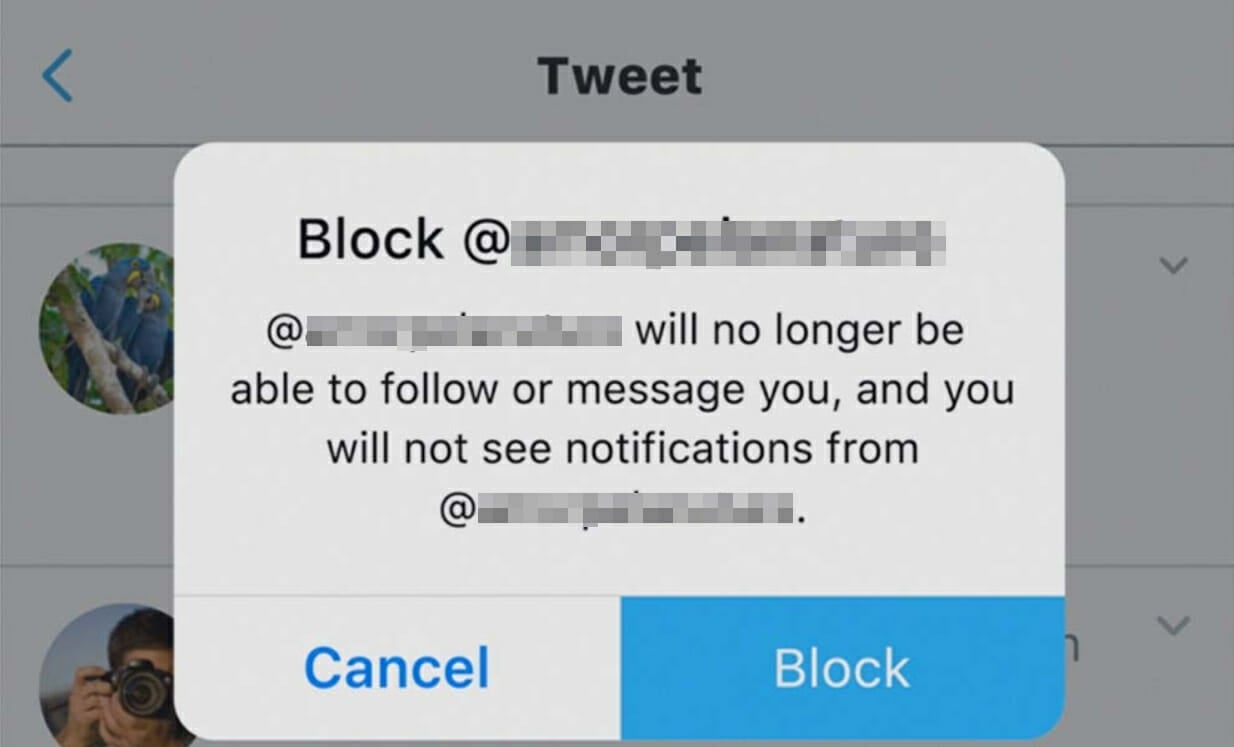
Blocking a Twitter user means that you no longer want to see their content. Hence, Twitter restricts both users from viewing each other’s content.
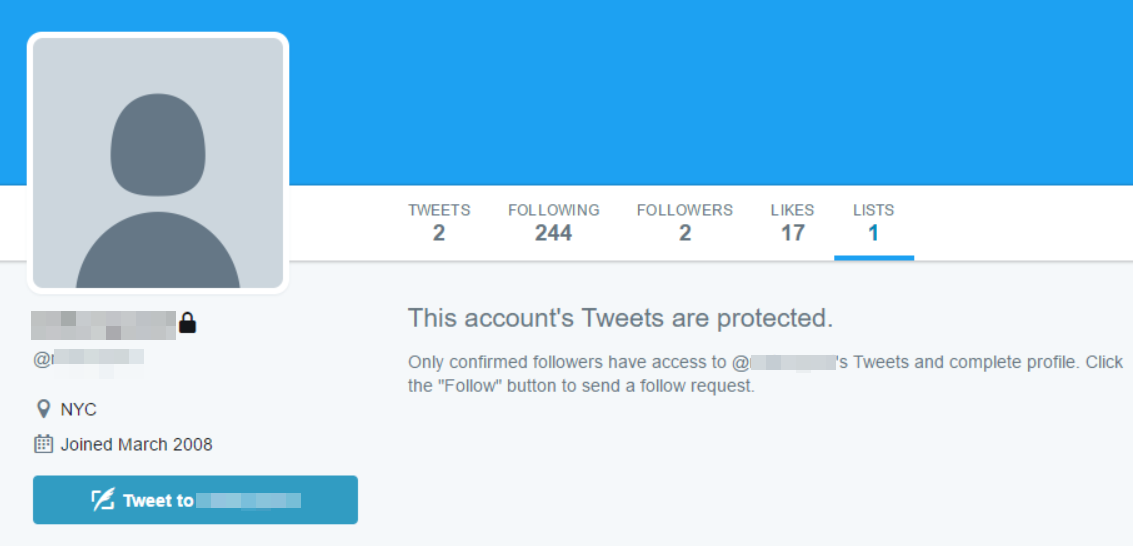
The tweet is from a private profile
The microblogging platform, Twitter, has around 321 million active users so, it sometimes gets too noisy.
Thankfully, you can set your account as private.
When you operate a private account, your content is only shown to users that follow you.
A blocked user is tagged in the tweet
Hiding the content of blocked users isn’t enough to keep them from showing up on your timeline.
If someone you blocked is tagged on a tweet, the tweet will be unavailable to you.
This is Twitter‘s way of protecting your privacy from users you blocked.
How can I remove the tweet is unavailable message?
1. Ask the poster of the tweet to unblock you
If the tweet is unavailable meaning that the Twitter user blocked you, you can reach out to them to ask them to unblock you.
When they do unblock you, their content will become available to you.
Since you can send them a direct message or post on their timeline, you can go through a mutual friend or follower.
2. Unblock the Twitter user who posted the tweet
If you realize that the reason why the tweet is unavailable to you is that you blocked the Twitter user, you have to unblock them to see the content.
Not only will this tweet be available to you; you can see all their content if they’re not blocked.
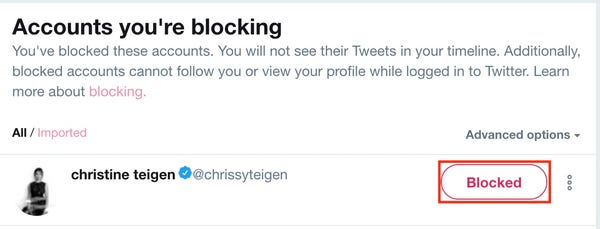
When you block a Twitter user, the follow button says Blocked. Simply tap or click on this button to unblock the account.
3. Send the Twitter user a follow request
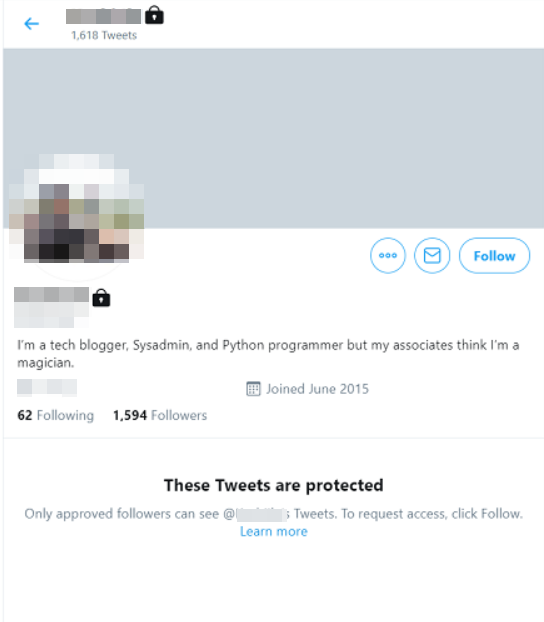
This solution will make the tweet available if the user protects their tweets. To follow a public profile, hit the Follow button.
But when it comes to private profiles, after clicking Follow, you have to wait until they approve your request.
When you finally follow them, you will no longer see unavailable tweets from the Twitter user.
4. Contact Twitter support
Finally, if none of these work, it could mean that your account is being penalized by Twitter. The platform limits your account especially when tweets from several users all show as unavailable.
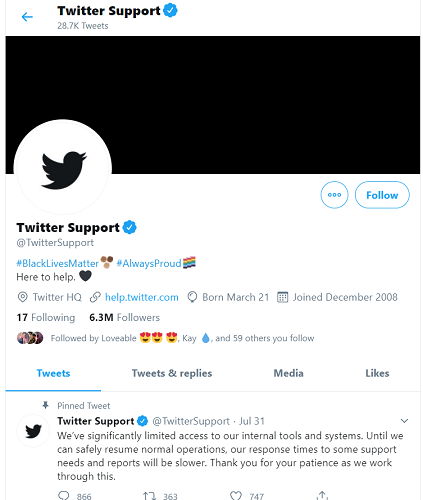
You can either visit help.twitter.com, call 415-222-9670 (toll-free), or tweet @TwitterSupport, stating your case.
If a resolution is possible, then it’s only a matter of time before tweets become available to you.
This unavailable tweet placeholder only applies to tweets that have no interactions (retweets, likes, or replies).
An example is when a user quotes a tweet, which got deleted after the quoting. Twitter tells you that this quoted tweet is unavailable if you want to view the original tweet.
If you’re a Microsoft 365 user, chances are you’ve used SharePoint to share and manage official documents and content.
The app, which recently received a Yammer integration update, comes in handy when you need to remotely collaborate on business files. Sadly though, threat actors know this too. So they’re now sending spoofed SharePoint emails to unsuspecting employees as part of a phishing campaign.
Microsoft 365 user credentials targeted in phishing attacks
The folks at Abnormal Securityuncovered a phishing campaign that targets corporate SharePoint users. Unfortunately, the end game for the attackers is to collect unsuspecting users’ Microsoft 365 credentials.
They start by sending spoofed SharePoint emails addressed to no specific person. By not naming any individual as the recipient, the threat actors aim at tricking as many victims as possible into supplying their Microsoft 365 login details.
This attack impersonates an automated message from Sharepoint to send phishing emails. The email itself is not addressed to any specific individual, and is meant to cast a wide net to phish for employees credentials.
However, unlike previous similar attacks, this phishing campaign doesn’t create any sense of urgency to get the target to act quickly.
According to Abnormal Security, the attackers designed the phishing emails to appear to originate from within the target organization.
As you may expect, each email has a malicious link. And if you click on the link, you end up on a fake Microsoft 365 landing page. The link may take the user to a PDF download page that redirects to another site, in other cases.
Whichever way the link goes, the user ends up on a site that requires Microsoft 365 security credentials to sign in.
Phishing attacks targeting the users of Microsoft 365 or other cloud-based or on-premises computing tools are a persistent cybersecurity issue. Be sure to guard your IT systems with all you’ve got, from antivirus solutions to Microsoft Defender ATP.
For any cybersecurity-related problem or question, write us a message in the comments box below.
Resuming browsing from the last session is extremely useful and time-saving. Most popular browsers have a restore or history button to help you, although the initial session still opens in a new page.
This tutorial, on the other hand, is helpful to force Internet Explorer to start from the last session.
This should restrict all users on the same PC, so that they can’t change the settings on their own, and start Internet Explorer from the previous session.
Press Windows Key + R, type gpedit.msc in the Run dialog box and hit Enter to open the Local Group Policy Editor.
In the left pane navigate to: User Configuration /Administrative Templates /Windows Components /Explorer /Internet Control Panel /General Page
In the right pane of Local Group Policy Editor, go to Start Internet Explorer and double-click it.
Now select Enabled and click Apply then OK.
Close the Local Group Policy Editor and see the changes you’ve made by running Internet Explorer.
2. Use the Registry
Press Windows Key + R, type put regedit in the dialog box and hit Enter to open the Registry Editor.
In Registry Editor in the left pane go to: HKEY_CURRENT_USER\Software\Policies\Microsoft\Internet Explorer
In the left pane again, right-click on the Internet Explorer key, select New -> Key. Name the new key ContinousBrowsing.
Now select it and come to its right pane.
Right-click and select New -> DWORD Value, name the DWORD as Enable.
Double-click on it, and you’ll get Edit DWORD Value box:
In the Value data field enter 1 in order to force Internet Explorer to start from the previous session.
Click OK and close the Registry Editor and restart your computer to apply the changes.
3. Use Internet Properties
Type internet properties in the home screen search box and double-click on the first result.
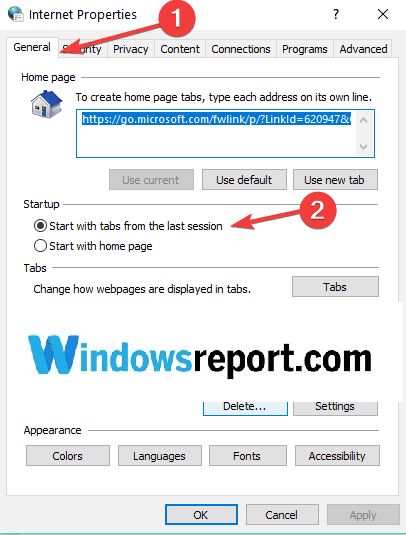
Now, go to the General tab and locate the Startup feature.
Check the option Start with tabs from the last session.
If you consider switching to an alternative browser and replace the outdated Internet Explorer, we strongly recommend OperaOne.
This is a free lightweight and fully-customized browser, that you can download and set up in just a couple of minutes.
It comes with a multitude of features to help you navigate between various tabs, workspaces, and built-in social media chat apps. The dedicated add on library contains tens of other options that you can get for and use for free.
Opera One is available for PC, mobile (including older phones), Mac, or Linux. Besides, you can synchronize the browser across all your devices, to easily manage all the settings.
Starting from the basic version, you can bring your own flavor to the browser, adding icons, sidebars, workspaces, and bookmarks for ease of access and a better-organized workflow.
Add the incorporated VPN and the built-in AI, and you have the perfect browser.
Opera One
Take your browsing experience to the next level with this amazingly fast and highly customizable browser. You won’t regret it!
VLC is a popular video player available on the Windows and Mac platforms. The VLC shortcuts, also known as hotkeys, allows the users to perform quick actions without using the mouse.
That being said, some users have reported having encountered the keyboard shortcuts not working issue in VLC.
VLC player may ignore your shortcut keys if the keys are not assigned correctly. In some instances, it can also happen due to a glitch in the media player.
In this article, we explore a few troubleshooting steps to help you resolve the keyboard shortcuts not working in the VLC issue on your Windows and Mac systems.
How can I fix the hotkeys not working in VLC?
1. Check VLC hotkeys preference
Launch the VLC player on your computer.
Click on Tools.
Select Preference from the options.
At the bottom, make sure the Simple option is selected under Show settings.
In the Preference window, open the Hotkeys tab.
Go through the assigned hotkeys and check if you have correctly assigned the keyboard shortcut for the function you want to execute.
Click on Save.
Once you have saved the hotkey changes, close the VLC player. Use Ctrl + Q for Windows, and Cmd + Q for Mac.
Right-click on the taskbar and select Task Manager. Find any and all instances of VLC player and end the process.
Relaunch the VLC player and check if you can use the keyboard shortcuts are working.
At times, not quitting the VLC player after making changes can prevent the changes from being applied. Simply relaunch the app and check for any improvements.
2. Update VLC player
Launch the VLC media player.
Click on Help.
Select Check for Updates.
VLC will scan for pending updates and prompt you to install if an update is available.
Read the description and click on Yes.
VLC player will download the update and prompt you to install it.
Click on Install.
Play any media file and check if the VLCshortcuts are working.
VLC releases new update fixing minor bugs periodically that can resolve glitches and bugs reported by the users.
3. Check your keyboard layout
Windows 10
Click the keyboard layout button from the notification area. Keyboard icon or ENG
If you are in the US, select English (United States) US Keyboard.
English (United States) US Keyboard and English (United States) US International Keyboard has a different layout.
Once you have selected the right layout, open the VLC player.
Play any media file and check if the shortcuts are working.
For many users, changing the keyboard layout has fixed the VLC hotkeys issue. Different keyboard layouts also have different hotkey functions. If you have multiple keyboard layouts installed, check if you are using the correct layout to fix the issue.
Mac
Open the Apple menu.
Select Preferences.
Select the Keyboard.
Open the Input Setting tab.
Check the box ‘Show input menu in menu bar’.
From your menu bar, click the Input icon and select your regular layout.
4. Run keyboard troubleshooter
Press the Windows key + I.
Choose Windows Update & Security.
Scroll down and select Troubleshoot from the left panel.
Scroll down and choose Keyboard.
Click on the Run the troubleshooter button.
Let windows troubleshooter find and fix any issue with the keyboard.
Running the Windows 10 keyboard troubleshooter can fix any compatibility issues with the keyboard and computer.
5. Reinstall VLC media player
Press the Windows key + R.
Type appwiz.cpl and click OK.
Select VLC from the list of installed apps.
Select Uninstall.
Click Next to complete the process.
Once uninstalled, download and install the VLC media player from the website.
The keyboard shortcuts not working in the VLC issue usually occur due to incorrect hotkey assignment or wrong keyboard layout selection. Follow the steps in the article to troubleshoot the issue.
Crunchyroll is a popular American anime, manga, and dorama streaming platform available on Xbox One and other platforms.
However, several Xbox users have reported the Crunchyroll server error when trying to open the app on their console.
The Crunchyroll is experiencing a server error that seems to be triggered by a bug in the app. Users have suggested that force closing the app seems to have resolved the issue.
In this article, we explore a few known solutions to help you resolve the Crunchyroll server error on your Xbox One.
How can I fix Crunchyroll experienced a server error on Xbox One?
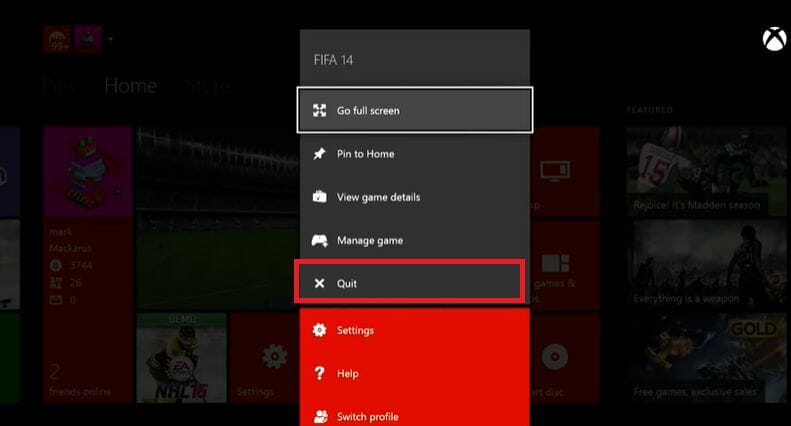
1. Force close and restart the app
Make sure the Crunchyroll app is open.
Press the Xboxbutton on your controller.
Make sure the Crunchyroll app tile is highlighted.
Press the Menu
Scroll down and select Quit.
Relaunch Crunchyroll and check if the server is resolved.
When the user closes the game or app on Xbox, the console pauses the game or media to be able to resume without having to restart the app again.
However, Crunchyroll seems to have an issue with the pause/resume functionality. So, force closing the app is a working workaround to resolve the error.
Make sure to quit the Crunchyroll app before turning off your Xbox to avoid getting the error.
2. Check for an app update
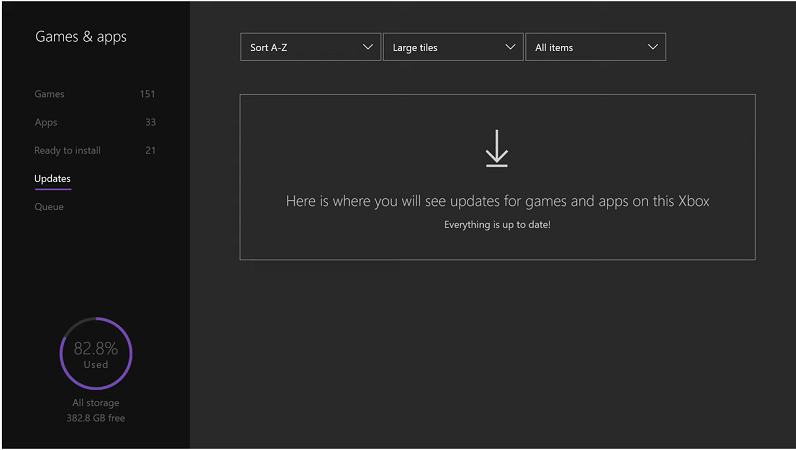
From your Xbox home screen, open My games and apps.
Under Games & apps, select Updates.
Download and install any update pending for Crunchyroll.
If no update available, press the B button go back to My games and apps.
Select the Apps tab.
Highlight the Crunchyroll app.
Press the Start button and select Manage.
Scroll down to Updates.
Download and install any pending updates for the app.
Crunchyroll seems to have released an update to fix the Crunchyroll is experiencing a server error. Download and install the update and check for any improvement.
3. Use VRV app on Xbox One
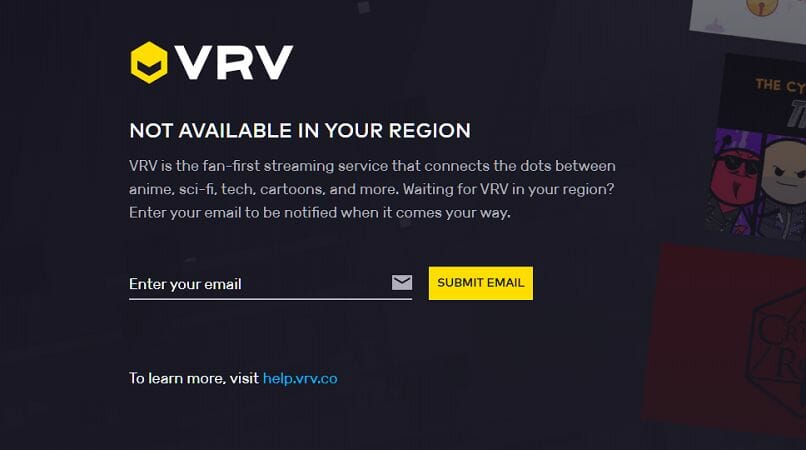
If the issue persists, you can download and install the VRV app on your Xbox One. VRV is a fan-first streaming service that offers anime, sci-fi, tech, and more. Crunchyroll develops VRV, thus allows you to link your Crunchyroll account to the app to maintain premium access.
Download and install the VRV app on your Xbox One. Link your Crunchyroll account to VRV, and you can watch your favorite manga or anime series without the server error.
Connect your Xbox One to the network and launch the Crunchyroll app.
If the issue persists after performing a network restart, try a network reset to fix the issue.
Reset router to factory default
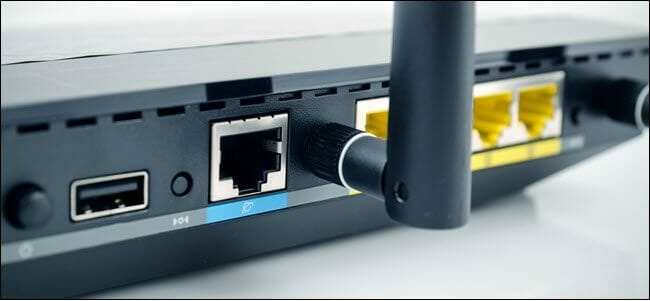
Locate the reset button on the back of your router.
Make sure the router is powered on.
Use a paper clip or similar object to press and hold the Reset button for 15 seconds.
Wait for the router to reset and power back on fully.
This should reset the router to its default factory setting. Connect your Xbox One to the router and check if the Crunchyroll experience a server error is resolved.
Note that resetting your router will wipe out off of your customized settings, including the router username and password. You may have to configure port forwarding and proxy setting from scratch after resetting the router.
The Crunchyroll server error on Xbox One occurs due to a bug in the app. To fix the error, make sure always to force quit Crunchyroll before shutting down your Xbox One.
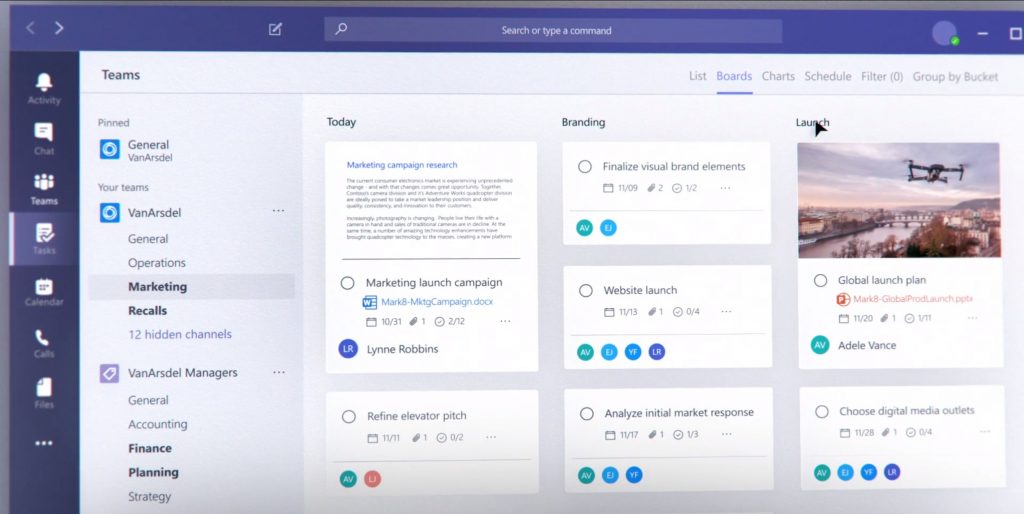
After a delay, and three months after an initial announcement, Microsoft is finally rolling out the new Tasks app in Microsoft Teams. The new experience is powered by both Planner and Microsoft To Do and is essentially a rebrand of the pre-existing Planner app inside of Microsoft Teams, creating one central hub for all things teamwork.
According to Microsoft, today’s rollout is a bit of a gradual one. The company says that it will be coming to a small group of users starting today, with a continued rollout through September. Tasks for Teams mobile, meanwhile, will not be available until the desktop rollout is finished.
Please be aware that, currently, the name of the Planner app inside Microsoft Teams will not change. Microsoft says that as they continue to roll out the new Planner experience in Teams desktop, the app name will initially remain Planner, then change to Tasks by Planner and To Do, and then change to Tasks. Mobile users, meanwhile, will always see the app as Tasks.
As a reminder, some features in the new Tasks app include a new list view, and the ability to edit multiple tasks at once. The list view includes a traditional board, charts, and schedule view from Planner, with the option for Lists, too. It also adds a bulk editing capability, where you can edit multiple tasks simultaneously, for changing progress, priority, due dates, and more.
Users of Power Automate can also enjoy integrations in the new Task app, to surface tasks created in other apps in Tasks in Teams. Finally, companies can use task publishing to create tasks at the corporate level and push those tasks to targeted locations of their Firstline Workforce.
You can check to see if Tasks is available for you by clicking the ellipses in the Teams sidebar and choosing Planner. This all part of a new movement by Microsoft dubbed as “Tasks in Microsoft 365.” With it, Microsoft is aiming at the coherence, intelligence, and integration principles.
Cuphead, one of the most successful ID@Xbox titles in recent years is being released on PlayStation 4 today. The run and gun adventure left a big mark since its release on Xbox One and Windows in 2017 and sold more than 5 millions copies to date. This is quite exceptional for an indie studio to get so much success with their first game, though Cuphead is a true work of art with its unique art style that pays homage to old-school cartoons.
Sony’s PlayStation 4 went to sell more than 100 million units during this console generation, so skipping the lead platform would have been a big missed opportunity for developer Studio MDHR. Before its PlayStation 4 release today, Cuphead has been previously ported on macOS and the Nintendo Switch as well. The indie studio also said today that it’s still working on Cuphead’s first DLC, The Delicious Last Course, which still has no released date.
Last but not least, it was announced today that the Xbox One version of Cuphead will receive a free update that will add a digital art gallery, behind-the-scenes commentary features, and playable soundtrack to the game. “This update is still in the early planning stages, and we’ll be taking the time to get things just right, but we will be sure to share more when we have something for you that meets the level of care and quality we always strive for,” the developers said today.
If you have yet to play it, Cuphead is just $19.99 on the Microsoft Store and it includes Xbox Play Anywhere support. It’s definitely a game that we would like to see coming to Xbox Game Pass one day, especially since it used to be a console exclusive on Xbox.
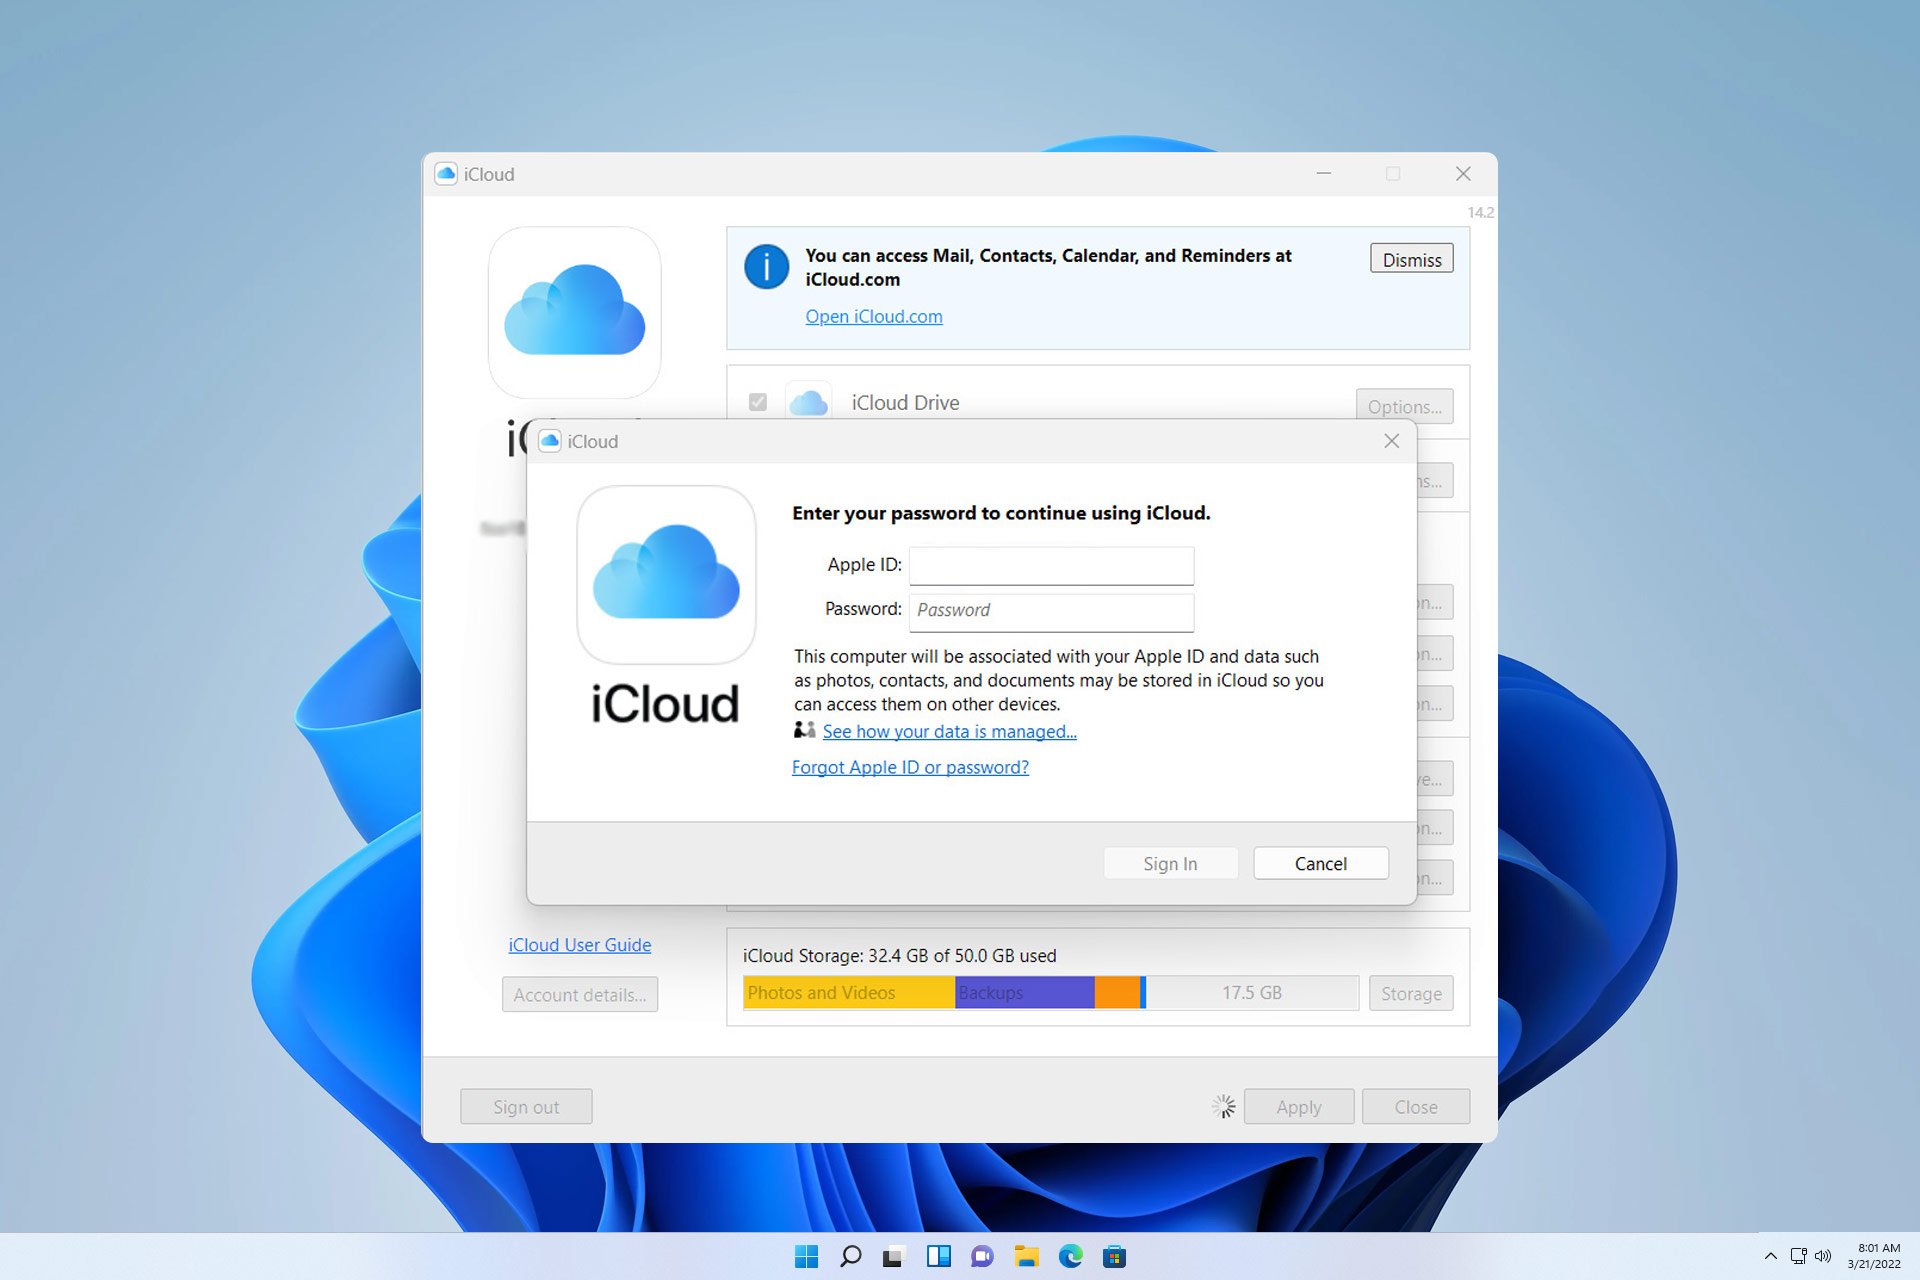
Many reported that iCloud keeps popping up on Windows 11, and this can be rather tiresome because the window starts appearing as soon as your PC starts.
Luckily, there are a couple of solutions that you can use to fix this problem on your PC, so keep on reading.
Why does my computer keep asking me to log into iCloud?
This is most likely due to iCloud configuration files. The software might not be properly configured, and this is why it’s asking you to log in constantly.
How do I stop the iCloud window from popping up?
Before we start:
You might be able to fix the problem by updating Windows or by entering your iCloud credentials into the prompt.
1. Disable iCloud from startup
Press Ctrl + Shift + Esc to open Task Manager.
Navigate to the Startup tab.
Locate iCloud on the list, select it, and choose Disable.
2. Reinstall iCloud
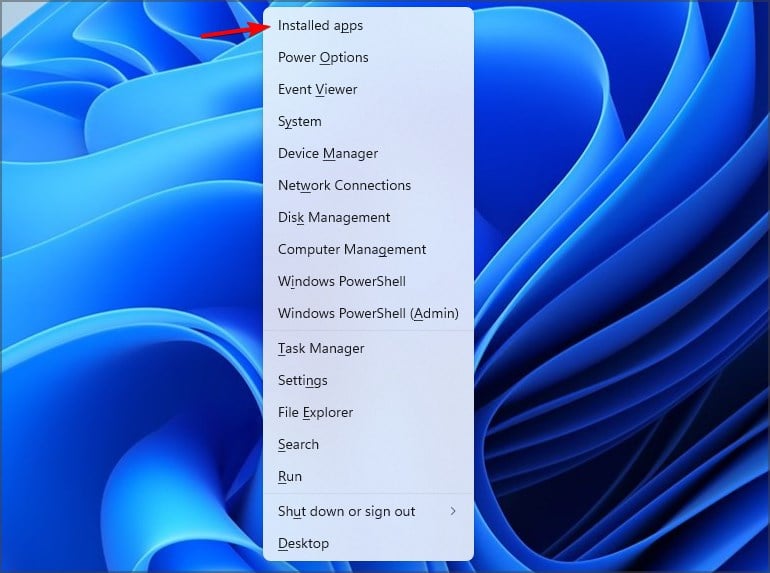
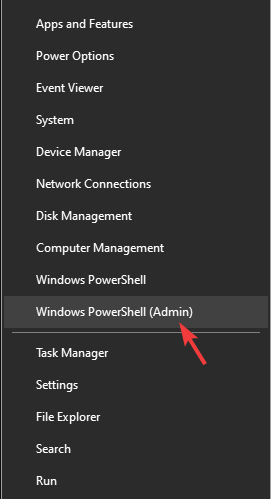
Press the Windows key + X and choose Installed apps.
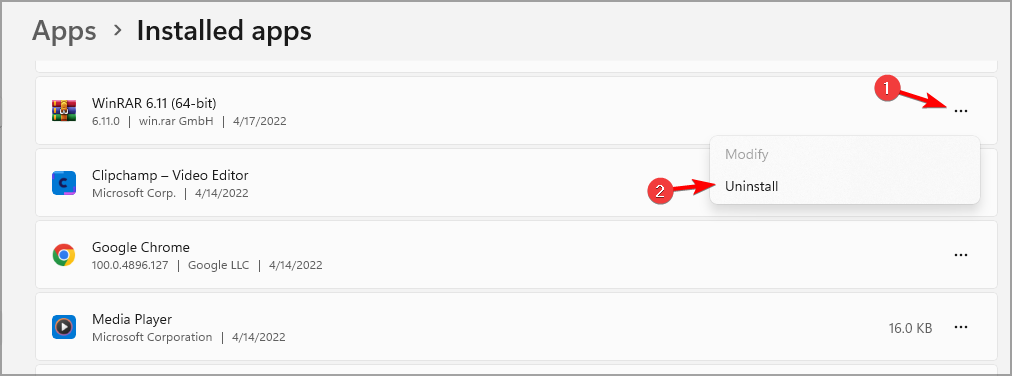
Next, select iCloud, click the three dots next to it, and choose Uninstall.
Follow the instructions on the screen to complete the process.
If there are any more iCloud apps available, remove them as well.
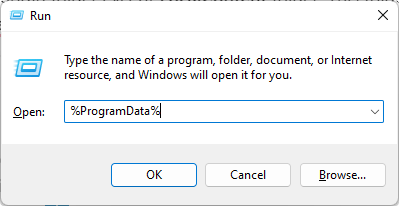
Press Windows key + R and enter %programdata%
Locate and remove all iTunes and iCloud folders. If you don’t have other Apple software, remove Apple folders as well.
Optional: Delete any iCloud folders from the following directories: C:\Users\[YourUser]\ C:\Users\[YourUser]\Pictures
All files that are already synced will remain in the cloud. However, files from iCloud Drive Folder will get deleted, so be sure to copy them to another location.
Microsoft Word is one of the most commonly used Microsoft 365 programs. It not only has some cool templates, but it’s also used to type up important documents, letters, and a whole lot more. Sometimes, though, Word might not work as expected, and you might end up getting an error code or an error message. Here’s a look at some of the most common Word problems, and how you can fix them.
My file won’t open
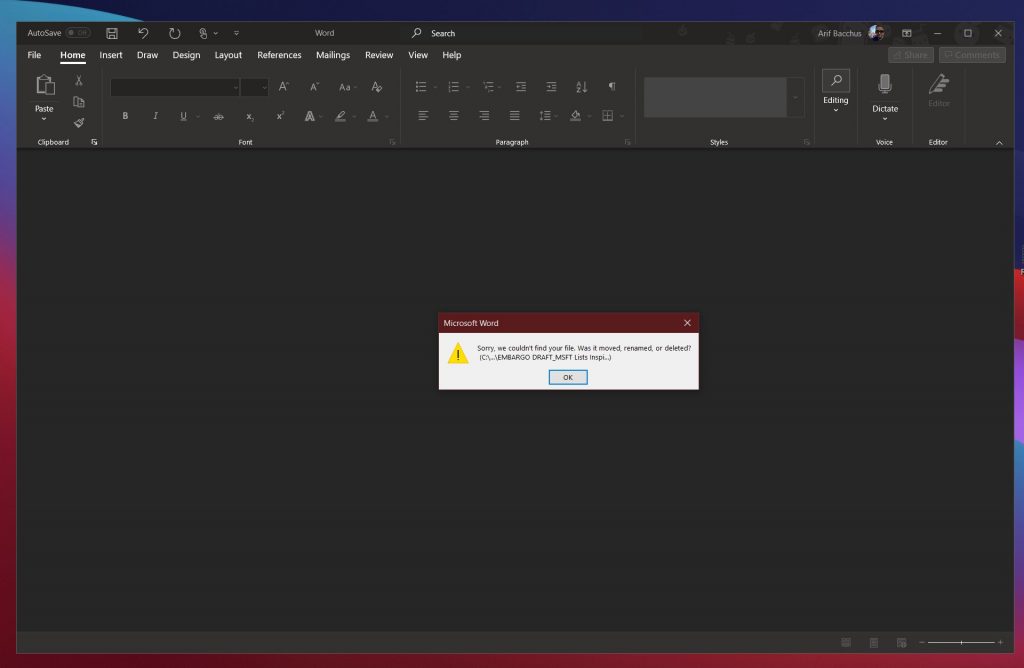
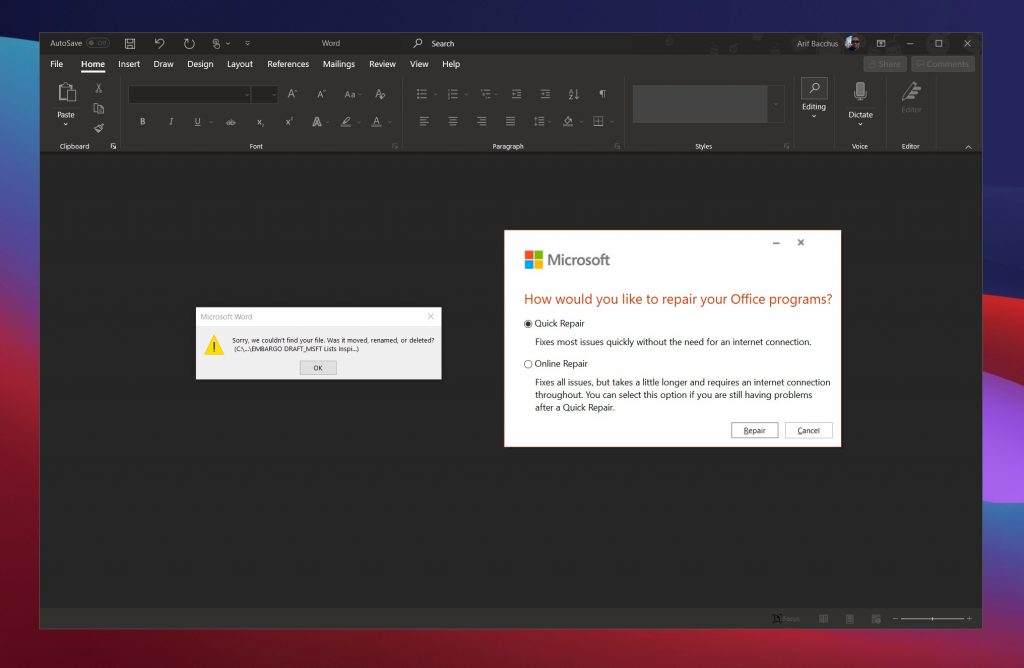
Trying to open a file but Word isn’t getting along? In this case, Microsoft Word might give you a message saying that it experienced an error while trying to open the file. This usually occurs when you don’t have the permission to open the file, or if the file has moved from its original location or has been deleted.
To fix this, check in the File Explorer or run a search in Windows 10 to see where the file has gone. To unlock the file and get the permission to open it, meanwhile, go to the location where it is saved, right-click the file, and then choose properties. From there, you’ll want to click the unblock option.
Microsoft Word crashes or freezes
Another common issue with Microsoft Word is that it might crash or freeze when opening a document. This might occur when Word is having some trouble reading the contents of a document, or if the document has a lot of images and text.
In most cases, it’s best to wait and let Word try to resolve the problem on its own. At the risk of losing your document, you also can try to force quit word using the task manager by pressing CTRL+ALT+DEL, and clicking Task Manager, looking for Microsoft Word, and then clicking End Task. This will give the program a fresh start. In most cases, Word will try to auto recover the document as you last had it and will open the Document Recovery task pane. Again, though, this is the last resort.
If Word continues to have a problem and still gives you error messages, you get a message saying that the document caused a serious error. In this case, you might need to reset Microsoft Word completely. To do this, head to the Windows 10 Start Menu and type Add or Remove Programs. Then, choose Office or Microsoft 365 from the list, followed by Modify. You should get the option for Quick Repair. Choose, this, and Word Will be reset.
Microsoft Word is running slow
The final issue on our list has to do with Microsoft Word running slow. This could be it not picking up your keyboard input in time, or images or other menu items taking a while to load. In most situations, we recommend to use the Quick Repair option we described above.
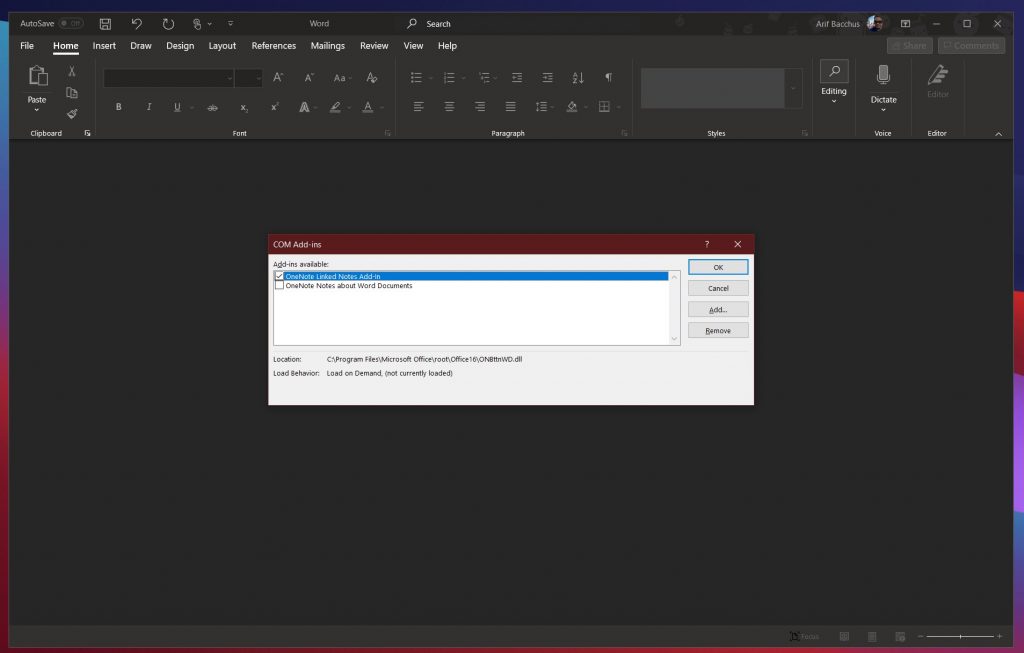
However, as an alternate, you also might want to try to disable extra add-ins. These are meant to boost your experience, but can also slow things down. You can disable these by clicking the File menu, followed by Options, and then Adds Ins. Click an add-in, and then the Go button. You’ll then be able to disable it by clicking Remove.
Contact Microsoft Support for help!
If all else fails, and you run into a problem with Word, Microsoft is here to help you. As covered under the Microsoft 365 subscription, you always can contact Microsoft for help. Simply visit this support page, and start a chat.
The Action Blocked message appears on Instagram accounts that have been blocked for suspected spam. Whether you are a spammer or not, the error message can be equally annoying to every Instagram user.
The Action Blocked message usually prevents users from performing a specific action such as liking a picture or sharing Instagram posts.
In this article, we explore a few troubleshooting steps to help you resolve the Instagram action blocked message so that you can continue using your favorite social media app without any issues.
How can I fix the action blocked error on Instagram?
1. Change your network preference
If you experience this action is blocked Instagram error when on Wi-Fi, try changing the network preference.
Switching to mobile data seems to have helped many users bypass the restrictions. This should work in case Instagram has blocked your IP address and not your account.
Disable VPN
If you are using a VPN, try disabling it. Due to the change of location, Instagram may suspect the account to be spam and block some actions temporarily.
Stop all Instagram activities temporarily
If switching to mobile data did not help, maybe time to reconsider your Instagram usage. Stop performing some Instagram activities such as liking and commenting for 24 hours.
Giving some rest to your account will reinstate the account standing and allows you to carry on with your usual Instagram activities.
2. Link to Facebook and other social media account
Launch the Instagram app.
Tap on your Profile icon.
Tap on three horizontal lines.
Select Settings.
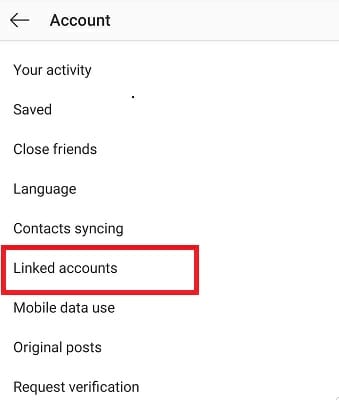
Tap on Account.
Select Linked Accounts.
Tap on Facebook.
Login with your Facebook credentials and then authorize Facebook to access your Instagram account. Once done, relaunch the app and check if the Instagram follow action blocked error is resolved.
Uninstall third-party apps
One of the common reasons for Instagram account action block is the use of third-party apps to automate likes or get followers. Uninstall any such third-party app and revoke the authorization if you have given it to any app or service to manage your account.
Try accessing the account from another device
If you haven’t tried already, it is worth a shot. Sign out of your Instagram account on your current device. Log in to your Instagram account on another device. Try performing the blocked action to see it works.
3. Reinstall Instagram
Open Settings.
Select All Apps.
Search and open Instagram.
Tap on Uninstall and confirm the action.
Open Play Store and search for Instagram.
Install the app and check for any improvements.
If you can access the account without error on a secondary device, try to reinstall the app to resolve Instagram won’t let me change my username action blocked issue.
Report to Instagram
Launch the app.
Take a screenshot of the error you are seeing and save it.
Tap on your Profile.
Tap on three horizontal lines.
Select Settings.
Select Help.
Tap on Report a Problem.
Select Report a Problem.
Explain your issue and attach the screenshot.
Tap on Submit to send your appeal.
If you think your account is flagged by mistake, you can report to Instagram to get your account reinstated. You can appeal to Instagram from your account’s settings menu.
Instagram will review the request and reply to the same in a few days to a few weeks.
Instagram action blocked can occur when creating an account, or changing usernames. Follow the steps in this article, and hopefully, you can fully restore your Instagram account in no time.
A lot of users utilize Facebook Messenger on Android mobiles. Some Messenger users might occasionally accidentally delete messages. There are a few ways you can recover deleted Facebook messages.
One recovery method is to restore lost messages from com.facebook.orca. That’s a Facebook Messenger folder that includes a repository of data files for messages, images, cookies, cache, and videos.
You can recover lost Facebook messages by copying and pasting the fb_temp subfolder in com.facebook.orca. If your Facebook app doesn’t work at all, check out this guide.
How can I recover my lost Facebook messages?
Use the Windows 10 File Explorer
Copy the fb_temp folder
First, plug your Android mobile’s USB cable into a desktop’s or laptop’s USB slot to connect it with PC.
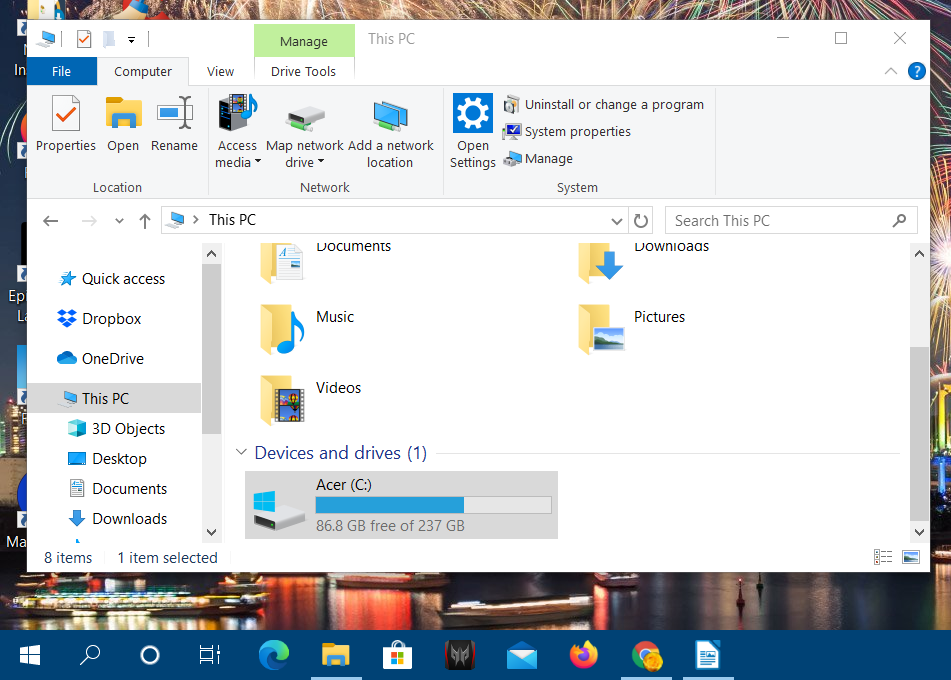
Next, click the File Explorer button in Windows.
Select your connected Android device on the left of File Explorer.
Select the inner storage for your Android mobile, which might be SD card.
Click the Android and data folders to open them.
Open the Applications subfolder, and then look for the com.facebook.orca folder there.
Open the com.facebook.orca folder.
Next, click the cache subfolder in com.facebook.orca to open it.
Select the fb_temp folder.
Press the Ctrl + C hotkey to copy the selected fb_temp folder.
Reinstall Facebook Messenger
To uninstall
Turn on your Android mobile.
Open Settings on your Android mobile.
Tap Apps to open a list of installed apps.
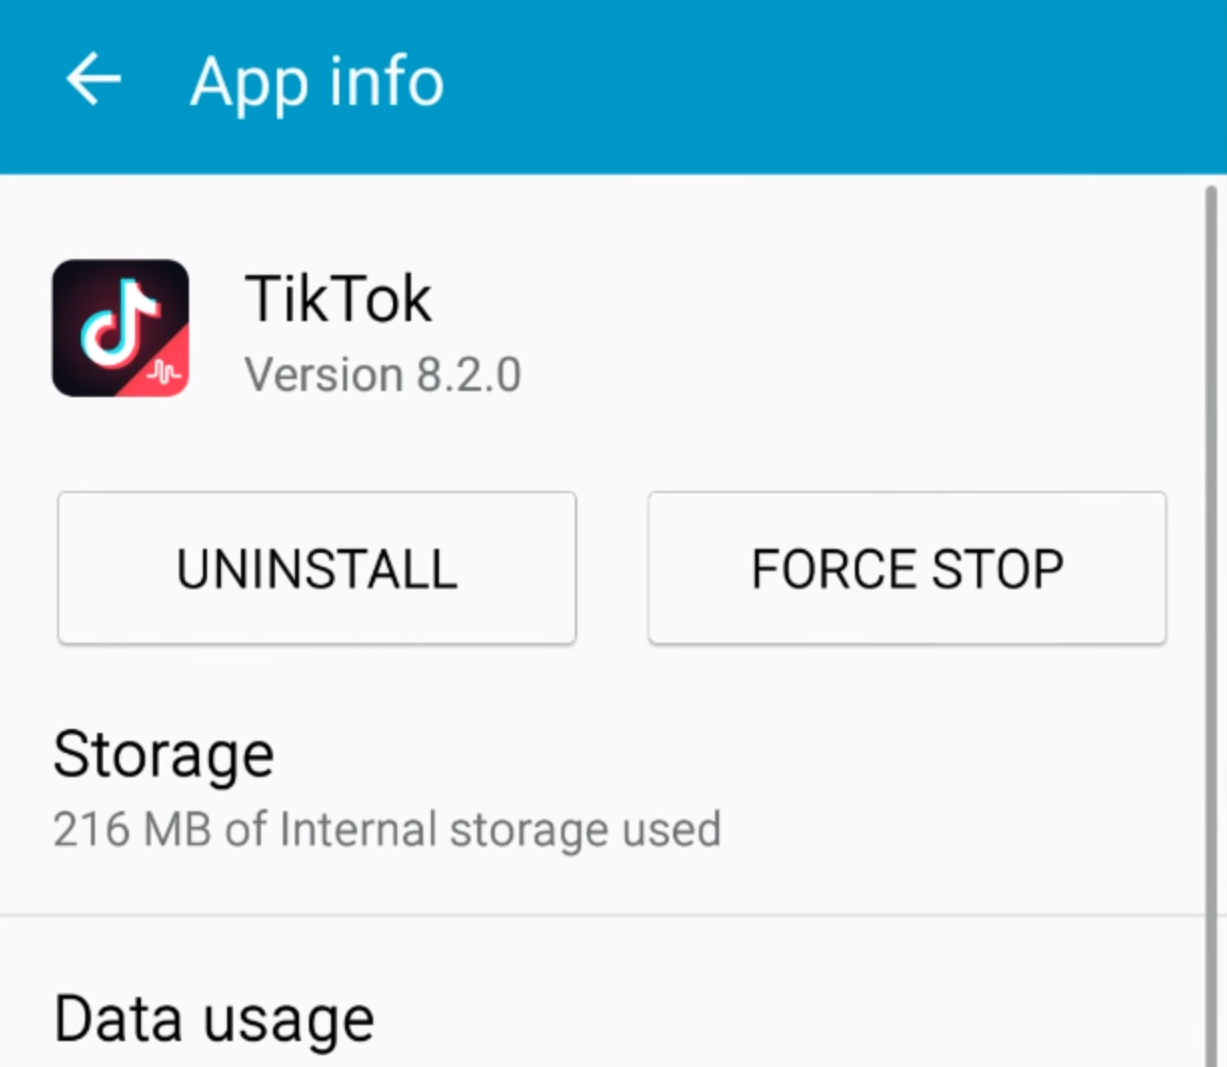
Select the Facebook Messenger app.
Then tap the Uninstall option for it.
To reinstall
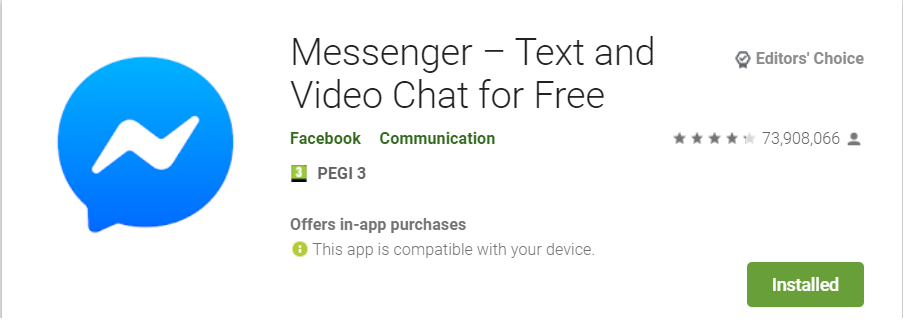
Open the Messenger app page in Google Play. Tap the install button there to reinstall it.
Then return to the Android > Data > Applications > com.facebook.orca > Cache folder path within File Explorer.
Right-click an empty space within the cache folder to select Paste.
Log back into Facebook within your Messenger app.
Note:You can also retrieve the deleted messages much the same by utilizing the file manager on your Android device. So, it’s not essential to connect an Android mobile with PC if it includes a file manager.
Although most of us turn to VPNs due to privacy concerns, some would argue that a VPN can do so much more than keep you anonymous while online. And they wouldn’t be wrong, either.
VPN, which is short for Virtual Private Network, can make sure your connection stays secure, your online identity private, and your browsing activity unlimited.
By unlimited, we mean that certain restrictions can be bypassed while using a VPN. For instance, you may know this already, but services such as ExpressVPN can help you circumvent geo-restrictions.
Netflix is a popular geo-restricted service
Netflix is one of the most popular streaming services in the world right now. Given that the current situation (with the pandemic and whatnot) implies we all have to spend more time indoors, Netflix is quite the rockstar.
You purchase a subscription plan, access the streaming service from your device, and start binge-watching.
However, there’s something that few mention (or know) when it comes to Netflix. This service is unfortunately not the same for everyone.
The US version has the widest range of content, and it’s simply not fair for other non-US customers.
Simply using a VPN (at first) seemed to yield great results, and just for a while, non-US Netflix customers could enjoy the same content as users in the US.
In return, Netflix rapidly caught the gist of it and started restricting VPN users. As we’ve previously explained, VPN traffic can be easily detected, especially since it always passes as encrypted.
How does Netflix detect and restrict VPN users?
However, Netflix has no way of seeing your traffic and detecting that it’s encrypted. Instead, what Netflix did to improve the VPN detection rate was check if the IP you’re using is in any way associated with a VPN.
Once a VPN IP gets picked up, it gets blocked, along with other addresses in the same range, or which belong to the same provider.
That’s why we can’t stress enough the importance of using VPNs with huge server networks.
Usually, VPNs that have extensive networks of servers also have thousands of IP addresses that they update on a regular basis.
Also, there’s the chance that you can simply switch the server if you discover one of them doesn’t work. Thus, the chances of getting detected while using a VPN with numerous servers are slim to none.
However, we can’t guarantee they’ll always be able to circumvent geo-restrictions.
ExpressVPN is perfectly capable to bypass Netflix VPN block
To wrap things up, if you’re wondering whether ExpressVPN can bypass Netflix‘s infamous VPNblock, it can. The most common way that Netflix blocks VPN access is by checking if the IP you’re using belongs to a VPN.
ExpressVPN is one of the VPNs that can render this checkup useless. It comes with a huge server network and a large number of IP addresses that get frequently updated.
It goes without saying that trust is a major factor you need to consider upon picking a VPN.
The market is over-saturated with VPN services, and if you haven’t been around this field for a while, choosing one to stick with can be quite challenging.
There’s an awful lot of categories, too, which can affect your decision. For instance, you’d be more prone to picking a free service that sells itself as being one of the greatest, if you wouldn’t know better.
Can you trust VPNs?
Many such promises are merely marketing gimmicks. You could see for yourself just by looking up past scandals involving certain free services. Privacy-wise, to be more specific.
However, on the opposite side of the ring lay paid services, such as ExpressVPN. These swear by their impenetrable infrastructure, zero-logging policy, and really good value for money.
So let’s see whether this service can really be trusted.
ExpressVPN’s censorship battle
A while back, in 2017, ExpressVPN‘s VPN apps were removed from Apple’s App Store in China.
This knowledge was made public by ExpressVPN in an open letter, which was later picked up by various media outlets.
Apple confirmed that the allegations were, in fact, true and also added that they’ve removed a total of 674 VPN apps from their App Store in China, at the request of China’s government.
Internet censorship in China affects those who want to publish online material, but also those who merely want to view it. Reportedly, Internet censorship in China is more advanced than anywhere else in the world.
It’s based on blocking certain website content, but also involves monitoring the Internet access of individuals.
Thus it’s clear to see why ExpressVPN, a service that promotes privacy and bypassing geo-restrictions, was removed from the Apple App Store in China and is also blacklisted as a whole.
ExpressVPN’s clean slate
Fortunately, ExpressVPN hasn’t lingered under the spotlight for too long, as it doesn’t have a record of breaking the trust of its customers.
Even when the need to unveil the truth was critical, nothing could be found on the ExpressVPN servers.
In December 2016, Andrei Karlov, the Russian Ambassador to Turkey, was assassinated by an off-duty Turkish police officer.
In 2017, Turkish authorities seized an ExpressVPN server, which they believed was used to erase information that was crucial to solving the case from the assassin’s Facebook and Gmail accounts.
The Turkish investigators didn’t find any logs that they could use in their investigation. ExpressVPN stated that this event verifies its zero-logging policy claim. The company also stated the following:
While it’s unfortunate that security tools like VPNs can be abused for illicit purposes, they are critical for our safety and the preservation of our right to privacy online. ExpressVPN is fundamentally opposed to any efforts to install “backdoors” or attempts by governments to otherwise undermine such technologies. (ExpressVPN statement on Andrey Karlov investigation)
What does ExpressVPN offer?
Enables you to browse anonymously
Unblocks geo-restricted content
ExpressVPN has more than 3,000 servers in 160 locations, in 94 countries
Comes with a built-in speed test to help you check the quality of your connection
Integrated kill switch that prevents any data leaks
Split tunneling for selective traffic cloaking
AES-256 (military/government-grade) encryption
TrustedServer security standards
All the data is wiped at every reboot (ExpressVPN servers run only on RAM)
Nothing ever gets written to the hard drive (to minimize data theft risks)
The whole software solution stack gets reinstalled on every server during startup
Zero-knowledge DNS on every ExpressVPN server
Strict no-logging policy
ExpressVPN
Looking for a VPN you can trust? ExpressVPN might be what you need.
You can see that, despite its somewhat more expensive subscription plans, ExpressVPN delivers an all-around privacy/security suite.
Yes, you can trust ExpressVPN
To put it shortly, ExpressVPN is among the most trusted VPN services you could stick with. It offers zero-logging, no-compromise policies, and a wide range of security and privacy features.
Its subscription plan pricing might be higher than other services, but you can breathe easy knowing that your private data will never be handed over to third parties, mainly because it won’t be logged.
When we think about VPNs, most of us picture these awesome tools that magically keep our privacy safe. Although half of this sentence is true, there’s the other, less-known part of how things really are.
VPNs are very efficient at routing and encrypting traffic so that it doesn’t fall in the wrong hands. Well, actually it can still fall in the wrong hands, but since it’s encrypted, it would be virtually useless.
If you know a thing or two about encryption, it shouldn’t come as a surprise that VPNs use complex algorithms. Let’s find out more about how VPNs work and keep your data private.
How does a VPN work?
Before talking encryption, it’s worth understanding how a VPN succeeds in protecting your data. Usually, your data is handled by your ISP, which is the middleman between you and the world wide web.
A VPN encrypts your traffic and routes it through a secure tunnel that your ISP can’t access.
After you install a VPN client on your PC, all your traffic will first go through it. Unless you use split tunneling, which changes things a bit.
Once your traffic gets to the client, it gets encrypted and pushed through the secure tunnel.
After passing through the tunnel, it reaches the VPN server, which decrypts it and sends it toward its destination.
The website/server/host generates a response and sends it back to you. Only now, traffic gets encrypted by the server and decrypted by the client, before you receive it.
All you need to know about VPN encryption
We’ve already mentioned encryption a few times, so you probably understand that it’s of utmost importance. But how does it work?
First of all, it’s worth mentioning that most VPNs use AES-256 for encryption. This is also known as the Advanced Encryption Standard or the Rijndael algorithm.
When it comes to VPNs, encryption involves taking regular traffic, and coding it so that nobody can make anything out of it. Unless they have the encryption key, that is.
If you’ve been paying attention earlier, you’ll know that your VPN client and server handle encryption and decryption.
Thus, both you and the service you’re trying to access through a VPN have access to the unencrypted data.
Anyone standing between these two points (VPN client/server) will only see encrypted data.
Ranging from passwords and usernames to private messages and emails, everything between you and the VPN exit point will be kept on the hush.
Of course, in reality, things are way more complicated than this, but we wouldn’t want to overburden you with technical gibberish such as symmetric and asymmetric key exchanges, or integrity algorithm check-ups.
Can VPN encryption be broken?
Truth be told, anything can be hacked, but brute-forcing a complex algorithm could take trillions of years. This number is so large, you can’t even wrap your head around it properly.
You couldn’t pull that off even with a supercomputer. Not even all high-end PCs on Earth couldn’t pull it off. So, the answer is no, AES-256 encryption (generally used by VPNs) can’t be cracked.
Enjoy browsing while your traffic is airtight-encrypted
While we agree that Kape Technologies’ PIA is one of the most secure VPNs on the market, there are other services that provide military-grade encryption standards.
Private Internet Access
Looking for a VPN with great encryption? Check out PIA.
Take a look at our best VPN recommendations, for instance. Regardless of what you decide to stick on, those services will make sure your traffic is securely encrypted using state-of-the-art security standards.
VPN encryption can’t be cracked
All things considered, even though it’s possible to break AES-256 encryption, it would take trillions of years to accomplish.
Considering that technology is ever-evolving, chances are you won’t even have this algorithm when the process would be complete.
So, to spare us all the headaches, it’s simpler to say that it’s impossible. Because, for so many reasons, it’s not wrong to assume so.
A VPN can get hacked, but usually, it’s done in other ways that don’t imply cracking a military-grade algorithm. So you can rest assured that it most likely won’t happen in this lifetime.
It happens that you want to remember the lyrics of a song, but all you have is a tune that’s playing in your mind in a loop. Thankfully, there are enough apps that can help you find the songs by humming.
In this article, we take a look at the best apps that can help you find songs by humming. This list consists of both web and mobile apps to help you find songs on the go.
What are the best apps that can identify a song by humming?
Shazam is there since the good old Nokia days and is one of the most popular music discovery software to identify any music playing around you.
Whether you want to find the name of a song or the artists, Shazam can do it in seconds. Moreover, you can also add and listen to the discovered song to your Spotify or Apple Music playlist.
Additionally, Shazam also features Shazamed tracks that show the most popular discovery of the week around the world. The app also has a Lite version, that is less than 1 MB but comes without additional features.
It works on your Android and iOS devices. It also supports both Apple and Android Wear platform.
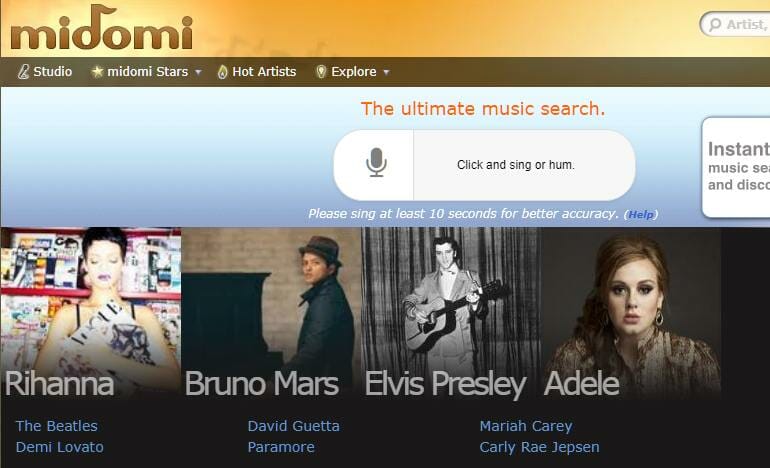
If you prefer to use a web app instead, try Midomi. It is a well-designed website that allows you to search for music using your voice. To search for a song, click the mic icon and then hum or sing the song.
After a few seconds, click the mic icon again to see if Midomi recognizes the song. Midomi will search through its large database to find a match and show the matching results.
If you are into singing, you can use the Midomi studio to sing your favorite song and upload it to the website. You can also use the large database to find your track using a text-based search engine.
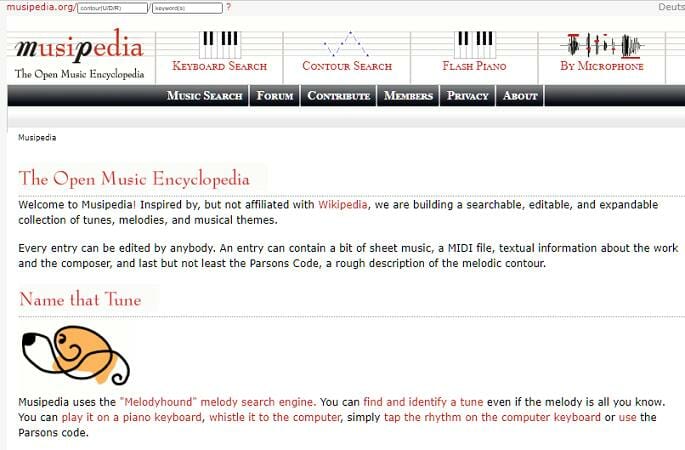
Musipedia is a melody search engine inspired by Wikipedia that is trying to build a searchable, editable and expandable collection of tunes, melodies, and musical themes.
Musipedia can help you find a tune even if the melody is all you know. You can play it on a piano keyboard, whistle to the computer using the microphone, or simply tap the rhythm on the computer keyboard or use the person’s code.
If you know how to play the piano, you can use flash-based piano, JavaScript-based piano, or by dragging the mouse.
SoundHound allows you to discover, search, and play any song using voice control. It is an app-only solution, so you have to download and install the app on your Android or iOS device.
To search for a song, tap the orange button, and start humming your song. It will search for the song based on your suggestion and show the most relevant results.
SoundHound also features SoundHound Char and Top Songs section that shows the most popular songs based on the SoundHound users’ search and listening.
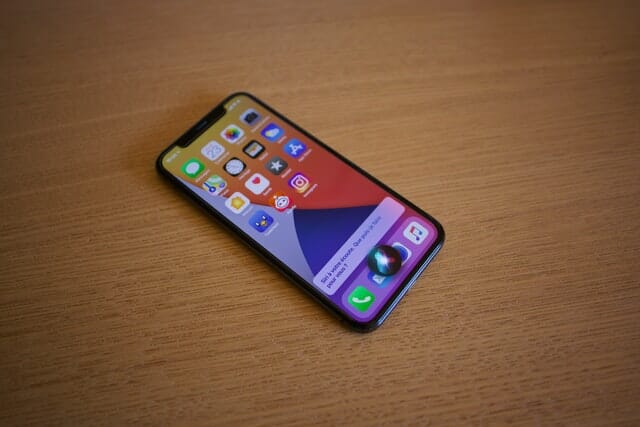
If you don’t want to use a third-party tool, try Siri on your iOS device or OK Google, voice command on your Android device.
You can activate the voice assistant by saying Siri or OK Google. Then say ‘What song is this’. The virtual voice assistant will look for matching results and recommend songs accordingly.
If you are using a Windows Phone, Microsoft’s Cortana can also perform a similar search and help you recognize songs by humming.
Still couldn’t find the song? Try WatZatSong. It is an online community of music lovers where you can upload a sample of the track and post other details. Members of the community will try to help you find the correct song immediately.
When you can’t remember your favorite song and all you can do is remember the tune, you can use the help of the music discovery apps listed in the article.
While some apps can be downloaded on your phone, a few can be accessed on any device as they are available on the web. Go through the list and let us know your pick in the comments.
There are only so many things that can go wrong when you try to install Windows 10. However, every single one of those scarce errors is usually quite hard to deal with.
The Windows setup could not install one or more boot-critical drivers error. appears immediately after you’ve loaded the installation files from the bootable drive.
Usually, the solution to fix the error is simple, such as taking out the CD or DVD from the ROM but it can also be the case that if this does not work then you’ll need to do other steps as well.
We hope the steps we enlisted below will help you out.
Windows could not install one or more boot critical drivers?
When it comes to solving common issues related to Windows startup, such as automatically booting the system, Tenorshare Windows Boot Genius is the way to go. The software’s interface makes it really easy to use and it’s intuitive.
If you need to boot your device and already tried everything but nothing seems to work, perhaps it’s time to try a boot repair software.
This type of tool will boot your device without having any negative impact on your files. They can also help you restore your Windows OS if needed.
Boot repair software helps you recover lost data, product keys, and more. They also offer support for easy and safe backups.
2. Remove the disk from the DVD/CD – ROM
Remove the disk from the DVD/CD – ROM.
Reboot your PC.
Try to boot with the USB again and look for changes.
This solved the majority of reported cases, and it’s as peculiar as one would expect.
The conflict between the two media drives particularly involves the disk with drivers in your DVD-ROM compartment. But the other disks might inflict the same error, as well.
On the other hand, if this isn’t the resolution for your problem and you’re still seeing the same error upon booting with the USB, there are additional steps to take. Have in mind that these require access to the hardware configuration, so you’ll need to take the following steps:
Open the PC case.
Unplug the DVD-ROM completely. In addition, if you’re using multiple HDD/SSD drives, keeping plugged only the one where the Windows 10 installation is placed.
Unplug all peripheral devices. Ideally, only the bootable USB drive should stay plugged in.
You’ll need the mouse and keyboard, so if you don’t have PS2 input devices, keep those, too.
3. Create new installation media with the Media Creation Tool
Plug-in the USB stick in the fastest port. It needs to have at least 6 GB of free storage space.
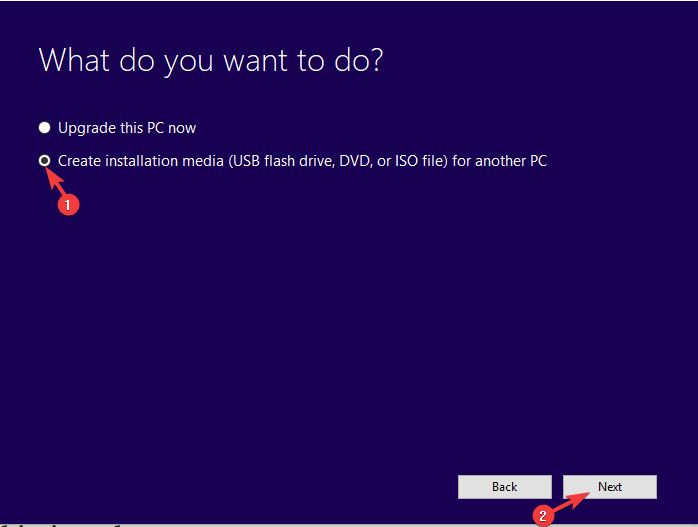
Select the Create installation media (USB flash drive, DVD, or ISO file) for another PC option and click Next.
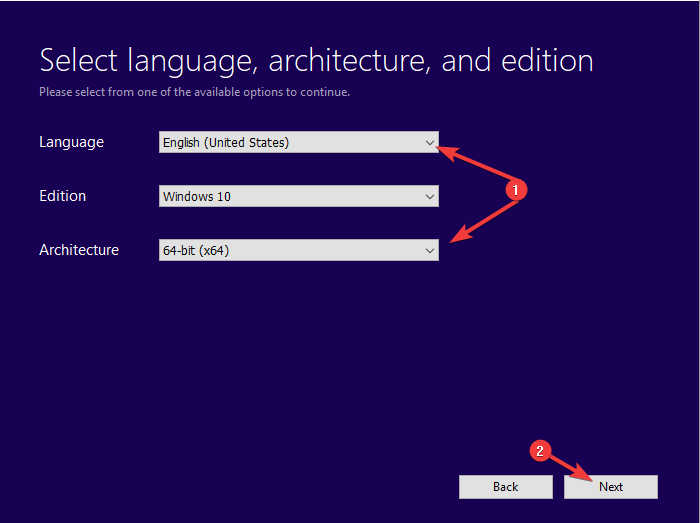
Choose Language and Architecture.
Click Next.
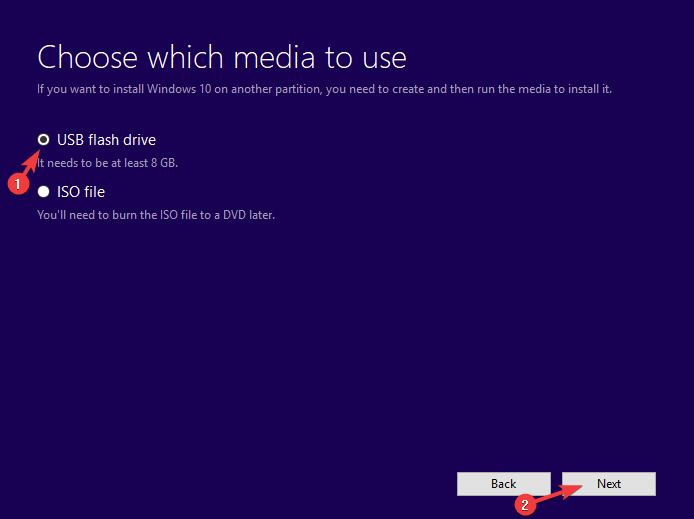
Choose the USB flash drive option.
Wait until the tool downloads the file and mounts them onto the USB.
Note: Have in mind that the procedure will delete everything from the USB flash drive, so backup your data timely.
4. Try booting in the Legacy mode
Press Windows key + I to open Settings.
Choose Update & Security.
Select Recovery from the left pane.
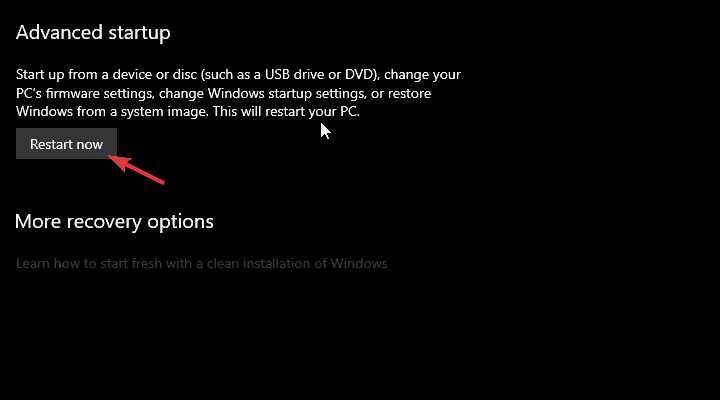
Under the Advanced startup, click Restart now.
Choose Troubleshoot.
Select Advanced options.
Choose UEFI Firmware Settings and click Restart.
In the UEFI settings menu, change the Boot Mode to Legacy and restart your PC.
Try to boot from the USB again and hopefully the error won’t reappear.
The usability of a bootable drive depends on a partitioning mode. If you’re using Legacy BIOS MBR (Master Boot Record) partitioning style you won’t be able to install Windows 10 in a UEFI boot mode. Only in Legacy BIOS.
The only way to make it boot is to format your HDD to its successor, the GPT (GUID Partition Table) partitioning style and then boot in UEFI boot mode. Alternatively, you’ll need to enter BIOS/UEFI settings and switch to the Legacy BIOS mode.
We prefer the first option as the UEFI is newer and better of the two. However, since it leads to formatting the hard drive (and who wants that), the Legacy BIOS should be a better temporary solution.
In order to change settings from UEFI to Legacy BIOS, you’ll need to access the BIOS/UEFI settings.
5. Fully format the system drive and try installing again
Plug in the USB (the DBAN tool takes only 32 MB but backup your USB data as this will probably wipe it as well).
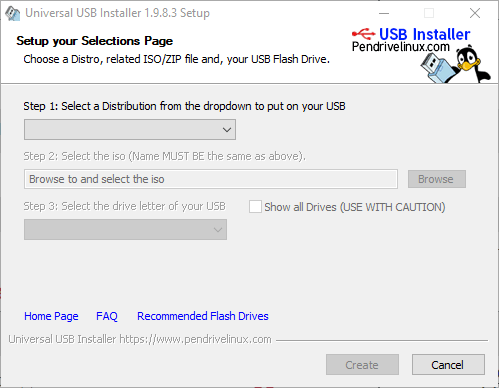
Run the Universal USB installer and choose DBAN ISO from the drop-down menu.
After you have the bootable DBAN USB drive, restart your PC and boot with it.
Once it boots, use the autonuke command to wipe everything.
Restart your PC and boot with the bootable USB Windows 10 installation drive.
In the end, if none of the steps worked out, we suggest fully formatting the hard drive and starting from scratch. This can be done through the elevated Command Prompt. At least, it should be.
If you’re unable to access the disk drive when the installation files load from the bootable drive (pressing Shift + F10 should open Command Prompt), you can use a third-party formatting tool and nuke the HDD that way.
And when we say nuke we mean completely and permanently wipe everything, without any way to restore your data.
Because of this fact, we recommend that you to backup all your data to alternative storage and then and only then follow the steps we enlisted above.
With that said, we can call it a wrap. If you have any questions or suggestions concerning the boot-critical driver’s error prior to Windows 10 installation, feel free to tell us in the comments section below.
If you are looking for software that could help and that is really easy to use, then you should have a look at Tenorshare Windows Boot Genius when it comes to solving common issues related to Windows startup.
Tenorshare Windows Boot Genius is a multi-functional boot recovery software that you can use to boot your device when nothing else seems to work, as well as keeping backup and restoring windows operating system if needed.
Moreover, if you are afraid of losing your data, the good news is that with this tool you can also recover data from an unbootable hard disk.
This tool will also repair the most common errors such as the blue screens and reboot loops that are often presented as a cause of viruses or a corrupted start file.
Tenorshare Windows Boot Genius
Tenorshare Windows Boot Genius is a multi-functional software designed to help you safe boot your device.
Fortnite is a free-to-play multiplayer battle royal game developed by Epic Games. Due to the popularity of the game, it is hard to find a unique username for your Player ID if you are new to the game. Even if you are a veteran, you may want to change your name to find a unique name in Fortnite.
Fortnite name generators are online tools that automatically generate 100s of unique names that you can use as your Fortnite player ID.
In this article, we take a look at the best way to find cool Fortnite names using some amazing online name generators.
Top 5 name generators to find your unique Fortnite name
Nickname is a popular name generator website that allows you to generate names for your social media and game accounts. Nickname Fortnite is a new tool specifically designed to generate cool Fortnite names.
Generating a name for your Fortnite account using Nickname is easy. Visit the website and click on the Generate Another button on the right-hand side.
The tool will quickly generate some unique names and show it on the right side of the screen. Go through the list and click the copy button to copy your new name to the clipboard. Paste the name on your Fortnite account to change the name.
You can also submit your unique Fortnite name and share it with your friends who can upvote or downvote the names to bring it on the popularity trend list.
Name Generator is another popular name generator to generate cool Fortnite names. However, compared to Nickname Fortnite, this tool offers a few customization options.
The customization feature allows you to find a very unique name using your first name, your favourite adjectives, nationality, body parts and animals, etc.
If you want some help, click on the suggest button next to every section to find a hint or suggestion that you can use. If you don’t want to customize your name, then you can generate a unique random name as well. Click on Write me some gaming names to generate a random unique Fortnite name.
Clicking on Fill entire form with random ideas will fill the entire form with random suggestions. You can review the form and make the necessary changes if you want to change anything.
If you are looking for something very simple that can help you find a cool Fortnite name with a few customization options, try GENR8RS. This name generator allows you to find a unique Fortnite name.
To generate a name, begin with selecting a name format. There are three name formats – Short, Regular and Long. You can also epicfy your name by adding a special character or number to your name.
Once you have selected the format and have included the special character or number that you want in your name, click on GENR8 button.
Scroll down to find your epic name. Click the Copy button to copy the name to your clipboard. You can paste the same in your Fortnite title to change the name.
LINGOJAM is not a Fortnite name generator, but a cool Fortnite fonts generator. The website has an intuitive user interface making it easy to use the tool.
If you are into fancy fonts, you can create one for your Fortnite name using the LINGOJAM tool. To use the tool, open the website, enter your Fortnite name in the left box, wait for a few seconds and the cool fonts matching your name will appear on the box on the right side.
Copy the font to your clipboard and paste it in your Fortnite name title to add the font.
Reedsy’s character name generator is designed for anime makers and game developers to find cool names for their characters. However, you can use this tool to find a cool Fortnite name for your character as well.
Reedsy allows you to generate a name using multiple properties such as language, medieval names, mythological god names, fantasy names and Archetype names.
If you choose to generate a name from the medieval section, you can choose names from Old Norse, Old German, Old Roman, Old Celtic and Old English names. The same also applies to the God and Fantasy category.
If you are stumped on what to call yourself in Fortnite, worry no more. All the name generators listed in this article will help you find the most unique name in your Fortnite circle. Try the tools and let us know your pick in the comments.
Visual Studio is one of the most used applications by developers. However, many reported that Browser Link isn’t working in Visual Studio for them.
This can be a big problem, especially if you’re working on an important project, and in today’s article, we will show you how to fix this problem once and for all.
What can I do if Browser Link isn’t working in Visual Studio?
1. Configure Visual Studio properly
Add the following NuGet package: AspNetCore.Mvc.Razor.RuntimeCompilation
Now add following line to the ConfigureServices() method in the startup.cs:
If you use the Notes app on your Apple device, iCloud allows you to sync your notes across your Apple devices connected to the same iCloud account.
However, at times you may encounter the Notes not syncing to the iCloud issue on Windows and macOS.
The notes may stop syncing if the iCloud settings are not correctly configured. In other cases, it can also occur due to device issues and software glitches.
In this article, we take a look at some common troubleshooting steps to help you resolve the notes are not syncing to the iCloud problem on macOS and Windows.
How can I fix Notes syncing issues with iCloud?
1. Manually sync pending notes to iCloud
Note: Before proceeding with the steps below, make sure you have created a backup of your Apple device to save un-synched notes. Here’s how to backup your iPhone and iPad data.
Once you have created a backup, proceed with the steps below.
Open the Notes app on your Apple device.
Tap the back button (top left corner).
Choose On my iPhone.
Tap on Edit.
Mark all the notes you want to sync.
Tap on Move to and select iCloud.
That should sync all your pending notes with the iCloud account.
If the issue persists, try force restarting your Apple device. Press and hold the home button (if available) and power button until you see the Power Off slide. Power off the device, leave it idle a for a few minutes and then turn it on.
2. Enable storing notes on iCloud
On your iPhone, open Settings.
Tap on Notes.
Select the Default Account.
Select iCloud.
If you have selected your notes to be stored On My iPhone, then the notes will be stored on your iPhone. Make sure you have selected iCloud in Notes setting to fix the issue.
3. Update system software
Although rare, the syncing issue can occur due to software incompatibility. If you are running an older version of iOS while your Mac is on the latest software version, there could be compatibility issues.
To check and update your iOS software, tap on Settings > General > Software updates. If a software update is pending, tap on Install Now.
Do the same for your Mac as well. Install any pending updates for macOS and check for any improvements.
Check if you are using the same iCloud on all device
If you have multiple iCloud accounts, you may not have logged into your iCloud account on all the devices. On your iPhone, go to Settings > iCloud and check if you are logged into iCloud.
For Mac, go to System Preferences and click on iCloud. If you are not logged, sign in with your iCloud account details associated with other devices.
4. Check iCloud sync setting
On your iPhone, open Settings.
Tap on iCloud.
Scroll down through the apps using iCloud.
Make sure the iCloud option is enabled for Notes.
You can turn off and on note syncing from the iCloud settings.
5. Log out of your iCloud account
Note: Signing out from your iCloud account will delete unsaved/unsynced notes from your device. Make sure you have created a backup before proceeding.
On your iOS, tap on Setting.
Go to iCloud.
Scroll down and tap on Sign Out.
Confirm the action by tapping on Yes.
On your Mac, go to System Preferences, click on iCloud and select the Sign Out option. Do this with all the devices that are associated with your iCloud account. Once logged out, make sure to sign in again, and that should fix any temporary glitches that are preventing the notes from syncing successfully.
The Notes not syncing to an iCloud issue usually occur if you have disabled iCloud syncing in your iPhone. Make sure you have also selected to sync to iCloud rather than saving on your iPhone to resolve the issue.
Google added 360-degree video support to YouTube in 2015. These videos have a new dimension that lets you rotate viewing angles with a navigation dial.
Furthermore, you can play the clips with a virtual reality headset such as Google Cardboard for even greater immersion. The 360 videos work in some Windows browsers and the Android and iOS YouTube apps.
If the 360-degree YouTube videos aren’t working for you, these are a few potential fixes.
How do I fix YouTube 360 video issues in Windows 10?
1. Check the browser compatibility
First, note that the 360-degree YouTube videos don’t work in all browsers. So, it might be that you’re opening the videos in an incompatible browser. You can view 360-degree videos in Google Chrome, Firefox, Internet Explorer, and Opera.
So, if the videos aren’t working for you in browsers such as Vivaldi or Maxthon, open them in Google Chrome instead.
2. Consider switching to a different browser
One thing you need to know about 360-degree YouTube videos is that they do require a bit more memory than regular videos, so a very lightweight browser is needed to compensate for the extra load.
Google Chrome isn’t exactly known for its resource-friendly nature, so if you continue having issues with your video playback, we recommend switching to a lightweight alternative.
One browser that competes with Chrome but is much faster is Opera One. This incredible option has all the features needed to make it excellent for watching movies and streaming content, including 360-degree videos.
Opera One
View 360-degree videos on YouTube without any issues with the help of this extremely reliable and fast browser.
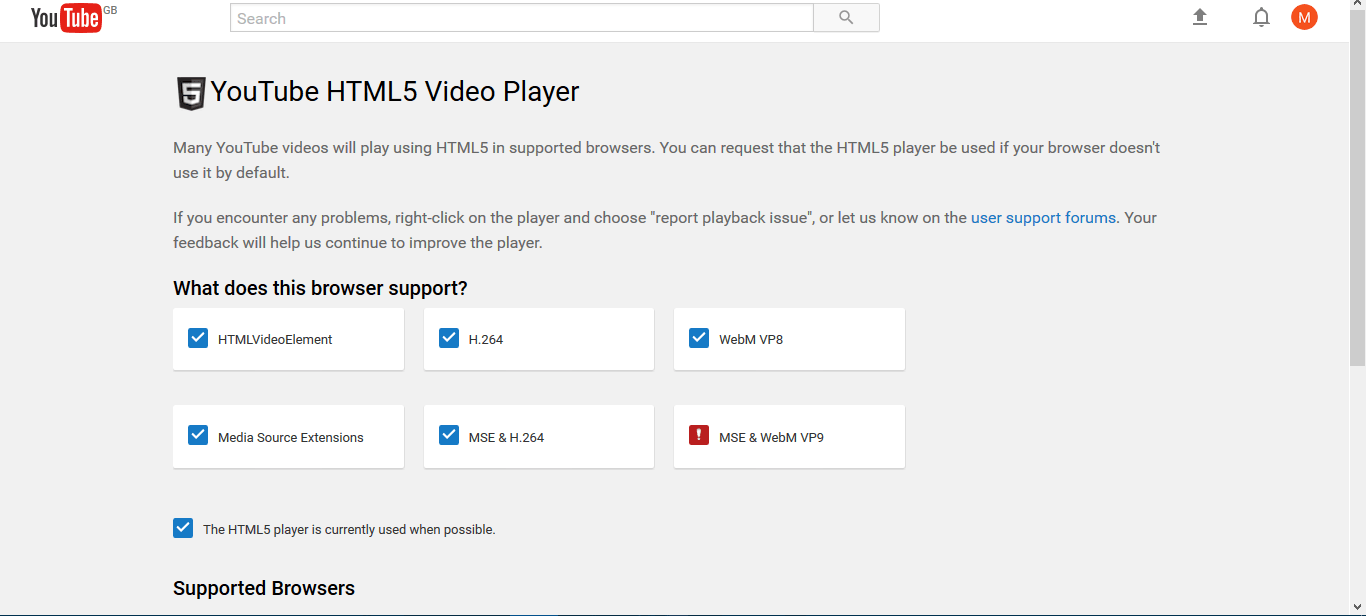
Your browser must support HTML5 for the videos to play. If it doesn’t support the HTML5 video element, that’s why the 360-degree clip isn’t working. You can check HTML5 support by opening this page.
That will tell you if your browser supports HTML5 and whether it’s the default player. If it isn’t your default player, and the browser supports it, press the Request the HTML5 player button.
4. Update your browser
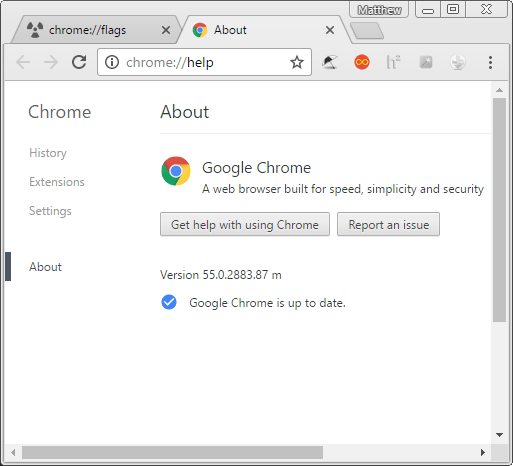
If your Firefox, Chrome, IE, or Opera browser doesn’t support HTML 5, it’s probably outdated. So now you should update your browser to the latest version. This is how you can update Google Chrome if required.
First, click the Customize Google Chrome button at the top right of the browser.
Then, you should click Help on the menu.
Now, click About Google Chrome to open the page in the shot below.
Chrome will check for and install updates. You can press a Relaunch button to restart the browser when it has updated.
5. Update the YouTube Video app on Android
If you can’t play a 360-degree video in the Android YouTube app, it might need updating. You can check Android app updates by opening the Play Store.
Then, look for a button with three vertical lines or dots at the top left or right of the Play Store. Click that button and select My Apps from the menu, which will open a list of your apps that need updating. If you can update YouTube, press the Update button for that app.
6. Switch on Full Hardware Acceleration in Windows
It might be the case that hardware acceleration is switched off in Windows. If you ever switched hardware acceleration off, now is the time to switch it back on so you can play 360-degree YouTube videos.
This is how to configure hardware acceleration, specifically in Windows 7 and 8.
Enter Control Panel into your Windows search box and select to open the Control Panel.
If the Control Panel is in Category view, press the View by button at the top right and select Large icons.
Now, you should click Display and Change display settings to open further options.
Select Advanced Display Settings to open an advanced settings window.
Then, you can click a Troubleshoot tab on that window if your graphics card supports hardware acceleration.
Press the Change settings button there to open a Display Adapter Troubleshooter window.
The Display Adapter Troubleshooter window includes a Hardware acceleration slider bar. You should drag the slider to the far right of that bar to switch hardware acceleration on if it’s not already enabled.
7. Enable Accelerated 2D canvas and Prefer HTML over Flash in Chrome
If 360-degree YouTube videos still aren’t working for you in Chrome, configure a couple of the browser’s about:flags settings. Input ‘about:flags’ into the browser’s URL bar and press enter to open the page shown below.
Now press the Enable button under the Accelerated 2D canvas setting there to switch that on.
Scroll down to the Prefer HTML over Flash setting and select Enabled from the option’s drop-down menu.
Next, restart the Google Chrome browser and try playing a 360-degree YouTube video.
8. Does your phone have a gyroscope sensor?
Android users should note that their mobiles need a Gyroscope for VR. So, if your phone doesn’t have a Gyroscope sensor, the 360-degree VR YouTube videos aren’t working.
You can check if your phone has that sensor with the CPU-Z app. That includes a Sensors tab that provides further device sensor details.
9. Calibrate the gyroscope
The sensor might still not be calibrated correctly if you have an Android phone with a gyroscope. Calibrating that sensor may fix 360-degree VR YouTube videos. This is how you can calibrate the sensor.
You can calibrate the Gyroscope by opening Settings on your Android device.
Then you should tap Accessibility in Settings.
Now you might find a Gyroscope calibration option. Select that option to calibrate the Gyroscope.
Now try playing the 360-degree clip in the YouTube video app again.
10. Update your graphics card drivers
Your graphics card also plays a role in playing 360-degree YouTube videos, and if you have an older driver installed, there’s a chance it won’t support it. So, the obvious solution, in this case, is updating the graphics card driver:
Go to Search, type devicemngr, and open the Device Manager.
Now, locate your graphics card, under Display Adapters.
Right-click your graphics card, and go to Update driver…
Wait for the wizard to look up some drivers online. If there’s a new version of a driver, it’ll get installed automatically.
Restart your computer.
If you don’t want the hassle of updating drivers manually, we strongly suggest doing it automatically.
Drivers are essential to your computer since they instruct your software on interacting with hardware.
You will need to update these drivers or, if necessary, install new ones. This can be challenging, for instance, when you need to upgrade graphics card drivers to watch YouTube 360 videos.
The best driver updaters assist you in maintaining and restoring old drivers and installing the necessary ones for the PC to function properly.
These driver updaters will automatically download and update the drivers you need for your computer.
So, with those fixes, you should now be able to play those dazzling 360-degree videos in your browser or YouTube apps. You can also watch the clips with 360-degree video player software and apps covered in the article.
Should you need more to read about troubleshooting online tools, visit our Fix Web Apps section, and manage any issues known.
What were the steps that helped you get through this issue? Let us know in the comment area below.
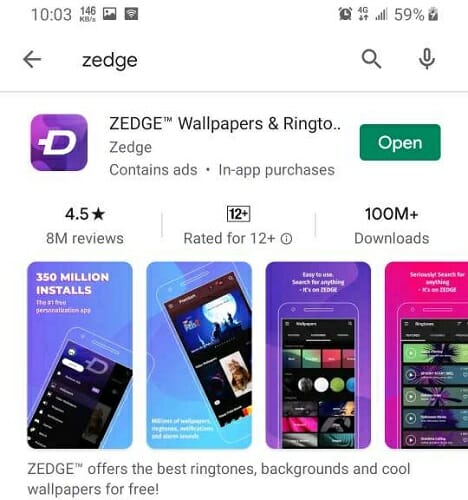
Zedge is a popular app for Android devices. It offers the best free wallpaper and ringtones to customize your Android phone.
That said, the popular personalization app ran into issues a few months ago. Google Play Protect started to send a Zedge harmful message warning to the user about the possibility that the app may try to attack other mobile and computer systems.
In this article, we explore how to fix the Zedge harmful message shown by Google Play Protect on your Android device, and if you should continue using the app.
Is the Zedge app harmful?
Last year, Play Protect flagged the Zedge app as harmful. The developers had to remove the app from the Play Store to find the issue.
The developers were not able to find any bugs or malware in the app. The reason for the Play Protect could be due to issues with the app’s security filters.
As of writing this article, Zedge is back on Google Play Store and working without any issues for many Android users.
However, if you continue to see the Zedge harmful message in your Android device, here is how to fix it.
Update the app
Open Google Play Store.
Search for and open the Zedge app.
Tap the Update button if available. Wait for the app to download and apply the updates.
Once installed, relaunch the Zedge app and check if the error persists.
The error will resolve as soon as you update the app. However, if the issue persists, try reinstalling the app.
Reinstall Zedge
On your Android device, tap on Settings.
Open Apps / Application Manager.
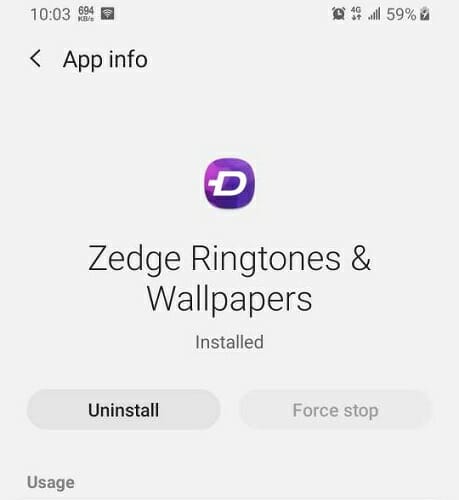
Search for and open the Zedge from the installed apps list.
Tap on Uninstall and then tap Yes to confirm.
Once uninstalled, reboot your device.
Open Google Play Store.
Search for the Zedgeapp.
Tap on Install to download the app.
Zedge is an excellent app if you are into customizing your smartphone. You can download wallpapers, video wallpaper, ringtones, alarm & notification sounds, and more with a simple search.
While there seem to be some bugs that exist within the app, the Zedge harmful issue seems to have resolved after the developers fixed issues with the security filters and released an update.
Network Discovery in Windows 10 allows computers and other devices to be discovered on a network. For this to happen, the Network Discovery function must stay on.
According to Microsoft, this issue can occur if the dependency services for Network Discovery are not running or if your Firewall is blocking the Network Discovery function.
In this article, we explore a few troubleshooting steps to help you resolve the Windows 10 Network discovery won’t say on issue for good.
What can I do if Network Discovery keeps turning off?
1. Check dependency services settings
Press the Windows key + R.
Type services.msc and click OK.
Search for and right and click on DNS Client service.
Select Properties.
In Properties, check if the Service status shows running.
If not, click on Start.
Also, make sure the Startup Type is set to Automatic.
Click Apply and OK to save the changes.
Next, repeat the steps for all the services listed below: Function Discovery Resource Publication SSDP Discovery UPnP Device Host
Make sure to save the change and then exit the Services window.
Restart your PC and check if Network Discovery stays on. As discussed earlier, the Network Discovery related issues occur if one of the aforementioned services are not running. Starting the services should fix the problem.
2. Update your Windows drivers
The Windows 10 Network Discovery issue might be connected to problematic drivers, but you can solve this in a timely manner by using a trusted third-party program with advanced capabilities of downloading, installing, and fixing Windows drivers.
3. Check your sharing options
Click on the Network icon in the taskbar.
Select your current network and click on Properties.
Scroll down and make sure he Network Profile is set to Private.
Press Windows key + I.
Open Network and Internet.
Click on Network and Sharing Center.
From the left pane, click on Change advanced sharing settings.
Under Network Discovery, select Turn on Network Discovery.
Make sure ‘Turn on automatic setup of network-connected devices’ box is checked.
Click Save Changes.
Try accessing the network and sharing options again to see if the issue is resolved.
4. Allow Network Discovery through Firewall
Press the Windows key + R.
Type control and click OK.
In Control Panel, go to System and Security.
Click on Windows Defender Firewall.
From the left pane, click on Allow an app or feature through Windows Defender Firewall.
Click on Change Settings.
Scroll down and locate Network Discovery.
Check the box to enable Network Discovery.
Click OK to save the changes.
Once done, try to turn on Network Discovery again to see if it stays on. You may also have to configure to allow Network Discovery on any third-party firewalls installed on your computer.
5. Run network troubleshooter
Press Windows key + I.
Open Update & Security.
From the left pane, select Troubleshoot.
Click on AdditionalTroubleshooters.
Select Network Adapter.
Click on the Run the troubleshooter
The network troubleshooter will scan the system for network issues and recommend some fixes.
Once done, run the troubleshooter for SharedFolders.
6. Reset network settings
Click on Start and select Settings.
Go to Network andInternet.
In the Status tab, scroll down and click on Network Reset.
Click on Reset Now.
This will remove and then reinstall all your network adapters, and set other network components back to their original settings. The PC will restart, so wait till it reboots to see for any improvements.
The Network Discovery won’t stay on issue usually occurs if the dependency function in services is not running. In other cases, it could be due to a firewall blocking the connection.
Follow the above steps and let us know which method worked for you in the comments.
If you’re seeing the Site can’t be reached error while trying to browse the internet, you must know that this is a very common occurrence.
Here is how the full error message looks like, noting that there is a large variety of formats in this case:
This site can’t be reached. The connection was reset.
Read on to explore this subject further.
Why do I keep getting this site can’t be reached?
The most common situations in which this error message occurs is if your Internet Provider has blocked the website you’re trying to visit, if some Windows settings are not set correctly, or if your internet connection is not set up properly.
It is worth noting that the exact error message you get will vary depending on the exact circumstances you find yourself in, but the troubleshooting steps required to fix them are the same.
Here are some errors that fit into the same category of fixes:
The webpage might be temporarily down
Err_connection_aborted
This site can’t be reached
Err_connection_reset
Err_connection_refused
Hm we can’t reach this page
The errors mentioned above apply to all browsers: Google Chrome, Microsoft Edge, Opera, and Safari.
Here is a list of some of the most common searches regarding this subject:
Plex this site can’t be reached
Netflix this site can’t be reached
Opera This site can’t be reached
Facebook this site can’t be reached
This site can’t be reached Windows 10
This site cannot be reached Microsoft Edge
This site can’t be reached localhost refused to connect
This site can’t be reached err_connection_timed_out
This site can’t be reached unexpectedly closed the connection
This site can’t be reached server IP address could not be found
This site can’t be reached the connection was reset. err_connection_reset
This site can’t be reached Mac / Xfinity site says this site can’t be reached on Mac
This site can’t be reached unexpectedly closed the connection. err_connection_closed
Gmail this site can’t be reached / this site can’t be reached mail.google.com is currently unreachable
This site can’t be reached Chrome/Can’t get onto sites with Chrome/This site can’t be reached unexpectedly closed
What does the This site can’t be reached error mean?
This annoying error message can appear for a variety of reasons, including an issue with your internet provider, a problem with your WiFi configuration, an issue with the web-server itself, a problem with your hardware, or even a wrong setting on your PC.
Because of the variety of reasons for getting this error message, it might be hard to identify the right fit for your situation, but the next section should help you with this task.
How can I fix This site can’t be reached?
Google Chrome: This site can’t be reached
Some users have encountered this error on Google Chrome, in which case the message will also contain the ERR_CONNECTION_RESET added to the text (in some cases).
Even though the base of the issue is the same, the resolution for it will be different, so make sure to check out how to fix this error on Chrome.
Also, sometimes this pesky issue can appear with another format in the same browser, which is the Err_connection_aborted error.
For others, the error message appears randomly, even when no specific browser is used at the time, which has left a large number of people with a lot more questions than in the case of a specific software occurrence.
We explored this specific subject further (while also mentioning the possible software that’s causing it), in our thorough ERR_CONNECTION_RESET error on Windows 10 guide, so make sure to explore it to find the solution.
As mentioned previously, to make the situation even more confusing, sometimes even the text of the error message appears differently.
We hope this guide has managed to clear up any questions you might have had about this annoying error. Make sure to explore the recommended links to resolve this issue effectively.
Wondering how you can send Instagram direct messages on Chrome/PC? When it comes to the Instagram app, you can send direct messages right from the user’s profile.
Unfortunately, on a desktop PC, you can’t post content, and there’s no direct messages button available.
Because Instagram was built to be used on smartphones, the ability to send messages from PC has not been implemented. The company has yet to change this, but there are a few tricks that will enable you to do so.
You can either use a Google Chrome trick, or you can make the Instagram servers identify your PC as a smartphone by using an Android emulator.
In today’s guide we will discuss both these options, so make sure to read through the entirety of this guide.
How can I send Instagram direct messages from my PC?
1. Using the Inspect Element on Chrome
Open your Chrome web browser.
Right-click on the page and select Inspect.
Click on the Toggle Device Toolbar on the top left-hand corner of the Inspect window.
Continue clicking the Toggle Device Toolbar until the screen displays like a smartphone.
Click on System Apps folder and select Play Store.
Go to the Apps section and type Instagram in the search bar.
Click on the Install button to proceed.
Get the Instagram app on your emulator and then open it to send DM messages.
Another method of sending Instagram direct messages on your PC is by making use of an Android emulator. These tools allow you to run Android apps on your computer.
With an Android emulator, you can install any Android app via the Play Store or its APK file and run the app as you would on a smartphone.
To send Instagram direct messages on PC (Chrome), you don’t need a complex tweak.
All you have to do is emulate a smartphone. You can emulate the device either using the Toggle Device Toolbar in the Inspect window or by using an Android emulator.
Follow the troubleshooting steps in the section that follows.
How do I fix the Instagram already connected to Facebook error?
1. Log out of Instagram and Facebook
The first thing to do when troubleshooting the this Instagram is already connected to a Facebook pageerror is to log out of both Facebook and Instagram.
For the best result, begin by logging out of Facebook. After logging out of Facebook, link both accounts again now using the Instagram app.
If logging out of Facebook doesn’t resolve the issue, then log out of Instagram and retry.
2. Unlink both accounts from Instagram
Launch the Instagram app on your device.
Go to your profile.
Tap the hamburger menu icon at the top right-hand corner.
Go to Settings at the bottom of the screen.
Tap on Accounts.
Select Linked Accounts.
Choose Facebook.
Find your Facebook account and hit the Unlink button.
3. Change your Facebook password
Open Facebook.
Tap on the hamburger menu icon on the top right.
Select Settings & Privacy.
Go to Settings.
Tap Security & Login.
Under Login, tap Change password.
You should change your Facebook password, in case the account was compromised and linked to a strange Instagram page.
4. Check admin rights
Log in to Facebook.
Open your Facebook page.
Go to Settings.
Select Page roles.
Ensure that your username is listed among the Current People as an Admin.
You may be experiencing This Instagram account is already connected to a Facebook page error message if you lack sufficient privileges for the Facebook page.
Only Facebook page administrators can link or unlink the page to an Instagram account.
5. Change your Instagram to a Personal account
Launch the Instagram app.
Go to your profile page.
Tap on the hamburger menu icon and select Settings.
Tap on Account.
At the bottom of the screen, select Switch to Personal Account.
Go back and link your Facebook to the personal account.
Change your Instagram back to a business account.
Some users have also fixed the This Instagram account is already connected to a Facebook page issue by removing special characters from the name of their Instagram or Facebook page.
If you follow the above methods, you will successfully get rid of the message and be able to connect your Instagram and Facebook pages.
If all solutions fail, your account may be compromised. Read about this popular Instagram hack to find out more about this subject.
We recommend you look for an antivirus with a generous and constantly updated threat database. Being able to block and detect threats as soon as possible is essential.
Another important asset that many modern-day antiviruses share is multi-layered protection. This type of shield will protect your system on all fronts, leaving no weak points for intruders.
Depending on your exact needs, there are other antivirus features to look for. If you enjoy gaming or streaming services, you will be able to find multiple options that include gaming and do-not-disturb modes that will pause intrusive notifications.
Many premium-level antiviruses also include VPN services or another type of online privacy features to keep your identity and online activity anonymous.
2. Try using a different browser
If you keep having this problem, you might want to consider using a different web browser such as Opera One for example.
Opera One is built on the Chromium engine, so it’s quite similar to Chrome. In fact, it can even run Chrome extensions. The browser also has a couple of unique features as well.
First off, there’s tracking protection and a built-in ad blocker, so you won’t have to deal with ads. For an extra layer of security, there’s a free VPN with unlimited bandwidth.
The browser also has a built-in social media, messaging apps and a native AI. Plus it features a modular AI-ready design for other AI integration.
Opera One is fast, reliable, secure, and it has a few unique features, so you might want to try it out.
If the issue is still there, uninstall your VPN software.
In some instances, your VPN software can be the problem, so you might want to try disabling it temporarily or uninstalling it.
If you want to achieve greater results, without the need to constantly change your VPN software, we recommend that you pick one of the best VPN services for Windows 10.
First and foremost, make sure that the VPN service of your choice has a good and transparent privacy policy and won’t use any type of private data.
We also recommend looking for a VPN that has a good number of servers across the whole world. This ensures faster browsing, gaming, and also allows you to surpass geo-restrictions and access any type of content you want.
4. Use the command line
Press Windows Key + X and select PowerShell (Admin) or Command Prompt (Admin).
Now run the following commands:
netsh winsock reset
netsh int ip reset
ipconfig / release
ipconfig / renew
ipconfig / flushdns
After running these commands, check if the problem with your browser is resolved.
If your browser isn’t working but the Internet is connected, the issue is probably related to your network configuration or your antivirus. However, you should be able to fix that using our solutions.
Showbox is a popular TV show and movie streaming app available on the Android platform. Due to the nature of the content offered by the app, it wasn’t available on the Play Store.
As a result, one had to install it from its website as an APK.
That said, the app seems to have stopped working for many. If you had used the app excessively to catch up with your favorite TV shows or new movie releases, you might have received an update about the shutdown of the service.
While one can still download and install the app from a third-party app website, the service itself is not accessible.
Is Showbox Working Now?
According to loyal Showbox users, the app has not been accessible since November 2019. Before Showbox’s twitter account was suspended, the company had tweeted acknowledging the problems faced by the users.
In a post on Twitter, Showbox wrote:
Sorry, we do see comments saying the app is not working. We think this is dependent on location, but we should have our servers up everywhere soon! Within the next days!! We apologize our stability is low recently we hope you stay with us.
In another tweet, the company wrote:
Our servers are still down, this set back hit harder than the dev team expected and we just want to let you know they are still working hard to get it fixed for you! Also thanks for the support recently we have been getting thousands of new supporters from our of nowhere.
Since the Twitter account of Showbox is suspended, there’s still no news of it and when the app can make a comeback.
Is Showbox safe to use?
Showbox is an ad-supported platform but was completely safe to use. However, since the developers did not have an official website and Play Store wouldn’t host the app, the safety of the can be of concern.
Many users have reported their phone’s being overwhelmed by malware after installing the app.
If you still want to use the app, make sure to download it from trusted .apk websites like APKpure and APKmirror.
The Showbox not working issue is due to the app being taken down for copyright infringement. While there is no official announcement on when the app will be accessible again, we will make sure to update the article as we have other news.
To create Word documents, you don’t have to use Microsoft Office. You can easily create Word documents in your web browser.
Microsoft offers a web version of most Office apps for enhanced accessibility, and accessing these is incredibly simple.
In today’s article, we will show you how to access Word in a browser.
How can I access Word documents offline?
You can’t access the web version of Office or Microsoft Word offline because it’s not developed to be accessed without an Internet connection. The files here are synced to OneDrive and are automatically updated.
You can download a document from the Word Online Editor and use the Microsoft Word app installed on the computer to access and edit the documents. However, the online version is best, especially when editing and you need to accept changes.
Accessing files from the OneDrive folder
Also, with the right settings in place, your One Drive files can be accessed from the dedicated folder on the computer even when not connected to the Internet. Any changes you make will be automatically updated once an Internet connection is established.
Is Word in browser free?
Yes, the Microsoft Word in browser, or all the Office applications for that matter, are free. You can simply log in to the Office365 website, and use these.
Also, since these are all web applications, they would work just as well on any web browser or operating system. But we would recommend using Opera One for the best performance.
Now you can create your document just like in regular Word.
Bear in mind that there are certain differences between Word Online and the desktop version of Word, but basic users most likely won’t even notice them.
2. Use Word Online extension
NOTE
The steps here are to install the Office Extension in Chrome. But, the Office extension for Edge is also available, and you can easily download it from the Edge Add-ons store.
Go to the Office extension page, and click on the Add to Chrome button.
Click on Add extension to confirm.
After the extension is installed, click on it, select Sign in, and complete the process.
Once done, select Office from the Extensions menu.
Now, click on Word to open its online version.
That’s how you open Word in a browser using the extension. Though it does exactly the same thing, using the extension streamlines the whole process.
How do I turn Word into dark mode?
Open the Word processor in browser, and click on the View menu.
Now, click on the Dark Mode button to enable it.
The online editor also allows changing the background, and can use the Switch Background button for that.
To revert back to normal mode, again click on the Dark Mode button.
Using Word in a browser is incredibly simple. You just need to use the dedicated extension or go to the Word Online website.
Microsoft releasedWindows 10 20H2 Build 19042.421 to the Beta Channel.
Remember the new Start menu with theme-aware tiles that came with build 20161 in the Dev Channel? The feature (along with Alt + Tab transition between apps and sites in Edge, programmable Taskbar, and more) has now moved to the next Windows 10 beta testing phase.
New Windows 10 20H2 build 19042.421 features
1. New Windows 10 Start menu
The new Windows 10 20H2 build 19042.421 introduces new features like theme-aware tiles in the Start menu. The redesigned interface creates a perfect home for Fluent Design icons for Microsoft Office applications and Edge.
2. Programmable Taskbar
The personalized Taskbar that came with build 20161 is now available to insiders in the Beta Channel.
3. Pinned sites in Edge
Interestingly, this build includes an update for Edge that makes it easier to access multiple tabs for your Taskbar-pinned sites.
At the time of writing this, the pinned site update is also available to Dev Channel insiders, courtesy of build 20175. It doesn’t come as a surprise since the three Windows code testing channels are no longer about what gets where first.
Instead, the distinction is in the quality and stability of the code right now. So you may expect Beta Channel testers to have a smoother experience than their Dev Channel counterparts with any of these Windows 10 changes.
4. Device management
There’s a change in the modern device management (MDM) policy affecting Local Users and Groups. As a system admin, you can now make granular modifications to a local group.
6. Multi-tab transition in Edge with Alt + Tab
In addition, build 19042.421 brings the ability to quickly transition between apps and multiple open tabs in Edge by pressing Alt + Tab keys.
5. Other updates
Other Windows 10 feature updates currently live in the Beta Channel involve notification toasts, Settings page, and 2-in-1 tablet experiences. You can read all about them in our build 20161 article.
As always, feel free to write your feedback on the latest Windows 10 updates in the comments section below.
Samsung offers its proprietary clone and data migration software known as Samsung Magician for its SSD users.
However, when trying to clone the hard drive to the new Samsung SSD, some users have reported having encountered the data migration error that occurred during the defragmentation error.
The error can show different messages depending on the user’s case. Some of the common Samsung SSD error you can encounter are:
an error occurred during defragmentation Samsung data migration 301400
an error occurred during defragmentation Samsung data migration 303250 04a092
Samsung data migration cloning failed an error occurred during defragmentation 303250 04a092
an error occurred during defragmentation of Samsung’s migration. 308401[04b4b1]
In this article, we have listed a couple of troubleshooting steps to help you resolve the Samsung data migration error occurred during drive cloning.
How can I fix the Samsung data migration error occurred during defragmentation?
1. Change GBT to MBR in Disk Manager
Close the Samsung Magician software completely from the system tray.
Disconnect your computer from the Internet.
Disable your antivirus temporarily.
Also, disable the Windows Firewall (scroll down for the steps).
Press Windows key + R.
Type diskmgmt.msc and click OK.
When the Disk Manager opens, you will be prompted to initialize the disk.
Select MBR instead of GBT.
Click Finish.
Run the Samsung Magician software as admin.
Disable Windows Firewall
Click on Start > Settings.
Go to Update & Security.
Select Windows Security.
Click on Firewall and Network Protection
Click on your active network.
Toggle the switch to turn off the Windows Firewall.
If changing the partition table did not resolve the issue, follow the next set of steps.
2. Disable Page File
Open File Explorer.
Right-click on This PC and select Properties.
In Control Panel, click on Advanced System Settings from the right panel.
Open the Advanced tab.
Click Settings under Performance.
Open the Advanced tab in the Performance Options window.
Click the Change button under Virtual Memory section.
Uncheck ‘Automatically manage paging file size for all drivers’ box.
Select No paging file.
Click OK to save the changes.
Once disabled, run the program again and check for any improvements.
In the System Properties window, select your C: drive.
Click on the Configure button.
Select Disable system protection.
Click Apply and OK to save the changes.
Disable hibernation files
Press Windows key + R to open Run.
Type control and click OK.
In Control Panel, go to System and Security > Power Options.
Select Choose what closing the lid does.
Click Change settingsthat are currently unavailable.
Uncheck Hibernation.
Click Apply > OK to save the changes.
Once the system protection is disabled, restart the PC and rerun the cloning tool to see if the error is resolved.
That’s it. If you have followed all the steps in the article one by one, you should be able to resolve the Samsung SSD error and clone your drive successfully.
While trying to log into your online banking account, you may run into an error that reads: We are unable to access your online banking account. Please contact us at [Banks Phone Number] (error code: 21001).
This error code isn’t restricted to accessing online banking on your computer. You may see it on your cellphone, gaming console, or any other device that can connect to the Internet.
The cause (and solution) is virtually the same on all devices. Learn about it in the guide.
The 21001 error code is generally caused by port issues or misconfigured Internet settings – particularly DNS settings. The remedy to this error may be as simple as changing your browser or as complicated as reconfiguring your Internet connectivity settings.
We’ll walk you through everything in this guide.
How can I solve an online banking 21001 error code?
1. Ensure that you have a stable Internet connection
Open the Run dialog (Win + R).
Type in CMD.
Press Ctrl+Shift+Enter on your keyboard.
Click on the Yes button on the UAC prompt.
Type ping www.google.com and press Enter.
It may seem pretty obvious but we often overlook the simplest solutions when we troubleshoot. It’s quite possible that you’re either not connected to the Internet or your connection is slow.
If you’re getting ping responses above 150 ms, then your Internet connection is painfully slow.
If it gives you a message that reads: Ping request could not find host www.google.com. Please check the name and try again, then you’re not connected to the Internet at all and this is the root cause of the online banking 21001 error code.
If the request times out, then you have a very choppy connection. Either way, make sure to check your router, cables, and any other devices that you use to connect to the Internet. If the problem persists, you’ll need to get in touch with your ISP.
2. Use a different browser
Browsers such as Internet Explorer have stringent security rules. Despite Internet Explorer being slow, it’s one of the safest browsers to use on the Internet.
However, this safety can come at a cost.
We know antivirus can detect false negatives. So can Internet Explorer.
Simply put, your browser may be Interfering with your access to your online banking. If you decided not to use Opera One to ensure your online safety, try downloading another browser.
For this reason, the safest bet is for you to change your browser to Opera One.
This super-speedy browser ensures that you will never have your data stolen or used by other third parties, as it contains an incredible array of security features. Plus, it comes with a native AI.
However, if you’re in a situation where you’re stuck with Internet Explorer or the browser you’re using, you can try changing its security settings.
In the Security level for this zone section set the slider to Medium.
Untick the box labeled Enable Protected Mode (if it’s ticked).
Click on Apply and then OK.
Restart Internet Explorer and check if you can access your Internet banking account.
3. Flush your DNS cache
Run Command Prompt with Administrator Privileges (see solution 1: steps 1 – 3).
Type ipconfig /flushdns into the console window and hit enter
After clearing the DNS cache, you’ll see a message that reads: Successfully flushed the DNS Resolver Cache.
If your bank recently changed the IP address or domain that connects you to their Online Banking, then your computer may be working with some outdated information. Flushing the DNS cache should resolve the error code 21001 online banking problem.
If it doesn’t, we still have a few more suggestions left in this guide.
4. Use Google Public DNS IP addresses
Open Properties
Open the Windows Run Dialog.
Type Control Panel into the open field and hit enter.
Click on Network and Sharing Center.
On the left side panel, click on Change Adapter Settings.
Right-click on the connection you use to connect to the Internet.
Select Properties from the context menu.
Edit Properties
Find and click on Internet Protocol Version 4 (TCP/IPv4). Do not untick it.
Click on Properties.
Find the radio button that reads: Obtain DNS server address automatically and click on the radio button beneath it (Use the following DNS server address).
Type 8.8.8.8 into the Preferred DNS server field.
Type 8.8.8.4 into the Alternate DNS server field.
Untick Validate settings upon exit.
Click on the OK button to save changes and close the Properties window.
Click on Close.
Try to log into your Internet banking.
With the above steps, we change the domain name servers that your ISP assigns to ones that Google assigns (Google Public DNS). This solution should solve the online banking 21001 error code.
However, if this solution fails, we suggest you change the settings back to the default.
Furthermore, if none of these solutions worked for you, this may indicate that there’s a problem with your online banking provider.
You can either wait for the situation to resolve itself or call your bank to find further assistance. If you bank with TD, check our dedicated guide for TD EasyWeb not working to fix service-specific issues.
Either way, we hope that you’ve found this article to be helpful. Please leave a comment down below. We’d love to hear from you. As always, thank you for reading.
Alexa can be useful, but many reported that Alexa won’t connect to WiFi. This can be a big problem since Alexa is almost completely useless without Internet access.
This isn’t the only issue you can encounter, and many reported that the Alexa app is stuck in setup, but we covered this in a different guide.
In today’s article, we’re focusing on the Wi-Fi issue, so without further ado, let’s get started.
Why is my Alexa not connecting to the Wi-Fi?
You’re having issues with your network connection.
Interference on your Wi-Fi network can cause this issue to appear.
Temporary glitches on Alexa can prevent you from using the network.
What can I do if Alexa won’t connect to WiFi?
1. Check your Internet connection
Try opening a web browser on your smartphone or PC to see if the internet connection is working.
If your Alexa still struggles to connect even after adjusting the Wi-Fi setup, you may also run into issues with connected smart devices. For example, check out this guide on how to fix Sengled not working with Alexa for more tips on resolving smart home connection problems.
2. Perform a device restart
Perform a network restart
Make sure the modem or Wi-Fi router is turned on.
Unplug both the router & modem from the power socket.
Unplug the Ethernet cable, if any.
Leave the devices idle for a few minutes.
Plug the router and the modem back in.
Wait till all the lights stop blinking.
Test to see if your Alexa device can connect to Wi-Fi.
Restart the Alexa device
Power off your Alexa-enabled device like Echo.
Turn it back on.
Try connecting to Wi-Fi again to see if it is working.
If not, manually power off the Alexa device and leave it idle for a few minutes.
Power it on and try again to see if the issue is resolved.
After doing that, the issue should be gone.
3. Reset your Alexa device
Make sure the Alexa device is on.
Launch the Alexa app on your iPhone or Android.
Tap on Devices.
Tap on Echo & Alexa.
Choose the device that you want to reset.
Scroll down and tap on Factory Reset.
Confirm the action by tapping on Reset.
The reset process may take a few minutes.
Once complete, set up your Alexa device like you did first. If Alexa won’t connect to WiFi, resetting the network device or Alexa is usually the best solution.
H.265 is the latest video compassion standard, and there are media players for TV that fully support it. In today’s article, we’re going to show you how to install web browsers on H.256 media players for TV.
How do I install a web browser on an H.265 media player for TV?
1. Use your PC
Find the application that you want to install on your TV on Google Play Store.
Now click the Install button.
Select your TV from the list of devices and click on Install.
This is the simplest method, and it should work for most Android H.256 media players.
Go to Settings. Locate Unknown sources option and make sure that the device is allowed to install files from unknown sources.
Insert the flash drive to your media player.
Open File Explorer File Manager.
Locate the APK file and select it to install it.
Follow the instructions on the screen.
Now that you know how to install a web browser, the question remains which browser to install. If you’re looking for a reliable and secure browser, Opera One might be the right choice for you.
Opera One comes with a built-in ad blocker that will make your web pages load faster than before. The browser will bring personalized news right to your home tab depending on the content you read.
Opera One has a powerful download manager that allows you to easily download files in the background or sort, delete or share your downloads. It also features a native AI.
The browser also has the ability to zoom on every page, and there’s even a built-in crypto wallet available. Opera One is available on all desktop and mobile platforms, so be sure to try it out.
Opera One
Opera One will give you complete control over your online privacy and a fantastic online experience.
Robinhood is a trading app for Android and iOS mobiles that provides users with commission-free trading tools for analyzing markets and investing in shares.
However, the Robinhood app doesn’t always work as expected for some users. If you can’t open and utilize the Robinhood app, check out the resolutions below.
What can I do if the Robinhood app is not working or loading?
Update the app
Android
Open Google Play on your mobile device.
Then tap the menu button in Google Play.
Select the My apps and games option.
Tap the Update all button. Alternatively, you can tap the Update option more specifically for Robinhood.
Apple iOS
To update Robinhood on Apple mobiles, open the App Store.
Next, tap your profile icon at the top right of the app.
Tap the Update option for the Robinhood app.
Clear the app’s cache data
Tap Settings.
Next, tap Apps in Settings.
Select the listed Robinhood app.
Then press the Storage button to open data options.
Tap the Clear cache button for Robinhood.
Restart your mobile device.
My app seems frozen (reinstall Robinhood)
Android
Tap Settings.
Select Apps in Settings to open your app list.
Next, select your Robinhood app; and tap the Uninstall option for it.
To reinstall Robinhood, open its Google Play page. Then you can select the Install option there.
Apple iOS
On iOS 13 iPhones, you’ll need to tap and hold the Robinhood app until it starts to shake (or jiggle).
Select the Edit Home Screen option.
Next, select Robinhood’s X option to erase that app.
Press the Home button, and open the Apple App Store.
Open Robinhood’s app page, and select the Get option.
Robinhood website not working
The Robinhood web app has a history of outages. In March 2020, there was a system-wide Robinhood outage that impacted both the web and mobile apps.
So, you shouldn’t be entirely surprised if the Robinhood website isn’t working because of a server issue of some kind.
To check if Robinhood is down, open the Downdetector page for it. That tells you if there are any confirmed issues (outages) for Robinhood for your selected country. If there’s an outage, you’ll just have to wait for that to get fixed.
In addition to that, try opening the Robinhood website in an alternative browser. Open Robinhood in Google Chrome, Firefox, or Microsoft Edge if you’re utilizing an alternative browser. Those are the three supported browsers for Robinhood.
So, the best thing to do when Robinhood isn’t working is to update the app, clear its cached data, and reinstall it.
If that’s not enough, however, you could also try utilizing Robinhood on your desktop or laptop with an Android emulator.
Feel free to share your experience with us by using the comment section below.