Google, which is also competing with Zoom, Microsoft Teams and others in the video conferencing space must certainly be feeling the heat. Indeed, the company announced this morning that Meet, its premium video conferencing app, would become free to use for everyone with a Google account.
“Since January, we’ve seen Meet’s peak daily usage grow by 30x. As of this month, Meet is hosting 3 billion minutes of video meetings and adding roughly 3 million new users every day. And as of last week, Meet’s daily meeting participants surpassed 100 million,“ said Javier Soltero, the former Outlook and Cortana boss who is now the head of Google’s G Suite.
Google Meet is currently available on the web, iOS and Android, and Soltero emphasized that the app respects your privacy. “Your Meet data is not used for advertising, and we don’t sell your data to third parties,” the exec said.
This free version of Google Meet will support up to 100 participants, matching what Zoom currently offers with its free tier. However, Google will beat Zoom’s 40 mins limit on group meetings by imposing no duration limit until September 30th, when meetings will be limited to 60 minutes.
Google will start opening up Meet to all users starting next week, and you can already sign up with your Google account to be notified when the app is available for you. In case you missed it, Facebook also announced its new Messenger Rooms last week which will support real-time video chat with up to 50 people, so it’s clear that the biggest tech companies won’t allow Zoom to keep dominating the videoconferencing space.
We all encountered a computer error at least once, and while many computer errors are relatively harmless, BSoD errors are not.
In Windows 10 and in all other versions of Windows, BSoD errors will usually restart your PC in order to prevent damage, and that can disrupt your work and cause you to lose important data.
As you can see, BSoD errors can be problematic, therefore today we’re going to show you how to fix NO MORE IRP STACK LOCATIONS error.
How can I fix NO MORE IRP STACK LOCATIONS BSoD in Windows 10?
How to fix NO MORE IRP STACK LOCATIONS error in Windows 10
Solution 1 – Run the BSOD Troubleshooter
If updating your drivers didn’t get the job done, let’s seek help from some troubleshooting tools. The first troubleshooter we’re going to try here is Windows 10’s built-in troubleshooter.
Here’s how to run the BSOD troubleshooter in Windows 10:
Open the Settings app and go to Update & Security section.
Select Troubleshoot from the menu on the left.
Select BSOD from the right pane and click Run the troubleshooter.
Follow the instructions on the screen to complete the troubleshooter.
Solution 2 – Keep your Windows 10 and drivers updated
In order to avoid BSoD errors, it’s important that you keep Windows 10 up to date with the latest patches.
Microsoft is constantly working on improving Windows 10, and many of these patches offer new features and security updates.
In addition, many patches are fixing issues with incompatible hardware and software.
And since many BSoD errors are caused by hardware or software incompatibility, you can see why it is crucial to use Windows Update regularly.
Bear in mind that updating Windows 10 regularly isn’t enough to prevent BSoD errors, and in addition to downloading updates, it’s also important to keep your drivers up to date as well.
Downloading the latest drivers is relatively simple, and you need to do is to go to your hardware manufacturer’s website and download the latest drivers for your hardware.
In addition, you can also use Device Manager to download all the necessary files. To do that follow these steps:
Press Windows Key + X to open Power User Menu. Select Device Manager from the list.
Once Device Manager opens, locate the driver you wish to update, right-click it and choose Update Driver Software.
Select Search automatically for updated driver software and wait for Windows 10 to download the driver.
Repeat this process for all the devices you want to update.
Update drivers automatically
Searching for drivers on your own can be time-consuming. So, we advise you to use a tool that will do this for you automatically.
Using an automatic driver updater will certainly save you from the hassle of searching for drivers manually, and it will always keep your system up to date with the latest drivers.
A dedicated third-party tool will help you update drivers automatically and prevent PC damage caused by installing the wrong driver versions.
After several tests, our team concluded that this is the best-automatized solution.
Solution 3 – Run the SFC scan
The next troubleshooting tool we’re going to try is the SFC scan. This is a command-line tool that scans your system for broken files and resolves them (if possible).
Here’s how to run the SFC scan in Windows 10:
Right-click on the Start Menu button, and open Command Prompt (Admin).
Enter the following line and press Enter:sfc/scannow
Wait until the process is done (it may take a while).
If the solution is found, it will automatically be applied.
Now, close the Command Prompt and restart your computer.
Solution 4 – Run DISM
DISM is the third command-line troubleshooter we’re going to try here.
Deployment Image Servicing and Management (DISM), as its name, says, re-deploys the system image all over again, which might be helpful when resolving issues like NO MORE IRP STACK LOCATIONS.
We’ll walk you through both standard and the procedure that utilizes the installation media below:
Standard way
Right-click Start and open Command Prompt (Admin).
Paste the following command and press Enter:
DISM /Online /Cleanup-Image /RestoreHealth
Wait until the scan is finished.
Restart your computer and try updating again.
With the Windows installation media
Insert your Windows installation media.
Right-click the Start menu and, from the menu, choose the Command Prompt (Admin).
In the command line, type the following commands and press Enter after each:
Make sure to change an X value with the letter of the mounted drive with Windows 10 installation.
After the procedure is finished, restart your computer.
Solution 5 – Check the hard drive
If there’s something wrong with your hard drive, BSOD issues are quite possible. So, go and run a command that will test the state of your hard drive, and provide a solution (if possible).
Here’s how to run the chkdsk command in Windows 10:
Enter the Advanced Startup (Restart your computer while holding the Shift key).
Choose Troubleshoot > Advanced Options.
Select Command Prompt from the list of options.
When Command Prompt appears, enter the following lines and press Enter after each line in order to run it:
bootrec.exe /rebuildbcd
bootrec.exe /fixmbr
bootrec.exe /fixboot
Some users are also suggesting that you need to run additional chkdsk commands as well. To perform these commands, you need to know drive letters for all your hard drive partitions. In Command Prompt you should enter the following (but remember to use the letters that match your hard drive partitions on your PC):
chkdsk /r c:
chkdsk /r d:
This is just our example, so keep in mind that you have to perform chkdsk command for every hard drive partition that you have.
Restart your computer and check if the issue is resolved.
Solution 6 – Uninstall your antivirus software
It’s not uncommon for antivirus software to cause a BSoD error such as NO MORE IRP STACK LOCATIONS.
Many users confirmed that after uninstalling their antivirus software the BSoD error was completely resolved.
According to users, Total Defense, Avast, Kaspersky, and Norton can cause this error to appear, and in order to fix this problem, you’ll have to remove the aforementioned software.
Bear in mind that antivirus software sometimes leaves certain registry entries and files behind, and even those files can cause BSoD errors to manifest.
In order to completely remove antivirus software, it’s recommended to use the dedicated uninstaller tools.
Many security companies offer dedicated uninstallers for their software, and you can download these tools for free.
Few users complained that they are unable to access Windows 10 at all due to NO MORE IRP STACK LOCATIONS error.
And if you can’t access Windows 10, you’ll have to remove your antivirus by using Safe Mode. To access Safe Mode, follow these steps:
Restart your computer a few times while it boots to start the Automatic Repair process.
Few users reported that NO MORE IRP STACK LOCATIONS error was caused due to audio drivers, and in order to fix this error, users had to remove and reinstall the audio driver.
To uninstall an audio driver you need to do the following:
Start Device Manager. You can do that by pressing Windows Key + X and choosing Device Manager from the list.
Once the Device Manager starts, locate your audio driver and right click it and choose Uninstall from the menu. If available, check Delete the driver software for this device and click OK.
After the driver is uninstalled, restart your computer.
If the PC is stable and BSoD error is fixed you can continue using the default driver, or you can try and download the latest audio driver for your device.
Solution 8 – Check your hardware
If the problem still persists, you might want to check your hardware. The most common cause of BSoD error is your RAM memory, and you can test it by using MemTest86+.
Keep in mind that in order to get accurate results you need to keep the testing process running for a couple of hours.
If your RAM is working properly, the problem might be caused by your hard drive, motherboard, or any other hardware component.
In addition to checking hardware, we strongly advise you to check if your hardware is properly connected and to make sure that there are no loose contacts.
If your computer is filled with dust, it’s also a good idea to clean it by using a pressurized can of air.
Solution 9 – Reset Windows 10
If the NO MORE IRP STACK LOCATIONS error is caused by a software problem, resetting Windows 10 will probably fix it.
Keep in mind that resetting Windows 10 will delete all files and folders from your C drive, so make sure that you create a backup. To perform a Windows 10 reset, do the following:
Restart your computer few times while Windows 10 boots. This will start Automatic Repair.
Choose Troubleshoot > Reset this PC > Remove everything > Only the drive where Windows is installed.
Follow the instructions in order to complete the reset process.
If the problem still persists even after you performed Windows 10 reset, the error is most likely caused by faulty hardware or hardware incompatibility.
NO MORE IRP STACK LOCATIONS error can cause you a fair amount of problems, but this error can be usually solved by removing your antivirus software.
If that solution doesn’t work for you, feel free to try any other solution from this article.
There’s something a bit exceptional about the video games industry this year: first of all, Microsoft and Sony are expected to launch their next-gen consoles this holiday season, assuming the ongoing coronavirus outbreak doesn’t cause any delays. This global crisis is also affecting game developers, with several high-profile games being pushed back to later this year.
In the meantime, though, we’ve already seen the release of three remakes of classic games from the ’90s: Resident Evil 3 (which we’ve reviewed earlier this month), Final Fantasy VII (a timed exclusive on PlayStation 4), and Trials of Mana. The latter may not have received the same amount of hype as the two other games, but the original game was actually never released outside of Japan.
Trials of Mana is the sequel to Secret of Mana, a classic action-RPG game released on the Super Famicom back in 1993. The original Trials of Mana game (named Seiken Densetsu 3 in Japan) hit the Nintendo console in 1995 in Japan, but we had to wait until the release of the Seiken Densetsu Collection on Nintendo Switch in 2017 for it to be finally available in the US and Europe.
This 2020 Trials of Mana remake was released on April 24 on PlayStation 4, Nintendo Switch, and Steam, and we’ve reviewed the PC version. Yes, the game hasn’t been released on Xbox One, just like the previous Secret of Mana remake did two years ago. This probably tells something about Microsoft’s struggles with Japanese developers and publishers, even though the Xbox One uses the same familiar x64 architecture as the PlayStation 4 or Windows PCs.
A great sequel to Secret of Mana
If you owned a Super Famicom in the 90’s, you’ve probably heard about Secret of Mana, which was just as influential as games like The Legend of Zelda: A Link to the Past or Chrono Trigger. Secret of Mana combined a memorable story you could play with 2 other friends, accessible combat, and a great soundtrack.
Trials of Mana hit the Super Famicom two years later in 1995, and it was one of the prettiest games to hit the 16-bit console at a time when the Sony PlayStation and Sega Saturn had just kickstarted the 32-bit consoles era. Even though Trials of Mana was never released in the US, the game was translated in English by fans and many Secret of Mana nostalgics had the chance to discover it through Super Famicom emulators on PC.
In this comparison video, it's easy to see that #TrialsofMana is a HD remake which hasn't forgotten its eye-catching 2D roots!
If Trials of Mana didn’t reach the same level of recognition as Secret of Mana due to its limited release, it was a superior game thanks to an improved combat system, more challenging boss fights, and a more engaging story which actually isn’t a direct sequel to Secret of Mana. In Trials of Mana, you could choose three characters in a pool of six, and there were three different endgames depending on your choice of the main character.
Trials of Mana was also one of the first J-RPG to introduce a day and night cycle, and there was also an interesting class system that allowed your character to changes classes and gain new abilities after earning enough experience. If the open world wasn’t really huge, it did keep familiar things from Secret of Mana such as cannon travel, as well as the draconic creatures you can use as a means of transportation.
This 2020 Trials of Mana remake drops the top-down perspective of the original game in favor of a much more immersive 3D world built with the Unreal Engine 4. The real-time combat system has also been completely redesigned, though we regret that it’s no longer possible to play the game in co-op with a friend.
Despite the move to 3D, this Trials of Mana remake stays true to the original game, and the improvements to the combat system are very welcome. Importantly, the game is very accessible, and you don’t need to have played previous games in the Mana series to enjoy this Trials of Mana remake.
Six different characters with interwoven stories
Trials of Mana’s story is set in a fictional heroic-fantasy world where Mana, a powerful but fading energy source is being coveted by different evil factions. At the beginning of the game, you’ll be chosen by a Faerie from the Sanctuary of Mana as a host, and this Faerie will guide you throughout your heroic journey.
Your main mission in the beginning of the game will be to open a portal to the aforementioned Sanctuary to find the Sword of Mana, the embodiment of the ancient power of mana. As the one who holds the Mana Sword gains awesome power, you’ll have to retrieve it before other evil factions in the game get to it first.
What’s interesting about Trials Mana is that your choice of main character will determine your primary antagonist, so you’re invited to play the game with at least three different characters to experience three different paths and endings. This a great way to improve replayability, especially since all six characters have different fighting styles and abilities.
During my playthrough, I chose the swordsman Duran as my main character, which shares his main antagonist with the magician Angela. There’s a unique prologue for every character, and when you’ll meet your two other companions, you’ll be able to either see a cutscene explaining their background, or experience their full prologue by yourself.
In Duran’s prologue, his hometown of Valsena is being attacked by troops from Altena, the Kingdom of Magic where Angela, my second magician character is coming from. After being humiliated in combat by Altena’s mysterious Crimson Wizard, Duran swears to not come back to his hometown until he has defeated the Crimson Wizard and become the best swordsman in the world.
Angela, my magician companion character also had some grudge against the Crimson Wizard, who serves as a chief adviser for her mom, the queen of Altena. Because Angela showed no natural ability to use magic, the Crimson Wizard convinced the queen to sacrifice her daughter’s life in exchange for more magic power.
We’re not far from Games of Thrones levels of drama here, and the interwoven destinies of all the different characters make for a pretty good story. And again, you’ll be able to discover two other main antagonists and storylines if you chose a main character that isn’t Duran or Angela.
An accessible combat system
Trials of Mana uses a real-time combat system that is pretty easy to master. You have one button for light attacks and another one for heavy attacks, which you can hold to do a charge attack. There’s also a limited but useful combo system to deal more damages to enemies, and I actually wish that that combo system offered a bit more depth. Unfortunately, you’ll quickly end up doing the same combo over and over again, and this can make combat a bit repetitive.
Fortunately, you can mix up regular attacks with Class Strikes, which are powerful range attacks you can use once you’ve dealt a certain amount of damage to enemies. Some characters including Angela can also unlock long-range magic attacks, which can be pretty effective at the cost of magic points. The familiar ring menu from the original Secret of Mana and Trials of Mana is still there, letting you pause the action to use magic attacks and healing items.
Each character has different strengths and weaknesses, so a swordsman like Duran is more powerful and resilient than the magician Angela, but the latter has better magic defense and can unlock some powerful spells. It’s important to choose your different characters carefully, though can switch between them at any time. It’s also worth noting that the game is best played with a controller, but mouse and keyboard controls are also supported on PC.
Some familiar and new RPG mechanisms
During your journey, you’ll meet 8 elemental spirits that will allow your characters to access new moves and magic. Those are unlocked by spending Training Points in different stats including Strength Stamina, Spirit, Intelligence, and Luck.
You’ll get more Training Points every time your characters gain a new level, and you can also use these points to unlock special abilities, which are a new addition in this Trials of Mana remake. From stat boosts to increased chances of critical hits, these abilities are pretty varied, and you can also learn chain abilities that will apply to all your characters.
You can only equip a limited number of passive abilities, and this number will increase once you switch to a higher class. You can do that first when reaching level 18, and a second time after reaching level 38.
When switching classes, you’ll be able to choose a “Light” or “Dark” path that will give your character different new abilities. Anyway, switching classes provides a new combo, a new “Class Strike” long-range attack, 2 new ability slots, and new magic spells to unlock with Training points.
This class system can really change your character’s abilities: With Duran, the Light path gives him a healing spell and the ability to equip a shield, while the Dark path improves his attack power and unlocks spells to add elemental damage to your attacks. In case you’d like to try a different class path, this remake introduces a new Goddess Scales item you can use to revert back to a previous class.
A game that still shows its age
Overall, Square Enix did a really good job at giving a fresh coat of paint to a cult-classic title, but RPG games have evolved quite a lot since Trials of Mana was released in the mid-nineties. There’s no denying that the game’s open world is pretty small by 2020’s standards, with redundant NPCs offering no real dialogue options.
Trials of Mana is also really linear, and the game’s various dungeons are pretty straightforward. There are no complex puzzles to solve except for some switches to activate to unlock some doors. This remake also added a new minimap with checkpoints, though you can turn it off in settings if you want fewer indications.
In general, I found that Trials of Mana is also a bit too easy, even if you chose the hard difficulty like I did. I probably died two or three times during my playthrough, and overall this remake felt much easier than the original Super Famicom game. That’s not necessarily a bad thing, but those of you looking for a challenge may be disappointed.
I won’t spoil anything about the endgame, but this remake brings a new chapter you’ll have to complete to unlock the New Game+ mode. This new chapter also introduces a fourth class change for your characters, which was a nice surprise.
A J-RPG for everyone?
J-RPGs can be a tough sell for the occidental audience. From convoluted storylines to unappealing characters with sometimes gravity-defying haircuts, there’s no denying that franchises like Final Fantasy or Kingdom Hearts are not for everyone. That’s probably why Square Enix didn’t release this Trials of Mana remake on Xbox One, even though the Japanese company has been an early supporter of Microsoft’s initiatives such as Xbox Game Pass.
Overall, I think Trials of Mana is highly recommended if you kept great memories of Secret of Mana on the Super Famicom. If you did play the original Trials of Mana game that did not ship outside Japan until 2017, I think you’ll also enjoy this 3D remake. For everyone else, this is a solid RPG with an interesting story, likeable characters, and pretty good combat. If the latter can become a bit repetitive, this is compensated by the variety of characters, and I can’t wait to start a second playthrough with different heroes.
I had high expectations for this remake, and I think Square Enix did a pretty solid job overall. I hope to see Trials of Mana join Final Fantasy XV and other Square Enix games in Xbox Game Pass for PC, but in the meantime, you can purchase the game on Steam for $49.99. A free demo is also available, and your save file will carry over if you decide to buy the full game.
Microsoft has released a Bing-powered COVID-19 tracking app on the Microsoft Store, offering both global and local COVID-19 information. The free Coronavirus tracker can be installed on Windows 10 devices running version 10586.0 or higher and comes with support for more than 30 different languages.
Unlike other US-centric COVID-19 trackers, the Windows 10 app provides location-based coronavirus news to keep you updated with the current situation in your specific area. Moreover, its real-time statistics and news and videos make it easier for you to keep an eye on the global and local stats, without being overwhelmed with too much information.
While a separate graphs tab offers additional options, allowing you to dig deep into the Total confirmed, Active, Recovered and Fatal cases in your selected region. In addition, this section features a dedicated graph to provide more insights about new cases as well.
At the time of publication, the US has around 1,035,045 confirmed and 118,228 recovered cases, while around 59 thousand cases fall into the fatal category, which is an alarming situation. If you are interested, feel free to download the Windows 10 COVID 19 tracker app on your PC and see how many coronavirus cases are near you.
Many Blue Screen of Death errors are caused by hardware and software issues.
For example, if certain hardware or software isn’t fully compatible with Windows 10, that can cause BSoD error such as KERNEL_STACK_INPAGE_ERROR to appear.
The easiest way to prevent these errors from appearing is to use Windows Update and download the latest patches.
Many of these patches improve system security, but at the same time, they also fix many hardware and software issues, therefore, be sure to download them as often as you can.
2. Update your drivers
In order for Windows 10 to recognize and use certain hardware, it’s important that you keep your drivers up to date.
Updating drivers make sure that Windows 10 can successfully recognize and use certain hardware.
And if the driver is outdated, corrupted, or just not compatible with Windows 10, you’ll get a KERNEL_STACK_INPAGE_ERROR BSoD error and your computer will restart.
To prevent these types of problems, it’s crucial to keep all drivers up to date, and you can do that right from the Device Manager by following these steps:
Press Windows Key + X to open Power User Menu. Select Device Manager from the list.
Once Device Manager starts, locate the device you want to update, right click it and choose Update Driver Software from the menu.
Now select Search automatically for updated driver software and let Windows 10 find and install the best driver for your device.
Repeat these steps for all devices that you want to update.
Updating your drivers via Device Manager is simple and straightforward, but it might not be the best solution.
According to users, sometimes Device Manager cannot find and download the latest drivers, therefore if you want to use the latest drivers, you might have to download them manually.
Downloading drivers manually is fairly simple, and in order to do that, you just need to visit your hardware manufacturer’s website, locate your device and download the latest drivers for it.
Keep in mind that you’ll need to find and download drivers for all major hardware components.
2.1 Update drivers automatically
Searching for drivers on your own can be time-consuming. So, we advise you to use a tool that will do this for you automatically.
Advanced software will help you update drivers automatically and prevent PC damage caused by installing the wrong driver versions.
Plus, managing your drivers with dedicated tools involves optimizing your PC performance with improved functionality of your devices.
In case you want a reliable service that prevents you from system malfunctions or crash errors, the software below is exactly what you need.
If updating your system and drivers didn’t resolve the problem, let’s try Windows 10‘s built-in troubleshooting tool.
This tool can help with resolving all sorts of issues, including the BSOD problems, like the KERNEL_STACK_INPAGE_ERROR error.
Here’s how to run the BSOD troubleshooter in Windows 10:
Open the Settings app and go to Update & Security section.
Select Troubleshoot from the menu on the left.
Select BSOD from the right pane and click Run the troubleshooter.
Follow the instructions on the screen to complete the troubleshooter.
4. Run the SFC scan
The next troubleshooting tool we’re going to try is the SFC scan. This tool scans your computer through the Command Prompt, in search of potential problems.
If the solution is possible, the SFC scan will automatically resolve it.
Here’s how to run the SFC scan in Windows 10:
Right-click on the Start Menu button, and open Command Prompt (Admin).
Enter the following line and press Enter:sfc/scannow
Wait until the process is done (it may take a while).
If the solution is found, it will automatically be applied.
Now, close the Command Prompt and restart your computer.
5. Run DISM
Deployment Image Servicing and Management tool is another command-line troubleshooter.
But unlike the previous two, this one completely re-deploys the system image, which can lead to resolving various problems. Including the KERNEL_STACK_INPAGE_ERROR error (hopefully).
We’ll walk you through both standard and the procedure that utilizes the installation media below:
Standard way
Right-click Start and open Command Prompt (Admin).
Paste the following command and press Enter:
DISM /Online /Cleanup-Image /RestoreHealth
Wait until the scan is finished.
Restart your computer and try updating again.
With the Windows installation media
Insert your Windows installation media.
Right-click the Start menu and, from the menu, choose the Command Prompt (Admin).
In the command line, type the following commands and press Enter after each:
Make sure to change an X value with the letter of the mounted drive with Windows 10 installation.
After the procedure is finished, restart your computer.
6. Check the hard drive
BSOD issues are quite common when there’s something wrong with your hard drive. So, we’re going to check your hard drive for potential problems.
To do that, you need to run the chkdsk command, which will scan all your partitions, and resolve potential problems, if possible.
Here’s how to check the hard drive in Windows 10:
Enter the Advanced Startup (Restart your computer while holding the Shift key).
Choose Troubleshoot > Advanced Options.
Select Command Prompt from the list of options.
When Command Prompt appears, enter the following lines and press Enter after each line in order to run it:
bootrec.exe /rebuildbcd
bootrec.exe /fixmbr
bootrec.exe /fixboot
Some users are also suggesting that you need to run additional chkdsk commands as well. To perform these commands, you need to know drive letters for all your hard drive partitions. In Command Prompt you should enter the following (but remember to use the letters that match your hard drive partitions on your PC):
chkdsk /r c:
chkdsk /r d:
This is just our example, so keep in mind that you have to perform chkdsk command for every hard drive partition that you have.
Restart your computer and check if the issue is resolved.
7. Check/Uninstall your antivirus
Certain software can also be the cause for KERNEL_STACK_INPAGE_ERROR BSoDerror.
Sometimes your antivirus software can cause this problem, so in order to fix it, it’s advised that you completely remove your antivirus.
In order to completely remove an antivirus program, it’s recommended that you use a dedicated removal tool.
According to users, the KERNEL_STACK_INPAGE_ERROR BSoD error can be caused if your hard drive mode isn’t properly set.
Users reported that switching their hard drive mode from AHCI to ATA fixed this error for them, so you might want to try that.
To switch your hard drive mode, you need to enter BIOS and change this setting.
For detailed instructions on how to do that, we strongly advise you to check your motherboard manual for detailed instructions.
9. Check your hardware
Several users reported that the KERNEL_STACK_INPAGE_ERROR error was caused by a hardware problem, mostly related to the hard drive.
To fix this problem, be sure to check if your SATA port is working properly.
Users reported that after connecting their hard drives to a different SATA port on their motherboard, the error was completely resolved.
In addition, be sure to check for any loose connections.
Apparently, this error can be caused if the power cable isn’t properly connected to your hard drive, therefore you need to check if the power cable is firmly connected to your hard drive.
In addition to the power cable, sometimes a faulty SATA cable can cause this error, and users reported that the issue was fixed after replacing the SATA cable.
It’s worth mentioning that almost any other hardware component can cause this error, so make sure that you check your RAM first since it’s the common culprit for these types of errors.
To check your RAM, you need to test RAM modules one by one until you find the one that is faulty.
In addition, you can also use MemTest86+ to perform a detailed scan of your RAM. If your RAM is working properly, be sure to check all other hardware components.
KERNEL_STACK_INPAGE_ERROR is often caused by a minor hardware problem, such as a loose cable, but before you start checking your hardware, be sure to try a few other solutions from this article.
Minecraft is a great and addictive game that is highly appreciated by worldwide users, whether we are talking about portable and touch-based handsets or even desktop devices. Unfortunately, many users reported Minecraft errors under Windows 10, especially of Nvidia graphic cards and especially after updating the Windows OS.
As you can already tell, we are facing some graphic card incompatibility as the Nvidia drivers can’t properly communicate with the Windows system.
But, don’t worry as you can still play Minecraft on your Windows-based device as we are here to help you out. Of course, this is not the only Nvidia graphic card incompatibility reported by Windows 10 users as some customers also complained about some HDMI issues.
Anyway, if you want to fix the Minecraft problems and get back on track, then don’t hesitate and apply the guidelines below. This troubleshooting solution can be applied within a few minutes and can be easily completed even by a newbie so you have nothing to worry about.
How do I fix Minecraft errors in Windows 10?
1. Update Minecraft
First of all, on your device install the Java package. Minecraft Java edition requires at least Java version 8. You should make sure you don’t have multiple Java versions installed on Windows 10 – download Java from here. Select the Online Installation option so that you will automatically load the correct version for your system.
Now, if the “bad video card drivers” alert is being displayed, just go to your Start Screen and follow the rest of the steps below.
Press “Wind + X” dedicated keyboard keys and run Device Manager.
From there head towards “Graphics Drivers” and uninstall your display drivers.
Then go to your manufactures official website (for example Acer, HP, Dell, and so on) – not on the Nvidia/AMD web page.
Download from there the drivers indicated by your manufacturer and in the end, install these drivers even in Compatibility mode for Windows 7.
In the end, run Minecraft one more as you are done.
Regardless of the issue you’re currently facing, the very first thing you should have in mind when dealing with that particular problem is keeping your game updated. Because installing the latest possible version of Minecraft may solve a lot of problems.
For downloading all the outdated drivers on your PC, we suggest you use a professional driver updater tool that safely install and upgrade all the drivers you need in seconds. A dedicated tool will keep you away from any risk of malfunctions.
Good job! Now you know how to update and make Minecraft work on Windows 10.
2. Can’t load a mod in Minecraft
If you like to experiment with Minecraft mods, but can’t install your favorite mod or mods won’t load, just change the approach.
You’ve probably been installing mods the old-fashioned way (putting files into Minecraft by yourself), which is prone to errors and issues. Instead, you should use a handy little program called Forge.
Forge basically doesn’t all the work for you. You just need to put the mod you want to install into Forge, and it will automatically implement it in the game. Saving you a lot of time and effort. You can download Forge for free from this link.
In case you need additional explaining, just watch the tutorial on how to use Forge to install Minecraft mods below:
3. Can’t play the game on LAN
Go to Search, type firewall, and open Windows Defender Firewall
Click Allow an app or feature through Windows Defender Firewall from the left pane
Select Minecraft/Minecraft for Windows 10 and make sure both Private and Public are checked
Restart your computer
If you’re still unable to play the game through LAN, make sure everything’s alright with your internet connection. In case you find out that something’s wrong, check out this article to solve the internet connection issues in Windows 10.
4. Minecraft is lagging
If you notice that your in-game performance is not great, and the game could run smoother, take these into account:
4.1 Meet the system requirements
If your computer doesn’t meet the minimum system requirements, you’re lucky to even launch the game. So, if you don’t have a computer powerful enough to play Minecraft, consider upgrading your hardware.
Minecraft system requirements:
CPU: Intel Pentium D or AMD Athlon 64 (K8) 2.6 GHz.
RAM: 2GB.
GPU (Integrated): Intel HD Graphics or AMD (formerly ATI) Radeon HD Graphics with OpenGL 2.1.
GPU (Discrete): Nvidia GeForce 9600 GT or AMD Radeon HD 2400 with OpenGL 3.1.
HDD: At least 200MB for Game Core and Other Files.
Java 6 Release 45.
4.2 Allocate more RAM to Minecraft
Minecraft launcher now allows you to allocate more RAM memory to the game, if you’re not satisfied with the performance. Here’s how to do that:
Open Minecraft Launcher
Go to Launch options, select your profile, and activate Advanced settings
Activate “JVM Arguments” and add the following command: -Xmx2048M -Xms2048M
Save these settings, and you’ll always start the game with 2GB of RAM. If you want to allocate more ram, simply replace 2048M with the amount of RAM you want to allocte.
4.3 Update Java
As Minecraft is powered by Java, you’ll need its latest version to run the game smoothly. You can download the latest version of Java from here.
Check out our article about fixing Minecraft crashes for more detailed info.
6. Saves disappear from the World List
If your saved worlds disappear from the World List, do the following:
Close Minecraft.
Go to Minecraft save folder. You can access this folder by entering the following command into Search: %appdata%.minecraftsaves
Open the save file that Minecraft doesn’t recognize.
Find the file called level.dat and rename it to corrupt.dat
Now, rename the file level.dat_old to level.dat.
7. Missing files error: org.lwjgl.LWJGLException
Type Firewall in the Windows Search bar and open Windows Defender Firewall.
Click on Turn Windows Firewall on or off in the left pane.
Disable Firewall for both Private and Public networks and confirm changes.
Try running Windows Store apps again and look for the error.
This error code appears when the Minecraft launcher fails to launch the game. The solution for this issue is disabling your antivirus program or Windows Firewall.
It’s also recommended to reinstall Minecraft upon disabling Firewall. Once this issue is resolved, we recommend turning your security solutions back on.
8. Server download doesn’t open
If you’re unable to run server downloads in Minecraft, there are a few things you can try:
Update Java
Edit the EULA.text
Download from official servers
Run a Minecraft Server Batch File
Run the Minecraft Server.exe Version as an Administrator
In case you’re not sure how to do some of these, we have a full guide about fixing this issue. So, you’ll find detailed explanations there.
9. Bad login error
Bad login error occurs when you fail to connect to Minecraft multiplayer. In that case, try some of the following workarounds:
Check that your network connection is enabled
Check if any programs are blocking outgoing connections.
Disable Windows Defender Firewall
Restart your modem/router.
10. Can’t chat in Minecraft
If you’re unable to chat inside the game, you need to change the Chat settings to Show. If you’re not sure how to do that, check out our complete guide about changing chat settings in Minecraft.
11. Service unavailable: Error 503
If you receive this error, there’s a chance Mojang‘s servers are down. Check the server status here. If the servers are down, the only thing you can really do is wait for them to get back online.
If not, try disabling your antivirus or Windows Firewall. Also, make sure your computer is able to receive signal from the following adresses:
minecraft.net
account.mojang.com
authserver.mojang.com
sessionserver.mojang.com
skins.minecraft.net
textures.minecraft.net
That’s about it, we certainly hope this article helped you resolve that Minecraft error that has been bothering you lately.
In our latest article we wrote about Bad video card drivers error in Minecraft, so don’t miss it for more solutions. If you have any comments, questions, or suggestions, just let us know in the comments below.
Blue Screen of Death errors will crash Windows 10 and give you an error message such as SESSION3_INITIALIZATION_FAILED before your computer restarts.
These types of errors can be caused by faulty hardware, and since these errors can be rather problematic, today we’re going to show you how to fix SESSION3_INITIALIZATION_FAILED error.
How can I fix SESSION3 INITIALIZATION FAILED BSoD error?
Fix – SESSION3 INITIALIZATION FAILED Windows 10 error
1. Update Windows 10
Updating Windows 10 is crucial if you want to keep your system error-free and stable.
Certain hardware or software might have issues with Windows 10, and that can cause BSoD errors such as SESSION3_INITIALIZATION_FAILED to appear.
By using Windows Update you’ll download the latest security improvements as well as many bug fixes.
These bug fixes are designed to fix incompatibility issues with certain hardware or software, therefore it’s crucial to download Windows updates in order to prevent BSoD errors from appearing.
2. Update your drivers
Drivers are a crucial part of every operating system since they allow Windows to recognize and utilize your hardware.
If a certain driver is corrupted or incompatible with Windows 10 that can cause a BSoD error such as SESSION3_INITIALIZATION_FAILED.
In order to fix these errors, it’s advised to update your drivers, and you can do that right from Device Manager by following these steps:
Press Windows Key + X and select Device Manager from the menu.
When Device Manager opens, locate the driver you wish to update, right-click it and choose Update Driver Software.
Select Search automatically for updated driver software. Windows 10 will now download and install the best driver for your device.
Repeat these steps for all drivers that you want to update.
Some users say that it’s better to download the drivers manually since Device Manager won’t always find the latest drivers for your hardware.
To download drivers manually, you just have to visit your hardware manufacturer’s website, find your device, and download the latest drivers for it.
Be sure to download and update drivers for all major hardware components.
Update drivers automatically
Searching for drivers on your own can be time-consuming. So, we advise you to use a tool that will do this for you automatically.
Advanced softwares will help you update drivers automatically and prevent PC damage caused by installing the wrong driver versions.
3. Run chkdsk scan
Sometimes BSoD errors like SESSION3_INITIALIZATION_FAILED can appear due to corrupted files on your hard drive.
And in order to fix this problem, you’ll need to check your hard drive by using chkdsk command. To do that, follow these steps:
Press Windows Key + X to open Power User Menu and select Command Prompt (Admin).
When Command Prompt starts, enter chkdsk /f /r C: and press Enter to run it. Bear in mind that you’ll have to perform this scan for all hard drive partitions that you have, so be sure to replace C with the letter that matches your hard drive partition.
It’s worth mentioning that you won’t be able to scan C drive right from Windows 10, so be sure to restart your computer when the Command Prompt tells you to.
When your computer starts again, the chkdsk will automatically scan your C drive for errors.
If you cannot access Windows 10 due to SESSION3_INITIALIZATION_FAILED error, you can perform the chkdsk scan by following these steps:
Restart your computer while it boots. You’ll have to restart it several times before you can start Automatic Repair.
When Command Prompt starts enter chkdsk /f /r C: to perform a scan. Repeat this step for all hard drive partitions and be sure to replace C with the appropriate letter.
4. Run the BSOD Troubleshooter
If none of the previous solutions resolved the issues, let’s try with Windows 10‘s built-in troubleshooter.
This tool can address various system issues, including the BSOD problems.
Here’s how to run Windows 10‘s built-in troubleshooter:
Open the Settings app and go to Update & Security section.
Select Troubleshoot from the menu on the left.
Select BSOD from the right pane and click Run the troubleshooter.
Follow the instructions on the screen to complete the troubleshooter.
5. Run the SFC scan
The next thing we’re going to try is running the SFC scan. The System File Checker is a command-line tool that scans all the system files for potential issues.
So, if a corrupt system file is the cause of the SESSION3_INITIALIZATION_FAILED error, the SFC scan will likely resolve it.
Here’s how to run the SFC scan in Windows 10:
Go to Search, type cmd, and open the Command Prompt as Administrator.
Enter the following line and press Enter:sfc/scannow
Wait for the scan to complete (it will take a while)
The tool will automatically resolve the problem, if possible.
Now, close the Command Prompt and restart your computer.
6. Run DISM
The third troubleshooting tool we’re going to use here is DISM.
Deployment Image Servicing and Management (DISM), as its name says, re-deploys the system image all over again, and resolves potential issues along the way.
So, it’s also possible it will resolve the SESSION3_INITIALIZATION_FAILED error.
We’ll walk you through both standard and the procedure that utilizes the installation media below:
Standard way
Right-click Start and open Command Prompt (Admin).
Paste the following command and press Enter:
DISM /Online /Cleanup-Image /RestoreHealth
Wait until the scan is finished.
Restart your computer and try updating again.
With the Windows installation media
Insert your Windows installation media.
Right-click the Start menu and, from the menu, choose the Command Prompt (Admin).
In the command line, type the following commands and press Enter after each:
Make sure to change an X value with the letter of the mounted drive with Windows 10 installation.
After the procedure is finished, restart your computer.
7. Replace smss.exe
According to users, corrupt smss.exe file can sometimes cause SESSION3_INITIALIZATION_FAILED BSoD error, and in order to fix it, you need to replace that file. To do that, follow these steps:
Restart your computer few times while it boots. This should start Automatic Repair.
Users reported SESSION3_INITIALIZATION_FAILED error while trying to install Windows 10 from a DVD, and according to them, the problem was damaged DVD disc.
If you’re installing Windows 10 from a DVD, be sure that your DVD doesn’t have any scratches on it.
Instead of using DVD, it’s always better to use a USB flash drive to install Windows 10. You can easily create bootable USB drive with Windows 10 on it by using Media Creation Tool.
Bear in mind that you can get the same error even if you’re using a USB flash drive to install Windows 10.
Apparently corrupt ISO image can create this problem, so be sure that you don’t interrupt Windows 10 ISO download.
9. Check your DVD drive
If you’re installing Windows 10 from a DVD, be sure that your DVD drive is working correctly.
Users reported that faulty DVD drive can prevent installation process and give you SESSION3_INITIALIZATION_FAILED BSoD, so be sure that your DVD drive isn’t faulty.
In case your DVD drive is broken, you can always install Windows 10 from a USB flash drive.
10. Check for hardware problems
SESSION3_INITIALIZATION_FAILED BSoD error can be caused by a faulty hardware, most notably RAM, so be sure that your RAM is working properly.
To check your RAM you can use tools such as MemTest86+.
In addition to RAM, almost any other hardware component can cause this error, so be sure to check other major components such as your motherboard, hard drive, graphic card, etc.
SESSION3_INITIALIZATION_FAILED error can be caused by corrupted files or hardware problems, but you can easily fix this error by using one of our solutions.
Can a PC run without RAM?
The short answer is NO. It is not possible for a computer to run without RAM. Read more about Random Access Memory.
Fix – SYMBOLIC_INITIALIZATION_FAILED Windows 10 error
Solution 1 – Make sure Windows 10 and your drivers are up to date
Windows 10 might be a great operating system, but it’s certainly not perfect.
In some cases, Windows 10 can have compatibility issues with certain hardware or software, and in order to fix those issues, it’s important to download updates on a regular basis.
Many of these hardware and software issues can be the cause for BSoD error, therefore it’s crucial to run Windows Update to download and install the latest updates.
Downloading updates is rather important for system stability and safety, but it’s also important that you download the latest drivers for your hardware.
In some cases outdated or incompatible drivers can cause BSoD errors to appear, therefore it’s crucial to keep your drivers up to date.
Updating drivers is relatively simple, and in order to do it, you just need to download them online and install them.
You can find the latest drivers available on your hardware manufacturer’s website. Alternatively, you can also install the drivers from CD that you got alongside your hardware.
Bear in mind that drivers on that CD might not be the latest, but they might work better than default Windows 10 drivers.
Update drivers automatically
Searching for drivers on your own can be time-consuming. So, we advise you to use a tool that will do this for you automatically.
Using an automatic driver updater will certainly save you from the hassle of searching for drivers manually, and it will always keep your system up to date with the latest drivers.
Also, it will help you update drivers automatically and prevent PC damage caused by installing the wrong driver versions.
After several tests, our team concluded that this is the best-automatized solution:
Solution 2 – Run the BSOD Troubleshooter
The next thing we’re going to try here is Windows 10’s built-in troubleshooting tool.
This tool is designed to deal with all kinds of system issues, so it might be helpful with the SYMBOLIC_INITIALIZATION_FAILED error, as well.
Here’s how to run Windows 10’s troubleshooting tool:
Open Settings app.
Go to the Update & Security section, and select Troubleshoot from the menu on the left.
Select BSOD from the right pane and click Run the troubleshooter.
Follow the further instructions on the screen to complete the troubleshooter.
Solution 3 – Run the SFC scan
The next troubleshooting tool we’re going to try is the System File Checker. This tool scans your computer for potential issues and resolves them automatically (if possible).
So, if the SYMBOLIC_INITIALIZATION_FAILED error is caused by a corrupt system file, the SFC scan will deal with it.
Here’s how to run the SFC scanner in Windows 10:
Right-click on the Start Menu button, and open Command Prompt (Admin).
Enter the following line and press Enter:sfc/scannow
Wait until the process is done (it may take a while).
If the solution is found, it will automatically be applied.
Now, close the Command Prompt and restart your computer.
Solution 4 – Run DISM
And the third troubleshooting tool we’re going to use while trying to resolve the SYMBOLIC_INITIALIZATION_FAILED error is DISM.
Deployment Image and Servicing (DISM), as its name says, re-deploys the system image, so it’s possible it will also resolve some potential issues along the way.
We’ll walk you through both standard and the procedure that utilizes the installation media below:
Standard way
Right-click Start and open Command Prompt (Admin).
Paste the following command and press Enter:
DISM /Online /Cleanup-Image /RestoreHealth
Wait until the scan is finished.
Restart your computer and try updating again.
With the Windows installation media
Insert your Windows installation media.
Right-click the Start menu and, from the menu, choose the Command Prompt (Admin).
In the command line, type the following commands and press Enter after each:
Make sure to change an X value with the letter of the mounted drive with Windows 10 installation.
After the procedure is finished, restart your computer.
Solution 5 – Check the hard drive
If there’s a problem with your hard drive, BSOD issues are quite possible. To check if that’s the case, run the chkdsk command.
This command will scan all your partitions for potential problems. If the solution is available, this tool will also apply it.
Here’s how to run the chkdsk command in Windows 10:
Enter the Advanced Startup (Restart your computer while holding the Shift key).
Choose Troubleshoot > Advanced Options.
Select Command Prompt from the list of options.
When Command Prompt appears, enter the following lines and press Enter after each line in order to run it:
bootrec.exe /rebuildbcd
bootrec.exe /fixmbr
bootrec.exe /fixboot
Some users are also suggesting that you need to run additional chkdsk commands as well. To perform these commands, you need to know drive letters for all your hard drive partitions. In Command Prompt you should enter the following (but remember to use the letters that match your hard drive partitions on your PC):
chkdsk /r c:
chkdsk /r d:
This is just our example, so keep in mind that you have to perform chkdsk command for every hard drive partition that you have.
Restart your computer and check if the issue is resolved.
In some cases, SYMBOLIC_INITIALIZATION_FAILED error can be caused by certain outdated or incompatible software, and the only solution is to find the problematic software and uninstall it.
It’s worth mentioning that recently installed or updated applications can also cause BSoD error, therefore if you installed any applications before the error started appearing, be sure to remove them.
Another common cause of BSoD errors is antivirus software. Windows 10 comes with its own Windows Defender antivirus, but many users tend to install third-party solutions instead.
Third-party antivirus software can sometimes cause BSoD errors to appear, therefore it’s important to remove any installed antivirus software.
To completely remove certain antivirus software it’s recommended to use a special uninstaller tool.
Many antivirus companies offer these tools for their software, so be sure to download them.
Solution 7 – Reset Windows 10
If the SYMBOLIC_INITIALIZATION_FAILED error is caused by software, you can fix that by performing Windows 10 reset.
Resetting Windows 10 will delete all files and folders from your C drive, so be sure to create a backup. After you created a backup, you can reset Windows 10 by following these steps:
Restart your computer few times while it boots. This should start the Automatic Repair process.
Choose Troubleshoot > Reset this PC.
Select Remove everything > Only the drive where Windows is installed > Just remove my files. Click the Reset button.
This should start the reset process. Follow the instructions to complete Windows 10 reset.
After the reset process is completed, all your files from C drive will be deleted and you’ll have a clean installation of Windows 10.
If the problem was caused by a problematic software or a driver, it should be fixed after Windows 10 reset. If the problem still exists, it’s most likely a hardware issue.
Solution 8 – Check your hardware
If the SYMBOLIC_INITIALIZATION_FAILED error still appears even after you reset Windows 10, it’s most likely that certain hardware is causing this problem.
If you installed any new hardware recently be sure to remove or replace it because it might not be compatible with your PC.
If the problem still persists, you should check if your hardware is working properly.
The most common cause for BSoD errors is faulty RAM and users reported that the SYMBOLIC_INITIALIZATION_FAILED error was fixed after finding and replacing the faulty RAM module.
To find a faulty RAM module you need to power down and unplug your computer case, open it, and remove all but one RAM modules.
Now turn on your PC and test it for a while to see if it works. In addition, you can also download MemTest86+, put it on a USB flash drive, and boot your PC from it.
Bear in mind you need to run MemTest86 for a couple of hours in order to perform a thorough scan.
If your RAM is working properly, you need to check other hardware components such as hard drive, motherboard, graphic card, etc.
Finding the faulty hardware on your own can be tricky, so it might be best that you contact an expert.
SYMBOLIC_INITIALIZATION_FAILED BSoD error can be problematic, but users confirmed that in most cases the cause of this error is a faulty memory module.
Before you replace your RAM, be sure to try other solutions from this article as well.
What is the reason for blue screen error?
Blue screens are generated usually by problems with your computer’s hardware or issues or with their drivers. Read more about what can cause a Blue Screen of Death.
Most error messages give away some hints on the cause of the issue, but not the Dropbox error 400. This is a pretty generic error code that pops up when signing in, exporting a file, or synchronizing Dropbox with another service.
How do I fix the Dropbox error 400?
1. Rename the file to fix Dropbox error 400 on uploads
Another variation of the error shows when you attempt to upload files to Dropbox.
Error on upload: The operation couldn’t be completed. (dropbox.com error 400)
If you get this Dropbox error 400 message, simply rename the file you want to upload. Renaming the file to a shorter name fixes the problem.
2. Reinstall Dropbox
If you are getting the Dropbox error 400 on the desktop Dropbox application, use this solution.
Press the Windows key and R to open the Run accessory.
From the dialog box, enter appwiz.cpl and click OK.
From the list of applications, find and right-click on Dropbox.
Next, hit Uninstall.
Follow through the uninstall wizard and restart your PC on completion.
When the system comes back on, hit the Windows key and E to open File Explorer.
Next, go to the folder path bar, enter %LOCALAPPDATA% and press Enter.
Locate the Dropbox folder and delete it.
Now, just like you did in step 5, navigate to %APPDATA%, %PROGRAMFILES(x86)%, and %PROGRAMFILES%.
Delete the Dropbox folders in each of the above locations.
Finally, download the Dropbox application from dropbox.com and install it.
3. Unlink Dropbox
Visit dropbox.com and sign in to your account.
Next, click on your picture at the top right-hand corner of the page and select Settings from the resulting dropdown.
In the Dropbox settings page, switch to the Security tab.
Here, you will find the web browsers and devices linked to your Dropbox account.
Click on the X beside the web browser or device that’s returning the Dropbox error 400 to unlink it.
Go back to the client you got the error on (the one you unlinked) and sign in to your Dropbox account to re-link it.
4. Update your drivers
Right-click on the Start button and select Device Manager.
Here is a list of devices currently installed on your computer.
Expand a device category to reveal the device(s) under it.
Next, right-click on a device and hit Update driver.
Follow through with your desired options and update the driver.
Repeat steps 3 and 4 until you update all the drivers on the list.
If you can, restart your computer after each driver update.
However, rebooting the machine after concluding all the updates works also.
5. Perform a system restore
Press the Windows key and search for system restore on the Start menu.
From the results, select Recovery.
Next, choose the Open system restore setting.
This launches the System Restore utility.
On the System Restore wizard, click Next and then select a restore point that occurred before you started getting the Dropbox error 400.
On completion of the System Restore, restart your machine and recreate the error.
Follow the solutions closely to fix the Dropbox error 400. Bearing in mind that there are many causes of the error, you may try a few before fixing the issue.
If none of these solutions work, let’s talk about it in the comments.
Dropbox Smart Sync not working means that you won’t be able to make files available online-only. The service is available to Dropbox Business teams, Dropbox Plus, and Professional users.
If you fall under any of the above categories but Dropbox Smart Sync is not showing up, you can fix it with the tested methods on this page.
How to repair Dropbox Smart Sync that is not working
1. Disable your antivirus
The operations of antivirus or other security software can be why Dropbox Smart Sync is not working. Your antivirus might have mistakenly identified the process as malicious and blocked it.
The fastest way to check if the Dropbox Smart Sync problem is from your antivirus is to disable the antivirus and retry.
2. Whitelist Dropbox from Windows Defender Firewall
Press the Windows key + I combination to open Windows Settings.
Next, in the box that says Find a setting, type in firewall.
After typing firewall, you will see results appearing under the search box.
From there, click on Allow an app or feature through Windows Firewall.
The next screen lists all the allowed apps and features.
Click on the Allow another app button at the bottom of the list.
On the popup that shows, hit the Add another app button below the list.
Next, click Browse on the popup.
This opens an instance of File Explorer.
Click on the address bar and type in
C:Program Files (x86)DropboxClient
. Press Enter to go to this path.
Double-click on Dropbox.exe or select it and hit Open.
The Dropbox application will now appear in the Add an app dialog box.
Click on it and hit Add.
Dropbox will now show up on the Allowed apps and features list.
Finally, mark the checkbox to the left of Dropbox.
To the right, mark the respective boxes to allow on private or public networks.
After that, click OK at the bottom of the page to save and whitelist Dropbox from Windows Defender Firewall.
3. Re-install the Dropbox app as an Administrator
Using the Windows key + R combination, open the Run dialog box.
Here, type appwiz.cpl and hit Enter.
You will see a list of applications here.
Locate Dropbox, right-click on it, and click Uninstall.
Complete the uninstallation process and reboot your machine.
After the restart, press the Windows key + E combination to open Find Explorer.
In File Explorer, click on the address bar and type %LOCALAPPDATA%. Hit Enter after typing this.
Next, delete the Dropbox folder.
Go to %APPDATA%, %PROGRAMFILES(x86)%, and%PROGRAMFILES%.
Delete the Dropboxfolders in the above directories.
Now, download the Dropbox installer from dropbox.com.
Go to the downloaded file, right-click it, and select Run as Administrator.
Finish the installation of Dropbox.
4. Check users’ Smart Sync and privileges
If you could access Smart Sync, confirm that you have Dropbox installed as an Administrator on the computers on which you intend to use the feature.
Administrators of Dropbox Business teams can also verify the members who installed the application with elevated privileges. Note that to do this, you must first deactivate Smart Sync.
Note, for the last solution, that some users may not be able to install the Dropbox application as Administrators without the help of a professional IT department or team.
Dropbox is one of the best cloud storage services on the market, but some users reported issues with it. According to them, it seems that their account was disabled for some reason.
This can be a big problem, especially if you use Dropbox for storing important documents and files, and in today’s article, we’ll show you how you can fix this issue.
What do I do if my Dropbox account is disabled?
1. Why would my Dropbox account be disabled?
Your account can get disabled for two reasons, inactivity, and violation of Terms of Service.
If your account is inactive for 12 months, it will become disabled. After an additional 90 days, files from your Dropbox will be deleted.
In order to prevent this from happening, you need to have some activity on your account once in 12 months, such as uploading, downloading, or editing files or folders.
As for Terms of Service violations, this can happen if you upload copyrighted content or any other type of content that violates the Terms of Service.
2. Contact Dropbox support
If your account is disabled, there’s not much you can do on your own. The first thing you should do is to try and log in to your account, but if that’s impossible, you should contact Dropbox support.
Keep in mind that you might not be able to recover your files since they will get deleted due to inactivity or Terms of Service violations.
Unfortunately, there’s not much you can do from your side if your Dropbox account is disabled, so it would be best to contact Dropbox support as soon as possible. If you found this guide useful, let us know in the comments section below.
You aren’t the only one who has a frequent recurrence of the AcroExch error when trying to insert a PDF into Word documents or opening an Excel document which have multiple objects in it. You may feel that odds are not in your favor when getting the same error message.
This message states: The program used to create this object is AcroExch. That program is not installed on your computer. To edit this object, you must install a program that can open the object.
As unpleasant as it may sound, there’s always a solution to this problem. Waste no more time as here you may find a couple of tips to help you resolve the annoying AcroExch error.
What can I do if getting the AcroExch error?
1. Download and install the right Acrobat Reader file
This is the PDF productivity solution that you’ve used for years to edit and convert PDF documents on both Mac and Windows platforms, so giving up on it that easily isn’t really an option.
Moreover, Acrobat Reader is the only PDF viewer that can open and interact with all types of PDF content.
Before trying out any sort of fixes, let us tell you that the quickest solution resides in grabbing the latest Acrobat Reader version that no longer has this error.
In fact, downloading and installing the most recent version is our top recommendation since it also gives you that peace of mind that no such errors will reappear. That’s what you’re hoping to get, right?
2. Close the PDF document you are trying to attach
There are times when little things make the difference. In our case, several users described a handy tip that worked for them like a breeze.
They used to get the same AcroExch error you are currently experiencing when the PDF document they were trying to attach was still opened.
Therefore, simply closing it solved the problem and attaching it to the document become instantly possible.
3. Disable Protected Mode in Adobe Reader
When using Adobe Reader and encountering this error, here’s another workaround you may apply. Under Privacy, you need to untick the option saying Enable protected mode at startup.
Adobe Reader’s Protected Mode will be turned off. However, do note that the AcroExch error isn’t always related to a Protected Mode problem and the tip can’t be applied if the error happens to show up in Adobe Acrobat Professional.
4. Use a different insertion method
Have you tried to insert the PDF into the Word document using Insert -> Object -> Create From File? Other users did the same and simply choosing a different insertion method worked for them.
You may as well try to follow this path Insert -> Object -> Create New and confirm that it worked.
As you can see, here we’ve compiled a list of solutions for the AcroExch error. Try them out and let us know if they’ve been helpful.
As always, if you have any other questions, leave them in the comments section below and we’ll be sure to check them out.
We share with you the enthusiasm for getting the Adobe Acrobat Pro DC activation code right away. After all, that’s a highly professional PDF tool that you may enjoy on the desktop, mobile apps, and the web as well.
If your Acrobat Pro DC trial is about to expire or you’re determined to purchase Adobe Acrobat Pro DC with no trial at all, then there’s no reason for us to remind you what it has to offer.
You’ve literally enjoyed the greatest PDF ecosystem of the moment and you’ve already decided what’s best for yourself. Therefore, let us guide you towards achieving your goal in no time.
How can I get Adobe Acrobat Pro DC activation code?
The monthly subscription is available for Windows and Mac OS at 29,74 €. Choose this one if it meets your interests.
On the other hand, if you’re sure you have a need for the latest features per long term, the 17,84 € a month option with an annual commitment may sound more appealing to you.
Enter your email (this applies to both new and existing users).
Read and accept the Terms of Use.
Click Continue to payment.
Finally, in the tools pane on the right, don’t forget to click the Activate button.
You may continue using some of the Pro features you appreciate in a more affordable Acrobat Standard version as well. The Acrobat Standard DC version clearly allows users to reliably create PDFs, edit, and sign them.
However, this means getting back to a few compromises in terms of some advanced editing features.
This includes forgetting all about the joys of exporting, organizing, and even combining files right from your tablet or mobile phone.
Can you continue working with no option to compare two versions of a PDF to review all differences and mobile editing features? You know the answer better than us this time.
Long story short, after your Acrobat DC trial expires, the Trial Expired message with a Buy Now link should pop up at the bottom of the right pane.
There’s no problem if you’ve missed it. The Adobe Acrobat Pro DC activation code is still waiting for you. The same goes for those willing to purchase Adobe Acrobat Pro DC with no trial in advance.
Just follow the steps detailed above and you’ll have this fantastic feature-rich tool on your hands in no time.
Don’t hesitate to let us know how the procedure of getting the Acrobat Pro DC activation code went for you. You may use the comments section below in that regard.
Last September, Microsoft announced the dates for Build, its annual developer conference, scheduling it for May 19-21. Well that was a very very long time ago. Since then, like nearly all in person events slated for the first half of this year, Microsoft announced in March that the conference would become a digital event, and the company has since announced the cancellation of all in person conferences and events through next July.
In announcing the in-person cancellation, Microsoft never said it was changing the dates of the event, but it didn’t say it wasn’t, only advising developers and enthusiasts to “stay tuned for more details to come.” In light of the massive effort it will take to switch this or any event to online only, it certainly wouldn’t have been surprising if the dates were to change.
Join us for virtual booth sessions to ask questions, talk about Build content, and chat with the Windows Insider team. Mark your calendar and follow our Mixer channel now!
Session 1: Tuesday, May 19 – 2 to 4 AM GMT (7pm-9pm PDT)
Session 2: Wednesday, May 20 – 5 to 7 PM GMT (10am-12pm PDT)
As part of the virtual //Build conference, we’ll be hosting two “booth sessions” for current Windows Insiders and non-insiders alike to visit us, ask questions, and enjoy good conversation. There aren’t specific technical topics planned as we have during our regular webcasts, but we’ll be listening for your suggestions, feedback, and questions about the program all the same.
Come join us!
For many developers and onlookers, Build 2020 will be much like recent versions, as Microsoft has done a great job of bringing not only the keynotes but many of the developer sessions online, either live, or shortly after. For the some 1,600 to 2,000 of us who have come to celebrate the annual gathering as another rite of spring, this will indeed be a different and unique Build.
So in these uncertain times, it’s good to know that we can actually do a bit of planning ahead. We’ll be (virtually) at Build 2020, as we have been for years, bringing you all the latest in Microsoft news and information.
Fix – OBJECT1_INITIALIZATION_FAILED Windows 10 error
Solution 1 – Update your drivers and Windows 10
In order to prevent these types of errors from appearing, it’s good to update Windows 10 as well as your drivers on a regular basis.
By using Windows Update you’ll be certain that you receive the latest security and stability patches.
Many updates bring new features and fix compatibility issues with certain hardware and software.
Since both hardware and software issues are common cause for errors such as OBJECT1_INITIALIZATION_FAILED, it’s highly advised that you keep Windows 10 updated in order to prevent BSoD errors.
Your drivers are another common cause for BSoD errors, and if a certain driver is outdated or not fully compatible with Windows 10, you’ll probably get a BSoD error.
To fix these types of problems, it’s recommended that you keep your drivers up to date.
Updating your drivers is fairly simple, and you can do it simply by visiting your hardware manufacturer’s website and downloading the latest drivers for your hardware.
Alternatively, you can use Device Manager to update the necessary drivers. To do that, follow these steps:
Press Windows Key + X to open Power User Menu. Select Device Manager from the list.
When Device Manager opens, locate the driver you wish to update, right-click it and choose Update Driver Software.
Choose Search automatically for updated driver software. Windows 10 will now search for the best driver for your device.
Repeat these steps for all devices that you wish to update.
Some users are advising that it’s better to manually update your drivers instead of using Device Manager.
Sometimes Device Manager might not be able to download the latest drivers, so it’s better to download the necessary drivers directly from your hardware manufacturer’s website.
Update drivers automatically
Searching for drivers on your own can be time-consuming. So, we advise you to use a tool that will do this for you automatically.
Using an automatic driver updater will certainly save you from the hassle of searching for drivers manually, and it will always keep your system up to date with the latest drivers.
Also, it will help you update drivers automatically and prevent PC damage caused by installing the wrong driver versions.
After several tests, our team concluded that Fortect Driver Updater is the best-automatized solution. It is easy to use, light and it requires minimal effort on your part.
Besides updating, the software can also help you identify whether your system has any damaged or missing drivers and replace them right away with proper versions.
The next thing we’re going to try is running Windows 10’s built-in troubleshooting tool. This tool can be used for resolving all sorts of system issues, including BSOD problems.
So, we can use it when dealing with the OBJECT1_INITIALIZATION_FAILED error.
Here’s how to run Windows 10’s troubleshooting tool:
Go to the Settings app
Head over to the Update & Security section.
Select Troubleshoot from the menu on the left.
Select BSOD from the right pane and click Run the troubleshooter.
Follow the instructions on the screen to complete the troubleshooter.
Solution 3 – Run the SFC scan
The next troubleshooter on the list is the SFC scan. This is a command line tool that scans your computer in search for potential issues. Including BSOD errors.
Here’s how to run the SFC scan in Windows 10:
Go to Search, type cmd, and open the Command Prompt as Administrator.
Enter the following line and press Enter:sfc/scannow
Wait until the process is done (it may take a while).
If the tool finds the solution, it’ll automatically apply it.
Now, close the Command Prompt and restart your computer.
Solution 4 – Run DISM
And the third tool we’re going to use here is DISM. Deployment Image Servicing and Management (DISM) re-deploys the system image, which can resolve various issues.
We’ll walk you through both standard and the procedure that utilizes the installation media below:
Standard way
Go to Search, type cmd, and open the Command Prompt as Administrator.
Paste the following command and press Enter:
DISM /Online /Cleanup-Image /RestoreHealth
Wait until the scan is finished.
Restart your computer and try updating again.
With the Windows installation media
Insert your Windows installation media.
Right-click the Start menu and, from the menu, choose the Command Prompt (Admin).
In the command line, type the following commands and press Enter after each:
Make sure to change an X value with the letter of the mounted drive with Windows 10 installation.
After the procedure is finished, restart your computer.
Solution 5 – Check the hard drive
If there’s something wrong with your hard drive, BSOD issues are more than possible. And the best way to check the current state of your hard drive is with the chkdsk command.
This command will scan your hard drive, and resolve potential problems.
Here’s how to run the chkdsk command in Windows 10:
Restart your computer while holding the Shift key
Enter the Advanced Startup.
Choose Troubleshoot > Advanced Options.
Select Command Prompt from the list of options.
When Command Prompt appears, enter the following lines and press Enter after each line in order to run it:
bootrec.exe /rebuildbcd
bootrec.exe /fixmbr
bootrec.exe /fixboot
Some users are also suggesting that you need to run additional chkdsk commands as well. To perform these commands, you need to know drive letters for all your hard drive partitions. In Command Prompt you should enter the following (but remember to use the letters that match your hard drive partitions on your PC):
chkdsk /r c:
chkdsk /r d:
This is just our example, so keep in mind that you have to perform chkdsk command for every hard drive partition that you have.
Restart your computer and check if the issue is resolved.
Solution 6 – Remove any problematic software
Sometimes certain software can cause OBJECT1_INITIALIZATION_FAILED BSoD error to appear, and in order to fix this issue it’s important to locate and remove the problematic software.
If you installed any new software before the error started appearing, be sure to locate and remove that software.
Alternatively, delete any application or driver that you updated in the last few weeks since sometimes the latest versions might have some problems with Windows 10.
To delete a specific driver, you need to do the following:
Press Windows Key + X and choose Device Manager.
When Device Manager opens, locate the problematic driver, right-click it, and choose Uninstall.
If available, check to Delete driver software for this device and click OK.
Restart your computer.
After you remove a certain driver, Windows 10 will replace it with a default driver, and if the default driver works well, you can continue using it.
If not, try downloading some older version of the driver.
It’s worth mentioning that antivirus software can also be a common cause for BSoD errors, therefore it’s advised to uninstall any third-party antivirus software that you have installed.
To completely remove an antivirus, it’s recommended to use special removal tools.
Many antivirus companies offer these tools for their software so be sure to download them and use them.
To be sure that a problem is caused by software, you can always start your PC in Safe Mode. To do that, follow these steps:
Restart your computer few times while it boots. This should start Automatic Repair process.
Navigate to Troubleshoot > Advanced Options > Startup Settings and click the Restart button.
Once your computer restarts again, press 5 or F5 to select Safe Mode with Networking.
Safe Mode disables most of the third-party applications and it uses only the default drivers, therefore if you have no problems in Safe Mode, it’s most likely that certain software is causing this error on your PC.
When you determine which software causes the issue, we advise you to remove it with the help of a third-party uninstaller. These will erase any trace of the app including temporary files and registry entries.
Solution 7 – Use System Restore / Reset Windows 10
If the OBJECT1_INITIALIZATION_FAILED error is caused by software, you should be able to fix it performing System Restore. To do that, follow these steps:
Restart your computer a few times while it boots to start Automatic Repair process.
Choose Troubleshoot > Advanced options > System Restore.
Select your username and enter your password.
Select Choose a different restore point and select one of the restore points.
Follow the instructions and wait for System Restore to complete.
If the problem is still present, you might have to reset Windows 10. Resetting Windows 10 will delete all your files and folders from C drive so be sure to back them up.
After creating a backup do the following:
Start Automatic Repair by restarting your PC a few times.
Select Troubleshoot > Reset this PC > Remove everything > Only the drive where Windows is installed > Just remove my files.
Click the Reset button and wait for the process to finish.
This process will remove all files and folders from your C drive, and if the problem was caused by software, that software should now be completely removed.
If the problem still persists, you might have faulty hardware.
Solution 8 – Check your hardware
Before you start checking your hardware, be sure to remove any recently installed hardware since it might not be compatible with your PC.
If you didn’t install any new hardware, you’ll have to check for faulty hardware.
A common cause for BSoD errors might be your RAM, so be sure to test your modules one by one. In addition, you can use MemTest86+ to check them for errors.
Few users reported that their motherboard was the cause for OBJECT1_INITIALIZATION_FAILED error and after replacing the faulty motherboard, the issue was resolved.
It’s worth mentioning that almost any hardware component can cause this error, so be sure to perform a detailed inspection.
OBJECT1_INITIALIZATION_FAILED BSoD is often caused by faulty hardware, but before you start replacing your hardware, be sure to try all other solutions from this article.
What is a HAL error?
An issue like HAL INITIALIZATION FAILED on Windows 10 is usually caused by device or hardware problems, especially if you got an older computer. You might also be interested in how to optimize your computer.
You can’t ignore a BSoD error, because ignoring it might damage your hardware for good. Go straight to our Troubleshooting BSoD errors section for solutions.
There are more errors in Windows 10 we’ve hoped for but luckily, we have solutions for all of them in our Windows 10 errors Hub.
Gears Tactics, Microsoft’s new turn-based strategy game set in the Gears of War universe, is now available on the Windows 10 Microsoft Store, Steam, and Xbox Game Pass for PC. The game has often been described as Microsoft’s take on a genre perfected by 2K Games’ X-COM franchise, but developers The Coalition and Splash managed to add their own touch to the turn-based tactics gameplay, including the gritty violence the Gears franchise is known for.
If recent Xbox Game Studios have often disappointed fans in recent years, Gears Tactics has received pretty good reviews so far with a 81 score on Metacritic. That’s much better than the sub-70 scores we’ve seen for other first-party games such as Sea of Thieves, Crackdown 3, or Bleeding Edge more recently. Actually, today’s blog post on Xbox Wire did put the emphasis on the good reviews PC Gamer, GameSpot, IGN, and more gave to Gears Tactics.
Gears Tactics is the first PC-exclusive game coming from Microsoft this year, following the release of Age of Empires 2: Definite Edition last fall. The company has another PC exclusive game coming later this year with the new Microsoft Flight Simulator, which currently enjoys a much higher level of hype thanks to a regular flow of new screenshot and videos.
Gears Tactics is priced at $59.99 on the Windows 10 Microsoft Store and Steam, but you can also try it for just $1 by signing up for 1 month of Xbox Game Pass Ultimate. If you sign up today, you’ll also be able to play Minecraft Dungeons when it hits Xbox Game Pass on May 26.
While Zoom’s popularity has significantly increased during the past couple of months, the increased usage came along with an unprecedented load on their servers. To deal with these issues, today Zoom has announced a partnership with Oracle to leverage the security and scalability of its Cloud Infrastructure service (via CNBC).
While the terms of the deal are not disclosed yet, Zoom’s CEO Eric Yuan shared some details in a press release today. “We recently experienced the most significant growth our business has ever seen, requiring massive increases in our service capacity. We explored multiple platforms, and Oracle Cloud Infrastructure was instrumental in helping us quickly scale our capacity and meet the needs of our new users,” said Yuan.
Interestingly, the US-based video communications platform quickly completed the deployment process for Oracle Cloud Infrastructure. Starting today, Zoom now delivers over seven petabytes through Oracle Cloud Infrastructure servers on a daily basis, with the ability to support hundreds of thousands of concurrent Zoom meetings. Moreover, the recent deployment will also allow Zoom to cope with a further increase in demand, which means that millions of users would be able to simultaneously conduct Zoom meetings.
Notably, Zoom has bypassed some major cloud leaders including Microsoft, Alphabet and Amazon to sign this new deal with Oracle. In the press release, Zoom stated that “We chose Oracle Cloud Infrastructure because of its industry-leading security, outstanding performance, and unmatched level of support.”
It’s important to note that Zoom was already an AWS and Azure customer, though with Zoom already competing with Microsoft in the video conferencing space, its management may have been interested in opting for other cloud providers. Anyway, this move brought some good news for Oracle as the announcement resulted in a slight change in Oracle’s stock.
Update 10:30AM BST: We’ve updated our story to clarify that Zoom was already using Microsoft Azure and Amazon Web Services, and this new deal with Oracle will only expand the company’s service capacity.
Microsoft announced earlier this month that it was getting ready to expand the preview of their Project xCloud game streaming service in 11 European countries, and the day has finally come (via The Verge). Starting today, consumers in France, Germany, and the Netherlands can now try out the new service after signing up on this page. Next week, the company plans to make the public preview available in Belgium, Denmark, Finland, Ireland, Italy, Norway, Spain, and Sweden as well.
If you already registered for the Project xCloud public preview, you should receive an email including details about how to get started. Even though Project xCloud is already available on iOS with some limitations, the preview is currently restricted to Android phones and tablets in these new European preview markets.
Microsoft is well aware that communication networks are under pressure since the beginning of the coronavirus pandemic, and that’s why the company will continue to roll out Project xCloud gradually. “We will take a measured approach to help conserve internet access, beginning the preview in each market with a limited number of people and adding more participants over time,” Catherine Gluckstein, GM & Head of Product for Project xCloud.
The Project xCloud public beta initially kicked off in October, and the catalog currently includes close to 100 games that are all free-to-play. The game streaming service is expected to be generally available later this year, and even though Microsoft previously mentioned an integration with Xbox Game Pass, the company has yet to share more details about the business model for Project xCloud.
Update 9:20 AM PDT: We previously wrote that Project xCloud was available in 11 new European countries starting today, and that was inaccurate. Microsoft contacted us to clarify that the preview just went live in France, Germany, and the Netherlands today, with 8 other European countries to follow next week. We’ve edited our story to reflect that.
Borderlands 2 is a popular action role-playing first-person shooter video game with tons of customization options for the users.
If you are someone who is new to the game and wondering how your friends have all the shiny weapons in their backpacks, you are not alone. Borderlands 2 weapon codes allow you to do the same with the help of a third-party editor.
The Borderlands 2 Save file editor by Gibbed lets you create new save files or modify existing save data in Borderlands 2. Using the tool with the code, you can level up your Vault Hunter, add more money, skip missions, and above all add those shiny weapons to your backpack.
In this article, we have put together a master list of all the best Borderlands 2 weapon codes that you can use with Gibbed’s Save Editor. If you don’t know how to use the Gibbed’s Save editor, scroll all the way down for a step-by-step guide.
The truth is that there is a large number of truly dangerous and destructive weapons and rocket launchers to be found in Borderlands2, but the nearly undisputed king of the hill has to be the Norfleet.
Use it to blast through entire bands of bandits or melt away the health of a boss, even the epic showdown against Voracidous.
But beware! Once you develop a taste for such destruction at your fingertips, it will be hard to put this weapon down.
How do you get legendary weapons in Borderlands 2?
These legendary powerful weapons are usually dropped when you defeat a boss in Borderlands 2, so that’s pretty much where to look for them.
That being said, know that they don’t always appear. If you’re really intent on grabbing one and didn’t get a drop at the end of a fight, remember that you can always go back and battle bosses again.
Although it can get tedious at times, just save and quit your game, then come back and hope for better luck.
How do you get modded weapons in Borderlands 2?
Not long ago, the Borderlands 2 Unofficial Community Patch finally landed for all involved gamers, with over 450 changes and fixes to many aspects of the game.
So, on the off chance you want to experience your favorite title, Borderlands 2 in a new way, this mod pack is exactly for you.
And, since we’re talking about mods, here’s a list of the best mods for Windows 11, just in case you were in need of something like this.
When launching an Adobe app such as Photoshop, Illustrator, InDesign, or Premiere Pro on Mac, you may encounter the To open Adobe app you need to install the legacy Java SE 6 runtime error.
Some of the older Adobe Apps require your Mac to have installed the Java SE 6 Runtime.
Apart from the Adobe apps, other popular apps like FileMaker Pro, PatchTool, Dreamweaver, Eclipse may also show a similar error and require the Java SE 6 to run without any error.
If you are also troubled by this error, in this article we show you two ways to install Java SE 6 on Mac and get rid of the error without uninstalling Java SE 8.
Install legacy Java SE 6 on Mac [Tutorial]
1. Install Java SE 6 from Apple
If the More Info link is broken, try this.
Launch the Adobe app or any other that was triggering the error.
Wait for the error to occur.
Click on the More Info link in the error window.
It will open the Apple Support site.
The site shows the instructions to download and install Java Se 6 on your Mac.
Once you have downloaded the installer, double-click on the .dmg file to run the installer.
Follow on-screen instructions to complete the installation.
Click the Download button to download the installer.
You can also directly download the file from here.
Once the download is complete, click on the download icon on the dock to open the download folder.
Double-click on the JavaforOS.dmg file to open the folder.
Double-click on JavaforOSX.pkg to run the installer.
Click Continue and follow the on-screen instruction to install Java SE 6 successfully.
Try to open the problematic app and check if the Java SE6 error is resolved.
As the error indicates, the particular app relies on Java 6 to function correctly. Since the newer version of Mac comes installed with Java SE 8 which is not backward compatible, the programs will end up displaying the aforementioned error.
However, the error can be resolved by installing the legacy Java version. If due to any reason, the installation fails, follow the second step to remove the installer limitations using a script.
2. Install Java SE 6 using a script
Download the legacy Java SE 6 installer from here. Click the Download button to begin downloading.
Once the file is downloaded, do the following.
Go to Application > Utilities and open Script Editor.
In the Script Editor, copy and paste the following command:
set theDMG to choose file with prompt "Please select javaforosx.dmg:" of type {"dmg"} do shell script "hdiutil mount " & quoted form of POSIX path of theDMG do shell script "pkgutil --expand /Volumes/Java\ for\ macOS\ 2017-001/JavaForOSX.pkg ~/tmp" do shell script "hdiutil unmount /Volumes/Java\ for\ macOS\ 2017-001/" do shell script "sed -i '' 's/return false/return true/g' ~/tmp/Distribution" do shell script "pkgutil --flatten ~/tmp ~/Desktop/Java.pkg" do shell script "rm -rf ~/tmp" display dialog "Modified Java.pkg saved on desktop" buttons {"Ok"}
Press Command + R to run the script.
When prompted, select javaforosx.dmg file and wait for the script to finish and install the Java.pkg file.
Script credit: bogdanw from Mac Rumours.
The above script removes the installation limits from Java macOS 2017-001 and helps in installing Java SE 6 if the installation failed during the first attempt.
Some legacy apps for Mac may require Java SE 6 even though Mac OSX and above comes installed with Java SE 8 out of the box. By following the steps in this article you can install Install Java SE 6 on Mac.
If you’re getting the ERROR_NOT_ENOUGH_MEMORY message with the Not enough storage is available to process this command description, follow the troubleshooting steps listed in this article to fix it.
This error codes affects Windows servers, causing systems to crash with the message Not enough storage is available to process this command in the error log.
Microsoft explains that this error may occur if the IRPStackSize registry entry on the server is set too low. As a result, the best and simplest way to solve this problem is to tweak the registry in order to allocate a larger IRPStackSize value.
How do I fix not enough memory resources are available to process this command
The following solutions involve modifying the registry. However, severe issues might occur if the registry values are changed incorrectly. Don’t forget to back up the registry before you modify it. In this manner, you can always restore it in case anything goes wrong.
1. Modify the IRPStackSize value
Go to Start > Run > type regedit > hit OK.
Locate and then select the following registry subkey:
If the IRPStackSize entry is not available, follow these steps:
Click Edit > New > click DWORD Value.
Type IRPStackSize > hit ENTER. Type IRPStackSize exactly as it appears. Don’t forget that the value name is case sensitive.
Click IRPStackSize > Edit > Modify. In the Data Value box, type a larger value > click OK. The values may range from 0x1 to 0xC, and are equivalent to 1 to 12 in decimal notation.
If the problem persists after you’ve modified the value, repeat the same steps and increase the value of IRPStackSize again.
2. Modify the SharedSection values
Open the Registry Editor > locate the following subkey
Select the Windows value > go to the Edit menu > choose String.
Increase the SharedSection parameter.
Windows NT uses the following format: SharedSection=xxxx,yyyy Add “,256” or “,512” after the yyyy number.
Windows 2000, Windows XP, and Windows Server 2003 use the following format: SharedSection=xxxx,yyyy,zzzz For 32-bit operating systems, increase the yyyy value to “12288”; increase the zzzz value to “1024”. For 64-bit operating systems, increase the yyyy value to “20480”; increase the zzzz value to “1024”.
3. Block UI app forks
A Windows user recently described an interesting troubleshooting method to fix the “Not enough storage is available to process this command” error code.
If an important app runs out of storage, you can restart it. The error will temporarily disappear. However, the desktop heap for the window station service will encounter memory issues again.
To permanently fix this issue, configure the xyzService.exe that runs out of memory to avoid UI application forks in session 0. Here’s how user BlueCode described the resolution adopted for this particular situation:
After talked with customer, I figured out that the whole story here is that, customer ran xyzService.exe with domain account DOMAINxyzServiceAccount in session 0, and xyzService.exe forks child processes xyzUIApplication.exe somehow periodically. Unfortunately the UI application did not exit as usually. This operation leaked the desktop heap in this specific window station Service-0x6-453186fc$ gradually until the depletion was detected by xyzService.exe while running queries.
To solve this issue, we simple configured the xyzService.exe and made it not forks UI application in session 0.
4. Upgrade the Microsoft SQL Server
Install the latest Microsoft SQL Server updates to make sure that your system benefits from the latest improvements and patches. For more information about the available updates, go to the Update Center for Microsoft SQL Server.
5. Delete the Temporary Folder
The Temporary Folder is hidden by default because it contains a lot of configuration files used by Windows occasionally.
It’s not intended to be messed around with, so the safer option is to back up the Temp folder, just to be sure.
You will find this folder in your Windows partition, and under the View tab you’ll have to check Hidden items to see it. Or you can try this way:
Press Windows + R and type “%temp%” in the dialogue box that appears. Then press Enter.
Press Ctrl + A to select all the files and click on Delete
Now go to your Windows installation drive, usually (C:), and find the temp folder and delete all the files there too.
After you restart your computer, the problem should disappear.
As always, if you’ve come across other solutions to fix the not enough memory resources are available to process this command error, you can list the troubleshooting steps in the comment section below.
systeminfo |find “Available Physical Memory” : this will show how much RAM is available
systeminfo | findstr /C:”Total Physical Memory” : this will show the total RAM installed
Subtract the first from the second and you will know how much memory is utilized.
What Does Not enough memory mean?
It is usually an error shown by a program that isn’t able to continue or doesn’t have any more memory available to store data and perform operations. See our complete guide on getting rid of the error.
Why does my computer say not enough memory?
Usually, it means that the operating system + the applications require more RAM memory than your computer has. Closing some of the applications that run in the background might help.
This milestone hasn’t gone unnoticed by Microsoft who is planning a variety of in-game events for those playing the modern version, Microsoft Solitaire Collection. Leading up to the big day, players will be able to earn extra XP and unlock special themed decks and card backs.
The official Microsoft Casual Games YouTube channel has also uploaded several videos featuring some of the game’s biggest fans explaining why they love the game so much. You can watch the videos here.
Microsoft Solitaire became one of the most-played video game in the 90s and 2000s due to it coming pre-installed with all new versions of the Windows operating system. You’d be hard pressed to find anyone who’s never played it.
Microsoft Solitaire Collection features all of the basic functionality from Microsoft Solitaire but boasts better graphics, online leaderboards, more game modes, and support for Microsoft’s Xbox Live online service which enables the unlocking of Xbox Achievements, Xbox friends, and cloud saves between different platforms.
It’s annoying when your PS4 randomly turns off when you use it, especially before you save your progress. When this happens, stop and repair the issue to avoid complications.
Your PS4 randomly turning off is usually from a defective component, most likely one related to power.
How do I fix my PS4 that randomly turns off?
1. Troubleshoot the connection to power
Press the Power button for around 8 seconds and wait for it to beep twice.
This switches off the PS4 console.
Unplug the game from the power outlet and let it be for a couple of seconds.
Check the power ports for clogging. If possible, get a replacement cable.
Reconnect the power cable and turn the PS4 console back on.
2. Troubleshoot the hard drive
Like in the first solution, completely power off the console by pressing the Power button for around 8 seconds until it beeps twice.
Unplug the power cable from your outlet, disconnect the USBs , and all other cables connected to the console.
Next, you now have to remove the hard disk drive cover, which is the shiny part on the body of the console. Slide it out.
Finally, observe the hard drive and confirm that it’s screwed tightly to the console and is seated correctly.
You may also want to change it to a different hard drive to rule out hard drive issues.
Troubleshooting the hard drive can help you fix the Cannot Start the PS4 (CE-34335-8) issue; read this guide to learn other solutions.
3. Update the PS4 in Safe Mode
Find a USB drive that has 400 MB of space, at least.
Create a folder on this drive and name it PS4.
In the PS4folder on the USB drive, create another folder and name that UPDATE.
Next, click on this link to download the latest firmware update for your PS4.
Upon downloading, copy the firmware to the newly created UPDATE folder on the USB drive.
Next, turn off your console by holding the Power button for 8 seconds.
When the console beeps twice, it indicates that it’s off completely.
With the PS4 off, connect the USB drive to it.
Now, on the switched-off console, press the Power button and hold it for 8 seconds.
This causes the console to boot into Safe Mode.
Finally, select Update System Software and follow the on-screen instructions to update the PS4.
4. Use a cable internet connection
Many tests have found that the console’s Wi-Fi modules can be the cause of your PS4 randomly turning off. Thankfully, you have other connectivity options.
To fix your PS4 that randomly turns off, connect a LAN cable between your console and router. This solution works mostly in cases where the PS4 randomly turns off only when connected to the internet.
5. Remove multi-connectors
Multi-connectors allow you to connect multiple modules to your PS4 at once. Now, a running module can interfere with the gaming and cause the PS4 to turn off randomly.
Remove the multi-connectors and connect the console directly for this solution. Use the PS4 connected directly to a TV or screen.
6. Troubleshoot overheating
If you try every solution above and your PS4 randomly turns off still, you may be experiencing challenges from an overheated console.
When your PS4 is overheated, it triggers a thermal switch that puts off the console automatically. Here are some tips to fix overheating on your PS4 console:
Operate the system in a well-ventilated room.
Use additional cooling, such as an air conditioner or standing fan.
Do not use the console for extended periods.
Your PS4 randomly turning off is a common hardware issue on old units. I hope the solutions on this page have helped you fix the problem. If not, kindly leave comments below.
How to fix the CDFS FILE SYSTEM error in Windows 10
Solution 1 – Make sure Windows 10 is up to date
Windows updates are crucial for your system stability, so be sure that you keep Windows 10 up to date.
Most updates bring security improvements and fix many hardware and software incompatibilities, therefore it’s recommended that you install them regularly.
If the CDFS FILE SYSTEM error is caused by a hardware incompatibility or a bad driver, downloading Windows updates CDFS FILE SYSTEM can fix it.
Solution 2 – Update your drivers
Many BSoD errors are caused by outdated or incompatible drivers, so it’s highly recommended to update your drivers regularly in order to avoid BSoD issues.
We have to mention that almost any driver can cause CDFS FILE SYSTEM to appear, so it’s highly recommended that you update all of your drivers.
Start with the motherboard, chipset, and audio drivers, and then update your network card and graphic card drivers.
In order to download drivers, you just need to visit your hardware manufacturer’s website, locate your device, and download the latest drivers for it.
If you cannot access Windows 10 due to CDFS FILE SYSTEM error, you might want to try updating your drivers by using Safe Mode. To enter Safe Mode, do the following:
While your computer boots restart it. Repeat this step until Automatic Repair process starts.
Once your computer restarts you should see list of options available. Select Safe Mode with Networking by pressing F5 or 5.
After you’ve entered Safe Mode, try updating your drivers.
It’s worth mentioning that if your computer works normally in Safe Mode the CDFS FILE SYSTEM error is probably caused by a bad driver or incompatible software, so you should focus on removing it.
2.1 Update drivers automatically
Searching for drivers on your own can be time-consuming. So, we advise you to use a tool that will do this for you automatically.
Using an automatic driver updater will certainly save you from the hassle of searching for drivers manually, and it will always keep your system up to date with the latest drivers.
Plus, this software will deliver qualitative driver automated updating from its rich online database that hosts millions of official drivers.
You can therefore repair screen errors caused by missing or outdated drivers with effective support from this driver expert tool.
If updating your system and drivers didn’t get the job done, we’re going to try Windows 10‘s built-in troubleshooter.
This troubleshooter can be used for dealing with all sorts of issues, including BSOD errors. So, it might be effective when resolving the CDFS FILE SYSTEM error, as well.
Here’s how to run Windows 10‘s built-in troubleshooter:
Open the Settings app and go to Update & Security section.
Select Troubleshoot from the menu on the left.
Select BSOD from the right pane and click Run the troubleshooter.
Follow the instructions on the screen to complete the troubleshooter.
Solution 4 – Run the SFC scan
The next tool we’re going to try here is the SFC scan. This is a command-line tool that basically scans your computer for damaged system files, and repairs them on the way.
So, it might be helpful with the CDFS FILE SYSTEM error, as well.
Here’s how to run the SFC scan in Windows 10:
Right-click on the Start Menu button, and open Command Prompt (Admin).
Enter the following line and press Enter:sfc/scannow
Wait until the process is done (it may take a while).
If the solution is found, it will automatically be applied.
Now, close the Command Prompt and restart your computer.
Solution 5 – Run DISM
Deployment Image Servicing and Management is another command-line tool. This tool re-deploys the system image, so it’s possible it will also resolve BSOD issues.
We’ll walk you through both standard and the procedure that utilizes the installation media below:
Standard way
Right-click Start and open Command Prompt (Admin).
Paste the following command and press Enter:
DISM /Online /Cleanup-Image /RestoreHealth
Wait until the scan is finished.
Restart your computer and try updating again.
With the Windows installation media
Insert your Windows installation media.
Right-click the Start menu and, from the menu, choose the Command Prompt (Admin).
In the command line, type the following commands and press Enter after each:
Make sure to change an X value with the letter of the mounted drive with Windows 10 installation.
After the procedure is finished, restart your computer.
Solution 6 – Uninstall your antivirus
As we already mentioned, certain software can cause CDFS FILE SYSTEM errors to appear, and the most common cause of BSoD error is your antivirus software.
According to users, almost any antivirus software can cause these types of errors to appear, so it’s advised that you temporarily remove your antivirus software.
Bear in mind that uninstalling antivirus software isn’t always enough since certain files are left on your PC, even after you remove your antivirus.
Those remaining files can sometimes cause CDFS FILE SYSTEM error, so in order to completely remove any antivirus, it’s advised to use special uninstaller tools.
Most antivirus companies offer these tools for their software, and you can download the uninstaller tools free of charge from almost any security company.
Solution 7 – Perform a chkdsk scan
CDFS FILE SYSTEM file system error can be sometimes caused by a hard drive corruption, therefore it’s advised that you use chkdsk to check your hard drive for corrupt files.
To do that, follow these steps:
Run Command Prompt as administrator. To do that, press Windows Key + X to open Power User Menu and select Command Prompt (Admin) from the list.
Once the Command Prompt starts, enter chkdsk /f /r C:. We advise you to perform this scan for all hard drive partitions that you have installed, so feel free to replace C with the corresponding letter. It’s also worth mentioning that you might not be able to scan C drive right from Windows, so you might have to restart your computer.
In case you cannot access Windows or Safe Mode, you can perform this scan by doing the following:
Restart your computer a few times while it boots. This should start Automatic Repair process.
When Command Prompt starts enter chkdsk /f /r C: to perform the scan. Again, you have to perform this scan for all hard drive partitions that you have installed, so make sure to replace C with the letter that matches your hard drive partition.
Solution 8 – Perform a System Restore / Reset your PC
If the problem is caused by a specific software or a corrupt driver, you can fix the problem by performing System Restore. To use System Restore, you need to do the following:
While your computer boots, restart it. Repeat this step few times.
Once the Automatic Repair starts, choose Troubleshoot > Advanced Options > System Restore.
Choose the restore point and follow the instructions on the screen.
If using System Restore doesn’t help, you might have to reset Windows 10.
Bear in mind that this process will delete all files from your C drive, therefore, make sure you create a backup. To reset Windows 10, do the following:
Start Automatic Repair process by restarting your PC couple of times during the boot.
Choose Troubleshoot > Reset this PC.
Now you can choose between Remove everything and Keep my files. In our experience it’s better to use Remove everything option because it removes all files from your C drive, thus eliminating any potential causes for CDFS FILE SYSTEM error.
Choose Only the drive where Windows is installed.
Wait for the process to finish.
If the problem still persists even after the reset, it’s most likely caused by faulty hardware.
Solution 9 – Check your hardware
CDFS FILE SYSTEM error is often caused by faulty hardware, most commonly RAM, so it’s advised that you check if your RAM is working properly.
To do that you can use the MemTest86+ tool. Simply create a bootable flash drive with MemTest86+ on it or burn the tool to a CD and boot your PC from it.
Start MemTest and let it work for a couple of hours. If no problems are detected, the issue might be caused by your motherboard or any other hardware component.
CDFS FILE SYSTEM is a troublesome error, and most users report that you can easily fix this error by finding the faulty RAM module and replacing it.
Before replacing your RAM, we advise you to try other solutions from this article.
What is a file system error?
File System errors are basically disk-related errors that may be caused by corrupt files, bad sectors, disk integrity corruption, and others. Learn how to fix corrupted system files.
GeForce Experience is the main application for gamers using GTX and RTX graphics cards on their Windows 10 PC. It provides important information about your hardware, and helps you configure your GPU and game settings.
The popular software from NVIDIA can sometimes not work properly or open up at all, with the error Something went wrong. Try restarting GeForce Experience being displayed to the user.
How do I fix GeForce Experience not opening in Windows 10?
1. End the NVIDIA processes in Task Manager
Head over to the bottom-left side of your Taskbar, then under the Search bar, and type in Task Manager
Scroll down and look for any NVIDIA processes that are running, then click on End Task
After you have closed all the processes, open up NVIDIA GeForce Experience again to check if the error has been fixed
2. Restart GeForce experience in Windows Services
Head over to the bottom-left side of your Taskbar, and search for Services, then click the first option
Search for the NVIDIA GeForce Experience service, then right-click on it and select Properties
Set the Startup type to Automatic, then select the Start button if the service is stopped
Click Apply, then select OK
Back on Services list, select the other NVIDIA services, then repeat the same process described above
After following the mentioned steps, start GeForce Experience normally, the error should now be fixed
Go over to Allow an app or feature through Windows Defender Firewall
Click on the Change settings button
Scroll down and look for any NVIDIA related app, and make sure the tick boxes are checked for all of them
Open up NVIDIA GeForce experience normally, and check if the issue has been solved
Alternatively, you should also temporarily turn off any third-party antivirus software to check if it stops GeForce Experience from running
4. Reinstall the GeForce Experience software
Type in Add or remove programs in your Windows Search, then select the first result
Search for NVIDIA GeForce Experience, select it, then click on Uninstall
After the software has been uninstalled, head over to the official GeForce Experience download page and get the newest version of GeForce Experience
Once you have downloaded the package, run it and install the application on your Windows 10 PC
5. Reinstall the graphics card driver in Device Manager
Head to the bottom-left corner of your Taskbar, right-click on the Windows icon, and select Device Manager
Lookup for Display Adapter, then right-click on your NVIDIA GTX or RTX graphics card and choose Uninstall device
After the driver has been uninstalled, head over to the NVIDIA download page and get the latest graphics card drivers for configuration
Now run the package installer and install your NVIDIA drivers
After installation, open up your GeForce Experience application to check if the error has been solved
By following these steps you should be able to fix your PC of all GeForce Experience issues. We covered a similar issue in our GeForce Experience not detecting games article, so don’t hesitate to check it out.
Know of any other solution that we may have missed out on? Let us know by leaving a message in the comments section below.
Nvidia GeForce Experience is a useful application, but many users reported error code 0x0001 while using Nvidia GeForce Experience. Today we’ll take a look at how to get rid of this error.
One user described the issue on Geforce Forums as follows:
I’m having an issue where when I open geforce experience it gives me a notification stating “Something went wrong, try rebooting your pc and then launch geforce experience; Error code 0x0001”
How to fix error code 0x0001 in Nvidia GeForce Experience?
1. Change all NVIDIA Container services to Local system account
Press Windows key + R to open Run, type services.msc and hit Enter.
A Services window will appear. Scroll through the list until you find the Container services used by Nvidia (usually 3 or 4).
When you find them, right-click on each of them and select Proprieties.
In the Proprieties window, go to the Log on tab.
Under Log on as: make sure that Local System account is checked and check the Allow service to interact with desktop option.
Hit Apply and OK.
After doing this, the next time you open GeForce Experience the error should be gone.
2. Update the NVIDIA Display driver or migrate to the Beta release
Head over to their driver page for the latest driver associated with your card.
Here, you will find 2 options: Automatic Driver Updates and Manual Driver Search. With the first option, you just click the Download button and Nvidia will automatically detect your GPU and the latest driver available and download it.
With the second option, you’ll have to select your exact GPU and operating system and then hit the Start Search button. A list of drivers will appear with the version and release date under them.
Download and install the latest driver. For more information on how to update your graphics card driver, be sure to check our guide on how to update graphics card drivers.
Try Beta drivers:
If this has no effect, you can also try to migrate to the Beta release. Go to the Nvidia GeForce Beta download page and download it.
In the Windows search box, type Control Panel and hit Enter.
In Control Panel, under Programs, click on Uninstall a program. Find Nvidia GeForce Experience, uninstall it and restart. Then install the Beta driver and the problem should be gone.
Don’t want to manually update drivers? Use a specialized driver updater tooland update all your drivers with just a few clicks.
You will update your drivers automatically without provoking other issues, and optimize your system to get the best results from your PC.
Open DDU and in the right section, under Select device, choose GPU and Nvidia.
Then click on the Clean and restart button.
Now install the latest driver and latest GeForce Experience release from Nvidia’s official site.
Hope that one of these confirmed solutions helped you solve the NVIDIA GeForce Experience error code 0x0001 and you can now enjoy your games without any interruptions.
If you have any more questions or don’t understand a certain step, feel free to reach for the comments section below.
Dropbox is one of the world’s foremost cloud storage services. Paper is a Dropboxfeature that enables users to set up and edit documents within the web app.
The Paper editor includes a Present option with which you can display basic image slideshows with captions within Dropbox. Then you can flick through your picture slides within the presentation.
How do I create a Slideshow on Dropbox?
To set up a slideshow, first open Dropbox within a browser.
Next, click Paper on the left side of the Dropbox tab.
Click the Create Paper doc button.
Then enter a title for the slideshow document, and press the Return key.
Left-click the mouse to open the toolbar shown directly below.
Press the Add images button.
Select an image to add to the document.
Click the Open button to add the image to document.
Click under the image to add a caption to it.
Repeat the previous four steps to add multiple images to the document with captions.
To add images from Unsplash, click Add media on the Paper toolbar.
Enter an email address to share the presentation with in the To box.
Select the Can view option.
You can enter an optional message in the Add a message box.
Press the Share button.
So, that’s how you can set up a picture slideshow with Dropbox’s presentation mode. Dropbox only includes very basic options for slideshows. However, setting up presentations within DB Paper documents is still a quick and straightforward way to showcase your favorite photos.
Dropbox is a popular file-sharing and collaborative platform that offers many file sharing features. The Shared Folder feature in Dropbox allows the users to share any folder with other Dropbox and non-dropbox users to upload and view files.
Now if you want to upload a file to the Dropbox account of another user, you must ask them to share the folder with your or ask for a file request.
In this article, we show you how to upload files to others’ Dropbox account by creating a shared folder or a request file link.
How do I upload files to other’s Dropbox account?
1. Use Dropbox file request
Note: File request must be sent by the user to whose Dropbox account you are trying to upload the file.
Sign in to your Dropbox account online.
Click the Files tab from the left pane.
Next, open File Requests.
Click the Createa file!!How to upload files to others Dropbox account request button.
Under, What are you requesting?, enter a name for the folder that will store all collected files.
You can also change the file storage path clicking on Change folder under ‘Where should these files go in your Dropbox? option.
Click Next.
Click on Copy link to copy the file request link.
Send the link to anyone you want to request a file from.
They can open the link and add as many files they want without creating a Dropbox account.
The invitation can also be sent via email.
Click Done.
Users can send files via the Dropbox file request link even if they don’t have a Dropbox account. This removes the hassle of creating a new Dropbox account simply to send a file.
Close a file request
Make sure you are signed in to your Dropbox.com account.
Go to Files > Files Request.
Click the three dots (ellipsis) icon.
Select Edit.
Click on the Close request button.
This will close the selected file request. You can view all the closed file requests from the Closed tab.
If you already have a folder to share, then click the Ellipsis button and select Share.
Select I’d like to create and share a new folder.
You can also select I’d like to share an existing folder if you want to share an existing folder.
Enter a name for your folder.
Enter the email of the invitee.
Click the Share button.
The user will receive an invite to access the Shared folder.
Add a shared folder to your account
Sign in to your dropbox.com account.
Click on Files.
Click Sharing.
Find the Shared folder that you want to access.
Click the ellipsis icon (three dots) and select Add.
You can now upload the files to the shared folder.
Dropbox makes it easy to share folder and files with other Dropbox and non-Dropbox users.
While the file request feature allows the users to upload files without needing a Dropbox account, the shared folder feature requires the user to have a Dropbox account to upload and view shared folder files.
Troubleshooting the Dropbox error 413 is straightforward, mostly because it gives you an insight into the issue. The full message reads:
Dropbox Error 413: Request Entity Too Large
Although the message suggests that your upload size exceeds a limit, the Dropbox error 413 is tricky. You may be able to upload an item today, but then it fails tomorrow, saying that the entity is too large.
Thankfully, some solutions have helped Dropbox users, as this is a fairly common error message. Clear the Dropbox error 413 with the methods here.
How do I repair the Dropbox error 413?
1. Reset your router
Disconnect the modem, router, switches, and other managed network devices.
Make sure the power is completely unplugged. Leave the devices disconnected for around a minute.
Next, connect the modem and wait for it to power on.
If it takes more than 5 seconds to come on, tap the Power button, and continue to the next step.
Now, wait for one minute.
Skip the following two steps if you use a combination router-modem.
Plug the router back in now.
You may need to press the Power button on some routers.
Leave it to boot and configure the networked devices for around 2 minutes.
You have successfully restarted your router the right way. Note that you should not press any button labeled Reset. Mostly, these buttons actually refer to a factory reset.
If you still get the Dropbox error 413 after restarting the router, then proceed to solution 2.
2. Check free space on Dropbox storage
Visit dropbox.com and log in to your account.
Next, click on your profile picture, and from the resulting dropdown options, select Settings.
Now, on the Settings page, go to the Plan tab, and here, you will see insights into your storage usage.
If the bar is entirely blue with no white area, then your storage is full.
Also, if the Unused space is less than or equal to the size of the upload, you will get the Dropbox 413 error.
Verify that the available storage you have for your Dropbox plan is not less than the size of the file you are trying to upload.
Error codes are mostly generic, and the Dropbox error 413 is almost always a problem with upload size. You could be getting the Dropbox error 413 because you are uploading a file that’s too large.
What happens if the compressed file is still too large?
If you get the Dropbox error 413 when uploading the compressed folder, here’s what you can do:
If you are added multiple files to the archive, you can remove some of the items from it and send only a few.
Then, compress the ones you removed and send it as another batch.
Depending on the compression software and compression technique that you made use of, you may be able to compress the file again.
Use a different archive format.
Good compression tools allow you the option of selecting a compression format.
Most of them can save the output files in ZIP, RAR, 7z, and other popular compression formats.
One of these solutions will repair the Dropbox error 413. However, in the unlikely event that none of them works, one last tip is to try uploading the file from a different client.
If you get the Dropbox error 413 on your PC client, try it again on your mobile app, etc.
Since the early days of Windows, the OS shipped with a pre-installed drawing app called Paint, which became very popular and was used by everyone to make simple doodles or complex drawings.
Now that Windows allows third party applications to be downloaded, many developers created an alternative to the pre-installed drawing software, and so, many Windows drawing apps have populated the Store.
While PC users have lots of professional drawing software at their disposal, the introduction of the new Windows allows anyone to download a Windows drawing app on their tablets and create projects on the fly.
Of course, there are other, more specialized apps, which provide tools for complex drawings.
Everybody likes to draw, some do it because they are bored and some do it as a profession, either way, drawing is a great way to escape boredom and challenge your imagination.
Some of the apps out there are really good even if you are looking for some extra features or functionality there are Windows drawing apps that are definitely worth checking out.
Adobe Photoshop is one of the best-known photo editing software worldwide, but it is also one of the best when it comes to painting. Is widely used by photographers, designers, and painters.
Photoshop gets constant updates from its hard-working developer team, coming up with new features that continuously keep it as the number one painting app.
The Content Aware Fill tool which uses AI to recognize objects along with Paint Symmetry are the latest additions to the suite.
There are also hundreds of customization options for brushes, pencils and pens that can be enabled by a single switch to the painting mode.
Other key features to consider for Adobe Photoshop:
Live blend mode preview
Custom preset brushes
Enhanced transform wrap
Multiple device connections
Compatible with XP-Pen
Curvature pen tool
Comes with 7-day trial
Adobe Photoshop
Adobe Photoshop has all the tools and customization you need to create the most astounding images.
If you are someone looking for complexity in your Windows drawing apps, your search ends here. Nothing you will see out there will match the possibilities you have while using this app.
After playing around with it for only a couple of minutes you will notice how everything falls in the right place and how beautifully designed the interface is.
You can choose between oil, pencil, or watercolors to create anything from doodles to art.
Really nice app if you enjoy the abstract drawings and physics. This is a great way to challenge your imagination and create great images.
The app is based on particle trajectories that are represented by lines. You are in control of every aspect of the beams by using forces and creating shapes out of the particle lines.
This is one of the better Windows drawing apps you can find. In fact, it is actually a drawing Extension for Google Chrome.
It has a really nice set of brushes and symmetry effects that allow you to create beautiful works of art.
If you are looking to create something more than just a drawing this app does just that. You can use any photo or image as a template and you have the option to share your creations with the world.
The interface is simple and it allows you to enjoy the app as soon as you install it.
If you are looking to draw something and have fun at the same time you should take a look at this app. Centrifuge developed this Windows drawing app to make an easy to play and fun game and the result is great.
People take turns drawing something that matches the description set by another player. As you can imagine the end result is hilarious and a great way to blow off some steam using their passion for drawing.
In case you want to level-up your creation, you can always choose to upgrade from drawing software to some specialized software. Here is a list that can help you choose a new drawing domain:
Google Chrome is one of the most popular browsers used on the Windows 10 system. It’s important to know how it runs and what processes are related to this web-browser client and how your Windows 10 system is affected by these additional features.
Anyway, if you’re reading these lines, it means you somehow found the Software Reporter toolexecutable app.
Thus, in this article, we will tell you more about this Google Chrome add-on; the goal is to understand what this software_reporter_tool.exe program does and how to disable/remove it if that’s necessary.
What is Google Chrome Software reporter tool used for?
The Software reporter tool is a Google Chrome program that scans your device. The scan is usually initiated once a week and runs for approximately 20 minutes. Here’s how Googleexplains the role of this tool:
The software_reporter_tool.exe is a part of malware scan which detects the presence of harmful or malicious content on Chrome. It scans the folders related to Chrome. Please do not worry as your data wouldn’t be effected by the clean up tool.
Moreover, the app reports these scans to Chrome. Based on these reports, the browser will then prompt you to remove the unwanted apps via the Chrome Cleanup Tool.
In other words, the Chrome Software reporter tool is associated with the Chrome Cleanup software – the later runs based on the scans performed by the software_reporter_tool.exe executable file.
Now, when these scans are running you might experience a high CPU usage situation, which might make you decide to disable or remove the Google ChromeSoftware reporter tool.
Now, you can just remove everything that you find there and get rid of Google ChromeSoftware reporter tool. However, this file might be afterward automatically downloaded by Google Chrome once again – if the browser gets an update for example.
So, what you should do instead is clear the content of this executable file. You can do that by opening software_reporter_tool.exe via text editor: open Notepad, click on Open and choose software_reporter_tool.exe.
Delete everything that will be displayed on Notepad and save your changes.
This process should disable the function of software_reporter_tool.exe and it will never be shown up on the process list. That’s all.
If you don’t like Notepad, check out this handy list with the best Notepad alternatives for Windows 10.
At this point, you should know why the Google ChromeSoftware reporter tool is running on your Windows 10 computer.
Also, if you somehow notice that the software_reporter_tool.exe process is causing high CPU usage, you can disable/remove this Chrome add-on. Before you leave, don’t miss our latest article on GoogleUpdate.exe and learn more about files.
If you have further questions or if you need our help, share your thoughts and observations in the comment section below.
Whether you’re working from home, or just using Microsoft Teams to work and communicate with your coworkers, there’s one thing that’s important: online presence.
Knowing when the people you communicate with are online can be key to business operations. You don’t want to send someone a message when you know they can’t (or won’t) see it. In Teams, there are indicators throughout the app on the desktop, the web, iOS, and Android which can alert you to the presence of the people you’re working with.
Here’s a look at how you can check online presence in Teams.
Some notes
Before getting into anything, there are some important things to understand. There are various online presence indicators in Microsoft Teams. These are set by clicking the profile icon and then choosing one of the status indicators. There’s a green check for “available,” two red circles for “busy” or “do not disturb,” and then a yellow clock for “be right back,” or “appear away.” These are the indicators you’ll have to look for.
It’s also worth noting that in most cases, status is auto-set by Teams. When a user comes online, they’ll get the screen online status. Then, when the user is active or idle for a few minutes, they’ll get the away status. Additionally, if a user enters a call, they’ll get an inactive or busy status to let everyone know they aren’t available for chats.
Checking the online status for all your team members
In our guide, we’ll talk about the various ways of checking a specific user’s online presence. However, there is one common way that is quite easy: checking the online presence of all users at once. You can do this by clicking the team name, clicking More options (the three dots), and then Manage team Members. Everyone who is online right now has the green circle with a checkmark next to their name. You’ll also see the other users too who are away, or offline entirely.
On the desktop and Web apps on MacOS or Windows or Linux
Now that you know what the indicators mean, you can look for them. In Teams on desktop or the web app, there are two places you can look for these indicators. That includes from the channel, or in the chat.
First off, you can look for the indicators in the channel where daily chats occur itself. In the channel, you’ll see the person’s profile icon, and the message they last left. The icon will have a little indicator next to it, to show if they’re available, busy, or away. This is the quickest way to check the online presence, and you can hover over their name to see additional details such as their email.
Next, there’s the chat. If the person who you’re trying to check the online presence on isn’t in the main channel, you also can try to check on their presence via a chat. To do this, you’ll need to head to the Search or type a command top bar in Teams and type out their user name. Select it from the list, and you’ll be taken to space to message them. Here you’ll see the online status in the middle of the screen, where their name appears.
On iOS and Android
Finally, there are iOS and Android. If you’re looking to check online presence when on the Teams mobile app, the process is similar to desktop. You’ll want to check in either a channel or via a chat. Chat on iOS and Android has a benefit as it shows the exact last time the user was active — something not possible on the desktop or web versions of the app.
To check the user’s online presence on a channel, you’ll want to visit the channel and look for their last sent message. You’ll then be able to see an icon showing one of the four indicators we listed in the first section. You also can tap their profile for more information, too.
Then, there’s the chat. If you’ve previously chatted with the user, you’ll be able to find them on the list. If not, just start a new chat. You should see everyone who you could chat with in the list, along with their presence indicators. Once you find the person, tap their name, and then you should see their status appear in the top left corner. If they are away or aren’t active, it will say Last Seen.
Check out our other guides for more
If you found our guide helpful, let us know in the comments below. And, feel free to check it out our Microsoft Teams news hub here for more Teams, information, tips and tricks, and guides.
Microsoft announced this morning a five-year partnership with The Coca Cola Company that will see the Atlanta-based multinational corporation replace its own technologies with Microsoft ones. Today’s press release specifically mentioned Azure, Dynamics 365, and Microsoft 365.
“Building on the goal of empowering employees with a networked way to access information and support, the company has expanded beyond a chat interface and designed a compelling and comprehensive app-based experience available on employee mobile devices. The Coca-Cola Company is also deploying Dynamics 365 Customer Service, the Power Platform and Microsoft Teams to all its employees, updating productivity with the enhanced security that runs across Azure and Microsoft 365 cloud services,” the press release reads.
Coca Cola is one of the biggest multinational companies with more than 700,000 employees worldwide, so Microsoft just gained a major customer for Microsoft 365 and Microsoft Teams. The press release also mentioned that Microsoft Teams was already helping Coca Cola employees to cope with the coronavirus pandemic, and Teams is also being used for internal meetings on a global, regional and local scale.
“This partnership with Microsoft allows us to really step change our employee experience through replacing previously disparate and fragmented systems. These platforms allow us to deliver relevant, personalized experiences as we network our organization,” said Barry Simpson, senior vice president and chief information and integrated services officer of The Coca-Cola Company.
Microsoft is constantly trying new ways to encourage Windows 10 users to try out its revamped Microsoft Edge browser. Last week we reported that Microsoft is now promoting the Chromium-based browser on Outlook.com. In yet another move to persuade people to switch to Microsoft Edge, recently the software giant has started serving advertisement banners within the Windows 10 search bar.
As spotted by Windows Latest, Windows 10 users who click on the search box are currently seeing an advert for the new Microsoft Edge in the panel that pops up on their screen. Interestingly, the banner contains a more or less a similar message than the one you would have seen on Outlook.com. The search box advert says that the Chromium-based Edge has been “built to bring you the best of the web”.
In addition, there is also a button that allows you to download the browser on your Windows 10 machine. In fact, once you install the browser on your PC, it would automatically replace the legacy Edge version to become your default web browser. However, thanks to the X button available next to the message, it’s fortunately, an easy matter to close the advert banner.
Although we haven’t seen the Edge recommendation here on our PC, Windows Latest shared a screenshot of the banner which looks like this:
Notably, Windows 10 users who already have the new Microsoft Edge browser but aren’t currently using it as a default browser are apparently seeing these prompts, too. As a quick reminder, NetMarketShare’s March report brought some good news for the Microsoft Edge browser, as it became the second most popular web browser on desktop, so we’ll probably see more ads for Edge in other parts of Windows 10 in the coming weeks.
Did you see the promotion banner on your Windows 10 device? Let us know in the comments section below.
Dropbox users can share their documents, which also enables other users to edit them at the same time. This can generate conflicted copy issues when two users edit the same shared file at the same time.
When that happens, multiple versions of the same edited file will appear within Dropbox. Those multiple file versions are conflicted copies.
How do I fix the Dropbox conflicted copy issues?
1. Move a file you’re going to edit out of Dropbox first
To avoid conflicted file copies appearing within Dropbox, temporarily move files you’re editing out of DB. Temporarily moving the file out of its Dropbox folder will ensure nobody you’re sharing the document with can make any changes to it when you are.
If you have the Dropbox app installed, you can drag the file out of the DB folder in File Explorer to another directory on your hard drive. When you’ve edited it, move the file back into Dropbox.
2. Share Dropbox files without editing rights
Alternatively, change the document’s access permissions for users you’re sharing it with to view only.
To do that, open Dropbox in a browser.
Hover the cursor over the file you need to edit.
Then click the Share button for it.
Next, click the Can edit button; and select the alternative Can view option.
Enter the email addresses of users you’re sharing the file with.
Press the Share button.
Now users you’re sharing the file with can’t edit it when you are.
3. Compare conflicted copies within Google Docs
To fix a Dropbox file with conflicted copies, try comparing the conflicted copies with Docs’ Compare documents utility.
To utilize Docs, you’ll need to set up a Google account first.
When you’ve set up a Google account, open Docs in a browser.
If the file isn’t saved in Docs native format, click File > Save as Google Docs.
Click Tools and Compare documents to open the utility shown directly below.
Click My Drive to select a conflicted copy to compare the open document with.
If the conflicted copy isn’t in your Google Drive storage, you’ll need to upload it there to select it.
Press the Open button.
Then the document comparison will highlight differences between the documents with red strike through lines as shown directly below.
On the right of the document, you’ll see Replace notes that tell you how to change the compared file so that it matches the original one opened in Docs.
Check out Conflicted Copy Resolver
Conflicted Copy Resolver is a Dropbox web app for checking for and erasing conflicted copy files.
If the CCR utility detects conflicting copies, it will provide three alternative options.
Select the Keep Original option to erase the newest conflicting copy.
Or you can select Keep Newest to erase the original.
Select the Detail View to manually resolve the conflicting copies.
So, you can avert Dropbox conflicted copies by moving files out of your cloud storage folder or by changing the sharing permission for them. If you already have conflicted copies, you can compare them within Google Docs or erase them with the Conflicted Copy Resolver.
Microsoft Teams is great way to message with your coworkers and get instant feedback on your projects while you work from home. Microsoft Teams lets you share images, videos, documents, and even your entire desktop with your coworkers within your Teams channel.
Think about how you share an email with your coworkers, do you usually just forward the email? Or do you copy and paste it directly into Teams like you do for all other media content? There is a better way to share emails in Teams, especially when you are trying to share an email from someone outside your organization to people inside your organization.
Now, you can send an email straight to a channel in Teams without the need to forward the email to everyone in your workgroup. In the Microsoft Teams channel that you want to send the email to, click on the three dots in the upper right-hand corner and select the “Get email address” option from menu.
When the “Get email address” menu pops up, click “Copy” to save the specific Team channel email address to your clipboard.
Now all you have to do is paste the email address using your preferred email account to send the email to your preferred channel in Microsoft Teams. There are also other advanced settings for Microsoft Teams admins. Microsoft Team admins can use “Advanced settings” drop-down menu while looking at your Teams channel email.
From the advanced settings dropdown menu, you can choose between these three options.
Anyone can send emails to this address
Only members of this team
Only emails sent from these domains (e.g. microsoft.com, gmail.com, outlook.com, <yourdomain>.com)
Once you choose what email option you want to use, click “Save” to save your email address advanced settings in Microsoft Teams. The ability to send emails to your Microsoft Teams channel is especially helpful to make sure everyone in your team sees important emails without having to leave the Microsoft Teams app.
If you don’t want anyone in your Teams channel to share emails at all, you can always opt to use the “remove email address” option to remove the email address for the channel.
Removing the email address for your Teams channel will only remove the existing email address. You can still repeat the “Get email address” option to generate a new email address for your Teams channel. The ability to generate a new email address at will can help protect your Team channel email address from being spammed.
So, the next time you want to make sure that your team members see that email showing what your customer expects from your product, you can share the email directly to your entire Microsoft Teams channel. By sending an email directly to your Microsoft Teams channel, you can coordinate and discuss with your team members on how to best approach the needs of your customers.
Let us know how you like the ability to send emails directly to your Microsoft Teams channel in the comments. Be sure to check out the rest of our Microsoft Teams coverage in our dedicated news hub.



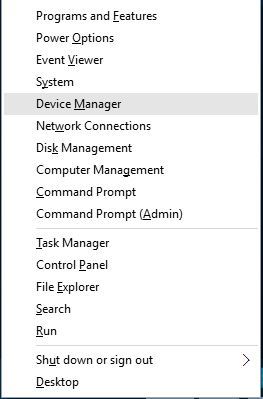
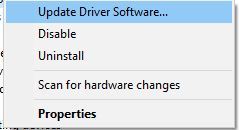
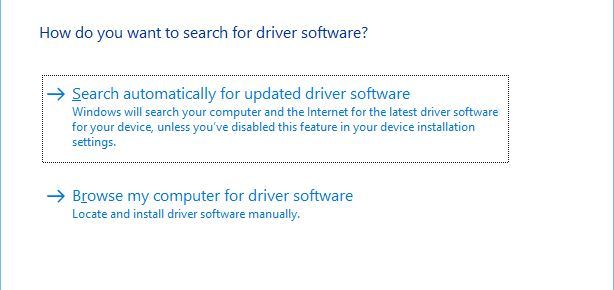


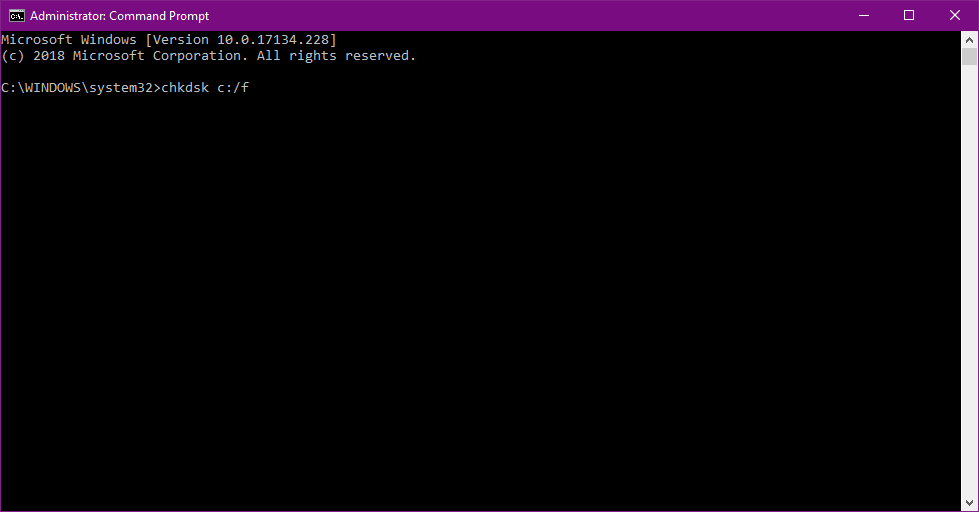
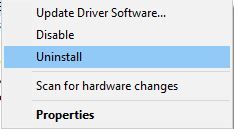



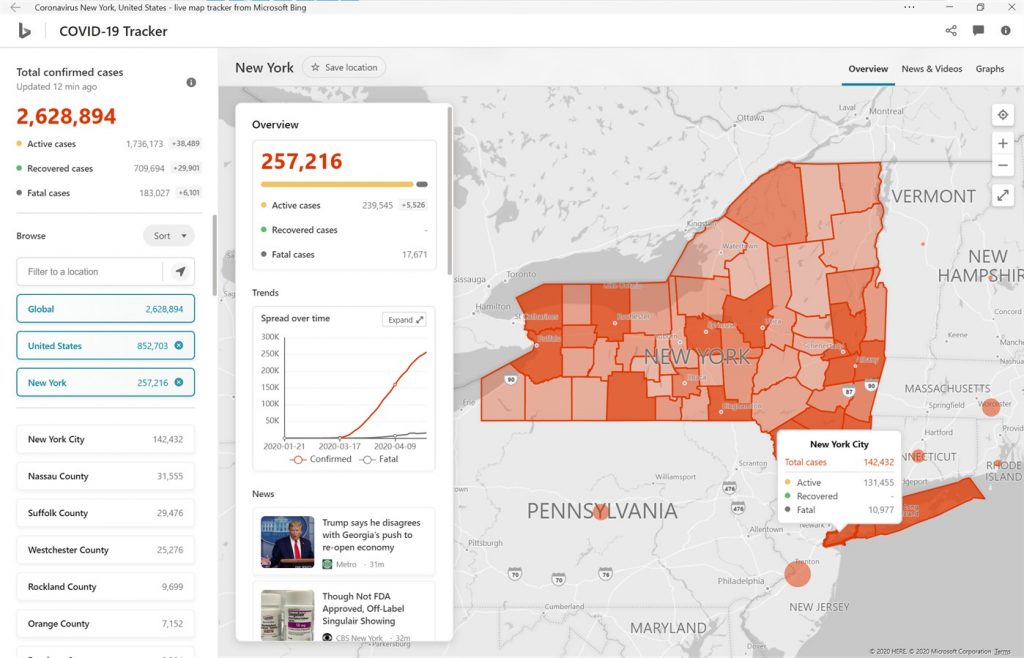


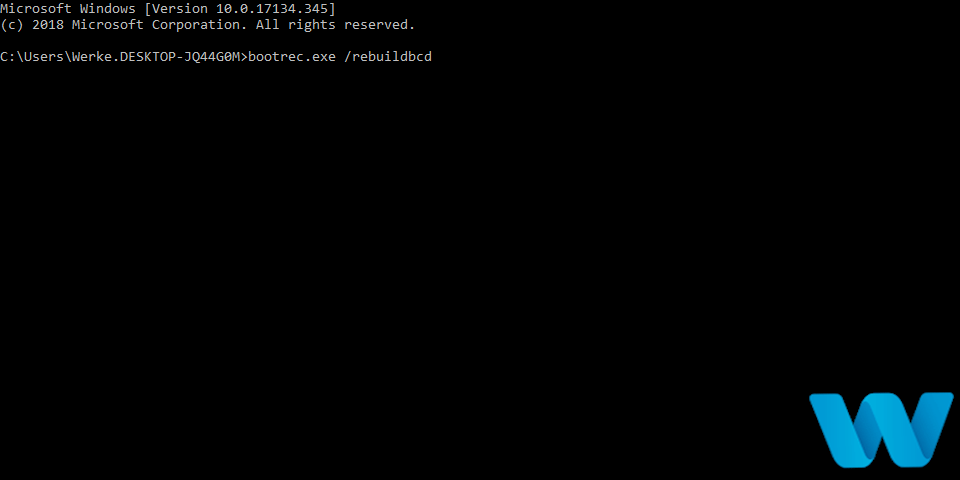
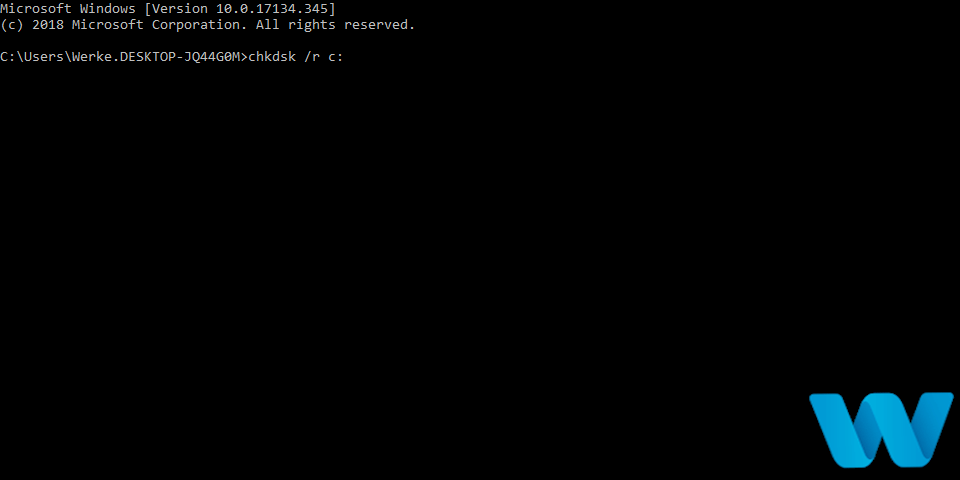


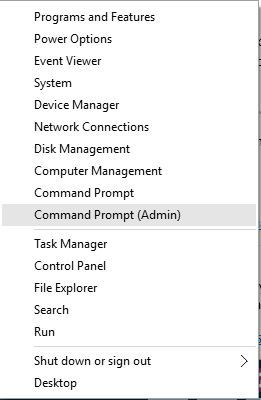
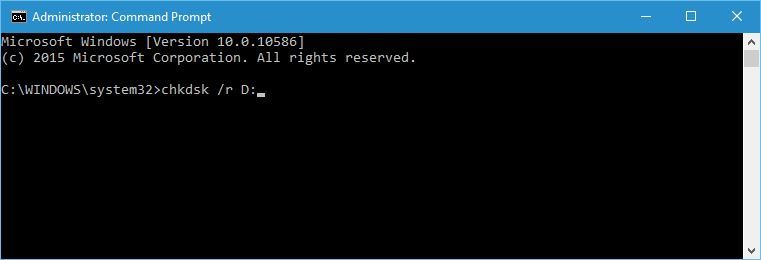
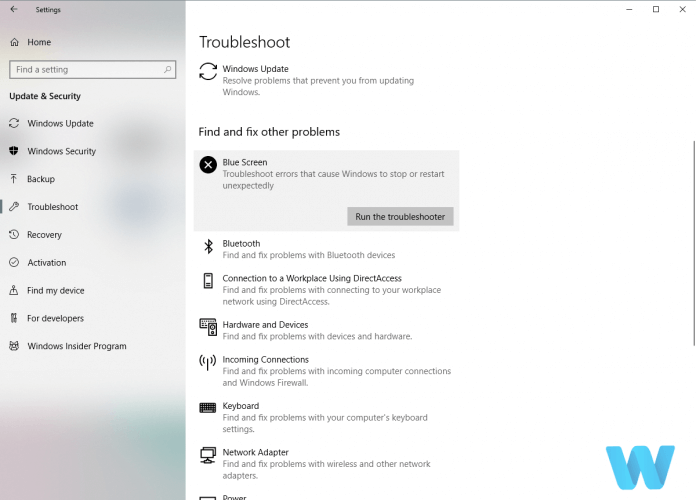
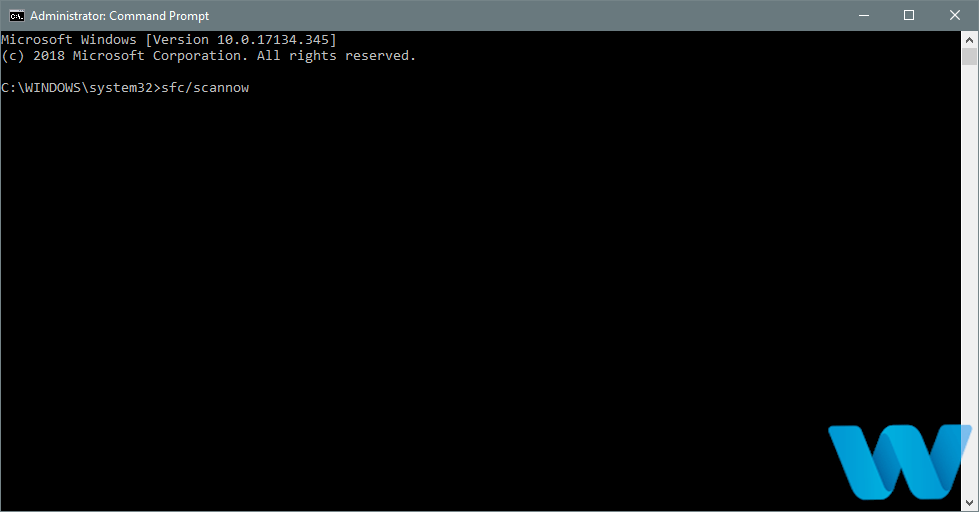
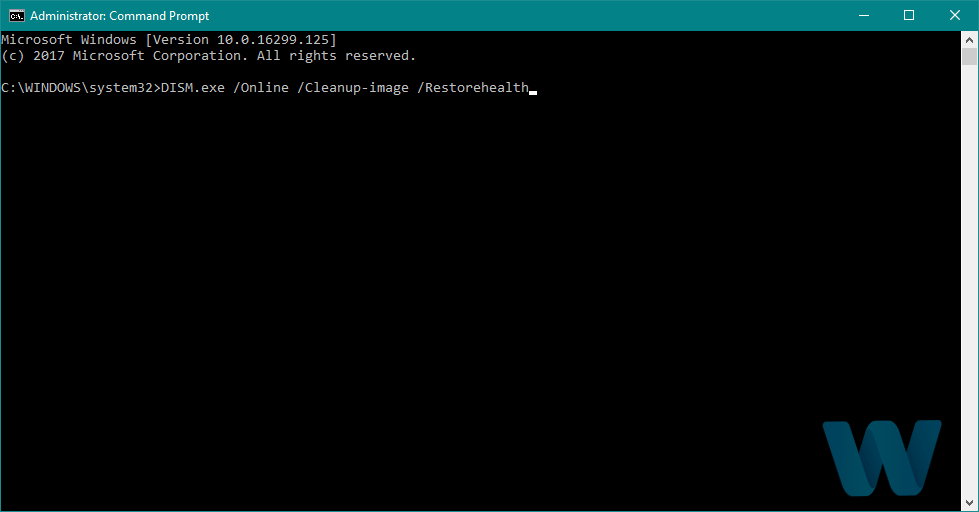







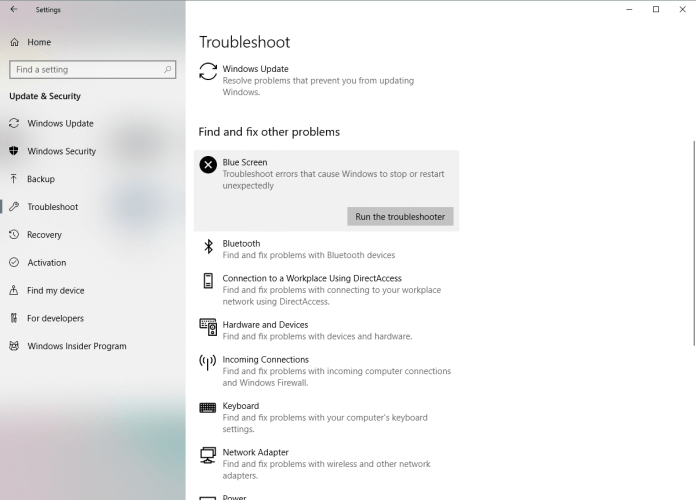

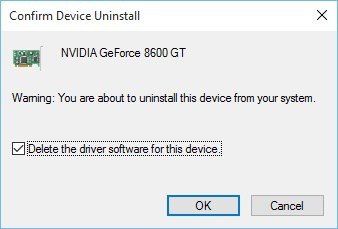


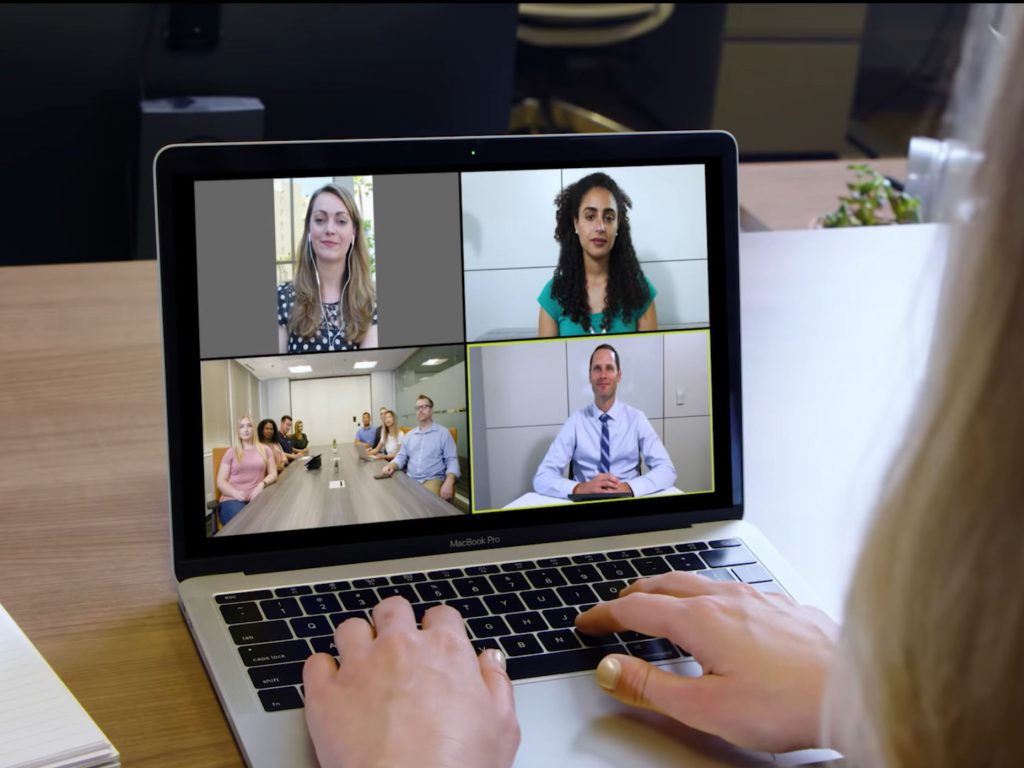




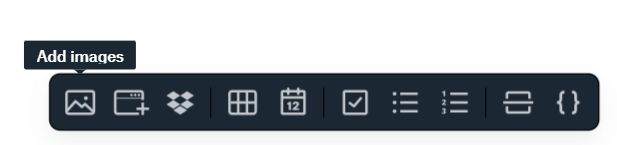
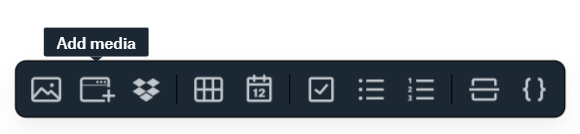








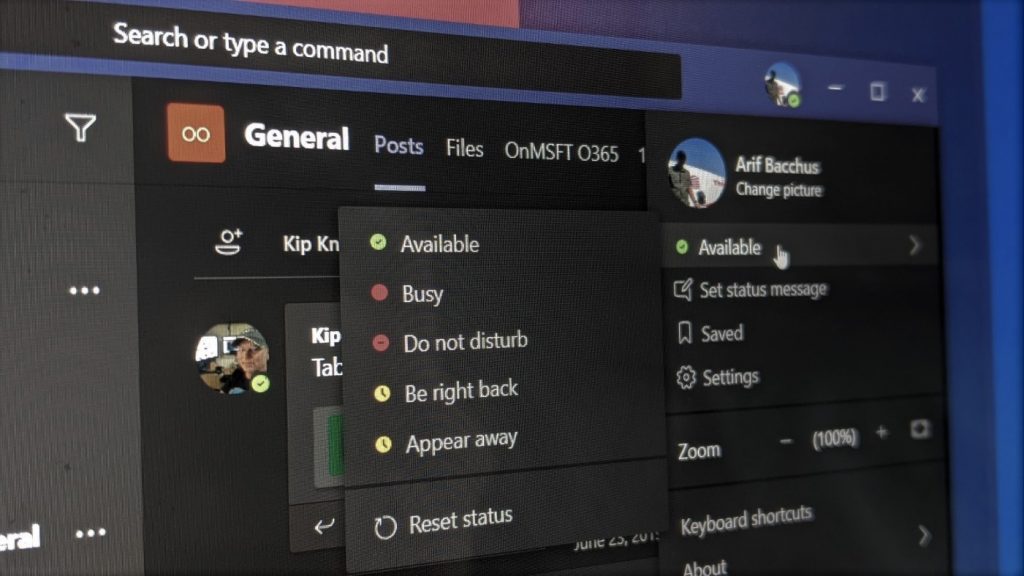




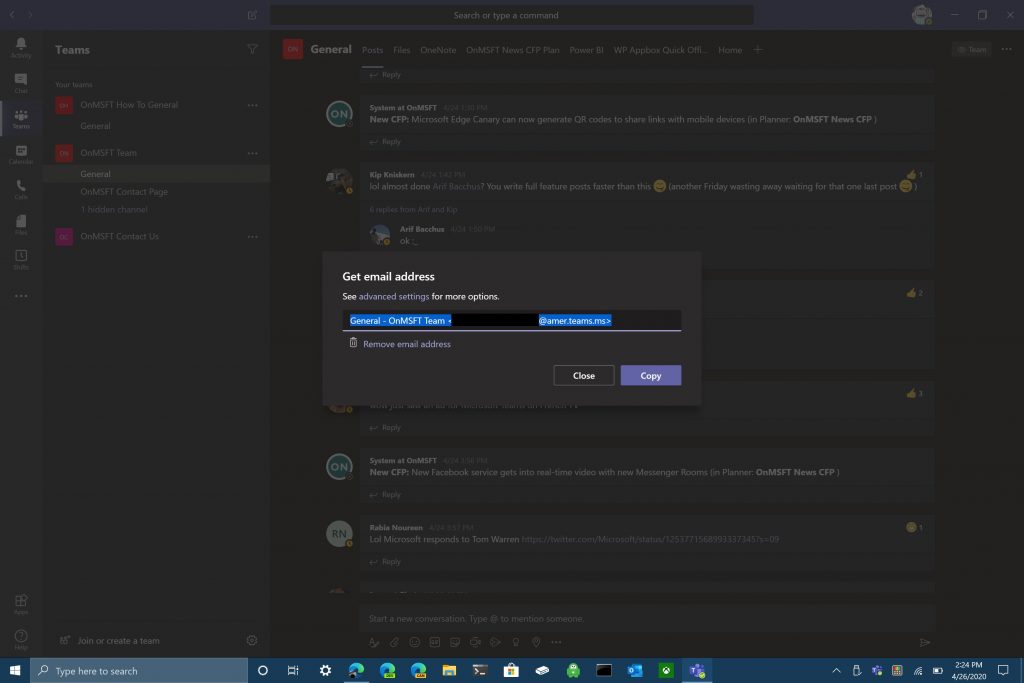


 Removing the email address for your Teams channel will only remove the existing email address. You can still repeat the “Get email address” option to generate a new email address for your Teams channel. The ability to generate a new email address at will can help protect your Team channel email address from being spammed.