Here’s where you can buy the cheapest Surface Laptop

Microsoft’s MacBook Air competitor, the Surface Laptop that comes with Windows 10 installed on its system just got a bit more affordable.

Excited enthusiasts can now purchase the Surface Laptop running Windows 10 for only $799. The Surface Pro priced at $799 comes only in Platinum.

Best price for Surface Laptop with Intel Core m3 CPU in the Microsoft Store

The machine comes with an Intel Core m3 CPU, 4GB of RAM and 128GB of storage space. These specifications are the same ones that are found on the Surface Pro which is also priced at $799, although this price does not include a keyboard.

cheap surface laptop

The Intel Core M processors are perfect for notebooking, email, web surfing, and basic daily tasks. It comes with Intel HD Graphics 615 graphics chip. Intel has initially introduced the Core m3 CPUs as the ideal chips for fanless designs.

On the other hand, a laptop with just 4GB of RAM is not quite future-proof these days, and we can say the same thing about the baseline Surface Pro. Anyway, this will definitely turn out to be enough for running Windows 10 S.

Surface Laptops with Intel Core i5 and Intel Core i7 CPUs are also available

The Core m3 CPUs are not as fast as the Core i5 and Core i7 chips that are included in the more expensive premium Surface Laptop version. You can find these two versions of the Surface Laptop in Microsoft Store as well.

The model with the Core i5 CPU model is priced at $999, and it comes with 128 GB of RAM, 4GB RAM and the Core i7 CPU model of the Surface Laptop, is priced at $1,599 and it includes 256GB of storage space and 8GB of RAM.

Considering that the Core m3 Surface Laptop is only available in Platinum if you really want a machine that comes in other colors such as Burgundy, Graphite Gold or Cobalt Blue, you have to go for the system that comes with the Intel Core i5 CPU.

Head over to the Microsoft Store and check out all the versions of the Surface Laptop and their available configurations.

RELATED STORIES TO CHECK OUT:

Office 2019 runs exclusively on Windows 10: Upgrade or stay out

MS Office is the world’s foremost Office suite. It incorporates MS Word, Access, PowerPoint, Outlook and Excel. Microsoft revealed last year that it planned to launch the latest addition to the MS Office suite series, Office 2019, in 2018. However, the company but did not make it clear then what platforms Office 2019 would support.

Most industry analysts might have probably expected the latest office suite to be available for two or three Windows platforms. However, Microsoft recently announced that Office 2019 will only be available on Windows 10.

Releasing MS Office for just one Windows OS is an almost unprecedented move by Microsoft. Yet, the big M has confirmed that Office 2019 compatibility will be restricted to Windows 10 Semi-Annual Channel release and Windows 10 Enterprise Long-Term Servicing Channel 2018, as well as upcoming Windows Server LTSC. This effectively means that when Microsoft no longer supports a Windows 10 version, you don’t get any further Office 2019 support (or updates) for that version either.

The big M also confirmed that it will be reducing the extended support period for Office 2019 by three years. MS Office 2019 will still get the usual five years mainstream support. However, beyond that the software publisher is only extending support by a couple of years instead of five.

Microsoft Office 2019

In addition, Microsoft confirmed Office 2019 will become available in the second half of 2018. However, the company will distribute early Office app previews from quarter two, otherwise April, May and June. Another thing to note about the upcoming suite is that it’s a perpetual Office version, which means that Microsoft is moving away from the subscription-based licensing model of Office 365 for the latest addition to the series.

Aside from that, Microsoft hasn’t revealed a huge amount about the new suite of applications as of yet. However, the general manager for Office has stated:

Office 2019 will add new user and IT capabilities for customers who aren’t yet ready for the cloud. For example, new and improved inking features—like pressure sensitivity, tilt effects, and ink replay—will allow you to work more naturally. New formulas and charts will make data analysis for Excel more powerful. Visual animation features—like Morph and Zoom—will add polish to PowerPoint presentations. Server enhancements will include updates to IT manageability, usability, voice, and security.

The latest announcement that Office 2019 is an exclusively Windows 10 package probably won’t go down a storm with many Office users who have stuck with Windows 7. Even though Win 10 is running on more than 400 million devices, Windows 7 still retains a substantial user base. The CEO of StatCounter stated, “Windows 7 retains loyalty especially amongst business users.”

So to embrace Office 2019, you’ll have to upgrade to Windows 10 first. Unless Office 2019 is a big enhancement on the previous version, it might not be worth upgrading for many Win 7 users. For further MS Office 2019 details, check out this post.

How to fix CyberGhost errors and issues on Windows 10

If you’ve decided to finally advance in your online privacy and security game, you’ll need a VPN to do so. Our recommendation goes to CyberGhost (which we’re affiliated with), for its reliability, affordability, and unlimited data and bandwidth. However, even the well-designed VPN isn’t flawless, so we decided to enlist the most common issues regarding CyberGhost and offer the applicable solutions.

If you’re using CyberGhost and you’ve bumped into an issue or two, make sure to check the list below.

CyberGhost VPN most common issues and how to solve them

  1. CyberGhost won’t start
  2. Can’t connect through CyberGhost
  3. CyberGhost crashes

1: CyberGhost won’t start

The basis of CyberGhost for Windows 10 is simple, hence the issues as critical as this are quite rare. Nonetheless, there are reports that the CyberGhost application for Windows 10 won’t start for no apparent reason. If you’re unable to get CyberGhost started, make sure to check these steps in order to resolve it:

  • Restart application.
  • Remove the similar applications.
  • Whitelist the CyberGhost application in third-party firewalls or disable them for the time being.
  • Reinstall CyberGhost clean. You can use IObit Uninstaller in order to clean the remaining files and registry inputs.
  • Run the application as an administrator.

–  Download now IObit Uninstaller (free)

2: Can’t connect through CyberGhost

Connection-related issues are the most common with the majority of VPN solutions. Either the connection is completely absent or it’s substantially slowing down/crashes. There are various reasons for such occurrences, both involving your own settings and the ones concerning CyberGhost VPN itself.

There are various steps you can apply to dismiss connectivity issues, and we made sure to enlist them below.

  • Use wired connection rather than a Wi-Fi.
  • Restart your mode or/and router.
  • Update router’s firmware.
  • Switch the server (different geo-location).
  • Create an exception in Firewall.
  • Switch the protocol. They vary in speed and encryption levels, so make sure to experiment until you find the one that works for you.

3: CyberGhost crashes

Similar to inability to start, CyberGhost seems to be prone to occasional crashes, as some users said. Luckily, this is far from being irreparable, and the steps below should enable you to avoid further crashes in Windows 10:

  • Disable background applications that might affect VPN activity.
  • Run CyberGhost as admin and in the compatibility mode with Windows 8.
  • Reinstall the application.
  • Add the firewall and antivirus exceptions for CyberGhost.

That should do it. In case you have alternative issues or solutions for the one we enlisted here, make sure to tell us in the comments section below.

RELATED STORIES YOU SHOULD CHECK OUT:

Tune in to the Windows 10 Insider BugBash Webcast tomorrow on Mixer!

The first and only Bug Bash for the upcoming Windows 10 Redstone 4 release is still ongoing, but Microsoft would like you to know about another upcoming community event. Indeed, the Windows Insider Bug Bash webcast is coming up tomorrow on Mixer, and you might not want to miss it.

Noted above, the Windows Insider team will be using a brand new microphone during this webcast, so you can expect to hear the bugs being bashed as clear as ever. As usual, you also will be able to submit your burning questions and other suggestions to the team during this webcast. Even better, you’ll likely hear more about how the Bug bash is progressing.

Build 17083 is the focus of this Bug Bash, with special attention to Input, IoT, Personalization, Privacy, Security, Store, and Windows Community. Are you submitting your feedback to Microsoft as part of this Bug Bash? If you’re not, feel free to check out this video for more on the Bug Bash process. And, let us know how the experience is going for you by dropping us a comment below.

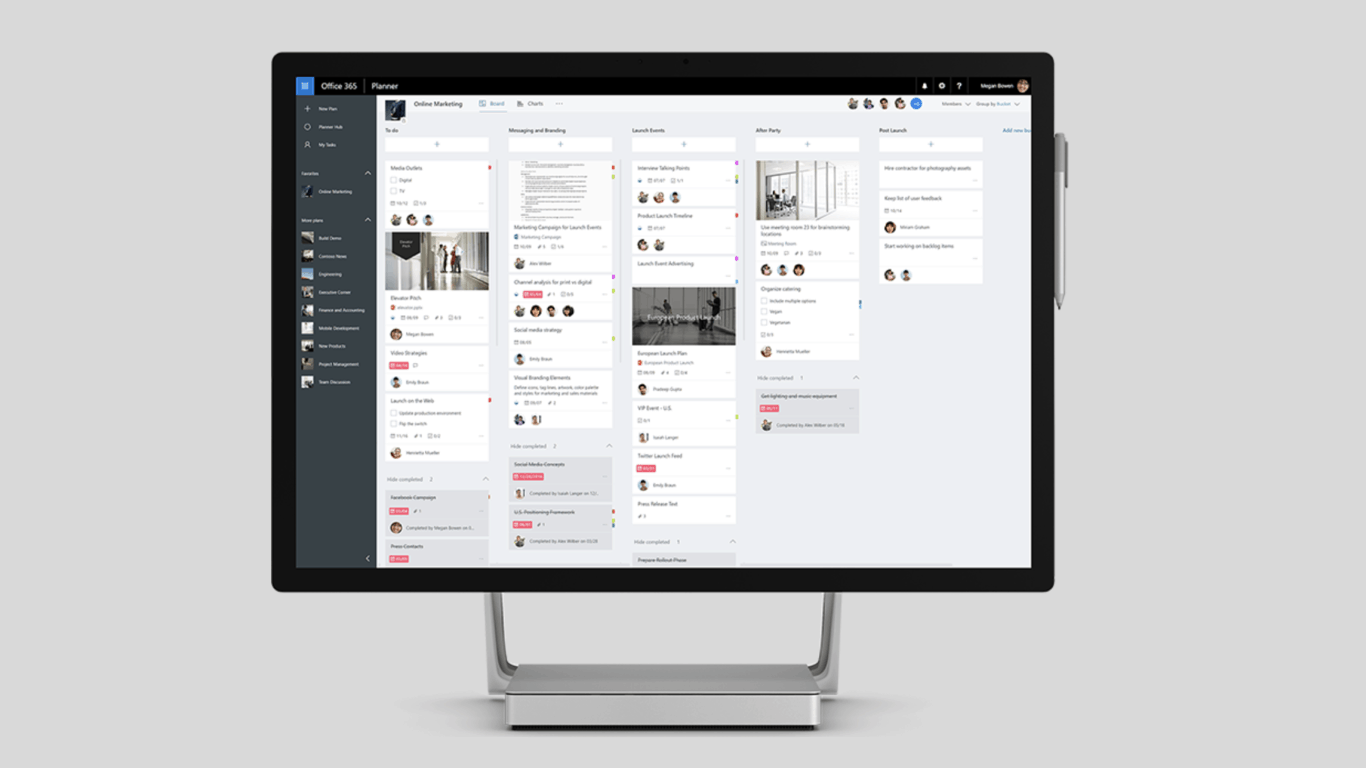
Microsoft Planner gets new Schedule view, Group and Filter options and Due date notifications

Microsoft announced today a big update for Planner, its task management app for Office 365. The Trello competitor is getting three new features today: the first addition is Schedule View, which lets Planner users view their task schedule with weekly and monthly views. Schedule view is accessible from a new button in the top bar of Planner.

With the new Group and Filter options, Planner users can also quickly surface tasks by assigned team members, progress, due date, label and more. This is really handful in case you already have many tasks grouped into buckets.

In addition to letting you filter tasks by due date, Planner can also send you emails to remind you about upcoming deadlines in the week to come, which some users may find quite helpful. Last but not least, Outlook calendar integration via the iCalendar format feed is also rolling out soon, the Office team revealed, and it will let you publish all your Planner tasks to your Outlook calendar. While this isn’t a true integration with Outlook Tasks, it’s still a good start.

You’ll soon be able to publish your Planner tasks to your Outlook calendar.

Microsoft says that these features were among the top requested additions on the Planner UserVoice website, and we invite you to check it to help the team prioritize new features.

Latest Microsoft Edge ad says yes to one touch syncing

Microsoft has promoted their Edge browser in YouTube spots before, but with the release of Edge on iOS and Android, the company is now taking their advertising machine for a new spin. Spotted by MSPoweruser, the latest Microsoft Edge advertisement is saying yes to cross-device PC to mobile syncing.

Unlike Super Bowl ads from this past Sunday, the Microsoft advertisement is very short, coming in at just 15 seconds in length. The company shows how a user can open a webpage in Edge on iOS or Android (sorry Windows 10 Mobile users), and then continue to read it on their Windows 10 PC. It’s part of how the Edge browser can allow users to “transition seamlessly from your PC to mobile in a flash,” per the YouTube description.

One touch syncing is just one of the many features of Microsoft Edge on iOS and Android. The mobile browser features a QR Code Reader, Reading List, voice search, and more. It has proven to be very popular on Android, coming in with over 1 million downloads. You can try the app for yourself and check it out via the link below.


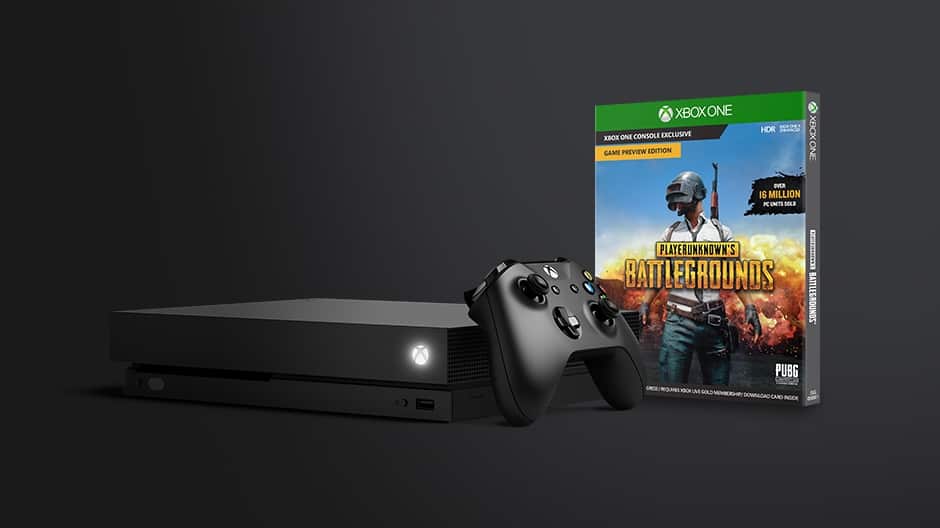
Xbox news recap: Microsoft rumored to purchase EA and PUBG, Gigantic closes and more

Welcome to our weekly Xbox news recap series, where we go over the top stories of the past week in the world of Xbox. Let’s get started.

Microsoft rumored to purchase EA and PUBG 

Rumors have been flying since a recent piece put out by Polygon. A paragraph in this article suggested that Microsoft was in talks to purchase Electronic Arts and PUBG Corp – an acquisition that would send shock waves throughout the entirety of the gaming industry. Electronic Arts is one of the least liked publishers in the industry, and many gamers would be very interested in seeing a change in ownership – but there’s no telling how drastically things could change under Microsoft, if at all.

Gigantic closing after final update

Things just weren’t working out for Gigantic. The promising third-person MOBA on Xbox One and Windows 10 has received its last update, bringing to the game a ranged hero named “T-MAT.” The servers will be remaining open until July of this year, and all heroes will become free until that time finally comes. Gigantic failed to find a foothold in a crowded genre, and despite its great ideas, it just wasn’t going to last. In the meantime, players who are looking for a third-person MOBA should probably head over to Smite.

Microsoft, Gigantic, Xbox One, Windows 10

Overwatch now playable in 4k

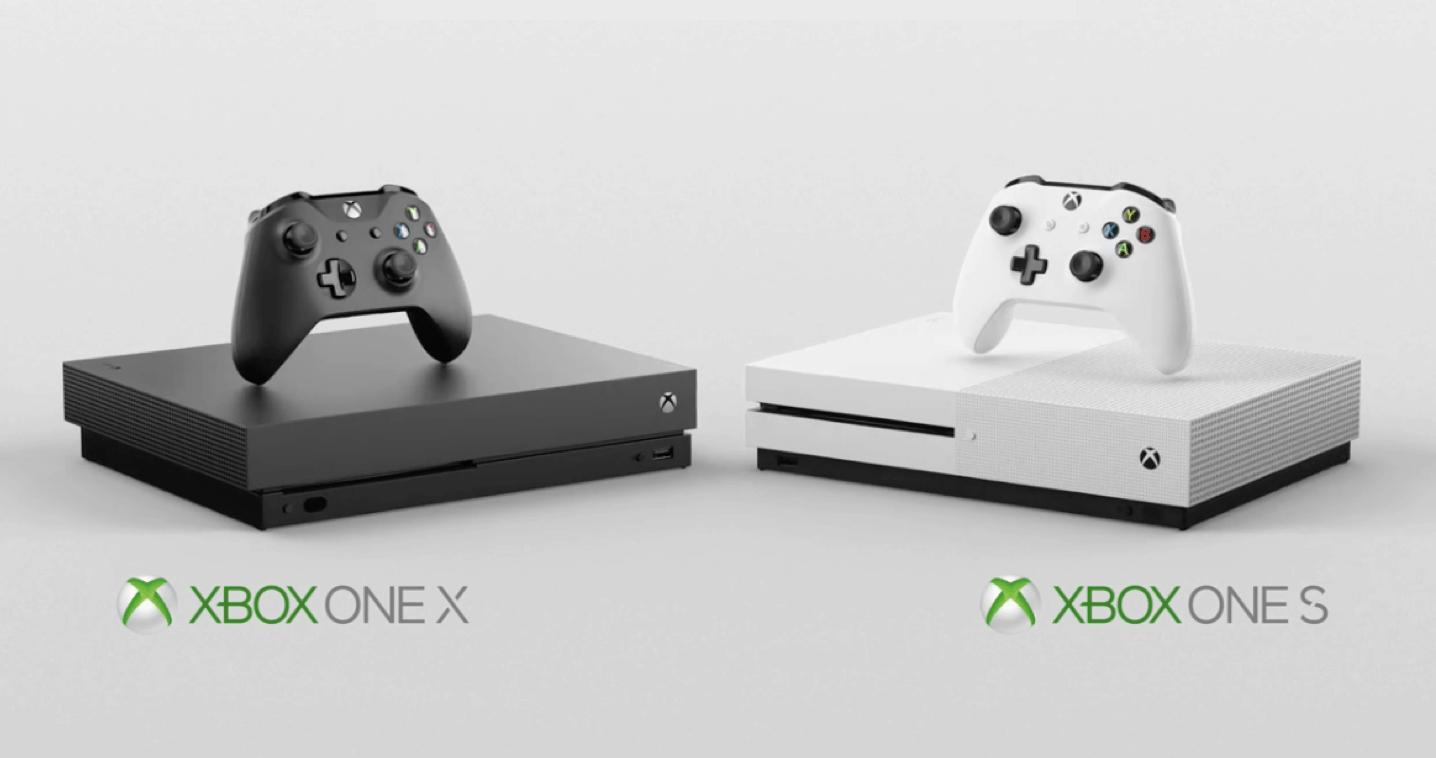
In more cheerful news, you can now play the world’s most successful team shooter in glorious 4k. If you have an Xbox One X and a 4k enabled TV, the latest patch that came out for Overwatch let the game be supported by this insanely detailed resolution. Enjoy!

Red Dead Redemption 2 delayed to October

Good things come to those who wait. The anticipated sequel to one of the great masterpieces in open world gaming, Red Dead Redemption, has been delayed until October of this year. The game was originally set to release in the second quarter of 2018, but it just wasn’t panning out. Rockstar is a company who’s usually known for quality over speed, so the wait should be worth it.

Thanks for joining us. To keep up to date with all the latest Xbox news, keep a close eye on our Xbox One tag.

Windows 10 news recap: Windows 10 S may become “S Mode”, Windows 10 overtakes Windows 7’s internet usage share and more

Welcome back to our Windows 10 news recap, where we go over the top stories of the past week in the world of Microsoft’s flagship operating system.

Surprise: Next major Windows 10 update might be called the Spring Creators Update

The next major update to Windows 10 will be on its way in a couple months, and Microsoft may have inadvertently leaked the name of the update, as if we couldn’t guess. The potential name of the next update is the Spring Creators Update.

Windows 10 S is reportedly being replaced with “S Mode” for other Windows 10 editions

It’s reported that Microsoft may be ditching Windows 10 S as a standalone version of Windows 10, and instead making an “S Mode” for all users, allowing users to opt for a Microsoft Store-only mode if they so wish.

Windows 10 Build 2017

Office 2019 will only run on Windows 10, Windows 10 support extended, Microsoft announces

The next iteration of Microsoft’s Office suite of productivity applications, Office 2019, will only run on Windows 10, not previous versions of Windows.

Statcounter: Windows 10 overtakes Windows 7 as the most popular Windows version for Internet usage

Windows 10 has been slowly working its way through Windows 7’s market share, and now Statcounter is showing that Windows 10 has finally overtaken Windows 7 as the most popular Windows version for internet usage.

That’s it for this week. We’ll be back next week with more Windows 10 news!

HP Laserjet p1102w Not Printing: How to Fix it

If you use a USB connection from your laptop to the printer, one of the things to watch out for is if the cable is misconnected because the printer may not work or offer all the available features. This is often the reason HP LaserJet p1102w is not printing

The advantage of using the USB connection or cable is that it offers the ability to connect many different devices like printers, cameras, scanners, and drives with one common connection, besides being more reliable. But if things don’t work out, here’s how you can fix it!

What can I do if HP LaserJet p1102w is not printing?

Before we move to the slightly complex solutions, try these quick ones first:

  • Ensure the cable is properly plugged in at both ends when using a wired connection. Also, look for any damages.
  • Disconnect any non-critical peripherals from the PC.
  • Check for any warning signs for the printer in the Device Manager. In case you find any, reinstall the driver.
  • Head to the manufacturer’s website and manually install the driver.

If none work, head to the fixes listed next.

1. Perform a clean install

  1. Unplug the USB cable from the printer.
  2. Right-click the Start button, and select Programs and features.
  3. Select all the HP LaserJet printer entries individually and click Uninstall.uninstall to fix HP LaserJet p1102w not printing
  4. Open the Control Panel, and click Hardware and Sound
  5. Select Devices and printers – select all the printer entries and remove the device.
  6. Press Windows + R to open Run, type printui.exe /s, and hit Enter.command
  7. In the Print Server Properties window, go to Drivers, and then remove any entry there as well.remove driver
  8. Press Windows + E to open File Explorer, and navigate the following path:C:\ProgramData
  9. Go to the Hewlett Packard folder, and remove any printer-related folders & files, then restart the computer.
  10. Finally, install the printer software from the CD or the official website, and reconnect the printer.

If the HP LaserJet p1102w is not printing on Mac or Windows, you need to perform a reinstall of the software.

2. Reset the printing system

  1. Launch the Control Panel and select Hardware and Sound.
  2. Select Devices and Printers.device and printers
  3. Click on Printers.
  4. Right-click on your printer in the list and select Reset printing system, then click OK to confirm.
  5. Give admin permissions where necessary and click OK to begin the system reset process.
  6. Click the + sign, select your printer, and click on Add.

This HP LaserJet p1102w not printing with USB issue could occur if the printer is not configured properly on the network. Try resetting the printing system, but beware that this will remove any existing print queue and reset customized driver settings.

3. Set the USB connection as the default printer

  1. Open the Control Panel, and click on Hardware and Sound.
  2. Click on Devices and Printers.
  3. Right-click the printer and select Properties.properties to fix HP LaserJet p1102w not printing
  4. Select Ports. The port with the USB should be set as the default printer.
  5. Right-click the icon and select Set as default printer.
  6. Once done, restart the computer for the changes to apply.

Try and print a text document, not a Windows test page, and see the HP LaserJet p1102w is now printing properly when connected via USB on Windows 10.

4. Use HP Print and Scan Doctor

This is a free tool to diagnose and resolve printing and scanning issues on your HP LaserJet p1102w printer. You can download HP Print and Scan Doctor and run it to quickly and automatically perform several troubleshooting tasks.

You can use the HP Print and Scan Doctor to test the status of the printer spooler, print queue, device manager, and device conflicts.

5. Perform a system restore

  1. Press Windows + R to open Run, type rstrui.exe, and hit click OK.
  2. Select Choose a different restore point, and click Next.choose different to fix HP LaserJet p1102w not printing
  3. Pick another restore point from the list and click Next.next
  4. Click on Finish to start the process.

If the USB device had worked previously and then became unworkable, try using System Restore to revert to a time before when the USB device failed. And this should fix things when HP LaserJet p1102w is not printing.

Before you leave, discover the best printer management software and get one today for seamless task execution and operations.

Did any of these solutions help? Let us know by leaving a comment in the section below.

Windows 10 S is reportedly being replaced with “S Mode” for other Windows 10 editions

According to a report from Thurrott.com citing internal documents, Microsoft is looking to make various changes to the current editions of Windows 10. This will lead to an expansion in Windows 10 editions, including a new “S Mode” which will replace the education-focused Windows 10 S.

The new “S Mode” for Windows 10 was initially noted by Neowin, which discovered references to it in a Feedback Hub Quest. This is marking a change in Microsoft’s approach to Windows 10 S, as the company is replacing it entirely. Microsoft is now planning to give all Windows 10 users (running Windows 10 Home, Enterprise, and Pro) the option of locking down any device running Windows 10 to the “S mode,” working only with UWP apps just as Windows 10 S does. That an interesting change, considering you previously could only install Windows 10 S on a device with a Windows 10 Pro or Education license.

Windows 10 S
Will Windows 10 in “S Mode” be powerful enough for consumers?

As noted by Thurrott.com, some PCs will also ship with Windows 10 in “S Mode,” but Microsoft is planning to allow Windows 10 Home users remove the S mode for free. Windows 10 Pro users with S mode enabled, though, will have to shell out $49 to get to standard Windows 10 Pro.

Also a major part of the change is a new Windows 10 Home Advanced SKU. This Windows 10 edition is set to become available starting May 1st and can be considered similar to Windows 10 Pro for Workstations (in that it will only be for premium PCs with high specs.)

In a separate report, Thurrott.com also explained Microsoft would also change Windows 10 licensing and pricing for OEMs starting April 2nd, basically boiling down to Windows 10 licenses costing more on higher-end devices. Interestingly, the Redmond giant is also setting some standard for partners in how they pre-install Windows 10. According to the report, Microsoft Edge will have to be set as the default browser, and the Linkedin UWP app and Office will have to pre-installed by default.

The many different editions of Windows have always been a bit hard for consumers to understand, and Microsoft will likely have a hard time explaining to consumers what this new “S Mode” is all about. Additionally, the paid update path from S mode to Pro might also bother consumers who already shell out big money for Windows devices. But whether you like it or not, it does seem that Microsoft is looking to push UWP apps and “S mode” pretty hard in the near future.

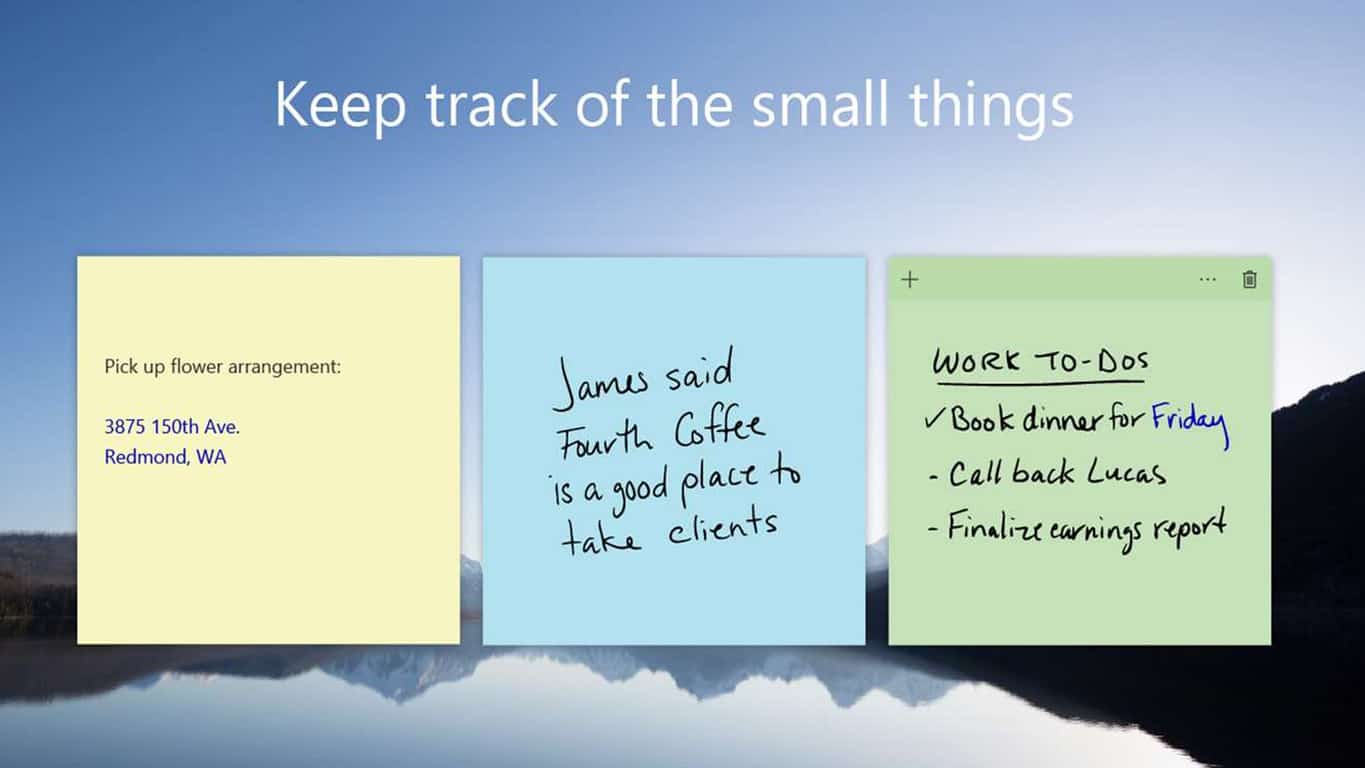
Sticky Notes on Windows 10 updated with new color picker UI, options to change font size

The Sticky Notes app on Windows 10 is already great for those moments when you want to drop down a quick idea for later, but a new update is making it even handier. Indeed, Microsoft has released a new version of Sticky Notes on Windows 10, bringing a new color picker UI and options to change font size.

We’re not seeing this update on any of our Windows Insider or Production ring machines just yet, but Microsoft’s Jen Gentleman recently tweeted about the new version of the app, saying it should be rolling out now. According to Gentleman, the update brings the latest version of Sticky Notes to version 2.1.3.0.

The new color picker UI can be found by pressing on the (…) at the top right side of a sticky note. Long time users will see the update now replaces the round color picker palettes with more squarer colors. The update also removes the settings cog from the bottom left side of a note to a dedicated area on the top right side of the color picker palettes.

Definitely great to see that Microsoft is refining the experience of the Sticky Notes app. While these new features are always appreciated, we’re still hoping that Microsoft can one day add a backup and sync feature in the application. What new features do you want to see in the Sticky Notes app? Let us know your thoughts below.

No new build today, but Microsoft kicks off the only Bug Bash for the Redstone 4 release

Dona Sarkar has just announced that there won’t be any new Windows 10 Insider build today (February 2nd) due to a rollback situation. However, there is still plenty of Windows Insider action on the road ahead: Indeed, the first and only Redstone 4 Bug Bash is kicking off today and will go on through 11:59 PM PST on Sunday, February 11th.

Since there are no new builds this week, the latest Windows Insider release –build 17083– is the focus of this Bug Bash. As always, this is your chance to complete quests, explore the new features in Redstone 4, and also provide feedback to Microsoft to help shape the final release. There are seven focus areas in this Bug Bash: Input, IoT, Personalization, Privacy, Security, Store, and Windows Community, but more content and quests will be added as the bash progresses.

If you’re a new Windows Insider, it’s best to check out this overview to learn more about how Bug Bashes work. Longtime and returning Insiders should also keep the following in mind if they’re looking to receive a Feedback Hub achievement for participating in the Bug Bash:

  • Be on the latest Fast or Slow ring build
  • Log a least one piece of feedback in the Feedback Hub
  • Complete at least one Quest in the Feedback Hub

If you so happen to be free later next week, you can feel free to tune into Microsoft’s special Bug Bash webcast on Mixer on Tuesday, February 6th, at 10:00 AM PST. You’ll be able to submit your questions to the Insider team and hear from them first hand on how the Bash is going. Happy bashing, and feel free to let us know if you’ve come across any major bugs in RS4 by dropping us a comment below.

How to set Cortana reminders in Windows 10 Mobile? Check this out!

One of the very first abilities of Microsoft‘s virtual assistant Cortana was to set reminders on Windows 10 PCs and Windows Phone devices. Since the introduction of Windows 10 and Windows 10 Mobile, Microsoft has been working on new functionality for Cortana with reminders as one of them.

With the latest Preview build for Windows 10 Mobile, Microsoft introduced two new ways of setting reminders with Cortana. Now you’re able to set a picture for your reminder in addition to setting Cortana up to remind you about third-party app content.

How to set Cortana reminders in Windows 10 Mobile

The first addition covered is titled Photo Reminder. With it, users can take a picture of something you need to be reminded about and Cortana will do so. The good thing is that you can also use existing photos from the Windows 10 Mobile Photos app, so users can set a Photo Reminder with older pictures.

Here’s how to create a Photo Reminder with Cortana in Windows 10 Mobile:

  1. Open Cortana on your Windows 10 Mobile device running at least preview build 14322
  2. Tap the hamburger menu, and open Reminders (or you can just say “Hey Cortana remind me to…”)
  3. Tap on ‘Plus’ to create a new reminder
  4. Set your reminder’s details, and if you want to include a photo, tap on the ‘camera button’
  5. You can now choose a photo from your Library, or take a new one with Camera
  6. Once everything is input, click Save and your reminder will be set

cortana reminder

As we mentioned, that’s not the only option available in Cortana after the most recent Windows 10 Mobile build. You can also share content from other apps that support Cortana integration and set reminders based on their information.

For example, users can go to Windows 10 Mobile’s News app and share an article with Cortana to be reminded to read that article later. It works just like other reminders, as well, so users can set time and date. Users will have access to the select article once Cortana reminds you about it.

We expect even more Cortana improvements to arrive in the coming Windows 10 and Windows 10 Mobile Preview builds, and we’ll make sure to let you know about every addition as soon as Microsoft releases it.

Windows 10 build fixes issue with Tencent online games not working

Windows 10 build 14342 has brought many fixes to frequently encountered issues, improving even more the user experience. One of these fixes finally solves the issue causing  Tencent online games not to work, relieving players.

Many games supported by Tencent have been affected by this bug, including CrossFire and League of Legends as players report:

I have a problem. When I open ET sometimes it says “ET.exe has stopped working” and that Windows is searching for a solution. Windows has searched long and hard but has not found a solution to my problem, so I thought I would ask the super duper professional eSport community crossfire.db.

Info:

  • Windows 10
  • this only happens sometimes, not all the time – sometimes if I try and open 3-4 more times it will just work fine
  • Haven’t reinstalled for years, just copied the folders over each time I clean installed […]
  • play on a laptop, have done since 2008 so that isn’t the problem.

I’m someone who was fortunate enough to never have problems with the client while using previous operating systems, but since upgrading to Windows 10 64-bit, I’ve twice had “LolClient.exe has stopped working” in the last week. Thankfully both times this happened I wasn’t in a game nor in a game lobby, just sitting at the main screen. If it matters, I did a clean installation of Windows 10, not upgrading from a previous operating system.

All Tencent supported games should run smoothly now for Windows 10 users thanks to Microsoft’s build 14342:

Here’s what’s fixed for PC […]

We fixed the issue causing Tencent online games from not working in current builds from the Development Branch.</p>

Speaking of games, check out these cool gaming laptops that will surely help you to land on the first place on the leaderboards. If you are a Tencent games fan, you can now add a new item to your gaming collection, namely Tencent’s new Blade BOX, its own Intel-powered Windows 10 gaming console.

RELATED STORIES YOU NEED TO CHECK OUT:

  • Will Tencent bring a UWP QQ or WeChat app to Windows 10?

WhatsApp OS: it will still support Windows 10 mobile!

Older mobile platforms’ enthusiasts are in for a change in 2018. These changes include ending support for one of everyone’s favorite instant messaging services. From January 1, WhatsApp has planned to pull support for BlackBerry OS, BlackBerry 10, and Windows Phone 8.0 and older versions.

The company announced that the users of these OSs wouldn’t be allowed to create new accounts and they won’t be able to re-verify their existing ones anymore. WhatsApp will still run normally if you already have it installed and activated on any of the platforms that we have mentioned above, but some of its features may stop anytime.

WhatsApp’s reason for cutting support for outdated platforms

WhatsApp stated that it decided to give up supporting older platforms because there will be some new features added to the latest versions of the app. These new functionalities will, of course, need modern technology and the older platforms don’t have it.

The company stated that older platforms lack the kind of features that the app requires in order to be able to expand its functionalities in the future.

Upgrade to a newer version of the OS of the outdated devices

If you’re using one of the devices that we mentioned, you are advised to upgrade to a more modern OS or a newer Android running OS 4.0, or iPhone running iOS 7+ or to Windows Phone 8.1+. This will be the only way to continue using WhatsApp.

WhatsApp will still support Windows 10 mobile

Regarding the Windows phone, the application will continue to support Windows 10 Mobile, even if the platform declined lately. On the other hand, unfortunately, there are a lot of users and developers who are dropping support for Windows mobile devices, and more and more important applications are leaving the platform. This is why we won’t be surprised if WhatsApp will decide to do the same thing shortly.

RELATED STORIES TO CHECK OUT:

Windows Template Studio 1.7 is out with support for Visual Basic and Prism framework

Windows Template Studio, Microsoft’s new UWP app creation tool, has been updated to version 1.7 this week. This new version of the Visual Studio extension brings many new features for developers including support for the Visual Basic Programming language as well as the Prism framework.

You learn more about the new features below, and the full list of adjustments is available on the dedicated GitHub.

New Programming Language Support: Visual Basic

New Framework Support: Prism framework

Updated Feature: URI Schema launching for Caliburn.Micro added.

Template improvements:

  • Tweaks for consistence across all frameworks and languages
  • Fix for bug where we have a toast and first time prompt crash.
  • Fix for JSON Helper (#1659)

Improvements to the Wizard:

  • Lots of under the hood bug fixes and code improvements
  • Changed how we handle verifying new templates. This process should be much faster now.

Improvements to Process and Tooling: Improved unit testing for verifying templates

Windows Template Studio 1.7 is available to download on this page, but the Visual Studio extension should automatically update the latest version if you have already installed it. Microsoft also shared some details about upcoming new features yesterday, including an improved UI and support for multiple projects in a single solution. You can make other feature requests by joining the community of developers on GitHub.

Heaps of anime movies & series discounted on Xbox One & Windows 10

It is shaping up to be a good month to be a fan of anime movies, games, and series because Microsoft has discounted several anime titles on Xbox One and Windows 10. The discounts are a part of the annual Anime Month celebration and will run from January 30th-February 26th in the Microsoft and Xbox Stores.

Mostly Naruto titles are included in the Anime Month Xbox games discounts, and Xbox Live Gold members can save up to 75% on certain titles such as Naruto Shippuden: Ultimate Ninja Storm 4. This title is free to play this weekend as part of Xbox Free Play Days, and Dragon Ball Xenoverse 2 will be free to play next weekend from February 8th-11th. Additionally, Microsoft is planning big Xbox game discounts for Okami HD through February 6th-12th, One Piece Burning Blood through February 13th-19th, and Attack on Titan from February 20th-26th.

On the Windows 10 side of things, certain TV season passes are up to 60% off, and certain anime moves up to 40% off. There is a wide list of TV savings that can be explored here, including on Attack on Titan, Fairy Tail, Assassination Classroom, and more. The same applies to certain anime movies on the Windows 10 Microsoft Store, which now are going for as low as $2.99. These titles include Bleach the Movie, Naruto Shippuden, Black Bulter The Movie, and more. Feel free to check here for the full list of movies which are being discounted.

Halo Wars 2 is now a part of Xbox Game Pass on Xbox One

Halo Wars 2 is now available to play as part of Microsoft’s Xbox Game Pass subscription service. Other new Game Pass titles this month include Fable Anniversary, Riptide Renegade, NBA2K17, WW2K17, Darksiders II, Rime, and Letter Quest: Grimm’s Journey.

Xbox Game Pass is a subscription service that gives subscribers full digital access to over 100 Xbox, Xbox 360, and Xbox One video games on an of the Xbox One consoles. Several titles are swapped out with newer ones each month, similar to how Netflix curates its movies and TV series.

Are you an Xbox Game Pass subscriber and would you recommend it to a friend? Are you hyped to play Halo Wars 2? Let us know in the comments below.

Trick: how to bring Windows Media Center back in your Windows 10

Microsoft decided to discontinue Windows Media Center in Windows 10, and you cannot officially install it again. But, if you still want to use this feature, there’s a trick which will bring it back in Windows 10.
windows media center windows 10
As you probably know, Windows Media Center was Microsoft‘s feature for multimedia content. It was introduced in Windows XP, and it also made its way to Windows Vista and Windows 7, but things were different in Windows 8.

In Windows 8, Microsoft decided to exclude this feature from the system, but it was still available as a separate buy. And finally, in Windows 10, it was completely shut down, and replaced with Microsoft’s new multimedia app, Windows DVD player.

Windows Media Center in Windows 10

But even if Windows Media Center isn’t available in Windows 10, a few users of MDL forums have found a way to install this multimedia feature on Windows 10 PCs. The team of ‘developers’ was working on this project for quite some time, and now it is finally ready.

And Windows Blog Italia, has documented the steps on how to bring back Windows Media Center on your Windows 10 PC. But we have to tell you that this isn’t an official way to install this feature, and Microsoft didn’t approve it, so we advise you to install it with caution and on your own risk.

Here’s what you need to do to bring back Windows Media Center to your Windows 10 PC:

  1. Download and extract the file “WindowsMediaCenter_10.0.10134.0.zip”(you can find the download on this address)
  2. Look for the file called “_TestRights.cmd”, right click on it, and then choose “Run as administrator,” and a command prompt window will appear
  3. Reboot your PC after the process is done
  4. Look for the file “Installer.cm,” right click on it, and then click “Run as administrator.”
  5. One the installer is done, a message will display saying “Press any key to exit.”

That would be all, after performing this installation, you should have Windows Media Center on your PC. You can search for it in the taskbar, and you can pin it to the Start Menu, as a fully functional feature.

Did you miss this feature? And will you follow this method and install it on your computer, even if it’s not an approved way? Let us know in the comments, below.

Read Also: 8GadgetPack Brings Windows 7 Gadgets Back to Windows 10

KB4041691 breaks Windows Hello and causes BSOD errors

Microsoft released an important Windows 10 Anniversary Update aimed at fixing system crashes. Update KB4041691 patches a series of memory corruption issues that result in random system crashes and which makes Internet Explorer more stable and reliable, among other things.

However, this update also brings a few issues of its own. Microsoft has already listed three known bugs on KB4041691’s support page, but users have also encountered two other, unexpected problems.

KB4041691 issues

Windows Hello fails to work

Users reported that KB4041691 breaks Windows Hello. The OS is unable to turn on the device’s camera, preventing users from logging in using this authentication tool. It appears that this issue affects mainly Surface devices.

Here’s how one user describes this problem on Microsoft’s forum:

Oct 11, 2017 Surface Book just updated with:
2017-10 Cumulative Update for Windows 10 Version 1607 for x64-based Systems (KB4041691)
immediately after updating it reboots and then Windows Hello at login says it can’t turn on the camera.
Settings app now says windows hello not available on this device, but it just worked right before the update
known issue? any fix?

The OP then contacted Microsoft’s Support engineers but couldn’t get a proper solution to fix this problem. Instead, they suggested upgrading to Windows 10 Creators Update.

BSOD errors

If you get BSOD errors after you install KB4041691, you’re not the only one. Quite a few users reported they too received error 0x000000e after the final reboot. They also confirmed that removing the update fixed the problem.

The good news is that BSOD errors should be history now. Microsoft fixed the root-cause of this issue and you should now be able to install the latest updates without any problem.

Have you installed KB4041691 on your Windows 10 computer? If you encountered other issues apart from the ones listed above, tell us more about your experience in the comment section below.

Windows 10 KB4058258 fails to install and breaks audio

Microsoft has had an irregular update release pattern lately. The company rolled out quite a large number of patches in January and wanted to end the month in style, so it pushed another update right on January 31.

Windows 10 KB4058258 fixes a few monitor color issues, improves caption and subtitle rendering in video playback and adds additional fixes for the annoying unbootable state error on AMD computers.

For more information about the full changelog, you can check out Microsoft’s Support page.

This update also brings three known issues to the table. Actually, two of them (error 0x80070643 and install issues on PCs running certain antivirus tools) are inherited from the previous release.

As far as the third issue is concerned, you should know that after installing this update, some users may experience issues logging into some websites when using third-party account credentials in Microsoft Edge.

Windows 10 KB4058258 bugs

Unfortunately, the list of bugs doesn’t end here. Users reported additional issues on Microsoft’s forum. We’ll list them below so that you know what to expect in terms of bugs.

  • KB4058258 requires a restart to finish installing

Many users complained that the update keeps on asking them to restart their computers in order to complete the install process. However, despite having restarted the machines several times, the issue persists.

I updated with this today but it says KB4058258 Requires a restart to finish installing Any help? Restarted about 4 times

Solution: Uninstall the update. Then manually download and install KB4058258  from Microsoft’s Update Catalog website.

Other users reported getting errors 0x80073715 and 0x80070bc2 while trying to install the update. Manually downloading and installing the update may help you fix the problem.

  • Audio stopped working

Audio problems seem to be quite common among users. If audio is unavailable on your computer, perhaps the best solution is to uninstall the update.

today my audio completely cut out. It worked perfectly up until today, and I don’t think there was any significant change or update, so I’m not sure why it stopped working. […] there are several updates appearing in the Windows Update menu and its “View installed update history” section […] One of these is “2018-01 Cumulative Update for Windows 10 Version 1709 for x64-based Systems (KB4058258).” I tried the Windows Update troubleshooter, but to no success.

As you can see, KB4058258 doesn’t cause any major issues, such as crashes or BSOD errors. However, the bugs listed above can sometimes become very annoying.

So, have you installed KB4058258 on your Windows 10 computer? Did you encounter any other issues?

FIX: Rise of Nations doesn’t work in Windows 10/11

The Rise of Nations is a popular strategy game released in 2003, but it seems that Windows 10 users are having some issues with this game.

According to them, Rise of Nation isn’t working on Windows 10, so let’s see if we can fix that.

The Rise of Nations is an old game, so some issues are expected, but if this game isn’t working you might want to try the following solutions.

How to Solve problems with Rise of Nations

Table of contents:

  1. Run DXSETUP.exe and reinstall Visual C
  2. Run the game in borderless window mode
  3. Run the game in the compatibility mode
  4. Check GPU drivers
  5. Change the INI file
  6. Reinstall the game

Fix: Rise of Nations problems in Windows 10

Solution 1 – Run DXSETUP.exe and reinstall Visual C

According to users, this is supposed to be performed automatically by Steam when you start the game for the first time, but for some reason, this doesn’t happen, so you have to do this manually.

To do this, follow these steps:

  1. Go to The Rise of Nations installation folder. By default it should be something like c:program files (x86)steamsteamappscommonrise of nations but this could be different for your computer.
  2. Next go to the _CommonRedist folder > DirectX > Jun 2010 folder and run DXSETUP.exe. Wait for it to finish.
  3. Now go to _CommonRedist > vcredist > 2012 and install both files.
  4. After installing both files you should be able to run the game now.

Download Visual C++ and you won’t need additional packages!


Solution 2 – Run the game in borderless window mode

Some users claim that running the game in fullscreen mode causes issues, so let’s change the mode from fullscreen to the borderless window.

This is usually performed from game’s video options menu, but if you can’t even start the game, you can change it by changing the game’s .ini configuration file.

To do so, do the following:

  1. Go to C:Users<username>AppDataRoamingMicrosoft GamesRise of Nations and find a file called rise2.ini.
  2. Open that file and find the Fullscreen=2 line.
  3. Change the value from Fullscreen=2 to Fullscreen=1.
  4. Save the changes.

For a better gaming experience, we recommend downloading Game Fire for free. It will help with various gaming issues, such as freezes, crashes, low FPS, lags and slow PC.


Solution 3 – Run the game in the compatibility mode

Due to old age, we can’t skip on the possible compatibility issues with Windows 10. The Rise of Nations, allegedly, worked as a charm on earlier Windows iterations, both Windows 7 and Windows 8.1.

However, Windows 10 is seemingly another cup of tea and running the game in the compatibility mode should resolve some issues.


Solution 4 – Check GPU drivers

Another viable lead tracks down to GPU drivers. Things tend to complicate when the legacy classics are played on Windows 10 platform.

Occasionally, the latest properly-updated GPU drivers won’t cut it for older games. That, of course, means that you’ll need to experiment and find the right driver able to run the game.

Here are the support sites of the most-renowned OEM’s. Download the older drivers and try running the game.


Epic guide alert! Everything you need to know about updating the graphics driver on Windows 10 is right here!


Solution 5 – Change the INI file

A lot of users managed to resolve the startup issue with The Rise of Nations by a simple change of the INI file configuration values.

In order to do so, navigate to the installation folder, open rise.ini and rise2.ini files and delete all values.

Copy-paste the following configurations in both folders respectively:

rise.ini

[RISE OF NATIONS] ContentDir=Thrones and Patriots AllowLogs=0 Dialog Error Level (0 – 3)=2 BreakOnGSCommandLineCheck=0 GraphicsDLL=d3dgl.dll UseSSEDLLs=0 Sound Directory=.sounds Default Sound Directory=.. Number FX SoundPaths=0 Number VoiceOver SoundPaths=2 Number SoundTrack SoundPaths=3 IgnoreSoundWarning=0 ScriptIncludePath=.scenarioscriptlibrary script_loc_file=scen_script_loc.xml UseAutoSave=1 CheckSumDeep=0 CheckSumWindowSize=256 CheckSumFailureThreshold=2 Seed (0 for random)=0 InitialDump=0 Left Minimap=0 DEBUGROADS=0 AutoSaveLoad=0 Record Results=0

rise2.ini

[RISE OF NATIONS] Windowed Width=1024 Windowed Height=768 FullScreen=1 VSync=0 AllowAllResolutions=1 IgnoreMinimizeOnTabOut=0 ConfigDatabase=BHGVidCardConfig.txt ESCKeyGoesToMenu=1 ClickDragTiming=5 ClickDragLowSensitive=20 ClickDragHighSensitive=64 ClickDragRightSensitive=6 SkipIntroMovies=1 ForceHardwareCursor=0 ForceGDICursor=1 ForceBWCursor=0 ForceStaticCursor=0 ForceAGPVBs=0 Don’t Allow Texture Compression=0 SYS_grade_override(A-F or AUTO)=AUTO MEM_grade_override(A-F or AUTO)=AUTO CPU_grade_override(A-F or AUTO)=AUTO GPU_grade_override(A-F or AUTO)=AUTO TEXTURE_grade_override(FULL, HALF, QUARTER, AUTO)=AUTO UseAltColors=0 Console Coord Mode=0 Console Name Mode=2 Sound Enabled=1 BackVidAsSlideShow=0 UseVTUNEDLL=0 TestDelayRenderAMin=0 TestDelayRenderBMin=0 TestDelayRenderAMax=0 TestDelayRenderBMax=0 RebuildBalance=0 Force Profile Menu=0 ForceLowCPUBackgroundVid=0 EnableGraphicsToggles=0 TPModsDirectory=.Mods ScenarioDirectory=Scenarios StandaloneScriptsDirectory=Stand-alone Scripts DefaultScenarioDirectory=.scenarioCustom DefaultScriptDirectory=.scenarioScripts GameFrameTestDelayMin=0 GameFrameTestDelayMax=0 RenderMinimap=1 StartConsole=0 StartReveal=0 StartPaused=0

Save changes and try starting the game.


Solution 6 – Reinstall the game

Finally, if none of the previous solutions proved fruitful, you can always try reinstalling the game and move from there.

In addition, if you’re using Steam to run the game, you can also validate its integrity and resolve possible issues that way.

Here’s how to do it in the Steam desktop client:

  1. Open Steam.
  2. Right-click on The Rise of Nations and open Properties.
  3. Select Local Files.
  4. Choose ”Verify integrity of game files…” and restart your PC after the process ends.

Now the game should run in borderless window mode, and it should work without problems. If you have any comments, questions or suggestions, just let us know in the comments down below.

RELATED STORIES YOU NEED TO CHECK OUT:

Fix: Blacklight Retribution won’t launch

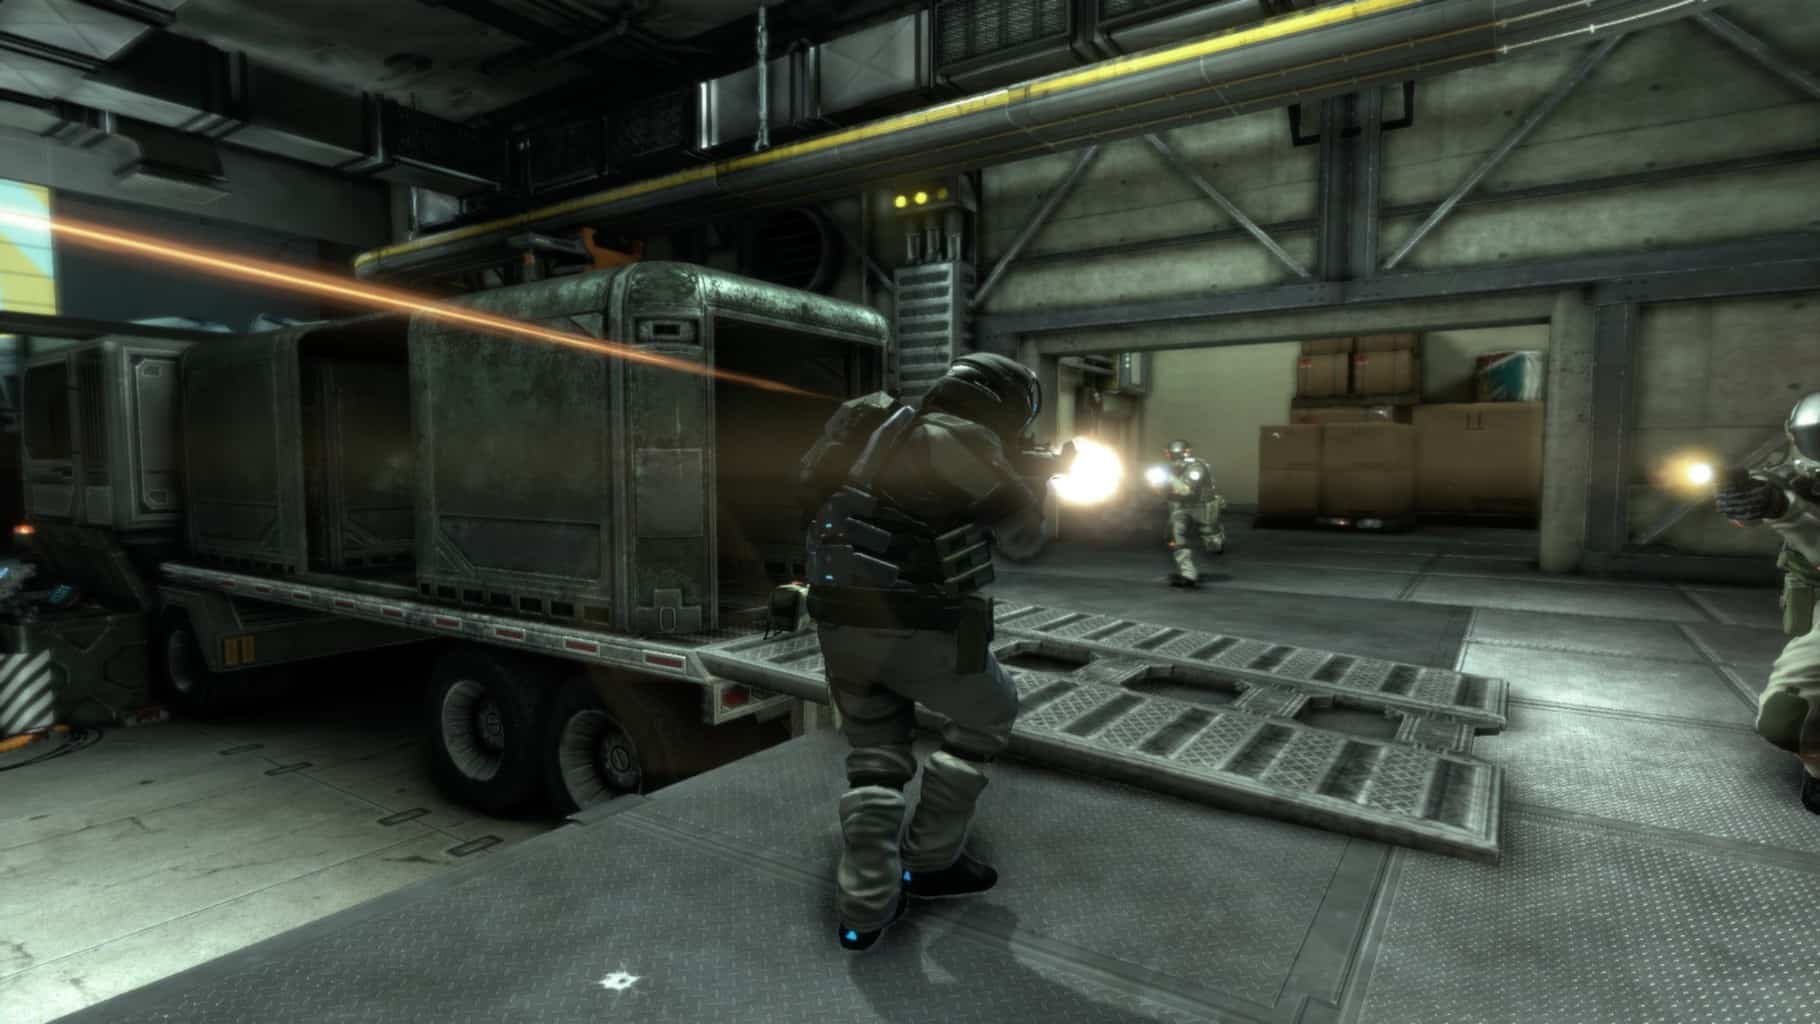
Blacklight Retribution is a cyber first-person shooter for Windows and PlayStation 4 that doesn’t always start. Some Blacklight Retribution players have stated on forums that the game isn’t launching in Steam. If you’re among those who can’t launch BLR, these are a few resolutions that might fix the game.

How to fix Blacklight Retribution launch issues and errors

1. Check the Game’s System Specifications

If you’ve never ran Blacklight Retribution in Windows before, and it isn’t launching, double-check that your desktop or laptop meets or eclipses the game’s system requirements. BLR is not a new game, so it doesn’t have especially high system requirements. A dual-core CPU, two GB RAM and 256 MB GPU are a few of the game’s specifications. Below is a snapshot of BLR’s full system specifications listed on Steam.

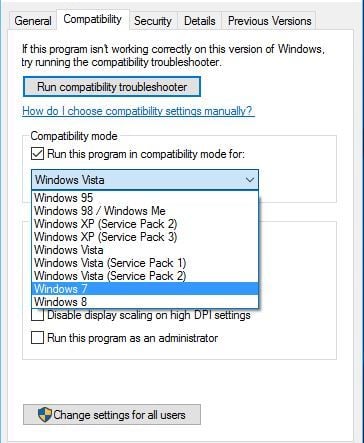
If your desktop or laptop doesn’t meet one of those specs, that might be why the game isn’t running. Even though Windows 10 and 8 aren’t listed as supported platforms on BLR’s Steam specifications, Blacklight Retribution does run in Windows 10. However, you could try running it in backward compatibility mode in Windows 8 and 10. To do that, right-click the BLR.exe, select Properties, click the Compatibility tab and select the Run this program in compatibility mode option.

2. Don’t Launch the Game Through Steam

Blacklight Retribution not launching can be due to the Steam launcher not launching it. Some BLR players have fixed the issue by starting the game from outside Steam. So enter the keyword ‘Blacklight Retribution.exe’ in your Windows search box, and then select to run BLR from there. Alternatively, open the Blacklight Retribution folder in File Explorer; and click the BLR.exe to open the game from its folder.

3. Adjust the AllowD3D11 Setting in the PCConsole-FoxEngine File

Some BLR players have fixed the game not starting by adjusting the AllowD3D11 setting in the PCConsole-FoxEngine file. This is an especially effective fix for Windows laptops or desktops that don’t support DirectX 11. This is how you can adjust the AllowD3D11 setting.

  • First, open this path in File Explorer: C:\Program Files (x86)\Steam\SteamApps\common\blacklightretribution\Blacklight Retribution\Live\FoxGame\Config\PCConsole\Cooked.
  • Then you can open the PCConsole-FoxEngine file in Notepad.
  • Alternatively, entering ‘PCConsole-FoxEngine’ in the Windows search box might be a quicker way to open the file.
  • Press the Ctrl + F hotkey to open the Find window.
  • Enter ‘D3A’ in the Find search box.
  • Then erase the true from the AllowD3D11 setting and enter ‘false.’ The setting should then be: AllowD3D11=False.
  • Click File and select Save from the menu.

4. Reinstall Blacklight Retribution in Steam

As previously mentioned, running this game without initializing the Steam launcher is a potential resolution for BLR not starting. Some players have also fixed the game by reinstalling in it Steam and then starting BLR with a Windows shortcut. That will update the game with the latest patches without the launcher.

  • To reinstall BLR in Steam, right-click Blacklight Retribution listed in Steam and select Delete Local Content.
  • You can then reinstall BLR by entering ‘Blacklight Retribution’ in the Steam’s search box.
  • Select to open Blacklight Retribution’s Steam page, and then click the Play Game button to reinstall.
  • Thereafter, right-click the Blacklight Retribution exe in File Explorer and select the Create shortcut option.
  • Press the Yes button to add a new BLR shortcut to the Windows desktop.

  • Then click BLR’s desktop shortcut to launch the game.

5. Verify the Game’s Cache

  • To check that the game is correctly installed, verify the game’s cache. You can do that by opening Steam and clicking Library.
  • Right-click Blacklight Retribution and select Properties from its context menu.
  • Select the Local Files tab shown in the snapshot directly below.

  • Then press the Verify Integrity Of Game Files button.

6. Close Background Software

It might be the case that background software is conflicting with BLR’s launcher. For instance, some Blacklight Retribution players have got the game starting by closing the TeamViewer remote desktop software. As conflicting software can vary widely from platform to platform, your best bet is close as many non-essential programs as you can via Task Manager. This is how you can close programs and background services with Task Manager.

  • You can open Task Manager by right-clicking the taskbar and selecting Task Manager.
  • Select the Process tab shown in the snapshot directly below.

  • First, close all the software listed under Apps by selecting them and pressing the End task button.
  • You can also close some background processes for third-party software listed under Background processes much the same. For example, terminate anti-virus software processes listed there.
  • In addition, you can remove third-party software from the Windows startup. Select third-party programs on the startup tab, and press their Disable buttons to remove them from the Windows startup.

Those are a few fixes that could kick-start Blacklight Retribution. If not, check out this article that provides further details for fixing Steam games that aren’t launching.

RELATED STORIES TO CHECK OUT:

Random system crashes? Fix: Windows 8.1 KB4041693, KB4041687

Microsoft’s focus point on this month’s Patch Tuesday edition are system crashes. The majority of the updates that the company recently rolled out, including Windows 8.1 KB4041693 and KB4041687, aim at fixing random system crashes.

Monthly rollup KB4041693 also brings a series of Internet Explorer fixes that patch various graphics issues, as well as the bug where Internet Explorer stops responding to a navigation request, and more.

On the other hand, security update KB4041687 adds only a series of security enhancement to the following Windows component: Windows Search Component, Windows kernel-mode drivers, Microsoft Graphics Component, Internet Explorer, Windows kernel, Windows Wireless Networking, Windows Storage and Filesystems, Microsoft Windows DNS, Windows Server, Microsoft JET Database Engine, and the Windows SMB Server.

Without further ado, here are the exact changes and improvements that Patch Tuesday brought to Windows 8.1.

KB4041693 changelog:

  • Addressed issue with docking and undocking Internet Explorer windows.
  • Addressed issue with form submissions in Internet Explorer.
  • Addressed issue where Internet Explorer stops responding to a navigation request.
  • Addressed issue that occurs in the WebView Control of Internet Explorer in certain scenarios.
  • Addressed issue with URL encoding in Internet Explorer.
  • Addressed issue that prevents an element from receiving focus in Internet Explorer.
  • Addressed issue caused by a pop-up window in Internet Explorer.
  • Addressed issue with the rendering of a graphics element in Internet Explorer.
  • Addressed issue in Internet Explorer caused by a redirection link.
  • Addressed issue where messages that should be in a non-English language display in English in Internet Explorer.
  • Addressed issue where USBHUB.SYS randomly causes memory corruption that results in random system crashes that are extremely difficult to diagnose.
  • Security updates to Microsoft Windows Search Component, Windows kernel-mode drivers, Microsoft Graphics Component, Internet Explorer, Windows kernel, Windows Wireless Networking, Windows Storage and Filesystems, Microsoft Windows DNS, Windows Server, Microsoft JET Database Engine, and the Windows SMB Server.

If you’re planning to install KB4041693, keep in mind that you may receive an error message informing your that an application exception has occurred when closing certain apps that use mshtml.dll to load web content. Microsoft is aware of this issue and its engineers are working to find a solution for this problem.

You can download KB4041693 and KB4041687 automatically through Windows Update or get the standalone package from the Microsoft Update Catalog website.

Installing Windows 10/11 on unsupported Macs? Here’s how

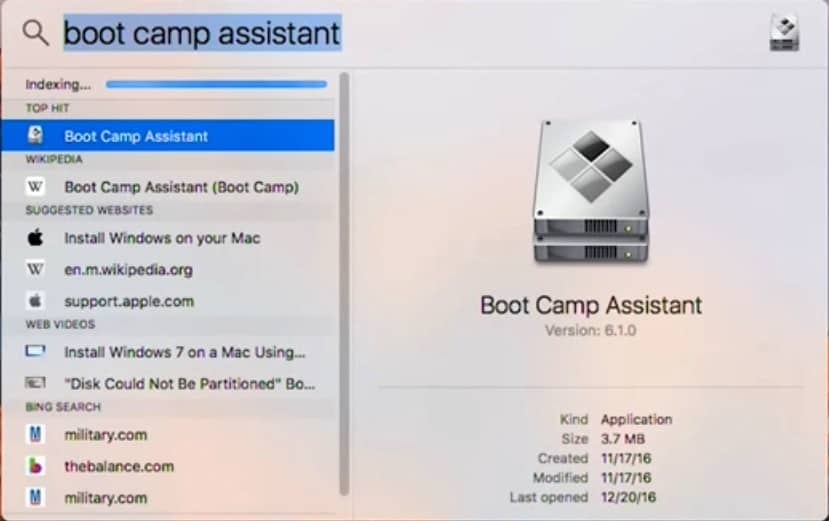
Do you happen to have a Windows 10 laptop and a Mac OS X (or macOS) desktop? If you prefer Windows 10 to Mac OS X, you can install Win 10 on Intel-based Mac systems thanks to the Boot Camp Assistant multi-boot utility. That’s a utility which enables users to install Windows platforms on Mac desktops or laptops, and Apple has updated it to support 64-bit Windows 10. This is how you can install USB flash versions of Windows 10 on Macs.

First, note some of the things you’ll need to install Windows 10 on a Mac system. You’ll need to have a more update Intel MacBook Pro, iMac, MacBook or MacBook Air that doesn’t predate 2012. A blank USB 2 flash drive with at least 16 GB of storage will also be needed. That will include the 64-bit Windows 10 ISO, and you’ll also need a valid Windows 10 product key, which this Windows Report article tells you how to find.

In addition, make sure your startup Mac drive has at least 55 GB of storage space. If that’s the case, you can now add Windows 10 to a Mac as follows.

  • First, download the 64-bit Windows 10 ISO to your Apple Mac desktop or laptop from this page, which will probably take a few hours.
  • Secondly, you should update your macOS, Boot Camp Assistant and Mac firmware if required. To do so, open the Mac’s App Store app and select Update to check for updates.
  • Now open the Boot Camp Assistant utility in your Mac’s Applications > Utilities folder.

  • Next, you should select the Create a Windows 10 install disk option. Also select the Install Windows 10 check box.
  • Insert the USB flash drive in one of your Mac‘s USB slots.
  • Now you can select the Windows 10 ISO file in Boot Camp Assistant by pressing the Choose button. Boot Camp will then turn your USB drive into a Windows 10 boot disk with all the required Boot Camp drivers copied to it.
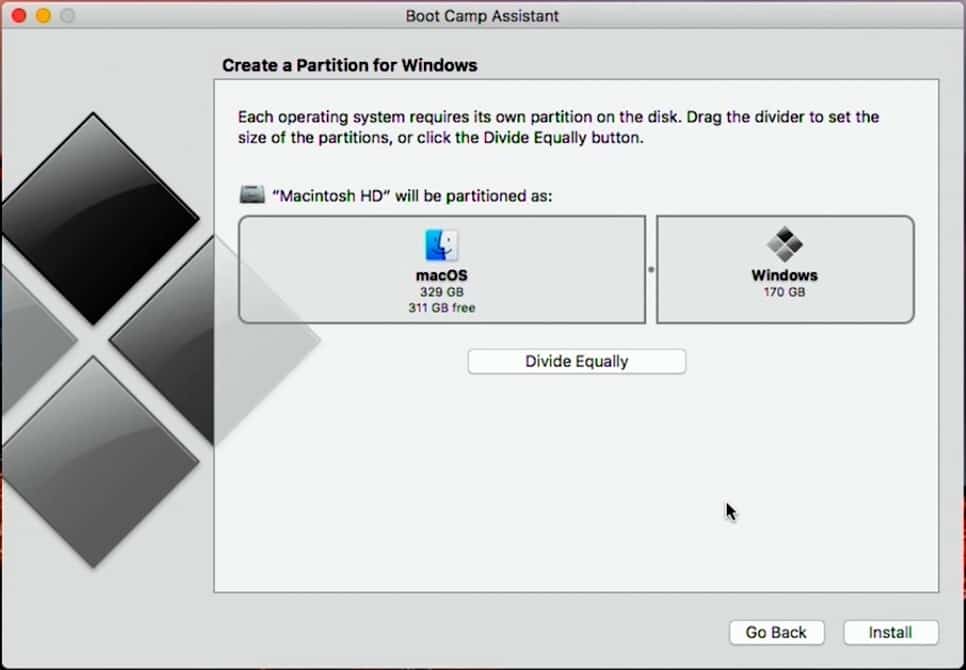
  • Then you’ll need to create the hard drive partition for Windows 10 with the Boot Camp Assistant’s slider. Set aside at least 30 GB for the hard drive partition so you can also add extra software to it.

  • Press the Install button after you’ve selected the required partition space. Do not remove the USB drive from Mac.
  • Once you’ve finished the assistant, the Mac will restart to the Windows installer.
  • First, select the required language, time and currency formats for Windows.
  • Then you’ll need to enter your Windows 10 product key. If you skip entering it, you can only use Windows 10 on the Mac for a 30-day trial period.
  • Next, you should select to install Windows 10 to the BOOTCAMP partition and click Format. Then you can press OK and Next to confirm.
  • The Windows setup process will continue for up to about 30 minutes. Thereafter, the Mac will boot up in Windows 10 and you can set up a user account.
  • Finally, you’ll also need to install Boot Camp’s drivers on the USB drive. So you should open the USB flash drive in File Explorer and then double-click the setup.exe in BootCamp folder to install the drivers.
  • You can switch between Windows 10 and your Mac platform by pressing the Option key on the Apple Mac startup. Alternatively, you can also click the Boot Camp system tray icon and then select Restart in OS X.
  • Note that you might also need to configure Windows 10 as your default Mac platform with the Boot Camp Control Panel.

So now Windows 10 is on your Mac! That’s how you can add Windows 10 to Macs with a USB drive, and you can also use a DVD installation disc (which might be essential for less update Macs).

RELATED STORIES YOU NEED TO CHECK OUT:

Call of Duty: Infinite Warfare – How to switch from Chinese to English

Call of Duty is a video game franchise that gained popularity in the early days of the shooter genre. It has been the subject of hard criticism in the past few years, due to the repetitive and unoriginal nature of their latest installments.

Despite receiving enough negative publicity already, the brand behind the game managed to strike again. The Chinese version of Call of Duty: Infinite Warfare has been shipped out to non-Chinese speaking countries, leaving customers unhappy and confused.

Hi. I just installed my IW Digital Deluxe Edition, which I had pre ordered earlier this year. The problem is that the game is in Chinese and there is no option for English in the language options inside the game. How do I change the language to English? I would really appreciate it if someone can help.

Gamers from other countries such as Singapore, but also Chinese residents that are not originally from China received the wrong game copy, and now can’t play it. While some are outraged and say they will ask for a refund, others are willing to accept a swap for the game version they wanted in the first place.

Fortunately, user CSA100 on the official Call of Duty forums has offered a solution that seem to work. According to him, users need to uninstall all their Call of Duty files and switch their location and time to UK from the language and region settings. When re-installing the game, the correct language version will be reinstalled as well.

Ok I have a fix, don’t refund. First uninstall all the COD IW files you got from the bundle. Then go to settings> system> language and location. Change location to UK and language to English(UK). Then reinstall all your files and it should be in English. It worked for me. Like if it works. Cheers!

RELATED STORIES TO CHECK OUT:

Fix: OHUb.exe Application Error in Windows 10

Just like with any other operating system sometimes there are errors and certain issues. Speaking of which, some Windows 10 users have reported Application Error for OHUb.exe so let’s see if we can solve this issue today.

Users report Application Error for OHUb.exe every time when they run Windows 10, and this can be quite irritating after a while. As far as we know, this issue is related to Microsoft Office, or one of its components so let’s see if we can fix it.

How to Fix the Application Error for OHUb.exe in Windows 10

Solution 1 – Reinstall Office

Users who got Application Error for OHUb.exe error report that uninstalling their version of Office fixed the issue, so if you’re having this problem, you might want to try that. Sadly, this doesn’t work for all users, but it’s worth trying. If reinstalling Office doesn’t work for you make sure that you try our next solution.

Solution 2 – Uninstall Get Office app

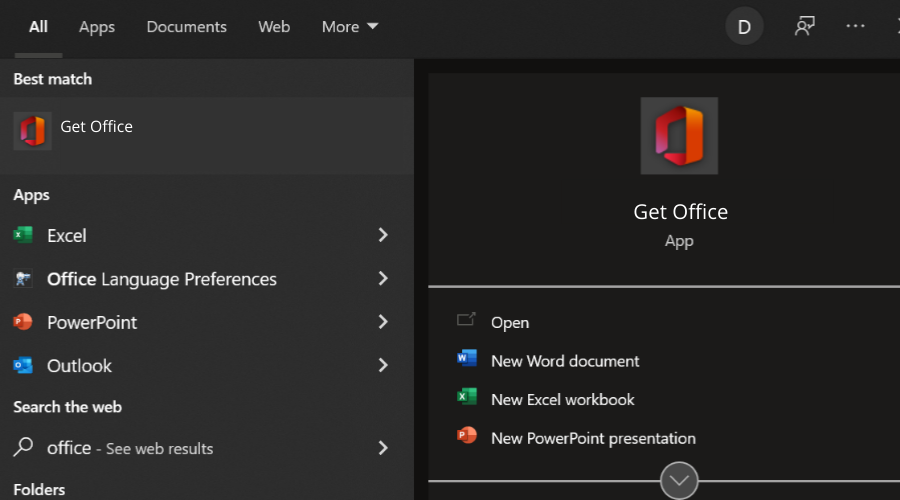
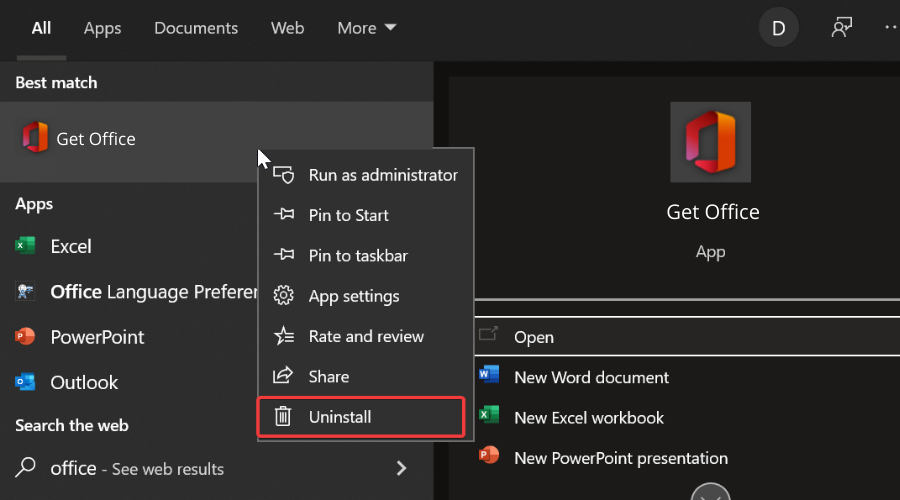
If uninstalling Office doesn’t help, then the problem isn’t a bad installation of Office as most users would assume – it’s something else. Users have found that the main cause for Application Error for OHUb.exe is a Get Office app that comes with Windows 10. This application is located in Start Menu and to fix this issue you just need to uninstall it. To do so, follow these simple instructions:

  1. Open Start Menu and locate Get Office app.
  2. Right click the app and choose Uninstall from the menu.
  3. After that restart your computer and Application Error for OHUb.exe should be resolved.

Alternatively, you can uninstall Office and all related files with the help of a third-party uninstaller tool such as IObit. This tool will automatically detect any registry entries and leftover files and completely remove them from your system.

⇒ Get IObit Uninstaller

Application Error for OHUb.exe can be irritating, but as you can see, it’s not too hard to fix. If you’re having this error, it won’t be necessary to uninstall your Office software, instead, you could just try uninstalling the Get Office app. Anyhow, we hope that these solutions were helpful to you.

Encyclopedia Britannica App: Tradition in Providing Knowledge

Encyclopedia Britannica App should be on all Windows 8, Windows 10 devices
encyclopeadia britannica windows 8
Some might wonder: why the heck do I need the Encyclopedia Britannica app for Windows 8, Windows 10 when I have Wikipedia at my disposal? In times when for many, Google equals the information search, it would seem that there isn’t room for other options. But I can assure you that even if Google is the absolute king when it comes to information finding, others still have kept their niche. I have recently bought the physical books from the Encyclopedia Britannica and I am quite pleased with it.

We’ve reviewed other educational apps here, on Windows Report, and one of them has been Khan Academy for Windows 10, Windows 8. But here are some other related articles you might be interested in:

Encyclopedia Britannica (the free edition, that is) is a mix of Wikipedia and tradition in providing knowledge, just like we’ve mentioned in the title. So, let’s see what interesting and appealing we can find inside the application.

encyclopedia britannica for windows 8

Encyclopedia Britannica for Windows 10, Windows 8

If you’ve opened up at least one Encyclopedia Britannica book in your life, then you know that the information found inside is organized in alphabetical order, just like inside a dictionary. Naturally, that has been kept and we can find it in the Windows 10, Windows 8 and Windows 8 RT application that we’re reviewing. The information that you’ll find inside the application is basically the same, like you find one the official website, on www.britannica.com

The sad part, of course, for those that can’t afford it, is the price that you’ll have to pay in order to get the full version. But the good part is that you’ll pay only $14.99 for an annual subscription. Comparing to the same amount of information in the “print version”, it’s actually pretty cheap, but then again, you’ll have to pay that amount every year. You should perceive Encyclopedia Britannica as a more “exclusive” Google.

So, in order to get the full functionality from Encyclopedia Britannica, you’ll have to pay that annual subscription. If you’re a student, pupil or just a hungry person for knowledge, then it will perform awesome for you. While you have opened an article, you can do the following while you’re on it:

  • Pin it to the screen for a later read.
  • Access the images and table of contents.
  • Link map: an interesting tool that allows you to link your article to others, if there’s any connection between them.
  • Change font size.
  • Add to favorites.
  • Save article

Get the paid app for full functionality

There are over 80, 000 articles inside the Encyclopedia Britannica application for Windows 10, Windows 8 right there, waiting for you to discover them. The free version will allow you to see the entire content of the articles featured in the “Top Article” section + the daily feature articles. From different articles, you’ll be able to see only 100-words articles.

If you save your article, then it will appear on your Saved “shelf”. If you choose to make it “favorite”, then it will appear under your “Favorites” section for later use. Also, there’s a recent section that will display all the articles that you’ve recently opened up. Also, on the start screen, you’ll see a promoted article related to the meaning of the current day. Also, there’s a “Did You Know?” section that highlights a curious fact. Here’s a video “walkthrough” of the app, as well. We hope you found our review useful.

One of the best Windows app for 2D Cad and technical drawing

If you are looking for a reliable 2D CAD and technical drawing app for Windows 8 or Windows 10, then you need to look no further than Back to the Drawing Board, a great utility and a must-have if you’re in this field.
2cad technical drawing app windows 8 10
The Back to the Drawing Board is a really well-made 2D CAD and technical drawing app and without any doubt, one of the best on the Windows Store. You can go ahead and download it now on Windows 8, but I guess it will work on Windows 10, as well, once that gets released. You can use it to create 2D plans, elevations, details, schematics, diagrams, and charts on your Windows 8 device.

Perhaps the best Windows app for 2D Cad and technical drawing

Back to the Drawing Board takes full advantage of the unique features of Windows 8 to provide a great drawing experience on desktops, laptops and tablets. It is an affordable CAD solution for businesses, consumers, students or anyone who needs to produce quick, accurate technical drawings.

What’s really cool is that the app comes with a free 15-day trial and when you will be convinced that it’s worth the money, you can buy it for $18.99. Here are the main features of the app:

2cad technical drawing app windows

  • Import DXF drawings, export to DXF, SVG, PNG and JPEG
  • Rich drawing primitives include lines, circles, arcs, ellipses, rectangles, irregular polygons and b-splines.
  • Automatic baseline and incremental dimensioning.
  • High-quality text rendering using OpenType font technology
  • Assign attributes including layers, colors, line weights, line types, fills and fonts.
  • Create groups and symbols, include in symbol libraries, insert in linear or radial arrays.
  • Use grids and rulers to simplify dimensional drawing.
  • Work in English or metric units, “engineer’s” or “architect’s” scale.
  • Enter points using your mouse, stylus or touch.
  • Enter exact values using absolute, delta or polar coordinates.
  • Snap to grids, objects, normals and tangents.
  • Measure precise distances, angles, and area.
  • Easily move, copy, delete, transform and group objects.
  • Powerful line and arc editing features.
  • View your drawing full-screen for an immersive experience, or pin the control panel for instant access to important functions.

READ ALSO: Watch Your Favorite Animated Movies for Free With This Awesome Windows App

Protecting your personal data: Windows Privacy Tweaker is all you need

While the Internet has provided the ability to reach various parts of the world, it has also opened the doors to our private lives. Most of the time, the Internet collects and stores our personal data even without our consent. Thanks to Windows Privacy Tweaker, you can adjust your Windows privacy settings by modifying the auto-running components and disabling certain Registry entries.

Available for users of Windows Vista and later, the privacy tool works to enable or disable various functions of Microsoft’s operating system. Windows Privacy Tweaker has an intuitive and efficient user interface. Also, the tool does not require installation at all. Keep in mind, though, that you must first create a system restore point to back up your important files before performing the system modifications. Otherwise, the system changes might disable or remove some programs in your PC.

The tool lets you adjust settings by simply clicking the enable or disable buttons. To achieve the level of privacy and security you desire, simply uncheck all the unsafe red fields to the safe green fields. Although the applications is compatible with Windows versions no older than Vista, it is optimized for Windows 10.

Windows Privacy Tweaker displays three tabs upon launch that store the necessary information targeting the Windows services, scheduled OS tasks, and registry items. You can apply batch modifications to all entries in the tabs by clicking the “Uncheck all” or “Check all” buttons.

Each tab includes the default Windows components that may intrude your privacy. The entries include Xbox data synchronization services, customer experience improvement program dependencies, Cortana-related settings, data collection, sensor service options, and other telemetry or biometric registry entries.

Windows Privacy Tweaker also controls how applications access location, camera, tools, or devices. It can also disable Microsoft ads and block Bing searches.

However, the application is limited to the modification of privacy options. That means you cannot use it to root out registry exploits from third party applications or fix malware issues. If you find the tool useful, you can download it from Phrozen Software.

RELATED STORIES YOU NEED TO CHECK OUT:

Windows Updates message gets your computer stuck? Here’s the fix

aWindows Updates may come to you via either of the following messages on your computer:

  • Do not turn off computer we have updates for you.
  • These updates help protect you on the online world.
  • We want everything to be ready for you
  • Welcome to Windows Creator 10 Update

Most users do not like annoying popups that show while they’re working on something with much focus, so when one of these show up, you may be curious as to whether it is truly a genuine popup from Windows, especially if you don’t know what it’s about.

One of these popup messages is one that says these updates help protect you in an online world.

Downloading Windows updates depends on your connection speed, the network settings, as well as the size of the update.  Usually, updates start looping if they encounter some corruption while doing their processes.

When you find that your computer is stuck or just loops at this update message, there are a few things you can do to troubleshoot and see if it goes away.

Fix: These updates help protect you in an online world is stuck

  1. Perform Automatic Repair
  2. Perform a System Restore

1. Perform Automatic Repair

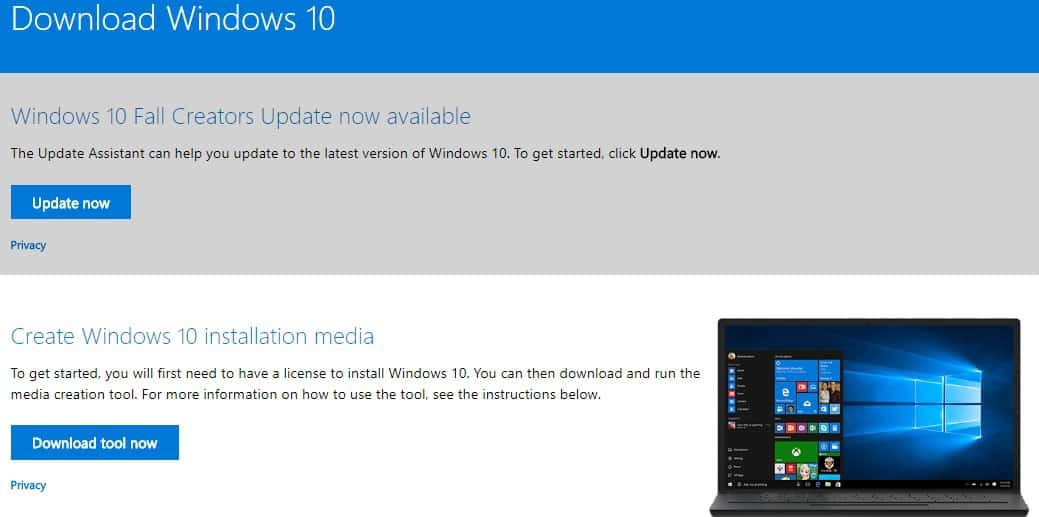
In order to do this, you need to download Windows 10 ISO then create a Media Creation tool, which you can do from another computer.

Once you have the installation media, follow the steps below:

  • Insert the Windows Installation disk or USB drive then restart your computer. You will see a message requesting you to Press any key to boot from DVD.
  • Press any key to boot from DVD
  • Once you see the Install Windows page displayed, click Repair your computer to start Windows Recovery Environment (WinRE)
  • In WinRE, go to Choose an option screen
these updates help protect you in an online world is stuck
  • Click Troubleshoot
these updates help protect you in an online world is stuck
  • Click Advanced Options
these updates help protect you in an online world is stuck
  • The Advanced Options box will display
these updates help protect you in an online world is stuck
  • Click Automatic Repair
these updates help protect you in an online world is stuck

Note: If you don’t see the Press any key to boot from DVD message, you need to change the boot order in your BIOS settings to start from disk or USB.

Be careful when changing BIOS settings as the BIOS interface is designed for advanced computer users because you may change a setting that may prevent your computer from booting properly.

You should only update BIOS when necessary like when solving a compatibility problem. It can be complicated, and render your computer inoperable in case of any errors.

Follow the steps below exactly as they are to change boot order then perform a repair:

  • In the restart process, check for any instructions on how to interrupt normal startup
  • Enter the BIOS Setup Utility. Most computers use F2, F10, ESC or DELETE key to begin this setup
  • Find a tab in BIOS set up utility labeled Boot Order, Boot Options, or Boot
  • Use the arrow keys to go to Boot Order
  • Press Enter
  • Locate the removable device (CD, DVD, or USB flash drive) in the Boot list
  • Use arrow keys to move the drive upwards to appear as the first in Boot list
  • Press Enter
  • Your boot order sequence has now been changed to boot from DVD, CD, or USB flash drive
  • Press F10 to save changes and exit BIOS Setup Utility
  • Click Yes in the confirmation windows
  • Your computer will restart normally
  • Let the scan proceed for a few minutes to remove any malware infecting your computer
  • Select your preferred language, currency, time, keyboard or other input method
  • Click Next
  • Click Repair your computer
  • Choose the operating system you want to repair (in this case Windows 10)
  • Click Next
  • On Choose an option screen
these updates help protect you in an online world is stuck
  • Select Troubleshoot
these updates help protect you in an online world is stuck
  • Select Advanced Options
these updates help protect you in an online world is stuck
  • Click System Restore
these updates help protect you in an online world is stuck

Did an automatic repair fix the error: these updates help protect you in an online world is stuck? If not, try a system restore as described in the next solution.

2. Perform a System Restore

Here’s how to do this:

  • Perform a hard reset – turning on and off the PC – by pressing and holding the power button for 10 seconds.
  • While booting, turn off the computer once you see the Windows logo. Do this at least three times
  • After the third run, the Recovery Screen will display
  • Select Advanced Options
these updates help protect you in an online world is stuck
  • Select System Restore. Choose the restore point where the issue did NOT exist.
these updates help protect you in an online world is stuck

Note: This will remove recently installed apps, drivers, and updates that may cause problems to your PC, but it will not affect your personal files.

  • In the System Restore dialog box, click Choose a different restore point
these updates help protect you in an online world is stuck
  • Click Next
  • Click a restore point created before you experienced the problem
these updates help protect you in an online world is stuck
  • Click Next
  • Click Finish

Restoring doesn’t affect your personal files. It however removes apps, drivers and updates installed after the restore point was created.

To go back to a restore point, do the following:

  • Right click Start
  • Select Control Panel
these updates help protect you in an online world is stuck
  • In the control panel search box, type Recovery
these updates help protect you in an online world is stuck
  • Select Recovery
these updates help protect you in an online world is stuck
  • Click Open System Restore
these updates help protect you in an online world is stuck
  • Click Next
these updates help protect you in an online world is stuck
  • Choose the restore point related to the problematic program/app, driver or update
these updates help protect you in an online world is stuck
  • Click Next
  • Click Finish

Let us know whether any of these solutions helped fix the error: these updates help protect you in an online world is stuck, by leaving a comment in the section below.

How to download the Fall Creators Update’s official ISO files without issues

Microsoft already started rolling out the Windows 10 Fall Creators Update to the general public. However, the update is rolling out in waves, which means that not all users will be able to install it today.

However, if you’re eager to get your hands on the update as soon as possible, you can simply download the Fall Creators Update official ISO files right now.

But first, make sure that your device is compatible with this OS version and meets the necessary system requirements.

Prepare your PC to install the Fall Creators Update

In order to avoid install issues and various other bugs, certain preparations need to be made. Here are the top things to do before upgrading to Windows 10 version 1709:

  • Backup and clean your computer — delete any unnecessary files because they may slow down the update process. Uninstall all the apps and programs that you haven’t used for ages.
  • Clear your browser’s cookies and cache.
  • Make sure that you have a stable internet connection.
  • Check the free space available on your computer’s hard drive.
  • Use a USB or external drive for the download and a blank USB or DVD (and DVD burner) with at least 8GB of space.
  • Run a full system scan —  in this manner you can detect and remove any malicious codes that may have infected your computer.
  • Create recovery media — in case anything goes wrong and your computer become unresponsive after the upgrade, your can always use a fully functional restore point to fix the problem. For more information on how to create a restore point, check out this guide.

Once you’ve checked all the steps listed above, you’re ready to go.

Download Windows 10 Fall Creators Update ISO files

download windows 10 fall creators update ISO files

You can download the 32-bit and 64-bit versions of the Fall Creators Update ISO files from Microsoft’s update page. You can find more information about the upgrade process on the same page.

As a quick reminder, Windows 10 Home is the version of Windows for general users. It doesn’t include the advanced or dedicated features available in the Windows 10 Pro version. You can download the Fall Creators Update Home edition from the link above.

Windows 10 Pro is the version of Windows developed for more advanced users and professionals. If you want to download Enterprise ISO files, you’ll need your business email address.

If you’ve already installed the Fall Creators Update on your computer, use the comment section below to tell us more about your experience!

Xbox One S console gets a price cut in Japan

There has been a contentious relationship between the Xbox and the Japanese market for some time and many have argued that Microsoft has done little to massage the rough edges of that situation.

Perhaps, Microsoft is offering an olive branch to the Japanese market by lowering the price of its most popular selling Xbox One console in recent months. Recently, Microsoft dropped the price of the Xbox One S 1TB model in Japan.

For fans of the Forza and Halo franchises, the Forza Horizon 3 and Halo: The Master Chief Collection can now pick up a bundle for 29,980 yen (around $278 US), which is a nice departure from the previous 34,980 yen it used to be marked as. Other bundles include an Xbox One S 1TB paired with Minecraft: Limited Edition which now sells for 34,980 yen.

The price cut isn’t only an attempt to garner more Japanese gamer attention but it can be seen as a competitive swipe at the PS4 competition in the country. The new price is more in line with the 500 GB PS4 model which now gives the Xbox One X a hard drive space advantage.

The new price cuts are not only a competitive move but mark another attempt by Microsoft to move more units in the country where, to-date, they’ve only managed to sell 90,000 units since availability in 2014.

AudioBookMaker: Turn Your Favorite Books into Audiobooks for Free!

AudioBookMaker is a free tool for Windows devices that converts books into audiobooks using a text to speech engine.

In some cases, when you want to go for a walk, jog, or take a nap, audiobooks are quite handy thanks to their hands-free/eyes-closed approach. (To stream Audiobooks, you can use Audible for Windows 10.)

AudioBookMaker features

This software lets you create audiobooks from text files or text you choose to add/copy to the program. The app supports plain text format along with Microsoft Word and HTML files.

No matter what you do, you can create a new document and then add/paste text in it directly. Alternatively, you also have the option of having the program read Clipboard text aloud.

AudioBookMaker has controls for the following features: playing text, selecting different voices, and changing speed, pitch, and volume. You can change these for new documents, and your default values will differ from their initial ones.

Audio speech engine

AudioBookMaker recognizes installed audio speech engines from the OS and lists them under voices. While audio output is identifiable as computer-generated, it isn’t a surprise.

The app supports pronunciation dictionaries, which you can add to the program to customize the pronunciation of words, phrases, and abbreviations. You can also substitute words.

Once you’re happy with it, all you have to do is hit the save button.

Windows Explorer integration

AudioBookMaker supports the .mp3 and .wav audio formats, allowing you to customize audio quality, file name, and other parameters.

More valuable options in the app’s preferences include Windows Explorer integration for easier adding text documents, changing hotkeys, and setting pre-processing process priority.

AudioBookMaker is a handy application that carries out the simple process of transforming text into audiobooks when an app like BorrowBox is not working.

While the output quality is acceptable even if the results are pretty robotic, you can change this by installing other text-to-speech engines on your Windows device.

You can download AudioBookMaker from the tool‘s official website.

Xbox One, Windows 10 game Gigantic set to close in July

Gigantic, available on Xbox One and Windows 10, received its last update yesterday. Sadly, the January 31st update will be the last content update for Gigantic and its servers will be shut down on July 31, 2018. The final Gigantic update introduces T-MAT, Gigantic’s newest ranged Hero. Other content included in the update are chances to the Shop, new Hero balance adjustments, exclusive Founder’s Pack colors, two new creatures, and an enormous list of new skins.

As noted on their blog, the decision to cease development on Gigantic was not an easy one.

“For all the amazing folks who continue to play and show passion for Gigantic, all Heroes will be FREE as the purchasing of Rubies and Hero Packs have been disabled. This includes our newest hero, T-Mat! Currency will still be rewarded in-game, and any Crowns or Rubies gained by an account will remain available to purchase Shop items at discounted prices.

Discontinuing Gigantic was not an easy decision. The game is a unique and exciting experience that captured many hearts and minds. Unfortunately, it did not resonate with as many players as we’d hoped. Over the last several months, the teams at Motiga and Perfect World looked into viable options to sustain Gigantic. However, the current state of the game has restricted options for further progress and relevant content updates, and delivering basic features while also fixing long-standing issues was more complicated than expected. Despite our best efforts, we were unable to find an impactful solution that would help Gigantic break through in a crowded market.”

Although Motiga and Perfect World were unable to find a way to make Gigantic a more economically successful game, you can still enjoy it on Xbox One (via the Microsoft Store) and Windows 10 (via Steam) until the official servers are shut down at the end of July 2018.

Statcounter: Windows 10 overtakes Windows 7 as the most popular Windows version for Internet usage

Last month, Windows 10 finally beat Windows 7 as the most popular desktop OS to browse the web worldwide according to Statcounter. The independent web analytics company, which data is based on over 10 billion page views per month to over 2 million websites, says that Windows 10 had a 42.78% desktop market share worldwide in January while Windows 7 fell to 41,86%.

“Windows 10 was launched at the end of July 2015 and Microsoft will be pleased to have put its Windows 8 experience behind it,” said Statcounter CEO Aodhan Cullen. “However, Windows 7 retains loyalty especially amongst business users. Microsoft will be hoping that it can replace it a lot quicker than XP, launched back in August 2001, which only fell below 5% usage worldwide in June of 2017.”

It’s worth noting that Netmarketshare, which uses a slightly different methodology disagrees with Statcounter: according to the company, Windows 10 remained close to 10% points behind Windows 7 in January.

While it’s difficult to know which company got closer to the reality, Statcounter’s data also combines desktop and mobile operating systems. Unsurprisingly, Android remained the most popular OS for Internet usage in January with a 40,05% usage share (36,56% for Windows). Looking closer at mobile platforms exclusively, Statcounter’s data also reveals that Windows Phone had a 0.61% usage share worldwide in January: This matches the latest data from Kantar, which showed that Windows phones accounted for less than 1% of smartphones sold in most markets in Q4 2017.