Legacy volume mixer may be getting muted in the future, replaced with a modern alternative in Windows 10 19H1

The Volume Mixer in Windows has been an easy method of adjusting the volume for individual programs and applications, all without needing to adjust the master volume. For example, you could turn the volume down on Google Chrome and turn the volume up on Spotify, but keep the volume for other applications the same.

As Microsoft continues to consolidate legacy settings panels into its Settings app on Windows 10, the company now looks set to be muting the Volume Mixer dialog, instead adding a new “App volume and device preferences” screen to the Settings app.

Windows 10 Volume Mixer
Via Windows Latest

The new panel retains the ability of individually setting the volume for different apps, but also lets you choose the audio output device for different apps.

It is curently in testing with Windows Insiders. As of Windows 10 19H1, build 18272, right-clicking on the Sound icon in the taskbar and clicking “Open volume mixer” opens up the above new Settings panel.

THQ Nordic: Darksiders I & II to get Xbox One X enhancements

Fans of the Darksiders series, as well as those who have not played Darksiders I & II but are interested, could be about to be pleased, as THQ Nordic confirms that the 2 previous titles in the Darksiders franchise are to receive updates to enhance the experience on Xbox One X, according to THQ Nordic in a report with Wccftech.

Both games will run at native 4K, while diving you into smooth action with 60FPS.

Those wanting to pick up the Darksiders games can do so for just $90. THQ Nordic is offering a bundle of Darksiders III: Blades & Whip Edition that includes Darksiders Warmastered Edition and Darksiders II Deathinitive Edition.

Xbox One X enhancements will be available for all the games by the end of the month.

Microsoft to remove USB TV Streaming from the Xbox app on iOS and Android

As Microsoft slowly ditches its all-in-one media ethos for Xbox One, instead refocusing the console to be the centrepiece of gaming, the console is losing some features that it once had.

It all started with the removal of the “snap” function, allowing you to snap content to the side of another app or game. This could allow you to watch a video or engage in a video call while playing a game.

The next feature to be dropped will be USB TV Streaming to the Xbox app on iOS or Android. Microsoft is sending messages to users of USB TV Streaming to warn them that the feature will be removed in just 30 days’ time.

Xbox app removes USB TV Streaming
Credit: theicecreaman37 via Reddit

Strangely, it appears the Xbox app on Windows 10 will be retaining the feature, enabling you to continue USB TV Streaming to your Windows 10 devices, just not iOS or Android.

With the removal of this feature, some Xbox users are raising concerns about the number of features being removed, while others are worried about the HDMI-IN feature’s future for the next Xbox console, which allows another HDMI-enabled device to pass video through to the Xbox.

Did you ever use the USB TV Streaming functionality? What are your thoughts on its upcoming removal? Let us know your thoughts in the comments below.

How to Open Ex_file Files in Windows 10

While using Windows 10, you might have noticed an unknown ex_ file extension. Today, we’ll tell you more about this extension and show you how to open ex_ file extensions in Windows 10.

So, what is a .ex_ file? Although its name is quite unusual, this is just a compressed executable file, also known as .exe.

As you know, .exe files are used for all sorts of things, such as starting setup processes. Sometimes, developers compress the .exe file into a .ex_ file to make it smaller.

How can I open ex_file files in Windows 10?

As we said earlier, .ex_ files are just compressed .exe files, and you’ll have to decompress them to open them. Although this sounds a bit complicated, it’s a lot simpler than it sounds.

To decompress .ex_ file you need to do the following:

  1. Open Command Prompt. You can open Command Prompt by pressing Windows Key + R and typing cmd.
  2. When Command Prompt starts you need to navigate to the folder where .ex_ file is stored. In our example we’ll assume that .ex_ file is located in c:my documents. To navigate to a specific folder using Command Prompt type this and press Enter:
    • cd c:my documents
  3. After you’ve successfully changed the folder you need to type the following and press Enter to run it:
    • expand filename.ex_ c:newfilename.exe
  4. Make sure that filename.ex_ matches the exact name of your .ex_ file.
  5. Now close Command Prompt, and you can run your newly created .exe file.

Here’s Microsoft’s definition of an .ex_file:

Windows executable file renamed from “.exe” to “.ex_”; contains the exact contents of an .EXE file; commonly found on installation CDs, where the installer must first rename the file before executing it.

We also must warn you that .ex_ and ._ex files are different. While the former are compressed .exe files, the latter are sometimes used for spyware. Now that we know the .ex_ file extension, let’s see how to open .ex_ files.

If you get the message ‘Error Msg: Can’t Open Output File <filename.ext>’ while trying to perform step 3, you need to do the following:

  1. Right-click filename.ex_ and select Properties.
  2. Make sure that Read Only checkbox isn’t checked.
  3. Click Apply and OK and repeat the process.

Since a .ex_file is a compressed .exe file and you need to decompress it, maybe you want to learn more about file compression and decompression tools. Here are some posts that may interest you:

That’s about it, I hope this article helped to understand ex_file extension in Windows 10 better. You might also find this article on how to quickly open RBF files useful since it shows you how to use the built-in Notepad or a dedicated third-party program.

If you have any comments or questions, reach for the comments below.

How to Create a Restore Point from Windows 10 Desktop

Restore points are very useful features of Windows operating systems. All users should have at least one recent restore point created, no matter how hard they ‘exploit’ their PCs. Windows 10, just like all older versions of Windows, has its own option for creating a restore point, but we a simpler method.

All you have to do to create an instant restore point shortcut on your Desktop (or anywhere you want) is to perform one simple, few clicks-long trick.

This method isn’t strictly attached to Windows 10, as it can be performed in Windows 7 and Windows 8.1, also, but it’s most useful in Windows 10, especially in Windows 10 Preview.

Steps to create a Windows 10 Restore Point

Restore Point Creation Tool on Windows 10

Here’s how to easily create a restore point creation tool on your desktop:

  1. Right-click on Desktop, go to New, and select Shortcut
  2. In the ‘Create Shortcut’ wizard, enter the following command
    • exe /k “Wmic.exe /Namespace:rootdefault Path SystemRestore Call CreateRestorePoint “%DATE%”, 100, 7″instant restore point windows 10
  3. Click Next, and name your news shortcut by your desire

And there you go! You now have a restore point creation tool right on your desktop, and all you need to do to create a restore point is to run it. But, we have to note that it will only work if you open it as Administrator, so keep that in mind.

Once you run it, the Command Prompt window will open, and it will automatically begin the creation of the new restore point. You’ll need to wait a few moments for the process to complete, depending on your C: drive size. Once the creation is done, you should receive a “Method execution successful” message, and the new restore point will be created.

As we said, restore points are extremely useful, especially in Windows 10 Preview, because if you get stuck with a corrupted build, or some other kind of error, you’ll be able to restore to the previous working state of your computer easily.

There are also situations where you can’t create a restore point. Or, you managed to create one but you cannot use it. We already covered these problems in our troubleshooting guides.

So, if you need some solutions to fix restore point issues, you can check out the guides listed below:

Here’s how to fix error 0x800070002c-0x3000d on Windows PCs


5 solutions to fix error 0x800070002c-0x3000d

  1. Uninstall antivirus and defragment your hard drive
  2. Disable USB devices
  3. Clean boot your PC
  4. Run the Update troubleshooter
  5. Disable your antivirus/firewall

Sometimes upgrading to Windows 10 isn’t as smooth as you might think and errors can occur. One of these errors is error 0x800070002c-0x3000d which happens when you try to upgrade from Windows 7 to Windows 10.

Error 0x800070002c-0x3000d can prevent you completely from upgrading to Windows 10, but it seems that there are few solutions available that you can try.

Steps to fix error 0x800070002c-0x3000d

Solution 1 – Uninstall antivirus and defragment your hard drive

If you’re upgrading from Windows 7 or Windows 8, you might want to try uninstalling your current antivirus software before upgrading to Windows 10.

After you’ve uninstalled your antivirus, try to upgrade to Windows 10 again. If the problem persists, you might have to use a defragmentation tool in Windows and defragment your hard drive.

Solution 2 – Disable USB devices and unplug all USB peripherals

Before we start, make sure that you have removed all installed antivirus software.

First, we’ll need to disable USB devices that you don’t use.

  1. Go to Device Manager and locate Universal Bus Controllers
  2. Expand it, and disable USB devices that you’re not using such as your card reader, by right clicking it and choosing Disable.0x800070002c-0x3000d error windows 10 upgrade

Now unplug any USB peripherals that you don’t need. This includes external hard drives, printers, game controllers, etc.

Solution 3 – Clean boot your PC

Next, you need to enable Clean Boot:

  1. Press Windows Key + R and type msconfig and press Enter to run it.
  2. Make sure that you select to disable all startup applications.
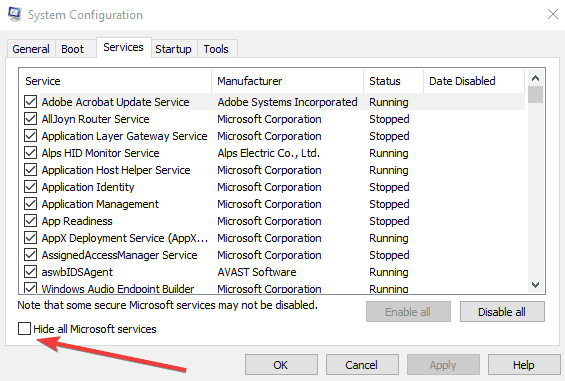
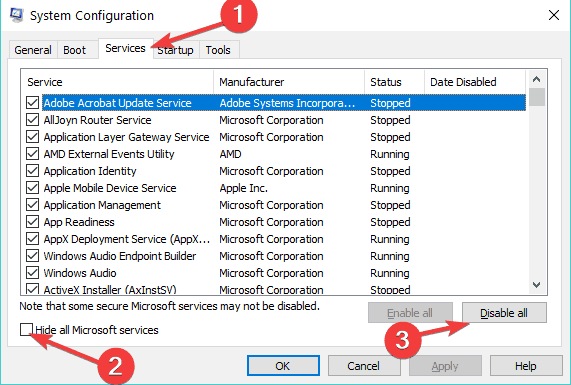
  3. Next go to Services and select hide all Microsoft services.hide all microsoft services
  4. After all Microsoft services have been hidden select Disable All.
  5. Click Apply then OK.
  6. Restart your computer.

Also remember to turn off your internet connection after all the necessary files have been downloaded. You  can do that simply by unplugging your Ethernet cable or by unplugging WiFi dongle or simply by pressing the WiFi switch on your router.

Solution 4 – Run the Update troubleshooter

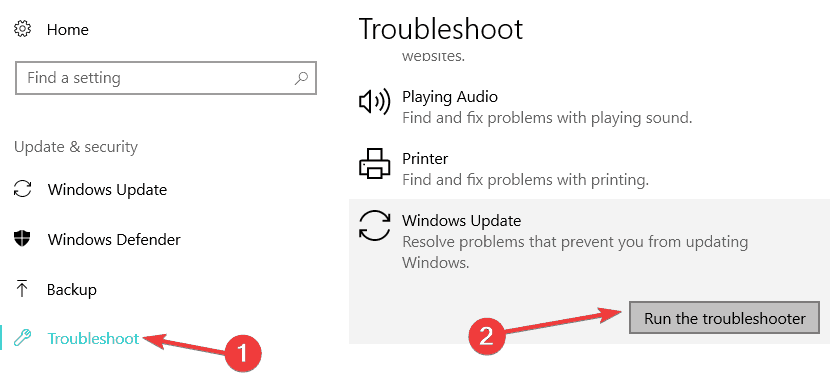
If the problem persists, you can also run the update troubleshooter. This is a built-in tool that automatically scans your system update files and fixes all the detected issues.

windows update troubleshooter

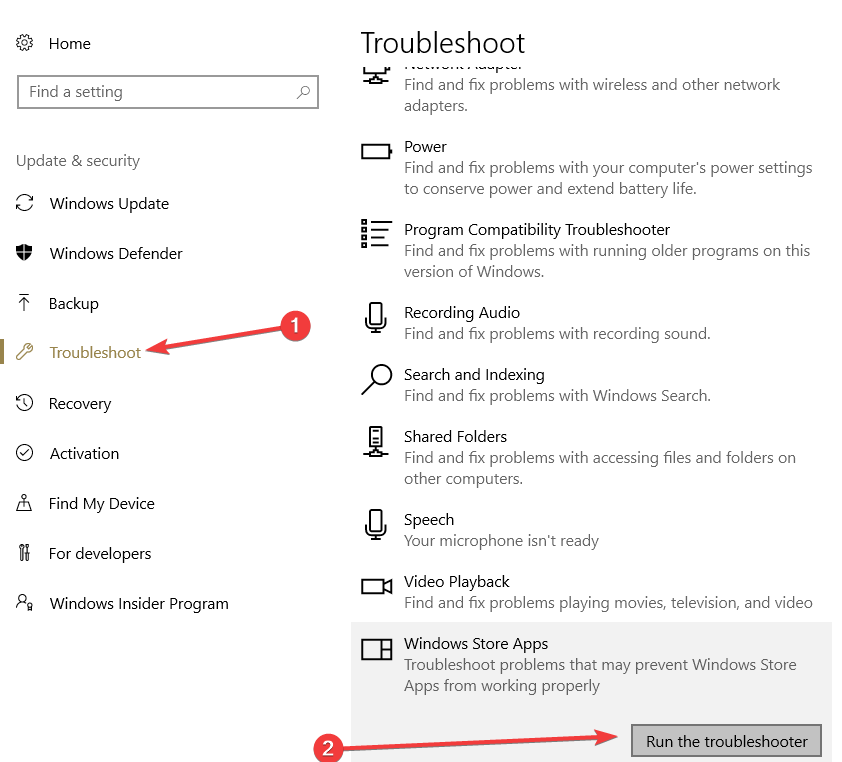
Go to Settings > Update & Security > Troubleshooter > run the Update troubleshooter.

Solution 5 – Disable your antivirus/firewall

Some users also confirmed that disabling their security tools helped them install the latest Windows 10 version. This means turning off your antivirus, firewall, malware and other security tools that you installed on your device.

Fix: Keyboard not working after Windows 10/11 rollback

Microsoft offers Windows 10 as a free upgrade for all Windows 8 and Windows 7 owners, but if you’re not pleased with Windows 10 you can easily roll back to the previous version of Windows. Several users reported that the keyboard isn’t working on their Windows after performing a rollback, so let’s see if we can fix that.

Keyboard not working after Windows 10 rollback

Keyboard issues can be a big problem, and speaking of these issues, here are some problems that users reported:

  • Windows 10 keyboard not typing letters – This can be an annoying problem, but you might be able to fix it by entering Safe Mode, so be sure to try that.
  • Keyboard and mouse not working Windows 10 – Sometimes both your keyboard and mouse won’t work properly and to fix this problem it’s advised to run the Hardware and Devices troubleshooter.
  • Keyboard not working windows 10 Dell, HP, ASUS, Acer, Toshiba laptop, desktop – This issue is usually caused by outdated drivers, so update them when you can and check if that helps.
  • Lenovo laptop keyboard not working Windows 10 – This issue occurs usually due to your keyboard driver, but you can fix the problem by reinstalling the problematic driver.

Solution 1 – Start Safe Mode

Users reported issues with the keyboard after rolling back from Windows 10, and if your keyboard isn’t working you might want to try starting Windows in Safe Mode. Safe Mode starts with default applications and drivers, therefore using Safe Mode can sometimes fix these types of errors.

To access Safe Mode, do the following:

  1. Open the Settings app by pressing Windows Key + I shortcut. Once the Settings app opens, navigate to the Update & Security section.
    Keyboard and mouse not working Windows 10
  2. Select Recovery from in the left pane. In the right pane, click the Restart now button.
    Lenovo laptop keyboard not working Windows 10
  3. Now choose Troubleshoot > Advanced options > Startup Settings. Click the Restart button.
  4. After your PC restarts, a list of options will appear. Press the appropriate keyboard key to choose the desired version of Safe Mode.

If your keyboard works without any problems in Safe Mode try starting Windows normally and check if the problem persists.

Solution 2 – Reinstall your keyboard driver

If your keyboard isn’t working after rollback from Windows 10, we suggest that you reinstall your keyboard driver. Reinstalling a certain driver is simple and you can do it by following these steps:

  1. Start Device Manager. Right-click the Start button and choose Device Manager from the list.
    Keyboard not working windows 10 Dell
  2. Locate the Keyboards section and expand it.
  3. Locate your keyboard, right click it and choose Uninstall from the menu.
    keyboard-windows-10-rollback-uninstall
  4. When the confirmation window appears click OK.
    keyboard-windows-10-rollback-confirm-uninstall

After the keyboard driver is removed you need to restart your computer. When your PC restarts the default keyboard driver will be installed and your keyboard should start working.

Solution 3 – Update your keyboard driver

According to users, sometimes your keyboard won’t work after Windows 10 rollback due to your drivers. Your keyboard drivers might be corrupted or out of date, so it’s advised to update them. You can do that by following these steps:

  1. Open Device Manager.
  2. Locate your keyboard, right-click it and choose Update driver.
    Keyboard and mouse not working Windows 10
  3. Now choose Search automatically for updated driver software.
    Windows 10 keyboard not typing letters

Windows will now try to find and download the best driver for your keyboard. This method doesn’t always work, but you can also try to manually update your keyboard drivers. To do that, just follow these steps:

  1. Open Device Manager, locate your keyboard and choose Update driver from the menu.
  2. This time choose Browse my computer for driver software.
    Lenovo laptop keyboard not working Windows 10
  3. Now select Let me pick from a list of available drivers on my computer.
    Windows 10 keyboard not typing letters
  4. Now you just have to select the driver that you want to use and check if that solves your problem.

Another way to update your drivers is to use third-party software that would allow you to update all your drivers automatically with just a couple of clicks.

Once your keyboard drivers are up to date, the issue should be resolved.

⇒ Get Fortect Driver Updater

Solution 4 – Copy the Driver folder from a working computer

Few users reported that they managed to fix this problem by copying driver folders from a working PC. Bear in mind that you need a working computer that uses the same operating system that are you currently using. For example, if you’re using the 32-bit version of Windows 7 be sure to copy these folders from another 32-bit Windows 7. To copy these files you need to do the following:

  1. Go to C:WindowsSystem32 folder and locate the drivers and DriverStore folders and Blue DRVSTORE file. If you can’t find the last file just copy the first two.
  2. Put those files on a USB flash drive and connect it to your PC.
  3. Paste those folders to C:WindowsSystem32 folder on your PC and overwrite the existing folders.

We have to mention that this procedure can lead to system instability, therefore it might be a good idea to back up your original drivers and DriverStore folders just in case. If some issues emerge, you might have to restore the original folders in order to fix it. If the keyboard still isn’t working or if you have any issues after copying folders from a different PC, you might have to reinstall Windows in order to fix these problems.

Solution 5 – Run Hardware and Devices troubleshooter

If your keyboard isn’t working, the problem might be a minor glitch on your system. Sometimes these glitches can occur, and the quickest way to deal with them is to run Hardware and Devices troubleshooter. To do that, just follow these steps:

  1. Open the Settings app and go to the Update & Security section.
  2. Pick Troubleshoot from the left pane. In the right pane, select Hardware and Devices and click Run the troubleshooter button.
    Windows 10 keyboard not typing letters
  3. Follow the instructions on the screen to complete the troubleshooting process.

After the troubleshooter process is finished, check if the problem is still there. This is a simple solution, but it might help you out with this problem, so feel free to try it out.

Solution 6 – Modify your registry

According to users, sometimes your keyboard might not work if there’s an issue with your registry. To fix this problem, it’s advised that you manually edit your registry by doing the following:

  1. Press Windows Key + R and enter regedit. Press Enter or click OK.
    Keyboard and mouse not working Windows 10
  2. When Registry Editor opens, head over to the following locations:
    ControlSet001ControlClass{4D36E96B-E325-11CE-BFC1-08002BE10318}
    ControlSet002ControlClass{4D36E96B-E325-11CE-BFC1-08002BE10318}
  3. For both of these keys you need to find and edit UpperFilters value. Simply change the value to kbdclass. If there are any other values inside UpperFilters, remove them and leave only kbdclass.In case UpperFilters value isn’t available, simply right-click the empty space in the right pane and choose New > Multi-String Value. Set the name to the UpperFilters and change accordingly.
    Keyboard not working windows 10 HP
  4. After making these changes, restart your PC and check if the problem is resolved.

We have to warn you that modifying the registry can be potentially dangerous, so we advise you to export both these keys before modifying them. If any issue occurs after modifying these keys, use the exported keys to restore the registry to its original state.

We know that this is a bit advanced solution, so if you’re not familiar with Registry Editor and you don’t know how to edit your registry, perhaps you should just skip this solution.

Solution 7 – Perform a System Restore

In case that the problem with the keyboard is still there, you might be able to solve it simply by performing a System Restore. In case you don’t know, System Restore is a useful feature that allows you to restore your system to an earlier date and fix many problems along the way. To do that, just follow these steps:

  1. Type system restore in the search field. Choose Create a restore point from the list.
    Lenovo laptop keyboard not working Windows 10
  2. When the System Properties window appears, click the System Restore button.
    Windows 10 keyboard not typing letters
  3. Click the Next button in the System Restore window to proceed.
    Keyboard and mouse not working Windows 10
  4. If available, check Show more restore points option. Now you just have to choose the desired restore point and click Next.
    Keyboard not working windows 10 ASUS
  5. Follow the instructions on the screen to finish the restoration process.

Once your PC is restored, your keyboard should start working again.

Rollback from Windows 10 can sometimes cause certain issues, but we hope that you managed to fix keyboard issues after using some of our solutions.

Windows Community Toolkit 5.0 released with new tools for developers

While Microsoft may be publically touting Progressive Web Apps as a viable alternative to the more traditional app development, the company is still heading its bets with UWP and .NET developers.

Senior Program Manager for the Windows Developer team, Nikola Metulev just announced that developers can now make use of Windows Community Toolkit v5.0 as soon as this week.

I’m excited to announce the next major update of the Windows Community Toolkit, version 5.0. This update introduces the new WindowsXamlHost control built on top of the new XAML Islands APIs to simplify adding built-in or custom UWP control to a WPF or Windows Forms desktop application. Alongside, this version introduces new WinForms and WPF controls that leverage the WindowsXamlHost interfaces to wrap UWP platform controls such as the InkCanvas and the MapControl.

Some of the standout features of today’s announcement also include an update to WindowsXamlHost, wrapped UWP controls for the WindowsXamlHost interface, a new TabView control,  support for Weibo publishing and Twitter and LinkedIn .NET framework support.

For anyone new to Windows Community Toolkit usage, Microsoft has built a sample app that will help walk developers through the new features and typical workflow of the service. To try out the Windows Community Toolkit Sample App or just read over the details of this weeks update, head here for more info.

How to really delete your Microsoft Edge browser history on Windows 10

If you’re looking to delete your browsing history in Microsoft Edge, there’s a way to get rid of everything: passwords, form information, and all the websites you have ever visited. Most of this information is stored on your Windows 10 PC only. However, if you use Cortana, some of your personal information is stored in the Microsoft cloud.

Microsoft provides a detailed list of what types of info you can delete in Edge, including what gets deleted, and where it’s stored. When you delete your Microsoft Edge browser history, all of the following items get deleted from your Windows 10 PC, with the exception of your browsing history, which you will also need to delete from the Microsoft cloud.

  1. Browsing history
  2. Cookies and saved website data
  3. Cached data and files
  4. Tabs I’ve set aside or recently closed
  5. Download history
  6. Autofill data (includes forms and cards)
  7. Passwords
  8. Media licenses
  9. Website permissions

Here’s the solution you need to delete all your browsing history in Microsoft Edge. Please note: you need to have an Edge browser window open to use the keyboard shortcuts.

1. Go to the menu in Microsoft Edge (Alt + X)
Microsoft, Windows 10, Edge, Microsoft Edge,

2. Go to History (CTRL + H)Microsoft, Windows 10, Edge, Microsoft Edge,
3. Go to Clear history.

Microsoft, Windows 10, Edge, Microsoft Edge,

4. Select all of the items you want to delete from your history. You can also select an option that will delete your browser history in Edge automatically every time you close your browser. Select Clear to clear all the selected items from your browser history in Edge.

Microsoft, Windows 10, Edge, Microsoft Edge, privacy

5. Now that your browser history is deleted from your Windows 10 PC, you have to delete your history from the Microsoft cloud. If you use Cortana and want to clear browsing history that’s stored in the cloud, select Change what Microsoft Edge knows about me in the cloud.

Microsoft, Windows 10, Edge, Microsoft Edge, privacy

From there, you will be taken to the Microsoft privacy dashboard. The privacy dashboard allows you to control your information and how it is used by Microsoft for all types of activities, including browser history, apps and services, voice, search, media, locations, and much more. There is quite a large amount of data that you can control and delete.

For this example, we just need to delete our Edge browser history. This is what you need to do.

1. Go to browsing history and select View and Clear Browsing History.
Microsoft, Windows 10, Edge, Microsoft Edge, privacy

2. Select Clear activity to delete your browsing history from the cloud.

Microsoft, Windows 10, Edge, Microsoft Edge, privacy

3. Microsoft will provide a prompt to notify you of the following:

  • Cortana will have a harder time helping you complete tasks and providing personalized suggestions.
  • Your experience with Microsoft products and services may be less relevant and personalized.
  • If you want to stop your browse history from being saved, you can always open an InPrivate window in Microsoft Edge.

If you are sure you want to clear your browsing history, select Clear.

Microsoft, Windows 10, Edge, Microsoft Edge, privacy

4. That’s it, you’re done. If you want to check if your browsing history is indeed gone, you can go back into your browsing history on the Microsoft privacy dashboard and you should see a screen like this:
Microsoft, Windows 10, Edge, Microsoft Edge, privacy

As mentioned before, the Microsoft privacy dashboard is a place where the Redmond tries to be as transparent as possible with what they do with your data. You can delete more data from other Microsoft services, including Cortana, Xbox, Office 365, Skype, and even LinkedIn.  You can also change other privacy settings, download your data, or change your advertisement settings. Take a look for yourself here

Microsoft Whiteboard to soon enable dark theme “blackboard” option

Microsoft Whiteboard, the company’s creative collaboration app available on Surface Hub, Windows 10, iOS and the web will soon get a dark theme option. Ian Mikutel, Senior Product Manager, Microsoft Whiteboard, Microsoft OneNote) announced the news on the dedicated UserVoice website today, saying that “more background options, including a dark ‘blackboard’ option” would be coming “soon.”

Adding a dark theme option to all Microsoft apps seems to be a real trend these days. File Explorer, Microsoft To-Do and Sticky Notes are three noteworthy examples on Windows 10, and we also learned earlier this week that Office for Mac was getting a dark theme option as well.

As the original piece of feedback highlighted on the Whiteboard’s suggestion portal, a “blackboard” mode really makes sense on the Surface Hub, a device sized like an authentic blackboard. However, more background options will definitely be welcome on all platforms where Microsoft Whiteboard is currently available.

Microsoft Whiteboard


‎Microsoft Whiteboard

Microsoft Edge is getting a Privacy Badger browser extension soon

Microsoft’s Edge browser has been derided for not having all of the functionally Google’s Chrome browser has built up over the past 10 years, despite being developed by the company who arguably won the browser wars back in the day.

However, it seems slowly but surely, Microsoft’s Edge browser is gaining support from third-party browser extension developers to help circumvent some of its latest criticisms.

The sought-after Privacy Badger web extension is making its way to the Edge browser soon, according to the developer’s GitHub announcement. (via MSPU)

Hi everyone, I have good news.
After further internal discussion, we’ve decided we can go ahead and publish in Microsoft Store. The next step should be putting together a pull request with fixes for Edge.
Thanks a lot for your support!

Perhaps, those “further internal discussions” had to do with Microsoft recently becoming the arbiter of one of the most trafficked open source communities to date, where much of Privacy Badger’s code resides.

However, the more likely story is that even with Edge’s modest user numbers, the audience was still attractive enough for Privacy Badger developers.

Adding Privacy Badger to the Microsoft Store gives its Edge browser another parity win with other popular modern browsers such as Google Chrome and Firefox.

As of now, Privacy Badger developers have not announced a release date, but I’m sure Microsoft marketing will be giving this popular, open source cookie blocker some love when the time comes.

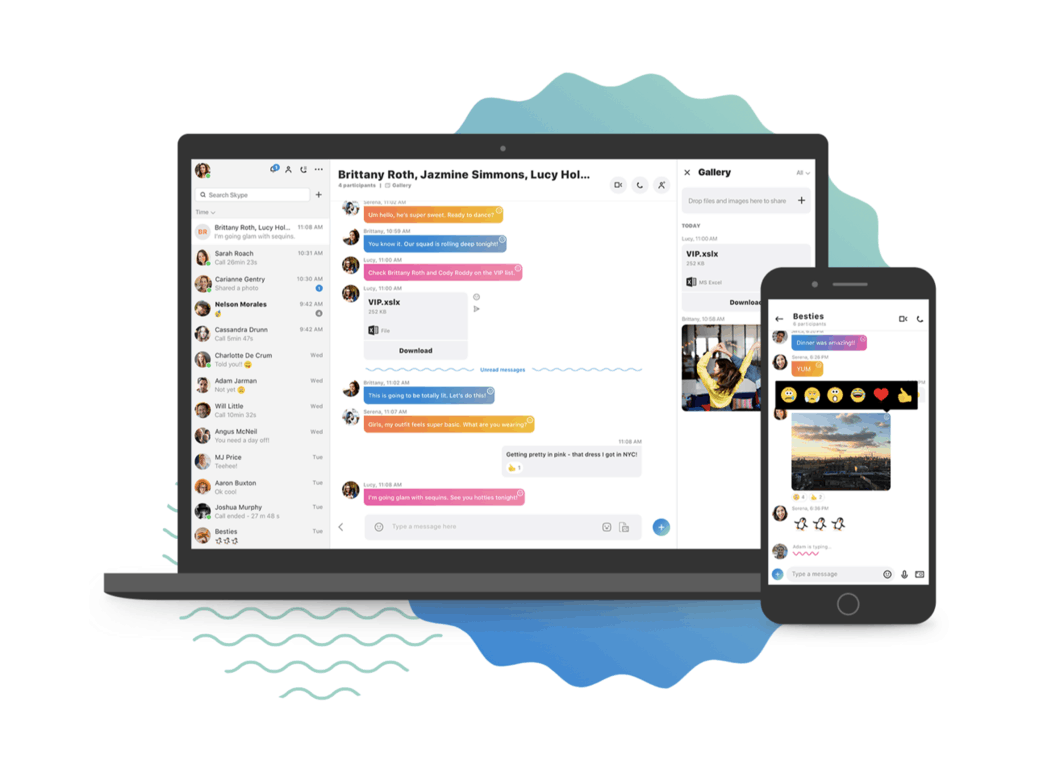
Microsoft starts upgrading more users to Skype 8 after dropping support for classic app

After Microsoft dropped support for its Skype Classic app on the desktop yesterday, the company has started pushing more users to its new cross-platform client today. Peter Skillman, Director of Design for Skype and Outlook announced the expanded rollout this morning, highlighting some of the new Skype v8 features along the way. Fans of the old Windows app may need some time to adjust to the new desktop version, but it does come with several useful new features such as built-in Call Recording, access to third-party apps (Skype Add-ins) within conversations and more.

If you miss the more compact design of the Skype Classic app, Skillman also emphasized today that the Skype team is currently working on a “more compact mode” for Skype v8. Unfortunately, the new desktop app also doesn’t support Split View mode as of today, though Microsoft has recently brought it back in preview form in Skype for Windows 10. This separate client is just like Skype v8, but it ships with the Windows 10 October 2018 update and integrates with Windows 10 features like MyPeople or the native Share menu.

Microsoft is now almost done rolling out Skype v8 on all platforms, and the modern experience is also launched in preview on the web earlier this week. The company is still have some work to do to achieve complete feature parity with the Skype Classic app, but the Skype team is now iterating fast with the help of Skype Insiders.

FIX: Windows 10 Update Failed Error 80072EE2

If you still didn’t download your free copy of Windows 10 you definitely should do it now! I hope the download process will be smooth.

Just in case anything goes wrong, I’m going to show you the solution for one of the most common errors which appear while a new Windows 10 update is downloading. Let’s talk about error 80072EE2.

This is how you can solve error 0x80072ee2

Solution 1 – Run the Windows Update Troubleshooter

Probably the simplest solution for this problem is running the Windows Update Troubleshooter. But I’m not sure how effective it is, so if it doesn’t solve the problem, go and try some other solutions listed below.

Here’s how to run the Windows Update Troubleshooter:

  1. Go to Search, type troubleshoot and open Troubleshooter
  2. Click on Fix problems with Windows Update under System and Securitywindows update troubleshooter control panel
  3. Wait for the wizard to complete the check and see if the problem is resolved.

Solution 2 – Use a third party repair tool

In order to fix this Windows update error, you can perform automatic repair using a specialized repair tool capable to fix Windows issues.

By choosing this software, it’s possible to run deep scans and find the system files or components that generate this kind of issue. Once detected, it will fix the issue automatically and restore your PC.

This being said, you will get a detailed report of what issues you need to repair and fix the corrupted software files efficiently.

Solution 3 – Delete the Software Distribution folder

Probably the best solution and the solution that proved to be the most effective for the error 80072EE2 is deleting Software Distribution folder. So, here’s how to delete it safely:

  1. Go to C:WindowsSoftwareDistributionDownload folder and delete everything in itSoftwareDistribution
  2. Now right click on the Start Menu button and open Command Prompt (Admin)
  3. Enter the following command and press Enter: exe/updatenow
  4. Go to Windows Update and check if the problem is solved

Solution 4 – Manually reset Windows Update components

If none of the above solutions helped you to solve the error 80072EE2 problem, you can try to reset Windows Update components manually. You can find the instructions for that on Microsoft’s page.

But I have to tell you that it’s a complicated process, so if you’re not sure what you’re doing, you should ask someone else for help. Also, don’t download fixing tools from that page, because they work on Windows 7 and Windows 8 only.

Solution 5 – Reset System’s Proxy Server

If your Windows 10 computer was recently infected with spyware or any kind of viruses, you should know that if you were using third-party software to remove them, that software might have modified some settings in Internet Explorer to use a proxy server. Here’s how you can reset the setting:

  1.  Click on Start Button and type in the Search box “Command Prompt”
  2. Open Command Prompt and you need to type the following command “netsh winhttp import proxy source=ie”. (Without the quotes.)
  3.  Restart your Windows 10 computer for the changes to take effect.

Some users confirmed that this solution worked. Maybe it will work for you as well.

Solution 6 – Change MTU settings

If you don’t know what MTU stands for, you should know that the Internet’s Transmission Control Protocol (TCP) uses the MTU to determine the maximum size of each packet in any transmission.

Also, If in your Windows 10 computer the MTU setting is not correctly set up, this can cause the 80072EE2 error. The good news is that there are not many occasions when this error occurred because of an MTU incorrect setting.

Anyway, there is a simple way to correct this. Here’s how:

  1. Click on Start Button and type in the Search box “Command Prompt”
  2. Type in “netsh interface ipv4 show subinterface” and press Press Enter.
  3. Type in “netsh interface ipv4 set subinterface “Local Area Connection” mtu=1458 store=persistent”. You should replace Local Area Connection with the name that appeared in the “Interface” column from steps 2-3 and press Enter key.
  4. Restart your computer and then test again.

That would be all, I hope at least one of these solutions helped you to solve the error 80072EE2.

If you have any other Windows 10-related issues you can check for the solution in our Windows 10 Fix section.

Skype focuses on accessibility with latest version 8.0 updates

Microsoft has released another round of updates for their new Skype v8 app for desktop devices including Windows and Mac systems. The company says it has made the new changes to improve the app’s accessibility features. Here’s the full list.

  • Focus assist, which announces when you receive an incoming call for keyboard only and screen reader users.
  • Screen reader announcements from users in the active call list.
  • Navigational focus announcements within the contact list and settings to improve flow.
  • Announcing the name, content, and actions of a pop up dialog.
  • New message announcements when users are in another chat.
  • Smoother navigation that takes a more natural left-to-right and top-to-bottom path.
  • Displaying additional information when sending and receiving messages. For example, Skype now announces when messages are sent and when messages you attempt to send have failed.

Microsoft has also created an accessibility guide to help people move from the classic Skype over to the new version. The company officially ends support for the classic app as of today, and legacy mobile version will be discontinued shortly after.

Are you enjoying the new Skype experience, and do you think these improvements will make Skype better? Let us know in the comment section below.

Xbox One exclusive Sunset Overdrive could soon be released on Windows

Sunset Overdrive, the open-world third-person shooter that launched exclusively on the Xbox One back in 2014 could soon make its way to Windows PCs. A Windows version of the game has recently been rated by the ESRB, and Windows Central is reporting today that the PC release is “near.”

While Microsoft or developer Insomniac Games have yet to confirm the PC port, an official announcement could be coming at Microsoft’s XO18 event on November 10. With its post-apocalyptic setting, unique art style and fun gunplay, Sunset Overdrive received some quite praise at the time of its Xbox One debut, and the Xbox One exclusivity almost seemed like a missed opportunity. It would be pretty great to see the game support Xbox Play Anywhere and cross-platform play between Xbox One and Windows 10, but a release on Steam would be even better.

Sunset Overdrive is currently free-to-play on Xbox One with Xbox Game Pass, and Microsoft previously gave it away with its Games with Gold program back in April 2016. This is really game that deserves to come back to the spotlight, especially after we’ve seen several Microsoft Studios games including ReCore and Super Lucky’s Tale being re-released on Steam.

Microsoft 365 recaps October advances: here’s what’s new

Microsoft has once again recapped  new features for the applications that come with their Office 365 subscription service, this time for October. The new updates mostly focus on improving productivity for tablets with styluses as well improving migration of data from Personal/Home to Business subscribers.

Perhaps the most interesting of changes is that Microsoft is allowing inked text and diagrams to be converted to printed text and boxes in Word and PowerPoint, which the company says leverages AI and language processing in the cloud. This is potentially a great way to improve productivity on tablets like the new Surface Pro 6, as typing and managing shapes and tables can be rather tedious on a touchscreen. Additionally, users can also make grammatical corrections and proofreading revisions with just their stylus by drawing the indicators on the document, which will be automatically corrected by the application.

An animated screenshot shows text in a Word document edited with a digital pen. The Ink Editor deletes a paragraph, inserts an ommitted word, and bolds a numerical figure.
Microsoft is improving proofreading on tablets though its inking tools.

Microsoft is also adding many other features to its Office apps. For example, users will be able to insert 3D animations into Word and PowerPoint documents to help create a better understanding when ideas seem to complex for static images. Additionally, those Word documents will also be easily converted into temporary web pages should the user wish to share the information in that way. While announced in October, animations will become available in November.

An animated screenshot showing an embedded animation of a hummingbird in PowerPoint.
3D animation will soon be inserted into Word documents and PowerPoint presentations.

The company is also making it easier for users to transition their data into the cloud with their new SharePoint Migration Tool, which will allow customers to migrate their personal SharePoint and OneDrive data over to SharePoint Online, OneDrive for business, and Microsoft Teams. And should the task prove more difficult than it sounds, Microsoft has a new help and support pane in the Office.com portal which can be accessed though a web browser.

Microsoft is allowing subscribers to try own the stylus proofreading and the drawings-to-diagrams features today, while most of the rest of the new features will roll out over the next few months.

Do you think these new features will improve productivity, especially on tablets like the Surface Pro 6? Please let us know what you think in the comment section below.

Latest Windows 10 19H1 Insider update 18272 breaks WSL, to be fixed next week

One of Microsoft’s most beloved additions to Windows 10, well at least it gets a lot of developer love, is WSL, or Windows Subsystem for Linux. With it, developers and administrators can get to a Linux command line directly from Windows without having to run a VM or a dedicated Windows box, and with half of all VMs on Azure running Linux, it’s a useful and necessary tool. However, with this week’s latest Windows 10 Insider build, 18272, WSL is broken:

A developer for WSL, Ben Hillis, and a program manager, Tara Raj, both confirmed on Twitter that the feature is broken in this build. At least we have a pretty good indication that there will be a new build next week, as according to the two it will contain a fix for the problem, so the issue, while annoying for some, will not (hopefully) be long lived.

If you have installed 18272 and are missing WSL, you can either roll back or wait a week for the next build, and if you haven’t yet installed 18272, you might want to wait.

We’ll have more on all the latest Insider build news as it happens, including the re-appearance of the Windows 10 October November 2018 Update, so be sure to keep coming back to OnMSFT.com!

Quick hands-on with Microsoft’s new Surface headphones

Microsoft’s Surface headphones are the latest addition to the growing family of Surface accessories, and I got the chance to go hands-on with them today at the company’s Future Decoded event in London. The Surface headphones were announced by Surface chief Panos Panay during last month’s Surface event in New York, and they feature the same premium design and attention to detail that you can find on other Surface devices.

During my quick hands-on, I found that the Surface headphones felt really comfortable, with their soft ear cups adjusting perfectly around my ears. The headphones also felt lighter than what I excepted (they weigh 0.64 lbs), and I could totally imagine wearing them for a long period of time without any discomfort.

The Surface headphones come with touch controls on the right cup: you can play, pause and change tracks by tapping the on-ear sensor, and it worked fine during my testing. To change volume, you just turn the dial on the right ear, and I found that the music sounded crisp even when turning volume up to the max. The headphones feature 40 mm Free Edge drivers and deliver what Microsoft calls “Omnisonic audio.” I’m not really a headphones expert, but I think the Surface headphones should please most music fans with their balanced, not too bass-heavy sound.

The Surface headphones have touch controls on the right cup, and you use the dial on the right ear to adjust volume.

I tried the Surface headphones in a very noisy environment, which was perfect for testing the Microsoft’s noise-cancelling technology. There are 13 different levels of noise cancellation on the headphones, and you can adjust them by using the dial on the left ear. This was actually my very first time trying noise-cancelling headphones, and I was quite impressed by the technology. I could still hear some background noise even after turning noise cancellation up to the max, but this is really something nice to have in a noisy environment like the one I was in.

The Surface headphones also integrate Cortana, but the digital assistant wasn’t enabled on the pre-production unit I tested. Microsoft says that Cortana will allow you to launch any music you want, start calls, set reminders, or even search the web. I’m not sure if this could be the headphones’ killer feature, but this sounds definitely nice to have.

The headphones use an USB-C port for charging, and there’s also a 3.5mm audio jack.

According to Microsoft, the Surface headphones should deliver up to 15 hours of battery life when connected via Bluetooth with active noise cancellation on, and they can be fully charged in less than 2 hours. The headphones use a USB-C port for charging, but they also come with a 3.5 mm audio connector if you want to continue using them after the battery drains. In addition to an USB cable for charging and audio cable, the headphones also come with their own carrying case, which looks pretty good.

The Surface headphones will be priced at $349.99 in the US, and they will start shipping on November 19 (pre-orders start on Nov 15). They should also be available in the UK before the end of the year, but there’s still no ETA or pricing details. Because of Cortana is still only available in select markets around the world, it’s still not clear if we can expect an expansion to other markets next year. That’s too bad, because they definitely seem to be the perfect audio accessory for Surface and Microsoft fans.

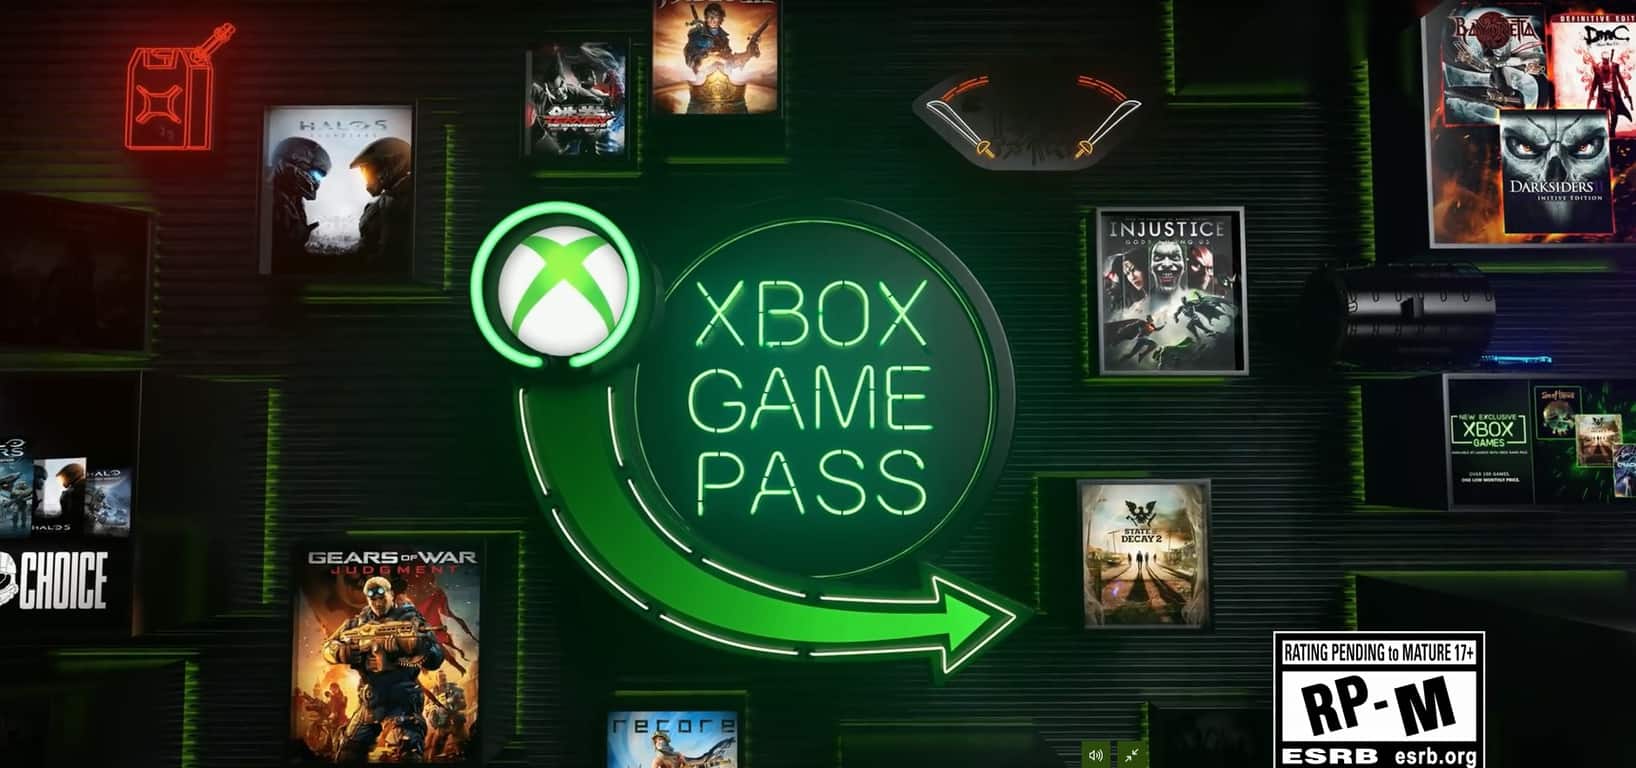
Microsoft has a hit on its hands with Xbox Game Pass, and analysts are starting to notice

Back in 2013 when Microsoft unveiled its Xbox One and the promise of an always connected and primarily digital gaming experience, the company was roundly mocked and panned for its seemingly overreaching ambitions.

At the time Microsoft proposed its online gaming distribution platform, companies such as Gamestop and other ambitious 3rd party studios looking to make a similar play denounced the company’s pitch.

Fast forward a few years, a couple of fundamental user-focused business strategies and advancements in the company’s cloud infrastructure and Microsoft seems to be revisiting a reality in which the Xbox platform evolves into a more digital gaming experience to a much more receptive audience.

While Microsoft’s Xbox Game Pass isn’t quite the cloud-based initiative proposed during the Xbox One unveiling, or like Sony’s actual cloud-based solution with PS Now, its implementation does offer Microsoft a platform expansion that should worry competitors.

The launch of Xbox Game Pass has been a relative success for the company as Microsoft chalked up a 44% growth in its gaming revenues annually. The growth of the Xbox division helped add an additional 9% or $2.74 billion to the company’s bottom line, making it the third fastest growing sector in Microsoft’s portfolio.

Microsoft’s Xbox One hardware hasn’t been flying off the shelves in any noticeable way as of late thus isolating the gains in Xbox revenue to software related initiatives such as an increase in Xbox Live and Game Pass subscribers.

What this means is, that Microsoft isn’t going to be walking away from Xbox Game Pass anytime soon, and in fact, is already strategizing ways to expand the ecosystem.

Xbox Game Pass

Over the past year, Microsoft has continued to blur the line between where it wants its gamers to enjoy their gaming experiences as it pitches both Windows PCs and Xbox’s as destinations. Microsoft’s gaming obfuscation can be viewed as a shrewd business strategy that’s leveraging its presence in both PC and console ecosystems, but the reality is that on-demand entertainment services are a trend that is crossing over into the casual gaming experience.

According to a report from the Motley Fool that uses a Newzoo survey to canvass the number of subscription gamers that exist today the data shows an increase in EA Access and Xbox Game Pass subscribers. EA Access garners 15% of family gamers subscriptions while Game Pass is a close second with 14%.

While Microsoft undoubtedly plans to use its upcoming Project xCloud platform to further entrench itself in digital and cloud gaming platforms, EA is looking to launch stave off the competition with its recently reported cloud service for Origin Acess.

Electronic Arts is also reportedly developing a new cloud service for Origin Access. That integration would allow subscribers to choose between downloading or streaming games, allow EA to expand the Origin Access ecosystem to tablets and smartphones, and possibly merge the two Access platforms on the Xbox One.

As both Microsoft and EA continue their strategic business tango with one another, companies such as Valve are left in the middle to fret about Microsoft or EA pulling their games from Steam to prioritize their very similar distribution platforms.

Whatever the outcome, investors are finally beginning to perk up at the potential of Microsoft’s digital gaming ecosystem as well as competitors taking notice of pervasive expansion happening within the confines of Microsoft’s Xbox platform.

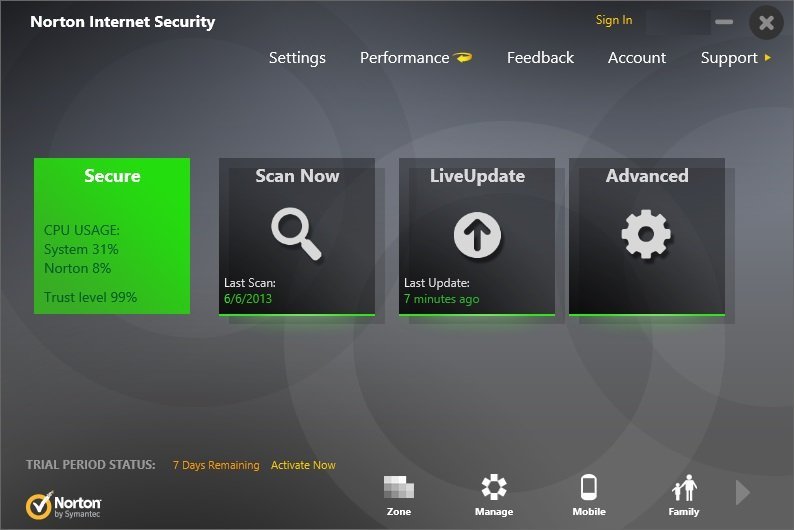
Norton Antivirus doesn’t work in Windows 10/11 Insider builds

Having an antivirus software on your Windows 10 is quite important. However, it seems that Norton antivirus has a strange conflict with Windows 10. If you are a Norton user and you have issues with it on Windows 10 you might want to have a look at our solutions.

According to users that have Norton Security installed on Windows 10 they are unable to receive Insider updates. As you can see, this is a huge problem because it can leave your system vulnerable and at the same time, you won’t be able to try new features that Microsoft is planning to introduce.

Speaking of issues, Norton Security has already caused some issues with Windows 10 users, such as preventing them from upgrading to Windows 10 in the first place. This is probably due to some compatibility issues that Norton Security has with Windows 10, but is there a way to fix this?

Norton Internet Security isn’t compatible with Windows 10

At the moment Norton isn’t working with the Insider program, so you won’t be able to download Insider updates while having Norton Security installed.

The only solution so far is to completely remove Norton Security from your Windows 10. On the other hand, Norton works well with non-Insider version, so if you want to continue using Windows 10 with Norton Security just leave the Insider program.

If you want to continue being part of Insider program, then you’ll have to uninstall Norton Security and switch to a different antivirus program. Users suggest using Windows Defender in a combination with MalwareBytes, but if you want more protection you can switch to antivirus software such as ESET HOME Security Essential that works with Insider program.

As you can see, this can be quite a problem. Fortunately, it can be resolved by uninstalling Norton Security and switching to a different antivirus software. For example, you can rely on Windows Defender instead.

Avoid using third-party antivirus solutions on Windows 10 Insiders builds

As a quick reminder, antivirus solutions closely work with Windows 10 and requite in-depth access to the heart of the OS.

Antivirus developers simply cannot keep up with the rhythm Microsoft rolls out new Insider builds. Therefore, they cannot test their products in relation with Microsoft’s latest Windows 10 Insider build version.

For this reason, new Insider builds tend to break your antivirus leaving your computer vulnerable to threats. Again, the best approach is to use Windows Defender while you’re enrolled in the Insider Program.

RELATED POSTS TO CHECK OUT:

How to Fix Lenovo E420 Touchpad Issues on Windows 10/11

Often people are having issues with their touchpads, so it’s not uncommon to see Lenovo E420 touchpad issues on Windows 10. If you’re having issues with your Lenovo Thinkpad E420 laptop, you might want to have a look at our solutions.

How do I fix my touchpad on my Lenovo E420 laptop Windows 10?

Below are some troubleshooting steps to try before moving to the sophisticated solutions in this section:

  • Unplug other USB devices which may be interfering with your touchpad.
  • Change Power Management options and test different options to see which one works for you.
  • Run the SFC scan in elevated Command Prompt.

1. Update your OS and touchpad drivers

Before we start, we strongly advise you that you keep your Windows 10 up to date in order to eliminate any compatibility issues.

At the same time, make sure that you download touchpad driver for Lenovo laptop. If there are Windows 10 drivers available, make sure that you download them.

If Lenovo hasn’t released Windows 10 drivers, just download the latest ones. If this doesn’t resolve your touchpad issues, you might want to try something else.

2. Run SynTPEhn.exe and SynTPHelper.exe in Compatibility mode for Windows 7

  1. Go to the Synaptics folder located in Program Files.
  2. Find SynTPEhn.exe and SynTPHelper.exe files in that folder. You’ll need to repeat the following steps for both files.
  3. Right-click SynTPEhn.exe or SynTPHelper.exe and choose Properties from the menu.
  4. Go to the Compatibility tab.
  5. Check Run this program in compatibility mode for and choose Windows 7 from the list.
    Run this program in Compatibility mode
  6. Click OK and then Apply to save the changes.
  7. Now repeat the process for the other file as well.
  8. Restart your computer and check if the issue is resolved.

3. Run the Hardware & Devices troubleshooter

  1. Press the Windows key, type cmd, and select Run as administrator under Command Prompt.
  2. Type the command below and hit Enter to run it: msdt.exe -id DeviceDiagnostic
    msdt
  3. Finally, wait for the command to finish running.

As you can see, Lenovo E420 touchpad issues can cause a lot of problems. We hope that our solutions proved helpful.

Similarly, if your Lenovo IdeaPad touchpad is not working, too, check our detailed solutions to fix it.

Feel free to let us know the solution that helped you fix this issue in the comments below.

How to automatically launch an app when you login to Windows 10

Do you always open a particular program as soon as Windows has started up? Perhaps it’s your web browser or favourite email app. If so, you could save yourself a few clicks by getting Windows to open it for you automatically each time you login.

Windows always starts several programs by itself once you get to the desktop – you’ve probably seen your system tray fill up with icons from apps such as OneDrive and your antivirus software. Typically, these programs start in the background and are hidden by default, so you don’t see any windows open on your desktop. However, you can use the same mechanism to open apps of your choice.

Screenshot of creating a desktop shortcut

This is a really simple process but you need to know where to look first. To begin, you’ll need a shortcut to the app you want to open. The easiest way to do this is to copy an existing desktop shortcut. If you already have a shortcut to the app on your desktop, just click the icon and hit Ctrl+C to copy it to the clipboard. Otherwise, you can create a new shortcut by opening the Start menu, finding the app and clicking and dragging it across to the desktop.

To make apps open automatically, you can just add your shortcut to a special Windows folder. Windows automatically launches all the shortcuts in the folder when it starts, so all you need to do is copy and paste your shortcut in. Because the folder is in a system location, the hardest part is finding it.

Windows 10 Startup programs folder

Open File Explorer (you can press Win+E from anywhere in Windows) and click in the address bar at the top of the screen. Delete its contents, type “%appdata%” (without the quotes) and press enter. Depending on the apps you have installed, this folder may contain a lot of different subfolders – take care not to modify or delete anything here.

Find the “Microsoft” subfolder and navigate into it. From here, drill down through the directories into Windows > Start Menu > Programs > Start-up. Once you’ve arrived at this location, you can just copy and paste your app shortcut into the folder. Next time you login to Windows, the app will get started automatically.

Windows 10 Startup programs folder

If in the future you want to stop the app from automatically starting, you can just head back to the folder and delete its shortcut. Alternatively, you can also open Task Manager (hit Ctrl+Shift+Esc to launch it quickly) and visit the “Start-up” tab. Here, you should see entries for all the Start-up folder shortcuts you’ve added. Click the app you want to remove and then press the “Disable” button at the bottom of the window.

Task Manager Start-up page

Using this method means you can return to Task Manager to re-enable the app in the future. You won’t need to touch your shortcut again. Task Manager also displays apps which register themselves as start-up apps using internal Windows APIs, instead of the Start-up Start menu folder.

Start-up apps page in Windows 10 Settings app

In addition, newer versions of Windows 10 have a “Start-up” page within the “Apps” category in the Settings app. This replicates the functionality available in Task Manager, displaying simple on-off toggle buttons for each of your start-up apps.

One point to note is that this tutorial assumes you only want the app to open when you login. The app will not start for other user accounts on your PC. If you would like an app to open for every user, repeat the process above but substitute “%appdata%” with “%programdata%” in the instructions. You will need to be logged in as an administrator to save to this location.

Having applications launch automatically can make the start of your day just a little bit easier. As soon as your PC boots up, you’ll have your most-used apps ready and waiting on your desktop. Just remember that having a lot of start-up applications could significantly reduce system performance as they all load up.

FIX: Security settings need attention Windows 10/11 error

There’s a new Windows 10 Redstone build available for Windows 10 Insiders almost very week. However, it seems that some of them are having trouble downloading it.

Namely, some users reported on Microsoft Community forums that when they try to run Windows Update and download the latest Windows 10 Preview build, a strange error message saying “Your security settings need attention to get Insider Preview Builds” appears.

This error left a lot of users confused, because it didn’t appear in previous Windows 10 Preview builds. The prompt suggested a restart of the computer to get rid of this error, but even after the restart, nothing changed.

Microsoft remained silent about this issue, but luckily for all those who are encountering this problem, users managed to find a solution by themselves.

How to fix Your security settings need attention error?

1. Tweak your Registry

To get rid of this error message, and be able to download the latest Windows 10 Preview build, you need to perform one registry tweak. Here’s exactly what you need to do:

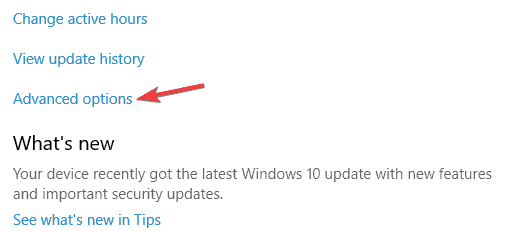
  1. Go to Settings, Update & Security, Windows Update, and then to Advanced Options
  2. Select Stop Insider Preview Builds
  3. Restart your computer
  4. When the computer starts again, open Registry Editor (go to Search, type regedit, and press Enter)
  5. Navigate to the following key:
    • HKEY_Current_UserSoftwareMicrosoftWindowsSelfHostApplicability
  6. Delete Error State, PilotInfoRing, and LastHR entriesYour security settings need attention to get Insider Preview Builds Error in Windows 10 Insider Preview
  1. Exit Registry Editor, and reboot your PC once again
  2. Now, go to Settings > Update & Security > Windows Update > Advanced Options again
  3. Choose Enable Insider Builds
  4. Enter your Microsoft Account info again, and follow on-screen instructions

After performing this registry tweak, you should be able to download the latest Windows 10 Preview build normally.

But we have to note that it may take up to 24 hours until you receive a new build, due to some technical reasons. So maybe you’ll have to wait a little, but you’ll get the latest build eventually.


2. Change EnablePreviewBuilds DWORD value

The second fix involves making a few minor tweaks in your registry. Namely, you need to locate the ‘EnablePreviewBuilds’ key and change its value to 1. But first, don’t forget to backup your registry and create a restore point just in case anything goes wrong. This is how you can do that:

  1. Launch the Registry Editor and locate this key:
    • HKEY_LOCAL_MACHINESOFTWAREMicrosoftWindowsSelfHostApplicability
  2. Now locate the EnablePreviewBuilds key > double-click it
  3. Go to Value data and change it to 1 > save the changes
  4. Now, open the Settings app > go to Update & Security
  5. Go to the Advanced options.
    Your security settings need attention to get Insider preview builds
  6. Hit the Fix me button > sign-in with your Microsoft account and follow the on-screen instructions.

3. Leave the Insider program

Some Insiders confirmed that leaving the program and changing their password helped them fix the problem. Once you’ve done that, simply restart your computer and enroll in the Insider Program once again. Check for updates to see if you can download the latest build.

We hope these solutions worked for you.

RELATED POSTS TO CHECK OUT:

Download Win10 Spy Disabler to block Windows 10 spying services

Privacy in Windows 10 is probably one of the most discussed topics related to the system. Even a few years after the release of Windows 10, and many Microsoft official announcements, users still fear that their privacy is threatened.

Privacy concerns are high, and a lot of developers are trying to develop apps to help users increase the safety of their data in Windows 10.

Meet Win10 Spy Disabler

After we told you about W10Privacy, we now report about a new, similar tool called Win10 Spy Disabler, which allows you to control your privacy settings in Windows 10. The tool comes in a portable version, so basically, all you need to do is to download it, unzip it, and run it.

The program offers more than twenty various security options. Some of them are specifically for Windows 10, while some of them could be applied to older versions of the system, as well. Some of the options are: Disable Spying Services, Disable Spying Schedule Tasks, Disable Microsoft Office 2016 Telemetry, etc.

You can also delete some of Windows 10 features with this tool, as it provides options to delete OneDrive completely, as well as default Windows apps. You can also disable Cortana, WebSearch, and BingSearch. This is a part of one option, and you can’t disable each feature individually.

You don’t have to worry if something could wrong when you disable some Windows 10 features, as Win10 Spy Disabler offers you an ability to create restore points. There’s also a System Tweaks tab, which gives you access to some more general Windows settings, like Show Hidden and System Files, Disable Windows Remote Assistance, Disable Windows Update P2P Distribution, and more.

wind10 spy disabler windows 10

Although the tool is called Win10 Spy Disabler, it also works and provides security options for Windows 7 and Windows 8.1 (as we mentioned above). This tool is free of charge, and you can download it from developer’s official site.

Win10 Spy Disabler recently received a series of new features and improvements that include:

  • The option to disable recent files and folders history completely
  • Ask for confirmation on file and folder deletion
  • Optimized NTFS partition settings
  • The option to disable Office 2016 telemetry (AllowTelemetry) and logging
  • Block Microsoft Telemetry Hosts (to do this, you need to use the  etchosts file)
  • You can optimize important Windows 10 privacy settings (more options have been added)
  • You can now use the option to undo selected changes (except app removal)
  • There’s a new tab to singularly disable Windows tracking options
  • The main graphical UI has been revamped.

Have you installed Win10 Spy Disabler on your computer? Let us know what you think about it.

RELATED POSTS TO CHECK OUT:

How to configure the Surface Dial for any Windows 10 PC

The Surface Dial is an accessory for Windows 10 accessory aimed to give people as new way to create. It’s compatible with any PC, laptop, or tablet running Windows 10 with Bluetooth support. In October 2016, Surface Dial was announced as an accessory to the newly unveiled Surface Studio, but  since its introduction, Microsoft has expanded Surface Dial for use beyond the Surface Studio to any Windows 10 PC.

Microsoft Surface Dial and the Surface Studio

If you own a Surface Pro 6, Surface Book 2, or Surface Studio 2, the Surface Dial works well as an onscreen tool with onscreen visual navigation. However, the Surface Dial is also useful for those without Surface integration. While you may not be able to use the Surface Dial as it was originally intended, the Surface Dial works well as a complementary accessory to your keyboard and mouse.

If the Surface Dial wasn’t useful off-screen, you wouldn’t see companies like Logitech integrating a mini-Surface Dial on their keyboard, like they did with the Logitech Craft. The Surface Dial can act as another tool you use to create on your laptop or desktop Windows 10 PC. You might find that the Surface Dial works better off-screen, making it easier for you to navigate around your Windows 10 PC.

By default, Surface Dial brings up the most used shortcuts in Windows 10; Volume, Scroll, Zoom, Undo, and Custom tool. Instead of relying on menu navigation or keyboard macros, you can set up the Surface Dial to control apps or perform other actions in Windows 10. There are custom Windows 10 app shortcuts and commands available in Windows 10 apps with Surface Dial support. You can also customize the tools available when you rotate the Surface Dial. In this guide, you will learn how to set up and configure the Surface Dial on your Windows 10 PC.

In order to change the settings on your Surface Dial, you need to first pair it with your Windows 10 PC. Here’s what you need to do.

How to add Surface Dial to Windows 10

  1. Go to Settings.
  2. Go to Devices.
  3. Go to Bluetooth.

Once you are at this point, you need to add the Surface Dial to your Windows 10 PC.

  • Turn on the Bluetooth toggle.
  • Click Add Bluetooth or other device.
  • When the Add a device window appears, select Bluetooth.

Now you need to put the Surface Dial in Bluetooth pairing mode. Do the following:

  1. Take off the bottom of the Surface Dial
  2. Press and hold the Bluetooth pair button on the Surface Dial until the light starts blinking.

Microsoft, Surface, Surface Dial

The Surface Dial will appear under Bluetooth devices. Select Surface Dial to finish the Bluetooth pairing process.

Once paired, you will be able to configure the Surface Dial settings through the Wheel settings. The Wheel settings are in the left pane under Devices.

Microsoft, Surface, Surface Dial

How to configure Surface Dial settings

Now you can customize Surface Dial settings. Please note that if you do not have a Surface Dial, you will not be able to configure these settings.

  1. Go to Settings.
  2. Go to Devices.
  3. Go to Wheel.

Microsoft, Surface, Surface Dial

From here, you can change the default tools available on the Surface Dial or add your own custom shortcuts. There are a number of global controls available on the Surface Dial that work across Windows 10 apps.

Some Surface Dial controls utilize media controls to raise and lower volume and play music in Windows 10 apps, including Spotify and Amazon Music. The Surface Dial is also helpful to navigate playlists or control music above your lock screen.

The Surface Dial offers haptic feedback, offering vibration that makes it intuitive to be more precise with the controls. Scrolling through documents and web pages is a breeze as is using zoom, undo and redo, and adjusting screen brightness.

How to use Surface Dial gestures

The Surface Dial uses three gestures to navigate: press & hold, rotate and click.

  • Press & hold to see a radial menu on-screen and rotate to a shortcut that you’ve set up and click to select shortcut.
  • Rotate to select the desired shortcut.
  • Click to select the shortcut.

The Microsoft Store offers a number of apps that work with the Surface Dial. Take a look at the Surface Dial apps here.

Microsoft, Surface, Surface Dial

How to keep your Surface Dial working properly

The Surface Dial is a simple Windows 10 accessory to maintain. It uses two AA batteries to function and eventually, those batteries will need to be replaced.

Surface Dial works well on certain devices within the Surface family, including the Surface Pro 6, Surface Book 2, and Surface Studio, but it will not work as well onscreen with the Surface Laptop 2 because the screen does not tilt enough.

New Windows 10 PCs that offer a 360-degree hinge are ideal for the Surface Dial. You can wipe away any dust build up on the bottom of the Surface Dial with an alcohol wipe or damp cloth.

Windows 10 UWP bug allowed full file system access without asking permission

A report by BleepingComputer has shed light on a Windows 10 bug that granted certain Universal Windows Platform (UWP) apps full access to a device’s file system, a great deal more than the expected limited file access.

UWP apps are allowed to request this extra access, however, they are expected to explain to Microsoft what the access will be used for when submitting the app to the store. UWP apps that use this extra access are also supposed to prompt a settings screen with the ability to enable this access when the app is first used.

Unfortunately, this screen wasn’t being prompted correctly and it doesn’t appear as if Microsoft is being that strict with app developers submitting such apps to the store.

This settings prompt bug has apparently been fixed in the Window 10 October 2018 update though that update has been delayed due to some other, unrelated, bugs.

You can read more about the nitty-gritty of this issue, and view some code samples, over on BleepingComputer.

Does this issue bother you? Share your thoughts with the community in the comments below and then follow us on Pinterest for more tech content.

FIX: SD card is disabled in Windows 10/11

As you know, Windows 10 is available on variety of devices such as smartphones and tablets. Unfortunately, some users are experiencing SD card slot issue on their smartphones. If you’re having this issue you might want to check out some of our solutions.

According to users they are getting “SD card slot disabled. You can’t use SD cards on your phone because of a server policy.” message. This can be big problem if you store a lot of important data on your SD card, but there are a few workarounds. Users have already tried performing hard resets but that just temporarily fixes the problem.

According to users, after a hard reset SD card is detected but as soon as you reboot your phone the problem starts again. Performing a soft reset sometimes help and shows the SD card, but that’s also not a permanent solution.

How to Solve Problems with SD Card in Windows 10

Before we start with solutions, it won’t hurt to check and download the latest build. If that doesn’t help, try some of our solutions below.

Solution 1 – Disable Work Access and move Airwatch from SD card to phone storage.

  1. Disable Work Access by going to Settings > Accounts > Work Access > Airwatch > Delete. We have to warn you that by doing so you’ll lose access to emails and contacts stored at work account.
  2. Reboot your phone and your SD card will now become available.
  3. Move the Airwatch app from SD card to phone storage.
  4. If you need to use Airwatch run it from the phone storage.

Solution 2 – Remove your Exchange account

Some users report that removing your work Exchange account from Your Email and Accounts fixes the problem. So you may want to try removing your Exchange account and using just your Outlook account. After removing Exchange account reboot your device and your SD card should be working again.

If your computer doesn’t even recognize a SD card, you should check out this article. Also, did you know that you can install your Windows 10 apps directly on a SD card?

Update: When it comes to Windows 10 phones, Microsoft has already given up hope about the future of these devices. The company decided to focus on its Windows 10 desktop OS and cloud services instead.

If you haven’t switched to another mobile platform, we’re afraid you’ll be forced to pretty soon. Windows 10 Mobile will soon become obsolete, it no longer receives new features and it obviously can’t keep up with the latest Android or iOS phone models.

It’s only a matter of time until Windows 10 phone will become history.

RELATED POSTS TO CHECK OUT:

Unable to Run GTA Episodes from Liberty City [Windows 10/11]


4 solutions to fix GTA issues on PC

  1. Check for updates
  2. Run the game in windowed mode
  3. Use ALT + TAB a few times
  4. Clean boot your computer

Grand Theft Auto games have many fans, and people play Grand Theft Auto and it’s DLCs such as Episodes from Liberty City regularly.

Speaking of Grand Theft Auto: Episodes from Liberty City, it seems that this game stops responding on Windows 10 for some strange reason, so let’s see if we can fix that.

Although this troubleshooting guide refers to this particular game DLC, you can use solutions listed below to fix similar issues affecting other GTA DLCs.

How to Solve GTA problems in Windows 10

Solution 1 – Check for updates

Grand Theft Auto: Episodes from Liberty City is relatively old game, it was released in 2008, so you might have some problems running it on Windows 10.

Usually these kinds of problems are caused by missing updates, so make sure that you update Grand Theft Auto as well as Windows 10 with latest updates.

This will fix any potential incompatibility issues. At the same time it’s advisable that you update your graphic card drivers with the latest version. After your game, Windows and display drivers have been updated you can try this solution.

Solution 2 – Run the game in windowed mode

If the Grand Theft Auto: Episodes from Liberty City is crashing for you you might want to try running it in windowed mode. This isn’t a permanent solution, but some users report that this is a working workaround, so it’s might worth a try.

To run Grand Theft Auto: Episodes from Liberty City in windowed mode you need to start the game, and navigate to Video Options and set it to run in windowed mode. If you can’t even launch a game without crashing it you might want to try this:

  1. Go to the game directory. By default it should be C:Steamsteamappscommongrand theft auto iv episodes from liberty cityEFLC, but it might be different on your computer.
  2. Next in that directory create a new text file called commandline.txt.gta iv episodes from liberty city problems
  3. Open the commandline.txt and enter -windowed.gta iv episodes from liberty city problems 2
  4. Save and exit commandline.txt and try running the game.

Solution 3 – Use ALT + TAB a few times

If the game stopped responding shortly after launch, try using Alt+Tab to go back and forth between the game and your desktop. This workaround may sometimes help, so it’s worth giving it a try.

Solution 4 – Clean boot your computer

If this problem is triggered by low computer resources issues, you can clean boot your machine. In this manner, your computer will use only the minimum set of drivers and programs necessary to run Windows 10.

  1. Go to Start > type msconfig > hit Enter
  2. Go to System Configuration > click on the Services tab >  check ‘Hide all Microsoft services’ > click Disable all.hide all microsoft services
  3. Go to the Startup tab > Open Task Manager.
  4. Select each startup item > click Disable > close Task Manager.disable startup programs
  5. Restart your computer and check if the game runs OK.

That’s about it, running the game in windowed mode should solve the problem. If you have any comments, or questions, just reach for the comment section below.

RELATED POSTS TO CHECK OUT:

How to remove ‘React to this message’ alerts on Skype

The future of Skype is determined. Microsoft decided, even after quite an opposing feedback, that the Skype 7.0 is the part of history.

As of November, all Skype users will be forced to either ditch Skype and choose an alternative app or settle for the Skype 8.0. This one is quite similar to the mobile version, with all traits of an instant messenger. Among the other features, Skype 8 includes message reactions.

These allow you to use an emoji and react to the message. A silly addition, especially for Bussines users who use Skype for formal contacts.

How can I disable ‘React to this message’ Skype alerts

There’s no option to disable these, so you’ll need to get used to it. Of course, you can avoid them, just don’t click on that emoji icon under the sender’s name and you’ll be golden. There might be an option in the future, though, as a lot of users are not satisfied with this and some other additions to the latest release of Skype.

But, for the time being, you can try them out and judge on your own. If it happens, by chance, that you’ve accidentally placed a reaction, you can remove it in the same manner. Just click on the reaction icon next to the sender’s name and click again on the emoji you’ve used. Simple as that.

We hope this was an informative read and make sure to tell us your opinion on the changes Microsoft made to Skype. You can do so in the comments section below.

RELATED STORIES YOU SHOULD CHECK OUT:

FIX: Unable to run Solitaire in Windows 10/11


5 quick solutions to fix Solitaire issues on PC

  1. Update your computer
  2. Restart app updates
  3. Rename the Cache folder
  4. Reset Solitaire
  5. Run the Windows Store Apps troubleshooter

Solitaire is one of the most popular games on Windows, and many people like to play Solitaire in their spare time on Windows 10. But sometimes there could be some issues. Users report that they are experiencing problems with Solitaire on Windows 10, and today we’ll try to fix some of these problems.

What to do if you can’t run Solitaire

Solution 1 – Update your computer

Users report that quite often Solitaire is crashing on Windows 10, but before we try any solutions, we advise you that you update Windows 10 using the Windows Update. Quite often these issues are fixed through Windows update, so it wouldn’t hurt for you to download all available Windows 10 updates before trying the following fixes.

Solution 2 – Restart app updates

This isn’t the best solution but some users claim that it works, so it’s worth checking out. Go to the Windows Store and click on the download icon on the top right next to the search box. If there’s a list of stalled app updates close them all by clicking the X button. Now the updates should start downloading again.

It seems that sometimes some app updates can cause problems with Solitaire, so if make sure that you restart any app updates that you have running.

Solution 3 – Rename the Cache folder

This usually works for most Universal apps, so if you’re having problems with Solitaire you might want to try this.

  1. Go to the  Users{Username}AppDataLocalPackagesWinStore_cw5n1h2txyewyLocalState folder.
  2. Find Cache folder inside it, right click it and choose Rename from the menu.
  3. Rename the Cache folder to Cache.old.
  4. Now right click the empty space and choose New > Folder from the menu.
  5. Rename the folder you’ve just created to Cache.
  6. Restart Windows 10.
  7. Try if your Universal apps are working, if everything is working fine, you can go back and delete the Cache.old folder.

Solution 4 – Reset Solitaire

Another method to fix this issue is to reset Microsoft Solitaire. Here are the steps to follow:

  1. Go to Settings > System.
  2. Select App & features > enter ‘Microsoft Solitaire Collection‘ in the search boxreset microsoft solitaire collection
  3. Go to Advanced options > hit the Reset button.

Solution 5 – Run the Windows Store Apps troubleshooter

Microsoft integrated a dedicated troubleshooter for Windows Store apps. With the help of this tool, you can quickly scan your Windows 10 apps and automatically fix general issues affecting them.

Go to Settings > Update & Security > Troubleshoot > locate and run the Windows Store Apps troubleshooter.

windows store apps troubleshooter

That’s about it, we hope these solutions helped you to solve the problem with Solitaire on your Windows 10 computer.

If you have any comments, or questions, just reach for the comment section, below.

RELATED POSTS TO CHECK OUT:

FIX: Adobe Error 2060 prevents Skype from working


5 quick solutions to fix Adobe security error 2060

  1. Update Skype and Windows 10
  2. Clear temporary Internet files and Skype browser cookies
  3. Enable Skype click to call
  4. Disable ads using the AdFender software
  5. Disable ActiveX

Errors are relatively common, but some errors such as Adobe error #2060 can cause big problems. It appears that this error is preventing Skype from working properly on Windows 10, and today we’ll see if we can somehow fix this error.

According to the users they are getting Adobe error #2060: Security sandbox violation when using Skype and according to them Skype freezes and becomes unusable. This is big problem if you’re using Skype on daily basis, but fortunately there are few solutions that you can try.

Steps to fix Adobe Security Error #2060 in Windows 10

Solution 1 – Update Skype and Windows 10

Before we start, we have to mention that Microsoft is aware of this issue, and the issue will be most likely addressed with the latest update. So, before trying other solutions make sure that your Skype is up to date. Make sure that you download all the Windows 10 updates.

Speaking of Windows updates, Microsoft rolled out security update KB3087916 a while ago specifically to target Adobe Flash Player security issues and errors. So, installing the latest Adobe patches should fix error 2060.

In addition, make sure that you have the latest version of Adobe Flash installed. If the Adobe error #2060 still persists try one of the following solutions.

Solution 2 – Clear Temporary Internet Files and Skype browser cookies

First let’s clear Temporary Internet Files:

  1. Open Internet Explorer and go to Tools > Internet Options > General.
  2. Find Browsing history section and press the Settings button.
  3. Next click the View files button.skype error windows 10
  4. Now delete all the files from Temporary Internet Files folder.skype error windows 10 1

Next, disable Skype browser cookies:

  1. Open Skype and go to Tools > Options > Privacy > Privacy Settings.
  2. Find and uncheck Accept Skype Browser cookies and Allow Microsoft targeted ads, including use of Skype profile age and gender.skype error windows 10 2

— RELATED: Full Fix: Adobe error 16 on Windows 10, 8.1, 7

Solution 3 – Enable Skype click to call

Now enable Skype click to call:

  1. Open Internet Explorer > Settings > Manage add ons.
  2. Under Toolbars try to locate Skype click to call. If Skype click to call is available make sure it’s enabled.

Solution 4 – Disable ads using the AdFender software

According to some users, this issue is caused by ads that are played in your applications such as AIM or Yahoo messaging programs. To stop this error from appearing just download and install AdFender. You don’t have to use AdFender, because any third party ad blocker software should do the trick.

Solution 5 – Disable ActiveX

Adobe also recomments disabling ActiveX. Here’s how to turn off ActiveX:

  1. Go to Internet Explorer > go to Tools > select Safety
  2. Go to ActiveX Filtering and disable the featuredisable activex filtering
  3. Restart your computer and you should be able to view the problematic content without any problems.

That’s about it, I hope this article helped you to solve the problem with Adobe Error #2060 preventing Skype from working. If you have any comments, or questions, just reach for the comment section below.

RELATED POSTS TO CHECK OUT:

Download 72 new sounds for your Windows 10/11 PC

Each new version of Windows has brought something new in terms of visual appearance and functionality, but quite often people miss the little things that come with each new version of Windows. Speaking of little things, today we’re going to see what new sounds are available in Windows 10.

Over the years many things have changed about Windows, and we got improved and simplified design, many new features and more. With the latest versions of Windows we got support for touchscreen devices. These are all major changes that users will surely notice the first time they start their Windows, but let’s talk about small, more subtle changes.

As you know, with every generation of Windows comes new set of sounds, and Windows 10 isn’t an exception, so let’s have a closer look at new sounds in Windows 10.

Download the New Sounds for Windows 10

Sounds are important part of our Windows experience, they allow us to easily distinguish notifications, alerts and errors, and they make our Windows experience more immersive.

Just like previous versions of Windows, Windows 10 comes with set of its own exclusive sounds. If you’ve been following the Windows releases over the years, you’ll notice that sounds have become more melodious. This is maybe not what everybody prefers but Windows 10 is continuing this practice.

You’ll be pleased to hear that Windows 10 comes with 76 new sounds that will play for certain events such as locking or unlocking your Windows 10, email notifications, calendar notification or regular notifications.
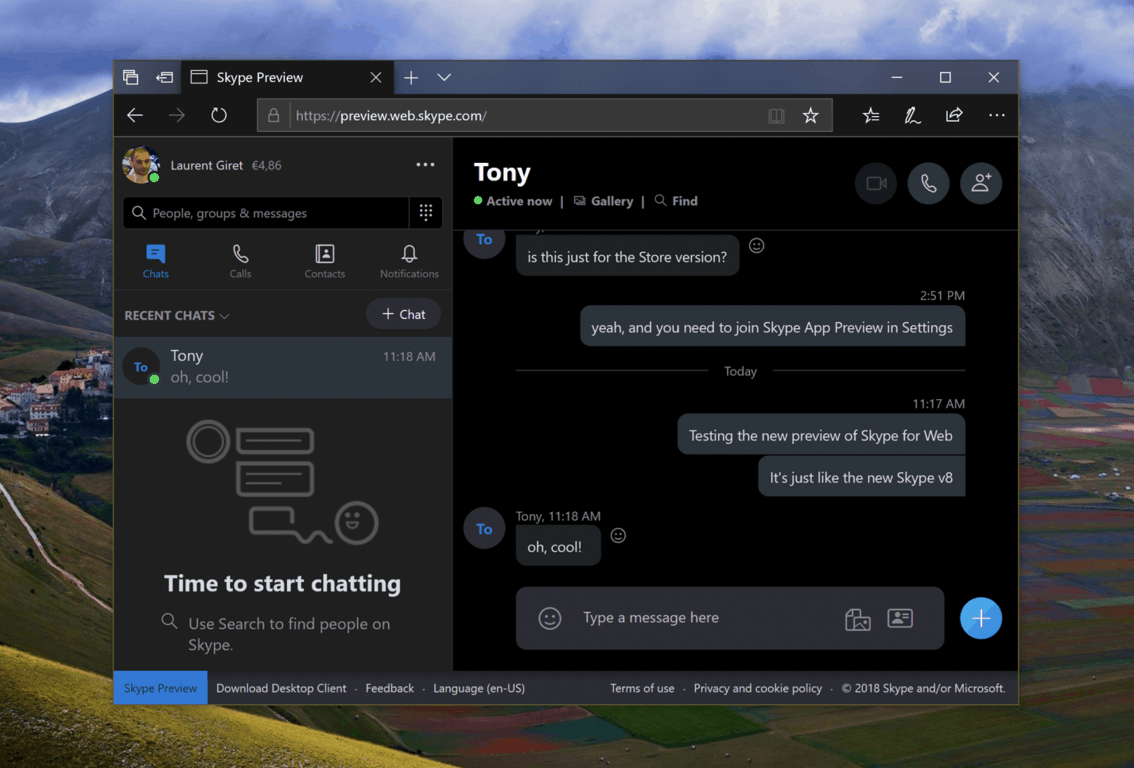
As for the sounds, there are sounds for all sorts of notifications from pop-up blocked, notifications, minimization, maximization, proximity connection, proximity notifications, printing completed and many other functions. As we said earlier, the list of sounds includes 76 new sounds and if you’re interested and you want to hear them you can download them here.

Sometimes, your Windows 10 computer may not play sounds. If you’re experiencing this problem, you can use the troubleshooting guides listed below to fix it:

Xbox Game Pass November update includes Sniper Elite 4, Olli Olli 2 XL and more

Microsoft has just announced the new games coming to the Xbox Game Pass catalog in November. Sniper Elite 4, Olli Olli 2 XL, Rise and Shone, Sheltered will be playable starting November 1, and Grip: Combat Racing will also be available on November 6, the same day as it launches on Xbox One.
The five new titles will join the four new survival horror games that Microsoft added to the catalog ahead of Halloween last week. In case you missed the news, these are Outlast, Observer, Dead Island: Riptide Definitive Edition, and Hello Neighbor. That’s already nine new games, but Microsoft plans to announce “even more great games” during its upcoming X018 event on November 10.

For just $9.99 a month, Xbox Game Pass gives you access to over 100 Xbox One and Xbox 360 games, including new first party titles on day one such as the critically-acclaimed Forza Horizon 4. You can try the service for 14 days for free, and Xbox Play Anywhere games such as Forza Horizon 4, Sea of Thieves or State of Decay 2 are also playable on Windows 10 at no additionnal cost.

Windows 10 news recap: ZIP file problems expected to be fixed in early November, security researchers show zero-day vulnerability, and more

Welcome back to our Windows 10 news recap, where we go over the top stories of the past week in the world of Microsoft’s flagship operating system.

Microsoft confirms ZIP file problems in Windows 10 1809, expects “early November” fix

Problems with Windows 10 continue to surface following the release of version 1809, this time with ZIP files. Copying files from a ZIP folder without extracting it may cause it not to copy or move correctly. Microsoft says it expects a fix in early November.

Microsoft is now testing sandboxing Windows Defender, here’s how to enable it sooner

To improve the security of Windows Defender, Microsoft’s built-in anti-malware software for Windows 10, the company has been working on sandboxing the software, and it now has a sandbox mode in testing.

Windows 10 Twitter PWA updates with image tagging & other improvements

Twitter has been busy working on an update to its PWA, including allowing up to 10 accounts to be tagged in attached images, performance improvements, and more.

Windows 10 Twitter app

Security researchers release Windows zero-day exploit proof of concept

Security researchers have found a zero-day exploit in Windows and have shown off a proof of concept. It affects Windows 10, but is patched as of October.

That’s it for this week, we’ll be back next week with more Windows 10 news!

Microsoft news recap: Microsoft officially owns GitHub, record first quarter earnings report, and more

Microsoft news recap is a weekly feature highlighting the top Microsoft news stories of the past week. Sit back, grab some coffee, and enjoy the read!

It’s official, GitHub is now owned by Microsoft

Following the EUs approval of Microsoft’s acquisition of GitHub last week, GitHub’s CEO has announced it is now owned by Microsoft. In a similar vein to LinkedIn, GitHub will continue to act as an independent company, despite being under Microsoft’s umbrella.

Bing removes and bans advertiser accounts following malicious ads when searching for Google Chrome

The Bing Ads team have acted on a report of malicious advertisements showing when searching for “download chrome”, in an ad that appears to have slipped through the moderation process.

Bing Ads

Microsoft’s “By The Numbers” website updated, details new statistics

For those who love numbers, Microsoft has finally taken the time to update its “By The Numbers” website, giving an insight into the company’s top achievements, mainly focused on environmental achievements, like being 100% carbon neutral since 2012.

Microsoft - By The Numbers

Microsoft produces ‘record’ FY19 first quarter earnings report with significant Surface, Office 365 and Azure gains

Microsoft has announced its first-quarter earnings for 2019. Its earnings report show significant growth amongst Surface, Office 365 and Azure, all of its main offerings that it has been focused on over the past few years.

That’s it for this week. We’ll be back next week with more Microsoft news.

Firefox 65 to enhance privacy by blocking third-party tracking by default

As the war for improving privacy continues, Mozilla continues to bring new privacy protections to its web browser, Firefox. Expected to release in January 2019, Firefox 65 will bring a big change that aims to deliver greater privacy, by default.

Firefox 65 will block third-party tracking by default. It will block cookies, local storage, as well as certain APIs such as the Broadcast Channel API.

Mozilla’s Firefox will use the Tracking Protection list, provided by Disconnect, to decide which third-party scripts to block when a website is loaded.

For those who like to try things out early, this feature is available in the current release of Firefox and can be enabled by going to Options > Privacy and Security, then enable the “Third-party cookies” option and set the option to “Trackers”.