How to Backup Windows 8.1 Settings


How do I backup Windows 10, 8.1 settings?

  1. Backup Using Windows Backup
  2. Backup using EaseUS Todo Backup

You might come to a point in time where you will have issues regarding your Windows 8.1 operating system. And if it is an unrecoverable issue then the settings that you made will normally get lost. But Windows 8.1 has the great feature that allows you to make a backup copy of your settings thus even if you get a blue screen for example or an error that you cannot get rid of you can anytime use the backup copy you created in Windows 8.1.
backup Windows 8.1 settings
In the tutorial posted below, you will see a detailed step by step introduction on how to backup your Windows 8.1 settings. You should always be aware that even if you have this feature in Windows 8.1 it won’t start automatically and it will not record every modification that you make to the system settings unless you program it to do so.

Detailed tutorial on how to backup Windows 8.1 settings for your device:

1. Backup manually

  1. For this tutorial to work you will need to reboot the Windows 8.1 device, log in with the administrator user and follow the simple steps below.
  2. On the start screen in Windows 8.1 you will be presented with a “Desktop” icon, you will need to left click on it.
  3. Move the mouse cursor to the lower right corner of the screen to open the menu available in Windows 8.1.
  4. Left click on the icon that says “Settings”.
  5. In the “Settings” window you opened look for a “Control Panel” icon.
  6. Left click on the “Control Panel” icon.
  7. In the next window that opened up left click on the feature that says “System and Security”.
  8. In the “System and Security” window you opened you will need to left click on the “File History” feature present in the right side of the window.
  9. After you left clicked the “File History” feature you will need to look for the “Windows file recovery” option.
  10. Left click on the “File recovery” feature.
  11. In the “File recovery” feature you opened up left click on the “Create a system image” option in order to start the process of backing up your settings.
  12. From the menu and options, you are presented In this window you will have to choose the location where you want your backup settings to be stored.
    Note: preferably store backup image to another partition or to an external storage device.
  13. Once you have selected to a destination, you only have to left click on the “next” button in the lower side of the screen.
  14. Left click on the “Start backup” button you will have on the screen.
  15. Now the process will start and it will take up to one hour depending on what you have installed on your Windows 8.1 device.
  16. After the process is completed left click on “Close”.
  17. Reboot the Windows 8.1 device and check if your backup has been created.

2. Backup using EaseUS Todo Backup

Using a third-party tool is a great idea as it has many useful features incorporated. You are safe from different errors and file loss as it creates a full backup package. We recommend EaseUS Todo Backup as one of the best on the market. How do you backup in this software:

  1. Download it here
  2. Install it
  3. Open EaseUS Todo Backup
  4. Click ‘File Backup’
  5. Select the files you want to backup (choose between ‘File type’ or ‘User defined’)
  6. Select your files and folders
  7. Select a destination (choose an external source)
  8. Customize your backup: compression, password, priority, etc.
  9. Start the backup process

So now perhaps you can sleep a little bit better tonight knowing that you have a full backup of your Windows 8.1 settings ready to use whenever you have an issue with the system. Write to us below in the Comments topic for any input regarding this article.

READ ALSO: File History not Working in Windows 8, 8.1 [Fix]

How to Encrypt Files in Windows 10

Encrypting your Windows 8.1 or Windows 10 files can solve a lot of security-related issues; basically, it encrypts your passwords for the Windows 10 or Windows 8.1 system so that someone that doesn’t have the specific encryption key cannot access your data thus lowering the exposure risk to your operating system files.
file encryption in Windows 8.1 and Windows 10
In Windows 8.1 or Windows 10 you have access to the feature specifically designed to encrypt your files and folders, you will only have to find out how to properly use this feature and you can start encrypting your files. Also for a more comprehensive understanding about how this encrypting feature works in Windows 8.1, Windows 10 you can read the below tutorial.

Tutorial for encrypting files in Windows 8.1 and Windows 10

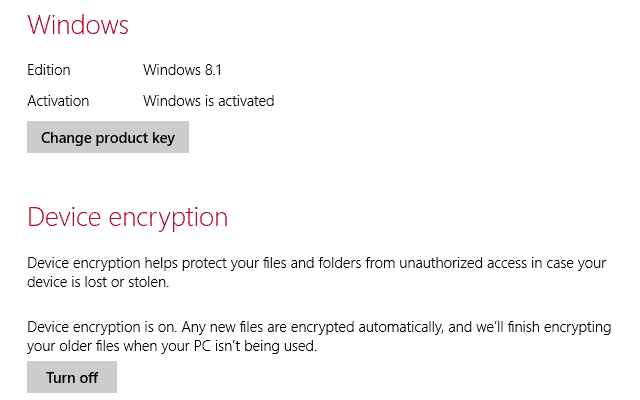
  1. In order to properly encrypt your files, you will need to use the “device encryption” feature.
  2. You will need to sign into your Microsoft account you made when you first installed Windows 8.1 or Windows 10.
    Note: You will need to sign into your account with administrative privileges to have access to this feature.
  3. Move the mouse cursor to the lower right side of the screen to open the Charms bar.
  4. In the charms bar left click on the “Settings” icon available there.
  5. In the Settings window, you will need to left click on the “Change PC Settings” feature.
  6. Left click on the “Accounts” feature present in the “Change PC Settings” topic.
  7. From the “Accounts” window left click on “Switch to a Microsoft account”.
  8. Log in from there to your Microsoft account with administrative privileges.
  9. Now to turn device encryption feature on you will need to move the mouse cursor to the lower right side of the screen.
  10. Left click on the “Search” feature you have on that menu.
  11. In the search box that pops up type “encryption”.
  12. You will need to left click on the “Change device encryption settings” feature.
  13. From the “Change device encryption settings” window you will only need to follow the instructions on the screen to activate the encryption to your system if it is not already activated.
    Note: The encryption key will be saved to your Microsoft account so if you ever need it just log into the account and you can access it from there.
    Note2: Now that you have enabled this feature you should know that you will probably need it when your Windows 8.1 or Windows 10 device will go into recovery mode, when the system will detect a hardware change or when the system will detect a hardware malfunction.

File encryption tips

Encrypting a file is not the only way to experiment with its security. You may also need to use it and to keep it safe. We will list below some of the most searched articles related to file encryption that will help you getHow to encrypt familiar with encryption. Here they are:

  1. How to encrypt folders in Windows 10, 8.1
  2. How to open encrypted files (in case someone sends you one)
  3. 256-bit encryption tool (for an advanced security level)
  4. Encrypting file sharing software for Windows 10 (safely transfer files)

Now you can encrypt and keep safe your files just by following the simple tutorial posted above. For any question that you may have on the subject, you can write us in the comments section a little bit below.

READ ALSO: How to Extract RAR Files in Windows 8, Windows 10: Easy Guide

Power BI Desktop August update adds PDF export feature and bookmark groups

Details on Microsoft Power BI’s August update have been announced on the official Power BI blog and there’s quite a few features users will appreciate.

The biggest change in the Power BI August update is the new ability to export reports as a PDF file, a feature that was apparently the most-requested in Microsoft’s UserVoice. Other changes include the introduction of bookmark groups, theming being made generally available, improvements to Q & A, and a better experience when viewing content between Power BI Desktop and Power BI Premium.

Here’s the full release notes.

Reporting

  • Print reports through Export to PDF
  • Create bookmark groups
  • Theming generally available
  • Slicer restatement

Analytics

  • Conditional formatting by values
  • Python integration (preview)
  • Q&A improvements
  • Q&A in Power BI Desktop generally available
  • Better matching experience for Power BI Desktop and Power BI Premium

Modeling

  • Data categories for measures
  • Statistical DAX functions

Custom visuals

  • 3AG Systems – Column Chart with Variance
  • Scatter Chart by Akvelon
  • Small Multiples Line Chart
  • Add Natural Language Summaries for BI
  • Pivot Slicer

Data connectivity

  • Spark connector generally available

Are you a Power BI user? What aspect of this update do you like the most? Let us know in the comments below and then like us on Facebook for more Microsoft news.

The app was not found in the store. ?

Language Pack Doesn’t Work in Windows 10/11 [SOLVED]

How can I fix Windows 10 language pack issues?

  1. Run SFC
  2. Delete temporary Internet files
  3. Install a fresh copy of Windows 10, 8.1
  4. Run DISM
  5. Update your OS
fix language pack issues windows 10

Are you having trouble downloading and installing Windows 8 or Windows 10 language packs? In this case, check out the tutorial below to learn how you can easily fix your Windows 10 language pack if it doesn’t work. All this will only take 5 minutes of your time.

When Windows 8 or Windows 10 users try to download a new Language pack for a specific language, the download progress bar basically freezes and gives you an error message. This issue is not very common but it prevents you from installing the language you wish on to your operating system.

How to fix language pack install stuck in Windows 10

1.  Run SFC

  1. Move the mouse over to the upper right side of the screen.
  2. Left click on the “Search” feature.
  3. Write in the search box the following “Command Prompt”.
  4. After the search is finished right click on the “Command Prompt” icon and select the “Run as administrator” feature.
  5. Left click or tap on “Yes” if you get a window from user account controls.
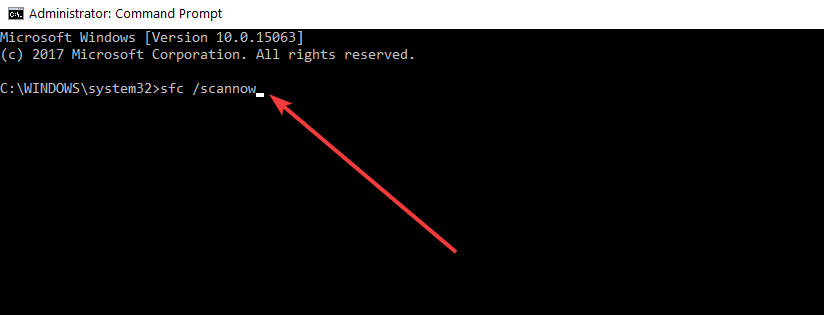
  6. Write in the “Command Prompt” window the following line: “sfc /scannow” but without the quotes.SFC scan
  7. Press the “Enter” button on the keyboard.
  8. Let the scan complete.
  9. Reboot your Windows 8 or Windows 10 device.
  10. Try and see if you can download and install your language pack now.

2. Delete temporary Internet files

  1. Press and hold the button “Windows” and the button “C”.
  2. After the Charms bar has opened up, you need to left click or tap on the “Search” feature.
  3. You will get to an “Apps” window.
  4. Left click or tap on the “Control Panel” icon.
  5. In the “Control Panel” window, left click on “Internet Options”.
  6. Left click or tap on the “General” tab you have in the upper side of the “Internet Options” window.
  7. Left click or tap on the “Delete” button you have there.
  8. Now in the new window that shows, you will need to check the box next to: “Temporary Internet files and website files” and “Cookies and website data”.
  9. Left click or tap on the “Delete” button in the lower side if the window.
  10. Reboot the Windows 8, Windows 10 device.
  11. Try and see if your Language Pack will work after the restart of the operating system.

3. Install a fresh copy of Windows 10, 8.1

Now, this is a more extreme method, but if you did not solve your Language pack issue by following the options above, then if you want a specific language pack installed, I suggest you do it with a fresh copy of Windows 8 or Windows 10.

This means that you should reinstall your Windows operating system once more on your system and install the language pack of your choosing afterwards.

For more information on how to install a fresh copy of Windows 10, you can check out these guides:

Note icon NOTE
If the Language pack download or installation is interrupted for any kind of reason, it will not work a second time. So, be very careful after your reinstall your operating system so that your download or install process won’t close accidentally.

4. Run DISM

If you don’t want to use complex solutions such as solution number 3, you can try to run DISM. Launch Command Prompt (Admin), type the following commands and hit Enter after each one:

  • Dism /Online /Cleanup-Image /CheckHealth
  • Dism /Online /Cleanup-Image /ScanHealth
  • Dism /Online /Cleanup-Image /RestoreHealth
Disk Management could not start VDS

Restart your computer and check if the issue persists.

5. Update your OS

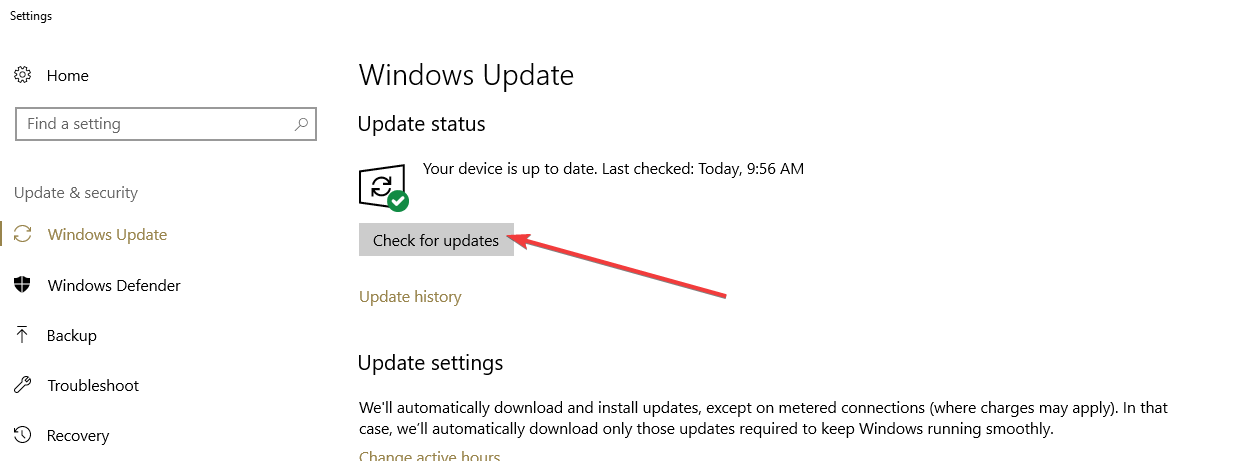
Some users confirmed that installing the latest Windows 10 version on their computers helped them fix this problem – at least partially. So, if you haven’t checked for updates in quite a while, go to Settings > Update & Security and hit the Check for updates button.

check for updates

In case you are not able to download and install the Marathi language pack on your Windows 10/11 computer, the reason could corrupted files, you can use these steps to fix the issue.

We also have a great guide on how to remove language pack on Windows 10, so don’t miss it.

For any other questions or thoughts on this subject, you can use the comments section below and we will offer your further support on this issue.

FIX: Windows 10 laptop won’t calibrate the screen

One of the key features Windows 8 and Windows 10 operating systems have offered to users is the screen calibration feature. What if laptop screen calibration doesn’t work? Follow the instructions listed in the troubleshooting guide below to learn how you can quickly fix the problem.

This feature will help you set the color quality in which your laptop’s screen is displayed, the shadow details, and the highlight detail but for these options to work on your Windows 8 or Windows 10 operating system. You will also need a compatible display on your laptop to fit with these features as well as a good and working Windows 8 system.

How do i calibrate my laptop screen in Windows 10?

  1. Enable screen calibration
  2. Uninstall display drivers
  3. Install display color calibration software

1. Enable screen calibration

You might have this feature turned off, so in this method, you will learn how to properly enable it.

  1. Move the mouse pointer over to the upper right side of the screen in Windows 8, Windows 10.
  2. Left click or tap on the “Search” feature you have there.
  3. In the search box you will need to write the following: “Color Management”.
  4. After the search is done, you will need to left click or tap on the “Color management” icon.color management windows 10
  5. Left click or tap on the “Advanced” tab you have in the upper side of the window.
  6. Left click or tap on the “Change system defaults” button presented in the “Advanced” tab.change display calibration settings windows 10
  7. Now, in the new window that appeared, you will need to left click on the “Advanced” tab you have in the upper side of the window.
  8. Now, you will need to check the box next to “Use Windows default calibration”.windows display calibration
  9. Left click or tap on the “Close” button.
  10. Left click on the “Devices” tab you have in the upper side of the window.
  11. Select the “Set as default profile”.
  12. Reboot the Windows 8 or Windows 10 device and see if your calibrate screen feature is OK now.

2. Uninstall display drivers

  1. Press and hold the button “Windows” and the button “R”.
  2. Now a Run window will appear.
  3. Type in the “Run” window the following: “devmgmt.msc”.
  4. Press the “Enter” button on the keyboard.
  5. A “Device manager” window will open in which you will need to double click on the “Display adaptors” on the left side to expand it.
  6. Double click or tap on the display adapter you have for your graphics card.
  7. After the “Properties” window pops up you need to left click or tap on the “drivers” tab situated in the upper side of the “Properties” window.
  8. Left click or tap on the “Uninstall” button.uninstall display adapter driver
  9. Left click on the button “yes” if you get a message to continue with the uninstall.
  10. Now, you will need to close all open windows and reboot your Windows 8 or Windows 10 device.
  11. After the restart of the system, the drivers should install automatically.
  12. Try and see if your calibrate screen feature works now.

If you want to fix the calibration issue on your laptop screen, it might be useful to reinstall your display driver. With this method, you have the chance to repair a possible damaged driver.

Although, uninstalling a driver can be risky if you don’t have the necessary knowledge on how to perform it correctly.

It can actually cause more severe system malfunctions by installing the wrong drivers for your devices. Fortunately, you have an efficient alternative.

Using dedicated software, you can reinstall any of your drivers automatically, with the latest version of the right drivers. All of this can be done safely with Fortect Driver Updater solution.

3. Install display color calibration software

If you don’t really like changing your computer settings, you can install dedicated software to do it for you. We already compiled a list of the best display calibration software to install on your Windows 10 computer. Simply download the tool that you like best, launch it and it will automatically change your display settings so as to display clear vivid colors.

There you have three useful methods on how to calibrate your laptop screen if it isn’t working as it should. For any questions and suggestions about this guide, use the comments section below.

How to Enable Email Icon in Internet Explorer

There are a few things that changed in Microsoft’s  Internet Explorer versions over time . One of them is the email icon you knew that was in the Command bar of the application. Read this post to learn what happened to it and how you can enable the Internet Explorer email icon in Windows 10 or Windows 8.1 in no time.
enable mail icon internet explorer for windows 8.1, Windows10
This email icon has been changed in Internet Explorer  for Windows 8.1 and Windows 10 to the Read mail icon. Although this icon in Windows 8.1 or Windows 10 has similar functionality, it also has some additional features. Continue reading this post to find out how you can find and use this icon to your liking.

Enable email (Read Mail) icon in IE in Windows 10, 8.1

  1. Move the mouse over to the upper right side of the screen.
  2. When the Charms bar opens, left click or tap on the “Search” icon you have there.
  3. In the search box, you will need to write “Internet explorer”.
  4. Left click or tap on the Internet Explorericon that shows after the search is finished.
  5. Right click on the “Command bar” you have in the Windows Internet explorer.
  6. Move the mouse over to the “Customize” feature and left click or tap on the “Add or remove commands” option.
  7. Right under the topic “Available toolbar buttons” you should have the “Read email” option.
  8. Left click or tap on the “Read email” button and Left click or tap again on the “Add” button in that window.
  9. Left click on the “Close” button situated in the lower side of the screen.
  10. Now you should restart your IE application in order for the changes to fully take effect.
  11. Open again the IE app and see if you have the “Read email” button present on the command bar.

So, now you have your email icon or read mail icon for the newer versions of Internet Explorer on your command bar and ready for use. You can enable or disable this icon whenever you wish by following the tutorial above. If you encountered any issues while following this tutorial, please let us know by writing us in the comments section below.

UPDATE: Microsoft no longer supports old Internet Explorer versions. As a matter of fact, Internet Explorer 11 is the only IE browser version currently supported. For an optimal browsing experience, we suggest using Microsoft Edge or other third-party browsers such as Google Chrome, Mozilla Firefox, Opera One, Vivaldi or the Tor browser.

RELATED STORIES TO CHECK OUT:

How to Get Back Your Apps in Windows 10, 8.1

Windows 10 apps have disappeared, what can I do? This is a very common question among Windows 10 users. In this guide, we’ll list 4 solutions that you can use to fix the problem.

Have you logged in to your Windows 8.1 or Windows 10 operating system and you noticed that all your apps went missing? Follow the tutorial below to learn what options you have in order to get your apps back and what should you do to prevent this from happening again.

The apps in Windows 8.1 or Windows 10 might be deleted or it might be a system malfunction. But with the help of the system restore feature in Windows 8.1 or Windows 10 we can get all of these apps back and also see what caused this issue to happen.

How to get your Windows 10 apps back if they’re gone

  1. Restart your computer
  2. Open System Restore
  3. Clear Windows Store cache
  4. Install the latest Windows 10/ Microsoft Store updates

1. Restart your computer

  1. We will try first to reboot your Windows 8.1 or Windows 10 device and check to see if after the reboot your apps are back to your start screen.
  2. After the reboot, you also need to run an antivirus scan using your antivirus software. Scan all the partitions you have and make sure that you don’t have any viruses infecting your system.

2. Open System Restore

  1. Move the mouse cursor over to the upper right side of the screen.
  2. You now have in front of you the Charms bar.
  3. Left click or tap on the “Search” feature you have there.
  4. In the search box, you need to write the following: “Control Panel” but without the quotes.
  5. Left click or tap on the “Control Panel” icon after the search is finished.
  6. You will have a search box in the new “Control panel” window you opened. In the search box, write the following: “Recover” without the quotes.
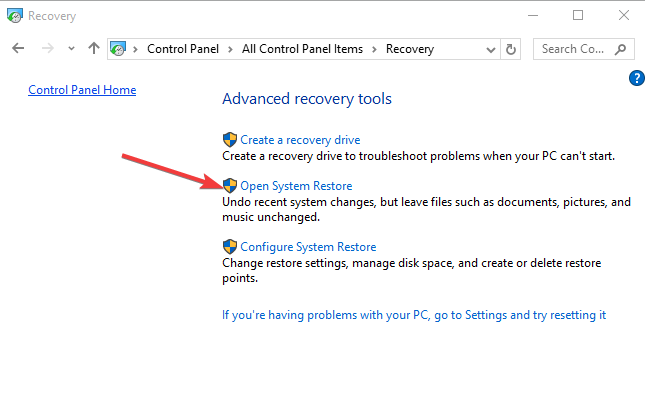
  7. Left click or tap on the “Recovery” feature after the search is finished.
  8. From the “Recovery” window, you need to left click or tap on the “Open system restore” feature.open system restore
  9. From there, you need to follow the instructions on the screen to finish the system restore process and bring back your operating system to a previous point in time where you did not had any apps issue in Windows 8.1 or Windows 10

3. Clear Windows Store cache

If you still can’t find your apps, try clearing the Windows Store cache. To do this, open a new Run window and simply enter the following command: WSReset.exe.

4. Install the latest Windows 10/ Microsoft Store updates

If you’re running outdated Windows 10 OS versions or it’s been a while since you last updated the Windows Store App, this may explain why your Windows 10 apps have disappeared. To fix this issue, you need to install the latest Windows 10 and Microsoft Store updated.

Go to Settings > Update & Security > Update and hit the ‘Check for updates’ button.

check for updates

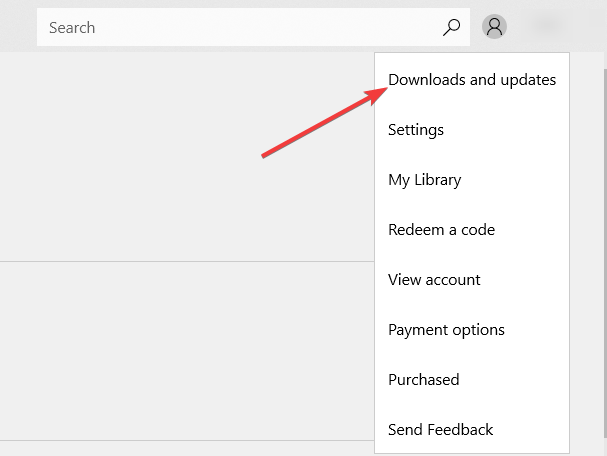
To update the Microsoft Store apps, click on the app menu, go to Download and updates and install all the pending updates.

update windows store apps

That is pretty much it. You most likely caught a virus or malicious code that might have deleted your apps on the Start screen on your Windows 8.1 or Windows 10 PC. Checking your system for viruses and launching system restore on the operating system will most definitely bring back the apps you once had. If you have additional questions on this article, let us know in the comments below and we will help you as soon as possible.
RELATED GUIDES TO CHECK OUT:


PaperPort Only Scanning First Page: 5 Ways to Fix it

PaperPort 14 is the fastest and easiest way to scan, share, search, or organize your documents. It now has a PC version that can deliver access to your most important files using the Nuance Cloud Connector. But for some, PaperPort is only scanning the first page.

Some users have raised concerns over PaperPort not scanning multiple pages or the page quality not being optimal. Keep reading to find out all about it!

Why PaperPort won’t scan multiple pages?

The problem occurs when using the automatic document feeder (ADF) scanner in PaperPort, and this may not manage to scan multiple pages at one go without user intervention.

It also happens when you’re using an outdated scanner driver or when you haven’t properly configured the scanner to run in PaperPort 14.

How do I scan multiple pages on PaperPort?

1. Update TWAIN driver on your scanner

In order to update the scanner driver, contact the scanner’s manufacturer to get the latest TWAIN scanner driver. You can download it from the website. A good example here is if you’re using Brother Scanner, go to the official Brother website and check for the driver.

update paperport software

They’re usually found under the Support menu. Download the latest TWAIN driver for the Brother scanner you’re using (the exact model), and ensure the driver is designed to run on the installed operating system. Don’t forget to install the latest Paperport updates as well.

If this solution doesn’t work, try the next one.

2. Enable ADF in Scanning profile

  1. Open PaperPort 14, and go to Scan or Get Photo pane.
  2. Select the scanning profile (the one in use).
  3. Click Settings and then go to the Scan tab.
  4. Set the Source option to ADF (you can also set it to Duplex ADF if available).
  5. Click OK.

Scan a document to verify if the PaperPort 14 won’t scan multiple pages issue is resolved without prompting for user intervention. In case PaperPort is still only scanning the first page, head to the next fix.

3. Complete Scanner setup wizard

  1. Go to Scan or Get Photo pane.
  2. Click Select.
  3. Click Advanced setup under the Available Scanners window and follow the on-screen instructions.
  4. Test the connection to the scanner and click Next again. If you get a message saying Scanner not found, check your cables and click Try again.
  5. Select the Basic scan test from the list.
  6. Select Check ADF capabilities and click Next.
  7. Click Next again to start the tests
  8. Select the appropriate settings for the scanner and click Scan. If there’s no image, click the missing image and try scanning again
  9. The wizard will detect the ADF scanner type that is connected. Select the correct option and click OK.
  10. Place multiple pages in the paper holder and click Next to start the test. If prompted, remove the pages and proceed.
  11. Click Next again and click Finish to complete testing.

4. Hide scanner native user interface

  1. Launch PaperPort and click on Scan settings.
  2. Select the correct scanner driver.
  3. Click on Advanced setup, and then click No when prompted to download the latest scanner database
  4. Click Next and then select Custom Mode from the list.
  5. Enable Perform Tests and click Next, then click OK to continue.
  6. Click Next to establish communication with the scanner, and choose Advanced settings.
  7. Select Enabling Hiding (or Hide native user-interface) and click OK.
  8. Enable any scanning tests to perform.
  9. Click Next and then on Finish when testing is complete

When Paperport is only scanning the first page, a quick solution is to modify the scan settings and hide the scanner’s native user interface.

5. Contact support

If none of the above solutions worked and PaperPort 14 won’t scan multiple pages, even when you’re using a properly configured ADF scanner, contact the PaperPort manufacturer’s tech support.

So, if PaperPort is only scanning first page, one of these solutions should have helped.

Before you leave, check our list of the best scanner software and get one today!

Let us know if any of these solutions worked by leaving a comment in the section below.

FIX: Case-sensitive errors with File History in Windows 10, 8.1

The File History feature available in the new Windows 8.1, Windows 10 is a very useful program to have because it will rapidly and easily provide you with a backup copy of the library folders, Desktop, Internet Explorer and Contacts list. Unfortunately, this feature has some bugs in it. One of them being that when you restore a backup archive of the File history, it will not to place the case-sensitive letters in the name of the folders you backed up.
turn on file history windows 10
After the backup copy is restored, the folders will change for example from “Library” to “library” or from “Games” to “games”. Normally, this little bug won’t affect your usage of Windows 8.1, 10 but if you are using an application, for example, and you define certain case-sensitive folders, this might affect the work you are trying to accomplish.

SOLVED: Case-sensitive errors while using File History

Unfortunately, there is no option you can check while doing the File History backups which can assure you that the case-sensitive folders will be restored with capital letters.

The only option we have until Microsoft fixes this bug is to manually restore the proper name to the desired folders by simply renaming them .

  1. Right click on the specific folder.
  2. Left click on the “Rename” feature.
  3. Name the folder with a capital letter.
  4. Press the “Enter” button on the keyboard.

This is the simplest way we can fix this until Microsoft updates this File History feature to prevent a future folder name change during the process.

So, we will come back to you with more updates on this subject as soon as they are available for the Windows 8.1, Windows 10 operating system. If you have any other questions on this subject, let us know in the comments below and we will help you further with this situation.

UPDATE: If you want to access File History on Windows 10, first you need to find Control Panel. Locating the Control Panel on Windows 10 is a bit difficult compared to previous OS versions as Microsoft prefers to somehow hide it from users.

Speaking of backing up your files and folders, for more information about the best backup software to use on your computer, you can check out this guide. Read the description for each tool and download the one that best suits your needs.

RELATED STORIES TO CHECK OUT:


Customize your Start List in Windows 10

The new Windows 10 comes with new and improved features one of which is the start list which allows you to pin the apps you frequently use in the upper left side of the Start menu. By reading the lines posted below you will find out how easy it is to customize the start list in Windows 10 and make it more suitable for your everyday needs.
start menu windows 10 screenshot
Customizing the start list in Windows 10 is done by accessing the Taskbar and Start menu Properties feature and just by doing a few clicks you can easily add a favorite app to the start list or perhaps disable one of your choosing.

How to customize the start list present in your Windows 10, 8.1 Start Menu?

  1. Right-click or hold tap on a free space on your Taskbar situated in the lower side of the screen in Windows 10.
  2. Left click or tap on the “Properties” feature you have in the menu that appears on the screen.
  3. You should now have in front of you the “Taskbar and Start menu Properties” window I have told you about above.
  4. In the upper side of this window you will need to left click or tap on the “Start Menu” tab.
  5. Now in this tab you will have to left click or tap on the “Customize” button situated in the middle right side of this window.
  6. Now you have a full list of features under “You can customize how links, icons and menus look and behave on the Start menu”.
  7. In the list you are presented there you need to scroll down until you find the “Pin to Start list” feature.
  8. Now under “Pin to Start list” you will have several items you can choose to pin to the start list like: “Control Panel”, “Devices”, “Documents”, “Help” and many others.
  9. In order to pin an option to the start list you will only need to left click or tap on the box next to it in order to place a check-mark.
  10. After you are done you only need to left click or tap on the “OK” button present in the lower side of this window.
  11. Close the “Taskbar and Start menu Properties” window and left click on the Start button in order to see the changes.
  12. If you would like to pin a favorite application to the start list you only need to drag and drop the application icon to the start list.

You can also play a little bit with the tile sizes so you put an accent on the most used apps and groups. The only thing you need to do is to right-click on the tile you want, select ‘Resize’ and play with the proposed dimensions. If you have live tile updates on and they annoy you everytime they pop up, just right-click on a tile, select ‘More’ and then click on ‘Turn live tile off’.

Now that you know how to customize your start list in Windows 10 you only need to try it yourself and see how it works. Also if you have any other questions on this article that you would like to find an answer to you can write us below in the comments section of the page and we will respond as soon as possible.

READ ALSO: Default Reader App for Windows Addresses Fixes More Problems for PDF, XPS, TIFF Files

New Xbox One 1810 build brings audio fixes, UI changes in My Games and Apps

A new Xbox One 1810 build is out today for Preview Alpha and Skip Ahead Insiders, bringing some important fixes to the various audio issues that some Insiders have been experiencing with beta releases. Streaming apps such as Netflix, Hulu, Plex and Youtube should no longer crash after installing the new bits, and the Xbox team also fixed some issues with Groups being buggy or disappearing in certain circumstances.

As usual, this new build also comes with a list of known issues, including one where some users using headsets may have an issue with the mic not working. The Xbox team also mentioned other issues affecting Microsoft Edge, OneGuide and the Virtual Keyboard, and we invite you to check the full release notes to learn more.

Microsoft is also testing a new UI for the different filters in My Games and Apps, and the team will listen to feedback before shipping it to more Insiders. That’s pretty much the only notable change in this build, but more new features are still in development for the Xbox One 1810 update including the redesigned Xbox Live Avatars, support for Dolby Vision and more.

How to: Download Windows 10 Quick User Guide

Microsoft alongside the Windows 10 Technical Preview version has released the quick user guide which will help you better understand this new operating system as well as learn how the official Windows 10 will look after it will be released. You will learn how to download this Windows 10 quick user guide by following the lines below.

The Windows 10 technical preview user guide will explain two main stages of Windows 10 which are the Windows Insider program that will help you get all the versions that will be available in the future regarding Windows 10 and the Windows Technical Preview guide which will tell you everything you need to know about this new operating system Microsoft has offered us.

How to download Windows 10 quick user guide?

The steps you need to take to access and download the user guide for Windows 10 are posted below:

  1. Go to the desktop feature of your Windows operating system.
  2. Double click (left click) the internet browser icon you are using
    Note: this tutorial is made for Mozilla Firefox but it has the same principle as the other browsers you might use.
  3. Now you will need to left click or tap on the link posted below
  4. Download here quick user guide for Windows 10 Technical Preview
  5. Now after accessing the link you should have the quick user guide in front of you but in order to download it you will need to left click or tap on the download button situated in the upper right side of the Mozilla Firefox window.
  6. Now you will need to left click or tap on the “Save file” feature you get in the next window.
  7. Left click or tap on the “OK” button in order to start the process.
  8. Now in order to access the Windows 10 Technical Preview guide you will need to left click or tap on the arrow pointing down situated in the upper right side of Mozilla Firefox.
  9. Right click on the User Guide in the list that appears and left click or tap on the “Open containing folder” feature.
  10. You should now have in front of you the folder in which the file was saved.
  11. Double click or tap on the file in order to open it and you are free to start learning everything there is to know about the new operating system Windows 10.

You also can try to download the Windows Quick User guide from other sources but you must be careful. Many of the sites proposing these guides in different formats may just try to illegally access some of your data through these files. We strongly recommend you to try to download this only from the Microsoft official page, as even PDF files may contain something harmful for your PC.

There you have it, a quick and simple way to download and access the quick user guide for Windows 10 Technical Preview. Also if you have any additional questions on this subject please don’t hesitate to contact us by posting in the comments section of the page a little bit below.

Fix: Missing Groups and Apps from Windows 10 Start Screen


What to do if Apps or groups are missing from Windows 10?

  1. Use PowerShell to reinstall the missing apps/folders
  2. Get apps back to the Start screen
  3. Find Groups in Windows 10, 8.1

Have you found yourself looking for the groups and apps in Windows 10, 8.1 that should be present in the Start Screen when you first log in to the operating system? You don’t need to be alarmed because you can fix this and get the apps you have installed and the groups back to your Start Screen in Windows 8.1 just by following the tutorial steps below.
windows 10 laptop start screen
There are several methods which you can do in order to bring back your apps on the Start Screen again but the quickest way is to simply pin them to the Start screen and also find out how to view the groups you have previously made just by making a click with your mouse. So go ahead with the steps below and find out how you can do these things in a few minutes of your time.

How to get back apps and missing groups in Windows 10 Start screen?

Use PowerShell to reinstall the missing apps/folders

  1. Open your ‘Start Menu’ and type ‘Powershell’
  2. Right-click on it and run and click ‘Run as Administrator’open powershell as admin fix apps missing
  3. When PowerShell is opened, paste this command in it and press ‘Enter’: Get-AppXPackage | Foreach {Add-AppxPackage -DisableDevelopmentMode -Register “$($_.InstallLocation)AppXManifest.xml”powershell windows with a command line
  4. Restart your PC and see if the apps and/or folders appeared.

Get apps back to the Start screen

  1. You will need to swipe on the Start Screen from the center of the window all the way to the upper side of the screen.
  2. This should get you to the “All Apps” view feature in Windows 8.1
  3. Now find the app you want to place on your Start screen in Windows 8.1
  4. Go with your mouse cursor over it and right click on it or hold tap.
  5. Left click on the “Pin to Start Screen”.
  6. Now you should have your app you pinned to the Start Screen present there.
    Note: you can do this with all the apps you would like to have present on the Start Screen.

Find Groups in Windows 8.1

  1. You can use your fingers and move them together on the screen or simply left click on the “Zoom” icon situated in the lower right corner of the Start Screen.
  2. This should give you a glimpse of the groups you have in Windows 8.1
    Note: you can also drag the groups around to rearrange them as you wish either with the touch screen feature or with your mouse by holding the left click on it and dragging it where you wish.

This is all you need to do in order to find your groups on the Start Screen or get your apps back to the Start Screen menu. Please write us below if you have any questions regarding these two subjects and we will help you further so that you can use your Windows 8.1 to fit your needs.

READ ALSO: Full Fix: Windows 10 default apps are missing

Posted in Fix

ID@Xbox to host 5th annual pre-PAX open house

Microsoft has announced that ID@Xbox is set to host the 5th annual pre-PAX open house. The event will be on Microsoft’s Redmond campus and will feature over 50 Xbox games from independent developers, and 8 new games.

Registration is open now (for free) and you can join in on August 30 from 5 p.m. to 9 p.m. to enjoy the games, and meet developers. You don’t need a PAX ticket to attend, and there will also be the chance to win a prize raffle. Other planned events can be seen below.

  • Meet and chat with other teams at Microsoft.
  • Say hello to the Xbox Ambassadors and spin their prize wheel to win some swag!
  • Head to the Mixer area to try out the latest MixPlay experiences and get a glimpse at the future of interactive gaming.
  • Chat with the Microsoft User Research team to share your personal feedback and help them make better products for you and everyone.

The 8 new titles available for play at the pre-PAX open house include Bot Rods, La-Mulana2, Museum of Simulation Technology, Orphan, Revenant Dogma, Super Retro Maker, Thunder Rally, and Where the Bees Make Honey. Free parking will be available in the area, and there will also be buses taking attendees directly to and from the event at the Washington State Convention Center.

Microsoft recognizes top contributors to security research at BlackHat 2018

At the BlackHat security conference held in Las Vegas this week, Microsoft released its latest list of “Top 100 Security Researchers,” an annual tradition that recognizes top security researchers around the world and their contributions to making Microsoft products more secure. Last week, Microsoft posted a “Making of” explainer for how these researchers were chosen, and at Black Hat, they released the 100 names, which you can check out in a follow-up blog post.

Security research continues to be a hot issue both at big companies like Microsoft, and for independent vendors and for end users. At the Black Hat conference, Google’s Director of Engineering and head of Project Zero, the controversial Google system of “deadline driven” exposure of software vulnerabilities that promises to release info on software problems 90 days after vendors have been notified, spoke at the opening keynote and noted that companies (Microsoft apparently included) have made significant changes in the way they handle these vulnerabilities based on the 90 day disclosure project. In the keynote, Parisa Tabriz noted that 98% of these vulnerabilities are now fixed within the 90 day period, up from only 25% before Project Zero was begun in 2014.

BlackHat seems to be both highlighting the work being done across the industry on security, and also bringing more attention to the problems being faced, and companies large and small seem to be taking security much more seriously. Tabriz’s call to examine root causes and for collaborative work across the industry to solve security problems, like Brad Smith’s call for a “Geneva Convention” on security, and the popularity of events like BlackHat, show that even as security problems become more complex, the industry is taking bold steps to combat them.

Microsoft expands rural broadband initiative to 110,000 in Ohio

Yesterday, Microsoft and Agile Networks announced they have reached an agreement to help 110,000 people in rural Ohio get access to the internet. This is the latest leg of Microsoft’s Airband initiative, which is aiming to bring broadband access to 2 million unserved people in rural America by 2022.

Under the agreement, Agile Networks will use its telecommunications infrastructure throughout the state, and TV White Space technology. There are also plans for Agile to enhance public safety across the state of Ohio while still providing competitive, affordable broadband access options to rural consumers and businesses.

In the words of  Shelley McKinley, Microsoft’s head of Technology and Corporate Responsibility:

“In today’s digital economy, broadband access has become a necessity across industries including healthcare, agriculture, business and education. Our partnership with Agile will help deliver broadband internet access to rural communities across Ohio so that they can take advantage of today’s and tomorrow’s opportunities and the latest cloud technologies.”

The agreement should also benefit medical clinics and rural hospitals, schools, oil and gas wells, agriculture operations, and households. Microsoft previously announced the winners of Airband Grants across New York, West Virginia, California, Maine, and Texas, with those groups also aiming to help bring broadband internet access to rural communities.

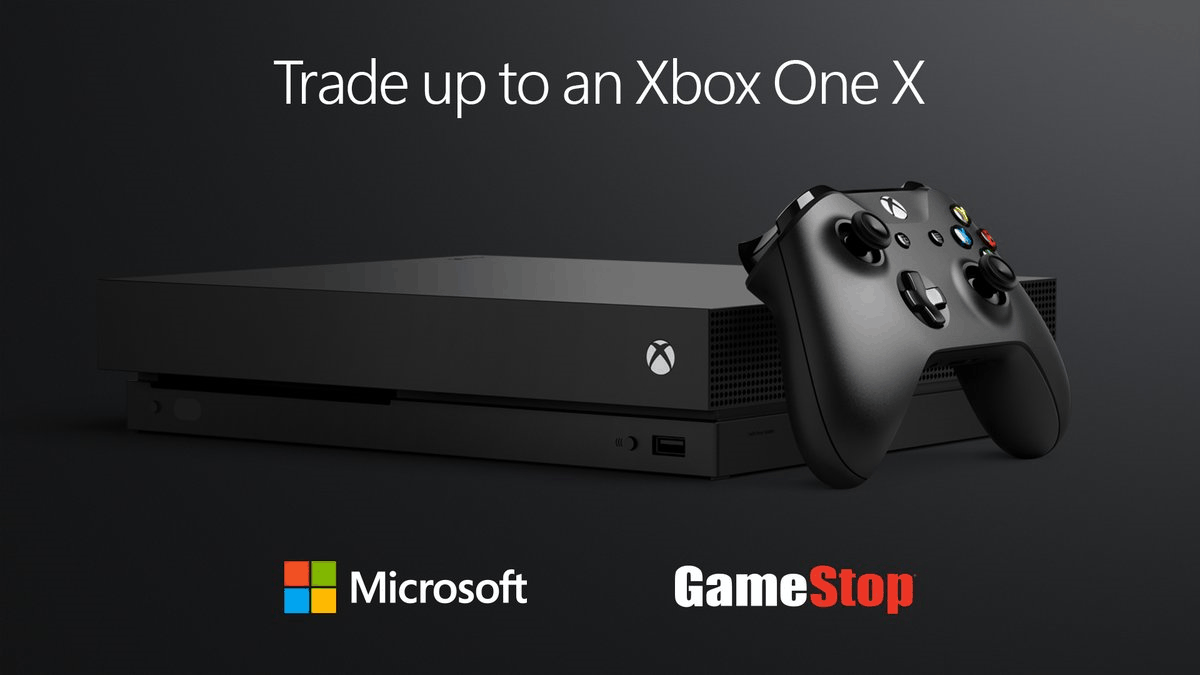
Get up to $300 towards an Xbox One X with a qualifying trade-in at Microsoft Store or Gamestop

If you’re still holding onto an older Xbox console and itching for an update, or just have a PlayStation 4 and want a switch Xbox, you’re in for a treat. Microsoft announced yesterday that you can now get up to $300 towards an Xbox One X with a qualifying trade-in at Microsoft Store or Gamestop.

The offer is valid until August 28th, and you can find out more by visiting your local Microsoft Store or Gamestop. A list of Microsoft Stores are available here, and you can find your local Gamestop by checking this link.

Microsoft is also running an additional offer where you can save $10 on select Xbox wireless controllers. It is defintley nice to see both these offers as it entices more people to upgrade or switch to the most powerful Xbox ever. Check out the trade-in offers for yourself, and let us know in the comments below if you’ve taken advantage.

Xbox Live Free Play Days are coming back this weekend

Starting today through Sunday, August 12, Xbox Live Multiplayer will be free for everyone on Xbox One and Xbox 360. Microsoft announced the new Free Play Days session in a video that was published on YouTube earlier today. As usual, those of you who don’t have an active Xbox Live Gold subscription will be able to try multiplayer on every game you own, but this is also a good opportunity to try free multiplayer games such as the massively popular Fortnite: Battle Royale.

This is the second time this year that Microsoft will be opening the gates of online multiplayer to all Xbox gamers (the last time was in February). Last but not least, Xbox One gamers will also be able to try The Elder Scrolls Online: Morrowind and the vehicular combat game Onrush for free this weekend.

How to Change Microsoft Email in Windows 10, 8.1

Now that in Windows 8.1 or Windows 10 you can log on to the system using your email account you might need to know how to change the Microsoft email if you ever need to. So by following the lines below in the short tutorial posted you will find out how to change the Microsoft email in Windows 8.1 or Windows 10.
Windows8.1,Windows 10 how to change microsoft email
Changing the email account you currently use in Windows 8.1 or Windows 10 with a new one will be done by changing your Microsoft account to the local one and registering back to another online email from the  Microsoft  feature you have in Windows 8.1 or Windows 10.

How to change your Microsoft email in Windows 10 or Windows 8.1?

  1. Log in to the Windows 10 or Windows 8.1 with the account you currently have and you would like to change.
  2. Move the mouse cursor over to the lower right side of the screen.
  3. Now you should have in front of you the menu Charms bar of the Windows 10 or Windows 8.1 operating system.
  4. Left click or tap on the “Settings” feature you have in the Charms bar menu.
  5. After you selected the Settings feature you should have on the right side of the window the “Change PC settings” button.
  6. Now in the “Change PC settings” window, you will need to left click on the “Accounts” button.
  7. In the “Accounts” topic you will need to left click or tap on the “Your account” feature.
  8. Now on the right side of the screen, you will need to left click or tap on the “Disconnect” link.
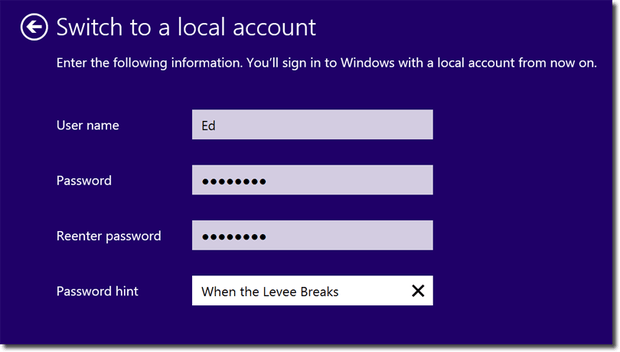
  9. You should now have in front of you a “Switch to a local account” window.
  10. In the above window you will need to write next to the “Current password” field the password from the account you signed into the Windows operating system.
  11. Left click or tap on the “Next” button situated in the lower right side of that window.
  12. In the next window that follows you will need to write your password again in the “Password” field.
  13. Retype the password in the “Reenter password” field.
  14. And in the “Password hint,” you will need to choose a hint that you will remember.
  15. Left click or tap on the “Next” button you have in the lower right side of the screen.
  16. In the next window that appears you will need to left click or tap on the “Sign out and finish” button situated in the lower right side of the screen.
  17. Now you will need to re-log into your Windows 10 or Windows 8.1 operating system using the new password that you changed.
    Note: This time the operating system will sign into the local account and not the Microsoft account you have.
  18. Now follow the steps posted above in order to get to the “Account” window again.
  19. Left click again on the “your account” topic on the left side of the screen.
  20. Now on the right side, you will need to left click or tap on the “Connect to a Microsoft account” link.
  21. You should have in front of you a window with “Switch to a Microsoft account on this PC”.
  22. You have there a “Current password” field in which you will need to write the password for the local account you signed in with.
  23. Left click or tap on the “Next” button you have in the lower right side of this window.
  24. Now in the “Sign in to your Microsoft account” window you will need to write the email and the password of the account you want to be the Microsoft account.
  25. Left click or tap on the “Next” button in the lower right side of the screen.
    Note: If you don’t have an account you can make one by left-clicking or taping on the “Don’t have an account?” link in the lower left side of the window.

You can also simply add an ‘alias’ account. That means that you simply add a new email address to your current Microsoft account. If you want to switch from an Outlook address to a, let’s say, Yahoo or Gmail, you only have to follow few simple steps (Note: this solution does not work if you have forgotten your credentials for logging in Microsoft account). Here they are:

  1. Access Microsoft account page
  2. Sign in your current account
  3. In the navigation bar at the top of the page, you must find the ‘Your Info’ tab; click it
  4. Click ‘Manage how you sign in to Microsoft’
  5. Click ‘Add email’ to create an alias
  6. Choose between ‘create a new’ and ‘add an existing’ mail addresses
  7. Check the mail you just added for the verification mail and verify the new address
  8. Choose ‘make primary’ if you want this address to be primary

This changing process may take up to 48 hours until it gets through all Microsoft security verifications so do not bother if this won’t work immediately.

There you go, a simple and very quick way to change your Microsoft email in Windows 8.1 or Windows 10 in just a few minutes. You can also write us below if you have any other questions on changing your Microsoft account and we will help you as soon as possible.

READ ALSO: Full Fix: Unable to Login with my Microsoft Account in Windows 10

Microsoft details where new Xbox Avatars will appear in new faq

While the new Xbox Avatars haven’t yet rolled out to the general public, many Xbox Insiders have already begun testing them on their consoles. To help these Xbox Insiders better understand how these new Xbox Avatars will work, Microsoft has published a new faq answering some of the questions Xbox gamers may have about them.

In addition to the expected reminder that not everyone has these new Xbox Avatars yet, the faq does make an important mention about a short delay that will happen whenever an Xbox One user switches over to these avatars. Turns out that these new Xbox Avatars won’t show up immediately and will be delayed by about 10 seconds while the system processed the change.

This new faq also confirms that the new Xbox Avatars will appear on user profiles, in the Activity Feed, on leaderboards, when comparing Gamerscore, on GameHubs, and in Clubs. These new creations may also show up on the Home page of the Xbox One’s dashboard and as notifications when friends come online.

There’s still no official ETA for the arrival of these new Xbox Avatars however it does look like they’ll be coming soon given how much testing is now being done with them by Xbox Insiders.

Do you think the new Xbox Avatars will launch soon? Do you like their style? Share your thoughts with the community in the comments below and make sure to follow us on Pinterest for more Xbox gaming content.

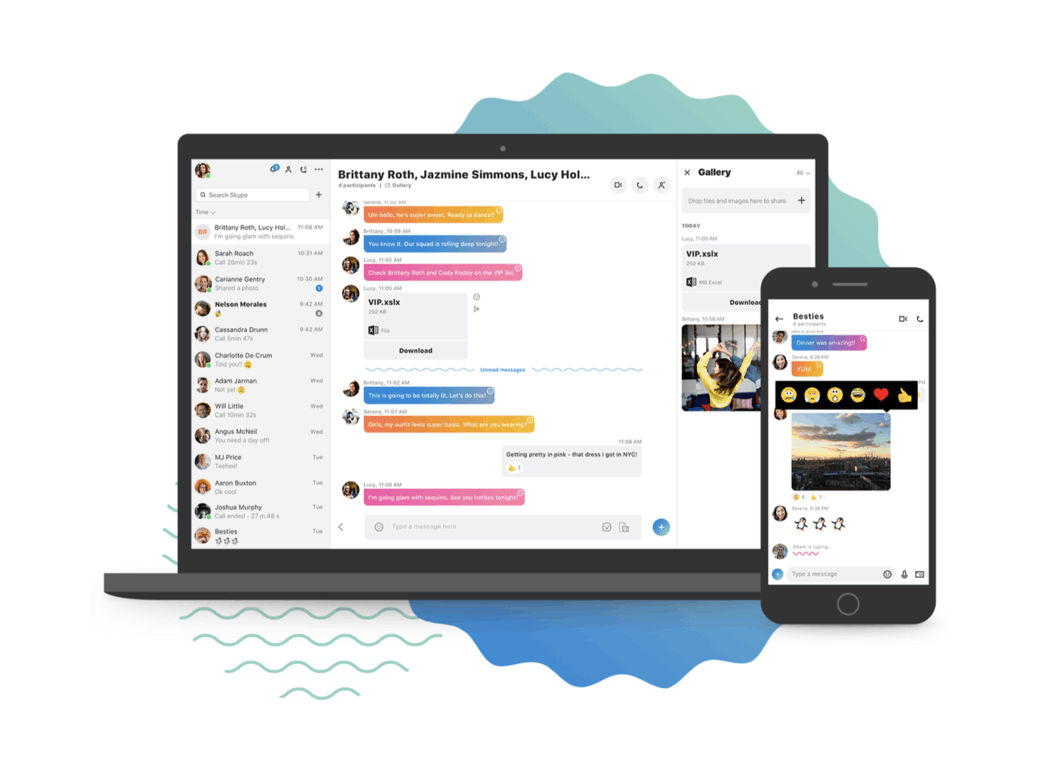
Microsoft changes its mind, extends Skype 7 support

In July 2018, Microsoft announced that it would discontinue Skype 7.0 (Skype Classic) in September 2018. The company confirmed the newly updated Skype 8.0 would replace 7.0. However, after something of a backlash on its forums, Microsoft has gone back on its original announcement by stating that it will extend support for Skype 7.

Microsoft’s original announcement that it will ditch Skype 7 in favor of 8.0 did not go down a storm. Microsoft was pushing a lot of users into updating the app when they actually preferred the 7.0 version. Lots of users rate Skype Classic more highly as they can open chats in separate windows and customize contact notifications. One user stated:

With the previous Skype I had (I think it might have been the Classic) I was able to set it up so that each person I was chatting with had their own window. I looked in the settings for Skype for Windows 10 and couldn’t find those options.

Users initially expressed their concerns regarding speculation that Microsoft might abandon Skype 7 in June. When the company confirmed it in July, some users could hardly believe it. After many posts on Microsoft forums lamenting the company’s announcement to discontinue Skype 7, the software giant has now reconsidered ditching Skype Classic.

Babs (Skype) updated an original forum post seeking feedback for the update. Now that forum post states: “UPDATE: Based on customer feedback, we are extending support for Skype 7 (Skype Classic) for some time. Our customers can continue to use Skype Classic until then.” Thus, Microsoft has now confirmed that it will continue to support Skype Classic beyond September.

Many Skype users are delighted Microsoft listened to feedback. One user stated, “WHOOPEE! We’re all watching – let’s hope what you have to offer in the near future is a decided improvement on the impoverished Skype you were about to offer!” Maybe now Microsoft will look for a way to incorporate simultaneous chat window support in the latest Skype 8.0 as widely requested.

So you don’t need to update to Skype 8.0 by September 2018 after all! Exactly how long Microsoft will continue to support Skype 7.0 remains unclear, but for now users can still stick with the classic Skype desktop app. Until Microsoft implements some of the changes users have requested for Skype 8.0, Skype 7 will probably retain a substantial user base.

Microsoft releases Windows Community Toolkit version 4.0

Microsoft’s Windows Community Toolkit has reached version 4.0 and with that update comes a handful of new additions and improvements.

Microsoft announced today that users of the Windows Community Toolkit v4.0 should look forward to:

  • New DataGrid with fluent design for all UWP developers
  • Two new Microsoft Graph controls. PowerBIEmbedded enables embedding PowerBI dashboards in your UWP apps and PlannerTasksList allows users to work with Microsoft Planner tasks
  • The Twitter, LinkedIn, and Microsoft Translator services have moved to the .NET Standard services package and available to even more developers, including desktop and Xamarin developers
  • Strong-named packages for those developers that require strong-named assemblies
  • Dark theme support for the sample app and theme chooser for each sample

For the extensive breakdown and visuals of the new update, users can either install the new update or visit Microsoft’s Windows Developer Blog or its GitHub repository here.

Fix: Error Code 0x80780119 in Windows 10/11, 8.1

When creating a system image file in Windows 8.1 and your partition has certain errors on it or you don’t have enough free space on it you will most likely get the following error message: “There is not enough disk space to create the volume shadow copy of the storage location (0x80780119)”. Well, you can follow the tutorial below to find out more about this issue and how to fix the error code 0x80780119 in your Windows 8.1 operating system.
How to fix error code 0x80780119 in Windows 8, 8.1
The space you require to make a backup copy of the system is not only in the regular partition of the Windows operating system but also refers to the volume shadow copy of the image. This copy will be placed on the OEM Recovery partition which windows creates but in most of the cases the partition doesn’t have enough free space on it in order for the shadow copy to be placed there.

Fix error 0x80780119 in Windows 8 and Windows 8.1

1. Shrink your recovery partition

  1. Open your “Disk Manager” feature available in your Windows operating system by pressing on the arrow situated in the lower side of the screen or just swipe up to open the app window.
  2. Now in the Apps screen swipe to the right side of the screen to open “Windows System” feature.
  3. Left click or tap on the “Control Panel” feature available there.
  4. In the “Windows System” category you should find “System and Security” link.
  5. In the “System and Security” feature you should left click or tap on the “Administrative Tools” feature situated in the lower side of the screen.
  6. In the “Administrative Tools” window you should double click (left click) on “Computer management”
  7. In the “Computer Management” window left click or tap on the “Disk Management” button.
    Note: You will need to expand the “Storage” option in order to see the “Disk Management” feature.
  8. You should have in the “Disk Manager” window the partitions made in your device.
  9. Look for the “Recovery Partition” that should be around 500 MB in size.
  10. Right click on this partition and left click or tap on the “Shrink Volume” feature available in the menu that appears.
  11. You should now have in front of you the “Shrink” window of the partition you selected.
  12. Next to “Total size before shrink in MB” you should have 500 MB or more.
  13. Now for example if the partition is 500 MB as above you will need to write a “10” next to “Enter the amount of space to shrink in MB” in order to bring under 500 MB the “Total size after shrink in MB” (if you write a 10 in that field as explained above, for a partition of 500 MB you should get in the “Total size after shrink in MB” the value of 490 MB)
    Note: If this partition is larger than 500 MB you will need to write in the field next to “Enter the amount of space to shrink in MB” the number necessary to bring the MB in the ” Total size after shrink in MB” field under 500 MB.
  14. Left click or tap on the “Shrink” button situated in the lower side of this window.
  15. After the process is completed your partition should be at 490 MB.
  16. You will need to reboot the Windows 8.1 operating system.
  17. Try to see if you can make the backup copy now.

2. Run a Disk Check

  1. Open Computer (This PC)
  2. Right-click on the drive you want to check and open its Properties
  3. Click on Tools tab, after that click Check Now (located under Error-checking)
  4. Click on ‘Automatically fix file system errors’ if you want your PC to do it automatically

There you go. Now you have a method which you can use to fix the error code 0x80780119 in your Windows 8.1 or Windows 8 operating system. You can write us below if anything is unclear and we will help you further with this issue.

READ ALSO: SOLVED: Unspecified error in Windows 10 (error 0x80004005)

How to fix Xbox sign in error 0x406

The Xbox app in Windows 10 provides many handy options for Xbox gaming. However, some users can’t always log in to their Xbox apps. One Xbox app sign in error message states: We can’t sign you in right now. Try again later (0x406). Here are a few resolutions for fixing the 0x406 sign in error.

How can I fix Xbox sign in error 0x406?

  1. Reset the App
  2. Install Missing Built-in Apps
  3. Add the Xbox Identity Provider App to Windows 10
  4. Open the Xbox App in an Administrator Account

1. Reset the App

Windows 10 includes a handy Reset option that’s always worth noting when an app throws out an error message. The Reset option will reset the app‘s data, but not your account data. This is how you can Reset your Xbox app.

  • Press the Type here to search (otherwise Cortana) button on Windows 10’s taskbar.
  • Enter the keyword ‘apps‘ in the search box.

  • Click Apps & features to open a list of UWP apps in Settings.

  • Enter ‘Xbox‘ in the Search this list box.

  • Select the Xbox app and click Advanced options.
  • Press the Reset button shown directly below.

  • Click Reset again to provide further confirmation.

— RELATED: Fix Xbox Sign in error 0x87dd000f with these 5 solutions

2. Install Missing Built-in Apps

Error 0x406 can be due to missing built-in apps that the Xbox app depends on. Thus, restoring missing built-in apps can fix error 0x406. You can ensure Windows includes all required apps as follows.

  • First, open the Cortana app.
  • Enter ‘Powershell’ in the Cortana app’s search box.
  • Right-click Windows PowerShell and select Run as administrator.

  • Enter this command in PowerShell:

Get-AppxPackage *windowsstore* | Remove-AppxPackage

Get-AppxPackage *xboxapp* | Remove-AppxPackage

  • Press the Return key after entering the above.
  • Thereafter, restart Windows 10.
  • Open PowerShell as administrator as before.
  • Then enter (or copy and paste) Get-AppxPackage -AllUsers| Foreach {Add-AppxPackage -DisableDevelopmentMode -Register “$($_.InstallLocation)AppXManifest.xml”} into PowerShell, and press the Enter key.

3. Add the Xbox Identity Provider App to Windows 10

Some users have confirmed that the Xbox Identity App also fixes error 0x406. Press the Get this app button at https://www.microsoft.com/en-us/p/xbox-identity-provider/9wzdncrd1hkw?rtc=1 to add the Xbox Identity App to Windows 10. Then open Xbox as you usually do to sign in.

4. Open the Xbox App in an Administrator Account

Also note that you need an admin account to sign in to your Xbox app. So make sure you’re opening the app within an admin account. You can quickly set up an admin account as follows.

  • Right-click the Start menu to open the Win + X menu.

  • Select Command Prompt (Admin) to open the Prompt’s window.
  • Now enter ‘net user administrator /active:yes’ in the Command Prompt’s window, and press the Return key.

  • Close the Command Prompt.
  • Press Ctrl + Alt + Del to select Sign out.
  • Then log in with your new admin account, and open the Xbox app.

Those are a few of the resolutions that will probably fix error 0x406 so you can sign in to your Xbox app again. Note that Windows 10 also includes an app troubleshooter you can open from Settings which might also come in handy for fixing error 0x406.

RELATED STORIES TO CHECK OUT:

Fix: Formatted Wrong Partition in Windows 10/11


What to do if I have formatted the wrong drive partition in Windows 10, 8.1?

  1. Use Remo Software
  2. Use iCare Data Recovery
  3. Use other partition software

While reinstalling the Windows 10 or Windows 8.1 operating system some of our users accidentally formatted the wrong partition which may include several important data like movies, music, files or work-related documents. You will be glad to know that there is a fix to this issue and you will learn what you need to do in the lines below in order to solve your Windows 8.1 or Windows 10 if you formatted the wrong partition.
Fix Formatted wrong partition in Windows 8.1
There are some useful applications that you can install in order to bring back your important data in Windows 8.1 or Windows 10 that you previously lost to the partition format action you made by mistake. Some of them you can get for free and some of them cost just a few dollars so mainly if you have very important data that you need to get back I don’t think a few dollars can stand in your way.

How to get back your partition if you formatted it by mistake in Windows 8.1 or Windows 10

1. Use Remo Software

  1. Left click or tap on the link posted below in order to download “Remo software” software.
    Note: This application will restore most of your files including videos, documents, music, emails, files and many others.
  2. Download here “remo Software”
  3. Now, wait for the download to complete.
  4. Go to the folder where you downloaded the application and run the application file in order to start the process.
    Note: Install it where the default path is in the installation process.
  5. After the installation process is completed you can go on your Windows desktop and run the icon from there.
  6. After you open the application you should have in front of you the main page.
  7. Left click or tap on the “Recover Partition/Drives” feature presented in the main page.
  8. Left click or tap on the “Partition Recovery” feature.
  9. You will have a list of available drives that you can recover data from.
  10. Left click or tap on the drive you want to recover your data from.
  11. After you start the process you will have to wait a couple of minutes (approximately 25 minutes)
  12. After the scan is finished you will be displayed with the data available that you wish to recover.
    Note1: You can save the files you want to recover on any partition or removable stick in your Windows 8.1 or Windows 10 operating system
    Note2: As a safety precaution it is recommended to always make a backup copy of the system before you attempt to format a partition or a full drive.

2. Use iCare Data Recovery

  1. Left click or tap on the link presented below
  2. Download here iCare Data Recovery standard
  3. Left click or tap on the “Save file” button you get on your screen after you left click or tap on the link above.
  4. Save it anywhere you like in your Windows 8.1 or Windows 10 system.
    Note: This application is free
  5. Install the application on a different partition then the one you formatted.
  6. After the installation is completed you will need to go on the desktop and open ” iCare Data Recovery” icon.
  7. In the main window of the application, you will need to left click or tap on the “Format Recovery”.
  8. Now you will need to left click or tap on the partition that you previously formatted.
  9. Left click or tap on the “Recover” feature presented in this window.
  10. After the scanning device process is finished you will have the formatted partition there.
  11. Select the formatted partition and left click or tap on the “show files” feature.
    Note: After you selected “Show Files” feature you will have in front of you the files that were on your partition before you formatted it.
  12. You only have to save the files that you lost to another partition on the Windows 8.1 or Windows 10 device and you are all done.

3. Use other partition software

The tools presented below work well on Windows 10, 8.1 but you might know other partition software that you have used already. Some of them like MiniTool Partition Wizard, Paragon Partition Manager or EaseUS Partition are known worldwide and will help you. However, before downloading one of them, be sure that they have a backup feature so you can recover your wrong formatted drive.

On our site, you can find more partition formatting software that will help you. They are selected for Windows 10 users and have advanced formatting features. Be sure you choose the right one in order to fix your problem.

There you go; two quick methods on how to get back your lost data if you formatted the wrong partition in Windows 8.1 or Windows 10. Please write us below for any additional questions you may have on this subject and we will help you further with this issue as soon as possible.

READ ALSO: Microsoft to Discuss Windows 10 on Tablets and Phones Next Week at a Special Event

New Artistic Endeavors Windows 10 theme added to Microsoft Store

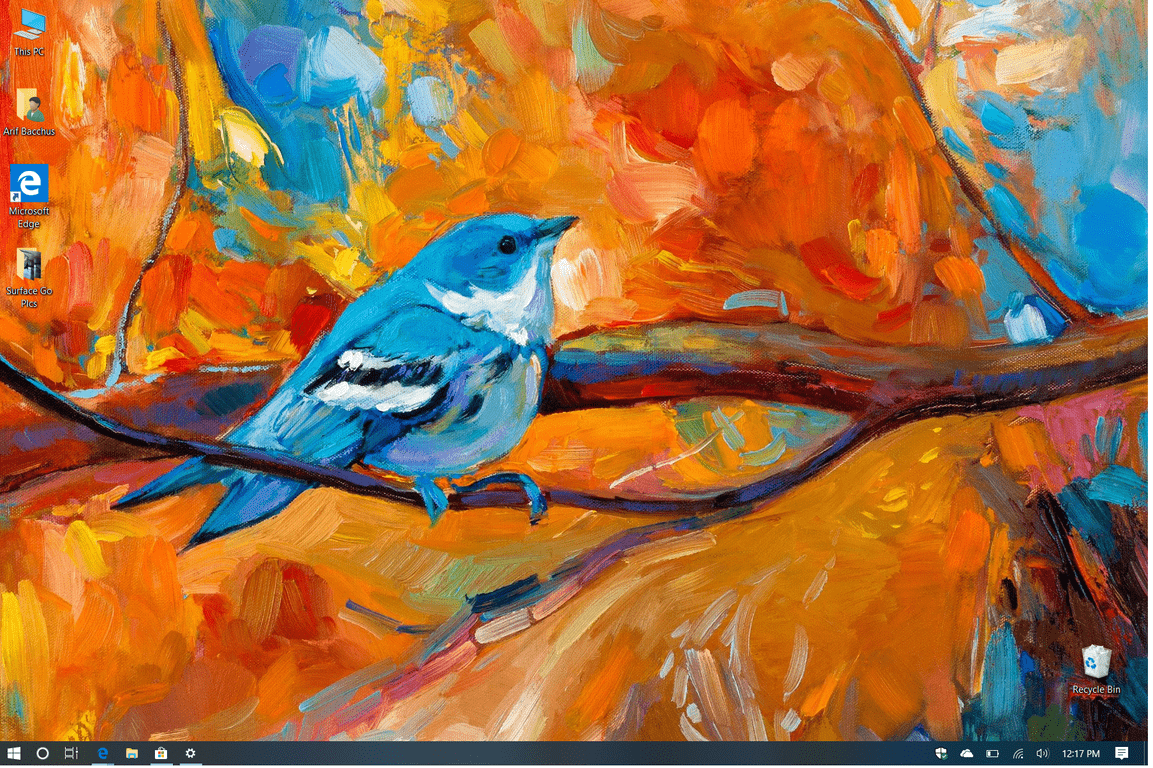
If you’re the kind of person that likes to change up your desktop and theme, you’re in for a treat. Microsoft has recently added a new Artistic Endeavors Windows 10 theme to the Microsoft Store, and it looks pretty cool.

The full theme comes with a total of 19 hand-painted images for your Windows 10 PC. There are pictures of calming flowers, birds, and landscapes in the pack, and you can tweak your theme settings to have it cycle through every once in a while. If you want, you can also head to the themes folder after the theme is unpacked, and choose a specific image to use persistently.

Microsoft has also recently unleashed a Ninja Cat pack, for Windows 10 to celebrate the mascot for the Windows Insider Program. Anyway, our favorite image in this collection happens to be the one with the bicycle, and we’re curious as to which one you like too. Head to the Windows Store now to download and let us know in the comments below!

Artistic Endeavors
Artistic Endeavors
Price:
Free

Right Click on Desktop Freezes Windows 11: How to Fix it

Upgrading the OS has several benefits, be it a better UI, enhanced feature set, or a user-friendly experience. But it’s not all pros. Several users, after upgrading, reported that a right click on the desktop freezes or hangs Windows 11.

You will most likely get this issue when you update/upgrade the OS, and some applications are incompatible with the new system. In most cases, the Autodesk Inventor application will make your operating system react like this.

Keep reading to find solutions when your Windows 11 desktop freezes after a right click.

What can I do if a right-click on desktop freezes Windows 11?

1. Disable contextmenuhadlers

Tip icon Tip
It is very important to make a backup copy of the Registry Editor keys or create a restore point before you modify or delete keys in case something goes wrong.
  1. Look exactly at which folders or file types you are having the right-click issue.
  2. Press Windows + R to open Run, type regedit, and hit Enter.regedit
  3. Now if you have issues with the right-click on a specific file type, you will need to navigate to the location below and disable or delete contextmenuhandlers:
    • File right-click issues– HKEY_CLASSES_ROOT\*\shellex\ContextMenuHandlers
    • File folders– HKEY_CLASSES_ROOT\AllFileSystemObjects\shellex\ContextMenuHandlers
    • Folders– HKEY_CLASSES_ROOT\Folder\shellex\ContextMenuHandlers
    • File folders– HKEY_CLASSES_ROOT\Directory\shellex\ContextMenuHandlers
    • File class– HKEY_CLASSES_ROOT\shellex\ContextMenuHandlers

Once done with the changes, restart the computer for the changes to effect, and right clicks on the desktop shouldn’t freeze Windows 11 anymore.

2. Use ShellExView app

  1. Download ShellExView.
  2. Install the app and run a scan to view all the shell extensions on your PC.
  3. Look in the results window that shows the shell extensions, left-click or tap on the Type button in order to sort them.
  4. Now scroll down until you find the context menu handlers of the system.
  5. Find the Autodesk Inventor context menu handler and disable it.

When third-party apps conflict with the functioning of the computer and a right click freezes Windows 10 or the latest iteration, using ShellExView might help.

3. Modify the Registry Editor

  1. Open the Registry Editor and navigate to the following path:Computer\HKEY_CLASSES_ROOT\Directory\Background\shellex\ContextMenuHandlers\Newregistry
  2. If you have any other third parties folders, we suggest you make a backup of them and remove or disable them one by one and check if your desktop reacts to the right-click action.

If Windows 11 freezes or hangs when you right-click on the desktop, modifying the registry to remove any third-party conflicts should fix things.

Before you leave, find out how to speed up Windows 11 and make the PC run faster than ever.

Please write us below in the comments section any other questions you may have on this article, and we will help you further with this issue.

Skype version 8 is getting a new Spotify add-in

Microsoft has started testing a new Spotify Add-in with Skype Insiders running the version 8.26 builds or higher. The new feature is only available for Insiders in the US for now, but a global roll out is coming soon. 

For those unfamiliar, Skype Add-ins are all the third-party services you can access right from your Skype chats by clicking the + icon. With the new Spotify add-in, you’ll be able to preview Spotify songs in Skype and share them with any of your contacts. On this support page, Microsoft notes that not all Spotify songs have a playable preview in Skype, and in that case your contacts will need to click the “Play on Spotify” button to listen to the song on the music streaming app.

Microsoft has already teamed up with the music streaming service to allow Groove Music Pass subscribers to transfer their playlists to Spotify, so we’re glad to see that both companies are continuing to work together. Spotify is one of the most popular players in the music streaming space these days, and this new Add-in may well make the controversial version 8 of Skype a little more bearable for music fans.  

Dead Cells video game is now ready for gamers on Xbox One

Dead Cells is now available to play on Microsoft’s Xbox One consoles. They game is a 2D action platformer with a retro art style and gameplay that’s heavily inspired by Castlevania and Roguevania playstyles.

Here’s the official game description:

Dead Cells is a rogue-lite, Castlevania-inspired action-platformer, allowing you to explore a sprawling, ever-changing castle… assuming you’re able to fight your way past its keepers. To beat the game, you’ll have to master 2D “souls-lite combat” with the ever-present threat of permadeath looming. No checkpoints. Kill, die, learn, repeat.

  • RogueVania: Intense 2D action with the adrenaline pumping threat of permadeath in a castle full of cuddly creatures.
  • Souls-lite combat: Pattern-based bosses and minions, weapons and spells with unique gameplay. Roll roll roll your boat gently down the stream…
  • Nonlinear progression: Unlock new levels with every death, take a new path. Tired of the stinking sewers? Why not take the ramparts?
  • Exploration: Secret rooms, hidden passages, charming landscapes. A fine place for a holiday.

Dead Cells is a relatively cheap Xbox One game, currently selling for $24.99 in the Store. Have you played it yet and would you recommend it to others? Let us know in the comments below and then follow us on Twitter for more Xbox gaming news.

Dead Cells
Dead Cells
Developer:
Motion Twin
Price:
Free

Invisible Cursor on Windows: How to Make it Visible Again

Your cursor is your most important navigation method, but many reported that their cursor is invisible. This can be a big problem since it makes even the simplest actions impossible to perform.

If this happens, you won’t be able to customize your cursor or perform any other major tasks, so it’s crucial to fix this problem, and in this guide, we will show you how to do it.

Why is my cursor invisible?

  • Your registry isn’t properly configured, and that’s causing the issue.
  • Temporary glitches with the mouse or operating system.
  • Problems with the mouse driver can sometimes cause this issue.

How do I fix an invisible cursor?

1. Use the keyboard shortcut

  1. Press and hold the buttons: Ctrl, Alt, and Delete on your keyboard.
  2. Press the Escape button to get back to your normal Windows screen.
  3. After applying the steps above, your main cursor should be again available for you to use.

This option is not a permanent fix, but it will give you the cursor back in a few seconds.

2. Tweak your Registry

  1. Press Windows key + R and enter regedit. Click OK.
  2. In the left side panel left navigate to HKEY_LOCAL_MACHINE\SOFTWARE\Microsoft\Windows\CurrentVersion\Policies\System
  3. In the right pane, double-click the EnableCursorSupression name.enable cursor suppresion regedit
  4. Set the Value data to 0 and click OK.cursor suppresion windows 10
  5. Restart your PC.

3. Run the Hardware and Devices troubleshooter

  1. Open Control Panel.
  2. Go to all Control Panel items and choose Troubleshooting.
  3. Select All categories and launch the Hardware and Devices troubleshooter.
hardware devices troubleshooter windows 10

After doing that, check if the problem is still there.

4. Update or roll back your mouse driver

  1. Press Windows key + X and select Device Manager from the list.
  2. Expand the Mice and other pointing devices section.
  3. Right-click on your mouse and select Update if you want to update the driversupdate mouse driver
  4. If you want to roll back to a previous version, then right-click on the mouse driver > click on Properties
  5. Go to the Driver tab and select Roll back driver if the option is not greyed out.
roll back mouse driver

These are just some solutions that can help you if you’re dealing with an invisible cursor on your PC.

Sadly, this isn’t the only issue you can encounter, and many reported that the mouse is selecting everything, but you can fix that using one of our other guides.

What method did you use to fix this problem? Let us know in the comments below.

FIX: Limited connectivity and Internet access [Windows 10/11]


How do I fix limited Internet connection?

  1. Update Network Adapter Drivers
  2. Uninstall Network drivers
  3. Reboot your wireless router
  4. Enable Receive Side Scaling in CMD
  5. Set up a new wireless network
  6. Check your router and update it
  7. Run the Internet troubleshooter

Yes, if you’re experiencing limited Internet connectivity issues on Windows 10, 8.1 or Windows 7, you found the right tutorial. This guide will show you how you can manage and fix the limited connectivity access error or perhaps a gateway error when you try to connect to the internet in your Windows 7, 8.1 or Windows 10 operating system. This sort of errors usually happen when you upgrade from Windows 7 or Windows 8 to Windows 8.1 or Windows 10. You only need to follow the instructions posted below in the right order and you will get your internet up and running in no time.

Most of the time, there is an issue with your wireless card driver which is not really compatible with your Windows 8.1 or Windows 10. Upgrading this driver is really easy and we’ll show you how to do that. You’ll also going to check some internet connectivity items and you’ll be able to solve this issue once and for all.

How can I fix limited connectivity no internet access?

1. Update Network Adapter Drivers

  1. Move the mouse cursor over to the upper right side of the screen.
  2. The Charms bar should be in front of you.
  3. Left click or tap on the “Search” feature present there. If you’re running Windows 10, you can simply type ‘device manager’ and hit Enter to open the Device Manager feature.
  4. In the search box, you will need to write “Device Manager” without the quotes.
  5. After the search is finished left-click or tap on the “Device Manager” icon.
  6. If you are prompt by a user account control message, you will need to left click or tap on the “Yes” button.
  7. On the left side panel in the “Device manager” window, left-click or tap on the “Network Adapters” icon to expand it.
  8. Look in the list of Network Adapters for the adapter you are using.
  9. Right-click or hold tap on your network adapter.
  10. Left click or tap on the “Update Driver Software” feature present in the list.update network adapter driver
  11. Choose the feature to “Search Automatically for Updated Driver Software”.
  12. Reboot your Windows 7, 8.1 or Windows 10 device and check to see if your Wireless connectivity still shows as Limited or it gives you access error.

2. Uninstall Network drivers

  1. Go again to the Network Adapter feature as you did in the step above.
  2. Right-click or hold tap on the network adapter, but this time left click or tap on the “Uninstall” button.uninstall network adapter drivers
  3. Go on the Manufacturer’s website and download then install the latest version of the driver that is compatible with your Windows 7, 8.1 or Windows 10 device.

3. Reboot your wireless router

  1. Unplug the Wireless router from the power socket.
  2. Wait approximately one minute.
  3. Plug in the power cord to the wireless router.
  4. Reboot your Windows 7, 8.1 or Windows 10 device.
  5. Try connecting again to your wireless router and see if you have the same limited connectivity and access error or gateway error.

— RELATED: Best Windows 10 router software you can configure routers with

4. Reset TCP connection

  1. Move the mouse cursor over to the upper right side of the screen.
  2. From the Charms bar present there you will need to left click or tap on the “Search” feature.
  3. In the search box write the following: “cmd” without the quotes.
  4. A “Command Prompt” icon should show after the search.
  5. Right click or hold tap on the “Command Prompt” icon and left click or tap on the “Run as Administrator” option.
  6. In the command prompt you will need to write the following: “netsh int tcp set heuristics disabled” without the quotes.
  7. Press the “Enter” button on the keyboard.
  8. Wait for the message “OK” then continue with the lines below.
  9. Write in the command prompt the following: “netsh int tcp set global autotuninglevel=disabled” without the quotes.connection limited windows 10
  10. Press the “Enter” button on the keyboard.
  11. Wait for the message “OK” then continue with the lines below.
  12. Write the following in the command prompt: “netsh int tcp set global rss=enabled” without the quotes.
  13. Press the “Enter” button on the keyboard.
  14. Wait for the message “OK” then continue with the lines below.
  15. Write the following in the command prompt: “netsh int tcp show global”without the quotes.
  16. Press the “Enter” button on the keyboard.
  17. Now reboot your Windows 8.1 or Windows 10 operating system.
  18. Check to see if your internet connectivity is working for you now.

Editor’s Note: This article continues on the next page.


5. Set up a new wireless network

  1. Move the mouse cursor over to the upper right side of the screen.
  2. Now left click or tap on the “Search” feature present in the Charms bar.
  3. In the search box write the following: “Network and Sharing Center”.
  4. After the search is finished left click or tap on the “Network and Sharing Center” icon.
  5. Now in the “Network and Sharing Center” you will need to left click or tap on the “Set up a new connection or network” feature.set up new connection network
  6. Left click or tap on the “Manually connect to a wireless network” feature.
  7. Now you will need to write the network details you have to connect to the wireless router.
  8. After you saved the network details please reboot your Windows 7, 8.1 or Windows 10 device.
  9. After the operating system has started check to see if you still have this issue.

— RELATED: How to fix Wi-Fi range issues on Windows 10

6. Check your router and update it

  1. Try connecting to a different wireless router to see if this happens only on your device or on multiple devices.
  2. If this happens when you try to connect to multiple devices, then it is most probably an issue with your network wireless adapter or with the Windows 7, 8.1 or Windows 10 operating system itself and not with the wireless router.
    Note: If it is a Windows issue and the steps above did not work, I would suggest making a clean install of the Windows operating system.
  3. If it only happens when you try connecting to your wireless router, then you will have to check on the manufacturer’s website of the wireless router. If there are new firmware updates available, install them. Even if you reboot the router but you don’t install the latest updates, this issue will reappear after a couple of days or a couple of weeks.

7. Run the Internet troubleshooter

If the problem persists, running the built-in Internet troubleshooting tool may help you fix it for good. On Windows 7 or Windows 8.1, you can find the troubleshooter on the Control Panel page.

  1. Launch Control Panel > type ‘troubleshoot’ in the search menu > select Troubleshooting.
  2. Click on View all to list all the troubleshooting tools available on your PC.
  3. Select and run the Internet Connection and Network Adapter troubleshooters, as shown in the screenshot below.

fix internet control panel

On Windows 10, you’ll find the two troubleshooters on the Settings page. Go to Settings > Update & Security > Troubleshoot > run the two troubleshooters.

internet connections troubleshooter

This is it folks, following the steps above will help you to properly connect your computer to the wireless internet in your home. We hope these solutions help you solve your limited connectivity and access error or gateway error issue. If you’re still getting limited connectivity errors, you can also check out this in-depth guide for Windows 10 for additional solutions.

If you have any additional questions related to this article, let us know in the comments below.

RELATED STORIES TO CHECK OUT:


How to: Delete or Forget Unused Network Names for WiFi in Windows 10


How to delete WiFi networks that I do not use anymore on my Windows 10, 8.1 PC?

  1. Forget from network Settings
  2. Forget from Connections
  3. Forget using Command Prompt
  4. Forget all networks at once

When you are using the Windows 10 operating system and you try to connect to a nearby WiFi network or you just want to connect to your own wireless router in your home, you might be annoyed by all the other networks that pop up in the Available WiFi networks feature in Windows 10, 8.1. Therefore you will learn below a few methods on how to delete or forget unused Network names for WiFi connections in Windows 10, 8.1 and it will only take you a couple of minutes of your time.
How to delete or forget unused Network name for Wifi connection in windows 8.1
In the Windows 8.1 operating system, the “forget wireless network” feature was a little bit hard to get to but with the help of a few Windows 8.1 updates, it made it possible and by applying the three methods below you will see how easy it is to do it yourself. Also, the methods below will describe how to forget the wireless networks by using the command prompt feature, the Windows PC settings feature as well as disabling them from the “Network List” menu.

Delete or forget unused Network names for WiFi connections in Windows 10

1. Forget from network Settings

  1. For this method to work you will need to be in the range of the specific WiFi network.
  2. Move the mouse cursor over to the bottom right side of the screen.
  3. In the Charms bar that pops up, you will need to left click or tap on the “Settings” feature.
  4. In the “Settings” feature you need to find and left click on “Network” icon.
  5. Now in the “Network” window, you will have a list of available WiFi networks for you to connect to.
  6. Left click or tap on the specific network you want to remove and left click or tap on the “Connect” button.
  7. Now if you cannot connect to that network, it will give you access to two buttons “Forget Network” or “Close”. In this window, you will need to left click or tap on the “Forget Network” feature.

2. Forget from Connections

  1. If you have the latest updates for Windows 8.1 then go to the PC settings feature by moving the mouse cursor over to the lower right side of the screen and left clicking on “Settings”.
  2. Now left click on the “Network” feature present there.
  3. Left click or tap on the “Connections” tap present in the “Network” window.
  4. Left click or tap on the desired WiFi network you wish to remove.
  5. Left click or tap on the “Manage known networks” link present in the lower side from the WiFi network you want to remove.
  6. You now have a list of available WiFi networks.
  7. Left click or tap on the WiFi network you wish to forget.
  8. Left click or tap on the “Forget” button in the lower right side of that window.
  9. Now the network should be forgotten and no longer saved in your Windows 8.1 system.

3. Forget using Command Prompt

  1. From the start screen in your Windows 8.1 system write the following: “cmd” without the quotes.
  2. Right click on the “Command Prompt” icon that shows after the search is finished.
  3. Left click or tap on the “Run as administrator” feature in the menu that shows.
  4. Left click or tap on the “Yes” button if you are prompt by a user account control message.
  5. In the black window that appears write the following: “netsh wlan show profiles” without the quotes.
  6. Press the “Enter” button on the keyboard.
  7. Now in the Command prompt window you should get a list of all available WiFi networks.
  8. Look for the name of the wireless network you wish to disable.
  9. Write in the command prompt window the following: netsh wlan delete profile name=”name of the network”
    Note: Instead of the “name of the network “ from the command above you will need to write the actual name of the network you wish to disable.
    Press the “Enter” button on the keyboard.

4. Forget all networks at once

  1. Open Commander Prompt as Administrator
  2. Type the following command (whithout the quotes): ‘netsh wlan delete profile name=* i=*’,  and press the ‘Enter’ keyforget wi fi network windows 10 using commander
  3. The PC disconnects and forget all available networks and remove their profile. Try to reconnect to the network you was using before this.

These are the four easy methods you need to do in order to delete or forget a WiFi network of your choosing in Windows 8.1. You can write us below in the comments section of this page if you need further assistance in the article posted above.

READ ALSO: My Logitech Wireless Mini Mouse M187 Has Some Serious Battery Life Problems

You can now write emails with your pen in the Windows 10 Mail app

A little while ago, Microsoft started testing some new inking capabilities in the Windows 10 Mail and Calendar App with Windows Insiders. Those same features are now rolling out to all Windows 10 users and should now be showing up after visiting the Microsoft Store and updating to the latest version of the app (via MSPoweruser.)

We can see this feature on two of our Windows 10 devices here, and we must say that it is pretty cool. You can find the features in version 16005.10325.20091.0 of the Windows 10 Mail and Calendar App. To enjoy, simply tap on new mail, enter in who you are sending to, and then click on the Draw tab. You can then click in the body of the email, and click on on “Drawing Canvas” to ink your message. There are multiple pen types, and a highlighter to choose from, and also an eraser.

The inked messages are sent as a PNG file, and the recipient can download them as he/she pleases. It’s a nice feature that shows off the power of Windows Ink, so be sure to update now, and let us know your thoughts in the comments below.

Mail and Calendar
Mail and Calendar
Price:
Free

Fix: Incompatibility Issue of Maple 18 in Windows 10, Windows 8.1


How to fix Maple 18 compatibility problems in Windows 10, 8.1?

  1. Run Maple 18 in compatibility mode
  2. Install the newest Visual C++
  3. Run a PC Refresh
  4. Create a new user account

Even though our Windows 10 or Windows 8.1 users were having no particular issues with the Maple 18 application in the past it seems that with Windows 10 or Windows 8.1 there are some glitches. They prevent you from running the maple 18 application properly. You will find by reading the lines below how you can fix the Maple 18 app and get it running again in Windows 8.1 and Windows 10.
Fix incompatibility issue of maple 18 in Windows 8.1 and Windows 10
Even though the Maple 18 application is supposed to run normally on Windows 10 or Windows 8.1 you might not have installed it correctly in the first place or you will need a Visual C++ feature installed. Nevertheless, you will in just a few minutes of your time find out what to do and from where you need to install the needed applications in order to run Maple 18 on your Windows device.

Fix Maple 18 app incompatibility issues in Windows 10, 8.1

1. Run Maple 18 in compatibility mode

  1. Log off from your current user and log in with your administrator account.
  2. While in your administrator account go to the executable file if the Maple 18 application.
  3. Right-click or hold tap on the icon in order to bring up the properties menu.
  4. Left click or tap on the “Properties” option you have present in that menu.
  5. In the “Properties” window left-click or tap on the “Compatibility” tab situated in the upper side in this window.
  6. Left click or tap on the checkbox next to “Run this program in compatibility mode for”.
  7. From the drop-down menu next to “Run this program in compatibility mode for” you will need to select the ‘Windows 8.1’ or ‘Windows 10’ operating system.
  8. Left click or tap on the “Apply” button situated on the lower right side in the window.
  9. Now close all the windows you opened and right click or tap on the installation file of the Maple 18 application.
  10. Left click or tap from the menu that shows on the “Run as Administrator” feature.
  11. Now you should be able to follow the instructions on the screen and get your Maple 18 application installed.

2. Install the newest Visual C++

  1. Left click or tap on the link posted below to download Visual C++ feature for your Windows 8.1 or Windows 10
  2. Download here latest version of Visual C++
  3. Now left click or tap on the “Download” button in the page above.
  4. Left click or tap on the “Save” button in order to download the installation package to your Windows 8.1 or Windows 10 device.
  5. Go to the directory where you saved the installation file and right click or hold tap on it.
  6. Left click or tap on the “Run as Administrator” feature.
  7. Follow the instructions on the screen to finish the Visual C++ installation.
  8. Reboot your Windows 8.1 or Windows 10 operating system.
  9. Check and see if you still have issues running the Maple 18 application on your Windows 8.1 or Windows 10 device.

READ ALSO: How to fix Microsoft Visual C++ runtime library error r6025 in Windows

3. Run a PC Refresh

  1. Move the mouse over to the upper right side of the screen.
  2. Left click or tap on the “Settings” feature present in the menu that pops up
  3. In the “Settings” window left-click or tap on the “Change PC settings” feature.
  4. Now in the “Change PC Settings” window Left click or tap on the “Update and Recovery” option.
  5. Left click or tap on the “Recovery” option.
  6. You will have there a topic named “Refresh your PC without affecting your files” and you have a button on it that says “Get started” which you will need to select.
  7. Follow the instructions on the screen in order to finish the system refresh of your Windows 8.1 or Windows 10 device.

4. Create a new user account

If you are able to install Maple 18 on your Windows 10, 8.1 PC, but you have problems while starting it, this might be caused by corrupted user account. In this case, try to create a new user account. After it is created, try to relaunch the software. An ultimate solution will be to contact Maple Support and ask them for help.

I am sure it wasn’t very hard to apply the methods posted above and get the Maple 18 app running once again in Windows 8.1. Please write us below in the comments section of the page if you need any further assistance with the Maple 18 application using Windows 8.1 or Windows 10.

READ ALSO: How to Delete or Forget Unused Network Names for WiFi in Windows 8.1/10