Snapdragon X Elite VS Plus: Which One is The Best?

Qualcomm has several new series available on laptops, and to determine which one is better, join us for a Snapdragon X Elite vs Plus comparison.

Snapdragon X Elite vs Plus, which one is better?

Hardware differences

 Snapdragon X Plus X1P-64-100Snapdragon X Elite X1E-78-100
Fabrication4nm4nm
Number of cores10 cores12 cores
CPU frequency3.4 GHz3.4 GHz
Cache42MB42MB
GPUAdreno X1 (3.8 TFLOPS)Adreno X1 (3.8 TFLOPS)
NPU TOPS4545
Memory typeLPDDR5xLPDDR5x
Transfer rate8448 MT/s8448 MT/s

As you can see, the Snapdragon X Plus X1P-64-100 is almost identical to the Snapdragon X Elite X1E-78-100, and the only difference is that the Elite model has 12 cores instead of 10.

To see how it compares to other models of the Elite series, we have a great guide on different Snapdragon X Elite versions, so we encourage you to visit it.

Performance results

According to CPUBenchmark, the two processors offer similar performance with Snapdragon X Elite X1E-78-100 having 4.3% better multithread results.

Surprisingly, X Plus came on top for single-thread results with 1.3% better results.

Geekbench results paint a slightly different picture, and in all cases, Elite model X1E-78-100 comes on top in both single-core and multi-core results.

While the difference in single-core performance isn’t that big, it’s noticeable when it comes to multi-core performance.

According to Cinebench 2024 results, X Elite outperforms X Plus for multi-core results, while X Plus just barely outperforms X Elite in single-core results.

As for multimedia performance, both CPUs use the same iGPU, so you can expect roughly the same benchmark results. Do keep in mind that the CPU can be a bottleneck in real-life situations, especially when gaming.

Conclusion

Despite sharing almost all hardware specs, the two extra cores that the X Elite model has make the difference in performance and that is noticeable during multi-core results.

Keep in mind that we compared the Snapdragon X Plus with the entry-level X Elite model since other models outshine it in every regard. To learn about the performance of other models, don’t miss out on the Snapdragon X Elite comparison guide.

To see how the Snapdragon X Elite compares to the M3 CPU, be sure to visit our dedicated guide to learn more.

How To Turn Off Mouse Acceleration in Windows 10 With Ease

Learn how to turn off mouse acceleration in Windows 10 in easy steps.

This setting adjusts the mouse cursor’s speed based on fast or slow movements. If you turn on acceleration and move the mouse slowly, the cursor will move on the screen slowly, and vice versa.

However, it can stand between you and your success in first-person shooter PC games, graphic design, and digital art. Read on as I present tried and tested methods to optimize your mouse cursor movements by disabling acceleration.

How To Turn Off Mouse Acceleration in Windows 10

Here’s how to easily deactivate mouse acceleration or pointer precision:

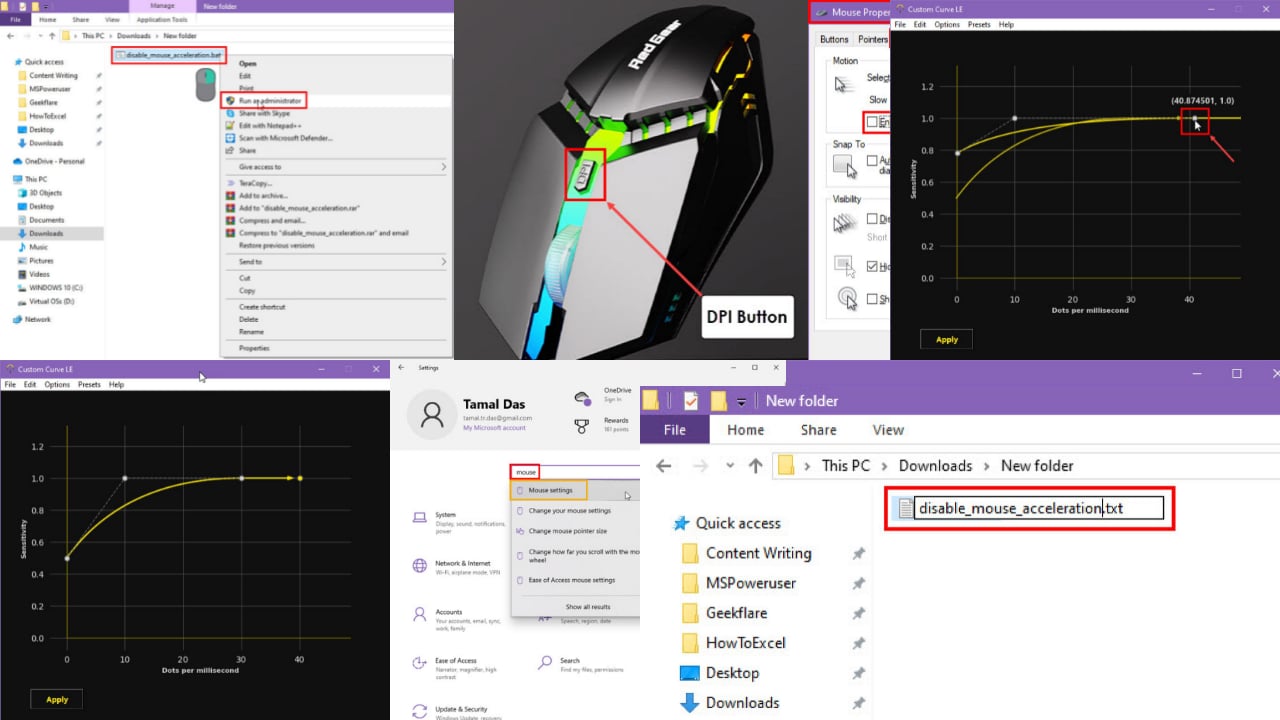
Using the Mechanical DPI Button

Most of the advanced and premium gaming mice come with a DPI button. It controls the sensitivity as well as the acceleration level physically. Therefore, you don’t need to make any changes on your PC.

DPI Button

You must consult the mouse’s user manual to learn which is the DPI button and how to reduce or go back to the default DPI. Usually, you can change it on repeated presses.

The effect is real-time, so you’ll immediately see the change on your screen. Certain RGB mice will also show a flashing RGB light to confirm that changes have become effective. For example, a RedGear mouse shows one red flash when you reduce the DPI setting to default.

Using the Windows Settings App

  1. Press the Windows + I keys to launch the Windows 10 Settings app.
  2. Type Mouse in the Find a setting search field and click on the Mouse settings option.
Mouse settings
  1. Click on the Additional mouse options hyperlink below the Related settings section.
Additional mouse options
  1. You should now arrive in the Mouse Properties dialog box. The Buttons tab will be the default selection.
  2. Navigate to the Pointer Options tab.
  3. Uncheck the box for Enhance pointer precision.
  4. Click Apply and then select OK to save the changes.
Mouse properties

Using a Command Prompt Script

You can create a batch script file to automate the process mentioned above. Once the batch script is ready, execute it once and reboot the PC to ensure the changes take effect. Here’s how:

  1. Open the Notepad from the Start Menu by typing in its name.
open notepad
  1. Copy and paste the following script inside the blank Notepad file you’ve just opened:
REG ADD "HKEY_CURRENT_USER\Control Panel\Mouse" /v MouseSpeed /t REG_SZ /d 0 /f
REG ADD "HKEY_CURRENT_USER\Control Panel\Mouse" /v MouseThreshold1 /t REG_SZ /d 0 /f
REG ADD "HKEY_CURRENT_USER\Control Panel\Mouse" /v MouseThreshold2 /t REG_SZ /d 0 /f
copy script
  1. Press Ctrl + S to save the file.
Save file
  1. Now, rename the file to disable_mouse_acceleration.
rename file
  1. Again, rename, and this time delete the TXT extension and replace that with the BAT extension.
change to bat
  1. If there’s any confirmation dialog, click Yes to confirm the change.
  2. Right-click on the batch file and choose Run as administrator to disable mouse acceleration.
Run as administrator

You can save the batch script file on the Desktop to access it quickly.

To undo the changes you’ve made, you can create another batch script in the same way as mentioned earlier. But, this time use the following script:

REG ADD "HKEY_CURRENT_USER\Control Panel\Mouse" /v MouseSpeed /t REG_SZ /d 1 /f
REG ADD "HKEY_CURRENT_USER\Control Panel\Mouse" /v MouseThreshold1 /t REG_SZ /d 6 /f
REG ADD "HKEY_CURRENT_USER\Control Panel\Mouse" /v MouseThreshold2 /t REG_SZ /d 10 /f

You can rename this batch file to enable_mouse_acceleration.bat and save it in Desktop for easy access. When you execute it, Windows 10 will set the MouseSpeed, MouseThreshold1, and MouseThreshold2 values back to their default settings.

Using the Custom Curve LE Tool

If you’re looking to enhance gaming accuracy, you should try the Custom Curve LE mouse adjustment tool.

You can download a free and test edition from the official MouseAcceleration.com portal. After you visit the website, click on the Download LE button.

Download LE

Install the app on your PC. You should see its shortcut on the Desktop as well.

Firstly, disable mouse acceleration by any of the methods mentioned earlier.

Now, run the app from the Desktop.

You should see a graph and control interface as shown below.

Custom Curve LE image

The velocity is plotted on the X-axis and the corresponding sensitivity is on the Y-axis.

Click on the point on the Y-axis to move it up or down to increase or decrease sensitivity.

Sensitivity change

To adjust the DPM (Dots Per Millisecond) value, click on the point that’s parallel to the X-axis and move it left or right to decrease or increase the DPM.

DPM change

You might have to do a few trials and errors to fine-tune the mouse performance curve. The changes will take effect in real time. Don’t forget to click Apply to save the changes you’ve made.

I’ve used this tool to optimize my mouse for fast-paced gaming events where I needed both slow and quick moves.

Take fast-paced first-person shooters for example. Spotting enemies requires quick flicks of the mouse to snap your aim from target to target. But then, in a split second, you might need to switch to magnified optics and make precise micro-adjustments for a headshot. This constant shift between lightning-fast swipes and pinpoint control is why optimizing your mouse settings is so important.

In such a challenging situation, Custom Curve LE along with disabled acceleration produces the best results.

Summary

So far, you’ve learned how to turn off mouse acceleration in Windows 10 using tried and tested methods. You’ve also found out how to create automated batch scripts to disable and enable it. Moreover, if you’re having trouble with cursor flickering, we’ve got just the guide for you.

To improve gaming navigation, you can use the third-party tool-based method to fine-tune the mouse cursor’s movements.

Microsoft Loop will send custom notifications on updates of all kinds to users

Microsoft has added the customization of the in-app notifications feature for Loop tables and table template updates. This new element promises to bring more fluidity and productivity to teamwork while ensuring that important updates are not overlooked.

In the past, users needed a Power Automates license to automate notifications. This was quite useful and secure, but now Microsoft has provided an additional method that is not dependent on having a Power Automates license. You can now arrange these notifications in the app, guaranteeing that your team is kept informed without any added obstacles.

In a blog post, Microsoft says the process of creating these notifications is very simple. You must go to a Loop page with a table or board, locate the “…” menu in the Operations bar, and select the Rules option. Then, choose your triggers and conditions for when notifications should be sent out – you are all set to ensure your team stays informed. It’s similar to having your team of small assistants who always remember everything for you.

In our quest to enrich this functionality and extend its benefits to all our users, we’re excited to share that you can now activate in-app notifications to keep your team updated, even without a Power Automate license.

Microsoft

If you’re a project manager, you can establish rules that will alert you directly in Loop when someone marks a task as done.

This update isn’t a small change; it’s a big deal for people using Microsoft Loop. By improving how notifications work and making them easier to adjust, Microsoft is making Loop an important tool for teams that want to make their work smoother and keep in touch more effectively. Not too long ago, the Redmond-based tech giant enhanced the platform with expandable boards and new ways to organize data.

So why not experience how these fresh custom notifications enhance your team’s collaboration?

Is Once Human on Xbox? Availability, Crossplay and Cross-Progression

Wondering if Once Human is available on Xbox? The short answer is no. Once Human is currently available on PC via Steam, Epic Games Store, and NetEase’s Loading Bay launcher. It launched on July 9, 2024. The game is also planned for iOS and Android devices, with the iOS release expected on September 26, 2024.

    Will Once Human be launched on Xbox?

    As of now, Once Human is not available on Xbox Series X/S, PS5, or any other console. Developer Starry Studio has indicated they are considering a console release based on player feedback and testing results.

    Starry Studio has stated multiple times that they are carefully deciding whether to release the game to console based on testing and player feedback, so there in no official timeline or confirmation has been provided yet. However, Once Human is already a pretty popular PC game so it wouldn’t be such an unbelievable surprise if we will see it on Xbox soon.

    The good news is that according to the developer, Once Human will support crossplay between PC and the upcoming mobile versions. Cross-progression is also supported, meaning you can switch between PC and mobile while retaining your progress.

    You can pre-register for the mobile version of Once Human on the Apple Store and Google Play Store. Also, pre-registering can earn you various in-game rewards.

      This ensures you don’t miss out on the mobile release and the extra goodies that come with pre-registration, keeping you engaged no matter the platform.

      Once Human is a free-to-play open-world survival game with both PvE and PvP elements. It features crafting, base-building, and multiplayer interaction, set in a post-apocalyptic world.

      This is all we know right now about Once Human’s current status and Xbox availability. Keep an eye on official channels for the latest updates and consider pre-registering for the mobile version to get a head start! However, we will also try to keep you updated with the latest developments.

      Are you expecting Once Human on Xbox? Leave your thoughts in the comments below.

      Microsoft finally fixes the broken taskbar in Windows 11

      One of the most frustrating issues in Windows 11 is the broken taskbar, which is often unresponsive or absent from the operating system for many users. However, the latest Patch Tuesday updates should now fix this.

      The issue mostly impacted those who use Windows N editions—these are versions without some media functions—and others who switched off “Media Features” through the Control Panel.

      The KB5040442 update for Windows 11 explicitly mentions fixing the annoying broken taskbar. Microsoft’s release notes confirmed that the taskbar should work correctly now. For those impatient to return their systems to normal, installing this update becomes necessary. It also contains crucial security improvements—hence, it will be downloaded and installed automatically.

      Taskbar (known issue) You might not be able to view or interact with the taskbar after you install KB5039302. This issue occurs on devices that run the Windows N edition. This edition is like other editions but lacks most media-related tools. The issue also occurs if you turn off “Media Features” from the Control Panel.

      Microsoft

      But if you cannot wait, you can manually search for updates in the Settings or download an offline installation package from the Microsoft Update Catalog.

      Although this fix is a relief, one issue remains for enterprise users. People using Windows 11 versions 22H2 and 23H2 cannot upgrade from Pro to Enterprise Edition even with valid licenses. Microsoft is investigating and working on a solution.

      On a wider view, Microsoft has also notified users that the backing for Windows 11 in 21H2 and 22H2 versions is getting close to an end. Less than 90 days are left, and users on these versions will be automatically updated to version 23H2 to run the most recent version.

      Sysdm.cpl is Not Working or Missing: 5 Ways to Fix it

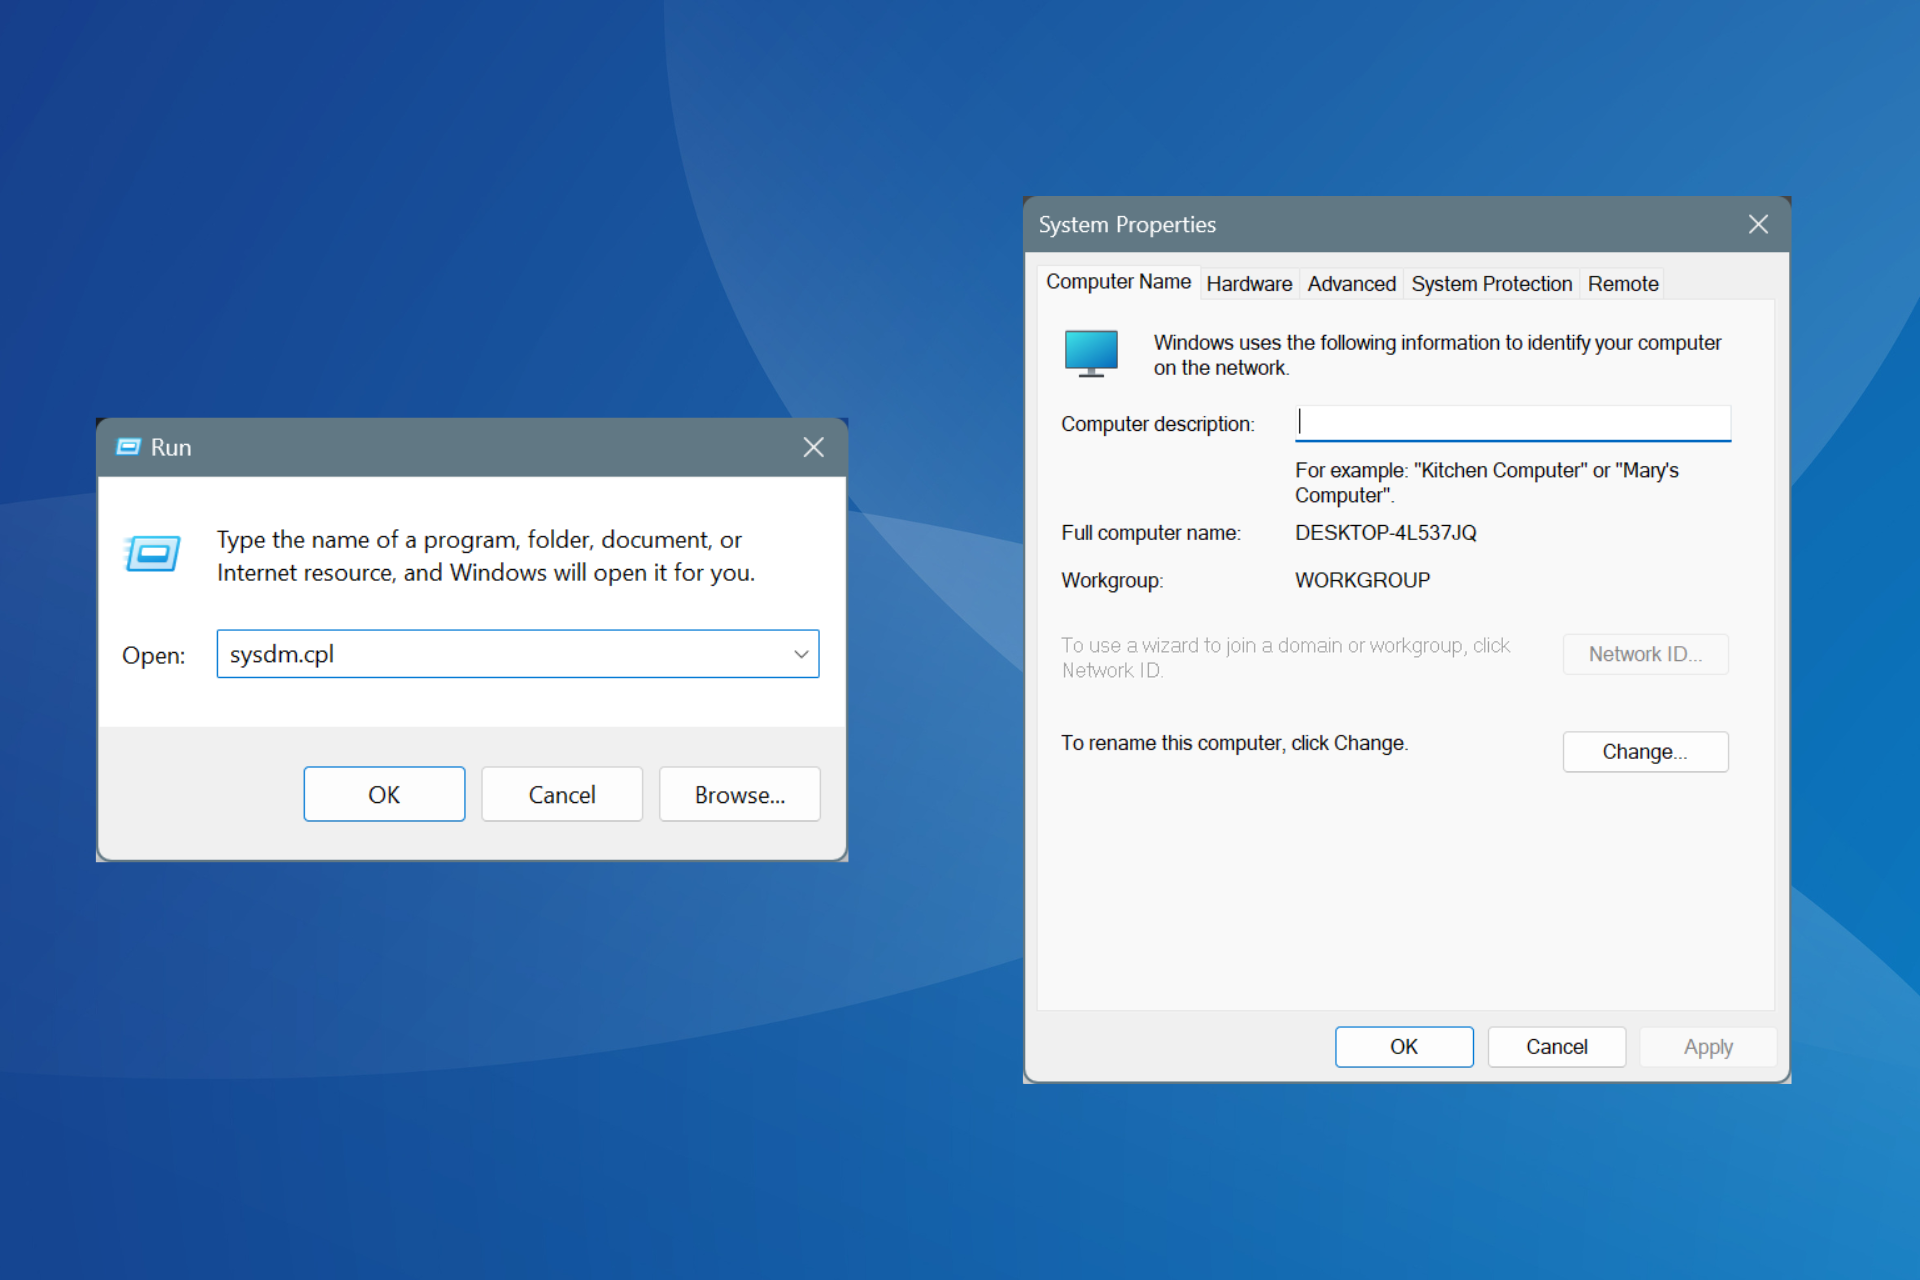
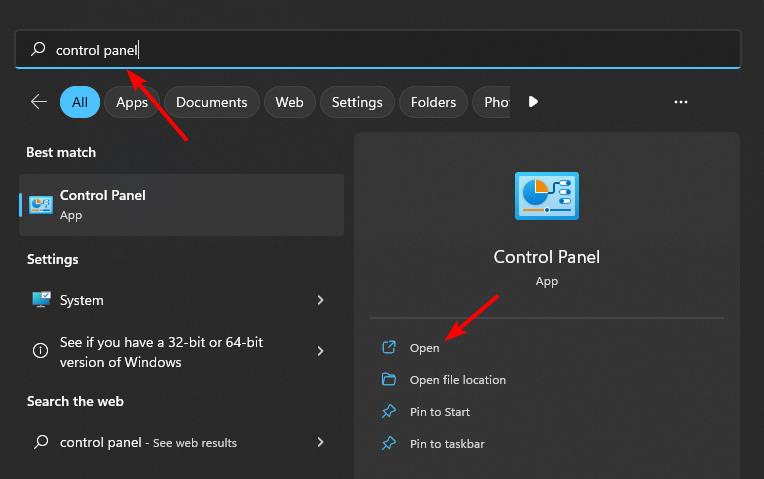
      Recently, on one of my PCs, I found that sysdm.cpl was not working. When opening System Properties via Control Panel, it returned an error stating that sysdm.cpl is missing!

      This happens due to corrupt system files, issues with the user profile, misconfigured Registry, or if you accidentally move/delete the sysdm.cpl file itself. If you are wondering why sysdm.cpl not opening is a problem, that’s because you won’t be able to perform a system restore or increase the virtual memory, amongst other critical changes.

      What can I do if sysdm.cpl is not opening or working?

      1. Manually copy sysdm.cpl from another PC

      As surprising as it may sound, simply copying the sysdm.cpl file from another computer to the affected PC fixes things in no time!

      As for the sysdm.cpl location, it’s: C:\Windows\System32

      sysdm.cpl
      sysdm.cpl in System32

      All you need to do is head to the System32 folder on another PC > locate the sysdm.cpl file > copy it to an external storage drive > move the file to the System32 folder on the affected PC.

      2. Repair the corrupt system files

      1. Press Windows + S to open Search, type Command Prompt in the text field, and click on Run as administrator.command prompt
      2. Click Yes in the UAC prompt.
      3. Paste the following DISM commands individually and hit Enter after each: DISM /Online /Cleanup-Image /CheckHealth DISM /Online /Cleanup-Image /ScanHealth DISM /Online /Cleanup-Image /RestoreHealth
      4. Next, run this command for the SFC scan: sfc /scannowsfc scan to fix sysdm.cpl not working
      5. Once done, restart the computer for the changes to come into effect.

      Missing or corrupt system files can often be the reason sysdm.cpl is not working in Windows 11. In this case, running the DISM commands and SFC scan will replace the corrupt/missing system files with their cached copy.

      If this doesn’t work and the error message highlights a DLL, use an effective DLL repair tool to replace it with a fresh copy.

      3. Delete problematic keys in the Registry

      Tip icon Tip
      This solution requires modifying the Registry Editor, which is a critical part of Windows. So, I recommend you create a restore point before proceeding. This will allow you to revert the changes in case things don’t go as planned.
      1. Press Windows + R to open Run, type regedit in the text field, and hit Enter.registry editor
      2. Click Yes in the UAC prompt.
      3. Paste the following path in the address bar and hit Enter: HKEY_CURRENT_USER\Software\Microsoft\Windows\CurrentVersion\Policies\Explorerpath
      4. Now, if you find the NoPropertiesMyComputer or NoControlPanel entry (DWORD) here, right-click on it and choose Delete.delete to fix sysdm.cpl not working
      5. Click Yes in the confirmation prompt.
      6. Also, check for the two entries in the following path and delete them: HKEY_LOCAL_MACHINE\Software\Microsoft\Windows\CurrentVersion\Policies\Explorer

      4. Create a new user profile

      1. Press Windows + R to open Run, type netplwiz in the text field, and hit Enter.
      2. Click the Add button.add new account
      3. Click on Sign in without a Microsoft account.
      4. Now, click the Local account option.create local account to fix sysdm.cpl not working
      5. Enter a username and password (not mandatory) for the account, and click Next.
      6. After creating a new account, select it from the list, and then click on Properties.properties
      7. Go to the Group Membership tab, select Administrator, and click Apply and OK to save the changes.set administrator
      8. Finally, sign in with the new account and verify whether sysdm.cpl is still not working.

      If sysdm.cpl starts working on a new account, the previous user profile is corrupt. In this case, use an external storage to move all personal files from the affected profile to the new profile. As for installed programs, you can have apps available to all users on the PC!

      5. Perform an in-place upgrade

      Note icon NOTE
      The steps listed here are to perform an in-place upgrade on Windows 11. If you are using the previous iteration, a repair upgrade on Windows 10 is just as simple!
      1. Go to Microsoft’s official website, choose the OS edition and product language, and then download the Windows 11 ISO.windows 11 iso
      2. Right-click on the downloaded ISO file, and choose Mount.
      3. Click Open in the confirmation prompt.
      4. Run the setup.exe file, and click Yes in the UAC prompt.setup,.exe
      5. Click on Next to proceed.
      6. Click Accept to agree to Microsoft’s license terms.
      7. Make sure the setup reads, Keep personal files and apps, and click on Install.in-place upgrade to fix sysdm.cpl not working
      8. Wait for the process to complete. It may take 1-3 hours.

      System errors like sysdm.cpl command not working often call for an in-place upgrade as a fix. Remember, this is what worked for me!

      An in-place upgrade is like a reinstall, except for the fact that your personal files and apps remain unaffected. And if this, too, fails for some reason, you can always create a bootable Windows USB, change the boot order to the USB, and reinstall Windows 11 from scratch.

      Which fix worked for you? Share with our readers in the comments section.

      Google Intel Gemini Lake Chromebook: All You Need to Know

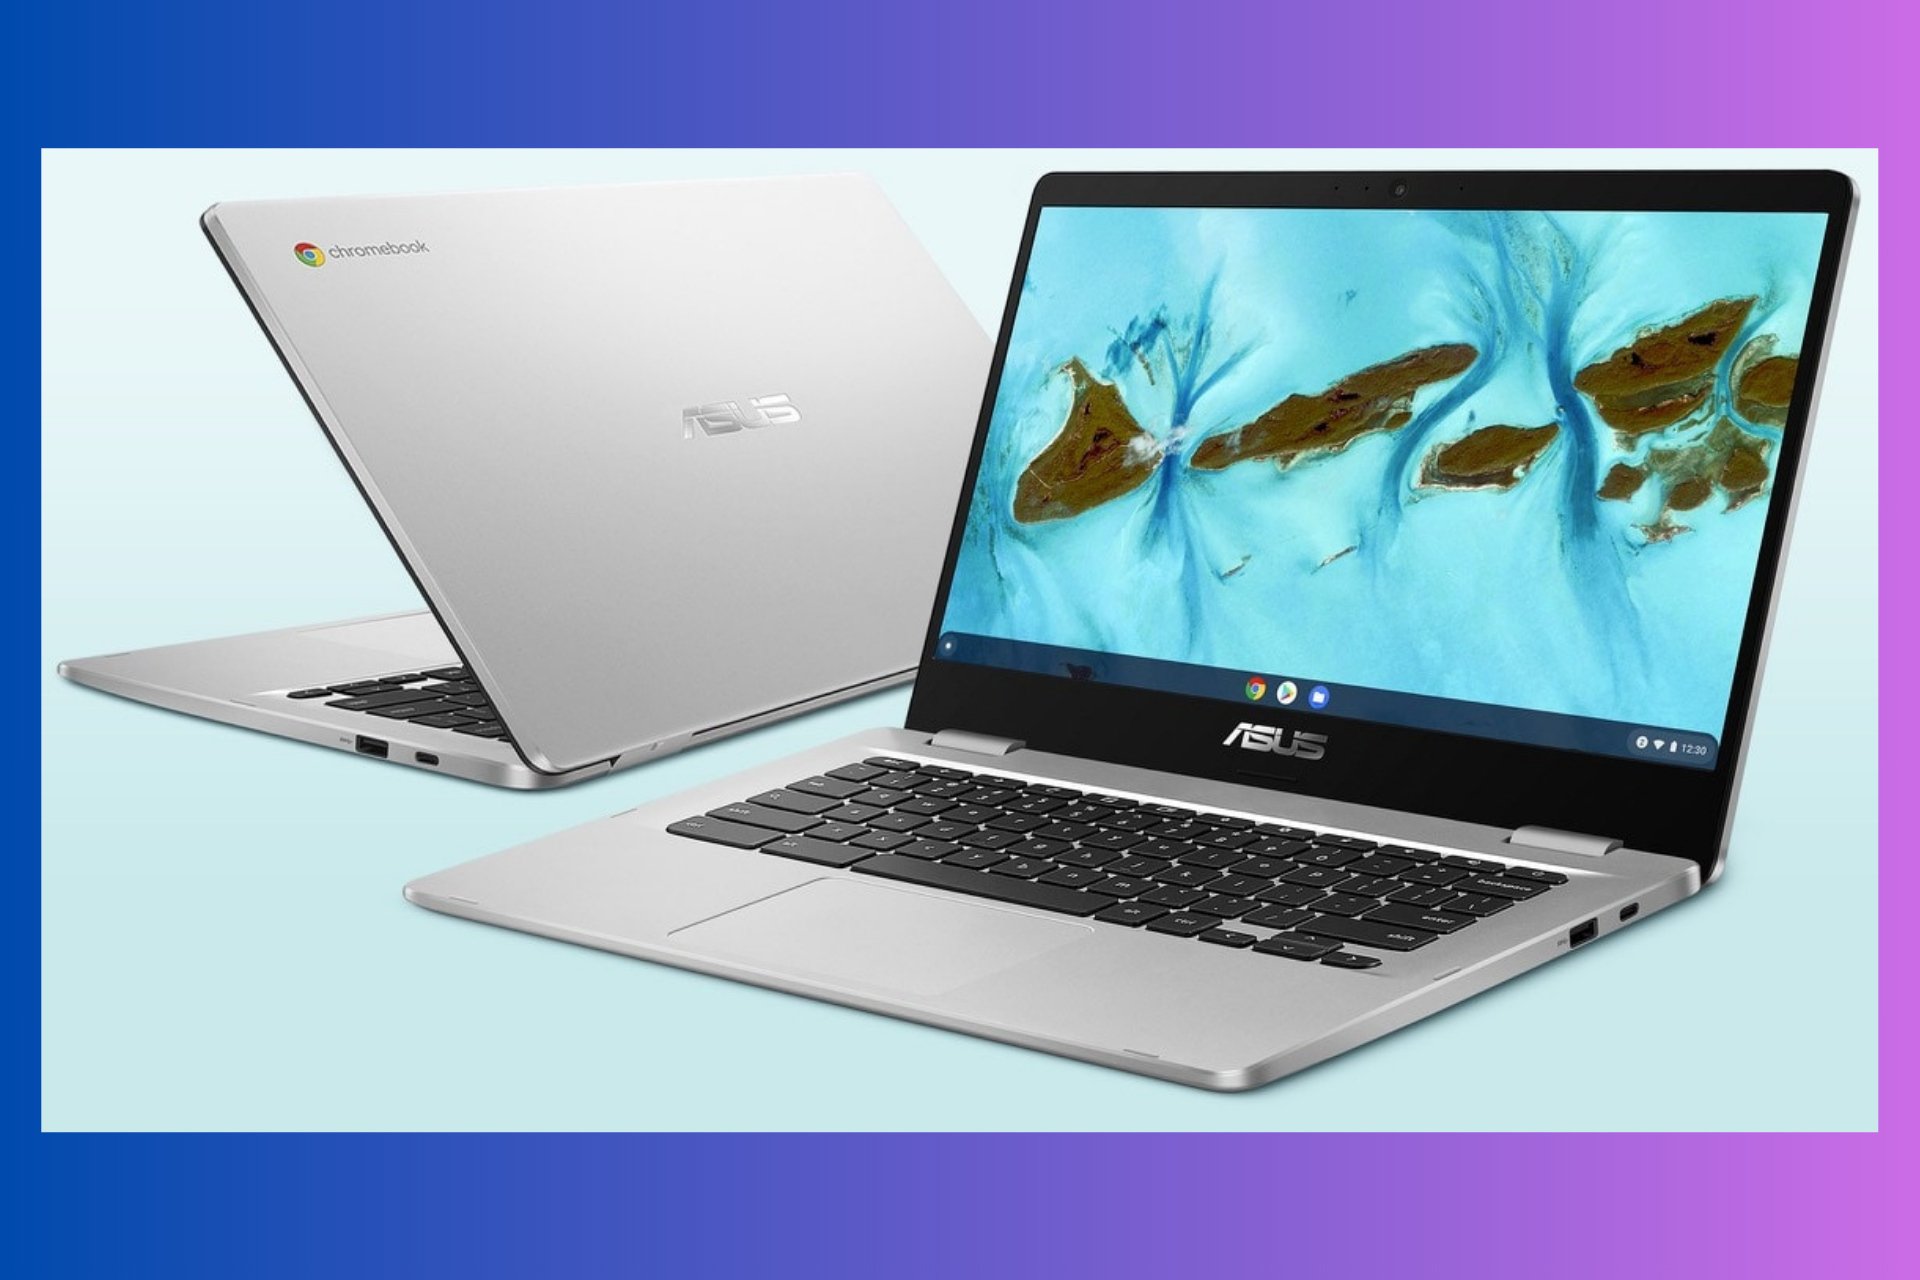
      Google Intel Gemini Lake Chromebook laptops are the collaboration result that marries the Intel Gemini Lake Intel CPUs with Google’s Chrome OS. The Intel Gemini Lake Chromebooks are built by several manufacturers such as HP, Acer ASUS, Samsung and Lenovo. So, basically, a Chromebook with Intel Celeron N4000 or N4100 series is an Intel Gemini Lake Chromebook.

      All about Google Intel Gemini Lake Chromebooks

      Google Intel Gemini Lake Chromebook specifications

      1. CPU: Intel Celeron N4000 or N4100 (Gemini Lake)
      2. Memory: Up to 8GB LPDDR4
      3. Storage: Between 32 GB and up to 128GB eMMC SSD
      4. Display: Up to 14″ HD or FHD (1920 x 1080 pixels) anti-glare
      5. Battery Life: Up to 12 hours
      6. Ports: USB-C, USB-A, microSD, headphone/mic jack
      7. Connectivity: Wi-Fi, Bluetooth
      8. Operating System: Google Chrome OS

      Understanding these specifications will help you see how the Google Intel Gemini Lake Chromebook balances performance, portability, and productivity. If you want to buy a Intel Gemini Lake Chromebook, follow this Amazon link to a recent search query to match the criteria of these laptops.

      Who is the Intel Gemini Lake Chromebook for?

      1. Students: The Chromebook is perfect for note-taking, research, and accessing educational tools. Its lightweight design and long battery life make it easy to carry throughout the day without needing to recharge.
      2. Professionals: This device supports professional tasks such as word processing, spreadsheet management, and presentations. The reliable performance of the Gemini Lake processors ensures smooth multitasking for various work applications.
      3. Casual users: For browsing the web, streaming videos, and casual gaming, the Chromebook offers a satisfying experience with its vibrant display and efficient performance.
      4. Multimedia Enthusiasts: The Chromebook’s high-definition displays and superior audio technology enhance the experience of watching videos and listening to music, making it an excellent choice for multimedia consumption.

      So, remember that ChromeOS is limiting this laptop to Android and web apps only. You can install some emulators to run Windows apps, but they will work pretty slow due to RAM limitations. You may also install Windows 11 on a Chromebook, but you should know from the start that it’s not offering a great experience. Chromebooks are pretty much big screen Android smartphones with laptop keyboards.

      How to Intel Gemini Lake Chromebooks compare with traditional laptops?

      1. Operating System:
        • Chromebooks run on Chrome OS, which is designed for web-based applications and cloud storage.
        • Traditional laptops can run a variety of operating systems, including Windows and macOS, supporting a wide range of software.
      2. Usage:
        • Chromebooks excel in lightweight tasks such as browsing, word processing, and media streaming.
        • Traditional laptops can handle more demanding applications, including video editing and 3D modeling.
      3. Design focus:
        • Chromebooks are optimized for portability, efficiency, and affordability.
        • Traditional laptops often come with more powerful hardware and higher costs, suitable for intensive computing tasks.
      4. Cost:
        • Chromebooks are typically a lot more affordable, with prices between $200 -$500 due to their lower-end specs and limited hardware.
        • Traditional laptops may cost more, reflecting their advanced features and higher performance capabilities.

      Understanding these differences will help you determine which device best suits your computing needs based on the operating system, usage, design focus, and cost.

      However, there is also a great advantage to Chromebooks. Google promises to install Gemini AI into Chrome OS. However, we don’t know yet if the feature will be available for the Intel Gemini Lake powered laptops.

      Setting up and using a Google Intel Gemini Lake Chromebook

      1. Setting Up:
        • Power on the device and select your language, keyboard layout, and Wi-Fi network on the welcome screen.
        • Sign in to your Google Account or create a new one to sync your services. Basically, it’s the same as setting up an Android smartphone.
      2. Navigating Chrome OS:
        • Use the launcher icon in the bottom-left corner to search for apps and files.
        • The shelf at the bottom provides quick access to frequently used applications.
        • Adjust settings by clicking the time in the bottom-right corner to open the system menu.
      3. Installing Apps:
        • Open the Google Play Store from the launcher.
        • Search for and install apps needed for productivity, education, or entertainment.
      4. Maximizing Productivity:
        • Utilize Google Workspace apps like Google Docs, Sheets, and Slides for cloud-based document creation and collaboration.
        • Attach peripherals via USB ports and Bluetooth for enhanced functionality.

      Following these information will ensure you can set up and efficiently use your Google Intel Gemini Lake Chromebook, making the most out of its features and capabilities. The conclusion here is that if you want a second laptop for casual and a few productivity features with long battery life, Chromebooks are excellent. If you’re a gamer or want to perform serious graphics editing, these laptops are not for you.

      We hope that our guide about Google Intel Gemini Lake Chromebook laptops provided you will all information needed to make the right decision about your next purchase.

      If you already bought one, here’s our list of the best gaming browsers for Chromebook. As we’ve outlined above, you can still run .exe files on Chromebooks and the highlighted guide will help you with that.

      What do you think about Google Intel Gemini Lake Chromebook laptops? Write your thoughts in the comments below.

      Windows 10 1809, 1607, and 1507 receive important Patch Tuesday security updates

      This week is Patch Tuesday, which means Microsoft is offering KB5040427, KB5040430, KB5040434, and KB5040448 updates to those who use Windows 10 version 20H2 or later versions, such as 21H2 and 22H2.

      For those enthusiastic about maintaining their systems, separate links for these updates can be found on the Microsoft Update Catalog. You might be curious about what’s in this update.

      The most important highlights of these patches are the security updates. However, not everything is without hiccups. A few problems we knew about before have returned, potentially giving some people a headache.

      If you enjoy using multiple monitors, Copilot in Windows may still cause your desktop icons to move around from one screen to another or have other alignment problems. And if you like to keep your taskbar vertical, Copilot might ignore you for now. But don’t worry—Microsoft is working on fixing these issues in the next version of Windows.

      If you’re still on an older Windows 10 version, don’t worry – the Patch Tuesday updates cover those, too. The forgotten ones like 1809, 1607, and even the ancient 1507 have also been shown some affection with links to these updates found in the Microsoft Update Catalog. However, Windows 10 20H2 and 1909 and non-LTSC editions of 21H2 have all reached the end of servicing.

      NewPipe Not Working: 3 Easy Ways to Fix it

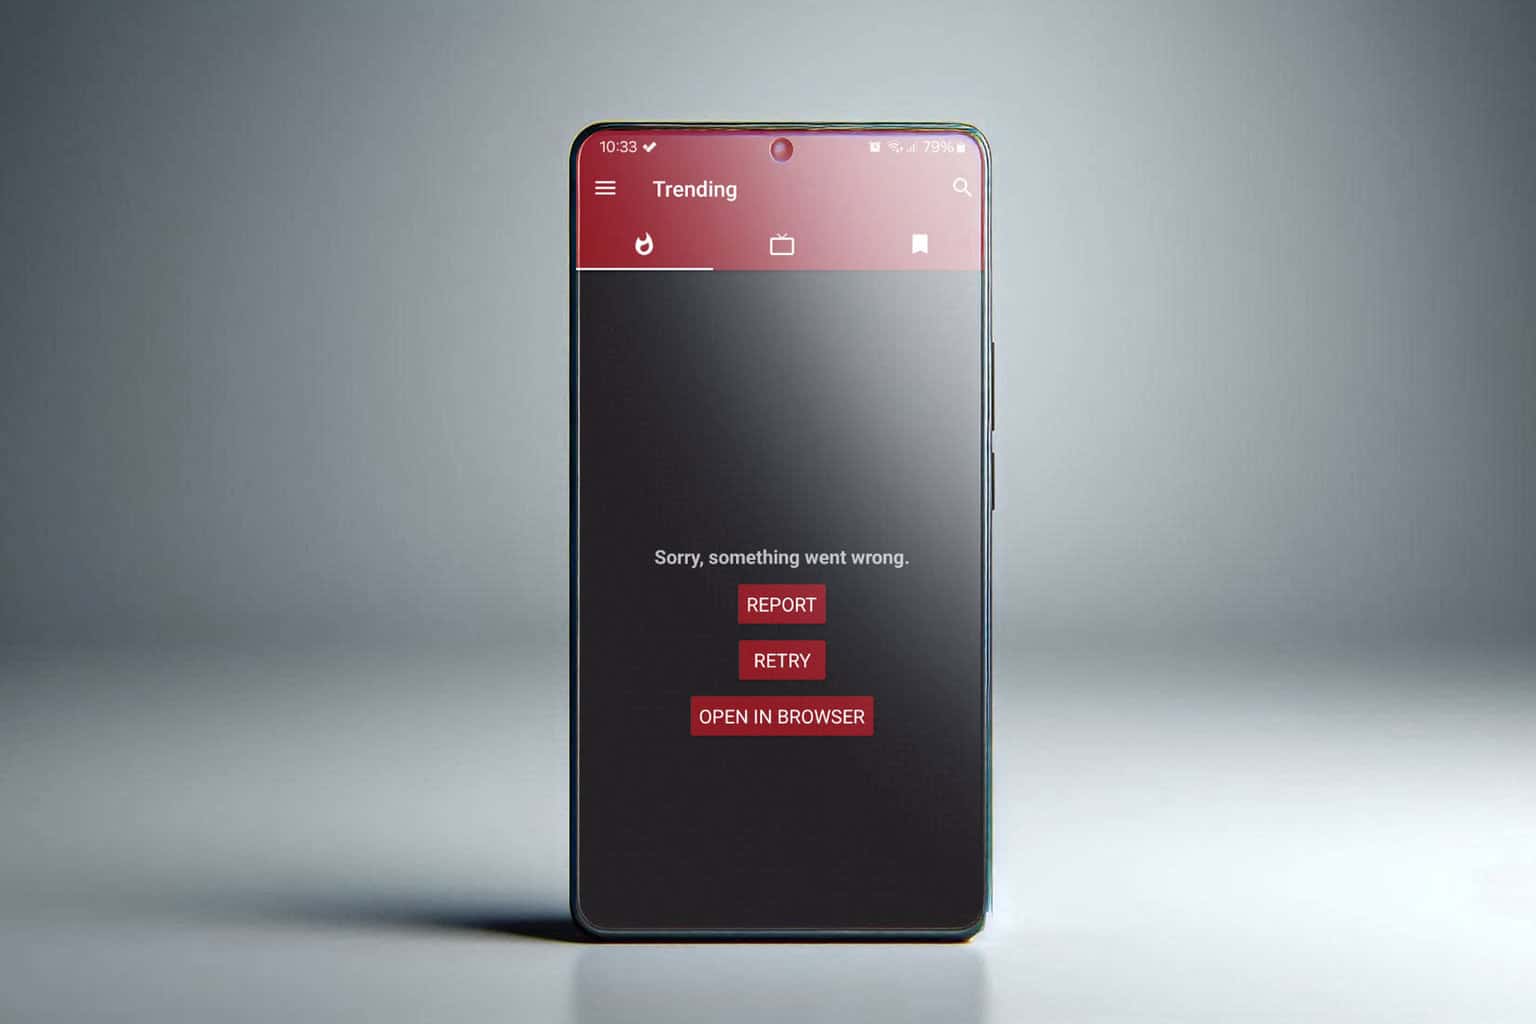
      If NewPipe isn’t working and you can’t watch any YouTube videos, we’ve got you. There’s an easy fix to get things running again. So if you get a network error on NewPipe or can’t start the app, follow the steps below.

      What can I do if NewPipe is not working?

      Before we start, disable any VPN that you may have. Users reported issues with Calyx VPN, but other ones might cause problems as well. A few users reported that using mobile data also worked as a workaround.

      1. Install the latest version

      1. Visit the NewPipe F-Droid page.
      2. Follow the instructions on the page to download the latest version.
        newpipe fdroid
      3. Alternatively, you can use the NewPipe GitHub page.

      Some users reported that installing the Release Candidate version fixed this issue for them, so give it a try.

      2. Change NewPipe settings

      1. Open NewPipe,  and then open the side menu and choose Settings.
        settings newpipe
      2. Next, go to Content.
         content settings newpipe
      3. Select Feed update threshold.
        feed update threshold newpipe
      4. Set it to Always update.
        always update feed update threshold always update
      5. Enable Fetch from dedicated feed when available.
        fetch from dedicated feed

      3. Clear cached website data

      1. Open Settings in NewPipe.
      2. Next, go to History and cache.
         history and cache newpipe settings
      3. Select Wipe cached metadata.
        wipe caced metadata newpipe settings

      If NewPipe is not working, this can be easily resolved by updating the app or by using our other solutions. For NewPipe network error, check out our article on how to resolve it.

      Do keep in mind that YouTube as a service has various issues, and we already wrote what to do if YouTube videos are not playing, YouTube Mobile is not available, or if you encounter If playback doesn’t begin shortly error.

      Did you find a different solution? If so, share it with us in the comments!

      Microsoft Outlook Cannot Sign or Encrypt This Message [Error Fix]

      Did you see an error stating “Microsoft Outlook cannot sign or encrypt this message”? Outlook offers strong security features to protect your emails, including the ability to sign and encrypt messages. The error message indicates a problem with your email security settings.

      This action requires specific configurations and valid digital certificates. So, you’ll get this error if any of these elements are missing or incorrectly set up.

      Luckily, I’ve got just the solution for it. Read on to find out!

      How To Fix “Microsoft Outlook Cannot Sign or Encrypt This Message”

      Follow these instructions:

      Modify E-mail Security Settings

      To adjust your e-mail security settings, do this:

      1. Tap File in Outlook.
      File button
      1. Click Options.
      Options
      1. Click Trust Center and select Trust Center Settings.
      Trust Center Settings
      1. Click the Email Security button, and ensure that the “Encrypt contents and attachments for outgoing messages” and “Add digital signatures to outgoing messages” boxes are unchecked. Tap OK.
      Email Security

      Fix Invalid Certificate

      Another issue could be that you’re using an invalid certificate. Here’s how to fix it:

      1. Once you open Outlook, click File > Options > Trust Center > Trust Center Settings > Email Security.
      2. Tap Import/Export.
      Import/export.
      1. Click Browse to import the digital ID from your PC.
      Browse

      Update Outlook

      The issue could also stem from an outdated Outlook. Follow the below steps to update it:

      1. Tap File.
      File
      1. Select Office Account.
      Office Account
      1. Tap Update Options and select Update Now from the drop-down menu.
      Update Now
      1. It’ll automatically download and install the update.

      Overall, the “Microsoft Outlook cannot sign or encrypt this message” error can be frustrating, but it’s easy to resolve with the right steps. Ensure you have a valid digital certificate, modify your e-mail security settings, and update Outlook.

      Another similar error includes the Microsoft Outlook was not able to create a message with restricted permission problem but we’ve already discussed how to resolve it. You may also experience App Access Blocked on Outlook.

      Moreover, if you’re encountering an error related to WAB.dll, Google Workspace sync, the AutoArchive settings are greyed out, or you want to change where sent items go, we’ve got just the guides for that.

      Which solution has worked for you?

      Microsoft announces Xbox Game Pass price change starting July 10

      As we predicted a while ago, Microsoft has made important changes to its Xbox Game Pass subscription price, an action that is guaranteed to create ripples within the gaming community. From July 10 onwards, those new to Xbox Game Pass must pay more. For example, if one wants a PC Game Pass from the U.S., now it costs $11.99 per month instead of the previous price, which was only $9.99 each month before the change date.

      If you are aiming for the Xbox Game Pass Ultimate, be ready to pay $19.99 every month, which is more than the previous monthly rate of $16.99. For yearly lovers of a 12-month Xbox Game Pass Core subscription, prepare yourself for a price of $74.99—an increase from the previous amount of $59.99 last year.

      July 10 also ends new subscriptions for the Xbox Game Pass for Console plan. If you are already in, then you are in, but if your subscription ends, there is no way back to this specific plan.

      Also, Microsoft limits how far you can stack your Game Pass for Console subscription. The maximum extension limit will be 13 months from September 18, 2024.

      Xbox Game Pass for Console codes will continue to be redeemable until further notice. As of September 18, 2024, the maximum extension limit of Game Pass for Console will be 13 months. This will not impact any time you currently have stacked on your account that exceeds 13 months and will only impact your future ability to stack more than 13 months after September 18, 2024.

      Microsoft

      Microsoft is playing a trick on us, too, and they are hinting about the introduction of the Xbox Game Pass Standard. It will cost $14.99 every month in the United States, and with this plan, you can expect to have access to a wide variety of Xbox games.

      You also get benefits such as being able to play online multiplayer games together and game discounts. However, the plan does not provide Day One games or Xbox Cloud Gaming support; these are only available for PC Game Pass and Xbox Game Pass Ultimate members.

      With these new Xbox Game Pass price changes, Microsoft seems to be leading us into new and unknown territories, and many users and gamers might not like it at all.

      You can check out all the new price details in this Microsoft PDF document.

      KB5040435, the first proper Patch Tuesday update for Copilot+ PC, is now available

      Microsoft has released its first proper Patch Tuesday update, KB5040435, aimed at Copilot+ PCs operating on Windows 11 24H2. The update pushes the system to Build 26100.1150 and guarantees numerous enhancements and security repairs intended to enhance user experience and system robustness.

      First, this update strongly focuses on security. By fixing many security problems, Microsoft guarantees that your operating system is protected from potential dangers, which increases the safety of your digital surroundings.

      Additionally, this is much more than a simple vulnerability update. It includes all the enhancements from the previous update (KB5039304) released towards the end of June. The present update covers the latest fixes and earlier improvements in one package for your system.

      One fix that stands out in KB5040435 is the Windows Installer. When you update, if an application is being repaired, then User Account Control (UAC) will ask for your credentials. For people annoyed by the UAC prompt, there is a solution that involves setting a registry value. As you can see below, it may be a simple modification, but it could make a big difference for developers and IT experts who appreciate efficient workflows.

      Windows Installer. When it repairs an application, the User Account Control (UAC) does not prompt for your credentials. After you install this update, the UAC will prompt for them. Because of this, you might have to update your automation scripts. Do this by adding the Shield icon. It indicates that the process requires full administrator access. To turn off the UAC prompt, set the HKEY_LOCAL_MACHINE\SOFTWARE\Policies\Microsoft\Windows\Installer\DisableLUAInRepair registry value to 1.

      Microsoft

      A second vital correction concerns the Remote Authentication Dial-In User Service (RADIUS) protocol and MD5 collisions. Although these terms might seem complicated, they are essentially about strengthening your system’s authentication procedures to prevent unauthorized entrance.

      For gamers on Arm devices, Roblox is not downloadable and playable through the Microsoft Store. However, you can solve this by downloading the game from the Roblox website directly.

      Lastly, if you wish to install this update on a machine without internet access, Microsoft has made it available for download from the Microsoft Catalog. For those machines with an internet connection and using Windows Update to receive updates, your device will automatically get it that way.

      The KB5040435 update for Windows 11 24H2 users is not only a regular security patch; it’s the first proper Patch Tuesday update for Copilot+ PCs, and you should download and install it right away. The patch also comes with 142 fixes for different CVEs, so it’s even more imperative to update ASAP.

      You can read the full KB5040435 changelog here.

      Microsoft fixes 142 vulnerabilities in the July 2026 Patch Tuesday update

      Microsoft’s Patch Tuesday in July 2024 dealt with 142 vulnerabilities, many of which revolve around remote code execution vulnerabilities. Among these were four zero-days that made the tech world very anxious: two actively exploited and another pair that had just been made public.

      The Windows Hyper-V Elevation of Privilege Vulnerability was highlighted in the zero days. Microsoft fixed this vulnerability, which allowed attackers to reach SYSTEM privileges. Another fix that stands out is the Windows MSHTML spoofing vulnerability, which requires attackers to send a harmful file to their target. This method is frequently used in cyber attacks.

      Microsoft also addressed the zero-day vulnerabilities in .NET, Visual Studio, and the FetchBench side channel, which can steal information through remote code execution. These two were not disclosed to the public, and the Redmond-based tech giant preferred to deal with them before making them known to users.

      Here’s the breakdown of all the types of fixed vulnerabilities with the July Patch Tuesday updates.

      • 59 Remote Code Execution Vulnerabilities
      • 26 Elevation of Privileges Vulnerabilities
      • 24 Security Feature Bypass Vulnerabilities
      • 17 Denial of Service Vulnerabilities
      • 9  Information Disclosure Vulnerabilities
      • 7 Spoofing Vulnerabilities

      Microsoft did not only patch vulnerabilities but also fixed five critical ones. All of these were flaws in remote code execution. This means that attackers could have taken over a system from a distance, making these fixes very important for the safety of users around the globe. The breakdown of fixed vulnerabilities involved different dangers, ranging from privilege escalation to service refusal.

      The Redmond-based tech giant wasn’t alone in this effort. Big tech players such as Adobe, Cisco, and VMware also released updates, indicating a joint action within the tech sector to fight against cybersecurity risks. Adobe fixed vulnerabilities in Premiere Pro, InDesign, and Bridge, while Cisco and VMware dealt with flaws found within their products; this shows that every nook of the technology globe may be exposed to danger.

      It is also worth mentioning that SQL Server customers might want to update their Windows servers as soon as possible. The July Patch Tuesday update deals with tens of CVEs that focus on SQL Server vulnerabilities. As you can see in the table below, all of them are deemed important, with some reaching a high score.

      For those who worry about cybersecurity, there is another issue they might want to pay attention to: CVEs with the No Customer Action Is Required label. Microsoft announced in June that it wanted to release CVEs specifically for cloud security issues; many of these will also have the label, so it will be an extra step for those wanting to keep their devices and servers safe. The July Patch Tuesday update doesn’t feature any CVEs with the label, but starting next month, Microsoft might release them with these additional criteria to be considered and consulted.

      Below, you can see all the CVEs addressed with the July Patch Tuesday updates. The 142 vulnerabilities are almost triple the number of CVEs addressed last month.

      TagCVE IDCVE TitleSeverity
      .NET and Visual StudioCVE-2024-30105.NET Core and Visual Studio Denial of Service VulnerabilityImportant
      .NET and Visual StudioCVE-2024-38081.NET, .NET Framework, and Visual Studio Elevation of Privilege VulnerabilityImportant
      .NET and Visual StudioCVE-2024-35264.NET and Visual Studio Remote Code Execution VulnerabilityImportant
      .NET and Visual StudioCVE-2024-38095.NET and Visual Studio Denial of Service VulnerabilityImportant
      Active Directory Rights Management ServicesCVE-2024-39684Github: CVE-2024-39684 TenCent RapidJSON Elevation of Privilege VulnerabilityModerate
      Active Directory Rights Management ServicesCVE-2024-38517Github: CVE-2024-38517 TenCent RapidJSON Elevation of Privilege VulnerabilityModerate
      Azure CycleCloudCVE-2024-38092Azure CycleCloud Elevation of Privilege VulnerabilityImportant
      Azure DevOpsCVE-2024-35266Azure DevOps Server Spoofing VulnerabilityImportant
      Azure DevOpsCVE-2024-35267Azure DevOps Server Spoofing VulnerabilityImportant
      Azure Kinect SDKCVE-2024-38086Azure Kinect SDK Remote Code Execution VulnerabilityImportant
      Azure Network WatcherCVE-2024-35261Azure Network Watcher VM Extension Elevation of Privilege VulnerabilityImportant
      IntelCVE-2024-37985Arm: CVE-2024-37985 Systematic Identification and Characterization of Proprietary PrefetchersImportant
      Line Printer Daemon Service (LPD)CVE-2024-38027Windows Line Printer Daemon Service Denial of Service VulnerabilityImportant
      Microsoft Defender for IoTCVE-2024-38089Microsoft Defender for IoT Elevation of Privilege VulnerabilityImportant
      Microsoft DynamicsCVE-2024-30061Microsoft Dynamics 365 (On-Premises) Information Disclosure VulnerabilityImportant
      Microsoft Graphics ComponentCVE-2024-38079Windows Graphics Component Elevation of Privilege VulnerabilityImportant
      Microsoft Graphics ComponentCVE-2024-38051Windows Graphics Component Remote Code Execution VulnerabilityImportant
      Microsoft OfficeCVE-2024-38021Microsoft Office Remote Code Execution VulnerabilityImportant
      Microsoft Office OutlookCVE-2024-38020Microsoft Outlook Spoofing VulnerabilityModerate
      Microsoft Office SharePointCVE-2024-38024Microsoft SharePoint Server Remote Code Execution VulnerabilityImportant
      Microsoft Office SharePointCVE-2024-38023Microsoft SharePoint Server Remote Code Execution VulnerabilityCritical
      Microsoft Office SharePointCVE-2024-32987Microsoft SharePoint Server Information Disclosure VulnerabilityImportant
      Microsoft Office SharePointCVE-2024-38094Microsoft SharePoint Remote Code Execution VulnerabilityImportant
      Microsoft Streaming ServiceCVE-2024-38057Kernel Streaming WOW Thunk Service Driver Elevation of Privilege VulnerabilityImportant
      Microsoft Streaming ServiceCVE-2024-38054Kernel Streaming WOW Thunk Service Driver Elevation of Privilege VulnerabilityImportant
      Microsoft Streaming ServiceCVE-2024-38052Kernel Streaming WOW Thunk Service Driver Elevation of Privilege VulnerabilityImportant
      Microsoft Windows Codecs LibraryCVE-2024-38055Microsoft Windows Codecs Library Information Disclosure VulnerabilityImportant
      Microsoft Windows Codecs LibraryCVE-2024-38056Microsoft Windows Codecs Library Information Disclosure VulnerabilityImportant
      Microsoft WS-DiscoveryCVE-2024-38091Microsoft WS-Discovery Denial of Service VulnerabilityImportant
      NDISCVE-2024-38048Windows Network Driver Interface Specification (NDIS) Denial of Service VulnerabilityImportant
      NPS RADIUS ServerCVE-2024-3596CERT/CC: CVE-2024-3596 RADIUS Protocol Spoofing VulnerabilityImportant
      Role: Active Directory Certificate Services; Active Directory Domain ServicesCVE-2024-38061DCOM Remote Cross-Session Activation Elevation of Privilege VulnerabilityImportant
      Role: Windows Hyper-VCVE-2024-38080Windows Hyper-V Elevation of Privilege VulnerabilityImportant
      SQL ServerCVE-2024-28928SQL Server Native Client OLE DB Provider Remote Code Execution VulnerabilityImportant
      SQL ServerCVE-2024-38088SQL Server Native Client OLE DB Provider Remote Code Execution VulnerabilityImportant
      SQL ServerCVE-2024-20701SQL Server Native Client OLE DB Provider Remote Code Execution VulnerabilityImportant
      SQL ServerCVE-2024-21317SQL Server Native Client OLE DB Provider Remote Code Execution VulnerabilityImportant
      SQL ServerCVE-2024-21331SQL Server Native Client OLE DB Provider Remote Code Execution VulnerabilityImportant
      SQL ServerCVE-2024-21308SQL Server Native Client OLE DB Provider Remote Code Execution VulnerabilityImportant
      SQL ServerCVE-2024-21333SQL Server Native Client OLE DB Provider Remote Code Execution VulnerabilityImportant
      SQL ServerCVE-2024-35256SQL Server Native Client OLE DB Provider Remote Code Execution VulnerabilityImportant
      SQL ServerCVE-2024-21303SQL Server Native Client OLE DB Provider Remote Code Execution VulnerabilityImportant
      SQL ServerCVE-2024-21335SQL Server Native Client OLE DB Provider Remote Code Execution VulnerabilityImportant
      SQL ServerCVE-2024-35271SQL Server Native Client OLE DB Provider Remote Code Execution VulnerabilityImportant
      SQL ServerCVE-2024-35272SQL Server Native Client OLE DB Provider Remote Code Execution VulnerabilityImportant
      SQL ServerCVE-2024-21332SQL Server Native Client OLE DB Provider Remote Code Execution VulnerabilityImportant
      SQL ServerCVE-2024-38087SQL Server Native Client OLE DB Provider Remote Code Execution VulnerabilityImportant
      SQL ServerCVE-2024-21425SQL Server Native Client OLE DB Provider Remote Code Execution VulnerabilityImportant
      SQL ServerCVE-2024-21449SQL Server Native Client OLE DB Provider Remote Code Execution VulnerabilityImportant
      SQL ServerCVE-2024-37324SQL Server Native Client OLE DB Provider Remote Code Execution VulnerabilityImportant
      SQL ServerCVE-2024-37330SQL Server Native Client OLE DB Provider Remote Code Execution VulnerabilityImportant
      SQL ServerCVE-2024-37326SQL Server Native Client OLE DB Provider Remote Code Execution VulnerabilityImportant
      SQL ServerCVE-2024-37329SQL Server Native Client OLE DB Provider Remote Code Execution VulnerabilityImportant
      SQL ServerCVE-2024-37328SQL Server Native Client OLE DB Provider Remote Code Execution VulnerabilityImportant
      SQL ServerCVE-2024-37327SQL Server Native Client OLE DB Provider Remote Code Execution VulnerabilityImportant
      SQL ServerCVE-2024-37334Microsoft OLE DB Driver for SQL Server Remote Code Execution VulnerabilityImportant
      SQL ServerCVE-2024-37321SQL Server Native Client OLE DB Provider Remote Code Execution VulnerabilityImportant
      SQL ServerCVE-2024-37320SQL Server Native Client OLE DB Provider Remote Code Execution VulnerabilityImportant
      SQL ServerCVE-2024-37319SQL Server Native Client OLE DB Provider Remote Code Execution VulnerabilityImportant
      SQL ServerCVE-2024-37322SQL Server Native Client OLE DB Provider Remote Code Execution VulnerabilityImportant
      SQL ServerCVE-2024-37333SQL Server Native Client OLE DB Provider Remote Code Execution VulnerabilityImportant
      SQL ServerCVE-2024-37336SQL Server Native Client OLE DB Provider Remote Code Execution VulnerabilityImportant
      SQL ServerCVE-2024-37323SQL Server Native Client OLE DB Provider Remote Code Execution VulnerabilityImportant
      SQL ServerCVE-2024-37331SQL Server Native Client OLE DB Provider Remote Code Execution VulnerabilityImportant
      SQL ServerCVE-2024-21398SQL Server Native Client OLE DB Provider Remote Code Execution VulnerabilityImportant
      SQL ServerCVE-2024-21373SQL Server Native Client OLE DB Provider Remote Code Execution VulnerabilityImportant
      SQL ServerCVE-2024-37318SQL Server Native Client OLE DB Provider Remote Code Execution VulnerabilityImportant
      SQL ServerCVE-2024-21428SQL Server Native Client OLE DB Provider Remote Code Execution VulnerabilityImportant
      SQL ServerCVE-2024-21415SQL Server Native Client OLE DB Provider Remote Code Execution VulnerabilityImportant
      SQL ServerCVE-2024-37332SQL Server Native Client OLE DB Provider Remote Code Execution VulnerabilityImportant
      SQL ServerCVE-2024-21414SQL Server Native Client OLE DB Provider Remote Code Execution VulnerabilityImportant
      Windows BitLockerCVE-2024-38058BitLocker Security Feature Bypass VulnerabilityImportant
      Windows COM SessionCVE-2024-38100Windows File Explorer Elevation of Privilege VulnerabilityImportant
      Windows CoreMessagingCVE-2024-21417Windows Text Services Framework Elevation of Privilege VulnerabilityImportant
      Windows Cryptographic ServicesCVE-2024-30098Windows Cryptographic Services Security Feature Bypass VulnerabilityImportant
      Windows DHCP ServerCVE-2024-38044DHCP Server Service Remote Code Execution VulnerabilityImportant
      Windows Distributed Transaction CoordinatorCVE-2024-38049Windows Distributed Transaction Coordinator Remote Code Execution VulnerabilityImportant
      Windows Enroll EngineCVE-2024-38069Windows Enroll Engine Security Feature Bypass VulnerabilityImportant
      Windows Fax and Scan ServiceCVE-2024-38104Windows Fax Service Remote Code Execution VulnerabilityImportant
      Windows FilteringCVE-2024-38034Windows Filtering Platform Elevation of Privilege VulnerabilityImportant
      Windows Image AcquisitionCVE-2024-38022Windows Image Acquisition Elevation of Privilege VulnerabilityImportant
      Windows Imaging ComponentCVE-2024-38060Windows Imaging Component Remote Code Execution VulnerabilityCritical
      Windows Internet Connection Sharing (ICS)CVE-2024-38105Windows Layer-2 Bridge Network Driver Denial of Service VulnerabilityImportant
      Windows Internet Connection Sharing (ICS)CVE-2024-38053Windows Layer-2 Bridge Network Driver Remote Code Execution VulnerabilityImportant
      Windows Internet Connection Sharing (ICS)CVE-2024-38102Windows Layer-2 Bridge Network Driver Denial of Service VulnerabilityImportant
      Windows Internet Connection Sharing (ICS)CVE-2024-38101Windows Layer-2 Bridge Network Driver Denial of Service VulnerabilityImportant
      Windows iSCSICVE-2024-35270Windows iSCSI Service Denial of Service VulnerabilityImportant
      Windows KernelCVE-2024-38041Windows Kernel Information Disclosure VulnerabilityImportant
      Windows Kernel-Mode DriversCVE-2024-38062Windows Kernel-Mode Driver Elevation of Privilege VulnerabilityImportant
      Windows LockDown Policy (WLDP)CVE-2024-38070Windows LockDown Policy (WLDP) Security Feature Bypass VulnerabilityImportant
      Windows Message QueuingCVE-2024-38017Microsoft Message Queuing Information Disclosure VulnerabilityImportant
      Windows MSHTML PlatformCVE-2024-38112Windows MSHTML Platform Spoofing VulnerabilityImportant
      Windows MultiPoint ServicesCVE-2024-30013Windows MultiPoint Services Remote Code Execution VulnerabilityImportant
      Windows NTLMCVE-2024-30081Windows NTLM Spoofing VulnerabilityImportant
      Windows Online Certificate Status Protocol (OCSP)CVE-2024-38068Windows Online Certificate Status Protocol (OCSP) Server Denial of Service VulnerabilityImportant
      Windows Online Certificate Status Protocol (OCSP)CVE-2024-38067Windows Online Certificate Status Protocol (OCSP) Server Denial of Service VulnerabilityImportant
      Windows Online Certificate Status Protocol (OCSP)CVE-2024-38031Windows Online Certificate Status Protocol (OCSP) Server Denial of Service VulnerabilityImportant
      Windows Performance MonitorCVE-2024-38028Microsoft Windows Performance Data Helper Library Remote Code Execution VulnerabilityImportant
      Windows Performance MonitorCVE-2024-38019Microsoft Windows Performance Data Helper Library Remote Code Execution VulnerabilityImportant
      Windows Performance MonitorCVE-2024-38025Microsoft Windows Performance Data Helper Library Remote Code Execution VulnerabilityImportant
      Windows PowerShellCVE-2024-38043PowerShell Elevation of Privilege VulnerabilityImportant
      Windows PowerShellCVE-2024-38047PowerShell Elevation of Privilege VulnerabilityImportant
      Windows PowerShellCVE-2024-38033PowerShell Elevation of Privilege VulnerabilityImportant
      Windows Remote Access Connection ManagerCVE-2024-30071Windows Remote Access Connection Manager Information Disclosure VulnerabilityImportant
      Windows Remote Access Connection ManagerCVE-2024-30079Windows Remote Access Connection Manager Elevation of Privilege VulnerabilityImportant
      Windows Remote DesktopCVE-2024-38076Windows Remote Desktop Licensing Service Remote Code Execution VulnerabilityCritical
      Windows Remote DesktopCVE-2024-38015Windows Remote Desktop Gateway (RD Gateway) Denial of Service VulnerabilityImportant
      Windows Remote Desktop Licensing ServiceCVE-2024-38071Windows Remote Desktop Licensing Service Denial of Service VulnerabilityImportant
      Windows Remote Desktop Licensing ServiceCVE-2024-38073Windows Remote Desktop Licensing Service Denial of Service VulnerabilityImportant
      Windows Remote Desktop Licensing ServiceCVE-2024-38074Windows Remote Desktop Licensing Service Remote Code Execution VulnerabilityCritical
      Windows Remote Desktop Licensing ServiceCVE-2024-38072Windows Remote Desktop Licensing Service Denial of Service VulnerabilityImportant
      Windows Remote Desktop Licensing ServiceCVE-2024-38077Windows Remote Desktop Licensing Service Remote Code Execution VulnerabilityCritical
      Windows Remote Desktop Licensing ServiceCVE-2024-38099Windows Remote Desktop Licensing Service Denial of Service VulnerabilityImportant
      Windows Secure BootCVE-2024-38065Secure Boot Security Feature Bypass VulnerabilityImportant
      Windows Secure BootCVE-2024-37986Secure Boot Security Feature Bypass VulnerabilityImportant
      Windows Secure BootCVE-2024-37981Secure Boot Security Feature Bypass VulnerabilityImportant
      Windows Secure BootCVE-2024-37987Secure Boot Security Feature Bypass VulnerabilityImportant
      Windows Secure BootCVE-2024-28899Secure Boot Security Feature Bypass VulnerabilityImportant
      Windows Secure BootCVE-2024-26184Secure Boot Security Feature Bypass VulnerabilityImportant
      Windows Secure BootCVE-2024-38011Secure Boot Security Feature Bypass VulnerabilityImportant
      Windows Secure BootCVE-2024-37984Secure Boot Security Feature Bypass VulnerabilityImportant
      Windows Secure BootCVE-2024-37988Secure Boot Security Feature Bypass VulnerabilityImportant
      Windows Secure BootCVE-2024-37977Secure Boot Security Feature Bypass VulnerabilityImportant
      Windows Secure BootCVE-2024-37978Secure Boot Security Feature Bypass VulnerabilityImportant
      Windows Secure BootCVE-2024-37974Secure Boot Security Feature Bypass VulnerabilityImportant
      Windows Secure BootCVE-2024-38010Secure Boot Security Feature Bypass VulnerabilityImportant
      Windows Secure BootCVE-2024-37989Secure Boot Security Feature Bypass VulnerabilityImportant
      Windows Secure BootCVE-2024-37970Secure Boot Security Feature Bypass VulnerabilityImportant
      Windows Secure BootCVE-2024-37975Secure Boot Security Feature Bypass VulnerabilityImportant
      Windows Secure BootCVE-2024-37972Secure Boot Security Feature Bypass VulnerabilityImportant
      Windows Secure BootCVE-2024-37973Secure Boot Security Feature Bypass VulnerabilityImportant
      Windows Secure BootCVE-2024-37971Secure Boot Security Feature Bypass VulnerabilityImportant
      Windows Secure BootCVE-2024-37969Secure Boot Security Feature Bypass VulnerabilityImportant
      Windows Server BackupCVE-2024-38013Microsoft Windows Server Backup Elevation of Privilege VulnerabilityImportant
      Windows TCP/IPCVE-2024-38064Windows TCP/IP Information Disclosure VulnerabilityImportant
      Windows ThemesCVE-2024-38030Windows Themes Spoofing VulnerabilityImportant
      Windows Win32 Kernel SubsystemCVE-2024-38085Windows Graphics Component Elevation of Privilege VulnerabilityImportant
      Windows Win32K – GRFXCVE-2024-38066Windows Win32k Elevation of Privilege VulnerabilityImportant
      Windows Win32K – ICOMPCVE-2024-38059Win32k Elevation of Privilege VulnerabilityImportant
      Windows Workstation ServiceCVE-2024-38050Windows Workstation Service Elevation of Privilege VulnerabilityImportant
      XBox Crypto Graphic ServicesCVE-2024-38032Microsoft Xbox Remote Code Execution VulnerabilityImportant
      XBox Crypto Graphic ServicesCVE-2024-38078Xbox Wireless Adapter Remote Code Execution VulnerabilityImportant

      How to Create and Use Microsoft Teams Webhooks

      Setting up webhooks in Microsoft Teams can significantly enhance your team’s communication and integration with other tools. Whether you need to send notifications to external services or receive updates from other applications, this guide will walk you through the process of creating both outgoing and incoming webhooks in just a few minutes.

      How do I create webhooks in Microsoft Teams?

      1. Create an Outgoing Webhook in Microsoft Teams

      1. Open Microsoft Teams and go to the team where you want to add the outgoing webhook.
      2. Click on the team name and then click on More options (three dots) > Manage team.
      3. Select the Apps tab.
      4. Click on Create an outgoing webhook in the bottom right corner.
      5. Provide a name for your webhook.
      6. Enter an address, description, and optionally, upload a profile picture and click Create.
      7. Copy the security token that appears. Important: You will only see this token once, so make sure to store it safely.

      By creating an outgoing webhook, you enable your team to send messages to external services, which is useful for sending notifications or data to other apps.

      2. Add an Incoming Webhook in Microsoft Teams

      1. Open Microsoft Teams and go to the team and channel where you want to add an incoming webhook.
      2. Click on the channel name and then click on More options (three dots) > Connectors.
      3. Search for Incoming Webhook and select Add.
      4. Click Configure.
      5. Provide a name for the webhook and optionally upload an image, then click Create.
      6. Copy the unique URL provided and save it. You will need this URL to send information to the Teams channel.
      7. Click Done.

      Using an incoming webhook allows external applications to send messages into Microsoft Teams, which can be helpful for integrating notifications or updates from other tools directly into your channels.

      3. Use Visual Studio to set up Outgoing Webhooks

      1. Ensure you have Visual Studio 2022 installed, with the ASP.NET and web development workloads.
      2. Open Visual Studio and create a new ASP.NET Core Web App.
      3. Set up a tunnel using dev tunnel:
        • Select Dev Tunnels from the debug dropdown list and click Create a Tunnel.
        • Fill in the details (Account, Name, Tunnel Type, Access) and click OK.
      4. Select F5 to run the application in debug mode, opening the dev tunnel.
      5. In Teams, go to the team where you want to add the webhook.
      6. Click More options > Manage team > Apps > Create an outgoing webhook.
      7. Fill in the details using the URL generated from dev tunnel.

      Setting up outgoing webhooks through Visual Studio with a tunnel can be a more advanced and flexible way to integrate Teams with other apps, especially for development and testing purposes.

      4. Configure Incoming Webhooks for PostHog

      1. In Microsoft Teams:
        • Navigate to the channel where you want to add the webhook.
        • Click on More options > Connectors > Incoming Webhook.
        • Click Configure, provide a name, upload an image (optional), and click Create.
        • Copy the unique URL provided.
      2. In PostHog:
        • Go to Project settings.
        • Paste the copied URL into the Webhook integration section.
        • Click Test & Save to ensure the integration works.
      3. To post actions to the webhook in PostHog:
        • Navigate to the action you want to trigger the webhook.
        • Select Post to webhook when this action is triggered.

      This method ensures that you can easily track and notify your team in Microsoft Teams whenever specific actions occur in PostHog.

      By following these solutions, you can effectively create and manage webhooks in Microsoft Teams to improve your team’s communication and integration with other tools.

      If you’re interested in other collaboration features, here’s our guide on how to integrate Microsoft Teams and Slack. We also have a guide on enabling API Key Availability in Teams.

      What do you think about using webhooks in Microsoft Teams? Tell us all about it in the comments below.

      VAN 68 Valorant Error [Solved]

      If you are a Valorant fan, chances are you must have come across the VAN 68 error code. The error message reads, VALORANT has encountered a connection error. Please relaunch the client to reconnect!

      VAN 68 is a common error code usually arising due to problems with the game servers, DNS issues, missing permissions, misconfigured network settings, or conflicts with other apps.

      Before you start troubleshooting, check Valorant’s server status on the official website or use a real-time monitoring service like Downdetector. If the servers are up and running, disable the VPN (if using one) and reboot/factory reset the router.

      How can I fix the error code VAN 68 in Valorant?

      1. Use a VPN

      A few of the affected Valorant players I talked to informed me that using a VPN fixed the VAN 68 error code. So, all you need to do is get a top-rated VPN solution, such as ExpressVPN.

      After you download and install the VPN service, you can connect to a server location in one of 105 countries to reduce ping and lag while playing Valorant.

      ⇒ Get ExpressVPN

      Also, you could download free VPN software if you are unsure about a paid one.

      2. Run Valorant as administrator

      1. Right-click on Valorant’s launcher (.exe file), and select Properties.
      2. Go to the Compatibility tab, and tick the checkbox for Run this program as an administrator.run as administrator to fix van 68 valorant error
      3. Click on Apply and OK to save the changes.

      3. Resolve DNS issues

      3.1 Flush the DNS cache

      1. Press Windows + S to open Search, type Command Prompt, and click on Run as administrator on the right.
      2. Click Yes in the UAC prompt.
      3. Paste the following command and hit Enter: ipconfig /flushdnsclear DNS cache
      4. Restart the computer, launch Valorant, and check for improvements.

      3.2. Use Google’s DNS

      1. Press Windows + R to open Run, type ncpa.cpl in the text field, and hit Enter.ncpa.cpl
      2. Right-click on the active network adapter and choose Properties.properties
      3. Select Internet Protocol Version 4 (TCP/IPv4) from the list, and then click on Properties.
      4. Choose the Use the following DNS server addresses option, and enter the following in the fields underneath:
        • Preferred DNS server: 8.8.8.8
        • Alternate DNS server: 8.8.4.4
      5. Tick the checkbox for Validate settings upon exit and click OK to save the changes.Google's DNS to fix van 68 valorant error
      6. Relaunch Valorant and verify whether you still encounter the connection error.

      In 4 out of 5 cases, it was a DNS issue to blame for the VAN 68 Valorant error on a Windows PC. Here, clearing the DNS cache and/or switching DNS addresses fixed things!

      While I selected Google’s public DNS, you can go with the fastest DNS server near you and enjoy an improved speed.

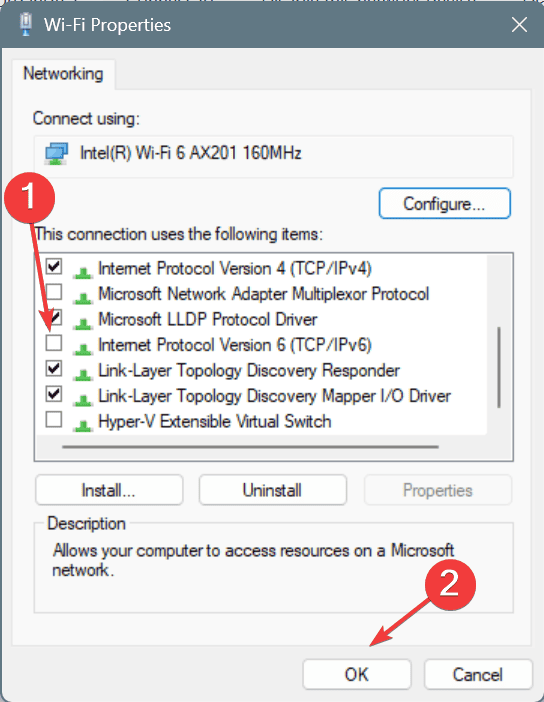
      4. Disable IPv6

      1. Press Windows + R to open Run, type ncpa.cpl, and hit Enter.
      2. Right-click on the network adapter in use, Wi-Fi or Ethernet, and select Properties.
      3. Now, untick the checkbox for Internet Protocol Version 6 (TCP/IPv6), and click OK to save the changes.remove IPv6 to fix van 68 valorant error
      4. Restart the computer, then launch Valorant and check whether the VAN 68 error still appears.

      5. Run the Vanguard service (Vgc)

      1. Press Windows + R to open Run, type services.msc in the text field, and hit Enter.services.msc
      2. Scroll down, right-click on the Vgc service, and select Properties.
      3. Select Automatic from the Startup type dropdown menu, and then click the Start button under Service status.run VGC to fix van 68 valorant error
      4. Finally, click Apply and OK to save the changes.
      5. Similarly, run all services linked to Valorant, Vanguard, and Riot Client and then check for improvements.

      6. Whitelist Valorant in firewall

      1. Press Windows + S to open Search, type Windows Defender Firewall in the text field, and click on the relevant result.
      2. Select Allow an app or feature through Windows Defender Firewall from the left pane.firewall
      3. Click on Change settings.
      4. Now, click on Allow another app.whitelist app
      5. Head to the installation path for Valorant, select the game’s launcher, and click on Open.
      6. Click on Add.
      7. Now, tick the checkboxes for Private and Public next to Valorant.whitelist to fix van 68 valorant error
      8. Similarly, whitelist Riot Client in Windows Defender Firewall, and click on OK to save the changes.

      Often, Windows Defender Firewall blocks an app, and if this is the reason for the VAN 68 error in Valorant on PC, you will need to whitelist the game. Also, if you have any third-party firewall or antivirus installed, make sure to allow Valorant through it.

      7. Uninstall conflicting third-party software

      1. Press Windows + R to open Run, type appwiz.cpl in the text field, and hit Enter.
      2. If you find Killer Control Center or Killer Network Manager in the list of apps, select it, and then click on Uninstall.uninstal to fix van 68 valorant error
      3. Follow the on-screen instructions to complete the installation process.
      4. Similarly, remove any other third-party software that may be conflicting with Valorant.

      If you don’t want to uninstall these apps, here’s the setting that needs to be disabled on both to fix the VAN 68 Valorant error:

      • Killer Control Center: Killer Prioritization Engine
      • Killer Network Manager: Enable Advanced Stream Detect

      But, since the settings may re-enable after an update, I recommend uninstalling the app altogether.

      In case the error persists, remove Valorant and Riot Client using an effective uninstaller software to get rid of any leftover files and Registry entries, and then reinstall them using the setup available on the official website.

      Before you leave, discover some quick tips to improve the FPS in Valorant and enjoy a superior gaming experience!

      Which fix worked for you? Share with our readers in the comments section.

      Web Threat Shield for Microsoft Edge: How to Install or Remove it

      Web Threat Shield is a security addon developed by Webroot for Microsoft Edge that, as the name suggests, blocks malicious websites and online threats while you’re browsing. In this guide, you will learn how to install it, if it’s worth doing that and about other existing options.

      How do I download and install Web Threat Shield?

      Download and Install the Web Threat Shield extension for Edge

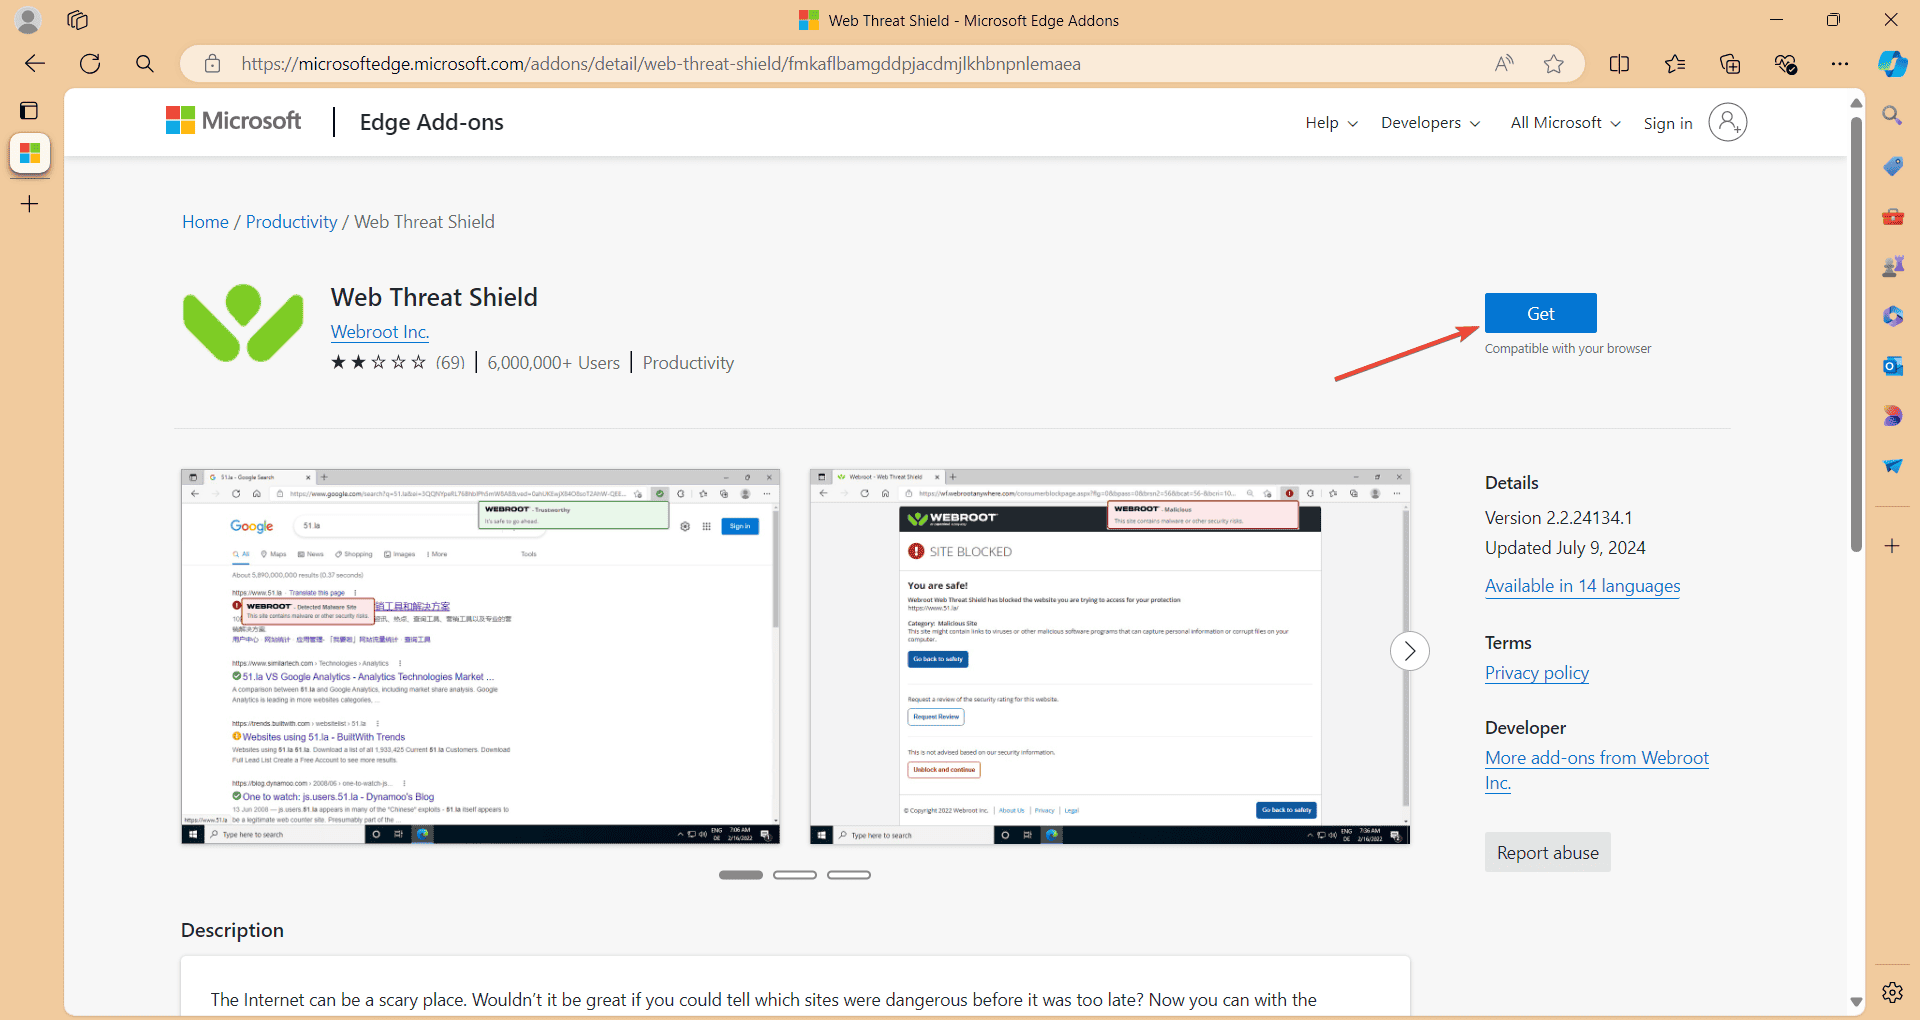
      1. Open Microsoft Edge and go to the Web Threat Shield addon page in the app store.
      2. Click on the Get button and click on Install addon in the popup window.
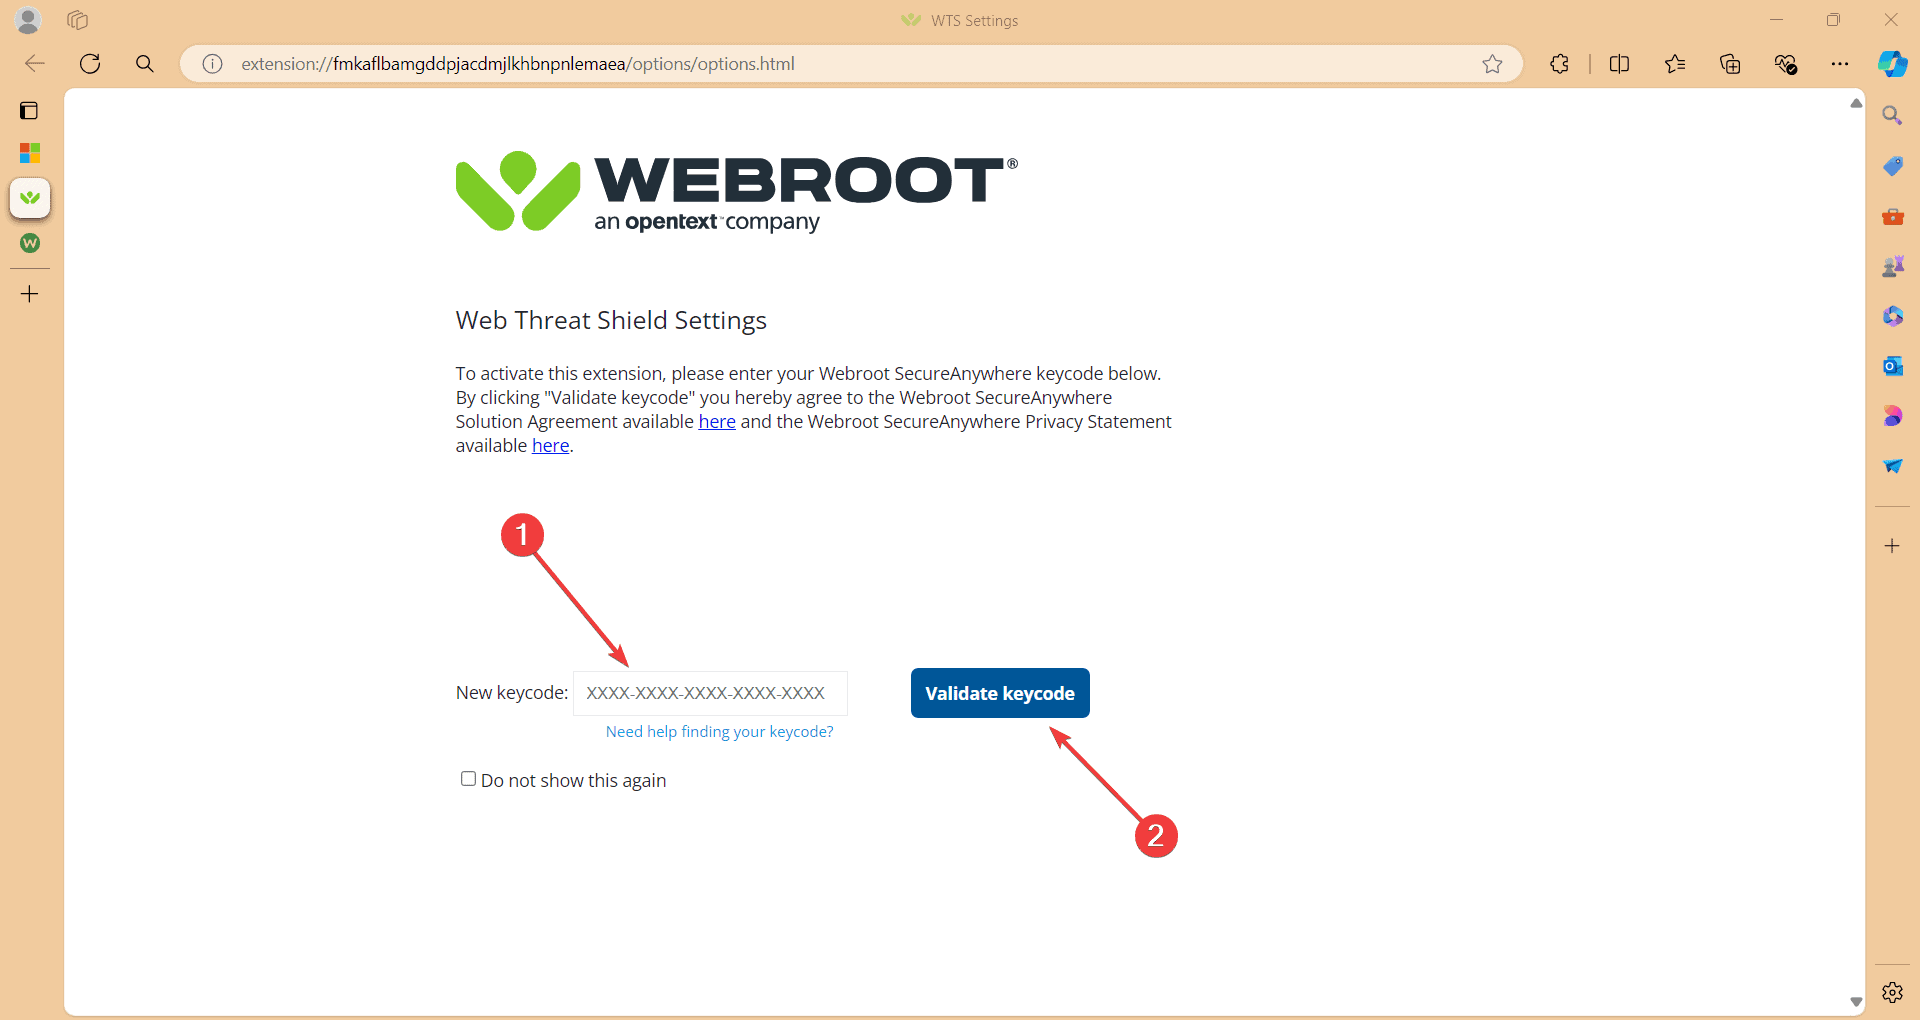
      3. Now, you will need to enter the validation key you received from Webroot and click on Validate keycode.
      4. Once the installation is complete, open the Web Threat Shield app.
      5. Click the Turn it On button that appears in the Web Threat Shield window.
      6. Check the upper right corner of your Edge browser; the Web Threat Shield icon should display to indicate that the app is turned on.

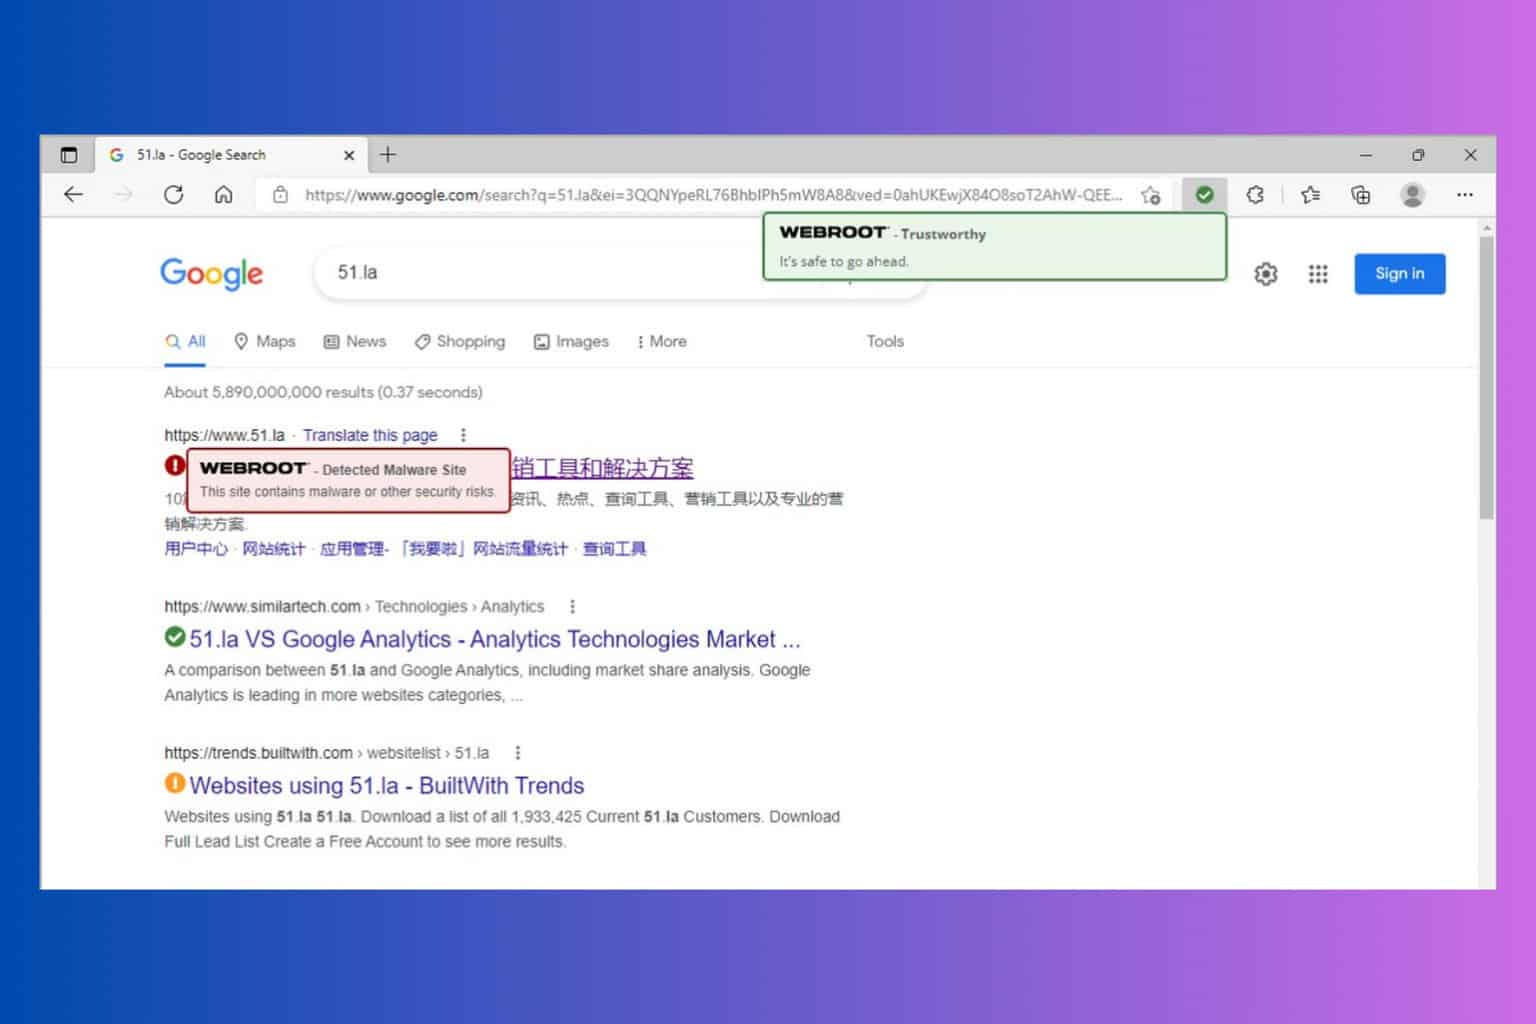
      You should know that the Web Threat Shield extension is not free. The plans start from $30 for one PC for a year. It also has dedicated extensions for Chrome and Firefox. Once you install it, you will see labels for all the links on a page with tags like WEBROOT Trustworthy, Caution and Malicious.

      Is Web Threat Shield safe?

      We didn’t see any complaints online about the Web Threat Shield. In the past, the addon has seen a lot of false positives, but it’s not the case anymore. It’s a pretty decent extension that has over 90% detection rate and it works smoothly on Edge.

      Is Web Threat Shield worth it? Well, here, the answer is not really. As you will see below, Microsoft Edge already has a similar protection tool that does a great job. So, our recommendation is not to pay for Web Threat Shield and install it, but it’s still up to you.

      Does Edge have a web threat shield?

      Yes, actually, you have a pretty good web threat shield already installed in Edge and it’s turned on by default. However, here’s how to check that or turn it on if it isn’t:

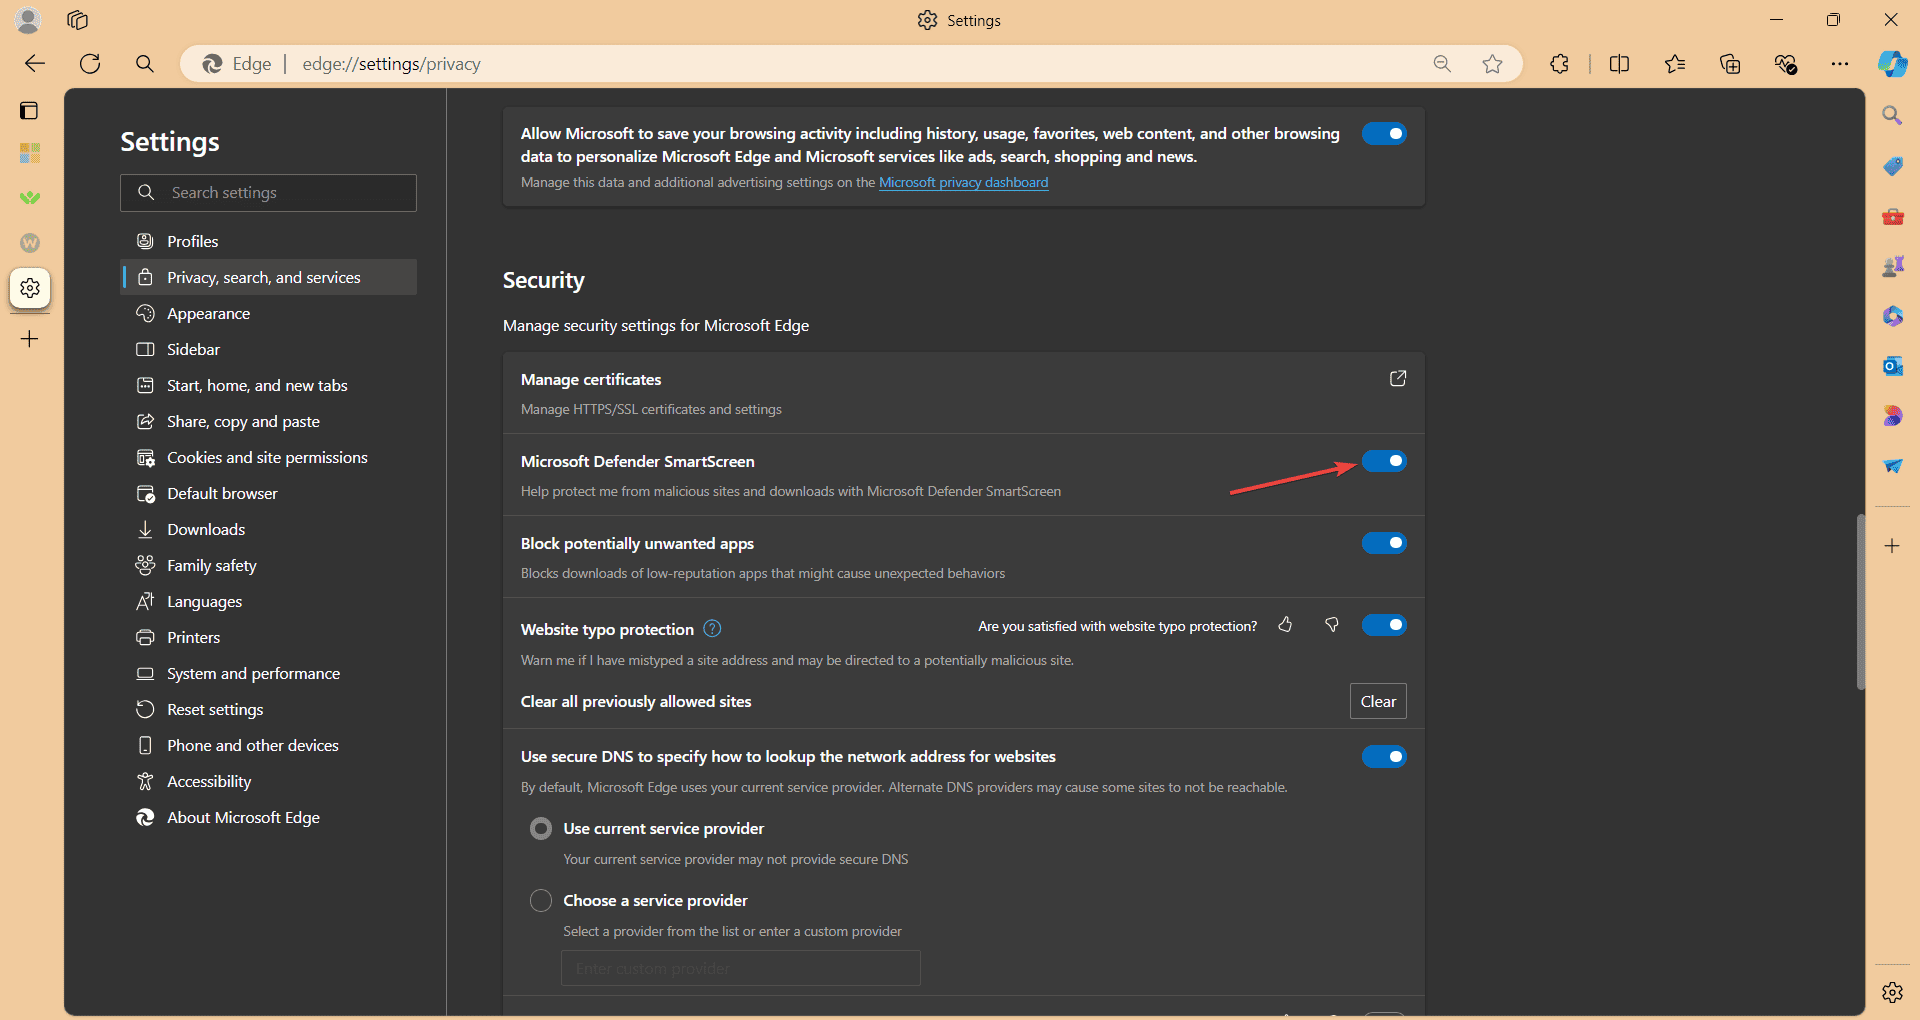
      1. Open Microsoft Edge and click on the three-dot menu and select Settings from the dropdown menu.
      2. Navigate to Privacy, search, and services on the left sidebar, then scroll down to the Security section.
      3. Toggle on the switch next to Microsoft Defender SmartScreen.
      4. While you’re there, also check if the PUP blocking feature right below is on.

      Turning on Microsoft Defender SmartScreen helps safeguard against malicious websites and downloads by providing early warnings and blocking harmful content. It’s a lot less invasive and it does a great job protecting you from malicious websites. Edge also has tracking protection, secure DNS and it blocks PUPs.

      How do I remove Web Threat Shield from Edge?

      1. Open Microsoft Edge, click the three-dot menu and click on Extensions.
      2. Locate the Web Threat Shield extension in the list.
      3. Click on Remove or Uninstall next to the extension.
      4. Confirm the removal in any prompt that appears.

      Removing outdated or malfunctioning extensions will prevent potential conflicts and ensure that your browser remains secure.

      That is all about the Web Threat Shield addon in Edge. Now you know how to install it, what are the existing options and how to get rid of it if you already installed it.

      You might also be interested in learning about the best Edge extensions to install on your browser.

      We also have a complete guide on how to make Edge as private and secure as possible.

      We hope that our guide provided sufficient information about Web Threat Shield on Edge. If you have any suggestions, use the comments section below to let us know about them.

      KB5040442, and KB5040431 for Windows 11 23H2, 22H2, and 21H2 are now available to download and install

      It’s the second Tuesday of the month, and if you’re a Windows user, then you know what that means: time for a new Patch Tuesday update. Microsoft has given updates for versions 23H2, 22H2, and 21H2, with the first two getting the KB5040442 while the 21H2 getting the KB5040431.

      KB5040442 and KB5040431 fix several problems in the various versions, ensuring Windows 11 operates better and more safely. Suppose you’ve ever experienced that irritating bug where you can’t click on your taskbar. In that case, you should know these updates are supposed to solve that problem, particularly for people using Windows N edition, which does not include many media-related tools because of licensing limitations.

      Taskbar (known issue) You might not be able to view or interact with the taskbar after you install KB5039302. This issue occurs on devices that run the Windows N edition. This edition is like other editions but lacks most media-related tools. The issue also occurs if you turn off “Media Features” from the Control Panel.

      Microsoft

      Regarding safety, these Patch Tuesday updates fix 142 security flaws. They also include dozens of enhancements and repairs that make your system work better and secure it from weaknesses. For example, a change in the Windows Installer asks for your login details when fixing an application, adding another level of safety to the process.

      For people who like to stay at the forefront, these 23H2 and 22H2 updates also contain enhancements from previous updates. This means that no one will be left behind in terms of technology. For those who are keen on tech matters have dealt with some quite complex things, such as problems in Remote Desktop MultiPoint Server and Remote Authentication Dial-In User Service (RADIUS) protocol.

      Known issues with KB5040442 and KB5040431 include difficulties enterprise users encounter when they upgrade from Windows Pro to a valid Windows Enterprise subscription. Additionally, for all users, changing their user account profile picture post-update could be a hiccup.

      These updates are available via Windows Update and should be automatically installed for most users. However, if you prefer manually managing updates, you can grab them from the Microsoft Catalog website: the ones for KB5040442 can be found here, while the ones for KB5040431 are here.

      The full changelog for KB5040442 (Windows 11 23H2, 22H2) is here. The list of all the changes, enhancements, and improvements for KB5040431 (Windows 11 21H2) is here.

      Just a quick heads up, you have less than 90 days to upgrade your Windows 11 22H2, and 21H2, to version 23H2, as they will expire in October 2024.

      Error 1015 in ChatGPT: 4 Ways to Bypass it

      Many reported being unable to use ChatGPT due to ChatGPT error 1015, and this can prevent you from completely using the service. Luckily, there are a few ways to fix this problem.

      What is error code 1015 in ChatGPT?

      This error appears if you’re making too many requests in a short time or if the service is having issues and can’t process all your requests.

      How do I fix error code 1015 in ChatGPT?

      Before we try anything else, try using a different network, such as your mobile network, and check if the issue persists.

      1. Check the OpenAI status page

      1. Visit the OpenAI status page.
      2. Check if all services are running.
        chatpgt status page
      3. If there is any outage, you’ll have to wait for OpenAI to address the issue.

      2. Use a different Bubble key

      1. Get a new Bubble API key.
      2. Use it instead of your current key.
      3. Check if the problem is still there.

      3. Don’t use Cloudflare Workers

      1. If you’re using Cloudflare Workers, disable them.
      2. Check if that solves the issue.
      3. If that’s the case, you might have to keep Cloudflare Workers temporarily disabled until the issue is resolved.

      4. Use Pipedream webhook

      1. Connect to Pipedream using Bubble API connector.
      2. Next, use Pipredram to send a request to OpenAI.
      3. The result should be returned to Bubble.

      This is just a workaround, but it has worked for several users.

      ChatGPT error 1015 is likely caused by an outage or issues with one or more services connected to it, so your best option is to wait or use one of the aforementioned workarounds from this guide.

      This isn’t the only issue, many reported Internal server error in ChatGPT as well as Bad gateway ChatGPT error.

      ChatGPT network error is also a prominent issue, but we already covered it in one of our previous guides.

      Snapdragon X Elite eGPU Support: Everything About That

      Snapdragon X Elite laptops are all over the market now and we’ve seen a lot of benchmarks and tests already. The consensus is that the latest machines are quite good, providing day-long batteries and great AI capabilities. They are also great for gaming and editing although not exceptional. And that’s where the discussion is taking us, because gamers are asking if they can connect their external GPU docks to improve the experience on their laptops. The answer is not that straightforward as it seems, so let’s get into gear with this Snapdragon X Elite eGPU support matter.

      Do Snapdragon X Elite laptops support eGPUs?

      Well, for an answer to this question, we need to establish if Arm chips support external GPUs and if we look at Apple’s M4 chip that started the whole ARM revolution, the answer is clearly a firm NO, at least not at the moment. No matter how they’ve tried, gamers didn’t manage to hook up their eGPU docks to M4 laptops.

      The explanation is pretty simple: for a good bandwidth, eGPUs need a Thunderbold 3 or Thunderbolt 4 connection. Now, Thunderbolt was developed by Intel and it only works with x86 CPUs and it has no Arm support yet. So, logically, you can’t connect your eGPU to an Arm chip powered laptop whether it’s Qualcomm’s Snapdragon X Elite or another similar architecture.

      However, that is half the story, because when asked, Qualcomm said that Snapdragon X Elite laptops will allow discrete GPUs. However, to be more precise, according to Sam Mobile, they’ve said they won’t prevent OEMs from hooking up discrete GPUs. That isn’t the same thing as allowing an external connection. Although, Snapdragon X Elite chips have 16 PCI lanes and although we already know what 8 of them do (Wi-Fi, Bluetooth, etc.), the other 8 might be used for a GPU connection.

      Here’s the twist, though: Snapdragon X Elite X1E-80-100 supports USB 4, and thus, it would support Thunderbolt 4. However, when a user tried connecting the eGPU to a Surface Pro 11, the laptop didn’t recognize and use it.

      Will it be possible to connect an eGPU to a Snapdragon X Elite laptop?

      There are two possible outcomes to this answer. The first scenario is that NVIDIA and AMD didn’t make the right drivers for Arm to support their chips, or Intel didn’t create the profile for the Thunderbolt 4 functionality for USB 4 on Arm.

      In the second scenario, eGPUs won’t be supported at all on Snapdragon X Elite for whatever reason. Those 8 PCI lanes must be used for something and we strongly believe that we will see eGPU support for Snapdragon X Elite powered laptops in the near future.

      Why are things moving so slow? Perhaps, a scenario is that Qualcomm, NVIDIA, AMD and Intel are still waiting for user feedback to learn about the real demand for this feature. Or, an even more wild scenario is that Qualcomm is waiting for Microsoft to develop an exclusive eGPU for Snapdragon X Elite laptops. We’ve already seen that with the Surface Dock before, so it wouldn’t be that hard to believe.

      That’s what we know about this whole story right now, but it’s a working process. Of course, we will let you know about future developments when they occur.

      In the meantime, use the comments to let us know what are your thoughts about this whole Snapdragon X Elite eGPU support story.

      6 Ways to Fix No Healthy Upstream Error on Spotify

      If you are encountering no healthy upstream error on Spotify, it could be due to server issues, which may prevent you from streaming music. Another reason for this issue could be misconfigured DNS settings.

      To resolve this issue, restart your computer, check if the browser is updated, and, if you are using the Spotify app, try reinstalling it.

      How can I fix the No Healthy Upstream error on Spotify?

      1. Reboot your router

      1. Remove all wires from the router and unplug it from the power source.
      2. Wait 30 seconds, then plug the power source back in to restart the router. Wait for 1-2 minutes and check if the issue is resolved.

      2. Try opening in an incognito window

      1. Open your preferred browser; here, we are taking the example of Google Chrome to demonstrate the steps.Settings - no healthy upstream spotify
      2. You can click the three horizontal dots icon at the top right corner and select the New Incognito window, or press Ctrl + Shift + N to open the private window and try opening Spotify.

      3. Clear browser cache (if using a browser)

      1. Open your preferred browser; here, we are taking the example of Google Chrome to demonstrate the steps.
      2. Click the three horizontal dots icon on the top right corner and select Settings.Settings CHrome - no healthy upstream spotify
      3. Go to Privacy and security, and select Delete browsing data.Delete browsing data
      4. Select All time from the drop-down, then place a checkmark next to Browsing history, Cookies and other site data, & Cache images and files.Delete - Settings4
      5. Click Clear data.

      4. Update your browser

      1. Open your preferred browser; here, we are taking the example of Google Chrome to demonstrate the steps.
      2. Click the three horizontal dots icon on the top right corner and select Settings.Settings CHrome - no healthy upstream spotify
      3. Now, click About Chrome.
      4. Your browser will start looking for an update and install it if available. Once done, restart the browser, then check if the problem is fixed.

      5. Reset your network settings

      1. Press the Windows + I to open the Settings app.
      2. Go to Network & Internet, then select Advanced network settings.Network & Internet -  no healthy upstream spotify
      3. Next, locate Network reset under More settings.Network Reset
      4. Click the Reset now button.Reset now 1
      5. Now, click Yes on the UAC prompt.

      6. Reinstall the app

      1. Press Windows + I to open the Settings app.
      2. Go to Apps, then click Installed apps.Apps - Installed apps - no healthy upstream spotify
      3. Locate Spotify, click the three dots, and select Uninstall.Uninstall
      4. Go to the Microsoft Store and click Get or Install.

      If none of these methods work, you can use an alternate browser. Ensure your browser is updated and the network configured correctly to avoid such issues.

      This isn’t the only error you might see when browsing or streaming. We also covered the upstream connect error or disconnect/reset before headers in our detailed How to Fix Upstream Connect Error Before Headers article.

      Did we miss a step that helped you fix the No Healthy Upstream error on Spotify? If so, share the method in the comments section below, and we will add it to the list.

      Msv1160cp10.dll: What is It & How to Fix It If It’s Missing

      If your games are crashing and you get the msv1160cp10.dll error dialog box, then it is because this DLL file has been infected or accidentally deleted. You need to either reinstall the game or download the DLL file again to fix the issue.

      To begin with, you can restart your computer, run a malware scan, reinstall the game or app that is showing the error, and ensure there are no pending updates on your Windows.

      What is msv1160cp10.dll?

      The MSVCP110.dll is a dynamic link library file that is part of the Microsoft Visual C++ 2010 ++ Redistributable package. The package consists of libraries used in various games and applications.

      How can I fix the msv1160cp10.dll missing error?

      1. Use a third-party DLL fixer

      If not done correctly, restoring a DLL file manually can cause more harm than good to your computer! Therefore, it is advised to use a third-party DLL fixer tool.

      These tools can recover or restore all Windows DLL files, like msv1160cp10.dll, without hassle. Thus, they resolve conflicts between third-party apps and the operating system and enhance PC performance.

      2. Reregister the DLL file

      1. Press the Windows key, type cmd and click Run as administrator.CMD elevated - msv1160cp10.dll
      2. Copy & paste the following command to register the msv1160cp10.dll and hit Enter: regsvr32 msv1160cp10.dll
      3. Click OK if prompted and reboot your PC.

      3. Repair/Reinstall the Microsoft Visual C++ redistributable

      1. Press Windows + I to open the Settings app.
      2. Go to Apps, then click Installed apps.Apps - Installed apps Msv1160cp10.dll
      3. Locate the Microsoft Visual C++ Redistributable and click the three dots and select Modify.three dots icon - Modify
      4. Click Repair and follow the on-screen instructions to complete the process.Repair - Msv1160cp10.dll

      If repairing doesn’t work for you, try reinstalling the app. For that, follow these steps:

      1. Press Windows + I to open the Settings app.
      2. Go to Apps, then click Installed apps.
      3. Locate the Microsoft Visual C++ Redistributable, click the three dots icon, and select Uninstall.
      4. Click Uninstall and follow the on-screen instructions to complete the process.Uninstall - Msv1160cp10.dll
      5. Click this link to download Microsoft Visual C++ Redistributable.
      6. Once downloaded, double-click the file to initiate the installation.
      7. Click on Agree, then Install and let the process get completed.Install C++
      8. Once done, reboot your computer.

      4. Run SFC & DISM scans

      1. Press the Windows key, type cmd, and click Run as administrator.CMD elevated - msv1160cp10.dll
      2. Type the following command to repair the system files and hit Enter: sfc/scannowSFCSCANNOW CMD - Msv1160cp10.dll
      3. Wait for the scan to complete, copy & paste the following command to restore Windows OS image files, and press Enter: Dism /Online /Cleanup-Image /RestoreHealthRestore health
      4. Once the scan is completed, your computer will automatically connect to the Windows Update service to download and replace the corrupt files. Restart your computer to let the changes take effect.

      5. Perform a System Restore

      1. Press Windows + R to open the Run window. sysdm.cpl - Msv1160cp10.dll
      2. Type sysdm.cpl and click OK to open the System Properties window.
      3. Go to the System Protection tab and click the System Restore button.System restore
      4. On the System Restore window, select Choose a different restore point, then click Next.Next Choose a different restore point
      5. Select the restore point before the DLL missing error appears and click Next.Choose a point
      6. Click Finish to initiate the restoration process.Finish  - Msv1160cp10.dll

      Windows will restart and restore to the selected version. If you see the System Restore didn’t complete successfully error, we advise you to check out this informative guide for solutions.

      6. Download the file manually & replace it

      Note icon NOTE
      Using an unreliable website to install DLL files can be dangerous and is never recommended. However, if you are using a site like DLL-FILES, which has been verified and trusted, you can follow the steps mentioned to restore the file manually.
      1. Visit the DLL Files website, search for msv1160cp10.dll, select an appropriate option, and click Download.
      2. Press the Windows key, type cmd, and click Run as administrator.
      3. Copy & paste the following commands one by one and press Enter after every command:
        • takeown /f %windir%\system32\msv1160cp10.dll /a
          icacls %windir%\System32\msv1160cp10.dll /grant administrators:F
          ren %windir%\System32\msv1160cp10.dll msv1160cp10.dll.bak
          copy c:\temp\msv1160cp10.dll %windir%\system32\msv1160cp10.dll
      4. Once done, the new DLL can be found in the System32 folder. Now, try using the apps that are throwing the error to check if it works.

      This is how you can fix the msv1160cp10.dll missing error. However, if you are facing the same issue due to any other DLL file, our guide can help you recover the DLL file with ease.

      If you want to learn more about the causes of missing DLL files on Windows, we have a separate guide for you. You can also fix a similar issue with Netapi32.dll.

      Before you go, don’t miss our latest guide on what to do if libgcc_s_dw2-1.dll was not found on your PC.

      Did we miss a step that helped you fix this missing DLL error? If so, share the method in the comments section below, and we will add it to the list.

      Galaxy Book4 Edge might be your first Copilot+ PC, as it has a huge discount

      Samsung has unveiled its very first Copilot+ PC, the Galaxy Book4 Edge. This product is causing a stir with an unbelievable discount—you can save $350 on this device. If you’re curious about the capabilities of the new Copilot+ PCs, then you should take advantage of this discount and get one for yourself.

      The Galaxy Book4 Edge is offered in two sizes and loaded with the Snapdragon X Elite processors, ensuring a balance between strength and effectiveness. These models are available in 14-inch sizes for those who like smaller gadgets, or they can go up to 16 inches if they need more space on their screens. Both variations have a 3K AMOLED 120Hz touchscreen display, guaranteeing clear images and fluid operation.

      However, it’s not solely a matter of the screen size or display. The Galaxy Book4 Edge is backed by cutting-edge Snapdragon processors for laptops, promising to uplift your computer usage. It has traits such as instant captions, Windows Studio Effects, and a special Copilot hardware key—all constructed to boost productivity and creativity. We should also remember the commitment to deliver up to 22 hours of video playback with one-time charging, made possible by its excellent battery life.

      Now, you might think, “What’s the catch?” Well, there isn’t one. Prices begin at $999 for the 14″ model and increase to $1,499 for the 16″ variant with a faster processor. Whether you like it for its revolutionary technology or amazing savings, this deal shows Samsung’s dedication to innovation and worth.

      Thus, this could be an ideal moment for anyone considering whether or not to upgrade their laptop. The Galaxy Book4 Edge is not merely a laptop; it signifies the forthcoming era in computer technology with its strong processors, magnificent screen, and advanced attributes. And when you see the $350 discount, it becomes very tempting.

      Get them here:

      But if you’re looking for something more affordable, you can get this Dell Inspiron 15 laptop for less than that discount: it’s literally $300.

      How To Disable Hardware Acceleration in Firefox in a Few Steps

      Wondering how to disable hardware acceleration in Firefox?

      GPU acceleration often leads to website surfing performance and content rendering issues. It’s especially prevalent in incompatible or underperforming graphics processing units.

      In this guide, I’ll cover tried and tested techniques to disable this feature to avoid such browsing inconveniences. Let’s get into it!

      Reasons to Disable Hardware Acceleration in Firefox

      You might want to deactivate GPU acceleration in Firefox in the following situations:

      • If you’re struggling with weird graphical glitches on websites.
      • If you’re on a high-performance PC with the latest GPU, certain browser add-ons or websites might utilize the hardware acceleration feature to mine cryptocurrencies without you knowing.
      • Malicious browser add-ons can include scripts to infect your PC through the GPU route.
      • Hardware acceleration can sometimes conflict with how Firefox displays videos.
      • If you’re working on a slightly older computer, hardware acceleration might be putting more strain on it than necessary and slowing it down.
      • It can often fix unexplained Firefox browser crashes when you try to load high-end graphics content.
      • Blurry text or unusual font sizes on certain websites might be due to the GPU acceleration feature.
      • When testing websites or web apps, you might want to disable it to explore performance improvement opportunities.
      • It helps you save your laptop’s battery power.

      How To Disable Hardware Acceleration in Firefox

      Find below different methods to disable GPU acceleration on your browser:

      On a Windows PC

      1. Click on the three horizontal lines in the top right corner of the Firefox app.
      2. Choose Settings in the context menu.
      firefox windows settings
      1. Find the Performance section at the bottom of the screen.
      2. Uncheck the checkmarks from the following items:
        • Use recommended performance settings
        • Use hardware acceleration when available.
      Windows performance
      1. Reboot the Firefox app to make the changes effective.

      On a Mac

      1. When Firefox is open and selected as the active window, click on the Firefox menu in the top-right corner of the screen. It’s near the Apple monogram on the Mac toolbar.
      2. Click on the Preferences option in the context menu that opens.
      preferences
      1. You should see the General page of the Settings tab.
      General
      1. Scroll down below until you see the Performance section.
      2. Uncheck the box for Use recommended…
      3. You’ll now see the Use hardware acceleration when available option.
      4. Uncheck that as well.
      disable gpu acceleration
      1. Go to the address bar and type in the following command:
      about:restartrequired
      1. Hit Enter to find the Restart Firefox button. Click on that.
      restart firefox mac

      Using a Terminal Tool

      1. Open Command Prompt with elevated rights from the Start Menu by typing CMD and clicking the Run as administrator link for Windows Command Prompt.
      CMD admin
      1. Type in the following command:
      cd C:Program FilesMozilla Firefox
      navigate to firefox
      1. Hit Enter to change the directory of Command Prompt to the Mozilla Firefox installation folder.
      firefox install location
      1. If you’ve installed the Firefox app in a custom directory, navigate to the directory that contains the Firefox icon.
      2. Now, type in the following command and hit Enter:
      firefox -safe-mode
      1. You should now see the Open Firefox in Troubleshoot Mode? dialog box.
      2. Click Open.
      firefox install location
      1. Firefox will open in safe mode without the GPU acceleration feature.

      Disable WebGL

      If you want to reduce the load on your GPU, you might also want to turn off the WebGL feature of Firefox. WebGL helps the browser process and display graphical content, videos, animations, etc.

      After disabling hardware acceleration, do the following:

      1. Type about:config in the Firefox address bar and hit Enter.
      2. You should see a warning screen. There, click on the Accept the Risk and Continue button.
      Accept the Risk and Continue
      1. In the search field, type in webgl.disabled.
      2. Only one entry will pop up.
      3. Click on the interchange icon as identified in the screenshot.
      Webgl disabled
      1. The webgl.disabled component will change to true.
      2. This means WebGL has been deactivated.
      Webgl deactovated
      1. Click on the stacked three-line menu in the top right corner of Firefox.
      2. A context menu will open. There, click on the Exit button.
      3. Now, run Firefox again to experience the difference.

      Summary

      If you’re here, congratulations! Now you know how to disable hardware acceleration in Firefox. We also have a guide for Opera GX if you need it.

      Before you leave, why not check how to change user agent in Firefox? We have a guide dedicated to it, so don’t miss it.

      If the article helped you to fix any GPU-related issues in Firefox or you want to give feedback, feel free to do so in the comments.

      Microsoft Teams will finally let users move freely between breakout rooms

      Have you ever been in a Microsoft Teams meeting and wanted to move between breakout rooms like in Zoom? Well, some good news is coming. In August 2024, Microsoft plans to introduce a feature allowing all participants (not only the moderators) to move around breakout rooms freely in Teams. For those who have experienced the hybrid workforce or online schooling, breakout rooms have been a significant part of group discussions, and this change will be greatly appreciated.

      Why is this so important? Previously, in Microsoft Teams, only the meeting moderator could move between breakout rooms, which could create extra complexity in meeting management. But now, everyone can select and alter rooms as they please, allowing for easier and faster teamwork.

      The feature, explained in the latest entry to the Microsoft 365 Roadmap, will make coordinating breakout rooms easier for organizers and attendees. It will be released worldwide on all platforms, including Mac and Windows desktops and iOS and Android mobiles. So, no matter what your device is, this feature can work.

      Now, meeting organizers can make the list of breakout rooms visible to all meeting participants and allow them to choose which room to join. Enabling this setting in breakout rooms allows participants to move freely from one room to another, simplifying breakout room coordination for meeting organizers and participants.

      Microsoft

      Rooms for breaking out are essentially ‘sub-meeting’ spaces inside a main Teams meeting, designed for smaller group discussions. Why did Microsoft take so long to introduce this feature?

      On Microsoft’s Community page, you will find requests dating back to 2022, in which people share their annoyance about not having these features. Others also suggested that Zoom’s feature to let participants move around rooms made it better for meetings that need breakout sessions.

      This improvement answers the users’ requests and annoyances, showing that Microsoft has finally listened to their feedback.

      When August 2024 arrives, prepare to manage your Team meetings more freely. Whether you are working together on a project, attending a workshop, or participating in online classes, changing breakout rooms as you wish will surely enhance the enjoyment and productivity of these events.

      Speaking of features that should have been in Microsoft Teams right from the beginning, the platform lets users change the sound of their notifications more than seven years after its release.

      What is Avastvboxsvc.exe & Should I Remove it?

      From the name, avastvboxsvc.exe belongs to the Avast family so it has to do with the security of your device.

      Windows has built-in antivirus but might not be as thorough as other third-party security software. On the downside, these additional antiviruses consume a chunk of your system resources and can significantly slow down your PC.

      For instance, the avastvboxsvc.exe works in the background to monitor apps’ behaviour and quarantines them if they’re found of suspicious activities. While this is great, on the downside, it uses a lot of memory and can interfere with other tasks.

      So yes, an overzealous antivirus is good for your device’s protection but not so forgiving on the memory footprint among other system resources. Nevertheless, while it is an important file, it is not essential for running Windows so you can remove it.

      How do I remove avastvboxsvc.exe?

      1. Limit CPU usage

      1. Click on the Start Menu icon, type Task Manager in the search bar, and click Open.task manager search
      2. Navigate to the Details tab.
      3. Right-click avastvboxsvc.exe, and select Set affinity.
      4. Now uncheck all CPUs if you don’t want the avastvboxsvc.exe using any processor.

      Limiting CPU usage may help address the resource usage issue but on the downside, there may be a system instability issue.

      2. Turn off self protection

      1. Open the Avast Antivirus window and click Menu at the top right of Avast Antivirus.
      2. Select General on the left of Avast Antivirus.
      3. Click Troubleshooting, and scroll down to the bottom of that tab.
        Open old settings option avast error occurred during uninstallation
      4. Next, click Open old settings.
      5. Select the Troubleshooting tab shown directly below.
        The Enable Avast self-defense module option avast error occurred during uninstallation
      6. Finally, deselect the Enable Avast self-defense module option if it’s selected.
      7. Click the Yes option to confirm further.

      Disabling the self defense option exposes your device to security vulnerabilities now that this function won’t be performing its duties.

      3. Run DISM and SFC scans

      1. Hit the Start Menu icon, type cmd in the search bar, and click Run as administrator.cmd-run-admin-w11 unexpected kernel mode trap windows 11
      2. Type the following commands and press Enter after each one: DISM.exe /Online /Cleanup-Image /Restorehealth sfc /scannow

      4. Repair the Avast program

      1. Type control panel in Windows search and open Control Panel from the results.
      2. Switch to the Category view of Control Panel by selecting it from the top right-hand corner, and then select Uninstall a Program in the Programs category.
      3. Scroll down this list and locate Avast. Right-click on the Avast program and hit Change.click-change-on-avast-high-cpu-usage
      4. Next, you will see the Avast uninstallation wizard screen showing three options – Update, Repair, and Modify. Select Repair and hit Next.
      5. Follow through with the wizard, and at the end, Avast will restart with the Avast high CPU usage fixed.

      Repairing the program may address the issues of high system resource usage.

      5. Uninstall Avast

      1. Download the Avast Uninstall tool.
      2. Launch the program by right-clicking and selecting Run as administrator.
      3. Click Yes to restart the window in Safe Mode.
      4. Again click Yes to immediately restart your Windows 11 PC into Safe Mode.
      5. When the system boots up in Safe Mode, select the location where you have installed Avast antivirus software. If you selected the default installation location during setup, then the tool will pick up the location automatically.
      6. Run the avastclear.exe utility tool, and fill in the prompts that follow.
      7. Click Uninstall at the bottom of the screen to uninstall Avast and clear all files.  
      8. The tool will remove Avast from your PC.
      9. You can download the latest version of Avast and check if the problem persists.

      Using the dedicated uninstall tool from Avast ensures all traces of the software are removed from your device. If you use the normal methods of uninstalling an app, add an extra step of removing software remnants.

      6. Perform a System Restore

      1. Press the Windows + R keys, type rstui, and hit Enter.
      2. The System Restore window will open. Click on Next.
      3. Select the restore point you wish to revert to and click on Next.
      4. Now click on Finish.

      From the options above, it appears each solution has its own downside if you’re trying to get rid of avastvboxsvc.exe from your system.

      The only viable option seems to be uninstalling the parent program. If Avast has been your dedicated antivirus program, you’ll have to look into other antivirus programs.

      Offline antiviruses are a good alternative as they are known to consume less system resources compared to their counterparts. They also have reduced background activity unlike those that run in the background and are continuously scanning for threats.

      After all, the Avast service has been known to have some issues. Avast is a CPU hogger and sometimes, it can keep detecting your network as a new one each time.

      Other times, Avast can slow down your internet so in light of all these problems, it may be time to consider another reliable and comprehensive security software.

      Have you encountered the avastvboxsvc.exe process or file on your device? What are other behavioural anomalies you picked up? Let us know in the comment section below.

      Fortnite Skins Missing from Locker: 4 Ways to Get Them Back

      If your Fortnite skins seem to have gotten removed, hang on. Skins missing from the locker seem to be a pretty recurring issue for players.

      The good news is that you can get them back. Your Fortnite skins aren’t deleted, they’re just not showing up.

      So, if you collected tons of skins over the years, don’t fret. We’ll show you how to get them back.

      How do I get my skins back on Fortnite?

      Tip icon Editor’s tip
      If the Epic Games services are down, the skins may not be listed for your account. This can also happen if you sign into the wrong account or have a server issue.

      1. Check your locker

      1. Open the Locker.
      2. Now navigate to Sort + Filter.
         
      3. Make sure that Filter is set to All so you can see all your skins.

      2. Contact Epic Games Support

      1. Go to the Epic Store site, and sign into your Epic Account.epic games login
      2. Go to Help.
      3. Click on the Fortnite icon.
      4. Click on Contact Us.
      5. Write your information and then click Submit.

      If your Fortnite skins are missing from the Locker, the best solution would be to contact Epic Game support and let them know about this problem.

      3. Upgrade to a full Epic Games account

      1. Go to the Epic Games website and make sure you are signed out.
      2. Now, click on Sign In.epic games login
      3. After you sign in successfully, you will be returned to the Epic Games website.
      4. Complete all the required fields and then click on Create Account.
      1. Go to the Epic Games website and sign in.epic games login
      2. Hover over your display name on the top right corner and then click Account.
      3. Click on Connected Accounts.
      4. Now, click on the account you wish to connect.
      5. Click on Link your account.
      6. Sign in with your console account on the window that will pop up, and then hit Confirm.
      7. Click Continue.

      Does Fortnite delete skins?

      No, Fortnite doesn’t delete skins unless there is a bug or if an exploit obtained the skin.

      We hope that this guide helped you fix the problem. Many have also reported that something went wrong during Fortnite payment, but we covered that in a separate guide.

      You can also explore solutions for Fortnite not working on Xbox One, unable to join party, game audio issues, or high CPU usage in Fortnite—they might be related.

      Before you go, why not check our guide on how to redeem Fortnite V-Bucks gift card?

      If you wish to tell us anything about Epic Store or Fortnite, do not hesitate to do so in the comment section below.

      Firefox Profile Location: Everything You Need to Know

      If you’re using Firefox, you have your user profile created, and in today’s guide, we’re going to show you everything you need to know about Firefox profile location.

      What is Firefox profile location and how to move it?

      Where is my Firefox profile located?

      To find the location of your Firefox profile, do the following:

      1. In the address bar type about:profiles and visit that location.
         about profiles firefox address bar firefox
      2. Locate your profile on the list.
      3. Check the path in the Root section.
        profile location firefox
      4. You can do the same for the Local path.

      By default, the location of your profile is usually in the following directories.

      For profile settings, data, and bookmarks: C:\Users\WindowsReport\AppData\Roaming\Mozilla\Firefox\Profiles

      For profile cache files: C:\Users\WindowsReport\AppData\Local\Mozilla\Firefox\Profiles\

      How do I move my Firefox profile to a new computer?

      1. Locate the location of your profile. Look for the Root folder location.
      2. Find your profile folder and copy it to a flash drive.
      3. On the second computer, go to the C:\Users\WindowsReport\AppData\Roaming\Mozilla\Firefox\Profiles
        profiles firefox
      4. Paste your profile.
      5. Start Firefox and check if the new profile is recognized.
      6. Optional: You can do that for the folder in the Local path as well, just paste it to the C:\Users\WindowsReport\AppData\Local\Mozilla\Firefox\Profiles\

      How do I import a profile in Firefox?

      Firefox doesn’t have the option to import the profile, and the only way to transfer all your data is to follow the steps from the section above and manually copy the profile folders.

      We hope that this guide has answered all your questions regarding the Firefox profile location on your PC. Some users prefer using the sync feature for data transfer, but many also reported that Firefox Sync isn’t working for them.

      Keep in mind that your profiles can get corrupted, and we wrote about Profile cannot be loaded error in Firefox in one of our older guides, so don’t miss it.

      To learn more about Firefox, we have a guide on how to change user agent in Firefox, so you might want to check it out. We also have a guide on how to transfer Firefox profile to a new computer, so be sure to visit it.

      To learn more about Firefox, don’t miss our new guide on Firefox incognito shortcut to learn how to protect your privacy. To learn more about private browsing, head to our latest article and learn how to set Firefox Private Browsing to a blank page.

      To learn more about Firefox, we have a great guide on how to clear the cache for one site in Firefox, so feel free to check it out. We also have an article on how to use multiple profiles in Firefox, so don’t miss it for more information.

      Copilot in Word will be enhanced with Personalization profiles, mimicking users’ style

      Microsoft is enhancing Copilot in Word with a Personalization mode that users can call if they want the AI model to mimic their response style.

      The Personalization profile isn’t just any assistant but becomes your customized writing partner. Suppose an AI that not only assists in summarizing documents, rewriting texts, and generating ideas according to your needs but also personalizes responses according to your distinct preferences and interests.

      Microsoft’s roadmap, which shows upcoming changes, just now revealed that this feature will be available in July 2024. It will be available if you are included in either Copilot Pro or Microsoft 365 subscription plans.

      Personalization profiles allow users to customize the way Copilot responds to their prompts. It considers user preferences, interests, and other information to give users a more personalized experience.

      Microsoft

      Microsoft portrays this feature as moving swiftly from an empty page to a completed document, and in many ways, it is very similar to another feature that the Redmond-based tech giant recently unveiled: Copilot as a writing coach in Microsoft Word, which is also coming this month.

      The two AI-based features will ensure that users never catch a break and run out of ideas. What do you think about the Personalization profiles in Copilot for Word? Are they enough? Let us know your opinion below.

      Reddit Connection Failure: 6 Quick Tweaks to Fix it

      Facing a Reddit connection failure can be frustrating, and it’s usually due to server-side issues or local connection problems. First of all, visit the Reddit Status page to check if Reddit is experiencing any outages. If so, you have nothing to do but wait it out. If that’s not the case, perform the solutions below.

      How do I fix the Reddit connection failure?

      1. Check your internet connection

      1. Ensure your device is connected to the internet.
      2. Open your web browser and try to visit other websites to confirm your internet connection is stable.
      3. If other websites are also not loading, restart your router by unplugging it, waiting for 30 seconds, and then plugging it back in.
      4. Once the internet is back up, refresh the Reddit page.

      Checking your internet connection helps rule out network issues that might be causing the problem.+

      If your connection is stable but you still see a Reddit server error, follow this dedicated guide for step-by-step fixes: Reddit server error troubleshooting.

      2. Clear your browser cache and cookies

      1. Open your web browser.
      2. Click on the three-dot menu in the top-right corner (for Chrome users).
      3. Select Settings from the dropdown menu.
      4. Scroll down and click on Privacy and security, then click on Clear browsing data.
      5. Make sure Cookies and other site data and Cached images and files are selected.
      6. Finally, click on Clear data.

      Clearing your browser’s cache and cookies can resolve issues related to outdated or corrupt files interfering with your connection to Reddit. However, you may also check Reddit in another browser and see if it behaves the same.

      3. Disable browser extensions

      1. Open your web browser.
      2. Click on the three-dot menu in the top-right corner (for Chrome users).
      3. Select More tools and then Extensions.
      4. Toggle off all extensions to disable them.
      5. Try accessing Reddit again.

      Disabling browser extensions helps identify if any add-ons are causing the connection issue.

      4. Use Incognito/Private Mode

      1. Open your web browser.
      2. Press Ctrl + Shift + N to open a new incognito window in Chrome. For Firefox, press Ctrl + Shift + P to open a private browsing window.
      3. Navigate to Reddit.com in this new window.

      Using incognito or private mode can bypass cache issues and extensions that may be causing the connection failure.

      5. Flush the DNS cache

      1. Press Win + R to open the Run dialog box, type cmd and select Run as administrator from the results.
      2. In Command Prompt, type or paste the following command and press Enter to run it: ipconfig /flushdns
      3. You should see a message saying, Successfully flushed the DNS Resolver Cache.
      4. Restart your browser and try accessing Reddit again.

      Flushing the DNS cache can resolve connection issues caused by outdated or incorrect DNS information.

      6. Reset the network settings

      1. Click the Start button, type cmd, and select Run as administrator.
      2. In Command Prompt, type the following commands one by one, pressing Enter after each:
        • netsh winsock reset
        • netsh int ip reset
        • ipconfig /release
        • ipconfig /renew
        • ipconfig /flushdns

      Resetting network settings can help resolve deeper network configuration issues affecting your Reddit connection.

      By following these steps, you should be able to resolve most Reddit connection failures.

      We also have a comprehensive guide on fixing the Session has expired on Reddit. Also, here’s our complete guide on how to fix Reddit if it’s not loading in Chrome.

      If you have any questions about the procedures above, feel free to use the comments below to let us know.

      Hulu Error 502 Bad Gateway [Solved]

      When I tried activating Hulu, it returned the 502 Bad Gateway error. Upon doing some research, it became apparent that the issue is not new. There are countless reports of the error, mostly while signing in to Hulu and activating Hulu from a paid Spotify account!

      For anyone wondering why Hulu says 502 Bad Gateway, it’s most likely a server-side issue. But in some cases, the corrupt browsing data, issues with the DNS, or a misconfigured networking setup on your end is to be blamed.

      Before you start with the troubleshooting, check for any reported Hulu server outages using a real-time monitoring service like Downdector. If others are not facing the issue, press Ctrl + Shift + R to refresh the page, switch to Private (Incognito) mode, or use another browser to stream shows on Hulu!

      How can I fix Hulu error 502?

      1. Clearing the browsing data

      Note icon NOTE
      The steps below describe clearing browsing data on Google Chrome. However, the process remains the same across browsers.
      1. Launch the browser and press Ctrl + Shift + Delete to open the Clear browsing data window.
      2. Select All time from the Time range dropdown menu, tick the checkboxes for Cookies and other browsing data and Cached images and files, and then click on Delete data.clear data to fix hulu error 502
      3. Relaunch the browser, try accessing Hulu, and verify whether it still throws the 502 Bad Gateway error.

      2. Flush the DNS cache

      1. Press Windows + S to open Search, type Command Prompt, and click on Run as administrator.
      2. Click Yes in the UAC prompt.
      3. Paste the following command and hit Enter: ipconfig /flushdnsipconfig /flushDNS
      4. Reboot the computer and check for improvements.

      For most cases of 502 Bad Gateway error, including with Hulu, simply clearing and resetting the DNS cache shall do the trick!

      3. Switch to Google’s DNS

      1. Press Windows + R to open Run, type ncpa.cpl in the text field, and hit Enter.ncpa.cpl
      2. Right-click on the active network adapter, which could be Wi-Fi or Ethernet, and choose Properties.network adapter
      3. Now, select Internet Protocol Version 4 (TCP/IPv4) from the list, and click on Properties.
      4. Select the Use the following DNS server addresses option, and enter the following:
        • Preferred DNS server: 8.8.8.8
        • Alternate DNS server: 8.8.4.4
      5. Tick the checkbox for Validate settings upon exit, and click OK to save the changes.Google's DNS to fix hulu error 502
      6. Reboot the device, then go to Hulu’s website and check for improvements.

      I have used Google’s public DNS owing to its reliability, but you can always set the fastest DNS server near you for better speed.

      4. Reset the router/modem

      If you recently modified the network connection properties via the router settings and have been getting the Hulu 502 Bad Gateway error ever since, resetting the router/modem will get things running. This can be done via the router settings or through the dedicated reset button on the back side of the router (if available).

      After the reset, you may have to create the network, set the security type, and configure other aspects. My suggestion is to go with the default settings.

      5. Contact Hulu support

      When nothing else works, the last option is to contact Hulu support. If it’s a server downtime to blame, the support team will provide you with a timeline. For other cases, they should share a series of verified solutions.

      As I said earlier, the 502 Bad Gateway error in Hulu is usually caused by a server-side problem, and anything you do won’t fix things if it’s the servers to blame. Often, the problem resolves on its own within 3-12 hours!

      Before you leave, discover our top tips to fix common Hulu errors in no time!

      Which fix worked for you? Share with our readers in the comments section.

      Fix: Microsoft Edge Can’t Read and Write to its Data Directory

      The Microsoft Edge can’t read and write to its data directory error is a common issue when you open many apps such as Microsoft Power BI, Autocad, and even Teams. Mainly, this problem is due to the fact that you installed the said software from your admin account and you’re now opening it as a regular user on the machine.

      The issue is triggered by Microsoft’s WebView2, or EBWebView, as you see it in the error path, which is trying to create a data folder in your app, but it doesn’t have sufficient privileges to do so.

      How do I do if Microsoft Edge can’t read and write to its data directory?

      1. Run the app as administrator, or log in as admin

      1. Right-click the shortcut of your app or its executable file and select Run as administrator.
      2. If this doesn’t work, log out of your current profile in Windows and log back in with the Administrator account.
      3. Make the necessary changes to the app if the error was triggered when you were editing something in the app.
      4. Try to log back into the Windows account you were using before and try again.

      This solution worked for most users so you should try it before anything else.

      2. Repair Edge and WebView2 using Control Panel

      1. Click the Start button, type control panel and open the app from the results.
      2. Click on Uninstall a program from the bottom.
      3. Search for edge, select the app and click on Change.
      4. Click on Repair when prompted.
      5. After the repair process is finished, do the same for Microsoft Edge WebView2 Runtime.
      6. Check if the problem has been fixed.

      The Microsoft Edge can’t read and write to its data directory error can also be due to Edge or WebView2 apps file corruption and by repairing them, you will make things right again.

      3. Change Edge permissions using PowerShell (for advanced users)

      1. If the above steps don’t work, you can use PowerShell to check and modify permissions for the Edge data directory.
      2. Here’s a sample PowerShell script you can try:
      3. Replace C:\Path\To\Edge\Data with the actual path to Edge’s data directory:
        • $edgeDataDir = ‘C:\Path\To\Edge\Data’
        • $acl = Get-Acl $edgeDataDir
        • $user = [System.Security.Principal.WindowsIdentity]::GetCurrent().Name
        • $rule = New-Object System.Security.AccessControl.FileSystemAccessRule($user, 'FullControl', 'Allow')
        • $acl.SetAccessRule($rule) Set-Acl $edgeDataDir $acl
      4. Run this script in an elevated PowerShell window (run PowerShell as administrator) to adjust permissions.

      Remember to back up any important data before making changes. If you’re still experiencing issues, consider reaching out to Microsoft support or the specific program’s support team for further assistance.

      We hope that after applying the solutions above, the Microsoft Edge can’t read and write to its data directory error is a thing of the past.

      You might also be interested in reading our guide on how to fix the STATUS_ACCESS_DENIED error on Microsoft Edge.

      If Microsoft Edge keeps crashing, click the highlighted link for the complete guide that will help you fix it.

      Did you fix the Edge error by using our solutions? Let us know in the comments below.

      Asus’ latest BIOS updates enable Windows 11 Dynamic Lighting, allowing users to control their motherboard lighting natively

      In the fast-changing world of PC customization, Asus’s inclusion of Windows Dynamic Lighting RGB support in their motherboards is a big advance. According to The Verge, this change, which focuses on improving user experience, lets users control RGB lighting with less difficulty and no requirement for extra software. Asus is testing this characteristic on their newest AMD and Intel motherboards, showing a move towards more integrated and easy-to-use PC customization choices.

      Windows Dynamic Lighting, a feature in Windows 11 by Microsoft, is a significant development as it provides built-in RGB lighting controls. This incorporation includes products from popular brands such as Razer, HyperX, Logitech, and MSI, with Asus also joining the list. Now, users can adjust their RGB settings straight from the Windows operating system, making customization more convenient and easier for everyone involved.

      Asus, a leading computer hardware company, has made beta BIOS updates available for its motherboards using the AMD 600 and Intel 700 series. These updates are compatible with the new Windows 11 operating system. However, it is important to note that these updates are in the beta stage, so they might have bugs or other issues that need fixing. If you’re not prepared to possibly return to an older BIOS due to problems with this beta version of yours, then perhaps waiting until there’s an official release would be more advisable.

      When you finish updating your Asus motherboard, the new way to control RGB lighting is using Windows Settings. This simplification means you no longer need the Armory Crate tool from Asus or other software of a third-party RGB controller unless you want more advanced functions.

      A special part of the beta BIOS updates for Intel Z790 motherboards is a microcode update, which focuses on fixing certain game crashing problems from Intel. This shows that Asus cares about improving things in terms of looks and enhancing how users feel when using their products.

      While we wait for these updates to be officially released, it is obvious that Asus motherboards incorporating Windows Dynamic Lighting are the next step in PC personalization and could become the industry standard.

      Microsoft Dynamics 365 introduces Offline Table Column Selection, allowing users to download only specific columns

      Microsoft Dynamics 365 will introduce a new capability, Offline Table Column Selection, starting this August. This capability will allow users to selectively use their mobile data to download only certain columns inside a Dataverse table.

      So, instead of your mobile app eating up data and taking the whole table, you can tell it specifically what pieces to bring back. For example, if a standard Contacts table has 240 columns, and you merely care about some of them, it seems like an inefficient use of time and bandwidth to process the entire table.

      This feature has many benefits. Firstly, if you only download the required columns, the duration of the offline sync process will be greatly reduced. This improves users’ experience as they need to wait less for synchronization; sizable updates on the device will also download and install faster.

      Secondly, the feature is very useful for controlling data usage, especially when internet access is considered a luxury or if one has limited data plans. Also, it helps to enhance performance: when there’s less data to handle, your mobile application will consume less battery and bandwidth—this feature speeds up the process of getting important information quickly when you require it urgently.

      However, it is important to note that this specific feature of offline data synchronization is currently in the preview phase, and its general availability is expected around August 2024.

      Whether you are a service technician in the field who needs to see customer details while on the move or a sales representative who wants quick access to product information during client visits, the new Offline Table Column Selection ensures that your experience with mobiles becomes more streamlined and productive.

      You can read more here.

      In other news, Microsoft 365 introduced an updated permissions UI for Excel, Word, and PowerPoint. This will keep your files secure, especially when they’re located in shared spaces. With the new permissions, you’ll be able to see and control who can edit your files.

      Netflix Error Code NW-3-16: 5 Ways to Fix it

      An nw-3-16 error code on your Netflix points to a connection error. It could be your internet that’s having an issue or your ISP.

      Most connection issues can occur if there’s been a power interruption. Your network configuration settings may be jumbled up and you’ll need to reset your router or contact your ISP to help you out.

      How do I fix error code nw-3-16 on Netflix?

      1. Sign out of Netflix on all devices

      1. Launch your browser on another device and open Netflix.
      2. Click the profile button at the top right of the Netflix browser tab.
      3. Select Account to open further options.
        The Account link netflix error 10002, 112, 0013
      4. Scroll down to Settings, and click the Sign out of all devices link there.
        Sign out of all devices link netflix error 10002, 112, 0013
      5. Click the Sign Out button shown directly below.
      6. Wait for a few hours. Then sign back into Netflix on the device the issue arises for.

      2. Address connection issues

      2.1 Change your network band

      1. Click on the Start Menu icon, type Device Manager in the search bar, and click Open.
      2. Navigate to Network adapters and double-click to expand.
      3. Right-click on your network adapter and select Properties.
      4. Click on the Advanced tab and locate the Preferred Band.
      5. In the Value drop-down menu, select Prefer 2.4GHz band then hit Enter.
      6. Restart your PC.

      2.2 Flush the DNS cache

      1. Press Windows + R to open Run, type cmd, and hit Ctrl + Shift + Enter.
      2. Click Yes in the UAC prompt.
      3. Now, paste the following command and hit Enter:ipconfig /flushdnsflush dns
      4. Once done, restart the computer for the changes to come into effect.

      2.3 Update your Network driver

      1. Hit the Windows key, type Device Manager in the search bar, and click Open.device manager w11
      2. Navigate to your Network adapter, right-click on it, and select Update driver.
      3. Select Search automatically for updated drivers.

      2.4 Reset your network

      1. Hit the Windows key and click on Settings.settings windows 11
      2. Navigate to Network & internet.
      3. Select Advanced network settings.going advanced network settings win11
      4. Click on Network reset.Network Reset 1
      5. Next, hit the Reset now button.Network Reset now

      You can also try your luck with another connection, another browser or device to isolate the nw-3-16 error code on Netflix. For all you know, it could be your choice of browser that Netflix does not support.

      If these steps don’t resolve the error, get in touch with your ISP. They may have additional solutions or reset your router from their end.

      3. Clear app cache

      3.1 TV cache

      1. On your TV, find your Settings.
      2. Go to Apps and select Netflix.
      3. Scroll down and hit Clear data and Clear cache.

      3.2 Windows app

      1. Hit the Windows key and click on Settings.settings windows 11
      2. Click on Apps on the left pane then Apps & features on the right pane.
      3. Locate the Netflix app, click on the three vertical ellipses, and select Advanced options.going advanced options microsoft store
      4. Click on Repair.
      5. Go back and click on Reset if the repair option failed.

      3.3 Android app

      1. Open the Settings app on your Android device, and select Apps.apps
      2. Choose Netflix from the list of applications.
      3. Tap on Storage.storage
      4. Tap on Clear data and then on Clear cache.clear cache to fix error code 14 disney plus
      5. Open the Netflix app again and check for improvements.

      3.4 Browser cache

      1. Launch your Chrome browser and click the three vertical ellipses in the top right corner.
      2. Select Settings.
      3. Click on Privacy and security, then select Clear browsing data.
      4. Check Cookies and other site data and Cached images and files, then hit Clear data.Clear data

      4. Check for your device’s firmware updates

      4.1 Android TV

      1. For this solution, we shall be using the TCL model.
      2. On your TV, find your Settings.
      3. Go to System.
      4. Click on About then select Software update.
      5. Select Network update and click on System update.
      6. Now click on Check Update. Your system will scan for any available updates.
      7. You’ll either start downloading updates or get a message that your TV is already up to date.

      4.2 Android phone

      1. Locate Settings on your device. (We’ll be using the Samsung model for this step).
      2. Go to Software update.
      3. Tap on Download and install.
      4. Wait for the update to finish installing if available, and retry.

      5. Reinstall your Netflix app

      5.1 TV app

      1. Open the Google Play Store app on your TV.
      2. Click on the three ellipses at the top right corner.
      3. Select My Apps.
      4. Scroll to the Netflix app and click Uninstall.
      5. Now go back and click Install.

      5.2 Windows app

      1. Press Windows + I to open Settings, go to Apps from the navigation pane, and click on Installed apps on the right.installed
      2. Locate Netflix from the list, click the ellipsis next to it, and select Uninstall.uninstall to fix error code 14 disney plus
      3. Again, click Uninstall in the confirmation prompt.
      4. You can now download Netflix from the Microsoft Store.

      5.3 Android app

      1. Open the phone Settings, and go to Apps.apps
      2. Select Netflix from the list.
      3. Tap on Uninstall at the bottom.uninstall
      4. Choose OK in the confirmation prompt.
      5. Finally, reinstall Netflix from the app store. 

      Additional tips to avoid Netflix connection errors

      • Keep your firmware updated from routers, operating systems, TV firmware and any other device including your Netflix app.
      • Kill background processes and switch off unnecessary devices when streaming on Netflix. This will boost your Wi-Fi signal and limit network interference. Also, use an Ethernet cable where possible.
      • Regularly check the Netflix status page for scheduled maintenance or outages as some errors like the nses-500 are server-related. Also, keep an eye on your internet speeds and inform your ISP if you spot any anomalies.

      Unfortunately, Netflix connection errors are in plenty but we try our best to highlight all of them so you don’t get stuck. We also share how to deal with low quality streams on Netflix so feel free to check our article on the same.

      If these errors are too many, try Netflix alternatives and see how well they perform. That brings us to the end of this article but keep the conversation going in the comment section below. Let us know of any other tips you may have to address this error.

      How To Block Adults Websites on Google Chrome [Simple Guide]

      Wondering how to block adults websites on Google Chrome? It’s important for maintaining online safety, especially for families and individuals aiming to protect their browsing experience.

      Luckily, Google Chrome offers several methods to effectively block access to adult content, whether for parental control or personal preference. Let me guide you through them, one by one!

      How To Block Adults Websites on Google Chrome

      Here are four simple methods:

      Use Chrome Settings

      You can configure the browser to restrict access to certain websites.

      Follow the below steps:

      1. Open Google Chrome and click on the three vertical dots in the top-right corner.
      Tap the three dots
      1. Scroll down and select “Settings” from the dropdown menu.
      Settings
      1. Click on “Privacy and security” in the left sidebar.
      Privacy and security
      1. Tap on “Site settings.”
      Site settings
      1. Click on the drop-down arrow beside “Additional content settings.”
      Additional content settings
      1. Scroll and select Insecure content.
      Insecure content
      1. Tap the Add button beside Not allowed to show insecure content.
      Add button
      1. Add the website’s URL, then tap “Add.”
      Add site
      1. The website should appear on the list.
      Website added

      Use Chrome Extensions

      For better control, you can use Chrome extensions designed to block websites. These tools offer more flexibility and features for managing website access.

      Here’s what to do:

      1. Open the Chrome Web Store and search for extensions like “Block Site.”
      2. Click on “Add to Chrome” and confirm the installation.
      Add to Chrome
      1. Once installed, click on the extension icon near the Chrome address bar and select Block site extension.
      Extension icon
      1. On the pop-up tab, add the URL of the adult site you want to block and then press OK.
      Add the site

      Select CleanBrowsing as a DNS Provider

      Picking a DNS provider that filters adult content is an effective way to block such websites on Google Chrome.

      Follow these steps:

      1. Open Google Chrome and tap on the three dots in the top-right corner of our screen.
      Tap on the three dots
      1. Scroll down and tap “Settings.”
      Settings
      1. Tap “Privacy and security.”
      Privacy and security
      1. Select Security.
      Security
      1. Under Advanced, tap the drop-down menu beside Select DNS provider. Pick CleanBrowsing (Family filter).
      CleanBrowsing (Family filter)

      Enable Google SafeSearch

      Google SafeSearch is a useful setting for filtering adult content from search results.

      To enable it, follow the below steps:

      1. Click the Windows icon + I to open settings.
      2. Tap the Search button.
      Search button
      1. Under “SafeSearch,” select Strict.
      Select strict

      So, now you know how to block adults websites on Google Chrome. It’s fairly straightforward. Whether you choose to adjust Chrome settings, use browser extensions, select a filtered DNS provider, or enable SafeSearch, you can create a safer browsing environment tailored to your needs.

      Moreover, if Chrome’s most visited pages aren’t showing, websites aren’t loading, or you can’t open certain pages, we’ve got you covered. You can also learn how to create shortcuts to your favorite websites.

      Error Searching Knowledge in ChatGPT: How to Fix it

      Many users reported ChatGPT error searching knowledge when trying to search the files you uploaded, and today we’re going to show you the best ways to fix this issue.

      How can I fix ChatGPT error searching knowledge?

      1. Try using a different format

      1. If you’re working with PDF files, copy the text from it to TXT files and use it instead.
      2. Keep the TXT file small, up to 5MB per file.
      3. In some cases, it might be necessary to reduce the number of characters to less than 2500.

      2. Clear the cookies

      1. Open ChatGPT in your browser.
      2. Click on the Site settings icon in the address bar and choose Cookies and site data.
         cookies and site data chatgpt in chrome
      3. Next, click on Manage on-device site data.
        manage on device site data chrome
      4. Click on the delete icon for all entries except for OpenAI.
        on-device site data delete in chrome
      5. Restart your browser.

      If these methods don’t work, ChatGPT error searching knowledge may be caused by temporary issues with the server or the service, and if that’s the case, you’ll have to wait for the developers to fix them.

      This isn’t the only issue and many reported ChatGPT click failed and that ChatGPT is stuck in verification.

      If ChatGPT is not working at all, we also have a guide that addresses this issue, so feel free to check it out.