Periodic backups are crucial for any business, and if your organization utilizes Amazon Simple Storage Solution (Amazon S3), then you will be pleased to learn that there is a quick way to automate backups for S3.
With the method we’ll show you here, you can configure your daily, weekly, or monthly automatic backups for S3. It’s straightforward if you follow the laid down here.
How do I automate backups for Amazon S3?
1. Install and configure the Amazon AWS CLI
Visit this page to find Amazon‘s detailed installation instructions.
Configure the access ID, user profiles, and key using the following command: aws configure
AWS Access Key ID [None]: <AccessID>
AWS Secret Access Key [None]: secretkey
Default region name [None]: us-east-1
Default output format [None]: json
NOTE: In the command above, replace <AccessID> with your access ID, secretkey with your secret key, and us-east-1 with your region. When in doubt, leave the region unchanged.
2. Create a batch file
Open Notepad.
Enter the following line of command into the blank Notepad file: aws s3 sync "C://Desktop/backups/" s3://your-bucket
Press the CTRL + S combination and save the file with the .BAT extension.
Click on the Start Menu button and search for task scheduler.
Open Task Scheduler. If it fails to open, fix it with this guide.
Click on the Actions menu and choose Create Task from the dropdown menu.
Name and describe the new task.
Add a one time, daily, weekly, or monthly trigger.
Click on the Actions tab.
Select Start a program from the resulting dropdown menu.
Find the batch file you created in step 3.
Save the task.
This page contains a detailed, short guide on how to automate backups for S3. You only have to follow the exercise caution when following the steps.
After saving the newly created task, you no longer have to back up your data to Amazon S3 manually because the Task Scheduler will do it for you at the configured interval.
Taco Bell has released a new commercial promoting their current Xbox Series X competition which, as you may have guessed, gives people the opportunity to get an Xbox Series X console when it comes out next month.
What’s noteworthy about the ad is that it features several live action elements from the popular Halo video game franchise such as Spartan armor and a ring itself. It’s unclear if these elements were borrowed from the upcoming live action Halo TV series which is set for release sometime in 2021 but they’re pretty cool regardless.
You can watch the ad below.
The inclusion of Halo content for an Xbox Series X launch promotion is rather amusing given that the Halo: Infinite video game will no longer be a launch title. Much like the Monster Energy Halo x Xbox Series X promotion, planning for this Taco Bell campaign was also likely well underway before the game’s delay was announced. It’ll be interesting to see if we get any more Halo promotions before the end of the year.
What did you think of this ad? Does it get you excited for Halo: Infinite and the Xbox Series X? Are you hyped for the live action TV series? Share your thoughts with the community in the comments below and then follow us on Twitter and Facebook for more Xbox gaming news.
Hamachi is a useful tool, but many users reported various errors with this app on their PC. These errors can cause various problems, and in today’s article, we’ll show you how to fix them.
Hamachi errors can cause many issues on your PC. Here are some common issues that users reported:
Hamachi network adapter error – Can occur if the necessary virtual network driver isn’t installed. Update the adapter driver.
Hamachi VPN error Windows 10 – Can be caused by other VPN applications. You can fix the issue simply by removing the other VPN from your PC.
Hamachi tunnel problem Windows 10, yellow triangle – Can occur if the necessary services aren’t running. Open the Services window and restart the required services.
Hamachi error this network does not exist, failed to connect to network adapter – The issue is most likely your firewall, so be sure to check its configuration and make sure that Hamachi is allowed to go through it.
Hamachi error 2503, 52, 1068, 2755, code 2502 – These errors can appear due to various reasons, but you should be able to fix them using one of our solutions.
According to users, the cause for Hamachi errors can be your antivirus. Sometimes your antivirus can block the VPN, so be sure to check its settings and make sure that Hamachi is allowed to run.
If this isn’t the issue, you might want to try disabling certain features or disable your antivirus altogether.
In case the problem is still there, your last option would be to remove your antivirus completely from your PC.
Even if you remove your antivirus, your PC will remain protected by Windows Defender, so there’s no need to worry about your safety.
The market is full of reliable antivirus software options that do not interfere with other applications on your PC.
Look for an antivirus that has a comprehensive threat database, real-time browsing connection, and low CPU usage. These are the most important features and they are generally included in free antivirus tools.
Some antivirus tools include built-in VPN solutions. If that appeals to you, you can drop your Hamachi subscription and use one software both for threat protection and online privacy.
2. Update the drivers automatically
Sometimes Hamachi errors can be caused by missing drivers, and if you’re getting a tunneling problem or a VPN error, the issue might be the missing drivers.
You could try updating them manually by selecting every single one from Device Manager and selecting the Update driver option but that will take a lot of time and doesn’t guarantee perfect results.
The quickest and safest way to update your drivers is by using specialized software like Outbyte Driver Updater.
It’s very simple to use but first, you need to download and install the tool. It will run automatically and start scanning your PC for old, missing, or malfunctioning drivers.
Don’t go away because the process will only last for a couple of seconds and after that, you will receive a list with the recommended drivers to install.
The last step is even easier because if you want to install all of them you just need to click on the Update All button.
Of course, you can also install only a few by checking their corresponding boxes and hitting their individual Update button from the right.
3. Make sure that Hamachi service is running
According to users, you can encounter various Hamachi errors simply if the required services aren’t running. Many users reported tunneling and VPN error in Hamachi, and in most cases you can fix these issues simply by restarting the Hamachi services. To do that, just follow these steps:
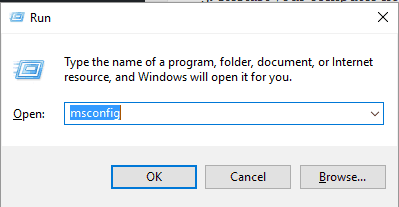
Open the Services window. The fastest way to do that is to press Windows Key + R and enter services.msc. Now press Enter or click OK.
When the Services window opens locate and double-click the Hamachi Tunneling Engine service.
When the Properties window opens, click the Stop button to stop the service. Wait for a couple of moments and then click the Start button. Click Apply and OK to save changes.
According to users, this simple solution fixed the tunneling and VPN error with Hamachi, so we encourage you to try it out.
4. Remove problematic applications
If you’re having Hamachi errors, such as the tunneling problem or the VPN error, the issue might be caused by third-party software.
Sometimes VPN clients can interfere with Hamachi and that can lead to this and many other problems.
To fix the problem, it’s advised to find and remove your current VPN client. Users reported that Dell VPN client caused this problem to appear, but after removing it, the issue was resolved.
Bear in mind that other software can cause this issue to appear, and not just your VPN client.
If your VPN client was the problem, you should consider switching to a different one. The best VPNs for Windows 10 are reliable and user-friendly software that will not interfere with your system.
Consider software with a large number of servers across the globe, unlimited bandwidth, top-level encryption, and a very transparent privacy policy.
If the VPN was the cause of your problem, then the issue should be remediated. Check your PC for other problematic/malicious software as well. You can do that from the Add or remove the panel in Windows Settings.
5. Reinstall Hamachi
Sometimes Hamachi errors can be caused by a corrupted installation, and if that happens, the best course of action would be to reinstall Hamachi.
This is fairly simple to do, but in order to completely reinstall Hamachi, it’s advised that you use specialized uninstaller tools.
In case you don’t know, uninstaller software can completely remove the desired application from your PC.
Unlike the regular uninstall process, these dedicated tools will remove all files and registry entries associated with Hamachi.
After Hamachi is completely removed, it will be as if it was never installed on your PC. Now you just have to download and install the latest version and the issue should be completely resolved.
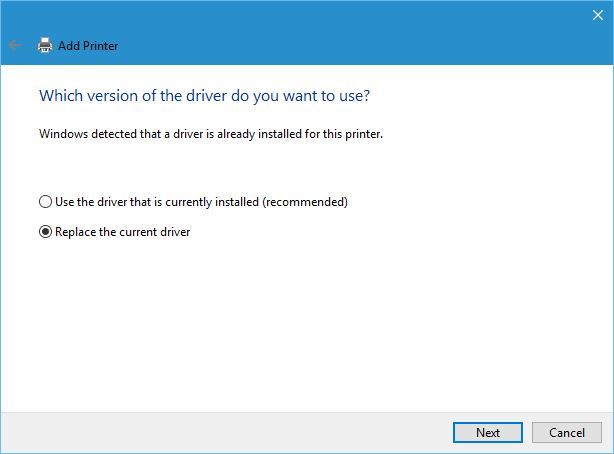
6. Install the driver manually while Hamachi is installing
Press Windows Key + X and choose Device Manager from the list.
Locate LogMeIn Hamachi Virtual Ethernet Adapter, right-click it, and choose Update driver from the menu.
Select Browse my computer for driver software.
Now head over to the Hamachi installation directory, by default it should be: C:Program Files (x86)LogMeIn Hamachi
Note: Once you select this directory, your PC should scan it and install the missing driver. Once that is done, the latest driver will be installed and the installation will complete successfully.
Bear in mind that you’ll need to update the driver quickly in order for this to work, so it might be a good idea to have the Device Manager open while installing Hamachi.
7. Use a different installer
According to users, sometimes Hamachi errors can be caused by your installer.
This is an unusual cause, but several users reported that they fixed the problem simply by removing Hamachi and using the different setup file to install it.
Users claim that they downloaded the installer from a different source that is not Hamachi’s official website, and by doing so the problem was resolved.
We don’t know how reliable this method is, but many users claim that it works, so feel free to try it out.
8. Try using an older version of Hamachi
In some instances, Hamachi errors can appear if you’re using the latest version. When it comes to software, usually it’s a good practice to use the latest software since it offers the latest features and updates.
However, sometimes certain features can be buggy, and that can lead to this and many other errors. To fix this problem, some users suggested rolling back to the older version of Hamachi and checking if that helps.
To do that, remove the current version and then download and install the older version. To find an older version, you might have to use third-party sources.
Once you download the older version, install it, and check if that solves your problem.
Bear in mind that Hamachi will check for the latest version once you install it, so be sure to prevent it from downloading the latest updates.
9. Disable Windows Firewall
Search for windows firewall and select Windows Defender Firewall from the list.
Click on Advanced settings from the menu on the left.
Select Windows Defender Firewall Properties.
Go to the Domain Profile tab and set Firewall state to Off.
Go to the Private Profile and Public Profile tabs and do the same. Lastly, click Apply and OK to save changes
Note: Disabling the firewall isn’t the best choice in terms of safety, but if Hamachi works after you do that, the issue is probably related to one of your firewall settings, so you’ll need to manually find and change it.
Several users reported that port25565 was the problem, so to fix this issue, be sure that port 25565 is open on the Incoming rules page. After making this change, the problem should be resolved and Hamachi will start working again.
Hamachi errors can cause many problems on your PC, but in most cases, these problems are caused by your firewall settings, corrupted installation, or other applications.
However, we hope that you managed to fix this problem by using one of our solutions and if you have any addition, leave us a note in the comments section below.
New ESRB ratings for next gen collections containing Wolfenstein, Dishonored, and Prey video games have been spotted, seemingly confirming that these titles will be getting enhanced versions for Microsoft’s upcoming Xbox Series X (and S) consoles.
No other consoles are mentioned in the listings which suggests that these Bethesda titles will be exclusive to Microsoft’s next gen Xbox consoles. This makes sense considering that the latter recently acquired the former.
Both collections are said to contain four video games each. While the listings don’t mention what these games are, it would makes sense for The Dishonored & Prey The Arkane Collection to contain Dishonored, Dishonored 2, Dishonored: Death of the Outsider and Prey and The Wolfenstein Alt History Collection to come with Wolfenstein: The New Order, Wolfenstein: The Old Blood, Wolfenstein II: The New Colossus and Wolfenstein: Youngblood.
System errors can occur once in a while, and many users reported getting ERROR_RELOC_CHAIN_XEEDS_SEGLIM error on their Windows 10 PCs.
This error also comes with The operating system cannot run %1 message, and today we’re going to show you how to fix it properly.
How can I fix the ERROR_RELOC_CHAIN_XEEDS_SEGLIM error?
1. Switch to a different browser
Several users reported that this problem occurs while trying to run Internet Explorer. According to them, the application was unable to start due to The operating system cannot run %1 message.
As a potential workaround, users are suggesting to switch to a different browser and check if that solves the problem.
As for a better and more reliable browser we recommend Opera One. It’s a fast browser that doesn’t interfere with your system so the RELOC_CHAIN_XEEDS_SEGLIM error becomes highly improbable.
If you enjoy social media, you will love this browser from the start because you will have shortcuts for Messanger WhatsApp, Instagram and even comes with a native AI.
You will probably also like the My Flow feature that allows you to connect your phone to the browser.
A big plus for Opera One is also the built-in VPN service. Once you start it, your privacy and identity will be protected even from your ISP.
Search for cmd and click on Run as administrator to start Command Prompt.
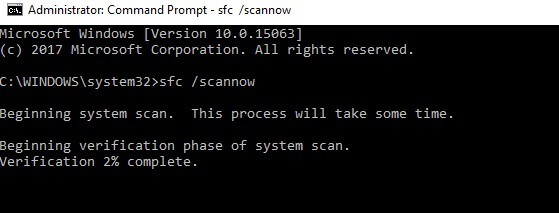
Enter sfc /scannow and press Enter.
Be patient while Windows scans for corrupted files and don’t interrupt the scan.
Note: If the SFC scan stops, read this expert guide to fix the problem quickly.
3. Remove problematic updates
Press the Windows Key + I to open the Settings app.
Go to the Update & security section, then to the Windows Update tab, and click on View update history.
Click on Uninstall updates.
Locate a recent update on the list and double click to uninstall it.
Note: Keep in mind that Windows 10 tends to install updates automatically, so it’s recommended to download the Show or hide updates troubleshooter. Using this tool you can prevent problematic updates from being installed automatically.
4. Reinstall Windows Media Player
Search for windows features and select Turn Windows features on or off from the list of results.
Expand the Media Features folder and uncheck WindowsMedia Player. Click OK to save changes.
Restart your PC.
Note: After your PC restarts, Windows Media Player will be removed. To install it again, repeat the same steps, but be sure to check the Windows Media Player option.
Once the Windows Media Player installs again, the issue should be completely resolved.
5. Completely remove the antivirus software
Having a proper antivirus is rather important, but certain antivirus tools might not be fully compatible with your system.
Many users reported that ERROR_RELOC_CHAIN_XEEDS_SEGLIM error appeared on their system due to Norton or McAfee antivirus tools.
If you have these tools installed, we urge you to remove them completely and check if that solves the issue.
Keep in mind that many antivirus tools tend to leave leftover files and registry entries that can interfere with your system even after you uninstall the application.
To completely remove your antivirus, it’s recommended to use its dedicated removal tool. Many antivirus companies offer these tools for their software, so be sure to download a dedicated removal tool for your antivirus.
After running the tool, all files and registry entries associated with your antivirus will be removed from your system. Once the antivirus software is completely removed, check if the issue still persists.
As previously mentioned, many users reported that Norton and McAfee are the main cause of this problem, but any other antivirus can also cause this issue to appear.
Although removing the third-party antivirus solutions, you will still have Windows Defender to protect your computer.
On the other hand, it is advised to have a more efficient antivirus that doesn’t interfere with your Windows services and also offers great complete protection against malware.
Several developers reported this problem while using postgreSQL with PHP on their PC. To fix the problem, you need to download postgreSQL, and copy its DLLs to the following directory C:WindowsSystem32
Keep in mind that this solution only applies to problems with postgreSQL, so if you don’t have this application installed, you can skip this solution entirely.
In addition, copying DLLs to the System32 directory can sometimes cause issues, so be sure to create a backup and use extra caution.
7. Make changes to your user account
7.1 Create a new user account
Press Windows Key + I to open the Settings app.
Go to Accounts section. Now go to Family & other people in the left pane and click on Add someone else to this PC in Other people section on the right.
Select I don’t have this person’s sign in information.
Enter the user name for the new account and click the Next button.
Switch to the new account and check if the problem still persists. If not, copy all your important files to the new account and continue using it as your main account.
Note: Several users reported that this issue occurs when clicking links in Outlook, Skype, and Excel. If you have the same problem, you might be able to solve it by creating a new user account.
Sometimes your user account might be corrupted, and the only way to fix the problem is to create a new one.
Some users are also suggesting to make a few changes to the registry. These steps aren’t mandatory, and if creating a new account fixed the problem for you, you can probably skip these steps.
7.2 Modifiy current user account with registry editor
Log in with your new account and navigate to the C:Users directory.
Locate your old user profile and rename its folder to your_username.old.
Press the Windows Key + R and enter regedit. Click OK or press Enter.
Go to File and select Export and select a safe location for your registry (in case anything goes wrong, you can use this file to restore the registry to its previous state).
In Registry Editor, navigate to the following key from the left pane: HKEY_LOCAL_MACHINESOFTWAREMicrosoftWindows NTCurrentVersionProfileList
Expand the ProfileList key and you should see several subkeys available.
Check all the keys and look for the ProfileImagePath value in the right pane. You need to find the key whose ProfileImagePath value represents the location of your old profile.
Memorize the last four digits of that key, in our example, it’s 1001 but it might be different on your PC, right-click the key and choose Delete. Double-check everything and be sure to delete the right key. Deleting the wrong key can cause issues with your PC, so be extra cautious.
Navigate to the following key and delete the key that has the same four digits that we mentioned in the previous step: HKEY_LOCAL_MACHINESOFTWAREMicrosoftWindows NTCurrent VersionProfileGuid (if you can’t find this key, feel free to skip this step).
Restart your PC and login with your new account, then transfer the data from your old account to the new one if you already haven’t.
Note: In most cases, it’s just necessary to create a new user account and transfer your files to it, but if the problem still occurs, you might have to change your registry as we showed you in the steps above.
8. Change your registry
Start the Registry Editor as shown in our previous solution.
Be sure to back up your registry before proceeding.
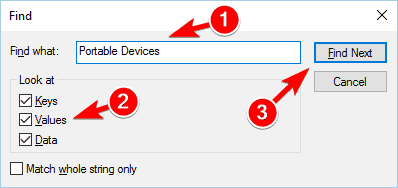
Press Ctrl + F and enter 9BD02EED-6C11-4FF0-8A3E-0B4733EE86A1 or 6A0357B5-AB99-4856-8A59-CF2C38579E78. Click the Find Next button.
You should find the following value: C:ProgramDataApp-V9BD02EED-6C11-4FF0-8A3E-0B4733EE86A16A0357B5-AB99-4856-8A59-CF2C38579E78RootVFSSystemieframe.dll
Replace it with the following value: C:WindowsSystem32ieframe.dll
Repeat the search and replace the values as we mentioned in our previous step (repeat the search a couple of times in order to replace all values).
Restart your PC and check if the problem is resolved.
Note: Keep in mind that this solution is for advanced users, so if you choose to apply it, be extra cautious in order to avoid causing damage to your Windows installation.
9. Rename the ssleay32.dll
This solution applies mostly to PHP developers that are getting The operating system cannot run %1 error on their PC. According to users, you might be able to fix this problem by reinstalling PHP and all the necessary components.
In addition, some users are suggesting to locate ssleay32.dll in the C:WindowsSystem32 folder and rename it. Keep in mind that renaming files in System32 folder can be potentially dangerous, so use extra caution.
After renaming the file, the issue should be completely resolved. This solution applies only to users that have PHP installed, so if you’re not a web developer you can skip this solution entirely.
10. Change the Skype shortcut parameters
Make sure that Skype isn’t running in the background. If it is, close it.
Locate the Skype shortcut, right-click it, and choose Properties from the menu.
Locate the Target or Start in field and add /legacylogin after the quotes. Do not change the path inside the quotes. Click Apply and OK to save changes.
Note: After making the changes, use that shortcut to start Skype. This is just a workaround, but it works according to users, so be sure to try it out. Keep in mind that you’ll have to keep using that shortcut to start Skype every time you want to use it.
11. Stop the Apache service and copy the DLL files
If you’re running WAMP and PHP on your local PC, you might experience The operating system cannot run %1 error once in a while.
If you’re having this problem, you need to stop Bitnami WAMP Apache service using the Stack Manager application.
After that, copy libeay32.dll and ssleay32.dll from installdir/php/ to installdir/apache2/bin/ directory. Lastly, start Bitnami WAMP Apache service again and check if everything is in order.
This solution is for web developers that have WAMP running on their PC. If you’re not using this application, this solution won’t apply to you.
12. Remove Internet Explorer Developer Channel
Press the Windows Key + I to open the Settings app.
Go to the System section and navigate to Apps & features, then select Internet Explorer Developer Channel and click the Uninstall button to remove it.
Note: If you don’t have an Internet Explorer Developer Channel, you can fix the problem by installing and then removing it by using the instructions above.
Another solution that can help web developers that have this problem with PHP is to update libeay32.dll and ssleay32.dll files.
Simply download these files from the latest PHP package and update them, and the problem should be resolved. In addition, some users are also suggesting updating php_curl.dll, so you might want to try that as well.
Note: This solution only applies to PHP developers.
ERROR_RELOC_CHAIN_XEEDS_SEGLIM and The operating system cannot run %1 errors can cause a lot of problems on your PC, but you should be able to fix them by using one of our solutions.
If you have any additions or suggestions leave us a note in the comments section below.
iCloud is an essential component of Apple’s ecosystem, and it’s available as cloud storage on all Apple’s devices.
Many users reported There was an error downloading this photo from your iCloud library message on their iOS device, so today we’re going to show you how to tackle this issue once and for all.
How can I fix There was an error downloading this photo from your iCloud library?
1. Sign out of iCloud
On your iOS device, go to Settings and select your name.
Now tap on Sign Out.
After doing that, you just need to sign back in and all your photos should be redownloaded and the problem will be gone.
Note: You will see a warning saying that all your photos will be removed from your phone, so be sure to back them up beforehand. Several users reported losing their photos with this method, so use it at your own risk.
2. Turn off Low Power Mode
On your iOS device go to Settings > Battery.
Now locate the Low Power Mode feature and disable it.
After doing that, the problem should be resolved. Many users reported that this setting was causing the issue, so be sure to disable it.
3. Change iCloud settings
On your iOS device go to Settings > Account > iCloud Account.
Now go to Photos and turn off Download and Keep Originals and Optimize iPhone Storage.
After doing that, check if the problem is resolved.
4. Backup up your device via iTunes
Open iTunes and connect your iOS device.
Unlock the iOS device and if you see a confirmation message choose Trust.
Now click the device icon in the upper left part of the iTunes window.
Go to the Backups section, make sure that This computer is selected, and click on Back Up Now.
Wait for the process to finish.
Now you need to reset your iPhone and restore the backup. Don’t worry, if you completed the previous steps properly, you should have a backup available on your computer. Follow these steps:
On your iOS device go to Settings > General > Reset.
Select Erase All Content and Settings.
If you want, you can upload the backup to iCloud just to be safe.
After resetting your iPhone, connect it to your computer and select Trust This Computer.
Select your device from Finder or in iTunes.
Now choose Restore Backup.
Select the latest backup and click on Restore.
Wait for the process to finish.
Once the process is done, the issue should be resolved. Keep in mind that this is a drastic solution, so use it only if the other solutions didn’t fix the problem for you.
There was an error downloading this photo from your iCloud library message can be problematic, but we hope that our solutions helped you fix this issue.
Sometimes you need to translate something, but if you need to translate something in real-time on your computer?
If that’s the case, you’ll be pleased to know that there are specialized live translation apps that you can use, and in today’s article, we’re going to show you the best ones for your PC.
What are the best live translation apps to use?
Microsoft Translator
Microsoft Translator is a live translation application that can be used to translate both text and speech, as well as live conversations.
If needed, you can also download AI-powered language packs and use them offline. The software supports speech input, text, or handwriting, so you can translate everything with ease.
There’s support for over 60 languages which will be more than enough for all your needs. Windows Translator also supports real-time translated conversations with up to 100 people.
Support for Cortana is also available, as well as the ability to translate images that you take on your devices. If needed, you can also share your translation with other apps.
Overall, Microsoft Translator is a great live language translation app, and since it’s completely free, you should definitely try it out.
Microsoft Translator features:
Completely free
Supports speech, text, or written input
Works with over 60 languages
Ability to start or join conversations through Cortana
Support for real-time translated conversations up to 100 people
Another useful live translation app for Windows is QTranslate. This software is simple to use, and you just need to select the text that you want to translate and use the keyboard shortcut to show the translation.
The software works with the following online translation services: Babylon, Baidu, DeepL, Google, Microsoft, Naver, Promt, Yandex, and youdao.
QTranslate can be used to translatetext in any application that supports text selection, and there’s also support for image text recognition.
Speech recognition is available as well, so you can translate speech in real-time. Additional features include text to speech, online dictionaries, spell checking, etc.
QTranslate offers great features, and the only flaw might be the lack of offline support. However, the application is free and simple to use, so you should try it out.
If you’re looking for a live language translation app, then you might want to try Just Translate. The software is available on multiple platforms, and it will work on your PC or Mac, Android, and iOS device.
The application is simple to use, and it can translate emails, instant messages, or websites with ease. Documents are also supported, and you can translate any document in a matter of seconds.
Just Translate also supports voice recognition, and the software will automatically translate what you said to the desired language. Of course, the software also offers a built-in text-to-speech feature.
As for the number of foreign languages, the software supports 100 languages, so you should be able to translate anything you need in a matter of moments.
Just Translate offers solid features, and since it’s available on multiple platforms, there’s no reason not to try it out.
Just Translate features:
Available on Mac, PC, Android, and iOS
Supports over 100 different languages
Ability to translate emails, instant messages, and websites
Another software that supports live translation is iTranslate. This is an Android and iOS app, but there’s also a web app that you can use on Windows or any other platform.
The app supports text translation, and it can recognize text in more than 100 different languages. Voice translation is also available and it will instantly translate what you say.
The voice translation feature also works offline, but currently, it supports only four languages in offline mode. Camera translation is available as well, allowing you to translate cards, signs, and everything else.
The app supports keyboard translation in messaging apps, so you can stay in touch with contacts that don’t speak your language.
Overall, iTranslate is a solid translation app, but unfortunately, some features are only available in the Pro version.
Google Translate is probably one of the best-known translation apps on the market. As you know, Google Translate is available on mobile devices, but you can use it on your PC as a web app.
The app supports keyboard input, but it can also translate voice input, or scan images and translate the text that appears on them.
In case you’re using the device on your phone, it can provide instant translation from your phone’s camera. If needed, you can also draw letters and translate them on your phone.
Offline support is also available, so you can translate everything you need even if you’re offline. As for the number of languages, there’s support for over 100 different languages.
Google Translate is a well-known live translation app, and it’s completely free to use, but not all features are available for all languages.
Google Translate features:
Available on Android, iOS, and in browser
Supports over 100 different languages
Supports text input, speech input, and image scanning
The matchmaker is full issue isn’t an incredibly serious problem; it just shows that the indie game Among Us is affected by the sheer number of users.
Launched in 2018, this game quickly grew in popularity, attracting millions of players and watchers.
Because of this, the servers aren’t equipped to handle this many users at the same time.
The error shows that tons of players are online at the same time, and the server has no more space to admit more players. This prevents players from entering games.
When players try to find a match, they can get the error that says:
Among Us matchmaker is full. Please try again in a few minutes.
This error message mostly shows up during peak gaming hours. If you experience this, know that it’s completely normal.
Don’t fret because you’re about to learn some workarounds to get rid of this error and enjoy the game.
How can I fix the Among Us matchmaker is full error?
1. Confirm that the servers are working
Before implementing any serious troubleshooting procedures, you have to be sure that the Among Us servers aren’t undergoing maintenance.
If you check these recommended places and realize that the issue isn’t peculiar to you, then it’s safe to wait it out and retry after a couple of minutes.
Otherwise, continue troubleshooting it with the solutions that follow.
2. Use a VPN service
We recommend that you try using a VPN service, as the error mentioned above is usually caused by a large group of users playing from the same location at once.
Because the Among Us servers work based on the location that you find yourself in, there are specific high traffic hours for each of the server zones.
A powerful VPN like Private Internet Access (PIA), can change the location the servers identify you from and thus allow you to connect without seeing the dreaded error message.
Besides this, owning a well-known VPN service also protects your privacy online from any third-party entity that might want to collect your data.
Private Internet Access
Easily bypass the Among Us matchmaker full error by changing your location with a few clicks of the mouse!
Plenty of players on the official forums agree that the steps to getting a good starter team are pretty straightforward:
Discard or sell all of the starter packs that you have or may get along the way.
Start doing all of the advanced Squad Build Challenges (SBCs) one-by-one.
Save up a large amount of currency
Buy your team with the proceeds.
Try to make team compositions with players from the same country for better synergies and loyalty in certain Squad Build Challenges.
What to look out for in Starter Team
While these steps may seem pretty simple enough, there are some things that need mentioning.
For starters, this strategy is only profitable at the beginning or the end of a season.
That is when all the prices are low and you don’t have to go farming like there’s no tomorrow for a single player.
This is mainly because the Futbin solutions are not up yet, so the prices are still low.
You need to have experience playing the game, since the advanced Squad Build Challenges aren’t exactly a walk in the park for some.
You’ll need to stay glued to the game so that you can take advantage of all the non-repeatable Squad Build Challenges available at any given moment.
Making a team composition using mostly players from the same country is very difficult.
This due to the Random Numbers Generator (RNG) nature of packs.
However, if you do manage to do this, you will easily build up a team of at least 80 in rating each.
Keep note that the highest rated players would not be the best option for starting squads as they usually sell with an enormous price.
Therefore, try to pick up enough average gold players in your team as early as possible.
This is because they are most cost-efficient solution for your starter team needs.
All in all, you should follow the advice listed above and maybe even put in a bit of time.
With a bit of luck, you’ll definitely have a good starter team to begin the FIFA 21 season!
Have you built your starter team yet? Let us know what methods you used to get a solid head start by leaving us your suggestions in the comments section below.
Fifa 21 is the latest in an extremely long-lived game series.
A whole new season is upon players, which means a whole new opportunity to make a name for themselves.
Of course, lots of players wait for new seasons to come so that they can take advantage of yet-unexplored market prices as a means to make in-game currency.
One of the best ways to do so is to perform if trading.
Quick Tip:
Speaking of trading and making money, if you don’t own FIFA 21 yet, get it now at the best possible price!
Enjoy the best of footbal, and grow alonside your favorite teams and players in no time.
700+ teams
30 official leagues
Unparalleled graphics
17,000+ authentic players
Have a career in professional football and grow
Play as one of the best football teams of the 2021 season
You first need to pay attention to see which is the Team of the Week (TOTW) and try to figure out which player from it will be popular.
A large number of cards of that type will then be placed on the market at an inflated price. This works best when you have enough cards of the same type to fill an entire market page.
This is not exactly a fool-proof strategy, as it relies on a buyer’s carelessness. On e good example are those who use the console and do not take the time to search for the lowest price on players.
The buyers search the market and see all the players up at a set price and buy a player. After seeing this, they end up thinking that must be his going rate.
Things to look out for to make IF trading effective
One thing you should also remember is to be aware of upcoming events and SBCS. This is because they usually have an effect on any IFs you are holding or looking to buy.
You also need to already have some consistent capital to start off with. This is so that you can afford the occasional mistake, such as a bad bulk buy.
The recommended amount varies but the common consensus is to have enough to buy an entire page’s worth of current IFs.
Because of the volatile nature of the market, any IF would theoretically rise in value at one point or another.
Unfortunately, this means an IF could be popular now, or just in a few months. Thus, this method requires a high amount of patience.
Keep in mind that IF trading can also be used as a means to build capital to buy off a good Starter Team.
What other tips would you give beginners that want to make in-game currency in FIFA 21? Let us know in the article below, and we’ll update it accordingly!
If you ever encountered the infamous error connecting to the server while using Mirth, you’ve come to the right place. There are quite a few reasons why Mirth would deny your server connection requests.
The good news is that this issue isn’t exactly unheard of, so there are a bunch of fixes that might restore the order of things for you. Many users complain about their occasional inability to connect to the Mirth server.
But worry not, as we’ve managed to isolate a bunch of fixes that could get you right on track.
What is Mirth?
Mirth, also referred to as Mirth Connect, or NextGen Connect is a health-industry cross-platform system that’s widely used for information management. It uses a bi-directional message sending technology to achieve great results.
More so, it uses several transports to send messages between both systems and applications. It integrates a wide selection of administration tools and helps facilitate fast and efficient health data exchanges.
Mirth error connecting to the server
As we’ve briefly mentioned above, some users may experience issues whenever connecting to the Mirth server. To be more precise, the client doesn’t recognize the server and asks you to check if the server is, indeed, running. Here’s the full error message:
There was an error connecting to the server at the specified address. Please verify that the server is up and running.
It’s also worth mentioning that the same users who got this error encountered no previous issue, not even while installing the program on their computers.
How to fix Mirth server error?
1. Update/downgrade Java
The most common reason why Mirth would throw a server connection error your way is the Java version. Apparently, this error started to manifest around Java version 8, so it’s been quite a while.
Users complained that not long after updating to Java version 8, they started to experience these server connection issues. The obvious fix to this problem was to downgrade to an older version of Java (i.e. version 7 for version 8 users).
We can’t advise you to downgrade to a version that old because of security issues, but you could try one of these two potential fixes:
Try downgrading to a previous version of Java if the suggested fix above doesn’t seem to work
Although the second fix seemed to work for many users a while ago, it will probably do more harm than good for you.
Reportedly, Mirth performs a quick Java version check upon launching, and prompts you to update to the latest version.
2. Change ports
If the administrator (client) version of Mirth isn’t configured to run on the same ports as the server, the connection might not be valid. As a result, you may encounter connection issues.
Make sure you’re matching ports whenever you configure the client and server versions of Mirth, to avoid compatibility issues.
3. Reinstall Mirth
If you’ve recently updated Mirth and notice that you’re suddenly unable to connect to your Mirth server, you might be the victim of a faulty installation.
The reasons why an installation could become faulty are countless, so we’ll focus more on the effect this issue has.
However, for your peace of mind, it’s probably because of outdated cached data on your PC. Many programs have this nasty habit of building insane amounts of cached data, which they conveniently forget to discard.
The most common result of this mishappening is hard-to-figure-out problems with the software program that saved the data, to begin with.
4. Use a VPN
If you’re connecting to an external Mirth server (i.e. not localhost) and are suddenly unable to connect to it, you might experience a shift in your network’s configuration.
More often than not this issue can be caused by your ISP blocking traffic on certain addresses, or imposing port rules. If that’s the case, you can turn to a trustworthy VPN to get you out of this situation.
Connect to a fast VPN server (servers that are closer are generally also faster)
Launch Mirth and check if you’re still unable to connect
A VPN can help you bypass several connection issues, especially if your ISP gets overzealous and starts blacklisting vital addresses/hosts/ports.
5. Change your TLS version
Open the mirth.properties file in a text editor and try changing the TLS protocols to other versions. Please note that by doing so you might tamper with the security of your machine.
It’s been noticed that older versions of the TLS protocol may restore the functionality of Mirth and let you establish a valid connection to the server.
However, the same old versions are incredibly insecure. Thus, proceed with caution and refrain from modifying settings you’re not comfortable with or know little about.
6. Check your firewall
Windows’ Firewall has been the kernel of many connectivity issues throughout time. Therefore, it makes sense to check if it’s not actively blocking your attempts to establish a connection between your Mirth client and server.
Furthermore, if you have any third-party security software, it would be a wise thing to check if they’re also not blocking Mirth’s connection attempts.
More often than not, security solutions can give you a hard time by restricting services and apps they’re not really supposed to.
Final thoughts on fixing Mirth server connection error
All things considered, if you’re having a hard time getting Mirth’s client to connect to the server, there might be hope yet.
The reasons for this occurrence are many and varied, so first and foremost you need to make sure you’ve got the latest version installed on your PC.
After you’ve done that and checked that the program is properly configured, you can start checking connectivity parameters.
If you feel adventurous, you can install a VPN, but note that using such a tool won’t help you if your server runs on the same machine.
Many users tend to pin items to Taskbar so they can easily access them when needed. While this is quite convenient, many reported that items pinned to Taskbar disappear on Windows 10.
This is a minor problem, but it can cause inconvenience, and in today’s article, we’re going to show you the best ways to fix it for good.
What can I do if pinned items disappear on Windows 10?
1. Check your antivirus settings
Open your antivirus settings.
Now look for the Folder Protection option.
Check if the Desktop folder is protected. If it is, remove it from the list of protected folders.
Save changes.
Users reported this problem with older versions of BitDefender, but Windows Defender can also cause this issue. To fix it, do the following:
Open Windows Security and go to Virus & threat protection.
Disable Controlled Folder Access feature.
After doing that, check if the pinned Taskbar items still disappear on your PC.
2. Change Group Policy Settings
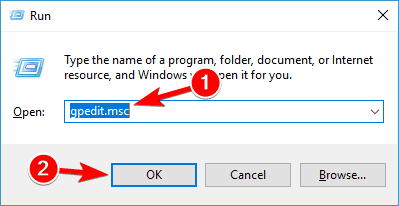
Press Windows Key + R and enter msc. Press Enter or click OK.
Navigate to User Configuration > Administrative Templates > Start Menu and Taskbar. In the right pane, double-click on Remove pinned programs from the Taskbar.
Set it to Disabled or Not Configured and save changes.
After doing that, check if pinned items still disappear on Windows 10.
Locate the application that you want to pin in File Explorer.
Now right-click the application and choose the Pin to Taskbar option.
Several users reported that items from Start Menu, search results, and shortcuts will disappear from the Taskbar. To avoid this, always pin the .exe file of the application that you want to pin.
This is just a workaround, but it seems to be working according to several users.
4. Move the Taskbar to the left
Right-click Taskbar and uncheck Lock the taskbar option.
Click and hold on the Taskbar and move it to the right.
Now move it back to the original position, and your icons should appear.
Keep in mind that this is just a workaround, but it might help you if pinned Taskbaricons disappear on Windows 10.
5. Restart File Explorer
Press Ctrl + Shift + Esc to open Task Manager.
Right-click the Windows Explorer and choose Restart from the menu.
After doing that, check if the problem is resolved. Keep in mind that this is just a workaround, so it might not work for you.
These are just a couple of simple solutions that you can use if pinned Taskbar items disappear on Windows 10, so be sure to try them all.
Our PC consists of a wide range of devices, some related to performance and graphics, many related to device connectivity, and others for networking operations. Each must perform effectively. But many found Microsoft Teredo Tunneling Adapter has a driver problem.
Be it the Microsoft Teredo Tunneling Adapter driver code 10 error or other similar problems with it, there’s always a solution for it. But before we head to those, let’s find out the role played by the adapter.
What is the Microsoft Teredo Tunneling Adapter used for?
IPv4 and IPv6 are two alternative IP protocols that assign unique addresses to PCs the world over. The Microsoft Teredo Tunneling Adapter device acts as a translator for IPv4 and IPv6 PCs for Internet communications.
As we exhaust the limited IPv4 addresses, the importance of the Teredo Tunneling Adapter becomes more than ever due to its ability to provide IPv6 connectivity to devices running IPv4.
What can I do if Microsoft Teredo Tunneling Adapter has a driver problem?
Before we head to the slightly complex solutions, here are a few quick ones to try:
Restart the computer.
Install any pending Windows updates and make sure you are on the latest OS version.
If these don’t work, move to the fixes listed next.
1. Use Outbyte Driver Updater
The Outbyte Driver Updater software can resolve driver issues by installing updated drivers for internal and external PC devices with antiquated or missing ones. With its super quick scanning and very large driver database, Outbyte Driver Updater is worth noting when you need to fix driver issues.
You can try updating the Teredo Tunneling Adapter driver with Outbyte Driver Updater Pro or its freeware version. One of the main differences between those versions is that Outbyte Driver Updater Pro will also automatically install downloaded drivers.
Other useful features
The driver backup utility enables you to back up drivers
You can schedule scans with Outbyte Driver Updater’s schedule manager
Its Download manager displays driver download progress
Live chat support provided for Outbyte Driver Updater
Moreover, you can also fix corrupted drivers that may cause risky system errors, by using automatic scans and replacing faulty drivers with new ones.
You should therefore consider this driver manager and optimize the system devices with the latest driver versions.
Outbyte Driver Updater
Manage all your drivers successfully with this secure and user-friendly driver software app.
Right-click on the active network adapter, and then choose Properties.
Now, tick the checkbox for Internet Protocol Version 6 (TCP/IPv6), and click OK to save the changes.
Once done, restart the computer.
A few users reported that enabling IPv6 got things up and running when they came across the Microsoft Teredo Tunneling Adapter has a driver problem message.
4. Edit the registry
Press Windows + R to open Run, type regedit, and click OK.
Click Yes in the prompt.
Paste the following path in the address bar and hit Enter:HKEY_LOCAL_MACHINE\SYSTEM\CURRENTCONTROLSET\SERVICES\TCPIP6\PARAMETERS
Double-click the DisabledComponents entry.
Enter 0 under Value data and click OK to save the changes.
Finally, restart the computer.
The above resolutions can fix the Microsoft Teredo Tunneling adapter that has a driver problem for Windows 7 and even the other iterations, including the latest, i.e., Windows 11.
Then, use an elevated command prompt to copy it to the C:\Windows folder.
Up next, also download the raccine-reg-patch.reg Registry file.
Don’t hesitate to double-click on it.
When it prompts you to merge the contents into the Registry, don’t hesitate to give it your permission to do so.
Raccine basically works by registering the raccine.exe executable as a debugger for vssadmin.exe. It does so by using the Image File Execution Options Windows registry key.
Once you register raccine.exe as a debugger, every time vssadmin.exe is executed, it will also launch Raccine, which will check to see if vssadmin is trying to delete shadow copies.
If it happens to discover that a process is indeed using vssadmin delete, it will automatically terminate the process.
How to delete Shadow copies Windows 10?
If your wish is to delete Shadow copies in Windows 10, then click the Win + Rkeyboard shortcut to open the Run dialog, input SystemPropertiesProtection, and press Enter.
Up next, you just need to select a partition to delete all these shadow copies from, and choose Configure.
Finally, make sure to press Delete in order to remove all restore points from this drive or partition, and click Apply.
You can delete shadow copies to free up space in your computer but never think of that any longer due to ransomware threats.
Raccine can easily solve this particular issue. Let us know in the comments area below if you tried it already.
Watching movies or playing music in your Windows 1o device can be a great experience with propper sound settings. And if you are an audiophile having the right balance of sound in your device is really important.
By adjusting the frequency ranges of said signals by boosting or cutting them until you’re satisfied with the quality of the sound you can create that sound experience you have been searching for.
This is something that you can either do manually or automatically. Although Windows 10 has an integrated equalizer there is not as much room and freedom to make advanced sound settings.
There is another option though, which would imply installing an equalizer on your device from where you can adjust the sound frequencies as you wish.
Don’t worry, we’ve got you covered in both cases.
In this article, we will explore exactly how you can adjust your equalizer settings in just a few easy steps, so keep reading.
How can I set the equalizer for the best sound in Windows 10?
1. Use a compatible sound equalizer
Before going deeper into the subject, the first and most important step is to make sure you are choosing the best sound equalizer for your device.
There are numerous options out there, and after making some tests, we would like to recommend using Bloom 3D.
Using this software it is very simple. Once you installed it on your device and choose your favorite enhancement, it is ready to go. It can be used with any headphones, players, or media streaming app you want.
Through the incorporated equalizer, you can modify the sound settings, if found necessary.
Moreover, Bloom 3D comes with an incorporated Music player so that the bloom settings will apply even when listening to your favorite music.
The sound booster option will allow you to turn up the volume of your device by raising it up a couple of notches but without creating any distortions which will reveal some amazing details that you wouldn’t hear otherwise.
If gaming is your thing, then the 3D sound technology will really make a difference in how you experience the entire game.
Additionally, another amazing thing about this equalizer is the free access to more than 20k Local and International Internet Radio Stations across 120 countries.
Here are some of its key features:
Amazing audio effects to enhance the sound experience.
Realistic surround sound atmosphere.
Innovative 3D sound technology.
Sound engaging algorithm.
Noise filtering option.
Safe volume booster.
Boom 3D
An amazing 3D audio with surround effects that will tweak your sound near to perfection. Try it now!
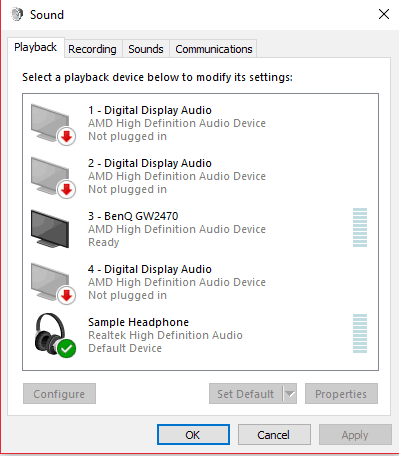
Right-click on the sound icon and select theplayback option.
Next, select the default speaker or headset device that you use for your PC.
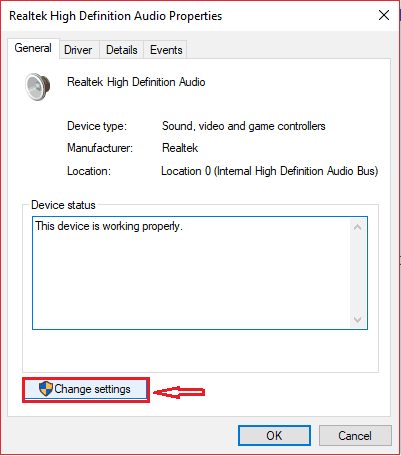
Double click the default icon and click on Properties.
Click on the change settings option in the general tab.
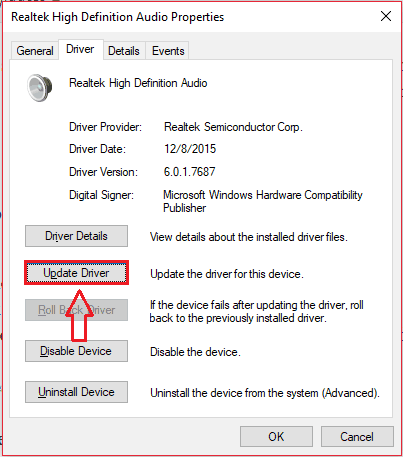
Go to theDriver tab and clickon update driver.
Note: This is the default Windows 10 equalizer. If for some reason you don’t have this equalizer, then you can easily download Realtek HD driversfrom the internet and use its equalizer.
Update drivers automatically
Updating the drivers manually is great but if you are looking for a safer and easier way to do it, then using dedicated software such as Outbyte Driver Updater is the way to go.
All you need to do in order to start is a stable Internet connection and you will have all the latest drivers installed on your PC in no time.
Not only that, but Outbyte Driver Updater will also fix any broken or missing drivers from your device by using its dedicated built-in library, that it’s constantly updated.
Another big advantage of using such a tool is that it automatically finds the versions that are actually compatible and working on your system.
You can rest assured that you’ll get the latest version of the driver because this library is updated every time a new driver version is being released.
Outbyte Driver Updater is portable and extremely easy to use. Once installed, you will only have to wait for the scan to start and be completed. Afterward, the software will automatically update your drivers.
Select Related settings and choose Sound settings.
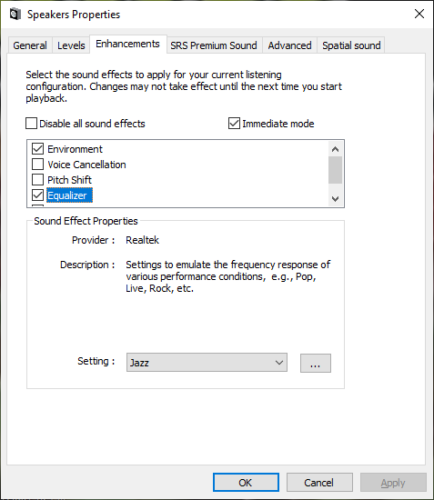
Click on the Enhancement tab and check the box next to Equalizer.
In the Settings box, select the sound setting you want to activate.
Click on OK to save the settings.
There you have it, this is how you can activate and set up your equalizer for an enhanced sound experience. You can either do this manually or simply install a dedicated tool that will do exactly that for you.
We hope that by following these few steps, you can significantly improve the quality of your audio experiences.
If you have additional questions or suggestions, please let us know in the comments section below.
Aaron Greenberg, General Manager of Xbox Games Marketing at Microsoft, took some time to celebrate a “record year” for Xbox Game Studios on Xbox Wire. It has been a spectacular year for Xbox Game Studios, especially with Microsoft’s recent acquisition of ZeniMax Media for $7.5 billion. As we collectively count down the days to the release of the Xbox Series X and Xbox Series S on November 10th, Greenberg looks at all the things that Microsoft and Xbox Game Studios have accomplished over the past year.
15 Xbox Game Studios games launched to-date (10 of which are brand new titles) and many more to come, a record for Xbox.
1.66 billion hours played by our fans and counting, the most ever year-to-date for Xbox Game Studios titles.
Microsoft Flight Simulator, our longest running franchise, returned with an overall Metacritic score of 92, a top-rated PC game this year.
Ori and the Will of the Wisps was the highest-rated Xbox game we launched this year with an average Metacritic score of 90.
Grounded, a new release from Obsidian, quickly exceeded more than 1 million players, while Sea of Thieves has now surpassed 15 million players to date.
Wasteland 3, not only was a fan-favorite and previously won the award for best RPG at gamescom, it also had an average Metacritic score of 86.
Besides all the great Xbox Game Studios announcements, the Xbox community has achieved some amazing in-game stats on Xbox One and Windows PC on Xbox Game Pass.
MicrosoftFlight Simulator players have already logged over 26 million flights and more than a billion miles flown, which averages out to 15 times more than the number of real-life flights taken globally each day in 2019, and enough miles to circumnavigate the globe over 40,000 times.
Minecraft Dungeonshas become a co-op favorite, with 6.9 million multiplayer sessions over the past two months, nearly two-thirds of which (4.4 million) were couch co-op.
More than 500 million bugs have been squashed in Grounded, but there are over 10 quintillion insects in the world so we’ve only exterminated 0.000000000005%.
Starting on November 10, 2020, Microsoft will release its next-generation Xbox consoles with the Xbox Series X and Xbox Series S. Xbox Game Studios will continue to crank out Xbox game exclusives to Xbox Game Pass and add to its already robust game offerings via Xbox Backward Compatibility. It is going to be hard for other competitors, including Sony to offer the best place for gamers when Microsoft owns most of the game studios and makes the decision on whether or not to release certain games on their platform.
You probably read the early reviews, saw the videos on YouTube, and heard the podcasts online. Everyone thinks the Surface Duo is disappointing.
Well, to begin my own review, I have a big message for everyone who is reading. Those early reviews of the Surface Duo are wrong. You shouldn’t dismiss the Surface Duo as a “bad phone” and you need to give it a chance, first.
Why? One month ago, I purchased the Surface Duo with my own money. I even sent away my Google Pixel 3XL to Microsoft to pay for it. And, after having it in my pocket as my daily driver for close to a full 30 days, I have a very different message.
The Surface Duo really changed the way I use my phone. It is an exciting dual-screen Android to love — if you give it a chance and use it the right way and don’t compare it to other phones on the market. Here’s my Duo story.
Editor’s note: The Surface Duo was not provided for review to us by Microsoft. Arif purchased the phone with his own money.
The Specs: A lot for $1,400
As with all my Surface reviews, I try not to delve into the technical aspects of the device. The Surface Duo will be no different. I’m going to focus on how I used the device, the hiccups I experienced. I will not be running Geekbench Benchmarks or battery tests. But, here’s a look at the specs.
Name
Specs
Dimensions (closed)
145.2 mm (H) x 93.3 mm (W) x 9.9 mm
4.8mm thin
Weight
250 grams
Display
Dual PixelSense Fusion Displays open: 8.1” AMOLED, 2700×1800 (3:2), 401 PPI
Single PixelSense Display: 5.6” AMOLED, 1800×1350 (4:3), 401 PPI
Battery
3577mAh
Charger
18W USB-C included
Camera
Adaptive camera 11MP, f/2.0, 1.0 µm, PDAF and 84.0° diagonal FOV optimized with AI for front and rear
Networks
WiFi: WiFi-5 802.11ac (2.4/5GHz)
Bluetooth: Bluetooth 5.0
LTE: 4×4 MIMO,
Processor
Qualcomm Snapdragon 855 Mobile
Connections
USB-C 3.1
Storage
6GM RAM, 128GB of internal storage
Speaker and Audio
Mono speaker, Dual Mic noise suppression, and echo cancellation
Qualcomm aptX audio
This model of the Duo I am reviewing is available for $1,400 at the Microsoft Store. You can also find a more expensive option with 256GB of storage for $1,500, too. If you’re looking to save on the Duo, though, you can trade-in your old phone and get back up to $700 off. I got $400 back for my Pixel, making my purchase close to $1,000.
The hardware and design: Hinges, thinness, and fit and comfort
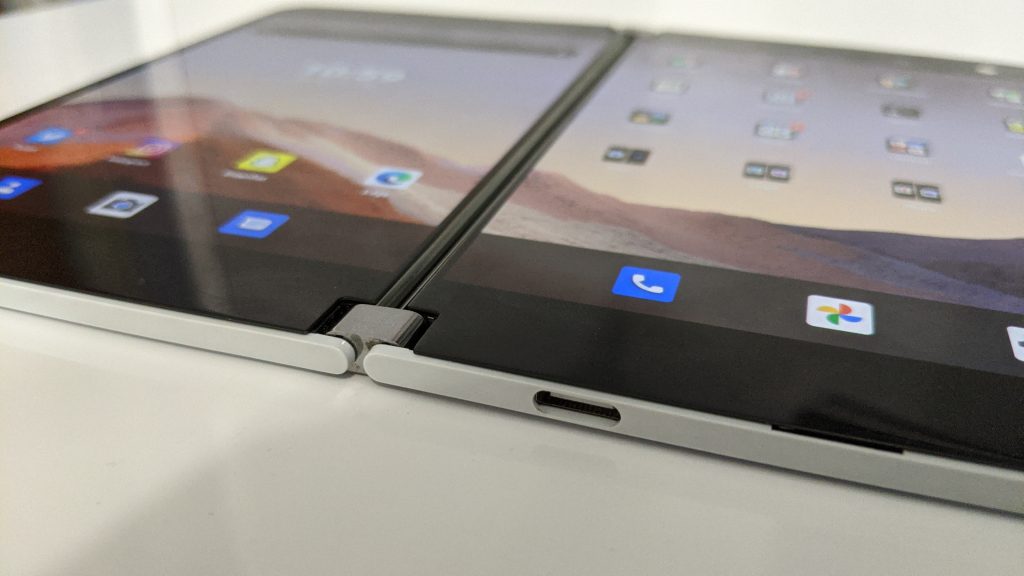
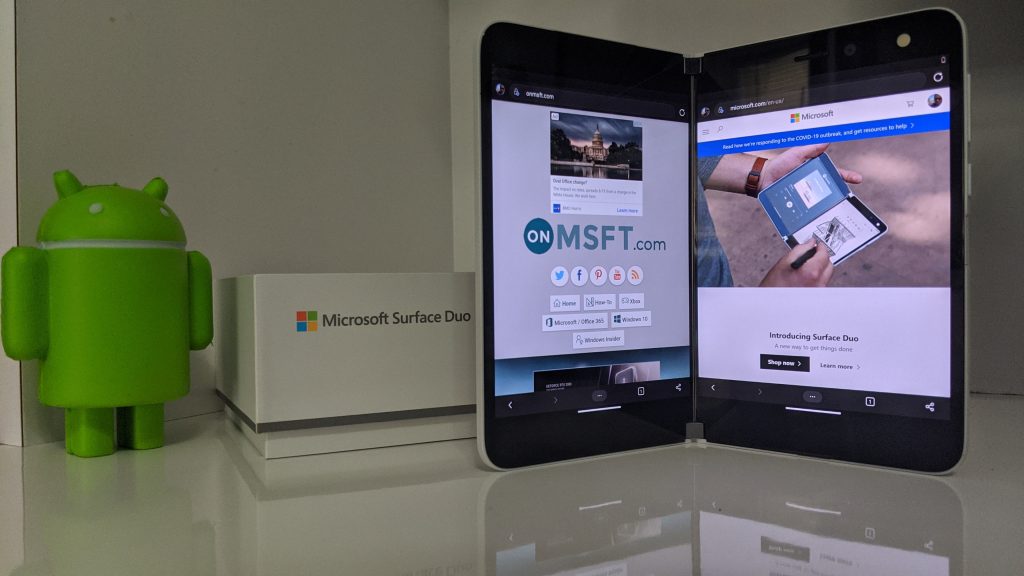
Like everyone else, one of my favorite things about the Surface Duo is the hardware. The phone is made of Gorilla Glass around the front and back. The buttons, fingerprint reader, and frame on the Duo facing the right are made of composite material, but the left side has the metal hinge. The fingerprint reader is on the right side of the device and is spot-on, never missing a login.
Then, there are the 360-degree hinges itself. The hinges separate the two screens and are tucked away at the top and bottom, encased in the two halves of the metal enclosure to the left of the phone (or just middle when folded open.) In one month of use, and thousands of times opening and closing, these hinges never failed me. Nor did it pick up pocket lint, dirt, or any other material.
To me, the hinges always felt just as precise and operational as the watchband hinges on a Lenovo Yoga. It creates a cool look because the hinges are polished metal. Plus, it helps holds the Duo up at almost any angle, if you’re to use it in one of its different modes.
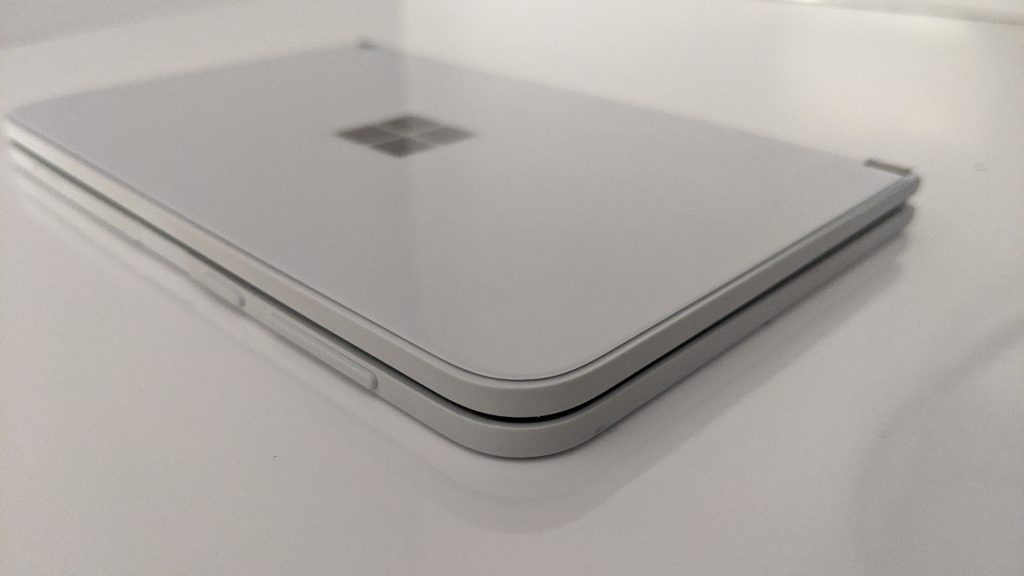
This all means the Duo feels premium, but also thin. As I said in my early- hands-on, I’ve never felt a phone like this. On this matter, the Surface Duo really is in a league of its own when compared to other flagships. The phone itself is almost as slim as the USB-C port on board the bottom of the device. It’s quite unique at 4.8 mm thin.
Asides from that, the fact that the Duo has those two screens, separated by the hinge, make it stand out from the Galaxy Z Fold. The hinge does make the gap a little seamless, though. I found that as I slide my hands between the two screens the hinge feels like it isn’t there, even if it is visually separated.
Oh, and about putting the Duo in your pocket. At 250 grams in weight, and with its overall thinness, it fits fine in a pair of my tightest jeans. When the weather was warm, it slid easily into my shorts. Then, as the weather got colder, It slid well as my sweat pants and jeans pockets. I never had to worry about the fit, and you shouldn’t either.
The screens: Aspect ratio, inking, sensitivity, bezels
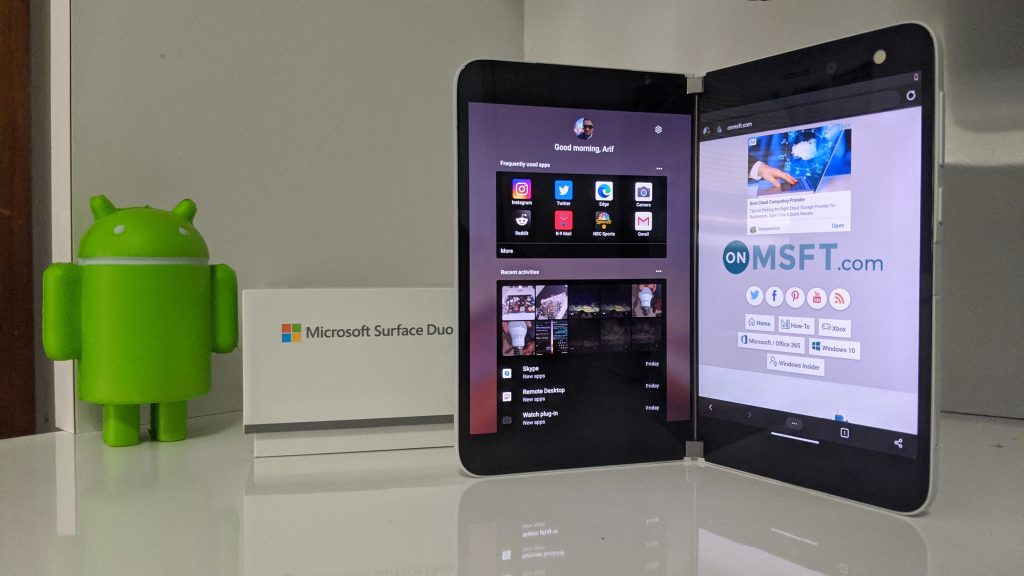
Now, for more on the screens. The Surface Duo comes with two 5.6 inch AMOLED panels. Each has a 1,800 x 1,350 resolution, and each is set in the 4:3 aspect ratio. When expanded out, the displays open up to a single 8.1 inch AMOLED display at 2,700 x 1,800 resolution in the 3:2 aspect ratio, albeit with split down the middle.
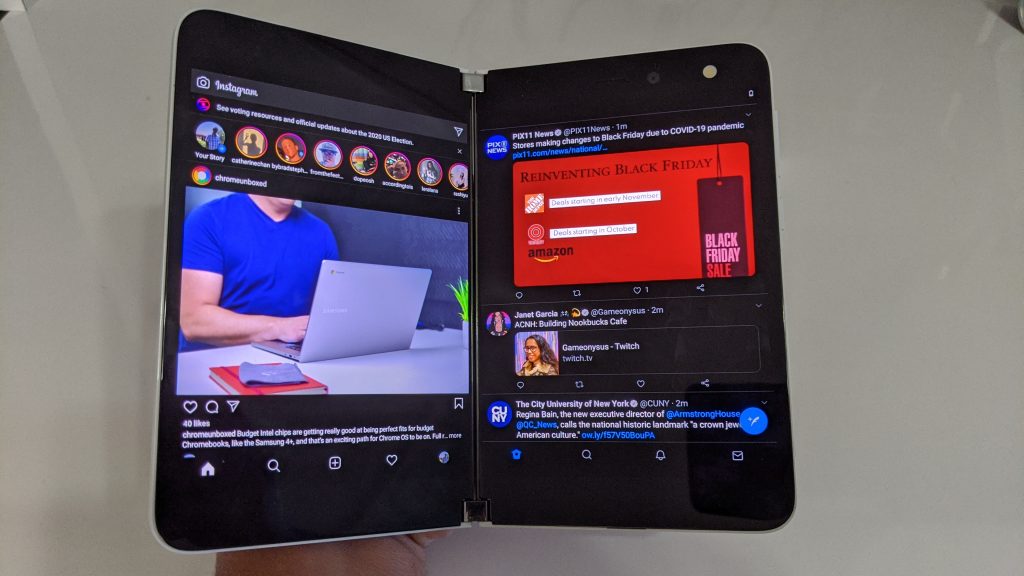
I initially had some trouble getting used to this new screen. Coming from an iPhone XS, the Duo felt a little shorter and wider than I was used to. Some apps like Instagram felt a bit cramped due to this aspect ratio. I felt the Duo wasn’t meant for social media, but after a few days, the aspect ratio felt more welcoming. Giving it a chance, I felt as though the Duo’s aspect ratio was putting more emphasis on the content I actually wanted to see, like a specific picture on Instagram, or a single tweet in my Twitter timeline.
Asides from that, the Duo’s screens are visually impressive. In both bright sunlight and indoors, everything on the screen appears sharp and crisp. It’s a pretty pleasing experience, especially with the adaptive brightness, which makes sure the screen is at the optimal brightness.
I’ll also touch on the bezels here. While many have criticized the phone for its thick bezels, I think it does help in terms of usability. When I switch the Duo into its various modes of use or decide to use the Surface Slim pen, having those thick bezels helps with holding the device in a more comfortable matter. I never had to worry about my hands accidentally touching the screen.
I'm definitely not an artist. But, I did a quick sketch in Autodesk on the Duo while looking at an image on one screen and I absolutely loved it. Prime time to learn to draw? pic.twitter.com/sFQVQlhTFS
Finally, there’s the sensitivity and inking experience. While some early reviewers reported bugs with the touch-screen experience, I haven’t had any major issues. Almost 99% of the time the keyboard was responsive, as well as the swiping and moving of apps and general day to day usage.
The other 1% of the time the issue with my screen was just with the orientation. Out of my 3 weeks with the device, a few times the Duo’s screens would not respond when I rotated it, or it would rotate on its own about once a week. Sometimes, an app also wouldn’t slide to the other screen. Usually, locking and unlocking the phone would fix this, and it wasn’t something that was breaking the phone.
Even inking was a great experience. With a wide and short format, and the ability to fold like a book, the Duo feels a lot like a Moleskine notebook. I was able to pull up an image on one screen. and then mimic it and draw on the other. I also used the Duo as a journal, but more on that next where I get into how the Duo changed how I used my phone.
The dual-screen experience and modes of use: Change the way you use your phone
I headlined this review as “a phone to love” and that’s all because of the Surface Duo’s dual-screens. Coming from iPhone, a Pixel, and a Lumia 950 XL, the Duo really changed the way I use my phone. For $1,400, you’re getting a lot of phone in one device.
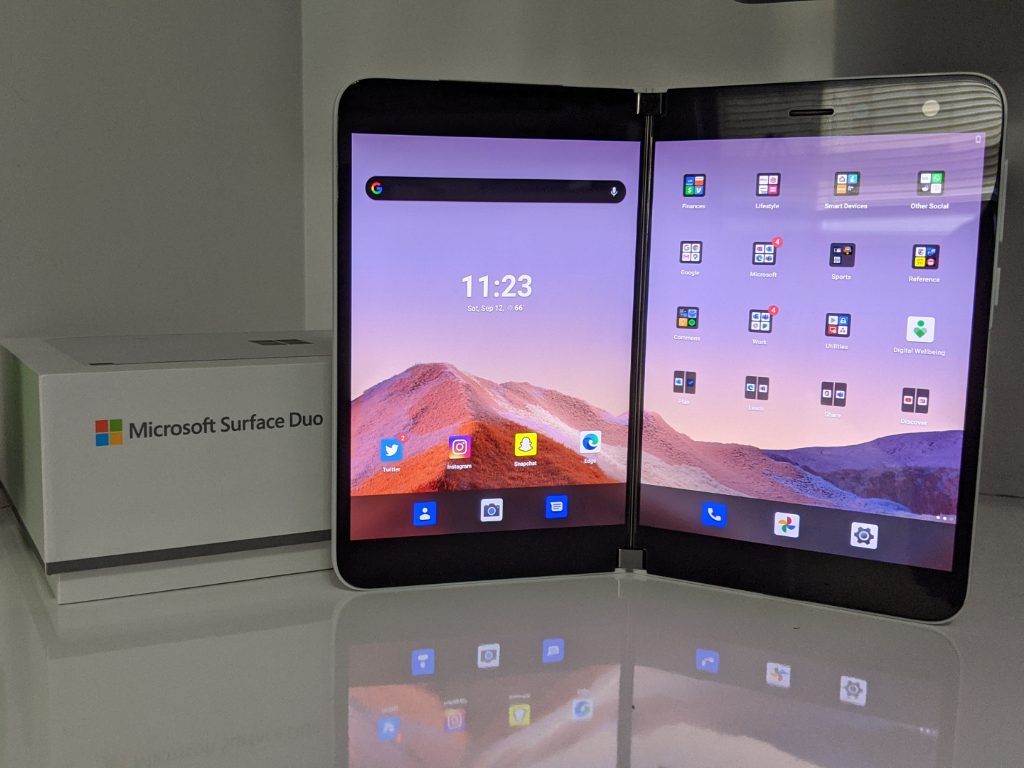
But, why you may ask? Well, the hinges on the Duo allow you to fold it into various modes of use or postures, like a modern Windows 2-in-1. These include Book Mode, Compose Mode, Dual Landscape Mode, Single Screen Mode, Tent Mode, and Peek Mode.
It is here where things come into play and where the Duo is unlike any other phone you’ve ever used. I found myself switching between these various modes, based on what situation I need my phone for. Combined with various gestures Microsoft has talked up for multitasking and swiping apps around, this means the Duo is versatile.
Book mode
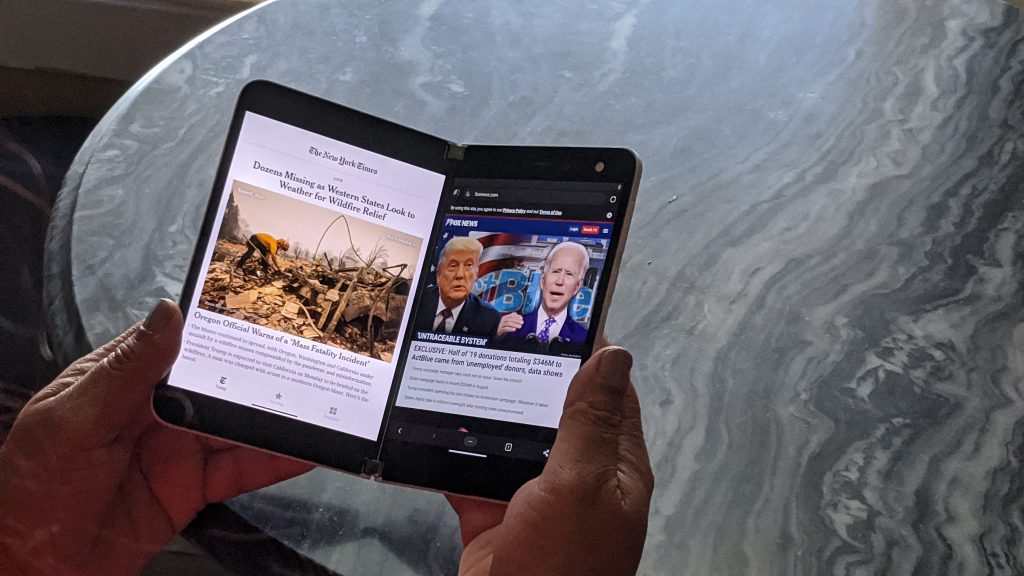
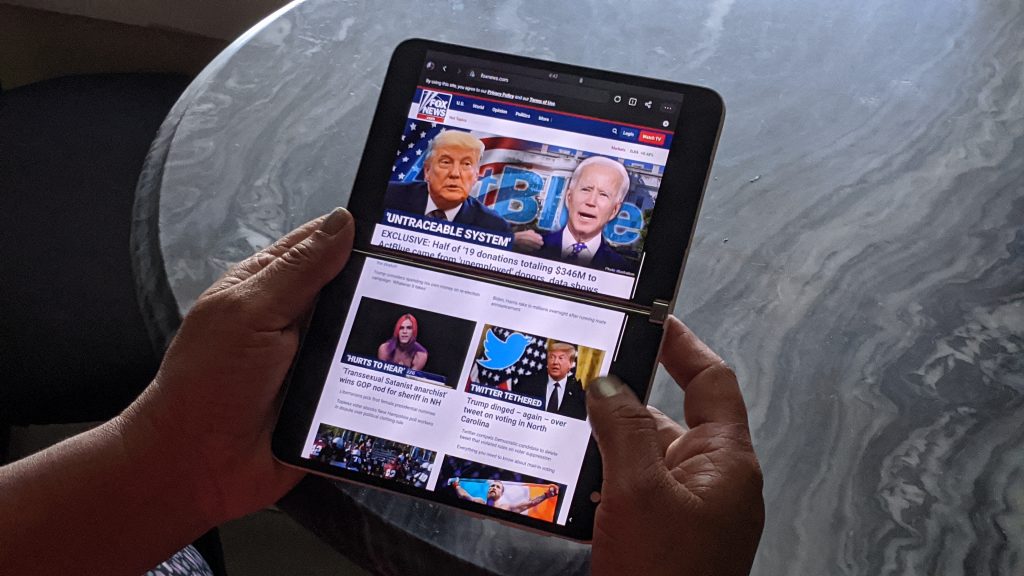
Book mode is how I spent the majority of my time using the Duo. For Book Mode, reading webpages and checking the news was fun. I was able to keep two different news apps, or two different webpages side by side, one on each screen. This is done by swiping the app to the screen you want it on and then pulling up to open the secondary app from the home screen. Twitter alongside Instagram. Snap alongside WhatsApp, Edge alongside Chrome? The possibilities are endless.
Essentially, you’re able to get more done and see two things in different apps at once, in a full-view that’s not squished down as it would be on a Galaxy Fold. And, what about this? Enjoying full-screen Android on one screen, and Windows 10 on the other, via a remote session!
But the one benfit of this on the Surface Duo? You can run windows remotely on one screen and right alongside Android on the other… No other phone can do that this flawlessly. pic.twitter.com/Yx8NCRr7pK
For me, Book mode is also useful for inking. I folded the Duo open in this mode and inked in OneNote with Surface Slim Pen as a journal. With the way the Duo’s aspect ratio feels, and how OneNote is optimized for the Duo, it’s quite natural and exactly like writing in a Moleskine notebook. I highly recommend Surface Slim Pen for this reason, as it adds a whole set of new use cases to the device.
One thing I've been doing since the start of 2020 was keeping my thoughts in a digital journal in OneNote. Before that, I had a physical Moleskine. It's amazing to me how similar writing in Onenote every night on my Duo feels to writing in a Moleskine. I dang love this phone. pic.twitter.com/lEhvzoHtjI
Book mode also has another interesting use. If you hold an app to the middle of the hinge, the Duo will span it across both screens. Amazon’s Kindle app supports this mode and will split so you see pages on each screen. A lot of apps don’t support this splitting yet, though, and will just be divided down the middle with the hinge. As dual-screen phones become more mainstream, this is something that’s up to Android developers to adapt their apps to, and not Microsoft.
Compose mode
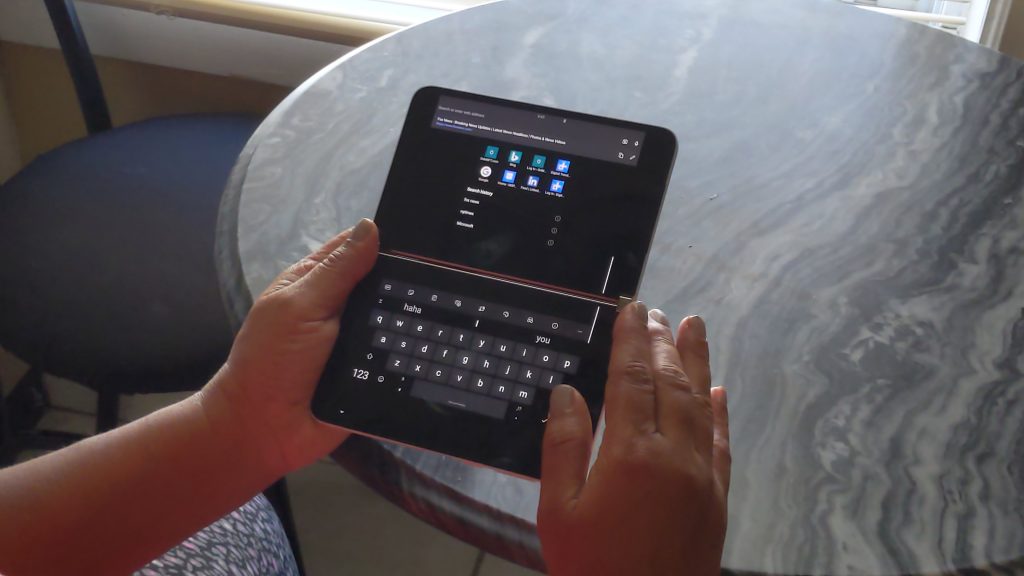
Compose mode is one of the weird use cases of the Duo. In this mode, you turn the Duo around vertically and span an app on the top, to get a keyboard on the bottom. This is for typing emails in Outlook or a document in Word. You also can fold the Duo like a laptop with the screen in a laptop mode to enjoy this mode. As much as Microsoft tries to sell it, this was a bit strange to me because of the small screen and keyboard. I never used compose mode much because I didn’t find it comfortable.
Landscape mode
Then, there’s Landscape Mode. This is one of my favorite modes for spanning one app across both displays, with the phone rotated vertically. Here you hold an app in the middle to span it vertically and get to use the full 8.1-inch screen to your advantage. This is great for web browsing, as it feels like you’re holding a newspaper in your hand. With the exception of the hinge cutting out content, scrolling, reading content feels quite natural here, especially on Twitter and Instagram.
Single screen mode
Next, there’s the single-screen mode. For most people, this mode will feel most natural. You can fold the Duo back, and hold is as you would a traditional phone. This mode cuts back on the Duo’s dual-screen features, but it’s the most comfortable for replying to texts at quick, without having to deal with swiping on the mini-keyboard. And yes, the back screen does go inactive when the phone is folded, but you can always switch back to it by flipping the phone and double-tapping it.
Heck, you even can use the Slim Pen to use your handwriting and ink on the screen respond to texts in this mode, too, if you install GBoard.
Saw a tip on Reddit to use Surface Pen with Gboard on the Surface Duo so you can pen as a keyboard. Really amazing. It's accurate. Why did everyone slam the Duo. I know it's being compared to flagships but on its own it does a lot of damn amazing things. I love this phone so much pic.twitter.com/22dcZomySA
It’s also where you’ll spend most of your time if you’re taking photos. I’ve seen some people fold the Duo and keep it like this in their pocket too, for quicker access to the cameras and such, but it’s not something I’ve tried. I am worried about scratching the screens.
Tent mode
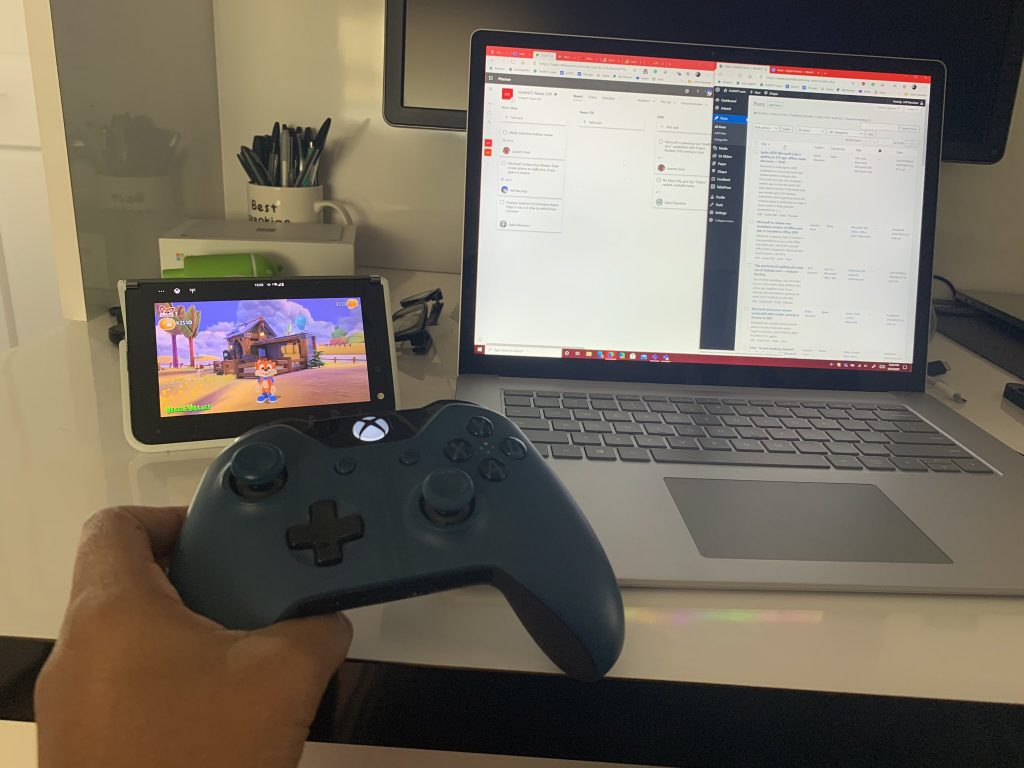
Tent mode is one of the most unique aspects of Surface Duo. Here you fold the Duo over into a “tent.” I like this mode for one reason, and it relates to multi-media or gaming. Folding the Duo over like this is great for watching movies or other TV shows. I enjoyed watching NASCAR Races, MLB games, episodes of Spongebob, as well as gaming via xCloud on the Duo in this mode. The possibilities are endless because you can prop your phone anywhere and enjoy it, without buying a stand.
Peek mode
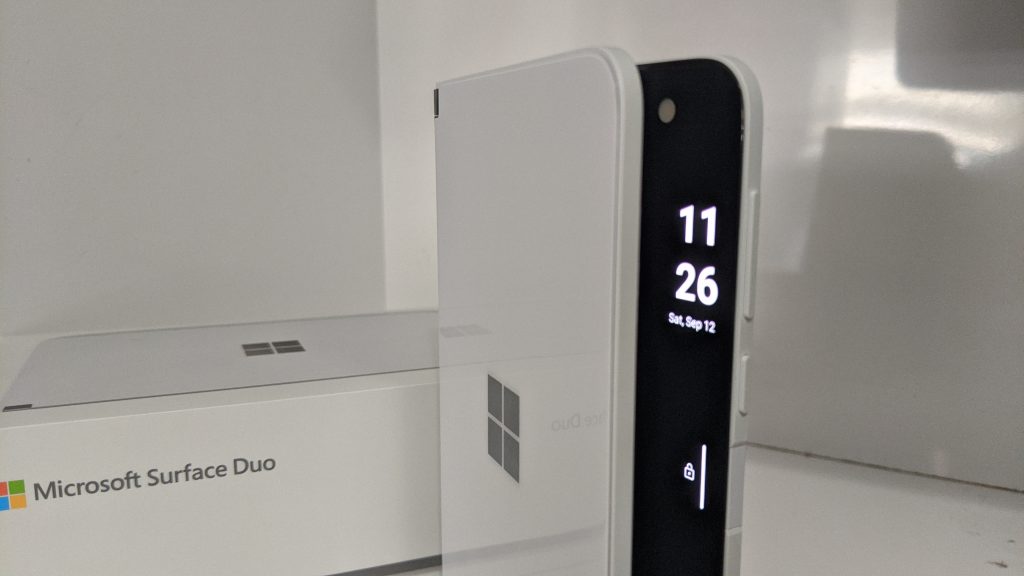
Finally, there’s the peek mode. Since the Duo lacks an external screen, in peek mode, you get to “pull” the Duo open at its side and see your notifications and the time on a glance screen. Right now, peek mode only works with seeing the time and date, but tweaking a setting gets it working to show notification badges. It’s a cool way to make up for the lack of an outside screen.
The camera: Good enough, but could be better
One of the most controversial things about the Duo has been the lack of an external camera. I’ve mentioned my concerns about this multiple times in different posts, but after using the phone for about a month, I’ve come to a different conclusion: For $1,400, the camera isn’t the greatest you could find on a flagship Android or iPhone, but it does get the job done and could be a little bit better.
Compared to my iPhone XS (and my Pixel before I traded it in) the Surface Duo’s single 11MP camera is just decent. With an f2.0 lens, and the lack of lasers to autofocus (it uses PDAF) the low-light images aren’t the best on the Duo. But, for outdoor shots, and general day-to-day photography in good lighting conditions, the Duo is great. You can see this in the slider below, where I took some photos of flowers using the Duo’s cameras.
In inside lighting, the photos also come out decent. However, the Duo’s cameras do like to wash out some colors or even the reflections of lights. I wrote a post about how to correct this through Google Photos. But you can see the difference in my Tweet below.
And here is that same photo edited in Google Photos with the auto correction. It's amazing to see how poor the camera can performs sometimes. It's hit or miss. But with Google Photos you can fix it when it goes wrong. pic.twitter.com/HSh1fgl1ma
One thing of note, though, is the way that you handle the camera. With no exterior camera, you need to fold the phone and then rotate it to switch from selfie mode to world-facing mode. Sometimes (which I say at 4% of the time,) the Duo wouldn’t properly flip photos or have a delay in the shutter click when I did this. It was awkward and annoying, but eventually, I did get used to it. I remain hopeful this can be get patched in future software updates. It’s just something you need to be patient with to properly enjoy the Duo.
With the exception of the photos I’ve posted and taken of the Duo itself (with my iPhone,) I’ve used my Duo exclusively for Instagram, Snapchat, and other pictures on social media. Nobody has told me that my photo quality has dropped. So, there is that. I think the camera is good for what I need. Compared to the dual or triple camera setup on other phones it isn’t the best, but I do have hope that Microsoft can improve it in software updates, too.
I also want to mention that the Duo does have a portrait mode like the iPhones and Pixels, but it’s pretty much useless if you’re taking a photo of something that’s facing you. For selfies, though, it’s pretty magical and will give you a fantastic bokeh effect you’ve likely seen on iPhones and Pixels. The front-facing camera is good for Teams, too, with my colleague telling me I was “crystal clear” when we did a test call.
The performance, software, connectivity, and the bugs: Not like everyone says
Now, for the performance. Powered by Android, and with last year’s Snapdragon 855 processor inside paired with 6GB RAM, a lot of people and reviewers have slammed the Duo for having outdated specs for its price. While this is true, and that is a rightful comparison, there’s another side to the story.
There’s a need to talk about how one actually uses the device without getting into the Geekbench and technical scores. Again, time to give the Duo a chance and put it into a real perspective.
For day-to-day usage, productivity, and social media, a Snapdragon 855 with 6GB of RAM on an Android phone is more than enough to get anything you need to do, done. All of my favorite apps, including Snapchat, Instagram, Twitter, WhatsApp, and Microsoft Edge performed fine on the Duo. I didn’t experience device-breaking lag or freeze (especially in Microsoft Edge) that those early reviewers have complained about.
Leveraging the dual-screens, I was able to run Twitter alongside Instagram. Edge alongside Chrome. Netflix alongside Amazon Videos… and the list can go on. Performance-wise, there wasn’t a single thing that the Duo couldn’t handle that my iPhone or Pixel can.
And, when setting up my apps, the Duo sped through it all with speed. Just be aware, not every Android app is optimized to use the dual-screens. Most non-Microsoft apps aren’t optimized and will default to the opening on one of the Duo’s single screens.
I've set up the Duo to feel like my Pixel did. I don't get why people said it freezes and is slow?! My apps all installed really quick. pic.twitter.com/dP5rRaZKdC
But it’s not always roses and perfume for the Duo. Just like the camera, occasionally there is a bug or two. While the Duo works fine 99% of the time, there are some bugs. Sometimes, Microsoft Launcher (which powers the Duo on top of Google’s Android) could not respond to my swipes as I moved apps across the screen, or swipe up on the screen to see all apps.
Usually, I’d just lock and unlock the phone to fix this, and it works fine. Again, another case where you have to give the phone a chance while Microsoft works out the bugs via software updates.
It should be noted that a lot of performance issues with the Duo can be addressed with software updates. The phone already received two since it launched, and more is on the way. Microsoft is also committed to three years of Android updates and monthly security updates for the Duo, so I am hopeful any bugs will be patched.
Battery life: More than enough to get through the day
When it comes to battery life on a phone, it depends on the user. Some people are glued to their phones all day, and others mainly keep it in their pockets. I am someone who falls in between that.
For my typical 8 AM- 10 PM day, the Surface Duo lasts me fine. With a full charge at 100% in the morning, I’d be down to 20% by the evening before bed. I’d also get anywhere between 4-6 hours of screen on-time, depending on how much I used the phone on a given day.
Considering the Duo has two screens, and a small 3,577mAh battery, I’d say that’s good enough for most people. I never was worried about battery life, and the Duo was always ready for me when I needed it. Plus, with an 18-watt quick charger included in the box, it charged up the device from 20-100% in about 45 mins.
Use as a phone: Can you hear me now? Good!
Of course, the Duo is a phone. Although Panos Panay and Microsoft don’t like calling it one, the Duo has all the functionalities of a cellphone. Here, there are no surprises. While the size makes the Duo a bit weird to hold in your hands to your ears, it’s as excellent of a phone as it is anything else.
Answering calls on the Duo works well. The phone rings, and as you open the screen, you’ll see it appear on the right screen (which has the earpiece.) I’ve had no issues with dropped calls or voice quality. The earpiece is loud, and everyone has told me that I sound clear, and as if I were in the room with them. And, when I finished the call, I could just fold the Duo closed to hangup.
PS: the Duo supports Voice over LTE and all the major networks in the USA. I used it with T-Mobile so I was able to enjoy WiFi calling. Just be aware, there is no 5G support on the Duo, mainly because of its chipset not supporting it.
The case and the bumpers: Much needed for protection
Midway through my review period, I decided to put the included bumper case on the Duo. I thought I would live without it, but after a few weeks, I felt like the Duo was too fragile, so I went for the extra protection.
The bumper case pastes to the sides of Duo with double-sided tape. It’s not a permanent bond and can be pulled back off later, but officially Microsoft says it’s not meant to be removed. It comes in four colors and adds a nice level of grip and makes the Duo feel a bit safer in the hands.
However, the bumper is made of a tacky rubber, which means it gathers pocket dust. But, it also does protect the composite side of the screen near the power buttons, which people have can lose its colors.
All in all, the bumper case is a must for the Duo. It helps protect the phone, and it’s nice that it’s included. After all, the last thing you want is to crack your $1,400 phone.
A great phone, despite the missing things
3,000 words later, and this is what I have to say. Yes, the Surface Duo isn’t perfect. It has its bugs and is far from the monster smartphone, but if you give a chance, you’ll love it. Sure, the camera isn’t the best, but the real use cases for the Duo are with it’s dual-screens. It changes the way you use your phone.
Things like NFC are missing from the Duo, but you can fix that by pairing it with a watch. And 5G support? is it even needed? And, expandable storage? With Microsoft 365, you get 1TB of OneDrive for your photos, so this shouldn’t be a worry. And how about wireless charging? You can add it to the Duo with third-party accessories.
Microsoft has now made it easier to highlight a specific person within a call with the new Spotlight feature, now generally available in Teams meetings. The company says that the new experience should be available for all commercial users in the Microsoft Teams desktop app.
The Spotlight feature allows presenters to lock an individual video feed for everyone to see during a Teams meeting. Once a person receives a spotlight, their camera feed will be prioritized over all attendees. The feature is particularly useful when a participant wants to act as the meeting host, present data, or answer a question.
Here’s a video look at how the Spotlight feature works.
To use the feature in Microsoft Teams, all you need to do is click the ellipsis icon next to any attendee and choose “Spotlight.” Once a participant is spotlighted, an icon should appear next to their name within the participants list.
Keep in mind that the organizer/presenter can only spotlight one video at a time. Moreover, if they record a meeting in which a person video is highlighted, the video won’t be spotlighted in the recording. At this point, Teams users won’t be able to start or stop spotlighting on their mobile devices. However, when someone using the desktop app spotlights a video feed, that video will be spotlighted for mobile users as well.
You may be familiar with the Blue Screen or Black Screen of Death errors, but when you hear other colors, it changes everything.
Apparently, there are other colors, though not so common, but computer users have experienced the purple, brown, yellow, red, and even green screen of death.
The main reason for such errors is malfunctioning or corrupted hardware drivers on your computer system.
And this color coding simply helps when you get the issue and the tech support at Microsoft can help you resolve it as they understand how deep an issue each one carries.
This article is about the Yellow Screen of Death, which occurs when an ASP.NET web application encounters a problem and eventually crashes.
ASP.NET is an open-source web application framework used in Windows OS for web development to build dynamic web pages.
So what happens when you get the yellow screen of death in Windows 10? We’ve got some troubleshooting tips for this PC error!
How do I fix the Yellow Screen of Death issue in Windows 10?
1. Uninstall and reinstall the graphics card driver
Right-click Start.
Select Control Panel.
Go to Programs.
Click Uninstall a program.
Right-click the graphics card driver you’re using and select Uninstall.
Confirm that you wish to continue with the uninstall.
A prompt will appear asking if you want to delete all saved profiles. Clicking Yes will delete all its software and saved profiles. Clicking No will remove its software but the profile files are saved on your hard disk.
Once driver files have uninstalled, restart your computer to complete the uninstallation.
Turn on your computer and reinstall your graphics card driver.
Outdated drivers can cause a variety of issues and are the very first thing to check when experiencing the Yellow Screen of Death issue.
However, do note that driver files should be uninstalled before you update to newer drivers, or when removing an older graphics card and replacing it with a new one.
Just use the steps detailed above in order to uninstall the graphics card from your system.
Moreover, other outdated drivers can cause this problem as well and there’s no secret that updating drivers manually can be a long and tedious process.
Therefore, you might want to use a tool that will easily update all your drivers for you. Just download Outbyte Driver Updater to do it automatically.
As confirmed by users worldwide, Outbyte Driver Updater will help you avoid any kind of damage to your PC by downloading and installing the wrong driver versions.
If you don’t have any driver updates available, right-click on the graphics card driver and click Uninstall, then restart your computer.
Update drivers from Windows Update
Click Start.
Select Settings.
Select Update & Security.
Select Windows Update.
Click Check for updates.
Update drivers from the manufacturer’s website
Right-click Start.
Select Device Manager.
Expand the Sound, Video and game controllers option.
Right-click on the name of the graphics card.
Click Update driver software.
Restart your computer.
Go to your graphics card manufacturer’s website, check for the latest Windows 10 drivers available and then install it based on the instructions on the website.
Besides, you can as well update your drivers using a specialized driver update program aforementioned in the first solution.
3. Boot in Safe Mode
Click on the Start button.
Select Settings.
Click Update & Security.
Select Recovery from the left pane.
Go to Advanced startup.
Click Restart now.
Select Troubleshoot from the choose an option screen.
Click Advanced options.
Go to Startup Settings and click Restart.
Once your computer restarts, a list of options will come up.
Choose 4 or F4 to start your computer in Safe Mode.
Safe mode starts up your computer with limited files and drivers but Windows will still run. To know whether you’re on Safe mode, you’ll see the words at the corners of your screen.
If the issue of the Shift key, not working persists, check whether it occurs while your computer is in Safe mode. Follow the above steps to start your computer in Safe Mode.
A quicker way to get into Safe Mode is to restart your computer then do the following:
From the Choose an option screen, select Troubleshoot > Advanced options > Startup Settings > Restart.
Once your computer restarts, a list of options will come up.
Choose 4 or F4 to start your computer in Safe Mode.
If the issue isn’t there while in Safe mode, then your default settings and basic drivers are not contributing to the issue.
4. Perform a clean boot
Go to the search box.
Type msconfig.
Select System Configuration.
Find the Services tab.
Select Hide all Microsoft services box.
Click Disable all.
Go to the Startup tab.
Click Open Task Manager.
Close Task Manager, then click OK.
Reboot your computer.
Performing a clean boot for your computer reduces conflicts related to software that can bring up the root causes of the Shift key not working.
These conflicts can be caused by applications and services that start up and run in the background whenever you start Windows normally.
In order to successfully perform a clean boot on Windows 10, you have to be logged on as the administrator, then follow the above procedure.
You will have a clean boot environment after all these steps are carefully followed, after which you can try and check if the Shift key not working problem is gone.
Can’t open Task Manager? Don’t worry, we’ve got the right solution for you.
Insert the Windows installation disk or USB drive, then restart your computer. You will see a message requesting you to Press any key to boot from DVD.
Do so and press any key to boot from DVD.
Once you see the Install Windows page displayed, click Repair your computer to start Windows Recovery Environment (WinRE).
In WinRE, go to Choose an option screen.
Click Troubleshoot.
Click Advanced Options.
Click Automatic Repair.
In order to do this, you need to download Windows 10 ISO then create a Media Creation Tool, which you can do from another computer.
Once you have the installation media, follow the steps above. If you don’t see the Press any key to boot from DVD message, change the boot order in your BIOS settings to start from disk or USB.
Be careful when changing BIOS settings as the BIOS interface is designed for advanced computer users because you may change a setting that may prevent your computer from booting properly.
You should only update BIOS when necessary like when solving a compatibility problem. It can be complicated and render your computer inoperable in case of any errors.
Follow the steps below exactly as they are to change the boot order then perform a repair:
In the restart process, check for any instructions on how to interrupt normal startup.
Enter the BIOS Setup Utility. Most computers use F2, F10, ESC, or DELETE key to begin this setup.
Find a tab in BIOS set up utility labeled Boot Order, Boot Options, or Boot.
Use the arrow keys to go to Boot Order > press Enter.
Locate the removable device (CD, DVD, or USB flash drive) in the Boot list.
Use arrow keys to move the drive upwards to appear as the first in Boot list > Press Enter.
Your boot order sequence has now been changed to boot from DVD, CD, or USB flash drive.
Press F10 to save changes and exit the BIOS Setup Utility.
Click Yes in the confirmation window and your computer will restart normally.
Let the scan proceed for a few minutes to remove any malware infecting your computer.
Select your preferred language, currency, time, keyboard, or another input method.
Click Next > click Repair your computer.
Choose the operating system you want to repair (in this case Windows 10) > Click Next on the Choose an option screen.
Select Troubleshoot.
Select Advanced Options.
Click System Restore or Startup Repair.
Once the repair is complete, check whether Windows 10 will not boot issue goes away, otherwise try the next solution.
Did any of these solutions help you fix the Yellow Screen of Death in Windows 10? Let us know in the comments section below.
Microsoft today announced that it’s planning to build new data centers in Greece, bringing the total number of Microsoft data centers worldwide to 63. With this new initiative called “GR for GRowth,” the company aims to invest in the cloud services infrastructure, support economic growth, and launch digital skilling programs.
The new data centers will deliver companies local access to Azure, Microsoft 365, and Dynamics 365, along with compliance, security, and privacy combined with data residency. The initiative will also help the company achieve its long-term goal of becoming carbon negative by 2030.
“By a substantial margin, this is the largest investment Microsoft has made in Greece in the 28 years we have been operating here. In part, this reflects confidence that our world-leading datacenter technology can help enable innovation and growth across Greece’s economy. In addition, this large investment reflects our optimism about Greece’s future, its forward-leaning government, and the country’s ongoing economic recovery,” said Brad Smith, President, Microsoft.
As a part of the digital-skills training program, the new data center would generate more than 10,000 job opportunities for local people by 2025. Microsoft believes that the new investment marks a major milestone in its mission to bring financial benefits of 1.0 billion euros to the country over the next five years. “Microsoft aims to boost the digital competencies of an estimated 100,000 public sector, business and IT professionals, educators, and students to support the digital transformation of public and private organizations,” the company explained.
If you’re getting the ERROR_INVALID_HANDLE error code with The handle is an invalid description, follow the troubleshooting steps listed in this article to fix it.
This error affects Windows 10 users when they try to log in to their computers. The error message prevents users from connecting to their accounts and actually using their PCs.
There are two main causes for this error: a recent Windows 10 update didn’t install correctly or some system files got corrupted or damaged. Here’s how one user describes this problem on Reddit:
So I just installed the upgrade and it was working just fine for a while . But now it went bat sh** crazy and BSOD […] I tried restarting the PC and it gives The Handle is invalid. […] Another issue is when I press shutdown after the Handle invalid it stay on and wont shut down.
On Windows 10, this error also blocks the print process, leaving users unable to add a printer or use the one already installed.
The handle is invalid error also affects older versions of Windows, preventing users from installing any updates or software on their computers.
In this article, we’re going to show you how to fix this error on Windows 10, as well as on older Windows versions.
How do I fix the Handle is invalid error?
1. Press the restart button
If you can’t access your user account due to this error, try restarting your computer several times. Many users confirmed that this simple action solves the problem.
If you don’t want to perform a hard reset, you can hold down the Shift key and click the on-screen power button, select the restart option while holding the Shift key, and then select Continue to Windows 10.
This will force Windows to repair damaged or corrupted update files.
2. Boot into Safe Mode and uninstall the security updates
Hold down the Shift key and click the on-screen power button
Select the restart option while holding the Shift key
Select Troubleshoot, then Advanced options, choose Startup Settings , and hit Restart
Select Safe Mode after restart.
Go to Update & Security, click on Windows Update and click on Advanced options
View your update history and uninstall the latest updates
Restart your computer.
Note: Many users report that cumulative updates KB3135173 and KB3124262 are actually the culprits, and uninstalling these two updates fixed the problem.
3. Update Citrix VDA
This solution works only for users running Citrix VDA. Some Windows updates are incompatible with Citrix VDA 7.6.300, causing The handle is an invaliderror. To fix this, download the cumulative update VDA 7.6.1000.
If you’re using VDA v7.7, download the newer versions of the tool, VDA 7.8 or higher, which contain the fix. For more information and a step-by-step guide, go to Citrix’s support page.
How do I fix The handle is invalid printer error?
1. Run a full system scan
Malware may cause various issues on your computer, including errors. Perform a full system scan in order to detect any malware running on your computer.
You can use Windows’ built-in antivirus, Windows Defender, but you can also opt-out for an advanced security tool, such as a third-party antivirus with deep malware scans included.
Install and run the antimalware removal tool, which should come with your antivirus security suite.
You should use the antivirus software to scan the entire computer, including the printer driver. Check to see if the printer is still unrecognizable after filtering and removing possible malware.
2. Update your PC drivers
How to update drivers on Windows 10?
Type update in the Search box, and click Check for Updates to download and install the latest updates.
To install particular drivers, launch Device Manager.
Expand the available categories and select the device that you wish to update the driver for.
Right-click on the driver and select Update driver.
Note: Another option is to download the available driver updates directly from the manufacturer’s website.
Looking for the driver on the manufacturer’s website can be risky because you still might get the wrong one and produce more damage.
That’s why we recommend downloading and installing Outbyte Driver Updater that updates all your drivers automatically in just a few seconds.
This excellent tool has a library of over 18 million drivers and it’s extremely easy to use so try it out right now. It scans for updates as antivirus scans for threats so, in a way, it has the same mission, to keep your system safe.
After the installation, Outbyte Driver Updater will automatically run a scan and in a few seconds, it will provide you with a list of files to update.
Clicking on the Update All button will install all the recommended updates but you can also install them individually by selecting their corresponding boxes and clicking on their Update buttons.
Make sure that you’re running the latest Windows OS updates on your machine. As a quick reminder, Microsoft constantly rolls out Windows updates in order to improve the system’s stability and fix various issues.
Go to Windows Update, check for updates, and install the available updates.
4. Repair your registry
1. Go to Start, type cmd, and click on Run as administrator to start Command Prompt
3. Restart your computer. All corrupted files will be replaced on reboot.
Note: The simplest way to repair your registry is to use a dedicated tool, such as CCleaner. Don’t forget to first backup your registry in case anything goes wrong.
If you haven’t installed any registry cleaner on your computer, check out our article on the best registry cleaners to use on Windows 10 PCs.
You can also use Microsoft‘s System File Checker to check for system file corruption.
5. Download the HP Universal Print Driver
Many Windows 10 users reported that downloading the HP Universal Print Driver fixed The handle is an invaliderror. As a quick reminder, this tool automatically detects and configures supported HP devices and some non‑HP devices.
Locate Microsoft Print to PDF, right-click it, and choose Remove Device.
Click the Add a printer button.
Click The printer that I want isn’t listed.
Select Add a local printer or network printer with manual settings and click Next.
Select PORTPROMPT: (Local Port) from the menu and click Next.
Select Microsoft and Microsoft Print to PDF.
Select Replace the current driver option and click Next.
Add a name for the printer and wait for Windows to install it.
How do I fix The handle is invalid error on all Windows versions?
1. Install the latest updates or upgrade to Windows 10
Microsoft regularly rolls out updates to all supported Windows versions. Go to Start, type update, click Check for updates, and install the available updates.
If you’re using Windows 7 or Windows 8, you can use the Upgrade Assistant to get your OS to the latest version.
2. Update the app affected by this error
Installing the latest version of the app affected by The handle is invaliderror may help you fix the problem.
To do this, you can either use the update button of the app or go to the app’s official website and install the latest version from there.
3. Download the HP Universal Print Driver
If The handle is invaliderror is preventing you from using your printer, download the HP Universal Print Driver. This tool automatically detects and configures supported HP devices and some non‑HP devices.
You can download the HP Universal Print Driver for Windows 7 and newer from HP’s website.
By following these steps, you should be able to get rid of the annoying error message for good.
As always, if you’ve come across other workarounds to fix this error, you can help the WindowsReport community by listing the troubleshooting steps in the comments below.
Press the Win+X keyboard keys. From the list that opens click on Device Manager.
From Device Manager find the Display adapters entry and expand it.
Right-click on each graphics card driver and select update.
If asked, select search automatically for driver software.
Wait while the wizard is running.
Restart your Windows 10 system in the end.
Keep in mind that all outdated drivers cause malfunction and errors.
Since updating drivers manually can be a long and tedious process, you might want to use a tool that will automatically update all your drivers for you.
Download and install Outbyte Driver Updater to do it automatically. This tool will help you avoid permanent damage to your PC by downloading and installing the wrong driver versions.
You will notice that after installation, this awesome tool starts automatically and begins scanning your system for any problems with the drivers.
After a few seconds, you will get a complete report with a list of all the drivers recommended for installation.
The only thing left to do is to hit the Update All button. That’s if you want to install all the drivers.
If you just want to install the graphics card drivers, you will have to check the corresponding boxes from the left of their names and click on the Update buttons from their right.
Under Boot options check Safe boot and beneath click on Network.
Save and apply your changes and restart the Windows 10 system.
From Safe Mode, access Device Manager as already showed and find your graphic cards.
Right-click on each driver and select uninstall.
Install the latest version of the Intel chipset driver on your computer.
3. Use CMD commands
First of all, download the latest built of ATI / AMD graphics card driver.
Next, on your computer navigate towards the following path: C:WindowsSystem32drivers.
Look for the atikmdag.sys file and rename it into atikmdag.sys.old.
Access the ATI directory located on your C drive and copy-paste the atikmdag.sy_ file on desktop.
Open Command Prompt as administrator.
In cmd type chdir desktop and press Enter (this will change the default cmd directory).
Enter expand.exe atikmdag.sy_ atikmdag.sys and press Enter.
Copy the atikmdag.sys file from your desktop and place it to C:WindowsSystem32Drivers
Restart your Windows 10 system in the end.
Note: If you are using an NVIDIA or Intel displaydriver the issue will be slightly different because the error code is named nvlddmkm.sys or igdkmd64.sys but the solutions from above should help you fix them.
When Windows 10 was initially released, it created some sort of a gap between Microsoft’s operating systems. One of the most visible differences was the list of compatible apps and software.
Many older programs, that worked well on Windows 7 or older versions of the system, simply didn’t work in Windows 10. Years later, various updates to the OS improved this situation, though.
These compatibility differences can cause a lot of problems for users switching from one version of Windows to another. Incompatible programs usually do more damage to the system, than just not working.
One of the most troublesome programs in Windows 10 is the world’s most popular image-mounting tool, Daemon Tools.
If you are running one of the latest Windows 10 versions, you definitely need to have at least version 5.0.1 of Daemon Tools installed for maximum compatibility.
If you’re running an outdated operating system, such as Windows 10 A, Daemon Tools version 4.47 or later is actually compatible and users should have no problems.
However, many users are still running older versions of Daemon Tools, and they’re experiencing very serious and annoying issues.
But what’s even a bigger problem is that users are not able to uninstall Daemon Tools in some cases, which pretty much leaves their hands tied.
Here’s what one user said on Microsoft’s forums, and a lot of people confirmed they have the same problem:
I have DAEMON tools on my computer and I just installed the updates on my OS. DAEMON tools worked fine before the update but now I get a bubble saying it won’t work. If I open My Computer where the virtual drives used to be listed it gives me the same error, “does not work on this version of windows click here to learn more”. The OS also blocks the uninstall app, so virtual drives are stuck installed on the PC.
The following article also covers the following topics, so read it well:
Daemon Tools not enough space on drive
Daemon Tools corresponding cue file not found
Daemon Tools not installing
Daemon Tools lite installer not working
Failed to initialize Daemon Tools installer
Daemon Tools engine isn’t loaded
How do I fix common Daemon Tools issues?
1. Uninstall Daemon Tools with uninstaller software
Unfortunately, there’s no confirmed solution to work for everyone. Other users have reported that the Daemon Tools engine isn’t loaded.
The best solution involves uninstalling Daemon Tools using uninstaller software.
A professional removal tool allows you to clean your system from bloatware and other software. It’s more powerful than Windows 10’s default uninstalling tool, so you can give it a try.
Third-party uninstallers are capable of going past the incompatibilities between the older software that is installed and Windows.
They are also better suited to identify any software leftovers and perform a deeper and more exhaustive uninstall process and keep track of those changes. When you remove that piece of software, this kind of tool will know exactly what other files are no longer needed.
This way, the removal process is more thorough.
2. Manually run uninsat.exe
Another solution for uninstalling Daemon Tools from your computer is running the uninsat.exe command from the Daemon Tools folder. You can find this command in Daemon Tool’s installation directory.
If the solutions listed above don’t get the job done, you can try updating Daemon Tools to its latest version, and then uninstall it.
That way, you’ll replace an incompatible version of the software with a compatible one, and the problem could be solved. You can download the latest version of Daemon Tools from its official website.
Microsoft is probably aware of this problem, because users have been reporting it since last year, but the company hasn’t released any fix yet. So, users are forced to solve the issue on their own.
If you plan to install Daemon Tools on your Windows 10 computer, please make sure that you’re installing the latest version of the software.
As you can see, an outdated version of Daemon Tools can get you into trouble, so it’s better to avoid it.
3. Daemon Tools installation issues
Usually, the errors involve Daemon Tools not installing, or the system failing to initialize Daemon Tools installer. This also applies to the Daemon Tools Lite installer not working as well as the Pro version.
There are two things that you can do. First, make sure the .exe is downloaded from the official website and contains the latest version possible.
Secondly, make sure your .NET framework is updated accordingly. Visit the Microsoft .NET download page to make sure you have the latest version on your computer before trying to install Daemon Tools.
4. Daemon Tools corresponding cue file not found
Go to the folder which contains the .cue file that issues this error.
In that folder, you should see a .bin file and a .cue file. Note the name of the .bin file.
Right-click on the .cue file and open with Notepad.
Search for the .bin section in Notepad and you should see a different name. Replace it with the one from step 2.
Save the changes and try again.
A very common error that is easily fixed. All you need to do is in the steps outlined above.
We hope that any issues you had have been solved using one of the solutions proposed. Leave us a comment below if there’s anything we missed or to let us know how well it worked out for you.
Microsoft news recap is a weekly feature highlighting the top Microsoft news stories of the past week. Sit back, grab some coffee, and enjoy the read!
Get paid for your photos with Trove, a Microsoft Garage project
Microsoft Garage project Trove has received a fairly major update. Now, users of the Trove app can upload their photos to earn money. The photos are used to help train AI. Earnings are paid via PayPal, but the app is only available in the United States.
Bing to appear as Search choice on new Android phones in 13 European countries after winning Google auction
Microsoft starts rolling out Hard Mute feature in Microsoft Teams
To help reduce interruptions, a new Hard Mute feature is now rolling out to Microsoft Teams. It allows meeting organisers to mute all attendees before or during a meeting, as well as control whether attendees can unmute themselves or not.
"Hard Mute" is now available in #MicrosoftTeams Meeting Options. You can now choose to not allow attendees to unmute their mic when in a meeting. They get a notification and the option greys out for them until an organiser makes them a presenter. Great for webinars and education pic.twitter.com/TVZ7nES0Nb
When it comes to image editors, Paint.NET is a pretty popular choice for many users. The software is simple to use, and it offers great features.
Paint.NET also supports various plugins, and in this article, we’re going to show you the best Paint.NET plugins and how to install them.
How to install Paint.NET plugins?
Extract the plugin to the required directory
Download the plugin archive.
Open the archive.
Go to the Paint.NET installation directory at: C:\Program Files\paint.net\
Now extract the plugin to the required directory. In most cases, the plugin will come with instructions, so you’ll know where to extract it.
For the Windows Store version do the following:
Go to the following directory: C:\Users\your_username\Documents
Create a new folder called paint.net App Files.
Navigate to the paint.net App Files directory that you just created.
Now create three different folders inside it named: Effects, FileTypes, Shapes.
To install a plugin, just download it and move it to the directory that’s mentioned in the instructions file.
GIF Animation Creator FileType plugin
This plugin is created by a user called midora, and it requires two additional plugins in order to work. To use this plugin, you need to create layers individually.
After doing that, you need to rename them but adding // in their name. Once you do that, you can assign various animation attributes to that layer.
For example, you can assign the number of loops for the animation, or the duration for each individual frame.
This isn’t necessary for all frames, since the frame will copy the duration of the previous frame unless you manually specify it. If needed, you can also add comments for each layer.
Overall, the GIF Animation Creator FileType plugin is a solid Paint.NET GIF plugin, so you should really consider it.
PSD Plugin for Paint.NET is a Paint.NET Photoshop plugin, and it lets you work with Photoshop files. The plugin will allow you to open and save PSD files with ease in Paint.NET.
The plugin will save RGB images, color depth of 8 bits per channel, raster images, layers along with their blend modes, and RLE compression from PSD files without any problems.
By using this plugin, you can easily edit your files in both Paint.NET and Photoshop, and if you’re using both applications, be sure to try this plugin.
If you’re looking for a Paint.NET perspective plugin, you might want to consider using Distort This. The plugin is simple to use and it will be available from the Effects menu.
To create the perspective effect, you just need to move the image corners to get the desired effect. You can also apply the antialiasing effect or create a forced perspective.
Overall, the plugin is incredibly simple to use, and it can create great perspective effects, so be sure to download it and try it out.
VTF files are associated with Valve’s games, and if you want to create your own VTF files, then this might be the perfect Paint.NET VTF plugin for you.
VTF Plug-In for Paint.NET brings support for a single frame or multi-frame VTF files. In addition, the plugin also works with 3 or 4 channel VTF files.
The plugin is simple to use, and it can be used to create simple VTF files. Although it’s not as powerful as other dedicated tools, it still offers solid features, so you should try it out.
If you’re looking for a bevel plugin for Paint.NET, Object Bevel might be just what you’re looking for. The software allows you to create various types of bevel effects with ease.
Speaking of bevel effects, you can create 10 different types of effects. All effects can be customized, and you can change the position of the light source, overall depth, the color of the bevel, etc.
The plugin is simple to use, but it offers extensive features, and it’s one of the best bevel plugins for Paint.NET out there.
Paint.NET is a great image editing software, but it’s even better with plugins. We listed some of the best and most commonly used plugins in this article that will make Paint.NET even better than before.
Did we miss your favorite plugins? Let us know in the comments below.
Sometimes you might need to record HD video on your webcam, and all that you need is a webcam that supports HD recording and suitable software.
In today’s article we’re going to show you how to record HD video from webcam to PC with ease, so let’s get started.
How can I record HD video from webcam to PC?
How do I capture HD video?
Make sure that your computer webcam is connected and working properly.
Press Windows Key + S, type camera, and select Camera.
When the Camera app opens, make sure that your video is showing.
Now click on the Take Video option on the right.
Click on the Take Video button once again and you’ll start recording.
To stop the recording click the Stop button or you can press the Pause button to pause the recording.
Keep in mind that the Camera app offers the most basic features, but there is a wide array of applications for video recording that you can use instead.
Adobe Premiere Pro is one of the best-known video editing software for professionals. The software offers integrated workflows, so you can focus more on important tasks.
As for supported formats, the software can handle any format with ease, including 8K and virtual reality formats.
Since this is an Adobe software, it works great with other tools from Adobe, so if you’re already using Adobe software, Adobe Premiere Pro will be a perfect choice.
Other useful features:
Ability to reformat videos
Ability to detect edits automatically
HDR for broadcasters support
Adobe Premiere Pro
If you’re looking for a professional video editing and recording software, Adobe Premiere Pro is the best choice.
Adobe Premiere Pro is a professional software and the best when it comes to HD videorecording, but if you’re looking for something different, feel free to check our other HD video recording software.
What is the best game recording software for YouTube streaming?
Bandicam
Bandicam is a well-known screen recording software that can create MP4 or AVI videos. The software allows you to select and record a specific part of a screen, or you can record the entire screen.
The software is optimized for gameplay recording and it will optimize and compress the video in order to save your space.
In addition, the software can optimize videos for YouTube in 720p or 1080p so you can upload videos without having to convert them.
Other useful features:
Ability to record from your console, smartphone, webcam, or computer
Support for system audio and voice recording
Support for chroma key
Bandicam
Bandicam is screen recording software that can also be used to record your webcam in HD.
If you want to transfer files from a multimedia device, you need to use the Media Transfer Protocol, but sometimes this application isn’t working properly. Today we’re going to show you how to fix that, so let’s get started.
Few users reported that you can fix the problem simply by installing the necessary driver manually. To do that, follow these steps:
Press Windows Key + X, and select Device Manager.
Go to View menu, and check the Show hidden devices option.
Locate your multimedia device, right-click it, and choose Update Driver Software.
Click on Browse my computer for driver software.
Select the Let me pick from a list of device drivers on my computer option.
Choose your device from the list. In our case, we chose Mobile devices.
Select MTP USB Device and click Next to install it.
In addition, you can also visit your device manufacturer’s website and download the latest USB driver for your device.
1.1 Update drivers automatically
Downloading drivers manually is a process that carries the risk of getting the wrong driver installed, which may lead to serious malfunctions.
The safer and easier way to update drivers on a Windows 10 PC is by using an automatic tool such as Outbyte Driver Updater.
This application is designed to automatically search and download the necessary drivers for you and optimize your PC in minutes.
It scans your system and lists all existing and possibly missing drivers. The tool also detects if there is already a new version for current records. If necessary, these can be updated directly via Outbyte Driver Updater.
To do this, load the corresponding file on your PC and copy the new version to your computer with one click. A wide range of hardware is supported, including drives, printers, and scanners.
Open the INF folder, and locate the wpdmtp.inf file.
Right click it, and choose Install from the menu.
Restart your PC.
If the Media Transfer Protocol isn’t working on Windows 10, you might be able to fix it simply by running wpdmtp.inf file.
Few users reported that they don’t have this file on their PC. If that’s the case, you need to transfer the wpdmtp.inf file from another Windows 10 PC.
3. Check if your phone supports MTP
We have to mention that not all devices support the MTP. Some older phones might not be fully compatible with your PC since they don’t support this protocol.
If that’s the case, you probably won’t be able to transfer files from this device using a USB connection.
Fortunately for you, most Android, iOS and Windows Mobile devices fully support the MTP, so you shouldn’t have any issues with it.
4. Make sure that your phone is set to work in the MTP mode
Multimedia devices such as smartphones and tablets support two connection modes, MTP and PTP.
PTP allows you to transfer pictures, but the MTP mode lets you transfer any type of file to your PC.
All modern multimedia devices allow you to choose between these two modes, and in order to transfer multimedia files you need to use the MTP mode.
You can set the MTP mode on most phones simply by navigating to the Settings menu and choosing to connect your phone as a Media or MTP device.
Most devices allow you to change this setting right from the notification menu, so be sure to check there as well.
It’s worth mentioning that minor glitches with this feature can occur, and you can sometimes fix them simply by switching between PTP, MTP, and Charging mode a couple of times on your device.
5. Try a different port or cable
Sometimes the Media Transfer Protocol isn’t working due to problems with your USB port or cable.
If your media device isn’t recognized and you can’t transfer your files, try connecting it to a different USB port.
USB hubs can also cause this problem, therefore it’s recommended that you connect your device directly to your PC without using the hub.
Lastly, be sure to try using a different cable and check if the problem still persists.
6. Turn on the Airplane mode
Airplane mode is a useful feature on mobile devices and laptops that will turn off all wireless signals.
According to some users, wireless signals can sometimes interfere with the Media Transfer Protocol.
To fix this issue users are recommending that you turn on Airplane mode on both your phone and PC and check if that solves the problem.
Most phones have an Airplane mode option, and you can turn it off from the Settings menu or from the notification panel.
Airplane mode is also available on laptops, and you can turn it off by doing the following:
Press Windows Key + A, and open Action Center.
Locate Airplane Mode icon and turn it on.
If this icon isn’t available, click Expand to show all options.
Alternatively, you can turn on Airplane mode by going to the Settings app. To do that, follow these steps:
Press Windows Key + I, and open the Settings app.
Go to Network & Internet section.
Select Airplane mode from the left pane and turn it on.
7. Install Media Feature Pack
The Media Transfer Protocol is closely related to Windows Media Player.
N and KN versions of Windows 10 don’t have the Windows Media Player installed by default. As a result, the Media Transfer Protocol won’t work on your PC.
Fortunately for you, you can easily install Windows Media Player and all its components. To do that, simply download Media Feature Pack and install it.
After installing the Media Feature Pack, check if the Media Transfer Protocol is working properly.
In addition to Media Feature Pack, several users reported that the Media Transfer Protocol Porting Kit can also fix this issue. To solve this problem simply download the Media Transfer Protocol Porting Kit and install it.
After doing that, restart your PC and check if the problem is resolved.
8. Use Command Prompt
Press Windows Key + X, and choose Command Prompt (Admin) from the menu.
Enter net localgroup Administrators local service /add.
Close Command Prompt and check if the problem is resolved.
In the left pane navigate to HKEY_LOCAL_MACHINESYSTEMCurrentControlSetControlClass
Right-click the Class key, and choose Export.
Select the save location, enter the file name for your backup, and click the Save button.
In case anything goes wrong after modifying the registry, you can always use this file to restore your registry to its original state.
Press Ctrl + F, and open the Search window.
Enter Portable Devices in Find what field.
Select Keys, Values and Data.
Click on the Find Next button.
Registry Editor will search for Portable Devices value. If Registry Editor can’t find this value, you can skip this solution since it doesn’t apply to you.
If Portable Devices value is found, look for UpperFilters value in the same key.
Delete UpperFilters value, and restart your PC.
We have to mention that this solution is potentially dangerous. If you accidentally delete a wrong value you can cause stability issues with your PC.
Locate your multimedia device in Universal Serial Bus controllers or any other similar section.
In some cases your device can even have an exclamation mark before its name, thus signaling a problem with the driver.
Right-click your multimedia device and choose Uninstall from the menu.
If available, check Delete the driver software for this device.
Restart your PC.
Once your PC restarts, Windows 10 will install the default driver automatically. After the driver is installed, check if the Media Transfer Protocol is working properly.
11. Disable driver signature enforcement
Press Windows Key + I, and open the Settings app.
Navigate to Update & security, and select the Recovery tab.
Click the Restart now button in the Advanced startup section.
When your PC restarts, a list of options will appear.
Choose Troubleshoot, and go to Advanced options.
Select Startup Settings, and click on the Restart button.
After your PC restarts you’ll see another list of options.
Press 7 or F7 on your keyboard to disable driver signature enforcement.
Your computer will restart and Windows 10 will start normally.
FAQ
Why isn’t MTP working on my device?
MTP may not work due to outdated drivers or incorrect settings. Ensure your device is in MTP mode and that your computer has the latest drivers installed.
How can I fix MTP if it’s not detecting my device?
Try reconnecting your device or using a different USB port. If the issue persists, restart both your device and computer to reset the connection.
Why does my phone not show up when using MTP?
Check that your phone’s USB settings are set to “MTP” and not “Charging only.” Also, ensure the USB cable is not faulty or damaged.
What should I do if MTP shows an error on Windows?
Update your device drivers via Device Manager or uninstall and reinstall the MTP drivers. Restart your PC afterward to apply the changes.
After disabling driver signature enforcement feature, try to install drivers for your multimedia device manually. For more information on how to do that, be sure to check the first solution of this article.
Keeping files and folders unsecured on your device can be a huge opportunity for malicious threats and viruses.
Not only that, but it can also be the case that you are not the sole users of your PC, and perhaps you don’t want everyone having access to all your personal files.
Luckily there are several tools you can use in order to ensure you have some privacy on your device and also when browsing online.
In this guide, we will show you our data protection software to keep your files safe, so keep reading.
What are the best data protection software to keep files safe?
WinZip is an extraordinary encryption software that allows you to password-protect your sensitive files.
The great thing about this tool is that it allows you to do more than just that, and it has some amazing features that will make it your number one choice.
One such great feature is that you can compress practically anything from images to folders and PDFs.
Additionally, the integrated repair feature will not only keep your files secure and protected but also optimized.
You will be able to share, encrypt, backup all your files and folders, and share them in just a few seconds via email.
Moreover, if you are working with Dropbox, OneDrive, GoogleDrive then the WinZip integration will be perfect for allowing you to work on your documents directly in the folder.
Here are some of its key features:
Cleaner feature that identifies and deletes unused files
File Splitting options.
Password protection.
Supports multiple compression formats: Zip, Zipx, RAR, 7z, TAR, GZIP, VHD, XZ, and more.
”WinZip”
”Keep
”Free”
&aff_sub2=Native” current_url=”true” button_text=”Get it now” image=”https://windowsreport.com/wp-content/uploads/2017/11/WinZip-button-210×160.png”]
IObit Protected Folder is another great software that will keep your files and folders safe. It’s an easy to use program with a user-friendly interface.
With this tool, you can protect any file or folder you want and set a master password for it. The only way someone else can access it is by using the same folder locker.
Not only is this tool protecting your sensitive data from being accessed by unauthorized users, but it will also keep them safe againstmalicious attacks.
Here are some of itskey features:
Protection for all sensitive data and folders.
Locking files feature even when the PC is infected by malware.
Exclude list feature.
IObit Protected Folder
Lock and encrypt all your sensitive files in no time at all, with this versatile software. Get the best deal now!
Nowadays, encrypting sensitive files has become a must in order to keep informations safe from being accessed by unauthorized users.
Using a dedicated tool such is advised and in that matter, we think GiliSoft Privacy Protector is a great option.
With this software, you will be able to easily delete all your browsing history, along with any third-party software traces.
Due to its second layer of protection, your documents, photos, videos, or audio files will not only be read-only or invisible. They will be kept private and out of reach for hackers or malicious software.
Another great feature of GiliSoft Privacy Protector is the option to create a Safe Space on your device for storing personal documents, videos, or sensitive files.
No one will ever know it’s there, you can turn it off and on as needed.
Gilisoft Privacy Protector
Keep your data confidential and secure at all times with this versatile tool. Get the best deal now!
Any time you are using your device, for personal or professional purposes, the files you are working on and saving, if not protected, could be accessed by anyone.
GiliSoft File Lock Pro is a great tool for ensuring data privacy and protection against malicious threats.
You can use it to protect documents, files, folders, videos from your local or external USB drivers, memory card, pen drive, and network drive.
You can make your files and folders will be read-only, password protect them, hide or encrypt them.
Although it does a lot of complex things, this software’s interface is very easy to use and user friendly.
This amazing software brings a solid layer of protection for all your files and you can even create a secret folder on your USB external hard drive.
All the GiliSoft File Lock Pro’s features provide a variety of security options to protect your data from unwanted access.
This software is one of the best protection solutions for keeping your files, folders, documents, external USB drives, and even walletswith store credits protected.
With Folder Lock you can encrypt all your files in one folder, and include there all you need protected and set up a master password to open it.
Whenever you delete a file from your device, is not a guarantee that it cannot be recovered, therefore using the Shredding feature of this software is recommended.
It will not only shred the files but it will also shred the empty drive so that all the previously deleted files will never be recovered.
There you have it. We hope this guide provided you with all the information you need to decide which data protection software is best in order to keep your files safe.
If you have any other questions, don’t hesitate to leave them in the comments section below.
It seems that a YouTube app for Xbox One is under development and might be launched in the Microsoft Store.
In a series of tweets, Aggiornamenti Lumia and other users revealed a few photos of the app, as installed on their devices.
How can I see or test the YouTube app?
The app is not available for the general public yet, but a few users running on Windows Insider managed to see the app in the Store and also install it via the appx file.
So for now, the app is probably still under development. As the pictures show, it is a UWP app, not a PWA.
Since it only takes up a few tens of MB, it will probably not be released as an application per see.
However, it promises an improved user experience when installed in Xbox One.
At this point, in order to watch YouTube on Windows users open the app in a web browser or via third-party apps. But the UWP should bring about new features.
For now, the tested app only has keyboard input.
It’s well known that Google has been trying to collaborate with Microsoft for some years now to develop a fully-featured YouTube app. Previous attempts on both sides to build an app for the Windows Phone have failed.
Neither Microsoft nor Google have confirmed anything about a possible soon-to-launched YouTube app yet.
Are you looking forward to such an app, though? Tell us your opinion in the comments section below.
UTorrent is one of the foremost BitTorrent software for downloading torrent files. However, some users can’t download torrents when the connecting to peers issue arises. When that error arises, uTorrent downloads get stuck on a connecting to peer status.
The uTorret software gets stuck on connecting to peers as the client can’t start a download for the required torrent file. The issue can be due to firewall and port settings or even ISPs that don’t permit you to utilize torrents.
If you need to fix uTorrent’s connecting to peers error, check out these resolutions.
What can I do if uTorrent gets stuck on connecting to peers?
1. Download torrents using a VPN connection
Some VPN (Virtual Private Network) software and connections might bypass restrictions for downloading torrent files.
This can increase performance and security, as it will be less likely to get targeted by phishing attempts when you use software that hides your IP address.
Some VPNs offer unlimited bandwidth, allowing you to download as much data as you need. Pair that with a large server coverage, and you get private and quick torrenting.
Make sure to use a VPN that gets constant updates so you benefit from the best privacy and security features.
2. Run uTorrent as an administrator
Open File Explorer (Windows key + E).
Open your uTorrent software folder in File Explorer.
Then right-click the uTorrent.exe to open its context menu.
Select the Run as administrator option to open uTorrent with elevated privileges.
3. Delete the resume.dat files
Open the window for File Explorer.
Next, open your user folder in File Explorer.
Select the Hidden items setting on the View tab.
Open the AppData and Roaming subfolders from your user folder.
Then open the uTorrent folder in the Roaming folder.
Hold the Ctrl key and select the resume.dat and resume.dat.old files.
Click the Home tab.
Press the Delete button to erase the resume.data and resume.dat.old files.
Note: Deleting those files will clear the torrent list in the uTorrent window. However, you can still resume downloads by manually opening torrent files from the uTorrent subfolder in Roaming.
4. Allow uTorrent through the Windows firewall
First, open Windows 10’s search utility by clicking the magnifying glass icon by the Start button.
Type firewall in the search utility’s text box.
Next, click Windows Defender Firewall to open that Control Panel applet.
Click Allow an app orfeature through Windows Defender Firewall to open the Allowed apps options shown directly below.
Select the Change settings option.
Select the Private and Public checkboxes for uTorrent.
Select BitTorrent on the left of the Preferences window.
Select the Forced option on the Outgoing drop-down menu.
Click the Apply and OK options to save settings and exit.
Those are some of the resolutions users have confirmed they’ve fixed the connecting to peers download error with. So, there’s a pretty good chance they’ll fix the issue for most users.
Good Old Games has always been a trustworthy digital distribution platform, and many gamers fell in loc with their design, DRM-free policies, incredible discounts, and more.
Well, their desktop client called GOG Galaxy has been through many changes since its inception, and their most recent iteration, GOG Galaxy 2.0, has been an immense success.
Of course, this tool is primarily a gaming library, but also a means to buy other games from their catalog, which makes it very similar to other similar tools, such as:
Well, this was taken a step further today, since GOG representatives just announced that you can use GOG Galaxy to buy Epic games-exclusive titles as well.
However, the most interesting part is that they will be applying their world-famous refund policy to these titles as well:
Most importantly, all purchases are covered by our 30-days refund policy as well as 24/7 human support.
User feedback to this news was mixed. On one hand, some are concerned that the Epic Games titles will not be DRM-free like the ones from GOG‘s own catalog.
Gotta say, this feels like a step backward. I’m all for the single launcher life but GOG sells itself on being DRM free.
By adding the Epic launcher and running it in the background while playing EGS games, you’re enabling their DRM. Kinda hoping there’s something I’m missing here because otherwise this feels like the first step down the wrong path.
On the other hand, the GOG representative did specify that only a hand-picked selection of games will be chosen from the Epic Games Store.
This in turn could hint that they may have been referring to the titles that are DRM-free there as well.
All in all, this change is great news for those that like the idea of having a unified gaming library, and more platform integrations will be expected in the future.
Are you excited about this new change brought to GOG Galaxy?
Let us know how you think this will affect your gaming experience by leaving us your feedback in the gaming section below.
A creative Instagram bio helps you make that impact on first impression. This is essential if you are an influencer or a business trying to reach your audience on Instagram.
Most people decide whether to follow and engage with accounts after reading the bio. Depending on whether you want to show off or simply advertise your hobbies, there are plenty of cools Instagram bio ideas that anyone can use to make the right impact.
In this article, we have listed the best Instagram bio ideas to help you customize your profile and take your social media game a notch higher.
Making photography easy. How to take pictures with an iPhone.
Photos around the world: my visual travel diary
“In photography, there is a reality so subtle that it becomes more real than reality.”
“The best thing about a picture is that it never changes, even when the people in it do.” — Andy Warhol
Wedding Photographer | Local + Destination Wedding
Your neighborhood photographer, specializing in [type of photography]
Now that you have seen the list, it is time to take your Instagram bio to the next level with unique and creative bios.
However, instead of merely copy-pasting the bios, make sure to add your own little touch. Your hobby, interest, profession, etc., goes a long way, setting you apart from others.
Modern web browsers like Chrome are all good until you start getting annoying errors. One such error is Your connection is not private.
The error throws a certain message for different users based on the Internet service they are trying to access.
If you are stuck with the Attackers who might be trying to steal your information from… warning, this guide will help you fix the issue on your web browser.
As I said, this error can be different based on the user. So, we have gathered all the errors and fixes related to the issue in this article.
Here are some of the most common error variations you may face:
Attackers might be trying to steal your information from mail.google.com
Attackers might be trying to steal your information from www.google.com
Attackers might be trying to steal your information from the localhost
Attackers might be trying to steal your information from myattwg.att.com
Attackers might be trying to steal your information from yts.am
Attackers might be trying to steal your information from lsapp.dev
Attackers might be trying to steal your information from iso.frontier.com
Alright, let’s dive right in and see how you can get rid of this cyber security problem.
If your PC is infected with malware, Google Chrome may throw this error when the malicious program tries to redirect browser requests to some insecure websites.
The best way to fix this is by running a scan using your antivirus program.
If you truly want to find the best protection for your PC, stop your search here. In this comprehensive article about the best virus and malware removal tools, you can make your choices.
It’s important to choose one that meets compatibility with other software in terms of security and unlimited encrypted traffic, so you can get the most of the anti-virus software.
After you have done the scan, go to the next steps for more safety measures.
In the command prompt, type the following command and hit Enter: ipconfig /flushdns
The command will work with all the versions of Windows. Just make sure you open the command prompt as an administrator.
Windows caches IP address to speed up things that are similar to how cache works for apps. Sometimes cache may include bad results that lead to network-related problems.
For example, attackers might be trying to steal your information. One way to fix the issue is by flushing the DNS.
3. Change DNS server address
Open Control Panel by pressing Windows Key + X.
Click on Network and Internet.
Open Network and Sharing Center.
Open Change Adapter settings. (left pane)
Right-click on your Wi-Fi or LAN connection and select Properties.
In the properties window, select Internet Protocol Version 4 (TCP/IPv4) and click on the Properties button.
Select the Use the following DNS server address option.
In the Preferred DNS Server and Alternate DNS Server field, enter a third-party address. For this guide, I have used Google DNS server.
Enter the following DNS server one by one: Preferred DNS server: 8.8.8.8 Alternate DNS server: 8.8.4.4
Click OK to save the changes.
If flushing the DNS doesn’t work, change the DNS server address manually. You can also use a DNS changer program to do the same.
You can’t open Control Panel? Take a look at this step-by-step guide to find a solution.
You can also use DNS Jumper
DNS Jumper is a free utility program for Windows OS that enables you to change the default DNS server with free third-party DNS servers.
It also has the option to find the fastest free DNS server. Download DNS Jumper, click on the Fastest DNS button, then apply the DNS server.
4. Check your computer’s date and time
Click Start and open Settings.
Open Time and language.
Turn off the Set time automatically option.
Click on the Change button under the Change date and time section.
Set the correct date and time and click the Change button to save the changes.
Security-related network errors are common, and one of the reasons for this can be incorrect dates and time on the computer.
The modern web browser does block the users from accessing any websites thinking it is a phishing attack when the time, date, and timezone on the PC mismatch with its own servers.
You can check the time and date on the taskbar beside the Action Center icon. If the time and date are incorrect, do the following to correct it.
Just make sure you turn on the Set time automatically option before closing the Settings window.
5. Enable Password Protected Sharing
Open Control Panel.
Go to Network and Internet > Network and Sharing Center.
On the left pane, click on Change advanced sharing settings.
Look for Home or Work profile. If you don’t find them, look for All Networks and expand it.
Scroll to the end and select the Turn on password protected sharing option.
Click on the Save changes button.
If you have turned off password-protecting sharing in the network and sharing center for your network, the attackers might be trying to steal your information from error may occur.
Make sure that password-protected sharing is turned on to fix the issue.
6. Check your Internet Security Settings
Different antivirus programs offer different kinds of security and at times security programs may block all the SSL/HTTP connections to/from the network.
For example, if you are using Avast security, try to disable Webshield security or go to customization for Web Shield and turn off the HTTPS scanning option.
Check for similar settings in other security programs as well. If nothing works, disable the firewall temporarily.
Then, disable antivirus temporarily to see if that makes any difference.
7. Clear browser cache and cookies
Click on Menu > More Tools > Clear browsing data.
Select the time range and set it back to 1 day or 1 week, depending on when the error first occurred.
Check Cookies and other side data and cached images and files option.
Click on the Clear data button to clear the cache.
The bad cache can cause Your connection is not privateerror in Google Chrome and other web browsers. Here is how to clear cache and cookies in Google Chrome and Edge.
8. Use Chrome’s built-in malware removal tool
Open Google Chrome. Click on Menu and select Settings.
Scroll to the end of the page and look for the Reset and Clean up section.
Click on Clean upcomputer.
Click on the Find button to begin the scanning process.
Google Chrome comes with a built-in malware removal tool. The tool will check for any malicious software that might be affecting the browser and remove it.
The tool will scan and remove any harmful software from your computer if found.
9. The problem can be on the server end
If you are facing a connection not private error while visiting a particular website, the problem can be from the owner’s end.
In this situation, you can report the problem to the website administrator and wait for it to be resolved.
The connection is not private – attackers might be trying to steal your information error can be annoying, and we hope one of the mentioned solutions may have helped you resolve the issue.
Make sure to leave a comment if the problem persists or if you have found a new solution. We would try to update the article with any new information available.
Dropbox is a popular file hosting service with its app available on across all the platforms. It offers all the essential features of a cloud drive utility including automatic file synchronization, personal cloud, and client software.
Messenger apps like WhatsApp compress media files to speed up upload and download speed. This is also true for other cloud storage apps like Google Photos.
But what about Dropbox? Does Dropbox compress photos?
How can I find out if Dropbox compresses photos?
If you read the Dropbox blog, it says:
When you open the app, photos, and videos from your iPhone or iPad are saved to Dropbox at their original size and quality in a private Camera Uploads folder.
However, this may not have been the case a few years ago. A simple search on the internet would bring up the results that do show file re-compression with Dropbox.
That said, in our testing, Dropbox doesn’t seem to re-compresses your photos before it uploads them to your account. And there are no visible changes in the image quality.
We uploaded an image to Dropbox with a file size of 4.47 MB and a disk size of 4.48 MB.
After uploading the photo and viewing the details on Dropbox, it shows the photo size as 4.48 MB, which is similar to the disk size shown on PC.
Downloading the same photo did not downgrade the image quality either. The downloaded file retained the same size and image quality.
After brief testing, we can say that Dropbox does not compress photos. Even if there is a compression or re-compression, it is not visible in the uploaded or downloaded images.
So, unlike other cloud services and messaging apps, Dropboxcan be used to share media files without worrying about the loss of quality.
GoG Galaxy is a gaming client that allows you to purchase and play your favorite PC games on the same platform. It is popular as it allows users to customize game data storage and game update settings.
However, many users often find themselves unable to avoid the pesky GoG Galaxy white screen issue.
If you are facing this problem then fret not, and read our comprehensive guide below.
How can I fix the Gog Galaxy white screen problem?
1. Update Graphics Card Drivers
Update via Outbyte Driver Updater
Updating your drivers implies complicated steps like searching manually for all drivers on the specific producer’s website, comparing the versions to the ones that you think you need, and ultimately downloading them one by one.
Even these steps don’t ensure that you didn’t get one of them wrong, which in turn can cause your PC to malfunction.
To ensure that you don’t expose your PC to any risk of installing non-compatible drivers, and perform the entire process automatically, we recommend that you use Outbyte Driver Updater.
Simply download and run the software, and an automatic scan will start to identify the best drivers for your system.
Not only will find the right drivers for your components but it can actually increase the entire system performance by getting the latest manufacturer drivers.
After the driver installation process is completed, restart your computer and run GoG Galaxy again.
Follow the prompt to install and stick to the recommended options. Do not customize download location.
3. Run an SFC scan
Press Windows Key + X together and run Windows PowerShell (as admin).
Type sfc /scannow and then Enter.
Give the scan about 10 minutes to finish.
4. Turn off the Windows firewall
Visit Control Panel and double click on Windows Defender Firewall.
In the submenu to the left, double click on the Turn Windows Defender Firewall on or off option.
Turn of the firewall for public and private networks.
Run the GoG Galaxy to verify any change.
Restore the firewall if no change is detected.
If the issue is fixed by turning off the firewall, this means that your firewall settings are somehow conflicting with the GoG galaxy launch. You may need to peruse your firewall properties.
5. Turn off Full Screen and change resolution
Launch GoG Galaxy and select the game you want to play from the library.
Navigate to the settings icon and click.
Select Additional Executables and the Graphic Mode Setup.
Make sure the Full Screen option is unchecked.
Navigate to the Advanced Settings.
Find the Window Resolution option and set it to 1280×768.
Run GoG Galaxy to verify.
In this guide, we covered how to fix the GoG Galaxy white screen issue. Solving the problem can involve anything from changing your firewall settings to buying a new graphics card.
Feel free to try any of our 5 solutions and let us know which one worked for you in the comments below.
Furthermore, if you have a fix not included in this article, we welcome you to share your knowledge with us.
Investors often get attracted to penny stocks because of their high volatility and low share prices.
That being said, sifting through penny stocks isn’t quite the baby steps to take for an investment portfolio.
According to the SEC (Securities Exchange Commission), penny stocks are securities that trade for less than $5 per share.
Penny stocks are speculative in nature but they are also cheap and great for traders with not much capital.
Useful steps to start day trading penny stocks:
Find a stockbroker: To start trading, you need a stockbroker. A simple search online will give you options, pick one who doesn’t have hidden charges.
Identify the best penny stocks: Use a market scanner to find a hot penny stock. Go for penny stocks with high volume.
Learn different strategies: Test different trading strategies and pick the best that works for you.
Practice risk management: They are known as “high-risk investment” for a reason, and they should be treated as such.
Execute multiple trades: Ensure you invest considerably in different penny stocks to diversify your trading portfolio.
The available software for trading penny stocks is called a trading platform.
Most trading platforms come with all tools you will need to find, analyze, and make excellent risk/reward trades that will fit your need.
What are the best tools for day trading on penny stocks?
StocksToTrade is a unique trading platform that comes equipped with all the tools you will need for the modern market.
It is a one-stop platform that gives you access to news feeds, algorithmic trading analysis, charting analysis, and scanner stock in one place. To try them out, take advantage of their free trial before making a purchase.
Profit.ly is a multifunctional tool that’s partly a social network, educational resource, and an analytical resource tool. You can find members’ experiences in the penny stock trading universe.
They share their entry and exit points and commentaries. Not only would you learn to trade with Profit.ly; you’ll also get advice, and know-how to implement them.
With over three decades under its belt, Eze EMS (formerly called Townsend RealTick) goes down as the best place to find reliable market data. It has an entirely customizable user interface and gives you access to custom tickers.
Joining a trading community is essential to succeed, Townsend RealTick can help out. The minimum funding requirement for Townsend RealTick is $10,000.
Largely regarded as one of the best Penny stock trading tools, Stock Rover is modern and slick. It offers top-notch fair value and margin of safety.
With this tool, you get 10-year historical data for earnings, financial, Morningstart analyst ratings, and dividend database. An advanced feature of Stock Rover is that it lets you correlate your portfolio and screen and balance dividends.
If you’re into book order trading, then you should consider Jigsaw Trading. This tool provides economic indicators, resiting orders, the accurate, current price for multiple stocks, and much more.
Jigsaw offers a unique Tape tool, which lets you measure volume and volatility at one glance. Compared to other similar Penny stock trading tools, Jigsaw is inexpensive and easy to jump on, thanks to the training courses it provides.
Just like every traded stock, day trading penny stocks could sometimes cause a significant drawdown to your investment.
If you feel confident in your trading system, it’s definitely worth your time to educate yourself a little more on how to day trade penny stocks and go for it.
Despite the risks involved in stock trading, penny stocks certainly present amazing potentials.