Users describe encountering a similar situation in the past few days – their Microsoft Edge browser tries to redirect them to Bing.
They see messages such as Connecting to, Processing request or Waiting for in the browser status bar. Instead of blaming the browser itself, users should take into consideration the following scenario.
It is perfectly normal for a site to redirect a browser to another location. However, if your web browser is constantly redirected to Bing, then you are most likely infected with some sort of a browser redirect virus.
For security reasons, you should better act fast and rid of this browser hijacker virus. The purpose of this redirect to Bing is obvious; here’s what one user said:
It sounds like you have a redirect virus that gets money by making you use Bing.
How to remove redirect virus?
Web browser redirects are typically caused by adware programs, browser extensions, addons, as well as various types of malware.
These unwanted programs are either installed manually or come bundled with free programs that you happen to download from the Internet.
To terminate such programs that may redirect you to Bing from Microsoft Edge, you should give a try to Vipre Antivirus.
This award-winning security tool will search your computer for active malware infections and attempt to terminate them so that they won’t interfere with your browsing activities any longer.
If you deal with a stubborn malware that intends to stay, do note that Vipre is known for more than just malware scanning and removal.
This antivirus includes real-time threat intelligence and free customer support for malware remediation into the package as well.
Vipre Antivirus Plus
In addition to making your forget all about your browser redirect virus, Vipre includes free support and it's simple to use!
Moreover, since you’re using Microsoft Edge, another quick solution involves returning to the original settings. Do so instead of letting the malware developers receive huge commissions.
Have the above tips worked for you? Don’t hesitate to share your experience of constantly being redirected to Bing in the comments area below.
Gaming giant Ubisoft is just 3 weeks away from the official launch of their latest big hit: Watch Dogs: Legion.
However, this launch may now be in peril due to unexpected events, to the point where the game may be canceled altogether.
Ubisoft and Crytek have been the victims of ransomware attacks
According to a Twitter post, a ransomware group called Egregor have leaked data on the dark web, claiming that it was stolen from Ubisoft and Crytek’s internal networks.
Apparently, the data was posted on Egregor’s portal on Tuesday, October 13 making it up for grabs by anyone.
Unfortunately, there is no further information regarding how they got hold of the data, nor on how Ubisoft or Crytek have reacted to the claim.
The data posted on Tuesday was not integral, and the ransomware group threatened to release even more of it if their demands were not met.
The ransomware group targeted the latest Watchdogs game
Egregor posted files that suggested that they were in possession of data from one of the company’s Watch Dogs games.
In fact, the group claimed the files were from Watch Dogs: Legion, although it was impossible to verify whether the files were from it, or from an older title.
Neither Ubisoft nor Crytek reported any incidents or data leaks, so players are now hoping that the launch of Watchdogs: Legion will not be delayed, or even canceled.
Do you think the launch of Watch Dogs: Legion is in danger? Lets us know what you think of this situation by leaving us a message in the comments section below.
Millions of users rely on Dropbox to store, access, and share their documents. This cloud storage service allows users to create a dedicated folder on their computers.
As expected, this will be synchronized so that they can access the same content irrespective of the device they use. Dropbox is a complex service, and sometimes it’s affected by various technical issues.
One of the most frequent bugs causes Dropbox to immediately close when users launch it. The Dropbox folder disappears from the screen, preventing files from syncing.
If you’re experiencing Dropbox crashes in Windows 10, follow the steps listed below to solve this problem. But before that, here are some more potential issues.
What can I do if the Dropbox app crashes as soon as it opens?
1. Disable your antivirus/add Dropbox to the exception list
If Dropbox keeps crashing, maybe your antivirus simply blocks it. To prevent that, you should find your way into Settings and add Dropbox to the list of exceptions.
Another option that we strongly recommend is to change your antivirus. Long story short, Vipre is the least intrusive solution that you can currently find and it brings much more to the table.
Well, it includes some useful bonus features not found in similar antivirus choices, including anti-threat protection and free, full-scale tech support.
It always comes a time when extra help for getting rid of a particularly stubborn piece of malware is required. In such cases, you’ll feel happier than ever for choosing Vipre over any other solution.
Vipre Antivirus Plus
In addition to making your forget all about Dropbox crashing issue, Vipre includes free support and award-winning protection!
Apply any Selective Sync settings valid prior to the reinstall > wait until Dropbox reindexes your files.
3. Use an error-free alternative – Zoolz
When you lack the time to go through all these troubleshooting steps, let us tell you more about an approach that can move things along.
Dropbox was your initial choice, that’s true. However, this doesn’t mean that you cannot give a try to an error-free alternative such as Zoolz.
You’re about to enjoy quite a few major advantages: no speed or size limits placed on uploads and downloads, ultra-secure AWS infrastructure, as well as multi-faceted backup.
Moreover, it’s known to have a minimum performance impact on end-user, so you’ll continue your daily activities and never worry about Zoolz crashing or interfering with your system in any way.
Zoolz
If you’re tired of Dropbox crashing issues, try out Zoolz. This tool truly is user-friendly and error-free!
Make sure that the Windows account you install Dropbox on is an Administrator account. Some users also report that after they add a password to their Windows account, Dropbox stops crashing.
Apparently, the Dropbox crashes can also be caused by permission issues.
6. Try installing Dropbox from the Microsoft Store
You probably prefer the regular, win32 version of Dropbox, but there’s also a UWP version, and it’s quite good. Additionally, UWP apps (should) work better in Windows 10, so you really have nothing to lose.
Just head over to the Microsoft Store, download and install the UWP version of Dropbox, and see if you have more luck with this app.
7. Check your firewall and add Dropbox to the exception list
Go to Allow an app or feature through Windows Defender Firewall.
Scroll down through the list of apps, and find Dropbox.
Make sure to check both Private and Public.
Save the changes and restart your computer.
Since Dropbox is not a first-party program, there’s a chance Windows Firewall will block it.
If that’s the case, you don’t really need to fully disable the firewall to make Dropbox working. You can just add it to the exceptions list by using the above steps.
8. Run the App Troubleshooter
Go to Settings.
Navigate to Updates & Security > Troubleshoot.
Click Windows Store Apps and choose Run the troubleshooter.
Wait for the troubleshooter to finish the process.
Restart your PC.
If you’re having problems with the UWP version of the app, you should run the built-in app troubleshooter to potentially resolve the problems.
If you’re having trouble opening the Settings app, just check out this detailed guide to solve the issue.
Go to Settings > Updates & Security > Windows Update.
Go to Update history > Uninstall updates.
Now, find the latest update installed on your computer (you can sort updates by date), right-click it, and go to Uninstall.
Restart your computer.
As we said above, you never know with Windows updates. So, it’s also possible for a Windows update to disrupt your system, and break some apps or programs.
If installing the latest updates didn’t get the job done (or even made the problem worse), let’s flip the philosophy and uninstall the latest Windows update. Use the above steps in that regard.
Do note that Dropbox issues may take various forms. To be more precise, users often complain about:
Dropbox keeps crashing – If Dropbox crashes, it’ll usually give you an error message. So, use that message to determine how to resolve the problem.
Dropbox keeps indexing – It’s also common for Dropbox to get stuck indexing. If that’s what bothers you, apply the solutions from this article.
Dropbox not connecting – If you have problems connecting Dropbox to the internet, make sure everything’s alright with your internet connection. If everything’s fine, move on to the solutions listed below.
Dropbox not syncing – The same applies to sync problems with Dropbox.
These above solutions should help you to fix Dropbox’s annoying crashes. If you’ve come across other workarounds to fix this problem, list the troubleshooting steps in the comments section below.
After previous reports revealed that Microsoft was apparently pushing the installation of Office PWAs to the PCs of some Windows Insiders, it appears that the company has also been doing the same with some non-Insider Windows 10 users. This weekend Sean Hollister from The Verge wrote a post to complain about the forced installation after seeing the Office PWAs appear on his Windows 10 PC after a forced reboot.
Here’s Hollister recap of the events that led him to write a probably justified rant:
I stepped away from my computer for dinner, halfway through writing a story for The Verge. When I got back, I couldn’t believe my eyes.
Windows 10 had restarted my computer without permission yet again — to install yet another forced OS update onto my solid state drive.
The craziest part: When my machine finished rebooting, it now contained the exact thing I’d been writing about before I was rudely interrupted. Microsoft had installed unsolicited, unwanted web app versions of Word, PowerPoint, Excel and Outlook onto my computer.
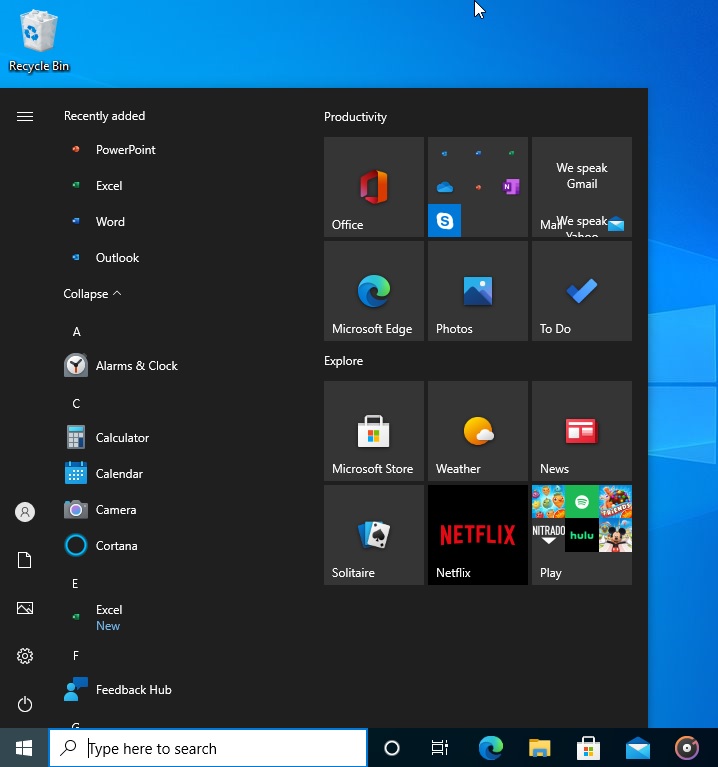
Hollister also pointed out that “Microsoft Office apps have magically appeared in my Start Menu, even though I’ve never once installed Office on this computer?” It’s not exactly clear why Microsoft started this experiment that seems to be pissing off Windows 10 users, and we also don’t know if many non-Insiders have been affected. On our end, we have yet to see these Office PWAs being pushed on our PCs.
This is a pretty strange situation, and Microsoft has yet to comment on the matter. “I’ve asked Microsoft several times for a response on what’s going on over the past two days and have received no information from the company,” Mary Jo Foley from ZDNet wrote on Friday, October 16. Fortunately, these Office PWAs can be uninstalled quite easily, but let us know in the comments if you’ve recently seen appear on your PC without your consent.
Update 10:10AM PT: ZDNet’s Mary Jo Foley heard from sources that Microsoft is about to stop forcing the installation of Office PWAs to Windows 10 users, which could be the result of a bug linked to the rollout of the new Chromium-based Edge. It’s not new that Microsoft has been pinning Office web apps shortcuts to the Start Menu on Windows 10 PCs where Office isn’t installed, but clicking these links used to open the Office web apps in the legacy Edge browser. With the transition to the new Chromium-based Edge, which can now “install” any website as an app, it seems that these pinned Office apps shortcuts have been transformed into installed Edge apps. “My contacts say that Microsoft plan to hold any further rollout of the migration while they figure out how to stop it from forcibly installing Office PWAs on Windows 10 users,” Foley wrote.
Apex Legends is the latest battle royale blockbuster for Windows that EA and Respawn released on Origin.
However, some Apex players have stated that the game crashes with some regularity since Respawn launched it in February 2019. One player stated:
I am writing this because I am one of the people who would very much enjoy and love your new game APEX LEGENDS; however, currently I am not enjoying your game because it keeps crashing non-stop WITH NO ERROR and not because I have a crappy PC.
Thus, Apex Legends crashes with some regularity for some players without any error message. So, there are no clues for potential resolutions within an error message. Nor has EA provided official resolutions or an update that fixes the Apex Legends crashing.
However, some players have still discovered some resolutions for fixing Apex. These are some of the resolutions that might fix Apex crashing.
Users should make sure that they have the most updated graphics card drivers for the GPUs, and this can easily be done if they have Outbyte Driver Updater.
This lightweight utility is extremely efficient, identifying all drivers on your PC that are either old, broken, or missing entirely.
It will then proceed to download the latest ones and install them on your PC with you only having to select which to fix or not.
Outbyte Driver Updater doesn’t just fix GPU drivers, it also handles drivers from peripherals as well, any device you have connected to your PC will have the latest drivers as well.
Outbyte Driver Updater
This app will update and fix your GPU drivers in an instant so that you can play APex Legends without any issues!
Reinstalling the Origin client software will ensure that players have the very latest version of the software. Origin games will likely run better with the latest version of the client software installed.
5. Repair the Easy Anti-Cheat service
First, open the Apex Legends game folder.
Next, open the Easy Anti-Cheat subfolder.
Then right-click Easy Anti-Cheat and select Run as administrator.
Press the Repair Service button on Easy Anti-Cheat setup window.
Thereafter, press the Finish button.
Apex crashing can also be due to the Easy Anti-Cheat service. So, repairing Easy Anti-Cheat is a potential fix.
6. Place a Restriction on the game’s frame rate
Open Origin.
Click My Game Library to open the game library.
Right-click Apex Legends and select Game Properties.
Select the Advanced Launch Options tab.
Then input +fps_max 100 in the Command line arguments text box.
Press the Save button.
Some users have said that they’ve fixed Apex by establishing a max 100 frame rate for the game.
Select the Load system services and Use original boot configuration settings.
Uncheck the Load startup items check box.
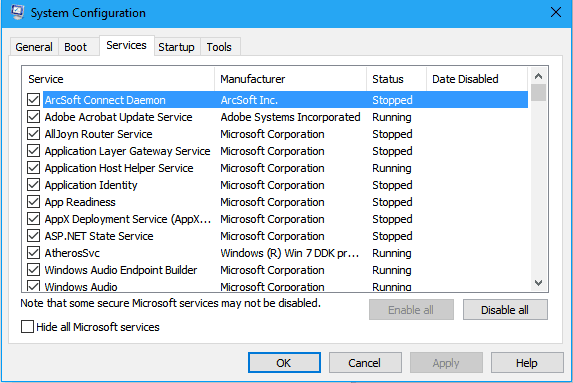
Then select the Services tab shown directly below.
Select the Hide all Microsoft services first, which will exclude more essential services from the list.
Then select the Disable all option.
Select the Apply option.
Press the OK button to exit system configuration.
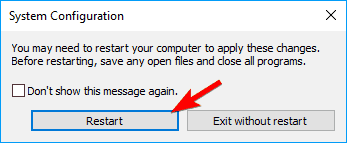
Select the Restart option on the dialog box window that opens.
Clean-booting Windows will ensure that there are no potential software conflicts with antivirus utilities and other programs by removing third-party programs and services from the startup. So, a clean boot might also make some difference.
If Apex doesn’t crash after the clean boot, players will need to figure out what the conflicting software is (most probably antivirus utilities). Then they can restore all the other software in the system startup via Task Manager.
The resolutions above might fix Apex crashing for some players. However, they aren’t guaranteed to fix Apex Legends for all players. Hopefully, EA will release some update patches soon that will resolve some of the game’s bugs.
For further guidance on resolving specific issues like memory problems in Apex Legends, our detailed guide on troubleshooting memory problems in Apex Legends can provide you with more targeted solutions.
The This device cannot find enough free that it can use (code12) error is one that devices’ properties windows display within a Device status box.
That error is a hardware conflict that arises when two devices are assigned the same I/O port. When that error occurs for a device, the device doesn’t work.
For example, users can’t connect to the internet when the code 12 errors occur for network adapters. Here are a few resolutions that might fix the code 12 issue in Windows.
How do I fix the Not enough free resources: Error code 12 error?
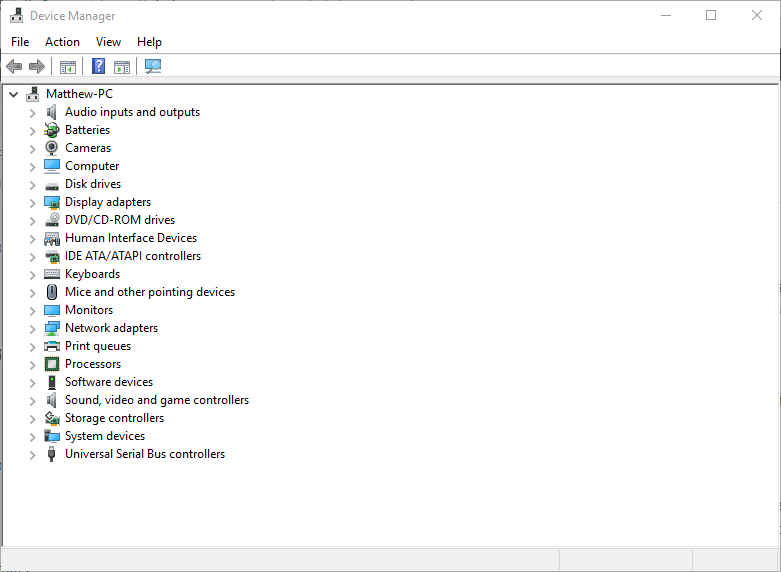
Press the Windows key + X hotkey and select Device Manager on the menu.
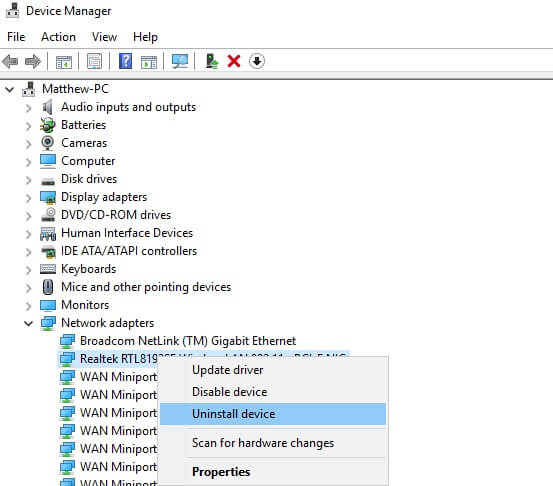
Then right-click the device that displays the code 12 error, which Device Manager highlights with a yellow exclamation mark.
Select Uninstall device on the right-click context menu that opens.
Select the Delete the driver software for this device check box on the dialog box window that opens.
Then press the Uninstall button.
Next, reboot the Windows OS.
Windows might automatically reinstall the device driver after rebooting. However, just to make sure, run a scan with Outbyte Driver Updater.
It is much faster and much more reliable than the method used above primarily because it will guarantee the right drivers are installed, and that they are the latest available version supported by your hardware.
Additionally, it will also fix the drivers that you already have but which are faulty, as well as drivers that are missing altogether from your PC.
Some users have stated on forums that they’ve fixed code 12 by updating the driver for the required device.
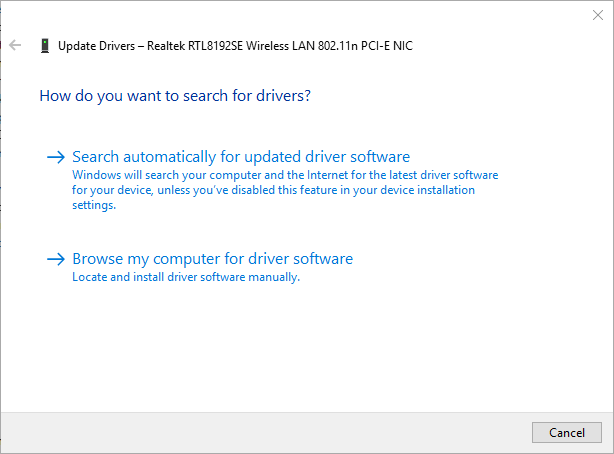
To do that, right-click the device with the yellow exclamation mark listed in the Device Manager window and select Update driver.
Then select the Search automatically for updated driver software option shown directly below. Restart Windows after updating the driver.
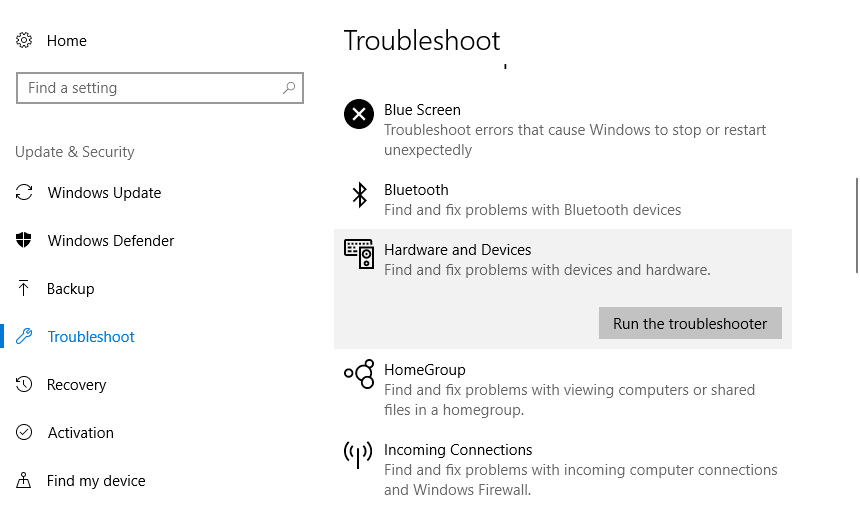
3. Open the Hardware and Devices Troubleshooter
Open the Cortana app by pressing the Type here to search button on the taskbar.
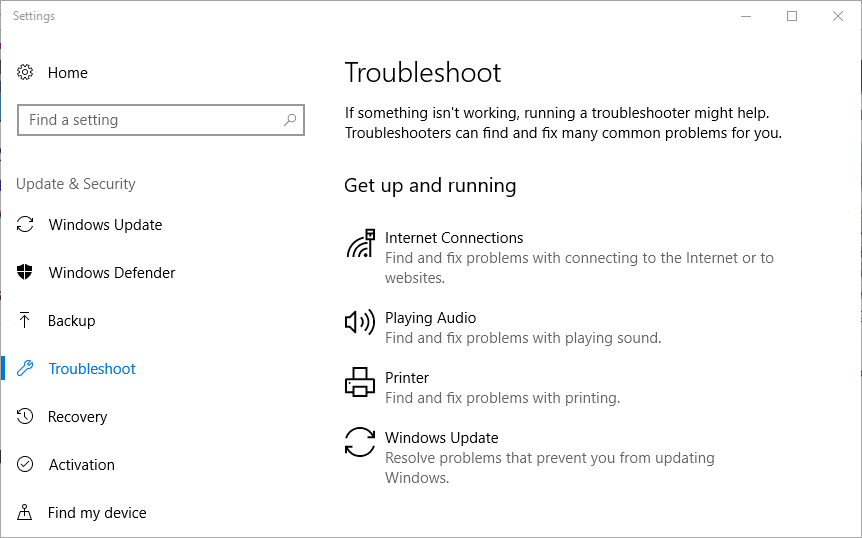
Enter the keyword troubleshoot in the search box and select Troubleshoot to open the window shown directly below.
Select the listed Hardware and Devices troubleshooter as below.
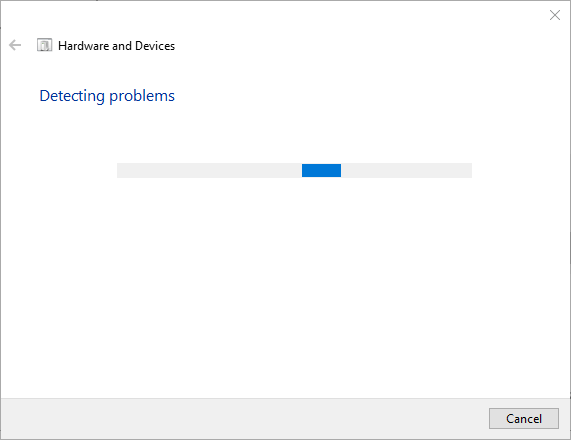
You can press its Run the troubleshooter button to open the window in the image directly below. The troubleshooter might then provide further resolutions.
You can open the Hardware and Devices troubleshooter in other Windows platforms by clicking Troubleshooting > Hardware and Sound within the Control Panel. Then you can select Hardware and Devices to open its window.
The Hardware and Devices troubleshooter could come in handy for fixing code 12. As code 12 is a hardware issue, that troubleshooter might provide a resolution for it.
4. Check Hidden Devices
As the code 12 error is usually a hardware conflict, disabling the conflicting device might also resolve the error.
The code 12 error message even states:
If you want to use this device, you will need to disable one of other devices on this system.
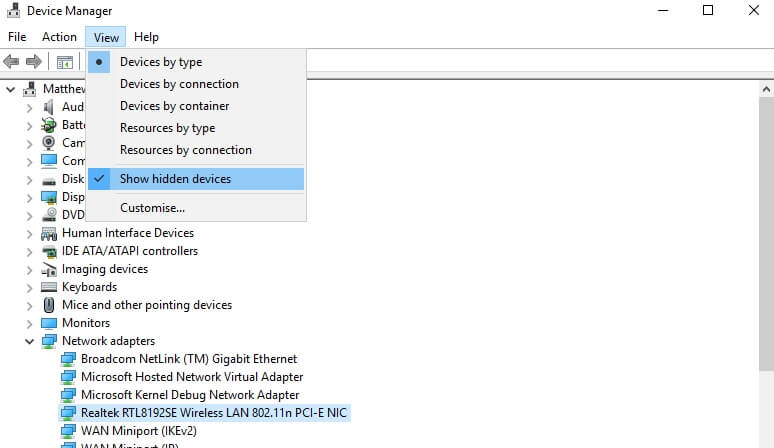
You might find a conflicting device by clicking View and Show hidden devices in Device Manager.
Then Device Manager will show you all devices when you expand their categories. If one of the hidden devices includes an exclamation mark, right-click it and select Disable.
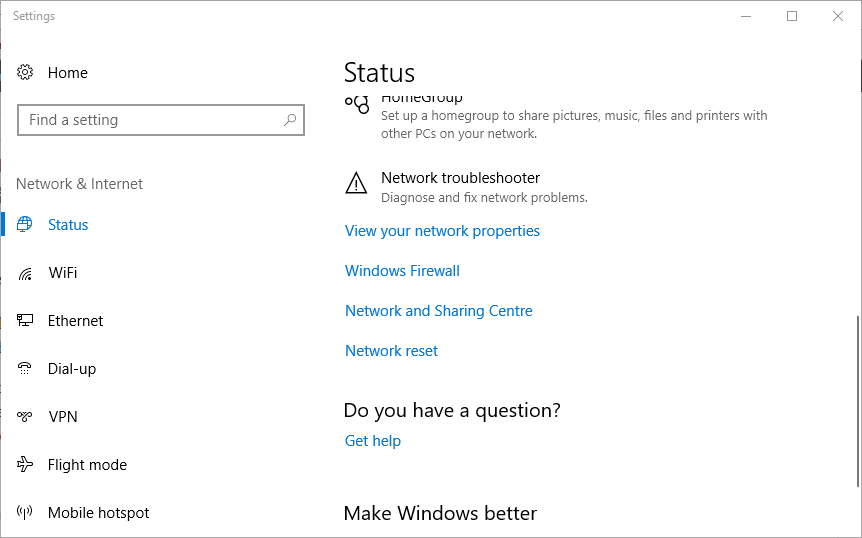
5. Select the Network Reset Option
Open the Cortana app by pressing its Type here to search the taskbar button.
Enter the keyword ‘network’ in the search box to find Network status.
Select to open the Network status window below.
Click Network reset to open further options.
Press the Reset now button.
This code 12 resolution is more specifically for network adapters. Resetting network settings might fix the code 12 error for network adapters.
6. Roll Back Windows to a Restore Point
Open the Run accessory with its Windows + R hotkey.
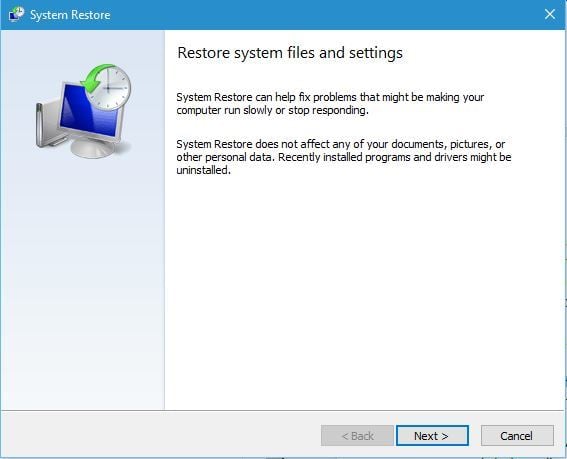
Then input rstrui in Run’s Open text box and click OK to open System Restore.
Click the Next button.
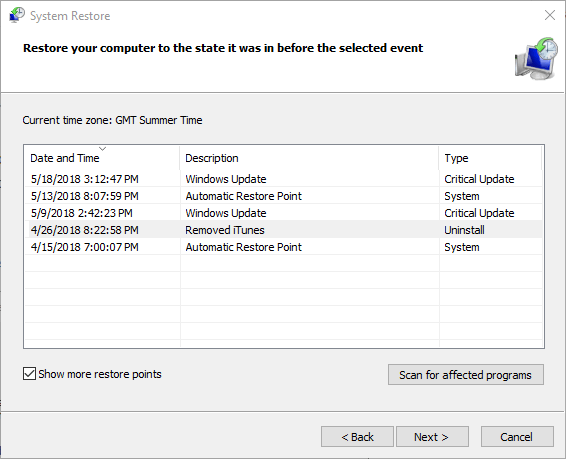
Select the Show more restore points option to expand the list of dates.
Select a restore point that predates Windows Update restore points.
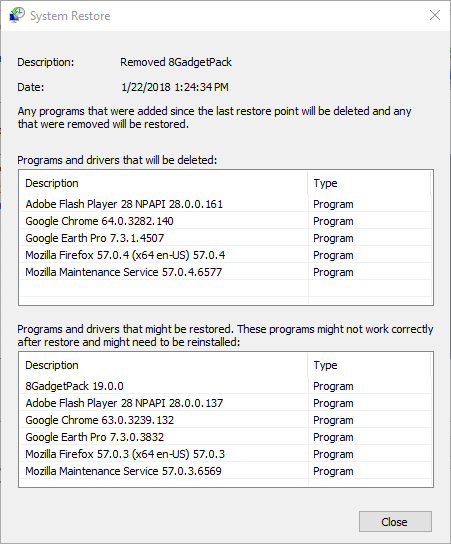
You can check what software gets removed for a restore point by pressing the Scan for affected changes button.
To confirm your selected restore point, press the Next and Finish buttons.
Some users have confirmed that the code 12 error occurs after a Windows update. So the code 12 issue might be due to a recent update.
You can remove recent updates for Windows with the System Restore tool. The only exception is for major updates such as Patch Tuesday Updates, which you can’t roll back with System Restore.
Those are some of the resolutions that have fixed the code 12 error for some users. If you have another fix the code 12 issue, feel free to share it below.
The Failed to initialize SmartAudio error message pops up during Windows startup that pertains to the Conexant High Definition Audio software.
Conexant High Definition Audio comes preinstalled with most modern laptops and desktops. Unfortunately, some users lose sound when that error message pops up. In this guide, we will show you how to fix this error effortlessly.
Why does the Smart Audio error appear?
Listed below are some of the reasons for the failed to initialize SmartAudio error:
Outdated drivers: One of the major causes of the Conexant SmartAudio failing to initialize in Windows 10 error is an outdated driver. Updating the driver to the latest version should solve the problem.
Issues with other audio devices: If you have more than one audio device on your PC, they might interfere with the Conexant software. It would be best if you disabled the other devices to solve this problem.
How can I fix Failed to initialize SmartAudio error?
1. Update the Conexant driver
Press the Windows key + X and select Device Manager.
Double-click the Sound, video, and game controllers option to expand it and right-click the Conexant device.
Now, select the Update driver option.
Finally, select Search automatically for drivers and install the available updates.
Some users have stated on forums that updating the Conexant SmartAudio HD driver has fixed the Failed to initialize SmartAudio error for them.
As Conexant does not provide drivers on its website, it’s probably better to update the drivers with the Windows driver updater.
To make things easier, we strongly recommend Outbyte Driver Updater for that job because it will do that automatically in only a few seconds and clicks.
Outbyte Driver Updater will automatically scan for and list outdated drivers after you download and install it.
Then you can press the Update All button to update the drivers. Alternatively, click the box from the left of the Conexant audio driver and press the Update button from the right.
Outbyte Driver Updater
Updating your drivers quickly with Outbyte Driver Updater will definitely improve your PC's performance.
Press the Windows key + I and select the Update & Security option.
Select Troubleshoot in the left pane and click on Additional troubleshooters.
Now, choose Playing Audio and click the Run the troubleshooter button.
Windows 10 includes a Playing Audio troubleshooter that can fix numerous audio issues. As such, that might provide a fix for the failed to initialize SmartAudio error message.
3. Disable all other audio device drivers
Launch the Device Manager and expand the Sound, video, and game controllers option.
Right-click all the audio devices listed there, except Conexant SmartAudio HD, and select Disable device.
Now, click the Yes button.
Finally, restart your PC.
4. Remove Conexant SmartAudio HD from the Windows startup
Suppose Conexant SmartAudio HD is not your default audio driver and manager. Please remove it from the Windows startup.
Press the Windows key + X and select Task Manager.
Now, select the Startup tab.
Next, right-click the Conexant SmartAudio HD and choose Disable.
Finally, restart your PC.
If you are getting the failed to initialize SmartAudio, the application will now exit error; it might be because the device is initialized correctly on startup. Disabling the app in Task Manager should do the trick.
5. Disable Audio Enhancements for the Conexant Audio Device
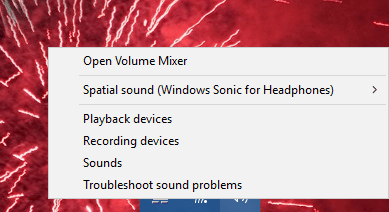
Right-click the speaker system tray icon and select Playback devices.
Right-click the Conexant audio device listed on the Playback tab and select Properties.
Now, select the Enhancements tab.
Select the Disable all enhancements (or Disable all sound effects) option.
Press the Apply button, followed by OK.
If you are facing the failed to initialize SmartAudio error, it might be because of the audio enhancement features. The solution to this is to disable all audio enhancements.
6. Reinstalling Conexant Audio software and driver
Launch the Device Manager and expand the Sound, video, and game controllers option.
Right-click the Conexant SmartAudio device and choose Uninstall device.
Now, check the box for Delete the driver software for this device and click the Uninstall button to confirm the action.
Next, press the Windows key + R, type appwiz.cpl, and click OK.
Right-click the Conexant SmartAudio HD software, select Uninstall, and follow the onscreen instructions to complete the process.
Finally, you can now download the latest version of the software from official sources.
7. Perform a clean boot
Press the Windows key + R, type msconfig, and click OK.
Select Services, check the Hide all Microsoft services box, and click the Disable all button.
Now, click the Startup tab and select Open Task Manager.
Right-click each of the apps there and select Disable.
Next, go back to the System Configuration window and click Apply, followed by OK.
Finally, restart your PC.
Once your PC restarts, check if the Failed to initialize SmartAudio error message is still there. If it doesn’t appear, it means that one of the disabled applications or processes was causing the problem.
In this case, you must keep the service or app disabled to prevent the error message.
Those resolutions will probably resolve the Failed to initialize SmartAudio error message. Aside from those resolutions, rolling Windows back to a restore point with System Restore or restarting the audio service might also fix the issue.
Feel free to let us know the solution that helped you solve the problem in the comments below.
Welcome back to our Windows 10 news recap, where we go over the top stories of the past week in the world of Microsoft’s flagship operating system.
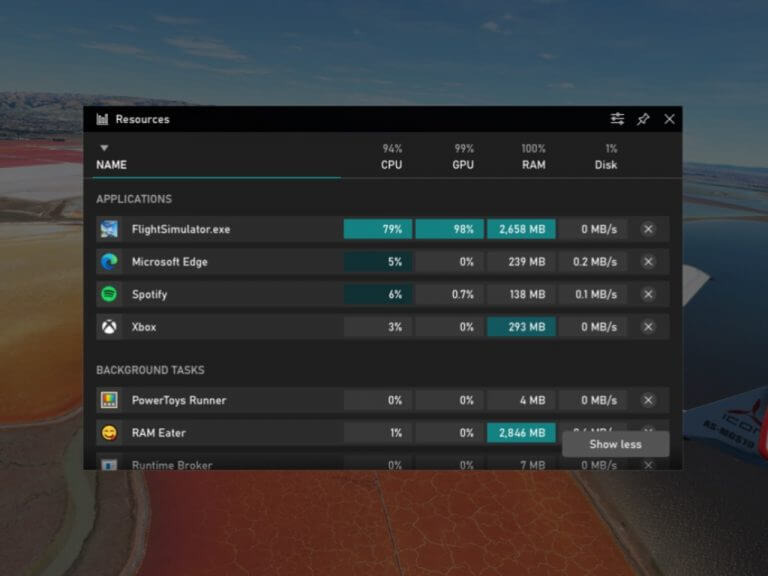
Windows 10 Xbox Game Bar gets new Resources widget
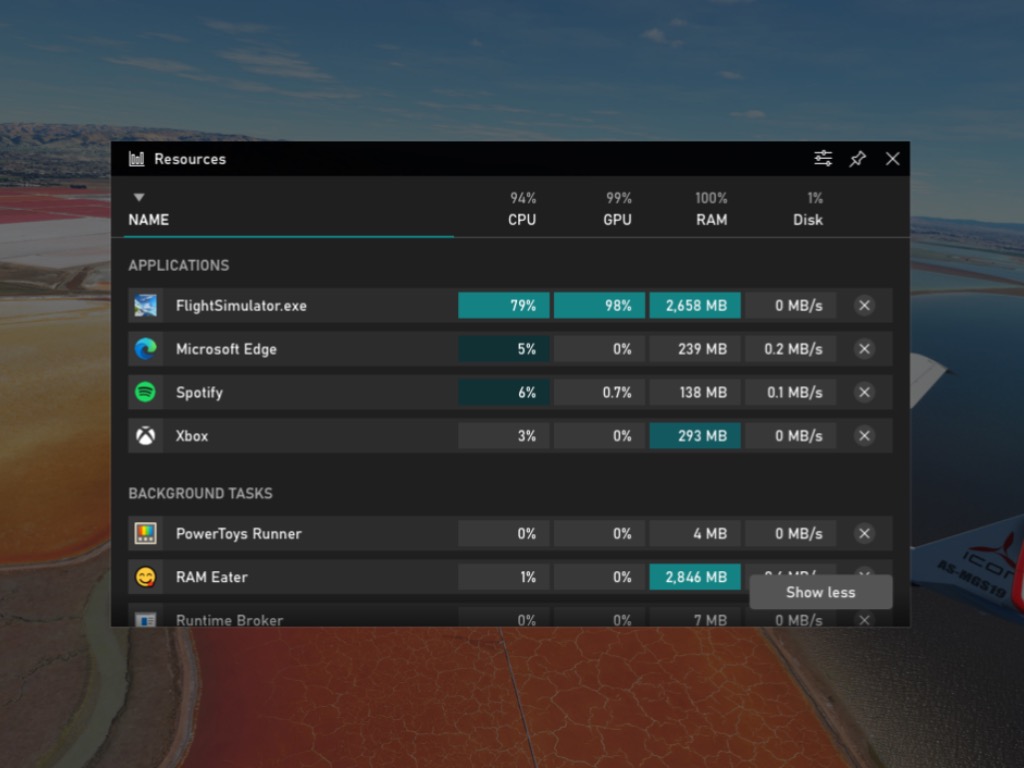
The Xbox Game Bar on Windows 10 has received a new update that adds a new Resources widget. It acts as a useful alternative to Task Manager, allowing you to see how your PCs resources are being used, helping you see what could be bogging your system down.
PC shipments grew some 11% last quarter, thanks to the pandemic
In the last quarter, PC shipments have grown by 11%. PC shipments have generally been declining for the past decade, but it appears the pandemic has helped cause some growth for the sector, as more people work from home and need their own devices, as well as children learning remotely.
Microsoft’s Surface Laptop Go, updated Surface Pro X, and new PC accessories are now available
This week has seen Microsoft begin shipping a couple new devices and a range of accessories. The Surface Laptop Go began shipping, along with the updated Surface Pro X. But a number of accessories, including a new keyboard, mouse, number pad, and a 4K wireless adaptor. You can see all of the new devices and peripherals here.
That’s it for this week. We will be back next week with more Windows 10 news.
Microsoft news recap is a weekly feature highlighting the top Microsoft news stories of the past week. Sit back, grab some coffee, and enjoy the read!
Microsoft extends Xbox Elite Controller Series 2 warranty to one year due to reliability issues
Due to issues with reliability, with Microsoft themselves admitting they’ve seen a small percentage of users experience technical problems with it, Microsoft has extended the warranty from 90 days to 1 year, giving that extra peace of mind.
Microsoft’s revenue sharing deal with GameStop could help drive Xbox Series consoles this generation
This week it was reported that Microsoft has a revenue sharing deal with GameStop, which could allow GameStop to receive a cut of all digital sales made on any Xbox Series consoles they sell, providing an extra incentive for the retailer to push Xbox consoles. It’s seen that this could help drive more sales of the console in this upcoming generation.
Microsoft goes after “largest botnet in the world,” citing trademark law
Microsoft has been granted permission to disrupt one of the world’s largest botnets, making use of copyright claims as a result of malware using Microsoft’s own code. It has also been granted the right to cease internet addresses from 8 hosting providers. The botnet aimed to disrupt the US election by locking up voter registration systems.
The new “voting booths” where you fill out your scantron sheet. Not very private, and not nearly as cool as the old lever machines.
That’s it for this week. We’ll be back next week with more Microsoft news.
Countless users describe that they’ve received a 7-Zip CRC failed error when attempting to extract a ZIP archive that may or may not contain large files.
It’s difficult to establish a pattern and identify the culprit from the start. There are times when the application ceases to function properly or when you experience a sudden interruption while downloading the files.
As you already know, the 7-Zip files become inaccessible after the CRC error, so it’s only natural to look for quick ways to solve it.
Luckily, there are a few easy methods to follow in order to achieve your goal. Just follow the procedures detailed below and you should be able to continue your download in no time.
How can I fix the 7-Zip CRC failed error?
1. Try out a different file compression tool
The malfunctioning of the 7-Zip application itself is the most common cause of CRC errors. Instead of wasting your time with repair tools that could supposedly unzip or rewrite the archive, use WinZip from the very start.
It is very simple to forget all about these issues with the help of an alternative file compression software like this one.
With WinZip you can unzip all major file formats – that’s confirmed already by users worldwide. So, before thinking that the contents of the archive under discussion are altered for good, install this tool.
You’re also about to take advantage of banking-level encryption, intuitive Background Tools, not to mention that you’ll be able to organize your photos in the cloud.
With this being said, using such an archive option will sure deliver great support and keep you away from errors when you extract your files.
The file integrity of your archive’s contents is also of main interest in this case. Corruption cases caused by viruses and malware are nothing out of the ordinary, so this should be your next step.
We’re referring to a deep scan of your system. However, make sure that you use an appropriate antivirus for this task.
For example, using reliable antivirus tools will protect you against malware, ransomware, malicious websites, countless online threats, and remove them with extreme ease.
After all, it’s essential to make sure that your system is free from viruses before downloading any important archives on it.
3. Make sure that you use the latest 7-ZIP version
If you’re determined to solve the 7-ZIP CRC failed error, double-check that you currently use the latest version of the program.
As it usually happens, the newest versions give you access to new features and improve stability, not to mention the changes related to the size limit of your files.
4. Check if your Internet connection is unstable
As a quick reminder, wireless networks in busy places have way too many devices trying to connect to them at once.
Therefore, downloading the 7-Zip archive from a computer at your university may not be a wise choice. If you’re at home, however, also make sure that you don’t deal with an unstable wireless connection.
You might have come across the ZIP or RAR archive formats that are widely used by developers to package their software.
If the software is packaged in a ZIP or RAR, you can extract these formats with file archivers. You can also set up your own compressed file formats with those utilities to save some disk space.
A file archiver is a fairly essential bit of kit. Windows 10 File Explorer does include an Extract all option.
However, you can only decompress ZIPs with that button. So, Microsoft needs to enhance Windows’ limited file archive options.
These are some of the best open-source file archivers for Windows 10.
What are the best open-source file archivers to save disk space?
Disclaimer: Although WinZip is not an open-source software tool, it can be used and tested over 30 days with full functionality, giving you plenty of time to test its features and decide whether it is worth it.
Our first recommendation would be WinZip – the most popular file encryption and compression tool.
This great software lets you easily share, compress, and backup files.
This software allows you to find, open, edit, move, and share the files stored on PCs, networks, or cloud services.
The tool can be fully integrated with Dropbox, G-Suite, or OneDrive.
Key features include:
Archive repair
Data Backup
File merging
File management
Cloud support
WinZip
Use the amazing WinZip software to safely archive your files for more disk space.
7-Zip is one of the most highly-rated archive utilities for Windows. This doesn’t have an especially stylish UI, but it’s an effective tool for packing and unpacking file archives.
This software can decompress a variety of compressed files such as ZIP, RAR, AR, VHD, Z, ISO, MBR, LZMA, UDF, VDI, NTFS, CAB, and more.
It can also compress several archive formats including its very own 7z format that splits files into multiple archives.
The software has a compression ratio of 2 – 10% for the GZIP and ZIP formats. Another advantage of this utility is that it integrates with File Explorer so you can select 7-Zip options from folder context menus.
In addition, it also provides AES-256 encryption so you can add passwords to ZIP and 7z archive formats.
PeaZip is another of the best open-source archive utilities that’s compatible with the 32/64-bit Windows and Linux platforms and also has a portable version.
This is a utility that works with more than 150 archive formats, and it provides full read/write support for ZIP, WIM, GZ, 7z, UPX, TAR, Bz2, and PeaZip’s PEA format.
This tool has a slightly more engaging UI design than 7-Zip, and it also adds some handy extra options and shortcuts to File Explorer’s context menu.
The software also provides encryption options for its users so that you can encode archives with the password manager. Another good thing about this utility is that you can repair damaged archives with it.
Other PeaZip comprehensive features are:
Novice-friendly
Operating PeaZip is as easy as dragging files
Decompression mode
Well-labeled buttons and simple functions
PeaZip allows applying powerful multiple search filters to archive
B1 Free Archiver is a multiplatform compression utility for Windows, Android, Mac, and Linux that has had glowing reviews.
This software enables you to open all the main archive formats such as ZIP, 7z, GZIP, TAR, ISO, RAR, CAB, and its own B1 archive file.
However, its archive creation is limited to only the B1 and ZIP formats. It gives you various compression modes, and users can also split and encrypt archives.
These are five great open-source file archivers for Windows 10 and other platforms. With the utilities, you can extract or compress files with a variety of archive formats, fix archives, and encrypt compressed files.
Spamming is the act of sending unsolicited messages via electronic messaging systems. This type of unwanted email consumes your corporate email bandwidth but can also affect in a negative way employee productivity.
For these reasons. it is very important that companies use good anti-spam software on their email servers.
Once installed on your mail servers, anti-spam software will block all spamemails based on different criteria – sender’s email address, subject line, the message in the body, type of attachments in the email, etc.
Over time, spamming has evolved and it’s no longer just about annoying emails, now spam poses real security threats. Emails can be used as gateways or entry points for malware.
For this reason, reliable good anti-spam software solutions will offer protection against email-borne malware as well.
In this article, we will explore the best anti-spam software to use on email servers.
This application provides top-rated antispam and antimalware for mail servers and ensures a secure messaging and collaboration environment with a low impact on resource consumption.
GravityZone Security from BitDefender employs multi-layer protection against any kind of spam or phishing attack through email messages.
It is based on BitDefender’s Global Protective Network and offers you real-time protection for your PC.
The multi-layered protection from Bitdefender has antispam, anti-phishing, antivirus, and anti-malware capabilities with behavioral analysis included. It can also filter traffic including attachments.
One of the best features of GravityZone is the top of the range heuristic antispam filter, called APM (Advanced Pattern Matching).
APM is a filter based on artificial neural networks and is trained on large volumes of spam messages.
During this training, APM learns how to recognize new spam by comparing the subtle similarities with the examples from the Bitdefender Antispam Lab.
Another very important feature of GravityZone is the Real-Time Data Analysis (RTDA) option that employs a Global protective Network security cloud to detect spam messages even before you have opened the email.
Let’s quickly look at its key features:
Secure messaging and collaboration environments for both external and internal threats
Protects physical and virtual mail servers
Centralized management and reporting
On-demand Antimalware scanning
Integration with Active Directory, VMware vCenter, Citrix XenServer
Bitdefender Gravity Zone
A complete cybersecurity solution to take care of your business end-to-end. Bitdefender only delivers the best results!
VIPRE delivers the ultimate protection for your endpoints against the most sophisticated threats. And it does so by combining real-time behavioral analysis techniques with machine learning.
This modern endpoint solution will take care of your entire infrastructure, servers included, and ensure your organization is up and running as expected.
Let’s quickly look at its key features:
Multi-layer protection to secure your files, apps, servers, and network
Comprehensive reports and dashboards to monitor the endpoint environment status at all times
Centralized management for all your assets
Modern interface with cross-platform compatibility
Powerful protection against all kinds of known and emerging threats
VIPRE Endpoint Protection
Why settle for less when you can get the ultimate protection? Activate the most powerful endpoint security solution from VIPRE!
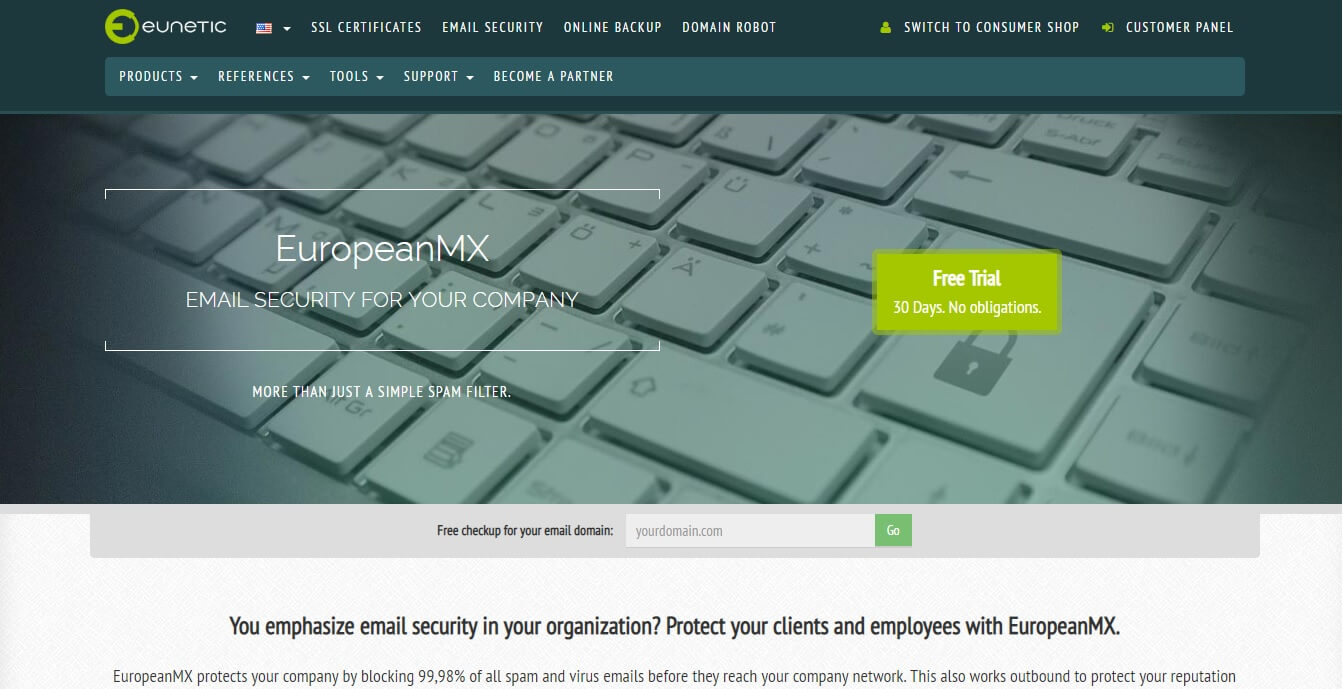
EuropeanMX has the ability to protect your company’s network by blocking 99.98% of all spam and virus emails before they have access to your network.
This software also works outbound in order to protect your reputation and clients.
Let’s quickly look at its key features:
Encrypted cloud storage to easily archive all your emails according to international law regulations (GDPdU, Sarbanes Oxley, SEC-Rules).
Reliable spam filters to increase productivity and long-term savings of both time and money
Self-adaptive and high-performance database (to store spam and malware in the program’s quarantine box without interfering with the emails)
Mailbox protection against spam, viruses, phishing, info harvesting, and other malware attacks for botnets and spammers
It protects your IP ranges before getting blacklisted (automatically lock hijacked accounts, block outgoing spam, and lets you know about any suspicious activity)
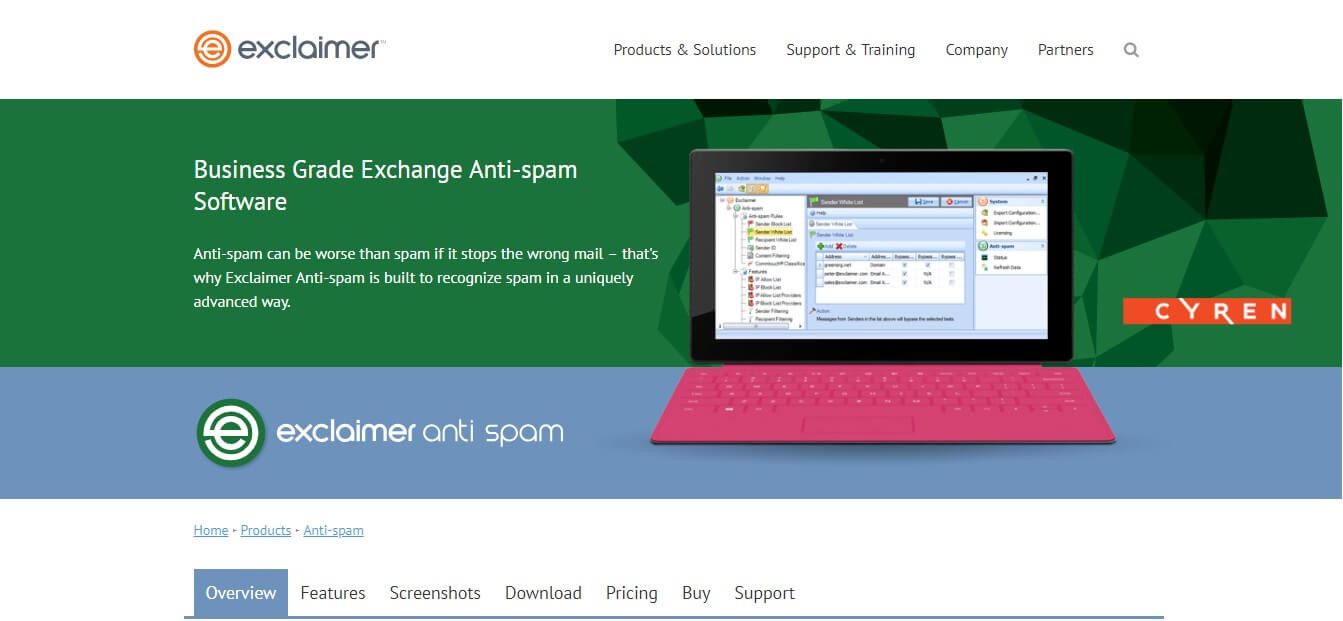
Exclaimer AntiSpam uses the Recurrent Pattern Detection engine from CYREN to compare every email you receive to the global spam traffic trends.
It’s syntax analysis and word filtering features can identify a spam email by comparing it’s ‘fingerprints’ to millions of other similar emails sent across the globe.
The RPD engine can easily identify spam even in situations in which spambots randomize portions of the email message or paste grammatically correct content inside the email.
Exclaimer analyzes spam emails sent across the globe and compares them to the emails in your inbox.
GFI Mail Essentials is another very capable option of anti-spam protection for your email. This program provides anti-spam and email security for your mail servers keeping your network secure and block any spam.
GFI MailEssentials features advanced malware protection that enables IT admins to secure their email infrastructure from the new breed of malware that creates different variants of itself to avoid detection.
Let’s quickly look at its key features:
Powerful and effective business spam filtering
Up to five antivirus engines
Scan for email-based exploits and malicious executables
You can install it on different serves and synchronizes the configuration across the entire network
Blocks phishing and spyware emails before reaching users inbox
Configure user-based or group-based rules
POP3 downloader, company-wide disclaimers, list server, email monitoring
Another good software option that can protect your email servers is MX GuardDog. It has the ability to stop spam in the cloud before it reaches your Exchange Server.
MxGuardDog scans your email for spam, phishing attacks, malware, and viruses. All the emails that are suspicious will be moved to secure quarantine on their network.
You will receive a quarantine report containing recently stopped messages and details about it, so you can easily decide if you want to see or lock up the attachments.
Let’s quickly look at its key features:
Quick setup with no changes needed to your Exchange infrastructure
Strong encryption using Transport Layer Security (TLS) and Perfect Forward Security (PFS)
LDAP Sync – easily syncs any changes regarding users on your Exchange server
100% transparent quarantine reports
AD & cPanel syncing
Outage protect – 168 hour spooling – stores your emails even if your server is unavailable
In this article, we listed some of the best tools the market has to offer for protecting your Exchange server from spam, phishing, malware, viruses, and other threats.
The long-range features in the software options presented in this guide will surely allow you to run your business or home server without spam problems.
Let us know what you chose from this list by reaching for the comments section below.
Kik Messenger is a popular instant messaging app for Android devices. Unlike other popular instant messaging apps like WhatsApp, Kik does not offer backup and restore chats feature to its users. However, at times you may want to restore deleted Kik messages and pictures on Android.
Kik, by default, does not offer any way to backup and restore Kik messages. However, there a few workarounds that you can try to recover the deleted Kik message.
In this article, we show you how to restore deleted Kik messages & pictures on Android devices.
How do I recover my deleted Kik Messages & photos?
1. Recover deleted messages with AnyMp4 Data Recovery
AnyMP4 Android Data Recovery is a popular Android data recovery software. It helps you recover deleted and lost Android files, including Kik photos.
AnyMP4 Android Data Recovery can recover all kinds of data, including contacts, text messages, WhatsApp & Attachment, call history, photos, music, videos, notes, and documents.
To recover your Kik messages, launch AnyMP4 Android Data Recovery, connect your Android device to your PC, and perform a scan. Preview the files that you want to restore and then proceed to restore the selected data.
Recover lost contacts, messages, attachments, and calls logs.
Enables you to recover data from broken devices.
Backup photos, music, video, and documents from your Android phone.
Supports all versions of Android and smartphones.
Quick Tip: Backup Kik messages with backup apps
Apps like AnyMP4 Android Data Recovery comes with backup and recovery features. Launch the app and check if you can backup Kik messages. You can also use the recovery apps to back up media files, contacts, and documents and then restore them with one click as well.
AnyMp4 Android Data Recovery
Easily recover deleted Kik messages on Android by using this powerful software today!
Scroll down and tap on Account. Login with the credentials if required.
Select the Backup and Restore option.
Tap on the Restore option.
Find any Kik messenger backup and proceed to restore.
All the Android devices have a built-in backup and restore option that you can use to restore backups. Since Kik does not offer any built-in option to backup chats, so you can only hope to find some media files, if any.
How to Backup Kik messages
Since Kik doesn’t have a default backup option, you must create a backup of any important messages that you want to preserve by yourself. Here’s what you can do to
If you are an Android user, try taking a screenshot of any important message and save it to the gallery. Open Kik and then open the chat room of which you want to take a screenshot.
Use the built-in screen capturing option to grab a few quick screenshots. Most of the Android phones use the Power and Volume button combination to save a screenshot.
Unlike other instant messaging apps, Kik does not provide an option to backup chat history and media. Your only option is to try third-party recovery apps or check for any backups in the Android settings.
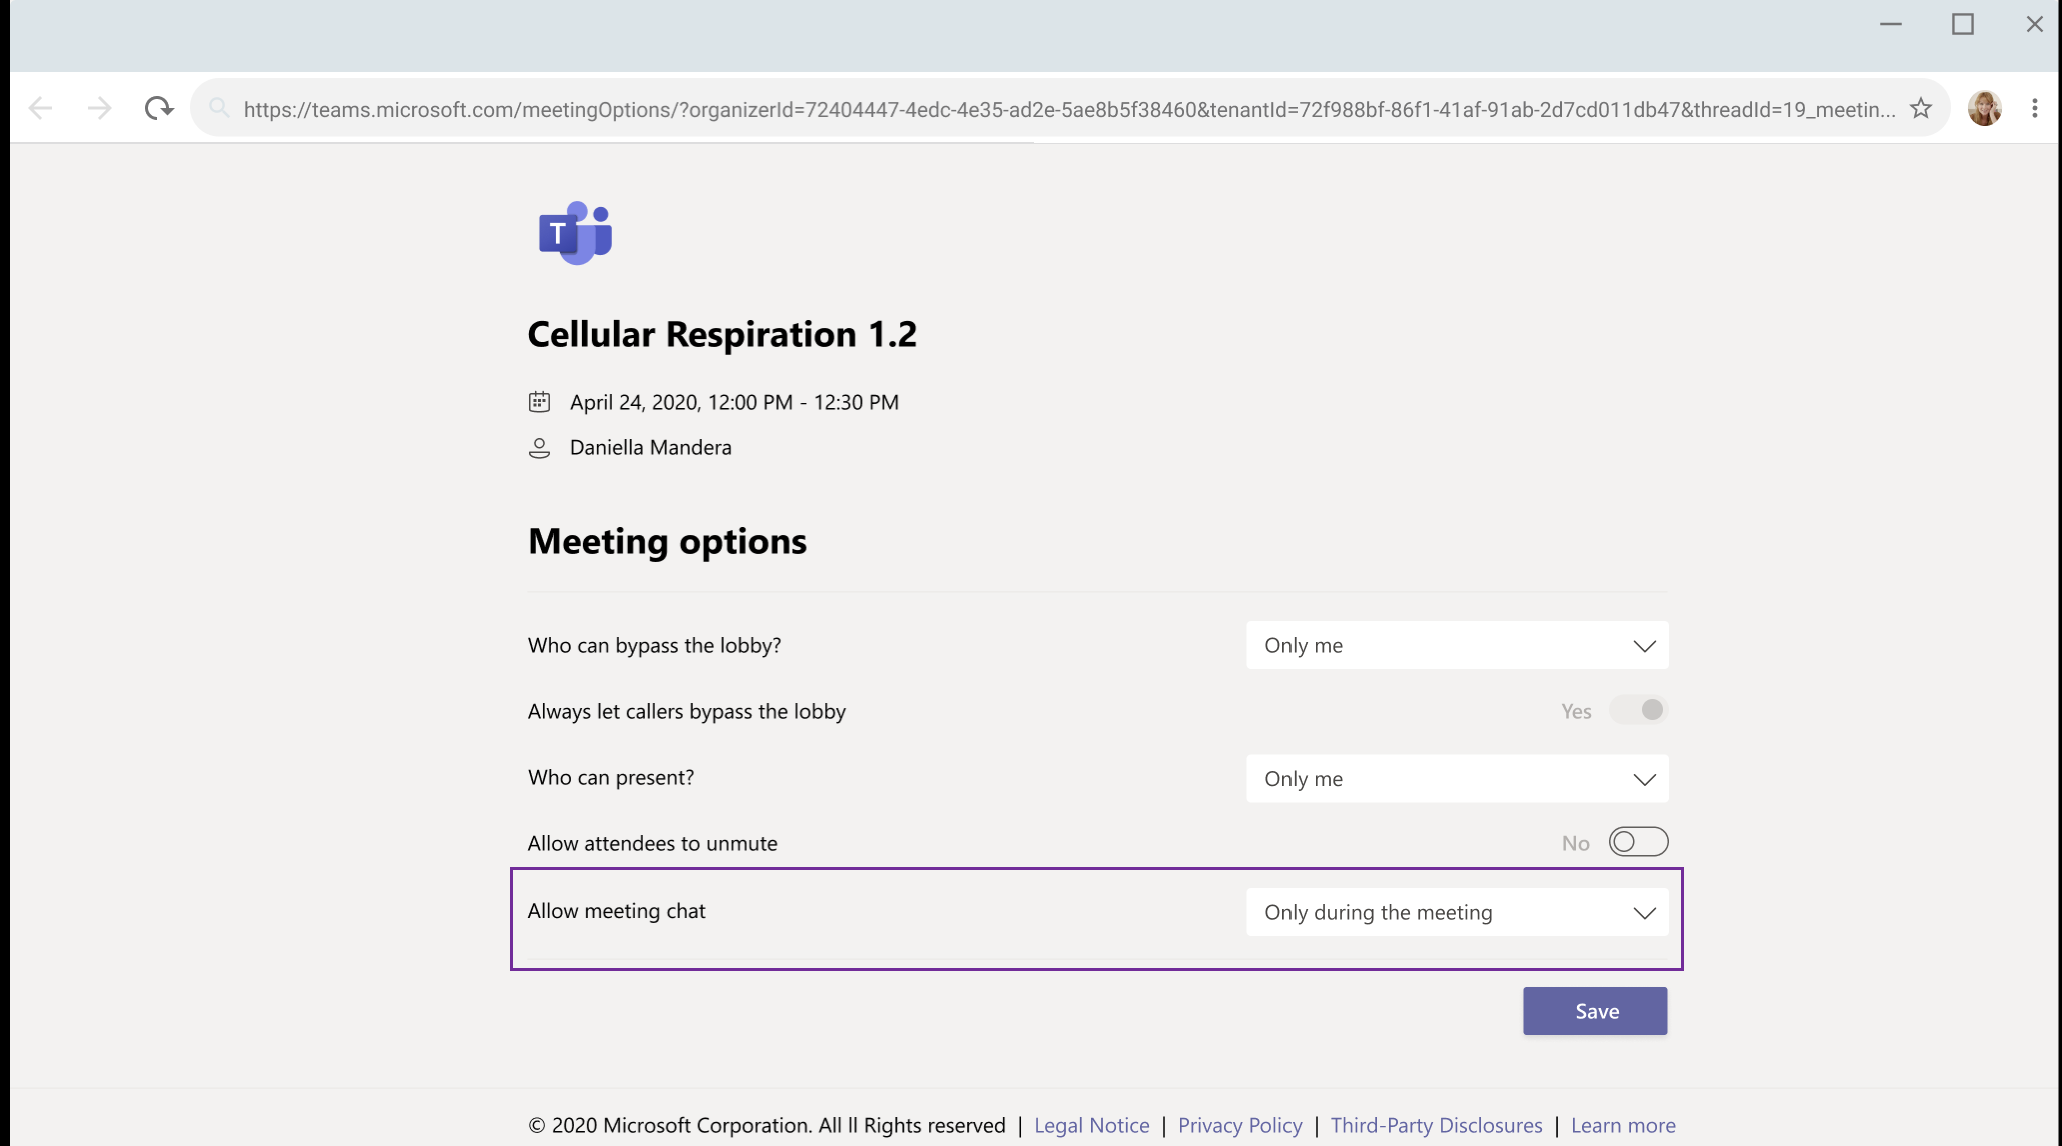
Microsoft is working on a new feature, which will give meeting organizers the ability to turn off the chat functionality during Teams meetings. This feature is in development and coming in November, according to the Microsoft 365 roadmap.
As a reminder, the feature builds on the already popular “Hard Mute” feature in Teams. It allows the meeting organizers to mute audio from all attendees. The company has listened to the feedback from its users to implement the new Meeting chat moderation settings.
The Meeting option has been designed to enable the meeting organizers to manage participants’ ability to chat before, during, and after a Teams meeting. Once the change starts rolling out, the organizer of the meeting will be able to set the “Allow meeting chat” setting within the Meeting options to On, Off, or during the meeting only.
In the remote-work era, Teams meeting conversation can get quite “noisy” in large meetings. As the session continues, a couple of important points may generate a lot of discussions. Indeed, Microsoft wants to address this issue by updating the Meeting options. This feature comes in extremely handy for the organizers to concentrate on the work at hand without being distracted by messages from their team.
How do you think the new meeting option will impact your work? Let us know in the comments down below.
A new update for the Windows 10 Xbox Game Bar is introducing a new Resources widget that let PC gamers see at a glance which apps are using too many resources. This is a handy alternative to Task Manager for closing apps certain apps, and this Resources widget includes a two-columns compact view displaying an “Impact level” for every background apps, as well as a more detailed view displaying CPU, GPU, RAM, and disk usage for each app.
In addition to this new Resources widget, this latest Game Bar Update adds a new GPU usage indicator to the Performance widget, and the Settings section will also tell you if your PC supports Microsoft’s new DirectX12 Ultimate API. You can find the full release notes below:
The new Resources Widget helps you identify and manage which apps are using system resources like CPU, GPU, RAM, and Disk. At a glance, or digging into the details, be sure you’re making the most of your system without leaving the game.
DirectX 12 Ultimate enables the latest cutting edge graphics features, and you check the Gaming features Hub within Game Bar settings to make sure you’re ready for the future.
The Performance widget now includes GPU Memory usage monitoring
It’s now easier to see what you’re recording using the Capture widget, which will now show the current target app.
Microsoft’s Xbox Game Bar overlay recently gained a third-party widget store which already includes widgets from Razer, Intel, XSplit. It also remains a neat tool for taking game captures, controlling audio devices, and chat with friends on Xbox Live, and it’s great to see Microsoft adding new features at a regular pace.
The problem with most good high-quality software is that you rarely ever find it for free, and even if you do, it’s probably open-source and very unstable because of the wide variety of contributors.
WinZip also falls under the category of high-quality software, and one testament to that is that you do indeed have to pay for it.
Fortunately enough, the software can be used over a period of 30 days for free, during which you have plenty of time to test out its functionality.
However, that begs the question: What should you do after the WinZip trial ends?
Since WinZip is so widely used around the world and pretty much everyone started off with the trial first, we decided to create this step-by-step guide to show you what you can do after WinZip’s trial expires.
What do I do if my WinZip trial has expired?
1. Try an alternative to WinZip
Depending on what exactly you were looking for when you first started off using WinZip, there are several alternative tools that you can choose from.
If you were using WinZip for compressing and decompressing data, we recommend you try one of the following:
WinRAR
7-Zip
NXPower Lite Desktop
For more similar products, check out this article for a list of the best file compression tools on the market.
If you were using WinZip for encrypting data, we recommend you try one of the following:
File Lock Pro
File Lock Lite
Privacy Drive
For more similar products, check out this article for a list of the best file encryption tools on the market.
If you were using WinZip for data backup, we recommend you also give one of the following a try:
Stellar Data Recovery
Acronis True Image
Paragon Backup & Recovery Advanced
2. Purchase the full version of WinZip
The main reason why you applied for the 30-day WinZip trial is because of the incredible toolset that the program has.
However, you’ve probably tested that out yourself since you did have 30 days at your disposal, but did you manage to discover the full extent of WinZip’s capabilities?
Many users probably remember WinZip’s first iterations when it was just a simple archiving tool similar to WinRAR or 7-Zip.
This is no longer the case since now WinZip is much more than that:
It has expanded its list of supported file formats to include almost all user-grade compression formats, including one that is proprietary to WinZip.
More so, it now also includes banking-level encryption, allowing you to both compress and protect your data from unauthorized access.
The list of protective features also includes data backup capabilities, allowing you to create copies of even the largest files or folders.
The program now also features cloud service integration with some of the most popular cloud clients out there, including Google Drive and OneDrive.
Lastly, you can also use WinZip to organize your files better, since it has all the tools of a basic file manager as well.
With so many tools that you probably haven’t thought about using yet, continuing to use WinZip does indeed seem like the best course of action.
Those who prefer not to continue with the paid version can easily remove the program from their system. Learn how to uninstall WinZip completely on Windows 11 with our quick step-by-step guide.
For a complete list of the best data backup software available, as well as a description of each one’s pros and cons, check out the step-by-step guide.
Now you know what can be done after WinZip’s trial has expired, and it should be easier for you to make a decision based on the facts stated.
Let us know what solution did you choose by leaving us a message in the comments section below.
Zipping and archiving files is an excellent way of both saving disk space and facilitating the process of file transfers, especially when you are dealing with services that don’t allow the transfer of folders.
That’s where zipping can come in handy, since it basically transforms your folder into a singular file, and it also reduces its size to make the transfer itself faster and easier.
If you were wondering how to zip files with Windows 10, it can be done and it can be done with ease.
The only question is how advanced file compression we are talking about, as the built-in File Explorer compression isn’t exactly something you would call feature-rich.
That’s where third-party tools come into play, but you can also use some of your OS’s native features to perform the task.
So, if you want to know how to zip a file on Windows 10, we got your back. And, as a bonus, we offer a more complex approach for those of you who want to step up their compression game.
Using an alternative zip application such as WinZip is an effective approach since third-party tools obviously bring many more features when compared to the system utility.
It’s not just about the popularity of this tool, but it is really more than a just simple compression tool. It also allows users to share, manage, protect, andbackup files.
WinZip is an all-in-one file manager that allows you to compress and decompress to save space on your hard drive, encrypt and password-protect your zip files and folders, manage and organize your files and so on.
Compatible with all major file formats, this tool allows provides you with a complete file management suite to handle your files effortlessly, share them, back them up and protect them according to your wishes.
Here’s a quick guide to zipping a folder with WinZip:
Open the WinZip app
Select the folder you want to compress with the tool’s pane
Click the Add to Zip option
Save your zip file in the desired location
Now, let’s quickly look at its key features:
Compatible with all major formats including Zip, Zipx, RAR, 7Z, GZ, ISO, TAR, IMG, and more
Navigate to the location where files that you want to compress are stored.
While pressing and holding CTRL on your keyboard, click on the individual files.
After you choose what files are going to be contained in the compressed folder, right-click on one of the files and choose to Send to > Compressed (zipped) folder from the contextual menu.
In case you want to unzip the newly-created zipped folder, just double click on it to open it.
Once there, click Extract all and choose the extract destination. As simple as that.
3. Zip the file using command-lines
Unlike the previous solution where you didn’t need any third-party help, Windows 10 doesn’t come with a command-line zip program.
However, this can still be done if you use a third-party archiver that supports a command-line executable, such as 7-Zip.
This program is open-source, and while it may not have the same rich toolset as our previous entry, it still gets the job done.
It supports many different archive file formats, and it even has its own proprietary file format as well that provides you with superior compression ratios when compared to traditional zip files:
Here’s how you can use 7-Zip’s command-line executable to zip a file:
Add the path to 7z.exe to your PATH environment variable
Within 7-Zip, open a new command prompt window and use the following command:
7z a -tzip {yourfile.zip} {yourfolder}
By following these 3 listed solutions, you should be able to zip and unzip files in Windows 10 in no time.
Try out all of the methods, and let us know which ones did you find to be the most effective by leaving us your feedback in the comments section below.
As most of you know, ISO images are DVD images of installation media. For applications that are large, providers usually supply the files in an ISO image format.
They basically have everything you need to install the product, but you need a specific utility to unzip ISO files on Windows 10 or Mac.
Once you have downloaded your ISO image files, you can install the application, view, and access files without first needing to burn the file to a disc.
Therefore, in this article, we explore the quickest methods to unzip ISO files on both Windows 10 and Mac.
With the ISO file already saved to the desktop, launch WinZip from your Start menu.
Up next, click File > Open in order to open the compressed file. If your system already has the extension associated with the WinZip program, you can also choose to double-click on the file.
Select all the files and folders inside the compressed file.
Then, click 1-click Unzip and choose Unzip to PC or Cloud in the WinZip toolbar.
You can now modify the location or accept the default one.
Click the Unzip button and wait for the procedure to complete.
If you are looking for the quickest way to extract ISO files on Windows 10, then don’t hesitate to let WinZip handle this task for you.
You basically need to complete the above procedure and you should have the files extracted in no time. As a bonus, WinZip’s interface is never a hassle, not even for those who lack the experience.
On top of that, if you prefer to keep your data safe, WinZip’s strong AES encryption will most likely sound like music to your ears.
For Windows 11 users, check our guide on how to unzip files to handle archives quickly using built-in tools or third-party software.
”WinZip
”Looking
”Free
&aff_sub2=Native” current_url=”true” button_text=”Get it now” image=”https://windowsreport.com/wp-content/uploads/2020/09/winzip-logo-210×160.png”]
Save the ISO file into an easy-to-access location. If the file was downloaded from a website, you may find it in the Downloads folder.
Launch WinZip and open the compressed file by clicking File > Open.
You can also right-click on the ISO image file and pick WinZip.
Select the files or folders you want to open by holding the CTRL key and left-clicking on them.
Click 1-click Unzip next, then choose the Unzip to PC option.
Select the destination folder and click the Unzip button.
The Extraction screen will reveal the progress and how long the extraction is supposed to take.
Once again, if you’re on a similar mission, but on a different OS, WinZip is the perfect tool for the task. Just check out the above steps and you’ll know how to extract ISO files.
You’ll eventually find your extracted ISO files in the destination folder. Then, feel free to enjoy banking-level encryption and the possibility to zip new files instantly.
WinZip for Mac
If you want to easily extract ISO files on Mac, look no further. WinZip is your safe choice for that!
In spite of using WinRAR for years, countless users complain about getting the Access is deniederror in Windows 10.
Some describe trying to back up an old drive from a WinXP machine in Windows 10 just to keep on getting the same message in a lot of the folders they’re trying to include.
Other users simply downloaded a WinRAR file from the Internet. Extracting the files from it should easily work, yet that’s not the case.
WinRAR files often get damaged and refuse to run showing this message when the download is complete due to software malfunction, a sudden system turn off, removal of the storage media, and more.
If you also see this Access is deniederror, it’s time to take immediate action. We offer you a few troubleshooting tips that should resolve the issue, so check them out below.
An archive might have dozens of files compressed in it and is it required to safely keep them there until you want to access them.
This can only be achieved by making use of a reliable file compression tool like WinZip. Give it a try too and you’ll see how simple it is to compress/decompress, protect, and share your files.
Yes, if your priority is security, then do keep in mind that WinZip protects your data with banking-level encryption.
This archiver also has quite a few nifty features to organize your photos in the cloud and it gives you the chance to access and edit files shared with you by others.
By taking into consideration all these aspects and the fact that it will keep you away from the Access is deniederror, do consider downloading WinZip and using it as a WinRAR alternative.
”WinZip”
”Looking
”Free
&aff_sub2=Native” current_url=”true” button_text=”Get it now” image=”https://windowsreport.com/wp-content/uploads/2020/09/winzip-logo-210×160.png”]
2. Try to re-download the WinRAR file
When encountering such issues, you could also re-download the WinRAR file. As said before, this might be caused due to various reasons including interruption during download and system shutdown.
In spite of that, this doesn’t mean that your file is corrupt and cannot be fixed. Just re-download it and once again try to extract the files off it.
This should eliminate potential issues from your WinRAR file during the first download, especially if you compare the file size of the downloaded file with the original one and you notice any differences.
3. Deselect Read-only
There are times when the culprit isn’t as dangerous as imagined. Instead of repeatedly trying to access the file, just to get the same error, right-click on the archive.
Then, find your way into Properties and in the attributes, simply deselect Read-only.
4. Use the WinRAR Repair function
Browse to the WinRAR file’s location.
Then, select the file and click on the Repair button found in the toolbar.
You can now choose Treat corrupt archive as RAR from the pop-up window that shows up next.
Wait until the repair process is completed. Then, click on the Close button.
Finally, select the newly rebuilt archive to extract the files that you initially had in mind.
Choose Extract without confirmation and the procedure should start right away.
When bothered by this issue, you can also try to use the official WinRAR repair tool. As you can easily imagine, it is specifically designed to fix problems like yours.
Do give it a try by using the above procedure and let us remind you that it’s safer to stay away from potentially tricky methods and unofficial third-party tools that claim to reliably repair all kinds of errors.
Don’t forget to tell us whether one of the solutions helped you this time. In addition, keep in mind that while closing the WinRAR file, it is essential to use the Exit option under the File menu.
If you terminate it directly, then there are chances for the RAR header to get affected, which can trigger RAR files to display such Access is deniederror messages.
In case you have any suggestions related to the subject, please let us know in the comments area below.
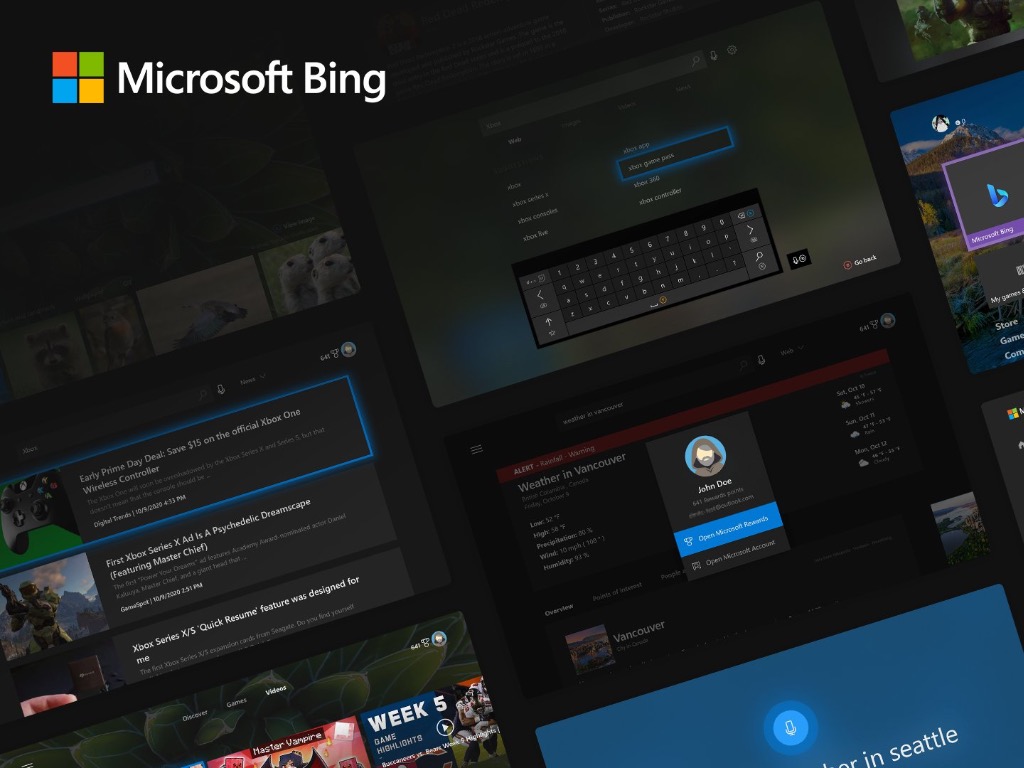
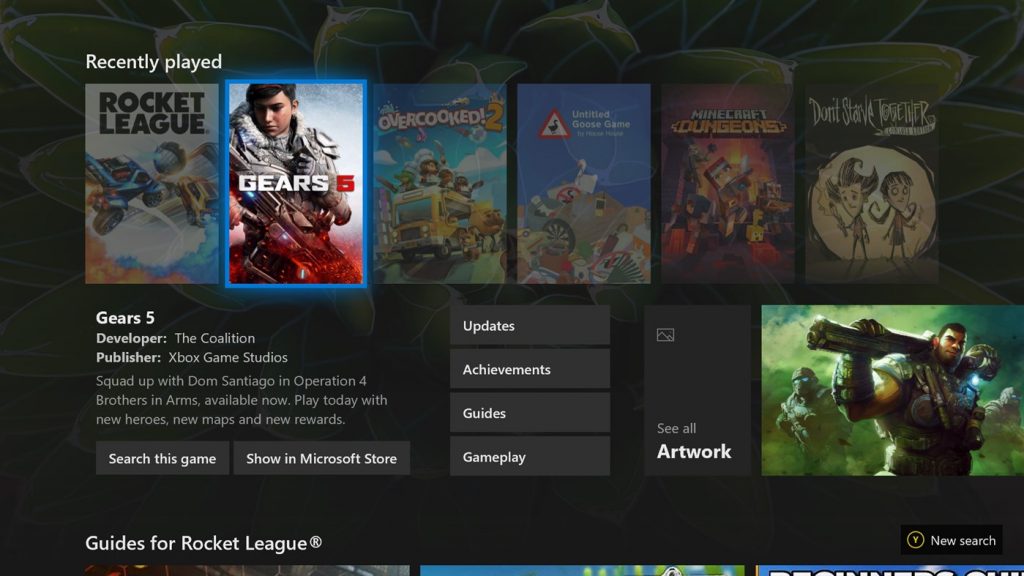
Alongside the search features to find photos, videos, and other content on Bing, the app has a few other interesting capabilities, too. First off, the app is able to combine Microsoft Bing data on games with information from Xbox. This includes your in-game progress and your Xbox friends who are playing a given title.
Secondly, Microsoft Rewards is integrated with the app, too. Just like on desktop and mobile searches on the Bing app on Xbox can help you earn points for redeeming gift cards or donating to charities. For those who have a headset or media remote, you also can use your voice to run searches, and there’s even some special quizzes and polls, too.
The app is available for download remotely here. Or, you can search for Microsoft Bing in the store on Xbox to find it. For those outside the U.S., Microsoft says it is planning to bring the Bing app on Xbox one to more markets soon.
Many of you are wondering if it is possible to extract multiple RAR files in a directory to their respective folders/subfolders. That’s precisely what this guide is about.
The RAR files practically are a data container that can store a large number of files in compressed form. Extracting them at once could have clear benefits in terms of both speed and efficiency.
Therefore, we can only encourage you to take a closer look and try the various methods discussed below.
How do I extract multiple RAR files from different folders?
1. How to extract multiple RAR files with 7-Zip?
Use 7-Zip to extract multiple RAR files
Firstly, group all the volumes of the file to extract in the same folder.
Up next, right-click the one with the lowest number and select 7-Zip > Extract the files from the menu that appears.
You can now select the folder to extrapolate the files by clicking on the button (…).
Confirm your action and the extraction procedure should immediately start.
In order to complete the procedure, simply apply the above steps. However, if the file happens to include a volume that does not have numbers in its name, select that instead of the actual files that end in 00 o 01.
2. Use WinZip to extract multiple RAR files
WinZip, the world’s best file archiver and unzipper, allows you to extract a wide range of file formats of compressed files in an extremely easy way.
All you need to do is to download and install WinZip on your computer and double click on the RAR file icon to open it in WinZip.
Up next, simply select all the contents inside the RAR by holding down the CTRL key during selection. Right-click to choose the extraction option and provide a destination path for saving the output.
That’s how simple the procedure really is. WinZip is known for the ability to process split (multi-volume) RAR files in their entirety as long as they have been saved in the same folder and strong AES encryption.
On top of that, it includes duplicate file detection and seamless integration with Microsoft Teams to improve your daily workflow, so feel free to choose over 7-ZIP.
Moreover, besides the great and fast functionality of extracting your files, you benefit from a user-friendly service and intuitive process of extracting RAR files.
3. Extract all RAR files in subfolders
For those of you who don’t know, unpacking RAR files in the subfolders of a source folder can be easily done directly with Rar.exe.
More precisely, Rar.exe currently supports wildcards on decompressing RAR archive files. Do note that the option -ad can be removed from the RAR command line if all archives contain a unique folder name.
That’s the actual batch script:
@echo off
set "SourceFolder=C:\Users\Unpack"
set "TargetFolder=C:\Users\New-Location"
if not exist "%TargetFolder%" md "%TargetFolder%"
"%ProgramFiles%\WinRAR\Rar.exe" x -ad -cfg- -idq -r -y "%SourceFolder%\*.rar" "%TargetFolder%"
del /F /Q /S "%SourceFolder%\*.rar">nul
for /D %%D in ("%SourceFolder%\*") do rd "%%D" 2>nul
In order to unzip multiple files in a folder, you can also use a quick PowerShell function. Refer to the above steps in that regard.
So, these are some effective methods to extract multiple RAR files. As for the actual procedure, do keep in mind that it’s more intuitive to go for WinZip from the very start.
If you have any other suggestions or questions, feel free to leave them in the comments section below.
Microsoft launched a brand new Xbox Elite Controller Series 2 last year, and many Xbox fans were hoping that it would be more reliable than the 1st gen Elite Controller which had some quality issues. Well, it seems that the company’s Elite Controller Series 2 also has its own set of problems, as Microsoft has quietly extended the warranty for the controller from 90 days to one year.
“We’ve received claims that a small percentage of our customers are experiencing mechanical issues when using their Xbox Elite Wireless Controller Series 2. To ensure your satisfaction, we’re extending the warranty coverage period on Elite Series 2 controllers from 90 days to 1 year from the date of purchase,” the company explained in a support page (via Windows Central).
This extended warranty also applies to all Elite Series 2 controllers that have been sold since launch, and Microsoft will also refund consumers who previously paid to repair faulty controllers by October 31, 2020. Microsoft’s Elite Wireless Controller Series 2 is currently priced at $179.99, and it will be backwards compatible with the company’s upcoming Xbox Series X and Series consoles.
Since launch, many customers have been complaining about a “stick drift” issue that has also been affecting the Nintendo Switch’s JoyCons. The problem is apparently so bad that Microsoft will have to deal with a class-action lawsuit that has been filed over “drifting” issues back in April 2020.
The Xbox Series X and Series S consoles will launch with a slightly redesigned controller, and we hope that it won’t be plagued by the same reliability issues. In addition to a new Share button, the next-gen controller will come with a redesigned D-pad inspired by the Elite Controller Series 2, and it will also use a USB-C port for charing.
While starting a downloading process and after successfully getting a few GBs or MBs, have you ever faced a sudden interruption accompanied by the Unexpected end of archiveerror?
Countless users are in the same boat and look for a quick solution to solve this WinRAR issue. Some of them even describe that they’ve been able to complete the download.
However, the same error message pops up when trying to open that archive file or extract it using WinRAR.
In certain cases, the download process was not fully complete. However, an unstable Internet connection, a virus, an unknown file format, or WinRAR itself are also potential culprits.
No matter what the actual cause is, rest assured that there are a few quick solutions that you can apply. Just check them out below.
How to fix WinRAR Unexpected end of archive?
1. Use a specialized file archiver utility
Both tech-savvy users and less experienced ones can give it a try to WinZip whenever encountering this Unexpected end of archive error.
That’s the quickest way to nail down the culprit. If it’s a WinRAR-related issue, then don’t hesitate to make the switch to this file archiver program right away.
Besides proving to be helpful in solving such errors encountered in similar utilities, do keep in mind the fact that it’s a safe and reliable solution that provides exactly the desired results while being used.
You can easily access and manage your files on a computer or on cloud, while the interface is user-friendly.
Winzip
Install WinZip to easily get rid of the Unexpected end of archive error.
Internet speed remains an essential factor when trying to download an archive. Wireless Internet seems to have deteriorated severely in terms of quality of service in the past few years.
If you see the Unexpected end of archive error, then make sure that your Internet connection is indeed stable.
When the network is not connected, the download process immediately stops and may display a complete download, even if that’s not the case.
No matter what your next activity should be – browsing, streaming, and so on – it cannot take place when the connection drops every five seconds or so.
3. Use a powerful anti-malware solution
There are plenty of viruses and malware that may be causing RAR file corruption and leading to errors like the one that you are dealing with at the moment.
That’s why it seems like an ideal time to perform a full scan of your system or even install a better antivirus program to remove them right away and get top-notch protection.
Many threats don’t act right away, they just slowly run in the background and cause progressive damage to your PC.
A professional security tool is the best option to make sure all threats are found and securely removed.
4. Try to re-download the file
Such errors happen for a variety of reasons, so don’t postpone checking the file size. Therefore, compare the file size of the downloaded file with the one in the original link.
If you discover that the downloaded file is smaller, this is a sign that your file is corrupted. In this case, try to download it once again.
5. Repair the file using the WinRAR inbuilt function
Firstly, browse to the drive or folder where your corrupt RAR file is present.
Up next, select the RAR file and click on the Repair button from the toolbar.
From the new window pop-up, just choose Treat corrupt archive as RAR.
After the repair process is finalized, click on the Close button.
Now, in order to extract your files, simply select your new rebuilt archive.
Choose the option that says Extract without confirmation and the procedure should start immediately.
You’ve seen that you have a reliable WinRAR alternative on hand for opening file archives. However, if you want to give WinRAR a second chance, try to repair the files is by using the inbuilt function.
Follow the above steps and if everything goes well, your RAR or ZIP file should be repaired in no time.
After completing the above procedures, the Unexpected end of archive error message should no longer appear when opening your archive file.
Which of our tips proved to be helpful? Let us know in the comments area below.
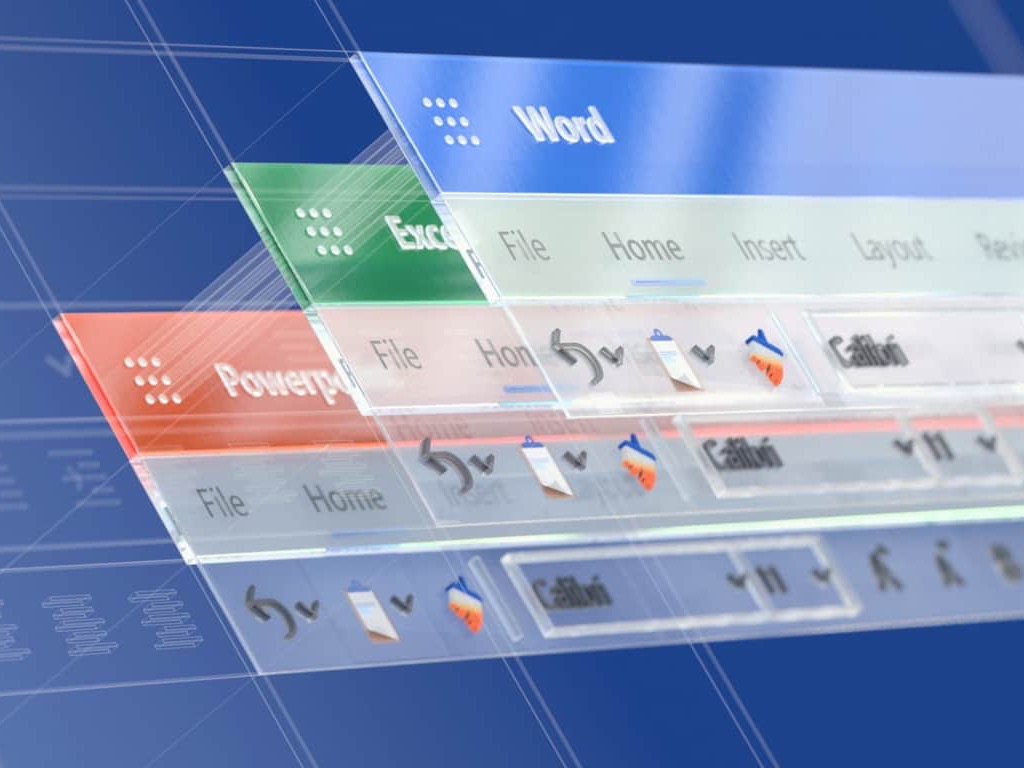
It looks like Microsoft is automatically downloading Office PWAs on some Windows 10 Insider PCs, even without explicitly asking from the users. According to a report from Windows Latest (via ZDNet), the company appears to be testing this approach selectively on some Windows 10 devices that are enrolled in the Windows Insider Program.
As it turns out, the company launched the forced installation process last week. Many users complained about getting dedicated entries for Word, Excel, PowerPoint, and Outlook in the Start menu on their machines without requesting so. More specifically, all PWAs appeared under the recently installed section in the Start menu.
Source: Windows Latest
As Windows Latest notes, the forced installation is currently being tested as a part of an A/B test effort, with only some users receiving the new PWAs. All PWAs that were installed quietly on Windows 10 machines came from Microsoft Edge. However, it remains to be seen if this also happened on PCs where the new Microsoft Edge isn’t set as the default browser.
It is worth noting that the PWA Builder and Microsoft Edge teams are currently collaborating to launch Edge-based PWAs in the Microsoft Store. So, it remains to be seen if the new collaboration has something to do with these reports.
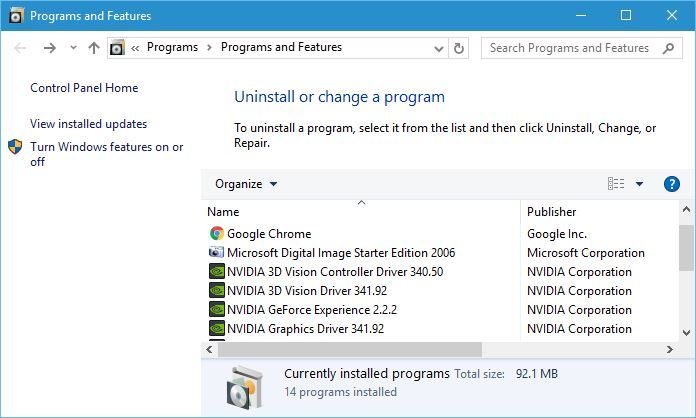
If you don’t want to use Office web apps, you can easily uninstall the PWAs by heading to the Programs and Features setting page in Microsoft Edge or the Windows 10 control panel. Did you notice this change on your PCs? Sound off in the comments section below.
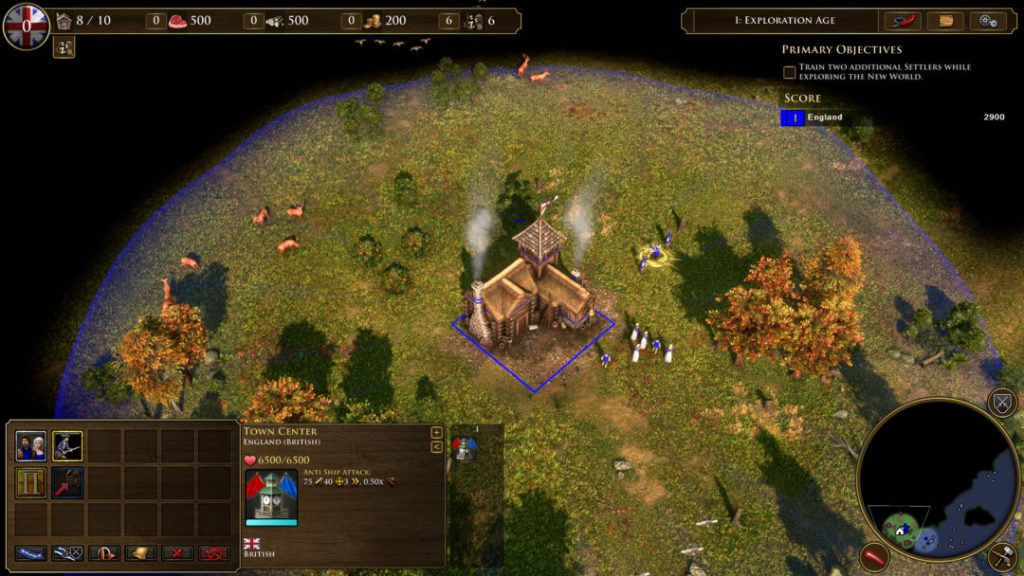
Fifteen years after its original release on PC, Age of Empires III: Definitive Edition is launching today on the Windows 10 Microsoft Store, Steam and Xbox Game Pass for PC. The game follows the previous releases of Age of Empires: Definitive Edition and Age of Empires II: Definitive Edition, and Microsoft has launched a new Age of Empires Definitive Collection that includes the three remastered games for $44.99.
As someone who loved previous episodes but never played the original Age of Empires III, I was quite excited to go hands-on with this remaster. Until now, my favorite Age of Empires game was Age of Mythology from 2002, which I still prefer over the Age of Empires I and II remasters. Despite the impressive visual overhaul and real attention to detail, I found that the core gameplay of the two Age of Empires games didn’t Age really well.
For this review, I want to first go through the gameplay changes introduced by Age of Empires III, then detail all the improvements brought by this new Definitive Edition of the game. If you never got the chance to play the original Age of Empires III, I’d say that there’s definitely a learning curve, though people familiar with the series should have no real trouble to adjust to the new gameplay.
A more complex but satisfying gameplay
Coming from Age of Empires 2 and Age of Mythology, there are a couple of things that confused me when I started playing Age of Empires III: Definitive Edition. First of all, resources gathered by villagers are immediately added to your stockpiles, and it’s no longer necessary to build dedicated buildings for collecting food, wood, or gold. Moreover, you can now assign up to 10 villagers to collect food on a farm, instead of 1 villager per farm like in previous Age of Empire games.
Another notable improvement compared to previous episodes is that military units are created in batches instead of one by one. This makes it much easier to quickly build an army. Moreover, this should also prevent your new units from being slaughtered by enemies when you automatically send them to the battlefield.
If Age of Empires II focused on the middle-ages, Age of Empires 3’s story is all about the European colonization of the Americas. This impacts the gameplay in many new ways, with each map containing villages of native tribes where you can build Trading Posts. Doing so will grant you access to unique units from allied tribes which can make a real difference on the battlefield.
In Age of Empires III, you’ll also need to select a different type of politician every time you’ll advance to the next age. Each politician grants one-time bonuses including resources, units, and military upgrades, and you’ll need to choose carefully if you want to speed up your progression.
Another big change in Age of Empires III is the ability to send shipments from your home city to the new world. You’ll unlock more powerful shipments as you progress through the different ages, which will provide resources, units, and other bonuses. At the end of a game, you can also visit your home city and choose new shipment types, called cards.
This is really a core new gameplay element in Age of Empires III, as you can also pre-select a ‘Deck’ of cards to send to your colony during all future games. Every civilization has a unique set of cards, making the 16 different civilizations slightly more different than in previous games.
What’s changed in this Definitive Edition
Age of Empires III: Definitive Edition includes all 8 campaigns from the original game and all expansions, and Microsoft did some work to revisit the Native American storylines to make them more historically accurate. The 16 civilizations include two new ones, the Incas and the Swedes, and each civilization has its own units, buildings, and city shipments.
On the graphics side of things, this Definitive Edition made the jump from DirectX 9 to DirectX 11, bringing support for 4K graphics, new particle effects, lighting, shadow, and destruction systems. The in-game cinematic have also been re-rendered with higher fidelity, and the music and sounds have been remastered. The UI has also been overhauled with 3 distinct layouts to choose from, and the camera is also more flexible and allows players to zoom in and out even further.
In this Definitive Edition, developer Tantalus Studios also made the choice to completely unlock the Shipment Orders (cards) and the Age-up Politicians. “In the original game, you had to grind for hundreds of hours to unlock all the good cards for each Civilization, and we felt that it gave an unfair advantage to experienced players,” explained Joss Ellis, Director of Development at Tantalus in an interview.
In addition to the different campaigns and multiplayer modes, Age of Empires III Definitive Edition also introduces new tutorials, historical battles and “Art of War” challenge missions. All these solo modes should benefit from better AI which should better react to what’s happening on the battlefield. There’s also a new “Extreme difficulty level which should be more challenging than the “Expert” level in the original game.
There are a lot of welcome changes for the multiplayer modes as well, including a new server-based system, Spectator mode, integrated leaderboards, ranked ladders, and matchmaking. The game also supports crossplay between Steam and the Windows 10 version, and I had no matchmaking issues during my tests.
Last but not least, Age of Empires III Definitive Edition will support mods, and a few of them built for the original game will still be compatible. For convenience, Tantalus Studios added a central hub at ageofempires.com/mods where players can upload their mods and browse for content.
There’s still more work to do
Age of Empires III Definitive Edition is an enjoyable RTS game overall, but I can’t conclude this review without outlining some issues that can be quite irritating. First of all, the pathfinding problems that plagued the Age of Empires I and II remasters are also present in AoE III: DE, and you may regularly need to help some lost units reach their destination. In one occasion, some of my units also became stuck in a wall, and I had no choice but killing them.
I hope developers will address these pathfinding issues with post-launch patches, but I also have some complaints about the AI. During battle, I often saw some of my units standing there doing nothing while the rest of them are fighting enemies. More often than not, units also focused on attacking buildings instead of the enemies currently attacking them, so you can’t really count on the AI to do what’s best on the battlefield. Obviously, the revamped AI that the developers introduced in this remaster still needs some work.
Still, Age of Empires III remains a great RTS game, and it has now beaten Age of Mythology as my favorite Age of Empires game. The gameplay improvements, graphical upgrades, and Cards system really make a difference, making Age of Empires III: Definitive Edition an enjoyable strategy game by 2020 standards. Microsoft will continue to support AoE III: DE after its release, and I hope the aforementioned problems will be fixed.
Age of Empires III: Definitive Edition is a $19.99 purchase on the Windows 10 Microsoft Store and Steam, and it’s also available on Xbox Game Pass for PC starting today. For new subscribers, we remind you that you can get your first month for just $1 instead of $9.99.
If your company just came on board with Microsoft 365, then there’s a lot ahead for you. Not only can you enjoy email in Outlook, and Ofice apps like Word and Excel, but there’s also the power of Teams and other apps. But, what if you’re looking to customize the Microsoft 365 online experience and make it your own? Here’s a look at some of the ways to do that.
Customize your theme
You likely know how to customize your PC to your own look, but did you know you could do that to Microsoft 365, too? It’s easy.
Just head to Office.com and sign in with your Microsoft 365 account. Then, click the settings gear at the top of the page. From there, you should see some Themes options. Click this, and then choose a new theme. There are various pre-sets like High Contrast, Rainbow, Blueprint, and more.
As you click the themes, the top bar in Microsoft 365 will change across apps like Planner. If you want, you can also click View All to see more themes. There’s a total of 52 to choose from, and the possibilities are endless.
Turn on dark mode
Working late at night? Or maybe you’re studying late at night? The last thing you want is a white screen to blind your eyes as you sit in the dark. Office has a lot of white space, but once you turn on dark mode, the experience changes drastically.
To turn on dark mode, visit Office.com and log in. Then, click the settings cog at the top right of the screen. From there, you can turn on Dark Mode with the toggle switch. Everything will instantly change, and become easier to view.
Pin or move apps to the launcher
Next on our list is another simple tip. If you use certain Microsoft 365 apps more than others, then you can pin apps to your launcher so you can access them more frequently. Say, if you use Teams more than Word, or Planner more than Excel.
To do this, visit Office.com and click the All Apps icon at the top left side of the screen. Then, scroll through the list, and find the app you want to add to the launcher. Hover over that app, and then right-click on it. Some apps might be pinned already and you can unpin them by right-clicking. If the app you want isn’t pinned, right-click, and choose Pin to launcher. Now, every time you click the launcher, you’ll see that app is pinned for quicker access.
Change your time zone and language
If you have a remote job or are schooling remotely, then you might not be in the same time zone or speak the same language or the location that you’re school or work is based in. Usually, Microsoft 365 is configured to the Time Zone that your organization is based-in, but you can set it up to your own location, too.
To set the time zone, click the settings cog after going to Office.com and then choose Language and time zone. Click the link that says Change your language. You’ll then be taken to this page, where you can configure settings and privacy. They’ll be a link that says Display Language. From here you can swap the language out to your native one. You also can change the region and the Time Zone, too. Just choose Time Zone from the list.
We have you covered
This is just our latest entry into our Microsoft 365 series. If you’re looking for more tips and tricks, check out our dedicated news hub. And, if you have anything else to share, let us know in the comments below.
If you have tried to extract a .exe file from an archive on your Windows 10 device only to get an error message, rest assured you are not the only one.
Although WinRAR is widely used, it does come with its share of errors, unfortunately.
There are many reasons why you could not extract the .exe file and the most common ones are faulty files due to an interrupted download process or even to viruses.
Nevertheless, we’ve got you covered in both cases.
In this article we will present you some easy steps that will allow you to extract .exe files in no time.
What can I do if WinRAR is not extracting .exe files?
Before going into the detailed solution steps, it could be a good idea to think about using a different tool to extract your files.
There are several other great software out there, but after several tools, we would like to recommend you give WinZip a try.
This is an all-in-one tool that goes way beyond simply offering some compression features. With WinZip, you can share, manage, and password-protect your files while you compress them.
Moreover, if in the compressing process the quality of the file is compromised, then there is no use in proceeding with such a process. This is another great feature of using WinZip.
Your videos and images quality will remain intact, regardless of how large the files are.
WinZip easily connects with Dropbox, Google Drive, or OneDrive for better workflow and file management.
Here are some key features:
Advanced compression features.
Strong encryption level.
Signature of new and existing PDF.
Microsoft Teams integration.
Background tools.
File deletion for duplicate files.
Advanced file management features.
”WinZip”
”Extract
”Free
&aff_sub2=Native” current_url=”true” button_text=”Get it now” image=”https://windowsreport.com/wp-content/uploads/2017/11/WinZip-button-210×160.png”]
2. Use the Repair option
Locate the corrupted RAR file and right-click on it.
From the options, select Open with WinRAR.
Click on the Tools option and select Repair archive.
Next, choose the destination where you want the repaired RAR file to be saved.
After the repairing process has been completed, click OK.
3. Check your Antivirus
It’s not uncommon for different extracting errors to appear due to your antivirus software.
Therefore, checking if the issue is caused by it or not, is an important step before moving forward.
In order to check if the error is caused by your current security software, make sure to disable it from the program’s settings and try to extract the files again.
If it did not work, we would suggest you try installing different antivirus software and then see if the process works.
4. Update WinRAR
Launch WinRAR on your Windows PC.
Next, click on Help and then select About WinRAR.
In the About WinRAR window, look for the WinRAR version info and the edition.
Click the Latest version of WinRAR under English WinRAR and RAR releases. Make sure to choose the correct edition 32-bit/64-bit depending on your PC’s Operating System.
Click Continue to download WinRAR.
Run the installer and proceed with the installation. Make sure you have closed the WinRAR app before running the installer to prevent any errors.
5. Uninstall and re-install WinRAR
Press the Windows key + R.
Type appwiz.cpl and click OK.
Next, in Control Panel, select WinRAR.
Click on Uninstall. Make sure to confirm the action by clicking on Uninstall/Yes.
Once uninstalled, reboot the computer.
Download and reinstall the app from the official WinRAR page.
5. Download the RAR file again
If the archive has been corrupted due to a faulty download process, then this may be the reason to why you cannot extract the .xls file.
Before proceeding with downloading the archive, make sure that your are connected to the Internet and that your connection is stable.
Depending on the file size you will need to wait a bit longer for the download to be finished.
We recommend that you indicate a different location for the file to be extracted to.
With this last step, we conclude our list of suggestions. We hope that one of them has helped you extract the .exe file from your WinRAR archive.
If you have additional suggestions or recommendations, please let us know in the comments section below.
WinRAR is great archiving software with an abundance of features, but some users reported that WinRAR is not working on a mapped drive.
This can be a problem for some users, and in today’s article, we’ll show you a couple of methods that you can use to fix this issue for good.
What do I do if WinRAR is not working on a mapped drive?
1. Use WinZip
If WinRAR is not working on a mapped drive, you might want to try using WinZip instead. The software works with over 24 different file formats, and that includes RAR files as well.
The application is pretty simple to use, and you can unzip or archive files with just a couple of clicks. It’s worth mentioning that the software has an encryption feature, so you can encrypt your archives.
There’s 128-bit and 256-bit AES encryption available, allowing you to password protect your files with ease. Another feature is the ability to convert PDF files to Word files, and vice versa.
The software also works as a file manager, so you can organize your files, and there’s even a file splitting feature, so you can easily split large files in order to send them faster.
Overall, WinZip is great file archiver software, with a wide array of features, so be sure to download it and try it out.
Other useful features:
Easy file sharing
Support for cloud storage
Ability to access and manage files on local PC and network devices
Available on Mac and PC
Compatible with over 24 different file types
”WinZip”
”WinZip
”Free
&aff_sub2=Native” current_url=”true” button_text=”Get it now” image=”https://windowsreport.com/wp-content/uploads/2020/09/winzip-logo-210×160.png”]
2. Disable SMB2
Press Windows Key + X and select Windows PowerShell (Admin).
When PowerShell starts, enter the following command:
Once the process is finished, move the extracted files to a mapped drive.
This is just a workaround, but several users reported that this method worked for them, so you might want to try it out.
If WinRAR isn’t working on a mapped drive, most likely there’s an issue with the SMB2, but if you don’t want to disable it, we suggest using WinZip instead of WinRAR.
Photos are a great way of preserving memories, and they are also important for work, especially if we’re talking about high-quality ones.
However, while storing a large photo file can be easy, sharing it with others can be especially troublesome, especially if you are doing it online via cloud hosting or storage services.
First, there is the problem of how much time it takes to upload and then download the file to and from the cloud.
Secondly, there’s always the matter of security when it comes to sharing data online.
That being said, we’ve constructed this step-by-step guide that will show you exactly how you can share large photo files via some of the most common cloud storage services.
In order to drastically reduce the upload and downloads times of your photo files, you will first have to reduce the disk space that they occupy.
The best way to reduce the size of your photo file is via a file archiver, and we recommend you try out the best there is, namely WinZip.
Not only is WinZip incredibly good at archiving all types of data, but it gives you a wide variety of archive formats to choose from, depending on your taste.
The next step is to protect your data via encryption, and WinZip also happens to support encryption that it describes as being banking-level.
Next up it is time to take the archive and share it via either cloud or email.
This is yet another feature that WinZip shines att, as it allows direct integration with some of the most well-known cloud storage services, such as Google Drive and OneDrive.
How can I send large photo files via email?
A great way of sending data via email is if your base program features email integration. This makes it so that you don’t have to open multiple programs in order to perform a single task.
Here’s how you can use WinZip to perform all of the tasks listed above with one simple command:
Right-click the file and select Zip and Share (WinZip Express)
In the next WinZip windows that appears, you will gain access to everything you need to perform all of the tasks described earlier in the article, including:
The ability to archive the file, and choosing in what format
The possibility of archiving the file
Choosing whether to save the new zip file on PC, send it to the Cloud, or export it via Email.
”WinZip”
”Sending
”Free
&aff_sub2=Native” current_url=”true” button_text=”Get it now” image=”https://windowsreport.com/wp-content/uploads/2017/11/WinZip-button-210×160.png”]
Note: In order to make use of this functionality, you need to have the desktop client of the Cloud service installed on your PC.
Additionally, in order to send the files via email, an email address needs to be provided and linked with WinZip.
By following these steps, you should now be able to send large photo files faster, and in a more secure way, all thanks to just one tool.
Let us know what other methods you use to make sending large photo files more efficient by leaving us a message in the comments section below.
File compression can come in a variety of forms, and they all depend on what exactly you are looking for when creating them.
For example, some users may want maximum compression, even if it does mean using more time to archive and unzip it.
On the other hand, there are those that prefer lossless compression, and that’s precisely what you can get if you opt for the XZ compression format.
This file format is a single-file compression format, so it doesn’t offer any archiving capabilities. However, it does offer lossless compression, making it ideal for those that want to preserve the data exactly how it was.
Of course, you can’t talk about compressed data without knowing a method of unzipping it, so we created this article to teach you precisely how you can unzip an XZ file on both a Windows 10 PC and a Mac.
How do I open an XZ file?
1. How do I unzip an XZ file on Windows?
Use a third-party archiving tool
XZ file is a compressed file format, and therefore gaining access to its contents involves extracting or unzipping it with a dedicated tool.
Since we like using the best available, we also urge you to try WinZip for this particular task, since it is lightweight, powerful, and very versatile in terms of what it can do and what kind of files it can handle.
For example. since you may be using XZ files for the sake of lossless compression, WinZip will provide you with safe decompression at incredible speeds, so you don’t have to worry about wasting time.
More so, WinZip can also encrypt your data, so your data will also be secured from unauthorized access.
Right-click the file, and select WinZip from the context menu
Select what type of action you want to take, and where to extract the data if that is what you need.
Depending on the file’s size, you’ll have to wait for WinZip to decompress it
Go to where the data was extracted and inspect whether everything is functional.
”WinZip”
”The
”Free
&aff_sub2=Native” current_url=”true” button_text=”Get it now” image=”https://windowsreport.com/wp-content/uploads/2017/11/WinZip-button-210×160.png”]
2. How do I extract an XZ file on Mac?
Use a third-party archiving tool
Similar to the Windows solution, if you’re not an expert in command lines, and prefer GUI-based software, we recommend you give a third-party unarchive a try, and one of the best on the market is ironically called The Unarchiver.
Here how you can use The Unarchiver to extract XZ files:
Undertale is one of the best if not the best indie game Steam has to offer. From the moment the game was introduced, it received worldwide recognition that led to multiple awards and millions of sold digital copies.
If there is a super-undemanding-stable game category, Undertale must be at the leading spot.
However, there are issues that may prevent you from enjoying this amazing game. It seems that the game won’t launch for no apparent reason.
But, don’t worry, we prepared a few workarounds to help you overcome this issue.
In Library, right-click Undertale and open Properties.
Open the Local files tab.
Choose Verify integrity of game files.
Restart Steam and try running the game.
2. Start the game from its folder instead of Steam
Close the Steam client and exit from the notification area.
Open Task Manager and stop the Steam process.
Find your way to the Undertale installation folder.
Double-click Undertale.exe and run the game.
As we all know, with the implementation of the Steam desktop app, all the games run through the client. However, on some occasions, the Steam app can provoke a lot of problems.
Note: Have in mind that the Steam client may start, nonetheless. If that is the case and the game is still faulty, move on to the next solution.
3. Delete the Steam_api.dll file
Close your Steam and kill all its related processes in Task Manager.
Go to the Undertale installation folder.
Find the steam_api.dll file and back it up.
Delete the files from the folder.
Start the game using Undertale.exe.
Additionally, you may try and run it through Steam if Undertale.exe won’t start the game.
Note: This may prove harder to do for many games, but the Undertale should function well. If things take a wrong turn, you can always restore a file from the backup location.
It’s quite hard to play Steam games independently, without Steam DRM. However, there are some games that are DRM-free, and luckily, that is the case with Undertale, too.
4. Extract Undertale.exe file
Close the Steam app and kill all its processes in Task Manager.
Find your way to the Undertale installation folder.
Right-click on Undertale.exe and choose Extract here with WinZip.
When asked to replace or rename Undertale.exe, choose rename and change its name to UndertaleOld.exe.
The new Undertale.exe that is extracted is your new game launcher.
Try launching the game.
Note: Some witty users from Steam community forum presented this interesting solution for this issue. Namely, it seems that the game’s exe file can be extracted with WinZip.
In the case of any problems, you can delete the newly appointed launcher and rename UndertaleOld.exe to just Undertale.exe.
When it comes to the Visual C++ Redistributables, you can download the latest version from this Microsoft page.
6. Reinstall the game
Go to the Steam client.
Open Library and right-click Undertale.
Choose Uninstall.
Open the Steam client and Library.
Find Undertale and select Install.
We came to the last resort. If you haven’t solved your Undertale issues with the previous workarounds, reinstallation is the only viable option.
After the process is finished, you should be able to play the game seamlessly.
We hope you were able to start the game by using these workarounds. In addition, if you have any questions or suggestions, please be free to tell us in the comments below.
Explore our excellent Gaming section for the latest tiles and tips.
WinZip is known as the best archiver tool ever made, but did you know that it’s also a great file manager software?
First of all, this tool is great at protecting your files safe using banking-level file encryption. And you can also convert your files to pdf using WinZip to pdf and then password-protect them.
Do you want to share your files? It’s easy as selecting your files and adding to a ZIP file big enough to be sent as an attachment to an email.
WinZip also has awesome cloud integration so you can upload the files to any of you cloud storage platform like Dropbox, Google Drive, OneDrive and more, and then send the link to anybody.
This modern file manager software also helps you regain a lot of your hard drive space by compressing your older files or the ones that you don’t use very often.
It also helps you compress MP3 files so that you can save space on your audio device. It’s easy as selecting your audio file and selecting the location you want to save it to.
WinZip can also help you backup your files really fast. You can just archive and save the files to a safe location but you can also make this process automatic.
Here are a few important features of WinZip:
Best compressing and decompressing speed
Compatible with a lot of file types
Cloud storage integration
Dual-pane user interface
High security encryption
”WinZip”
”WinZip
”Free
&aff_sub2=Native” current_url=”true” button_text=”Get it now” image=”https://windowsreport.com/wp-content/uploads/2020/09/winzip-logo-210×160.png”]
WinNc is another dual-pane file manager for Windows 10. The application has a tabbed interface allowing you to open multiple directories.
Using this tool, you can perform basic tasks such as copying, moving or deleting, but you can also compress or uncompress files and create links.
The application also supports some advanced options such as disc burning and it can even create ISO files. In addition, you can also convert audio or create self-extracting .exe files from .zip archives.
WinNc uses different colors for different actions, so you can easily distinguish files that are being copied or moved. In addition, you can queue your actions and perform multiple tasks with ease.
There’s also a built-in file viewer, slideshow viewer, and multimedia player so you can preview your files with ease.
Find some other notable features of WinNc:
Quick Access feature that lets you open frequently accessed folders with ease
Another great dual-pane file manager that we want to show you is AB Commander. The application offers support for tabs, so you can switch easily between several open directories.
It also supports all standard file management options while offering some advanced features like a built-in image viewer as well as a text editor.
Speaking of images, you can change their resolution or rotate them. We have to mention that there’s also support for file splitting and folder synchronization.
Each pane has a folder tree so you can easily navigate through your directories. Speaking of navigation, the application has history and favorites lists, allowing you to easily access your favorite folders.
Another useful dual-pane file manager is One Commander. The application has a modern design, so it looks visually appealing and supports two different themes that you can easily switch between.
You can use the column view if you prefer the dual-pane view along with tab support tabs so you can work with multiple folders easily.
The application has an address bar that shows you all available subfolders and works similarly to a folder tree, a great feature since it allows you to navigate to any folder with ease.
Although this feature is useful, it might take some users a while to get used to it. Fortunately, you can minimize the address bar and it will work like a standard address bar in File Explorer.
One Commander’s other interesting features:
History panel to access any previously visited folder
Probably one of the most popular file managers for Windows is Total Commander. This is another dual-pane file manager, and like most entries on our list, it fully supports tabs.
The application supports the drag and drop method, so you can easily use both File Explorer and Total Commander simultaneously.
If you’re an advanced user, you’ll be happy to hear that there’s a built-in command line that you can use to start programs with different parameters.
The application has a built-in file viewer so you can view any file in hex, binary, or text format. There’s also a Bitmap viewer as well as an HTML viewer.
You can switch between several different views and show thumbnails if needed. It’s worth mentioning that Total Commander supports multi-rename so you can easily rename several files at once.
Notable features of Total Commander:
Native support for ZIP, ARJ, LZH, TAR, GZ, CAB, RAR, and ACE archives
Another great file manager that we have to mention is the Free Commander. The application allows you to choose between dual-pane or single-pane view and there’s also support for tabs.
In addition, you can also show a folder tree for each pane and use it to navigate to the desired directory with ease.
The application also has a built-in file viewer so you can easily view images or any other file in hex, binary, or text format.
We have to mention that Free Commander works with ZIP archives, and you can easily view files and images inside an archive. If you want to work with other types of archives, you can do that via various plug-ins.
The application offers a powerful search engine, and you can use it to search through folders and archives alike.
If you’re looking for a free file manager, we have to recommend FileVoyager. This is a dual-pane file manager with a tabbed interface so you can easily open multiple directories.
The application allows you to browse disks, folders, and archives, and there’s also an FTP feature available. All standard file management options are available and you can access them with a single click.
The application can work with various file archives, but it can also play both audio and video files. We have to mention that FileVoyager requires codecs to do that, so be sure to install them.
As for additional features, the application allows you to compare files and folders, and there’s also a folder synchronization feature.
Here are a few other mentionable features of FileVoyager:
If you’re looking for a file manager that offers more features than File Explorer, we suggest that you try any of the tools from our list. We also have a guide on the best file manager for Windows 11, so don’t miss it.
Many file managers on our list are completely free, so feel free to try them.
Monster Hunter: World is an awesome video game where you hunt epic monsters in various regions. You can either kill or trap the monsters you’re assigned to hunt, depending on your preferences.
Alright, that may not sound exactly great, but get this: the game rewards you with parts from each monster you hunted. You can use the parts to craft more and more powerful gear, needed to hunt more dangerous beasts.
Last, but not least, Monster Hunter: World comes in two flavors. Depending on your social needs, you can be a lonely wolf and hunt by yourself, or team with up to 3 more players to take out monsters together.
Naturally, playing in a party will also increase the difficulty of the monsters you’re hunting. But look at us derailing from the real topic we wanted to discuss, which is packet loss in Monster Hunter: World.
What is packet loss in Monster Hunter: World?
Packet loss is the same, regardless of where you encounter it. It happens whenever packets of data get lost somewhere along the way and never make it to their destination.
Many mistake it for high latency, and they’re not to blame, considering that they cause similar issues. But truth be told, these two events couldn’t be more different. For once, when your connection has latency, the packets eventually make their way to their destination.
In packet loss, well, they get lost for good. So strictly from a resource management standpoint, it’s worse to experience packet loss. The symptoms of packet loss in Monster Hunter: World include:
Rubberbanding (when characters get stuck for a while and then suddenly teleport)
Game crashes or disconnections
As you can see, it’s not exactly a joking matter, especially if you’re just about to deliver the killing blow to an epic monster with your friends.
What can cause Monster Hunter: World packet loss?
There’s a huge number of reasons you may experience packet loss in Monster Hunter: World. However, one of the most frequent causes of packet loss is network congestion.
To put it shortly, this phenomenon can be observed whenever a certain portion of your connection gets overcrowded. For instance, if your ISP can’t handle traffic properly, you may notice slowdowns at certain times of day. That’s definitely network congestion.
However, this is absolutely not the only thing that can trigger packet loss. These are some of the most common causes:
Subpar connection quality (cheap Internet subscription plans)
Using Wi-Fi instead of wired connections
Old, worn-out Ethernet cables
Outdated network adapter drivers on your system
Improper router configuration (even being behind a double NAT can slow you down)
Outdated router firmware
Using a physically limited router (i.e. using a 150 Mbps router on a 300 Mbps connection)
Game server issues (you should check for those on forums)
ISP bandwidth throttling and improper traffic routing
It’s worth to be mentioned that the underlying issue can occur anywhere between your PC and the game server. Which is exactly why diagnosing and fixing packet loss is usually no walk in the park.
Connect to a fast server of your choice (nearby servers are usually the fastest)
Launch Monster Hunter: World
Check if there’s any improvement
Note that using a VPN service such as Kape Technologies’ PIA can do wonders for connectivity issues, but only if they’re not on the farther ends of the connection.
To be more specific, if you’re getting packet loss because of chewed-up Ethernet cables, a VPN won’t help. However, replacing the cables will.
Private Internet Access
Looking for a VPN to fix packet loss in Monster Hunter: World? PIA might be just the one you need.
Same goes if the issue is on the game server’s host side. A VPN will still use the origin and destination points of your connection but will try to find a way around your ISP’s default connection.
Thus, it goes without saying that using a VPN to fix packet loss will only work if your ISP is somehow responsible for this situation, either through bandwidth throttling or other ways of limiting your connection.
Now it’s very important that you restart your Windows PC as soon as the last command is executed. Only after rebooting you can launch Monster Hunter: World once more and check if the packet loss issue is still there.
Often times, cached data gets stacked in unhealthy build-ups, which can interfere with your connection’s well-being. To prevent that from happening, you can flush and renew your DNS, as well as use the Netsh Winsock reset command.
We also recommend switching from your ISP-assigned DNS to a public, free DNS. We’ve tested Google’s Public Free DNS, Cloudflare, and OpenDNS, and they’ve all shown promising results.
You can, of course, choose whichever you prefer.
3. Manually troubleshoot
Restart the game, your PC, router, and/or modem, if necessary
Call your ISP and ask them nicely if they can look into the issue and maybe even fix it
Check if the Monster Hunter: World servers are up and running, and not undergoing maintenance
Inspect your end of the connection thoroughly and look after any malfunctioning component
Replace or fix any troublesome component on your end of the connection
Check the quality of your Ethernet cables and upgrade them if necessary (for instance from Cat 5 to Cat 6)
Always use wired connections instead of Wi-Fi (Wi-Fi packet loss happens way more often)
Contact Monster Hunter: World if you think there’s something wrong on their side
Avoid peak hours if you suspect your network is congested (or use a VPN to avoid it)
Update your system drivers (especially network adapter drivers)
Lower the quality settings of the game
Close any programs or services on your PC that might be heavy on the bandwidth (torrent & VoIP clients)
Choose a different broadcast channel on your wireless router if you’re using Wi-Fi
Run a pathping test to see if you’re leaking packets on your end of the connection
There you have it, a list of suggested fixes that may help you alleviate your Monster Hunter: World packet loss issue. Keep in mind that not even taking all these suggested steps might fix your issue, especially if you have no clue on what’s causing the leak.
However, performing as much steps as you can from the list above may help you increase the quality of your connection. That, in turn, may help you reduce the percentage of lost packets, and even increase your connection’s speed.
Final thoughts on Monster Hunter: World packet loss
All things considered, packet loss can be a bummer, whether you encounter it in Monster Hunter: World or any other place. However, with enough patience and determination, things can significantly improve.
It’s worth noting that, while using a VPN is still one of the most popular fixes for packet loss, it may not help at all if there’s something wrong on your end, or if the game servers have issues.
A lot of trouble seems to have emerged after Edge rolled out the latest stable version last week (v86).
As shown recently, the changes implemented in the downloading process generated some discontent.
Similarly, users have taken to the forums to point out that Salesforce has become unusable for the past few days.
When I click on an url, a new tab is opening in a visual force page. It looks like the app lay-out is not supported or something like that.
Another user is offering more details:
I am working in the version: 86.0.622.38. It looks like the apps in Salesforce are no longer supported in the latest version of Microsoft Edge.
Quick tip:
Whenever an app proves faulty in a specific browser, the easiest solution is to test it in a different one
On this note, we’re pretty sure that Salesforce is perfectly functional in Opera.
Not only it is faster, and considerably lighter compared to Edge, but it comes with multiple exclusive features such as ad blocker, built-in messenger apps, customizable speed dials, separate workspaces, or visual bookmarks.
The built-in free and unlimited VPN is also one of the main perks of the free, user-friendly browser.
Opera
Use Salesforce in Opera to improve your workflow and take advantage of all the exclusive features this browser offers.
How do the changes in Edge affect Salesforce users?
More specifically, with the release of Edge 86, SamesSite cookies are set as SameSite=Lax by default. (Until the Edge 86 release, the default was SameSite=None; Secure. )
This means that any website using non-secure access (HTTP) is blocked and also that custom Salesforce integrations relying on cookies can’t be accessed anymore.
Salesforce has notified its users about the upcoming changes while also mentioning that all editions of Lightning Experience and Salesforce Classic are impacted.
What should I do to make Salesforce work in Edge?
1.Revert the changes
According to Salesforce, developers can opt in to explicitly use setting SameSite=None; Secure. However, this might affect the security of the used apps.
2. Switch to HTTPS connection
First, one can check the connection type used in their org. From Setup, in the Quick Find box, enter Session Settings, then select Session Settings.
If some sites or portals are still using HTTP connection (although the secure one should have been enabled by default), you can request the changes as follows:
From Setup, in the Quick Find box, enter Sites, then select Sites.
Click the site you want to edit, and ensure that the Require Secure Connections (HTTPS) checkbox is selected.
Using WinRAR is fairly common for reducing the size of large attachments and even saving some storage space on the PC.
However, users report getting a strange error message No archives found or Does not appear to be a valid archive when trying to extract files through WinRAR.
These are some of the most common error messages found during WinRAR extraction.
Several reasons could have led to this message, such as viruses on your device, an incomplete download process, or using untrustable third-party tools for performing the file compression.
Don’t worry; we’ve got you covered in all cases. In this article, we will explore in more depth what you need to do to fix the error and safely extract your files.
How can I fix the No archives found error in WinRAR?
1. Use a dedicated software
The No archives founderror usually appears when the initial compression of the files has been corrupted or if you have some viruses on your device that may have altered the file structure of the RAR file.
There are several tools out there that you can use to compress large files, but to avoid getting this kind of error, we would recommend that you use a reliable tool, such as WinZip.
This amazing tool allows you to compress, manage, and share all your files quickly and without compromising their quality.
Sharing, editing, watermarking, or moving the files stored on your PC or in the cloud service are other useful features you will have access to after installing this software.
If you are concerned about the privacy of the compressed files, we have good news.
WinZip uses a protection algorithm similar to the one used for bank protection. Your files will remain confidential throughout the entire process.
Using this software is very easy; all you need to do is download it and run the installation package on your device. Afterward, you can select the files or folders that need to be compressed.
Let’s have a look at some of its key features:
File splitter features.
Repairs faulty ZIP file.
Extract multiple files option.
Compression features.
Password protection feature.
Data back-up and sharing options.
Supports multiple compression formats: Zip, Zipx, RAR, 7z, TAR, GZIP, VHD, XZ, and more.
WinZip
Compress, store, and share all your files with this error-free software. Get the best deal now!
Launch WinRAR and then select the location where the corrupted file is saved.
Next, click on the corrupted archive file (RAR or ZIP file).
Click on the Repair button in the tool and choose the repair archiver from the drop-down list that appears.
Choose the location that you want to save the new archive after repairing the file.
Next, click on OK to save settings.
After the repair process is completed, go to the folder chosen as the location for the new archive and access the repaired file.
3. Use the shortcut menu
Launch WinRAR.
Right-click on the corrupted archive.
Click on extract files in the shortcut menu that pops up.
Move to the Extraction path and options menu.
Next, select a folder to save decompressed archives.
Check the box indicating keep broken files in Miscellaneous.
Click OK to start the extraction process.
Note: Although this method works well in some cases, trying all the alternative methods listed above is recommended before resorting to this method to repair archived files.
4. Open the file with File Explorer
Click on the corrupted ZIP file.
Select Properties, on the Home tab and open it.
Set Open with File Explorer, on the General tab,
Next, at the bottom unblock the Security option and click OK.
Go to Extract in the View tab on the selected file and click Extract All.
This is all. You can easily fix the No archive found error using a dedicated error-free tool such as WinZip or by using one of the other alternatives we’ve described in this article.
We hope one of our suggestions helped you solve the error, and if you have additional comments or suggestions, please let us know in the comments section below.
In the new digital age, most of our communication has transitioned to the online environment. Managing your documents on your Windows 10 device is not always as easy as it seems.
Having some easy ways to transfer large files or store them without compromising on their quality, has become a priority for almost everyone.
While any archiving software can simply unzip and zip files, there are plenty of other options available on the market that don’t do only that but offer you a wide array of other incredibly useful features.
If you want to have access to a full set of features that include a variety of options, you don’t have to look any further than WinZip.
WinZip has some amazing features to offer and can help you unzip files easily, encrypt the data, break up archives, and also rebuild them easily. Besides the seamless integration with iCloud Drive, Dropbox, Google Drive, it also works perfectly with ZIP, ZIPX, RAR, LHA, 7Z, JAR, and WAR formats.
One of the most important features of this app is the ability to repair ZIP files, includes a powerful cleaner tool, and everything is wrapped nicely into a user-friendly and beautiful interface.
All in all, if you want an error-free tool that will extract RAR and ZIP files fast and efficiently, then WinZip is the best way to go.
”WinZip”
”Archive,
”Free
&aff_sub2=Native” current_url=”true” button_text=”Get it now” image=”https://windowsreport.com/wp-content/uploads/2020/07/winzip-logo-e1594725366607-210×160.png”]
How come WinRar never expires?
The team behind WinRar chose this way of promoting their product, which doesn’t involve stopping your access to the software entirely.
WinRar just limits the number of features available for you and keeps reminding you that you can buy it every time you open the software.
This can surely get annoying over time, thus our recommendation of the powerful WinZip.
Is WinRar free software?
WinRar is not a free software, but they have chosen the strategy of letting users have access to the trial version indefinitely, in order to improve the chances that the user will at some point want to buy the product.
The fact that WinRar does actually accommodate the basic needs of archiving and unzipping files is unquestionable and while it’s free to use, allowing it to remain like this, could create a better possibility for the user to spend some money at some point.
We hope that this article has offered more in-depth details about RAR files and their utility.
If you have additional comments and suggestions, please let us know in the comments section below. title here
Why does WinRAR last forever?
Even though the capabilities of the WinRar software are not fully-fledged as a trial version, it still offers some basic archiving options, and this makes most of the users satisfied with using it.
Because the market is over-saturated with a variety of software options, most people tend to stick with the one they have been using for a while.
If you’d like to take your archiving experience to the next level, we recommend that you try out WinZip by clicking the link above.