How to install Linux/Ubuntu on Surface Pro tablets

Well, Windows 10 runs smoothly on the Surface Pro, but I think some users are wondering how and if they can install any other operating systems on their Surface Pro device.

You will be glad to hear that the answer is ‘Yes’. You can always change your operating system to Ubuntu.

This OS is a Linux-type operating system. For the Linux users out there. Installing Ubuntu on the Surface Pro is highly recommended and very easy to use and install.
ubuntu linux for surface pro devices
All that’s necessary for you to have is only a USB drive or perhaps a Micro SD card and you can get started right away with the installation of Linux on your Surface Pro device.

Also, before you get started with the installation of Linux on the Surface Pro device, it would be highly recommended that you back up all your files and folders in Windows 10 to prevent any loss of information.

Steps to install Linux/Ubuntu on Surface Pro

1. Turn off Secure Boot

First of all, we need to disable the “Secure Boot” feature.

  1. Move the mouse cursor over the right of the screen to open the Charms bar in your Windows 10 system.
  2. Left click or tap on the “Settings” icon you have in the Charms bar.
  3. Left click or tap the “Change PC Settings” situated on the bottom of the Settings window.
  4. Under the “General” topic, you will have there “Settings” panel, you will have to choose the feature “Advanced Startup”.
  5. Let your Surface Pro boot into the Blue menu. Click or tap the “Troubleshoot” icon.
  6. After you get into the “Troubleshoot” menu, you need to tap or click on “Advanced Options”.
  7. In the Advanced Options menu, you will need to click or tap “UEFI Firmware Settings”.uefi firmware settings
  8. This feature will restart your system again and will bring it back up with a black screen and two options available for you.
  9. Tap or click the “Secure Boot Control” feature (the feature should be on “Enable”).
  10. After you tap the “Secure Boot Feature”, a menu will pop up and you will have the option to set it as Disable.
  11. After you set the “Secure Boot Feature” to “Disable”, you need to tap “Exit Setup” and your Surface Pro will restart again.

Secure Boot stopped working? Don’t worry, we’ve got the right solution for you.


2. Boot from USB/Micro SD card

The next step in this process is to boot from the USB or Micro SD card. Of course, for this you need a bootable copy of Ubuntu Linux on your USB drive or MicroSD card.

  1. Place the USB drive or Micro SD card in the Surface Pro USB slot or Micro SD slot.
  2. Move the mouse cursor to the right side of the screen and from the Charms Bar tap the “Settings” icon.
  3. From there tap the “Change PC Settings” and tap again the “Advanced Startup” feature as you did above.
  4. Click or tap the icon resembling the USB stick from the menu.
  5. Click or tap the DVD “Use a device the Surface pro has booted into Advanced Settings”.
  6. In this menu, you will have access to the available boot options that you have in your system.
  7. Tap from this menu the USB stick or Micro SD you have the Linux Ubuntu on.
  8. Now it will boot into the USB stick or MicroSD.
  9. After the USB with Linux Ubuntu boots up, you will be presented with two options:
    • Install the Linux Ubuntu in your system
    • Boot directly from the USB stick and try it for yourself before you install it on to your Surface Pro
      We will choose the second option and boot directly the Linux Ubuntu from the stick.
  10. When we get into Ubuntu, you will have an option on the desktop to continue with the installation of Ubuntu.
  11. Tap on the icon from the desktop to start the installation of Linux Ubuntu.
    Note: After the installation from the USB stick or Micro SD card is completed, you will notice that your screen will look a bit smaller and it will be quite hard to use it properly. For this, you will need to set the scale a bit higher from inside Ubuntu. If you don’t mind the small icons, then you can start using it right away.

Can’t boot Windows 10 after installing Ubuntu? Check out this guide and solve the problem in no time.


Was it hard to Install Ubuntu on your Surface Pro device? Now, you have a brand new Linux Ubuntu operating system on your Surface Pro device.

If you’re interested in how to properly dual boot Windows 10 with another OS, check out this amazing guide.

As you can see, it doesn’t take more than half an hour to install it. For any questions regarding the article, use the comments below. We will answer any questions regarding the installation of Ubuntu Linux.

RELATED STORIES TO CHECK OUT:

Skype Doesn’t Ring on Incoming Calls: 4 Tested Ways to fix

Skype is a popular communication platform that allows users to make voice and video calls, send instant messages, and conduct online meetings.

However, users occasionally encounter issues where Skype fails to ring incoming calls. This problem can be frustrating, especially if you miss important calls or messages.

In this guide, we will explore common solutions to resolve the problem and ensure you receive incoming call notifications as intended.

What causes the Skype incoming calls not ringing issue?

There could be various reasons for this problem; some of the common ones are mentioned here:

  • Sound settings – Incorrect sound settings on your device or within Skype can result in the absence of incoming call notification sounds.
  • Notification settings – If the notifications for incoming calls are disabled or set to a different sound, you may not hear the ringing sound when a call comes in.
  • Outdated Skype version – Using an outdated version of Skype can lead to compatibility issues and glitches, including the problem of calls not ringing.
  • Weak internet connection – A poor or unstable internet connection can interfere with the proper functioning of Skype and result in calls not ringing.
  • Firewall or security settings – Sometimes, your computer or network’s firewall or security settings may block Skype’s incoming call notifications.

Now that you know the causes of the problem, move to the troubleshooting steps to resolve the issue.

How can I fix Skype incoming calls not ringing?

Before engaging in advanced troubleshooting steps, you should consider performing the following checks:

  • Verify you have signed in to Skype with the current account.
  • Confirm that the Skype contact who was calling isn’t blocked.
  • Ensure your Windows is up to date.
  • Right-click the Skype icon and select Run as administrator.
  • Turn off the antivirus temporarily to check if the issue persists.
  • Ensure VPN is not connected.

Once done, let’s check out the solutions to fix the problem.

1. Verify if the sound settings are correct

  1. Press Windows + I to open the Settings app.
  2. Go to System, then Sound.System - Sound
  3. Locate Volume, and move the slider to the right to increase the sound.Volume slider
  4. Now press the Windows key, type skype, and click Open.Skype open
  5. Click on your profile icon and select Settings.Skype Settings  Skype When Doesn’t Ring on Incoming Calls
  6. Go to Audio & Video, locate Speakers and other settings, and ensure everything works fine.Skype_Volume Audio
  7. Next, switch to Calling, and ensure the toggle switch is on for the Show call window when Skype is in the background.Skype_calling
  8. Locate Privacy, then Only allow Skype calls from contacts to ring on this device. Click the toggle button next to it and turn it off.Privacy Show call window when Skype is in the background.

2. Check for updates

  1. Press the Windows key, type skype, and click Open.Skype open
  2. Press the Alt key to get the menus.
  3. Click Help, then click Check for updates.Help updates Skype When Doesn’t Ring on Incoming Calls
  4. Skype will check for updates and will inform you if they are available.

3. Ensure that Focus is disabled

  1. Press Windows + I to open the Settings app.
  2. Go to System, then click Focus.System, click Focus Skype When Doesn’t Ring on Incoming Calls
  3. Now check if it is turned on. If it is enabled, make sure you deactivate it.
  4. If you want to keep it turned on, you can add Skype to the Priority list. Go to the Notifications option.Notifications
  5. Click Set priority notifications.Notifications
  6. Now click Add apps.Add apps Skype When Doesn’t Ring on Incoming Calls
  7. Choose Skype from the list.

If Focus mode is on, then you will not receive any notifications for calls or messages received on your Windows computer.

4. Reinstall the Skype app

  1. Press the Windows key, type control panel, and click Open.Control Panel start menu
  2. Select Category as View by and choose Uninstall a program.CP Uninstall Skype When Doesn't Ring on Incoming Calls
  3. Now click Skype and then click Uninstall.Skype Uninstall
  4. Once Skype is uninstalled, go to the official website or open Microsoft Store.
  5. Click Get Skype for Windows 10 & 11 on the official website or Get on Microsoft Store.Download Skype
  6. If using the official website, double-click the downloaded file, and initiate the installation. However, with Microsoft Store, you must wait for the installation to complete, then sign in to use Skype.

This is how you can fix the Skype incoming calls not ringing issue and ensure that Skype rings for incoming calls.
If you face issues like Skype won’t open, we recommend you check out this guide for quick solutions.

If you have additional questions or suggestions, please tell us in the comments section below. We look forward to hearing from you.

How to Disable Sound Notifications in Windows 10

Windows 10 has a built-in feature that allows turning the notifications sound on or off thus optimizing your use of the PC and making it more to your liking. Even though the notifications sounds for the apps usually come in enabled mode, we will list below a few options that will allow you to disable the ones you wish.

How do I turn off notification sound on PC?

1. Disable sound from the Notification menu

  1. Move the mouse cursor to the right side of the screen
  2. Tap or left click on the “Settings” icon.
  3. In the Windows 10, 8.1 settings window left click or tap the “Notifications” icon presented there.
  4. In the “Notifications” menu, you will have there the option to turn the sounds on or off. Just slide the bar over to the left on the app you are trying to disable the sound and it will be set to “off” mode.
  5. After you turned off the notifications on the app you wanted .just close the PC settings window.
  6. Reboot your Windows 10, 8.1 PC and see if you still have the notifications sounds on the apps you disabled.

2. Use this app to disable sound

Left click the download link presented below to download the app necessary for disabling the sound for modern apps.

  • Download here app for disabling notification sounds
  1. Save the file you download above to the desktop of your Windows 10, 8.1 device.
  2. Double left click the file you downloaded to your desktop to begin the installation.
  3. You will get a message before the installation; left click the “Run” button situated below of that message.
  4. After you finished installing this app, you will have your modern sound apps disabled and get back to your work.

UPDATE: The app is no longer available for download.

3. Disable sound notifications from the Settings page

If you’re running Windows 10, you can disable app sound notification straight from the Settings Page.

  1. Go to Settings > System > Notifications & Actions.
  2. Under the Notifications menu, you can choose what and when to receive notifications. Use the toggle button to disable notifications.turn off notifications settings page windows 10
  3. If you scroll down, under ‘Get notifications from these senders’, you can better filter the apps and programs that you want to send you notifications. disable app sound notification
  4. If you don’t want to receive notifications from particular apps, simply toggle off the button located in the right.

There you have three quick methods to disable the modern app notification sounds on your Windows 10, 8.1 device as well as how you can get them back on. And if app-specific notifications like Twitter push notifications are not working, check out our article on how to bypass this issue.

If you encountered any issues or you have questions related to this topic, use the comments below to contact us.

How to Disable Microsoft Confidential Watermark in Windows 10, 8.1


Steps to remove Microsoft Confidential Watermark

  1. Tweak your Registry and create a new DisplayNotRetailReady key
  2. Change Ease of Access settings
  3. Additional solutions

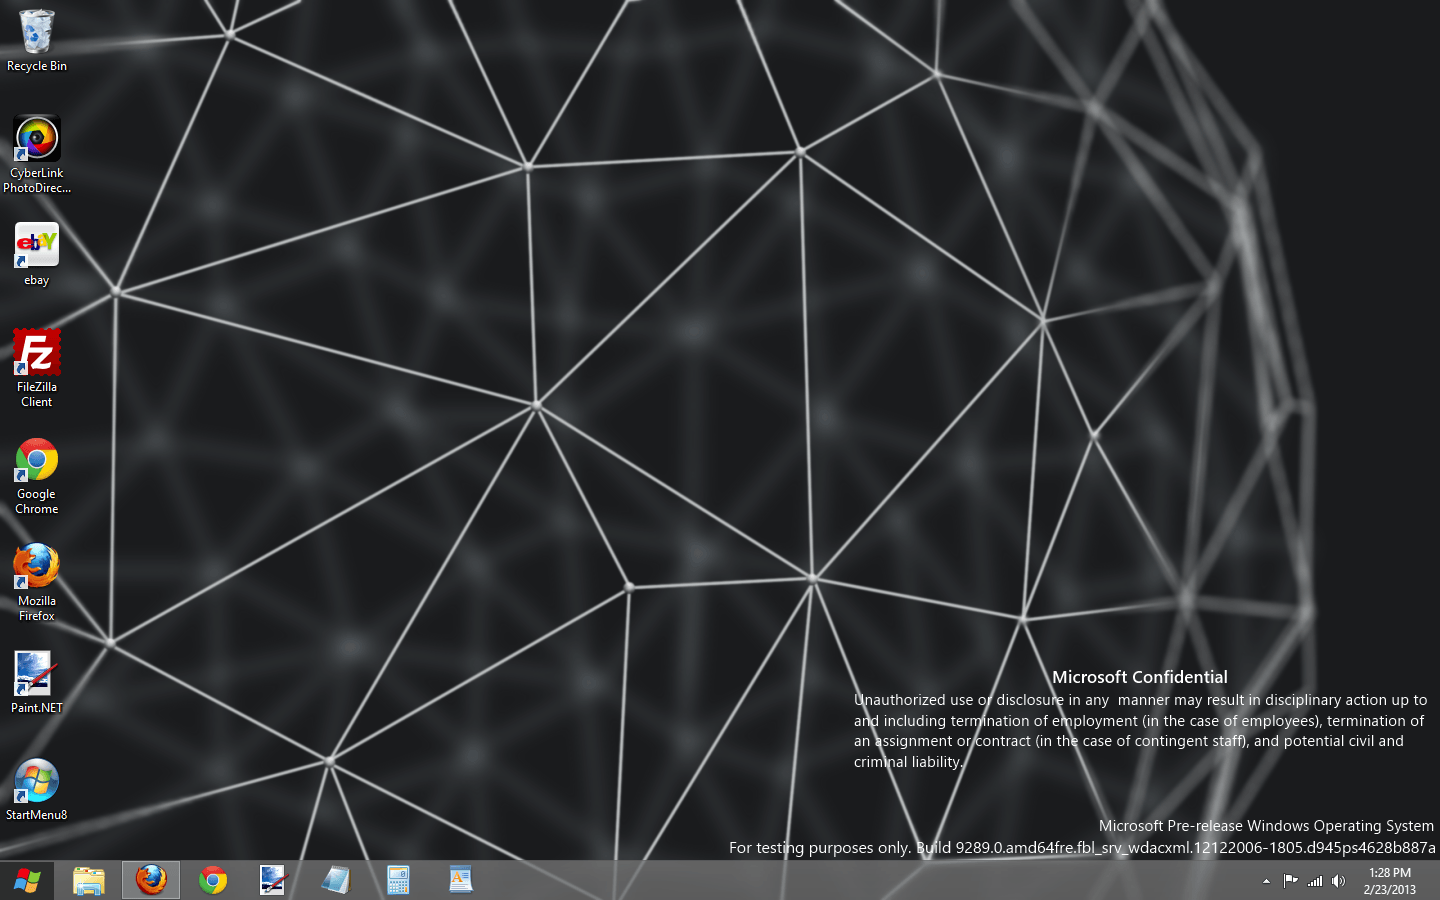
If your Windows 10, Windows 8.1 operating system automatically installs new updates, this is because you chose to do so when you first installed Windows 10, 8.1. Unfortunately, if the operating system downloads and installs updates automatically, you might end up with a Microsoft confidential watermark on your desktop. Seeing that this can get pretty annoying sometimes, we will show you how you can disable this watermark and get on with your work.
microsoft confidential watermark in Windows 8
The tutorial below will show you how to disable the Microsoft confidential watermark you have on your Desktop. You’ll access the Registry Editor feature you have in Windows 10, 8. From the “Registry Editor” feature, you’ll make the proper adjustments in the system to make the Microsoft watermark disappear. Make sure to follow the instructions in this tutorial very carefully. If you modify other options, this might cause various Windows 10, 8.1 errors.

Remove Microsoft confidential watermark

1. Tweak your Registry

  1. Press and hold on your keyboard the buttons “Window” and “R”.
  2. A “Run” window will pop up and in the run window type “regedit” without the quotes.
  3. Press the “Enter” button on the keyboard”.
  4. You will get a pop up from “User Account Controls” where you need to proceed by left clicking on “Yes”.
  5. Left click in the left side of the “Registry Editor” window on “HKLM”.
  6. In the “HKLM” folder left click on “Software”
  7. In the “SOFTWARE” folder left click on “Microsoft”.
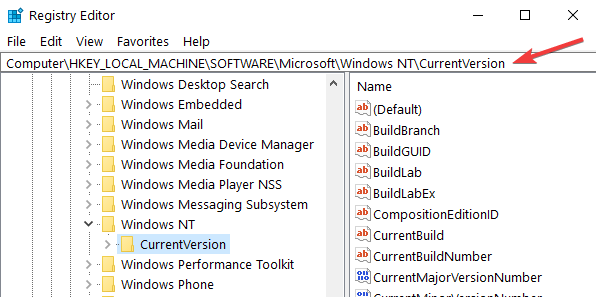
  8. In the “Microsoft” folder left click on “Windows NT” to open it.
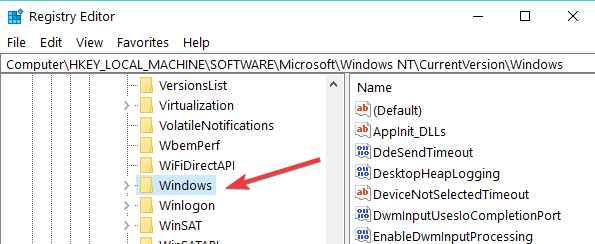
  9. In “Windows NT” folder left click on CurrentVersion”windowsNT registry editor
  10. And finally, in the “CurrentVersion” folder, left click on “Windows”windows NT windows registry
  11. On the right side, you will need to create a new “DWORD” file with the name “DisplayNotRetailReady” and double click on it to open.
  12. After you are in the Edit DWORD window of the “DisplayNotRetailReady” you created, write in the “Value data” the number “0” without the quotes or just leave it blank.
  13. Left click on the “OK” button you have in the “Edit DWORD” window.
  14. Close the Registry Editor.
  15. Now after a reboot of the Windows 10, 8 operating system, your watermark will be gone.

2. Change Ease of Access settings

Another quick way to remove your Microsoft Confidential watermark is to change Ease of Access settings. Keep in mind that this solution also removes background images.

  1. Open Control Panel
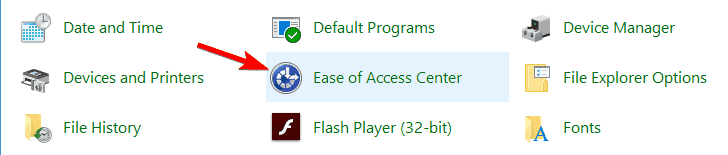
  2. Go to Ease of Access Center
    Remove watermark Windows 10 Test Mode
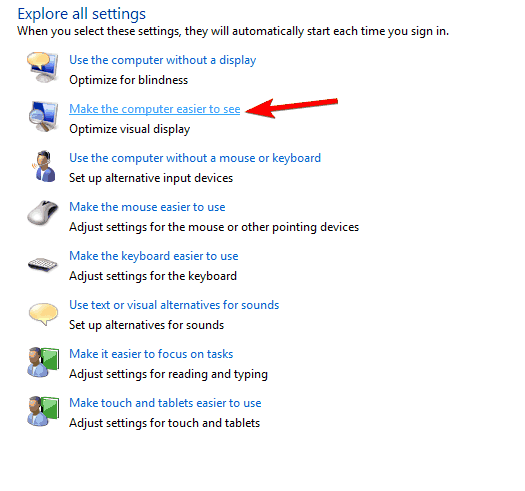
  3. Select Make the computer easier to see.
    emove watermark windows Education
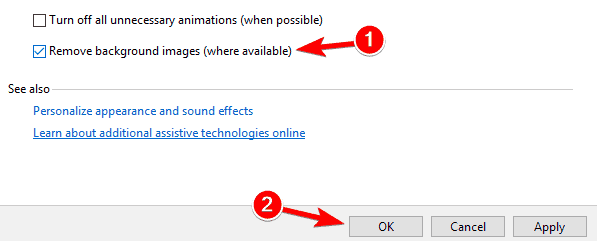
  4. Check Remove background images (where available) >  Apply > OK.
    Windows 10 remove watermark registry

3. Additional solutions

If your watermark is still there, you can also use our general troubleshooting guide on how to remove watermark in all Windows OS versions. Hopefully, one of the solutions listed there will help you fix the problem.

As you can see, you should be able to remove he Microsoft confidential watermark in Windows 10, 8.1 in just a few minutes. For any other questions on the subject, use the comment section. We will reply in the shortest time possible.

RELATED STORIES TO CHECK OUT:


Windows 7 KB4343900 causes BSOD for many users

If you’re planning to install Windows 7 KB4343900 on your computer, read this quick post and then decide whether you still want to hit the ‘Check for updates’ button or not.

Many users complained about Blue Screen of Death errors after installing this patch. They also confirmed that entering Safe Mode and uninstalling the update helped them fix this problem.

Here’s how one user describes this issue on Microsoft’s support page:

In a recent Windows 7 Professional update, KB4343900 caused the blue screen of death after I restarted my computer. I managed to start the PC in Safe Mode and uninstalled the update and it is working well since then. Considering it is deemed as an important update, how can I reinstall the update without the blue screen of death reappearing?

Well, if you experienced similar issues and you want to play on the safe side, you can try to reinstall this patch once again.

If the BSOD errors persist, the best approach is to simply avoid installing the August Windows 7 Patch Tuesday updates altogether.


Keep your OS fresh by checking out our always updated article about Windows 7 Patch Tuesday!


Fix Windows 7 BSOD errors

If you’re a problem solver and you want to find a solution to fix Windows 7 BSOD after update, here are a few workarounds that you can use:

  1. Install the latest drivers: Make sure that you have the latest driver updates installed on your machine. Outdated driver versions are known to cause BSOD issues.
  2. Check your disk for errors: Disk errors or corrupted system files often trigger BSOD errors. You can quickly check and repair hard disk errors by following these steps: navigate to Computer > right-click on your main drive > select Properties > go to the Tools tab > Check for errors.
  3. Repair your computer: Boot up your computer and press F8 before the Windows 7 logo appears on the screen. Select  Advanced Boot Options > Repair your computer > go to System Recovery > launch Startup Repair.
  4. Use a restore point: If nothing worked, you can simply use a restore point to restore your machine to a functional version.

Have you encountered other KB4343900 bugs? Let us know in the comments below.

How to Download Documents, Pictures From OneDrive

Microsoft OneDrive on Windows 10, Windows 8 is a good feature that you can use to save your documents and pictures on it having a maximum capacity of 25 GB of free space. Seeing that many of Windows users are using this feature these days, I have decided to create this quick tutorial and show you how you can download your documents and pictures from your Microsoft OneDrive storage center. All these steps will only take a few minutes of your time.
Microsoft OneDrive downloads
You can either download your documents and pictures from the OneDrive desktop client or from SkyDrive —  if you do not have the Windows 10, Windows 8 the OneDrive desktop client. In the lines below, we’ll talk about the second method because this is the method that most users are having issues with.

How do I download files from OneDrive to my computer?

  1. First, you will need to access the link below to take you to the Microsoft OneDrive where you can sign in or create an account
  2. On the first page of OneDrive, you will have access to all the files or albums you wish to download.
  3. Right click on the specific file or album that you wish to download.
  4. Left click in the menu that appears on the “Download” feature.download onedrive files
  5. It depends on your internet connectivity and the size of the downloaded objects to determine the time necessary for the files or albums to be downloaded.
    Note: It can take up to several hours depending on the size of the files.

It is worth mentioning that one of the most common errors when accessing or downloading specific files and folders on OneDrive is this: This item might not exist or is no longer available. If you can’t download OneDrive documents and pictures due to this error, use this troubleshooting guide to fix it.

So, there you have a few quick steps to download any files, such as documents and pictures from the Microsoft OneDrive server to your Windows 10, 8.1 PC . This feature is very useful due to the fact that you don’t need to worry about your files being lost on  your Windows 10, 8.1 device as long as the files are saved to OneDrive as a backup.

Speaking of backing up your files, there are many backup software that you can use, apart from OneDrive. Check out our guide on the best backup software for Windows 10 and download the one that best suits your needs.

If you have any issues while following this tutorial, let us know in the comments below. We will see what we can do to improve your Windows experience.

RELATED STORIES TO CHECK OUT:


y.

Microsoft fixes log in and activation issues in Office 365

Microsoft announced that it has fixed an issue preventing Office 365 users from logging in or activating their Office 365 subscription. Apparently, the company had to face two different problems: Office 365 commercial users being unable to sign in to the cloud productivity suite, and consumers being unable to activate their Office 365 Personal and Home subscription in their Office apps.

https://twitter.com/Office365Status/status/1030112960167854082

We have been personally affected by the second issue over the past couple of weeks, with the Office apps not recognizing an active Office 365 subscription across several devices (Windows 10 PC, Mac, and even iOS). In our case, we can confirm that the situation is back to normal as of this writing. As noted by ZDNet’s Mary Jo Foley, Office 365 users on macOS may need to use the Office License Removal tool if Office 2016 for Mac still doesn’t recognize a valid Office 365 license.

Office 365 reached 100 million commercial active users last year, and Microsoft revealed during its latest financial results that it now has 31.4 million Office 365 consumer subscribers. Office has definitely become a core business for Microsoft, and the company can’t really afford to let its customers down and risking losing some to the competition from Google and others.

Your Movies & TV viewing history will soon appear in Windows Timeline

Microsoft Movies & TV is joining the small list of apps that integrate with the new Timeline feature on Windows 10. In the latest version of the app (10.18081.1041.0) for Windows Insiders, you’ll see that your Movies & TV viewing history will show up in Windows Timeline (via MSPoweruser). For now, it seems that Timeline can only recognise content purchased from the Microsoft Store, and not personal videos watched with Movies & TV app.

The app has also started to promote the new integration with Disney’s Movies Anywhere service, and you’ll see in Settings a new link to connect your Movies Anywhere account and bringing over your movie collection.

The new Timeline integration is nice, but it doesn’t immediately let you pick up where you left off. Clicking on a video in the list will open the information page for the movie and TV show and you’ll have to click on “Resume” to continue watching. Still, this is better than nothing for now and it helps Movies & TV stand out among all the stock UWP apps from Microsoft. Again, this Timeline integration requires a new version of the app that is only available for Insiders right now, but it should become generally available pretty soon.

Download Windows Phone 8 SDK from Microsoft

Windows Phone 8 has just been launched and it has managed to make quite a good impression thanks to many positive reviews. But, just as with the Windows 8 and like we previously mentioned, you can’t do too much if you don’t have enough applications in the Windows Store. In order to compete with other serious companies in the mobile field, one needs to appeal to developers so they could start making more apps.

In order to create more applications for the Windows Phone 8 ecosystem, Microsft has come up with pretty useful advices, tools and tips for developers. Just like with Windows 8, there are plenty of resources for programmers to start working on applications for Windows Phone 8. But probably the most important instrument is Windows Phone 8 SDK. And Microsoft has just announced that is ready for download.

download the windows phone 8 software development kit
Developers, get you Windows Phone SDKs

Download Windows Phone 8 SDK

At the Build developer conference, on Day 1, Microsoft has announced that the software development kit for Windows Phone 8 has been made ready for download. The Redmond company has a tough job trying to catch up with iOS and Android who seem to share the supremacy in the mobile market. Many have been criticising Microsoft for delaying this update, but Ballmer and Company has always defended saying that they were still working on crucial features.

Here’s what Windows Phone 8 analyst Donnie Berkholz thinks about this:

Windows Phone 8 now provides an end-user experience on par with iOS and Android. The public release of the developer SDK finally makes it possible to nail a critical component of mobile adoption, the broader app ecosystem. Unfortunately the SDK wasn’t released in advance of Windows Phone 8 so developers could have apps available at the release, which will hurt both developers and Microsoft because of the importance first impressions have to consumers. Given Microsoft’s near-legendary tenacity and its clear understanding of the importance of mobile devices, I expect they’ll continue pursuing this until they get it right — if not for Windows Phone 8, for the next release.

2018 update: Windows 8 Phone SDK has not released any official information about further support. We have searched all over the internet, and all we found recently is that SDK is no longer supported on some phones as the following error appears: windows 8 phone sdk error

Apparently, there is no solution for this error, and Microsoft developers have not said anything on official forums. IN case you arrived to fix this error, share this information with us so we can update this article and help other users.

From a critic point of view, releasing the Windows Phone 8 SDK just now is a very, very bad move. I mean, does Microsoft want developers to start making apps just now? Wouldn’t it been a much better idea to release it at least 3 months, or 1 month ago, so that developers could have enough time to populate the Windows Store with apps? But let’s hope that things will change.

[Download Windows Phone 8 SDK ]

How to: Print the Calendar in Windows 8, 8.1


How do I print my calendar in Windows 8.1, 8 if it is not working?

  1. From Calendar App menu
  2. Make a print screen
  3. Calendar software that can be printed

A lot of Windows 8.1, 8 users have an issue with printing the calendar, after trying all sorts of different Windows 8 features I found out that some apps in Windows 8.1, 8 do not support and don’t have the feature available for printing pages inside the app.
Print calendar in Windows 8
If you are trying to print a calendar in Windows 8,1, 8 and you cannot find in the File menu the print option or the “Ctrl” plus “P” doesn’t work you will see in a few steps below how you can try to print the contents of the calendar in just five minutes of your time.

Print calendar in Windows 8.1, 8: how to do it?

1. From Calendar App menu

The first steps we need to take are to check if we can print normally the calendar by clicking (left click) on the “File” menu inside the app and then click (left click) on “Print”.

This should take you to your printing page and from there all you have to do is select the options for printing you want to have and click (left click) on the “OK” button situated in the lower side of the “Print” window you opened.

2. Make a print screen

If you do not have access to the print app in Windows 8 then we are going to try to work around this issue and print the calendar using another method posted below.

  1. Click (left click) on the calendar app.
  2. Go to the calendar you want to print.
  3. Press and hold on the keyboard the button “Ctrl” and the button “PrtScn” (the button for print screen).
  4. Open a Word document and name it as you see fit (Example: Calendar)
  5. Press and hold the buttons “Ctrl” and “V” or just right click in the word document and select from there “Paste”.
  6. You can change in the Word document the picture as you see fit.
  7. Press and hold on the keyboard the button “Ctrl” and the button “P” or go to the “File” menu in the document and select from there the “Print” option.
  8. Now you can print the calendar within the word document.

3. Calendar software that can be printed

You might want to change your calendar, in order to print it, especially if the Calendar App from Windows does not let you print it. You can set up a personalized calendar on your Windows PC. If you want to personalize it more, you can even install a photo calendar software and mark dates with your favorite photos. Finally, if you want a simpler method for you to print your calendars and your events, just go on and install Google Calendar.

Seeing that Windows 8 doesn’t have the print feature for all of the apps the second tutorial is a good way to print the calendar and it will only take you a few minutes of your time. If you have anything else to add to this tutorial please write us below your opinions on the matter.

READ ALSO: 5 best calendar apps for Windows 10 users

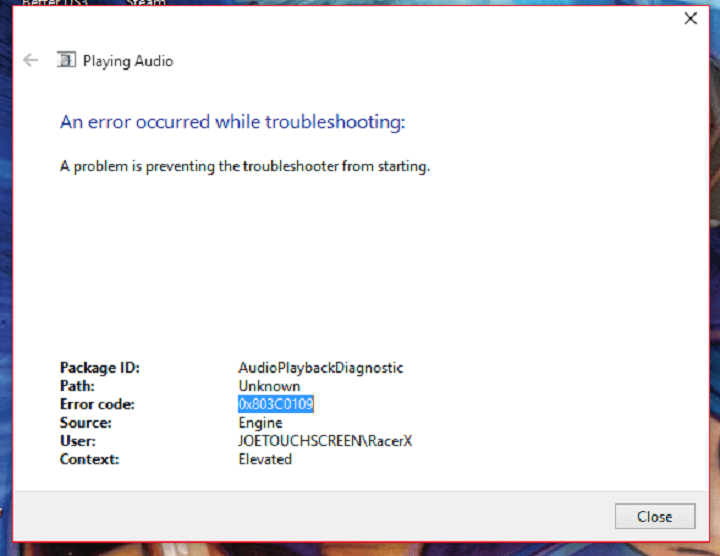
Fix: Windows 10 update error 0x803c0109

While Windows 10 should be a certain upgrade over its predecessors, it inherited few common issues. Additionally, with Microsoft cutting off support for previous systems, Windows 10 becomes the only viable option in the upcoming years.

The majority of errors is somehow connected with updates and all of them can manifest different issues. One of those errors that commonly appear after updates, bears the code 0x803c0109. As some users reported, this issue affects sound and sound device drivers. The main culprit is a failed update or a defective build. However, don’t worry, because we have a few workarounds that should resolve this annoyance, in case it bothers you.

How to fix error 0x803c0109 on Windows 10

Table of contents:

  1. Check Speaker Properties
  2. Reinstall Driver Manually
  3. Restart Update Services
  4. Check system integrity with SFC
  5. Uninstall previous updates
  6. Run DISM
  7. Run the Update troubleshooter
  8. Restart Update components
  9. Make sure the BITS service is running
  10. Disable antivirus
  11. Install the update manually

Fix – Update error 0x803c0109 in Windows 10

1. Check Speaker Properties

Your first step should be checking sound devices and connect them to an alternative source. Additionally, some updates can change your settings, so follow these steps and make sure everything is set as it’s supposed to be.

  1. Right-click in the Volume icon in Notification area.
  2. Open Volume Mixer and make sure the Speakers volume is not muted.
  3. Right-click Volume icon again and open Playback Devices.
  4. Right-click preferred device and Set as Default.
  5. Select the preferred device and choose Properties from the bottom.
  6. Open Advanced tab and set Default format to 16bit 44100hz (CD quality).
  7. In the same tab, check both Exclusive mode boxes.
  8. Save and test your sound.

That should resolve all potential issues with the Speaker settings. However, if the problem is persistent, move on to the next step.

2. Reinstall Driver Manually

As you might be aware of, Windows 10 Update will occasionally install a few drivers on your PC, too. In some cases, that can be a good thing. However, more time than not, the generic drivers are not the best solution. So, you’ll probably need to uninstall Sound drivers and get the new ones from the manufacturer’s official site. In order to do that, follow these instructions:

  1. Right-click Start and open Device Manager.
  2. Find Sound, video and game controllers.
  3. Select your device, right-click and open Properties.
  4. Open Details tab.
  5. In the drop-down menu, select Hardware Ids.
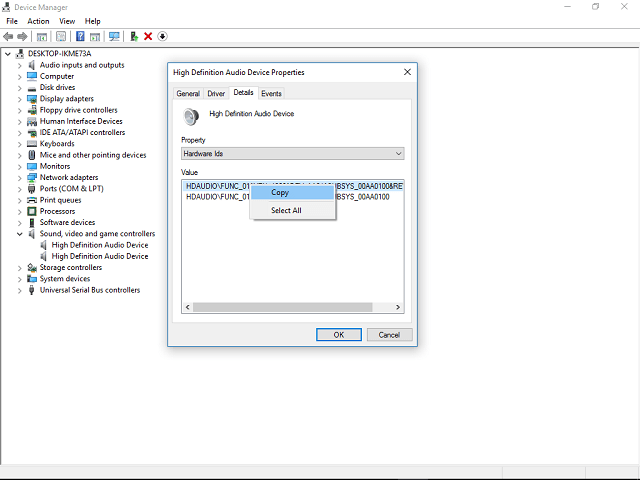
  6. Copy the first line and paste it into any web Search Engine (Google, Bing etc.).
  7. You should see your sound device’s official manufacturer and support drivers.
  8. Download and install.

In addition, we advise you to download drivers exclusively from the official site, and not from non-trusted sources. That way you can be secure and obtain a valid driver.

2.1 Update drivers automatically

In order to prevent PC damage by installing the wrong driver versions,  we strongly suggest to do it automatically by using a third-party tool.

An automatic tool will help you update all outdated drivers safely. After several tests, our team concluded that this is the best-automatized solution:

3. Restart Update Services

As we already stated, the previously installed updates are the reason for sound issues. At least, most of the time. Due to corrupted or incomplete updates, you can experience performance drops or malfunction of certain peripheral devices. This is how you can try and fix updates in the first place:

  1. Press Windows key + R and type services.msc
  2. Press Enter to confirm.
  3. Find Background Intelligent Transfer Service (BITS).
  4. Make sure that the status is set to Running.
  5. If it isn’t, right-click and choose Start.
  6. Right-click again and open Properties.
  7. Choose the Recovery tab and make sure that First failure and Second failure are set to Restart service.
  8. Save and try updating.

That way you’ll make sure that the main update service is working. Try updating and see is the problem maybe resolved.

4. Check system integrity with SFC

Additionally, if the updated system files are corrupted or incomplete due to malware or misuse of any kind, various errors can occur. However, you can solve that in a few easy steps with the SFC tool. And this is how:

  1. Right-click on Start and run Command Prompt (Admin).
  2. In the command line type sfc/scannow and press Enter.
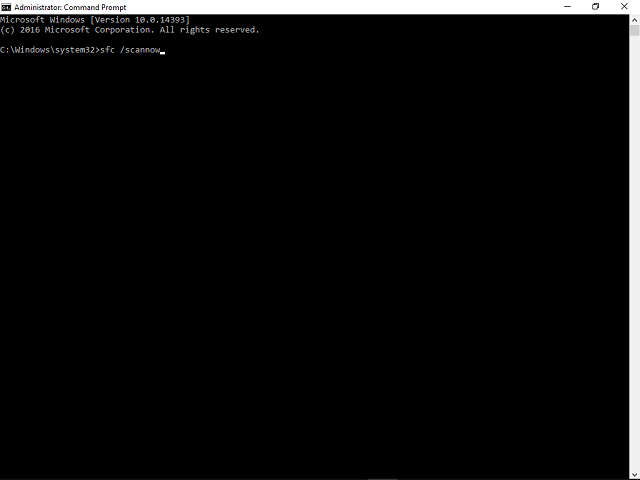
  3. Wait for the process to complete and restart PC.
  4. Try updating.

Hopefully, after that, you’ll be able to install new updates and possibly fix the sound issue.

5. Uninstall previous updates

Even though the Updates are forced, you still can uninstall the ones that cause problems of any sort. This exact problem impacts sound but its main source is faulty update. And if your sound worked just fine prior to an update, that is the reason more to get rid of them. So, in order to do so, follow these steps:

  1. Choose Windows Search and type Updates.
  2. Open View installed updates.
  3. Right-click on the latest update and choose Uninstall.
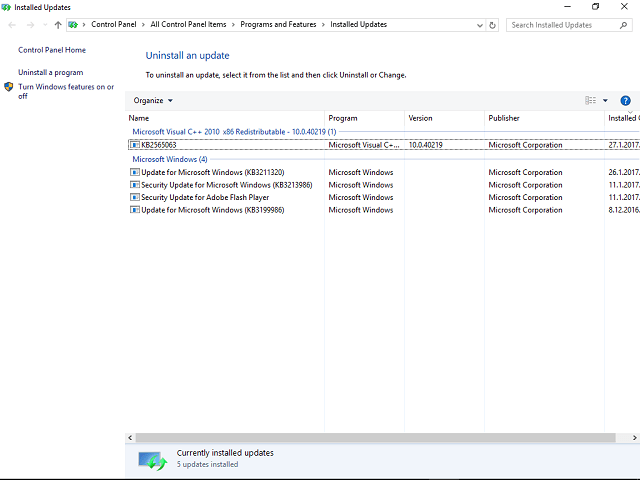
  4. Save and restart your PC.

Most of the time, Microsoft address this issues, so you can expect a fix with the upcoming updates.

6. Run DISM

If running the aforementioned SFC scan didn’t get the job done, you can try with DISM. Deployment Image Servicing and Management is a command-line tool that deploys the system image all over again. Maybe this process will help with updating problems.

Here’s how to run DISM in Windows 10:

  1. Open the Command Prompt as shown above.
  2. Enter the following command and press Enter:
    • DISM.exe /Online /Cleanup-image /Restorehealth
  3. Wait for the process to finish.
  4. Restart your computer.
  5. In case the DISM can’t obtain files online, try using your installation USB or DVD. Insert media and type following command:
    • DISM.exe /Online /Cleanup-Image /RestoreHealth /Source:C:RepairSourceWindows /LimitAccess
  6. Make sure to replace ”C:RepairSourceWindows” path of your DVD or USB.
  7. Follow further on-screen instructions.

7. Run the Update troubleshooter

We mention Windows 10’s built-in troubleshooter in almost every article. And that’s for a reason. Microsoft introduced this tool to automate troubleshooting in Windows 10 and make it easier for end-user. As the troubleshooter offers solutions for various problems, we can use it for resolving update issues, as well. Hopefully, the system will recognize what’s wrong and resolve the issue for us.

Here’s how to run Windows 10’s built-in troubleshooter:

  1. Go to Settings.
  2. Head over to Updates & Security > Troubleshoot. 
  3. Select Windows Update, and go to Run the Troubleshooter. 
  4. Follow further on-screen instructions and let the process finish.
  5. Restart your computer.

8. Restart Update components

If the troubleshooter failed to resolve the problem, we’ll have to go back to our own. So, the next thing we’re going to do is resetting crucial Windows update components, in order to get them back to a (hopefully) working state. Here’s what you need to do:

  1. Start Command Prompt as administrator.
  2. When Command Prompt starts, run the following commands:
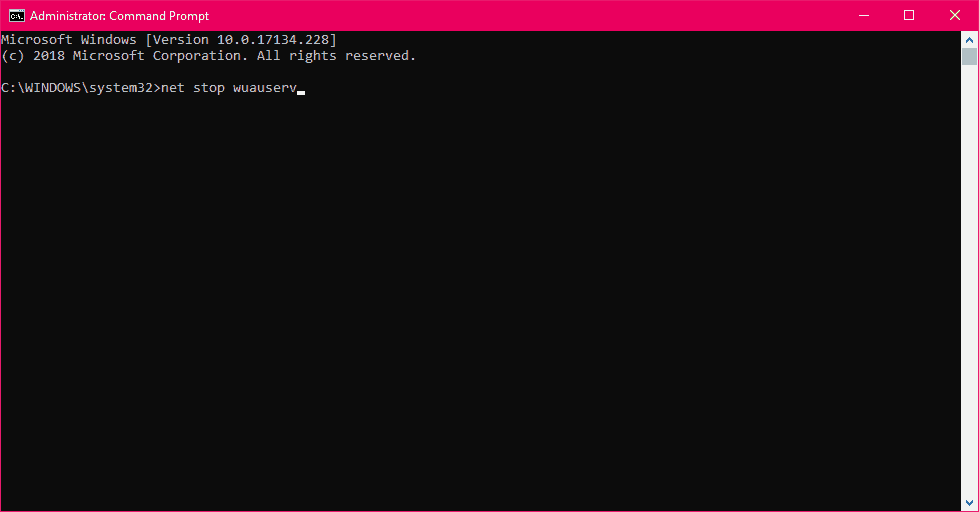
  • net stop wuauserv
  • net stop cryptSvc
  • net stop msiserver
  • ren C:WindowsSoftwareDistribution SoftwareDistribution.old
  • ren C:WindowsSystem32catroot2 Catroot2.old
  • net start wuauserv
  • net start cryptSvc
  • net start msiserver

9. Make sure the BITS service is running

Background Intelligent Transfer Service (BITS) is a key service for delivering Windows updates. So, the first thing we’re going to do is restarting it. This should help to eiminate any possible interferences. After that, we’ll enable the service and make sure it stays on.

Here’s what you need to do:

  1. Go to Search, type services.msc, and open Services.
  2. Find Background Intelligent Transfer Service. Right-click and open Restart.
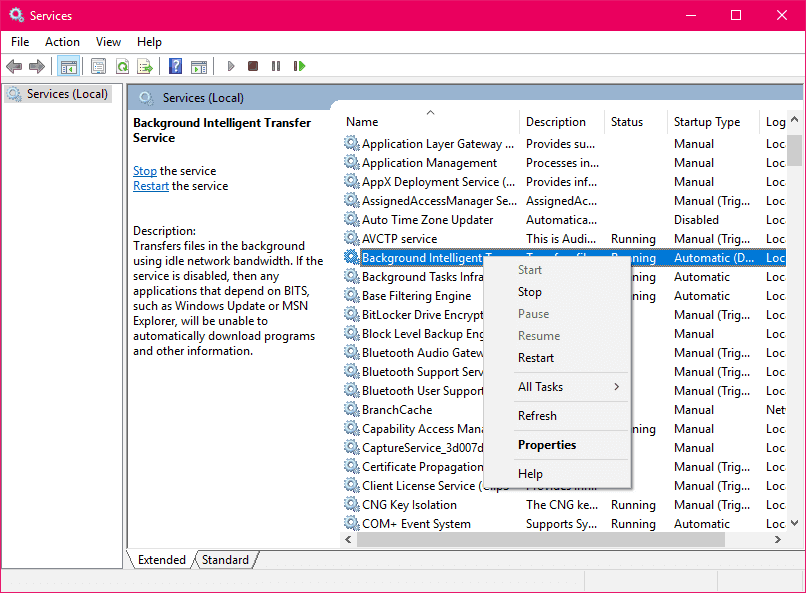
  3. Wait for the process to restart.
  4. Now, on the General tab, find Startup type and choose Automatic.
  5. If the BITS is not running, right-click and choose Start.
  6. Confirm selection and close window.

10. Disable antivirus

Third-party antivirus programs and Windows updates are not designed to work in harmony. Because of that, it’s quite possible for your antivirus to block the incoming update. To eliminate the doubt, disable your antivirus for a few minutes, and try to install updates once again. If you succeed, the problem is resolved. If not, well…

11. Install the update manually

And finally, if none of the previous solutions managed to resolve the problem, we’ll have to surrender and install the update manually. Here’s how:

  1. Copy the name of the issued file.
  2. Go to Microsoft Catalogue here.
  3. Paste the name into the search box.
  4. Download the file. Keep mind on your system architecture (x86 or x64).
  5. Install the update file.
  6. Restart your PC.
  7. Check for additional updates to make sure the update is up and running.

That is it. We hope you’ll manage to get your sound back and resolve additional issues.

If there is anything you would add, the comments section is bellow.

For more Windows Update workarounds, and additional info, make sure to check our Windows Update hub.

How to Detect Home Network in Windows 10


How do I detect my home internet network on Windows 10, 8.1 laptops or PC?

  1. Reboot your PC
  2. Power-off your router
  3. Check your Wi-Fi connection distance
  4. Check if router works normally
  5. Check for interfering signals
  6. Check the router for monitor mode
  7. Check the router for monitor mode
  8. Other Interner connection errors that you might encounter

In Windows 10, 8.1 operating systems we might experience some issues regarding the connection to our home network. Although even if our Windows 10 PC or laptop cannot connect to the internet our other devices like phones and tablets will have no problem connecting to your router or modem. This failed detection of the home network in Windows 10, 8.1 can be the cause of a few reasons but we will enumerate the options you can follow to fix this issue in a few rows down.
Windows-8-network detection
Some of us when we buy a new laptop for example with Windows 10 or Windows 8.1 on it and we try to connect to the wireless internet router in our home it fails to detect our home network, but we need to be aware of a few things before we try to connect to the network like making sure the wifi adapter on the laptop or PC is turned on properly. In most of the cases, there is a Wifi icon light somewhere near the keyboard of the laptop and we need to see if it is turned on, if not we need to turn the adapter on in order to detect our wireless home network.

How to find a home network in Windows 10?

1. Reboot your PC

  1. Reboot the Windows 8 PC or laptop.
  2. Try to connect after the reboot.
  3. If it doesn’t work go to the second option.

2. Power-off your router

  1. Unplug the router you have in your home from the power outlet.
  2. Wait between 20 and 30 seconds with the power off on the router.
  3. Plug in the router again to the power outlet.
  4. Wait approximately 30 seconds for the router to initialize.
  5. Now you will need to try to connect again to the network with your PC or laptop and see if it did the job

3. Check your Wi-Fi connection distance

We might have a problem when connecting to our home group network because our PC or laptop is situated to far from the router. In this case, you won’t be able to catch a signal from the router or it will connect and disconnect regularly making the network connection very annoying.

The only way we can fix this issue is either move the Windows 8, 8.1 PC or laptop closer to the router or you can buy an amplifier for the wifi connection in order to increase the range of your router.

4. Check if router works normally

Your router or access point might not be working properly.

If you experience hardware issues with the router you will need to take the router to a specialized store where you can fix it or if you still have a warranty on it just take in back to the place you bought it.
Note: To check if your router is working, try connecting to the router via other devices like phones and tablets.

5. Check for interfering signals

You might have some other devices interfering with your wireless signal, therefore, preventing you from connecting to your network.
The devices can be for example microwave ovens or just a phone that has the same frequency as your router, in this case, you can check by moving the devices in another room or far from the router.

Another fix to this issue is by setting the router to automatically set up a wireless channel (read the router’s manual for more information on this option).

6. Disconnect unneeded devices from the router

The router can have too many connections to it, so if you have a lot of PCs and other devices connected to it you might have issues detecting or connecting to the router.

In this case, you can try to disconnect some of the devices and see if you can detect the home network and connect to it .

7. Check the router for monitor mode

The last thing we can try is to check if the router in your house is in monitor mode. There are some programs for your Windows 10, 8.1 PC or laptop that will monitor the network if you leave it opened in the background. The only problem is that if you leave the monitoring program opened the router will not let you detect the network and therefore you will not be able to connect to it.

Solution: Close any network monitoring programs you might have running on your PC or laptop, unplug the router’s power cable, reboot the PC, plug the power cable in the router and try to see if it will detect the home network now.

8. Other Interner connection errors that you might encounter

Connection-related issues are some of the most annoying and often-appearing on Windows laptops and PCs. We have created countless guides in order to fix such issues and helped thousands of our readers with that. Here are some that will help you to solve the most encountered internet connection issues:

  1. Fix: Windows 10 Can’t Connect To This Network
  2. File Explorer won’t detect Network devices in Windows 10
  3. Wi-Fi doesn’t have valid IP configuration on Windows 10
  4. ‘A network change was detected’ error on Windows 10
  5. Windows 10 can’t find Wi-Fi network
  6. Homegroup Cannot Be Set Up in Windows 10, 8.1 and 7

Can you detect your home network in Windows 10 and Windows 8.1 now?If you followed the options presented above and you still cannot detect the home network please write us below and we will see what we can do to fix this issue.

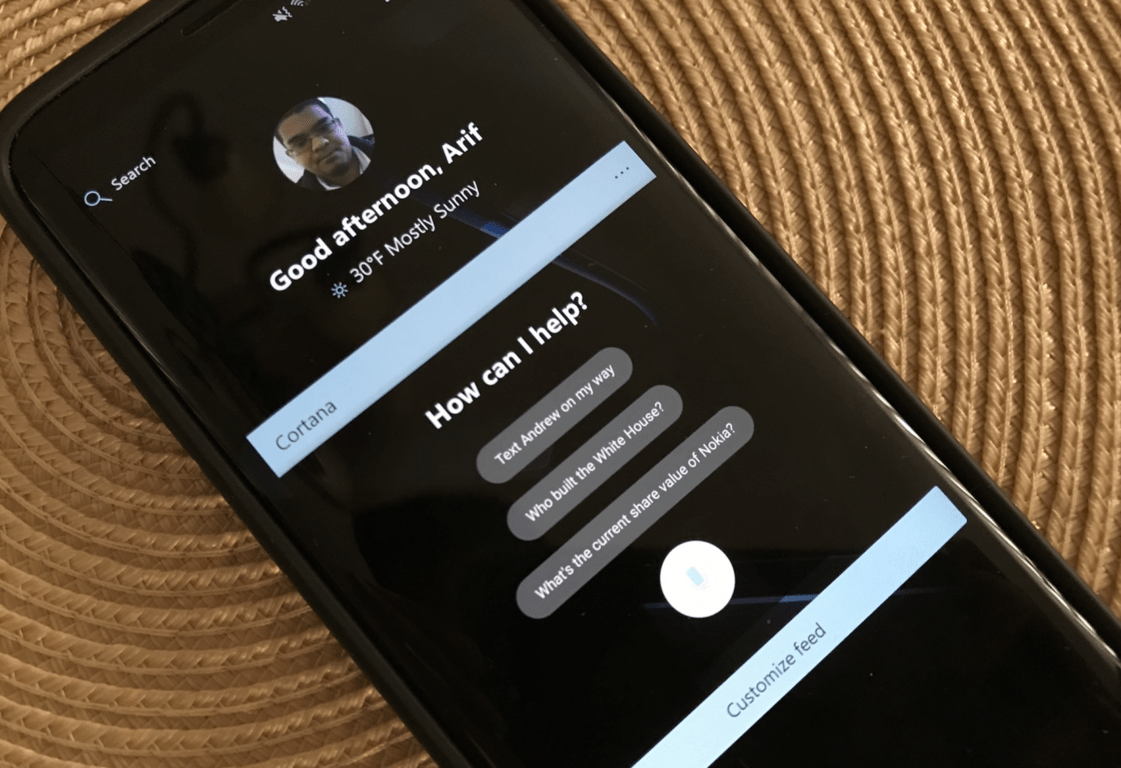
Microsoft Launcher beta 4.13 is out with new Read text message aloud feature for Cortana

Microsoft has just released a new beta version of its Microsoft Launcher today, which brings some UX improvements as well as new features for the built-in version of Cortana. Microsoft integrated the digital assistant to its Android Launcher earlier this year, and with this latest release you can now ask Cortana to read your incoming text messages and find the location of your kids. “We’re working on some big things and these next few months are going to be exciting times,” wrote Microsoft’s Product Manager Ezra Park on the dedicated Google+ community:

Here are the full release notes for Microsoft Launcher version 4.13:

  • Now you can drag and drop widgets to and from the Launcher Feed. Widgets also no longer have card headers when placed in the Feed.
  • Updates to the calendar card let you add a new event with one click when you no longer have any more events for the day.
  • Tuning fixes for new app drawer animation.
  • Parents can now ask Cortana for the location of their kids via voice (ex. “where are my kids?”)
  • Cortana can now read incoming SMS messages and now supports en-IN.

This new beta build is still rolling out on the Google Play Store, so you may not be able to download it immediately. If you’re not a beta tester yet, you can still sign up on this page.

Microsoft Launcher
Microsoft Launcher
Price:
Free

How to fix corrupt AutoCAD files in Windows 10/11

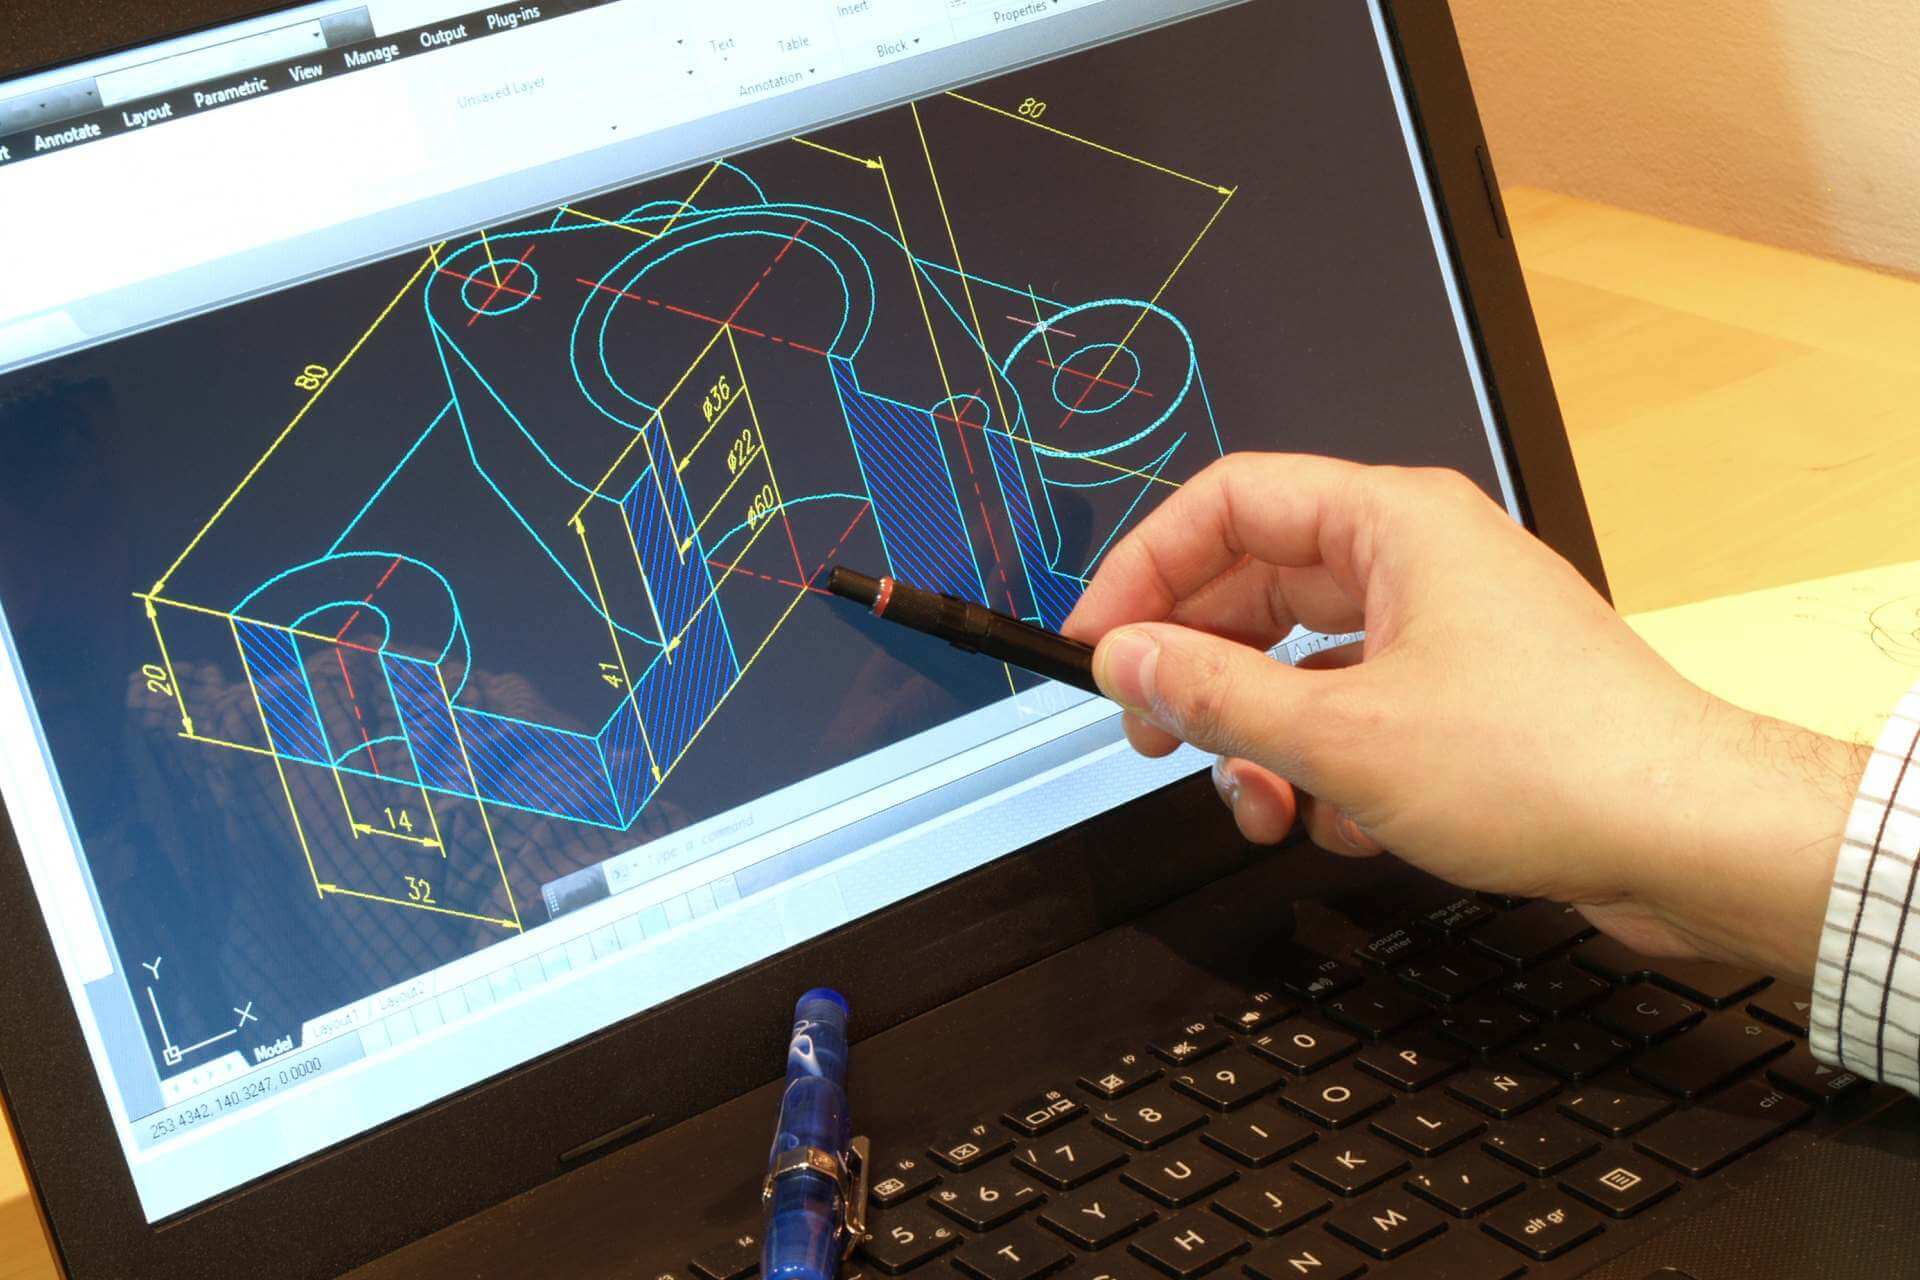
Having trouble nursing a corrupt AutoCAD file back to health? An AutoCAD file is one that has the .DWG extension, also known as an AutoCAD Drawing Database file. Such files store metadata, 2D or 3D vector image drawings you can use with the computer aided design (CAD) program(s).

These files can be transferred between programs because they’re compatible with several 3D drawing and CAD programs, though not all viewers can open each type of DWG file.

It can be miserable when a file appears to be lifeless, or when you have to kill it after it has brought your system down to its knees, literally.

Some of the symptoms of a corrupt AutoCAD file include:

  • A drawing that seems funny
  • The file works slowly
  • File doesn’t open
  • File hangs or crashes the AutoCAD program
  • A few commands won’t work
  • It appears to have some missing parts
  • Unexplained increase in size of the file
  • Display or regen issues
  • The corrupt AutoCAD file just won’t reveal itself when you try to open it

Eventually, all these elements cause the AutoCAD program to send you unexpected or unwanted messages.

These and other issues are caused by third-party apps within AutoCAD, DWG files created or saved by products that aren’t Autodesk or RealDWG, the program terminates while saving, or old drawings getting used all the time, over a few years.

Other causes include network faults such as file locking, latent data writing, transmission errors, storage media degradation by bad hard drive sectors, failing/defective RAM, OS problems, power surges, and outdated software.

— RELATED: 8 best laptops for architects to unleash your imagination

For each of the above symptoms, and a few others, there are several causes you need to consider, each of which have solutions to help you clean, repair, fix, and recover your drawing.

Fix corrupt AutoCAD files

  1. Use Recover Command
  2. Use Auto save feature
  3. Other steps to take

1. Use Recover Command

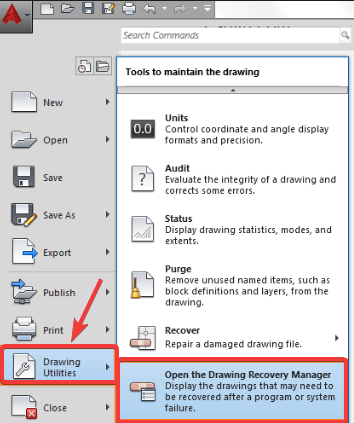
Recover Command lets you restore the corrupt AutoCAD files directly if you either deleted or lost them. To do this:

  • Open a new AutoCAD drawing
  • Select file
  • Select Drawing Utilities
  • Select Recover or Recovery Manager, depending on your software versionautocad drawing utilities
  • Select the drawing
  • Click OK

2. Use Auto save feature

  • Open AutoCAD
  • Select Tools
  • Click Options
  • Click Files
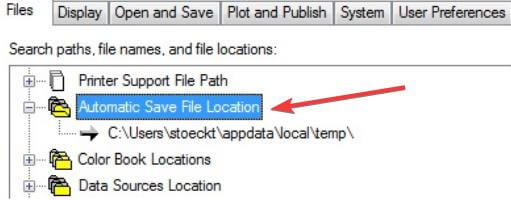
  • Click Automatic Save File LocationAutomatic Save File Location autocad
  • Check the location of the autosave files saved under: C:Documents and SettingsUsernameLocal SettingsTemp
  • Locate your CAD file by name
  • Check the date of modification of the files
  • Select the right version – the one that was deleted or lost
  • Change the file’s extension from .bak or .sv$ to .dwg
  • Try and see if you can use your AutoCAD file/files again. You can use a dwg file opening software, then convert the drawing to an older DWG version and try to open again
  • Go to your backup system. Restore the file from a previous time before it was corrupted

If the file opens, do the following:

  • Open the file
  • Purge Registered Applications by typing PURGE in a command line. Type R for Regapps and press enter. Type N when asked to verify each of the names to be purged, and press enter
  • Type PURGE gain at the command line
  • Check all the boxes and click Purge All
  • Type AUDIT at the command line. Type Y for Yes to fix errors and press enter
  • Save your drawing

— RELATED: Fix: AutoCad not Working in Windows 10

3. Other steps to take

Method 1

If the corrupt AutoCAD file persists, try the steps below:

  • Open the corrupt AutoCAD file or drawing and a new drawing
  • Press CTRL+A to select everything on the corrupt AutoCAD file, and press CTRL+SHIFT+C
  • The base point will be 0,0,0
  • In the new drawing, press CTRL+V
  • The insert point is 0,0,0
  • Save the new drawing

If it still persists, do the following:

  • Check that all the layers are ON, thawed, and unlocked
  • Detach all XREFs (external references) and that they have no circular attachments
  • Write Block all necessary information in the corrupt AutoCAD file to a new drawing using the command line.
  • Type WBLOCK in the command line
  • Go to Source > select Objects
  • Click Select Objects
  • Use a selection window to pick only necessary objects from the file (don’t type ALL)
  • Set the file path and name > click OK
  • Open a new blank file (drawing file)
  • Insert the file you created from the command line
  • Type INSERT in the command line and select the file
  • Uncheck the box “Specify On-screen”
  • Check Explode box and click OK
  • Type PURGE in the command line > click Purge ALL
  • Audit and fix the errors
  • Type SAVE AS and create a new file name

Method 2

  • Open a new blank AutoCAD file
  • In a command line, type RECOVER
  • Go to the corrupt AutoCAD file to let the program restore it
  • Type OVERKILL at the command line
  • Select all objects
  • Check or uncheck the properties to include/ignore
  • Click OK
  • Type DELCON at the command line
  • Select all objects
  • Type BREP
  • Select all objects
  • Type –SCALELISTEDIT
  • Type R for reset and Y for yes
  • Type FILTERS
  • Click Delete filters

If the file is unexpectedly large in size, use the DGNPURGE tool.

Were you able to find a solution among these listed here? Let us know which one worked for you by leaving a comment in the section below.

RELATED STORIES TO CHECK OUT:

KB4343909 bugs: Install fails, VPN won’t connect and more

The latest Windows 10 v1803 cumulative update, KB4343909, brings a series of useful fixes and improvements that will make the OS more stable. Unfortunately, installing KB4343909 won’t be an easy ride for all users. Many Windows 10 April Update users already complained about various issues after installing this patch. We’ll list the most common ones in this post.

KB4343909 reported issues

Games won’t launch

If you’re an avid gamer, you should not hurry to install the latest Windows 10 updates on your computer. As a matter of fact, many users said their games had become unplayable after installing KB4343909. Uninstalling this patch quickly solved the problem.

[…] KB4343897 for Windows 10 1709 and KB4343909 for Windows 10 1803. These installed overnight on two different computers. Prior to that every game was working on these computers. Afterwards no games worked. I have tried games like Assassin’s Creed, DDO, SWTOR, they all start to load, drop off, then you are back at the desktop with a semi-locked screen. It takes over 7 minutes for Task Manager to load at this point and ending a task is impossible. Removal of the update on the machine with Windows 10 1803 has made the games playable […]

If you can’t launch games on Windows 10, here are some guides to help you fix this problem:

VPN won’t connect

It seems that KB4343909 breaks VPN connections. Many users reported that their VPN tools failed to connect.

No matter how I tried, I never got a VPN connection following the same steps and I didn’t receive any error. VPN client just said “Trying to connect” for ever, w/o an error message or success message. […] I realized that this morning some fixes from MSFT Update have been installed in my computer so I took a look. I saw two fixes, “KB4343909 and KB4343902”. […] So I decided to uninstall the first one and after some reboots, now I can connect again using VPN client.

Meanwhile, you can use the following troubleshooting guides to solve this problem:

KB4343909 install fails

There are also some users who are still struggling to install this patch. The update process often freezes, gets stuck or ends abruptly with an error code.

KB4343909 does not complete. Yesterday 8/14 this monthly update started at some point. 4 hours after I noticed, it was still running and did not complete. This morning 8/15 – It ran all night without completing […] Windows update has started again and been running now for over an hour. Seems to be cycling between downloading, initializing, then installing, then initializing ….

Bluetooth keyboard won’t connect

If your Bluetooth keyboard fails to connect, you’re not the only one. Quite a few Windows 10 April Update complained about this issue. More specifically, Bluetooth keyboards automatically go to sleep and then fail to establish a stable connection to computers.

I use the microsoft designer bluetooth keyboard. The problem is it goes to sleep if not being used for around 10 minutes. It then takes at least 10-15 minutes of messing around with bluetooth to get it to reconnect again […] The most recent windows update that I have installed is KB4343909

We’ll end our list here. If you encountered other issues, feel free to tell us more about your experience in the comments below.

RELATED STORIES TO CHECK OUT:

KB4343909 fixes DLL and high CPU issues on Windows 10 v1803

The Windows 10 April Creators Update recently received a new cumulative update on August Patch Tuesday: KB4343909. This patch focuses on quality improvements only and doesn’t add any new OS features.

Windows 10 KB4343909 brings additional security improvements for the latest Spectre and Meltdown  threat variations.

Provides protections against a new speculative execution side-channel vulnerability known as L1 Terminal Fault (L1TF) that affects Intel Core processors and Intel Xeon processors (CVE-2018-3620 and CVE-2018-3646). Make sure previous OS protections against Spectre Variant 2 and Meltdown vulnerabilities are enabled using the registry settings outlined in the Windows Client and Windows Server guidance KB articles.

At the same time, this update fixes the issue that causes high CPU usage on some machines equipped with Family 15h and 16h AMD processors. Users affected by this issue usually experience performance degradation and lag. However, not all Windows 10 v1803 users are affected by this issue. As Microsoft explains, this bug occurs after installing the June 2018 or July 2018 Windows updates alongside the AMD microcode updates that address Spectre Variant 2.

If you’re still experiencing high CPU usage after installing this update, you can use the troubleshooting guides listed below to fix this issue:

Users who experienced severe battery life issues after upgrading to Windows 10 version 1803 should download and install KB4343909 as soon as possible. The patch successfully addressed this problem and you should no longer experience abnormal battery depletion rates.

If you’re still experiencing Windows 10 battery drain issues, here are some guides to help you fix the problem:

KB4343909 changelog

These are the most important improvements packed by this patch. Additional fixes include:

  • The update fixes the bug that prevents apps from receiving mesh updates after resuming. Fortunately, this issue affects only Spatial Mapping mesh data apps, as well as programs that are involved in the Sleep or Resume cycle.
  • Internet Explorer and Microsoft Edge now support the preload=”none” tag.
  • All apps running on HoloLens should now authenticate after upgrading to Windows 10, version 1803.
  • Device Guard no longer blocks ieframe.dll class IDs.
  • Addresses a vulnerability related to the Export-Modulemember() function when used with a wildcard (*) and a dot-sourcing script. More specifically, the existing modules on devices that have Device Guard enabled fails to work.
  • Apps that rely on COM components should no longer display “access denied,” “class not registered,” or “internal failure occurred for unknown reasons” errors.
  • Security updates to Windows Server.

Download KB4343909

You can download KB4343909 from Microsoft’s Update Catalog website. You can also download the update automatically through Windows Update.

Have you encountered any issues after installing KB4343909? Let us know in the comments below.

Xbox updates their customer support operation

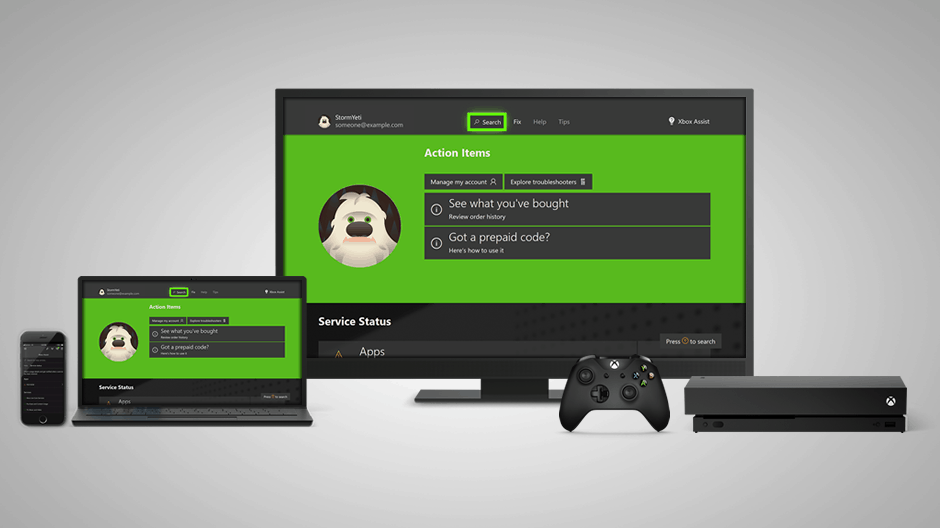
Microsoft today took to their Xbox Wire blog to update consumers on some changes to their Xbox customer support operation. The firm explained that they are looking to provide “fast and effective help” for gamers, whenever it is needed, be it with the virtual agent, Xbox Assist app, and more.

First of the changes happens to be with the Xbox Assist app. This was originally launched last Fall, and the company says it will be adding new troubleshooters later this summer so gamers can solve common problems with Xbox live, and more. To go with that are enhancements to the virtual agent, which now will pick up new capabilities which should help gamers troubleshoot common problems, and find the right place to get support.

The second round of changes are with support callback, and device repair and tracking improvements. Microsoft will be updating the Xbox support line with a “callback” option so that after describing the problem on supporrt.xbox.com gamers won’t need to waste precious time on hold.  This is meant to tie in with the device repair and tracking improvements, which now allows you to track the repair progress of any Xbox on account.microsoft.com.

Finally, as we noted before, Microsoft will be moving the Xbox Forums to the Microsoft Community. This change is Microsoft’s bigger plans to “empower users with discussions.”  All that said, there’s definitely now more than one way to solve your Xbox related problems, so you’ll likely never have to worry again about being left with a broken console.

How to Remove the Windows 10 Lock Screen


How do I remove the Lock Screen function on my Windows PC or laptop?

  1. From Group Policy Editor
  2. From Registry Editor

A lot of Windows 10, 8.1 users are trying to get rid of the lock screen and to tell you the truth I would to. It is quite annoying if you have a Windows desktop or laptop and you have to go through the lock screen every time.
remove lock screen Windows 8.1
The Windows 8.1, 10 lock screen can be removed by following one of the two options below. Depending on the version of Windows that you have one of them might not work properly for you. So follow the guidelines below and you will be able to fix this issue in just ten minutes of your time and also you will find out how you could switch the lock screen back on for future use if you want.

Tutorial for removing Windows lock screen:

1. From Group Policy Editor

  1. Press and hold the “Windows” button and the “R” button on the keyboard.
  2. Now that you have the “Run” window opened up you will need to type in the run box “gpedit.msc”
  3. Press the “Enter” button on the keyboard.
  4. Now you should have the “Group Policy” window in front of you.
  5. On the left side in that window left-click or tap on “Computer Configuration”
  6. In the “Computer Configuration” folder left-click or tap on “Administrative Templates”
  7. In “Administrative Templates” left-click or tap on “Control Panel”.
  8. And in the “Control Panel” folder left-click or tap on “Personalization”.
  9. After you got to the “Personalization” folder you will have in the right menu a file with the name “Do not display the lock screen”. Double click (left click) or tap on the “Do not display the lock screen” feature.
  10. Set the value present in the feature above to “Enable”.
    Note: for enabling the lock screen to go in “Do not display the lock screen” feature and set it to “Not Confirmed”
  11. Reboot the Windows 8.1 PC and see if you got your lock screen removed from the system. Also if you could not remove the lock screen by following this option please read the option two posted a little bit below.

2. From Registry Editor

  1. Press and hold the button “Window” and the button “R”.
  2. In the Run window that pops up write “regedit”.
  3. Press the “Enter” button on the keyboard to open the “Registry Editor” window.
  4. Now after the Registry Editor window is opened left-click or tap from the menu on the left side on “HKEY_LOCAL_MACHINE”
  5. In the “HKEY_LOCAL_MACHINE” folder you will have to left click or tap on “Software”.
  6. In the “Software” folder left-click or tap on “Policies”.
  7. In the “Policies” folder left-click or tap on “Microsoft”.
  8. In the “Microsoft” folder you will find a “Windows” folder, left click or tap on it.
  9. In the “Windows” folder left-click or tap on “Personalization”.
  10. On the right side of the window you should have a DWORD with the name “NoLockScreen”, double-click (left click) on it and set the value field with “1”.
    Note: if the “NoLockScreen” DWORD is not there you can create it and set the value to “1” afterward.
  11. Close the “Registry Editor” window and reboot the Windows 8.1 device.

Note: Both methods work for Windows 8, 8.1 and Windows 10. Even if there are different engines on each system, the interface of both Group Policy editor and Registry editor is the same. You can use these solutions whithout any problems on your Windows 10, 8.1 or 8 PC. However, we must mention that the screen lock function is useful especially if you do not want certain persons to access your desktop. Thus, we suggest you think twice before doing that.

Update: Windows 10 Lock Screen may have some issues, most specifically when some users lock the screen, it goes back to sign in screen and it returns to lock screen. Hopefully, on Microsoft forums, there where an user that described this problem and also gave a solution. If you have any issues with your lock screen that goes to the sign-in screen, here’s a video that you could use in order to fix this problem:

Above you have two methods on how to disable the lock screen for your Windows 8.1 device, this is especially useful for the desktop PCs and laptops but you can also do this for your tablets or Smartphones if you wish. If you have any questions or issues with the steps posted above contact us by writing in the comments field of this page situated below.
READ ALSO: Windows 10 build 17686 triggers infinite lock screen loops

How to Disable Yellow Warning Bar in Internet Explorer

Having the yellow bar in Internet Explorer on Windows 8.1 or Windows 10 computers can be very helpful in some situations. The respective yellow information bar is meant to offer you additional information on any sorts of errors that you might get during your use of Internet Explorer.

One of the most important message that might appear is this one: To help protect your security, Internet Explorer blocked this site from downloading files to your computer. The alert appears on the screen when you try to access any potentially harmful download files.
disable yellow bar in Windows 8
So basically the information bar is exactly the yellow warning bar you get in Windows 8.1/ Windows 10 and notifyies you about any issues that might happen while you’re using your computer. This bar is situated in the upper side of Internet Explorer for Windows 8.1 or Windows 10. The good news is that you can disable it very quickly by following the tutorial below.

Steps to disable information bar in Windows 10, 8.1

Before we dive in, it is worth mentioning that it is not recommended to turn off all the warning messages and notifications that you get on your PC. Some of them are very useful in protecting your device from unwanted programs or viruses.

  1. Left click on the “Start” button you have in the lower right side of the Desktop in Windows 8.1 or Windows 10.
  2. In the search box you are presented there you will need to type “Internet Explorer”.
  3. Left click on the “Internet Explorer” icon you have in that search list.
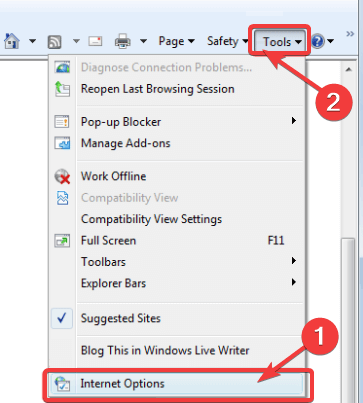
  4. Now that Internet Explorer is open you will have to left click or tap on the “Tools” feature situated in the upper left side of Internet Explorer.internet explorer tools
  5. From the Tools menu, you will need to left click or tap on the “Internet Options” feature.
  6. Left click or tap the “Security” tab you have in the upper side of the “Internet Options” window.
  7. Left click or tap on the “Custom level” feature presented in the “Security” tab.
  8. You will be presented with a list of options in which you will have to search for “Automatic prompt for ActiveX controls”.
  9. After you find the feature above you need to left click or tap on it and disable it in order to prevent any further messages from this part.
    Note: You will have to do this for every kind of message that you get in the yellow warning bar in order to disable it.
  10. After you left clicked on that feature you need to left click again on the “OK” button you have in the lower side of the window.
  11. Left click or tap on “Yes” to confirm the change you made.
  12. Left click on the “OK” button to save the change you made.

Now that you blocked the alert, you also need to turn off  notifications related to blocked pop-ups. Go to the Privacy tab, navigate to the Pop-up blocker and select Settings. All you need to do is uncheck the option “Show Information bar when a pop-up is blocked“. In this manner, you won’t receive any alerts about the pop-ups that have been blocked.

So, there you have  the method on how to disable the warning yellow bar in Internet Explorer for any kind of message that pops up in Windows 8.1 or Windows 10. If you have any questions or suggestions on this article, you can use the comments section below.

RELATED STORIES TO CHECK OUT:


How to prevent users from deleting Internet Explorer history

When you use your Internet explorer in Windows 7, Windows 8.1 or Windows 10, you have the feature to delete your internet history as well as a multitude of others settings that allow you to manage the cookies stored in your web browser. Some Windows 8.1 or Windows 10 users want to prevent the internet history from being deleted. If you feel the same and you want to prevent users from deleting Internet Explorer browsing history, then follow the instructions below for a quick understanding on how you can do that.
How to stop users from deleting internet history in Windows 8.1 and Windows 10
Stopping users from deleting the internet history as well as other features in your browser can be done by accessing the Group Policy Editor. You can then change the restrictions from there. So for accessing this feature and making the necessary modifications, follow the steps below.

Stop users from deleting Internet history in Windows 10, 8.1, 7

  1. Press and hold the “Windows” button and the “X” button on the keyboard and select the “Run” feature.
    Note: Another way to access the “Run” window is the press and hold the “Windows” button and the “R” button.
  2. Write in the run box the following: “gpedit.msc” without the quotes.
  3. Press the “Enter” button on the keyboard.
  4. Now you should have the “local Group Policy Editor” window in front of you.
  5. Double click or tap on the “Computer Configuration” folder situated in the left side list in the window.
  6. In the “Computer Configuration” folder double click or tap on the “Administrative templates” folder.local group policy editor administrative templates
  7. In the “Administrative Templates” folder double click or tap on the “Windows Components” folder.
  8. In the “Windows Components” folder double click or tap on the “Internet Explorer” folder.internet explorer local group policy
  9. Now double click on the “Delete Browsing History” folder inside the “Internet Explorer” file.
  10. You should have on the right side in the “Local Group Policy Editor” window the “Prevent access to delete browsing history” option.prevent access to delete browsing history
  11. Double click or tap on the “Prevent access to delete browsing history” option to open it.
  12. Check the “Enable” feature in that window.block user delete browsing history
  13. Left click or tap on the “Apply” button in the lower right side of the window.
  14. Left click or tap on the “OK” button afterwards.
  15. Reboot your Windows 8.1 or Windows 10 device and see if another user except the administrator can delete the Internet History.

You can also prevent users from deleting forms and passwords. The steps to follow are similar to those listed above but instead of selecting the option “Prevent access to delete browsing history”, you need to select the ” Forms” and “Delete Passwords” functionalities.

There you go, a simple way on how to stop users from deleting internet history in Windows 7, Windows 8.1 and Windows 10. For any other additional questions or suggestions on this subject, use the comments section below. We will help you further as soon as possible.

RELATED STORIES TO CHECK OUT:


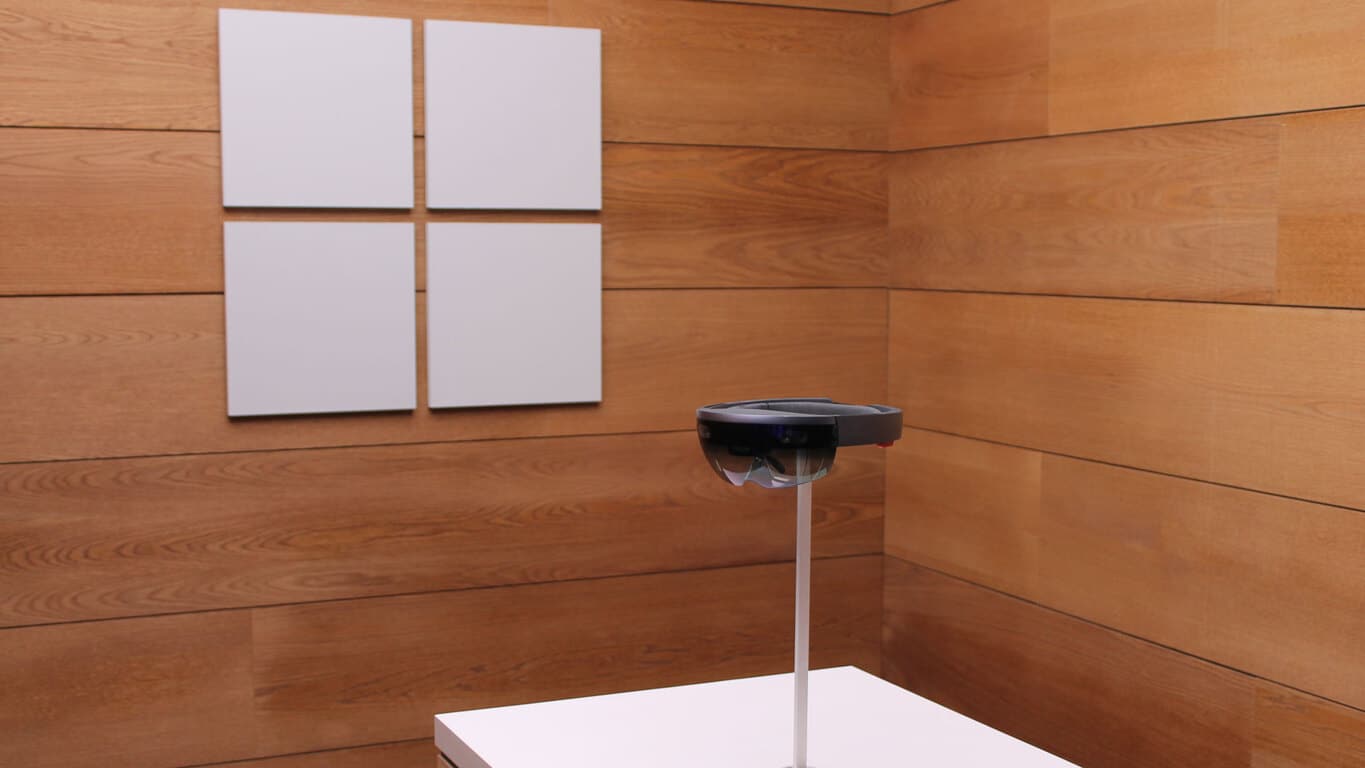
Windows 10 for HoloLens gets a new Redstone 5 build, too

Microsoft’s HoloLens got its first Redstone 5 build last month, and yesterday the company pushed yet another build to the headset. This time, the build comes in at 17737 and is primarily focused on delivering fixes rather than new features (via Windows Central.)

First off, are the fixes. You can have a look at these below.

  • We fixed an issue where the cursor will jump between gaze and mouse when using a Bluetooth mouse.
  • We fixed an issue with some notification toasts appearing as a gray box.
  • We fixed an issue where Cortana may stop listening if you wait for her to respond after saying, “Hey Cortana.”
  • We fixed several other issues with voice commands and dictation, including an issue that prevented Cortana from working after update.
  • We fixed an issue that prevented holograms from re-appearing after sign-out and sign-in.
  • We added OCR support for Chinese and Japanese characters in the localized builds. For more information on using these builds, see the link above.
  • We fixed a crash in the camera when taking a photo while the thumbnail previous of the last capture is visible.

Next up, are the known issues. There are only two documented known issues with this build, but it is always best to play with the build and investigate for more, then send your Feedback to Microsoft in Feedback hub.

  • We’re still investigating a bug causing the share dialog to not load all available apps to share to for a while after initial boot.
  • After updating from a previous build, customers may not be able to receive incoming calls in Remote Assist.

Asides from Miracast support and a handful of other improvements, it is not looking as though the Redstone 5 update for HoloLens will introduce many other new features. Development on Redstone 5 is also winding down, so there’s probably not much else in store.

The Walking Dead: The Final Season video game debuts on Microsoft’s Xbox One consoles

The first chapter of The Walking Dead: The Final Season is now available to play on Microsoft’s Xbox One consoles. Unlike previous Telltale Games’ Walking Dead series, the first chapter of The Final Season is unavailable individually on Xbox One and seemingly must be purchased as part of the full Season Pass in The Complete Season bundle.

The Walking Dead: The Final Season will only have four episodes and, as its name suggests, will be the final Walking Dead video game from Telltale Games with Clementine.

Here’s the official game description and trailer:

Clementine, now a fierce and capable survivor, has reached the final chapter in her journey. After years on the road facing threats both living and dead, a secluded school might finally be her chance for a home. But protecting it will mean sacrifice. Clem must build a life and become a leader while still watching over AJ, an orphaned boy and the closest thing to family she has left. In this gripping and emotional final season, you will define your relationships, fight the undead, and determine how Clementine’s story ends. Includes access to all 4 episodes (Episode 1 available at launch, Episodes 2-4 coming soon).

Are you a fan of The Walking Dead video games? How many have you finished? Let us know in the comments below and then follow us on Pinterest for more Xbox video game content.

Enable Legacy Boot on Windows 10 [How to]

Many PC come with legacy boot disabled in favor of UEFI. However, many are wondering how to enable legacy boot on Windows 10 for compatibility issues.

Speaking of issues, we covered legacy boot issues in one of our older guides, so be sure to check it out.

If you still want to turn on legacy boot on Windows 10, this guide will show you the best way to do it.

UEFI boot vs Legacy boot

Let’s start with explaining why one would choose to use the Legacy boot option instead of the UEFI on a compatible PC.

Most of the contemporary configurations support both Legacy BIOS and UEFI booting options. And the latter is the default version.

However, if you have a Windows 10 installation drive with an MBR (Master Boot Record) partitioning style, you won’t be able to boot and install it in the UEFI boot mode. And this is a common problem.

Also, if you have HDD partitioned and formatted as a GPT drive, you won’t be able to install Windows 10 from an MBR drive. And vice versa.

But, this is a story for some other time, as we’ll try to focus on enabling Legacy BIOS boot on your PC today.

Now, if you, for any reason, need to boot your PC in the Legacy BIOS mode instead of UEFI, the BIOS/UEFI settings are the place to be.

There, you should have an easy time changing the Boot mode from one to another. However, with Windows 10 and its Fast Boot, the mere accessing the BIOS/UEFI settings isn’t exactly a walk in the park.

How can I enable legacy boot on Windows 10?

Access BIOS

  1. Press Windows key + I to open Settings.
  2. Choose Update & Security.
  3. Select Recovery from the left pane.
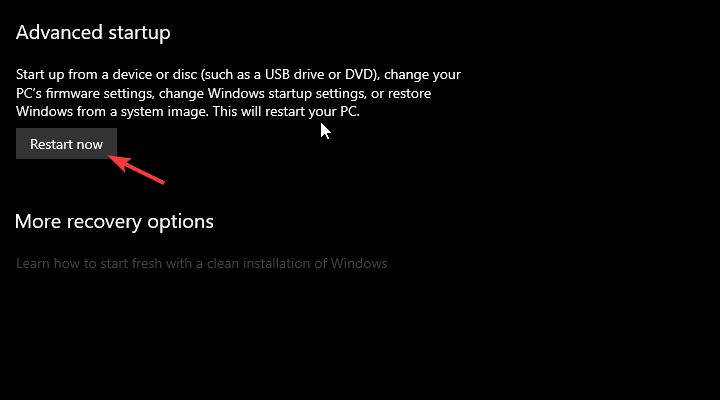
  4. Under the Advanced startup, click Restart now.
    How to enable Legacy Boot in Windows 10
  5. Choose Troubleshoot.
  6. Select Advanced options.
  7. Choose UEFI Firmware Settings and click Restart.

Once there, navigate to the Boot section and replace UEFI with the Legacy (or Legacy BIOS) option. On the other hand, if the option is grayed out, you’ll need to set the Administrator password and reboot your device.

As you can see, enabling legacy BIOS mode on Windows 10 is pretty simple.

Enter the boot password and access the BIOS/UEFI settings again. You should be able to switch to Legacy mode this time. We suggest removing the Administrative password afterward, as it’ll pop up every time you boot the PC.

If you want to learn more, we have a great guide on how to enable Secure Boot without BIOS that you might want to check out.

That’s it. If you have any alternative ways you can provide us with, feel free to do so. The comments section is just below.

Got two download folders in Windows 10/11? Here’s what to do

Once you open the File Explorer, there’s the whole left side reserved for a sidebar tree. There, you can find all major folders you would regularly use, including the Downloads folder. However, some users are not willing to deal with two or even three Download folders which lead to the same path.

This might be due to a system error during the system upgrade or some third-party application unreasonably added another folder. As all of them link to the same path (usually C:UsersUsernameDownloads), you probably want some of them gone.

We made sure to explain how to remove the built-in folder (or not) in the list we provided below.

How to remove a redundant download folder from Windows 10

  1. Delete the redundant folder
  2. Change the path for downloaded files
  3. Reset your PC

1. Delete the redundant folder

If the path is the same for both folders but they are presented with two different names, you can delete one freely without any repercussions. Just make sure to backup all your data from the folder to avoid permanent loss of data. Of course, if a third-party application created the folder, the next time you try to download something, it’ll recreate the same folder. That’s why we suggest re-assigning the download path to a system-default Downloads folder.

Once you’ve done that, roam through all applications you use to download files and change the path. All browsers store files in a default folder, originating in C:UsersUsername. If you want to change them, continue with the further steps.

2. Change the path for downloaded files

Now, if want to change the default download location and remove the default Download folder, that’s completely a new deal. And it can be done with a certain Registry script or manual approach. Maybe, in this scenario, the built-in Downloads folder isn’t of any use to you.

Maybe you want to keep your downloads away from the system partition. Whether that includes an alternative storage partition or even a cloud service client which swiftly backs them up.

Here’s how to completely remove the built-in Download folder from Windows 10:

  1. Download the Registry script and save it on your PC. Preferably, on the Desktop.
  2. Run the patch as an administrator and confirm merging.
  3. Restart your PC.

This is how to change the default download location on Chrome, Mozilla, and Edge:

Chrome

  1. Click on the 3-dot menu and open Settings.
  2. Expand the Advanced section.
  3. Under the Downloads > Location, click Change. I have two download folders windows 10
  4. Select an alternative location where the future files you download will be stored.

Firefox

  1. Click on the hamburger menu and open Options.
  2. Under the Files and applications > Downloads, click Browse.I have two download folders windows 10
  3. Select the download location.

Edge

  1. Click on the 3-dot menu and open Settings.
  2. Under the Downloads section, click Change and change the location.I have two download folders windows 10
  3. All new downloads will be stored in a newly-chosen location.

3. Reset your PC

Finally, if you’re completely bamboozled with the way Download folders are created and they multiply unreasonably, we suggest scanning for malware and PuP. After that, resetting the PC to factory values should be the shortest route to resolving this problem. Why such a drastic measure, you might ask? Well, if you’ve upgraded to Windows 10 from Windows 7, the system folders in File Explorer seem to double.

Because of that, we suggest resetting your PC to factory values. Hopefully, after that, you’ll be left with just one Downloads folder. Here’s how to reset your PC to factory values:

  1. Open Settings.
  2. Choose Update & Security.
  3. Choose Recovery from the left pane.
  4. Under the ”Reset this PC” section, click Get started.I have two download folders windows 10
  5. Follow the instruction until your PC is restored to factory values.

With that said, we can conclude this article. In case you have an alternative solution or similar problem you care to share, the comments section is below.

With latest Insider update to the Microsoft Store, users get the wish list feature they’ve been wishing for

Microsoft started testing a new Shopping Cart in the Microsoft Store with select Windows and Xbox Insiders yesterday, and it turns out this feature also introduced a handy “Save for later” option which pretty much works like a wish list. Once you add some items to your shopping cart (just games, apps and devices for now), the list will sync across the web and the Microsoft Store on Windows 10 and Xbox One. But for those times when you’re not ready to pull the trigger yet, the “Save for Later option will act as a wish list replacement.

It would have been better if Microsoft added this “Save for Later” button right on all store listings, eliminating an additional step to access it along the way, but for now this is better than nothing. The Shopping Cart and Save for Later features are currently available in the Microsoft Store for Xbox Insiders on the Skip Ahead, Preview Alpha and Beta Rings as well as Windows Insiders on the Skip Ahead ring. You can also find these two features on the web, which is sometimes the fastest way to access the Microsoft Store.

Freshly-released game Graveyard Keeper joins Xbox Game Pass today

Graveyard Keeper, a new medieval cemetery management simulator from indie developer Lazy Bear Games is joining Xbox Games Pass today, the same day as it launches on Xbox One and Steam. The game lets you manage your own graveyard, but the developer’s dark sense of humor resulted in giving players many possibilities to make money, including recycling body parts for profit

The game also lets you make business alliances, explore villages and get a glimpse of the medieval folklore with dungeons, witches, and various monsters to kill.

In addition to Graveyard Keeper, Xbox Games Pass also picked up Bethesda’s critically-acclaimed shooters Doom and Rage last week. Overall, that’s 10 new games in the catalog in August, including Hitman: Season 1 and Ryse: Son of Rome. Xbox Games Pass is just $9.99/month, but you can get a 14-day trial to try the collection of over 100 Xbox One and Xbox 360 games.

Windows Server 2019, Windows Admin Center get new Insider builds

In addition to a new Windows 10 Redstone 5 build for Fast Ring Insiders, Microsoft released Windows Server 2019 Insider Preview Build 17733 yesterday along with a new preview of Windows Admin Center. The new Windows Server 2019 build comes with new improvements for Cluster Sets, which the company describes as its “new cloud scale-out technology.” There’s also a new version of Microsoft Hyper-V Server in the available content.

Microsoft detailed what’s new in Windows Admin Center Preview 2018 in a separate blog post. The tool previously known as Project Honolulu is getting a new Apps & Feature extension to let IT admins control the apps and other components that are currently installed on the Windows machines they manage. This build also brings minor improvements to Task Scheduler, File Sharing, Azure Update Management support and more.

As usual, Windows Insiders can get the latest builds for Windows Server 2019, Hyper-V Server and Windows Admin Center from the Windows Server Insider Preview download page. Microsoft has been consistently releasing new Windows Server Insider builds every two weeks for quite some time now, so it’s safe to expect a new flight before the end of the month.

Microsoft is looking for “breakthrough ideas” with AI Idea Challenge

Microsoft is looking to its community for “breakthrough ideas” with the AI Idea Challenge. As noted in a post on the Machine Learning blog, Microsoft is looking for “breakthrough AI solutions from developers, data scientists, professionals and students, and preferably developed on the Microsoft AI platform and services.”

The AI Idea Challenge allows users to share their creations on the Microsoft AI platform, so they are accessible for future Microsoft projects. Full terms and conditions of the contest are available here. Microsoft will judge submissions based on the following criteria:

  1. Originality: 50%
  2. Feasibility: 20%
  3. Difficulty to Implement: 30%

The top three entries for the Microsoft AI Idea Challenge will get great prizes for their efforts. The first place winner will get a Surface Book 2, the second place winner will get a Dji Mavic Pro drone, and the third place winner will get an Xbox One X.

If you are interested in entering, Microsoft has some requirements. Individuals or teams are required to submit a “working AI model, test dataset, a demo app and a demo video that can a maximum of three minutes long.” Microsoft invites you to take a look at AI Idea Challenge examples at AI.lab.
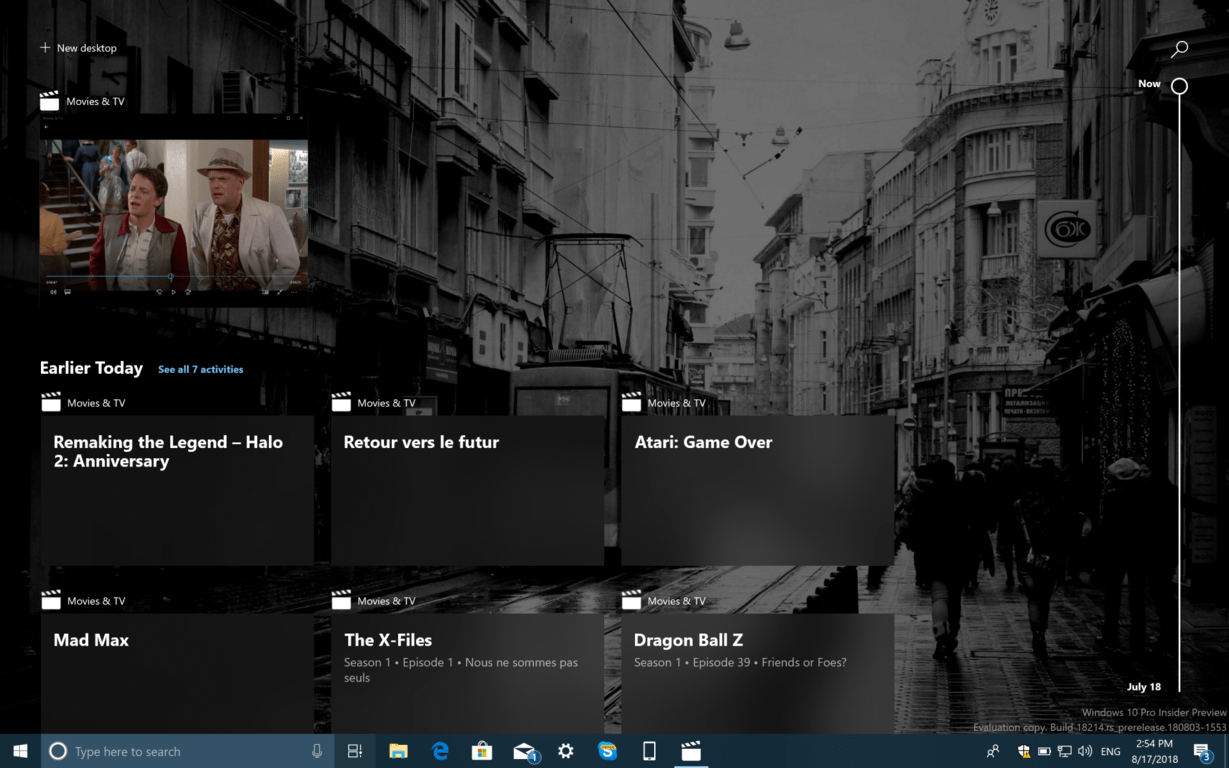
The Microsoft AI Challenge is accepting submissions until October 12th, 2018. Register your AI idea today.

Windows Insiders can no longer join Skip Ahead to get previews of the Windows 10 19H1 update

It’s been more than a few weeks now since Microsoft first allowed Windows Insiders to “Skip Ahead” to preview the next Windows 10 19H1 update. However, if you’ve been holding off on opting into this special ring of the Windows Insider program, you’re now out of luck as enrollment is now closed.

We’re not certain on the specific date when enrollment first closed, but we tried to enroll one of our Insider Machines to the Skip Ahead branch today and received the “closed” message seen in the featured image above (looks like MSPU noticed it, too). It is kind of surprising to see that it took this long for enrollment to close up, as enrollment previously shuttered up in under a week with the last Windows 10 development cycle.

At any rate, only those who did manage to opt to Skip Ahead will now continue to see new Windows 10 features and updates for stock apps like Sticky Notes, Mail, and Photos. Insiders on the other rings (who also opted into the Windows App Preview Program) will also still see updates for specific inbox apps, but will only likely get Redstone 5 bug fixing and quality builds moving forward.

The overall news should not be shocking, as Microsoft mentioned on multiple occasions that it will be closing off Skip Ahead once the maximum number of seats are filled. The company also specifically limited enrollment to Skip Ahead and “Forked” the Insider program in order to ensure quality feedback on 19H1 builds, but not shift attention away from Redstone 5 development.

Microsoft is now rolling out folder protection feature for OneDrive on Windows 10

A few months ago Microsoft rolled out a Known Folder Move experience for OneDrive to help business users automatically sync over their important their files to the cloud. Well, that same feature is now rolling out to all Windows 10 users, helping them sync and protect their important documents, pictures, and desktop folders to OneDrive (via The Verge.)

We’re not seeing this folder protection feature just yet, so it may be rolling out slowly to all users. Anyway, the settings option for folder protection can be found by clicking on the OneDrive icon in the Windows 10 system tray, and then going to the Activity Center. From there you can go to More, Settings, Auto Save, and then Update folders. You can then select all your important folders (like Documents, Desktop, Pictures, etc) for syncing and then click Start Protection.

As explained by a Microsoft spokesperson:

“This is a new feature we started rolling out broadly this week that is now available to OneDrive users with personal accounts…“It makes it easier to move content into OneDrive, have access to all your important files on all your devices, and keep more files protected with features like ransomware detection & recovery.”

There are a few limits on what can be synced up to OneDrive protected folders, but this feature makes life easier for those who have multiple PCs. All your folders should now be in sync regardless of which device you work on, and you’ll be able to fully recover your files in the event if your PC crashes or runs into trouble.

Disney Epic Mickey 2 & For Honor now free on Xbox with Games With Gold

Xbox 360 video game, Disney Epic Mickey 2: The Power of Two, and Xbox One’s For Honor are now both downloadable for free as part of the Games With Gold promotion for Xbox Live Gold subscribers.

Disney Epic Mickey 2: The Power of Two is a family-friendly 3D action adventure title with support for two-player co-op gameplay. It’s available to grab online here. Here’s its official description and trailer:

Unleash the power of the brush in an all new co-op adventure. Join Mickey and Oswald in an epic battle to save the magical world of Wasteland and change it forever. Interact with your favorite characters like never before in the most heroic adventure yet.

For Honor is a relatively new title that only launched on the Xbox One in February of last year. The game features a strong focus on online multiplayer battles and strategic gameplay and allows players to choose between a variety of factions such as viking, samurai, or knight.

Enter the chaos of war and choose your faction. Play as a bold Knight, a brutal Viking, or a deadly Samurai. Experience the thrilling story campaign solo or co-op, and fight in brutal PvP multiplayer modes, now on new dedicated servers. Choose a faction, grab your sword, and fight with your allies to survive in innovative PvP melee combat. Enjoy an evolved experience – with 12 base Heroes, 18 maps, new PvP and ranked modes, thousands of gear items, and more since launch. Dedicated servers provide a stable and seamless experience as you fight to claim victory for your faction. Earn rewards while you learn the art of combat with a brand-new training mode that takes you from Apprentice to Master.

Are you excited to play either of these Xbox titles? Let us know which one you’ll be playing first in the comments below.

FOR HONOR - Standard Edition
Developer:
Ubisoft
Price:
Free

How to Pin Folders to Start Menu in Windows 10


How do I pin folders to the start menu in Windows 10?

  1. From the folder’s right-click menu
  2. Drag the folder
  3. Pin other Windows 10 elements to start menu

You will learn in this tutorial exactly how to pin your folders and also if you wish other applications to your Start menu in the new Windows 10 technical preview version. Doing the steps below is a very easy task and you will be ready to pin your folders to the Start menu in no time.
how to pin folders to the start menu in Windows 10
Pinning folders to the Start menu in Windows 10 is just one of the most useful features you have access to this new operating system. You can use one of two methods that we are going to explain a bit below but basically, you either have to drag and drop a folder to the Start menu or just right click on it and select the feature from there.

How to pin folders to Start menu in Windows 10?

1. From the folder’s right-click menu

  1. Open the Start menu in Windows 10.
  2. Find the folder you want to pin to the Start menu.
  3. Right click on the folder.
  4. Left click or tap on the “Pin to Start menu” feature.
  5. You should now have that specific folder in the Start menu.

2. Drag the folder

  1. Left click and hold on the folder you wish to pin to the Start menu.
  2. Drag the folder while holding the left click pressed all the way to the “Start” button.
  3. Wait for a “Pin to Start menu” message to pop up.
  4. Release the left click in order to place that folder in the Start menu.
  5. Now left click or tap on the “Start” button and you will see that the folder is present in the menu.

3. Pin other Windows 10 elements to start menu

While you have pinned already some folders on your Start Menu, you might have issues while pinning apps on that Start Menu. You will fix this problem from the link previously mentioned. You can also pin your favorite games in Windows 10, and here’s how to do that. Some interested users can see how they can pin Settings to the Start Menu.

This is the short and very quick tutorial on how to pin your folders to the Start menu in Windows 10. If you have any further questions on this subject don’t hesitate to write us below in the lower section of the page and we will get back to you as soon as possible.

READ ALSO: Fixed: You Cannot Open the Windows Store Without an Internet Connection

Select Xbox Insiders can now test a new Shopping Cart feature in the Xbox Store

Xbox Insiders in the Skip Ahead, Preview Alpha and Beta rings can now test a new Shopping cart feature in the Xbox Store that syncs with the Microsoft Store on Windows 10 and the web. For eligible Insiders, All games and apps on the Xbox Store should now have an “Add to Cart” button, which is accessible by selecting first the “…” button next to the Buy button.

Once you add an item to the Shopping cart, you can access it from the dedicated icon at the top of the Xbox Store. The cool thing is that you can add items from your console and pick up where you left off on the web or the Microsoft Store app on Windows 10.

This feature was long overdue (as is a wish list feature) and it’s great to see some core Microsoft Store features being standardized across platforms. The Xbox team notes that it may take a couple hours before you see the new Shopping Cart in the Xbox Store, and you may need to hard reset your console to finally see it.

Microsoft releases “Patch Tuesday” build 17134.228 with additional Spectre protections, battery life improvements

Microsoft has just released new “Patch Tuesday” updates for all supported versions of Windows 10, if you’re running the April 2018 update then you should be seeing the build 17134.228 (KB4343909) in Windows Update. This new build brings a fix for a new variant of the Spectre CPU security flaw that was discovered earlier this year, and Microsoft says that it also address an issue where previous Spectre fixes could cause hight CPU usages on PCs with certain AMD processors.

The release notes also mention a fix for an issue that could cause “significantly reduced battery life” after installing the April 2018 update, something that laptops and tablets users will likely appreciate. The full list of fixes is available below:

  • Provides protections against a new speculative execution side-channel vulnerability known as L1 Terminal Fault (L1TF) that affects Intel® Core® processors and Intel® Xeon® processors (CVE-2018-3620 and CVE-2018-3646). Make sure previous OS protections against Spectre Variant 2 and Meltdown vulnerabilities are enabled using the registry settings outlined in the Windows Client and Windows Server guidance KB articles. (These registry settings are enabled by default for Windows Client OS editions, but disabled by default for Windows Server OS editions.)
  • Addresses an issue that causes high CPU usage that results in performance degradation on some systems with Family 15h and 16h AMD processors. This issue occurs after installing the June 2018 or July 2018 Windows updates from Microsoft and the AMD microcode updates that address Spectre Variant 2 (CVE-2017-5715 – Branch Target Injection).
  • Addresses an issue that prevents apps from receiving mesh updates after resuming. This issue occurs for apps that use Spatial Mapping mesh data and participate in the Sleep or Resume cycle.
  • Ensures that Internet Explorer and Microsoft Edge support the preload=”none” tag.
  • Addresses an issue that prevents some applications running on HoloLens, such as Remote Assistance, from authenticating after upgrading from Windows 10, version 1607, to Windows 10, version 1803.
  • Addresses an issue that significantly reduced battery life after upgrading to Windows 10, version 1803.
  • Addresses an issue that causes Device Guard to block some ieframe.dll class IDs after installing the May 2018 Cumulative Update.
  • Addresses a vulnerability related to the Export-Modulemember() function when used with a wildcard (*) and a dot-sourcing script. After installing this update, existing modules on devices that have Device Guard enabled will intentionally fail. The exception error is “This module uses the dot-source operator while exporting functions using wildcard characters, and this is disallowed when the system is under application verification enforcement.” For more information, see https://portal.msrc.microsoft.com/en-US/security-guidance/advisory/CVE-2018-8200 and https://aka.ms/PSModuleFunctionExport.
  • Security updates to Windows Server.

There is still one known issue with this new Windows 10 build, which was already present in the last two cumulative updates: Applications that rely on .NET Framework can fail to start after installing the July 2018 .NET Framework Security updates, and Microsoft is once again saying that it will provide a fix in an upcoming update. In the meantime, let us know in the comments if you encounter any issues after installing this new build.

Tomb Raider: Legend and Tomb Raider Anniversary now playable on Xbox One, get them while they’re on sale

Following the additions of Prince of Persia, SINE MORA, and Earth Defence Force 2025 last week, Microsoft is bringing two Tomb Raider games to the Xbox One Backward Compatibility list today: Tomb Raider Legend and Tomb Raider Anniversary. The first one was released back in 2006 on the Xbox 360, while the second one (a remake of the 1996 original game) was released a year later on the 7th gen consoles.

Both episodes received critical acclaim, and if you have yet to play them they’re both available for $1.99 each on the Microsoft Store this week. All Tomb Raider Xbox 360 games except the 2013 reboot are now backward compatible on the Xbox One, as Microsoft previously added Tomb Raider Underworld and Lara Croft and the Guardian of Light in 2017 and 2018, respectively. You can check out the latest additions to the Xbox One Backward Compatibility list on Major Nelson’s website.

Microsoft unveils new Phantom Black and Grey/Blue Xbox controllers

There’s no shortage of Xbox One controller options these days, and today more new color schemes have entered the fray. Indeed, Microsoft has just announced new Phantom Black and Grey/Blue Xbox One controllers, giving you more ways to customize your gaming setup.

The Xbox Wireless Controller in Grey/Blue comes with a sleek, dark gray design, blue accents on the thumbsticks and base, and a monochrome ABXY, menu, and navigation buttons. The special edition Phantom Black controller, meanwhile, fades from a translucent matte black to a stunning metallic champagne gold. That controller also has textured grips, Black buttons, triggers, thumbsticks, and bumpers accented with a champagne gold D-pad.

Special edition Phantom Black controller

The Phantom Black Special Editon controllers will become available on September 11 in the USA for $69.99, and the Grey/Blue controller will follow on September 25 for $64.99. You can pre-order both controllers today at the Microsoft Store, and also at select retailers worldwide.

Grey/Blue Xbox One controller

For those not in the USA, the Grey/Blue controller will ship on October 9. The controllers come with 14-day trials for Xbox Live Gold and Xbox Game Pass.

If you’re after some nostalgia, you might also want to check out the Green Xbox One ‘Duke’ controller. Though not designed by Microsoft or as flashy as these new controllers, it is a replica of the original Xbox Controller, but designed to work with a wired connection with Xbox One.