5 best writing computer desks for great posture

Writing desks are usually made from wooden, have an antique look, and a traditional aesthetic design. Sometimes they have drawers or small storage space.

Modern writing computer desks can hold a laptop, but their workspace area has a smaller size. They don’t have a dedicated tray for a computer keyboard, thus they are not suitable for desktop PC systems.

It has a simpler design with a lot of space at the feet area because it does not include a dedicated space for a PC unit.  Instead, a computer desk is larger and includes features like space for multiple monitors or cable management holes.

In this article, we will present you with the best writing desks that you can find on the market.


What are the best writing computer desks?

Tribesigns Writing Desk

  • It can also be used as a computer desk or office workstation
  • Spacious leg room
  • You can choose different colors for the tabletop
  • Overall solid design
  • The price tag

With a modern and simple look, the Tribesigns writing desk is one of the best desks you can buy.

It is especially easy to assembly this desk, and it will only take you about 15 minutes. Furthermore, it is made of 0.98 inches thick laminated MDF which is waterproof, and scratch-resistant.

Its metal legs and adjustable leg pads, make the desk keep stable even on uneven floors.

If your work requires a lot of space then the Tribesigns writing computer desk is the best choice. With 63 inches x 23. inches of tabletop and 58.26 inches of legroom, this desk gives you plenty of space for any task or project.


Coleshome Computer Writing Desk 

  • Reinforced brackets
  • 47 inches x 24 inches for the tabletop and 29 inches in height
  • Easy to assembly
  • Comes in multiple color schemes
  • Adjustable feet are made of solid plastic

The computer writing desk from Coleshome is a great option if you’re looking for a mid-sized desk.

It features a sleek, modern design. If you are a fan of darker tones, this desk will delight your sight. However, if you prefer lighter tones, you can choose the Walnut color option for the tabletop.

The desk frame is made of heavy-duty powder-coated steel which ensures stability and durability.  Additionally, the tabletop itself is waterproof, scratch-resistant, and easy to clean.


Foxemart Writing Computer Desk 

  • Easy 15-minute assembly
  • Tabletop made from a thick MDF
  • Scratch-resistant desk
  • Could use a bit of extra space
  • Not suitable for someone that needs to have more than one monitor

If you are looking for something small, then the 39 inches writing computer desk from Foxemart, is an excellent choice.

It is a compact desk with a stylish design, perfect for dorms and other small spaces. Anyway, it offers just enough space for a laptop, books and a coffee so you can get comfortable and start writing.

Another great feature is the adjustable leg pads, as well as the triangular brackets that aids in support and eliminate shaking or noise. For sure you don’t need a noisy desk when writing.


Foxemart Writing Computer Desk 

  • Effortlessly assembles in under 15 minutes
  • Extra sturdy metal frame
  • Elegant wood finish
  • Adjustable leg pads
  • You can feel it is a bit wobbly if you place it on a carpet

If you need a desk to fit perhaps a printer, then this great piece of writing desk from Foxemart is a good option.

With a modern sleek design, the desk can be used in any home, office dorm, school, and workspace. The tabletop has 47 inches x 24 inches, which provides you ample space for a computer, monitor, printer, and other office supplies.

 This computer table is made of thicker MDF, it is scratch-resistant, anti-collision and waterproof. You can use this durable desk for years.


Cubiker Writing Desk

  • Adjustable leg pads
  • Comes in a variety of sizes and colors
  • Sturdy and stable
  • Comes with a side storage container
  • The storage bag color does not match the desk color

The writing desk from Cubiker is a handsome piece of furniture and an ideal choice for a resistant desk.

It is made from a modern metal frame with a classic wood grain tabletop. The extra steel support beams offer durability. In addition, the desk includes a built-in storage bag that will help you organize your working space.

This multipurpose desk is perfect for those who are limited on space, like students’ dorms or small apartments.

You can place a writing desk anywhere in the room, it will look perfect along a wall or in the middle of a home office floor.


All of the above desks have a simple and modern design that will definitively help you concentrate on your writing.


4 cheapest background check services [Criminal Record]

There are a number of reasons why you might want to run a background check. With the background check services, you can be sure about the data that is made available to you when getting into a personal or professional transaction.

Background check service are also useful if you have lost contact with someone and search for them. When it comes to privacy, these services don’t keep public records of searches made and the party of interest.

While these services are easy to use and can be used to perform all kinds of checks, they can be limited if you want more than just names, addresses, and telephone numbers.

With so many background check services available online, in this article, we take a look at the cheapest background check services providing criminal and financial history with other details.

What are the cheapest background check services available online?

Intelius

cheapest background check services

Intelius offers one of the most reliable ways to search for people, telephone numbers, addresses, background checks, criminal records and more. It can help you to reconnect with old friends or find out who’s calling you again and again.

 If you are a business looking to hire, Intelius allows you to check an associate’s criminal record. Property dealers can look for property data on the house they want. You can even check what appears in your background check.

Intelius shows a connection graph to make it easier to relate things and connection. The company claims to keep all searches private and confidential.

Pros:

  • Shows contact information, educational history and criminal records
  • Graphed visualization
  • Single-report and subscription-based options

Cons:

  • Expensive
  • Reports cannot be downloaded

⇒ Get Intelius


TruthFinder

cheapest background check services

With accurate, and easy-to-use information, and detailed explanation of how to use background reports, TruthFinder is one of the reliable background check service available online.

 Compared to other background check performing services, TruthFinder returned up-to-date contact information including phone number, email address without cluttering the background report with outdated information.

 With the Fair Credit Reporting Act making it illegal to use information from regular background checks to make hiring decisions, TruthFinder is transparent about how you can use the information you find in the background report.

On the flip side, TruthFinder does not offer any option to purchase individual reports, and there is no trial period either. Another pet peeve is an unnecessary emphasis on horoscopes.

Pros:

  • Number of search parameters
  • Membership offers unlimited background checks
  • Social media report included
  • Mobile apps for iOS and Android platform

Cons:

  • Cannot purchase individual reports
  • No trial period

⇒ Get TruthFinder


Instant Checkmate

cheapest background check services

Instant Checkmate is an affordable all-rounder among the background check services available online. However, don’t take the bit Instant in the name too seriously, as the service takes a good 12 minutes to perform a check.

The user interface offered by Instant Checkmate is intuitive with various parameters to perform searches. It can extract information from Social Media, photos, police records, background checks, civil judgement, contact information and more.

Instant Checkmate offers complete privacy to the users, and the searches are secured with a 128-bit encrypted connection with verified security protection.

Pros:

  • Affordable solution with many features
  • Reliable and up to date data
  • Search tool with excellent options

Cons:

  • No single-report option
  • Phone data can be inconsistent

⇒ Get Instant Checkmate 


BeenVerified

cheapest background check services

BeenVerified is for those who are specifically looking for a background check service to help with uncovering employment history of potential candidates as the tool shines when it comes to uncovering employment history.

 On the flip side, it does not include property or business-related information by default. However, you can access this information with optional extra. You also won’t find any option for individual reporting.

However, for what’s on offer, and for the price BeenVerified is a fine choice for businesses. You can opt for either one month plan or go big with three months subscription.

Pros:

  • Excellent employment history
  • Affordable monthly and longer plans
  • Reliable data

Cons:

  • Property and business information costs extra
  • Must have a subscription to use the tool

⇒ Get BeenVerified


Background check have increasingly become normal in the hiring process.

With the help of cheapest background services you can easily confirm person’s identity and good-standing.

These services also help you to cross-verify records of criminal and financial behaviors before you get into business with the person.

How to open and use QlikView in a browser

Many enterprise organizations utilize business analytic software to ensure that their decision-making process is as exact as possible.

Such software can provide an invaluable overview of financial and more specific product data for organizations.

What is QlikView used for?

QlikView is analytic software some organizations utilize to set up data visualization documents. Then their QlikView users can view and analyze business data.

The advantage of QlikView is that it displays data charts and tables in much more interactive and engaging ways than spreadsheets.

QlikView is a web-based software with a QlikView AccessPoint web portal assigned users can view business data with.

Assigned users can access the QlikView AccessPoint web portal in its supported web browsers, such as Google Chrome, Internet Explorer 11, Firefox, Edge, and Safari.

How to open and utilize a QlikView AccessPoint portal in a browser

Open QlikView

  1. First, open a QlikView compatible browser.
  2. Type the following command in the URL bar, and press the Enter key (replacing the<ipaddress> with the IP address for the host PC): https://<ipaddress>/qlikview/
  3. Thereafter, a QlikView AccessPoint web portal page will open in the browser, which includes the QVW documents assigned to you.
  4. Click a QVW document to view it in the browser.
    QlikView AccessPoint how to open qlikview in browser

Use in browser (useful tips)

reopen closed tabs browsers

To see additional info for a QVW document, you can click the View details links beneath their thumbnails.

If you can’t find a document you’re looking for, using the handy Search Here box will surely be of help.

You can also switch to a list view by selecting the List View option shown directly below, and can add documents to a favorites list by clicking the Add to favorites option.

Then you can easily get access to Favorites by using the the Category drop-down menu to filter favorite QVW documents.


So, that’s how you can open your assigned QlikView documents within a web browser.

You can also open QVM documents within the QlikView Desktop client software, which is compatible with 64-bit Windows 10 and 8.1 platforms.

Windows 10 KB4598291 broke Discord screen share with audio

Last week, Microsoft rolled out KB4598291, an optional cumulative system update that contained lots of fixes for browser-use and games.

However, it seems that while the update did correct frequent crashes, it also brought along other issues, which users have rapidly shared on dedicated forums.

Discord users, for instance, encountered problems with their audio while sharing their screen or while using the platform.

I updated Windows. I would consistently get Sorry we couldn’t access… – UAC also would not always pop up. Even when it did though, it didn’t matter.

It took just one user to voice out the issue on the forum, that others followed.


How do I fix Discord audio after update crash?

fix discord audio after update

One user also posted a full list of what he tried to troubleshoot audio in Discord. All his solutions are commonsensical and are general fixes that anyone would try (and that we’d also recommend) when faced with such a problem.

I’ve tried almost all the fix available on the internet but none seems to work. From adding Google Chrome to the games list under Game Activity, resetting the Voice Settings, uninstall and update the audio drivers of the system. I’ve also reinstalled Discord twice or thrice but that didn’t work too. 

What others have also tried was to access the chat platform in another browser, but that didn’t work either.

So the only thing left to do to make sure that Discord works smoothly again is to actually uninstall the faulty update.

How do I uninstall an optional update?

uninstall optional updates
  1. Type update in the home screen search field.
  2. In the Settings’ Update & Security section go to View update history.
  3. Click on Uninstall updates.
  4. Choose the update corresponding to KB4598291, right-click on it and Uninstall.

The procedure is the same if you want to uninstall any other cumulative update that is causing issues with one or more apps or processes.


What issues did KB4598291 fix?

KB4598291 was launched as an optional update, meaning that it wasn’t immediately pushed onto Windows 10 systems and that users could actually choose whether they want to install it or not.

And yet, many users supposedly were interested in the many fixes it contained:

  • Ctrl+Caps Lock and Alt+Caps Lock key combination for some regions
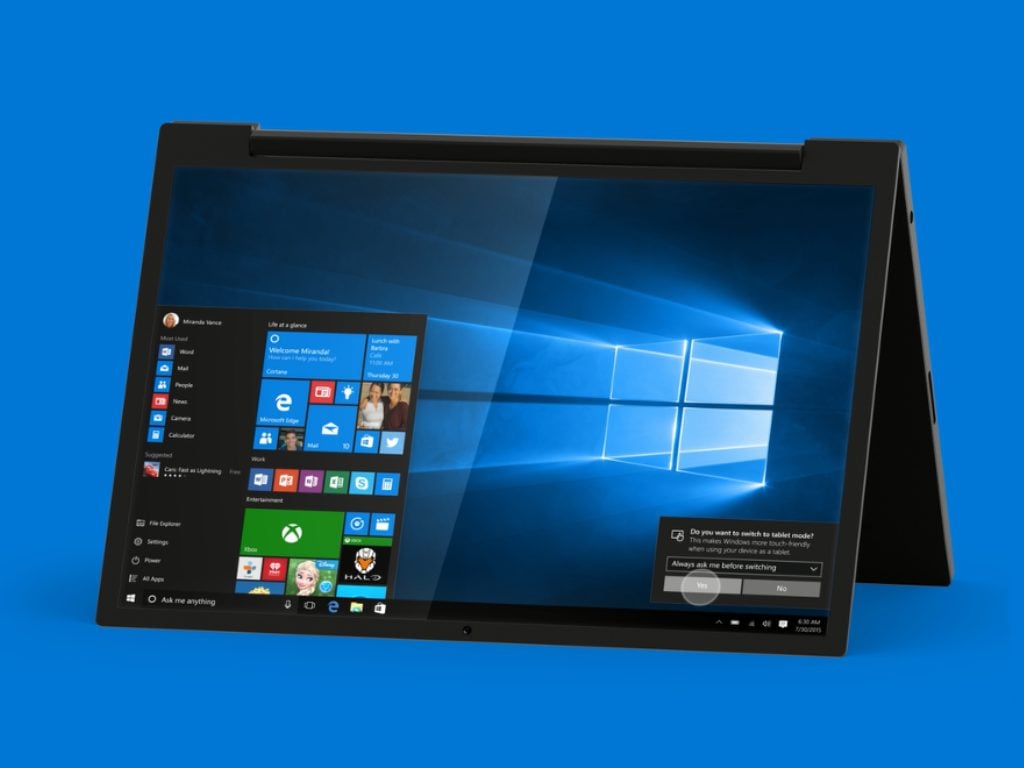
  • Freeze when playing games in tablet mode or in full-screen.
  • Faulty process when extracting online-only ZIP files
  • Blank lock screen after a device wakes up from Hibernate
  • Duplicate cloud provider folders in the File Explorer
  • Incorrect deactivation of some Windows 10 Education devices after upgrading to Windows 10, version 2004
  • Issue with Start menu, Cortana, and tiles pinned to the Taskbar

So reverting KB4598291 to fix Discord will most likely also cause some of these bugs to reappear (in case you also experienced them). But at this point, this is the only fix, until the next Patch Tuesday updates.

4 best router temperature monitoring software [Real temp]

Heat is the number one adversary of electronics, and your router is no different.

Irrespective of the kind of business you have, a router is what helps you manage the traffic and connect multiple networks efficiently.

Overheating issues can shutdown or at items results in the untimely demise of your network routers. The best way to prevent this mishap from happening is to invest in router temperature monitoring software.

Top of the line business routers come equipped with temperature sensors out of the box. However, to gather the required data via SNMP, you need router temperature monitoring software.

Finding the right router temperature monitoring software can be a daunting task no matter if it’s used for your router or for monitoring your CPU temperature.

That’s why we have jotted down a few network monitor software that can collect temperature data from your router.

What is the best router temperature monitoring software?

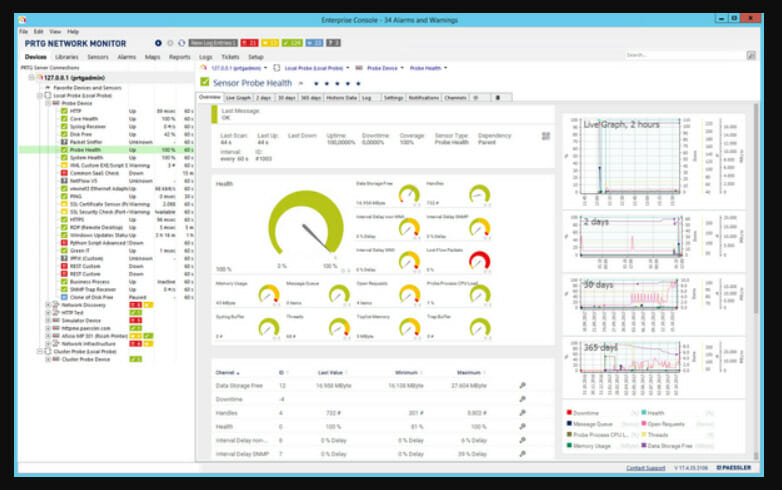
PRTG Network Monitor

 router temperature monitoring software

PRTG Network Monitor is an agentless network monitoring software from Paessler AG.

Apart from monitoring and classifying various conditions, it can also offer a powerful network and CPU temp monitor program.

PRTG Network Monitor can check network components’ status and performance, measure bandwidth usage, and send alerts if anything on your network requires attention.

The temperature software can monitor disk space, CPU loads, memory usage, routers, and servers.

Using the tool, you can monitor all the systems, devices, traffic, and applications in your IT infrastructure with ease. All the software runs on your hardware giving full control for customization.

Key features of PRTG Network Monitor:

  • Temperature monitor software for routers and computer hardware 
  • Software runs on on-premise hardware 
  • Complete control and full customization option 
  • Easy to use and plenty of tutorials 
PRTG Network Monitor

PRTG Network Monitor

The PRTG Network Monitors enables accessible and fast information about your router’s temperature and also other hardware.
Free trialVisit website

ManageEngine OpManager

 router temperature monitoring software

OpManager by ManageEngine is a network management application that can monitor network devices such as routers, switches, firewalls, load balances, wireless LAN controllers, servers, and more. 

The hardware health monitoring feature allows you to monitor the health of key device parameters, including temperature, voltage, power, fan speed, and disk arrays. OpManager uses SNMP to monitor and collect the hardware health status of your router and switches.

OpManager can provide historical reports on the status of hardware health, trigger and suppress hardware alarms for individual devices, and customize the hardware health monitoring interval at the device level.

Key features of ManageEngine OpManager:

  • Monitor key device parameters such as temperature, voltage, and power 
  • Collect hardware health data using SNMP
  • Offers historical reports on hardware health status 
  • Trigger and suppress hardware alarms 

ManageEngine OpManager

Monitor router temperature and other key parameters with this professional software.
Free Trial Visit Website

Zenoss CiscoMonitor ZenPack

 router temperature monitoring software

If you use Cisco switches and routers, then CiscoMonitor ZenPack by Zenoss provides health and performance monitoring for a wide range of Cisco products.

This includes switches, routers, and network devices, virtual resources such as firewalls, load balancers, and extensible LANs.

CiscoMonitor ZenPack collects reports using syslog and SNMP traps. The auto-discovery feature provides access to a router’s various parameters

These parameters include temperature, power, fans speed, chassis, fiber channel interfaces, and line cards.

Key features of CiscoMonitor ZenPack:

  • Monitors physical and logical parameters 
  • Monitors Cisco router and switches temperature 
  • Class-based QoS monitoring 

⇒ Get Zenoss CiscoMonitor ZenPack


WhatsUp Gold Network Traffic Monitor

 router temperature monitoring software

WhatsUp Gold Network Traffic Monitor allows you to identify and remediate potential problems resulting from sub-optimal operating conditions for the hardware equipment.

It can obtain internal device temperature measurements from Cisco switches and routers, dell servers, and HP Procurve switches.

Apart from the hardware monitoring tools, WhatsUp Gold Network Traffic Monitor allows you to discover all devices on your network, create customizable network maps, and provides real-time alerts. 

WhatsUp Gold Network Traffic Monitor can monitor anything that can be accessed with standing monitoring protocols like Ping, SNMP, WMI for Windows, and SSH for Linux.

Key features of WhatsUp Gold Network Traffic Monitor:

  • Monitor anything with an IP address
  • Hardware monitoring tool to get real-time reports on router temperature and more
  • Customizable network maps
  • Can automatically discover all devices on a network 

⇒ Get WhatsUp Gold Network Traffic Monitor


Router overheating can lead to many issues, including dropped connections, slower speed, hardware malfunction, at times burnt plastic odor, and complete shutdown.

Explore the router temperature monitoring software listed in this article and find the right tool to help you detect overheating issues before it happens.

Top 5 tips and tricks to get the most out of your Surface Pen

If you’ve just purchased a Surface, then a Surface Pen is a must-buy add-on for your new tablet or laptop. Not only can you use it to bring out your creative side in drawing apps like Fresh Paint, but Surface Pen can also be used to navigate Windows 10, launch apps, and a lot more. That’s why we’ve put together this guide, showcasing our top 5 tips and tricks for Surface Pen.

A guide to Surface Pens

Before getting into anything, we want to give you a bit of a history lesson. It’s important for us to mention this because not all Surface Pens are created equal. There are different Surface Pen models, designed for the very first Surface in 2012 up until the most recent Surface Pro X in 2020.

Each pen has different features, too. Here’s a quick summary if you’re considering buying a used or new Surface pen for your device.

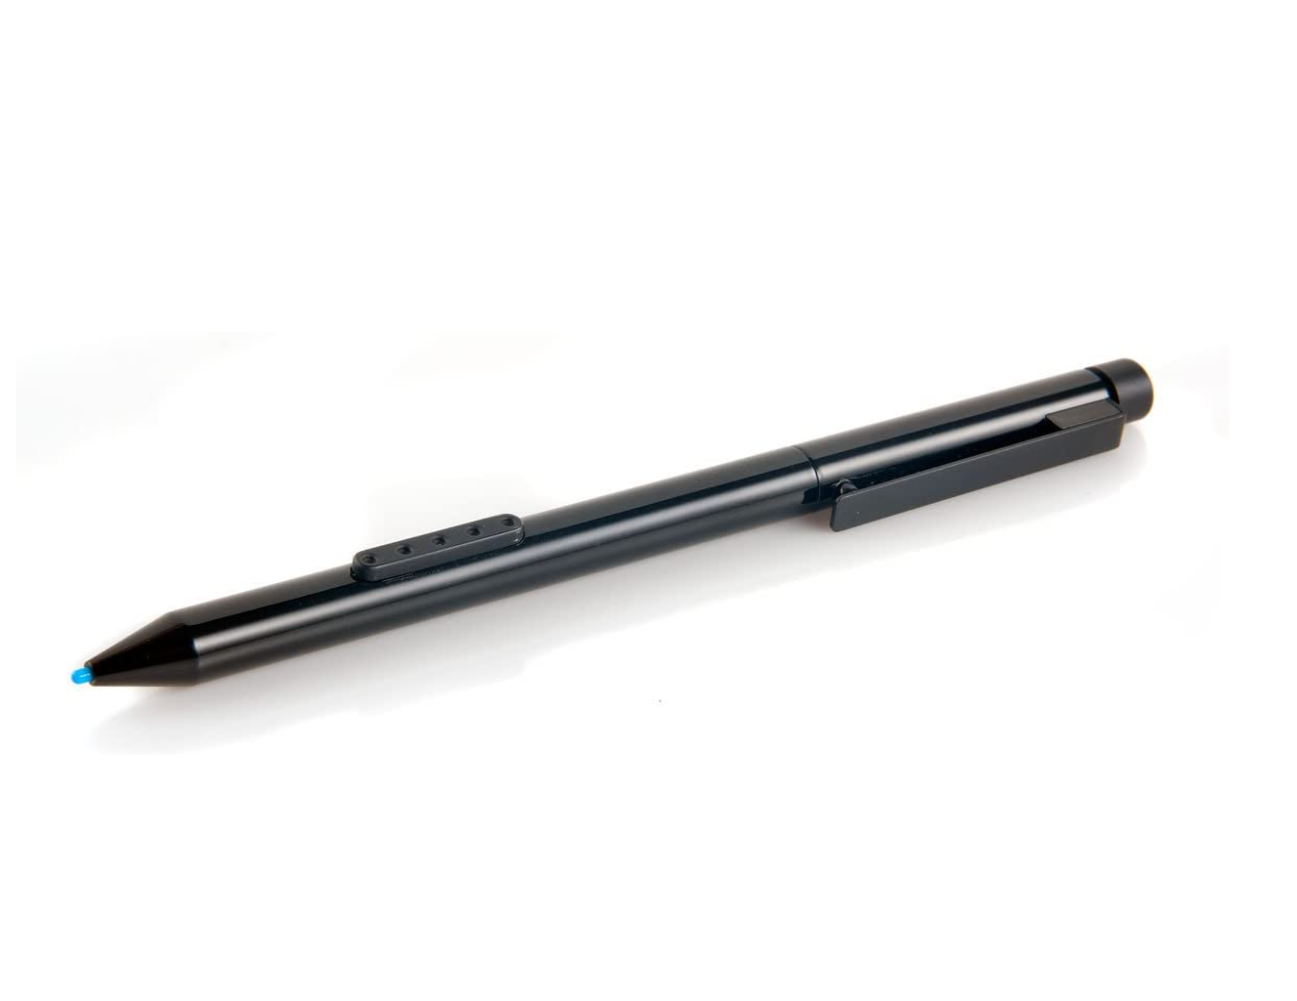
  • First Gen Surface Pen: This pen is powered by Wacom technology. It is no longer supported on most modern Surface devices (Surface Pro 3 and newer) for that reason. It’ll only work on Surface Pro 1 and Surface Pro 2. You can tell this pen apart from others because it has a giant physical button on the right side and has a black plastic-like design.
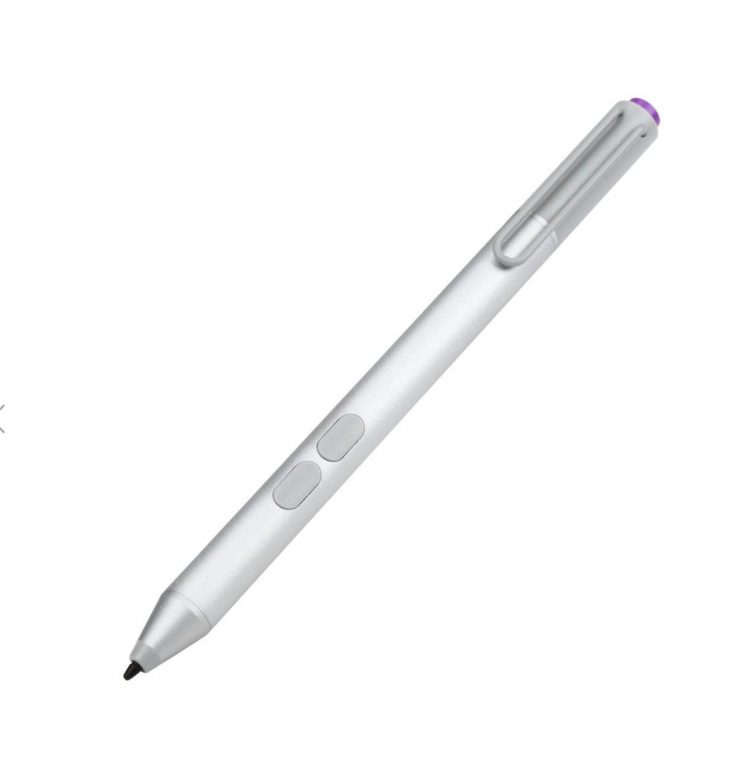
  • Second Gen Surface Pen: This pen uses N-trig technology. The N-trig technology is used in all modern Surface devices. For this reason, a second generation Surface Pen works on the Surface Pro 3 and onwards. The second gen Surface Pen supports 1,024 pressure points, and has Bluetooth connectivity with Surface. It also slid into a pen loop on the Surface Cover, and it has two buttons on the side barrel of the pen. It needs to be powered by a single AAAA battery and has a plastic eraser button, though it can’t be used as an actual eraser.
  • Third Gen Surface Pen: Also using N-Trig technology, this pen was introduced along with the Surface Pro 4.  It works on all modern Surface devices. You can tell it apart from the others thanks to its single button on the side. This pen also brought back a top-mounted physical rubbery-like eraser, and could be mounted to the side of the Surface magnetically. It also needs AAAA battery, too.
  • Fourth Gen Surface Pen: Another pen powered by N-trig technology, this pen was introduced with Surface Pro 5th generation, and has since been the default pen on the Surface Pro 5, 6, and 7. This pen is Microsoft’s most sophisticated, and the one we suggest buying. It comes with 4,096 levels of pressure points. You can tell this pen apart from the others as it now comes in multiple colors, and it doesn’t have a pen clip on the side. It’s still powered by an AAAA battery.

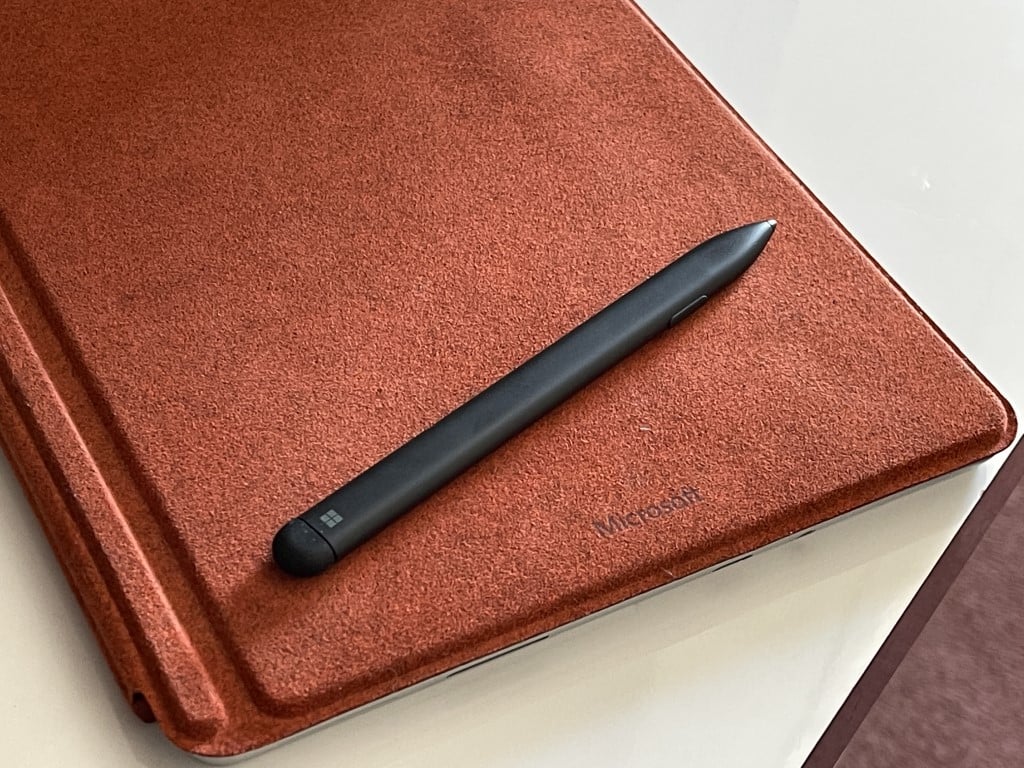
We’ll end this section by mentioning the Surface Slim Pen. This pen is the most modern from Microsoft. It changes up the design from previous pens as it is flatter like a carpenter’s pencil. It also removes the need for AAAA batteries, as it comes with its own USB-C charging holster, or can recharge via the Type Cover in the Surface Pro X. Pressure sensitivity is the same, though. We’ll be using this pen in our guide.

Tip 1: Use your pen to navigate Windows 10

Surface Pen Nivigate Windows

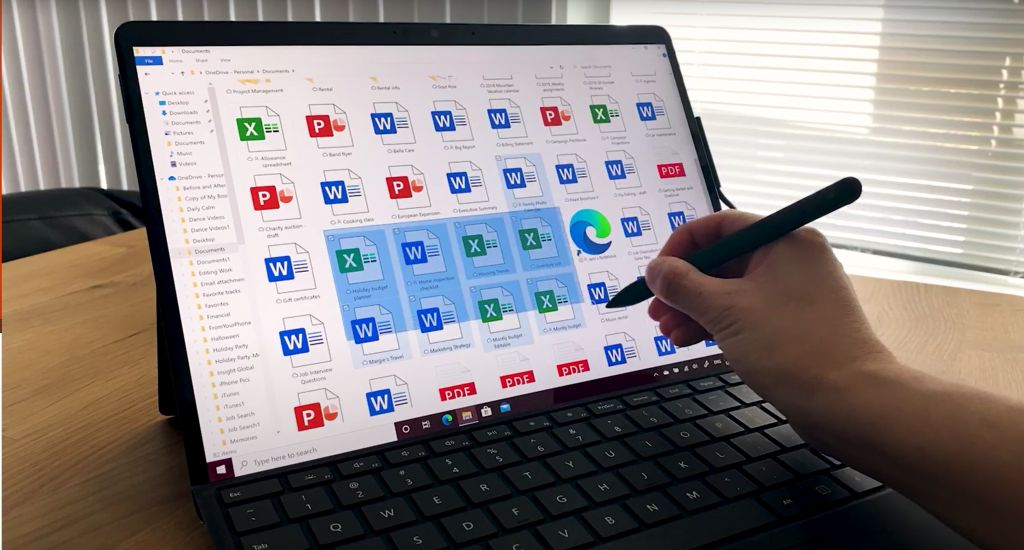
Typically, you might use your mouse to get your way around Windows 10, but if you have a Surface Pen, it also can be used for navigation. It also might be more convenient, especially since you’re already likely holding the Surface Pen in your hands.

There’s a couple of different ways Surface Pen can be used in place of your mouse in Windows. First off, you can tap your pen on the screen on an item to click or select it. Then, you can press and hold on the side button on the pen to right-click, or simply hold your pen down on the screen, too.

You also can drag and drop by placing your pen on an item, holding it until you see a circle, and then moving it around. Or, simply draw a box around the item and drag the item with the pen itself. Finally, you can select multiple items by pressing and holding the side button and dragging the pen over the items you want.

Tip 2: Use the eraser button to do things in Windows 10

Rface Pen Whiteboard

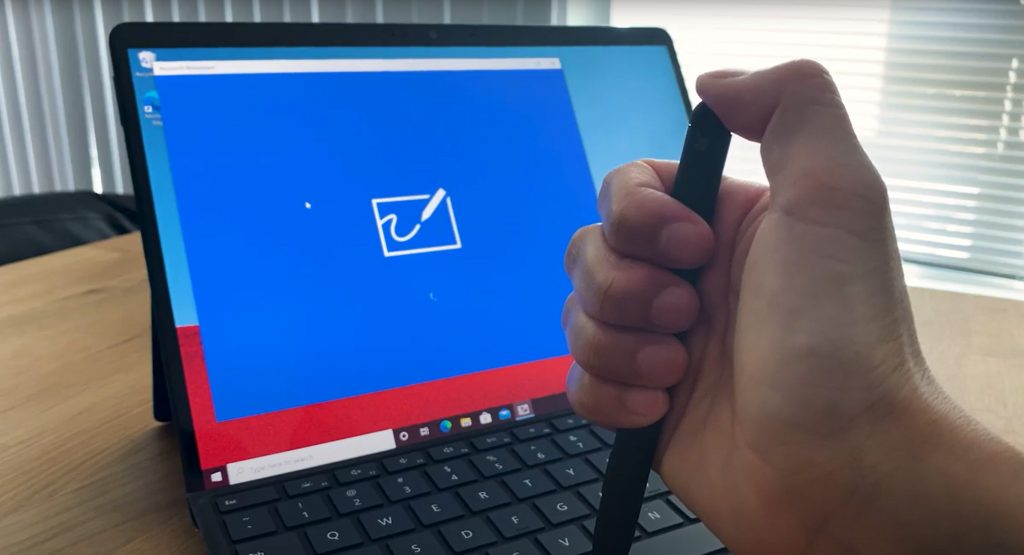
On Surface Pen Gen 3 and 4, the top of the pen has an eraser that can be used to remove inking in drawing apps, but did you know the eraser button can also be clicked down to open select apps in Windows 10? By default, there’s a couple of different functions configured for the eraser button in Windows. These can be seen below. Keep in mind, you’ll need to have Bluetooth turned on, and have paired your pen to your Surface for this to work.

  • Click the top button once: Opens Microsoft Whiteboard
  • Double click the top button: Open Snip & Sketch
  • Open Sticky Notes: Press and hold the top button

You can always change these defaults by pairing your Surface Pen to your Surface and then going to Pen & Windows Ink in System Settings. We’ll have more on those in our next tip.

Tip 3: Change your Surface Pen settings

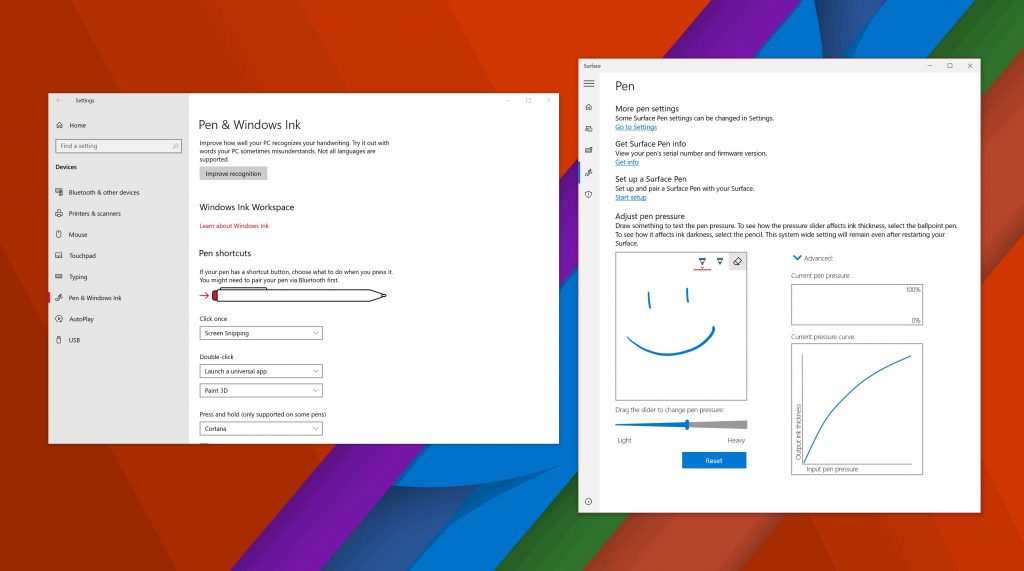
Pen Settings Windows 10

Our third tip isn’t about the pen itself, but rather the way it works in Windows 10. If you visit Settings and then click Devices there will be a category for Pen & Windows Ink. Click this, and then you can change your Surface Pen settings. You can switch which hand you use the pen with, change visual effects, fonts when writing, and when handwriting boxes will appear. You also can change what the eraser button does, or assign to launch a specific app.

Finally, there’s a note on changing the pressure sensitivity of the Surface Pen. If you open the Surface app in Windows 10, and then click the pen icon in the left bar on the screen, you can use the slider to adjust the sensitivity of the pen so it fits your own needs. You can always reset it to default, too.

Tip 4: Change your pen nibs!

If you’re using a Surface Pen with no clip or a surface pen with a single button on a flat edge, then we have a cool tip for you. Microsoft actually has different pen “nibs” for these generation Surface Pens. The nibs come in a little box, in the 2H, H, HB, B sizes. There are different sized “nibs” for different tasks. Nibs should work with the third-gen or fourth-gen Surface pens only.

You can use a medium tip to get the feel of a pencil or swap it out with a low-friction tip similar to a fine-point pen. Nibs can be removed by using the tweezer in the box, squeezing the nib out, and pushing it back in. Note that these nibs only work with third-gen pens, though. You can learn more at Microsoft here, and buy the nibs for $20 through the Microsoft Store.

Tip 5: Attach your pen to your Surface to keep it safe

Surface Slim Pen Side Of Type Cover

As long as you have a third-gen of a fourth-gen Surface Pen, then your Surface Pen will attach magnetically to the side of your Surface. It’s best to attach it to the left side of the device, so it frees up your charging port. Surface Slim Pen will also slot to this side of Surface, too, though it doesn’t have the best hold. If this doesn’t work for you, then you can slot the Surface Pen to the left side of Type Cover when it is closed. This is a great way to travel with the Surface Slim Pen when it’s not in use as we have above.

How are you using Surface Pen?

That was a look at some of our Surface Pen tips and tricks. Do you have any of your own Surface Pen tips? Feel free to let us know in the comments below. And, be sure to check out our Surface news hub for more Surface guides, how-tos, and news articles.

10 Best Network Traffic Monitoring Tools for Linux [IT Pro]

Network traffic monitoring tools for Linux helps you monitor your Linux network bandwidth usage and visualize the behind the network happenings.

These tools are essential to not only analyze and troubleshoot network related issues but many times can help you prevent them from happening.

Linux has plenty of open-source network monitoring tools available. However, premium tools offer more features.

The premium features include elements like monitoring network interfaces and ports, critical network services, firewall, web server services, network bandwidth, packet loss monitor, and even bandwidth usage checking.

In this article, we have listed the best network traffic monitor tools for Linux to help security engineers and network admins monitor the most critical aspects of their network.

What are the best network traffic monitor tools for Linux?

ManageEngine OpManager

network traffic monitoring software Linux

ManageEngine OpManager is a highly scalable and powerful Linux network monitoring tool. It can monitor all the Linux devices in your network for availability, including health and performance in real-time. 

ManageEngine OpManager is one of the very few network monitoring tools for Linux that can maintain an inventory of all your Linux devices, show your Linux devices’ real-time status, and identify traffic congestion in the interfaces and show detailed performance reports.

The intelligent Linux network fault management alerts the IT admin about network failures. Network automation helps with the automation of repetitive but important tasks reducing the workload on IT admins.

Key features of ManageEngine OpManager:

  • Customizable dashboards
  • Real-time performance and network monitoring 
  • Monitor critical hardware components 
  • Recurring tasks automation

ManageEngine OpManager

Monitor network performance and other key parameters with ManageEngine OpManager.
Free Trial Visit Website

PRTG Network Monitor 

network traffic monitoring tools for Linux

PRTG Network Monitor is an all-in-one network monitor tool that is compatible with Linux and allows you to keep an eye on several PRTG servers at once. With PRTG Desktop, you can configure your Linux monitoring environment, track your monitoring results and keep an eye on the network.

PRTG Network Monitor offers total control over multiple servers, making it an ideal solution for large network managers. It offers features like Device Tree Management, Multi-Server, Multi-Edit, and more.

Irrespective of the Unix system running, PRTG Network Monitor supports all the major Linux distributions such as Ubuntu, Debian, Mx Linux, Linux Mint, and Fedora.

Key features of PRTG Network Monitor:

  • Access multiple PRTG core server at once 
  • Compatible with all the major Linux distributions 
  • Compatible with mobile devices 
  • Plenty of network monitoring tools 

PRTG Network Monitor

Easily manage all aspects of your network traffic on Linux by using this great software today.
Free trial Visit Website

Zabbix Network Monitoring 

Zabbix Network Monitoring is an open source monitoring solution for network monitoring supporting various metric collection methods and protocols such as SNMP, IPMI, Active and passive modes, and IPv6 support. 

Zabbix Network Monitoring allows you to monitor network performance, including network bandwidth usage, packet loss rate, interface error rate, high CPU or memory utilization. It also monitors your network health and records configuration changes.

Key features of Zabbix Network Monitoring:

  • Support multiple metrics collection methods and protocol 
  • Flexible and extendable data gathering 
  • Autodiscovery to detect network devices 
  • Pre-made templates for metrics monitoring 

⇒ Get Zabbix Network Monitoring

Nagios Core

network traffic monitoring tools for Linux

Nagios Core is another open-source tool that enables organizations to identify and resolve IT infrastructure problems before affecting business workflow.

Core features of Nagios Core including comprehensive monitoring, visibility, and awareness to monitor applications and offer a centralized view of the entire monitored IT infrastructure. It also offers alert acknowledgments to provide communication on known issues with support for historical reports on alerts, notifications, and alert response.

Other notable features of Nagios Core include integration with in-house and third-party applications with multiple APIs, full access to source code, and multi-user access to the web interface allowing the stakeholders to view infrastructure status. 

Key features of Nagios Core:

  • Comprehensive monitor tools 
  • Centralized view of entire monitored IT infrastructure 
  • Event handlers and alert acknowledgment 
  • Extensive reporting tools

⇒ Get Nagios Core

Zenoss Zenpacks Linux Monitoring

network traffic monitoring tools for Linux

Zenoss Zenpacks Linux Monitoring offers monitoring support for Linux servers by leveraging OpenSSH for data access. Apart from the system’s health, it can also monitor LVM, services, and processes.

Zenpacks Linux Monitoring automatically discovers hard disks, processors, IP services, and file systems and updates their attributes and collections with modeling.

Additional features offered by the tool include performance monitoring, service impact, and root-cause analysis.

Key features of Zenoss Zenpacks Linux Monitoring:

  • Monitor multiple Linux flavors and versions 
  • OpenStack LVM volume integration 
  • Block device monitors
  • Dynamic view support and root-cause analysis 

⇒ Get Zenoss Zenpacks Linux Monitoring

OpenNMS

network traffic monitoring tools for Linux

OpenNMS is an open-source network management system to monitor Linux server applications and services. Built for enterprises, it can monitor millions of devices from a single instance. The flexible architecture allows service polling and performance data collection. Included network discovery system can add any new device that enters the system automatically.

Key features of OpenNMS:

  • Open source network traffic monitoring 
  • Flexible and extensible architecture for service polling 
  • Supported by a large community of users 

⇒ Get OpenNMS

Cacti

network traffic monitoring tools for Linux

Cacti is a complete network graphing solution designed to harness RRDTool’s data storage and graphing power. It offers the fast poller, advanced graph templating, multiple data acquisition methods, and user management features—the intuitive and easy to use interface designed for complex networks with thousands of devices.

Key features of Cacti:

  • Network graphics solution 
  • Offers fast poller, and advanced graph template 
  • Clean and easy to use interface with multi-device support
  • User management features 

⇒ Get Cacti

ntopng

network traffic monitoring tools for Linux

Based on the original ntop, ntopng is the new-gen network traffic analyzer that can monitor network usage. Its portability ensures it can be run on every Unix platform, macOS, and even Windows systems. Ntopng offers an intuitive web user interface for exploiting real-time and historical network traffic information. 

Key features ntopng:

  • Shows real-time network traffic and active hosts 
  • Ability to produce long-term reports for several network metrics, including L7 application protocols
  • Sort network traffic with filters like IP address, port, and layers

⇒ Get ntopng

Htop

network traffic monitoring tools for Linux

A text-mode application for console and X terminals, Htop is an interactive process viewer. Compared to top, Htop is an advanced process that is more interactive and works in real-time. However, the tool does not have a graphic based interface, unlike other tools in this list.

Key features of Htop:

  • Advanced interactive process viewer
  • Easy to use command-based UI

⇒ Get Htop

Darkstat

network traffic monitoring tools for Linux

Darkstat is a cross-platform, real-time network traffic monitoring tool that captures network traffic, keeps a tab on data bandwidth usage, and serves the reports over HTTP. It is a simple and lightweight utility that can be installed directly from the software repositories of major Linux distributions, including RHEL/CentOS and Ubuntu. Below is the command that you can use to install Darkstat on your Linux server.

$ sudo apt-get install darkstat

Key features of Darkstat:

  • Portable and efficient web-based network traffic analyzer 
  • The web interface shows network traffic graphs and reports on host and ports
  • Support IPv6 protocol 

One of the main reasons behind monitoring a Linux server is to know what’s going with your network at any given point to maintain and improve your quality of service.

All the tools listed in this offer excellent Linux network monitoring tools to track performances and extract detailed imports.

Email Scanner Software: 9 Best to Use in 2026

Email attachments proliferate and spread malware. For example, Melissa was one of the more notable mass-mailing viruses back in the 90s.

Thus, email-scanning programs are effectively antivirus utilities that scan and detect the adware.

Most of the best antimalware software automatically scans emails for viruses, and there are still quite a few that don’t come with this feature.

In addition, there are also some more specific packages for network mail servers that eliminate malware and block spam.

In this article, we have compiled some of the best email-scanning software for combating mail viruses.

What are the best antivirus tools to scan emails?

VIPRE Antivirus Plus

The VIPRE Antivirus Plus software is our first recommendation for safely removing malware from your emails.

This amazing tool keeps you safe from ransomware and other nefarious malware in an era of unprecedented attacks.

The Email Security feature and its suite of add-on solutions, delivered from the convenience of cloud-based architecture, is the secure choice for today’s pervasive email threats.

The software is also rich in features, including:

  • Advanced Active Protection
  • Anti-spam Protection
  • Cloud-enabled Security
  • Personal Profile Protection
  • Dark Web Scanner
VIPRE Antivirus Plus

VIPRE Antivirus Plus

You can have total protection for your emails against malware threats with the VIPRE Antivirus Plus software!
Free trialVisit website

Bitdefender Antivirus Plus

bitdefender antivirus email scanner

While we’re at essentials, we can’t overlook Bitdefender Antivirus Plus which is, arguably, one of the best free antivirus you can get for your Windows OS.

But, there’s a catch: the amazing virus detection and protection features are all you’ll get. No additional features, no multi-structural protection, password managers, or Wi-Fi advisors.

Most of the antivirus software nowadays evolved into multi-functional hubs for everything even remotely related to PC security.

So what you’ll get with this tool are the ultimate anti-malware and anti-phishing protection traits. Other features are:

  • Complete Reat-Time Data Protection
  • Web attack prevention
  • Anti-Pishing & Anti-Fraud
  • Network Threat Prevention
  • Social Network Protection
Bitdefender Antivirus Plus

Bitdefender Antivirus Plus

With Bitdefender Antivirus Plus you get the best real-time protection, as well as 24/7 anti-phishing and anti-fraud security.
Free trialVisit website

Panda Dome Essential

panda email protection

The Panda Dome Essential antivirus packages come with both, a free and a paid version.

Once known as Panda Free Antivirus, it can be found on the official website but it has limited features for advanced users, especially for those which have special expectations for email protection and web surfing.

If you want to access all of its potentials – you’ll have to upgrade up to full version. The free version has special algorithms and can filter URLs and web surfing.

The separate Panda Email Protection comes as a tool designed only for email scanning. It manages email security by company, domain or user.

The tool comes with a multi-layer system of filters for inbound and outbound email, using multiple connections, antivirus, and content filters to deliver the most effective security.

Other Panda Dome Essential comprehensive features are:

  • Antivirus protection with firewall
  • Free VPN
  • Wi-Fi network protection
  • External/USB devices scanner
  • Antivirus protection for Mac & Android
Panda Dome Essential

Panda Dome Essential

Use the dedicated email protection from Panda Dome Essential to get top anti-spam and anti-malware security.
Free trialVisit website

Norton 360

Norton email scanning tool

Norton 360 is one of the most highly rated anti-virus utilities. This software has Standard, Deluxe, and Premium editions.

The Premium subscription is the best version that offers full anti-spyware, antivirus, malware, and ransomware protection with a lot of extra options, including VPN and cloud backup space.

On the other hand, Norton has a  separate non-SSL POP3 and SMTP Email Scanner that scans incoming email attachments and hyperlinks for viruses, spyware, and malware.

The email tool is configurable as you can select it to scan either incoming or outgoing mail. In addition, it also includes instant messaging scanning for Yahoo, MSN, AOL, and Cerulean Studios.

Other essential features are:

  • Password Manager
  • Smart Firewall
  • SafeCam
  • Dark Web Monitoring
  • Parental Control
Norton 360

Norton 360

Use Norton’s improved protection features to benefit from seamless email security.
Free trialVisit website

AVG Internet Security

get AVG Antivirus for email security

AVG is award-winning anti-virus software for Windows. As such, it’s a good choice for eliminating email viruses.

You can add the freeware version of AVG or AVG Internet Security to Windows, Mac or Android platforms. 

This antivirus has a limited email scanner that will block suspicious email attachments and hyperlinks. It will also scan for and block spam and phishing emails.

The software includes a variety of email configuration options for users. For instance, users can select to scan for incoming or outcoming emails, scan inside archives, and to use heuristics.

AVG Internet Security’s other features include:

  • AI Detection
  • PUA Scanner
  • CyberCapture
  • Turbo Scan
  • Behavior Shield
AVG Internet Security

AVG Internet Security

Protect your personal files and your private life from malware only with AVG Internet Security.
Free trialVisit website

GFI MailEssentials

GFI MailEssentials is email-scanning software specifically designed for network mail servers. It will scan for all manner of email junk, be it viruses, spam, or phishing.

The software is compatible with the Microsoft Windows Server platform.

The great thing about GFI MailEssentials is that it incorporates five renowned anti-virus engines. It supports Kaspersky, Avira, BitDefender and McAfee engines for scanning emails.

Furthermore, the software is loaded with anti-spam filter tools such as SpamRazor, Sender Policy Framework and Grey List that block junk emails.

Other extensive features are:

  • Protection against Trojans and email exploits
  • Centralized management console
  • Integrated reporting
  • Hassle-free spam and malware protection
  • Anti-Pissing & Spyware

⇒ Get GFI MailEssentials

MailScan

MailScan is an email anti-virus software for mail servers. So, this is primarily business network software that eliminates email viruses and malware from email.

The software supports a variety of mail servers among which are Microsoft Exchange Server, SMTP Server, Lotus Notes and VPOP3.

It’s also compatible with most Windows platforms including the Server series.

It scans any emails before they enter the system and works with outbound messages as well as incoming emails.

Other features include:

  • Attachment Filtering
  • Advanced Anti-Spam and Anti-Phishing
  • Blocking Image Spam
  • Comprehensive Attachment & email Archiving
  • LDAP & POP3 Authentication

⇒ Get MailScan

Mailwasher

email protection mailwasher

Mailwasher is primarily spam-filtering software, but can also be a handy email anti-virus utility.

This is one of the foremost spam-filtering programs you can use with pretty much any email software be it Outlook Express, Incredimail, Microsoft Mail, and Windows Live Mail.

In addition, it also enables you to delete email spam and viruses with webmail providers, plus to preview and delete emails at the server before the email software has got them.

The software is also rich in features, including:

  • Effective anti-spam tools
  • POP3, IMAP, Hotmail, AOL, Gmail etc
  • Colored grid lines for easy reading
  • Real-time spam filter service
  • Auto delete spam

⇒ Get Mailwasher

BullGuard Internet Security

bullguard antivirus email scanning

BullGuard Internet Security is a tool that will suit your antimalware needs.

This extremely versatile antivirus is good against any type of online threat and combines multiple protection layers like anti-malware, antiphishing, anti-ransomware, and vulnerability scanner.

It will scan and block every threat before it reaches your PC as it has a special behavioral engine. The tool is similarly efficient in terms of email scanning.

However, please note that BullGuard Internet Security doesn’t scan incoming emails at the network level. Instead, it uses email client add-ins (Outlook and Thunderbird are supported).

Key features include:

  • Dynamic Machine Learning
  • Vulnerability Scanner
  • Secure Browser
  • Cloud Integrated Backup
  • Home Network Scanner

⇒ Get Bullguard

All the email-scanning software listed here is reliable and easy to find, install, and manage. They use few resources and offer maximum protection against viruses and malware.

If you have any other suggestions or questions, feel free to leave them in the comments section below.

[Fixed] Solarwinds not sending email alerts

Since 2000, Solarwinds has been a constant presence in the IT industry.

Their purpose is to provide powerful IT infrastructure management software at affordable prices. Many of their users have encountered the Solarwinds not sending email alerts issue.

Users have complained about this problem in the Solarwinds forum:

Me and the team from Solarwinds have been trying for three days to fix this error but without success. Does anyone have experience with this issue, and if so, please help me find a solution.

We have investigated this issue too, and you will find in our next section our best solutions. They have been tested to help you fix the Solarwinds not sending email alerts issue.

How can I fix the Solarwinds not sending email alerts error?

1. Verify if the STMP server is valid

  1. Use an account with administrative privileges.
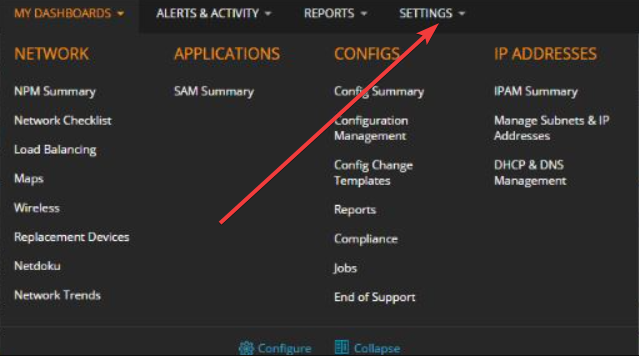
  2. Log in to Orion Web Console and click Settings.Orion Web Console interface
  3. Navigate to Reports and Alerts and click  Manager SMTP Servers.
  4. Choose SMTP Server and click Edit.
  5. Provide the following: Username/IP address and SMTP Port Number.
  6. To authenticate, check This SMTP Server requires Authentication.
  7. Provide the necessary credentials and click Send Test Email.
  8. Insert email addresses there: one of your recipient and one for Reply.
  9. Click Send. 

2. Verify if the Email action is enabled

  1. Use an account that has administrative privileges.
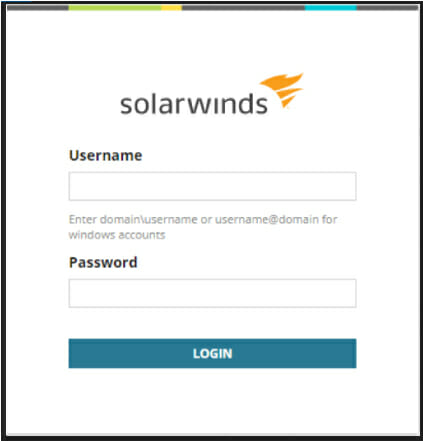
  2. Log in to Orion Web Console.Login Orion Web Console
  3. Click Settings, navigate to Reports and Alerts and click Manager Alerts.
  4. Click the Action Manager tab, a group that lists based on Action Type.
  5. Verify Send an Email/Page action if the affected alert is enabled.

3. Verify the Solarwinds log

  1. Go to the following path: C: ProgramDataSolarwindsLogsOrion
  2. Search for the Alerting.Service.V2.
  3. Verify what (if any) errors appear in the list.

Note: An error implies that an incorrect SMTP server was used for one of the alerts, or the issue might be caused by a subscription problem preventing the SWIS v3 from launching.

4. Use a professional third-party solution

To resolve the Solarwinds not sending email alerts issue from appearing again, you can always choose professional software. The proper one to use in this situation is a WiFi analyzer.

We recommend you Paessler PRTG Professional WiFi analyzer that allows us to monitor all your wireless connected devices.

Use it to manage your routers using five important factors: device status, speed, load, traffic, signal strength, and WiFi usage.

There are several solutions you can try to fix the Solarwinds not sending email alerts issue.

Using a professional third-party application such as PRTG Network Monitor not only prevents the email issue from occurring again, but is far less time-consuming and allows you to avoid any other issues.

We also recommend you to verify the following: valid SMTP server, enable Email action and verify the Solarwinds log.

Feel free to share your experience with us by using the dedicated comment section found below this guide.

Payday 2 Mods Not Working [Complete Fix]

PayDay 2 is a multiplayer co-op action game on Windows and other gaming platforms.

With the popularity came mod support, and the players have used the BLT mode manager to install mods on the game. However, recently, many users have reported the PayDay 2 mods not working issue on relevant forums.

If the mods are not working for PayDay 2 on your computer, check if the mod placement is done correctly.

If the placement is correct, check if the computer has Redist 2017 installed. Finally, check the required DLL files to make the mods work again.

In this article, we look at the best solutions to help you resolve the PayDay 2 mods not working issue on Windows systems.

How do I fix the PayDay 2 mods not working problem?

1. Check for correct mods placement

Payday 2 mods not working
  1. Open File Explorer and navigate to the game installation folder. If you have downloaded the game from Steam, navigate to the following location:
    C:\Program Files (x86)\Steam\steamapps\common\payday2\
  2. Open the mods folder and manually find and copy the mods without mod.txt files in the folder.
  3. Go back to the main mods folder. Open the Assets folder and mod_overrides folder and paste the copied mod files in the mod_overrides folder. If no such folder exists, create a new folder named mod_overrides inside the Assets folder.
  4. Delete the copied mod files from the original location.

Close the File Explorer window and then try executing the mods again to see if it is working. 

PayDay 2 has two types of modes. Modes that require a mods.txt file should be placed inside the Mod_overrides folder. Incorrect placement means the mods cannot be used during gameplay.

2. Repair and Reinstall VC Redist 2017

Repair Microsoft Visual C++ 

Payday 2 mods not working
  1. Press the Windows key + R to open Run.
  2. Type control and click OK to open the Control Panel.
  3. In the Control Panel, go to click on Programs and then choose Programs and Features.
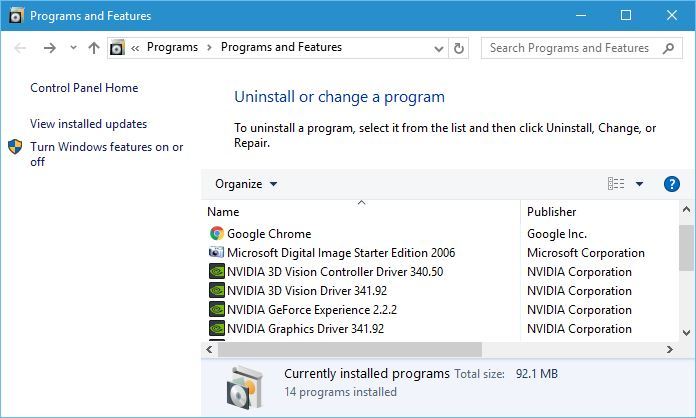
  4. Scroll down and select Microsoft Visual C++ 2017 Redistributable.
  5. Click the Change button on top of the menu.
  6. In the Modify Setup window, click the Repair button. Click Yes when prompted by UAC.
  7. Windows will scan the redistributable package for corruption and missing file issues and apply required fixes automatically. Click Close once the setup is complete.

Restart your computer to save and apply the changes. Try using the PayDay 2 mods again and check if it is working. If the issue persists, reinstall redistributable package 2017 to resolve the PayDay 2 mods not showing up the problem.

Reinstall Microsoft Visual C++

Payday 2 mods not working
  1. Press the Windows key + R.
  2. Type appwiz.cpl and click OK to open the Control Panel.
  3. Select Microsoft Visual C++ 2017 Redistributable package from the list of installed apps and click Uninstall.
  4. Click Yes when prompted by UAC to confirm the action.
  5. Follow on-screen instructions to remove Redist 2017 from your computer completely.
  6. Once uninstalled, download Microsoft Visual C++ 2017 and run the installer once the download finishes.

Restart your computer once the package is installed. After the restart, check if the mods are working again.

3. Replace Vanilla BLT with Super BLT

Payday 2 mods not working
  1. Open File Explorer and navigate to the PayDay 2 installation folders.
  2. Locate and delete the IPHLPAPI.dll file. Click Yes if prompted by UAC.
  3. Next, delete the mods/base folder.
  4. Now download the Super BLT mod manager to your computer.
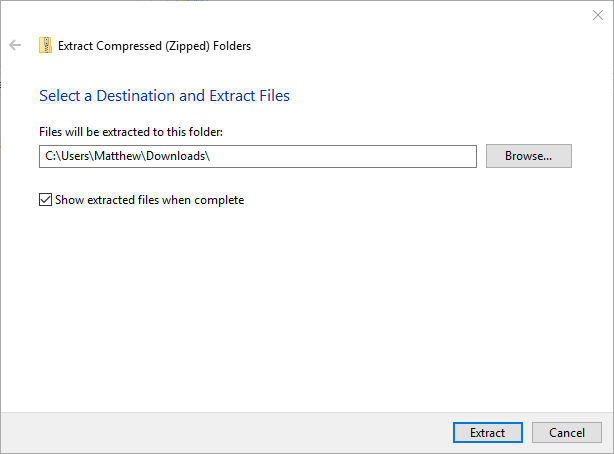
  5. Once downloaded, extract the zip folder, and copy the wsock32.dll located inside the folder.
  6. Go back to the PayDay 2 installation folder and paste the copied dll file.
  7. Next, run the payday2_win32_release.exe file. Super BLT mod manage will prompt you that it will download the base mode folder.
  8. Click Yes when prompted by the mod manager, and wait for the download to finish.
  9. Next, download the required mods in their appropriate folders.
  10. Launch PayDay 2 and check if the PayDay 2 mods not showing up problem is resolved.

4. Disable the Compatibility Mode 

payday 2 mod override folder not there
  1. Open File Explorer and navigate to the PayDay 2 installation directory.
  2. Right-click on the main PayDay 2 executable file and select Properties.
  3. Open the Compatibility tab in the Properties window.
  4. Uncheck Run this program in compatibility mode for box.
  5. Click Apply and OK to save the changes.

Close the Properties window and launch PayDay 2 to check if the mods are working again.

The PayDay 2 mods not working issue can occur if the mods are not placed in the correct directory.

Additionally, try reinstalling the Redist 2017 package, replacing the dll file, or disabling the compatibility mode to resolve the issue.

If you are facing other issues related to PayDay, like Nebula Data error on PayDay 3: Failed To Fetch Config Data.; read this guide to learn the solutions.

Posted in PC

How to upgrade to Chrome 88 [Windows & Mac]

Google has just released an update for the Stable channel for Windows, Mac, as well as Linux, in order to patch an actively exploited zero-day security vulnerability in Chrome 88.0.4324.150.

This version will gradually roll out to the entire user base during the upcoming days and weeks. As confirmed, Google is aware of reports that an exploit for CVE-2020-16009 exists in the wild.

In spite of that, it did not provide any further details regarding the threat actors behind these attacks. That’s what Google reveals at this point:

Access to bug details and links may be kept restricted until a majority of users are updated with a fix. We will also retain restrictions if the bug exists in a third party library that other projects similarly depend on, but haven’t yet fixed.

How can I upgrade to Chrome 88.0.4324.150?

Chrome 88.0.4324.150
  1. To start the procedure, access Settings.
  2. Then, find your way into Help > About Google Chrome.
  3. At this point, rest assured that the Google Chrome web browser will automatically check for this new update and install it when available.

If waiting isn’t really your thing, then keep in mind that as a Windows, Mac, or Linux desktop user, you can already upgrade to Chrome 88.

Just follow the above steps and note that updates happen in the background, when you close and reopen your computer‘s browser.

As always, keeping Chrome up to date is your chance to take advantage of the latest security updates and features to keep you safe and productive.

Therefore, have you completed the above procedure as well? Let us know your opinion in the comments area below.

Disable Nvidia Capture Server proxy [AutoStart folder]

At this moment, NVIDIA is one of the top hardware manufacturers of graphics processing units. Many users noticed the NVIDIA Capture Server Proxy running in Task Manager.

Some of them became suspicious about this file and wanted to remove it from their computer. What is Nvidia Capture Server proxy? That’s what most likely some of you have in mind.

Well, it is actually a service that becomes available after you have purchased an NVIDIA GPU and installed the GeForce Experience Control Panel.

Some users have complained about this issue on the official NVIDIA forum:

I just reinstalled my operating system, installed the latest NVIDIA driver and noticed NVIDIA Capture Server. I have never seen it before. What is this?

Read the following section and learn how you can disable the NVIDIA Capture Server proxy.


How do I turn off NVIDIA Capture?

1. Turn of Game Stream

  1. Open the NVIDIA GeForce Experience application.
  2. Navigate to Settings and check Features.
  3. Turn off the Game Stream.NVIDIA Game Stream

The NVIDIA Capture Server Proxy is a component of the Game Stream service. For this reason, it will allow you to stream your game to other in-home devices.

This solution requires you to close the Game Stream service. After you have closed this process, that will decrease the number of resources it uses.


2. Disable Nvidia Capture Server proxy from services.msc

  1. Press Windows key + R to open Run.Open Run from Start
  2. Type in taskmgr.TASK MANAGER
  3. Search for NVIDIA related processes.
  4. Find and disable NVIDIA Streamer Service and NVIDIA Streamer User-Agent.
  5. Click the Windows button and type in services.msc in the search bar.Open Services
  6. Find NVIDIA Streamer Service, verify Service Status, and click Stop.
  7. Press OK to confirm the action then click on the Startup Type box.
  8. Choose the Disabled option, click on Apply, and then OK.

After you have disabled NVIDIA Streamer Service, this will prevent this service to start itself in the future.

This solution allows you to verify how many NVIDIA services are running, and to close those that are not necessary. 

Two of them are the Streamer Service and the User-Agent. These services allow you to stream games from your PC to NVIDIA Shield devices. It is not necessary to let them run in your operating system.

When you disable them, that will completely disable the NVIDIA Capture Server Proxy. This solution will free up some computer memory, and your gameplay will also improve. 


3. Disable the NVIDIA Web Helper service

  1. Press Windows + R shortcut to open Run and type in services.msc.
  2. Press Enter and go to Services.
  3. In that section, locate NVIDIA Network Service Container.
  4. Open it, go to Startup and change its status to Disabled.
  5. Click on Apply and then OK.

The NVIDIA Web Helper service has the purpose to download automatically new drivers and then install them. In some situations, it will disrupt other computer processes.

This solution allows you to disable this service. Once performed, you will not find the NVIDIA Capture Server Proxy as an active process in Task Manager.


If you wish to turn off the NVIDIA Capture Server Proxy, then try out our simple and tested solutions from the previous section.

You can disable the Game Stream service, the process from Windows services, and not only.

The first two solutions will also enhance your computing experience and free up computer resources. Test them and leave us a comment about your experience.

FIX: CPU not showing all cores in Task Manager

The Task Manager is an incredibly useful tool that many Windows users tend to ignore, primarily because all it does is show graphs and numbers that everyone may understand.

It can be used to monitor active processes on your PC, the CPU and RAM usage of different programs, as well as some hardware specifics. For more detailed specs, check out the CPU Z tool.

One good example is how you can use the Task Manager to monitor the number of cores and threads on your CPU.

However, some users reported that they are having issues with this aspect of Task Manager, as it shows fewer cores and threads than the CPU actually has:

Its an old cpu and after a long time i went into the task manager and it only shows 1 core and 2 logical processors even though the intel site mentions 2 cores and 4 threads.

This is a problem that especially occurs on lower-end PCs, such as those that are dual-core in nature.

Since not everyone can afford to constantly upgrade, we’ve created this guide that will show you exactly what to do in this kind of situation.

How to show all cores in Task Manager?

1. Use a different monitoring tool

Sometimes this issue can be a simple display bug from Task Manager. Simply restart the PC and check again. If the number of cores and threads is still inconsistent, you should try using a different monitoring tool for your CPU.

There are plenty of software tools out there that can monitor your CPU activity, and many of them are even better than Task Manager. PRTG Network Monitor is a great example.

It can monitor the number of cores and threads, check the temperature, minimum and maximum processing speeds, and more.

⇒ Get PRTG Network Monitor

2. Make sure all of your CPU cores are enabled

  1. Press Windows + R.
    • This will open the Run menu.
  2. Type in MSConfig.
  3. Go to the Boot tab.boot advanced settings
  4. Select Advanced Options.
  5. Look at where it says Number of processors.
  6. If the checkbox is enabled, uncheck it.
    • Your system should now use all of its processors whenever given the chance.
      set number of cores
  7. Reboot the PC.
  8. Open the Task Manager or any other monitoring program to view the number co cores. You should see the right number now.

Note: By design, this system setting can only be used to reduce the number of cores your CPU uses, since the system’s goal is always to make the most of your processors.

That being said, if you do find this system setting modified to less than the default value, it may be the result of another software’s tampering.

By following these steps, you should be able to see the correct number of processors when using task Manage or any other monitoring program.

To better understand what CPU cores are and how they work together with threads, read our detailed guide on CPU cores explained for Windows users.

3. Replace the CPU

If you are running a much older PC, then maybe the reason you are seeing fewer cores is that the CPU is giving in. If none of the solutions mentioned above yield any results, then your best bet is to simply get a new CPU.

There are plenty of upgrade options for you to choose from. Besides, getting a brand new CPU will greatly affect your PC’s performance, since the processor is the brain of your computer.

That concludes our article. Make sure to follow our solutions thoroughly and, if you’re aware of another way to solve this problem, share it in the comments section below so that other users can try it, as well.

FULL FIX: HAL INITIALIZATION FAILED error in Windows 10/11

There are all sorts of errors on Windows 10, but Blue Screen of Death errors are probably the most problematic.

These errors will constantly restart your computer in order to prevent damage, and that can be rather tiresome.

Since these errors are so serious, today we’re going to show you how to fix HAL INITIALIZATION FAILED error. We have to mention that our solutions also cover the VMware HAL INITIALIZATION FAILED issue.

How can I fix the HAL INITIALIZATION FAILED BSoD error?

  1. Use third-party repair software
  2. Check if your drivers and Windows 10 are up to date
  3. Run the BSOD Troubleshooter
  4. Run the SFC scan
  5. Run DISM
  6. Check the hard drive
  7. Check for problematic software
  8. Set UsePlatformClock to true
  9. Update your BIOS
  10. Reset Windows 10
  11. Check your hardware

1. Use third-party repair software

BSoD errors are not to be treated lightly as they can disturb all your workflow and can consume time and effort to fix.

However, there is an easier way to deal with them and especially with the HAL INITIALIZATION FAILED error. That is by using specialized software that can fix such errors automatically and quickly repair the system.

2. Check if your drivers and Windows 10 are up to date

Many BSoD errors are caused by hardware or software incompatibility, and in order to fix this issue, it’s crucial to update Windows 10 frequently.

Microsoft is bringing new features through Windows Update, but in addition to new features, there are also many fixes designed to fix any hardware and software incompatibilities that you might have.

To avoid any BSoD errors, and to keep your computer safe and stable, make sure to update Windows 10 as frequently as you can.

Downloading Windows 10 updates is important, but it’s also crucial that you update your drivers.

Drivers allow Windows 10 to better utilize your hardware, and if the certain driver is outdated or not compatible with Windows 10, you’ll encounter a HAL INITIALIZATION FAILED BSoD error.

To update your drivers, all you have to do is to visit your hardware manufacturer’s website, locate the device you wish to update, and download the latest drivers for it.

After downloading the latest drivers, the BSoD error should be resolved.

Few users reported that this BSoD error was caused by their graphic card driver, therefore be sure to update your graphic card driver first and then move to other drivers.

To be sure that the error is fixed, try to update as many drivers as you can.

Update drivers automatically

Searching for drivers on your own can be time-consuming. So, we advise you to use a tool that will do this for you automatically.

Using an automatic driver updater will certainly save you from the hassle of searching for drivers manually, and it will always keep your system up to date with the latest drivers.

3. Run the BSoD troubleshooter

  1. Open the Settings app.
  2. Go to the Update & Security section.
  3. Select Troubleshoot from the left pane.
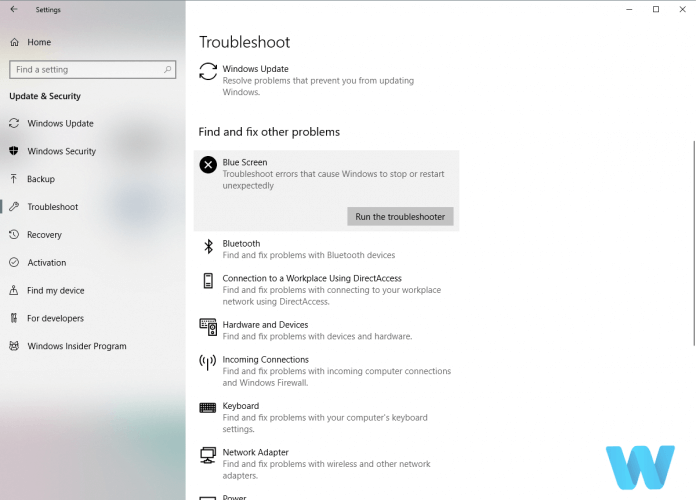
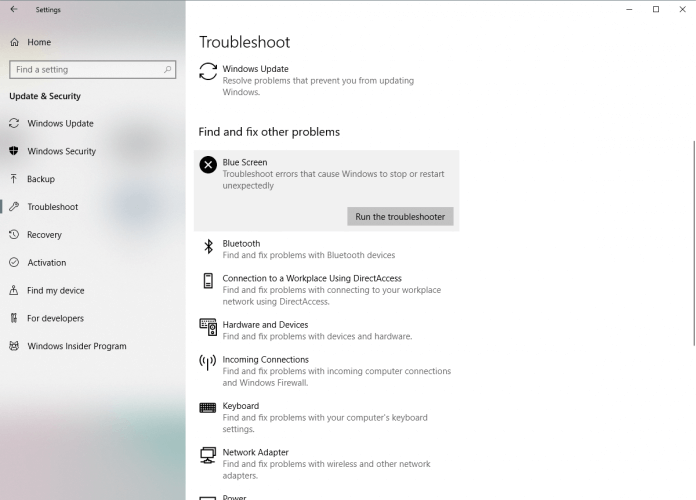
  4. Select BSoD from the right pane and click on Run the troubleshooter.HAL INITIALIZATION FAILED Windows 10 error
  5. Follow the instructions on the screen to complete the troubleshooter.

The next thing we’re going to try is running the built-in troubleshooter featured in Windows 10. This troubleshooter can help with all sorts of issues, including the BSOD errors.

So naturally, it could be helpful with resolving the HAL INITIALIZATION FAILED error, as well.

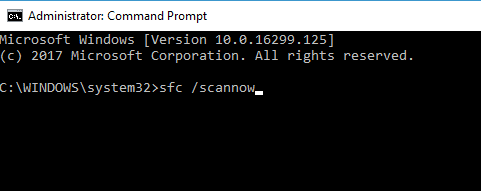
4. Run the SFC scan

  1. Go to Search, type cmd, and open the Command Prompt as administrator.
  2. Enter the following line and press Enter: sfc/scannowHAL INITIALIZATION FAILED Windows 10 error
  3. Wait for the scan to complete (it will take a while).
  4. The tool will automatically resolve the problem, if possible.
  5. Close Command Prompt and restart your computer.

Another troubleshooter that could be helpful here is the SFC scan. This is a command-line tool that scans your system for potential flaws, and resolves them, if possible.

So, it could also resolve the HAL INITIALIZATION FAILED error.

5. Run DISM

5.1 Run DISM the standard way

  1. Open the Command Prompt as shown in the previous step.
  2. Paste the following command and press Enter:
    • DISM /Online /Cleanup-Image /RestoreHealthHAL INITIALIZATION FAILED Windows 10 error
  3. Wait until the scan is finished.
  4. Restart your computer and try updating again.

5.2 Run DISN using a Windows installation media

  1. Insert your Windows installation media.
  2. Start Command Prompt as shown in the previous solution.
  3. In the command line, type the following commands and press Enter after each:
    • dism /online /cleanup-image /scanhealth
    • dism /online /cleanup-image /restorehealth
  4. Now, type the following command and press Enter:
    • DISM /Online /Cleanup-Image /RestoreHealth /source:WIM:X:SourcesInstall.wim:1 /LimitAccess
  5. Make sure to change an X value with the letter of the mounted drive with Windows 10 installation.
  6. After the procedure is finished, restart your computer.

And the third troubleshooting tool we’re going to use while trying to resolve the HAL INITIALIZATION FAILED error is DISM.

Deployment Image and Servicing (DISM), as its name says, re-deploys the system image, so it’s possible it will also resolve some potential issues along the way.

We’ll walk you through both standard and the procedure that utilizes the installation media above.

6. Check the hard drive

  1. Enter the Advanced Startup (Restart your computer while holding the Shift key).
  2. Go to Troubleshoot > Advanced Options.
  3. Select Command Prompt from the list of options.
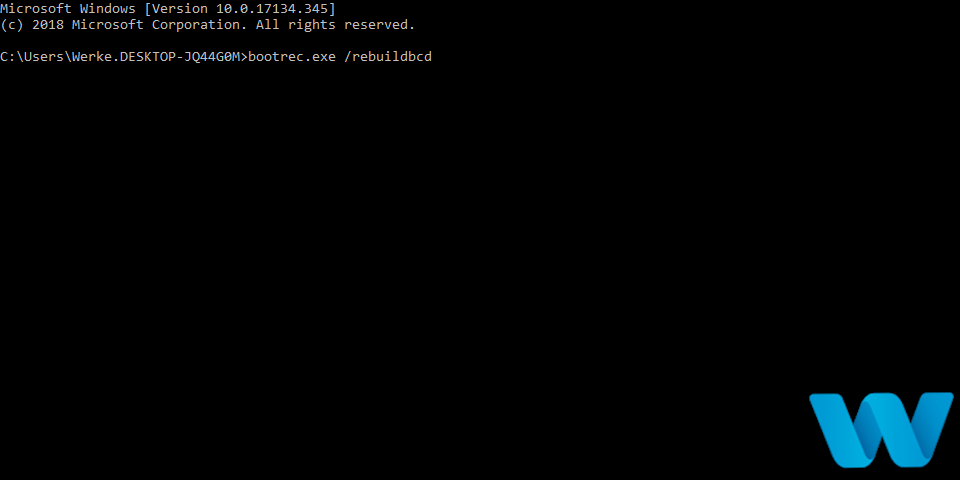
  4. When Command Prompt appears, enter the following lines and press Enter after each line:
    • bootrec.exe /rebuildbcdHAL INITIALIZATION FAILED Windows 10 error
    • bootrec.exe /fixmbr
    • bootrec.exe /fixboot
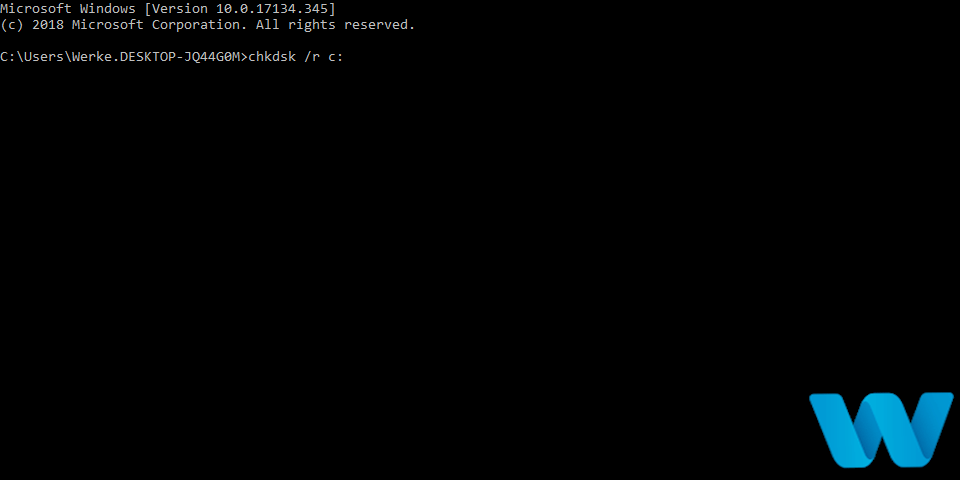
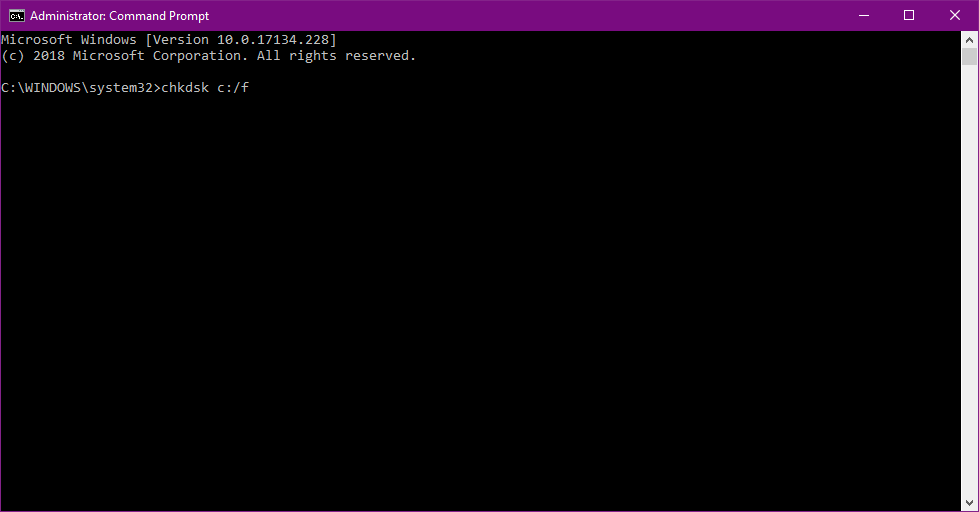
  5. Some users are also suggesting that you need to run additional chkdsk commands as well. To perform these commands, you need to know drive letters for all your hard drive partitions. In Command Prompt you should enter the following (but remember to use the letters that match your hard drive partitions on your PC):
    • chkdsk /r c:HAL INITIALIZATION FAILED Windows 10 error
    • chkdsk /r d:
    • This is just our example, so keep in mind that you have to perform chkdsk command for every hard drive partition that you have.

6. Restart your computer and check if the issue is resolved.

A broken hard drive is alarming. And the first warning messages come in the form of BSoD issues. So, go and check the current state of your hard drive.

To do that, you should run the chkdsk command. This command will scan your partitions, and apply solutions, if possible.

7. Check for problematic software

Often these types of problems can be caused by problematic software. And in order to fix HAL INITIALIZATION FAILED error, you’ll need to find the program that is causing this problem and disable/uninstall it.

Most commonly these types of errors are caused by your antivirus software, so be sure to uninstall your antivirus software.

If you’re concerned about your safety, you should know that Windows Defender will turn on automatically after you uninstall your antivirus program, so your PC won’t be without any protection.

It’s worth mentioning that almost any antivirus program can cause this error, so be sure to remove any third-party antivirus that you have installed.

In addition, in order to completely remove a certain antivirus, including registry entries and all files, it’s recommended to use a dedicated PC cleaning tool to analyze and remove junk files.

Many antivirus companies offer uninstaller tools for their software, so be sure to download them and use them.

However, sometimes there are files that are left behind after the installation and that can lead to other problems with your system and take up precious space.

The best way of wiping up an app is by using specialized software and CCleaner is perfect for this job. Not only that it will uninstall the app but it will delete any records from the registry and any other leftover files.

⇒ Get CCleaner

8. Set UsePlatformClock to true

8.1 Use Command Prompt

  1. Open Command Prompt as shown in step 4.
  2. Once the Command Prompt opens, enter the following and press Enter to run it:
    • bcdedit /set useplatformclock true
      useplatformclock-true
  3. Close Command Prompt.

Users reported that performing the aforementioned steps fixed the BSoD error while waking up from Sleep Mode, so if you’re having a similar problem, be sure to try the steps above.

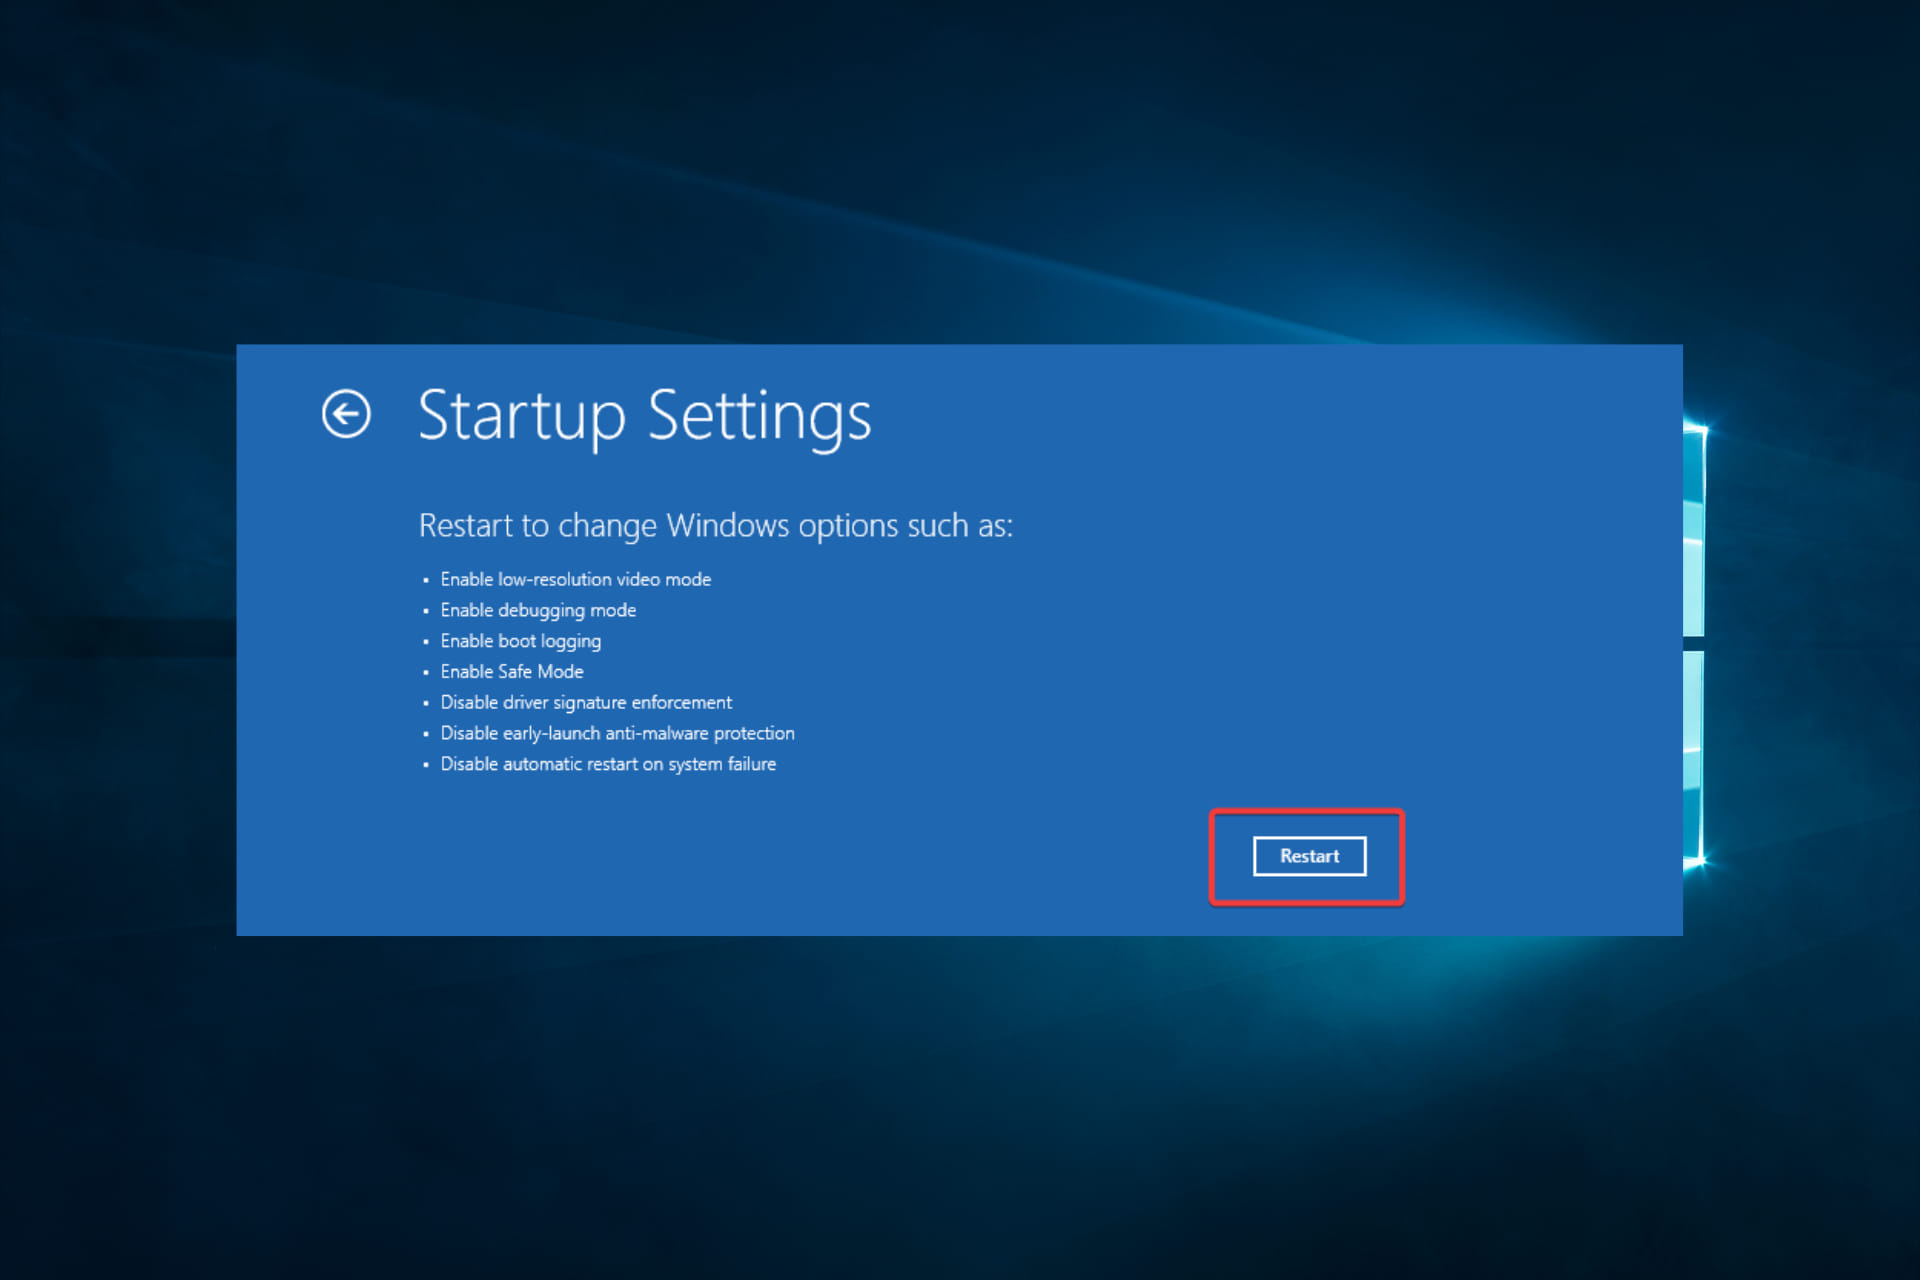
If you cannot access Windows 10 due to this error, you can try performing these steps from Safe Mode. To enter Safe Mode, follow the next steps.

8.2 Enter Safe Mode

  1. Restart your computer a few times while it boots. This should start Automatic Repair process.
  2. Choose Troubleshoot, select Advanced options, click on Startup Settings and click Restart.
  3. When your computer restarts you should see a list of options. Select Safe Mode with Networking by pressing 5 or F5.
  4. Once the Safe Mode starts, try running Command Prompt and performing the steps from the 8.1 solution.

9. Update your BIOS

Few users reporting that updating BIOS fixed the HAL INITIALIZATION FAILED error.

Updating BIOS is an advanced procedure, and if not performed properly it can permanently damage your motherboard, so be extra careful. To see how to properly update your BIOS check your motherboard manual.

As for the necessary files, you can download the latest BIOS from your motherboard manufacturer’s website.

10. Reset Windows 10

  1. Reset your computer a few times while it boots.
  2. Choose Troubleshoot, select Reset this PC and click on Remove everything.
  3. Now select Only the drive where Windows is installed and click on Just remove my files.
  4. Follow the instructions and wait for the reset process to finish.

If the problem persists even after Windows 10 reset, it means that the issue is most likely caused by a faulty or incompatible hardware.

If the problem is caused by a certain software, you can fix it by performing Windows 10 reset.

Note icon NOTE
Resetting Windows 10 will delete all files from your C drive, so be sure to create a backup.

11. Check your hardware

HAL INITIALIZATION FAILED can be often caused by incompatible hardware, therefore if you installed any new hardware recently, be sure to remove it or replace it and see if your PC works better without it.

If you didn’t install any new hardware, you might want to check if your hardware is working properly.

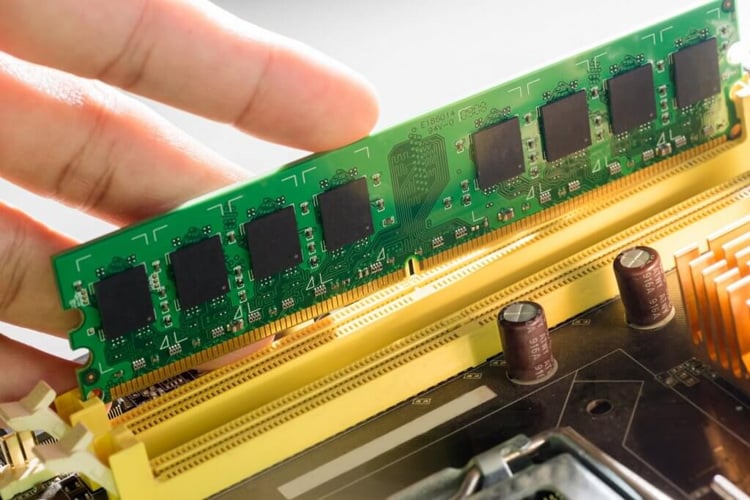
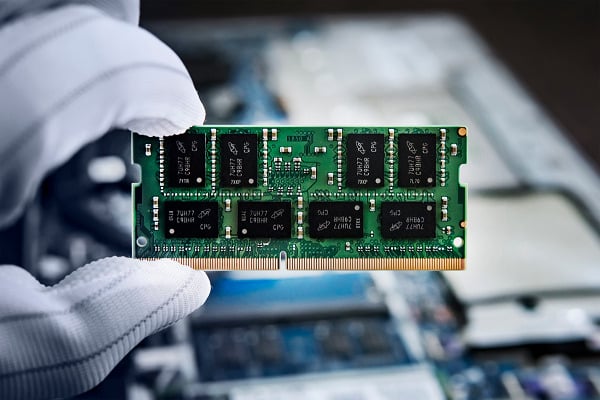
A most common cause for BSoD errors is your RAM, so be sure to test your RAM modules one by one.

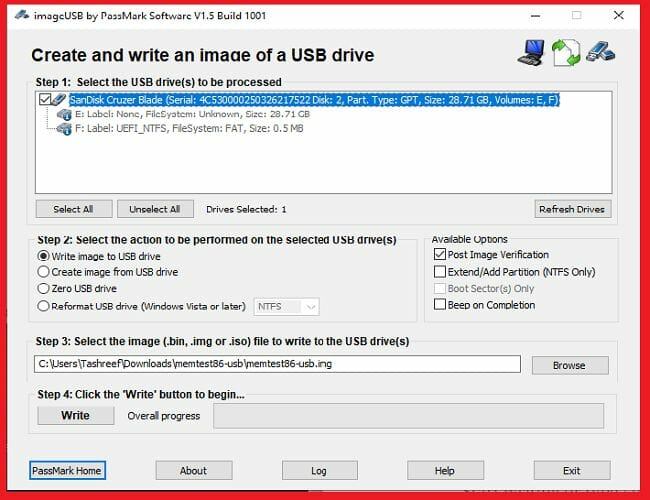
In addition, you can also use tools such as MemTest86+ to check your RAM. If your RAM is not the problem, check your hard drive, graphics card, and motherboard.

Almost any hardware component can cause this error, so you’ll need to perform a thorough inspection.

HAL INITIALIZATION FAILED BSoD error can be problematic, but as you can see, this error can be relatively easy to fix if you use one of our solutions.

If you suceeded in fixing this BSoD error by using one of our solutions let us know in the comments section below.

FIX: PCI BUS DRIVER INTERNAL error in Windows 10

Blue Screen of Death errors are one of the most problematic errors on Windows 10. Errors such as PCI BUS DRIVER INTERNAL can cause you a lot of problems, but fortunately for you, there’s is a way to fix this error.

How do I fix PCI BUS DRIVER INTERNAL errors?

  1. Update your drivers
  2. Update Windows 10
  3. Remove problematic software
  4. Run the Hardware Troubleshooter 
  5. Run the SFC scan
  6. Run DISM
  7. Remove overclock settings
  8. Reset Windows 10
  9. Check your hardware

1. Update your drivers

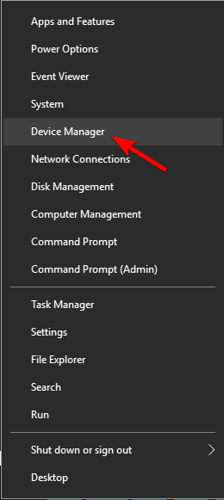
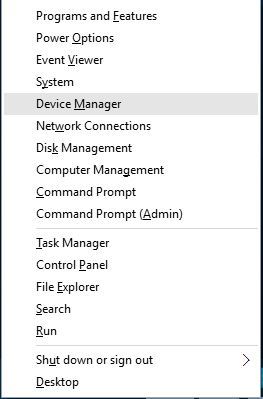
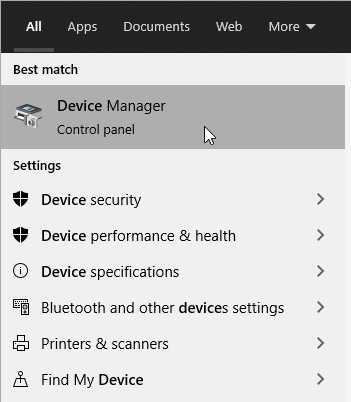
  1. Right-click the Start button and select Device Manager from the list.
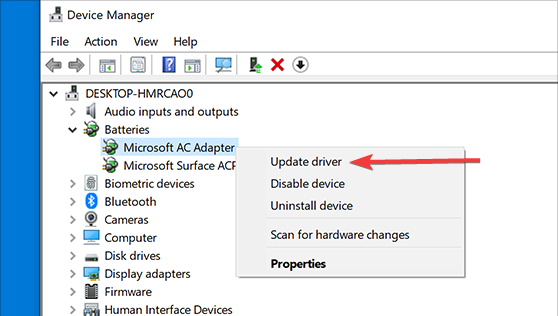
  2. Expand the component that you want to update the driver for (In our case, the display adapter).
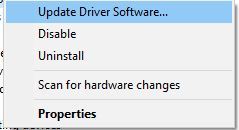
  3. Right-click the driver and select Update driver from the drop-down list.
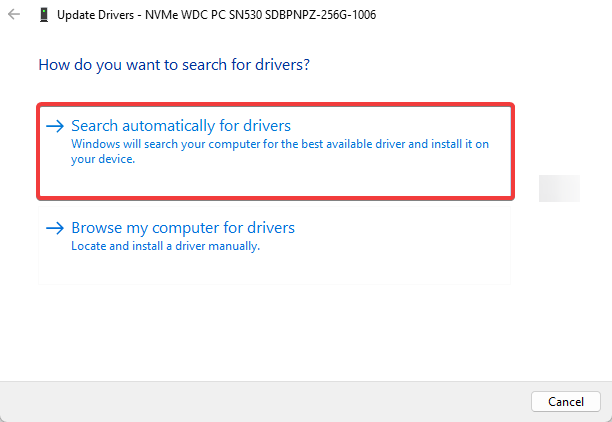
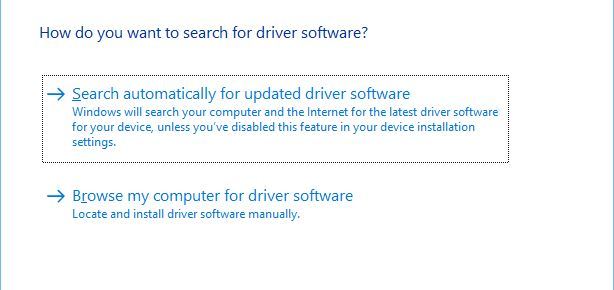
  4. Select Search automatically for drivers.
  5. Device Manager will download and install the compatible drivers for the component.
  6. Perform the same procedure for all the drivers.

Installing Windows updates is crucial for system stability and safety, but your PC drivers are important as well.

Windows 10 relies on these drivers in order to communicate with your hardware, and if a certain driver is outdated, that can cause PCI BUS DRIVER INTERNAL error to appear.

You can easily fix these errors by updating your drivers, and in order to do that, you just need to visit your hardware manufacturer’s website and download all the necessary drivers.

2. Update Windows 10

Before we start fixing this error it’s important that your Windows 10 is up to date. Microsoft is working hard on Windows 10, and new updates are released frequently through Windows Update.

Many of these updates address certain hardware and software issues, and in order to prevent BSoD errors, such as PCI_BUS_DRIVER_INTERNAL error, be sure to update Windows 10 frequently.

3. Remove problematic software

Blue Screen of Death errors can be caused by incompatible software, and if that’s the case, it’s highly advised that you locate and remove that software.

VPN clients are known to cause these types of errors, so if you’re using these programs be sure to remove them.

Another type of software that causes these types of errors is your antivirus. Many antivirus programs can cause Restart required PCI bus error to appear.

And in order to fix this problem, it’s advised that you uninstall all antivirus programs from your computer.

Even if you uninstall all third-party antivirus programs, you will still be protected by Windows Defender, so your PC won’t be completely defenseless.

It’s worth mentioning that antivirus software will often leave certain files and registry entries behind once you uninstall it, and sometimes even those files can cause BSoD errors.

To completely remove certain antivirus it’s advised that you use a dedicated PC removal tool such as CCleaner.

This software has its own uninstaller feature as well as PC cleaning capabilities which combined will ensure your PC will be free of any unwanted applications and their corresponding files.

4. Run the Hardware Troubleshooter 

  1. Open the Settings app and go to Update & Security section.
  2. Select Troubleshoot from the menu on the left.
  3. Select BSOD from the right pane and click Run the troubleshooter.
  4. Follow the instructions on the screen to complete the troubleshooter.

You can sometimes fix PCI bus error on Windows 10 by using Windows 10’s built-in troubleshooter.

This tool can be used to resolve various issues, including the BSOD problems.

5. Run the SFC scan

  1. Right-click on the Start Menu button, and open Command Prompt (Admin).
  2. Enter the following line and press Enter: 
    sfc/scannow
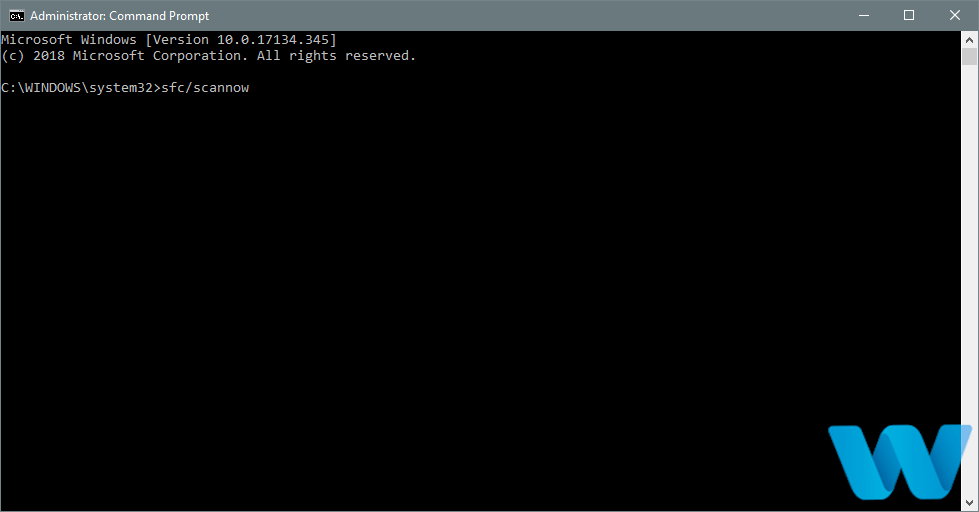
  3. Wait until the process is done (it may take a while).
  4. If the solution is found, it will automatically be applied.
  5. Now, close the Command Prompt and restart your computer.

If the built-in troubleshooter failed to resolve the problem, let’s try the SFC scan. This command-line tool scans your system and searches for potential problems.

The SFC scan will automatically resolve any issue if the solution is possible.

6. Run DISM

  1. Right-click Start and open Command Prompt (Admin).
  2. Paste the following command and press Enter:
    DISM /Online /Cleanup-Image /RestoreHealth
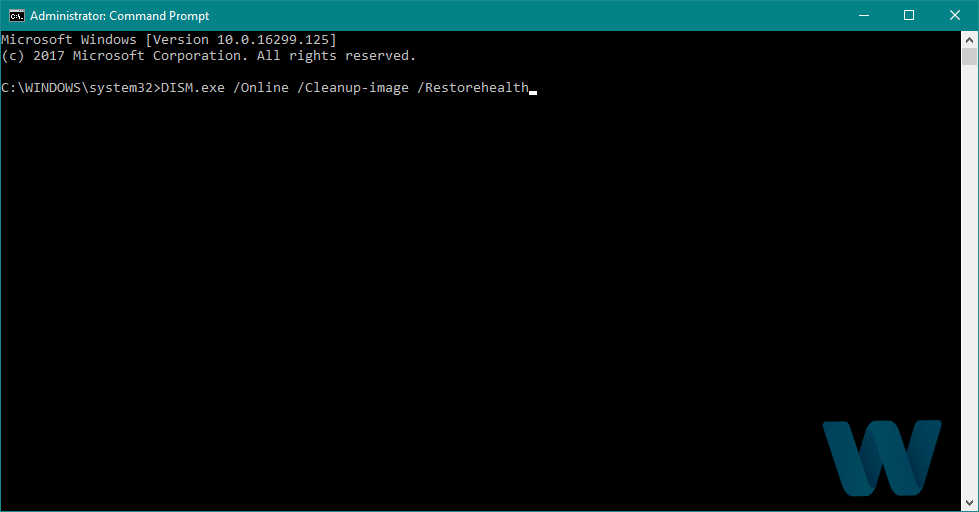
  3. Wait until the scan is finished.
  4. Restart your computer and try updating again.
  • With the Windows installation media
  1. Insert your Windows installation media.
  2. Right-click the Start menu and, from the menu, choose the Command Prompt (Admin).
  3. In the command line, type the following commands and press Enter after each:
    dism /online /cleanup-image /scanhealth
    dism /online /cleanup-image /restorehealth
  4. Now, type the following command and press Enter:
    DISM /Online /Cleanup-Image /RestoreHealth /source:WIM:X:SourcesInstall.wim:1 /LimitAccess
  5. Make sure to change an X value with the letter of the mounted drive with Windows 10 installation.
  6. After the procedure is finished, restart your computer.

If you’re still getting Restart required PCI bus message, you might be able to fix it with DISM.

Deployment Image Servicing and Management (DISM) is a tool that reloads the system image, and possible issues may get resolved along the way.

7. Remove overclock settings

By using overclocking software you can change how certain hardware works and achieve better performance, but overclocking your hardware comes with certain risks.

By overclocking your hardware you can potentially damage your computer, and you can cause system instability and error messages such as Your PC needs to be restarted PCI bus.

Few users reported that they managed to fix this error by setting the memory clock to the default value.

But bear in mind that almost any overclock setting can cause these types of errors, therefore, be sure to remove all overclock settings and check if that fixes the error.

8. Reset Windows 10

  1. Restart your computer during the boot sequence a few times in order to start Automatic Repair. Alternatively, you can press and hold the Shift key and click the Restart button.
    restart
  2. Choose Troubleshoot and go to Reset this PC. Now select Remove everything. You might get asked to insert Windows 10 installation media, so be ready to do that.
  3. Choose Only the drive where Windows is installed and then select Just remove my files and click the Reset button.
  4. Follow the instructions and wait for the reset process to complete.

After the reset process is completed, all files from your C drive will be removed, along with any software cause for the BSoD error.

If PCI bus driver error on Windows 10 is caused by software, you can fix it by performing a Windows 10 reset.

This procedure is similar to clean install, and it will remove all files from your C partition, so before you start Windows 10 reset, we strongly advise that you create backup for your important files.

It’s also worth mentioning that this procedure might require Windows 10 installation media, and you can easily create a bootable USB flash drive by using Media Creation Tool.

9. Check your hardware

Restart required PCI bus error can be caused by incompatible hardware, and if you installed any new hardware recently, be sure to remove it or replace it.

If the new hardware isn’t fully compatible with your PC that can lead to system instability and BSoD errors, so be sure to remove any recently installed hardware.

If the problem isn’t caused by new hardware, be sure to check all major hardware components such as your RAM, motherboard, hard drive, etc.

We also have a guide on how to fix Device PCI requires further installation message, so don’t miss it.

This error is usually caused by problematic drivers or by overclocking, so be sure to update all your drivers and remove all overclocking settings in order to fix this error.

Full Fix: SYSTEM EXIT OWNED MUTEX error in Windows 10/11

Blue Screen of Death errors are often caused by faulty hardware or a software issue.

And since they keep restarting your computer to prevent damage, they are one of the most troublesome errors on Windows 10.

There are all sorts of BSoD errors, and today we will show you how to fix SYSTEM EXIT OWNED MUTEX BSoD error.

How can I fix SYSTEM EXIT OWNED MUTEX BSoD?

1. Use specialized BSOD repair software

BSOD errors are among the hardest to fix, even for experienced users. But you can simplify this process by using specialized tools optimized for dealing with BSOD errors.

2. Disable HDMI device from Device Manager

  1. Open Power User Menu by pressing Windows Key + X and choose Device Manager from the menu.
    device-manager
  2. When Device Manager opens, you need to locate your HDMI device, right-click it and choose Disable from the menu.
    device-manager-disable

After disabling your HDMI device the problem with SYSTEM EXIT OWNED MUTEX BSoD error should be resolved.

As we mentioned earlier, BSoD errors are often caused by software problems, and a few users reported that disabling their HDMI device fixed the SYSTEM EXIT OWNED MUTEX error.

Apparently, certain HDMI devices have problems with X-Fi sound cards, so to fix this issue, it’s advised to disable your HDMI device.

3. Update Windows 10

update windows system exit owned mutex

Microsoft is constantly upgrading Windows 10, and many new features are being added.

In addition to new features, Microsoft is fixing security flaws and compatibility issues with specific software and hardware.

Since BSoD errors are caused by incompatible hardware or software, it’s recommended that you perform Windows Update regularly in order to keep Windows 10 running without any errors.

4. Update your drivers

  1. Right-click the Start button and select Device Manager from the list.
  2. Click on the problematic component to expand it (In our example, the display adapter).
  3. Right-click the driver and select Update driver from the drop-down list.
  4. Select Search automatically for drivers.
  5. Device Manager will download and install the compatible drivers for the component.
  6. Perform the same procedure for all the problematic drivers.

As previously mentioned, many BSoD errors can be caused by your software, and if your drivers aren’t fully compatible with Windows 10, you might get SYSTEM EXIT OWNED MUTEX error. This is also often the reason behind MUTEX_LEVEL_NUMBER_VIOLATION BSOD.

To fix this issue, it’s strongly advised to keep your drivers updated.

⇒ Get Outbyte Driver Updater

5. Run the BSOD Troubleshooter 

  1. Open the Settings app and go to Update & Security section.
  2. Select Troubleshoot from the menu on the left.
  3. Select BSOD from the right pane and click Run the troubleshooter.Troubleshooting BSoD
  4. Follow the instructions on the screen to complete the troubleshooter.

The next thing we’re going to try is Windows 10‘s built-in troubleshooting tool. This tool can resolve all sorts of issues, including the BSOD problems.

6. Run the SFC scan

  1. Right-click on the Start Menu button, and open Command Prompt (Admin).
  2. Enter the following line and press Enter: 
    sfc/scannow
  3. Wait until the process is done (it may take a while).
  4. If the solution is found, it will automatically be applied.
  5. Now, close the Command Prompt and restart your computer.

The next troubleshooting tool we’re going to try is the SFC scan. This command line troubleshooter can also resolve System Exit Owned Mutex error.

7. Run DISM

  1. Right-click Start and open Command Prompt (Admin).
  2. Paste the following command and press Enter:
    DISM /Online /Cleanup-Image /RestoreHealth
  3. Wait until the scan is finished.
  4. Restart your computer and try updating again.
  • With the Windows installation media
  1. Insert your Windows installation media.
  2. Right-click the Start menu and, from the menu, choose the Command Prompt (Admin).
  3. In the command line, type the following commands and press Enter after each:
    dism /online /cleanup-image /scanhealth
    dism /online /cleanup-image /restorehealth
  4. Now, type the following command and press Enter:
    DISM /Online /Cleanup-Image /RestoreHealth /source:WIM:X:SourcesInstall.wim:1 /LimitAccess
  5. Make sure to change an X value with the letter of the mounted drive with Windows 10 installation.
  6. After the procedure is finished, restart your computer.

DISM is a command line tool that repeatedly deploys the system image. That process can lead to resolving various problems, including BSOD issues.

8. Check the hard drive

  1. Enter the Advanced Startup (Restart your computer while holding the Shift key).
  2. Choose Troubleshoot > Advanced Options.
  3. Select Command Prompt from the list of options.
  4. When Command Prompt appears, enter the following lines and press Enter after each line in order to run it:
    bootrec.exe /rebuildbcd
    bootrec.exe /fixmbr
    bootrec.exe /fixboot
  5. Some users are also suggesting that you need to run additional chkdsk commands as well. To perform these commands, you need to know drive letters for all your hard drive partitions. In Command Prompt you should enter the following (but remember to use the letters that match your hard drive partitions on your PC):
    chkdsk /r c:chkdsk /r d:
  6. Restart your computer and check if the issue is resolved.

If your hard drive is not in the best shape, BSOD errors such as System Exit Owned Mutex will occur.

In that case, you should run a drive diagnostic tool that will tell you if your hard drive is damaged.

9. Reinstall your Sound Blaster driver

  1. Press Windows Key + X and select Device Manager from the list.
  2. When Device Manager starts, locate your audio driver, right-click it, and choose Uninstall. If available, check Delete the driver software for this device and click OK.
    uninstall-driver
  3. After deleting the driver, restart your PC.
  4. If the error is fixed and sound is working properly, you can continue using the default driver. If there are any sound problems, feel free to update your audio driver.

Although users reported problems with Sound Blaster audio driver, you can try this solution even if you don’t have to use Sound Blaster audio.

Sometimes updating your drivers isn’t going to fix the BSoD error. Therefore, you’ll have to remove the audio driver beforehand.

Few users reported issues with Sound Blaster drivers, and they managed to fix SYSTEM EXIT OWNED MUTEX BSoD error simply by removing the Sound Blaster driver and reinstalling it.

10. Clean your PC and reseat your RAM modules

rearrange ram modules

RAM problems cause many BSoD errors, and if you’re getting the SYSTEM EXIT OWNED MUTEX error you might want to check your RAM.

To complete this step, you’ll need to open your PC case, so ensure your computer isn’t under warranty.

Once you open your PC, you must clean it from dust with a pressured air can. When your PC is dust-covered, carefully remove your RAM modules and switch their places.

Several users reported that reseating the RAM modules permanently fixed the SYSTEM EXIT OWNED MUTEX BSoD error, so make sure to try that.

11. Check for hardware problems

check hardware system exit owned mutex

As previously mentioned, BSoD errors are commonly caused by faulty RAM, so it’s always a good idea to test if your RAM is working properly.

To do so, you can remove one or more RAM modules and check if your PC works well without it.

You might have to test all RAM modules one by one before you find the one that is causing this error.

In addition to removing RAM modules, you can also use tools such as MemTest86+ to test your RAM.

Create a bootable USB or CD with MemTest, and boot your PC from that USB flash drive or CD. Start MemTest and let it test your RAM for a couple of hours.

To find the faulty module, you might have to test one memory module at a time before you find the faulty one.

In addition to your RAM, any other hardware component can cause this error, so be sure to check your motherboard and hard drive as well.

Recently we covered a similar error in our ERROR_MUTANT_LIMIT_EXCEEDED guide, so don’t miss it for more information.

It’s also worth mentioning that any recently installed hardware that is not fully compatible with your PC can cause this error, so make sure to remove or replace it and test if your PC runs without it.

DAE error 13001 was encountered in Pro Tools [Fixed]

Pro Tools is a popular digital audio workstation available on Windows platform. However, when accessing the tool, you may encounter the dae error 13001 on Windows 10, 8.1 and 7 running computers.

The dae error 13001 error indicates the issue to be at the permission level. Insufficient permission for the tool to access system resources can result in this error.

While you can resolve the issue by running the tool as an administrator, at times, it may require the app to be reinstalled with administrative privilege to work. 

In this article, we explore a few troubleshooting steps to help you resolve the dae error 13001 error in Windows computers.

How do I fix the DAE error 13001 error in Windows 10?

1. Run Pro Tools with admin access

DAE error 13001
  1. Locate the Pro Tools desktop shortcut.
  2. Right-click on the shortcut and select Run as Administrator.
  3. The tool will now launch with administrative privilege. Use the tool and see if the error is resolved. If you confirm the error to be triggered due to a permission issue, modify the app properties and set the tool to run as admin all the time.
  4. Close Pro Tools.
  5. Right-click on the desktop shortcut again and select Open File Location.
  6. Right-click on the main Pro Tools.exe file and select Properties.
  7. In the Properties window, open the Compatibility tab.
    DAE error 13001
  8. Under the Settings section, check the Run this program as administrator box.
  9. Click Apply and OK to save the changes. Close the Properties window.

Once the changes are saved, launch Pro Tools using the desktop shortcut. The tool will launch with administrative privilege. Check if the dae error 13001 Pro Tools 10 Windows 10 problem is resolved.


2. Run Pro Tools in Compatibility mode 

DAE error 13001
  1. Right-click on the Pro Tools desktop shortcut and select Open File Location.
  2. When the installation folder opens, right-click on the main PoTools.exe file and select Properties.
  3. In the Properties window, open the Compatibility tab.
  4. Under the Compatibility mode section, check Run this program compatibility mode for box.
  5. Click the drop-down menu and select Windows 7 or Windows 8.1.
  6. Click Apply and OK to save the changes.

Launch Pro Tools again and check if the dae error 13001 was encountered is resolved.

If you are running the older version of Pro Tools originally developed for Windows 7 or XP, it may face compatibility issues when run on new-gen Windows 8.1 or Windows 10 computers. 

Windows by default offer a compatibility mode to help users run their older programs on Windows 10 in compatibility settings.

Alternatively, you can also choose to install the latest version to avoid running the program in compatibility mode. If the issue persists, try reinstalling the app with admin access to resolve the issue. 


3. Reinstall Pro Tools as administrator 

dae error 13001 was encountered windows 10
  1. Click on Start and type control.
  2. Click on the Control Panel to open the app.
  3. Select Programs and then click on Programs and features. This will list all the programs installed on your system.
  4. Select Pro Tools from the list and click Uninstall. Click Yes to confirm the action when prompted by UAC.
  5. Wait for Windows to uninstall the app completely. Once uninstalled, reboot the computer to apply the changes.
  6. After the restart, go to the download page of Pro Tools and download the latest version of the app available but don’t run the installer yet.
  7. Open the folder where you have the Pro Tools installer downloaded. Right-click on the installer and select Run as Administrator.
  8. Click Yes/Install when prompted by User Account Control.
  9. Follow on-screen instructions to complete the installation. Once done, reboot the computer.

Launch Pro Tools again and check if the Pro Tools first dae error 13001 is resolved.

The Pro Tools dae error 13001 error in Windows computers usually occurs due to compatibility issues or insufficient permission to run the app.

Try running the app as an administrator to fix the problem. Alternatively, you can also run the app in compatibility mode if you use the older version of the app.

SolarWinds error: unable to connect to server [Fixed]

SolarWinds RMM comes with a complex set of tools that helps to efficiently secure and maintain the IT infrastructure while offering automation and scripting, patch management, reports, and predefined monitoring templates.

Many users report getting a Solarwinds error: unable to connect to the server when accessing the Virtual Appliance Management Interface (VAMI).

This type of error is usually caused by the local device not being able to establish an HTTPS session to the dashboard server.

Although it seems complicated, don’t worry. In this article, we will explore some easy steps that will help you fix this issue.

How can I solve the Solarwinds error: unable to connect to server?

1. Use PRTG Network Monitor

If SolarWinds keeps on failing to work properly then perhaps before moving forward with the solutions for this issue, our recommendation would be to use a tool that is more reliable and error free.

After we have tested several such tools, we would suggest that you try using the PRTG Network monitor.

What makes this tool amazing is that as the title says it’s a network monitor that allows you to have an overview of all your systems, traffic, and additional applications depending on the IT infrastructure.

Most importantly though, as mentioned earlier, PRTG Network Monitor is a reliable, error free tool that will not make you waste time searching for ways to fix errors.

This tool will monitor the performance based on the server threshold, network traffic limits, and temperature.

The software will look at the server, routes, and switches and based on the findings will inform about the CPU and bottlenecks.

If anything is not going as it should, then you will receive an alarm, in a prompt manner so that you can take care of the issue before it becomes a bigger problem.

Moreover, you will have full access to an impressive gathering of resources on their Support page where you’ll find manuals, how-to guides, training, and many more.

Let’s have a look at some of the key features:

  • User-friendly and intuitive interface.
  • Access to a free version.
  • Network analytic results.
  • Monitors all the IT infrastructure.
  • Various license types to choose from.
PRTG Network Monitor

PRTG Network Monitor

A reliable and error free tool that will help you efficiently monitor all your devices and identify any weak spots.

2. Clear DNS cache

  1. Click Start and then right-click to select Run.
  2. Next, type cmd, and then press Enter.
  3. Type in the command: ipconfig /flushdns
  4. The DNS cache is now clear.

3. Restart the Advanced monitoring agent

How to fix laptop screen flickering
  1. Press Windows Key + R to open the run window.
  2. Type in the box: Services.msc
  3. Next, select Ok.
  4. Right-click on the Advanced Monitoring Agent service option.
  5. Select Restart.

4. Check the Firewall

Launch the game from the game folder
  1. Press Windows key + R to open up a Run dialog box.
  2. Next, type appwiz.cpl inside the text box and press Enter.
  3. In the Programs and Features menu locate the security program and choose Uninstall.
  4. Follow the sunscreen indications to complete the process.
  5. Restart your device and check if the issue is still there.

In case that the Solarwinds error: unable to connect to the server will not appear once you performed the above steps, this indicates that the issue was connected to your Firewall blocking the communication to the URL’s.


There are several reasons to why the Solarwind stops working properly and it’s understandable how this can be a sensitive matter that needs fixing as soon as possible.

As we explored in this article, clearing the DNS cache or checking if the Firewall is not by any chance preventing the communications to the URL’s can help solve the issue.

We help that the solutions presented below helped you fix the SolarWinds error: unable to connect to server. Let us know in the comments section below if you have additional recommendations or suggestions.

Fix: Comcast Status Code 225

Comcast is not a new name in the leading communication companies world, and it’s one of the most used in its category.

Users are excited about using Comcast since it grants them access to affordable, affordable internet services.

However, since no technology is perfect, users began experiencing issues and reported getting a status code 225 when using the service.

Sounds complicated, but in this article, we will discuss and explore how to quickly fix this problem to be able to use the service again fully.

How can I fix the Comcast status code 225?

1. Reboot your Comcast Box

Perform a force restart
  1. First, unplug the Comcast box from the power.
  2. Wait for at least 15-20 seconds before plugin it in again.
  3. Once you plug it in, turn it on and check if the issue is still there.

2. Check the cable connectivity

If you are still facing the Comcast status code 225 after rebooting the device, make sure to check the cable connectivity.

Take a look if the cable is in good condition, and also make sure to double-check the cable connection associated with your Comcast.

If you find any cable defects, this indicates buying a new one.

3. Check the power outlet

DisplayPort to HDMI not working

Once all the above steps have been performed, make sure to check if the issue is still there. And if it is, then make sure to also check the power outlet where the Comcast box is plugged in.

One easy way to check that everything works with the power outlet is by plugging in other devices and see if they are working properly or not.

If they are not, then this is an indication that something may be wrong with the power outlet. This can easily be solved by switching the Comcast box to another power outlet.

4. Contact customer support

In case you made the above-described steps, and you are still getting the status code 225, our last recommendation is to contact Comcast customer support.

At this point, there is a strong indication that the issue is not at your end, and they should be able to help you with further verifications in their system.

They may test by sending a signal to your device and check whether it reaches you or not.

With this last step, we will conclude our list of recommendations that will help you fix the Comcast status code 225.

If your issue is not with the status code itself but with email access, check our dedicated guide on Comcast email not working.

As you can see, a few very simple and easy-to-perform steps will help you determine whether the issue is on your end or not. And if it’s not then contacting Comcast customer support is the best way to move forward.

Be sure to check out other similar articles, such as the Xfinity error 500 and how to bypass it.

If you have additional recommendations or suggestions, we would love to hear them in the comments section below.

Comment failed to post on YouTube? Here’s a quick fix

One of the great things about YouTube is that its users can usually leave comments under videos

However, a Comment failed to post error can arise for some users when they try to post a comment for a YouTube video.

Consequently, the comments some users enter don’t appear on YT pages.

How can I fix the comment failed to post on YouTube error?

1. Play the YouTube page’s video for a minute

A YouTube page comment failed to post youtube

To stop spamming, Google blocks comments from users who haven’t played videos on YT pages for at least a few seconds.

So, try playing the video on the YouTube page you can’t comment on for about a minute or two.

If you still can’t comment on YT pages after playing their videos, try the resolutions below.


2. Disable all browser extensions

Google Chrome

  1. Click the Customize and control Google Chrome button to open that browser’s menu.
  2. Select More tools > Extensions to open the tab in the snapshot directly below.
    Extensions tab comment failed to post youtube
  3. Click the blue toggle buttons on all extensions enabled in your browser.

Firefox

  1. Click Firefox’s Open menu button.
  2. Then click Add-ons to open the tab shown directly below.
    Add-on Manager comment failed to post youtube
  3. Click the toggle buttons for all enabled add-ons listed there.

Edge

  1. Press the Settings and more button at the top right of Edge’s window.
  2. Select the Extensions option.
    Edge's extensions page comment failed to post youtube
  3. Click the toggle buttons for installed extensions, and restart the Edge browse.

3. Open YouTube in incognito browsing modes

Incognito mode comment failed to post youtube

Incognito mode browsing also disables extensions. You can activate incognito browsing in Chrome, Firefox, and Edge with these hotkeys:

  • Google Chrome: Ctrl + Shift + N
  • Firefox: Ctrl + Shift + P
  • Edge: Ctrl + Shift + N

4. Clear browser data

Google Chrome

  1. Press the Ctrl + Shift + Delete keyboard keys at the same time.
  2. Select all the checkboxes for cookies, browsing history, and cache data on the Basic tab.
    Clear browsing data utility comment failed to post youtube
  3. Click All time on the Time range drop-down menu.
  4. Press the Clear data option.

Firefox

  1. Click Firefox’s Open menu button, and select Options on the menu.
  2. Click Privacy & Security on the left of the tab, and press the Clear data button.
  3. Select both the Cookies and Site Data and Cached Web Content checkboxes.
    Clear Data utility comment failed to post youtube
  4. Press the Clear button.

Edge

  1. Press the Alt + F hotkey within Edge, and select the Settings option.
  2. Select Privacy on the left of the Settings tab.
  3. Then press the Choose what to clear button.
    Clear browsing data utility comment failed to post youtube
  4. Select All time on the Time range drop-down menu.
  5. Select the cookies, browsing history, and cache data settings.
  6. Click Clear Now to delete browsing data.

5. Sign out and log back into YouTube

  1. Click your user account button at the top right of YouTube.
    Sign out option comment failed to post youtube
  2. Then click the Sign out button.
  3. Next, click the Sign In button at the top right of YouTube.
  4. Enter your account password in the text box.
  5. Click Next to sign in.
  6. Then try adding comments to a YouTube video page.

6. Disable VPN and proxy connections

  1. Click the Type here to search taskbar button to open that search tool.
  2. Then enter proxy in the search box.
  3. Next, click Proxy settings to open the window in the snapshot directly below.
    The Use a proxy server option comment failed to post youtube
  4. Then turn off the Use a proxy server option.

Note: You can also disable VPN connections via the Settings app. Our How to turn off VPN on Windows 10 post provides further details for disabling VPN connections.


7. Change your YouTube name

  1. Click the button for your user account at the top right corner of YouTube’s page tab.
  2. Select the Settings option.
  3. Click the View or change your Google Account settings option.
  4. Click Personal info on the left of your Google Account page.
    Personal Info tab comment failed to post youtube
  5. Enter a new user name in the Name box.

It’s usually relatively straightforward to fix the Comment failed to post error.

The resolutions above should be enough to fix the Comment failed to post YouTube error for most users.

FIX: Adobe Audition freezing/ not responding on slow PCs

Adobe Audition is a first-class audio editor tool used by millions of professionals and amateur editors worldwide.

As is the case with all Adobe software, Audition offers lots of tutorials to get you started with the editing process and helpful tips to help you progress and join creative communities.

On the other hand, Adobe programs can sometimes be quite demanding in terms of resources and system requirements.

Users oftentimes complain that Audition freezes when running several programs simultaneously, or when running it with Premiere Pro also open.

Sometimes, Audition would stop working while recording or freezes when initializing.

At this point, Audition shows a not responding message. The worst part is that reloading the program results in losing all the work completed up to that point.

Now a Reddit user suggested an extremely helpful fix and sharing it is likely to save some trouble for many Audition fans. Especially since this is an issue that has been going on for quite some time.

The solution employs the Analyze Wait Chain function in Task Manager’s Resource Monitor.


How do I fix Adobe Audition freezing on my computer?

1. Use Resource Monitor

resource monitor fix adobe audition
  1. Open the Resource Monitor by typing resmon in the search bar.
  2. Under the CPU tab, you should see the non-responding processes marked in red.
  3. Right-click on it and select Analyze Wait Chain...
  4. You should see one or two processes in the popup window (each with a sub-process attached and having svchost.exe in their names)
  5. Select the last sub-process in the list (the svchost.exe sub-process attached to the last process.
  6. Click End process.

Note: Audition might close during the last step. But, according to the comments, in most cases it will unfreeze, and your work should be there.

Also, the speakers and microphone will stop working. At this point you have to right-click the sound tray icon, select Sounds > Playback > right-click the speakers > Test.

The sound should now work normally. If it doesn’t, save your progress, close the program, and reboot the computer.

2. Install a fresh copy of Audition

Although it’s less probable that the cause is a corrupted Adobe Audition version, you shouldn’t take this off the list.

Besides, it’s best to make sure at all times that your software has the latest updates and that it is compatible with your OS.

Adobe Audition

Adobe Audition

Adobe Audition keeps freezing on your PC? Make sure that you have the latest version with all the awesome features included.
Free trialVisit website

Although the troubleshooting solution presented here addresses Adobe Audition, it can be actually used for the same purpose for any unresponsive program in the Adobe Creative Cloud Suite.

The only trick is to correctly identify the sub-process that’s causing the issue.

We hope that this is helpful advice and we’d like to hear if you successfully unblocked Audition using it. Feel free to use the comments section for any insights in this topic.

Clfs.sys Blue Screen of Death: 6 Methods to Fix This Error

Getting the clfs.sys error message on a blue screen is a common Windows 10 issue that most users have trouble fixing.

You are in luck because you will see below a quick tutorial about the steps you need to take to solve it. Let us first explore some possible reasons you may have gotten this error.

What is a CLFS SYS error?

This error is related to the CLFS driver for this system on your operating system.

This driver helps provide recovery support and operations of transactional files on the OS. This error will typically occur for any of the following reasons:

  • System conflicts – These may be conflicts between hardware and software.
  • Driver issues – In most cases, this refers to corrupted drivers and outdated system or program drivers.
  • Malware – Virus contributes to almost all kinds of issues on a computer, including clfs.sys blue screen error.
  • Corrupted files – System files are essential in carrying out specific functions on a computer. When they become corrupt, you may expect issues such as this BSoD.

What is clfs.sys?

CLFS stands for Common Log File System. This file system is an essential part of the Windows 10 OS, and its primary function is to log files and record OS events and activity.

We will show you some of the best solutions if you encounter a clfs.sys blue screen problem.

How can I fix clfs.sys blue screen error?

1. Run a security scan

  1. Type Windows Security in the Search bar, and click on the relevant search result.
    clfs.sys blue screen
  2. Now, click on Virus & threat protection here.
    clfs.sys blue screen
  3. Click on Scan options.
    clfs.sys blue screen
  4. Select Full scan and click the Scan now button at the bottom.
    clfs.sys blue screen

Open your antivirus and do a full system scan for any malware or viruses.

Usually, when your system registries are damaged in any way, thus getting the clfs.sys blue screen, a virus, or a malware infection might cause the error message.

After the scan is completed, reboot the Windows 10 computer. Then, check and see if you still get the same clfs.sys error message.

2. Update clfs.sys related drivers

  1. Press the Windows Key + S.
  2. Then, type Device Manager and select the utility.
  3. Expand the device category that needs to be updated, then right-click on it, then select Update Driver.
  4. Click Search automatically for drivers.

Updating drivers manually can be time-consuming. Instead, we recommend using a tool that automatically updates your drivers. Using such a tool will eliminate the possibility of downloading the wrong driver version.

You must click a couple of times, and the program will do the rest. This includes scanning your hardware and software for newer versions of compatible drivers and installing them.

More so, using a dedicated driver update tool will enhance your PC performance at maximum due to renewed device drivers.

In conclusion, updating drivers with this lightweight automated solution and resolving hardware issues efficiently is more beneficial.

⇒ Get Outbyte Driver Updater

3. Restore your system to a previous point

  1. Press Windows + R, trupe rstrui and hit Enter.
    clfs.sys blue screen
  2. Select Choose a different restore point option and hit Next.
    clfs.sys blue screen
  3. To view the full restore list, click the Show more restore points option, select a restore point, and hit Next.
  4. Click Next and Finish to roll back Windows.

Note: System Restore is a built-in tool to help you fix corrupted system files. With this utility, you can restore Windows 10 before the error occurs.

4. Run an SFC scan

  1. Enter command prompt in the Windows screen search box.
  2. Right-click Command Prompt and select Run as administrator.
    clfs.sys blue screen
  3. In the command prompt window, write the following command and then press Enter: sfc /scannow
  4. It will take a couple of minutes until the system file checker is finished.
  5. After it is finished, you will need to reboot your Windows 10.
  6. See if it fixed your clfs.sys error message after the sfc scan was performed.

Note: If a virus or malware has corrupted your system, the System File Checker can try to repair the affected files. This built-in solution will scan system files and replace any corrupted ones with a cached copy. 

Performing DISM and SFC scans is also recommended when facing Cldft.sys BSoD issues. Rest assured that solving Cldft.sys BSoD issues with simple methods is possible.

5. Run a disk check

  1. Write cmd in the Windows search box, then select Run as administrator.
  2. Click the Yes button if a user account control window pops up.
  3. In the command prompt window, write the following and hit Enter: chkdsk /f
  4. After completing the check process, you must close the command prompt window and reboot the Windows 10 PC.

Note: This process will check your disk for any errors it may have on it and try to fix them.

6. Check if your RAM is corrupted

  1. Download the Windows MemTest86 USB image.
  2. Extract it from the ZIP file on your PC.
  3. Insert an empty USB stick into your computer.
  4. In the extracted folder (MemTest86), run the imageUSB tool and choose your USB stick so it becomes bootable.windows memory diagnostic tool stuck
  5. Restart your PC with the USB drive as the main bootable device.
  6. Follow the commands from the screen while MemTest86 checks for memory issues.

Note: MemTest86 is a free memory testing program; you have to boot this one from a USB flash drive. The software can test your RAM for all kinds of issues.

You have above a couple of options to try to fix your clfs.sys error message in Windows 10.

Also, you can write us below in the comments section of the page any questions you may have on this subject, and we will help you further with this issue as soon as possible.

Microsoft’s Custom Neural Voice technology goes out of preview

Microsoft has announced that its text-to-speech AI “Custom Neural Voice” has hit general availability. The technology enables developers to create personalized voices using their audio data and deep neural networks (DNN).

“The real technology breakthrough is the efficient use of deep learning to process the text to make sure the prosody and pronunciation is accurate. The prosody is what the tone and duration of each phoneme should be. We combine those in a seamless way so they can reproduce the voice that sounds like the original person,” said Xuedong Huang, a Microsoft technical fellow and the chief technology officer of Azure AI Cognitive Services.

According to Microsoft, Custom Neural Voice can offer more natural-sounding voices than similar text-to-speech services. It creates voice fonts with the help of a sound or phonemes bank and ensures the accuracy of the duration as well as the tone of each phoneme with various neural networks. This makes it easier for the machine learning model to use a natural-sounding synthetic voice.

To use this service, customers simply need to record their voice and then upload it to Custom Neural Voice for training the model. It will automatically generate a natural sounding voice for the recording without any developer intervention.

Microsoft detailed various use cases where several companies are already using the technology, including Warner Bros and AT&T. Interestingly, a newly installed experience lets people can interact with Bugs Bunny at the AT&T Experience Store in Dallas. The technology can be particularly useful for people and organizations in different scenarios such as voice assistants, Customer Service Chatbots, reading audiobooks, and online learning.

Microsoft understands that this tool can be used for malicious purposes, and the company has decided to limit its access for now. Customers will need to seek approval from the company before they can use Custom Neural Voice. The company also plans to add a digital watermark within a synthetic voice to inform users that Custom Neural Voice was used to create the digital content.

CANCEL STATE IN COMPLETED IRP error in Windows 10 [FULL FIX]

Computer errors are relatively common, and while certain errors can be annoying, most of them are relatively harmless.

However, one of the more serious errors on Windows 10 are Blue Screen of Death errors.

Most of these errors can be caused by a software issue, but in a worst-case scenario, these types of errors can be caused by faulty hardware.

There is a wide range of BSoD errors available and since these errors can be rather troublesome, today we’re going to show you how to fix CANCEL_STATE_IN_COMPLETED_IRP error.

The solutions in this article also cover the following BSoD errors, so try these solutions if you encounter any of them:

  • cancel_state_in_completed_irp aswnethub.sys
  • cancel state in completed irp

How can I fix CANCEL STATE IN COMPLETED IRP BSoD error?

  1. Use software to fix your BSoD
  2. Update Windows 10 regularly
  3. Update your drivers
  4. Run the BSOD Troubleshooter
  5. Run the SFC scan
  6. Run DISM
  7. Check the hard drive
  8. Uninstall your antivirus
  9. Uninstall problematic applications
  10. Check for hardware errors

1. Use software to fix your BSoD

BSoDs are caused by a variety of issues, and tracking the exact culprit can be hard, so using third-party tools that perform an overall cleanse of your PC becomes the next best solution.

2. Update Windows 10 regularly

Windows 10 is constantly being improved with new features through Windows Update, and it’s important to update Windows 10 regularly because many of these updates bring security and compatibility fixes.

For example, if certain hardware isn’t fully compatible with Windows 10, the latest update might fix that issue.

In addition to hardware, these updates often fix many software related issues.

And since both hardware and software problems can cause CANCEL_STATE_IN_COMPLETED_IRP error, you can see why it’s crucial that you download Windows 10 updates regularly.

3. Update your drivers

Drivers are a crucial component of every Windows, and if a certain driver is outdated or faulty, that can be the cause for CANCEL_STATE_IN_COMPLETED_IRP BSoD error.

According to users, Netgear drivers can often be cause for these types of problems, so if you’re using Netgear devices, be sure to update them as soon as you can.

It’s worth mentioning that almost any driver can cause BSoD error to appear, so be sure to update as many drivers as you can if you want to permanently fix this issue.

Updating your drivers is relatively easy, and you can do that simply by visiting your hardware manufacturer’s website and downloading the appropriate drivers.

Alternatively, you can always use Device Manager to update the necessary drivers. To do that, follow these simple steps:

  1. Press Windows Key + X to open Power User Menu and select Device Manager.
    device-manager
  2. Once Device Manager opens, locate the driver you wish to update.
  3. Right click the driver and choose Update Driver Software.
    update-driver-software
  4. Select Search automatically for updated driver software.
    browse-my-for-driver-software
  5. Windows 10 will now automatically download the best driver for your device.
  6. Repeat these steps for all devices you want to update.

Update drivers automatically

Searching for drivers on your own can be time-consuming. So, we advise you to use a tool that will do this for you automatically.

Using an automatic driver updater will certainly save you from the hassle of searching for drivers manually, and it will always keep your system up to date with the latest drivers.

⇒ Get Outbyte Driver Updater

4. Run the BSOD Troubleshooter .

  1. Open the Settings app and go to Update & Security section.
  2. Select Troubleshoot from the menu on the left.
  3. Select BSOD from the right pane and click Run the troubleshooter.CANCEL STATE IN COMPLETED IRP Windows 10 error
  4. Follow the instructions on the screen to complete the troubleshooter.

If updating your drivers didn’t get the job done, let’s try with the troubleshooting tools. The first tool we’re going to try is Windows 10’s built-in troubleshooter.

This tool can be useful for resolving various issues, including BSOD errors

5. Run the SFC scan

  1. Right-click on the Start Menu button, and open Command Prompt (Admin).
  2. Enter the following line and press Enter: sfc/scannowCANCEL STATE IN COMPLETED IRP Windows 10 error
  3. Wait until the process is done (it may take a while).
  4. If the solution is found, it will automatically be applied.
  5. Now, close the Command Prompt and restart your computer.

The SFC scan is a command-line tool that basically scans your computer for potential errors, and resolves them if the solution is available.

Among other errors that the SFC scan can help with are the BSOD issues.

6. Run DISM

6.1. Standard way

  1. Right-click Start and open Command Prompt (Admin).
  2. Paste the following command and press Enter:
    • DISM /Online /Cleanup-Image /RestoreHealthCANCEL STATE IN COMPLETED IRP Windows 10 error
  3. Wait until the scan is finished.
  4. Restart your computer and try updating again

6.2. With the Windows installation media

  1. Insert your Windows installation media.
  2. Right-click the Start menu and, from the menu, choose the Command Prompt (Admin).
  3. In the command line, type the following commands and press Enter after each:
  • dism /online /cleanup-image /scanhealth
  • dism /online /cleanup-image /restorehealth
  • DISM /Online /Cleanup-Image /RestoreHealth /source:WIM:X:SourcesInstall.wim:1 /LimitAccess

Make sure to change an X value with the letter of the mounted drive with Windows 10 installation.

After the procedure is finished, restart your computer.

And the third troubleshooter we’re going to try is DISM. Deployment Image Servicing and Management is a tool that deploys the system image all over again. So, it’s possible that the BSOD error will get resolved along the way.

7. Check the hard drive

  1. Enter the Advanced Startup (Restart your computer while holding the Shift key).
  2. Choose Troubleshoot > Advanced Options.
  3. Select Command Prompt from the list of options.CANCEL STATE IN COMPLETED IRP Windows 10 error
  4. When Command Prompt appears, enter the following lines and press Enter after each line in order to run it:
  • bootrec.exe /rebuildbcd
  • bootrec.exe /fixmbr
  • bootrec.exe /fixboot

Some users are also suggesting that you need to run additional chkdsk commands as well.

To perform these commands, you need to know drive letters for all your hard drive partitions.CANCEL STATE IN COMPLETED IRP Windows 10 error

In Command Prompt you should enter the following (but remember to use the letters that match your hard drive partitions on your PC):

  • chkdsk /r c:
  • chkdsk /r d:

Restart your computer and check if the issue is resolved.

8. Uninstall your antivirus

Antivirus software is one of the essential programs on every computer, but unfortunately, antivirus software is also a common cause for BSoD errors.

Users confirmed that Bitdefender is the cause of CANCEL_STATE_IN_COMPLETED_IRP error, so it’s advised that you remove it.

It’s worth mentioning that uninstalling the antivirus software isn’t always enough since many antivirus tools leave certain files and registry keys behind after they are removed.

Even these files can cause BSoD error to appear, so it’s crucial that you use a dedicated removal tool to completely remove a certain antivirus program.

Many antivirus companies have these tools available on their websites, and you can download them free of charge.

Bear in mind that almost any antivirus software can cause BSoD error to appear, so be sure to remove any antivirus tool that you have installed, except for Windows Defender.

If uninstalling the antivirus fixes the problem, you can install a newer version of the same tool you were using or you can switch to different antivirus software.

Additionally, we recommend you use a dedicated uninstaller to get rid of any leftover data that usually follows a typical uninstall.

9. Uninstall problematic applications

Often cause for CANCEL_STATE_IN_COMPLETED_IRP error can be installed software, and if you installed any software before this error started appearing, you might want to remove it.

Users reported that Firefox can cause this error if you’re using 3D Vision, so you might want to try uninstalling Firefox and using a different browser.

Alternatively, you can delete your Firefox profile and add Firefox to 3DMark Profile or simply add StereoNotSupported Flag to Mozilla Firefox Profile.

It’s worth mentioning that almost any installed application can cause this error to appear.

So you might have to uninstall any applications that you installed or updated in the last few days or weeks in order to fix this problem.

10. Check for hardware errors

CANCEL_STATE_IN_COMPLETED_IRP BSoD errors are often caused by hardware failure, and in order to fix this error, you need to find and replace the faulty hardware.

Users reported that this error can be caused by a faulty USB device, so be sure to unplug all USB devices except for your keyboard and mouse.

Another cause for this issue might be your portable hard drive, so be sure to check if it works properly.

Lastly, make sure to check your memory. RAM is often the cause of many BSoD errors, so make sure that you check it out. To check your RAM, you need to do the following:

  1. Download MemTest86+.
  2. Create a bootable USB flash drive or CD with MemTest86+ on it.
  3. Restart your computer and boot it from that USB drive or CD.
  4. Once MemTest86+ starts, let it test your RAM for a couple of hours.

If no problems are found, your RAM isn’t the cause of this error, so you should check your motherboard and other hardware.

CANCEL_STATE_IN_COMPLETED_IRPB error and many BSoD errors can be rather problematic since they constantly restart your PC in order to prevent damage.

However, most of these errors can be fixed by using one of our solutions.

Fix: PAGE FAULT IN NONPAGED AREA [Bug Check 0x50]

BSoD errors also known as Blue Screen of Death errors usually occur when there’s a major error with your computer.

The PC shuts down giving you BSoD in order to prevent potential damage to your hardware.

There are all sorts of BSoD errors and today we’re going to show you how to fix PAGE FAULT IN NONPAGED AREA BSoD error in Windows 10.

PAGE_FAULT_IN_NONPAGED_AREA is quite a unique error since it can be related to both hardware and software.

So if you have recently changed any hardware, you might want to remove it and to see if the problem persists. If that doesn’t help maybe you should try some of the following solutions:

How can I fix PAGE FAULT IN NONPAGED AREA errors?

1. Use a specialized BSOD repair software

Fixing page_fault_in_nonpaged_area stop code in Windows 10 isn’t an easy task, especially if you’re not familiar with these types of errors.

Therefore, it might be better to use tools specifically designed for these types of problems.

2. Test your RAM

test RAM page_fault_in_nonpaged_area
  1. Download Memtest86+.
  2. After you’ve downloaded it, you can burn it to a CD or put it on a USB flash drive.
  3. You need to make sure that your CD-ROM or USB is set as first boot device in BIOS.
  4. Make sure that your CD or USB is inserted and restart your computer.
  5. Memtest86+ should open and you can start testing your RAM memory. This process can take a while, from 10 to 30 minutes, sometimes even more, so please wait patiently.
  6. If no errors are found this means that your RAM is functional and something else is causing the problem.

As we mentioned before page_fault_in_nonpaged_area BSOD can be caused by faulty RAM, so be sure to check it first.

3. Remove or update problematic software

BSOD page_fault_in_nonpaged_area (cpuz138_x64.sys) error , for example, is caused by a software called Speccy and it’s advised that you update the software that is causing your computer to crash.

If updating the software doesn’t help you might have to uninstall it until the developers fix this issue.

One common software-related error is PAGE_FAULT_IN_NONPAGED_AREA (applecharger.sys).

This error is caused by an application called ON/OFF developed by Gigabyte. Just uninstall this app in order to resolve this problem.

4. Uninstall, rollback or update your audio or display driver

  1. Open Device Manager and find your audio or display driver.
  2. Right-click it and choose Uninstall if you want to use the default driver, or Rollback Driver if you want to use the previous version of drivers. PAGE_FAULT_IN_NONPAGED_AREA
  3. If you choose to uninstall drivers select Delete the driver software for this device and click OK.
  4. Now you should be using default or previous version of drivers depending on your choice.

PAGE_FAULT_IN_NONPAGED_AREA(usbaudio.sys) usually means that your audio driver is causing these problems, so it’s advised to update them.

Doing so manually can be a tedious task, but there are third-party solutions that can automate this process.

⇒ Get Outbyte Driver Updater

5. Update your OS

update windows 10 page_fault_in_nonpaged_area

If you’re not running the latest Windows 10 OS version, you may want to check for updates.

The latest OS versions are fully optimized for making the OS more stable and reliable.

You may also want to disconnect all peripheral devices when booting up your computer since this error is usually triggered by incompatible or faulty hardware.

Windows stop code page_fault_in_nonpaged_area error can be tricky since it can be caused by software, hardware , or a bad driver.

So if you try to fix it make sure that you keep a close eye on the brackets next to an error because it usually points out to a file that is causing these issues.

Corrupt Memory Dump: 3 Ways to Fix This Error on Your PC

It isn’t every day that you come across a corrupted memory dump file, but when you do, it will be a frustrating experience. That is for the simple reason that the condition renders your PC virtually unusable.

Thankfully, it is an issue that can be easily fixed with the correct information, such as the one in this guide.

What does a corrupt memory dump mean?

A corrupt memory dump comes up when your PC generates a faulty memory dump file from your virtual machine. This happens when users try to generate a complete memory dump file from their virtual machine.

The primary cause of this issue is that the option Enable heartbeat monitoring for the virtual machine is selected in the virtual machine.

How do I fix corrupted memory dump file errors?

1. Use a specialized repair software

It would be best to use specialized BSOD repair software to fix a corrupt memory dump. Fixing BSOD errors manually can be a problem, but there are specialized tools that can help you.

2. Change the setting via GUI

  1. For this, open Failover Cluster Manager first and click on Roles.
    roles corrupt memory dump
  2. Search for the virtual machine resource and click on the Resources
  3. Under the Resources tab, right-click on the virtual machine.
  4. Now, click on Properties and select Settings.
  5. Under Heartbeat Setting, clear the Enable automatic recovery for application health monitoring checkbox.
  6. Similarly, clear the Enable heartbeat monitoring for the virtual machine checkbox and click OK for the setting to take effect.

This should help prevent the generation of corrupt memory dump files on Windows.

3. Change the setting via Windows PowerShell

  1. Press the Windows key + X and select Windows PowerShell (Admin).
    powershell
  2. Type the command below and hit Enter to run it: Get-ClusterResourceget cluster
  3. Next, run the following command to check if Enable heartbeat monitoring for the virtual machine and Enable automatic recovery for application health monitoring are enabled:
    Get-ClusterResource <VirtualMachineName> | Get-ClusterParameter CheckHeartbeatcheck corrupt memory dump
  4. Now, type the command below and hit Enter to set the CheckHeartbeat value to 0:
    Get-ClusterResource <VirtualMachineName> | Set-ClusterParameter CheckHeartbeat 0get 0
  5. However, just in case you’d like only the Enable automatic recovery for application health monitoring option to be canceled, run the following command:
    (Get-ClusterResource <Object>).EmbeddedFailureAction = 1get 1
  6. Finally, exit Windows PowerShell and restart your PC.

Note that this solution is pretty technical and requires you to enter the commands carefully.

We can conclude this guide on fixing the corrupt memory dump issue with this. You should be able to solve the problem quickly, provided you follow the instructions carefully.

If you want to know how to delete a system error memory dump file, check our detailed guide to do it quickly.

Let us know which solutions worked best for you by leaving a message in the comments section below.

FIX: Critical structure corruption BSOD error in Windows 10

If you thought that the transition to Windows 10 means saying a final goodbye to Blue Screen of Death errors, you’ll be surprised.

The shift from the former iterations to Windows 10 is, especially if you choose to upgrade rather than perform a clean install, far from perfect and a bunch of errors emerged.

One of them seemingly crashes the system and results in a Blue Screen of Death. Before the system hits the lights, you’ll see the Critical Structure Corruption“prompt.

This is a severe issue and, since it’s hard to determine the exact reason why it occurs, we provided an in-depth curated list of all possible solutions.

Therefore, if you’re stuck with this error and sudden shutdowns come in unpredictable time intervals, make sure to check the solutions we provided below.

Table of contents:

  1. Check the hardware (HDD, RAM, PSU)
  2. Use specialized BSOD repair software
  3. Run Blue Screen troubleshooter
  4. Run SFC
  5. Check all drivers
  6. Try with DISM
  7. Uninstall critical third-party programs
  8. Backup your data and clean install Windows 10

How do I fix the Critical Structure Corruption BSOD error?

1. Check the hardware (HDD, RAM, PSU)

We can’t possibly move to software-related troubleshooting steps until we check out the hardware first.

Concerning the possible causes of the Critical Structure Corruption BSOD, there are 3 physical parts we’ll need to check out. They are all known instigators of various critical issues and causes of many system crashes.

  • HDD
    • Use Chkdsk (Command Prompt > type: chkdsk c: /r and press Enter) to find and fix errors or use a third-party tool.
    • Make sure everything is properly connected.
  • RAM
    • Run Memory check or use MemTest86 to scan for RAM errors.
    • In case you have several RAM sticks, unplug them one by one (keep at least one plugged in all the time) and look for malfunctions.
  • PSU (Power Supply Unit)
    • Make sure all cables are connected properly.
    • Also, if you’ve recently added a new piece of hardware, make sure it doesn’t exceed the power supply’s limits.

Also, you can try and unplug all peripheral devices and boot that way and restore to default values overclocked devices. Clean boot, with only Microsoft’s native services at the startup, can help, too. You can disable all third-party services in Task Manager > Startup.

As the final touch, just to eliminate hardware as the possible culprit for the BSOD, boot your Windows in Safe Mode. If everything works as intended and system crashes don’t occur, continue with the steps below.

2. Use specialized BSOD repair software

If you’re wondering how to fix the Critical Structure Corruption error, the best way may be to use specialized repair software.

Fixing BSOD errors manually can be a daunting task, even for experienced users, but there are tools that can help you with that.

3. Run Blue Screen troubleshooter

  1. Press Windows key + I to open the Settings app.
  2. Select Update & Security.critical structure corruption windows 10
  3. Choose Troubleshoot from the left pane.
  4. Expand Blue Screen troubleshooter and click on the Run this troubleshooter button.critical structure corruption windows 10
  5. Wait until the procedure is finished and look for improvements.

Common errors ask for a unified troubleshooter, and that’s what Microsoft provided to Windows 10 users after the Creators Update.

In there, besides the usual troubleshooting tools, one can find more the troubleshooter which specializes in resolving Blue Screen errors that affect Windows 10.

Now, taking into consideration the overall lackluster success rate, we wouldn’t hold high hopes. However, it’s won’t cost you and it can help.

4. Run SFC

  1. Right-click Start and open Command Prompt (Admin).
  2. In the command line, type:
    critical structure corruption windows 10
    sfc/scannow
  3. Wait until the tool scans for errors and close Command Prompt.

System File Checker is the built-in tool run through the elevated command line.

Its main purpose is to scan for the faults in system files and fix possible corruptions. It’s, of course, of utmost importance for all files integrity to be untouched.

Looking at the minidumps shared by the affected users, the ‘Critical Structure Corruption‘ is frequently invoked by kernel32.dll failure. And something as grave as this plagues most users that upgraded to Windows 10 rather than performing a clean installation.

5. Check all drivers

  1. Right-click Start and open Device Manager.
  2. Click on the View and enable Show hidden devices.
  3. If there’s a faulty driver, search for it online and install it.

Searching for drivers manually can be a tedious task, and this is why it’s recommended to use specialized driver updater software.

Specialized software will update all your drivers and fix BSOD Critical Structure Corruption errors along the way.

⇒ Get Outbyte Driver Updater

6. Try with DISM

  1. Right-click on the Start and open Command Prompt (Admin).
  2. In the command line, type the following lines and press Enter after each:
    critical structure corruption windows 10
    DISM /Online /Cleanup-Image /CheckHealth
    DISM /Online /Cleanup-Image /RestoreHealth
  3. Wait until the scanning ends and close Command Prompt.
  4. Restart the PC.

The recipe for troubleshooting major system flaws is almost the same every time.

You give SFC a try and, if it doesn’t notice anything, move to a more specific tool. That tool is DISM or Deployment Image and Servicing Management tool.

In comparison to SFC, DISM has a much higher reach and it depends on Windows Update (or external medium) to replace the affected system files.

So if you’re getting Windows stop code Critical Structure Corruption error, be sure to try DISM.

7. Uninstall critical third-party programs

Now, this is something you should be especially interested in.

Not all third-party programs you seamlessly run on Windows 7 will work on Windows 10. Essentially, this is a second look at the decision to upgrade to Windows 10 over an older Windows operating system.

This goes for various secondary tools and antivirus solutions mostly, but we can’t be sure what exactly triggers the error at hand.

  • Antivirus solutions
  • Automatic Driver Updaters
  • Virtual Drive software.
  • Intel built-in applications for system management.
  • GPU and CPU overclocking applications.

Vulnerabilities in older software may be rapidly found and shared among cybercriminals. This type of attack may be avoided by uninstalling programs that are no longer compatible with your current operating system.

An uninstaller software removes programs remnants, leaving you with a fresh start to install new suitable software that won’t crash following system upgrades. All unused applications, even resistant and bundled apps, can be totally removed.

Additional cleaning and maintenance modules assist in keeping your PC in a healthy condition.

8. Backup your data and clean install Windows 10

Finally, if none of the above steps fixed the BSOD Critical Structure Corruption error, we recommend clean reinstallation as the last-resort solution.

Namely, as we indicated so many times, even though upgrading is better than the clean install on paper, it doesn’t meet the expectations every time.

The distinction between Windows 7/8.1 and Windows 10 is not minor, and the older configurations will have a hard time with Windows 10. Especially due to the driver’s incompatibility. And that’s where BSOD errors emerge.

You can find out how to reinstall Windows 10 cleanly in this article. Just make sure to backup your data and store the license key.

With that, we can wrap it up. In case you’re still unable to move past the error and sudden shutdowns still occur, we recommend contacting the Microsoft support team and sending them the crash report stored in the minidump file and uploaded to a third-party site.

Furthermore, you can share your alternative solutions or post a question regarding the ones we enlisted. The comments section is just below.

What to do when Userdata.dll is missing in Windows 10

Userdata is a shared DLL (Dynamic Link Library) system file that some software need to run.

Some users have stated that a userdata.dll error message pops up whenever they start Windows or when trying to manually open a specific program.

The userdata.dll error message states: This application failed to start because userdata.dll was not found. Reinstalling the application may fix this problem.

Another related error message you can encounter is: The program can’t start because userdata.dll is missing from your computer. Try reinstalling the program to fix this problem.

This error message usually pops up when the userdata.dll is either missing or corrupted in some way. Consequently, software that needs the user data file can’t access it.

The same error message can pop up for other DLL files, and the fixes for it are pretty similar. Keep reading to learn how to fix the userdata.dll is missing error message in Windows 10.

How do I fix userdata.dll problems in Windows 10?

1. Use a dedicated tool

There are plenty of third-party repair programs out there that promise to fix or replace missing or broken DLLs, and most of them stay true to their word.

These tools are able to replace corrupt or missing DLL files with fresh, updated ones using their own Windows file databases.

2. Run a System File Checker scan

  1. Enter command prompt in the home screen search box.
  2. Right-click Command Prompt and select Run as administrator to open its window.
  3. Next, write the following command and press Enter: DISM.exe/Online/Cleanup-image/Restorehealth
  4. Then input sfc /scannow in the Prompt, and press the Enter key.
  5. Restart Windows if Windows Resource Protection does repair corrupted files.

Note: If a virus or malware has corrupted userdata DLL, the System File Checker can also repair it. This built-in solution will scan system files and replace any corrupted ones with a cached copy. 

3. Update device drivers

Some users have stated that updating hardware drivers fixed the userdata.dll is missing error. So updating outdated or corrupted drivers is a potential resolution for the userdata.dll error.

However, it’s hard to tell what drivers you’ll need to update. Your best bet is to add software to Windows 10 that will scan your drivers.

Outbyte Driver Updater is a tool that you can update AMD, Nvidia, and Intel drivers with, among others. You can download the tool for free to your Windows device by visiting the website indicated below.

Upon launch, the software automatically scans drivers and lists any that need updating. Select each indicated driver in turn and click the Update button to get the latest version compatible with your system.

Outbyte Driver Updater has a small footprint and you can let it run in the background and set it up to update and repair your drivers on a regular basis. This will save you lots of time and hassle and prevent driver-related issues from occurring again.

4. Scan the registry with CCleaner

  1. Download CCleaner for free and wait for the setup to finish.
  2. Open CCleaner and click Registry on the left of CCleaner’s window to open the registry cleaner.Clean registry errors
  3. Select all the registry check boxes, and press the Scan for Issues button.
  4. Click the Fix selected Issues button.
  5. Next, select the Yes option if you prefer to save a backup file (although you probably won’t need it).
  6. Press the Fix All Selected Issues button to repair the registry.

Note: Registry problems are often the source of DLL file errors. It might be the case that there are invalid registry entries for userdata.dll. You can scan and repair the registry with third-party tools like CCleaner. 

5. Remove programs from the Windows Startup

  1. Pree Win + X and select Task Manager from the menu.
  2. Click the Start-up tab.
  3. Then you can remove programs from the Windows startup by selecting them and clicking Disable.

Note: Some users have said that they fixed the issue by removing the Password Manager Pro and Fingerprint Reader programs.

Thus, it might be the case that a startup program generates the error message. So removing software from the system startup is another potential fix for the userdata.dll error.

6. Rollback Windows with System Restore

  1. Right-click the Start menu and select Run.
  2. Enter rstrui in Run’s Open text box and click OK to open the System Restore window.
  3. Click the Choose a different restore point option as an alternative to the recommended restore.
  4. Press the Next button to open the list of restore points.
  5. To view the full restore list, click the Show more restore points option.
  6. Choose a restore point to roll Windows back to.
  7. Restoring Windows removes programs installed after a selected restore point.
  8. You can press the Scan for affected programs button to see what software is deleted for a specific restore point.
  9. Click Next and Finish to roll back Windows.

Note: System Restore can come in handy for fixing corrupted DLL files. With this utility, you can restore Windows 10 to an earlier point in time, which can fix corrupted system files.

in this case, you should select a restore point that will restore Windows to a date when the DLL error message did not pop up on your laptop or desktop.

7. Reinstall the software

  1. Open Run as shown before.
  2. Input appwiz.cpl in the box and click OK.
  3. This will open Control Panel, where you have to select the program that returns the DLL error message, and click the Uninstall button.
  4. Click the Yes button to confirm.
  5. Restart Windows after uninstalling the program.
  6. Then reinstall the latest version of the software. You can usually download the latest version from the software’s website.

Note: The userdata.dll is missing error message stating, Reinstalling the application may fix this problem. So that’s one hint about the specific app which might cause the error. 

8. Get a new userdata.dll file

  1. Open the official DLL files webpage in your browser.
  2. Click Download to save the userdata.dll ZIP.
  3. Open the userdata ZIP in File Explorer.
  4. Press the Extract all button.
  5. Click Browse to select a folder path to extract the ZIP to, and click the Extract button.
  6. Open the extracted userdata.dll folder in File Explorer.
  7. Select the userdata.dll file, and press the Copy to button.
  8. Select to copy it to the System32 folder.
  9. Then select the original userdata.dll file in the folder you exacted it to, and press the Delete button.
  10. Restart your desktop or laptop.
  11. You might also need to register the DLL file. To do so, press the Windows key + X hotkey and select Command Prompt (Admin).
  12. Enter regsvr32 userdata.dll in the Command Prompt’s window, and press Enter.
  13. Click Restart on the Start menu.

9. Add DLL Fixer software to Windows

There are numerous DLL fixer software for Windows that fix DLL errors. DLL Suite, DLL Tool, DLL Files Fixer, and Free DLL Fixer are some of the utilities that scan for and repair corrupted DLL files.

They also include databases that you can get replacement DLL files from. As such, those utilities might come in handy for fixing the userdata.dll is missing error.

You can try out an unregistered version of DLL Suite by clicking the Start Download button on this page.

So these are a few resolutions that should fix the userdata.dll is missing error in Windows 10.

Note that some of the above resolutions might also fix missing DLL error messages for other files.

Posted in Fix

PSA: There won’t be a new build for Windows Insiders in the Dev channel this week

Sorry Windows Insiders, there won’t be a new flight for the Dev Channel this week, the Windows Insider team announced a couple of minutes ago. “This week’s Dev Channel build candidate didn’t pass our quality gates,” the team wrote on Twitter, adding that it’s hard at work on fix with hopefully a new build coming next week.

Two days ago, Microsoft released a cumulative update with no new features for last week’s build 21301, which brought minor improvements to the touch keyboard. The Windows Insider team also updated the list of known issues for the build 21301 to mention a new bug affecting some Dev Channel Insiders to upgrade to this latest build.

In case you missed it, Microsoft also yesterday released a new cumulative update with no new features for Beta and Release Preview Insiders still running Windows 10 version 2004. This same patch is also available as an optional update on the Production ring.

Cancelled Xbox 360 remaster of Goldeneye 007 has leaked online

There’s currently a renewed interest around the cancelled Goldeneye 007 remaster that was being developed for Xbox 360 consoles many years ago. If a 30 minutes video of the game was published on YouTube back in 2016, the cancelled remaster has now leaked and full video playthroughs are now available online for nostalgics of this cult-classic Nintendo 64 game. (via Eurogamer).

For those unfamiliar with Goldeneye 007, it’s a critically-acclaimed game inspired by the 1995 James Bond movie, and it was released back in 1997 on the Nintendo 64. Goldeneye 007 was developed by Rare, the British studio behind Microsoft’s pirate game Sea of Thieves on Xbox consoles and PCs.

Back in the day, Goldeneye 007 was pretty much the Nintendo 64’s Halo, a true system seller that pioneered things like four-player splitcreen before Halo CE perfected this years later on the original Xbox. After Rare was acquired by Microsoft back in 2002, the studio started working on an Xbox Live Arcade remaster of Goldeneye 007 around 2008, though the game never saw the light of day due to licensing issues.

When asked in 2015 to negotiate with Nintendo and Activision (which had then acquired the James Bond game license) to finally release this Goldeneye 007 remaster on Xbox consoles, Xbox head Phil Spencer explained why this is unfortunately never going to happen. “Goldeneye rights are so challenging, looked at this many times. Lot’s of different parties to work with, we’ve always given up,” the exec said on Twitter.

According to Ars Technica, the leaked Goldeneye 007 ROM should pretty easy to find online, and it works well with the Xenia emulator on Windows 10. The game feature remastered graphics and runs at 60FPS, and the 4 players split-screen mode that was so popular on the Nintendo 64 is still there. We won’t tell you where to find this ROM, but it’s nice to imagine how this Goldeneye 007 remaster would have made many fans original game happy during the Xbox 360 era.

Fix Ntdll.dll Error Messages in Windows 10

Seems that a lot of Windows 10 users have encountered at one point or another the Ntdll.dll error messages.

These error messages might occur for a huge number of reasons, but we will explain some of the most common messages that relate to the Ntdll.dll error and also how to fix them in a short tutorial below.

The Ntdll.dll error message can appear either when you start a specific application, while you are running an application, or just when you shut down the application in Windows 10.

Some of the more common Ntdll.dll error messages are STOP: 0xC0000221 unknown hard error C:WinntSystem32Ntdll.dll,

AppName: [PROGRAM NAME] ModName: ntdll.dll and [PROGRAM NAME] caused a fault in module NTDLL.DLL at [ANY ADDRESS].

Below, we will present you some safe solutions that you need to try in order to fix the Ntdll.ll error message on your PC, so keep reading.

How can I fix the Ntdll.dll error messages in Windows 10?

  1. Use a repair tool
  2. Reboot your system
  3. Remove the problematic application
  4. Disable IE add-ons
  5. Disable UAC features
  6. Update hardware drivers
  7. Check RAM and HDD
  8. Run a system refresh
  9. Replace your HDD
  10. Run a clean Windows installation

1. Use a specialized repair tool

There are several ways to fix the Ntdll.dll error, but if you want the fastest and safest method, you can always rely on third-party software specialized in system repairs.

Professional repair tools come with advanced features that will help you repair lost or deleted files from your PC that may cause the annoying Ntdll.dll error.

2. Reboot your system

  1. Save all the work you have done in the Windows 10 operating system.
  2. Move the mouse cursor over to the lower right side of the screen.
  3. From the menu that appears left click or tap on the Settings feature.
  4. Now left click or tap on the Power button, and afterward left-click or tap on the Restart feature.
  5. After the device reboots check again to see if your Ntdll.dll error message still pops up.

3. Remove the problematic applicationntdll.dll windows 10 screenshot

  1. Move the mouse cursor over to the lower left side of the screen.
  2. Right-click or hold tap on the screen.
  3. From the menu that appears left click or tap on the Control Panel feature.
  4. Now, left-click or tap on the Uninstall a Program feature available in Control Panel.
  5. Left-click or tap on the application you are having issues with and then left click or tap on the Uninstall, Change, or Repair button.
  6. Follow the on-screen instructions to finish the uninstall process.
  7. Reboot your device and go on the manufacturer’s website to download the latest version available for the application.
  8. Install the application as you normally do, but keep in mind that if the application is not compatible with the Windows 10 version of the operating system, you might still get the Ntdll.dll error message.

Depending on the application you were using when you got the Ntdll.dll error message you will have to uninstall and install it again.

4. Disable IE add-ons

  1. Open your Internet Explorer application.
  2. Left-click or tap on the Tools tab situated on the upper side of the Internet Explorer window.
  3. Now find and left-click or tap to open the Manage Add-ons feature.
  4. In this window, you will have a Show drop-down menu, left-click or tap on the drop-down menu.
  5. Select the Add-ons that have been used by Internet Explorer option.
  6. Now left-click or tap on each Add-on you have in the list and then left click or tap on the Disable button.
  7. After this left-click or tap on the OK button.
  8. If you get a message saying For changes to take effect, you might need to restart Internet Explorer, left-click or tap on the OK button on this one as well.
  9. Close the Internet Explorer application.
  10. Reboot your Windows device, and see if you still get the Ntdll.dll error message.

5. Disable UAC features

  1. Move the mouse cursor over to the Start button.
  2. Right-click or hold tap on it.
  3. From the menu that appears left click or tap on the Control Panel feature.
  4. From the Control Panel window left click or tap on the System and Security feature.
  5. Now in the next window that appears, left-click or tap on the Administrative Tools feature.
  6. Now from the next list that shows search for Local Security Policy, and left-click or tap on it to select it.
  7. On the left side panel left-click or tap on the Local Policies folder to open it.
  8. Within the Local Policies folder double-click or double tap on the Security Options folder.
  9. On the right side panel, you will have to search for all the user account control features and disable them one by one.
  10. After you disabled them reboot your Windows device.
  11. When the device starts, check again if you still get the Ntdll.dll error message.

6. Update hardware drivers

  1. Check on the manufacturer’s website to see if there are any available driver updates for the hardware you have on your device.
  2. If there are, then download and install the latest ones.
  3. After you successfully installed them reboot your device once more.

Updating drivers manually is a tedious process, so we recommend you use a specialized driver updater that can automatically scan for and update your drivers in just a few minutes.

7. Check RAM and HDD

  1. Check your RAM memory if it is operating with the right parameters.
  2. Check your IDE cable going from the Hard Drive to the Motherboard, if possible replace the cable and see if you still get the Ntdll.dll error messages.

8. Run a system refresh

  1. Move the mouse cursor over to the lower right side of the screen.
  2. From the menu that appears left click or tap on the Settings feature.
  3. Find and left-click or tap on the Change PC Settings feature.
  4. Left-click or tap on the General option.
  5. Under the Refresh Your PC Without Affecting Your Files topic, left-click or tap on the Get started option.
  6. Follow the on-screen instructions to finish the System Refresh.
  7. Check again if you still get the Ntdll.dll error message.

9. Replace your HDD

Make a backup copy of all your important files, folders, and applications and do a complete reinstall of the Windows 10 operating system.

Also, on rare occasions, the Ntdll.dll error message may appear if you have bad sectors on your hard drive, so if you do have a spare Hard drive try replacing the current one and install the Windows 10 operating system on it.

If you’re looking for a new hard drive, check out our best hard drives for Windows 10 PCs list to expand your storage space. 

10. Run a clean Windows installation

This is truly the ultimate solution, so be sure you have checked all other solutions before doing it.

Beware that you have to do a clean install which means that you should erase all the tech data from the drive where you will install Windows.

Thus, you won’t have the same error after.

If you have successfully reinstalled Windows, see if the Ntdll.dll error still appears. Now try to install the programs you had before one by one and see when this error occurs.

When you have spotted which software causes the error to appear, contact the support team of that program.

There you go, a few methods will get your Ntdll.dll error message fixed in Windows 10.

Also, if you do have further questions regarding this subject please write us in the comments section of the page below, and we will help you further as soon as possible.

This Microsoft Teams accessibility bot is helping 30,000 users to stay productive

The COVID-19 has resulted in schools shut worldwide, and billions of students are currently relying on digital platforms for learning. With this sudden shift away from the traditional classroom environment, there are obvious downsides to it, and one of these is related to accessibility.

In a recent blog post, Microsoft has taken the opportunity to share information about a new bot for Teams designed to support remote work/learning. Named Accessibility Bot, this app has been developed by a Microsoft partner Future Worx, which specializes in digital workplace transformation. The free bot has been helping students and staff members at Imperial College London, and around 30,00 Teams users are currently using it.

“We wanted to make a helpful bot that would be used by as many people as possible,” said Steve Giles, Director of Sales at Future Worx. “So one thing we decided early on was that the bot would only collect anonymised data about the questions it is asked, so we can improve the responses. It really exists just to help people collaborate and communicate in a way that suits them.”

According to Microsoft, it allows people with situational or temporary accessibility needs to understand all accessibility features across Office 365, Edge, and Windows 10. The digital helper can benefit users by responding to their requests like reducing background distractions, turning on live captions for Teams meetings, and Focus Assist.

Overall, it’s a great productivity tool that enables users to get the most out of Teams and boost their engagement in online meetings or classrooms. Download the accessibility bot now via this link, and let us know how you’ll be using it, too.

FIX: Res ieframe.dll errors in Internet Explorer

Ieframe.dll is a Dynamic Link Library file for Internet Explorer that converts HTML code to web pages.

The res://ieframe.dll/acr_error.htm#hrbl.net error is one of a few ieframe.dll issues that can arise for Internet Explorer users while browsing.

Here is what one user has to say on the Microsoft support forum about this issue:

When I open Internet Explorer 8 ,the following appears in the address: res://ieframe.dll/acr_error.htm#

I cannot enter any web address in the address bar and the page keeps on refreshing!

It is worth mentioning that this error appears no matter what version of Internet Explorer you’re using.

Check out how to fix this issue by following the methods described below.

How can I fix the Res ieframe.dll errors?

1. Update Internet Explorer

  1. Navigate to the download page of the latest version of Internet Explorer.
  2. Select your operating system from the drop-down menu.
  3. Click Download IE 11 and install it on your PC.

Note: Usually, if you keep your system connected to the internet and install all the Windows updates, you should already have IE version 11 installed.

2. Clear temporary IE files

  1. Open your Internet Explorer browser.
  2. Click Tools.
  3. Select Internet Options.
  4. Click the Delete button from Browsing history.
    Delete Browsing History window res ieframe.dll errors
  5. Select the Temporary Internet files and website files checkboxes.
  6. Click the Delete button.

Note: Temporary files are just copies of webpages kept in IE cache for faster browsing. These can sometimes lead to errors.

3. Turn off IE’s add-ons

  1. Click the Tools button in your browser.
  2. Select the Manage add-ons option to open the window in the snapshot directly below.
    Manage Add-ons window res ieframe.dll errors
  3. Select the All add-ons option on the Show drop-down menu.
  4. Then right-click the listed add-ons and select their Disable options.

Note: Incompatible add-ons can be the cause for this error, thus, disabling them can repair the issue.

4. Reset Internet Explorer

  1. Open Run by pressing the Windows key + R keys.
  2. Next, input inetcpl.cpl in the Open box, and press the OK button.
  3. Select the Advanced tab shown directly below.
    Internet Properties window res ieframe.dll errors
  4. Click the Reset button to open the window in the snapshot directly below.
    Reset Internet Explorer Settings window res ieframe.dll errors
  5. Click Reset again to confirm.

Note: Resetting IE is always a good choice because it can solve various errors from java applets problems to webpage display and freezing.

5. Turn off the Windows firewall

  1. Press the Win + R keys.
  2. Type firewall.cpl in the text box and click OK to open the Windows Defender Firewall applet.
    Windows Defender Firewall window res ieframe.dll errors
  3. Click Turn Windows Defender Firewall on or off to open further options.
    Customize Settings window res ieframe.dll errors
  4. Select the Turn off Windows Defender Firewall options on the Customize Settings window.
  5. Click the OK option to exit the window.

Note: Windows Defender is built-in antivirus protection, but, sometimes it can block apps from running correctly. 

6. Configure IE to check for new webpage versions more often

  1. Enter inetcpl.cpl in the Run dialog box and click OK.
  2. Click Settings on the General tab.
    Website Data Settings window res ieframe.dll errors
  3. Select the Every time I visit the webpage radio button.
  4. Click the OK button.

7. Move IE’s temporary internet files folder to its default path

  1. Open the Website Data Settings window as outlined for the resolution directly below.
  2. Click the Move to folder button on the Website Data Settings window.
    Browse for Folder window res ieframe.dll errors
  3. Expand the C: drive on the Browse for Folder window.
  4. Then open this path: C:/Users/[username]/AppData/Local/Microsoft/Windows/iNetCache
  5. Click the OK buttons on the windows.
  6. Select the Yes option if you’re prompted to log off.

Note: Ieframe.dll errors can also arise when Internet Explorer’s Temporary Internet Files folder isn’t in its default path

We hope this guide has managed to resolve the res://ieframe.dll/acr_error.htm  error easily. These resolutions can also fix other ieframe.dll issues with different error messages.

Leave a comment in the section below to get in contact with us.

FIX: winmm.dll Is Missing

Winmm.dll is a Dynamic Link Library system file for Windows. When that file becomes inaccessible, some software will not run. Then an error message like this will pop up:

This application has failed to start because winmm.dll was not found.

To fix that DLL error, check out some of these potential resolutions for it.

How can I fix the winmm.dll is missing error?

1. Use third-party tools to repair your DLLs

If the problem is not fixed yet, then we recommend you use an all-rounded system repair tool, which can get rid of all the errors from your PC within a few clicks.

2. Scan system files

  1. Press the Windows key + S, and type cmd.
  2. Right-click Command Prompt, and select Run as administrator.
  3. First, run a Deployment Image scan by entering the following command, and pressing Enter: DISM.exe /Online /Cleanup-image /Restorehealth
  4. Then type sfc /scannow in the Command Prompt, and hit Enter.System File Checker command winmm.dll is missing
  5. Thereafter, wait for the System File Scan to complete its scanning. Restart Windows if the SFC scan does repair something.

3. Check the Recycle Bin

Restore the selected items option winmm.dll is missing
  1. Double-click the Recycle Bin icon on the Windows desktop.
  2. Select the winmm.dll file in the Recycle Bin if you find it there.
  3. Then click the Recycle Bin Tools tab.
  4. Press the Restore the selected items button.

4. Reinstall the software the error arises for

  1. To open Run, press the Windows key + R at the same time.
  2. Input appwiz.cpl and press Enter to open the Programs and Features Control Panel applet.
    Windows uninstaller winmm.dll is missing
  3. Select the software the winmm.dll error arises for.
  4. Click the Uninstall option.
  5. Click Yes on any dialog box windows that might open.
  6. Restart your desktop or laptop after uninstalling software.
  7. Then download the installer for the latest version of the uninstalled software.
  8. Open the program’s setup wizard to reinstall it.

If the winmm.dll error occurs for a more specific program, reinstalling that software might just fix the issue.

Installing and uninstalling programs can be a headache for you, and if you don’t do it correctly, you can get serious problems with your PC.

That’s why we recommend you the IObit Uninstaller 10 PRO software. This tool will take care of your PC for you, and you make sure you don’t make mistakes that lead to other mistakes.

IObit Uninstaller Pro

Remove any leftovers of programs uninstalled properly and keep your PC clean of errors.
Check price Visit Website

5. Restore Windows to an earlier date

  1. Open Run, and enter rstrui.
  2. Click OK to open System Restore.
  3. Press the Next button to proceed.
  4. Click the Show more restore points option if you can.
    System Restore window winmm.dll is missing
  5. Select a restore point that will roll Windows back to a time that predates the winmm.dll error on your PC. (If you’re not sure, your best bet is to select the oldest restore point listed.)
  6. Software installed after a restore point gets deleted.
  7. To check what software will be deleted, click the Scan for affected programs button.
  8. Press the Next and Finish buttons.

Restoring Windows to a time that predates the winmm.dll error on your laptop or desktop is another probable fix.

6. Reset Windows 10

  1. To reset Windows 10, click the Type here to search button.
  2. Input reset in the search box, and then click Reset this PC.
  3. Next, click the Get Started button.
    Get started button winmm.dll is missing
  4. Select the Keep my files option, and then click the Next button.
    Keep my files button winmm.dll is missing
  5. Press the Reset button to continue.

Reinstalling Windows 10 by resetting the platform should restore a missing winmm.dll system file.

So, that’s how you can fix the winmm.dll is missing error. Note that the above resolutions can also fix similar errors for other DLL files.

For any questions or other suggestions, please write to us in the comments section below.

Dbghelp.dll Missing or Not Found Error: Causes & How to Fix

Various factors could affect the work of your dbghelp.dll file. Sometimes, dbghelp.dll errors could cause some registry problems, also, there’s a chance that you caught a virus or malware.

And in this article you’ll find the most common solutions to fix this problem with ease, so be sure to check them out.

There are a couple of ways that dbghelp.dll could show up on your computer. Here are some of them:

  • Dbghelp.dll Not Found
  • This application failed to start because dbghelp.dll was not found. Re-installing the application may fix this problem
  • Cannot find [PATH]dbghelp.dll
  • The file dbghelp.dll is missing
  • Cannot start [APPLICATION]. A required component is missing: dbghelp.dll. Please install [APPLICATION] again

What you can do when dbghelp.dll errors occur?

  1. Download the latest DbgHelp.dll version
  2. Restore dbghelp.dll from the Recycle Bin 
  3. Run a virus/malware scan
  4. Use system restore to undo changes
  5. Run System File Checker
  6. Run DISM
  7. Reinstall the software that uses dbghelp.dll
  8. Update your computer
  9. Perform a system recovery

How can I fix the dbghelp.dll errors?

1. Download the latest DbgHelp.dll version

A first solution to fix this problem is to download the newest DbgHelp.dll version directly from Microsoft’s support page.

If you still can’t find the file, we strongly recommend using third-party software that will find and replace the missing DLL file.

2. Restore dbghelp.dll from the Recycle Bin

This may sound ridiculous to you, but there’s a possibility that you accidentally deleted the file. So it would do no harm if you check whether the file is in the Recycle Bin.

If you find that you have accidentally deleted the dbghelp.dll file, then the following is very simple. You just need to restore it from the Recycle Bin and the problem should solve itself.

3. Run a virus/malware scan

Some errors with dbghelp.dll could be related to a virus or other malicious software on your computer.

To remove this possible cause from the list of harmful factors, you need to run a virus scan using your antivirus program in order to determine if your system is virus-free.

4. Use system restore to undo changes

  1. Right-click on This PC, and go to Properties.
  2. On the left side of the window, click on System Protection.
  3. In the System Properties click on System Restore.
  4. Choose your restore point and follow further on-screen instructions from the installation wizard.

If you suspect that dbghelp.dll error was caused by a certain change in your system configuration, you should restore your system using a System Restore feature.

Also, don’t forget to back up your data before you perform a System Restore.

5. Run System File Checker

  1. Go to Search, type cmd in the Search box, and then right-click on Command Prompt.
  2. Click on Run as administrator. (If you are prompted for an administrator password or for a confirmation, type the password, or click Allow).
  3. At the Command Prompt, type the following command, and then press Enter: sfc /scannow

If your DLL file is provided by Microsoft, running the System File Checker will replace the corrupted copy of the dbghelp.dll file with the cached one.

The SFC/scannow command will scan all protected system files, and replace corrupted files with a cached copy that is located in a compressed folder at %WinDir%System32dllcache.

6. Run DISM scan

bdservicehost-dism
  1. Go to Search, type cmd, and launch Command Prompt (Admin).
  2. Type the following command, and hit Enter: DISM /Online /Cleanup-Image /RestoreHealth
  3. Wait for the process to complete, and restart your PC.

DISM is a tool that’s complementary to SFC. Basically, this command scans and restores missing files. Sometimes, when the SFC can’t fix the problem, running DISM could help you.

7. Reinstall the software that uses dbghelp.dll

If this error occurs when you’re launching a particular program, you can easily fix it by removing and reinstalling the respective tool.

Once you’ve done this, restart your computer and check if the error persists.

8. Update your computer

Microsoft regularly releases new updates to improve the OS performance. One of the ways Microsoft achieves that is by updating DLLs.

If Microsoft detected any major DbgHelp.dll issue, it will definitely include the fix in the latest update.

9. Perform a system recovery

  1. Go to the Start menu, and click on PC Settings.
  2. Go to Update and Recovery, and choose Recovery.
  3. Under Refresh your PC without affecting your files click on Get Started and follow further on-screen instructions.

If nothing of the previous pieces of advice helped, then performing a system recovery might return your files to normal.

Don’t worry, performing a system recovery will just refresh your system, without affecting any files. To perform refresh your PC without affecting your files, follow the above steps.

These are our solutions to fix the dbghelp.dll error in Windows 10. Which one did you use? Leave us your answer in the comments section below.

Cng.sys Failed: 6 Solutions for This Blue Screen Error

You probably just encountered cng.sys failed. The blue screen error is a common problem many Windows users face, leading to frustrating crashes and system instability.

Cng.sys is an essential next-generation Windows Operating System file on your computer. It is problematic if it is missing.

So, let us discuss the possible causes of this error and provide some effective solutions to fix and prevent it from occurring.

Why does Cng.sys failed error code occurs?

The error code typically occurs due to a problem with the CNG (Cryptography Next Generation) system file in the Windows operating system. Here are some possible reasons why this error may occur:

  • Corrupted or outdated system files – If the CNG system file or other related system files are corrupted or outdated, it can cause the cng.sys failed error.
  • Malware or virus infections – Malware or viruses on your computer can damage or corrupt system files, including the CNG system file, leading to the error.
  • Driver issues – Outdated or corrupted drivers for your hardware devices are also a leading cause.
  • Hardware issues – Hardware problems, such as a faulty hard drive or memory module, are known to trigger the error. 

How can I fix cng.sys failed blue screen error?

1. Run a BSOD quick fixer

Fixing BSOD used to be quite a complex task in the past but nowadays there are specialized tools that allow you to scan your computer and replace any broken system files in just a few minutes.

More so, usually, the more professional repair tools also come with advanced maintenance features so you can easily monitor the health of your system.

2. Restore an earlier version of Windows

  1. Start and turn off your computer once it starts to boot. Do this a few times, and it will enter the Windows Recovery Environment.
  2. Select Troubleshoot, then click Advanced options.
  3. Go to Startup Settings and click Restart.cng.sys failed
  4. Once your computer restarts, a list of options will come up.
  5. Choose 4 or F4 to start your computer in Safe Mode.
  6. Press Windows + I to open the Settings app.
  7. Click Updates & Security.
    cng.sys failed
  8. Click Recovery.
    cng.sys failed
  9. Select Get started in the Go back to an earlier build tab.
  10. Click Next when asked why you have chosen to revert your software.

This is one of the fastest ways to resolve the cng.sys error, but you must do it within 10 days after upgrading to Windows 10.

And it only applies if you had an earlier version of Windows before the upgrade. Otherwise, you’ll have to make do with the new version.

3. Download and install pending updates

  1. Start and turn off your computer once it starts to boot. Do this a few times, and it will enter the Windows Recovery Environment.
  2. Select Troubleshoot, then click Advanced options.
  3. Go to Startup Settings and click Restart.cng.sys failed
  4. Once your computer restarts, a list of options will come up.
  5. Choose 4 or F4 to start your computer in Safe Mode.
  6. Press Windows + I to open the Settings app.
  7. Click Updates & Security.
    cng.sys failed
  8. Click on Check for updates.
    cng.sys failed

Downloading and installing Windows pending updates may help to resolve the issue.

4. Run a full scan of your computer

  1. Start and turn off your computer once it starts to boot. Do this a few times, and it will enter the Windows Recovery Environment.
  2. Select Troubleshoot, then click Advanced options.
  3. Go to Startup Settings and click Restart.cng.sys failed
  4. Once your computer restarts, a list of options will come up.
  5. Choose 4 or F4 to start your computer in Safe Mode.
  6. Type Windows Security in the Search bar, and click on the relevant search result.
    cng.sys failed
  7. Now, click on Virus & threat protection.
  8. Click on Scan options.
  9. Select Full scan and click the Scan now button at the bottom.

Run a full scan of your computer using the antivirus solution installed on your device, and check if it helps.

Any infected data files may be cleaned only by completely deleting the file, meaning there is a possibility of losing data.

Use a reliable, powerful tool to remove malware for good. Also, allow it to run in real-time, to prevent possible attacks

5. Restart in Safe Mode and Uninstall drivers

5.1 Enter Safe Mode

  1. Press Windows + I to open the Settings app.
  2. Click Updates & Security.
    cng.sys failed
  3. Click Recovery.cng.sys failed
  4. Go to Advanced startup, and click Restart now.
    cng.sys failed
  5. Select Troubleshoot, then click Advanced options.
  6. Go to Startup Settings and click Restart.
    cng.sys failed
  7. Once your computer restarts, a list of options will come up.
  8. Choose 4 or F4 to start your computer in Safe Mode.

5.2 Uninstall drivers

  1. Press Windows + R, type devmgmt.msc, and hit Enter.
    cng.sys failed
  2. Expand Display adapters.
  3. Right-click the listed adapter and select Uninstall device.
  4. Confirm your choice and reboot your computer.

Once your computer reboots, update your computer as you did in solution 3.

You can also try a driver update using a third-party driver updater like Outbyte Driver Updater. With a single click, it will detect outdated or missing drivers.

6. Run disk clean up

  1. Start and turn off your computer once it starts to boot. Do this a few times, and it will enter the Windows Recovery Environment.
  2. Select Troubleshoot, then click Advanced options.
  3. Go to Startup Settings and click Restart.cng.sys failed
  4. Once your computer restarts, a list of options will come up.
  5. Choose 4 or F4 to start your computer in Safe Mode.
  6. In the search bar on the home screen, type disk cleanup and open the utility.
    cng.sys failed
  7. The disk cleanup drive selection box will appear. Select your disk and click OK.
  8. Click on Clean up system files.

Before doing this, ensure you have sufficient disk space on the Windows drive.

These are our solutions if cng.sys failed on a Windows PC. We’d like to hear if any of them helped and which one. Use the comments section.