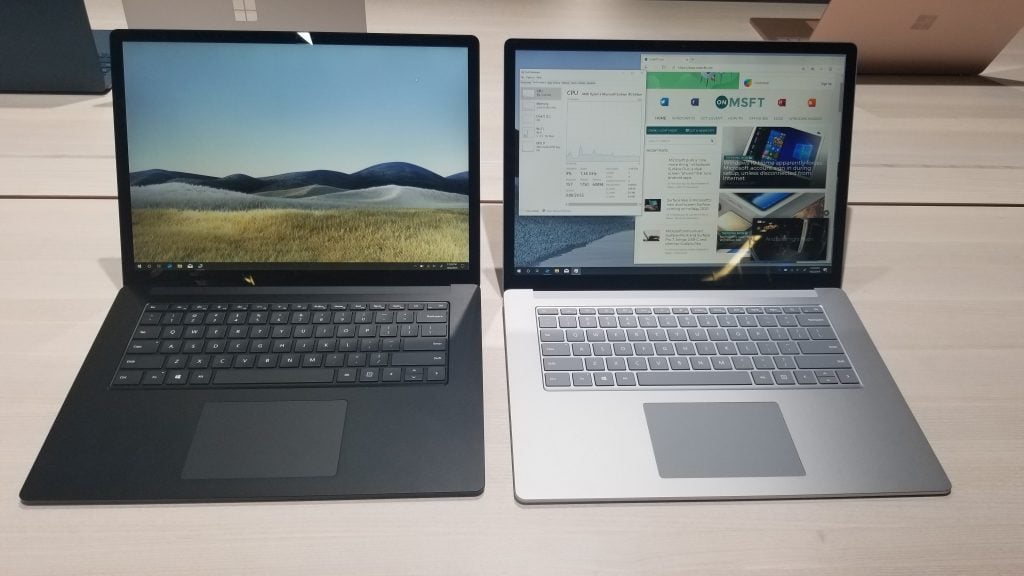
Hands on at the Surface Event, we get a quick look at Surface Laptop 3

At today’s Microsoft Event in New York City, Microsoft took the wraps off a trio of new products and hinted at even more to come. The list range from the Surface Earbuds, Surface Laptop 3, Surface Pro X, and even the dual-screen products dubbed the Surface Duo and Surface Neo.

There’s a lot to process, but we received some quality hands-on time with the devices after today’s show. While Surface Duo and Neo were behind a barricade and out of our reach, here’s a look at the Surface Laptop 3. We’ll be following up a bit later with a video all about the Surface Pro X and Surface Earbuds.

Surface Laptop 3

As rumored, Surface Laptop 3 comes in two different flavors at both 13.5 inches and 15-inches. We’re starting first with the 13.5-inch version. Some quick points to note are that the 13.5 inch Surface Laptop 3 comes with 10th Gen Intel Core processors. There’s also an option for a version with a full aluminum enclosure on black and gold-colored models, in addition to classic versions with the Alcantara fabric.  Here’s a quick video of the device below, explaining some of these details.

Personally, one of the first things I noticed when holding the 13.5 inch Surface Laptop 3 was the aluminum finish. It’s easy to hold in the hands and it is very cool to the touch. The device itself is also easy to open, as I could pull its lid up with just one hand. Asides from that, the keyboard keeps the same layout and 1.3 mm of travel. The trackpad is 20 percent larger, and I was easily able to navigate Windows 10 and the web without issues.

Another thing that stuck out to me was the beautiful screen. That default landscape wallpaper really popped right out, and the brightness wasn’t even turned past 50 percent. Of course, also of note are the ports on the device. There’s now USB-A, USB-C (but no support for Thunderbolt 3, sadly) as well as Surface Connect. That makes it well rounded and modern for most individuals, without having to worry about dongles. Users can even upgrade the device is they want, as Microsoft mentioned to me that the components are modular, including the hard drive.

Under the hood, the 13.5 inch Surface Laptop 3 sports 10th Gen Intel Processors. The model I was hands-on with sported the Intel Core i7-1065G7. Naturally, that means opening up multiple apps and instances of Edge didn’t slow the device down. Microsoft is claiming this Surface Laptop 3 is 2 times faster than the previous generation. There also are some significant graphical improvements with Intel’s new Iris Plus integrated graphics, that could make it good for light gaming, but more testing is needed.

Next up is the 15 inch Surface Laptop 3. While it keeps the same design and build as the 13.5-inch version, this model is particularly different from anything Microsoft has ever released before. Instead of Intel inside, it sports a custom AMD Ryzen 5 processor under the hood, with an extra core on the GPU. Apparently, this is spiffy enough for web browsing, and even some CAD design, and light gaming, according to Microsoft. I wasn’t able to take the processor THAT far, but it was able to handle web browsing, and opening some of the other apps in Windows 10. It didn’t once freeze.

For all that power under the hood, the 15 inch Surface Laptop 3 is a bit heavy. Microsoft says it’s 3.4 pounds, and I noticed this when trying to carry the device around the showroom floor and when holding it and the 13.5-inch version in my hand.

Other things to note on the Surface Laptop is its support for fast charging. You can now get up to an 80 percent charge in just one hour. Microsoft claims 11.5 hours of battery, but more testing will be needed again, especially when such power-hungry processors. Either way, the 13.5 inch and 15 inch Surface Laptop 3 are definitely powerful, and closer to being MacBook killers.

Microsoft announced Surface Pro X and Surface Pro 7, brings USB-C and slimmer Surface Pen

Microsoft has just announced the new line of Surface Devices at the Surface Event earlier today. Perhaps the most exciting new device (at least of the ones available this year) announced on stage is the Surface Pro X, which comes with many new features including a new Microsoft-designed ARM-based SQ1 processor for enhanced portability and long battery life.

The company says its new processor will be very power efficient, providing three times the computing power per watt compared to the Surface Pro 6. It is a custom build of the Snapdragon 8cx processor and will also feature an integrated AI engine, which will bring enhanced eye tracking to the device. It will also offer a graphics performance rating of 2 teraflops, allowing users to play casual games and use various graphics applications, and Surface Pro X will also support two separate 4K displays.

Microsoft has also integrated a 13-inch display on the same panel that was designed for the older 12-inch Surface Pro. The display will offer a screen resolution of 2880 x 1920, giving the device a pixel density of 267 per inch. With the new custom-designed ARM processor, Microsoft is also able to give users LTE Advanced, always-on functionality, and crazy fast charging speeds. The device also comes with a USB type-C port, just like the company’s recently announced Surface Laptop 3 and Surface Pro 7 devices mentioned below.

Microsoft will also be selling the new Surface Pen with will be much slimmer and will allow it to charge from inside the keyboard case, replacing the near-obsolete AAAA batteries the older generation devices used until now.

Surface Pro 7

Microsoft also briefly announced the Surface Pro 7 on stage at the event. The device will feature the same 12.3-inch display as the previous generation, but the most notable change is the USB-C port in place of the outdated mini Display port, while retaining the Surface Connector. The company didn’t go into details about specs on stage, except that the tablet will use Intel’s 10th generation Core processors. We’ll have to wait and see when pre-orders become available later today.


Surface Pro X will be available November 5 and pre-orders are open today, with prices starting at $999. If your budget is tighter or you need Intel Core computing power, the Surface Pro 7 will be available starting October 22 with prices starting at $749.

Microsoft unveils real-time captioning Surface Earbuds during splashy hardware event

Microsoft rattled off a series of updates, redesigns, and custom chipset development during its October 2, 2019 event and in the melee of announcements, the company dropped its latest installment in the wearable productivity space. Alongside its over-the-ear Surface Headphones, Microsoft will be selling its newly unveiled Surface Earbuds later this year.

Sometime during the holiday season, customers can pick up the Surface Earbuds for $249.00 and for that price the earbuds claim to provide 24-hour battery life, support for any platform, 2 mics per earpiece, a multitude of gesture controls, and Office dictation and real-time captioning as the cherry on top.

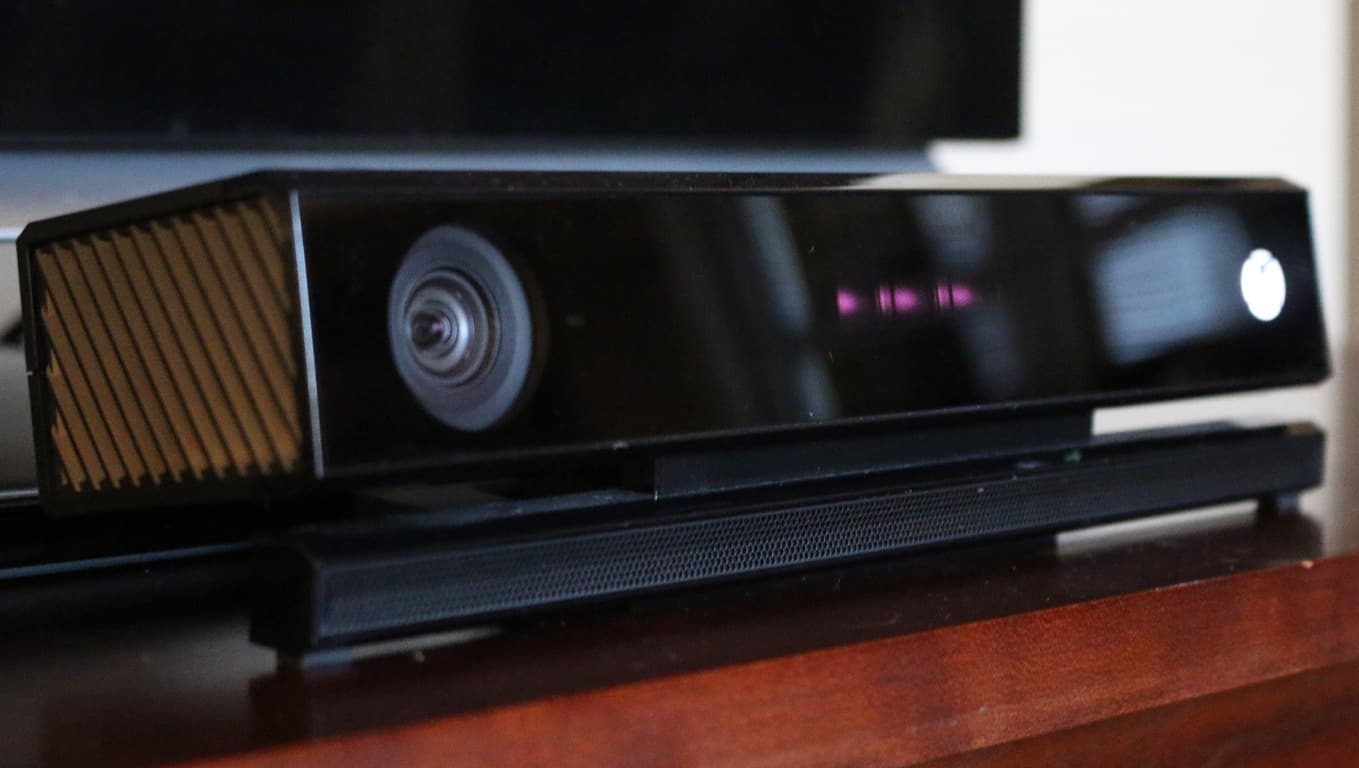
Microsoft is reportedly working on a next-gen camera for its Project Scarlett Xbox console

Microsoft could be working on a new high-end camera system for its Project Scarlett, according to a report from Gizmodo. As per the media outlet’s sources, the camera would primarily be used for live-streaming and won’t be an upgrade to the Kinect hardware.

This would make sense, as Microsoft has been pushing gamers, especially those on Xbox, to use its live-streaming service Mixer over that of competitors such as Twitch and YouTube, although in a strange twist, the company has removed Mixer game streaming from the Windows 10 Xbox Game Bar. With live-streaming as a core focus on Microsoft’s new hardware, it could help the company’s streaming service gain more attention.

According to Gizmodo, the new camera system could be capable of streaming in 4K Ultra HD with an incredible two-frame latency. We’re not sure how that converts to milliseconds, but the Kinect was capable of somewhere between 8–10 ms. The report also notes that Microsoft has also been demoing Snapchat-like filters for use that changes with the lighting within games.

Sony is also reportedly working on a camera system of its own for the unreleased PS5 as can be seen in a leaked Brazilian design sheet published on Scribd. The document doesn’t explain anything as far as internal specs, only showing a few diagrams of the device.

What do you think about the live-streaming camera that could be bundled with Microsoft’s unreleased console? Do you think Microsoft should bundle it in, or sell it separately? Let us know in the comments.

PUBG now supports cross-platform play between Xbox One and PlayStation 4

Just announced yesterday, PlayerUnknown’s Battlegrounds (PUBG) got a new server update allowing cross-play between Xbox One and PS4. The cross-play console announcement was made back in August, and you can test out the console crossplay using PUBG’s new Update 4.3 on public test servers now.

In addition to cross platform play, Console Update 4.3 adds a number of other features, including a new featured map, the ability to see Xbox One and PS4 icons next to players on game leaderboards, updates to new weapons, character customization, and more.

PUBG cross-platform play leaderboard

When you are playing on PUBG’s Public Test Server, you will be able to identify which players play on which platform through special console-specific icons. Other cross platform play benefits include:

  • Players playing on the same platform will show the platform logo in front of their ID when played on Cross Platform Play option “on”.

  • Players will be able to identify the platform of other users in loot box, when spectating, on user status message, etc.

View the Console Update 4.3 Patch Notes for the full list of other updates, changes, and bug fixes.

Download the PUBG Public Test Server for Xbox One.

Amazon Fire TV Stick not Connecting? Try this

Amazon Fire TV stick is a video streaming device. With it, you can stream video and audio apps, such as Netflix and Spotify.

People from all around the world are using this device, so it is a successful technology. However, nothing is perfect, and the Amazon Fire TV stick is no exception.

Few users can’t connect the Amazon Fire TV stick to Wi-Fi. Fortunately, there are some solutions available for this significant issue.

Today, we will show you how to fix the problem for good.

What to do if Amazon Fire TV stick is not connecting to server?

1. Set up your network

  1. When you see the “unable to connect to network” message, press and hold the Home button for at least 10 seconds.
  2. This will bring a message in the bottom-right corner that the new remote has connected.
  3. Navigate through the options to set up your connection.

2. Restart the device

Sometimes, a simple restart might solve the issue.

  1. Press and hold the Select button for at least 5 seconds. This will put the remote into pair mode.
  2. Press the Select and Play buttons together to restart the device.

3. Reset the device

If the solution above doesn’t work, try resetting your device to fix the connectivity issue in the Amazon Fire TV stick.

  1. Click Settings on your Fire TV.
  2. Click on System.
  3. Scroll down and choose Reset to Factory Defaults.
  4. The message “You are about to reset your Fire TV to its original factory settings. Your sign-in information and personal preferences will be lost” will appear. Click on the Reset button.
  5. The restore process will take approximately 5 to 10 minutes. Wait for your Amazon Fire TV to reset.

It is worth mentioning that this problem appeared after people used a new Wi-Fi connection.

Luckily, you can solve this issue quickly with our effortless solutions. Set up your new network, restart the device, and reset your device if these operations don’t work.

If you’re looking for more TV tips, our guide on how to use a phone as a TV keyboard can be quite useful.

Did our solutions work for you? Did you find another method to solve this issue? Do let us know in the comments section below!

Can’t follow a new Steam curator? Here’s what to do

Steam is one of the biggest video-game distribution platforms on the market today.

One of the key elements boasted by Steam is the ability to host and help out indie developers so that they can get recognized.

One such aspect is a user’s ability to follows publishers, curators game developers and more of the like.

However, some Steam users have been complaining about an error message that is preventing them from following any more curators.

Whenever I try to follow a steam curator I get the following message: “There was a problem trying to follow the Steam Curator.” or another message about a problem with servers (I don’t have the exact text right now). The problem occurs regardless of whether I use the steam application or the website.

Why can’t I follow curators?

There’s a limit to how many curators you can follow

Further investigations and discussions among users revealed the answer.

It would seem that Steam doesn’t differentiate between curators, publishers, or developers that you follow.

Additionally, not many people know but Steam has an unofficial limit of 100 follows.

As such, if you are already following the max number then you will not be able to follow another.

If you do try this, you get the “There was a problem trying to follow the Steam Curator” warning everyone else is getting.

Thus, the only logical solution is to simply unfollow curators that haven’t been active in a while, so that you can make room for the new ones.

Steam is not the only one out there

If you want to try something else other than Steam, you could try some other digital game distribution platforms, such as Epic Games or GOG.

Both of them come with their own mini-clint that acts as both a game launcher and a library.

More so, all of them have weekly sales, as well as massive Summer and Winter Sales where you can get discounted games, DLCs and OSTs.

Dedicated fans of Electronic Arts,  Ubisoft or Rockstar Games should also know that these publishers have their own clients as well.

These are  Origin, Uplay, and the Rockstar Games Launcher respectively.

RELATED STORIES YOU SHOULD CHECK OUT:

GOG Games won’t Launch? 5 Quick Ways to Fix it

GOG is a popular game publishing and distribution platform for classic games that allows users to manage all of their games from one place. However, at times you encounter an issue where a GOG game won’t launch on your PC.

This is a common problem, but you can fix it with some tweaks.  In this article, we have compiled a list of fixes to help you resolve GOG games won’t launch issues in Windows computers.

Note: These fixes deal with both GOG standalone installer as well as the Steam client.

Why won’t my GOG games open?

Below are some of the reasons a GOG game might not be launching on your PC:

  • Compatibility issues: Sometimes, the GOG game you are trying to play might be compatible with your operating system. What you need to do here is to play the game in compatibility mode for an older OS.
  • Corrupt game files: If you are experiencing this issue on Steam, it might be because of corrupt game files. Verifying the integrity of your games files should help restore normalcy here.
  • Problems with the galaxy.dll file: Some users have found this issue to be to issues with the galaxy.dll file. Delete the file has fixed the problem in most cases.

How can I fix GOG games if they won’t launch on my PC?

1. Run the game from the directory

  1. If you are unable to launch the GOG games from the desktop shortcut, try to launch the game directly from the installation folder.
  2. Open File Explorer and navigate to the GOG game data folder.
  3. Double-click on your game‘s .exe file. The game will open without any issues.

2. Disable Run as administrator

  1. Open File Explorer and navigate to the game directory where the game is installed.
  2. Right-click on the exe file of the problematic game. (example – crosscode-beta.exe for Crosscode)
  3. Select Properties.
  4. Go to the Compatibility tab.
    GOG games won't launch
  5. Under the Settings section, uncheck Run this program as an administrator option.
  6. Click Apply and click OK to save the changes.
  7. Double-click on the .exe file of the game and check if it fixes the GOG games won’t launch problem.

3. Run the game in compatibility mode

  1. One workaround to run some games is to run them in compatibility mode.
  2. Open File Explorer and navigate to the game directory where the problematic game is installed.
  3. Right-click on the exe file of the faulty game and select Properties.
  4. In the Properties window, click the Compatibility tab.
    GOG games won't launch
  5. Under the Compatibility mode, check Run this program in compatibility mode for: box.
  6. Select the OS for the compatibility mode by clicking on the drop-down menu.
  7. Click Apply and OK to save the changes.

4. Verify game cache

  1. If you are using GOG via Steam client, try verifying the game cache.
  2. Launch the Steam client on your computer.
  3. Click on the Library tab.
  4. Right-click on your game and select Properties.
  5. In the Properties window, open the LOCAL FILES tab.
  6. Click on Verify integrity of game files button.
    GOG games won't launch
  7. Steam will validate the game files and show All file successfully validated message.
  8. Click Close.
  9. Try launching the game and check if the GOG game launches successfully.

5. Delete the galaxy.dll file

  1. If you are using GOG Galaxy, try deleting the galaxy.dll file from the game folder.
  2. Open File Explorer and navigate to the following location: C:/Program Files (x86)/Steamsteamapps/common/Your game
  3. Next, go to your game/bin/x64 folder.
  4. Delete the galaxy.dll file from the folder. Also, delete any file that mentions Galaxy.
  5. Close File Explorer and launch the GOG game.
  6. Wait for a minute for the game to boot, and that should fix the GOG game not working on your computer problem.

With this, we can conclude our guide on the GOG game not working issue. You only need to follow the instructions above and the problem should be solved.

Similarly, if your GOG games won’t open in full screen, check our guide to fix it. Feel free to let us know the solution that helped you fix this issue in the comments below.

How to create Hyper-V virtual switch [Step-by-step guide]

Previously we have shown you how to add network adapter to Windows 10 Hyper-V virtual machine.  In this post, we look at how to create Hyper-V Virtual Switch in Windows virtual machines.

Knowing how to create and manage Hyper-V virtual switches is a critical aspect of managing and maintaining your Hyper-V virtual machines. In this article, we will show you all the methods to configure and deploy Hyper-V virtual switches.

Follow the steps in this article to create Hyper-V virtual switches on Windows computers. There are two ways to do this, and we have listed both of them.
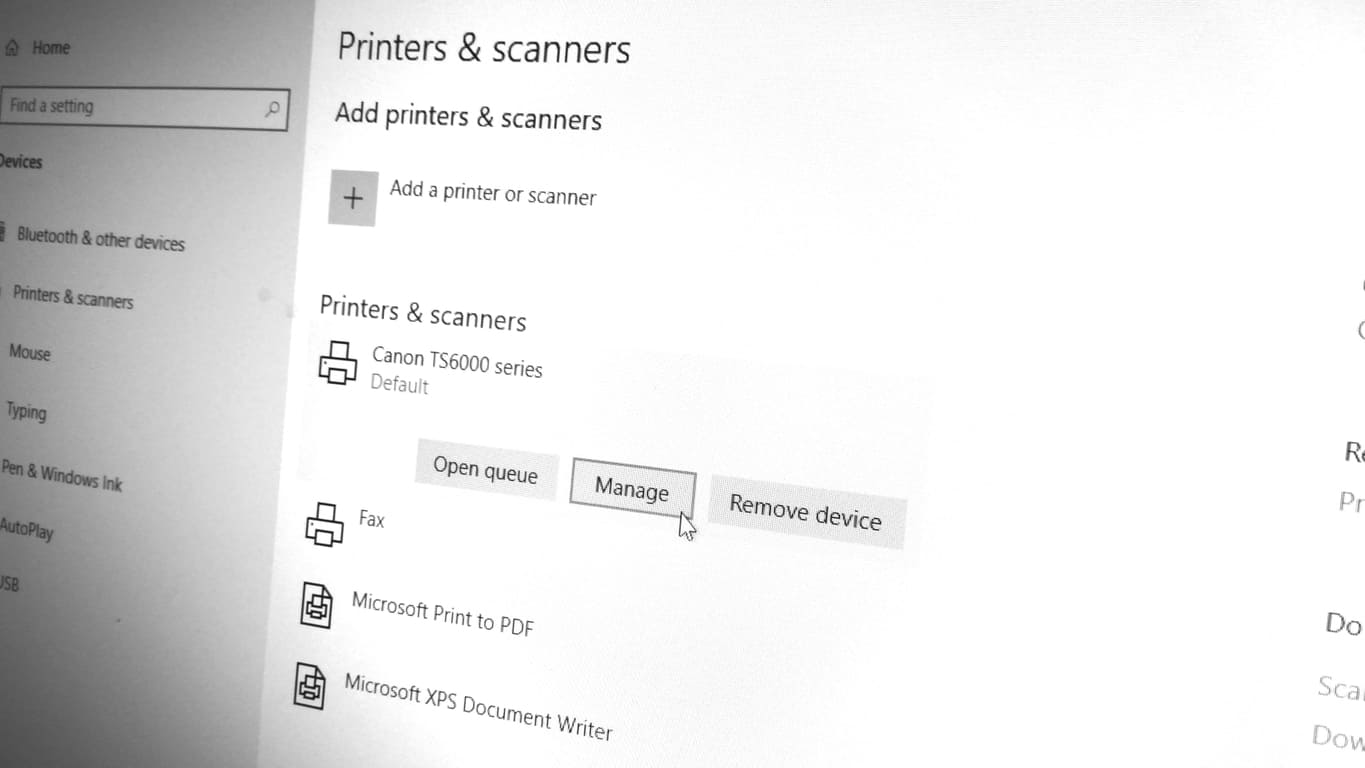
Steps to create Hyper-V virtual switch

1. Create virtual switch using Hyper-V Manager

  1. Creating virtual switches using the Hyper-V virtual manager is easy. Here is how to configure it.
  2. Open Hyper-V Manager on your Windows computer.
    Create-hyper-v-virtual-switch
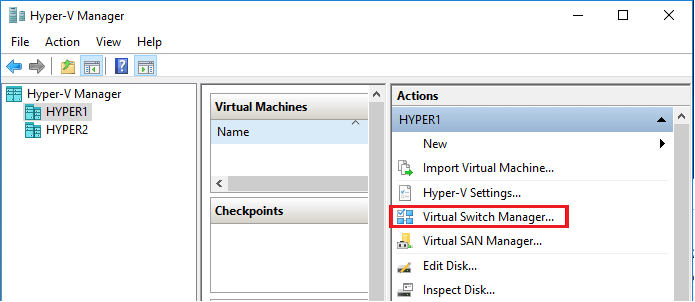
  3. From the right pane click on “Virtual Switch Manager” under Actions. It will open the Virtual Switch Manager wizard.

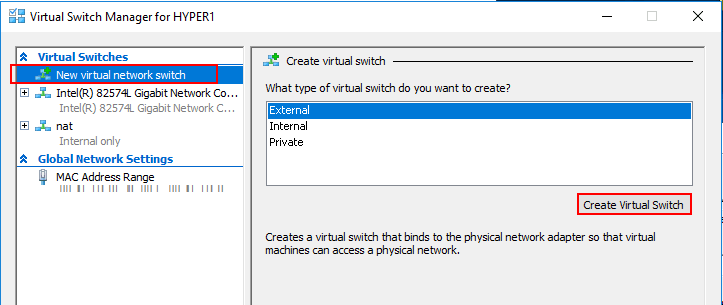
  4. In the wizard, choose the “New virtual network switch” option.
    Create-hyper-v-virtual-switch
  5. Next, select the type of virtual switch you want to create. There are three types of the virtual switch which I have explained below.
    Private Virtual Switch – This switch only allows communications between the connected VMs that are connected to the private virtual switch.
    Internal Virtual Switch – This switch only allows communication between virtual adapter connected to connected Virtual Machines and the operating system.
    External Virtual Switch – This switch allows communication outside the host. This is due to the switch being connected to a physical network adapter installed in the Hyper-V.
  6. Select you prefered type of virtual switch and click on Create Virtual Switch button.
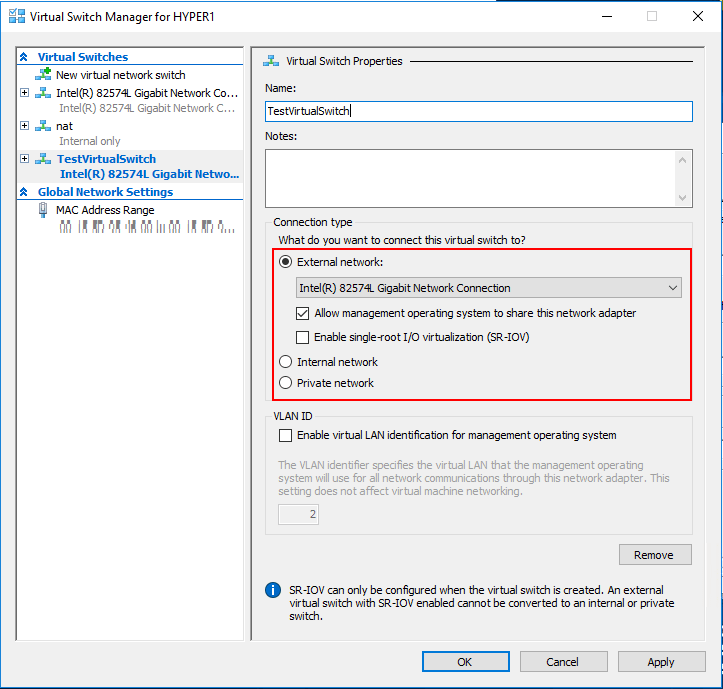
  7. Name your new virtual switch.
    Create-hyper-v-virtual-switch
  8. For Connection Type, select “External Network” and select the network connection from the drop-down menu.
  9. Check “Allow management operating system to share this network adapter” box. These options depend on the virtual switch type selected by the user.
  10. There is an option to enable “VLAN ID” for LAN identification. Leave it unchecked, if you don’t know what it does.
  11. Once done, click on Apply and OK to complete new virtual switch configuration.

Before setting up virtual switches, make sure Hyper-V is installed and running properly. You can follow this complete step by step tutorial on how to install Hyper-V on Windows Home.


How to fix the Hyper-V Error applying hard drive changes


2. Create Hyper-V virtual switch using PowerShell

Configure Hyper v virtual switch

  1. One advantage of using PowerShell to create a virtual switch is the automation it offers in the Hyper-V environment. It also expedites the process by creating virtuals switch with a few commands.
  2. Right-click on “Start” and select Windows PowerShell (admin).
  3. In the PowerShell window, enter the following command and hit enter:
  4. This command will show network adapters. Take note of the names.
    Get-NetAdarpte 
  5. External Switch – The following command creates a new External switch. Make sure to replace switch name and network adapter name accordingly.
    New-VMSwitch -name < switch name > -NetAdapterName < network adapter name > -AllowManagementOS $true
  6. Internal Switch – The following command creates a new Internal Switch. Make sure to replace the switch name and network adapter name accordingly.
    New-VMSwitch -name < switch name > -SwitchType Internal
  7. Private Switch – The following command create a new Private Switch. Make sure to change the switch name and network adapter name accordingly.
     New-VMSwitch -name < switch name > -SwitchType Private
  8. Execute any one of the above commands to create Hyper-V virtual switch.

Conclusion

These are the two ways to create Hyper-V virtual switch in Windows virtual environment. Do let us know your thoughts in the comments below.

RELATED STORIES YOU MAY LIKE:

How to fix Outlook error 0x8004060c

Error 0x8004060c is an MS Outlook issue that arises when users try to send emails. The full error message can vary a little, but this is one example: Task ‘EMAIL ADDRESS’ – Sending and Receiving reported error (0x8004060C): ‘Unknown Error 0x8004060C.’ Thus, Outlook isn’t much good when error 0x8004060c strikes as users can’t send or receive messages with the application. This error is often due to inflated PST files that eclipse the max mailbox storage size for Outlook.

How Can Users Fix Outlook Error 0x8004060c?

1. Use dedicated repairing software for Outlook

If the Outlook app doesn’t seem to respond properly, you might fix it with Outlook email recovery tools that can manage this concern in minutes.

By choosing such automated tools, you will repair multiple problems concerning your email client. More exactly, it helps to fix corrupted PST files and recover email data from your mailbox instantly.

Plus, it can manage other data file errors that may occur and prevent you from accessing the platform to send and receive your emails.

2. Delete Superfluous Emails

First, try deleting superfluous emails wasting storage space. To do that, hold the Ctrl key and select multiple emails. Then press the Delete button to erase them.

The Delete button outlook error 0x8004060c

3. Reduce the Mailbox Size

  1. Outlook 2019 and ‘16 users can try reducing the mailbox size to fix error 0x8004060c with the Mailbox Cleanup utility. Click Files and Tools to open the options shown directly below.The Mailbox Cleanup option outlook error 0x8004060c
  2. Click the Mailbox Cleanup button.
  3. Select the AutoArchive option to archive more emails.

4. Compact the PST Size

  1. Users can also try compressing PST files. Click File and Info in Outlook.
  2. Click the Account Settings button to open a settings window.
  3. Then click the Data Files tab.The Data Files tab outlook error 0x8004060c
  4. Select a PST file to compact.
  5. Click the Settings button.
  6. Press the Compact Now button on the Outlook Data File window.

5. Recreate the Outlook Data OST File

  1. Recreating the Outlook data OST file is another potential fix for error 0x8004060c. First, close Outlook if it’s open.
  2. Launch Run with the Windows key + R hotkey. Input ‘Control Panel’ in the Open box, and click the OK button.
  3. Click the Control Panel > button is shown directly below to select All Control Panel Items. Then click Mail Setup (or Mail) in Control Panel.
    All Control Panel Items option outlook error 0x8004060c
  4. Click the Show Profile button.
  5. Select the profile to fix, and then press the Properties button.
  6. Click the E-mail Accounts button.
  7. Select the E-mail tab on the Accounts Settings window.The E-mail tab outlook error 0x8004060c
  8. Select the Exchange account, and press the Change button.
  9. Deselect the Use Cached Exchange Mode setting.
  10. Click the More Settings button to open further options.
  11. Select the Advanced tab on the Microsoft Exchange window.
  12. Press the Offline Folder File Setting button.
  13. Click the Disable Offline Use button.
  14. Click Yes to confirm.
  15. Then click the Offline Folder File Setting option and OK.
  16. Select Yes on the dialog box that opens.
  17. Select the Use Cached Exchange Mode option, click OK & Next, and press the Finish button.

6. Fix PST Files With Scanpst.exe

  1. Fixing corrupted PST files with the Scanpst utility (otherwise Outlook Inbox Repair Tool) might also fix error 0x8004060c. Press the Windows key + E hotkey, which will open File Explorer.
  2. Then open the MS Office folder in Explorer. The default path for MS Office will be something like: C:Program Files (x86)Microsoft OfficerootOffice16.
  3. Click SCANPST.EXE to open the window shown directly below.Microsft Outlook Inbox Repair outlook error 0x8004060c
  4. Click Browse to select the Outlook PST file to repair.
  5. Click Start to initiate a scan.
  6. Then press the Repair button.

The above resolutions might fix error 0x8004060c for some Outlook users. In addition, the Microsoft Support and Recovery Assistant might come in handy for fixing error 0x8004060c. Click Download Now on the Outlook Support Center page to check out that Microsoft utility.
Posted in Fix

Outlook Action Cannot be Completed: 5 Ways to Fix it

Some Outlook users have posted on the Microsoft forum about an Outlook error. The full error reads: The action cannot be completed. The connection to Microsoft Exchange is unavailable. Outlook must be online or connected to complete this action.

That error arises when users try to set up or utilize a Microsoft Exchange email account within Outlook.

How do I fix the Action cannot be completed error on Outlook?

1. Reregister the DNS

  1. Some users have fixed the action cannot be completed error by reregistering the DNS. Press the Windows key + S hotkey.
  2. Type cmd in the search box, and select Run as administrator under Command Prompt.
  3. Then enter these commands separately and press Enter after each:ipconfig /flushdnsipconfig ipconfig /registerdns ipconfig /release ipconfig /renew NETSH winsock reset catalog NETSH int ipv4 reset reset.log NETSH int ipv6 reset reset.log
  4. Close the Command Prompt.

2. Delete the Outlook Profile

  1. Deleting the current Outlook profile and adding a new one is another potential resolution for the Exchange is unavailable error. To do that, press the Windows key + R hotkey.
  2. Input Control Panel in Run, and click the OK button.
  3. Click Control Panel > in the path bar and select All Control Panel Items.
  4. Then click Mail to open Mail Setup.
    All Control Panel Items option outlook the action cannot be completed
  5. Click Show Profiles to open the General tab.
    Mail Setup outlook the action cannot be completed
  6. Select the profile listed there, and click the Remove button.
  7. Thereafter, close the Mail Setup window.
  8. Outlook will automatically prompt you to set up a new profile after removing the previous profile.

3. Turn Off the Windows Defender Firewall

  1. To check if the Windows Defender Firewall isn’t responsible for the action cannot be deleted error, turn the WDF off before launching Outlook. Press the Windows key + S hotkey.
  2. Input the keyword firewall in the search box, and click Windows Defender Firewall to open the Control Panel applet directly below.
    The WDF applet outlook the action cannot be completed
  3. Click Turn Windows Defender Firewall on or off to open the options in the snapshot directly below.
    Turn off Windows Defender Firewall options outlook the action cannot be completed
  4. Select the Turn Off Windows Defender Firewall option for both the Private and Public network settings, and click the OK button.

4. Turn Off Third-Party Antivirus Utilities

  1. Right-click the Taskbar and select Task Manager.
  2. Click the Startup tab shown directly below.
    Start-up tab outlook the action cannot be completed
  3. Select an antivirus utility, and click the Disable button.
  4. Then restart Windows after removing the antivirus software from the startup.

Some users might need to disable or even uninstall their third-party antivirus software firewalls. To disable antivirus utilities, remove them from the system startup

5. Turn Off Outlook Add-ins

  1. To ensure there aren’t any conflicting add-ins, turn off Outlook’s add-ins. To do that, click File and Options in Outlook.
  2. Then click Add-ins on the left of the window.
  3. Select COM Add-ins on the Manage drop-down menu.
  4. Click the Go button.
    The COM Add-ins window outlook the action cannot be completed
  5. To remove add-ins, select them on the COM window and click the Remove button.

Those are a few of the resolutions users have fixed the action cannot be completed error. In addition, check out the Microsoft Support and Recovery Assistant, which is a handy troubleshooting utility for Outlook and other MS Office application issues.

Users can add that software to Windows 10 by clicking the Download now button on its Outlook Support Center page.

Feel free to let us know the solution that helped you fix this issue in the comments below.

Windows 10 Home apparently forces Microsoft account sign in during setup, unless disconnected from Internet

Part of the setup process of Windows 10 usually involves creating, signing in with a Microsoft Account (MSA,) or signing in with an Offline Account locally without an MSA if you prefer not to use one. Well, according to new reporting from HowtoGeek, the latest version of Windows 10 Home with the May 2019 Update now steps back from that.

Though we haven’t confirmed it ourselves, it is being claimed that the latest stable versions of the May 2019 Update no longer automatically provides an alternate option for local sign-in during the first time set up process. Apparently, the option to create an Offline Account has disappeared entirely from the setup.

Clicking “Next” or “Create account,” during Account set up will automatically prompt for an MSA or Skype name. As HowtoGeek points out, clicking “Learn More” on the following set up pages will instead come up with the following disclaimer, telling users to create an MSA anyway, and then remove it in settings.

“If you’d prefer not to have a Microsoft account associated with your device, you can remove it. Finish going through Windows setup, then select the Start button and go to Settings > Accounts > Your info and select Sign in with a local account instead.”

We’ve reached out and asked Microsoft for a comment on this issue. However, for now, it would appear that the only way to bring back the classic option to use an Offline Account (and not use an MSA) would be to disconnect a PC from the internet during set up.

That can either be done by disabling WiFi or unplugging the Ethernet cable. This will force the setup into an error code, and you can then “Skip” the process of creating an MSA, and see the old Offline Account option.

Xbox Game Streaming app shows up on the Google Play Store, but you can’t download it yet

As the public beta for Microsoft’s Project xCloud game streaming service is about to kick off in the US, UK and Korea, the Xbox Game Streaming (Preview) app for Android phones has showed up on the Google Play Store (via Windows Central). The app isn’t available for download yet, but Android users can still add it to their Wishlist.

According to the app description, the Android app will support streaming games from Microsoft servers as well as from your own console. Microsoft said last week that only 4 games (Halo: 5 Guardians, Gears 5, Sea of Thieves, and Killer Instinct) will be available initially during the Project xCloud public beta, but the new Console streaming feature that Microsoft should start testing you will allow Xbox One owners to stream any game they own to their Android phone or tablet.

We still don’t know when Microsoft plans to kick off the public beta for Project xCloud, but an announcement is likely coming very soon. As for the Console Streaming, the network test for this feature is now live in the latest Xbox One preview builds for Preview Alpha and Skip Ahead Insiders, and the feature should be available soon for select Xbox Insiders.

These are definitely exciting fans for Xbox fans, though iOS users may be out of luck for now. Microsoft previously said that Project xCloud will only support Android phones and tablets at launch, and iOS support is still unclear for Console Streaming.

Microsoft partners with Novartis to bring AI to the next generation of medicines

Microsoft is partnering with Novartis, as Switzerland based pharmaceutical company, to use use artificial intelligence to improve drug discovery. The company aims to use AI to enhance research into developing new treatments for many of the health issues that are still without a cure.

Microsoft says that the partnership will help provide solutions to challenges when it comes to drug development, including research, trials, manufacturing, and even finance. The two companies can also address other challenges such as increasing the efficiency of analyzing huge sums of data and allow associates to easily share each others’ work.

In the announcement video, Microsoft CEO Satya Nadella explains:

“That’s why I’m so optimistic about this strategic partnership we’re announcing today with Novartis, which brings together the life sciences expertise with the power of Azure and Microsoft AI. Together we will work to answer some of the most challenging questions facing the life sciences industry today.”

Data scientists from Microsoft will work with Novartis research teams to investigate new ways on how AI can be used in three different areas. The first is to address challenges for personal treatment for macular degeneration, a disease that leads to irreversible blindness. Second, the companies want to look into using AI to increase the efficiency of manufacturing new gene and cell therapies for those with acute lymphoblastic leukemia. And lastly, they will work on ways to use neural networks to generate, screen, and select promising models to help improve the time it takes to create new medicines.

In addition to this partnership, Microsoft also worked with Novartis in 2016 in the past to help doctors access multiple sclerosis using the Kinect. The more recent partnership definitely makes a lot of sense, especially as Microsoft pushes to try to be the leader when it comes to AI advancements.

What do you think of the partnership? Feel free to drop a comment down below.

If you’re on Windows 10 1903 and your printer is broken, here’s what you need to do

Microsoft has acknowledged that some users running the latest version of Windows 10—the May 2019 Update—have been experiencing issues preventing them from using wireless printing. The company says it’s working on a fix for the issues, but has also provided temporary workarounds for users to try in the meantime.

Microsoft’s Windows Health Dashboard notes the issues arose in version 18362.357, causing print jobs to be canceled or failing altogether. The dashboard also mentions that affected devices could include older versions of Windows 10 dating back to version 1607 in addition to Windows 8.1, Windows 7 SP1, and Windows Server.

The company says users should be able print the file after the first error, but that a restart could work if the failure is persistent. If all else fails, it also notes that those using the v4 print driver might be able to install v3 to correct the issue.

The company says that it is “working on a resolution” for the issue and “will provide an update in an upcoming release.” Hopefully it will get sorted out sooner than later.

Are you experiencing issues like this on your Windows 10 machine? Let us know in the comments area down below.

Sony’s PlayStation Now gets more AAA games and a big price cut to compete with Xbox Game Pass

If Sony pioneered video game streaming with its PlayStation Now service back in 2014, the company is apparently taking the new competition from Google Stadia and Microsoft’s Project xCloud pretty seriously. Today, the Japanese company announced some big changes for PlayStation Now, including a significant price cut, which affect both current and new subscribers.

Starting today, the subscription service currently available on PlayStation 4 and Windows will cost $9.99/month (previously $19.99), or $59.99 yearly (previously $99.99). The new $9.99 monthly price is now in line with Xbox Game Pass and Google Stadia Pro, though Sony wants to stay competitive by adding new blockbuster games to the PlayStation Now catalog every month.

“We currently have the largest game library of any console game subscription service, with more than 800 games available. Starting today, we’re adding more blockbuster content that includes some of the most highly played and critically acclaimed PS4 games ever,” the company said today. The PlayStation 4 exclusives God of War, Uncharted 4: A Thief’s End, inFAMOUS Second Son, along with Rockstar Games’ GTA V are joining the catalog today and will be available through January 2, 2020. Going forward, Sony said that it plans to make more “marquee games” available in PlayStation Now for a limited period.

If adding more blockbuster games and PS4 exclusives will be important to make the service stand out, Sony is also about to kick off its first global marketing campaign for PlayStation Now. You can watch the first TV spot below:

Five years after its initial debut in the US, PlayStation Now is now available in 19 territories and 70% of the PS4 user base, the company said today. Earlier this year, Sony revealed that PlayStation Now had reached 700K subscribers worldwide, and this new price cut may push more PS4 owners to check out the service. Sony also announced this summer that it had sold more than 100M PlayStation 4 units worldwide, so the company is definitely well-placed to become one of the biggest players in the emerging cloud gaming market.

Microsoft will soon block more files extensions on Outlook on the web

In a move that appears to be focused on security, Microsoft’s Outlook on the web will be increasing the number of blocked file extensions that can be accessed through the online email service.

Last week the company explained in a post on its Exchange Team Blog, that its BlockedFileType property will now be “adding several additional file extensions.”

For those interested, the following file extensions being added to the list are as follows:

“.py”, “.pyc”, “.pyo”, “.pyw”, “.pyz”, “.pyzw”

“.ps1”, “.ps1xml”, “.ps2”, “.ps2xml”, “.psc1”, “.psc2”, “.psd1”, “.psdm1”, “.cdxml”, “.pssc”

“.appref-ms”

“.wsb”

“.cer”, “.crt”, “.der”

“.jar”, “.jnlp”

“.appcontent-ms”, “.settingcontent-ms”, “.cnt”, “.hpj”, “.website”, “.webpnp”, “.mcf”, “.printerexport”, “.pl”, “.theme”, “.vbp”, “.xbap”, “.xll”, “.xnk”, “.msu”, “.diagcab”, “.grp”

Microsoft is assuring users that the newly blocked file extensions were rarely used by organizations and shouldn’t affect most of its user base. Going forward though, anyone who sends or received any of the above file extensions through attachments will relieve a notification that will not be able to download the attachment.

However, for any person or organization fearful of being accidentally blacklisted, Microsoft does offer a manual whitelist ability for file extensions to be added to AllowedFileType lists with the following script:

$policy = Get-OwaMailboxPolicy [policy name]
$allowedFileTypes = $policy.AllowedFileTypes
$allowedFileTypes.Add(“.foo”)
Set-OwaMailboxPolicy $policy -AllowedFileTypes $allowedFileTypes

Users can also leverage the following shortcut, Set-OwaMailboxPolicy -Identity “<Policy Name>” -AllowedFileTypes @{Add=”.foo”}

Lastly, for anyone looking to salvage their file extensions from Microsoft’s predetermined blacklist, users can apply the following script to bump the file extensions out of lock and key in the future.

$policy = Get-OwaMailboxPolicy [policy name]
$blockedFileTypes = $policy.BlockedFileTypes
$blockedFileTypes.Remove(“.foo”)
Set-OwaMailboxPolicy $policy -BlockedFileTypes $blockedFileTypes

If, you’re still confused by the change or wondering why a certain file extension was added to the Outlook on the web’s blacklist, read the company’s individual explanations on their inclusions here.

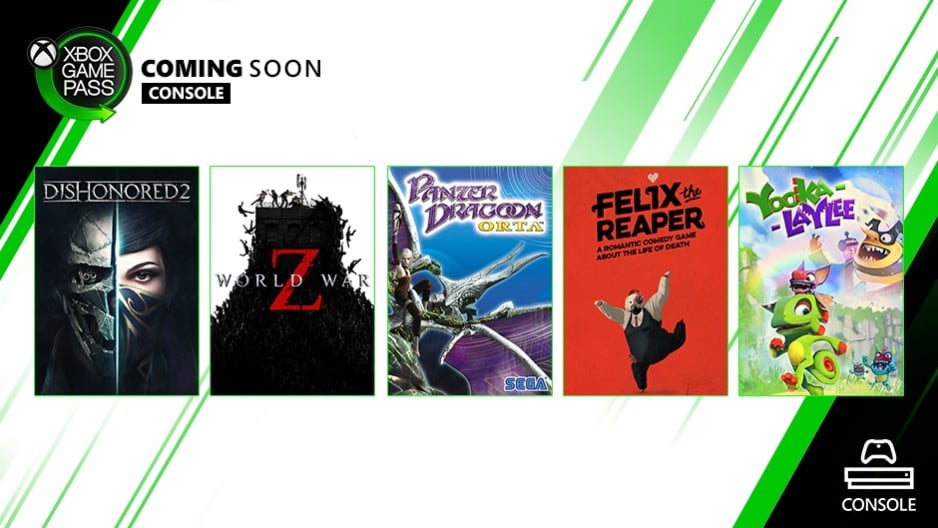
Dishonored 2, World War Z, and Fallout: New Vegas are coming to Xbox Game Pass for console this month

Microsoft has just announced the next games coming to Xbox Game Pass for Console in October. Following Doom, Wolfenstein II: The New Colossus, Fallout 4, and Prey, Dishonored 2 will be the next Bethesda game to join the catalog on Thursday, October 3. While it’s a bit surprising that the original Dishonored game isn’t coming first to Game Pass, the sequel received the same level of critical acclaim, and you should really check it out if you enjoy steampunk universes and games with stealth elements.

Five other games will be coming to Xbox Game Pass in October, and on October the 10 the service will welcome the co-op third-person shooter World War Z and the open-world platform Yooka Laylee. Three other games will follow on October 17 with the Xbox 360 games Fallout: New Vegas and Panzer Dragoon Orta, as well as Felix the Reaper, a new 3D puzzle adventure game that will premiere on Game Pass.

Microsoft will likely announce more games coming to Xbox Game Pass for Console and PC later this month, and here comes our reminder about the great limited-time discount on Xbox Game Pass Ultimate. For just $2, you can get two months of Xbox Game Pass Ultimate, which includes Xbox Game Pass for Console, Xbox Game Pass for PC, plus Xbox Live Gold.

Xbox Game Pass Ultimate

How to Use OneDrive Personal Vault

Yesterday, Microsoft released the OneDrive Personal Vault to everyone. Personal Vault is a free new security feature for Office 365 subscribers, but all OneDrive accounts come with limited use of Personal Vault. OneDrive Personal Vault was announced back in June 2019 but is now generally available. OneDrive Personal Vault is a special folder within OneDrive where you can lock files and/or folders with a PIN, biometric authentication, or through SMS and email authentication. If you have a Windows 10 PC, OneDrive will automatically sync Personal Vault files to a BitLocker-encrypted hard drive.

At this time, OneDrive Personal Vault is available free for Office 365 subscribers and Windows 10 users using OneDrive’s free or 100 GB plan are restricted to storing only three files in a protected folder. Microsoft has a list of OneDrive free and paid subscription plans. At some point, Microsoft plans on making a OneDrive Personal Vault icon available within your OneDrive folder, making it easier to locate on your Windows 10 PC. Microsoft has a list

For now, here’s what you need to do to start using OneDrive Personal Vault.

1. Log in to your OneDrive account online

2. In the upper right-hand corner, Go to Settings > Options

3. From the left-hand pane, choose Personal Vault and Manage how you sign into Personal Vault

From there, you can choose your recovery email and phone number you wish to use. You can download the OneDrive on Android or iOS to manage your security options. Other options include adding how you are notified of changes to your Personal Vault files or folders and disabling Personal Vault. Below is the sign-in process for OneDrive Personal Vault on an Android smartphone.

Additional security options are available to manage how you sign in to OneDrive and other apps using your Microsoft Account. OneDrive Personal Vault will automatically sync to your OneDrive folder on your Windows 10 PC.

Microsoft 365 Family
Price:
$99.99


Microsoft 365 Personal

Did your Xbox Gamertag change by itself? Here’s why

Xbox is a video gaming brand created and owned by Microsoft which represents a series of video game consoles developed by Microsoft.

Users have to buy one such console, and based on an account they create, they can then securely log in, buy and play videogames.

Their account is represented to others through the avatars and the Gamertag that they have.

Unfortunately, some users have reported that their gametag has changed by itself.

So my gamertag changed by itself to some random generated bs. Anyone had this happen, or know what could have caused it?

Most users describe the issue in the same way apparently.

It would seem that while playing, they were suddenly logged out, and when they logged back in, their gametag was changed.

What can cause sudden gametag changes?

1. Your gametag is offensive or violates several rules

There is a change you created a Gamertag that has been determined to violate the Terms of Use or Code of Conduct.

If that’s the case, know that the system will automatically choose a new Gamertag for you.

The most painful part of this entire issue is that you then have to pay $9.99 to change your Gamertag.

2. Someone reported your Gamertag

One thing that you need to know is that your Gamertag isn’t necessarily detected by Xbox itself.

It can also be reported by other players you play with via the Xbox Enforcement feature.

You too can visit the site to whether your account was banned from here or not, and for what reason.

If it doesn’t show up under your enforcement history then you may have signed into the wrong account.

Keep in mind that maybe your Gamertag may seem normal in your native language, but may be offensive in another.

Not all Gamertag reportings may be valid

Many of the users complaining on the forums about getting their Gamertag changes think the Xbox Enforcement system is abusive.

hey guess what? Mine was “baguetteavocat” and it deleted mine. What part of that name violates ANY rule??

One thing about the Xbox Enforcement feature is that no one knows for sure if your reports are actually verified by hire-ups.

This means that someone could report your Gamertag as potentially offensive even if it isn’t.

As such, one good piece of advice would be to take a screenshot of your current Gamertag.

Then, in case this issue ever happens to you, you can then use the screenshot as proof when contacting Xbox support.

Whether this issue will still be a problem with the launch of Project Scarlet, only time will tell.

Does your Dell PC get a boot error? Here’s what to do

Dell is one of the biggest multinational computer technology companies that develops, sells, repairs, and supports computers.

Their computers are well-known around the world for their quality.

Unfortunately, not every company has a perfect record.

Dell users have been reporting on the official Microsoft forums that they are sometimes receiving error messages on boot.

For the last 2 weeks I have been getting the following message on system start up: “Checking media (fail)”. The message appears twice then the system starts normally and I haven’t noticed any problems with any of the applications/programs. I did not install new software before this problem started and did not make any other changes that I can recall.

Apparently, this problem only seems to be common among users that have Dell PCs.

How to get rid of the media check error when booting Dell PCs

Change the boot priority order on your PC

You must keep in mind that the Boot Manager needs to run first in order to avoid the error.

As such, you need to follow these steps:

  1. Boot your PC
  2. Press F2 right when the Dell Logo pops up
  3. Use your arrow keys to move to the tab named Boot
  4. Select, with the arrow keys so that the text named UEFI Boot
  5. Navigate to the bottom, there you should be able to see Windows Boot Manager
  6. Press F5 or F6, to move it up and down the list until you arrange your boot settings in this particular order:
    1. Windows Boot Manager
    2. UEFI Onboard LAN IPv4
    3. UEFI Onboard LAN IPv6
  7. Press F10 to reboot your system

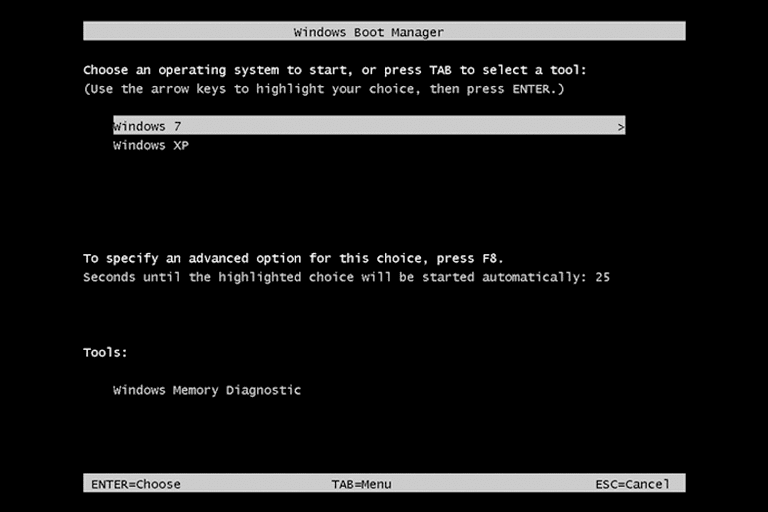
Windows Boot Manager

If for some reason you are unable to find Windows Boot Manager in the list, you must do the following:

  1. Boot your PC
  2. Press F2 right when the Dell Logo pops up
  3. Use your arrow keys to move to the tab named Boot
  4. Change SATA option from Rapid Store technology to AHCI
  5. Windows Boot Manager should now appear in UEFI menu
  6. Move Windows Boot Manager to the first position in the list
  7. Go back to the previous menu and revert SATA to Rapid Store technology
  8. Exit and save settings
  9. Reboot

By following these steps, your Dell PC should now boot without that annoying message showing up.

RELATED STORIES YOU SHOULD CHECK OUT:


Glyph launcher error 1034? Try these solutions

Glyph is a digital gaming platform that offers a  lightweight digital hub for gamers. However, some users have reported Glyph launcher error 1034 when trying to launch a game.

This error can occur with any game including Trove, Archeage A etc. The reason for the error can vary depending on the game.

If you are also troubled this error, here are a couple of troubleshooting tips to help you resolve Glyph launcher error 1034 in Windows computers.

Step to fix Glyph launcher error 1034

1. Use a different network

Glyph game wont launch

  1. Some users have reported that connecting to Glyph using a different network has helped them resolve the error.
  2. If you don’t have an alternate network to use, use your phone.
  3. Turn on Hotspot on your smartphone.
  4. Connect your computer to the hotspot.
  5. Now try signing into Glyph and launch the game.
  6. Check if the launcher error 1034 is resolved.

Top 5+ game booster software for Windows 10


2. Use Glyph’s standalone installer

  1. If you are using Glyph from the Stream interface, try using the standalone Glyph installer.
  2. Reportedly, some users were able to log in and play the game without any error while using the Glyphs standalone installer.
  3. Download the Glyph installer and install the app.

3. Run Glyph as administrator

  1. Open file explorer and navigate to the Glyph installation directory:
    C:\Program Files (x86)\Glyph
  2. Right-click on GlyphClient.exe and select Properties.
  3. Click the Compatibility tab.
    Glyph launcher error 1034
  4. In the Settings section, check the “Run this program as an administrator” box.
  5. Click Apply and OK to save the changes.
  6. Now open the installer again and check if the launcher error 1034 is fixed.

4. Add Glyph as an exception to Firewall

  1. Press Windows Key + R to open Run.
  2. Type control and click OK to open the Control Panel.
  3. Go to System and Security > Windows Defender Firewall.
    Glyph launcher error 1034
  4. From the left pane, click on “Allow an app or feature through Windows Defender Firewall” option.
  5. Click on Change settings.
    Glyph launcher error 1034
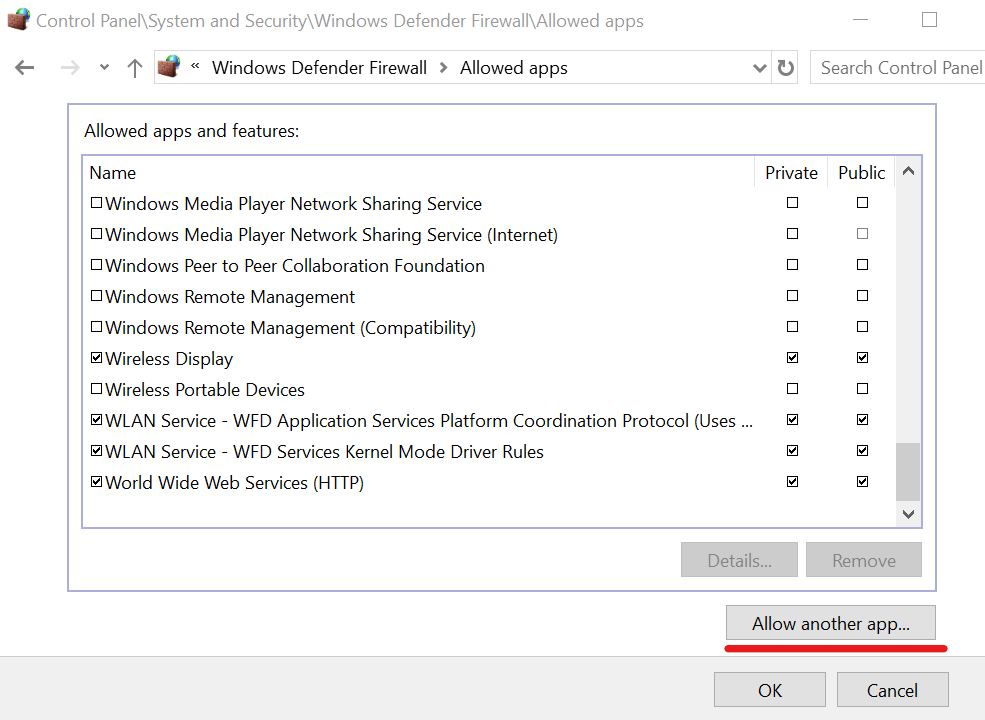
  6. Choose “Allow another app” button.
  7. Click the browse button and navigate to the following location:
    C:\Program Files (x86)\Glyph
  8. Click on Add.
    Glyph launcher error 1034
  9. Make sure you check both “Private” and “Public” box.
  10. Click OK to save the changes.
  11. Make sure you disable any third-party firewall that comes with the Anti-virus in case it is active.
  12. Relaunch Glyph and check if the error is resolved.

5 Check Glyph for updates

  1. This error was associated with an older version of Glyph.
  2. Check if you have the latest version of Glyph installed.
    Glyph game error
  3. Launch Glyph and click on Settings.
  4. Select the General tab from the left pane.
  5. You should see the version information at the bottom.
  6. Compare the information with the latest available version of Glyph.
  7. If you don’t have the latest version installed, you may have to uninstall the current version and install the newer version.

Reinstall Glyph

  1. Press Windows Key + R to open Run.
  2. Type appwiz.cpl and click OK.
  3. Select “Glyph” and click on Uninstall.
    Glyph launcher error 1034
  4. Once uninstalled, you need to delete the local app data folder.
  5. Open File Explorer and navigate to the following location:
    C
    :\Users\USERNAME\AppData\Local\
  6. Delete the Glyph folder.
  7. Download and install the new version of Glyph from the official link.

Conclusion

The Glyph launcher error 1034 can occur due to several reasons, but we have tried to cover as many fixes as possible. Follow these steps and let us know which fix helped you resolve the error in the comments.

RELATED STORIES YOU MAY LIKE:

Can’t use the phone companion app? Try this

Connecting your phone to your PC has its perk, such as the ability to transfer photos in bulk fast.

The problem is that connecting these two devices is no longer just a simple matter of plugging your phone into one of your PC‘s ports.

Now you have dedicated apps that manage these tasks all the more easier.

For example, you have the Your Phone Companion – Link to Windows for your phone, and its PC equivalent.

The problem is that some users are claiming to have problems with this app:

I cant connect my Android (Xiaomi Redmi 4A) phone with my laptop(win10+insider program) through “Your Phone” App.{…}. But the problem is it just shows only my phone name and on the front page ita shows send notification

Apparently, either no notification would appear at all, or a large notification would appear on PC stating that

We need your permission to connect and access data on your phone. Please check your phone and tap allow

The problem is, nothing happens when you press the Send notification button.

It would seem that there are plenty of people with this problem.

Additionally, users should know that this seems to be most prevalent with Xiaomi phones.

Because of this, many solutions were found, each addressing various aspects of the problem in particular.

How to connect your android devices to your PC via My phone

1. Check to see if the two machines recognized each other

When you connect your android phone to your PC, you should receive a notification from the Microsoft Apps app on your Android saying that your phone and PC are connected.

In case you don’t see the notification, check whether or not notification permissions are enabled for Microsoft Apps.

2. Check to see if your laptop and your phone are on the same WIFI network

This solution is pretty straightforward, as you need to make sure both devices are on the same WIFI to be able to connect.

This is also a common solution for most data transfer apps that share a link via WIFI.

3. Make sure both your Android and PC have the latest version of their respective apps

You can set up your phone to update all installed apps whenever an update is available.

However, if you’re concerned about your mobile data, you can set it up to do it automatically as soon as it connects to a WIFI network.

As for your PC, check out this neat guide on how to update Windows 10 apps automatically.

Your Phone App

How to fix Outlook’s operation failed attachment error

Some MS Outlook users have said in Microsoft forum posts that an operation failed error arises when they try to open attachments in messages or send emails. The full error messages states: The operation failed. An object cannot be found. As a consequence, users can’t open attachments or send messages with Outlook.

How can Users Fix the Operation Failed Error?

1. Check Outlook Isn’t in Compatibility Mode

  1. First, check that the Run this program in compatibility mode option isn’t selected for Outlook. Right-click an Outlook icon on the desktop or in File Explorer to select Properties.
  2. Select the Compatibility tab shown in the image directly below.
    Compatibility tab outlook the operation failed attachment

  3. Deselect the Run this program in compatibility mode setting if selected.
  4. Select the Apply option.
  5. Click the OK button to exit the window.

2. Update Outlook

Some users confirmed in August 2019 that recent Outlook updates fix the operation failed error. So, check for updates by clicking File > Office Account ( or Account). Then click Update Options and Update Now to update the application.

Update Now option outlook the operation failed attachment

3. Set Up a New User Profile

  1. The operation failed error can be due to corrupted Outlook profiles. To set up a new Outlook profile, launch Run (press the Windows key + R hotkey), enter ‘Control Panel’ in the Open box, and click OK.
  2. Click Mail in the Control Panel.
  3. Press the Show Profiles button on the Mail Setup window that opens.
  4. Click the Add button.
  5. Enter a profile title in the text box, and click the OK button.
  6. Enter the required email account details in the Add Account window.
    Add Account window outlook the operation failed attachment
  7. Click Next to go through the rest of the account setup wizard.

4. Clean Boot Windows

  1. Conflicting software, such as antivirus utilities, can be another factor behind the operation failed error. To remove startup software and services, press the Windows key + R keyboard shortcut.
  2. Enter ‘msconfig’ and click OK to open the System Configuration utility.
  3. Click the Selective startup radio button, and then select the Load system services and Use original boot configuration options.
    The Selective startup options outlook the operation failed attachment
  4. Deselect the Load startup items check box.
  5. Click the Hide all Microsoft services setting on the Services tab.
    The Services tab outlook the operation failed attachment
  6. Press the Disable all button to deselect third-party services.
  7. Click Apply and OK.
  8. Select the Restart option on the dialog box window that opens.

5. Repair Outlook’s Data File With Scanpst.exe

  1. Outlook’s PST data file might be corrupted, which users can repair with Scanpst.exe. To do that, press the Windows key + E hotkey.
  2. Open the Office folder in File Explorer. The default path for Office 2019/2016 will be: C: > Program Files > Microsoft Office > root > office16.
  3. Click SCANPST.EXE to open the Outlook Inbox Repair Tool.
    The Outlook Inbox Repair utility outlook the operation failed attachment

  4. Press the Browse button.
  5. Then select the default PST file. For Outlook 2010-19, the typical default path for the PST file will be: C:\Users\%username%\Documents\Outlook Files.
  6. Click Start to initiate scanning.
  7. Users can then click Repair if the file needs fixing.

So, there are a few potential fixes for the Operation failed error. Users can also try fixing the issue with third-party Outlook repair software, such as Stellar Repair for Outlook. That isn’t freeware software, but it fixes numerous PST errors.

Posted in Fix

FIX: Sky Go not working in Windows 10/11

Sky Go is a streaming app that enables users to watch Sky content on their Windows desktops and laptops. However, some users have said on the Sky forum that they can’t get that app started. For other users, the Sky Go app might stop playing content. Here are some Windows 10 resolutions that can fix a Sky Go app that doesn’t start or play content.

How can Users Fix Sky Go?

1. Remove CiscoVideoGuard and Reinstall Sky Go

  1. A lot of users have said they’ve fixed Sky Go by thoroughly removing CiscoVideoGuard and reinstalling Sky Go. First, launch Run with the Windows key + R hotkey.
  2. Input ‘appwiz.cpl’ in Run’s Open box, and select the OK option.The Windows uninstaller sky go not working windows 10
  3. First, select CiscoVideoGuard; and press the Uninstall button.
  4. Select the Yes option.
  5. After uninstalling CiscoVideoGuard, select SkyGo and click Uninstall.
  6. Click Yes to provide further confirmation to uninstall Sky Go.
  7. Users will then need to delete remaining VideoGuardPlayer and Sky Go folders. To do that, click the File Explorer button on the Windows 10 taskbar.
    File Explorer sky go not working windows 10
  8. Open this folder path in File Explorer: C: > User > [user folder] > AppData > Local > Cisco.
  9. Select the VideoGuardPlayer folder, and press the Delete button.
  10. Next, open this folder within File Explorer: C: > User > [user folder] > AppData > LocalLow > Cisco.
  11. Right-click the VideoGuardPlayer folder and select Delete.
  12. Open the Roaming folder at this path: C: > User > [user folder] > AppData > Roaming.
  13. There select the Sky Go and Sky folders, and click the Delete button to erase them.
  14. Finally, open the Downloads folder in File Explorer. Select all the SkyGoInstaller files there, and click Delete to erase.
  15. Users might need to empty the Recycle Bin after deleting those folders and files. Click the Recycle Bin on the desktop, and then select the Empty Recycle Bin option to clear it.The Recycle Bin sky go not working windows 10
  16. Restart Windows before reinstalling Sky Go.
  17. Then click Download now for Windows on the Sky Go download page to save the installer for the app. Reinstall SkyGo with the installer.

2. Close Screen Capture Utilities

  1. Screen capture utilities can stop Sky Go playing content. Make sure there aren’t any screenshot programs running by right-clicking the taskbar and selecting Task Manager.
  2. Select a screenshot utility on the Processes tab.Task Manager sky go not working windows 10
  3. Then press the End task button to close the screenshot software.

3. Turn Off Firewalls

  1. Firewalls don’t always mix so well with streaming service apps. To ensure Windows Defender Firewall isn’t blocking Sky Go, press the Windows key + S hotkey, which will open the search utility.
  2. Enter the keyword ‘firewall’ in the search box. Click Windows Defender Firewall to open the Control Panel applet shown directly below.The Windows Defender Firewall applet sky go not working windows 10
  3. Click Turn Windows Defender Firewall on or off, which will open the settings in the snapshot directly below.Windows Defender Firewall options sky go not working windows 10
  4. Select the Turn off Windows Defender Firewall options there to turn off WDF.
  5. Click the OK button.

In addition, try turning off, or even uninstalling, third-party antivirus utilities that might also incorporate firewalls. The support pages for the antivirus utilities will provide further details on how to temporarily disable them. Users can turn off some antivirus software by right-clicking their system tray icons to open context menus that include disabling or turn-off options.

4. Clean Boot Windows

  1. As some programs, such as CiscoVideoGuard, conflict with Sky Go, clean-booting Windows to remove conflicting third-party software and services from the startup might fix the app. Enter ‘msconfig’ in Run and click OK to open the System Configuration utility.
  2. Then select Selective startup, Load system services, and Use original boot configuration on the General tab.
  3. Deselect the Load startup items check box.The System Configuration utility sky go not working windows 10
  4. Select the Hide all Microsoft services option on the Services tab.
  5. Select the Disable all option, and then click Apply > OK.
  6. Click Restart to reboot Windows.

The resolutions above might fix Sky Go so users can watch content with the app. In addition to those fixes, make sure that Windows 10’s short and long date format is dd/MM/YY.

You have changed this message error on Outlook [FIX]

Many people use Outlook to send emails and organize their work. However, many users are encountering major issues in Outlook that affect their job.

Quite a few people encountered this message: “You have changed this message. If you save the changes, the message will no longer be digitally signed. Do you want to save your changes?”

So, people can’t see the digital signature of the emails they reply to. It is worth mentioning that this message appears in the Outlook version for Office 365.

Some people consider this message “normal”, but it is far from it. Also, according to these users, the workaround for this problem is clicking “Yes”. However, the message will no longer be digitally signed – which is the root of the issue.

Receiving this prompt message? Here’s a workaround

Switch to another release channel

  1. Download and install ODT (Office Deployment Tool) and create a configuration update.xml file that specifies the appropriate channel name. Here’s what it should look like:<Configuration><Updates Channel=”Targeted” /></Configuration>
  2. Open Windows Powershell, switch to the folder location where setup.exe resides.
  3. Run the following command:administrator powershell
  4. Start Outlook, and select File > Account.
  5. In the Product Information section, select Update Options > Update Now.
  6. Restart your computer if necessary and startup your Outlook.

Conclusion

The workaround described above will not work in a business environment. These changes must be made for every user, which is tedious work.

Also, it is worth mentioning that this issue appeared after an update. So, users can now only hope for a new patch that will solve the problem and remove this annoying pop-up.

Moreover, you can revert to a previous version of Outlook, but again, this is impractical for a company.

The good news is that Microsoft had acknowledged this issue and they are working to fix it. We still don’t know when they will solve the problem.

The digital signature is important in an office environment, and any issue with it might affect people’s jobs. Even if that’s not the case, clicking “Yes” every time this prompt message appears could become very annoying.

Did you find our workaround useful? Did you know another way to remove this message? Do let us know in the comments section below!

RELATED ARTICLES YOU NEED TO CHECK OUT:

Posted in Fix

Here’s what’s new for Teams in September: Chat filters, cross channel posting, and more

Microsoft Teams is one of the core areas of Office 365, and as the month of September is coming to a close, it is now time to take a look back at some of the new features added to the Teams experience this month. From chat filters, cross channel posting, and more, here’s everything new in Teams in September.

We begin first with all the new chat and collaboration features. First off, there was a new ability to cross-post messages across multiple channels. This feature allows you to get your important words out across different Teams channels, without having to manually visit each one.

Next, there’s an ability to filter through chats. With the new filters in Chat and Teams channels, you can filter our group meetings, one-on-one- conversations, and more. You also can add more filters of your own, such as unread messages. Finally, there was the ability to turn off notifications for channels. As the name suggests, this feature lets you concentrate, and zoom out the noise when working on something important.

Moving onwards, also new are some additional calling features for Teams. Microsoft added a secondary ringer option, which allows Teams users wearing headsets to hear incoming rings on their computers. Other new calling features include enhancements to Cloud Voicemail, reverse number lookup, and the ability to make calls from the Chrome web browser.

Finally, are the enhancements to the meeting experience. On this end, Microsoft added an ability to pin a meeting participant, allowing you to create a custom view of participants in meetings. Other enhancements include the addition of a new notification type which shows if you missed being added to a meeting. Finally, Microsoft made easier for those using Internet Explorer, Safari, or Firefox to join Teams meetings with light-weight meeting capabilities.

These features keep making Teams great and prove that Microsoft is always working to make Teams a better competitor to Slack.

Getting started with Office 365, tips and tricks for small businesses

If you’ve decided to bring your company or small business on board with Microsoft Office 365, congratulations! There’s a lot of value on your new subscription and a lot of ways that you can make your small business more successful. Over the past few months, we’ve been giving all of the Office 365 apps a close look, so now, here is a wide look at some tips and tricks for how you can get started with Office 365.

Check out the Office 365 Dashboard

One of the first things you should check out with Office 365 is the main dashboard. This is the hub for all Office 365 activities. You can find links to your apps, a list of your most recent files, a search bar to reach out to your contacts, and a SharePoint section for other internal files. Like the Start Menu in Windows 10, this is the place to go for everything Office 365 related.

Try out Microsoft Teams and Microsoft Planner

Another element of Office 365 worth checking out is Microsoft Teams. As we’ve highlighted before, this service allows you to collaborate with your employees, regardless of their location. The user interface is very friendly, and there are many apps and services you can integrate with it. By trying out Teams, you can boost your productivity levels, and check up on what your employees are doing, and give them central channels and hubs to chat and stay healthy. You might also be able to replace your internal phone-lines, and PBX platforms with Teams, as Microsoft itself has done.

Secondly, tying in with Teams is Microsoft Planner. This service lets you reduce chaos at work, and create different buckets and lists for tasks. You can track and assign tasks, set due dates, put your details in cards, and create groups to pick tasks that matter. You also can enjoy a chart-view to give you an analytic look at your progress on the days work.

Configure your OneDrive

When you run a small business, storage space is important. Be it emails, photos, invoices, receipts, and other documents, you’ll need to put things in the cloud for easy access. Luckily, with certain Office 365 plans, you can get up to a 1TB of storage on OneDrive. This will allow you to share files both internally and externally, as well as back up PCs to the cloud. You even can save email attachments to OneDrive. And, for collaboration, you also can send Office files via OneDrive links, to make things easier for those within your organization.

Get the most out of Outlook

Emailing is the core part of the modern world, especially if you’re running a small business. Luckily, most Office 365 subscription includes access to Microsoft Exchange. This means you’ll get to create your own domain name, and enjoy the abilities to manage calendars, share meeting times, schedule meetings, and more. Of course, with Microsoft Exchange, you also can recall en email, if you happen to make a mistake. And, you can enjoy all the capabilities of the dedicated Outlook app on Windows or macOS included with Office 365.

Auto Draft

Install the Office apps

Finally, if your subscription allows it, you should download and install the Office 365 apps. Once you’ve downloaded, you can create professional-looking PowerPoint presentations, crunch numbers easily in Excel, and even create newsletters and mass emails in Publisher. Of course, you also can enjoy all the features of Microsoft Word,  and auto recover lost files with the power of OneDrive.

Microsoft Office 365 icons

Other tips and tricks

There’s so much more that you can accomplish with Office 365, and we’ve just touched the surface. You can convert to PDF files in Office, and try out Microsoft’s video streaming service. Your workers can even use MyAnalystics as part of Office 365 to stay healthy on the job. How are you using Office 365 to be successful? Let us know in the comments below.

Gmail Spell Check not Working? Fix it with These Solutions

Gmail is one of the most popular email service providers and offers several features for professionals to compose better emails without using any third-party plugins. That said, several Gmail users have reported Gmail spell check feature is not working while composing emails.

Gmail’s spell check feature is a handy tool that catches any spelling errors and saves you from embarrassing situations when sending professional emails. Now if your Gmail spell checker is not working, it is possible that you have disabled it.

Follow the steps in this article to fix Gmail if it is not checking spelling while composing emails. This is a browser-independent process, so you should be able to use it irrespective of the browser you are using.

How can I fix Gmail spell checker if it’s not working?

1. Enable Gmail spell checker

  1. Login to your Gmail account and click on Compose (+) button to compose a new email.
  2. In the New Message window, click on the three dots (bottom right side).
  3. Select the Check Spelling option.
    Gmail not checking spelling
  4. This will enable the spell checker for your Gmail account.
  5. The spell checker will detect and highlight the misspelled word. To correct the word, click on the highlighted word and select the right word.
    Gmail not checking spelling
  6. Click on Re-Check option to run the spell checker after composing the email.
  7. To change the language, click the small drop-down menu beside Re-check. Here you can select your prefered language for spell check.
  8. Compose a new email and check if the Gmail not checking spelling error is resolved.

If Gmail is not spell checking, it might be because you have disabled the feature. So make sure you activate it again.

2. Enable spell checker for Chrome

  1. If you want to have a spell checker for all the web pages, you visit, including social media pages, enable spell checker for Google Chrome. Microsoft Edge, by default, has the spell checker enabled.
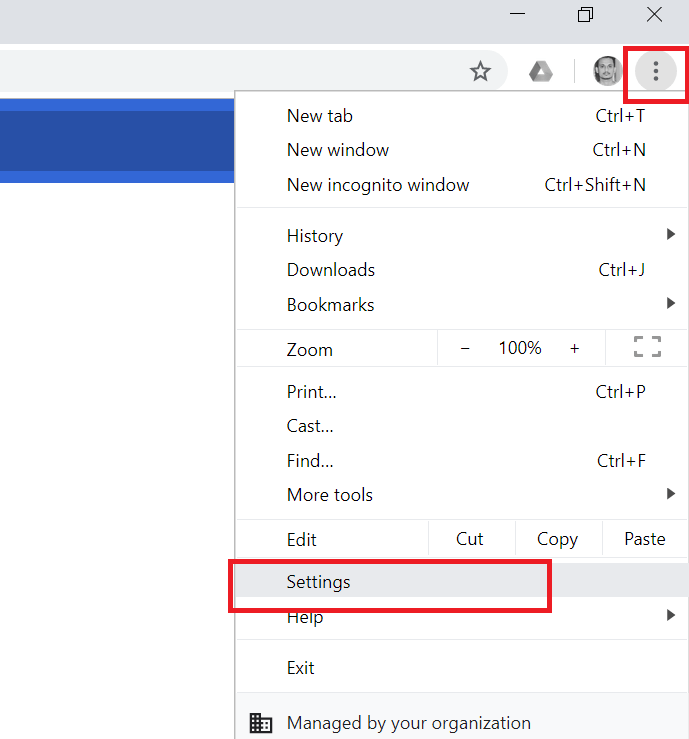
  2. Open Google Chrome and click on the Menu icon ( Three dots, upper right corner).
    Gmail not checking spelling
  3. Select Settings from the options.
  4. Scroll down and click on Advanced to get more settings.
  5. Scroll down to Languages section.
  6. Toggle the switch to enable Spell Check.
    Gmail not checking spelling
  7. Select the Enhanced spell check option. The basic spell check option offers fewer features.
  8. Next, click on Customize spell check option.
    Gmail not checking spelling
  9. Here you can enter any words that you want the spell checker to ignore while checking for spelling errors.
  10. Relaunch the Chrome browser, and the spell-checker feature should be working on all websites now.

Another solution to try if Gmail autocorrect is not working is to enable the spell checker for Chrome. This will make the feature work on all pages you visit.

In this article, we have listed two ways to get the Gmail spell check feature working again. Follow the steps, and you can fix the Gmail not checking spelling while composing emails.

If you are dealing with system encountered problems on Gmail, check our guide to fix it.

Feel free to let us know if you were able to fix the issue in the comments below.

Want to know how to highlight in Paint 3D? Read this guide

Do you want to highlight an important part of your Paint 3D project and don’t know how? We’ve got the answer.

Being able to evidentiate specific parts of an image or text can be extremely useful. This applies especially if you’re trying to create a presentation or focus on specific parts of a complex system when specifying details.

You might know that there are other software options that allow you to do this, but you’re simply not up for the task of dealing with the learning curve.

Well, if that is the case, then you need to know that you can achieve the same results without needing to learn any new software.

You can do so by using the built-in Paint 3D app of Windows 10. Check out how to do it by reading on.


Want to add text to your Paint 3D project? Here’s how to do it


Wondering how to highlight elements in Paint 3D? Here are the steps

  1. Open your Paint 3D project, or open Paint 3D if you’re just starting.
  2. Click the New button to create a new project.
  3. Press the Menu button found on the left side of your screen.menu paint 3D - Paint 3Dhow to highlight
  4. Click on the Insert button to open up the image you want to edit.
  5. Depending on the shape of the element you want to highlight, you will need to choose from a circle or square highlight.
  6. Press the 2D shapes button from the top menu.2D shapes - Paint 3D how to highlight
  7. Choose the shape of your highlight.
  8. Click and drag your mouse on the canvas and surround the area you want to highlight.
  9.  Choose the color of your highlight by clicking the colored box under the Line Type text.
  10. Customize the thickness and the opacity of the circle (or square).

Conclusion

In this how-to guide, we suggested the best way to highlight a part of your Paint 3D project by using the incorporated circle or square shapes inside the program.

If you found this guide helpful don’t hesitate to let us know by using the comment section below.

READ ALSO:

Incompatible Office products are installed on your machine [FIX]

Many people around the world use Microsoft Office products. Unfortunately, many problems affect these tools.

Users encountered the following error message when trying to open an Office app: “Sorry, we can’t perform this action.  Incompatible Office products are installed on your machine. If you have an administrator, please contact them for help.”

microsoft excel error

However, after clicking OK, the message box disappeared, and the program worked properly.

Users reported that the error didn’t affect the tools in any way. Also, this problem appeared on all Office programs when trying to open a file.

Also, it is worth mentioning that the problem appeared in Microsoft Office 2013.

This is an annoying issue in Office, and today we will show you how to fix the problem.

Encountering an error message when opening Office? Try this!

1. Delete cache

Many users encountered that this issue comes along with a high CPU for Microsoft Upload Center. Also, deleting the cache solved both the high CPU problem and the “incompatible Office products are installed on your machine” error.

  1. Open Microsoft Upload Center.
  2. Check the box from Delete files from cache when they are closed.
  3. Click on Delete cached files and then click OK.upload center
  4. Close and restart PC.
  5. Open an Office file to see if the problem persists.

2. Reinstall Office

Another way to resolve the problem is to reinstall Microsoft Office. It is worth mentioning that by uninstalling Office, you will only remove the applications. Your files will remain on your computer.

Also, once uninstalled, you can install Microsoft Office in another way. You can install Office with Click-to-Run, Microsoft Windows Installer (MSI) and Microsoft Store.

Choose the type of installation that best suits you.


Learn everything there is to know about uninstalling Microsoft Office completely!


Conclusion

The “Incompatible Office products are installed on your machine” error message is annoying many users. Fortunately, there are some easy solutions available to solve the problem in no time.

So, delete the cache, and, if this doesn’t work, reinstall Microsoft Office.

However, the error doesn’t affect your Office files. So, you can still use Word, Excel, PowerPoint and other Microsoft Office tools without any worries.

Did our solutions help you fix this annoying issue? Do let us know in the comments section below!

RELATED ARTICLES YOU NEED TO CHECK OUT:

Fix: The password won’t be encrypted when sent Power BI error

Power BI is a popular data visualization BI tool that allows the companies to present their data in a new way. Sometimes, while working with the API in Denodo, you may encounter “The password won’t be encrypted when sent” error.

This error is not common hence there are not many resources on how to fix it. The error seems to occur when the users try to connect to an API in Denodo to Power Bi or similar function as reported in the Power BI community.

I am trying to connect to an API in Denodo to Power BI. I have specified the Authentication as HTTP Basic and have given a login and a Password in Denodo.
While connecting to the Power BI using the HTTP BasicAuthentication I am getting the error as -The password won’t be encrypted when sent

If you are also troubled by this error, here are a couple of troubleshooting tips to help you resolve “the password won’t be encrypted when sent” error in Power Bi.

Steps to fix Power Bi Denodo API encryption issue

1. Check if the action is supported

The password won't be encrypted when sent Power BI

  1. As of writing this, Power bi did not support encrypted password for the web API call.
  2. So, when trying to access the Web API in Denodo to Power Bi, it will reject the request.
  3. Client certificate authentication option in Power Query is one of the most requested option, but Microsoft is yet to include it in Power BI.
  4. You can vote for or check the status of the request for Client certificate authentication on the official page.


2. Use third-party BI tools

The password won't be encrypted when sent Power BI

  1. If the Client certificate authentication is a must, have a look at other BI tools.
  2. Tableau is one of the popular BI tools to offer Client certificate authentication.
  3. Tableau comes with a free trial to test the tool before making a purchase.

Conclusion

To fix the password won’t be encrypted when sent error in Power BI, either you need to wait for Microsoft to add the feature to Power Bi or opt for other BI tools like Tableau. Do let us know which BI tool you prefer the most in the comments.

RELATED STORIES YOU MAY LIKE:

How to open multiple images in Paint 3D?

If you want to know how to open multiple images inside Paint 3D, your search is over.

In today’s how-to article we will discuss how to open multiple images in Paint 3D and combine them into one project.

Doing this properly will allow you to create great art projects and presentations, all from the user-friendly interface of Paint 3D.

Read on to find out the exact steps required.


Want to open more than one image in Paint 3D? Here’s how

Adding the first image to Paint 3D:

  1. Click the Cortana search box from your taskbar -> type Paint 3D.
  2. Click on the first result to open it.
  3. Press the New button to create a new project.
  4. Click Menu -> choose Insert -> navigate to the location of the first image you want to use in the project -> select it -> press Open.insert option Paint 3d - How to open multiple images in Paint 3D
  5. The first image will appear on the canvas.
  6. You can modify the size and location of the image (press the Shift key to maintain the aspect ratio while resizing).

Note: Make sure you place the first image in such a way that you can add the other image/images as well. Once the image is set on the canvas, you will not be able to move it.


Wondering if you can use Paint 3D to convert images to black and white? Try this method


Adding the second image to your project:

  1. Click the Menu button found in the left-upper-side of your screen -> select Insert.
  2. Navigate to the location of the second image you want to use -> select it -> click Open.
  3. Modify the location and size of the second image (press Shift key to maintain aspect ratio).
  4. Repeat these steps for all the images you want to add to your Paint 3D project.

Conclusion

We would love to know if this guide has proven helpful to you. Following the steps presented in this list will surely allow you to add as many images as you want to your Paint 3D project.

If you would like to get into contact with us, please use the comment section found below this article.

READ ALSO:

Is your VMware replication status not active? Try this

If you see the VMware replication status appearing as being not active, even though the VM is configured for replication, you came to the right place.

Having the status of the replication remains inactive, even if the replication process completes successfully can be extremely frustrating for some users.

To add to this initial frustration, even the vSphere Replication Management Server (VRMS) states that the VM is inactive.

This issue can occur in VR environments that use a Network Address Translation (NAT) between the two replication locations, or if a firewall is blocking the network ports required to perform a full replication.

In this fix article, we will explore the best solutions to fix this method once and for all, and change the VMware replication status to its true value.


Here’s how to change replication not being active on VMware

1. Make sure firewall is not blocking the required VR ports

laptop with user and phone - VMware replication not activeYou will need to check your firewall settings to make sure that the 31031 and 44046 ports are not being blocked.

These ports allow your VMware application to connect the two replication locations.

Depending on the firewall service your computer is using, the steps will vary.

If you’re using the Windows Firewall, follow these steps to unblock the ports mentioned above:

  1. Press the Win+X keys on your keyboard -> click Control Panel.
  2. Select System and Security -> Windows Firewall.
  3. Choose the option Advanced Settings and select Inbound Rules from the left-side panel.
  4. Right-click the Inbound Rules -> choose New Rule.
  5. Add the port 31031 -> click Next.
  6. Choose the protocol type (TCP or UDP) -> press Next.
  7. Choose your network type -> Next.
  8. Add a name to the newly created rule and click Finish.
  9. Repeat steps 1-8 of this method and add the port 44046 to the same list.

Want to clone virtual machines in VMware? Here’s how


2. Use an IPsec tunnel between the two replication sites

laptop close-up black - VMware replication not activeIf you’re using a NAT in your VR environment, then you need to exclude all VR components from the NAT.

The best method of communication between all your VR components is either by using an internal or external address.

To create an IPSEC tunnel between the two replication sites, follow these steps:

  1. Open vCloud Air -> click the Gateways tab.
  2. Select the gateway you want to set up an IPsec VPN connection.
  3. Click the option Manage Advanced Gateway Settings.
  4. Choose the gateway name -> right-click -> choose Edge Gateway Services inside the VPN tab.
  5. Check Enable VPN.
  6. Click Add -> complete the entire list of needed information.
  7. Click Ok.

Note: The IPsec VPN connection needs to be created from both of the sites you want to replicate.


Conclusion

In today’s guide, we discussed the best method to try if VMware replication status is not active despite having the right settings.

Please let us know if this guide was helpful by using the comment section below.

READ ALSO:

Paint 3D Guide: How to save and remove stickers

If you’re wondering how to save and remove stickers in your project, your search is now over.

Besides all the common features like drawing in 2D and 3D, readjusting the model, and coloring every part of it to your desire, you can also use Paint 3D to add great-looking stickers.

These colorful stamps can improve your projects with different great looking stickers, that can be added to both 2D and 3D projects. Beyond this, you can also add different textures to your artwork, with just a few clicks.

In this article, we will discuss every aspect of your usage of stickers inside Paint 3D, and we’ll do it efficiently and fast.

Read on to find out more details about this subject.


Here’s how to save a sticker inside Paint 3D

  1. Press the Start button in your taskbar -> scroll the list of programs to find Paint 3D -> click on it to open it.Paint 3D - app inside Cortana search
  2.  Inside Paint 3D -> press the Sticker button found in the menu at the top of your screen.
  3. This will open a Stickers menu on the right side of your screen that contains three tabs – Stickers, Textures, and the Browse button.
  4. Select the Stickers tab -> choose one of the stickers available (or choose the browse tab to upload your own sticker).
  5. After selecting a sticker, click and drag your mouse on the canvas to set it.
  6. Press the checkmark button to the right side to apply it to your canvas.
  7. Press the Menu button from the left corner of your screen -> select Save -> choose the desired location of your file.

Want to curve text in Paint 3D? Here’s how


How to save a sticker in PNG format?

  1. Open your art project inside Paint 3D.
  2. Follow steps 1 to 6 from the first method.
  3. Click the Canvas button from the menu at the top.Canvas option Paint 3D - How to save a sticker Paint 3D
  4. Resize the canvas size -> toggle the button Transparent Canvas.
  5. Click the Menu icon -> select Save as -> click on the Image option.
  6. Browse to the location you want your files to be saved in.
  7. Click the drop-down menu next to Save as type -> choose the option 2D .png.

How to remove stickers in Paint 3D?

laptop on desk black - How to save a sticker Paint 3D
Inside the app:

  1. Click and drag your mouse around the sticker you want to delete to select it.
  2. Press the Delete key on your keyboard to delete the specific sticker.

To remove stickers you saved in Paint 3D:

In order to remove the stickers that you previously created, you will need to follow these steps:

  1. Press the Win+R keys on your keyboard -> copy-paste this link: %localappdata%PackagesMicrosoft.MSPaint_8wekyb3d8bbweLocalState
  2. To run the command, press Enter.
  3. This will open the folder in which your created stickers will be stored.
  4. To delete any of them, right-click it -> select Delete (or select it and press Shift+Delete to remove it permanently).

In today’s Paint 3D guide we explored the best method to save and remove stickers in the software.

We also explained how to find and remove saved stickers from your hard-drive.

Please feel free to let us know if this was helpful in your case. You can do that by simply using the comment section below.

[wl_navigator]

Minecraft Earth begins global release this month, Realms Plus with premium content for $7.99 per month

Minecraft Earth is set to be released starting next month, as announced during the Minecon event earlier today. The game has been in limited closed beta testing for select players on iOS, and more recently Android, for some time now.

The game saw some demo time during Minecon Live with the Minecraft Earth game director Torfi Olafsson and two of the other show hosts showing it in action live. The developers working on the project have not only brought crafting to the table (pun intended) since the game was announced, but also “Adventures”—allowing players to interact with mini games such as the one demoed during the event.

The announcement of the game’s release during the Minecon Live event was very vague on the details, but it’s easy to imagine it rolling out in the game’s main markets, including the U.S., Mexico, U.K., Japan, and of course Mojang’s home Sweden. The game is also expecting to see its first feature update in the spring of 2020.

Minecraft Realms is getting a major upgrade

Another perhaps really exciting announcement during this year’s annual Minecraft event is the new Realms Plus subscription. It will cost the same as the current 10-player-maximum subscription of $7.99, but will “add more than fifty pieces of content” including skins, textures, and worlds according to Fedrick Telenius, the program manager for Realms.

Mojang will be offering a free trial to those who haven’t subscribed to Realms before. Additionally, current members of the 10-player subscription will be upgraded automatically upgraded free of charge.

Which are you most excited about—Minecraft Earth or Realms Plus? Be sure to share your thoughts in the comments area below.