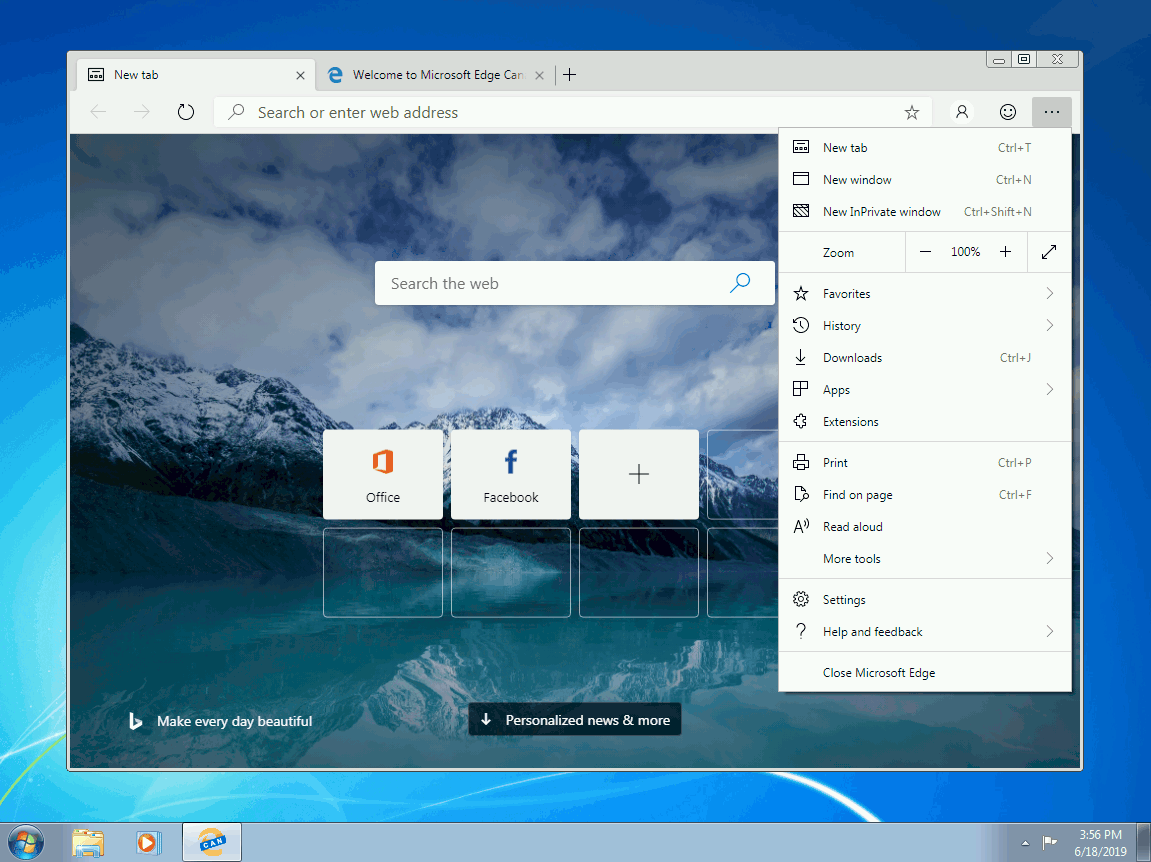
Microsoft Edge Insider Canary channel is now officially available on Windows 7, 8, and 8.1

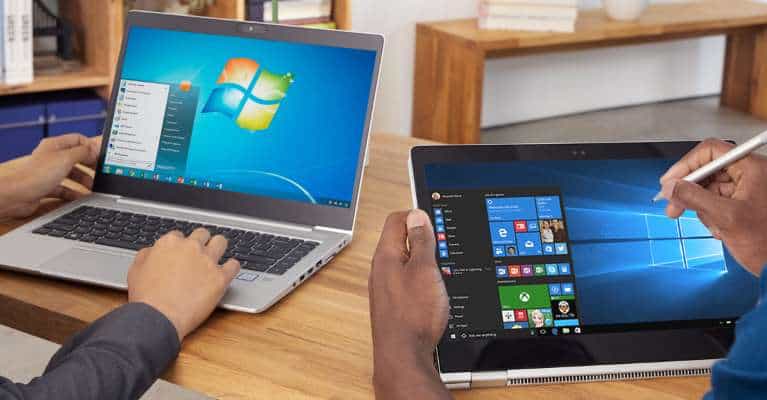
Following the release of Microsoft Edge Insider on macOS, Microsoft has made its new Chromium-based web browser officially available on Windows 7, 8, and 8.1 today. For now, only the Canary channel is available on these older versions of Windows, though Microsoft said today that the Dev channel which gets less frequent updates will be available “soon.”

“Delivering the next version of Microsoft Edge to all supported versions of Windows is part of our goal to improve the web browsing experience for our customers on every device, and to empower developers to build great experiences with less fragmentation,” Microsoft explained today. “Microsoft Edge will have the same always up-to-date platform and the same developer tools on all supported versions of Windows and macOS. This will reduce developer pain on the web, while ensuring all Windows customers have the latest browsing options,” the company commented.

Microsoft also highlighted today that the first Edge Insider Canary builds on Windows 7, 8, and 8.1 have a couple of known issues: Among highlights, dark theme and signing with an Azure AD accounts are currently not supported. The software giant is committed to improve its Edge Insider browser by listening to user feedback, and you can share your thoughts about the new Chromium-based Edge by clicking the smiley face next to the Menu button.

You can download Microsoft Edge preview builds from the new Edge Insider website, where Microsoft also publishes a detailed roadmap with upcoming new features.
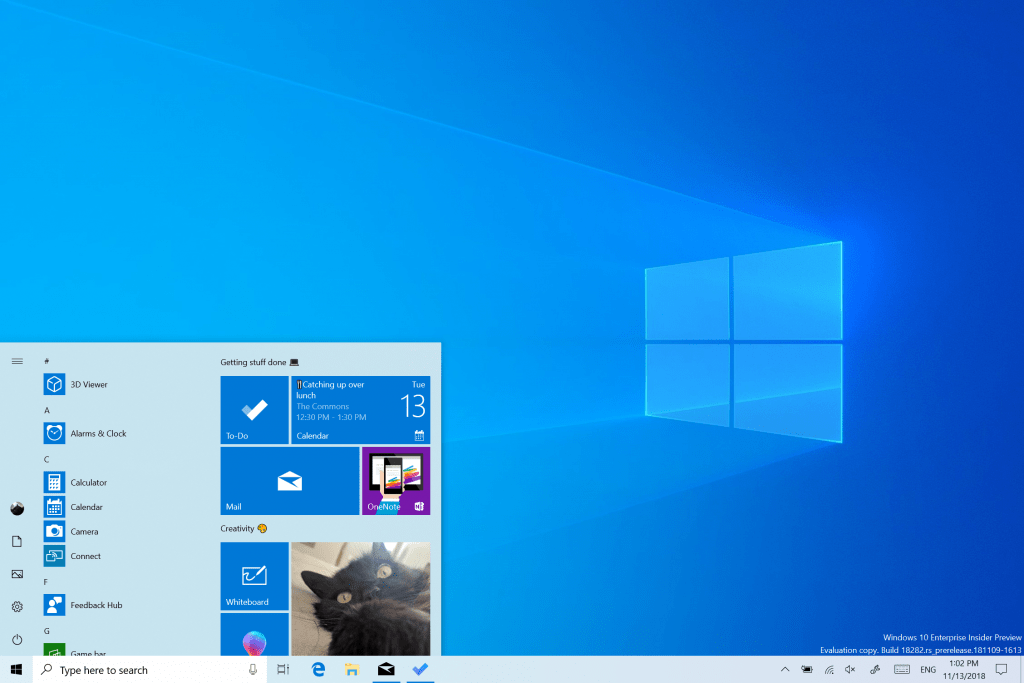
Windows 10 20H1 build 18922 is out with improvements for Language Settings and Feedback Hub

Microsoft has just released another minor update for Windows Insiders on the Fast Ring. The 20H1 preview build 18922 brings a revamped Language Settings page that should be easier to navigate, and Microsoft has also reorganized the language installation page to add some useful descriptions.

Starting with this build, Microsoft is also rolling out a new Find Similar Feedback feature in Feedback Hub: After logging any new feedback, Windows Insiders will be able to browse similar items and even link their feedback to existing contributions from other Insiders.

This new 20H1 build also brings several bug fixes, and it addresses two specific Windows Update issues preventing some Insiders to install recent builds. You can check out everything that’s fixed and still broken in this build below:

General changes, improvements, and fixes for PC

  • We fixed an issue resulting in some Insiders getting Windows Update error 0x80010105 when updating to recent builds.
  • We fixed an issue resulting in some Insiders getting Windows Update error 0xc0000005 when updating to recent builds.
  • We fixed an issue where the Action Center background was unexpectedly opaque in the quick action section.
  • We fixed an issue where if you used the spacebar to switch to a different Focus assist state in Settings, keyboard focus would unexpectedly jump to the Have a Question? Section.
  • We fixed an issue with the Bopomofo IME where the character width would suddenly change to Full width from Half width.
  • We’ve added a tip to the Bopomofo IME settings that Ctrl + Space can be used for toggling conversation mode.
  • We fixed an issue where, when using the Japanese IME with Excel, if you’d turned off Japanese input-mode by clicking the input-mode indicator, the input-mode would revert back to “Hiragana” every time focus moved to another cell.
  • Based on feedback, we’ve updated the Chinese Pinyin IME settings to now refer to Default mode, rather than Input mode.
  • We fixed an issue for some of the Insiders with the updated File Explorer search experience, resulting in suggested results in the search dropdown not responding when clicked. Thanks for reporting this!
  • We’ve made a few small design tweaks to the updated Windows Ink Workspace, including changing the overflow menu button to new use an ellipsis icon. Note – this feature update is still in the process of rolling out.
  • We’re now starting to roll out the updated Settings header again after addressing an issue with the OneDrive entry – appreciate your patience!

Known Issues

  • This update might fail the first time you try to download it with a 0xc0000409 error code.
  • For Home editions, some devices might not be able to see the “download progress %” change on the Windows Update page.
  • There has been an issue with older versions of anti-cheat software used with games where after updating to the latest 19H1 Insider Preview builds may cause PCs to experience crashes. We are working with partners on getting their software updated with a fix, and most games have released patches to prevent PCs from experiencing this issue. To minimize the chance of running into this issue, please make sure you are running the latest version of your games before attempting to update the operating system. We are also working with anti-cheat and game developers to resolve similar issues that may arise with the 20H1 Insider Preview builds and will work to minimize the likelihood of these issues in the future.
  • Some Realtek SD card readers are not functioning properly. We are investigating the issue.
  • Tamper Protection may be turned off in Windows Security after updating to this build. You can turn it back on. In August, Tamper Protection will return to being on by default for all Insiders.
  • We’re investigating an issue where some users are reporting that File Explorer search is rendering in an unexpectedly small area and clicking it results in a crash.

Known issues for Developers

  • If you install builds from the Fast ring and switch to either the Slow ring or the Release Preview ring, optional content such as enabling developer mode will fail. You will have to remain in the Fast ring to add/install/enable optional content. This is because optional content will only install on builds approved for specific rings.

As a little sidenote, the Windows Insider team previously said in February that it would release the first 19H2 to Windows Insiders “later this Spring,” but it looks like this won’t be happening after all. Spring is ending in just two days, and Brandon Leblanc from the Windows Insider team shared on Twitter that there won’t be any news about 19H2 builds this week.

19H2 is expected to be a minor Windows 10 update ahead of the release of 20H1 in the first half of 2020, but 19H2 may well have a much shorter testing process compared to previous releases. We hope the Windows Insider team will soon share more details, but for now you probably shouldn’t get too excited about the upcoming 19H2 update.

Microsoft wants to bring ability to uninstall PWAs from Windows 10 Settings to all Chromium-based browsers

Microsoft remains committed to make Progressive Web Apps (PWAs) first-class citizens on Windows 10 PCs, and the recent switch to a Chromium base for Microsoft Edge already appears to help a lot in that area. Indeed, the new Edge Insider browser makes it possible to “install” PWAs and have them showing up at the top level of the Windows 10 Start Menu.

The point of “installing” PWAs is to have a web app that can be pinned to your taskbar, and this app will open in its own windows without all the “chrome,” by removing all unnecessary UI elements from your web browser. As a result, these PWAs just look like regular apps, as seen below with OnMSFT PWA created with Microsoft’s Edge Insider browser.

You can create a PWA with Edge Insider just by clicking on the ellipsis at the top right of the browser, and then select Apps>Install this site as an app:

Install website as PWA on Edge Insider


As spotted by Windows Latest, PWAs installed via Microsoft Edge now show up in the Apps section of the Windows 10 Settings, right alongside regular UWP and Win32 apps. Edge PWAs also appear in the legacy Control Panel, and they can be uninstalled from both locations. Again, these PWAs behave just like regular apps, and it’s pretty handy to be able to remove them from these familiar places.

It’s now possible to uninstall Edge PWAs from the Settings app or the legacy Control Panel.

PWAs installed via Google Chrome currently don’t have the same hooks to the Windows 10 Settings app and Control Panel, and they currently have to be uninstalled from the PWA’s ellipsis menu. This is something that Microsoft is wanting to change for all PWAs installed via a Chromium browser, as the company explained in a recent Chromium commit discovered by Windows Latest. The bug report is currently labeled as “active,” which means that the changes Microsoft suggested could soon end up in the Chromium open source project and eventually other Chromium-based browsers.

There are no plans for an Xbox Project Scarlett version of the Cyberpunk 2077 video game

With Cyberpunk 2077 due for release during the same calendar year as the next Xbox console (which is currently going by the temporary codename of Xbox Project Scarlett), some had been wondering if the game would also be getting a release on Microsoft’s new console in addition to the current gen Xbox One.

With Project Scarlett apparently being capable of playing games in 8K resolution, it would make sense that the devs behind a title as visually impressive as Cyberpunk 2077 would want it to release on such a device so that their creation could look its absolute best.

Unfortunately, according to an interview with the game’s quest director, Mateusz Tomaszkiewicz, over on GamingBolt, it seems that Cyberpunk 2077 is only currently being developed for the Xbox One, PlayStation 4, and PC.

While disappointing, it is important to note that Project Scarlet will be able to play a large number of video games from the Xbox, Xbox 360, and Xbox One libraries which will likely include Cyberpunk 2077. There’s always the possibility too that an enhanced version of the game could get a next-gen release further down the line.

Tomb Raider, for example, launched on the Xbox 360 but was given a major re-release on the Xbox One in a Definitive Edition that included significant graphical upgrades and all of the previously released DLC. The same could happen with Cyberpunk 2077 though probably not in time with the console launch in 2020.

Would you buy Cyberpunk 2077 on the next-gen Xbox console or are you happy to play it on your Xbox One? Share your thoughts with the community in the comments below and then follow us on Pinterest for more Xbox gaming content.

Cyberpunk 2077
Cyberpunk 2077
Developer:
CD PROJEKT RED
Price:
$29.99

Need a browser to play Travian Legends? Here are our top picks

Travian Legends is an online real-time strategy game that had been released in 2004 by software developer Travian Games. The game is played online, directly through the user’s browser, so no download is required.

Since this is a browser-based game, we are going to present you with the browsers to run Travian.


What are the best browsers for playing Travian?

Opera GX

Opera was launched in 1995 as a direct competitor to Internet Explorer. Opera Software, a Norwegian software company, developed Opera – which eventually became a multi-award winning web browser.

The web browser offers its users Opera Turbo mode, allowing web pages to load and run much quicker than usual. Although Opera does have the multiple tabs option, it’s not as efficient as UR Browser in Travian Legends.

Opera’s main asset seems to be the Bookmarks section though. Bookmarks are very well organized in the left side of the screen, allowing users to have their favorite links right at their fingertips.

Overall, Opera might not be as popular as other browsers on the list, but it still offers decent features that you should definitely check out.

Opera GX

Get the best out of online gaming with especially tailored features that take care of your privacy and create the perfect environment with CPU, RAM and Network limiters.
Free download Download now

UR Browser

UR Browser best browsers for playing travian

The first entry on our list is UR Browser, and what separates this browser from the rest is its focus on privacy and user security. The browser has a built-in ad blocker and anti-tracking protection, so you’ll remain safe from any harmful tracking cookies.

In addition, the browser has built-in virus protection so it will warn you if you download a malicious file or visit a malicious website. The browser also has an advanced Private Browsing mode, so it won’t store or send any of your information to Google.

There are also various features that will reduce your digital fingerprint and protect your privacy even more. Lastly, there’s also a built-in VPN, so you can rest assured that your information is safe at all times.

It’s worth mentioning that UR browser is built on Chromium, so it has the support for same features and extensions that Chrome uses. If you want to play browser games with extra security and privacy, UR Browser is the best choice.

UR Browser

UR Browser

Play web games securely and keep your privacy with UR browser’s built-in ad-blocker and anti tracking protection.
Free downloadDownload now

Mozilla Firefox

firefox best browsers for playing travian

Firefox was first released in 2002 by the Mozilla Corporation, currently being the 2nd most popular web browser on the market.

Mozilla Firefox supports many web standards, including HTML5, XML, XHTML, MathML, SVG 2 (partial), CSS , ECMAScript (JavaScript), DOM, XSLT, XPath, and APNG (Animated PNG) images with alpha transparency.

Regarding the memory usage, Firefox uses a bit less memory than Chrome, which makes it perfect if you’re on a low-end PC or if you want to reduce the memory usage on your PC.

Although it is not as fast as Google Chrome, Firefox will provide you with solid performance while playing browser-based games.

Get Firefox


Find out how UR Browser protects your privacy in this id-depth review


Google Chrome

chrome best browsers for playing travian

Chrome is probably one of the best-known web browsers today. This browser has been developed by Google, and it’s currently the most used browser in the world. Google’s browser has the best JavaScript/ECMA Script support available and was ranked first at the HTML5 web standard test.

Due to these features, Chrome‘s quickness seems best fitted to run games like Travian. If you have a decent PC, you can easily switch between multiple tabs while playing your favorite games.

Other than that, Chrome is fast, reliable and secure, but not as private with user data as our previous entry on the list. Nevertheless, it’s a great browser, and you should definitely try it out.

Get Google Chrome

Install these privacy extensions for Chrome to keep your data private.

We hope that our list of best fitting Travian Legends browsers could help you decide which web browser you’d prefer using. If this article helped you, leave a comment in the comment section below.

READ ALSO:

Windows 10 KB4503327 brings black screen issues for many

Microsoft recently updated its support page that shows the current status of active issues affecting Windows 10 versions.

The Redmond giant released Windows 10 cumulative update KB4503327 on this month’s Patchday. Now, the tech giant confirmed that the update introduced a bug that may lead to black screen issues on startup.

Microsoft confirmed that this bug targetted various versions of Windows such as Windows 10 Enterprise LTSC 2019, Windows 10 version 1809, and Windows Server 2019. 

You can visit the official web page to read more details regarding the issue.

Here’s a quick workaround

Thankfully, Microsoft suggested a quick workaround to resolve the black screen issues. The company suggested users should wait until their systems gets stuck on the black screen.

Then, they can force restart their machines. This time, the systems areexpected to boot correctly.

You can perform the force restart by following these steps:

  1. Once you see the black screen, press Ctrl+Alt+Delete.
  2. Now you will see a Power button at the lower right corner of the screen. Click on the Power button and then click Restart to reboot your system. Click Power button
  3. Now your machines will complete the reboot process without any issues.

Microsoft is investigating the issue

Microsoft is currently investigating the issue and promised to release a patch in the upcoming release. Meanwhile, you can try this temporary fix to solve the problem.

Microsoft is all set to roll out a new batch of cumulative updates in late June.

We can not deny the fact that the infamous Windows 10 October 2018 Update still gets affected by various issues every now and then.

However, it is not always necessary that all problems are related to Windows. Some issues are caused by outdated drivers, custom configurations, and hardware issues.

As far as the Windows bugs are concerned, you can use the defer update feature introduced in the Windows 10 May 2019 Update.

This feature saves your system from early issues that come along with each update. Additionally, you should create a restore point before updating your system. This can help you to avoid potential issues.

For additional information on how to fix black screen issues on Windows 10, do check out the guides below:

Your browser or operating system does not support this yubikey [FIX]

YubiKey is a popular two-factor authentication security key offered by the industry leader Yubico. This service works with all the major systems including Windows 10. Microsoft had announced the support of Yubikey for the Windows 10 device in the past.

However, some users have experienced an error while trying to install a Yubi security key. The full error reads Your browser or operating system does not support this yubikey. This error can occur due to several reasons.

In this post, we listed a couple of fixes to resolve this error on your Windows system.

Why Windows won’t install Yubikey?

1. Use Microsoft Edge or Opera Browser

  1. Click on Start and select Settings.
  2. Click on Updates and Security.
  3. Select Windows Updates.
    Check for Windows Update your browser or operating system does not support this yubikey
  4. Click on the Check updates button.
  5. If you have metered connection option turned on for the network, click on Download over the metered connection to download the updates.
  6. After installing the updates, restart the system and check of any improvements.

If you ask us about the browser that works without issues with both system and third-party integrations, we have a clear answer. Opera is the right choice for a security-oriented, third-party available, and effective browser.

And, after a few months of everyday use, we at WindowsReport can say that Opera won’t disappoint.

It comes with a built-in VPN and a plethora of integrated apps on your homepage, pinboards, or separate workspaces for improved productivity.

If you want the safest of the safe when it comes to the browsing experience, look no further.

Opera can offer valuable browsing results that will sure fix compatibility issues with other applications or programs, so give it a try.

⇒ Get Opera

2.  Use YubiKey Manager

  1. Download and install the Yubikey manager on your computer from here.
  2. Next, open the YubiKey manager app,
  3. Now insert your YubiKey into the USB port.
  4. Click on Application tab and select “FIDO2”. yubico your browser or operating system does not support this yubikey
  5. Now click on Set PIN button under FIDO2 PIN.
  6. Enter the security key pin number you want to use, confirm the password and click on OK button again to save the changes.
  7. Your YubiKey is now ready to be used. Try to access it via the Edge browser and check if the error is resolved.

3. Use Other Browser

  1. Launch Chrome or Firefox browser.
  2. Go to the Microsoft Account Security page.
  3. Sign in to your Microsoft Account if asked to do so.
  4. Now scroll down to the Windows Hello and Security Key section.
    windows hello and security keys Fix YubiKey not support error
  5. Choose “Set up a security key” option if you want to use FIDO2 security key or select “Set up Windows Hello” if you want to use Windows Hello.
  6. Sign in your Microsoft account again and follow the on-screen instructions to complete the setup.
  7. Connect your Security to finish the setup.

IE mode won’t be available on Chromium Edge for macOS

Chromium-based Edge is bringing some amazing new features. The new Microsoft Edge browser features Fluent Design UI elements, extended privacy controls, as well as an IE mode.
These features seem to impress macOS users as well. For example, one users asked Microsoft if IE Mode will be offered to Mac users as well.

Is the IE tab going to exist on the macOS version or will that be Windows specific?

Microsoft told the Redditor that IE mode on Chromium-Edge is a Windows specific feature. That means it won’t be available on macOS.

IE mode will be supported where IE11 is currently supported so yes, it is Windows specific. Thanks!

So, if you’re a Mac user and you want to test all the new features that Edge brings to the table, the only solution is to switch to Windows 10. Or simply ask a friend to let you test Chromium Edge on his/her Windows 10 PC.

Microsoft is getting ready to revamp Edge

Microsoft is currently testing the new Edge browser and a stable release is expected to be available later this year.

The company does not want to go for a sudden release. Indeed, Microsoft needs to work on polishing the key features and then fix the issues reported by Windows Insiders.

The big M recently announced that it is bringing new autoplay media settings in Chromium Edge. This will allow users to block the video advertisements they see on different webpages.
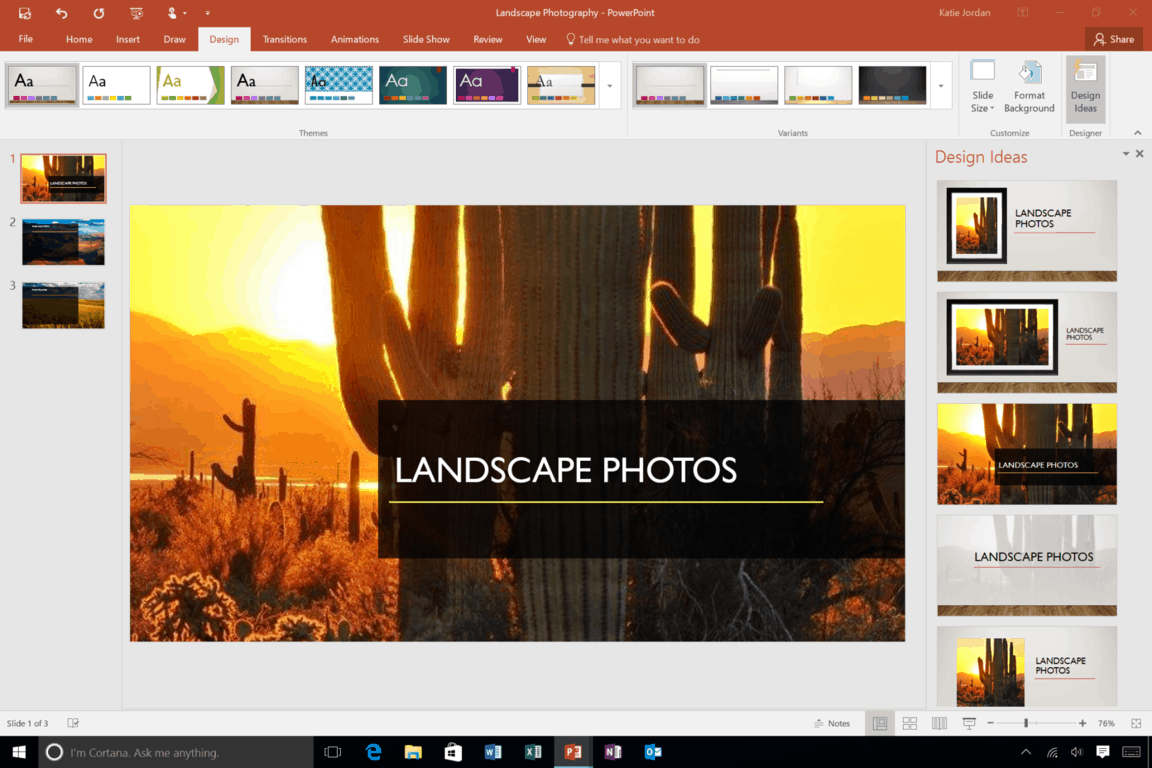
Well, we need to wait for a few more months until the official Edge version is rolled out. Meanwhile, you can try the Preview builds.

RELATED POSTS:

How to fix Bluetooth issues after June Patch Tuesday updates

Have you noticed any Bluetooth connectivity issues after installing the June Patch Tuesday updates on your system? If you have, don’t worry, you are not alone.

Microsoft already acknowledged this bug that affects various versions of Windows 10, Windows 8.1 and Windows Server. For more information about the OS versions affected by this isssue, go to Microsoft’s support page.

Microsoft released a patch to fix Bluetooth issues as a part of security updates released on this Patchday. As mentioned before, the bug is affecting only certain Bluetooth devices.

Therefore, you need to check if your device is on the list of the affected devices. You need to launch Event Viewer and look at the Event Log to determine the bug. Navigate to Start menu >> type Event Viewer >> Run as administrator and check event details.
Your device is affected if your Event Log displays the following Event Message:

Your Bluetooth device attempted to establish a debug connection.  The Windows Bluetooth stack does not allow debug connection while it is not in the debug mode. 

Check Windows 10 Event log

How to fix Bluetooth issues after update

So, now it’s confirmed that your PC can’t pair with Bluetooth devices. You can try one of the following solutions to fix the issue.

1. Check for updates

Most of the times, this issue is caused by outdated software installed on your system. Therefore, you should check for software updates by visiting the website of your device manufacturer.

2. Uninstall security updates

Microsoft confirmed that the recent security updates released on June 11 cause this issue. The tech giant says you may fail to connect, pair or use some Bluetooth devices. 

Therefore, if your Bluetooth device was previously working fine, you can remove these update to resolve these issues. However, as Microsoft explains:

These security updates address a security vulnerability by intentionally preventing connections from Windows to unsecure Bluetooth devices. Any device using well-known keys to encrypt connections may be affected, including certain security fobs.

This solution is not officially recommended and you should avoid it– if possible.

3. Wait for the patch

Microsoft is aware of the issue and we expect the hotfix to land in the coming days. A temporary solution is to stop pairing your Bluetooth devices until a patch is available.

If you have not installed the June security updates for Windows 10, you can avoid the Bluetooth issues by delaying the installation of updates.

RELATED ARTICLES YOU NEED TO CHECK OUT:

Steps to enable DNS Query Logging on Windows systems

Microsoft released a new version of the Sysmon tool. The company confirmed that Windows system monitor now supports DNS query logging.

This tool is developed by the CTO of Microsoft Azure Mark Russinovich, who announced the new feature on his official Twitter account. Russinovich attached a screenshot showing how the tool logs DNS queries and information.

Let’s discuss how Sysmon works. It basically monitors specific events currently on the system and then maintains their record in the event log.

But from now onwards, the new Sysmon version brings DNS query logging support. Interestingly, you can also spot which query initiated the program by looking at the “Image” value.

How to enable DNS logging on Windows

  1. Open the run dialogue box by hitting Windows+R keys.

Open Run

  1. Now type eventvwr.msc in the dialogue box and hit Enter. It will open the Event Viewer Window.
  2. At this step, navigate to Applications and Service Logs >> Microsoft >> Windows >> DNS Client Events >> Operational.DNS Client Events
  3. You will see Operational option, right click on it and click Enable Log.

Finally, DNS logging is now enabled on your system. 

Users are excited about this feature

Windows users are really excited about this new feature. Many users started commenting on the post about how the feature would be beneficial.

It looks like you get more data in one event with this vs the dns client log. If you are already using sysmon this is a big win. Don’t have to ask the windows team to turn on DNS client logs.

Another Windows user stated:

Yep so many times I had to fire up message analyzer to grab the process making the DNS request. Really exciting!

What do you think about DNS query logging feature in Windows system monitor? Let us know in the comments section below.

RELATED ARTICLES YOU NEED TO CHECK OUT:

DNS server not authoritative for zone error on Command Prompt [FIX]

Fix This: Your DNS Server Might be Unavailable in Windows 8, 8.1, 10

Patch Tuesday updates bricked Event Viewer? Use this fix

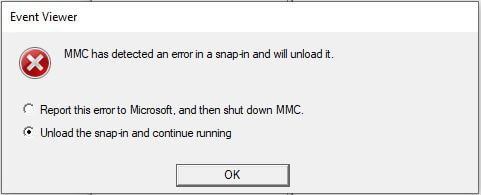
Microsoft confirmed that the June 2019 Patch Tuesday updates introduced a new issue for Windows users. The Redmond giant says that these updates trigger a bug in the Event Viewer app when you use Customer Views.

This issue affects all those users who updated their devices with the security-only updates, monthly rollups, and cumulative updates released on this Patch Tuesday edition.

According to the official support note, this problem affected almost all versions of Windows 10, Windows 8.1, Windows 7 and Windows Server.

Event Viewer bug

Microsoft explained the issue in the following manner:

When trying to expand, view or create Custom Views in Event Viewer, you may receive the error, “MMC has detected an error in a snap-in and will unload it.” and the app may stop responding or close. You may also receive the same error using Filter Current Log in the Action menu with built-in views or logs. Built-in views and other features of Event Viewer should work as expected.

How to fix Event Viewer bugs after update

The good news is Microsoft suggested a temporary workaround to fix the issue. The tech giant says that you should launch PowerShell with administrator privileges. 

  1. Press Windows key + X, you will see a list of options.
  2. Click Windows PowerShell (Admin) to open PowerShell. 
  3. Copy the code mentioned below and paste it in the new Window opened in front of you.
function get-EventViewer {
                Write-Output "List of custom views on the machine"
                Write-Output ""
                Get-ChildItem "C:ProgramDataMicrosoftEvent ViewerViews" -Filter *.xml | % { select-xml -Path $_.FullName -xpath "//Name" } | Select-Object -ExpandProperty Node | Select-Object -ExpandProperty InnerXml
                Write-Output ""
                $view_name = Read-Host "Enter the name of custom view to execute"
                # Get the file name of the view
                $ViewFile = Get-ChildItem "C:ProgramDataMicrosoftEvent ViewerViews" -Filter *.xml | where-object { (Select-Xml -Path $_.FullName -xpath "//Name").Node.InnerXml -eq $view_name }
                Get-WinEvent -FilterXml ([xml]((Select-Xml -Path $ViewFile.FullName -XPath "//QueryList").node.OuterXml))
}

Microsoft promised to release a permanent solution in late June. However, you can use this method to create new views and see custom views that already exist.

Microsoft will release a new batch of cumulative updates in two weeks’ time. Meanwhile, you can develop custom scripts to fix the issue on a temporary basis. 

Alternatively, you can also use one of these event viewer software solutions.

RELATED ARTICLES YOU NEED TO CHECK OUT:

Microsoft releases Windows Server vNext Preview Build 18917 and Windows Admin Center Preview 1906

Microsoft has just announced the release of Windows Server vNext Preview Build 18917, along with Windows Admin Center Preview 1906. The release notes for the new Windows Server build only mention four minor fixes and a couple of known issues, and we invite you to check the Windows Insider blog for more details.

The wording on the official blog post is actually a bit confusing, as the “Windows Server vNext Semi-Annual Preview” that Microsoft refers to should be the 19H2 release of the server OS coming later this year. However, if you’ve been following Windows Insider news recently, you should probably now that 18917 is the build number for the latest Windows 10 Insider build from the 20H1 development branch. Microsoft has yet to release a first 19H2 build for Windows 10, and this new Windows Server build is apparently from the 20H1 branch, not 19H2.

As for Windows Admin Center Preview 1906, this new build brings Import/Export buttons to the Virtual Machines tool, the ability to tag VMs on a Hyper-V server, and improvements to Azure integration functionality. IT admins can also select individual Windows updates to install, which was a top user request. You can download Windows Server vNext Preview Build 18917 and Windows Admin Center Preview 1906 from the Windows Server Insider Preview download page.

Microsoft Research brings four new accessibility games than can be played with your eyes

Microsoft Research has published four games to the Microsoft Store for Windows 10 devices, each of which aim to introduce eye control to those with speech or mobility disabilities thanks to the use of the Windows 10 Eye Control assistive technology. The four games—Tile Slide, Match Two, Double Up, and Maze, all can be played with either an eye tracker device or with a traditional mouse and keyboard, and additionally exercises areas such as memory, math, and strategic thinking that they can apply to other eye gaze assistive technologies. According to the Microsoft Accessibility Blog:

Challenge yourself to complete the Tile Slide puzzle in the fewest number of moves; exercise your memory playing Match Two; sharpen your math and strategic thinking playing Double Up; and see how fast you can get your lost puppy home, without getting lost yourself, in the Maze. Compete with friends and family for high score honors. And the twist? Play by using your eyes!

If you’re interested in giving the games a try, or know a friend who could benefit from them, they are available for free from the Microsoft Store. If you want to take advantage of the eye tracker technology, you’ll also need a PC that is updated to the Windows 10 April 2018 Update or newer.

These games are just an example of Microsoft’s focus on providing games and other services to those with mobility impairments. The company also has the Xbox Adaptive Controller, which takes advantage of custom setups with external buttons, switches, and joysticks to allow those with disabilities, including injured veterans seeking reliability, to play their favorite games to nearly the same level (pun intended) as everyone else.

Microsoft also has an entire document online about using eye control, in case you or someone else could find them useful. You can download the games using the links below, and feel free to share your thoughts in the comment section.

Eyes First - Tile Slide


Eyes First - Match Two


Eyes First - Double Up


Eyes First - Maze
Eyes First - Maze
Developer:
Microsoft Research
Price:
Free

PowerPoint gets more AI features and new Presenter Coach rehearsing tool

Microsoft has just announced some big updates for PowerPoint Designer, the AI-powered feature that can suggest you design ideas for your slides. More than one billion slides have been created with PowerPoint Designer since launch, the company revealed today, adding that Designer is getting three new features to ease the process of creating compelling slides.

The first addition is Designer for branded templates, which make the AI-powered recommendations much more relevant when using an organization’s template. For PowerPoint users who won’t start with a branded template, the new theme ideas in Designer will also make it easier to kick things off. Lastly, PowerPoint will be leveraging Microsoft Research’s Perspective Engine to add some context to numerical slides. “For example: The size of Afghanistan, which is 652,232 km², is hard to interpret, but adding that it’s “about equal to the size of Texas” makes it easily understandable,” the company explained.

In addition to these Designer updates, the most interesting announcement Microsoft made today is Presenter Coach, a new rehearsing tool that’s coming first to the PowerPoint web app. “This feature allows you to enter rehearsal mode and while speaking you receive on-screen guidance about pacing, inclusive language, use of filler words, and culturally insensitive phrases. It even lets you know when you’re just reading off the slide,” the company explained. This sounds like a great feature to improve your presentation skills, and you can see how it works in the video below.

Presenter Coach will go live in the PowerPoint web app later this summer, and Microsoft didn’t say today if it would also be coming to the desktop apps on Windows and Mac.

How to install Windows 10 on a second drive [QUICK GUIDE]

Some users wonder how they can install Windows 10 on a second drive, without damaging the system. Setting up Windows 10 on the new drive is not a hard task, but requires attention. Therefore we made a guide for you to follow.

One user on Microsoft Answers forum asked a similar question:

I have a desktop computer that is running windows 10 home edition with a 1tb hard drive. I’m installing a solid state drive as a second hard drive. I want to install windows 10 home edition on this drive and make it the boot drive

Quick guide on installing Windows 10 on the second drive

1. Download the Windows ISO files

download windows 10 iso how to install windows 10 on second drive
  1. In order to set Windows up, you first need to download the Windows ISO file that will help you create a bootable drive.
  2. To get a clean version of the Windows image you need to download it from the official Microsoft website.
  3. Alternatively, you can download the Media Creation Tool and use it to download the ISO file.

2. Create a bootable Install Media

  1. Now you need to use a disk burning software. We would recommend that you use Rufus for creating the bootable disc.select ISO file rufus how to install windows 10 on second drive
  2. In order to create the bootable drive using Rufus, you’d have to load the image file into the software.
    windows 10 iso select install windows 10 on second drive
  3. Select the file system to FAT32.
  4. Afterward, you simply have to press the Start button.
    start rufus how to install windows 10 on second drive
  5. If you still have files on your USB flash drive, you will be asked to delete them in order to proceed with the burning process.

3. Install Windows

  1. After having the bootable drive ready, you need to set your PC to boot from this drive.
  2. Booting your PC from the Windows drive takes you to the Windows Setup.
  3. Here you will need to press the Install now button. Then you will be asked to choose Language, enter the product key and select Windows version.
    install now windows 10 install windows 10 on second drive
  4. When you reach the point of being asked to choose between Windows Upgrade and Custom install, choose the second option.
  5. Now you can choose to install Windows on the second drive. Click the second drive and then click Next.
  6. This will start the Windows install process.
  7. Wait for Windows to install and set up on its own. Be aware that the installer will restart the computer a few times on its own.

We hope that you found our quick guide on how to install Windows 10 on a second drive useful. If you liked this article, leave a comment in the comment section below.

Microsoft could be adding an Office key to Windows keyboards

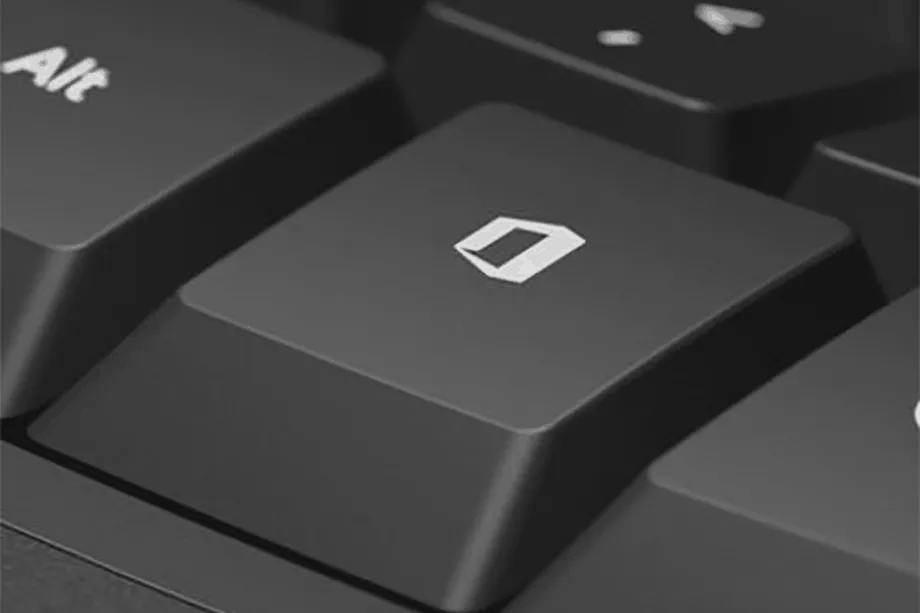
Microsoft could be adding a dedicated Office key to future Windows keyboards, as spotted by WalkingCat on Twitter. The company is offering a survey which presumably targets users who have tried one of the concept devices.

https://twitter.com/h0x0d/status/1140784669962584066?s=20

Brad Sams from Petri noted that at least two different keyboards, codenamed Holgate Low and Holgate Mid, are in development to take advantage of the new feature according to his sources that are familiar with Microsoft’s plans. These devices would be able to take advantage of certain Office key-related shortcuts, such as Office Key + S to share a document with other users.

The key would be located between the right Alt and Control keys, replacing the dedicated menu and/or the right Windows key on some keyboards. It’s not certain how Microsoft will push it onto future devices, however the familiar Windows Key is required on all keyboards to be certified by the company—something that, as noted by The Verge, has existed for 25 years (longer than the author of this post).

While this feature could certainly serve useful to those who use Office apps on a frequent basis, it’s doubtful that it will reach the masses anytime soon. It’s exclusive to users on the Windows 10 May 2019 Update, which accounts for only 1.4 percent of all Windows 10 devices worldwide due to its gradual rollout as seen in the most recent report from AdDuplex.

In any case, what is clear is that with productivity being a core focus of Microsoft’s business strategy, the company wants to promote its premium services—especially Office which targets both consumers and businesses—as much as possible. Is the Office key something that you would use, or would it be just one of those things that you would keep unintentionally hitting? Let us know in the comments.

How to use profiles, a new feature in Microsoft Edge Insider

Microsoft’s new Chromium-powered Edge Insider browser comes with support for profiles, a feature which will be new to users of the Edge currently included with Windows 10. Profiles allow multiple people to use one installation of the browser. They can also be used to compartmentalise your data, so you don’t need to switch to incognito mode or use another browser to access work sites.

Profiles have their own individual identities. Bookmarks, settings and extensions you add to one profile won’t take effect in any of the others. This makes profiles ideal for sharing access to your browser with another user, or for separating your work and personal browsing.

Screenshot of profiles in Microsoft Edge Insider

By default, you’ll start with a single profile. To add or switch profiles, click your profile picture icon to the right of the address bar. This brings up the profiles popup, where you can add a new profile, switch between existing profiles, or launch a guest session. The latter option will create a temporary profile which won’t persist any data across sessions.

Screenshot of profiles in Microsoft Edge Insider

You can access profile settings by clicking the three dots menu icon in the top-right of the Edge interface. From the menu which appears, click “Settings.” Settings will open to the profile management screen. Here, you can see all your added profiles.

Screenshot of profiles in Microsoft Edge Insider

To add a new profile, click the “Add profile” button. You’ll need to type a name for your profile and then assign an optional avatar icon. Click the blue “Add” button to create the profile. You can then switch to the profile using the profiles settings page or the profile switcher popup.

Once you’re using the profile, you can start browsing as normal. History, bookmarks and settings will be confined to your active profile. You can even sign in with a Microsoft account and enable sync – again, this will apply just to your current profile.

Screenshot of profiles in Microsoft Edge Insider

The Profiles settings page also lets you edit any existing profile by changing its name or avatar. You can remove unused profiles too, which might be handy if you’re only making a temporary profile. You can always see which profile you’re using by looking at the profile switcher icon next to the address bar. The icon will show your profile’s avatar, or your Microsoft profile picture if you’re signed in with a Microsoft account.

Battlefield V, FIFA 19, Anthem, and more video games discounted on Xbox One this week

As is typical for Xbox video games, a variety of titles are now discounted as part of Deals With Gold and other new weekly promotional campaigns.

With the Deals With Gold sale, which requires an active Xbox Live Gold subscription to receive the discounts, Anthem (60% off), Battlefield V (60%), Cartoon Network: Battle Crashers (60%), and FIFA 19 (60%) are some of the biggest games worth checking out.

Also on this week is an Explore and Discover sale and the usual Publisher Spotlight Sale. Among these discounted titles, Fallout 76 Standard Edition (50% off), Nevermind (75%), Samsara (50%), Soul Axiom (70%), and The Witness (pictured above, 50%) are worth keeping an eye on. A large number of Sonic video games are also heavily discounted on Xbox One and the Xbox 360.

All of these discounts are listed within the Gold section on the Xbox One Dashboard and in the Store tab.

Did you buy any discounted video games this week for your Xbox console? Let us know which ones you picked up in the comments below and then follow us on Pinterest for more Xbox gaming content.

1st Xbox gamer to reach 1 million Gamerscore jumps from Twitch to Microsoft’s Mixer

Xbox gamer, Stallion83, who was the first person to ever reach the 1 and 2 million Gamerscore milestones has made the leap from the popular Twitch video game streaming service to Microsoft’s rival, Mixer.

While Stallion83 had actually had his Mixer account since 2016, he had also been a Twitch Partner, a role that prevents streamers from broadcasting on rival platforms.

Stallion83 streamed on Twitch for the last time two weeks ago and began streaming on Mixer almost immediately. The transition was promoted on the official Mixer Twitter account earlier today. It’s unclear why Stallion83 decided to change platforms.

https://twitter.com/WatchMixer/status/1140741022986702848

Mixer is Microsoft’s direct competitor to Amazon’s Twitch. It’s a streaming video platform that’s primarily designed to broadcast video game gameplay but is also used for streaming the occasional special event or esports competition.

Do you prefer Twitch or Mixer? Let us know in the comments below and then follow us on Twitter for more video game and streaming news.

How to make Skype work on iPad Mini [ULTIMATE GUIDE]

IPad owners where left frustrated after Skype dropped support for earlier versions of iOS. When trying to install Skype on their iPads, an error message interrupts the process. The error message specifies that the app requires the device to have a minimum of iOS 10 version in order to run Skype.

We can provide you with a few solutions though, that should help you successfully run Skype on an iPad Mini.

Why can’t I connect to Skype on my iPad Mini?

1. Update the OS

  1. First, you should consider connecting your iPad to a Wifi network, as the download could use up a lot of mobile data.
  2. Then you have to access Settings > General > Software Update.
  3. Tap Download and Install. If you don’t have enough storage space, clear up the necessary space for the update and try updating again.
  4. Enter your passcode if required, in order to proceed with the system update.
  5. After upgrading to the newer iOS version, installing Skype on your iPad should work.skype not working on ipad mini

Looking for the best PC emulators for Mac OS? Here are our top picks.


2. Download the Skype iPhone app

  1. Download and install this specific iTunes version from here on a PC.
  2. Type Skype in the Search box > select the iPhone version of the app and click Get.
  3. Open the Skype for iPhone download link, here, that takes the iPad to AppStore.
  4. Choose to install the app > you will get the iOS 10 required message, afterward it will recommend you an older version of the app, which you have to accept.skype not working on ipad mini

We hope that our quick guide helped you install Skype on your iPad. If you found this article helpful, leave a comment in the comment section below.

READ ALSO:

There was a problem accessing your keychain [EXPERT FIX]

Keychain is an Apple-developed password system for MacOS. Apparently, there is an issue with the keychain that users encounter when trying to access OneDrive. The error message There was a problem accessing your keychain. Please check that the login keychain exists and that OneDrive has access to it. If prompted, please allow OneDrive access to your keychain pops up leaving users unable to access the platform.

One user explained the problem on the support forum.

“out of the blue” (perhaps after an auto update of OneDrive) I get the message [Please check that the login keychain exists and that OneDrive has access to it]. Options are Quit OneDrive and Try again. When I try again, I go through a log in process (using MS Authenticator – and the login is Approved), but the message comes back almost immediately. I am running the latest OneDrive (verified with the Mac AppStore) version.

In order to stop this error from occurring, follow the guidelines presented below.

How to fix problem accessing your keychain on OneDrive

1. Delete OneDrive cached key

  1. Press command + space to open Spotlight Search > type keychain and press return.
  2. In the Keychain Access search box type OneDrive.There was a problem accessing your keychain
  3. From the search results, select OneDrive Standalone Cached Credential > press delete.
  4. Start OneDrive again. The system will create the deleted key automatically.

Most users have no idea that they can create Mac OS installation media on Windows 10. We’ve written extensively about the procedure. 


2. Update OneDrive

  1. Remove the OneDrive from your Mac OS.
  2. Download the installation file of OneDrive for Mac, here.There was a problem accessing your keychain
  3. Install it, log in, and look for improvements.

We hope that our quick guide helped you fix the issue disallowing access to OneDrive. If you liked this article, leave a comment in the comment section below.

READ ALSO:

Xbox One update error code 0x8b05000c [FIX THIS]

Some Xbox One and Xbox One S users encountered an annoying issue after logging in to their Xbox Live accounts. Immediately after the sign in process, the users get signed out and receive an error message There was a problem with the update. Error code: 0x8B05000C 0x00000000 0x00000203. Apparently, this issue usually appears after performing a system update.

A user complained online about this specific issue:

Hi, My Xbox one was updated a couple of weeks ago. It has been working fine since then. Today when I turned it on, it wouldn’t sign me in (it would sign me out as soon as I sign in) and it was offline by default. I went online and was displayed with a message “There was a problem with the update. Error code: 0x8B05000C 0x00000000 0x00000203”.

If you’re dealing with this issue, follow the steps described below.

How can I fix Xbox error 0x8b05000c?

1. Restart your console

  1. Press the Xbox button on your controller.
  2. Select Restart console > Restart.Xbox update error code 0x8b05000c
  3. Check to see if you can now sign in properly.

2. Spam the Try again button

  1. As soon as you receive the error message after the sign-in attempt, try spamming the Try again button.
  2. Do it repetitively for some time.Xbox update error code 0x8b05000c
  3. You should get to sign in eventually.

We’ve written extensively on Xbox One S issues. Check out these guides for more information.


3. Verify and improve the network connection

Test your network connection using the Xbox test network feature

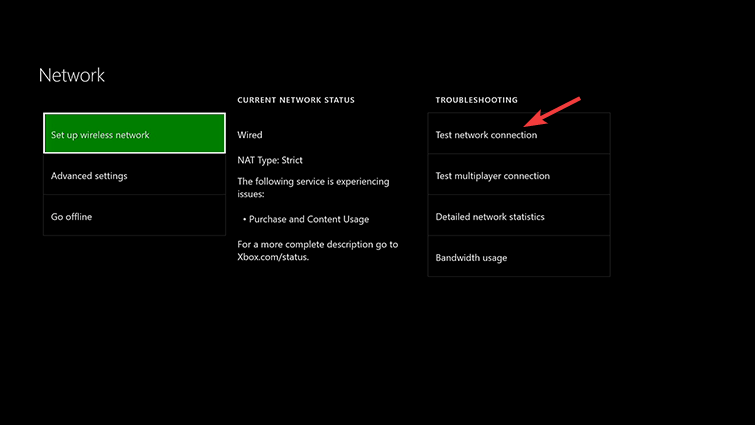
  1. Press the Xbox button > open Settings.
  2. Choose All settings > Network > Network settings.
  3. Select the Test network connection.Xbox update error code 0x8b05000c
  4. If everything is running normally, try signing in again.

Improve your internet connection

  • Perform a hard reset on your modem/router
  • Connect your Xbox to the internet through a wired connection, it tends to be faster and more reliable than Wi-fi connections
  • If you notice that your internet is running slower than usual, contact your ISP and inform them about this issue.

4. Reconnect your Xbox Live account to the console

  1. Press the Xbox button > select System.
  2. Access Settings > Account > Remove Accounts.Xbox update error code 0x8b05000c
  3. Choose the account to remove > select Remove.
  4. Select Close and restart your console.
  5. Turn off the console from the Xbox Power button of the console.
  6. Leave the console off for about 10 seconds.
  7. Turn the console back on.
  8. Press the Xbox button on your Controller.
  9. Select Sign in > then choose Add & manage .
  10. Enter the account login information and check the privacy settings.
  11. Choose a color for the profile > and then select Next.
  12. Confirm the gamerpic > choose Next.
  13. Choose between Save my password or Keep asking for my password.

READ ALSO:

Microsoft beefs up GitHub with PullPanda acquisition, makes code review tools free

Last year, Microsoft acquired GitHub in a $7.5 billion acquisition, aiming to continue its long tradition of supporting developers, and perhaps steer them towards Microsoft Azure services in the process. Today Microsoft added to its GitHub stable, acquiring Pull Panda for an undisclosed sum and making the tools free. Users of the premium version of the service will retain full support, but the company plans to eventually integrate the tools into GitHub.

PullPanda helps “teams create more efficient and effective code review workflows on GitHub,” according to a post on the GitHub blog (via Mary Jo Foley). For teams, large or small, using GitHub, pull requests (actions to work on, manage, or deploy code), can “pile up and fall through the cracks.” PullPanda helps teams manage these requests in three ways:

  • Pull Reminders: Get a nudge in Slack when a collaborator needs your review. Automatic reminders ensure that pull requests never slip through the cracks.
  • Pull Analytics: From wait times to top contributors, get real-time insight into the effectiveness of your team’s process. Then make data-driven improvements that create a more transparent and accountable culture.
  • Pull Assigner: Automatically distribute code across your team, so no one gets overloaded and knowledge gets spread around.

All of the tools are available now on GitHub for free, included in the Pull Panda app. Are you a GitHub user? Will PullPanda help your workflow? Let us know in the comments below.


What’s the best Windows 10 change from Windows 7, Windows Insider’s Jen Gentleman asks

It’s now been almost five years since Microsoft released Windows 10, but the almost 10-years-old Windows 7 is still alive and kicking. According to Statcounter, more than 33% of Windows PCs were still running Windows 7 last month, with 56.48% of users having already updated to Windows 10.

With Microsoft ending support for Windows 7 in January 2020, the company would really like these users to upgrade to Windows 10 to keep their PCs secure. However, that’s not so such an easing thing to do, especially since Windows 7 is probably still considered the best version of Windows by common agreement.

The Redmond giant is well aware that convincing Windows 7 die-hards to update isn’t an easy task. Today, Jen Gentleman from the Windows Insider team asked her Twitter followers what are the new features they would recommend to users in the process of updating to Windows 10, and that’s actually a really good question. The answers, as expected, were equally interesting.

Many replies from power users mentioned Windows Ink, dark theme, the improved snipping tool, the new Action Center, the cloud clipboard, Timeline, Your Phone, as well as OneDrive Files-on-demand. Some new capabilities such as Cortana or My People didn’t get a lot of love, and that’s not really surprising as these features didn’t really resonate with consumers.

Interestingly, one person highlighted Windows Update, which probably isn’t exactly what you would call a fan-favorite feature. However, Windows 10 updates are now cumulative, which means that new patches include all previously released updates. This is a pretty good way to avoid “update fatigue” and situations where users decide to block all updates to avoid any interruptions in their workflow.

Last year, Microsoft said that it was finally fixing Windows Update so that your PC would no longer reboot while you’re busy. More recently, the Windows 10 May 2019 Update also allowed all Windows 10 users to pause updates for up to 35 days (Home users were previously limited to 7 days).

These Windows Update improvements are nice, but Windows 10’s real killer feature may well soon be the Your Phone app. Mac and iPhone users have been able to enjoy “continuity” features for years, with Text Message Forwarding between iPhone, iPad and Mac, seamless photo transfer between devices, and much more. Some of these things are now possible using Your Phone and an Android smartphone, but the app still remains a work in progress. However, it’s now clear that Android now has more synergies with Windows 10 that Windows Phone/Windows 10 Mobile never had, and it’s really great to access your phone’s text messages, recent pictures, and notifications right from your Windows 10 PC. A recent Your Phone update also brought a new screen mirroring feature, though it only works with select Android headsets for now.

Do you still know people who are not ready yet to update to Windows 10? If so, how would you convince them to finally make the jump? Let us know in the comments below.

Windows 10/11 Keeps Asking Me to Create a PIN [Solved]

Security was always a big thing for Microsoft, but many users reported that Windows 10 keeps asking to set up a PIN. This can become rather annoying quickly, but today, we will show you how to fix this problem once and for all.

Here’s how one user described this problem on Microsoft Answers forum:

I just updated my PC (in the middle of the day instead of 12AM like I said to, but I can’t complain about that right now) and now every time I log on, Windows asks me to set up a PIN. I do not want one.

How can I stop Windows 10 from asking for PIN?

1. Dismiss the set-up in Windows Defender

  1. Log on to your computer. When the Use Windows Hello instead of your password screen appears, click Next.
  2. In the Did you mean to cancel PIN? screen click on I’ll set up a PIN later in the bottom-left.
  3. After that, click the Windows Defender Security Center icon in your tray (bottom-right).
  4. Now, in Windows Security, in the left side-panel choose Account protection.
  5. In the right section, under Windows Hello, you will see Set up Windows Hello for faster, more secure sign-in and a Set-up button. Click it.
    account protection windows 10 keeps asking me to create a pin
  6. When it will prompt you to set-up a PIN, instead of doing that click Dismiss.
  7. After that, you shouldn’t get the prompt to set-up a PIN every time you log on to your PC.

2. Use the Group Policy Editor

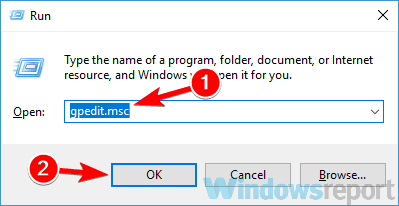
  1. Press the Windows key + R to open Run, type gpedit.msc, and then hit Enter. If you found this shortcut useful, feel free to check other awesome Windows 10 shortcuts that you can use.gpedit run window stop windows 10 pin setup
  2. Navigate to Local Computer Policy > Computing Configuration > Administrative Templates > Windows Components > Windows Hello for Business.
  3. Now go to Use Windows Hello for Business policy, double-click it, and set it to Disabled. Click Apply and then OK.
  4. Restart your PC.

Disabling the policy will also help with the Your organization requires you to change your PIN error.

Note: Your path could look like this: Computer Configuration > Administrative Templates > System > Logon then locate Turn on convenience PIN sign-in policy, double-click it, set it to Disabled, hit Apply and OK and then restart your PC.

3. Other workarounds

Select/Highlight the Password option

  1. When you log into your PC, under the box for your PIN/Password there are 2 icons. The left one is for PINS, the right one is for Passwords.
  2. Just click on the right one and you shouldn’t see the set-up a PIN prompt.

Create a PIN identical to your Password

include letters and symbols set up a  PIN windows 10 asking to setup a pin
  1. Start the PIN set-up wizard.
  2. When you’re prompted to enter a PIN, under the box check Include letters and symbols
  3. Now you can enter your Password and use it as a PIN.

Remove Passwords from User Accounts

  1. Press Windows key + R to open Run, type netplwiz and hit Enter.
  2. Uncheck User must enter a username and password to use this computer, click Apply and OK, and you’re good to go.users must enter a user name and password bypass Windows 10 create pin

Hope that one of these solutions worked for you, as they worked for many others. If you found another way to solve the problem or have some questions, reach for the comments section below, and we’ll look.

Fortnite is the world’s most popular game, but it was almost cancelled before it launched

Since its launch on July 27, Epic Games’ Fortnite has become the most popular video game worldwide and a true pop culture phenomenon. Having crossed more than 250 million players earlier this year, the game also had a profound impact on the video game industry, pushing Microsoft, Nintendo, and a reluctant Sony to embrace crossplay multiplayer.

But Fortnite almost never came to be. Rod Fergusson, head of the Microsoft-owned game studio The Coalition, revealed that he wanted to cancel Fortnite when he was still Director of Production at Epic Games in the early 2010’s. In an interview with Game Informer (via Business Insider), the man now responsible for the Gears of War franchise explained that early concepts of Fortnite and its “Save the World” survival mode didn’t really meet his expectations.

“If I stayed at Epic, I would have cancelled Fortnite,” Fergusson said to Game Informer. “Before I left, I tried to cancel Fortnite. Fortnite, when it was Save the World… that was a project that had some challenges. As a director of production at that time, that game wasn’t something that would’ve passed my bar to keep going.”

Fergusson did leave Epic Games in 2012, five years before the release of Fortnite. In retrospect, Fergusson did correctly predict that Fortnite’s “Save the world” didn’t really set the world on fire, but the game really took off when it offered a free battle royale mode when PUBG, the game that reinvented the genre was still in early access on PC. Fortnite Battle Royale was poised to take the lead as it was free-to-play, available on more platforms, and much more optimized than PUBG (which also uses Epic Games’ Unreal Engine 4).

Flash forward to 2019, Fergusson is now well aware that him leaving Epic Games in 2012 was ultimately a blessing in disguise. “So when people look at me and say ‘Don’t you feel bad?’ I say ‘No, you should feel really good, because that game you love, that worldwide sensation, would not exist had I stayed at Epic,” the video games veteran commented.

We may well have reached peak Fortnite in recent months, and the game was barely a part of the video games conversation during E3 2019 last week. Still, Fortnite remains a forced to be reckoned with, as you can tell by the brand new Xbox One S Fortnite Special Edition bundle that Microsoft launched earlier this month. In an interview with The Wall Street Journal (via Gameindustry.biz), Epic Games founder Tim Sweeney also emphasized that Sony enabling crossplay on Fortnite between PlayStation 4, Xbox One, and Nintendo Switch was “one of the greatest moment in Epic’s history.”

Xbox One update error code 0x8b0500b6 [TESTED FIXES]

Some Xbox One users reported experiencing an issue while trying to update installed apps.

The updates come to a halt while being blocked by a pop-up message containing the error code: 0x8B0500B6 0x00000000 0x00000200.

A user affected by this issue complained in the online forums:

I have a regular Xbox One that I have confirmed can connect to the internet, but the update is stuck at 0% downloading, and at one point after restarting and trying again I got the error code: 0x8B0500B6 0x00000000 0x00000200.

This error is apparently caused by network conflicts or Xbox Live account issues.

If you’re dealing with this annoying Xbox issue, try performing our tested solutions.

How can I fix Xbox one update error code 0x8b0500b6?

1. Verify the Xbox servers’ status

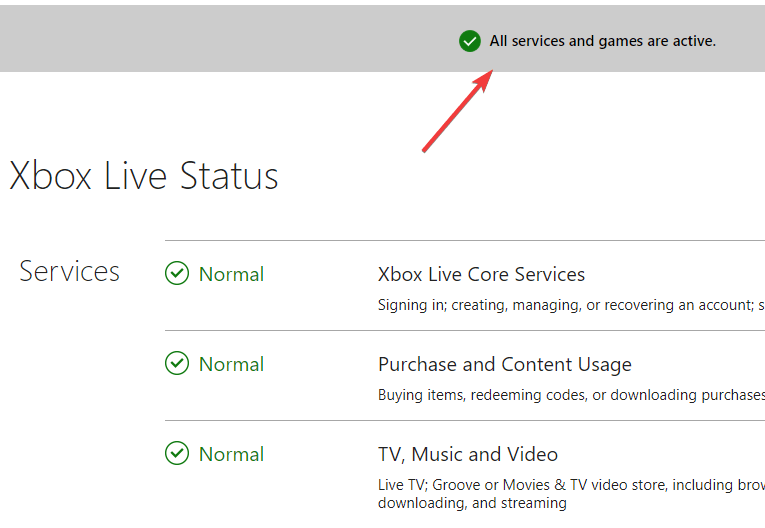
  1. First, you should make sure that the Xbox servers are running.
  2. Check the Xbox servers’ status on the official Microsoft web page.
  3. If they are down or under maintenance, you will have to patiently wait until Microsoft solves the issues they’re dealing with.

xbox server status information Xbox One update error code 0x8b0500b6


2. Test the network connection

  1. Press the Xbox button > open Settings.
  2. Choose All settings > Network > Network settings.
  3. Select Test network connection and make sure that your connection is running at optimum performance.

test network connection Xbox One update error code 0x8b0500b6


3. Toggle between network connections type

change network type Xbox One error 0x8b0500b6

  1. Try switching to a different network connection.
  2. If you’re running a wired connection, change to a wireless network and vice versa.

Xbox update fails to install? Fix update errors with this simple guide!


4. Re-add your Xbox Live account to your console

  1. Press the Xbox button > select System.
  2. Access Settings > Account > Remove Account.
  3. Choose the account to remove > select Remove.
  4. Select Close and restart your console.

remove account Xbox One update error code 0x8b0500b6

Turn the console off and restart:

  1. Turn off the console.
  2. Leave the console off for at least 2 minutes.
  3. Turn the console back on.

Add your account back:

  1. Press the Xbox button on your Controller.
  2. Select Sign in > then choose Add & manage.
  3. Enter the account login information and check the privacy settings.
  4. Choose a color for the profile > select Next.
  5. Confirm the gamerpic > choose Next.
  6. Choose between Save my password or Keep asking for my password.

5. Contact the Xbox support center

contact xbox support Xbox One update error code 0x8b0500b6

  1. If none of the above solutions helped you repair the issue, consider contacting the Xbox support team.
  2. You can get live support through the Support section on the Microsoft web site.

We hope that our list of solutions helped you fix the frustrating error. If you liked this article, leave a comment in the comment section below.

READ ALSO:

Microsoft’s next gen Xbox console (Project Scarlett) confirmed to have a disc drive

In an interview with GamesIndustry, Microsoft’s Phil Spencer confirmed that the company’s next generation Xbox console, currently going by the temporary codename, Project Scarlett, will indeed have a physical disc drive.

“Yeah [physical discs are part of our future],” Spencer says in the interview. “We know, because we see it, that more and more players are buying digital. We think the experience in certain instances, specifically if I am away from my console and everything is on my hard-drive with the entitlements are all there, there are some scenarios that are easy. But we know that people still have discs.”

Given Microsoft’s recent investment in digital services such as Xbox Game Pass and xCloud plus the relatively recent release of a discless Xbox One S console, many had speculated that the next gen Xbox could very well launch with a strong focus on digital and do away with physical discs altogether.

The reality is, though, that many users simply aren’t ready for a purely digital gaming experience due to outdated and/or expensive internet infrastructure in various regions. A lot of gamers basically wouldn’t be able to use an Xbox console if it didn’t have a disc drive.

Of course, this isn’t to say that Microsoft won’t release a discless Project Scarlett in addition to the disc version. Clearly, with the release of the Xbox One S All-Digital Edition, there’s already a growing market for such a device.

Project Scarlett is confirmed to launch in late-2020. Interestingly, Microsoft has already started work on the post-Scarlett Xbox console as well.

Do you want a disc drive in your Xbox console? Share your thoughts with the community in the comments below and then follow us on Pinterest for more Xbox gaming content.

Microsoft news recap: gives back to investors with $0.46 per share dividend, first details about next-gen “Scarlett” Xbox, and more

Microsoft news recap is a weekly feature highlighting the top Microsoft news stories of the past week. Sit back, grab some coffee, and enjoy the read!

Microsoft, the trillion dollar company, gives back to investors with $.46 per share dividend

With Microsoft remaining as a trillion dollar company since last Friday, investors have received good news with an announcement of the quarterly dividend being $0.46 per share.

Microsoft India

Microsoft Teams users can now react to messages with 6 different emojis

Following in the footsteps of LinkedIn which recently added reactions to posts, Microsoft Teams now allows you to react to messages with 6 different emojis, instead of just ‘like’.

Microsoft has teams around the world working on some 150 Android apps, for hundreds of millions of users

A Senior Software Engineer at Microsoft, Cesar Valiente, has spoken of Microsoft’s work with Android, following the failure of its own mobile operating system. In all, Microsoft has teams across the world that work on 150 Android apps, with large numbers of users using them.

E3 2019: Microsoft shares first details about its next-gen “Scarlett” Xbox console

At E3, Microsoft shared the first details of its next-gen Xbox console, Scarlett. Details about the power of the console were unveiled, including 8K resolutions and a higher framerate.

That’s it for this week. We’ll be back next week with more Microsoft news.

There was a Problem and we Couldn’t Continue (0x80a4001a) [FIXED]

Many users reported There was a problem and we couldn’t continue (0x80a4001a) error on Xbox One that prevents them from signing in.

One user described the error on Reddit as follows:

I’m getting this message when trying to log into my account. I have contacted support but got nothing from them so far. The password screen is also white Instead of gray. The message reads (there was a problem and we couldn’t continue 0x80a4001a). How do I fix this. . .

We managed to come up with a few solutions in order to fix this frustrating sign-in error.

How can I fix error 0x80a4001a on Xbox One?

1. Make sure the servers are running properly

  1. First of all, you have to make sure that the Xbox Servers are up and running.
  2. Check the Xbox Live Status on the official website in order to obtain reliable information.
xbox live status There was a problem and we couldn't continue (0x80a4001a)

2. Reconnect your account

sign out xbox one There was a problem and we couldn't continue xbox error
  1. Press the Xbox button > go to the Home tab and select your profile.
  2. Choose the account you want to disconnect > select Sign out
  3. Go to the Home tab > press Sign in.
  4. Choose the account you want to use and press the A button on your controller.

3. Attempt to remove and recover the Xbox profile

  1. First, remove the existing profile.
  2. Press the Xbox button > select System.
  3. Access Settings > Account > Remove Account.remove account xbox one xbox error 0x80a4001a
  4. Choose the account to remove > select Remove.
  5. Select Close and restart your console.

Secondly, you have to Power cycle the console:

  1. Turn off the console using the power button on the console.
  2. Leave the console off for about 10 seconds.
  3. Turn the console back on.

Next, you need to recover the account:

  1. Press the Xbox button on your controller.
  2. Select Sign in > then choose Add & manage.
  3. Enter the account login information and check the privacy settings.
  4. Choose a color for the profile > select Next.
  5. Confirm the gamerpic > choose Next.
  6. Choose between Save my password or Keep asking for my password.

4. Check Internet connection

check the network connection There was a problem and we couldn't continue (0x80a4001a)
  1. Perform a test on your internet connection from the Xbox settings.
  2. Hard restart your router/modem.
  3. Make sure to run a wired connection, rather than a wireless connection.
  4. Contact your Internet provider if you notice unusual internet activity.

We hope that our guide on fixing the There was a problem and we couldn’t continue (0x80a4001a) error was helpful. If you found other working solutions, share them in the comment section below.

Xbox update error code 0x8b05000f [EXPERT GUIDE]

Many Xbox One users experienced an issue with the system update, such as error code 0x8b05000f.

While trying to perform a mandatory system update, sometimes this error can interrupt the process, leaving users in a frustrating loop.

One user described this issue as follows:

Recently there is an mandatory update and im trying to update my xbox one s the update stops at 47% and this error code 0x8B05000F 0x00000000 0x90070007 comes what’s the problem can anyone help please I’m experiencing it from last 3-4 days.please help

This error could be caused by Xbox software or hardware issues.

Fixing this issue requires you to follow our solutions.

Here’s how to fix update error code 0x8b05000f on Xbox One

1. Switch to a wired connection

use wired connection xbox update error code 0x8b05000f

  1. If you’re using a Wi-Fi connection, try switching to a wired connection instead, since it’s usually more stable.
  2. In case you’re already using a wired connection, try restarting your router or switching to Wi-Fi connection instead.

2. Perform a power cycle on your console

power cycle your xbox xbox update error code 0x8b05000f

  1. Press the Xbox power button on your console until it shuts down.
  2. Leave the console rested for at least one minute.
  3. Turn the Xbox back on and see if it can perform the update properly.

3. Remove additional hard drives

remove external drive xbox error 0x8b05000f

  1. If you have any external hard drives connected to your console, remove them while the console is turned off.
  2. Power the Xbox back on and see if the update takes place in normal conditions.

Not enough storage on Xbox One? Expand it with these drives


4. Reset the Xbox to factory settings

xbox factory settings  xbox update error code 0x8b05000f

  1. Press the power button on your console until it shuts down.
  2. Unplug the power cord for 30 seconds and connect it again.
  3. Press the Xbox power button.
  4. Hold down the Bind button (find it on the side of the console, next to the USB port), and the Eject button at the same time (find the Eject button on the front of the console next to the disk slot).
  5. Keep the Bind and Eject buttons pressed until you hear a second power up chime.
  6. Choose Reset this Xbox One
  7. Select if you want to fully reset the console or keep your saved contents
  8. Wait for the reset process to take place and then attempt to start the update.

If none of the solutions above worked for you, then you might be dealing with a damaged HDD. Ask for professional advice in order to get a correct diagnosis. A hard disk replacement might be needed.

We hope that our solutions helped you fix the update issue. If you liked this article, leave a comment in the comment section below.

READ ALSO:

Printer is in Use or an Error Has Occurred: How to Fix it

An annoying error prevents printers from printing files on the Windows 10 operating system, and they find that the printer is in use. When attempting to initiate the printing process, the error message Another computer is using the printer pops up.

This specific issue is usually related to outdated drivers, system conflicts, or incorrect system settings. If you’ve encountered this issue and looking for a way to avoid it, consider checking our tested solutions.

How can I fix the Printer in use error?

1. Reset the Print Spooler service

  1. Press the Windows + R on your keyboard, type services.msc, and press Enter.
  2. Search for the Print Spooler service in the right pane, right-click on it, and select Stop.stop printer spooler Printer is in use by another computer
  3. Now, right-click on it again and select Start.
  4. Close the Services window and restart your computer to see if this fixed the issue.

2. Perform a printer power cycle

  1. Turn off your computer and your printer.
  2. Unplug your computer and printer from the power socket.
  3. Let it rest for a minimum of 2 minutes.
  4. Plug them back in and turn them on.

Once done with the reset, verify that the Printer is in use error is fixed.

3. Update or reinstall the printer driver

  1. Press the Windows + R, type devmgmt.msc and click OK.
  2. In the top menu, click View and select Show hidden devices.show hidden devices device manager Printer is in use by another computer
  3. Expand the Printers menu, right-click on the available device, and select Update driver.Update printer driver Printer is in use by another computer
  4. Alternatively, you can select to Uninstall driver, restart the computer, and it will automatically reinstall the printer‘s driver.

You can also use a dedicated driver updater such as Fortect Driver Updater. Using a resourceful driver database, it can find the best driver for your hardware and automatically download and install it to your PC. It can regularly scan and keep all your drivers in check.

⇒ Get Fortect Driver Updater

4. Update Windows

  1. Press the Start button and open Settings.
  2. Click Update & Security.
  3. Select Windows Update.
  4. Click Check for updates.windows update Printer is in use by another computer
  5. Let it complete the process and restart your computer if it finds any updates.
  6. After rebooting your PC, check if updating Windows fixed the issue

We hope that you can fix the Printer is in use error issue by following our guide. Before you leave, check the best printer management software for seamless operations.

If you found this article helpful, comment in the comment section below.

A request is not recognized as an internal or external command [SOLVED]

The Windows OS is keeping a list of paths to the location of the most accessed programs called Windows Environment Variables and it can access them easily. Sometimes, this list gets corrupted or messed up and that’s when a request is not recognized as an internal or external command, operable program or batch file.

Before anything else, look in the System32 folder to see if the program you’re trying to access exists. If it’s there and you can’t run it, then go to the solutions.

How do I solve Windows Environment Variables errors?

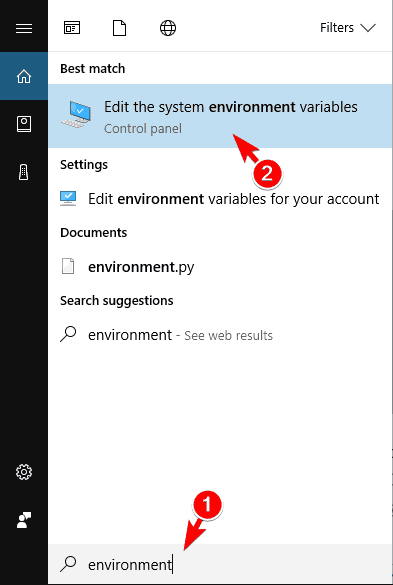
Solution 1 – Set the path in Windows Environment Variables

  1. In the Windows search box type environment and click on the first result(Edit the system environment variables).open system environment variables A request is not recognized as an internal or external command windows 10
  2. On the Advanced tab, in the bottom right, click on Environment variables… Environment Variables A request is not recognized as an internal or external command
  3. Under System variables, in the list, locate Path and click on it. Then click Edit.
  4. Optional step: copy all the paths there and put them in a notepad for safekeeping, just in case something goes wrong.
  5. Now check to see if the directory path of the program you’re trying to access is there. If it’s not, you’ll have to add it.
  6. Click on New and type the directory path of the program you’re trying to access (for example C: >Windows >System32).
  7. Click OK on all windows and then restart your PC.

After the restart, if you added the directory path properly, everything should work fine. Keep in mind that you can add new directory paths but you can also edit the old ones that are no longer valid.


We’ve written extensively about adding and editing the path for variables before. Bookmark this page in case you need it later. 


Solution 2 – Set the value of PATHEXT Environment Variable

  1. In the Windows search box type environment and click on the first result(Edit the system environment variables). open system variables A request is not recognized as an internal or external command
  2. On the Advanced tab, in the bottom right, click on Environment variables… choose environment variables A request is not recognized as an internal or external command
  3. Under System variables, in the list, locate PATHEXT and click on it. The click Edit.
  4. Under Variable value, you can add or delete a new extension manually. You also have the options to Browse Directory… or Browse File… to add new extensions. edit system variable hot to solve windows environment errors
  5. Check the file extension of the program you’re trying to access and then add it to the PATHEXT list of default extensions.
  6. Click OK on all windows and then restart your PC.

After you set the correct values of the environment variables, everything should work fine and you’ll be able to access your programs on Windows 10 without any problems.

If you have any more questions, feel free to reach for the comments section below.

[wl_navigator]

RELATED STORIES YOU SHOULD CHECK OUT:

How to fix Windows Media Player green screen problems [FULL FIX]

Many users have experienced the Windows Media Player Green Screen on some occasions. In this article, we will discuss the different solutions on how to fix this problem.

Here’s how one user described the issue on Microsoft Answers forums:

windows media player wont play, either will windows media center. they just goto green screen, there is sound

How can I fix Windows Media Player green screen problems?

1. Edit Media Player Settings

  1. Open the Windows Media Player.
  2. On the Tools menu, Click on Options and then press the Alt key.
    options windows media player windows media player green screen
  3. Click on Performance.
  4. Finally, uncheck the Turn on DirectX video acceleration.
    turn on directx video acceleration windows media player green screen

2. Update Display Driver

  1. Open the Device Manager.
  2. Expand the Display Adapter tab.
  3. Double click on your display adapter.
    graphics card driver windows media player green screen
  4. Click on the Driver tab and then click on the Update Driver option.
    update driver windows media player green screen
  5. Select the desired option and follow the instructions on the screen.
  6. If this method didn’t work for you, check out our in-depth guide on how to update graphics card drivers.

Alternatively, you can use a third-party tool to update all your drivers automatically with just a few clicks.

Fortect Driver Updater keeps your system running smoothly by upgrading its drivers. This utility examines your system and discovers outdated drivers that cause outbreaks.

However, a solution like Fortect Driver Updater not only downloads and installs drivers, but also manages them by troubleshooting, backing up, and restoring them. As a result, it is worthwhile to use it!

It works with all versions of Windows and makes upgrading drivers a breeze. You may rely on Fortect Driver Updater to make such enhancements to ensure a proper update with the most recent graphics card drivers.

3. Update codecs

  1. Go to Microsoft website and download codecs.
  2. After downloading the setup file, run it to install the codecs.
  3. Alternatively, you can use third-party codec packs to fix this problem.

4. Turn off hardware acceleration

  1. First, right click on the particular video that is showing green screen.
  2. Go and select Settings from the menu.
  3. Locate Enable hardware acceleration and untick the box.
  4. Exit the window and restart it

5. Register Windows Media Player Again

  1. Start Command Prompt as administrator.
  2. In the Command Prompt, type regsvr32 wmvdecod.dll and press the Enter button.
    register windows media player windows media player green screen

6. Make Sure DirectX is Updated

  1. Press Windows Key + R to open the Run dialog.
  2. Type dxdiag in the command prompt window and press the Enter button.
    dxdiag run window windows media player green screen
  3. A window will appear. Browse through to where the version of DirectX is stated and ensure that you write it down.
    directx diagnostic tool windows media player green screen
  4. Open your web browser and go to the DirectX official website. If the version on the site is a newer version of the one you wrote down, download it.
  5. Open the downloaded file and Install the software on your computer.

There you go, use these solutions to fix the problems with Windows Media Player green screen on your PC. If these solutions worked for you, feel free to let us know in the comments section below.

Windows Media Player cannot copy files to your library [FULL FIX]

Many users have complained about their Windows Media Player not being able to copy files from the device to their library.

Here’s how one user on Microsoft Answers forum describes the issue:

Windows Media Player 12 on Windows 8.1 DOES NOT sync MP3 Library files to Flash drives or USB SD cards in USB adapter.

In Windows Media Player 12 Playlists do not transfer and individually selected MP3 files do not transfer/sync.

After Sync, the message when Windows Media Player 12 Playlists do not transfer/sync is:

And when ‘Click here’ is selected the message that is “There are no sync results to show.”

In this article, we will outline a few solutions to this problem, so let’s get started.

What to do if Windows Media Player won’t add files to library?

1. Clear Windows Media Player database Cache

  1. Press Windows Key + R to open the Run window.
  2. Then, type %LOCALAPPDATA%MicrosoftMedia Player and then press the Enter button.
  3. Browse through the search results and locate wmpfolders file.
    wmpfolders app data windows media player cannot copy a file from the device to your library
  4. Right-click it and select the Delete option.
    wmpfolders delete windows media player cannot copy a file from the device
  5. Restart the Media player and see if the problem persists.

2. Rebuild and Reset Windows Media Player database

  1. Press Windows Key + R.
  2. Type services.msc in the search box and Press the Enter button.
  3. Under the Services tab, browse through to find Windows Media Player Network Sharing Service.
    windows media player sharing service windows media player cannot copy a file from the device to your library
  4. If the Windows Media Player Network Sharing Service status is Started, click, right-click the service and choose Stop.
    windows media player network service stop windows media player cannot copy a file from the device to your library
  5. Now press the Windows key and R again.
  6. A Window will pop up. Type %USERPROFILE%Local SettingsApplication DataMicrosoftMedia Player in the box and hit Enter.
    userprofile run window windows media player cannot copy a file from the device to your library
  7. Select all the files on the page.
    media player all files windows media player cannot copy a file from the device to your library
  8. Right-click and select Delete.
    media player delete files windows media player cannot copy a file from the device to your library
  9. After this, restart the Windows Media Player.

Now you should be able to add files from your device to Windows Media Player Library. Try these solutions and drop your comments in the box below.

RELATED STORIES TO CHECK OUT:

How to remove corrupted printer driver [STEP-BY-STEP GUIDE]

It is quite usual for printer drivers to become corrupted though strangely enough, there are no specific reasons for that happening. If that is not weird enough, it can happen anytime, and during most of the time, without any warning either. The visible symptoms of your printer drivers becoming corrupted aren’t specific too, though what’s common is that the printer is going to behave erratically.

So, if you are faced with a printer that is behaving in a manner you can’t explain, you should consider removing the drivers for the same as those are most likely to have become corrupted.

How to get rid of corrupted printer drivers

1. Remove the printer

  1. Click on Start -> Settings -> Devices.add printers and scanners corrupted printer driver
  2. Select Printers & scanners from the options on the left panel.
  3. You will get to see the list of printers or scanners installed on your device. Click on the one that is bothering you.
  4. Click on the Remove device
  5. Consent to any confirmation box that seeks to double check your decision.
  6. Follow on-screen instructions that appear.

2. Uninstall printer software

  1. Launch Print Management. To do that, you just have to type Print Management in the Cortana search box, hit Enter and select from the search result.print management corrupted printer driver
  2. In the left panel of the Print Management window, select Drivers.
  3. You will get to see a list of printer drivers shown on the right panel.
  4. Select the printer driver that you wish to uninstall. You can make multiple selections at one go.
  5. Right click on the selected drivers and click on Remove Driver Package.
  6. Click the Delete button in the next confirmatory window that pops up.

That’s it. You have now completely removed all drivers related to the printer you are having issues with.

3. Install official OEM’s driver

  1. Click on Start > Settings > Devices > Printers & Scanners.
  2. On the right, under Related Settings, click on the Print server properties
  3. In the Print Server Properties window, under the Drivers tab, your printer should already be listed.
  4. However, if your printer isn’t listed, click on the Add
  5. This will launch the Welcome to the Add Printer Driverprinters and scanners settings corrupted printer driver
  6. Click on Next.
  7. In the Processor Selection dialog box that opens, select the device’s architecture.
  8. Click on Next.
  9. In the Printer Driver Selection dialog box, select the printer manufacturer from the left panel.
  10. Select the printer driver from the right panel.
  11. Click on Next > Finish.
  12. Follow on-onscreen instructions.
  13. Click on Start > Settings > Devices.
  14. In the Devices page, select Printers & scanners from the left panel.
  15. In the Printers & scanner page, select Add a printer or scanner.
  16. Follow on-screen instructions.

If you want to save time and automate the above-mentioned steps, you can use a driver updater tool such as Fortect Driver Updater. It will check, update and repair your drivers on a regular basis.

This should be all you need to deal with a corrupted printer driver.

Meanwhile, here are some related resources for your reference.

Posted in Fix