Fix: RAM Usage Went up After Installing Windows 10/11

I know that a lot of users who upgraded to the Windows 10 or the Windows 8.1 operating system might have some memory RAM related issues. But you will find out below some tips on how to fix your Windows 8.1 or Windows 10 if the RAM usage went up after the update you made.
RAM usage went up after installing Windows 8.1, Windows 10 Fix
The RAM usage went up after installing Windows 10 or Windows 8.1 first of all because the new operating system from Microsoft needs a few more RAM memory to operate as well as the applications you have installed on it. The lines below will show you how to better optimize your operating system and get your RAM memory down a notch.

How to fix RAM usage if it went up after the installation of Windows 10

  1. Adjust RAM performance
  2. Check problematic apps
  3. Disable startup programs
  4. Defragment your drives
  5. Open only needed applications
  6. Run a virus/malware scan
  7. Reboot your PC periodically

First option: Adjust RAM performance

  1. On the start screen of your Windows 8.1 or Windows 10 device you need to left click or tap on the “Desktop” icon.
  2. You will have there a “Computer” icon. You will have to right click on it or tap and hold in order to bring up the next menu.
  3. Left click or tap on the “Properties” option.
  4. Now in the properties window you will need to left click or tap on the “Advanced System settings” feature situated on the left side in the window.
  5. Now you have in front of you the “System properties” window.
  6. In the window above you should have a “Performance” topic and you need to left click or tap on the “Settings” icon.
  7. Now you have a “Performance options” window in front of you.
  8. Left click or tap on the option “Adjust for best performance”.
  9. Left click or tap on the “Apply” button.
  10. Left click or tap on the “OK” button to close this window.
  11. Close all the other open windows.
  12. Reboot your Windows 8.1 or Windows 10 operating system.
  13. Check and see how your RAM usage is doing now.

Second option: Check problematic apps

For a better improvement on your RAM usage, you will also have to check all the apps you are using inside Windows 8.1 or Windows 10 operating system.
Note one: Uninstall the apps that you are not using or don’t need in the Windows 8.1 or Windows 10 operating system.
Note two: Check if one of your apps is using more RAM memory then it is supposed to(You can check this by opening the task manager and looking into the processes tab to see which app is using the most memory).

Third option: Disable startup programs

See what programs are running at startup of the Windows 8.1 or Windows 10 device.

If you don’t need all of them to startup when the Windows 8.1 or Windows 10 boots I would suggest taking them out and opening them only when you need it. You can use the described steps below to take out a specific app from the startup feature.

  1. Press and hold the button “Windows” and the button “R”.
  2. Now that your run window shows you will need to write in there “msconfig” without the quotes.
  3. Press the “Enter” button on the keyboard.
  4. Now that you have the “Task manager” window in front of you left click or tap on the “Startup” tab situated in the upper side of the window.
  5. You will have there a list of programs that run at startup.
  6. If you want to disable them you only need to right click or tap and hold on a specific application and left click or tap on the “Disable” feature.

Fourth option: Defragment your drives

  1. Press and hold the “Windows” button and the “R” button.
  2. In the run window you will need to write the following: “dfrgui” without the quotes.
  3. Press the “Enter” button on the keyboard.
  4. In the new window that shows you will need to left click or tap on the hard drives you want to defragment.
  5. After you have selected the hard drives you will need to left click or tap on the “Optimize” button and follow the instructions on the screen to finish the defragment process.
  6. After the defragmentation is completed reboot your Windows 8.1 or Windows 10 device and try to see if it improved your RAM usage.

Fifth option: Open only needed applications

Try to open only the applications you need in Windows 8.1 or Windows 10. If you have more apps opened that you don’t use please close them to ensure a better functionality of the Windows 8.1 or Windows 10 system.

Sixth option: Run a virus/malware scan

Run a full system virus scan to ensure that you don’t have any third party programs that make your system RAM take up more usage.

Seventh option: Reboot your PC periodically

It is always helpful in case your Windows 10 or Windows 8.1 operating system is not working at the speed you want it to reboot it once in a while. If you do a reboot of the system this would ensure that you don’t have blocked applications in your processes even though you closed the previously.

How to Fix High RAM Usage in Windows 10

Solutions from the first part of the article apply to Windows 8.1 and Windows 10 Technical Preview! So, we found a couple of more solutions that might be helpful in solving the high RAM usage problem in the full version of Windows 10.

Solution 1 – Disable Windows tips

Ever since the Technical Preview, and it looks like it’s still present in the full version of Windows 10, the system will ocasionally show you some tips about using or some other system-related actions. As some users who were facing the high RAM usage problem in Windows 10 said, this proved to be a huge ‘memory-eater.’ So, since this isn’t an important part of the system, and you probably figured out how to use Windows 10 on your own by now, you can disable this feature, and hopefully you’ll regain some of your memory’s used space. Here’s how to easily disable “Show me tips about Windows” feature:

  1. Open Settings app
  2. Go to System
  3. Under Notifications & actions tab, uncheck Show me tips about Windows high ram usage windows 10

There you go, you computer should be at least a little faster now. But, if you’re still experiencing the high RAM usage problem, check out another solution below.

Solution 2 – Change Memory Management Settings

To change a Memory Management settings, you’ll have to perform a little registry tweak. Here’s exactly what you need to do:

  1. Go to Search, type regedit and hit Enter
  2. Go to the following path:
    • HKEY_LOCAL_MACHINESYSTEMCurrentControlSetControlSession ManagerMemory Management
  3. Find ClearPageFileAtShutDown and change its value to 1 high memory usage windows 10
  4. Restart your computer

There you go, the few options above will help your Windows 8.1 or Windows 10 operating system use only the necessary RAM memory and ensure that your system is working at the speed it is intended. Also you can write us below any other questions related to this article and we will help you further in the quest of making your operating system work better.

You can also check our dedicated guide in order to fix low memory on Windows 10, 8.1 or 8. You can sometimes get other common error: Your computer is low on memory. Do not bother if you get this error message as our team managed to create a fix guide for ‘your computer is low on memory’ and its solutions will help you get rid of this issue.

READ ALSO: Windows 7 SP1 to Windows 10 Upgrade to be Performed Through Windows Update

Fix: Right Swipe not Working in Windows 10/11

Are you using a touchscreen device with Windows 10 or Windows 8.1 and your right swipe is not working? Well, you will be glad to find out that this feature can be easily fixed in no time at all but you will have to follow the instructions posted below very carefully in order to enable or fix the right swipe in Windows 8.1 or Windows 10.
Fix: Windows 8.1, Windows 10 right swipe not working
This feature can be either disabled or bugged but you will learn in the tutorial below how you can enable it if it is the case or what are your options to fix this feature if it is broken using a Windows 8.1 or Windows 10 device.

How to fix right swipe if it is not working correctly in Windows 10:

First method:

In this method you will learn how you can enable it if by any chance when you installed Windows 10 or Windows 8.1 it was disabled.

  1. First of all you will need to reboot your Windows 8.1 or Windows 10 device.
  2. When the operating system starts you will have to log in with your administrator account.
  3. Now while on the start screen you will have to move the mouse cursor over to the lower right side of the screen.
    Note: You can also press and hold the “Windows” button and the “C” button.
  4. You should have the “Charms” bar in front of you.
  5. Left click or tap on the “Settings” icon in the charms bar.
  6. At the lower side of the “Settings” window you will need to left click on the “Change PC settings” feature.
  7. Now you will need to left click on the “PC and devices” feature.
  8. Now in the new window you will need to left click on “Corners and edges” which situated on the left side in the “PC and devices” window.
  9. Now you should have on the right side of the screen a “App switching” topic.
  10. Move the button under the “When I swipe in from the left edge, switch between my recent apps instead of showing a list of them” topic all the way to the right side in order to enable this feature.
  11. Now under the “Corner navigation” feature you will need to place all the buttons you have on the “ON” position as well.
  12. Now reboot your Windows 8.1 or Windows 10 device and try your right swipe and see if it did the trick.

Second method:

  1. Move the mouse over to the upper right side of the screen.
  2. Left click or tap on the “Settings” feature.
  3. Left click or tap on the “Change PC settings” feature.
  4. On the left side panel you will need to left click or tap on the “Update and Recovery” feature.
  5. In the list presented you will need to go all the way down and select the “Recovery” setting.
  6. Now you will need to left click or tap on the “Get started” button under the topic “Refresh your PC without affecting your files”.
  7. Left click or tap on the “Next” button in the next screen you get.
  8. Left click or tap on the “Refresh” feature.
  9. It will take approximately fifteen minutes depending on the hardware configuration of your system.
  10. After this, you will need to reboot your Windows 8.1 or Windows 10 device and try again to swipe from the right side to see if it works.

Editor’s update: There are also some other issues that are related to a touchscreen device, and it would be good for you to know that many of them may occur on your device as well. If you have a specific device model you might be interested in the fixes below. Here they are:

That is it. Just two methods on how to fix your right swipe if it is not working as expected. Please write us below for any questions or thoughts on this subject and we will help you further with your issue on your Windows 8.1 or Windows 10 touchscreen device.

READ ALSO: CyberPOWER’s New FangBook Edge: Thin Gaming Laptop With 4K Display, NVIDIA GeForce GTX 860M

Full Fix: Blue Circle When Playing Games in Windows 10

Many people enjoy gaming on Windows 10, but some users report that they are getting a blue circle during games. This can be quite distracting when you’re playing your favorite game, but luckily for you, there’s a simple solution available.

How to get rid of the blue circle while playing games in Windows 10

Many gamers reported a strange blue circle while playing their favorite games. This can be a big problem, and speaking of blue circles in games, here are some similar issues reported by users:

  • Nahimic blue circle – This issue usually occurs due to Nahimic software, but you can disable the blue circle simply by using a single keyboard shortcut.
  • CSGO blue circle – Many users reported this issue in Counter Strike: Global Offensive. The problem can be caused by certain third-party applications, so to fix the issue, it’s advised to remove the problematic application.
  • Blue circle on screen Alienware – Alienware owners reported this problems as well. To fix the issue, find and disable Audio Recon feature.
  • Blue circle Steam games – This problem can occur with Steam games as well. To fix the issue, it’s advised to disable biometric devices on your PC and check if that helps.
  • Overwatch blue circle on screen – Sometimes this problem can appear due to your audio drivers. Try installing the default audio drivers to fix the issue and check if that helps.
  • Blue circle appearing in games – Blue circle can appear in almost any game, and in order to fix the issue, be sure to try some of our solutions.

1. Remove biometric software from your computer

Users report that biometric software, such as Asus Smart Gesture and HP Simple Pass, causes this issue so if you want to stop blue circle from appearing you might have to uninstall this software.

If you’re using HP Simple Pass you don’t have to uninstall it completely, instead, you can just disable LaunchSite from the Simple Pass settings.

There are several ways to remove these applications from your PC, but one of the best is by using uninstaller software.

In case you’re not familiar, uninstaller software is a special application that will completely remove all files and registry entries related to the application you want to remove.

Thanks to these tools, the application will be completely removed, and leftover files won’t interfere with your system.

Uninstaller applications will completely remove problematic apps from your PC, we suggest you give them a try.

2. Disable your biometric device / remove biometric device drivers

If the previous solution doesn’t work for you might want to try disabling your biometric device or uninstalling its drivers.

  1. Press Windows Key + X and from the menu choose Device Manager.
    CSGO blue circle
  2. In the Device Manager look for the biometric device.
  3. Right-click it and from the menu Choose Disable or Uninstall.
  4. Restart your computer and check if the issue is resolved.
  5. If the problem persists, you might want to repeat the entire process but choose a different option in Step 3.

3. Disable Nahimic sound tracker

According to users, a blue circle in games can appear due to the Nahimic sound tracker feature. To disable this feature, you just need to make a few changes to the Nahimic application. To do that, follow these steps:

  1. Open MSI Dragon Center Application and click on Nahimic2UILauncher.
  2. When the Nahimic window opens, go to Sound Tracker tab.
  3. Now press the On/Off button to disable this feature.

Alternatively, you can press LCTRL + LSHIFT + S shortcut to turn this feature off instantly. Many users reported that this solution worked for them, so be sure to try it out.

4. Turn off Audio Recon

Sometimes third-party applications can cause the blue circle to appear during gaming sessions. Many users reported that the problem occurred on Alienware laptops due to the Audio Recon feature. To fix the problem, go to Alienware Sound Center > Audio Recon and turn it off.

After turning this feature off, the blue circle should be gone and you’ll be able to enjoy gaming sessions without any problems.

5. Install the default audio driver

According to users, the blue circle appears in your games due to your driver software. To fix the problem, it’s recommended to switch back to the default audio driver. Although dedicated drivers are usually better, for basic needs such as gaming and multimedia, the default driver should be more than enough.

To install the default driver, first, you need to remove your current driver. To do that, just follow these steps:

  1. Open Device Manager, locate your audio device, right-click it and choose Uninstall device.
  2. When the confirmation dialog appears, check Remove driver software for this device option and click Uninstall.
  3. Once the audio driver is removed, click Scan for hardware changes button.
    Nahimic blue circle

Windows will now install the default audio driver. Once the default driver is installed, check if the problem is still there.

Alternatively, you can use a dedicated driver software such as Fortect Driver Updater. This utility scans your PC for damaged, missing, and outdated files and automatically fixes them.

It is very easy to use and safer because it always finds the corresponding driver for your hardware, eliminating the risks that come with mismatched drivers.

⇒ Get Fortect Driver Updater

6. End nahimic2uilauncher.exe process

As we already mentioned, sometimes a blue circle can appear on MSI motherboards due to the Nahimic Surround Sound application. However, you can fix this problem simply by ending a single task. To do that, just follow these simple steps:

  1. Open Task Manager. You can do that quickly by using Ctrl + Shift + Esc shortcut.
  2. When Task Manager opens, go to the Details tab. Right-click nahimic2uilauncher.exe and choose End task from the menu.
    Blue circle Steam games

After ending this task, the blue circle should be gone. Keep in mind that this isn’t a permanent solution, so you’ll need to repeat it every time you turn on your PC.

7. Use Safe Mode

Safe Mode is a special segment of Windows that runs with default drivers and applications, so if a third-party application is causing the blue circle to appear during your gaming sessions, you might be able to troubleshoot the issue using Safe Mode.

To enter Safe Mode, you just need to do the following:

  1. Press Window Key + I to open the Settings app.
  2. When Settings app opens, go to Update & Security section.
    Nahimic blue circle
  3. Go to the Recovery section in the left pane. In the right pane, in the Advanced startup section click the Restart now button.
    Blue circle on screen Alienware
  4. Choose Troubleshoot > Advanced options > Startup Settings. Now click the Restart button.
  5. When your PC restarts you’ll see a list of options. Select any version of Safe Mode by pressing the corresponding key.

Once you enter Safe Mode, check if the problem is still there. If the issue doesn’t appear in Safe Mode, it means that one of your third-party applications is causing the problem. To see how to identify the problematic application, be sure to check out the next solution.

Solution 8 – Perform a Clean boot

As already mentioned, third-party applications can cause this issue to appear, and one way to find and disable the problematic applications is to perform a Clean boot. If you’re not familiar, the Clean boot state will start your PC only with default applications and services, so you can easily tell if a third-party application is a problem.

To perform a Clean boot, you need to do the following:

  1. Press Windows Key + R and enter msconfig. Press Enter or click OK.
    CSGO blue circle
  2. System Configuration window will appear. Go to Services tab and check Hide all Microsoft services. Now click Disable all button.
    Blue circle on screen Alienware
  3. Go to Startup tab and click Open Task Manager.
    Blue circle Steam games
  4. Task Manager will now open with the list of all startup applications. Right-click the first item on the list and choose Disable from the menu. Repeat this step for all startup applications on the list.
    Overwatch blue circle on screen
  5. Once you disable all startup applications, go back to the System Configuration window and click Apply and OK to save changes. Restart your PC.
    Blue circle appearing in games

Once your PC restarts, check if the problem is still there. If not, you can enable disabled applications and services one by one or in groups. Keep in mind that you need to restart your PC in order to apply changes after enabling each group of applications.

Once you find the problematic application, you can keep it disabled or uninstall it, so it doesn’t interfere with your gaming sessions anymore.

As you can see, the blue circle during games is caused by biometric software, but if biometric software isn’t the issue, be sure to try our other solutions.

Printer Won’t Scan to Computer: 4 Ways to Fix it

Printer issues are fairly common, and many reported that printers won’t scan to the computer. This can be a problem and prevent your printer scanner combo from working properly.

The issue is different than printer won’t print issue that was previously encountered, and today we’re going to show you the best ways to fix it.

Why my printer can print but cannot scan?

  • If your device isn’t properly connected, you’ll encounter issues while scanning or printing.
  • Outdated drivers are one of the most common causes of printer problems.
  • Temporary glitches with your printer or system can cause this problem.

How do I get my printer to scan to my computer?

1. Check your USB cable and printer

  1. Check your USB cable from the printer to the Windows device and be sure it is plugged in.
  2. Check if your printer is running in normal parameters and all the lights are on.
  3. Check and see if you can print a document so that we resume ourselves only to the scanning feature of the printer.

If your printer is working properly and you just need instructions for scanning, check our guide on how to use your printer to scan.

2. Update your printer drivers

  1. Press Windows key + X and select Device Manager.
  2. Locate your printer scanner combo, right-click it and choose Update driver.
  3. Select Browse my computer for driver software.
  4. Next, navigate to Let me pick from a list of device drivers on my computer.
  5. Locate your model on the list and select it.
  6. Follow the instructions on the screen to complete the setup.

After doing that, check if the problem is resolved.

3. Get the latest printer drivers from the manufacturer’s website

  1. Visit your printer manufacturer’s website.
  2. Navigate to the driver’s section and locate your model.
  3. Locate the latest driver and download it.
  4. Once the setup file is downloaded, run it to install it.

4. Run the Printer troubleshooter

  1. On Windows 10, simply go to Settings and select Update & Security.
  2. Next select Troubleshoot.
  3. Select and run the Printer troubleshooter.


As you can see, it’s easy to fix this problem on your PC as long as you follow our solutions.

Sadly, this isn’t the only issue you’ll encounter, and many reported that the HP scanner is not working on Windows.

What solution did you use to fix this problem? Let us know in the comments section below.

[Updated] Xbox team shares plans for Gamescom next month, teases “all new Xbox hardware and accessories”

The Xbox team is coming back to Gamescom in Cologne, Germany this August, giving Xbox fans in Europe a big opportunity to check out an exciting lineup of games coming on Xbox One. The annual trade fair for video games will kick off on Tuesday, August 21 with a press/trade only day plus a special Inside Xbox episode at 4:30 PM EST, but the Xbox and Mixer booths will welcome all Xbox fans from Wednesday, August 22 to Saturday, August 25.

Attendees will be able to get their hands on a selection of 25 games including some of the most exciting Xbox exclusives to be released in the coming months. “This is the first time that European gamers will have the chance to jump in and try out many of our newest gameplay experiences including the open world freedom of driving through stunning beautiful historic Britain in Forza Horizon 4 or embarking on a journey to unravel Ori’s true destiny in this emotionally engaging, hand-crafted, story-driven adventure in Ori and the Will of the Wisps,” wrote Xbox’s Major Nelson.

Interestingly, Major Nelson also teased “all-new Xbox hardware and accessories, and features on upcoming titles that we can’t wait to tell you more about and perhaps even a few surprises” in his blog post. It’s not immediately clear what to expect from the announcement, but this could well include the new version of the Xbox Elite Controller that leaked a couple of months ago.

Last but not least, there will also be an exclusive Xbox FanFest on Thursday, August 23, though Microsoft has yet to share more information about the program and tickets. The official Xbox Gear shop, which officially launched in the US during E3 will also make its European debut at Gamescom, in partnership with Game Legends.

Update: Xbox’s Major Nelson has updated his blog post to replace the “all-new Xbox hardware and accessories” bit with “new Xbox One bundles and accessories,” and explained on Twitter that the initial wording was an error.

Microsoft removes Windows 10 Insider ISOs from download page, new ones coming soon?

Windows Insiders looking for a fresh start with the newest builds usually turn to ISOs for help, but Microsoft hasn’t pushed out new files in over four months. There might still be hope for new ISOs soon though as the company has now placed a “Coming Soon” message on Advanced Preview download section of the Windows Insider website (via Neowin.)

This portion of the Windows Insider website was last offering both builds 17127 and 17115, which have now been removed in favor of the “Coming Soon” message. These builds also both come from the Redstone 4 development cycle, which has since expired. It is likely that Microsoft removed these builds in favor of the message because Windows Insiders were not able to properly install.

ISO releases usually coincide with Slow ring releases, and there only been one of those in the last four months. Since the company recently announced a fork in the Redstone 5 cycle, Microsoft could likely be cooking up new ISO’s soon. You’ll just have to stay tuned for more and hope for an announcement in an upcoming build blog post.

Fix: Windows + Shift + S hotkey not Working in Windows 10

Since the Creators Update, some users have stated on forums that OneNote 2016’s Windows + Shift + S hotkey (Windows + S in earlier versions) doesn’t work in Win 10.

Windows + Shift + S is now the default hotkey for the Snipping Tool. Thus, the Snipping Tool and OneNote have a keyboard shortcut conflict. Here are a few resolutions for fixing OneNote’s hotkey so that it opens the Select Location in the OneNote window for screen clippings.

What can I do if the Snipping Tool shortcut won’t work?

1. Change the OneNote Hotkey

Some users have fixed the OneNote 2016 hotkey for screen clippings by changing the keyboard shortcut. OneNote doesn’t include any built-in options for customizing hotkeys. As such, you must modify its hotkey with the Registry Editor as follows.

  1. Press the Windows key + R hotkey to open Run.
  2. Input ‘regedit’ in Run and click OK to open the Registry Editor.
  3. Then open this key in the Registry Editor: HKEY_CURRENT_USER\Software\Microsoft\Office\16.0\OneNote\Options\Other.
  4. Select Other and then right-click an empty space on the right of the Registry Editor window to open the context menu. Select New > DWORD (32-bit) Value to set up a new DWORD.
  5. Then enter ‘ScreenClippingShortcutKey’ as the title for the new keyword.
  6. Double-click ScreenClippingShortcutKey to open the Edit DWORD window.
  7. Then input ‘5A’ in the Value data text box to change the OneNote 2016 clipping tool’s hotkey to Win + Shift + Z.
  8. Press the OK button to close the window.
  9. Then close the Registry Editor, and restart your laptop or desktop.

2. Disable the Global Hotkey

Alternatively, you can disable the global Windows + S hotkey so that the Snipping Tool doesn’t open when you press the Win key + Shift + S keyboard shortcut. Windows doesn’t include options to customize its default keyboard shortcuts. However, you can disable the Windows + S global keyboard shortcut with the Registry Editor as follows.

  1. Enter ‘regedit’ in Run to open the Registry Editor.
  2. Then browse to this registry key: HKEY_CURRENT_USER\Software\Microsoft\Windows\CurrentVersion\Explorer\Advanced.
  3. Right-click Advanced and select New > String Value.
  4. Enter DisabledHotkeys as the title for the new string value.
  5. Double-click DisabledHotkeys to open the Edit String window.
  6. Enter ‘S’ in the Edit String window, and click OK to close the window.
  7. Now close the Registry Editor, and click Restart to restart Windows.

3. Capture Screenshots With OneNote’s System Tray Icon

OneNote 2016 users don’t need to press the Windows + Shift + S hotkey to capture screenshots. Instead, you can configure the application to capture snapshots when you click its system tray icon. This is how you can capture snapshots with the OneNote system tray icon.

  1. Right-click the OneNote system tray icon to open its context menu. You might need to click the notification area’s up arrow to right-click that icon.
  2. Select the Take screen clipping option on the context menu.
  3. Then you can select an area to capture in the snapshot, and the Select Location in the OneNote window will open.
  4. Thereafter, you can click the OneNote system tray icon to capture snapshots and open the Select Location in the OneNote window.
  5. If you can’t find OneNote’s system tray icon, right-click the Win 10 taskbar and select the Taskbar settings option. Click Select which icons appear on the taskbar to open a list of icons as shown below. Toggle the Send to OneNote Tool icon on to include it in the system tray.

So that’s how you can fix the OneNote hotkey for screen clippings and capture snapshots without it. Then, you can select a OneNote location to save the snapshots instead of pasting them into notebooks with the Ctrl + V hotkey.

And if you also find that keyboard shortcuts are not working in Word, the problem is just as easy to fix.

To share more solutions with us, drop a comment below.

Windows Server 2019 Insider build 17713 now available with new preview of Windows Admin Center

Microsoft has released today the preview build 17713 for Windows Server 2019 and Windows Server version 1809. The new Insider builds bring no new features to the two separate versions of the server OS, but in the additional downloads you’ll find a new preview of Windows Admin Center (1807).

Windows Admin Center (formerly Project Honolulu) became generally available back in April, and it allows IT admins to remotely manage Windows Server and Windows 10. Windows Admin Center will be optimized for Windows Server 2019, and this latest preview release brings a couple of new features including File Sharing from the Files tool, Azure Update Management integration and more. We invite you to check this separate blog post to get all details about this new preview release.

As usual, registered Windows Insiders can download the new Windows Server preview builds from the Windows Server Insider Preview download page. For Windows Admin Center Preview 1807, you’ll have to look under the Additional Downloads dropdown.

Get Death Squared and Splinter Cell: Conviction free now with July’s Xbox Games with Gold

Every month, Xbox Live Gold members are treated to free games and special discounts with Games with Gold. As we now enter the second half of July, Death Squared and Splinter Cell: Conviction have just become available for free on Xbox One to Xbox Live Gold subscribers.

Death Squared is a fun puzzler, offering 80 puzzles to solve alone or with the help of up to four friends on Xbox Live. Splinter Cell Conviction is a great Xbox 360 game that is available via Xbox Backward Compatibility and puts you in the shoes of Sam Fisher, who is considered a fugitive of the US government.

These games add up for a total of about $35 in value, so be sure to grab them up soon. As  you’re at it, you also might want to check out this week’s Deals with Gold, featuring Fortnite premium packs, cult-classic OKAMI HD, Dragon Ball Xenoverse 1 and 2, and more.

Download the latest version of VLC Desktop for Windows 10

I know most of our Windows users like having the VLC multimedia player around and for a good reason.

This platform offers a large amount of accessible multimedia files, as well as the DVD’s readings, audio CD’s, VCD’s extensions and many other streaming protocols.
download latest version of VLC for Windows
The latest version available on the market for free is the 3.0.3 VLC version for Windows operating systems. One of the best features in this new version is the faster decoding time on multi-core– test it for yourself.

So, let’s take a look at the available features in the VLCDesktop application and see what’s new in this version. Read this review all the way to the end to find the link which you can access in order to install the latest VLC Desktop version.


If VLC is lagging on Windows 10, check out this dedicated guide to solve the problem in no time.


Download VLC Desktop 3.0.3

download link VLC desktop

The video features available in VLC 3.0.3

  1. The VLC app brings us with this new version some new video outputs for the Windows 7, OS/2, Android and last but not least the compatibility with iOS platforms.
  2. It also has a “shader” support for the OpenGL outputs and also for “colorspace” conversion.
  3. A high variety of anti-flickering and debanding filters available.

The Audio features available in the latest VLC version:

  1. In the audio features, VLC includes resamplers for higher quality audio output.
  2. Karaoke filters and a dynamic range compressor.
  3. As posted above it has the feature for new audio outputs like iOS, Android and even OS/2.
  4. Faster processing of the audio outputs that are made by simplifying the audio core of the application is another useful option available in VLC 2.0

Want to know how to adjust subtitle speed in VLC? Check out this guide and learn how to do it with ease.


The devices and inputs for this application are many in number but I will enumerate just a few that many of our users probably need:

  1. BluRay discs.
  2. Support for a SDI capture cards if needed.
  3. Support for QTKit devices if you have any that you want to use.

The VLC 3.0.3 version also provides support for MxPEG files, streams as well as a more customizable menu for the Mac OS X operating system.

Also a large variety of fixes for HTTP Live streaming, “CDDB”, “UDP/RPT” support and a great improvement in bug fixes on the”MKV” support subject.

VLC is one of the few media players that support absolutely all the file formats our there.

So, if your default player could not render a particular format, go ahead and install VLC Desktop on your Windows computer and you’ll be able to play the respective file.

Here is the complete list of supported media file formats:

  • MPEG-1/2, DivX (1/2/3/4/5/6), MPEG-4 ASP, XviD, 3ivX D4, H.261, H.263 / H.263i, H.264 / MPEG-4 AVC, Cinepak, Theora, Dirac / VC-2, MJPEG (A/B), WMV 1/2, WMV 3 / WMV-9 / VC-1, Sorenson 1/3, DV, On2 VP3/VP5/VP6, Indeo Video v3 (IV32), Real Video (1/2/3/4).
  • MPEG Layer 1/2, MP3 – MPEG Layer 3, AAC – MPEG-4 part3, Vorbis, AC3 – A/52, E-AC-3, MLP / TrueHD>3, DTS, WMA 1/2, WMA 3, FLAC, ALAC, Speex, Musepack / MPC, ATRAC 3, Wavpack, Mod, TrueAudio, APE, Real Audio, Alaw/µlaw, AMR (3GPP), MIDI, LPCM, ADPCM, QCELP, DV Audio, QDM2/QDMC, MACE.
  • DVD, Text files (MicroDVD, SubRIP, SubViewer, SSA1-5, SAMI, VPlayer), Closed captions, Vobsub, Universal Subtitle Format (USF), SVCD / CVD, DVB, OGM, CMML, Kate.
  • ID3 tags, APEv2, Vorbis comment.

So, if this version got your attention, access the link below and install VLC to try it for yourself.

If you have any other questions regarding VLC media player, don’t hesitate to leave them in the comments section below and we’ll be sure to check them out.

RELATED STORIES TO CHECK OUT:

Fix: Do you Want to Allow Files From this Website to be Copied to Your Computer

Sometimes, you will try to copy and paste or drag and drop an image file or any other kind of file from a website to your Windows 8.1 or Windows 10 device, you will get the Do you want to allow files from this website to be copied to your computer message.

This tutorial will show you how to enable or disable this feature.

How can I fix do you want to allow files from this website to be copied to your computer?

1. Change security settings

  1. Open your Internet Explorer application Windows 10.
  2. Left-click the Tools button you have in the upper side of the screen.
  3. Now select Internet Options.
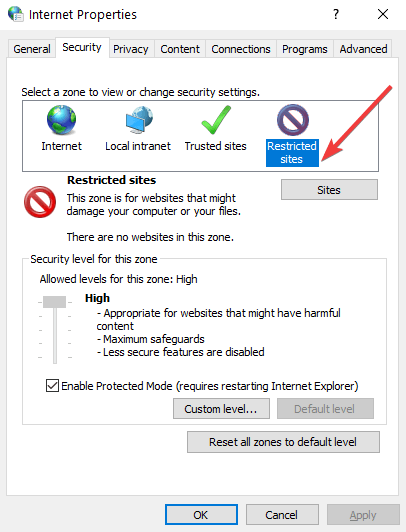
  4. Click the Security tab situated in the upper side of this window.
  5. You will have in this window a topic named Select a zone to view or change security settings.change internet security settings
  6. Next, click the Restricted Sites icon.
  7. Select the Custom level button in the lower side of this window.restricted sites internet settings
  8. Tick the Enable box for Drag and drop or copy and paste files in the Security Settings – Restricted site zones option.
  9. Finally, click the Apply button, followed by OK and restart your PC.

2. Tweak your Registry Settings

  1. Press the Windows key + R, type regedit, and click the OK button.
  2. Now, navigate to the path below in the left pane: HKEY_CURRENT_USER\Software\Microsoft\Windows\CurrentVersion\Internet settings\Zonesinternet settings registry editor
  3. Next, double-click the folder named 4 under Zones.
  4. Double-click the 1802 DWORD in the right-pane.
  5. Change its Value data to 0.
  6. Finally, click the OK button and restart your PC.

If the method above did not work for you then you can also change this message from the Registry Editor window by doing the steps above.

3. Customize GPO settings

  1. Press the Windows key + R, type gpedit.msc, and click OK.
    gpedit.msc
  2. Go to the path below in the left pane: User Configuration > Administrative Templates > Windows Components > Attachment Manager
  3. Now, double-click Do not preserve zone information in file attachments.
  4. Tick the Enabled radio button, click the Apply button, followed by OK. In this manner, your computer will run all your downloaded files without displaying any alert.
  5.  To be more specific, you can enable the policy inclusion list for the following file extensions that you often run .exe; .docx;.doc;.xlsx

There is also a third solution that you can use and it involves changing your GPO settings.

This is pretty much all you need to do in order to disable the Do you want to allow files from this website to be copied to your computer message you get while trying to copy a file from a website to your Windows 8.1 or Windows 10 device.

If you are also dealing with a similar error in do you want to allow webpage to access your clipboard, check our detailed guide to fix it.

If you have any other questions regarding this article, let us know in the comments below.

How to record Skype calls on Windows 10, 7

There are a couple of possibilities for your Skype application in which you can record video, audio calls. However, keep in mind that Skype does not have a built-in feature that will let you do this. Therefore you will need a third party application for recording Skype calls. We will show you exactly what we need to do in order to record video and/ or audio Skype calls using Windows 8.1, Windows 7 or Windows 10.

You can either use the Evaer Skype video recorder application or use the Supertintin Skype Video Recorder application. Using these two applications is as easy as it can get and you will find the download links as well as a few tips on how to install and use these applications below.

How can I record Skype video calls on Windows 10?

1. Download and install Evaer

evaer-video-recorder-windows-10

  1. Download from the link below the Evaer application:
    Click here to download Evaer
  2. After you downloaded the application you will need to double click or tap on the executable Evaer file in order to start the installation.
  3. Left click on the “next” button in the first window that pops up after you opened up the executable file.
  4. It will ask you if you want to allow the Evaer application to use Skype in which case you will need to left click or tap on the “Allow access” button.
  5. Now that you have installed the Evaer application you will only need to start your Skype conversation and left click or tap on the “Start recording” button present in the “Evaer” application.

— RELATED: How to keep using old Skype versions on Windows 10, 8, 7

2. Download and install Supertintin

Supertintin skype recorder app

  1. Download from the link below the Supertintin application:
    Click here to download Supertintin
  2. Double click or tap on the executable file after the download is finished.
  3. Follow the instructions on the screen to finish the installation.

3. Additional Skype recorder software for Windows 10

As you already know, Skype doesn’t support video and audio recording natively. However, the company has also published a list of the best tools that you can use to record your Skype calls. You can check out the list on Skype’s official website. Read the description for each tool and download the one that you like best.

We also compiled a list of the best apps and software to record Skype videos and audio. As you can see, there are plenty of tools to choose from.

There you have a few applications that you can download for free and begin recording video and audio Skype calls in Windows 8.1 and Windows 10. If you experience any difficulty or you have any other questions related to this article, let us know in the comments below.

RELATED STORIES TO CHECK OUT:


Microsoft could bring ads to Windows 10 Mail App in the future

Microsoft seems to be testing this strange change on its Mail app. This was spotted by most insiders who have been seeing ads in their inboxes. So, the only conclusion may be that the Windows 10 Mail app could soon receive an update that will definitely be hated by lots of users, there’s no doubt about it. Ads straight into the main UI above your latest emails from your inbox is not something you’ve been dreaming to have, we assume.

You won’t simply be able to opt out

Windows 10 Mail App ads

It also seems that this is not a feature that you will simply be able to opt out of. Instead, it will be an ad that’s bundled into the application that nobody can get rid off. This could trigger users to give up on the app entirely if such a thing will happen. For the moment, this may seem the best idea or solution for most ad haters, and it’s also very unusual for an app that’s developed by Redmond for an OS designed by them as well to include built-in ads.

Let’s hope Microsoft ditches the idea

For the sake of the app, we hope that this is just an experimental feature and it will not be implemented eventually. Anyway, if Microsoft plans to release the feature to all Windows 10 users, the Mail app’s user base will definitely decline numerically especially considering the vast number of email clients that are available out there for free and without any annoying ads implemented in their UI. Many users already shared their thoughts about this on Reddit:

Here’s a thought: Use another mail client. Thunderbird for example, or pay for one if you don’t like the one Microsoft is making. Personally, the moment I see an ad on the Mail app I will completely uninstall it and use Thunderbird exclusively. Maybe even donate more money to Mozilla. It’s nice that you can still do that.

This is not even the most controversial change that Microsoft is planning for the Mail app. Let’s not forget that Microsoft has recently revealed that users will be forced to open links in Microsoft Edge and not in their third-party browsers that are set as their default. This was for sure another disturbing news coming from Redmond.

RELATED STORIES TO CHECK OUT:

Fix: Clear.fi media not playing DVD in Windows 10/11, 7

The Clear.fix media is an extremely useful application for viewing DVDs. But what if you upgraded to Windows 8 or Windows 10 and this application suddenly stopped working? By reading this article below, you will find out how you can fix the clear.fi application in your Windows 8 or Windows 10 device.
clear.fi media not working in Windows 8 or WIndows 10
Usually, most Windows 8 or Windows 10 users are having issues with the Clear.fi application when they place a DVD in and the application will not open automatically. Often, they just get a black screen instead of the context menu within the Clear.fi application. Unfortunately, this isn’t as simple as a reboot of the Windows 8 or Windows 10 system but you can surely fix this by applying the steps below.

SOLVED: Clear fi won’t play DVD

1. Reinstall drivers and apps

  1. Left click or tap on the “Desktop” icon you have in the start screen of Windows 8 or Windows 10.
  2. Left click or tap on the “Start” button in the desktop feature.
  3. Left click on the “All Programs” feature in the start menu.
  4. In the “All programs” feature you will need to left click or tap on the “Acer” folder.
  5. Left click or tap on the “Acer eRecovery Management” feature.
  6. If you get a pop up window from UAC (user account controls) you will need to left click on the “Yes” button to allow access to this feature.
  7. Now you should have in front of you the “Acer eRecovery Management” window.
  8. On the left side of the window left click or tap on the “Restore” option.
  9. Now left click or tap on “Reinstall Drivers and Applications” button.
  10. Left click or tap on the “Content” feature.
  11. Now select the “Acer Clear.fi” application.
  12. After you selected the option above go to the right side of the window and left click or tap on “Install” button.
  13. Follow the instructions on the screen to complete the installation.
  14. After the installation process is completed you will need to reboot your Windows 8 or Windows 10 device in order for the changes to take effect.
  15. After the restart you can try inserting a DVD and see if your Clear.fi applications is running correctly.

— RELATED: Windows 10 Can’t Play DVD or Blu-ray [Fix]

2. Use System Restore

  1. Press and hold the buttons “Windows” and “X”.
  2. After you release the buttons you will get a menu in which you will need to left click or tap on the “System” feature.
  3. In the new window that pops up you need to left click on the “System protection” situated in the left side of the window.
  4. Now you should left click on the “System restore” button.
    Note: running this feature in Windows 8 or Windows 10 means that your system will go back to how it was in a previous point in time. So be sure to save or write down all the apps you might of installed after that restore point.
  5. Follow the instructions on the screen and restore your system to a point where you know you did not have this clear.fi issue.
    Note: Basically you will need to restore your system before you updated your Clear.fi application.
  6. After the restore point is completed do not update the Clear.fi applications because you will run into the same issue again

3. Install a different DVD player

If the issue persists, install a different player. Check out our list of the best DVD player apps that you can use on your computer and install the one that best suits your needs.

Keep in mind that Clear.fi was originally designed for Windows 7 and installing in on another OS version may trigger various technical issues. As a result, it’s best to use an alternative DVD player tool.

Now you have a few quick methods on how to fix your Clear.fi applications and get your DVD’s working again on the Windows 8, Windows 10 device. If you have any other questions on this subject, let us know in the comments below.

RELATED STORIES TO CHECK OUT:


Fix: Laptop Freezes Completely After About 30 Seconds

Do you want to find out how you can fix your Windows 8, Windows 10 laptop if it freezes in 30 seconds after you start it?

After reading the guide below, you will learn what are the possible reasons as to why your laptop freezes, as well as what steps you need to take in order to fix your Windows 8, Windows 10 operating system.

If it is a hardware failure of the laptop that causes your Windows 8 or Windows 10 to freeze, then it is probably because a specific component is heating up above the normal parameters.

This means that you might need to take your laptop for a maintenance run in a specialized store. If this issue is caused by the Windows 8 or Windows 10 system you will be able to solve it by applying one of the methods listed below.

My laptop freezes after a few seconds. How do I fix it?

  1. Boot into Safe Mode
  2. Use a third-party specialized software
  3. Run the System Maintenance troubleshooter
  4. Run Microsoft’s Safety Scanner
  5. Run SFC scan
  6. Additional troubleshooting solutions

1. Boot into Safe Mode

You will need to boot into safe mode first and see if you have an application that uses a lot of memory from the Windows 8, 10 devices, therefore, causing the system to crash or freeze.

  1. Reboot your Windows 8 or Windows 10 device.
  2. While the operating system starts you need to press and hold the “Shift” button and keep pressing the “F8” key.
  3. You should get to a blue recovery window where you need to left click or tap on the “See advanced repair options” button.
  4. Left click or tap on the “Troubleshoot” button you have in the next screen.
  5. In the new “Troubleshoot” menu left click or tap on the “Advanced options”.error 0x80041006
  6. Left click or tap on the “Windows Startup Settings” feature.
  7. Left click or tap on the “Restart” button situated in the lower right side of this window.
  8. Now after the restart of the operating system is finished you should get to a black screen where you have the chance to choose “Safe mode”.
  9. After you have chosen the “Safe Mode” feature hit the “Enter” button on the keyboard.
  10. It will automatically log you to the “Safe mode” feature.
  11. Wait a few minutes and see if you’re Windows 8 or Windows 10 is freezing again.
  12. If the system runs normally then you will need to do a clean boot by following the next steps below.
  13. Move the mouse pointer to the upper right side of the screen.
  14. On the Charms bar you will need to left click or tap on the “Search” feature.
  15. In the search box you need to write “msconfig”.
  16. Left click or tap on the “msconfig” icon after the search is finished.
  17. Left click on the “Services” tab situated in the upper side of the window.
  18. Left click to check the box next to “Hide all Microsoft services”.hide all microsoft services
  19. Left click or tap on the “Disable all” button.
  20. Left click or tap on the “Startup” tab situated in the upper side of the window.
  21. Left click on the “Open Task Manager” feature.
  22. From the applications list you have in front of you left click on each application at a time and left click or tap on the “Disable” button.
  23. After you disabled them you need to close the “Task manager” window.
  24. Left click on the “OK” button in the “System Configuration” window in order to close this as well.
  25. Reboot the Windows 8 or Windows 10 device.
  26. After the restart of the system, check if you have the same freezing issue.
  27. If you do not then it means that one of the recent applications you have installed is causing these freezing issues.
    Note: You will need to enable them one at a time following the steps above and see which app is causing this. When you find the app you will need to either uninstall it or upgrade it to the latest version for your Windows 8 or Windows 10 system.

2. Use a third-party specialized software

Using a dedicated PC repair tool is one of the safest options. This type of utility simplifies and automates troubleshooting tasks, so you won’t have to worry about manually working with your system settings and risking generating even more errors.

We recommend repair software because it can assess and fix multiple PC problems, including an overused CPU, an unstable PC, or a faulty security system.

3. Run the System Maintenance troubleshooter

  1. Move the mouse pointer to the upper right side of the screen.
  2. Left-click on the “Search” feature.
  3. Write in the search box “Control Panel”.
  4. After the search is finished left click or tap on the “Control Panel” icon.
  5. Left-click or tap on the “Troubleshooting” feature you have in the control panel.
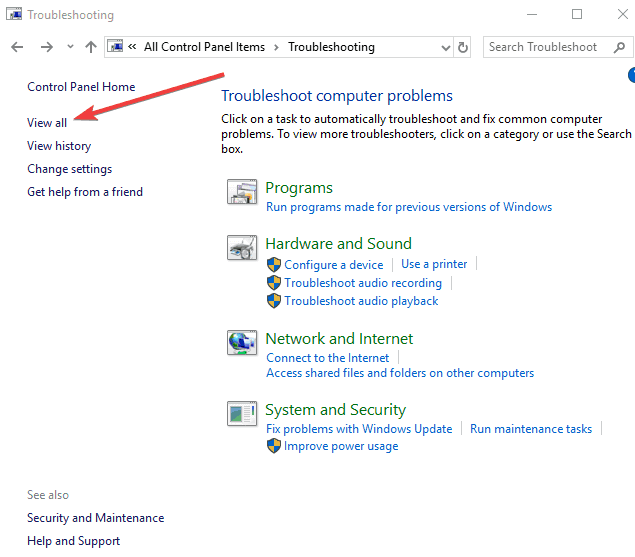
  6. Left-click or tap on the “View all” feature situated on the left side of the window.
  7. Left-click or tap on the “System Maintenance” icon.
  8. Left-click or tap on the “Next” button and follow the instructions you have on the screen to finish the troubleshooting process.
  9. After the troubleshooting process is finished start your Windows 8 or Windows 10 normally and check if it freezes again.

4. Run Microsoft’s Safety Scanner

  1. Left-click on the link below to download the “Microsoft Safety Scanner” application.
    Download here Microsoft Safety Scanner
  2. Install it and run it by following the instructions you have in the application.
  3. After you run this app you will need to reboot your system again and see if it freezes.
Note icon NOTE
If it’s working correctly after you tried this method you can go ahead and uninstall the “Microsoft Safety Scanner” app.

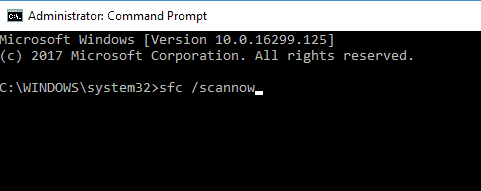
5. Run SFC scan

  1. Move the mouse pointer to the upper right side of the screen.
  2. Left-click or tap on the “Search” feature.
  3. Write in the search box “Command prompt”.
  4. Right-click on the “Command prompt” icon and select from there the “Run as administrator” option.
    Note: You might get a pop-up window asking you for the administrator account and password in which case you will need to type in there the required information.
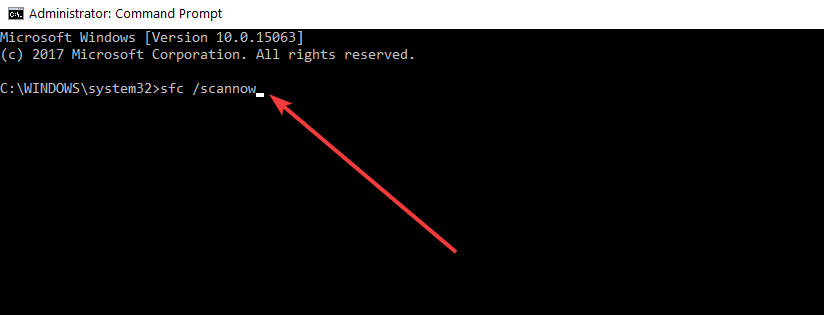
  5. Write in the “Command prompt” window the following “sfc /scannow”.SFC scan
  6. Press the “Enter” button on the keyboard.
  7. You will need to wait a couple of minutes for the sfc scan to finish.
  8. After the scan is completed you need to reboot the Windows 8 device.
  9. Check after the reboot of the system if you still have this freezing issue.

6. Additional troubleshooting solutions

If the problem persists, here are a few additional workarounds that may help you fix the problem:

  • Disable overclocking software. Keep in mind that overclocking tools put a strain on your computer’s hardware and cause overheating issues which often lead to unexpected system freezes and crashes.
  • Uninstall recently installed apps and programs. If this problem occurred shortly after you downloaded and installed new tools on your machine, try uninstalling them and check if the problem persists.
  • Reinstall your graphics drivers. Boot into Safe Mode as previously explained, uninstall your graphics drivers and then re-install them. Restart your computer and check if the issue persists.

There you have a few methods on how to repair your laptop if it freezes after 30 seconds of run time in Windows 8 or Windows 10. If you found this article helpful or if you have any additional questions, use the comment section below to let us know.

FIX: MSDTC encountered an error (HR=0x80000171)

MSDTC encountered an error on your PC? Don’t not worry, we have got the right fixes for you. Some Windows users reported getting errors when they enable the WCF-Custom receive location. The error is usually displayed in this format: MSDTC encountered an error (HR=0x80000171) while attempting to establish a secure connection with system.

Microsoft’s Distributed Transaction Coordinator (MSDTC) enables you to control transactions coordination between resource managers and applications. Also, while MSDTC relies on the network topology of the underlying components, a transaction can span multiple DTCs throughout your network.

However, Network DTC Access must be enabled on all MS DTC instances that are participating in the transaction; this enables transactions to be coordinated across the network.

For example, if a remote computer attempts to update a SQL database by using MS DTC transaction while Network DTC is disabled, the transactions will fail; hence, the MSDTC encountered an error prompt. The Windows Report team has compiled the applicable solution for this error problem.

How to fix ‘MSDTC encountered an error’ alert

  1. Enable Network DTC Access
  2. Enable a firewall exception for MS DTC
  3. Exclude MSDTC in your antivirus settings
  4. Enable rule for PPTP

Solution 1: Enable Network DTC Access

One of the quick fixes for the error problem is to enable Network DTC Access for MS DTC transactions. You can do this in the component services. Follow these steps to enable network DTC Access:

  • Go to Start, type “dcomcnfg” without quotes, and then hit the Enter key.msdtc encountered an error
  • Expand the console tree to locate Local DTC (usually located in the component services tab)
  • On the Action menu, click Properties.
  • Click the Security tab and make the following changes:
  • In Security Settings, select the Network DTC Access check box.
  • In Transaction Manager Communication, select the ‘Allow Inbound’ and ‘Allow Outbound’ check boxes.
  • Click OK.
  • Restart the Distributed Transaction Coordinator service (MSDTC) afterwards.

However, if you still get the error after trying out this fix, you may proceed to the next solution.

Solution 2: Enable a firewall exception for MSDTC

Sometimes, MSDTC encountered an error prompt is caused by the Windows Firewall. Windows Firewall prevents MSDTC from running on your computer; this is due to its protective measures against external control.

However, you can bypass this ‘wall’ by enabling firewall exception for MSDTC. Here’s how to do this:

  • Go to Start > Type “Windows Firewall”, and select “allow an app through Windows Firewall“.msdtc encountered an error
  • Click on “Change Settings” optionsmsdtc encountered an error
  • Now, Click on “Allow another program”
  • On the Exceptions tab, select the ‘Distributed Transaction Coordinator’ check box.
  • Click OK.

Meanwhile, if you still get the error after trying out this fix, you may proceed to the next solution.

Solution 3: Exclude MSDTC in your antivirus settings

Also, hyperactive antivirus programs can block MSDTC on Windows 10; hence, resulting in MSDTC encountered an error prompt. The best workaround would be to exclude DTC from your antivirus protection settings.

Here’s how to do this in Windows Defender:

  • Launch Windows Defender Security Center
  • Now, go to Virus & Threat protection settingsmsdtc encountered an error
  • Select Exclusions
  • Click on ‘Add or remove exclusions’ option
  • Now, select ‘Add an exclusion’ and add DTC.
  • Restart your PC

— RELATED: FIX: Wi-Fi frequently disconnects in Windows 10, 8.1, 8, 7

Solution 4: Enable rule for PPTP

Here’s how to do this:

  • Go to Start > Control Panelmsdtc encountered an error
  • Now, go to Windows Firewall > Select Advanced Settingsmsdtc encountered an error
  • Search for the ‘Routing and Remote Access “under Inbound Rules and Outbound Rules”.

For Inbound Rules: right-click “Routing and Remote Access (PPTP-In)”, select “Enable Rule”.  For Outbound Rules: right-click “Routing and Remote Access (PPTP-Out)”, select “Enable Rule”.

Conclusively, we suggest that you also check the MSDTC security settings dialog for details concerning MSDTC encountered an error (HR=0x80000171) prompt. Let us know how you were able to solve this error problem. Feel free to comment below.

RELATED STORIES TO CHECK OUT:

Trump’s immigration policies might force Microsoft to move jobs overseas

In a new interview with CNBC, Microsoft president Brad Smith discussed politics, the US and China trade war, and more. The most interesting part of the segment, though, revealed that Microsoft could be forced to potentially move jobs out of the United States due to the Trump administration’s immigration policies.

Like many other tech giants, Microsoft hires foreign workers for tech-related jobs, but the Trump administration’s tightening and cuts at some older immigration policies are cutting into talent acquisition. There are two policies which Smith pointed out specifically in his interview— an Obama administration rule which allows spouses of people with non-immigrant H-1B visas to work, and a rule which allows international students to work while applying for a visa. According to Smith, Microsoft doesn’t want to move jobs overseas but the changes in immigration policies leave them with no choice.

“We don’t want to move jobs out of the United States and we hope that we don’t see decision making in Washington that would force us to do that…We’re not going to cut people loose. We’re going to stand behind them…In the world of technology you better stand behind your people because your people are your most valuable asset.”

Smith further detailed that the tightening of and more changes to immigration policies could result in “hundreds of employees [losing] their ability to work in the United States.” He also added that the company has a development center in Vancouver which can be  “a bit of a safety valve”

He ended by saying Microsoft feels the need to stand up for immigration “where we feel our interests are at stake.” This was best seen when Microsoft lashed out at the Trump administration for the proposed end to DACA and then stood up for legislation to protect DACA recipients.

Play the Defiance 2050 video game for free on Xbox One today

The Defiance 2050 video game is finally available to play on Xbox One consoles in most regions beginning today. The game is a current-gen upgrade of the Xbox 360 Defiance title that features improved graphics and more in-game content for players to unlock. Here’s the full description and release trailer.

Join your friends and become an Ark Hunter in a massive cooperative online shooter like no other. Choose from an array of fully customizable weapons and classes, explore a unique futuristic open world, and engage in epic fast-paced third-person shooter combat.

  • Seek fame and fortune as an Ark Hunter in a compelling sci-fi narrative
  • Fight it out through fast-paced third-person shooter combat in a massive open world
  • Battle alien races alongside hundreds of other players in massive dynamic world events
  • Craft a perfect Ark Hunter via thousands of unique class, weapon, and upgrade combinations
  • Test your arsenal against other players in instanced battlegrounds and giant 64×64 open world battles
  • Join up as a 4-person squad and challenge punishing story driven instances
  • Race from battle to battle across a devastated Earth using dozens of futuristic vehicles

Defiance 2050 is free-to-play on Xbox One however players can buy special Class Packs which unlock classes, boosters, and outfits for characters.

Are you going to give Defiance 2050 a go? Let us know in the comments below and don’t forget to follow us on Twitter for more Xbox video game news.

Defiance 2050
Defiance 2050
Developer:
Trion Worlds Inc.
Price:
Free

Surface Go vs Apple iPad: Which is better?

FCC documents highlighted that Microsoft was about to release a new Surface tablet. Now Microsoft has duly announced the Surface Go tablet on Windows Blogs. That is a successor to the Surface 3 tablet and Microsoft’s most economical Surface tablet to date.

Microsoft announced the Surface Go will be available for pre-order from July 10, 2018. The tablet will be more widely available from August 2. The tablet is retailing at $399.99, but that RRP increases with the inclusion of its Type Cover keyboard and stylus pen accessories. With a the keyboard and pen included, the Surface Go will be available at $597.

Surface Go specs

Microsoft has already revealed full specifications for the Surface Go. It includes an Intel Pentium Gold processor that clocks in at 1.6 Ghz. The tablet‘s storage ranges from 64 GB-256 GB. The Surface Go can include 4-8 GB RAM depending on configuration. The tablet‘s 10-inch display has a resolution amounting to 1,800 x 1,200.

The Surface Go includes front and rear cameras for photography with five and eight megapixel resolutions. The tablet also includes a microSD slot, which is a good addition for photographers. You can transfer your photos to the Surface Go directly from camera SD cards via the microSD slot.

A USB Type-C 3.1 port is another welcome addition to the Surface Go. That is the emerging industry standard port which boasts a much faster data transfer than USB 3.0. Most Surface laptops don’t include USB-C ports, and Microsoft has released a USB-C dongle for the Surface Pro. However, you won’t need a USB-C adapter for the Go tablet.

— RELATED: Microsoft’s low budget Surface tablet takes on Apple’s iPad

Head-on collision: The Surface Go vs the iPad

Microsoft is launching the Surface Go to take on the Apple iPad 9.7, which is the budget iPad. The Surface Go’s RAM and storage specifications certainly compare favorably with the iPad 9.7. The Go tablet can pack up to eight GB RAM compared with the iPad 9.7’s two GB. The 9.7’s maximum storage is 128 GB, while Surface Go users can upgrade to 256 GB storage.

There is not much difference between the tablets‘ batteries. Microsoft states that the Surface Go battery can last up to nine hours. Apple claims the iPad 97’s battery will last for 10 hours without recharge.

The Surface Go’s display is perhaps one weak spot. The iPad 9.7 boasts a 1,536 x 2,048 display resolution, which is a higher resolution than the Surface Go. Even the Surface 3 has a higher display resolution than the Go tablet. Note, however, that you can hook the Go tablet up with a 2K VDU (Visual Display Unit) via its Surface Connect port.

— RELATED: 5+ best iPhone & iPad emulators for Windows 10

A built-in kickstand is a handy addition to the Surface Go, which is another thing the iPad 9.7 does not include. That kickstand enables users to stand the tablet on surfaces, which is handy for video playback. The kickstand tilts the tablet at a 165 angle.

When it comes to RRP, however, the iPad 9.7 is the most economical tablet. The iPad 9.7 is retailing at $329, which is about $70 less than the Go. An additional Logitech keyboard and stylus pen increases the iPad 9.7’s price to $527.95, but it remains less expensive than the Go tablet.

So, the iPad 9.7 still remains the best value tablet. That might be a decisive factor in the 9.7’s favor when the Surface Go launches in August. Nevertheless, with a built-in kickstand, plenty of RAM, a USB-C port, microSD slot, greater storage and a touchpad keyboard, the Surface Go has enough in its armory to be a worthy alternative to the iPad 9.7.

RELATED STORIES TO CHECK OUT:

Microsoft fixes double zero-day security flaw in Windows 7

Microsoft fixed a security flaw that hit Windows 7 and was discovered together with ESET. The great thing is that according to the tech giant, there haven’t been any attacks thanks to the fast discovery and fix of the problem.

ESET helps Microsoft to fix Windows 7 security vulnerability

Matt Oh, Windows Defender ATP Research released a technical analysis of the vulnerability and pointed out that Microsoft teamed up with ESET and Adobe to fix two different zero-day exploits in a PDF which was believed to pack an unknown Windows kernel flaw.

Although the PDF sample was found in VirusTotal, we have not observed actual attacks perpetrated using these exploits. The exploit was in early development stage, given the fact that the PDF itself did not deliver a malicious payload and appeared to be proof-of-concept (PoC) code.

The notes also say that finding this vulnerability before an attacker got a chance to use it was a great effort of the collaboration between Microsoft and ESET.

The analysis details that one exploit affected Adobe Acrobat Reader and the other one hit Windows 7 and Windows Server 2008. The first flaw targeted Adobe JavaScript engine, and the other was aiming at Windows.

Update your OS now

The same recommendation that Microsoft has been offering users is also appropriate now: update your older operating system in order to benefit from the latest security updates and always remain protected.

If you have to delay upgrading your OS, it’s recommended that IT admins disable JavaScript in Adobe Acrobat and Adobe Reader until the updates are eventually installed. They are also advised to double-check their PDFs for malware just to make sure that no exploits are targeting the network systems. You can read the complete details on the exploit on Microsoft’s support page.

RELATED STORIES TO CHECK OUT:

New in Insider Preview Build 17713— web sign-in to Windows 10, Inking plus Notepad updates, and more

It’s time for a mid-week treat, as Microsoft today released Windows build 17713. This build is a big one, as it comes packed with plenty of cool new features, like Web Sign-in to Windows 10, Remote Desktop with Biometrics, and more. Here’s what you need to know before installing on your PC.

Generally speaking, this builds adds some improvements to Edge, including per-side media autoplay, look up definitions in Books, and some polish for the PDF reader. In addition, the build improves on Notepad, adding in enhancements for wrap-around, find and replace, zooming, and more. You’ll also find this build adds a new faster sign in on shared PCs, and Inking updates so the embedded handwriting will now be the default experience for text entry with a pen in modern applications.

On the bigger business side of things, Microsoft also made is so Azure Active Directory and Active Directory users using Windows Hello for Business can use biometrics to authenticate to a remote desktop session. Finally, Microsoft has added support for Web Sign-in to Windows 10 on Azure AD Joined PCs, and also improved on Windows Defender Application Guard. See below for more on each of these features.

Edge Improvements

  • You can now control autoplay permissions on a per-site basis under the “Website permission” section of the Website Identification pane – just click the information icon or lock icon on the left side of the address bar and click “manage permissions” to get started.
  • We’ve added a new dictionary function, so you can look up definitions for key words when reading a page or document. Simply select a single word to see the definition appear above your selection.
  • You can choose to have a word read aloud to you to hear the correct pronunciation or expand more details from the definition. You can toggle whether definitions appear and which types of content they work in under the “General” tab of the Microsoft Edge settings menu.
  • The toolbar available on a PDF document opened in Microsoft Edge will now show text descriptions for the icons to make them easily understandable. by the users. New options like “Add notes” are now available in the toolbar so that these tools are handy when you need them.
  • The toolbar can now be pinned at the top of the document, making all the PDF tools easily accessible if you need them. You can also unpin the toolbar for an immersive reading experience. If the toolbar is unpinned, it will hide itself – just hover over the top area to bring it back.
  • We’ve included a bunch of rendering performance fixes with this build. Now you will see less and less of the white pages when you navigate through PDF files in Microsoft Edge.

Notepad

  • Wrap-around find/replace: We’ve made significant improvement to the find/replace experience in Notepad. We added the option to do wrap-around find/replace to the find dialog and Notepad will now remember previously entered values and the state of checkboxes and automatically populate them the next time you open the find dialog. Additionally, when you have text selected and open the find dialog we will automatically populate the search field with the selected text.
  • We’ve added options to make it quick and easy to zoom text in Notepad. There is a new menu option under View > Zoom to change the zoom level and we display the current zoom level in the status bar. You can also use Ctrl + Plus, Ctrl + Minus and Ctrl + MouseWheel to zoom in and out and use Ctrl + 0 to restore the zoom level to the default.
  • A long outstanding request has been to add the ability to display line and column numbers when word-wrap is enabled. This is now possible in Notepad and we’ve made the status bar visible by default. You can still turn the status bar off in the View menu.
  • We’ve improved the performance when opening large files in Notepad.
  • Notepad now supports Ctrl + Backspace to delete the previous word.
  • Arrow keys now correctly unselect text first and then move the cursor.
  • When saving a file in Notepad, the line and column number no longer reset to 1.
  • Notepad now correctly displays lines that don’t fit entirely on the screen.

Faster sign-in to a Windows 10 shared PC

  • Do you have shared PCs deployed in your work place? Do you wish that signing in to a PC with your account was faster? Starting with this build, we are introducing “Fast Sign-in,” which enables users to sign in to a shared Windows 10 PC in a flash!
  • To enable Fast Sign in,
    a)Set up a shared or guest PC with Windows 10
    b)Set the following policy to enable Fast Sign in (Policy CSP/Authentication/EnableFastFirstSignIn)
    c)With the policy enabled, sign-in to a shared PC with your account and notice the difference!

Inking Updates

  • We introduced the embedded handwriting panel with the April 2018 Update, and after taking some time to refine the experience based on your feedback, in RS5 the embedded handwriting will now be the default experience for text entry with a pen in modern applications. Just tap a text area, like a search box, and it will expand to give you a comfortable area in which to write.

Windows Defender Application Guard Improvements

  • Windows Defender Application Guard introduced a new user interface inside Windows Security in this release. Standalone users can now install and configure their Windows Defender Application Guard settings in Windows Security without needing to change Registry key settings. Additionally, users who are managed by enterprise policies will be able to check their settings to see what their administrators have configured for their machines to better understand the behavior of Windows Defender Application Guard. This new UI aims to improve the overall experience for users to manage and check their Windows Defender Application Guard settings. As long as devices meet the minimum requirements, these settings will appear in Windows Security.

Web Sign-in to Windows 10

  • Until now, Windows logon only supported the use of identities federated to ADFS or other providers that support the WS-Fed protocol. We are introducing “Web Sign-in,” a new way of signing into your Windows PC. Web Sign-in enables Windows logon support for non-ADFS federated providers (e.g. SAML).
  • To try out Web Sign-in: Azure AD Join your Windows 10 PC. (Note: Web Sign-in is only supported on Azure AD Joined PCs).  Set the following policy to enable Web Sign-in (Policy CSP/Authentication/EnableWebSignIn) On the lock screen, select Web Sign-in under Sign-in options. Click on the “Sign in” button to continue.

As you can tell, there is a lot to play with in this build, especially if you’re a business user. Fire up those VM’s and Insider PCs now and get downloading. Once you’ve updated, let us know how the build is running for you by dropping us a comment in the section below.

With Windows 10 Insider build 17713, Microsoft resets Skip Ahead – here’s what you need to know

Microsoft has just released the latest RS5 build, 17713, and with it comes a significant change for some Windows Insiders. Since the release of the Windows 10 April 2018 Update, the Insider Fast and Skip Ahead rings have been on parallel tracks, but as of today, just like with earlier versions (RS3 and RS4), Fast Ring and Skip Ahead will diverge.

If you’re currently on the Fast Ring, you’ll continue to receive Insider builds, although they have been renamed slightly, to “RS5_Release.”

For Insiders on the Skip Ahead Ring, things are a bit different than previous iterations. This time, Microsoft is doing a complete reset of the Skip Ahead program:

Insiders who previously opted in to Skip Ahead will be automatically put back into the Fast ring. The option to join Skip Ahead will disappear from the dropdown under Settings > Update & Security > Windows Insider Program. In the coming weeks, we will make an announcement that we have re-opened Skip Ahead for Insiders to opt-in. If you were previously in Skip Ahead, you will need to opt-in again.

What the reset does is clear the decks and the Skip Ahead program will start fresh “in the coming weeks,” with all Insiders having to opt-in to the program all over again. This will allow some Insiders who were left out of the Skip Ahead program to gain access, but it may and probably will leave some previous Skip Ahead testers out in the cold. We’ll keep you informed on when the new Skip Ahead opt-in option becomes available, but if you want to get the latest bits, you’re going to have to be on your toes.


Two USB adapters for Surface Go will launch August 2nd, too

Microsoft’s upcoming Surface Go features a single USB C port, so if you’re looking to connect your older accessories to the new device come August 2nd, you’ll need a dongle. Luckily, Microsoft is planning on launching two new USB C adapters for the Surface Go, including a new Surface-branded USB C to Ethernet adapter (via Windows Central.)

Both adapters are expensive for their purposes, but they come with the Microsoft Surface branding. Anyway, the first adapter allows you to convert USB C to USB A for connecting mouse, keyboard, and USB flash drives. Microsoft’s second USB C adapter, meanwhile, turns your USB C port to an Ethernet port, and also has a USB A port (pictured in the featured image above)

The USB C to USB A adapter is available for pre-order at BestBuy for $19.99, and the USB C to Ethernet is also available for pre-order for $54.99. Microsoft has yet to announce either of these, but it interesting to see the company embrace the adapter lifestyle, especially after launching a Surface Connect to USB C adapter earlier in this month.

Lenovo’s Windows 10 on ARM powered Miix 630 is now available

If you’ve been on the hunt for an Always Connected PC (also known as Windows 10 on ARM) device, you’ve likely already seen or considered the ASUS NovaGo or the HP Envy x2. Well, several months after being announced at CES 2018, Lenovo’s Miix 630 Always Connected PC is now also available for purchase.

Coming in at $899.99, the Lenovo device is somewhat more expensive than the $699 ASUS NovaGo but much cheaper than the $999 HP Envy X2. For the price, you’re getting 4GB of RAM, a 12.3” FHD+ (1920 x 1280) IPS multi-touch display, and the Lenovo Active Pen and Keyboard included. Of course, you’re also getting the security of Windows 10 S, and the convenience of the Qualcomm Snapdragon 835 for 20 hours of battery life, and 4G LTE connectivity.

The release of this device comes just a few weeks after Microsoft promoted the Always Connected PC on Amazon’s main page. Qualcomm also recently published YouTube spots which highlight the benefits of Always Connected PCs, so you might want to check those our if you’re on the fence about getting one of these devices.

Dead Cells’ Xbox One release date announced, pre-orders open

The video game, Dead Cells, has officially been confirmed to be coming to the Xbox One on August 7th this year and digital pre-orders for it are now live.

The game is a 2D platformer with a huge emphasis on exploration, numerous skill and weapon combinations, and nonlinear progression. Here’s the official game description and announcement trailer.

Dead Cells puts you in control of a failed alchemic experiment trying to figure out what’s happening on a sprawling, ever-changing and seemingly cursed Island. Tough but fair combat, responsive controls, challenging foes, permadeath and of course, the emergency panic roll to get you out of trouble, make for a demanding, visceral and cathartic action game. Experience a Roguevania, mixing an interconnected world, branching paths and unlockable skills with the constant adrenaline-pumping threat of permadeath. No checkpoints. You either vanquish the final boss in one go, or you try again. However, you keep some of your progress for successive runs; new paths you’ve unlocked, access to new levels, mutations, abilities and weapons.

Speaking of weapons, Dead Cells features a plethora of ways to slay your enemies. A large variety of swords, bows and of course spells, but also whips, grenades and turrets, each one with its own unique twist. Plus, mutations and scrolls allow you to build and customize your character differently with each and every run. At the end of the day though, it’s YOUR skills as a player that matter most! Roguelites are about constantly sharpening your skills, until what was an insurmountable obstacle becomes a walk in the park. Patience, you’ll get better!… eventually.

Dead Cells has a rather large loyal following after being available to play on Steam since early-2017 so it should be interesting to see if its popularity transfers over to the console launch.

Are you excited to play Dead Cells on your Xbox One? Let us know in the comments below and then like us on Facebook for more Xbox video game news.

Dead Cells
Dead Cells
Developer:
Motion Twin
Price:
Free

Shining Resonance Refrain is a new 4K JRPG video game on Xbox One

Shining Resonance Refrain now available to play on Microsoft’s Xbox One consoles. The game is a Japanese roleplaying game (JRPG) that’s actually a re-release of the Japan-only original with new features and character options. Shining Resonance Refrain is also Xbox One X Enhanced and will play in 4K resolution when played on that console.

Here’s the full game description and trailer.

Play as Yuma Ilvern and stop the Empire from exploiting the power of the ancient dragons, including the soul of the Shining Dragon within you. With the help of your friends, realize your destiny, save Astoria, and unleash the strength you’ve always had locked away.

In the original game, previously released only in Japan, Imperial Princess Excella was an unplayable character, but in the new “Refrain Mode” in Shining Resonance Refrain, both she and Dragonslayer Jinas can be added as party members for a new experience – just be sure to save this for your second playthrough to avoid any spoilers!

Dragons were long thought to be extinct, and because Yuma holds the ability to transform into the Shining Dragon, he was taken as a captive of the Empire. With the help of the Dragoneers, Sonia, princess of Astoria, pleads with Yuma to aid them in their fight to save their land from the Empire’s dominion. Typically timid, will Yuma find the courage to realize the strength he has within him?

Do you enjoy playing JRPGs on your Xbox One? Share your favorites with the community in the comments below and then make sure to follow us on Pinterest for more Xbox video game content.

Shining Resonance Refrain
Developer:
SEGA
Price:
$5.99

Rocket League comes to Xbox Game Pass

Rocket League, the popular vehicular soccer game that has grown to become an eSport phenomenon is joining Xbox Games Pass today. Microsoft announced the big news during the monthly Inside Xbox livestream, and this is exactly the type of games Xbox Games Pass needs to attract more subscribers.

In addition to Rocket League, the strategy simulation game Bomber Crew is also joining Xbox Games Pass today on its day of release. Then on July 13, the action-adventure title Warhammer Vermintide: 2 will also be added to the catalog when it launches on Xbox One.

Overall, July saw 10 games joining Xbox Games Pass, including Bethesda classics such as Fallout 3 and The Elder Scrolls IV: Oblivion plus more recent games such as Abzu or Dirt 4. We hope to see more popular games like Rocket League being added in the future, including Microsoft’s own properties such as Minecraft or Forza Horizon 3.

Twitter Won’t Open: How to Fix it for Good

Since Twitter, Inc. discontinued the support for the UWP version of the Windows 10 app and traded it for a similar global model (Progressive Web App), some issues emerged. Basically, for many users, Twitter won’t open.

We’re still talking about a small number of affected users, as the Twitter app is the wrapper for the web-based version, and it’s usually working fine. However, others cannot open the Twitter app and access their feed. Keep reading to find out all about it!

Why is the Twitter app not opening on Windows?

Here are a few reasons the Twitter app is not working:

  • Misconfigured app settings: A common reason behind the problem is when the app settings start to conflict with the system, and, as a result, the Twitter app keeps crashing.
  • Corrupt app cache: In many cases, users found that it was a corrupt cache to blame for the issue.
  • Issues with the network: For some users, a configured VPN, firewall, or similar security software prevented Twitter from running in Windows.

What can I do if the Twitter app won’t start?

Before we start with the complex solutions, here are a few quick tricks:

  • Restart the computer.
  • Disable the VPN and any third-party antivirus installed on the PC.
  • Make sure your Windows firewall is not blocking the app.
  • Check the network connection and verify that you have a high Internet speed.

If none work, move to the solutions listed next.

1. Run the app troubleshooter

  1. Open Settings.
  2. Choose Update & Security.
  3. Select Troubleshoot from the left pane.
  4. Scroll to the bottom and expand the Windows Store Apps troubleshooter.
  5. Click on the Run the troubleshooter button.windows 10 twitter app won't open

As we’ve said, the troubleshooting steps are fairly limited regarding Windows-native apps. There’s a dedicated built-in troubleshooting tool for dealing with problems in Microsoft Store. And it covers all apps downloaded from the Store, both pre-installed and third-party.

Upon running, this tool should check for possible errors and resolve them. And hopefully, it will fix things when Twitter won’t open.

2. Reset app settings

  1. Right-click Start and open Settings.
  2. Choose Apps.
  3. Under the Apps & features section, search for Twitter and click to highlight it.
  4. Click Advanced options.windows 10 twitter app won't open
  5. Click Reset.windows 10 twitter app won't open

Firstly, like any other UWP app, including the pre-installed ones, you can reset all stored cache and settings. By doing so, there’s a good chance you’ll fix the bug. If it’s the bug we’re looking at, and that’s the reason why Twitter for Windows 10 won’t open.

3. Reinstall the Twitter app

  1. Press Windows + I to open Settings.
  2. Choose Apps.
  3. Search for Twitter in the right pane and expand it.
  4. Click Uninstall.windows 10 twitter app won't open
  5. Navigate to the Microsoft Store page for Twitter and re-download the app for Windows.windows 10 twitter app won't open

Sometimes, it’s hard to explain why an app from the Windows ecosystem won’t function as it should. Even though Twitter for Windows 10 is just a mere PWA wrapper (albeit with a slight visual redesign), we can’t say why it works for some and can’t be accessed for others.

It should be just a new browser-like window with the Twitter feed (what PWA is). Seemingly, that’s not the case. And the next obvious step in addressing this particular problem is reinstallation.

4. Use Twitter alternatives for the time being

Ultimately, we recommend alternatives to the official app if Twitter still won’t open and you lack other troubleshooting actions. Some might advise resetting Microsoft Store in the PowerShell command line, but it seems that causes even more significant problems. So stay out of it.

There are various alternatives (some better and some worse), and we suggest trying them out. Hopefully, you won’t give up and stick with the in-browser Twitter version.

Some of the best-rated ones are:

They are wrappers rather than full-on UWP apps, but that’s sadly the state of Microsoft Store, and the availability of competitive alternatives is what it is. We hope this was a helpful read and that you found the solution (or workaround) for your problem.

Power users who want a richer multi column experience can switch to TweetDeck and follow this guide on how to use TweetDeck to manage their X feed from any browser.

If you regularly get too many interactions, your app might also be overwhelmed with the number of requests so consider making your Twitter account private until things cool down.

And if you regularly download apps, find out how to speed up downloads from the Microsoft Store.

Don’t forget to share with us how the troubleshooting goes or provide additional helpful information. You can do so in the comments section below.

Wallpapers Now Windows 8, 10 App Brings Daily HD Quality

Microsoft Store is filled with plenty of wallpaper apps, so it becomes really hard to decide which one to download and install on your Windows 10, 8.1 device and which one to skip. Today we’ve picked Wallpapers Now and we think you won’t regret getting it.

Wallpapers Now for Windows 10, 8.1 is one app that has received plenty of positive reviews and has a very good rating of 4.4 from almost 70 votes. The reason why so many are pleased with it is the fact that it features HD quality images that are a pleasure to enjoy, especially on your Windows 10 tablet, if you have one. But the app looks just as great on any other Windows 10, 8.1 desktop device, too.

windows 8 wallpapers app

Enjoy awesome HD wallpapers on your Windows 10 tablet

*Such wallpapers!* Get HD wallpapers straight to your desktop daily! This app features lots of categories compiled into one great ever changing list. Simple to use, these wallpapers are great for your desktop, laptop, and slate machines! … This application pulls all the awesome wallpapers from reddit, so it does require an internet connection to use!

wallpaper app windows 8The Wallpapers Now Windows 10 application is available for download at the price of $1,99 and what’s really cool is that there are no ads, whatsoever, as the developer has decided not to put ads, since he “enjoys building this stuff”. Well, that’s really great for the users, in the end. There are new HD wallpapers being added on a daily basis and saving them to your own system is really simple. You will find all of them in the Pictures library. There are also comments for certain pics and you can share your awe and inspiration, as well.

[UPDATE] Since Wallpapers Now is a Windows 10 Platform App, your device must be updated to the latest version of Windows for the best performance. You can search for your favorite wallpapers and enjoy the HD quality images. The variety of wallpapers are updated every day and the subject matter is awesome.

If you are interested in finding more high rated wallpapers apps, check out the following articles:

Microsoft introduces new Sport White Special Edition Xbox Wireless Controller

Xbox One controller options are almost limitless these days as Microsoft is always coming up with new colors and themes. In the latest addition, the Redmond giant is now introducing a new Sport White Special Edition Xbox Wireless Controller.

The controller has mint accents, grey, and silver patterns and a grey rubberized diamond grip on the back. It is set for release on July 31st at the Microsoft Store and participating retailers in the United States and Canada.

To pair up with the controller, Microsoft is also planning on selling a matching officially-licensed Xbox Pro Charging Stand. This accessory is $49.99 and comes in the same colors as the controller, a battery cover, rechargeable battery, and 6-foot power cord.

Microsoft says the new Sport White Special Edition Xbox Wireless Controller is different since it is “Inspired by trends in athletics and sports lifestyle.” Interestingly, the Controller does the same grip design as the Combat Tech Special Edition but in a new white base color. You can check out the other Xbox Wireless controllers by clicking here.

Action RPGs Overlord I and II are now backward compatible on Xbox One

Overlord I and II, two action role-playing games released on the Xbox 360 between 2007 and 2009 are now backward compatible on the Xbox One. These follow the addition of Assassin’s Creed Liberation HD and Tom Clancy’s Ghost Recon Advanced Warfighter to the list earlier this month.

For those unfamiliar, the Overlord series of video games let you play as a mysterious warrior named, you guessed it, the Overlord. The game is set in a fantasy universe and you’ll have to defeat your enemies by commanding legions of small creatures called “Minions.”

If you’re a fan of the genre, the first game and its sequel are available for $9.99 each on the Microsoft Store. You can check the latest additions to the Xbox One backward compatibility list on Major Nelson’s website.

Microsoft To-Do starts testing new “important” category for your most urgent tasks

After Microsoft recently added a dark theme option to the Windows 10 version of Microsoft To-Do, the company has now started testing a new star feature that lets you add select tasks to an “Important” category. This new option is now live for Windows Insiders in the Fast and Skip Ahead rings, who can now download the version 1.35.1807.6002 of the app

After installing the update, you’ll see that the “Important” section appears right below “My Day” on the left panel of the app. To mark a task as important, you just click the star icon that is now visible when you open any of your tasks.

This new feature will hopefully help To-Do users keep up with their most important activities, even though it’s already possible to set reminders, due dates, or just adding your priority tasks to “My Day.” If you’re not a Windows Insider or using To-Do on another platform, you should get this new starring option over the coming weeks.

Naruto Shippuden Season 1 is now free on Xbox One and Windows 10

As part of the Microsoft Store’s Anime Month promotional campaign, the entire first season of the popular Naruto Shippuden anime series has been made completely free.

The discount on the first season will run for eight more days but anyone who claims it before the end date will get to keep it for life and can watch it whenever they like. The first season of the Dragon Ball Super anime series was also given away for free earlier this month.

Movies and series purchased in the Microsoft Store can be viewed on Windows 10 PCs, Windows 10 Mobile smartphones, and Xbox One consoles as long as the same Microsoft account is being used on each device. Xbox One users can stream purchased content while those on PC and mobile can also download media for viewing when offline.

Have you purchased anything from the Microsoft Store this month? Let us know in the comments below and then follow us on Twitter for more Microsoft news.

FIX: We need your help to finish adding a feature

Are you getting the ‘We need your help to finish adding a feature’ pop-up? There’s no need to panic! Windows Report will you to fix the error.

The error is reported to occur after upgrading to Windows 10 or installing a new Windows 10 version. The reason for this error is related to Windows 10 installation and its auto optional feature. Hence, we have the put together the best workarounds to fix this error problem.

How to fix ‘We need your help to finish adding a feature’ alert

  1. Turn off optional feature
  2. Perform SFC and DISM check
  3. Run System Restore in safe mode
  4. Roll back Windows
  5. Reset Windows Updates components
  6. Perform an in-place upgrade

Solution 1: Turn off optional feature

You can use the turn-off optional feature in control panel. Here’s how to do this:

  • Press the Windows + X, and F keys on keyboard to open “Programs and features” window
  • On the left pane of Programs and Features, click on Turn Windows Features on or off menu.we need your help to finish adding a feature
  • In Windows Features window, check (On) or clear (Off) the feature you want.
  • Once you are done, click “OK” to apply this change, and then restart your PC.

Alternatively, you can uninstall optional features using “Settings” on your Windows 10 PC, here’s how to do this:

  • Press the Windows key, type ‘settings’, and then hit enter
  • In the settings window, click ‘system’.
  • On “App & Feature tab, click the ‘manage optional features’ menu.
  • Select the feature you want, and you’ll see a button to either uninstall or manage; this redirects you to the settings page where the feature is located.

However, if the ‘we need your help to finish adding a feature’ error message still occurs, you may proceed to the solution.

Solution 2: Perform SFC and DISM check

Sometimes we need your help to finish adding a feature error message that can appear due to corrupt system files. If that’s the case, we recommend performing an SFC scan and repairing your files. To do that, you need to follow these steps:

  • Press Windows+Q and type cmd.
  • From the search results, right-click Command Prompt and choose “Run as Administrator”.we need your help to finish adding a feature
  • A new cmd window appears. Type sfc /scannow and hit the ‘Enter’ key.we need your help to finish adding a feature
  • Wait until scan and repair process is finished.

Due to malware infections, some of the system files can get corrupted or quarantined. For that reason, DISM (Deployment Image Servicing and Management) can be used to scan and resolve this issue by repairing broken files.

Here’s how to run DISM in Windows:

  1. Press Windows key + X and run Command Prompt (Admin).
  2. Copy and paste the following command on the command line:
    1. exe /Online /Cleanup-image /Restorehealthwe need your help to finish adding a feature
  3. In case the DISM can’t obtain files online, try using your installation USB or DVD. Insert media and type following command:
    1. exe /Online /Cleanup-Image /RestoreHealth /Source:C:RepairSourceWindows /LimitAccess
  4. Be sure to replace ”C:RepairSourceWindows” path of your DVD or USB.

Make sure that you replace the repair source path with your own. Alternatively, we strongly suggest you specialized PC repairing tools to detect the system issues responsible for this recurring error message.

Solution 3: Run System Restore in safe mode

Safe mode is a diagnostics mode in Windows that starts your PC in a basic state, with only basic files and drivers running. However, you can restore your system to a state before you started experiencing the error problem. Here’s how to do this:

  1. Shut down your PC and turn it on again.
  2. Navigate to the “Run in Safe Mode” option and hit “Enter”.
  3. Go to Start > Type “system restore” and then hit “Enter”.
  4. Follow the prompts to revert back to a certain restore point.
  5. Wait for the process to complete, and then reboot.

Note: identify the restore point date before the error message display. Also, System restore does not affect any of your files, documents, and personal data.

Solution 4: Roll back Windows

Sometimes, a recent upgrade from Windows 7/8/8.1 to Windows 10 might cause the error problem. Hence, you may consider downgrading your Windows OS back to its previous OS.

Also, you have to run your PC in “Safe Mode” in order to downgrade so as to make the process easier. Here is how to do this:

  • Go to Start > type ‘settings’ > launch Settings.
  • Go to the Update & Security menu.we need your help to finish adding a feature
  • Select the Recovery tab.
  • Click the button “Get started under the option Go back to Windows 7/8/8.1.
  • Follow the prompts to finish the downgrade processes.

Note: An intact Windows.old file (stored in C:Windows.old) is the important precondition for the downgrade.

Solution 5: Reset Windows Updates components

Disclaimer: this solution contains steps that are part of modifying the registry. Please note that serious problems may occur if you do this incorrectly. Hence, follow these steps correctly, and carefully.

So, you should back up the registry before you modify it; this enables you to restore the registry in case a problem occurs.

Here’s how to manually reset the Windows Updates Components:

  1. Right click Start
  2. Select Command Prompt (Admin)we need your help to finish adding a feature
  3. Click Yes when asked for permissions
  4. Stop the BITS, Cryptographic, MSI Installer, and Windows Update Services by typing the following commands at a command prompt:
  • net stop wuauserv
  • net stop cryptSvc
  • net stop bits
  • net stop msiserver

(Press Enter after each command you type)

  1. Rename the SoftwareDistribution and Catroot2 folder by typing the commands below in the Command Prompt then press Enter after each command you type:
  • Ren C:WindowssoftwareDistribution SoftwareDistribution.old
  • Ren C:WindowsSystem32catroot2 Catroot2.old
  1. Restart the BITS, Cryptographic, MSI Installer, and Windows Update Services by typing the following commands in Command prompt:
  • net stop wuauserv
  • net stop cryptSvc
  • net stop bits
  • net stop msiserver
  1. Type Exit in the Command Prompt to close it

After trying out the steps above, you can run Windows Updates, and then follow the prompts to complete Windows Update process.

Meanwhile, some Windows users reported getting “Access Denied” prompts when trying the step above. Here’s what to do if your access is denied:

  • Log in first as administrator or use administrator user account
  • Stop the windows Update service and try to rename SoftwareDistribution folder
  • Right click Start
  • Select Run
  • Type services.msc and press OK or enter
  • Scroll down and locate Windows Update service
  • Right click and select Properties
  • Stop the service
  • Follow the steps again to reset Windows Update Components

After you complete the process, go to “Services” window again, now start the Windows Update service, and then restart the computer.

Note: We highly recommend that you check the “Give me updates” menu for other Microsoft products when using the Windows update option. Windows Updates downloads and installs updates required to run Windows efficiently.
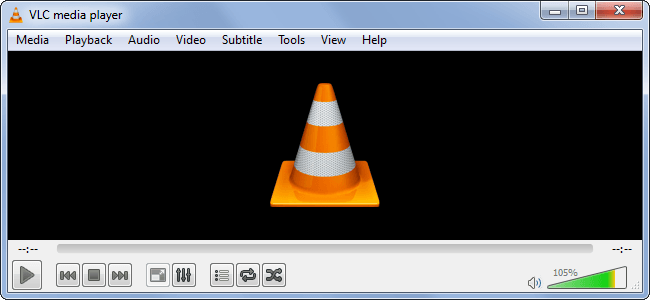
Solution 6: Perform an in-place upgrade

Microsoft constantly releases patches that fix a plethora of Windows issues. So, you might want to consider updating your Windows 10 PC by performing an in-place upgrade. Meanwhile, an in-place upgrade will force Windows 10 to update to the latest version. To do that, do the following:
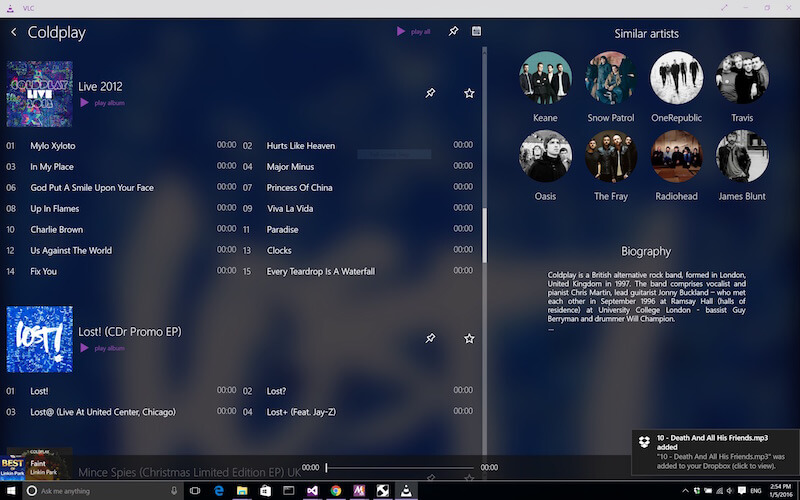
  • Download Media Creation Tool and run it on your PC.
  • Select Upgrade this PC now.
  • Wait while the application prepares your system.
  • Now select Download and install updates (recommended) and click Next.
  • Follow the instructions on the screen until you get to Ready to install screen. Now select Change what to keep.
  • Select “Keep personal files and apps” and click Next.
  • Follow the instructions on the screen to complete the setup.

Once the process is finished, you’ll have the latest version of Windows installed, and all your files and apps will be preserved.

That should wrap it up. We need your help to finish adding a feature error that should be resolved if you followed any of these workarounds carefully. In case you have some questions or additional workarounds, please be sure to inform us in the comments section.

Windows 10 build 17711 bugs: Slow CPU, browser errors and app issues

Many Windows 10 Insiders who tested the latest build release over the weekend confirmed that Windows 10 build 17711 is affected by a series of bugs that include install problems, computer slowdown issues, browser errors and more.

Well, if you’re planning to install the latest Windows 10 build on your computer, read this post to learn what are the most common issues affecting this build. Maybe you’ll change your mind and wait for the next build.

Windows 10 build 17711 bugs

1. Install won’t complete

Some Insiders are still trying to download Windows 10 build 17711 but the install process often fails with an error code or simply gets stuck.

It downloads and tries to install until it reaches 24% and then it stops and starts all over again. It has down this continuously for over 24 hours.

2. Slow CPU

If your computer is slower than usual, maybe you should uninstall this build. Many users complained about their machines running very slowly after getting the latest Insider build.

I have just upgraded to Build 17711 and have noticed system is running very slow. I check task manager and it shows two cores and four logical processors. I have and INTEL quad chip and it should show four cores eight logical processors.

As a quick workaround, navigate to System Configuration(msconfig), click on Boot, go to Advanced options and uncheck Number of processors and Maximum memory, as shown in the screenshot below.

disable Number of processors maximum memory

3. Edge won’t work

Microsoft Edge is unavailable for many Insiders, whereas other browsers work just fine. Apparently, enabling IPv6 may help you solve the problem.

I updated to build 17711 last night before bed. I woke up this morning and tried to connect to the internet through Microsoft Edge but, as the title suggests, I could not connect. I am able to connect through Chrome […]

4. Microsoft Store is unresponsive

Other Insiders reported that the Microsoft Store app is completely unresponsive and nothing happens when they try to launch it.

Today I updated to build 17711, but Microsoft Store does NOT work properly! It runs and displays the windows as last, but by clicking right-top … to pull down “update and downloading” it does not show anything! Other pull down menu items also does NOT work. I confirmed this on my 2 PCs.
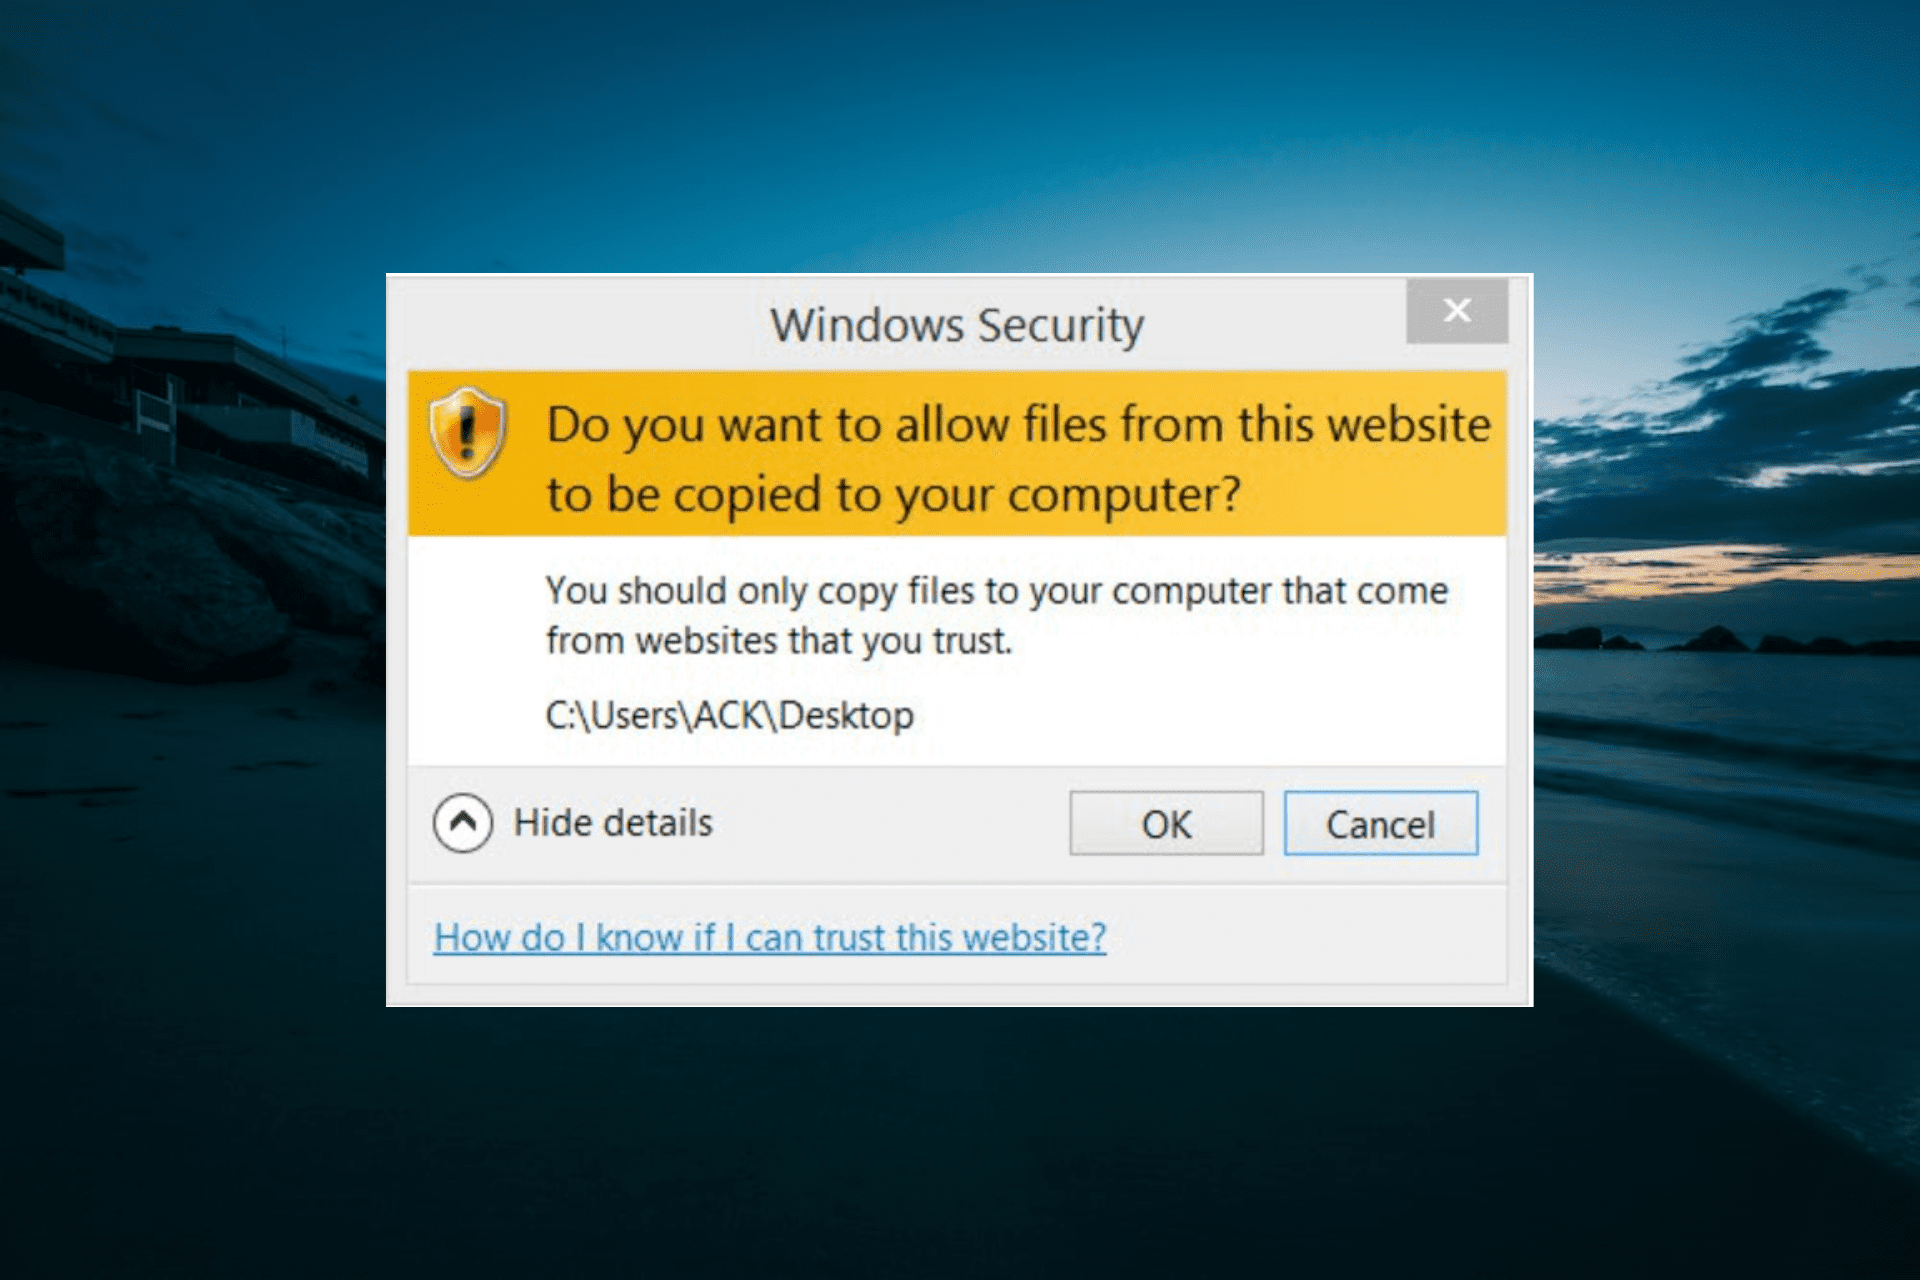
There you go, there are the most frequently reported Windows 10 build 17711 issues. If you already installed this build version on your computer, tell us more about your experience in the comments below.


[Updated] Microsoft Surface Twitter account teases ‘what’s next?’ Suggests July 10 date for possible Surface Go
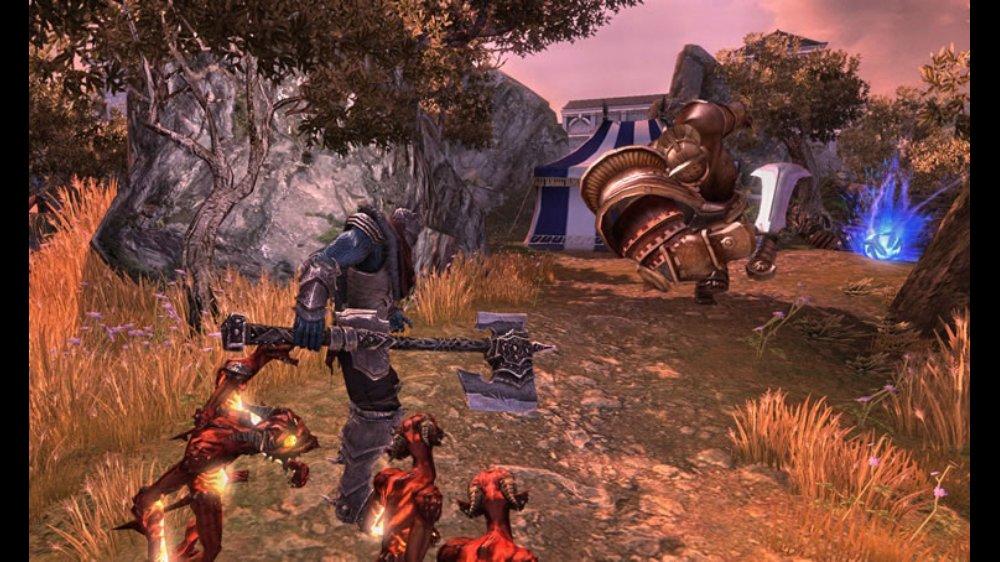
Earlier today we noted on a new rumor which indicated that Microsoft’s 10-inch Surface devices could be launching this week. Though that was based on a Reddit posting, the official Microsoft Surface Twitter now looks to be tossing its own chum in the rumor infested waters as well. Spotted by Richard Hay, a new tweet from that account now teases a July 10 release date for next possible Surface.
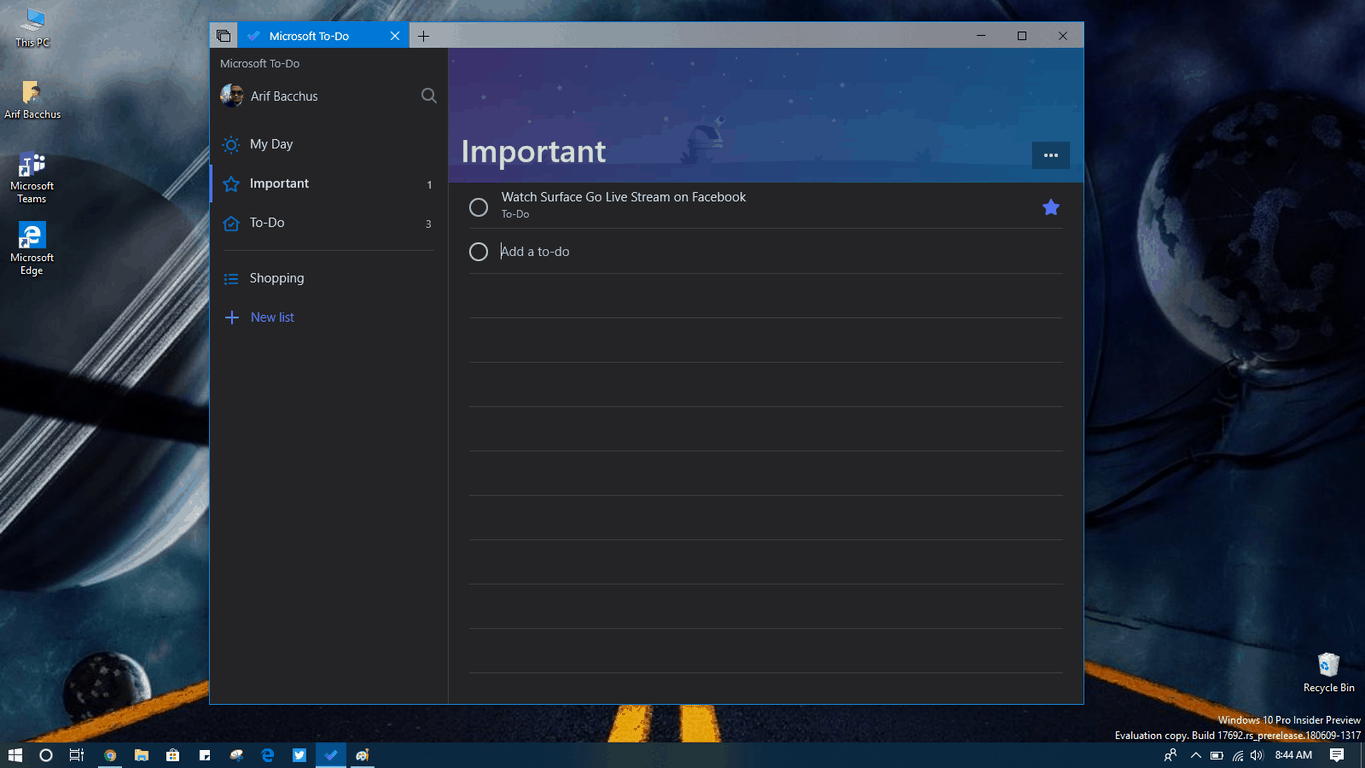
Again, nothing here is officially being claimed by Microsoft from this latest tweet. However, similar to Apple teasers, there is a small detail that might hold a bit of confirmation if you look a little deeper beyond “where will Surface go next.” Indeed, the screens on the devices in the Tweet all have a date and time for this week— July 10th, at 6:00 AM PT.

This time falls perfectly in line with the news cycle that Microsoft usually makes big announcements. The date also falls within this same week as this morning’s Reddit posting also suggested.

Curiously, a tweet from a well-known iOS programmer, Steven Troughton-Smith dug even deeper and suggested that the new Surface could be called “Surface Go.” He actually first mentioned this well over a month ago and hinted that Microsoft held a private embargoed event for the device, telling his followers to “come back in a few weeks.”

Microsoft usually holds large hardware events for new Surface devices, but as of recent, the company has had a bit of a different tactic. Both the Surface Book 2 and Surface Hub 2 were announced in 6:00 AM blog posts and not at dedicated events. We might as well expect another blog post style type announcement within the week, so best to keep tuned for more. There are definitely exciting times ahead.