If you’re a security expert, you might’ve encountered an Error updating the NVD data. This can be an annoying issue, but there are ways to fix it, and in this guide, we’ll show you a couple of methods you can use.
How can I fix the error updating the NVD data error?
Runt the following command: dependency-check.sh –purge
Check if the problem is gone.
In most cases Error updating the NVD data; the NVD returned a 403 or 404 message occurs due to issues with the API, but that is usually fixed by the NVD. If not, you can go and try our other solutions.
The new Xbox Wireless Headset is here, and its advanced features, including spatial audio and voice isolation, promise to take gaming audio to the next level. The new enhancements are designed to further this experience, and here’s everything you need to know about them.
The Xbox Wireless Headset now comes with Dolby Atmos at no additional cost, adding a new dimension to the sound experience. Sound can now be experienced with stunning precision, allowing you to pinpoint every footstep, explosion, or whisper. With Dolby Atmos, you can feel the sound around you, creating a more immersive experience.
Xbox has upgraded the headset’s dual beamforming microphones to offer better voice isolation and auto-mute functionality. They’re engineered to pick up your voice while minimizing background noise, ensuring you come through loud and clear.
The new Xbox Wireless Headset has been updated to feature Bluetooth 5.3, improving its wireless range, speed, and bandwidth. It also now supports direct pairing to Xbox Series X|S consoles. With Qualcomm S5 Gen 2 technology, you can expect ultra-low latency wireless connectivity for smooth, uninterrupted gameplay.
The headset still offers up to 20 hours of battery life on a single charge and now comes with an extended microphone boom for improved voice pickup.
The new Xbox Wireless Headset is available now in select markets worldwide for $109.99. You can find more details here.
Microsoft has rolled out a new Windows 10 version 22H2 non-security release preview update, KB5045594. The update brings the build number to 19045.5073. It introduces a new account manager on the Start menu and fixes several issues.
The most notable change in this update is the new account manager on the Start menu. The updated design makes it easier to view and access your account settings. To switch to a different user, select the ellipses (…) next to Sign out. The Lock command has also been moved to the power menu.
Additionally, Microsoft has fixed several issues in Windows 10 22H2. The company says it’s resolved a problem where a multi-function printer (MFP) would print specific network command text when you didn’t want it to, as well as an issue where a scanner driver would fail to install when you used a USB cable to connect to an MFP.
Microsoft notes that you’ll need to install update KB5015684 to get today’s update. The company says that if you have installed previous updates, only the new fixes in today’s release will be downloaded and installed on your device.
Microsoft says today’s release has no known issues. You can grab the update from Windows Update now.
Furthermore, Microsoft has released a new servicing stack update, KB5046823, for Windows 10 22H2. The update improves the quality of the servicing stack, which is the component that installs Windows updates.
Microsoft has begun rolling out the Windows 11 non-security updates under KB5044380. These include Windows 11 Enterprise and Education version 22H2 and all editions of Windows 11 version 23H2 (builds 22621.4391 and 22631.4391).
For instance, with KB5044380, Microsoft is introducing the ability to stop Windows 11 from suggesting you turn off notifications from specific apps. It also adds a new keyboard layout for the on-screen keyboard designed for gamepads.
Microsoft says it’s adding “button accelerators” with KB5044380, allowing you to use the “X” button on your gamepad as a backspace and the “Y” button as a spacebar. The company has also changed the “All apps” view in the Start Menu, Microsoft Edge favorites, and more.
With KB5044380, Windows 11 will no longer drain so much battery energy while the device is on Modern Standby.
The update is available now through Windows Update. If you don’t see it immediately, it could be because KB5044380 is part of a gradual rollout.
Your PC has various DLL files, and some users have noticed gwrks64.dll on their PC. If you don’t know what this file is, in today’s guide we’re going to explain what it does.
What is gwrks64.dll?
This is a rather unknown file, and there’s not much information about it. It can be often found in the following directories:
Studio One 3\3rd party\gwrks64.dll
C:\Program Files\Steinberg\WaveLab Elements 9.5\gwrks64.dll
Both Studio One 3 and WaveLab Elements 9.5 are music editing applications, and the file is most likely one of their components.
Is gwrks64.dll safe?
As previously mentioned, this file is often associated with music editing software, so if you downloaded the software from a legitimate source and use legitimate plugins, it means that the file is most likely safe.
Always check the location of the file, and the folder that it’s in, since that can give you a lot of information about it. If it’s in folder of an application that you don’t recognize, it might be malicious.
You can always scan the file to determine if it’s safe by doing the following:
Locate gwrks64.dll.
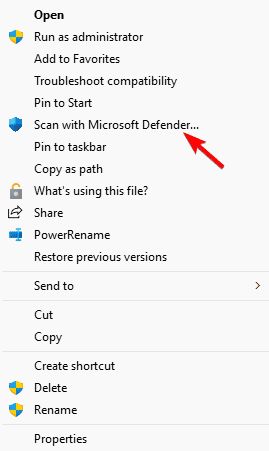
Right-click and choose Scan with Microsoft Defender.
Wait for the scan to finish.
You can also check the legitimacy of a file by checking its digital signature:
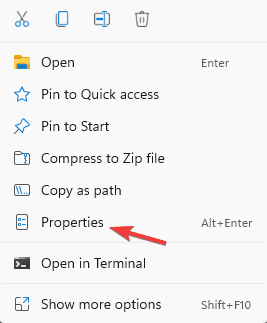
Locate the file, right-click it, and choose Properties.
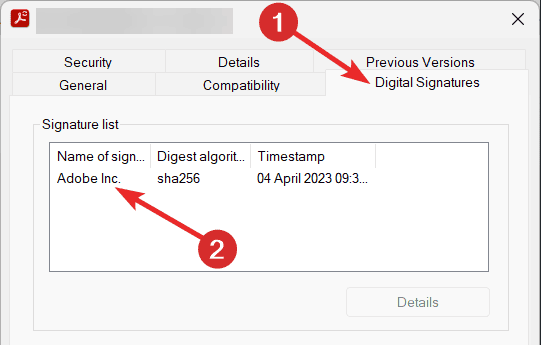
Next, navigate to the Digital Signatures tab and double-click the available signatures.
You should now see the information regarding the developer of this file.
Check for the developer online, and if it’s a credible company, it means that the file is safe.
Press the Windows key + I to open the Settings app.
Go to Apps and select Installed apps.
Locate the application that has this file in its directory.
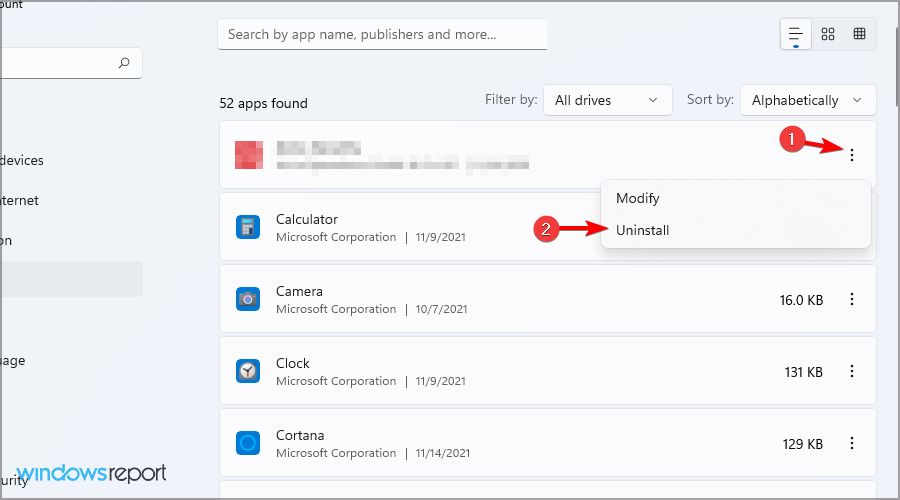
Click the three dots icon and choose Uninstall.
Follow the instructions on the screen.
You can also use uninstaller software to ensure that the application and all its files are removed.
Even though this file is shrouded in a veil of mystery, it’s not harmful if it comes from a legitimate source and it’s associated with actual software from a reputable company.
We also have guides on nvapi64.dll and amdihk64.dll, so don’t miss them if you want to learn more.
Windows 11 version 24H2 significantly improves the already robust update foundation of Windows. In a blog post, Microsoft says the latest version offers reduced installation time, restart time, and central processing unit (CPU) usage for Windows monthly updates.
Besides, enhancements to handling feature updates further reduce download sizes for most endpoints by extending conditional downloads to include Microsoft Edge.
Windows 11, version 24H2, includes several improvements to how you install monthly updates compared to the previous Windows 11 client servicing stack:
Parallel processing of component manifests.
Optimized reading and parsing of component manifests.
Scalable use of available random-access memory (RAM).
The Redmond-based tech giant conducted two tests on different devices to determine the speed of the Windows 11 24H2 installation, and the results were surprising.
For the first test, a typical scenario of updating a well-maintained device with the February 2024 security base image (Build 22621.3155) to the following month’s update was considered. Windows 11, version 24H2, performed significantly better than Windows 11, version 22H2. The installation process was 45.6% faster.
The second test imitated updating a device that is out of date by 18 months, an atypical scenario. Again, Windows 11, version 24H2, showed significant improvements. The installation process was 43.6% faster.
Both tests used 8 vCPUs, 16 GB RAM, SSD storage VMs with Windows 11 22H2 installed.
This is not all, though. In Windows 11, version 24H2, the traditional feature update downloads are also smaller by approximately 200 MB. This is thanks to the redesign and conditional download of Microsoft-developed apps that you first saw in Windows 11, version 22H2.
For Windows 11, version 24H2, Microsoft extended this design to include Microsoft Edge, saving approximately 200 MB for some endpoints. This means faster monthly updates and smaller feature update downloads for devices transitioning to Windows 11, version 24H2.
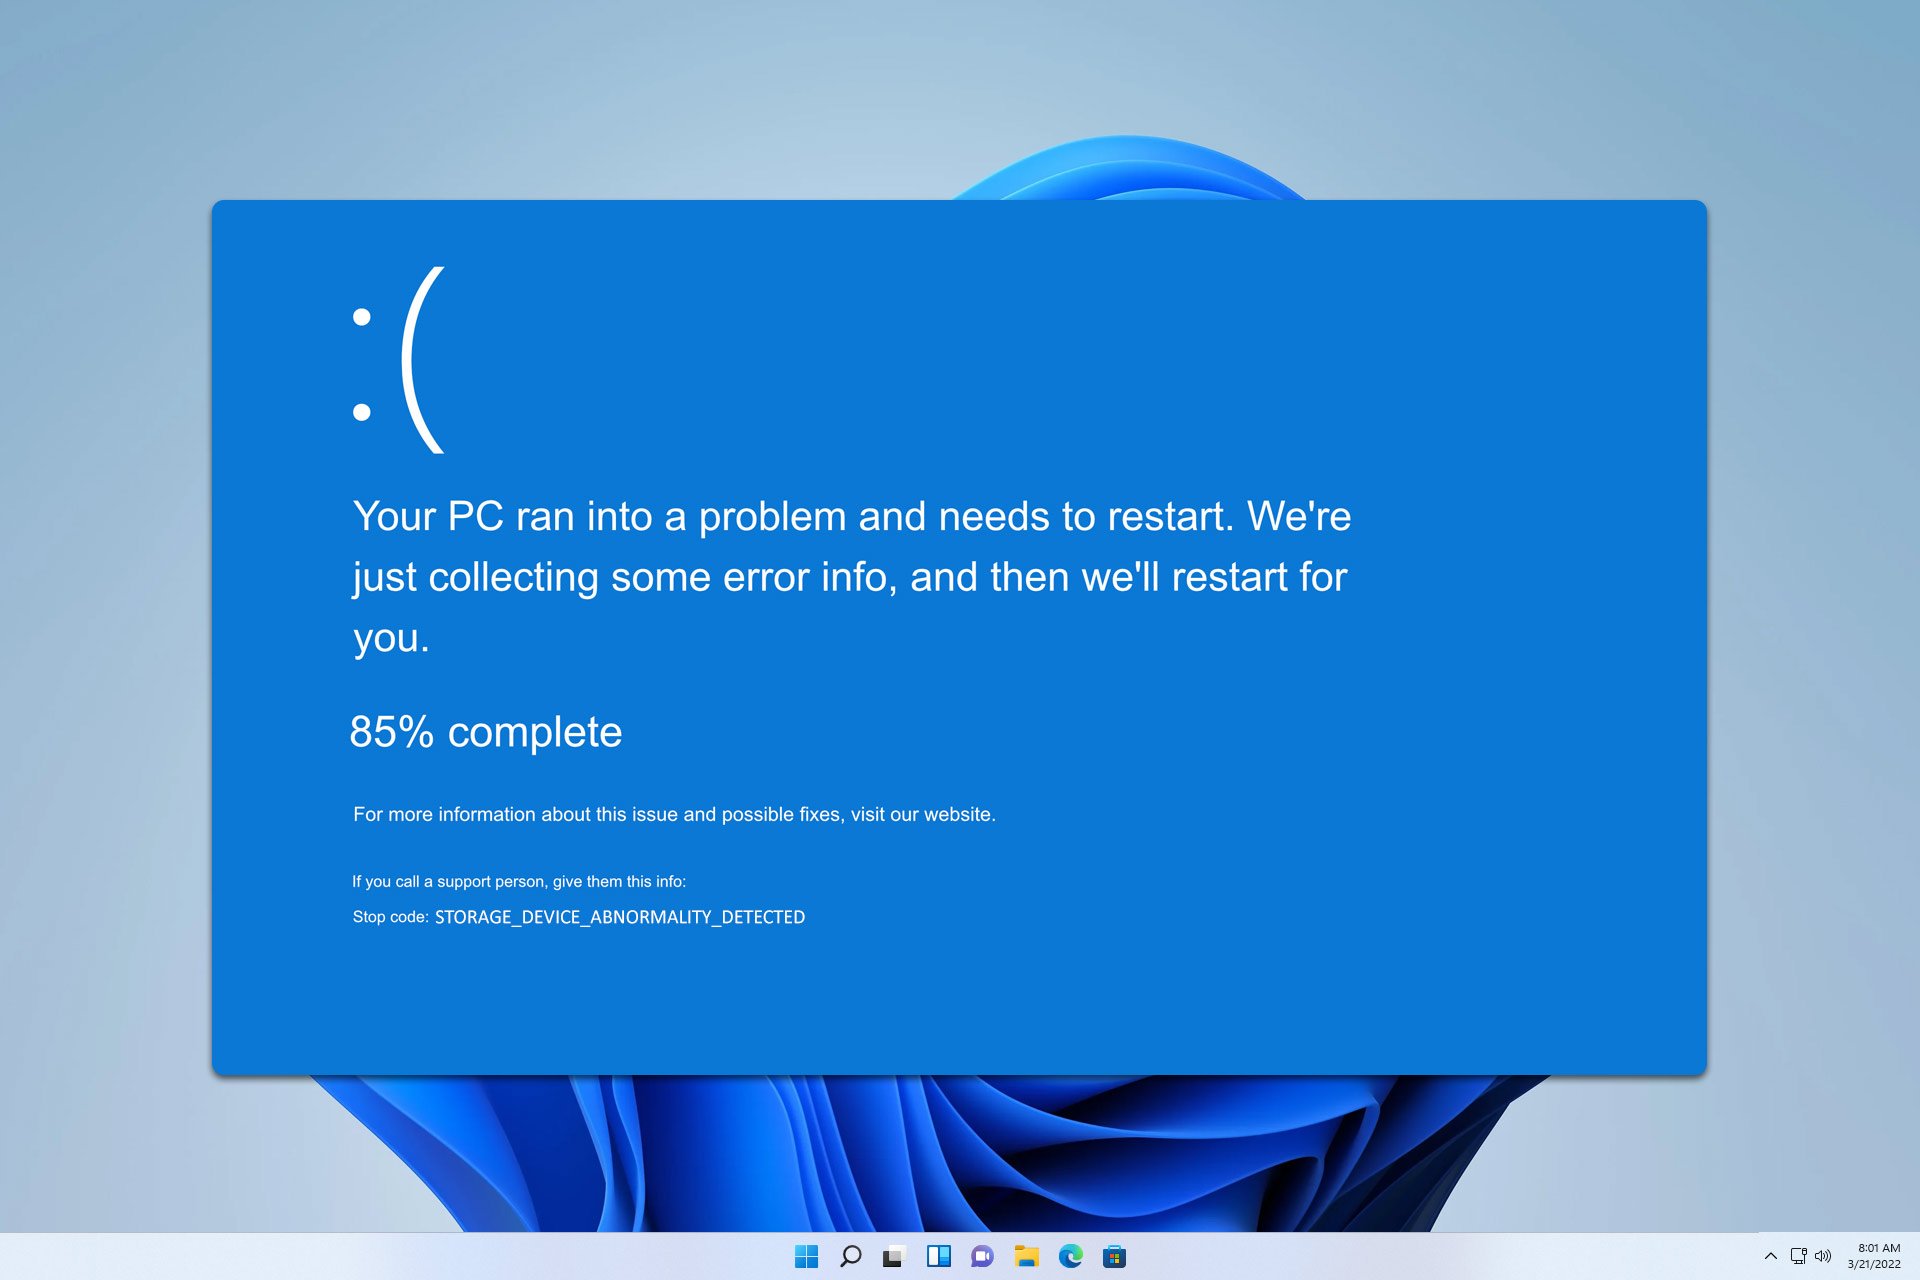
Storage_Device_Abnormality_Detected comes with a 0x00000140 code, and it is a vague BSOD error, it usually affects developers, but sometimes even regular users can experience it. If you encounter it, here’s what you should do.
How can I fix the Storage_Device_Abnormality_Detected error?
1. Restart your device
Press the Power button on your device to turn it off.
Now wait for it to boot and check if the problem is still there.
If you have a dedicated Restart button, use it instead.
If you’re a Surface owner, do the following:
Press and hold the Power button to shut down the device.
Remove all accessories, including the SD card.
Now press the Power button again to turn it back on.
2. Check your storage device
If possible, remove your SSD.
Connect it to another computer and check if it works.
If not, your only option might be to replace the drive.
As stated previously, Storage_Device_Abnormality_Detected BSOD usually affects developers, so it’s somewhat rare to experience it as an end user.
According to Microsoft’s documentation, this issue appears if the driver stack encounters a rate of responsiveness violations that exceed the threshold or if it fails to respond.
If you ever experience Netflix error code E100, you won’t be able to enjoy a specific title, and today we’re going to show you how to fix this error.
What is code E100?
This error code appears if the Widevine component isn’t available in your browser, or if there are temporary glitches with your streaming device or Netflix.
How do I fix Netflix E100?
Before we try anything else, update your Netflix app and streaming device to the latest version.
1. Restart your device
Turn off your streaming device. You can do that using your remote.
If the device has a power cord, disconnect it.
Wait for about 15 seconds.
Turn the device back on.
For this method to work, ensure that you’re not putting the device to sleep or standby mode. Check your manual to see how to properly turn off the device.
2. Check if your browser supports Widevine
Open Chrome.
Next, type the following in the address bar: chrome://components/
Scroll to the bottom and check if Widevine is available.
Most modern browsers support Widevine, and since Netflix is using it to protect its content, your browser needs to support it to work.
Almost all Chromium browsers, Firefox, Edge, and Vivaldi support Widevine. Brave also supports this component, but it’s disabled by default.
If the Netflix error code E100 persists, your only option would be to contact Netflix support or switch to a different device that doesn’t have this issue.
A SECURE_BOOT_VIOLATION error usually denoted by code 0x00000145 may appear on your screen when you’re booting up your PC indicating that the boot process was interrupted.
Secure Boot is one of the mandatory features for devices running Windows 11 and for good reason. It protects your PC from potential security violations. If Secure Boot detects something is amiss and shouldn’t be part of your startup programs, this error may be triggered.
Usually a recent hardware change could be causing the SECURE_BOOT_VIOLATION error or outdated firmware preventing your OS from loading.
How do I fix the SECURE_BOOT_VIOLATION 0x00000145 error?
1. Verify hardware compatibility
Visit the manufacturer’s website of your computer or motherboard. For instance, we are taking HP as the manufacturer. Open your preferred browser and navigate to HP’s official support page.
In the search bar, enter your HP computer’s model number (Serial number, & product number). You can find it on the back panel of your device.
Click the Product Specifications tab to open the specifications page or compatibility list.
Check if the hardware components, including the chipset and processor, are compatible with your Windows version.
Verifying your hardware will ensure it is supported by Secure Boot especially if you’ve made recent hardware changes to your PC. When making hardware changes, you need to do them correctly otherwise, you may run into a Windows failed to start error.
2. Disable Secure Boot
Restart your computer. During startup, you need to press a key designated by the OEM or computer manufacturer to access the UEFI settings. For HP, it is F10; for Dell, it is F2.
You will enter the UEFI settings. Locate the Security or System Configuration section.
Now look for Secure Boot or UEFI Secure Boot, select it, and change the status to Disabled.
Depending upon your machine, you might also have to change the UEFI mode to Legacy mode to disable Secure Boot.
Once done, Save & Exit to save the changes.
Restart your computer.
Remember that disabling Secure Boot can leave your system vulnerable, so ensure you switch it on once the SECURE_BOOT_VIOLATION error has been addressed. Also, regularly check whether it is on as there are some instances where Secure Boot is enabled, but not active.
3. Deactivate driver signature
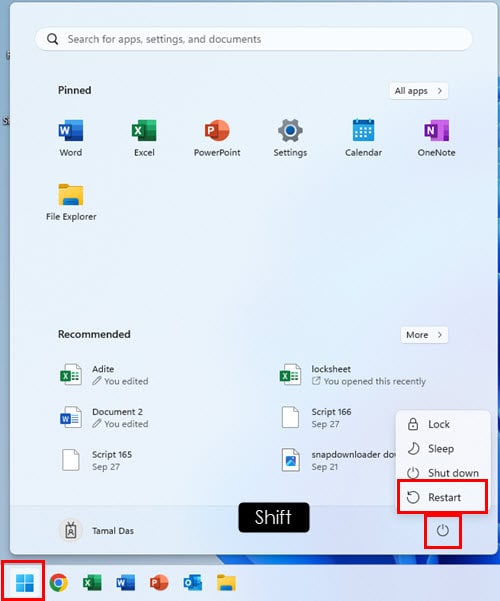
Press the Windows key and select the Power button while holding down the Shift button.
Your PC will restart in Advanced Options mode.
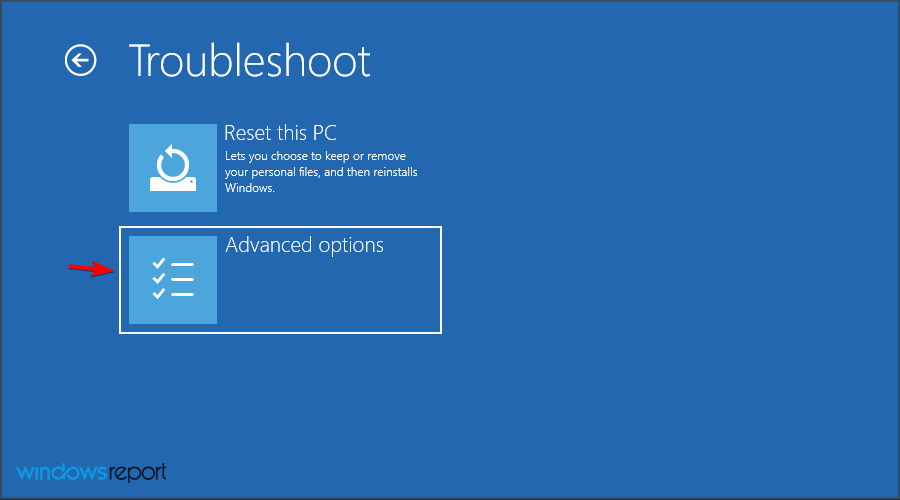
Select Troubleshoot option.
Navigate to Advanced options.
Select Startup settings.
Next click on Restart.
Select Disable driver signature enforcement.
Your PC will reboot again.
If you made recent hardware changes on your PC, the hardware may not support newer signed drivers. This in turn will make Secure Boot unable to perform the integrity checks for the drivers and allow them to load during the boot process potentially bypassing the SECURE_BOOT_VIOLATION error.
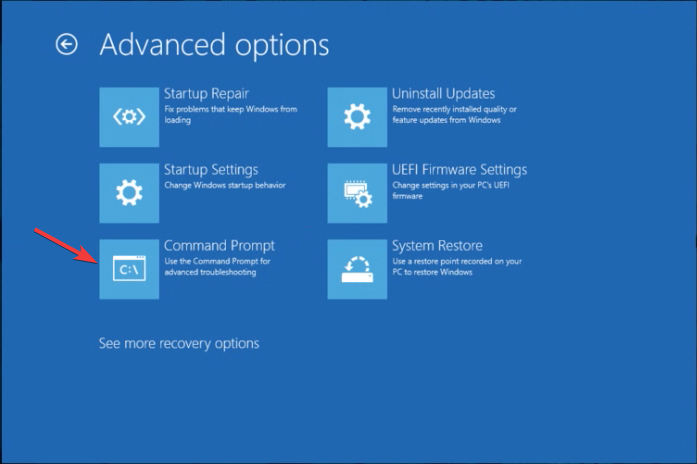
Choose Advanced options from the next screen to proceed.
Select Command Prompt from the Advanced options window. The system will restart and enter credentials when prompted.
On the Command Prompt window, type the following command to restore the system files and hit Enter: sfc /scannow
The command will take some time to complete; wait till you see a successfully completed message, then restart your PC.
A SECURE_BOOT_VIOLATION can be catastrophic for our PC so ensure you address this error. If none of this solutions resolve it, you may have to reset your PC or perform a clean install of your OS in cases of a Secure Boot failure.
5. Update BIOS
The process of updating BIOS will differ depending on your motherboard. For this step, we shall be updating the HP motherboard.
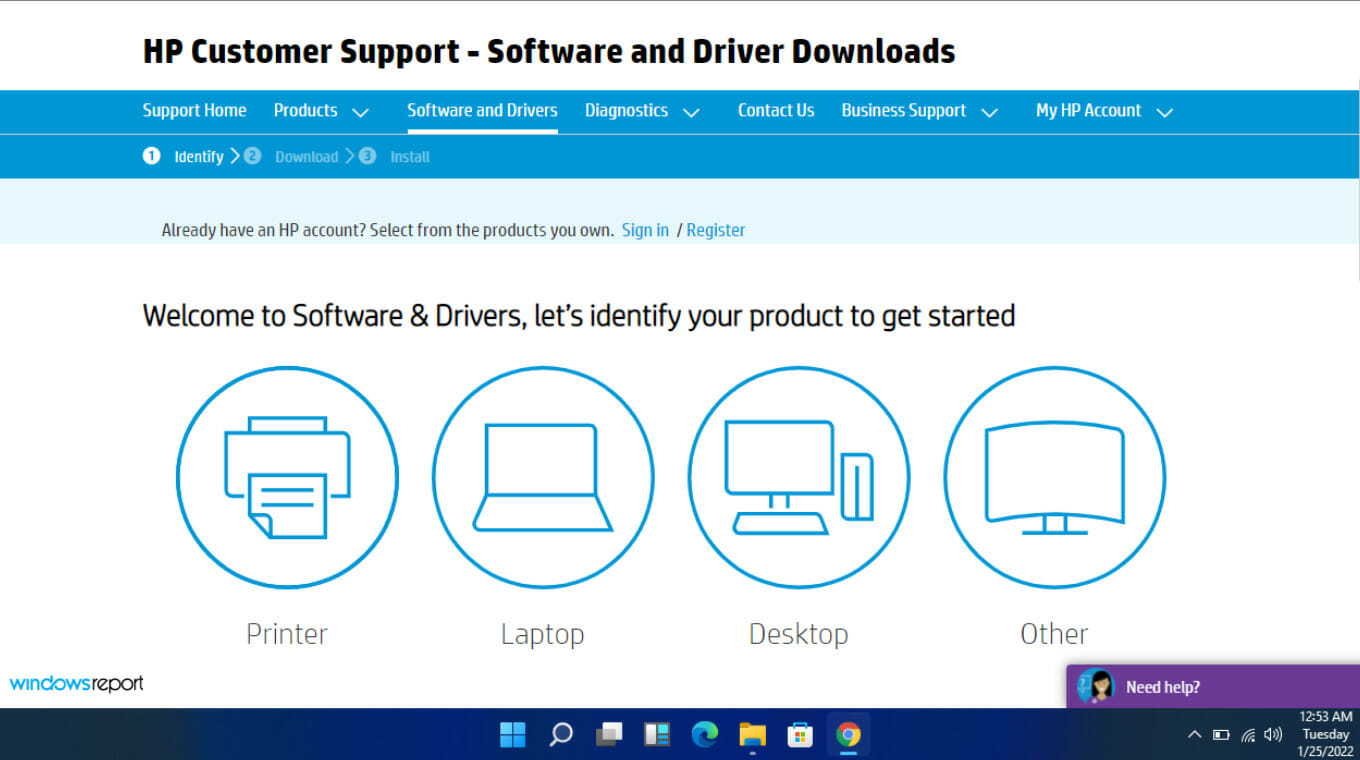
Choose laptop or desktop, depending on the type of computer you’re using.
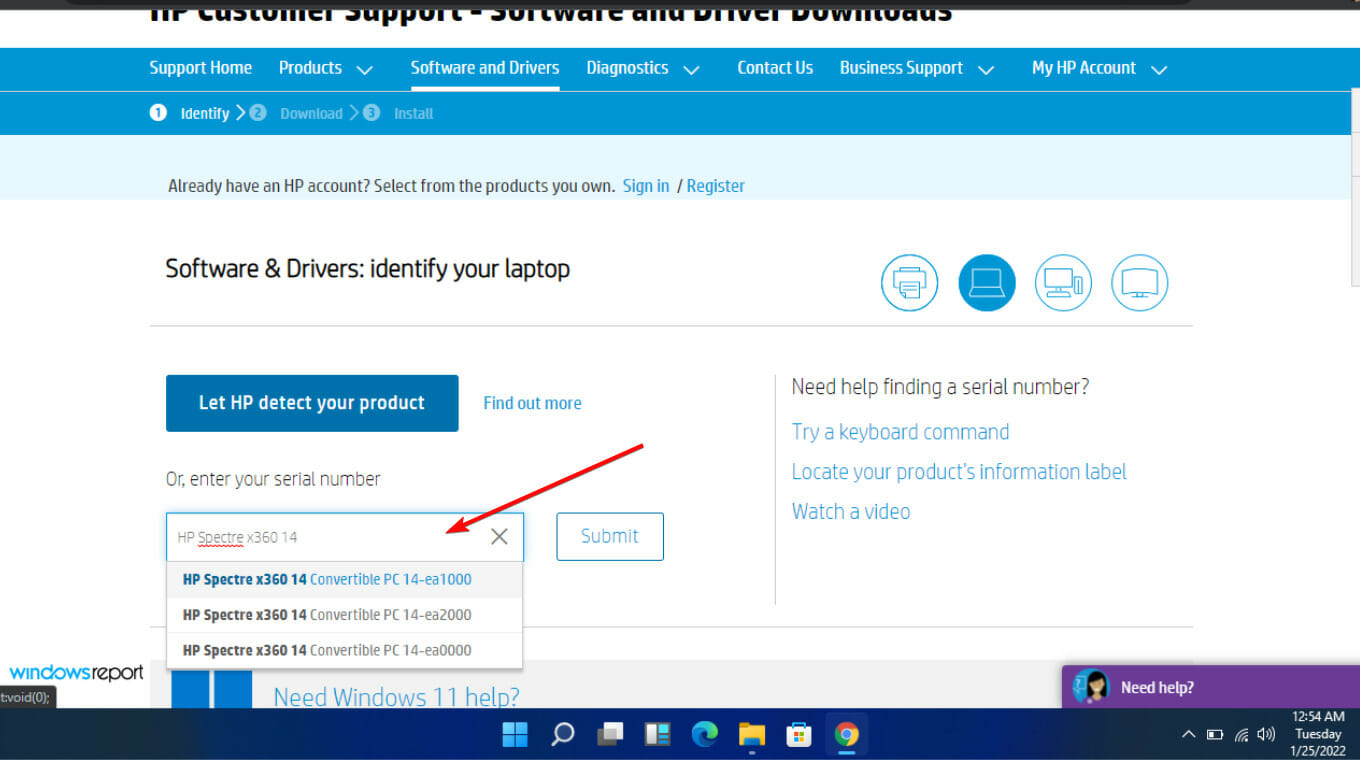
Enter your exact serial number or your exact computer model.
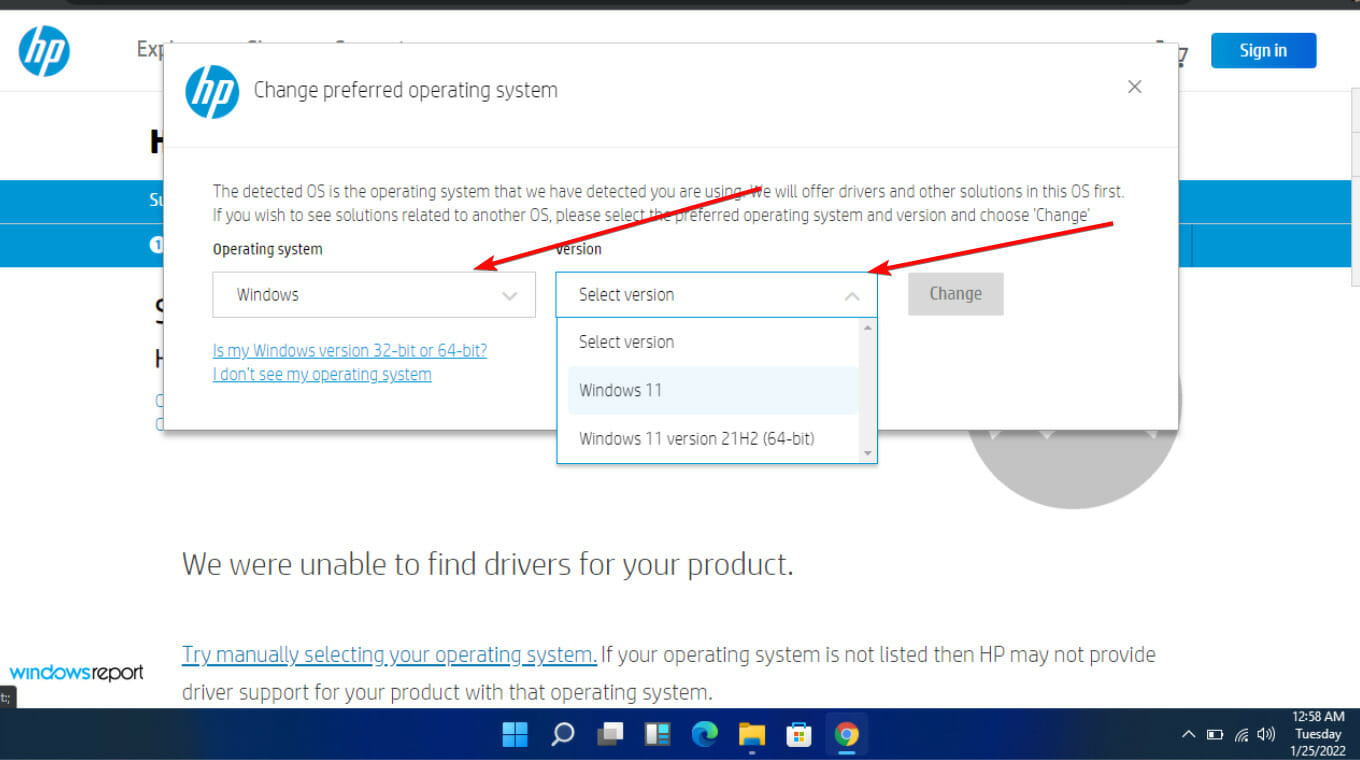
Select your OS and OS version, then click Submit.
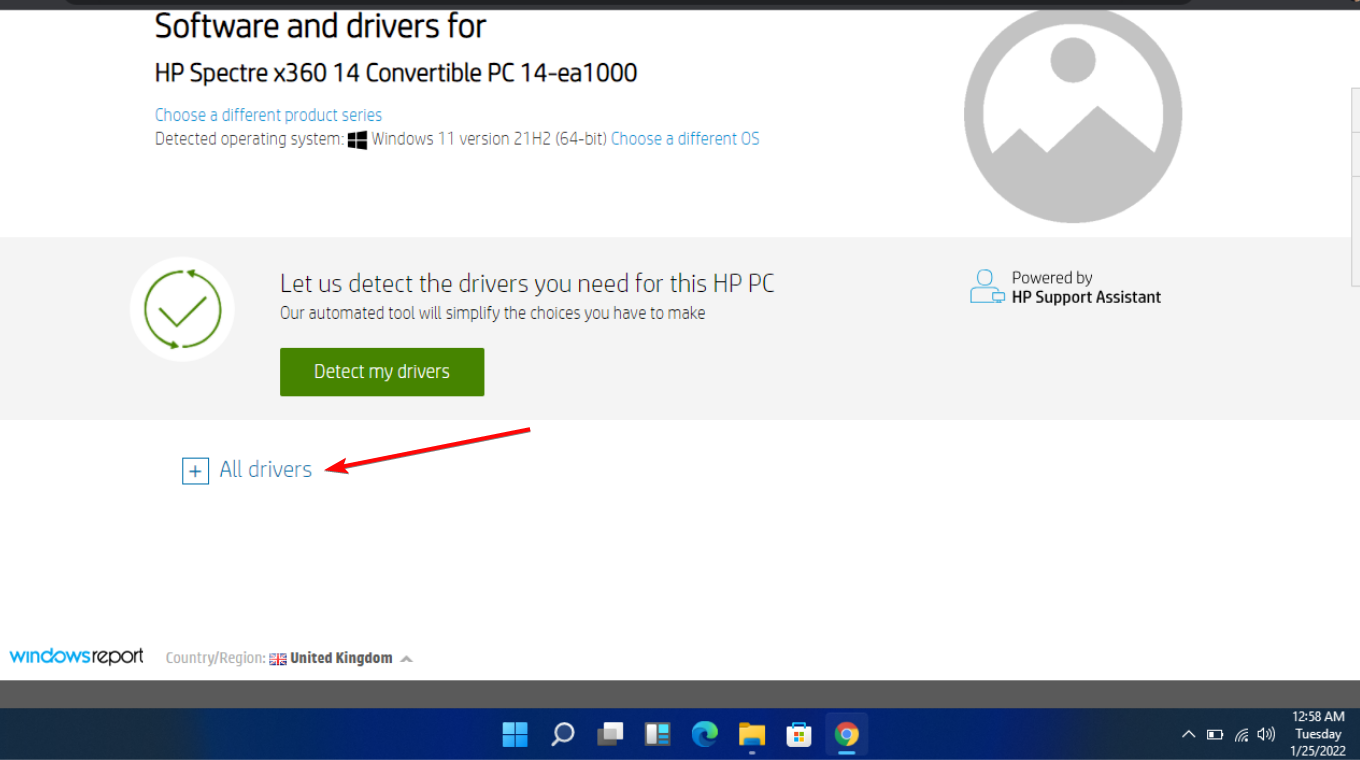
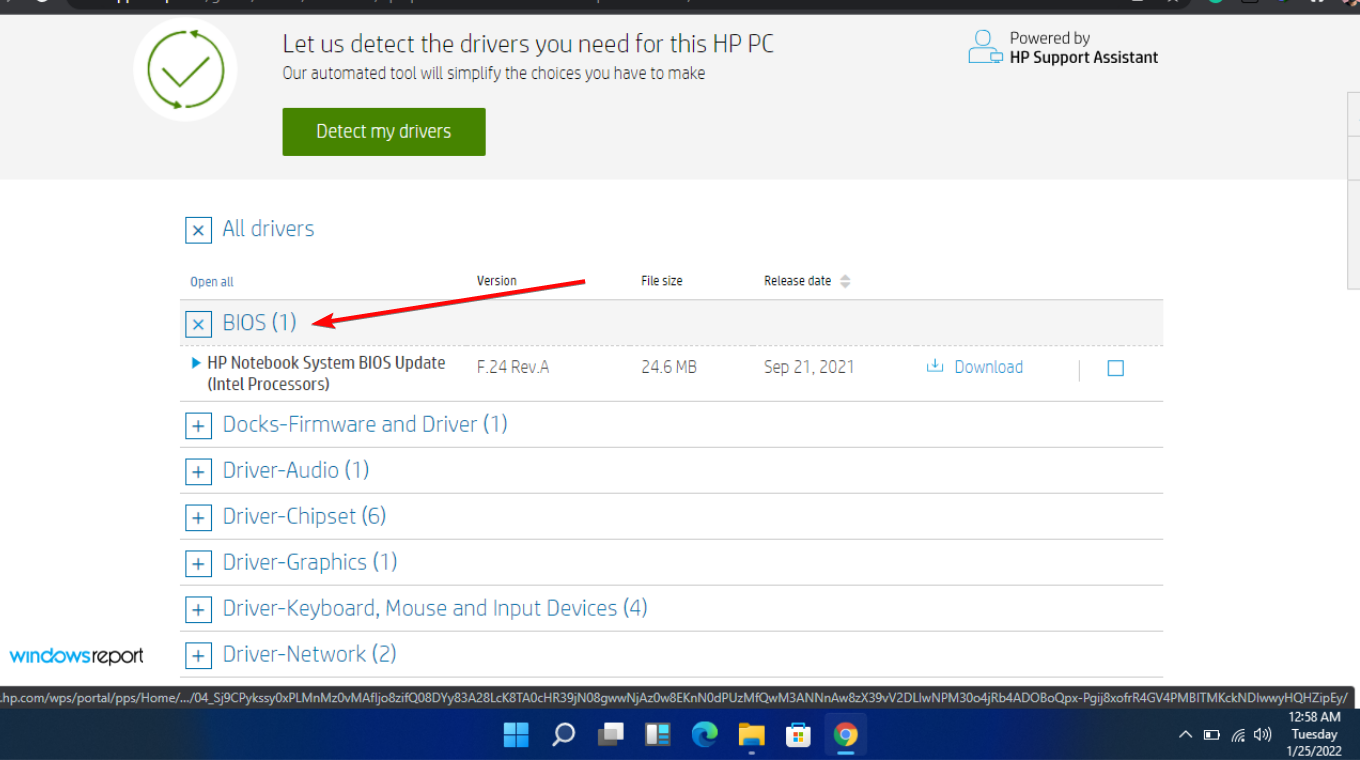
Click on All drivers and then expand BIOS to see available updates.
Click the download icon.
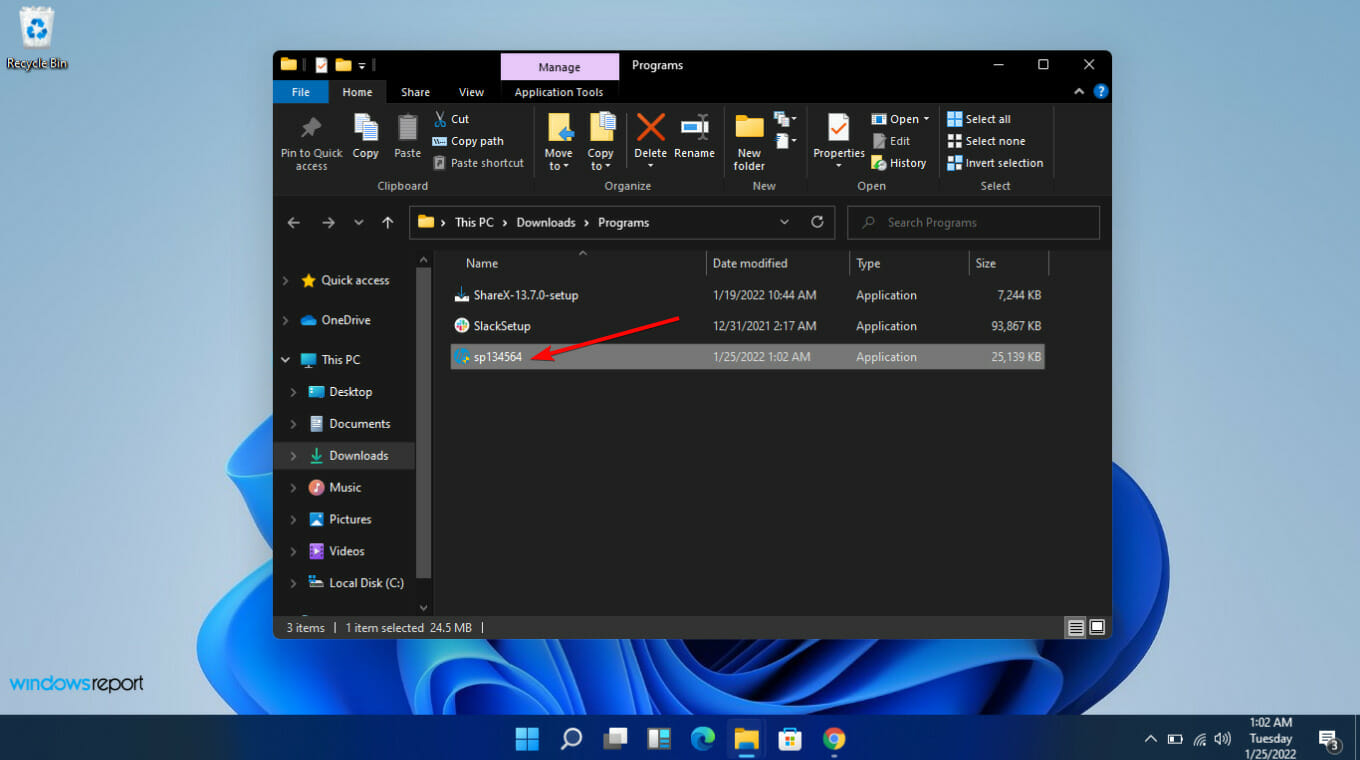
Install the .exe file, following the on-screen instructions.
Restart your PC.
It is possible that you’re getting the SECURE_BOOT_VIOLATION error because of compatibility issues. This can help enhance hardware compatibility and make it easier for Secure Boot to recognize it and whitelist it during the boot process.
The PROCESSOR_DRIVER_INTERNAL 0x00000143 is a Blue Screen of Death error that indicates a problem with the processor driver. This usually occurs when there is a hardware failure, corrupted drivers, or compatibility issues.
To fix this blue screen error, check your device for overheating and the CPU to ensure all the system components are properly seated. Also, ensure your Windows and BIOS firmware are updated to the latest version, then run the malware scan using a reliable antivirus software. If the issue persists, proceed with the steps below.
How can I get rid of the PROCESSOR_DRIVER_INTERNAL error?
1. Update the drivers
Press Windows + R to open the Run console.
Type devmgmt.msc and click OK to open Device Manager.
You will get the list of system components; click on each category one by one, and look for the problematic driver with a yellow triangle and an exclamation mark inside it.
Once located, right-click it and choose Update driver from the context menu.
Click Search automatically for drivers, and Windows will try to find a compatible driver for your device.
Follow the on-screen prompts to complete the process. Repeat this process for all problematic drivers in the list.
If Windows cannot find the latest driver, you can go to the manufacturer’s website and download it manually. Alternatively, try any driver updater tools recommended in this guide to install the latest driver.
2. Run the Windows Memory Diagnostic tool
Press Windows + R to open the Run window.
Type mdsched.exe, and click OK to open the Windows Memory Diagnostic tool.
Select the Restart now and check for problems option to restart your PC and run the tool.
The scan will run upon boot, and depending on your device’s RAM size, the process may take some time.
Once the test is complete, Windows will restart, and you will see the test results on the desktop.
To check the error report in detail, go to Event Viewer, expand Windows Logs, and click System. Then, check for warnings or errors related to hardware or memory to gain more insight.
3. Restore your system to a previous version
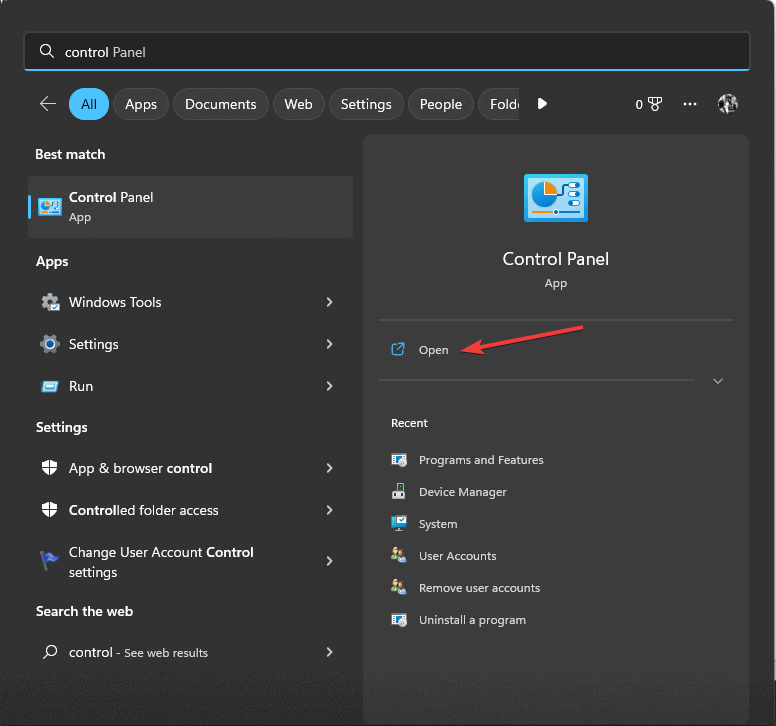
Press the Windows, type Control Panel in the search box, and click Open to launch Control Panel.
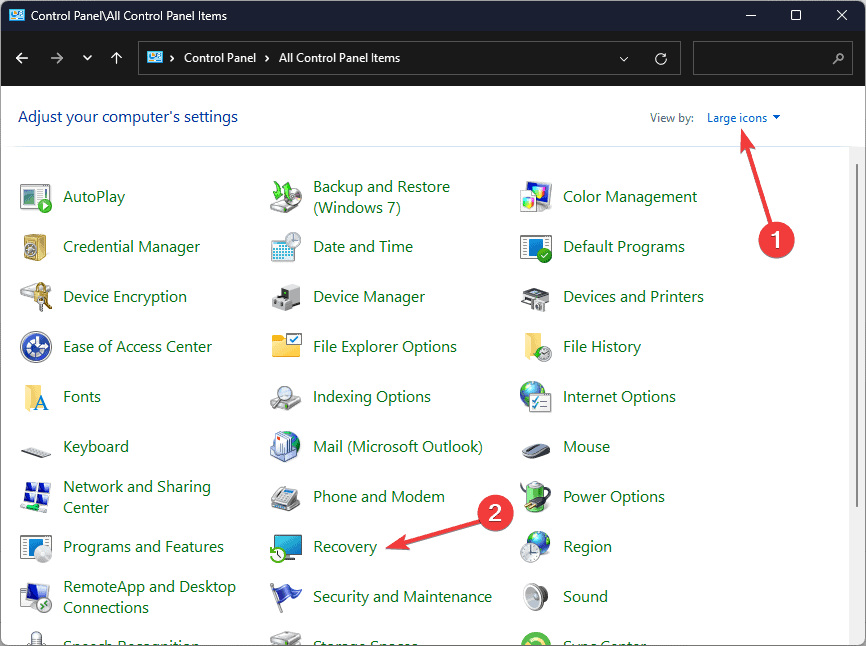
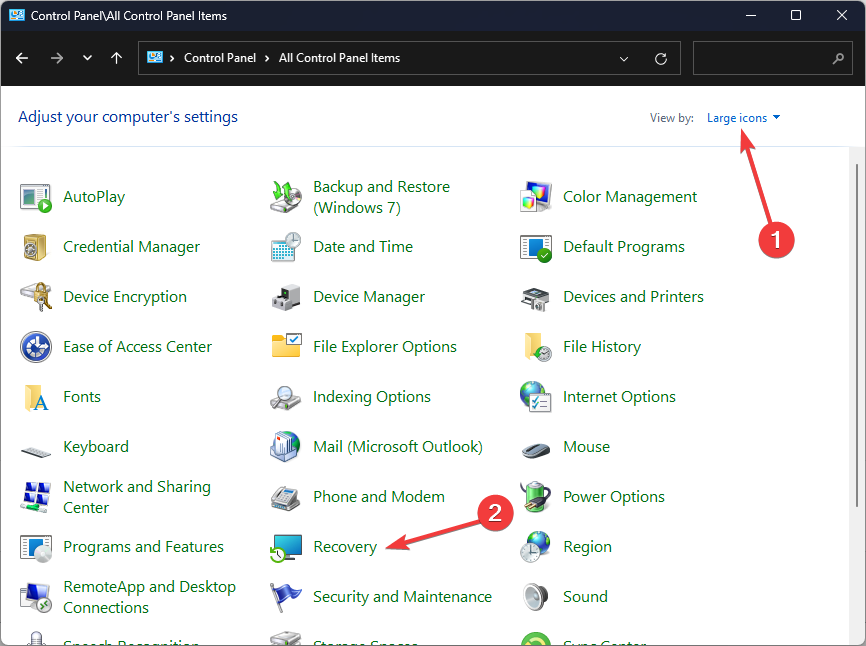
Select Large icons for View by, then click Recovery.
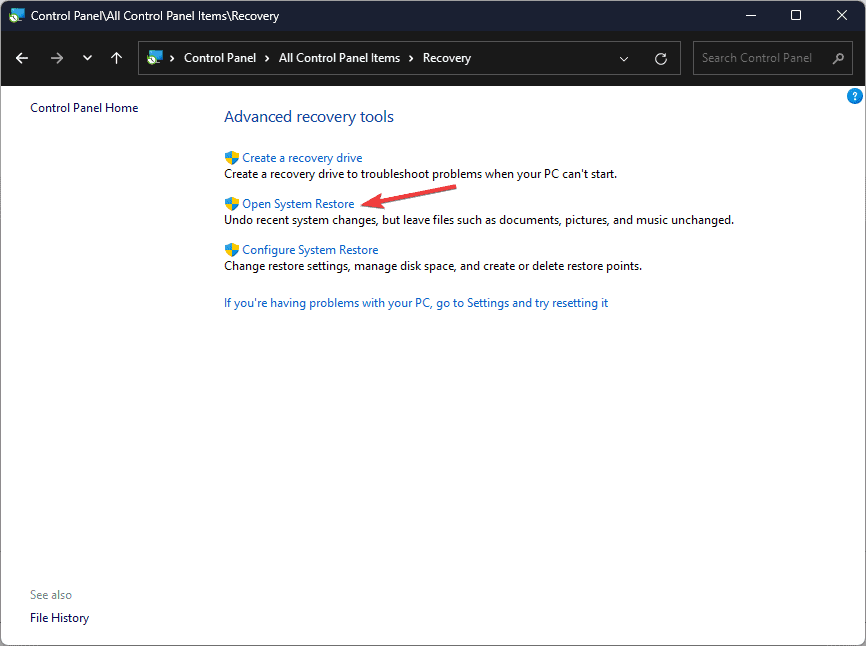
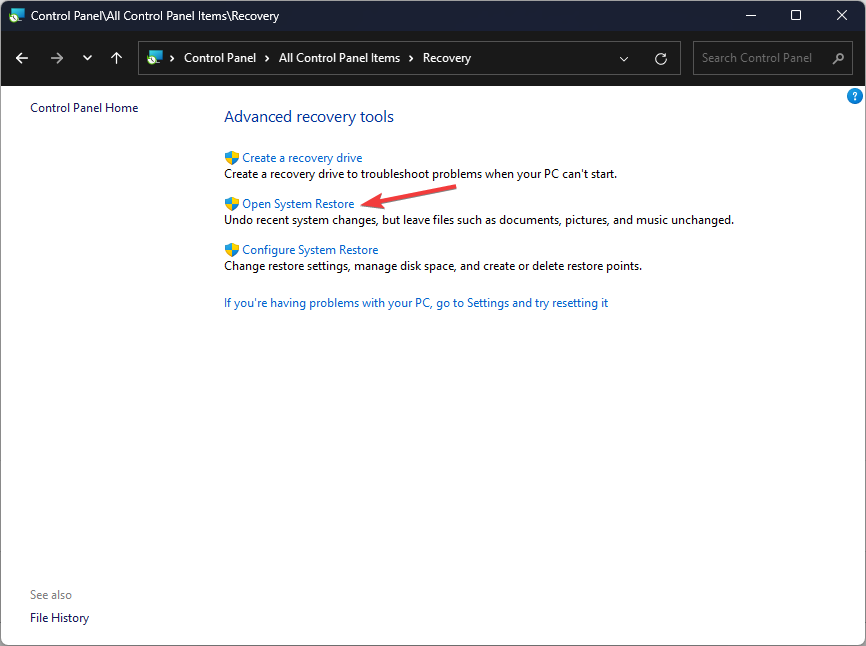
Click the Open System Restore link.
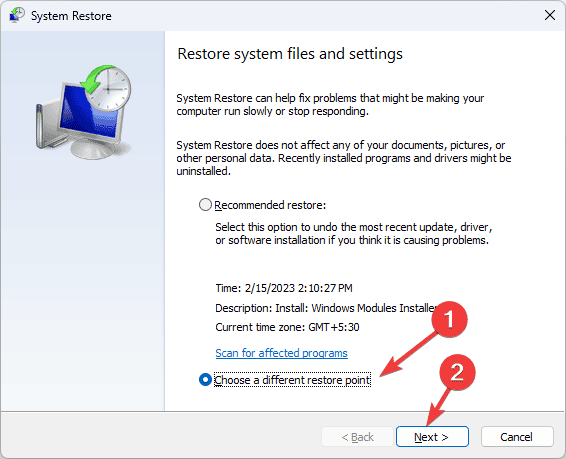
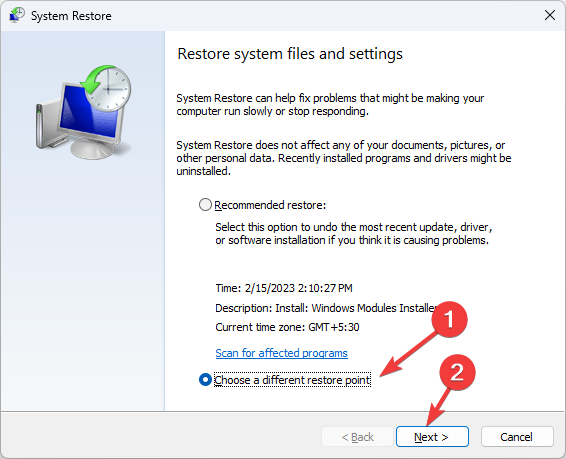
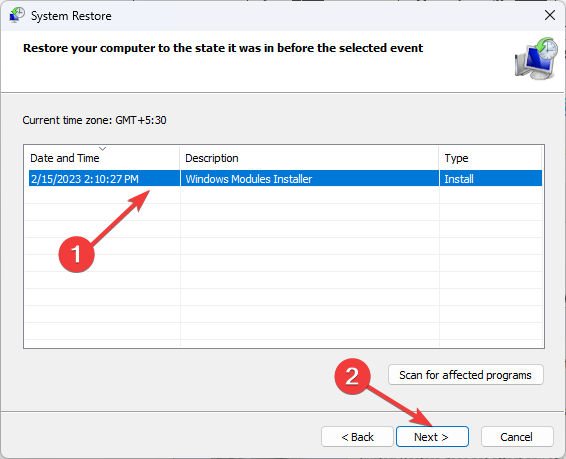
Select Choose a different restore point on the System Restore window, then click Next.
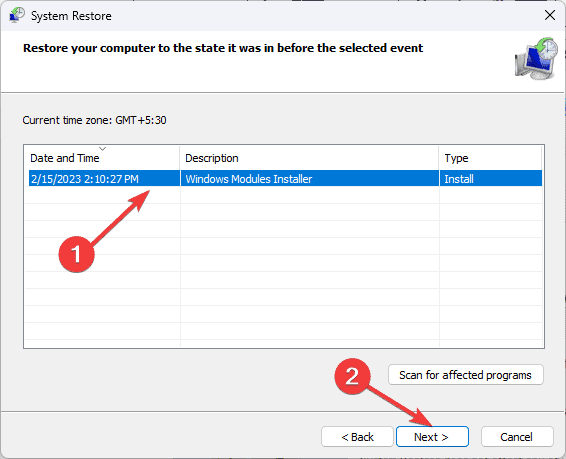
Choose the restore point from the list of restore points created before encountering the BSoD error and click Next.
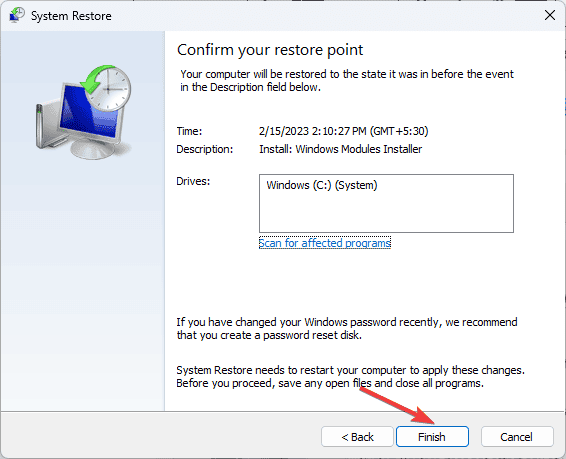
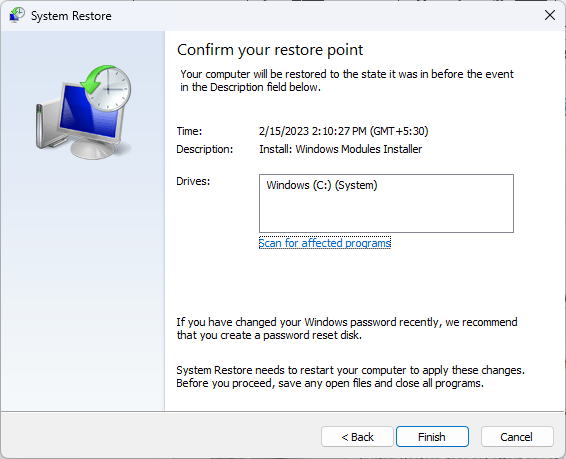
Click Finish.
Your device will restart, and Windows will try to restore the system settings to the selected point. If, upon reboot, you see the System Restore didn’t complete the error successfully message, it could be due to driver error or conflicting apps. We suggest you check out this detailed guide to learn more.
4. Reinstall Windows
NOTE
Before following these steps, ensure you have a stable internet connection and a USB flash device with at least 8GB of empty space. Also, back up your important data to another device.
When the executable file is downloaded, double-click it to open the tool and click Yes on the UAC prompt.
On the Windows 11 Setup guide, click Accept to agree to the license terms and agreements.
Select USB drive, and click Next.
Choose a language, edition, and architecture (64-bit or 32-bit), then click Next.
Click the USB flash drive you want to select, then select Next.
Follow the on-screen prompts to complete; once done, click Finish.
Reinstall Windows
Plug the USB drive into the targeted computer, and press Windows + E to open the File Explorer.
Select the drive with the installation media, locate and double-click the setup.exe file, and click Yes on the UAC prompt to proceed.
Click Next.
Click Accept to agree to the terms of the license.
Now, click Change to specify what you want to keep or delete. Select one of the following options accordingly, then click Next:
Keep personal files and apps – Allows you to keep your data, apps, and settings.
Keep personal files only – Lets you keep your data and settings, but the installed apps will deleted.
Keep nothing – This allows you to remove all personal data, settings, and apps.
Choose Install to initiate the reinstallation of Windows 11 on your PC.
In conclusion, to fix the PROCESSOR_DRIVER_INTERNAL BSoD error, ensure your Windows and BIOS firmware is up to date, update device drivers, and run the Windows Memory Diagnostic tool. If these don’t fix your issue, you can reinstall Windows.
While you are here, we advise you to check out this guide on BSoD errors and their causes; we have a detailed guide for you; don’t forget to check it out!
If you have any other questions or suggestions about the PROCESSOR_DRIVER_INTERNAL BSoD error, feel free to mention them in the comments section below.
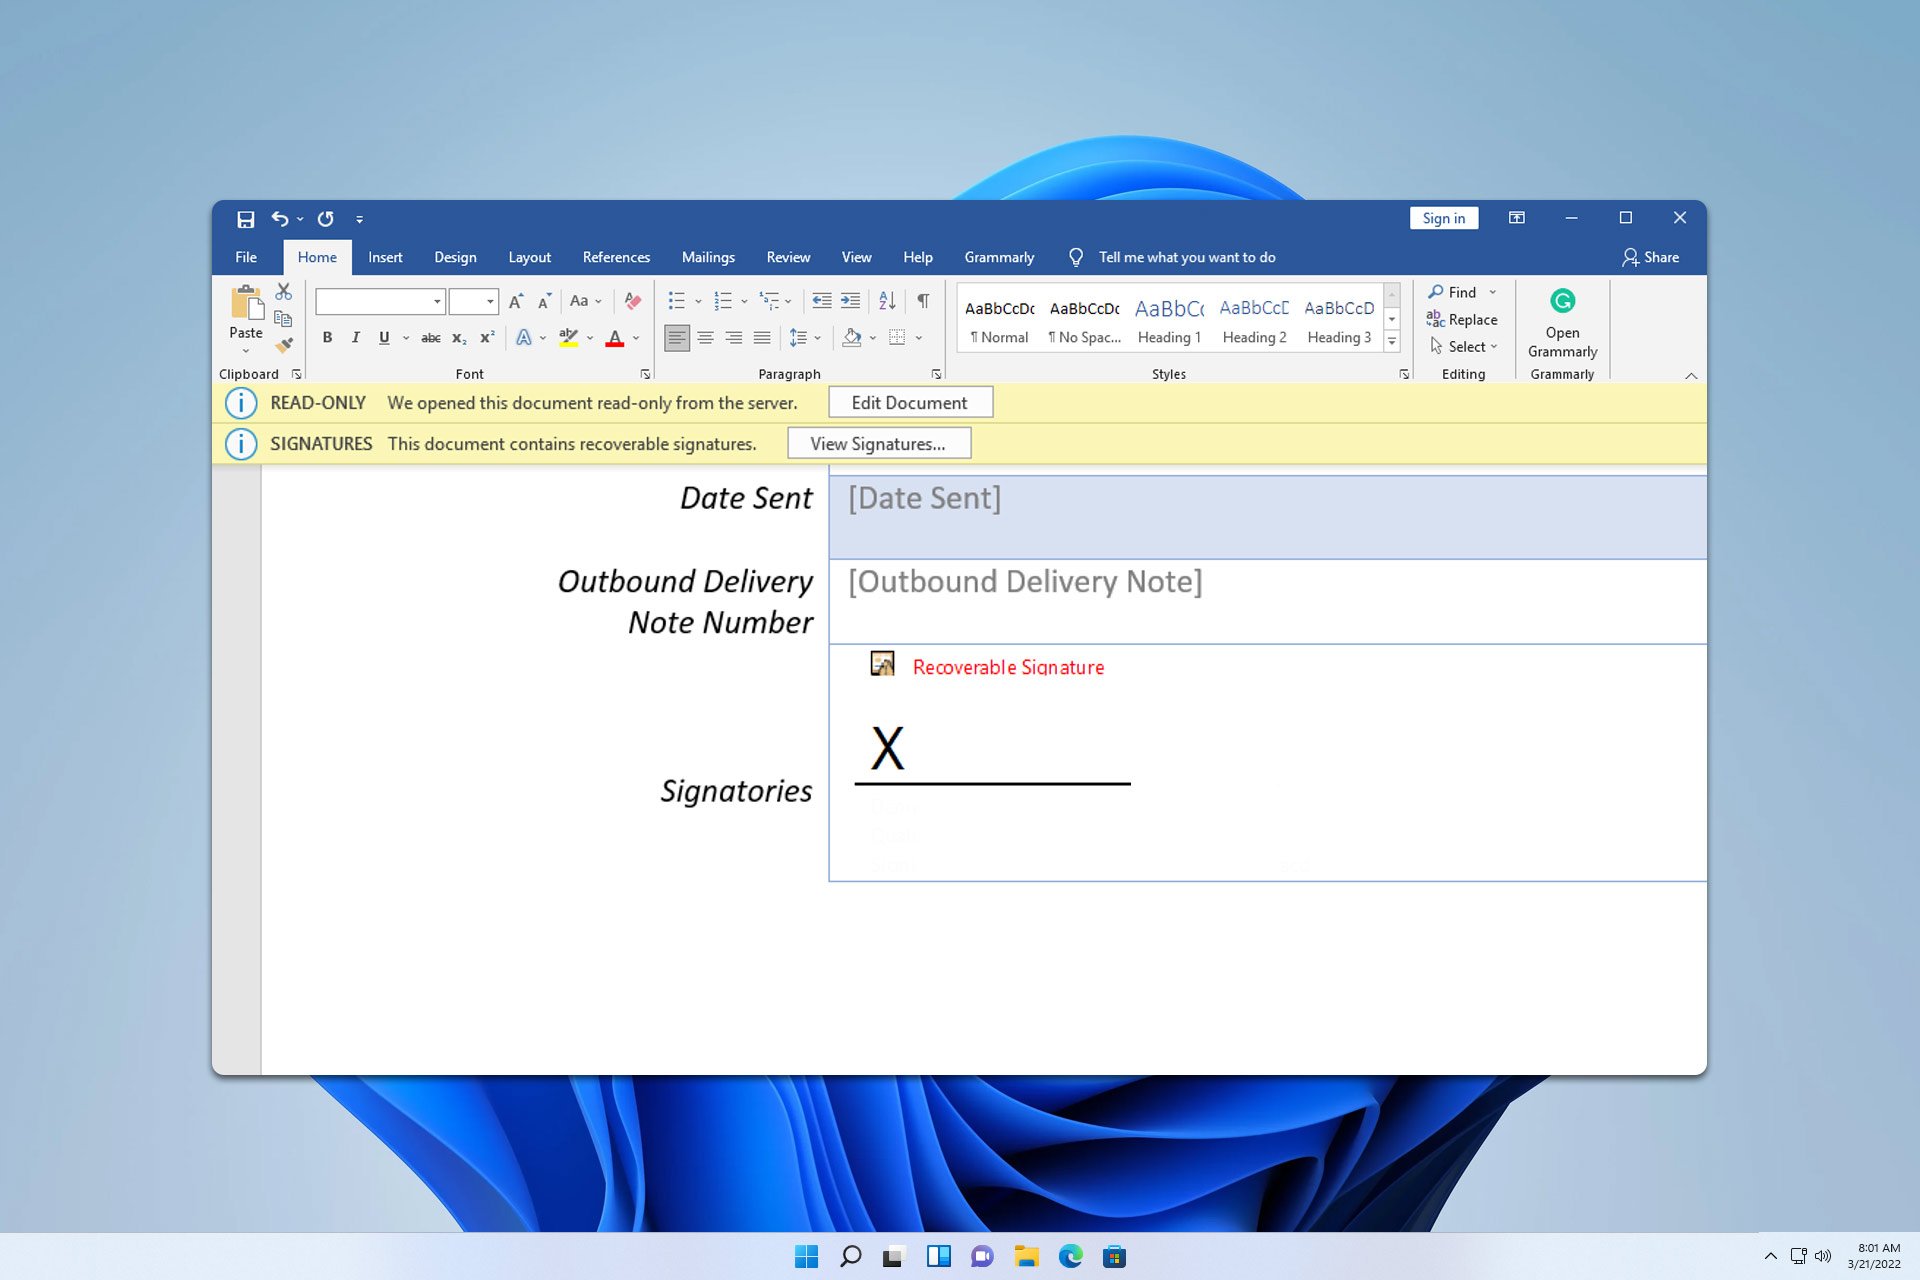
Many are confused by Recoverable signature message in Microsoft Word, so in today’s guide, we’re going to show you a couple of methods that you can use to fix this problem.
What does recoverable signature mean in Word?
This message means that there’s an issue with your certificates. The certificate might not be trusted or it might not have CRL specified.
What can I do if a Recoverable signature message appears in Microsoft Word?
1. Select the option to trust the user’s identity
Double-click the signature.
Next, click on Click here to trust this user’s identity.
After that, the issue should be gone.
2. Move the certificate to the Trusted People group
Press the Windows key + R and type mmc. Press Enter.
Click on File and choose Add/Remove Snap-in.
Select Certificates and click on Add.
Select Computer account and then Local computer and click on Finish.
Click OK to confirm.
Go to Personal and select Certificates.
Select your certificate, right-click it, and choose Cut.
Navigate to Trusted People and then go to Certificates.
Right-click the right pane and choose Paste.
Once the certificate has been moved, check if the problem is resolved.
Ensure that your certificate has a CRL distribution point.
The CRL distribution points must be specified in the issued certificates.
In the intermedia CA is used, the two CRLs must be maintained and specified. One for the certificates issued by Root CA and another for certificates issued by intermediate CA.
If nothing else works and you’re still stuck with a Recoverable signature – The signer’s certificate cannot be verified in Microsoft Word, you might have to issue a new certificate by using SelfCert.exe.
Did you use any other method to fix the Signature certificate cannot be verified in Word? If so, share it with us in the comments section below.
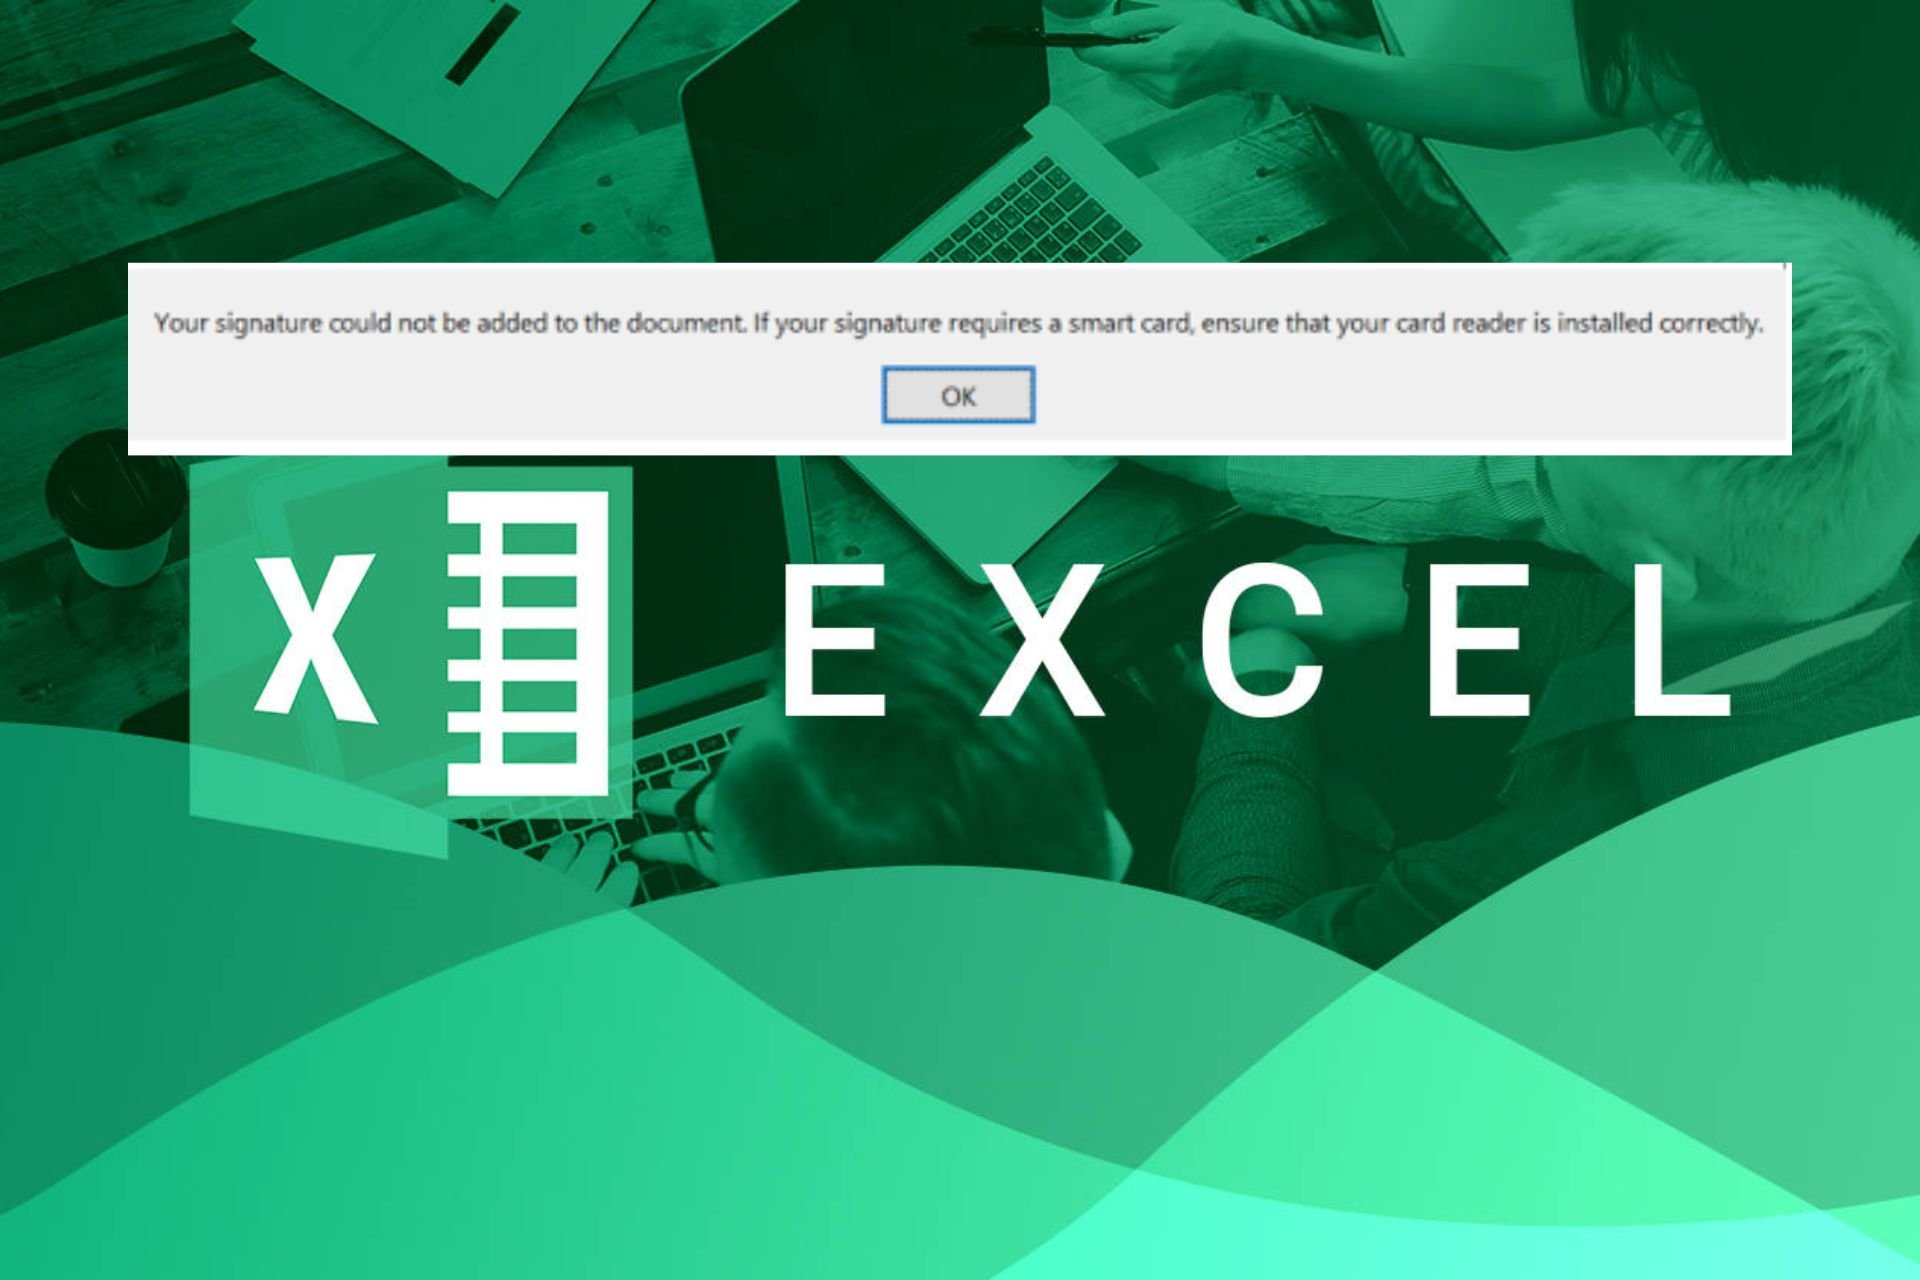
We’ve already discussed the importance of signatures on documents so when you run into your signature could not be added to the document on your Excel workbook, its authenticity may be put to test.
It’s not uncommon for your signature not to show on your Microsoft Office document but sometimes, the issue is beyond the clearing cache. For this particular error that occurs in Excel workbooks, we found that it happens to work/school accounts.
Most of these organizations use smart cards to validate the signature so if there’s an issue with yours such as insufficient permissions to use the smart card or it has not been properly inserted, you may have trouble inserting the signature.
How do I fix the your signature could not be added to the document error?
1. Start Excel in Safe Mode
Click the Search button from the taskbar, type excel, then right-click on it and select Open file location.
Press and hold the Ctrl key and double-click the Excel executable file.
Click Yes when you’re prompted if you want to open Excel in safe mode.
2. Disable Excel Add-Ins
Close the Excel app, and relaunch it by double-clicking the app icon on your desktop.
In the Excel window, click File and select Options.
Click on Add-ins in the next window, select COM Add-ins, and click on Go.
Ensure all the checkboxes are unchecked, and click OK.
Close Microsoft Excel and restart the application to see if the error persists.
3. Check the digital certificate’s validity
Press the Windows + R on your keyboard and type certmgr.msc then hit Enter.
Open the Personal category in the left pane.
Click on Certificates and under Issued To, select the certificate that corresponds with your account name.
Open Action menu.
Go to All Tasks.
Click to sort by Issued By column > locate the certificate issues by Communications Server
Check to see if the certificate exists and isn’t expired.
4. Install smart card drivers in Compatibility mode
Locate the driver setup file, right-click it, and choose Properties from the menu.
Head over to the Compatibility tab and check Run this program in compatibility mode for option. Choose Windows 8 or higher and click OK to save changes.
5. Move the certificate to the Trusted People group
Press the Windows key + R and type mmc. Press Enter.
Click on File and choose Add/Remove Snap-in.
Select Certificates and click on Add.
Select Computer account and then Local computer and click on Finish.
Click OK to confirm.
Go to Personal and select Certificates.
Select your certificate, right-click it, and choose Cut.
Navigate to Trusted People and then go to Certificates.
Right-click the right pane and choose Paste.
It is possible that your signature could not be added to the document because it is not trusted by your system. Adding the certificate to the trusted group bypasses any security restrictions that may be preventing the signature from being added.
Type Control Panel in the search bar and click Open.
Go to Programs and select Uninstall a Program.
Now, click Microsoft Office and select Change.
Finally, click Online Repair, then select Repair.
Alternatively, you can click on Windows Settings, select Apps, then click on Apps & features.
Locate Microsoft Excel/Office, click on the three ellipses, and select Advanced options.
Next, click on Repair.
Once the repair process is complete, restart your computer and check whether the issue still occurs.
The issue on signatures can occur on any Microsft Office app. Outlook also has its own share of problems as sometimes you add signatures but they disappear. If so, feel free to check out our article on how to get it back.
Hopefully, one of these solutions has helped you get your signature situation on Excel fixed. We also welcome any additional solutions that worked for you but missing from our list in the comment section below.
The ERROR_SAME_DRIVE 143 (0x8F) error message, “The system cannot join or substitute a drive to or for a directory on the same drive,” appears when your system is unable to execute a drive substitution (SUBST command) or join a drive to a directory operation on the same drive.
The error appears if you try to map a drive letter to a folder on the same drive as the drive letter you are trying to use. Windows doesn’t let you do this because it could conflict with your device’s file system.
How can I fix the ERROR_SAME_DRIVE 143 (0x8F)?
1. Use a different drive letter
When you want to substitute a folder (let’s say C:\MyFolder) to a drive letter (F:), you need to make sure that the drive letter (F:) is not assigned to another location on the same drive (in this case, it is C:). To check the substitution, follow these steps:
Press the Windows key, type cmd in the search box, and click Run as administrator.
Type the following command to list any current drive substitutions and hit Enter: subst F: C:\MyFolder
Now F: is already mapped to some other path, or if it is a location on C:, you will get ERROR_SAME_DRIVE
2. Move the directory
If you encounter the ERROR_SAME_DRIVE error when mapping a folder on the same drive, you should try moving that folder to a different drive. For example, if you have a second drive, like F:, move the folder from C: MyFolder to F: MyFolder.
Press the Windows key, type cmd in the search box, and click Run as administrator.
So if you create a virtual drive letter Z: that points to this folder and hit Enter, you will get the error: subst Z: C:\MyFolder
So, to fix this, you should move C:\MyFolder to a different drive. For this, type this command to move the folder, and hit Enter: move C:\MyFolder F:\
So, now C:\MyFolder doesn’t exist, and the folder is in F:\MyFolder. To map the new location, copy & paste the following command and press Enter: subst Z: F:\MyFolder
Before making any move, check the path and drive letter you use in the command to ensure there are no typos, as it could cause an error.
Also, ensure there is no circular reference, which can lead to errors and confusion. To avoid this, you should always check the contents of the folder you want to map so that it does not contain references to the drive letter you are using for substitution.
4. Use an existing drive letter
If you want to create a substitution for a drive letter already in use, you should first delete that existing substitution.
For example, if F: is currently mapped and you want to free it, you can use the subset Z: /D command, which will remove the mapping for Z: and let you reassign it later.
In conclusion, to avoid issues like ERROR_SAME_DRIVE, you can use a different drive letter, move directories to separate drives, and make sure there are no circular references.
In case you face another issue related to the drive like ERROR_NOT_SUBSTED, check out this guide to learn the detailed steps. We also have a new article on Storage_Device_Abnormality_Detected error, so don’t miss it.
If you have any questions or concerns about the ERROR_SAME_DRIVE issue, feel free to mention them in the comments section below.
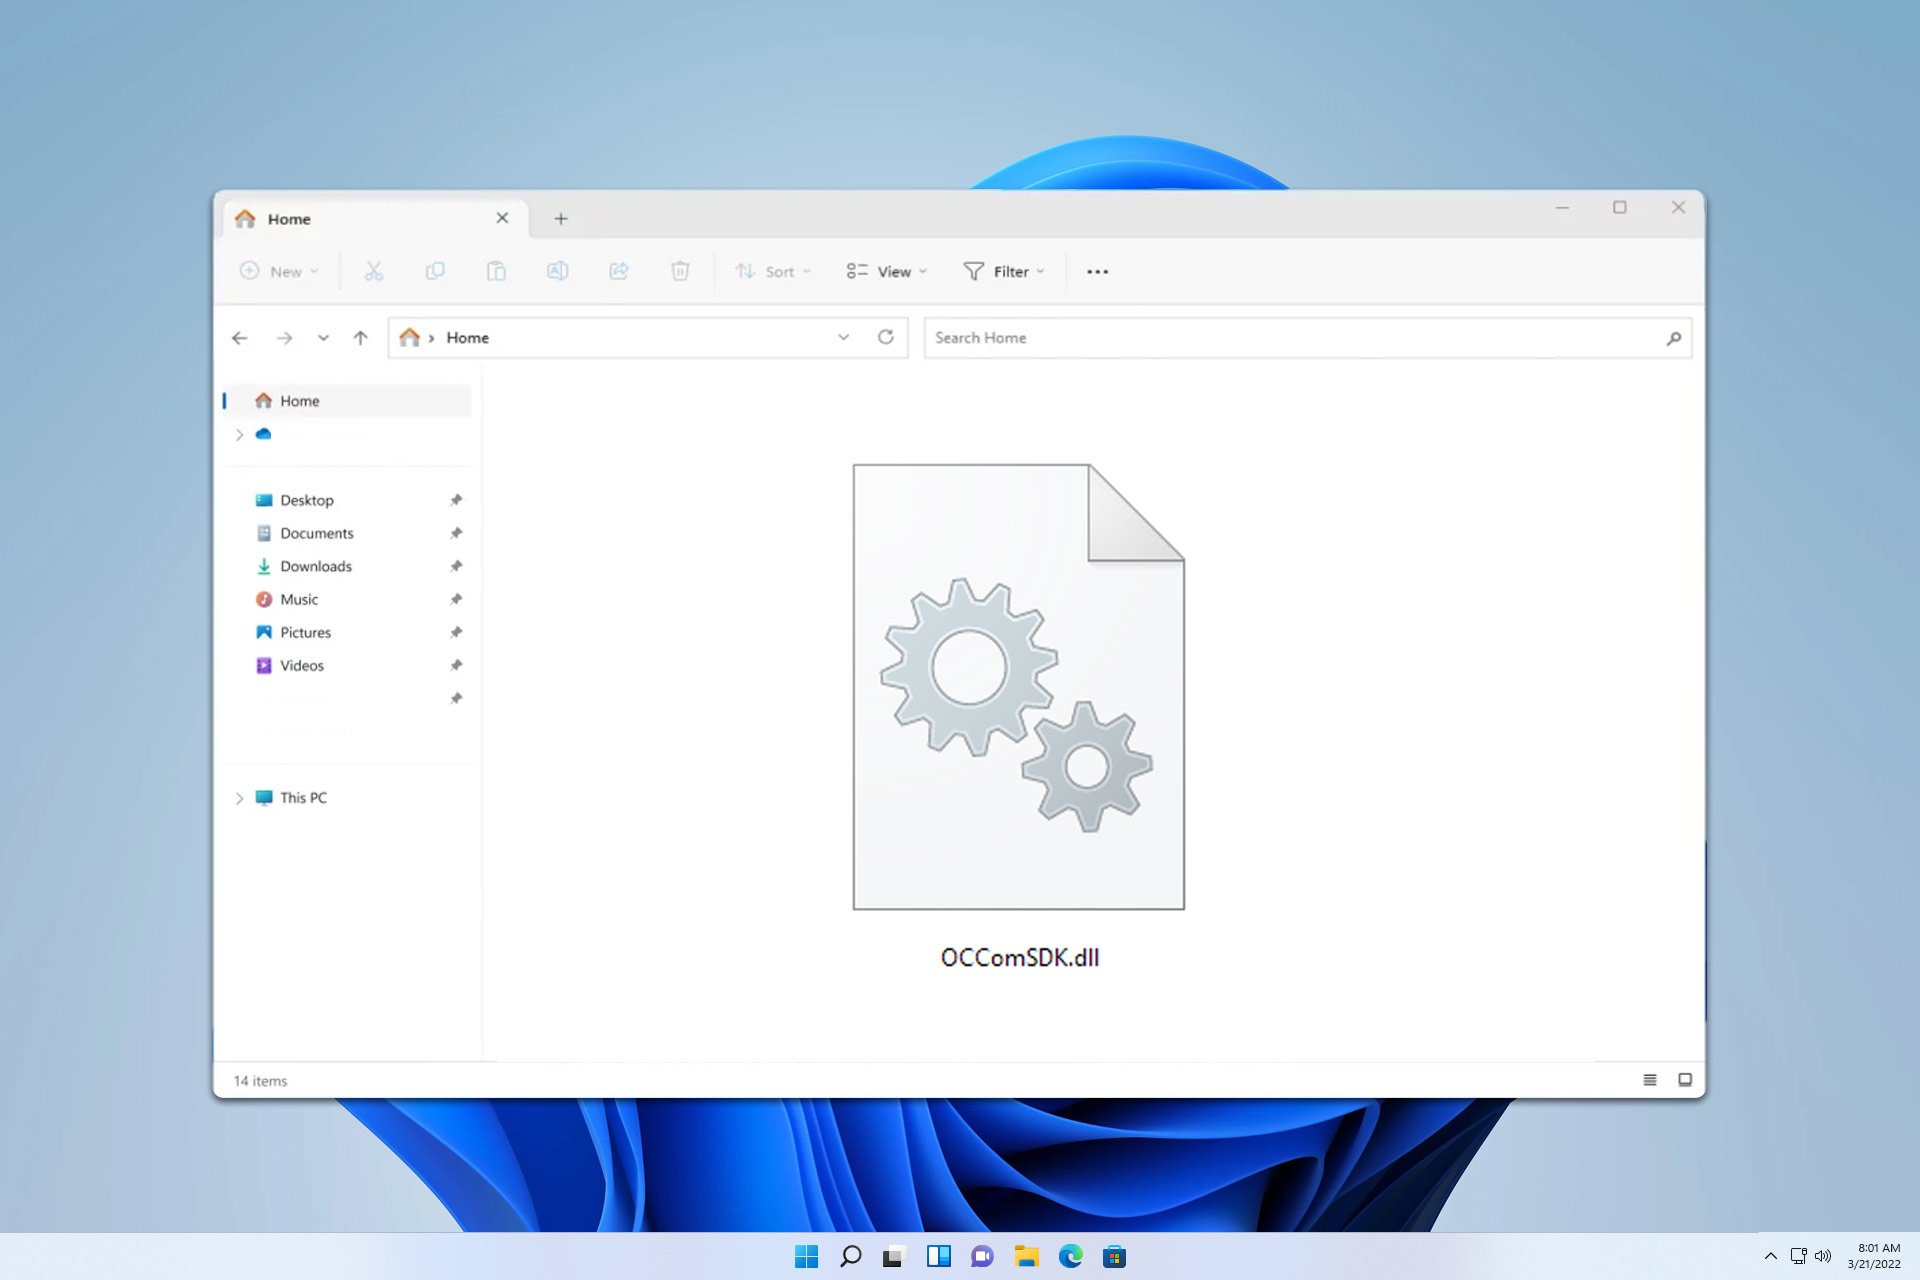
Sooner or later you’ll notice an unusual DLL file on your PC, and speaking of which, many have reported occomsdk.dll. Today we’re going to take a closer look at this file and see what it does.
What is occomsdk.dll?
The occomsdk.dll is often associated with OpenCandy adware, and if you notice this file on your PC it means that you have OpenCandy installed as well.
What is OpenCandy used for?
OpenCandy was used to bundle unwanted software into regular software installations.
During the setup, users would be asked to install additional software, from OpenCandy automatically, and the only way to avoid this was to manually decline to install them.
Is OpenCandy safe?
While OpenCandy isn’t dangerous malware, it would install unnecessary software on your PC and gather non-identifiable PC information. While not as harmful as other threats, it’s unnecessary and considered generally unsafe.
How do I delete OpenCandy?
1. Scan your PC for malware
Press the Windows key + S and type Windows Defender. Select Windows Security from the list.
Next, go to Virus & threat protection and choose Quick scan.
Wait for the process to finish and remove the occomsdk.dll and other malicious files.
If the scan finds nothing, go to Scan options.
Choose Full scan and then press Scan now.
Wait for the scan to finish.
If the scan doesn’t find anything, use any antivirus software without ads, to perform a full scan of your PC. Users had the most success with Malwarebytes, but you can use any other tool.
Click the Menu icon in the top right corner and choose Settings.
Choose Reset settings in the menu on the left.
Next, choose Restore settings to their original defaults.
Click on Reset settings to confirm.
3. Completely remove Chrome
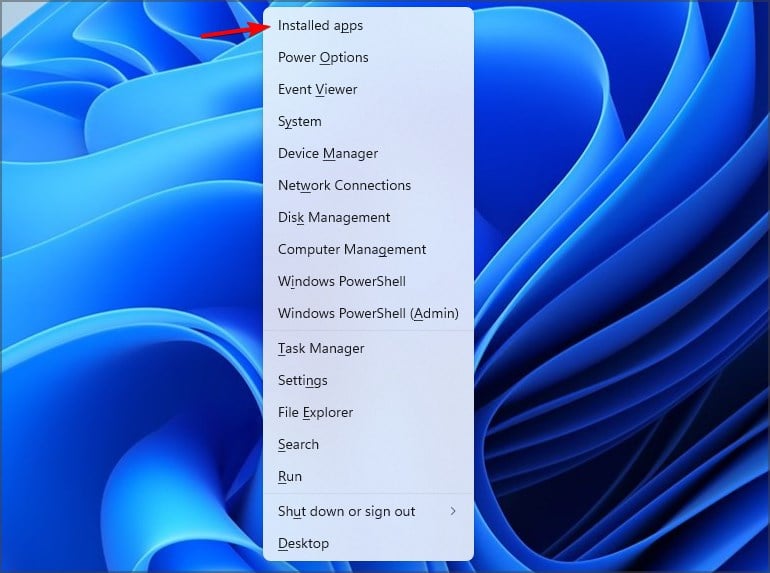
Press the Windows key + X and choose Installed apps.
Locate Google Chrome. Click the three dots next to it and choose Uninstall.
Follow the steps on the screen to complete the process.
You can also use uninstaller software to ensure that Chrome and all of its files are removed. Once removed, install the software again and check if the problem is resolved.
Keep in mind that the last two methods work only if OpenCandy changes your start page in Chrome.
As you can see, occomsdk.dll is associated with OpenCandy malware, and it should be removed if you find it. We have to mention that this file is often associated with OCSetupHlp.dll, another malware file, so keep an eye out for it as well.
This isn’t the only unknown file that you can encounter, and we wrote about SppExtComObjHook.dll in our other guide, so don’t miss it.
Many within the gaming/Xbox community agree that the Xbox Series S should not have existed. Why, you might ask? Well, arguably, it’s pushing away games from the console, according to an Xbox user on Reddit.
More specifically, Xbox Series S is the culprit for game studios releasing their games for Xbox later than the other platforms. It happened, and Baldur’s Gate 3 is one of the most famous. Wukong: Black Myth is another recent example.
According to the user, the developers need extra time to make demanding games run on casual consoles, such as the Xbox S. While the Xbox X is arguably on par with PlayStation 5 and can run most of these games perfectly, the Xbox S, which is suited for more casual gaming but less powerful than its older sibling, sometimes struggles to maintain a balanced performance.
Considering this, Microsoft’s policy that all games running on X must run on S, too, makes the Xbox miss the release date for important games, leaving people without the possibility of experiencing them at the same time as the rest of the world, agrees the gamer.
These are valid points if we don’t consider that the Xbox Series S is selling much better than the Xbox Series X, and Microsoft has no reason to give up on it yet. In fact, the Redmond-based tech giant recently released enhanced versions for both Xbox S and X consoles.
A report published last year revealed that in 2022, 74,8% of Xbox Series owners had the S version, while the rest, 25,1%, owned the X version. And that’s for good reason, too. The S is often cheaper than the X, and many users choose it over the X.
Some people from the Xbox community agree that price is a big factor when considering purchasing an Xbox Series console, while others consider the S an entry point to the Xbox console. Others believe the Xbox Series S should not be held responsible for the developers’ fault.
This is nothing more than an excuse used by developers. The requirement is known to them from the very start. If they ignore it until the end of development, it is their own fault.
Some even agree that the S is not holding the Xbox console down but rather encouraging developers to optimize games for other consoles and even PCs.
What do you think about the Xbox Series S? Is it holding Xbox down?
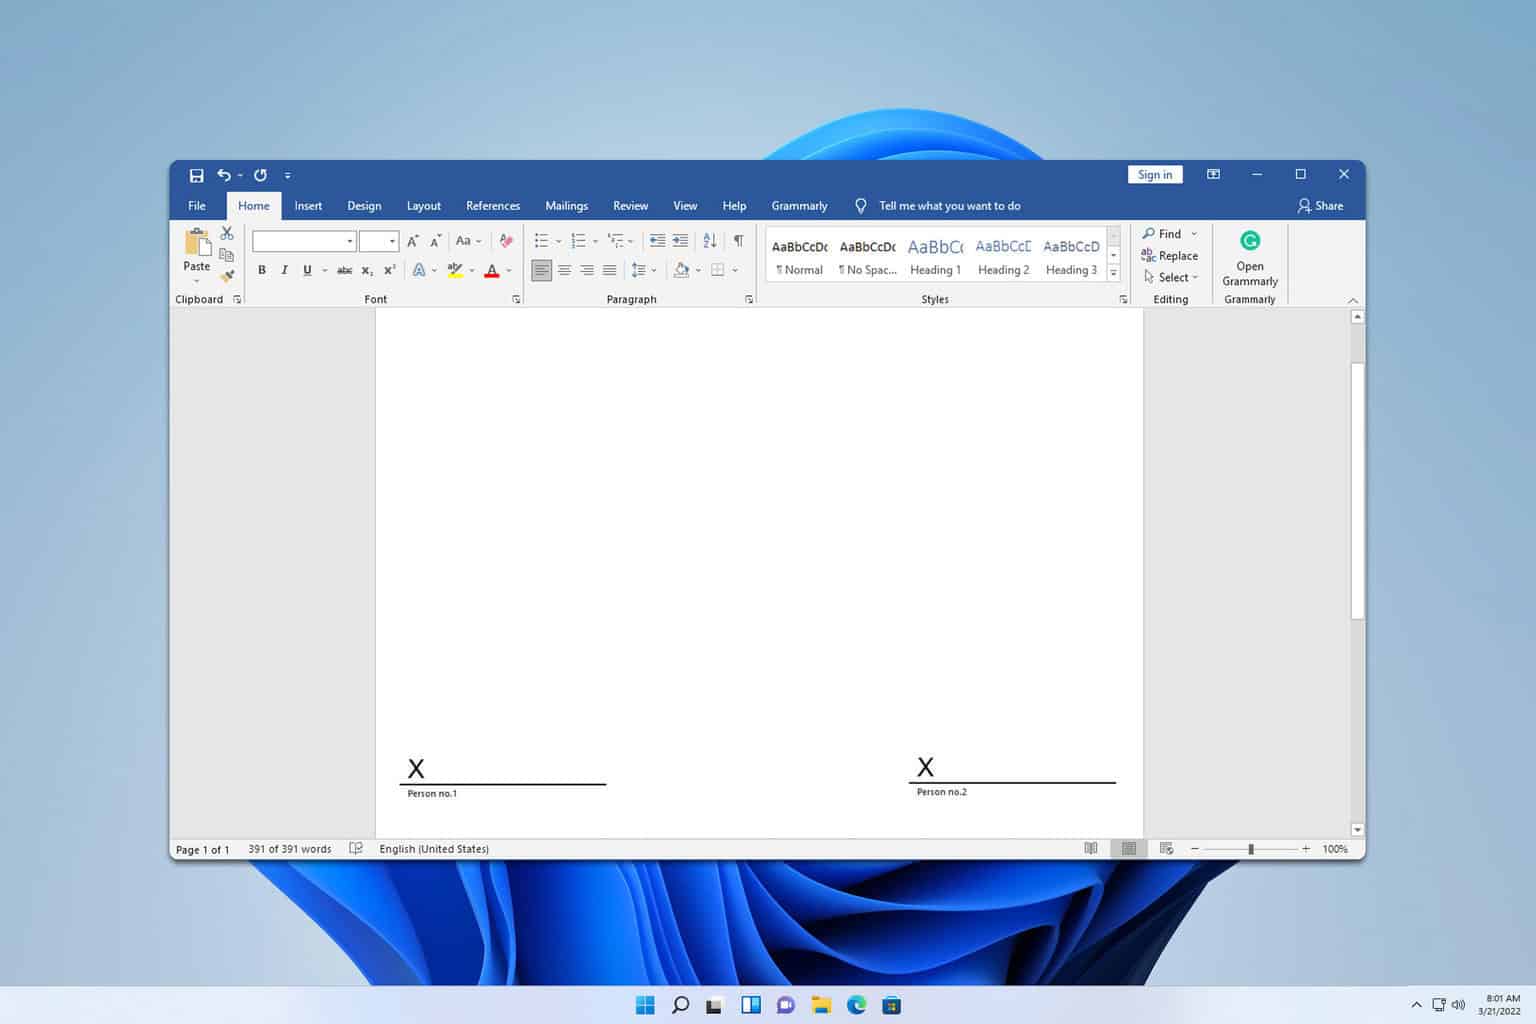
Sometimes you need multiple signatures in a document, and in today’s guide, we’re going to show you how to create multiple signature lines in Microsoft Word.
How can I create multiple signature lines in Word?
1. Use the Signature Line option
Go to the Insert tab and click on Signature Line.
Enter the necessary information and click on OK.
Next, repeat the same steps to add another signature.
This is the best way to add multiple signatures on a Word document since it will allow it to digitally sign it.
2. Use Text Box
Go to the Insert tab and choose Text Box.
Select the desired style.
Draw the text box and enter several underlines to create a line.
Next, double-click the border.
In the Outline options, set No outline.
Once done, just select the text box, and press Ctrl + C and Ctrl + V to paste it.
If needed, remove the outline on the second signature line.
Now you know how to insert multiple signature lines in Word, so go ahead and give these methods a try and see which one works best for you. Keep in mind that these methods can come in handy if a signature line is greyed out in Microsoft Word, so don’t hesitate to use them.
Microsoft Teams will soon allow participants to Town Halls meetings on desktop and web to pause the live streaming as they wish, or even move forward or back within, as they would with a standard recorded Teams meeting.
In a new entry to the Microsoft 365 Roadmap, the Redmond-based tech giant calls it Digital Video Recording. It’s set to be released in December 2024 on all devices, including iOS, Android, Mac, and Desktops.
However, only the Microsoft Teams Premium licensed Town Hall meetings will allow participants to use the Digital Video Recording capability.
Users can now interact with an instance of a live streaming town hall instance in the same way they would a recorded piece of content when viewing via desktop or web. DVR functionality in town hall enables event attendees to pause and move forward or back within a town hall, navigate to any previously-streamed timestamp, and other abilities that make interacting with a town hall more convenient and makes it easier to digest the content being presented. This feature is available for town hall instances that have been set up by an Organizer role with a Teams Premium license.
This capability can be quite useful for those who entered a webinar or a presentation way past its starting point and would like to catch up with the rest of the participants. Plus, allowing them to catch up on important key points within the meeting makes this capability quite appealing.
In other news, regarding Microsoft Teams meetings, the Redmond-based tech giant will update the platform to allow admins to control who can leave messages in the chat box before and after a meeting.
Many users with Dell computers have reported that Windows 10/11 mistakenly identifies firmware updates with the Trojan:Win32/Vigorf.A. This Trojan is a casual malware that Microsoft Windows Defender detects automatically when it suspects something corrupt or wrong with the recently accessed files.
In this case, many Dell computers seem to be affected, and Windows Defender will label certain recent firmware updates with this tag, quarantining them or, in some cases, deleting them.
Users have reported this on both official Windows and Dell forums, and it has happened on Windows 10 and Windows 11 version 22H2.
So I know back in 2022, Windows Defender was making false positives on Dell PCs. Unfortunately, it appears to be happening again. This afternoon I was met with:
Detected: Trojan:Win32/VigorfA
This was connected with C:\ProgramData\Dell\SARemediation\SystemRepair\Snapshots\Backup\[long code]
And also file:\Device\HarddiskVolumeShadowCopy1\Windows\[long code]\DellUpdate.Msi
Could someone from Dell please confirm this is a false positive detection?
Both of the “Affected items” on Windows Security are linked with Dell.
For now, the detection seems to be a false positive, meaning that Windows Defender mistakenly identifies a threat in these updates. According to the independent advisors, though, Microsoft is already looking into it.
For now, it preponderantly affects only Dell computers, and the Trojan:Win32/Vigorf.A detection might automatically appear after turning your device on. Scanning your computer will prompt Windows Defender to quarantine or remove the files. If it affects you, you should let Microsoft know in the Feedback Hub.
We don’t know if the latest Patch Tuesday updates affected Windows Defender, but the Redmond-based tech giant will most likely provide more clarifications in the next few days.
All you have to know is that, currently, this is a false positive, and your Dell device is not in danger.
Many users want to change their Firefox Private Browsing start page to a blank page, and while this isn’t natively available, there are ways to do this, and this guide will show you how.
How can I set Firefox Private Browsing to a blank page?
1. Create a new shortcut
Right-click your desktop and choose New and select Shortcut.
Next, paste the following in the Type the location of the item field. "C:\Program Files\Mozilla Firefox\firefox.exe" -private-window about:blank
Click Next and follow the instructions on the screen to complete the process.
Once done, you’ll have a separate icon for Firefox Private Browsing that will always start with a blank page.
2. Adjust the userContent.css file
Press the Windows key + R and type %appdata%\Mozilla\Firefox\Profiles\
Next, open the folder that matches your Firefox profile.
Look for the chrome folder. If it’s not available, create it.
Inside of the chrome folder open userContent.css. If it’s not available, make sure to show file extensions on Windows 11, create a new text document, and set its name to userContent.css.
Add the following to the userContent.css file: @-moz-document url(about:privatebrowsing) { .showPrivate { display: none !important; } }
Save changes.
Now whenever you open Private Browsing mode in Firefox, it will always open with no elements shown. Keep in mind that to complete this solution, you need to find your Firefox profile location and select the right folder in Step 2.
As you can see, it’s not possible to natively change the Firefox Private Browsing start page to a blank page, but you can always create a dedicated shortcut to do so.
Qualcomm has revealed that several content creation apps for Windows 11 will now natively support its Arm-based Snapdragon X Elite and chips. The new apps include Blender, CaptureOne, Moises, Steinberg Cubase, and Nuendo.
Windows 11 PCs sporting the new Snapdragon chips will also be getting a new free NPU-based plugin for Blender that “will simulate rendering on the NPU using a neural network at warp speed” and “reduce the time it takes to enhance your early 3D object file into a higher-quality 2D image with text-to-image AI,” Qualcomm said in a blog post.
Qualcomm said Blender’s new plugin will soon be available and will work with the Snapdragon X Elite and Plus chips inside HP, Lenovo, and Samsung Copilot+ PCs.
Alongside Blender, several other software will soon be available on Snapdragon-based Copilot+ PCs, including Affinity Photo 2, and Capture One. But the most exciting reveal is that several DAWs (Digital Audio Workstation) will finally be available on these devices.
Qualcomm announced that Snapdragon Elite and Plus can now support Moises and several other DAWs, such as Cubase, Nuendo, Cockos Reaper, and Reason from Reason Studio. Additionally, Steinberg and Focusrite will release their own drivers for Copilot+ PCs, making these devices ready for producing music.
Snapdragon-based Copilot+ PCs also support MIDI for electronic instruments and the much-needed ASIO driver for low-latency audio—a must for every musician/producer.
There is no word on whether the other more popular DAWs on the market, specifically Ableton, will be available on Copilot+ PCs, but there are huge possibilities for it. Ableton is already on Apple’s M processors. These processors have an ARM architecture, so it wouldn’t take much for Ableton and other similar DAWs to be adapted for Copilot+ PCs.
Qualcomm mentions that most of these DAWs are entering a preview phase this month, while others will be available starting in 2025.
Microsoft has recently expanded the language capabilities of Microsoft 365 Copilot. This AI-powered tool has added 12 new languages, bringing the total to 42. The new languages include Bulgarian, Croatian, Estonian, Greek, Indonesian, Latvian, Lithuanian, Romanian, Serbian (Latin), Slovak, Slovenian, and Vietnamese.
These languages were teased earlier this year, in an entry to the Microsoft 365 Roadmap. Here’s what the entry says:
The Copilot for Microsoft 365 team is working on supporting 12 new languages across all M365 Copilot features: Bulgarian, Croatian, Estonian, Greek, Indonesian, Latvian, Lithuanian, Romanian, Serbian (Latin), Slovak, Slovenia, and Vietnamese. They’re also improving the handling of these language variants: Dutch (Belgium), German (Switzerland), English (UK), Spanish (Mexico), and French (Canada).
This means users from all Europe can use Copilot in their native language, and the AI model will respond to them in that language, without the need to translate. Alternatively, you can converse with Copilot in another language other than English, and have the AI tool respond to you in English.
There are also some hiccups to watch out for – for instance, Microsoft notes that users working in Serbian will see Teams meeting transcripts in Cyrillic, not Latin script. Microsoft says it’s working on resolving this and will provide updates on progress.
The additional support should make Copilot a valuable tool to have when dealing or processing lots of information. For example, such an extended support could be useful in cases where forms, or quizzes are set in multiple languages.
However, according to the announcement, not all users will receive the new languages simultaneously. For instance, the Indonesian and Serbian languages are being rolled out in stages and may not reach all customers until early November.
Microsoft is not done adding new languages to Copilot. The company plans to support even more languages in the coming months.
Microsoft 365 Copilot, the company’s AI assistant, is getting a significant upgrade with the arrival of new autonomous agents. According to the company, the agents can help ” accelerate lead generation and process sales orders to automate your supply chain.”
Autonomous agents are a new feature of Copilot Studio, the tool that allows businesses to build and train custom AI models. Microsoft says the new agents can “range from simple prompt-and-response to fully autonomous” and “will work on behalf of an individual, team, or function to execute and orchestrate business processes.”
Businesses can use Copilot Studio to build autonomous agents that connect to data in Microsoft 365 Graph, Microsoft’s company-wide data system, Microsoft Fabric, its metadata repository Microsoft Dataverse, and other third-party systems.
Announced earlier this year, Microsoft says the agents can be used for various tasks, including “accelerating lead generation and processing sales orders to automating your supply chain.” Microsoft claims that the agents are built with security in mind and can be managed by IT departments.
Agents in Copilot Studio, built by data engineers and business analysts, include guardrails and controls established by maker-defined instructions, knowledge, and actions. The data sources linked to the agent adhere to stringent security measures and controls — all managed in Copilot Studio. These include data loss prevention, robust authentication protocols, and more. Once these agents are created, IT administrators can apply comprehensive features to govern their use.
Microsoft is offering several autonomous agents as part of Dynamics 365, its enterprise resource planning and customer relationship management apps. Customers can use the agents to improve sales, service, finance, and supply chain processes.
In a blog post, the company says the agents can be used for tasks like lead qualification, supplier communications, customer intent, and knowledge management. Microsoft says it’ll add more agents to Dynamics 365 over the coming year, presumably including those developed by third parties.
AI-first business process in Dynamics 365 is a game changer for our customers, helping them advance their AI journeys and drive business value. AI is today’s ROI and tomorrow’s competitive edge. The new agents in Dynamics 365 will help our customers scale their impact and future-proof their organizations.
Microsoft says that the new agents in Copilot Studio will be available in public preview next month, while the agents in Dynamics 365 are already available to some customers.
We often have many DLL files on our PCs, but users have noticed rnd.dll on their computer, and are wondering if the file is dangerous. Today we’re going to analyze this file and tell you what you need to know.
What is rnd.dll and what does it do?
What is rnd.dll?
This file name is extremely vague, and there’s not much information about it. Judging by its name, it’s probably used by software to generate random numbers.
Is rnd.dll a virus?
Malware may be disused as this DLL file. It’s advised to scan this file by doing the following:
Locate the rnd.dll file and right-click it.
Choose Scan with Windows Defender.
Wait for the scan to finish.
You can also use any other antivirus software to scan the file.
Is rnd.dll legitimate?
To check if this file is legitimate, look at its location. If it’s located inside a folder that is associated with legitimate software, it means that the file itself is most likely valid and used by that software.
You can check the file signature to determine if it’s valid:
Right-click the rnd.dll file and choose Properties.
Go to the Digital Signatures tab. Next, double-click the available signatures to see their details.
Check which company signed the file. Make sure you research the company and ensure that it’s legitimate.
If the file is a directory of an unknown application, you can uninstall that application by doing the following:
Press the Windows key + X and choose Installed apps.
Locate the application that has rnd.dll inside it.
Click the dots next to its name and choose Uninstall.
Follow the steps on the screen to complete the process.
Alternatively, you can go ahead and manually delete this file.
There is almost no information on rnd.dll, and since it has such a vague name, there’s a chance that the file is malicious, so be sure to check its digital signature and scan it with your antivirus.
If the file is associated with an application that you don’t recognize, go ahead and remove that application from your PC.
This isn’t the only unusual DLL file that you can encounter, and we wrote about version.dll as well as productinfo.dll in our previous guides, so don’t hesitate to check them out.
To learn more about DLL files, we have a new guide on imageres.dll, so don’t miss it for more information.
Many are wondering if is it possible to add a signature line in Microsoft Word without X, and in this guide, we’re going to answer this question and show you how to do that.
Why is there an X on the signature line?
This is a visual indicator, and it shows others where their signature needs to go.
How do I add a signature line on Word without the X?
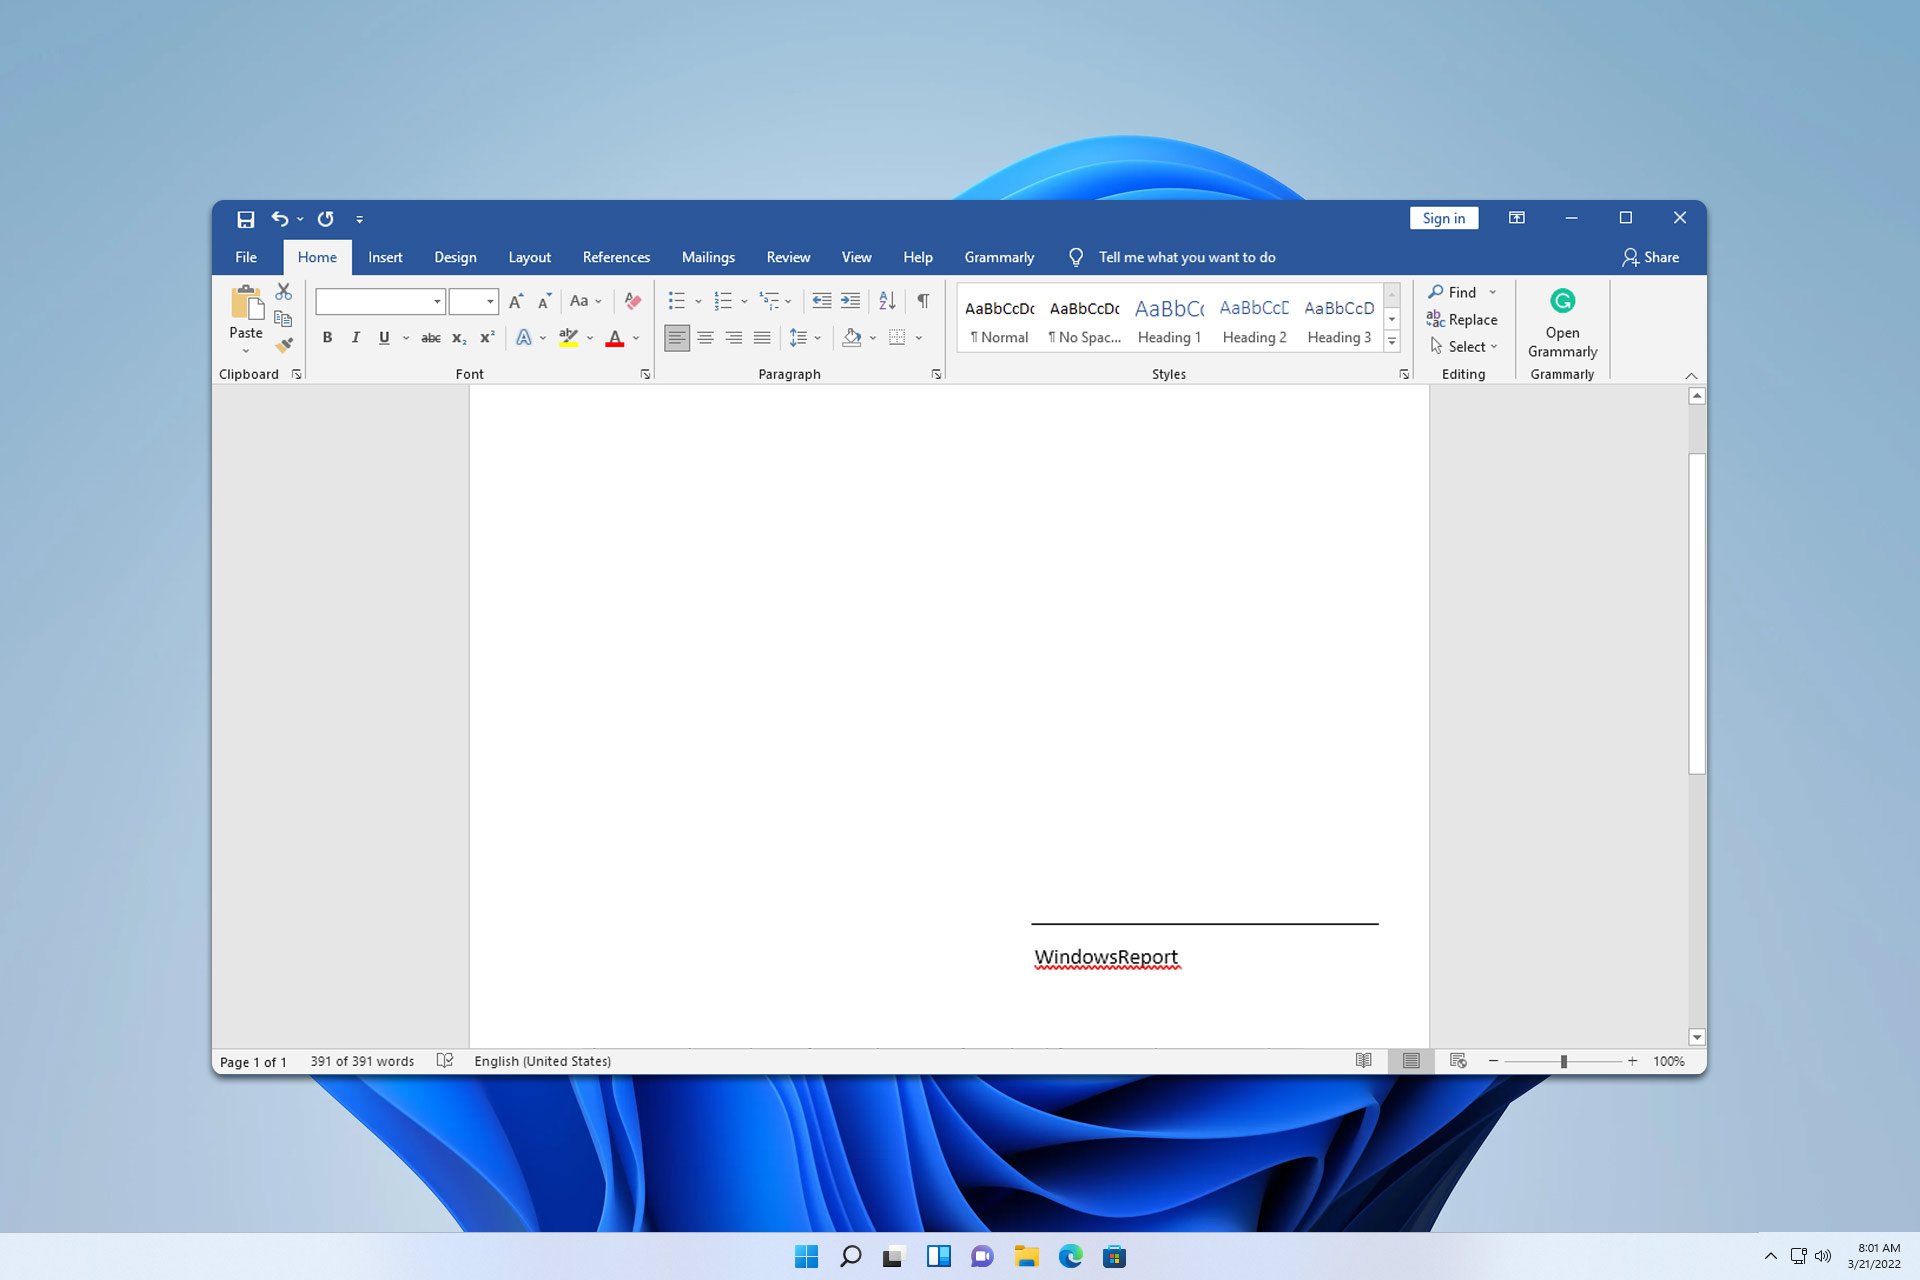
1. Use Text Box
In Word, go to Insert and choose Text Box.
Select the desired style and place the textbox at the desired location.
Remove all text and add several underlines to it.
Optionally, you can press Enter and additional information below the signature.
Double-click the outline of the text box.
Set Shape outline to No outline.
2. Use shapes
Go to the Insert tab and choose Shapes.
Select Line.
Now place it where you want your signature to be.
Use the Shift key while dragging to make it straight.
Keep in mind that with this method you won’t be able to add text easily below the line since you’ll need to adjust your formatting.
On the Home tab, click the down arrow next to the Border icon.
Choose the Horizontal line from the menu.
Click the horizontal line and drag the resize box to adjust its size.
You can also drag and drop the line, but it will follow your document’s formatting, so placing it in the right position might not be as easy.
How to remove X in digital signature in Word?
Unfortunately, it’s not possible to remove X in the digital signature, and you’ll have to rely on workarounds to create a signature line without X in Microsoft Word.
Keep in mind that these methods won’t work if you want to digitally sign the document. However, you work around this by signing the entire document instead.
Now that you know how to add a blank signature line in Word, which method will you be using? We suggest the text box since it allows the most control and it’s the most straightforward out of all options.
The ERROR_DIR_NOT_ROOT with error code 144 (0x90) and error message The directory is not a subdirectory of the root directory, usually appears if the folder you’re trying to access or manipulate is not recognized as a subdirectory of the root folder; it should be under.
You might see this error during file operations when the path you mentioned doesn’t match the designated structure. Before delving into the detailed steps, reboot your computer, as sometimes a simple restart can fix the file access issues.
How can I fix the ERROR_DIR_NOT_ROOT 144 (0x90)?
1. Check the path
Press the Windows key, type cmd in the search box, and click Run as administrator to launch Command Prompt with elevated rights.
Type the following command to check if the folder is at the specified path after replacing Pathtoyourdirectory with an actual path, then hit Enter: dir C:\Pathtoyourdirectory
You will get the list of subdirectories and files in the directory.
You should also look for typos, missing slashes, or incorrect casing and ensure that the path you are using is complete.
2. Edit the permissions
To access a file or folder, you must have enough permissions to read, write, or execute the command. To check the permissions, follow these steps:
Right-click the folder and select Properties.
Go to the Security tab, select your username under Group or User Names, and check the Permissions field. A tick mark should be next to Full control, Modify, Read, Write, and Read & Execute.
If not, click Edit and mark them, then click Apply, then OK to save the changes.
First, check which folder is the root directory for that task or program. You can find this information in Program Files or the app settings.
Also, carefully examine the full path of the main folder and the folder you want to navigate to ensure the folder that you want to go to is inside the main folder. For example, if your root directory is E:\RootDirectory, then subdirectory or subfolder should be at this path:C:\RootDirectory\Subdirectory, however, if it is not, then you will encounter this error.
4. Check the file health
You must also be sure that the file or folder supports the operation you want to perform; next, run a disk check to ensure the file system is not corrupted. Follow the below-mentioned steps, but before that, create a backup of your important files:
Press the Windows key, type cmd in the search box, and click Run as administrator to launch Command Prompt with administrative rights.
Type the following command to locate bad sectors and fix errors on your disk and press Enter:chkdsk C: /f
If you execute this command on your system drive, usually the C drive, you may get a message saying that the drive is locked and the scan will start after the next restart. Type Y and hit Enter.
Restart your computer and the CHKDSK scan will run automatically before Windows loads.
To conclude, to fix the ERROR_DIR_NOT_ROOT 144 (0x90) issue, you must ensure the software causing the issue is up to date and that the file path you are using is correct. Next, you must reboot your PC before following the steps and check if the issue persists.
If you have any other questions or concerns about the ERROR_DIR_NOT_ROOT BSoD error, feel free to mention them in the comments section below. We will be happy to help!
The ERROR_SUBST_TO_JOIN 141 (0x8D) with an error message: The system tried to SUBST a drive to a directory on a joined drive, means that the system has attempted to use the SUBST command to assign a drive letter to a directory located in a drive that has already been joined using the NET USE command or other similar method.
The error occurs because you are not supposed to map a drive letter to a directory that is part of a networked drive. To fix the issue, restart your computer, as it can clear temporary issues, and refresh the drive mappings.
How can I fix the ERROR_SUBST_TO_JOIN 141 (0x8D)?
1. Check the existing mappings
Press the Windows key, type cmd in the search box, and click Run as administrator to launch Command Prompt with elevated rights.
Type the following command to get the list of all currently mapped drives and their statuses, then hit Enter: net use
In the list, look for the drive letter or directory for which you are trying to use the SUBST command. If it is in the list, it might be the reason for the error.
2. Try using a different drive letter
Press the Windows key, type cmd in the search box, and click Run as administrator to launch Command Prompt with elevated rights.
Type the following command to get the list of all currently mapped drives and their statuses, then hit Enter: net use
Select a drive letter that is not on the list, copy & paste the following command after replacing the drive letter and path you need, then press Enter: SUBST Z: "C:\Path\To\Your\Directory"
To verify the new mapping type the net use command again.
To access the mapped drive, press Windows + E to open File Explorer.
Go to This PC, look for the new drive letter, and double-click it to access the directory.
Press the Windows key, type cmd in the search box, and click Run as administrator to launch Command Prompt with elevated rights.
Type the following command to get the list of all currently mapped drives and their statuses, then hit Enter: net use
Identify the drive that you want to remove and disconnect the mapping, copy & paste the following command after replacing [drive letter] with the Drive letter you want to disconnect and hit Enter: net use [drive letter] /delete
Rerun the net use command to check if the mapping is removed.
4. Check the drive status
Press Windows + R to open the Run window.
Type diskmgmt.msc and click OK to open the Disk Management window.
Locate the drive and check its status; you may see any of these options:
Healthy: The drive is working correctly.
Unallocated: Space on the drive that hasn’t been allocated to a partition.
Offline: The system does not recognize the drive.
Foreign: The drive is from another device and needs to be imported.
You can also right-click the drive and select Properties, then get the detailed information about the drive.
To conclude, the ERROR_SUBST_TO_JOIN 141 (0x8D) issue can be fixed by checking the existing mappings, reviewing the drive status or removing the existing mappings on your device.
Don’t forget to check out all the reasons for BSoD occurrence so that you can take precautions and avoid these errors from reappearing. We have covered another BSoD issue, Error_not_joined, so read this guide to learn more about it. Before you leave, check out this guide on ERROR_NOT_SUBSTED 137 (0x89), a similar BSoD issue.
Did we skip a step that helped you fix this BSoD issue? If so, feel free to share it with our readers in the comments section below, and we will add it to the list.
The ERROR_NOT_SUBSTED with 137 (0x89) The system tried to delete the substitution of a drive that is not substituted message appears when a program tries to delete a drive substitution that doesn’t exist. This could happen for various reasons, including the drive letter being never substituted, the substitution being removed, or a typo in the drive letter or path.
How can I fix the ERROR_NOT_SUBSTED 137 (0x89)?
1. Check the current substitutions
Press the Windows key, type cmd in the search box, and click Run as administrator to launch Command Prompt with elevated rights.
Type the following command to get a list of currently substituted drives and hit Enter: SUBST
2. Remove the substitution correctly
Press the Windows key, type cmd in the search box, and click Run as administrator.
To delete the substitution drive, make sure you are using the correct drive letter. Type the following command, but replace [Drive:] with the drive you want to delete and hit Enter: SUBST [Drive:] /D
When working the SUBST command in Windows, you must verify the current drive substitution list to avoid errors like ERROR_NOT_SUBSTED
Therefore, before performing any operation related to these drivers, you should use the SUBST command to check the list of current drive substitutions. If the drive letter you want to delete is in the list, it is substituted, but if it doesn’t, it could mean that the driver was never substituted or has been removed.
Besides this, if the ERROR_NOT_SUBSTED issue appears when you run a script or program, check the code to ensure the reference related to the existing substitutions is correct. If everything is right from your end, you can also try restarting your computer.
You can also check the settings of the following tools on your computer: virtual drive, development backup and sync (such as Dropbox), file management tools, and game launcher to ensure these are not causing this issue.
Before you leave, don’t miss our recent guide on Error_Delete_Pending, since it covers a similar type of error.
If you have any other questions or suggestions related to ERROR_NOT_SUBSTED, feel free to mention them in the comments section below.
The CRITICAL_INITIALIZATION_FAILURE with error code 0x0000013D in Windows indicates a critical failure during the system’s initialization process. The error usually occurs when you have corrupted drivers, missing system files, malware infection, installed new software or hardware, or have problems with RAM or hard drives.
How can I fix the CRITICAL_INITIALIZATION_FAILURE error?
1. Boot your PC in safe mode & update drivers
Press Windows + R to open the Run window.
Type msconfig and click OK to open the System Configuration window.
Go to the Boot menu, and under Boot options, select Boot and Network.
Click Restart when prompted.
Once you are in safe mode, follow these steps to update the problematic driver:
Press Windows + R to open the Run console.
Type devmgmt.msc and click OK to open the Device Manager app.
You will get a list of system components; click on them one by one, and look for the driver with a yellow triangle and an exclamation mark inside it.
Once located, right-click the driver and select Update driver from the context menu.
Click Search automatically for drivers and Windows will try to find a driver for your device.
Follow the on-screen prompts to complete the process.
If Windows is not able to find the latest driver, you can visit the manufacturer’s website and download it manually. Alternatively, you can also try any of the driver updater tools recommended in this guide to install the latest driver.
2. Uninstall the recently installed software
While in safe mode, press Windows + I to open the Settings app.
Go to Apps, then click Installed apps.
Next, locate the app, click the three-dot icon and select Uninstall.
Click the Uninstall button to confirm.
3. Run the SFC scan
In safe mode, press the Windows key, type cmd in the search box and click Run as administrator.
Copy & paste the following command to restore or recover missing system files on Windows and hit Enter: sfc /scannow
Once the scan is completed successfully, restart your computer.
4. Check your disk for errors
NOTE
If you suspect drive issue, you must backup your important data before running this scan.
In safe mode, press the Windows key, type cmd in the search box and click Run as administrator to launch Command Prompt with administrative rights.
Type the following command to locate bad sectors and fix errors on your disk and press Enter: chkdsk C: /f
If you execute this command on your system drive, which is usually the C drive, you may see a message saying that the drive is locked and that the scan will start after the next restart. Type Y and hit Enter.
Restart your computer and check disk will run automatically before Windows loads.
5. Restore your system settings to a previous version
Press Windows + R to open the Run console.
Type sysdm.cpl and click OK to open the System Properties window.
Go to the System Protection tab, then click the System Restore button.
Select Choose a different restore point on the System Restore window, then click Next.
From the list of available restore points, choose the restore point created before encountering the BSoD error and click Next.
Click Finish.
Your computer will restart, and Windows will try to restore the system settings to the previous state. If upon restart, you see the System Restore didn’t complete the error successfully message, it could be due to conflicting apps or a driver error. We recommend you check out this detailed guide for solutions.
6. Check for Windows updates
Press Windows + I to open the Settings app.
Go to Windows Update, and click the Check for updates button.
If an update is available, click Download & install to download it.
You might get a prompt to restart your PC, so save your work and close all files, before restarting.
7. Reset your Windows
NOTE
Make a note of apps on your computer as you need to reinstall them after restart, and take a backup of all important apps and files.
Press Windows + I to open the Settings app.
Go to System, and click Recovery.
Under Recovery options, locate Reset this PC, and click the Reset PC button.
On Choose an option screen, select Keep my files.
Click the Cloud download option on the next screen.
On the Additional settings page, check the settings, if you want to make changes, click Change settings. Once satisfied, clcik Next.
Click Reset to start the process.
Depending on the system configuration, the process may take some time, and your device will restart multiple times. Once the reset is complete, you will have to go through the setup process.
Now, install Windows updates and required apps on your device.
To conclude, to avoid CRITICAL_INITIALIZATION_FAILURE or any other BSoD error, you must ensure the drivers and Windows version are up to date. To quickly fix this issue, first examine the error message, then take the steps accordingly. You may also perform a clean Windows installation to fix all the Windows-related issues.
Before you leave, we recommend you check out all the reasons for BSoD occurrence so that you can take precautions and avoid these errors from reappearing. We also have a new guide on Win32k_Atomic_Check_Failure error, so you might want to visit it.
If you have any questions or suggestions about the CRITICAL_INITIALIZATION_FAILURE error, feel free to mention them in the comments section below.
Many of our readers have reported facing the Amdihk64.DLL Not Signed issue while playing games like Apex Legends with AMD drivers on the computer. The issue usually occurs if the DLL file is missing, system files are damaged, GPU drivers are corrupted
What is Amdihk64.DLL?
Amdihk64.dll is associated with AMD’s drivers and software, usually related to graphics cards. It plays a vital role in supporting various functions related to graphics processing, including performance enhancements and rendering for AMD GPUs.
The DLL file is part of the AMD driver package, including the software that allows the operating system to communicate with the graphics hardware.
How can I fix the Amdihk64.DLL not signed error?
1. Use a third-party DLL fixer tool
One of the easiest ways to get the DLL file and get rid of the error is to copy the DLL file (C:\Windows\System32\) from another computer with the same version of Windows. Then, paste it into the affected computer at the exact location.
However, if you are unsure about the file location or device you are using, we recommend using a third-party DLL fixer tool as it can help you restore the DLL file and fix the problem. To use it, download & install the app, then run it to recover DLL files on your device.
2. Clean install the AMD driver
NOTE
First, temporarily disable antivirus software, as it can interfere with driver installation. Then, check Windows for updates and ensure you are running the latest version.
Uninstall existing driver
Press Windows + R to open the Run window.
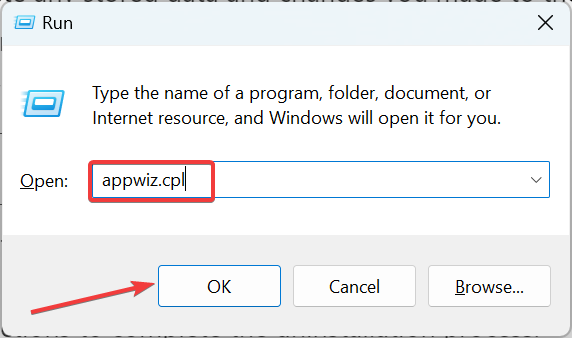
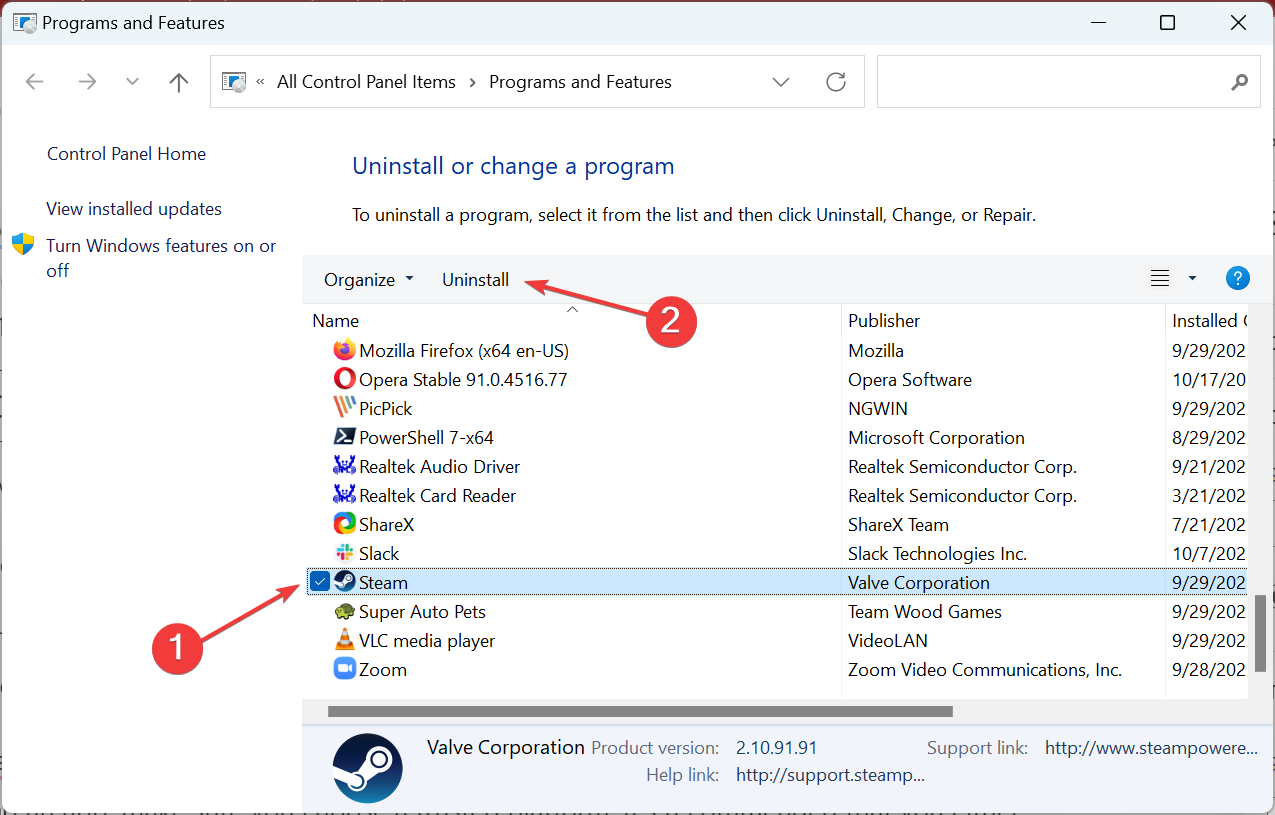
Type appwiz.cpl and click OK to open the Programs and Features window.
Look for AMD software in the list of apps, select it, and click the Uninstall button at the top of the menu.
Next, open the Run window again, type devmgmt.msc, and click OK to open the Device Manager app.
Locate the Display adapters category, click it to expand, right-click the AMD driver, and select Uninstall device from the context menu.
Click Uninstall again to confirm.
Download Radeon Software Adrenalin 2019 Edition 19.7.1 or later
Enter the graphics card model and other details to access a page with drivers related to your selected model. Click Previous Drivers, then choose your Operating system.
You will see the latest driver on the following page, then click Download.
Once downloaded, double-click the .exe file to initiate the installation.
Select Custom Install, then place a checkmark next to Perform a clean installation.
Follow the on-screen prompts to complete the process.
Once installed, right-click on the desktop and choose AMD Radeon Settings or Radeon Software. Then, go to the System tab to ensure the latest version is installed.
3. Reregister the DLL file
Press the Windows key, type cmd in the search box, and click Run as administrator to open Command Prompt with admin rights.
Copy & paste the following command to reregister the Amdihk64.dll and press Enter:regsvr32 Amdihk64.dll
Click OK when prompted and reboot your computer.
If the DLL file is already in the system, you will still face the error; you can try registering it again, as this can refresh file registration within the Windows system and resolve the missing DLL file problem.
4. Run SFC & DISM scans
Press the Windows key, type cmd in the search box, and click Run as administrator to launch Command Prompt with elevated rights.
Click Yes on the UAC prompt.
Type the following command to restore/repair the Windows system files and hit Enter:sfc/scannow
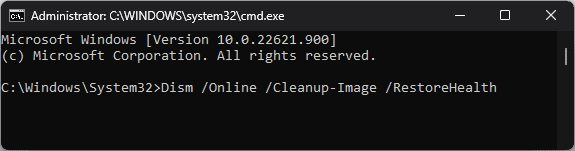
Wait for the scan to execute, copy & paste the following command to scan the Windows image for corruption and repair it using the Windows Update, and press Enter:Dism /Online /Cleanup-Image /RestoreHealth
Once the scan is complete, restart your computer to let the changes take effect.
Press the Windows key, type control panel in the search box, and click Open.
Choose Large icons for View by and click Recovery.
Click the Open System Restore link.
Select Choose a different restore point on the System Restore window, then click Next.
From your computer’s list of available restore points, choose the restore point created before encountering the missing DLL error and click Next.
Click Finish.
Your device will restart, and Windows will try restoring the system settings to the chosen version. If you see the System Restore didn’t complete the error successfully message, it could be due to conflicting programs or a driver error. We recommend you check out this detailed guide for solutions.
6. Download the DLL file from a third-party website
NOTE
The last resort to get the DLL file is to download it from a reliable third-party website, like DLL-FILES, which WR experts verified and tested.
Click the DLL-FILES website to access the Amdihk64.DLL page, then click Download.
Double-click the downloaded folder, then locate and copy the .dll file.
Go to this path and paste the DLL file. Don’t forget to replace C with the system drive letter of your device if it is not C for you:C:\Windows\System32\
Reboot your computer to save the changes.
This is how you can fix the Amdihk64.DLL not signed error. However, if you face the same issue due to any other DLL file, this guide can help you quickly recover it.
Before you go, don’t forget to check out our latest guide on what to do if IEShims.dll is missing from your computer. We also have a new guide on Gwrks64.dll, so don’t miss it to learn more about DLL files.
If you have any suggestions or questions about this DLL issue, feel free to mention them in the comments section below.
Are you getting the Dwmapi.dll missing or loading errors when launching a game or software?
Third-party Windows software and games may fail to load when they can’t interact with the Microsoft Desktop Window Manager API or the Dwmapi.dll file.
Luckily, I’ve tested various troubleshooting techniques to help you fix and restore the missing DLL files. Let’s check them out!
What Is Dwmapi.dll?
Dwmapi.dll is a system file that controls Windows Aero and other modern Microsoft Store Themes. It’s the API file for the Desktop Window Manager. Third-party apps and games use it to interact with the Windows default themes and other visual features.
When you see the missing or can’t load aler, it means any of the following:
Some malware or apps might have deleted the file.
A malicious app keeps the DLL file busy so others can’t access it.
15 other DLL files are statically linked to Dwmapi.dll, so one of those must be missing too.
The DLL file isn’t for anything earlier than Windows Vista. So, the app that’s not running isn’t compatible with your system if you try to run it on Windows XP or older PCs.
How To Fix Dwmapi.dll Missing or Loading Errors
Now, let me show you how to resolve this issue:
Download Dwmapi.dll From a Third-Party Source
The best and quickest way is to download a fresh copy and place it into the appropriate directory so the app looking for this file can access it.
Now copy the file and paste it into the following Windows system directories:
C:\Windows\System32
C:\Windows\SysWOW64
For third-party apps that keep the DLL file in their own directories, look up any of these folders and paste it:
bin
lib
plugins
dll
modules
extensions
shared
components
external
resources
If you can’t locate the exact folder, contact the game app developer and ask for the correct location for the Dwmapi.dll file.
The app or game isn’t fully compatible if the error is on a Windows XP PC. Still, you can try copying the DLL file in the System32directory and see if there’s any improvement.
Register the DLL File Using REGSVR32.EXE
You can register the newly copied DLL file manually or force a registration if it’s already available in System32 or SysWOW64.
Press Windows + X to launch the Power User menu.
Select Windows PowerShell (Admin).
In the terminal, type regsvr32 dwmapi.dll.
Hit Enter.
You should see the “The module was loaded…” message.
Perform a Clean Boot
This method will help you find if any third-party app keeps the DLL file busy so others can’t access it. Here’s how to clean boot your Windows PC:
Call the System Configuration dialog box by pressing Windows + R and running the msconfig command.
Go to the Services tab.
Select the Hide all Microsoft services option.
Click Disable all.
Now, navigate to the Startup tab of the same dialog box.
Click on the Task Manager hyperlink.
Windows will take you straight to the Startup tab.
Right-click on a startup item and select Disable.
Now, repeat the step for all the items except for the system utilities, like audio, video driver console, Bluetooth, etc.
Close Task Manager.
Go back to the Services tab on the System Configuration dialog box.
Click Apply and OK.
Now, restart the PC.
If this method resolves the Dwmapi.dll file missing error, it means a third-party app, service, or background process is the root cause.
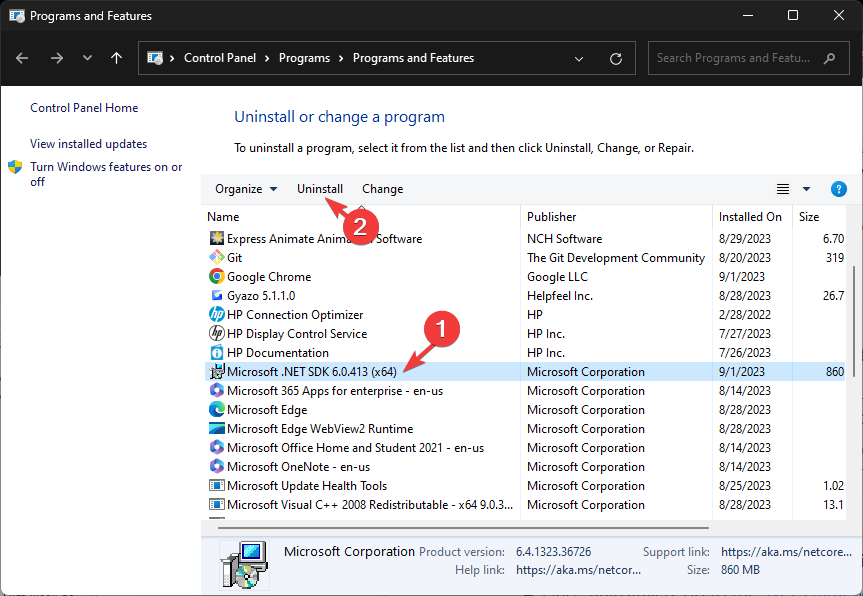
Press Windows + I and go to the Apps menu in the Windows Settings. Uninstall any recently installed third-party program from the Apps & features column on the right side of the window.
To reenable all genuine services, reverse the steps mentioned for a clean boot process and reboot the PC.
Scan the System to Find and Remove Malware
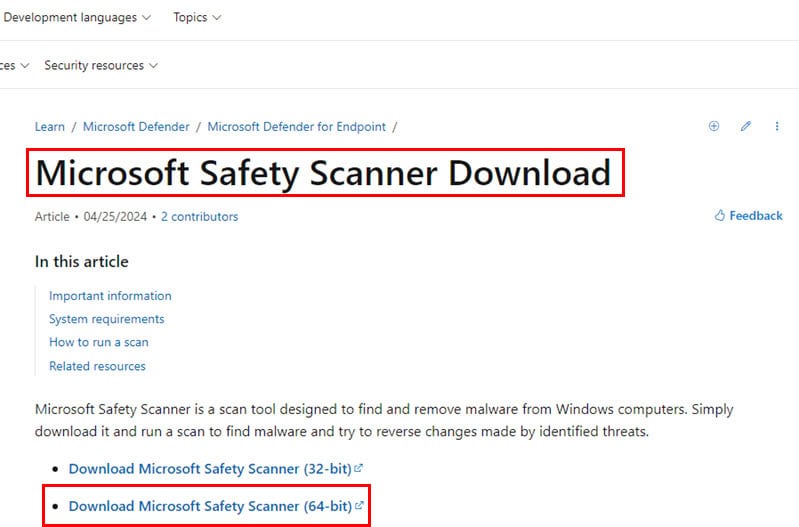
Run the Microsoft Safety Scanner to detect and delete malware that interferes with the DLL files. Here are the simple steps:
Download the appropriate edition by choosing between the 32-bit and 64-bit options.
Press Windows + R and enter the msinfo32 command. Hit Enter. Now, look at the System Type line. If it says x64, then download the 64-bit app or vice versa.
Go to the Downloads directory and double-click on the msert.exe file.
The Microsoft Safety Scanner will open.
Accept the terms on the first window and click Next.
Click Next again to access the Scan type dialog.
Select Full scan and hit Next.
Restart the PC once done.
Run System File Checker (SFC) Scan
An SFC scan can help you fix the system files automatically when the PC is online. Here’s how:
Access the Power User menu by pressing the Windows + X keys together.
Select the Windows PowerShell (Admin) item.
Inside the command line interface, copy and paste this command:
sfc /scannow
Hit Enter to execute.
Wait for the SFC scan to run completely.
Here are the possible results:
No integrity violations found: No actions are needed further. You can ignore the DISM scan method.
Integrity violations found: The SFC command itself tries to fix as many corrupted system files as it can. It’ll also show the total number of files it repaired. If it shows all files have been repaired, you don’t need to run a DISM scan. However, if you see some files weren’t restored, go to the next section.
Scan could not be completed: Try running a DISM scan.
Run Deployment Image Service and Management Tool (DISM) Scan
In the same terminal window, enter this command:
DISM.exe /Online /Cleanup-image /Restorehealth
Press Enter.
Wait for the DISM command to look for system file issues and repair them.
Here are the possible outcomes:
No integrity violations found: All systems files are in good condition.
Integrity violations found: The command will use an online image to fix the system files.
Scan could not be completed: You must again run the DISM scan.
Create a New User Account
Specifically for certain game apps, you should create a new Windows User Account:
Open the Windows Settings app.
Click on the Accounts option.
Navigate to the Family & other users menu.
Click on the Add someone else to this PC option on the right side.
Select the I don’t have… hyperlink on the Microsoft dialog box.
On the Create account page, select Add a user without a Microsoft account option.
Enter the relevant details into the fields.
Click Next.
Follow the on-screen instructions to set up a new account.
Restart the PC.
Log in using your new account.
Now, try to run the game app using its EXE file from the installation directory or the Steam app.
Perform a System Restore
Windows OS automatically creates restore points when you make substantial changes in the device. If you didn’t disable this feature manually, you might be able to restore the PC to the last known good configuration. This should also fix the issue. Follow these steps:
Click the Start menu and type in Restore.
Select the Create a restore point option below the Best match section.
The System Properties dialog box will open.
Click on the System Restore button.
Select Next on the System Restore dialog box.
Choose a restore point from the table. Click Next.
Hit the Finish button.
Wait for the system restore process to complete automatically. Your PC might restart a few times.
Reinstall Game App
As a last resort, you might need to uninstall a game app that’s not launching due to the Dwmapi.dll missing or loading errors.
If you’ve installed it using a DVD or digitally delivered package installer, go to Apps, find the game title in the Apps & features section, click on it, and hit Uninstall.
Alternatively, if you’ve used Steam, follow these steps:
Open Steam.
Select the Library menu at the top.
Look up the game you want to remove below the Games and Software navigation panel on the left side.
Right-click on the game title and select Uninstall from the context menu.
Click Uninstall again on the confirmation dialog box.
Steam will start removing the local files, which might take a few minutes.
Once you see the uninstallation confirmation, again go to the Library tab. You should still see the game in the left-side navigation panel.
However, if you right-click now, it should show Install.
Transferring Game App Data
Before uninstalling the game, you can copy your progress from the game save data directory.
You should be able to find it in the following locations on your PC:
Now you know how to handle the Dwmapi.dll loading or missing error in Windows Vista and newer operating systems. To learn more about DLL files, don’t miss our latest cncs32.dll is missing article.
If the article helped you, feel free to comment below which method worked for you. Also, if you know of a better troubleshooting idea, mention that in your reply.
Launching programs on your PC shouldn’t be a hassle but if you keep getting the mscorlib.dll error or any of its variations, something could be preventing them from launching properly.
Oftentimes, when an app fails to launch, it is because it wasn’t installed properly or has been infected by malware. Mscorlib.dll is part of the .NET Framework hence a core DLL file for running .NET applications. If you get a .NET Framework error message, chances are that the application is corrupt.
How do I fix errors related to mscorlib.dll?
1. Run the SFC and DISM scans
Press the Win key to open the Start menu.
Type command prompt and run it as an administrator.
Type the below command and press Enter:sfc /scannow
The SFC command will resolve the problem.
Type the below commands and press Enter after each one: Dism /Online /Cleanup-Image /CheckHealthDism /Online /Cleanup-Image /ScanHealthDism /Online /Cleanup-Image /RestoreHealth
Restart your computer.
2. Use a third-party DLL fixer
Mscorlib.dll, is used by many apps on the .NET Framework including Visual Studio so if it is a missing DLL file or damaged, the apps will not launch or work properly.
It is therefore recommended that you use the third-party DLL fixer tool to fix the problem if you’re looking for an automatic repair tool.
Launch the program by double-clicking the EXE file.
Accept the terms and conditions and click Next.
The program will begin diagnosing the issues associated with the NET Framework on your computer and present you with a list of Recommended changes that are required to resolve the problem.
Click on the Next button to apply the solutions.
Finally, click Finish to complete the process.
3.1.1 Repair via Programs and Features
Press the Windows key + R keyboard shortcut.
Enter ‘appwiz.cpl’ in the Open text box, and click the OK button.
Select a .NET Framework version listed in the Programs and Features applet if you can anything. Then you can press a Change/Uninstall button to open a window that includes a Repair .NET Framework option on it.
Select the Repair .NET Framework to its original state option.
Then click the Next button to fix .NET Framework.
3.2 Reinstall the .NET Framework
Press the Win key to open the Start menu.
Open Control Panel.
Click on Programs and Features.
Select NET Framework and hit the Uninstall button at the top.
Press Windows + R to launch the Run command, type services.msc, and click on OK.
Locate and double-click on the Application Identity service.
Check the Service status. If it stays Stopped, execute the other steps listed here. In case it reads Running, head to the next fix.
Click on Start under Service status to run the service.
Click on OK to save the changes.
Similarly, run the Windows Update service.
5. Re-register the DLL file
Hit the Windows key, type Command Prompt right-click on it, and select Run as administrator.
Type the following command and press Enter: regsvr32 mscorlib.dll
This command registers the missing DLL file. However, if more than one DLL file is not registered, you can use the following command: for %1 in (*.dll) do regsvr32 /s %1
6. Reinstall the app that won’t open
Press Windows + R to open Run, type appwiz.cpl and click OK.
Locate and select the problematic application, and then click on Uninstall.
Now, follow the on-screen instructions to complete the uninstallation process.
Make sure you get rid of all software leftovers before reinstalling the app to ensure it is not installed using the same corrupt installation files.
Detach from Edge was a popular capability that allowed Edge users to detach their Edge sidebar from the browser on the desktop, allowing quick access to Copilot and other applications in this area.
Microsoft initially released it in Edge’s Insider Channels, and although Detach from Edge has never seen the light of day on the Stable channel (according to my research), it was incredibly popular on Insider Channels.
Something happened meanwhile—possibly the release of Copilot as a sidebar on Windows 11—and the Detach from Edge capability was deprecated, leaving many users, including popular tech enthusiast @leopeva64, to come up with their own solutions—which don’t work anymore.
However, it seems that Microsoft is seriously considering bringing it back to Edge again. We found a recently published patent that describes a technology called a Detachable browser interface for context-aware web services, which sounds incredibly similar to Detach from Edge, as you can see in the featured image above.
It describes a system that lets you have a sidebar with helpful web services that you can detach from your browser and place on your desktop. And it works exactly like Detach from Edge: You can remove the sidebar from your web browser, and then dock it on your desktop, allowing you to use the sidebar’s web services with your browser and other apps simultaneously.
The Redmond-based tech giant chose to deprecate the feature back in 2023, and there was a solution, which worked for a while. However, while Edge still supports the useful Sidebar, you can’t detach it anymore.
Many users saw it as a downgrade, given the large number of tutorials on the Internet explaining how to enable it back, but the capability was quite useful to those working with many tabs. It seems Microsoft might have noticed it, and it might bring it back.
The patent mentions the integration of an AI-based chatbot, most likely Copilot. It will be context-aware and use information from Edge to enhance the experience of navigating the apps within the sidebar. It also mentions something related to workspaces, so this enhanced capability might be able to work with these workspaces while controlling certain settings for each workspace individually.
For instance, the desktop includes a workspace that serves as a primary area, or “wokspace” for a user to interact with applications, manage files and folders, and the like. For instance, the workspace may be the area of the desktop where applications windows may be displayed. The desktop further includes a taskbar that displays currently runnning and/or pinned application indicators, and a start button that provides access to various system featues, settings shortcuts to frequently used appkicatons, etc.
You can easily fix the MUI_NO_VALID_SYSTEM_LANGUAGE error with the right instructions.
Right after changing the default user interface language or modifying the existing language pack, you might see this Blue Screen. It often happens if the Windows UI language change doesn’t go how it should.
However, fixing this Blue Screen loop is challenging since most Microsoft Community discussion threads usually suggest re-installing the OS.
If you’re looking for less exhaustive solutions, this is the article for you. I’ve tested more than 20 approaches to fix this BSOD error. After a stringent evaluation, here are the ones that reliably worked. Let’s dive in!
What Is the MUI_NO_VALID_SYSTEM_LANGUAGE BSOD Error?
MUI_NO_VALID_SYSTEM_LANGUAGE is a critical error of the Multilingual User Interface (MUI) technology. On Windows PCs, MUI helps users work on globalized apps in a localized way, like automatically changing software languages and providing API access to multiple language databases.
Here are more details of this BSOD event:
Stop Code: MUI_NO_VALID_SYSTEM_LANGUAGE
Bug Check Value: 0x0000012A
Error Description: Windows did not find any installed language packs during phase I initialization.
Potential Causes
Usually, it’s caused by:
Removing the default language sets: You’ve forcefully or incorrectly deleted the existing Windows language pack to install new MUI packs.
Attempting to change UI language: Someone or you might have installed an unofficial pack.
Malware or virus infection: If some malicious software is meddling with your system files, especially language-related ones, this error might pop up.
Corrupted language packs: Windows can’t seem to find a valid language to speak—literally. If they’re corrupted or missing, it throws a fit.
Incorrect region or language settings: Sometimes, Windows gets confused about where it is in the world. If the system region and language don’t match, expect a meltdown.
Outdated Windows updates: If you ignore updates for too long, Windows often throws such errors to remind you that you’ve been ignoring its notifications for too long.
Misconfigured registry settings: If you or someone else have been poking around the Windows Registry database and changed language settings manually, without knowing the consequences, BSOD is the most common thing you can expect.
Faulty third-party software: Some apps don’t play nice with Windows’ language settings, causing the system to freak out when it can’t communicate properly.
Damaged system files: Corrupted Windows installation files also can’t be ruled out.
How To Fix MUI_NO_VALID_SYSTEM_LANGUAGE BSOD Error
Unfortunately, none of the usual basic troubleshooting can fix this issue, except a PC restart if you’re lucky. If a simple reboot doesn’t work, follow these methods:
Reboot Into Safe Mode
When the PC enters a Blue Screen loop, try these steps to revive it into a troubleshooting or diagnostic state:
Power on the computer, and as soon as Windows starts to load, force shutdown by holding the power button.
Repeat this three times.
On the third attempt, Windows should enter Automatic Repair Mode.
Once in Automatic Repair Mode, click Advanced Options > Troubleshoot > Advanced Options.
Choose Startup Settings and click Restart.
After restarting, press F4 for Safe Mode or F5 for Safe Mode with Networking.
If you can successfully enter Windows Safe Mode, reboot the PC. This should fix the BSOD loop temporarily.
Correct Language and Regional Settings
If you’re facing intermittent Blue Screen errors showing MUI_NO_VALID_SYSTEM_LANGUAGE, try these steps:
Press Windows Key + I to launch the Settings app.
Select Time & Language from the menu.
In the left sidebar, click on Language.
If the correct language isn’t listed, click Add a preferred language.
Pick your desired language and select Set as default.
Under Regional format, ensure the correct region is selected for dates, time, and numbers.
Scroll down and click Administrative language settings under the Related settings section.
In the new window, click Change system locale… under the Language for non-Unicode programs section.
Select the appropriate language, click OK, and hit the Apply button.
Restart your system for the changes to take effect.
After rebooting, check for any pending updates in Settings > Update & Security > Windows Update.
Reset Language Settings
If manually adjusting doesn’t work, you’ll need to restore the MUI settings to default by following these simple steps:
Open the Windows Settings app. You can use the Windows + I hotkeys.
Scroll down to find and select the Time & Language menu.
In the left panel, click Language.
Scroll down to the Preferred languages section on the right.
Select a language pack, like English (Vanuatu), and click on the Remove button.
Now, repeat this step for the rest of the language packs, except the default one, like English (United States).
Scroll down to the Related settings section.
Click on the Administrative language hyperlink.
The Region dialog box will open.
Navigate to the Administrative tab and click on the Change system locale button.
You should see the Region Settings dialog.
Ensure you select the following settings there:
Current system locale: Same as the default region and language in the Language settings section. For example, English (United States).
Check mark Beta: Use Unicode UTF-8.
Click Apply and select OK.
Restart the PC.
Update Windows
You can force a Windows update by executing these steps:
From the Time and Language settings window, navigate to the Home menu.
Scroll down and select the Update or Update & Security option.
Click on any of the following options you might see:
Resume updates
Check for updates
Download and install updates.
Try Fixing the Corrupted Registry Entries
First, create a backup of the existing Registry database:
Press Windows + R to open the Run dialog.
Type regedit in the Open field and hit Enter.
The Windows Registry Editor will open.
Select the Computer tree at the top, right-click, and select Export.
Choose a directory using the Export Registry File dialog.
Enter the preferred name for this backup in the File name field.
Click Save.
Here’s how to use the Glarysoft Registry Repair tool to fix broken Windows Registry entries or any other Registry errors:
Now that you’ve fixed the database with a Registry cleaner, monitor if the BSOD error comes back.
Restore Windows to a Previous State
If you’ve been regularly creating restore points, follow these steps to revert the PC to a state when it wasn’t showing the MUI_NO_VALID_SYSTEM_LANGUAGE error:
Firstly, move all personal files and downloaded items from the Windows installation drive or C:\\ to another drive or external storage.
Now, open the Run dialog box and execute the rstrui command.
The System Restore wizard will open. Click Next.
You’ll see a table for the available restore points.
Select one from the list and click on the Next button.
Click Finish on the next screen to start the PC restoration process.
You might see the PC restarting one or more times during the process.
Rebuild MUI Cache
Here are the sub-processes you need to execute to reconstruct the MUI cache:
Clear Temp Files
Press Windows + E to launch File Explorer.
Click on the View tab, then select Options.
In the Folder Options window, go to the View tab, select Show hidden files, folders, and drives, and click OK.
Go to the following Windows installation directory and look for the MUI folder:
C:\Windows\System32
Access the MUI folder, press Ctrl + A, and hit Delete.
Confirm all file deletions if you see a warning message.
Now, open the Run command and type in %temp%.
Hit Enter to open the Temp directory.
Delete everything from the Temp folder.
Run SFC
Press the Windows + X keys together to launch the Power User menu.
Select Windows PowerShell (Admin).
Copy and paste the following command into the terminal:
sfc /scannow
Hit Enter.
Run DISM
Ensure the PC is connected to a reliable internet network.
When the SFC scan is complete, type the following command into the same terminal window:
DISM /Online /Cleanup-Image /RestoreHealth
Hit Enter.
Restart your PC and monitor its performance for several hours to check if the BSOD error returns.
Contact Microsoft Support
If none of the above works for you, installing a fresh Windows OS is the only option to resolve the MUI_NO_VALID_SYSTEM_LANGUAGE Blue Screen loop. However, before you do that, try contacting the Microsoft Support team for advanced technical support.
Once you arrive on the Contact us page, click on the Windows logo.
A dialog box will open for Home and Business support choices.
Select the appropriate option and follow onscreen instructions to talk to an expert.
Reset the Windows OS
First, move all your files and downloaded content from C:\\ drive to a different one for backing up data. Now, follow these steps:
Ensure you’ve connected the PC to a reliable internet network.
Click on the Start menu button and select the Power icon.
Press the Shift key and select Restart from the Power context menu.
Keep the Shift key pressed until the device restarts and shows the Please Wait loading dialog.
Select Troubleshoot on the Choose an option window.
Click on the Reset this PC option.
Select Remove everything.
Select Cloud download on the window that follows.
Click Fully clean the drive button on the Reset this PC window.
Now follow the onscreen instructions to finish resetting the device.
Summary
So far, you’ve learned how to deal with intermittent or looped Blue Screens caused by MUI_NO_VALID_SYSTEM_LANGUAGE.
If any of the above methods helped you, feel free to mention them in the comment box. Also, if you know any fixes that I missed, do share.
Signatures on your Microsoft Word document help add authenticity and credibility to your document so when you send it and your signature is not showing on the other end, something could be amiss.
It is also possible that you did not insert the signature correctly or the document is corrupt. One way to verify this is if Word documents are not saving.
What can I do if the Microsoft Word signature is not showing?
1. Change settings from the properties window
Launch your Microsoft Word app and open a blank document.
Navigate to File and select Account.
Click on Sign Out.
Sign back in and open the folder where Microsoft Word is installed, right-click it and select Open file location.
Right-click the Microsoft Word icon and select Properties.
Inside the Shortcut tab, click on the drop-down menu next to Run, select Maximized, and click OK.
Check to see if this fixes your problem. If it doesn’t, please follow the next method.
It is possible that the signature is not showing because it is not rendering correctly. Changing the view to maximized can help resolve any display issues.
2. Clear Microsoft cache and run Microsoft Word in Safe Mode
Close all your Office apps.
Press the Windows key + R to open the Run command.
Type the following command and press Enter or click OK: %appdata%\Microsoft\Office\Recent
Delete everything in this folder then restart your Microsoft Word.
Press the Windows key + R to open the Run command.
Type the following command and press Enter or click OK: word /safe
3. Repair the Word file
Launch Microsoft Word and open a new Word file.
Click on File.
Select Open.
Click the Browse button and select the problematic Word file.
From the Tools drop-down menu, select the Open and Repair option.
The problematic Word file will be repaired, and you can open it.
Alternatively, you can copy and paste the content to a new document then re-insert the signature.
To avoid such errors in the future, ensure your Microsoft Word is always up-to-date, you’re using the best practices to insert your signature and sharing compatible document formats.
You can also convert to a widely acceptable format like PDF before sharing to ensure the signature registers and doesn’t have any issues.
Has any of the above solutions helped recover your Word signature on your documents? Do you have any other solution you’d recommend? If so, let us know in the comment section below.
Google Chrome Music Maker is a simple web tool that allows you to make music, and if you’re not familiar with it, in this guide we’re going to show you everything you need to know.
What is Google Chrome Music Maker?
Google Chrome Music Maker, also known as Chrome Song Maker, is a part of Chrome Music Lab, and it can be used to make simple songs.
It supports mouse input, keyboard input, MIDI keyboard as well as your microphone.
How can I use Google Chrome Music Maker?
Simply open the Song Maker page and from there you’ll be able to use different instruments to create songs.
You can choose between five different main instruments, and there are four instruments available for rhythm. At any given time, you can always use one main instrument and one rhythm instrument which seems rather limiting.
In addition to instruments, you can adjust the tempo or place the beats anywhere you like. As mentioned earlier, you can use your mouse, but you can also use your keyboard if it’s more convenient for you.
You can also customize various settings and adjust the length, beats per bar, scale, range, and other settings.
While simplistic, this service also allows you to undo any changes or start from scratch instantly. You can also save your creation as a WAV or MIDI file, or you can share the entire creation with others as a link.
Overall, Google Chrome Music Maker is a simple tool that is most suitable for students who are still learning. It’s rather limited in terms of functionality, and it can’t be used in any professional environment.
Despite being released three weeks ago, Windows 11 24H2 is quite buggy for a major release: we’re not just talking about the 8.63 storage dump, the patch deactivating Windows 11 altogether, or causing major issues with WD SSDs; apparently, the patch might cause serious installation errors on some Asus devices or even when simply opening the Camera app.
According to the latest entries in the Windows Release Health Dashboard, a couple of Asus devices, specifically the X415KA and X515KA models, cannot undergo the Windows 11 24H2 installation process. Acknowledged by Microsoft, the company is trying to find a solution to this issue together with Asus, and these devices will no longer receive the option to upgrade.
A solution is coming, and more information will be available soon, but the Redmond-based tech giant says a hardware error mostly causes the issue.
After attempting to update to Windows 11, version 24H2, some ASUS devices, specifically the X415KA and X515KA models, might encounter an issue where the system is unable to complete the update. During the update process, devices might experience a blue screen with an error message and cannot complete the installation of version 24H2.
Windows 11 24H2’s buggy ways continue with the Voicemeeter application, which apparently conflicts with the new patch, causing major blue screen errors with the Memory Management issue. Similar to the previous issue, Microsoft is currently investigating the bug with VB-Audio Software to provide a swift resolution.
The bug, per se, is caused by a conflict of drivers.
After installing Windows 11, version 24H2, you might experience issues with your device if you are running the Voicemeeter application. While using the Voicemeeter application, you might observe that your device encounters a blue screen with an error message indicating a MEMORY MANAGEMENT error. Note: This issue is caused due to the incompatibility of VoiceMeeter’s driver with the latest Memory manager.
Unfortunately, Windows’ native apps are not sparred. Using the Camera app and its facial recognition abilities within Windows 11 24H2 might cause some applications to become buggy and unresponsive. It doesn’t only affect the app, but other platforms that use the Camera are affected by this bug, as well. Here’s how Microsoft describes it:
After installing Windows 11, version 24H2, certain devices might experience problems using the integrated camera in scenarios where object or face detection features are enabled. This can include using the Camera app, using facial recognition sign-in options with Windows Hello, and other applications that use the integrated camera.
Similar to the other issues, Microsoft is working to provide a permanent solution to users, and many devices will not yet have the option to install Windows 11 24H2.
However, given the magnitude of the major issues currently happening with Windows 11 24H2, it might be best not to install it for now. While this shouldn’t happen, in the first place, the best solution is to avoid it until it gets more stable.
Have you experienced any of these issues while installing the latest Windows patch?