Movie Making Software for Windows: 8 Best in 2026

Movie-making has become nowadays something almost anyone can do thanks to the variety of movie-making software out there.

Tasks such as editing raw footage whether from your camera or phone, are as simple as a drag-and-drop command, not to mention many other features used with expensive software that is now at your disposal.

Some factors to consider when looking for the best movie-making software include your specific needs, formatting and sharing capabilities that you can show off on social networks, a user-friendly interface, and free trials.


What are the best movie-maker programs for Windows 10?

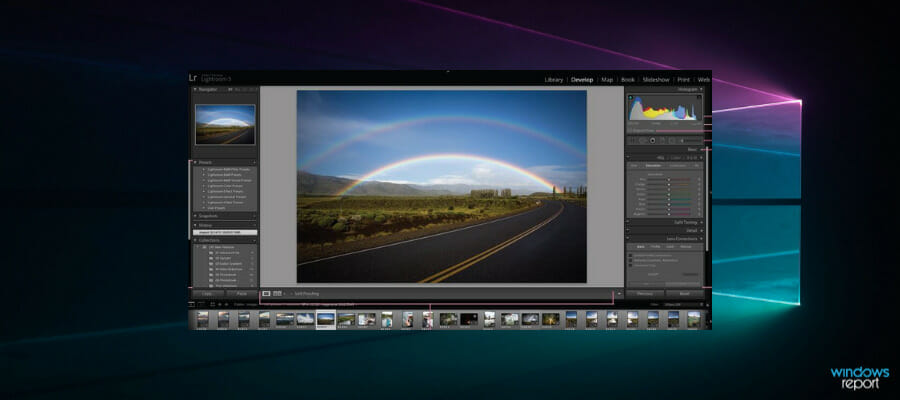
Adobe Premiere Pro

Adobe Premiere Pro is an industry-leading movie making software which adds that touch of professionalism to your film editing process, so you can craft your videos according to your creative vision.

This remarkable tool allows you to edit footage in any type of format from 8K to virtual reality. Thanks to features like native file support, lightweight proxy workflows and fast ProRes HDR, you can work on your videos even from a mobile work device.

With the Premiere Rush app, you are able to edit complex footage on your phone and then share it to social media. You can also get the right video framing for social posting by using Auto Reframe.

Download the Audio Stack app directly from the Essential Sound panel so you can choose the best music for your footage.

Don’t let any idea slip away, make adjustments, add cuts with the Scene Edit Detection tool that automatically identifies original edit points.
Adobe Premiere Pro

Adobe Premiere Pro

Refine your movie making craft and try your skills virtual reality with this state-of-the-art video editor!
Check priceVisit website

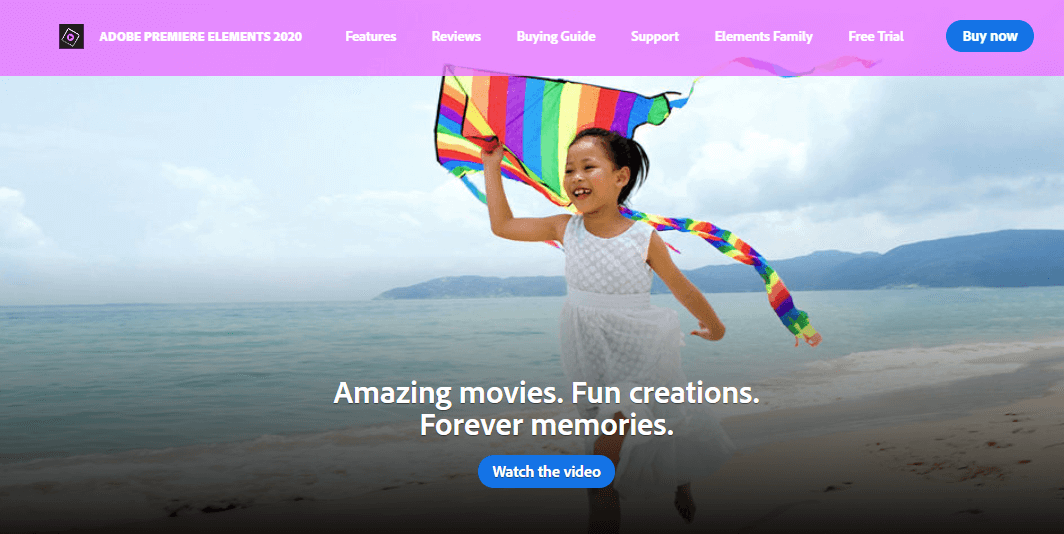
Adobe Premiere Elements

This is a trusted, innovative, and sound movie making software with so many benefits from helping you organize your videos with ease, to step-by-step guided edits, intelligent editing, and creating stunning yet shareable video memories.

You can sort your clips by date, tag and find videos by people, places and events, freeze frames with motion titles, create fun bounce-back effects, fix action camera footage, make animated posts for social media, create cool titles with dramatic effects, create a signature look, and add a pop of color for an instant wow effect on your videos.

What’s more, you can create slow-motion effects, extract photos from your video’s raw footage, use the Smart Trim feature to carve out the bad parts and leave the good, clear hazy portions, remix music from the library, and tell dazzling stories with your content.

You can also enhance clips with textures and colors from another clip, add signature and copyright lines as a watermark, and even create collages.

Adobe Premiere Elements

Adobe Premiere Elements

Make the best of your video editing process and create exciting visual stories using a versatile software!
Check priceVisit website

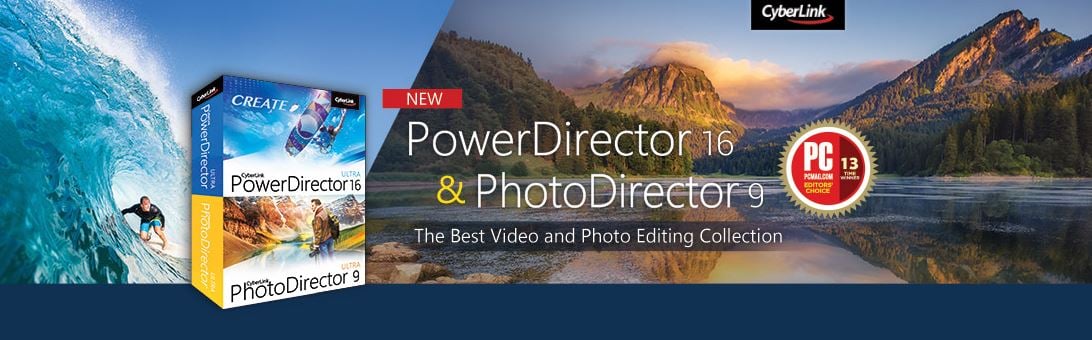
CyberLink Power Director

movie making software

This movie making software is powerful, smart, and delivers on its promises.

Features include ability to capture scenes from multiple angles using the MultiCam Designer, Disc authoring and online sharing to social media, TrueVelocity rendering engine for smoother previews and faster production.

Its Intelligent Color Correction analyzes your video and adjusts lighting, saturation and color for a consistent look across the entire footage in case you shot it in different settings.

The Express Color Grading with Look-up tables is a quick way to match your video footage from different sources to achieve a certain effect all through.

Use the Video Collage Designer to combine up to seven different clips into one collage, or enhance video colors using the TrueTheater Color feature that optimizes hues and vibrancy to deliver a true-to-life video appearance.

Other tools include a designer for transition, title, mask, and themes, as well as PiP (Picture in Picture) designer to overlay animated objects on your video, create 360º videos, and seamlessly add titles to them, plus use the View designer to use 360º footage in standard video projects.

Choose from including Ultimate Suite, Travel pack, Wedding pack and Holiday Pack packages this festive season to capture your holiday videos with festive effects and fast templates.
CyberLink Power Director

CyberLink Power Director

Transform your footage into high-quality entertaining videos using this great editing program!
Check priceVisit website

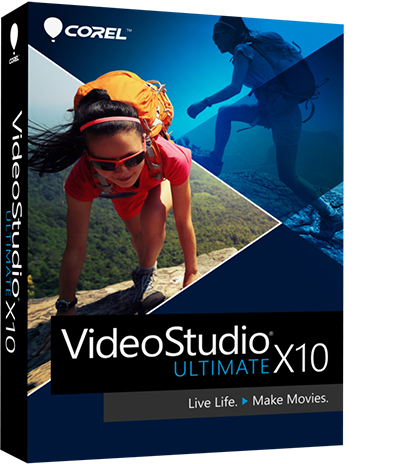
Corel Video Studio

This movie making software is the ultimate in video editing tools.

Features include complete 360-degree editing, support for portrait videos, enhanced stop-motion animation, effects to selected areas with masks, layer effects, playing with speed and reverse clips effects, you can create the best videos like a pro.

Express your creativity with over 2000 customizable effects, with HD precision editing, 4K editing, intuitive workflow from templates to timeline editing, and get support for popular video formats.

You can also combine photos, videos and audio, add effects, enhance your graphics and clips, customize effects, create high-quality videos, and still share on social media or burn to discs.

Corel Video Studio

Corel Video Studio

Create amazing videos and enhance your editing skills with a powerful software!
Check priceVisit website

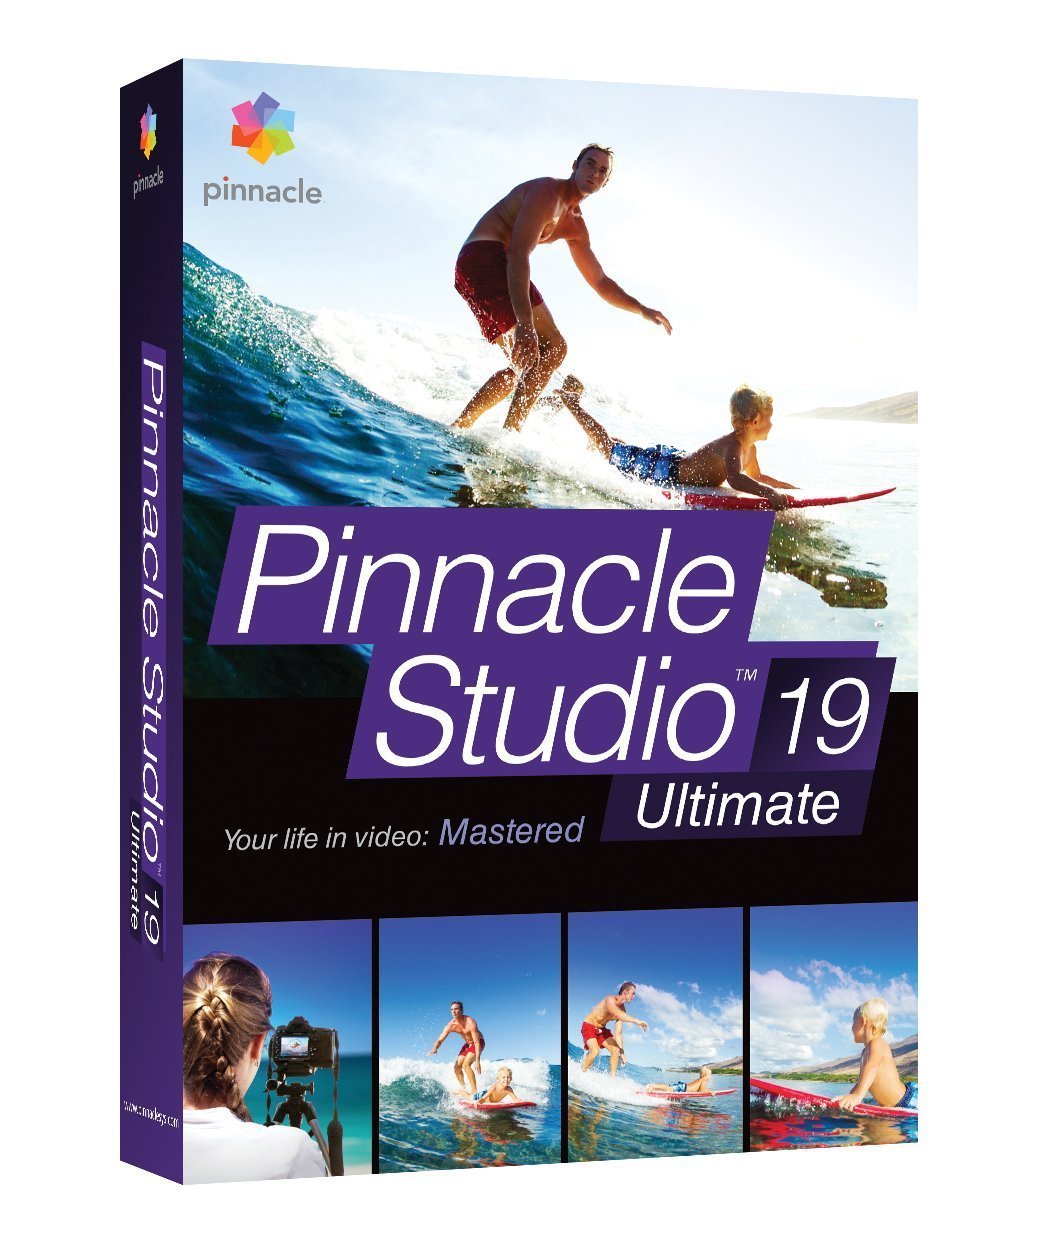
Pinnacle Studio

This movie making software’s name matches its qualities –the peak of movie making and video authoring perfection.

Features include an advanced video editor, creative control with unlimited possibilities to enhance color and add effects, caliber tools for multi-camera editing and split-screen video, royalty-free music, and voiceovers that offer powerful audio options, plus you can burn your video to discs, or upload it to social media and export to most major file formats.

Newer versions come with a new user intuitive user interface to streamline your video editing workflow and quick access to the tools with power and precision, split screen video, drag and drop functionality.

Other tools like paint effects can transform your video into a storybook-like motion animation, drag and drop filters, plus you can morph transitions between clips, with enhanced 360-degree editing, and NewBlue effect to add emphasis with selective focus, color, and tint.

You can also capture live screens, use over 2000 effects, remove distortions, straighten the horizon, and add 3D text to your videos with tilting options.

Pinnacle Studio

Pinnacle Studio

Test the limits of your imagination by customizing the most amazing videos with this smart editor!
Check priceVisit website

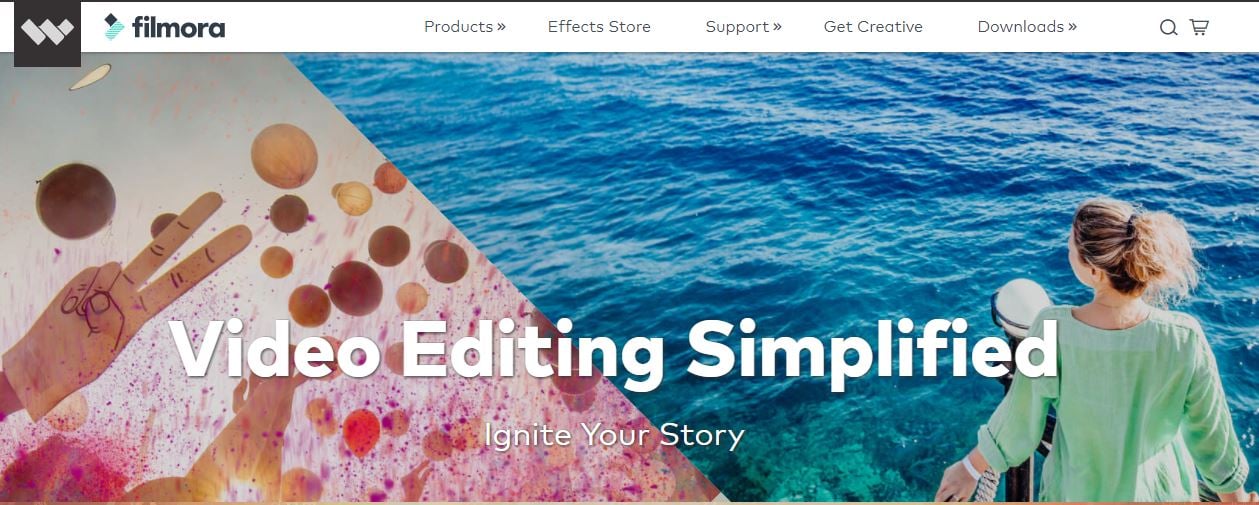
Filmora

movie making software

Filmora simplifies movie making with features such as camera shake, precision speed controls, PiP Blend and opacity, frame overlays, and an effects store with lots of filters, animated elements and other modern video effects.

It is contemporary, easy to use and has a charmingly intuitive design that will turn you into a great movie maker.

Creative features include filters, graphic overlays, text, titles, motion elements (drag and drop), transitions, and royalty-free music from the library.

Other features or tools you can use to create amazing video stories include GIF support, noise removal, color tuning, pan and zoom, 4K editing support, reverse for playing clips backward, and importing photos and clips from social media.

Advanced features include PiP, audio mixer, green screen to change your background and create special effects using the Chroma key tool, screen recording for your computer screen and webcam, split-screen to play multiple clips at a go, 3D Look-up tables, video stabilization to eliminate camera shake effects, audio separation to detach audio from your video and edit separately, and tilt-shift, among many others.

Filmora

Filmora

Start creating amazing videos in an instant with the help of this advanced software!
Check priceVisit website

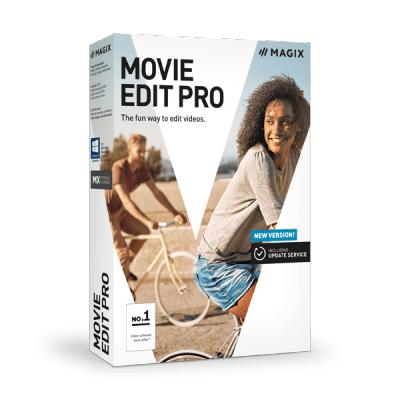
MAGIX Movie Edit PRO

This movie making software lets you create unique yet stunning video content, what with its high quality effects, easy operation, and features you cannot resist.

Features include color optimization, camera shake stability, adding background music with over 200 multimedia tracks from real musicians, and effects to use, superfast performance and precision control, quick and easy storyboard, scene selection, and transitions.

You can add recordings from smartphones, digital cameras, or camcorders.

It also supports most major video formats, and has a host of effects such as slow motion, color explosion, movie titles, and over 1500 effects at its core, plus an in-app store if you want more.

Other features include pans and zooms, noise and wind removal, Mercalli image stabilization for shaky video footage, changing speeds, incidence angle definition, Shot Match tool to give videos the look of your favorite films, or you can also add uniform look to all your videos no matter the lighting you took them in.

Magix Movie Edit Pro

Magix Movie Edit Pro

Give your videos a touch of innovation with a movie making software that can do it all!
Check priceVisit website

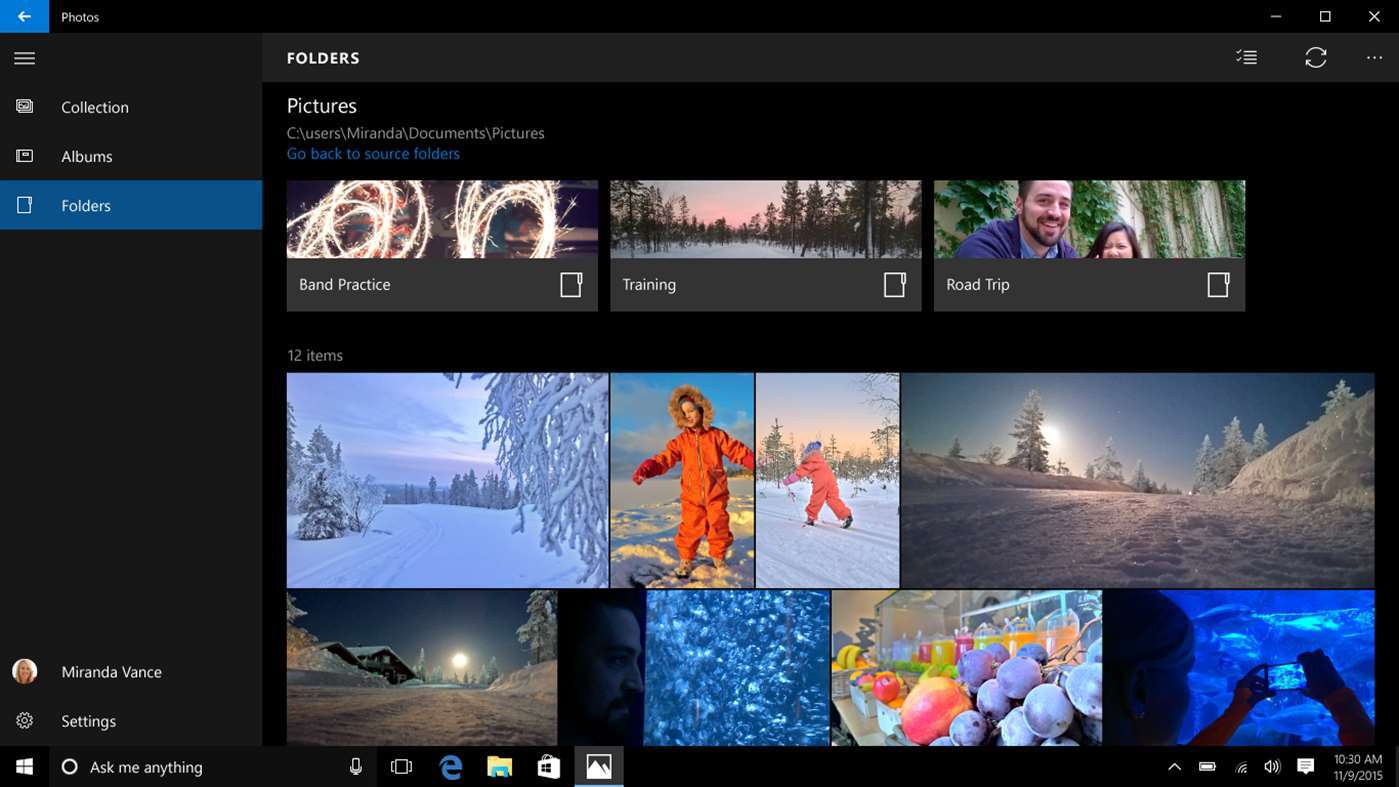
Microsoft Photos

Microsoft Photos

If you don’t want to download any third-party tool to edit your Christmas videos, you can use Microsoft Photos.

This tool is the successor to Windows Movie Maker. If you’ve used it, you’ll quickly get the hang of Microsoft Photos as well.

Microsoft Photos allows you to view and edit your photos and videos, as well as create movies based on the footage stored on your PC.

This tool has everything you need to create albums or videos from photos, including the options to change camera motion, add audio to your video footage, add 3D effects, and more.

⇒ Download Microsoft Photos from the Store

Don’t see your favorite movie making software here? Or have you used one of these before? Share with us your recommendations and/or experiences in the comments section below.
AI Art Generator Software to Try in 2026: Top 11 Ranked

Creating art needs patience and a lot of inspiration, but with the advent of AI, now all you need to do is jot down your thoughts, and the rest can be taken care of by AI art generator software.

AI art generator tools can help you create images, logos, paintings, and more for your social media, brand, or personal use.

If you are not sure which one to use, this guide can help! We will explore some of the best computer generated art software to help create visuals that you like.

What are the best computer-generated art software?

Adobe Illustrator – Best for professionals

Adobe Illustrator

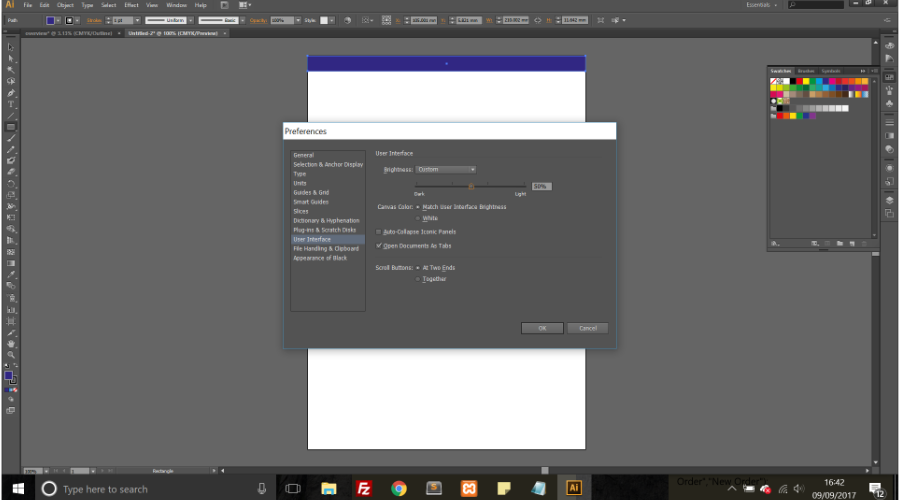
Illustrator is part of the Creative Suite, & it remains the kingpin of graphic design software, and for good reasons. The program packs a lot of features that will give users control over their design.

To begin, the pixel grid will make it very easy to align objects while the precise shape-building tools and brushes cleanly. The advanced path controls will give you the freedom to create almost anything graphically.

The perspective grids will help you create distance and also realistic depths. Gorgeous typography, visual effects, and the new tracking engine that is able to convert raster images to editable vectors.

When you need to use color sparingly, you will find out that gradients can be extremely efficient. The program enables interactions with gradients straight on an object.

More features of Adobe Illustrator include:

  • Allows you to apply gradients to single strokes
  • Enables you to control placement and opacity
  • Can create logos, packaging designs, & web graphics
  • Lets you transform complex data into simple graphics

Adobe Illustrator

Generate art like it was nothing and bring your imagination to life with the help of the best raster-based image editor!
Free trial Visit Website

Corel Painter – Professional digital art software

Corel Painter

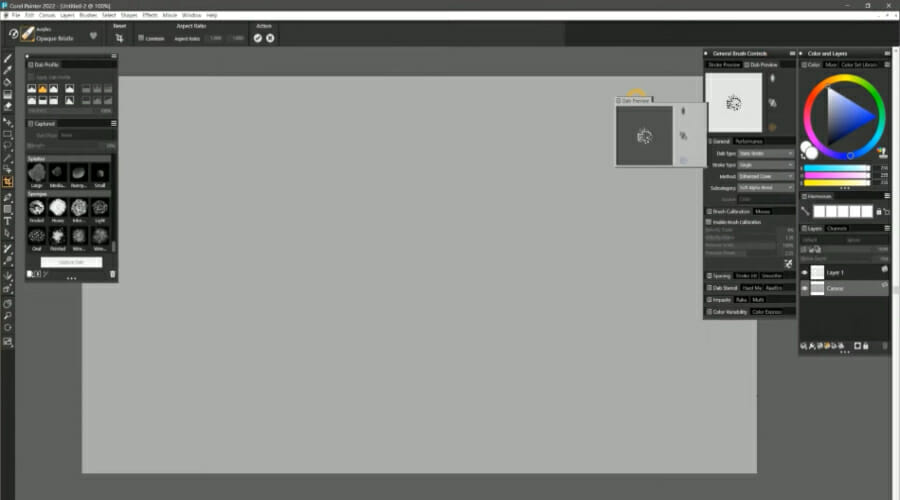
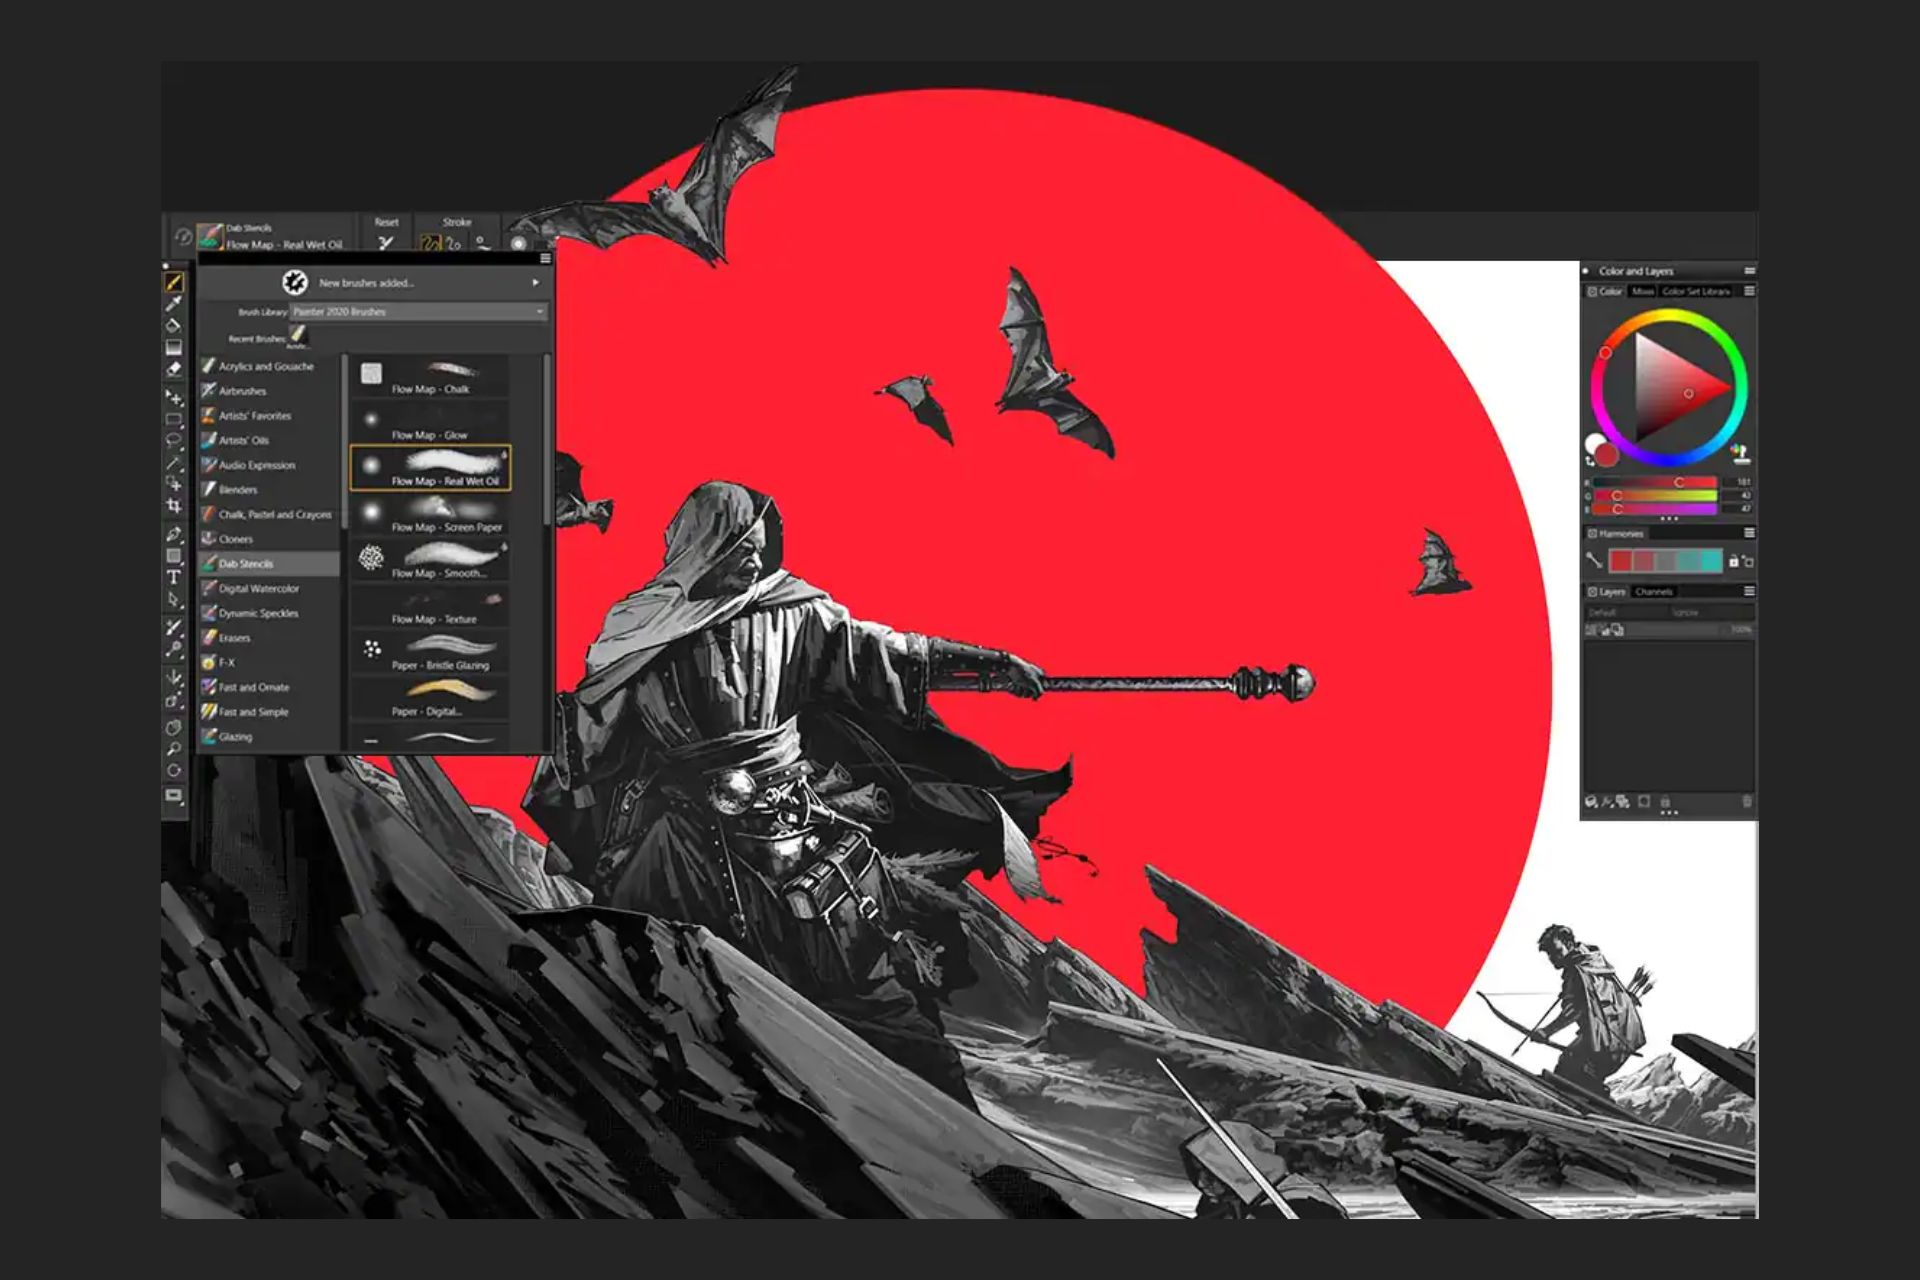
Corel Painter promises to be the world’s most authentic digital painting software, as it allows you to express your creative vision in the most original ways.

Painter features new physics-inspired Particle Brushes that will allow both brush control and chaos, and that will give you the ultimate freedom to create work from scratch.

Corel Painter is the most responsive and fastest version of the software, which allows users to experience speed and brush accuracy performance.

You can take advantage of the new brush tracking utility to control pressure-sensitive memory for each variant of the brushes.

More notable features of Corel Painter:

  • More intuitive new user interface
  • Allows you to create your workspace
  • Works on Windows Real-Time Stylus and a Tablet PC user interface
  • Preserve colors and layers when transferring files between Painter and Photoshop

Corel Painter

Art should be more about your imagination and not your ability to use a PC. Corel Paint makes creating digital art as easy as it can get.
Check price Visit Website

Summitsoft Logo Design Studio – Best to design logos

Summitsoft Logo Design Studio

The program visually looks something along the lines of Microsoft Office, and it also offers a free trial to test it and check out all of its features.

The program features 1500 pre-designed templates that will match any industry, from food to finance, from cleaning to construction, and so on. It also includes more than 5000 objects to pull from.

You can personalize your logo with colors, shapes, and lots of effects, or you can even import your own graphics.

You will be able to use the shape tools to draw your own logo and snap them into place with the alignment option.

More features of Summitsoft Logo Design Studio include:

  • Allows to print your logo in high resolution
  • Secure your brand identity and generate ideas for slogans
  • Helps with taglines to go with your logo
  • Layered canvas enables you move parts of the log from front to back

Summitsoft Logo Design Studio

Summitsoft Logo Design Studio will make creating digital art a walk in the park, so get it at a special price today!
Check price Visit Website

Artweaver – Best for beginners

Artweaver

Artweaver is a full-featured painting tool that includes a full set of predefined realistic brushes to paint creatively or just to experiment. The software is perfect for both beginners and advanced users.

It has a powerful and highly configurable brush system to stimulate a broad palette of brushes. The program also features an intuitive and easy-to-use interface, and it is also fully configurable.

Artweaver allows you to work together with other artists over the Internet, and it is powered by a potent core that supports lots of layers, tools, and filters.

It includes a few natural media brushes and tools such as chalk, pencils, charcoal, oil paint, felt markers, crayons, airbrushes, acrylic, sponges, pastels, and cloners.

Some notable features of Artweaver are:

  • Records the whole painting process as events
  • Demonstrate to other users your painting style
  • Free to use and compatible with Windows
  •  Allows you to together on the same document with other artists using the Internet.

⇒ Get Artweaver

Pixarra TwistedBrush – Compatible with all platforms

Pixarra TwistedBrush

Pixarra features software from natural media, photo editing, and also illustrative styles. From the very beginning, TwistedBrush has had a primary focus on digital fine arts.

It was developed to have one of the strongest and most versatile brush engines in the world. The flagship edition of the product is Pro Studio, with more than 9000 brushes.

There are more focused editions for TwistedBrush that include the Paint Studio, which focuses on digital painting, andTree Studio for the creation of 2D trees.

Your photos will become masterpieces with the help of hundreds of blenders, filters, tracing features, cloners, drawing guides, layers, and RAW camera support.

Liquid Studio features an original way of painting and constructing art, and Blob Studio can be considered a 2.25D painting. All these tools are available for all Windows versions.

Other important features of the app are:

  • Avoid bad oils, chemicals, and dust that come from real art materials when you use the realistic natural media brushes
  • Take advantage of the immense versatility and various brushes to develop concept art for film
  • Create manga using the diverse set of sketching, inking tools, and drawing
  • Comes with the graphic qualities of the Liquid and Blob brushed

⇒ Get Pixarra TwistedBrush 

Laughingbird – Best for making professional-looking logos

Laughingbird

You can start off by creating some amazing logos using the 300 built-in templates. You will be able to map them onto some of your business card templates and have them all printed and shipped right to your door.

There is no need to draw anything in Laughingbird’s Logo Creator, but on the other hand, you will have to download the computer-generated art software, which is available for both Mac and Windows, with a free trial.

The program features lots of graphic elements, and you can drop them straight into the canvas. There’s a range of special effects and text options on the menu as well.

You can choose the alternative and upload your own graphics or import custom graphics from the Internet to make sure that you are not violating copyrights of any kind.

Notable features of Laughingbird are:

  • Able to export your logo
  • Save the file as a jpg, gif, bmp, tiff, or transparent gif/png
  • Easy-to-use intuitive interface

⇒ Get Laughingbird

GIMP – Best open-source tool

GIMP
Created with GIMP

GIMP is described as the GNU Image Manipulation Program, and it is a cross-platform image editor that is available for GNU/Linux, OS X, Windows, and more.

The software is free and open-source, which means you can change its source code and distribute it after that.

You will be able to increase your productivity with the software thanks to various customization options and third-party plugins.

The only limit will be your imagination, as the program provides tools for retouching, restoring, and creative composites.

The software offers artists the power and the flexibility to transform images into original creations, producing icons, graphical design elements, and also art for mockups and user interface components.

More features of GIMP include:

  • Offers high-fidelity color reproduction across digital and printed media
  • Extensibility through integration with more programming languages such as Python, Perl, Scheme, and more
  • Multi-language support, including C, Perl, C++, Scheme, Python, etc.
  • Allows use of layer masks to modify the opacity of a layer

⇒ Get GIMP

ChaosPro – Real-time freeware fractal generator 

ChaosPro

ChaosPro lets you create 2D and 3D fractal types, true colors, and animated images. The software is the perfect choice for you in case you want to create computer-generated art or if you are interested in fractals, or if you want to experiment with novelties.

The program can create almost any kind of fractal using the integrated compiler, and it will be up to you to decide what formula you will use.

There are already lots of methods that have been written by other people. They include IFS fractals, bifurcation diagrams, Plasma fractals, dynamic systems like the Lorenz attractor, and more.

More features of this computer-generated art software include:

  • Supports several fractal types/rendering algorithms
  • Allows to calculate several fractals at the same time in different windows without needing to close them
  • Real-time fractal exploration, which means any change can place instantly
  • Enables you to create Zoom movies by just mentioning where it starts from, where it ends, and the number of frames to calculate

⇒ Get ChaosPro

Deleter CGillust – Best drawing app for students

Deleter CGillust

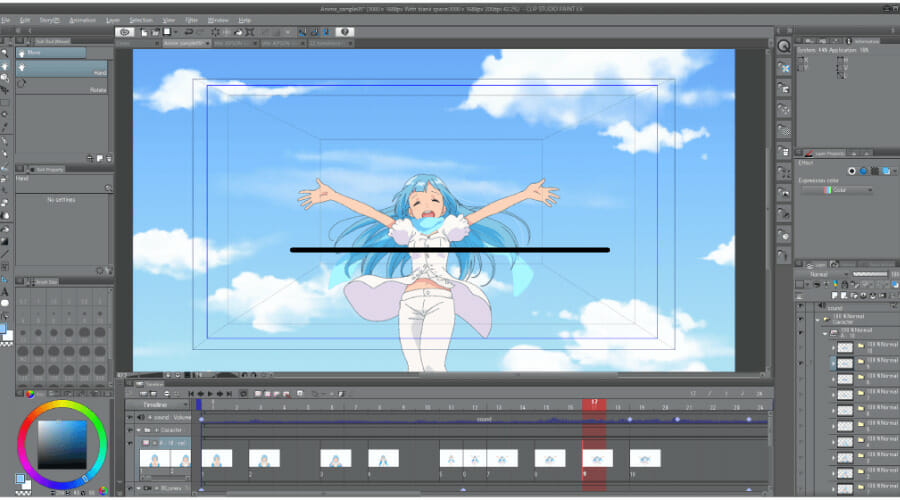
This is a very versatile program that features painting tools for users of all kinds of levels and is specifically for artists who like anime and manga-style graphics.

Deleter CGillust comes with a trial version of the software available for download, & the full version involves a fee and works for Windows only.

Aside from the basic drawing features, the tool is also designed to provide high-end illustration utilities such as pens and brushes.

One of its most exciting features is the Work in Progress feature, and with the help of this particular function, users can view the work as it progresses from start to finish.

Notable features of Delete Cgillust are:

  • Comes with various pen and brush tools, line tools, color options, and more
  • Offers more than 200 tone patterns that they can choose from
  • Records every stroke and every modification so that you can see the journey later
  • Offers a vast range of masks and layers for their projects

⇒ Get Deleter CGillust

Drawing for Children – Best drawing app for kids

Drawing for Children

This is a great drawing app targeted at kids, which is available on Windows for free. You may think that any basic drawing app for kids is perfect and they don’t need very complicated things.

But there is more to this app than this, as its tools and features that have been included in it offer a broad range of ways for users to draw.

They are not complicated, but they have various options for changing the way a tool works. The app will turn out to be fantastic for children due to its many effects and colors.

Check out all these tools for generating art and stick with those that best suit your needs and your art-creating process.

More important features of the app include:

  • Simple and easy to use
  • Comes with interesting features, including colors, shapes, and effects
  • Is not resource intensive

⇒ Get Drawing for Children

VEED.IO – Free AI text-to-image generator tool

Veed.io tool

VEED.IO enables you to generate images, art, text art, and drawings right in your browser, therefore, you don’t need to install an app.

All you need to do is type in the description for the image you want, mention the desired resolution, and click Generate to get the image.

Once you get the image, you can download it, copy the link, and click Open in Editor to use the image to create a video using VEED free video editor.

This computer-generated art software uses machine learning to give you better results so you can type in different prompts to the suitable image.

More features of VEED.IO:

  • Easy-to-use text-to-image generator online tool
  • Create videos, add animated text, sound effects, and special effects
  • Don’t require to sign up
  • Available for free

⇒ Get VEED.IO

So, these are the computer-generated art software that you can use to generate beautiful images in a few clicks.

If you are looking for a tool to generate content using AI, we recommend you check out this guide to find the options.

If you think we have not included a tool that you like, please feel free to mention that in the comments section below.

Best Youtube Intro Maker [We Tested 15 in 2026]

A YouTube intro is a short clip that precedes a YouTube video that introduces the vlogger and the topic he or she intends to cover.

Intro videos include details like the name of your channel, a logo, brand colors, some jingle or music, and graphics, all of which work together in the theme and tone of your video or vlog.

This is your chance to make a brilliant first impression while letting viewers of your channel content know what experience they’ll expect should they continue watching or even subscribe to your channel.

Moreover, your vlog will look professionally done, not just shot in front of your webcam or phone.

In order to make such great intros, there is a variety of YouTube intro software you can use, a lot of it free to use, and plenty of video templates and editing tools.

Now, remember, your intro should tell the story and be branded so viewers can recognize and remember it. Without further ado, here are the best video editors to make YouTube intros.

What is the best software to make YouTube intros?

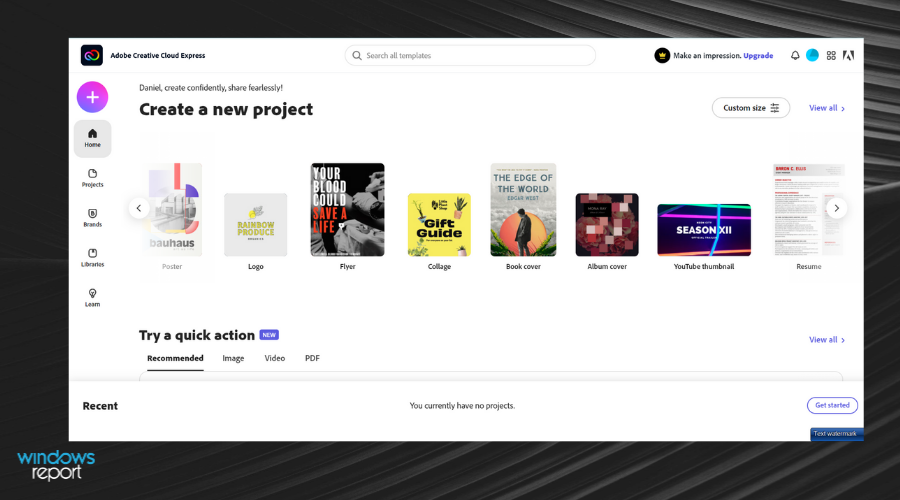
Adobe Express

With this software, you can create your own YouTube intros for free in minutes, without the need for design, programming or other technical skills.

Adobe Express Video, formerly Adobe Spark, can be used by anyone while giving you full control of the design process to create descriptive, engaging, and unique YouTube intros that’ll persuade viewers to stay on.

This best software to make YouTube intros comes with standard video software, a huge selection of customization options to create a stunning video.

Plus, you will have tools to let you play around with design features to your heart’s pleasure, with changes updated immediately.

In as little as under two minutes, you can create your YouTube intro, unlike when you use complex video production packages.

Adobe Express’s user-friendly interface lets you master video intro making in a matter of minutes with professional results in a few mouse clicks.

Features include beautiful and professionally designed fonts for free, iconic imagery, and professional themes with best-in-class layouts, colors, and fonts you can easily tweak to your preferences.

Adobe Express

Create impactful video intros and get inspired by the latest video content trends with this professional software.
Free trial Visit website

Renderforest

Renderforest is great for personal, educational, or even business use as it provides a simple yet easy-to-use online video editing platform.

It is a cloud-based video maker for creating great YouTube intros, or you can do explainer videos, kinetic typography, product or service promo videos, music visualizations, and much more.

The benefits of using Renderforest include powerful animation packs for making animations and promo videos, mobile app toolkits, powerful intro templates for impressive videos and parallax slideshows.

You can also benefit from Sci-Fi space for advanced typography videos and trailers, a whiteboard animation pack, and much more.

Your projects get saved in your dashboard and you can edit or download them anytime you wish.

Whether it’s for commercial or personal use, Renderforest will produce an impressive effect for it. Everything is in the cloud so you’re assured of using it wherever you go at any time.

Renderforest

Start creating your YouTube intros today using hundreds of stock videos and music tracks to personalize them for your audience.
Check price Visit website

Wondershare Filmora

Filmora is a well-established video editor software and extremely popular with beginners since it is very easy to learn and use.

The editor has a simple, all-comprising interface, where you can upload and adjust the videos with handy settings and tools that you can find in the menu.

To a plain, unattractive video, you will easily add effects, apply color correction and color enhancer, add a video or animation effects, split screens, or fast-forward/slowdown certain scenes.

The result will be a fresh-looking video that you can combine with other video content that you have and share on social media.

Filmora even encourages you to better your video editing skills by submitting videos in seasonal contests and winning prizes.

Wondershare Filmora

Give your YouTube intros the fresh, cinematic look they deserve and share them with the community.
Free trial Visit website

Canva

If you are into graphic design, then you have certainly heard of, if not used, Canva at least once.

It is a very popular, and partially free graphic editor, suitable for beginners and pros alike, and extremely resourceful in terms of templates for personal, business, educational or marketing purposes.

You can further use your creations on various social media channels, in print or to deliver professional presentations.

With Canva, you cannot create YouTube intro videos per se, but you can personalize your YouTube channel with crisp-looking customized art templates that you can download for free.

Or you can also edit them as you please with your own photos or graphic elements. Using Canva is intuitive, free, and utterly fun.

⇒ Get Canva

Flixpress

best software to make YouTube intros

This is another free online YouTube intro maker that lets you create intro videos with customized text and images. You also get to make high-quality videos and preview them once they’re done.

While the standard mp4 format is available, you can also get any other format you want so it can work for you on each video you create.

This is probably the most popular site as you can even add your own text into a pre-made template, choose from a huge variety of animated intros, and most videos are less than $5, while the majority are free for use.

However, once you monetize your channel, the rules change. You can customize images, text, upload audio or video, and use multi-layout templates plus a 3D objects library and live actors, among others.

⇒ Get Flixpress

Biteable

best software to make YouTube intros

With this best software for YouTube intros, you can make an intro video professionally by inserting your brand identity, credits, business cards, and anything else you deem important, then preview it later.

It is one of the popular YouTube intro makers, plus the world’s simplest video maker such that you can make animations online in a few minutes and then download and publish them to your website or social networks.

It is perfect for YouTube intros for your channel or vlog as you get a variety of video styles and effects to choose from, and then add your brand identity or look and feel styles.

⇒ Get Biteable

Tube Arsenal

best software to make YouTube intros

This name sounds like it was built for YouTube – a whole arsenal of tools for creating stunning YouTube videos from intro to outro.

It is a free and easy online YouTube intro maker which you can create custom intros, brand your YouTube channel and social networks plus much more, without the need for software to create them.

All you do is choose a template, change text, images, and colors, and then download.

Gamers and YouTubers or hobbyists and another film/video producers will find this a unique software with unique and awesome templates suitable for every need.

⇒ Get Tube Arsenal

Ready to create your YouTube intro today? Let us know your favorite pick from these best software to make YouTube intros, or if there’s one you used and it was great, share with us by leaving a comment in the section below.

Microsoft showed off their new Xbox Wireless Headset back in October and no one noticed

In a very cool move, Xbox’s social media manager today revealed on Twitter that the recently announced Xbox Wireless Headset was in fact shown in the Xbox Series X Power Your Dreams commercial way back in October of last year.

His tweet also reminds gamers that the Xbox Series S console was also hidden in plain sight in another video well before its official reveal as well.

“Xbox Series S – on Phil’s shelf,” his tweet begins. “Xbox Wireless Headset – in October Power Your Dreams. ??? – ???”

While he does seem to tease other future Xbox tech being shown in this or other Microsoft videos, he followed up his tweet with another clarifying that he has no idea if this is the case or not. “Literally have no clue if anything else is hidden,” he said plainly. “But I won’t mind as someone on the social team if everyone goes back and drops views on content.”

Microsoft’s new Xbox Wireless Headset is designed to work with Xbox One and Xbox Series S and X consoles in addition to Windows 10 PCs though it also supports other devices such as smartphones and tablets as well. It’s set to launch on March 16th for $99.

Like Xbox news like this? Follow us on Twitter, Facebook, and Pinterest for more.

How to Flip Video Horizontally in Windows 10 [Best Tools]

Have you ever recorded a video with your smartphone and then play it on your computer just to find that the video is upside down?

If you ever go through this, you will have to manually fix the video with the help of various third-party software.

Of course, there is also the solution that involves a quick and simple fix: a keyboard shortcut. If you want to rotate the video clockwise, you have to push Alt + 3.

To turn it anti-clockwise, push Alt + 1, to flip it horizontally, press Alt + 2 or 8 and to flip it vertically, push Alt + 4 or 6.

If you are still having problems, then your best bet is a video editor, and the advantage of using such a tool is that it comes with more functionalities included.

That’s why we picked out five of the best available solutions to fix upside-down videos in Windows 10.

Make sure you check them out before making the ideal decision for your video editing needs because these come with many more features and functionalities included.


What are the best tools for fixing upside-down videos on PC?

Adobe Premiere Pro

Adobe Premiere Pro Animation Image

Adobe Premiere Pro is the best tool in the video editing industry, complex and easy to use.

In addition to helping you fix upside-down video problems using the Effects Control panel, Adobe can surprise you with a lot of other extra features.

You can reframe your videos for posting them on Social Media or use the incorporated audio features in order to improve the quality of the footage.

Don’t be afraid to unlock your imagination. Feel free to edit color grades and add special video effects so you can create quality film form clips.

Just check out this article on how you can enhance your footage and edit out a green screen by using the Adobe Suite.

Decide on the length of your footage by making videos shorter or longer using the precise trimming feature.

You can also choose from a variety of motion graphics in order to enhance your videos and make them even more entertaining.

One of the most important things is the fact that Adobe supports many file formats, so you can edit videos from H264, H265 (HEVC), ProRes as ProRes HDR – on both macOS and Windows. 

You have to convince yourself of Adobe’s editing power, especially if you have 7 days free trial.

Adobe Premiere Pro

Adobe Premiere Pro

Test the limits of your imagination with a video editor that can help you create entertaining quality videos !
Check priceVisit website

Movavi Video Editor

The Movavi Video Editor will allow you to flip videos, edit and enhance their quality easily, adding stylish titles, transitions, filters and so much more.

Just take a look at the most exciting functionalities that you will be able to enjoy while using this software:

Get rid of the shaky camera movement, thanks to this editor you can stabilize and even reverse videos.

With the amazing audio features, you can make a great soundtrack for your footage or equalizes the sounds of the video.

This editor makes flipping and mirroring videos a breeze, so you can let your creativity run wild.

After checking out the manual that comes with the software, you will be able to manage your videos really quickly and effortlessly.

All you need to do is install the video flipper and launch the app to get started with flipping your video that way you want to.

Movavi Video Editor

Have a great time editing your clips and turning them into captivating videos with this great software!
Free trial Visit website

VideoPad Video Editor

VideoPad Video Editor is an entry-level video editing app that is really powerful for creators who want to publish their videos to YouTube or Facebook.

This is easy to use, and it makes the workflow of social publishing easier. You can flip your video the way you want, and in addition, you also get a variety of other interesting functionalities.

Fill out the description, tags and more metadata for your video and upload it online straight from the app.

VideoPad comes with a vast library of tools and plug-ins that makes it really effective at specific tasks.

This tool is ideal for content creators who want to export their videos on YouTube and other social platforms.

VideoPad Video Editor

VideoPad Video Editor

Create high-quality videos and make the best of your editing skills with a complex and user-friendly software!

Any Video Converter

The Any Video Converter software allows you to convert your videos to any type of format available without spending a dime.

You can extract audio files from CDs and convert video into audio. Thanks to this feature you’ll be able to extract your favorite background music from movies, so you can create your own playlist if you want.

One of the most awesome characteristics is that you can download videos and music directly from YouTube, Facebook, VEVO, Vimeo, SoundCloud, Dailymotion, and many other streaming platforms.

With this video editor you get the highest HEVC/H.265 video coding efficiency, this means that you can compress a video to half the size of AVC, without losing any of the quality.

Any Video Converter

Any Video Converter

Have a great time editing your clips and turning them into captivating videos with this great software!

Windows Movie Maker

Using Windows Movie Maker, it will be straightforward to rotate a video to its correct orientation. This tool also comes packed with lots of other features as well.

To rotate a video you need to the load the clip into the program, you should see a preview on the left and the scenes on the right side.

Click on the Home tab, and there you will see a Rotate Left and Rotate Right option. In order to save this fix for good, you have to save your file out: click on File and Save Movie.

Windows Movie Maker comes with lots of other options for saving your movie file depending on what device you are planning to view it on.

There are also lots of other features included in this handy tool such as photo transition effects, filters for image enhancement, lots of fonts for your subtitles, background music, HD video quality and many more.

⇒ Download Windows Movie Maker


VLC Media Player

This is a free and open source cross-platform multimedia player and framework that is able to play most multimedia files and DVDs, CDs, and more.

VLC Media player is obviously able to play damaged video files, and this is why we include it in our list. It also comes with pretty much every video codec already built-in.

To rotate a video in VLC, you have to open the video so that it’s playing, then click on Tools and then Effects and Filters.

On the Adjustments and Effects dialog, you will have to click on the Video Effects tab and then press the Geometry tab.

Now, you will be able to adjust the video’s orientation in two ways; the easiest one is to check the Transform box and choose Rotate by 180 degrees from the drop-down menu.

⇒ Download VLC Player


These are our five picks for the best software that can quickly flip your upside-down videos. 

No matter which one you’ll go for, you will see that there are more functionalities included in each and every one of them that you will be able to enjoy if you want to edit your video.

We want to keep in touch with you so don’t shy away from the comment section and drop us a comment.


Marvel’s Avengers next gen Xbox Series X update to launch alongside the Hawkeye DLC next month

The next gen update for the Marvel’s Avengers video game is now officially set to launch on March 18th, almost exactly a month from today.

While the Xbox One version of Marvel’s Avengers is playable on Microsoft’s new Xbox Series S and Xbox Series X consoles, this update will enhance the game to improve its framerate, character details, loading times, and other aspects when played on this new hardware.

This update is completely free for current owners of the Xbox One version of the game and full cross-save functionality will be supported after it launches which means that progress will be able to be transferred between the Xbox One and Xbox Series S/X version.

Also launching on March 18th will be the free Hawkeye downloadable content (DLC) which adds the popular Avengers character and a variety of new story and in-game content for players to consume.

While it’s always good to see a major video game get new free content, one does have to wonder if this update will be enough to renew interest in Marvel’s Avengers whose playerbase has decreased dramatically since launch.

To give an idea of just how low the game’s playerbase is, the third-party SteamCharts website currently shows a daily average of just 402 global players for the past 30 days for the PC version available via Steam while PSNProfiles shows only 243 recent players. Xbox stats are a little harder to track though we can see that Marvel’s Avengers isn’t even in the Top 50 most played games right now.

Needless to say, that’s not good at all.

It’s hard to pinpoint why exactly Marvel’s Avengers has failed to maintain momentum though the general consensus amongst players and critics seems to be that it’s due to a combination of unimpressive graphics and gameplay, odd character designs choices, and an assumption by the developers that all players love to grind. Spider-Man being made a PlayStation exclusive character probably didn’t help matters either.

There’s also been an odd lack of synergy with other Marvel properties that has ruined any chance of building cross-promotion buzz. For example, everyone’s talking about Wanda and Vision right now due to the mega-successful WandaVision series on Disney Plus yet those characters aren’t even playable yet in Marvel’s Avengers (they could be coming in the future though according to a leak). Meanwhile, Hawkeye and Kate Bishop will be sharing their own series on the same streaming service a year or so from now yet they’re being added to the game first.

Do you think Marvel’s Avengers will make a comeback or do you see it being put out of its misery in the near future? Why do you think it’s failing? Share your thoughts with the community in the comments below and then follow us on Twitter and Facebook for more Xbox gaming news.

11 Best Image Optimization Software to Use in 2026

If you’re an online publisher or blogger, you know the importance of image optimization software. Size limits on social networks and the impact on webpage loading times make them vital.

Balancing file size with quality is essential, and today we’ll take a look at the best software that can do just that:

Top image optimization tools for Windows 

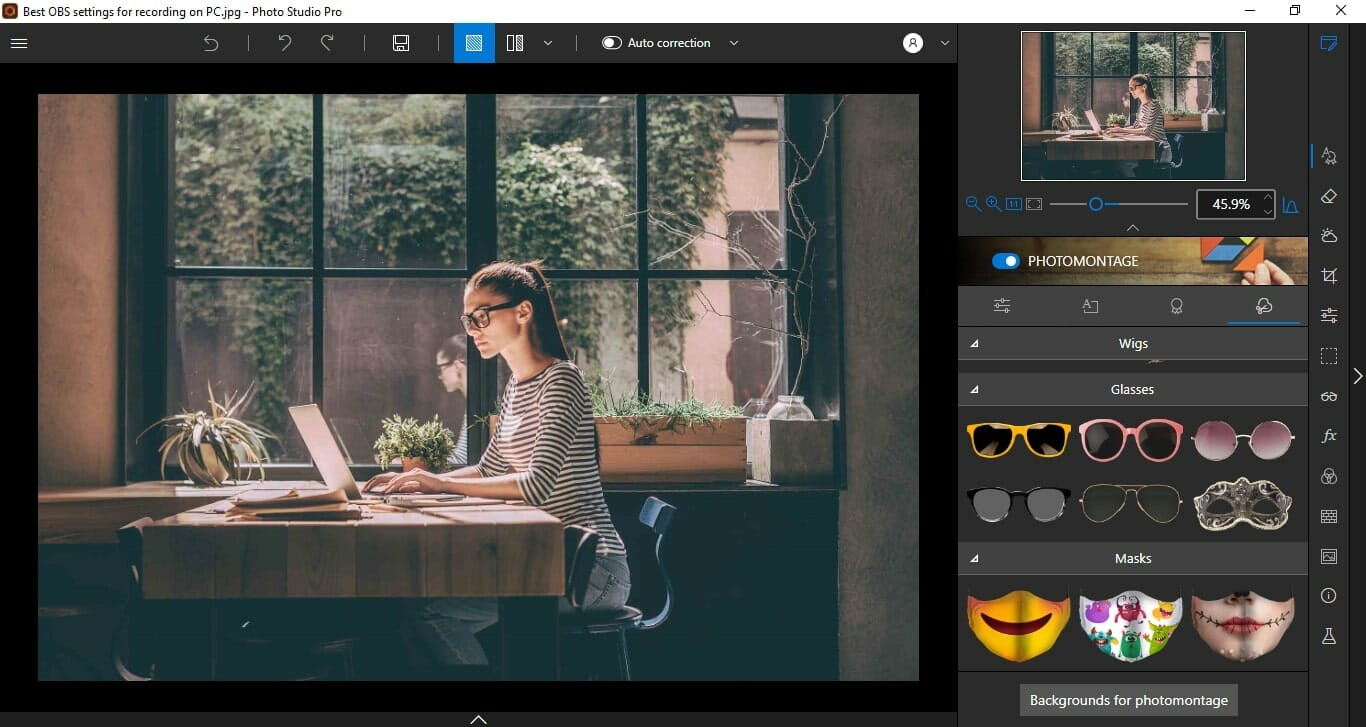
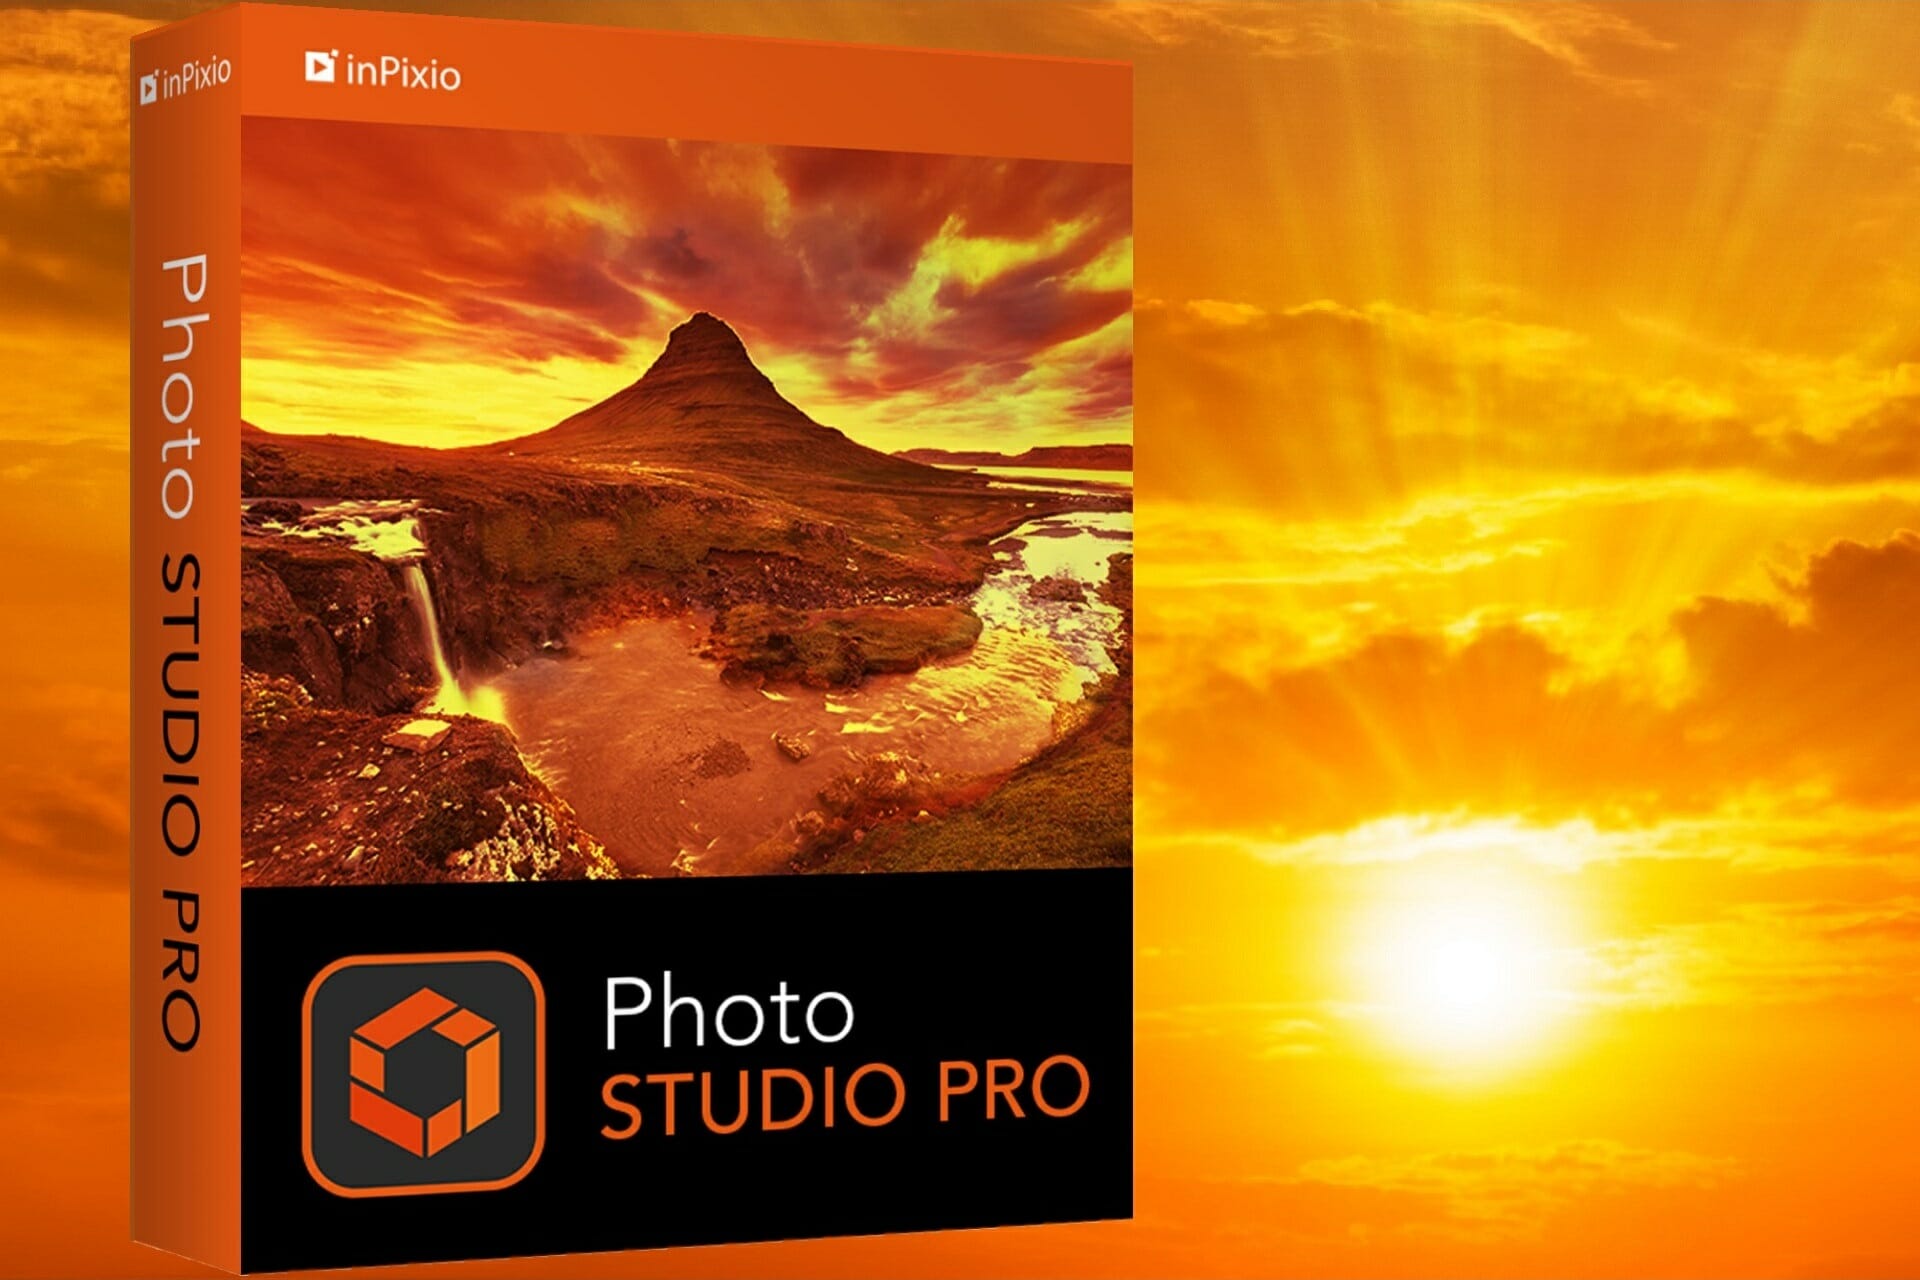
InPixio Photo Studio Pro 12 – advanced photo manipulation and optimization

inPixio Photo Studio Pro 12 offers comprehensive image editing capabilities with essential tools for managing format, size, and resolution.

You can easily resize images, adjust resolution, and select from various formats like JPEG, PNG, and TIFF during export.

Therefore, not only will you be able to obtain high-quality pictures, but also have them in a format that’s suitable for your website or app.

Moreover, you can crop and adjust aspect ratio. You also have some options to edit metadata, but they’re somewhat limited.

All in all, if you want a photo editor that doubles as an optimizer, inPixio is a great choice.

Photo Studio Pro 12

Photo Studio Pro 12

Optimize and perfect your photos with the help of this user-friendly image editing tool.
Check price Visit website

Adobe Photoshop Elements – quick photo adjustments

Photoshop Elements is an excellent choice for photo optimization, offering a wealth of features to enhance your images.

It includes innovative photo and video effects, automated editing, and a variety of templates for slideshows and collages. The Automatic Colorization tool allows you to adjust or enhance colors effortlessly.

With step-by-step guidance from Adobe Sensei, you can create stunning edits like borders, memes, and watercolors.

Features like Smooth Skin and Open Closed Eyes help perfect portraits. It also includes powerful search and auto-curation tools to keep your workspace organized.

Adobe Photoshop Elements

Get all image optimization functions in one application!
Free trial Visit website

NX Power Lite Desktop – advanced file compressor


This tool optimizes your JPEG images but also your Word, Excel, or PowerPoint documents. It reduces them to a fraction of their original size.

Files remain in their original format and there is no need to unzip before using them. It also allows you to customize the balance between quality and compression ratio, a very useful feature for images.

It’s very user-friendly: just select the file you want to compress, choose your compression level and click the ‘Optimize’ button.  

You can also optimize files from within Windows Explorer and Microsoft Office programs, or choose to automatically optimize email attachments as they are sent.

This tool can be tried for free, but, if it fits your long-term needs and the features from the trial are not enough to accomplish your work – you can buy the full version.

⇒ Get NX Power Lite Desktop

ShortPixel Online Image Compressor – batch compressor online

With ShortPixel’s Online Image Compressor, you can can compress batches of up to 50 images.

The tool has three levels of compression called Lossy, Glossy, and Lossless, the first one providing the best archival rate.

But that’s not all, Online Image Compressor also has some interesting advanced settings. For instance, you can set up the exact dimensions for the images, keeping the EXIF data or not, generating Webp and Avif, and even removing the background.

The only restrictions are the file size (maximum 10 Mb) and the fact that you may only upload JPG, PNG and GIF images.

Lastly, with this tool you can also compress the image on a whole webpage by just inserting the link! Pretty awesome, right?

⇒ Get ShortPixel Online Image Compressor

Compressor.io – multi-format image compressor

Compressor.io is a great online image/photo compressing tool. It lets you choose between two compressing modes: Lossless or Lossy.

Lossless will optimize the size of your photos while maintaining the image quality at the same. Lossy will compress the photo more but will reduce its quality.

The lossless mode supports only JPEG and PNG formats, while Lossy works out with the following 4 formats:

  • JPEG
  • GIF
  • PNG
  • SVG

The Compressor is simple to use. You select a preferred optimizing mode, upload your image and it gets automatically optimized. A nice addition is a split-screen preview that lets you see the exact difference in transition.

A tool supports only one file per compression up to 10 MBs of size.

You can find Compressor.io here.

⇒ Try Compress.io

JPEG Optimizer reliable image resizer & compressor

JPEG Optimizer is a simple and reliable online tool for both compressing and resizing images. It kind of lacks the advanced features, but it gets the basic job done.

Furthermore, the files can be compressed from 1 up to 99 percent, but have in mind that photos will lose a lot of original quality.

The procedure is simple:

  1. Upload a photo (JPEG, GIF, PNG, or BMP)
  2. Choose a compression level (from 0 to 99).
  3. Select the preferred width in pixels.
  4. Click Optimize.

⇒ Try JPEG Optimizer

Optimizilla – drag and drop batch image optimizer

Optimizilla is a well-designed online tool for image optimizing. The interface is great and easy to use.

It supports only 2 file formats: JPEG and PNG, but since these are the most common formats, you shouldn’t have any major problems.

Even though some other solutions support more formats, most of them don’t have the drag-and-drop option. To optimize your photo using this tool, do as follows:

  1. Choose up to 20 files, drag-and-drop them in a marked area.
  2. Once uploaded, select an individual file in the queue.
  3. Use sliders to choose optimization level (more quality – less compression).
  4. Compare images to find wanted optimization.
  5. Download files in the standard manner or in a ZIP archive.

⇒ Try Optimizilla

Kraken.io – effective optimization with cloud storage

Kraken.io utilizes similar features as most of the other optimization tools. But it goes one step further. It has a premium version called KrakenPro. In addition, it supports cloud store input.

Same as Optimizilla, you can drag and drop files in the marked area. However, a free version is limited to 1 MB per file so this may be a deal-breaker for some users. In addition, there is no image preview on the site.

Nonetheless, there are Lossy and Lossless compression modes and Expert mode for advanced tweaks. To optimize your photo with Kraken.io, do as follows:

  1. Select an optimization model.
  2. Drag photos from desktop or import from Box/Google Drive/Dropbox.
  3. Download files individually or in a ZIP archive.

⇒ Try Kraken.io

Resize Photos – quick and easy online optimizer

Resize Photos trades interface simplicity for an abundance of options. Yes, you can just select simple optimization and resize the selected image. But there is much more you can do. For start, you can modify output format.

Once the photo is uploaded, there is a variation of different features. Some of them are shadows, effects, and captions. It supports only one file per conversion which can be JPEG, PNG, GIF, BMP, or PSD format, respectively.

To optimize your photo/image with Resize Photos, follow the instructions:

  1. Upload a photo with a supported format.
  2. Select width in pixels.
  3. Choose post-optimization photo quality.
  4. Select the wanted output format.
  5. If needed, modify additional settings.
  6. Apply to inspect changes.
  7. Once finished editing, download the image.

⇒ Try Resize Photos

Convert Image – preview files before conversion

Convert Image is a simple, but quite useful online compression tool.  Its distinctive feature is multiple input-output file choices, with most of them unavailable with other online solutions.

You can compress only one photo per conversion up to 24 MB. A tool offers tips about compression levels and preview images.

That way you’ll get full insight into the image export quality. However, switching between the output formats is somehow complicated and confusing.

To compress photos/images with Convert Image, do as follows:

  1. The default output format is JPEG. To choose other extensions, scroll to the bottom of the page.
  2. Upload photo and Agree to the Terms of Use.
  3. Click Send this image.
  4. Select the preferred compression level and click Validate.
  5. Download compressed photo.

⇒ Try Convert Image

TinyPNG – versatile image conversion

TinyPNG is one of the simplest online optimization solutions that offer great compression without quality loss.

It merely decreases the number of colors in the image without reducing its quality. However, you can’t tweak anything compared to some other available solutions.

It supports only 2 main formats: JPEG and PNG. Per conversion, you can compress up to 20 files with 5 MB as a single file limit. After the conversion, the file-bundle is downloaded as a ZIP archive.

Additionally, it offers premium service and WordPress and Photoshop plugins for a modest price. Finished photos can be directly downloaded or transferred to a Dropbox.

To optimize photos/images with TinyPNG, do as follows:

  1. Drag and drop preferred files in the marked area(up to 20).
  2. Wait until the automatic optimization is done.
  3. Download compressed files or export them to Dropbox.

To compress your photos using TinyPNG, go here.

⇒ Try TinyPNG

RIOT – supports cropping, adjusting & optimizing

RIOT supports all basic image/photo formats with the addition of PSD, RAW, HDR, and even a few more niche formats.

Besides compression, you can use RIOT as a full optimization tool for all the operations needed (cropping, rotating, adjusting brightness, or gamma). On the other hand, we are here for the automatic optimization feature.

It works fast and your photos will be as good as they were before the size reduction. The automatic preview will let you see all the changes, with both dual or single view.

Additionally, multiple compressions can be done parallelly, and you can choose the output size threshold. RIOT also comes as a plugin for GIMP, IrfanView, or XnView.

If you are keen to move from browser to desktop, you can find RIOT, here.

⇒ Try RIOT

No matter what option you choose, optimizing your photos for online implementation is imperative. On the other hand, images you upload must maintain a certain quality and be a valid addition to your site.

So, trying to balance between those two is the key.

What is your favorite image/photo optimization tool? Tell us your impressions and experience in the comments section.

Time Lapse Software for Windows: 11 Best to Use in 2026

Time-lapse photography is a technique where the frequency at which film frames are captured is much lower than the frame rate used to view the particular sequence.

When it’s played at average speeds, time looks as if it were moving faster, therefore lapsing. Time-lapse photography can be considered the opposite technique of high-speed photography or slow motion.

There are lots of techniques for assembling a time-lapse movie from still images and lots of tools to help effect these techniques.

Check out the list of software for time-lapse movies that we’ve prepared for you below and choose your favorite.


What are the best time-lapse software tools to use?

Adobe Premiere Pro

Topping out our list is a software tool that can handle pretty much all of the basic video editing features that you can imagine, and time-lapsing is one of them.

Adobe Premiere Pro is the first and also the last program you may ever need for video editing since as long as you have the raw footage, you can compile and cut it in any way you want.

The extensive toolset and versatility in terms of supported file formats makes it so that you can work with pretty much any type of video from any type of camera, and then export your work to any type of medium.

More so, this otherwise premium program is now available for free for 7 days if you opt to register your Adobe account for a 7-day trial.

Not only that, but the trial will also grant you access to all other Adobe programs included in the Creative Suite.

Here are some of the main features of Adobe Premiere Pro:

  • A professional-level toolset that covers all basic video editing needs
  • Works best when paired with other Adobe products such as Adobe After Effects
  • Highly compatible with all video formats, both in terms of importing and exporting
  • Tutorials for it are easy to find
  • It can be texted out for free for a 7-day period
Adobe Premiere Pro

Adobe Premiere Pro

The industry-leading video editing software, Adobe Premiere Pro is a great tool to have if you need to create time-lapse videos.
Free trialVisit website

Adobe After Effects

Adobe After Effects

Adobe After Effects is a great software capable of producing stunning works of visual art. It is part of the Adobe Creative Cloud suite’s tools and is the video industry standard for visual effects and motion graphics.

However, it isn’t ideal for editing footage like Adobe Premiere Pro. You should use Adobe After Effects to apply effects after your footage has been roughly edited. At this point, you can use it to create a time-lapse.

Speaking of effects, there is nothing you can’t do with this program. For instance, you can start a fire or make it rain, and animate a logo or character. You can even navigate and design in a 3D space. 

The most important feature of Adobe After Effects:

  • Comes with many simulation effects that can be used to create anything from rain to hair
  • The new 3D Transform Gizmo allows you to scale, position, and rotate 3D layers; with visual guides and multiple modes, this multifunctional gizmo offers more power when navigating 3D
  • Roto Brush 2 uses Adobe Sensei to make rotoscoping easy, intuitive, and accurate
  • Besides all the great built-in features, there are hundreds of free plugins available that can be installed and used inside of After Effects
Adobe After Effects

Adobe After Effects

With After Effects you can take any idea and make it move. That’s why this time-lapse software is worthy of your attention.
Free trialVisit website

SkyStudioPro

This is a freeware time-lapse and motion detection app for Windows, and you can use it to capture time-lapse movies with the help of almost any capture device or webcam.

Take a look at the most important features of this app:

  • As the tool also features motion detection, you will be able to set it to record movie clips each time motion is detected
  • You can also use the tool to make stop-motion movies by taking manual snapshots of a certain scene; you can use the SkyStudioPro VideoCompliler to make a compressed movie from your previously saved images
  • You can also use the tool to monitor your camera for motion and then trigger a recording with audio and video when the software detects motion
  • There’s a unique feature included in the tool as well, and it’s the option to slow down time-lapse on the motion; when motion is detected, the frame rate of your time-lapse movie will be temporarily increased in real time
  • When you playback the video, you’ll be able to see the time-lapse suddenly slowing down to show the moving object
  • The software is free

You should also take a look at the key features included by the Video Compiler (beta) which is a tool for making movies from bitmap sequences:

  • It offers support for two video devices
  • You can use any capture device or webcam
  • You can capture a video at any size and frame rate
  • You will get enhanced night vision by using a lower frame rate
  • You can create time-lapse movies using the codec of your choice
  • You can detect and capture motion

⇒ Download SkyStudioPro


PhotoLapse

This is a free app for creating .avi format movies from the JPG image sequence. Be sure of the fact that it is worthy of your full attention.

Take a look at the set of key features included in the tool:

  • You will be able to create fantastic video editing from your photo collection with PhotoLapse
  • The tool has a straightforward interface, and you don’t have to be a pro to use it
  • You can merge as many photos as you like and link up their scrolls for creating a semblance of animation

The tool is free, and it’s also compatible with all versions of Windows. The program can also be seen as an image to video converter.

⇒ Download PhotoLapse


Chronolapse

Chronolapse includes everything you will ever need to capture still images from your webcam or desktop automatically, then process them (rotating, scaling, PiP) and then combine them into complex time-lapse videos.

The software is an image sequence maker that includes features and solutions for creating still images from the web or desktop-based cameras.

Check out its main features below:

  • First, it takes the screenshots, or the webcam captured images, and you’ll be able to schedule them for processing and also combine them into time-lapse videos
  • You can also share your work with others when it’s completed
  • After the tool takes screenshots from one or multiple monitors and still images from webcams, you will be able to crop, scale, and create picture-in-picture effects
  • You can create a video from your still images with a custom frame rate
  • You’ll also be able to add audio to your completed videos

Chronolapse is the tool with enough features and instruments that you will need for automatically capturing the still images from the camera/webcam/desktop and process them after you have finishing combining them to create your time-lapse videos.

⇒ Download Chronolapse


Time Lapse Tool

This Windows software builds HD or 4K time-lapse videos from digital photos. The tool includes a great variety of effects that make it unique and incredibly easy to use to create amazing videos.

Take a look at the key features of this app:

  • You can render your time-lapse video to major video formats (Windows Media, Apple TV, H.264, and others)
  • You will be able to experiment with different frame rates
  • You can emulate camera move and zoom
  • You will be able to save your video with FullHD – or even 4K resolution -and different aspect ratios
  • You can apply image effects with just a few clicks
  • The tool lets you publish the video you create to YouTube directly from the application
  • You will also be able to use photos with an extra high resolution from your DSLR camera
  • You can create as many videos as you need from the same files; the time-lapse maker does not change any of the input photographs
  • With this tool, you can create a GIF in a few clicks

⇒ Download Time Lapse Tool


VideoMach

This video tool has an extensive palette of uses. Could you be one of them as well? Let’s find out together.

It can produce high-speed videos, as you can see by taking a look at its key features:

  • It can convert high-speed images and videos to slow-motion video
  • The tool can display real capture time (in milliseconds or microseconds) on the output video
  • The software offers you extra video filters to adjust White Balance, Gamma Correction, Brightness, Contrast, Saturation, and Sharpness
  • The program imports Vision Research Phantom CINE format (uncompressed)
  • The program imports Integrated Design Tools (IDT) RAW format
  • This tool also imports Fastec TS3Cine Bayer-TIFF format
  • The software supports other popular image and video formats

It is also used for creating Timelapse, Stop-Motion Animation, and CGI Videos:

  • It can convert time-lapse photos to full speed video (with music)
  • It can display days/hours/minutes/seconds when the image was captured on the output video
  • You will also get some extra video filters to adjust White Balance, Gamma Correction, Brightness, Contrast, Saturation, and Sharpness

You can create Animated GIF, FLI, and FLC

  • The program is the easiest way to convert short videos to animated GIF, FLI or FLC
  • It can convert a part of a larger video to GIF, FLI or FLC
  • It also extracts pictures from GIF, FLI or FLC
  • You can make a sprite sheet from GIF, FLI or FLC
  • The tool provides you an advanced two-pass color palette optimization for best 256-color picture quality

As you can see this program is flooded with features, and we haven’t even mentioned them all.

There is also VideoMach Professional which supports high-speed video capture and animation file formats and to use it you will need a license.

In any other case, VideoMach will turn out to be more than enough.

⇒ Download VideoMach


Panolapse time lapse

With the help of this tool, you can add motion to timelapse videos. The tool uses perspective correction to create real-world rotational panning through the scene.

Check out the main features of this software below:

  • Panning – it simulates rotational panning with perspective correction
  • Zooming – it animates a lens zoom in or out of your scene
  • Blend frames with RAWBlend – it can interpolate RAW metadata like exposure, contrast, white balance, saturation, and more
  • Deflicker – you can smoothen changes in brightness
  • Autoexposure – you will be able to get the perfect exposure, no matter what camera settings you’re at, analyzing changes in aperture, shutter speed, and ISO
  • Combine JPG images into a video – you can export to high-quality pictures or video (jpg, mp4, mov)
  • Fisheye Lens support – the tool works with both standard lenses and fisheyes
  • Animate stitched panoramas – it supports 360 degrees equirectangular panoramic images
  • Fisheye Effect – you can convert time-lapses to fisheye perspective for added artistic effect

The software also supports the camera, and it will allow you to set the crop factor, lens focal length, and lens type (normal, fisheye, stereographic, equidistant,  equirectangular), so the program works with all cameras (full-frame, crop-sensor, point-and-shoots, GoPro).

What’s more interesting is that RAWBlend works with dozens of RAW file formats, as well as JPG.

⇒ Download Panolapse time lapse


LRTimelapse

The tool offers the most comprehensive solution for time-lapse editing, grading, key-framing, and also rendering.

The program is currently being used by most of the known time lapse producers and by lots of beginners and amateurs as well.

Here is a list of its key features:

  • It allows key-framing and grading of time-lapse sequences in an all-raw-file-based workflow, and it uses the Adobe Camera RAW develop engine implemented in Lightroom (Versions CC, 6, 5 and 4) and Adobe Camera Raw
  • You can create day-to-night and night-to-day time-lapse transitions very easily wits the tool’s feature which is called Holy-Grail-Wizard
  • You can render the final sequences in professional video formats such as Prores 4:4:4 and 4:2:2 and resolutions up to 8K and beyond; the tool also supports consumer formats like MP4/H.264/H.265/HEVC
  • It offers you the opportunity to use your favorite photographic software (Lightroom or the Adobe Creative Suite) to produce time lapses with all the advantages and power that those programs offer for editing images
  • It also lets you quickly deal with time lapse specifics, like getting rid of the tedious flicker-effect
  • It will also help you to achieve the so-called holy grail of time-lapse photography: smooth day-to-night transitions
  • More features include the following: Animate and Keyframe Exposure, White Balance, and any other Lightroom/ACR editing tool over time
  • You will be able to use the full potential of Lightroom / ACR for color grading and even animate Graduated-, Radial- and Paint-Brush-filters

This is a very sophisticated tool for more experienced users, and it will definitely be worth your while.

⇒ Download LRTimelapse 4


Time Lapse MovieMonkey

With the help of this tool, you will be able to create a time-lapse movie from a pre-existing collection of pictures which usually are JPEGs.

Take a look at the tool’s most important features listed below:

  • The program can write the .avi file using various compression codecs, or it can also make it uncompressed for later editing (you will have zero loss of quality from picture to movie)
  • The video’s resolution will be determined automatically from the loaded images, and the video will easily be resized; the original images will not be touched, and the whole resizing process is an instant one
  • The tool offers you the opportunity to make a great time-lapse as easy as possible, and it will only take two clicks and three seconds with the default settings to create your movies
  • The app is user-friendly, portable, quick, and nimble
  • The software needs no installation, (as the folder is portable) and the program is about 23 MB in size on HDD
  • The program is also stable, and it will never use more than 125 MB of your RAM
  • This software has been stress-tested with 50.000 files at once, and it should be able to take more
  • Here are the potential output codecs: MPEG4 MPEG2 MSMPEG4v2 MSMPEG4v3 FLV1 H263P WMV1 WMV2 Raw Movie format: *.avi

The supported operating systems include the following: any x32 or x64 Windows above and including Windows XP. For this software to work, you first have to install .NET4 from Microsoft.

⇒ Download Time Lapse MovieMonkey


MakeAVI

This is a straightforward tool, and at the same time, it is a capable image to video assembler that will allow you to assemble a series of JPG based images or images of other formats into a video that is based on the format of the AVI file.

It will allow the conversion of images of almost any formats into AVI video files. Here are the key features offered by the program:

  • It provides various editing supports JPG, BMP, PNG, and more formats
  • Its interface is straightforward, and you will be able to understand the program very easily

⇒ Download MakeAVI


Every tool that we have included and described above will turn out to be great, and after you browse through the features of these programs, you will be able to decide which one is the most appropriate for your specific needs.

If you have any other suggestions or questions, feel free to reach for the comments section below.


6 Best Stock Photo Editing Apps in 2026

Looking for reliable software to enhance your photo projects with stock images? We’ve got you covered!

Whether you’re making layouts, editing images, or creating vector art, the tools below will help. Not only do they let you edit and create stunning visuals, but also offer access to libraries of royalty-free stock images.

Let’s check them out.

What is the best software to get and create stock photos?

1. InPixio Photo Studio 12

inpixio user interface

If you want a one stop shop for everything photo manipulation, check out InPixio.

You can access a wide selection of stock photos right from within the app.

All you have to do is use a search bar and filter feature, and tons of options will show up.

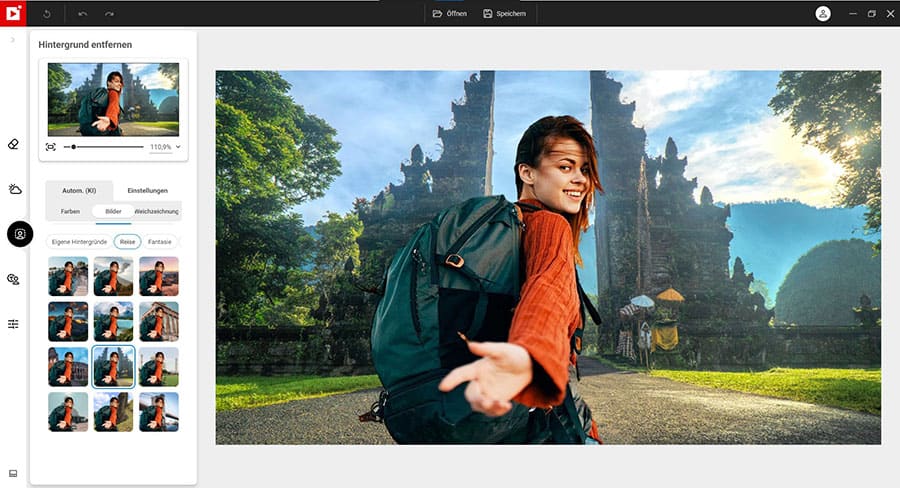
Further, the tool is easy to use and offers everything you need from background removal, and blurring effects, to fun and quick filters.

It’s perfect for finding high-quality pictures to use in your projects, adding a personal touch to your work.

Key Features:

  • Search and access a wide range of stock images directly in the app
  • Use advanced editing tools like object removal and background changes
  • Enjoy an easy-to-use interface suitable for both beginners and experienced users

InPixio Studio Pro 12

Explore endless creative possibilities with InPixio’s stock photo gallery!
Check price Visit website

2. Adobe Photoshop

Photoshop is one of the best graphic design software for beginners and pro alike. You can use it to edit your best photos and create royalty-free images with ease.

It comes with a lot of smart tools designed to help you edit your images and get the best version out of them.

Here are other key features of Photoshop:

  • Cropping, straightening, rotating, and flipping.
  • One-click auto-adjustment.
  • Blemish removal – removing spots or dirt from the image.
  • Slide controls to improve the colors of the image.
  • Lots of eye-catching effects you can select from.
  • Panoramic image option.
  • Give a personal touch to photo borders.
  • RAW photo support
  • Sharing: on social media sites like Facebook, Revel, Twitter, Tumblr, and more.

Adobe Photoshop

Get professional stock photos for personal use with the industry’s leading photo editing tool.
Free trial Visit website

3. Adobe Indesign

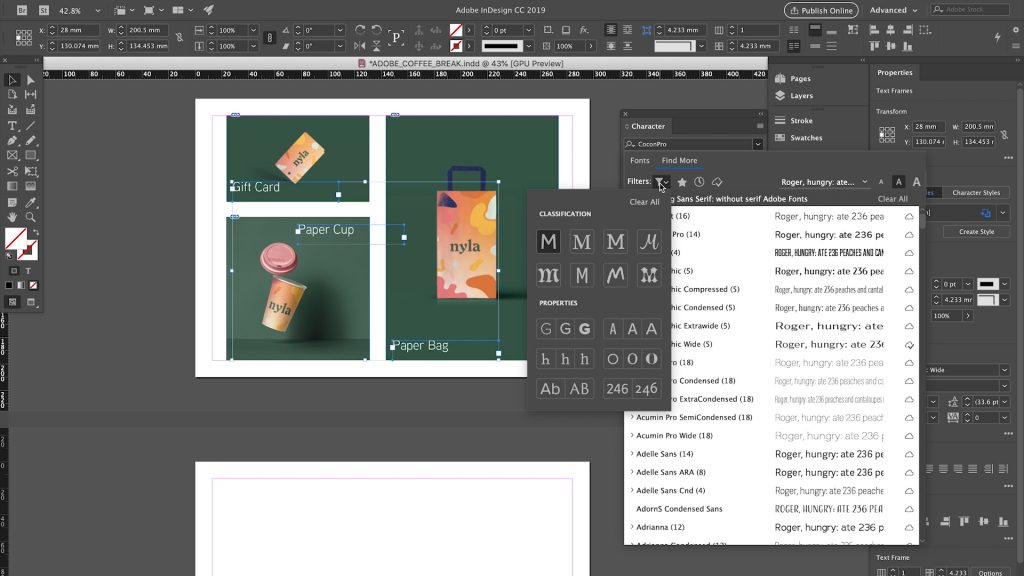
Adobe InDesign is ideal for layout design usage.  For example, this software can be used for online magazines, printed books, brochures, or digital magazines most especially to create a royalty-free image.

You can improve your InDesign project with more than 60 million creative images, graphics, 3D photos at a high quality and resolution by using Adobe Stock’s templates.

The fact that Adobe Stock is integrated into the InDesign platform will ease considerably your work, so you can search for the images by going to the Select File tab and then clicking on Search Adobe Stock. 

Key features:

  • Find images directly from the Select File tab in InDesign
  • Integrated with Creative Cloud Libraries for easy access
  • Visit Adobe Stock’s official website to search for watermarked images

Adobe InDesign

Use Adobe’s stock templates, but bring your own touch to create the most amazing layouts!
Free trial Visit website

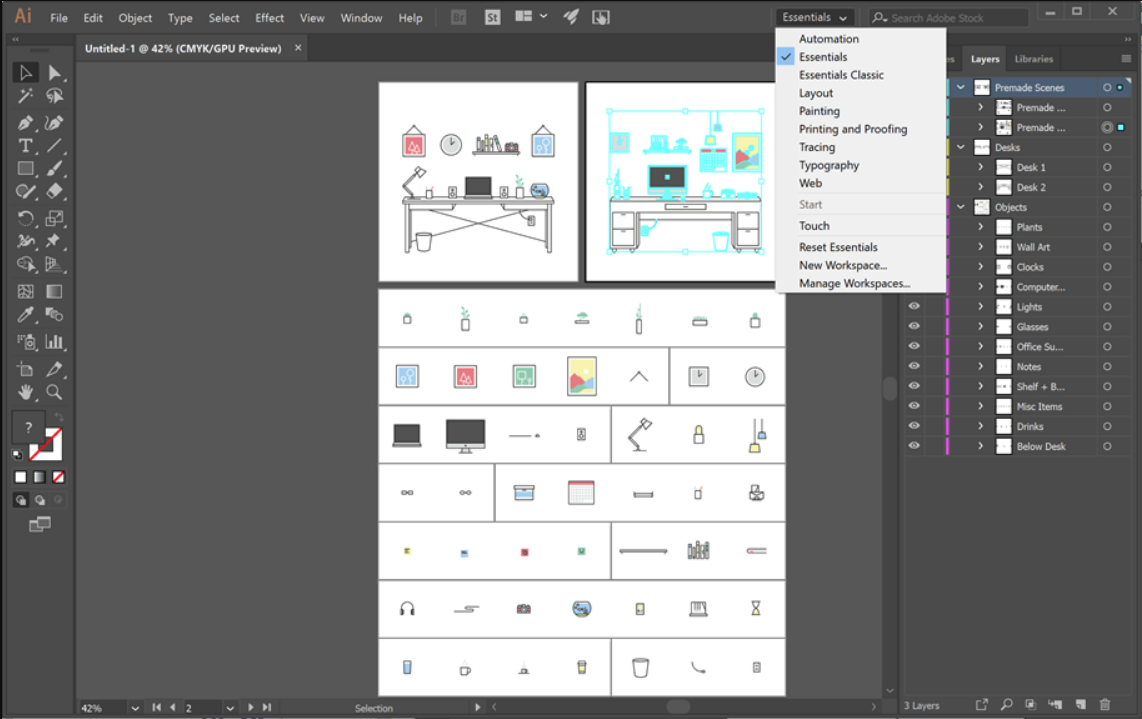
4. Adobe Illustrator

This is the right tool for vector art to create logos, sketches, icons, typography or even complex illustrations for videos or mobile is an illustrator.

In order to use the best creative assets in Adobe Illustrator, you can search for images, 3D assets, graphics and illustrations in Adobe Stock, that is integrated into Adobe Illustration Platform.

As well, you can download a single asset or you can choose a subscription plan for more Adobe Stock illustrations. For a start, you can download 10 images for free in order to bring more color to your projects.

Key Features:

  • Access Adobe Stock for vector images and graphics
  • Create and edit logos, illustrations, and more
  • Download images for free to start your projects

Adobe Illustrator

Make a statement out of your ideas and bring them to life!.
Free trial Visit website

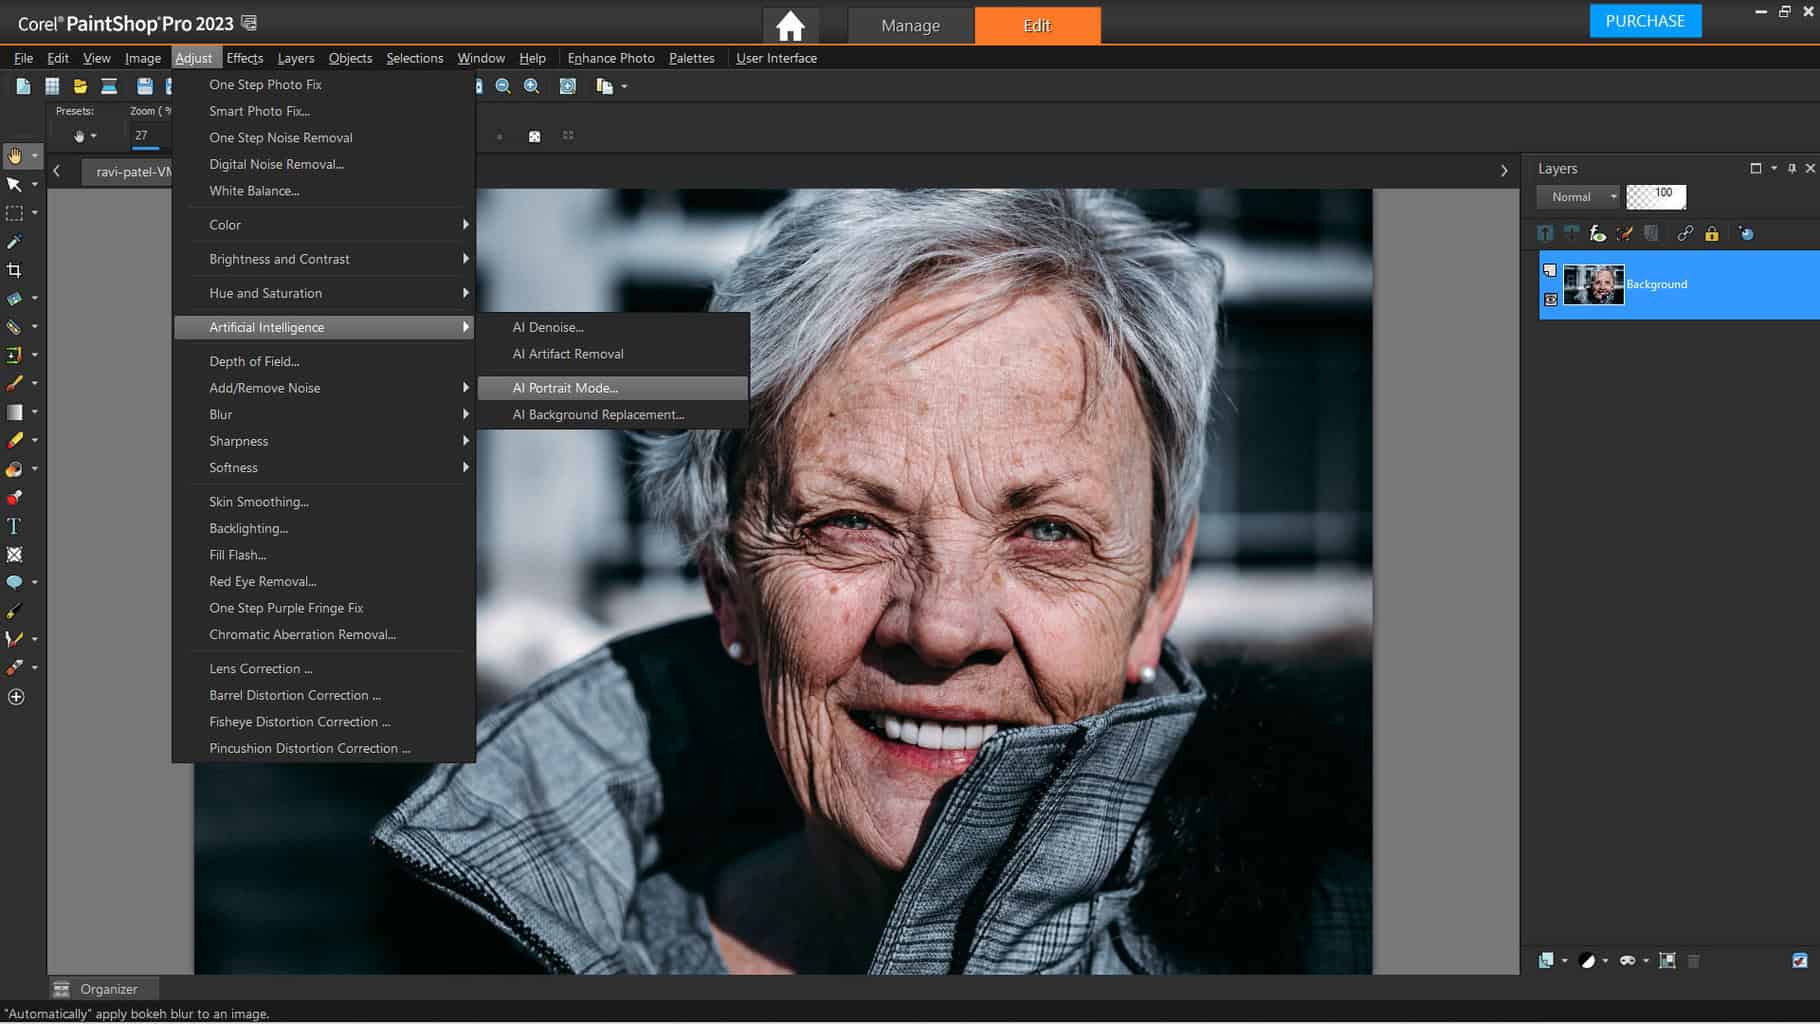
5. Corel PaintShop Pro

corel paint shop pro

Corel‘s photo editors couldn’t have missed from such a list. With a brand new interface and enhanced tools, PaintShop Pro is more powerful than ever.

The entire photo editing workspace has been redesigned to offer users a modern, thrilling experience and AI-powered tools.

Despite the many tools, the software is quite intuitive to use. Besides, users have access to 100+ royalty-free backgrounds that they can borrow for their designs.

Key features:

  • It has professional tools that can be used easily by both professionals and newbies
  • Video tutorials and other forms of support forums to understand the software better
  • Over ninety creative filters can be used to enhance the image texture and color
  • RAW editing support with Corel AfterShot 3
  • PhotoMirage Express feature for mesmerizing effects on regular photos
  • Painter Essentials 7 included if you want to also hone your digital painting skills.

⇒ Download Corel PaintShop Pro

6. Xara Photo & Graphic Designer

xara photo&graphic designer

Xara Photo & Graphic Designer is an all-inclusive photo editing software, specially designed for Windows PC. and one of the best parts is that it supports older Windows OS versions as well.

Xara Photo & Graphic Designer boasts some very dynamic features, many of which are highly optimized to facilitate and speed up photo editing.

Some of these features include customizable templates, background eraser, magic erase, photo grids, photo heal (to remove spots, blood- eye or wrinkles), filters, photo resize, and many more.

Key Features:

  • Access a large collection of royalty-free stock photos and illustrations
  • Use customizable templates and advanced photo editing tools
  • Enjoy a user-friendly interface optimized for speed

⇒ Dowload Xara Photo&Graphics Designer 

Benefits of using royalty-free images

  • Stock photos can be used on designs, multiple promotional campaigns, and digital media.
  • It is cheap and very fast to use.
  • It saves time and money.
  • You can search, find and use international stock photos very fast without any added costs.
  • Many benefits can be received from stock agency-free memberships.

Downloading and creating your own royalty-free images is easy. As you have seen, a lot of software comes with its own collection of stock content that can be used for inspiration.

Do you have a favorite software among the listed ones? Tell us in the comments below.

FIX: ATTEMPTED_SWITCH_FROM_DPC error in Windows 10

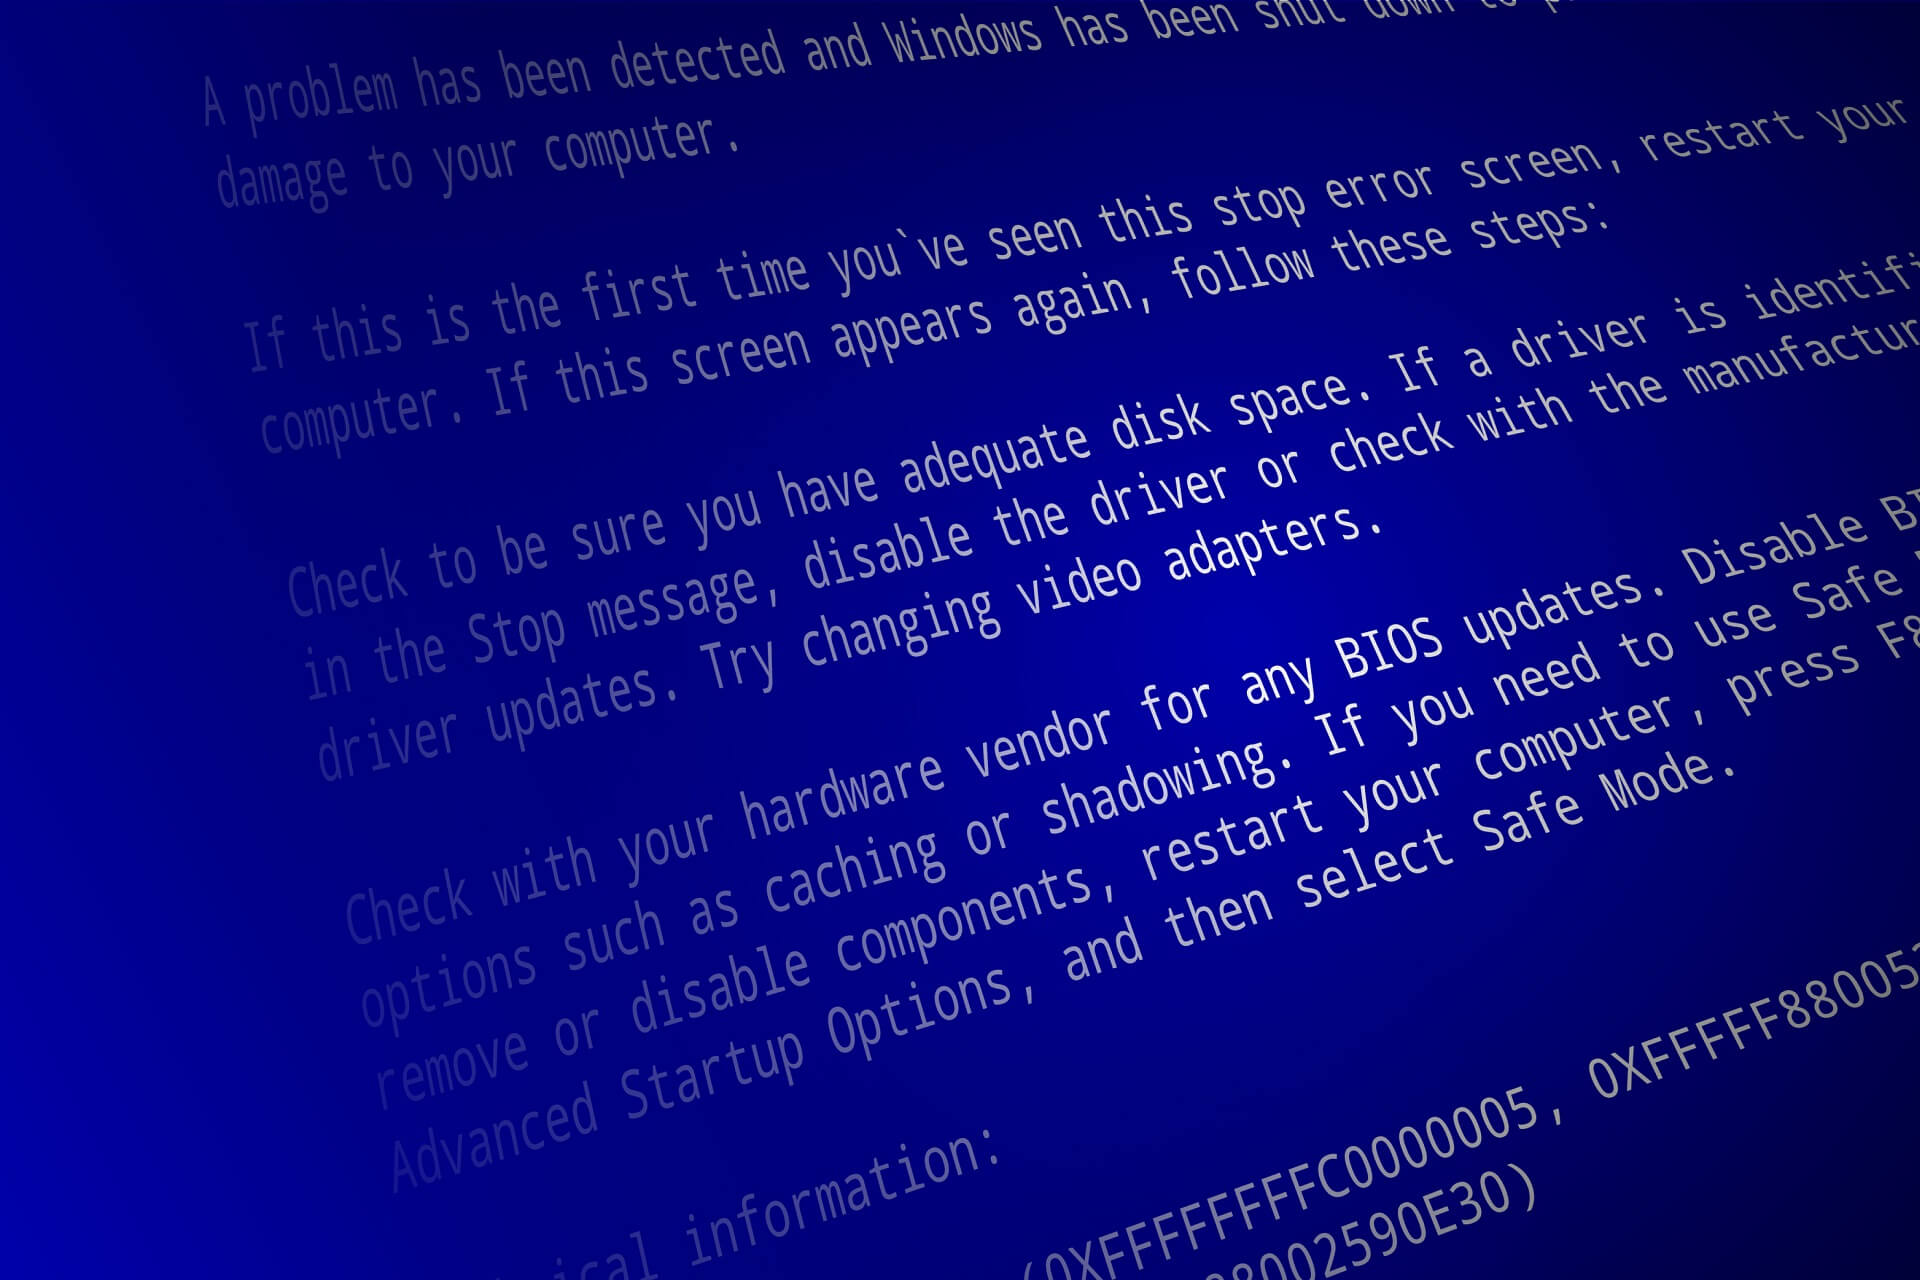
There is a wide range of Blue Screen of Death errors that you can get on Windows 10, and although these errors are rare, it’s common to restart your PC in order to prevent any damage.

Since BSoD errors can be a serious problem, today we’re going to show you how to fix the ATTEMPTED_SWITCH_FROM_DPC error, so keep reading.

How can I fix the ATTEMPTED_SWITCH_FROM_DPC BSoD error?

  1. Use a repair tool
  2. Run the Hardware Troubleshooter
  3. Update Windows 10 and all your drivers
  4. Run the SFC scan
  5. Run DISM
  6. Uninstall the problematic drivers
  7. Uninstall the problematic applications
  8. Disconnect your DVD drive
  9. Slow down your SSD drive

1. Use a repair tool

The ATTEMPTED_SWITCH_FROM_DPC Blue Screen of Death error can be problematic, and since a faulty driver usually causes this error, it can be easily fixed by using specialized repair tools.

2. Run the Hardware Troubleshooter 

  1. Open the Settings app and go to the Update & Security section.
  2. Select Troubleshoot from the menu on the left.
  3. Select BSOD from the right pane and click Run the troubleshooter.Troubleshooting BSoD
  4. Follow the on-screen instructions to complete the troubleshooter.

The Troubleshooting tool is a universal tool that basically deals with all sorts of issues within Windows 10. And it might also be helpful with the BSOD issues, so be sure to try it out.

3. Update Windows 10 and all your drivers

Windows 10 might have a few issues with certain older hardware and software, and in order to fix those issues, it’s important that you download and install the latest patches by using Windows Update.

Many of these patches offer security improvements and various bug fixes related to both hardware and software, therefore if you want to fix BSoD errors such as ATTEMPTED_SWITCH_FROM_DPC, it’s important that you keep Windows 10 up to date.

In addition to Windows updates, it’s also important to keep your drivers up to date.

Outdated or incompatible drivers can often cause stability issues and BSoD errors, so it’s crucial that you update them as often as you can.

Updating drivers is fairly simple, and you can download all the necessary drivers right from your hardware manufacturer.

According to users, your Wi-Fi adapter can often cause these types of errors, and there are reports that outdated touchpad drivers can cause these issues on Windows 10 laptops.

Almost any driver can cause these types of problems, and in order to fix them, it’s highly recommended to update all your drivers.

Update drivers automatically

Searching for drivers on your own can be time-consuming. So, we advise you to use a tool that will do this for you automatically.

Using an automatic driver updater will certainly save you from the hassle of searching for drivers manually, and it will always keep your system up to date with the latest drivers.

⇒ Get Outbyte Driver Updater

4. Run the SFC scan

  1. Right-click on the Start Menu button, and open Command Prompt (Admin).
  2. Type the following line, and press Enter: sfc/scannow
  3. Wait until the process is done (it may take a while).
  4. If the solution is found, it will automatically be applied.
  5. Now, close the Command Prompt and restart your computer.

If the troubleshooter failed to resolve the problem, we’re going to run the SFC scan. This is a command-line tool that scans your system for potential issues, and resolves them, if possible.

So, it might be helpful with the ATTEMPTED_SWITCH_FROM_DPC error, as well.

5. Run DISM

  • Standard way
  1. Right-click Start and open Command Prompt (Admin).
  2. Paste the following command and press Enter:
    • DISM /Online /Cleanup-Image /RestoreHealth
  3. Wait until the scan is finished.
  4. Restart your computer and try updating again.
  • With the Windows installation media
  1. Insert your Windows installation media.
  2. Right-click the Start menu and, from the menu, choose the Command Prompt (Admin).
  3. In the command line, type the following commands and press Enter after each:
    • dism /online /cleanup-image /scanhealth
    • dism /online /cleanup-image /restorehealth
  4. Now, type the following command and press Enter:
    • DISM /Online /Cleanup-Image /RestoreHealth /source:WIM:X:SourcesInstall.wim:1 /LimitAccess
  5. Make sure to change an X value with the letter of the mounted drive with Windows 10 installation.
  6. After the procedure is finished, restart your computer.

Deployment Image Servicing and Management is a command-line utility that reloads the system image. Reloading the system image can eliminate various problems, including the BSOD errors.

We walked you through both the standard and the procedure that utilizes the installation media as above explained.

6. Uninstall the problematic drivers

  1. Press Windows Key + X to open Power User Menu. Select Device Manager from the list.
    device-manager
  2. When Device Manager opens, locate the problematic driver and right click it. Choose Uninstall from the menu.
    uninstall-driver
  3. If available, select Delete driver software for this device and click OK.
    confirm-uninstall-driver
  4. After the driver is uninstalled, restart your PC.

In some cases, certain drivers just aren’t compatible with Windows 10, and the only solution is to remove them completely.

Users reported that Qualcomm Atheros or all-in-one card reader drivers can cause ATTEMPTED_SWITCH_FROM_DPC error to appear, so be sure to uninstall these drivers.

After uninstalling the problematic drivers, Windows 10 will automatically install the default driver, and you can continue using it if your device is working well, or you can try and find the newer version of the driver.

7. Uninstall the problematic applications

If a certain application isn’t fully compatible with Windows 10 that can cause Blue Screen of Death error such as ATTEMPTED_SWITCH_FROM_DPC.

According to users, tools such as WiseCleaner can cause these types of errors, so you might have to remove them in order to fix this problem.

In addition, many users reported that BitRaider is the common cause for this BSoD error, and in order to fix it, you’ll have to completely disable BitRaider.

Few users also reported that Acronis software can sometimes cause these types of errors, but you can easily fix this problem by updating to the latest version of the Acronis software.

Another common cause for these types of errors can be your antivirus software, and according to the users, the only solution is to remove all third-party antivirus programs.

Bear in mind that removing the antivirus programs might not fix this issue since many antivirus programs tend to leave certain files behind once you uninstall them.

To completely remove an antivirus program from your system, we kindly encourage you to consider the most efficient uninstaller programs you’ll find right now.

8. Disconnect your DVD drive

Several users reported that they managed to fix the ATTEMPTED_SWITCH_FROM_DPC error by disconnecting their DVD drive.

Disconnecting your DVD drive might not be the most elegant solution, but it’s a solid workaround according to users.

Just to be sure, you can also try replacing your DVD drive, in case your current one is faulty.

9. Slow down your SSD drive

Few users reported that the ATTEMPTED_SWITCH_FROM_DPC error can be caused by your SSD. According to the users, it seems that Windows 10 has certain issues with fast SSDs, and the only solution is to slow down your SSD.

Users reported problems with Samsung SSD, and by using the Samsung Magician Software they managed to slow down their drive a bit and fix this BSoD error.

ATTEMPTED_SWITCH_FROM_DPC Blue Screen of Death error can be problematic, and since this error is usually caused by a faulty driver or some minor hardware issue, it can be easily fixed by using one of our solutions.

We hope that these recommendations from our list were helpful. For more suggestions, please access the comments section below.

5 best laptop stress test software [Safety Guide]

A stress test for systems like desktops, notebooks, and laptops usually puts the hardware components under exaggerated levels of usage, in order to test the performance.

In other words, stress testing your device should tell you how stable and performant it is.

There are various types of tests, most of them include huge workloads and tasks, memory usage, thermals, clock speeds, and more.

In this guide, we’ll present you with 5 best tools to stress test your system’s components: CPU, RAM, and GPU.

Before starting any test, close all your non-essential programs like Office programs and browsers. We want the PC to focus all the resources on the test, in this way we obtain the best and most accurate results.

These software tools will rise up your CPU/GPU temperature, so make sure your system is properly ventilated.

What are the best laptop stress test software tools?

AIDA64 Extreme

AIDA64 has more editions depending on your needs and it is more comprehensive than Prime95.

It is the perfect tool for monitoring in real-time all computer sensors; you can see accurate voltage, temperature, and more.

When it comes to the diagnostic feature, it helps in detecting and preventing any hardware issues.

Of course, it includes many stress tests for checking the performance of individual hardware components or the whole system.

AIDA64 Extreme

If you want an industry-leading laptop stress test software, AIDA64 Extreme is clearly up for the task!
Free trial Visit website

Prime95

Prime95 was originally designed by George Woltman to find Mersenne prime numbers.

A Mersenne prime is defined as a prime of the form 2P-1 and there are only 40 known Mersenne primes. From here we have the logo of the tool.

A feature of Prime95, Torture Test, makes it suitable and very popular for stress testing.

The software puts a heavy load on the computer making the CPU and/or memory overclock, meaning that the computer will be put past its limits and then slow down a little bit.

This freeware tool that is compatible with most Windows platforms, includes options that let you focus the test on the CPU, memory, or both.

The software does not require an installation, you only need to download, unzip the archive, and double click on the Prime95 application.

You’ll be prompted with a small options window from which you can customize the test.

⇒ Get Prime95

IntelBurnTest

Used for CPU stress tests, it is freeware made available by AgentGOD for Windows systems.

What makes this software a good choice is that it uses the same stress-testing engine used by Intel to test their products before getting out of the factory and being sold.

It also claims to run all the necessaire tests in about 8 minutes, which makes it faster than other related tools.

Try to set the limit for the memory test to the one you have on your laptop, otherwise, the time for the test might be greater than 8 minutes.

Don’t worry if your laptop came with an AMD CPU, this tool works for both AMD and Intel CPUs.

⇒ Get IntelBurnTest

3DMark

If you bought a laptop for gaming or video editing purposes, use this tool. It is designed to test and analyze your GPU performance.

It’s an incredibly user-friendly option because it automatically scans your hardware and recommends the best tests to run.  

The software includes a lot of tests, but you can choose to install only the tests you need.

It also includes hardware monitoring that lets you see charts with different GPU parameters and customs settings from where you can change some quality settings for your test.

This tool is available for home and business use. The good news is that you can download a free version for home use, but of course, with fewer features.

⇒ Get 3DMark

MemTest86

MemTest86 is the original, standalone, free memory testing software for X86 systems. It is an old industry standard, been used by various producers since 1994.

Having issues with PC memory is nothing out of the ordinary. MemTest86 boots from a USB flash drive and tests RAM memory using comprehensive algorithms.

It can detect faulty memory or rule out any RAM issues. Even more, the newest version of the software supports all current technologies.

The list includes DDR4 RAM, UEFI, Graphical interface, mouse support and logging of results to disk, Network PXE boot, and more others.

⇒ Get MemTest86

All these software tools work great, are easy to use, and will give you an accurate idea about your laptop performance.

Even if you have an overview of your laptop capabilities by reading its specifications, perform stress testing to know exactly how far you can push the limit of your device without damaging its component.

6 Best Software for Meme Making [2026 List]

If you’re into online chatting and social media platforms, then you are definitely familiar with the meme phenomenon.

Memes tend to pop up a lot on platforms like Facebook or Twitter but are not exclusively reserved for those particular social networks.

In fact, memes are pretty much everywhere nowadays and have taken over pop culture. Some are funny, others educational or motivational, and a great deal is all about trolling.

Regardless of their nature, memes are totally in and maybe you thought of making one (or more) for yourself. If so, then you should not miss our tips for choosing the best meme creator out there.

Got a great idea? Pair with a catchy image and let the meme generator of your choice put everything together. Then, go viral!

What software is the best for making memes?

inPixio Photo Studio Pro 12

Create lots of awesome and funny memes thanks to inPixio, one of the best photo editing software on the market. The program comes with a plethora of editing options for you to choose from.

On top of that, it is actually easy to use, which makes it perfect for both novices and experienced people, thanks to its comprehensive and intuitive UI.

Some of inPixio’s key features include:

  • Remove background and objects
  • Photo effects
  • Photo resize and crop
  • Red-eye corrector
  • One-click image correction
  • Color effects
  • Text and stickers tool

inPixio has a free meme generator online, but if you want to make further changes to optimize your memes you need to download the desktop version of Photo Studio Pro 12.

Photo Studio Pro 12

Create the funniest images and show them to your friends on Facebook and Twitter.
Check price Visit website

Adobe Photoshop

As the world’s best imaging software, it’s no wonder that Adobe Photoshop is a hugely popular choice when it comes to designing memes.

Its numerous brushes and special effects paired with the fact that it gives you complete control over the lettering through pixel-by-pixel editing lead to impressive meme creations in no time at all.

Let’s quickly go through its key features:

  • Play with color and effects using custom or Photoshop preset brushes
  • Your work is automatically saved to the cloud for quick access, no matter where you are
  • Lens Blur to offer a more natural and realistic look when blurring an object in the foreground
  • Improved Content-Aware Fill
  • Object Selection tool (create fast and precise selections by drawing a simple rectangle)

Adobe Photoshop

Create the best designs and the most astonishing photos thanks to Adobe Photoshop!
Free trial Visit website

Adobe Creative Cloud Express (formerly Adobe Spark)

Part of the Creative Cloud suite, Adobe Creative Cloud Express is a powerful app for desktop and mobile that allows you to transform your ideas into stunning visual stories in no time.

Simply pick a design template, add your photo and text, and resize your composition to fit your favorite social network in just seconds.

Needless to say, there are countless options for you to customize your meme such as color palettes, changing the appearance and alignment of your text, and backgrounds, and picking themes.

Let’s quickly go through its key features:

  • Attractive fonts with stunning typography
  • Text embellishments
  • Powerful imagery (countless options available for image selection across the Adobe Creative Cloud)
  • Professional-looking themes
  • Generous color palettes to choose from

Adobe Creative Cloud Express

Digitalize your mind and ideas by creating awesome meme images thanks to this feature-rich Adobe tool!
Check price Visit website

Adobe After Effects

If you want to take to meme creation at a professional level, there is no way to beat Adobe After Effects. In terms of graphics and visual effects, there is practically nothing you can’t achieve with it.

Combine techniques, images and apply killer effects to create a jaw-dropping meme that will conquer the online environment as soon as you press (or tap) the share button.

Let’s quickly go through its key features:

  • Graphics and text enhancements (new dropdown menu expression controls, templates that are easier to update in Premiere Pro, etc.)
  • Pixel-perfect selections
  • Stunning effects
  • Custom font design (serif or sans serif fonts, handwriting, tattoos and many more)
  • Custom letterforms that fit your unique layout and design

Adobe After Effects

Let your ideas loose! Adobe After Effects allows you to express your artistic self!
Free trial Visit website

Filmora FREE Online Meme Maker

There are, of course, free solutions for making memes and Filmora Online Meme Maker is one of the best options out there, made available to you courtesy of Wondershare software.

Blending videos, GIFs, and images, this easy-to-use tool allows you to create your own memes directly from your browser. All you need to do is upload a file and enter the URL for your video, GIF, or image.

Then you are all set for customizing your creation to reflect your brilliant meme idea.

Let’s quickly go through its key features:

  • Quick online access with no installation setup
  • Drop a file or upload it (image, GIF, or video from your PC or paste in a link)
  • Font editor included (you can easily edit the text font, size, color, and position)
  • Various export formats available (PNG, GIF, JPG, or MP4 file)

⇒ Get Filmora Meme Maker

Meme Generator by Imgflip

Operating in HTML5, the Meme Generator is an online image maker perfectly suited to create memes.

This instant meme creator is a versatile tool on which you can upload your own images as templates and start the customization process from there.

There is a free online version and also a subscription variant from which you can choose, offering, of course, more complex functionalities.

Let’s quickly go through its key features:

  • Add custom resizable text to images (move and resize the text boxes by dragging them)
  • Customize the font color and outline color
  • Advanced font editing options (Imgflip supports all web fonts including bold and italic)
  • You can rotate your meme, add speech bubbles, or other custom images

⇒ Check out Imgflip’s official page now

In order for a meme to be shared throughout the online community, it has to have a strong message and an appealing look.

Keeping this in mind, if you’re feeling inspired, don’t procrastinate and start creating your own memes today with dedicated meme maker software. What will be the meme generator of your choice? Let us know in the comments section below.

6 Best Drawing Software for Huion Tablet [2026 Guide]

Today, we’re going to show you the best software to use with your Huion tablet. Whether you want to create amazing digital art, perfect your photo edits, or dive into 3D design, the tools below will help you get the best of your tablet.

What drawing software can I use with the Huion tablet?

Adobe Photoshop – Best resolution for digital art

Adobe Photoshop has become synonymous with graphic designing, and we can’t help but think about it whenever the words drawing software come to mind.

It has a long history of being efficient, and it is available on a wide range of devices, including graphics tablets, making it a great drawing app for Huion tablets.

Take a look at these key features:

  • The most popular graphic design software in the world
  • Thousands of tutorials are available online
  • Easy to master
  • Compatible with Adobe Illustrator
Adobe Photoshop

Adobe Photoshop

Bring your ideas to life and use all the editing software of this amazing software before sharing your pictures with friends,
Free trial Visit Website

Corel Painter – best for high resolution art

Corel Painter app

Corel Painter is a neat graphics design tool that comes with pretty much all the tools you may need for image editing.

You can use it for simple tasks such as photo retouching, or you can use it to design a drawing from scratch. It has a blank canvas mode where you can use the entire tablet to work, with no distractions.

The interface is pretty simple to master, especially if this is your first Huion sketch app and drawing app that you have ever tried.

Take a look at these key features:

  • Color mixing and canvas control
  • Tons of composition tools from layer tools to perspective guides and proportions
  • Edit photos, manage fonts, and layout multi-page designs
  • Learn quickly in a user-friendly design environment
Corel Painter

Corel Painter

Create detailed and immersive concept art with Corel Painter’s advanced digital painting tools!
Check price Visit Website

Adobe Illustrator – Best tool to vectorize your drawing

Probably not as known or as popular as Adobe Photoshop, Adobe Illustrator is still a great tool if you’re considering graphic design.

The interface is neatly arranged so that all the most common tools are at your disposal, and it features plenty of instruments that make it perfect for precision work.

Take a look at these key features:

  • Compatible with all systems
  • Can be used seamlessly with Adobe Photoshop
  • Great for professionals doing precision work
Adobe Illustrator

Adobe Illustrator

Use all the amazing features of this complex tool in order to make your pictures or web exactly the way you envision them!
Free trial Visit Website

Clip Studio Paint – best for digital drawing and comics

If you bought a Huion tablet to get in touch with your artistic side, then digital drawing is probably where you want to start. A no better software application is better at that than Clip Studio Paint.

This neat little tool has everything you need to create beautiful drawings, comic books, manga, and more. Additionally, the interface is customizable and can fit anyone’s drawing style.

Take a look at these key features:

  • Great for digital drawing
  • Customizable interface
  • Comes with plenty of tutorials
Clip Studio Paint

Clip Studio Paint

Create stunning digital art and comics with Clip Studio Paint’s versatile tools and features!
Check price Visit Website

Krita – Best tool for beginners

Krita best software to create NFT art

Krita is a versatile digital art software with a large enough toolset to cater to any type of artist.

You can use it to create sketch art, and digital paintings. It has a canvas-only mode that allows you to work on the whole screen without distractions.

It has multiple sets of brushes and is in fact suitable for photo editing as well.

Take a look at Kitra’s key features:

  • Brushes for sketching and painting
  • Freehand support
  • Masking tools, selection tools
  • Layer styles 
  • Support for all popular formats
Krita

Krita

Start creating beautiful digital art with Krita’s versatile and beginner-friendly tools today!
Free Download Get it now

Autodesk Maya – Best for sketch and technical drawing

Maya is built for professional painters and animators; it allows you to bring your models to life and draw 3D scenarios and sketches in the most fluid way imaginable.

Yet, you can customize every inch of skin tone or tiny traces on your sketch. Palettes can be turned on or off, and icons are identifiable for their purposes.

Even as a novice or intermediate, you won’t be let down by its outstanding features.

Take a look at these key features:

  • Intuitive interface
  • The Scan Sketch feature imports your line art with a transparent background, ready for inking and coloring
  • Compatible with all devices

Maya Autodesk

Maya Autodesk

Bring your 3D models and animations to life with Autodesk Maya’s powerful and intuitive tools!
Check Price Visit Website

Are Huion Tablets good for drawing?

Yes. Huion tablets offer up-to-date drawing tools and features that perform really well. They’re good both for beginners and advanced graphic designers and illustrators.

Users are satisfied with the performance of the stylus which offers a very realistic drawing experience. 

While it is true that you could use any drawing software on a Huion tablet, the entries on our list are the ones that can fully take advantage of all that the tablets have to offer.

It doesn’t matter if you are retouching your selfie to look perfect, or if you are creating the next best fantasy wallpaper, these programs are here to help you along the way.

We truly hope that this list aids in your selection to get reliable software for your Huion tablet. Please leave your comments in the section below so that we can keep this list up to date.

How to download & install SonicWall Global VPN Client

Nowadays, the menace of cyberthreats appears to be expanding towards unfathomable lengths. Naturally, the need for self-preservation becomes more and more obvious, especially when the stakes are high.

If you run a business, you probably understand and appreciate the importance of having a reliable security tool. More so one that could keep your corporate communications private with zero compromises.

A popular example is Cisco AnyConnect, but today we’re taking a look at SonicWall Global VPN Client.

What is SonicWall Global VPN Client?

SonicWall Global VPN Client is a popular corporate VPN client that can provide your organization with the security level it needs. It’s crucial to establish a secure work environment, especially if you have more than just a few remote employees.

Currently, there’s no better way than creating a VPN between your employees and the corporate network. Using a solution such as SonicWall Global VPN Client can make sure that your employees can access corporate network resources without jeopardizing their or the network’s security.

Additionally, this tool supports a wide range of devices. Thus, it’s possible that your employees can connect to your network in more than just one way. You can use SonicWall Global VPN Client from Mac, iOS, Chrome OS, Android, Windows, and even Kindle Fire.

In the following sections, we’re going to show you how to download and install this tool.

QUICK TIP: If you’re looking for excellent security, simplicity, reliability, and a great cost-benefit ratio, we suggest you give PIA a try. It did amazing on all our tests and we recommend it.

Private Internet Access

Private Internet Access

This VPN secures your connection and keeps your online activity private and away from prying eyes.
$2.69/mo. Buy it now

How do I download SonicWall Global VPN Client?

  1. Access SonicWall’s dedicated download section
  2. Locate the Global VPN Client entry in the list
  3. Click the arrow next to its nameDownload page SonicWall Global VPN Client
  4. Choose between the 32-bit and 64-bit versions
  5. Click the download button that matches your selectionDownloading SonicWall Global VPN Client

How do I install SonicWall Global VPN Client on Windows 10?

  1. Launch the 32-bit or 64-bit installer you downloaded
  2. Hit the Next button
  3. Accept the SonicWall End User Product Agreement
  4. Set a destination path on your computerInstalling SonicWall Global VPN Client
  5. Hit the Next button

That’s it, you’ve successfully downloaded and installed SonicWall Global VPN Client on Windows 10. Note that this program isn’t just any standard VPN client, and you’ll soon understand why.

How do I use SonicWall Global VPN Client?

In order to use this program, you must have a corporate network that it can connect to. As opposed to free VPNs like Turbo VPN, this one doesn’t come with a bunch of preloaded servers. In other words, you can’t use it if you don’t already have a server.

Assuming that you do, launch the app and follow the wizard’s instructions to establish your connection. You must define a hostname or IP address for the server and assign it a name. After doing so, you’ll be able to see the app’s main window.

Using SonicWall Global VPN Client on Windows 10
Here you can manage your connections (if there’s more than just one), enable or disable them, and configure them properly. Note that closing the window will minimize the app to the systray instead of shutting it down.

An easy-to-use VPN client for your corporate needs

To wrap it up, SonicWall Global VPN Client is a good choice if you need to establish a secure link between your remote employees and your company’s intranet, in order to redirect all network traffic through VPN.

Downloading and installing it are quite effortless processes and not even using the app should be difficult. Assuming that you already configured a network it can connect to, that is.

However, if you’re looking for a VPN solution for casual usage, we suggest checking out the best VPNs for Windows 10.

Microsoft Edge’s new “adaptive notification request” feature will suggest site notification permission requests

Microsoft previously introduced a feature known as “quiet notification requests” in Edge 84, to help reduce notification permission requests from websites. That might have been a while ago, but turns out the company has learned from the past and is actively testing “adaptive notification requests” in the latest version of Edge.

This new feature allows websites and Edge to prompt users with either a full notification permission request or a quiet request, based on actual data acquired from users. Microsoft says they run these suggestions with consideration to the user’s context and timing after users have engaged with sites. According to Microsoft:

Sites that follow good practices and earn a high user acceptance rate will begin to show the full prompt without being “quieted.” . Based on the collective score of users, we provide quiet requests to the websites whose scores are higher than the threshold.

Microsoft developed a score element as part of this for the buttons you see in Edge when you get a notification request. Clicking “Block” will yield a high score and a negative impact on a website, and clicking “Ignore” and “Dismiss” will be a week negative signal. “Allow,” meanwhile will give the lowest score, and appear as “positive” to Edge.

Of course, data is updated regularly, and Microsoft believes sites can provide the full prompt to their users when they get better acceptance rates from their users. This can be seen as a motivator for sites to follow best practices when it comes to requesting notifications.

This feature will be found under Settings,  Cookies and site permissions, and Notifications.

FIX: JavaFX application error due to system configuration

Nowadays, Internet Explorer is the only browser with support for Java plugins and applets (NPAPI). Many java issues are related either to the Java version installed on your PC or to the cache.

Anyway, JavaFX is not really an applet and doesn’t use a browser plugin to run. It is a set of graphics and media packages used by programmers to create and design Java applications.

Therefore, errors related to the JavaFX application may appear in your browser. Is this the issue that bothers you too?

Here’s how to fix the Internet Explorer error that says JavaFX application could not launch due to system configuration.

How to fix the JavaFX application could not launch error?

1. Clear browser’s cookies and cache

  1. Close any Internet Explorer page.
  2. Search for Internet Options on Windows search bar.
  3. Look for Browsing history and then click on the Delete button.delete bowsing history
  4. Tick all the boxes and click Delete.delete internet explorer history
  5.  Go to the Advanced tab and click on Reset.The webpage might be unavailable
  6. Tick the box in front of Delete Personal Settings and click Reset.Unable to connect to proxy server Chrome

Once you have performed the steps above, close the Internet Options window and open your browser again.

If you had Favorite Bar active, you will have to activate it again by right-clicking below the address bar and selecting the Favorite Bar.


2. Use another browser

try to use another browser

JavaFX does not run into your browser but runs from a browser. When you click the link, the app using JavaFX should be downloaded and then run on your desktop, like any other standalone Java application.

There are multiple web browsers available besides Internet Explorer. Windows 10 comes with Microsoft Edge but you can also download and install Opera One, Chrome, Firefox, etc.

It is always a good idea to have more than one browser available. They should do the same thing, but there are Internet services that are supported only by a particular browser.


3. Check Java Security settings

  1. Go to Control Panel.
  2. Adjust the view to Small Icons from the upper right side.
  3. Click on Java.
  4. Go to the Security tab.
  5. Change your security level from High to Medium or from Very High to High, depending on your Java version.java control panel
  6. Click on Edit Site List to add the website to the Exception Site List.
  7. Use Add button and type the complete link to the website.exception list java
  8. Click again on Add.
  9. On the Security Warning windows, click on Continue.

You can close the Java Control Panel and lunch the website again. If a security warning pops up, make sure to click on Run.


You can’t open Control Panel? Take a look at this step-by-step guide to find a solution.


4. Clear Java’s temporary files

  1. Open Java Control Panel. Follow the steps 1-3 from the above solution.
  2. From the General tab, click on Settings.java settings
  3. Click on Delete Files.
  4. Tick all the boxes and hit OK.java-temporary files
  5. Click the OK button to close the Java Control Panel.

If you still continue to encounter the same issue, the last thing to do is to check the application requirements.

There might be older applications that need to use an older version of Java. If this is the case, you have to uninstall your version and install the recommended version. 

You can use these steps for any other Java-related issues that pop up in your Internet Explorer browser. It will solve your problems in most cases.


Have you applied the above procedures too? Let us know which one worked for you by using the comments area below. 

A Serious Error has Occurred on PS4 [Solved]

Plenty of gamers have faced the following frustrating situation with their PlayStation 4 console: after updating the system firmware, the console got stuck when booting, showing an error message.

The full message reads: A serious error has occurred in the system software. The PS4 will restart.

The same happened to users who, accidentally or not, unplugged their PS4 before it was fully powered down. 

There aren’t many options to explore here, since the console is almost impossible to use, however, we’re trying to shed some light into the matter in this article.


How can I fix the serious error has occurred on PS4?

1.Restore to factory settings

  1. Plug your controller to the console using a USB cable.
  2. Press the PS4 power button until the console beeps twice.
  3. The press the PS4 button on the controller to enter Safe Mode.
  4. Here, scroll to the Restore Database option and proceed.a serios error occured ps 4
  5. Allow the process the finish and then try to reboot the console as you usually do.

 This will clear the system of any corrupt files but will also restore the database and will also clear anything you have saved up until that point. So make sure you have a backup of your files prepared.

This will also help if you find Spotify not working on PS4.


2. Reinstall software using a USB 

reinstall ps4 from usb

  1. On a FAT32 USB created a folder named PS4. Inside that folder, create another folder named UPDATE.
  2. Download the installation file from the PlayStation official page, and save it in the UPDATE folder as PS4UPDATE.PUP. (The PS4 has to be at the root of the USB storage device, and not contained in another folder.)
  3. Follow the first 3 steps mentioned in the previous solution to enter Safe Mode.
  4. Here, select  Initialize PS 4, then Update from USB Storage Device and OK.

This applies only if you have a USB with the PS4 software on it; and hopefully, the console will read it. On some occasions, the users complained that the console took a very long time until it recognized the file.


Hopefully, one of these solutions is of use in your situation, as these recommendations have proven useful for other users.

This isn’t the only error you can encounter, and many reported An error has occurred message on PS4, but we have a separate guide that addresses it.

This isn’t the only update error, and we already covered SU-41350-3 in a previous guide, so don’t miss it.

Feel free to share your experience with us or suggest another way of fixing this problem by using the comment section below.

Best HDR Software for Windows 10 & 11 to Use in 2026

With good HDR photography software, you can get more control over your high-dynamic range shots.

HDR cameras typically come with some photo manipulation features, but they’re not enough. If you want precise results and a lot of freedom to adjust every single detail, consider the tools below.

What is the best HDR software for HQ images

Adobe Lightroom – simple HDR editing tool

Adobe Lightroom can process HDR images without any complex plugins. Just load your image, and you’re good to go.

This tool makes photo manipulation easy. You can adjust shadows, highlights, whites, blacks, clarity, and vibrance with quick sliders.

Plus, it’s light and supports both PCs and mobile, being a great option if you’re into on-the-go photo editing.

Adobe Lightroom

Adobe Lightroom

Get the most popular fully-featured photo editing tool that goes perfectly with your HDR images on any device!
Free Trial Visit Website

Aurora HDR – One-stop HDR photo editor

Aurora HDR features a powerful HDR Tone Mapping tool. It’s a slider that can increase or decrease the HDR effect.

Its Quantum HDR Engine is able to process millions of pixels to build high-quality images.

Aurora HDR offers several other options, such as adding custom textures and bracketing the HDR mode. It also allows you to selectively include or exclude areas that will be affected by these adjustments.

Aurora HDR

Aurora HDR

Use this award-winning HDR image editor and give your photos a crisp, stunning new look within seconds.
Check price Visit Website

EasyHDR – Straightforward interface

EasyHDR simplifies HDR creation with a straightforward interface and supports multiple formats including JPEG, TIFF, PNG, and RAW.

It features effective tone mapping, deghosting, and alignment controls. While it may load slower compared to other tools, EasyHDR excels in integrating various editing options for high-quality HDR images.

Key features include tone mapping options, deghosting, a fast and responsive editing tool, and alignment control.

⇒ Get EasyHDR

HDR Projects – Provides an add-on system

HDR Projects 4 offers advanced HDR processing with Ultra HDR technology, supporting up to 33 images in an exposure series.

It provides extensive post-processing effects, interactive ghosting removal, and various HDR algorithms.

The software is available in Standard and PRO versions, with the PRO version offering additional features like an add-on system and more post-processing effects..

⇒ Get HDR Projects

Picturenaut 3.2 – Create HDRIs from multiple exposures

Picturenaut 3.2 is an effective HDR editor known for its automatic alignment, deghosting, and tone mapping.

It supports multiple HDR formats including TIFF float, OpenEXR, and Radiance RGBE. The software features a multi-threaded architecture for efficient processing, high-quality resizing, and various HDR plugins.

Picturenaut offers a wide range of plugins, including format plugins such as HDR and LDR. You can also create plugins such as 32-bit floating-point image buffers.

⇒ Get Picturenaut 3.2

In this article, we presented you with a wide array of HDR software options for your image post-processing on Windows 10.

Note that the most professional options with an incredible user interface require more system resources. 

Depending on your specific needs, you can also choose HDR software solutions with a lower impact on your system resources that have a lower number of features and still offer a powerful image creation and post-processing program.

Better yet, you can easily calibrate HDR on Windows for better picture quality without looking for a professional tool.

Tell us what you think about the options presented in this article, and let us know if we missed anything in the comment section below.

Microsoft Edge introduces new Kids Mode on the Canary channel

Microsoft is introducing today a new Kids Mode for its Edge browser, which is now available in preview for Edge Insiders in the Canary channel. This new browsing mode will offer kids a tailored experience with customized themes and child-friendly content on Edge’s New Tab page, as well as special privacy and security features that should give parents more peace of mind.

This new Kids Mode in Microsoft Edge has been designed for two age groups, 5-8 and 9-12. Both groups should enjoy a safe browsing experience with Bing SafeSearch, which blocks adult-themes text, images, and videos. Kids Mode also sets Tracking prevention in Edge to Strict, which blocks a majority of ad trackers while browsing the web. When Kids Mode is enabled, Edge’s New Tab page will also be free of ads.

Kids Mode settings

In addition to these specific privacy and security settings, Kids Mode will also allow parents to prevent their kids from visiting certain websites. The feature is going live today in the Canary channel, and parents can try it out via Edge’s profile picker without having to set up a family group with child accounts first.

Kids Mode is currently only available for US English users on Windows and macOS, and the Edge team will be listening to feedback to improve the experience for kids exploring the web. You can learn more about how to get started with Edge’s Kids Mode on this support page.

[Solved] Require a managed browser to open this link

When you usually want to access a web app, you can do it straight from your mobile browser.

Regardless if you use Mozilla Firefox, Google Chrome, or Safari, you will require a managed browser to open this link you have in mind.

This error message is usually related to Microsoft Intune, a cloud-based service that manages mobile devices and mobile applications.

When using it, you gain control on how the devices of your organization are used, and this includes tablets, laptops and mobile phones.

Users have discussed this issue in the Microsoft forum:

Can someone please tell me how can I force staff to open links on the managed browser. Currently, when someone emailed a link to Outlook, the user on mobile Outlook app clicked on the link and it is opening on the default browser on the mobile.

When someone clicks on the link on Outlook mobile app, the website must open in the managed browser.

We have prepared several solutions that will address this issue. Read the next section and check how you can solve the require a managed browser to open this link issue.


What to do if you require a managed browser to open a link?

1. Create a protection policy for Outlook in Intune

  1. Open Microsoft Intune and navigate to Client apps.
  2. Select App protection policies, and then Create policy.Create policy
  3. Click on Settings and go to Allow app to transfer data to other apps.
  4. Select Policy managed apps in that section.
  5. Check Restrict web content transfer to other apps.
  6. Select Policy managed browsers in that section.

This solution allows you to choose to either select the option from step four or five or to select both options from steps four and six. 

If you use it, it should solve the require a managed browser to open this link issue.


2. Apply Conditional Access

Configure Conditional Access for Microsoft 365

  1. Sign in as administrator to the Azure portal.Sign in to Microsoft Azure
  2. From Azure Active Directory, navigate to Security.
  3. Navigate to the Conditional Access section.Conditional Access
  4. Choose New policy and give it a name.
  5. From Assignments choose Users and groups and then Include.
  6. Select All users or specific Users and groups, and then Done.
  7. Navigate to Cloud apps or actions, check Include, and then choose Office 365.Cloud apps or actions
  8. Navigate to Conditions, choose Device platforms, set Configure to Yes.
  9. Include Android and iOS, navigate to Conditions, choose Client apps.
  10. From Configure select Yes, and choose Mobile apps and desktop clients.
  11. Deselect everything else.

Ensure you have taken each of the above-mentioned steps and then proceed to the second part of the first stage.

  1. Navigate to Access controls, select Grant the three options (see next step).
  2. Select Require approved client app, followed by Require app protection policy.
  3. Choose Require one of the selected controls.
  4. Confirm settings, go to Enable policy, and set it to On.
  5. Choose Create for creating and enabling that policy.

This solution ensures all mobile access to Microsoft 365 uses approved apps such as OneDrive and Outlook Mobile.

They are protected by an application protection policy before you receive access to them.

Use this solution for your organization and solve the require a managed browser to open this link issue. The first stage is to apply Conditional Access for Microsoft 365.

The next one requires you to configure the Azure AD Conditional Access policy using ActiveSync for Exchange Online. You will find below what are the steps you must take in this regard.

Configure an Azure AD Conditional Access policy with ActiveSync (EAS)

  1. Log in to Azure Active Directory.
  2. Select Security and Conditional Access.
  3. Choose the New policy option, name it and navigate to Assignments.
  4. Choose Users and groups, and from Include select All users or specific Users and groups.
  5. Select Done, navigate to Cloud apps or actions, and choose Office 365 Exchange Online.
  6. Navigate to Conditions, choose Client apps, and from Configure select Yes.
  7. Choose the Exchange ActiveSync clients while deselecting everything else.
  8. In Access controls, select Grant access and Require app protection policy, and choose Select.
  9. Confirm settings, navigate to Enable policy, and select On.
  10. Choose Create and then create and enable the new policy.

The third stage of this solution requires you to focus on Android and iOS applications. Your task will be to configure an Intune protection policy for them by applying the steps explained below.

Configure Intune protection policy for Android and iOS applications

  1. Log into the Microsoft Endpoint Manager admin center.Microsoft Endpoint Manager
  2. Select Apps and App protection policies.
  3. Choose Create policy and then iOS/iPadOS or Android.
  4. In Basics add values to Name and Description sections for Platform.
  5. Click Next, navigate to Apps and add a minimum of one application.
  6. In Target to apps on all device types select Unmanaged or Managed for iOS.
  7. Choose between Unmanaged, Android device administrator, and Android Enterprise for Android.
  8. Ensure to check Select public apps and Select custom apps.
  9. Click Next to navigate to Data protection settings.
  10. Click Next to navigate to Conditional launch.

Conditional launch for iOS and Android

  1. Select Setting, insert a Value, and choose Action.
  2. Click Next and navigate to Assignments.
  3. Click Next: Review + create and then click Create.

This allows you to set the sign-in conditions for the app protection policy. The Value must be met by users that want to sign in to your company app.

When you choose Action, that section contains the conditions for when users do not meet your requirements. There are certain cases when you can configure multiple actions for a single setting.


The issue named require a managed browser to open this link is something many users have encountered when trying to open a browser.

Some employees have encountered this error when trying to open a link from their work mail address.

We recommend you use Microsoft Intunes for eliminating this error and create a protection policy for Outlook Express. Another way to solve the issue is to apply Conditional Access.

This will require you to perform three additional sub-fixes: configuration for Microsoft 365, configuring a policy with ActiveSync and setting a policy for iOS and Android apps.

Test our solutions and comment in our dedicated section about your experience with our previously mentioned fixes.

Samsung’s Galaxy Chromebook 2 with QLED display looks to take on premium Windows laptops in 2021

Samsung announced today that an updated version of its bestselling Chromebook is now available for pre-order through February 28, 2021. The Galaxy Chromebook 2 can be pre-order via Samsung’s own website or through Best Buy starting at $549.99. Despite Chromebooks taking really taking off in 2020, to the tune of 30 million sold, Samsung is further incentivizing the purchase of the Galaxy Chromebook 2 with early pre-order discounts.

For both the Fiesta Red and Mercury Gray color options, anyone who pre-orders through February 28, 2021, will be eligible to earn $50 towards select purchases (presumably accessories and peripheral Chromebook devices) from their respective online stores that include both Samsung.com and Best Buy. For anyone who reserves their Galaxy Chromebook 2 today, they could also receive an additional $30 off select purchases depending on any fine-print purchase restrictions. If you’re not an early bird type, the Galaxy Chromebook 2 will be available for purchase starting March 1, 2021, and any purchase from March 1 through March 14, 2021, could be eligible for $30 off an additional purchase at another time.

Galaxy Chromebook 2 Dynamic2 Red

Samsung unveiled the Galaxy Chromebook 2 during CES 2021, and it instantly stood out thanks to its bright red casing, however, there are some under-the-lid improvements and changes from its predecessor that include a new QLED display, 178 percent boost in sound output thanks to its new Smart Amp technology, latest Gorilla Glass protection, 13-hours of battery life, the latest Intel Core i3 processor and most importantly Wi-Fi 6 support.

Galaxy Chromebook 2 L Perspective2 Gray


Samsung’s effort to bring down the price of its Chromebook is a welcomed change from last year’s inexplicably expensive Galaxy Chromebook and puts a little bit of pressure on Windows manufacturers and the operating system teams within Microsoft to fine-tune their options this year to meet surging demand for ChromeOS-like experiences from Windows 10 devices.


How to use your iPhone or iPad as a webcam in Microsoft Teams on Windows 10

We recently wrote about how you could use an Android phone (or even a Kinect!) as a webcam in Microsoft Teams in Windows 10. We promised we’d follow up to explain how iPhone or iPad users, could do the same, but through a little more complicated process — and with some limits. So, here’s a look at how.

Prerequisites

Ivcam

Just like using an Android phone as a webcam in Teams on Windows, going the route of using an Apple phone or tablet will require some third-party software. We suggest trying to join the meeting on your phone itself before trying out your phone as a webcam, as it would be the most logical thing.

However, if you really want an external webcam that is your Apple-made phone, you can download iVCam on your iPhone, iPad, and PC to get started. Note that the free version of iVCam won’t pick up on your iPhone’s microphone. You’ll have to use a dedicated microphone or Bluetooth earbuds connected to your iPhone in its place. The $20 version of the app on Windows 10 will unlock these features and remove the ads that you’ll see on your iPhone’s screen while using the app. It might be a cheaper purchase for some vs spending on a new webcam.

‎iVCam Webcam
‎iVCam Webcam
Developer:
俊红 柴
Price:
Free+

Install and run the apps

Ivcam

Once downloaded, be sure to install the apps on your iPhone, iPad, and PC. On your PC, just double-click to launch iVCam after it installs. On an iPhone or iPad, just look for the app on your home screen, launch it, and then give it the permissions. Once you launch the Windows 10 app and have the iPhone app running, you’ll see that the Windows 10 app will start showing your iPhone’s camera feed.

Ivcam Teams
Selecting iVCam in Teams

Once you see the camera feed running, you’ll just need to switch your camera input from within Microsoft Teams. Head into your camera settings during a call by tapping the three-dot button at the top right of the screen. Then, click the Device Settings button. From the list on the right side of the screen, choose e2eSoft iVCam as your camera input.

How are you enjoying Teams?

Thanks to iVCam as well as DroidCam, you can enjoy using your iPhone and Android as a webcam when one isn’t avaialble to you. This will likely help you get a lot more out of Teams. This is why we remind you that you can check out our dedicated Microsoft Teams hub for more how-tos, guides, and tips and tricks just like this one!

Photo Noise Reduction Software: 6 Best We Tested in 2026

With a noise reduction tool, you can fix those blurred or noisy pictures that detract from the quality of your photos.

Noise, which disrupts pixel clarity and prevents accurate color representation, can be effectively managed with the right software. To save you time, we listed the best options, tested by our experts.

Check them out.

What are the best noise reduction software to fix your photos?

inPixio Photo Studio Pro 12

inPixio Photo Studio Pro 12 offers a user-friendly approach to noise reduction, making it easy to enhance your photos.

The software provides intuitive sliders to address different types of noise.

The Reduce Noise slider helps smooth out graininess and pixelation, which is especially useful for low-light photos.

You can also adjust Color Noise to remove unwanted colored specks that often appear in shadowed areas.

Additionally, the Radius slider lets you control how much denoising affects each pixel, allowing you to strike a balance between smoothing and preserving details.

Other features:

  • Automatic red-eye correction
  • Multiple photo styles worthy of a professional photographer
  • Remove any object, background, or persons
  • Share button for Facebook and Twitter
  • Sky switch between landscape photos
  • Photomontage
Photo Studio Pro 12

Photo Studio Pro 12

Reduce noise, and edit your photo with one of the best and simplest software.
Check price Visit website

Adobe Photoshop

photoshop noise reduction

Reducing photo noise in Adobe Photoshop is simple and effective. Start by opening the Edit menu and accessing the Detail panel.

Use the Noise Reduction slider to smooth out graininess, adjusting carefully to avoid losing fine details. Click the 1:1 icon for a better view of the noise.

Additionally, use the Color Noise Reduction slider to address any color specks.

Other features:

  • Powerful photo editing and repair toolkit (crop, remove objects, retouch, resize, add color, and effects, etc.)
  • Unlimited layers, masks, and brushes (fully customizable or design your own)
  • Real-time cloud-based storage and back-up
  • Object Selection tool to create fast and precise selections
  • Seamless integration with other Creative Cloud services and hundreds of third-party apps
  • Compatible with any platform and device from Windows, to mobile, with full support for stylus and touch technology
Adobe Photoshop

Adobe Photoshop

In search of a good photo noise reduction tool? You cannot go wrong with the world’s imaging and best graphic design software.
Free trial Visit website

Corel PaintShop Pro

remove noise paint shop pro

Corel PaintShop Pro is a powerful tool for reducing photo noise with ease.

To start, go to the Edit menu and select Adjust, then click on One Step Noise Removal. Adjust the Small, Medium, and Large settings based on the Link detail sizes checkbox.

Set the Correction Blend Control to your preferred level, ranging from 0 (no noise reduction) to 100 (full processing). Fine-tune the settings as needed and click OK.

It efficiently removes noise while maintaining photo quality, making it an excellent choice for enhancing your images.

Other features:

  • Organization and photo management tools (save, transfer, export and share your assets in numerous formats)
  • Content-aware SmartClone feature (easily merge elements from multiple images)
  • Simplified workspace (for quick photo edits and subtle adjustments)
  • The Selection tool (for extreme precision and accuracy)
  • Retouch and restore with unlimited layers and masks, 360° photo editing, HDR effects, batch processing and more
Corel PaintShop Pro

Corel PaintShop Pro

Reduce noise and enhance your photography to perfection with Corel!
Free trial Visit Website

Adobe Lightroom

lightroom noise reduction

The lightweight alternative to Photoshop is yet another app from the Adobe Creative Suite with equally impressive capacities when it comes to dealing with photography.

This nifty tool delivers the same professional editing instruments as Photoshop but also brings to the table much-needed storage, photo management, and sharing options to accelerate your workflow.

When it comes to reducing excess noise in your photos, Lightroom offers the same easy and comprehensive tools that Photoshop delivers, with a higher degree of flexibility.

This means you can easily start your work on the desktop and finish it on the go, from your smartphone.

Other features:

  • Photo editing and photo management tools in a centralized location
  • Generous cloud-based storage starting from 20 GB to access and edit your projects anytime and anywhere
  • Step by step, in-app tutorials, plus inspirational content from professional photographers
  • Panorama fill edges
  • Local Hue adjustment for subtle adjustments that do not impact the colors in your entire image
  • Extensive settings customization for raw photos
Adobe Lightroom

Adobe Lightroom

Light and friendly, but immensely powerful, Lightroom will revolutionize your photo editing flows to the core!
Free trial Visit website
cyerlink photo director noise reduction

PhotoDirector caters to professionals without sacrificing on ease-of-use.

This unique combo of comprehensive, expert-grade photo editing tools and intuitive, uncluttered UI makes the PhotoDirector one of the best photo editors to deliver professional results.

The tool is loaded with blending modes, unlimited effects and masks, customizable templates, and many more.

This feature-rich AI-powered software allows you to eliminate noise by adjusting luminance, details, and colors with simple sliders.

Let’s quickly look at its key features:

  • Creative blending modes, filters, effects, and layers.
  • Animation toolkit and video editing capacities.
  • Customizable Warped Text Layers.
  • A generous array of brushes.
  • AI-Powered Deblur feature and advanced Color Replacement.
  • Content-Aware Remove, Move & Clone functions.
Cyberlink PhotoDirector

Cyberlink PhotoDirector

This professional photo editing software will help you enhance your photos with enhanced features and tools.
Free trial Visit website

Noise Reducer Pro

systweak noise reducer pro

You are now able to reduce the noise in your photos with this noise reduction app for Windows.

This efficient software will help you remove noise from your digital favorite digital pictures, and it will smoothen them gently. You’ll be able to eliminate the irregularly tinted pixels for good.

When you are not using the Auto mode, the Custom Slider will provide you with complete control to adjust the noise reduction level that will help you make your pictures flawless.

Let’s quickly look at its key features:

  • Automatically removes noise with no clicks required
  • Shows real-time noise reduction process
  • Compares original and final images with a vertical bar
  • Zooms in up to 200% to inspect noise levels
  • Simple and user-friendly interface

⇒ Get Noise Reducer Pro

These are the best Windows-compatible noise reduction tools that you can find out there.

No matter on which one you’ll decide, we can assure you that every one of them is like a brand new feature added to your camera that will definitely enhance the quality of your photos.

All you have to worry about from now on is finding the perfect scenery or people for your pictures. Have fun!

Outlook for Windows adds “Meet Now” button to start Teams meeting even faster

Microsoft has released a new Meet Now integration for its Outlook for Windows client that should make it easier than ever to start a Teams meeting. The feature was spotted by Microsoft MVP Randy Chapman, and it’s gradually rolling out to all commercial and GCC tenants.

The new Meet Now button enables users to start an ad-hoc Microsoft Teams meeting from the Calendar Tab ribbon in the Outlook desktop client. When the user clicks that button, a new private meeting will start in Teams, and they can then invite other people to join the meeting. The feature works similarly to the function available in the Teams client calendar app, and it’s also coming to the iOS version of the app to follow in the coming months.

Keep in mind that there are specific requirements to use the Meet now button in Outlook. First of all, the Teams and Outlook desktop apps should be installed on a Windows PC. Secondly, the Teams add-in must be enabled in the Outlook client to use this feature.

In addition to the Meet Now experience, the company has also added a new option for Teams and Outlook users to set their calendar options so all new meetings will be created as online meetings. To get started, users need to head to Outlook Options, > click the Calendar tab, and enable the “Add online meetings to all meetings” setting under the Calender options.

This capability is already available in Outlook on the web and Outlook for Mac, and it is not compatible with third-party online meeting providers. With more employees working from home than ever before, the new meeting experience should help to boost the productivity of remote teams.

4 Best Image Warping Software to Use in 2026

If you’re looking to fix distortions or get creative with your photos, photo warping is the way to go. This technique allows you to correct image issues or have fun by turning ordinary images into hilarious caricatures or spooky animations.

While photo warping isn’t usually found in standard editing apps, there are some great tools designed specifically for this purpose. In this article, we’ll explore some of the best options available,

What is the best photo warp tool to add some fun into images?

inPixio Photo Studio Pro 12 – easy built-in photo warping tools

InPixio Photo Studio Pro 12 is a versatile tool enjoyed by both beginners and professionals.

Its features include removing unwanted details without compromising image quality, changing backgrounds with the Cutter feature, and erasing objects or noise with just a few clicks.

You can also remove watermarks, edit landscapes, and replace skies with options from its library.

The Erase feature allows you to restore old photographs by eliminating imperfections, and you can easily share your creations on social media.

Photo Studio Pro 12

Photo Studio Pro 12

Unleash your imagination and take your photography skills to the next level with this special tool!
Check price Visit website

Adobe Photoshop – highly customizable warping features

When it comes to photo editing, Adobe Photoshop is simply unbeatable and photo warping makes no exception.

Beautifully equipped to let you bend photography to your will, it brings you an Enhanced Transform Warp to use for anything from subtle image retouching to total transformations.

Add control points anywhere or divide your image with a customizable grid and transform it by individual nodes or a larger selection.

The Warp command lets you drag control points to manipulate the shape of images, shapes, or paths. You can also apply Puppet Warp to layer and vector masks to nondestructively distort images.

Some key features include the Enhanced Transform Warp function and the Object Selection tool that allows you to create fast and precise selections by drawing a simple rectangle.

Adobe Photoshop

Adobe Photoshop

Get creative and experiment with your photos as much as you like with Photoshop’s rich set of features.
Free trialVisit website

Morpheus Photo Warper – supports animations

Morpheus Photo Warper is a powerful tool for exaggerating, modifying, or distorting photos to create animated images.

It’s compatible with Windows and macOS, supporting all Windows OS from 98SE onward. With an intuitive UI, it’s accessible for both amateurs and professionals, allowing for quick and easy setup to create warped images in seconds.

Features include animation sharing, warp zooming, previews, and support for multiple formats like GIF and SWF. Morpheus Photo Warper is available in Standard and Professional editions.

⇒ Download Morpheus

Magic Mirror – fun effects for distorted photos

magic mirror

Magic Mirror by Zeallsoft is a Windows-only photo warp software designed to deform photos for creating comic pictures or eerie animations.

Its standout feature is the “magic mirror” effect, allowing zooming in and out of photo parts while leaving others unchanged, enabling distortions like bulging or depressing facial features. You can modify noses, mouths, eyes, and ears with ease.

The software also offers standard editing tools, image resizing, selective distortion, an intuitive UI, and support for PNG, JPEG, BMP, and GIF formats. It includes free lifetime support and a 30-day free trial.

⇒ Download Magic Mirror

So if you were wondering what is the best photo warp tool for, creating animations, caricatures, or distorted artworks (photos), simply go for one of the above-listed tools.

Let us know what convinced you in the comments section below.

Dirt 5, Wreckfest, and more are coming to Xbox Game Pass this month

Microsoft has just revealed the second wave of new games coming to Xbox Game Pass in February. There are two new racing games with Wreckfest and Dirt 5, the latter being a cross-gen title that was also a launch game for Microsoft’s Xbox Series X|S consoles. Other new titles in the list include Elite Dangerous, Killer Queen Black, and Pillars of Eternity 2: Deadfire – Ultimate Edition, and you can find all details about platforms and availability dates below:

  • Code Vein (PC) – February 18
  • Pillars of Eternity 2: Deadfire – Ultimate Edition (Cloud and Console) – February 18
  • Wreckfest (Cloud, Console and PC) – February 18
  • Killer Queen Black (Cloud and Console) – February 23
  • Dirt 5 (Cloud, Console and PC) – February 25
  • Elite Dangerous (Console) – February 25
  • Superhot: Mind Control Delete (PC) – February 25

The Xbox team also announced today that Monster Hunter: World is now cloud-enabled, and seven other Xbox Game Pass games now support touch controls on Android: The list includes Bridge Constructor Portal, Morkredd, Neoverse, Nowhere Prophet, Spiritfarer, The Little Acre, and Yooka-Laylee and the Impossible Lair.

In case you missed it, we also reported this morning that six games will also leave the Xbox Game Pass catalog at the end of the month, including Dirt 4 (to be replaced by Dirt 5), Oxenfree, and Vambrace: Cold Soul. Overall, this is a pretty good month for Xbox Game Pass with several high-profile games joining the game subscription service. If you manage to get your hands on an Xbox Series X|S, you may want to give Dirt 5 a try as this is one of the few optimized games that offers different visual settings, with the ability to push frame rate to 120FPS if your screen supports it.

Easy to Use Resizing Software: Top 5 Picks of 2026

Whether you want to reduce the size of or enlarge an image, reliable resizing software will make your job easy. The options we list below aren’t just easy to use but maintain great photo quality.

Check them out:

What are the best image resizer tools for Windows?

inPixio Photo Studio

InPixio Photo Studio simplifies resizing images. You can quickly upload your photo, choose from preset sizes or enter custom dimensions, and adjust with ease.

We can assure you that this tool preserves the original aspect ratio, ensuring your images stay sharp and professional.

It’s suitable both for visuals for social media and print. Plus, sharing or saving is a easy.

inPixio Photo Studio

inPixio Photo Studio

Take complete control over image resizing and make sure your pictures are never blurry.
Free trial Visit website

Adobe Photoshop

Adobe Photoshop is the industry standard in photo editing and digital art.

You can use this tool to edit your photos as you want: crop them, resize them, remove objects, combine multiple images into a single one, add effects, and so on.

Speaking of editing photos, resizing images has always been tricky due to image quality loss issues. But thanks to Photoshop, you can now resize images and photos without quality loss.

Adobe Lightroom

Interface of Adobe Lightroom

If you’re looking for a simple way to use image resizer software, then Lightroom might be just what you need.

The tool has a simple-to-use interface where you can easily find the pictures that you want to resize, crop, or edit according to your preferences.

Overall, Lightroom is a solid tool for resizing images, but it also supports some advanced bonus features like support for social media, cloud base photo storage, and in-built tutorials.

Adobe Lightroom

Resize any photo in seconds with this light and easy tool!
Free trial Visit website

Fotor

Another great tool that can work as an image resizer is Fotor. It has many features available, including retouching, cropping, resizer, splitter, and several more.

Fotor is an incredibly powerful tool, and with the ability to convert and resize files, it will be a perfect choice for many users.

Fotor

Create, adjust, and resize any image with just a few clicks!
Check price Visit website

Luminar

luminar

Luminar is a revolutionary software with incredibly powerful photo editing capacities that will allow you to resize, adjust, refine, any image to perfection.

Boasting a unique combination of professional AI-based design features and an intuitive interface, Luminar makes the perfect choice for any user from advanced to novices.

⇒ Get Luminar

That completes our list of best image resizer tools. Any of them will definitely help you out with your pictures without losing quality. You can also learn a quick way to resize pictures using the built in Photos app by reading our dedicated guide.

If you have other solutions to suggest, let us know in the comments below.

How to Resize a Picture for the Desktop Background [2026]

We all know that when surfing the web we come across some cool images that we’d like to keep as desktop background or just add to the collection and use later. It can be very useful to know how to trim and resize the pictures so they’ll fit your desktop just right

Users have discussed how to resize images to desktop size in the Microsoft forum:

We have compiled a few efficient solutions that will allow you to resize images to desktop size. Read the following section and learn how to modify the size of an image to fit your desktop background.


What can I do if I want to resize an image to desktop size?

1. Use a dedicated software

If you need to increase the size of an image using the programs already encompassed in Windows might not always provide the desired effect.

The more efficient way to do this is to use professional software dedicated to image manipulation.

We recommend you use Adobe Photoshop, dedicated software that is useful for a great variety of editing activities. It allows users to perfect their skills in photo editing, animation, digital painting, and graphic design.

Your ideas will be brought to life on various devices and you can use the AI to transform images just how you want them to look.

If you use Livestream, you will also learn new skills and discover a fast way to share your projects.

Adobe Photoshop

Adobe Photoshop

Change the size of images and transform them in any way you want with the use of Photoshop’s powerful editing tools!
Free trial Visit Website

2. Use the Photos app

  1. Double-click on your image to open it in Photos.
  2. Click the three dots icon in the top right corner and select Resize.
    Select Resize in Windows Photos
  3. Select one of the three preset sizes or click Define custom dimensions.
    Options to resize image in Windows Photos
  4. Select your desired dimensions and click Save resized copy. 

Windows 10 has a useful application that allows you to modify your pictures. When you use Photos, it will be easy to resize images to desktop size.

If you opt for the custom dimensions mentioned in step three, then you will have access to the size of your image. Another great thing is that you can also choose the quality of your resized image.

Keep in mind that when you choose a higher quality for your picture, this will also increase the size of the image file.

Also, if you have checked Maintain aspect ratio, you must change only height or width, and the other criteria will change automatically to match your choice.

You can also follow a complete guide that explains more ways to resize pictures with the Photos app by visiting our dedicated guide.


3. Use Microsoft Paint

  1. Type in Paint in the search box near the Start button.
    Open Paint
  2. Click on File, select Open and choose your image.
    Open image in Paint
  3. From the Home tab, click Resize and navigate to Resize and Skew.
    Resize and Skew in Paint
  4. Set the size for your future resized image.
  5. Click OK to implement changes, select File and Save As to save the new image.

After you have selected the desired image for resizing from your computer files, verify the Resize and Skew section in Paint. To resize the image to the desktop size or to add other values in terms of height and width, there are two variants.

The first one is to choose setting image size by percentage, making it X% bigger or smaller. The second one is to adjust the image by Pixels and input the dimensions you want for the new image.

When you have chosen to resize the image to desktop size by Pixels, you can check the Maintain aspect ratio. In this case, you must only specify the desired height or width for your future resized image.

The program will automatically set the other dimension.


You can try different solutions to resize images to desktop size. In our previous section, we have prepared the best and most efficient ones.

Use professional software that offers lots of possibilities in terms of image editing. The best tool in this regard is Adobe Photoshop, and we highly recommend it to create an image just how you desire it.

The other two programs you can use are Photos and Paint, available to use in your operating system.

Let us know in a comment how everything worked out.

5+ cheap & easy-to-use photo editing software [User friendly]

With the proliferation of smart devices packed with professional built-in cameras, taking photos has become almost second nature these days.

But taking a photo is just the tip of the iceberg. You also need to have somewhere to store them just as you need a good photo viewer and photo editor.

As computer users continue with the transition to the Windows 10 operating system, it is imperative that most, if not all, applications and programs are compatible with this OS.

So, if you need to work on your photos and/or images, here are the best photo editing software for Windows 10 that will take your pics to the next level ASAP!


What are some easy photo editing software for Windows 10?

inPixio Photo Studio Pro

Whenever you think of photo editors, you probably think of tools that require you to have a vivid imagination, a powerful PC, and an above-average budget.

While the first requirement is somewhat of a must, the latter aren’t so much, especially if you use inPixio Photo Studio Pro 11.

What makes this tool stand out is just how active the developement team seems to be behind it, constantly improving the toolset, making it easier to use, richer in features, and lighter on your PC.

It has all of the tools you’d ever need from a photo editor, such as the ability to crop objects out of images without leaving a trace!

More so, the program caters to beginners as well thanks to the interactive assistant, as well as the multitude of tutorials, both traditional and interactive, that will get you started in no time at all!

Photo Studio Pro

Remove objects, tweak images, remove imperfections from portraits, and more, all with inPixio Photo Studio!

Adobe Photoshop

Adobe Photoshop is designed for hardcore professionals who need all the advanced goodies in one package. Why is this photo editing software a key resource for your activity?

Firstly, Adobe Photoshop has got a huge Color Palette and fully customizable features. You may crop, remove objects, and combine photos in a blink of an eye.

Lens Blur offers a realistic look when blurring an object in the foreground and the included masking tools are also unmatched in the business

You’ve got unlimited layers and masks to choose from when spicing up your stunning images as well.

Let’s quickly look at its key features:

  • Other leading-edge features that make it worth trying are fast editing controls, professional retouching capabilities, brushes that you easily control with a stylus or touch on iPads, and adjustment layers for non-destructive editing.
  • Unlike other similar tools, Adobe Photoshop syncs with multiples devices, and your work is always automatically saved to the cloud.
  • Overall, Adobe Photoshop is a strong professional editing software for Windows 10, yet you don’t have to be an editing master to use it or to spend too much time. Its cutting-edge photo editing capabilities will do the job for you.
Adobe Photoshop

Adobe Photoshop

Unleash your creativity and craft stunning photography with the world’s best imaging and graphic design software.
Free trialVisit website

Adobe Lightroom

Adobe Lightroom creativity software

There are plenty of photo editing software tools available in the market to explore, yet you can’t go wrong with Adobe Lightroom. If your goal is to capture and edit stunning images, don’t look any further.

Its photo editing tools are a powerful yet easy-to-use alternative to other complicated creativity software options. Lightroom gives you the full package to edit photos and make them really pop.

For that to happen, you’ll want to check out the in-app Lightroom tutorials and comprehensive content from professional photographers as they take you through their process and share useful tips.

Let’s quickly look at its key features:

  • To avoid clutter, take advantage of the Adobe Sensei machine learning that recognizes people and themes, making finding photos or creating albums as easy as pie.
  • Store and share amazing photos across all your devices. Just keep in mind that cloud storage starting at 1TB is there to ensure that you can access your library from any location.
  • Friendly user interface (That’s perfect especially if you have never used this type of software before).
Adobe Lightroom

Adobe Lightroom

Be inspired, have fun, and enjoy photography with this light and friendly app that will satisfy all your editing needs.
Free trialVisit website

FOTOR

photo editing software for Windows 10

When all you want is to quickly edit photos with high-quality finishing, then Fotor is your best photo editing software for Windows 10.

Its tools include premium filters, one-click photo enhancement, batch photo processing, and vibrant color effects. Its unique feature is the batch photo processing tool that lets you filter volumes of photos at a go, with less stress, and saves you editing time.

Let’s quickly look at its key features:

  • You can apply scenes, effects, add borders, and much more to batches of photos with one click.
  • You can also create photo collages with more than 20 different layouts to get your desired look, adjust patterns and colors to get a polished touch on your photos, but there’s also an option for Freestyle Collage if you don’t like ordered things.
  • Fotor’s Tilt-Shift tool lets you mix focus with either clear or selective blurring, giving your photos depth as would be done by a DSLR camera.
  • Add text, borders, and mash-up different effects on your photos, then import or export them in different image formats such as JPG, TIFF, and PNG, or convert RAW files if you so wish.
  • 13 different 1-tap photo enhancement scenes that touch up your photos depending on the conditions they were shot in.
Fotor

Fotor

Create, adjust, and edit any photo to perfection with just a few clicks by using Fotor, an awesome design software!

CorelDraw

CorelDraw Graphics Suite .eps files

CorelDraw is an all-in-one vector illustration, layout, and photo editing software designed for professional use. But there is no need to get intimidated for this graphic art suite is as powerful as it is flexible.

You can pair it with a pen-compatible tablet or ditch the stylus completely and focus on the touch experience to edit your photos quickly and efficiently.

With exceptional bitmap-to-vector trace results and AI-powered image solutions, you can elevate your photography to art level effortlessly.

Let’s quickly look at its key features:

  • Enlarge images without losing detail
  • Eliminate noise from highly-compressed JPEG images
  • Smart Selection tool
  • Powerful layer-based photo editing tools
  • Adjust color and tone, remove imperfections, and correct perspective
  • Create High Dynamic Range photos from your RAW images
  • Change the transparency and fill objects with patterns, gradients, and more
  • Non-destructive editing features
CorelDraw

CorelDraw

Experience AI-powered bitmap-to-vector trace technology with impressive results!
Check priceVisit website

Aurora HDR

This award-winning software is known as the world’s most advanced HDR photo editor for good reasons.

Acting as a standalone app or as a plug-in, Aurora HDR is as powerful as it is versatile and committed to delivering spectacular AI-powered photography enhancement every time.

Let’s quickly look at its key features:

  • Artificial Intelligence-powered color enhancement
  • 20+ essential tools for HDR editing
  • A polarizing filter, color toning, HDR Denoise, dodge & burn, details enhancer, and many more
  • Powerful layers, blending modes, masking and many more
  • Bulk processing engine for batch processing
  • Native RAW files support

⇒ Get Aurora HDR now


Have you found the photo editing software of your dreams yet? Share your favorite pick in the comments section below.


Assassin’s Creed Valhalla video game updates on Xbox with new replayable River Raids mode

Assassin’s Creed Valhalla’s latest update, Update 1.1.2, will begin to roll out to owners of the title on all supported platforms today including Microsoft’s Xbox One and Xbox Series S and X consoles.

This update brings an absolutely massive number of minor fixes and changes to the game (which can be read about here) but the more noteworthy additions include that of a new River Raids mode and several new abilities and skills.

Here’s what you need to know about each:

We added in-game support for River Raids.

Prepare your Jomsviking crew for this new highly replayable mode that will take you to unexplored regions of England, which is full of raiding opportunities. New loot, rewards, and challenges await the Raven Clan!

The River Raids Mode is part of the Yule Season content. It is free for all Assassin’s Creed® Valhalla players, and it is accessible in-game after downloading Title Update 1.1.2.

NEW ABILITIES

  • Berserker Trap: This attaches a trap to your arrow, spreading hallucinatory powder. Any nearby movement causes the trap to trigger. Surprise clueless passersby!
  • Battle Cry: In a fit of rage, Eivor lets out a blood curdling scream, gaining strength and causing nearby enemies to stumble backwards in fear, interrupting their attacks.
  • Shoulder Bash: Eivor performs a shoulder bash that pushes back enemies and destroys objects.

NEW SKILLS

  • Assassin Carry: Automatically carry a body after a successful assassination.
  • Assassin Slide: Slide into enemies and knock them off balance while sprinting.
  • Power Stroke: Trigger a speed boost on the long ship at the cost of stamina.
  • Arrow Looter: Eivor has a greater chance of looting arrows from archers.
  • Fight Ready: Always start a fight with an adrenaline-filled slot.
  • Long Ship Brace: When you are in command of the long ship, the crew will raise their shield with you.

As with previous updates, this Assassin’s Creed Valhalla update is completely free for all players and should automatically download as soon as it goes live (at 1 PM CET, 7 AM EST, 4 AM PST, and 11 PM AEDT.) Download times may vary though as it comes in at 18.04 GB on PC, 15.27 GB on Xbox One, and 19.53 GB on Xbox Series S and X.

Are you enjoying Assassin’s Creed Valhalla? Let us know why or why not in the comments below and then follow us on Twitter and Facebook for more Xbox game news.

Assassin's Creed® Valhalla
Developer:
UBISOFT
Price:
Free

Microsoft’s GroupMe app gets a small update on Windows 10 with fixes and improvements

Microsoft’s little communications app, GroupMe, received a small update for Windows 10 devices today.

This latest update fixed some issues that were causing app crashes and also squashed several bugs that were preventing videos from uploading properly. Some group changes were also made.

Here’s the full release notes:

  • Set request to join on your groups and accept/decline membership requests
  • Fix video uploads failing
  • Fix some crashes

GroupMe is a tool used for connecting users across devices and helping them communicate via text messages and media. GroupMe apps are also available on iOS and Android devices in addition to being accessible via the web.

Do you use GroupMe? Let us know how often in the comments below and then follow us on Facebook and Pinterest for more Microsoft app content.

GroupMe
GroupMe
Developer:
Skype
Price:
Free

FIX: Adobe Creative Cloud download error

Adobe Creative Cloud encourages you to explore your creativity with over 20 desktop and mobile apps. Enjoying access to thousands of fonts or creating your very own portfolio website feels liberating with this amazing tool.

The only problem is that not everyone has the chance to take advantage of it since many users have reported repeated Adobe Creative Cloud download errors.

The error message states: Download error. Please retry to try again or contact customer support. If you see it too, we’ve compiled a list of the quickest solutions that you can use to get around this inconvenience.


How can I fix the Adobe Creative Cloud download error?

1. Install the latest version of Creative Cloud

There are times when only a complete reinstallation of the most recent version allows the Adobe Creative applications to function properly again.

Therefore, don’t hesitate to hit the download link below instead of worrying about download errors. The issue will be gone for good and you’ll get back to your routine.

Adobe Creative Cloud

Adobe Creative Cloud

Don’t let downloading issues ruin your creative process. Get the latest product version, with all the fixes included.
Free trialVisit website

Need more help with installing Creative Cloud? Check out this guide!


2. Remove the OOBE and AAMUpdater folders

Remove the OOBE and AAMUpdater folders
  1. Quit the Creative Cloud desktop app.
  2. Navigate to Users>AppData>Local>Adobe.
  3. To view the hidden AppData folder, see Show hidden files>folders>filename extensions.
  4. While here, locate the AAMUpdate and OOBE folders.
  5. Remove them both right away.
  6. Relaunch the Creative Cloud desktop app from the Start menu. At that point, the AAMUpdater and OOBE folders will be immediately recreated.

3. Check your Internet connection

Internet connection

Do note that the Creative Cloud desktop app requires a stable Internet connection to properly download apps. Verify that you are connected to the Internet and click Retry.

Moreover, did you know that your antivirus can block the Internet connection? Check out this quick guide to find out more.


4. Temporarily disable antivirus software

temporarily disable the antivirus

On your Windows 10 computer, the Windows Defender antivirus is often a reliable anti-malware solution to protect your computer from unwanted viruses, spyware, and many other forms of malware.

So you may want to disable it temporarily during the downloading process. In fact, nearly all antivirus protection programs can be disabled for a while.

You’ve got nothing to lose when trying out this option as well. However, if you do get the confirmation that the antivirus is the culprit, it might be the ideal time to change it with less intrusive security software.

Our recommendation on this note is Vipre, for it’s low impact on resources and useful set of tools that offer powerful and efficient protection against cyber-attacks.


These amazing uninstallers will help you to remove any traces of your old antivirus from your PC.


Which of the solutions mentioned above helped you bypass the Adobe Creative Cloud download issues? Let us know by leaving a message in the comments area below.


5 Best adblockers for your Android browsers

Pop-up and video ads are a nuisance and ruin the browsing experience. Some websites won’t even let you press the back button and force you to click on some ads.

To avoid this, many browsers come with built-in ad blockers. However, this is not the case when it comes to the Android browser.

Thankfully, there are plenty of third-party adblocker apps that can help you resolve this issue. That said, some of these ad blockers for your Android browser requires a rooted device.

This article lists the five best adblockers for your Android browser that can block systemwide ads. However, do note that almost all these apps required manual installation using the APKs.


What are the best adblocks for Android browsers?

AdAway (Root only)

 adblockers Android browsers

AdAway is one of the most popular ad blocker app available for the Android browser. It helps surf the web without annoying ads offering a cleaner, faster web by blocking ads. However, using this app requires root access.

It is a free and open-source project for Android using the hosts’ file. When an app requests an ad from a host in that file, this request is redirected to the local IP, which does nothing.

AdAway also offers an option to run a local webserver to respond to the blocked hostname and redirect requests to the IP address of your preference.

Download and install the APK from the provided link. You may also need to give permission to install apps from unknown sources to install AdAway.

⇒ Get AdAway


AdGuard 

AdGuard works similar to AdAway; however, you can use it on both rooted and non-rooted devices. Although, on non-rooted devices, you need to take some extra steps to setup the app.

AdGuard is a premium ad blocker for Android that removes ads in apps and browsers, protects privacy, and helps you manage your apps. After installing the app, you can enable or disable ad blocking manually.

Furthermore, it allows you to manually enable or disable ads for a website that you regularly visit. The app shows how much data is saved by blocking the ads.

⇒ Get AdGuard 


Block This

 adblockers Android browsers

Block This may not be among the most popular ad blocker apps for Android, but it is effective. It is a free open source ad blocker for Android that works on all apps and browsers.

It also provides additional benefits of malware protection, increases page loading speed, and reduces data consumption by blocking pop-up and video ads on websites.

Similar to other apps in the list, Block This is not available on Google Play Store. You have to download and install it using the official APK from the developer’s website or GitHub page.

⇒ Get Block This


Adblock Browser

 adblockers Android browsers

Adblock Browser is not an ad blocker but a full-fledged Android browser developed by Adblock built around adblocking. It offers Adblock Plus features on mobile, and allows you to stream videos without any interruption, and maximize your data and battery.

Adblock Browser is based on Chromium, so if you use Google Chrome as your default Android browser, switching to this browser won’t be an issue. It also comes with privacy feature that blocks ad trackers and all kinds of ads, including video ads, and banner ads.

Filtering options in the browser does offer the option to whitelist or blacklist website that you want to support by not blocking ads on selected websites.

⇒ Get Adblock Browser


AdShield – Ad blocker

 adblockers Android browsers

AdShield is an ad blocker and DNS changer that supports Wi-Fi, mobile data, and IPv4 and IPv6, running on your Android phone and tablet. It can block ads, banners, adult websites while consuming fewer data to load web pages.

AdShield adblocker can also prevent advertisers from tracking your behavior and saves battery as well as a data plan. It runs on almost all Android browsers, including Chrome and Firefox.

⇒ Get AdShield


Ads are annoying, and some ads like pop-up and video ads can be frustrating as they drain your battery and consume a lot of mobile data.

All the ad-blockers listed in this article can block ads on the Android browser. What do you think? Let us know your pick in the comments below.


Is your Work VPN Slow at Home? Make it Faster

We’ve already established that corporate VPNs work differently from personal VPNs.

We’ve also explained a bunch of differences between them and individual VPN services.

Thus, you can have a better understanding of specific phenomena that might occur while using them.

For instance, most users wonder why corporate VPNs are generally slower than their personal counterparts.

If you’re rather tech-savvy, you might think that it’s because this type of VPN caters to the needs of multiple users at once, so work VPN slows down internet and you aren’t far from the truth.

However, the reasons why a VPN (even a corporate one) is acting slowly may vary, and we’ll tell you all about them.

Why is my VPN so slow?

First and foremost, we must remember that both corporate and individual VPNs are basically the same type of service.

Thus, individual users might experience slow VPN connections for the same reasons as corporate users. We’ll break them down for you here:

1. You’re using a Wi-Fi connection instead of a wired one

Although your Internet connection might be quite fast by default, connecting to a VPN might slow it down.

Much so when you’re using Wi-Fi, which is slower than using a wired connection.

Therefore, you might want to establish a wired Internet connection and check if there’s any speed improvement.


Your Wi-Fi connection is slow? Make it faster with the software in this awesome list.


2. Your device might not be powerful enough

Some devices just aren’t built for speed, and that shows.

If you want to rule out that your device, is, in fact, the common denominator, just try installing the VPN on a different device (if possible) and see if you achieve the same speed values.

This goes especially for wireless-capable (phones, tablets, laptop) devices.

3. Have you rebooted your router lately?

Every tech support and IT crew will tell you the same old thing: have you tried turning it off and on again?.

It’s quite common knowledge by now that if your Internet speed is slow, one of the first things you should do is restart your router.

Memory leaks or infrequent connections can mess up its ability to maintain a stable connection speed, so try rebooting it before swearing off using a VPN.

4. Try a different server

If you remember using the VPN at decent speeds and it decided to throw you a fit out of the blue, you might want to check the server.

More often than not, this is the main reason why a VPN is suddenly slow.

If picking a different server from the same country doesn’t work, try choosing another region altogether.

5. Change the VPN port and/or protocol

This is clearly not something a novice might want to try, but you can modify the VPN protocol and/or port if you’re experiencing slow speed values.

Keep in mind, however, that some protocols might offer faster speed values in exchange for poorer security.

6. Modify firewall/antivirus rules

Although some providers might recommend you to turn your security services off altogether for a while, we don’t encourage that. It might put your whole system at risk for just a few more MBs worth of speed.

Instead, you can whitelist your VPN in your firewall and antivirus/antimalware components.


Windows Defender Firewall blocked your VPN? Check out this guide and fix the issue in no time.


7. Use another VPN service

If none of the methods mentioned above yielded any satisfactory results, you might want to try another VPN service designed for corporate usage, with more advanced features.

Perimeter 81 VPN is a great alternative since it’s faster and more secure for your business needs. It’s a cloud-based VPN, allowing you and your team to work securely from anywhere. This VPN allows you to support ALL your employees’ unmanaged devices and has a Multi-factor authentication. Plus, it provides Zero Trust Access making it ideal to protect your business.

⇒ Get Perimeter 81 VPN

Corporate VPNs can be slow, just like individual ones

Last, but not least, remember that corporate VPNs are still VPNs, and are prone to the same faults that their individual counterparts are subject to. If you’ve ruled out the reasons above and you still experience slow speed, maybe it’s time for an upgrade.

Check out our list of the best corporate VPNs you can find on the market. If you can’t decide, we’ll gladly let you know that at the time being, PIA and CyberGhost VPN are the top contenders for the best corporate VPNs.

Set Up a VPN Between Two Computers [Office & Home Networks]

Creating a VPN (Virtual Private Network) between two access points is crucial for keeping activities private.

If your job involves handling sensitive information within your network, it would be wise to consider using a VPN.

This solution can also facilitate the access of remote workers to your local network. After connecting to the VPN, it will appear as if they are physically available on the LAN.

Thus, they can access and share resources and devices on your network seamlessly.

Using any standard VPN service provider in this situation is not a viable solution. VPN software route all your traffic through a private server, but you can’t see or interact with users who are connected to the same network.

However, creating your own network can bypass this restriction. Here’s what you’ll need to create a VPN between two computers or more:

  1. At least two PCs (a host and the clients)
  2. An Internet connection for establishing the network (on all PCs)
  3. Each PC’s IP address and credentials for the network

How to create a VPN tunnel between two computers

Then, you can start setting up a VPN connection and authenticate with your credentials. Lastly, configure the incoming setup for a server PC that will create the tunnel between the client computers.

Using this VPN capability can provide the needed infrastructure to learn about creating specific outcomes such as:

  • How to create a LAN network between two computers
  • How to create a VPN tunnel between two sites
  • How to create a VPN tunnel between two offices

In addition, be sure to have the technical specifications if you want to create a VPN between two computers.

How to use VPN to connect to another computer

It’s required to know the IP or domain name of both computers and the name and password for the network connection.

More exactly, you can utilize the VPN Remote Desktop on Windows 10 or 11 to connect to another PC through your VPN connection.

So if you have everything on the checklist, next we’ll show you how to create the PC to PC VPN.

How do I set up a VPN between two computers?

1. Access the connection setup wizard on the client’s PC

  1. Hit the Win (⊞) key on your keyboard
  2. Type Ethernet and select Ethernet Settings from the search resultsEthernet settings in start menu
  3. Click the Network and Sharing Center hyperlinkNetwork Sharing Center location
  4. Select the Set up a new connection or network option from the menuSetting up a new VPN connection

2. Configure the new VPN connection you’re creating (outgoing)

  1. In the Internet address field type the IP address or domain name of the PC you want to connect toCreating a VPN connection
  2. Pick a name for the new connectionFill in the Internet address and connection name fields
  3. Click the Create button

3. Establish the outgoing VPN connection

  1. Locate the VPN connection by clicking the systray network iconWhere to find the outgoing VPN connection
  2. Select it and click the Connect button
  3. You’ll be prompted to sign inType your credentials in the VPN dialog
  4. Use the credentials of the PC you’re trying to connect to

4. Finishing setup on the server PC (incoming)

  1. Access the Network and Sharing Center like in solution 1
  2. Click the Change adapter settings hyperlinkWhere to find the Change adapter settings menu
  3. In the Network Connections window, hit the ALT key on your keyboard
  4. From the File menu, select New Incoming ConnectionAdding a new incoming connection
  5. Select the users you want to allow to connect to your PC through the VPNDeciding who can use your VPN
  6. Click the Next button
  7. Check the Through the Internet checkbox and hit NextConfiguring how will users connect to your VPN
  8. Leave everything the way it is (check the screenshot for how it should look like)Choose the VPN connection types
  9. Click Allow access

Can you use the same VPN on two computers?

Affirmative, you’re able to use a VPN for multiple devices using the same connection. So if you wonder how can you share a VPN connection with others, this guide has the proper insights.

Plus, be aware that you can have VPN software that delivers support for up to 10 devices using one connection.

That’s it. You’ve learned how to create VPN tunnel between two computers and create a list of users that can access your network.

If everything is done right, you should be able to connect to the network without any issues.

[Solved] PIP Not Recognized in PyCharm Terminal

The PIP not recognized PyCharm terminal error is common for Python software users.

This issue can arise when users try to install Python packages via the PyCharm terminal and Command Prompt. Consequently, users can’t install Python packages.

What is PIP used for in Python?

PIP is an acronym for Pip Installs Packages, a package management system for installing software programmed with the Python programming language.

Most users use PIP to install Python Package Index software by running PIP via PyCharm or the Command Prompt.

Why PIP is not recognized?

The PIP not recognized error usually arises because PIP hasn’t been added as a system environment variable.

The ‘pip’ is not recognized as the name of a cmdlet error message is a similar one.

What can I do if PIP is not recognized?

1. Add PIP to the PATH environment variable

  1. Press the Windows key + X hotkey.
  2. Click Run on the Win + X menu to launch that accessory.
  3. Next, input sysdm.cpl in the Run and click OK to open the window in the shot directly below.
    System Properties window pip is not recognized
  4. Press the Environment Variables button on the Advanced tab to open the window shown directly below.
    Environment Variables window pip is not recognized
  5. Select Path in the User variables box.
  6. Click the Edit button.
    Edit environment variable window pip is not recognized
  7. Press the New button on the Edit environment variable window.
  8. Then enter your PIP (Python) installation path. If you’re not sure what the PIP’s folder location is, open your Python > Scripts folder in File Explorer, and copy and paste that path.
  9. Press the OK button to apply the settings.

2. Reinstall Python

  1. Press the Windows and R keys simultaneously to open the Run window.
  2. Type appwiz.cpl into the Open text box, and select the OK option.
    The uninstaller applet in Windows pip is not recognized
  3. Select Python within Programs and Features.
  4. Click the Uninstall option to remove Python.
  5. After uninstalling the software, click the Download Python 3.9.1 button on the Python webpage.
  6. Then open the folder that includes the Python setup wizard.
  7. Click Python’s installer to open the window shown directly below.
    Python installer window pip is not recognized
  8. Select the Customize installation option.
  9. Make sure the pip checkbox is selected, and click the Next button.
  10. Select the Add Python to environment variables checkbox.
    The Add Python to environment variables option pip is not recognized
  11. Click the Install option.

Install PIP packages without adding PATH variable

  1. Click the Type here to search button to open the search box in Windows 10.
  2. Enter Command Prompt (or cmd) in the search utility.
  3. To open an elevated Prompt window, right-click Command Prompt and select Run as administrator.
  4. Enter this command into the Prompt’s window: python -m pip install [packagename]
    Python install command pip is not recognized
  5. Then press the Enter key.

Note: You’ll need to replace [packagename] in the above command with an actual Python package title.

So, that’s how you can resolve the PIP not recognized error on your system. In case you’re having additional issues, our The term is not recognized as the name of a cmdlet guide should be able to help you.

This isn’t the only Python error you can encounter, and another common error is Error subprocess-exited-with-error, but we covered it in a separate guide.

With that issue fixed, you can install the software from Python Package Index via PyCharm or the Command Prompt.