Xamarin vs PWA : Which is the best approach for you?

Does a truly cross-platform development even exist for your business? Back in the day of the early internet age, and an era of desktops in every household it was thought to be a pipe dream by many in the industry. However, today, an app can work seamlessly well regardless of the device which is now a reality with robust tools that have developed over time for the past several years.

Which one is better suited for small business users and students small projects that does not take up resources. Let’s explore!

Xamarin

Xamarin is more handy when you need to create an application quickly and want a high quality user interface for your business applications, and even for interactive business applications that are AR and VR based, which is not possible with PWA cloud based apps. Xamarin based apps are reliable in terms of security for mobile banking based applications and finance based applications under a contained native app suitable for business owners that do not want their business and personal financial data on floating in the web. Further, Xamarin based apps brings opportunities to small business app makers in terms of monetisation and promotion opportunities of app services under App Stores.

Progressive Web Apps

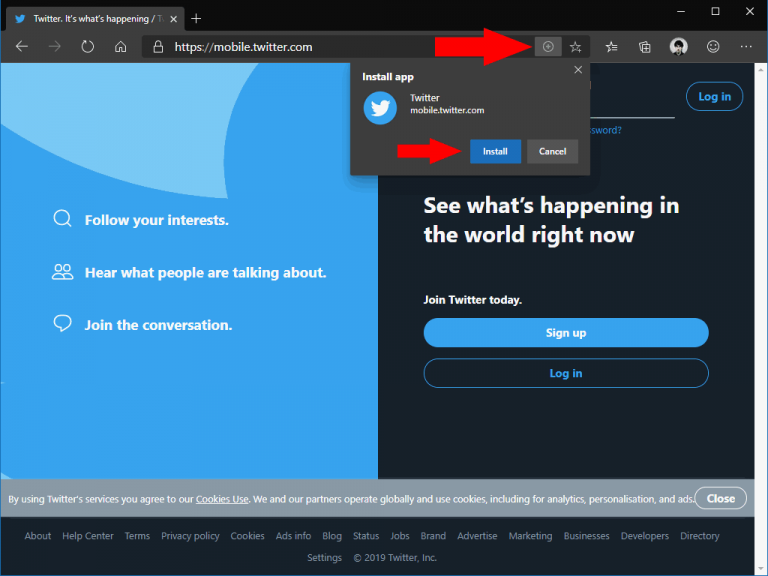
Installing PWA with Edge Insider

Progressive Web Apps (PWA) is a comparatively new technology that is currently on the meteoric rise in popularity. Even though the development is not mobile per se, the result you get is equivalent if not sometimes better than a native mobile app experience. You can upload it to a store if need be, but it also works directly from the browser. In essence, it is a complex website that can work offline. It’s implemented with the help of a Service Worker, JavaScript code that works in the background and does the caching, while also handling such features as updates and notifications. PWA brings opportunity for small businesses owners who can quickly deploy apps using its web stack to their customers with few lines of code from a slew of growing PWA development tools.

The Future App Market

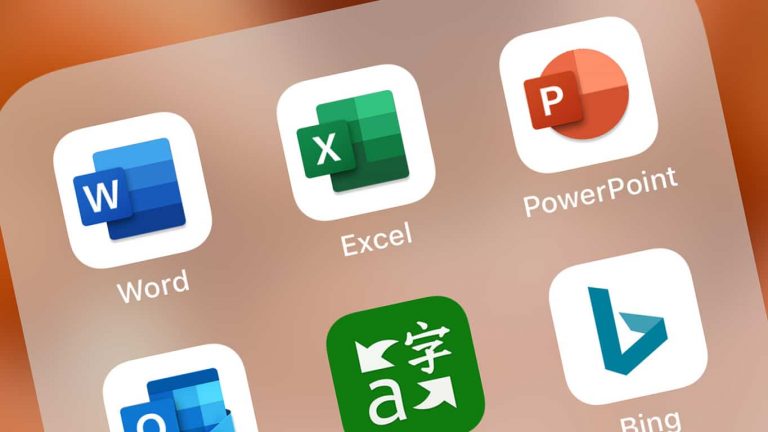
Microsoft Word, Excel, Bing, Microsoft Translate, Outlook, and PowerPoint apps on iOS

Many enterprises will still stick with solutions such as Xamarin.Forms or native apps for the moment, as they are still realize their investments in the technology. They are more likely to stick to native applications, and this provides some incentive in keeping Xamarin.Forms relevant. With more established mature existing native SDK libraries compared to PWA based applications that have a large customer base with cloud infrastructure, Xamarin may still have an advantage.

SummaryVisualstudio2

Xamarin has improved over the years since Microsoft acquisition with more robust and mature tools under Visual Studio IDE with regular and substantial updates. The cost to development of native cross platform apps has decreased, reducing the barriers to entry of App Stores, tools are more efficient and that has reduce development times for cross platform based apps on Android, iOS and UWP.

PWA needs maturity in the market in terms of app development tools, lots of dev time, the problems of offline PWA limitations, and the missing components of hardware acceleration from different mobile chipsets and hardware components that is holding back potential. Furthermore, slow page loading speeds and also constraints by the browser’s speed and the quality of internet connection, whereas a native Xamarin app directly uses device OS roots. However, PWA has a growing potential to compete with native apps that breaks barriers to entry like app store approvals and with more mobile friendly tools coming out.

However, for businesses, Xamarin native apps are still king for those that are familiar with native apps. Xamarin tools are more suitable to maintain business applications for those that want to deliver a high quality service to their customers with a high quality robust, mobile friendly native application user interface. Xamarin native apps are still dominant in distribution channels of mobile app stores, an advantage over PWAs because the absence of PWAs on renowned mobile app marketplaces may turn into a disadvantage. As a result, you may miss an opportunity for promotion and target audience coverage which can be costly as a small business owner.

Stay tuned for more related enterprise, small business developer related articles here on OnMSFT. Let us know what you think in the comments below!

5 Best Network Scanner For Windows 10/11 & Mac

Network administrators perform a network reconnaissance for identifying security threats that can cause unauthorized breaches resulting in critical data loss and system shutdown.

Network scanners for Windows 10 and Mac are software that can help you identify various network issues and prevent potential threats to your network.

When working in large organizations, managing the IP address can be a messy task. IP scanners can help you to scan IP, port, manage IP address, and more.

These tools can help managers, testers, and hackers find loopholes that unknown entities can exploit.

In this article, we have listed the best 5 network scanner for Windows 10 and Mac to help you ensure access to critical system resources are secure.

What are the best network scanners for Windows and Mac

PRTG Network Monitor 

network scanner for Windows 10

PRTG Network Monitor is an all-in-one network monitoring solution. With PRTG, you can monitor your network and receive timely alerts when there is a breakdown or disruption.

Apart from monitoring your network devices, it can also monitor applications and network traffic.

During the installation, PRTG Network Monitor scans the private IP address of the area in the tool’s subnetwork. The IP sensor allows you to check all devices’ reachability, while the IP snipper can filter your traffic by IP addresses, servers, computers, laptops, or printers, among others.

Key features of PRTG Network Monitor :

  • IP scanner with auto-discovery feature to scan and add private IP addresses automatically 
  • IP sensor to check the reachability with your IP Network 
  • Filter traffic by IP addresses, server, computer, and laptops using Packet Sniffer 
  • Tons of pre-configured SNMP sensors compatible with multiple vendors 
PRTG Network Monitor

PRTG Network Monitor

Easily and efficiently scan your networks with the amazingly efficient PRTG Network Monitor software today.
Free trialVisit website

ManageEngine OpUtils 

network scanner for Mac

ManageEngine OpUtils is an IP address and switch port management tool designed to help engineers efficiently monitor, diagnose and troubleshoot network resources. With A comprehensive set of 20+ tools, you can manage switches and IP Address Space.

ManageEngine OpUtils can help you perform network monitoring tasks like identifying unauthorized device intrusion, monitoring bandwidth usage and availability of critical devices, and backing up Cisco configuration files.

Other notable features include config file management, wake-in LAN tool, SNMP and CISCO tools, diagnostic and network monitoring tools, and address monitoring tools.

Key features of ManageEngine OpUtils:

  • Scan IPv4 and IPv6 subjects in the network to identify available and used IP addresses 
  • Switch port management and rogue device detection 
  • Bandwidth monitor and config file management 
  • Tons of network monitoring tools compatible with existing applications 

ManageEngine OpUtils

This easy-to-use but efficient software will enable you to scan your networks with just a few clicks of your mouse.
Free trial Visit website

Angry IP Scanner

network scanner for Windows 10

Angry IP Scanner is a fast and reliable IP address and port scanner. It can scan IP addresses and their ports in any range. The tools’ cross platform nature means it is compatible with both Windows, Mac, and other major system OS.

Angry IP Scanner works by pinging each IP address in your network to check if it’s active, and then proceed to resolve its hostname, determine the MAC, scan ports, and more if required. 

Scanner results can be saved to and exported in CSV, TXT, XML, or IP-Port list files. Additional features supported by the software include NetBIOS information, favorite IP address ranges, web server detection, customizable openers, etc.

Key features Angry IP Scanner:

  • Lightweight and cross-platform IP scanner 
  • Pings and optionally resolves hostname, scans ports, determine MAC address 
  • NetBIOS information gathering 
  • Saved data can be exported in multiple formats 

⇒ Get Angry IP Scanner

Network Scanner by LizardSystems

network scanner for Windows 10

Network Scanner by LizardSystems is an IP scanner software that can be used in large corporations with large IT networks and small home networks with a few computers. It can scan a list of IP addresses, computers, and a range of IP addresses along with the number of computers and subnets.

Along with FTP and web resources, it can also show shared resources. Network administrators and regular users can use it for auditing network computers and searching for available network resources.

Key features of Network Scanner:

  • Easy to use for network administrators and regular users 
  • Multi-threaded scanning to scan multiple computers per minute 
  • Excellent filtering options 
  • Network resource audit to check access rights to resources 

⇒ Get Network Scanner by LizardSystems

Intruder

network scanner for Mac

Intruder is a web-based vulnerability scanner that can help find cybersecurity loopholes in your IT Infrastructure and prevent potential data breaches. It offers enterprise-grade security, perimeter specifics to find mistakes that can increase your external attack surface, and emerging threat scan to automatically scan the system for security issues as they appear.

Intruders can monitor your cloud systems to maintain perfect visibility of your system, receive intelligent results that need minimal human analysis, and report on actionable issues that have a genuine impact on your security.

Key features of Intruder:

  • Excellent threat coverage with over 1000 checks 
  • Emerging threat scan 
  • Compatible with AWS, Azure, and Google Cloud connectors 
  • API integration with your CI/CD pipeline 

⇒ Get Intruder

System administrators use IP scanning tools to perform a quick check of their network infrastructure. These tools are used to scan all devices on your LAN and WLAN.

Most of the software listed in this article is cross-platform compatible and works with Windows 10 and Mac systems in particular. 

Microsoft’s new Translator Cognitive Service can translate documents in a batch

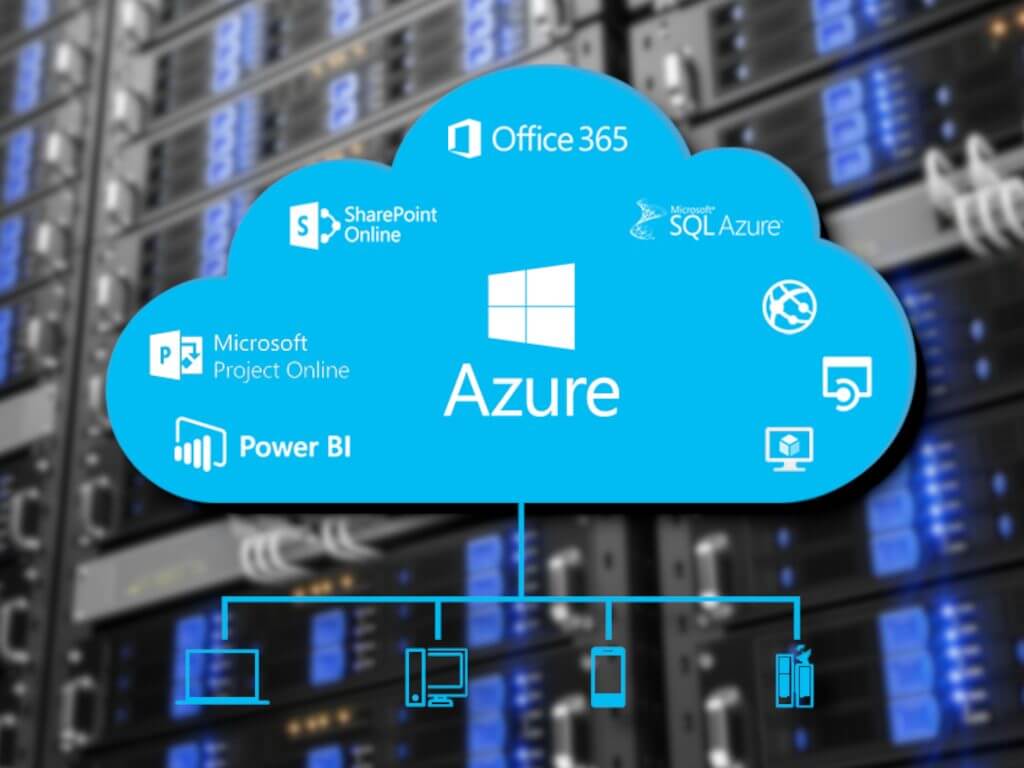
Microsoft has introduced a new Document Translation feature for its Azure Translator service in public preview. The company has announced that Translator Cognitive Service will now allow organizations to translate documents in a batch in various file formats preserving their original structure and layout.

“Translation of documents with rich formatting is a tricky business. We need the translation to be fluent and matching the context, while maintaining high fidelity in the visual appearance of complex documents. Document Translation is designed to address those goals, relieving client applications from having to disassemble and reassemble the documents after translation, making it easy for developers to build workflows that process full documents with a few simple steps.”, said Chris Wendt, Principal Program Manager.

The standard translation services that are currently available in the market have certain limitations. They support translating documents in plain text or HTML, and users can only translate a specific character count in one go. Customers need to manually split large documents into smaller pieces, translate them individually, and then combine the translated sections into a single document. This leads to a significant problem when translating large complex documents with rich content in them.

The incorporation of the Document Translation feature into the Azure Translator service brings more accuracy and reliability to translation. The cloud-based feature has the capability to process source documents by automatically recognizing the format of the input document, extract textual content, and translate it into the target language selected by the user.

thumbnail image 1 of blog post titled Translator announces Document Translation (Preview)

It preserves the original format and layout as presented in the source document while reconstructing the translated document and saves it to a specific location on the device. The list of supported file formats includes HTML, Text, PowerPoint, Excel, Word, PDF, Outlook Message, and more.

Microsoft has been consistently working to improve its document translation technology, and this service will definitely help consumers translation agencies, large enterprises who frequently need to deal with volumes of complex documents. To get started, you will need to create a free Azure account, and you can find pricing details here and additional information on this page.

Affinity Designer is not responding? Try these solutions

Affinity Designer is your top choice vector graphic design solution, yet achieving high productivity becomes impossible when it fails to respond. Designers describe all sorts of unpleasant situations.

Some say that the startup icon is nowhere to be found and Affinity Designer is not opening at all. No error messages are ever displayed, so they have no clue where to start their troubleshooting.

Other users complain that it is not working when using the appearance panel. One way or another, there’s no doubt that you need to take action and correct this issue that severely interrupts workflow.

Whenever you’re ready, the solutions below are waiting to be applied whenever Affinity Designer is not responding. Also, these solutions work for Affinity Photo too.

What can I do if Affinity Designer is not working?

1. Try out Adobe Illustrator

If you cherish your freedom to illustrate and precision for design, why don’t you try out Adobe Illustrator instead?

Some of the fixes we’ve detailed below involve time-consuming troubleshooting and not all are up for the challenge.

Whether you want to skip the uninstall process or simply save precious time, Adobe Illustrator is the smartest solution for your needs.

This software program assures graphics that are designed with maximum precision. No questionable resolution is in the cards while using it.

The graphics are no longer based on stored pixels, but rather on mathematics equations. Thus, you are always getting the sharpest results ever that may be easily printed in any desired dimension.

There’s no better choice for your design projects, especially when you start from scratch and have the highest expectations.

Key improvements over Affinity:

  • It works with both vector and raster graphics
  • It allows in-panel editing
  • Feature-packed user interface
  • Can be enjoyed on pretty much any computer system
  • It integrates perfectly with other Adobe products such as Flash and Photoshop, to name a few

⇒ Get Adobe Illustrator

2. Uninstall Designer or Photo and reinstall it

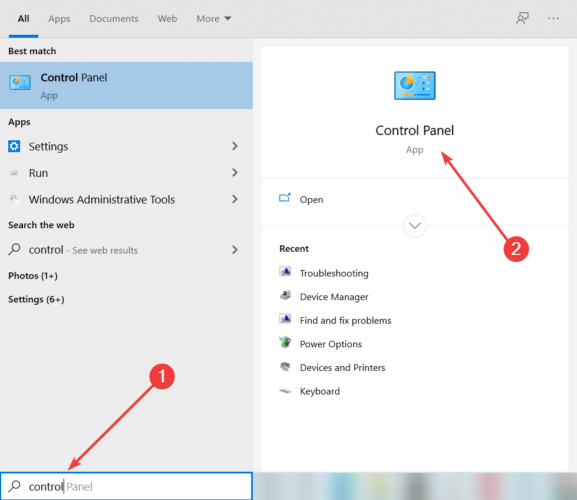
  1. To begin the procedure, open
  2. Go to Programs and Features.
  3. Then, select the program you wish to remove.
  4. You may either right-click it and select Uninstall or select Uninstall at the top of the list.

Uninstalling Affinity Designer in the hope of a fresh start has sometimes worked like a charm. Don’t hesitate to enter into my C: drive and delete all signs of Affinity. Up next, reinstall the program.

However, if getting a message saying The older version of Affinity Designer cannot be removed. Contact your technical support group, be sure to check out this amazing list with the best uninstaller software.

3. Fire up an SFC scan

  1. Press the keyboard shortcut Windows Key + S to open the Windows search bar.
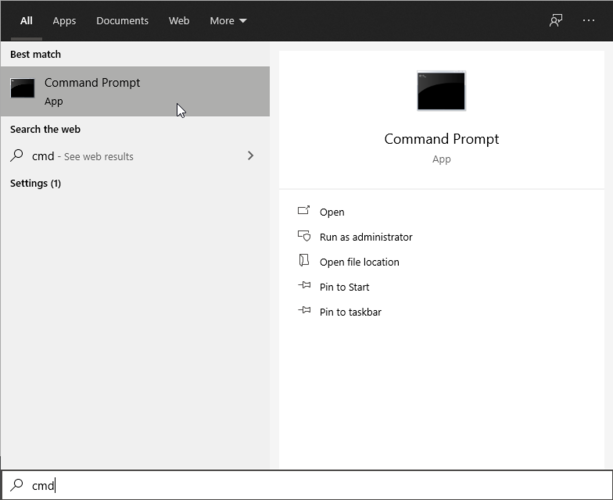
  2. Type cmd and select the Run as administrator option.
  3. After you’re inside the elevated Command prompt, type the following command, and then press Enter: sfc /scannow
  4. Finally, close the elevated Command Prompt and restart your computer.

If you’re still unable to open Affinity Designer or Photo, chances are the path of your file is stored incorrectly.

Since the SFC utility usually scans all system files and replaces corrupted files with a cached copy, it might be your best bet now.

4. Make sure your computer is up to date

  1. Firstly, open the Settings app by pressing the Windows+I key combination.
  2. Click on Update & Security.
  3. Click the Check for Updates button and wait for Windows Update to check for any available updates for your PC.
  4. Assuming that some updates are found, they’ll be shown, so don’t hesitate to install all important updates and service packs that are available.

Users tend to rely on Windows 10 for updates, but don’t take it for granted.

Even if Windows Update automatically installs updates as they become available, there are times when you may need to double-check that things go according to the plan.

A simple update is not only essential to keep your computer both safe and efficient, but also fixes many bugs or glitches from the applications, which may be your case.

The above solutions should help you out when having issues with any of the Affinity programs, like Designer or Photo.

Let us know how the above procedures went for you or if Adobe Illustrator already took Affinity Designer’s place. The comments area is waiting for you.

D3dx9_33.dll is Missing From Your Computer? Here’s a Fix

D3dx9_33.dll is a shared Dynamic Link Library system file for Windows. This particular DLL file is a component of Microsoft DirectX.

So, d3dx9_33.dll missing errors usually arise when users try to start multimedia software or games. A common d3dx9_33.dll error message states:

The program can’t start because d3dx9_33.dll is missing from your computer. Try reinstalling the program to fix this problem.

When the above error message pops up, the software that needs the d3dx9_33.dll usually doesn’t start.

The error message makes it clear d3dx9_33.dll is not accessible, which can mean that file has been deleted. Various potential resolutions can restore that missing DLL file.

How can I fix a d3dx9_33.dll is missing error?

1. Use third-party software

Why manually search for, download, extract, and register a replacement d3dx9_33.dll when dedicated tools can do the job for you?

A system repair tool will replace all missing or corrupted Windows DLL files on your PC at just the click of a button. Such options can also purge any fake malware DLL files.

They use their own updated Windows files database to add fresh and well-functioning files to your system in just a few seconds.

These utilities can help you fully optimize your PC, repair files affected by viruses, remove unnecessary files, and help diagnose certain hardware issues.

2. Run a System File Checker scan

  1. Click the Type here to search button on the far left side of Windows 10’s taskbar.
  2. Type in Command Prompt as the search keyword.
  3. Right-click Command Prompt and select Run as administrator to open that utility with elevated user rights.
  4. First, enter this command and press Return: DISM.exe /Online /Cleanup-image /Restorehealth
  5. When the Deployment Image Servicing scan is done, type in this System File Checker command: sfc /scannow
    sfc /scannow command d3dx9_33.dll missing
  6. Press the Enter keyboard key to start the SFC scan.
  7. Wait for the System File Checker utility to finish scanning.
  8. Restart your PC if the SFC scan results say Windows Resource Protection fixed files.

3. Check your Recycle Bin

  1. Click the Recycle Bin icon on your Windows desktop.
  2. Type d3dx9_33.dll in the Recycle Bin’s search box.
  3. Select the d3dx9_33.dll if your Recycle Bin search finds it.
    Recycle Bin d3dx9_33.dll missing
  4. Click the Restore the selected items option.

4. Reinstall software the d3dx9_33.dll issue arises for

  1. Press the Windows and X keys at the same time.
  2. Click Apps and Features to open Settings as in the snapshot directly below.
     The Apps & features tab d3dx9_33.dll missing
  3. Select the software you need to fix the d3dx9_33.dll error for.
  4. Click Uninstall to remove the selected program.
    The Uninstall button d3dx9_33.dll missing
  5. Restart Windows when you’ve uninstalled the software.
  6. Then reinstall the latest version of the software with its downloaded setup wizard or DVD.

5. Restore Windows to a previous date

  1. Right-click the Start button and select Run on the Win + X menu.
  2. Press the Enter keyboard key after entering this command Run’s Open box: rstrui
  3. Select the Choose a different restore point option, and click Next to proceed.
  4. Click the Show more restore points checkbox to view a full list of available restore point dates.
     System Restore utility d3dx9_33.dll missing
  5. Now choose a restore point that will roll Windows back to a date that predates the d3dx9_33.dll error on your desktop or laptop.
  6. Click Next to continue to the confirmation step.
  7. Finally, select the Finish option to confirm and roll back Windows to your chosen restore point.

Note: System restore points delete software installed after their dates. To check what software gets removed for a chosen restore point, click the Scan for affected programs option.

The above resolutions will most likely fix any d3dx9_33.dll missing error message on Windows.

The last resort resolution is to reinstall or reset Windows with installation media or the Reset this PC utility. Our Factory reset Windows 10 guide tells you how to utilize the Reset this PC utility.

5 Best Software that Allows for Parametric Image Editing

Parametric image editing is the process of making changes to an image while preserving the original image.

All the changes made to the images are saved in layers allowing the creator to re-edit the image by changing the previously set instructions.

Parametric editing deals with RAW images. Not all image editors, have parametric editing capabilities that allow you to re-open and edit the previously edited file for old instructions.

Photo editing software Adobe Lightroom and ACDSee Photo Studio are some of the well-known image editors to have parametric image editing features.

However, there are a few more tools offering a similar set of features with a better price tag.

Today, we take a look at the best software for parametric image editing to help you edit and enhance the RAW image while preserving the original file.


What is the best software for parametric image editing?

Adobe Lightroom

Adobe Lightroom CC is the industry standard when it comes to RAW image processing.

The software has evolved over the years and one of its most recognized features is the ability to organize your photos into one searchable catalog.

In comparison to Photoshop, Lightroom is targeted at busy photographers who need a tool to manipulate images with parametric image editing capabilities and also easier organization features.

Adobe Lightroom CC is a premium application, and unlike most of the Adobe software, Lightroom has also gone cloud.

You can buy it as a part of Adobe Creative Cloud Suite subscription or Photography plan that cost $10/mo but offers Light CC, Lightroom Classic CC, Photoshop CC and 20 GB of cloud storage.

You can also opt for Lightroom CC only plan that offers 1TB of storage but doesn’t include Adobe Photoshop CC etc. The more expensive plan offers up to 1TB of cloud storage.

In comparison to Photoshop, Lightroom is easy to use. The user interface is identical to the previous version of Lightroom but offers a cleaner look with a streamlined workflow.

All the images including the edits and originals are saved in the Adobe Cloud which allows you to access it from anywhere.

Adobe also has a Lightroom CC app for Android and iOS just in case you need to make quick corrections to your social media pictures.

Adobe Lightroom also uses a machine-learning algorithm called Adobe Sensei to recognize the people and other content in your phone and applies searchable keywords to the photos automatically.

You can create custom albums based on any person or theme you want. Adobe Lightroom is an excellent software for parametric image editing and other image manipulation work with RAW images.

If you are a photographer and does not mind paying for the subscription every month, Adobe offers one of the best in business image manipulation tool.

Adobe Lightroom

Adobe Lightroom

Edit your photos with the industry-leading software solution for parametric image editing.
Free trialVisit website

ACDSee Photo Studio Ultimate

ACDSee Photo Studio Ultimate

ACDSee Photo Studio Ultimate is a RAW image manipulation program that offers parametric editing capabilities along with new features such as Face Detection and Facial Recognition.

ACDSee comes in multiple versions. The Ultimate version offers the most features and also the only version that has Layered Editing feature. The other two versions are Professional and Standard.

The latest version of ACDSee Photo Studio Ultimate comes with Facial Detection and Recognition allowing the users to tag photos with a name to make the isolation and searching process quicker.

Once tagged, ACDSee will automatically tag every photo matching the description with the given name. The Layered Editor is what allows you to use parametric photo manipulation.

Using the feature, you can add layers to make adjustments, add effects and pair individual layers with any edit mode filter to create a stunning image. All that without altering your original image.

The Digital Asset Management feature allows you to find, sort, move, organize and share images to increase the workflow.

You can also add the rating, keyword, categories, location data to your pictures, visual tags and color labels to quickly identify the photos from the collection when you need them.

ACDSee Photo Studio Ultimate is an excellent tool for anyone looking for a one-stop-shop to view, process RAW files and edit with layers.

And the perpetual license means you don’t have to deal with the subscription drama every month, but pay once and keep it forever.

⇒ Download ACDSEE Ultimate


Skylum Luminar

Luminar 3

Skylum’s Luminar is among the newest kid on the block. Despite its late entry, this image manipulation tool has become one of the most popular editing programs among photographers.

It is available for both Windows and macOS running computers. Luminar comes with an aggressive price tag of $69 for the latest version.

It is among the cheapest image editing software with RAW picture editing capabilities and other advanced features including DAM and AI Sky Enhancer.

The addition of DAM (digital assets management) system automatically sorts images into a dated folder. You also have the option to create your custom structure.

Another feature is Luminar’s AL Sky Enhancer. This feature works wonderfully for landscape photos by detecting and enhancing the color of the sky without affecting the rest of the image.

Accent AI is another AI feature that automatically analyzes the photos and enhances the images to make them look sharp and saves you from the hassle of manual adjustment.

You can select from over 60+ default styles handcrafted by professional photographers or download additional looks to match your vision.

Luminar has a different workspace for Landscape, Professional photography, Portrait and Aerial Photography that offers carefully selected set of tools to work with different types of images.

Luminar is not a perfect image editing software and does lack some nuts and bolts, but nothing that can’t be improved in future releases.

However, considering the price, Luminar offers a good combination of AI tools, assets management tools and a good level of control to the photographers.

⇒ Download now Skylum Luminar


Capture One Pro

Capture One Pro

Capture One Pro is a powerful image manipulation tool and a direct rival to the Adobe Lightroom. Being a rival doesn’t mean it is cheap.

Priced at $299 for a perpetual license, it is fairly expensive for an image editor. Although, there is a subscription plan which again is not the cheapest on the market.

Capture One Pro allows you to edit RAW images with parametric image editing features and organize images into a single large catalog to streamline the workflow.

The user interface is nothing like the Lightroom but resembles the long-retired Apple Aperture. The tool doesn’t use modes for different operations but depends on the functions of the left control panel.

Being an image editing tool, Capture One Pro offers essential image editing tools like annotation tool to add a layer of markup as instruction for other editors.

The Refine Mask option can be used to capture intricate and minor details like hair. Use the clone tool to remove unwanted objects and a very detailed color editor for color correction.

Capture One Pro supports more than 500+ camera models including Sony and Fujifilm.

If you use only one specific brand camera, Capture One Pro offers highly customized software specifically designed to work with the images captured with these cameras.

Notable features offered by the image editing tool include full creative control, asset management, color handling, detail, and lens profile and tethered capture.

Capture One Pro is a competent alternative to Lightroom and offers better color correct, faster performance and more creative control.

However, if you are looking for an alternative to Lightroom expecting similar workflow and familiar user interface, Capture One Pro is a different universe altogether.

That said, Capture One Pro is equally suitable for professional photographers as well as advanced amateurs looking to extract the best image quality of their RAW shots.

⇒ Download Capture One Pro


DxO PhotoLab

DxO Photolab

DxO combined its older DxO Option Pro with a new set of features to create a complete image editing software.

The DxO Optics Pro was known for its RAW image processing capabilities, and the latest version in the form of DxO PhotoLab brings more features while retaining the DNA of Optic Pro.

DxO PhotoLab offers localized image adjustment tools to save you from the hassle of using two software to process RAW images and make adjustments.

With Graduated Filter, you can balance the exposure in your image, add depth to the sky and make changes to your subject’s surrounding areas.

Other essential editing tools offered by DxO PhotoLab includes a Brush tool and Automatic Repair tool to replace distracting objects from any image.

The denoising technology helps you to remove noise from high ISO images without losing details, and the ClearView feature brightens the horizon in images by eliminating haze or smog from photos.

DxO PhotoLab can be a bit confusing with all the customizable window and same tools in multiple sub menus. It is also relatively slower than its competitors during the importing process.

DxO is a complete image manipulation software that is a viable alternative to Adobe Lightroom or even Capture One Pro.

⇒ Download DxO PhotoLab 


All the software listed in this article is capable of parametric image editing, thanks to their unparallel RAW image processing capabilities.

However, apart from the core functionality to processing RAW images, you also get localized image adjustment tools to create a final product without needing to use additional software.

So, which one should you use? Decide for yourself by taking these programs for a spin. Have you used any of this software before? Do let us know your experience in the comments below.


Best OCR software to extract text from images

Have you ever tried out ABBYY Fine Reader, the application for desktop that uses optical character recognition technology to convert scanned images into editable file formats?

If the answer is yes, then you will surely want to install these tools that use the same technology to recognize the text within images and allow users to copy and paste it to a new document.

OCR is the abbreviated form for Optical Character Recognition. A cool technology that allows you to convert different types of documents into editable and searchable data.

In this article, we will present to you what is the best Windows 10 OCR software app to use.


What is the best Windows 10 OCR software?

Adobe Acrobat DC Pro

Adobe Acrobat

Edit your scanned documents with ease using Adobe Acrobat. Thanks to its integrated OCR technology, you can extract text and convert scanned documents into editable, searchable PDF files instantly.

When you enable this function, Adobe Acrobat performs OCR on PDFs that contain images, vector graphics, hidden text, or a combination of these items.

By default, OCR uses the language selected in the dialog box to interpret the scanned text. OCR engine uses language-based dictionaries for conversion, so choose the correct language to improve accuracy.

Adobe Acrobat Export PDF supports the following languages for OCR:

Adobe Acrobat supported languages for OCR

The scanning and text recognition using the Searchable Image (Exact) command basically adds an image layer on the original scan with hidden text.

Let’s quickly look at its key features:

  • Instant conversion (automatically extract text from any scanned document or image and convert it to editable text)
  • Text formatting recognition (automatic custom font generation)
  • Seamless integration with Office products (export text to DOCX, PPT, XLS, or TXT file formats)
  • Archive-fit (preserve the exact look and editing restrictions with the smart PDF format that include searchable and editable text)
  • OCR language (picked from default locale)
  • System fonts (the converted text is displayed in an available font that is the closest match to the original used in the scanned page)
  • All pages editable (convert all pages of the current document to editable text in one click)
  • Turn off / disable automatic OCR for scanned documents
  • Batch OCR using (convert any number of image-only PDFs to editable text in one click)
Adobe Acrobat DC Pro

Adobe Acrobat DC Pro

Use one of the best PDF reader software with built-in OCR technology allowing you to create editable documents.
Free trialVisit website

Photo Scan app

Google’s Photo Scan app is available for Windows 10. OCR technology is part of the Universal Windows Platform and many developers started creating applications that extract text from photos.

The Photo Scan for Windows 10 is a free application that supports in-app purchases and comes with many great features.

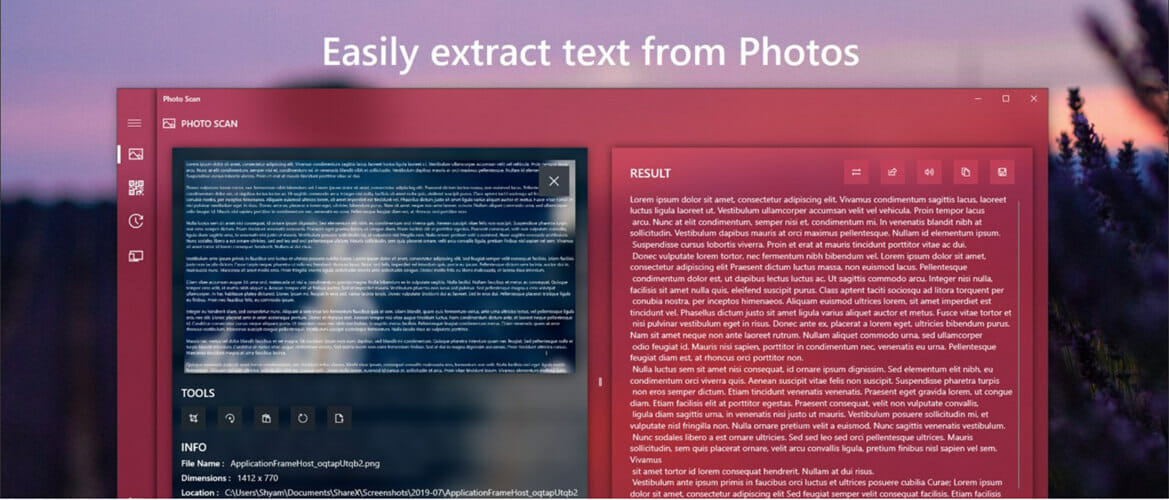
First of all, once you open a photo using Photo Scan, the application analyzes it and if the image contains any text, it automatically extracts and displays it on the right side.

In addition, you can save the extracted text to Text File Document, Rich Type Format, HTML File Document, CSS and other file formats, or to clipboard.

If you have a picture and want to extract text from it, right-click on it and select Open with, then click Photo Scan. The list of the entire photos collection can be found in the left-pane of Photo Scan.

The Photo Scan app supports also the web camera, and its speech feature can be used to read out all extracted text from an image.

Other features of the Photo Scan app include glare-free scans, smart rotation, and automatic cropping. If you want to get rid of ads, you need to make in-app purchases.

⇒ Download Photo Scan app


There you go, you should be able to choose your weapon when it comes to editing scanned documents with no effort at all.

What tool do you like best? Share your impressions with us in the comments section below.


Drafting Software for Windows PC [2026 Updated List]

Looking for the best drafting software to create flat, two-dimensional, or even three-dimensional models of physical components?

Stop searching since you’re definitely about to achieve your goal sooner than expected.

For the nostalgic, manual drafting has its charm nowadays. However, can you really afford to keep using it in your engineering and design plans?

Drafting software tools that are compatible with Windows 10 represent an effortless approach to take into consideration.

Architects, designers, and engineers have often concluded that using computer-aided design and drafting software programs helps them think outside the box.

This type of software allows professionals to get closer to how a design may perform in the real world.

If you like the sound of it, waste no more time and take a look at the following top choices for your business.


What’s the best drafting software for Windows 10?

Adobe Illustrator (recommended)

Without any question, Illustrator is the 3D modeling program around for hardcore design professionals.

The software’s advanced drawing and visualization production capabilities make it incredibly easy to model and analyze complex structures.

There are a few advanced features you’ll be interested in, the best is the 3D and 2D rendering of images. The full potential of regular CAD programs isn’t for everyone.

So, you’ll be pleased to find out that for the most part, Adobe Illustrator keeps complexity to an absolute minimum as compared to those programs.

This doesn’t mean that you’re not getting advanced rendering and animation capabilities to better visualize product design.

Some other robust, powerful features that will please all experts include:

  • Lighting, shading, and other properties to control the appearance of 3D objects
  • Generous file type support and collection of templates
  • Intuitive Touch Type feature
  • Accessible troubleshooting when saving files
  • Creative Cloud membership plans for individuals, institutions, and businesses
  • Detailed guidance in the form of tutorials that provide basics and help you inspire (access the Home and Learn tab to find them)
Adobe Illustrator

Adobe Illustrator

Take your creativity to the next level with this excellent tool that helps you create professional images!
Free trialVisit website

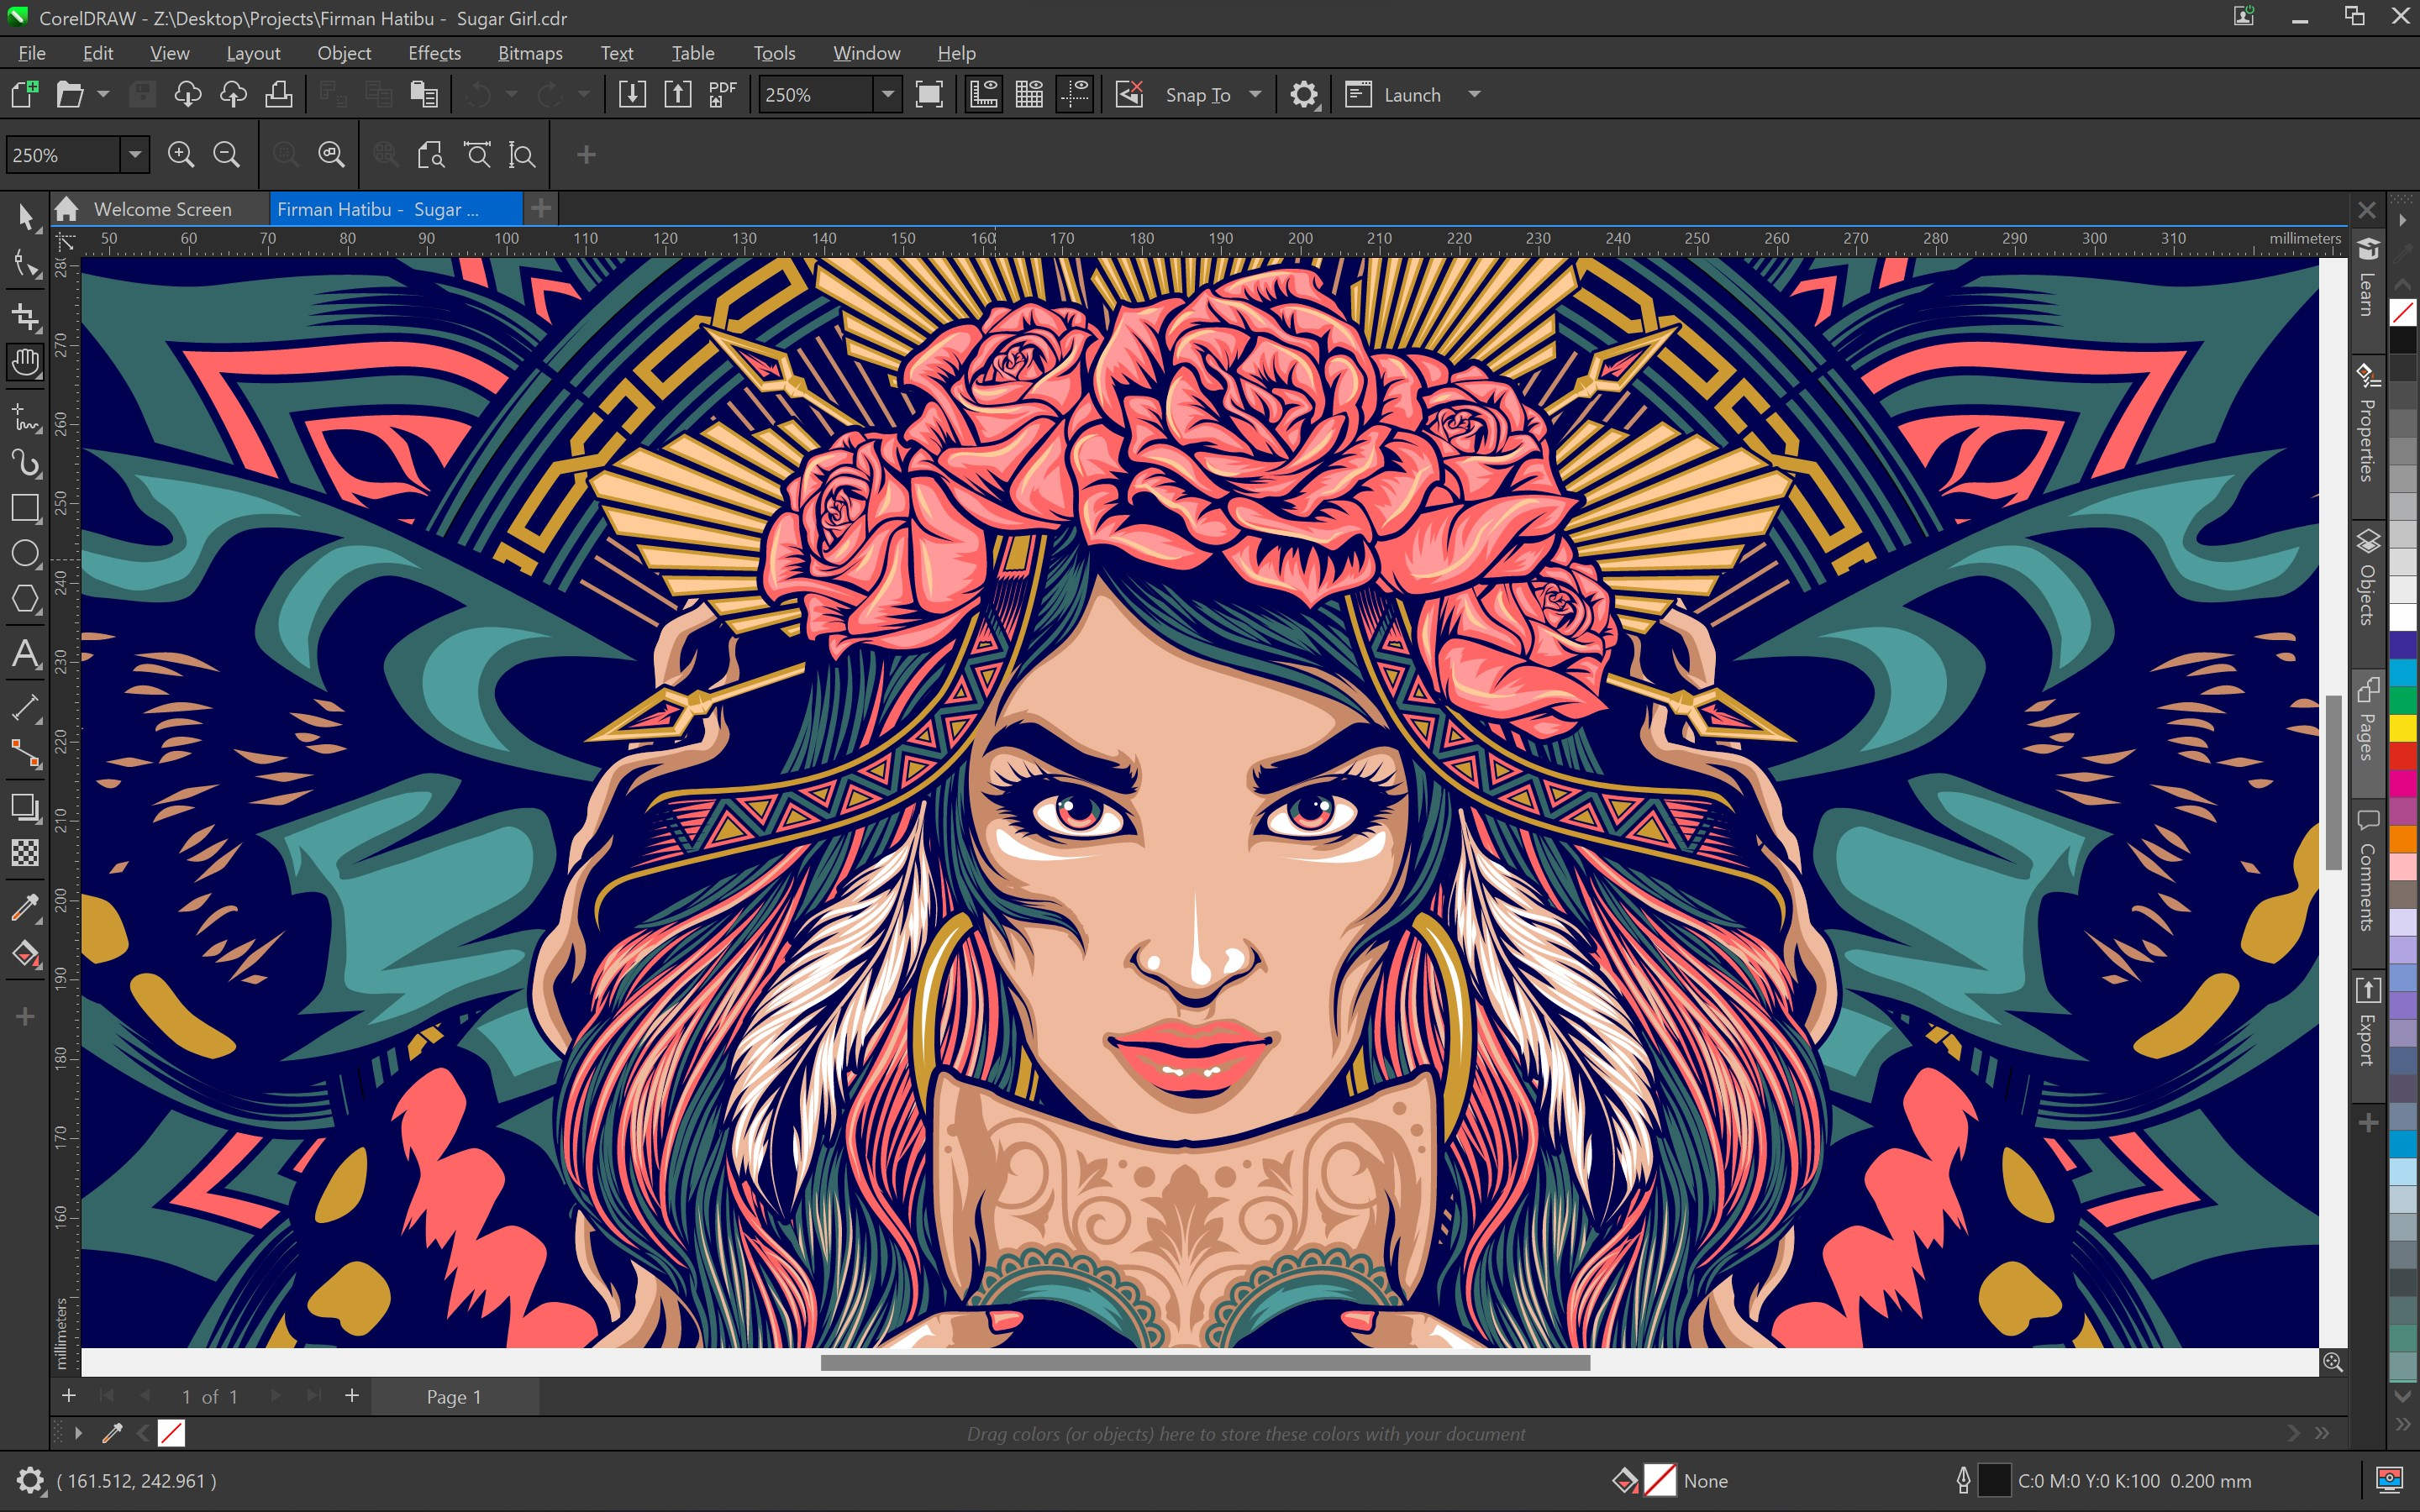
Corel Draw

Traditional drafting software is fairly complex and not that productive any longer. Corel Draw steps in to help you forget all about manual drafting.

In fact, it isn’t at all difficult to make the transition when you can design on virtually any device you may use.

2D designs are turned into three-dimensional graphics in just a few clicks, while the.STL support for 3D printers assures that all your visions materialize quickly.

On top of that, if you want time-saving collaboration and project-sharing features for flawless communication with your team members, you can’t go wrong with Corel Draw.

Some of the key features that provide a simplified CAD experience include:

  • Enhanced 2D drafting functionality
  • PolySolid 3D solid editing and modeling tools
  • Advanced OffsetEdges to make 2D entities from 3D solid or surface boundary
  • .DWG file format support
  • Enhanced Custom Blocks saved as separate drawings with a specified name
Corel

Corel

Create outstanding 3D graphics and upgrade your editing experience with a high-quality tool!
Free trial Visit website

Autodesk Fusion 360

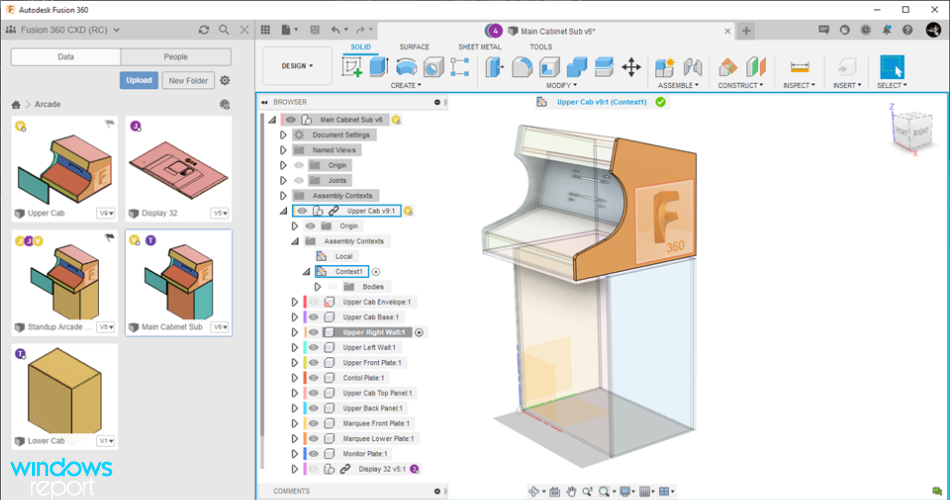
Autodesk Fusion 360 empowers educators and students in training themselves for the era of innovation. It is the first 3D CAD, CAM, and CAE solution, which connects every comprehensive process of designing to one virtualized platform. The software is a way for you to materialize your ideas.

It provides a free online trial with several videos based on level of skills so you can give it a shot and see how it works for you.

Fusion 360 can be downloaded as a desktop or laptop software or as a Chrome plugin for both Mac and Windows.

Drafting components are necessary for manufacturing techniques that utilize a mold, such as cast parts, injection molded parts, and thermoformed parts.

That is why it is critical to be able to not only update draft angles but also to verify when draft angles are insufficient or missing entirely. Fusion 360 does it all for you.

Some of the essential elements of Fusion 360 include:

  • Connect with people from all backgrounds of expertise, from students to specialists. 
  • Discover more about 3D printing and industrialization in the long term.
  • Participate in a variety of projects and gain real-world experience.
  • Select Draft Sides for your project: One Side: Apply draft to one side. Two Side: Apply draft to two sides at different angles. Symmetric: Apply draft to two sides at the same angle.

Start with Autodesk Fusion 360 if you’re a beginner doing it for fun or professional development. It is free for students and teachers. It supports all CAD, CAM, and CAE functions and is extremely simple to use.

Autodesk Fusion 360

Autodesk Fusion 360

Another Autodesk product with a complete package for 2D and 3D designs, engineering, architecting, and drafting.
Free trialVisit website

OpenSCAD

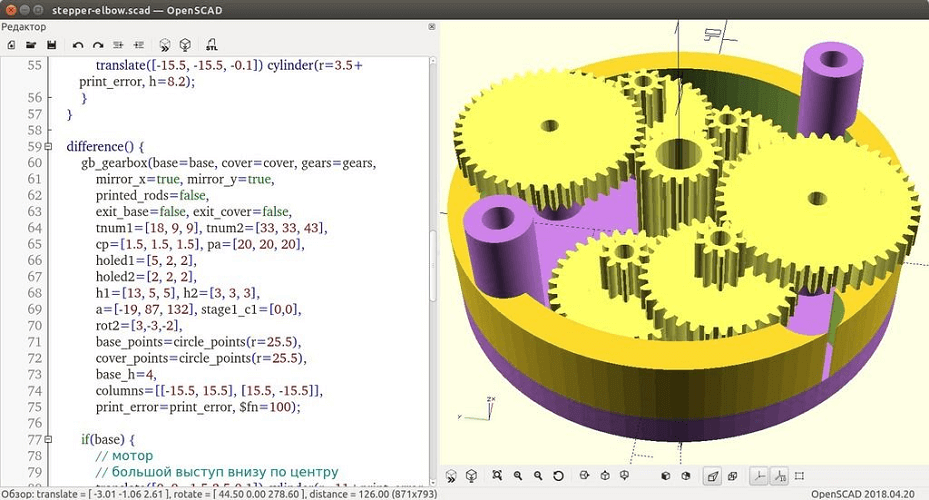
OpenSCAD solid 3D CAD objects

OpenSCAD is another great drafting software for PC that you may use for creating solid 3D CAD objects.

Thanks to its modeling techniques such as constructive solid geometry and extrusion of 2D outline, this tool is developed expressly for coders/programmers.

Do note that, unlike similar programs, it is not focused on the artistic aspects of 3D modeling, but on the CAD aspects.

This might sound like music to your years, but do note that it is completely based on description language. Therefore, the program will not be intuitive for all eager users.

Key features here included:

  • Precise designs in configurable parameters
  • 2D paths for extrusion
  • Ability to read design parameters from DXF file
  • Read and create 3D models in both STL and OFF file formats

⇒ Get OpenSCAD


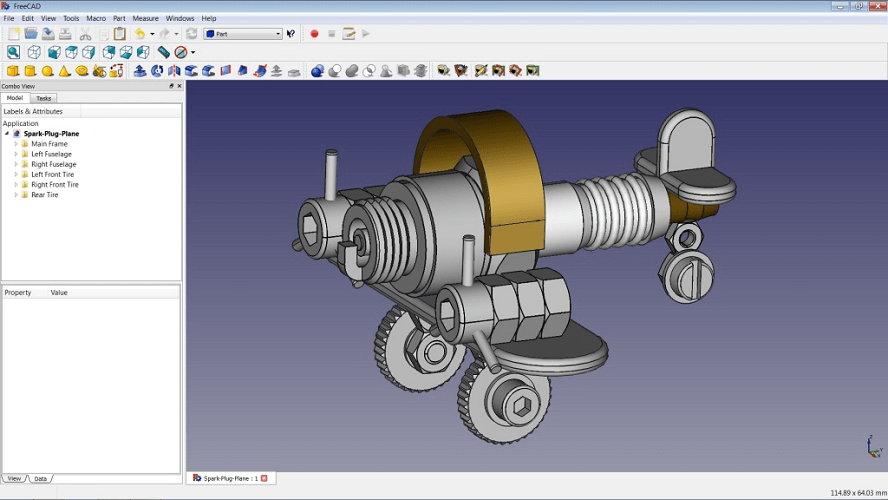
FreeCAD

FreeCAD intuitive virtual designing solution

Another intuitive virtual designing solution is FreeCAD.  This tool enables you to design real-life objects of any size, sketch geometry constrained 2D shapes, and use them as a base to build other objects.

However, it is quite a simplistic program. The parametric component makes editing work like a breeze and you can go to your model’s history and change the parameters at any time.

While recommended for product design, mechanical engineering, and architecture, this clearly has limitations for some designs. It is aimed mostly at people who lack experience with 3D modeling.

Thanks to its user-friendly characteristics we recommend this tool as being the best drafting software for beginners.

Key features:

  • Advances tools to adjust dimensions or extract design details from 3D models
  • Compatible with Windows, Mac, and Linux
  • Modern Finite Element Analysis (FEA) tools
  • Experimental CFD, BIM
  • Robot simulation module to study robot movements

⇒ Get FreeCAD


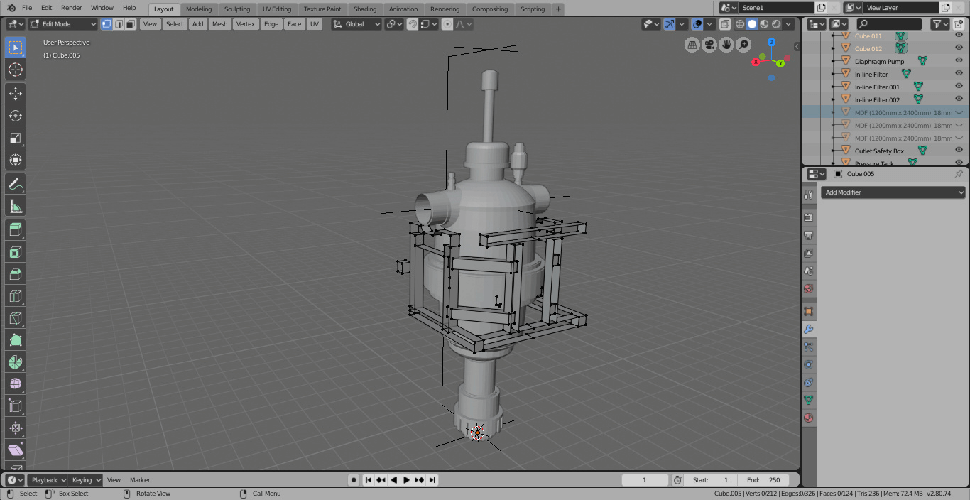
Blender

Blender great drafting software

Blender is a great drafting software suitable for a wide range of domains. You may use it to create all sorts of 3D designs, from electronic projects to digital art.

If you’re looking for the best drafting software for architects, this program makes a great choice, mainly thanks to features that allow you to develop 3D geometrical drawings.

Animators, game developers have full access to modeling, rigging, rendering, compositing, and motion tracking.

The list further extends to creating simulations and animations, video editing, and game creation. You may enjoy this rich sculpting toolset, yet you need to be experienced with 3D modeling.

Key features:

  • Blender’s API for Python scripting is ideal to customize the application
  • You may write specialized tools
  • Enjoy polygonal modeling techniques
  • Multiplatform support (Linux, Windows, and Macintosh computers)
  • Large community, offering a lot of tutorials

⇒ Get Blender

If you’ve been a while in a growing industry that relies a lot on drafting software tools, you probably already know that making a choice can be quite difficult.

Take your time to compare features and let us know your decision by using the comments section below.

5 best online vector graphics editor for PC

If you intend to create and edit vector graphics, chances are you have a hard time deciding which online vector graphics editor suits your needs.

Vector graphics are known to use mathematical expressions to draw lines, shapes, and colors. As long as they’re infinitely scalable, no size is out of limits any longer.

Moreover, it’s incredibly easy to zoom in and out on an image without any resolution issues. Vector graphics are the perfect choice for your professional design tasks.

Here we’ve gathered a list of online vector graphics editor tools with an incredibly robust set of design features, just to make your choice a lot easier.


What’s the best online vector graphics editor?

Adobe Illustrator

If you’re looking for a complete vector graphics editing package for your professional career with all the tools included, then take a closer look at Adobe Illustrator.

That’s an industry leader synonymous with image editing itself.

Take the example of so many designers and artists all over the world who use this tool to create everything from gorgeous app icons to impressive billboards.

Adobe Illustrator has all the features you need to create beautiful and unique vector art. After all, you may add effects and edit individual characters to create typographic designs.

Best of all, do keep in mind the great compatibility between itself and other Adobe programs, which you’ll most likely appreciate when working within the Adobe Suite.

If you are considering Illustrator but want to weigh other choices too, check this detailed Adobe Illustrator alternative guide for more professional and free tools.

Anyone considering Illustrator for professional vector work can also review this guide on how to download Illustrator for free trial to test the full toolset before committing.

Take a look at other top key features which make Adobe Illustrator so popular:

  • Full layer support
  • Amazing file sharing features
  • Your work gets stored in the cloud
  • Hundreds of video tutorials and great guides when extra help is needed

⇒ Download Adobe Illustrator


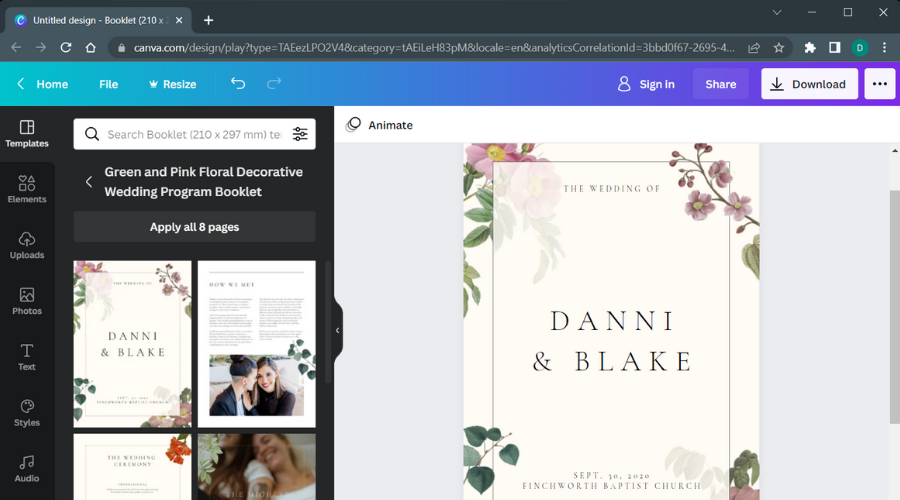
Canva

Canva vector graphics editor

A top straightforward vector graphics editor to go for is Canva. It doesn’t really matter if you intend to create a simple app icon or go big and design social media graphics and awesome presentations.

This software makes it incredibly easy to work, even if you lack experience. It will basically prompt you to choose what type of graphic you’re trying to create, then it will suggest all sorts of template visuals for you.

Working as part of a team is always more fun, so email people from within the tool to invite them for collaboration.

Finally, you may download copies of your finished design or brag about your work and share them directly on Twitter and Facebook.

Besides quick results in vector illustration and thousands of impressive layouts, Canva has a lot more to offer.

Here are some of Canva’s key features:

  • A generous collection of free icons and shapes
  • Hundreds of fonts to choose for every single design
  • Files may be downloaded as printable PDFs
  • Advanced photo filters

⇒ Download Canva


Fotor

If your wish is to create personalized graphic designs in no time, be sure that the online picture editor and graphic designer Fotor is also a top choice.

The software provides some handy tools and a range of vector design templates/layouts needed to edit your dearest photos, make collages, and create refreshing designs.

For example, you may use vector clipart and vector layout to start a new design and make amazing graphic designs that will always stand out, no matter who sees them.

The user interface is very intuitive and it helps the user easily organize work, even when not knowing much about design.

Key features to consider:

  • A wide range of creative layouts and unique fonts styles
  • Essential retouching tools waiting to be used
  • Ready-made posters if you lack inspiration
  • Customizable smart clip arts

⇒ Download Fotor


Inkscape

Even if it’s not as prolific as Adobe Illustrator and CorelDRAW, professional editing results are always guaranteed when using Inkscape.

Not only that you can create vector objects, but you may also perform all sorts of manipulations on them.

Since this is a high-end vector graphics creation and editing software, it allows you to create vector images from bitmaps and enjoy features such as fill, render, transform, group, and more.

No less important, Inkscape encourages its community to become active by coding function-enhancing extensions and add-ons and debugging glitches.

See other key features which are most welcome:

  • Edit raster formats such as PNG are also included
  • Constantly updated software
  • Robust community to reach for help
  • Available for Linux, Windows, and Mac OS.

⇒ Download Inkscape


Draw Svg

Draw Svg powerful editor

Draw Svg is a vector graphics designing tool that helps create signs, amazing photos, posters and more. You may even create memes with your favorite pictures and photos, that’s how flexible this tool is.

You need to know from the start that it is optimized for both Chrome and Firefox, yet it’s compatible with Edge, Safari, and Opera as well.

Its user interface is available exclusively in English and it looks a bit different as compared to other interfaces found in similar desktop applications.

In spite of that, its multiple tools and that generous shapes library might just win you over.

Other interesting key features of this powerful SVG editor:

  • Easy SVG drawings conversion to PNG images
  • Touch device compatibility
  • Developers integration API included
  • Impressionist drawings with Photo to drawing Tool

⇒ Download Draw Svg


It is up to you to go for the software with an extensive features list that gives you the desired freedom or to choose a completely free vector graphics designing tool.

Let us know what you think of these options by using the comments area from below.


FIX: PDF files not printing correctly in Windows 10/11

PDF is one of the most popular file formats for documents due to its features. In that case, some users are wondering ‘Why is my PDF file not printing correctly?, so let’s see why that is the case and how to fix this problem.

What do I do if PDF files are not printing properly?

  1. Check if the PDF file is corrupted
  2. Make sure you use a reliable PDF editor
  3. Reload the fonts
  4. Keep your printer drivers up to date
  5. Print PDF as an image
  6. Try to print another document
  7. Create a copy of the PDF file
  8. Restart your PC
  9. Force printer to use TrueType fonts
  10. Install the missing fonts
  11. Embed the fonts in PDF files
  12. Use PDF/X standard
  13. Make sure that No Color option isn’t selected
  14. Make sure that visibility isn’t set to Screen
  15. Turn on Display PDF in the browser option
  16. Downgrade your PDF tool
  17. Disable Rely on system font only, don’t use document fonts option

1. Check if the PDF file is corrupted

  1. Open the problematic PDF file in the PDF editor.
  2. Choose File > Print and choose the option to save the file as PDF.
  3. Open the new PDF file and try to print it again.

One of the most common causes of PDF printing problems is the corruption of the PDF file. PDF files can become corrupted during the file transfer process, and if that’s the case, you’ll encounter issues when printing the PDF, so it’s best to download it again.

If the PDF file is stored on your PC, it can be corrupted due to a bad disk sector on your hard drive. To fix this problem, be sure to recreate the PDF file from the original source and save it to a different location.

2. Make sure you use a reliable PDF editor

PDF printing issues can occur if you’re using an untrustworthy PDF editing tool, so be sure to download and install a reliable PDF editor option.

For instance, we often suggest to our users to use the Soda PDF editor because it can secure your PDF documents so none of the information within will be compromised.

Moreover, it offers easy-to-use tools to help you create, convert, customize your content, and share it safely and securely.

Older PDF editor versions might have some issues regarding PDFs not printing properly, and in order to ensure that everything is working, try Soda PDF first. After downloading and installing this tool, try to print the PDF file again.

Soda PDF

Secure your PDF files and print them without worrying about transfer corruption file issues.
Free Trial Visit Website

3. Reload the fonts

Sometimes PDF files aren’t printed properly if there’s a problem with fonts. If you are the creator of the PDF document, try reloading fonts and check if that fixes the problem with printing.

4. Keep your printer drivers up to date

  1. Press Windows Key + X to open Win + X menu and choose Device Manager from the list.
    pdf-files-not-printing-properly-device-1
  2. When Device Manager opens, look for your printer.
    • If you don’t see it in Device Manager, go to the View tab and check Show hidden devices option.
      pdf-files-not-printing-properly-device-2
  3. Locate your printer, right-click it and choose Uninstall.
    pdf-files-not-printing-properly-device-3
  4. In the next window, check Delete the driver software for this device and click OK.
    pdf-files-not-printing-properly-device-4

Your printer relies heavily on drivers in order to work properly, but sometimes driver issues can occur.

If that’s the case, you should install the latest drivers for your printer. To do that, simply visit your printer manufacturer’s website and download the latest drivers for your model.

It is very important to choose the right driver versions from the manufacturer’s website. In case you choose and install the wrong one, this will not only be an issue for the GPU but may harm all your system.

Because of that, it’s better to be careful and consider specialized programs that can update drivers on their own. Hence, you can choose the best driver update software on Windows 10.

5. Print PDF as an image

If your PDF files aren’t printed properly, there might be an issue with rendering PDF files. To fix this problem, you need to check the Print As Image option. This option is available from the Print window so be sure to check it.

If you can’t find this option, be sure to look for it in the Advanced menu. By using this option your PDF file will be converted into an image before printing and all problems with rendering will be avoided.

6. Try to print another document

Sometimes these problems can be caused by your printer, and if that’s the case, you should check if your printer is working properly. To do that, try to print any other PDF document.

If the issue persists, try printing another type of file. This will help you determine if the problem is caused only by PDF files. If you can, you can also try using a different printer and check if that solves the problem.

7. Create a copy of the PDF file

According to users, you might be able to fix this problem simply by creating a copy of the PDF file. To do that, open your PDF editor and choose File, then Save as.

Enter the new name for the PDF file but be sure not to use any special characters or symbols. After creating a copy of the PDF file, try to print the new file and check if the same problem appears.

8. Restart your PC

A few users suggested that you might be able to fix this problem simply by restarting your computer. This problem can be caused by your cache, but it should be removed when you restart your PC. After restarting your PC, check if the issue is resolved.

9. Force printer to use TrueType fonts

Users reported that text isn’t being printed while printing a PDF file, and instead of letters users are getting empty boxes.

According to users, this issue is caused by TrueType fonts. Sometimes printers can use their own fonts instead of TrueType fonts and that can cause this error to appear.

To fix this issue you need to force the printer to download TrueType fonts for printing. To do that, make sure to change TrueType font option to Download as Softfont. Save changes and try to print again.

10. Install the missing fonts

If text is missing when printing a PDF file, that can be caused by missing fonts on your PC. When creating a PDF file users can embed custom fonts in the PDF which ensures that it will look the same on any PC.

By embedding fonts into the PDF file the file will be larger in size, and that’s not what many users want. In order to reduce the size of a PDF file, users often don’t embed custom fonts into PDF documents which can create these types of problems.

To fix this problem, you’ll need to find the fonts that are used by the PDF file and install them on your PC in order to print the PDF file properly.

11. Embed the fonts in PDF files

  1. When you’re printing the document as a PDF, click the Printer Properties button.Embed the fonts in PDF files
  2. Now click on Adobe PDF Settings tab.
  3. Click the Edit button next to the Default Settings dropdown menu.
  4. Click on Fonts and check the Embed all fonts option.

If you created the problematic PDF file, you should be able to fix the problem with missing text simply by recreating the file and embedding the missing fonts.

After doing that, custom fonts will be embedded in a PDF file and the issue should be resolved. Keep in mind that embedding fonts will make the PDF file larger in size.

12. Use PDF/X standard

You can avoid most of the printing problems with PDF files simply by using the PDF/X standard. Any document can easily be converted to PDF/X standard by using Adobe Acrobat or a third-party application.

The PDF/X standard requires that all fonts are embedded in the PDF documents. In addition, bounding boxes have to be specified. You also need to define the color and disable all transparency for this standard.

By using this standard you’ll ensure that your PDF file looks the same on your device and on paper. Keep in mind that the PDF file will be larger in size since you’re embedding fonts to it.

13. Make sure that No Color option isn’t selected

  1. Select field Properties.
  2. Navigate to Appearance.
  3. Now set Border Color to any color that you want.
  4. Set Fill Color to white.

Users reported that certain fields are visible on their PC when viewing the document, but the same fields are missing after the document is printed. This is a strange problem, but it seems that this issue is caused by the No Color option.

After setting Fill and Border colors to anything other than No color, the issue should be completely resolved.

14. Make sure that visibility isn’t set to Screen

If certain elements aren’t displayed when you print a PDF document, you need to check the visibility settings for that document. Few users reported that certain elements aren’t visible because their visibility was set to Screen.

By using the Screen option your elements will be visible only on your screen but not when you print the document. After changing the visibility to something other than Screen, the issue should be resolved.

15. Turn on Display PDF in browser option

  1. Open the file in Acrobat Reader and go to Edit > Preferences.
  2. Select the Internet category.Turn on Display PDF in browser option
  3. Locate Display PDF in browser option and check it.
  4. Save changes and try to print the document from the browser again.

According to users, sometimes PDF documents aren’t printed properly from the browser, and in order to fix that issue, you need to change few settings in Acrobat Reader.

16. Downgrade your PDF tool

If your PDF documents aren’t printed properly, you might want to consider downgrading your PDF tool. Newer versions often introduce new features, but certain bugs can be present and cause printing problems.

One suggested workaround is to downgrade your PDF tool to the older version and use the older version until the issue is resolved.

This might not be the most efficient solution, but it should allow you to print your documents without any problems.

17. Disable Rely on system font only, don’t use document fonts option

  1. Open Settings and go to Devices.
  2. Select Printers & Scanners.
  3. Select Adobe PDF, right-click and choose Printer preferences.adobe pdf printer properties
  4. Uncheck Rely on system font only, don’t use document fonts option.

As you know, you can embed fonts to PDF documents in order to avoid problems with viewing and printing, but some PCs don’t allow custom fonts to be displayed, and that can cause PDF documents to be improperly printed.

PDF documents are both portable and extremely useful, but sometimes issues with printing can occur. To fix problems with PDF files and printing, be sure to use some of our solutions.

Microsoft Edge ePub Reader No Longer Supported [2 Solutions]

Once upon a time, Microsoft’s Edge let you read your favorite EPub books directly in the browser.

Back in 2017, Microsoft launched the awaited Windows 10 Creators Update that brought EPub file format support to Edge (among other new features) for all Windows 10 users.

But that was a while ago. Now let us fast-forward to more recent times when Microsoft announced the EPub adventure was coming to an end as far as the Edge browser was concerned.

So there it is; Microsoft declared on its official page that Microsoft Edge will no longer support e-books that use the .epub file extension. Therefore, you won’t be able to open EPub with Edge anymore.

What can I use to open EPUB files?

Of course, you can use third-party apps to replace your Edge Epub reader – do check out our complete guide containing the best EPub readers to use on Windows 10 and even search the Microsoft Store to pick an Ereader.

Nevertheless, the best software for the job is Icecream Ebook Reader.

Icecream Ebook Reader – Improve your reading experience

Icecream Ebook Reader is shaped to improve your reading experience.

Providing support for EPUB, MOBI, FB2, CBR, and other popular formats, this ebook reader is incredibly easy to use, and it has a wide range of features to offer, like Fullscreen and Night mode, Bookmarks and even Custom categories.

You can enjoy it for free or get the PRO version for even more perks.

Let’s quickly go through its key features:

  • Supports multiple file formats (FB2, EPUB, PDF, MOBI, and others)
  • Library (to manage your digital content) and Export Library (to transfer your ebook collection between PCs)
  • Reading progress (to resume reading where you left off in just 1 click)
  • Copy, Translate, Search features
  • Annotation features (to add notes, highlights, and bookmarks)
  • Navigation scrollbar (to browse pages faster)

Icecream Ebook Reader

Read your ePub with this simple and specialized software.
Free Trial Visit Website

Adobe Digital Editions – Built-in organization features

Beautifully suited for PCs, MAC, tablets, and mobile devices, ADE will help you proofread, take your reading online and offline, and even borrow/purchase digital content automatically stored on all your devices.

Adobe Digital Editions supports multiple file formats, including EPUB, EPUB3, and PDF, and it allows you to optimize your reading experience by modifying text and document size in different formats.

You can even use it as a file manager thanks to its in-built organization features that enable the creation of custom bookshelves sorted by title, author, and publisher.

Let’s quickly go through its key features:

  • Cross-platform functionality (download and transfer books across all your devices)
  • Enhanced reading experience (render audio and video content; support for right-to-left reading; dynamic image resizing, interactive quizzes, etc.)
  • Full-text search functionality and easy navigation to different pages
  • Compatible with various screen readers (including JAWS, Window-eyes, and NVDA)
  • Multi-lingual support for eBooks (English, French, German, Italian, Spanish, Dutch, Brazilian Portuguese, Japanese, Korean, Chinese, etc.)
  • Bookmarks, highlights, and notes available
  • File Organization features (create custom bookshelves sorted by title, author, and publisher to organize your digital content)
  • Multiple file formats support (including EPUB, EPUB3, and PDF)

Adobe Digital Editions

Optimize your Epub reading with this software from Adobe.
Free Trial Visit Website

The bottom line is that you still need to use a third-party application or extension to read EPub files, even if you’re an Edge user. The same applies when it comes to opening EPUB files in Windows 11.

But that is probably a blessing in disguise since there are numerous options to pick from that bring more to the table than the Edge browser ever could.

Give ADE or IceCream a try. They are entirely free, and let us know your thoughts in the comments section below.

Dandara and Lost Planet 2 video games are now free to download for Xbox Live Gold subscribers

February’s two new mid-month Games With Gold titles are now available to claim, download, and play for all gamers with an active Gold membership and a console from either the Xbox One or Xbox Series X families.

The first game is Dandara: Trials of Fear Edition, a single-player 2D platformer with a strong retro Sci-Fi aesthetic that came out in 2018.

Here’s the game description:

The world of Salt hangs on the brink of collapse. The citizens, once free spirits, now stand oppressed and isolated. But not all is lost, for out of this aether of fear arises a heroine, a ray of hope. Her name is Dandara. Welcome to a unique 2D metroidvania platformer full of mystical creatures and boundless exploration. Defy gravity as you jump across floors, walls, and ceilings alike. Discover the mysteries and secrets hidden throughout the world of Salt and its diverse array of characters. Empower Dandara for combat and survival against enemies bent on oppression. Awaken, Dandara, to bring freedom and balance to this directionless world.

The second game, Lost Planet 2, is an Xbox 360 title that released way back in 2010. It supports local multiplayer for up to four players and online multiplayer for matches with up to 16.

Here’s the full game description for Lost Planet 2:

Rediscover the world of LOST PLANET 2, the latest entry in the 2.7 million-selling action shooter series! Over 10 years on from the events of the original, LOST PLANET 2 returns to the troubled world of E.D.N. III, with a globe-trotting story of a planet torn apart by the battle for precious thermal energy.In addition to the all-new 4-player co-op Campaign, LOST PLANET 2 introduces a new character customization system, an arsenal of new weapons and VSs to pilot, and a host of massive new Akrid to use them on.LOST PLANET’s famed online multiplayer battle also makes a return, with new maps, modes, and more for up to 16 players!

This month has been a pretty good one for Xbox Live Gold subscribers as it’s given them five full video games to claim as opposed to the usual four. Gears 5, Resident Evil, and Indiana Jones and the Emperor’s Tomb have already been available this month though it’s worth noting that the ability to claim the latter title expired on the 15th.

Have you played any of February’s Game With Gold titles yet? Let us know which one’s your favorite in the comments below and then follow us on Twitter and Pinterest for more Xbox gaming news.

Dandara: Trials of Fear Edition
Developer:
Raw Fury
Price:
$14.99


Lost Planet 2
Lost Planet 2
Developer:
CAPCOM CO., LTD.
Price:
$3.99

Windows 10 version 21H1 is now available for “seekers” in the Beta Channel

Microsoft has finally shared all the details about Windows 10 version 21H1, the next version of the OS to be released later this Spring. As expected, this will be another minor update just like 20H2 was last fall, and this will actually be the first time since Microsoft shifted to a bi-annual release cycle that the “Spring” update for Windows 10 is a minor one.

Windows 10 version 21H1 is available today for “seekers” in the Beta channel. To download it, you’ll need to go to Settings > Update & Security > Windows Update and then choose to download and install 21H1, which is the build 19043.844 (KB4601382). The installation process will be very fast, similar to the upgrade path from version 2004 to 20H2.

“Windows 10, version 21H1 will have a scoped set of features improving security, remote access and quality. The features we are releasing in this update are focused on the core experiences that customers have told us they’re relying on most right now,” explained John Cable, Vice President, Program Management, Windows Servicing and Delivery.

New features in Windows 10 version 21H1 include multi-camera support for Windows Hello, which will allow users of PC with an integrated camera to use an external camera for authentication. The update also brings performance improvements for Windows Defender Application Guard as well as Windows Management Instrumentation (WMI) Group Policy Service (GPSVC) updating, the latter getting support for remote work scenarios.

Windows 10 version 21H1 will be available for non-insiders “later in the first half of this calendar year,” Cable said today, and we should get a release date in the coming weeks. In the meantime, Microsoft has also released a new 20H2 build for Insiders in the Beta channel who don’t want to install the 21H1 update yet. You can learn more about this new 20H2 build in our separate post.

5 best VPNs for StarCraft and StarCraft 2 to reduce lag

StarCraft II is a critically acclaimed military real-time strategy game developed by Blizzard Entertainment.

The game has four different releases titled Wings of Liberty (released in 2010), Heart of Swarm (released in 2013), Legacy of Void (2015) and Nova Covert Op ( released in 2016).

The gameplay is consists of three major species which are Protoss, Terrans, and Zerg. Players choose characters based on the story mode of each of the game releases.

The storyline for each character is usually that of rebellion against an autocratic established order.

Starcraft II since its release is one of the most popular games played worldwide with over 8 million downloads. Gamers typically log on to game servers to play against other rivals or computer-generated rivals.

This can lead to congestion of servers and cause poor gameplay or lags to some players. Some regions also suffer from geo-block restrictions on gaming servers.

However, these issues can be easily resolved with the use of VPN software. VPN (Virtual private network) gives secure connection and override geo-restrictions making it easier to access StarCraft II servers.

This guide highlights the best VPN software which has been tested to give speed, reliability, and zero issues while playing StarCraft game.

What are the best VPNs for StarCraft and StarCraft II?

Private Internet Access (recommended)

Private Internet Access, developed by Kape Technologies, is one of the few VPN that offer quality service on a cheap. The VPN for StarCraft offers many privacy features and has mover 3200 servers in 46 countries.

Their servers boast of fast speed, which is a good fit for StarCraft II gamers. In fact, the widespread servers and fast speeds make it one of the best VPNs for gaming in the world.

Meanwhile, they also offer users secure options such as kill switch and DDoS security against hacks and snoops.

PIA also encrypts users’ connections and reroutes user traffic through their servers to improve user gameplay.

More so, their encryption technologies is one of the best, so not even your ISP will know what you are up to.

Here are some of the perks of using Private Internet Access:

  • 3200 servers located in 46 countries
  • One subscription gets you support for 10 devices
  • Easy to setup
  • Easy-to-use
  • No-log policy
  • Encrypted Wi-Fi capabilities
  • Unlimited bandwidth
  • Zero lag
  • and more…
Private Internet Access

Private Internet Access

High ping in Starcraft affects your victory streak? Use PIA to fix it easily.
$2.69/mo. Buy it now

CyberGhost

CyberGhost offers excellent VPN services and is an ideal service for StarCraft gamers. Developed by the same company that created PIA, it offers over 3000 servers in 60 countries; these servers have been strategically placed to bypass any restriction.

This is of importance to gamers in a region with limited access to gaming servers.

In addition, this best VPN for StarCraft offers full VPN security services with the kill switch and DNS leak protection features which lets you enjoy gaming with little worries.

Your identity is kept safe and your connections are encrypted with state of the art technology to keep you secure. Also, the special offer for CyberGhost is $2.75 per month which is billed annually and includes a 30-day money-back guarantee.

CyberGhost VPN

CyberGhost VPN

Losing easy games in Starcraft because of high ping? CyberGhost VPN can help you fix that.
$2.75/mo. Buy it now

NordVPN

This VPN developed by Tefincom & Co., S.A. works very well for StarCraft, and has a friendly interface with excellent features. They offer over 2800 servers in over 50 locations across the world. The servers also boast fast connection speed which is essential for gaming.

In addition, the user interface is clean and connections can be set up with a few clicks on the main menu. NordVPN also prevents DDoS attacks while playing StarCraft to prevent other gamers from gaining an unfair advantage over you.

Also, NordVPN has a strict no-logs policy; hence, your information is not stored on their servers. Moreover, the military-grade 256+ encryption ensures your connections are in no way tampered with.

NordVPN

NordVPN

NordVPN can protect your online privacy, but it can also lower your ping in Starcraft.
$3.71/mo. Buy it now

ExpressVPN

If you need a reliable and consistent VPN for StarCraft, StarCraft II, Express VPN is one of the best solutions in that aspect.

Developed by Express VPN International Ltd., this VPN is cross-compatible with other OS and most especially Windows OS.

Users also have the option of allowing up to five simultaneous connections on a single subscription. However, in terms of security, ExpressVPN is stable; since they own their servers there is increased performance and reliability.

ExpressVPN

ExpressVPN

Can't play Starcraft properly because of high ping? ExpressVPN can help you with that.
$8.32/mo. Buy it now

VyprVPN

VyprVPN is one of the established VPN services available and provides quality VPN services focused on secure encryption.

This best VPN for StarCraft, StarCraft II offers 6500 servers in more than 60 server locations placed strategically around the world.

With this VPN service, you get quality VPN features such as DNS leak protection and kill switch features.

Users can rest assured while gaming as the servers is owned by them, which enables maximum game performance.

VyprVPN

VyprVPN

VyprVPN can help you lower your ping in Starcraft while also protecting your online privacy.
$1.66/mo. Buy it now

The VPN for StarCraft, StarCraft II listed above have been tested and proven to give an excellent solution to several connection issues that you may experience.

Feel free to share your StarCraft + VPN gaming experience with us by commenting below.


Phototastic Collage for Windows 10/11 [Review, Download Link & Alternatives]

When it comes to making collages out of your pictures in Windows 10/11, then Photostatic is among the best apps one could use. Even more, it is completely free to use and comes with no advertising.

With Phototastic, you can create fantastic-looking collages of your photos. With 100+ collage templates to choose from, you’ll never get bored.

Today, we’ll take a look at its main features so you’ll know what to expect from this software.

Sounds good? Let’s get started.

Photostatic Pros and Cons

✅ Pros

  • Free and Ad-free
  • 100+ Templates: Wide variety of collage options.
  • Customizable photo placement for creative freedom.
  • Editing Features: Add stickers, text, backgrounds, and frames.
  • Special Frames: Supports Polaroid and filmstrip styles.
  • Photo Effects: 30+ effects for contrast and brightness.
  • Built-in Camera: Capture images directly within the app.
  • Social Media Sharing: Easy sharing on Twitter, Facebook, etc.
  • Adjustable Borders: Customize collage borders.

❌ Cons

  • Learning Curve: New users may need time to learn features.
  • Limited Image Manipulation: No advanced retouching options.
  • Template Reliance: Creativity may be constrained by existing templates.
  • No Mobile Support: Available only for desktop.

Features

Let’s take a look at some of the features of Photostatic for Windows:

Free Mode

According to the release notes published by Thumbmunkeys, the developer, the Windows Photostatic app now comes with a few new features, such as the Free Mode.

With the Free Mode function, you can place your photos wherever you want, you have access to photo and collage frames, but also to collage templates and more backgrounds.

Collage Templates

You will find over 100 collage templates with up to twenty-five photos. Also, the app comes with a built-in action camera and adjustable collage inner and outer borders.

phototastic windows 10 app

Special Effects and Filters

Phototastic also offers you loads of options for adding stickers, text, custom backgrounds, and applying photo frames.

If you’re a fan of Polaroid and filmstrip frames, this is the perfect app for you as it supports both these types of frames on collages.

The app packs more than 30 effects for photographs that you can use to adjust image contrast and brightness. What’s even more interesting is that it offers front and rear camera support.

In other words, you can capture images for your collages with a built-in action camera and then apply various effects to your newly captured shots.

When finished arranging your photos, apply one of the many photo shapes or background patterns to give your collage that extra pop. Once you’re done, share it with your friends.

Social Media Integration

When you’re happy with the end result, you can share your photo collages on social media. The app supports photo sharing for Twitter, Tumblr, Flickr, Facebook other social media platforms.

Get the latest version of Photostatic from the Microsoft Store and start creating awesome collages.

⇒ Get Photostatic Collage

What alternatives are there to Phototastic Collage?

Adobe Photoshop

Adobe Photoshop is a professional-grade alternative for creating stunning photo collages and digital artwork.

This world-renowned raster-based image editor has all the tools one may ever need to create stunning images and photos.

It does this by adding a wide variety of effects and montage features, so creating an image collage is second-nature for this tool.

Adobe Photoshop

Create stunning collages today with Adobe Photoshop’s pro toolset!
Free trial Visit website

Adobe Express

While Phototastic Collage is a great tool for creating photo collages, it isn’t the only software of its kind. For example, Adobe Express is just as good at creating them, although this isn’t the software’s intended purpose.

There are numerous tasks you can do with this solution, and creating inspiring and original photos is surely one. With various templates, photos, or graphic elements, nothing keeps you from creating awesome photo collages.

Besides the photo collages, Adobe Creative Cloud Express allows users to create and design visual content of all kinds. These, in turn, can be used for businesses, education, social media, etc.

Adobe Creative Cloud Express

Transform your ideas into captivating designs with Adobe Creative Cloud Express.!
Check price Visit website

In this article, we presented you with a wonderful photo editor, Photostatic, as well as some alternatives to this tool. Which one would you rather go for? Tell us more in the comment section below.

New Microsoft update forces Flash Player removal for good

Microsoft is currently pushing forward an older update that forces users to remove Flash Player for good from their Windows 10 devices.

KB4577586 was initially rolled out last autumn and included in the Microsoft catalog as Update for Removal of Adobe Flash Player (followed by the OS version and specs).

Whereas back then it was an optional update, now it’s been not just brought to the top of the catalog list, but also included in the automatic updates launched last week.


Will I be able to keep Flash Player?

keep flash player

In other words, users that have postponed or have been reluctant to uninstall Flash Player traces will now have no choice.

The update will be visible to more and more uses in the following weeks, in the Update& Security section of their devices’ settings.

If you’re keen on using this update now, you can download it straight from the official catalog.

Note that the update applies to Windows 10, version 1903, and later, and it can’t be uninstalled. Similarly, Flash Player support can’t be restored after this change.

On the other hand, according to a support document, the patch is designed to remove Flash Player installed by Microsoft only and it won’t affect any versions of the software that have been installed manually by you via third-party software.

This is yet another step forward to eliminate Flash Player support. As of January 2021, major browsers have excluded it so that Flash content is no longer usable.

While many users are nostalgic about Flash games or similar content, HTML5-based content replacing it is actually safer.

Also for digital safety reasons, don’t forget to get your Patch Tuesday updates. They come with important security adjustments.

If you’re keen to share your non-Flash experience with us, we’d be happy to read it. Feel free to use the comments section.

Microsoft is now helping developers to make their Xbox and PC games more inclusive

Microsoft’s response to Sony’s first-party gaming line up out of the gate is arguably softer than some fans would like, however, its response to gamers’ accessibility needs at least feels strong and thoughtful.

Over the past few years, companies such as Microsoft, Apple, and Google have made public showings of their efforts to address inclusion, representation, and accessibility throughout their software and hardware experiences. In 2021, Microsoft is taking its accessibility efforts further by creating a uniform framework for its game developers to leverage when considering members of the Gaming & Disability Community.

At the end of January 2020, Microsoft and industry experts collaborated on the Xbox Accessibility Guidelines (XAGs) as a new “comprehensive set of best practices to support the gaming industry in driving accessibility efforts forward.”

Among the tenants of XAGs conception were improving guideline language, creating a succinct goal statement for developers, improving the overview sections with contextual information, high-level scoping developer questions, key areas to target, adding background and foundational info, and lastly, better implementing guidelines.

  • Improved Language: The language used in the XAGs has been improved to ensure that guidelines are clear and easily understood. A focus on removing overly technical terms, or adding additional context to help readers understand terms, was a top priority.
  • Clear “Goal”: Each XAG now has a succinct “goal” statement. Readers can more easily find XAGs relevant to their current work by quickly reading through goal statements.
  • Improved Overview: To ensure that developers understand the importance of each XAG guideline, improved overview sections now provide key contextual information including a summary of the impact a XAG can have on gamers with disabilities as well as those facing situational impairments.
  • Scoping Questions: High-level questions ask developers to identify whether certain elements are present in their game. This yes/no determination can help developers more easily identify which XAGs are key priorities to be focused on first.
  • Key Areas to Target: Helps developers identify areas across their game experience that should be addressed when implementing XAG guidelines.
  • Background and Foundational Info: As some XAGs are more complex than others, additional background and foundational information has been provided to help make certain XAGs easier to comprehend.
  • Implementation Guideline examples: To help clarify guidelines that were difficult to understand, numerous examples (in the form of images and videos) have been created and aligned with various guidelines to demonstrate real-world examples of specific guidelines in action.

Xac Updates And Testing Hero Asset

According to Microsoft’s Xbox team, the end result is, “Developers now have the option to send Microsoft their Xbox or PC title and have it analyzed and validated against the recommendations provided in the XAGs. Where issues are found, they are noted with reproduction steps, screenshots, and other information to help the developer understand what aspect of a given experience may be challenging for certain gamers with disabilities.”

Perhaps, even cooler than meeting Microsoft’s increasingly stringent requirements for accessibility is that developers now also have access to those who are part of the Disability Community of gamers as early testers. Through XAGs, every test pass now includes members of the Gaming & Disability Community as actual real-world experiences to test use cases against to get more accurate feedback regarding their game and its development.

Microsoft is making strides in crafting gaming experiences for as many fans as it can get to the platform, but in the end, it’s ultimately up to developers to provide the more meaningful and longer-lasting experiences to all fans of gaming, including those who rely on accessibility considerations.

4 Best Dynamic Website Creator Software [2026 Guide]

A website is the face of an individual blogger or an organization these days. And, a well-made website has a great impact on their online exposure.

A dynamic website not only maximizes the online presence of a business, but it also helps increase their profits.

Web designers have to stay open to any new change in the designing sphere. That’s when they need the assistance of some of the best software to create a dynamic website that meets client demands.

There’s an ever-increasing demand for improved websites in terms of looks and responsiveness. From a VR-based website to something that features a voice search, new technology is simply essential.

While there are umpteen web design software programs out there, there are some that excel the expectations of the users.

Here’s a quick list of the best software to create a dynamic website that can help users make the right choice.


What is the best software to create dynamic websites?

Adobe XD

Adobe XD product

Adobe XD offers one of the fastest ways to design websites and share the user experience. It comes loaded with fast responsive tools that take users deep into their designs.

Using this software, users can add voice to prototypes. Auto-resizing of elements on various screens, or the option to create beautiful animations are the features to look out for.

It allows users to change from design to prototype mode in a single click. Users can then drag the wires between the artboards that helps them convert the wire structures into collective prototypes.

It also allows users to make any modifications on the go and also view the same on their mobile phones.

What’s more? Users can also share their auto-saved files in the cloud safely with the team, from any location.

Fast performance, amazing plugins, and the option to discuss experiences within the community are some of its features that make it a sought-after software.

Adobe XD

Adobe XD

Design websites, apps, voice, create mockups and prototypes across any device, while also collaborating with your team on the same project.
Free trialVisit website

Mockplus

Mockplus is a web-based collaborative design platform that connects designers, product managers and developers, built for making design faster and easier.

By Mockplus, your teams can simply use drag and drop components and create prototypes, easily. It comes with a collection of pre-designed components and icons. Users can also create complicated interactive components such as pop-up panels and share them as team assets. Mockplus also offers Pen and Pencil tools for vector drawing, user can create vector shapes, logos, icons, and even illustrations.

On the other hand, you can import designs from Sketch, Adobe XD, Adobe Ps, Figma, then collaborate with teams and hand off the design to developers to finalize the design process, your team can also manage the projects and design system in a more collaborative way, making the entire design process in order. 

Mockplus

Mockplus

If you prefer rapid wireframe tool and you are looking for one that is cheap, try out Mockplus.
Check priceVisit website

Template Toaster

best website creation software

Template Toaster has rapidly grown in popularity over the years in the category of the best web design software.

It comes with an advanced site layout and is extremely compelling with a user-friendly editor. The editor also features the drag and drop function.

The software offers some eye-grabbing templates and themes which can be produced in just three simple steps.

All the user needs to do is to download the software and install it on the system, generate themes or personalize the pre-designed templates, and export and upload them to the hosting server.

The best part about this software is that it’s perfect even for beginners as it does not involve any complex coding. It’s a desktop-based program and so, can also be used offline.

Moreover, it’s compatible with almost all major platforms.

Besides, it allows users to boost their profits using the website builder and the e-commerce website builder options.

The responsive web themes, the option to upload them on any web host, and free website themes are its other major highlights.

⇒ Get Template Toaster


Sketch

website software

Sketch is one of the best software to create a dynamic website in the category that comes with a totally fresh and redesigned interface. This makes the designing process more responsive.

It comes with a responsive interface and powerful features. It also boasts an extended plugin ecosystem.

Among its major features are, a complete toolkit, non-harmful editing function, option to edit vectors, grid and tutorials, code export, and more.

Users can now link artboards, include simple animations, and convert static screens into prototypes that can be clicked and playback in the software.

Users can also work in collaboration, and sync and share the styles and symbols with co-workers. Best of all, they offer hundreds of plugins to choose from.

⇒ Get Sketch


Website designing is an art and all it needs is the penchant for some creativity and the help of some expert tools.

Whether you are starting with your first website or you want to revamp the existing one, you can use one of the best web design software from the list and get going with your idea.


4 best audio interface software [2020 Guide]

Although audio interface software isn’t exactly a standalone thing. since, you know, it requires the actual hardware component which is the audio interface itself.

It can sure make things easier for hobby musicians and professionals alike by ensuring that those audio signals routed through the interface are not going to waste.

We have listed below some of the few best software solutions that are oriented towards efficient handling of audio interfaces on your Windows 10 computer.


What is the best audio interface software that I can get?

Adobe Audition

Adobe currently holds a huge slice of the multimedia editing software market and Adobe Audition is currently one of the reasons why this happened.

If you’ve been in this field long enough, you’re probably welling up remembering the good old days when this tool was simply called Cool Edit Pro.

Nevertheless, this utility is among the power players when it comes to recording audio and editing the input on your computer as efficiently as possible.

To get that crispy, crystal-clear sound, professionals use an audio interface between the mic and their Windows computer.

Among its most popular features, one can find Adaptive Noise Reduction, Spectral Frequency Display, a built-in metronome, and support for VST and AU plugins.

You can download Adobe Audition as part of the Adobe Creative Cloud software suite, but that doesn’t mean you have to purchase the whole bundle just so you can perform recordings and edit them.

Adobe Audition

Adobe Audition

The best audio interface software that comes with a multitude of features designed to bring your work to the next level.
Free trialVisit website

Total Studio 2 MAX

Total Studio 2 MAX is an all-in-one music production software solution that can be used as a collection of standalone applications or in conjunction with specialized IK Multimedia audio interfaces.

It provides a wide variety of synthesizers, a massive library of samples, instruments, an outstanding collection of mixing and mastering effects, as well as a broad range of guitar and bass amps.

It is safe to say that Total Studio is an army of one, making it possible for amateur music producers and professionals to ditch their outdated studio equipment and embrace the era of digital instruments.

Of course, and this can’t be stressed enough, all of these fantasy-like scenarios would be absolutely in vain without proper instrument-computer communication via a supported audio interface.

That being said, make sure you’ve got the right tools before making the commitment of purchasing Total Studio 2 MAX.

⇒ Get Total Studio 2 MAX


Guitar Rig

As the guitar is one of the most famous and instantly-recognizable instruments out there, Guitar Rig is, without question, one of the best amp modeling software solutions.

However, things are not exactly that simple, as more often than not you can’t just plug the guitar into your computer and expect everything to be smooth sailing.

Sometimes an extra tool called an audio interface, is needed to transfer the instrument’s signal to your computer in a way that’s as lossless as possible.

Guitar Rig, is here to cater to all your guitar processing needs, providing you with means of yielding the best tone for your instrument without breaking a sweat, twisting knobs, and flicking switches.

Currently, this tool holds roughly 17 amp models, 27 cabinets, and 54 effects, which is more than enough considering that in real life this kind of equipment would take more than two bedrooms.

Guitar Rig can be downloaded and tried for free from the official Native Instruments website and features all the Guitar Rig 5 PRO components, but there are two downsides to this convenient situation:

  • The demo only runs 30 minutes per session (can be re-launched);
  • The Save and Total Recall features are disabled;

⇒ Get Guitar Rig


Virtual Audio Cable

Virtual Audio Cable is one of the most widely-used software that specializes in providing seamless integration with various audio interfaces and organizing these devices as effectively as possible.

This tool is actually a software device that emulates an audio cable. So it does everything that a real audio cable is capable of doing, but as lines of code on your Windows 10 computer.

Therefore, Virtual Audio Cable takes all the audio signals that reach its CABLE input and routes them to its CABLE output, much like what happens in real life.

Users are then capable of making computer recordings in a much easier way without going through configurations, but also perform tasks such as connecting a software audio player to a recording utility.

Getting a bit more technical, Virtual Audio Cable comes with a multi-format audio engine, which makes it possible for this tool to work with audio applications that use WASAPI, KS, DX, KS or MME interfaces.

Although Virtual Audio Cable is a free software solution (well, the correct term would be donationware), this version is limited to personal use.

However, the developers also provide you with other options, especially if you’re interested in volume licensing, commercial distribution and even company deployment.

⇒ Get Virtual Audio Cable


Whether you’re a professional musician or an aspiring one, you’ve relied on software solutions at some point, since they give you the possibility of lifting a huge burden off your shoulders.

Since connecting your favorite instrument to the computer is most of the time a difficult job, you’re also probably relying on interfaces that simplify this task for you to the point of plugging and playing.

Audio interface software was designed to help you go through the whole creation itinerary, from getting the PC to recognize your instrument to recording those signals and editing them to your liking.


FIX: sfl.dll is missing / error [Complete guide]

Many users report getting the sfl.dll is missing/error which can cause some of the associated software to not work properly.

There are multiple reasons why this error can appear but most often is associated with Windows registry issues, faulty applications, or malicious software.

What is sfl.dll used for?

The sfl.dll file with the dll extension is associated with Paint Tool SAI and is usually used to run this application.

Also, specific or more sophisticated video games and software applications use the sfl.dll file in order to get access to certain API functionalities that are provided by Windows 10.

In this article we will explore how you can best handle the sfl.dll error with just a few easy steps, so make sure to keep on reading.

How can I fix the sfl.dll is missing error message?

1. Restore the sfl.dll file

Before trying any solution, the easiest thing to do is try and restore the sfl.dll file.

You can do this manually but we would recommend using a dedicated third-party tool which will also ensure that other damages won’t be made during the process.

It is highly recommended to utilize specialized tools to find missing DLL files on your system and therefore repair your PC securely without taking any risks.

Hence, you can resolve this efficiently with DLL support offered by automated tools that will find missing or broken software files and replace them with functional ones.

2. Update Windows

As you have probably noticed already Windows 10 is regularly releasing new updates, sometimes several times a month.

Make sure to check if your Windows is up to date and if is not performing the update is our next recommendation.

This will ensure that there is no incompatibility between an older version of the sfl.dll file and your current Windows 10 version.

3. Perform a system rollback

  1. Type System Restore in the Search bar.
  2. Select Create a restore point and click on the System Restore button.
  3. Next, select Choose a different restore point and click Next.
  4. Select a date for restore then click on Next.
  5. Enter your password if asked and follow the on-screen steps to choose a restore location
  6. Reset your device.

4. Reset your device

  1. Write reset this PC in the Windows search box.
  2. Click on Reset this PC and press on the Get started button.
  3. From the displayed list select the Keep my files option.
  4. Finally, press on the Next button and Reset to confirm.

5. Scan your device

Most of the time, the sfl.dll error is prone to happen due to a malware infection or a virus on your device.

It’s not uncommon for a malicious program to cause this sort of error to the DLL file, and for this reason, using specialized software like Malwarebytes can make a huge difference.

Not only that you can remove any malware that’s already on your system, but if you choose to do so, you can also prevent any other malware from being able to infect your OS.

This powerful software offers quick resolution to any malware problem, and many other useful features while presenting you with an easy-to-understand UI.

Hence, you can trustfully use Malwarebytes to entirely scan your PC and find harmful malware anytime or block ransomware attacks or malicious websites.

Problematic applications or malicious files can cause the sfl.dll error and you can easily fix this problem by following the steps indicated in this article.

We definitely hope that following the steps shown in this guide has managed to help you resolve the sfl.dll error.

Please share with us in the comments section below any other recommendations or suggestions you may have or which one from the above solutions helped you solve the error.

5+ best VPNs for Dragon Age Inquisition

Dragon Age: Inquisition is the third installment game of the Dragon Age series which was released in 2014.

The game involves players choosing a player character known as inquisitor through a quest to close a mysterious hole in the sky known as the Breach.

The role-playing action game was developed by BioWare Edmonton and released by E.A games. At the start of the game, you choose from various races as your inquisitor character.

This includes Human, Elf, Dwarf, and Qunari. There are also three classes you have to select from – warrior, mage, and rogue – with each class having special abilities and weaknesses.

The game is critically acclaimed by millions of gamers worldwide. The Windows version has an open-world multiplayer which is accessed by eager gamers daily.

This could make some players experience connection problems which could cause gameplay performance problems. Hence, the use of a VPN would reduce connection problems.

This post highlights five of the best VPN programs that are perfect for Dragon of Age: Inquisition gaming with their major features to help guide you in picking the right one for your gaming needs.

The best VPNs for Dragon Age: Inquisition

Private Internet Access (recommended)

get Private Internet Access

Security-conscious gamers can’t find a better VPN solution for countless hours of Dragon Age: Inquisition fun. Owned by Kape Technologies, Private Internet Access promises military-grade security.

It never keeps logs of your activities and even if you’re not willing to explore its advanced features, it will still keep your connection secure.

Private Internet Access provides IP cloaking servers and grade firewalls with every account. Remember that it protects up to 10 devices simultaneously – which is certainly enough to cover all of your devices.

Ultra high-speed servers are also part of the package, therefore slow loading times are out of the question when you’re ready for another Dragon Age: Inquisition round.

As if these weren’t tempting enough, you’ll most likely appreciate this VPN if you want to use P2P file sharing. Torrenting is unlimited now and always will be.

On top of that, no DNS or WebRTC leaks will ever disrupt your experience.

Check out the best features that are packed in Private Internet Access:

  • Excellent privacy policy without any record of past data breaches
  • Masking, DNS leak protection, and data encryption are all included
  • Easy-to-use interface for casual gaming use
  • Allows P2P and streaming services
  • Supports all popular platforms – Windows, Mac OS, Linux, and Android
Private Internet Access

Private Internet Access

Eager to play Dragon Age Inquisition? Use PIA to reduce connection problems. Now available at a major discount!
$2.69/mo. Buy it now

CyberGhost

get CyberGhost VPN

CyberGhost is an all-round VPN that has lots of useful features for playing Dragon Age: Inquisition. CyberGhost offers a full VPN service for a variety of purposes.

It offers over 6400 servers across different locations in 89 countries. In addition, CyberGhost is one of the best VPN available for playing games online and secure web browsing.

This VPN service provider also gives a strong performance as their servers have fast speed and reliable connections which makes it a must-have for online gaming and streaming.

Moreover, there is the free version of the VPN but it comes with limited features and annoying pop-up ads.

To enjoy the full capabilities of CyberGhost, you’ll need to upgrade to premium which costs $44.99 for a single device and $70 per year for up to seven simultaneous connections.

This makes it one of the expensive options, but it gives good value for money.

CyberGhost VPN

CyberGhost VPN

Discover the joy of playing Dragon Age: Inquisition with this amazing VPN. Don't hesitate to claim the best deal!
$2.75/mo. Buy it now

NordVPN

grab NordVPN

NordVPN may not offer the fastest VPN speeds. However, its secured connection and friendly interface make it a must-have.

The Panama-based VPN developed by Tefincom & Co., S.A. is known for having one of the most secure connections which bypass many geolocation blocks and firewalls.

In addition, NordVPN is a good choice of VPN for Dragon Age in regions where internet use is highly curtailed by the government.

The VPN offers 5400 servers+ in over 50 countries; this gives gamers diverse options to connect to the game servers.

Also, the VPN can also allow up to six simultaneous connections on a single connection and is secured by 256-bit encryption which keeps your data secured and private.

However, order to use the NordVPN costs $5.75 per month which is billed annually and allows for up to six devices connected simultaneously.

NordVPN

NordVPN

Dragon Age: Inquisition has high ping? NordVPN could fix it for you.
$3.71/mo. Buy it now

PureVPN

grab PureVPN

Developed by GZ Systems Limited, PureVPN places more emphasis on performance and is one of the most reliable VPN services available with secured connections.

This Hong Kong-based GZ Systems Limited VPN offers over 2400 servers in 140+ countries worldwide.

This enables gamers to access servers anywhere in the world. Even more, the VPN supports up to five simultaneous devices which makes it handy for home devices.

When it comes to gaming speed, PureVPN does not disappoint and holds some of the fastest server speeds recorded in VPN tests.

You also get secure encryption of your information and a great kill switch option that keeps you safe from hacks.

PureVPN subscription comes in various packages with the cheapest coming at $2.95 billed biannually, while the yearly subscription costs $10.95 billed monthly.

PureVPN

PureVPN

In need of a VPN that can lower ping in Dragon Age: Inquisition? Check out PureVPN.
$3.33/mo. Buy it now

VyprVPN

download VyprVPN

VyprVPN is geared toward maximum speed as they own fast servers which make it a popular choice among heavy Internet users, and most especially Dragon Age: Inquisition game players.

Also, this Golden Frog GmbH VPN offers a secure connection for your browsers and keeps your information safe.

Using this VPN is highly recommended for gamers in locations with poor Internet connection speeds.

It also has an intuitive and user-friendly interface that allows for connection to the fastest connection close to you with one click.

However, VyprVPN offers both basic and premium subscription service, with the basic $5 billed annually. The premium one costs $6.67 billed annually.

VyprVPN

VyprVPN

VyprVPN can lower your ping in Dragon Age: Inquisition and keep your privacy safe.
$1.66/mo. Buy it now

ExpressVPN

grab ExpressVPN

This highly-rated VPN for Dragon Age: Inquisition offers a blend of performance and security with a nice user-friendly interface.

Developed by Express VPN International Ltd., it offers numerous servers in 160 locations in over 90 countries worldwide, with unlimited bandwidth.

Gamers are assured of reliability when connected to Dragon Age servers. Connections are rerouted through ExpressVPN servers; this keeps them safe while maintaining fast server speeds.

ExpressVPN adheres to a no-log policy and has other advanced security features like the useful kill switch and DNS leak protection which enable safe gaming.

To enjoy the full benefits of ExpressVPN, note that it comes at a monthly cost of $8.32 billed annually and comes with a 30-day money-back guarantee.

ExpressVPN

ExpressVPN

Check out ExpressVPN if you want to lower your ping in Dragon Age: Inquisition and protect your privacy at the same time.
$8.32/mo. Buy it now

We hope this list makes it easier for you to choose the best VPN for Dragon Age: Inquisition.

Feel free to share with us your experience in using any of the VPN service providers we mentioned in the guide by commenting below.

7 best VPNs for Warframe to play without high latency

Warframe is a third-person shooter video game with a huge fan base which was released in 2013. The game is free to play and was developed and published by Digital Extremes.

Players control characters from the race Tenno which are warriors awaken from centuries at war with the Grineer race, Corpus, the Infested, and the scientists.

Meanwhile, the Tenno race uses special biochemical suits to generate their special ability called the eponymous Warframes.  Players can choose missions scattered over several planets from Pluto to Sedna.

In addition, players collect Warframes but can only use a single Warframe at a time with each Warframe possessing 4 active and a passive ability.

The game has huge followership with thousands of players logging into the game servers daily which could cause lagging for some players with poor connection and lead to connection problems.

Hence, VPN can resolve these connection problems as they offer secured browsing and reliable connection.

In addition, VPN also protects gamers from DDoS attacks which are used by rival gamers to gain an unfair advantage which could reduce your progress in gameplay.

This post highlights five of the best VPNs that are perfect for Warframe gaming with their major features to help in choosing the right one for your gaming needs.

What are the best VPNs to use with Warframe?

Private Internet Access (recommended)

Topping off our list is a VPN service developed by Kape Technologies called Private Internet Access, or PIA for short.

Not only has this VPN proven itself to be great for playing Warframe, but it has shown great potential with all online games for that matter.

More precisely, whenever you want to use a VPN for an online game, you’re most likely looking to play on a server that is far away. However, this usually comes at the cost of latency issues.

However, this is not the case with Private Internet Access, since it allows you to connect to over 3400 servers located in 46 countries so that you get the best speeds no matter where you are.

Here are some of the perks of using Private Internet Access:

  • You get unlimited bandwidth
  • 100% no-log policy
  • 3400+ servers
  • P2P support
  • One subscription gives you support for 10 devices
  • Easy-to-use interface
  • Encrypted Wi-Fi
  • and more…
Private Internet Access

Private Internet Access

PIA can help you play Warframe without experiencing high ping.
$2.69/mo. Buy it now

CyberGhost

This popular VPN has many features which make it one of the most used VPN services worldwide. CyberGhost, also developed by Kape Technologies, offers subscribers over 1200 servers in 50 locations spread in over 40 countries.

You get lots of options to connect to gaming servers and the user-interface of the game enables for a quick connection without hassles. CyberGhost offers fast server speeds and comes with DDoS protection as well as a killswitch option.

CyberGhost VPN

CyberGhost VPN

Want to lower online ping while playing Warframe? Check out CyberGhost VPN.
$2.75/mo. Buy it now

NordVPN

The Panama based VPN developed by Tefincom & Co., S.A. is known for its secure connection which bypasses many geolocation firewalls and is popularly used for streaming websites. NordVPN enables you secure access to Warframe servers from any location in the world.

The best VPN for Warframe offers over 2500 servers which are located in over 60 countries; this enables gamers diversity in the choice of the server coupled with the easy to use interface which automatically picks the fastest server available.

NordVPN

NordVPN

Check out NordVPN if you want to play Warframe and other online games without high ping.
$3.71/mo. Buy it now

PrivateVPN

PrivateVPNPrivateVPN focuses mostly on the security aspect of VPN services and is known for its secure encryption. It has numerous servers that enable subscribers which make it an ideal VPN for Warframe.

In addition, PrivateVPN servers give decent server speeds and enable for a stable connection to Warframe online. However, PrivateVPN runs its own server infrastructure which enables them to have zero server downtime and increased performance.

Furthermore, PrivateVPN has a very cheap subscription plan. The VPN pricing starts with the basic plan coming at $3.22 which is billed annually.

Private VPN

Private VPN

Not only can Private VPN protect your privacy, but it also lowers ping in online games like Warframe.
$2.07/mo. Buy it now

PureVPN

PureVPN is a popular name in the VPN industry developed by GZ Systems Limited that has an excellent blend of good customer support and good VPN features. The VPN has over 500 servers in over 100 countries; this enables gamers of numerous choices when connecting to Warframe servers.

Meanwhile, PureVPN owns its servers which ensure a maximum server speed which enables seamless gameplay and ensures no lags while playing Warframe.

In addition, PureVPN protects your privacy with their kill switch options and DNS leak protection; this enables you to access Warframe servers without fear of cyber hacks or DDoS attacks.

Lastly, PureVPN’s basic subscription costs $5 a month which is billed annually and the three-year plan gives the best value as it equates to $1.47 a month.

PureVPN

PureVPN

Check out PureVPN if you want to lower ping in Warframe.
$3.33/mo. Buy it now

ExpressVPN

ExpressVPN, developed by the eponymous Express VPN International Ltd. has been in the industry for a while and is renowned for its excellent security and performance features. This best VPN for Warframe has over 2200 servers in 90 countries located in 148 cities across the world.

Unlike other VPN services, Express offers unlimited bandwidth which is cool as you are not restricted during browsing or while playing Warframe.

Your connections are routed through their servers which enable you to have steady and reliable connections devoid of lags when gaming. The 256 military-grade encryption makes your connections extra secure from snoops, hacks, and detection from your ISP.

Although, ExpressVPN is quite expensive with the basic pricing plan costing $8.32 a month which is billed annually with a 30-day money-back guarantee; but, this gives you ample time to test their service.

ExpressVPN

ExpressVPN

ExpressVPN can protect your privacy and boost your Warframe experience by lowering ping.
$8.32/mo. Buy it now

VyprVPN

Another great VPN for gamers is VyprVPN that was developed by Golden Frog GmbH, and this software comes with over 700 servers located in over 70 different countries. As a result, you should be able to access any geo-restricted content using VyprVPN with ease.

VyprVPN is located in Switzerland, and as such it has to comply with strict privacy laws. This means that your online activity won’t be logged or sold to third-parties. Unlike some other VPN providers, VyprVPN doesn’t impose any restrictions, so you will always achieve maximum speed and unlimited bandwidth.

As for encryption, VyprVPN uses PPTP, L2TP/IPsec, and OpenVPN protocols. There’s also Vypr’s Chameleon technology that uses OpenVPN 256-bit protocol in order to scramble metadata and prevent VPN blocking or throttling.

In order to keep your online activity protected from third parties, VyprVPN has its own VyprDNS that is basically an encrypted DNS server. Thanks to this feature, your online activity will become almost impossible to log. As for security, VyprVPN has a built-in NAT firewall, so it will block unrequested inbound traffic while using a VPN.

As for availability, this VPN is available on many platforms including Windows, Mac, iOS, Android, and routers. Overall, VyprVPN is a great VPN and it’s a perfect choice if you want to protect your privacy online.

Overview:

  • 700+ servers located in 70+ countries
  • No log policy
  • PPTP, L2TP/IPsec, and OpenVPN protocols
  • Encrypted VyprDNS server
  • NAT firewall
  • Cross-platform availability
VyprVPN

VyprVPN

High ping disrupting your Warframe experience? Check out VyprVPN.
$1.66/mo. Buy it now

The VPN for Warframe listed above gives you optimal gaming experience for Warframe. However, you can always take advantage of the money-back guarantee to test the best VPN for your needs.

Share your experience with us in using any of the best VPN for Warframe by commenting below.


Add perk points in Fallout 4 with these simple steps

Fallout 4 is an action role-playing game developed by Bethesda Game Studios.

The triple-A title is set in a post-nuclear war world, filled with mutants and unforgiving places.

You start your journey as one of the few survivors of this apocalyptic war, and as you play, you become stronger by acquiring better weapons, increasing your strength, and as with any other RPG, upgrading your stats.

Fallout’s character progression is done through a special perk tree which you can upgrade.

The tree consists of a talent system, filled with various abilities that you can acquire by using special perk points.

The game can be unforgiving, therefore having lots of those abilities is mandatory to progress through the story.

How can I add perk points in Fallout 4?

1. Use console commands

Add a specific perk

  1. Change your system language to EU (US).
  2. Start Fallout.
  3. Find the name of the specific perk you’d like to add.
  4. Press the ~ key on your keyboard to open the console.
  5. Type help “perk_name” 4 in the console.
  6. You will get the ID code of that specific perk.
  7. Type player.addperk ID_code then hit Enter.

Add perk points

  1. Change the system language to EU (US).
  2. Start Fallout.
  3. Open the console by pressing ~.
  4. In the console, type CGF “Game.AddPerkPoints <desired_number>

Note: The desired_number from step 4 is the number of perk points you’d like to add, therefore if you replace it with 10, for example, 10 perk points that you can spend will be added to your character.


2. Use Cheat Engine

Another more intricate way to modify the in-game numbers is by using Cheat Engine.

The software doesn’t only allow you to change your perks, it allows you to change everything regarding the game. From the power of the enemies to your stats and the number of items you have.

The program is pretty straightforward, but it takes a while to get used to its interface and the way it works.

It scans the command values of your game and allows you to modify them through scripts. In addition, you can use Cheat Engine with any single-player game.

Note: Do not use this software to cheat in multiplayer games, because it will probably get you banned or in trouble.

⇒ Download Cheat Engine


3. Level up

If you don’t feel like cheating, and you want to do things legitimately, in the old fashioned way, you can. Here is a list of the best and fastest ways to level up your character to gain the perk points faster.

  • Use the Barter Skill.
  • Fight and kill enemies.
  • Lockpick everything you can.
  • Modify your equipment.
  • Build settlements
  • Do the Learning Curve quest.
  • Maximize your intelligence stat.
  • Join the Brotherhood of steel.
  • Farm Side Quests.

These easy solutions will get you all the perks you want, so you can finally defeat that powerful foe that stopped you from progressing and unfolding the awesome story of this game.

You can also use Fallout 4 Mods if you want more customization options, enhanced graphics, unique gameplay experiences.

If you have anything new to add to the subject, please feel free to discuss it in the comment section below.

7 Best Greeting Card Software for Windows 10/11 [2026]

If you are looking for the best greeting card apps for your Windows tablet or desktop device, then you have arrived at the right place.

Few people still make and send physical greeting cards today, which is a real pity. Many are turning to greeting card apps, and this is true not only for iOS or Android users but also for owners of Windows 10 tablets and computers.

We have selected the most interesting and easy-to-use greeting card apps that we want to show you. If you know of other reliable ones, do let us know by leaving your comment at the end of the article.

What are the best greeting card apps for Windows 10 & 11?

InPixio – Most creative greeting cards

One of the most appreciated photo editors when it comes to greeting cards is inPixio. With complete graphics and photomontages, any user can express one-time moments to their peers.

It is extremely easy to design and edit photos or card templates with this AI-powered solution. More so, you can enhance and create the best quality of your products.

There are other worthwhile features that will bring never-seen photomontages, creative designs made of original images, and many more editing tools.

You should also know about the modern functionalities for editing cards and images from the smallest details, with brightness, sky removal, or background replacing features.

All having been said, benefit from high-end graphics and photo studio editing for outstanding greeting cards.

Here are some other features:

  • Original pictures and photomontages
  • Inspiring text and image graphics
  • Advanced AI functionality
  • Object editing tools
  • Cut-out photo backgrounds
InPixio

InPixio

Create state-of-the-art greeting cards using this professional Photo Studio solution.
Check price Visit Website

Adobe Creative Cloud Express – Exhaustive photo editor

Adobe Creative Cloud Express is our top pick when it comes to software to be used for creating amazing greeting cards.

The main feature that separates Creative Cloud Express from all the others is the almost unlimited amount of templates to choose from. This feature simplifies the process enormously, and also allows you to focus more on the design of your project, and not on technicalities.

Even more than this, Adobe Creative Cloud Express allows you to edit any template to fit your needs and provides other useful features as well.

Here are some other features offered by Adobe Creative Cloud Express :

  • A very easy-to-understand and use interface that enables fast image processing
  • Low system impact compared to other software options
  • Crisp and simple design
  • Works great for creating a variety of greeting cards
  • Unlimited number of fonts and themes to choose from
  • Can be used for free for 7 days

CorelDRAW – Top image manipulation

CorelDRAW needs to be mentioned among the top graphic editors for creating amazing greeting cards, although this suits more advanced users.

The software is well-known and widely used in the graphic design industry for the vector illustration, layout, and typography tools it includes.

Even more than this, CorelDRAW allows you to follow up on the changes you make with a new PowerTRACE™ feature, as well as collaborate with your team, family, and clients, as you move forward into your graphic design projects.

Surely, when designing holiday greeting cards you might not need all those professional features, but CorelDRAW is a suite to be used in the long run.

Here are some other features offered by CorelDRAW:

  • Image editing and pixel-based design program
  • Font exploration and management tool
  • RAW photo editor
  • 7,000 clipart, digital images, and vehicle wrap templates
  • 150 professionally designed templates
  • QuickStart guide, plus online tutorials

Canva – First choice for online designs

Canva is a popular graphics design editor suitable for both amateurs and professionals. It can be used for free, for the most part, and it suffices for basic greeting card design.

However, account creation is necessary (without the need to also provide credit card details).

The Pro account unlocks a great variety of patterns, templates, GIFs, and other perks to experiment with, for even more creative ideas.

For the winter holiday season, Canva offers a lot of templates that you can work on. You can freely personalize the existing templates with photos, images, or objects of your own choice.

When you think your card is done, download it in jpeg, pdf, or other available formats and prepare it for sending.

Here are some other features:

  • Design visual suite
  • Photo collages & editor
  • Thousands of graphics and stickers
  • Business template cards
  • Social media products

Hallmark Card Studio 2022 Deluxe – Countless templates

If you’re looking for a simple greeting card application, you might want to consider Hallmark Card Studio 2022 Deluxe. This version has more than 19,000 Hallmark cards available, so you can easily customize them to create your own greeting cards.

In addition to cards, there are over 21,000 premium images that you can add to your cards. The application also has more than 16,000 Hallmark sentiments available to choose from.

Another useful feature of this application is a built-in photo editor that you can use to edit and customize your photos.

We have to mention that this tool isn’t limited to greeting cards, and you can create envelopes, photo projects, scrapbook pages, calendars, and all sorts of other graphics right from this tool.

Overall, Hallmark Card Studio 2022 Deluxe is a simple tool that will allow you to easily create various greeting cards with ease.

Thanks to the extensive amount of available graphics and templates, you should be able to create beautiful greeting cards without any problems.

Overview:

  • 19,000 templates to choose from
  • 21,000 images
  • 16,000 sentiments
  • Built-in photo editor
  • Simple to use

⇒ Get Hallmark Card Studio 2022 Deluxe

Greeting-Cards – Classic greeting cards

Greeting-Cards windows 10 app

By using the Windows 10 app Greeting-Cards you will be able to make your birthdays, holidays, or other events special and easy to remember.

Among the most important features of the app, we enlist the following – upcoming events cards, 15+ occasions cards, the ability to schedule greeting cards, and even to download the latest greeting cards added from the server.

Unfortunately, the app is not free and you’ll have to invest $1.49 to get it on your Windows 10 tablet.

⇒ Get Greeting Cards

Greeting Cards Studio – Frame packs inclusion

greeting cards studio app windows 10

If you’re looking for yet another useful Windows 10 greeting card app, then have a look at Greeting Cards Studio, as well.

This Windows app is the perfect answer for the average user who needs to personalize greeting cards with eye-catching frames.

You can also add multiple images and personalize your message for special occasions or memorable events with family and friends.

Among its most important features, we find the following:

  • The option to  customize greeting cards by using our picture and texts
  • The ability to pinch and rotate gestures to adjust pictures
  • If you choose the buy the PRO version, then you can even import new themes and features.

⇒ Get Greeting Cards Studio

These are some of the best tools that you can use to create greeting cards, and most of them are quite simple to use, so feel free to try any of them.

Microsoft Garage announces Journal, a new ink first note-taker with AI super powers

Microsoft Garage is introducing a new app that Surface owners are sure to appreciate. Their latest project, known as “Journal” is a personal inking journal, powered by AI to help superpower your writing, with gestures, and new ways to search and filter for your notes.

The new project is available as an app in the Microsoft Store and is designed to be a lot more personal than existing apps like OneNote, or Microsoft Whiteboard. Indeed, as developed by Microsoft’s Applied Sciences Group, the app can help you do things that physical paper or pen, or most inking applications can’t.

There are several AI features, which can be seen below. Again, all of these are designed with Surface and Windows tablets in mind. It’s unlike your typical inking app.

  • An ink-first experience for those who write with a digital pen
  • A page-based canvas for easy scrolling, optimized for tablet and 2-in-1 devices
  • New intuitive Ink Gestures to erase and select ink that don’t require mode switches
  • Use touch to scroll pages, or tap ink to select words, sentences, and more
  • Drag and drop selected content between pages, or to your favorite applications
  • Microsoft 365 integration to access your Calendar for faster meeting notes*
  • Import and markup PDF and images
  • Search and recall using keywords or filters

Overall, this app is pretty solid on Surface devices. We tried it out, and all the gestures and interactions with Surface Pen are quite smooth and the user interface is really fluent. It’s also nice to see that you can use the app as a way to mark up PDFs and other documents, too. Check it out now via the link below, and let us know your thoughts in the comments.

Microsoft Journal
Microsoft Journal
Price:
Free

[Updated] Microsoft is investigating Teams outage affecting chat messages and Live events

If you’re having issues with Microsoft Teams right now, you’re not alone. The company has acknowledged that Teams users may experience delays in receiving chat messages or be unable to join live events, and it’s currently investigating.

According to the company, the issue is currently impacting users in North and South America. “We’ve identified a potential networking issue that may be causing the problem. We’re working to confirm our findings while simultaneously exploring the optimal solution to remediate impact,” the company said a couple of minutes ago on the Microsoft 365 Twitter account.

It’s certainly not the first time that Teams is having issues, and you may want to try using the Teams web app instead of the desktop app to see if this changes anything. We’ll keep you informed when the company shares some new information about the outage, so stay tuned to OnMSFT for more updates on this Teams outage.

Update 3PM PT: Microsoft says that things should now go back to normal. “A majority of the impact has been mitigated. We’re monitoring the service to ensure full restoration and will take any necessary action if impact persists,” the company said on Twitter.

Microsoft Teams users can now open apps and channels tabs in separate windows

Last year at its Build conference, Microsoft unveiled a slew of updates for its Teams collaboration service, including pop out apps. Two months ago, we learned that the feature started rolling out to users, and yesterday, the company has announced that it is now generally available to everyone, along with a new pop out tabs option.

Microsoft Teams already allows users to open their one-to-one or group chats, meetings, and calls. The ability to pop out personal apps in Microsoft Teams has been one of the top requested features. It enables users to open their Teams apps pinned in the app bar in a separate window and easily switch between them.

thumbnail image 2 captioned User right clicking on a personal app to pop out in a separate window.

There are multiple ways to pop out an app in Teams. Users can navigate to the app bar on the left rail, right-click on the specific app, and select the “Pop out app” option. There is also a dedicated small icon in the app window itself that lets users pop out the personal app.

Secondly, Microsoft has also added a new pop out tabs functionality in Teams. Thanks to this feature, users can now pop out tabs pinned in their chats and channels. To do this, simply select the particular tab and then the “pop out tab” icon available on the right corner of the header. The desired tab will then instantly open in a dedicated window.

thumbnail image 3 captioned The ‘pop out’ symbol in the channel tab is in the top right.

The ability to open apps and tabs in a separate window is a welcome change for first-line workers, and it should help them to focus on important tasks without jumping between windows. Keep in mind that these options are available only for the Windows and macOS desktop apps, and they are not yet enabled on the Web client.

FIX: DRIVER_CORRUPTED_EXPOOL error on Windows 10/11

Blue Screen of Death errors such as DRIVER_CORRUPTED_EXPOOL can cause many problems on Windows 10 since they tend to frequently restart your PC.

Since these errors are rather serious, today we’re going to show you how to fix DRIVER_CORRUPTED_EXPOOL error.

DRIVER_CORRUPTED_EXPOOL error can be a big problem, and users reported the following issues related to this problem:

  • Driver_corrupted_expool Cisco Anyconnect, VPN – This error message can appear due to third-party applications and many users reported it while using Cisco Anyconnect. However, other VPN applications can also cause this error to appear.
  • Driver corrupted expool blue screen – This is a Blue Screen of Death error, and as such it will cause your PC to restart as soon as it appears in order to prevent damage to your computer.
  • Driver corrupted expool Windows 10, 8, 7 – This error is common and it can appear on any version of Windows. However, you should be able to fix this problem on any version of Windows using one of our solutions.
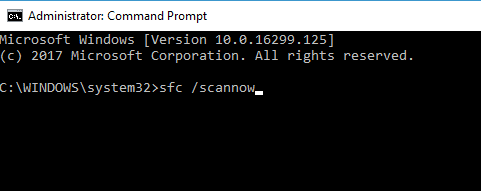
  • Driver corrupted expool RAM – Blue Screen errors such as this one are often caused by your hardware, most likely your RAM, and if you’re experiencing this problem, be sure to check your RAM and replace it if needed.
  • Driver_corrupted_expool rdyboost.sys, tcpip.sys, usbport.sys, usbccgp.sys, afd.sys, acpi.sys, ataport.sys, ntfs.sys, netio.sys, nvlddmkm.sys, ndis.sys, dxgmms1.sys, hal.dll, halmacpi.dll, ntoskrnl.exe – Usually this error message is followed by the name of the file that caused it allowing you to easily find the problematic device, application or hardware.
  • Driver corrupted expool when connecting to Internet – Many users reported this issue when connecting to the Internet. If you have the same problem, be sure to check your network adapter or network driver.
  • Driver_corrupted_expool Windows 10 install – This problem can also appear while installing or upgrading Windows 10. This usually happens if Windows 10 isn’t fully compatible with your drivers or installed applications.
  • Driver corrupted expool on startup, after overclock – Many users reported that this error appears as soon as their PC boots. This can be caused by incompatible driver or software, but it can also be caused by overclocking.
  • Driver corrupted expool Avast, Kaspersky – Your antivirus tool can also cause this error to appear. Many users reported this issue with Avast and Kaspersky, but other tools can also cause it.

How can I fix the DRIVER_CORRUPTED_EXPOOL BSoD error?

1. Use a repair tool

Using specialized repair tools is by far the safest and fastest way to fix system files that cause these kinds of errors. Professional tools are able to scan your computer find the broken files and quickly replace them with fresh ones from their databases.

2. Remove your antivirus software

Windows Defender is a decent antivirus software, but many users tend to use third-party antivirus programs as well.

Even though these tools offer amazing protection, sometimes they can cause certain issues, such as DRIVER_CORRUPTED_EXPOOL BSoD error.

In order to fix this problem, you need to remove all third-party antivirus programs that you have installed.

Bear in mind that uninstalling the software might not fix this error, so you’ll have to use a dedicated removal tool to remove any remaining files associated with your antivirus program.

Many security companies offer these tools for download, so be sure to download and use one.

Users reported that Emsisoft Internet Security can cause these errors, and if you’re using this tool, you’ll have to remove it to fix this problem.

Bear in mind that almost any antivirus program can cause this error to appear, so be sure to remove all third-party antivirus programs from your PC.

3. Remove problematic applications

DRIVER_CORRUPTED_EXPOOL error can be caused by certain applications, and in order to fix this problem, you’ll have to find and remove those applications.

It’s worth mentioning that almost any installed application can cause this error to appear, therefore be sure to remove any recently installed or updated applications.

Few users reported that VirtualBox can cause these types of problems, so if you’re using this tool be sure to remove it or to update it.

Another problem can be Radeon software, and many users reported that DRIVER_CORRUPTED_EXPOOL BSoD error was fixed after removing this program.

4. Update Windows 10 and all your drivers

  1. Press Windows Key + X to open Power User Menu and select Device Manager from the list.
    Driver corrupted expool Windows 10
  2. When Device Manager opens, locate the driver that you wish to update, right-click it and choose Update Driver Software.
    Driver corrupted expool RAM
  3. Select Search automatically for updated driver software. Windows 10 will now download the best driver for your device.
    Driver corrupted expool blue screen
  4. Repeat this step for all drivers that you want to update.

Blue Screen of Death errors can be caused by both hardware and software issues, but fortunately Microsoft is working hard on improving Windows 10.

By using Windows Update to download the latest patches you’ll ensure that your system is safe from malicious users and software.

We also have to mention that these updates bring many fixes related to hardware and software compatibility, and if you want to ensure that your PC doesn’t get a BSoD error, be sure to download the latest updates.

Although Windows updates are important for your system stability and safety, it’s also important that you update your drivers regularly.

Downloading drivers is fairly simple, and you can download all the necessary drivers right from Device Manager by following the above steps.

Downloading drivers by using Device Manager is quick and simple, but some users argue that this method isn’t the best.

According to them, Device Manager doesn’t always download the latest drivers, therefore if you want to install the latest drivers, you’ll have to manually download them.

Downloading drivers is fairly easy, and you can download the necessary drivers from your hardware manufacturer’s website.

Users reported that DRIVER_CORRUPTED_EXPOOL error was fixed after updating the chipset drivers, so be sure to update those first.

Update drivers automatically

If that doesn’t fix the issue, be sure to update all drivers on your computer.

Downloading drivers manually is a process that carries the risk of getting the wrong driver installed, which may lead to serious malfunctions.

The safer and easier way to update drivers on a Windows computer is by using an automatic tool.

Outbyte Driver Updater automatically identifies each device on your computer and matches it with the latest driver versions from an extensive online database.

⇒ Get Outbyte Driver Updater

5. Update BIOS

If any of your hardware components aren’t fully compatible with your motherboard that can lead to Blue Screen of Death errors.

Several users reported that they managed to fix DRIVER_CORRUPTED_EXPOOL error by updating BIOS, so you might want to try that.

Updating BIOS is an advanced procedure, and if you don’t perform it carefully you can cause permanent damage to your PC, therefore be extra careful if you decide to update BIOS.

6. Reset Windows 10

  1. Restart your computer a few times during the boot sequence to enter Automatic Repair.
  2. Choose Troubleshoot > Reset this PC > Remove everything. You might get asked to insert Windows 10 installation media, so be ready to do that.
  3. Select Only the drive where Windows is installed > Just remove my files and click the Reset button.
  4. Follow the instructions to complete Windows 10 reset.

Error DRIVER_CORRUPTED_EXPOOL can be caused by certain software, and you can fix most software related issues by performing a Windows 10 reset.

To reset Windows 10, you might need a Windows 10 installation media, and you can easily create one by using an empty USB flash drive and Media Creation Tool.

We have to warn you that resetting Windows 10 is similar to clean install, so be sure to back up all important files from your C partition before you start this process.

If the issue still persists, it’s most likely that you have a hardware problem, so be sure to check your RAM and all other major hardware components.

DRIVER_CORRUPTED_EXPOOL BSoD error can cause certain problems on Windows 10, but we hope that you managed to fix this problem by using one of our solutions.

Best Green Screen Software for Windows 10: 7 Top Solutions

Chroma Keying or popularly known as Green Screen technology is commonly used in video production.

Be it your favorite superhero flying in space or the news channels showing a giant weather forecast map behind the presenter on Live TV.

Much of this is achieved with the help of Chroma keying using green screen software. If you are into video production, you already know how useful green screen is.

Irrespective of the size, almost every production house uses a green screen to record the videos as it gives the flexibility to edit and add visual effects in the video production stage while keeping the cost low.

How does a green screen work?

Green-screen-in-action

Have a look at the image above. A person is standing in front of a green screen. In the first phase, production houses shoot the videos using the green screen as shown in the image.

The next phase involves a process called Keying.

Keying is the process of isolating a single color from a still or multiple frames (videos) and replacing it with a new image (commonly backgrounds). To achieve this, you need a video editing tool or green screen software.

Note that, Chroma keying does not necessarily involve green screen but any color and mostly blue apart from Green.

Companies use Chroma keying to produce professional-looking marketing and informative videos about the products, and product updates quickly without overspending on the production cost.

In this article, we will explore the best free green screen software as well as paid Chroma key software for Windows 10 which will help you choose the right software for your next video project.

What is the best green screen software for Windows 10?

Adobe After Effects (recommended)

Green screens are all about special effects, be it for cinematography or just your typical YouTube video, and in this day and age, you cannot talk about videos with special effects without mentioning Adobe After Effects.

This program was specially created for digital visual effects, motion graphics, and compositing. Its popularity made it a must-have in the post-production process of film making, video games, and television production.

In short, describing it as the Photoshop of videos would be an understatement, but it surely does act as a very relevant summary.

Of course, you don’t have to settle just for the base program. Getting Adobe After Effects you are now open to using the many plugins that it can handle.

A variety of plug-in styles exist, such as particle systems for realistic effects for rain, snow, fire, etc.

All these together with the typical green-screen setting of creating videos means that editing and post-production will be a piece of cake, without actually needing any prior experience with similar tools.

All in all, if you want to bring your videos to life in a whole new way by making images brighter, colors more vivid, and transforming an otherwise boring presentation into something ripped out of a sci-fi movie.

How do I remove green screen in Adobe After Effects?

  1. Click once on the green screen video footage.
    • This will make it active in Adobe After Effects.
  2. Click on Effect, Keying, and Keylight.
    • This is a plug-in effect for Adobe After Effects that comes pre-installed
  3. Go to the Effect Controls tab.
  4. Choose the Eyedropper icon.
    • It is next to the Screen Color option.
  5. Select a section of the green screen somewhere around the middle of your video.
  6. Click on View and then choose Status.
    • You can use it to see any parts of the green screen that were not removed.
    • These areas will appear white and gray around the object.
  7. Increase the Screen Grain until the outer edges of gray and white disappear and all you see is the shape of the object.

Adobe After Effects

Let your imagination roam free with this fantastic tool that allows you to create movie titles, add sensational effects to clips or remove objects.
Free trial Visit website

Adobe Premiere Pro (suggested)

Adobe Premiere Pro is the industry standard when it comes to video editing software. Adobe is not new to the digital editing software game.

Like its other tools, Adobe Premiere Pro shines with its state-of-the-art tools, collaboration capabilities, and the support for 360 VR and 4K content despite our love-hate relationship with its signature nonlinear user interface.

The latest iteration of Premiere Pro comes with a more polished user interface and adds more tools to its already huge arsenal.

The Chroma keying is not new to Adobe Premiere Pro and those who can go through the learning curve involving the use of Premiere Pro can do miracles in the digital world.

How do I remove green screen using Adobe Premiere Pro?

The Chroma Keying process with Adobe Premiere Pro is not as easy it is with Camtasia. But, Adobe is a professional video editing tool and has robust green screen footage editing tools on offer.

Once you have a green screen video imported to the editing screen (sequences), go to Videos Effect and select Keying. All the tools required to edit a green screen video is available under the Keying tab.

Begin with adding the Ultra Key effect onto your clip; You can use either Color Key or Ultra Key effect. For this guide, we are using the Ultra Key effect. Use the eyedropper tool and select the green area in the video.

Fine-tune the selection by using the settings option to set the best effect and also adjust numbers under Matter Generation to reduce noise.

There are multiple settings here, play with the options and numbers until you get the desiring result.

After removing the green screen from the video, you can add any object (image) to the background of the video to create a clean and professional-looking video.

The only bitter part is Premiere Pro’s pricing which may not be affordable for everyone. But, if you are a professional with a budget, the Pro in Adobe Premiere Pro indeed holds to its name.

Adobe Premiere Pro

As one of the best video editing software out there, this tool will bring all your projects to a professional level.
Free trial Visit website

Camtasia

Camtasia logo

Camtasia has been my go-to video editor ever since I started making YouTube videos. I may not have been a great video editor, as my post-production videos speak for themselves, but Camtasia is undoubtedly one of the best video editors to start with for any beginner content creator.

Even for professionals who find the sophistication of Adobe Premier suite a little too much, Camtasia has enough tools in its arsenal to help you produce a clean, professional-looking video in no time. The learning curve is simple as drag, drop, edit, and render.

Talking about the green screen bit in Camtasia, the tool offers a “remove a color effect” in the software. The users can remove any color from a video by following a simple procedure.

How do I remove green screen using Camtasia?

The working of Remove a color effect is simple. The user needs to drag the Remove a Color effect on any video on the timeline. From the properties panel, select the effects and pick a color that you want to replace with the green screen.

After the selection is made, make sure to fine-tune the properties like tolerance, softness, and defringe to make the video look as real as possible.

Once done, proceed with adding a new background that will replace the green screen by adding the background below the edited clip.

Camtasia is an excellent tool particularly for new content creators who want to create eLearning courses and how-to videos for their audience as it offers screen recording and web capturing features as well.

It is also less expensive than other sophisticated tools like Adobe Premiere Pro, and the vast collection of how-to videos makes it a go-to tool even for a novice.

Camtasia

Create videos like a pro with this easy to use tool, without spending countless hours with complex commands.
Free trial Visit website

MAGIX VEGAS Pro

Vegas Pro (formerly known as Sony Vegas Pro) now owned by Magix is a professional video editor with tons of editing features for the professionals. The latest iteration of Vegas Pro has put the tool right back in competition with Adobe Premiere Pro and other premium video editing software.

Vegas Pro now offers an improved user interface along with excellent import and export format support.

It also comes with support for motion tracking, video stabilization, HDR and 360-degree videos. In addition, Vegas Pro now supports Bézier masking OFX plug-in and Boris FX Continuum Lights Unit for applying masks to multimedia files.

Like any other Professional-grade video editors, Vegas Pro can be used to remove green from a video. The Chroma keying process in the tool is straightforward for beginners.

For the pros, Vegas Pro does have the option to fine-tune green screen videos to achieve Hollywood grade results.

Our only complaint about Vegas Pro is with its performance which can be improved with the update and also the media library that doesn’t look as robust as Premiere Pro.

How do I remove green screen using Vegas Pro?

Launch Vegas Pro. Import the green screen clip and drop it on the video track in the Timeline. Also, import the background-clip or image that you want o to replace with the green screen and drag it to Track 2.

Click on Video Fx drop-down menu, select Chroma Keyer and drag and drop it on the green screen video in the video track. Use the eyedropper under the Color section and select the green color.

On the preview window, click on the green screen to remove the green screen from the video and the background image will become visible.

Magix Vegas Pro

A powerful editing tool that offers features based in artificial intelligence that will help get your work done faster.
Check price Visit website

DaVinci Resolve 15

Blackmagic Design has done real magic with the launch of Davinci Resolve 15. The updated version of the ever-popular Davinci Resolves video and audio editor is more or less on par with premium video editing tools like Apple’s Finalcut Pro and the Adobe Premiere Pro with its stunning list of features and an unbeatable price of 0$.

The biggest addition to the DaVinci Resolve 15 is the integration of the Fusion app used by Hollywood studios. The software is easy to learn and looks better optimized than the Adobe Premiere Pro when it comes to importing media files. In the exporting process, Premiere Pro still takes the lead, though.

DaVinci Resolve 15 also has impressive chroma key features that let you edit any green screen video with precision. You can import visual effects from After Effects to DaVinci Resolve for chroma keying as well.

How do I remove green screen using DaVinci Resolve?

Launch DaVinci Resolve. Import the background-clip or image and place it on Track 1. Also, import the green screen video and place it on Track 2.

Go to the Color tab and select the eyedropper. Select the green background in the video. Use the highlight visualizer to see if the background is selected correctly.

You can further fine-tune the keying from the qualifier tab. Also, the use of the blur radius effect will smoothen the edges to make the precise transition between the subject and the background.

DaVinci Resolve 15 is the best free video editor available for Windows. If you are looking for serious video editing software with a green screen removal feature, DaVinci Resolve well worth the time you would spend learning it.

⇒ Get DaVinci Resolve 15 

HitFilm

HitFilm is one of the best free green screen software for Windows 10. This free utility is brimming with features, and with some trade-offs, HitFilm is said to be the best free Adobe Premier Pro alternative.

It also comes in a pro version, but we will keep this discussion to the free version of the popular video editor.

HitFilm offers a clean user interface with a good selection of tools. The playback option in the tool can help the user in faster editing. One can also edit the videos when the export is in progress.

In addition, the latest versions add new features from the pro version, including animation keyframing, motion blur, improved layout panel, masking options, additional workspaces, etc.

For those wondering, HitFilm does offer Chroma Keying functionality to remove the green screen and blue screen from videos and images.

Just like Adobe Premiere Pro, the keying effects are placed under the Visual Effect tab. There are multiple options, but the one we need is the Color difference key to remove the green screen.

Tip: HitFilm has video tutorial guides explaining all the features of the tool, including the use of Chroma Keying. You can find it in the Video Tutorials tab.

How do I remove green screen using HitFilm?

  1. To remove the green screen, import the green screen video clip. Right-click on the video and create a new composite shot.
  2. In the effects library’s search box, search for green screen / blue screen. Or directly go to Visual Effect, select Keying, and choose Color Different key.
  3. Find the Color Key difference effect from the result and drag the effect onto your video clip. Next, you need to adjust the gamma slider to remove the major part of the green screen.
  4. Once it goes black, drop Spill Removal and Matter Cleaner effects onto the video to clean the mess, I mean green.
  5. Finish the video by adding a new video clip or image to the background of the edited clip replacing the green screen.

⇒ Get HitFilm

Lightworks

Lightworks is one of the most ALSO free video editors available for Windows. The software comes in free and paid versions. While the free version has almost all the features of the paid version, the exporting process is what makes it a difficult choice despite having excellent importing support.

Lightworks offers a good number of visual effect tools to fine-tune any image or video to its perfection. However, using these effects requires more than just drag and drop work.

Using the free version one can export videos in 720 HD (max) and only in MPEG4/H.264 format. But, for YouTube creators, the videos can be directly uploaded to the streaming platform including Vimeo.

Lightworks also offers Chroma keying to edit green screen videos on Windows computers. The keying process in Lightworks is a little more tedious than other video editors mentioned earlier.

How do I remove green screen using Lightworks?

Launch Lightworks and create a new project. Select a frame rate and import an image or video that you want to use as the background. Click the Edit tab and import your green screen clip onto the V1 track of the timeline.

In the preview window, right-click and select Tracks and add video. Now drag the green screen video onto V1 track and background video/image onto the V2 track. Make sure to match the length of the background video with the original video.

Go to VFX tab. From the timeline select V1 track and click + icon on the left pane. Click the favorite button and select Key and choose Green Screen. Click Add Effects.

Use the eyedropper tool to select the green screen background you want to remove. The auto-selection does a pretty decent job.

However, you still need to do some fine-tuning to get a 100% result. Adjust Saturation and Luminance sliders to achieve the best effect while minimizing the spill.

In the Reveal box, you can preview the video before proceeding with the export. The marked white areas are the parts that will be removed and replaced with the background image.

⇒ Get LightWorks 

GTA 3 not working on Windows 10/11 / won’t launch [Fixed]

Grand Theft Auto 3 was one of the most iconic and popular games of its time. Everyone who got to play the game has fond memories of it.

In fact, the game was so successful and well-made that people still play it today.

We could argue that only those who had the chance to play GTA 3 during its prime want to revisit it today, but there are lovers of retro games out there who did not get the chance to enjoy this masterpiece back then.

However, it seems that Windows 10 users are having trouble getting it to work because it is a 20-year-old game, made for older versions of Windows.

Thankfully, there are solutions that will fix your problem and allow you to see experience gaming as it was in the 2000s.

How can I get GTA 3 to work on Windows 10?

1. Install the GTA 3 patch

  1. Navigate to the GTA 3 installation folder on your system and open it.
  2. Find your gta3.exe file, right-click on it, then select Properties.
  3. Then click on Compatibility.

  4. Check the box saying Run this program in compatibility mode for,
    then select Windows XP (Service Pack 2).

  5. Check Run in 640 x 480 screen resolution.
  6. Click Apply, then hit Okay.
  7. Start your game, then go to Options, then Display Settings.
  8. Hover over Screen Resolution, and change it to your display resolution.
  9. Afterward, go back to the gta3 executable, Properties, then Compatibility.
  10. Uncheck Run in 640 x 480 screen resolution, hit apply, then okay, and start your game.

2. Install DirectX

Almost all games require one of the many DirectX versions available, including GTA 3.

If you just installed Windows 10, you probably don’t have DirectX 11 installed in your system, so you need to download and install it.

Note: Windows 10 comes with DirectX 12 preinstalled. However, some older games are not compatible with the newest version of DirectX, so installing a previous version of the software is a good choice.


3. Reinstall the game

  1. Go to the Windows Search Bar.
  2. Type in Control Panel.
  3. Under Programs, select Uninstall a Program.
  4. Find GTA3, right-click on it, and select Uninstall.
  5. After the game has successfully uninstalled, install it via CD, Steam, or Rockstar Games Launcher.

4. Verify Game Data (For Steam users)

  1. Start Steam.
  2. Go to Library, then select Home.
  3. Find Grand Theft Auto III, right-click on it then select Properties.
  4. Navigate to Local Files, then select Verify Integrity of Game Files.
  5. Follow the steps and wait for steam to verify your data and do the necessary updates.

Note: This only works for those who bought Grand Theft Auto III on the Steam store.


These solutions will fix your GTA 3 problems, making it launch and fixing any possible resolution mismatching you could get. Go ahead and enjoy one of the most precious jewels of the game industry.

If you feel like adding anything to the discussion, write a message to us in the comment section below.

Best Video Sharpening Software to Improve Video Quality

Amateur enthusiasts have never been closer to professionals when it comes to video recording.

Once upon a time, the technology to record a good video was remarkably expensive, but nowadays everyone can afford film studio-like equipment and processing tools.

You can now record 4k videos with your mobile phone, on the move with unlimited possibilities. The only thing that is in question is the available storage space and will to film.

Nevertheless, half of the recording job is done with the camera. The other half is done with the PC while editing and improving your videos to suit your needs.

As the way of filming has evolved, the options that are presented in editing software followed closely. Instead of a complicated interface, nowadays it is easy to adapt to even the most complex solutions.

We brought to you a roundup of the most used software for video editing, montage, and improvement of your videos.

Most of them are paid solutions. There is an abundance of free software but it is lackluster in almost every category in comparison to the paid options.


What are the best programs for improving your videos?

Adobe Premiere Pro

Now we are talking about the monumental program residing in the video editing world for quite some time. Adobe Premiere Pro is one of the best solutions in the matter.

Nowadays, it is obtainable through a subscription with the monthly or yearly plan with Creative Cloud. Even though the past system was better for customers, you can’t be wrong with Adobe Premiere Pro.

Adobe Premiere Pro is a professional tool and the step-up in video editing category. By unifying all previous editions, the latest version is created for the customers best experience.

The interface is fully customizable and you can set it to follow your unique preferences. In addition, importing videos from your PC or external source is newer been easier.

Timeline options are versatile and work in your favor. The time consumption of complex editing operations is dynamically solved with template bins.

Once created, template bins can be loaded into the next project. The majority of options are clear and most of the newcomers to the program will find it understandable.

Nevertheless, this is a professional tool and it is recommended to advanced users or know-how enthusiasts.

Adobe Premiere Pro

Adobe Premiere Pro

The industry-leading video editing software, Adobe Premiere Pro is a great tool to have for improving the quality of your videos.
Check priceVisit website

Corel VideoStudio

Corel VideoStudio Pro

Corel Video Studio implements professional options in an easy-to-understand package. It kind of sums up the best of the advanced usage while making your editing experience simple.

It offers only one video line with 32 editing tracks. For many advanced users, this is an underwhelming option but for undemanding ones, it will serve the purpose.

With a library of over 1500 viable effects for improving your videos, so you are not really in need to create them by yourself.

With the Project Tab option, you ‘ll get it working in no time and even upgrade your knowledge for more advanced operations.

Things can go even faster with the FastFlick option, which is most viable to express the creating of favorable video content. Insert video, edit, and share within the minutes.

Additionally, there are all of the professional processes like multi-cam, motion tracking, Chroma Key (video background selection), and others.

You can try out or buy Corel VideoStudio’s latest version on the link below.

Corel Video Studio

Corel Video Studio

Edit and improve your video quality with one of the best software for movie making and video editing.
Check priceVisit website

CyberLink PowerDirector

CyberLink PowerDirector is probably the best video editing solution for newcomers. If you are willing to start from scratch, learn basic things and move up the ladder, this is the best program for you.

One would assume that this may lead to a lack of premium tools, but that is not the case. Power Director has all the tools and approaches needed to make a novice create premium content in no time.

You can use more than 500 different effects and transitions in a linear timeline or storyboard. And every step you take is going to help you upgrade your knowledge.

While this is available in Full Feature Editor mode, the simplistic Express Mode will generate the best solution for your video editing in just a few minutes.

It also has a brilliant option called Magic Movie Studio that will help you creating premium clips in a few minutes. You’ll just have to import video, background music and do little tweaks at the end.

The main purpose of this generated option is to teach you how to use more advanced ones without fear of complex commands and editing software.

You start with the elementary things, advance through the editing till you reach full knowledge. Even people without basic knowledge of the surroundings are going to find it familiar and forgiving.

PowerDirector 365

PowerDirector 365

The best video editing solution if you are a beginner. It will definitely help you to give a better quality to your videos.
Check priceVisit website

Filmora Wondershare

Wondershare Filmora is one of the best video editing software solutions for novices. It lacks options for advanced users, especially editing tracks.

The 8 editing tracks are quite enough for someone who is a beginner. The learning graph will swiftly rise since Filmora has a convenient interface and all the options are available on the main screen.

As you would expect, there aren’t so many effects and tools. Filmora Wondershare is simple but, it can do the job. You can select between 2 modes, Easy or Full Feature Mode.

The Easy mode will get you started in no time, with plenty of video or audio tweaks. The Full Feature mode is more similar to the superior editing solutions.

Wondershare offers 300 different effects that can be used in video editing, with motion path, Chroma Key, and screen recorder available. You’ll learn to use this software in no time.

⇒ Download Wondershare Filmora


Magix Movie Edit Pro

Magix Movie Edit Pro falls under the same list as the many of the previously listed programs.

Its goal is to offer premium options that are used by editing professionals in a way that is understandable to casual users. In that way, everyone can be a film-maker if enough time is invested.

Magix Movie Edit Pro has a distinguished timeline that makes workflow better, presenting operations clearer to beginners. There are no separate tracks for different media so you’ll adjust to your liking.

The Storyboard mode is flexible and simple until the end when only small tuning is needed to get the job done. It is well adjusted for novice users and will lead them through the learning process.

An interesting novelty is proxy-editing. Proxy-editing lowers video resolution while you are editing. After the editing is finished, it restores it to an original resolution.

This way you’ll spend less time on rendering operations. It has a special database of effects and transitions that need to be separated from downloading.

Most of the options available on advanced editing applications are presented here. Color corrections, chroma-key, framing and captions tools are all implemented.

If you want to buy Magix Movie Edit Pro, follow the link below.

⇒ Download Magix Movie Edit


VSDC Video Editor

VSDC is making a bold move by offering a large array of options that are normally available only with paid versions. And it gets better and better with every update.

While the abundance of the options is certainly rewarding, the complex interface is not newbie-oriented so some initial problems may occur.

However, when you get into the workflow, everything will work like a charm.

The first thing to get to know is a specific non-linear track editor that can be confusing for newcomers. It lets you position video, audio, and effects in the timeline without an order.

That makes this program probably the best free solution for advanced users who are not willing to pay for a video editing application.

⇒ Download VSDC Video Editor


Nero Video

Nero Video is a good video editing solution from the once-leading burning software developer, Nero. The main flaw is its interface, which is a bit confusing.

While others have compelling usability, Nero Video is complex where there is no need for complexity. Nevertheless, it is a viable option because of over 400 effects and transitions available.

Advanced Editing is based on more complex, timeline editing. In the Advanced Editing, you can insert an unlimited number of editing tracks, which is great for more complicated tasks.

On the other hand, even though it is more simple editing-wise, Express Editing mode isn’t without its benefits. In a rather small amount of time, you can make great video and audio tweaks.

The problem that got our attention is the incompatibility between the two modes. If you start editing a project with Advanced Editing mode, you won’t be able to use it on Express Editing mode.

Nero is somewhere in the middle when it comes to editing solutions. You’ll need a few hours before you get to know it, but once you do, you’ll have all the tools you need to enhance your videos’ quality.
⇒ Download Nero Video


Lightworks

Lightworks is best described with the phrase: customizable underdog. Why is that so? Well, there is no video editing program with an interface as optimizable as Lightworks.

And the underdog part is because of the lack of recognition this software gets when compared to other well-known solutions.

And there are not many reasons for that. It is good enough to do all the work while offering remarkable innovations.

Additionally, there is a free version that doesn’t lack options compared to the paid ones. The only difference lies in export file size in format, which is not that big of a deal.

The program is rather small and it is a viable option for low storage devices. It is somehow obscure when it comes to complex movie editing since it doesn’t support closed captions.

While this can be a problem, it is solvable with third-party apps. The best thing about this light program is undemanding versatility and customization far beyond expectations.

⇒ Download Lightworks


AVS Video Editor

AVS Video Editor is a video editing solution levitating between great walkthrough interface with an abundance of effects and overlays and a bit obscure exported quality.

It sticks out itself with remarkable video tutorials well implemented for novice or casual users.

From the beginning, you’ll interact with different modules while learning their use. If you are new to this complex world, this software will introduce you to all the basics and much more.

Besides that, most of the related options are present in a simplified manner so you’ll get into the matter relatively easily. Both the timeline and storyboard modes are available.

However, there’s only one editing track, which can be an issue for more advanced work, but a number of effects and transitions kind of compensate for that.

AVS also has a vast number of templates of titles, scrolling credits, and adjustable letters.

To summarize it, AVS Video Editor is software that punches above its weight. If the export video quality could be a bit more refined, it would be one of the best solutions in the category.

⇒ Download AVS Video Editor


VideoPad Video Editor

VideoPad Video Editor is the free solution for editing software while upgrading your knowledge in the matter.

Most of the best-equipped programs are often expensive and advanced, this program will move you through elementary editing with more than a few premium tools. And it is free.

Lightworks is a leader in freeware video editors. And all those features are presented in a simplistic and understandable way so even newcomers can start editing with little to no experience.

Most of the effects and transitions that are standard in video editing are implemented in VideoPad, also.

You can add templates or create your own effects, edit a diversity of formats and then export videos, upload them online or burn them on the DVD storage.

This small but surprising editor will suit well to all beginners and casual users.

⇒ Download VideoPad


The video editing software market is full of different solutions for various customers’ tastes and experience levels.

If you are new in editing, you may want to think twice before paying for an application that is too complicated to use. On the other hand, professionals are best suited to leading expensive but rewarding software.

One way or another, we hope you’ll find something for your likeness. What is your favorite video editor and why would you recommend it? Do tell us in the comments.


Doodle Drawing Software for Windows [2026 Guide]

Advertisers, marketers, and business communicators want to use more animation, motion, and doodle videos in order to attract views’ attention more than ever.

Doodles can help them pass on their messages more powerfully and efficiently. Without using the right tool, this is really tough to obtain.

This is the reason for which we picked some of the best choices for doodle creation that are on the market right now. Check out these doodle creations software and see which one works best for you.


What are the best tools for creating doodles on Windows PCs?

Explaindio

Explaindio is one of the best animation, doodle sketch, and motion video creation software that you can currently find. It will allow you to create attention-grabbing professional-looking 2D and 3D videos.

The software is all about freedom, and it’s not cloud-based. You will have all that you need right on your computer without having to be connected to the Internet.

Take a look at the best features packed in Explaindio:

  • It comes with an easy and intuitive interface
  • You just have to pick the object and action from the tool’s library and combine them with your very own videos, audio, and images
  • This tool includes eye-catching custom transitions and on-screen effects
  • It also provides unlimited commercial use, and you can get the commercial license option to create videos for your clients
  • Explaindio allows you to combine 2D and 3D animations, whiteboard sketch elements, and also full-motion videos
Explaindio

Explaindio

With Explaindio you can combine 2D and 3D animation but you can also doodle sketch to your own desire.
Check priceVisit website

Doodly

Doodly is a simple drag-and-drop doodle video creator. Using this tool, anyone can create doodle videos that are proven to increase conversions and sales as well.

With Doodly, you’ll be able to create videos that everyone will adore and enjoy and it will help you increase your engagement and turn all your visitors into buyers.

Have a look at a few of its essential features listed below:

  • Doodly is easy to use, and it’s available for Windows systems
  • After you download the program, you will be able to create your very first video in a minute
  • The program allows high customization, and all you have to do is tap into the royalty-free library of scenes, props, characters, and sounds
  • You can also upload your own media
  • After the video is complete, you will get the chance to export it in either HD or SD format

⇒ Download Doodly

Adobe Premiere Pro

Adobe Premiere Pro is a great product when it comes to video editing. This professional program has all the tools and features needed to create and compile a video from scratch.

The end result is usually Hollywood-level production that can be created from the comfort of your own desk.

The time-line based editing makes it so that anyone with a minim experience editing videos can understand the UI immediately.

In fact, those used to other Adobe products such as Photoshop or Illustrator will have an even easier time getting used to it.

After the video is compiled, you can export it to add additional special effects in other tools such as Adobe After Effects with which Adobe Premiere Pro is perfectly compatible.

Of course, this entire toolset can just as well be used to create video doodles too, so why not get a video editor that can do both?

Here are some of the main features of Adobe Premiere Pro:

  • It can support simultaneous Projects
  • comes with several motion graphics templates
  • The ability to share projects
  • Supports VR Editing, VR rotate sphere, and VR audio editing
  • Perfectly compatible with other Adobe products
Adobe Premiere Pro

Adobe Premiere Pro

If you want to deliver Hollywood-level productions, Adobe Premiere Pro has all the possible features that you will require.
Free trialVisit website

Adobe Illustrator

Adobe Illustrator is targeted more towards those who want to create image doodles.

This vector-based image editor comes with the same complete set of tools that you need to create art from scratch, ranging from photorealistic wallpapers to the common free-hand doodles.

More so, those of you that are used to working with photoshop will find that this program’s UI is strikingly similar, to the point where you would mistake the two.

Pretty much anything you may ever need to create a drawing is at your disposal, from layer support and brushes to masks and extensive plug-in support.

While everyone knows that most Adobe products are subscription-based, you should know that you can apply for a 7-day trial so you can test out any product included in the Adobe Creative Suite.

Here are some of the main features that you should expect from Adobe Illustrator

  • A professional-level vector-based graphics editor
  • An extensive toolset that can be expanded via plug-ins
  • Libraries are filled with brushes, templates and presets
  • Compatible with most other Adobe products
  • Easy-to-use for veteran Photoshop users
Adobe Illustrator

Adobe Illustrator

This is a better match for doodle lovers as it offers all the brushes and tamplates for complete success.
Free trialVisit website

VideoScribe

VideoScribe is a marketing tool that is proven to increase the speed of learning.

Using this tool, you will be able to create doodles and animation videos easily, quickly and inexpensively. The program is used by more than 2 million people in the world in over 150 countries.

This is used by various companies in order to grab attention on social media. Just take a look at the most important features and functionalities that are packed in this software:

  • You can create doodles and animation effortlessly even if you’re just a beginner
  • VideoScribe provides business solutions, allowing you to engage prospects, educate employees, launch products and build your brand
  • VideoScribe is the education tool of both kindergartens and global leaders

⇒ Download Videoscribe


EasySketchPro 3.0

EasySketchPro is another great tool for creating doodles. Animated doodle sketch videos are one of the best ways to boost conversion rates, and this software makes use of this advantage.

With EasySketchPro, you can upload any video, and the software will sketch out the opening scene and then make a mind-blowing effect from Sketch to Live Video.

Take a look at the best features that are included in EasySketchPro:

  • You will also be able to set the drawing time sketch before it transitions to Live Video
  • EasySketchPro lets you add your own music and voice-over to both live video and sketch
  • You can also add your own text with the drag-and-drop interface
  • This tool allows you to add images from your computer or its extended source of royalty-free images

⇒ Download EasySketchPro


Moovly

With Moovly Studio, you can create video animation and doodles with ease even if you are just a beginner.

This animation and doodle maker has a core focus on enabling everyone to create engaging multimedia content by making it intuitive and simple.

Thanks to Moovly’s extensive library, including full Shutterstock integration, and easy drag-and-drop interface, you will be able to create doodles, and more animation graphics.

Check out the main features that are included in this tool:

  • It provides robust solutions to promote, educate and entertain
  • With Moovly, you will be able to tell your story using video
  • Shutterstock is now integrated into Moovly Studio
  • You can create, customize and share all your videos effortlessly and all you have to do is select your favorite objects, add and edit the animation, and your video is done
  • Moovly’s library consists of more than 175 million video clips, sound effects, images, and music files
  • As a part of your subscription, you will get 500,000 items royalty-free
  • You don’t have to be previously trained to be able to use this tool

⇒ Download Moovly


These seven tools for creating doodles are all compatible with systems running Windows and no matter which one you decide to get, you’ll be able to enjoy easy, fun doodle creation.

Let us know in a comment below, what software do you use to create amazing doodle.


Avchrome.dll is Missing [Error Fixed]

Many users report that the Avchrome.dll is missing which in turn is causing their system to stop working properly.

Trying to find what has caused it can be time-consuming and frustrating at the same time so we made sure to simplify the process for you.

What is avchrome.dll and what does it do?

Avchrome.dll is an important and essential file that is associated with and used for running-based applications.

For example, sophisticated video games and software applications are using this file to work properly.

We will explore in this article a few easy steps to restore the avchrome.dll file so make sure to keep on reading.

How can I fix the avchrome.dll is missing?

1. Restore the avchrome.dll file

Since the avchrome.dll is completely missing from your system, or you simply cannot find it, then the first and easiest thing to do would be to restore the file.

If you deleted it by mistake or due to any other reason, we recommend that you use a dedicated repair tool that will help you restore the file.

Thanks to the libraries this kind of software uses to compare the files found in your device, once the scan is finished, it will simply download and replace the faulty registries.

3. Run a malware scan
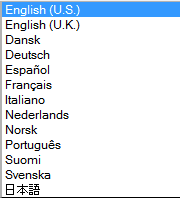
The avchrome.dll issues are often associated with an existing virus or malware in your device that has caused damage to the avchrome.dll file.

Performing a simple scan on your device could help you solve this issue quickly by detecting and removing any possible threats or infections, and we recommend that you try out Malwarebytes.

Using specialized software like this not only gives you quick results but also ensures that no harm is caused to your system.

Malwarebytes does all this at the click of a button and also protects your PC from future possible intrusions.

Malwarebytes

Prevent issues with the avchrome.dll file from happening again by using this great tool today.
Free trial Visit Website

2. Reinstall the program

Most often, reinstalling the program that is generating the avchrome.dll file is an easy approach to solving this problem.

If the avchrome.dll error appears only when you are trying to run a specific program, then uninstalling it and then reinstalling it on your device would be recommended.

In doing that you will substitute the program’s file, registry entries, and the avchrome.dll file that is required in order for the program to run.

4. Perform a system rollback

  1. In the search bar type System Restore.
  2. Now select the Create a restore point option.
  3. Next, click on the System Restore button.
  4. Select Choose a different restore point and click Next.
  5. Enter a date for restore before the avchrom.dll error, then click on Next.
  6. Enter your password if asked and follow the on-screen steps to choose a restore location
  7. Reset your device.

5. Update Windows

Thankfully, Windows 10 updates are always coming with multiple updates being delivered monthly event.

It can be possible that there have been changes in the operating system that are not compatible with the old version of the avchrome.dll file.

If this is the situation, then simply updating Windows will deliver the updated avchrome.dll version of the file.

We hope that one of the solutions presented here helped you solve the avchrome.dll missing file or any other dll-related issues for that matter.

If you have additional recommendations or suggestions we would love to hear about them in the comments section below.

Fix: Windows 10/11’s clipboard history is not working

The Windows 10 October 2018 Update introduced clipboard history. That’s a somewhat overdue addition to Windows 10 which enables users to copy multiple items to the clipboard.

Thus, users are no longer restricted to copying just one item to the clipboard. Furthermore, users can also sync items copied to their clipboard histories with other Win 10 devices.

So, the clipboard history is pretty cool. However, some users have posted on the Microsoft forum about clipboard history not working for them. Thus, some users need to fix clipboard history, or its cloud syncing at least.

How can I fix Windows 10’s clipboard history?

1. Check clipboard history is Enabled in Settings

  1. First, check that Clipboard history is turned on in Settings.
  2. Open Windows 10’s search box with the Windows key + S keyboard shortcut.
  3. Input clipboard in the search box.
  4. Click Clipboard history to open the Settings window as in the snapshot directly below.Clipboard history option windows 10 clipboard history not working
  5. Toggle the Clipboard history setting on if it’s off.

2. Sign in with a Microsoft account to enable clipboard history syncing

Users also need to sign in to Windows 10 with a Microsoft account to sync the clipboard across devices. To do that, click Sign in just below the Sync across devices subheading on Settings’ Clipboard tab.

Then users can select a Sign in with a Microsoft account instead option. After signing in with an MS account, users can select an Automatically sync text that I copy option in Settings.

Microsoft account window windows 10 clipboard history not working

3. Enable clipboard history with Group Policy Editor

  1. Some users might need to enable clipboard history with Group Policy Editor within Windows 10 Pro or Enterprise.
  2. To do that, open Run’s window by pressing the Windows key + R keyboard shortcut.
  3. Enter gpedit in Run and click OK to open Group Policy Editor.Group Policy Editor windows 10 clipboard history not working
  4. Click Computer Configuration on the left of Group Policy Editor’s window.
  5. Then click Administrative Templates, System, and OS Policies on the left of Group Policy Editor.
  6. Double-click Allow Clipboard History to open an Allow Clipboard History window.
  7. Click Enabled if that setting isn’t configured.
  8. Press the Apply button, and select the OK option to exit the window.
  9. Users who also need to enable clipboard syncing can double-click the Allow Clipboard synchronization across devices Group Policy setting.
  10. Then click the Enabled radio button on the Allow Clipboard synchronization window.
  11. Click Apply and OK.

4. Restart Windows Explorer

  1. Users have confirmed they’ve fixed clipboard history by restarting Windows (or File) Explorer. Right-click the taskbar and select Task Manager.
  2. Scroll down to the Windows Explorer process on the Processes tab.Windows Explorer process windows 10 clipboard history not working
  3. Select the Windows Explorer process, and then click the Restart option.

5. Edit the Registry to enable Clipboard history

  1. Users can also fix clipboard history by editing the registry. Enter regedit in Run’s Open text box, and click the OK button.
  2. Then open this registry path in the Registry Editor: ComputerHKEY_LOCAL_MACHINESOFTWAREPoliciesMicrosoftWindowsSystem.system key windows 10 clipboard history not working
  3. Select the System key on the left of the window.
  4. Users who don’t see a AllowClipboardHistory DWORD should right-click an empty space and select New > DWORD 32-bit Value.
  5. Enter AllowClipboardHistory as the new DWORD.
  6. Double-click AllowClipboardHistory to open an Edit DWORD window.
  7. Enter 1 in the Value data box, and click the OK button.
  8. If there isn’t an AllowCrossDeviceClipboard DWORD for the System key, right-click a space on the right and select New > DWORD 32-bit Value.
  9. Then enter AllowCrossDeviceClipboard, and press the Return button.AllowCrossDeviceClipboard DWORD windows 10 clipboard history not working
  10. Double-click AllowCrossDeviceClipboard, and then enter ‘1’ in its Value data box.Edit DWORD window  clipboard history not working
  11. Press the OK button to close the window.
  12. Thereafter, close the Registry Editor; and restart the desktop or laptop.

Those are a few of the potential resolutions for fixing Windows 10’s clipboard history and syncing.

Remember, however, that there are numerous third-party clipboard managers users can utilize that are just as good, if not better, than Windows 10’s clipboard.

Clipboard management can be greatly enriched if you use third-party tools, and many related issues can also be fixed if you use such tools as alternatives to the conventional Copy/Paste procedure.

That is why we recommend that you give Comfort Clipboard a try, especially since its main feature is an expanded clipboard history at your disposal.

This concludes our article on how to fix clipboard history issues in Windows 10. If you know of any other solution we may have missed out on, let us know by leaving your feedback in the comments section below.

Slow Motion Video Editing Software for PC: Top 7 of 2026

Videos have become an important part of the way we choose to share information online as a society.

Thanks to the latest advancements in technology, now almost everybody has a video camera with 10 times more processing power than the first Apollo Space Shuttle mission.

You can now use slow-motion videos to review sports events, optimize the strategy of your sports team, collect surveillance data, create video tutorials and guides, create music videos with great-looking effects, etc.

There is a wide range of software options on the market that allow you to apply slow-motion effects to your videos.

In this article, we will explore some of the best video slow-motion software for PC. This list contains powerful professional video editing tools, and also some user-friendly easy to use options that can be used by beginners.


What are the best slow-motion video editing tools?

Adobe After Effects CC

Adobe After Effects - slow motion software

Adobe After Effects is another great software option that allows you to easily slow down or speed up your videos and offers a wide range of other useful video features.

After Effects is part of the Adobe Creative Cloud pack but can be bought as a stand-alone version.

The tool is a bit harder to get used to than the other software options presented in this article, as it requires a bit of a learning curve.

If you find the wide range of features and options in this software to be a bit overwhelming, you can always visit the Adobe tutorials page.

Key features include:

  • Access to mask and shape points
  • Wide range of motion graphics
  • Data-driven animation tools — you can easily animate charts, graphs, etc.
  • Great range of optimization tools
  • Professional editing features
  • 3D pipeline with Cinema 4D Lite R19
  • Multiple effects
Adobe After Effects CC

Adobe After Effects CC

Add effects, edit videos, create compositions, import from Photoshop and many more with this fantastic tool.
Free trialVisit website

Corel Video Studio

Corel VideoStudio is a well-designed and powerful video editing software that comes with support for 4K and 360-degree video.

Additionally, the affordable price tag makes this tool a top choice for professional and home users.

Although the user interface is clean and simple, so regardless if you are a beginner or not, there will be no problems in using this tool, Corel Visual also brings a set of features that will allow you to edit all your videos in a professional manner.

The multi-cam editing, motion tracking support, 4K, and 360-degree video support, as well as video masking, are just some of the features that Corel Video Studio comes with

Let’s have a look at some of the key features:

  • Intuitive user interface
  • Support for 4K Ultra HD videos
  • 360-degree video
  • Motion tracking support
  • Editing tools
Corel Visual Studio

Corel Visual Studio

Create movies with this award winning tool that will make all your dear memories come to life. Get the best deal now!
Check priceVisit website

Movavi Video Editor

Movavi Video Editor - slow motion software

Movavi Video Editor is another great tool that can be used to apply slow-motion effects to your videos with ease.

This software is designed to be easy to use, with just 20 minutes required for you to master it, can quickly import and export into all popular formats, and bolsters intuitive drag-and-drop controls.

Movavi offers an incredible range of effects in the Movavi Store:

  • Buy titles, transitions, and other extras designed by the Movavi team
  • Media files import – from your camera, smartphone, or computer hard-drive, support all popular formats
  • Easily remove unwanted segments of your video clip, move segments around, add titles and transitions, filters, etc.
  • Ability to save the video clip on your hard-drive or export it directly to YouTube or your 4K TV
  • Multi-track editing
  • Built-in media – video clips, backgrounds, sound, music
  • Video stabilization features – removes distortion without affecting the video quality
  • Can combine multiple videos on one screen
  • Audio tools – frequency, remove noise, normalize audio, special effects

Movavi Video Editor also allows you to use your web camera to record video, can automatically detect the audio rhythm and syncs it to the tempo of your project, and also has support for Intel hardware acceleration.

Movavi Video Editor has been released in 3 different versions, each catering to the needs of different users:

Video Editor 15

  • Basic video editing tools
  • Filters, transitions, titles, effects
  • Montage wizard – helps you set everything up
  • Up top 6 tracks on the Timeline
  • 5 ready-to-use intros and outros
  • 10 sample video clips
  • 27 songs built-in
  • 10 stickers
  • Fast processing of large HD videos

Video Editor 15 Plus has everything from Video Editor 15 edition and adds:

  • Up to 99 tracks on the Timeline
  • Keyframe animation of titles, overlay video, etc.
  • Highlight and conceal tool
  • 16 ready-to-use intros and outros
  • 20 sample video clips
  • 39 built-in songs available
  • 86 stickers
  • Fast processing of Full HD and 4K videos

Movavi Video Editor Business Edition contains all the features found in the two previous versions and also adds:

  • Can use one key on 2 PCs
  • Free minor updates
  • Priority support
  • Personal account manager
  • Easier screen recording
  • Improved recording frame – allows you to choose the capture area of your screen by click and drag
  • Can schedule recordings to capture the screen at any time, even remotely
  • New titles, stickers, music, backgrounds, etc.
  • Fast Track HD Technology – offers you great processing speeds

The Business Edition of Movavi Video Editor was designed to be used either in the business sector, but it can also be used by teachers, marketers, developers, and bloggers.

Teachers can provide more comprehensive and immersive teaching sessions can create presentations by the use of captions, call-outs, etc., and can also be used to highlight actions performed by a keyboard or mouse.

Bloggers can use Movavi to create high-quality content for their video blog, and can also easily edit, remove unwanted parts of the video, and even apply filters. You can also add background music and voiceover, and you can upload your video directly to YouTube.

If you feel like you need a bit of guidance regarding how to start using Movavi Video Editor, use the official how-to guide.

Movavi Video Editor

Create engaging and high-quality videos with this fantastic tool and the built-in features that come with it.
Free trial Visit website

Videopad by NCH

Videopad by NCH is an amazingly powerful software that allows you to create slow-motion videos with ease. This software has a user-friendly UI (user interface) that allows you to easily create professional-looking videos.

This software has a wide range of video transitions and effects, digital audio tools, and also good video optimization tools :

  • Allows 3D video editing and 2D to 3D conversion
  • Can add text, effects and overlays
  • Can customize the way the applied transition reacts
  • Can import and export music tracks
  • Audio effects – choral, echo, distortion, etc.
  • Can record your own narration easily
  • Customize color and other visual effects
  • Slow down or speed up videos
  • Video stabilization – reduces camera shake for crisp-looking videos
  • Transition effects – cross fade, fade to black, dissolve, etc.

You can import video (avi, mpeg, wmv, divX, Xvid, etc.), images (bmp, gif, jpg, png), and also audio files (wav, mp3, m4a, mid, flac, etc.).

You can export your project directly by burning it to a disc (DVD, CD, Blu-ray), or by exporting it to video files (avi, wmv, mpg,etc.), that can be on your hard-drive or you can directly post to YouTube, Facebook, and Flickr.

VideoPad was released in two editions – Home and Master’s, each with different features.

VideoPad

VideoPad

Create professional videos within minutes with this amazing software and apply all the effects that you can imagine.
Free trialVisit website

Ashampoo Video Optimizer Pro

Ashampoo Video Optimizer Pro is another great software option that allows you to easily apply slow-motion effects to already recorded videos, and you can also choose from a wide range of video editing features.

This software can help you improve the quality of your videos, has stabilization for shaky videos, and you can use it to optimize colors and contrasts.

Another great feature of Ashampoo Video Optimizer, is the fact that you can easily remove digital noise. 

After you applied all the effects needed to your clip you can also use slow motion or time lapse effects to make your creation stand out even more.

It also has the standard toolset of almost every video application, you can rotate, crop, and also merge your videos at the click of a button.

Some other notable features of Ashampoo Video Optimizer Pro:

  • Compatibility with smartphones, digital cameras, and drones
  • High-performance image stabilization
  • Automatic fisheye remover
  • Great color sharpness for crisp-looking images
  • Great exposure and contrast settings for optimum setup of your scene
  • Tilt-shift, noise reduction and deflickering
  • Batch-processing
Ashampoo Video Optimizer Pro

Ashampoo Video Optimizer Pro

Edit your videos with just a few clicks and without spending a lot of time with this powerful video editing software.
Check priceVisit website

Wondershare Filmora

Wondershare Filmora - slow motion software

Wondershare Filmora is another great software option that allows you to create, edit and process all aspects of your video creation.

You can easily add a wide range of effects, from slow-motion, to fast-forwarding any part of your clip.

This software contains hundreds of presets of different types that, with the ease of use of the user interface, offer great customization tools, no matter how experienced you are in the field of video editing.

You can easily add filters, overlays, elements, transitions, and can also mix multiple layers of effects and audio into one.

In Wondershare Filmora, you can find extremely rich effects rack that enable you to edit the colors in your videos, add image overlays and text, etc. This software also has a good range of royalty-free music that allows you to create the perfect soundtrack for your video project.

All the changes done to your project can be saved as presets, allowing you not to repeat the process of creation too often. Why re-create a video from scratch when you can use the presets that you saved ? This allows you to save time and be more productive.

The software’s rich effects library enables you to enhance the colors in your videos, add text or image overlays.

Wondershare Filmora also offers royalty-free music you can use to create a perfect soundtrack for your videos that can be exported to YouTube directly from the editor.

You can add text with animations and save it as preset to use in the future, or make some creative videos with the split-screen video or Chroma keying feature.

Other notable features of Wondershare Filmora include:

  • Extremely intuitive
  • Simple color correction and audio editing
  • Advanced features like PIP, Green Screen, Tilt-shift, Mosaic, etc
  • Compatible with the most commonly used formats like MP4, MKV, MOV, FLV, etc
  • Split-screen video options
  • Add animated text
  • Slow down or speed up your video easily
  • Chroma keying

⇒ Download Filmora Video Editor

BeeCut

BeeCut - slow motion software

BeeCut is a great light-weight software option that allows you to play video in slow motion. You can find all the basic video editing options in this software that allows you to cut, crop, merge, zoom in, adjust colors, and speed of playback.

This software also enables you to be able to add mosaic effects, text, audio and video files, etc. You can easily import your video with its user-friendly interface and edit them as you wish.

Some other notable features include:

  • Drag and drop overlays and filters
  • Great range of pre-made templates
  • Can edit audio files by adjusting speed and volume
  • Ability to add mosaic effect – this allows you to disguise any aspect of your video
  • Can customize video parameters – contrast, saturation, hue, etc.
  • Picture-in-picture options
  • Allows multi-track usage – can simultaneously edit footage on video, audio, PIP, overlay, filter track
  • Can add a wide range of masks to your video for a professional look

BeeCut licenses can be bought for personal or business use. Both of these options come with a monthly, yearly, and a lifetime subscription options.

You can find a good step-by-step tutorial regarding how to use BeeCut to play slow motion videos, on the Official Apowersoft website.

For any other tutorials, you can visit the BeeCut FAQ page.

⇒ Try BeeCut


These are our picks for the best video editing software that allows you to slow down or speed up your video recording with ease.

Some of the software options presented in this list are suitable for professionals with a good range of experience in video editing, and other options can be used by anybody, without needing to go through a learning process.

If you can’t find your favorite video software with slow motion capabilities in this list, please feel free to share your suggestions in the comment section below.

Best Video Stabilization Software to Download in 2026

Nowadays everybody can easily record a video using their smartphone camera. However, sometimes a video can be shaky especially if you don’t hold your phone steadily while recording.

If your recorded video is shaky, you can stabilize it by using special software for video editing. Now we’re going to show you the best video stabilization software for Windows 10.

What is the best video stabilization software for Windows 10?

Adobe Premiere Elements (recommended)

Adobe Premiere Elements official image

Adobe Premiere Elements is one of the most popular video editing and video stabilization tools on the market. This is a powerful tool and it allows you to create dynamic collages with your pictures and videos. The tool also supports audio, and you can easily add any song to your videos.

We have to mention that the tool allows you to remix your songs so they can match the length of your video perfectly. Adobe Premiere Elements also supports the Guided Edit feature that allows you to apply effects across multiple clips in your video simultaneously.

This tool supports face detection features and it allows you to center your videos around specific people thus speeding up the creation process. The tool uses a tagging system that allows you to sort videos by places, events, and albums in order to access them quickly.

We have to mention that this application is optimized for touchscreen computers, so you can easily perform simple editing and organize your videos without using a mouse.

This tool supports a motion to text, so you can easily create attractive titles for your videos. Regarding the text, you can even add videos inside your text thus getting some attractive results.

Adobe Premiere Elements supports color adjustment and playback control so you can easily speed up your videos or create slow-motion effects.

Of course, just like any advanced video editing tool, Adobe Premiere Elements supports Shake Reduction so you can easily fix shaky videos. We have to mention that you can also add various artwork to your videos.

The application has 50 different music tracks and 250 sound effects that you can add to your videos. Regarding effects, there’s also a photo-blending feature that allows you to use the color and textures of another clip on your current clip.

After you’re done editing your videos, you can easily burn them to a DVD or upload them directly to YouTube, Facebook, Vimeo, or your own website. Adobe Premiere Elements is a great video editing tool that also supports a video stabilization feature.

This tool is available as a free trial, but if you want to continue using it, you’ll need to purchase a license.

Adobe Premiere Elements

Adobe Premiere Elements

Create the best dynamic collages with sound by using the most popular software for photo and video editing.
Check priceVisit website

VideoStudio Ultimate

Another professional video editing tool with video stabilization is VideoStudio Ultimate. This tool has a Mask Creator feature that allows you to apply effects only to the selected area of the video.

The tool also supports video transparency and it allows you to combine two or more videos in order to create some interesting results.

The application supports multi-camera videos so you can create videos using 6 different angles. There’s also stop motion animation as well as motion tracking support.

VideoStudio Ultimate also supports various effects, animated titles, transitions as well as picture-in-picture effects. Of course, there’s an ability to enhance the color of your video as well as support for Green Screen.

Regarding the additional features, this tool supports video stabilization and fisheye removal. We have to mention that this tool is fully compatible with a wide range of cameras, so you can easily import your videos.

VideoStudio Ultimate supports the Time Remapping feature so you can easily slow down or speed up the video playback in order to create some impressive results.

The program also supports audio normalization and audio ducking. Of course, the application comes with royalty-free music that you can add quickly to your projects.

VideoStudio Ultimate offers easy video editing and support for 360-degree videos. The tool also allows you to record your screen or to burn your videos directly to discs.

If you want, you can also upload videos directly to social media and video-sharing sites right from the application.

VideoStudio Ultimate is a professional video editing tool and it comes in several different versions, but keep in mind that only the Ultimate version supports video stabilization.

Corel Video Studio Ultimate

Corel Video Studio Ultimate

Create the videos of your dreams using stabilization and other of Corel’s awesome features!
Check priceVisit website

Vegas Movie Studio

Vegas Movie Studio is a professional video editing software that supports a wide range of features, including video stabilization. It supports simple and advanced editing modes, perfect for both basic and advanced users.

There’s support for 3D editing and 4K resolution, which should be more than enough for most users.

There are various video and audio effects along with text animations. We have to mention that this tool supports color matching so you can easily match the colors from two clips in order to achieve the best results quickly.

Of course, just like any other professional video editing tool, this one also supports the video stabilization feature.

In addition to video editing, you can also create slideshows using VEGAS Movie Studio. The tool also supports advanced audio editing, so you can have full control over audio effects.

It’s worth mentioning that this tool supports élastique Pro technology so you can perform time stretches and pitch-shifts of your audio without reducing its quality.

Of course, there’s support for surround sound as well as support for live audio recording. Regarding the file output, the tool supports a wide range of file formats.

In addition, you can also burn your videos right to DVD or Blu-ray discs. If you want, you can even preview your DVD movie and see how its menus work in action.

Of course, you can directly upload your videos to Facebook or YouTube with just a few clicks.

Vegas Movie Studio is a professional video editing software and it’s available as a free trial.

Keep in mind that there are three different versions available, and not all versions support video stabilization or other advanced features.

Vegas Movie Studio

Vegas Movie Studio

Go professional by using Vegas Movie Studio, top software for video editing and stabilization.
Check priceVisit website

Movavi Video Editor

This video editor supports a wide range of audio and video formats. The application allows you to add files from your computer, but it also supports video and audio capture.

Of course, you can easily transfer files from your digital camera or phone. In addition, you can also digitize old VHS tapes or record videos from TV tuners.

After importing the desired clips, you can trim them, rotate them and remove unwanted segments. Of course, you can edit your clips by adding one of 20 available transitions.

Movavi Video Editor supports various video improvements and you can adjust the sharpness, brightness, contrast, and other color settings. In addition, you can stabilize your videos or improve quality automatically by using the Magic Enhance feature.

We have to mention that this tool supports a wide range of effects, and you can choose between 160+ different video effects.

We also have to mention that this application supports background removal and audio normalization. There’s also an audio equalizer and various audio effects that you can add to your videos.

Regarding the additional features, Movavi Video Editor also supports slideshows, so you can easily create slideshows using the dedicated wizard. The tool allows you to save your videos in different formats and optimize them for different devices.

Of course, you can also optimize your videos for social networks and video websites.

Movavi Video Editor is a great video editing tool that supports various audio and video formats as well as video stabilization. The tool is available as a free trial.

⇒ Get Movavi Video Editor

Pinnacle Studio

Another professional video editing software with video stabilization is Pinnacle Studio. This tool supports unlimited tracks as well as 4K and 3D video.

We have to mention that this tool supports live screen capture, so you can easily create video guides with it.

There’s also support for the Audio Ducking feature that will ensure that your foreground and the background sound is balanced.

Pinnacle Studio supports over 2000 2D and 3D effects, and it also supports the Stop Motion Animation feature.

Another useful feature that content creators will like is the Green Screen effect. The application supports 360 video editing and it allows you to combine up to 6 cameras in Multi-Camera Editor.

There’s also a Motion Tracking feature that allows you to track, label, or blur objects with ease. Regarding the effects, the application also supports 75 different plugins from NewBlue.

The plugins include new transitions, video stabilization, new effects, etc. We also have to mention that this tool supports track transparency so you can easily control the opacity of each track.

Pinnacle Studio allows you to create DVD discs and add menus, sub-menus, and chapters to your videos. The tool supports drag and drops HD video editing.

We also have to mention that you can export your videos in formats such as FLV, MPEG-G, and DivX. Of course, you can also add videos directly to social networks right from this tool.

Pinnacle Studio is a professional video editing tool, and it offers advanced features as well as video stabilization. It is available in three different versions, so keep in mind that not all features are available in all versions.

The tool isn’t available for a free trial, so if you want to use it, you’ll have to purchase it first.

⇒ Get Pinnacle Studio

Turbo Video Stabilizer

Unlike most video stabilizers, this one supports 6 degrees of motion on 3 axes thus offering 3D stabilization. The tool also allows you to rotate your video at any time, which can be rather useful.

Turbo Video Stabilizer also supports Rolling Shutter Correction so you can easily fix slants and tilts that are caused by CMOS sensors.

We also have to mention that this tool supports video up to 4K resolution, which is more than enough for basic users. The tool supports a wide range of formats so it can read almost any video file.

In order to achieve maximum performance, this tool offers multi-core and multi-threaded support. The application is simple to use, and it offers an attractive user interface.

We also have to mention that there’s support for YouTube and Facebook so you can easily upload your videos right from the application.

Turbo Video Stabilizer isn’t a video editing software, so you won’t make any impressive videos with it, but it will allow you to stabilize your videos and edit them in different third-party tools.

The tool is available as a free trial, but you need to purchase a license if you want to continue using it.

Since this tool doesn’t support video editing, it’s a lot cheaper than some other entries on our list.

If you’re looking for affordable and user-friendly video stabilization software, we highly recommend that you try out Turbo Video Stabilizer.

⇒ Get Turbo Video Stabilizer 

Filmora Wondershare

If you’re looking for advanced video editing software that also supports video stabilization, Filmora Wondershare might be perfect for you.

The first thing you’ll notice about this application is its modern and sleek user interface. In addition to a great user interface, this tool offers a wide range of video editing features.

Using this tool you can add filters and overlays, text and titles, and graphics. In addition, there’s wide range of transitions available, and you can also add your own music to the videos.

Regarding the music, the application allows you to download and add royalty-free songs right from it.

The tool can work with high-resolution videos up to 4K, so it will be perfect for content creators.

In addition, the tool fully supports GIF files and you can easily import, edit and export GIF files right from Filmora Wondershare.

The tool also has a Noise Removal feature, so you can easily remove background noise and make your videos crystal clear.

Additional features include speed control, frame-by-frame preview, color tuning, and pan and zooming. Of course, this tool supports some advanced features as well.

A list of advanced features includes the picture in picture, audio mixer, advanced text editing, screen recording, and green screen support. There’s also a split-screen feature, 3D lut, video stabilization, and tilt-shift.

The tool also allows you to separate the audio from your video clips and edit it separately. If you want to fine-tune your audio, there’s an audio equalizer available.

We also have to mention that this tool has a scene detection feature that will analyze your video for different scenes thus saving your time.

Filmora Wondershare is a great video editing tool, and just like every advanced tool, it supports a video stabilization feature.

The tool offers a beautiful user interface and amazing features, so it will be perfect for basic and advanced users alike.

We have to mention that this tool isn’t free, and if you want to continue using it, you’ll need to purchase a license.

⇒ Get Filmora Wondershare

Arcsoft Video Stabilizer

Arcsoft Video Stabilizer is a simple video stabilization software that will be perfect for basic users. This tool offers a humble user interface and it works with AVI, MPG and MPEG formats.

Arcsoft Video Stabilizer is simple to use, and you just need to add the video that you want to edit and select the part of the video that you want to fix. In addition, you can also select and fix the entire video if you want.

After selecting the parts of the video that you want to stabilize, click the Stabilize Video button and the program will start the stabilization process.

This is an extremely simple video stabilization software, so it is perfect for basic users that want to quickly fix their videos.

We have to mention that this tool doesn’t support any advanced options, and it only works with few file formats which is its biggest flaw.

If you’re a basic user and you’re looking for a simple tool for video stabilization, feel free to try Arcsoft Video Stabilizer.

⇒ Get Arcsoft Video Stabilizer

Windows Movie Maker

Probably one of the best-known free video editing software is Windows Movie Maker. This tool was a core component on previous versions of Windows, but Microsoft decided to remove it.

The tool is still available for download as a part of Windows Essentials suite, and you can download it and use it for free.

Regarding the tool, it supports a wide range of formats and it allows you to easily capture video. The tool offers basic video editing and you can cut your video, add music, titles or captions to it.

Just like many other video editing tools, Windows Movie Maker supports different transitions and visual effects. Regarding the number of effects, there are about 50 different transition effects and 20 different visual effects.

The tool also allows you to create a fade-in and fade-out effects and control the speed of playback. Of course, Windows Movie Maker also supports a video stabilization feature.

Regarding stabilization, you can choose between Anti Shake, Anti Shake and Wobble Correction (low), and Anti Shake and Wobble Correction (High).

If you’re not sure which setting you need to use, you can always preview it and see the results.

Windows Movie Maker is a decent video editing tool and it offers basic video stabilization features. Older users are probably familiar with this tool, and if you want to use it, you can download it and install it for free.

⇒ Get Windows Movie Maker

Deshaker

Deshaker is a video stabilizer plugin for Virtual Dub. Virtual Dub is a free capturing and encoding tool for Windows. This tool can be enhanced by many different plugins and one of those plugins is Deshaker.

This tool stabilizes horizontal and vertical panning, rotation, and zooming. In order to provide optimal simulated camera motion, the tool works in two passes.

We have to mention that this tool can also fill black areas during the stabilization process with future and previous frames.

Deshaker also supports motion vector video output on its first pass and a wide range of options for advanced users. If you want, you can even edit the video on a frame per-frame basis in order to achieve the best results.

Deshaker is a great plugin for Virtual Dub and it’s available in 32-bit and 64-bit versions. We also have to mention that this tool is available for free, so you can use it without any limitations.

Deshaker offers a wide range of features when it comes to video stabilization, so it’s perfect for advanced users. Keep in mind that you need to download Virtual Dub before you can use Deshaker.

⇒ Get Deshaker

AVS Video Editor

This video editing tool offers support for some of the most popular video formats. The tool supports AVI, VOB, MP4, DVD, WMV, 3GP, MOV, MKV formats as well as H.264, MPEG-4, H.263, and many other codecs.

We also have to mention that this tool supports various resolutions up to 4K Ultra HD which should be more than enough for most users.

Just like most video editing tools, AVS Video Editor allows you to trim, cut, split, and merge your videos. There’s support for various video effects and you can choose between 300 different video effects and transitions.

In addition to effects, you can also add menus, audio, text, and subtitles to your videos. We also have to mention that there’s a video stabilization feature that you can use to fix shaky videos.

The tool has integrated video cache technology, thus making editing of high-definition videos faster than before. AVS Video Editor also allows you to record video from DV cameras, web cameras, and VHS cameras.

The application supports screen recording, so you can use this tool to create video guides and tutorials.

In addition to video editing, this tool allows you to create slideshows from images. Regarding slideshows, you can add audio and voice narration to it. We also have to mention that this tool allows you to create Blu-ray videos.

There’s also support for social networks, so you can publish the video right from this application.

AVS Video Editor supports a wide range of features as well as video stabilization, so it will be perfect for both basic and advanced users.

This tool isn’t free, but you can download and use the trial version without limitations.

Keep in mind that the trial version will add its watermark to all your videos, so if you want to remove the watermark you’ll need to purchase a full version.

⇒ Get AVS Video Editor

ProDRENALIN

If you’re an outdoors person and you tend to record videos, you might want to use this application. This application allows you to improve your videos that are recorded by action cameras such as GoPro.

This tool can remove fisheye, rolling-shutter, and perspective distortion, but it can also stabilize your video. In addition, the tool allows you to rotate your video or to reduce noise, which is a useful feature to have.

ProDRENALIN allows you to compare the original video and your edited video so you can easily see the improvements. Regarding stabilization, it uses award-winning stabilization technology, so it offers amazing results.

Of course, you can also adjust color correction, brightness, and contrast right from this tool.

As for supported resolution, this tool can easily work with 4K and 2.7K videos. We also have to mention that this tool supports a wide range of formats, and it will work with almost any video format.

If you’re looking for a simple tool that allows you to stabilize your videos, ProDRENALIN might be perfect for you. This tool doesn’t support any advanced options or video editing, and it only provides video stabilization.

If you’re a basic user and you want to stabilize your videos, we strongly recommend that you check this application out.

⇒ Get ProDRENALIN

NewBlue Stabilizer

Recording a video using a hand camera or an action camera will usually produce a shaky video, but you can fix that by using this tool.

This video stabilization software doesn’t require a stationary point in order to work, and you can choose to focus on different regions or objects in your video.

The tool also has a built-in stabilization engine, so you can easily emulate Steadicam. Of course, you can fine-tune the amount of stabilization as well as strength and motion control.

This is a professional video stabilization software, and it offers a wide range of features. Unfortunately, it doesn’t support video editing, but it offers amazing results when it comes to video stabilization.

The tool is available for a free trial, but you need to purchase it if you want to continue using it.

⇒ Get NewBlue Stabilizer

Video stabilization feature is usually included in video editing software, but there are also a few dedicated tools that only offer video stabilization.

If you use an action camera or create videos using your smartphone, be sure to try some of the video stabilization tools from our list. If you have any suggestions, don’t hesitate to point them out in a comment below.