How to Update Uplay Games: Simple and Efficient Solution

Ubisoft has plenty of well-known titles under their belt, and their own desktop client to act as a game launcher and library manager. This client is known as Uplay, and while it may not be the most stable program of its type, it does a pretty good job.

However, many of our readers have been complaining that they are having problems updating their games through Uplay.

Other users stated that whenever they pressed the Update button that’s right under the game‘s icon within Uplay, nothing would happen. However, if they try to verify the game‘s files, it will fail to validate the game.

How do I update my Uplay games?

Keep note that this is more of a workaround rather than an official fix, so make sure you make a backup of your game‘s install files before trying this.

  1. Go to the install location of your Uplay games
    • This location varies depending on where you chose to install Uplay
  2. Rename the folder of the game that you cannot update into something else, but do NOT delete it
  3. Launch Uplay
    • In your list of installed games, the game which you renamed should now be missing from your library
  4. Proceed to look for the game in your game‘s list and click on Download
  5. Before pressing Continue after you chose the install location, go back to your Uplay folder and rename the game back to what it used to be
  6. Now return to the install wizard and click Continue
    • Now instead of downloading the files, Uplay will discover the ones already installed
  7. Uplay will now finish downloading whatever update was NOT installed until that very moment.
  8. Launch the game
Rename Ubisoft game

If you follow these steps, you should be able to successfully update pretty much any Uplay game.

An alternative solution would be to download the game through Steam instead since most Ubisoft games can be found there as well.

However, keep in mind that there are some incompatibilities between Uplay and Steam and that a Ubisoft game downloaded through Steam can only be handled through Steam.

More so, before trying any of these solutions, check to see if you have the disk space to spare.

This is because a lot of Ubisoft titles have patches that are quite big.

Download the October 2019 Patch Tuesday updates right now

Patch Tuesday is right around the corner and a new set of cumulative updates will be released for all the supported Windows 10 versions.

Microsoft just released the following updates:

  • Windows 10 version 1507 — KB4520011 (OS Build 10240.18368)
  • Windows 10 version 1607 — KB4519998 (OS Build 14393.3274)
  • Windows 10 version 1703 — KB4520010 (OS Build 15063.2108)
  • Windows 10 version 1709 — KB4520004 (OS Build 16299.1451)
  • Windows 10 version 1803 — KB4520008 (OS Build 17134.1069)
  • Windows 10 version 1809 — KB4519338 (OS Build 17763.806)
  • Windows 10 version 1903 — KB4517389 (OS Build 18362.418)

Windows 10 October Patch Tuesday updates

Although we’ve gotten used to big Patch Tuesday updates and lots of features and changes, it seem that Microsoft will deviate this time from the classic deployment.

A smaller number of updates is expected, mainly because .NET, Exchange, and SharePoint got some big changes in September.

Also, Chrome and Firefox next major releases are set for later this month. As a result, there will be minimal or no improvements at all in this Patch Tuesday.

Hopefully, there will be some changes involving Adobe Flash. Considering the fact that Flash got only one security update in the last three months, now is probably the time for another one.

SSU’s and Windows 10 v1909

Speaking of security updates, it’s also possible to see some new SSU’s (service stack updates). Microsoft is releasing them separately because they are critical for stability and maintenance.

SSU’s usually contain CVE fixes and they should be installed prior to any update to make sure that everything goes well.

Last month we saw for the first time SSU’s released for all the operating systems, but Microsoft has released them more often in recent times. So we might see new ones in the October 2019 Patch Tuesday.

Another thing to keep in mind is that the tech giant releases major feature updates on a semi-annual cycle, usually in April and October.

This means that Windows 10 v1909 will finally show up. It has been tested in the Insider Program for months, and now it’s finally ready for deployment.

19H2 will be a smaller update without many new features. Basically, it will be a stepping stone for 20H1 which will be released sometime in the spring of 2020.

Download October 2019 Patch Tuesday updates

If you have enabled automatic updates, the October 2019 Patch Tuesday updates will automatically install on your PC. If you want to manually install them, you can do so from Setting. check for updates october patch tuesday

Keep an eye on our latest news if you want to be the first one that gets the download links and changelogs for October 2019 Patch Tuesday, as we will keep you updated with all the important info.
READ ALSO:

How to stack or cascade your app windows in Windows 10

Windows 10’s most commonly used window management function is Snap, which lets you drag apps to the corners of your display to “snap” them side-by-side. However, the operating system also comes with a couple of other options, Stack and Cascade, which can be more helpful when you’re working with a large number of apps.

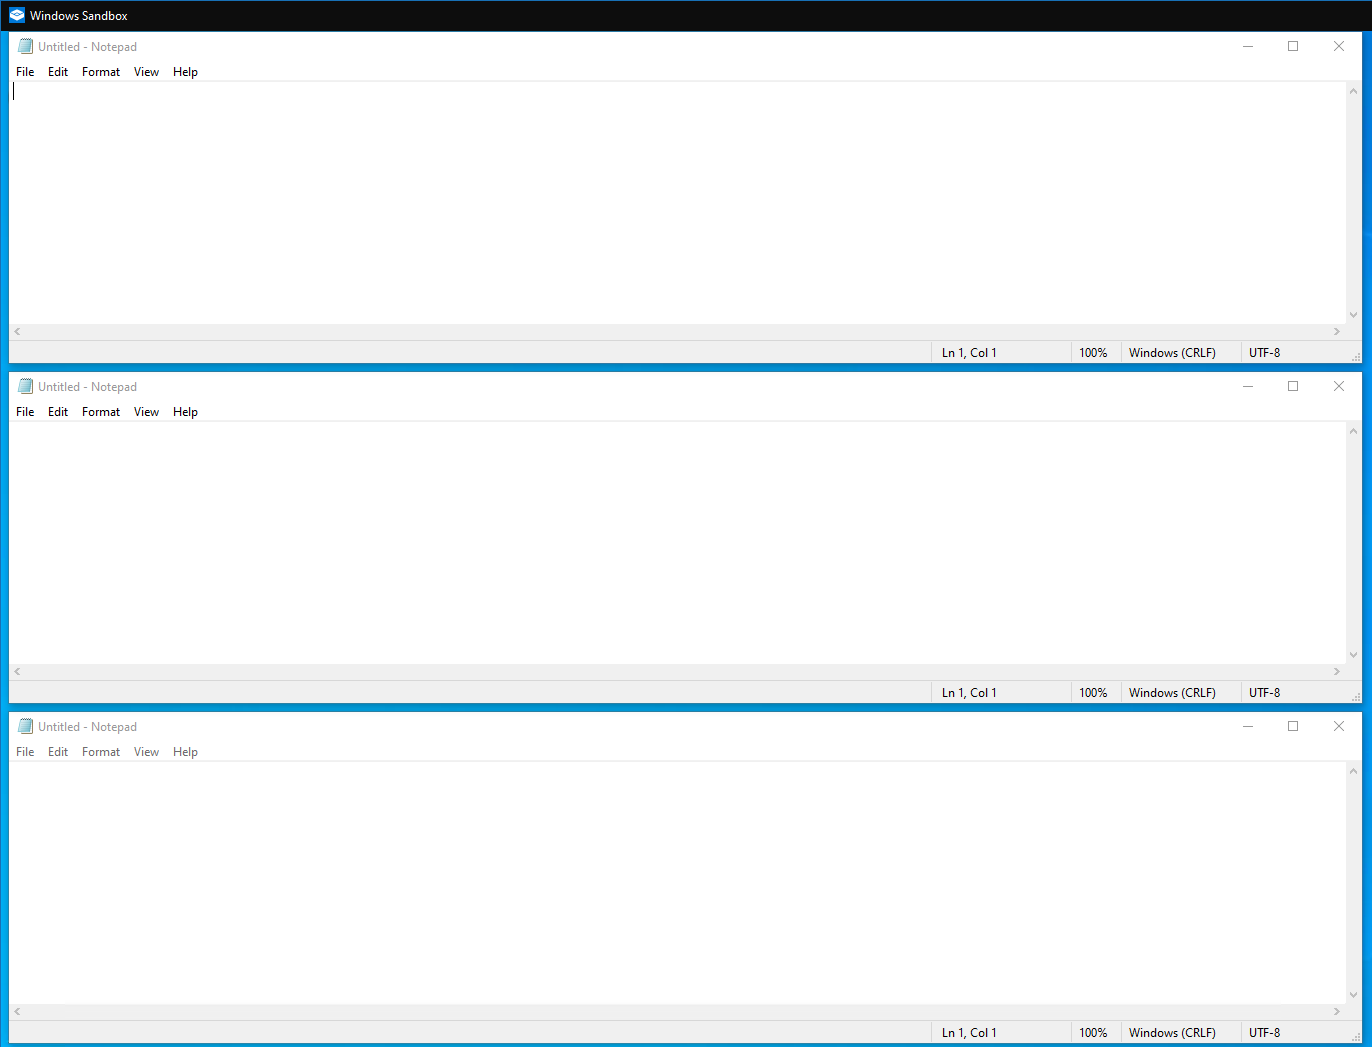
You can find Stack and Cascade by right-clicking your taskbar. You’ll see the two options as “Cascade windows” and “Show windows stacked”. Click the function you’d like to use.

Cascading windows

The cascade function repositions your windows so that each one is slightly nested inside another, like a stack of cards. This is intended to help you quickly identify all your open apps by looking at their titlebars. You can rapidly minimise or close apps using the titlebar buttons.

Cascading Windows in Windows 10

In Windows 10, Cascade is perhaps less useful than it once was. Its functionality has been largely replaced by the Task View interface, which gives you an overview of all your apps while providing a preview of each.

Stacking windows

Stacked windows appear as a vertical stack of apps. Like Cascade, it’s unlikely you’ll be using this one often. Users of monitors in portrait orientation will find Stack helpful though, as it enables you to make the most of your vertical pixels.

Stacking Windows in Windows 10

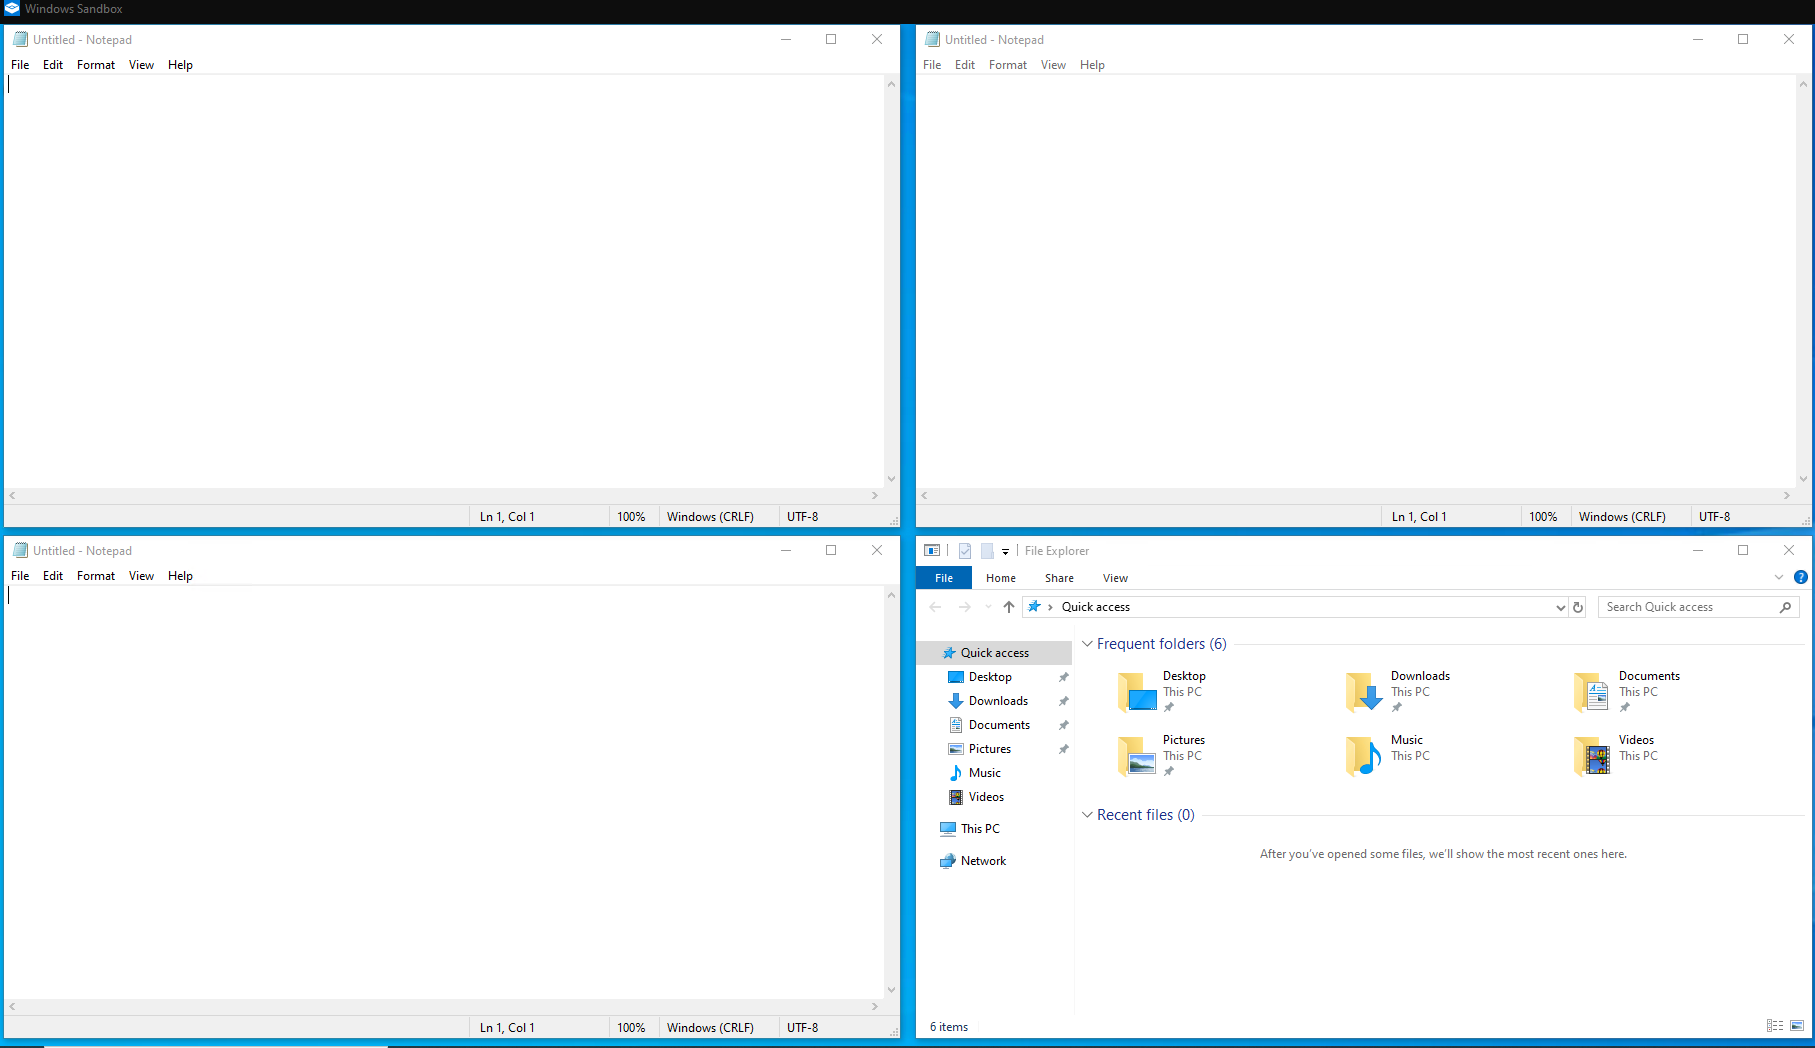
A separate option in the taskbar right-click menu, “Show windows side by side,” is similar to stack but works on the horizontal axis. It automatically arranges all your open apps so they’re visible as columns across your monitor. It feels like Snap but with support for more than two apps.

Stacking Windows in Windows 10

Whether you use these features is entirely up-to-you. They’ve been a component of the Windows desktop for decades and remain available in Windows 10. While Cascade is now largely redundant, Stack gives you a window tiling solution that’s somewhere between Snap and the new FancyZones app.

Microsoft to expand TV white spaces Airband Initiative globally

Microsoft is expanding its Airband Initiative—an effort to bring broadband Internet access to unserved 3 million residents in the U.S.—to become a global initiative. The company now aims to support as many as 40 million individuals who have little or no access to high-speed broadband internet.

Microsoft will begin with “areas with significant underserved populations”—Latin America and Sub-Saharan Africa—which also have government interest in improving connectivity for its residents. The company aims to cover the 40 million individuals between these two areas over the next three years.

Vacant broadcast frequencies known as TV White Spaces have proven to be quite effective for improving broadband coverage in rural America, so this technology will be a big part of Microsoft’s plan expand high-speed internet access in a very cost effective way. Microsoft also has other plans for achieving its goal, including:

  • Partnering with local internet service providers (ISPs) to provide affordable, reliable internet services.
  • Enabling rural digital transformation in newly connected areas, with a focus on supporting agriculture, education, rural entrepreneurship and telemedicine, as well as off-grid energy sources where necessary in order to improve rural productivity and livelihood.
  • Building a larger ecosystem of support, with a focus on stimulating international financing, to scale connectivity projects beyond our own direct investments.

Microsoft has seen an interest in expanding internet services across the world for some time now. The company has also used TV White Spaces to improve connectivity in other parts of the world—including India, Kenya, and Ghana.

What do you think of Microsoft’s ambitions? Be sure to share your thoughts in the comments area below.

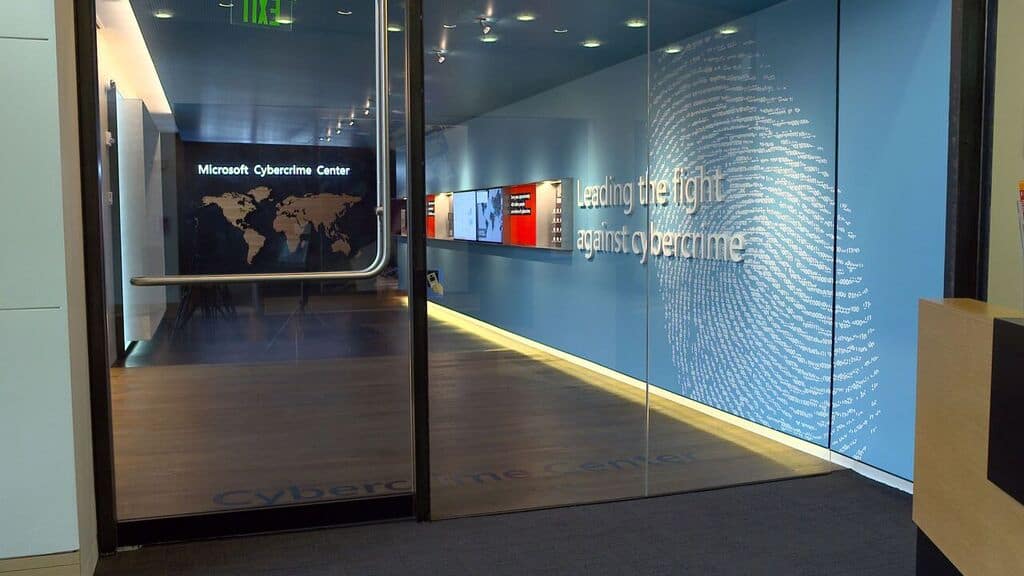
Hacking group linked to Iranian gov’t tried to break into US Presidential candidate’s email, says Microsoft

Reporting of nation-state attacks has been increasing over the past handful of years as both journalists and targeted entities are becoming more transparent about the data and personal information of citizens, customers and users that are put at risk.

Either directly or by proxy tech companies have increasingly been getting involved with local and state governments to help combat meddling as well as protect their users from the growing wave of nation-state attacks, some of which are directed at disrupting the democratic processes within countries.

Microsoft most notably has developed and cultivated its AccountGuard service to help “monitor accounts of campaigns and other associated organizations related to election processes in democracies around the world, publishing this information should help others be more vigilant and take steps to protect themselves.”

In doing so, Microsoft was able to monitor and help notify the Iranian government to 2,700 attempts from a threat group they dubbed Phosphorus, to identify consumer email accounts that were linked to specific Microsoft customers. Being a nation-state attack, Phosphorus targeted 241 accounts associated with “U.S. presidential campaign, current, and former U.S. government officials, journalists covering global politics and prominent Iranians living outside Iran.”

Phosphorus used information gathered from researching their targets or other means to game password reset or account recovery features and attempt to take over some targeted accounts. For example, they would seek access to a secondary email account linked to a user’s Microsoft account, then attempt to gain access to a user’s Microsoft account through verification sent to the secondary account. In some instances, they gathered phone numbers belonging to their targets and used them to assist in authenticating password resets.

Unfortunately, four accounts had been compromised and Microsoft obviously is mum on the information regarding those breaches but has notified the customers directly and helped to resecure them.

In the wake of the attacks and breach, Microsoft is calling on not only governments to help combat these constant attacks but on customers to be aware and take the necessary steps to help keep themselves safe from sophisticated and, in this instance, unsophisticated but persistent attacks.

Yooka-Laylee and the Impossible Lair video game is now live on Xbox One consoles

Yooka-Laylee and the Impossible Lair, the direct sequel to the original Yooka-Laylee (itself a spiritual successor to the Banjo-Kazooie video game series), is now available to download and play on Microsoft’s family of Xbox One consoles.

Like its hit 2017 predecessor, Yooka-Laylee and the Impossible Lair is a colorful 2.5D platforming title with a strong focus on puzzles and problem-solving. The game is a purely single-player experience but does support 4K Ultra HD visuals when played on an Xbox One X.

Here’s the official game description and trailer:

Yooka and Laylee return for a platform hybrid adventure. Yooka & Laylee are back in a brand-new platform adventure from Playtonic Games! With their arch-nemesis Capital B up to no good, the buddy duo needs to spring into action once again to save the day. To thwart his evil plan of using a “Hivemind” device to enslave an entire kingdom of bees, our heroes need to take the fight to Capital B’s “Impossible” Lair. Things look tough, but with the help of Queen Phoebee and her Royal Beettalion , Yooka and Laylee might just have a chance!

Have you been waiting for Yooka-Laylee and the Impossible Lair and are you a fan of this new video game franchise? Share your thoughts with the community in the comments below and then follow us on Pinterest for more Xbox gaming content.

Can’t Access WindowsApps Folder? 3 Ways to Fix Permissions

The WindowsApps folder in Windows 10 stores the data related to the Microsoft Store apps. However, if you try to, you might get a message saying that you can’t access the WindowsApps folder.

Many reported that the WindowsApps folder is missing, but that’s a completely different issue we covered in a separate guide.

Today we’re going to focus on access problems related to this directory, so let’s get started.

Why don’t I have access to the WindowsApps folder?

  • This is a system file, and you don’t have ownership over it.
  • Even if you’re an administrator, you’ll need to obtain ownership over this directory to access it.

How do I give myself access to WindowsApps folder?

1. Use the Take Ownership registry hack

  1. Since the error is due to permission issues, you can resolve it using a registry hack. This can also be done manually, but first, we will try the easy ready-made method.
  2. First, download the Take Ownership file to your computer.
  3. Extract the ZIP file.
    can't access Windowsapp folder
  4. Open the extracted folder and double-click on InstallTakeOwnership file to execute it.
  5. Follow the on-screen instructions to install the registry hack.
  6. Once done, navigate to the Windowsapps folder location.
    C:\ProgramFiles
  7. If the folder is not visible, click the View tab in the File Explorer and check the Hidden items box.
    can't access Windowsapp folder
  8. Right-click on the Windowsapps folder.
  9. Select Take Ownership from the context menu.
  10. Click Yes when the User Account Control prompts for administrator access.
  11. Wait for the PowerShell commands to be executed.
  12. Once done, try accessing the Windowsapps folder and check if the error is resolved.

2. Change Windowsapps folder permission manually

  1. If the issue persists, try changing the permission for the Windowsapps folder manually.
  2. Navigate to the location where the Windowsapps folder is stored, which is generally in the following location:
    C:\ProgramFiles
  3. Right-click on the Windowsapps folder and select Properties.
  4. Click the Security tab.
    destination folder access denied
  5. Click on the Advanced button.
  6. In the new window, click the Change link beside the Owner: tag.
    can't access Windowsapp folder
  7. Type the username you want to assign the permission to and click on Check Names.
  8. If found, select the username and click OK.
    destination folder access denied
  9. Make sure you check the Replace owner on sub-container and objects box.
  10. Click Apply to save the changes.
  11. Click OK. Windows will now start changing the permission for the Windowsapps folder. This process may take some time, so wait till it is complete.
  12. Once done, try to access the Windowsapps folder and check for any improvements.

After doing that, you should be able to access this directory without issues:

3. Rename the Windowsapps folder

  1. After changing the folder permission, if you face the Bad data error, try to open File Explorer and navigate to the following location:
    C:\ProgramFiles
  2. Select the Windowsapps folder and click Rename.
    destination folder access denied
  3. You can rename it to whatever you want but keep it close. Rename it to Windowsapp123 etc.
  4. Click Yes if prompted to confirm the action.
  5. Now try to access the Windowsapps folder and check for any improvements.

By following the steps in this article, you can fix all problems with the WindowsApp directory. To learn more, we have a great guide on how to find and access WindowsApps folder, so be sure to check it out.

Did we miss a solution? If so, let us know in the comments section below.

Windows 10/11 updates ignore active hours? Try this

Updating Windows 10 is an integral part of what it means to keep your OS in neat condition.

It presumes downloading the latest upgrades, tweaks, and fixes for some of the most common problems reported.

However, restarts are usually needed for update downloads to take effect.

Unfortunately, having to forcefully restart your PC isn’t all that convenient, especially when you are running a network of multiple PC’s.

Because of this, it is usually recommended to set your Windows Updates to not start downloads during active hours.

How to set up active hours on Windows 10:

  1. Press Windows
  2. Go to Settings (The cogwheel-shaped button)
  3. Click Update & Security
  4. Select the Change active hours option
  5. Enter a time interval you wish to not have any updates downloaded
    • You can only input a time interval of up to 18 hours, anything over that value will be deemed invalid
  6. Click Save

You can also make the computer to automatically change your active hours based on your average PC usage.

However, some users are complaining that Windows 10 is ignoring this feature:

How can I stop Windows 10 from performing it’s very large Windows Updates download during normal business hours? I have ‘Active Hours’ set to non-business hours but Windows 10 will still download massive amounts of data over a limited WAN connection. […] I want the download to be done after hours when the office is closed and the computer left on as to have no negative business impact.

How do you make your Windows 10 to stop ignoring your active hours?

Please remember that active hours are not for controlling the download of Windows updates, but for installing the downloaded Windows updates.

It will keep downloading updates but will install only during specified active hours.

You absolutely have no control over the timing of Windows updates download.

As such, all you are left with is controlling when will your PC restart for certain updates to take effect.

1. Schedule update installation

These steps can only be followed by a group administrator running Windows Server 2019 version 1903 and later:

  1. Press Windows
  2. Type in Group Policy
  3. Go to Group Policy
  4. Access Configure Automatic Updates
  5. Select option 4 – Auto download and schedule the install
  6. Input time in the Scheduled install time dropdown

Configure Automatic Updates

By following these steps, you will force restart after the specified installation time.

This will also let you configure a timer to warn a signed-in user that a restart is going to occur.

2. Stop Automatic Updates altogether

If all else fails, simply consider shutting down automatic updates on Windows 10, and installing them manually when you have the time.

3. Wait it out

If the problem persists even after both you and the administrator have followed these steps, all you can do is wait for a new patch that may fix this issue.

If you have any other suggestions or questions, don’t hesitate to leave them in the comments section below and we’ll be sure to check them out.

READ ALSO:

FIX: Windows Server Change product key does not work

Usually, activating your Windows Server or changing the product key shouldn’t be a major problem. However, there are evidently users that have a hard time with Windows Server as the Change product key option doesn’t work for them. In case you are in that group, check the solutions we have to offer below.

Windows Server won’t accept the product key

1. Try adding the product key during the installation

Primarily, you can try and enter the product key during the installation instead of activating Windows Server later on. This seems to work for a lot of affected users, as they reinstall the server and insert the product key prior to the installation.
Windows Server Change product key does not work

Just back up your data and go for the reinstall. Once you are prompted, insert the product key and then go through with the installation. That should resolve the problem with the product key. It applies if you want to change it or activate Windows Server for the first time.


Learn how to add a user on Windows Server with this detailed tutorial. Check it out now.


2. Run the CMD script

Alternatively, you can run the CMD script that includes your product key. With it, you’ll be able to force the activation and avoid further issues. You can, of course, use this approach to change product key on Windows Server as well. It seemingly works on both Windows Server and standard Windows versions.

Follow the instructions below to change the product key on Windows Server via the Command Prompt:

  1. Open the Command Prompt (Admin).
  2. Type the following command in the command line and press Enter: SLMGR.VBS -IPK XXXX-XXXX-XXXX-XXXX (instead of XXXX-XXXX-XXXX-XXXX insert your license key).
    Windows Server Change product key does not work
  3. Restart your PC and check if the procedure has resolved your issues.

With those steps, you should be able to change the product key without any issues whatsoever.

If you have succeded, tell us in the comments section below.

RELATED STORIES YOU SHOULD CHECK OUT:

GOG games won’t open in full-screen? Here’s what you can do

GOG is a popular video game distributing and management client for the Windows platform. However, multiple users have reported the GOG games won’t open in full-screen issue when playing.

This issue mostly occurs with the classic games that may not support modern display resolutions. This results in black bars at the side of the games (windowed mode).

If you are also troubled by this issue, here are a couple of troubleshooting tips to help you fix GOG games won’t open in full-screen issue Windows.

What can I do if GOG games won’t open in full-screen?

1. Turn off GPU frame rate software

  1. If you are using frame rate software that helps you match the graphic card frame rate with the monitor frame rate, it can create issues with the display resolution.
  2. Several users have reported that turning off software like Vsync has helped fix the GOG games full-screen issue.
  3. Try turning off Vsync or any other similar software and check for any improvements.

Fix: Frame rate problems in Windows 10


2. Check your graphic card settings

  1. If the issue persists, check your graphic card settings for the scaling.
  2. If the automatic scaling option is disabled, the graphic card will not scale the games to your display resolution.
  3. Follow these steps to turn on GPU scaling for AMD and NVIDIA graphics.

Turn on AMD GPU scaling 

  1. From your desktop, right-click on anywhere and select AMD Radeon Settings menu from the options.
  2. In the AMD Radeon Settings window, click the Display tab (top menu).
  3. Click on the GPU Scaling option and toggle the switch to turn it on.
    GOG games won't open Full-screen
  4. Choose the Scaling Mode. If you are not sure which scaling mode to choose, select one from the option, apply it and check if it resolves GOG games won’t open in the full-screen issue.
  5. If the issue persists, change the scaling mode again until you find the right mode.

Turn on NVIDIA GPU scaling

  1. Right-click on your desktop and select NVIDIA Control Panel.
  2. In the NVIDIA Control Panel, open the Display tab.
  3. Click on Adjust desktop size and position option.
    GOG games won't open Full-screen
  4. Click the drop-down many under “Perform scaling on”  and select GPU.
  5. Here you can choose all the available scaling mode and accompanying options according to your needs.

3. Run the game in compatibility mode

  1. If the issue persists, try running the game in compatibility mode in Windows.
  2. Right-click on the game shortcut on the desktop. If you don’t have a shortcut, then navigate to the installation folder and right-click on the game.exe file.
  3. Select Properties.
  4. In the Properties window, click the Compatibility tab.
    GOG games won't open Full-screen
  5. Check the box “Run this program in compatibility mode for” option.
  6. Click the drop-down menu and select the Windows OS. Select the older version of the OS.
  7. Click on Apply > OK to save the changes.
  8. Launch the games again and check for any improvements.

By following the steps in this article, you can fix GOG games won’t open in full-screen issue in Windows computers. Do let us know which fix helped you in the comments.

RELATED STORIES YOU MAY LIKE:

How to link PayPal to a bank account in just a few steps

PayPal is probably the world’s most well-known company operating a worldwide online payment system.

This system supports online money transfers and has become the go-to solution when it comes to making cross-border payments, or general online shopping.

However, you need to remember that PayPal is only a messenger and that you need to actually have your own funds in order to make any transfers or purchases.

As such, the most common way to provide PayPal with funding is by linking it to your bank account.

Remember that all Paypal payments are secured with multiple layers of protection.

Additionally, your own bank may have its own multiple-step verification systems that needs clearing before PayPal transactions can be made.

How do I link my PayPal account to a bank account?

  1. Go to the official Paypal website
  2. Log in to your PayPal account
  3. Click Wallet at the top of the page
  4. Click Link a bank account
    • A number of various banks will be displayed, which are chosen based on the region you are currently logged in from
    • You may have an option to link your bank instantly using your online banking login information (This depends on the bank you select)
      • This means you have to log in with the account and password you have with your bank
    • If your bank is not on the list, click I have a different bank at the bottom right
  5. Select Checking or Savings
  6. Type in the bank’s routing number and your account number
  7. Click Agree and Link
  8. Double-check if the information you wrote down is correct
  9. Click Continue

Here’s a list of common things you may need to know when linking a bank:

  • Your routing number is made up of the first set of numbers at the bottom of your check. It is also usually made up of 9 digits.
  • Your bank account number is the second set of numbers at the bottom of your check.
  • If during the linking process you receive a Check and Try again message, you may have typed the wrong number, or PayPal doesn’t accept your bank.
  • Remember to always check your account balance before making a PayPal purchase.
  • If you close your bank account, remember to unlink the back from your account.

As you can see, linking your PayPal account to a bank account is not that hard. Just follow the steps from this guide and you’ll be done in no time.

If you have any other questions, reach for the comments section below.

RELATED ARTICLES YOU SHOULD CHECK OUT:

How to fix there are problems with your account Office errors

Some Microsoft Office users might encounter account error messages that state: There are problems with your account. To fix the, please sign in again. Users might see that error message when they click File > Accounts to update Office. When that issue arises, the Office activation isn’t working; and users can’t fully utilize their Office software.

How can Users Fix the Problems With Your Account Error?

1. Click the Fix me Button

The problems with your account error message include a Fix me option under it. First, try clicking that Fix me button. The Fix me button probably won’t always work for all users, but it might still resolve the issue for some users.


2. Reset the Office Account Password

  1. Some users have said they’ve fixed the account error for Office 365 by resetting their account passwords. To do that, log in to your Office 365 portal with a web browser.The sigin page for Office 365 microsoft office account error there are problems with your account
  2. Click the user account title at the top right of the Office 365 portal and select My account.
  3. Click Security on the left of the portal’s page.
  4. Press the Manage security button, and select thePassword option.
  5. Then fill out the password fields, and click the submit button.

3. Edit the Registry

  1. Some Office 365 Click-to-run users (within VMware UEM 9.3 environments) have fixed the problems with your account error by deleting the Identity registry key. To do that, launch the Run accessory (press the Windows key + R hotkey to open).
  2. Input ‘regedit’ in the Open text box, and click the OK button.
  3. Office 2016 and ‘19 users should open this key in the Registry Editor: HKEY_CURRENT_USER\Software\Microsoft\Office\16.0 \Common\Identity. If using earlier Office versions, open HKEY_CURRENT_USER\Software\Microsoft\Office, click the version number key, and then Common > Identity.The Registry Editor microsoft office account error there are problems with your account
  4. Next, right-click the Identity key and delete.
  5. It’s recommended that users set up System Restore points before deleting registry keys. So, set up a System Restore point as outlined in the post below before editing the registry.

4. Check for Expired Product Keys

  1. The problems with your account error can be due to expired or fake Office product keys that need deleting. To check the Office product keys, open the Win + X menu with the Win + X hotkey.
  2. Input ‘cmd’ in the Open box, and click the Ctrl + Shift + Enter hotkey.
  3. Open the Office folder in the Command Prompt by entering cd in the Prompt followed by the full MS Office path. For example, users would enter this command to open the default path for MS Office 2016: cd C:\Program Files (x86)\Microsoft Office\Office16.
  4. Then enter ‘cscript ospp.vbs /dstatus’ in the Prompt’s window, and press the Return key. That command will show users their Office product keys.The cscript command microsoft office account error there are problems with your account
  5. To uninstall a fake or expired product key, input ‘cscript ospp.vbs /unpkey:XXXXX’ and press Enter. Replace the XXXXX in that command with the last five letters or numbers of the expired or fake product key.
  6. Then enter ‘cscript ospp.vbs /act’ to activate the valid Office product key.

The above resolutions should fix the Microsoft Office account error There are problems with your account. In addition, check out the Microsoft Report and Recovery Assistant, which might also come in handy for fixing Office activation errors.

Windows Insider Program looks for a leader as Dona Sarkar moves to new role at Microsoft

Dona Sarkar, the energetic and charismatic head of the Windows Insider Program, is moving on to a new role at Microsoft. Sarkar succeeded to Gabe Aul back in June 2016, and the Microsoft veteran announced today that she’ll be joining the Microsoft Developer Relations team to lead advocacy for Microsoft’s Power Platform ((Microsoft Flow, PowerApps, Power BI).

“Currently, we are conducting a search for a new leader of the Windows Insider Program,” wrote Eran Megiddo, CVP of Windows and Education today. “In the meantime, I and the Insider crew (including Brandon, Jennifer, Blair, Jason, Vivek, Eddie) look forward to continuing to engage with you each week as we ship new builds.”

Dona Sarkar left quite a big mark on the Windows Insider program over the years. She launched the #Insiders4Good initiative, aiming to help Insiders around the world to solve problems creatively with Microsoft products. The Windows Insider team also increased engagement with Insiders under her leadership, especially with the regular Windows Insider webcasts on Mixer.

In addition to her work at Redmond, Sarkar is also an author and fashion designer. We wish her all the best in her new role at Microsoft, and we’re looking forward to see who Microsoft will chose as new leader of the Windows Insider Program.

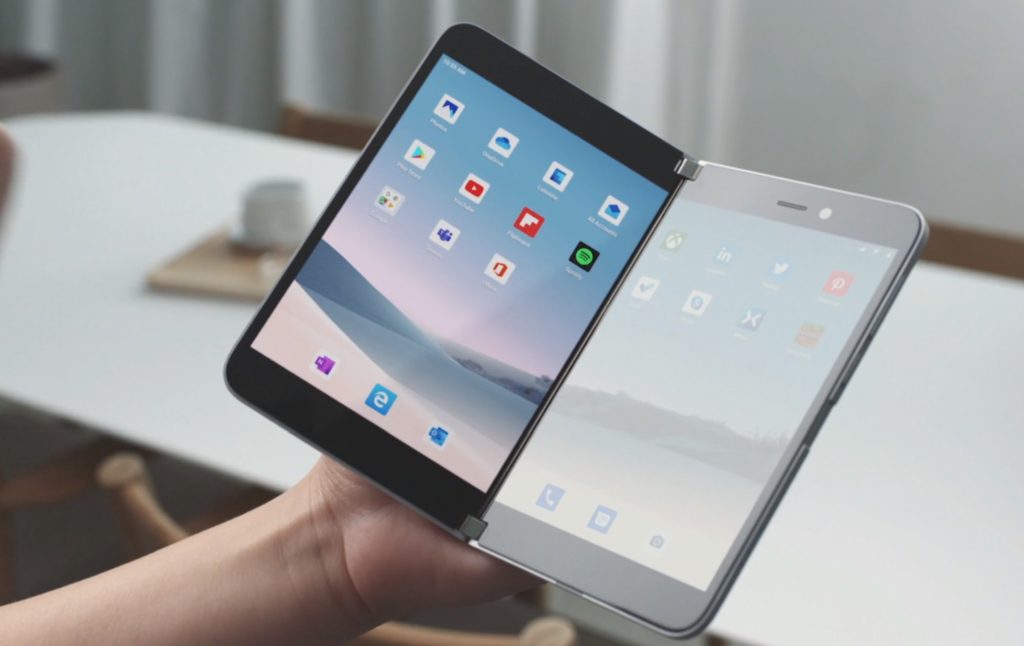
Microsoft may be prepping multiple color options and a rear facing camera for Surface Duo

After the flood of camera flashes and 360-degree spanning slow-mo videos, we’re finally able to take a breather and fully examine Microsoft’s new Surface Duo and a few internet sleuths are starting to pose some interesting questions, like, will there be more than just the off-white color option for the device?

While Microsoft paraded around its white/off-white Surface Duo to the press and for the cameras on October 2, 2019, there have been captures and brief moments in video that have spotted a black version of the device in use.

Alongside @galayder’s observation, Microsoft’s CPO of hardware, Panos Panay has been spotted, in this Marques Brownlee YouTube video, using a black version with a reference area in place for what could be a future camera module.

Following its relatively dazzling unveiling last week, Microsoft’s miniature foldable offering has received a lot of press attention. Some journalists have gotten some hands-on with the dual 5.6-inch screened device powered by Android while others have had opted to speak at length with Microsoft’s chief product officer about the ins and outs of the company’s new foldable.

Over the past, 120 hours or so, Panay and his team of executives have stated consistently that the hardware for the Microsoft Duo is locked in and will likely not change over the next year as the company prepares to court developer for apps and services for the device. Despite their vocal convictions, there appears to be a couple of unanswered questions about the hardware of the Duo including final color options and camera inclusions (note that the black Duo Panos is holding does have what appears to be a rear facing camera, unlike the white version shown last week) as well as final chipset offerings.

The Surface Duo is currently running a custom Snapdragon 855 chipset, however, by holiday season 2020, chip designer Qualcomm will presumably be offering as a beefier upgrade for mobile devices.

Microsoft has doubled down on its matte black color options for the Surface Pro, Surface Laptop and now the Surface Pro X and it would seem its newest foldable options, the Neo and Duo will probably follow suit, especially if the head of the division is already rocking a black version.

How to enable and configure Dark mode in Office 365 on Windows 10

Dark Mode is beautiful. The popular feature in most apps and operating systems turns off the lights and brightness and makes things easier to understand and read. But, did you know that each of the Office apps has its own Dark Mode too? Well, in this guide, we’ll explain how you can enable Dark Mode in Office 365 in Windows 10.

To get started with enabling dark mode, you’ll need to first launch either a new document in Word, a presentation in PowerPoint, or a spreadsheet in Excel. Once done, you need to click on the File tab along the top of the open window.

Next, click the Account options on the bottom left-hand corner of the screen. From there, you’ll want to look for the Office Theme drop-down menu. Be sure to click the box and choose Black from the list. After choosing Black, you should notice that most menus inside yout Office 365 app have turned dark. This includes items in the ribbon, as well as the navigation and status bar along the bottom of the screen.

If you’d like, you can choose additional customization options from this Account menu. You can change the background image for the app, which generally appears in the upper right-hand corner of the screen. Some options range from Circles and Stripes, Circuit, Lunchbox, and more. You also can disable the background, and get a pure dark mode by choosing the No Background option.

As you can see, enabling Dark Mode just takes a few simple steps. So, do you like the looks of Dark Mode in Office 365? Let us know your thoughts in the comments below.

How to use tracking prevention in Edge Insider

Microsoft’s Edge Insider builds now include support for tracking prevention. This feature helps protect your privacy online by disabling website trackers. This stops companies from monitoring your browsing history to serve up targeted ads.

Tracking Prevention is now enabled by default in current Edge dev builds. You can find it under “…” > Settings > Privacy and services > Tracking prevention. You can disable the feature altogether by turning the “Tracking prevention” toggle button to “Off.”

Tracking Prevention in Microsoft Edge

With Tracking Prevention on, you have access to three different prevention levels: Basic, Balanced and Strict. Balanced is the default. It blocks known malicious trackers, as well as some third-party trackers which may power personalized ads.

Switching to Basic mode will allow third-party trackers to continue operating. Only malicious trackers are blocked by this setting.

Using the Strict mode gives you the greatest privacy. The majority of third-party tracking scripts will be caught and blocked. However, this is likely to break some webpages. You might see empty spaces where third-party content should be loaded.

Tracking Prevention in Microsoft Edge

You can mitigate the impact of this by adding exceptions for particular sites. Click the “Exceptions” button to configure a whitelist of sites where trackers should be allowed. This gives you the best protection while ensuring reputable sites continue to work as intended.

Tracking prevention is a valuable feature which is becoming more common across browsers. It is therefore a positive move by Microsoft to include it in the next version of Edge. Whether you use it is ultimately a personal choice; although there are clear benefits, the feature is not without its drawbacks, which some may see as significant shortcomings.

Microsoft Search to showcase what’s new and what’s next at Ignite

The evolution of Microsoft’s search has been a relatively complicated matter since the company seemingly sidelined the convention of Cortana as a conduit to Bing Search.

However, with just 20 something odd days away from Microsoft’s corporate developer’s conference Ignite 2019, there is news surfacing that the company may have plans to streamline its messaging behind its various search initiatives.

Microsoft is offering a list of sessions for developers interested in what’s next for Microsoft’s Search story that includes:

SRCH10 What’s new and next for Microsoft search

Get the latest updates on Microsoft Search. Come on the journey to learn how insights, actions, and answers are being built into your everyday experiences across Microsoft 365, Bing, and Edge. See the latest roadmap across all of your experiences, from SharePoint to Office and beyond. In addition, get insights on how to connect external third-party content connectors, customization, and extensibility.

SRCH20 Microsoft Search for the administrator: What you need to know

Learn about the impact of Microsoft Search on you, the administrator. We’ll take you through the inner workings of Microsoft Search and pull back the curtains on the architecture. Then we’ll translate that into practical tasks for search administration that will help you and your organization get the most out of Microsoft Search.

SRCH30 Connect your world of information to Microsoft 365 and Microsoft Search: A sneak peek at Micr…

Modern information workers need to find knowledge quickly and easily regardless of where the data resides. Come take a first look at Microsoft Graph Connectors, which will enable users in your enterprise to search over content sources beyond Microsoft 365. You will see how Microsoft and our partners are jointly making Microsoft Search more powerful to benefit your users. We will also show you a simple set of APIs that you can start using for your custom connector development.

SRCH40 Get answers in context with semantic search and natural language in Microsoft search

For human beings, reading comprehension is a basic task, performed daily. As early as in elementary school, we can read an article, and answer questions about its key ideas and details. But for AI, full reading comprehension is still an elusive goal—but a necessary one if we’re going to measure and achieve general intelligence AI. In search applications, machine comprehension will give a precise answer rather than a URL that contains the answer somewhere within a lengthy web page. Moreover, machine comprehension models can understand specific knowledge embedded in articles that usually cover narrow and specific domains, where the search data that algorithms depend upon is sparse. In this session, see and learn about the latest innovation with natural language and machine reading comprehension in Microsoft Search.

SRCH50 What’s new and next for Microsoft Search customization and development

Microsoft Search is an intelligent, enterprise search experience from Microsoft that applies the artificial intelligence technology (AI) from Bing and deep personalized insights surfaced by the Microsoft Graph, to make search more effective for you. In this session, we demonstrate new Graph APIs and how Microsoft Search will let you create and customize rich search experiences around all of your enterprise content, regardless of where it resides. See our roadmap and examples of how to modernize your existing SharePoint-based enterprise search experiences to take full advantage of Microsoft Search.

There will several other sessions in relation to Microsoft Search during the four-day event, but the above list was one handpicked by a contributing member of the Microsoft Search Blog. For anyone interested in other the other related sessions that include, “Getting Started with Microsoft Search in Bing and Edge,” as well as “Hands-on with the Microsoft Search API in the Microsoft Graph,” visit here for the list.

Microsoft Ignite is scheduled for November 4 through the 8 in Orlando, FL this year and should go a bit more in-depth on things Microsoft’s only hinted at in other conferences such as what developers can expect for Office 365, Azure and even second-generation HoloLens development.

Download Failure on Firestick: 3 Ways to Fix it

Amazon Fire Stick is one of the best devices to watch movies or listen to music, but many users reported download failure on Firestick.

This is a big issue since it will prevent you from downloading any new apps and severely impact your multimedia experience. This isn’t the only problem, and many reported that Fire Stick won’t work in fullscreen mode, but we covered that in previous guides.

Today we’re going to focus solely on download issues you can experience.

Why is my FireStick not allowing downloads?

  • Issues with network connection can prevent you from downloading apps on your device.
  • Older models might not work too well with modern apps.
  • One Click purchase isn’t enabled on your Amazon account.

How can I fix download failure on Firestick?

1. Make sure your Wi-Fi connection works

  1. Test your Wi-Fi connection.
  2. Check if your phone or other devices can use Wi-Fi.
  3. Restart your router if any issues are present.

2. Ensure your Amazon Fire Stick is not too old

  1. Check the model of your device.
  2. Make sure it’s not too old.
  3. If it is, you’ll have to upgrade it.

Purchase failure on Amazon Fire Stick occurs on older and outdated models, so if your device is older, it might be time for an upgrade.

3. Activate 1-Click

  1. Go to your account.
  2. Select content and devices
  3. Go to Preferences
  4. Select 1-Click setup.
  5. Add your details.

You can activate this service even though you download only free apps. Also, it is easier to get Amazon applications through 1-Click.

After doing that, check if download failure on Firestick is gone.

This issue is not as serious as it seems. Just make sure your connection works and buy a newer version of Amazon Fire Stick.

Also, check if you activated 1-Click. This service should be activated even if you only download free apps.

If these solutions don’t work, you might have a more serious problem. For a specific fix to your problem, please get in touch with Amazon support.

Speaking of serious issues, a few users reported that Amazon Firestick is not booting, but we covered that in a separate guide.

Did our methods help you? Did you find another way to fix this issue? Please let us know in the comments section below!

Fix: MS Office shortcuts missing from the Start menu

Some users might wonder what has happened to their missing MS Office shortcuts on the Windows 10 Start menu. MS Office app shortcuts can disappear from the Start menu’s app list for various reasons. In earlier Windows 10 build versions, Office apps can go missing when there are more than 512 apps on the Start menu’s app list. Here are a few potential resolutions for users who can’t find their Office app shortcuts on the Start menu.

How can Users Fix Missing MS Office Shortcuts?

1. Check How Many Apps Are Installed

  1. First, check how many installed apps there are with PowerShell. Press the Windows key + S hotkey to open the search utility.
  2. Enter ‘PowerShell’ as the search keyword.
  3. Click PowerShell to open its window.
  4. Then enter ‘Get-StartApps | measure’ in PowerShell, and press the Return key. Powershell will then tell users how many apps there are on their Start menus.
Get-StartApps measure command office shortcuts missing from start menu

2. Uninstall Superfluous Apps

  1. If there are more than 512 apps on the Start menu, uninstall some software. To do that, enter ‘apps’ in the search box.
  2. Click Apps & features to open the window shown directly below.The Apps & features tab office shortcuts missing from start menu
  3. Then select an app to remove.
  4. Click the Uninstall button.

Read also: How to Uninstall Programs and Apps in Windows 10

3. Reset the Office App

  1. Resetting the MS Office 365 app might restore its app shortcuts on the Start menu. To do that, open Apps & features in Settings again as outlined above.
  2. Select the Office suite app, which might be listed as Microsoft Office Desktop Apps.
  3. Then click Advanced options.
  4. Press the Reset button to reset the data for Office apps.The Reset button office shortcuts missing from start menu
  5. The Repair button is another option there that might fix Office shortcuts.

4. Repair Office

  1. Users can also try repairing MS Office shortcuts with the Quick Repair or Online Repair options. Press the Windows key + R keyboard shortcut.
  2. Open Programs and Features by entering ‘appwiz.cpl’ in Run and clicking OK.The Programs and Features applet office shortcuts missing from start menu
  3. Select the Microsoft Office suite listed in the Programs and Features.
  4. Click the Modify button.
  5. Then select either the Quick Repair or Online Repair option.

5. Check Out the Start menu Troubleshooter

The Start menu troubleshooter might also come in handy for fixing Office Start menu shortcuts. Users can still download the Start menu troubleshooter from Softpedia. Click Download Now on its Softpedia page, and then click startmenu.diagcab to open the window shown directly below. Thereafter, users can press the Next button to initiate the troubleshooter.

Start Menu troubleshooter office shortcuts missing from start menu

6. Pin Office Apps to the Taskbar

This isn’t really a fix, but users can always add Microsoft Office shortcuts to the taskbar instead of Start menu. To do so, open an MS Office Word or Excel document. Right-click the Office application’s taskbar icon to select the Pin to taskbar option. Thereafter, users can open their pinned Office software from the taskbar.

Pin to taskbar option office shortcuts missing from start menu

Those are some of the resolutions that might fix missing Microsoft Office Start menu shortcuts. Aside from those fixes, users can also try reinstalling the MS Office software to restore its Start menu shortcuts.

Petition calling for Microsoft to offer a Windows 10X variant of the Surface Duo begins

Earlier this week, Microsoft announced its foray back into the smartphone market, surprisingly under the Surface brand.

The company took to the stage to announce the Surface Duo, a dual-screen Android phone.

But at this same event, Microsoft announced the Surface Neo and Windows 10X, the first Surface with a dual-screen running Microsoft’s new operating system built for dual-screen devices.

Now, a petition has been started on Change.org that is calling on Microsoft to offer a variant of the Surface Duo phone with Windows 10X instead of Android (via Neowin).

The petition claims that Microsoft promised that its Universal Windows Platform (UWP) would work across all form factors, including phones.

Because there are many developers still out here that want to write Universal Windows Platform (UWP) apps that run on all form factors.  When UWP was announced you promised one code base to run on any form factor… including phones and other small form factor “pocketable” devices.

Bringing Windows 10X to the Surface Duo would potentially create the ‘Surface Phone’ that many have dreamed of for years, since the demise of Windows phone.

The question is – is Microsoft ready to dive head-on back into the smartphone market with Windows?

You can see the petition here.

Fix GOG games show black screen issue in Windows 10/11

GOG is a popular classic games publishing and distribution platform used by gamers to manage their titles. However, sometimes it may happen that you try to launch a game and encounter GOG games black screen issue in Windows.

Compatibility issues usually cause the black screen problem in GOG. You can try to fix it by running the game in compatibility mode.

If you are also trying to troubleshoot this issue, here are a couple of tips that you can apply to fix GOG games black screen problem in Windows.

Steps to fix GOG games black screen problem

1. Run the game in compatibility mode

  1. Many users have reported that they are able to resolve the black screen issue after running the game in compatibility mode. Here is how to do it.
  2. Open File Explorer.
  3. Navigate to the location where the problematic game is installed.
  4. Right-click on the game.exe file and select “Properties”.
  5. Open the Compatibility tab.
  6. Check the “Run this program in compatibility mode for:” box under “Compatibility mode” section.
    gog games black screen
  7. Click the drop-down menu and select the older version of Windows. If you are using Windows 10, try Windows 7.
  8. Click on Apply > OK to save the changes.
  9. Close the properties window and launch GOG client.
  10. Try to open the game and check if the black screen issue is resolved.

Add -no3d -doublebuffe 

  1. If the issue persists, try adding -no3d -doublebuffe in the target field of the game shortcut.
  2. Right-click on the game‘s shortcut and select “Properties“.
  3. In the Shortcut tab, locate the Target field.
    GOG games black screen
  4. Add the following command at the end of the file path. (refer the image)
    -no3d -doublebuffe 
  5. Click Apply > OK to save the changes.
  6. Double-click on the shortcut again to launch the game and check for any improvements.

2. Start the game directly

  1. If the black screen occurs while trying to launch the game from GOG Galaxy, try launching it from the installation directly.
  2. Open File Explorer.
  3. Navigate to the location where the game is installed. The location generally looks like this:
    C:GOG GamesMy Friend PedroMy Friend Pedro – Blood Bullets Bananas.exe
  4. Double-click on the game.exe file.
  5. Many users have reported that running the game directly from the installation directory has resolved the black screen issue.

Run as administrator

  1. Another quick workaround that has worked for other users is to run the game as administrator.
  2. If you have the game shortcut on the desktop, right-click on it and select Run as admin.
  3. If not, navigate to the game installation folder.
    gog games black screen
  4. Right-click on the game.exe file and select Run as Administrator.

3. Install the game directly

  1. If it is not a GOG exclusive, try to install the game directly from the developer.
  2. Many users have reported that the GOG games black screen issue is fixed after installing the game directly from the developer.
  3. Make sure you have uninstalled the game from the Control Panel > Programs > Programs and Features.

So these are the troubleshooting steps that you need to follow to fix GOG games black screen issue in Windows. Do let us know any other workarounds in the comments.

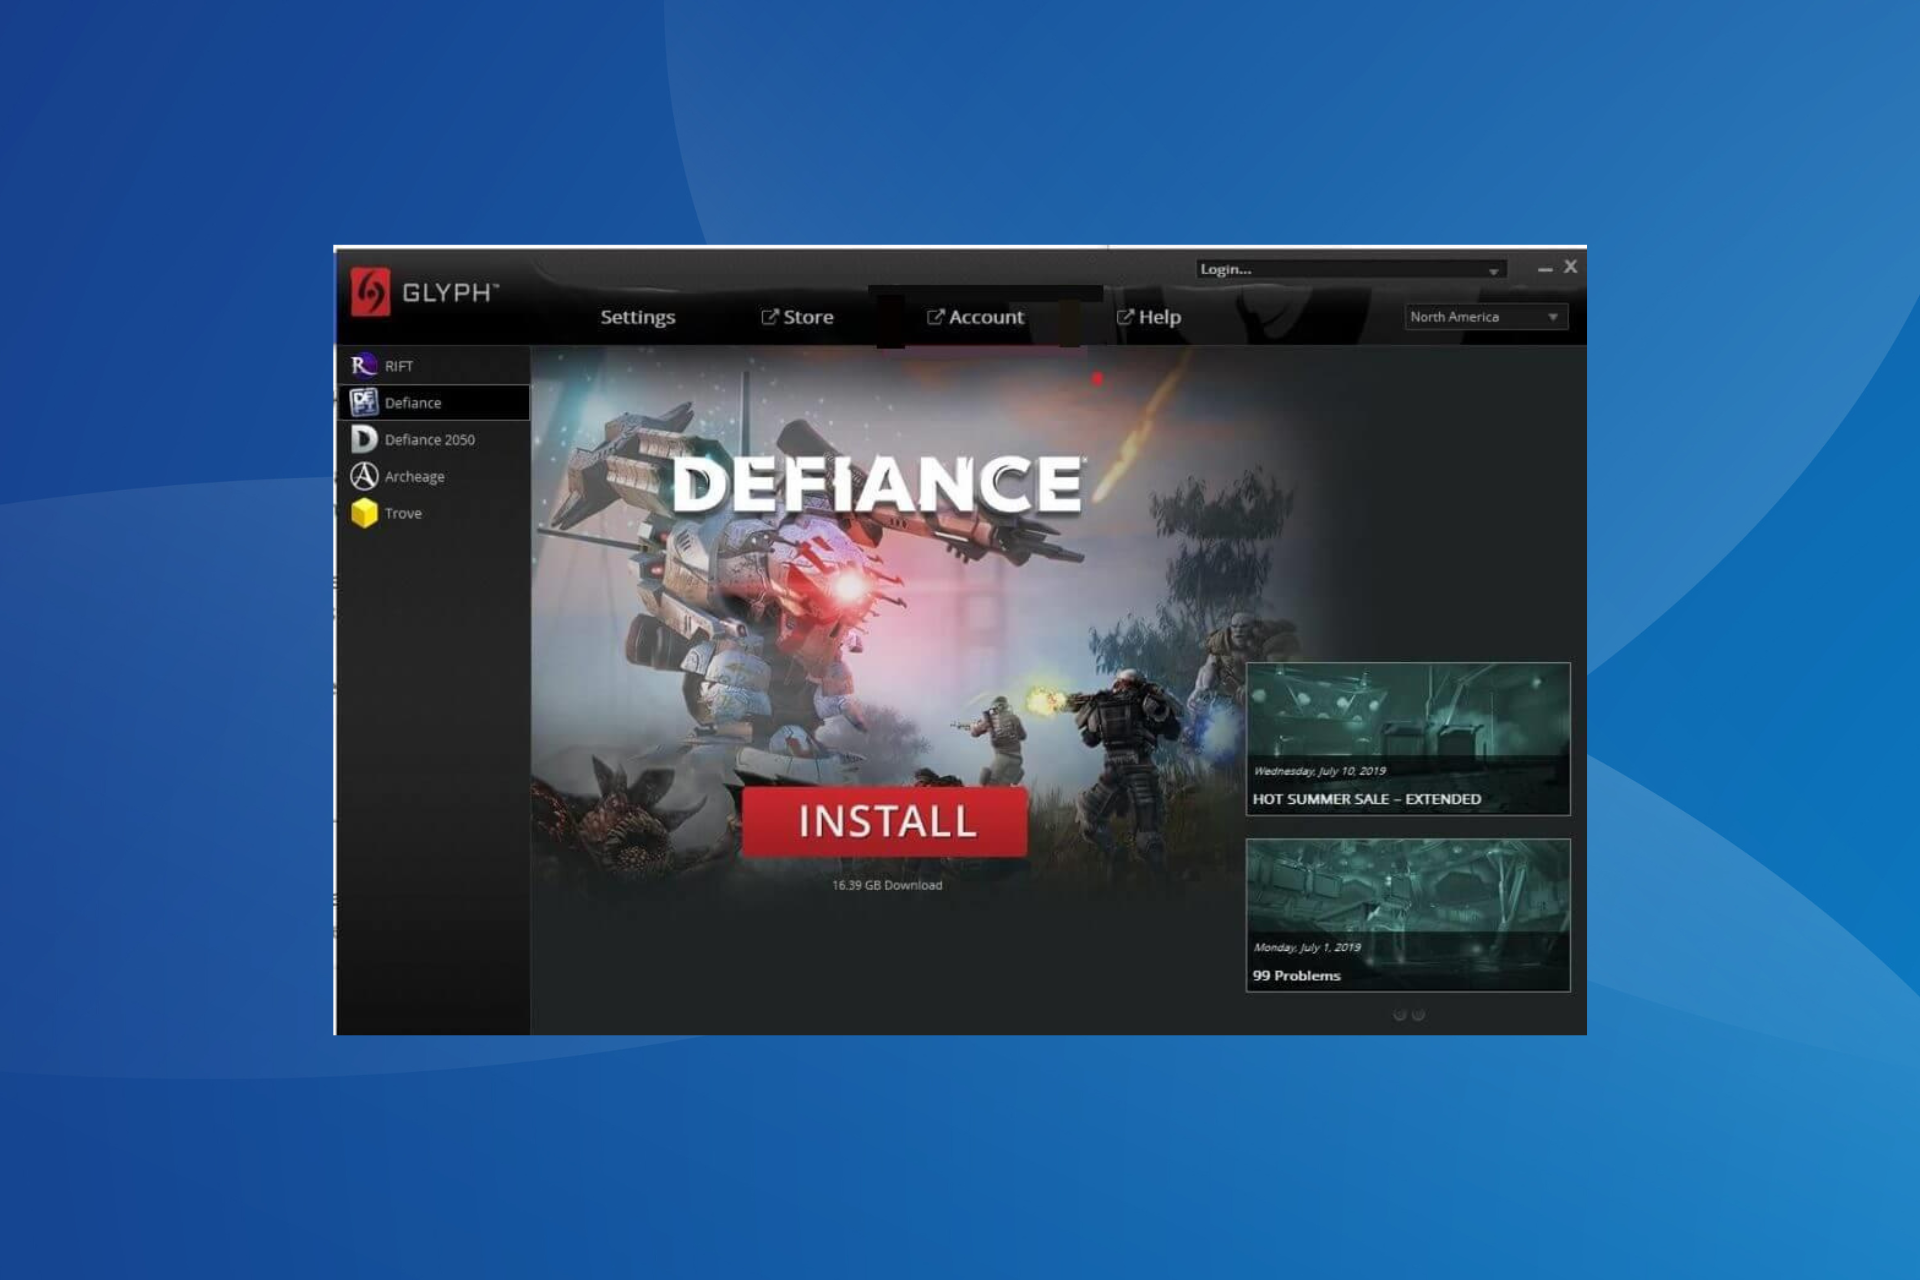
Glyph launcher error 1013? Try these solutions

Glyph is a popular software distribution and game management platform for the Windows OS. Sometimes, when opening a game or performing Glyph update, you may encounter glyph launcher error 1013.

This is a common error and can occur due to system issues that may not be related to Glyph etc.

If you are also troubled by this error, here are a couple of troubleshooting tips to help you fix Glyph launcher error 1013 in Windows computers.

Steps to fix Glyph launcher error 1013

1. Check for Glyph update

  1. Check if you have the latest version of Glyph installed. If the issue is widespread, the developer will release an update to fix the problem.
  2. Launch Glyph and click the Update button to download and install the new version if available.

Manually update Glyph

  1. If you are unable to update directly from the Glyph client, update the client manually.
  2. First, open Control Panel and go to Programs > Programs Features.
    Glyph update error
  3. Select Glyph and click on Uninstall.
  4. Now go to the Glyph page and check if a new update is available.
    Glyph launcher error 1013
  5. Download and install the newer version of the client.
  6. Even though Glyph update’s automatically, manually doing the same can help you resolve the issue.

Check for service issues

  1. The aforementioned error also occurs if the Glyph service is down due to regular maintenance.
  2. Check Glyph’s social media accounts as the developers usually posts about the issues at their end on social media.

Glyph launcher error 1034? Try these solutions


2. Check security software

  1. The Glyph launch error can occur if your antivirus is blocking connection to the internet. Also, check if Windows Defender Firewall is blocking the connection.
  2. Click on the System Tray icon to show the hidden icons.
  3. Right-click on your Antivirus software and select Disable/Quit.

Turn off Windows Defender Firewall

  1. Click on Start and select Settings.
  2. Go to Updates and security.
  3. Click on Windows Security.
    Glyph update error
  4. Choose the “Firewall and Network Protection” option.
  5. Click on your currently active network.
    Glyph update error
  6. Click the little switch under the “Windows Defender Firewall” to turn it off.
  7. Relaunch Glyph and check if the launcher error is resolved.
  8. Make sure you enable the Antivirus as well the Firewall after diagnosing the issue.

3. Perform System Restore

  1. Windows OS automatically creates Restore Point when the users install updates and software on the system. You can use these restore points to fix many issues.
  2. Type restore in the Windows search bar.
  3. Click on the “Create a Restore Point” option.
    Glyph launcher error 1013
  4. Click on the “System Restore” button and click Next.
    Glyph launcher error 1013
  5. Check the “Show more restore points” box is available.
  6. Select the most recent restore point and click on Next.
  7. Read the description and click on Finish.
  8. Wait till the PC is restored to the selected restore point.
  9. Once done, try launching Glyph and check if the error is resolved.

Closing words

By following the steps in this article, you can fix the Glyph launcher error 1013 in Windows computers. Do let us know which fix worked for you in the comments.

RELATED STORIES YOU MAY LIKE:

Fix the Glyph Launcher crashing issue on Windows 10/11

If you noticed that your Glyph Launcher crashes after a few seconds of turning on your PC, you must know you’re not the only one experiencing this problem.

This issue seems to be different from case to case, with some users saying that it happens as soon as they open their PC and others that are saying that the Glyph app disappears from the processes window after a couple of minutes.

In today’s fix article we will list a series of methods that could prove useful in this situation. Please read on to find out the details.


Is Glyph Launcher closing by itself? Fix it by trying these methods

1. Run Glyph with administrator privileges

laptop close-up - Glyph launcher crashing
One time:

  1. Right-click the Glyph launcher.
  2. Choose the Run as administrator option.
  3. Check to see if this fixes your issue.

Using Properties:

  1. Right-click the Glyph launcher.
  2. Choose Properties from the menu.
  3. Click the Compatibility tab.
  4. Tick the box next to the option Run this program as an administrator.
  5. Press Ok.
  6. Try to see if this method worked.

2. Close background tasks

laptop on desk with user hands - Glyph launcher crashing
In some cases, your RAM memory might not be enough to permit the smooth running of a bigger number of applications.

If that is the case, then it is recommended that you close any apps running in the background.

This will allow you RAM memory to be used specifically to run the Glyph application.


Does the latest Chrome Canary keep crashing on Windows 10? Fix it


3. Change the compatibility settings for Glyph

  1. Right-click the Glyph launcher icon.
  2. Select Properties from the menu.
  3. Click the Compatibility tab.
  4. Under the Compatibility mode section -> Click the box next to the option Run this program in compatibility mode for.Compatibility tab - Glyph launcher crashing
  5. From the drop-down menu -> choose another version of Windows.
  6. Pres Ok -> try to see if this method helps you.

4. Verify the game cache integrity on Steam

steam-logo - Glyph launcher crashing

  1. Restart your PC and launch Steam.
  2. Inside the Library section -> right-click on the game that’s causing issues -> select Properties.
  3. Select the Local files tab -> click the Verify integrity of game files button.
  4. Steam will start verifying the game’s files.

Conclusion

In today’s article, we explored some of the best troubleshooting steps you can try to fix the issue caused by the Glyph launcher suddenly crashing.

We hope this guide managed to help you solve your problem. If that is the case, or if you have any suggestions, please feel free to use the comment section below.

READ ALSO:

Glyph Launcher is Not Working or Won’t Open [Fix]

If you find that your Glyph launcher won’t open or is not working when it does open, you are not the only user experiencing this issue. From the research we made online relating to this issue, it seems the problem is server-side.

But in a few cases, users reported issues with the PC or app setup that triggered the problem. Keep reading to find out the solutions!

What can I do if the Glyph launcher won’t open?

1. Reinstall the Glyph app

1.1. Uninstall the app

  1. Press Windows + X, and choose the Apps and features option from the menu.Apps and features - Glyph launcher not working
  2. Search for the Glyph app inside your app list, select it, and press Uninstall.
  3. Make sure to get rid of the Glyph folder in this location where Username is the current profile name:C:\Users\USERNAME\AppData\Local
  4. Remove any other folders that remain on your PC by doing a full search of your hard drive.

1.2 Re-install Glyph

  1. Visit the official Glyph webpage and download the latest installer.Download page - Glyph launcher not working
  2. Run the installer and follow the on-screen instructions to complete the setup.

Often, it’s the app files, the previous installation settings, or issues with the Glyph launcher itself to blame when it won’t open. And a quick solution is to reinstall the app.

In case the manual method doesn’t work, use a reliable uninstaller tool to get rid of all leftover files and registry entries.

2. Edit the .cfg file from the installation folder

  1. Press Windows + E to open File Explorer and navigate the following path where Username is the active profile name: C:\Users\USERNAME\AppData\Local\Glyphfile explorer
  2. Find the file with the name GlyphClient.cfg, and open it in Notepad.
  3. Under the Glyph section inside the text, copy-paste this text: BetaOptin=true
  4. Press Ctrl + S to save the file, and restart the computer for the changes to apply.

Many users reported that modifying the GlyphClient.cfg file fixed things when the Glyph launcher won’t open in Windows.

Before you leave, find out some quick tips to boost the gaming performance of your PC.

Please let us know if this guide has proven useful for your situation or if you have any suggestions.

How to completely remove Overwolf from your computer

If you’re wondering how to remove Overwolf from your computer, this article will help you understand all the options available to you.

Removing apps from your PC can sometimes be complicated.

Some would even go as far as saying that some application developers are trying their best to make it harder to remove an app than installing it.

Even though the reasons for this happening are somewhat obvious, Overwolf doesn’t fit into this category.

The software is user-friendly in all aspects and has been designed with the user in mind. This implies that the process of installing, using, and uninstalling is as simple as it can be.

In this guide, we will discuss the entire range of removing options at your disposal. Read on to find out the details.


Want to remove Overwolf from your PC? Follow these steps

1. Use the Add/Remove programs feature of Windows

user typing on laptop - How to remove Overwolf
The most common way of uninstalling an app entirely on Windows is to use the uninstalling wizard found built into your Windows platform.

Here are the steps to complete this process:

  1. Press the Win+X keys on your keyboard -> select Apps and Features from the menu that pops up.Apps and features - How to remove Overwolf from computer
  2. This will open the list of installed apps on your PC.
  3. Scroll through the list and find Overwolf.
  4. Select it by left-clicking on the app.
  5. Click the Uninstall button to start the removal process.
  6. Follow the on-screen instructions to complete the task.
  7. This should have removed the Overwolf app from your PC, but if this method doesn’t work, you can try out the next option.

Want to disable Overwolf overlays for specific games? Try these methods


2. Use Cortana to run the uninstaller

laptop side view - how to remove Overwolf from computer

  1. Click the Cortana search box from your Windows taskbar.
  2. Search for the Overwolf app.
  3. Once the results are displayed, the first option will be the app executable file. (don’t click that or you will open it).
  4. Under the executable files, you will see some other options, amongst which the Uninstall Overwolf option will be.
  5. Click the Uninstall Overwolf option.
  6. This will open the uninstallation wizard.
  7. Follow the on-screen instructions to complete the process.

Note: If none of the above-mentioned methods were successful in removing Overwolf from your PC, please try the next solution.


3. Contact Overwolf support

Overwolf support page - how to remove Overwolf from computer
If you didn’t have success by using the first two solutions, you will need to contact the official Overwolf support team and ask for help.

Here’s how you can do this:

  1. Visit the official support page. 
  2. Complete the respective boxes with the details required by Overwolf.

Note: The accuracy of these details you provide to the support team will allow them to offer you full support for your problem.


Conclusion

In today’s how-to article we explored the step-by-step process in which you can successfully remove the Overwolf app from your Windows 10 PC.

We hope this guide has proven useful in your case. If it has, please feel free to let us know by using the comment section below.

READ ALSO:

Windows 10 news recap: dual-screen Surface Neo device coming next year, major PC manufacturers announce Windows 10X device plans, and more

Welcome back to our Windows 10 news recap, where we go over the top stories of the past week in the world of Microsoft’s flagship operating system.

Surface Neo is Microsoft’s new dual-screen Surface, coming on holiday 2020

Microsoft has announced a new dual-screen Surface device that is arriving next year. Called the Surface Neo, it will run a new operating system by Microsoft, Windows 10X.

Microsoft to launch new Surface Audio app on Windows 10, iOS, and Android devices

Coinciding with Microsoft’s new Surface Earbuds, the company is set to launch a new app called Surface Audio. It will act as a companion to the Surface Earbuds. It will be available on Windows 10, iOS, and Android.

Microsoft Surface Earbuds

ASUS, Dell, HP and Lenovo to release new devices powered by Windows 10X in Fall 2020

It’s not just Microsoft that will be using its new operating system, Windows 10X. Major PC manufacturers, including ASUS, Dell, HP, and Lenovo are set to launch new devices next year that utilise Windows 10X. They include dual-screen and foldable devices.

The Windows 10X Start Menu won’t have any Live Tiles

With all the talk of Windows 10X, it has become known that it will not have Live Tiles on the Start Menu. Depending on how you feel about Live Tiles, this may or may not be a good thing.

That’s it for this week. We’ll be back next week with more Windows 10 news!

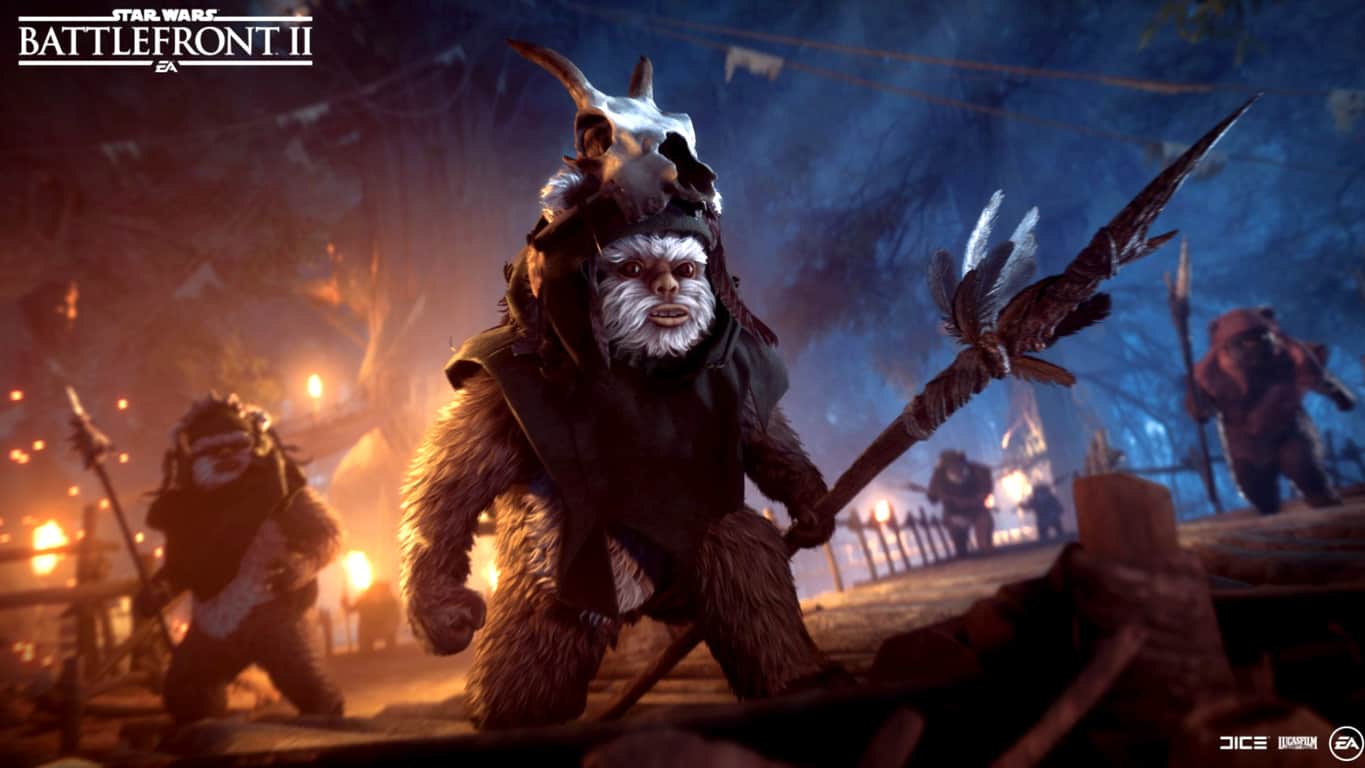
Star Wars Battlefront II video game to get new hero skins and Ewok Hunt map this month

Star Wars Battlefront II’s community calendar for the month of October has just been released and there are quite a few surprises for players coming over the next few weeks.

In addition to the expected Heroes Unleashed event in the middle of the month and the Double XP events every Wednesday, Star Wars Battlefront II will also be getting a new map for the popular Ewok Hunt mode. This new map will be a revamp of the current Endor map but its addition is still surprising given the addition of the new Felucia map in September.

The new Ewok Hunt map will come as part of an update on October 23rd. Also included with this update will be new skins for Hero characters. New appearances for reinforcements have recently leaked from the PC version of the game so it’s possible that these will also be included with this update.

Star Wars Battlefront II October 2019 Roadmap

Details on the exact skins coming this month will likely be confirmed closer to the update date.

Here’s the rundown of the important dates for this month:

  • October 4-6th: Boots on the Ground event (No heroes or vehicles in GA and CS modes.)
  • October 11-18th: Community events for previously announced Luke skin and Maul emote.
  • October 18-20th: Heroes Unleashed event.
  • October 23rd: Game update with new Endor map, skins, fixes, etc.
  • October 23-31st: Halloween Double XP event.

Star Wars Battlefront II launched on Microsoft’s Xbox One console almost two years ago and continues to receive frequent content updates which are free for all owners of the game. While a smaller update is expected for November, a much bigger one will likely drop in December or January to tie into the launch of Star Wars Episode IX The Rise of Skywalker with a new map and several new skins inspired by the movie having already been confirmed.

Do you play Star Wars Battlefront II? Let us know what you’d like to see in future updates in the comments below and then follow us on Twitter for more Xbox gaming news.


Thunderbird Password Recovery: Best Ways to get it Back

Mozilla Thunderbird is a top-notch email client, news client, RSS, and chat client that is most famous because it is free and open-sourced.

However, being an email client means you must log in using an email and a password. Unfortunately, as we all know, we tend to forget passwords most of the time.

If you forgot your Thunderbird password, we will show you the best recovery method to get it back in this guide.

How to recover a forgotten Thunderbird password?

There are two known methods to recover a forgotten Mozilla Thunderbird password. These methods are listed below:

  • Using the built-in password manager: If you have set Thunderbird to remember your password but have forgotten it, you can get your password back within the app. However, this requires you to have access to the app.
  • Using a password recovery tool: If you cannot recover your password from the Thunderbird profile, you can use a specialized password recovery tool.

Where is Thunderbird’s password stored?

The Thunderbird password location is not the most difficult to find. Provided you ask the app to remember your password, it will be stored in the Password Manager.

You can find this under the Privacy and Security section of the app’s settings.

How can I perform Thunderbird password recovery?

1. Use the built-in Password Manager

  1. Launch Mozilla Thunderbird and click Tools > Options.
    tools thunderbird password recovery
  2. Now, click the Security tab at the top.
  3. Go to the Passwords tab and click the Saved Passwords button.
    saved
  4. If you want to see the passwords you have saved, click Show Passwords.
    show
  5. Next, click Yes to continue.
    yes thunderbird password recovery
  6. This will add a column named Password will appear in the Saved Logins window.
    option
  7. Finally, you can copy your account’s password from here.

The first method to use if you want to perform Thunderbird password recovery is to check the password manager. However, this requires you to have the app logged in on your PC.

But if you don’t have access to the app, proceed to the next solution.

2. Use a Thunderbird password recovery tool

If you are logged out of the Thunderbird app and need to recover your password, your only option is to use a specialized password recovery tool.

While you can use a series of tools, we recommend using a top-notch app like Passware Kit basic. This tool decrypts the password of the Thunderbird app and restores access to your account.

We have reached the end of this guide on how to perform Thunderbird password recovery. You should now be able to regain access to the email client using the two methods above.

If you need a list of top-notch apps to recover your lost email password, check our guide for the best options available.

Feel free to let us know the solution that helped you solve the problem in the comments below.

The following fatal alert was generated [QUICK GUIDE]

While visiting any website or looking in the event find viewer in Windows Server, users may encounter “The following fatal alert was generated: 10, The internal error state” error. Many users have reported similar errors in the Microsoft community forum.

Hello, Has anyone ever found a fix for this error in event viewer? “The following fatal alert was generated: 10″. The internal error state is 10. I have been receiving this error in the past three weeks by the hundreds. It seems like I start getting the error after I log in to a web site.

If you are also troubled by this error, here are a couple of troubleshooting tips to help you fix the following fatal alert was generated 10 error.

How can I fix The following fatal alert was generated error?

1. Disable TLS in Internet Properties

  1. If the error occurs while using a web browser, try disabling the TLS option in the Internet Options.
  2. Press Windows Key + R to open Run.
  3. Type control and click OK to open the Control Panel.
  4. Go to Network and Internet > Internet Options.
    internet options the following fatal alert was generated
  5. In the Internet Properties window, click the Advanced button.
    use TLS the following fatal alert was generated
  6. Scroll down to the end and uncheck the following options:
    Use TLS 1.0
    Use TLS 1.1
    /Use TLS 1.2
  7. Click Apply and OK to save the changes.
  8. Now try to open the website and check if the error is resolved.

Windows Server: How to enable TLS with ease


2. Disable SCHANNEL logging

  1. If the issue persists, it is possible that the problem is not in your computer but on the server. Disabling SCHANNEL in the Registry Editor should help you fix the problem.
  2. Press Windows Key + R to open Run.
  3. Type regedit and click OK to open the Registry Editor.
    registry editor The following fatal alert was generated
  4. In the Registry Editor, navigate to the following location:
    • HKEY_LOCAL_MACHINE\System\CurrentControlSet\Control\SecurityProviders\SCHANNEL
  5. Select the SCHANNEL
  6. From the right-pane, double-click on EvenLogging
  7. Change the value from 1 to 0.
  8. Click OK and exit the registry editor.
  9. Now try to access the web browser or web sites and check if the service is working fine.

3. Allow Local Activation Security Check Exemption

  1. You can fix this issue by enabling “allowing local activation security check exemption” in the Group Policy editor.
  2. Press Windows Key + R to open Run.
  3. Type gpedit.msc and click OK to open the Group Policy editor.
    allow local activation security check the following fatal alert was generated
  4. In the “Group Policy Editor“, navigate to the following location:
    Computer Configuration > Administrative Templates > System > Distributed COM > Application Compatibility
  5. Double-click on “Allow local activation security check exemptions”.allow local activation security The following fatal alert was generated
  6. Select the “Enabled” option.
  7. Click Apply and OK to save the changes.
  8. Close the Group Policy Editor and check for any improvements.

Conclusion

The error “The following fatal alert was generated 10” can be triggered by multiple non-SSL requests that are flooding the IIS, SSLv3 communications, failed connection through port 339 etc. Following the tips in this article can help you to fix this issue in no time.

RELATED STORIES YOU MAY LIKE:

Firestick Not Connecting to TV: 4 Ways to Recognize it

The Amazon Fire Stick is a simple device people use for streaming. However, many reported that the Firestick does not connect to a TV.

This issue differs from the one we covered before, where Amazon Fire TV Stick is not connecting to the server. However, reading if you’re having network issues is still helpful.

Today’s guide will show you what to do if the TV doesn’t recognize your device.

Why is my FireStick not picking up by my TV?

  • You may be having issues with the power adapter.
  • Problems with HDMI cables can cause various connection issues.
  • Temporary glitches with Firestick can cause this problem.
  • Incorrect resolution can also cause this problem at times.

What can I do if Firestick is not connecting to TV?

1. Make sure your Power indicator is static

  1. Check the power cord, plug, and socket for damages.
  2. If everything seems fine, connect the power cord to another socket.
  3. Start your device again.

2. Check the HDMI cable

  1. Ensure your HDMI cable is not faulty and stays fixed in the port.
  2. Disconnect and reconnect the cable to see if you can solve the issue.
  3. Also, you should use only an authenticated cable.
  4. If everything seems fine, try connecting the cable to another port.

A loose HDMI connection can often be responsible for Firestick not connecting to the TV, so be sure to fix it.

3. Reconnect your Amazon Fire TV Stick

  1. Make your TV set OFF.
  2. Remove the stick from the HDMI port of the TV.
  3. Unplug the power cord from the stick.
  4. Wait at least 5-10 minutes, and then plug the power cord into the Amazon Fire TV stick and wait for 5 minutes.
  5. Make your TV set ON.
  6. Reconnect the Fire TV stick with the HDMI port.
  7. Press any button on the Fire TV remote. Wait for a few seconds after each input. Executing the commands might take time.

Sometimes reconnecting the device can help if Firestick is not connecting to the TV or other network-related issues.

4. Ensure you select the correct resolution

  1. Press the UP and REWIND buttons from your Fire Stick remote.
  2. Then, select Use current resolution.
  3. Save changes.

You can fix this issue with some quick solutions. Ensure you get a good connection with the power source and that your HDMI cable and port are not damaged.

Also, reconnect your Amazon Fire TV stick and make sure you selected the correct resolution for your monitor.

This isn’t the only issue, and many reported that Firestick is not loading home screen, but we have a separate guide that tackles this issue. Even more, chances are your Firestick says the network is disconnected even when there is a working internet connection available. Rest assured that we have more info on that as well in this article.

Did our solutions help you fix the problem? Please let us know in the comments section below!

How to recover your lost Microsoft Office password

Microsoft Office is probably the most well-known product from Microsoft, after the Windows 10 itself of course.

This family of client software, server software, and services offers you the chance to do pretty much anything you would need in an office environment.

You can write documents, create presentations, write e-mails, create spreadsheets, and more. Of course, this all comes at a price and making sure that your license is secure is a must.

As such, getting access to any of your Microsoft Office components is usually done via logging in with an account name and password. The problem with passwords is that they are usually prone to be forgotten, and that can be really troublesome at times.

How do I recover my lost Microsoft Office password?

1. Use a dedicated Microsoft Office password recovery tool

Forgetting your Microsoft Office password is something that happens more frequently than anyone would like to admit.

As such, the Internet is full of software tools dedicated specifically to recover your Microsoft Office password.

However, you must know that these tools can only recover the password from older versions of Microsoft Office.

These include:

  • Microsoft Office 95
  • Office 97 and 2000
  • Microsoft Office XP and 2003
  • Microsoft Office 2007
  • Office 2013

Here are some of the best Microsoft Office password recovery tools you can find online:

Recover Microsoft office password

Keep note that most of them are hidden behind a paywall and that the free version offers little actual functionality.

2. Perform an Office 365 password recovery

This may seem like the most obvious choice, especially for those using Office 365.

  1. Click the account you want to access at the Office 365 login screen
  2. Enter your email address
  3. Next to Password, click I forgot
  4. Enter your email address and click I forgot
  5. Enter your email address, and click Continue
  6. Under How do you want to reset your password, select the account you want to send the reset email to
    • If for any reason you don’t have access to another email account, select the My account administrator option. Your account administrator will receive a password reset request, and he can then provide you with a temporary password.
  7. Send a password reset email
  8. Click Send Email.
    • Within a few minutes, you’ll receive a password reset link in the email inbox you specified
  9. Open the email, and click Reset Your Password

recover office 365 password

However, this method only works if you have Office 365.

How to Recover Your Lost BIOS Password in Windows 10/11

If you’re concerned about security and the privacy of your data, then most likely, your PC is protected by layers upon layers of passwords.

These protection methods range from password protecting files and folders or encrypting files, folders and drives.

Of course, if you want to bring your protection to a whole new level, you could password protect your PC with an account password, and lock your PC with a BIOS password to safeguard data on a PC.

The problem with a password is that it is, well, a password, and we sometimes tend to forget them.

This is perfectly normal, especially if you haven’t accessed your BIOS in a while or if you use a different password for every single thing.

How can I recover my own BIOS password in Windows 10?

1. Reset your BIOS by removing the CMOS battery

  1. You must first disconnect your PC from any power source.
    • If you are using a laptop, this includes removing the battery
  2. Remove your PC‘s cover, and locate the CMOS battery
  3. Remove the battery
  4. Press the power button for around 10 seconds
  5. Put the CMOS battery back in place
  6. Put the cover back, or reassemble the laptop
  7. Boot the PC
reset bios password cmos battery

You will get a warning telling you that the BIOS date is not set, which is a clear sign that it was reset, and that there is no password anymore

2. Remove BIOS password using an MS-DOS Command

You will first have to enter your computer in MS-DOS mode:

  1. Reboot your PC
  2. Enter the Boot menu
  3. Choose Safe Mode with Command Prompt

While in MS-DOS mode,  a black dialogue box of cmd will turn up with a C:WINDOWS> prompt

  1. Type in Debug
  2. Hit Enter
  3. Enter the following command given below and press Enter:
    • debug
    • o70 2E
    • o71 FF
    • quit
  4. Type in Exit, and hit Enter
  5. Reboot your PC

Next time you will try to access the BIOS settings, you won’t be asked about a password anymore

3. Reset your BIOS password with a backdoor password

If, for some reason, your CMOS battery cannot be removed, or you aren’t too sure of yourself using the Command Prompt, your only choice is to use a backdoor password.

This password is especially built-in by the computer’s manufacturer and is generally not known by most users.

  1. Boot your PC
  2. Try to access the Boot Menu and intentionally type in the wrong BIOS password 3 times
    • This will force your PC to go into a lockdown mode along with a System disabled message paired with a code
  3. Note the code down
  4. Go to bios-pw.org/ and enter the code
  5. Press Get Password
  6. The website will generate passwords similar to the one you used
Recover BIOS password

While it won’t give you the exact password, the ones generated will be close enough that you will surely remember the right one.

Even more, we invite you to also check out our guide on how to remove BIOS password in Windows 11.

Wondering how to use Overwolf? Here’s a guide

If you want to know how to use Overwolf for a streamlined experience, you’ve found the perfect guide.

Overwolf is an un-obstructive overlay that acts like a platform offering you the capability of adding apps inside your PC games. Yes. You read that correctly.

The variety of apps that can be attached to your favorite games varies incredibly. Some of the most praised add-ons include Twitch streaming, game recording apps, and even an in-game Chrome browser.

You can choose from thousands of applications inside the Overwolf Appstore. These cover the needs of game players, but also for various development teams.

In this article, we will talk about how to use Overwolf, and what are some of the best features this platform has to offer. Read on to find out more.


Here’s how to use Overwolf for a streamlined gameplay experience

Installation

Download page - How to use Overwolf

In order to install Ovoerwolf, you will need to install it on your PC. To do so, you can visit the official download page and get the installer package.

To install this app on your PC, you will need to double-click the installer package and follow the on-screen instructions to complete the setup.

Once you’re done with this step, read the next section of this article to get started using it.


Is your Overwolf software not recording? Check out these steps


Here’s how to manage hotkeys in Overwolf

Laptop with user's hand - OVerwolf how to use/How to manage hotkeys

Once installed, you can simply launch Overwolf and start your favorite game. If you want to summon the Overwolf dock, you can press the Ctrl+Tab keys on your keyboard.

The application comes with some pre-installed apps, but if you truly want the full Overwolf experience, it is recommended that you visit the Appstore for more options.

To use the Overwolf apps inside the game, you can simply select them by using your mouse.

If you’re inside a game where you don’t have access to the mouse cursor, you can use the Ctrl+Tab keys to switch from the game to the app control.

If you press Shift+F2, you will be able to show/hide the Overwolf app windows.

One great feature found in Overwolf is that you can customize your hotkeys exactly as you want them. You can do this by opening the settings window – right-click the Overwolf tray icon -> select Settings.

Overwolf is compatible with a large number of games. The list includes Alan Wake’s American Nightmare, Assassins’s Creed, and the Battlefield series, just to name a few options.

If you’re curious to see a complete list of supported games, you can find this information by visiting the official game list.


Conclusion

In today’s how-to article we explored some of the featured that are offered by the free overlay platform named Overwolf.

This tool can be incredibly useful for both gamers and developers alike. The range of apps available also helps you customize how you use it almost endlessly.

If you found this guide helpful make sure to let us know by using the comment section below.

READ ALSO:

Red Dead Redemption 2 is coming to Windows PCs and Google Stadia next month

Rockstar Games announced that Red Dead Redemption 2 is coming to Windows 10 PC on November 5, 2019. Red Dead Redemption 2 will also be available on Stadia at launch, but Google has not yet to confirm an actual launch date for its hyped cloud gaming service. As noted in a blog post on the Rockstar Games blog, Red Dead Redemption 2 will have a number of special bonuses available when you pre-order the game through the Rockstar Games Launcher starting on October 9th.

Previously, Rockstar Games gave away a free copy of Grand Theft Auto: San Andreas just for downloading their launcher in September 2019. For those that did not take advantage of that offer, you have until October 8th to claim your free copy of Grand Theft Auto: San Andreas. It’s important to note that Red Dead Redemption 2 will also be released on Steam in December 2019.

Pre-purchases for Red Dead Redemption 2 for PC begin at 11 AM ET on October 9th exclusively by downloading the Rockstar Games Launcher for Windows. From October 9th through October 22nd, Rockstar Games is offering two free Rockstar Games PC titles from this list:

  • Grand Theft Auto III
  • Grand Theft Auto: Vice City
  • Grand Theft Auto: San Andreas
  • Bully: Scholarship Edition
  • L.A. Noire: The Complete Edition
  • Max Payne 3: The Complete Edition

Pre-orders made on the Rockstar Games Launcher will also include free upgrades to the Premium Editions of Red Dead Redemption 2, and the Special Edition and Ultimate Edition will get $20 off discounts. Rockstar Games will also offer discounts on special Red Dead Redemption 2 bonuses purchased through the Rockstar Games Launcher, including:

  • Outlaw Survival Kit for Story Mode
  • War Horse for Story Mode
  • Treasure Map for Story Mode
  • Cash Bonus for Story Mode
  • 50 Gold Bars for Red Dead Online

Get ready to take advantage of these special deals by downloading the Rockstar Games Launcher for Windows now. Red Dead Redemption 2 is also available on Xbox One right now for $59.99 in the Microsoft Store.

Red Dead Redemption 2
Developer:
Rockstar Games
Price:
Free

How to clear browser data in Edge Insider

Microsoft’s Edge Insider builds bring a different approach to data management than the outgoing EdgeHTML-based browser. You have more granular control over the types of data that are affected when you clear cached resources.

Before we start, it’s worth noting that the “Clear browsing data” option isn’t necessarily what you’re looking for. The most common forms of data deletion, such as clearing history or deleting bookmarks, can also be found within their respective menus. This function is geared towards the mass reset of browser settings, for when you want to get back to a clean slate.

Clearing browser data in Edge Insider

Click the “…” button in the top-right of the Edge interface. Select “Settings” from the menu which appears and then switch to the “Privacy and services” page.

At the top of the page, click the blue “Choose what to clear” button. A popup will appear which lets you precisely define the types of data which should be removed.

Clearing browser data in Edge Insider

First, use the “Time range” dropdown menu to choose how much data should be deleted. Options range from “Last hour” to “All time.”

Next, use the checkboxes to select the types of data to be removed. You will see warnings of the potential impact of each deletion – for example, removing cookies will sign you out of sites, while clearing cached images could result in slower page loads.

Clearing browser data in Edge Insider

Most of the checkboxes should be fairly self explanatory. Some to note are “Passwords” (this will delete your stored site passwords, potentially leaving you locked out), “Site permissions” (resets all the permission popups displayed when you visit pages) and “Hosted app data.” The latter option will clear all data used by web apps installed on your machine. This might have implications on the functionality of those apps.

Once you’ve made your selection, click “Clear now” to perform the deletion. The selected data types will be removed immediately.

Finally, Edge lets you automatically clear this data each time you close the browser. Back on the “Clear browsing data” settings page, click the “Choose what to clear every time you close the browser” link. You’ll arrive on a new page of options very similar to what we just saw. Use the toggle buttons to enforce automatic deletion for your chosen cache types.

How to create groups of lists in Microsoft To Do

Microsoft To Do recently rolled out support for creating groups of lists. This feature lets you tidy up your navigation menu by nesting related task lists under named folders.

Groups in Microsoft To Do

To create a group, press the icon to the right of the “New list” button in To Do’s navigation. Next, type a name for your list group.

With the group created, you’re ready to add some lists to it! Drag and drop any of your lists into the panel below the group’s name. They’ll now belong to the group. You can click the group’s name to hide or reveal the lists which are within it.

Groups in Microsoft To Do

Groups are a convenient way to combine related lists of tasks. However, the functionality is currently quite limited. There’s no way to view a list of all the tasks in a group, aggregated from all the lists within it. Groups are static collections of lists, so you can’t use them to create any more complex task management workflows. It’s possible Microsoft will add more group-specific capabilities in the future but for now they’re an organisation mechanism only.