Many users using the desktop version of Power BI are experiencing sign-in issues.
If you are one of them, you should know that this may because by one of three causes:
Power BI is being blocked by your Firewall
Proxy Authentication errors
Non-HTTPS URL redirect errors
Some users have reported encountering issues when trying to log into the desktop version of Power BI.
[…] My manager is trying to sign in to PowerBI desktop using his work email. But he is not able to sign in, when he enters his credentials, there is absolutely no response! It neither signs in nor throws an error! But he can sign in fine for PowerBI Web.
Power BI is being blocked by your Firewall
Make sure Power BI is added in the exception list of your Firewall:
Click Home
Type Windows Firewall
Select Windows Defender Firewall from the list
Select Allow an app or feature through Windows Defender Firewall
Check the box next to Power BI’s services
How do I fix proxy authentication errors
Whitelist the appropriate domains
For proxy authentication servers
If your network uses a proxy authentication server, whitelisting these domains on the proxy authentication server will most likely fix the issue:
app.powerbi.com
api.powerbi.com
domains in the *.analysis.windows.net namespace
For those part of government clouds
If your network is part of government clouds , whitelisting these domains on the proxy authentication server will most likely fix the issue:
app.powerbigov.us
api.powerbigov.us
domains in the *.analysis.usgovcloudapi.net namespace
As a measure of precaution, let your administrator know he should check that secured URLs are used for their authentication sites.
Use the Web version
The web version of Power BI is the first one to automatically update. So if you find any issues with the desktop version, just switch to the web version.
One of the biggest differences between Waze and other GPS navigation software is the alerts system.
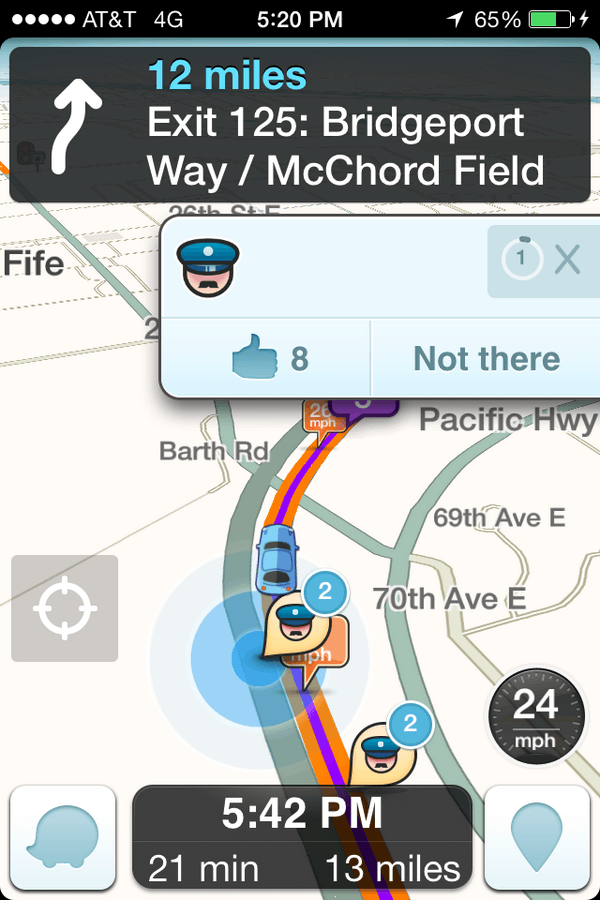
Waze benefits from a user input system that allows constant alerts about speed cameras, police, speed alerts, and more. Of course, speed limit and the usual driving alerts are also present.
But lots of wazers complain that the audio alerts are not working and they only get visual updates about hazards.
If you encountered the same problem, there’s a couple of things that you should be aware of.
What can I do if the audio notifications in Waze don’t always work?
1. General tips
Make sure that your sound is turned on. Go to Waze > Settings > Voice & sound > Sounds > choose Alerts only or On.
Raise the volume level in the app.
Check if you have a Waze voice selected.
Close and then restart the Waze app. Additionally, you can also restart your device.
If Waze is connected to Android Auto or Apple CarPlay, make sure that the volume level is at an appropriate level and there are no other car settings that block audio.
2. Waze not alerting police
First of all, make sure that you’re alerts are ON and the volume is turned up.
If Waze is not alerting police, it is possible that it was reported on the other side of the road. If that’s the case, the app won’t alert you.
Another possible issue could be the fact that you have an incomplete voice pack download. If the sound clip for police is missing from your voice pack, then you won’t hear any alert.
To fix this you’ll have to connect to Wi-Fi and change your Waze voice. Let it download and then change back to your default voice that you use and let it fully re-download.
3. Waze not alerting speed cameras
If Waze is not alerting speed cameras and red light cameras, first you’ll have to know a couple of things:
To get any king of notification, the camera has to be on your driving direction.
Waze will notify you about a camera if it’s valid, it’s on your driving direction, and you’re exceeding the speed limit. Keep in mind that the app will not alert you with audio if you’re under the speed limit.
The last wazer that edited the camera, locks it to his rank. A lower rank user won’t be able to edit or delete the camera.
The most important things that you have to keep in mind is that the camera needs to be confirmed by an editor and you’ll get audio alerts only if you exceed the speed limit of that camera.
If your voice alert prompts are corrupted, you can reinstall the client or clear the cache and the storage. You can do that by following the steps:
On your Android device, go to Settings.
Navigate to Apps & notifications.
On the bottom of the screen tap on See all apps.
Search for Waze and tap on it.
Then on Storage.
Tap on CLEAR CACHE and then on CLEAR STORAGE. Confirm by taping OK.
After that, login again in the Waze app and check if the alerts are working properly.
The same steps can be followed if there are no audio alerts at all in Waze or if the volume is too low, even when the device volume is turned all the way up.
Most of the sound and alerts issues on Waze are caused by improper settings or corrupted sound packs. Clearing the cache or reinstalling the app should fix these problems.
If you have any other suggestions or questions, feel free to leave them in the comments section below and we’ll be sure to check them out.
Waze, along with Google Maps and Apple Maps, are some of the most popular GPS navigation software in the world.
If the maps from Google and Apple are widely used for city navigation and on foot navigation, Waze is the more popular option for drivers.
The reason behind this is the customizability and alerts (speed cameras, police), but most importantly, the interaction with the map .
Being able to alert other drivers about road hazards and being alerted about them is a great feature, but what happens when your Waze map is not updating?
Today, we’re going to take a look at what can you do if Waze is not updating.
What can I do if Waze is not updating my maps?
1. General tips
Some Waze users are complaining that their map doesn’t update automatically when a route changes:
I use Waze everyday to get home after work. However, I saw that when I start following a certain route and start a new route 10 minutes later, sometimes the « new » route is different from the first one. If there is an advantage to that « new » route, shouldn’t it be notified to me without having to start a new route guidance?
When you set a start and end point in Waze, the app creates a certain route, timeline, and step-by-step instructions. The route is created based on your settings (fastest route, avoid toll roads, dirt roads).
When you select a certain route, keep in mind that Waze will update the ETA every 2 minutes and check for better routes every 5 minutes.
If the route that it finds is not significantly better, it will not update it with new instructions (it will not re-route). The only way you can do that is manually.
If you stop the current route and redo the destination, then the app will automatically choose the new route that you want.
2. Map edits don’t appear in the Waze app
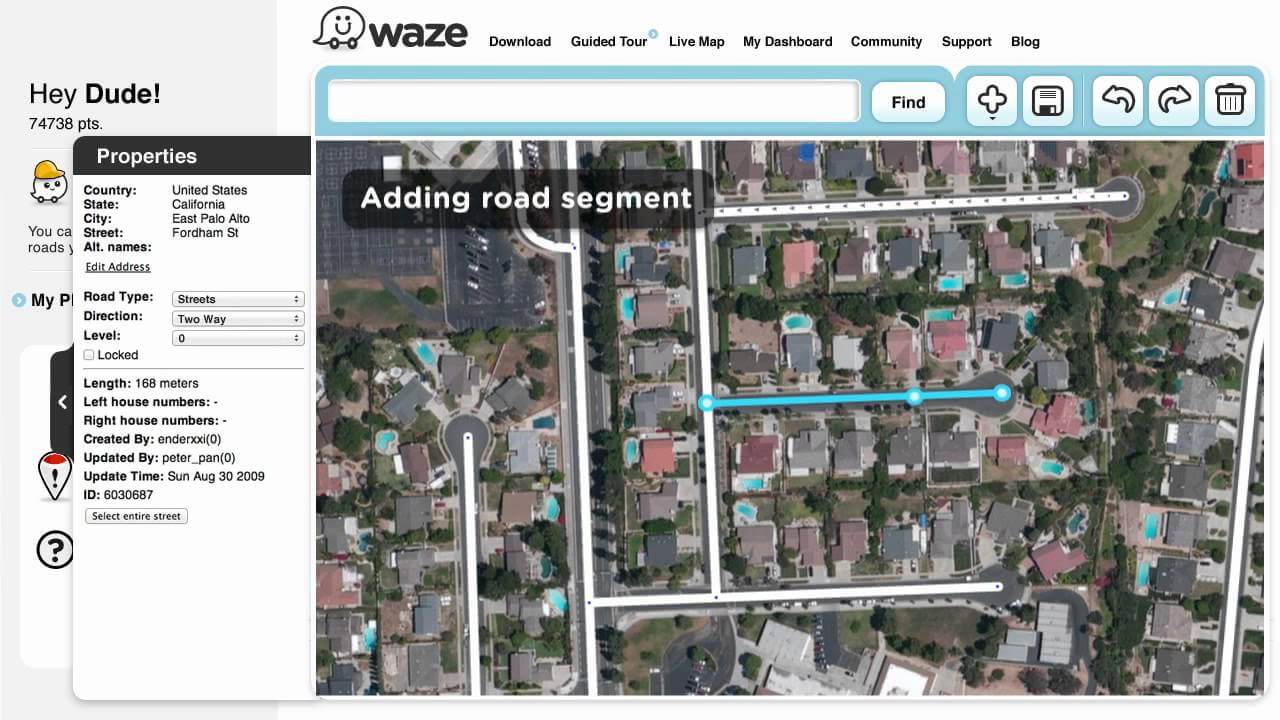
Wait a couple of days. Edits made in the map editor don’t appear instantly on the live map.
Go to status.waze.com and check the tiles update status. (NA servers for North America and INTL for the rest of the world)
Make sure that your edits are correct. If the road appears as a red coloured thin line, then some edits are wrong. (city, streetname)
Go to Waze > Settings > General > tap on Refresh map of my area.
You can also manually update your maps from the Waze website at step 2. If you made certain changes on the Waze map editor and they are still not reflected on your client, you may be a couple of tiles behind.
3. Waze not updating in Android Auto
Some Waze users reported that Waze maps won’t update and sometimes the app won’t even work with Android Auto.
This issue is usually triggered by the power saving mode or the connection to the server.
You can try to disable the power saving mode, as it solved the problem for many. It might work for you too.
Regarding the connection to the server, when you open Waze on your device, it will automatically try to connect to the Waze servers. If it doesn’t succeed, it will periodically try to reconnect.
Until a connection is established, you’ll have access to cached maps and some cached routing information. The app will also do its own routing, but the estimated times and other info won’t be accurate.
After the connection is establish, Waze will automatically update the map and your route.
Don’t forget to manually refresh your map every time you have any update problem. This is the simplest solution and can solve the problem without much hassle.
If you have any more suggestions or questions, don’t hesitate to leave them in the comments section below.
Windows 10 let you customise graphical performance settings on a per-app basis. This allows you to configure some apps for better performance, while optimising others for improved battery life. The options are particularly useful on devices with both integrated and dedicated graphics chips, as you can restrict undemanding apps to just the low-power integrated processor.
Open the Settings app from the Start menu and click the “System” category. Scroll to the bottom of the “Display” page which appears. Click the “Graphics settings” link.
This screen displays a list of all the app-specific performance configurations you’ve assigned. The list will be empty if you’ve never used these options before.
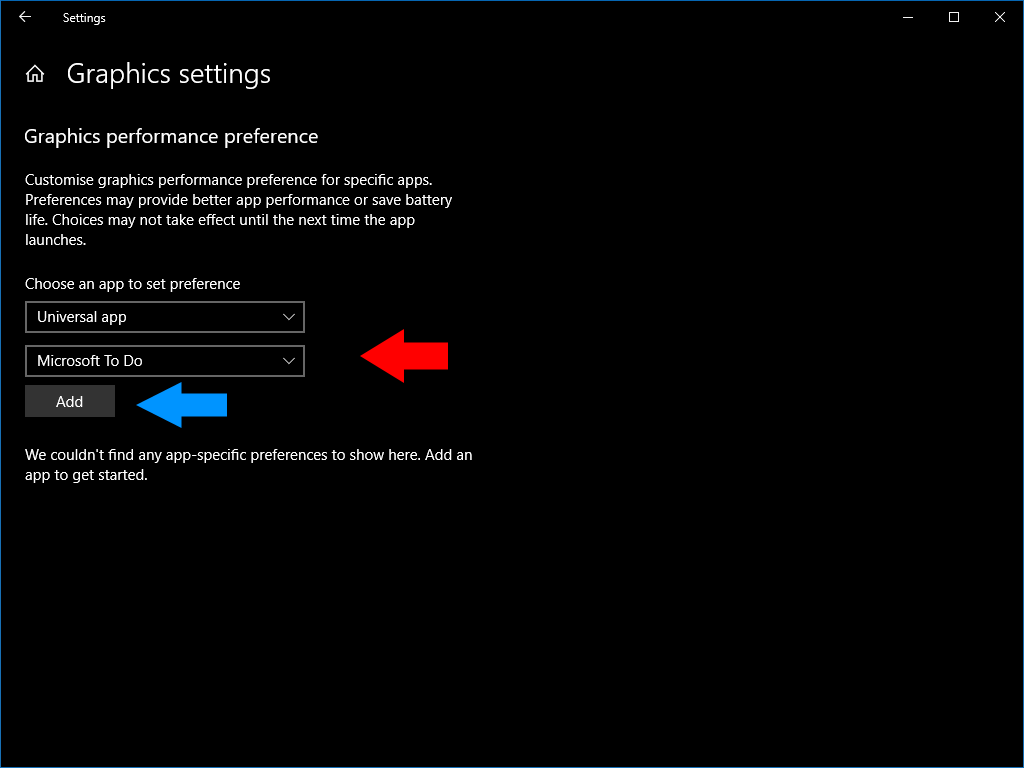
To register a new preference for an app, you’ll first need to select whether the app is “classic” or “universal.” Universal refers to apps installed from the Microsoft Store, whereas classic apps are traditional Windows desktop programs. Select the correct type from the drop-down menu which appears.
For classic apps, you’ll need to manually browse to the program’s executable file (an .exe). You’ll probably find it under C:Program Files or C:Program Files (x86).
When picking a universal app, a second drop-down menu will appear. This contains a list of all the Microsoft Store apps on your system. You can quickly select the app you’d like to set preferences for. Click the “Add” button to enter it into the list.
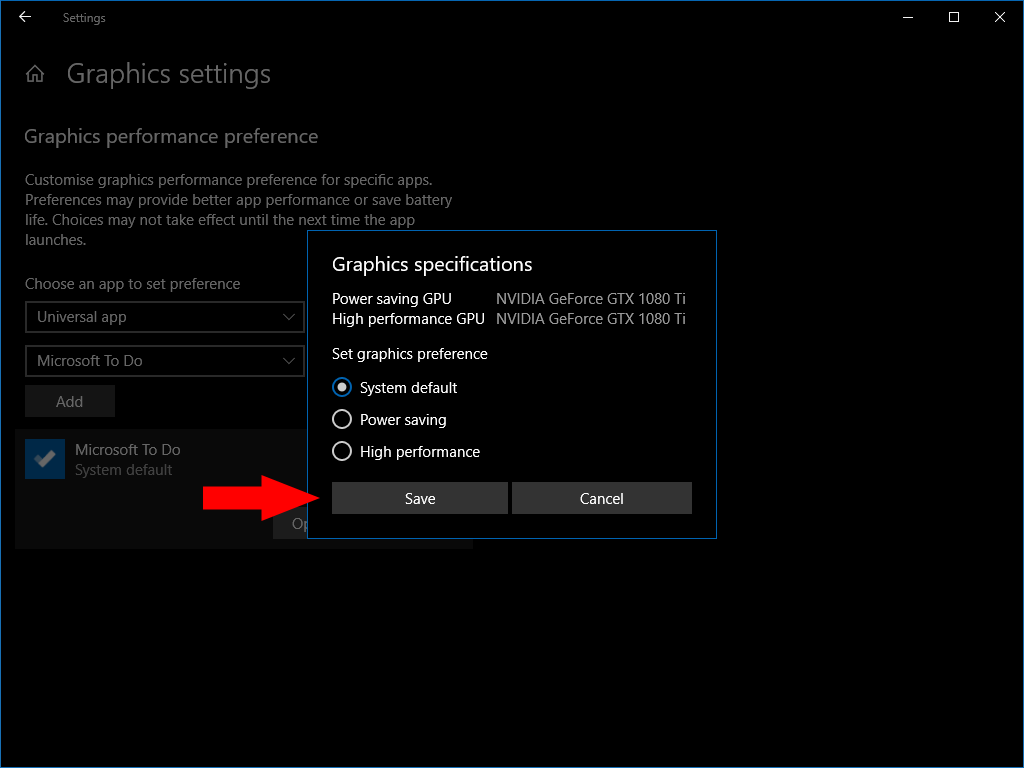
By default, all apps are configured to have the “System default” performance setting. To change this, click an app in the list and then press the “Options” button which appears.
You can assign an app to have default, power saving or high performance graphics. Generally, simple apps will run without issues on the power saving mode. High performance should be used with more demanding, graphically complex apps such as games and video streamers.
On devices with multiple GPUs, the high performance mode will allocate the dedicated graphics card to the app. This will enable the app to run at the highest possible frame rate, although more power will be drawn. Power saving mode will restrict the app to your device’s integrated graphics chip, which uses less power but will typically have limited performance.
Other than Excel spreadsheets and Microsoft Word documents, another core part of any business and the Office 365 experience is PowerPoint. When you’re going to have to sit through meetings with bosses, colleagues, and cohorts, having a visual cue to keep them awake will help — and PowerPoint is usually the best way to go.
But, not all PowerPoint presentations are created equally. In our latest installment to our Office 365 tips and tricks series, we will now showcase our top 5 tips and tricks for PowerPoint — hopefully helping you come away a master at presentations.
Use the Zoom feature for long presentations
One of the worst things that can happen when going through PowerPoint slides during a presentation is losing your place. Even worse, is when someone asked you to go back to a slide, or if you forgot to mention something from a slide all the way at the start of your presentation. Well, worry no more.
With the Zoom feature in PowerPoint, you can get through slides with seamless transitions, focus on the details that matter most. Here’s how you can get started with it.
Click the Insert Tab, and then choose Zoom
Click Slide Zoom
Choose your options. Summary, Section, or Zoom.
Summary will insert a summary of the selected slides. So, when you present, you can click or use the summary slide to zoom to the content. Section will help you and your audience with slide context and can go back to a specific slide or portion of a PowerPoint presentation, if needed. Slide Zoom will help out by including a link to a slide that you can click to navigate to, without exiting your current show.
Use Designer to brighten up your presentations
Not everyone is creative enough to manually create beautiful and fluent PowerPoint presentations that will capture the attention of an audience. Well, the Designer tool in PowerPoint can help out by suggesting themes, colors, fonts, photos, and more. It’s easy to get started with, too. Here’s how.
Create a new PowerPoint presentation
Head to the Design Tab
Click the Design Ideas icon in the far right hand corner
Sort through a suggested design
Designer is a nice alternative to the built-in Templates feature, which can get pretty generic.
Use ink to draw on slides for more natural presentations
During a presentation, perhaps with numbers and charts, having a touchscreen-enabled PC like a Surface will be one of your biggest advantages. You can ink up your presentations and point out important figures, quotes, charts, and more. This will make your presentation much more natural. Here’s how you can get started.
Click the Slide Show tab and make sure Presenter View is turned on
From the Slide Show tab click to begin the Slide Show
In Presenter View, you’ll notice that there are some icons on the bottom left side of the screen. Click the one that looks like a pen.
Choose the Pen from the pop out menu
Drag your Pen over the screen to ink on the slide.
For further customization, you can choose the ink color of the pen. Once your slide show is finished, you can even choose to Keep or Discard your inking.
Collaborate on PowerPoint presentations with OneDrive, or convert to PDF
During a presentation, most in the room might be on their laptop or smartphone. That’s why it’s best to send along a copy of the presentation so your audience can follow along with you if needed. To do this, you can either use the power of OneDrive to send a link to your presentation so everyone can view it. Here’s how you can share and invite others to collaborate on your PowerPoint via OneDrive.
Head to the File tab and click Save As
Choose the OneDrive option
Once saved to your OneDrive, head back to your PowerPoint, and click the Share icon on the upper right corner of the screen
Type out the email addresses to share to, and change the permissions to either Can edit or Can View.
Click Share
Most people might have Office 365 installed on their PC already, but in some cases, they might not. That’s why, you can convert a PowerPoint to a PDF file. You can easily do this by heading to the File tab and clicking Save As. Then, from the drop-down menu, you’ll want to choose PDF (*.pdf)
Use the Slide Master to create a consistent presentation
Nothing is more annoying than sitting through a PowerPoint, only to have the theme change every other slide. It’s visually distracting and can ruin the look and feel of a presentation. To ensure that never happens, you can use the Slide Master in PowerPoint. Here’s how.
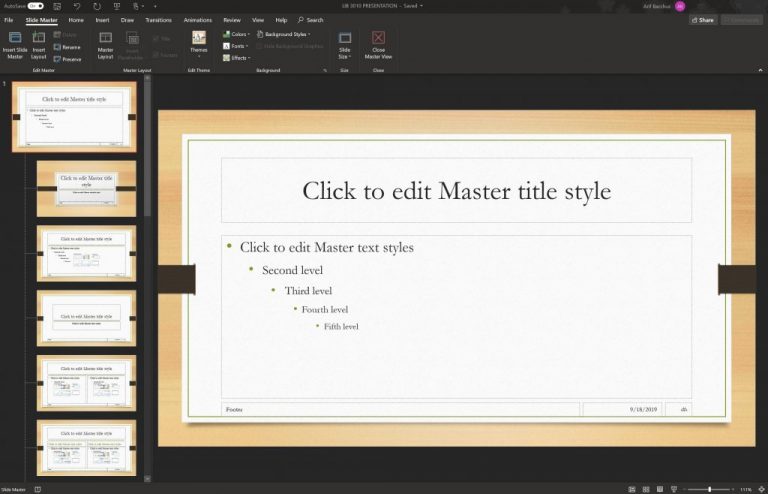
Click View and then choose Slide Master.
A bunch of new slides will then open up, and you can edit these slides. Once you apply a change to the slide master, all PowerPoint sldes of the same format will use the same master.
You can then insert the elements that you want to stay the same across the slideshow.
This feature is especially useful for inserting company logos, and photos, as it will retain a consistent look as the presentation progresses. No more visual distractions for your viewers!
How will you put the Power in PowerPoint?
Be it the Zoom feature, designer, inking, or collaboration, these top 5 tips and tricks for PowerPoint are just the beginning. There’s so much more you can do with PowerPoint. We’ve only scratched the surface, and there’s a lot you can learn.
Let us know in the comments below if you’ve got any tips or tricks you’d like to share. And, be sure to keep tuned to our Office 365 hub for all your Microsoft Office news and information.
Microsoft has just announced its partnership with Nextlink Internet to help expand broadband to more than 9 million people in Illinois, Kansas, Nebraska, Oklahoma and Texas, including over 1 million who don’t have broadband access at all. The company’s blog post says that as part of the agreement, Nextlink will take advantage of unused television spectrums known as white spaces to cost effectively expand broadband in many rural parts of the country.
Microsoft says that bringing broadband access to these residents will also be beneficial for the whole economy, as well. Farmers will be able to take advantage of faster internet to use technologies to help monitor crops and increase yields. According to Shelley McKinley, the company’s vice president of Technology and Corporate Responsibility:
“It’s time to deliver on the connectivity promises that have been made to people across the country, and this partnership will help do that for many who have been left behind and unserved in the heartland of America. In the past two years with our Airband Initiative, we’ve seen that progress is possible — particularly when the public and private sectors come together. Partnerships with regional ISPs like Nextlink that have the desire and wherewithal to provide internet connectivity are a critical part of closing the broadband gap and helping families, children, farmers, businesses and whole communities to not only survive, but thrive in the 21st century.”
The agreement is part of Microsoft’s Airband Initiative, an ambitious goal to bring broadband access to more than 3 million unserved residents in rural parts of the United States. The company says that more than 162 million individuals across the country are not taking advantage of or do not have access to high-speed broadband Internet.
What do you think about Microsoft’s ambitions for serving the millions of people who do not have access to high-speed internet? Feel free to let us know what you think by leaving a comment down below.
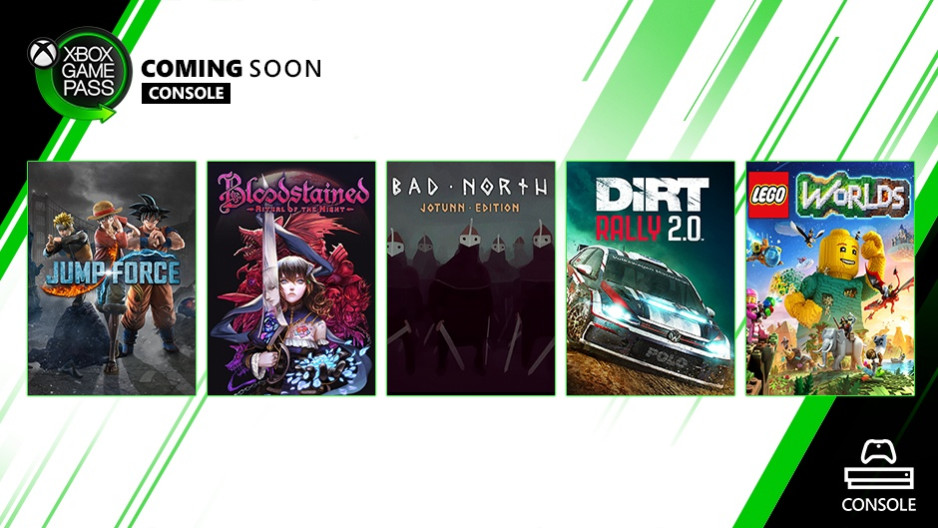
The three other Xbox One games coming on September 26 are DiRT Rally 2.0, the open world game LEGO Worlds, and the real-time tactics roguelite Bad North. Jump Force is the clear headliner among these new titles as the crossover fighting game received a lot of hype ahead of its release, though reviews have been pretty mixed.
Xbox Game Pass for console already received six new games earlier this month with Gears 5, Dead Cells, Metal Gear Solid HD Edition: 2 & 3, Creature in the Well, Enter the Gungeon, and Gonner Blüeberry Edition. Microsoft didn’t announce new games for its separate Xbox Game Pass for PC subscription service today, and we may have to wait until next month to see new PC games join the catalog.
Stadia is a new gaming platform from Google. The main feature that separates it from other gaming platforms is accessibility.
In other words, you can play your favorite game from a browser tab. So, you don’t need fancy (and expensive) equipment.
You will only need a fairly good desktop computer or laptop with Windows 10 (64-bit) and a good network connection.
Also, Google Stadia is a cloud gaming platform, so you don’t have to install the games on your computer. This is a major advantage for this platform when we think about the disk space requirements for games.
Moreover, the quality Stadia has to offer is top-notch. You can play 4K/60fps games in your browser tab.
It is worth mentioning that Stadia will only be available in Google Chrome.
How Google Stadia works in Windows 10
Google Stadia is made especially for Windows PC gaming. So, it will be easy to use and set up. So, you only need a decent computer, a fast network connection, and Google Chrome.
The steps in setting up Stadia are pretty easy. Go to the Stadia homepage and pick your country.
You need to go through a connection test. This will check your Internet bandwidth and will make sure you don’t lose any data. You need to have a streaming rate of about 15Mbps, and data loss should be below 5%.
Also, the test will check the latency between your computer and the servers. The latency should not be longer than 40 milliseconds.
If you met these requirements, you are ready to play.
Keep in mind that when you start a game, the program will go full screen automatically.
Also, you can improve your gaming experience if you use a console such as Steam Link to play on a bigger monitor from the comfort of your couch.
So, you can use controllers for the games that work more efficiently this way. However, you can still play like a traditional PC gamer, so the mouse and the keyboard are not yet obsolete.
Speaking of games, Google Stadia allows you to play many popular games, such as Assassin’s Creed: Odyssey, Attack on Titan 2: Final Battle, Mortal Kombat 11, and Tomb Raider Definitive Edition.
Conclusion
As you can see, Google is prepared to shake off the gaming industry by offering a cloud-based platform.
By doing this, the American tech giant introduces gaming to the masses. However, you still need a decent computer with at least 8 GB of RAM.
What’s your take on Google Stadia? Do let us know in the comments section below!
RELATED ARTICLES YOU NEED TO CHECK OUT:
Can Google Stadia compete against Microsoft’s Project xCloud?
While trying to launch one of the Microsoft Office programs, you may encounter an error that won’t let you access any of the Microsoft Office apps. The error reads “This Action is Only Valid for Products that are currently installed” and can occur on multiple versions of Windows OS.
Many of the Windows users took to the Reddit Forums to explain the issue. The error can occur due to multiple reasons, including corrupt Microsoft Office Installation or multiple instances of Office installation.
I’ve been rolling out Office 2016 & Windows 10 to our users, maybe a quarter of them will occasionally get the error “This action is only valid for products that are currently installed” in relation to Office 2016.
The error can happen when they click on an Office shortcut from the Start Menu or Taskbar or when clicking on a document even if the Office app is already open
If you are troubled by this error, here are a couple of troubleshooting tips to helo you resolve Action Only Valid for Products Currently Installed error in Windows computers.
How to fix This Action is Only Valid for Products that are currently installed
1. Uninstall Trial Version of Microsoft Office
Irrespective of the version of Microsoft Office you are using, the underlining cause for this error almost same.
The error is usually caused by the multiple instances of Microsoft Office installed. Begin with uninstalling the trial version of Microsoft Office installed on your computer.
Press Windows Key + R to open Run.
Type control and click OK to open the Control Panel.
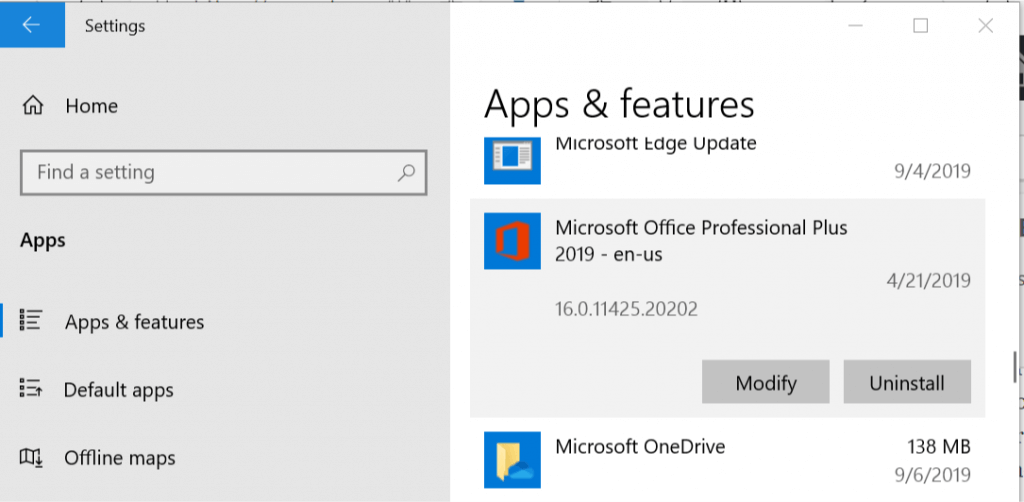
Select the trial version of the Microsoft Office and click on Uninstall.
Wait for the Office app to uninstall and reboot the computer.
If the issue persists, run the Microsoft Office Troubleshooter to repair the installation.
Press Windows Key + R to open Run.
Type control and click OK.
In the Control Panel, go to Programs > Programs and Features.
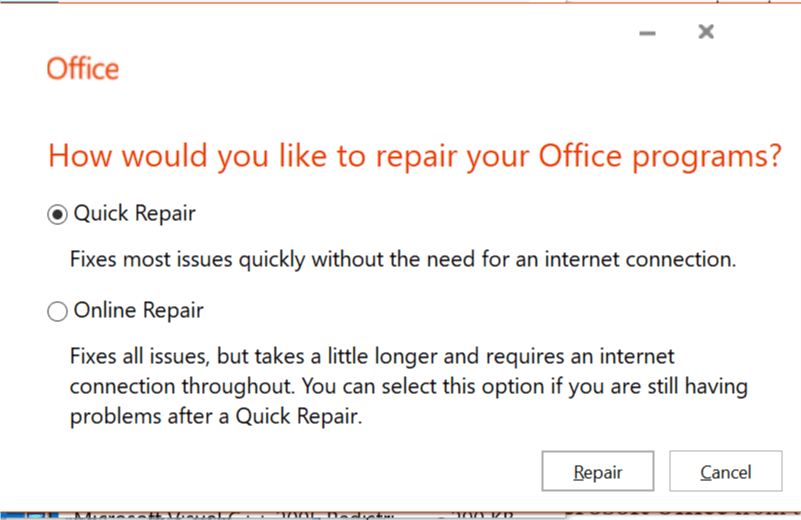
Select Microsoft Office app and click on Change.
Here you have two options: Quick Repair – First select this option. Quick Repair will scan the Microsoft Office installation for any issues and fix the problem without requiring internet connectivity. Online Repair – This option requires internet. Connect to the internet and run the Online Repair option. This may take a few minutes to fix the issue.
Wait for the repair process to complete, reboot the computer, and check for any improvements.
Ubisoft is well-known for the great games it dishes out every year.
In fact, things are going so well for Ubisoft that they figured they could create their own game distribution platform.
That’s the story of how the Uplay client came into existence, and this article will tell you how to fix some of the most common error you might meet while using it.
Fix common Uplay error messages
1. Errors 17008, 17012, 17013 and 17014
1.1 Run Uplay with administrator rights
Right-click he Uplay
Select Run as Administrator
1.2 Install a fresh copy of Uplay
Press Windows + R
Type in control appwiz.cpl to open the Programs and features window
Look for Uplay
Right-click it and select Uninstall
Once it is done, go back to Ubisoft’s website and download it again.
2. Error 17011
Check to see if you have sufficient disk space by:
Pressing Start
Type in This PC and click it
Right-click the partition where you want to download your game
Select Properties
Make sure to you have sufficient disk space for your game.
If that is not the issue, try running Uplay with administrator rights
3. Errors 17002 and 17009
You need to check and see whether the account of the game you want to launch is linked to your Ubisoft account,
There are Ubisoft games out there that can also be bought through Steam, so be sure you have the two accounts linked.
Also make sure you are logged with the right account credentials, and that the game you are playing is not an expired Demo.
These are generally network-related issues, and can be fixed by doing one of the following:
Reset your network hardware
Make sure that no software running on your PC is affecting your ability to connect with Uplay
Port forwarding, and these are the ports you need for Uplay PC:
TCP: 443, 14000
Rule out that an outdated configuration blocks our connection.
Obtain an up to date IP address of the webservice you want to connect to.
Check for other factors that may limit your ability to connect.
5. Erros 17005 and 17016
No exact cause is known for this error, but if you do encounter them, the Ubisoft support staff recommends that you contact them immediately and share with them these three log files:
DXDIAG
MSINFO
UPLAY PC LOGS
6. Any other Uplay error that might occur
If any other error message might appear to you, try one of the solutions listed above, most importantly:
Running Uplay with administrator rights
Troubleshooting your network connectivity
Install a fresh copy of Uplay
7. Use a reliable VPN service
Using a third-party VPN service to access Uplay can prevent many of the above-mentioned errors.
This type of program has customizable privacy settings and allows you to access the desired content from multiple servers located in different parts of the world. In this way, you’ll be able to use the platform with ease and enjoy long gaming sessions with no bandwidth throttling or lag.
Waze is one of the biggest GPS navigation software in the world.
A lot of people rely on Waze for their daily routes, traffic info, and driving instructions. The app is mainly used on iOS and Android.
Usually, wazers (waze users) sync their app with the car through Android Auto or Apple CarPlay.
But sometimes, Waze is not showing the map but only the directions. This is a pretty common problem and a lot of Waze users have complained about it:
After using Waze for years, my map has disappeared. The turn by turn route guidance remains, but that is all. It happened in the middle of a drive. I have an iPhone 6 with the latest iOS.
If you bumped in to the same issue, you’ll be happy to know that there are a few things that you can try.
How do I get my map back on Waze?
1. General troubleshooting steps
Re-download the map.
Completely close the app and then reopen it.
Check if Waze needs to be updated.
Check if your Android/iOS device needs to be updated.
Uninstall the app and then reinstall it from the app store.
Make sure that there’s no problem with your device’s display.
2. Clear the app’s cache
On your Android device, go to Settings.
Then tap on Apps & notifications.
In the bottom of the screen select See all apps.
Scroll down until you find Waze and tap on it.
Now select Storage.
You’ll see two buttons: CLEAR CACHE and CLEAR STORAGE.
First, tap on CLEAR CACHE.
Then, tap on CLEAR STORAGE. Confirm by selecting OK.
After clearing the cache and clearing the storage, you’ll have to re-enter your login information, credentials, and set up your preferred settings.
The steps for iOS devices are similar, you’ll just have to look for similar settings/options.
3. Refresh the map from Waze
Open Waze on your device.
In your search address bar type 2##2 and hit search to enter debug mode.
Now go to Settings > General.
Tap on Refresh map of my area.
Go to your map and start zooming in/out and moving the map to check if the map is refreshing.
If you have this problem when you’re connected to your car (Android Auto/Apple CarPlay), keep in mind that you’ll only see turn-by-turn instructions on your phone and the map on the car’s display.
The map is not displayed automatically in the car, you’ll have to select it.
Waze is an amazing GPS navigation software and many Android/iOS users are preffering it instead of Apple Maps or Google Maps, and for good reason.
The interface is easy to use, the visual and voice instructions are on point, and the customizability is amazing.
So if you’re a Waze fan, hope that the solutions above helped you get rid of the disappearing map bug.
If you have any other suggestions or questions, don’t hesitate to leave them in the comments section below.
If your Mixer app is not streaming no matter what channel you try on, you don’t have to worry.
This problem is more common than you might think, and it affects people with different Xbox One configurations and setups.
The issue is most likely caused by an error within the Mixer servers, but there are a few things you can check to make sure the problem is not caused by a local factor.
Because we understand how important it is for you to be able to use the streaming services provided by Mixer, we compiled the best troubleshooting methods for this issue.
What to do if Mixer is not streaming on Xbox One
1. Check the Mixer Health Dashboard
In order to eliminate the possibility of this issue being caused by a server error or a service that’s not running, you can check online.
To find this information, you will need to access the Mixer Status website and see if there are any issues there.
If the service is running properly, please try the next troubleshooting methods.
2. Power-cycle the Xbox One console
Turn off your console by pressing theXbox button on the front of your console for 10 seconds.
Wait for the console to completely turn off -> unplug the console’s power cable -> wait 10 seconds (it is very important to wait at least 10 seconds as this will reset the power supply also).
Plug the console’s cable back into the wall socket -> press the Xbox button to turn it on.
Check to see if you can stream on Mixer.
3. Remove your profile from Xbox and change settings
After you’ve removed your profile, press the Xbox button on your controller -> select Settings.
Select Network -> Network Settings.
Click on Advanced Settings -> select Alternate MAC address -> choose Clear -> click Restart.
After this process is completed, download your Xbox profile again and try to see if the issue persists.
4. Turn off the Low-latency option from the video player
Some users have reported that they managed to solve the issue with Mixer not streaming on Xbox One, by simply deactivating the Low Latency option.
You can do so by opening the stream you want to watch and checking the taskbar for the option mentioned above.
5. Check your Wi-Fi settings
Note: To try out this method, you will need to have access to a PC. This is important as it is the only way to find out the Service Set Identifier (SSID) and the password.
Open your router settings on a PC and take note of the SSID and password.
Turn your Xbox One on -> press the guide button on your controller -> click System -> Settings.
Select the Set up wireless network option -> select the SSID you wrote down (if you can’t find the SSID in the list, your router might be too far away).
Enter the password and press the Enter button to connect to the Wi-Fi.
Conclusion
In this guide, we found out the best steps to take in order to try and solve the issue caused by your Mixer not streaming on Xbox One.
Please make sure to follow the guide carefully to avoid any unwanted complications.
If you want to let us know your opinion please feel free to use the comment section below.
If you find that you are a server administrator but you still don’t have permission to a specific file or folder, you came to the right place.
This issue is extremely common among people that use VMs on their Windows Server machines.
People have been consulting among themselves on online forums and asked for help on multiple forums.
It seems the issue might be caused by the UAC of your PC or some wrongly assigned permissions on your server.
In today’s article, we will explore some of the best solutions for this problem.
Please make sure to follow the steps presented in this guide carefully to avoid causing any other issues.
What to do if the WindowsServer administrator doesn’t have permission?
1. Create another group for domain admins
Open the Microsoft Management Console (MMC) snap-in.
Right-click on the root connection of the domain that has issues -> select Properties.
Click on the Group Policytab -> click New -> name it.
Right-click the newly created GPO -> select Properties -> modify the settings to your desire -> click Ok.
Inside the Properties dialog box for the domain root -> click Edit.
Navigate to the MMC snap-in.
Click on Computer Configuration -> Windows Settings -> assign group to specific folder.
2. Set full permission for Domain account
Some users on the online forums discussing this issue have solved the problem by making sure that the domain admin account has full permissions, both in the Share and Security tabs.
Open MMC -> right-click the domain account -> select Properties.
Click the Sharetab -> allow the user full permissions.
Select the Security tab -> allow the admin full permission.
Click Ok to save the settings.
Note: If the domain account is baned domain/admin 2, then use this name for the permissions in both categories.
The Revolut service comes in handy especially when you travel abroad.
You can use it for spending and withdrawing money from ATM’s or exchanging currency at very good rates.
If you’re new to Revolut and don’t know how the currency exchange works and what currencies you should use when you travel in different countries, keep reading this article to find out all you need to know.
How can I use different currencies with Revolut?
1. Currency exchange in Revolut
If you need a certain currency, you can exchange your funds directly from the Revolut app. Just go to the Exchange section in the app and select the currencies that you would like to exchange.
Then, you can spend your money in over 150 currencies with the interbank exchange rate. The Revolut fees are between 0.5% and 1.5%, depending on the time of the week.
Also, for certain currencies a flat mark-up may apply.
The exchange process in the Revolut app is simple and straightforward: you just choose your current currency and convert it into any other currency that you need.
In just a couple of steps you’ll have your money exchanged and you can start spending them.
2. Activate multiple currency accounts
If you created your Revolut account in a certain currency, let’s say USD, you can also activate multiple accounts with other currencies as well.
As an example, let’s say that you already have a USD account and you also activate and EUR and GBP account.
If you top up the EUR and GBP account from your USD account, you’ll use Revolut’s exchange rates. However, if you top up the two accounts from other EUR and GBP accounts, there will not be any fees.
After that, if you spend your money online or make any transactions with your card, Revolut will automatically use that certain currency and only then your base currency.
For example, if you have the three currency accounts mentioned above and you make a transaction in EUR, Revolut will automatically withdraw money from the EUR account, even if your base currency is USD.
The only time when Revolut will exchange the base currency is when you don’t have sufficient funds in the other currency accounts that you try to use.
As you can see, using the currency exchange and multiple currencies in Revolut is pretty easy. Most of the process will happen automatically, you’ll just have to make sure that the accounts are topped up.
If you have any other suggestions or questions, don’t hesitate to leave them in the comments section below.
If you don’t know what is Revolut by now, you’re missing out on some financial services that could come in handy.
Revolut is a banking service that offers prepaid debit cards (MasterCard or Visa), currency exchange, cryptocurrency exchange, and peer-to-peer payments.
In other words, Revolut is a mobile app for Android, iOS, and the web, that helps you manage your financials, spend money everywhere and withdraw from ATMs.
The app is very popular worldwide because it charges no fees for the majority of its services.
Despite all this, Revolut is not without any faults. Many smartphone users complain about the inability to use the app because the Your device is not compatible with this version or This app is incompatible with your device errors.
This problem can be pretty annoying, but fortunately, there are a couple of solutions to fix it.
How do I fix app not compatible with Android device?
1. Update your Android device and the Revolut app
On your Android device go to Settings.
Scroll all the way down and click on System.
Now click on Advanced.
At the bottom of the page you’ll see System update. Click on it.
Your device will automatically search for updates, but you can also click on Check for updates to manually search for them.
If a system update is available, you’ll get the Download and install button. Click on it and wait for the process to finish.
After you update your Android device, check if the Revolut app is working properly.
If you don’t have a system update available, you can check if you have the latest version of the Revolut app. This is pretty simple and you can do it by following the steps:
On your Android device locate Play Store and click on it.
In the Play Store, click on the search box at the top of your screen (Search for apps & games).
Type revolut and click on the search button.
Optionally, you can achieve the same result by clicking on Settings (the three horizontal lines in the search box, top left corner) > My apps & games > look for Revolut.
When Revolut app appears, click on it.
If there’s an update available, you’ll see a green Update button.
Click on it and wait for the process to finish.
After that, your Revolut app should work without any problems. We have to mention that some of the steps and options may be called differently on your device, depending on your Android version.
Just look for similarly named options. The same applies to iOS users.
Keep in mind that the Revolut app is available for iPhones (iOS 8), iPads, or Android (4.2) supported phones with a minimum screen size of 3.5 inches.
2. Clear the cache for Google Play services and Store
On your Android device go to Settings.
Find Apps & notifications and click on it.
In the bottom of the screen, click on See all apps.
Now scroll down until you find Google Play services and click on it.
Select Storage.
First, click on CLEAR CACHE and wait for the process to finish. After that, click on CLEAR STORAGE > CLEAR ALL DATA.
After the process finishes, return to the app list and repeat the process for Google Play Store.
If Revolut still doesn’t work as intended, you can apply the same process for the Revolut app (clear cache and data) and this will reset your app and credentials and you’ll have to login again.
3. Use emulator software
If everything else fails, you can use an Android emulator on your Windows 10 PC to run the Revolut app.
These tools will make your system behave like an Android device, thus allowing you to install and run apps that are typically incompatible with your desktop PC. It is a quick solution that will let you access your Revolut account in just a few minutes.
We recommend LDPlayer because it is extremely safe and easy to use. It is an Android emulator that will enable apps like Revolut to install and run on non-android devices.
As a last resort, you can try to download and install an older Revolut app on your Android device, but you’ll have to download it from unknown sources.
Sometimes, these apps can crash or cause system incompatibilities. If you still want to download a third-party app, do it at your own risk, as we are not responsible and do not recommend the installation of apps from unknown sources.
After following these solutions, your Revolut app should work like a charm. If you have any other suggestions or questions, don’t hesitate to leave them in the comments section below.
Rockstar games has officially released its very own game launcher, allowing the game development company to manage its own digital rights management system and encourage gamers to purchase games from them as opposed to game distributors such as Steam. What’s more, the company is giving away a free copy of Grand Theft Auto: San Andreas as an incentive to get people to jump on its platform.
A move like this not surprising. It’s something that other development companies—Bethesda, EA, and Ubisoft just to name a few—have been doing for some time now. Not only does this give developers a way of managing their own digital rights management system for their games, but also allows them to sell their games without giving a cut to their distributors.
According to TweakTown, it’s possible that Rockstar is also launching the new game launcher as the storefront of its Red Dead Redemption 2 game available on PS4 and Xbox One. If that’s the case, it could suggest that the game is coming to Windows PCs, event if it won’t be distributed on other networks including Steam or the Microsoft Store on Windows 10.
Would you purchase and play game directly from Rockstar, or do you prefer the ease and feature sets of going with other platforms such as Steam? Your thoughts are welcome in the comments area below.
Steam Link is a small box for streaming games from PC to your TV. So, this little piece of hardware helps users to play their favorite games from the comfort of their couch.
Despite its small size, Steam Link supports many devices. It even supports Xbox and Play Station controllers via USB.
So, if you have a controller from these two consoles, you can use it on your Steam Link. You can try a new one as well from our fresh list.
Furthermore, you can use a mouse or a keyboard with your Steam Link. This way you will have the whole PC gaming experience but on a wider screen.
Also, you can install a wireless controller, but this is a harder procedure that requires some workarounds. If you want, you can buy a Steamcontroller as well.
This versatility of Steam Link is one of the main reasons users prefer this box to play their games on their TV.
Moreover, the installation of Steam Link is as easy as breathing. Today we will show you how to connect Steam Link to PC.
How do I connect Steam Link to PC?
Your PC should be ready to go. Make sure you have a strong Internet connection. Everything should run properly, and of course, make sure you installed Steam on your computer.
Go to the Steam preferences and then to In-Home Streaming to check Enable streaming.
Set up your Steam Link
Plug the Steam Link power adapter.
Connect to your home network and plug Link into a display device.
Plug a controller, mouse, or keyboard into one of the USB ports on Link Steam.
Follow the instructions from the screen to locate PCs with Steam on your home network.
Choose your computer by pressing A on your controller.
If your computer is not listed, press Y. This way, Steam Link will search again.
After you selected your PC, Steam Link will show a four-digit PIN. Type the code on your PC to confirm the connection.
Other requirements
You need to have a computer that runs Windows 7 or Windows 10. Of course, newer versions of Windows are recommended.
Also, you need a strong network connection. A wired Internet connection is better than Wi-Fi.
Conclusion
As you can see, you can set up Steam Link quickly and without effort. Follow the steps above and enjoy your favorite games.
Did you find our article helpful? What games do you play on Steam Link? Let us know in the comments section below!
Over the past handful of years, Microsoft’s presence in the in-dash infotainment arena has eroded as the company has embarked on a mission beyond being the part of the consumer-facing automotive experience but instead becoming the semi-standard cloud mesh service solution for car manufacturers and mobility-as-a-service providers.
The aforementioned list is comprised of about 40 various Azure services tailored specifically for the automotive experience while delivering cloud functionality to vehicles such as over-the-air (OTA) updates and optimizations and two-way network connectivity, to name a few.
With MCVP, and an ecosystem of partners across the industry, Microsoft offers a consistent platform across all digital services. This includes vehicle provisioning, two-way network connectivity, continuous over-the-air updates of containerized functionality, support for command-and-control, hot, warm, or cold path for telematics, and extension hooks for customer or third-party differentiation. Being built on Azure, MCVP includes the hyper-scale, global availability, and regulatory compliance that comes as part of the Azure cloud. OEMs and fleet operators leverage MCVP as a way to “move up the stack” and focus on their customers rather than spend resources on non-differentiating infrastructure.
On showcase at IAA last week, Microsoft leveraged specific partnerships to highlight the new value-adds highlighting LG Electronics and Faurecia use of MCVO’s container-based runtime environments to create custom digital experiences for both the driver and passengers in a vehicle or cockpit.
Teraki and TomTom utilized similar containerized functionality to make use of Azure ML to leverage telemetry, video, 3D information, and other sensory data into feedback and context for mapping and vehicle performance.
As for actual driver engagement, Otonomo’s existing ecosystem is supporting MCVP for a secure transferring of driver data between the two services. On the vehicle side, DSA and WirelessCar are partnering to make state-of-the-art mobility services that help to close the “feedback loop between production facilities and field cars” while also expediting the eco-system development of OEM’s by making sense of telematics and prediction services.
Lastly, Cubic Telecom, Excelforce, and Tata Communications are partnering with MCVP to create a real-time connectivity window between infotainment service providers, car manufacturers and drivers utilizing deep integration, OTA updates and IoT connectivity capabilities.
Microsoft’s MCVP may not be as dazzling as getting the latest version of Spotify on an in-dash screen, but its play to position itself between car OEM’s, the underlying platform developers target and drivers with its stable of Azure-powered connected services could become an exciting story as vehicles continue to become more tech riddled in the future.
The Microsoft Store is hosting a rather hefty list of game promotions right now. More than 500 game titles and downloadable content are free this week, including AAA titles from Rockstar Games and Square Enix.
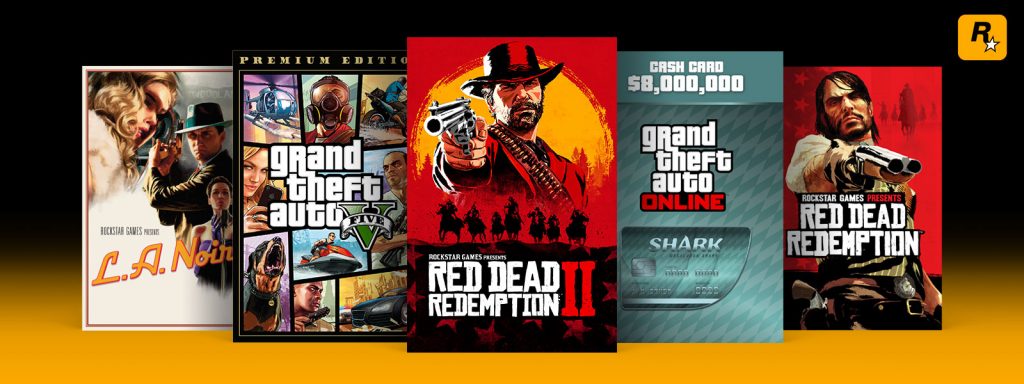
Rockstar Games is taking half off most of their game titles. This puts the long-popular crime-focused action game Grand Theft Auto V to just $14.99 right now, and the crime thriller L.A. Noire is also on sale for just $19.99. The Ultimate Edition of Red Dead Redemption 2 can also be owned for only $49.99—less than the non-sale $59.99 price of the standard game, which is also on sale for $34.99 (40% off).
Square Enix is also running a publisher sale of its own. The 20th anniversary edition of Rise of the Tomb Raider is just $8.99, well below its initial list price of $59.99. The first season of Life is Strange 2 is also just $26.79 (33% off) this week, and those just getting into the franchise can purchase the first season for only $3.99. Another title that might deserve a link is Just Cause 4—which is 67% off right now—making the Standard, Deluxe, and Gold editions of the game just $19.79, $23.09, and $29.69 respectively.
And of course, Microsoft hasn’t forgotten its Xbox Live Gold members, either. A couple interesting titles that are on sale exclusively for subscribers include Crash Team Racing Nitro-Fueled which is taking a $10 discount down to $29.99, and well as Marvel vs Capcom: Infinite, which is available for just $13.19 right now (67% off).
And if you’ve already got a rather hefty collection of games and just looking to spice them up, the Microsoft Store is also hosting an “Extended Play” sale. DLC from many popular titles including Battlefield 4, Surviving Mars, and The Sims 4 for up to 75% off.
Which game(s) are you interesting in right now? Any particular titles you think should get a price cut? Feel free to share your thoughts in the comments area below.
With technologies such as IoT, AR, and even game streaming on the rise, it’s clear that wireless network are going to need to support the low-latency and high-bandwidth requirements that help make them possible. As such, our wireless networks need to be able to handle the heavy load of tasks when such technologies become mainstream especially among multiple users at once, and that’s where the next generation Wi-Fi network comes in.
Wi-Fi 6 was just officially certified by the Wi-Fi Alliance, “bringing advanced capabilities for greater overall Wi-Fi network performance” according to the organization’s official tweet. Samsung’s Galaxy Note 10’s already support the new standard, and Apple’s upcoming iPhone 11 models will support them as well.
It’s here: Wi-Fi CERTIFIED 6 from Wi-Fi Alliance is now available, bringing advanced capabilities for greater overall #WiFi network performance. Learn more about an exciting new Wi-Fi era here: https://t.co/oodCLsQrIBpic.twitter.com/pNTyPPNskM
Wi-Fi 6 (more technically IEEE 802.11ax) includes a lot more capacity than it’s previous generation counterpart, 802.11ac (more commonly known as Wi-Fi 5), promising up to a 40% boost in maximum data speeds. In addition to bandwidth improvements, Wi-Fi 6 also introduces latency improvements, which could prove very beneficial to adopters of online gaming streaming services such as Project xCloud under development by Microsoft.
While the crazy speeds definitely sound very nice in themselves, it’s unlikely for smaller households to really notice most its improvements. The real benefits come to public networks that are often well overcrowded. Not to sound too technical, but these changes include technologies such as orthogonal frequency division multiple access (OFDMA) which allows multiple devices to share the same channels, as well as multi-user multiple input multiple output (MU-MIMO) for improving downlink and distributing data between more devices. The organization’s official website has more on the improvements, for those interested.
Are you hyped about the new Wi-Fi 6 standard? What are some ways you’d like to take advantage of its improvements? Feel free to share your thoughts in the comments area below.
If you’re a fan of Ubisoft titles, new and old, then you most likely know what Uplay is. However, the service has some issues, and many reported that Uplay not downloading.
Sadly, this isn’t the only problem, and sometimes Uplay won’t connect at all. Issues such as these will prevent you from playing your favorite games, so it’s important to fix them.
We will do this exactly, so keep reading to learn how to fix download issues in Uplay.
Why is my Uplay game not downloading?
A lack of administrative rights can sometimes interfere with the download.
Windows Firewall can, in some cases, block Uplay.
Lack of storage space can cause issues with the download process.
Third-party applications will sometimes interfere with the download.
What can I do if Uplay is not downloading?
1. Run Uplay with administrative rights
Navigate to your Uplay’s install directory on your hard drive
Right-click and select Run as administrator from the list.
Try to download the game again.
Once you obtain admin rights, check if Uplay is still not downloading.
2. Turn off your Windows Firewall while running Uplay
Press Windows + R and then type in control.
Go to System and Security.
Select Windows Defender Firewall.
Go to Turn Windows Defender Firewall on and off.
Select Turn off Windows defender Firewall in both Private and Public networks.
3. Check to see if you have enough disk space for your game
Open This PC.
Right-click the drive you want to download your game to.
Select Properties.
Check out to see if you have more free space in it than it is needed for your game.
After doing that, check if Uplay download is not loading.
This means that if you bought a game via Steam, you can only install it on Steam (even if it is a Ubisoft title).
Our guide should help you fix Uplay not downloading issue on your PC. In case you’re having further issues, check our Uplay unable to start your download guide for more solutions.
If you have any other solutions you think might work, let us know in the comments below!
Windows 10 includes Paint and Paint 3D apps for users to open and edit images with. They are relatively basic image editor apps, but Paint 3D does enable users to add 3D shapes and objects to pictures. Some users might need to add gridlines to pictures in the Paint apps as a measurement reference or even to include in printed output. This is how users can add gridlines in both Paint and Paint 3D.
How can Users Add Gridlines in Paint?
Adding Gridlines in Paint
First, open the search box by clicking the Type here to search button.
Enter ‘Paint’ in the search box. Then click Paint to open the window shown directly below.
Click the View tab.
Select the Gridlines option to add a grid to the canvas as shown below.
Users can open images by clicking File > Open. The grid overlay will remain intact on the image.
Adding Gridlines in Paint 3D
Paint 3D doesn’t include a built-in gridlines option, but users can still insert transparent grids over their images. First, open Paint 3D by selecting that app on the Start menu.
Next, click the Menu tab.
Click the Browsefiles button to open an image.
Users can download transparent grid images from Free Icons PNG. Open the Free Icons grid image page in a web browser.
Select a grid from there, and then click the Download PNG or Icon button.
Return to Paint 3D, and click the Insert button.
Then select the downloaded grid, and click the Open button.
Next, users might need to resize the grid a bit with the 2D selection tool so that it exactly fits the image. Click outside the selection box when that’s done.
To remove empty white spaces above and below the picture, reduce the borders of the canvas so they match the image’s dimensions. To do that, drag the canvas borders inwith the Canvas utility, which will leave users with an image grid like the one shown below.
Overall, it’s better to utilize the original MS Paint for adding gridlines to images. However, Paint 3D users can still add gridlines to their pictures with overlapping grid images.
Microsoft introduced a few new Skype features in 2018 and 2019. Among them is the split view mode that enables users to split Skype chats into separate windows. That’s a neat new option, and this is how users can split and then regroup windows within the Skype UWP (Universal Windows Platform) app.
How to Split and Regroup Windows in Skype?
Use split view mode option
First, click the Skype app on the Start menu to open its window.
Then click the More menu to open it.
Select the Enable split view mode option on the More menu. Skype will then display just the contacts as the chat half of the window disappears from view.
Next, double-click a contact to open a new Skype chat window for it. That window will be completely separate from Skype’s primary window.
Users can now drag and move the separate chat window around the desktop. Click the Minimize button to move it to the taskbar.
Then users can maximize the window by moving the cursor over the Skypetaskbar icon. Select the windows’ taskbar thumbnail to restore it on the desktop.
To regroup the Skypewindows, click the More button on the software’s primary window.
Select the Disable split view mode option, which will rejoin the separate chat windows with the rest of Skype.
So, splitting and then regrouping Skypewindows is a piece of cake. Note that the Enable split view mode option is only available in the latest v 14.37 version of Skype. Thus, some users might need to update their Skype software to split windows.
Nowadays, Windows 10 gamers like to play their games through digital distribution services like Steam and Uplay.
It is much easier to have access to a game library at all times, keep your games updated and organized, and have them all in one place.
But sometimes, problems can occur with already installed games and the Uplay client. If you are an Uplay user and the client doesn’t detect your installed games, take a look at the solutions below.
Uplay game not showing up in library
1. General troubleshooting steps
Make sure that your game is not connected to another Ubisoft Account. If you’ve created or logged in with a secondary account, log in to that account and check if the game is in the game library.
Make sure that your game is not hidden. In Uplay PC you have the option to hide games from the library. Scroll to the bottom of your Uplay PC game library and expand the Hidden section to check if your game is there.
Empty the cache folder for Uplay PC. Close Uplay > navigate to the Uplay default directory > find and rename the cache folder to something else > relaunch Uplay PC and check if the problem is still present.
2. Choose the right game directory
Open Uplay on your Windows 10 PC and log in.
Now go to your games library in the Uplay client and locate the game that you want to detect.
Click on the game.
On the game page, under the Download button, you’ll see a Locate installed game button.
Click on Locate installed game and then manually select the installation directory of your game.
Now click OK.
After that, you should be able to update and launch the game through Uplay PC. Alternatively, you can use the Download button:
First, back up your games, just in case something goes wrong.
After that, open Uplay and log in.
Go to your games library and click on the game you want to detect.
Now you’ll see a Download button.
Click on it.
Now point the Uplay installer at the game directory.
Uplay should now Discover Files… and it should show your game as installed.
A lot of Uplay users had the same problem but managed to solve it by using this method, so you can try it as it might fix the issue for you too.
3. Uplay not detecting Steam installed games
Close Uplay. If needed, open Task Manager and end any Uplay related processes.
Navigate to your default Uplay PC directory (usually C:Program Files (x86)UbisoftUbisoft Game Launchercache).
Now locate and delete the Ownership folder.
Restart Uplay PC.
Try to launch the game again from Steam.
4. Move your games to another partition
If the previous solutions didn’t work, as a last resort, you can try to move your games to another drive/partition and reinstall Uplay on your Windows 10 PC.
We’ve already covered how to move Uplay games to another drive/partition in this dedicated guide, so be sure to check it out and follow the steps there.
After moving your games to another partition and reinstalling Uplay on your PC, they should be automatically discovered.
Keep in mind that you should first try to use the Locate installed games and Download buttons from the Uplay client, as many users solved the problem in this manner.
Moreover, you also can split your hard drive into more partitions and separate system files from other applications or games, and thus better sort out files.
In case you need extensive support regarding partition operations to easily transfer data, you can always use partition manager software.
If you have any other suggestions or questions, feel free to leave them in the comments section below.
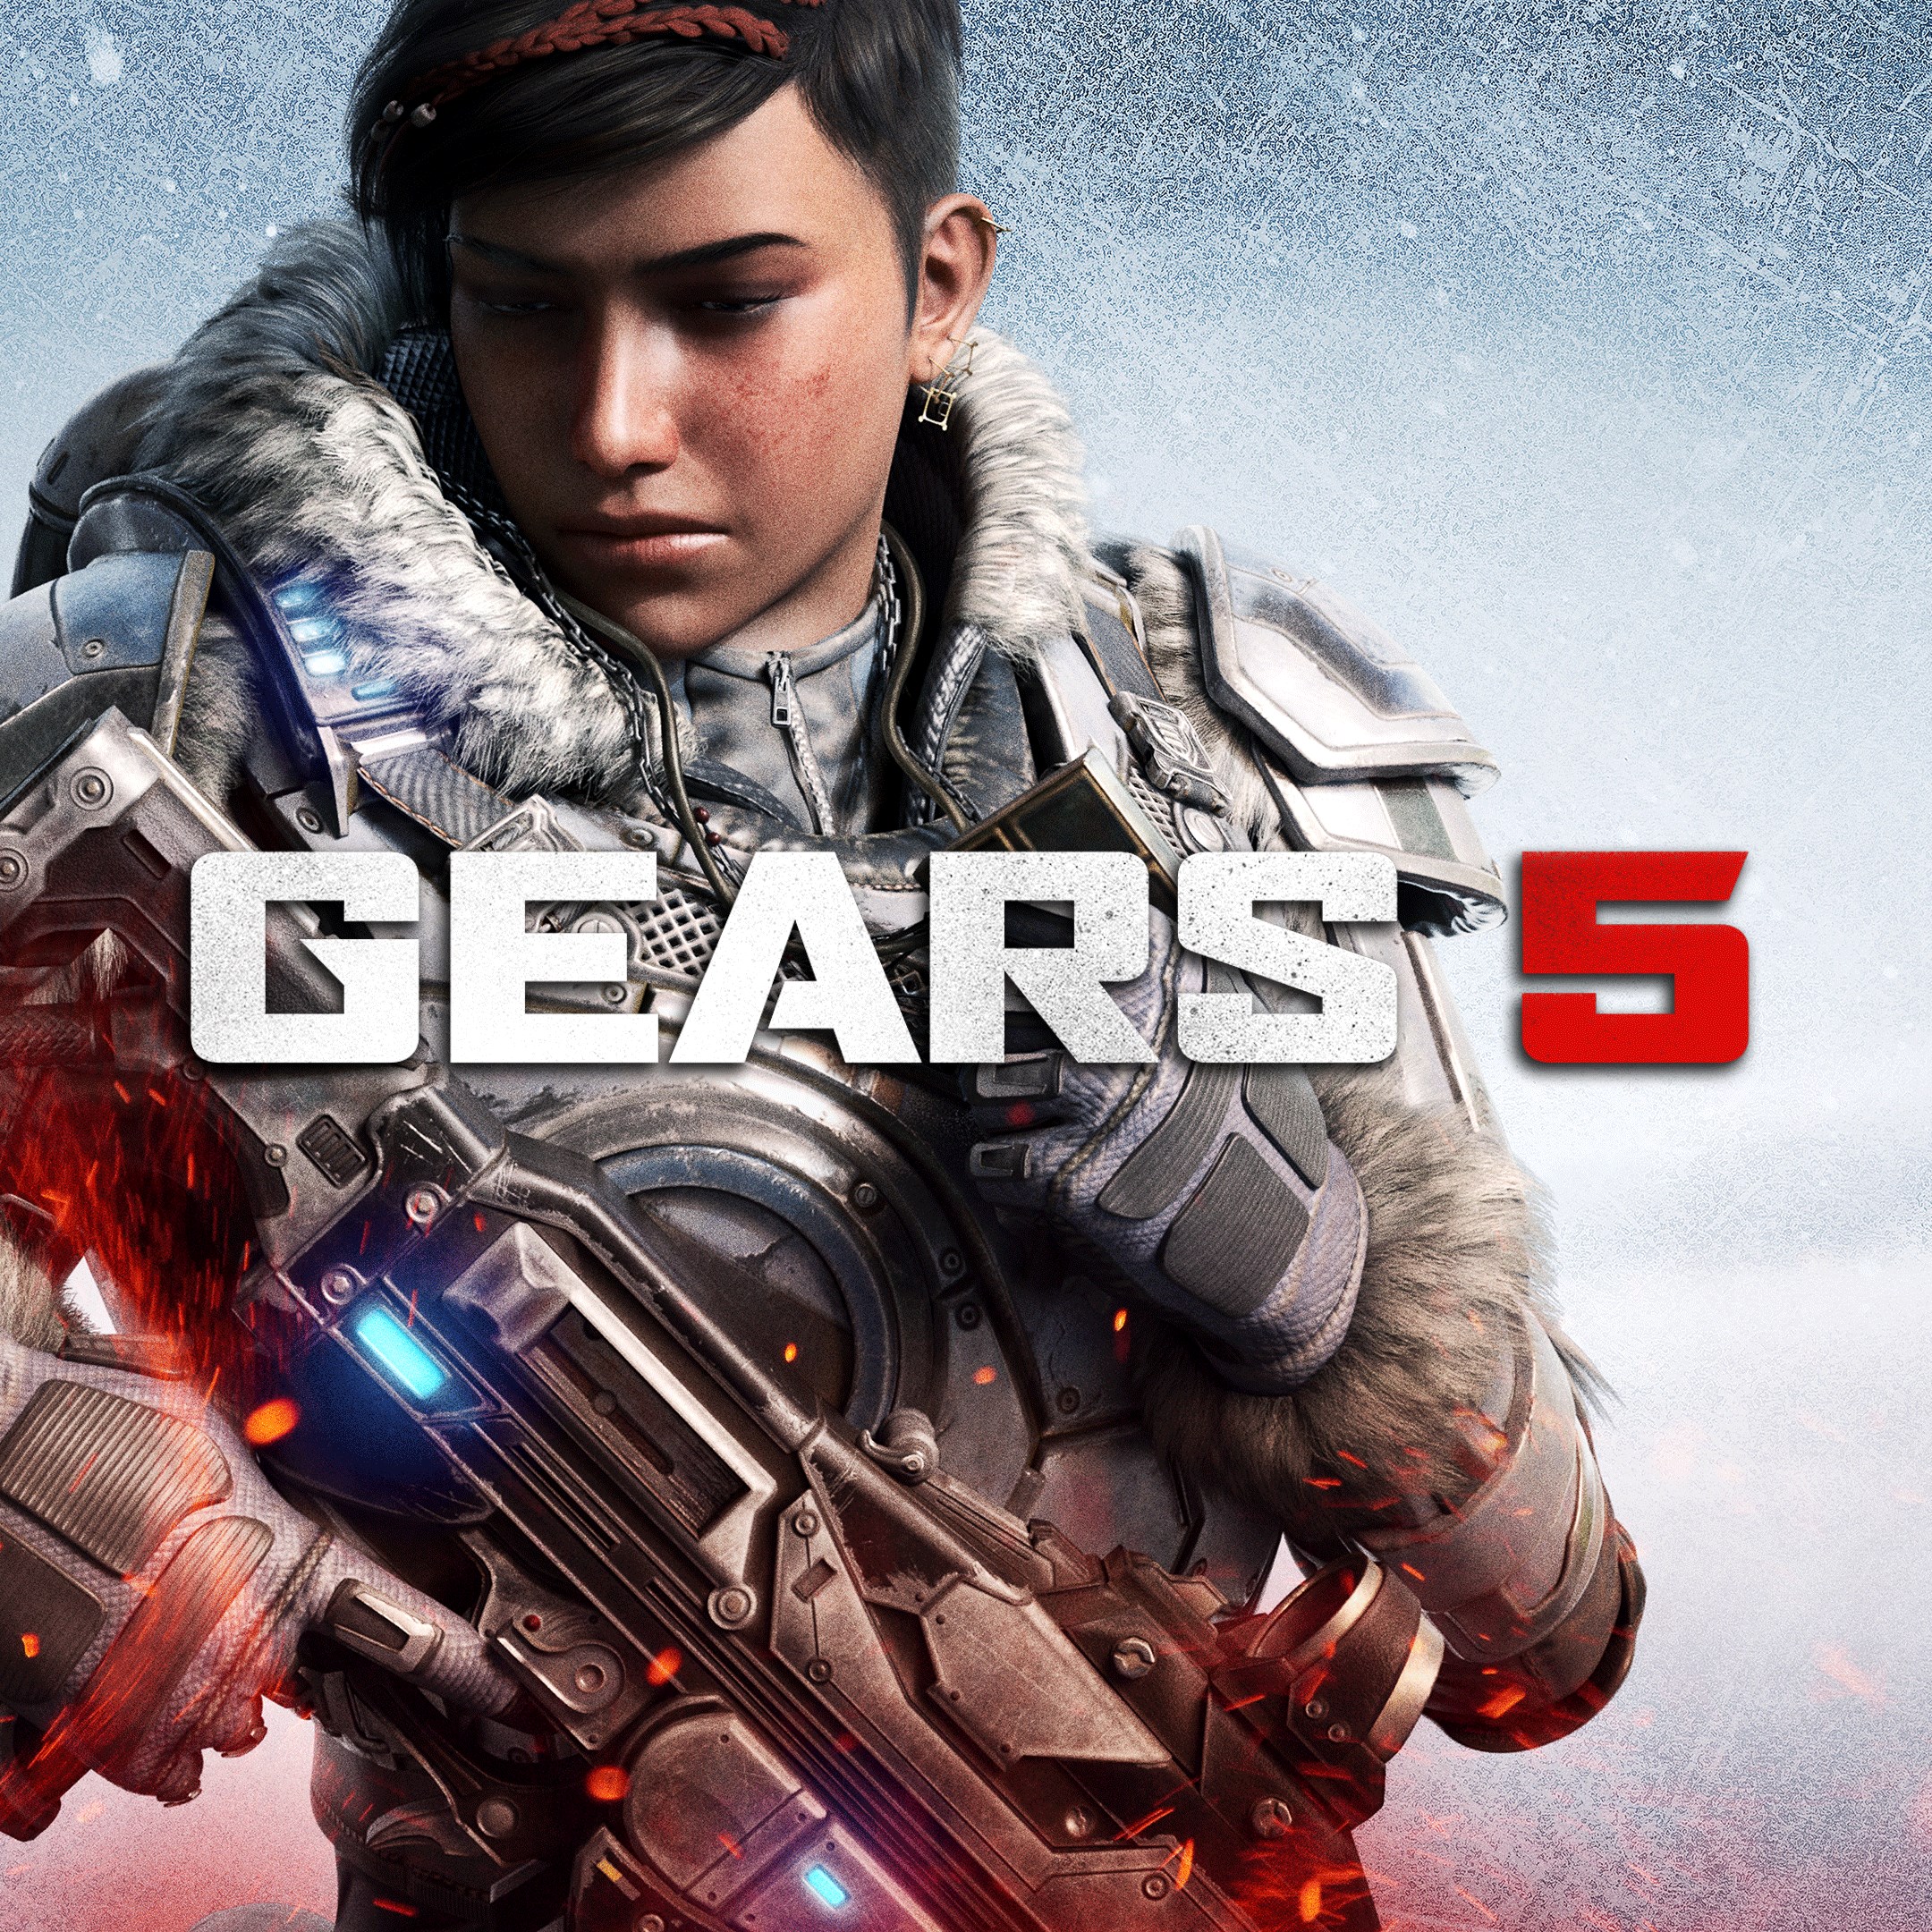
Gears 5, the latest blockbuster game coming from Xbox Game Studios had the biggest launch for any first-party game for this console generation, Microsoft announced today. That’s not really surprising considering Microsoft has been promoting the game like crazy, providing great fan service by including characters from Halo: Reach, Terminator: Dark Fate, and even Dave Bautista himself.
Time to be The Animal! You can play as Batista in #Gears5 beginning right now as @WWE#ClashofChampions gets underway.
“The performance easily doubled the first week’s debut of Gears of War 4 and made Gears 5 the most-played Xbox Game Studios title in its first week since 2012’s Halo 4. First week performance includes the four-day early access period beginning Friday, September 6, which was exclusive to Gears 5 Ultimate Edition and Xbox Game Pass Ultimate members. On the PC, Gears 5 has nearly tripled the performance of its predecessor, becoming the biggest-ever launch for Xbox Game Pass for PC, and Xbox Game Studios’ best-ever debut on Steam,” wrote Aaron Greenberg, Xbox Games Marketing General Manager.
As usual, Microsoft isn’t sharing any data about how many Gears 5 units it sold since launch, and it’s highly likely that making the game available on Xbox Game Pass on launch day has been cannibalizing game sales. However, getting gamers jump on the Xbox Game Pass bandwagon is probably what Microsoft really cares about, and Gears 5 is probably an excellent bait for that.
If you haven’t done it yet, we remind you that you can get two months of Xbox Game Pass Ultimate for just $2, which will give you access to Xbox Game Pass for console, Xbox Game Pass for PC, and Xbox Live Gold. With so many games on the Game Pass catalog, that’s really a deal you don’t want to miss.
No visual on your game means no game at all. Unfortunately, this problem appeared for many users that play through Nvidia GameStream.
Most people encountered this issue when launching Dark Souls III in the Shield tablet.
Also, users can access the controls, but there’s only a black screen. Moreover, the sound works properly.
Luckily, there are some solutions available to fix this problem and today we will show you how to bring the visual experience back on Nvidia Gamestream.
Here’s how to fix black screen on GameStream
1. Add Remote Desktop
Adding a Remote Desktop solves the issue for quite a few users. We described the method below.
Open GeForce Experience and select Settings.
Click on Shield and select GameStream.
Select Add and choose your main hard drive.
Go to Windows, and then System32.
Run mstsc.exe.
2. Force to stream at 1080p60 resolution
Usually, a different resolution solves a video issue. Follow the steps below to try this solution.
Open the Nvidia game app.
Go to Settings and select GameStream PCs.
Select your PC and go to Show advanced options and click on HQ.
Change the resolution to 1080p60.
3. Reinstall GeForce Experience
A simple reinstallation of GeForceExperience might remove the bug. The following steps below will show you how to reinstall GFE.
Uninstall GeForce Experience from your device.
Close all the Nvidia services and containers that still run.
Delete entirely the Nvidia directory at “C: > Program Files > NVIDIA Corporation“.
Fresh install the latest GeForce Experience.
Also, if you reinstall GeForce Experience, the Nvidiadriver will not be affected in any way. So, this method is safe as it doesn’t affect your drivers.
Conclusion
Not seeing anything in GameStream is no game (literally). That’s why is important to solve this issue. You can do that as quickly as possible with our solutions.
Reinstalling GeForce Experience is the better option since the first two could prove inefficient. So, deleting and installing the program will remove this bug.
Moreover, you can avoid these problems by updating your graphics driver frequently. Learn how to do that with the help of our detailed guide.
There is a new Extensions Menu available in the latest Microsoft Edge Insider Dev build. As noted in a post by Bleeping Computer, this new extensions menu can currently only be enabled for the Edge Insider Dev browser. The new and experimental extensions menu in Microsoft Edge Dev offers a better way to manage and organize installed extensions in Edge.
The new menu allows you to see all of your installed Edge extensions within a dedicated menu. The new menu can be accessed by clicking the Extensions icon in the Edge Dev toolbar. After you enable the secret extensions menu, you should be able to view your extensions like the image below.
Microsoft Edge Dev Extensions menu
This new extensions menu can be enabled using a few simple steps, here’s what you need to do:
1. Create a shortcut of the Microsoft Edge Dev browser on your Windows 10 desktop.
2. Right-click the Microsoft Edge Dev icon and choose Properties
4. Copy and Paste the following line (including the quotation marks) into the Target: “C:Program Files (x86)MicrosoftEdge DevApplicationmsedge.exe” ––enable-features=ExtensionsToolbarMenu
(Update: Important Note – WordPress replaces two en dashes – – with an em dash — the line above should have two en dashes, like this:
Apologies for the inconvenience, apparently it’s not easy to disable this behavior!)
Microsoft Edge Dev properties
5. Click OK
You will need to restart your Microsoft Edge Dev browser for the changes to take effect. Now when you open the Microsoft Edge Insider Dev, you will see the new extensions menu located to the right of your address bar.
In an announcement on Twitter, Microsoft acknowledged via Windows Update that there are issues on Windows 10 version 1903 involving Intel and Broadcom Wi-Fi adapters.
???? [Windows Release Health Update – New Known Issue: Mitigated] Safeguard on certain devices with some Intel and Broadcom Wi-Fi adapters. Read more here: https://t.co/NHEQuEjsVX.
“Microsoft and NEC have found incompatibility issues with Intel Centrino 6205/6235 and Broadcom 802.11ac Wi-Fi cards when running Windows 10, version 1903 on specific models of NEC devices. If these devices are updated to Windows 10, version 1903, they will no longer be able to use any Wi-Fi connections. The Wi-Fi driver may have a yellow exclamation point in device manager. The task tray icon for networking may show the icon for no internet and Network & Internet settings may not show any Wi-Fi networks. To safeguard your update experience, we have applied a compatibility hold on the affected devices from being offered Windows 10, version 1903.”
Microsoft added that there is a workaround for those affected by the issue. All you need to do is disable and then re-enable the Wi-FI adapter in Device Manager. This will allow you to use Wi-Fi until the next time you reboot your Windows 10 PC. Upon reboot, you will have to complete the process again to enable Wi-Fi. Microsoft is working on a fix for this issue, which will be available in a future Windows 10 update.
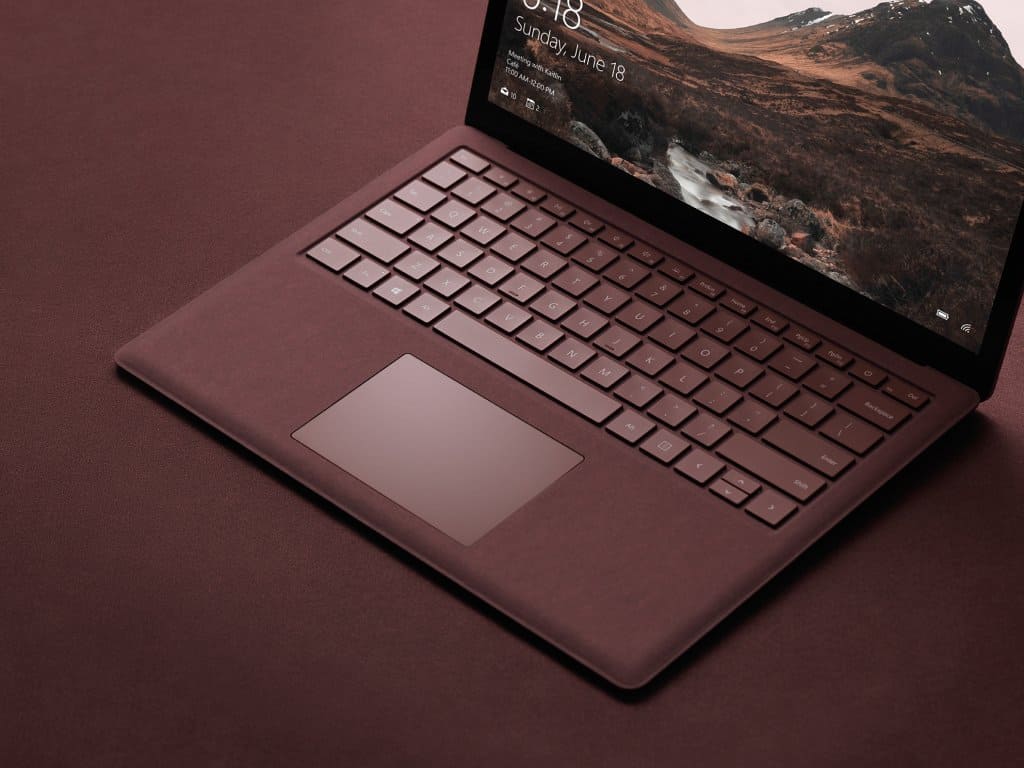
Microsoft’s upcoming Surface event in New York on October 2 may bring some good surprises for fans of the company’s Surface Laptop line. Citing information coming from European retailers, Roland Quandt from German website WinFuture.de claims that Microsoft’s new Surface Laptop 3 will be available for the first time in a 15” variant. Interestingly, this 15” model will be powered by an AMD processor, which would be a first for a Surface product.
New Microsoft Surface Laptop 3 15-inch runs…. AMD!
Massive design win for AMD and their Ryzen SoCs. Also could signal an attractive pricing on the new 15in model. Confirmation based on non-public retail info. https://t.co/cDWMPCBcNz
According to the report, Microsoft may offer three three AMD-based models of the Surface Laptop 3 with a 15-inch display, but it’s still not clear if there also could be Intel variants of the new 15” Surface Laptop 3. The 13” model is expected to stick with Intel processors, though an AMD variant may also be on the table.
While not as popular as Intel CPUs, AMD processors are usually cheaper and come with much better integrated GPUs. Earlier this year, the chip maker unveiled 2nd Gen Ryzen PRO mobile processors, which are 12nm chips with fast integrated Radeon Vega graphics. Anyway, a 15″ Surface Laptop 3 should be an interesting alternative to the 15″ Surface Book 2, which has a detachable form factor that may not be that attractive for people who are not creative professionnals.
According to AdDuplex’s numbers from last year, Microsoft’s Surface Laptop 2 and its predecessor have been far less popular than the Surface Pro 6 and the more affordable Surface Go. Maybe AMD processors and a new 15″ model will help to shake things up, but as pretty much all premium laptops now come with multiple USB-C and Thunderbolt 3 ports, it’s time for Microsoft to finally ditch its proprietary Surface connector and switch to these more versatile options.
GameStream is a great tool for playing PC games on the Nvidia Shield console. Many people choose to play this way for the enhanced gaming experience.
However, GameStream is affected by many issues. The most severe problem is probably the inability to launch games in Nvidia GameStream.
For some users, this error appears even though Steam works.
Luckily, there are some solutions available and today we will show you what to do if you’re not able to launch games.
GameStream won’t launch games? Here is what to do
1. Disable your antivirus
A simple solution is to disable your antivirus. It is well known that an antivirus program can interfere with online gaming.
You can reenable your antivirus after you finished your gaming session.
Also, you can install a new antivirus that will not cause this issue. As it happens, we have a fresh list of software. Choose the antivirus that works best for your computer and doesn’t cause problems with GameStream.
2. Clear cache from GeForce Experience
Sometimes, clearing the cache of GeForce Experience will solve the issue. We all know what problems temporary files might bring. So, it is always a good idea to clear them from time to time.
3. Reinstall GeForce Experience
A simple reinstallation of GeForce Experience might solve this problem. Follow the steps below to reinstall GFE.
Uninstall GeForce Experience.
Close all NVidia services and containers that still run.
Remove the Nvidia directory at “C: > Program Files > NVIDIA Corporation“.
Fresh install the latest GeForce Experience.
Keep in mind that if you reinstall GeForce Experience, the Nvidia driver will not be affected in any way. So, use this method without any worries.
Conclusion
As you can see, this is an issue that can be solved in a matter of minutes. Other users proposed reinstalling Windows, but this is too much.
Also, you have easier solutions available. Reinstalling Windows is tedious and is simply not worth the effort.
At most, you can reinstall GeForce Experience, but you can fix the problem simply by disabling your antivirus.
Moreover, don’t forget to always install the latest version of Nvidia GameStream. This will prevent further issues.
Did our article help you play games through GamesTream again? Do let us know in the comments section below!
Many users encountered a pretty severe issue with Nvidia. They couldn’t stream games in Windows 10. No matter what they tried, they didn’t manage to connect Nvidia GameStream to PC.
Also, some users reported that an orange triangle which signifies an error appeared next to their name after trying to update Shield Hub.
These users encountered the “Cannot launch game. Check network configuration.” when trying to start a game.
So, this is a major problem with Nvidia GameStream. Luckily, there are many easy solutions to solve this problem in no time. Today we will show you what to do if Nvidia GameStream cannot connect to PC.
What to do if Nvidia GameStream cannot connect to PC
1. Log out of GameStream
Sometimes, this issue can be solved if you log out of GameStream from all your devices. Restart them and log back in.
Several users reported that this procedure allowed them to stream again in Windows 10.
2. Update Shield Hub
Updates are extremely important for Shield Hub. So, don’t forget to install the latest version of Hub.
3. Clear the Shield Hub cache
Quite a few users reported that clearing the cache from Shield Hub solved this problem.
4. Check the Wi-Fi strength
Because this is a connection issue, you should check your Wi-Fi strength. If you have a poor Wi-Fi signal in Windows 10, try one of these solutions from our detailed guide.
Alternatively, you can connect to the Internet through cable. Although this is not always practical, it might do the trick for you. As we all know, the cable connection is stronger.
5. Reinstall GeForce Experience
Uninstall GeForce Experience.
Close all NVidia services or containers that might still be running.
Completely remove the Nvidia directory at “C:Program FilesNVIDIA Corporation”.
Fresh install the latest GeForce Experience.
You don’t need to reboot to reinstall GeForce Experience. Furthermore, this procedure will not uninstall the card driver.
Conclusion
As you can see, this connection issue with Nvidia GameStream has many solutions. Try them to see what solves the issue for you.
Also, keep in mind that updating your drivers is crucial for your programs to run smoothly. Learn everything there is to know about updating your Nvidia drivers from our comprehensive guide.
Did our solutions help you connect Nvidia GameStream with Windows 10? Do let us know in the comments section below.
Power BI users have been frequently complaining about not being able to open their Power BIfiles at times. They have experienced error messages when trying to open Power BIfiles.
Unable to open document; we weren’t able to restore saved database to the model
Before following any of the steps, make sure you’ve already checked that the file you are trying to open is actually Power BI compatible, which include
Power BI Desktop files (.pbix)
Microsoft Excel spreadsheets (.xlsx or .xlsm)
Comma Separated Value databases (.csv)
I can’t open Power BI files: What can I do about it?
1. Make sure Power Bi files are named appropriately
Rename files if needed
Similar to other services, Power Bi may experience difficulties when trying to open and read off of files named using special characters.
As such, it is recommended that you keep your filenames simple and made up of only upper and lowercase letters as well as digits. Do not include special characters such as “@”, “&”, “^” etc.
2. Consider a fresh Power BI install
Getting rid of your old Power BI installation
Go to the install directory of your Power BI client
Uninstall Power BI Desktop
Delete the Cache and CEF folders from the following path: C:UsersyourusernameAppDataLocalMicrosoftPower BI Desktop
3. Get the latest version of the Power BI desktop client
Power BI is constantly subjected to updates, so make sure you have the latest Desktop or Store App version installed.
4. Use the Web version
The web version of Power BI is the first one to automatically update, so if you find any issues with the desktop version, just switch to the web version.
You can use the web version to open your locally stored Power BIfile, thus removing the need to use any third-party data recovery software
If all else fails, you could consider looking at their forums for frequent discussions and patch notes.
Additionally, you can contact customer support and report your problem directly and follow their instructions afterward.
Dropbox is a very efficient tool to share documents and other files. By all means, the app shouldn’t be complicated. Also, the features should be intuitive and user-friendly.
This is not always the case. Many people encountered issues when trying to share files in Dropbox. The following error messages usually pop up when this happens:
Sharing was unsuccessful
You don’t have permission to create a link to this file
You don’t have permission to perform this action
There are too many files
So in this article we will show you how to fix these annoying problems once and for all.
Why can’t I share folders in Dropbox?
1. Sharing was unsuccessful
If the Sharing was unsuccessfulerror message appears, check if this option is disabled for the person you’re trying to share a file with.
Probably, the user is on a Dropbox Business team that doesn’t allow the members to receive invites or files from users outside the team.
The team admin is the one who can change the settings to enable file sharing.
2. You don’t have permission to perform this action
The errorYou don’t have permission to perform this action (alternatively, You don’t have permission to create a link to this file) appears when the owner of the file or folder doesn’t allow other people to share it with other users.
Also, you might have view-only access to the file. To solve this, contact the owner of the file to change your privileges.
3. There are too many files
Open Dropbox from browser.
Click on Files.
Rename the folder with too many files.
Click on New shared folder.
Choose I’d like to create and share a new folder.
Click on Next.
Add a name for this folder.
Add the email addresses of the people you want to share with.
Select Share.
In the Dropbox app from your computer, open the old folder you wanted to share.
Open your new shared folder.
Paste files from the old folder into the new folder that’s shared on Dropbox.
These are the solutions to some of the major issues with sharing files and folders in Dropbox.
For other errors in Dropbox, you can check out our comprehensive article.
Did our solutions help you? Do let us know in the comments section below.
Dropbox is a great tool to sync your files from computers to mobile devices. This way, you can access your data from any device.
However, many users encountered several issues with this app. In this case, the export function is not working. Many users complained that this problem appeared after an update.
Fortunately, there are some simple workarounds available for this problem.
Save to Camera Roll option not available in Dropbox
1. Use the simple Save option
Go to the three dots from the upper-right corner of your phone.
Select Share via.
Tap on Save image.
Many people said that this is not a very user-friendly feature. It is not so intuitive and the option is difficult to come by from the first try if you don’t know the app very well.
2. Save to an SD card
You can export a file to your external SD card in an easy way. Follow the steps below on your Dropbox app from your mobile device.
Tap the Quick Action button to the right of the filename.
Find and tap Export.
Select Save to device.
Select your external SD card.
Saving to an external SD card is extremely important. Having your data on hardware as well diminishes the chances to lose important information.
Save all your files to your computer’s Dropbox folder.
Open Dropbox mobile app.
Select your photos, then choose Save to device.
Go to your phone’s DCIM folder and save the photos there.
Now all the photos will appear in your phone’s gallery.
This method is useful if you want to load some photos on Instagram or other mobile applications.
Conclusion
These workarounds allow you to export your files to your mobile phone.
However, these methods are not so intuitive, and this syncing option should be extremely easy to access for a tool such as Dropbox.
For this reason, you might consider installing a similar app. As it happens, we have a fresh list of the best cloud software. These tools have encryption as well. So, you can sleep well knowing your data is secured and protected from prying eyes.
Did you find our workarounds useful? How do you save to camera roll on your phone? Do let us know in the comments section below.
Many users reported that Gmail is not receiving Yahoo emails on their PC. This can be a big problem, especially if you’re waiting for a response from someone using Yahoo Mail.
Fortunately, it is not a problem that is impossible to fix, and we will show you how to go about it in this guide.
Why is my Gmail not receiving some emails?
Below are some of the potential reasons Gmail is not receiving Yahoo emails:
Wrong settings: In some cases, you might have set Yahoo emails to be filtered and blocked. The solution to this is to remove it from the filtered list.
Issues with Yahoo and Gmail: These Gmail to Yahoo email problems often occur due to issues between the two email clients. In this case, you need to report the issue and wait for it to be resolved.
What can I do if Gmail is not receiving Yahoo emails?
1. Use an alternative email client program
Gmail supports IMAP and SMTP, two protocols that enable you to check your emails using other desktop programs. In addition, Mailbird is a popular email client service that automatically detects your Gmail server settings and lets you access your emails via its platform.
All you need to do is open the Mailbird app and add your Gmail account details via the Settings tab from the main menu. In this way, by using a third-party service, you won’t have any problems receiving and opening emails from Yahoo users.
Mailbird
Connect to your Gmail account with this professional email client program!
Launch Gmail and click the Settings icon at the top.
Select See all settings.
Now, click the Filters and Blocked Addresses tab at the top.
Finally, check if there are any strange settings there.
Sometimes, Gmail is not receiving Yahoo emails because of your settings. If you find any strange settings in the Filters and Blocked Addresses section, remove them.
Gmail not being able to receive Yahoo emails can be frustrating, but in most cases, these issues are caused by email providers.
Since this is a server-side issue, there’s not much you can do as an end-user except to report the problem and wait for the issue to get resolved. Yahoo and Google are usually quick to fix these kinds of errors.
So you won’t have to wait for too long.
There are a few solutions you can try if Gmail isn’t receiving Yahoo emails. As you can see, this is usually a server-side problem and has been reported to be fixed already.