Failed to Send Authorization Request (25): How to Fix

Many users have reported seeing the error Failed to send authorization request (25) in Steam. If Family Sharing is not working on Steam, an authorization problem such as this one is likely causing it.

Luckily, there are ways to fix this problem, and today we’re going to show you how to do it.

Why am I getting a Steam request access failed message?

  • A lack of administrative privileges can cause this error message to appear.
  • Corrupted game installation can sometimes cause this issue.
  • Incorrect Family Sharing settings can cause the problem.

How can I fix Failed to send authorization request (25) in Steam?

1. Run Steam with administrator privileges

  1. Navigate on your PC to the location of your Steam installation.
  2. Right-click on the Steam icon and select Run as administrator.run steam as administrator - Steam failed to authorize computer
  3. Try to see if this method solved your issue.

2. Verify the integrity of your game files

  1. Open Steam and navigate to the game you want to share inside your Steam Library.
  2. Right-click the game Properties.
  3. Inside the Local Files tab, click on the Verify integrity of game files button.Steam verify game data - Steam failed to authorize computer
  4. Wait for the process to complete and check to see if the issue persists.

After doing that, check if Failed to authorize with Steam message is gone.

3. Modify Family settings in Steam

  1. Open Steam and go to Settings.
  2. Select the Family tab.Steam family settings - steam failed to authorize computer
  3. Click on Eligible accounts.
  4. Tick the box next to the friend that you want to share your library with and make sure they do the same.
  5. Click OK and try to authorize the computer again.

4. De-authorize your PC from the other person Steam account

  1. Ask your friend or family member to go into their Steam Settings and select Account
  2. Next, go to Manage Other Computers and select ‘name of your PC‘. Lastly, click on De-authorise.Steam family settings other accounts - steam failed to authorize computer
  3. Follow the same steps, but this time authorize your PC.
  4. Log out of Steam and exit it completely (from your PC).
  5. Log back into Steam.
  6. Try to see if the issue persists.

In this article, we explored some of the reasons that can cause the error message Failed to send authorization request (25) and some of the recommended troubleshooting methods.

If the problem is still there, be sure to read our guide on common Steam errors to see how to fix it.

Please let us know if this guide helped you solve your issue by using the comment section below.

2 best Mac to Windows software to get acquainted with MacOS

If you have been a long time user of Windows OS and are curious about the next best thing MacOS, you don’t necessarily need to spend a four-figure fortune on buying an all-new shiny Macbook or iMac.

You can try out all the working of the MacOS from the comfort of your Windows computer.

That said, running the MacOS on your Windows computer is comparatively tedious tasks than running Windows on a Mac.

While the Mac users have virtualization software like the Parallel Desktop, Wine, Bootcamp, VMware Fusion, Windows users are limited to a few open sources virtual software.

Nevertheless, the software works and allows you to experience the working of the MacOS on your Windows system.

In this article, we take a look at the best two Mac to Windows applications to run Mac exclusive apps on your Windows system.

Run MacOS on Windows with these 2 tools

WMware Workstation Player 

Run Mac software on Windows

  • Price – Free  for personal use /  Starts at $149

VMware Workstation Player is a streamline desktop virtualization application that allows you to run one or more operating system on the same computer without having to reboot the system again and again.

It is a premium software and starts at $149 for the commercial use but you can grab the free copy to test it out for your personal use.

VMware offers simple but power virtualization with nearly 20 years of active development. The sandbox features offered by the VMware Workstation Player allows the users to run and learn about the different operating system without affecting the main desktop environment.


In case you decide to install MacOS on a standard PC, learn how to do it here.


On the performance front, VMware Workstation Player appears to be a better choice over the VirtualBox. Although VMware Workstation Player appears to be more reliable with the more polished environment and fewer bugs and glitches to deal with, it still lags behind when it comes to compatibility with other systems.

VMware Workstation Player is an excellent virtual machine to run MacOS on your Windows System. However, some features of the software are locked for premium users only.

Apart from that VMware Workstation Player is reliable software to test and run the MacOS on your Windows computer.

Download VMware Workstation Player

VirtualBox 

Run Mac Software on Windows

  • Price –  Free 

VirtualBox is among the most popular Virtualization machines for Windows computers. It is an open source project and is available for download and use. It is a multi-platform software, in case you want to install it on other environments.

Compared to WMware Workstation Player, the VirtualBox interface is a bit intimidating for the average and first-time users. You may need to read some guide or watch a YouTube video to understand the working and use of VirtualBox.

On the performance front again WMware Workstation Player looks better optimized for the system with low/medium hardware.

However, if you have powerful enough system you probably won’t notice the difference between the two virtual machines.

VirtualBox no doubt can boast about its compatibility features which we found a bit lacking in WMware Workstation Player for the advanced users.

You can set up virtual machines, save a snapshot and launch the virtual data on a different computer immediately. This feature is not available in the WMware Workstation Player free version.

Other feature like a shared folder, shared data transfer, and seamless mode is offered by both the virtualization software. If you have a decent system with good configuration and you don’t want to pay for any features, VirtualBox fits the bill perfectly.

Download VirtualBox


Conclusion

So, these are the two best Mac to Windows software that you can use to run the Mac apps on your Windows computer.

The VirtualBox is completely free software with all the features on offer whereas the VMware Player offers better reliability, easier to use but requires you to pay for some additional features.

If you are a tech enthusiast, try both the software and compare them side by side. But, if you are a casual user, go with VMware Player.

What do you think? Do let us know which virtualization software you prefer in the comments below.

RELATED STORIES YOU MAY LIKE:

Why is Microsoft.Photos.exe trying to access the internet?

Microsoft.Photos.exe is the process for Microsoft Photos, which is Windows 10’s default image viewer. However, some users get a little concerned when third-party antivirus software flag Microsoft.Photos.exe.

Then antivirus window prompts pop up requesting that users select to either allow or block Photos’ internet communications. Some users might wonder why Photos is trying to access the internet and why antivirus utilities flag a trusted Microsoft app.

There are actually three reasons why Photos needs to access the internet. Firstly, because Microsoft updates Photos just the same as it updates other UWP (Universal Windows Platform) apps that come with Windows 10. Thus, Photos can’t receive any updates without access to the net.Microsoft.Photos.exe trying to access the internet


Secondly, Photos includes a OneDrive syncing option. When users enable OneDrive syncing, Photos syncs images stored in OneDrive cloud storage. The net connection is essential for the app’s OneDrive cloud storage syncing.

Photos, and other UWP apps, also send data back to Microsoft. That data usually takes the form of diagnostic data. Thus, the Photos app‘s internet communications can also be outgoing.

Some antivirus software flag Photos’ internet communications as that app have an unknown signature. Microsoft seemingly forgot to add its official digital signature to Photos. Antivirus utilities don’t recognize programs with unknown signatures and duly prompt their users when those apps try to access the net. Users can then select Block options on the antivirus prompts to sever Photos’ net communications.


We’ve written extensively on Photo app issues. Check out these guides for more information.


Why Does the Photo.exe Keep Running?

Some users have also raised this question: Why do Photos keep running when it’s not open on the taskbar? That is primarily because Photos is Windows 10’s default image viewer configured to run as a background app.

Windows 10 apps usually have permissions to run in the background so they can get updated and send notifications. Like other default apps, Photos keeps running even when users close its window.

How to Turn Off or Remove the Photos Background App

  1. Background apps consume system resources, and users can turn off Photos’ background app permission via Settings. To do that, open the search utility with the Windows key + S hotkey.
  2. Enter ‘background apps’ in the Type here to search box.
  3. Select Background apps to open the options shown directly below.
    Background app list microsoft.photos.exe is trying to access the internet
  4. Then turn off the Microsoft Photos background app.
  5. Alternatively, users can uninstall Photos if that app is surplus to requirements. Enter ‘PowerShell’ in Windows 10’s search box.
  6. Right-click PowerShell and select the Run as administrator context menu option.
  7. Enter ‘Get-AppxPackage *photo* | Remove-AppxPackage’ in PowerShell as in the shot below, and press the Return key.
    Uninstall Photos command microsoft.photos.exe is trying to access the internet
  8. Then restart Windows after uninstalling Photos.

Although Photos isn’t a bad app, there are still quite a few third-party image viewers that are good alternatives. So, it’s worth considering replacing Photos with an alternative default image viewer that doesn’t collect data for Microsoft and hogs fewer system resources.

RELATED ARTICLES TO CHECK OUT: 

This is how you can fix Xbox error 0x87de0017 in 3 simple steps

Many Xbox One users encountered error 0x87de0017 when trying to download new games on their Xbox One consoles. Unfortunately, many said this error code affects all downloads, not just certain game titles.

Now, one of the first steps to finding a solution to this problem is knowing the cause. So, what could be the cause of error 0x87de0017?

There are several factors that might be causing the Xbox One error code 0x87de001.

The following are some that you might want to look into:

  • Xbox Live services might be down — This happened in the past when Microsoft’s servers were hit by DDoS attacks. If this happens, you can’t do anything but wait patiently for Microsoft to fix the issue. Keep checking the status page of the Xbox Live page from time to time.
  • Game update bugs– Many users encountered this error after manually downloading game updates by going to the My Game and App section, thereby forcing the update to download.
  • Other game bugs – This kind of error takes place with updates from physical games i.e. when a game disk is inserted in the Xbox console. In this kind of situation, the fastest solution is to uninstall the game and perform a hard reset.

So, carefully scroll through this guide, follow the steps and get rid of this error once and for all.

Steps to fix Xbox One error 0x87de0017

Solution 1: Check the status of Xbox Live Services

Make sure this issue is not beyond your control. Check the status of the Xbox Live services.

If you notice  there are problems with their services, wait patiently wait for some hours, then try to download the problematic game or game update again.

If you discovered that there is nothing wrong with their services, then move on to the next solution.


Experiencing slow Xbox One download issues? Use these solutions to fix the problem.


Solution 2: Download the game again

A temporary issue with your DNS might be the cause of you getting the Xbox One error code 0x87de001.

In this situation, the solution is to try to download the content again.

  1. While on your Home screen, navigate to the My games and apps using the R2 button.xbox one my games
  2. On the My game and app menu, select the Queue window.
  3. Check the status of the game you are having the error code issue with is Queued or Paused.
  4. If it is any of these, carefully select it from the list of other games and click on Resume Installation for a re-download.

Solution 3: Uninstall the game and hard reset the console

Performing a hard reset when then the internet connection is disabled might help you to fix this error. Ideally, uninstall the problematic game first, and then hard reset your console.

Here are the steps to follow:

  1. Go to your game queue and cancel any installation or updates.
  2. Navigate to the Game menu, select the game and click on uninstall. Make sure this is done after you canceled the update.
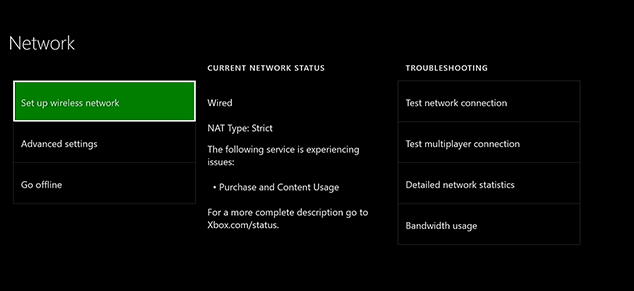
  3. Go to the Setting > Network and click on the Network settings.xbox Network settings
  4. In the Network settings, click on Disconnect wireless.
  5. If you are facing the issue with a physical game, bring out the disk.
  6. Make a hard reset by pressing down the power button for a few seconds.
  7. Put on the Xbox console again, slot in the disk and allow the game to copy fully, then enable the internet connection again.

As soon as the internet connection is activated, try to install the previous pending updates or download the problematic games again.

With these all solutions, we believe you should be able to get rid of this error code.

If you solved your Xbox One error code 0x87de001 with another method, tell us about it in the comments below.

RELATED POSTS:

Can I use Paint 3D to Convert Images to Black and White?

Unfortunately, Paint 3D doesn’t have a feature to turn pictures black and white. Ho

The best free alternative is the good old Paint, but if you are looking for a more tedious, professional approach, Corel Paint is the software for you.

Below, we explain how to use both to convert images to black and white.

How to convert images to black and white without using Paint 3D

Using Microsoft Paint

  1. Click on the Paint button.
  2. Select Save as.
  3. From the dropdown menu choose Monochrome Bitmap as shown below.
black white image paint

Paint offers a rather limiting monochrome bitmap conversion which is not quite advised for highly-detailed images.

That kind of conversion is better done on more advanced photo-editing applications, like Photoshop. On the other hand, it does quite well when it comes to simple images you just want to get black and white.

How to convert images to black and white with Corel Paint

  1. Open CorelDRAW.
  2. Go to File, and select Import.
  3. Pick Bitmaps, then select Mode, then Grayscale.
  4. If you want to adjust, go to Effects, select Adjust, then Brightness/Contrast/Intensity.
  5. Go to File, and select Save As to save the image.

On the other hand, besides Photoshop, Corel Paint is definitely a tool to go for when it comes to color conversion. The images stay true to the original form in regards to details.

That’s why, if you need a professional touch, Paint is a no-go. Corel Paint is a professional suite and thus it will cost you some money. But the end result is worth every penny.

To learn more on how to convert images to black and white with Corel Paint, go to the tools’ official support page. There, you’ll find all the information you need on how to properly use the greyscale option and create high quality black and white images.

How to open VFS files on Windows 10 [COMPLETE GUIDE]

VFS is a somewhat obscure file format that few programs support. Those are files that contain an index of directories from HDD or media storage. The file type is associated with some HP all-in-one-printers and games that utilize the VFS extension for file archives.

A VFS file is an animated slide saved in an archive format and keeps assets that assemble a slide, such as graphics, audio, and textures.

VFS files are usually used for presentations, promotional videos, and product reviews, and are similar to the .PPTX format.

If you want to learn how to open VFS files, then follow the recommendations mentioned below in our article.

How can I open VFS Files?

1. Open Game Archive VFS Files With Explaindio

  1. Download and install the Explaindio software, then run the app.
  2. Open the folder where the files are located.
  3. Search for the preferred .VFS files.
  4. Unzip it and import the files into the Explaindio app.
  1. Now you should be able to see every individual slide.

2. Open Game Archive VFS Files With Dragon UnPACKer 5

  1. As mentioned, a few games have VFS archives that contain images, audio, maps, and other data. Users can open VFS archive files with Dragon UnPACKer 5 by clicking the Get the recommended version button on the program’s website.
  2. Click dup570beta-setup.exe to open the setup wizard for Dragon UnPACKer 5. Then install the software with the setup wizard.
  3. Next, open the Dragon UnPACKer 5 window shown directly below.The Dragon UnPACKer 5 software how to open vfs files on Windows 10
  4. Thereafter, click File > Open.
  5. Select the VFS, and press the Open button. That will open the VFS as shown directly below.A VFS file opened in Dragon unPACKer how to open vfs files on Windows 10
  6. Thereafter, users can browse through the VFS subfolders on the left of the window. The right side of the window displays the files within each subfolder.

If you’re looking for the best clouds to back up your files and put some peace in your mind, then you can check here the best options.

3. Convert HP VFS Files to Alternative Formats

  1. Users can convert the HPIMAGE.VFS file to various alternative file formats, such as JPG, PDF, and ABM, at Conversion Ai. Open the HP All In One Thumbnail File (.VFS) page on that website in a browser.
  2. Then select HP All In One Thumbnail File (.VFS) on the top VFS Converter drop-down menu.
  3. Select an alternative format to convert it to on the second drop-down menu, and click the Convert button. Thereafter, open the converted file with software that supports the format.
Conversion Ai website how to open vfs files on Windows 10
  1. Note that users can also eliminate HP VFS files by turning off the Enable Faster Browsing setting. To do that, select Setup on the printer’s control panel.
  2. Select the Preferences option with the arrow keys.
  3. Press OK to confirm.
  4. Then select the Enable Faster Browsing setting, and press OK.
  5. Select the Off option, and press OK to confirm the new setting. That will stop the printer from adding VFS files to flashcards.

Read more about this topic

FIX: Windows 10/11 Firewall disabled but still blocking apps

The Windows Defender Firewall in Win 10 monitors network traffic and blocks unpermitted programs connecting with the internet. Thus, some users might need to occasionally turn off the Windows Firewall; or at least configure the firewall’s settings to enable certain programs through it. However, some users have said that Windows 10 Firewall is disabled but still blocking programs.

How do I stop Firewall from blocking programs in Windows 10?

1. Turn Off the Firewall via the Advanced Security Window

  1. To ensure the Windows Defender Firewall is off for all network profiles, try turning it off via the Advanced Security instead. Open the Win 10 search box with the Windows key + S hotkey.
  2. Then enter the keyword ‘advanced security’ in the Type here to search box.
  3. Click Windows Defender Firewall with Advanced Security to open the window shown directly below.Advanced Security window windows 10 firewall disabled but still blocking
  4. That window might show some users that the Windows Defender Firewall is, in fact, still on for one network profile. Click Windows Defender Firewall Properties to open the window shown directly below.Firewall state option windows 10 firewall disabled but still blocking
  5. Then select Off on the Firewall state drop-down menus for the Public, Private, and Domain Profile tabs.
  6. Select the Apply option to apply the settings.
  7. Then click OK to exit the window.

2. Adjust the Network Location Awareness Startup Type Setting

  1. Adjusting the Network Location Awareness Startup type setting to Automatic (Delayed Start) might fix a turned off firewall still blocking programs for business network users. To do that, press the Windows key + X keyboard shortcut.
  2. Select Run to launch that accessory.
  3. Input ‘services.msc’ in Run and click OK to open the window in the shot directly below.The Services window windows 10 firewall disabled but still blocking
  4. Double-click Network Location Awareness to open the properties window for that service.Network Location Awareness service windows 10 firewall disabled but still blocking
  5. Select Automatic (Delayed Start) on the Startup type drop-down menu.
  6. Click the Apply and OK options. That will ensure the NLA service has more time to correctly authenticate the domain so that it doesn’t wrongly identify it as a public network with a firewall enabled by default.

3. Turn Off Third-Party Antivirus Utilities

  1. Users who utilize third-party antivirus software may need to turn off those utilities’ firewalls, which might be the ones blocking programs. To disable a third-party antivirus utility, right-click its system tray icon to select turn off or disable context menu option.
  2. Alternatively, users can clean boot Win 10 to ensure that no third-party antivirus utilities, or other programs that might have firewalls, start with Windows. To do that, enter ‘msconfig’ in Run and click OK.
  3. Click Selective Startup, on the General tab, and deselect the Load startup items check box.System Configuration windows 10 firewall disabled but still blocking
  4. Check the Use original boot configuration and Load system services checkboxes.
  5. Select the Services tab, and select the Hide all Microsoft services option.The Services tab windows 10 firewall disabled but still blocking
  6. Select the Disable all option to remove superfluous third-party services from the system startup.
  7. Click the Apply and OK.
  8. Then press the Restart button on the dialog box that pops up.

Printer is not Printing Barcodes: How to Fix it

Printing documents is usually easy, but sometimes printer is not printing barcodes. This can be an issue, but it’s not the only problem you can encounter.

A few users reported that the printer is not printing the whole page , but this issue has its own guide.

In today’s article, we will focus only on the issues with printing and barcodes.

Why is my printer not printing barcodes?

  • Outdated firmware can sometimes cause issues while printing.
  • Certain printer settings can interfere with the printing process.

What can I do if the printer is not printing barcodes?

1. Update the firmware of your printer

  1. Open your printer software.
  2. Select your printer model and select Firmware Updater.
  3. Click on Install.
  4. Follow the installation instructions on the screen.
  5. Once the firmware is ready to be installed, click the Start button.
  6. Wait for the process to complete and don’t interrupt it.
  7. Once the process is done, click on Finish.

If the Epson printer not printing barcodes, you can follow these instructions to update its firmware.

Note icon NOTE
These are general instructions for Epson printers. To avoid permanent damage, always check your printer manual for exact steps.

2. Uncheck the print as image option

  1. Go to the print option.
  2. Locate the Advanced button and click it.
  3. Disable the Print as image option.
  4. Resume printing.

In this article, we discussed the reasons for printing issues, and we hope you found this guide helpful.

In most cases, the problem is related to your settings, but adjusting the settings doesn’t help, then you must upgrade your firmware to fix this issue.

Unfortunately, this is just one of many issues, and speaking of issues, many reported that printer is not working after power outage, so feel free to check that guide for more solutions.

Please let us know if this guide helped you in any way by using the comment section below.

Microsoft Forms Pro is now available to all Windows 10 users

A few years ago, Microsoft launched its survey creation product called Microsoft Forms. Commercial and Office 365 Education users can use this service to create polls, quizzes, questionnaires, and surveys.

Microsoft Forms is specifically popular among teachers and students worldwide.

The big M is still committed to providing advanced analytics capabilities to its business users. Now Microsoft has launched an enterprise variant named Forms Pro.

The new version is expected to offer better alignment with other business apps and improves governance. It was initially announced in February this year.

Microsoft’s Principal Group Program Manager Welly Lee explains in a blog post:

Microsoft Forms Pro is a simple to use, yet robust enterprise-survey solution that integrates with Office 365, Dynamics 365, and the Power Platform. It’s built on Microsoft Forms for Office 365 with new, advanced survey capabilities to further support business survey solutions, including point-and-click simplicity to create and send custom surveys, integration with your business processes, and AI-assisted features that provide a deep-level of insights across transactional and behavioral data.

Microsoft Forms Pro features

Microsoft’s enterprise-survey solution Forms Pro focuses on the following areas:

Easy survey management

Microsoft Forms Pro helps novice users to easily create professional surveys. A person with any skillset can use it to create and manage professional surveys quickly. One of the important aspects of the service is it facilitates users with AI-based suggestions.

The tool comes with built-in suggested questions that can help you to create personalized surveys. Furthermore, it supports multiple languages.


Looking for advanced tools to create surveys? These are the best options for Windows 10 PCs.


Survey integration

Enterprise customers can easily integrate their surveys into existing products such as Power Platform, Dynamics 365, and Office 365. You can use existing data to personalize surveys that can be later embedded into PowerApps.

Moreover, survey automation via Microsoft Flow is another unique feature of this product. You can ensure the timely distribution of surveys based on specific events.

Provides data-driven insights

Microsoft Forms Pro offers some other unique features such as “AI-infused sentiment analysis and keyword detection”. It provides rich data set through the survey data integration with the Common Data Services platform.

If you have Dynamics 365 Enterprise license, you can use Microsoft Forms Pro today. An Enterprise user can use it to get 2,000 survey responses on a monthly basis.

Furthermore, Microsoft allows Enterprise users to purchase additional capacity according to their specific needs. Forms Pro is also available to Office 365 customers.

Get started with Microsoft Forms Pro.

RELATED ARTICLES YOU NEED TO CHECK OUT:

Microsoft Windows Store error 0x87E10BD0 [FIXED]

A number of users have reported that they see the error code 0x87E10BD0 whenever they try downloading a game or application from the Windows 10 Store.

This error can be extremely annoying as you can not download or update any of the games and apps from your Windows 10 Store.

This error is very likely caused by a corrupted file, and our team has scoured the Internet in the search for the best troubleshooting steps you can take in this situation. Please follow the steps described in this article closely to avoid any other issues.

How can I fix error 0x87E10BD0 on Windows 10?

1. Recreate the AUInstallAgent folder

  1. Press ‘Win+R’ keys on your keyboard -> type ‘ %windir%’ (without quotes) -> press Enter.run dialogue box with windir command - error 0x87E10BD0
  2. Look for the folder named ‘AUInstallAgent’.
  3. If the folder is missing, right-click an empty space inside the Windows folder -> create new folder -> rename it ‘AUInstallAgent’ -> restart your PC and check to see if the issue persists.windir creating new folder - error 0x87E10BD0 -
  4. If the folder is in the Windows folder opened earlier, follow the steps in method number 2 below.

2. Reset Windows Store Cache

  1. Press ‘Win+R’ keys on your keyboard -> type ‘ wsreset.exe’ (without quotes).wsreset command - error 0x87E10BD0
  2. Press Enter.
  3. A new window will appear with a blinking line that looks like this:wsreset process - error 0x87E10BD0
  4. After the process is completed, it will automatically run the Windows Store.
  5. Check to see if you can download your games. If the issue persists, please follow the next method.

Is your Windows Store cache damaged? Fix it in 2 minutes with out guide!


3. Try installing the apps in Clean Boot Mode

  1. Press ‘Win+R’ keys on your keyboard -> type ‘ msconfig’ (without quotes) -> press Enter.msconfig in run window - error 0x87E10BD0
  2. Inside the System Configuration window, select the ‘Services’ tab -> tick the box next to ‘Hide all Microsoft services’.system config disable services - error 0x87E10BD0
  3. Press the ‘Disable all’ button.
  4. Select the ‘Startup’ tab, and click ‘Open Task Manager‘.
  5. Inside the Startup tab of Task Manager, right-click on each of the enabled applications and select ‘Disable’.disable apps startup - error 0x87E10BD0
  6. After this process is completed, close the Task Manager, and click ‘Ok’ inside the System Configuration window we opened earlier.
  7. Restart your PC and try to see if this issue persists.
  8. When the troubleshooting steps are done, you can reset the computer to start normally by following the information in this link.Windows forums reset computer to start normall after clean boot - error 0x87E10BD0
  9.  Check to see if the issue is solved.

These are the best troubleshooting method for solving this error message. Please let us know if this guide solved your problem by leaving a comment below.

READ ALSO:

New Outlook on the web is now available for Office 365 customers

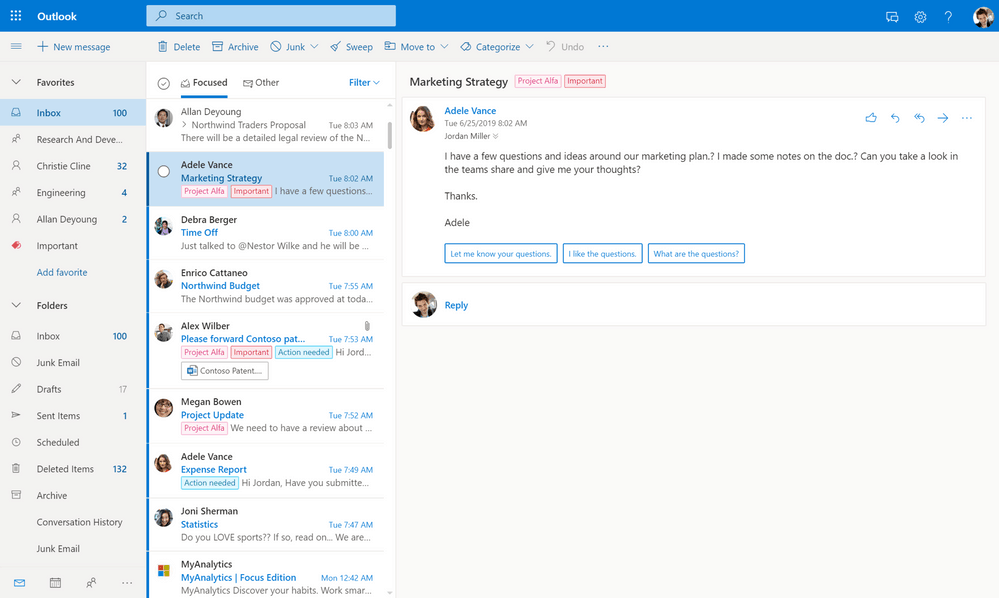
Microsoft announced this week that the new Outlook on the web is now ready to roll out to all Office 365 customers. The new web app has been available as an opt-in experience since last year, but Microsoft says that it used this testing experience to make “many improvements throughout the product.”

Outlook on the web looks a lot like the new Outlook.com, as it shares the same UI including the new dark mode. However, there are some specific features for Office 365 customers, especially in the calendar section. IT’s now easier to create meetings with your coworkers, and a new drop down menu has been added to create online meetings with Skype or Teams. from the event peek, it’s also possible to join an online meeting in just one click.

The tasks section has also been replaced with the Microsoft To-Do web app, which can shows flagged emails as well as Planner tasks that have been assigned to you. To-Do is also available right from the Mail and Calendar sections of Outlook on the web, allowing users to drag and drop items and transform mail and calendar items into tasks.

If your organization has blocked the opt-in toggle for the new Outlook on the web organization, you’ll have to wait a bit to get the new experience. For Targeted Release customers, the opt-in toggle will be removed in late July and the new experience will be on by default. Other Office 365 customers will have to wait until their organization has been upgraded to the new Outlook on the web.

This game doesn’t allow sharing to Xbox Live [FIXED BY EXPERTS]

A great number of users have reported having an issue when trying to share their screen-captured video on Xbox Live. The error message says: This game doesn’t allow sharing to Xbox Live.

One user described the problem as follows on Microsoft Answers forum:

I have a problem. When I try to upload my recordings or a screenshot this popup shows: Sorry , you don’t have permission to share clip. It may be a problem with the service or because of the privacy settings or your last behavior . To check your privacy settings go to Xbox.com

This issue can cause gamers a lot of issues, especially if you want to share an important video with your friends, or even in the case that you create game screen recordings for a living.

For these reasons, in this article, we will explore some of the best troubleshooting methods to deal with this problem. Please follow the steps presented in this list carefully to avoid any unnecessary complications.


How can I fix This game doesn’t allow sharing to Xbox Live error message?

1. Run the Windows troubleshooter for apps

  1. Press ‘Win + X’ keys on your keyboard -> select Settings.Settings option in Win + X menu - this games doesn't allow sharing to xbox live
  2. Inside the Settings window, click on Update and Security.Windows settings update and security - This game doesn't allow sharing to xbox live
  3. Click on Troubleshoot -> select Microsoft Store Apps.troubleshoot windows store apps - this game doesn't allow sharing to xbox live
  4. Select ‘Run the troubleshooter’.

2. Update your Microsoft Store apps and games

  1. Click on Cortana search box -> type in ‘Microsoft Store’ -> click on the first option from the top.
  2. Click the three dotted lines at the top-right part of your Microsoft Store window -> choose Download and updates -> Get Updates.Windows Store settings Download and updates - This game doesn't allow sharing to xbox live
  3. Wait for the processing to be completed, and try to see if this method fixed your issues.

3. Sign into Windows as a different user

  1. Click on Start button -> click on your account picture -> choose another account.Start menu accounts - this game doesn't allow sharing to xbox live
  2. Log into the Xbox application again, and check to see if this method solved your problem.

Can’t start Xbox app on your PC? Fix it with this simple guide!


4. Uninstall and reinstall the Xbox application

  1. Press Win + X keys on your keyboard -> select Windows PowerShell (Admin).Windows PowerShell with admin - This game doesn't allow sharing to xbox live
  2. Inside the PowerShell window, copy and paste this command: get-appxpackage Microsoft.XboxApp | remove-appxpackageWindows PowerShell with command - This game doesn't allow sharing to xbox live
  3. Press Enter.
  4. After the process of uninstalling the Xbox application is completed, restart your Windows 10 device.
  5. Reinstall the Xbox app by clicking here.Xbox console companion - This game doesn't allow sharing to xbox live
  6. After the installation process is completed, log into your Xbox app and check to see if the problem is solved

In this article, we explored the best troubleshooting methods to deal with the issue caused by your Xbox application not allowing you to share video screen-recordings to Xbox Live.

Please feel free to let us know if this guide helped you solve your issue by using the comment section found below.

READ ALSO:

Xbox app updates on iOS and Android with advanced messaging features

The official iOS and Android Xbox apps updated today with some rather significant new features that will change the way gamers communicate with each other.

The updates, which took the app to Version 1906.0627.0045 on Android and Version 1906.625.1605 on iOS, have added some functionality to the Xbox messaging service that most would associate with dedicated chat apps such as Facebook Messenger or Line; animated gifs and clickable weblinks.

After installing the update, users will be able to liven up their conversations with gifs, which should be fun, but the real game-changer is the addition of web links which will let everyone share links to their Twitch or Mixer profiles, product pages on online stores such as Amazon, social media accounts, or any other web page directly within the app.

Here’s the full release notes:

Hi Xbox app users! In this release, we’ve continued to improve the new messaging experience. Download the latest update to get:

  • ‘View’ support for images and GIFs in messaging
  • Clickable weblinks. You can now send and click link in messaging. Hooray!
  • Performance and bug fixes

Thank you for continuing to use the Xbox mobile app.

Are you surprised by this update and will you use these two new features? Share your thoughts with the community in the comments below and then follow us on Pinterest for more Xbox gaming content.

‎Xbox
‎Xbox
Price:
Free


Xbox
Xbox
Price:
Free

Microsoft drops another 1985 Windows 1.0 ad just in time for Stranger Things 3

Following up on yesterday’s retro Windows 1.0 social media posts, Microsoft has posted a new old-school ad promoting the launch of the operating system complete with 80s synth and graphics. You can watch it below.

https://twitter.com/Windows/status/1146456110917914624

While unconfirmed, these ads are likely a cross-promotion for the Netflix series, Stranger Things 3, which debuted today. This third season of the popular show is set in the year 1985 and Windows 1.0 came out in that same year. With the launch of this fictional version of Windows 1.0 and the Stranger Things 3 season happening on the same day, it would be a really crazy coincidence if Microsoft is promoting something else entirely.

Are you excited for the new season of Stranger Things and have you been enjoying these retro Microsoft ads? Let us know with a comment down below, follow us on Twitter for more Microsoft news, and have a fantastic Fourth of July.

Windows 10 dual cameras not working on SteamVR Settings [FIX]

The gaming community is now fascinated by VR games. Manu gamers enjoy their favorite VR games on their controllers via SteamVR.

However, there are some players who reported getting “Camera Not Available” errors on SteamVR Settings.

According to the reports, the SteamVR Settings trigger the issue. It seems that many people experienced this issue in Windows 10.

I had a similar problem with Kaspersky blocking my camera as it has a similar privacy protection to stop people from accessing your webcam.

Another person commented on Reddit:

I’m having the same issue. But to clarify for others, the camera works even if you don’t restart steam VR when it prompts you too, after enabling the camera checkbox.

If you are also experiencing the same issue, you need to follow some simple steps to get rid of it.


These are the best VR zombie games to play on Steam – hours of fun guaranteed!


What to do if camera is not available on Steam VR Settings

You need to follow these steps to fix the “Camera Not Available” issue on your system:

  1. Navigate to the Start menu and type “Settings”.
  2. You will see a list of results click Windows Settings.
  3. A new Windows will open on your screen. Navigate to the left pane and click Privacy.
  4. Now select Camera that is located under App permissions.
  5. You need to make sure that Camera access for this device is on. If the feature is off, use the toggle button to turn it ON. Camera Settings Windows 10
  6. Furthermore, Allow apps to access your camera should be ON. 

Finally, you need to restart SteamVR to apply the new changes. Your Camera should now work perfectly fine.

Have you experienced a similar issue on your PC? How did you fix it? Let us know in the comments section below.

RELATED ARTICLES YOU NEED TO CHECK OUT:

Posted in Fix

US Trade tariffs on China are pushing Microsoft, others to move production elsewhere

Arguably when US-based companies move production out of the US, it’s a cost-based measure allowing them to maximize profits by dispersing production procedures over a myriad of regions where labor and technologies are cheaper. It just so happens that China became a place where many of those cost-saving benefits coalesced for many tech companies, however, due to recent international trade disputes, businesses such as Microsoft and Apple are having to reevaluate where their production will now commence.

According to a Nikkei staff writer out of Taipei, in addition to Chinese officials implementing production cost increases, US imposed tariffs on items such as game consoles, smart speakers and data center components have companies such as HP and Dell considering shifting their production outside of China to avoid continued profit losses.

“The industry consensus is to move an average of some 30% of production out of China depending on how important the U.S. market is… Everyone needs to come up with a plan,” a supply chain executive familiar with the plans said. “Apple is really the very last and the slowest to start formulating plans, while everyone else out there is much more aggressive.”

Despite a vaguely articulated truce agreed upon by U.S. president Donald Trump and China president Xi Jinping at last weeks G20 summit, tech companies are still evaluating production operations outside of China due to the financial uncertainty between the two nations.

Microsoft recently joined a collation of other tech companies in voicing their distress over the continued tariff war and its effects on the gaming industry. Now it seems, the company will be doing a bit more than simply complaining about the effects of the tariff war by joining other companies who are considering moving up to 30% of its current production out of China moving it potentially to Thailand or Indonesia, according to sources.

If Microsoft, HP, Dell, Apple, and others were to eventually move their production out of China, the country’s long-standing electronics export business which tops $1.35 trillion could be in serious danger. Effects of the continued trade war are already forcing China-based companies who rely heavily on U.S. technology products, to find greener pastures outside of the region such as Foxconn Technology who have moved production efforts to Mexico and the Czech Republic.

In preparation for what many believed was an August deadline for trade negotiations between China and the US, US-based tech companies had begun reducing production forecast for the remainder of 2019 which is already showing signs of impact in China as its reputation as a dominant production hub is now being challenged by other more palatable countries.

While alternatives are being explored, there seems to be a general consensus that most companies would like to remain in China as a cost-saving measure and hope that both China and the US can come to some more permanent agreement soon.

Email server does not support secure connection [FIXED BY EXPERTS]

A large number of users have reported having an issue when trying to use their written script to send emails through Gmail.

They report that the issue arises suddenly after using the same script for a long time:

This issue can be extremely annoying, especially if you need the script to run properly for a company or multiple users. This error message is caused by one of the following issues:

  • the connection settings are incorrect (wrong port specified)
  • the credentials provided are incorrect (username and password)

For these reasons in this article, we will explore some of the best methods to solve this problem, and be able to send emails using your scrip again. Please follow the steps closely to avoid any unnecessary issues.

What to do if Email server doesn’t support secure connection?

1. Change ‘client.port’ value

  1. If you find yourself in the same situation as the user mentioned above, you will simply need to stop using port 25, and change it to port 465 or 587.
  2. Using port 587 is a security requirement for outgoing mail (SMTP) servers for Gmail.  
  3. This method should solve your issue, but if the issue persists, follow the next method.

2. Change the value of SmtpServer.EnableSsl


The code of your script should look like this :

 Dim client As New Net.Mail.SmtpClient("smtp.gmail.com")
        client.Port = 587
        client.EnableSsl = True
        client.UseDefaultCredentials = False
        client.Credentials = loginInfo
        client.Send(mm)

Change the value of SmtpServer.EnableSsl from ‘true’ to ‘false’.

 SmtpServer.EnableSsl = true;

turns into:

SmtpServer.EnableSsl = false;

After changing this value, check to see if the issue persists. If it does, please follow the next method.

3. Change settings of your Gmail app

  1. In order to access the link provided in the next step, you will need to make sure you’re logged into your Gmail account
  2. Visit this link and activate the option ‘Access for less secure apps’.Less secure app access Gmail - email server doesn't support secure connection
  3. Retry running your script to check if the issue is resolved.

4. Use a third-party email client service

Alternatively, you can send the script by connecting your Gmail account to a third-party email client program. Software like Mailbird can fully sync and configure with Gmail, allowing you to manage your contacts and messages in one inbox.

Mailbird can connect to Facebook, Google Calendar, WhatsApp, Twitter, Dropbox, Evernote, Google Docs, Slack, and other day-by-day apps.

Moreover, the program will detect the server settings automatically, so you won’t have to insert them manually.

In addition to basic email client functionality, it offers support for IMAP, POP3 servers, email search, filtering, and more.

Mailbird allows you to snooze incoming emails and includes a fast reading of messages as well as a quick preview of attachments for text files and graphics.

Follow these steps to connect the two accounts:

  1. Download and install Mailbird for desktop
  2. Go to Settings and select Add account from the Accounts tab
  3. Enter your name and Gmail address
  4. Click Allow to load your Google emails and contacts into Mailbird

In this article, we explored some of the best methods to solve the issue caused by an error in the script for sending emails through Gmail.

Please feel free to let us know if this guide helped you solve your issue, by using the comment section below.

Electronic Frontier Foundation calls out Slack on retention policies – how does Teams compare?

The Electronic Frontier Foundation (EFF,) an international non-profit digital rights group, recently took their agenda to the New York Times, writing an op-ed warning the general public about Slack’s data retention policies.

In what some might consider a scathing article, the EFF detailed that Slack stores all of its users’ messages and everything else shared on the platform by default, unless admins configure optional settings under a paid plan. EFF also detailed that Slack’s data is not end-to-end encrypted, and can be intercepted or read by both hackers and authorities.

Considering that Slack is in use by millions of businesses and individuals across the world, there is a lot to worry about with these revelations. All Slack users simply don’t have fair enough control of their data.

However, we here at OnMSFT are a Microsoft-centric news website. Given the natural comparisons that come with Microsoft Teams and Slack, we also wondered how do Microsoft’s policies compare to Slack? And what happens with your data shared in Teams? We did some digging, and here’s more on what we found.

Microsoft Teams Admins can configure their own retention policies

Slack’s policies state that under all plans, paid or free, it will keep all data by default as long as a workplace exists (unless configured otherwise with a paid plan.) Microsoft’s policies part from that a bit and put admins in more control of data. According to this documentation, all Microsoft Teams conversations are persistent and can be retained forever by default. However, Teams admins do have the choice of configuring custom retention policies.

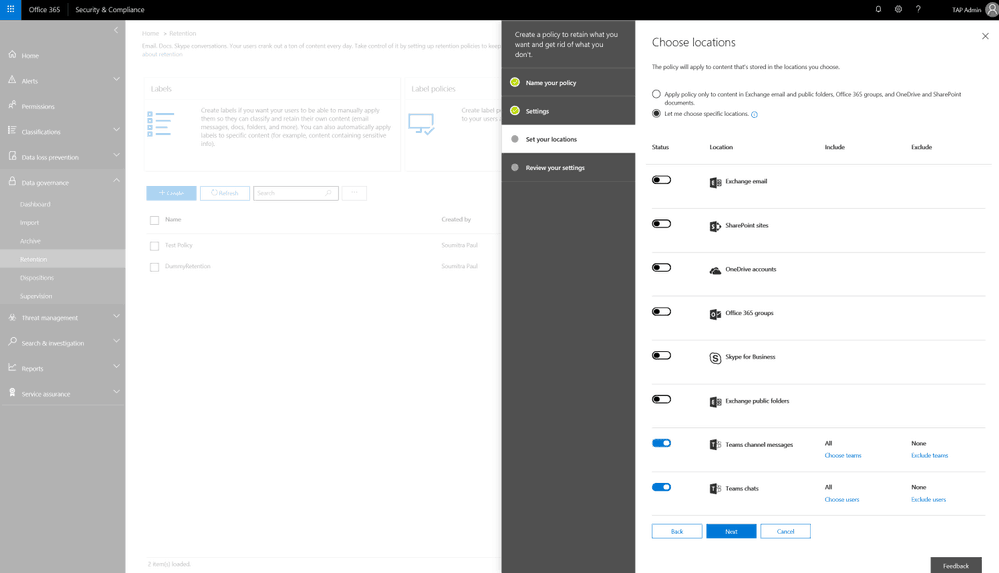
This can be achieved via the Office 365 Security and Compliance Center. When configured, and when data is deleted, it will be removed from all permanent data storage locations on Teams, with the following three conditions.

  • Preservation: Keep Teams data for a specified duration and then do nothing
  • Preservation and then delete: Keep Teams data for a specified duration and then delete
  • Deletion: Delete Teams data after a specified duration

We created a free Microsoft Teams account using a standard @live.com Microsoft Account and email to see if we would have access to the Security and Compliance Center, but we couldn’t access it. So, it looks as though only if a Teams subscription is covered under Office 365 can admins go on and configure retention policies to delete data. That’s somewhat similar to Slack, as it retains all messages forever by default with free plans.

Teams Retention

Microsoft, though, explains that advanced retention policies do not yet apply to Teams chat and Teams channel message locations. Retention policies also can’t go on less than 30 days. That means it would appear as though admins cannot yet set up to delete Teams data on a nightly basis (as you can on paid Slack plans.) Separate retention policies can’t be configured for Teams private chats, and channel messages.

A separate document also explains that Microsoft Teams chats are stored in a hidden folder in the Exchange mailbox of each user included in a chat, and Teams channel messages are stored in a similar hidden folder in the group mailbox. It’s also explained that teams is a Microsoft Azure-powered chat service that will store all data by default forever. Microsoft recommends that admins use Teams location to retail and delete data.

An error when trying to access the Office 365 Security and Compliance Portal

Microsoft Teams has the same encryption as Slack

While companies like WhatsApp or Telegram have come on board with end-to-end encryption, Microsoft joins Slack by using the lesser secure type of encryption policy. According to this support page, Microsoft Teams data is encrypted in transit and at rest. Files in Teams are shared through SharePoint and are backed by SharePoint encryption, and Notes are stored in OneNote and are backed by OneNote encryption.

That brings us back to the second argument from the EFF. Like Microsoft, Slack does not use end-to-end encryption, but rather only in transit and at rest. This means the data is only protected as it moves across the network, and then as it gets stored on a server. Unlike with end-to-end encryption, the data is not encrypted on a sender’s system or device, and not only the recipient is able to decrypt it. Best put by Business Insider, in transit and at rest. “keeps data safer from hackers, but also means that Slack can hand over plain text data over to law enforcement.”

While in transit and at rest is secure, Microsoft and Slack are on the same page with encryption, and could both be putting user data at risk. There have been several user voice requests for Microsoft to use end-to-end encryption in Teams, but we haven’t seen official responses from the company on forums.

Microsoft Teams 2
Workers using Microsoft Teams

Data retention is a problem for everyone, not just Microsoft and Slack

In the world where every device is coming online, and we’re becoming ever so more connected, putting users in control of their data is a big issue. The EFF has a valid point, and the retention of customer data is this is a problem not just for Microsoft or Slack, but for other companies too. A recent report from CNET indicates that Amazon keeps all Alexa transcripts and voice recordings, and will only remove it at the request of a user. Amazon also revealed it shares Alexa requests that involve a transaction. While Microsoft and Slack offer up options to delete user data, be it paid, or free, it’s time we step up for user privacy.

Here’s what’s fixed and changed in Windows 10 Insider build 18932 for the Fast Ring, including some important Settings Sync news

Yesterday, Slow Ring Insiders got some love with the first 19H2 build, but if you’re in the Fast Ring, there’s no reason to feel left out. Microsoft today pushed out build 18932 to the Fast Ring, and along with a number of new features and improvements, there are a number of changes and fixes with the new build.

Top of the list among these is news about some changes coming to the way settings in Windows 10 are synced among your devices. Microsoft is “in the process of converging settings sync engines to reduce complexity and improve reliability of sync,” and to accommodate those changes, it’s turning off the older sync engine in 20H1 builds starting with this one. Until work is complete with the new version, some settings will stop being synced. Settings impacted include “taskbar orientation, wallpaper, theming, and others.” You may see your settings sync one time after a PC reset or upgrade, but the sync will stop after that. You can find a full reference of settings sync listing all current settings coming to 20H1 in this Microsoft Docs file, and if you have feedback on which settings should be prioritized, be sure to let Microsoft know.

There are a number of other changes and fixes, as well, here’s the full list:

  • We’re in the process of converging settings sync engines to reduce complexity and improve reliability of sync. As of today, the older settings sync engine will be turned off for 20H1 builds and changes made to settings that have not yet been migrated to the new settings sync engine will stop being sent and received until that work is complete. Some settings may not be migrated. The full list of settings that have been supported for sync are available here, but the list is subject to change during 20H1. Synced settings that are impacted by this change include settings pertaining to taskbar orientation, wallpaper, theming, and others. If there’s a setting you’d like to particularly be prioritized as we work on this, please let us know. Please note, you may notice a one-time receival of synced settings changes after you upgrade or reset your PC, but after that it will stop.
  • We’ve updated our indexing behavior to exclude common developer folders, such as .git, .hg, .svn, .Nuget, and more by default. This will improve system performance while compiling and syncing large code bases in the default indexed locations such as user libraries.
  • We fixed an issue where the update might have failed the first time you tried to download it with a 0xc0000409 error code.
  • We fixed an issue where recent updates might have failed with a 0x80070005 error code.
  • We fixed an issue for Home editions where some devices couldn’t see the “download progress %” change on the Windows Update page.
  • We fixed a race condition resulting in some Insiders seeing a large number of explorer.exe crashes in recent builds. This is also believed to be the root cause for some Insiders finding that Control Panel wasn’t launching – please let us know if you continue seeing issues after upgrading to this build.
  • We fixed an issue resulting in some Insiders finding that their File Explorer search box was rendering in an unexpectedly small space and crashed when clicked.
  • We fixed an issue where Settings would crash if you tried to add a language on the previous build.
  • In Word, after showing a “flash message” on a braille display, Narrator is now correctly showing just the current heading.
  • We made a small backend change to the updated Windows Ink Workspace to help improve the launch time.
  • We fixed an issue resulting in Task Manager unexpectedly showing 0% CPU usage in the Performance tab.
  • We fixed an issue that could cause certain apps to crash when you input Asian characters.
  • We fixed an issue resulting in not being able to use touch to open context menus on websites in Microsoft Edge after using pinch to zoom in and back out.
  • Narrator search mode will now reset scoping to all elements each time it is opened.
  • The data looks good, so we’re now rolling out the fix for taskbar unexpectedly dismissing when invoking Start if set to autohide to all Insiders in Fast.
  • We fixed an issue where the Bluetooth Hands-Free audio driver (bthhfaud.sys) could get stuck when making or breaking a synchronous connection-oriented (SCO) link to the headset. This would cause all audio on the system to stop working until the system was rebooted.

The list of known issues should be familiar if you’ve been following along, with the usual anti-cheat and Realtek SD card caveats. If you’re having trouble installing games via the Xbox app, try again, or you may have to roll back to build 18922. Here’s the full list of known issues:

  • If you’re seeing failures installing games via the Xbox app, you can retry the install. If it continues failing, you may want to roll back to Build 18922.
  • There has been an issue with older versions of anti-cheat software used with games where after updating to the latest 19H1 Insider Preview builds may cause PCs to experience crashes. We are working with partners on getting their software updated with a fix, and most games have released patches to prevent PCs from experiencing this issue. To minimize the chance of running into this issue, please make sure you are running the latest version of your games before attempting to update the operating system. We are also working with anti-cheat and game developers to resolve similar issues that may arise with the 20H1 Insider Preview builds and will work to minimize the likelihood of these issues in the future.
  • Some Realtek SD card readers are not functioning properly. We are investigating the issue.
  • Tamper Protection may be turned off in Windows Security after updating to this build. You can turn it back on. In August, Tamper Protection will return to being on by default for all Insiders.

So for now, check your sync settings and get to downloading the latest Windows 10 Insider build 18932.


New “Icebreaker” app for Teams promotes team bonding

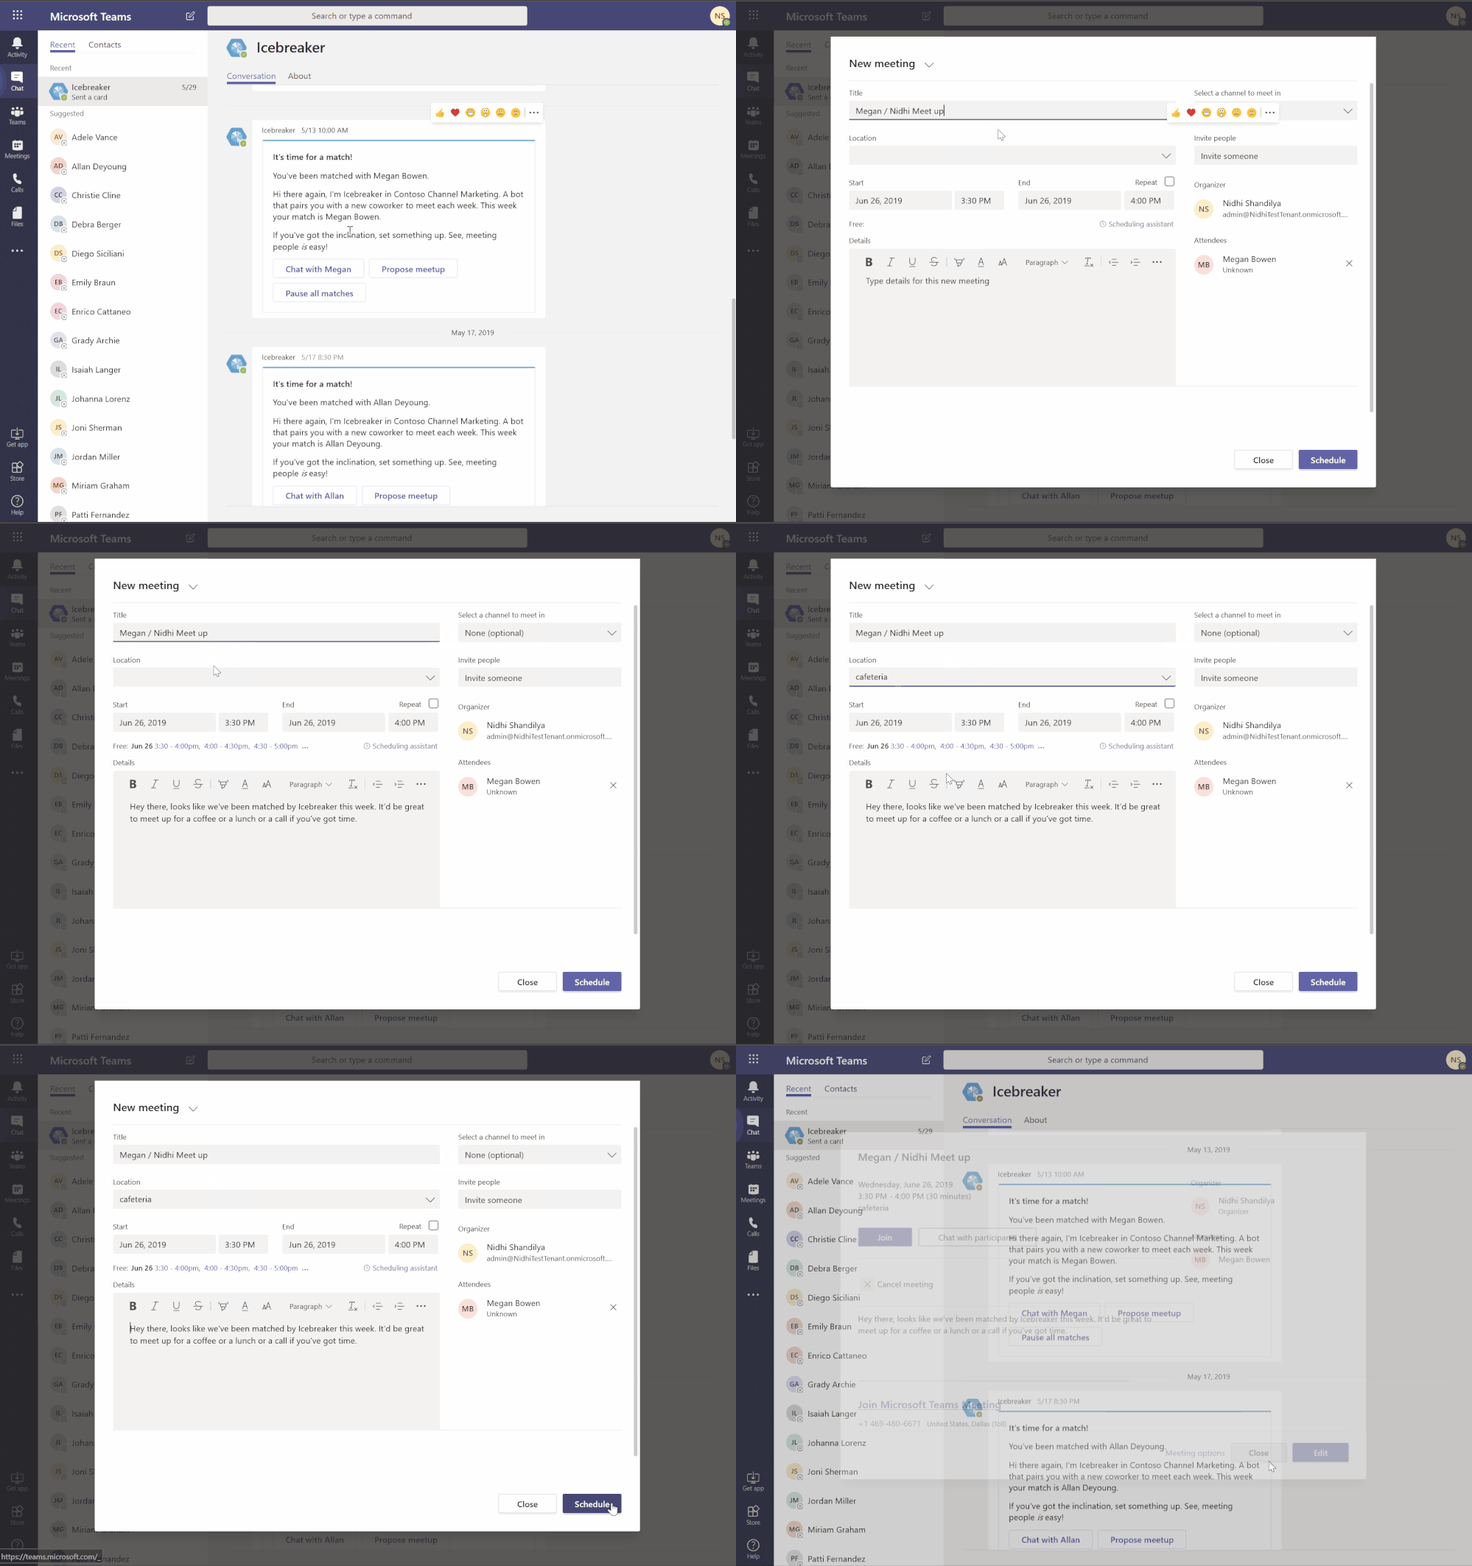
Microsoft wants to promote team bonding, and what better place to do so than with its own Teams app? Except, perhaps not the way you might think. The company announced its new Icebreaker bot, an app that pairs two random people to each other, kind of like Chatroulette for those of you who might have been breathing the internet back in the day.

Still, it’s a very interesting concept. Microsoft notes an importance of culture of one of the defining factors of any team, and the simple little bot is one way of sharing them among other team members who might not work from the same locations as one another.

It’s really easy to use, too. Admins can create a new team and invite individuals “who are open to trying something new and meeting new people”, then install the bot within the team. After that, the bot will randomly pair two people up every Monday at 10 AM, and can even suggest times that are free for both parties to get to know each other.

IcebreakerScheduling1.gif

The idea actually comes from another bot created by an early engineer of Microsoft Teams, who created something called “Meetuply”, which also paired two members within an organization for coffee. It was created to answer the “Who are these new people and what are they working on?” question that might have run across the minds of many other team members.

If you’re interested in incorporating something like this into your own teams, the Icebreaker App Template is available for free on GitHub. It’s open source, too, so you’re free to modify it to better suit your needs.

And of course, if keeping your team members away from each other is something that you’re in need up, that integration is going to be build straight into Teams soon, no bot required. Feel free to share your thoughts in the comments below.

Revamped marketing coming for Microsoft 365 in new fiscal year

Every year, the month of July is when a new fiscal year kicks off for Microsoft, and this is usually an opportunity for the company to do some house cleaning. According to the usually well-informed Mary Jo Foley from ZDNet, a recent reorg of the Microsoft 365 organization has led to the creation of a new “M365 Foundations” team that will be in charge of marketing Microsoft 365 as a unified product.

For those unfamiliar, Microsoft 365 is a subscription bundle including Windows 10, Office 365, and Enterprise Mobility + Security. Prior to the recent internal reorg, Microsoft used to have three separate marketing teams overseeing these three products, according to Foley. That’s reportedly changing with a new single marketing team that will try to better market a set of different products for enterprise users.

As part of this M365 marketing reorg, there’s now a new “M365 Foundations” team being run by Rob Howard. The idea here is to bring together Windows, Office Management and the M365 Developer Platform into a common org.

Howard spoke to me at Build 2019 (before this reorg) about what Microsoft considers this “M365 Developer Platform” to include. The short answer: Microsoft’s identity platform (Azure Active Directory and Active Directory); the unified Microsoft Graph API; the “knowledge substrate”; and the coming Fluid Framework for faster coauthoring and building web-based distributed apps.

Microsoft officially announced Microsoft 365 two years ago at its Inspire conference, and it’s safe to say that the new brand isn’t as well known and understood as Office 365 for now. This new unified marketing team will have a lot of work to do to infuse some meaning into this brand and make it more relevant in the enterprise world. Microsoft is also expected to be working on a consumer version of Microsoft 365 which is currently supervised by the company’s Modern Life & Devices team.

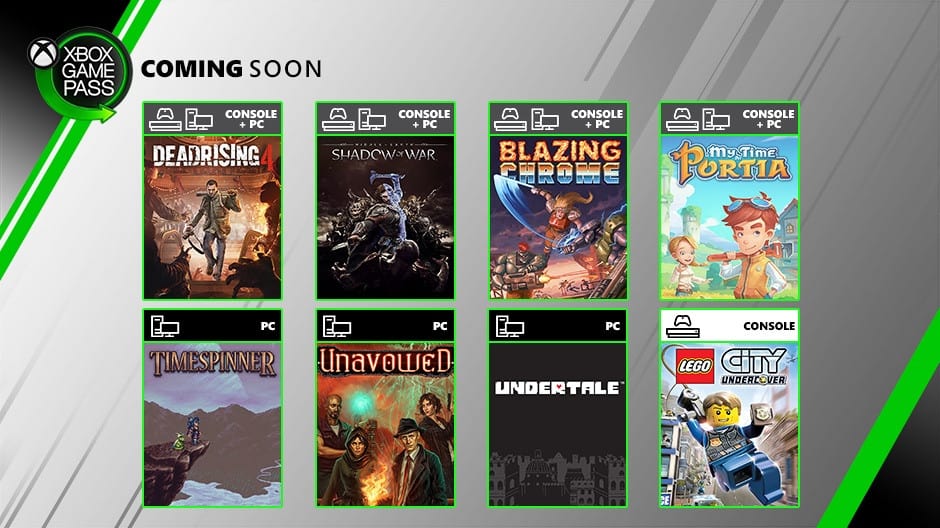
Middle-earth: Shadow of War, Dead Rising 4 and more are coming to Xbox Game Pass in July

The Xbox team has just announced that eight new games are coming to Xbox Game Pass in July, and following the launch of Xbox Game Pass for PC last month Microsoft will be adding three games just for PC gamers. Four games will be available on both Xbox One and PC, starting with Middle-Earth: Shadow of War and My Time at Portia on July 4, followed ny Dead Rising 4 and Blazing Chrome on July 11.

It’s worth noting that Middle-Earth: shadow of War is an Xbox Play Anywhere title that also supports cloud saves between Xbox One and PC. The game is a sequel to Middle-Earth: Shadow of Mordor, which is already available with Xbox Game Pass for Console.

On July 11, LEGO City Undercover will also join Xbox Game Pass for Console, while Timespinner, Unavowed, and Undertale will be added to Xbox Game Pass for PC (and Xbox Game Pass Ultimate, which includes both Xbox Game Pass for console and Xbox Game Pass for PC). Overall, that’s five new games for Xbox gamers and seven new games for PC gamers, which is pretty fair. Xbox Game Pass for console recently crossed more than 200 games, while the catalog of Xbox Game Pass for PC games is just above 100 titles.

Every month, some games also leave Microsoft’s gaming subscription service, and 10 games will leave the catalog in July: These are Aftercharge (July 9), Warhammer Vermintide 2 (July 10), LEGO Movie: The Videogame (July 16), followed by Dandara, Dead Rising 2, Hitman Season 1, Metal Slug XX, Defense Grid: The Awakening, Hexic 2, and Iron Brigade on July 31.

If you haven’t done it yet, we remind you that you can still upgrade from Xbox Game Pass to Xbox Game Pass Ultimate for just $1, and get Xbox Live Gold, Xbox Game Pass for console and Xbox Game Pass for PC in a single subscription. Even better, Microsoft will apply any prepaid time you have on Xbox Live Gold and/or Xbox Game Pass toward Xbox Game Pass Ultimate, up to a maximum of 36 months.


How to build a great Microsoft Store app

It seems like almost every day a new framework or tool is released in the quest to help developers be more productive. While diversity is never a bad thing, a lot of times it feels we are trying hard to reinvent the wheel by solving problems that don’t really exist anymore. While that might be the case with many of the tools and utilities out in the market today, when it comes to Microsoft Store app development the Windows Template Studio extension is king!

What exactly is this magical tool you ask? Well I am about to tell you! As Microsoft continues their quest to lure developers to the now not so new Universal Windows Platform, they ingeniously devised a way for developers of pretty much any skill and experience level to hit the ground running when developing a Universal Windows application. And when I say hit the ground running, I am not kidding! Let’s drive right in!

The first thing you are going to need is Visual Studio 2017 or newer installed. Once we have gotten that out of the way head over to the Visual Studio marketplace and download the Windows Template Studio extension and install it. You can grab that by following this link.

Creating a project using the tool is straight forward.

Open Visual Studio, Click on File -> New -> Project…

Visual Studio 2019 Create New Project

That will launch the Create a new project dialog. From here type “Windows Template Studio” in the search box and select the first option if you are going to use C# or second option for Visual Basic if that is still your thing…

Windows Template Studio Create New Project

On this next dialog you are asked to select the project name, location, solution name. After doing so comes the fun stuff!

Windows Template Studio Configure New Project

Modern Windows application development is demanding. Users expect these applications to support things like notifications, live tiles and deep linking all while remaining very efficient and available. What do I mean by available? Well they expect their application experience to be consistent and available across devices.

The Universal Windows Platform delivers just that, and now with the Windows Template Studio you don’t have to worry about properly implementing these concepts on your own, it does all the heavy lifting for you and generates well-formed, very readable code which follows Microsoft and industry best practices and design patterns.

I am going to take you through some of the available options in the tool as you begin configuring your application.

The first step is to choose a project type. In this context that basically means navigation type. We will select “navigation pane”, many of you may know this simply as a “hamburger menu”.

Windows Template Studio Project Type

The next decision is probably one of the most important, I am partial to MVVM Basic, but Code Behind continues to be a very popular approach. These decisions are not going to necessarily limit what you can do with the application, but they will, depending on your skill level, add an element of difficulty to your implementations.

Windows Template Studio Design Pattern

The next section is where you add pages to the application. There are a lot of common pages Windows Template Studio takes care of for you. These include pages for settings, data grids, media players and more! Creating blank pages is a great way to make place holders for content you expect to add later on, it adds it to the navigation menu and gives you an idea of how to do that later yourself in code.

Windows Template Studio Pages

The final step is to add features. If you thought this tool was great already, your mind is about to be blown away! The features section allows you to, with the click of a button add functionality like deep linking, live tiles, toast notifications and integration with the Windows Timeline.

Windows Template Studio Features

That was it! The last thing we need to do now is hit “Create”.

The result is a buildable, runnable application which can be deployed across any device which supports Universal Windows Platform applications.

Visual Studio Windows Template Studio Application

At this point you can begin to modify and mold this application to fit your needs. The possibilities are endless. While most of the functionality this tool deploys for you was never particularly difficult to implement, the fact remains they were time consuming. This tool eliminates that initial and tedious implementation and deployment of your application framework. Not only that but the resultant code follows industry standards and patterns while providing developers of all skill levels with an extremely robust and extensible foundation for their applications.

Windows Template Studio Application

Now that you have the foundation to a great Microsoft Store App, what story will you tell with it?

For more information on the Windows Template Studio extension for Visual Studio visit the official extension page.

How to revoke Microsoft Store app licenses from a device

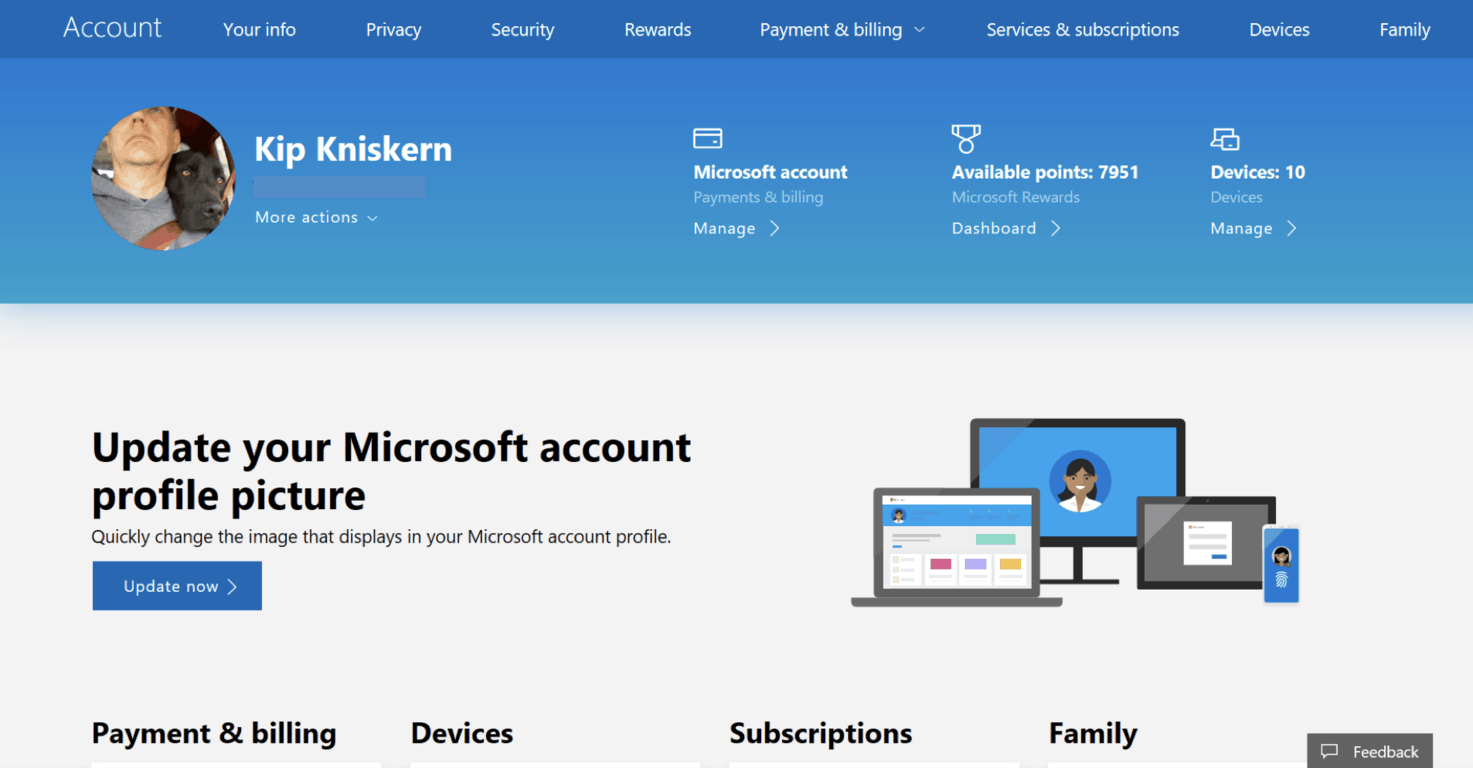
The Microsoft Store permits you to use apps and games on up to 10 of your devices at a time. If you add an eleventh device to your account, you’ll find you won’t be able to install any apps to it. You’ll need to revoke the Microsoft Store license for one of your other devices, so you stay below the limit.

To complete this procedure, start by logging in to your Microsoft account online. The direct link is “account.microsoft.com/devices/content,” which will take you straight to the relevant page. You can also head to Microsoft Account home and follow the “Devices” links. You’ll be prompted to enter your password or confirm a Microsoft Authenticator prompt to verify your identity.

Screenshot of removing a device from Microsoft Store

This screen shows you which of your devices are currently registered for Microsoft Store app installs. You’ll see how many devices are connected, as well as the last usage date of each one. Identify the device you want to remove and click the “Remove” link next to its name.

A popup prompt will give you a final warning before you revoke the device’s license. Tick the checkbox to acknowledge the prompt. Press the “Remove” button to complete the removal process.

Screenshot of removing a device from Microsoft Store

You’ll now have an unused license available, so you can start installing apps on your new device. If you try to use Windows Store apps on your delicensed device, you’ll find they no longer work. Further app installations from the Store will fail, as your device will no longer hold the required license.

While most people are unlikely to use 10 devices simultaneously, it’s possible you may reach the limit as you replace older devices with newer hardware. Getting up and running again takes only a few moments though – head to your Microsoft account, and revoke the Store licenses from your redundant devices.

You can now pre-order and pre-download the NBA 2K20 video game on Xbox One

NBA 2K20 is now available to pre-order and pre-download on Microsoft’s Xbox One consoles ahead of its September 6th release date.

This latest version in the NBA video game series is said to feature improved graphics and gameplay, new game modes, more customization than previous entries, and an open-world neighbourhood to explore.

NBA 2K20 will be available in three versions, each with a plethora of additional digital bonus content. Here’s what comes with each version in addition to the base game:

NBA 2K20

  • 5,000 Virtual Currency
  • 5,000 MyTEAM Points
  • 5 MyCAREER Skill Boosts
  • MyPLAYER Clothing Capsule
  • 10 MyTEAM League packs (delivered one a week)
  • 5 Heat Check packs (delivered one a week beginning at the start of the NBA season)

NBA 2K20 Digital Deluxe

  • 35,000 Virtual Currency
  • 10,000 MyTEAM Points
  • 10 MyCAREER Skill Boosts
  • MyPLAYER Clothing Capsule
  • 10 MyTEAM League Packs (delivered one a week)
  • 10 MyTEAM Heat Check Packs (delivered one a week beginning at the start of the NBA season)
  • 1 Sapphire MyTEAM Cover Athlete Card

NBA 2K20 Legend Edition

  • 100,000 Virtual Currency
  • 50,000 MyTEAM Points
  • 20 MyCAREER Skill Boosts
  • MyPLAYER Clothing Capsule
  • MyPLAYER Apparel Collection
  • ‘Pick 10’ MyPLAYER Shoe Collection (10 shoes, user choice)
  • 20 MyTEAM League Packs (delivered one a week)
  • 20 MyTEAM Heat Check Packs (delivered one a week beginning at the start of the NBA season)
  • 5 MyTEAM Themed Packs (one per theme release across the first five releases)
  • 2 Sapphire MyTEAM Cover Athlete Cards

Are you interested in NBA 2K20? Let us know which version you’re going to pre-order in the comments below and then follow us on Pinterest for more Xbox gaming content.

NBA 2K20 Pre-Order
NBA 2K20 Pre-Order
Developer:
2K
Price:
Free


NBA 2K20 Digital Deluxe Pre-Order
Developer:
2K
Price:
Free


NBA 2K20 Legend Edition Pre-Order
Developer:
2K
Price:
Free

Microsoft new survey tool Microsoft Forms Pro is now generally available

Microsoft’s new survey solution, Microsoft Forms Pro, has finally launched in proper after several months of public preview testing.

The tool is available as part of a Dynamics 365 Enterprise license but can also be accessed by other Office 365 users who can sign up for it via the official website.

Microsoft Forms Pro is a tool for both collecting information for users and for analysing the result data. Each survey can be heavily customized visually and in how it flows with options for advanced branching, skip logic, individualized survey links, and multilingual capabilities being made readily available for developers.

The tool can also be integrated into existing Office 365, Dynamics 365, and Power Platform projects.

The rollout of Microsoft Forms Pro has be surprisingly fast for a Microsoft as it was announced back in February of this year, just four or so months ago.

Are you interested in using Microsoft Forms Pro? Let us know why or why not in the comments below and then follow us on Twitter for more Microsoft news.

Microsoft’s Windows 1.0 tease is likely a Stranger Things Season 3 promotion

Microsoft’s official Windows social media accounts have been having a bit of fun today by “introducing” the new Windows 1.0 operating system to their followers.

The fun started with a post on their Instagram and Twitter accounts with a short teaser video for the “all-new Windows 1.0, with MS-Dos Executive, Clock, and more!!” which was soon followed by subsequent posts about Windows 1.0 software such as “Excel, Chart, and even Flight Simulator” and a Twitter poll quizzing people on how much memory would be required to run the OS.

https://twitter.com/Windows/status/1145731141695168512

The Twitter account has even updated its profile photo and banner to reflect the launch of this retro OS.

Windows 1.0 and Stranger Things

While the first two posts had people wondering if Microsoft was planning some sort of retro/nostalgia product release, the text in the Twitter poll tweet referencing 1985 pretty much gave the true aim of these posts away.

They’re just a clever promotion for the new season of Strange Things.

Strange Things Season 3 is set to debut on Netflix over the next 24 hours and this latest season will be set in the year 1985, the same year that Windows 1.0 actually launched. Microsoft products have appeared in a variety of Netflix TV shows over the years so it’s incredibly likely we’ll see some in Stranger Things as well. Hell, showcasing old-school computer software would actually be a perfect fit for Stranger Things with its heavy emphasis on geek culture nostalgia.

What do you think? Are these posts a Stranger Things tie-in or something else entirely? Share your thoughts with the community in the comments below and then follow us on Twitter for more Microsoft news.

Did you know Windows 10 doesn’t store Registry backups by default?

Microsoft warned Windows 10 users about an existing bug that affected Windows 10 October Update. Surprisingly, the bug is not actually a bug. It’s a feature introduced by Microsoft itself.

Around 8 months ago, the Redmond giant disabled Registry backups in Windows 10. However, the tech giant didn’t bother to inform Windows users about this move.

They still think that the System Restore is backing up their system on a regular basis. In fact, no backup files are stored on your system even though it says “The operation completed successfully”.

Windows 10 Registry backup

Windows backup is an important feature specifically for businesses who can’t afford to lose important data. You can imagine the impact of this change on large enterprises.

Many people want to know why Microsoft decided to disable the feature. The tech giant aims to reduce the disk size occupied by Windows 10.

On a quick note, the registry back is just 50-100MB in size. Therefore, this attempt does not look feasible at all.


Don’t risk losing your data. Install one of these data backup solutions right now.


How to enable Registry Backup on Windows 10

Don’t worry, there is a quick workaround. According to Microsoft, you can still enable the System Restore feature in Windows.

You need to change a Registry key value to enable the functionality.

  1. Type regedit.exe in the Start menu. You will see a list of results, click Registry Editor option.
  2. Now look for the Configuration Manager key by navigating to HKLMSystemCurrentControlSetControlSession ManagerConfiguration ManagerEnablePeriodicBackup
  3. Select Configuration Manager and right-click on it. Create a new entry by selecting New >> Dword (32-bit) Value named EnablePeriodicBackup.
  4. Once the new value is created, change its default value to 1.
  5. Finally, restart the system to activate the new changes.

However, you should keep in mind that the upcoming feature update may disable the feature again. Therefore, you need to repeat the entire process after each upgrade.

Many think Microsoft shouldn’t lie to them

Many Windows users didn’t like Microsoft’s approach at all. According to Redditors, Microsoft should properly notify its users that the System Restore process is now disabled by default.

I don’t care how infrequently this functionality might have been used, folks, intentional breakage like this by Microsoft is just unforgivable. If they wanted to disable it and let the end user know that then fine, but don’t lie to them and let them think that the backup completely normally when in fact it did nothing! 

Others are concerned about the fact that the registry tweak may not be a feasible solution.

RELATED ARTICLES YOU NEED TO CHECK OUT:

Password Failed To Unlock Volume C [Technician Fix]

Windows 10, similar to the earlier version, comes with the BitLocker Drive Encryption. Although the feature is only available for Windows 10 Pro and Windows Enterprise Edition, it is a convenient feature until you run into a problem.

Sometimes, BitLocker may not accept the password and recovery key to unlock the drive, leaving the user locked out of one or all the drive in the system.

If you enter the password to unlock BitLocker Encryption, it may return  Error: The password failed to unlock Volume C. This can also happen with other drives in your system. If you are facing this error, here is how to troubleshoot BitLocker password and recovery key-related issues on your Windows 10 device.

What can I do if the password failed to unlock BitLocker encrypted volume?

1. Disable BitLocker and Unlock the Drive from Control Panel

  1. Press Windows Key + R to open the Run box.
  2. Type control and hit enter to open the Control Panel.
  3. Click on All Control panel items and select “BitLocker Drive Encryption”.
  4. Click on Turn Off BitLocker. It will ask you to enter the BitLocker password to unlock the drive.
  5. Enter the password and click on Unlock

Alternatively, you can unlock the BitLocker from the File Explorer > This PC.

  1. Open “File Explorer” and click on This PC.
    unlock-drive-BitLocker
  2. Right-click on the locked drive (c:) and select Unlock.
    BitLocker Unlock Enter Password
  3. A pop-up window will appear. Enter the password used to lock the drive and click on Unlock.

2. Use Command Prompt to Unlock BitLocker

  1. Press the Windows Key and type cmd.
  2. Right-click on the Command Prompt option and select Run as Administrator.
  3. In the Command Prompt window, type the following command hit Enter. manage-bde -unlock c: -password
  4. In the above command make sure to change the drive letter if you want to unlock D: or E: drive.
    BitLocker Unlock Command Prompt
  5. When prompted, enter the BitLocker password that you used to lock the volume and hit enter. The Password may not be visible while typing, so type the password and hit enter.
  6. If BitLocker accepts the password, you will see “The password successfully unlocked volume D:” message.
  7. However, sometimes BitLocker may show an error after entering the password. This can be resolved by entering the Recovery key in the command prompt.
  8. Open the Command Prompt as admin. Refer to the earlier steps.
    BitLocker Unlock Command Prompt
  1. In the Command Prompt enter the following command and hit enter.
    manage-bde –unlock C: -recoverypassword xxxxx-xxxxxx-xxxxxx-xxxxx-xxx
  2. In the above command, make sure you change the drive letter if you are trying to unlock a drive other than C: and change the xxxx-xxxx with the recovery key that you have saved as a file or uploaded to your Microsoft Account while encrypting the drive.
  3. Upon success, you should see “BitLocker Drive Encryption: Configuration Tool version 6.1.7600. Copyright (C) Microsoft Corporation. All rights reserved. The password successfully unlocked volume D:.” Message.

Let us know your thoughts in the comments area below.

Windows 10 19H2 brings controlled feature roll out this fall

People had the impression that Microsoft was more concerned about 20H1 as compared to the next feature update (aka Windows 10 19H2).

These concerns were laid to rest when Microsoft recently revealed some more details about Windows 10 19H2.

This time Microsoft is completely focusing on performance improvements. However, the company does not plan to introduce any major changes in 19H2.

Windows 10 19H2 is going to be a minor update releasing later this year. According to Microsoft, 19H2 will bring enterprise features, quality improvements, and performance improvements.

Windows 10 Insider Preview Build 18362.10000 (19H2)

Microsoft made it clear that Windows 10 19H1 will be serviced for around 30 months. The company also made the following announcements.

19H2 requirements

Microsoft revealed the upcoming 19H1 feature update will be rolled out to Slow Ring Insiders. However, their PC should be running Windows 10 May 2019 Update.

Cumulative update

These updates will be available as a monthly Cumulative Update. It means that you can quickly install the latest update once it starts rolling out.

Furthermore, the Redmond giant plans to ensure a smooth installation process with the help of servicing technology.


Check out this guide if you want to learn when the next big Windows 10 update arrives.


Controlled feature rollouts (CFRs)

One of the interesting aspects of Windows 10 19H2 is that it rolls out new features to Insiders via controlled feature rollout.

Microsoft stated that you may need to manually turn on some features because they are by default disabled.

Microsoft further explains in a blog post.

This update contains two behind-the-scenes changes designed for OEMs and does not contain anything visible to Insiders. We’re using this update to test our process and servicing pipeline for delivering these updates to customers. 19H2 updates to Insiders will also be cumulative with the latest May 2019 Updates. 

Microsoft says that Windows 19H2 is a work in progress. As of now, the company has not announced any release date.

However, Microsoft stated that 19H2 lands in September this year. If you are interested in 19H2 you can visit Windows Update section to download Windows 10 build 18362.10000. 

Microsoft encourages Windows Insiders to report potential issues via Feedback Hub. 

RELATED ARTICLES YOU NEED TO CHECK OUT:

Outlook Won’t Print in Color [PERMANENT SOLUTION]

Sometimes, when you print your calendar from the Outlook client you may find that it is only printing in black and white color. The issue is known to occur in Outlook 2016 and later versions.

According to Microsoft, the issue may occur due to a bug in the Outlook client that does not respect the Print using the grey shading setting.

When the user goes to the preview, the print screen only shows Black and White option. If you are facing a similar error, here is how to fix this error on your Windows 10 device and Outlook client.

Why won’t Outlook print in color?

1. Disable Print Using Grey Shading

  1. Launch Outlook client.
  2. Click on File and select the Print option.
  3. Click on Print Option and then under Print Style, click on Page Setup button.
    Disable Print using gray shading
  4. Under Shading, Uncheck “Print using grey shading” option.
  5. Close the Outlook client and relaunch it. Check if the color print options are back and you are able to print color documents as well.

If the printer won’t print in color, the solution above will most likely fix the problem quickly.

2. Check your Printer Settings

  1. Click on Start and select Settings.
  2. Click on Devices and then click on Printers and Scanner from the left pane.
  3. Look for your printer in the list of the printer. Click on your printer and select Manage.
    Printers and Scanner - Manager Printer
  4. Under “Manager your Device” click on “Printing Preferences“.
  5. Depending on your printer configuration, find the option and select whether you want to print in color or black and white. Since you want to print in color, check if it is set to Black and White. If so, set it to print color.
  6. Close the Printer properties window and launch Outlook. Try printing any document and check if the color printing option is available.

3. Update the Printer Driver

  1. Press Windows Key +  R to open the Run dialogue box.
  2. Type “devmgmt.msc” and hit enter to open the Device Manager.
  3. In the Device Manager, expand “Print queues“. Printer Queues Device Manager - Update Driver
  4. Look for the affected printer in the list. Select the printer and select Update Driver.
  5. Choose “Search automatically for updated driver software“.
  6. Windows will look for any new update for the driver and download it. After the driver is installed. Close the Device Manager, and launch Outlook. Check for any improvements.

If the manual method of updating your drivers didn’t work out, don’t stress about it. You have a more practical alternative to manage all the PC drivers automatically.

So, you should use effective driver update support for Windows given by a fully automated program. It offers a detailed driver scan and a complete list of outdated drivers you can fix by only pressing one button.

⇒ Get Fortect Driver Updater

4. Repair MS Office

  1. Press Windows Key + R, type Control and hit enter to open Control Panel.
  2. Go to Programs > Programs and Features.
    repair office client
  3. Locate Microsoft Office and click on Change.
  4. In the Office Repair tool, select Quick Repair and click the Repair button. Wait for the troubleshooter to complete the repair.  Check for any improvement.
    Microsoft Office Repair Option
  5. If the issue persists, again launch the office repair tool and select the Online Repair option. Click on Repair button again. This option requires an internet connection to work properly.
Posted in Fix

Install SUSE Linux Enterprise Server 15 SP1 on Windows 10/11

All the Linux fans out there! You can now download SUSE Linux Enterprise Server 15 SP1 from Microsoft Store.

Windows 10 users were previously allowed the install a few Linux distributions on Windows 10 including Arch, Ubuntu, Kali Linux.

They can now install SUSE Linux Enterprise Server 15 SP1 as well. The developer explains:

SUSE Linux Enterprise Server 15 SP1 is a multimodal operating system that paves the way for IT transformation in the software-defined era. The modern and modular OS helps simplify multimodal IT, makes traditional IT infrastructure efficient and provides an engaging platform for developers. As a result, you can easily deploy and transition business-critical workloads across on-premise and public cloud environments.

However, you should be running at least Windows 10 build 14388 (Windows 10 Anniversary Update) to install the new distribution on your system.

You should keep in mind that you can not run SUSE Linux Enterprise Server 15 SP1 in Window 10 S Mode.

Moreover, it also supports Windows Server 2019 version 1709 and later.


Did you know Linux beat Windows 10 v1903 at multi-thread performance?


How to install SUSE Linux Enterprise Server 15 SP1 in Windows 10?

In order to install SUSE Linux Enterprise Server 15 SP1, you should first enable WSL in Windows 10 and Server.

Follow these steps to enable the feature:

  1. Open Powershell as an Administrator and enter the following as a single command:                                     
    Enable-WindowsOptionalFeature -Online -FeatureName Microsoft-Windows-Subsystem-Linux 
  2. Finally, restart your system to enable the changes.

Now you can start the installation process.

  1. Visit the Windows App Store and download SLES-15-SP1. Download SUSE Linux Enterprise Server 15 SP1
  2. Once the download is complete, open the installation file named “SLES-15-SP1.appx” and hit the Install button.
  3. You can see the installation progress in a Command Prompt window.
  4. The initialization process will start after the installation is complete.
  5. Now the system prompts you to enter a username. Remember, you don’t need to choose the same username as you currently have as Windows username.
  6. Next, you need to enter a password against the username.
  7. The system will prompt if you want to use the username administrative (sudo) purposes.
  8. Last but not the least you can use “sudo SUSEConnect -r [registration code]” to register SLES-15-SP1.Register SUSE Linux Enterprise Server 15 SP1

Apart from the Windows 10 Home users, the new distribution is expected to attract large enterprises.

What do you think about SUSE Linux Enterprise Server 15 SP1 arrival in Microsoft Store? Let us know in the comments down below. 

RELATED ARTICLES YOU NEED TO CHECK OUT:

How to fix Surface pro 6 battery drain [EXPERT FIX]

Users have reported that their Surface Pro devices drain the battery too fast to be able to use it properly. This issue can be extremely annoying, especially in the case that you are on the road and need access to the information stored on your Surface Pro.

This is how one user describes the issue on Microsoft Answers forums:

I recently just picked up the new Surface Pro 6 with 128gb 8gbRAM and i5. It has been a great device however the battery life is concerning.I loose 7% of my battery by using Youtube for 20 minutes on recommended battery and suggested brightness. I dont know if this is normal or do I have a defective device.

In this article, we will explore some of the best troubleshooting methods. We will try to figure out what causes the battery to drain so fast, and then we will explore some methods to troubleshoot it. Read on to find out more.

How can I fix battery drain problems on Surface Pro 6?

1. Download the latest firmware for your Surface Pro device

  1. Visit the official Microsoft webpage.
  2. Scroll down and select the version of Surface Pro you own.Surface firmware page - surface pro battery drain
  3. Click the appropriate link, download and install the firmware update.

2. Clean the connector on the power supply

  1. Clean the connector pins.
  2. Unplug the power supply from the wall socket -> clean the pins using a pencil eraser.
  3. Use a cotton swab with alcohol to clean the pins.
  4. After you’ve made sure that the pins are clean, make sure that all pins are dry.
  5. Plug the power supply into the wall socket, plug in the connector, and connect it to your Surface device.

3. Remove and reinstall the battery driver

  1. Open Device Manager -> click on Batteries to expand the section.device manager batteries - surface pro battery drain
  2. Double-tab on the Microsoft Surface ACPI-Compliant Control Method Battery.
  3. Inside the Driver tab, select Uninstall -> Ok.
  4. Navigate to the Action menu -> select the option Scan for hardware changes.

In extension, you should be aware of specialized driver software that can manage your drivers easily by installing or updating them automatically. Plus, you can fix damaged drivers in no time.

⇒ Get Fortect Driver Updater

4. Run the Surface Diagnostic Toolkit

surface diagnostic tool - surface pro battery drain
  1. Click this link to download the Surface Diagnostic Toolkit.
  2. Run the application on your device.
  3. After the diagnostic process is completed, perform a forced shutdown by keeping the power button pressed for 10 seconds.
  4. When you turn on your Surface device, the updates will be applied.

5. Shut down your device and charge it fully

  1. Shut down your device.
  2. Connect the charger and charge your device completely.
  3. Once the device is charged, check if the problem is still there.

6. Reset your Surface software


If all other methods have failed to solve your issue, it is recommended that you reset your device.

In order to reset the software on your Surface device, you will need to navigate to the Fresh Start option and follow the on-screen instructions.

We hope this guide helped you solve your Surface Pro issue. Please feel free to let us know if it did by using the comment section below.

Cannot Delete Files in Windows Media Player [Fix]

The Windows Media Player is one of the best apps for multimedia, but some users reported that Windows Media Player cannot delete a file from the device.

Needless to say, it’s a minor issue at best and can be taken care of easily. Keep reading to find out!

What can I do when Windows Media Player cannot delete files?

1. Delete the file from your PC

  1. Connect your device, either the Windows Phone or MP3 player, to your computer.
  2. Click on Start, and then open File Explorer.
    Connect the device and attempt deleting if windows media player cannot delete a file from the device
  3. Click on This PC from the options on the left.
  4. Your external device should be listed here. Double-click on it to reveal its file structure.
  5. Navigate to the folder where the music or video files are stored.
  6. Locate the file you want to remove, right-click it and choose Delete. 
  7. Click Yes to confirm.

A quick fix when you cannot delete files in Windows Media Player on Windows 7 is to take the manual approach. Locate the file in the File Explorer and remove it.

2. Clear the Windows Media Player cache

  1. Press Windows + R to open Run, paste the following command, and hit Enter: %LOCALAPPDATA%\Microsoft\Media Player
  2. In the window that opens, press Ctrl + A to select all files, and then hit Delete to clear them. Make sure you are deleting only the files and not any folders therein.
    Rebuild WMP Library database if windows media player cannot delete a file from the device
  3. Restart Windows Media Player. This will rebuild the database all over again.
  4. Now, try deleting the file that you wish to.

3. Reset Media Library

  1. Restart your device.
  2. Type Services in the Search box and select the Services app from the search result.
  3. Look for Windows Media Player Network Sharing Service.
    Stop WMP network sharing service if windows media player cannot delete a file from the device
  4. Check the status. If it is running, double-click on the service and click on Stop to prevent the service from running.
  5. Next, paste the following path in the Search box, and hit Enter:%LOCALAPPDATA%\Microsoft
  6. Select the first search result.
  7. Locate Media Player and rename it to something else, say, Media Non Player.
    Rename media player folder if windows media player cannot delete a file from the device
  8. You might have to select the setting to show hidden files and folders if you cannot see the Media Player folder, as the same could be hidden.
  9. Restart Windows Media Player.
  10. Start Media Player again and check if the issue is still there.

That’s it! One of the solutions should have helped if you cannot delete Windows Media players files.

If the problem persists and you are looking for alternatives, we recommend switching to a reliable and universal video player.

Tell us which fix worked for you in the comments section below.

Microsoft provides “one stop shopping” for all Insider programs on this web page

Following the launch of the Windows Insider Program in late 2014, Microsoft has been pursuing a wide “insidering” effort across the company, with new Insider programs for Office, Skype, Xbox, and more. This actually happened so fast that it’s actually hard to keep up with all the various Insider programs that the company created over the years.

Fortunately, the software giant has now put all information about its various Insider programs on a single web page, which was shared on Twitter today by Microsoft Partner Program Manager Scott Hanselman.

This may have passed under your radar, but Microsoft has launched Insider programs for Bing as well as Visual Studio Code in recent years. The last Insider program Microsoft launched is for the new version of Microsoft Edge, which is now based on the open-source Chromium project. Since its official launch in April, the Edge Insider Program has become pretty active with the Canary and Dev channels giving us new builds at a regular pace.

On the Windows Insider side, the program has now crossed more than 16.5 million members this year, but it looks like some changes are incoming. For the first time ever, Microsoft recently made Fast Ring Insiders skip the next Windows 10 update (19H2) to test the first feature update coming in 2020. As for the 19H2 update, the first preview build shipped to Slow Ring Insiders yesterday, and Microsoft explained that this minor update will install just like a regular cumulative update when it’s released later this Fall.

The Windows Insider program isn’t the only one that went through some changes in recent years, as the Xbox Insider program went from an invite-only structure to a more complex organization with five different Insider rings. It’s nice that all information about Microsoft’s Insider programs can be found in one single place, but all programs keep their specificities and it certainly take some time to figure out how to use them best.

Windows Media Player Can’t Skip or Fast Forward [Fix]

Windows Media Player can’t skip forward? This can be a big issue, so today, we will show you how to fix it.

What can I do if Windows Media Player can’t skip forward?

First, just restart your PC. This quick reset could help address minor bugs. Also, try press and hold on to the button for at least 15 seconds for the forward action to take place.

If none work, move to the solutions listed next.

1. Run Windows Media Player Settings troubleshooter

  1. Press Windows + R to open Run, paste the following command, and hit Enter:msdt.exe -id WindowsMediaPlayerConfigurationDiagnostic
  2. On the WMP troubleshooter window, click on Next for the process to begin.
    Troubleshooting WMP settings if windows media player cannot skip forward
  3. Follow on-screen instructions.

2. Run Windows Media Player Library troubleshooter

  1. Press Windows + R, paste the following command, and press Enter:msdt.exe -id WindowsMediaPlayerLibraryDiagnostic
  2. Click on Next for the troubleshooting process to begin.
    Try troubleshooting WMP Library if windows media player cannot skip forward
  3. Follow the instructions on the screen.

The built-in troubleshooters often help fix things when Windows Media Player can’t skip forward 10 seconds or jump by 5 seconds.

3. Register DLL files

  1. Press Windows + S to open Search, type Command Prompt, and click on the relevant search result.
  2. Paste all the following commands individually and hit Enter after each:regsvr32 ntdll.dll /s regsvr32 msdxm.ocx /s regsvr32 dxmasf.dll /s regsvr32 wmp.dll /s regsvr32 wmpdxm.dll  /scommand
  3. Once done, restart the PC.

4. Check file types

This error usually pops up with formats like MKV, FLV, MOV, or older AVI files. These formats often cause skipping issues in Windows Media Player due to compatibility problems.

To fix this, try converting the file to something more compatible, like MP4 or WMV. You can use apps like VLC or online services like Zamzar or Convertio to convert quickly.

For an even faster solution, try the Windows Photos app: open the video in Photos, choose Edit & Create > Save as video, and save. This will re-encode the file in MP4, so it should play smoothly in Windows Media Player.

This should be all that you need to do if Windows Media Player can’t skip forward. Besides, if the problem persists, we recommend you switch to a reliable and dedicated media player.

Tell us which fix worked for you in the comments section below.