PS4 Controller Audio Driver Issues in Windows 10/11 [Pro Fix]

As PS4‘s controller, DualShock 4 isn’t made to work on a Windows PC by default; you need to install the right drivers to make the connection. 

Users have been reporting a specific issue with the audio driver that causes many issues. For example, Windows tends to recognize the controller as an audio device, automatically disabling the default audio hardware.

So, we’ll try to offer a few solutions for this and all other audio driver-related issues with the DualShock 4 controller in Windows 10.

How to fix DualShock 4 audio driver issues in Windows 10?

1. Reinstall the controller

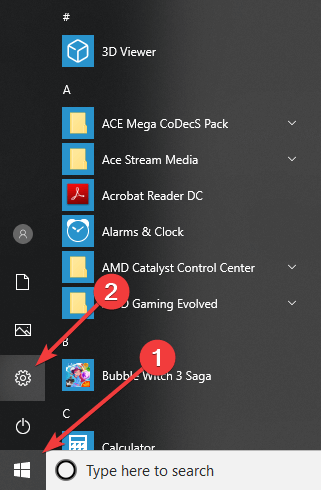
  1. Go to Settings > Devices.bluetooth devices ps4 controller audio driver windows 10
  2. You should see the DualShock 4 controller under Other devices.
  3. Left-click it, and go to Remove device.
  4. Unplug the controller, and re-connect it again.
  5. It should look for new drivers automatically. Wait for the drivers to install, and the controller should work now.

2. Update drivers

  1. Right-click the Start and select Device Manager.
  2. Navigate to Universal Serial Bus controllers and expand this section.device manager ps4 controller audio driver windows 10
  3. Right-click your controller and open Properties.
  4. Select the Details tab.
  5. From the drop-down menu, open HardwareIds.
  6. Copy the first row and paste it into your browser’s address bar.
  7. The search results should show you the exact drivers you’ll need to install.

Updating drivers can also help you with issues like can’t connect 2 DualShock controllers on your PC; read this to learn more.

2.1 Update drivers automatically

Another solution is to update your drivers using a specialized driver updater tool. A dedicated tool is very easy to use and allows you to update the drivers fast and safely. Such a tool is always a better solution when you have never experienced driver updating.

3. Use the Bluetooth troubleshooter

  1. Open the Settings app and go to Update & Security section.
  2. Select Troubleshoot from the menu on the left.
  3. Select Bluetooth from the right pane and click Run the troubleshooter.bluetooth troubleshooter ps4 controller audio driver windows 10
  4. Follow the instructions on the screen to complete the troubleshooter.

4. Run the Sound troubleshooter

  1. Open the Settings app and go to Update & Security section.
  2. Select Troubleshoot from the menu on the left.
  3. Select Playing Audio from the right pane and click Run the troubleshooter.playing audio troubleshooter ps4 controller audio driver windows 10
  4. Follow the instructions on the screen to complete the troubleshooter.

Let us know how the procedure went for you in the comments area below.

You can now use full-feature Google Earth on Chromium Edge

You can now use Google Earth on all browsers, including the new Chromium-based Edge. Google has officially launched the preview beta version to all users.

As a quick reminder, the search engine giant launched Google Earth for web users two years ago. The service was accessible only to Chrome users at that time. The company did not do any notable efforts to extend the service for other browsers up until recently.

Later on, Google decided to use WebAssembly to redesign Google Earth for web. We saw a glimpse of the new version at Chrome Dev Summit 2017.

It was an early release and nothing was polished at that time. Google never advertised any release date for the new version until now.


Looking for a reliable GPS app for your Windows 10 PC? Check out this fresh list of GPS tools for PCs.


The Google Earth service was working perfectly fine with Google Chrome. Confused with the word Chromium, people assumed that the new Edge browser will support the service.

But they were surprised to see that the reality was different and they could not use Google Earth on the new browser.

Google realized it was high time to release Google Earth for all the other major browsers out there.

The company announced the release on its Chromium  blog.

The Earth team found a solution to allow Google Earth to move across multiple browsers—something we’ve been working on for a while now. Earth first came to the Web about two years ago using Native Client (NaCl), a Chrome-only solution—at the time. It was the only way to run native code in the browser and offer the performance users expect in modern web applications.

Google promised to improve Google Earth’s performance with new WebAssembly tools.

The company sees WebAssembly as an opportunity to run applications across different browsers. You can explore more details about the technical implementation at web.dev. 

RELATED POSTS:

Follow these simple steps to pin websites from Edge to taskbar

We all have some favorite websites that we want to visit a daily basis. However, no one wants to look for these sites over and over again.

Microsoft Edge is the browser that comes preinstalled with Windows 10 OS. The company has recently rolled out the new Chromium Edge version to Insiders.

This browser is currently in the testing phase. The recent Edge Canary build brings a new built-in feature that will interest many users.

You can use this feature to pin your favorite websites to the Windows 10 Taskbar. Then you can simply click on the pinned icon to open the site.

As a quick reminder, this feature is already available in the original version of Microsoft Edge. However, it is pretty much possible that users may get confused between the old and new pins.

You will notice a bluish border that appears around the icon that belongs to the old browser.


Speaking on Edge’s UI, here are some interesting themes to improve the browser’s aesthetics.


Steps to pin a website from Microsoft Edge to Windows 10 taskbar

Microsoft Edge now allows its users to pin their most visited websites to the taskbar. You can then click on the pinned icon to open the website in a new tab.

Let’s learn how to pin a website to the taskbar.

  1. Open the new Microsoft Edge and visit your favourite website that you would like to pin.
  2. Navigate to the three-dot menu that is available on the right side of the screen.
  3. Click on it and select Pin to taskbar option to pin the website to Taskbar.pin website to taskbar edge browser
  4. That’s it, you can now find the website shortcut on Taskbar. 
  5. You can repeat this method to pin as many websites as you want.

Note: Chromium Edge allows you to pin these websites to the Start menu as well.  To do this, you can click the same three dots menu and select Pin this page to Start option.

Want to unpin a website?

Later at some point, you may experience a situation when you want to clear your taskbar.

Don’t worry there is still an option to delete the pinned websites.

Here are the steps to follow:

  1. To do this simply navigate to the taskbar and right click on the pinned website.
  2. You will see a list of options, click Unpin to delete the website. 

Done! The website will no longer be visible on the taskbar.

Right now, this feature is only restricted to Canary version. However, a public rollout is expected later this year.

QUICK TIP:

Meanwhile, if you’re looking to switch to a new browser, why not try UR Browser?

It’s fast, secure, privacy compliant and fully customizable.

Editor's recommendation
ur browser
  • Fast page loading
  • VPN-level privacy
  • Enhanced security
  • Built-in virus scanner

RELATED ARTICLES YOU NEED TO CHECK OUT:

Microsoft and Nvidia work to fix latency spikes in Windows 10 v1903

Many users encountered issues with Nvidia drivers after installing the latest OS version on their machines. Ntoskrnl.exe is causing large latency spikes after installing the Windows 10 May Update.

One user reported the following problem:

InLatencyMonI noticed large latency spikes of around 1300us for ntoskrnl.exe. I also ran into 1 instance where my entire PC froze for a good 10 seconds or so while playing Apex Legends before all of a sudden everything resumed back to normal. I was using drivers 430.86 but am now back on 430.64 (need to do more testing).

Latency spikes after Windows 10 May Update

The issue appeared after updating to Windows 10 version 1903, as one Reddit user reported:

since I made a fresh Windows 1903 install I get a high DPC latency spike caused by ntoskrln.exe. My windows is optimized. I disabled all the C states etc in my UEFI. I disabled (gpedit) auto update and driver installations from Microsoft at the beginning of my installation of the OS. My PC is a i7 8700k Z370 build wih a GTX 1080.


Ntoskrnl.exe also caused high CPU usage? Check this guide for further details!


Major issue but no solution available

The users reported that the system had difficulties with real-time audio. They experienced clicks, pops, and dropouts due to buffer underruns.

In the latest Windows 10 update, Microsoft introduced some significant changes including those to the WDDM (Windows Display Driver Model) and kernel.

For now, there are no solutions for the issue, but there is a workaround. Users said that after reverting to Windows 10 version 1809, the problem disappeared.

If you want to avoid similar issues, check our guide on how to block Windows 10 v1903 from installing on your computer.

Microsoft Launcher Beta 5.6 now available with revamped Settings page, Teams meeting integration

Just one day after Microsoft Launcher version 5.5 went mainstream, a new beta release is now available for download. With the fresh version beta 5.6 release, testers of the popular Android launcher can now enjoy a new integration with Microsoft Teams meetings and see flagged emails right from the Tasks cards.

Full changes introduced with this update can be seen in the changelog below, as seen on the Google Play Store. Keep in mind that Adaptive Icon support is not one of the new features, as it was previously added with yesterday’s version 5.5 update.

  • Adaptive icons support – Now you can have the same look for your app icons with multiple choices for shapes.
  • You are able to join Microsoft Teams meeting in Calendar card in your Feed.
  • You can see your flagged emails from your Microsoft Account or work/school account in Tasks card.
  • Launcher settings experience has been optimized so you can discover and find what you’re looking for quickly.
A look at the revamped settings page and Flagged Emails in the Task card

Teams integration in the calendar card and Outlook integration in the feed card are very welcome additions, helping bring together more of Microsoft’s services in the Launcher. Beta testers will also likely appreciate the easier to understand setting page, as it will make customizing the launcher a bit easier.

Microsoft Launcher version 5.6 beta should be showing up right now in the Google Play Store if you’ve already enrolled as a beta tester. If not, you can grab this latest update right now by clicking the link below, and scrolling to the middle portion of the app listing. Everyone else should expect this update to drop after a period of testing is complete.

Microsoft Launcher
Microsoft Launcher
Price:
Free

Windows 10 v1903 install fails with error 0x8000ffff for many

As incredible as this may seem, Windows 10 v1903 is still affected by installation issues. It’s been quite a few weeks since the update is out but some users still can’t install it on their machines.

You would think that Microsoft has solved all the issues by now. Sorry to break the bad news, but that’s not the case.

Many Windows 10 users are still bumping into problems and errors when trying to install v1903 on their PCs. Despite working on some systems, on others, error 0x8000ffff pops on the screen:

Successfully installed 1903 on 3 comp0uters. Cannot install 1903×64 over 1809 on an Acer Aspire 5750.Fails with error 0x8000ffff.

For right now, this error doesn’t have a particular cause, but in many instances, it appeared because of the time zone settings or incompatible drivers.

How can I fix 0x8000ffff error on Windows 10?

The normal solutions like Windows update troubleshooter, deleting the SoftwareDistribution folder, performing a clean boot, or using the Windows installation media don’t work.

1. Update your drivers

As we mentioned before, this error could be triggered by some driver incompatibilities, so make sure that all your drivers are up to date. If you don’t know how to do that, we’ve prepared a dedicated guide to help you.

You shouldn’t worry too much about this manual process. There are automated ways to help you manage all your drivers automatically, plus avoiding other system malfunctions caused by incompatible drivers.

⇒ Get Fortect Driver Updater

2. Check Date and Time settings

So if you want to get rid of the 0x8000ffff error, you should be checking your Date and Time settings. For some unknown reason, if the Set time zone automatically is OFF, the install will fail with this error.

In the Windows search bar, type Date & time and hit Enter. When the Date & time settings appear, make sure that Set time zone automatically is ON.

This is a very simple solution and it worked for many Windows 10 users, so we recommend that you try it with confidence.

3. Disable system protection

The last thing that worked for some users and you should try it as well, is to disable system protection and re-enable it in System Restore settings.

After these steps, your installation should work as intended.

As you can see, the solutions to solve the 0x8000ffff error on Windows 10 are pretty simple. More importantly, many users confirmed these methods worked. If you follow them properly, you should fix this error in no time.

Users often report that error 0x8000ffff catastrophic failure appears after updates, restores, or upgrades. This detailed error 0x8000ffff catastrophic failure fix explains how to repair the problem across multiple Windows versions.

If you encountered this error code and dealt with it in a different way, share your method in the comments section below so that other users may try it as well.

How to fix common My Friend Pedro bugs on Windows PCs

My Friend Pedro is an new, impressive, arcade-like game, that managed to take the word “cool” to a whole new level for all the gamers out there.

However, as all Windows PC owners out there know it, not even the most impressive games are free of various issues.

The good news is that for most of the issues, workarounds are available, as you can find by reading this article further.

Fix common My Friend Pedro issues

  1. Camera stuttering
  2. Unable to hear sounds
  3. Freeze and crash at launch

1. Camera stuttering

The biggest bug reported, it appears that the game really stutters during camera movement, even though it is locked at 60FPS. From user reports, this can be fixed in the following ways:

For variable sync users

  1. Add “-window-mode exclusive” to launch parameters
  2. Use RTSS to cap framerate to 50

For non variable users

  1. Use RTSS to cap framerate to 50
  2. Set refresh rate to multiple 50 or 100

2. Lack of game sound

Some users are reporting a lack of sounds when playing the game. Apparently, this is caused by incompatibility between the Unity game engine and audio enhancement software’s, such as “ASUS Sonic Studio”. Disabling the software will fix this issue.

3. Freeze and crash at launch

If you are one of the few unfortunate users experiencing this issue, there is still hope for you. Check your antivirus firewall   -> look under blocked applications. If the game is blocked, unblocking it might solve the issue for you.

A great update is that the developers are actively working on fixing all outstanding issues our there. They have already released an experimental branch up on Steam with a temporary fix (setting the FixedUpdate rate to 60hz).

So make sure to always keep your game up to date, for an enhanced gaming experience.


How has your experience playing My Friend Pedro been so far? Is the game running smoothly for you?

In case you’ve encountered other workarounds for the issues mentioned above, you can list the troubleshooting steps in the comment section below.

More gaming-related articles:

Posted in Fix

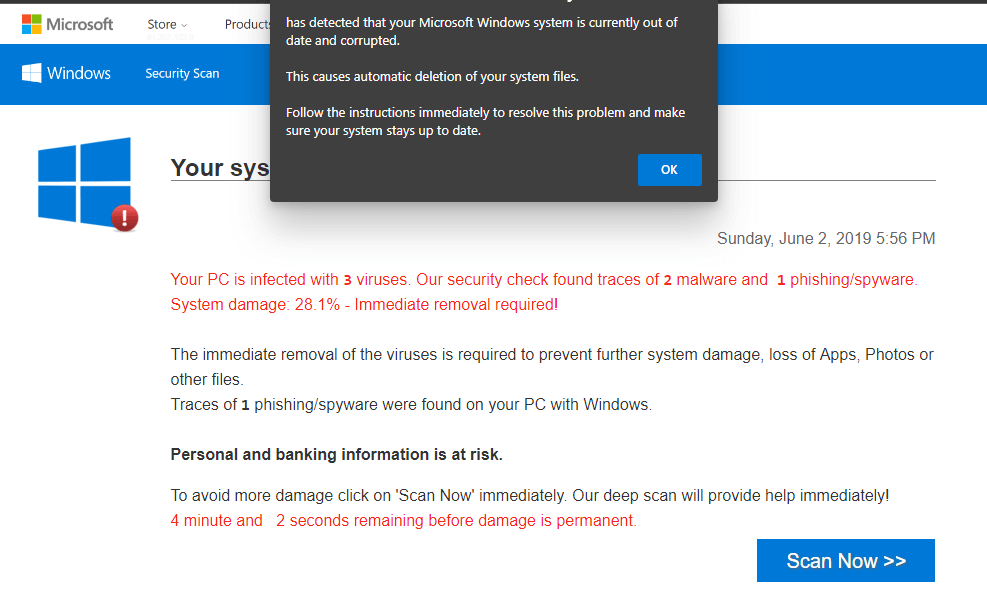
Malvertising attacks plague Microsoft Games [HOW TO STAY SAFE]

Microsoft users reported that malicious banner ads open fraudulent web pages when running Microsoft Games apps on Windows 10.

These websites threaten to infect your PC with viruses or promise winnings in various competitions.

The fake virus warnings go to a download page that Microsoft classifies as PUA (potentially unwanted application).


Enjoy peace of mind with these PUA removal tools!


How to keep yourself safe from these malvertising attacks?

Still, you are safe as long as you close the respective window without clicking on anything else.

Windows Defender SmartScreen is not recognizing this issue, so it is not blocking it.

In other words, when the fake virus screen appears, you simply close that page or tab. If that page or tab would not close, open Task Manager with Ctrl + Shift + Esc and stop the browser process with End Task.

Also, as a precaution, clear your temporary internet files and cache.

malvertising attacks Microsoft Games

“Win a prize” fake survey: a more complicated issue

As for the “win a prize” fake survey, this issue is more complicated. An user stated:

The “fake survey win a prize ” one is being more problematic in that yes it does go away when you close the tab but unfortunately it keeps coming back. Since I installed Malwarebytes it is blocked but not blocked from trying so whilst I no longer get the” survey” I am getting page blocked interrupting my game about 3 or four time a minute which is frustrating to say the least.

Therefore, basic security and privacy are crucial for eliminating these problems. Choose an antivirus from our list to protect your computer and your privacy.

System doesn’t meet the requirements for this update [FULL FIX]

While trying to install HP updates, many Windows 10 users reported Your system does not meet the minimum requirements for this update. Update has been canceled error.

We can provide you with a guide on how to fix the error, depending on its cause.

What to do if your computer doesn’t meet the software requirements?

1. Run as Administrator

  1. Log in Windows with the Administrator User or
  2. Right-click on the program you wish to run and click Run as Administrator.
    run file as administrator your system doesn't meet the minimum requirements for this update

2. Update Windows

  1. Click the Start button > Settings.
  2. Select Update & Security > click Windows Update.
  3. Choose Check for updates.
check for updates windows update your system doesn't meet the minimum requirements for this update

3. Double-check the driver version

  1. Make sure you install a 32-bit driver when running a 32-bit Windows version and a 64-bit driver when running a 64-bit Windows.
  2. To ensure that you have the correct version, check your system information and the download page before downloading the driver.

To ensure that you’re downloading the correct drivers, you can use third-party solutions to automatically update all your drivers with a few clicks.

4. Make sure your hardware has compatible updates

  1. Make sure that the update is available for your model.
  2. Check the update release notes and ensure that that your model is compatible with the latest update.

5. Do a disk cleanup

  1. Press the Start button > type Disk Cleanup in the search bar and hit Enter.
  2. Select all the unnecessary files that the tool recommends.
    disk cleanup select files your system doesn't meet the minimum requirements for this update
  3. Click OK > click Delete files.
  4. Try to see if the update now works.

Not familiar with Disk Cleanup? Check out our Disk Cleanup guide to learn how to properly remove temporary and junk files.

We hope that our quick guide could help you fix your issues. If you have any other fixes, leave them in the comment section below.

Download KB4501375 to fix existing Windows 10 v1903 bugs

Microsoft just rolled out another cumulative update to Windows 10 May 2019 Update users. Update KB4501375 fixes some issues introduced by the initial rollout of Windows 10 v1903.

This non-security update bumps the OS build to version 1903 18362.207. However, this update is only available to Release Preview Ring Insiders. 

That is why Microsoft didn’t release a changelog for this update.

As a quick reminder, this month’s Patch Tuesday updates introduced many Event Viewer bugs. Some users confirmed that KB4501375 addresses some of these issues.

However, keep in mind there is no official confirmation yet as to exact bug fixes brought by this update. We expect Microsoft to reveal the complete changelog as soon as the update is available to non-Insiders as well.

Download KB4501375

Similar to all the previous updates, KB4501375 is available as an automatic update. You can go to Settings > Update and Security and then Check for Updates.

However, you need to reboot your system to apply the changes. You first need to download and install the servicing stack update first before installing KB4501375. 

Many people have already started to download the update. So far, no issues have been reported.

The installation process went smoothly for all users. We will keep an eye on Microsoft’s forum and update this article as soon as new information is available. 

Are you experiencing any issues with KB4501375? Let us know in the comments section below.

RELATED ARTICLES YOU NEED TO CHECK OUT:

Microsoft to add recently acquired Flipgrid as default video camera for OneNote

Microsoft is setting Flipgrid as its default video camera recorder in OneNote, starting with the free web app in the fall of 2020 and eventually other platforms, as well. Mike Tholfsen, the company’s project manager on the Microsoft EDU team, noted that both students and teachers will be able to record videos and embed them directly into their notes.

The company acquired the video-based social learning platform just barely over a year ago for an undisclosed amount. Now, it seems they want to make better use of their money spent, bringing it to one of their core Office apps to potentially boost its audience size of more than 20 million users.

The company is also rolling out a host new tools for Flipgrid, as well, including video transcription powered by Microsoft Azure and support for Immersive Reader. Those using OneNote will find the Shorts Camera to be useful, allowing them to put together segments to create a simple video with stickers, inking, and video styles.

Additionally, the company is also releasing FlipgridAR, which allows users to create and print stickers “for any response to place Flipgrid videos in augmented reality on everything.” Users can also also use the “hundreds of millions” of existing Flipgrid QR codes to decorate their classrooms in AR.

How do you think these new features can be useful for students and teachers? Share your thoughts below.

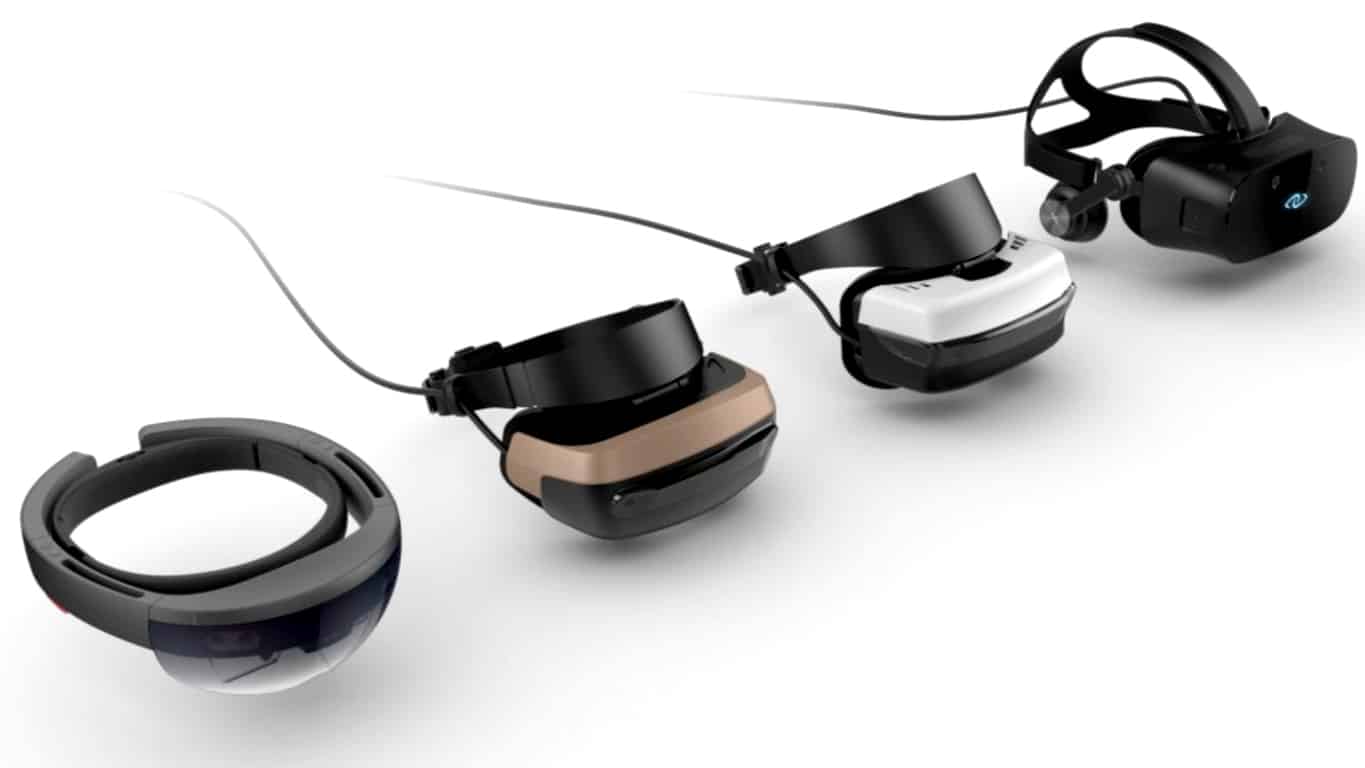
Only one Windows Mixed Reality headset still available on the Microsoft Store, stocks also limited on Amazon

It seems that Windows Mixed Virtuality headsets are becoming a rarity on the Microsoft Store. Road to VR noticed that the Samsung HMD Odyssey+ is the model that’s available for purchase as of today, with the other Asus Mixed Reality Headset being out of stock. The three other headsets on the Microsoft Store include the Oculus Rift S, the HTC Vive and the HTC Vive Pro.

Taking a quick look at Amazon this morning, we’re seeing that the online retailer currently has low stocks of Windows Mixed Reality headsets from Acer, HP, Lenovo, Dell, and Samsung, so it appears the Microsoft Store isn’t an isolated case. Earlier this year, Microsoft dropped Windows Mixed Reality devices from its affiliate program, meaning that it would no longer be will no longer be encouraging further sales of the product though affiliates. Road to VR reached out to Microsoft to get a statement about the state of VR headsets on the Microsoft Store, but the company declined to comment.

Windows Mixed Reality was one of the big new features in the Windows 10 Fall Creators Update (or version 1709), but the first headsets from Microsoft’s OEM partners didn’t give much a challenge to market leaders Oculus and HTC. According to Steam’s latest hardware survey, WMR headsets had a 10.99% usage share in June, far behind the Oculus Rift (46.03%) and the HTC Vive (40.81%).

In the Windows May 2019 Update, Microsoft brought support for legacy Win32 apps in Windows Mixed Reality, and that should certainly help to make the platform stand out in the VR market. However, the missing piece in the puzzle remains the lack of Xbox One support, but Microsoft previously said that it was waiting on better wireless technologies to finally bring VR to its Xbox consoles. The company had nothing to announce about Windows Mixed Reality support for Project Scarlett during E3 2019, and that may be a missed opportunity after Sony announced that its PSVR headset would be backward compatible on the PlayStation 5.

Microsoft and Intel to continue support for Huawei laptops

In a response to the recent drama surrounding Huawei and the U.S. government and growing concern about the company’s products outside China, Microsoft has reaffirmed their support for current Huawei’s devices in a statement to PCWorld.

“We remain committed to providing exceptional customer experiences,” the statement reads. “Our initial evaluation of the U.S. Department of Commerce’s decision on Huawei has indicated we may continue to offer Microsoft software updates to customers with Huawei devices.”

Intel has also confirmed to PCWorld that they will be continuing security and driver updates for Huawei laptops using their chips.

What this means is that, at least for the time being, current owners of Huawei-branded laptops need not worry too much about their devices going obsolete or falling behind with the latest security updates.

It’s important to stress, though, that this isn’t exactly a ringing endorsement for purchasing new Huawei laptops as the conflict between the company and the U.S. government is still ongoing and is unlikely to reach a resolution soon.

Are you relieved to hear that current Huawei products will continue to receive support? Are you thinking of buying a new Huawei computer despite the uncertainty? (Huawei devices have been added back to the Microsoft Store after all.) Share your thoughts with the community in the comments below and then follow us on Twitter for more tech news.

Forza, Shantae, and Tron video game content discounted on Xbox One this week

This week’s discounts are now live on Microsoft’s Xbox One and Xbox 360 consoles and there are quite a few good savings to be had when it comes to both video games and downloadable content.

On Xbox One, Aaero: Complete Edition (25% off), Hunting Simulator (80%), and Tron RUN/r (65%) are discounted with Deals With Gold while Forza Horizon 3 Blizzard Mountain (75%), Shantae and the Pirate’s Curse (40%), and Shantae: Pirate Queen’s Quest (50%) have had their prices slashed as part of the current Spotlight Sale.

On Xbox 360, all three Crysis titles are now 67% off while Goosebumps: The Game (60%), Metro 2033 (70%), and Metro: Last Light (70%) are also reduced due to Deals With Gold.

The full listing of the discounted games can be viewed within the Store tab on the Xbox One dashboard. Note that Deals With Gold discounts require an active Xbox Live Gold membership.

Did you buy any Xbox video games this week? Let us know which ones in the comments below and then follow us on Pinterest for more Xbox gaming content.

Windows 10 Telegram app updates with new location-based chat features

The official Telegram app for Windows 10 devices, Telegram Desktop, updated to Version 5.8 today. This latest update adds the ability to add contacts without using their phone numbers, a new feature for adding other users who are geographically close, and support for location-based chats.

The location-based chat feature is rather impressive as it allows anyone to begin a public chat that can be accessed by anyone else within 100 meters.

Here’s the full release notes:

  • Telegram 5.8 lets you add anyone to your Telegram contacts – even if you don’t have their number.
  • If you’re looking to exchange contact info with people standing next to you, try the new Add People Nearby section in Contacts. You will see other users within 100 meters who are also viewing this section at the same time.
  • The People Nearby section also shows Groups Nearby –public chats related to places around you. As of today, anyone can host location-based group chats in their city.
  • We’ve also added a tool to transfer group ownership and enhanced notification exceptions to all apps.

Telegram is a popular communication service with a strong emphasis on privacy and security. Recent app updates have included new background image options, anonymous polls, and custom languages.

Do you use Telegram? Let us know why or why not in the comments below and then follow us on Pinterest for more Windows app news.

Telegram Desktop
Telegram Desktop
Price:
Free

Application Blocked by Java Security: 3 Ways to Fix it

Ever since Java 7, Oracle has implemented a security check within the program to help with security. However, this can result in application Blocked by Java security error.

There are many issues with Java, and we have already covered outdated Java message in the past.

Today, we’ll show you how to unblock an app blocked by Java, so let’s get started.

Why am I getting Application blocked by Java security error?

  • The application or program is self-signed, unsigned, or not signed by the vendor.
  • The permission attributes are missing in the application.
  • You are either using a custom program or playing a game that uses Java.

Although these are some potential reasons that trigger the Java security alert, there are some false positives as well.

How do I fix Java application blocked by security error?

1. Configure the Java Security settings

  1. First, you need to navigate to the Start menu, type Control Panel in the search box and hit the Enter button.
  2. Open the Control Panel that will now appear in the list of programs.
  3. Now change the view Small icons.control panel small icons
  4. Search for Java (32-bit) and click on it as you can see in the image.
  5.  You will now see Java Control Panel with various tabs, select the Security tab.
  6. The Security tab has two types of security settings, Very High and High. Change the security setting to Very High. Alternatively, you can also keep it to High to work easily on your system.
  7. At the bottom of the Window, you will see the Exception Site List option. Here you can add the sites that you want to enter in the list. The applications launched from those sites will be allowed to run. java security settings
  8. The Edit Site List button is available at the right side of the Window click on it.
  9. A new window will be opened, click the Add button to paste the desired links.
  10. You can allow access by entering the URL and domain names under the Location field.
  11. Click OK and you are done. The application will no longer be blocked by Java Security.

2. Update your Java version

  1. Navigate to the Java site and look for the version compatible with your PC.
    windows online java download
  2. Download and install the update and check it resolved the issue.
  3. If not try updating the program, and browser, that you are currently using.

After doing that, check if the error message is gone.

3. Install a new certificate

  1. Report the issue to the program vendor and request a new certificate. 
  2. Install the new certificate on your system.
  3. The alert should now no longer be triggered.

Often, Application blocked by Java security is caused by expired certificate, and this solution should fix that.

There you go, we hope that these three quick workarounds helped you to fix the problem.

In case you have further issues, we have a great guide on what to do if your browser doesn’t support Java, so be sure to read it.

What method did you use to fix this issue? Let us know in the comments below.

Error 0xc190012e is blocking Windows 10 v1903 install for many

Many users reported encountering an error when trying to update their OS to Windows 10 v1903 via Windows Update.

Before the error itself, users would usually receive a message stating that “Your device is missing important security and quality fixes”.

In the end, they would receive error 0xc190012 which seems to persist regardless of the methods they used to bypass it.

I have a issue to install the update 1903. I have error 0xc190012e.
Either through Windows Update or by downloading the iso and running the setup.exe.

More so, the problem doesn’t seem to be associated with any other known issues or processes, as nothing was found even when users reported using the “Reset Windows Update System” Tool.

Additionally, even common solutions such as clearing the cache, using the System File Checker, deleting temp files, chkd or DISM component store check didn’t seem to come up with any solution or allow the update to run its course accordingly.


If you’re a gamer, maybe you should not install Windows 10 v1903 after all.


How to fix Windows 10 update error 0xc190012e

An independent advisor suggested that one possible solution to the problem would be to do the following:

  1. Right click on Windows Start button
  2. Select Windows Powershell with Administration rights
  3. Typing and confirming the following commands one by one:
    • net stop wuauserv
    • net stop cryptSvc
    • net stop bits
    • net stop msiserver
    • Ren C:WindowsSoftwareDistribution SoftwareDistribution.old
    • Ren C:WindowsSystem32catroot2 Catroot2.old
    • net start wuauserv
    • net start cryptSvc
    • net start bits
    • net start msiserver

After you follow these steps, and without restarting your computer, you should try to see if you can successfully update to 1903.

If the above solutions failed to yield any positive results and you still get the 0xc190012e error, the only solution to fully ensure a successful upgrade is by manually updating your Windows system.

If you still can’t install the latest Windows 10 updates on your computer, these troubleshooting guides may come in handy:

Authentication Error: The Function Requested is Not Supported [FIX]

Many Windows 10 users reported encountering an error message while trying to connect two computers through Remote Desktop Connection.

The rrror message An Authentication Error Has Occurred the Function Requested is Not Supported pops up leaving users hopeless.

This error seems to be caused by either a Windows patch issue or by some Oracle settings that need adjusting.

We were able to come up with a few solutions in order to help you fix this problem.

Steps to fix authentication errors: The function requested is not supported

  1. Update Windows
  2. Modify settings using Group Policy Editor
  3. Adjust the settings using the Registry Editor

1. Update Windows

Making sure that you have the latest updates guarantees that your system is working properly.

Try updating both the computers’ OS you want to connect.

In order to perform a Windows update, follow these steps:

  • Press the Start button > open Settings

  • Click Update & Security

  • Select Windows Update > click Check for updates

  • If it finds any updates, let it complete the process and restart your computer
  • After rebooting your PC, check if updating Windows fixed the issue

Alternatively, you can download specific updates from the Microsoft Update Catalog website.


You may want to check out this guide, just in case you can’t install the latest updates.


2. Modify settings using Group Policy Editor

Some users reported that modifying the Encryption Oracle Remediation policy using the Group Policy Editor helped them surpass this issue.

Follow the next steps in order to make the necessary adjustments:

  • Press the Windows logo key + R on your keyboard > type gpedit.msc in the Run box and hit Enter

  • In the left pane of the Group Policy Editor follow this location: Computer Configuration > Administrative Templates > System > Credentials Delegation

  • Double click Encryption Oracle Remediation in the right pane to open it
  • In the Encryption Oracle Remediation window, select Enabled > in the Options section, select Vulnerable as the Protection level

  • Save changes and close the Local Group Policy Editor
  • Restart your PC and see if these changes had any impact on the issue.

Don’t have the Local Group Policy Editor on your PC? Here’s how to install it.


3. Adjust the settings using the Registry Editor

Alternatively, you can enable the Encryption Oracle Remediation through the Registry Editor.

Attempting the change using the Registry Editor has the same effect, but is performed differently.

Some users find this method to be easier to perform.

In order to make modifications through the Registry Editor, follow these steps:

  • Press the Windows logo key + R on your keyboard > type regedit in the Run box and hit Enter

  • In the left pane of the Registry Editor follow this location:
HKLMSoftwareMicrosoftWindowsCurrentVersionPoliciesSystemCredSSPParameters
  • Double click AllowEncryptionOracle in the right pane to open it
  • Set the Value data to 2 > click OK
  • Close the Registry Editor and reboot your PC
  • After restarting your PC check to see if this fixed the issue

We hope that you found at least one of our solutions helped you to fix this authentication issue.

READ ALSO:

Install this new Chrome extension to flag dodgy websites

Google launched a brand new Chrome extension that helps users to report malicious sites.

Google named this extension as the Suspicious Site Reporter. After you install the extension, you’ll see an icon in the toolbar.

You can use this icon to report the site you are currently visiting. You also need to provide some details as to why you think that the website is malicious.

You’ll also get alerts about suspicious websites

Furthermore, once you have installed the extension, you will see a flag icon beside their address bar.

This icon will inform users about potentially dodgy websites. You may want to learn more about the criteria that the extension uses to detect suspicious sites.

Google uses some specific metrics to flag a site. It flags any particular domain if it is not popular, received no visitors during the past three months, or uses some mysterious characters.

Chrome users need to provide complete details regarding the suspicious site in order to submit a report.

You should have details such as an IP address, URL, screenshots, and so on. Additionally, the system will ask you about the steps you have taken to reach the dodgy website.


In case you want to be secure while surfing the internet, you will need to get a full-dedicated tool to secure your network.  Install now Cyberghost VPN and secure yourself. It protects your PC from attacks while browsing, masks your IP address and blocks all unwanted access.


Previously, Google only used machine learning techniques to ensure Safe Browsing. Thankfully, the search giant has now revised its policy.

The company has now shifted its focus to user reports. Google may think about adding these sites to its Safe Browsing systems.

Google explains that:

If the site is added to Safe Browsing’s lists, you’ll not only protect Chrome users but users of other browsers and across the entire web. 

Google  also revealed its usage statistics. According to the company, around four billion devices are currently using Google’s Safe Browsing service. Today, many popular browsers use this service. Some of these are Firefox, Chrome and Safari.


Are you looking for a fast, secure, privacy compliant browser? UR Browser is the perfect tool for you.


Thousands of phishing scams are currently targetting the users on a daily basis. We really hope that Suspicious Site Reporter extension will help  users stay safe online.

RELATED ARTICLES YOU NEED TO CHECK OUT:

Download KB4503277, KB4503283 to fix Internet Explorer 11 bugs

Microsoft recently rolled out two previews updates to Windows 7 and Windows 8.1 computers. Both of these are non-security updates.

KB4503277 addresses issues in Windows 7 Service Pack 1 and Windows Server 2008 R2 Service Pack 1.

On the other hand, KB4503283 is available for Windows 8.1 and Windows Server 2012 R2. Both of these monthly rollups resolve some major issues breaking down IE11 and the Calculator app.

KB4503277 and KB4503283 are available as an optional update via Windows Update. However, you can also opt for a manual download through the Microsoft Update Catalog.

A quick reminder, Beta releases are considered to be unstable. It is highly recommended that you should back up your system before starting the installation process.

KB4503277 and KB4503283 changelog

Calculator app bug fix

KB4469068 introduced a new bug in the Calculator application. Microsoft acknowledged the fact that this issue prevented the app from following the Gannen settings. Microsoft resolved the issue in KB4503277, KB4503283.

IE11 compatibility issue resolved

Previously, two serious issues affected Internet Explorer 11. The browser was unable to ensure that a device or application is compatible with Windows updates.

Secondly, users reported that IE11 stopped responding with SVG markers. Microsoft resolved both of these issues in the recent release.

Reliability issues fixed

Microsoft released KB4503283  to address some reliability issues in the Windows 8.1 and Windows Server 2008 R2 Service Pack 1.

Unresponsive UI fix

KB4503283 resolves Unresponsive UI issues in the operating system. According to some user reports, they experienced the issue when scrolling in windows.

Event Viewer issues resolved

KB4503277, KB4503283 address a major error in Event Viewer that affect both versions of Windows. The error states “MMC has detected an error in a snap-in and will unload it.” The first scenario is when a user creates, views or expands Custom Views. The same error also appears in the case when you use Filter Current Log in the Action menu.

Known issues

Microsoft acknowledged one major issue that affects KB4503277 and KB4503283.

The company is currently collaborating with McAfee to investigate an issue with McAfee Security Products.

Microsoft confirmed this bug affects those devices that have installed McAfee VirusScan Enterprise (VSE) 8.8, McAfee Host Intrusion Prevention (Host IPS) 8.0 and McAfee Endpoint Security (ENS) Threat Prevention 10.x. 

The tech giant warns its users that the installation of KB4503277 and KB4503283 may slow down their system. The respective devices may also stop responding.

Just in case you’re experiencing any of these issues, check out these troubleshooting guides:

Microsoft is rebooting its Redmond campus, here’s a progress report

Over the last five years, Microsoft has overhauled its management hierarchy and processes, streamlined its engineering development, trimmed its product lines and engaged in more cross-platform synergies than it had in much of its business history. Now, the company is looking to codify its refined image with a makeover to its headquarters.

Two years ago, we learned that Microsoft was planning a massive rearchticture of its Redmond campus that will center around expediting access to its various buildings by creating a more centralized design. The specifics of Microsoft’s plan revolve around redeveloping a 72-acre portion of the Redmond campus that will reposition buildings in closer clusters at one of the campus rather than the scattered shot design of today.

GeekWire got an exclusive look at the before and the vision the company has for the campus, afterward, and it’s clear the multi-billion dollar project is an investment in Microsoft’s employee future.

Parts of the campus redesign include the demolition of 1980’s era buildings and erecting more modern locations, presumably equipped with the latest and greatest tech from the company and its partners; as well as incorporating more trendy business environments such as open office spaces, better conference rooms, and recreational areas.

While Microsoft is in the relatively early stages of the project, some employees can expect to be in their new offices as soon as 2022 and 2023, which would coincide with the city’s expansion of its light rail that travels from downtown Seattle through Redmond.

The 17 new four- and five-story buildings will total approximately 3 million square feet. The original two-story buildings set for demolition — which include Buildings 1 through 6 and 8 through 10, among others — total about 1 million square feet. (Microsoft’s missing Building 7 is the stuff of legend.) That results in a net addition of about 2 million square feet and room for an additional 8,000 employees.

Interestingly enough, Microsoft allowed the four contract companies assigned to the project to offer their own flare to the portions they are in charge of, which means the new buildings will differ in many ways that include style, design, and probably amenities.

While Microsoft dictates much of what goes into each building including the materials used, the company employed LMN, NBBJ, WRNS Studio, and ZGF Architects to help design along Skanska, Balfour Beatty, GLY and Sellen as contractors to help take part in the project. In the end, GeekWire reports that this is an 80/20 relationship as far as how much creative design the contractors and designers are able to dictate the final outcome of the new building designs, with Microsoft being the majority decision holder.

Similar to Apple, Microsoft would also like to open portions of its campus to the public and plans to offer access for hosting of public events, sports, shopping, and dining. Microsoft definitely seems to be investing in its employees’ well being, but its new project can also be seen as an investment in the company’s recruitment future as it now competes with Amazon and Facebook in its own backyard. Out in the Silicon Valley, Microsoft is also planning a few redesign tweaks to that location as it brushes up its physical resume.

As more engineers, salespeople, marketing agencies, graphic artists, software designers and the like get accompanied to open offices, bike trails, sleeping pods, and game rooms, Microsoft is making sure its campus is just as appealing as its competition and not a museum to Gates, Allen, and Ballmer.

Former Windows Insider chief Gabe Aul now works at Facebook

Gabe Aul, the former head of the Windows Insider Program announced on Twitter today that he has joined Facebook after working at Microsoft for almost 27 years. Today is Aul’s first day as Vice President at Facebook, and the former Microsoft employee has yet to share more details about his new job.

Aul started his career at Microsoft in 1992, and his latest role was Corporate Vice President of the Windows Engineering System team. Aul is mostly known for being the man behind the Windows Insider Program, which has become a massive beta testing program over the years with more than 15 million Windows Insiders. In June 2016, Aul passed the Windows Insider Chief torch to Dona Sarkar, which has since taken the program a step further with a new #Insiders4Good arm.

Windows Insiders quickly made Gabe Aul become an Internet meme.

Facebook has been the subject of many controversies in recent months, many of them related to privacy subjects, but the company remains highly attractive for tech veterans. Aul actually isn’t the only high-profile Microsoftee that joined Facebook this month: Clint Rutkas, a former Senior Product Manager focusing on the developer platform announced two weeks ago that he was now Developer Advocate for the big blue app.

We wish both Aul and Rutkas the best of luck at Facebook and hope they’ll be able to help it become a better company.

Update: According to Dona Sarkar, Gabe Aul is actually joining Oculus, the VR company that Facebook acquired back in 2014.

Myplaces.kml not responding Google Earth error [EXPERT FIX]

Google Earth is incredibly useful software, but some users reported Myplaces.kml not responding message. This error could be caused by either myplaces.kml being damaged, either there could be a graphics software issue.

One user described the issue on Google Groups as follows:

Hello. My Google Earth stalls for literally about 10 minutes while it
gives me the message “Loading myplaces.kml, including enabled
overlays”
My Google Earth used to startup and be ready to go in about 3 seconds.
How do I fix this to get it back to the old ways?

Fortunately, we found a few ways of fixing this error, listed below.

What to do if Google Earth isn’t responding on Windows 10?

1. Make sure Windows Firewall isn’t blocking Google Earth

  1. Type in the search box Windows Firewall.
  2. Click Windows Firewall in the search results to open it.
  3. Select Allow an app or feature through Windows Firewall.
    allow an app through windows firewall google earth myplaces.kml not responding
  4. Tick the box next to the Google Earth app > press OK.

2. Clear disk cache

  1. Open Windows Explorer.
  2. Select Organize > click Folder Options.
  3. Go to the View tab > check Show hidden files and folders.
    show hidden files folders and drives file explorer options google earth myplaces.kml not responding
  4. Follow these location C:>Users>username>AppData>LocalLow>Google>GoogleEarth.
  5. Create a back up for myplaces.kml in a safe spot.
  6. Delete the Google Earth folder.
  7. Try loading the Google Earth app.

Alternatively, you can use the Repair Tool:

  1. Open the Google Earth app.
  2. Select Help > click Launch Repair Tool.
  3. If asked which product to repair, select Google Earth Pro.
  4. Keep the Repair Tool open and close Google Earth Pro.
  5. Click Delete my places > select Delete.

Google Earth won’t work on your PC? Fix it with this simple guide!


3. Try to switch the graphics displays

switch to directx google earth myplaces.kml not responding

  1. Open Google Earth Pro.
  2. Select Tools in the top menu > click Options…
  3. Find the Graphics Mode sections and change from OpenGL to DirectX or the other way around if you have DirectX selected.
  4. Select Apply > click OK.
  5. Restart the Google Earth app and see if it works.

4. Disable Atmosphere

disable atmosphere google earth myplaces.kml not responding

  1. Open the Google Earth app.
  2. Click View in the top menu.
  3. Deselect Atmosphere > click OK.

We hope that our simple steps on how to fix Myplaces.kml not responding error in Google Earth. If you have any other suggestions on fixing this error, feel free to leave them in the comments section below.

READ ALSO:

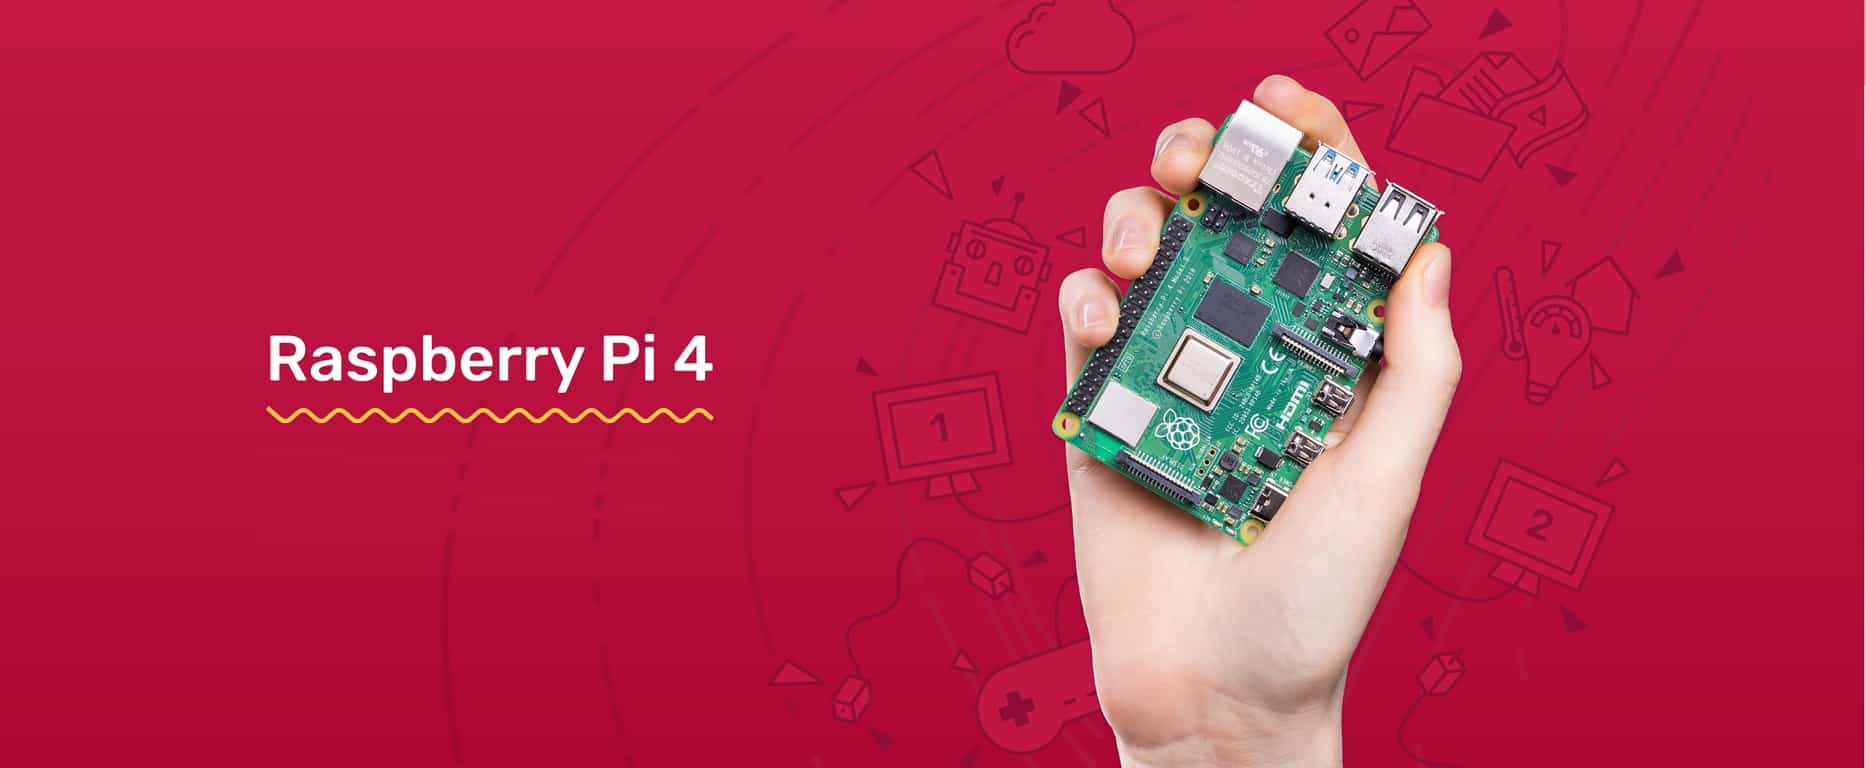
Raspberry Pi 4 released with upgraded specs, starts at $35

The new Raspberry Pi 4 is here with upgraded technical specifications, including 1GB, 2GB, and 4GB RAM versions. The Raspberry Pi 4 pricing starts at $35 (1GB), $45 (2GB), and ends at $55 for the 4 GB DDR4 RAM version. Additionally, the Raspberry Pi 4 is now using USB-C for power, getting rid of the old USB micro-B connector, available in older models.

Two other big changes are the removal of the full-sized type-A HDMI connector in exchange for two Type-D micro HDMI connectors, and the placement of the Gigabit Ethernet jack next to the 4 USB connectors. The Raspberry Pi 4 also sports 2 USB 2.0 ports and 2 USB 3.0 ports. Here’s the video showing off the new Raspberry Pi 4.

As noted in a post on the Raspberry Pi blog, here’s a look at all the updated specifications available in the new Raspberry Pi 4 Model B:

  • A 1.5GHz quad-core 64-bit ARM Cortex-A72 CPU (~3× performance)
  • 1GB, 2GB, or 4GB of LPDDR4 SDRAM
  • Full-throughput Gigabit Ethernet
  • Dual-band 802.11ac wireless networking
  • Bluetooth 5.0
  • Two USB 3.0 and two USB 2.0 ports
  • Dual monitor support, at resolutions up to 4K
  • VideoCore VI graphics, supporting OpenGL ES 3.x
  • 4Kp60 hardware decode of HEVC video
  • Complete compatibility with earlier Raspberry Pi products

Besides the Raspberry Pi 4 upgrades and older models’ legacy support, Raspberry Pi will abandon the legacy graphics driver stack used in previous Raspberry Pi models.

“Instead, we’re using the Mesa “V3D” driver developed by Eric Anholt at Broadcom over the last five years. This offers many benefits, including OpenGL-accelerated web browsing and desktop composition, and the ability to run 3D applications in a window under X. It also eliminates roughly half of the lines of closed-source code in the platform.”

The Raspbian Desktop software is getting revamped too. Based on the upcoming Debian 10 Buster release, the new Raspbian Buster desktop software offers “a modernised user interface, and updated applications including the Chromium 74 web browser.” Head on over to the Raspberry Pi downloads page to download the new Raspbian Buster desktop for yourself. The new Raspberry Pi 4 (4GB RAM) offers enough technical specifications to run full Windows 10.

Buy the Raspberry Pi 4 Model B from the Raspberry Pi Store.

Download Realtek HD Audio Manager for Windows 10 [How To]

Realtek HD Audio Manager is one of the most popular audio drivers available. It provides DTS, Dolby, and Surround Sound support for the user’s audio card.

The audio driver allows users to use different speaker configurations, offering Stereo, Quadraphonic, and 5.1 Speaker support.

What does Realtek HD Audio Manager do?

Realtek HD Audio Manager is basically a control panel for the audio adapters, offering users a wide range of instruments necessary to make all the desired changes.

Right-clicking the audio manager icon in the bottom right corner of the desktop expands multiple options.

realtek audio manager taskbar icon Download Realtek HD Audio Manager

From here, users can access the Volume Control center, their audio devices, the Sound Manager, System Sound Events, Sound Recorder, and Windows Media Player.

Accessing the sound manager allows users to adjust speakers and microphone settings (if available).


1. Speaker Configuration

The Speaker Configuration tab contains an animation displaying all the speakers connected to the system.

speaker configuration realtek HD audio manager Download Realtek HD Audio Manager

From this tab, the user can choose what type of configuration he’d like to choose depending on the audio system.

Having a 5.1 surround system allows users to choose between using a 5.1 speaker configuration, quadraphonic or stereo.

In the Speaker Configuration tab, users can choose which speakers to disable/enable by ticking/un-ticking respective speaker’s boxes.

The Play button near the Speaker Configuration allows users to test the system’s working status.

2. Room Correction

The Room Correction tab is available when having a surround system.

speakers settings Download Realtek HD Audio Manager

It allows their users to manually adjust each speaker’s volume individually.

To be able to make adjustments to the speakers’ volume, the Enable Room Correction box needs to be ticked.

3. Default Format

The Default Format tab allows the user to change the audio adapter‘s sound quality.

default format Download Realtek HD Audio Manager

It also contains a button that restores the default settings. The button is located next to the Default Format options.

How do I get Realtek HD Audio Manager?

Installing Realtek HD Audio Manager requires you to download the installer first from the official website. After you download it, you’re ready to install it.

How do I install the Realtek HD Audio Manager?

Installing Realtek HD Audio Manager is a straightforward task and requires you to perform these steps:

  1. Open the Realtek installer you downloaded.
  2. Click Next and wait for the installation to complete.
  3. Once the installation is done, select Yes, I want to restart my computer now > click Finish.

Besides, if you encounter the Install Realtek HD Audio Driver Failure error, uninstall the current driver first!

We hope our quick guide on how to use Realtek HD Audio Manager was of help to you. Leave a comment in the comment section if you liked this article.

Your System Does Not Use 3D Hardware Acceleration Blender Error [Fix]

Windows 10 users have encountered an issue with Blender not being able to open on their PCs. Error message Your system does not use 3D hardware acceleration. Blender requires a graphics driver with OpenGL2.1 support pops up, leaving users unable to utilize Blender.

The issue causing the Blender error seems to be an OpenGL file missing from the system.

We can provide you with a quick guide on how to fix this error.

Why Blender 3D won’t detect 3D acceleration driver?

To be able to run Blender properly, you will need to manually implement a fully supported OpenGL file on your computer.

The steps below will guide you on how to do this process:

  1. Access the official page.
  2. Choose the version of your OS.
  3. Download the file.
  4. Place the opengl32.dll file in your Blender installation folder, the same folder containing blender.exe.
  5. Open Blender.

After that, you should be able to run Blender without any problem. If you’re, on the other hand, still bothered by the error, consider reinstalling the application from scratch.

Looking for the best alternative for Blender on Windows 10? Here are the best options.

You should be able to resolve the problem by reinstalling the app.

  1. Open Control Panel.
  2. Choose Uninstall a program from the Category View.
  3. Uninstall Blender from the list of installed applications.
  4. Reboot your PC.
  5. Navigate here to download the Blender installation file.install Blender your system does not use 3d hardware acceleration
  6. Install Blender and look for improvements.

This isn’t the only error you can encounter, and many reported that Blender crashes when opening files, but that can be easily fixed.

We hope that this quick guide on fixing Blender’s error message worked for you. If it did, let us know in the comment section below.

How to disable quick access in Windows 10 in just one minute

Windows 10 contains a Quick Access tab in the File Explorer. This option was not available in previous OS versions.

Quick Access contains a list with frequent accessed folders and recent files.

Although Microsoft implemented Quick Access in order to add an extra option for their users, many of them hate it and don’t want it displayed.

If you want to browse This PC, you now have to expand it in the left pane, in order to have easier access to your computer’s drives.

If you want to disable Quick Access, follow the steps listed below.

Tutorial on how to disable Quick Access

Disabling the Quick Access in the File Explorer is not a hard task. Here are the steps to follow:

  • Press the Windows logo key + E on your keyboard to open File Explorer
  • Click File > select Change folders and search options

  • Unckeck the boxes next to Show recently used files in Quick Access and Show frequently used folders in Quick Access

  • Switch Open File Explorer to This PC if you want to completely remove Quick Access

We hope that our quick guide on how to disable Quick Access in Windows 10 helped you out.

If you liked this article, leave us a comment in the comment section below.

READ ALSO:

Windows 10/11 computer turns on by itself? We got the right fix for you

There is a specific Windows 10 issue that left many users confused. Most of them reported that after installing the latest updates, their computers started turning on by themselves for no reason.

Apparently, the Windows update triggers certain system changes that were not set as default before.

The changes that trigger this unusual PC behavior could be related to power management settings or certain features.

In order to help you fix this issue, we came up with this list of fixes.

Stop your PC from booting up by itself

  1. Use professional software for Windows optimization
  2. Attempt to turn off Fast Startup
  3. Turn off Wake Timers
  4. Change Startup and Recovery settings
  5. Restore to default power settings
  6. Turn off Automatic Maintenance
  7. Turn off Reboot Scheduled Task

1. Use professional software for Windows optimization

This issue can have more than one cause, so using reliable software that addresses various system errors is recommended.

Do you think manually repairing Windows bugs and errors is counterproductive? It opens up a lot of human error and oversight.

When your computer boots up for no apparent reason, it could be a registry problem or an update caught in a loop, and you may not be able to stop it manually.

This is only one of the many reasons why you should keep your registry clean and healthy, removing any obsolete, corrupted, or redundant entries.

That’s why we recommend utilizing a third-party repair app that can automatically analyze your device for corrupted or damaged files and then repair them to restore normal operation.

2. Attempt to turn off Fast Startup

Some users reported this issue being caused by the Fast Startup feature.

Disable Fast Startup by following these steps:

  • Open Control Panel > select View by Large Icons
  • Select Power Options
  • Click Choose what the power button does in the left pane
  • Under the Define power buttons and turn on password protection section > select Change settings that are currently unavailable
  • Uncheck the box next to Turn on fast startup (recommended)
  • Click Save changes > restart your computer and see if it made any difference.

3. Turn off Wake Timers

Wake Timers are programmed events that wake the computer up at specific preset times.

Disable the Wake Timers by following these steps:

  • Open the Control Panel > select View by Large Icons
  • Select Power Options
  • Under the Choose or customize a power plan, select Balanced > click Change plan settings
  • Select Change advanced power settings
  • Expand the Sleep section > expand Allow wake timers > select to disable the Setting from the drop down menu
  • Click OK > restart your computer to see if it made any changes

4. Change Startup and Recovery settings

There is a feature that forces the computer to automatically restart upon system failure.

Disable this feature by following these steps:

  • Open the Control Panel > select View by Large Icons
  • Select System
  • Click Advanced system settings in the left pane
  • In the System Properties window, select the Advanced tab > under the Startup and Recovery section, click Settings
  • Under System failure, make sure to have the box next to Automatically restart unchecked
  • Click OK > restart your computer to see if it had any impact.

5. Restore to default power settings

Performing a default power settings restore should bring your system to the pre-update state.

Restore to the default settings by following these steps:

  • Type Command Prompt in the search box > right click Command Prompt > Run as administrator
  • Type powercfg –restoredefaultschemes in the Command Prompt and hit Enter
  • Close the Command Prompt > reboot the PC and see if it fixed the issue.

6. Turn off Automatic Maintenance

Automatic Maintenance is a tool that helps your computer stay in a healthy state by running security checks and virus scans.

Scheduled Automatic Maintenance could turn on your computer in order to perform the preset process.

Disable Automatic Maintenance by following these steps:

  • Open the Control Panel > select System and Security
  • Select Security and Maintenance
  • Expand the Maintenance section > select Change maintenance settings
  • Under Automatic Maintenance, make sure to have the box Run maintenance tasks dailyunchecked
  • Click OK > restart the computer and see if it fixed the issue.

7. Turn off Reboot Scheduled Task

There could also be a scheduled task set to reboot your computer and trigger this unexpected PC power up.

Disable this task by following these steps:

  • Press the Windows logo key + R on your keyboard > type Taskschd.msc in the Run box and hit Enter to open the Task Scheduler
  • Navigate to this location from the left pane: Library/Microsoft/Windwos/UpdateOrchestrator
  • Find the Reboot task and double click it
  • Open the Conditions tab > under the Power section, make sure to have the box next to Wake up computer to run this task unchecked > click OK
  • Right click Reboot > select Disable
  • Type Command Prompt in the search box > right click Command Prompt > Run as administrator
  • Type the following commands in the Command Prompt and hit Enter after each:

takeown /f C:WindowsSystem32TasksMicrosoftWindowsUpdateOrchestratorreboot

cacls C:WindowsSystem32TasksMicrosoftWindowsUpdateOrchestratorreboot /G Your_Username:F

  • Restart your computer and see if it fixed the issue

Eventually, if none of the above solutions worked, make sure to check that your hardware is functioning properly.

You can try unplugging your keyboard and mouse. Keep in mind that if your power button is stuck on your keyboard this may explain why your PC boots up on its own.

Here’s how Project Athena will revolutionize Windows 10 laptops

Intel’s Project Athena created a lot of hype in the tech world. But how does Project Athena make laptops better? Read on to learn more.

What is Project Athena and how it affects me?

But what is Project Athena? Well, it’s a collaboration between Intel and the biggest laptop manufacturers in the industry to create the laptops of the future.

The main goal is to create improved laptop hardware and software, and offer certitude to users.

Remember ultrabooks from back in the day when they first launched? It’s a similar story, but with a lot more guarantees from Intel and OEM manufacturers.

If you’re a normal Windows 10 user or even if you’re a power user, this is great news for you. Project Athena will have some important standards that will have to be met by the laptops.

That means improved performance, faster boot time and startup, stable connections, and enhanced battery life.

Along with all these, there will be an updated annual platform requirements standard, continuous collaboration in an open ecosystem, a comprehensive certification process, and real-world benchmarking.

You’ll no longer see shady benchmarks with the brightness all the way down, no Wi-Fi, muted sound, and very little to none CPU usage. No one uses their laptop this way.

The benchmarks on Windows 10 will be in real-world condition, with real tasks, as a normal user would have.


Speaking of benchmarks, download one of these tools if you want to test your PC’s performance.


This means that when you buy a Project Athena certified laptop, you can expect that the claims regarding speed and battery life are accurate.

If I’m just a normal Windows 10 user, what’s in it for me?

Some of the most important features you can expect on Windows 10 are:

  • Instant-on: inspired by the mobile world, Intel is aiming at a minimum to none boot time. In theory, your Windows 10 laptop should power on instantly, with all the connections available right away.
  • 5G connectivity: all the Athena certified laptops will come with fast, reliable, 5G connectivity.
  • Intel hardware: the certified laptops will also feature the latest and greatest. This means the fastest SSD storage and support for WI-FI 6, along with the latest hardware available.
  • Longer battery life: Intel is aiming at a standard of 9 hours. While this might not seem so impressive, you’ll have to keep in mind that it’s not just a spec on a sheet, but a real-world number that every user owning an Athena certified laptop should achieve.

We also have to mention that not all laptops will be Athena certified. Only those who meet the standards and offer the best experience will pass.

You can expect to see some Project Athena certified laptops to start rolling out in Q3 and Q4 of 2019, but the majority will be launched next year.

If you’re an Windows 10 user, expect great things in the near future. The guarantees that Athena is offering along with the OS optimizations from Microsoft is a big win for everyone, especially for the average buyer.

Opening your PC with Windows Hello will be faster than ever, running Windows 10 apps from the fastest SSD will also be cool, and downloading and uploading on WI-FI 6 will be crazy fast.

This is pretty exciting news. A powerful laptop paired with the latest Windows 10? That sound like a great package, thanks to Intel and Microsoft.

All that remains is to actually test these laptops with Windows 10 on your own.

Are you as excited as we are? Does this new laptop standard means something to you or do you think that it won’t have such a big impact?

Leave your answers along with any other questions in the comments section below.

You may also want to check out these related posts:

Your browser is not compatible with FlowPaper [SOLVED]

FlowPaper (formerly known as FlexPaper) is a web PDF viewer and digital publishing suite. Its main goal is to convert your content into a responsive and interactive online publication.

Sometimes and for some users, the errors like Your browser is not compatible with FlowPaper. Upgrade to a newer browser or download Adobe Flash Player 10 or higher occur.

To see how you can do that, check the guide below.

Fix browser issues with FlowPaper

Solution 1 – Enable Flash Player in your browser

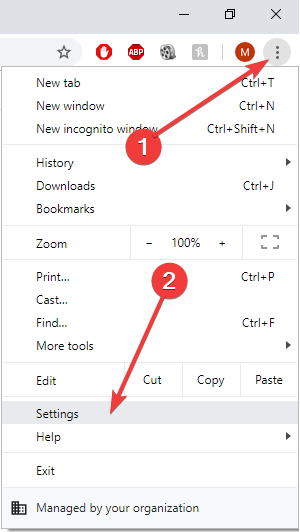
  1. Open Chrome settings. Flowpaper isn't compatible with the browser
  2. Go to Advanced > Site settings.
  3. Now scroll down until you see Flash and click on it.
  4. Make sure it’s enabled.

Solution 2 – Allow Flash Player on the website

  1. In the address bar of your browser, click on the lock icon before the web address.
  2. Select Site settings.
  3. Find Flash and set it to Allow.allow flash Your browser is not compatible with FlowPaper

Solution 3 – Update/Reinstall Flash Player

  1. If your Flash player is outdated, you’ll need to download the latest version.
  2. Go to Adobe Flash Player official website, here, and follow the on-screen steps. Don’t forget to uncheck McAfee offer.download flash Your browser is not compatible with FlowPaper
  3. After downloading and installing the latest version, the FlowPaper issue should be gone.

Solution 4 – Update/Change your browser

Some users are reporting that FlowPaper is working just fine on some browsers, and not at all on other browsers. The development team behind the software addressed some issues with updates, but not all of them.

First, update your browser. Again, for example, we’ll use Google Chrome but you can follow similar steps for other browsers. Go to Chrome’s settings, select Help, and then About Google Chrome.

If that doesn’t work, change your browser. It seems like FlowPaper problems are not that common on Internet Explorer or Edge. Or, even better, maybe try a browser that works flawlessly with all kinds of third-party websites while keeping the intrusive ones at bay.

Opera One is the go-to browser choice in terms of apps integrations or free privacy VPN services. This inclusive browser has practical functionalities that allow you to integrate multiple third-party tools.

Check out Opera One now and see for yourself how amazing it is.

Steam update goes backwards [FIXES THAT REALLY WORK]

A very unusual issue occurs while trying to download updates for Steam, users report. It seems that after the download reaches a certain point, it starts going backward, leaving users unable to complete the download. Steam breaks down games/updates into small 1MB chunks. When an update is released, Steam analyzes files, working out how to build the necessary files from those small chunks.

Fortunately, we came up with a series of fixes that impact other causes.

Why does Steam client updates keep resetting?

1. Check your internet connection

  1. Open your internet browser and check to see if web pages load quickly and without interruption.
  2. If you notice your internet running slower than usual, perform a hard reset on your router/modem.
  3. Contact your internet provider if hard resetting the router/modem doesn’t work and let them know about the issue you’re having.
  4. Try using a wired connection instead of Wifi as well. Wireless connections are usually slower and internet spikes could occur more often.

2. Reinstall Steam

  1. Open Start and locate Steam.
  2. Right-click on it and choose Uninstall. This will take you to Control Panel > Uninstall a program section.
  3. Uninstall Steam.
  4. Download the Steam client, here, and install it as an administrator.

3. Clear download cache

  1. Press the Steam button in the top left corner > open Settings.
  2. Go to the Downloads section > Press Clear download cache.
  3. Press OK and re-attempt starting the download.

4. Allow Steam to run through Windows Firewall and disable antivirus

  1. Open the Control Panel > go to System & Security.
  2. Under Windows Defender Firewall, choose to Allow an app through Windows Firewall.
  3. Click Change settings > find the Steam app and make sure it has both Public and Private boxes ticked.
  4. Disable your antivirus temporarily.
  5. Press OK > try reloading Steam and see if it works.

5. Change the download region in Steam

  1. Click Steam in the top left corner > open Settings.
  2. Select the Downloads tab > click the Download region drop-down menu and select a different region > click OK.
  3. Check to see if downloading is now running properly.

6. Repair Library folder

  1. Click Steam in the top left corner > open Settings.
  2. Select the Downloads tab > choose Steam Library Folders.
  3. Right-click on folder > select Repair Folder.
  4. Restart Steam and see if it fixed the download issue.

What to do if the PC goes into Automatic Repair on boot

Automatic repair is a Windows 10 tool developed to repair common issues that could occur when trying to boot the OS. Many users reported experiencing a frustrating issue with the repair tool. It seems that every time they restart the computer, it automatically boots into the repair tool.

In order to fix this issue, we managed to come up with a few solutions that are worth trying. Be aware that, to make an attempt to solve this issue, you need a bootable Windows 10 installation drive. Learn how to create a bootable USB flash drive with the Media Creation Tool, here.

How do I bypass Automatic Repair?

1. Perform a disk check

  1. Boot from the bootable USB drive.
  2. Select Language > click Next.
  3. Click Troubleshoot > Advanced options > Command Prompt.
  4. Type chkdsk /f /r C: and hit Enter – make sure that you input the drive containing the Windows folder – usually installed in C:chkdsk /f /r C: pc goes into automatic repair
  5. Type exit in the Command Prompt and hit Enter.
  6. Reboot your computer and see if it fixed the issue.

2. Rebuild BCD using Command Prompt

  1. Boot from the bootable USB drive.
  2. Select Language > click Next.
  3. Click Troubleshoot > Advanced options > Command Prompt.
  4. Type the following commands in the Command Prompt one by one and press Enter:
    exe /rebuildbcdexe /fixmbrexe /fixbootexe /rebuildbcdexe /fixmbrexe /fixboot pc goes into automatic repair
  5. Type exit in the Command Prompt and hit Enter.
  6. Reboot your computer and see if it fixed the issue.

3. Try to disable Automatic Startup Repair

Sometimes, a system error could cause the Automatic Startup Repair to be enabled without user interference.

Boot from the Windows installation drive and Disable the Automatic Startup Repair by following these steps:

  1. Boot from the bootable USB drive with the Windows 10 installation again.
  2. Select Language > click Next.
  3. Click Troubleshoot > Advanced options > Command Prompt.
  4. Type bcdedit /set {default} recoveryenabled No in the Command Prompt and press Enter.bcdedit /set {default} recoveryenabled No pc goes into automatic repair
  5. Restart the computer and see if it worked. Enabling the Automatic Startup Repair back requires you to type bcdedit /set {default} recoveryenabled Yes in the Command Prompt.

4. Use the Reset your PC tool

  1. Boot from the bootable USB media.
  2. Select Language > click Next.
  3. Click Troubleshoot > choose Reset your PC.
  4. Follow the simple process steps and wait until the process completes.Reset your PC pc goes into automatic repair

We hope that at least one of our solutions could help you fix the booting issue. If you found this article helpful, leave a comment in the comment section below.

PC Goes to Sleep While Streaming Video: How to Fix it

The streaming community seems to be blooming nowadays, but some users reported that the PC goes to sleep while streaming video, even when using reliable streaming software, though the software is not generally the problem.

This leaves the streamers unable to track their stream status. This can be a big problem since you’ll have to wake up your PC and start your stream again. We created a guide on fixing this issue, so let’s get started.

How do I stop the PC from going to sleep while streaming?

1. Change Power settings

  1. Open Control Panel.
  2. Select Large icons from the View by dropdown menu, and click Power Options.
    power options control panel pc goes to sleep while streaming video
  3. Select Change when the computer sleeps on the left pane.
    change when the computer sleeps pc goes to sleep while streaming video
  4. Make sure the Turn off the display and Put the computer to sleep settings are set to Never, then select Change advanced power settings.
    change settings for the plan change when the computer sleeps
  5. Scroll down to Multimedia settings and click the plus sign in order to expand the settings.
  6. Expand When sharing media, change the setting to Prevent idling to sleep, and then click OK.change power settings to fix pc goes to sleep while streaming

That’s it! After you have made the changes, verify whether the PC still goes to sleep while streaming. For most, the problem should be resolved.

2. Prevent Windows from sleeping in UMS (Universal Media Server)

  1. Open the Universal Media Server software.
  2. Navigate to the General Configuration tab in UMS.
  3. Then you need to check the box next to Prevent Windows from sleeping under the Advanced HTTP and system settings, and you should be good to go.ums settings

If the previous solution didn’t help, modifying the Universal Media Server settings should get things running when the PC goes to sleep while streaming. There also must be a similar option in other streaming apps, so make sure you enable it.

As you can see, this problem is quite easy to fix, and you need to adjust your power settings and prevent your PC from going to sleep.

Before you leave, do check some quick tips to extend the battery life of your laptop.

If you liked this article, comment in the comment section below.

Internet connection sharing error: LAN connection already configured [FIX]

Many users reported receiving the error message Internet connection sharing error LAN connection already configured. This usually happens when users try to set up their wireless network and share the active internet connection.

This is how one user described the issue on Microsoft Answers:

Alright, I keep getting this message whenever I try to share my internet through like an Ad-Hoc or anything else at all. “Cannot enable shared access. Error 765 ICS cannot be enabled. A LAN connection is already configured with the IP address that is required for automatic IP addressing.” Meaning I can’t get like my xbox live or anything. Oh, I’m using a wireless internet card from our phone company, and it is installed on my father’s identical laptop, and we share it through an ad-hoc when he is using it, would that be the problem?

In the following guide, we’ll help you fix this error.

What to do if LAN connection is already configured?

1. Run the Internet troubleshooter

  1. Open the Control Panel.
  2. Type troubleshooter in the Search box and press Enter.
  3. Select View All in the left pane.
    view all troubleshooters internet connection sharing error lan connection already configured
  4. Click Internet Connections.
    Internet connections troubleshooter internet connection sharing error lan connection already configured
  5. Wait for the process to complete and see if it fixed the issue.

2. Refresh your IP address

  1. Type command prompt in the Windows search box and hit Enter in order to access the Command Prompt.
    command prompt search internet connection sharing error lan connection already configured
  2. Type ipconfig in the Command Prompt and hit Enter.
  3. To remove your IP address and disconnect from the internet, type ipconfig /release in the Command Prompt.
  4. Wait at least five minutes after you’ve released your IP.
  5. Type ipconfig /renew in the Command Prompt in order to get your IP restored and connect to the Internet.
  6. Close the Command Prompt and see if it fixed the issue.

3. Share Internet connection

  1. Press the Start button > open Settings.
    settings start menu internet connection sharing error lan connection already configured
  2. Click the Network & Internet.
    network and internet settings app internet connection sharing error lan connection already configured
  3. Select Mobile Hotspot.
  4. Select Edit to add a username and password for the new connection > click Save.
  5. Choose Share my Internet connection with other devices.
  6. Check to see if you can connect other wireless devices to the network.

4. Add the IP address and Subnet Mask manually

  1. Press the Start button and open the Control Panel.
  2. Select Network and Sharing Center > click on your hosted network connection.
    network and sharing center control panel internet connection sharing error lan connection already configured
  3. In the newly opened Network Connection window select Internet Protocol Version 4 > click Properties.
  4. Select Use the following IP Address.
  5. In the IP Address field manually input: 192.168.137.1.
  6. At the Subnet Mask manually input: 255.255.255.0.
  7. Click the OK button to apply the new settings.

We hope that our quick guide could be of help to you. Leave a comment below if this tutorial helped you fix the connectivity issue.

Why does my computer go to sleep while watching Netflix [FIX THIS]

Binge-watching Netflix content is a norm these days. However, some users reported that their Netflix sessions are frequently interrupted by PC going to sleep. It seems that the Sleep mode kicks in in the middle of the streaming, which is, of course, a major problem and quite a vibe-killer.

We managed to come up with a quick guide to help you fix this issue.

How to prevent my PC from going to sleep when streaming Netflix?

1. Change the Power Settings

  1. Open the Control Panel > select View by Large icons.
  2. Click Power Options.control panel why does my computer go to sleep while watching netflix
  3. Under the Choose or customize a power plan > select Balanced > click Change plan settings.
  4. Change Turn off the display and Put the computer to sleep settings, set them both to Never > click Save changes.power settings why does my computer go to sleep while watching netflix
  5. Check to see if this had any effect.

Did you know that certain browsers are better for streaming Netflix than the others? Here are our top picks.


2. Disable extensions

  1. Click the Three button icon on the top right corner of the browser.
  2. Expand the More tools menu > select Extensions.browser settings why does my computer go to sleep while watching netflix
  3. Disable the extensions by clicking the toggle switch next to their name – toggle turning gray means the extension is disabled.
  4. Restart the browser and see if disabling the extensions fixed the issue.

We hope that our guide on how to stop the PC going to sleep in Netflix could help you out. If you found this article helpful, leave a comment in the comment section below.

READ ALSO:

Here’s how to recognize a PWA when you come across one

Back in May, it was announced that Progresive Web Apps (PWAs) were coming to desktops and the Chrome OS.

More so, it was hinted that as far as Windows 10 users are concerned, PWAs will be designed to feel even “more native” to Microsoft’s OS.

What is a PWA anyway?

For those of you who don’t know, Progresive Web Apps are basically the desktop equivalent of an app, as they allow certain websites to be far more accessible through the use of what could be considered a “mini-client”.

The appearance of PWAs nowadays is partially due to websites becoming more and more complex to the point where Internet service providers can’t provide enough bandwidth to allow them to load fast enough.

How did PWAs first appear?

Since researches showed that users will generally never visit a website again if it takes more than 3 seconds to load, or if commands take too long to complete, it’s easy to see why websites opt to new solutions to combat this problem.

PWAs already have complete access to Windows 10 feature APIs and can be installed on pretty much any device from the UWP family without hindering compatibility across browsers or other devices at all.

Considered to be the successors of Hosted Web Apps, PWAs have the advantage of having standards-based support for offline scenarios, courtesy of Service Workers, Cache, and Push APIs.


Did you know that you can now uninstall PWAs from the Control Panel?


Microsoft is working on optimizing PWAs

Many Redditors wondered if the new PWA features are available to all Windows 10 users.

all this talk about pwa’s lately, and i’ve never seen one in the wild, am i just on the wrong websites? how do i even know if a website has it?

The answer came quickly from another Redditor:

Can confirm. This already seems to be in place with Windows 10 version 1903 release preview and Edge Insider Dev. At least on my systems–there’s always a chance they are still a:b testing this.

How can you recognize a PWA?

Imagine having a PWA powered by YouTube. It would allow you to have better connectivity and use less traffic. Since a lot of the data that usually loads each and every time would already be present in the form of a framework that just needs minor updates.

Just like the YouTube app on your phone, you’d first have to add it to the home screen of your desktop, which is pretty much the best giveaway that the website uses a PWA to run.

Those of you reading this may think that this sounds a lot like how many Windows Store Apps work, as most of them are nothing more than locally hosted frameworks that support the content of a website, and you couldn’t be more right.

With that in mind, since Microsoft has already been experimenting with their own versions of PWAs ever since they first started making Store Apps for the Windows 8, it shouldn’t come as a surprise that they would somehow manage to make them feel as if they are native to the Windows 10 OS
altogether.

Interested in reading more about PWAs? Check out these posts: