Microsoft turns its Mile-IQ acquisition into a new app, Spend

A couple of years ago, Microsoft acquired Mobile Data Labs, the company behind the mileage-tracking app MileIQ. This week, the team has quietly released a new mobile app called Spend, which purpose is to help users tracking expenses (via Techcrunch).

According to the App Store description, the new iOS app has been put under the Microsoft Garage banner, but it already looks pretty solid and currently enjoys a 5 stars rating on the App Store. The app is targeting professionals needing to track business expenses for reimbursements or taxes, and Spend can do that intelligently.

First of all, the app can sync purchases from cards and bank accounts, and let users classify them as business or personal, add notes or tags to purchases, and it’s also possible to take pictures of receipts to attach them to expenses. In addition to automatic expense tracking, Spend can also give users customizable summaries at a chosen frequency.

Spend is only available on iOS for now, but a web dashboard is also available where you can edit purchases and more. “This is an early version of the service, so you can expect rapid improvements, updates and some changes down the road,” the team wrote in a blog post. You can download Spend from the download link below.

The app was not found in the store. ?

It’s official, the EU has approved Microsoft’s acquisition of GitHub

The last hurdle standing between Microsoft and its purchase of the largest open source repository community to-date has finally been removed.

According to a report from Reuters, the European Commission has officially approved of the Microsoft and GitHub purchase without any conditions and says the purchase would not damage competition in the sector.

“The Commission found that the combination of Microsoft and GitHub’s activities on these markets would raise no competition concerns because the merged entity would continue to face significant competition from other players on both markets.”

The EU’s rather complimentary approval comes just a few days ahead of Microsoft’s latest quarterly earnings report where we can be sure to hear of early plans incorporating the purchase into one of many business sectors the company reports on. Another take away from the unconditional nature of the EU’s approval speaks to the structural and principal shift of Microsoft’s business goals.

While the deal between Microsoft and GitHub may have been approved years prior, it seems reasonable to assume that based the history the EU and Microsoft have, the commission may have taken a much longer look at the purchase on paper and perhaps even added conditions in places it thought Microsoft of old might be tempted to step over.

Fortunately for Microsoft, the $7.5 billion acquisition was seen as having little undermining power to the open nature of GitHub, perhaps, due in part to Microsoft’s war chest of open source contributions.

Nevertheless, GitHub will become a business under the Microsoft umbrella of offerings and company CEO Satya Nadella says the company is eager to continue running its new purchase as an independent open source solution.

“We are committed to being stewards of the GitHub community, which will retain its developer-first ethos, operate independently and remain an open platform. We will always listen to developer feedback and invest in both fundamentals and new capabilities.”

It will be interesting to see what moves Microsoft makes with GitHub in the future to help expand its developer reach as well as add to its revenue bottom line.

How to install Windows 10’s Linux Subsystem on your PC

In 2016, Microsoft made a stunning announcement during its annual Build developers conference: it was bringing the Linux shell Bash to the Windows desktop* as a first-class citizen.

The initial branding of “Bash on Ubuntu on Windows” obscured a lot of the underlying technology though – what Microsoft really engineered is a way to layer a Linux stack on top of Windows, without emulation or virtualisation. The “Windows Subsystem for Linux” provides a Linux kernel interface to the Windows kernel, so Linux apps get their kernel calls seamlessly translated into native Windows ones.

The early naming also hid the fact that it’s not just Ubuntu that’s supported. While the first release was Ubuntu-only, the subsystem’s now been expanded to support many other Linux distributions including Debian and SUSE.

Enough of the technical talk – let’s get started installing a Linux distribution on Windows, natively. For illustrational purposes, we’ll be going ahead and using Ubuntu. The process is very similar for other distributions. We’ll also assume you’re using the Windows 10 Fall Creators Update (version 1709) or newer; older versions of Windows 10 do require a different installation process.

Turn Windows features on or off

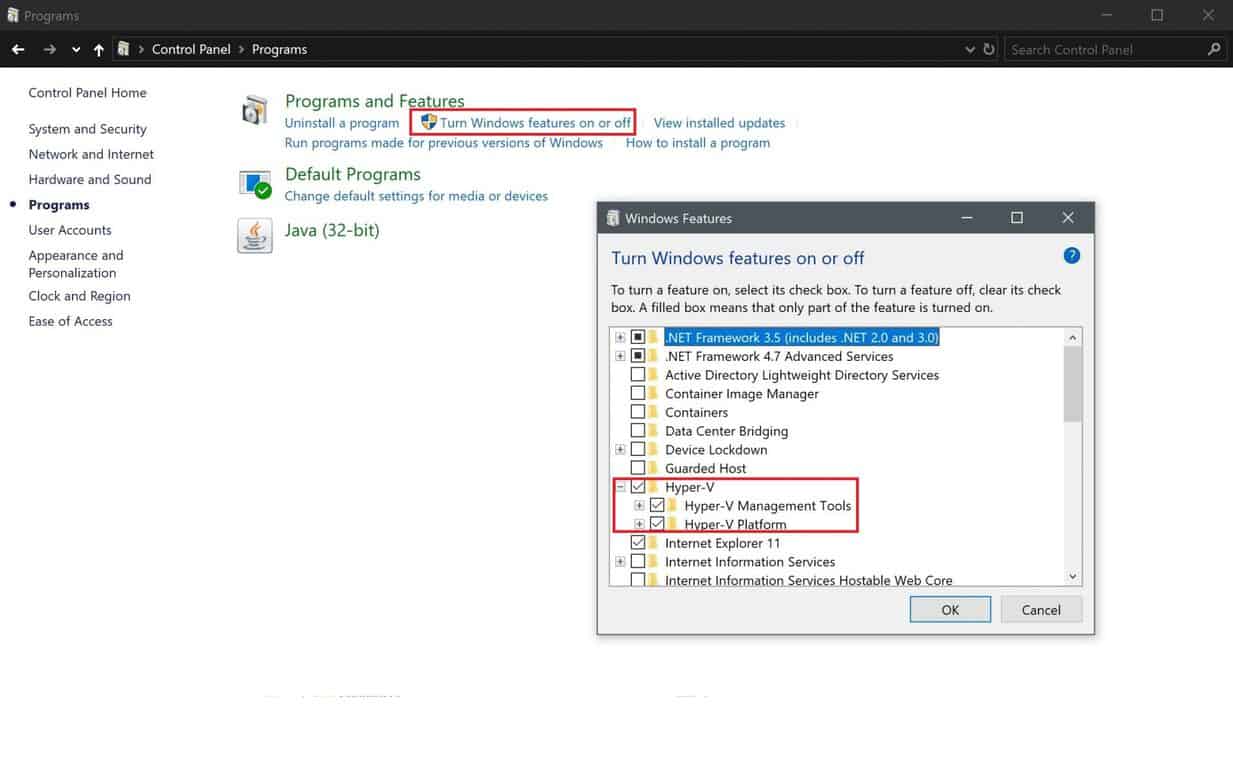
To begin, you need to enable Windows Subsystem for Linux support on your device. Open the Start menu and type “turn on” until you see the “Turn Windows features on or off” program. Launch it and scroll down the list to “Windows Subsystem for Linux.”

Screenshot of enabling Windows Subsystem for Linux

Tick the checkbox, press OK and wait while Windows configures the feature. You’ll then be prompted to reboot your computer; come back to this tutorial once you’re back at your desktop!

Now you’re ready to download the Linux distribution itself. This is much simpler than it used to be, as distros (that’s Linux parlance for “distributions,” or operating systems) have been hosted in the Windows Store since the Windows 10 Fall Creators Update.

Screenshot of Linux distributions in the Windows Store

Open the Store and search for the name of your distribution. You can also search for “linux” to see a link to a special page showcasing all the available distributions. As mentioned, we’ll be running Ubuntu, but you’re free to choose an alternate distro if you prefer.

At this point we’ll add a brief note on versioning – some distros, Ubuntu included, have multiple pages in the store with each one dedicated to a specific release. The “Ubuntu” listing, for instance, always tracks the latest long-term support (LTS) Ubuntu release, which is 18.04 at the time of writing. If you want to install a particular version, make sure you’re on the right page first.

Downloading Ubuntu from the Windows Store

When you’ve found the distro you want to install, simply click the “Get” button. The Linux distribution will download and install itself like any other app from the Windows Store.

After the install completes, launch the distribution from the Start menu. A console window will launch and display progress as final installation and first-run steps are performed. Wait while these activities complete.

Windows Subsystem for Linux

You’ll then be deposited at a UNIX user account creation screen. Follow the steps to create your new Linux user account within your distribution. Feel free to choose any username and password – they don’t need to be linked to your Windows credentials.

Now, your distribution should be ready to go. Next time you launch it, WSL will start almost instantly and present you with a fully-functioning Linux terminal. You can install Linux software using the distro’s regular package manager, but remember that not all programs will function correctly – or at all – under the basic Linux kernel provided by the Windows Subsystem for Linux.

Windows Subsystem for Linux

That’s about all for this tutorial. Windows Subsystem for Linux is aimed squarely at developers and power users who, for whatever reason, need access to a Linux terminal on a day-to-day basis. The complexity of its initial setup reflects the anticipated technical know-how of the feature’s target audience.

After installation though, WSL provides an incredibly effortless approach to running Linux from within Windows. With no virtualisation overheads and support natively integrated into Windows, it’s a simple way to combine the best of both Windows and Linux environments.

Windows 10 “19H1” update will address performance slowdowns caused by Meltdown/Spectre mitigations

The Meltdown and Spectre CPU vulnerabilities took the industry by storm this year, forcing Microsoft and its partners to collaborate to patch the security flaws. As you may know, the different mitigations caused a decrease in system performance, especially on older systems.

At the time, Microsoft said that slowdowns should be pretty minor on Windows 10 PCs powered by Skylake, Kabylake or newer CPUs, but Microsoft has recently made some changes to the Windows Kernel so that the Spectre mitigations now have a negligible impact on performance. This all thanks to the new “Retpoline kernel,” which according to Mehmet Iyigun
from the Windows/Azure Kernel Team as already been enabled in the latest 19H1 Insider builds for Fast and Skip Ahead Insiders (via MSPoweruser).

This is certainly good news for consumers with older PCs which were more impacted by performance slowdowns. The Meltdown and Spectre vulnerabilities were definitely a major headache for chip makers this year, and Intel was quick to announce that its latest Xeon and 8th gen Core CPUs would have built-in protections against these security flaws. We’re glad to see that Microsoft is also doing its part of the job on the software front, and in case you missed it, the company kicked off a new series of technical articles about Windows this week with a first post about the Windows Kernel.

FIX: Disk Space Problems in Recent Windows 10/11 Builds

By default, Windows 10 Technical Preview builds take 16GB of disk space. But what if your new build requires much more space than the previous build? In that case, you’re facing a bug, and this issue needs to be solved.
Disk Space Problems In 10041 and 10049 Builds Of Windows 10 Technical Preview
Over-sized installation of recent builds could cause various problems. For example, you won’t be able to install it due to insufficient disk space. Or it will take much more time to install than it should, some users report that it took them up to hours to install the new build.

The cause of disk space and installation time problems is a bug in recent builds of Windows 10 Technical Preview. In some cases, this bug is causing setup to download all available language packs during the installation of new builds of Windows 10 Technical Preview. Besides disk space and installation time problems, this bug could also make a few unexpected and unwanted folders appear on your desktop or in File Explorer.

How to fix low disk space issues in Windows 10 Insider builds

Additional language packs take 2.5GB of disk space. So in order to solve this issue, free up 2.5GB of space, install the latest build and uninstall unnecessary language packs. To uninstall unnecessary Windows 10 Technical Preview language packs from your computer, do the following:

  1. Go to Search and type cmd
  2. Open Command Prompt as Administrator
  3. Type the following command and press Enter: Lpksetup /u
  4. It will show you the list of all language packs installed on your computer, just select the unwanted language packs and uninstall them

You probably noticed that Windows 10 Technical Preview is full of bugs and errors, and this disk space error is just one of many. But this is just a technical preview of the system, so we should expect the final version to be much more stable and bug-less.

Alternative methods when running low on disk space

The latest Windows 10 versions are more stable and you shouldn’t face so many bugs as in the previous releases. But, in case you need some free space, you can try the following steps.

1. Delete junk files using Storage Sense

storage sense windows 10

You can delete junk files by opening the Settings tab > System > Storage > click on “Change how we free up space automatically”.

2. Remove temporary files using Disk Cleanup

In order to remove the temporary files, open the Setting tab > System > Storage > “Free up space now” link.free up space now issues

3. Uninstall apps and games you don’t need

Just click on Setting tab > Apps > App s& Features. From there you can select and uninstall what you need.

4. Disable Hibernation on Windows 10

If you want to disable Hibernation, click on Start > open Command Promp (Run as Administrator). You need to type in “powercfg /hibernate off“. That’s all.

5. Copy files, apps, games to an external hard drive.

We hope these quick solutions helped you fix your disk space issues.

RELATED STORIES TO CHECK OUT

How to fix HiDPI issues in Windows 10/11 in just 5 minutes


You can fix HiDPI problems using these 5 steps:

  1. Control System-Wide Display Scaling
  2. Disable display scaling for specific applications
  3. Update your computer
  4. Check your GPU settings
  5. Uninstall problematic apps and programs

Having a high resolution display is great, if you need a lot of space while working, or if you want to enjoy in high quality picture, but it has it’s flaws. As much as we love high resolution display, it seems that some users are having HiDPI issues on Windows 10.
windows 10 rtm release wind8apps
HiDPI
displays and laptops are relatively new, and just like with every new type of technology there is an adjustment period before software manufacturers optimize their devices for such high resolution displays. If you have HiDPI display or laptop, you might notice some issues such as small menus or blurry text.

This is issue for both software manufacturers and Microsoft, because some software might look normally while certain sections in Windows 10 look bad and vice versa on high resolution display.

So what can you do to fix this? We’ll tell right away.

Solutions to fix Windows HiDPI problems

Solution 1 – Control System-Wide Display Scaling

If you have high-resolution display or device, Windows 10 will automatically detect the best settings for you. However, this doesn’t always work perfectly so you might want to adjust scaling manually, and here’s a way to do it.

  1. Right click on your Desktop and choose Screen resolution from the menu.
  2. Go to “Make text and other items larger or smaller” link and now you’ll be able to set the custom scaling level for your display.

In newer versions of Windows 10, you can access these settings by going to the Settings Page > System > Display > Scale and layout, as shown in the screenshot below.

scale and layout windows 10

It’s worth noting that in Windows 10 changing the custom scaling doesn’t require you to log out and log back in, you can just continue where you left off.

Since this is the problem for third-party developers, some applications have blurry fonts when you use scaling. Although Windows 10 enables DPI scaling for all desktop apps, the ones that don’t have high DPI support will have blurry or fuzzy text on certain settings, for example when you set scaling to 200%. Many popular apps have this problem, such as Google Chrome or Steam, but you can somewhat fix this problem.

Solution 2 – Disable display scaling for specific applications

  1. Find the app that is giving you DPI issues and right click it, then choose Properties from the menu.
  2. Go to the Compatibility tab and check Disable display scaling on high DPI settings.Disable display scaling high DPI settings windows 10
  3. Click Apply then OK.

Fonts won’t be blurry anymore, but the downside of this method is that some graphical elements of the app might be scaled down. Depending on the application maybe you can change the size of fonts or graphical elements inside it.

In addition, you can disable DPI scaling entirely, but that might not be the best solution, since all graphical elements will look smaller.

Solution 3 – Update your computer

check for updates

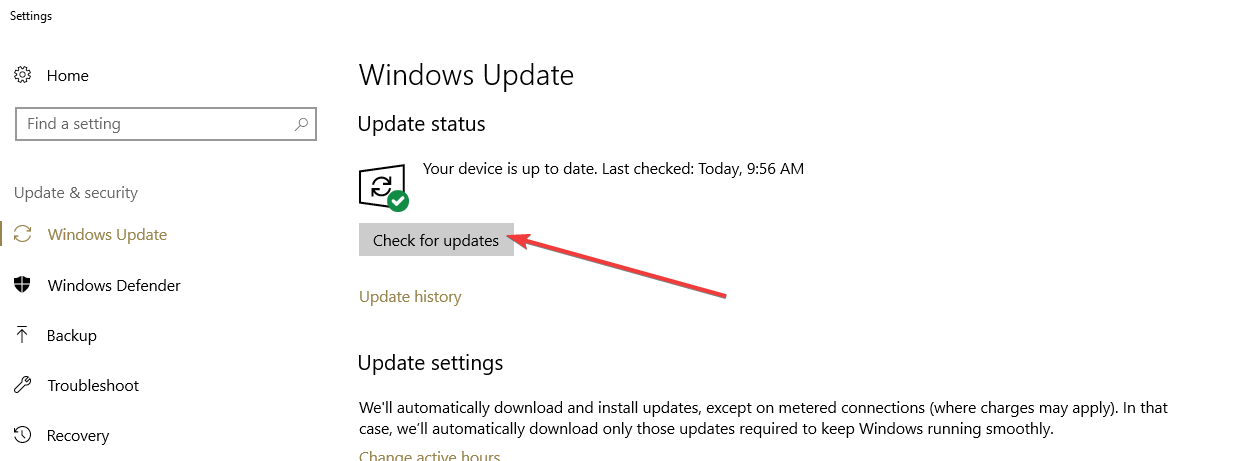
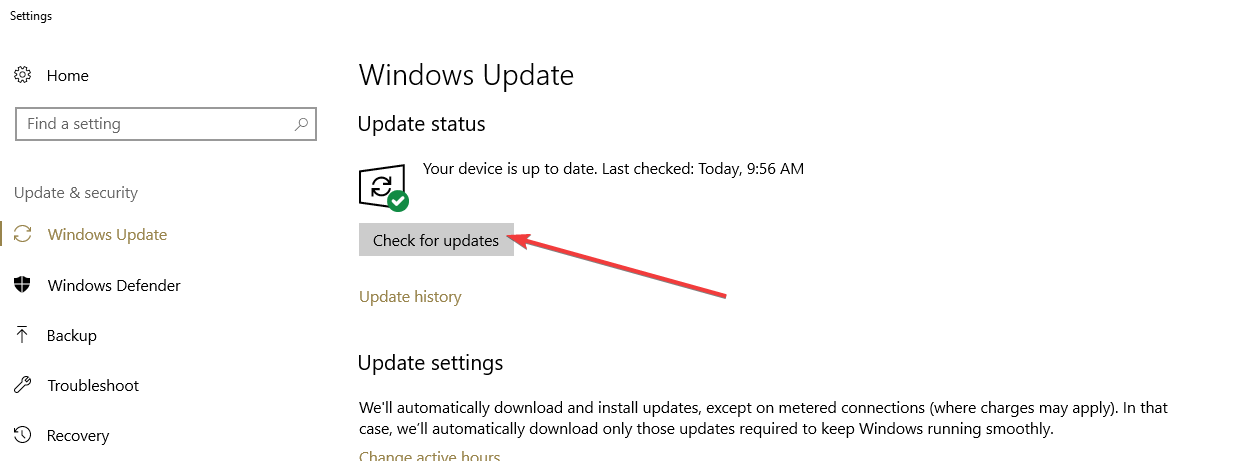
Microsoft already rolled out quite a few cumulative updates that packed HiDPI improvements. Make sure that you’re running the latest Windows 10 OS version to benefit from these improvements. Check for updates and install the new updates that are available.

Solution 4 – Check your GPU settings

Your graphics driver may also be the root-cause of the problem. First of all, make sure that you installed the latest GPU driver versions.

Then, make sure to set your native resolution as the default value. If these values are lower, this indicates that only the generic driver is being used. You want to use your AMD/NVIDIA/ Intel driver as well.

Solution 5 – Uninstall problematic apps and programs

If the HiDPI problems that you’re experiencing concern only specific apps and programs, uninstall and then re-install the problematic tools. This quick workaround may be the answer to your problem.

High DPI displays and devices are amazing, but as you can see software isn’t still optimized for them, and there are some issues. It’s up to software developers and Microsoft to optimize their products for final users, but this might take some time.

We’re currently waiting for permanent patch from Microsoft that will fix this, and we’re sure that other software developers will slowly but surely optimize their software for HiDPI devices.

If you have any other Windows 10-related issues you can check for the solution in our Windows 10 Fix section.

RELATED GUIDES TO CHECK OUT:

Feature Update Error 0x80240020(-2145124320): Fixed

You must have found this article because you encountered error 0x80240020(-2145124320). Let us discuss all you need to know.

Error code 0x80240020 is a Windows Update error that occurs when there is a problem installing updates.

Some users have also faced 0x800f081f and 0x800f0900 errors. And some fixes here may apply as well.

To fix it, you should follow the steps we have highlighted below.

5 solutions to fix error 0X80240020

Various error codes could occur in Windows 10, and every single one of them is equally annoying. We already showed you how to solve some errors in Windows 10.

error 0x80240020 wind8apps

In this guide, we’re going to show you how to solve the error 0X80240020 in Windows 10.

When you try to download a certain Windows update, like recent Windows 10 cumulative updates, or maybe a new version of the system itself, if you still didn’t upgrade, sometimes error 0X80240020 may occur.

This issue occurs if the Automatic Updates process is unable to complete your request and download certain updates. Luckily, there is a couple of workarounds that can resolve this issue.

How can I fix the error code 0x80240020(-2145124320)?

Solution 1 – Delete the SoftwareDistribution folder

This solution doesn’t only apply to the 0X80240020 error specifically because it could also solve other update errors. So, here’s what you need to do to delete the SoftwareDisribution folder and try to download updates again:

  1. Go to the following folder and delete everything in that folder: C:WindowsSoftwareDistributionDownloadSoftwareDistribution
  2. Now, right-click on the Start Menu button and open Command Prompt (Admin)
  3. Enter the following line and press Enter: wuauclt.exe /updatenow
  4. Wait until the process is done and close the Command Prompt
  5. Now, go to Start Menu, open Settings app, go to Update and try to download updates again (or Go to Control Panel, Update, if you didn’t download Windows 10 yet)

Solution 2 – Verify BITS service is enabled

BITS (Background Intelligent Transfer Service) is the main service for communication between your computer and Microsoft’s servers, so if something’s wrong with this service, you probably won’t be able to receive any updates. To make sure this service is running correctly, do the following:

  1. Go to Search, type services.msc, and open Services.
  2. Double-click Background Intelligent Transfer Service.
  3. In the Service Status section, make sure that the service is listed as Started.
  4. If the status is listed as Stopped, click Start, and then click OK.
  5. Try to install updates again.

Solution 3 – Verify Name Resolution

Another thing you can try is verifying your Name Resolution. To do this, follow these steps:

  1. Close any Windows Update or Microsoft Update browser windows.
  2. Right-click on the Start Menu button and open Command Prompt (Admin).
  3. Enter the following commands, and press Enter after entering each command in the command line:
    • nslookup
    • ns
    • your computer name (You can check your computer name when you right-click on Properties on This Computer icon on your Desktop, under Computer name, domain and workgroup settings)
  4. After the process is finished, try to run updates again.

Solution 4 – Use sign-in info to complete the update

The fourth solution involves checking the option ‘Use my sign-in info to automatically finish setting up my device and reopen my apps after an update or restart.’

To enable this feature, navigate to  Settings > then go to Accounts > Sign-in Options > and tick the respective check box. 

sign in info finish setup windows 10

This is efficient for the 0x80240020(-2145124320) error. 

You should also note that this error comes up on both Windows 10 and Windows 11.

Solution 5 – Enable OSUpgrade in your Registry

If you’re a power user, you can also tweak your Registry to fix Windows 10 error code 0X80240020. Keep in mind that incorrect Registry changes may lead to severe technical issues. Don’t forget to back up your computer before you proceed. Here are the steps to follow:

  1. Go to Start > type Regedit > Open the Windows Registry tool.
  2. Locate this key: HKEY_LOCAL_MACHINE\SOFTWARE\Microsoft\Windows\CurrentVersion\WindowsUpdate\OSUpgradewindows update registry editor
  3. If the OSUpgrade doesn’t exist, create it by right-clicking on WindowUpdate >  select New > KeyAllowOSUpgrade regedit windows 10
  4. Create a new DWORD (32-bit) value and name it AllowOSUpgrade > set the Value = 0x00000001.

That’s it; we hope at least one of the mentioned solutions helped you to solve the problem with error 0X80240020 in Windows 10, or while downloading Windows 10.

If you have any comments, suggestions, or maybe some other solutions for this problem, don’t hesitate to write them down in the comment section below.

Also, if you have any other Windows 10-related issues, you can check for the solution in our Windows 10 Fix section.

RELATED GUIDES TO CHECK OUT:

FIX: Can’t Install Dynamics CRM on Windows 10/11

Dynamics CRM is quite important for some business users, however, it seems that some users can’t install Dynamic CRM on Windows 10. Don’t worry, there are few solutions that can help you with this and we’ll list them below.
Dynamic CRM windows 10

Dynamics CRM wont’ install on Windows 10

  1. Install the application in compatibility mode
  2. Install the Dynamics CRM in pieces
  3. Switch to newer version of CRM

Solution 1 – Install the application in compatibility mode

  1. Find the setup file of Dynamics CRM.
  2. Right click it and choose Properties.
  3. When Properties window opens up, go to Compatibility tab.
  4. Check the “Run this program in compatibility mode” and select the desired version of the Windows operating system.
  5. Click Apply then OK to apply the changes.

This isn’t the best solution, but it might help in some cases, so it’s worth trying out.

— RELATED: Microsoft Brings Dynamics CRM Integration with Cortana

Solution 2 – Install the Dynamics CRM in pieces

This process is a bit more complex to do, so make sure that you’re comfortable before trying it.

  1. Enable the .Net 3.5 and .Net 4.6 as well as Windows Identity Foundation 3.5.
  2. Install Office.
  3. Manually Download and install the following CRM client files (All of them are available from Microsoft’s website):
    • SSCERuntime_1033_x64.msi (SQL Compact Edition x64)
    • msoidcli_1033_64.msi (Microsoft Online Services Sign-in Assistant)
    • wllogin_64.msi (Windows Live ID Sign-in Assistant)
    • ReportViewer.exe (ReportViewer 2010 ver10.0.30319) 
  4. Now you need to extract the CRM Install files: CRM2011-Client-ENU-i386.exe /extract:c:mypath
  5. Now, you’ll need to create log file folder structure: (MD C:Users%username%AppDataLocalMicrosoftMSCRMLogs).
  6. After that install Error reporting: msiexec /i “C:mypathDWDW20Shared.msi” /LV* “C:Users%username%AppDataLocalMicrosoftMSCRMLogswatson.log” /qn REBOOT=ReallySuppress APPGUID={0C524D20-0409-0050-8A9E-0C4C490E4E54} REINSTALL=ALL REINSTALLMODE=vomus.
  7. Now start the main CRM install: msiexec /i “C:mypathClient.msi” INSTALLLEVEL=”3″ INSTALLTYPE=”INSTALL” SOURCEFOLDER=”C:mypath” TARGETDIR=”C:Program Files (x86)Microsoft Dynamics CRM” INSTALLDIR=”C:Program Files (x86)Microsoft Dynamics CRM” /l+ “C:Users%username%AppDataLocalMicrosoftMSCRMLogscrm50clientmsi.log” LOGFILE=”C:Users%username%AppDataLocalMicrosoftMSCRMLogscrm50clientmsi.log” ALLOWRUN=”1″ REBOOT=ReallySuppress NOSELECTION=1
  8. Install the language pack: msiexec /i “C:mypathMUISetup_1033_i386.msi.
  9. At the end Install RU 18 for CRM 2011.

As you can see, this is bit more complex solution, so if you’re not sure how to do it, please find someone to do it for you.

Solution 3 – Switch to newer version of CRM

If you’re using CRM 2011 try switching to newer version if you’re on Windows 10. It might be optimized better for Windows 10.

That’s it, if you have any other Windows 10-related issues you can check for the solution in our Windows 10 Fix section.

UPDATE: If the Dynamics CRM issues that you’re experience are related to Outlook, you can use this step-by-step installation guide from Microsoft to make sure that you don’t skip any step.

If the problem persists, you can simply contact Microsoft’s Dynamics CRM support engineers. We’re sure they’ll find the right solution for you.

RELATED GUIDES TO CHECK OUT:

Fix Screen Rotation Issues on Yoga 2, 3 Pro in Windows 10/11


4 solutions to fix Lenovo Yoga screen rotation

  1. Enable tablet mode
  2. Disable YMC service
  3. Manually enable auto-rotation in the registry
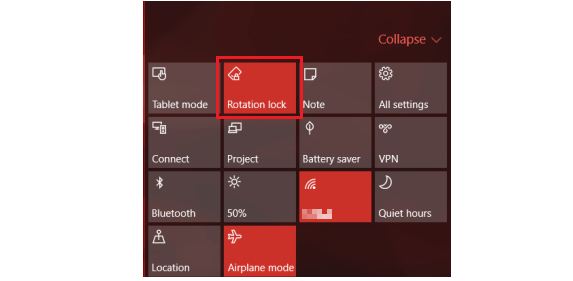
  4. Turn on/ off Rotation Lock in Action Center

Windows 10 is a multi-platform operating system, which means that not only PC users got the upgrade, but a lot of Yoga ultrabooks, as well.

Some users of Yoga 2 Pro and Yoga 3 Pro ultrabooks reported that automatic screen rotation doesn’t work for them after the upgrade to Windows 10. And in this article, I’m going to show you a few tricks to solve this issue.
yoga pro 2 windows 10

How can I fix Lenovo Yoga screen rotation problems?

Solution 1 – Enable tablet mode

This first thing you can try is the simplest one. Just switch your device to tablet mode, and restart it, after the restart, check if the auto rotation is working again. This will reset the auto rotation sensors, and hopefully, you’ll manage to activate it again.

Also, I probably don’t have to mention to check your drivers, but if you didn’t, go to Device Manager and check if all the drivers are updated. But if the auto-rotation doesn’t work after the restart and if your drivers are updated, you can try one of the following solutions:

Solution 2 – Disable YMC service

Maybe disabling the YMC service will restore the functionality of auto-rotation again. Here’s what you need to do to disable this service:

  1. Go to Search, type services.msc and open Services
  2. Find YMC service, right-click on it and go to Properties
  3. Click on Disable, and then to Enable, to reset it
  4. Reset your device and check if the rotation works now.

— RELATED: Fix: Lenovo N700 driver error on Windows 10

Solution 3 – Manually enable auto-rotation in registry

If disabling the YMC service didn’t solve the problem, you can try to enable your auto-rotation manually, in the Registry Editor. Here’s exactly what you need to do:

  1. Go to Search, type regedit and open Registry Editor
  2. Go to the following path:
    • HKEY_LOCAL_MACHINESOFTWAREMicrosoftWindowsCurrentVersionAutoRotationautoRotation windows 10 registry
  3. Set the value of Enable DWORD to 1
  4. Close Registry Editor, restart your device and check if the auto-rotation works now

Solution 4 – Turn on/ off Rotation Lock in Action Center

Another quick solution to fix autorotation issues on your Lenovo Yoga devices is to enable or disable the Rotation Lock feature from the Action Center. The screenshot below gives you all the details that you need.

fix rotation lock lenovo yoga

That’s it, I hope some of these solutions helped you to solve the problem with auto rotation on your Yoga 2 Pro device.

If you have any other Windows 10-related issues you can check for the solution in our Windows 10 Fix section.

RELATED GUIDES TO CHECK OUT:

Half-Life 2: The Orange Box and three more Valve games are now Xbox One X enhanced

In recent years, we’ve seen many video game publishers release remastered versions of classic games for current-gen consoles, but the release of the Xbox One X last year seemed to have changed things a bit. There are already many Xbox One games that have received special enhancements for the Xbox One X, but a growing number of Xbox 360 games and original Xbox have been getting a similar treatment this year.

Indeed, four Valve games that were already backward compatible on the Xbox One are now enhanced for the Xbox One X: these are the Half-Life 2: The Orange Box bundle, Portal: Still Alive, Left 4 Dead and its sequel Left 4 Dead 2. All these games are considered classics, and you can enjoy a 9X resolution bump and better textures on the Xbox One X.

“The power of Xbox One X enables the Xbox 360 emulator to showcase the very best version possible with the existing assets—all without touching the game code,” explained Xbox’s Will Tuttle. In addition to the higher resolution, all these games should also provide a smoother experience with less FPS drops on the Xbox One X.

As of today, there are now 21 Xbox One X Enhanced Xbox 360 titles including Assassin’s Creed, Fable Anniversary, Fallout 3, The Witcher 2, or Red Dead Redemption. Microsoft oftens markets the Xbox One X as “the best console to play the games of the past, present, and future,” and this has never been so true.

What to do if you can’t use Nvidia GeForce GTX760 on Windows 10

5 steps to fix Nvidia GeForce GTX760 problems on PC

  1. Check to see if driver installation was successful
  2. Check if your graphics card is installed correctly
  3. Check your GPU settings
  4. Download the latest drivers
  5. Check for overheating issues

So far, we’re loving Windows 10 and all of its new features. However, Windows 10 isn’t without flaws. One of the more frustrating problems is related to hardware issues. Some users have reported that they can’t use Nvidia GeForce GTX760 cards after updating to Windows 10.

This is quite a big problem actually, since graphic cards are one of the most expensive parts of your computer, so changing your graphic card is usually the last option. However, there’s no need to worry if your GeForce GTX760 isn’t working with Windows 10, there are a few solutions that can’t help you with this issue.

Users have reported a number of issues with Nvidia GTX760 cards, some of them couldn’t start their favorite video games due to crashes, some of them even reported black screens while starting Windows. Like most issues with Windows 10 and hardware, these are caused by driver incompatibility with Windows 10.

Solutions to fix Nvidia GeForce GTX760 issues on Windows 10

1. Check to see if driver installation was successful

Sometimes issues can be caused by incomplete driver installation, and to see if the driver is properly installed and working you need to visit the Device Manager and find it under Display Adapters.

If the driver has an exclamation sign then it means that the driver wasn’t installed properly. Try going to the Action Center by clicking its icon in the bottom right. There you need to find “Finish installing hardware drivers” and click it. After the process is complete, your Nvidia drivers should be installed properly.

2. Check if your graphics card is installed correctly

Sometimes,  Windows 10 may not use your NVIDIA graphics driver because you didn’t connect it properly. Make sure that the GPU is properly installed. Remove it and install it again. If you haven’t done this before, you should skip this step to avoid breaking your hardware. Or you can ask a professional to do it for you.

3. Check your GPU settings

Some users said that turning off Vsync and enabling Maximum Performance in the Nvidia Control Panel worked for them. Here are the steps to follow:

  1. Go to the Nvidia Control Panel > Manage 3D settings.manage-3d-settings
  2. Set Power Settings to Maximum Performance > disable Vertical sync.
  3. Save the changes and check is this solved the issue.

4. Download the latest drivers

Since driver compatibility is an issue, downloading the latest drivers from Nvidia’s website or using the Windows Update application is usually the best choice.

We have to mention that some users claim that drivers from Nvidia’s websites are giving them problems, while others claim that drivers downloaded via Windows Update cause the problem. If you notice any problems, remove the previously installed drivers and try another.

Update drivers automatically

If you do not have the necessary computer skills to update the drivers manually, we strongly suggest doing it automatically by using specialized software.

A computer cannot manage video cards, computer programs, sound cards, or other hardware; they must be managed by a driver. You can manually update drivers if you have a thorough understanding of the drivers your PC requires, although a driver updater utility is the best alternative.

A dedicated tool such as Fortect Driver Updater inspects the computer, generates a status report, and restores the system to its original state.

You may rely on Fortect Driver Updater to make such enhancements to ensure a proper update with the most recent graphics card drivers.

This tool is 100% secure and will update and download the right driver version for your device. Nonetheless, it will avoid PC damage from updating the wrong version and compromising your entire system.

5. Check for overheating issues

A very common issue preventing you from using your NVIDIA graphics card is overheating. If you use overclocking software, temporarily disable it to check if this solves the problem. Keep in mind that overclocking tools force your hardware to run at peak performance which puts a strain on your GPU and CPU.

You can also get a cooler and clean your computer from dust specks.


Being unable to use the Nvidia GeForce GTX760 graphics card on Windows 10 can be extremely frustrating, but we hope these tips helped you solve this issue. If everything else fails, you can always contact Microsoft and Nvidia for their support.

In the end, this is just a driver issue, and just like most driver issues, it should be fixed soon with the latest version of Nvidia drivers or with the latest Windows 10 patch.

If you have any other Windows 10-related issues you can check for the solution in our Windows 10 Fix section.

Microsoft invests in Pennsylvanian wind energy though partnership with TransAlta Renewables

Microsoft has signed a deal with TransAlta Renewables to invest in environmentally friendly wind energy. As part of the investment, the Redmond giant will make a fifteen-year purchase of 90 megawatts of the power generated from the new facility, which will be located in Hector Township, Pennsylvania. Brian Janous, Microsoft’s General Manager of Energy and Sustainability, stated that,

“Working with companies like TransAlta to bring new projects online, especially wind projects in states outside the Wind Belt, is good for our business, the community and the clean energy economy. We’re pleased to enter a new state in the PJM region and take another step toward our goal of enabling a clean energy future for everyone.”

The company has made numerous other investments into cleaner energy in the past, including their 37-megawatt purchase of wind energy from GE in Ireland, and a whopping 237-megawatt purchase the company made a couple years back. Microsoft seems to have always been a big supporter in wind energy, because afterall, you can’t say Windows without “wind,” can you?

Do you think Microsoft’s investments in cleaner energy will entice other organizations and individuals to commit to going cleaner as well? Feel free to share your thought down below.

What to do if Cortana Can’t Send Dictated Emails or Take Notes


3 solutions to fix Cortana not sending dictated emails

  1. Change your regional settings
  2. Restart Cortana
  3. Fix Windows Speech Recognition

One of the most anticipated features of Windows 10 was Microsoft’s virtual assistant, Cortana. For the most part people are loving Cortana. However, there are some users complaining that they can’t send dictated emails and take notes with Cortana on Windows 10.
cortana use google wind8apps
Currently Cortana is only available in USA, UK, France, Spain, Germany, Italy, and China, but Microsoft will soon expand it to Japan, Australia, Canada (English only), and India (English only). In addition Brazil, Mexico, and Canada (French) should be added on the list of supported countries in near future.

UPDATE: Cortana is now available in 13 countries.

FIXED: Cortana won’t send emails

Solution 1: Change your regional settings

If you’re not in these countries, you can’t use Cortana, but you should also know that sending dictated emails is currently enabled only for UK and US. For example, if you’re using Cortana with French or German settings, you can’t send dictated emails. However, switching your regional settings to English unlocks these features.

Here’s what you need to do:

  1. Open Settings and click on Time & Language.
  2. Then click on Region and Language from the sidebar.
  3. Find Country or region option, and select United Kingdom or United States from the list.
  4. Save the changes.

Now dictated emails and notes should work with Cortana. This little trick isn’t the best solution, especially if you don’t want to change your settings, but it’s the only workaround so far.

Microsoft has acknowledged that dictated emails are only available for English settings, and currently they are working on expanding their support for dictated emails. However, this might take a while, and we don’t know when this update will roll out.

So if you don’t want to wait for official update from Microsoft, try changing your regional settings in Windows 10 and see if this works for you. Also, if you’re confused about what Cortana can do on your computer, you can always ask her and she’ll list the all the supported features.

  • RELATED: Full Fix: Hey Cortana not Recognized in Windows 10

Solution 2: Restart Cortana

Another quick solution is to simply disable Cortana and restart your computer. Once your PC has booted up, you can re-enable Cortana and try to send an email to check if the issue persists.

Solution 3: Fix Windows Speech Recognition

Oftentimes, Cortana can’t send dictated emails due to Windows Speech Recognition problems. Here’s how you can fix that:

  1. Say ‘Stop listening to” stop Windows Speech Recognition
  2. Start Cortana > select ‘I agree’ to enable all the features of the assistant
  3. Enable Windows Speech Recognition back on by saying “start listening.”

If you have any other Windows 10-related issues you can check for the solution in our Windows 10 Fix section.

RELATED GUIDES TO CHECK OUT:

Can I clean reinstall Windows 10/11 after upgrading?

Windows 10 is still offered as a free upgrade for most people, but it’s safe to say that some users are a bit skeptical about it. Users also have all sorts of question. One of the main questions these days is whether users can install a clean copy after a Windows 10 upgrade. Here’s the answer.
windows 10 rtm release wind8apps
When Windows 10 was first announced people were extremely excited when they found out that Windows 10 would be free for all genuine Windows 7 and Windows 8.1 users. We were all excited when we were offered a free upgrade to latest operating system, but is Windows 10 really free, or is it just a free one-time upgrade?

Can I reinstall Windows 10 on my computer after upgrading?

According to Microsoft, Windows 10 is free, and it will remain free for all users that have upgraded from genuine Windows 7 or Windows 8. This means that you can perform a clean reinstall of Windows 10 if you like, and you will still keep your license for free.

When you activate your Windows 10 through upgrade, it’s registered to your computer hardware, and you can reinstall it as many times as you want. This is extremely useful if you don’t want to go back to previous version of Windows, and you don’t want to keep it on your hard drive.

You can safely format your hard drive and install Windows 10 from scratch on the same computer. Bear in mind that Windows 10 is registered to your computer hardware, so you won’t be able to install it on your laptop or anywhere else.

Also remember that you can revert back to Windows 7 or Windows 8.1 if you don’t like Windows 10, but this doesn’t mean that you can install Windows 10 on any other computer using your license, because every computer gets one license, and that license is registered to that computer hardware even if you don’t use Windows 10 anymore.

These are some common questions that people are having about Windows 10, but if you’re concerned if you can perform a clean reinstall of Windows 10 after you’ve updated to Windows 10, there’s no need to worry.

You can perform as many clean reinstalls for free on your computer as long as your hardware, or in this case motherboard remains the same.

You can clean reinstall the OS by using Microsoft’s Media Creation Tool to create a bootable media to reinstall Windows 10. When you insert the bootable media, there are two options available: perform a clean install or upgrade again.

If your computer asks you to enter a product key, simply select the option ‘I’m reinstalling Windows 10 on this PC‘. This should force the install to continue and your computer will activate your product licence again.

You can also clean reinstall Windows 10 by using the Reset option of the Windows 10 Refresh Tool.


If you decide to upgrade your hardware, or if you replace it for some other reason, you might need to contact Microsoft to see if you can transfer your license.

If you have any Windows 10-related issues you can check for the solution in our Windows 10 Fix section.

For more information on how to reinstall Windows 10, check out these guides:

New Windows Insider series to go behind the scenes on how Windows works

In the wake of a highly publicized fumble of a Windows 10 Update this fall, Microsoft’s Windows team is going back a trusted move from their playbook of old it seems.

Recently announced, the Windows team is unveiling its Windows Internals Series and is starting off the serial with a deep dive into the development of the One Windows Kernel.

I mentioned that the Windows team is using a familiar move with its announcement of the Windows Internals Series as it seems very reminiscent to an initiative the team used a couple of years ago where they published posts in what is now called the Feedback Hub, about the people behind the Windows 10 experience.

According to introductory post on the Windows Insider blog,

One of the pieces of feedback we regularly hear is that our fans want more detailed and technical articles diving deep into the behind-the-scenes on the development of the Windows OS. To address this feedback, we’re officially kicking off the Windows Internals series of articles today. Some of these articles will be new content published here on our Windows Insider website while others might be links to other blog posts from various teams talking about their work in Windows. The goal is to publish these articles whenever we can but there isn’t a set schedule. Sometimes we may have multiple articles within a single week and sometimes it might be a week or two between new articles. I’m keeping a list of topics in Microsoft To-Do and if you have any suggestions, feel free to tweet them my way!

The deep dive on the One Windows Kernel is published by Principal Group Program Manager Hari Pulapaka, who covers the flexibility and scale at which the Window Kernel operates. Despite the Windows team offering a mind-numbing amount of Stock Keeping Units or SKUs, the way the Windows Kernel operates among those different configurations remains relatively unchanged. The engineering development of such a flexible core is a rather impressive topic of discussion.

As with Windows CE, the One Windows Kernel is being plopped onto a multitude of devices such as laptops, game consoles, ATM machines, and countless IoT devices. Pulapaka covers the evolution of Microsoft’s highly touted One Windows Kernel and how it manages to scale to most architectures.

While this particular first piece of the Windows Internals Series does not directly tackle the feedback and development chain of Insider communication, it’s perhaps safe to say over the course of the series, Insiders will get a bit more clarity on how complex Windows development actually can be, and how somethings can be missed.

Satya Nadella hauls in a $25 million paycheck for a record fiscal year 2018

Microsoft CEO Satya Nadella hauled in a massive paycheck for the fiscal year 2018 which was recently revealed in Microsoft’s Annual Proxy Statement after a year where several milestones were met by different Microsoft businesses. Salary, stock awards and cash bonuses together brought home a whopping $25.84 million in total for Nadella, though in stock awards he hasn’t beaten Bill Gates’ records just yet.

This year Microsoft stock went over the $100 per share mark which made $100 billion in revenue for investors.

Despite a significant culture change at Microsoft that was arguably spurred by Nadella, the company still finds itself in a lawsuit for gender discrimination. Nadella has acknowledged this and is looking to address similar issues within the company.

We remain committed to increasing diversity and making sure that Microsoft is a workplace where everyone has an equal opportunity to succeed. The judge made the right decision that this case should not be a class action.

The proxy document also displays for the first time how Nadella’s compensation compares to the median employee at Microsoft, this is thanks to the new ruling where CEO’s have to disclose pay ratios.

The median employee at Microsoft makes roughly $167,689 in compensation which translates to 154:1 when compared to Nadella.

Shareholders will have a lot to discuss this November in Bellevue at the Annual Shareholder Meeting which will start at 8am on the 28th.

Microsoft, LinkedIn

The proxy statement also shows the revenue from Microsoft’s cloud business equalling $23 billion, and the company’s gaming division hitting $10 billion. Integration with independent business LinkedIn and the acquisition of GitHub should also boost Microsoft’s revenue numbers this quarter. Nadella’s evaluated performance was marked at a 130 percent grade out of 200.

Not bad.

How to Fix No Sound in Fortnite [Step-by-Step]

If Fortnite suddenly has no sound-no—no footsteps, no lobby music, nothing—something’s broken. Here’s how to troubleshoot it and get your audio back, fast.

How can I fix in-game audio issues in Fortnite for PC?

Solution 1 – Disable Visualize Sound Effects

  1. Start the game.
  2. Open Settings.fortnite settings
  3. Choose the Audio section (speaker icon.)
  4. Select the “Visualize Sound Effects” feature.fortnite visualize and sound effects settings
  5. Make sure it’s set to “OFF” (as shown above).

Solution 2 – Check Sound drivers

  1. Type device manager in the taskbar and open it.
  2. Navigate to Sound, video, and game controllers.device manager sound, video and game controllers
  3. Expand the list, and right-click on each device and select Update driver.update audio driver

Solution 3 – Run Fortnite as an administrator

  1. Right-click on the Fortnite desktop shortcut and open Properties.
  2. Choose the Compatibility tab.
  3. Check the “Run this program as an administrator” box and confirm the selection.
  4. Do the same for the Epic Games Launcher.in game audio not working fortnite

Learn everything there is to know about the administrator account and how you can enable/disable it right here!

Solution 4 – Troubleshoot sound options for Fortnite

  1. Open Fortnite and minimize it by pressing the Windows key + M key.
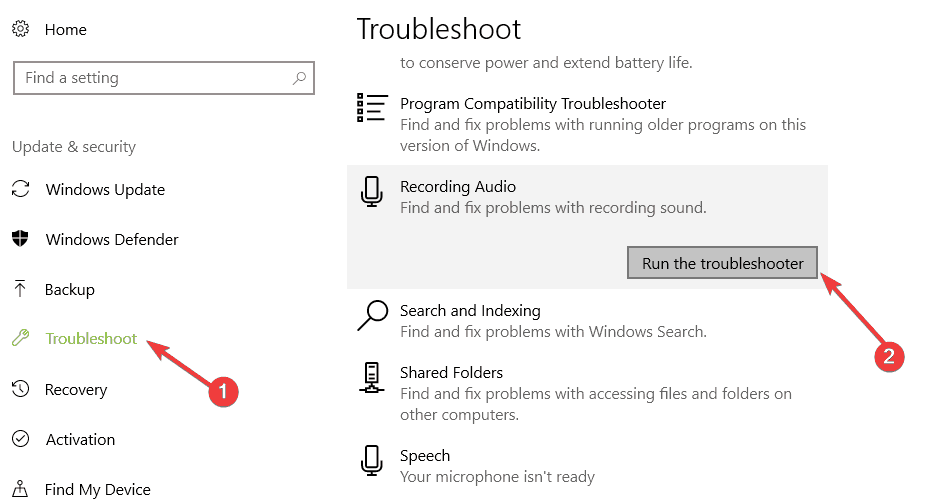
  2. Press Windows key + I to summon the Settings app.
  3. Choose System.in game audio not working fortnite
  4. Select Sound from the left pane.
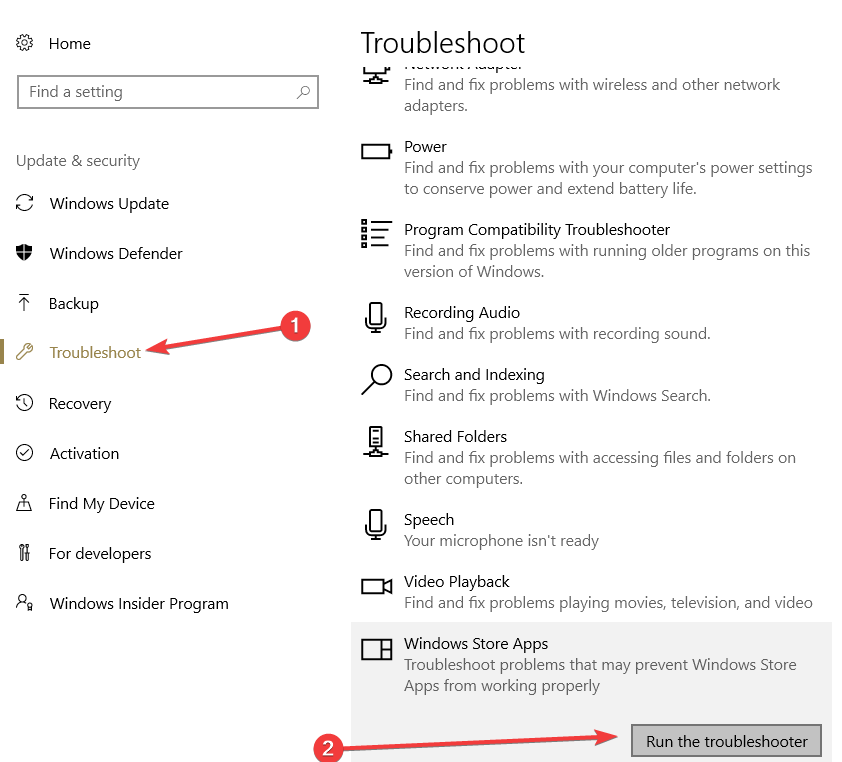
  5. Make sure both input and output devices are not muted. You can test them and run the troubleshooter if they won’t work.in game audio not working fortnite
  6. Now, open Advanced sound options.in game audio not working fortnite
  7. You should see Fortnite on the list. Make sure it’s not muted.

If you’re having trouble opening the Setting app, take a look at this article to solve the issue.

Solution 5 – Update the game

The in-game sound got broken (completely or partially) after an update. This means that, if the game bug is causing the issue in the first place, the next update will deal with it.

To update Fortnite on PC, all you have to do is fire up the Epic Games launcher. If a new update is available, the installation will automatically start. Just wait for it to complete and restart your game.

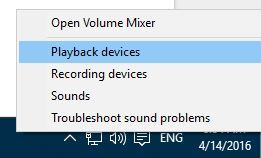
Solution 6 – Set the default playback device

  1. Make sure that your sound input/output device (headphones, speakers, or mic) are plugged in.
  2. Close the game.
  3. Right-click on the Sound icon and open Sound from the contextual menu and choose Sound Settings.sound settings windows 11
  4. Check the volume settings for your output device and make sure none of them are muted or set to a very low value.volume settings windows

Solution 7 – Install DirectX

Make sure to download and install the latest iteration of DirectX (FROM MICROSOFT STORE!) , depending on the version your GPU supports. Also, look for the redistributables like VC++. This might solve the problem you have with the installation.

If you can’t install DirectX, use this troubleshooting guide to get rid of the problem.

Solution 8 – Reinstall the game

  1. In the Windows Search bar, type Control and open Control Panel.
  2. Click on Uninstall a program.in game audio not working fortnite
  3. Uninstall Fortnite.
  4. Use any of these tools we recommend to clear all remaining associated files and registry inputs.
  5. Use the Epic Games Launcher to download and install Fortnite again.

If you need more info on how to uninstall programs and apps in Windows 10, check out this dedicated guide.

Solution 9 – Reset your PC to factory settings

Here’s how to reset your PC and, hopefully, finally enjoy the full battle royale experience in Fortnite:

  1. Press Windows key + I to open the Settings app.
  2. Choose Update & Security section.
  3. Select the Recovery from the left pane.
  4. Under the “Reset this PC” option, click Get started.in game audio not working fortnite

Need more info on how to factory reset your PC? Read this article and find out everything you need to know.

With that said, we can conclude this article. In case you have any alternative solution we forgot or a question concerning the enlisted ones, do tell. You can share your thoughts in the comments section below.

Fortnite has its fair share of issues, and no sound is just one of them. If your skins suddenly disappeared, you’re unable to join a party, seeing high CPU usage, or Fortnite’s just not working on Xbox One, you’re not alone.

Even payment problems like the dreaded “something went wrong” error have been popping up. The good news? Every one of these has a fix.

Console players may run into similar audio glitches, so check our full guide on fixing Fortnite sound not working on Xbox for solutions tailored to Xbox users.

Microsoft gets another low score from iFixit for Surface Pro 6

Microsoft’s Surface Pro 6 tablet started shipping in 10 markets yesterday, and the folks over at iFixit have already published their complete teardown. Surface devices are notoriously hard to repair, and as it turns out the Surface Pro 6 is unfortunately no exception.

Except from the new 8th gen quad-core Intel processors, iFixit found very little changes compared to the Surface Pro 5. Microsoft added new heat spreaders to deal with the additional heat produced by the more powerful processor, but there’s still no active cooling system inside. The battery is also identical to the one in the Pro 5, and it’s still glued-in, just like the display. Moreover, storage on the Surface Pro 6 is non-removable, and this wasn’t the case in previous versions.

iFixit highlighted a few positive things like the use of standard screws and a compatibility with the Surface Pro 5 display, but the new tablet is still very difficult to repair. “We found the same glued-shut (dare we say disposable?) 1/10 repairability score tablet we’ve seen for the past few years. No upgradability, no USB-C, a glued-in battery with a limited life—but hey, it comes in black,” wrote iFixit.

The teardown experts have yet to publish their analysis of the Surface Laptop 2, and expectations for this one may be a little bit higher. Last year, the original Surface Laptop got a 0/10 repairability score, with iFixit calling it a “glue-filled monstrosity.” The new model apparently kept the same chassis, and we doubt Microsoft made an extra effort to improve its repairability.

Windows Insiders are welcomed to Microsoft HQ

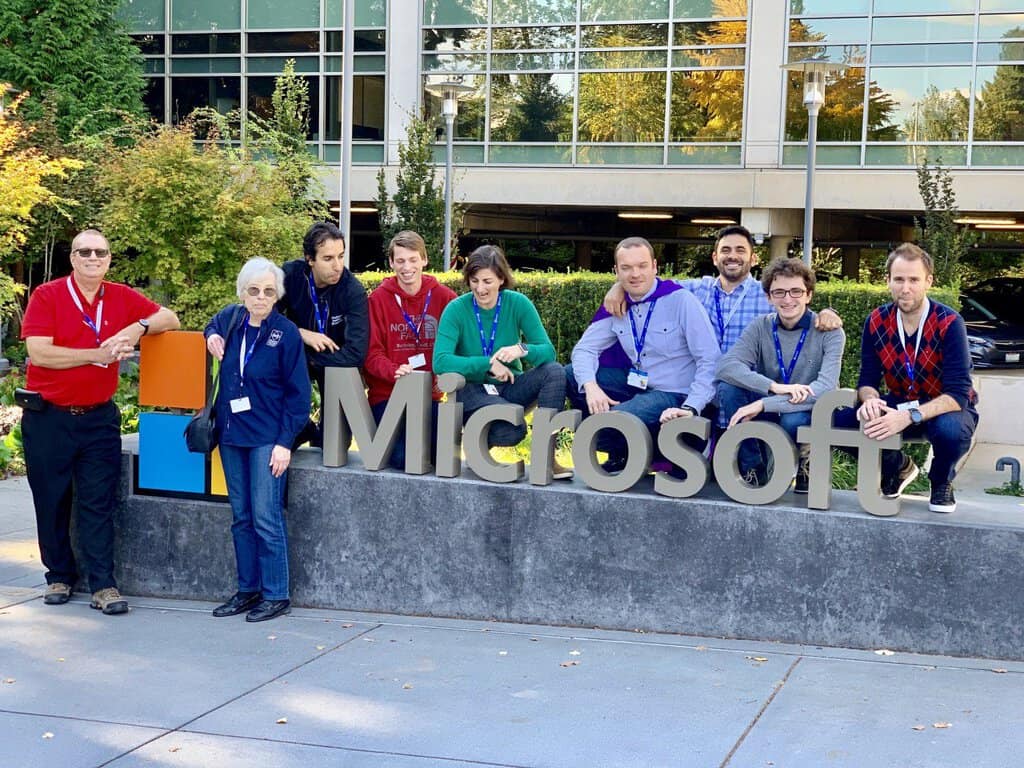
As one of the lucky winners of the #Insider2Campus contest, I got the chance to visit the Microsoft Campus in Redmond last week. The tour of the campus was an amazing experience. Some of you asked how did I enter the contest, what did I have to do and what did I see while I was there? Here is the full story.

The Windows Insiders Bug Bash and Contest

The contest consisted of participating in a Bug Bash where you go through step by step quests to try out the latest features from a new major Windows 10 update before it is released to the public. Windows Insiders leave feedback for the engineers back in Redmond so they can fix and resolve problems.

The rules were:

  1. You have to had been a Windows Insider by joining the program
  2. Download the latest preview build during the bug bash, there was one in June and one in July.
  3. Complete at least one quest in the feedback hub
  4. Post at least one feedback post in the Feedback Hub for the build you just downloaded.
  5. Submit a video and short brief on why your a windows fan and there was some specific criteria for this video.

Who were the other lucky winners?

The Tour:  

First off we had to get our Bacon! Yes, just like the strips from the narwhal (seriously I thought something was odd, it all made sense).

Then we were taken by bus to visit each of these places throughout the week.

A Modern Workplace – A look at how Microsoft is reshaping the workplace to make it more modern with spaces that provide collaborative working without sacrificing personal space. The Modern Workplace is so you can enjoy the secure environment and can exchange ideas and conversations so the best work can be produced in a faster more agile workspace.

The Anechoic Chamber – how audio is tested on devices namely Surface and Xbox devices. The chamber has won a Guinness World Record for being so quiet. The testing of sound on devices is important when used in certain conditions in the room, so this chamber cuts out all the noise levels and the devices get a proper test for all those decibel ranges.

The Surface Lab – A look at what makes up a Surface device, I was amazed at how much thought is put into the Surface Devices, every look and feel is designed with thoughtful care and attention. They are tested for durability so when you throw it at the wall it doesn’t crumble into pieces (Please don’t try this at home).

The Microsoft Garage – Experiments are conducted here and if they are lucky enough make it on the hall of fame. Some of these experiments include FindTime, a Microsoft App which is very useful when you’re trying to find time with a co-worker or family member. These experiments are made by small teams and interns also have a chance experiment.

Microsoft Treehouse – Another touch on the Modern Workplace, a new venture outdoors, where your well-being can be improved with the forces of nature. The sound and space around you is different, a more relaxing atmosphere. If you like nature then you will hear the rustling sound of a squirrel.

Envisioning Center – The home of the future, and the future of the workplace, how rapid change in the home environment and busy working lives feel like they are merging together sometimes. It is a vision of the future where technology is made easier to use and faster connectivity.

The New Modern Campus was showcased – we got chance to see the new Microsoft Campus through Hololens and walk around the new campus as if we were there, there is a focus on local communities getting involved and selling their products on campus.

At the end of the week, we had some fun on the webcast! You can see a replay from Mixer. The whole tour was very well organized by the Windows Insider Team, so much energy and excitement for us to be there made the tour that much enjoyable. Look out for more contests from the Windows Insiders Blog posts, you may get lucky like me to visit the campus.

Office 365 seeks to stop over 8 million business email phishing attempts with new low miss rate

Microsoft has released its report on Office 365’s phishing miss rate. According to their own statistics, the company has blocked approximately 5 billion phishing attempts on Office 365. This is though the analyzation of more than 400 billion emails the company says it scans each month.

The Redmond giant admitted in their blog post that when comparing their email account service with others, the company’s blocking of phishing emails wasn’t close to the high of other major email vendors during last year.

Microsoft show's how its miss rate for phishing emails was relatively high between November 2017 and January 2018
Microsoft show’s how its miss rate for phishing emails was relatively high between November 2017 and January 2018

This led to the company to hire thousands of security experts and to put in an annual $1 billion budget for cybersecurity protection. Enhancements include the detection of domain spoofing and display name impersonation as well blocking of links the service considers to be unsafe. The company really goes in depth in their post.

Microsoft outlines some of the types of phishing attempts it protects Office 365 users from.

After a few months of improvement, the tech giant’s new statistics show that their security enhancements really paid off, and that their phishing miss rate was much lower than that of their leading competitors (although they didn’t specify which competitors were measured). Safe Links, the company’s URL link scanning service for Outlook, has protected users against 7 billion potential malicious links in 2018 alone.

Microsoft's new graft showing how Microsoft's phish-attempt blocking is now leading its competitors by a significant margin.
Microsoft’s new graph showing how Microsoft’s phish-attempt blocking is now leading its competitors by a significant margin.

Have you noticed improvement of Outlook’s phish-blocking when subscribed to Office 365? You thoughts are welcome in the comment box below.

New radial interface for typing text using a game controller or gestures appears in new Microsoft patent

If you ever tried to type text using the on-screen keyboard on the Xbox One or in the Windows Mixed Reality environment, you’re probably aware that the process can be really tedious. Microsoft and third-party manufacturers currently sell chatpads for the Xbox One controller, which make it easier to write text on Windows 10, the Xbox One or Windows Mixed Reality using a tiny keyboard, but it looks like Redmond could be developing a better solution based on a new radial interface (via Windows Central).

In a new patent titled “Text Entry Interface” and published last week, Microsoft explains why on-screen QWERTY keyboards offer a sub-optimal typing experience on gaming consoles and virtual reality headsets:

The QWERTY layout was designed and optimized for a two-handed, 10 finger input. However, it is inefficient and unnatural for the gaming, VR, AR, MR, and other input modalities (e.g., gamepad interaction, gaze, hand gestures, etc.). These modalities, by nature, are less efficient compared with simultaneous ten-fingers input. They are used to sequentially navigate a cursor or other indicator to desired characters on the QWERTY layout from character to character.

Microsoft’s alternative input solution for these devices would be a radial interface that would let consumers easily select letters using gamepad thumbsticks, which can be rotated to move the cursor and select different characters. You can see how it would work in the drawing below:

Moreover, the patent also mentions other types of inputs including voice, hand gestures, thumb gestures, as well as a “gaze” that would be performed through rotating eye movement. “Additionally or alternatively, identification of a character may be based on screen position, layer position, layer and/or character orientation, or other factors,” the patent description reads.

This all sounds pretty futuristic, but as with all patents this technology may never see the light of day. In the meantime, the good ol’ Xbox One chatpad with backlit keys is a pretty safe bet, even when using Windows Mixed Reality headsets: Starting with the October 2018 update, Microsoft added a new “Flashlight” feature to Windows 10 that lets you see your physical environment (in our case, the Xbox One chatpad or a PC keyboard) without removing your VR headset.

Microsoft teams up with Taco Bell to offer limited-edition Xbox One X consoles

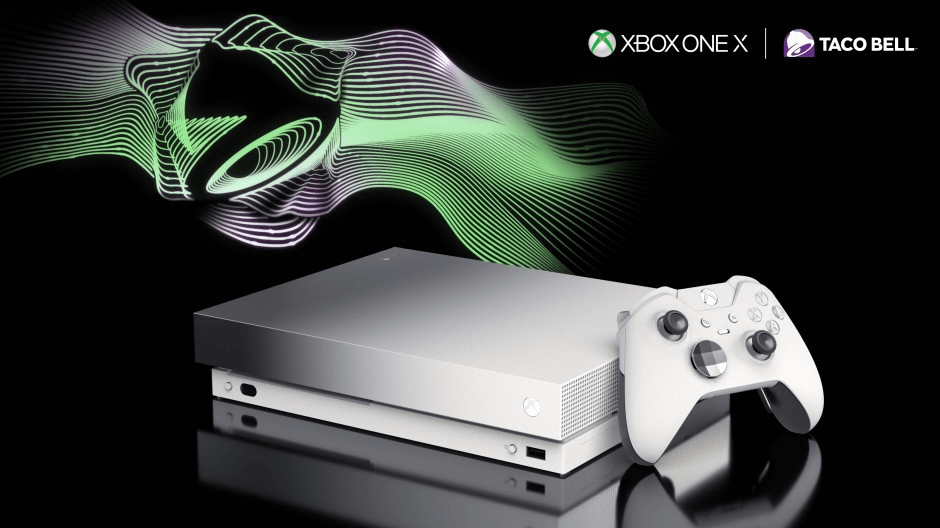
Taco Bell has partnered with Microsoft to create a special limited-edition platinum Xbox One X consoles which feature the fast food joint’s iconic bell noise upon the console’s boot. Starting tomorrow, customers of the fast food joint can participate in their limited-time contest to win the console, which comes with a White Special Edition Xbox Elite controller, plus a three-month subscription to both Xbox Live Gold and Xbox Game Pass.

Those who wish to enter can do so by buying the joint’s limited-time $5 Chalupa Cravings Deal. Inside the box, the customer receives a printed code, which can be sent via text to the phone number listed in the rules. The company says that a customer wins once every 10 minutes on average, and the promotion is here until November 21 (two days before Black Friday).

The Xbox One X is Microsoft’s latest and top-of-the-line console that plays Xbox One X Enhanced games in 4K and HDR. The console comes with 1 TB of storage and a built-in 4K-capable Blu-ray player. The limited-edition platinum edition is a slight variation of white version released a couple months back.

Will you be participating in the Xbox promotion? Let us know in the comments below.

How-To: All about Bluetooth on Windows 10

With the performance and availability of wireless peripherals continuing to grow, Bluetooth is becoming an increasingly common feature on Windows PCs. Whereas it was once limited to a handful of laptops, Bluetooth’s now a common sight on all Windows tablets and convertibles, as well as some desktops.

Bluetooth’s undergone steady development too, with its latest iteration focusing on improvements around power efficiency and performance. Many modern peripherals use Bluetooth for their wireless connections, including Microsoft’s Surface mouse and keyboard and the company’s latest Xbox One controllers for Windows.

Getting connected

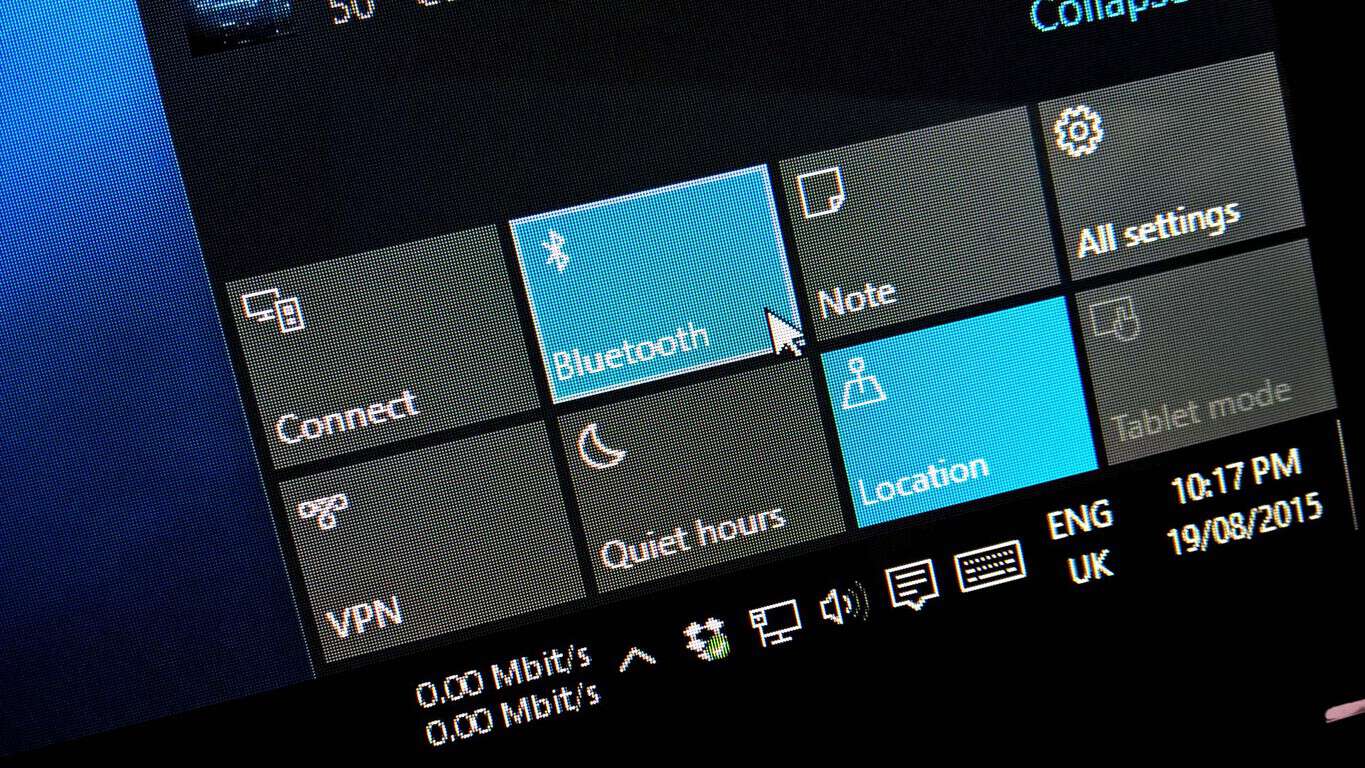
Getting connected to a Bluetooth device is much easier in Windows 10. To get started, make sure Bluetooth is turned on – you can check using the Quick Action tile in Action Centre. If it’s highlighted with your accent colour, you’re good to go. If not, you’ll need to click the tile to turn Bluetooth on.

Bluetooth Quick Action

If you don’t see the Bluetooth quick action, you’ll need to head to the Settings app and enter the “Devices” category. You should land on the Bluetooth page automatically; turn the toggle button at the top on to enable Bluetooth. In the event there’s no Bluetooth page in the Settings app, make sure your device really has Bluetooth and that the adapter is enabled.

With Bluetooth turned on, you’re ready to connect. Again, the simplest way is to use Action Centre, this time clicking the “Connect” tile. If you don’t see this tile, you can also use the Bluetooth page in Settings (click “Add Bluetooth or other device”), or press the Win+K keyboard shortcut to open the Connect flyout. From this menu – or the Bluetooth settings page – you should see a list of available Bluetooth devices after a few seconds.

Adding a Bluetooth device

Tap or click the device you want to connect to and follow the instructions to complete the procedure. Some products may require you to enter a PIN or press a button as an additional security step. You should then be equipped to use the device; simple peripherals such as mice, keyboards and headsets will start working immediately, but specialist hardware might have additional steps before they’re ready.

At this point it’s worth mentioning the connection process is fundamentally the same for all kinds of device – whether it’s a mouse, keyboard, Bluetooth speaker or game controller. You can also use Windows’ Connect panel to connect to different, non-Bluetooth devices – for example, wireless display adapters using Miracast technology.

Removing Bluetooth devices

You should only need to go through the connection procedure the first time you use a new device. After that, most products will remember the connection and stay paired – you should just need to enable Bluetooth and turn on the device.

Removing a Bluetooth device

If you want Windows to forget a device, head back to the Devices > Bluetooth page in the Settings app. Find the device you want to remove – the list is organised by category – and click its name. Then just hit the “Remove device” button. Next time you want to use the product, you’ll have to add it again.

Using Bluetooth to send files

You can use Bluetooth to directly transfer files to compatible devices – mostly phones and media players. The simplest way to use this feature is through the Bluetooth icon in the system tray. If you don’t see it straight away, it’s probably buried in the overflow menu (click the little upwards-pointing arrow). Note that the icon only appears when Bluetooth is turned on.

Screenshot of Bluetooth system tray menu

To send a file, right-click the icon and choose “Send a file.” In this window, you’ll see all the devices you’ve previously connected to Windows which are capable of receiving files. Choose the device you want to share to and make sure it’s ready to receive. On the next screen, you’ll be able to pick the files to share and begin the transfer.

Screenshot of sending a file with Bluetooth

Receiving files is a similar process – right-click the taskbar icon and choose “Receive a file.” Your PC will now be ready to receive a file from a paired Bluetooth device. After the transfer completes, you’ll be able to pick a location to save the files.

Sending files with Bluetooth

Bluetooth isn’t a complicated technology but there are a few things to remember. First and foremost, Bluetooth must be turned on for any of this to work! If devices aren’t pairing to each other, make sure Bluetooth really is enabled and you’ve entered any PIN codes that may be required. One other tip is to turn off Bluetooth if you’re not going to use it regularly – although newer versions of the technology are much more power-efficient, it’s still a potential battery drain and security vulnerability.

The latest Chrome update leverages its PWA platform on Windows 10

Google may have just broken the dam on PWA’s being treated as first-class citizens on the desktop with its Chrome 70 release on Windows 10 and Chrome OS (Chrome 67). The latest Chrome upgrade comes with the rare collaborative support between Google’s browser and Microsoft’s Windows 10 that allows the browser to install PWA’s as regular applications on Windows 10.

The new feature means, apps such as Starbucks or Twitter which have been increasingly making use of PWAs, can now live on Windows 10 as more native experiences. Users can now install PWAs from the Chrome menu and see their installs appear in the Windows 10 Start Menu as any other Microsoft Store app or 3rd party application would, as well as supporting other Windows 10 settings like pinning the app to the taskbar or web notifications appearing in the Action Center.

The PWA version of Chrome apps act and appear much more like native apps by doing away with the browser chrome (pun intended) that usually surrounds the web version of the software and adhering to a higher experience standard for both Chrome and Windows 10 usage.

As part of the release notes, Google outlines the benefits of its PWA implementation as such,

Desktop progressive web apps can be ‘installed’ on the user’s device much like native apps. They’re fast. Feel integrated because they launched in the same way as other apps, and run in an app window, without an address bar or tabs. They’re reliable because service workers can cache all of the assets they need to run. And they create an engaging experience for users.

For its part, Google seems to view PWA’s as bridging the gap between the mobile experience and a familiar desktop paradigm for users.

Microsoft has pitched a similar narrative with its approach to PWA’s but has yet to drum up enough developer interest in its development platform.

Perhaps, as smartphone usage matures and the app paradigm resurfaces on the desktop in its more streamline mobile approach on Chrome OS or in the Microsoft Store iteration, and with the world’s leading browser developers putting its considerable influence behind it, Microsoft’s dream of a viable PWA platform could wind up being a more successful pivot than its UWP effort.

Where Can I Find my Windows 10 Product Key? [Quick Guide]

find product key in windows 10

You probably received Windows 10 as a free upgrade, so everything was done automatically for you, and you didn’t have to worry about any product keys, activation steps and stuff like that. But if you want to know the product key of your copy of Windows 10 just in case, I’m going to show you how to easily find it.

How to find Windows 10 Product Key?

The Windows Product key is actually not easy to find manually, because you’ll have to go through various registry scripts. So, not only that you’ll waste your time, you can also damage something in the registry, and there will be trouble.

But thankfully, there’s much easier solution. You can use some key-finder tools which will show you your product key in seconds.

How to locate your Windows 10 product key with ProduKey

produkey

I personally recommend NerSoft’s ProduKey, because it’s extremely simple tool to use and it will show you product keys of other software as well, not just your system. Click here and download ProduKey for free and it will immediately show you your product key.

You don’t even have to install it, just extract the .rar file and open the tool. Another good thing is that this tiny program doesn’t load your computer with junk promotional software and it doesn’t change your default search engine, like many programs do.

Speaking of which, if you want to change your default search engine  in Microsoft Edge, check out this article.

As I said, using this software is very easy. Just open it and it will show you the name of the software, it’s Product ID and most importantly it’s Product Key. If you double click on the name of any listed software, it will show you even more detailed info, and you can easily copy product key and everything else wherever you want.

I know you’re skeptical about using a third-party software while performing a system-related task. It’s okay, I was skeptical too. But you don’t have to worry about ProduKey, because it’s completely safe and it won’t damage your computer with malicious content. At the end of the day, it’s much more simple than going through complicated registry paths by yourself.

— RELATED: How to get a cheap Windows Product Key

Other methods to find your Windows Product Key

Additionally, you can retrieve your Windows 10 Product Key from your hardware manufacturer or from Microsoft Support.

If you bought a new computer running Windows, then the product key is preinstalled on it. Contact your hardware manufacturer for more information.

Also, if you purchased a digital copy of Windows 10 directly from Microsoft’s website, then you should have it in your confirmation email. If you deleted that email, contact Microsoft support to get more information about the respective digital license.

If you have any other Windows 10-related issues you can check for the solution in our Windows 10 Fix section.

Using Windows 11 instead? View your product key in seconds with this quick guide: How to view your Windows 11 product key super fast.

RELATED GUIDES TO CHECK OUT:

Remove Login Screen in Windows 10: How to do it

Since Windows 10 is a security-oriented operating system, it requires you to enter a password for your Microsoft account before login, just as was the case earlier. But many users want to remove the login screen in Windows 10.

This is especially true if you’re the only person using the computer and want to boot it without interruptions. So, let’s find out how to disable the Windows login on startup.

This action is very simple, and it doesn’t require registry hacks or tweaks. All you need to do is to change a couple of settings in your User Account.

How do I get rid of the login screen in Windows 10?

Tip icon Tip
We advise you to perform this action only if you’re sure that no one else will use your computer because it will render the PC unprotected. So if you’re using Windows 10 at work, keeping your computer safe is better.

1. Use netplwiz

  1. Go to Search, type netplwiz and hit Enter.
  2. Uncheck Users must enter a username and password to use this computerskip login to windows 10 wind8apps
  3. Enter your password and click OK.
  4. Restart your computer, and it should sign in automatically without requesting a password

If you change your mind and decide to turn on password request at login again, you repeat the process and enable Users must enter a username and password to use this computer again. Simple and easy!

Also, if you were wondering how to disable the sign in Windows 11, disabling the dedicated checkbox also works on the latest iteration.

2. Use Group Policy

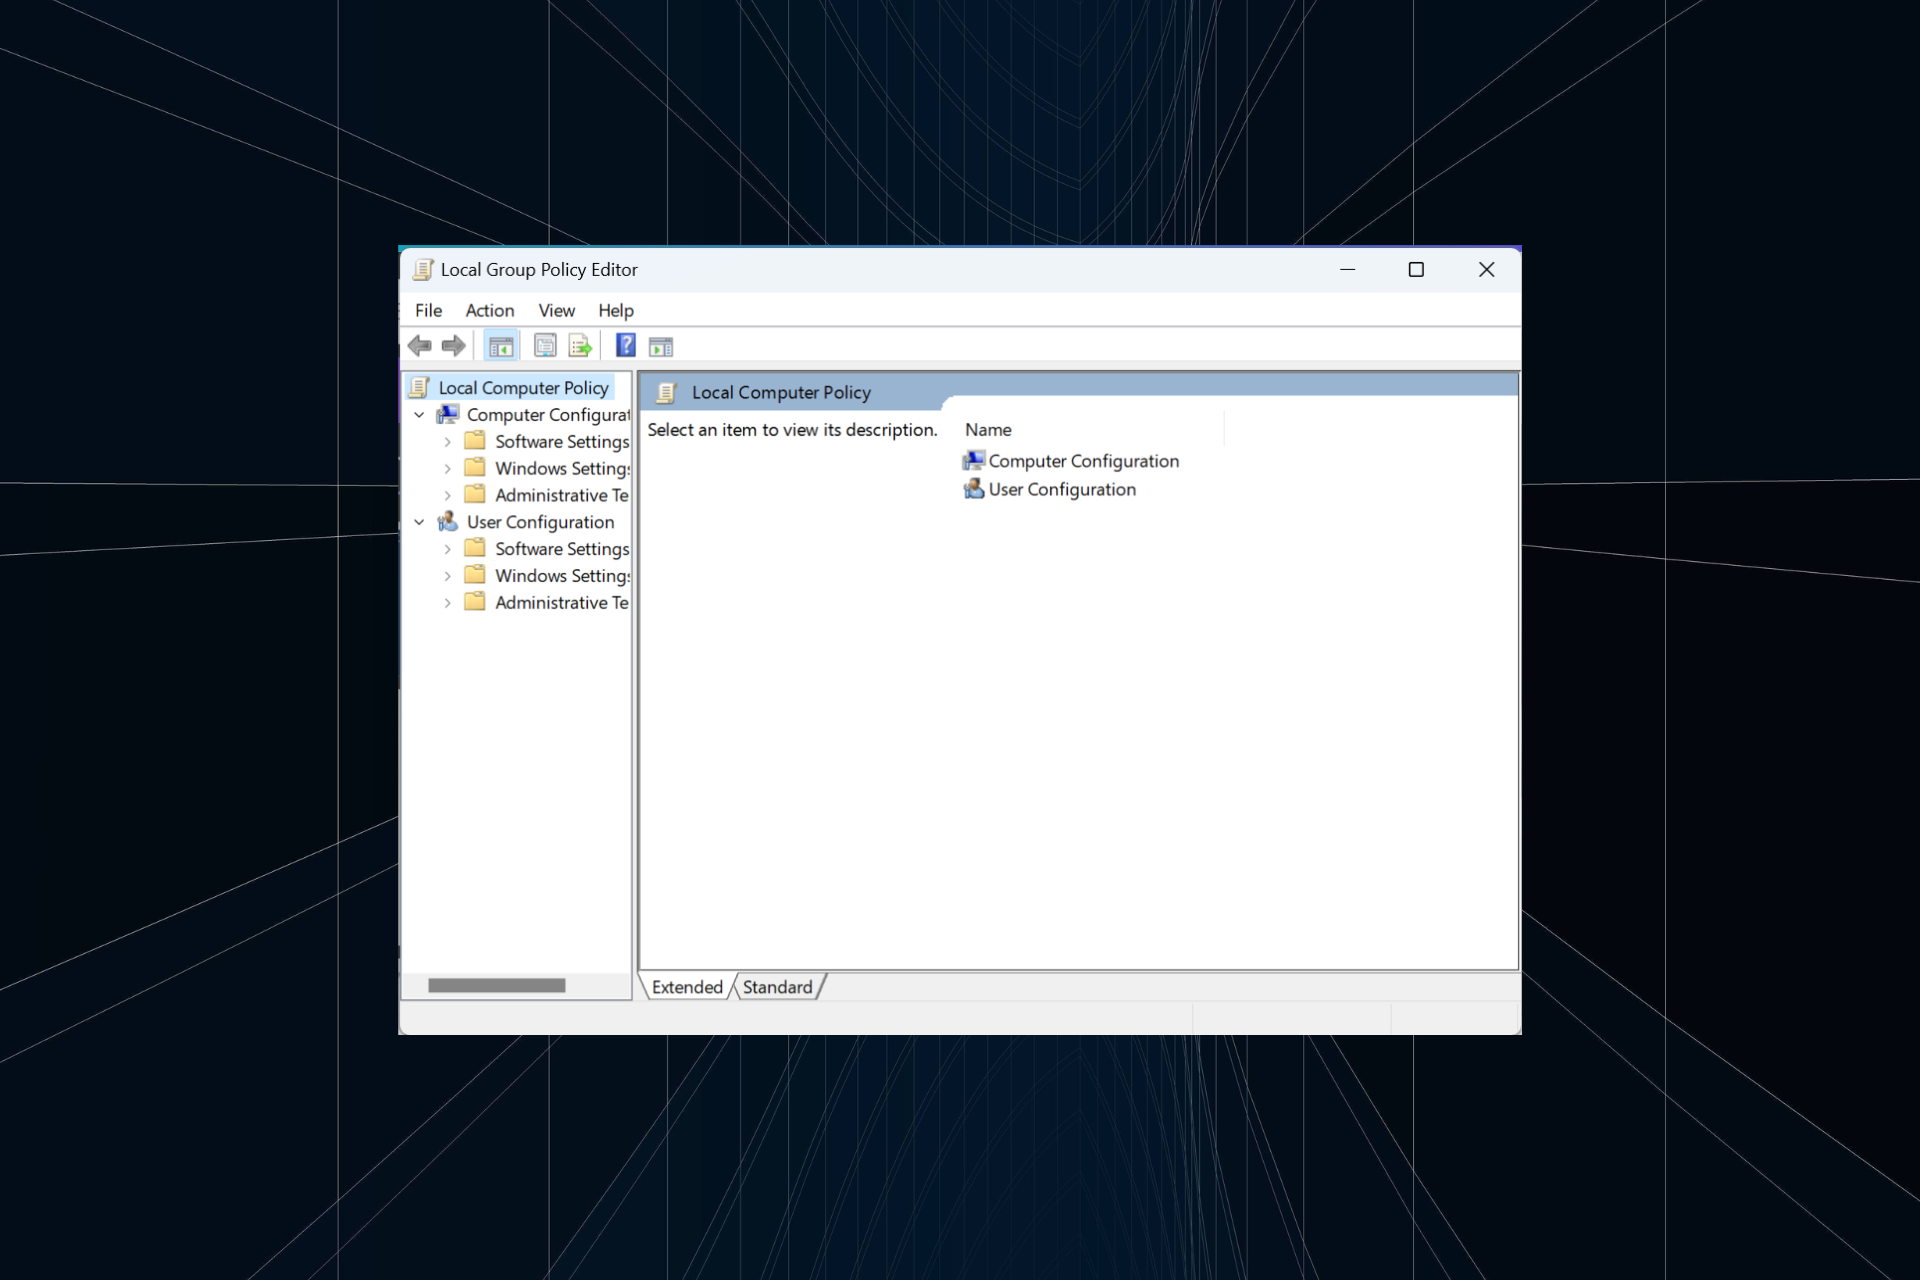
  1. Go to Start, type Edit group policy, and click the relevant search result.edit group policy
  2. Navigate to Computer Configuration, expand Administrative Templates, and select System.system configuration group policy
  3. Now, locate the option Logon, and double-click on Don’t display the Getting Started welcome screen at logon.Don’t display Getting Started welcome screen logon
  4. All you need to do is Enable this option; the login screen will no longer appear when you start your computer.

Another way to remove the Windows 10 login screen is to disable this feature directly from the Group Policy Editor. Remember the Home edition of Windows doesn’t come with the utility pre-installed, so you will have to manually install gpedit.msc.

Before you leave, find out how to set up passwordless login in Windows 10.

If you have any other problems, drop a comment below.

The Crysis trilogy is now backward-compatible on Xbox One

Xbox’s Major Nelson has just announced that Electronic Art’s classic Crysis trilogy of games for the Xbox 360 is now backward-compatible on the Xbox One. Crysis is EA’s sci-fi first-person shooter series where players are soldiers in high-tech “Nanosuits” who blast aliens that have come to invade and lay waste to the earth. As of this writing, each game can be individually purchased for just $19.99 on the Xbox 360 marketplace.

The Crysis trilogy follows the addition of Metal Gear Solid 2 and 3 HD to the backward compatibility list last week, and those games are also considered cult-classics. There are now over 600 Xbox 360 and original Xbox games that are playable on the Xbox One, and the full list is available here.

Since the Crysis is published by EA, it’s safe to expect that it may soon join EA Access, the company’s Xbox Game Pass-like service for the Xbox One. In the meantime, though, owners of digital or physical copies can revisit the trilogy on the Xbox One today at no additional cost.

How to Change the Default Search Engine in Microsoft Edge

Changing the default search engine on Edge is simple and easy to do. By default, the browser uses Bing, but you can quickly switch to another option such as Google, MSN or DuckDuckGo in just a few steps:

How to change the default search engine in Microsoft Edge

  1. Open Edge and type the web address of the search engine you want to set as default. (i.e. If you want Google, type google.com; if you prefer DuckDuckGo, type duckduckgo.com).
  2. Click the three dots in the upper right corner and select Settings.edge settings
  3. Select Privacy, Search, and Services.privacy search and services in edge settings
  4. Scroll down to Services and click on Address bar and search.address bar and search settings in edge
  5. Locate Search engine used in the address bar and select the option you want from the list. search engine used in address bar edge
  6. If the search engine you want to use is not listed, select Manage search engines.manage search engines
  7. Click the Add button and manually enter the web address of the search engine you want to use.add search engine in edge

We also have a special guide on how to change the default search engine in Edge to Google, so feel free to check it out.

Wrapping up

Edge is one of the top browsers on the market. And because it keeps adding cutting-edge features like Microsoft Start and Background Tab Summary, it will probably stay at the top of the game.

Though Microsoft recommends using Bing, the default search engine in Edge for the best experience. The browser fully integrates the search engine and supports Bing-powered features like Visual Search.

That said, many users still prefer the quality of search results of browsers like Google or the privacy offered by DuckDuckGo. Learn how to secure your browser and manage privacy while changing your search preferences in this full guide Privacy settings in Microsoft Edge.

Regardless of your reasons, follow the guidelines above to change the default search engine in Microsoft Edge.

Microsoft signs Made by Dislexia pledge, offers tools and support for students

Microsoft has announced that they have joined the Made by Dyslexia pledge, thus committing to give the hundreds of millions of dyslexic students all over the world access to tools to make it easier for them to effectively read and write. The company’s Learning Tools already helps people, including those with dyslexia, learn to do this without costing them anything.

Speech dictation is coming to the Word and OneNote web clients allowing the dyslexic to add written words to documents using their voices, which Microsoft says will be supported on all web browsers over the coming weeks. Speech dictation is already part of the company’s Office 365 desktop applications.

Immersive Reader is coming to Flipgrid, the company’s recently-acquired video-based learning platform. The new tool will make it easier for those struggling to read to do so with a lot more ease. Text can be spaced out, broken into syllables, and color-coded to indicate nouns, verbs, adjectives and adverbs. Immersive Reader is already a feature of Word and OneNote on Windows 10 devices.

In addition to making reading easier, Immersive reader will also add support for math problems though the use of speech-to-text as well as highlighting a single line of text at a time to boost focus. This is not only useful for those with dyslexia, but those with dyscalculia and others who are differently-abled.

Immersive Reader helps with math, too.

In addition to the math-solving tools, Microsoft will also add Microsoft Translate support to Immersive Reader to make it easier for people to read in another language. The Translate tool will allow syllable separation, text-to-speech, and picture definition of words.

For those lucky enough to get the October 2018 Update before it was pulled, Edge includes a number of new features to help with reading, including a built-in Dictionary tool for PDF documents, ePub books, and sites in Reading View. Reading view will addtionally include line-focusing to keep the attention on the words, and ePub books will feature many color options as well.

Office Lens will support optical character recognition on Android and will roll out to users of the Android mobile operating system starting later today. The feature is already available on iOS devices.

All these features will roll out to users periodically over the coming months. How do you think these tools will help your child learn?


How to Block Automatic Updates in Windows 10

Microsoft recently announced that users of the Windows 10 Home edition OS wouldn’t be able to control Windows Updates.

But probably because of many negative comments from users, the company decided to release a tool which will allow users to block automatic Windows 10 updates.
windows 10 rtm release wind8apps
As a part of a huge update pack for the latest Windows 10 version, among other updates and improvements, Microsoft also released a tool which helps you to prevent automatic updates.

It actually allows you to hide unwanted updates, as Windows won’t install hidden updates.


Need more ideas on how to disable Windows 10 automatic updates? Check out this guide.


Download KB3073930

If you didn’t receive this troubleshooter, which goes by the code of KB3073930, through Windows Update, you can download it from Microsoft’s website.

But, as Microsoft said, this troubleshooter is available only for the users of Windows Insider program, and it won’t make its way to the final version of the OS.

Since this tool works only in Insider build versions, this means that it will probably also work in the full version of Windows 10 when it gets released.

Using the troubleshooter is very simple, it works just like other Windows troubleshooters.

You just have to open it and select Hide updates. Once you select which updates you want to hide, Windows will hide them and they won’t be installed.

Updates are very useful for every Windows version because they provide additional stability and security to the system.

But, although it’s good for your system, a lot of people find downloading and installing them annoying, especially if they cannot control it.

So when Microsoft announced that all the updates for Windows 10 Home will be automatic, a lot of people were angry, and this tool can fix things at least a little bit.

Of course, if you don’t like the idea of downloading that tool on your computer, there are other methods that you can use to prevent Windows 10 from installing automatic updates.

For example, you can block the Update Services or set up a metered connection.

If you’re using Windows 10 Pro, you may consider yourself lucky. Users of this OS can use additional methods to block updates. They can even defer updates for up to 365 days.

For additional ways to block Windows 10 automatic updates, you can check out the guides below:

How to install a virtual machine on Windows 10 using Hyper V, now even easier with Quick Create

Currently, it’s possible to run a number of Linux distros natively on Windows 10. However, these Linux environments are limited in the features and tools that you can use.

In Windows 10, there are only three distros to choose from: Ubuntu, SUSE Linux Enterprise, and OpenSUSE Leap. All three distros rely on a command-line interface, so you’ll miss out on running any of the graphical experiences (GNOME, KDE, XFCE, or other Linux-based graphical applications).

To get a full-featured version of Linux on Windows 10, installing your favorite distro (Linux-speak for “a distributor or distributed version”) on a second PC is always an option if you are fortunate to have one, but not everyone has one to spare.

Luckily, you can just use your Windows 10 PC, it’s still possible to run a full-blown version of Linux by using a virtual machine (VM) using Hyper-V. Here’s what you need to do on Windows 10 to create a virtual machine using Hyper-V.

Enable Hyper-V on Windows 10

Hyper-V is a virtualization technology tool from Microsoft that is available on Windows 10 Pro, Enterprise, and Education. Hyper-V allows you to create one or multiple virtual machines to install and run different OSes on one Windows 10 PC.

Having the correct Windows 10 version is not the only thing your PC needs; there are also hardware requirements:

  • 64-bit CPU with Second Level Address Translation (SLAT).
  • The processor must support VM Monitor Mode Extension (VT-c on Intel chips).
  • 4GB of memory at a minimum.

Here’s what you need to do to verify that your Windows 10 PC has Hyper-V support.

  1. Open Start.
  2. Search for Command Prompt, left-click the top result and click “run as administrator.”
  3. Click Yes on the UAC prompt.
  4. Type the following command and press Enter: systeminfo.exe
  5. Under Hyper-V Requirements, If you see a “Yes,” your PC can run Hyper-V.
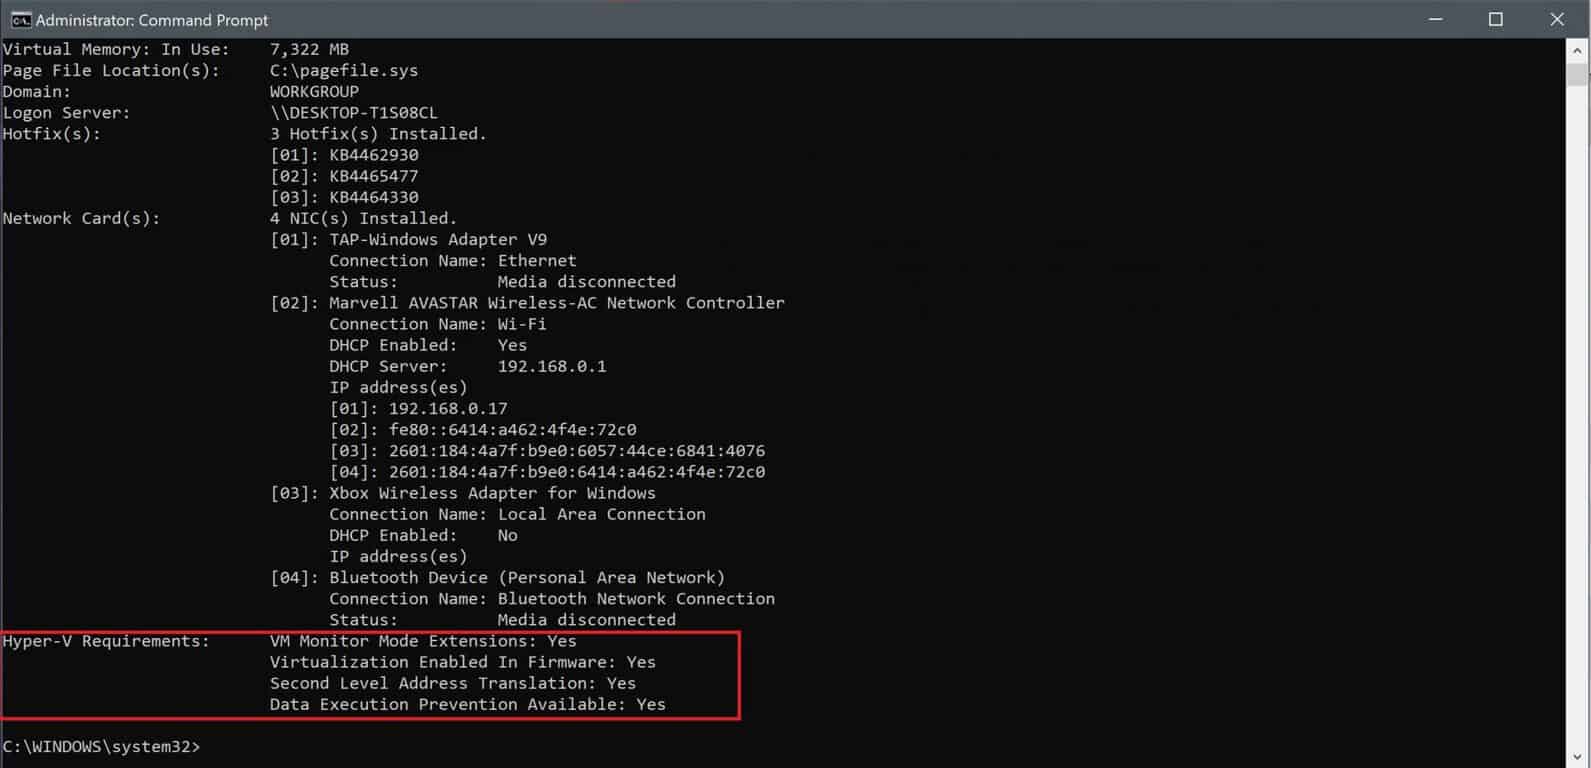
Hyper-V, Windows 10, virtualization

If the command displays “No” under Hyper-V Requirements, then your Windows 10 PC hardware doesn’t support this feature or you may have to enable these features manually in your system.

Now that you know your machine is Hyper-V capable, you need to enable Hyper-V. Here’s what you need to do:

  1. Open Control Panel.
  2. Click on Programs.
  3. Click on Turn Windows features on or off
  4. A Windows Features pop-up box appears and you’ll need to check the Hyper-V option. Be careful that Hyper-V Management Tools and Hyper-V Platform are selected.
  5. Click OK.

install a virtual machine on windows 10

After Hyper-V is enabled, you will be prompted to restart your Windows 10 PC to finish installing the requested changes. Restart your computer. Hyper-V is now enabled. The next step will be to create a virtual machine using Hyper-V.

Now that Hyper-V is enabled and you’ve successfully added a virtualization layer to Windows 10, you’ll need to create a virtual machine (VM) for the Linux distro you want to use. In order to do that, you’ll need to create a virtual switch to connect the VM to the Internet. Here’s what you need to do next.

Creating a virtual switch

Use the following steps to configure a virtual switch on Hyper-V:

  1. Open Start.
  2. Open Hyper-V Manager.
  3. Click on the Action menu.
  4. Select New and click Virtual Switch Manager.
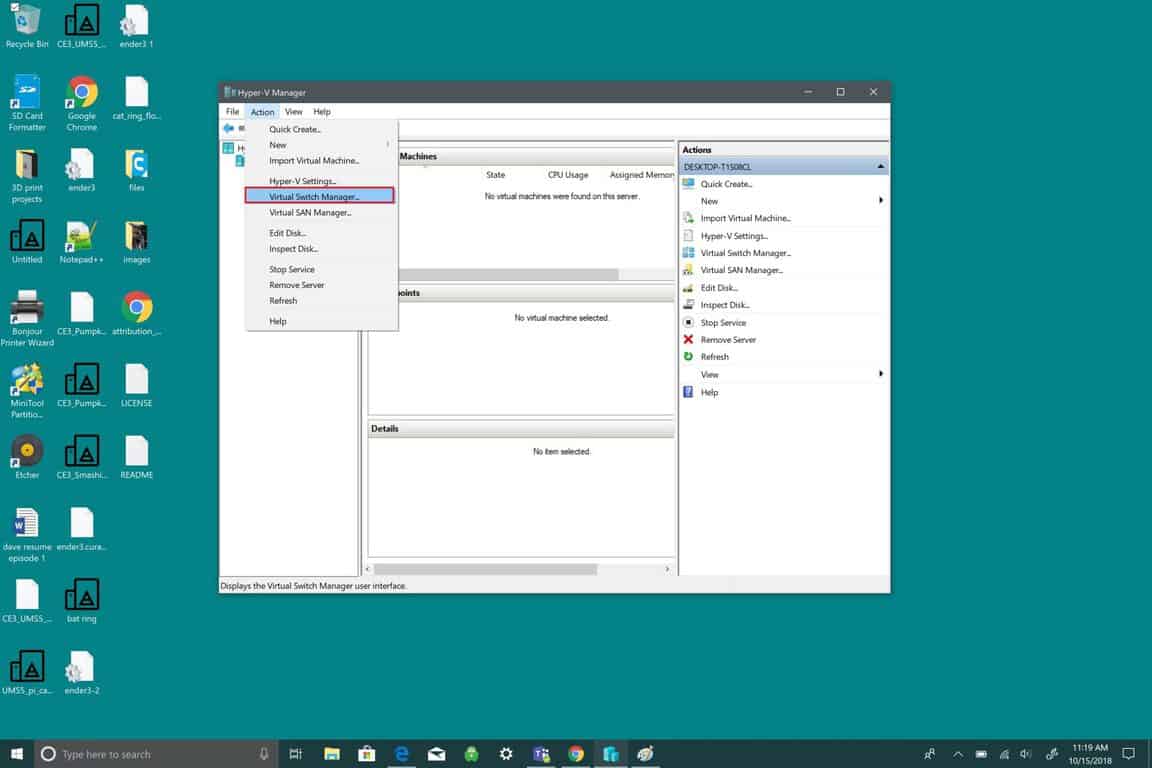
Microsoft, Virtual machine, VM, How-to
Next, you need to follow the highlighted items in the menu, as seen in the picture below. This will create a virtual switch. A virtual switch acts like an extra layer of security between your virtual machine and your Windows 10 PC.Microsoft, Virtual machine, VM, How-to

  1. Select New virtual network switch
  2. Select External.
  3. Select Create Virtual Switch.

Now, you need to customize your virtual switch. In this example, I used “Windows 10 Virtual Switch.” However, you can name your switch anything you want.

  1. Enter a virtual switch name (e.g., Windows 10 Virtual Switch).
  2. Under connection type, your network adapter should use the External network option.
  3. Select OK.

Microsoft, Windows 10, VM, Virtual machine

Now that you’ve successfully created a virtual switch, you can create a virtual machine. The purpose of a virtual switch is to provide protection by using security measures to provide an extra level of protection between virtual machines.

The virtual switch is an added safeguard in case anything goes wrong. Let’s walk through what you need to do to create a virtual machine.

Creating a Virtual Machine

  1. Open Hyper-V Manager
  2. Open the Action menu
  3. Select New and Select Virtual Machine.
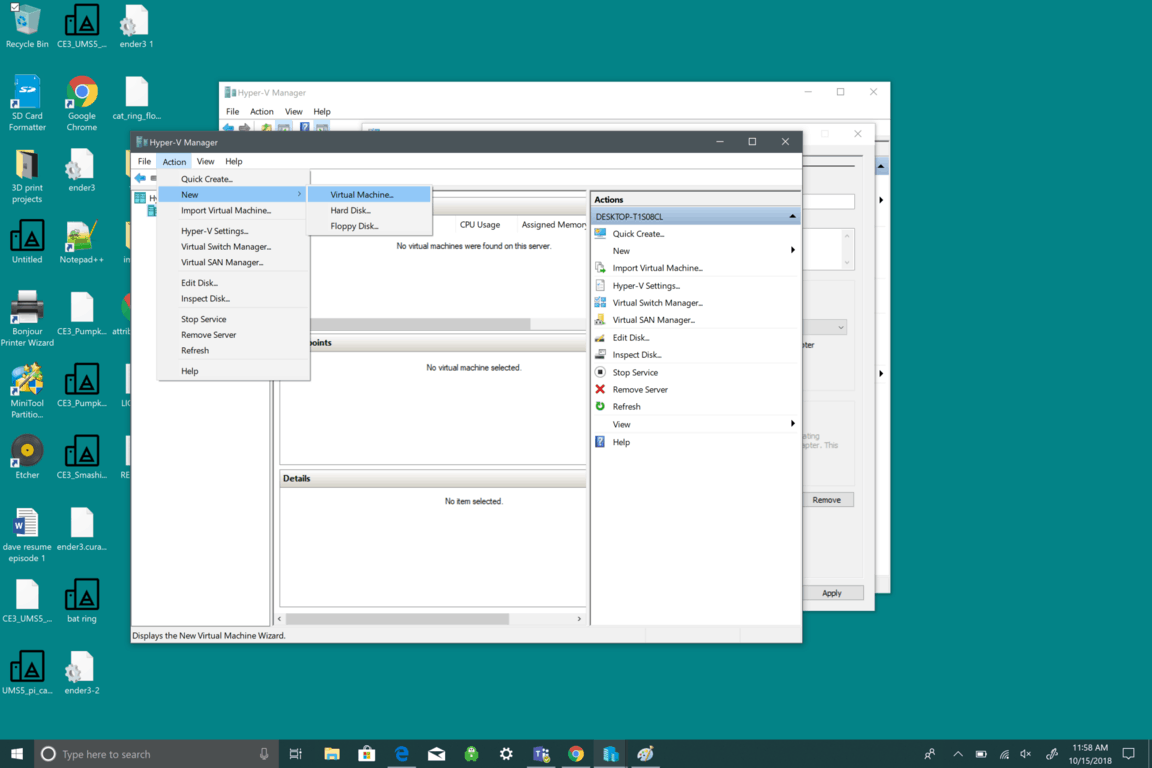
Microsoft, Virtual machine, VM, How-to

Next, you will be taken to New Virtual Machine Wizard, which will walk you through the steps needed to set up a virtual machine in Windows 10 using Hyper-V.

The New Virtual Machine Wizard is pretty straightforward and Windows 10 handles all the default virtual machine settings. All you need to do in New Virtual Machine Wizard is to follow the prompts.
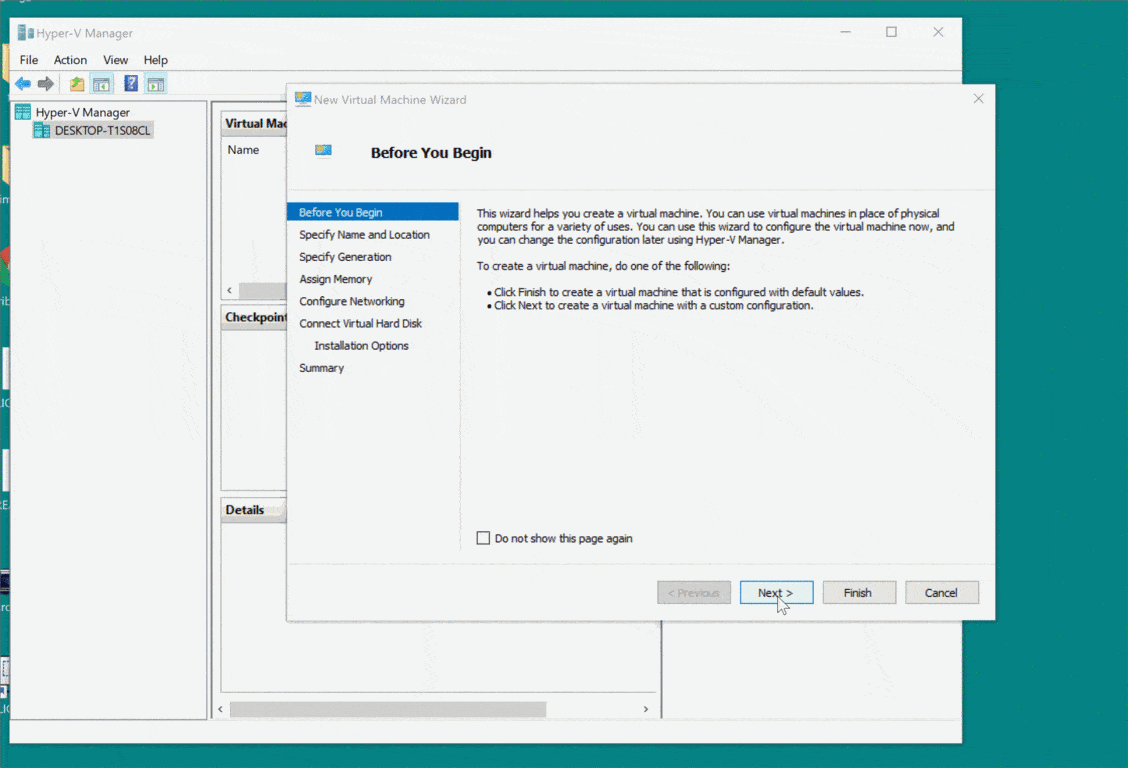
The New Virtual Machine Wizard takes the guesswork out of any questions you may have while setting up a virtual machine. Setting up a virtual machine is a breeze using the New Virtual Machine Wizard. Windows 10 makes setting up a virtual machine fast and easy. Here’s all you need to do to set up the virtual machine:

  1. Specify Name and Location
  2. Specify Generation
  3. Assign Memory
  4. Configure Networking
  5. Connect Virtual Hard Disk
  6. Pick Installation Options
  7. Summary

Depending on how you want to set up your VM, the New Virtual Machine Wizard will walk you step-by-step and let you customize your VM on Windows 10 using Hyper-V. In the Windows 10 Fall Creators Update, Microsoft made it even easier to create a VM with Hyper-V Quick Create.

Now, you can create a VM using Windows 10 dev environment or Ubuntu 18.04.1 LTS. Quick Create can be launched independently of Hyper-V Manager and is a quick tool to use to create a VM in Windows 10.

Microsoft has a quick guide on how to use Hyper-V Quick Create available on the Windows blog. The only prerequisite for being able to use Hyper-V Quick Create is that you are running at least the Windows 10 Fall Creators Update.
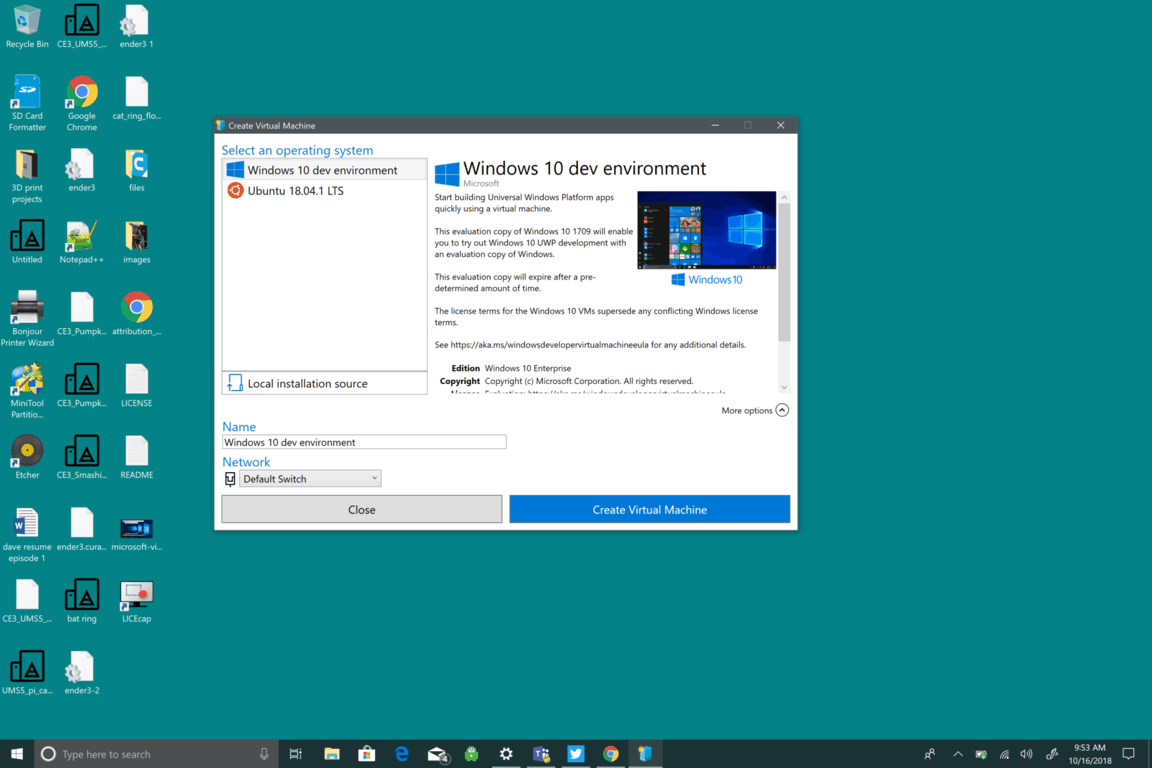
Windows 10, Microsoft, Hyper-V Quick Create

With Hyper-V Quick Create, Microsoft shows that you can create a VM in Windows 10 in as little as three steps:

  1. Open Hyper-V Quick Create from the start menu.
  2. Select an operating system or choose your own by using a local installation source; if you want to use your own image to create the virtual machine, select Local Installation Source. or Select Change Installation Source. Be sure to pick the .iso or .vhdx that you want to turn into a new virtual machine. If the image is a Linux image, deselect the Secure Boot option. Secure Boot is only for Windows 10 dev environment.
  3. Select “Create Virtual Machine“

From there, Hyper-V Quick Create will create a VM for you without you needing to worry about it. Be aware that if you don’t have the OS already installed on your Windows PC, you will be required to download your preferred OS from within the Windows 10 app. You can also access Hyper-V Quick Create from the right pane within Hyper-V Manager.

Once you’ve created a virtual machine, you should see a screen like this (if you used Windows 10 dev environment).

Microsoft, Windows 10, VM

Obviously, Ubuntu and other OS welcome screens will have different welcome screens, but you will be able to successfully create a VM using Hyper-V Manager or Hyper-V Quick Create. Windows 10 is making creating virtual machines (VM) easier and faster than ever.

Hopefully, the tips listed above helped you install a virtual machine on Windows 10 using Huper-V. We’d also like to invite you to check out our separate guide where we’ll show you how to install Windows 11 on a virtual machine without TPM. Be sure to also share your experience with us in the comments.


Microsoft’s co-founder Paul Allen dies of cancer at age 65

Paul Allen, the former Lakeside School classmate of Bill Gates, who went on to form Microsoft with his high school buddy in 1975, has died of lung cancer at age 65. Allen and Gates started Microsoft to at first to sell BASIC interpreters to Altair, and then rose to prominence with the development of MS-DOS, and then Windows and Office and all the rest. Allen left the company in 1982, but retained his shares in Microsoft stock, making him a billionaire many times over. Allen has battled cancer for a number of years, and recently announced that he was resuming treatment for non-Hodgkins Lymphoma. He was an owner of the Seattle Seahawks, the Seattle Sounders and the Portland Trailblazers, and was active in local Seattle and Portland goings-on as well as a long list of scientific, environmental, an exploration efforts through his company Vulcan, Inc., and numerous other ventures.

Allen’s Wikipedia page goes on and on with his accomplishments, and they really are too numerous to mention. He will be missed, in the Seattle Sports, Arts, and philanthropy circles, at Microsoft, and in many places around the world.


How to Fix Double Layered Tiles Borders in Windows Store

Universal apps became very important part of Windows 8, 8.1 and 10 operating systems. But some occasional bugs in Windows Store may limit the functionality or damage the appearance of the app and its Live Tile in Start Screen, Start Menu or Windows Store. One user complained that his Live Tiles are double-layered, and we’ll try to find a solution for his problem.
windows store double layered tiles wind8apps

How to fix Windows Store double layered tiles borders

There’s a very rare bug in Windows Store that makes layers of app tiles doubled. This issue could be very annoying because you won’t be able to install any app until you resolve the problem. To resolve this annoying issue you can try to reset the Windows Store and see if there are any changes.

You can easily reset the Windows Store with just a couple of clicks, and here’s exactly what you need to do:

  1. Go to Search, type wsreset and right-click on WSReset.exe
  2. Select Run as administrator and execute the command

This command will reset the Windows Store and you’ll get the message saying that your cache is cleared. Now login with your Microsoft account back to Windows Store and see if the tiles are back to normal. We cannot guarantee you that this solution will work, because we didn’t test it, as this issue is very rare and it occurs on a small amount of computers.

Additionally, you can also run the Windows Store Apps troubleshooter. This built-in troubleshooting tool quickly scans your Windows 10 apps and automatically fixes all the issues that it detected.

To use this tool, go to Settings > Update & Security > Troubleshoot > scroll all the way down and launch the App troubleshooter, as shown in the screenshot below.

windows store apps troubleshooter

Just because this issue isn’t common Microsoft’s developing team didn’t even pay attention to it, so it didn’t release any Windows Store updates that will fix it, and you have to find the workaround on your own.

If you have any comments, suggestions or maybe more experience with the problem of this kind, please write it down in the comments. We would love to have more info about this rare, but annoying Windows Store bug.

RELATED GUIDES TO CHECK OUT:

How to fix computer sound problems in minutes

windows 10 rtm release wind8apps

Ever since the introduction of the Windows Insider program back in October 2014, besides other issues, people have often been reporting audio problems. A couple of factors could cause your sound to disappear in Windows 10, but there are also a couple of workarounds that will help you to return it.

Microsoft released many Windows 10 OS versions since 2015, and they are all stable operating systems. However, this wasn’t the case throughout the Windows Insider program, as many builds were unstable and incompatible with a lot of software solutions. Microsoft actually still works on improving compatibility of Windows 10 with various drivers and programs.

How do you fix sound problems on your computer?

Solution 1: Disable audio enhancement settings

If you’re sure that your audio driver is up to date, but you’re still facing the sound issue you can try with changing the sound format and disabling the enhancements. This issue actually occurred on my computer after installing some of the previous builds, but everything was back to normal after I changed my sound format from 16bit to 24bit.

You should try this workaround as well, and here’s what you need to do:

  1. Right-click on Speaker icon in the Task bar
  2. Open Playback devices
  3. Select your default playback device and go to Properties
  4. Go to Advanced tab
  5. Under Audio Format choose 24bit, 96000Hz (Studio Quality)
  6. Test if your sound is working and click OK

If you’re using an older audio card, you’ll need to switch to 16bit, if your current audio format is 24bit. But in most cases, switching from 16bit to 24 will get the job done. You can also try with disabling Audio Enhancements. To do so, follow first three steps from above, go to Enhancements tab and check Disable all enhancements.

Solution 2: Update your audio driver

So the first thing you should do, if you’re facing audio issues in Windows 10, is to check if your audio driver is updated. You probably know that, but it would do no harm if I mention it. 

We recommend a third-party tool (100% safe and tested by us) to automatically download all the outdated drivers on your PC.

Solution 3: Run the Audio Troubleshooter

Another solution is to run the built-in audio troubleshooter. With the help of this tool, you can quickly scan and assess your audio devices in order to automatically repair potential issues. You can launch the Windows 10 audio troubleshooter from the Settings page by going to Update & Security > Troubleshoot.
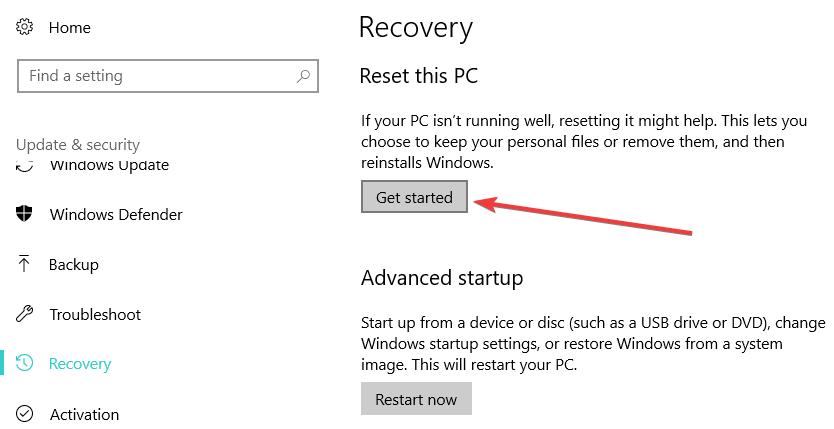
That would be all, if you have some other kind of audio problem in Windows 10, tell us in the comments, we’ll try to provide you with another solution. Or you can just wait until Microsoft fixes the majority of problems via a hotfix.

Meanwhile, here are some additional solutions to fix sound problems on your PC:

KB4468550, KB4468304 fix audio issues on Windows 10 v1809

If you recently upgraded to the Windows 10 October 2018 Update but you’re planning to roll it back due to audio issues, well, just have a little patience. You should give Microsoft a second chance as the company recently rolled out two important patches that address audio bugs on Windows 10.

Windows 10 KB4468550 and KB4468304 target two specific audio problems that usually affect Intel audio drivers and HP computer, respectively.

Here’s the official KB4468550 changelog description:

This update addresses an issue where after installing the Intel Smart Sound Technology driver (version 09.21.00.3755) via Windows Update or manually, computer audio may stop working.

Update KB4468304 adds the following improvements:

In working with HP, Microsoft has identified an HP driver with known incompatibility with certain HP devices on Windows 10 versions 1803 and 1809.  On October 11, 2018 Microsoft removed the driver from Windows Update to reduce the number of devices affected.  Additionally, Microsoft has released this update to remove the incompatible driver from devices pending reboot.  HP is actively working on this issue.

As a quick reminder, after installing the HP keyboard driver, version 11.0.3.1, owners of HP devices may experience the annoying  Blue Screen of Death error: WDF_VIOLATION. This is due to an incompatibility issues on certain HP devices running Windows 10 versions 1803 and 1809. Fortunately, now there’s a hotfix for this problem.

Download KB4468550, KB4468304

You can download and install these two updates directly via Windows Update. All you need to do is go to Settings > Update & Security > Update and hit the ‘Check for updates’ button. Your computer will automatically download the necessary patches, depending on its hardware configuration.

check for updates

Of course, you can also get the patches from the Microsoft Update website. In this manner, you can better filter the updates that you’re going to download.

KB4468550, KB4468304 issues

For the time being, there are no known issues affecting KB4468550 or KB4468304. However, if these patches did break anything on your computer, let us know in the comments below.

Here are some additional troubleshooting guides that you can use to fix audio problems on Windows 10:

Microsoft to disable outdated TLS 1.0, 1.1 for Edge and IE early next year

Microsoft announced today its plans to drop support for Transport Layer Security (TLS) protocol version 1.0 and 1.1 in Microsoft Edge and Internet Explorer 11 in the first half of 2020. This early notice comes just a couple of months before the 20th anniversary of TLS 1.0 on January 19, 2019.

“We are announcing our intent to disable these versions by default early, to allow the small portion  of remaining sites sufficient time to upgrade to a newer version,” said Kyle Pflug, Senior Program Manager, Microsoft Edge. According to data from SSL Labs that Microsoft’s blog post mentioned, 94% of the top websites already support the more recent TLS 1.2 cryptographic protocol, and less than 1% of secure connections in Microsoft Edge are currently using TLS 1.0 and 1.1.

“Most sites should not be impacted by this change,” said Pflug. If most websites already support the TLS 1.2 protocol, its successor TLS 1.3, which will allow faster and more secure connections has been defined by the Internet Engineering Task Force (IETF) in August of this year. Microsoft is already working to bring support for this new version of the protocol in Microsoft Edge.