A similar rating has also shown up for Germany’s USK ratings board, as was reported a few weeks back. In each case the rating description details some gameplay aspects, but does not divulge any new features that might be included with a current-gen version.
One new graphical enhancement that Minecraft fans would likely expect to see is ray-tracing. This has already been demoed, and the results were pretty spectacular. The feature is already available in the Windows version of Minecraft.
At this point it remains unclear if the new current-gen upgrade for Minecraft would become available on other platforms like the PlayStation 5. Though at this point it’s worth noting that nothing whatsoever has been officially announced regarding a native Xbox Series X|S Minecraft version by either Microsoft or developer Mojang Studios.
In an anticipated shift in OneDrive’s storage policies, Microsoft unveiled its new approach to managing photos across its cloud-based storage platform. Starting Oct. 16, 2023, each picture uploaded to OneDrive will count twice against the user’s storage quota. The move, Microsoft stated, is aimed at “improving your Microsoft 365 experience.”
The specifics of the change were outlined in an email shared by Dr. Windows, illustrating that the data from photos saved in the “Gallery” and in the “Albums” features would count separately against the storage quota. The result is an unexpected doubling of the apparent storage taken up by the same photo.
For the unfamiliar, the Gallery feature is OneDrive’s default destination for all uploaded images. Meanwhile, the Albums feature, an optional addition, allows users to construct customized collections of pictures.
In response to potential concerns about increased data consumption, Microsoft offered a reassuring message in its email. To soften the transition period, users will receive a one-year storage boost to help adapt to the new storage policies.
Nonetheless, specifics surrounding the size of this storage boost and how it will be distributed were left unsaid. Users should be mindful that the additional storage is temporary and will expire one year after it is assigned to the account.
However, there’s a potential benefit hidden in this change. This alteration implies that users can keep photos in Album even if they choose to remove them from Gallery, and also the other way around – a level of flexibility users might appreciate.
The company’s drive for change doesn’t seem to stop at this policy shift. Recently, a leaked video hinted at an upcoming OneDrive-related announcement set for October 3rd.
In conclusion, while these changes may initially seem odd to OneDrive users, Microsoft’s decision may offer nuanced benefits. The one-year storage boost should provide a fair buffer period for users to adjust their cloud storage practices, while the potential AI upgrade may open up new avenues of user experience.
Stay tuned with us for more updates on these developments.
Microsoft Teams can be improved with Microsoft Teams Exploratory which gives you a trial access to some of the Microsoft apps. The list includes 18 different services, such as Exchange, Sway, Forms, Planner, StaffHub, Power Apps, Insights, and more.
Before you can use it, you need to have an active and managed Azure AD domain email address and a paid subscription to Office 365.
You also can’t have an active Teams license or be a tenant where a license assignment policy was created. Also, users who have used a trial license or a part of Syndication Partner Customer or a GCC, GCC High, DoD, or EDU are ineligible.
How do I get a free exploratory license for Teams?
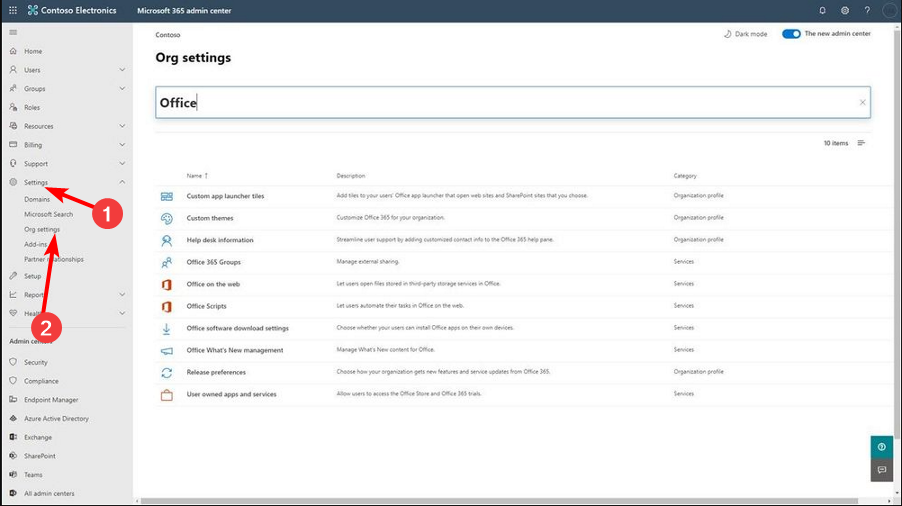
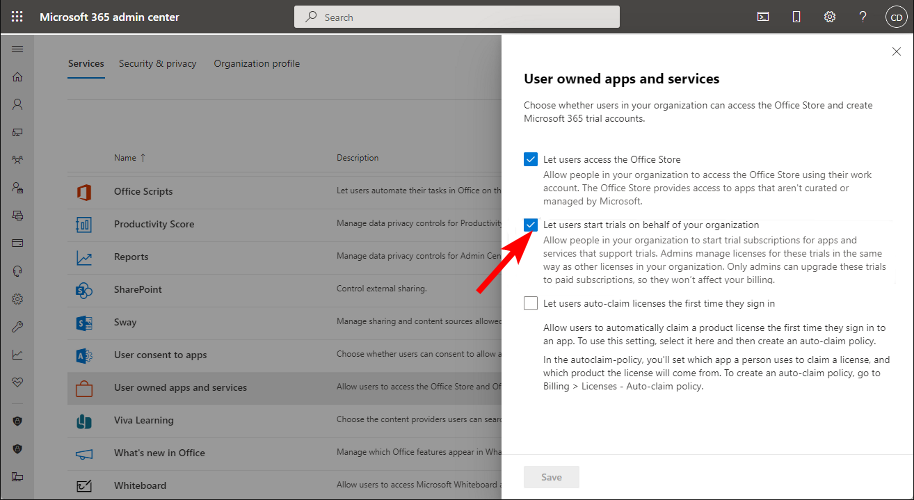
Navigate to the Services tab and check the Let users start trials on behalf of your organization option.
2. Steps for users
Navigate to your desktop app or web browser and sign in to your Teams account. Remember to use your Azure Active Directory credentials. (Mobiles are not supported).
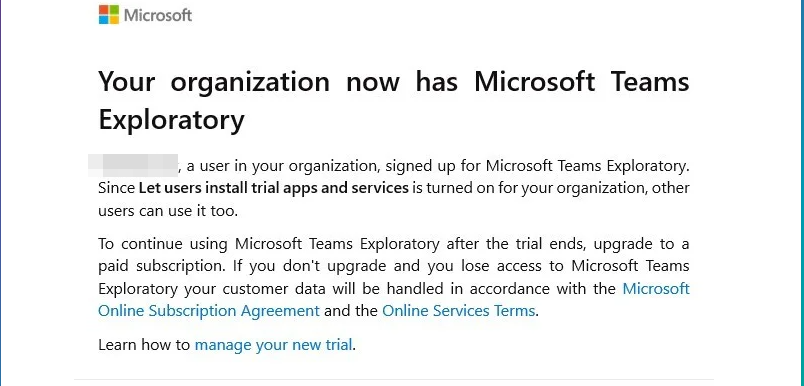
You’ll be assigned a license automatically, and your organization admin will get a notification.
Remember that once the first user in an organization has signed up, the 12-month period also begins for all other users, regardless of whether they’ve started using it or not.
What are some of the benefits of the Exploratory Trial?
You’ll get a fully functional version of Microsoft Teams, and your team can use it for free for up to a 12-month trial period.
The exploratory experience gives you a sense of how well Microsoft Teams works with your current hardware and software environment before committing to an upgrade. For instance, you can try Teams on Chromebook and observe if there are any issues.
You can install the software on multiple devices with up to 100 users.
Allows for cost-saving as the grace period time frame is enough to cover an entire financial year that would have otherwise been used to try out new products with shorter trial periods.
What happens when Microsoft Teams exploratory trial expires?
Once your trial period elapses, Microsoft is gracious enough to give you another 30-day grace period, but you will lose access to the Office 365 apps.
Thereafter, you have another 30 days, and failure to renew your license within 60 days after the expiration will result in your data being deleted.
Have you gotten to testing the Microsoft Teams Exploratory experience yet? What are your thoughts, and would you consider upgrading your subscription after the trial period? Let us know in the comment section below.
Hotmail was the name of Microsoft’s email service, but it has since been replaced by Outlook, so it’s no surprise that many users want to change their account from Hotmail to Outlook.
There are several reasons why you should make the change, and we’re going to go over them before we show you how to migrate to Outlook.
Why migrate from Hotmail to Outlook?
Hotmail service has been discontinued, so your email address might look outdated to some.
Outlook address looks more professional.
There are no security or functionality benefits since Outlook is the successor to Hotmail and it uses the same infrastructure.
How do I transfer my emails from Hotmail to Outlook?
1. Create an alias
Navigate to Outlook’s web page and log in with your current Hotmail account.
Next, click your profile icon in the top right corner and choose My Microsoft account to edit your mail settings.
Navigate to Your info and then select Edit account info to edit email properties.
You should now see your Outlook email address. In the Account alias section click on Add email.
From the list of options, you need to pick Create a new email address and add it as an alias. Enter an original email address and click Add alias.
After doing that, you’ll have an alias ready that you can use instead of your primary address.
2. Export the emails manually
Make sure that your Hotmail account is properly added to Outlook.
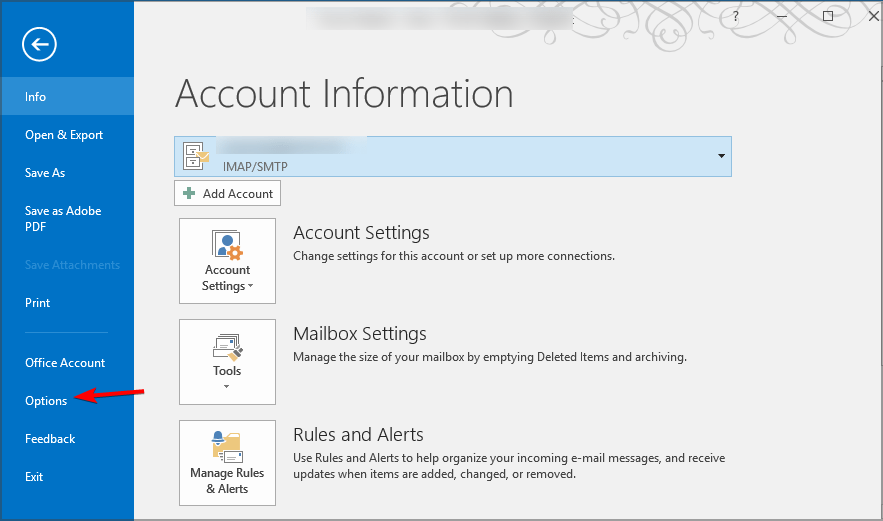
Next, navigate to File and select Import and Export. Lastly, choose the Export to a File option.
Access the data file and choose the desired account.
Choose the save location.
Configure Outlook for Exchange Online.
Lastly, add the required PST files and copy them to the Exchange account. After that, the emails will be moved to the current email address.
3. Use Directory Synchronization
Enable Directory Synchronization in Microsoft Online.
Start the Microsoft Online Services Migration Tool and install it.
Next, go to All Programs and choose Online Microsoft Service.
Select Sign in and enter the following data as follows:
Set your Hotmail email account as Sourceidentity and SourceLoginID.
Next, set the Microsoft Online Services email address as Targetidentity
After entering the email ID and password, the sync should be complete.
How do I merge Hotmail and Outlook?
It’s not possible to merge Hotmail and Outlook accounts into a single account. If you want to move your emails from Hotmail to Outlook, it’s best to use an alias.
While it’s possible to move emails from Hotmail to Outlook manually, Microsoft advises using the alias instead since you’ll get a new Outlook address while keeping all your emails, calendars, and other data.
Migrating from Hotmail to Outlook is seamless, but emails might get lost, and if that happens, we have a guide on recovering old Hotmail emails from Outlook. In case you’re using Gmail, migrating from Gmail to Office 365 can be more complex, but we have a guide for that as well.
Do you know any other method for switching from Hotmail to Outlook? Don’t hesitate to let us know in the comments below.
As you might already know, Microsoft decided that WordPad had a long life, but now it’s time to move on. On September 1, the Redmond-based tech giant released a note announcing that WordPad will be removed in a future release of Windows.
WordPad is no longer being updated and will be removed in a future release of Windows. We recommend Microsoft Word for rich text documents like .doc and .rtf and Windows Notepad for plain text documents like .txt.
Microsoft
Microsoft advises you to use Microsoft Word and Windows Notepad when you work with documents from now on, efficiently taking away the free text editor in lieu of Word (which has to be paid in order to use) and Notepad (which doesn’t have the capabilities of WordPad, but hey, autosave will be coming to it soon).
In other words, if it’s free, it has no purpose, otherwise, there are no other reasons why is Microsoft killing one of its most useful apps. If this is a way Microsoft is forcing people to pay for a subscription to use Microsoft Word, then by all means, it will be working. Unless Google Docs somehow becomes more popular.
Or, but this is just a theory: Microsoft might actually retire WordPad, so it can release an improved version of it, under another name, which will have AI capabilities. Is this too much? We think not. Here’s why.
An AI-enhanced WordPad in Windows 12?
A future release of Windows basically means Microsoft intends to retire WordPad in Windows 12. So far, all we know about Windows 12 is that this operating system will heavily feature AI capabilities. What we also know is that we’ll get the first hints of it in 2024, so just a few more months until then.
However, think of all the AI coming to Windows 12: we’re going to have Windows Copilot, Microsoft Edge, and Microsoft 365 apps with AI-enhanced features. AI will basically be everywhere.
But here’s the catch: While Windows Copilot and Microsoft Edge might be free to use, we’ll still need to use Word if we want to process texts. However, if you don’t use Word that much, and you don’t want to pay for it, you currently have WordPad, which can help you with a lot of text processing for free.
Windows 12 won’t have WordPad anymore, so you will basically have no other options to process your texts, other than using Google Docs or actually paying for a Microsoft 365 subscription. Wouldn’t it be nice if Microsoft released an AI-enhanced WordPad with Windows 12?
It would be free, of course, and its AI capabilities would be limited: suggestions, corrections, and some layout editing here and there. This WordPad on Windows 12 would be a total winner. Plus, if they want to, then Microsoft can add several other features in a Premium one-purchase edition. But at least, we would have a free text processor.
What if Microsoft is actually thinking about adding an AI-enhanced WordPad in Windows 12? I wouldn’t be surprised. What about you? What do you think?
Outlook remains one of the most popular webmail services, hosting a wide array of additional features. Given the over-reliance on it for day-to-day tasks, it’s imperative to know how to use some of these. And today, we will explore all the ways to share a contact group in Outlook.
Previously known as a Distribution List, the contacts folder or group is used to send an email to several people at once. And when you share the contact list with others, they, too, can send emails to the same set of email addresses. So, let’s find out how you can share Outlook’s contact group.
How can I forward a contact group in Outlook?
1. Drag and drop
Open Outlook, go to the Home menu, and click on New Email.
Go to the People tab, select the contact group you want to forward, and then drag and drop it to the subject section of the email message window.
Fill out the various details, if required, and send the email.
If facing issues with the drag-and-drop functionality, you could use Snap Layouts to open both the contact folder and the email message side-by-side.
2. Use the Forward functionality
Open Outlook, go to People from the navigation pane, and locate the contact group you want to share.
Right-click on the desired distribution list, hover the cursor over Forward Contact, and select As an Outlook Contact from the context menu.
Enter the recipient’s email address, include a subject or add a message body if required, and click the Send button.
An easy way to share individual contacts or the entire address book is to utilize the Forward functionality. You can only share the groups as an Outlook contact, while for personal contacts, there’s also the option to forward them as a Business Card.
3. Share from the contact group’s dedicated settings
In Outlook, go to the People tab from the left, and double-click the contact group you want to share.
Click on Forward Group, and select either In Internet Format (vCard) or As an Outlook Contact from the menu. In the Internet format, it’s shared as a text file (.txt), while for Outlook contact, the format is Outlook item.
Once done, fill out the other details, including the email address of the receiver, a subject, and the message body (if required), then click Send.
Open Outlook, click the Home menu at the top left, and then select New Email.
Go to the Insert menu, and click on Outlook Item.
Choose Contacts under Outlook Data File, then select the distribution list you want to share, and click OK.
Fill out the other vital details, and send the email with the list of contacts.
For those wondering how to forward a contact group in Outlook, you can share the entire distribution list in one go in an email. Just load the contacts, and you are good to go! Besides, you can always share a single contact as an email attachment.
Why can’t I share a contact group in Outlook?
Local misconfiguration: Often, misconfigured settings at the user’s end trigger issues when sharing a contact group in Outlook.
Missing folder permissions: Sometimes, we can’t share data in Outlook due to the absence of critical permissions.
Corrupt user profile: When the profile is corrupt, you are bound to face issues working on the email client. An easy solution is to rebuild the Outlook profile.
Issues with Outlook installation: A few users reported problems with the app installation to be the underlying cause. Simply reinstalling Outlook does the trick!
Policies set by the administrator: If you can’t share stuff in Outlook, check with the system administrator because they may have configured policies to restrict this action.
If multitasking, sometimes you need to open multiple Outlook windows to optimize your workflow, and in today’s guide, we’re going to show you how to do that properly.
This has several benefits, so let’s take a closer look at them before we see how to use this feature.
Why open multiple Outlook windows?
Improved multitasking by having two or more emails opened simultaneously.
Ability to have a separate window for each folder.
Faster switching between open windows.
Ability to use Windows window management features such as snapping.
How do I open multiple Outlook windows at the same time?
1. Use the Open in New Window option
Open Outlook and right-click the folder that you want to open.
Choose Open in New Window from the menu.
The folder will now open in a new window and you can easily switch to it.
2. Create a new shortcut
Right-click on Desktop, choose New, and then select Shortcut.
Click on Browse and locate the Outlook exe file. We used the following path as an example: C:\Program Files (x86)\Microsoft Office\Office15\
Now add one of the following flags at the end to open Outlook in a separate window: /select Outlook: Inbox /select Outlook: Calendar /select Outlook: Contacts /select Outlook: Tasks
Add the desired name for the shortcut and click on Finish.
By using shortcuts, you can set Outlook to open multiple windows automatically.
3. Open the email in a new window
Locate the email message you want to open in a new window.
Double-click it and it should open in a separate window.
If that doesn’t work, select the email message and click Open in the new window icon.
As you can see, if you want to open emails in separate windows, you don’t need to start another instance of Outlook.
If you want to take your Outlook knowledge to another level, we have a great guide on how to send Outlook invite with multiple times, so be sure not to miss it.
What method do you use to open multiple Outlook windows? Don’t hesitate to let us know in the comments section.
Australian Survivor streams are geo-blocked. So if you try to watch it outside Australia, you’ll get an error message.
But there’s a way past that. We’ll explain below how streaming platforms learn your location and what you can do to trick them.
We’ll show how to watch the show on 10 Play because it’s fairly easy to unblock and broadcast all seasons for free.
Let’s get started.
How to watch Australian Survivor in Canada?
All you need to watch Australian Survivor in Canada is a VPN. It encrypts your internet traffic and routes it through local servers in your selected country.
Therefore, by connecting to an Australian server, sites like 10 Play will think you’re located in Australia.
Why do you need a VPN to watch Australian Survivor in Canada?
You need a VPN to watch Australian Survivor in Canada because it helps you bypass geo-restrictions placed by streaming channels.
To be precise, the show airs on Network 10 in Australia. But this channel’s streaming platform, 10 Play, blocks anyone from accessing it outside the country.
Therefore, if you try to watch the show on 10Play from Canada, you might receive an error message saying: Sorry 10Play is available for Australian residents only’ or ‘access is blocked.
Thankfully, using a VPN grants you access. The tool hides your real IP address and replaces it with one from Australia.
Summary
With its gripping survival competition format and exotic setting, Australian Survivor is a must-watch for reality TV fans.
Thanks to VPNs, you know how to watch Australian Survivor in Canada despite the geo-blocking barriers.
Connecting to an Australian server lets you access 10 Play and stream new episodes live or watch past seasons on demand.
Don’t miss out just because you’re located in Canada! Follow the steps above to gain access today.
Minecraft, the iconic building block video game, has still managed to keep gamers hooked with its limitless creativity and charming visuals.
Despite the visual appeal of the game, gamers often find ways to enhance the in-game experience; and in the case of Minecraft, Shaders are the go-to tool.
In this comprehensive guide, we will list some of the popular Minecraft Shaders for Windows 11 to breathe new life into your blocky adventure.
Installing Minecraft shaders can improve your gaming experience in many ways. Some of the benefits of using it are:
Adds realistic shadows, lightning, and reflections and makes the game more immersive.
Comes with customization options to adjust settings as per preferences.
Offers texture enhancements, enhancing the look of in-game blocks & objects.
Allows you to capture screenshots & create cinematic videos.
Adds a layer of immersion to make you feel more connected to the virtual world.
Which are the most popular Minecraft Shaders for Windows 11?
High customization and optimization are the key features of BSL Shaders, which help bring the world to life in a picturesque way.
This shader for Minecraft Java edition includes volumetric light, bloom, real-time shadows, customizable clouds & water, and in-built anti-aliasing.
With effects like depth of field, specular, motion blur, normal mapping, world curvature, and Cel Shading, BSL Shaders improve the visuals drastically.
The recommended video settings, like choosing Graphics as Fancy, Render Distance 8 or more, Smooth Lighting to the maximum, and Smooth Lightning Level to 100%, help you bring a dreamy vision to your Minecraft world.
Whether you want a realistic or artistic view, you can choose any with various presets or customize settings to get the desired look and enhance the gaming experience. You can use this shader on various hardware, including NVIDIA, AMD, Intel, and Apple (M1/M2).
More features of BSL Shaders:
Dynamic shadows that change in real-time
Add atmospheric effects like fog to enhance depth & realism
High-quality texture packs
Makes the game look immersive with a cinematic blur effect on distant objects
This shader pack for Minecraft is used with OptiFine or GLSL Shaders, works with Minecraft JAVA 1.19.4, and is compatible with NVIDIA and AMD systems.
SEUS deploys traditional rasterization-based rendering methods to bring quality with reasonable performance.
The shader is famous for providing a natural and authentic feel, with crystal-clear water, vibrant and life-like plants, and realistic cloud formations instead of yellow squares.
It focuses on performance optimization, but the main emphasis is on realistic lightning and effects, which means you may need robust hardware resources.
One of the key features of Sonic Ether’s Unbelievable Shaders is the advanced global illumination effect that simulates realistic light interactions, giving you dynamic lighting.
Some other features of Sonic Ether’s Unbelievable Shaders:
Sky textures enhance the visual appeal of the game
Solas Shader – A balance between realism & artistic style
Solas Shader for Minecraft Java edition is compatible with NVIDIA and AMD systems and provides a lot of customization options to help you create stunning visuals.
This popular shader can enhance water with realistic reflections, animations, and ripples, creating natural-looking water surfaces.
It strives to deliver breathtaking visuals while maintaining smooth performance, catering to a wide range of hardware.
The shader pack comes with 3D volumetric clouds and volumetric light, adding depth & realism to Minecraft lightning and sky.
Solas Shader features vibrant lightning and global illumination, which significantly improves Minecraft’s lightning effects, enhancing the overall gaming experience.
Some key features of Solas Shader
Cinematic post effects, TAA, chromatic aberration, bloom, depth of field
Water light refraction & absorption
Sky effects: Milky Way, Ender vortex, Aurora borealis, Ender nebula and more
The shader pack comes with a realistic and dynamic shadow effect, which creates real-time shadow effects for in-game entities and objects.
The Volumetric Vanilla-Style clouds mimic the original look of Minecraft clouds but add volume and realism, making them appear three-dimensional and immersive.
To provide smoother and refined edges, the Minecraft shader uses temporal anti-aliasing, making the entire game’s visuals appealing. It is compatible and usable on both NVIDIA and AMD systems.
The Vanilla Plus Shader improves how light interacts with objects and surfaces, making them more dynamic and giving you an immersive lighting experience.
You can customize water textures and screenspace reflections, enhancing the realism of both and adding reflecting surfaces, thus improving it visually, as per your preferences and hardware capabilities.
Some other features of Vanilla Plus Shader:
Screenspace godrays
Several color profiles to imitate looks or older shaderpacks
Optional lens effects, like lens flares, depth of field, and vignette
Supports resource pack materials based on the labPBR standard
As the name suggests, the shader pack was originally released to recreate the aesthetics of the first-generation shaders, which may no longer work with new versions of Minecraft.
However, it comes packed with a few advanced features & visual effects to improve the overall gaming experience and is compatible with both AMD and NVIDIA systems.
The Nostalgia Shader allows you to give a personal touch to Minecraft by letting you customize the appearance of the game’s skybox and lighting colors, creating visually appealing landscapes.
Add Volumetric fog to introduce a sense of depth and mood in diverse settings & biomes and make the landscape more enthralling.
The shader-based vanilla-styled clouds improve cloud visuals and atmospheric effects while maintaining the game’s familiar aesthetics.
With photorealistic skyboxes, ProjectLUMA Shader makes the game more visually appealing, providing you with breathtaking skies that add realism to the Minecraft world.
To create a cinematic lightning effect, the shader incorporates the godrays effect, which simulates rays of sunlight and other light sources as they pass through objects & other atmospheric elements.
It supports Physically Based Rendering (PBR), which makes sure that Minecraft’s textures and materials behave realistically, thereby providing an overall immersive experience. The shader is compatible and can be used on systems with AMD, NVIDIA, Intel, and Apple.
ProjectLUMA Shader comes with ambient occlusion, a rendering technique that helps enhance the realism of shading & shadows, making in-game objects life-like.
With realistic water wave effects, the shader enhances the water bodies’ appearances making them more realistic and visually appealing.
More features of ProjectLUMA Shader:
Add bump mapping effects automatically to create the illusion of surface relief and depth
Parallax Occlusion Mapping to make objects appear three-dimensional
A high-quality shader pack, Complimentary Reimagined, designed for Minecraft Java Edition, delivers stunning visual enhancements, improving the overall graphics quality.
The main aim of this shader is to preserve Minecraft’s iconic aesthetics and original charm while enhancing the graphics. It is compatible with a wide range of hardware, including NVIDIA, AMD, Intel, and Apple (M1/M2) systems.
With features like Atmospheric Sky, Realistic Sky, Volumetric Clouds, Moving Clouds, Realistic Water, and Parallax Water, it allows you to customize sky, clouds, and water, to personalize the in-game experience.
It allows you to increase the lighting and shadows of the game, which results in improved visuals that respond dynamically to every movement, like raindrops and falling leaves.
The shader comes with realistic water reflections, which enhance the visual fidelity of water bodies, making them look real.
Some key features of Complimentary Reimagined:
Volumetric lighting
Godrays can appear underwater
Simulated wind and enhanced particle effects
Offers support on the Discord community for settings optimization
With Global Illumination, Continuum Shaders can simulate the scattering of light throughout the Minecraft world, which ensures light interacts with in-game elements in a more natural way.
The Volumetric Clouds feature adds depth and realism to the sky, generating dynamic cloud formations and providing a more immersive in-game experience.
With the PCSS Soft Shadows feature, you can enhance the shadows to make them look softer and more realistic, elevating the overall Minecraft experience.
This Minecraft shader with ray tracing makes water surfaces look life-like with light refraction, enhancing the realism of the game.
This popular shader pack comes with a dynamic weather system that changes daily, so you can experience diverse weather conditions, including snow, sunshine, and rain, adding variety to your gaming atmosphere.
Other amazing features of Continuum Shader:
Compatible with Nvidia GeForce GTX 1080 / RTX 2070 or AMD RX 5700* or above
Inspired by SEUS and Chocapic shaderpack, Sildur’s Shaders come in four versions, Sildur’s Vibrant Shaders, Sildur’s Enhanced Default Shaders, Sildur’s Fabulous Shaders and Sildur’s Basic Shaders.
The Sildur’s Vibrant Shaders version stands out as it revamps the entire graphics by adding advanced effects like bloom, ambient occlusion, volumetric lighting, and reflection.
It defines the way light interacts with the in-game objects and elements in the game world. It is compatible with NVIDIA, AMD, Intel, and Apple GPUs
With realistic shadows and lighting, Sildur’s Shaders aims to improve the overall appearance of the Minecraft Bedrock or JAVA edition.
You can choose Lite, Medium, High, High-MotionBlur, & Extreme editions from Sildur’s Vibrant Shaders that suit your needs and hardware resources to achieve a visual masterpiece, making it the best Minecraft shader for low-end PCs.
Some key features of Sildur’s Shaders
Lens flare effect
Transforms the sky and sunset by adding vibrant colors & smooth transitions
Oceano Shaders can be installed on NVIDIA, AMD, Intel, and Apple M1/M2 systems. The shaderpack uses Ambient Occlusion, a rendering technique that simulates the way light interacts with elements and surfaces.
It also comes with Cel Shading, which imparts a cartoon-like look to your Minecraft world. This effect simulates the look of hand-drawn animation by segmenting lighting into distinct levels and applying shading to 3D models.
With motion blur, the shader mimics the way fast-moving elements blur in the real world to infuse a cinematic and visually stunning atmosphere into the Minecraft world.
You can personalize multiple things in the game’s visuals, including the sun’s brightness, water, sky color, foliage, and additional customization options.
This Minecraft Bedrock and Java Editions shader can replicate the appearance of the light reflection on the water’s surface, especially underwater, resulting in a captivating gaming experience.
Before downloading any shader, download and install OptiFine and JAVA on your computer. Choose any shader from the list, and download it on the PC that has Minecraft. Double-click the file to initiate the installation.
Once it is installed, Minecraft will launch & start the import process. Wait for it to complete. Now, launch Minecraft, and click Play, then click Create New.
On the next page, select Create New World, then click Resource Packs. Go to My Packs, select the Shader, and click Activate. You can also change other settings related to the shader to get the desired output, then click Create.
Windows 11 has been a massive upgrade from the previous iterations, both in terms of functioning and UI. But changes to the scrollbar behavior don’t seem to go well with the users. Many want to configure things such that the scrollbar always shows up in Windows 11.
This is useful if you rely on the Settings app, the Search menu, or even some third-party Microsoft Store apps where Windows 11 hides the scrollbar after inactivity. Remember, this is an intentional change from Microsoft, and simply hovering the cursor over the vertical scroll bar should activate it.
Keep reading to find out the two ways you can always show the Windows 11 scrollbar.
How do I force Windows 11 always to show scrollbars?
https://youtu.be/5u2qyMvO5II
1. Change the Accessibility settings
Press Windows + I to open the Settings app, go to Accessibility from the navigation pane, and click on Visual effects.
Now, enable the toggle switch for Always show scrollbars.
To enable inactive scrollbars and get rid of the default behavior, reconfigure the Windows 11 scrollbar settings and get it to always show up. This is, by far, the simplest method and should be the preferred approach.
Before you start making the changes, make sure to create a restore point to be able to revert the changes in case things don’t work out correctly.
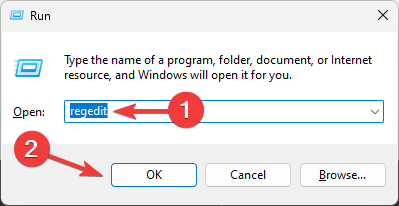
Press Windows + R to open Run, type regedit in the text field, and click OK.
Click Yes in the UAC prompt.
Paste the following path in the address bar at the top, and hit Enter: HKEY_CURRENT_USER\Control Panel\Accessibility
Now, check whether the DynamicScrollbars DWORD exists on the right. If not, right-click on the empty portion, hover the cursor over New, select DWORD (32-bit) Value, and name it DynamicScrollbars.
Double-click the DynamicScrollbars DWORD, enter 0 under Value data, and click OK to save the changes.
Make sure to restart the computer or re-sign in for the changes to come into effect.
When the Always show scrollbar setting in Windows 11 is not working, another option is to reconfigure the Registry Editor. These changes tend to override any inconsistencies and force show the vertical scrollbar in Windows 11.
Besides, many prefer the Smooth Scrolling feature for browsers, which makes the task feel more natural and seamless. Lastly, you can choose how many lines to scroll at a time or get inactive windows to respond when you hover the cursor over them.
The two methods listed here will allow you to have the Windows 11 scrollbar always show up. This also applies to the scrollbar for applications. But we recommend you go with the default setting since that’s best for productivity!
Apart from the scrollbar, there are several other changes to make Windows 11 faster. So, do check them out and witness a drastic improvement in performance.
If you face any issues with the process, drop a comment below, and we will get back at the earliest.
The “Web preview” feature, as found on Reddit, in Microsoft Edge seems to be an experimental or unreleased feature that allows users to copy and paste links with a preview of the linked webpage. This feature appears to be aimed at enhancing the link-sharing experience by providing a preview of the webpage when you paste a link into a text field.
In the Settings menu, you can find an option named “Web preview,” which allows you to turn this feature on or off. Furthermore, the context menu has a “Copy preview link” option, which implies that users can select to copy the link as a typical URL or as a “Web preview” link.
The behavior of the “Web preview” feature may vary depending on the website you’re trying to share. Some websites may not support this feature, resulting in the option being grayed out or not providing the expected preview.
The Reddit post mentions that this feature doesn’t work on platforms like Twitter, Reddit, and Disqus, possibly because these platforms have not integrated or do not support the “Web preview” feature.
Regardless of whether Microsoft will ship “Web preview” to the public, it is not the first (and probably not the last) feature that makes you question Edge’s promise to keep you safer and more private.
This statement by Neowin has been bashed by @Leopeva64, a Microsoft Edge enthusiast, who originally posted this article on Reddit, stating Microsoft makes no such bold claim regarding privacy, and neither has it not been in the Reddit post.
The author of this article always finds a way to bash Microsoft on every new feature they test for alleged privacy invasion ????, I guess bashing Microsoft generates more clicks and of course more ???? ????… https://t.co/uJm0huAqdR
It’s worth noting that the information provided is based on a Reddit post, and the availability and functionality of this feature may have changed. Users interested in this feature should watch Microsoft Edge updates for future enhancements or broader availability.
A severe lightning storm hit Sydney, Australia, on the evening of August 30, causing major cloud providers, including Oracle Cloud, NetSuite, and Microsoft’s Azure, to suffer outages. It affected Microsoft 365 and Power Platform services as well. A similar outage happened in July as well.
Microsoft’s post-incident analysis report attributed the blackout to a combination of a couple of factors.
Cooling Systems Stopped Working
Because of the power problem, cooling units in one data center within one Availability Zone to go offline. The data center’s systems shut down automatically to prevent the computers from getting too hot and potentially being damaged. This made it impossible for people to use Azure and Microsoft 365 services.
Not Enough Staff at Night
There weren’t enough people working at the data center during the nighttime. This made it hard to fix the cooling systems quickly. To fix this problem, Microsoft hired more people temporarily to work at the data center at night.
Both this leads Microsoft to improve the automation game. Microsoft acknowledged the need to enhance automation within the data center to make it more resilient to various voltage sag event types. This includes evaluating the sequence in which servers and chillers are restarted to ensure that the highest-load servers and their corresponding chillers are prioritized.
The outage resulted from a combination of factors, including a power sag, cooling unit failure, and an automated shutdown triggered by rising temperatures. Insufficient nighttime staffing was also a contributing factor.
Microsoft is making notable enhancements to Microsoft Priva, focusing on strengthening its capabilities. These enhancements give organizations more powerful tools to address data protection and privacy requirements.
Microsoft Priva is a comprehensive privacy risk management solution designed to assist organizations in identifying, assessing, and mitigating privacy risks within their Microsoft 365 environment. It offers a centralized view of personal data, enables establishing and enforcing data protection policies, and automates the management of subject rights requests.
Here are the enhancements:
Deeper data viewpoints
Before, Microsoft Priva took a long time to show certain information about how data is handled. Now, it can provide important insights about data much faster, within just a few days. This helps organizations understand their data trends better and make smart decisions about data privacy.
Better integration with Compliance Manager
Microsoft Priva and Compliance Manager work together to improve overall compliance score. Compliance Manager provides insights and advice on staying compliant, now available in Microsoft Priva for easier privacy rule-following.
Fulfill more request types
Microsoft Priva simplifies managing personal data requests, including data deletion, with easy approval and summary tracking.
These solutions help organizations navigate the complex landscape of data protection and privacy, ensuring compliance with regulatory requirements and enhancing data privacy practices.
Once you’ve described your preferences, it will present you with a recommended route using Bing Maps. This feature can help you navigate and plan your journey more efficiently.
Example Query
For instance, you can ask BCE,
“Can you give me the best directions from downtown Redmond to SeaTac Airport?”
And expect to receive comprehensive directions along with a recommended route.
This enhancement could make your navigation experience with BCE more informative and user-friendly, allowing you to access directions and maps conveniently.
Apart from the Maps and Directions feature, it’s important to mention that Bing Chat Enterprise on Windows Copilot has been launched in preview. This feature assures data protection and privacy for organizations using Windows Copilot, offering a secure environment for chat interactions. Microsoft added that eligible organizations that have enabled Bing Chat Enterprise can now use it seamlessly on Bing.com and Windows Copilot without needing additional steps.
Windows 365 Switch provides a seamless transition between a Windows 365 Cloud PC and a local desktop. With Windows 365 Cloud PC, you can access your personal applications, content, and configurations directly from the Microsoft Cloud on any device. Being a cloud-based solution, you can resume your work from where you left off without any hassle. This means you can work efficiently and without worrying about losing your progress. In this post, this is precisely what we are going to show you: to move between my PC and Cloud PC using Windows 365 Switch.
To easily switch between your local and Cloud PC, use familiar keyboard shortcuts, mouse clicks, or four-finger swipe gestures. This is especially helpful when connecting your Windows device to a securely managed company-owned Cloud PC.
The Windows 365 Switch feature will become accessible once the following prerequisites are met:
Usage of Windows 11-based endpoints, specifically Windows 11 Pro and Enterprise editions.
Enrollment in the Windows Insider Program (Beta Channel).
Possession of a valid Windows 365 Cloud PC license.
How to set up a PC for using Windows 365 Switch
Enabling the Windows 11 Beta channel
As previously mentioned, your cloud and local PCs must run Windows 11 Beta channels. To obtain this channel, you must enroll in the Insider Program and specifically select the Beta channel.
Open the “Settings” menu and navigate to “Windows Update” within the menu.
Locate and click on the “Windows Insider Program” option.
Click on “Get Started” to initiate the enrollment process. Our PC was already in the program.
At this point, you will need to log in using your Microsoft or Azure account.
Select the “Beta Channel” option from the list of available versions and then click “Continue.”
Make sure to restart your device to ensure that everything is updated properly.
Finally, check for updates and install the Beta updates when available.
Installing Windows 365 app
You may proceed without completing this step if you currently possess the Windows 365 app. However, if you do not have the app in question, several methods are available to acquire it. This guide will focus on downloading it through the Microsoft Store. To install the Microsoft 365 app from the Microsoft Store, follow these steps:
How to move between your PC and Cloud PC using Windows 365 Switch
Launch the Windows 365 application on your local PC. Here, you’ll find a list of your Windows 365 Cloud PCs. Choose the specific Cloud PC you wish to switch to and click on the user actions menu, represented by the three-dot icon at the upper right corner of the Cloud PC card.
Click Add to Task view from the menu to activate Switch.
Move your cursor over the Task view icon on the Windows 11 taskbar.
It resembles a rectangle with two vertical lines adjacent to it. A thumbnail of your Cloud PC will appear; click on it to initiate your Cloud PC within the native Windows 11 environment.
You’ll now be directed to your Cloud PC desktop, where you can perform your tasks as usual.
A status indicator in the screen’s bottom right corner will show that you are currently using your Cloud PC.
How to move between my PC and Cloud PC using Windows 365 Switch
To return to your local PC, simply hover over the Task view icon on the Windows 11 taskbar.
On the left side of the Task view screen, locate an option labeled “Local Desktops” and click on it to switch back to your local PC’s desktop.
In conclusion, by following these steps, you can use your Cloud PC using Windows 365 Switch app, making it very easy to transition between a work PC and a work-from-home PC.
Microsoft to unbundle Teams from Microsoft 365 and Office 365 in EEA and Switzerland.
Microsoft will unbundle Teams from its Microsoft 365 and Office 365 suites in the European Economic Area (EEA) and Switzerland starting October 1, 2023. This decision follows an investigation by the European Commission, which raised concerns about unfair competition.
Customers in these regions can now purchase these suites without Teams, saving €2 per month or €24 annually. Microsoft also plans to improve interoperability and support for application developers, making it easier for competitors to utilize its functionality. Microsoft aims to strike a balance between competitors and European business interests while remaining engaged with the European Commission’s concerns.
Microsoft is looking to expand its Xbox gaming AI team.
Microsoft is delving into the realm of AI-driven gaming innovation, as indicated by a recent job listing titled “Principal Software Engineer, Gaming AI.” The listing, posted in July, seeks an experienced software engineer to explore and create groundbreaking Artificial Intelligence/Machine Learning (AI/ML) features, tools, and services within the Xbox Gaming AI team.
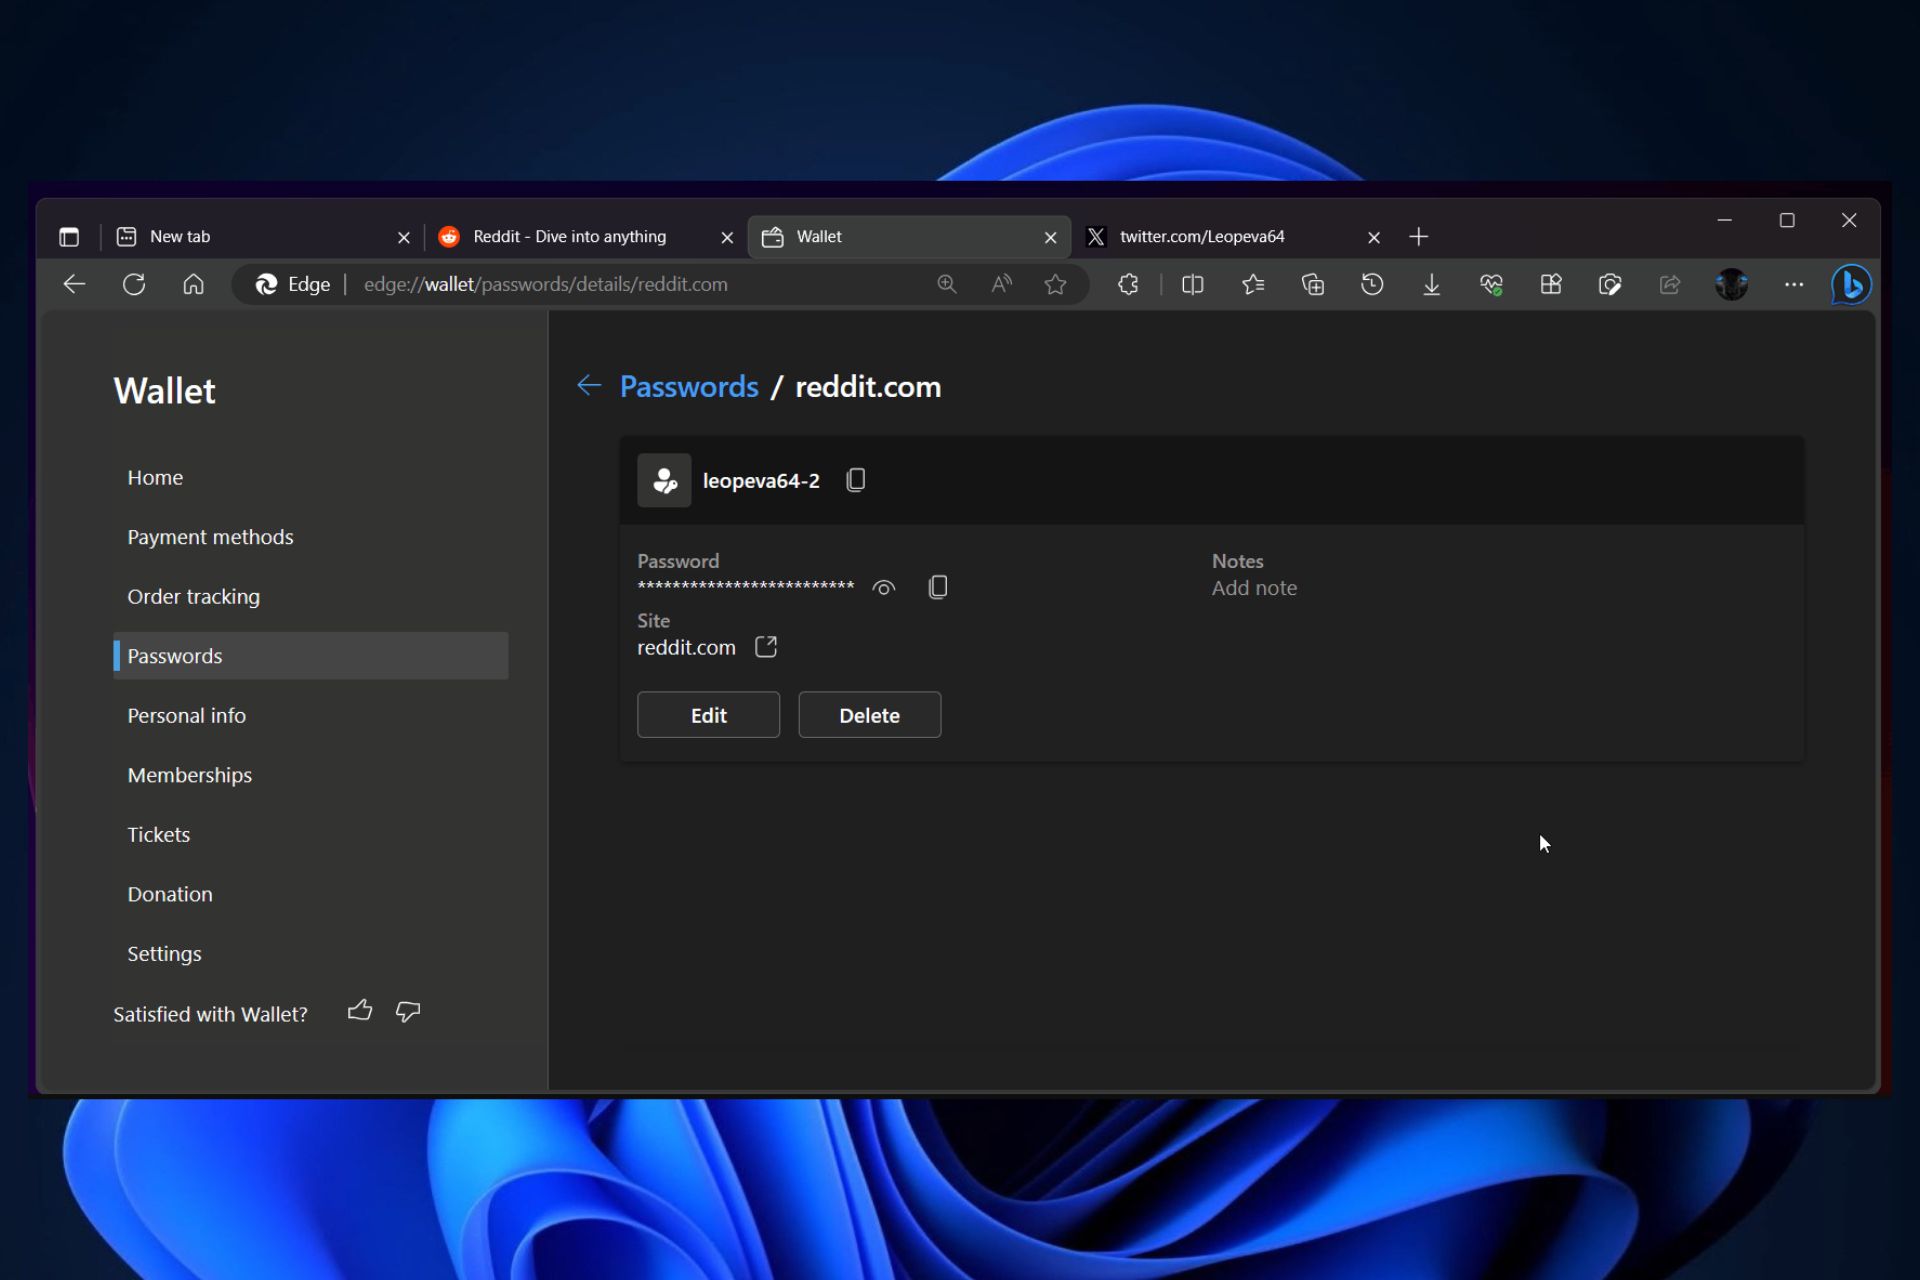
Microsoft is working on redesigned password management for Edge.
Microsoft is reportedly giving its Edge web browser a makeover by redesigning its password manager. This update will introduce a feature allowing users to add notes to their passwords, similar to Chrome’s functionality. While the release date is unclear, this improvement is set to enhance password management, making it easier for users to keep track of their credentials and offering a more secure and user-friendly experience.
That’s it for this week. We will be back next week with more Microsoft news.
The Touch Keyboard and Handwriting Panel service brings touch features and handwriting functionality to compatible devices.
If the service isn’t working, certain Windows apps might not work, and in today’s guide, we’re going to show you how to enable or disable it on your PC.
How do I enable the Touch Keyboard and Handwriting Panel service?
1. Use the Services window
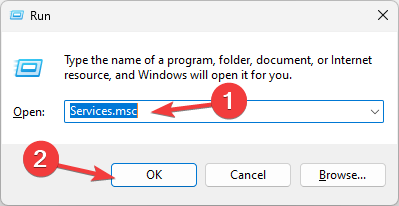
Press Windows key + R and enter services.msc.
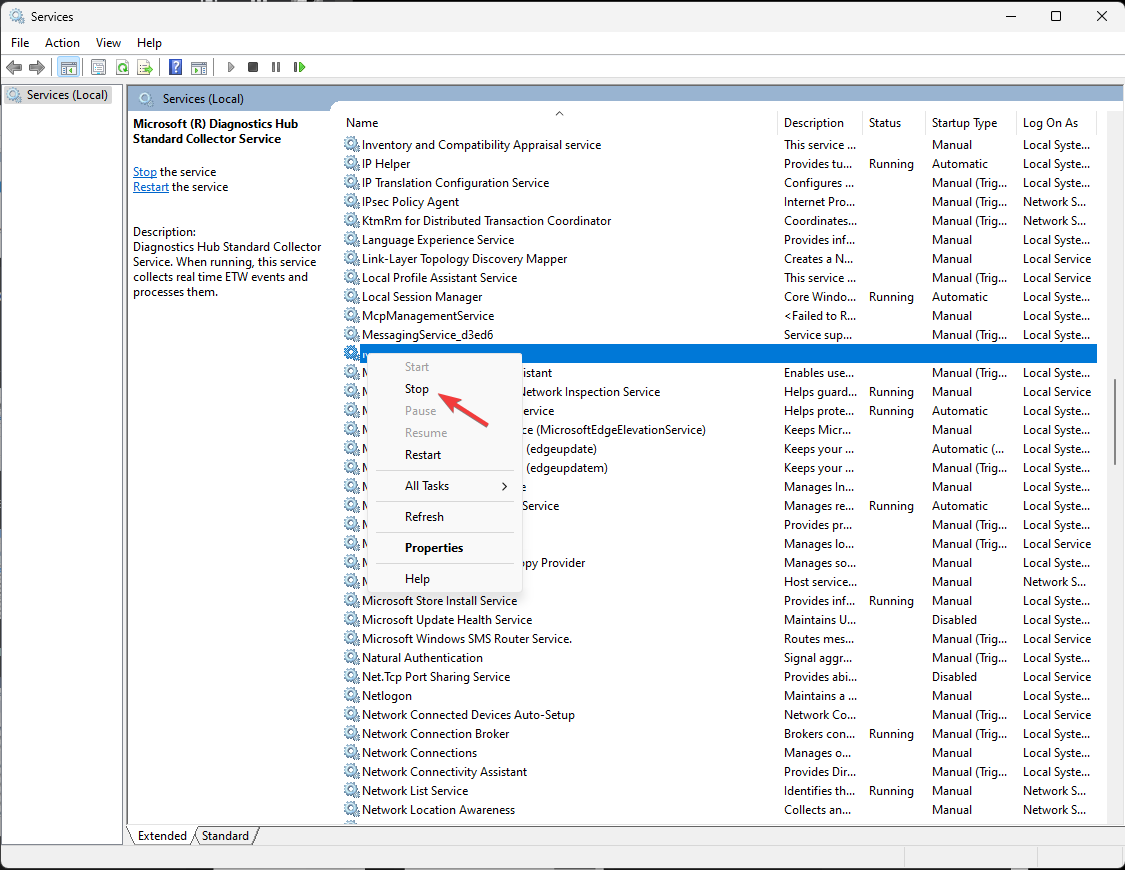
Locate the Touch Keyboard and Handwriting Panel service, right-click it, and choose Start.
Alternatively, double-click the service.
Next, set the Startup Type to Automatic and click on Start.
Click Apply and OK to save changes.
If you want to disable the Keyboard and Handwriting Panel service, repeat the same steps, but set the Startup type to Disabled or Manual and click on Stop to stop the service.
2. Use the Command Prompt
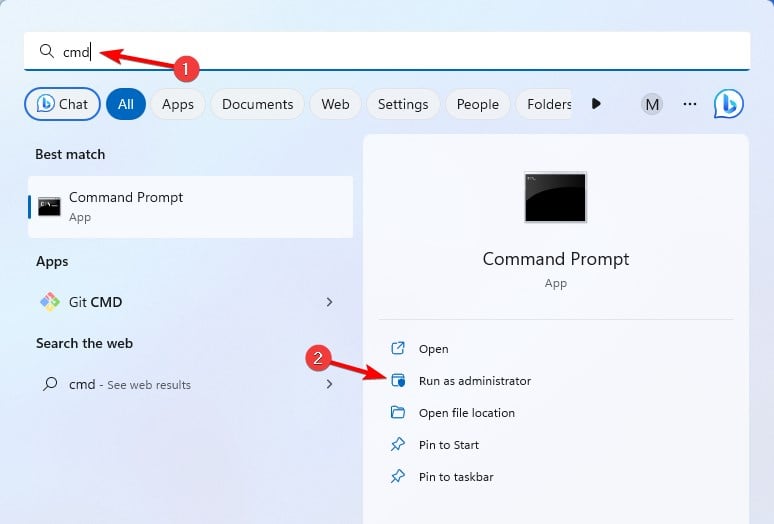
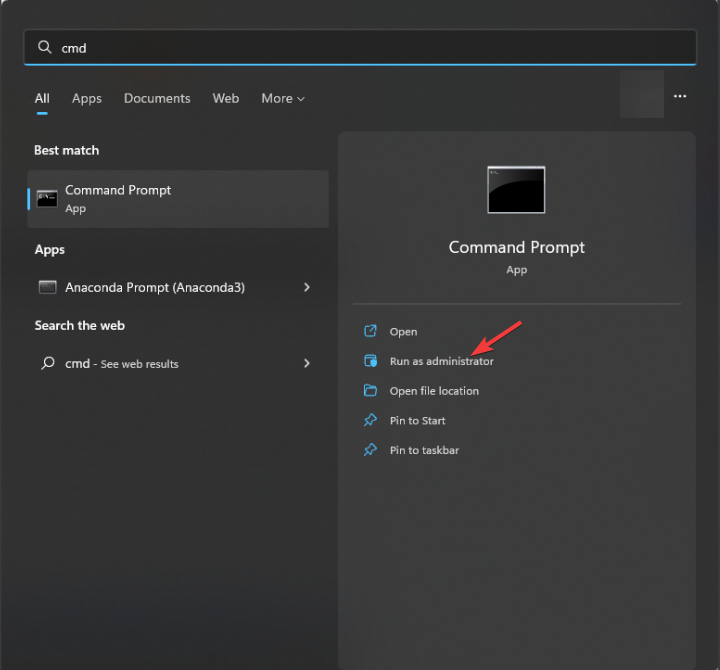
Press the Windows key + S and enter cmd. Select Run as administrator.
Now run the following command: sc queryex state=all type=service
The list of all services will appear. Locate the Touch Keyboard and Handwriting Panel service and check its service name. It should be TabletInputService.
Now run the following command to start the service: net start "TabletInputService"
To stop the service, you can use net stop "TabletInputService"
To disable the service run the following command: sc config "TabletInputService" start=disabled
If you want to enable the service and set the startup type to Automatic: sc config "TabletInputService" start=auto
For different startup types, you can use the following parameters:
Manual startup: start=demand
Automatic delayed: start=delayed-auto
To start the service immediately, use the sc start "TabletInputService"
3. Use the PowerShell
Press Windows key + S, enter powershell, and choose Run as administrator.
Enter the following command to get the list of all services on your PC: Get-Service
Look for the Touch Keyboard and Handwriting Panel service. Its name should be TabletInputService.
To start the service, run the following command: Start-Service -Name "TabletInputService"
You can stop the service with this command: Stop-Service -Name "TabletInputService"
To disable the service, use this command: Set-Service -Name "TabletInputService" -Status stopped -StartupType disabled
To enable the service, use the following command: Set-Service -Name "TabletInputService" -Status running -StartupType automatic
Touch Keyboard and Handwriting Panel service is missing on Windows 11
Keep Windows up to date, or try performing an in-place upgrade.
Start PowerShell as administrator and run Get-AppxPackage -allusers | foreach {Add-AppxPackage -register “$($_.InstallLocation)\appxmanifest.xml” -DisableDevelopmentMode}
The service is also associated with fingertip handwriting, and if you want to know more about it, we have a guide on how to enable fingertip handwriting in Windows 11.
If you have any questions regarding this service, let us know in the comments below.
Crave is a video-on-demand streaming service intended mainly for Canadian residents. It houses numerous exciting movies and TV shows including content from Showtime, HBO, and lots more.
As with many popular streaming platforms, Crave is geo-restricted. This means that viewers outside the borders of Canada need a VPN to access it.
However, over time, there have been numerous complaints about VPN not working with Crave.
Trust me, I know there’s nothing more annoying than seeing that ugly error message saying Sorry, this content is not available in your region.
In fact, many die-hard lovers of the streaming service have had to seek alternatives when they couldn’t get past that block even with a VPN.
But not to worry, I figured out the cause of the issue and this article will help you fix any problems you’re experiencing with Crave.
So, stay glued to this piece.
Crave not working with VPN? Try this!
The following fixes will help you solve the issue:
1. Update your VPN
One of the major reasons why Crave is not working with a VPN is using an outdated app.
VPNs often roll out updates to their apps in a bid to fix bugs and improve their services.
Therefore, your first course of action should be to update your VPN app.
To do this, simply go to your VPN’s official website and download the latest version.
2. Delete browser cookies
Follow these steps to delete your browser cookies:
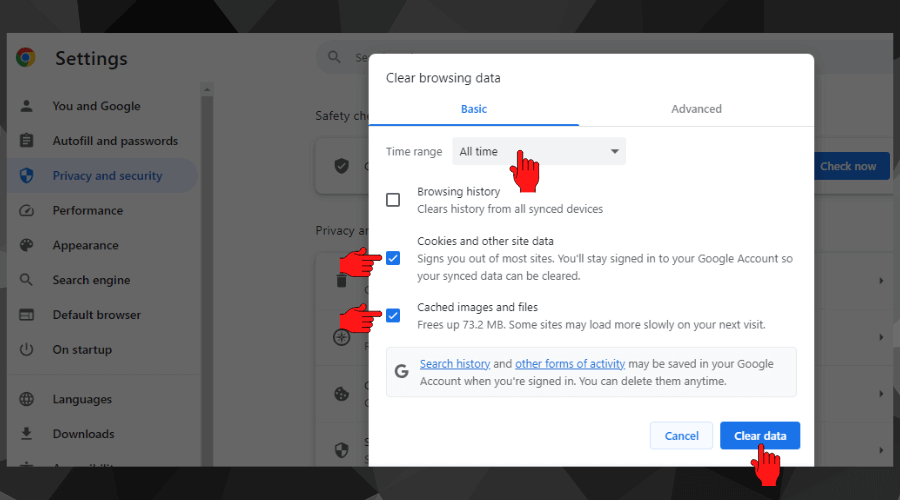
Open your browser and navigate to Settings
Click on it to open and select Privacy and Security
Select Clear browsing data.
Set the duration of cookies to clear, then click the Clear data button.
Your browser stores certain information in its cookies which includes your location.
Geo-restricted websitesuse these cookies to determine your actual location, causing them to block your access if you’re from an unapproved location.
Deleting that data can help you access Crave freely.
3. Change Servers
Here’s how to do that:
Open your VPN app and disconnect from the server you’re currently connected to.
Close the software and wait for a few minutes.
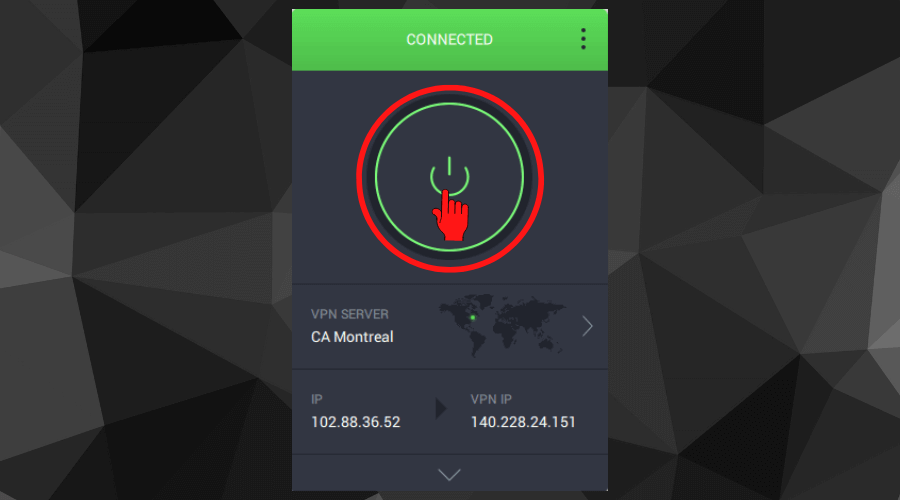
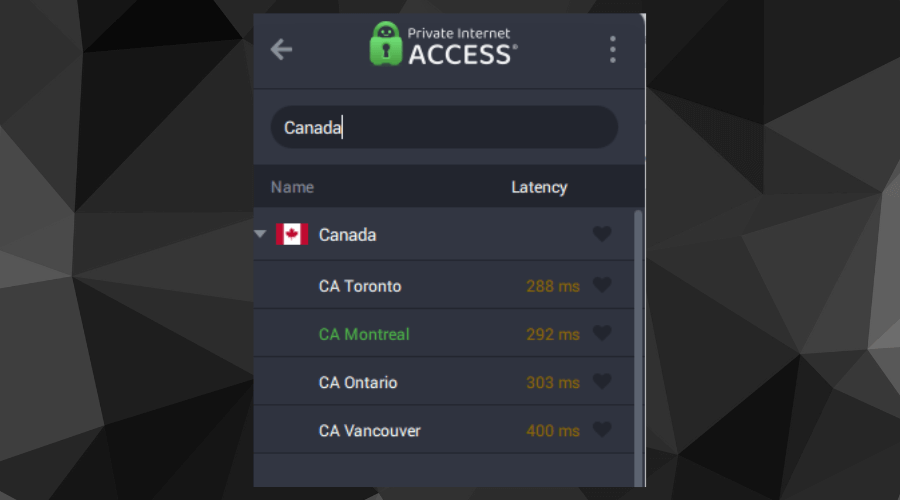
Launch the app again and connect to another Canadian server.
Check if it’s working well with Crave now.
If you can’t unblock Crave even when your VPN connection is active, then it’s safe to assume that the problem is from the server you’re connected to.
This is because Crave can detect and block individual VPN servers. When this happens, all the IP addresses associated with that piece of hardware become useless.
In this case, the best solution is to connect to another Canadian server.
4. Use a different VPN protocol
Here’s how to change your VPN protocol:
Open your VPN app and go to Settings.
Click the VPN Settings tab.
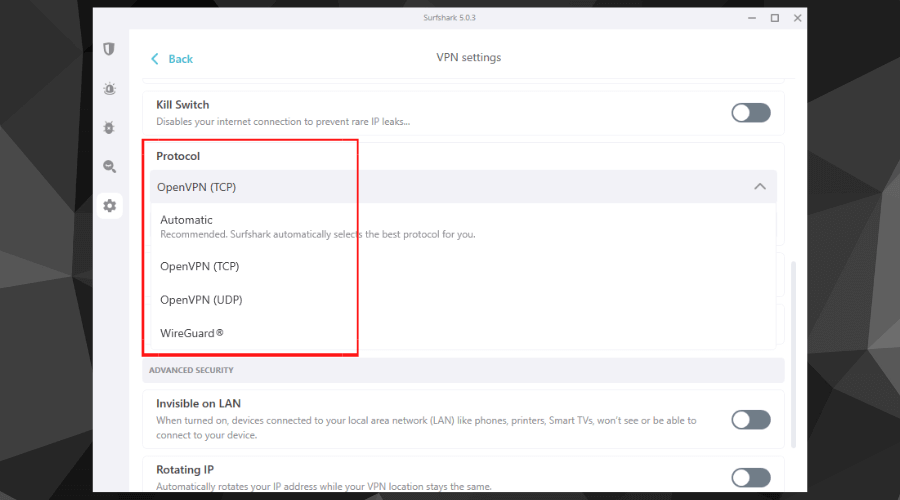
Click the Protocols drop-down menu and select a different connection protocol.
Close the settings page, then connect to a server to confirm if it works.
This usually works because different protocols have different uses. Some are great for bypassing region locks but less than ideal for speed and security. Meanwhile, others are optimized for streaming and torrenting.
So, changing things around can make a big difference and get Crave to work with your VPN.
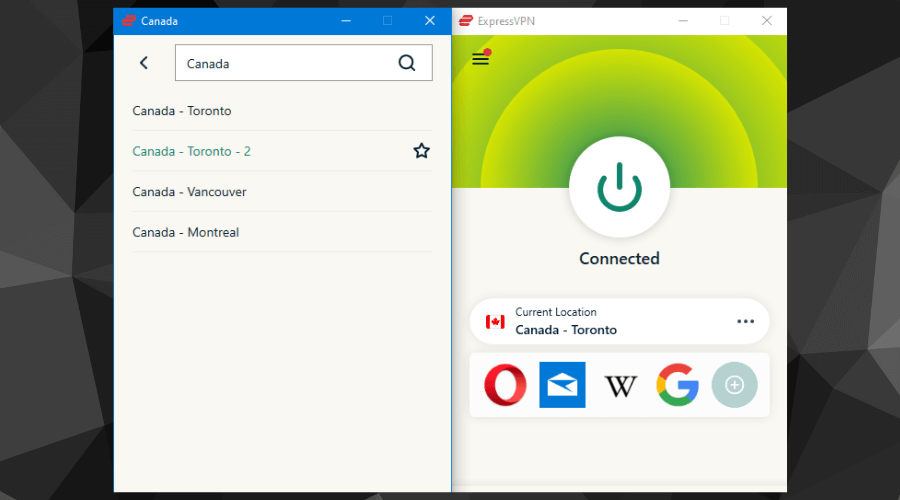
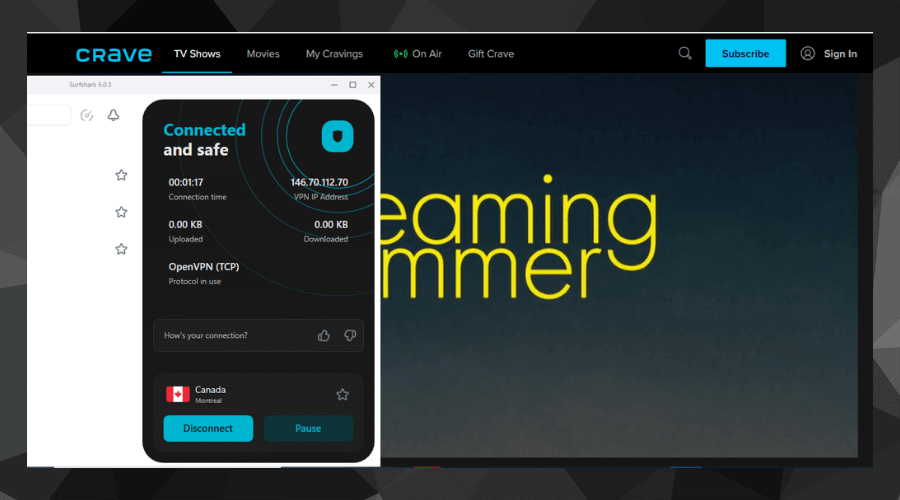
In my case, Surfshark refused to work on my PC for the longest time. I tried everything possible without getting a break.
However, the solution turned out to be as simple as changing the protocol setting from Automatic to OpenVPN.
Therefore, take it from someone with lots of experience with VPNs – this solution works.
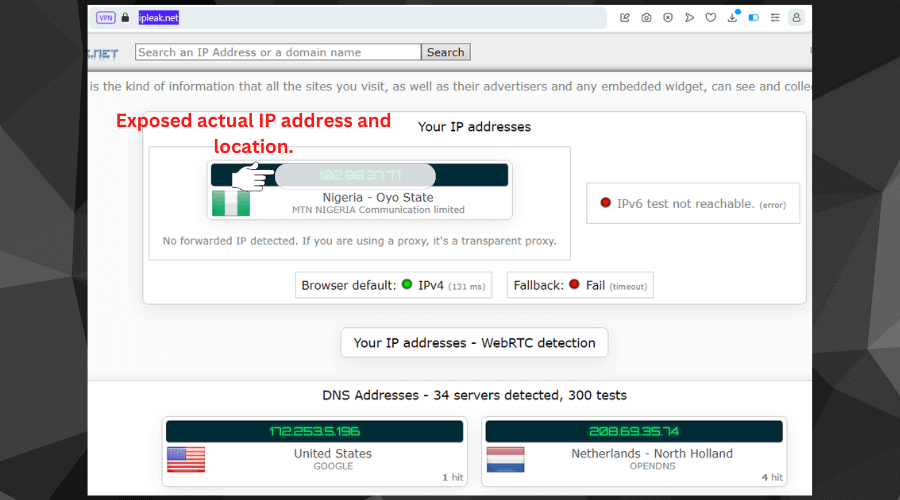
Go to ipleak.net and run a leak test. Note your actual IP address from the results.
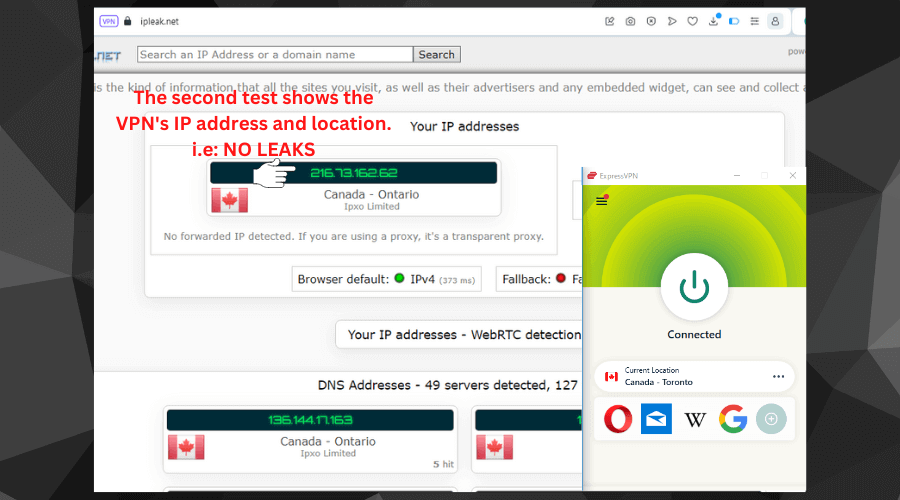
Connect to a VPN server and rerun the test.
Compare the results from both tests.
If you get similar results, it means you have a leak.
Leaks are security vulnerabilities that cause websites to discover your true IP address even when using a VPN.
If your VPN happens to have leaks, then the next two solutions are your best bet to fix it:
6. Contact the VPN support team
Yes, they’re in the best position to help you solve most of the technical issues causing Crave to not work for you.
They’ll provide you with the necessary information you need to resolve your issues.
However, if they can’t help you, then you should definitely:
7. Change your VPN provider
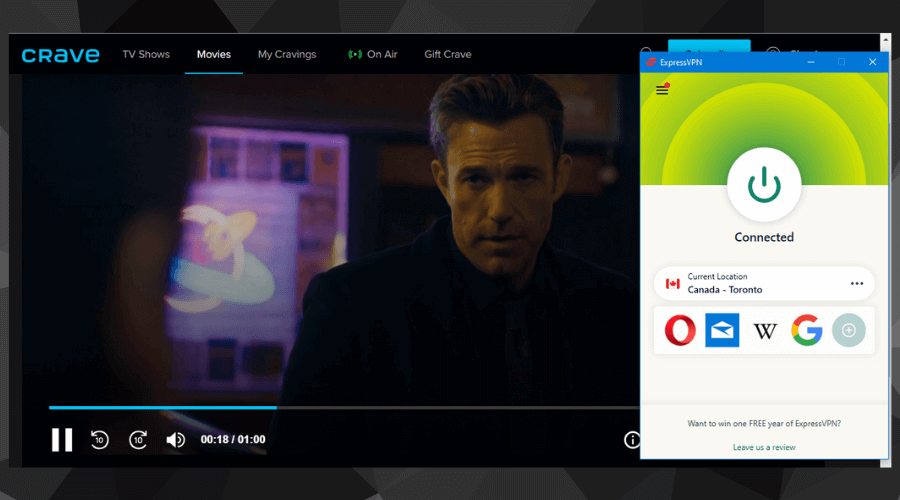
If all the solutions above fail, it’s in your best interest to ditch your current VPN. Instead, switch to a better and more reliable provider like ExpressVPN.
Sign in to your Crave account and enjoy streaming your favorite series with a VPN that actually works.
You don’t want to use free VPNs for Crave!
Your VPN determines how well and easily you’ll connect to and enjoy certain internet services, especially streaming platforms.
ExpressVPN is one of the best premium providers on the market right now. It’s been tested and reviewed countless times with evidence available online to back these claims.
It cuts through all the noise and gives you exactly what you need to unblock Crave.
That includes an array of streaming-optimized Canadian servers, strong unblocking protocols, and a PrivateDNS feature that keeps your activities speedy and anonymous.
Does Crave block VPNs?
Yes, Crave blocks the use of VPNs on its platform.
It’s geo-restricted due to copyright laws and its broadcasting licensing agreements.
Therefore, ithas to regulate access to its content in order to avoid legal issues.
However, premium VPNs have tons of IP addresses that can easily help you spoof your location and evade detection on the website.
So, even if one IP gets blocked or blacklisted, you can always get another one by switching servers.
How does Crave detect my VPN?
It’s a fact that streaming websites, including Crave, use VPN detection tools and technologies like GeoIP databases.
These databases provide Crave with different IP addresses known to belong to VPNs, so the platform is automatically able to tell where those connections are coming from and block them.
Also, when there are numerous requests coming from a single IP address, it arouses suspicions that cause Crave to block access to that address.
This usually happens with free VPNs, which are typically overcrowded.
Does Crave work with a VPN?
Yes, Crave works with VPNs.
The key is to use a premium VPN that has all the features required to bypass its geo-blocks.
The problem is that free providers often struggle to replace their blocked servers.
On the other hand, premium services like ExpressVPN and Surfshark are flexible enough to quickly provide other working options when they get blocked.
So, let’s check out some of the top options in more detail:
Best VPNs for Crave
After a lengthy search and lots of tests, here are the best VPNs you can use with Crave:
1. ExpressVPN – best-in-class for speed and privacy
Wonder why ExpressVPN tops this list? It’s due to its versatility and overall functionality, especially for unblocking different streaming sites.
With over 3000 servers in 94 countries, including hundreds from 4 Canadian locations, getting Crave to work is an easy task.
Its PrivateDNS feature helps to process DNS requests faster and more securely, which translates to streaming speeds of up to 10GB/s.
Beyond streaming, ExpressVPN comes with the AES 256-bit encryption for data protection.
In addition, it has inbuilt IPv4, IPv6, and DNS leak protection for better privacy.
But that’s not all, it also protects against WebRTC leaks, a security weakness that allows video content websites to learn a user’s true identity through browser data.
Furthermore, ExpressVPN has an automatic kill switch that prevents accidental leaks when your VPN connection drops.
Above all, the service operates a strict no-logs policy that guarantees your complete anonymity and privacy online.
ExpressVPN allows 8 simultaneous connections and has apps for Android, iOS, MacOS, Windows, and Linux.
Pros:
Super-fast connection
Top-notch security and privacy features
Allows anonymous payments
Unblocks numerous streaming platforms
Cons:
A bit pricey compared to rivals
ExpressVPN
Unblock Crave in no time and enjoy high-quality streaming with this top VPN.
Surfshark is an amazing solution because it offers above-standard features at super-affordable prices.
First of all, it has over 3200 servers in 100 countries including 3 options in Canada. And all of them offer great speeds ranging between 1GB/s and 10GB/s, providing a smooth streaming experience.
It unblocks Crave using connection protocols like WireGuard and OpenVPN.
You also get best-in-class 256-bit AES encryption, DNS and IPv6 leak protection, an inbuilt kill switch, ad-blocker, and malware scanner.
In short, Surfshark is the complete package, but that’s not all:
It also comes with top features like the NoBorders mode that allows you to bypass the toughest censorship anywhere in the world.
In addition to that, it has a rotating IP feature that makes your connection harder to detect, and a camouflage mode that disguises your VPN connection like regular internet traffic.
Surfshark has apps for Android, MacOS, Linux, Windows, and iOS. It also allows manual configuration on selected internet routers.
Pros:
No logs policy
Fast streaming
Strong security features
Unlimited simultaneous device connection
24/7 live chat support
Cons:
Slow response time from their support team
Surfshark
Make quick work of geo-restrictions and stream on all your devices with Surfshark.
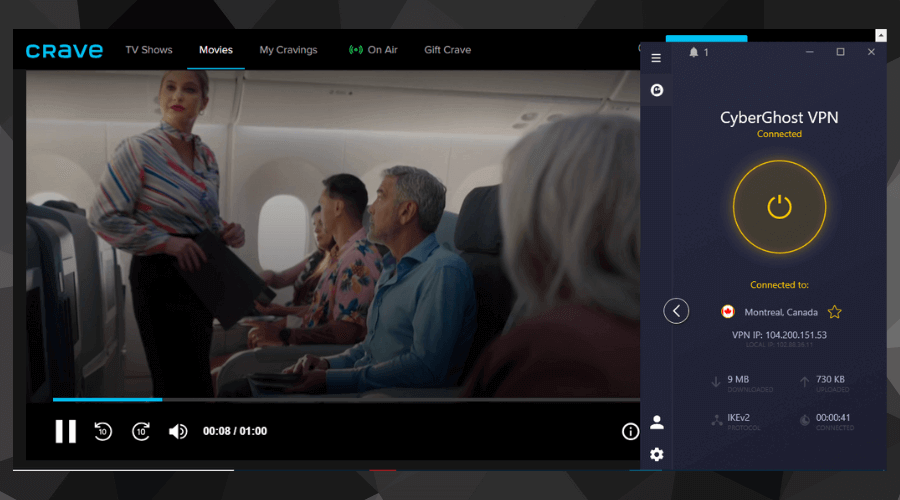
3. CyberGhost – best for privacy and anonymous streaming
CyberGhost has a network of 9650 servers across 91 countries, including 480 in 3 Canadian locations.
The best part is that it offers numerous streaming-optimized servers dedicated to popular platforms for easier connections.
As with every other VPN on this list, it uses military-grade AES-256-bit encryption to securely tunnel your data.
In addition, it has other interesting security features like an automatic kill switch that blocks leaks on poor networks, an automatic malware scanner, and IPv6 and DNS leak protection.
CyberGhost upholds a high standard of privacy as it doesn’t log any identifiable user information.
Above all, its 10GB/s server connection speeds make accessing Crave from abroad possible without breaking a sweat.
You can use CyberGhost to unblock Crave on Android, Windows, iOS, Linux, and macOS.
And it allows manual installation on selected routers.
Pros:
Enhanced security
Streaming-optimized servers
Fast and easy unblocking
Cons:
Limited control for advanced users
CyberGhost
Benefit from streaming-optimized servers and quickly unblock Crave with CyberGhost.
DLL or Dynamic Link Library files are critical to any Windows installation. Multiple applications often share these simultaneously, and issues with one can cause the related program to crash. One such DLL that often throws an error is winmmbase.dll.
In some cases, users found that winmmbase.dll was missing or could not be found. The winmmbase.dll crash error message reads, C:/WINDOWS/SYSTEM32/ winmmbase.dll is either not designed to run on Windows or it contains an error.
So, what is winmmbase.dll? Microsoft developed the file as part of the Base Multimedia Extension API DLL library to support the operating system and the software running on it. Also available as a 32-bit file, it’s considered a Win32 DLL.
Here are the reasons you come across a winmmbase.dll error in Windows 11:
Corrupt files: If the system files are corrupt, you may experience issues with the stored DLLs.
Malware or virus: Often, a virus or malware infection can render the DLL unusable.
Bad sectors: Issues with the storage drive can also trigger the error where the DLL becomes inaccessible.
Keep reading to find out how to install winmmbase.dll when it’s missing!
How do I fix winmmbase.dll crashing on Windows 11?
Before we proceed to the slightly complex solutions, try these quick ones first:
Registry issues can also trigger a DLL error. So, if you recently made any changes to the Registry Editor, revert them. Or use an effective Registry cleaner to get rid of conflicting entries.
If none work, move to the fixes listed next.
1. Replace the DLL
The winmmbase.dll, a critical component, comes bundled with the default Windows installation. The file size is 170 KB, and the file location is: C:\WINDOWS\System32
System32 folder
So, your primary approach when winmmbase.dll is corrupted or not found should be to replace it.
Get the DLL from another computer running the same architecture of Windows, be that 32-bit or 64-bit, copy it to a flash drive, and then transfer it to the System32 folder on the affected PC.
2. Repair the corrupted system files
Press Windows + R to open Run, type cmd, and hit Ctrl + Shift + Enter.
Click Yes in the UAC prompt.
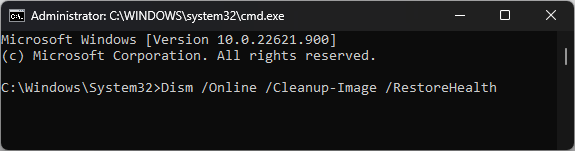
Paste the following three DISM commands individually, and hit Enter after each: DISM /Online /Cleanup-Image /CheckHealthDISM /Online /Cleanup-Image /ScanHealthDISM /Online /Cleanup-Image /RestoreHealth
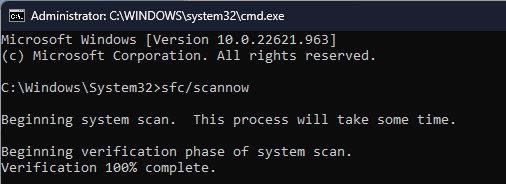
Now, execute this command for the SFC scan:sfc /scannow
Once done, restart the computer and check whether the error is fixed.
In case the SFC scan returns, Could not reproject corrupted file \??\C:\WINDOWS\SysWOW64\winmmbase.dll; source file in store is also corrupted, pair it with the DISM commands or perform an in-place upgrade as detailed in the last solution.
Repairing corrupted system files can be done easily when using a specialized repair tool. These tools will scan your system and repair any broken files they encounter.
3. Manually update the audio and Bluetooth drivers
A few users found that their audio and Bluetooth drivers relied on the winmmbase.dll file for functioning. And simply replacing the DLL with a fresh copy didn’t work as system processes were constantly using it, though that’s not always the case.
When dealing with drivers, it’s always recommended to use specialized software. Such tools will scan your system and identify your missing or out-of-date drivers in no time. The best driver updater software will also download and replace the drivers for you.
4. Reinstall the affected application
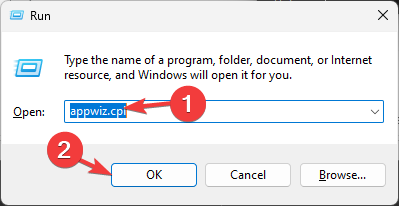
Press Windows + R to open Run, type appwiz.cpl in the text field, and hit Enter.
Select the application that throws the error, and click Uninstall.
Follow the on-screen instructions to complete the process, and then restart the computer.
Now, reinstall the application from an official source, either the website or Microsoft Store.
In some cases, the winmmbase.dll error in Windows appears due to a faulty application and not an issue with the OS. Reinstalling the app should help here.
Go to Microsoft’s official website, choose the product language and OS edition, and download the Windows 11 ISO.
Double-click the ISO file, and click Open in the prompt.
Run the setup.exe file.
Click Yes in the UAC dialog box.
Click on Next to proceed.
Now, click Accept to agree to Microsoft’s license terms.
Finally, verify that the setup reads Keep personal files and apps, and then click on Install.
Wait for the Windows 11 repair upgrade to complete.
Since winmmbase.dll is a Windows operating system file, an in-place upgrade will help when the DLL is missing or corrupt. When you perform a repair upgrade, all OS files are replaced without affecting the stored data or installed applications. It’s basically like reinstalling Windows.
The winmmbase.dll shouldn’t ideally throw errors, but when it does, things are easy to fix! While some go with the manual methods, we recommend using a dedicated DLL repair tool to get things running quickly!
For any queries or to share more solutions with us, drop a comment below.
Drive failure is a serious problem, and it can make your files unrecoverable or your boot drive unable to work, so many users choose to create a mirror volume on Windows 11 to prevent that.
In case you’re not familiar, mirror volume is an exact copy of another drive, and it works as a backup in case the disk failure occurs. It’s a great backup solution, and today, we’ll show you how to create it on your PC.
What are the prerequisites for setting up a mirror volume?
Two dynamic disks that are similar in size. The mirror drive can be larger than the source drive.
RAID support, which is available on almost every modern PC.
The mirror drive should be unallocated and without any volumes.
How do I create a mirror volume in Windows 11?
1. Use Disk Management
Press the Windows key + X and select Disk Management.
Locate the primary disk, right-click it, and choose Add Mirror.
Select the secondary disk that you want to use in the dialog box. The drive should be unallocated.
Follow the instructions on the screen to create a mirrored volume on Windows. It might be necessary to format the mirror drive, so use the same settings you used for the source drive.
2. Use the Storage Spaces feature
Press the Windows key + I to open the Settings app.
Navigate to Storage.
Select Storage Spaces.
Next, click on Create a storage pool and Storage Space and set the name for the storage pool.
Select the two drives you want to use and click on Create.
Enter the desired name for the mirror, set resiliency to Two-way mirror, and click on Create.
Next, specify the name of the label, set the drive letter set the file system as NTFS, and click on Format.
After the process is done, the new drive will appear on your PC.
Press the Windows key + X and choose Windows Terminal (Admin).
Run the following command: diskpart
Next, run the following command: list disk
Locate the disks you want to mirror. In this example, we’ll use disk 0 and disk 1.
Type select disk 0
Next, use this command to convert the basic disk to the dynamic disk: convert dynamic
Repeat steps 4 and 5 for disk 1 as well.
Run the following command to create a mirror volume on the desired disk: create volume mirror disk=1
Lastly, run the following to add the other disk to the mirror: add disk=0
After doing that, exit diskpart and restart your PC.
This is an advanced method that is suitable for users who are already familiar with diskpart. Use this method with extra caution.
Why can’t I create a mirrored volume?
One of your drives isn’t a part of the storage pool.
Your disks aren’t configured as dynamic.
The mirror disk is smaller than the source disk.
It’s pretty simple to create mirror volume on Windows 11, and we recommend using Disk Management or Storage Spaces to achieve this since it’s the most straightforward method. This feature is available on older versions as well, and we have a guide in how to mirror a hard drive on Windows 10.
The exFAT file system continues to be widely used for external drives, given its enhanced compatibility and support for large storage. These drives work on both Windows and MacOS. But there are instances when exFAT drives do not show up in Windows 11.
Also, users found the exFAT is unavailable when formatting drives in Windows 11, though the problem is usually linked to the USB flash drive and not the OS. Extensible File Allocation Table or exFAT has reportedly been problematic for many.
So, why is exFAT not working in Windows 11? Here are the possible reasons:
Drive letter not assigned: When the driver letter is not assigned, the external drive won’t appear in File Explorer, though it would be listed in the Device Manager.
Changes to the OS: Windows 11 interacts with the file system slightly differently, and this, sometimes, leads to exFAT not working on Windows.
Outdated or incompatible drivers: Problems often arise with external drives, be it in NTFS, exFAT, or the FAT32 file system, if the installed drivers don’t work.
Malfunctioning drive: A few users found that the external storage device itself was malfunctioning or had some physical damage.
How do I get Windows 11 to recognize my exFAT drive?
Before we head to the slightly complex solutions, here are a few quick ones to try:
Reconnect the drive to another port. Check if there’s one on the back side of the CPU and connect the exFAT formatted drive to it.
Connect the drive to another computer to identify whether the problem lies with the flash drive or the earlier PC.
If changes to an exFAT drive don’t reflect in File Explorer, rename the folder or add or remove files. This will trigger Windows 11 to register the change.
Make sure you are running the latest version of Windows.
Check for any physical damage to the hard drive, or take the drive to a repair shop.
If none work, move to the fixes listed next.
1. Mark the drive as active and assign a drive letter
Press Windows + S to open Search, type Create and format hard disk partitions in the text field, and click on the relevant result.
Locate the exFAT formatted external drive, right-click on it, and select Mark Partition as Active.
Choose the appropriate response in case a confirmation prompt appears.
Again, right-click on the external storage device, and then select Change Drive Letter and Paths.
Click the Add button.
Choose Assign the following drive letter, select one from the default menu or go with the the default choice, and then click OK.
Often, after initially formatting and setting up an external drive using the exFAT file system on MacOS, it may not show up on Windows 11 due to some inconsistencies. And simply marking it as active and assigning a drive letter should do!
2. Reformat the drive
Tip
We have listed two ways to format the drive: via Disk Management and the Diskpart utility. Go with the latter only if the format fails to work with the former. Make sure to create a backup of the data beforehand or move it to another PC where the USB drive is readable.
2.1 From Windows Disk Management
Press Windows + R to open Run, type diskmgmt.msc in the text field, and hit Enter.
Right-click on the problematic external drive, and select Format.
Now, enter a Volume label in the text field, select exFAT from the File system dropdown menu, choose 128K as the Allocation unit size, then untick the checkbox for Perform a quick format, and click OK.
After the drive is formatted, check whether it’s now readable on Windows 11.
2.2 Using Diskpart
Press Windows + R to open Run, type cmd, and hit Ctrl + Shift + Enter.
Click Yes in the UAC prompt.
Paste the following command and hit Enter: diskpart
Now, run this command to view the available disks: list disk
Identify the ID assigned to the external drive, and then execute the following command while replacing X with the assigned number: select disk X
Run this command to clear the disk and delete any files: clean
Now, create a partition using this command: create partition primary
Execute this command to set exFAT as the file system: format fs=exFAT
Use this command to assign a drive letter: assign
When exFAT is not showing up on Windows 11, reformatting the drive will do the trick! And with Diskpart, you can eliminate any trivial bugs that are preventing the format from going through.
3. Update the driver
Press Windows + X to open the Power User menu, and select Device Manager from the list of options.
Expand the Disk drives entry, right-click on the affected USB drive, and select Update driver.
Now, choose Search automatically for drivers and wait for Windows to install the best one stored locally.
When it’s incompatible or outdated drivers to blame for the exFAT drive not recognized in Windows, updating the drivers should work. Also, if Windows can’t find one, head to the manufacturer’s website, locate the latest version, and manually install the driver.
On the other hand, you can successfully update any driver on your PC with a leading driver solution that securely updates old or incompatible drivers.
Press Windows + R to open Run, type cmd, and hit Ctrl + Shift + Enter.
Click Yes in the pop-up window that appears.
Now, paste the following DISM commands individually and hit Enter after each: DISM /Online /Cleanup-Image /CheckHealthDISM /Online /Cleanup-Image /ScanHealthDISM /Online /Cleanup-Image /RestoreHealth
Next, execute this command to run the SFC scan: sfc /scannow
Corrupt system files are known to trigger a range of issues, including cases where Windows exFAT is not recognized. So, if the file system doesn’t appear when formatting a flash drive, simply run the DISM commands and the SFC scan.
Tip
If the exFAT drive is not showing up on Mac, run this command: sudo pkill -f fsck
Can I format exFAT on Windows 11?
Press Windows + E to open File Explorer, go to This PC, right-click on the drive you want to switch to exFAT, and select Format.
Select exFAT from the File system dropdown menu, tick the checkbox for Quick format, and click OK to start the process.
Wait for the format to complete.
Yes, you can format USB flash drives with the exFAT file system drives in Windows 11. We have a special guide that explains how to change exFAT to FAT32 on your USB drive, so don’t miss it.
If exFAT is unavailable as a File System, check whether the drive in question is a built-in hard drive. exFAT shows up for most flash drives and external hard drives, but it’s not recommended for internal HDDs or SSDs.
Lenovo has officially unveiled their new gaming handheld, the Legion Go, at IFA Berlin 2023. The company also announced an array of other gaming accessories that will perfectly complement the console, thus confirming all of Windows Report’s initial leaked info about these devices.
First, let’s backtrack a bit:
At the end of July, the initial rumors about a Lenovo gaming handheld surfaced
Lenovo has officially revealed the Legion Go alongside other gaming accessories at IFA, confirming all of our initial leaked data. The console is going up against the likes of Valve’s Steam Deck, ASUS’ ROG Ally, AYANEO’s handhelds (with the KUN on the way), and the Nintendo Switch, combining some of the best features of each.
It is a bit heavier than the competition, coming in at 854g, but the 8.8-inch QHD+ screen more than makes up for that. The Legion Go is similar to the ROG Ally, sporting an AMD Ryzen Z1 Extreme, 144Hz display, a 49.2WHr battery, and 16GB of RAM. Here’s the full specifications:
Operating System: Windows 11
CPU: Up to AMD Ryzen Z1 Extreme with AMD RDNA Graphics
Ports: 3.5mm audio combo jack, 2x USB Type-C (top and bottom), 1x microSD card reader
And that’s not all, as Lenovo also confirmed the console will come with Hall Effect joysticks, eliminating drift and dead zones. That’s great news for most of the gamers out there, especially for the hardcore ones.
But maybe the biggest news is the price: the Legion Go is set to hit the market at a very aggressive $699 in the US, which means it’s a direct competitor for the ROG Ally but with many more features. You’ll be able to buy it sometime at the end of October. Until then, you can see how it stacks up against its biggest competitors, the Steam Deck and ROG Ally.
Lenovo also launched a series of laptops & accessories
Besides the Legion Go, Lenovo also revealed the Legion AR Glasses and the Legion E510 in-ear gaming headphones that should take your on-the-go gaming experience to the next level.
Regarding laptops, the powerhouse Lenovo Legion 9i will also be available sometime in October, but at a hefty price. Maybe the top specs and the incredible build quality will make the price easier to digest.
But what do you think? Leave us your thoughts on the Legion Go and how you think it will go up against the Steam Deck and ROG Ally in the comments section below, and we’ll continue the talk.
AirPlay is a feature that allows Apple users to stream audio and video content wirelessly between their devices.
Many people use VPNs with AirPlay for better speed and to bypass content restrictions. However, in some cases, it seems that the VPN is blocking the AirPlay connection.
In that case, you may not be able to pair your devices or the connection will be poor.
Fortunately, we’ve detailed simple troubleshooting steps to try when your VPN is blocking AirPlay.
Can you AirPlay with a VPN?
Yes, you can AirPlay with VPN, but it has to be configured correctly.
While AirPlay itself doesn’t have an anti-VPN policy, there are various reasons why VPN use can interfere with its functionality.
For example, some VPNs don’t support multicast traffic which is the transmission of data from one sender to multiple receivers simultaneously.
This type of traffic is essential for AirPlay to function properly, as it allows audio and video content to be streamed from one device to another without delay or buffering.
Additionally, network restrictions, cookies, and underperforming VPN servers can also lead to AriPlay not working with your VPN.
That being said, there are several steps you can take to resolve the problem and enjoy uninterrupted streaming.
What to do if your VPN is blocking AirPlay?
If you’re experiencing issues with AirPlay while using a VPN, the following are steps you can take to resolve the issue.
1. Change your VPN server
When your VPN is blocking AirPlay, it could be due to a particular server or location being blocked. To resolve this issue, you can try switching to a different server by following these steps:
Disconnect from your current VPN server.
Open your VPN app and select a different server location.
From the list, connect to the new server and try using AirPlay again.
Now try to use AirPlay again. If the server was the actual problem, then the connection should work now.
2. Clear your browser data
Sometimes, clearing your browser data on your apple device can help resolve issues with AirPlay not working with your VPN. Here’s how to do it:
Safari
Open Safari on your Mac.
Click on Safari in the top menu bar and select Preferences.
Look for an option to clear your browsing data, such as cache and cookies.
Select the data you want to clear and click Clear.
Restart your browser and try using AirPlay again.
iPad/iPhone
Go to the Settings app on your device.
Select Safari from the list of apps.
Choose Clear History and Website Data.
Try using AirPlay again with your VPN.
Chrome
Open Chrome.
Click on the three dots in the top-right corner of the browser window.
Navigate to your cookie preferences.
Click on Privacy & Security and select Site Settings.
Scroll down to find Cookies and other site data and click on it.
Scroll further down and click on See all site data and permissions.
Click on Clear Data to delete the selected data.
Restart your browser and try using AirPlay again.
Clearing your browser data can help remove any old settings or preferences that may interfere with AirPlay.
Note that the steps for clearing your browsing data on Google Chrome are similar to other popular web browsers like Microsoft Edge, Opera, or Mozilla Firefox.
3. Switch to a better VPN
Some VPN providers may not work well with AirPlay to provide a reliable or stable connection.
If none of the above-mentioned suggestions work and your VPN is still blocking AirPlay, it may be time to switch to a better VPN.
For a reliable AirPlay experience, we recommend using ExpressVPN because it offers fast and secure connections.
Launch the app and sign in using your ExpressVPN account details.
Choose a server location that is optimized for streaming.
Connect to the server and try using AirPlay again.
In addition, ExpressVPN has a wide range of servers located worldwide (90+ countries), so you can easily bypass any VPN blocking issues and use AirPlay to stream your favorite content.
With ExpressVPN, you can stream your favorite content using AirPlay without interruptions.
ExpressVPN
Use ExpressVPN for error-free screen mirroring on all devices connected to your AirPlay!
While a VPN can block AirPlay, simple solutions exist to overcome this issue. Try changing your server, clearing browser data, or switching to a VPN that supports AirPlay.
Using a reliable VPN can ensure seamless AirPlay functionality and unrestricted streaming.
With these steps, you can bypass VPN blocking and enjoy uninterrupted AirPlay streaming on your Apple TV.
RSS feed support is natively available in Outlook, but what if you need to remove certain RSS feeds from Outlook?
Sometimes you just want to stop following certain sources, and if that’s the case, we’re pleased to say that this is pretty simple to do in Outlook, and today we’re going to show you how to do that.
Why do I have an RSS Feeds folder in Outlook?
The RSS feeds folder in Outlook helps you manage and follow RSS feeds. This is a default folder in Outlook and it’s available even if you don’t use RSS feeds.
How do I remove an RSS Feed from Outlook?
1. Manually remove the desired feed
Expand the RSS Feeds folder.
Locate the source that you want to remove and right-click it. Choose Delete Folder.
Confirm that you want to remove that feed from Outlook.
The steps are the same for all versions of Outlook, regardless of the version you’re running.
2. Change Outlook settings
For Outlook 2010 and newer
Click on File and select Options.
In the left pane, click the Advanced tab.
Locate the RSS Feeds section. Next, you need to both Any RSS Feed item that is updated appears as new and Synchronize RSS Feeds to the Common Feed List (CFL) in Windows options.
Save changes.
For Outlook 2007
In Outlook, click on Tools and select Options.
Now head to the Other tab and click the Advanced Options button.
Uncheck the Sync RSS Feeds to the Common Feed List and Any RSS Feed item that is updated appears as a new item options.
Click the OK button to save changes.
3. Modify the registry
Press the Windows key + R and enter regedit.
Navigate to the following path: HKEY_CURRENT_USER\Software\Microsoft\Office\16.0\Outlook\Options\RSS
In the right pane, look for Disable DWORD. If it’s not available, right-click the right pane and choose New and then DWORD (32-bit Value). Name the new DWORD Disable.
Double-click the Disable in the right pane.
Set the Value data to 1 and save changes.
The steps are the same for all versions of Outlook, and the only difference is the path. For Outlook 2007 the path is the following:
For years, anyone who has used Notepad.exe can explain the discomfort of being prompted always by a dialogue box asking to save changes to open text files. The particular quirk of Notepad, a tool with a reputation for being indispensable yet stubbornly outdated, has been its defining feature for over forty years. Now, however, change seems to be on the horizon.
In a bid to update its traditional applications, Microsoft has at last accommodated the request for an autosave functionality in Notepad from its users. Microsoft’s Dave Grochocki, in a blog post on the Windows Insider Program, informs users that following updates, Notepad will now automatically save your session, leading to a more streamlined user experience.
The upgrade negates the necessity of manually saving every individual file before closing Notepad, enabling users to resume work right from where they left off. In addition to this, Notepad will reinstate previously open tabs, along with unsaved content and edits, when it is reopened.
Importantly, the saved session file will not interfere with the user’s control over their content. Decisions to discard or save the unsaved changes in files remain firmly in the hands of users.
Although modest, the enhancement carries enormous importance for countless Notepad users globally, particularly those who favor it as a primary note-taking tool for its straightforwardness and speed.
Now, Notepad.exe, along with newfangled upgrades like tabs, dark mode, and the small spinning gear concept, looks set to step gracefully into the modern computing era, headed by the all-important AutoSave feature.
Along with this, the Windows Snipping Tool also gets a facelift. Users can now bypass the screenshot toolbar and go directly to screen recording via a new, more efficient keyboard shortcut, according to Microsoft.
Use the Print Screen or Win + Shift + S keyboard shortcuts to open the capture bar for snipping, where you will continue to find the familiar snipping modes, or try the new Win + Shift + R keyboard shortcut to open the capture bar for recording.
Enhancements also include a default audio source option that can capture mic input and computer audio.
At present, these newly minted features are available to users subscribed to the Canary and Dev channels as part of the Windows Insider Program. For those keen on early adoption, the features can be checked out immediately via the program.
Microsoft has released the latest version of its much-adored toolset, Microsoft PowerToys. The new update, Microsoft PowerToys v0.73.0, is packed with exciting new features, robust stability, performance enhancements, and refined user experience.
It is perfect for users who want to take their Windows operating system to the next level, with unparalleled productivity and customization options. Let’s take a more in-depth look at the main highlights and changes that Microsoft PowerToys v0.73.0 brings to the table:
What’s new in Microsoft PowerToys v0.73.0?
Besides the main highlights, Microsoft PowerToys v0.73.0 sees several general severals and fixes. The ‘Always On Top’ feature now has border transparency, improving the visual appeal of prioritized windows.
Other tools such as File Locksmith, File Explorer add-ons, Installer, Mouse Highlighter, Mouse Pointer Crosshairs, Peek, PowerToys Run, Registry Preview, Runner, Screen Ruler, and Settings have been given an upgrade to amplify functionality and fix issues.
Expanded Keyboard Management with Numpad Support
Arguably, the standout feature of this release is the extension of the Keyboard Manager’s abilities. Numpad support grants users comprehensive control over their keyboard shortcuts and key mappings. This increases flexibility in customizing key combination assignments and usage, offering a more personalized user experience.
Crop And Lock: A Fresh Face in the Line-Up
In this release, Microsoft PowerToys v0.73.0 rolls out a new utility called ‘Crop And Lock’. This user-friendly tool gives users the autonomy to manage their workspace better by cropping an operational application into a more compact window or creating a thumbnail. This can be especially useful when juggling multiple tasks or maintaining close tabs on several applications concurrently.
FancyZones and ImageResizer: Powered Up
In this iteration, FancyZones, the robust window layout, and multitasking tool, receives an overhaul with major code improvements and software optimization, resulting in a more fluid performance. Similarly, ImageResizer sees a complete revamp of its user interaction design, making it remarkably easy to resize images precisely.
PowerRename: Now Even More Powerful
PowerRename, a utility tool purpose-built to simplify bulk file renaming, gets a significant upgrade with advanced counter functionality. The upgrade enables it to rename multiple files with consecutive numbers seamlessly.
Additional features such as remembering the last window size logic and optimized item sorting enhance the user experience, making file organization and batch operations a breeze.
With enhancements across the board, could this be the go-to set for any Windows user aspiring for a powerful, efficient, and customized operating system experience? Let us know your thoughts on this.
Microsoft is taking a big step forward in the world of wearables with its latest design of an AI-powered backpack. The US Patent and Trademark Office (USPTO) recently approved this patent filing that reveals a backpack concept equipped with smart sensors.
The futuristic backpack, which was first noticed by MSPowerUser, looks like it came straight out of a science fiction movie.
Meet the Backpack of The Future
At its core, the patent illustrates the “artificial intelligence-assisted wearables.” However, the mentioned prototype chiefly revolves around an intelligent backpack. The smart luggage is a game-changer in the wearable tech industry, boasting a wide range of sensors in the arm straps.
The sensors, strategically placed to face forward like the wearer, may include cameras, microphones, GPS, and compasses. Adding a layer of dynamism, these elements are expected to be supplemented by LEDs and speakers. Moreover, the straps may also contain a haptic actuator, providing a whole new level of interactive experience.
Onboard Processing Power
The backpack, powered by real-time processing capabilities, will potentially house numerous recognition modules encompassing image, text, speech, facial, and cognitive domains.
Additionally, it will come equipped with storage capabilities for recording, wireless connectivity, and a provision for battery charging.
The AI-driven system built within the backpack is expected to provide unprecedented benefits to the wearers. These include advanced object identification and analysis, nearby device interaction, and contextual insights.
Users may interface with the backpack’s onboard AI using voice commands or by interacting with the sensors on the straps. It is a versatile accessory that serves many practical purposes in everyday life.
For instance, it can guide the wearer while trekking or point out the direction they are facing. It employs advanced scanning technology to evaluate the surroundings and notify the user if the direction is not feasible.
The AI-assisted backpack design indicates the role of digital assistants beyond the confines of homes and offices. This innovation aligns with the current trend of dedicating AI acceleration hardware to PC processors.
If you notice a process ngen.exe or Microsoft Common Language Runtime Native Compiler is causing high CPU usage, this guide can help! We will discuss the expert-tested methods to fix the issue right after explaining the causes.
Microsoft Common Language Runtime Native Compiler (ngen.exe) plays an essential component of the .Net Framework, and it creates a Runtime environment that supervises the operation of apps written for the .Net platform, irrespective of their programming language.
It handles various tasks such as converting code into machine language, garbage collection, exception handling, and thread management to enhance the performance of managed apps in Windows.
If you see high CPU usage due to this process, here are some of the reasons for the same:
The process is scheduled to run as a part of system maintenance.
Incorrect configuration settings.
Multiple apps are using the process for compilation.
The process is running in the background with other system resources.
Corrupted system files or services
Malware disguising as the process
How to stop CLR Native Compiler’s high CPU usage?
Before engaging in advanced troubleshooting steps, you should consider performing the following checks:
Restart your computer.
Wait for the process to complete the compilation process.
Go to the Processes tab, locate Microsoft Common Language Runtime Native Compiler or ngen.exe, select it, and click End task.
Closing the process causing performance issues is a workaround that you can follow before moving to other solutions. You can apply the same approach to other processes, such as Runtime Broker.
2. Restart the service
Press Windows + R to open the Run dialog box.
Type services.msc and click OK to open the Services app.
Locate and right-click Microsoft Common Language Runtime and click Stop.
Wait for the service to stop, then close the Services window.
3. Reset the NGen cache & change the priority settings
Press the Windows key, type cmd, and click Run as administrator.
Type the following command to reset the NGen cache to resolve conflicts and corruption and hit Enter: ngen executeQueuedItems
Copy & paste the following command to adjust the priority and scheduling of the process to reduce the load and press Enter: ngen queue /priority priorityLevel
Type msconfig and click OK to open the System Configuration window.
Go to the Services tab, click Hide all Microsoft Services, then select Disable all.
Switch to the Startup tab and click the Open Task Manager link.
On the Task Manager window, locate each Enabled task and click Disable.
Close Task Manager, click Apply, then OK on the System Configuration window.
Click Restart.
Your computer will restart with limited functionalities so that you can identify the third-party software or service causing the conflict. Once done, follow the steps above to undo the changes and restart your computer normally.
5. Run SFC & DISM scans
Press the Windows key, type cmd, and click Run as administrator.
Copy & paste the following command to repair system files and press Enter: sfc/scannow
Wait for the scan to complete, then type the following command to restore the Windows OS image and hit Enter: Dism /Online /Cleanup-Image /RestoreHealth
Once the command is executed, restart your computer.
6. Delete a registry key
Press Windows +R to open the Run dialog box.
Type regedit and click OK to open Registry Editor.
First, take a backup, go to File, then select Export. Save the file in .reg format on your computer in an accessible location.
Navigate to this path: Computer\HKEY_LOCAL_MACHINE\SOFTWARE\Microsoft.NETFramework\v2.0.50727\NGenService\Roots
Right-click and select Delete to remove all the entries for the Roots folder and close the Registry Editor.
Once the setup is downloaded, go to the file location, and double-click it to initiate the installation.
Click Install, and wait for the process to complete.
To avoid high CPU performance issues, including the Microsoft Common Language Runtime Native Compiler has stopped working issue, make sure to allow the ngen.exe process to run when your system is in an idle state and keep your system & software up to date.
Bumped into any issues, or do you need more info about Microsoft Common Language Runtime Native Compiler? Don’t hesitate to leave a comment in the section below.
A license type of Windows 11 determines the limitations and benefits associated with it. If you are looking for a way to check your Windows 11 license type, this guide can help.
We will mention the step-by-step instructions to find out the Windows license type and also explain the difference between them.
There are three types of licenses:
OEM(Original Equipment Manufacturer) – Intended for computer manufacturers and system builders, and it comes preinstalled with the machines that are sold by manufacturers.
Retail license – Designed for individual consumers and businesses and can be bought online or in retail stores. It comes with a product key, and the user can activate Windows 11 on a single device.
Volume – Intended for businesses, educational institutions, and organizations who want to use Windows on multiple devices.
How do I know what license I have on Windows 11?
1. Use Command Prompt
Press the Windows key, type cmd, and click Run as administrator.
Type the following command to know the license type and press Enter: slmgr /dli
Wait for a couple of seconds; you will see a small Windows Script Host dialog box, including a partial product key.
I have the OEM key; that’s why it says OEM_DM. For Retail, it will say Retail Channel, and for Volume, it will be Volume_KMS.
Press the Windows key, type powershell, and click Run as administrator.
Copy & paste the following command to know the license type and hit Enter: slmgr /dlv
Wait for a while; you will see the Windows Script Host page with all the licensing information.
Once you know the license type, ensure you link your product key to your Microsoft account. If you don’t know how to do it, you must check this post for detailed steps.
Once you link the product, a digital license links your computer to your Microsoft account, which offers an easy way method activate a Windows without entering a 25-character product key during reinstallation.
What’s the difference between OEM, Retail, and Volume?
To know the difference between OEM, Retail license, and Volume, you can check some factors like activation, distribution, transferability, and more. For more information, check the table below:
Category
OEM
RetailLicense
VolumeLicensing
Distribution
Sold to hardware manufacturers & comes preinstalled with new computers.
Can be bought directly by end-users.
Bought by organizations & businesses.
Transferability
Can’t be transferred to another computer.
Can be transferred to any compatible computer, but can be active on only one computer at a time.
Can be transferred to a PC within the organization & can be activated on multiple computers.
Activation
Ideally activated automatically during the initial setup of the computer
Activated manually by inserting the product key while installation
Uses Multiple Activation Key (MAK) or Key Management Service (KMS) activation method
Binding
License is tied to a specific hardware
NA
NA
Support
Support is provided by a computer manufacturer and is not eligible for direct Microsoft Support.
Direct Microsoft Support is provided.
Have access to dedicated support channels.
Cost
Cheaper than retail licenses as it comes with new hardware purchases.
Expensive than OEM and Volume licenses.
Cost-effective for businesses.
Limitations
Need to reactivate or get a new license after a major hardware change.
Can be activated on a single machine. If you try to use it on more than one, it will be deactivated on the previous machine.
Volume license key requires minimum purchase requirements, which is why suitable for larger organization
Knowing the license type of Windows you own is important, especially if you need any technical support or want to transfer the license to another device.
Remember that you must always check & save the Product ID, Serial Number, Product key, and license type of your Windows 11 computer in an accessible location for emergencies.
With robust features, highly customizable options, and seamless integration within the Microsoft ecosystem make Microsoft Outlook one of the most robust and popular email clients globally.
In this comprehensive guide, we will explore the email client market share and historical trends and compare it with its major competitors.
With over 400 million users worldwide, Microsoft Outlook is one of the most extensively used email services.
More than 347 billion emails are exchanged every day.
Current Market Share of Microsoft Outlook
Global Market Share
Microsoft Outlook has been persistent with its productivity-enhancing features and is becoming simpler to use and personalize.
According to SimilarWeb, with a global ranking of 3, Microsoft Outlook boasts over 3.17 million companies using the email client.
It maintains a dominant market share of 40.28%, followed by Gmail at 35.69 %, MailChimp at 8.33 %, and Microsoft Office 365 at 4.56% in the email management category. Here are some other competitors with their market share:
Technology
Domains
Market Share
Microsoft Outlook
3,158,566
40.28%
Gmail
2,811,083
35.69%
MailChimp
656,378
8.33%
Microsoft Office 365
356,859
4.56%
SendGrid
164,433
2.09%
Zoho Mail
126,579
1.61%
Mailgun
122,274
1.55%
Mimecast Mailbox Continuity
87,735
1.11%
SendinBlue
84,320
1.07%
However, if we talk about the most used email clients worldwide, Apple and Gmail have surpassed Outlook.
According to the latest data, Apple Mail is 58.09%, Gmail is 28.72 %, and Outlook holds a 4.14% market share in most used email. Here are the details:
Email client
Market Share(Most used category)
Apple
58.09%
Gmail
28.72%
Outlook
4.14%
Yahoo! Mail
2.55%
Google Android
1.59%
Outlook.com
0.66%
Thunderbird
0.25%
Samsung Mail
0.14%
Web.de
0.06%
Windows Live Mail
0.05%
The global website rank was 700 in May 2023 but decreased to 787 in three months, which suggests a shift in online popularity.
It also indicates potential changes in user engagement or competitive dynamics within the digital landscape.
However, it has successfully maintained its category rank, demonstrating its continued relevance and ability to stay competitive within its niche.
Regional Market Share
Microsoft Outlook boasts a diverse customer base across various geographic locations worldwide.
With its calendaring and other productivity features, Outlook has gained popularity in email management across different continents, with 1,505,729 customers in the United States, 306,088 in the United Kingdom, and 154,088 in Germany. Here are more details:
This widespread adoption across different geographies showcases Outlook’s impact in improving user communication and organization.
If we segregate the data further, we can see that 32.54 % of customers in the United States use a Desktop to log in or use Outlook.com, followed by 5.59% in the United Kingdom and 3.64 % in France.
Country sending traffic to Outlook.com on Desktop
Percentage
United States
32.74%
United Kingdom
5.59%
France
3.64%
Japan
3.37%
Canada
3.13%
Others
51.53%
According to a report by Similar Web, Outlook.com has a 56.83% male audience and 43.17% female. If we talk about the age distribution, the age group that visits it mostly is 25-34 on desktop. Here are the details:
Regarding Device distribution, the monthly visits percentage via the mobile web is 92.34% worldwide, and 7.66% of people use the website on a desktop.
Over 85% of Outlook users check their emails from their mobile devices.
Microsoft Outlook is a popular choice for email management in the Information Technology and Services industry. The primary users of its services are the companies with 50-200 employees and with revenue ranging between 1M and 10M dollars. Here are other details:
Industry
Distribution of companies
Information Technology & Services
10457
Hospital & Health Care
7419
Construction
6301
Computer Software
5677
Financial Services
5063
Real Estate
4135
Nonprofit Organization Management
4069
Retail
3920
Education Management
3153
Higher Education
3067
According to enlyft, Of companies using Microsoft Outlook, 35 % of them are small, i.e, less than 50 employees, 47% are medium-sized, and 17% are large, i.e, more than 1000 employees. Here is the graph to help you understand the percentage of companies using the service :
If we talk about the percentage of companies using Microsoft Outlook based on the revenue they generate, 69% of the companies are small (<$50M), 15% are large (revenue – >$1000M), and 9 % are medium.
More than 87% of Fortune 500 companies rely on Microsoft Outlook, which indicates its reliability and powerful influence.
Historical Trends in Outlook’s Market Share
With the shift in trends and technology, Microsoft Outlook’s market share and stats have been experiencing fluctuations over the past few years.
Though it managed to maintain its place in the world’s top ten most-used email clients, it has faced a decrease in the percentage of users. According to Litmus, 2014, it was 9%, and in 2023, it reached 4.14. Here are more details:
The rank of the email client has also changed, ranging from 4th to 6th place for years. 2014, it held the 4th rank, then dropped to 5th place in 2015 and remained there for three years.
In 2022, Microsoft Outlook rose above in ranks and is in 3rd position and has maintained the position in the subsequent year, while Outlook.com is in 6th place.
If you think Outlook is complicated and want to check out another email client, check out this guide for options.
Outlook’s Major Competitors
Introduced in 1997, Microsoft Outlook has always been helpful as an email client and task management tool, but there are others in the competition, too.
Gmail by Google and Apple Mail by Apple.Inc., are its formidable competitors and capture a vast market share in the email management industry. Here is the list of competitors of Outlook recorded in 2023:
Benefits and Drawbacks of Microsoft Outlook Compared to its Competitors
Microsoft Outlook has been in the race for a long time and has undergone many changes. It has the upper hand over its competitors due to its seamless integration and productivity features but also has a few drawbacks when compared to others. Here we are comparing it with its top two contenders:
Category
Outlook
Apple Mail
Gmail
User interface & design
Clean & professional interface with customizable themes.
Sleek & user-friendly design consistent with the Apple ecosystem.
Modern and intuitive design with the ability to customize the look.
Integration with ecosystem
Seamlessly integrates with Microsoft’s ecosystem and lets you access Office 365, OneDrive, and Teams, promoting collaboration.
Works well within the Apple ecosystem, syncing with iCloud, Calendar, & other Apple services.
Integrates well with Google Workspace services like Google Calendar, Google Drive, and Google Docs.
Email management
Offers Advanced filters, Rules, and categories to organize emails how you want. It also has a Focused Inbox option to separate essential email messages.
Has smart mailboxes, VIP tagging, and threading to organize & prioritize emails.
Features tabs, labels & filters to manage emails, and a tabbed inbox to segregate emails into Primary, Promotional, and Social tabs.
Calendaring & Scheduling
Features Shared Calendars, Scheduling Assistant, and comes with the ease of sending meeting invites.
Integrates with Apple Calendar and offers event creation, & seamless integration with other Apple services.
Features Google Calendar integration, with scheduling, reminders, and smart suggestions options.
Security & privacy
Equipped with advanced security features, including encryption, secure attachments, and phishing protection. It also offers to wipe lost devices remotely.
Offers end-to-end encryption for Apple-to-Apple communication and has inbuilt privacy features.
Comes with robust spam filters, two-factor authentication, and powerful spam filters.
Collaboration
Integrates with Microsoft Teams, which allows quick collaboration within emails.
Lacks direct integration but can share attachments via iCloud.
Integrates with Google Workspace, offering real-time collaboration on Google Sheets, Docs, and Slides.
Platform compatibility
Available for Windows, Android, iOS, and macOS.
Designed only for iOS, iPadOS, and macOS.
Available for Windows, Android, iOS, and macOS.
Complexity & learning curve
The extensive features of Outlook could lead to complexity as you have to invest time to understand and master the functionalities.
Simple to use.
Easy to use.
Resource intensiveness
Consumes a considerable amount of system resources.
Lighter than Outlook.
Light on system resources.
Cost
To use Microsoft Outlook to its full potential, you need to get a Microsoft 365 subscription plan.
No cost.
Available for free.
Limited Cross-platform support
The features and performance might be different for every platform.
Consistent on all compatible platforms.
Consistent on all platforms.
In the digital landscape, efficient communication is essential, and with rapid growth in the Email market, the email client market share will continue to change.
With its extensive range of features, seamless integration with Teams and Office 365, and compatibility with mobile devices, Outlook enhances productivity, helps users with efficient email management, and will likely stay in the game for a long time.
Its substantial market share and user statistics are evidence of people’s reliance on the email client. Another popular product by Microsoft is Windows, and if you want to know about its latest iteration’s market share, user base, and other insights, read this post.
If you know any other interesting facts about Microsoft Outlook or want to share your experience using its desktop or mobile app, feel free to mention them in the comments section below.
Outlook remains one of the most popular email clients and is used extensively in organizations. The seamless functioning and wide array of features are what sets it apart from the rest. And today, you will find out all about printing Outlook contacts.
Outlook stores the email address and other information of users in the dedicated Contacts folder.And you can both access and print the contact list seamlessly. Keep reading to find out how!
How do I print my Outlook address book?
1. Print individual Outlook contacts
Launch Outlook, go to the People tab from the navigation pane, and select the Contact folder on the right.
Double-click the contact that you want to print.
Go to the File menu from the top left and select Print.
Select the desired printer from the dropdown menu, configure the Print Options, and once done with the setup, click the Print button.
Individual contacts can be printed in Outlook, but you are not offered many customizations. Though the process is quick, and you can also print downloaded Outlook contacts in no time!
Also, you can print Outlook contacts exported to Excel or any similar app.
2. Print the entire list of contacts in Outlook
In Outlook, go to People from the left, and then select the Contact folder.
Click on the File menu, and then select Print.
Select a printer from the dropdown menu, or click Add Printer to configure another one that’s not listed here.
Next, choose the desired print style for Outlook’s contact list. You have the following options:
Card style
Small booklet style
Medium booklet style
Memo style
Phone directory style
If you want to change the paper type, format, size, or orientation, it can all be done via Print Options.
After selecting the desired print style, configuring print options, and choosing a printer, click the Print button.
When printing all Outlook contacts in one go, you can select from a range of print styles. Check the preview to identify which styling works best for you. Also, if you want to print Outlook contacts with notes, choose Memo style as the layout.
But, we would recommend keeping things simple as changing too much, especially the page setup, may affect the print’s clarity.
3. Export Outlook contact as a PDF to print later
Tip
Before you proceed, make sure Microsoft Print to PDF is selected as the default printer in Outlook.
Go to the People section in Outlook.
Once the contact list is displayed, right-click on the one you want to export as a hard copy, and then select Quick Print.
Go to the desired location, enter a name for the file, and click on Save.
The contact will now be saved in PDF format.
If you just want to store Outlook contacts offline in the PDF format, doing so is even easier in Outlook. And you can always print these later!
Can you sort & print Outlook contacts by category?
Open the contact list in the People section on Outlook.
Go to the View menu, and click on View Settings.
Click the Sort button.
Select how you want to sort the contacts from the dropdown menu, choose whether to display them in Ascending or Descending order, and finally, click OK.
Yes, you can sort and print Outlook contacts by category. The email client offers a wide array of parameters to sort contacts, be it First name, Full name, Surname, Job title, or Office address, amongst others. Do that before printing, and you will have a personalized address book.
Besides, you can filter contacts in Outlook and then get a hard copy of only the required ones.
Now that you understand all about sorting and printing Outlook contacts, it is just as important to know how to print emails to work effectively on the email manager. And if you find some people missing from the list, make sure to update the global address list before proceeding.
Do tell us your experience printing contacts and if you faced any issues.
If you’re someone who forgets their passwords often, then we have good news for you. Microsoft Edge will soon allow you to add notes to your password, and these notes can also be clues for your literal password, in case you don’t remember it.
The feature, which was spotted by the Windows enthusiast @Leopeva64, is now available in the Canary channel within the Microsoft Edge Insider Program. Chrome already has this useful feature, and now Edge is getting it too.
Basically, whenever you save a password to your Wallet app inside Edge, you can access it by going to the Wallet app. Once you’re there, you’ll be able to add notes to your password, for every platform that you’ve saved passwords.
These notes will help you to remember the password, down the road, and it can be useful, especially when you don’t want to go through the stressful process of changing your passwords every time you forget them.
How to add notes to your passwords in Microsoft Edge
First of all, as we mentioned earlier, every password that you use for every platform that you’re getting on can be saved in your Wallet.
Open your Microsoft Edge, then go to Settings.
Once you’re there, you should see your Microsoft Wallet at the bottom of the page.
Click on Passwords, and here you’ll have all the passwords that you have saved over time.
If you’re in the Canary Edge, you should see the option to Add notes, right next to the password that you selected.
Once you click on it, you’ll be able to add notes to your passwords.
We recommend using this feature to add clues to every password that you save. However, go for personal clues, clues that only you would know about, in case your Microsoft Edge ever becomes compromised.
Are you excited about this new feature coming to Microsoft Edge? Let us know.
Dealing with multiple tasks and emails is often overwhelming, and it’s no surprise that many are wondering how to set a reminder in Outlook in order to better manage their tasks.
By using reminders, you’ll never forget to answer an important email or miss an event. In case you’re not familiar with this feature, in today’s guide we’ll show you everything you need to know about it.
Where are my reminders in Outlook?
Unfortunately, it’s not possible to see all reminders in Outlook in a single place since there are different types of reminders, and each type is located in its respective category.
How do I add or remove a reminder in Outlook?
1. Add a reminder to an email message
Click on Message and choose Follow Up.
Select the desired reminder time.
Save changes.
How do I remove a reminder from an email message?
Open the list of sent messages.
Locate the one that has the follow-up flag.
Right-click it and choose the Clear flag to remove follow-up reminders.
2. Add a reminder to the Calendar
Navigate to Calendar in Outlook.
Select New Appointment or New Meeting.
Now, expand the Reminder drop-down menu and select the desired interval.
Fill in other event information and click on Save & Close to save the event reminder.
How do I remove a reminder from the Calendar?
Open the Calendar and double-click the desired event.
Locate the Reminder menu and set it to None.
Click on Save & Close to save changes.
3. Add a task reminder
Open Outlook, and click the To Do icon.
Click on Remind me in the task information and select the desired time.
Save the changes.
How do I remove a reminder from a task?
In Outlook, navigate to the To Do section.
Locate the task that has a reminder and click it.
Click the X button next to the Remind me section to remove a reminder.
Now you know how to remove a reminder in Outlook, but keep in mind that each reminder needs to be removed from the appropriate section.
Why can’t I set a reminder in Outlook?
A corrupted Outlook profile might have issues setting up new reminders.
In case your date and time aren’t correct, you might have issues with reminders.
The Reminders folder on your PC might be corrupted.
You might have reminders disabled or set to be dismissed.
Reminders are natively available in Outlook and you can add them to events, emails, or tasks. You can even customize Outlook reminder sounds if you want to.
Starfield will be out on September 1st for Early Access, meaning that if you purchased the Premium Edition, you’ll be able to play it a week earlier than its intended release. If you don’t have access to it yet, and you have to wait until next time, then make sure to use this time to get accustomed to its complex control scheme.
But on other notes, and speaking of them, Starfield’s director, Todd Howards, released an emotional note chronicling the time it took to develop Starfield, and the challenges the team faced, including some tragic moments as well.
Windows Central received the note, which was verified by Microsoft, and it revealed some important details about Starfield. The game has been in development for 10 years, starting in 2013. Everyone was on board with the idea of exploring space in a virtual manner.
When the team finally started to work on the game, in the middle of development, the pandemic happened, then Robert Altman, one of Bethesda’s founding figures, unfortunately, passed away, and then Bethesda got acquired by Xbox. Howards goes on to say that despite the harsh challenges, Startfield is the biggest IP Bethesda has worked on, and he’s grateful to bring such a vast story to the gaming community everywhere.
Read the whole note below.
A note from the Starfield director, Todd Howards
I knocked on Robert Altman’s door. “Got a few minutes?”
“Sure.”
It was early 2013, we were developing Fallout 4, and Skyrim was still enjoying enormous success. I was there to pitch him on our next game. It would not be a sequel to our current games, (he looked concerned), but a grand space RPG and our first new IP in over 25 years (looks curious). It would delve into creation and the search for our place in the universe (slight twinkle). You would explore the galaxy in ways only video games can do. And it would be called – Starfield. (Smile)
“Sounds fantastic.”
Robert would be the very first to believe in us, no matter the situation. Our path to creating Starfield would be a long and winding one where we made other games along the way (Fallout 4, Skyrim SE, Fallout Shelter, Skyrim VR, Fallout 76, Skyrim again…). The core development from 2020 to 2023 saw enormous changes in our lives. A global pandemic, Robert’s passing, and becoming part of Xbox.
It’s incredible to be at the moment where Starfield is finally launching this week. It only exists because everyone else believes as well. We’ve been supported for decades by everyone at ZeniMax, all doing their best work yet. Special thanks to our publishing teams who aimed to create not just another release, but something that would capture the minds and inspire gamers everywhere. And to our partners in QA who had the difficult task of testing a game where anything can (and will) happen. And thanks to Jamie Leder and our Admin/HR teams who supported everyone during the most challenging years any of us have faced.
And of course, there is Phil Spencer. His support of every game and every player has been unwavering and fierce. Joining Xbox brought us closer to so many we had worked with for over 20 years. I cannot imagine a better place to create games, where the diversity of studios, creators, and games are allowed to flourish. This support came from the entire Xbox leadership team and all areas of publishing and dev support. Special thanks to the magicians at ATG whose spells and incantations helped make this our best performing game.
Most importantly, is the team I work with at Bethesda Game Studios. It’s an incredible blessing to be surrounded by so many talented and inspirational people every day. Moments like this make you reflect back. Some of us have been together for decades, some joined more recently, but everyone has the same passion. I could not be prouder of their continued dedication to create something truly special.
Lastly, a huge thanks to all of you within the Xbox and Bethesda family. Your enthusiasm and encouragement have meant the world to us. Creating this game has been one of the most challenging and thrilling experiences of our careers – a journey we’ll never forget. And as we come to the end of this chapter, we pass it along to you. Each of you is receiving the game with Early Access, and can begin playing this Friday Sep 1st, but since it’s one global time you can actually play Thursday evening (Thanks New Zealand!).
We hope you get a chance to play, and that your journey is as rewarding as ours.
All our best,
Todd
Starfield is nonetheless a title that will both define the Xbox consoles in the years to come and will be remembered as the first convincing try to explore the starts, even virtually, of course.
If you’ve been following us, you know that this game has been met with a wave of huge excitement, across the world. People on Reddit have been buying Xbox consoles solely for playing this game, and the community around it has also grown over the months.
We know what you think: With great expectations come great disappointments. However, we’re inclined to think that Starfield is going to be the title of the year.
Multiple accounts on the computer allow us to configure personalized settings and install the required apps for all users. However, conflicts or performance issues often arise when another profile is logged in. In this case, you will need to sign out other users in Windows 11.
While the process is simple, you may run into an error while removing other users, especially when not logged in with an administrator user account. These accounts have administrative rights and can make critical changes to the OS.
The following section details how to remove other signed-in users on Windows 11.
Press the Ctrl + Shift + Esc keyboard shortcut to open the Task Manager, and go to the Users tab from the navigation pane.
Locate the user profile you want to log out, right-click on it, and select Sign off.
Click Sign out user in the confirmation dialog box that appears.
The simplest way to sign out other users in Windows 11 and have the current user logged in is through the Task Manager. It’s quick, and the best part is that we are already used to operating the Task Manager.
For a complete walkthrough on logging out from your own profile, see this step-by-step guide on how to sign out of Windows 11.
2. Using the Command Prompt
Press Windows + S to open Search, type Command Prompt, then right-click on the relevant search result, and select Run as administrator from the context menu.
Click Yes in the UAC prompt.
Paste the following command and hit Enter to view the list of the current user sessions: query session
Identify the ID for the user you want to log out, then run the following command while replacing X with the account’s assigned user ID: logoff X
While the Task Manager works fine in most cases, users adept with the command line would find Command Prompt (or Windows Terminal) more efficient to sign out other users in Windows 11.
Right-click on the downloaded ZIP file, and select Extract all.
Check the path for extracted files, click Browse to change it, then tick the checkbox for Show extracted files when complete, and click on Extract.
Right-click on the procexp.exe file and select Run as administrator.
Click Yes in the prompt.
Go to the Users menu, hover the cursor over the profile you want to sign out, and select Logoff.
Process Explorer can be called an advanced version of the built-in Task Manager. It lists all the active tasks/DLLs and helps verify the digital signature, in addition to logging out users.
If you get an Error logging off session: Access denied message while signing out other users in Windows 11, the administrative privileges are missing.
As a quick tip, if other accounts invade your privacy and you are wondering how to hide apps from other users Windows 11, delete all the app shortcuts and files from the dedicated user profile and the Public folder in the following location: C:\Users
Also, a few apps during the setup offer an option to install it only for the current user profile. You could choose that, or if you missed it, reinstall the app and select the option the next time. While taking about apps, you may consider removing accounts used by other apps for better performance.
Besides, to restrict access to other users in Windows 11 and prevent them from viewing or editing critical system files, change the account type to Standard user. They would then lose administrative privileges and couldn’t make any critical changes.
Why should you sign out other users on Windows 11?
Boost performance: When multiple user accounts are signed in, they will hog the system resources with their individual processes and slow down the PC.
Eliminate conflicts: Often, during the installation of an app, you get an error when it’s already installed on a user profile that’s signed in.
Enhanced privacy: Any logged-in user account can be a privacy risk if you have not set up optimal security measures for the active account.
Now that you know how to sign out other users in Windows 11, it will undoubtedly enhance privacy. Another trick is to lock the Windows 11 PC every time you step away. Or, if you are concerned about other users, remove their accounts from Windows 11.
When receiving multiple emails on a daily basis, it’s pretty easy to miss an important email, and this is why many users want to know how to view the next unread message in Outlook.
Not seeing an important email can be a problem, and you might miss a meeting, a deadline, or important information. In this guide, we will show you several ways never to miss an email again in Outlook email client.
How do I go to the next unread message in Outlook?
1. Use a keyboard shortcut
Navigate to the folder tab for unread messages in Outlook. You should now see the message list.
Next, use the Ctrl + > shortcut for next email message in Outlook.
Alternatively, you can use the Ctrl + < to go back to the previous message.
2. Create a new search folder
In Outlook, go to Folder and select New Search Folder.
Select Unread mail and click OK.
Now you can view the unread emails easily simply by using the unread folder you just created.
3. Customize the quick access toolbar
Get to the email folder that contains the unread messages, and open an email message.
In the message window, right-click the Quick Access Toolbar. After that, choose the Customize Quick Access Toolbar option from the drop-down menu.
Set Choose commands from to All Commands.
Choose Next Unread Item from the menu and click on Add.
Lastly, click on OK to save changes.
Now you just need to open an email message from that folder and you can read next Outlook message with a click of a button.
Why is Outlook not showing all unread emails?
You are using a Focused Inbox that shows you only the most important messages.
Using filters in a view will prevent you from seeing certain emails.
If you’re using a shared mailbox, you might have the privilege of seeing private items.
If you want to view the next unread message in Outlook, you can use the existing folder list, or modify the quick access toolbar. Unfortunately, there’s no dedicated Outlook keyboard shortcut for it, but we hope that Microsoft will change that in the future.
In case you want to organize emails better in the future, you can always use mark all emails as read option, and follow the guidelines from above to never miss an email again.
What method do you use to view unread messages in Outlook? Share them with us in the comments section.