How to Set IrfanView as Default Photo Viewer in Windows 11

The Photos app in Windows is useful, but it’s not as versatile as many others, and this is the main reason why many want to set IrfanView as the default photo viewer in Windows 11.

These are the most common reasons why users want to switch to IrfanView:

  • It’s extremely lightweight and fast.
  • Highly customizable with third-party plugins and skins.
  • Supports advanced image editing.
  • Offers conversion and batch processing.

How to make IrfanView your default image viewer on Windows 11?

1. Use the Properties menu

  1. Locate the desired image, right-click it, and choose Properties.
     
  2. Click the Change button.
  3. Choose InfranView and click on Set default.

  4. Now click on Apply and OK.
  5. Do this for all images you want to open with IrfanView as the default program.

2. Reset the Photos app

  1. Press the Windows key + I to open the Settings app.
  2. Navigate to Apps and select Installed apps.
  3. Locate Microsoft Photos and click three dots next to its name. Select Advanced.
  4. Click on Reset and wait for the process to finish.

Next, change the file association by doing the following:

  1. Locate the image you want to open. Right-click it and choose Choose another app.
  2. Select IfranView on the list and click on Always.
  3. After that, the changes will be applied to that file type.
  4. Repeat the steps for different image formats that you use.

3. Manually change the default app

  1. Open the Settings app.
  2. Next, to go Apps and select Default apps.
     
  3. Select Photos.
  4. Choose the desired format and click it.
  5. Next, select IrfanView and click on Set as default.
  6. Repeat these steps for all file extension types that you want to associate with IrfanView.

For a quick overview of features, see this guide to IrfanView as an image editor for Windows.

What is the best photo-viewing app for Windows 11?

  • Adobe Lightroom
  • Apowersoft Photo Viewer
  • Movavi Photo Viewer
  • ACDSEE Photo Studio Ultimate 2022
  • 123 Photo Viewer
  • IrfanView
  • Google Photos

All these apps are from our guide on the best photo viewers for Windows 11, so be sure not to miss it for more information.

Changing file associations isn’t as straightforward as it was on Windows 10, and this means that if you want to open NEF files or any other file type, you need to change the default image viewer on Windows 11 for each image format.

In case you’re still on Windows 10, we have a great guide on the best photo viewers for Windows 10 that might interest you. All of them also work on Windows 11, so don’t be shy to give them a try!

Did we miss your favorite method of setting IrfanView as the default viewer in Windows 11? If so, let us know in the comments below.

VAL 59 Error Code in Valorant [Fix]

The Val Error code: 59 troubles a lot of users, and will prevent you from joining the queue, so it can be a major problem. However, we have a few solutions that can fix it.

How do I fix the VAL 59 error code in Valorant?

Before we head to the slightly complex solutions, try restarting your PC and router. Also, check the Riot Games service status on the official website for any problems with the service.

1. Run Riot Client with administrative privileges

  1. Terminate all active Riot Client processes on the PC.
  2. Locate the Riot Client’s shortcut, right-click on it, and select Properties.
  3. Now, navigate to the Compatibility tab, tick the checkbox for Run this program as an administrator, and click OK to save the changes.run as administrator to fix val 59 error
  4. Finally, launch Valorant and verify whether Val error 59 disappears. 

2. Repair Valorant’s game files

  1. Launch the game client, click on the profile icon near the top right, and select Settings.settings
  2. Navigate to the Valorant tab, and click the Repair button.repair to fix val 59 error
  3. Wait for the process to complete, and then relaunch the game.

Often, it’s a game bug responsible for Valorant error codes. A quick solution is to use the built-in Repair function to eliminate any trivial issues. 

3. Change the IP address and DNS server

  1. Press Windows + S to open Search, type Command Prompt, right-click on the relevant search result, and select Run as administrator.
  2. Click Yes in the UAC prompt.
  3. Now, paste the following commands one at a time, and hit Enter after each:ipconfig /flushdns ipconfig /renewrenew IP
  4. Press Windows + R to open Run, type ncpa.cpl in the text field, and hit Enter.ncpa.cpl
  5. Right-click on the active network adapter, and select Properties.properties
  6. Choose Internet Protocol 4 (TCP/IPv4) from the list, and click the Properties button.
  7. Next, select Use the following DNS server addresses, and input the following values:
    • Preferred DNS server: 8.8.8.8
    • Alternate DNS server: 8.8.4.4change DNS server to fix val 59 error
  8. Finally, click OK to save the changes.

While you could manually choose another IP address from the network adapter settings and fix the Val 59 error code in Valorant, we recommend letting the OS handle the task to avoid misconfiguration. And we have used Google’s DNS, but you can use the fastest DNS server in your location.

Keep in mind that certain DNS can affect your ping negatively, so if you choose to do this, test Valorant latency to ensure that there are no network problems.

4. Reset the network settings

  1. Press Windows + I to open Settings, go to Network & Internet from the navigation pane, and click on Advanced network settings.advanced network settings
  2. Now, click on Network reset.
  3. Click the Reset now button.reset now to fix val 59 error
  4. Finally, click Yes in the confirmation prompt.
  5. Once the reset is complete, connect to the network, relaunch Valorant, and verify whether the error code is fixed.

5. Reinstall Riot Client and Valorant

  1. Press Windows + R to open Run, type appwiz.cpl in the text field, and click OK.
  2. Select Valorant from the list of installed apps, and click Uninstall.uninstall to fix val 59 error
  3. Similarly, remove Riot Client from the PC.
  4. Delete the Riot Games folder in the C: drive, if it exists.C: drive
  5. Restart the computer for the changes to apply.
  6. Now, reinstall both Riot Client and Valorant.

Often, the problem lies with an improper installation, and re-downloading both the game client and Valorant will fix the Val 59 error. For effective removal and to clear any leftover files and registry entries, we recommend using a reliable uninstaller tool.

6. Create a new Valorant account

A few users reported that creating a new Riot Client account and then playing Valorant on it fixed the problem. Though you will lose any in-game progress.

So, we recommend using this trick if you are new to Valorant or the game throws an error just for you while others can play Valorant fine.

7. Contact Riot support

When nothing else works, the last option is to contact Valorant support. The team will identify the underlying cause and list out the relevant solution.

Or, if it’s a server or technical issue to blame, they will provide a timeline as to when you can expect things to be up and running.

Now that you have fixed the Val 59 error in Valorant, it’s time to optimize the PC for gaming and get the best performance. Because games deliver a thrilling experience when run under optimal conditions!

And if you are faced with the server maintenance Valorant Error code 46, we have some valuable insights!

We also have a guide on Valorant could not enter matchmaking, so be sure to visit it.

Do share your experience with Valorant and any other verified solutions in the comments section.

How to Remove Focus Sessions From the Clock App

Are you at your wits end with the Focus Sessions screen that appears immediately after you open the Clock app? We all want to stay productive, but at the same time, reminders set within a short period to take breaks can be more disruptive than helpful. 

Luckily, you can easily keep this feature tucked away with a few basic steps that shouldn’t be too hard to follow, as you shall see below.

How do I turn off Focus Sessions from the Clock?

1. Turn off Focus Assist

  1. Hit the Windows key and click on Settings.settings windows 11
  2. Click on System and select Focus assist.
  3. Tap on the Stop focus session button and restart your Clock app again.

Remember that when you turn off Focus Assist, you’ll start getting app notifications again. Still, you can disable your notifications and view them from the Notification Center whenever you’re ready.

2. Roll back recent Windows updates

  1. Hit the Windows key and select Settings.settings windows 11
  2. Click on Windows Update and select Update history on the right pane.update-history restart to repair drive errors
  3. Scroll down, and under Related settings, click on Uninstall updates.uninstall-updates-w11 computer-recognize-logitech-unifying-receiver
  4. This will take you to the most recent installed updates.
  5. Select the topmost update and click on Uninstall. (The feature is part of the 23481 Build, so you can find this update and uninstall it).uninstall-update-latest computer-recognize-logitech-unifying-receiver
  6. Restart your PC and check if the problem persists.

While this may be a temporary workaround, remember that there are risks associated with running outdated operating systems, so don’t stay too long without checking for updates.

3. Use the Group Policy Editor

  1. Hit the Windows + R keys to open the Run command.
  2. Type gpedit.msc in the dialog box and hit Enter.GPEDiT.msc -Windows Remediation Service Failed to Start?
  3. Navigate to the following location: User configuration/Administrative Templates/Start Menu and Taskbar/Notifications
  4. Double-click on Turn off Quiet Hours policy, and in the pop-up window, check the Disabled box, then hit Apply and OK to save changes.

The downside to this method is that all your toast notifications will also be disabled. To counter this, repeat the steps above, but in 4, instead of Disabled, set it to Not Configured, and the permissions will be back to the default settings.

What are the benefits of removing Focus Sessions from the Clock App?

  • You can set your own focus mode within manageable limits without the constant reminder to finish everything in a given time frame.
  • Strict guidelines on achieving your daily goals are often counter-active. Productivity will look different every day, so having a set of predefined focus periods cages you into a box that is not sustainable in the long run.
  • Focus Sessions can generate a lot of alarms & clock notifications that disrupt your workflow and interrupt you. Fewer distractions mean more productivity allowing you to have maximum concentration. 

If you’re one of the users who don’t mind having the Focus Sessions feature, perhaps exploring some of the benefits of removing it may convince you to get rid of it after all.

Obviously, the best way to focus on your tasks will be different for everyone. If you’re perfectly fine with being interrupted every time and want your daily progress reports, keep the Focus Assist settings.

However, if you tend to be a little more productive when you’re not being distracted by notification badges and need a little more deep focus, this simple tweak might just be worth a shot.

What’s your opinion on Focus Sessions? Should they be enabled or disabled? Share your thoughts with us in the comment section below.

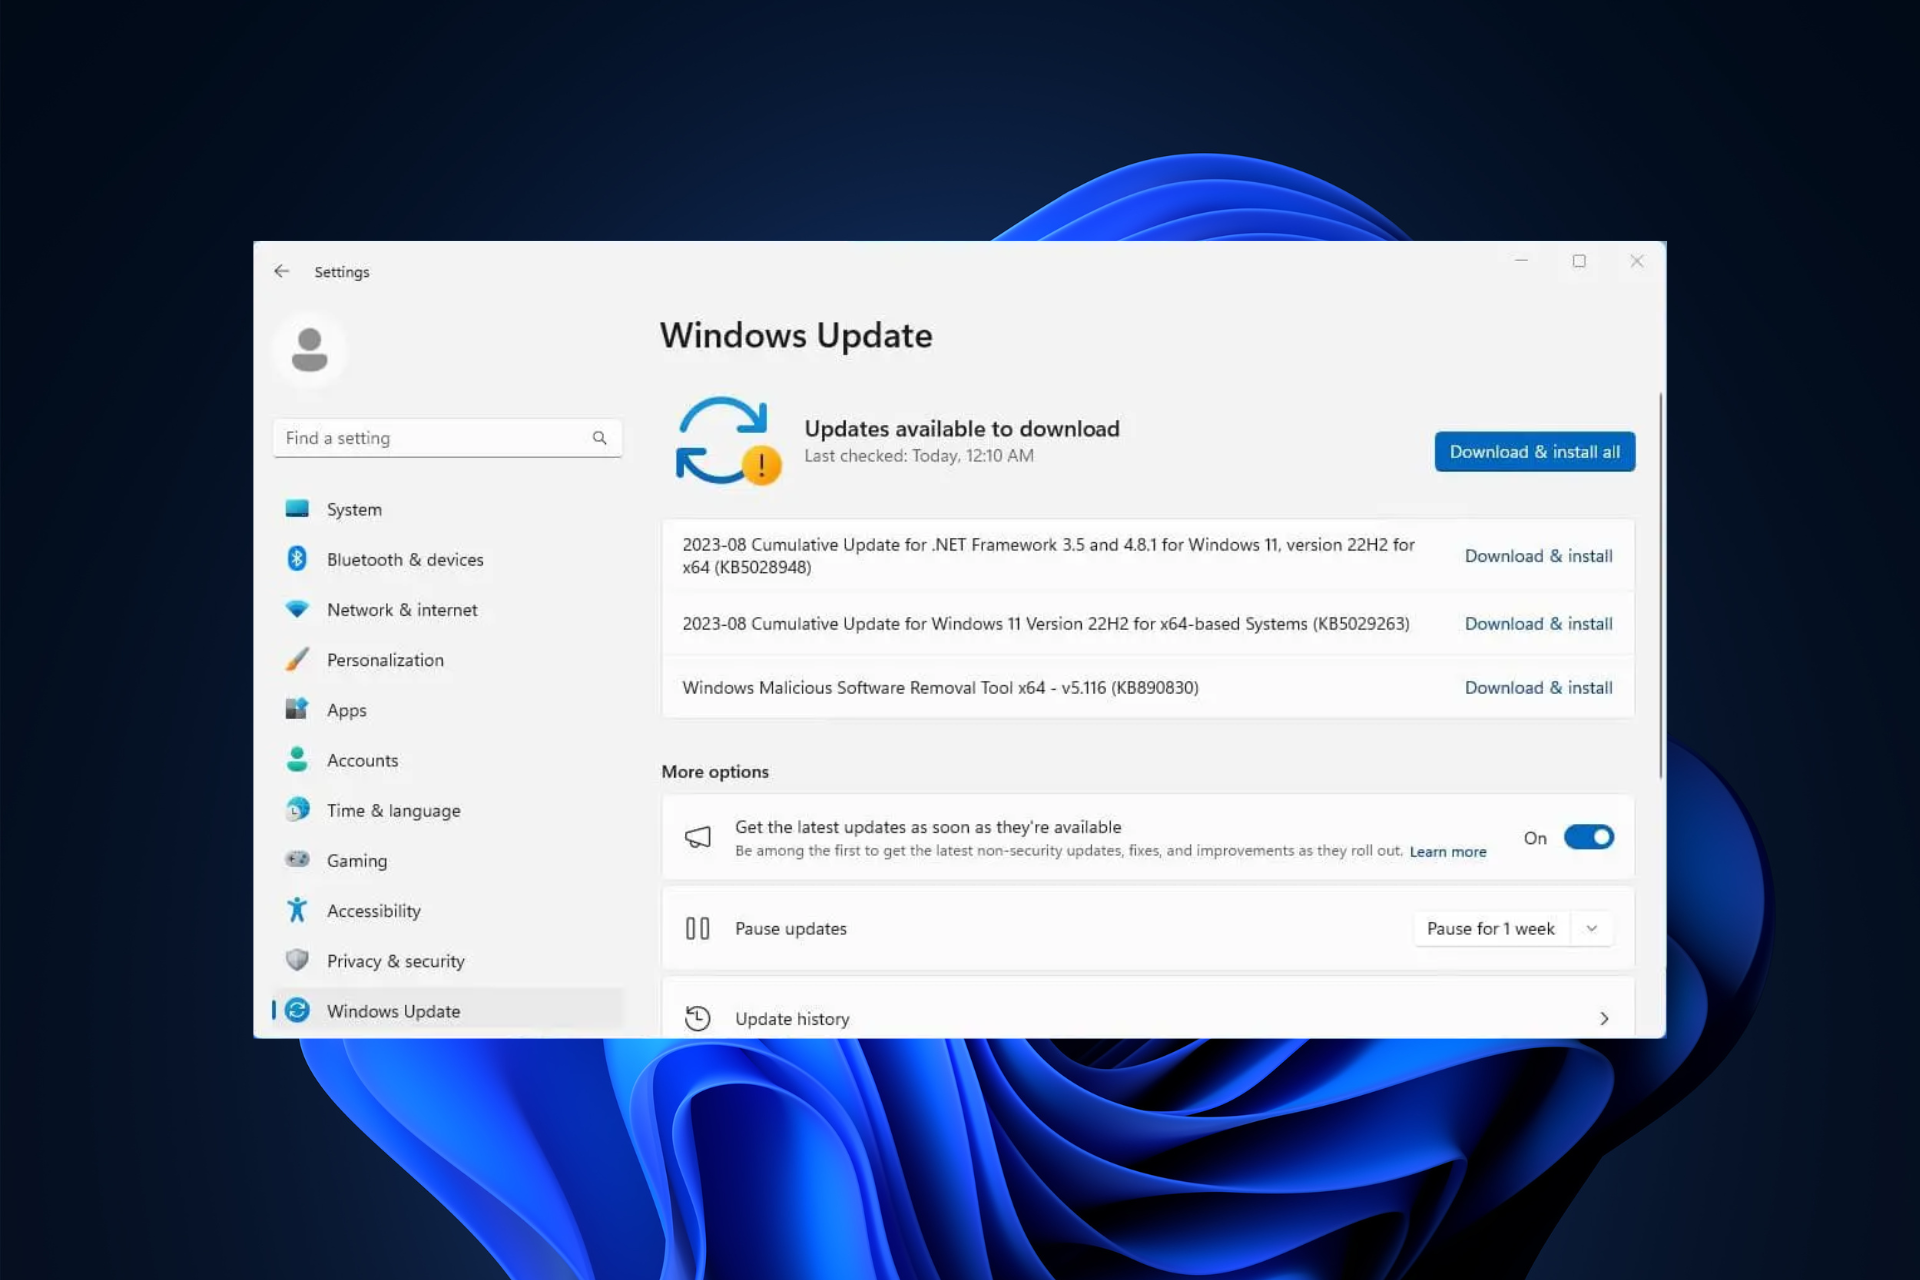
KB5029263 not installing on Windows 11? Fix it in 6 Steps

KB5029263 is a Cumulative Update for Windows 11 version 22H2 for x64-based Systems, which addresses security issues in internal OS functionality.

If you are stuck with KB5029263 not installing and a stop error code like 0xEF, and it is refusing to budge on your system, this guide can help!

There are various reasons for KB5029263 not working on your computer; some of the common ones are:

How do I fix KB5029263 not installing on Windows 11?

Before moving to the detailed troubleshooting solutions to fix the cumulative update failed issue, make sure you perform these checks:

  • Restart your computer.
  • Check your internet connection.
  • Turn off the Windows Firewall.
  • Disable or uninstall third-party antivirus (if applicable).
  • Unplug all external peripherals except the Keyboard, LAN cable, and Mouse.

1. Run the Windows Update troubleshooter

  1. Press Windows + I to open the Settings app.
  2. Go to System, then click Troubleshoot. troubleshoot  KB5029263 not installing
  3. Next, click Other Troubleshooters.Select Other Troubleshooters
  4. On the next page, locate Windows Update under the Most Frequently Used section and click the Run button.Run Windows Update Troubleshopoer
  5. Wait for the process to complete and follow the prompts.

2. Restart the related services

  1. Press Windows + R to open the Run dialog box.Services RUn command   KB5029263 installation issue
  2. Type services.msc and click OK to open the Services app.
  3. Locate Background Intelligent Transfer Service (BITS) and double-click it to open Properties.BITS service
  4. Next, locate the Startup status; if it says Stopped, click Start. If it is running, click Stop, then Start to restart the service.Start the service BITS
  5. On the Services window, locate Windows Update, and double-click it to open the Properties window.Windows Update service
  6. Go to Startup status; if it is Stopped, click Start. If not, then click Stop, then Start to restart it.Start the service

3. Run DISM & SFC scans

  1. Press the Windows key, type cmd, and click Run as administrator.CMD elevated
  2. Copy & paste the following command to repair the Windows image using Windows Update as a source and press Enter: DISM /Online /Cleanup-image /RestorehealthRestore health
  3. Wait for the scan to complete; once you see The operation completed successfully message, type the following command to replace the corrupted versions of files from the local Windows cache and hit Enter: sfc /scannow SFCSCANNOW CMD  KB5029263 not installing
  4. After you get the Verification 100% complete message, close the Command Prompt window & restart your PC.

If you applied this process and it didn’t solve the issue, don’t panic. There is dedicated repair software designed for such Windows troubles regarding corrupted files or other issues.

4. Reset Windows Update Components

  1. Press the Windows key, type cmd, and click Run as administrator.CMD elevated KB5029263 not installing
  2. To stop the BITS, Cryptographic & Windows Update services, type the following commands one by one and hit Enter after every command:
    • net stop bits
      net stop wuauserv
      net stop cryptsvc
      net stop msiserver
      Stop the services
  3. Copy & paste the following command to delete the qmgr* .dat files and press Enter: Del "%ALLUSERSPROFILE%\Application Data\Microsoft\Network\Downloader\qmgr*.dat"
  4. Type the following command and hit Enter: cd /d %windir%\system32
  5. To reregister the BITS & Windows Update files, copy & paste the following commands one by one and press Enter after every command:
    • regsvr32.exe atl.dll
      regsvr32.exe urlmon.dll
      regsvr32.exe mshtml.dll
      regsvr32.exe shdocvw.dll
      regsvr32.exe browseui.dll
      regsvr32.exe jscript.dll
      regsvr32.exe vbscript.dll
      regsvr32.exe scrrun.dll
      regsvr32.exe msxml.dll
      regsvr32.exe msxml3.dll
      regsvr32.exe msxml6.dll
      regsvr32.exe actxprxy.dll
      regsvr32.exe softpub.dll
      regsvr32.exe wintrust.dll
      regsvr32.exe dssenh.dll
      regsvr32.exe rsaenh.dll
      regsvr32.exe gpkcsp.dll
      regsvr32.exe sccbase.dll
      regsvr32.exe slbcsp.dll
      regsvr32.exe cryptdlg.dll
      regsvr32.exe oleaut32.dll
      regsvr32.exe ole32.dll
      regsvr32.exe shell32.dll
      regsvr32.exe initpki.dll
      regsvr32.exe wuapi.dll
      regsvr32.exe wuaueng.dll
      regsvr32.exe wuaueng1.dll
      regsvr32.exe wucltui.dll
      regsvr32.exe wups.dll
      regsvr32.exe wups2.dll
      regsvr32.exe wuweb.dll
      regsvr32.exe qmgr.dll
      regsvr32.exe qmgrprxy.dll
      regsvr32.exe wucltux.dll
      regsvr32.exe muweb.dll
      regsvr32.exe wuwebv.dll
  6. Type the following command to reset Winsock and hit Enter: netsh winsock resetcmd_netsh winsock reset
  7. To restart the BITS, Cryptographic & Windows Update services, copy & paste the following commands one by one and press Enter after every command:
    • net start bits
      net start wuauserv
      net start cryptsvc
      net start msiserver

      Start the services
  8. Once the commands are executed, reboot your PC and try to reinstall the update.

5. Run your computer in a clean boot environment

  1. Press Windows + R to open the Run dialog box. cleanboot - KB5029263 not installing
  2. Type msconfig and click OK to open System Configuration.
  3. Go to the Services tab, select Hide all Microsoft services, then click the Disable all button.Clean boot Disable all
  4. Switch to the Startup tab and click the Open Task Manager link.Open task Manager Clean boot
  5. In Task Manager, for each Enabled item, select it and click Disable from the top right corner of the window. Close Task Manager.Enable Task
  6. Go to the System Configuration window, click Apply, then OK.CLEAN BOOT 5
  7. Select Restart from the next window.Restart clean boot

Windows will restart in a clean boot environment without the third-party apps interference & limited functionality; try to install the update now. Once successfully installed, use the steps above to reverse and gain full functionality.

6. In-Place upgrade (The last resort)

  1. Visit the Windows 11 website.
  2. Locate Download Windows 11 Disk Image (ISO), select Windows 11(multi-edition ISO) and click Download Now.Select the editon and click Download
  3. Select the product language and click Download.
  4. Once the ISO is downloaded, right-click it and select Mount.Mount KB5029263 not installing
  5. A window will open, locate, and click Setup.exe.Setup exe
  6. Click Yes on the UAC prompt.
  7. On the Install Windows 11 dialog box, click Next.Click Next
  8. Click Accept on the license terms window.Accept the terms KB5029263  not installing
  9. Next, on the Read to install page, ensure the Keep personal files and apps option is selected. If not, you can click the Change what to keep option to decide.Ready to Install
  10. Click Install and follow the onscreen instructions.

During the process, your machine will restart several times, and once done, you will be at the lock screen of your computer. This method repairs corrupted OS files without removing your personal files and installed apps.

How to prevent Windows 11 update install issues in the future?

  • Create a restore point before installing the update.
  • Backup your important data
  • Use the Windows Update feature to check for updates.
  • Ensure you have a stable internet connection.
  • Download & install the cumulative update for Windows 11 using the Microsoft Update Catalog website.
  • Ensure your PC has the latest drivers modified by Microsoft.

Failing to install essential updates like KB5029263 might have various implications, including security vulnerabilities, bugs, glitches, system instability, and more.

However, using the preventive measures and solutions discussed, you can avoid Windows Update errors like pending installation.

If you bump into any other error codes or need more info about the KB5029263 update, don’t hesitate to leave a comment in the section below.

Fix: Keyboard Shortcuts are Not Working in Word

Keyboard shortcuts are vital for quick and seamless functioning, and many rely too much on these. There’s nothing wrong with the approach until the keyboard shortcuts are not working in Word. This issue is usually due to misconfigures shortcut mapping or incorrect default language. However, Office update bugs or keyboard issue may also create problems with shortcuts in Word.

In case you have problems with a shortcut that employs the F1 – F12 keys, try holding Fn when using the keyboard shortcut. Also, try connecting an external/different keyboard if possible, to rule out keyboard problems.

How do I fix my shortcuts if they’re not working in Word?

1. Launch Microsoft Word in Safe Mode

  1. Press Windows + R to open Run, type winword /safe in the text field, and hit Enter.winword /safe
  2. When Word launches in Safe Mode, open a new document and verify whether the keyboard shortcuts work fine. If they do, it’s a conflicting add-in to blame.
  3. To remove add-ins, click on the File menu near the top left, then choose More, and select Options.options
  4. Navigate to the Add-ins tab, select COM Add-ins from the dropdown menu, and click the Go button.COM Add-ins
  5. Select any add-ins that appear in the list, and click on Remove.remove to fix shortcuts not working in word
  6. After you have removed all the add-ins, click OK to save the changes.
  7. Finally, launch Microsoft Word normally, and the shortcuts should start working.

When the Ctrl shortcuts are not working in Word, inspect the installed add-ins. Also, instead of removing them all in one go, you could remove one, launch Word in normal mode, and verify if the problem is fixed.

When things improve, the add-in last uninstalled triggered issues with the keyboard shortcuts functionality. You can now reinstall the other add-ins removed in the process.

2. Run the dedicated troubleshooter

Tip icon Tip
Users running the latest version of Windows 11 may not find the Keyboard troubleshooter. In that case, head to the next solution.
  1. Press Windows + I to open Settings, and click on Troubleshoot on the right in the System tab.troubleshoot to fix shortcuts not working in word
  2. Click on Other troubleshooters.
  3. Click the Run button next to the Keyboard troubleshooter.
  4. Follow the on-screen instructions to complete the process and make the recommended changes, if any.

When the undo shortcut is not working in Word, the dedicated troubleshooter will help. Also, you may run the Hardware and Devices troubleshooter.

3. Manually configure the keyboard shortcut

  1. Launch Microsoft Word, click on the File menu, then choose More from the bottom left, and select Options.
  2. Go to the Customize Ribbon tab, and click the Customize button next to Keyboard shortcuts.customize
  3. Select All commands under Categories, then choose the task for which the shortcut is not working from the right, and press the keyboard shortcut key(s) you want to set for it.command
  4. Once done, click on Assign and save the changes.

When facing problems with specific ones, say the copy paste shortcuts are not working in Word, you can check if there were any changes and manually configure the shortcut.

Here are the command names for some of the popular shortcuts:

  • EditCopy: Copy text
  • EditCut: Cut text
  • EditPaste: Paste text
  • EditUndo: To undo an action
  • ShrinkFont: Reduce the font size
  • GrowFont: Increase the font size

4. Update the keyboard drivers

  1. Press Windows + X to open the Power User menu, and select Device Manager from the list.
  2. Expand the Keyboards entry, right-click on the affected keyboard, and select Update driver.update driver to fix shortcuts not working in word
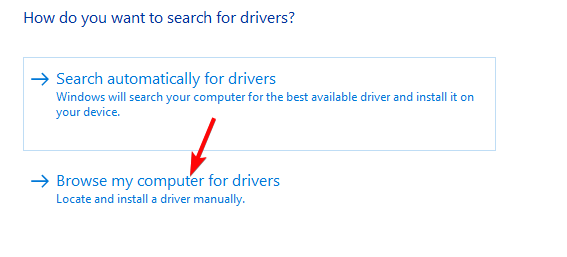
  3. Choose Search automatically for drivers and wait for Windows to install the best one available locally.search automatically
  4. Once done, restart the computer.

Drivers are critical for the effective functioning of any device, so make sure you update the keyboard drivers.

In case Windows can’t find a newer version stored locally or the subscript shortcut is still not working in Word, head to the manufacturer’s website and manually install the latest driver.

5. Change the language 

  1. Launch Word, click the File menu, choose More, and select Options.
  2. Go to the Language tab, and click on Add a Language.add a language to fix shortcuts not working in word
  3. Select English (United States) from the list, and then click the Install button.English (United States) 
  4. Wait for the download to finish, and then relaunch Microsoft Word.
  5. Once done, set English (United States) as the preferred language under both Office display language and Office authoring languages and proofing.set as preferred
  6. Again, relaunch Word for the changes to come into effect and verify whether the keyboard shortcuts now start working. 

6. Repair Microsoft Office

  1. Press Windows + R to open Run, type appwiz.cpl in the text field, and hit Enter.
  2. Select Microsoft 365 from the list of programs, and click on Change.microsoft 365
  3. Click Yes in the UAC prompt.
  4. Now, select Quick Repair, click on Repair, wait for the process to complete, and check whether the problem is resolved.quick repair
  5. If not, run an Online Repair, and follow the on-screen instructions.online repair to fix shortcuts not working in word

When everything else fails to work, you can always repair the Office installation. An Online Repair, though it takes more time and requires an Internet connection, is a foolproof solution against most Microsoft Office issues.

How do I reset keyboard shortcuts in Word?

  • Open Microsoft Word > click File > select More > choose Options. Then go to Customize Ribbon > click Customize > click on Reset All > Finally, click Yes in the confirmation prompt > relaunch Word.

If the Reset all button is greyed out in Word, a quick workaround is to change the shortcut for any command that functions well, say EditCopy or Bold. As soon as you save the changes, the Reset all button will be available, and you can reset configurations to the default settings.

Remember, in most cases, it’s the keyboard to blame for the problem, not Microsoft Word. And replacing it worked for many.

Now that you know what to do when keyboard shortcuts are not working in Word and have things up and running check the best Windows 11 shortcuts to perform tasks effortlessly. In case you’re still having issues, our Ctrl + D not working guide should provide you with additional solutions.

And for those who are yet to upgrade to Windows 11, we also have a list of the best Windows 10 shortcuts.

If you know any additional solutions, drop them in the comments section below.

Fix: Unable to Install SQL Server on Windows 11

SQL Server is often used by developers as a relational database management system, and many of them reported that they are unable to install SQL Server on Windows 11.

Without the SQL Server running, their project won’t have a database it can use, so it’s crucial to fix this problem, and this guide will help you with that.

How do I download and install SQL Server on Windows 11?

1. Delete the affected registry key

  1. Press the Windows key + S and type the command prompt. Select Run as administrator from the list of results.
  2. Now run the following command: reg DELETE “HKLM\SOFTWARE\WOW6432Node\Microsoft\Microsoft SQL Server Management Studio” /reg:32
  3. After that, close Command Prompt.

This is a straightforward solution, and it can help if you can’t install SQL Server 2014.

 2. Check the sector size of your drive

  1. Press the Windows key + X and choose Terminal (Admin).
  2. Now run the following command. Be sure to replace C with the drive you’re installing SQL Server to. fsutil fsinfo sectorinfo C:
     
  3. Locate the PhysicalBytesPerSectorForAtomicity and PhysicalBytesPerSectorForPerformance values.

If the values are different, locate the one that has a higher value. If that value is higher than 4096 you need to make a few changes in the registry by doing the following:

  1. Start Command Prompt as administrator.
  2. Run the following command to add the key: REG ADD "HKLM\SYSTEM\CurrentControlSet\Services\stornvme\Parameters\Device" /v "ForcedPhysicalSectorSizeInBytes" /t REG_MULTI_SZ /d "* 4095" /f
  3. Run the following command to validate if the key is added successfully:
    REG QUERY "HKLM\SYSTEM\CurrentControlSet\Services\stornvme\Parameters\Device" /v "ForcedPhysicalSectorSizeInBytes"

If you don’t feel comfortable modifying the registry and changing the disk sector size, you can always install SQL Server on a different drive. Just check the drive with fsutil fsinfo sectorinfo command and make sure its values aren’t higher than 4096.

3. Set the trace flag to 1800

  1. Open the command line.
  2. Now run the following command: DBCC TRACEON (1800, -1);
  3. Close the command line tool.

By modifying startup parameters you’ll force the SQL Server to use 4 KB as the disk sector size for read and write processes.

Why is SQL Server not installing?

  • Issues with certain registry keys can cause this problem to appear.
  • A sector size that is larger than 4KB is the common cause of this problem.

Microsoft is fully aware of this issue, and according to them, some newer storage devices will use higher block sizes than the supported 4-KB sector size used by SQL Server.

Hopefully, this issue will be resolved when Microsoft upgrades its software. Speaking of upgrades, we have a great guide on how to upgrade from SQL Server 2008, so be sure to check it out.

Upgrading will also prevent various compatibility issues such as the Operating system is not supported by SQL Server error.

Have you found a different way to fix this problem? If so, let us know in the comments below.

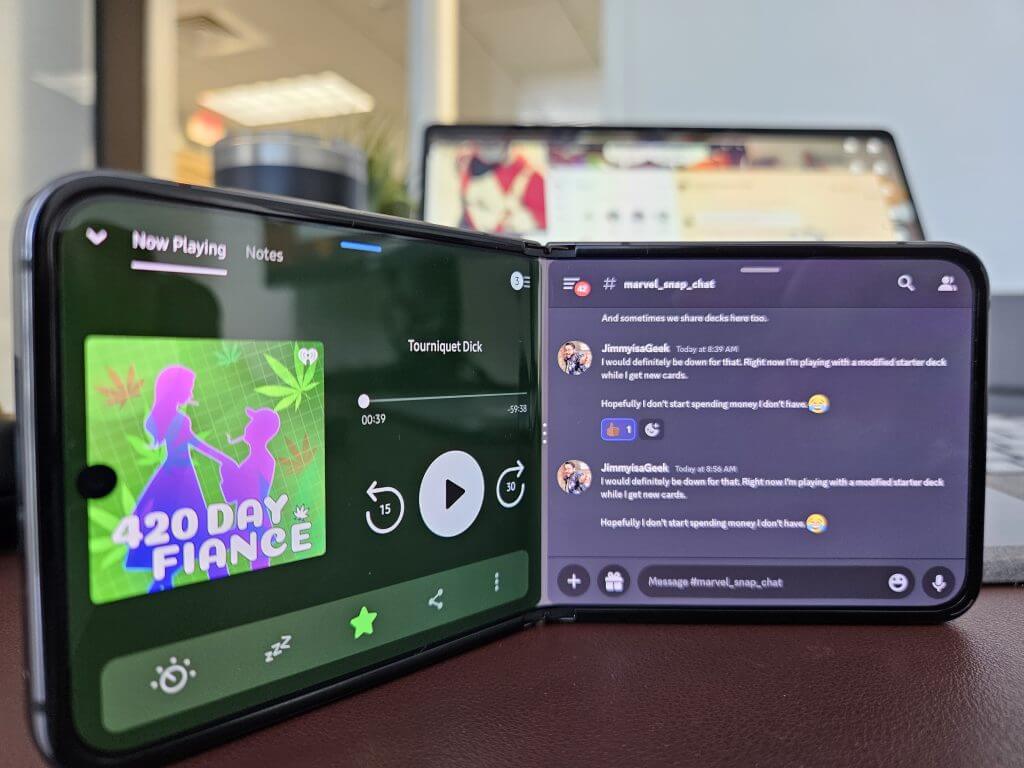
Samsung Galaxy Flip5: The First 48 hours hands on

Back with another installment of the First 48, and this time we’re handling the Samsung Galaxy Flip5 thanks once again to AT&T.

Unboxing

Continuing its trend of minimalistic packaging, Samsung ships the Flip5 in discrete matte black box with an embossed silhouette of an unfolded Flip phone that resembles a two-tone black domino dead center.

When opened, the packaging reveals a single unfolded Flip5 wrapped in fine black construction paper and little else visible. Under the phone, tucked away is the necessary paperwork, single black USB-C to USB-C 2-foot cable, and metal sim card ejector.

Aside from using eco-friendly practices as an excuse for packaging, Samsung’s approach to wrapping their devices does in a little more than thin sheets of construction paper and equally thin boxes helps to center the object and jump starts the experience.

In a roundabout way, the less that there is in the box, the sooner a user is up and playing with their new device.

Clever girl.

Clever Girl

Look and Feel

Holding the Flip5 unfolded feels almost like any other smartphone aside from its slightly elongated design. For a common comparison, I’d imagine holding a Sony Xperia 1, 10 Plus, and PRO-I net a similar in-hand experience, right down to the narrow width to aid in reachability.

At $1,119.99 the Flip5 offers a premium heft that accents its metal and glass frame without being overly bulky or cumbersome when unfolded.

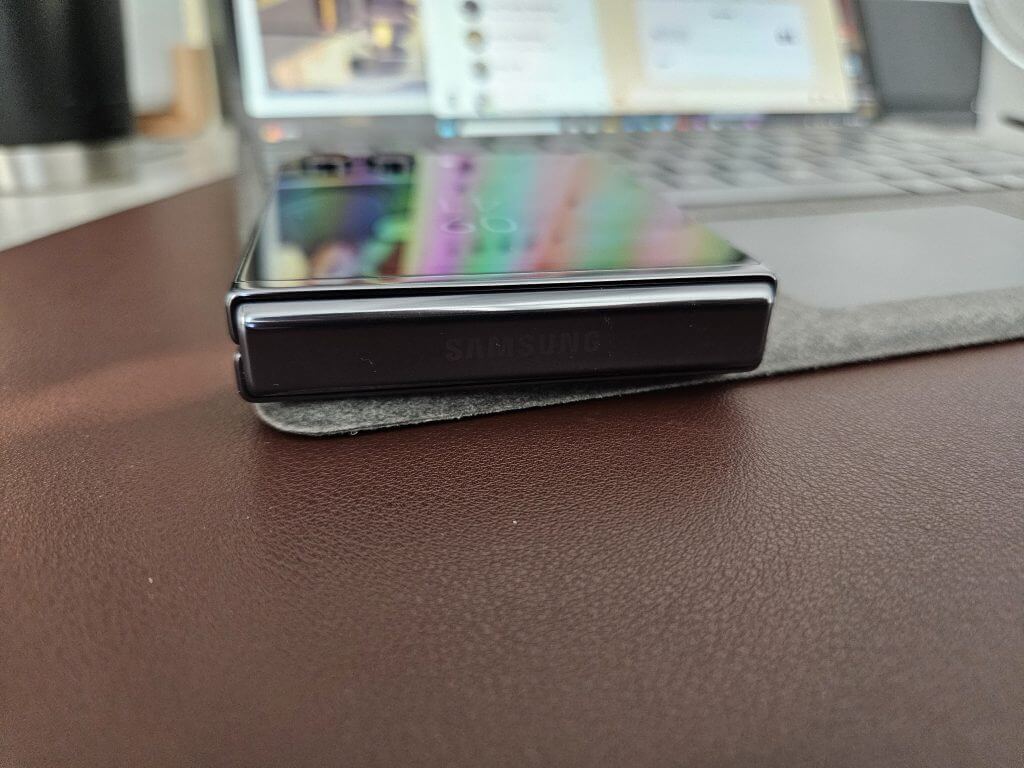
Samsung Flip5 - Closed

The edges are wrapped in polished aluminum that can look black or dark grey depending on the lighting. With half the exposed body of the Flip5 being a screen the Graphite color only really shines on the half-sized back panel but looks nice in contrast to those darker graphite edges, and the completely black Wi-Fi bands

The infamous Samsung folding hinge in the Flip5 is initially hidden and tucked away between the two separate ends of the phone when unfolded while flush power and volume buts sit anchored on the left side of the phone.

Unlike the Fold5, the Flip5 doesn’t feel as slippery, thanks to its narrow design when opened or its squatter position when closed most users will be able to get a full grip around the smartphone when in use.

The weight of the phone feels comforting and in its folded position it feels intuitive for anyone whose first cellphone experience included an LG Tracfone, Sharp GX, Motorola RAZR or V300 or the myriad of other flip formed devices.

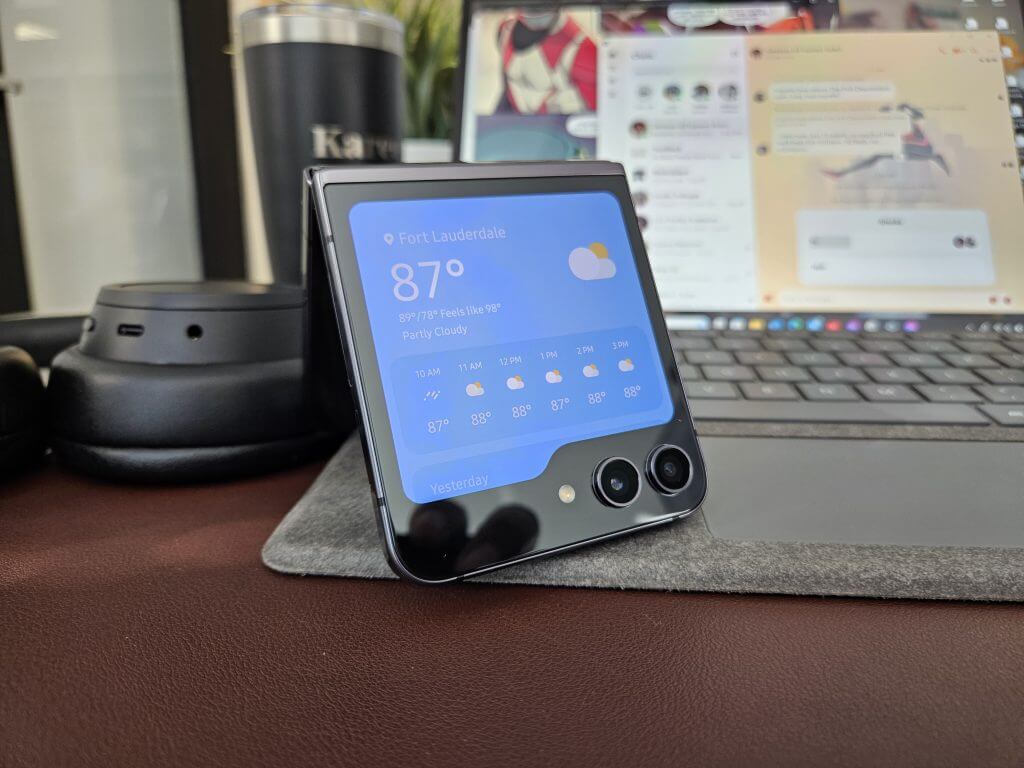
Samsung Flip5 - Widget 2

On the inside of the phone there is an initial notice of the crease in the screen, and its presence tends to linger longer than the Fold5 as its horizontal presence makes it a constant contact point when scrolling the long screen vertically.

We’ll see if the crease eventually becomes white noise when using the Flip5 as it did while using the Fold5.

Lastly, the camera arrangement is another notable design observation as it protrudes out of the top screen enough to offer a physical marker to help users identify the top front of the phone when scavenging for it in a pocket.

Performance

I mean, there isn’t much to say here just yet. The Flip5 performs like a modern smartphone in most ways.

The biggest caveat is the widget accessibility on the cover screen. With full screen sized widget support on the Galaxy Flip5, opening the phone takes a backseat to skimming quick notifications that include weather, stocks, messages, step count, calendar events, calls, alarms, maps, Whatsapp.

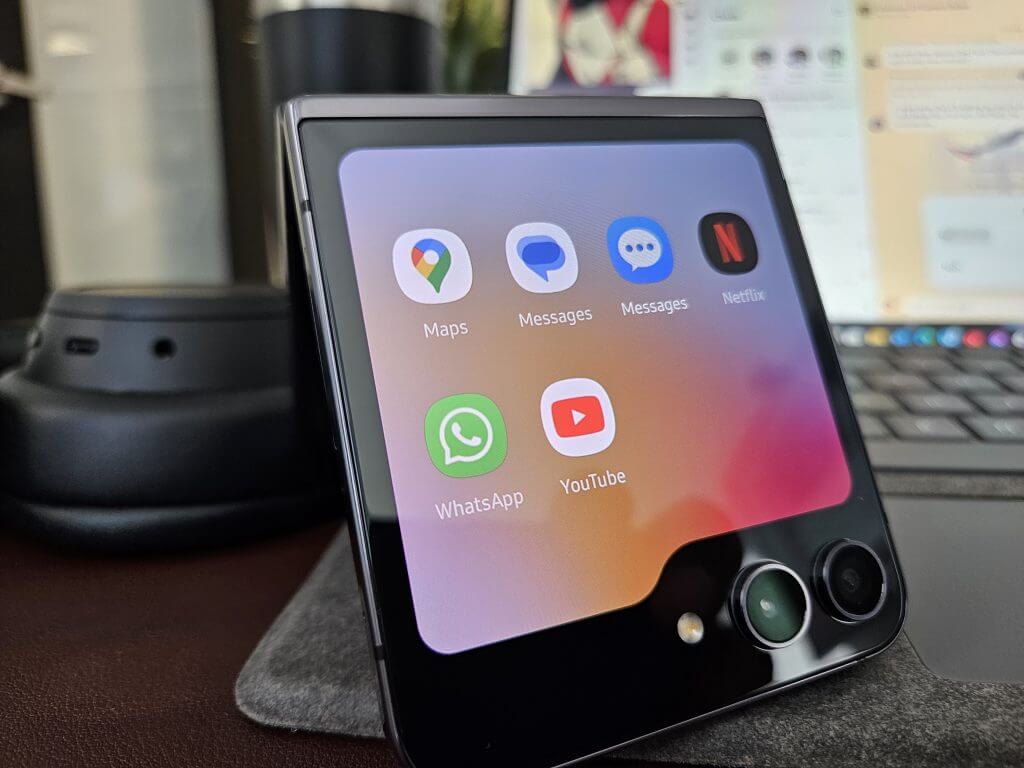
Samsung Galaxy Flip5 - App support

For longer engagements, users can watch video content from Netflix and YouTube which is a nicety paired with its compact design allowing for much longer viewing sessions with the phone nestled in the palm of the hand rather than some finger contortions that include pinky balancing.

Equipped with the Snapdragon 8 Gen 2 mobile SoS, the Flip5 has speed through all tasks I’ve put it through that includes downloads (mostly thanks to AT&T’s network coverage in South Florida) loading web pages, gameplay, and video streaming.

Samsung’s OneUI has gotten optimized and feels just as fluid on the Flip5 as it did on my S22.

Initial Thoughts

Aside from the nostalgic appeal of condensing the physical footprint of your smartphone, Samsung’s work on the outer screen is by far the biggest reason to get into this style of phone.

I’m victim to getting lost in my phone when attempting to do quicker and more focused interactions like responding to text, checking notifications, or keeping up on news. While the widgets panel is limited in its app support, the ones that are available are currently more than enough for me to keep my phone closed at most times.

Samsung Galaxy Flip5 - Dual Apps

Using the phone for a couple of days with a focus on the outer screen has brought me to the realization that if phones replaced their notification shade with a handful of full-sized widgets with varying degrees of functionality, people may not be on their phones as much, at least not me.

But it’s also early days, we’ll see how widgets help with my phone detox weeks in.

Dell’s latest Alienware monitor brings a new design, AMD FreeSync and HDR10 support

Dell introduced its refresh rate breaking Alienware monitor, the Alienware 500Hz Gaming Monitor at CES earlier this year and the company is following up that announcement with a top-shelf variant that offers a revised design, AMD FreeSync Premium technology and VESA AdaptiveSync Display certification.

The newer version of the Alienware 500Hz panel (AW2524HF) still delivers a 500/480Hz (native) refresh rate with 0.5ms gray to gray response times for the smoothest ghosting-free gaming experience around.

However, with the addition of AMD FreeSync Premium, gamers will now be unincumbered by GPU support and worrying if their monitors can keep up with their other hardware.

The IPS paneling supports 99% sRGB color accuracy at wider angles as well as incorporating blue light technologies in the form of TUV-certified ComfortView Plus Low Blue light hardware solutions.

Alienware - 500Hz Gaming Aw2524Hf 6

As for the new design, the base of the monitor takes up a hexagonal shape rather than the elongated V as many other monitors adhere to so that it can be placed in most modern desktop set ups. The stand is fully adjustable, meanwhile Dell managed to tack on a retractable headset arm for gamers to rest their headphones on.

As for ports and connectivity, Dell seems to have chucked the kitchen sink at the back and bottom of them monitor:

  • Power Connector
  • SuperSpeed USB 5 Gbps (USB 3.2 Gen 1) Type-B upstream port
  • 2x SuperSpeed USB 5 Gbps (USB 3.2 Gen 1) Type-A downstream ports
    Joystick
  • SuperSpeed USB 5 Gbps (USB 3.2 Gen 1) Type-A downstream port with Power
    Charging
  • SuperSpeed USB 5 Gbps (USB 3.2 Gen 1) Type-A downstream port
  • Security-lock slot
  • HDMI port
  • 2x DisplayPort

The Alienware 500HZ Gaming Monitor (AW2524HF) will be available for purchase on September 12, 2023 starting at $649.99 USD.

Microsoft Teams Premium trial licenses to be available next month

Microsoft will seemingly enhance organizations looking to optimize their collaboration experience. Next month, Microsoft Teams will offer self-service trial licenses for Teams Premium, enabling businesses to explore advanced features before committing to full licenses.

Teams Premium is an add-on license designed to elevate the Teams experience for Microsoft 365 subscribers. This move aims to allow IT administrators and users to harness the power of Teams Premium features on a trial basis. The trial period will allow organizations to feel the benefits and tailor the offerings to their needs.

Beginning next month, organizations can access the Teams Premium 30-day trial license directly from the Microsoft 365 admin center. This initiative will allow interested parties to explore the capabilities of Teams Premium at no cost.

The trial version will include a comprehensive set of Teams Premium features, such as personalized and intelligent meetings, enhanced meeting protection, advanced management tools, and virtual appointments.

Each organization with a trial license can assign up to 25 users to test Teams Premium features during the trial period. This will enable teams to experiment with the offerings and make informed decisions.

It’s important to note that some advanced features, like end-to-end encryption for meetings, customized meeting templates, and organization-branded backgrounds, may require administrative configuration before users can fully utilize them.

This initiative marks a step forward in Microsoft’s commitment to enhancing organizational collaboration experiences.

via Petri

Microsoft commits to EU’s Digital Services Act (DSA) for transparency in ads

Microsoft is taking steps to comply with the European Union’s Digital Services Act (DSA), which aims to protect users online and increase transparency for tech platforms.

Microsoft has committed to providing more information about targeted advertisements to users. This move is likely in response to the DSA’s requirements for platforms to be more transparent about their advertising practices.

From October onwards, Microsoft plans to release a report every six months on its DSA compliance efforts on the Microsoft Reports Hub. This report will provide updated information on Bing’s average monthly active users in the EU.

The Digital Services Act (DSA) is a regulation in EU law that aims to update the Electronic Commerce Directive 2000 regarding illegal content, transparent advertising, and disinformation.

The DSA has a significant requirement that platforms should provide users with the choice to have a feed that is not personalized and not based on user profiling. Microsoft’s LinkedIn has successfully implemented this change on both the desktop and mobile versions of the network.

  • A new Digital Safety website has been launched to inform users about Microsoft’s safety practices policies and how to report concerns across its online services.
  • Bing’s “Report a Concern” process now includes easier reporting of exposed personal information by minors, a new category for reporting concerns in generative AI features, clearer policies on nonconsensual intimate imagery and synthetic “deepfake” images.
  • The Microsoft Ad Library has been introduced to enhance transparency for consumers about the advertisements on the Bing platform.
  • Additional transparency documentation is being developed to better explain Bing’s search processes, ranking principles, moderation policies, and user controls.

The DSA applies to “very large” social media networks and websites. Microsoft-owned platforms like Bing and LinkedIn, along with other major tech players such as Facebook, Instagram, Snapchat, and TikTok, are among the platforms covered by these regulations.

Microsoft identifies Flax Typhoon: a Chinese state-backed hacking campaign targeting Taiwanese organizations

Microsoft has uncovered a series of concerning activities aimed at organizations primarily located in Taiwan. This campaign, attributed to Flax Typhoon (also connected to ETHEREAL PANDA), is suspected to be orchestrated by a nation-state actor based in China. 

The operation involves sophisticated techniques that could be replicated in other regions, raising concerns about potential global implications. Microsoft has chosen to make this threat public due to the significant risks it poses and the need for collective vigilance within the security community.

The Flax Typhoon campaign has been in operation since mid-2021, with its primary targets encompassing government agencies, education institutions, critical manufacturing, and information technology organizations within Taiwan. Although the impact has been concentrated in Taiwan, certain victims have also been identified in Southeast Asia, North America, and Africa. 

Flax Typhoon’s tactics are centered around persistence, lateral movement, and acquiring credential access. As per established practices, Microsoft has directly notified affected parties to help bolster their security measures.

Preventive measures to counter Flax Typhoon

To respond effectively to suspected compromises, organizations are advised to take the following steps:

  • Identify Compromised Accounts or Systems:
    • Locate instances of LSASS and SAM dumping to detect affected accounts.
    • Scrutinize compromised accounts for malicious activities or exposed data.
    • Invalidate or modify credentials for all compromised accounts, considering the potential scope of compromise.
    • Isolate and meticulously examine affected systems for traces of malicious actions.
  • Defend Against Flax Typhoon Attacks:
    • Maintain updated security patches for public-facing servers, which are attractive targets for threat actors.
    • Employ methods like user input validation, file integrity monitoring, behavioral monitoring, and web application firewalls for enhanced server security.
    • Monitor the Windows registry for unauthorized modifications, leveraging the Audit Registry feature.
    • Utilize network monitoring and intrusion detection systems to spot unusual or unauthorized network traffic.
    • Ensure Windows systems are up-to-date with the latest security patches, including MS16-075.

How to mitigate the risk of compromised accounts

Microsoft also recommends several strategies to mitigate the risk of compromised accounts and systems:

  • Enforce Strong Authentication:
    • Implement robust multifactor authentication (MFA) policies involving hardware security keys or Microsoft Authenticator.
    • Leverage passwordless sign-in methods, such as Windows Hello and FIDO2 security keys, to reduce vulnerability.
    • Set password expiration rules and deactivate unused accounts to curtail risk.
  • Enhance Security Measures:
    • Randomize Local Administrator passwords using tools like Local Administrator Password Solution (LAPS).
    • Employ attack surface reduction rules to block or audit identified malicious activity patterns.
    • Strengthen LSASS process security with features like Protective Process Light (PPL) and Windows Defender Credential Guard.
    • Implement cloud-delivered protection in Microsoft Defender Antivirus for dynamic threat coverage.
  • Deploy Endpoint Detection and Response (EDR):
    • Utilize EDR in block mode to enable Microsoft Defender for Endpoint to neutralize threats even when other antivirus systems are passive.

The exposure of Flax Typhoon’s operations underscores the importance of robust security practices and collaboration across the security landscape. Microsoft’s proactive approach aims to empower organizations and the security community at large to bolster defenses against evolving threats like the Flax Typhoon.

Via: Tech Times

How to Auto-install Approved Apps in Microsoft Teams

If you’re an IT admin, you’ll soon be able to let your organization discover apps to install after you have approved them first. The feature was recently added to the Microsoft 365 Roadmap.

As an IT admin, you must approve all the apps that can be installed in your organization. After you do that, the auto-install approved apps feature will send recommended suggestions to install the apps to the organization.

The installation is not enforced but instead suggested and recommended so that users will naturally choose to install apps.

Microsoft Teams Auto Install Approved Apps uses intelligent signals from your users to install and surface the apps that the admin has already allowed for the tenant. An admin can enable it to help users naturally discover and use apps that are highly relevant to their needs within Microsoft Teams.

Microsoft

There are a lot of benefits that come with this feature. For instance, as an IT manager, you won’t have to waste time making particular policies for specific users.

On the other hand, users won’t have to ask IT managers for specific apps and won’t have to install them either, as the feature will take care of everything once it’s enabled.

How can I auto-install approved apps in Microsoft Teams?

Auto-installing approved apps in Microsoft Teams could be an oxymoron, as there is no need for human input when it comes to it. But auto-installing will still need to be enabled by an IT manager who has to approve apps first.

And to do so, it’s fairly easy. Sure, it will take some time to go through each app to decide if you approve it, but once done, you never have to bother again with it. So, it’s just a one-time job.

  1. Sign in to the Teams admin center, go to Teams apps, and then go over to Manage apps.
  2. Once there, select Org-wide app settings and enable the Auto to install approved apps option.
  3. You can enable or disable specific, by going to Manage selected apps and changing the setting for each app.
  4. Select Save and that’s it.auto install apps in microsoft teams

Once this feature is enabled, it can take up to 2 days for the installation to happen. According to Microsoft, users receive a welcome message from the app if the installed app supports bots.

Users also receive an Activity Feed notification on Teams desktop or web client informing them about the new app that is added. Unfortunately, the notification isn’t available on mobile devices, for now.

If you want to install the Teams app for all user profiles on a computer, read this guide to learn the detailed steps.

What do you think about this new feature coming to Microsoft Teams?

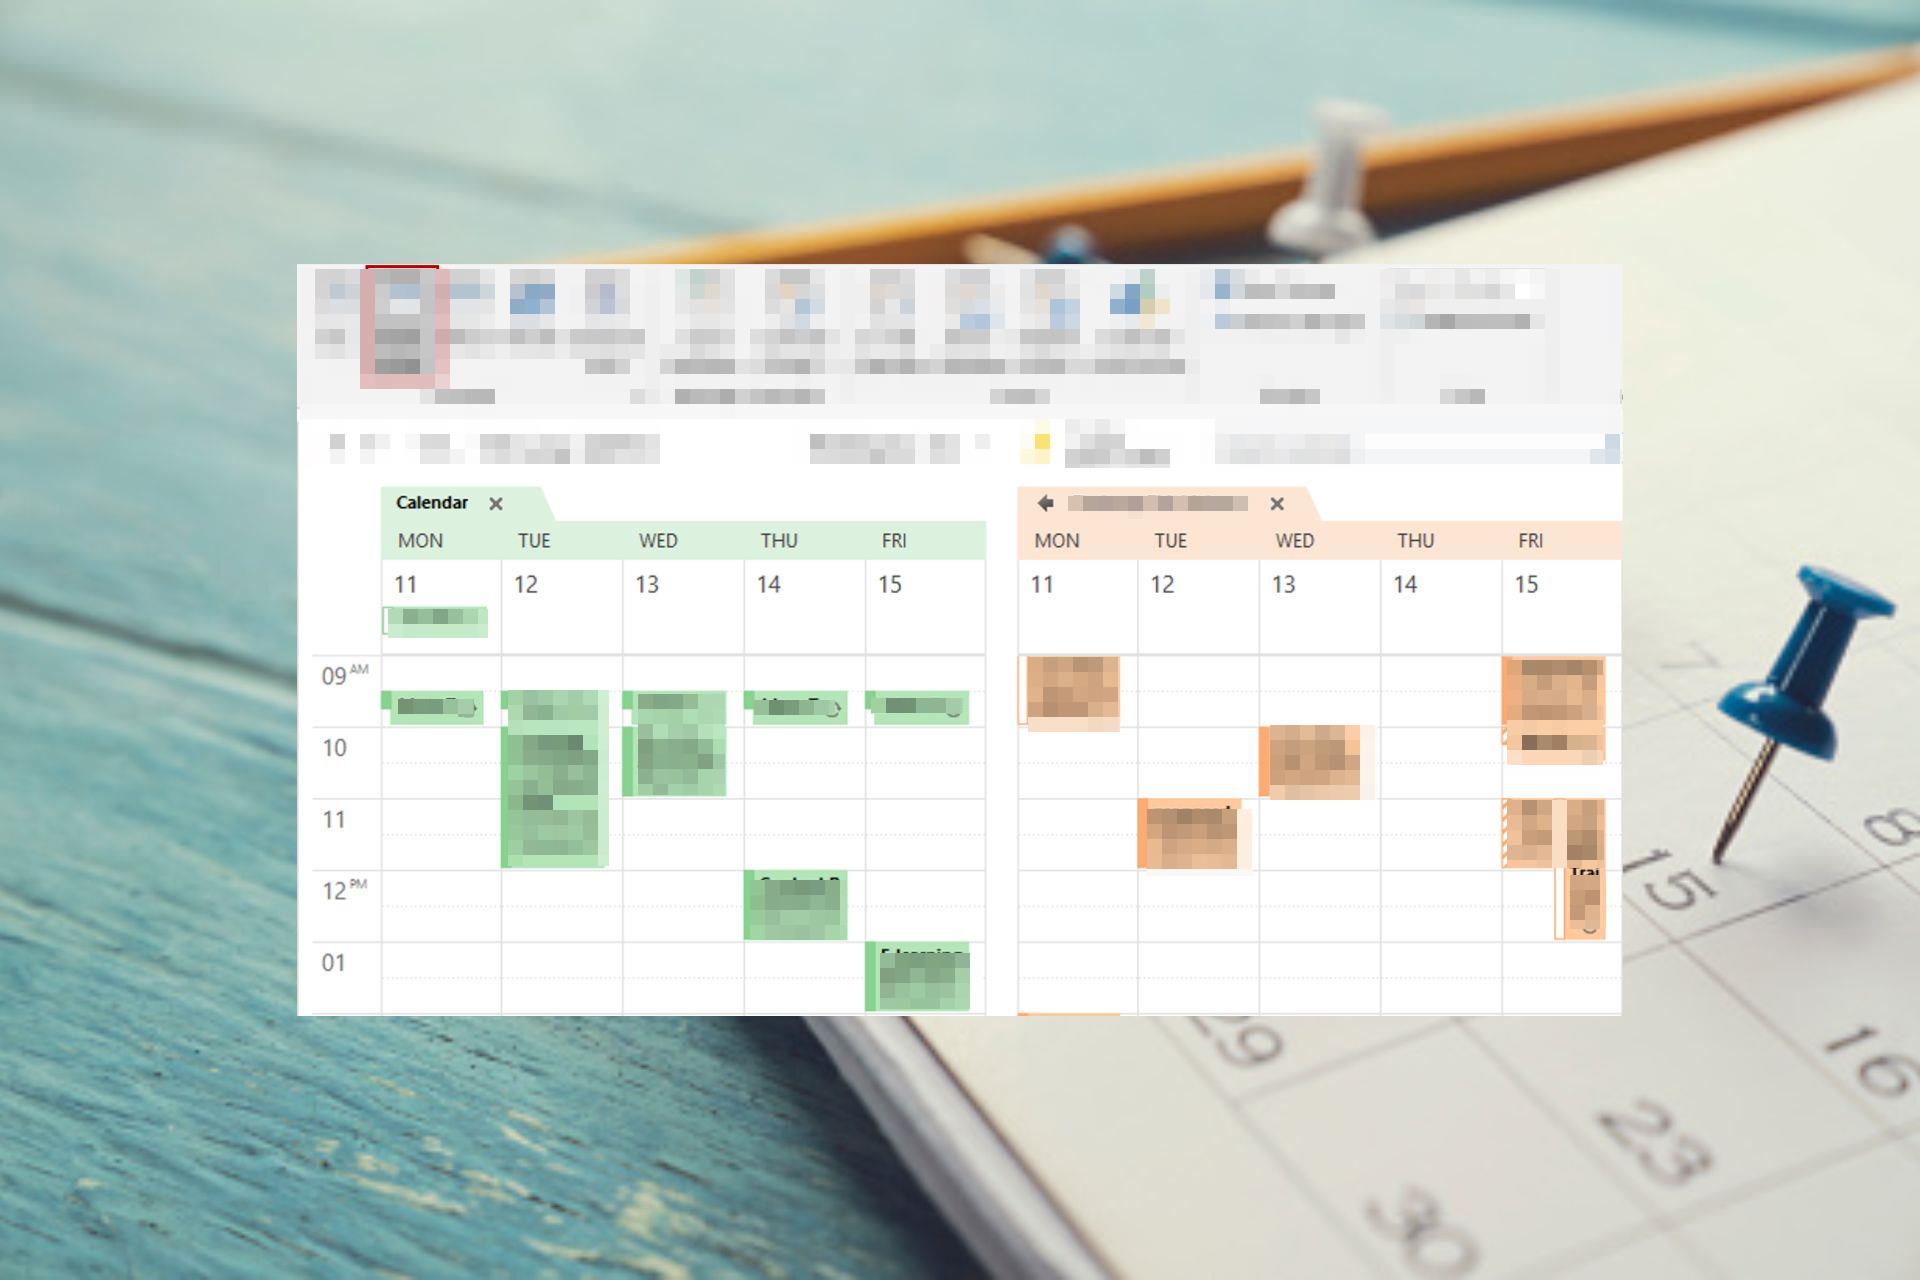
How to Overlay and View Multiple Outlook Calendars at the Same Time

Managing multiple schedules in Outlook is straightforward with its calendar overlay feature. This functionality allows you to view multiple calendars simultaneously, merging them into a single, color-coded view. Whether you’re juggling personal, work, or shared calendars, overlaying helps prevent scheduling conflicts and streamlines your planning process.

In this guide, we’ll walk you through the steps to overlay calendars in both the Outlook desktop application and Outlook on the web, ensuring you can efficiently manage your time across all platforms.

How do I view multiple calendars in Outlook?

1. Use the Side-by-side feature

  1. Launch your Outlook app.
  2. Right-click on the Calendar icon to reveal any additional calendars.
    calendar icon
  3. Check all calendars you wish to display in the main view.

All selected calendars will be in different color options to easily tell them apart. The side-by-side view is appropriate when you just have a secondary calendar. This way, you can easily see which calendar appointments conflict with each other and adjust them accordingly.

2. Use the Overlay Mode

  1. Launch your Outlook app.
  2. Still having selected the calendars from the side-by-side view above, right-click on them and select the Overlay option.

The main advantage of this option is that you can easily spot conflicting calendar entries and drag appointments around on the screen if they overlap.

How do I manage multiple calendars in Outlook?

The calendar app is a powerful tool. It can keep track of your tasks to help you manage your time and be more productive, but only if you know how to put it to good use.

Aside from displaying multiple calendars in one view, you can also tweak a few settings to ensure you get the most out of it. 

Some tips to stay on top of your game include:

  • You can assign colors to individual calendars. Using color-coded calendars helps keep your schedules organized and avoid scheduling conflicting events.
  • You can also close inactive calendars to create space for more. 
  • You can switch from overlay to side-by-side mode by clicking the right arrow to view one calendar. To revert, click the left arrow.

How can I add and manage other people’s calendars in Outlook?

Below is the step-by-step procedure:

  1. Launch your Outlook app.
  2. Click on the Calendar icon from the left side menu.
    calendar icon
  3. Navigate to the Home tab, click Manage Calendars, select Add Calendar, then Open Shared Calendar.
  4. Type in the mail address of the person you’d like to add, and a request will be sent out. Once they accept, their calendar will appear in your calendar list. Repeat these steps to add more people.

Note that you may require permission to add some people’s calendars. Their calendars won’t be visible until they receive and accept your request to share their calendars.

After adding a colleague’s calendar, you may also want to share your own schedule with them. Here’s a simple guide on how to share your Outlook calendar securely.

Even after accepting the request, the owner has full control of the calendar items available to you and can choose to make their calendars private at any time.

If you have been having issues juggling all of your Outlook Calendars, try some of these go-to techniques for viewing multiple calendars simultaneously. You can also try opening multiple Outlook windows and having separate calendars in each window.

Should you find that your Outlook crashes when opening the calendar, proceed to our expert guide to resolve this issue. For more ways to customize your experience, you can set a default Outlook calendar or add holidays to your calendar for better planning.

Which method do you prefer? The side-by-side or overlay method? Let us know in the comment section below.

How to Automatically Accept or Decline Meetings in Outlook?

If you often have to accept or decline meeting invites but don’t like doing it manually, you can set them to be accepted or rejected automatically.

This will help you set a clash-free meeting schedule and minimize distractions so that you can focus on what’s important.

In this guide, we will explore detailed steps to auto accept or decline incoming meeting requests on Outlook so that a timely response is sent to the meeting organizer.

How do I automatically accept a meeting without sending response in Outlook?

  1. Press the Windows key, type outlook and click Open.Outlook Start menu open Automatically Accept/Decline Meetings
  2. On the Outlook main window, go to the File tab.File menu
  3. Select Options to open Outlook Options.OUTLOOK Options
  4. Go to Calendar from the left pane, locate Automatic accept or decline, then click the Auto Accept/Decline button.OUTLOOK_Accept meeting request
  5. On the Automatic Accept or Decline window, to accept a meeting, place a checkmark next to Automatically accept meeting requests and remove canceled meetings and click OK.OUTLOOK_select  Automatically accept meeting requests and remove canceled meetings
  6. Next, on the Outlook Options window, Calendar pane, locate Calendar options and select Accept for the Use this response when proposing a new meeting time option.Accept
  7. Click OK and relaunch Outlook to save the changes.

If you use Outlook 2010 or an older version, look for the Resource Scheduling option instead of Automatic accept or decline. Click the Resource Scheduling button to get the Automatic Accept or Decline window, and change the meeting request settings on Outlook.

How do I automatically accept meetings with a response in Outlook?

1. By setting a rule

  1. Launch Outlook and go to the Home tab.
  2. Click Rules, then select Manage Rules and Alerts from the drop-down list.Rules - Manage Alerts
  3. Click New Rule.OUTLOOK_New Rule
  4. On the Rules Wizard dialog box, select Apply rule on messages i receive and click Next.OUTLOOK_V Apply rule on messages i receive Automatically Accept/Decline Meetings
  5. On the next page, select which is a meeting invitation or update and click Next.OUTLOOK_which is a meeting invitation or update
  6. From the Step 1 box, select reply using a specific template, then go to the Step 2 box and click the specific template hyperlink.OUTLOOK_reply using a specific template
  7. On Select a Reply template window, for Look In, choose Standard Template or User Templates in File System; you will see the meeting response template in the box below. If there are multiple options, choose one and click Open.Template to accept meeting
  8. Click Next, then click Next.
  9. Now name the Rule if you want and click Finish.Create a rule

You can also select Create this rule on all accounts to auto accept the meeting invite on all your email addresses on Outlook.

2. By running a VBA script

First, you need to save the script in VBA; for that, follow these steps:

  1. On the Outlook window, press Alt + F11 to open the Visual Basic Application (VBA) for Outlook.
  2. Go to Insert, then select Module.Insert Module
  3. When the new module opens, copy & paste the following script to auto accept the meeting invitations on Outlook and press Ctrl + S to save it:
Sub AutoAcceptMeetingRequests()
    Dim objNamespace As Outlook.NameSpace
    Dim objFolder As Outlook.MAPIFolder
    Dim objItem As Object
    Dim objMeetingRequest As Outlook.MeetingItem
    
    ' Set up Outlook objects
    Set objNamespace = Application.GetNamespace("MAPI")
    Set objFolder = objNamespace.GetDefaultFolder(olFolderInbox)
    
    ' Loop through inbox items
    For Each objItem In objFolder.Items
        If objItem.Class = olMeetingRequest Then
            Set objMeetingRequest = objItem
            objMeetingRequest.GetAssociatedAppointment(True).Respond olMeetingAccepted, True ' olMeetingAccepted for acceptance, True to send no response
        End If
    Next objItem
    
    ' Clean up objects
    Set objMeetingRequest = Nothing
    Set objItem = Nothing
    Set objFolder = Nothing
    Set objNamespace = Nothing
End Sub

Once you have the script in VBA, you need to run it; follow these steps to do that:

  1. Go to the Outlook window and go to the Developers tab.
  2. Select Macros, and from the drop-down list, choose the Macros you created to run it.Macros run  Automatically Accept/Decline Meetings

Before using VBA scripts on Outlook, create a backup of your data and configuration settings, and always test the script on a small scale before running it for the entire mailbox.

Auto-responding to meeting invitations in Outlook saves you time. It is a hassle-free way to inform the meeting organizer about your attendance. However, always check the meeting request to know your fellow attendees to ensure you are aligned with the participants on the meeting agenda.

How do I automatically decline meetings in Outlook?

1. Use Outlook Options to decline all meeting invites

  1. Launch Outlook and go to the File tab.File menu
  2. Select Options to open Outlook Options.OUTLOOK Options
  3. Go to Calendar, locate Automatic accept or decline & click the Auto Accept/Decline button.OUTLOOK_Accept meeting request
  4. Select Automatically decline meeting requests that conflict with an existing appointment or meeting to decline a meeting.OUTLOOK_ Automatically decline meeting requests that conflict with an existing appointment or meeting to decline a meeting.
  5. Next, Select Decline for the Use this response when proposing a new meeting time option under Calendar options and click OK.OUTLOOK_Decline meeting request
  6. Relaunch Outlook to save the changes.

2. Set a rule to decline meeting invites from a specific email address

First, you have to create a response and save the template to reject the meeting; for that, follow these steps:

  1. On the Outlook main window, go to Calendar and select New Meeting.OUTLOOK_calendar New Meeting
  2. In the Meeting window, enter the text in the body you want to send to decline a meeting invite and go to the File tab.Go to File
  3. Now click Save as.OUTLOOK_Save as
  4. On the Save As window, for Save as type, select Outlook Template (.oft), and for the File name, input a name and click Save.OUTLOOK_save file as otf Automatically Accept/Decline Meetings

Now that you have a customized template let us create a rule to decline the meeting.

  1. Launch Outlook and go to the Home tab.
  2. Click Rules, then choose Manage Rules and Alerts from the drop-down list.Rules - Manage Alerts
  3. On the Rules and Alerts window, select New Rule.OUTLOOK_New Rule
  4. On the Rules Wizard dialog box, select Apply rule on messages i receive and click Next.OUTLOOK_V Apply rule on messages i receive Automatically Accept/Decline Meetings
  5. From the Step 1 box, Select the from people or public group option, then move to Step 2, and click the people or public group hyperlink.OUTLOOK_from people or public group option
  6. It will open the Rule Address window; select the username whose meeting invite you want to reject, click From, and then OK.OUTLOOK_Rule Address window
  7. Now select which is a meeting invitation or update and click Next.OUTLOOK_ reply using a specific template
  8. On the following page, choose the reply using a specific template option from the Step 1 box and in Step 2, click the specific template hyperlink.
  9. On Select a Reply template window, for Look In, choose User Templates in File System; you will see the meeting response template in the box below. Select the one you created and click Open.OUTLOOK_Decline meeting
  10. Click Next, then click Next.
  11. Now name the Rule and click Finish.OUTLOOK_Name the rule and click Finish

Select Create this rule on all accounts if you want to respond automatically to meeting requests on the other email accounts.

3. Use a VBA script to reject multiple meeting invites

First, you need to add and save the script to VBA, here’s how you can do that:

  1. Launch Outlook, and on the main window, press Alt + F11 to open VBA.
  2. Go to Insert, and click Module.Insert Module
  3. Copy & paste the following script to delete the meeting request in the module and press Ctrl + S to save it:
Function GetCurrentItem() As Object
    Dim objApp As Outlook.Application
    Set objApp = Application
    On Error Resume Next
    Select Case TypeName(objApp.ActiveWindow)
        Case "Explorer"
            Set GetCurrentItem = objApp.ActiveExplorer.Selection.Item(1)
        Case "Inspector"
            Set GetCurrentItem = objApp.ActiveInspector.CurrentItem
    End Select
        
    Set objApp = Nothing
End Function

Sub Decline_Meeting()
    Dim oAppt As AppointmentItem
    Dim cAppt As AppointmentItem
    Dim num_declines As Integer
    Dim oResponse
    
    Set cAppt = GetCurrentItem.GetAssociatedAppointment(True)
    Set oAppt = Application.CreateItem(olAppointmentItem)
    
    num_declines = InputBox(Prompt:="How many declines?", Title:="Decline It")
    
    If num_declines < 0 Then
        MsgBox "Nope."
    ElseIf num_declines > 40 Then
        MsgBox "Too far. Be nice."
    Else
        While num_declines > 0
            Set cAppt = GetCurrentItem.GetAssociatedAppointment(True)
            Set oResponse = cAppt.Respond(olMeetingDeclined, True)
            oResponse.Send
            num_declines = num_declines - 1
        Wend
    End If
    
    Set cAppt = Nothing
    Set oAppt = Nothing
End Sub

Now that you have saved the script, close the VBA window. To run the script, follow these steps:

  1. On the Outlook window, select the meeting invites that you want to decline, then press Alt + F8.
  2. You will get the Macros window, select the Decline_Requests module and click Run.OUTLOOK RUn code
  3. On the next window, enter the number of declines and click OK. Here, enter the number of meeting requests you have selected.OUTLOOK_ Declines

If you are unavailable at the same time slot, the script will automatically decline the meeting but will not delete the email message from Outlook, so you can forward the meeting invite to someone to attend it on your behalf.

Also, to avoid back-and-forth emails about the meeting logistics, you can use Bcc to add the person to the meeting.

Automating the response for a meeting invite can increase your scheduling efficiency by letting you know which time slots are free, streamlining your workflow.

Tell us how auto-responding to the meeting request has helped you in the comments section below.

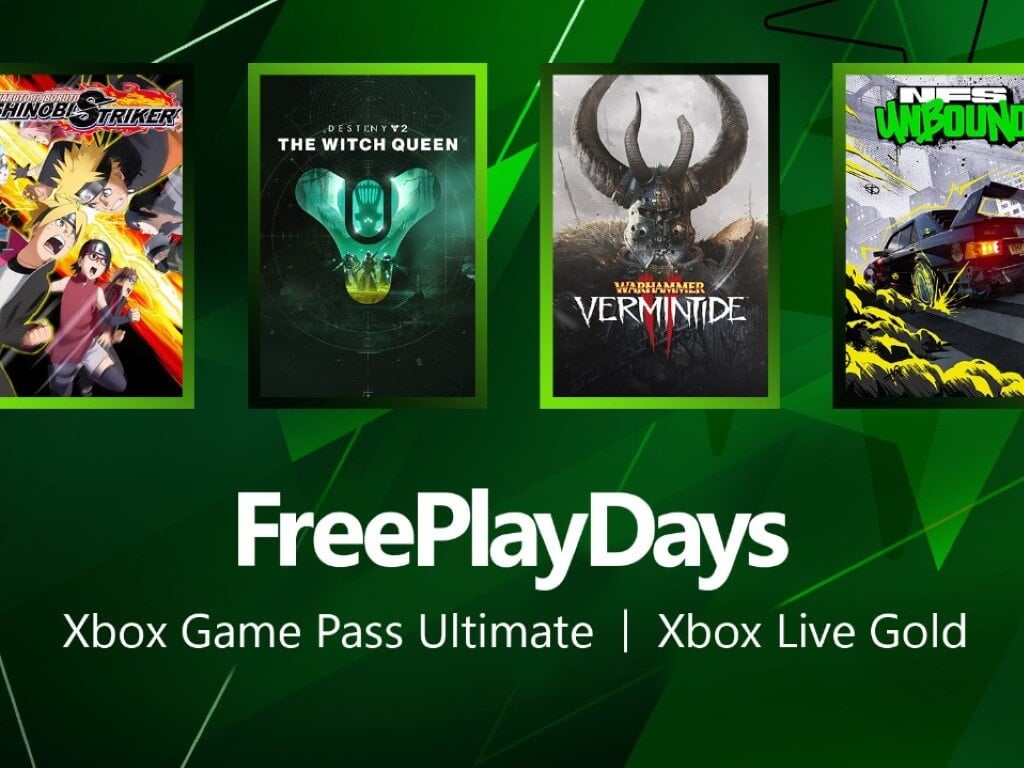
Xbox Free Play Days: NFS Unbound, Destiny 2: The Witch Queen and more

Another week for Xbox Free Play Days, another stacked lineup of free titles for Xbox Live Gold and Xbox Game Pass Ultimate members. This week there are four games representing a range of genres, so there’s bound to be something for everyone here.

This week’s Xbox Free Play Days games will be available as part of the event from Thursday, August 24-Sunday, August 27. See the lineup below.

NARUTO TO BORUTO: SHINOBI STRIKER

Answer the call of the shinobi! Create your own custom shinobi, or select your favorite character, and participate in 4v4 battles where you can unleash a multitude of ninja techniques on your opponents. Follow your ninja way and lead your team to victory! Starting August 25th, play as Kaguya Otsutsuki, the final character for Season Pass 6. Get Season Pass 6 now, and purchase Naruto to Boruto: Shinobi Striker for 50% off this weekend! —Xbox Wire.

Destiny 2: The Witch Queen

A twisted wonderland of corruption and splendor, Savathûn’s Throne World plays host to a fragile balance of terrifying power. From the foundation of her glistening palace to the gnarled roots in the swamp, all that she hides can be found here. Seek the truth and learn that in this place, mystery makes its home in both the Darkness and the Light.—Xbox Wire.

Warhammer: Vermintide 2

Warhammer: Vermintide 2 is the sequel to the critically acclaimed Warhammer: End Times – Vermintide. Fight together with your friends against the forces of Chaos and Skaven in this epic 4-player co-op game set in the Warhammer Fantasy Battles world. Vermintide 2 expands the intense first-person combat with a brand-new enemy faction, 15 new career paths, talent trees, new weapons, an improved loot system, and more. —Xbox Wire.

Need for Speed™ Unbound

Feel the rush in Need for Speed Unbound Volume 4 as cops join the chase in new Gauntlet Playlists. Celebrate 75 years of Porsche with special events and the wildest Legendary Custom Porsche that Lakeshore has ever seen! Stand out on the streets with new premium content in the Store including the Hip Hop Origins Pack. —Xbox Wire.

Learn more about Xbox Free Play Days

Nearly every week Xbox Free Play Days brings a list of games for Xbox Live Gold and Xbox Game Pass Ultimate members to try at no extra cost. If you would like to learn more then head on over to the Xbox Free Play Days FAQ page.

Featured image via Xbox Wire. 

Microsoft enables real-time calendar sync for Outlook and Microsoft Teams via Microsoft 365 Roadmap

Microsoft is making it easier to sync your calendars between Outlook and Teams with their latest Microsoft 365 roadmap additions.

Microsoft has introduced a real-time calendar sync feature between Outlook and Teams. When you modify your Outlook calendar, they will automatically reflect in your Teams calendar, and the same applies vice versa, and it all happens in real time.

For Feature ID 138248, this update was added to the roadmap on August 22, 2023. The feature will be available for Microsoft Teams users in various instances, including DoD, GCC, GCC High, and Worldwide (Standard Multi-Tenant). Desktop and Mac platforms will be covered, and the feature will be generally available starting September 2023.

In another move to improve calendar functions, Microsoft Teams is also getting an update. Feature ID 138326, added to the roadmap on the same date, lets you see real-time meeting changes on your Teams calendar using Android and iOS devices. This feature covers multiple cloud instances like the previous one and will be generally available. The rollout for this enhancement began in August 2023.

These updates from Microsoft aim to streamline calendar management, helping users keep track of their schedules seamlessly across Outlook and Teams.

Microsoft introduces Windows Backup app to Windows 10 with KB5029331 update

Despite the regular feature introduction in Windows 11 and Microsoft forcing users to switch to the latest OS, Microsoft is demonstrating its commitment to the loyal user base of Windows 10 by rolling out a new tool borrowed from Windows 11. The recent release of the KB5029331 update brings an exciting addition for Windows 10 users: the new Windows Backup app, now available for download.

While the Windows Backup app is poised to become a standard feature for all Windows 10 users in due time, it’s currently accessible only to those who actively seek it out. This is because the KB5029331 update, serving as a preview version of an upcoming release, remains an optional update for the moment.

Windows Backup added to Windows 10

For users eager to experience the benefits of the Windows Backup app and explore the other enhancements within the KB5029331 update right away, there are a couple of routes to take. You can manually initiate a search for optional updates or, alternatively, make use of the Microsoft Update Catalog to secure the update package.

However, the allure of the KB5029331 update extends beyond the inclusion of the Windows Backup app. Microsoft highlights the broader spectrum of updates and improvements contained within the package, which you can read in our post on the Windows 10 KB5029331 update.

Via: Beta News

Phil Spencer talks Activision Blizzard, hardware prices, Xbox 360 Store closure and more at Gamescom 2023

Gamescom 2023 continues into its second day and as promised, Xbox is having its biggest presence ever at the event. It has already been quite a showing with the Starfield opening demo and the first teaser for the upcoming Fallout TV show from Amazon Prime Video.

Xbox chief and Microsoft Gaming CEO Phil Spencer has had a lot to say at Gamescom 2023 on a wide range of topics in an interview with Eurogamer. Let’s try and break it all down.

Xbox on Mobile

It’s no secret that Microsoft is planning to create a “next-gen” Xbox mobile gaming store sometime in 2024. And it’s also clear that Microsoft’s pending $68 billion acquisition of Activision Blizzard King is a big part of that endeavor, as laid out by Spencer.

The reason we’re in the acquisition discussion with Activision Blizzard King is around their mobile capability,” said Spencer. “Because it’s just something we don’t have.

“We obviously already have Call of Duty on our platform, we already have Diablo on our platform. So it’s not about new games that Xbox players don’t have access to today. It is about a capability on mobile, and some broader ambitions that we have on the largest gaming platform, which is mobile phones.”

Don’t expect Xbox Series X|S prices to drop any time soon

Xbox Series X And S Side By Side Custom

Spencer told interviewers at Gamecom that we shouldn’t wait for current-gen hardware prices to be cut anytime in the near future.

“…you’re not going to be able to start with a console that’s $500 thinking it’s gonna get to 200 bucks. That won’t happen. Because the core components that you use – you’re used to Moore’s Law shooting up and to the right – but your components… you can’t buy them anymore as a hardware maker because nobody’s making that kind of RAM or other components.”

“It’s not the way it used to be where you could take a spec and then ride it out over 10 years and ride the price points down. It’s why you see console pricing relatively flat.”

In fact, both Sony and Microsoft have increased hardware price points (at least in certain regions) for their current-gen consoles within the last 12 months.

“The prices aren’t coming down. We see it now, and that’s why we did Xbox Series S. I know there’s a bunch of questions like, ‘what is it doing?’ We wanted to make sure we had a sub-$300 console because we want to grow, and we think an entry level price point for many new families or players coming into the market is going to be important.”

The future of the Xbox Series S

And sticking to the topic of the Series S, Spencer was asked about the ongoing debate over Microsoft’s less powerful entry level current-gen offering, and whether it was holding back the Series X due to the parity mandate.

“I don’t see a world where we drop S. I want to make sure games are available on both, that’s our job as a platform holder and we’re committed to that with our partners.”

The debate over the Series S feature parity clause has been rekindled by the delay of Baldur’s Gate 3 on Xbox. While Larian Studios’ action-RPG is eventually headed to Xbox, in the meantime the game is enjoying enormous popularity on other platforms including PlayStation 5, Windows and even Mac.

Spencer on the closure of the Xbox 360 store and game preservation

Last week it was announced that the Xbox 360 Store would be closed down in July 2024. This has led to a renewed discussion online about games preservation. Spencer also touched on this during his interview with Eurogamer at Gamescom.

Xbox 360 console
Xbox 360 console

“Game reservation is critical to us at Team Xbox. One of the things we do is ship all of our games on PC, because I actually think PC is the best ecosystem for game preservation because it’s not tied to one piece of hardware.”

Spencer went on to say that the Xbox 360 community is a very small one, adding

“There’s a list of, what 220 games that are not back compat, and I have that list and I’ve got it stapled on my forehead, and like, how can we make sure [you can play them still?] How many of those are on PC?”

Hopefully, the team at Xbox will find a way to ensure these games remain accessible after the 360 Store closure.

Gamescom 2023 will run through Sunday, August 27. Stay tuned to the Xbox YouTube, Twitch and Facebook channels for more info on everything Xbox-related going on at the event.

Via VideoGamesChronicle. 

Microsoft Viva Engage introduces new video and image features for enhanced user experience

Microsoft has released information about the new features and updates coming to the Viva Engage platform, focusing on enhancing the use of video and images for communication and engagement within organizations. Another Microsoft Viva suite product, Viva Pulse, announced nine updates.

What is Viva Engage?

Viva Engage is an app for social collaboration and part of the Microsoft Viva suite of employee experience (EX) products. Its purpose is to assist employees in connecting with each other, sharing knowledge, and establishing a community.

Changes to the “Stories” Feature

Based on user feedback received during its public preview, improvements are being made to the “Stories” feature. Videos and images will not be separated into a distinct carousel to prevent confusion. Instead, all media will appear in the existing feeds. Engaging layouts and immersive viewers will showcase videos and images within posts.

Media Sharing

Users can access dedicated buttons for adding videos and images in the command bar. This feature is available for both desktop and mobile devices. Mobile users can also record videos. Desktop users can record videos using their webcam or screen recording.

Media Presentation

The updated design now displays videos and images right in the feeds. A post with only one video or photo and very little text will be showcased automatically.

Availability

  • Next quarter, Viva Engage users will receive new buttons for uploading and recording media at no additional cost. 
  • Later in the year, preview customers will have access to enhanced media experiences, such as showcasing media in feeds and using the immersive player. 
  • Creators using the Microsoft Viva suite will have access to the new video and image experiences.

These updates seem to provide a more streamlined and engaging experience for sharing and consuming video and image content within the Viva Engage platform.


How to move old apps to a new Windows 11 computer

Thinking of moving to a new Windows computer? Or maybe you’d like to switch to a new Windows 11 version on the same PC. Whatever options you choose, if you decide to go the simple copy-and-paste route, you’ll have a fair amount of heavy lifting here.

For one, you’ll have to install all the system files and then reconfigure your settings. Now, if that was all you’d to do, you could still have pulled through, however grudgingly. But when you go with the default way of moving things around on Windows (which means reinstalling everything from zero), you’ll also have to install all your third-party apps individually; a nasty, long-winded way to go about things, for sure.

Don’t worry, though, because we’ve got your back. So let’s jump in and look at how to move your old apps to the new Windows 11 in as simple manner as possible.

How to move old apps to a new Windows 11 computer

As I’ve said repeatedly over the years, there’s more than one right way to do things in tech—whether that’s the larger tech scene or even your daily Windows things.

If you’re a long-term Windows user, you know precisely what I’m talking about. Broke something? Here, try out these twenty-four different ways to fix your PC backup! Can’t restart your Windows? Here are ten other ways to do it!

So, it’s no surprise that the same holds for moving your old apps to a new Windows 11. Now, don’t worry—you won’t have to jump through any unnecessary hoops here; just two methods are enough to move your old apps to your new Windows 11.

You can use your Microsoft account or a third-party tool, and you’ll be done in no time. Let’s start with the Microsoft account first.

1. Move your old apps to a new Windows 11 through Microsoft account

It goes without saying that to take your old apps and settings to a new Windows 11 system through your Microsoft account, you’ll have to have your files backed up in the first place. Basically, you need to have your files stored in the cloud—OneDrive in this case—and you can then download your apps and settings to your new Windows 11.

If you have backed up your apps or settings already, here’s how you can do it:

  1. Launch the Windows Settings app by pressing the Windows key + I shortcut.
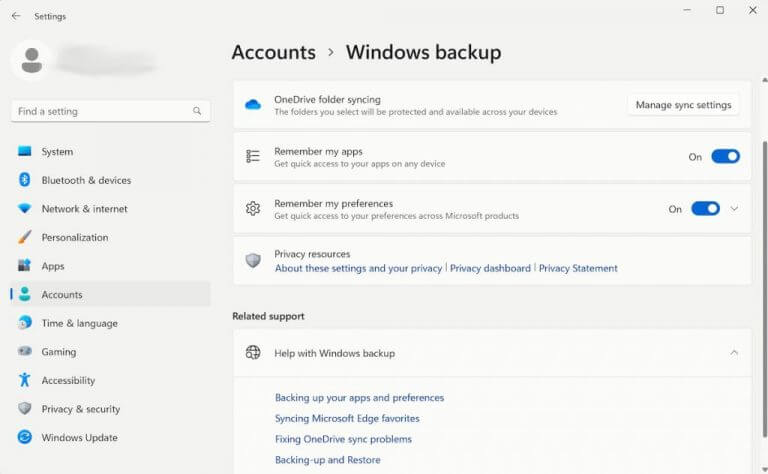
  2. Head to the Accounts > Windows backup section from there.
  3. Move to the Remember my apps option and toggle on the Windows settings.
  4. Click on Remember my preferences option to back up your settings.

windows backup

You can confirm your backup by checking the Preferences section from the top; it should now have “backed up” there.

When you have cloud backup in place

If you have a cloud backup in place from beforehand, or if you created one just now, you’re ready to move your old apps to a new Windows 11 machine.

When you’re done installing your Windows 11, sign in with your user account (where you’d earlier backed up the files) whenever you’re asked.

You’ll then get a dialog box asking you to confirm your restoration. Click Next to go ahead, and your old apps will be transferred to the new Windows 11 system in no time.

When your PC boots up, you’ll be taken to the Microsoft Store, where you can then restore your additional apps on your PC. From there, click on the Restore my apps button.

In the Store, click on Restore all, and you will get all your Microsoft Store apps back.

2. Use a third-party app

The above method is enough for almost all your Windows apps. But if you want to move your third-party apps as well, you need additional help. You’re looking for a third-party app to help you in that case.

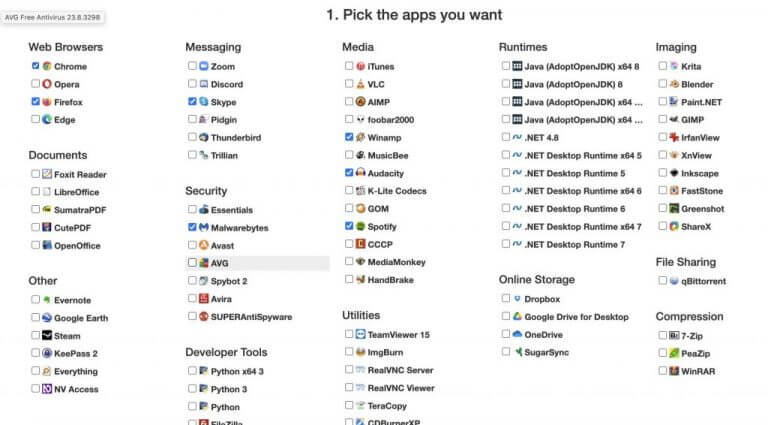
For example’s sake, we’ll be using Ninite. You are, of course, free to use any app you find better suited. Ninite works by helping you install or update multiple apps in a single go, without having to resort to installing the apps one at a time. So, while you won’t be able to carry your apps to the new Windows 11 with you, you can install them through a custom installer created by Ninite. Here’s how:

  1. Head to official Ninite website.
  2. Pick the apps you’d like to install simultaneously from the Pick the apps you want section.
  3. Finally, click on Get Your Ninite button to create a custom installer.

ninite installer creation

After you have followed above the above steps, the Ninite website will create and download the custom installer for you. All you have to from here is to launch the .exe setup and the app will take care of the installation.

Moving old apps to new Windows 11 PC

Moving to a new computer system setup can be overwhelming in itself. You might have to get used to new hardware and software (if you’re changing the OS), and you might have to adjust yourself. Add in moving your old apps to the new Windows 11 on top of this, you will unnecessarily complicate the things.

If you follow the above methods, though, you can easily transfer your apps from one Windows to another without any hassles. So try them out and let us know if you have any tricks in mind.

Opera GX VPN not working? Try these fixes now!

Opera GX, a special version designed specifically for gamers can encounter several stumbling blocks like VPN not working issues. It’s imperative to get rid of these connectivity issues to continue your private browsing.

Opera GX has a free VPN that one can enable with a mere click. The makers added the feature to enhance user privacy and security while browsing the internet. VPNs encrypt internet traffic and hide the user’s IP address, making it difficult for third parties to track their online activities.  

Secondly, VPN helps to bypass geo-restrictions and lets you access region-locked content.

You can troubleshoot VPN issues on Opera GX on your own. We can assist you in navigating the process of maintaining your anonymity while using the internet.

Apart from a built-in VPN, Opera GX comes with an adblocker, AI features, a password manager, and much more.

You should consider making Opera GX your default browser for quick access to web applications in case you’ve already been using it for a while.

 Opera GX

Opera GX

Enjoy the free VPN feature on the Opera GX browser.

Why is my Opera GX VPN not working?

There can be many potential reasons why the VPN on Opera GX has stopped working properly. However, the most common underlying reason could be staying connected to the VPN over time. Other times, you might be having difficulty connecting to the VPN.

Well, the possible issues related to VPN not working on Opera GX could be anything. You can always troubleshoot to know the root cause and apply fixes.

Opera GX’s free VPN lets you connect to three continents mainly – the Americas, Asia, and Europe. By default, it chooses an optimum location. For starters, you can shuffle between these three provided locations to get your VPN back to work.

And, if the primary solution doesn’t seem to work, you can always follow the below troubleshooting guide to fix Opera GX VPN issues.

How do I get a VPN to work on Opera GX?

Fixing VPN connecting issues could be tricky as you never know what triggered the problem in the first place. Nevertheless, the goal is to bring the virtual connection back to work and continue private browsing.

Here are some troubleshooting tips and fixes that you can use to resolve common VPN-related problems.

Check internet connection

The first and foremost fix is to check that you’re on a stable and reliable internet connection. A weak connection is often the main cause of interruptions in establishing a VPN connection.

Restart the VPN and browser

Another solution that you should try first is to restart the VPN and browser. Firstly, cancel the connection attempt. Restart your browser and then reconnect to the VPN. More often than not the VPN connectivity issue is tied to this. So, it’s better to use the primary fixes first before jumping on to the bigger ones.

Try a different server location

Opera GX VPN not working

Another fix that you can try to reconnect Opera GX VPN is by simply switching to another server. It is possible that you might be encountering a VPN connectivity issue with a particular server of the available location.

Reasons could be anything, sometimes, servers are taken offline for maintenance. It’s also possible that the server you’re trying to connect to is under heavy load.

Another obvious reason is the server you’re getting connected to is far from your physical location, hence the slower speeds. So, it’s better to switch. You can choose between a server in the Americas, Asia, or Europe.

Clear browser cache and cookies

One of the main reasons that your VPN keeps on disconnecting is because of the stored caches. Caches can interrupt a VPN connection by storing outdated or incorrect information about the VPN server or client.

So, go to the left sidebar of the browser click the “Privacy & Security” section, and then tap on the ‘Clear browsing data’ option to clear caches and cookies.

Opera GX clear caches

Update Opera GX and resolve the VPN connectivity issue

You should also update Opera GX to the latest available version because it’s possible that the VPN connection issue is tied to an older version of the browser. An outdated browser or software can invite many vulnerabilities that can make it more unstable and hence unable to be used.

Disable other VPN software/ extensions

Needless to mention, if you have any third-party VPN extension installed on your Opera GX then you have to disable it. This is because it might conflict with Opera GX’s built-in VPN. Also, uninstall any other VPN software installed on your system.

Disable firewall or antivirus software

One of the main causes that may interfere with the VPN connection is firewall or antivirus software. Disable them and check if the issue is resolved. However, enable them back once you’re done with your VPN session.

Here’s how you can disable the firewall on Windows 11.

  1. Open Settings go to Privacy & Security and select Windows Security  > Firewall & Network Protection.
  2. Select a network profile: Domain network, Private network, or Public network.
    Alternatively, you can type ‘Control panel’ on the Start and search for ‘Firewall’ for quick access.
    Windows firewall
  3. Under Microsoft Defender Firewall, switch the setting off (if it’s On already).
    Note that turning off the Microsoft Defender Firewall could make your device (and network, if you have one) more vulnerable to unauthorized access.

Note: It’s possible that you may not be able to access popular video streaming sites like Netflix. This is not an issue of Opera GX. The streaming site has geo-restriction block mechanisms in place and the browsers can’t bypass them.

Also, unlike standalone VPN software that we install on our Windows system, Opera GX’s built-in VPN is easy to solve. You just have to solve the troubleshooting guide to get the private browsing back to work.

Outlook BAK File: What is it & How to Open or Restore it?

If you have come across a BAK file in the Outlook folder, wondering what it is used for, or if it is legit, this guide can help!

We will discuss how the BAK file is created, its functionality, and detailed instructions to restore lost Outlook data.

An Outlook BAK file is a backup file that is created by Microsoft Outlook Inbox Repair Tool just before making changes in the original PST file during a repair process

The file created has the same name as the original file but has a .bak extension and is stored in the same folder as the Outlook data file, which is System Drive:\Users\<username>\AppData\Local\Microsoft\Outlook

It may contain additional data, including email messages, contacts, calendar items, and settings. Therefore, it can recover data if the original data file becomes inaccessible.

In case you don’t want to save this file, you can remove the checkmark next to Make backup of scanned files before repairing before you click the Repair button on the Inbox Repair window.

How do I open a BAK file in Outlook?

You can not directly open the BAK file in Outlook; however, you can access it after changing the file format from .bak to .pst. Once you change the extension, you can follow these steps to open the file in Outlook:

  1. Press the Windows key, type Outlook, and click Open.Outlook Start menu open
  2. Go to the File tab.File menu option
  3. Select Open & Export, then click Open Outlook Data File.OPen Outlook data file outlook bak file
  4. On the Open Outlook Data File window, go to the address bar, paste the path, select the file and click OK.OUTLOOK_Select the file and click OK

Outlook will refresh and show you the contents of the file. Go through the email messages, contacts and configuration settings to confirm that the data you want to recover is on the file.

How do I restore a BAK file in Outlook?

  1. Press the Windows key, type Outlook and click Open.Outlook Start menu open
  2. Go to the File tab.File menu option
  3. Select Account Settings, then Account Settings.Account Settings - Account Settings
  4. On the Account Settings window, select Data Files. Go to the email related to the Data file; you will get the location of the original PST file.Open the  Outlook BAK file using the Open File location option
  5. Click Open File Location and locate the file with the .bak extension.
  6. Select the file and click Copy, then right-click and select Paste to get a copy of the file.Copy the file
  7. Now to restore the BAK file to PST, double-click the file name and add .PST to the existing name. For example, if your BAK file name is backup.bak, create a copy, then name it backup-Copy.bak.pst.

How do I import a BAK File in Outlook?

Now that you have the .PST file ready, you can import it using the Import & Export Wizard window. To do so, follow these steps:

  • Press the Windows key>Outlook>Open. Afterward, go to File>click the Open & Export option>select Import/Export.
  • Choose Import from another program or file, click Next, select Outlook Data File (.pst), and click Next.
  • Click Browse to select the file, select the radio button next to Do not import duplicates, then click Next.
  • Select Include subfolders, click the radio button next to Import items into the same folder, choose the Import Folder, and then click Finish.

Once the import process is complete, Outlook will refresh itself, and you can see the recovered items in the selected folder.

If the Import process fails, the BAK file is likely corrupted; in that case, you might need a reliable data recovery tool to restore the lost data.

Always be extra careful when you change the file’s extension, as if not done correctly, the file becomes unusable and might not appear in the Import Outlook Data File window.

Also, before changing the extension, you should create a copy of the backup file and make changes to always have the original backup file if anything goes wrong.

Speaking of BAK files, if you want to open the SQL Bak files on Excel, we have an exciting guide to help you with that.

To learn about a similar file type, our guide on how to open BCK files is here to answer all your questions. For conversion, we have a simple guide to transform MSG to PST format.

To understand more about this file format in general, see what a BAK file is and how it works.

If you have any other questions related to BAK files, please mention them in the comments section below.

What is a Tentative Meeting in Outlook & How Can I Use it?

Outlook is a popular email service allowing users to set up meetings and send requests. When one does that, they sometimes find that the particular meeting slot shows up as Tentative in Outlook, which leaves them wondering whether the user is available.

Going by the dictionary definition, tentative is anything that’s not fixed or certain. Uncertainty is the key aspect.

What does Tentative mean in Outlook?

Tentative allows users to inform the meeting administrator that they may or may not be able to join the meeting. When Outlook meeting requests appear tentative, the administrators will know your participation is not certain. 

Remember, tentative isn’t foolproof and is one of the primary reasons behind double-booking a given time slot since administrators can’t see the tentative status in Event. Instead, it’s visible under the Scheduling Assitant.

How do I set Outlook meeting requests to show as Tentative?

  1. When you receive a meeting notification or an invitation via email, there will be several meeting responses available. Simply click on Tentative. Alternatively, you can open up the meeting and choose the response.tentative
  2. After you do that, the user who set up the meeting will receive a notification, and their calendar will reflect the same.

Marking participation as tentative confuses the person who forwarded the meeting invite. Making your plans evident right away is the best way to proceed! Also, Outlook uses color coding to highlight how attendees have marked their presence.  

When responding to meeting requests in Outlook, you have the following options:

  • Accept: This shows that you are available, and the meeting is added to your calendar.
  • Tentative: It indicates that you may join the meeting, and it’s still added to the calendar.
  • Decline: This indicates your inability to join the meeting, and it’s not added to the calendar.
  • Propose a new time: If allowed by the meeting organizer, you can propose a new time for the meeting, one when you will be available. A new meeting request is sent to the organizer.

How to manage Tentative appointments in Outlook?

  1. Launch Outlook and open up the meeting.
  2. Go to the Show as dropdown menu, and select an option other than Tentative.choose an option

You can change the tentative appointments and meetings, and accept or decline them at a later stage, once things clear up. As a rule, choose your response to meetings carefully and go through the meeting details.

Remember, meetings and appointments always show as Busy by default in Outlook, and you must manually change the status.

To sum up, while Tentative meeting in Outlook is a great feature, there’s still room for improvement, especially for users who are often double-booked. Use the feedback section in Outlook to share your suggestions!

Our recommendation is to be direct with your responses to meeting requests and leave no room for ambiguity. 

If you are facing issues with Outlook meetings or can’t seem to find the right slot, send meeting invites with multiple times to get everyone on board.

For any queries or to share issues you faced with tentative meetings in Outlook, drop a comment below.

Microsoft releases enhancements for live camera embedding ‘Cameo’ in PowerPoint presentations

Microsoft announced enhancements to the “cameo” functionality in Microsoft PowerPoint for both Windows and Mac platforms.

A cameo in this context refers to a small video feed, often from a camera, that can be embedded into PowerPoint slides. This feature is particularly useful for presentations where you want to include live video content within your slides. Microsoft 365 subscribers can access cameo on the desktop app for Windows and macOS.

Here are the introduced enhancements:

  1. Camera Preview and Source Control: Users can now turn the camera preview on or off and change the camera source while in Slide Show View or Presenter View mode. This allows for greater control over when and how the cameo appears in your presentation.
  2. Improved Design and Consistency: Fresh cameo designs have been added to align with the overall theme of your PowerPoint presentation. With a single click, you can now easily insert these cameo designs into all your slides, creating a cohesive look throughout the presentation.
  3. Personalized Cameo Styles: Users can insert a cameo on a single slide, customize its format, and then apply the same format to all slides with a single click. This ensures that the cameo maintains a consistent style across all slides.

Cameothumbnailppt

You can learn more about how to apply this in your presentation here.

If you are utilizing these additional features, it has been reported that the camera may not appear when using the cameo. This could be because another application is using the camera. In this case, you may need to select a different camera or disable the camera for the other application.

These enhancements are available to Beta Channel users running specific versions:

  • Windows: Version 2307 (Build 16731.10000) or later
  • Mac: Version 16.76 (Build 23081101) or later

These updates aim to give users greater flexibility and control when integrating live camera feeds into their PowerPoint presentations. It’s a great way to make presentations more engaging and dynamic by incorporating real-time video content directly into your slides.


Microsoft 365 Roadmap announces 9 major updates for Microsoft Viva

Microsoft has recently announced a series of updates to its Microsoft Viva platform via the Microsoft 365 roadmap. These enhancements aim to streamline communication and feedback processes within organizations.

What is Microsoft Viva Pulse?

Microsoft Viva Pulse is a feedback solution for team leaders and managers to obtain immediate insights into their team’s performance. This is part of Microsoft Viva, a bundle of employee experience applications that enables organizations to connect their people, knowledge, and insights to drive business outcomes.

The new features include:

  1. Organization-Wide Customization: Managers and project leads can now create organization-wide templates and customize questions to gather valuable insights.
  2. Wider Reach: Viva Pulse users can now send pulse requests to a larger audience, reaching up to 10,000 recipients simultaneously.
  3. Scheduled Resending: The ability to schedule and resend pulse requests allows teams to receive periodic feedback, ensuring a continuous feedback loop.
  4. Create from Scratch: Users can build Viva Pulses from scratch by formulating questions or selecting from a predefined question library.
  5. Teams Integration: Responding to Viva Pulse requests is made more convenient with Microsoft Teams chat notifications and inline response features.
  6. Flexible End Dates: Customization extends to setting specific end dates for Viva Pulses, tailoring the feedback collection period.
  7. Question Library: Users can access a library of research-backed questions for crafting effective Viva Pulses that yield meaningful insights.
  8. Email Interaction: Responding to Viva Pulse requests is also possible through email, providing multiple avenues for engagement.
  9. Policy Integration: Organizations can enhance their pulse customization by including links to internal policies within the reminder messaging.

These updates were added to the Microsoft 365 roadmap between August 18, 2023, and August 22, 2023. The rollout is set to begin in December 2023. The updates will be accessible on various platforms, including the web, Microsoft Teams, and Surface Devices. They will be available to users worldwide under the General Availability release phase.

Microsoft’s long-term stock evaluation looks very sunny for investors

Over the past seven years, Microsoft CEO Satya Nadella has preceded over a cloud services division that’s effectively printing money for the company, and the folks over at The Motley Fool believe that ATM machine will continue to rain revenue and profit gains for investors for years to come.

Microsoft’s stock has seen a quantified resurgence since its president of servers and tools ascended to the CEO spot and ushered in a very profitable pivot to a cloud services era for the company.

From 1998 to November 2016, Microsoft’s stock hovered between lows of $19 to highs of $52 a share, but once its cloud services shift was in full swing, early investors have enjoyed a three hundred dollar increase on their returns and according to analysts over the Motley Fool cloud service diversity is what will keep the Redmond-based company a worthwhile investment despite its increased buy in over the years.

At over 11 times annual sales, shares have become more expensive compared to the start of the year when they were trading at below 9 times sales.

You can own individual companies that each compete in a small portion of Microsoft’s territory for much cheaper. The cybersecurity expert Palo Alto Networks trades at 10 times sales, for example, and video game giant Electronic Arts is valued at 4 times sales.

But Microsoft delivers exposure to these niches and a half-dozen more, all wrapped up under a single brand. That diversity makes it an obvious choice for most enterprises seeking comprehensive tech services. It also makes it an attractive stock to have in your portfolio. As a result, owning Microsoft stock over the next several years will likely have a positive impact on your portfolio, despite its high price today.

Screenshot 2023 08 23 105731

Providing cloud platforms, services, and securities has become an increasingly competitive market with Amazon still leading the charge, but Microsoft has nestled into the second spot and utilized its position as a hybrid solutions business to chip away at AWS lead in the market.

While competitors such as Google Cloud, Alibaba Cloud, Oracle, IBM’s Kyndryl, Tecent and OVHcloud vie for users, investors feel confident in Microsoft leveraging its established enterprise business offerings to continue to bolster Azure.

In accordance with its shift from licensing Windows to licensing its cloud services and platforms, Microsoft investors are recognizing another bet from the company in the way of AI that can help to generate revenue during the ebbs and flows of the cloud market.

While Microsoft currently sits at a comfortable second place to AWS in the cloud market the year over year gains for the business have come down from quarters of leaps and bounds to a more moderate churning of revenue, however, Microsoft is now juicing its cloud business with artificial intelligence, and investors should see additional returns thanks to some very strategic partnership that net the company profit as enterprise adopts AI, LLMs, and GPT models across its stack.

Microsoft Azure is available in sixty regions with 116 available zones compared to AWS at 26 regions and 84 zones or Google 32 regions and 103 zones. Combine Azure’s accessible footprint and historic compliance records with Microsoft also leading a public charge of artificially intelligent and generative pre-trained infused systems and services into areas such as LinkedIn, Dynamics 365, GitHub, Azure SQL, and Office 365 the company has a myriad of diversification options to continue to suck up cloud revenue for investors despite a contentious market.

Sony’s PlayStation Portal remote handheld to launch this year at $199.99

Sony has announced that its portable PlayStation 5 remote player handheld will launch later this year at a $199.99 price point. It will be known as the PlayStation Portal.

We reported earlier this year that the device, then known by its project name the “Q Lite,” was in development. Apparently the device will be able to stream PS5 games over WiFi at 1080p @60FPS.

The PlayStation Portal will feature an 8″ LCD screen sandwiched between what is essentially a DualSense controller. The PlayStation Portal will also be able to mirror the PS5 via the homescreen. It won’t be able to do any kind of playback offline, however. Strangely, the PlayStation Portal won’t feature cloud gaming support. Nor will it be compatible with PlayStation VR or VR2. From the announcement post over on the PlayStation Blog,

The homescreen of the PlayStation Portal mirrors your PS5.

PS VR2 games, which require the headset, and games that are streamed through PlayStation Plus Premium’s cloud streaming, are not supported.”

In this the PlayStation Portal seems oddly limited for what it is. While it is rumored to be set for a November release date, nothing more specific than “later this year” has been revealed by Sony.

Microsoft introduces Copilot for Power Apps

In the rapidly evolving landscape of AI innovation, Microsoft has leaped with the introduction of Copilot for Power Apps. The expansion is geared towards empowering users and enhancing functionality.

Becoming a “Copilot”

Microsoft plans to amp up user productivity by integrating next-generation AI into a user-friendly interface. Copilot, being the magic behind the invention, allows users to gain valuable insights about their data.

But its benefits go beyond just data analysis. The tool reinvents user interaction by enabling communication with the app through natural language, providing an intuitively receptive experience. It’s like having a virtual buddy guiding you through every corner of your app universe.

Model-Driven Apps

Microsoft Copilot assists users in extracting valuable knowledge from their data. It improves app interaction by engaging users in purposeful, interactive discourse using natural language. Copilot in model-driven apps will debut as part of the Monthly Channel release.

  • Assists Users: The copilot offers help to users by facilitating data interpretation with meaningful insights.
  • App Interaction: It enhances the user experience on the app by fostering relevant and interactive conversations in natural language.
  • Monthly Channel Release: Copilot will debut in the model-driven apps as part of the Monthly Channel release.
  • Rapid Progress: The strategy allows Copilot to evolve swiftly based on user feedback.
  • Frequent Updates: No longer do users have to wait for semi-annual updates.

Canvas Apps

A significant upgrade makes Copilot in canvas apps more powerful since launching earlier this year. Microsoft met the demand for support for larger datasets with a true reward: no size limits when connecting Copilot control to Dataverse. Now, those multi-terabyte tables can be seamlessly managed, and manipulated within the canvas.

The software giant further motivates users to leverage the Copilot control with PowerFx, enhancing ease of use and capability. The ‘Selected Items’ property of the Copilot control, for instance, will display live details about the answer on the screen.

While Copilot for both model-driven and canvas apps is currently only available in English and within the United States.

Microsoft Edge flags Google Chrome installer as harmful, mistake or deliberate action?

Microsoft Edge version 116 incorrectly flagged the ChromeSetup.exe file, the installation file for Google Chrome, as potentially harmful. This led to warning messages and prompts discouraging users from downloading Chrome. This issue seemed to affect only some users, with the error being observed in around one out of five Edge 116 stable installations during testing.

Chromesetup Flagged Harmful By Edge

Lately, Microsoft has been known to promote its Edge browser and ecosystem to Windows users, and this situation could be seen as a way to subtly encourage users to stay within their ecosystem.

Microsoft Edge Voices Against Chrome

However, these aggressive advertisements and practices aren’t uncommon in the tech industry, and Google is no stranger. Microsoft and Google have been known to engage in such behavior. Back in the day, Chrome applied similar tactics to get hold of its customers when they were dominating the browser business.

Is it safe to say that karma hits you back? Either way, such strategies could be misleading for the customers.

There has been no official statement from Microsoft regarding the flagging of ChromeSetup.exe as potentially harmful.

via WindowsLatest

Microsoft’s AI-powered designer tool comes to Edge sidebar

Microsoft Designer can now be accessed through the Edge sidebar, offering a streamlined integration. This spares users the need to open a new app or tab for creating personalized designs.

In a blog post, the software giant touted: “Users can now create stunning visual designs with just a few clicks.”

The tool, according to the company, can generate varying designs, from greeting cards and social media posts to PowerPoint illustrations and logos for businesses.

Microsoft Designer was crafted with the capabilities of DALL-E, a powerful image-generation tool. It is now integrated into the Edge sidebar, transforming the mundane tasks of creating designs into a simplified yet engaging activity. How it works parallels AI-powered text-to-image models, like Stable Diffusion.

Integrating Microsoft Designer with the Edge sidebar enables users to readily produce custom designs for emails or social media posts on platforms such as Instagram and Facebook. This development eliminates the need to depend on third-party apps for such functionalities.

Accessing the new Designer tool is straightforward: click on the ‘+’ icon visible on the right side of the Edge sidebar, followed by the ‘Designer (Preview)’ option. To start creating designs, supply the search box with key terms relevant to your desired theme or event. The tool then automatically generates unique images boosted by the DALL-E image generator.

Once the images are generated, they are readily available for download and use for any purpose the user deems fit. Yet, it’s worth noting that the tool is currently in the preview phase. As of now, it is exclusively available to users based in the United States.

Fix: Tozo t12 not Working with Windows 11

The transition to Windows 11 has brought a myriad of features, but for many TOZO T12 earbud users, it’s also introduced unexpected connectivity challenges. These disruptions can significantly affect your daily audio experiences, whether it’s for work, leisure, or communication. This guide is tailored to provide clear solutions, ensuring that you can swiftly return to enjoying your favorite tunes, podcasts, or calls without hassle. For more general information on Windows 11 headphone issues, you can refer to this guide.


Understanding the Issue

  • Bluetooth Compatibility: Changes in Windows 11 might affect the earbuds’ Bluetooth connectivity. Similar issues have been reported with Galaxy Buds.
  • Driver Conflicts: Outdated drivers can cause connection issues between TOZO T12 and Windows 11. This problem is not unique to Windows 11, as Windows 10 users have faced similar challenges.
  • Interference: External devices or software might disrupt the Bluetooth connection.

Step-by-Step Solutions

1. Ensure Bluetooth is Enabled

Why it’s Crucial: Bluetooth is the bridge between TOZO T12 and your device.

  • Move your cursor to the bottom left corner of your screen.
  • Click on the ‘Start’ button, represented by the Windows logo.
  • In the Start menu, locate and click on the ‘Settings’ option, represented by a gear icon.
  • In the Settings window, find and click on ‘Bluetooth & devices’.
  • Look for the Bluetooth toggle switch and ensure it’s set to ‘On’.

2. Re-pair TOZO T12

Why it’s Crucial: A fresh pairing can resolve minor connection issues.

  • In the ‘Bluetooth & devices’ section, find and click on ‘Add device’.
  • Take your TOZO T12 earbuds and put them in pairing mode. If unsure how, consult the earbuds’ manual.
  • On your computer screen, a list of available devices will appear. Find and click on ‘TOZO T12’.
  • Follow any on-screen prompts to complete the pairing process.

3. Update Bluetooth Drivers

Why it’s Crucial: Current drivers ensure the best compatibility.

  • Move your cursor to the bottom left corner of your screen.
  • Right-click on the ‘Start’ button.
  • From the menu, select ‘Device Manager’.
  • In the Device Manager window, find and expand the ‘Bluetooth’ category.
  • Right-click on your Bluetooth module listed under this category.
  • From the dropdown menu, select ‘Update driver’.
  • In the next window, click on ‘Search automatically for updated driver software’ and wait as your computer searches for and installs any available updates.

4. Install Windows 11 Updates

Why it’s Crucial: Regular updates might contain fixes for known issues.

  • Move your cursor to the bottom left corner of your screen.
  • Click on the ‘Start’ button.
  • In the Start menu, locate and click on the ‘Settings’ option.
  • In the Settings window, find and click on ‘Windows Update’ in the left pane.
  • On the right side, click on the ‘Check for updates’ button. If updates are available, follow the on-screen instructions to install them.

5. Reset TOZO T12 Earbuds

Why it’s Crucial: A reset can clear internal glitches in the earbuds.

  • Take out your TOZO T12 manual.
  • Follow the specific reset instructions provided in the manual.

By following this guide, users should restore the functionality of TOZO T12 with Windows 11, ensuring a quality audio experience. If your computer still won’t recognize the headphones, you may find additional solutions in this article.

How to Download & Install Samsung NVME Driver on Windows 11

We’ve repeatedly reiterated the importance of updating your drivers regularly. A good driver can make a huge difference on your PC, and the NVMe driver is no exception. 

In today’s article, our main focus is the Samsung NVMe driver. We explore how to download and install it on your Windows 11, potential issues that may arise from having the wrong driver installed as well as how to optimize it.

The Samsung NVMe driver works with Windows 11, provided you meet all the system requirements. The Samsung NVMe driver software allows your Windows operating system to recognize and communicate with your Samsung NVMe SSD.

Without this driver, Windows will not recognize your storage drive, and you will not be able to use it in other storage-related tasks.

Some of the issues that may pop up in the absence of the correct or missing driver include:

  • Boot failure – If your computer doesn’t have access to the right driver, you may experience a disk read error because it can’t read any data on your SSD and hence keeps rebooting.
  • Performance degradation – If your driver isn’t optimized for your storage controller, you’ll notice slower speeds than you should be getting from your hardware.
  • Data loss – Your PC may be unable to read or write data from/to your SSD. This can cause file corruption issues and even data loss if the problem persists.
  • Compatibility issues – If there are compatibility issues with the operating system, the driver may fail to communicate with other devices or become unrecognizable.

How can I download & install the Samsung NVMe driver on Windows 11?

1. Download from the official site

  1. Navigate to your browser and download the Samsung NVMe driver.
  2. Locate the downloaded file and double-click it to open.
  3. Click Next on the setup wizard window.
  4. Check the I accept the agreement box and click Next.
  5. Wait for the installation to complete, click on the Yes, restart the computer now option, and hit Finish.

When you install a new driver, it may not be loaded into memory. Some drivers require Windows to load them before they can be used. Restarting the computer will ensure the newly installed driver is applied to all running processes and applications.

2. Download from the Device Manager 

  1. Hit the Windows key, type Device Manager in the search bar, and click Open.device manager w11
  2. Locate the Samsung NVMe SSD from the list, right-click on it, and select Update driver.
  3. Select Browse my computer for drivers.Browse my computer for drivers
  4. Locate the driver downloaded in Step 1 above and click Next.
  5. Follow the on-screen instructions and wait for the driver to be installed, then restart your PC.

Still, you may get that Windows 11 is not recognizing your NVMe driver or other driver issues. It is possible that your OS is installing generic drivers and won’t load the correct driver. In such cases, we’d recommend a driver updater utility. 

Outbyte Driver Updater is our chosen fighter for obvious reasons, such as its huge database of drivers and its scanning and detecting abilities for missing, damaged, and outdated drivers. It then replaces it with the correct version.

⇒ Get Outbyte Driver Updater

Can I optimize the Samsung NVMe driver on Windows 11?

After installing the Samsung NVMe driver, you might think your work is done. However, the process is far from over. You need to ensure your driver and OS are updated at all times to pass the compatibility check; otherwise, you’ll suffer a performance loss and, eventually, a disk crash.

Regular disk defragmentation on your NVMe and adjusting the NVMe controller settings, such as enabling the TRIM feature, should also suffice. The TRIM command blocks off no longer needed data and makes room for new data.

If you’re experiencing any of these issues or anything else odd with your Samsung NVMe SSD, such as NVMe not showing in BIOS, there’s a good chance it’s because you don’t have a compatible driver. Perhaps it’s time you considered getting one of the best NVMe laptops in the market.

That’s all on how you can download and install the Samsung NVMe driver on Windows 11. If you encounter any issues with the drivers, you can contact Samsung support for further assistance.

For any additional thoughts, leave us a comment down below.

How to View Firefox Saved Passwords and Manage them

Firefox lets you save your passwords so that you don’t have to type them manually the next time you’re logging in. Its password manager is pretty simple to use. It can automatically fill in login details for quick access, lets you find your saved passwords and much more.

Firefox is known for its fast performance and strong security features. Like others, the browser goes through some stumbling blocks like pages not loading up, tabs crashing, or battery drain issue as well. However, it’s easier to downgrade Firefox to the previous version or try other fixes to restore everything.

The browser gives you many features and password management is one of them, where it stores all your logins and lets you manage them. It’s totally in the users’ hands whether they want to enable saved logins for websites.

Once saved, you can view saved passwords on Firefox, copy and delete them, and sync logins as well. Also, it’s pretty safe to save passwords in Firefox, provided you’re using a primary password.

Let’s dive into the guide and know how you can view your saved passwords in Firefox and manage them further.

Is it safe to save passwords with Firefox?

Firefox’s built-in password manager has been designed to be secure and encrypted, so it’s generally safe to save passwords in Firefox. However, for extra security, Firefox lets you set a primary password as your master password to further give a shield to your saved passwords.

It’s recommended to set a primary password in case other people also use your system. If a primary password is not set, anyone can look into your saved passwords and get access to those sites.

By default, the feature is disabled, but one can enable it and set a password.

Setting a primary password on Firefox not only protects your passwords but also helps in managing them. It helps in syncing and exporting passwords across different devices.

  1. Go to Settings and select Privacy & Security.
  2. Scroll down until you see Logins and Passwords section.
    Firefox logins and passwords
  3. Just check the option that reads “Use a Primary Password.”
  4. A new window will open where you’d need to set up the primary password.
    Set primary password to view saved password in Firefox

So, this is how you protect your saved passwords in Firefox.

Primary password set on Firefox

Once the primary password is set, Firefox will ask you to enter it every time you’re viewing your saved login credentials or doing other things using its password manager.

How do I view my saved passwords in Firefox?

So, you’ve saved your login credentials with Firefox and now you want to know where your logins are stored! Well, it’s pretty easy to locate your saved passwords. Just follow the below instructions to have a look at your stored passwords.

  1. On Windows, visit Settings, and go to Logins and Passwords section, and select Saved Logins.
    Firefox view saved logins
  2. Open the Firefox menu on the top right and select Passwords.
  3. If you’ve set up a Primary Password, you’ll be prompted to enter it before viewing your passwords.
  4. After this step, you’ll be able to see all of your saved logins in a list.

You may also see icons next to a website login. For instance, a list of breached websites above the other saved sites.

On Android, tap the Menu button and select Settings. Choose Logins and Passwords, and pick Saved logins. Select one to view the details.

View Firefox saved passwords on Android

How can I manage passwords in Firefox?

Managing passwords in Firefox is simple. You can delete your saved passwords if you don’t want the browser to remember them any further.

Firefox’s built-in password manager lets you remove all your saved logins in just one go. “Remove All Logins” delete all the logins in a click. However, you can also choose to edit and delete specific passwords for saved sites.

You can also export your saved usernames and passwords in a .csv file and move them to a different application.

You can also turn on sync on Firefox so that you can use your stored passwords across all devices. The sync feature also lets you sync other data such as bookmarks, history, passwords, open tabs, and installed add-ons. You can also fix syncing issues if Firefox is throwing any.

If you’re an iOS user, don’t miss our guide on how to use iCloud Passwords for Firefox and get access to all your passwords.

How to Change MTU Size on Windows 11

Problems may arise if your system sends or receives data with the wrong MTU size. In this guide, we’ll show you how to change the MTU size on your Windows 11 PC.

How do I modify MTU settings on Windows 11?

Tip icon Tip
The default MTU size in Windows 11 is 1500, the maximum allowed. This is the largest packet size that can be sent or received on a network. If these limits are exceeded, there will be repercussions. For instance, if your MTU size is too high, you may experience errors such as the Xbox 360 MTU error.

Before going through the steps below, take note of the following:

  • Check your computer’s maximum MTU size and ensure not to exceed these limits. Open a command line as an administrator, enter the following command to find the current MTU: netsh interface ipv4 show subinterfaces

Below is how you can adjust your MTU settings:

1. Use the Control Panel

  1. Hit the Windows key, type Control Panel in the search bar, and click Open.control-panel-search fallout new vegas runtime error
  2. Navigate to Network and Internet.
  3. Click on Network and Sharing Center.
  4. Next, click on your Wi-Fi adapter and select Properties.
  5. Hit the Configure button.
  6. Navigate to the Advanced tab, locate the Jumbo Packet under Property, then under the Value option, select an option from the drop-down menu, and hit OK.

2. Use the Command Prompt

  1. Hit the Windows key, type cmd in the search bar, and click Open.cmd-run-admin-w11 unexpected kernel mode trap windows 11
  2. Type the following command and hit Enter: netsh interface ipv4 show subinterfaces
  3. Note down the interface you’d like to change, then enter the next command. Remember to replace subinterface name with the one you noted down and 9000 with a new MTU value within the accepted limits: netsh interface ipv4 set subinterface <subinterface name> mtu=9000 store=persistent

How to verify the changes and ensure optimal performance

After changing your MTU settings on your Windows PC, we recommend running a few tests to ensure everything is working as intended:

A key tell-tale would be to run a ping command. If your gaming performance has improved, file sharing is faster, and sites load a little bit faster, you can conclude the change in MTU settings was successful.

However, if the result is vice versa, and you experience slow internet speeds, it is possible the process was unsuccessful.

Hopefully, these steps have enabled you to edit your network settings for the best MTU value optimization.

2 Quick Ways to Import vCards to Outlook

VCF or Virtual Card Format, is a digital business card that stores important contact information, including name, phone number, email address, physical address, and ZIP code, amongst others. And Outlook users can easily import vCards in no time.

The functionality is built-in to Outlook, but the process is a bit tedious when it comes to bulk vCard import, and that’s where a vCard importer tool comes into the picture.

What are the benefits of importing vCards to Outlook?

  • Presents all information accurately: Since the information stored in vCards is critical, it’s important that all of it is imported and that, too, accurately. And Outlook does that perfectly.
  • Secure: Outlook, a secure email management platform, ensures that the stored information in VCF file format remains safe.
  • Quick import: The process to import contacts and vCards is often the quickest on Outlook, and it offers multiple methods.

How to manually import vCards into Outlook?

  1. Launch the Outlook app, and click on the File menu near the top left.
  2. Click on Open & Export.open & export for importing vcards to outlook
  3. Now, click on Import/Export.
  4. Select Import a VCARD file (.vcf) from the list, and click Next.import vcard
  5. Head to the destination folder where the VCF file is stored, select it, and then click on Open.importing vcards to outlook
  6. Once done, the VCARD will be imported to Outlook. It shouldn’t take more than a few seconds.

So, while manually importing vCards to Outlook for only one contact through the built-in method is a reliable solution, using a third-party tool for multiple VCF files or an entire contact list to process bulk import is best.

How to automatically import vCards into Outlook? (third-party tools)

  1. Go to the official website, and then download vCard Importer Tool.
  2. Run the setup and follow the on-screen instructions to complete the installation process.
  3. Once done, launch the app, and click on Add File near the top left.add files for importing vcards to outlook
  4. Head to the folder where the vCards are stored, select all you want to import, and click Open. To import multiple contacts, hold the Ctrl key, and then select the individual entries.select files
  5. After choosing the VCF files, select Horizontal or Vertical under Switch View, and make sure all the contact information is available.switch view
  6. Click the Export button.export
  7. Now, select the Contact folder from the left, choose MS Outlook Profile, select the required options from the dropdown menus under Destination, and finally click on Export.contact for importing vcards to outlook
  8. You should now receive a confirmation.confirmation
  9. The vCard Importer Tool also presents a report listing all contacts that got successfully imported and the ones that failed.export report
  10. You will now find these contacts in Outlook’s Address book.

These are some simple steps for importing vCards to Outlook using the vCard Importer Tool. We recommend the tool due to its effective functioning and simple user interface. There are other options available, though. These include:

  • 4Team SyncWiz: Allows automatic syncing of calendar and contacts, easy vCard import, and sends over 4000 vCards in a small file.
  • Address Magic Plus: Allows conversion of address book between different email services and stores all contact information. 
  • vCard Converter: Ensures data accuracy and allows conversion of vCard to CSV format, PDF, Doc, HTML, and Excel, amongst others. The demo version only permits up to 25 contacts from every folder.

Using a third-party tool also lets users convert a Virtual Business Card to a CSV file type. And you can always download Outlook contacts after updating the list.

For more effective management, you should create Outlook categories, or if the situation demands, create a group email to notify multiple users at once.

For any queries or to share your favorite tool to import vCards, drop a comment below.

Paint and Photos apps for Windows 11 could soon get an AI boost

Windows in-box staple apps Paint and Photos may get injected with Microsoft’s artificially intelligent secret sauce as part of the company’s plan to enhance its operating system with various AI technologies.

Zack Bowden over at Windows Central is reporting that sources familiar with Windows development are saying that apps such as Paint, Photos, and Snipping Tool are being experimented with and could offer users AI-enhanced capabilities in a possible future update.

Similar to the updates that came to the Camera and Microphone apps on the Surface Pro 9 powered by Qualcomm, some of these AI-embedded features could be hardware specific, requiring dedicated processors on a chip while others would be delivered through platforms embedded in Windows.

Regarding the specific updates, the Snipping Tool in Windows 11 and future versions could come with optical character recognition (OCR) technology which would allow the software to identify text in images or screenshots and highlight them specifically for copy/paste functions. The same sort of OCR is planned for the Camera app in Windows as part of a platform upgrade to Windows Studio Effects according to Bowden’s sources.

Y79Vjlswnsqkmhtadowej3 1200 80

The Photo apps will gain new tagging and identifying features that will allow it to select objects or people in photos and isolate them from images, ala iPhone’s “Lift subject from background” feature in iOS 16.

Then there is the inclusion of similar Bing Image Creator generative AI capabilities possibly landing in Paint to help move the app beyond its nostalgic clip art renderings from users to more prompt-based creations.

Nuuna76Qyzqgehmivdzrx5 1200 80

Bowden is clear in stating that these features are in an experimental phase within Microsoft’s Windows development meaning they may make it to a final app release in the future, they may show up and eventually be shelved like tabbed window support of all apps, or never show up based on internal decisions from the development team.

While Microsoft does have an event planned a month away on September 21, 2023, the new Paint, Snipping Tool, and Photos feature upgrades aren’t expected to make an appearance and may stay concealed until next year when Microsoft is expected to release the follow up to Windows 11.