Here’s how to solve the VMware not booting error

A large number of users have reported that their version of VMware is not booting.

This issue can cause you a lot of stress, as it stops you from accessing both the Virtual Machine and the data stored on it.

The problem becomes even bigger if you’re using VMware as a company, and can’t get access to the data required to run your business.

For this reason, it is extremely important that you manage to solve the VMware not booting error as fast as possible.

In today’s article, we will explore some of the best methods to try to help you with this issue.

Please follow the steps described in this article in the order that they were written to avoid causing any unnecessary complications.


Here’s how to deal with the VMware not booting error

1. VMware not booting from CD

cd - Vmware not booting

  1. Power on your VM.
  2. When the black screen with the VMware logo appears -> click the window to select it.
  3. Press the Esc key or the F2 key on your keyboard to open the boot setup menu.
  4. Select the CD-ROM as the first boot device.
  5. Press Enter to continue the booting process.

2. VMware not booting from USB

usb port on computer - Vmware not bootingStart the New Virtual Machine Wizard:

  1. Download Plop Boot Manager and extract it to your hard-drive.
  2. Plug the bootable USB drive inside your PC.
  3. Launch VMware -> click the File button – choose the New Virtual Machine option.
  4. This will start the New Virtual Machine Wizard.
  5. Select the option Typical -> click Next.

Navigate to the location of your ISO file:

  1. Choose the option Installer Disc Image File (ISO) -> click the Browse button.
  2. Inside the browse window -> navigate to the location of your extracted Plot Boot Manager.
  3. Select the .ISO file -> click Open -> Next (inside the wizard window).
  4. Choose the guest OS as Linux -> and choose Ubuntu under the Version section -> click Next.
  5. Add a name for your virtual machine -> click Next -> select disk size -> click Next.
  6. Press the Customize Hardware button -> select USB Controller from the left side menu.
  7. Tick the box next to the option Automatically connect new USB devices -> click Finish.

Is your Hyper-V not connecting to the Internet? Try this


3. VMware not booting from vmdk

laptop on desk with notepad - VMware not bootingTo make VMware boot from your .vmdk file, you will need to transform the file to be compatible with ESXi.

Follow these steps to do so:

  1. Download the VMware V2V converter (you will need to be signed into the VMware website to access the link).
  2. Run the installer and follow the on-screen instructions to complete the setup.
  3. Reboot the server for the configuration to be saved.
  4. Try to boot from the vmdk file again.

4. VMware not booting from disk

laptop on desk with apple - VMware not bootingTo fix this issue, please follow the steps presented in the first method of this article, but choose the ISO image as the boot source.

If your VM is not recognizing the ISO image, it means that the ISO is corrupted and you will have to replace it.


Conclusion

In today’s fix article we explored the best methods you want to try in order to fix the VMware not booting error.

Please let us know if you found this guide helpful by using the comment section below.

READ ALSO:

How to Disable Lock Screen on Windows Server [EXPLAINED]

For obvious security reasons, your Windows Server will, by default and after some time of inactivity, turn off the screen and lock the computer. And, although there’s a security risk if you are working in a crowded environment, some users do not want to lock screen on Windows Server. If you want to disable lock screen on Windows Server, check the steps below.

How do I stop the server from locking when idle?

1. Disable the ‘Turn off the display’ feature in Power Options

  1. Open Control Panel from the Start Menu.
  2. Select Power Options.Disable Lock Screen on Windows Server
  3. Click Change plan settings.Disable Lock Screen on Windows Server
  4. Under the Turn off the display, select Never.
  5. After that, you won’t have issues with the display turning off and the server automatically logging you out of the session with the lock screen.

Enable the Remote Desktop on Windows Server 2019 and get help from a tech-savvy friend with these steps.


2. Use Group Policy

  1. Alternatively, you can open the Group Policy Editor and disable the lock screen there. To do so, search for Group Policy in the Windows Search bar. Open GPE there.
  2. Once there, navigate to Computer Configuration > Policies > Administrative Templates > System > Power Management >Video and Display Settings. Alternatively, on newer versions, you should navigate to Computer Configuration > Administrative Templates > System > Power Management >Video and Display Settings.
  3. Once there, double-click on the Turn off the display (plugged in) feature.Disable Lock Screen on Windows Server
  4. Make sure that the option is disabled.
  5. Confirm changes and reboot your Windows Server.

After that, the lock screen on Windows Server is disabled. If you, of course, want to do quite the opposite and enable it, follow back the steps and either change the screen-off timeout or enable the option in the Group Policy Editor.

With that said, we can wrap it up. In case you have any questions or suggestions, feel free to tell us in the comments section below. We look forward to your feedback.

RELATED STORIES YOU SHOULD CHECK OUT:

How to block IP and IP range on Windows server?

If you want to find out how to block IP and IP ranges on a Windows server, you are lucky.

In this article, we will discuss precisely this subject, and you will find out what are the best solutions available.

Blocking an IP or an IP range on your Windows server will allow you to prevent access to your server from a specific country or region. This will give you the possibility to control the security of your server easily.

Please follow the steps presented here carefully to avoid any issues.


Here’s how to block an IP or an IP range on Windows server

1. Add Local Computer to Security Policies

javascript code smaller - Windows server how to block ip; block ip range

  1. Press Win+R to start the Run dialog box.
  2. Type MMC -> press Enter.
  3. Inside the console -> click File -> Add/Remove Snap in.
  4. Select the Standalone tab -> click the Add button.
  5. Choose the IP Security Policy Management option -> Add -> Local Computer -> Finish -> Close -> Ok.

2. Create IP security policy

laptop on desk with user - Windows server how to block ip; block ip range

  1. Inside the console -> right-click the IP security policies on local computer option found in the left pane -> choose Create IP security policy.
  2. Click the Next button and name the policy Block IP.
  3. Add a description of your choosing.
  4. Click the Next button and make sure that the box next to the Activate option is ticked.
  5. Click Next -> tick the Edit properties option -> click the Finish button (this will open the properties window).

Seeing the specified user does not exist error in Windows Server? Do this to fix it


3. Create a new rule inside the IP filter list

user laptop - Windows server how to block ip; block ip range

  1. Inside the properties window that you previously opened -> click Add -> Next.
  2. Make sure the This rule does not specify a tunnel option is selected -> click Next.
  3. Leave the All network connection option selected -> click Next.
  4. This will open the IP filter list (you will need to create a new filter, so don’t choose any of the default values).
  5. Click Add -> type a name for your list (ex. IP block list) -> add a description (can be the same as name).
  6. Add the option -> click Next to move to the next step.
  7. Type IP1 as a name (or IP range) in the description box.
  8. Make sure the Mirrored. Match packets with the exact opposite source and destination addresses option is ticked -> Next (source address needs to be the same as My IP address).
  9. Select A specific IP address or A specific Subnet (depending on if you want to block an IP or IP range).
  10. Copy-paste the IP address or the subnet type -> click Next -> select Protocol Type as Any -> Next -> Finish.

Conclusion

In today’s fix article we explored how to block an IP or IP range on a Windows server quickly. We hope the guide was easy to follow, and that it managed to solve your issue.

Please feel free to let us know if it did by using the comment section found below this article.

READ ALSO:

How to fix common VMware network adapter issues?

If you want to know how to fix common VMware network adapter issues, you came to the right place.

A large number of users have encountered issues with their VMware network adapter, and that can cause a lot of stress.

The entire reason for using VMware for virtualization is to be able to have a substrate of software that mediates the operations between the operating system and your PC‘s physical hardware.

Having this ability allows you to tackle a wide range of possible problems, without risking to corrupt the entire system setup.

For this reason, in today’s article, we will discuss how to solve the most common issues encountered when using VMware on your Windows 10 machine. Read on to find out more details.


Here’s how to fix common VMware network adapter issues

VMware network adapter not working

laptop on desk - How to fix common VMware network adapter issues

  1. Open VMware.
  2. Navigate to the Preferences menu -> select the Network tab.
  3. Inside the Network tab -> uncheck the box next to the option Require Authentication.
  4. This should solve your issue.

VMware network adapter not connected

laptop on table - How to fix common VMware network adapter issues
There are a few ways to tackle this problem, depending on the details of your circumstances. To fix this issue, try these methods:

  1. Increase the port number for your virtual switch and restart the host machine to apply the changes (it is recommended that you increase the number of ports for all hosts in a DRS cluster).
  2. Create a new virtual switch and distribute the virtual machines and ports between them.
  3. If you’re using the NIC teaming -> make sure that the value for the load balancing policy is the same on all the ESXi/ESX hosts.
  4. In the case that you’re VLAN is configured -> make sure it is available on all ESXi/ESX hosts contained in the cluster.
  5. Set the Notify Switches option found inside NIC teaming to Yes.

Looking for the best browser for VMware Web Client? Here’s the Top 3


VMware network adapter not showing up

laptop with mug on desk - How to fix common vmware network adapter issues
If your VMware network adapter is not showing up inside your Network Connections window, this issue might be caused by a power outage or a sudden shutting down of your server.

To solve this, it is recommended that you restore your system to the previous version before the issue occurred:

  1. Click Cortana search box -> type Create a restore point -> select the top result called System Properties.
  2. Inside the System Protection tab -> click the System Restore button.
  3. Follow the on-screen instructions to complete the restore process.

VMware network adapter general failure

laptop close-up - How to fix common vmware network adapter issues

  1. Press Win+X keys -> select PowerShell (Admin).
  2. Type the following commands and run each of them:

ipconfig/release

ipconfig/renew

ipconfig /flushdns 

netsh int ip reset c:tcp.txt

netsh winsock reset 

3. Restart your PC.


Conclusion

Please feel free to let us know if this guide helped you solve your issue with the VMware network adapter, or if you have any suggestions.

You can do so by using the comment section found below this article.

READ ALSO:

Error 0x87dd0004 on Xbox Live: Here’s a quick fix

Many users reported Xbox Live error 0x87DD0004 on their console. This issue usually appears while trying to download new content on Xbox One.

Here’s how one user described the issue on Microsoft Answers:

what is error code 0x87DD0004? i can’t log in!

In today’s article, we’ll show you how to quickly and easily fix this problem on your Xbox One, so let’s get started.

How do I fix Xbox Live error 0x87DD0004?

1. Check the status of Xbox Live services

xbox services status xbox live error 0x87dd0004

  1. Check Xbox Live Status online.
  2. If all services are running normally, proceed to the next solution.
  3. In case any of the services are having issues, it means that the issue is server-related and it should be fixed by Microsoft shortly.

2. Try to redownload the content

redownload content xbox live error 0x87dd0004

  1. Head over to the My games & apps.
  2. Choose Queue and highlight the game or app that is giving you this error.
  3. Check the status of the game/app. If it’s Queued or Paused, press the Menu button and select Resume installation.
  4. After doing that, check if the issue is resolved.

Your Xbox One doesn’t work after power outage? Fix it with these simple steps!


3. Power cycle your console

power cycle xbox xbox live error 0x87dd0004

  1. Press the Power button on your console and hold it pressed for 10 seconds.
  2. After your console turns off, disconnect it from the power outlet.
  3. Keep it disconnected for a minute or two.
  4. Now connect the console to the power outlet and start it again.
  5. Check if the issue is still there.

4. Restart your modem/router

network connection xbox live error 0x87dd0004

  1. Press the Power button on your modem/router to turn it off.
  2. Now, wait for at least 30 seconds.
  3. Press the Power button again to start your router/modem.
  4. Once the router boots, check if the problem is still there.

There you go, these are several quick and simple solutions that you can try in order to fix Xbox Live error 0x87DD0004. If you found our article useful, feel free to let us know in the comments section below:

READ ALSO:

Windows 10 news recap: New app icons spotted for a number of apps, Windows 10 at 50% marketshare, and more

Welcome back to our Windows 10 news recap, where we go over the top stories of the past week in the world of Microsoft’s flagship operating system.

New Microsoft app icons spotted for Groove Music, To-Do, Solitaire, and Weather

New icons for some of Microsoft’s apps have been spotted, including for Groove Music, Solitaire, and more.

New Microsoft app icons

Despite conflicting measurements, Windows 10 finds itself gaining 50 percent marketshare

Microsoft’s Windows 10 OS has reached a milestone of 50% market share, though reports of when exactly it hit 50% are conflicting.

Microsoft plans to remove Adobe Flash from all of its web browsers by December 2020

Adobe Flash is set to be removed from all of Microsoft’s web browsers by December 2020, helping to bolster browser security and reduce security flaws.

Strong PC sales driven by commercial demand as consumer sales remain weak

Whilst consumer sales of PCs remain weak, strong PC sales has been driven by the commercial demand for them.

Surface Laptop 2 on sale at Microsoft Store for up to $300 off

That’s it for this week. We’ll be back next week with more Windows 10 news!

FIX: Windows server does not allow clipboard redirection

If you are seeing the error Windows server does not allow clipboard redirection, you have to know, you are not the only one. A large number of Windows server users have encountered this exact issue.

This policy is put in place to protect you from any remote computers connecting to your client computer while performing the Remote Desktop Services.

Simply put, this policy prevents users from deviating any sort of clipboard data back and forth between the remote computer and the host server.

This setting is set to allow Remote Desktop Services access to the clipboard, but if the above-mentioned policy is activated, any clipboard data will not be given access.

Not having this policy enabled can be extremely dangerous, as a third-party can perform an attack on the server without any sort of warning.

For these reasons, in today’s article, we will explore the best way to deal with this issue. Please follow along to ensure that you will perform the steps correctly.


Windows server not allowing clipboard redirection

In order to prevent any third-party’s access to your Windows Server clipboard functionality, you will need to configure your server to not allow clipboard access.

The steps required for different versions of Windows server will vary, but please follow the steps presented here to enable the option easily:

Windows 2016 server

desktops with mug - Windows server does not allow clipboard redirection

  1. Press Win+X keys -> select PowerShell (Admin) from the menu.
  2. Type gpedit.msc inside the elevated command prompt.
  3. Press Enter to run the command and open the Local Group Policy utility.
  4. Navigate to Computer Configuration -> Administrative Templates -> Windows Components -> Remote Desktop Services -> Remote Desktop Session Host.
  5. Make sure the option Do not allow Clipboard redirection is Enabled.

Windows 2012 server

laptop on desk with notepad - Windows server does not allow clipboard redirection

  1. Press Win+R keys to open the Run dialog box.
  2. Type ServerManager -> press Enter.
  3. Click on the Remote Desktop Services -> select Collections.
  4. Select Tasks -> choose Edit Properties.
  5. Under the Client Settings tab -> make sure Clipboard and Drive is disabled.

You can not create SSL/TLS secure channel on your Windows Server? Try this


Windows 2008 server

laptop on desk with coffee - Windows server does not allow clipboard redirection

  1. Press Win+R keys on your keyboard.
  2. Type ServerManager -> press Enter.
  3. Inside the Server Manager window -> click on Connections.
  4. Right-click the connection you want to modify settings to -> select Properties.
  5. Inside the Client Settings tab -> make sure the box next to Clipboard is checked.

Note: If you don’t want to allow copying and pasting of files either, make sure to check the box next to the Drive option.


If you want some users to have access to the clipboard function, do this:

You will need to segment the LAN connections that have Remote Desktop Services clipboard enabled to allow you to track the influx of information.

This will prevent any unauthorized access to your server‘s clipboard function, and if any connection is performed, you can analyze the data. This will allow you to make sure that your system will not be corrupted.


Conclusion

Please feel free to let us know if this guide helped you in any way, or if you have any suggestions.

You can do so by simply using the comment section below.

READ ALSO:

Xbox error 0x90072ee7: Here’s how to fix it

Many Xbox users reported error 0x90072ee7 on their Xbox. According to users, this issue appears when you try to open specific content on Xbox One.

Here’s how one user described the issue on Microsoft Answers forum:

I am trying to get my Forza 6 to work again.
Got an error message 0x90072ee7.  There seems to be no history of that error code listed.
Any suggestions?

This can be a big problem for some users, but in today’s article, we’re going to show you how to fix this problem once and for all.

How can I fix Xbox error 0x90072ee7?

1. Try to access a service a bit later

access the service later xbox error 0x90072ee7

Sometimes this error can occur if there’s an issue with the service you’re trying to access. There might be a temporary server issue or outage that is causing this error to appear.

If that’s the case, try waiting for a couple of minutes or hours and try to access the service again.


2. Check the status of Xbox Live services

xbox live service status xbox error 0x90072ee7

  1. Check the status of Xbox Live services.
  2. If all services are up and running, move to the next solution.
  3. If certain service is down, you’ll need to wait for Microsoft to fix the problem.

3. Check your network connection

check network connection xbox xbox error 0x90072ee7

  1. Press the Xbox button on the controller to open the guide.
  2. Head over to the System > Settings > Network.
  3. Select Network settings > Test Network connection.
  4. If you notice more than 5-percept packet loss, it means that your connection is the problem.

YouTube app doesn’t work on your Xbox One? Don’t worry, there’s a quick fix available!


4. Restart your router/modem

restart router xbox error 0x90072ee7

  1. Press the Power button on your router/modem.
  2. Wait for 30 seconds and press the Power button again.
  3. Once your router boots, check if the error 0x90072ee7 is still there.

5. Power cycle your console

power cycle xbox error 0x90072ee7 xbox one

  1. Press and hold the Power button on your console for 10 seconds.
  2. After your console is turned off, disconnect the console from the power outlet.
  3. Wait for a few minutes and connect the Xbox to the power outlet.
  4. Press the Power button to start your console and check if the problem is still there.

There you go, a few quick and easy solutions for error 0x90072ee7 on Xbox One. If you found our solutions helpful, feel free to let us know in the comments section below.

READ ALSO:

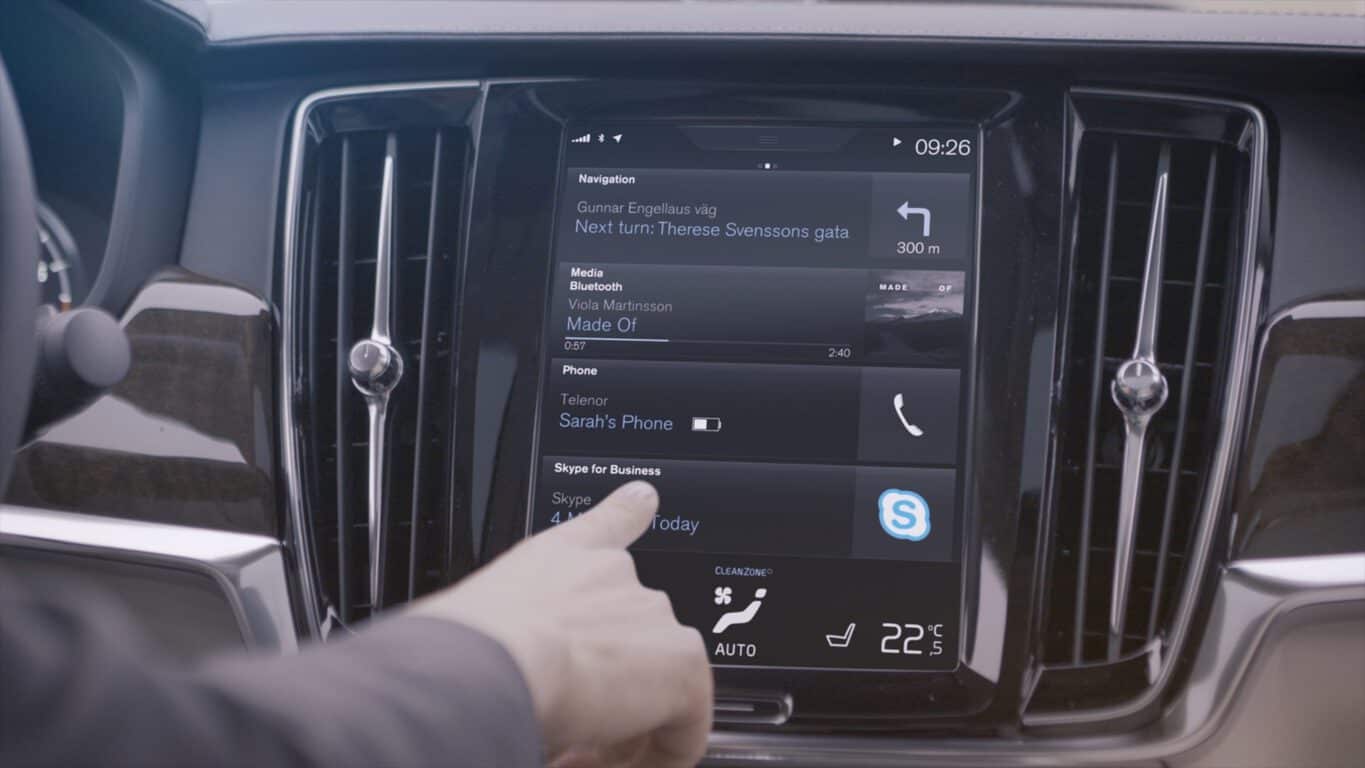
Microsoft bolsters its Connected Vehicle Platform (MCVP) with new TomTom addition

Microsoft’s connected vehicle platform normally is not considered in the same discussion as Google’s Android Auto or Apple’s Car Play, but according to a new report from ZDNet, it seems the company is adding yet another noteworthy feature to its collection of Azure-connected car related service bundles that could bring it closer in conversation.

Microsoft and the Dutch-based navigation software provider TomTom have partnered to create a level of integration with Azure that would allow automakers to “generate data-driven insights to deliver tailored services and to make better-informed designs and engineering decisions,” based on the press release from TomTom.

In addition to helping automotive engineering decisions, TomTom will also be providing its obvious HD mapping technology, traffic information analytics, and navigation tools to automakers to aid in autonomous software development.

“Our integration with the Microsoft Connected Vehicle Platform means that automakers can get access to precise and reliable navigation and driving behavior data easily, while of course adhering to privacy principles. This data could, for instance, be used to predict the range of an electric vehicle based on driving behavior and planned route more accurately; or to work out, based on navigation behavior, what connectivity package for online navigation would be best suited for a driver. This is a game-changer for OEMs.”

Today’s news follows a three-year-long pattern of decisions from both Microsoft and TomTom to enlist the help of one another while leveraging the benefits of cloud-based navigational developments.

Back in December 2016, TomTom began seeding its location-based services to Azure and in February 2019, Microsoft awarded TomTom the coveted spot of location data provider for mapping services across the company’s various solutions that included Bing, Cortana, Windows and Azure Maps.

Star Wars: Knights of the Old Republic not working on PC

Windows 10 is the latest operating system from Microsoft, but just like many other operating systems, sometimes Windows 10 has issues with older software.

Some users have reported that Star Wars: Knights of the Old Republic is not working on Windows 10, so let’s try to fix that.

How do I fix Star Wars: Knights of the Old Republic on Windows 10?

Star Wars: Knights of the Old Republic is a great game, however, since the game was released a while ago, it has some issues with newer operating systems such as Windows 10. Speaking of issues, users reported the following problems:

  • Star Wars Knights of the Old Republic won’t start, play, open – Many users reported that they are unable to play or open the game at all. This can be an annoying error, but you should be able to fix it by running the game in Compatibility Mode.
  • Star Wars Knights of the Old Republic has stopped working – This is another common error with Star Wars Knights of the Old Republic. If your game suddenly crashes, be sure to try some of the solutions from our article.
  • KOTOR crashing after character creation – This is another problem that users reported. In most cases, this issue is caused by your graphics configuration.
  • Star Wars Knights of the Old Republic keeps crashing – Many users reported that their game keeps crashing. This is an annoying problem, but you can fix it by changing CPU priority and affinity.
  • Star Wars Knights of the Old Republic not loading, working – In some cases, the game won’t load or work at all on your PC. However, you should be able to solve that problem by using one of our solutions.

Compatibility issues are relatively common with every new operating system especially when it comes to older software. Speaking of which, Knights of the Old Republic was released back in 2003, so it’s expected to have some issues with Windows 10.

Users report that they are able to start the game, but when they want to load a saved game or start a new one the game just crashes to Windows.

If you’re having this issue you should know that there are a few things that you can do to fix it.

1. Try running the game in the compatibility mode

Since compatibility could be an issue, the first thing we’re going to try is running the game in compatibility mode. And here’s how to do that:

  1. Find Knights of the Old Republic shortcut and right click it. Choose Properties from the menu.
    Star Wars Knights of the Old Republic has stopped working
  2. Navigate to Compatibility tab. Check the Run this software in compatibility mode for and choose an older version of Windows such as Windows 8 or Windows XP. Click Apply and then OK.
    Star Wars Knights of the Old Republic won't start

After making these changes, the game should start working again without any problems.

2. Disable Frame Buffer Effects and Soft Shadows

These are some old options that don’t work on newer platforms, so it’s best to disable them. To do this you need to do the following:

  1. Start the game.
  2. Go to the Options menu.
  3. Select Graphics. Next, go to Advanced Graphics Options.
  4. Find and uncheck Frame Buffer Effects and Soft Shadows options.

3. Set the CPU priority and affinity

The next thing we’re going to try, if you’re still unable to play Star Wars: Knights of the Old Republic on your Windows 10 PC, is to change the CPU priority and affinity. To do that, just follow these steps:

  1. Locate swkotor.exe (it should be in your installation directory, or if you have Steam version of the game, it will be located in C:Program Files (x86)SteamSteamAppscommonswkotor), right click the .exe file and choose Properties.
  2. In the Target box add the following lines to the Target location:
    • /high /affinity 1
      tar Wars Knights of the Old Republic not loading
  3. For example, if you have Steam version of Knights of the Old Republic your target field should look like this:
    • C:Program Files (x86)SteamSteamAppscommonswkotorswkotor.exe /high /affinity 1
  4. Click Apply then OK to save the changes.

4. Uncheck the Read-only property of the game directory

  1. Locate the installation directory of your game and right click it.
  2. Choose Properties from the list.
  3. Make sure that Read-only property is unchecked. Click Apply and OK to save the changes.
    Star Wars Knights of the Old Republic won't play

After making this change, check if the issue still persists

5. Edit the game configuration file to run the game in Window mode

  1. Locate the swkotor.ini file and open it with Notepad. This is the configuration file for the game and it should be located in the game directory.
  2. Locate the following line:
    • Fullscreen=1
  3. and change it to:
    • Fullscreen=0.
  4. In the [Graphic Options] section add the following line:
    • AllowWindowedMode=1
  5. Save the file.
  6. Run the game using the swkotor.exe file from the game directory. Bear in mind that running the game from Steam Library will undo these changes, so remember to run it from the installation directory.

If you want to use another text editor, check out the best Notepad alternatives in this article.

6. Run the SWUpdate file

If you’re having problems with Star Wars: Knights of the Old Republic on your PC, the problem might be related to missing updates. However, you can easily fix that issue simply by running the SWUpdate file.

This file is located in Knights of the Old Republic installation directory, by default, it’s steam/steamapps/common/swkotor, and after running this file most problems with the game should be resolved.

7. Turn of Vsync and other graphics options

If you’re having problems with Star Wars: Knights of the Old Republic, the issue might be related to your video configuration. Many users reported that they had problems with Vsync, but after disabling this feature, the game started working again.

This is a rather simple solution, and several users reported that it works, so disable Vsync in the game and check if that solves the problem. If the issue still persists, try disabling other graphics options including shadows and grass.

8. Add Disable Vertex Buffer line to the swkotor.ini file

According to users, you can fix the problem with Star Wars: Knights of the Old Republic simply by modifying its configuration file. You can locate swkotor.ini in the game’s installation directory.

Once you locate the .ini file, open it with a text editor such as Notepad. Now enter the following line at the bottom:

  • Disable Vertex Buffer Objects=1

Save changes and check if the problem still persists. If you’re using SLI, be sure to use only Single GPU for SLI Rendering Mode. To change this setting go to Nvidia Control Panel > Manage 3D Settings > Program Settings.

9. Change your graphics settings to maximum

If you’re having problems with Star Wars: Knights of the Old Republic, you might be able to fix them simply by changing your settings.

Several users reported that they set their graphics settings to maximum and that solved the problem for them.

In addition to regular settings, you might want to enable additional settings as well and check if that solves the problem for you.

Star Wars: Knights of the Old Republic is an old game, and every computer should be able to run it at maximum settings without any problems, so you don’t have to worry about hardware power.

10. Reinstall the game

If you’re having issues with Star Wars: Knights of the Old Republic, you might be able to fix them simply by reinstalling the game. To fix this issue, first, you need to uninstall the game from your PC.

If you want to remove all files and registry entries associated with the game, we suggest that you try using an uninstaller application.

There is plenty of great uninstaller software available. These applications will completely uninstall the game and remove any leftover files preventing any future issues.

Now you just have to install the game again and the issue should be fixed. Several users reported that they installed the game on a different hard drive partition and that solved the problem for them, so be sure to try that as well.

If you want to remove any software leftovers from your Windows 10 PC, take a look at this step-by-step guide.

Solution 11 – Run the game as administrator

If problems with Star Wars: Knights of the Old Republic still occur, you might be able to fix them simply by running the game as administrator. To run the game as an administrator, you need to do the following:

  1. Locate the game’s shortcut, and right click it.
  2. Choose Run as administrator from the menu.
    Star Wars Knights of the Old Republic has stopped working

If the game is working well, you’ll need to repeat this solution every time you want to play it. You can also set the game to always run with administrative privileges. To do that, just follow these steps:

  1. Locate the game’s shortcut, right click it and choose Properties from the menu.
    KOTOR crashing after character creation
  2. Navigate to the Compatibility tab. Now check Run this program as an administrator and click on Apply and OK.
    Star Wars Knights of the Old Republic keeps crashing

After doing that, the game will always start with administrative privileges and you shouldn’t have any issues. Several users reported that running the game as an administrator in Compatibility mode fixed the issue, so be sure to try that as well.

That’s it, some of these solutions should solve your problem with playing Star Wars: Knights of the Old Republic on Windows 10.

If you have any other suggestions or questions, just write them down in the comments section below.

Windows 10 20H1 build 18975 brings draggable Cortana app window to Fast Ring Insiders

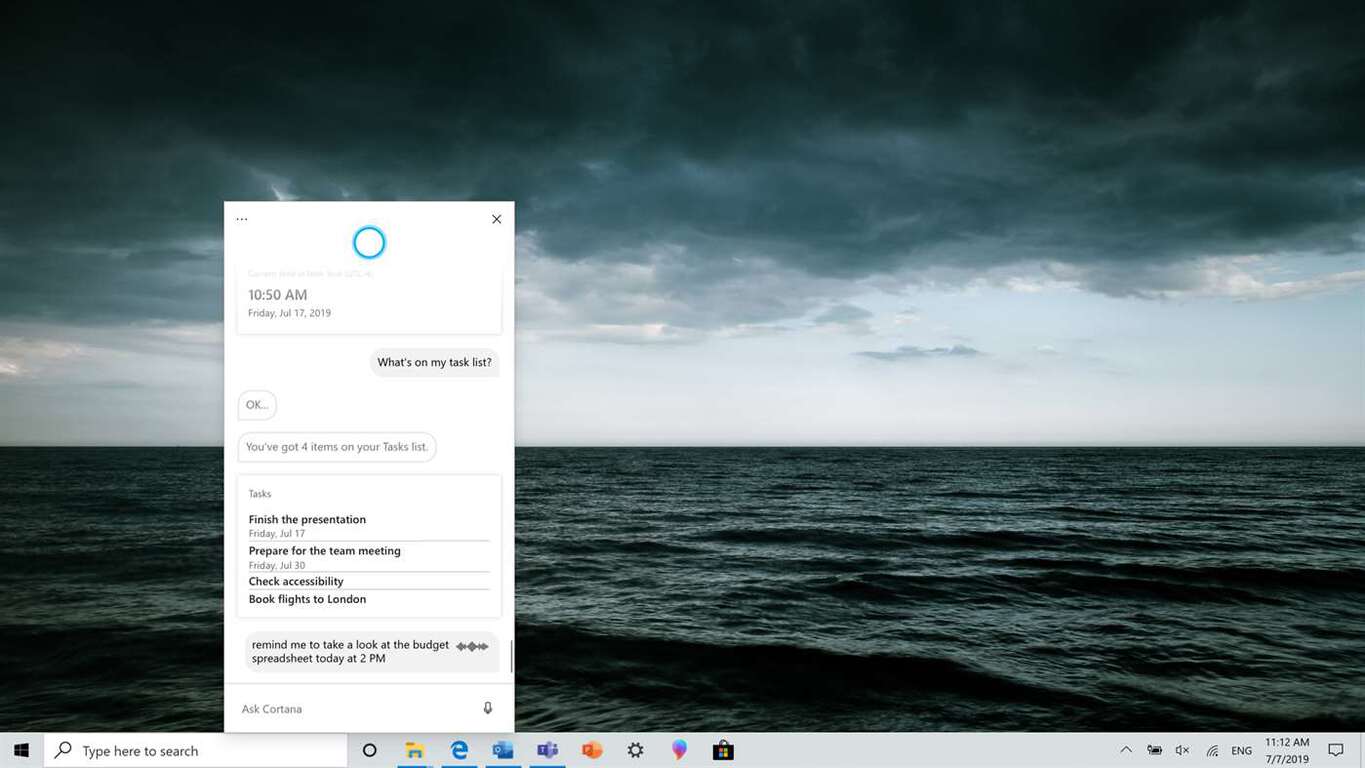
Microsoft has just announced the release of Windows 10 20H1 build 18975 for Fast Ring Insiders, which brings some improvements to the new Cortana beta app that’s currently only available for Insiders in the US. Starting this build, Microsoft will roll out the ability to drag the Cortana windows across the screen to 50% of Fast Ring Insiders. The Cortana app windows can also be resized like any other app, and this looks to be a positive change overall.

In addition to these Cortana updates. Microsoft also announced that the ability to rename virtual desktops should now be available for all Insiders in the Fast Ring. This is a minor update overall, but you can check out the full details about what’s new below:

Introducing the ability to move the Cortana window

With the new conversational Cortana experience, we understand that you wanna keep the chat going sometimes, and the default position of the window isn’t always where you’d prefer to have it docked if you’re going to have a longer back and forth. That’s why we’re starting to roll out the option to be able to move the window (by dragging the title bar area), to anywhere you’d like on the screen–just like you can with other windows. You can also resize the window if you’d like. Currently, this change is rolled out to 50% of Insiders with the new Cortana experience, and we’ll continue the rollout as we validate the quality of the experience.

Demoing the ability to make Cortana's window smaller, as well as move it around.

Windows Subsystem for Linux (WSL) Improvements

See the latest improvements with WSL in the latest Insider Preview builds.

Other updates for Insiders

Announcing the first preview and code release of PowerToys

Yesterday we announced the first preview and code release of PowerToys for Windows 10. This first preview includes two utilities: the Windows key shortcut guide and a window manager called FancyZones. Check out this article for all the details!

Showing the PowerToys logo. Retro / pixel art design style

Update on Virtual Desktop renaming

The ability to rename your virtual desktops is now available for all Insiders in the Fast ring! Thanks again everyone who shared feedback requesting this.

To get started:

  1. Open Task View by selecting the Task View icon in the taskbar or pressing WIN+Tab.
  2. Select New Desktop.
  3. Select the desktop name (“Desktop 1”) and it should become editable, or right click the desktop thumbnail and a context menu will appear with a Rename entry.
  4. Input whatever name you’d like, and press enter.
  5. Done!

Demoing the ability to add a name to your virtual desktop, as described above.

As usual, this new build brings comes with new bug fixes and general improvements, and it’s worth noting that Microsoft fixed an issue fixed an issue resulting in some Insiders receiving error 0xC0000142 when attempting to upgrade to recent builds. We invite you to check our separate post for the full list of quality improvements and known issues in this build.

Last but not least, the Windows Insider team revealed today that the 20H1 Bug Bash will kick off on September 25 and last through October 2. The team will share more details about how Insiders can participate later this month.

Enhanced error reporting: Here’s how to allow it on Xbox One

Enhanced error reporting is a useful Xbox feature that allows you to send reports to Microsoft and help them analyze and fix issues better.

This feature will send information such as the memory state of your console when a crash appears. Also, you should know that this feature might send some of your personal information to Microsoft, so you might want to disable this feature if you’re not comfortable with sharing of your personal information.

If you want to enable Enhanced error reporting on your console, in today’s article we’re going to show you how to do that easily on your Xbox One.

How do I enable Enhanced error reporting on Xbox One?

Enable Enhanced error reporting both globally and for individual users

change settings xbox xbox allow enhanced error reporting

Enhanced error reporting is available both globally and per user account. This means that you can have Enhanced error reporting available only for selected accounts on your console.

Bear in mind that Enhanced error reporting won’t work for any user on your console if it’s disabled globally. To enable Enhanced error reporting globally, you just need to do the following:

  1. Navigate to Settings > System.
  2. Now select Console info.
  3. Enable Allow enhanced error reporting.

After doing that, Enhanced error reporting will be available for all accounts on your console.


Getting ads on Xbox Gold? Here’s how to get rid of them once and for all!


However, even if this feature is available for all users, you still have to enable it personally for each user account. To enable this feature for your currently active account, just do the following:

  1. Make sure you’re signed in to your profile.
  2. Head over to the Settings > Account > Privacy & online safety.
  3. Navigate to the Xbox Live privacy > View details & customize > Data collection.
  4. Now change the You can share enhanced error reports setting

Bear in mind that these settings are related only to your console, and they won’t be applied to other Xbox devices you sign into.

Also, members of the Insider or developer program might not be able to turn this feature off, and if that’s the case, your only option is to leave the aforementioned program.

We hope that you found this article informative and that now you have a better understanding of Enhanced error reporting.

READ ALSO:

How to move text and objects inside Paint 3D?

If you want to start using Paint 3D on your PC and feel a bit confused about how to move text and objects inside the software, you came to the right place. This is the subject we will discuss in this article.

In the past, one of the most used built-in applications was by far Paint. I remember how excited I was that I could use my old PC to create basic drawings, add colors, create shapes, etc.

In the same way, the computers evolved from 256 KB RAM memory with a Pentium 1 processor to today’s amazing specs, the Paint software has evolved as well.

The new version of this software, called Paint 3D, is a very useful tool and allows you to create various scenes, by using and manipulating both 2D and 3D objects.

Read on to find out how to move objects and text inside Paint 3D.


Here’s how to move text and objects inside Paint 3D on Windows 10

How to move text:

  1. Open Paint 3D on your PC.
  2. Click the New button to create a new project, or open to edit a project you already created (I will click new for the sake of this guide).
  3. Click on the Text option from the top menu, and choose from the right-side menu if you want 2D or 3D text.text button - Paint 3D how to move text; How to move objects
  4. Click-and-drag a text box onto your canvas.
  5. Type the text of your choosing inside the box, and use the options from the right-side menu to customize how it looks (change size, font, color, etc.)text inside box - Paint 3D how to move text; how to move objects
  6. You can also modify the size of the text box by dragging on one of the squares on the side of your box.
  7. If you want to spin the text, you can press the button located in the center of the text box that shows a circled arrow.
  8. In order to move the selected text, you can click and drag on any of the dotted lines of your text box.

Want to bring objects to the front, and also move them to the back in Paint 3D? Here’s how


How to move objects:

  1. To create a 3D object, please click on the 3D Shapes button found inside the top menu.
  2. From the right-side menu, you can choose what kind of a 3D object you want to create (I went with the 3D doodle tube brush).
  3. After choosing the settings for your 3D object, you can simply click and drag on the canvas to create your object.3d tube drawing - paint 3d how to move text;how to move objects
  4. To move the object, first, you need to select it by clicking on it.
  5. This will open the menu that allows you to spin the object in space.3d tube drawing selection box - Paint 3D how to move text; How to move objects
  6. If you click anywhere inside the selection box and drag, you will be able to move the object to your desired location.

Conclusion

Being able to move text and objects inside Paint 3D is very important in order for you to be able to create unique art projects.

We hope you found this guide easy to understand and to follow along. We also have a great guide on how to curve text in Paint 3D, so don’t miss it.

Please let us know if you found this How-to article helpful. You can do so by using the comment section found below this article.

Error Applying Hard Drive Changes in Hyper-V [Fix]

Some users have encountered Error applying hard drive changes while using Hyper-V. This can be an issue and prevent you from using native virtualization on your PC.

In case you’re not familiar with it, we have a great guide on how to enable Hyper-V, so we recommend checking it out.

However, today we’ll focus solely on hard drive issues and Hyper-V, so let’s get started.

Why does Error applying hard drive changes in Hyper-V appear?

  • Other virtual machines might be using the same hard drive, thus causing the problem.
  • Antivirus or backup software can sometimes interfere with Hyper-V.
  • Your hard drive or DVD drive isn’t properly configured in Hyper-V Manager.

How can I fix error applying hard drive changes in Hyper-V?

1. Make sure no other VMs are using the same hard drive

  1. Open Hyper-V Manager.

  2. Select the host machine that you want to check the hard-drive of -> right click it -> select Hyper-V Settings.
  3. In the newly opened window -> check the location of your virtual HDD (click Browse to modify it if needed).

This method applies in the case that you’re using multiple VMs from the same host machine.

Please check the virtual hard drives linked with each of your virtual machines to ensure there’s no conflict between them.

2. Check if any antivirus or backup software is locking the HDD

  1. Open your backup or antivirus software.
  2. Check its settings.
  3. Make sure that it’s not blocking the hard drive.

After doing that, check if the error applying hard drive changes in Hyper-V is gone.

3. Change ISCSI Controller or IDE Controller settings

  1. Open your Hyper-V Manager.
  2. Right-click the host machine -> select Hyper-V settings.
  3. Under the section SCSI Controller from the right-side menu -> right-click the HDD -> choose Properties.

  4. Click the drop-down menu under the Controller section -> choose another option (depending on your default setting, the exact options will vary).

4. Remove and re-add DVD drive from Hyper-V VMTo remove:

  1. Open Hyper-V Manager.
  2. Click Start -> Administrative Tools -> click Hyper-V Manager.
  3. Under the virtual machine name, inside the Action panel -> click Settings.
  4. Select the DVD drive from the left-side panel.
  5. Click Remove on the DVD Drive window.
  6. Click Ok.

To re-add:

  1. Inside your VM settings -> click the SCSI Controller option.
  2. Select DVD Drive from the options to your right.
  3. Click Add to complete the process.

In this guide, we explored the best options available to sort the Hyper-V not applying hard-drive changes issue. We hope you found this guide helpful.

This isn’t the only issue you can encounter, and many reported that they can’t install Hyper-V, but we covered that in a separate guide.

Please let us know if this guide was helpful to you by leaving a comment.

Unable to Allocate RAM in Hyper V: 3 Ways to Increase it

Many reported Unable to allocate RAM in Hyper V, which can cause your virtual environment to crash, so it’s important to fix it as soon as possible.

This can also lead to other issues, such as high CPU usage in Hyper-V, so it’s important to address them, and in today’s guide, we’ll show you the best ways to do that.

Why is my VM saying not enough memory?

  • Your host machine doesn’t have enough physical memory to handle the VM.
  • Having multiple VMs running can cause this problem to appear on your PC.
  • You’re not using Dynamic Memory setting in Hyper-V Manager.

How can I fix Unable to allocate RAM in Hyper V?

1. Close any VMs that you don’t need to run

  1. Close all other virtual machines that you have running.
  2. Keep only the most essential ones available.
  3. If you need to have several machines running, consider investing in more RAM.

Doing this will allow your RAM memory to be allocated properly to run the VM you’re working on without issues.

2. Select Dynamic Memory for the VM and make sure the optimal requirements are met

  1. Open your VM settings.
  2. Locate Dynamic memory option and enable it.
  3. Save changes.

For more information, there’s a guide from Microsoft on how to set memory for Hyper-V, so be sure to read it.

3. Add more RAM to your host machine and add memory to Hyper-V

  1. Open the Hyper-V Manager.
  2. Click the Settings button -> access the Memory tab.

  3. Set the new RAM value you required by modifying the value in MB.

Remember to use these steps only after you have added additional RAM to your PC.

After doing that, the Hyper-V virtual machine management service terminated with the following error: ran out of memory error will be gone.

In today’s article, we explored the best methods to fix the Hyper-V ran out of memory error message.

In case you have further problems, our Not enough memory in the system to start virtual machine guide should be able to help you fix them.

We would love to know if you found this guide helpful. Please feel free to share this information with us by using the comment section below.

Fix: Windows Server Not Showing up in Network in File Explorer

Some users utilize Windows Server PCs for their local networks. However, a few users have stated in forum posts that their Windows Server PCs don’t appear in Network within File Explorer on their client PCs.

Thus, File Explorer does not display all network devices within the Network on its navigation pane. This issue has become more prevalent since Microsoft removed HomeGroup from Windows 10 1803.

However, the same error can also arise on Windows 7 clients.

The Network icon windows server not showing up in network

What can I do if Windows Server is not showing up in Network?

1. Check that Network Discovery is Enabled

  1. First, check that network discovery is on (for all the networked PCs), which enables the connected PCs to find each other. Users can do that by pressing the Windows key + R hotkey.
  2. Enter ‘Control Panel’ in Run’s Open box, and click the OK button.
  3. Then click Network and Internet > Network and Sharing Center to open the applet shown directly below.Network and Sharing Control Panel applet windows server not showing up in network
  4. Click Change advanced sharing settings to open the options shown directly below.Advanced sharing settings windows server not showing up in network
  5. Is the Turn on network discovery option selected? If not, select the Turn on network discovery setting.
  6. Don’t forget to click the Save changes button before closing the window.

2. Turn the FDResPub Service On

  1. Users have confirmed they’ve fixed File Explorer Network not displaying Windows Server by turning the Function Discovery Resource Publication (FDResPub) service on. To do that, open the Run accessory with the Windows key + R hotkey.
  2. Type ‘services.msc’ in Run and click OK to open the window shown directly below.Services window windows server not showing up in network
  3. Double-click Function Discovery Resource Publication to open that service’s window.The Function Discovery Resource Publication service windows server not showing up in network
  4. Select the Automatic option on the Startup type drop-down menu.
  5. Click the Start button.
  6. Select the Apply option, and click the OK button to close the window.

3. Check the DNS Client, SSDP Discovery, and UPnP Device Host Services are On

If turning FDResPub on doesn’t do the trick, other services users might need to switch on. So, check if the DNS Client, SSDP Discovery, and UPnP Device Host services are turned off.

Repeat the steps outlined for FDResPub for those services by double-clicking them, selecting the Automatic Startup type option, and clicking Start for each.

DNS Client window The Function Discovery Resource Publication service

4. Turn on SMB 1.0

  1. The SMB 1.0/CIFS File Sharing Support feature needs to be on for network discovery. To check if that feature is enabled, launch the Run accessory.
  2. Input ‘appwiz.cpl’ in the Open box and click OK to open the uninstaller Control Panel applet.The Windows uninstaller windows server not showing up in network
  3. Click Turn Windows features on or off on the left of the Control Panel.
  4. Then select the SMB 1.0/CIFS File Sharing Support check box if that isn’t currently selected.Windows Features windows server not showing up in network
  5. Press the OK button.
  6. Restart Windows after turning SMB 1.0 on.

5. Turn Off Windows Defender Firewall

  1. To ensure Windows Defender Firewall isn’t blocking network discovery, turn off the WDF. Open the search utility by pressing the Windows key + S hotkey.
  2. Enter ‘firewall’ in the search box, and click Windows Defender Firewall.Windows Defender Firewall applet windows server not showing up in network
  3. Then click Turn Windows Defender Firewall on or off, which will open the settings shown directly below.Windows Defender Firewall options windows server not showing up in network
  4. Select the Turn off Windows Defender Firewall settings, and press the OK button.
  5. If Network then displays all network devices after turning WDF off, click Allow an app or feature through Windows Defender Firewall on the WDF Control Panel applet.The Allow an app link windows server not showing up in network
  6. Click the Change settings button.Alllow application settings windows server not showing up in network
  7. Then select all the Network Discovery check boxes.
  8. Press the OK button.
  9. Then, users can turn the firewall back on, which will no longer block network discovery.

6. Turn Off third-party antivirus software

In addition, turn off third-party antivirus utilities that might also include firewalls. Users can usually do that by right-clicking antivirus system tray icons and selecting a turn off or disable setting on their context menus. Alternatively, open the antivirus software’s primary window and look for a disable option on its Settings tab.

So, that’s how users can fix File Explorer when it doesn’t display all networked devices. Then File Explorer will show all networked devices in the Network.

Firefox 69 is out and blocks third-party tracking cookies and cryptominers by default

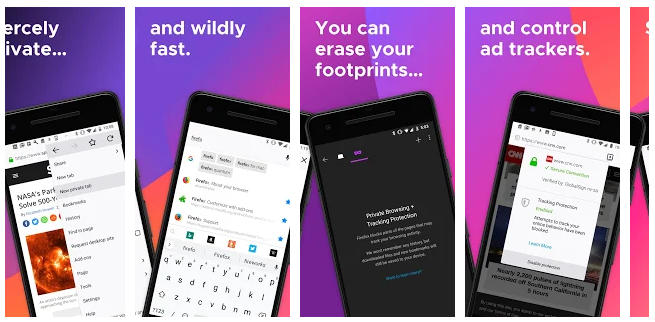
Despite much of the internet browsing world preferring to make use of Google’s Chrome web browser, the folks over at Mozilla continue to toil away at providing an alternative solution with their Firefox software.

A couple of days ago, Mozilla rolled out Firefox v.69 and with the new release, the company is empowering Android, Windows, and Mac users with a new blocking feature that targets third-party tracking cookies and Cryptomining by default. According to a Mozilla press release:

For today’s release, Enhanced Tracking Protection will automatically be turned on by default for all users worldwide as part of the ‘Standard’ setting in the Firefox browser and will block known “third-party tracking cookies” according to the Disconnect list. We first enabled this default feature for new users in June 2019. As part of this journey, we rigorously tested, refined, and ultimately landed on a new approach to anti-tracking that is core to delivering on our promise of privacy and security as central aspects of your Firefox experience.

The new additions are denoted by a new bright green lock icon that appears in the address bar of the browser that highlights the safety and security of the site per Firefox’s stringent tracking policies.

For specific allowances, Android users can dig a bit deeper into the new features preferences by hitting the green lock icon in the address bar and opt to “Turn off Blocking for This Site.”

A lesser highlighted feature of Firefox 69 is the protection from Fingerprint scripts that help protect users from sites that capture snapshots of a computer’s configuration upon visit. To enable this feature, users need to turn on “Strict Mode” from their browser settings, for now. Mozilla mentions in their press release, that they are planning to bring Fingerprint script protection as default feature sometime in the future.

To grab the latest version of Firefox, visit the Google Play Store link below or the company’s website for download.

Firefox Fast & Private Browser
Developer:
Mozilla
Price:
Free

Latest Windows 10 1903 update also broke Windows Search for some, but a fix is coming this month

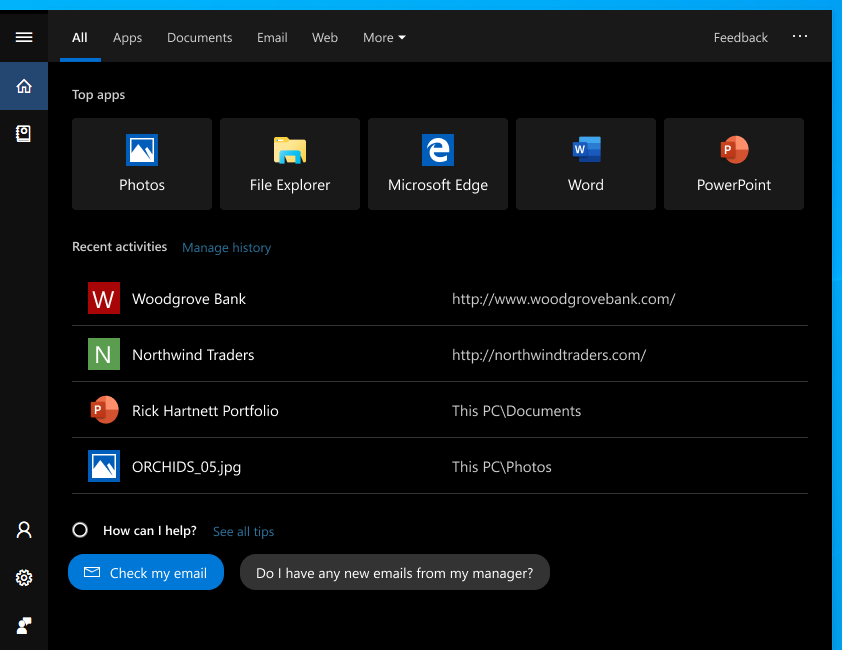
Microsoft’s latest optional update for Windows 10 version 1903 has been more problematic than expected. If Microsoft didn’t indicated any known issues when it released the build 18362.329 on August 30, some users have quickly noticed that Cortana’s background process (SearchUI.exe) could cause unusual CPU spikes of between 30% and 40% for no apparent reason.

Microsoft finally acknowledged the issue two days ago and said that a fix could come in an upcoming release, but the company has since updated the known issues for the optional update to mention some Windows Desktop Search issues that haven’t been discussed before (via ZDNet).

Microsoft is getting reports that a small number of users may not receive results when using Windows Desktop Search and may see high CPU usage from SearchUI.exe. This issue only occurs on devices that have disabled searching the web using Windows Desktop Search.

Again, the software giant says that these issues are only affecting “a small number of users,” and the build 18362.329 is still an optional update that the company is pushing to all users on Windows 10 version 1903. Anyway, the good news is that the Microsoft expect to fix these issues “in mid-September,” which could be next week with the monthly “Patch Tuesday” update.

How to make Windows 10’s File Explorer show the full directory path in the title bar

File Explorer, formerly Windows Explorer, has steadily evolved over the years and become easier to use. One change has been to “prettify” directory paths, which are now obscured from the user.

File Explorer in Windows 10

File Explorer’s address bar breaks the path up into individual folders, which you can expand to quickly navigate through a directory hierarchy. However, you can’t see where the root folder resides without first clicking into the address bar.

File Explorer in Windows 10

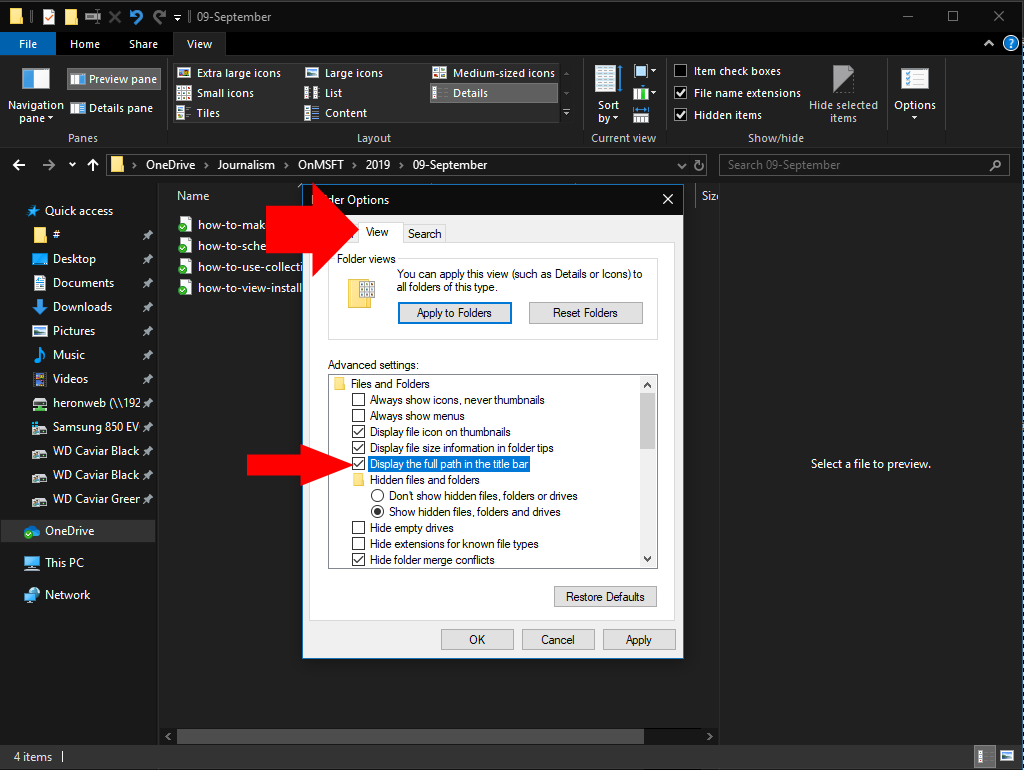
It’s possible to make the window’s title bar (but not the address bar) display the complete path. With this option enabled, you’ll see window titles such as “C:,” instead of just “OneDrive.” This can be helpful when working with lots of similarly named folders under different root directories.

File Explorer in Windows 10

Open File Explorer and click the “View” tab on the ribbon. Next, click the “Options” button to the far-right of the ribbon. Switch to the “View” tab and then select the “Display the full path in the title bar” checkbox. Click “Apply” and then “OK” to close the popup.

Subsequently opened File Explorer windows will now be titled with the full path to the directory they’re currently displaying. You can easily reverse the change by returning to the Folder Options popup and clearing the “full path” checkbox.

To learn more about directories and files paths, we have a great guide on what is the root directory on your PC, so you might want to check it out.

Xbox download error 0x87e00005: Here’s how to fix it

Xbox download error 0x87e00005 can appear when installing certain Xbox One games. Although this error can be problematic, there’s a way to fix it, and today we’re going to show you how to do it.

Here’s how one user describes the issue on Microsoft Answers forums:

I can’t download/install any games on my xbox one, it shows downloading then after about 5min shows error 0x87E00005.

How can I fix Xbox download error 0x87e00005?

1. Move the game to the external drive

move the game to the hard drive xbox download error 0x87e00005

Note: This solution works only when installing a game from a disc.

  1. Go to the Games and apps and select the game that is giving you this error.
  2. Press the Menu button and choose Manage game.
  3. Now select Move and choose your hard drive.
  4. Check if the problem is resolved.

2. Check your router

check your network connection xbox download error 0x87e00005

  1. Make sure that Xbox is allowed to access the Internet.
  2. If possible, try using wired instead of wireless connection.
  3. Check your router and its security policies and make sure that nothing is blocking Xbox from accessing the Internet.
  4. Try restarting and/or resetting your router to the default.
  5. Try a different Internet connection and check if that helps. If the Internet connection is the problem, contact your ISP.

Game won’t start on your Xbox One? Fix it now with this simple guide!


3. Change the DNS on your Xbox One

change the DNS xbox one xbox download error 0x87e00005

  1. Navigate to the Settings > Network > Advanced settings.
  2. Choose DNS settings > Manual.
  3. Now set the following options:
    • Primary DNS: 8.8.8.8
    • Secondary DNS: 8.8.4.4
  4. After doing that, save changes and try to download the game again.

4. Power cycle your console

power cycle your console xbox download error 0x87e00005

  1. Turn your Xbox One off by pressing and holding the Power button on your console for 10 seconds.
  2. After your console shuts down, disconnect it from the power outlet.
  3. Wait for a minute or two and connect all the cables. Press the Power button to start the console.

There you go, four simple and easy solutions that might help you fix Xbox error 0x87e00005. Several users reported that changing the DNS fixed the problem for them instantly, so we suggest trying that first.

If you found our solutions helpful, feel free to let us know by leaving a comment below.

READ ALSO:

Microsoft reminds Windows gamers that Game Bar exists with quirky new angel ad

The Game Bar is a pretty cool Windows 10 feature that can streamline multitasking while gaming on PC but it’s also something that most casual users likely don’t use or are even completely unaware of.

Microsoft is hoping to remind Windows 10 users of the feature with a new ad that it launched this morning on the official Xbox YouTube account. It’s a bit of a convoluted ad featuring two women in a sauna talking about how pressing the Win + G keyboard shortcut on a laptop gives an angel its wings. It’s kind of a bizarre play on the popular phrase from It’s A Wonderful Life.

Short of a two second screen of the Game Bar windows, the ad doesn’t really make an effort to educate the viewer on what exactly the feature does. Instead, its main focus seems to be on helping the viewer to remember the keyboard shortcut to activate it by repeating “Win + G” numerous times.

The shortcut itself is actually one of the easiest Windows 10 keyboard shortcuts to remember, though, as it’s just the Windows key and the first letter of Game. However, the ad seems to be going for the wing pun. As in, when you add G to the end of Win you get wing.

To be honest, this pun is something that didn’t even occur to me until I saw someone else point it out in the YouTube comments so it will be interesting to see if many others pick up on it.

What do you think about this ad? Do you like it? Do you think it’s effective? Share your thoughts with us in the comments below and then follow us on Pinterest for more Xbox gaming content.

New Windows 10 app icons bring more colour to your desktop

With its upcoming Windows 10 20H1 update in the Spring of next year, Microsoft is working hard on redesigning the whole UI.

Microsoft’s overhauled UI might include app icons

The accidental release of Windows 10 build 18947 revealed some of the changes that the tech giant is preparing.

While the Start Menu and Action Center overhaul sounds intriguing, rest assured that Windows 10 apps and their icons haven’t been forgotten.

New icons for Windows 10 apps have been spotted here and there, but officially, only the Office apps got new design elements.

We recently shared a concept design of the Start Menu, and while it was a concept, many of the icons featured there are the new icons for Windows 10 apps.

These new colourful icons look amazing

Windows 10 new app icons
Furthermore, besides the new colourful icons for Mail, Calendar, Snip & Sketch, and Camera that were spotted by Aggiornamenti Lumia, new ones have appeared.

It seems that Microsoft To-Do, File Explorer, Microsoft Solitaire Collection, Groove Music, Movies & TV, and MSN Weather are also getting new icons. new Windows 10 colourful redesigned icons

The blue tones used by Microsoft in all their apps is still present, but not as much as before. And you can say goodbye to the current white icons, as the new ones are much more colourful.

If the tech giant will use them or not, it remains to be seen in future builds.

Now back to you: What do you think of the new colourful icons for Windows 10?

As always, share your thoughts in the comments section below and we’ll continue the talk.

India’s Yes Bank partners with Microsoft to strengthen its AI-powered banking solutions

Yes Bank has announced its partnership with Microsoft to strengthen its first of its kind, AI-enabled chatbot, YES ROBOT. The chatbot combines natural language processing (NLP) and AI to offer an almost human-like experience for customers while addressing their banking needs. Founded in 2004, Yes Bank is India’s fourth-largest private sector bank.

The chatbot is capable of understanding and resolving the evolving banking needs of customers without the need for human intervention. It helps users to perform financial and non-financial banking transactions by employing conversational AI, thereby relieving customers from the hassle of navigating through multiple web pages.

Ritesh Pai, Chief Digital Officer, Yes Bank believes that chatbots would be game-changers in the industry, providing major competitive advantage to banks. “The aim is to make the whole service experience more personalized and instant so that the chatbot can evolve and operate as a full-fledged banking assistant in future,” he adds.

YES ROBOT has been build by the bank’s in-house technology team using Microsoft Azure Cognitive Services. Going forward, Yes Bank plans to integrate the bot with services such as contextual and real-time transfer of chat from bot to the live agent as well as integration with different platforms and applications such as WhatsApp, Alexa, Google Assistant, and Siri.

India’s Yes Bank partners with Microsoft to strengthen its AI-powered banking solutions

A customer can apply for over 65 banking products, check his/her eligibility for a loan, and then get serviced by a Relationship Manager after all the basic checks are done by the bot. It can also provide an indicative loan amount using Machine Learning and advanced credit scoring algorithms. One of the most pivotal features of this chatbot is the option to book fixed deposits and recurring deposits by simply conversing with it.

The chatbot can identify the intent of the user with over 90% accuracy, even with human errors, and over 8.3 million customer interactions have already been reported since its launch in December 2018.

Xbox disc error 0x82d40004: Here are 5 simple fixes

Error 0x82D40004 on your Xbox One can prevent you from playing certain games. Although this error seems problematic, you can easily fix it by using one of our solutions below.

Here’s how one user described the issue on Microsoft Answers forum:

Im trying to play Monster Hunter World but when i insert the disk into my xbox 1 i keep getting a message saying “cant read license, check to see if disc is dirty or damaged” error code 0x82d40004.

How can I fix disc error 0x82d40004 on my Xbox One?

1. Insert the game disc

insert game disc xbox disc error 0x82d40004

Sometimes this error can appear due to licensing issues, but you can fix that simply by following these steps:

  1. Insert the game disc, even if your game is installed.
  2. Run the game.
  3. Your console will now check the license stored on the disc and the game should start.

2. Clean your disc

clean your disc xbox disc error 0x82d40004

  1. Eject the game disc.
  2. Hold the disc by the edges without touching the top or bottom.
  3. Now use the smooth, clean, slightly damp cloth to clean the bottom of the disc.
  4. While cleaning the disc, always go from the center to the edges.
  5. Once the disc is cleaned, wait for a few moments and nsert it again.
  6. Check if the problem is still there.

Game installation stopped on your Xbox One? Fix it right now with this guide!


3. Restart your console

restart the console xbox disc error 0x82d40004

  1. On your console, press and hold the Power button for 10 seconds.
  2. Once the system turns off, disconnect the Xbox from the power outlet.
  3. Wait for a few minutes.
  4. Press the Power button again and check if the issue is still there.

4. Try a soft reset

perform soft reset xbox disc error 0x82d40004

  1. Go to Settings > System.
  2. Now select Console Info > Reset the console.
  3. Select Reset and keep my games & apps.
  4. Once the process is finished, check if everything works.

Note: You can also use Reset and remove everything option, but that will remove all installed games and apps, so you’ll have to download them again.


5. Try a different disc or contact Microsoft support

contact microsoft support xbox disc error 0x82d40004

  1. Insert a different disc and check if the same problem appears.
  2. If the issue appears with multiple discs, it’s possible that your console is damaged.
  3. In that case, it’s advised to contact Microsoft support.

Xbox disc error 0x82d40004 will prevent you from running certain games, but hopefully, you managed to fix it with our solutions.

If you found our solutions helpful, let us know in the comments section below.

READ ALSO:


Here’s how to change color in Paint 3D

If you found yourself asking the question ‘ How can I change color in Paint 3D? ‘, you came to the right place.

There is nothing better than being able to create your own art from the comfort of your own home. With the use of Paint 3D, you can now create elaborate 3D models and scenes to complement or replace your 2D art entirely.

In order to be able to create at your full potential, you will need to know how to apply and change the color of your 2D and 3D models.

For this reason, in today’s article, we will explore the best way to change colors of 2D shapes, specific selections in your project, and also 3D models. Read on to find out how to do it.


Steps to change the color of objects in Paint 3D

How to change the color of a 2D shape in Paint 3D?

As Paint3D was created in order to offer you a viable option to create using your Windows 10 PC, it was built to be easy to use.

As in the case of the ‘old-school’ Microsoft application, in order to change the color of a 2D object, you will need to first make a 2D object. Follow these steps to do so:

  1. Open Paint 3D.
  2. Select Create a new project from the start menu.
  3. Select the 2D Shapes button found in the top toolbar.
  4. Use the right-side menu to choose the desired shape of your 2D object -> click and drag the mouse on the canvas to create the shape.created 2D object - Paint 3D how to change color
  5. Inside the Fill section in the same right-hand side menu -> click the to activate the drop-down menu -> select Solid.Solid option Fill - paint 3d how to change color
  6. Click the square box next to the drop-down menu -> select your desired color.Fill color options - paint3d how to change color

Can I use Paint 3D to convert images to black and white?


How to change the color of selection inside Paint 3D?

In order to be able to change the color of a selection inside Paint 3D, you will need to follow these steps:

  1. Select the 2D or 3D object you want to change the color to by clicking the Select tool.select tool - paint 3d how to change color
  2. Press the Brushes icon found inside the top toolbar.
  3. From the right-side menu select the Fill option.fill tool brushes menu - Paint 3D how to change color
  4. Click on the selection to fill it with the desired color.

Conclusion

In today’s How-to article we explored the best way to add color to your Print 3D project. We also discussed the easiest way to add color to a 2D object, and also how to add color to a selection.

Please feel free to let us know if this guide helped you to better understand how to use Paint 3D on your Windows 10 PC. You can do so by leaving a comment in the comment section below.

READ ALSO:

How to fix Dropbox’s Export Failed error when exporting videos

Some users utilize Dropbox cloud storage to transfer videos from Windows desktops and laptops to their mobile devices.

However, an “Export Failed” error might arise when users try to export videos saved in Dropbox to their mobiles devices.

The full error message states: Export Failed. Dropbox was unable to save to the Photo Library.

Consequently, users can’t export their videos from Dropbox to the mobiles.

The “Export Failed” error is usually due to video format incompatibility. The video formats users are trying to export aren’t compatible with their mobile devices.

However, users can fix the error by converting their videos to compatible mobile formats with various optimizer software before saving them to OneDrive.

How to fix Dropbox Export failed errors?

1. Try using the web version

Sometimes using the web version of Dropbox can fix this issue. You can use any web browser for this task, but we suggest trying Opera One.

Opera One browser is known for the fact that it is really fast and it comes with some really cool data compression features.

This browser comes with with unique features, such as workspaces, tab islands, built-in Ad blocker, VPN and AI. Also, it features a modular AI-ready Design for the integration of other AI technologies.

Opera One

Opera One can be your new browser, with all of your bookmarks, passwords and autofill data, in just a couple of clicks.
Free Download Visit website

Want to learn more about UR Browser? Here’s our in-depth review!


2. Convert videos to compatible formats with HandBrake

  1. Users can convert videos to compatible mobile device formats with the open-source HandBrake software for Windows. Click Download (64-bit) on Handbrake’s download page to save the installer for that software.
  2. Then open the installer for Handbrake to add that software to Windows.
  3. Open the HandBrake software.The Handbrake software dropbox error exporting files
  4. Click the File button, and then select a video to optimize.
  5. Press the Open button.
  6. Click the Presets button.
    The Presets button dropbox error exporting files
  7. Click Devices on the Presets sidebar.
    The preset Device category dropbox error exporting files
  8. Next, select an Apple, Android, or Windows Mobile preset that best matches the device you’ll export the video to.
  9. Click Preview, select Use system default video player, and press the Live Preview button to play a preview of the video.
    The video Preview window dropbox error exporting files
  10. Users can click the Browse button on the Summary tab to select an alternative folder path for the output file.
  11. Press the Start Encode button to initiate the conversion.
  12. Thereafter, users can upload their converted videos to OneDrive to export them to mobile phones.

Looking for a powerful video Editor? Check out our review of Movavi Video Editor Plus!


3. Update the Dropbox app

Some users might also need to update the Dropbox apps on their mobile devices to fix the “Export Failed” error. The best way to do that is probably to uninstall the apps.

Then open the Dropbox Google Play or iTunes pages to get the latest version of the app.

The Dropbox page dropbox error exporting files

So, that’s how users can convert their videos to compatible mobile device formats to fix the “Export Failed” error. Then users can export the videos from OneDrive to their mobiles. Aside from HandBrake, users can also convert videos to compatible mobile formats with Video Converter Ultimate, Video Optimizer Pro, and Format Factory.

RELATED ARTICLES TO CHECK OUT: 

Mixer not showing the video stream? Do this to fix it

If you want to use Mixer and it is not showing the video stream, you are not the only user dealing with this.

This issue can cause some stress to people that want to stream a specific gaming session online, and the impact of this issue becomes even bigger if you’re streaming videos online professionally.

The Mixer not showing the video stream issue can be caused by a variety of issues. It depends on the details of your situation, therefore, the issue might be caused either by an issue with the streamer or with your streaming device.

In this article, we will try to fix this issue by using some of the proven methods we found by performing in-depth research on the forums that deal with troubleshooting Mixer issues. Read on to find out how to do it.

What to do if Mixer isn’t showing video stream on Windows 10?

1. Check the Mixer Service Health Dashboard

Mixer service health dashboard - mixer not showing stream/ mixer not showing video


Before you attempt to modify any of your PC‘s settings, first, you will first need to make sure that the Mixer servers are up and running.

To do so, please visit the official Mixer Service Health Dashboard, and check if the servers are online. If they are and everything works properly, follow the next methods.

2. Your browser might not work with Mixer


If you’re using Opera, we have bad news for you. Similarly, Vivaldi will encounter issues with Mixer as well.

Mixer doesn’t support your browser and the only way to fix it (for now), is to change your browser when trying to stream online.

If you need a browser to use with Mixer, we suggest using UR Browser. This browser is built on Chromium engine, and it’s privacy-focused.

The browser isn’t associated with Google in any way, so it won’t send your personal information to Google. In addition, it also has tracking, malware, and privacy protection.

If you need even more security, there’s a built-in VPN you can use.

⇒ Get UR Browser

3. Clear browser cache and refresh webpage

  1. Download CCleaner and install it to your hard-drive.
  2. Open CCleaner.
  3. Click on the Custom clean button.
  4. Tick the boxes next to the cache options for the browsers you’re using with Mixer.
  5. Click Run Cleaner.Clear caches firefox and chrome - mixer not showing stream/ mixer not showing video
  6. Check to see if the issue persists.

4. Change your stream settings

Broadcaster possible causes:

  • The encoder settings of the broadcaster might be set too high, and their hardware can’t handle it properly. Check the best settings here.
  • The CPU of the device the broadcaster is using might be reaching its limit while streaming.

Viewer possible causes:

Conclusion

We understand how important it is for you to be able to stream your favorite games properly, without any lag or buffering issues.

For this reason, in this article, we explored the best solutions to the possible reasons for you encountering this problem.

We hope this guide managed to help you fix your issue with the Mixer app not showing the video stream on Windows 10.

Please feel free to let us know if this article helped you, or if you have any other suggestions about how to fix this problem. You can do so by using the comment section below.

Hyper V Failed to Realize: 3 Ways to Fix it

Hyper V failed to realize error will prevent your virtual machine from running, and this can be a serious problem that needs to be addressed as soon as possible.

The issue is similar to the Hypervisor is not running problem that we covered in the past, and in today’s guide, we’re going to show you the best ways to fix the problem.

Why does the Hyper V failed to realize error appear?

  • You’re experiencing issues while copying files from a USB drive.
  • The directory that you’re copying to isn’t available.
  • Issues with your current virtual machine.

How can I fix Hyper V failed to realize error?

1. Copy the files you’re trying to import to your hard-drive

  1. Copy the files you’re trying to transfer from the USB to the host machine.
  2. After that, move the files from the host to the VM.
  3. Wait for the transfer to finish.

2. Make sure that the drives and directories being used exist

  1. Ensure that the drive to which you’re trying to import your files exists.
  2. If the drive exists, try the process again.
  3. Wait for it to finish.

After doing that, check if the error is gone.

3. Delete and re-create the Virtual Machine while keeping the VHDX file

To delete VM:

  1. Open the Hyper-V Manager.
  2. Select the VM you want to delete -> right-click it -> select Delete.

  3. Press again on Delete to confirm.

To create a new VM:

  1. Inside the Hyper-V Manager -> click on your desired host from the left pane.
  2. Click the New option found in the right-hand Actions pane ->select Virtual Machine.

  3. Follow the rest of the wizard and set the characteristics you had in your previous VM.
  4. Follow the next method when reaching the virtual hard-disk configuration window.
  5. Click the Browse button, navigate to the location of your VHDX file, and select it.
  6. Click Next inside the Wizard and follow the on-screen instructions to complete the setup.
  7. This should allow you to import your VM successfully.

The methods presented to you in this guide will cover all the required steps if you get Hyper V failed to realize message on your PC.

For more information, you might want to check our Not enough disk space error in Hyper-V guide.

Please let us know if this guide helped you by commenting below.

How to stop OneDrive’s sync pausing in battery saver mode

The OneDrive cloud storage automatically pauses syncing when Windows 10 is in battery saver mode. A “This PC is in battery saver mode” toast notification pops up to inform users that OneDrive has paused syncing to preserve battery. Users can then select a Sync anyway option on that toast notification. However, some users would prefer if OneDrive didn’t pause syncing so they don’t need to manually enable it via the toast notification.

How can users fix OneDrive’s sync pausing?

1. Turn Off Battery Saver Mode

  1. Users who don’t need battery saver mode can stop OneDrive’s sync pausing by turning that mode off. To do that in Windows 10, click the Type here to search button.
  2. Enter ‘battery saver’ in the search box.
  3. Click Battery saver settings to open the window shown in the snapshot directly below.The Turn battery saver on automatically setting this pc is in battery saver mode
  4. Then deselect the Turn battery saver on automatically if my battery falls below option.

2. Deselect the Automatically Pause Sync Option

  1. Users who need to keep battery saver mode on should deselect the Automatically pause sync setting in OneDrive. Click the OneDrive system tray icon.
    OneDrive system tray icon this pc is in battery saver mode
  2. Click the More button shown directly below.
    The More button this pc is in battery saver mode
  3. Then click Settings to open the window shown below.
    Microsoft OneDrive window this pc is in battery saver mode
  4. Select the Settings tab on that window.
    The Automatically pause sync option this pc is in battery saver mode
  5. Then deselect the Automatically pause sync when this device in battery saver mode check box in the shot directly above.
  6. Press the OK button to exit the window.

Want to switch to a different cloud storage service? Here are some great OneDrive alternatives!


3. Edit the Registry

  1. Users can also stop OneDrive sync pausing by editing the registry. Launch Run with the Windows key + R hotkey.
  2. Input ‘regedit’ in the Open box, and click the OK button.
  3. Open this registry path: Computer\HKEY_CURRENT_USER\Software\Microsoft\OneDrive.The OneDrive key this pc is in battery saver mode
  4. Select the OneDrive key on the left of the Registry Editor.
  5. If the OneDrive key doesn’t include a UserSettingBatterySaverEnabled DWORD, right-click an empty space on the right of Registry Editor to select New > DWORD (32-bit) Value.
    Then enter ‘UserSettingBatterySaverEnabled’ as the new DWORD title.UserSettingBatterySaverEnabled DWORD this pc is in battery saver mode
  6. Double-click UserSettingBatterySaverEnabled to open the Edit DWORD window.
  7. Then enter ‘1’ in the Value data box, and click the OK button.
    The Edit DWORD window this pc is in battery saver mode
  8. Close the Registry Editor.
  9. Users might also need to sign out and back in to their user accounts for changes to take effect.

That’s how users can stop OneDrive’s sync pausing in battery saver mode. Then the “This PC is in battery saver mode” notification won’t ever appear for users to restart syncing.

RELATED ARTICLES TO CHECK OUT: 

Microsoft’s Ignite conference, set for November and full of Windows sessions, is sold out

Microsoft’s Ignite conference, which will kick off on November 4 in Orlando, Florida, is now sold out, the company announced on Twitter today. If you already have a pre-existing registration code, you can still complete the process and get your ticket today. In case you didn’t pre-register, you may still have a chance to get in by joining the waitlist on this page.

The session catalog for Ignite 2019 went live last week, and there are 466 sessions as of this writing. Ignite is an event dedicated to IT Pros, so you can expect to learn a lot about Azure and Microsoft. You’ll also find sessions about the Windows Subsystem for Linux, the new Windows Terminal, Windows Sandbox, Windows Virtual Desktop, and many more Windows 10-related topics.

The event will last five days between November 4–8, 2019, and in addition to the various sessions Microsoft also promises to offer 200+ hands-on experiences to attendees. You can learn more about the event on the dedicated website.

Microsoft acquires cloud migration company Movere

Microsoft is continuing to bolster its Azure services through acquisition, this time with the addition of cloud migration company Movere to the arsenal. Movere seeks to make it easier for companies to move to the cloud, having learned some of the pitfalls over the last eleven years as it grew as a consulting company working to provide actionable data, “giving customers the power of the story that only data can tell.” Movere has been working closely with Microsoft over the years, and Microsoft is pushing hard to get more and more companies to make the move to the cloud, so this is a natural fit.

Microsoft sees the acquisition as a complement to both Azure Migrate and other 3rd party solutions in helping make the move, according to Jeremy Winter in an Azure Blog post announcing the acquisition:

Movere’s innovative discovery and assessment capabilities will complement Azure Migrate and our integrated partner solutions, making migration an easier process for our customers. We believe that successful cloud migrations enable business transformation, and this acquisition underscores our investments to make that happen.

Together, Azure Migrate, Movere, and our ecosystem of independent software vendor (ISV) partners’ solutions provide choice and a comprehensive set of capabilities from discovery, assessment, to migration and optimization. We aim to streamline our customers’ journey to the cloud, enabling them to bring innovation and transformation with the power of Azure.

Microsoft has been increasing its pace of Azure acquisitions lately, as it continues to build out what’s quickly becoming the center of the company’s focus as it moves beyond Windows and Office.


Korean carrier SK Telecom will leverage Microsoft’s Project xCloud to launch 5G-based cloud gaming service in the country

Korean carrier SK Telecom announced at a press conference today that it has teamed up with Microsoft for delivering a joint 5G-based cloud gaming service in the country. According to the press release, the carrier will be “an exclusive operating partner of Microsoft’s cloud gaming service in Korea,” and it will leverage its 5G and LTE infrastructure to help Microsoft fine tune Project xCloud for mobile gamers around the world.

As you may know, Microsoft’s Project xCloud game streaming service will focus exclusively phones when it goes into public testing in October, and the software will really need to work hand in hand with carriers to make sure that Project xCloud can deliver a great gaming experience. Today’s announcement put the emphasis on the “super-fast speed and ultra-low latency” delivered by SK Telecom’s 5G network, and the Korean carrier currently has over 1 million 5G subscribers in the country.

There are still a lot of unknowns about Project xCloud, including details about supported phones. Beyond the latency issues that have often been talked about, it’s also the monthly data caps that most carriers still use today that could be more problematic for users, as streaming video games in high definition will likely consume a lot of data.

It also remains to be seen if carriers could soon use Project xCloud as an incentive to join their networks, just like T-Mobile is now offering free Netflix in the US, and Sprint is doing the same with Hulu. Anyway, with South Korea being the fourth largest gaming market in the world and an early adopter for 5G, this should be a great place for game streaming services to thrive.

This band is using Microsoft’s Windows Sonic technology to make an “audio-only music video”

Microsoft has teamed up with with the American rock band X Ambassadors to create what they’re calling an “audio-only music video” especially for those who are blind or with low vision (via Engadget). The band worked with Microsoft technologists to create the pictureless music video thanks to the company’s Windows Sonic 3D technology.

Inspiration of the project comes from the band’s lead keyboardist, Casey Harris, who has had low vision since his birth. He noted that:

“As someone who’s been blind since birth, it was really important to me to make a video that the blind community could enjoy as much as the sighted community enjoys our visual content.”

Users will be able to take advantage of the new 3D audio experiences using the band’s new “Boom” app, which is available for Windows 10, Android, and iOS. Users will have two different experiences to choose from—Bushwick, Brooklyn where the band’s rehearsal studio used to reside, as well as Ithaca, New York where Casey and his brother Sam grew up.

Casey also mentioned that those who are blind or with low vision aren’t the only people who can enjoy the thrill of the 3D video. “I mean, I’d say the app is for everybody,” he said in the video above.

If you’d like to see for yourself, you can download it from any of the link below, depending on your platform. Be sure to leave your thoughts about the app in the comments area below.

X Ambassadors Boom
X Ambassadors Boom
Developer:
X Ambassadors
Price:
Free


‎X Ambassadors Boom
‎X Ambassadors Boom


X Ambassadors Boom
X Ambassadors Boom
Developer:
X Ambassadors
Price:
Free

How to set up and manage your email account in Outlook in Office 365

Emailing is one of the core experiences of any business operation. With an Office 365 subscription, you can typically access your email from the Outlook web app, or set up your email account with various email clients across different phones or PCs. One of those clients happens to be the Outlook desktop app, as included with many Office 365 subscriptions.

In this step-by-step guide, we’ll give you a look at how you can set up and manage your email account in the Outlook desktop app. The process is simple and straight forward. In as little as 5 minutes, you can be up and running and sending emails from your computer or laptop, without having to visit the web.

Setup via the File option

Typically, Outlook will greet you with a first-time step-by-step wizard to set up an email account if you’ve never used it before. This is the easiest way to get started with Outlook. However, in some rare cases, the wizard might not appear. In this case, you’ll need to manually set up your email by visiting the file menu. The manual set up process is very similar to the initial setup, and the steps are below.

  1. Head to File in Outlook and click on the Add Account button.
  2. Type in your email address in the pop-up Outlook box
  3. Press the blue Connect button
  4. If you’re using an Exchange account, Google, or a POP account which requires advanced security settings, choose the Advanced Options drop down menu. If your account is POP or IMAP, you’ll then want to choose the Let me Set up my Account Manually option and input the appropriate fields. Microsoft has a list of suggested settings here.
  5. Sign in with your password

Once you sign in, Outlook will auto-fetch most of the content from your email account. That will include all of your emails from the inbox, folders, and more. You’re now free to email from the Outlook desktop app!

Managing your new email account in Outlook

With your email account set up in Outlook, you’ll likely now want to know how you can manage it. This just involves a visit to the File option once more. From there you’ll see a drop-down menu listing the names of any accounts you’ve added. You’ll also see the ability to add more accounts. Some other options for managing Outlook accounts are explained below.

  • Account Settings: This first setting allows you to add or remove accounts, switch and manage Outlook profiles, or change account settings. Other options here allow you to download your contacts, set up SMS alerts for emails, and more. There’s even an option to change your profile picture, and access your email from the web
  • Automatic Replies: This setting will let you set up Automatic Replies if you’re out on vacation, sick, or not avaiable for answering messages.
  • Tools & Mailbox Settings: If you’re concerned about storage space of Outlook, these tolls allows you to manage the size of your mailbox. It also can help you clean up your mailbox by emptying the deleted items folder. Finally, it also can help you move old items to an Outlook file.
  • Manage Rules and Alerts: This option is for setting up rules for email messages, and alerts for whenever items are auto-moved.
  • Manage Add-Ins: This final tool is for managing your add-ins for Outlook

The wrap-up and other tips and tricks

As you can see, setting up your email account with the Outlook desktop app as part of Office 365 is easy. You just need to follow a few easy to understand prompts, and then visit the File menu again to manage your account. We have previously explained how you can attach files in Outlook, recall an email, and even given a look at some of our favorite Outlook tips and tricks. Fell free to check it out, and let us know how Outlook is working for you by dropping us a comment below.

New Microsoft mouse and keyboard have been revealed by FCC filings

A new wireless keyboard as well as a mouse to go with it have both been passed though the FCC, likely designed primarily for new Surface hardware Microsoft could be set to announce next month (via MSPU). Given these documents have just recently passed less than a month ahead of the upcoming Surface hardware event it’s possible for them to show up during the event.

As seen in the diagrams in the FCC listing, the wireless keyboard—with 1898 as the model number—will include a battery chamber along one of the corners of the device. The mouse going under model number 1929 won’t include a removable battery cover according to its diagram, potentially suggesting it might be charged via a cable.

The company is set to announce a multitude of new additions to the Surface lineup, including Surface Pro 7, Surface Laptop 3, and a Surface Book 3. A few media outlets are also suggesting these devices could include the newest 10th generation Intel CPUs as well as USB type-C support. We’ll just have to wait and see.

Would you buy a new Surface wireless keyboard combo so go along with your new/existing Surface device? Share your thoughts in the comments area below.

How to fix Origin error code 16-1 in Windows 10/11

EA’s Origin is one of the most popular game stores that allows you to purchase and manage games from anywhere. That said, Origin like most of the Windows software has its fair share of errors that can occur to anyone.

One such error is Origin error code 16-1.  This error usually occurs when you install or update the Origin client.

In case you are also troubled by this error, here are a couple of troubleshooting tips that you can try to fix the origin error code 16-1 in Windows computers.

How to fix Origin error code 16-1

1. Update Graphic Card Driver

  1. Origin may require you to have an update to date graphic card driver installed. Check if any update is pending for your graphic card in the Device Manager.
  2. Press Windows Key + R to open Run.
  3. Type devmgmt.msc and click OK to open the Device Manager.
  4. In the Device Manager, expand the Display Adapter section.
  5. Right-click on your graphics card device name and select Update Driver.
    Origin error code 16-1
  6. In the new window, click on “Search automatically for updated driver software“.
    Origin error code 16-1
  7. Wait for Windows to download and install any pending update.
  8. Once the driver is installed, reboot the computer.
  9. Launch Origin and check if the Origin error code 16-1 is resolved.

Origin update error code 11:0: Here’s how to fix it


2. Disbale Antivirus and Firewall

  1. if the issue persists, try disabling your antivirus temporarily and the Firewall as well.
  2. To disable antivirus, right-click on the Antivirus icon in the taskbar and select Exit or Disable.
  3. To disable the Firewall, do the following.
  4. Click on Start and select Settings.
  5. Go to Update and Security.
  6. Click on Windows Security.
  7. Click on Firewall and Network Protection.
    Origin error code 16-1
  8. Select the currently active network (Private or Public Network).
    Origin error code 16-1
  9. Under Windows Defender Firewall, toggle the little switch to turn off the Firewall.
  10. Try to run the Origin installer again and check if the Origin error code 16-1 is resolved.

3. Uninstall and Reinstall Origin

  1. If the issue persists, try to uninstall and reinstall the Origin client.
  2. Press Windows Key + R to open Run.
  3. Type control and click OK to open the Device Manager.
  4. In the Control Panel, go to Programs > Programs and Features.

  5. Select Origin and click on Uninstall. Click on Yes to confirm.
  6. Once the Origin client is uninstalled, you need to clear the Origin folder as well.
  7. Open File Explorer and navigate to the following location:
     C:\ProgramData\Origin
  8. Delete the Origin folder.
  9. Download the Origin installer from the official website again and proceed with the installation.
  10. This should help you to fix the Origin error code 16-1 in Windows.

If you are unable to delete the Origin folder in the above steps, try to boot into Safe Mode and then delete the folder.

  1. Press Windows Key + R.
  2. Type msconfig and click OK.
  3. In the System Configuration window, open the Boot tab.
  4. Under “Boot Options”, check the “Safe boot” box.
  5. Click Apply and then click OK.
  6. Restart the computer and delete the Origin folder again.
  7. After that run the Origin installer again.
  8. Make sure you uncheck the Safe Boot option after deleting the Origin folder.

RELATED STORIES YOU MAY LIKE: