We had recently published a fix article to resolve the Silver Wolf error on Xbox consoles that was causing some issues with the Call of Duty Black OPS 4 game on the Xbox. Another error that has been bugging the Call of Duty Black Ops 4 users is the bravo code 381 Orange Wolf.
The error code bravo 381 orange wolf appears whenever the Xbox users try to launch Black OP4 on their console. The game simply kicks the user out and shows the error. If you are also troubled this error, you are not alone. Here’s what one user said about it on the official subreddit.
Please help! Error code: Bravo 381 Orange wolf. Tried to contact support and cannot get through to anyone. Saw a lot of people having issues. Just bought the game today (11-23-18) and got everything downloaded. Was able to play blackout for a short while and now everything is locked?
Read below to find out how to solve this.
How to fix the Xbox error code Orange Wolf on Xbox
1. Check Xbox Live Status
Before applying any of the fixes listed in this article, make sure all the services and apps are running correctly at the Xbox end. You can check the Xbox Live Status on the Official page. If everything is in green, it means the error is not at the Xbox Live end.
2. Reset Console Factory Default
On the Xbox home screen, press the Xbox button to open the guide.
Now go to System and select Settings.
Select System and then Console Info.
Select Reset Console option.
On the Reset Console? Screen, you have two options. Reset and remove everything – This option resets the console to factory settings. But also remove all the user data, saved games, settings, home Xbox associations, and all games and apps. You should only use this as a last resort and if the second option doesn’t work.
Reset and keep my games and apps – This is the first option you should select to resolve the orange wolf error. This option will reset the OS and delete all the corrupted data but keeps all the game data, personal files and installed games and apps intact.
Select “Reset and Keep my games and apps” and confirm the action if asked.
Now the Xbox will start resetting the console to factory default.
After the reset is over, follow the wizard to complete the Xbox setup.
Log in with your Xbox Live account and you should be able to able to play the game without any error.
While resetting the Console is the last recommended option, many users have reported that resetting the console has resolved the issue on their Xbox and the error orange wolf for Call of Duty Black Ops.
Close the Call of Duty screen if running on your Xbox.
Turn on the mobile hotspot on your Smartphone.
Connect your Xbox to the hotspot.
Launch Call of Duty Black OPs4 and open the Multiscreen window.
Quit the game.
Now disconnect and connect to your regular WiFi / Wired network.
Relaunch the game and check if the error is resolved.
3. Check for Update / Reinstall Game
If you haven’t already, check if the game has a new update available. In case this is a widespread issue, developers may release an update to fix the issue.
If no updates are available, you can try uninstalling and installing the game again. For some users, reinstalling the game has resolved the error.
Contact the Game developers via twitter. When asked, make sure you tell, you have more than 5Mbps connection and have cleared the cache but the issue persists.
Windows 10 comes in multiple versions, namely Windows 10 Home, Professional, Education, and Enterprise. Windows 10 Home is the standard version while the other three versions come with more features targetted at different users.
Now if you are a student who was provided with a Windows 10Education key and wondering if you will be able to play some games in your free time or if you should go with any other version, we made sure to give you some insight.
While you can play video games on any Windows 10 version, there are some differences between these Windows 10 version. Let’s find out which Windows version should you choose for gaming.
Can I play games on Windows 10 Education?
The short answer is yes. There is no restriction on what consumer grade software you can install on Windows 10Education. The Education version offers all the features of the Windows 10 Home and some additional features that the student may require access to including Active Directory access for Windows domain network.
No. In fact, if you are not interested in using any of the advanced features provided by the Windows 10Education version, you are better of installing the Windows 10 Home version.
Windows 10Education has more process running in the background which has no benefit for a common user.
On the flip side, Windows 10 Home users miss out on the Microsft’s encryption software BitLocker Encryption. So, if Encryption is something you want to for your laptop or desktop, you can opt for Windows 10 Pro or Education.
Difference Between Windows 10 Education and other Windows 10 Versions?
The Windows 10 Home is for the normal users who don’t need to use the business features of the Windows OS. However, not having the BitLocker feature is something that put the Home user at a disadvantage. Below is a chart explaining the major differences between the different Windows 10 versions.
Windows 10 Features
Home
Pro
Enterprise
Education
Device Encryption
Yes
Yes
Yes
Yes
Domain Join
–
Yes
Yes
Yes
Group Policy Management
–
Yes
Yes
Yes
BitLocker
–
Yes
Yes
Yes
Enterprise Mode Internet Explorer
–
Yes
Yes
Yes
Assigned Access 8.1
–
Yes
Yes
Yes
Remote Desktop
–
Yes
Yes
Yes
Direct Access
–
–
Yes
Yes
Windows To Go Creator
–
–
Yes
Yes
AppLocker
–
–
Yes
Yes
BranchCache
–
–
Yes
Yes
Which version of Windows 10 do you use as your daily driver? Let us know in the comments below.
Many Windows 10 users are asking themselves what’s the difference between the Sleep and Hibernate.
Although they have similar purposes, these two functions are different.
In this article, we’ll tell you everything you need to know about the two power saving functions in order to have a better understanding of their differences.
What is the difference between Sleep Mode and Hibernate Mode?
1. Sleep
In sleep mode, all the processes on the computer are stopped.
Applications and documents are kept in the computer memory, while many PC functions are turned off. This allows the computer to save more power.
Turning the computer back on is done very quickly, as there is no need for the booting operation to take place.
After exiting sleep mode, apps and documents are exactly as you left them before entering sleep mode.
Therefore, picking up the tasks from where you left them off is done easily.
Sleep mode is frequently used for short periods of time. Although it does save energy, the function still requires a bit of power in order to run.
Microsoft announced some changes for its popular cloud storage service OneDrive. New security options and a new storage plan is now available to Office 365 subscribers.
According to Microsoft, OneDrive is getting a new OneDrive Personal Vault feature. Furthermore, the company will offer new subscription plans for Office 365 and OneDrive customers.
Get more storage space without paying more
Previously, Microsoft offered 50 GB of storage for a monthly fee of $1.99. You can now enjoy 100 GB of storage for the same price tag.
Microsoft confirmed that the extra 50 GB storage will be added to your account very soon without any user intervention.
Likewise, Microsoft is also upgrading the subscription plan for Office 365 subscribers. Office 365 Personal and Home subscribers currently get 1TB of cloud storage.
Now you can purchase 200 GB storage by paying a negligible price of $1.99 per month. However, what if you are looking for additional storage at a minimum price? Don’t worry! Office 365 price plans got you covered.
You can get up to 1TB of extra storage on a monthly basis only for $9.99.
Microsoft says that you can subscribe to the additional storage plans within the next few months. However, there is a catch for multiple account holders who fall under the Office 365 Home subscription.
According to Microsoft, the extra storage space will be available to just the primary account holder.
The additional storage comes to the rescue in those situations when you need to delete some old files to free up some memory.
OneDrive mobile app allows users to directly record videos, grab pictures and scan documents in separate folders. In other words, Personal Vault is a secured place to store your insurance, identification, travel, vehicle or personal documents.
Personal Vault can minimize the chances of security threats and ransomware attacks. OneDrive Personal Vault will be available to Windows 10, mobile and Web users later this year.
Initially, the access will be limited to New Zealand, Australia and Canada.
Microsoft decided to end its partnership with Intel and switch to AMD to power upcoming Surface Go, Surface Laptop, and Surface Pro devices.
Intel and AMD are considered to be two major competitors in the industry. Microsoft used Intel to power its Surface range for the past 5 years.
This move came after the notorious Spectre and Meltdown attacks affected many of Intel’s chips. These vulnerabilities had a major impact on the reputation of Microsoft devices.
Therefore,this decision may be a major setback for Intel. According to some recent reports, Microsoft’s relationship with Intel is not at all perfect. This might be the reason why the tech giant is looking for alternatives.
Microsoft already developed some prototype Surface devices. Currently, the company is testing ARM and AMD chips that can run on those prototypes.
The big M also used Qualcomm Snapdragon chips to power some of the Surface Pro prototype.
Microsoft’s very own chip coming soon
Microsoft is reportedly working on its own 8cx chip codenamed Excaliburin collaboration with Qualcomm.
This customized chip is specifically developed to provide excellent performance on Windows 10. However, there is no official confirmation from Microsoft at the moment.
Meanwhile, the next generation Xbox Scarlett consoles are powered by AMD chips. So, Microsoft has an extra reason to switch to AMD for its Surface devices CPUs as well.
In terms of performance, Qualcomm-powered devices are comparatively less powerful than Intel-based laptops.
However, these devices do bring some advantages of their own. They offer integrated LTE connectivity, extended battery life, and lightweight and slim design lines.
Microsoft does not plan to completely end its relationship with Intel. Some of its upcoming devices may feature Core i5 or i7 processors.
It will be interesting to see how Microsoft goes ahead with these plans. We do expect to see some major changes in the upcoming dual-screen foldable Surface devices next year.
Microsoft finally decided to make the install process of Visual C++ Redistributable packages much simpler. The tech giant released an updated version of its Universal C Runtime installer to resolve the issue.
We have many applications in our systems that often install Microsoft Visible C++ Redistributable packages on our Windows 10 Home systems.
It is because these applications are developed in a way that they need these packages to run on our systems. Therefore, we see multiple copies of Microsoft Visible C++ Redistributables installed.
These packages are automatically installed alongside with Windows Updates. However, sometimes we need to install them manually. And that can turn into a hassle.
Microsoft made some changes to its system with the release of Visible Studio 2015, Visible Studio 2017 and Visible Studio 2019.
This means you don’t need the previous Redistributable versions to run Visible C++ 2019. Keep in mind that you still need to download redistributables for Visual C++ 2017 and 2019 with the installation of Visual C++ 2015.
Microsoft released a Universal C Runtime installer for Windows administrators. You can simply install the 32-bit or 64-bit packages on your PC.
Apparently, this situation might create problems for the gaming community. One of the users took it to the AMD community forum to discuss the issue.
Still going to have a “problem” when installing older games as they will want to install VCRest by default, even if they have “modern” installers from GoG, Steam, or what have you.
What do you think about this change? Let us know in the comments section below.
Don’t forget to bookmark these pages in case you’re getting Visual C++ errors:
Have you ever encountered This program is blocked by Group Policy error on your PC? Fortunately for you, this error is relatively simple to fix, and today we’ll show you how to fix it for good.
How do I unblock a program that is blocked by the administrator?
1. Disable the Software Restriction Policy
Press the Windows key + S, type cmd, and click Run as administrator under Command Prompt.
Run the following command in the Command Prompt: REG ADD HKLM\SOFTWARE\Policies\Microsoft\Windows\Safer\Codeldentifiers\ /v DefaultLevel /t REG_DWORD /d 0x00040000 /f
After the message appears that it is OK, you can reboot your computer to save the changes, and hopefully, the issue will be fixed.
The first solution to apply if you are getting this program is blocked by group policy. For more information, contact your system administrator error is to disable the software restriction policy.
Press Windows key + R, type regedit, and press Enter to open Registry Editor.
Go to the next registry key: HKEY_CURRENT_USER\Software\Microsoft\Windows
Then navigate to: CurrentVersion\Policies\Explorer\DisallowRun
Now, select DisallowRun, and if appears at Data: msseces.exe, right-click on it (msseces.exe) and Delete.
To save changes, you have to reboot your computer and see if the error message still appears.
3. Create a New User Account
Press the Windows key + I to open Settings and select Accounts.
Select Family & other people (you can find it in the left-hand menu) -> Add someone else o this PC.
Click I don’t have this person’s sign-in information.
Now, click on Add a user without a Microsoft Account.
Create the new username and password for the new account and press Next.
Next, you have to Sign In with this new user account.
Finally, check if the problem is still there.
If you are getting this program blocked by group policy on apps like Microsoft Store, PowerShell, Visual Studio, and Event Viewer, you can create a new user account and check if the issue persists there.
With this, we can conclude this guide on fixing this program is blocked by group policy error on Windows 11 and other versions of Windows. You should now be able to fix the issue for good on your PC.
There’s nothing more annoying than being unable to load your hard-earned in-game progress and getting the We couldn’t get your latest saved data error on the Xbox One.
Is there a fix to this issue? It’s been happening to me for a few days now and it’s starting to get a little frustrating. I’ve mostly been playing Fallout so it hasn’t effected me that bad because I can just play offline, but I’m about to hit level 50 and I want the achievement. Most of the other post I’ve seen about this issue just say that it’s an MS issue that will be fixed, but they’re usually from a while ago, so I don’t know how reliable they are. Any info would be appreciated.
However, there’s a way to fix this issue.
How can I fix Unable to get your latest saved data Xbox One error?
1. Check your Internet connection
Press the Xbox button to open the guide.
Select Settings.
Select AllSettings.
Select Network.
Select Network Settings.
On the right side of the Network Settings screen, select Test network connection. The test will run automatically and let you know if there’s a problem with your connection.
If that doesn’t work, restart your modem.
2. Turn off your console and unplug the power cable
Press and hold the power button on your Xbox One to turn it off.
After your Xbox One turns off, unplug the power cable.
Keep the cable disconnected for a minute or two.
Connect the power cable to your console and press the power button.
3. Check the DNS settings
Press the Menu button on your controller and choose Settings. Alternatively, you can just select Settings from the Home screen.
Select Network > Advanced settings.
Choose DNS settings and set them to Automatic.
Press the B button to save changes.
Start Netflix and check if the error appears again.
If one of the services is having problems, wait for Microsoft to fix the issue.
5. Delete and redownload your profile
Press the Guide button on your controller.
Go to Settings and select System Settings.
Go to Storage >All Devices >Gamer Profiles.
Select your gamertag that you want to delete.
Select Delete.
Select Delete Profile Only. (This deletes the profile but leaves saved games and achievements.)
6. Clear the system cache
Press the Guide button on your controller.
Go to Settings and select System Settings.
Select Storage or Memory.
Highlight any storage device, and then press Y on your controller (you can select any storage device, because the system will clear the cache for all of them).
Select Clear System Cache.
Confirm the action.
Restart your console
7. Power cycle your console
Open the guide by scrolling left on the Home screen.
Select Settings and go to All Settings.
Choose System > Console info & updates.
Select Reset console.
You should see two options available: Reset and keep my games & apps and Reset and remove everything. Select the first option.
If the problem is still there, try using the second option, but keep in mind that this option will delete all your games and files.
That’s about it, we certainly hope at least one of these solutions helped you resolve the We couldn’t get your latest saved data error on the Xbox One. In case you have any additional questions, or some more solutions to this problem, don’t hesitate to let us know in the comments below.
In recent years, many of Microsoft’s hero features for (the old) Edge have revolved around Reading View and its tools to assist readers and learners. At least some of these features are currently being re-implemented within the Chromium-powered Edge Insider builds, ensuring they’re still available to users when Microsoft transitions away from EdgeHTML.
At present, the grammar tools aren’t exposed within Edge Insider’s settings. To enable them, you’ll need to manually edit a browser flag.
Head to the “edge://flags” page and search for “grammar tools” using the search box at the top of the page. You should see a single result appear, for “Grammar Tools in Reading View.” Enable the flag using the dropdown menu and then click the blue button at the bottom of the browser to restart Edge.
Grammar Tools will now be enabled. Head to a webpage where Reading View is supported (look for the book icon in the address bar). Click the Reading View icon to open the page in the reader.
You’ll now see a new “Grammar tools” button at the top-right of the page. Click it to reveal the Grammar Tools panel, which lets you enable individual grammar features.
Edge Insider currently supports splitting words into syllables and highlighting individual word types within the content. This kind of feature can prove an invaluable aid in teaching students how to read, or assisting people who may have trouble when reading long passages of text.
Although the toolset is currently sparse compared to what’s offered with EdgeHTML, it’s likely Microsoft will continue to bring more capabilities across during Edge Insider’s development. Reading View’s comprehension features are one of the standout capabilities of the current version of Edge, so Microsoft will want to retain as many of them as possible.
The current Edge browser, using EdgeHTML, has a much more capable Reading View, supporting a variety of layout and formatting options as well as text-to-speech. The grammar tools are distributed separately as an extension available from the Microsoft Store. With Edge Insider, Microsoft seems to be taking a different approach, baking the toolset directly into the browser – no extension required.
At Build 2019 Microsoft gave developers and power users many things to be happy about, but perhaps one of the biggest surprises was the announcement of the Windows Terminal.
For those not familiar with what a Terminal is or what it’s for… It is simply an application which takes user input to and presents output from the underlying system. Its Windows equivalent was the command line.
For years Microsoft has quietly taken it on the chin about its command line deficiencies while not being able to do much about it, mainly due to the fact that further modification to the command prompt would break backwards compatibility. The solution? It had to be replaced.
Finally the Windows Terminal is born! This new utility gives users the ability to run the Command Prompt, PowerShell and Windows Subsystem for Linux in a modern, efficient and customizable terminal application.
It brings complete control over the experience allowing users to customize every aspect of the new system.
The Windows Terminal uses a GPU accelerated DirectWrite/DirectX-based text rendering engine. This new text rendering engine will display text characters, glyphs, and symbols present within fonts on your PC, including CJK ideograms, emoji, powerline symbols, icons, programming ligatures, etc. This engine also renders text much faster than the previous Console’s GDI engine!
– Kayla Cinnamon, Microsoft DevBlogs
Now that we’ve gotten that out of the way let’s dive into what you need to get started on your Windows Terminal journey. Before June 21st you had to clone the source code from GitHub and build the Windows Terminal yourself, as Microsoft gave developers an early peek at the new app. That is no longer the case and it has been made available for download through the Microsoft Store.
The first thing you’ll need is to make sure you’re at least running Windows 10 version 1903, also known as the May 2019 update. There are many ways to check what version of Windows you’re running. But we are going to take you the long way, click on…
Start -> Settings -> System -> About
and then scroll down to Windows Specifications. Your build information can be found here.
If you are running an older version, there are a few ways you can get on the latest as explained here.
That’s it! You’re ready to go. By default, you will get access to PowerShell and the Command Prompt. You can add the ability to load your favorite Linux distro by editing the profiles.json found by selecting “Settings”.
In the next article we’re going to talk about how to add your favorite Linux distro, version of PowerShell and customize the Terminal!
For now, if you haven’t already, head to the Windows Store and download and install Windows Terminal from the link below:
Playing your favorite Xbox Games and going hunting for achievements is fun, but what if you could enter auctions and get free stuff just from your hard-earned gamerscore? Well, Von Coin, a new Xbox One app from the Dublin, Ireland based gaming tech company Von Lab, allows you to do just that.
Somewhat similar to Xbox Game Pass quests, the rewards system is free, and converts your gamerscore to a virtual currency dubbed Von Coins. It all is backed by game publishers and brands, and the company even has a partnership with TrueAchievements.com to assist in calculating rewards points. Ray “Stallion83” Cox, the first Xbox gamer to reach the 1 and 2 million Gamerscore milestones is also an “Official Vonbassador” explains how the app works:
We recently went hands on with the public version of the app that launched earlier this year in the US, and here’s what we think of the experience.
Easy to sign up process — but not for everyone
Signing up for Von Coin and becoming a “Von Citizen” is quite a simple process. All it takes to get started is to download the app from the Xbox Store. This allows Von Coin to verify your gamertag. Once that is done, you must then verify your email, and then get into the app, which also has a web dashboard.
Unfortunately, there is a catch, and not everyone may be able to sign up for Von Coin. Currently, the program is only open to Xbox gamers with a Gamerscore of 10,000 and over — in order to help stop cheaters. You also must set your Xbox privacy settings so your gamerscore, latest achievements, and Gamertag are public.
The welcome page
A confusing points system that Microsoft couldn’t think of
After verifying, you’ll be granted the virtual currency, Von Coins, based on your Gamerscore. The first time around, there is a conversation ratio of 1000-1 Gamerscore to Von Coins, with a maximum of 250 coins. This makes a lot of sense, and our Gamerscore of 17485 was converted to 117 points.
After that, however, the points system is a bit confusing to understand. There’s several other types of points to consider — TrueAchievements Score, and Premium Points. We’ll have more on the Premium points later, but let’s try to explain the rest of the system in detail.
According to this FAQ page, once the initial conversion is finished, new Von Coins from new achievements will be granted at a rate of 10-1 TrueAchievement Score (TA score) to Von Coin. There is also a maximum cap of 150 coins per month, and a delay with the TA score being converted back to Von Coins. This is apparently done due to a disparity in the TA Score of achievements earned in the first two weeks of a new game’s release. It’s also done that way to ensure that TA score has its true value.
For bonus points, Von Coin also runs Specialist game promotions. It allows anyone to earn double coins on achievements earned within the promotional period of a new game. This can be earned above the typical 250 point limit.
Coming from a program like Microsoft Rewards, where points are instant and set on an easy to understand points value of 5, 10, 50, or 150 points, this 14 day conversion period is a bit of a let down. But, all things considered, the points system remains a cool gamification feature, especially since Microsoft has yet to find a way to turn gamerscore and achievements into actual redeemable points.
Von Coin Dashboard
Spending points in Auctions isn’t a guarantee you’ll win something
Points explanation done, there’s now the auctions to consider. Auctions are the way to cash in your points for cool items, but there’s a catch for that, too. With Microsoft’s Xbox Game Pass Quests, your Microsoft Rewards points can be redeemed for Microsoft Store gift cards, Xbox Live Gold subscriptions, and many more items. Unfortunately, with Von Coin, you’ll be bidding against other gamers for prizes.
That means there is no guarantee you’ll come home with free swag or games. There’s also a once a day set time for auctions, so if you happen to miss an auction event (like we did during this writing), you’ll be left out of the action. But, to be fair, auctions can be pretty fun and competitive.
Once the Auction begins, it is a two stage process. In the “Normal bid stage,” anyone can bid to a maximum of 20 coins over the last bid. This can go on for 50 minutes or an hour. After that, in the final 10 minutes, there is the “One Coin Bid Stage,” which is only open to users from the previous bid stage. Here, users no longer can choose their bid, and each bid is one point higher than the leader.
In the final stage, there is a 30 second shot click, to make a bid above the current leader. If no bid is made within 30 seconds from the user, the clock gets reset to 30 seconds. This will continue until the clock runs down to 0, or until the auction ends at the chosen time.
Just like with eBay, no coins are deducted if you bid or lose an action. This makes it a fair game, allowing you to jump right back into the next bid. Coins are also capped per month, and the value of products for auction are limited. Users can even earn coins by putting their own items up for auction to earn extra coins.
How Auctions Work
There’s a premium side too
As with many other free services, Von Coin has a premium side. Awarded at a rate of 1-1 TA score to Premium point after the 2500-250 TA Score to Von Coin monthly cap is exceeded, these points give you access to premium auctions.
If you reach 18,000 premium points within six months, you’ll be able to get the “Von Magnate” status. These exclusive auctions went live at the end of May, and they’re reminiscent of Microsoft Reward’s “Level 2,” which gives you access to discounts on certain items.
The Von Coin leader board
But the auctions are cool
While the points system is tricky and winning auctions is not guaranteed, the Von Coin auctions are still really cool, as everything is free. There’s a lot of interesting items that can go up for auction, from Xbox Accessories, Limited Edition Prints, Gaming Merchandise, Original Games and Comics, Games, and DLCs.
Mystery Auctions are also hosted, and no one knows what the item is until someone wins. Here’s how Von Coin describes their auction policies:
As our users grow, so do the number of auctions we host. It is our aim to continue to host over 5% of auctions to active users every month! That means that over the course of a year over 60% of our active users will have had the opportunity to be rewarded with a winning auction!
An example is the Stereo Gaming Headset seen below. Shipping is even included if you win the item, but currently only in the US, Canada and the UK.
A very cool prize
Better than Microsoft Rewards?
Looking at Von Coins as a whole, the idea is pretty exciting, but the execution isn’t perfect. Microsoft’s Xbox Game Pass Quests are simplistic systems, and we truly love it. However, with Von Coin, the community has a reason to go further and engage with all their games. Gamers can simply dive back into titles they’ve already owned or played to earn more points, making this a pretty fun system for the achievements hunters out there.
Von Coin is coming come out of beta in the US today, June 27, and it’s also expanding to the UK, Canada and Ireland. “As our Von Republic grows so will the prizes,” said Von Labs CEO Eoghan O Sullivan in a press release.
Sometimes while running server webpages you might get Data area passed to a system call is too small error. This error occurs when you’re connecting to Active Server Pages(ASP) on a computer running Internet Information Server, and in this article, we’ll try to show you how to fix this problem once and for all.
Good day, I am receiving this error when I try to open a image file The message is: The data area passed to a system call is too small. Any help? please? Windows 10
How can I fix The data area passed to a system call is too small error?
1. Change Web site properties
Open the Microsoft Management Console (MMC), open the Web site Properties, and then click the Home Directory tab.
In the Application Settings tab, click Configuration.
Click to check the Cache ISAPI Applications check box.
Once the hotfix is installed, check if the problem is still there.
3. Reinstall the problematic applications
Remove iTunes and Dell SupportAssist from your PC.
Once you remove them, download them again and reinstall them.
Check if the problem is still there.
Bear in mind that other applications can cause this problem as well, so be sure to reinstall an application that is giving you this error.
To ensure that the problematic software is completely removed, consider using uninstaller software such as IOBit Uninstaller to completely remove the application and all of its files.
We hope this fix was of use to you, and in the meantime what other solutions have you found out to this problem?
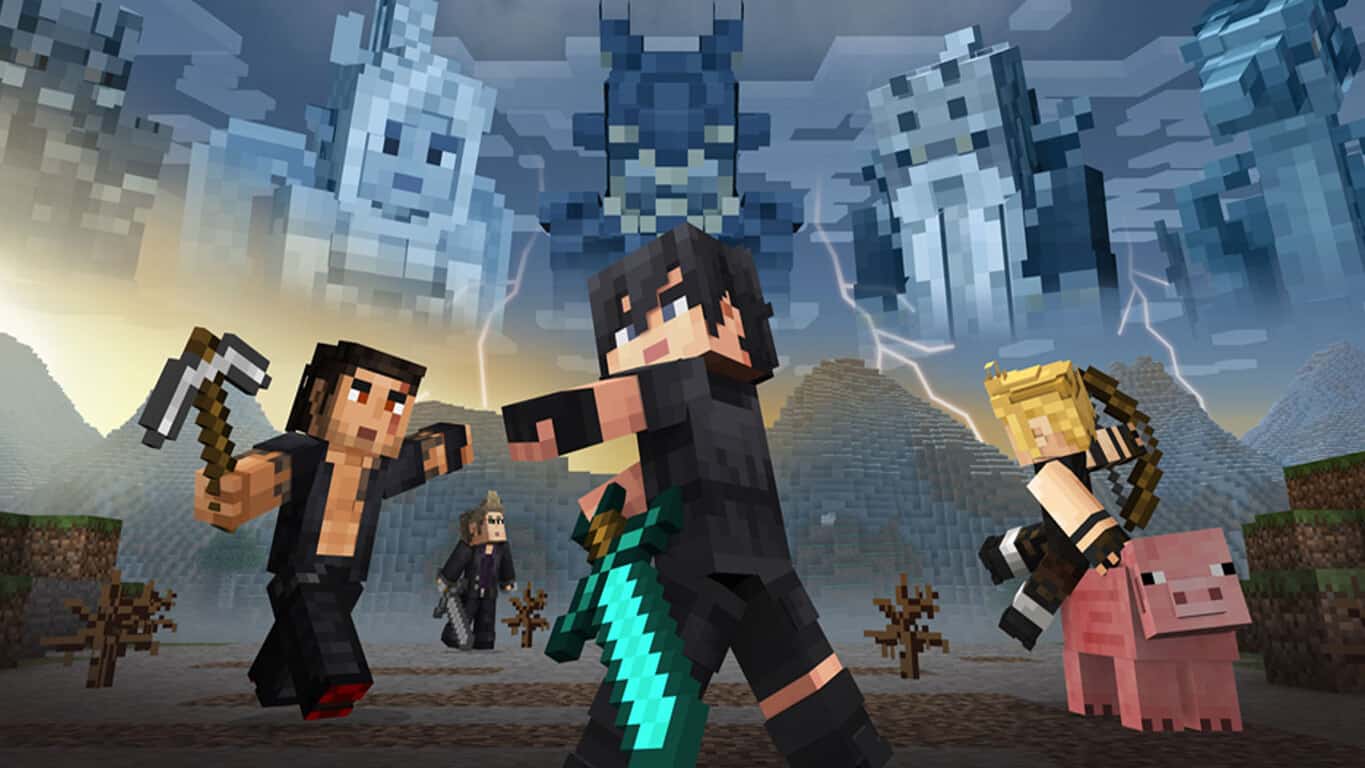
The popular Minecraft video game will be getting a significant revamp to its combat mechanics according to a Reddit post (via WC) made today on Reddit by the game’s chief creative officer, Jens Bergensten.
In the post, Bergensten explains that they’ve been wanting to improve upon the combat system for a while now and that they’ll first begin testing it in the Java version of Minecraft and then roll out the changes to the other versions when ready.
Here are the issues she outlined in the current combat system on PC/Java and console/Windows 10/mobile:
Main issues in Java Edition,
Too slow for PvP – not exciting enough
Damage per second is too low to beat regenerating items
Too hard to understand for new players
Main issues in Bedrock,
Tedious on controller (Legacy editions fixed this)
Weapons are very similar
Armor is not balanced
And here are the improvements made with the new combat system:
Overall much faster attacks
Attacks only happen when fully charged, even if you spam click
You can hold to attack
Weapons have different reach (attack range)
When you stop attacking, the attack timer will continue charging to 200%
At 200% you can perform special attacks (crits, sweeping, knockback) and these attacks have longer reach
Sweeping only occurs on swords with the Sweeping enchantment
Critical attacks (jump attacks) bypass shields
Shields have no warm-up delay
Shields also activate when crouching/sneaking
If you hit something, the target’s “invulnerability timer” will be shorter if you have a quick weapon
Minecraft Java players can test the new system by downloading and installing the zip file included in the Reddit post while players on other platforms will simply need to wait for now.
There aren’t too many problems that may occur while you’re using the on-screen keyboard in Windows 10. Because it’s the on-screen keyboard, a simple feature that comes to aid when you can’t use the physical one. However, one of the main problems users may have with this feature is if it goes transparent.
A transparent on-screen keyboard is as useful as no keyboard at all. And if you’ve recently encountered this issue, you’ve come to the right place. We’ve put up a lengthy list of possible workarounds the transparent on-screen keyboard problem, and you’ll surely find an adequate solution.
Why the on-screen keyboard in Windows 10 is transparent
Solution 1 – Make sure the Fade option is not enabled
Open up the On-screen keyboard, and do your best spot the Fade button in the lower right corner.
Tap the button, and the keyboard should be visible again.
If the Fade button isn’t the cause of the problem, carry on with the solutions listed below.
Solution 2 – End the touch keyboard task
Right-click the taskbar, and open Task Manager.
Scroll down until you see Touch Keyboard and Handwriting Panel and Highlight.
Solution 3 – Update your graphics card drivers and Windows
Right-click the Start and select Device Manager.
Navigate to Display adapters and expand this section.
Right-click your graphics device and open Properties.
Select the Details tab.
From the drop-down menu, open HardwareIds.
Copy the first row and paste it into your browser’s address bar.
The search results should show you the exact drivers you’ll need to install.
Go to Settings.
Open Updates & Security.
Check for the latest updates.
Solution 4 – Delete Windows updates
Press Windows Key + I to open the Settings app.
Once the Settings app opens, navigate to the Update & security section.
Go to Windows Update tab and click on Update history.
Click on Uninstall updates.
List of installed updates will now appear. Select the problematic update that you want to remove and click the Uninstall button.
After removing the update, restart your PC.
That’s about it, we certainly hope at least one of these solutions helped you resolve the problem with a transparent on-screen keyboard in Windows 10. In case you have any comments, questions, or suggestions, feel free to let us know in the comment section below.
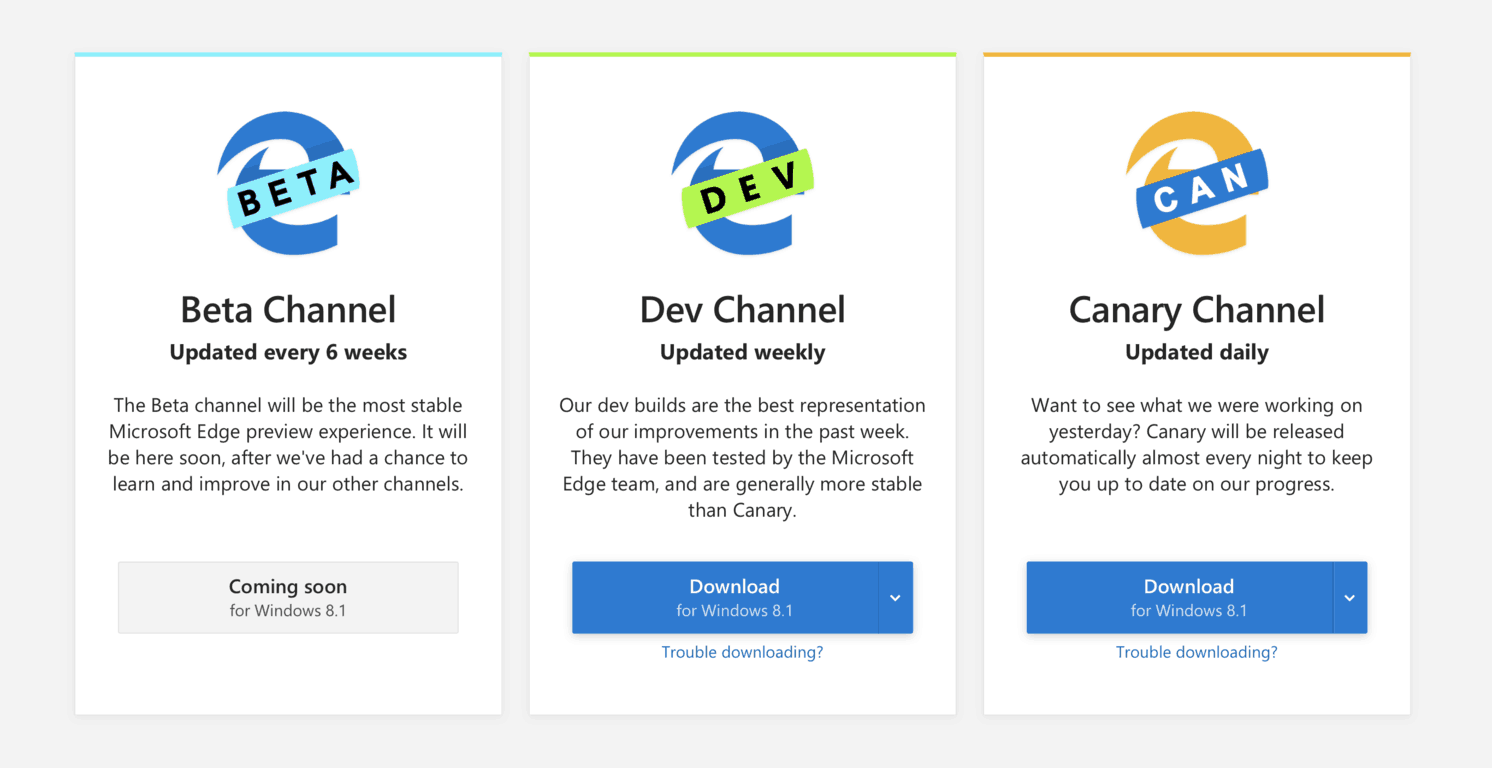
The Dev channel for Microsoft’s new Edge Insider browser is now available on Windows 7, 8 and 8.1, the Microsoft Edge team announced today. The Canary channel, which gets daily updates, launched on these older versions of Windows last week, and it’s good to see Microsoft bringing the Dev channel to these users so promptly.
The Dev channel is currently on a weekly release cycle, and the latest Dev build was released yesterday with dark mode improvements and more. A Beta channel that will be updated every six weeks will be available later on Windows and macOS.
We remind you that you can install both the Canary and Dev channels of Microsoft Edge on your PC, and both apps will be updated automatically once a new build is available. All preview builds are available to download on Microsoft’s Edge Insider website.
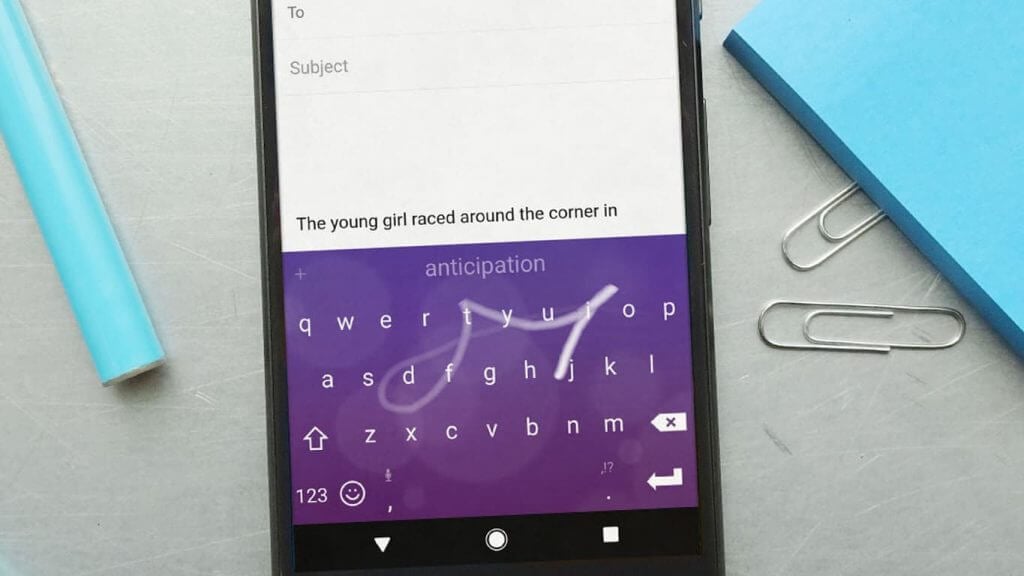
Some Switfkey users who have connected the keyboard to their Gmail account are currently being notified by email that the integration will stop working after July 15, 2019 (via Bleeping Computer). In the email, Google explains that Swiftkey is one of the apps that needs to “comply with our updated data policy requirements,” and that recent API changes have been made as part of “ongoing efforts to make sure your data is protected and private.”
@SwiftKey I've received below email from Google. I still use the feature of learning from my gmail account using swiftkey board. pic.twitter.com/hzl40uh8O5
By connecting Swiftkey to a Gmail account, the iOS and Android keyboard can use data from personal emails to offer better word suggestions to users. As noted by Bleeping Computer, the Swiftkey app may have been asking for too many unnecessary permissions such as “Compose and send new email” or “View, manage, and permanently delete your mail in Gmail,” prompting Google to step in.
To prevent app developers from abusing permissions, Google recently updated its User data policy to mention that devs should “only request access to the minimal, technically feasible scope of access that is necessary to implement existing features or services in your application, and limit access to the minimum amount of data needed.” This is probably for the better, and we hope Microsoft will implement the necessary changes before July 15 so that the Gmail integration in Swiftkey will continue to work after that date.
WordPerfect is a popular word processing software, but many users reported that Wordperfect is not working on their PC. However, there’s a way to fix this problem and today we’re going to show you how to do it.
hello It all started with an issue with WP X5 which had been working fine for years Caused my machine to crash and only in safe mode was I able to remove WP. I made a clean removal “000004657 – How to remove WordPerfect Office X5” re-installed now as soon as I open WP I get the “WP has stopped working” window I do not seem to have any problem in QP, only in WP.
What to do if WordPerfect won’t open?
1. Delete WordPerfect template file
Locate the WordPerfect default template file and delete the file.
Launch WordPerfect to recreate a new default template.
Check if the problem is still there.
2. Repair WordPerfect installation
Open Control Panel.
Select Uninstall a program.
Locate WordPerfect on the list, select it, and click Repair.
Follow the instructions on the screen.
Once you repair the installation, check if the problem is still there.
Press Windows Key + R and type msconfig in the input field. Click OK or press Enter.
Go to the Services tab and check Hide all Microsoft services check box. Disable all services by clicking the Disable all button.
Go to the Startup tab and click the Open Task Manager.
Right-click the first entry on the list and choose Disable. Repeat this step until you disable all items on the list.
Go back to the System Configuration window. Now click Apply and OK to save changes and restart your PC.
4. Create a new user account
Open the Settings app and navigate to the Accounts section.
Now you need to select Family & other people in the left pane. Click Add someone else to this PC.
Select I don’t have this person’s sign-in information > Add a user without a Microsoft account.
Enter the desired name for the new user account and click Next.
After creating a new account, switch to it and check if the problem remains.
There you go; these are just a couple of solutions you can try if WordPerfect isn’t working on your PC. Be sure to let us know which solution worked for you.
Lenovo has announced its ‘Made To Order’ service for India. While the service debuts for the company’s iconic ThinkPad line, it will be rolled out for other Lenovo brands as well later this year.
The service allows users to create a true factory-built custom PC and offers over 100,000 configurations. Lenovo will hope that it will also prove to be a compelling proposition for their direct e-commerce business on www.lenovo.com.
All you need to do is to head here, select your base model, and choose the specifications, upgrades, and accessories to have the laptop delivered right to your doorstep. The customization options are available across the following parameters:
CPU –AMD/ Intel; Intel CPU Customization options – Core i3, i5 or i7
Screen – FHD/ UHD, between touch and non-touch screen
Pre-installed Software options – MS Office, Adobe suite, Anti-virus solutions and more
Accessories – Upgraded extra battery, Ethernet dongles, Expansion docks, External monitors and more
Premier Support – Extended warranty and Accidental Damage Protection
The laptops ordered using this unique service will be custom created at Lenovo’s facility and will be delivered to customers’ doorsteps in just over two weeks.
Steam is one of the biggest gaming platforms, but players reported that Steam does not show them in game. This problem is particularly annoying, especially if you want to notify your friends that you’re playing a certain game.
Here’s how one user described the issue on Steam Community forums:
Doesnt show when i play rocket league, just stays on “online” (blue colour) and when in game i cant invite or be invited by others :/
We can provide you with a few simple fixes for this issue below.
What to do if Steam isn’t showing me in game to friends?
1. Enable Steam community in the game
Click the Settings button in the Steam window.
Select the In Game tab > make sure to have Enable Steam Community in Game box checked.
Go to Privacy Settings > under My Profile, find Game Details, if you have it set as Private, change it to Friends Only.
3. Enroll Steam to the Beta mode
Open Steam window > click the Steam button > go to Settings.
In the Account section, find Beta participation > click Change…
Change the Beta participation to Steam Beta Update > click OK.
Restart Steam and try again.
There you go, these are three simple fixes that you can try if Steam doesn’t show you in game, so be sure to try them all in the order in which they are presented. If you know any other working fixes, leave them in a comment in the comment section below.
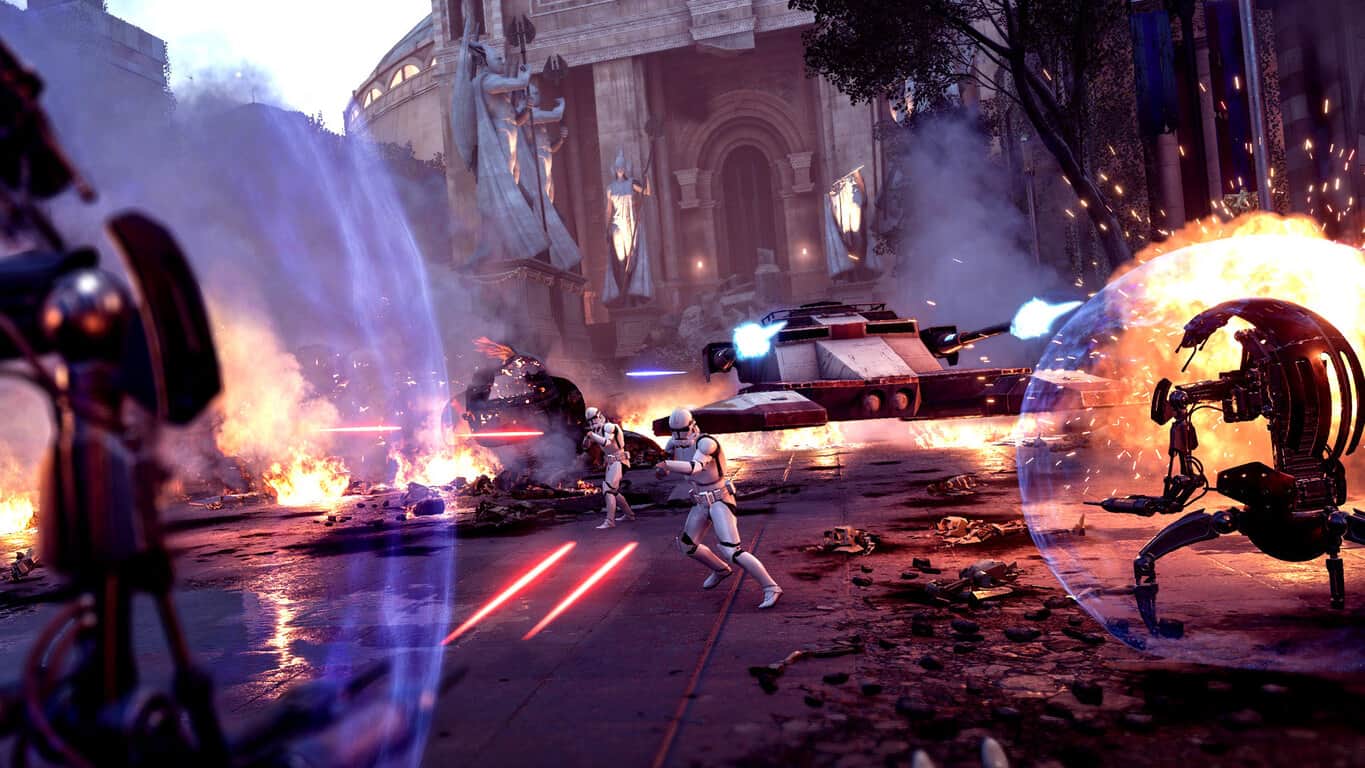
The popular Star Wars Battlefront II video game received a rather significant update today on Xbox One and other platforms that added a plethora of new content to unlock.
The update, aptly named the Where Are Those Droidekas? Update, finally adds the fan-favorite rolling droids who were made famous by The Phantom Menace and its two subsequent sequels. The Droideka have been added as playable Enforcers on Prequel Era maps in the game and are able to walk or roll and are equipped with their own force fields, just like in the films.
This update also adds the TX-130 vehicle as a counter to the Droideka on the Light Side and unlocks Naboo as a playable map in the recently added Capital Supremacy multiplayer mode. Like the other maps that have been added to this mode, Naboo also looks different than its usual appearance with new objectives, visual changes to the environment, and new objects added for player cover and inconvenience.
A variety of new skins have also been added to Star Wars Battlefront II. Most notable is the new Clone Wars appearance for Anakin Skywalker but the addition of the 212th Recon Division and 41st Scout Battalion appearances for Clone Troopers should also please many fans of the franchise.
Here’s their official descriptions:
The 212th Recon Division was outfitted with the angular Phase I ARF (Advanced Recon Force) armor and desert camo during the Second Battle of Geonosis when the Republic invaded the retaken world. Obi-Wan Kenobi (along with Anakin Skywalker and other Jedi Knights) led the siege with his loyal troops through dunes, canyons, and caverns of the Separatist-controlled planet.
The 41st Scout Battalion was under the direction of Jedi Grand Master Yoda. The 41st Scout Trooper’s armor, though featuring less plastoid plating compared to the traditional clone armor, allowed for greater mobility and flexibility in jungle-rainforest environments. The sunshield, wider visor, and overall shape of the helmet also help with vision when traversing or fighting in rainy foliage and wet regions.
The 41st Scout Battalion appearances will be classed as Epic and will be available for 40,000 credits or 1,000 crystals. The 212th Recon Division are rare and will cost 20,000 credits or 500 crystals.
A large number of fixes and balancing changes have also been made with this update. You can read them in detail here.
As with all Star Wars Battlefront II updates, this one is also completely free for all owners of the game and is now available to download on all Xbox One consoles in all regions.
Despite now being over a year and a half old, Star Wars Battlefront II is doing surprisingly well on all platforms with player numbers apparently being near those at the games launch according to recent comments made by its community manager.
Even more content updates are expected throughout 2019 with new game modes and the new planet, Felucia, already being confirmed.
The Samurai Shodown video games are fighting games that got their start back in 1993 with the debut of the original Samurai Shodown. Its sequel, Samurai Shodown II (1994), was the first game in the series to launch on an Xbox console though it wasn’t until Samurai Shodown V in 2003 that a second game in the series was available to play for Xbox gamers.
2008’s Samurai Shodown: Edge of Destiny got a launch on the Xbox 360 and this latest title, which goes simply by Samurai Shodown, will be the first on the Xbox One.
While having the same name as the original Samurai Shodown video game, this latest entry in the franchise features an original storyline that’s set before the events of the first game and has a roster of old and new playable characters.
Samurai Shodown will also play in 4K Ultra HD when played on an Xbox One X console and supports online multiplayer matches for up to 10 players.
Here’s the official game description:
A brand new SAMURAI SHODOWN game takes aim for the world stage! SAMURAI SHODOWN has enjoyed worldwide success as a blade-wielding fighting game series since its first release in 1993. 11 years have passed since the last series instalment, and it is now time for SAMURAI SHODOWN to return in a brand-new game featuring high-end visuals and gameplay! Faithfully reproducing the game mechanics and atmosphere that contributed to the success of the series, SAMURAI SHODOWN includes a revolutionary feature that learns players’ game actions and patterns in order to create CPU-controlled “ghost” characters. With its story set one year before the very first instalment, warriors and combatants from various backgrounds and with their own goals are about to battle to fulfil their destinies!
Carrying on the Legacy: The new game aims to bring the same tense and exhilarating battles that the series is known for. Intense and epic battles are back!
Evolving the Presentation: Using the power of UNREAL ENGINE 4, the series is able to achieve a level of detail never before seen for a totally new visual experience!
A Revolutionary new AI system: Using revolutionary Deep Learning AI, the game will learn from player tactics and create Ghost characters which players around the globe can share and fight against.
Are you a fan of the Samurai Shodown series and will you pick up this latest title? Share your thoughts on it with the community in the comments below and then follow us on Pinterest for more Xbox gaming content.
So, you got yourself a threat in the form of the new Surface Book 2? You’re excited and proud because you now own a top-notch device that you paid the full price for. But then, the first problems arise. In particular, the WiFi connection becomes slow, preventing you from doing basically anything with your new book-shaped laptop.
But fear not, you don’t have to worry about how you spent a small fortune on a dysfunctional device. Because the slow WiFi problem in the Surface Book 2 is solvable. And in this article, we’re going to show you exactly how.
What to do if the Surface Book 2 WiFi becomes slow
1. Use the Network Troubleshooter
Open the Settings app and go to Update & Security section.
Select Troubleshoot from the menu on the left.
Select Internet Connections from the right pane and click Run the troubleshooter.
Follow the instructions on the screen to complete the troubleshooter.
2. Reset TCP/IP stack
Right-click the Start Menu button and choose Command Prompt (Admin).
Enter the following lines and press Enter after each one:
netsh int ip reset
netsh int tcp set heuristics disabled
netsh int tcp set global autotuninglevel=disabled
netsh int tcp set global rss=enabled
Restart your computer and see if you’re able to connect to WiFi now.
3. Update network drivers
Right-click the Start and select Device Manager.
Navigate to Network adapters and expand this section.
Right-click your graphics device and open Properties.
Select the Details tab.
From the drop-down menu, open HardwareIds.
Copy the first row and paste it into your browser’s address bar.
The search results should show you the exact drivers you’ll need to install.
3.1 Update drivers automatically
The search and update of the right driver could be very frustrating and time-consuming, so in that case, you can always use software that will automatically do it for you. An automated driver updater will certainly keep you up-to-date on new drivers and avoid damage from installing incorrect driver versions.
With that being said, you only have to update drivers automatically and manage them with dedicated software like Fortect Driver Updater.
4. Change the channel settings
Go to Search, type control, and open Control Panel.
Open Network and Internet and then Network and Sharing Center.
Choose Change adapter settings.
Right-click the network adapter and open Properties.
Click Configure.
Under the Advanced tab, scroll to WZC IBSS Number Channel.
From the right drop-down menu, choose channels 1, 6, or 11 and confirm changes.
5. Disable Bluetooth
Open Settings.
Navigate to Devices.
Disable Bluetooth.
Reboot your PC and check for improvements.
That’s about it. We certainly hope at least one of these solutions helped you resolve the problem with the slow WiFi on your Surface Book 2. Don’t forget to update it regularly, as the Windows 10 updates might fix the problem with Wi-Fi as well. If you have any comments, questions or suggestions, feel free to write them down in the comments section below.
As PS4‘s controller, DualShock 4 isn’t made to work on a Windows PC by default; you need to install the right drivers to make the connection.
Users have been reporting a specific issue with the audio driver that causes many issues. For example, Windows tends to recognize the controller as an audio device, automatically disabling the default audio hardware.
So, we’ll try to offer a few solutions for this and all other audio driver-related issues with the DualShock 4 controller in Windows 10.
How to fix DualShock 4 audio driver issues in Windows 10?
1. Reinstall the controller
Go to Settings > Devices.
You should see the DualShock 4controller under Other devices.
Left-click it, and go to Remove device.
Unplug the controller, and re-connect it again.
It should look for new drivers automatically. Wait for the drivers to install, and the controller should work now.
2. Update drivers
Right-click the Start and select Device Manager.
Navigate to Universal Serial Bus controllers and expand this section.
Right-click your controller and open Properties.
Select the Details tab.
From the drop-down menu, open HardwareIds.
Copy the first row and paste it into your browser’s address bar.
The search results should show you the exact drivers you’ll need to install.
Another solution is to update your drivers using a specialized driver updater tool. A dedicated tool is very easy to use and allows you to update the drivers fast and safely. Such a tool is always a better solution when you have never experienced driver updating.
3. Use the Bluetooth troubleshooter
Open the Settings app and go to Update & Security section.
Select Troubleshoot from the menu on the left.
Select Bluetooth from the right pane and click Run the troubleshooter.
Follow the instructions on the screen to complete the troubleshooter.
You can now use Google Earth on all browsers, including the new Chromium-based Edge. Google has officially launched the preview beta version to all users.
As a quick reminder, the search engine giant launched Google Earth for web users two years ago. The service was accessible only to Chrome users at that time. The company did not do any notable efforts to extend the service for other browsers up until recently.
Later on, Google decided to use WebAssembly to redesign Google Earth for web. We saw a glimpse of the new version at Chrome Dev Summit 2017.
It was an early release and nothing was polished at that time. Google never advertised any release date for the new version until now.
The Google Earth service was working perfectly fine with Google Chrome. Confused with the word Chromium, people assumed that the new Edge browser will support the service.
But they were surprised to see that the reality was different and they could not use Google Earth on the new browser.
Google realized it was high time to release Google Earth for all the other major browsers out there.
The company announced the release on its Chromium blog.
The Earth team found a solution to allow Google Earth to move across multiple browsers—something we’ve been working on for a while now. Earth first came to the Web about two years ago using Native Client (NaCl), a Chrome-only solution—at the time. It was the only way to run native code in the browser and offer the performance users expect in modern web applications.
Google promised to improve Google Earth’s performance with new WebAssembly tools.
The company sees WebAssembly as an opportunity to run applications across different browsers. You can explore more details about the technical implementation at web.dev.
We all have some favorite websites that we want to visit a daily basis. However, no one wants to look for these sites over and over again.
Microsoft Edge is the browser that comes preinstalled with Windows 10 OS. The company has recently rolled out the new Chromium Edge version to Insiders.
This browser is currently in the testing phase. The recent Edge Canary build brings a new built-in feature that will interest many users.
You can use this feature to pin your favorite websites to the Windows 10 Taskbar. Then you can simply click on the pinned icon to open the site.
As a quick reminder, this feature is already available in the original version of Microsoft Edge. However, it is pretty much possible that users may get confused between the old and new pins.
You will notice a bluish border that appears around the icon that belongs to the old browser.
Steps to pin a website from Microsoft Edge to Windows 10 taskbar
Microsoft Edge now allows its users to pin their most visited websites to the taskbar. You can then click on the pinned icon to open the website in a new tab.
Let’s learn how to pin a website to the taskbar.
Open the new Microsoft Edge and visit your favourite website that you would like to pin.
Navigate to the three-dot menu that is available on the right side of the screen.
Click on it and select Pin to taskbaroption to pin the website to Taskbar.
That’s it, you can now find the website shortcut on Taskbar.
You can repeat this method to pin as many websites as you want.
Note: Chromium Edge allows you to pin these websites to the Start menu as well. To do this, you can click the same three dots menu and select Pin this page to Start option.
Want to unpin a website?
Later at some point, you may experience a situation when you want to clear your taskbar.
Don’t worry there is still an option to delete the pinned websites.
Here are the steps to follow:
To do this simply navigate to the taskbar and right click on the pinned website.
You will see a list of options, click Unpin to delete the website.
Done! The website will no longer be visible on the taskbar.
Right now, this feature is only restricted to Canary version. However, a public rollout is expected later this year.
QUICK TIP:
Meanwhile, if you’re looking to switch to a new browser, why not try UR Browser?
It’s fast, secure, privacy compliant and fully customizable.
Many users encountered issues with Nvidia drivers after installing the latest OS version on their machines. Ntoskrnl.exe is causing large latency spikes after installing the Windows 10 May Update.
InLatencyMonI noticed large latency spikes of around 1300us for ntoskrnl.exe. I also ran into 1 instance where my entire PC froze for a good 10 seconds or so while playing Apex Legends before all of a sudden everything resumed back to normal. I was using drivers 430.86 but am now back on 430.64 (need to do more testing).
since I made a fresh Windows 1903 install I get a high DPC latency spike caused by ntoskrln.exe. My windows is optimized. I disabled all the C states etc in my UEFI. I disabled (gpedit) auto update and driver installations from Microsoft at the beginning of my installation of the OS. My PC is a i7 8700k Z370 build wih a GTX 1080.
For now, there are no solutions for the issue, but there is a workaround. Users said that after reverting to Windows 10 version 1809, the problem disappeared.
If you want to avoid similar issues, check our guide on how to block Windows 10 v1903 from installing on your computer.
Just one day after Microsoft Launcher version 5.5 went mainstream, a new beta release is now available for download. With the fresh version beta 5.6 release, testers of the popular Android launcher can now enjoy a new integration with Microsoft Teams meetings and see flagged emails right from the Tasks cards.
Full changes introduced with this update can be seen in the changelog below, as seen on the Google Play Store. Keep in mind that Adaptive Icon support is not one of the new features, as it was previously added with yesterday’s version 5.5 update.
Adaptive icons support – Now you can have the same look for your app icons with multiple choices for shapes.
You are able to join Microsoft Teams meeting in Calendar card in your Feed.
You can see your flagged emails from your Microsoft Account or work/school account in Tasks card.
Launcher settings experience has been optimized so you can discover and find what you’re looking for quickly.
A look at the revamped settings page and Flagged Emails in the Task card
Teams integration in the calendar card and Outlook integration in the feed card are very welcome additions, helping bring together more of Microsoft’s services in the Launcher. Beta testers will also likely appreciate the easier to understand setting page, as it will make customizing the launcher a bit easier.
Microsoft Launcher version 5.6 beta should be showing up right now in the Google Play Store if you’ve already enrolled as a beta tester. If not, you can grab this latest update right now by clicking the link below, and scrolling to the middle portion of the app listing. Everyone else should expect this update to drop after a period of testing is complete.
As incredible as this may seem, Windows 10 v1903 is still affected by installation issues. It’s been quite a few weeks since the update is out but some users still can’t install it on their machines.
You would think that Microsoft has solved all the issues by now. Sorry to break the bad news, but that’s not the case.
Many Windows 10 users are still bumping into problems and errors when trying to install v1903 on their PCs. Despite working on some systems, on others, error 0x8000ffff pops on the screen:
Successfully installed 1903 on 3 comp0uters. Cannot install 1903×64 over 1809 on an Acer Aspire 5750.Fails with error 0x8000ffff.
For right now, this error doesn’t have a particular cause, but in many instances, it appeared because of the time zone settings or incompatible drivers.
As we mentioned before, this error could be triggered by some driver incompatibilities, so make sure that all your drivers are up to date. If you don’t know how to do that, we’ve prepared a dedicated guide to help you.
You shouldn’t worry too much about this manual process. There are automated ways to help you manage all your drivers automatically, plus avoiding other system malfunctions caused by incompatible drivers.
So if you want to get rid of the 0x8000ffff error, you should be checking your Date and Time settings. For some unknown reason, if the Set time zone automatically is OFF, the install will fail with this error.
In the Windows search bar, type Date & time and hit Enter. When the Date & time settings appear, make sure that Set time zone automatically is ON.
This is a very simple solution and it worked for many Windows 10 users, so we recommend that you try it with confidence.
3. Disable system protection
The last thing that worked for some users and you should try it as well, is to disable system protection and re-enable it in System Restore settings.
After these steps, your installation should work as intended.
As you can see, the solutions to solve the 0x8000ffff error on Windows 10 are pretty simple. More importantly, many users confirmed these methods worked. If you follow them properly, you should fix this error in no time.
Users often report that error 0x8000ffff catastrophic failure appears after updates, restores, or upgrades. This detailed error 0x8000ffff catastrophic failure fix explains how to repair the problem across multiple Windows versions.
If you encountered this error code and dealt with it in a different way, share your method in the comments section below so that other users may try it as well.
The biggest bug reported, it appears that the game really stutters during camera movement, even though it is locked at 60FPS. From user reports, this can be fixed in the following ways:
For variable sync users
Add “-window-mode exclusive” to launch parameters
Use RTSS to cap framerate to 50
For non variable users
Use RTSS to cap framerate to 50
Set refresh rate to multiple 50 or 100
2. Lack of game sound
Some users are reporting a lack of sounds when playing the game. Apparently, this is caused by incompatibility between the Unity game engine and audio enhancement software’s, such as “ASUS Sonic Studio”. Disabling the software will fix this issue.
3. Freeze and crash at launch
If you are one of the few unfortunate users experiencing this issue, there is still hope for you. Check your antivirus firewall -> look under blocked applications. If the game is blocked, unblocking it might solve the issue for you.
A great update is that the developers are actively working on fixing all outstanding issues our there. They have already released an experimental branch up on Steam with a temporary fix (setting the FixedUpdate rate to 60hz).
So make sure to always keep your game up to date, for an enhanced gaming experience.
How has your experience playing My Friend Pedro been so far? Is the game running smoothly for you?
In case you’ve encountered other workarounds for the issues mentioned above, you can list the troubleshooting steps in the comment section below.
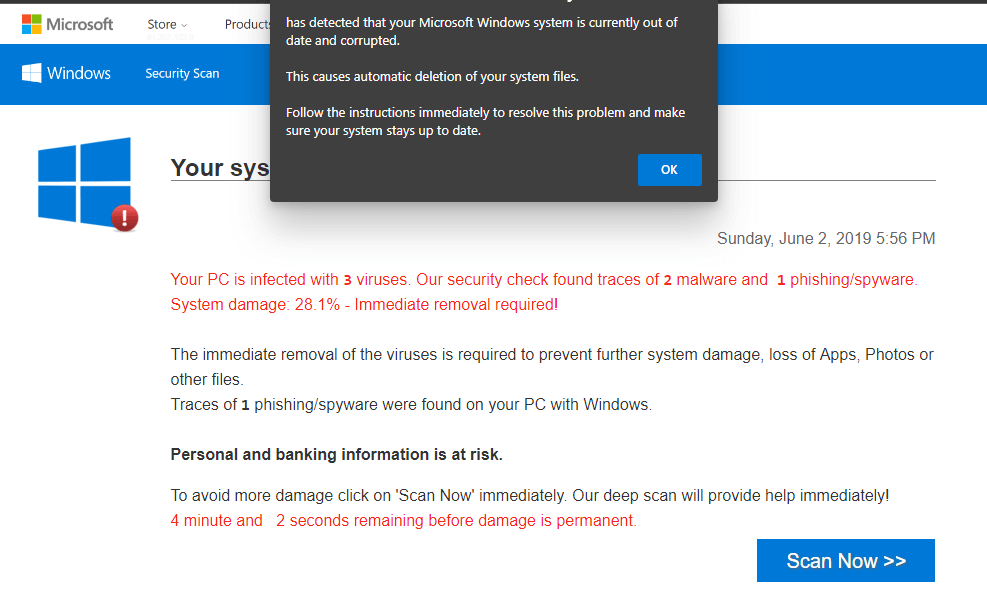
How to keep yourself safe from these malvertising attacks?
Still, you are safe as long as you close the respective window without clicking on anything else.
Windows Defender SmartScreen is not recognizing this issue, so it is not blocking it.
In other words, when the fake virus screen appears, you simply close that page or tab. If that page or tab would not close, open Task Manager with Ctrl + Shift + Esc and stop the browser process with End Task.
“Win a prize” fake survey: a more complicated issue
As for the “win a prize” fake survey, this issue is more complicated. An user stated:
The “fake survey win a prize ” one is being more problematic in that yes it does go away when you close the tab but unfortunately it keeps coming back. Since I installed Malwarebytes it is blocked but not blocked from trying so whilst I no longer get the” survey” I am getting page blocked interrupting my game about 3 or four time a minute which is frustrating to say the least.
Therefore, basic security and privacy are crucial for eliminating these problems. Choose an antivirus from our list to protect your computer and your privacy.
While trying to install HP updates, many Windows 10 users reported Your system does not meet the minimum requirements for this update. Update has been canceled error.
We can provide you with a guide on how to fix the error, depending on its cause.
What to do if your computer doesn’t meet the software requirements?
1. Run as Administrator
Log in Windows with the Administrator User or
Right-click on the program you wish to run and click Run as Administrator.
2. Update Windows
Click the Start button > Settings.
Select Update & Security > click Windows Update.
Choose Check for updates.
3. Double-check the driver version
Make sure you install a 32-bit driver when running a 32-bit Windows version and a 64-bit driver when running a 64-bit Windows.
To ensure that you have the correct version, check your system information and the download page before downloading the driver.
Microsoft just rolled out another cumulative update to Windows 10 May 2019 Update users. Update KB4501375 fixes some issues introduced by the initial rollout of Windows 10 v1903.
This non-security update bumps the OS build to version 1903 18362.207. However, this update is only available to Release Preview Ring Insiders.
That is why Microsoft didn’t release a changelog for this update.
As a quick reminder, this month’s Patch Tuesday updates introduced many Event Viewer bugs. Some users confirmed that KB4501375 addresses some of these issues.
However, keep in mind there is no official confirmation yet as to exact bug fixes brought by this update. We expect Microsoft to reveal the complete changelog as soon as the update is available to non-Insiders as well.
Download KB4501375
Similar to all the previous updates, KB4501375 is available as an automatic update. You can go to Settings > Update and Security and then Check for Updates.
However, you need to reboot your system to apply the changes. You first need to download and install the servicing stack update first before installing KB4501375.
Many people have already started to download the update. So far, no issues have been reported.
The installation process went smoothly for all users. We will keep an eye on Microsoft’s forum and update this article as soon as new information is available.
Are you experiencing any issues with KB4501375? Let us know in the comments section below.
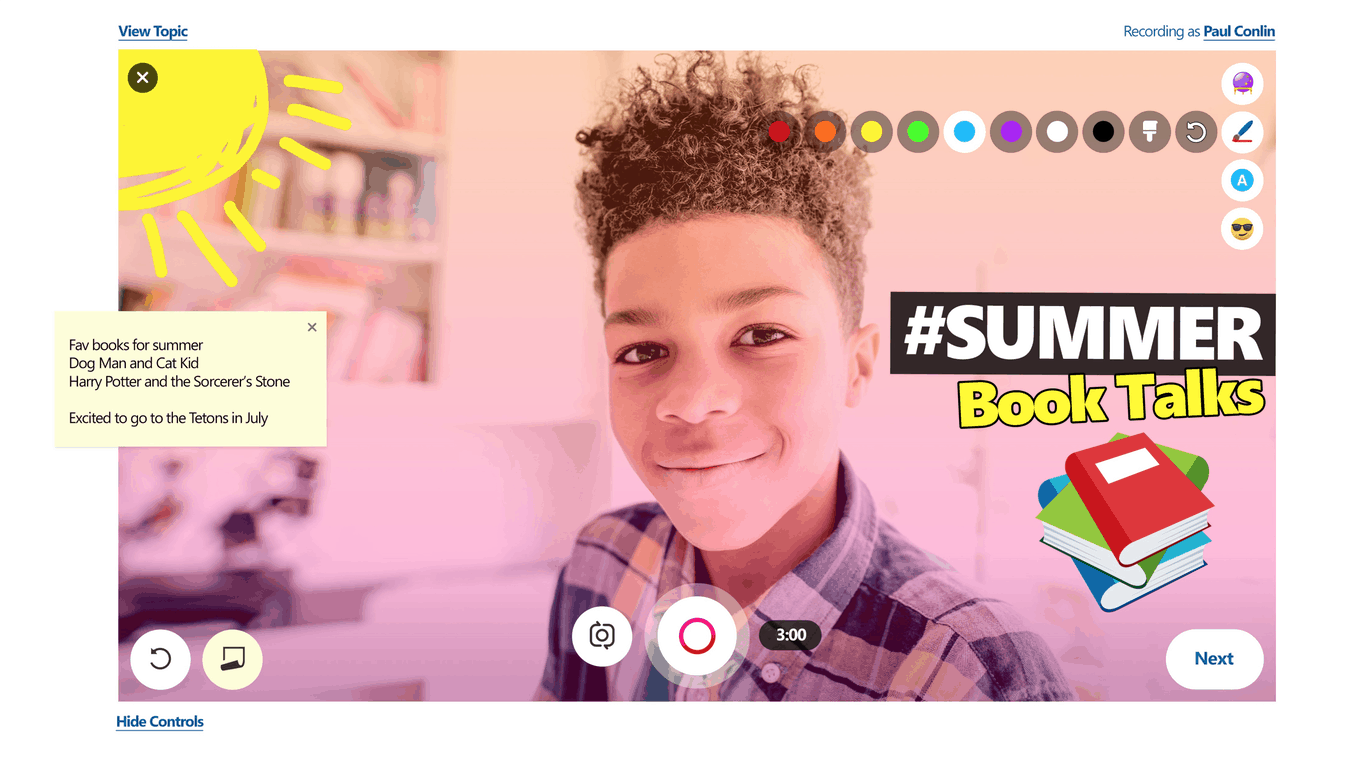
Microsoft is setting Flipgrid as its default video camera recorder in OneNote, starting with the free web app in the fall of 2020 and eventually other platforms, as well. Mike Tholfsen, the company’s project manager on the Microsoft EDU team, noted that both students and teachers will be able to record videos and embed them directly into their notes.
BIG NEWS! Last night we announced that the Flipgrid video camera ???? will be the default video recording tool in #OneNote ???????? Ss and Ts can record & embed a ????
The company acquired the video-based social learning platform just barely over a year ago for an undisclosed amount. Now, it seems they want to make better use of their money spent, bringing it to one of their core Office apps to potentially boost its audience size of more than 20 million users.
The company is also rolling out a host new tools for Flipgrid, as well, including video transcription powered by Microsoft Azure and support for Immersive Reader. Those using OneNote will find the Shorts Camera to be useful, allowing them to put together segments to create a simple video with stickers, inking, and video styles.
Additionally, the company is also releasing FlipgridAR, which allows users to create and print stickers “for any response to place Flipgrid videos in augmented reality on everything.” Users can also also use the “hundreds of millions” of existing Flipgrid QR codes to decorate their classrooms in AR.
How do you think these new features can be useful for students and teachers? Share your thoughts below.
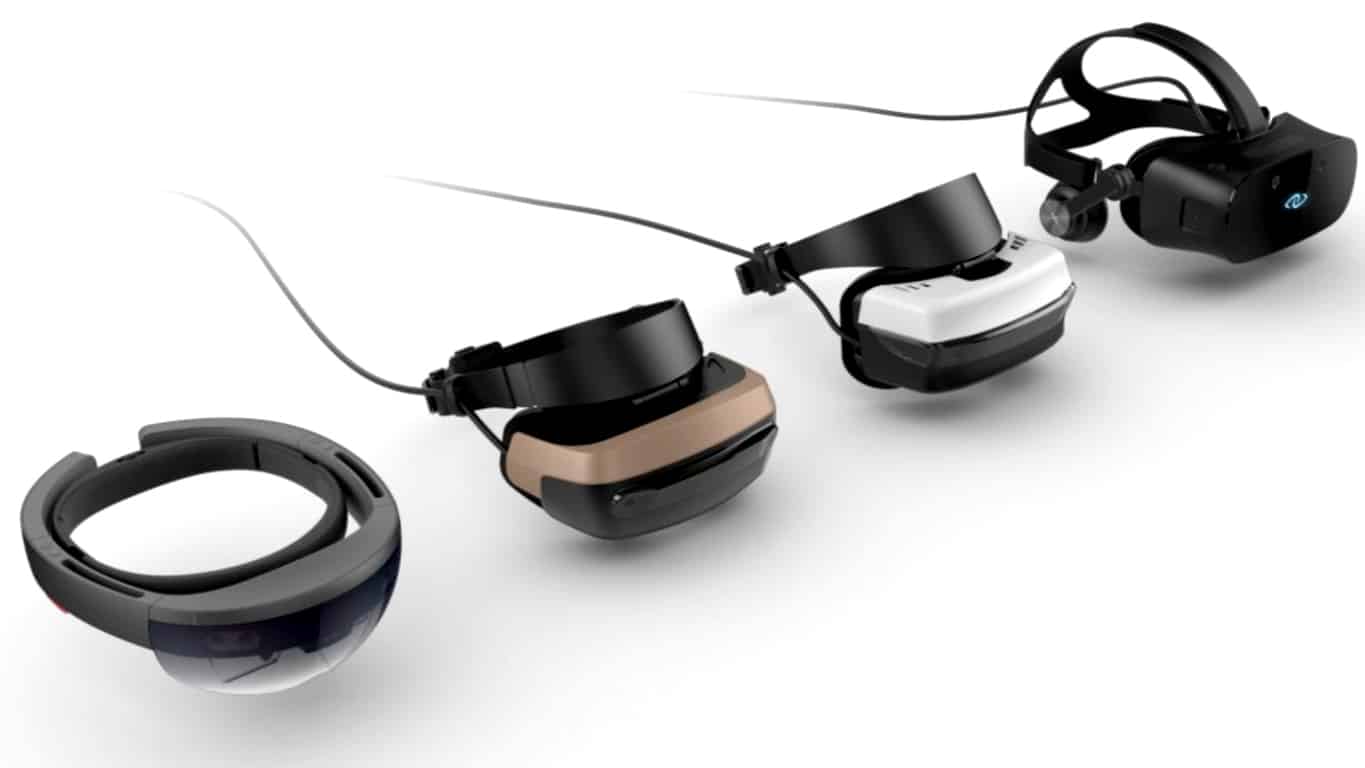
It seems that Windows Mixed Virtuality headsets are becoming a rarity on the Microsoft Store. Road to VR noticed that the Samsung HMD Odyssey+ is the model that’s available for purchase as of today, with the other Asus Mixed Reality Headset being out of stock. The three other headsets on the Microsoft Store include the Oculus Rift S, the HTC Vive and the HTC Vive Pro.
Taking a quick look at Amazon this morning, we’re seeing that the online retailer currently has low stocks of Windows Mixed Reality headsets from Acer, HP, Lenovo, Dell, and Samsung, so it appears the Microsoft Store isn’t an isolated case. Earlier this year, Microsoft dropped Windows Mixed Reality devices from its affiliate program, meaning that it would no longer be will no longer be encouraging further sales of the product though affiliates. Road to VR reached out to Microsoft to get a statement about the state of VR headsets on the Microsoft Store, but the company declined to comment.
Windows Mixed Reality was one of the big new features in the Windows 10 Fall Creators Update (or version 1709), but the first headsets from Microsoft’s OEM partners didn’t give much a challenge to market leaders Oculus and HTC. According to Steam’s latest hardware survey, WMR headsets had a 10.99% usage share in June, far behind the Oculus Rift (46.03%) and the HTC Vive (40.81%).
In the Windows May 2019 Update, Microsoft brought support for legacy Win32 apps in Windows Mixed Reality, and that should certainly help to make the platform stand out in the VR market. However, the missing piece in the puzzle remains the lack of Xbox One support, but Microsoft previously said that it was waiting on better wireless technologies to finally bring VR to its Xbox consoles. The company had nothing to announce about Windows Mixed Reality support for Project Scarlett during E3 2019, and that may be a missed opportunity after Sony announced that its PSVR headset would be backward compatible on the PlayStation 5.
In a response to the recent drama surrounding Huawei and the U.S. government and growing concern about the company’s products outside China, Microsoft has reaffirmed their support for current Huawei’s devices in a statement to PCWorld.
“We remain committed to providing exceptional customer experiences,” the statement reads. “Our initial evaluation of the U.S. Department of Commerce’s decision on Huawei has indicated we may continue to offer Microsoft software updates to customers with Huawei devices.”
Intel has also confirmed to PCWorld that they will be continuing security and driver updates for Huawei laptops using their chips.
What this means is that, at least for the time being, current owners of Huawei-branded laptops need not worry too much about their devices going obsolete or falling behind with the latest security updates.
It’s important to stress, though, that this isn’t exactly a ringing endorsement for purchasing new Huawei laptops as the conflict between the company and the U.S. government is still ongoing and is unlikely to reach a resolution soon.
This week’s discounts are now live on Microsoft’s Xbox One and Xbox 360 consoles and there are quite a few good savings to be had when it comes to both video games and downloadable content.
The full listing of the discounted games can be viewed within the Store tab on the Xbox One dashboard. Note that Deals With Gold discounts require an active Xbox Live Gold membership.