We can all admit that FAR: Changing Tides is an awesome masterpiece that offers unique sail experiences and most of the time it works irreproachably.
However, many users reported that FAR: Changing Tides is sometimes crashing on StartUp and if you also face this issue, do not panic!
Because it is a pretty common situation, we’ve managed to put together several solutions you can try to fix it.
What can I do if FAR: Changing Tides is crashing on StartUp?
1. Check if your OS meets the game requirements
Use the following keyboard shortcut to openWindows Settings:Windows+I.
Navigate toSystem.
Scroll down until you find theAboutsection, then click on it.
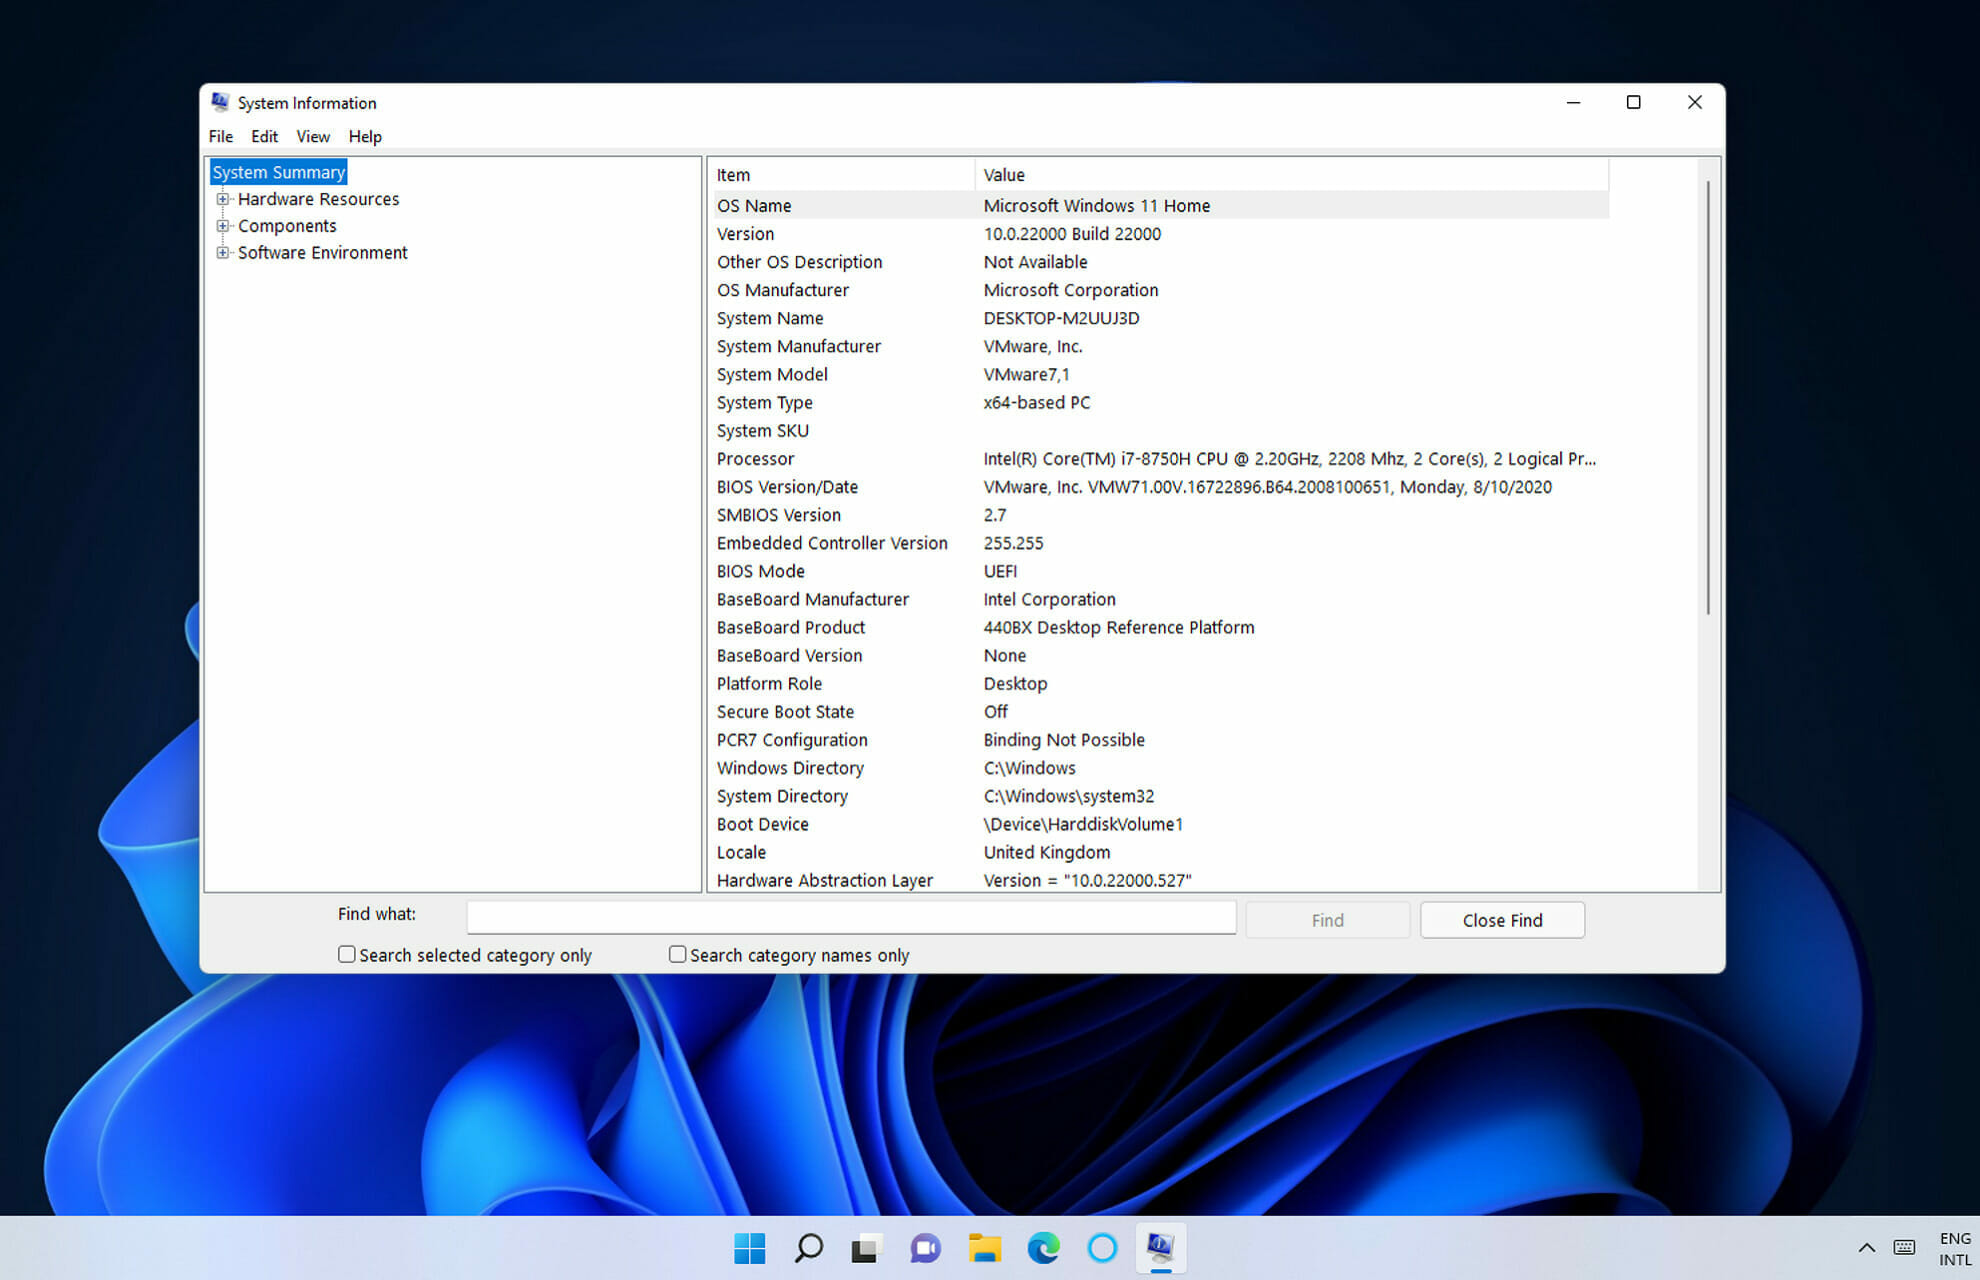
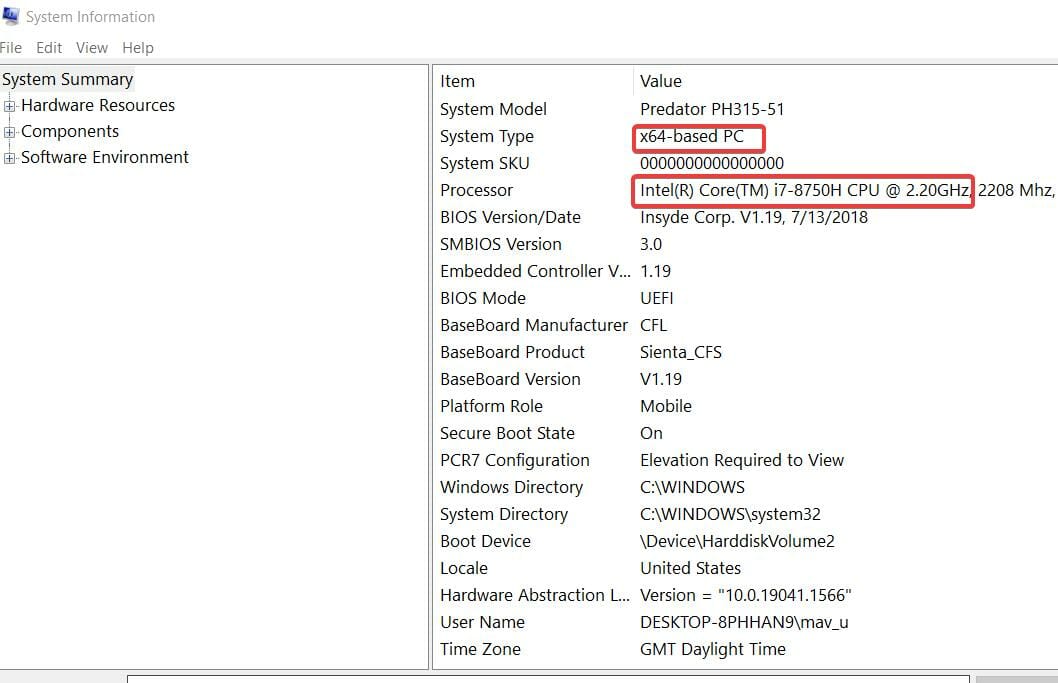
Now, you can visualize yourPC and OS specifications.
The first thing you should do is check if your operating system meets the game’s minimum requirements. If you’re not sure what are those, make sure you verify the list below:
Just download and install the software installer package and run it. Keep in mind that you’ll require DirectX 11 or above to run the Far Changing Tides game properly.
11.2 Microsoft Visual C++
Hit the Windows key, type Apps & features, then open the first result.
In the opened list, locate the Microsoft Visual C++ program(s).
Click on each program, then choose to Uninstall them.
In case none of the above solutions worked for you, you’ll probably need to reinstall the game.
As you can see, there are plenty of solutions you can apply if FAR: Changing Tides is crashing on StartUp. We guarantee that at least one would manage to solve your problem without any effort.
If it’s happening to encounter additional related questions, feel free to leave a comment in the dedicated section below.
If you don’t like the default interface of your Windows 11 PC, icon packs give you the chance to change it to meet your preference.
Windows 11 comes with customization options like the use of wallpapers, using your image, skin packs, etc, to change the look of your PC.
If any of them doesn’t satisfy your desired experience, you go for Windows icon packs that will help you achieve it with many tools.
In this guide, we will look at the best Windows 11 icon packs and their features that you can use.
Is it compulsory to use Windows 11 icon packs on my PC?
Having Windows 11 icon packs is not compulsory, but rather it’s normally used for those users who’d like to enhance their PC.
It’s mainly for people who want their PC to look unique and be different from the others. If you have a PC and use the default icons, there is no need to worry.
Simplus is one of the best free Windows 11 icon packs due to its good appearance. Each icon has a resolution of 256PX x 256 PX, and they are available both in JPG and PNG formats.
It adds a minimalistic look to Windows 11 due to its set of shades and looks. It is easier to install due to the documentation instructions, and the whole process is easier. All you need is to download the zipped installation file.
Simplus has light icons that mainly work best for light backgrounds, and it’s easier to sport them. The dark icons work well with light backgrounds and wallpapers, making sorting folders and files easier. The icon design is stylish and straightforward.
Lumicons icon comes with icons, installation instructions to help users who may have problems installing the pack. It supports quick installation through DLL and other tools.
It gives Windows 11 a different look due to the database of colors and shades you can choose from.
Lumicons comes with additional apps that customize all parts of your Windows 11 to meet your taste and a resource hacker app to modify Windows binaries, e.g., images, menus, or strings.
It creates a nice contrast with the Windows 11 theme and the soft edges rhyme with the hard edges of the theme.
This pack consists of many icons, i.e., Adobe CC apps, folder icons, Microsoft Office-like Word, Excel, PowerPoint, desktop icons, Twitch, web browsers, Spotify, Netflix, directories, i.e., Windows System, symbolic and mono apps.
As the name suggests, its icons have some shadow that provides extra shadows behavior to your Windows 11 theme.
It has 46 icons that work well with folders, files each serving different purposes. Shadow 185 pack gives users the ability to change all the folder’s icons.
Even more, it lacks application icons that many people look for when choosing an icon pack. The pack has a large selection that ensures the design is the same across Windows 11.
The Google Material UI inspires its user interface, and all the icons have white colors that indicate the depth of the icons. The icons get a dynamic look through the rounded squares and inner circular designs. It only offers the icons in .png format.
This pack targets users who want to give their Windows 11 PC a retro look, to look like the old Windows 2000 or XP. It makes the PC appearance look like it’s in the late 80s, 90s, and early 2000s.
Its design got inspiration from Nintendo’s NES, which had a vintage and pixelated appearance. The pack divides icons by changing the grids into squares and filling them with the right color giving them a minimalistic look.
It brings back the youthful feeling and only comes in .ico format. It’s a better choice though those having eye problems cant use this pack.
OS X Minimalism iPack has minimal icons that give Windows 11 the look of macOS. When you download the installation package, it comes as a 7Z (compressed).
Therefore, you have to unzip it using unzipping software like WinRAR to extract the pack’s contents and view them. Locate the OS X Minimalism iPack.exe file, then run it to initiate the installation.
The installation of this pack is a bit different, whereby you don’t install each icon manually but rather the whole pack. Once you install the app, the whole look of the PC changes with the new icons.
It patches icons for several apps like Chrome, Command Prompt, Windows Media Player, Firefox, Regedit, calculator, etc. All the icons are in .png format.
It is one of the modern icon packs that exists right now, with over 100 icons. The icons get designed to have an image with a circular background with a specific color.
The pack offers the icons in different file formats, e.g., SVG, PNG, ICO, giving users many options.
Kameleon Icons pack has icons for Windows 11 folders, e.g., Documents, Downloads, Pictures, or Music.
Each has its design making it look good and appealing, giving your PC a sleek feature. It also has the other normal icons, i.e., recycle bin, videos, gaming, and replacement of DLL files.
It also has a premium version that you can upgrade and access over 2,000 icons.
It consists of 51 icons. The pack has icon made from swords, crowns, arrows, shield, castles, bows, as the name suggest. Its inspiration is from how the Kings used to dress during the early days and take care of their kingdom.
It is also a good option for movie lovers who watch movies that involve a lot of shields and fights, i.e., Game of Thrones or Robinhood.
The only issue with this pack is that the icons don’t represent the real folder, i.e., an arrow can represent the documents folder, it’s upon you to remember which icon represents a certain folder. All the icons come either in JPG or ICO format.
The pack consists of icons for Windows applications, web apps, and folders. It has hundreds of icons from Chrome, Facebook, Gmail, Google Play Store, messenger, and not only.
This icon pack is comprehensive, with flat and 3D designs of the icons. Each design gives the shadow of the icon to increase the depth of the colors.
It’s still under development and works better if your Windows 11 PC use Faba Of Sam Hewitt.
Customization helps you improve your experience when using your PC. Some packs may have malware that can affect your machine and lower its performance. Be very careful when downloading any icon pack for your PC and always use a reliable antivirus.
The majority of the icons come as an executable file which hackers enjoy using to carry malicious files. Be very careful with what you download and install.
Most of the icon pack software and files are easier to use with straightforward instructions and guidelines.
If you are interested in knowing how to build your icons without the icons manager, you can download software to help you out.
We hope our guide was useful. Just let us know the pack you use in the comments section.
Hitting the Alt + Tab key is a quick way to navigate through the open applications in Windows and quickly open the desired one. It’s a keyboard shortcut we all love. But many users, after upgrading to Windows 11, have found the Alt + Tab to not be working.
In this case, you can still manually open the desired apps, but those with their hands set on the Alt + Tab keyboard shortcut often find that a problem. For others, too, the shortcut is a much more convenient option.
So, if Alt + Tab is not working in Windows 11, try the methods listed in the following section to eliminate the issue.
What do I do if Alt + Tab is not working in Windows 11?
1. Restart the Windows Explorer process
Press Ctrl + Shift + Esc to launch the Task Manager.
Select the Windows Explorer (explorer.exe) process, right-click on it, and select Restart from the context menu.
More often than not, it’s a trivial bug in the Windows Explorer process that’s causing the Alt + Tab not working issue in Windows 11 here. In this case, restarting the process should fix the error.
2. Try another keyboard
If you have been using the keyboard for long enough, and notice other issues with it, the problem may just as well be with the keyboard. Check if the other shortcuts involving the Alt or Tab key work.
You can also try using another keyboard, and if it works, your earlier keyboard was probably malfunctioning. If the new one doesn’t work, it’s a software issue. In this case, one of the methods listed below should work.
3. Update Windows 11
Press Windows + I to launch the Settings app, and select Windows Update from the tabs listed in the navigation pane on the left.
Next, click on the Check for updates button on the right.
If an update is listed after the scan, click on Download & install to get it.
Sometimes, a bug in Windows Update too might lead to Alt + Tab not working in Windows 11. And, if any such bug is found, a patch for it is released in the subsequent updates. So, updating the OS should fix the issue for you.
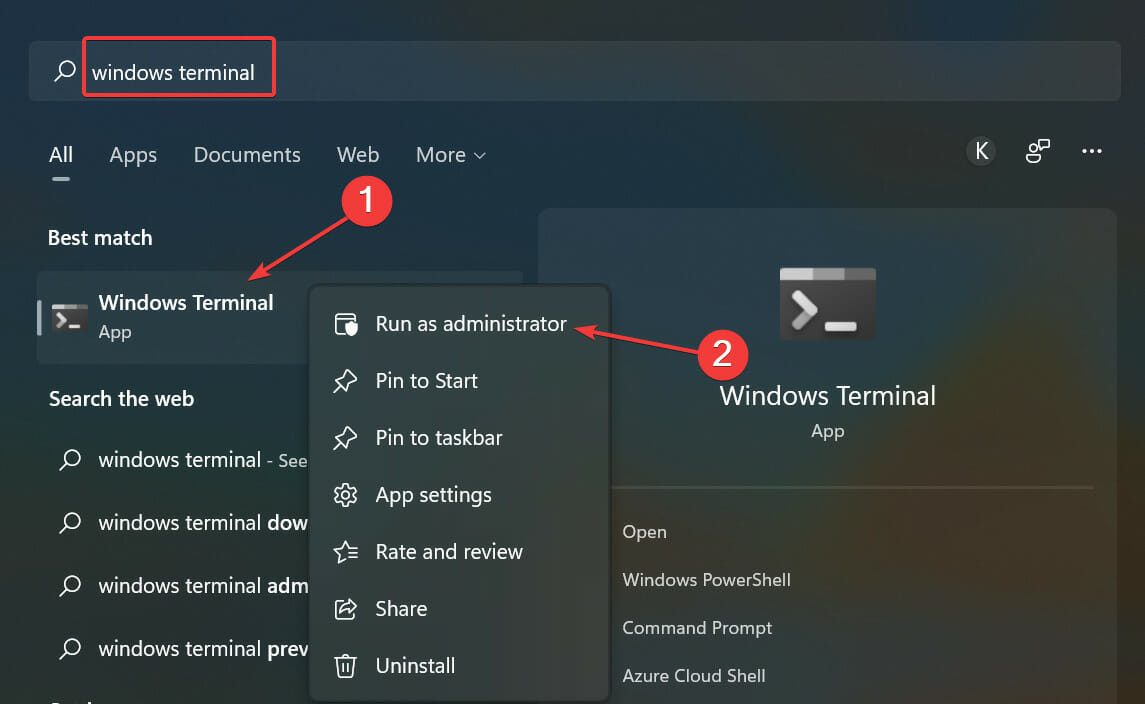
Press Windows + S to launch the Search menu, enter Windows Terminal in the text field at the top, right-click on the relevant search result, and select Run as administrator from the context menu.
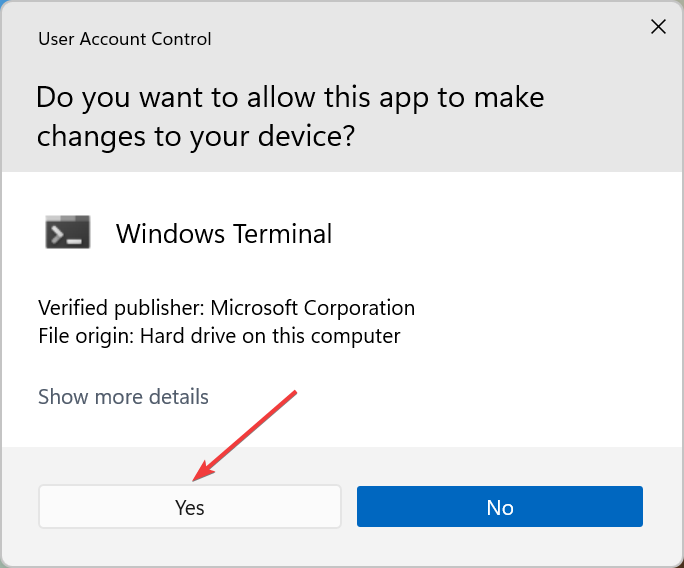
Click Yes in the UAC (User Account Control) prompt that pops up.
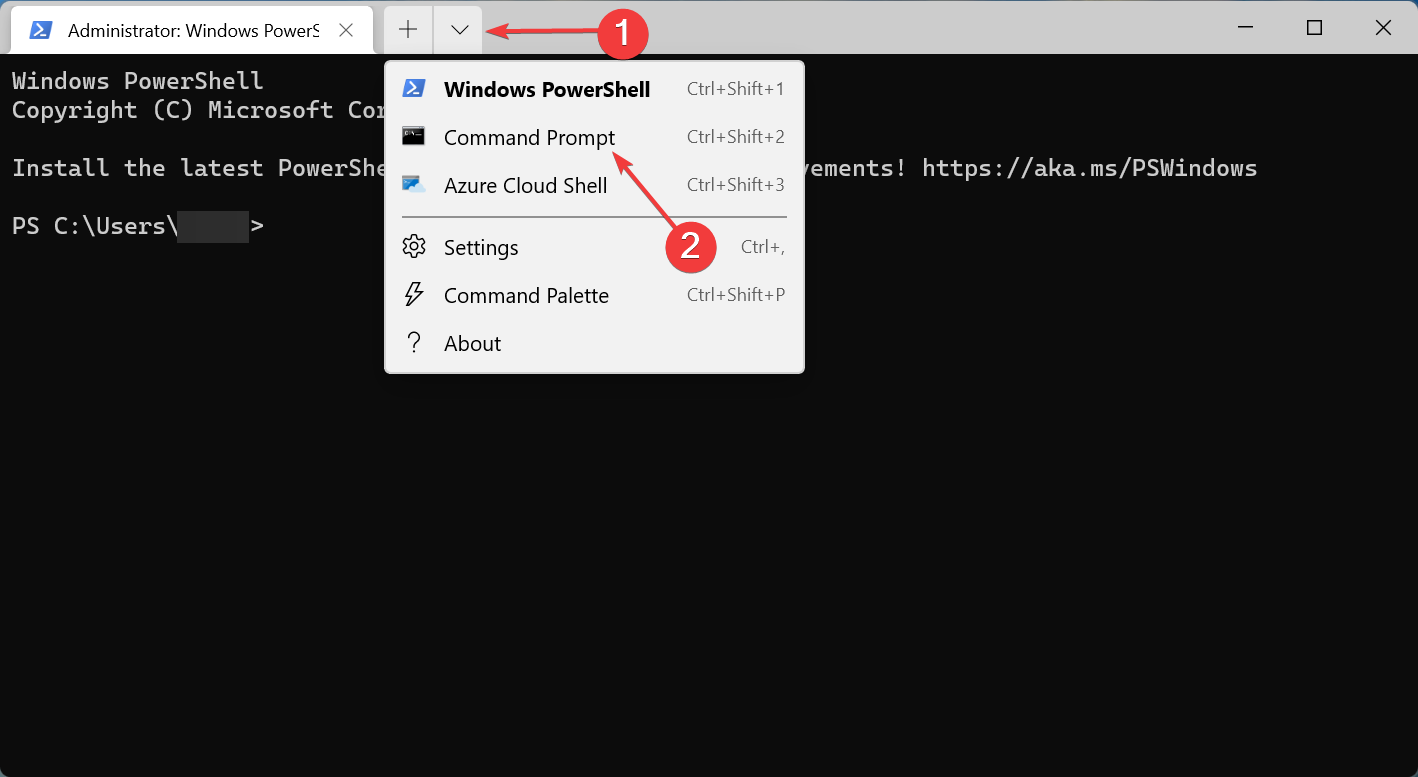
Now, click on the downward-facing arrow at the top, and select Command Prompt. Alternatively, you can hit Ctrl + Shift + 2 to launch Command Prompt in a new tab.
Now, paste the following command and hit Enter to run the DISM (Deployment Image Servicing and Management) tool:Dism /Online /Cleanup-Image /RestoreHealth
Once done, execute the following command to run the SFC(System File Checker) scan:sfc /scannow
Once done, restart the computer and check if the error is fixed.
Returning your computer to a functional state as fast as possible is essential, which is why using dedicated repair software not only will simplify this whole process but is also recommended in most cases.
5. Uninstall conflicting third-party apps
Press Windows + I to launch Settings, and select Apps from the list of tabs in the navigation pane on the left.
Next, click on Apps & features on the right.
Locate the conflicting app, click on the ellipsis next to it, and select Uninstall from the flyout menu.
Again, click on Uninstall in the confirmation prompt.
If the Alt + Tab not working in Windows 11 after installing a third-party app, it’s time you remove it. Many third-party applications are found to conflict with the functioning of the OS and can lead to an error.
Other than that, various third-party Alt + Tab switchers are meant to improve the functionality but start conflicting, and cause a bunch of issues. So, make sure to remove these as well.
6. Update the keyboard and graphics driver
Press Windows + S to launch the Search menu, enter Device Manager in the text field, and click on the relevant search result.
Double-click on the Keyboards entry here to view the devices under it.
Right-click on the malfunctioning keyboard, and select Update driver from the context menu.
Next, select Search automatically for drivers from the two options that appear in the Update Drivers window.
If you are running an outdated version of the driver or haven’t updated it in a long while, it’s time you do so since this too can lead to Alt + Tab not working in Windows 11. Though the OS takes care of the updates, there’s no harm in manually checking for them.
Also, if the above methods don’t work, you can try other ways to update the driver in Windows 11. In many cases, the keyboard manufacturer may not have submitted the driver to Microsoft and directly installed it on their official website, so check there as well.
7. Switch to the old Alt + Tab version
Press Windows + R to launch the Run command, enter regedit in the text field, and either click on OK or hit Enter to launch the Registry Editor.
Click Yes in the UAC (User Account Control) prompt that appears.
Now, paste the following path into the address bar at the top, and hit Enter. Alternatively, you can navigate to it using the pane on the left:HKEY_CURRENT_USER\Software\Microsoft\Windows\CurrentVersion\Explorer
Right-click anywhere on the empty portion on the right, hover the cursor over New, select DWORD (32-bit) Value from the menu, and name the key as AltTabSettings.
Double-click on the AltTabSettings key that you just created to modify it.
Enter 1 under Value Data and click on OK at the bottom to save the changes.
Restart the computer for the changes to come into effect fully.
If nothing else works, you always have the option to revert to the old Alt + Tab viewer since it’s less prone to errors. Here, you will also see the app icons, not preview thumbnails.
Though this is not the best solution, it should keep you going for the time being until Microsoft releases a fix for the Alt + Tab not working issue in Windows 11.
What are some useful keyboard shortcuts in Windows 11?
There are a bunch of useful keyboard shortcuts that would help you perform various actions and open applets quickly rather than going the conventional way.
You can use Windows + I to launch the Settings app, Windows + X will open the Power User/Quick Access menu, Windows + A will give you access to the Action Center, and Windows + Z will help open the Snap Layouts.
Other than these, you can also quickly launch File Explorer by clicking Windows + E, the Run command using the Windows + R, and the Widgets using Windows + W. Also, check out the other useful keyboard shortcuts to make your Windows 11 experience simpler.
FAR: Changing Tides was recently released (1 March 2022) and it is available for Windows computers and for consoles like PlayStation or Xbox editions.
Even if FAR: Changing Tides doesn’t deliver something tangible, that has a story told in audio logs and written lore, this game places you into a wonderful sail set letting you explore various voyage experiences.
Unfortunately, like any other game or program, FAR: Changing Tides can generate many annoying bugs, like not installing, downloading, launching, or not working at all.
There’s nothing worse than not being able to enjoy your favorite video game, so it is always important to know how to deal with specific bugs.
If you’re a FAR: Changing Tides fan, this guide is dedicated only to you! To discover the best solutions you can try to fix game-related problems, make sure you read it completely.
How can I fix the FAR: Changing Tides bugs?
1. PC bugs
1.1 Check if your OS meets the game’s requirements
Use the following keyboard shortcut to open Windows Settings: Windows + I.
Navigate to System.
Scroll down until you find the About section, then click on it.
Now, you can visualize your PC and OS specifications.
Even if some users forget to check these, the FAR: Changing Tides minimum requirements are mandatory if you want to run the game on your PC.
So, checking your computer’s specifications should be the first thing to do if it seems like not working/downloading/installing properly.
If you’re not sure what you should look for, verify the list below and discover the minimum requirements for FAR: Changing Tides:
However, the minimum requirements might sometimes not be enough for the smoothest FAR: Changing Tides experience, so in order to prevent any related bugs, make sure you meet the following recommended aspects:
OS: Windows 10 64-bit
Processor: Intel Core i3-8350K or AMD Ryzen 3 1300X
In the top-left corner of your Steam desktop app, click on Steam.
Choose to Exit the app.
Now, use the following keyboard shortcut to open the Windows run dialog box: Windows + R.
In the opened window, input this command: steam://flushconfig
This command will refresh your Steam files.
Open Steam, try to run FAR: Changing Tides, and check if the bug persists.
For those of you who choose to run FAR: Changing Tides on Steam, keep in mind that you can encounter related bugs because of the gaming platform.
Thus, it is best to restart it and make sure the problem is not caused by Steam. If you didn’t manage to solve your issue, we have more efficient workarounds you should try.
1.3 Run the game through another browser
Some users prefer running FAR: Changing Tides through the Steam browser app. If you’re one of them and you face game-related bugs, trying another browser it’s a reliable idea.
In this case, you would need an option that is designed especially for gamers, and Opera GX is one of the best on the market.
This browser comes with a dark theme by default that is both easy on the eyes and visually appealing. Its UI interface is extremely intuitive and well-organized, so it won’t give you headaches.
The browser has a dedicated tab (called GX Corner) that brings you the latest news from the gaming world.
Plus, it is has a built-in VPN. It is pretty strong and can be used to protect your online privacy.
If you’re wondering if Opera GX is able to boost your gaming performance, keep in mind that it also depends on your PC configuration and the available resources.
In your Steam desktop or browser app, go to Library.
Look for FAR: Changing Tides, then click on it, and choose Properties (Similar to the CS example shown directly below).
From the left window pane, click on Local Files.
Now, look at the right side of the window, and choose to Verify the integrity of the game files…
This workaround also applies if you’re using the Steam gaming platform. Verifying the integrity of your game files would
If you are missing textures or other content in-game or experiencing crashing while playing a game, you can have Steam verify that the game’s files are installed correctly on the computer.
1.5 Run the gaming app in compatibility mode
Right-click on your Steam desktop shortcut, then choose Properties.
Click on the Compatibility tab, then check Run this program in compatibility mode for.
Choose an older Windows OS version for the drop-down menu.
Try running FAR: Changing Tides in Steam and check if the issue persists.
1.6 Update your graphics drivers
Press on the Windows key, type Device Manager, and open the first result.
Expand the Display adapters section, then right-click on the needed element, and choose to Update driver.
Select to Search automatically for drivers.
Wait until your OS scans for newly available options.
If there are any solutions found, you’ll be notified.
You can follow the steps above without any hesitation, but we also have an additional solution to update your graphics drivers in no time.
With Outbyte Driver Updater you’ll be able to update and fix all of your drivers like an expert. This software will constantly update your elements with the latest features.
While you can always manually update your drivers, this software makes this tedious process a breeze by automating it.
Outbyte Driver Updater will automatically take care of broken or corrupted drivers, that can stop you from enjoying a smooth and complete gaming experience. Plus, it is able to find any missing device driver.
Make sure that the connection between your PS4 and the Internet is stable.
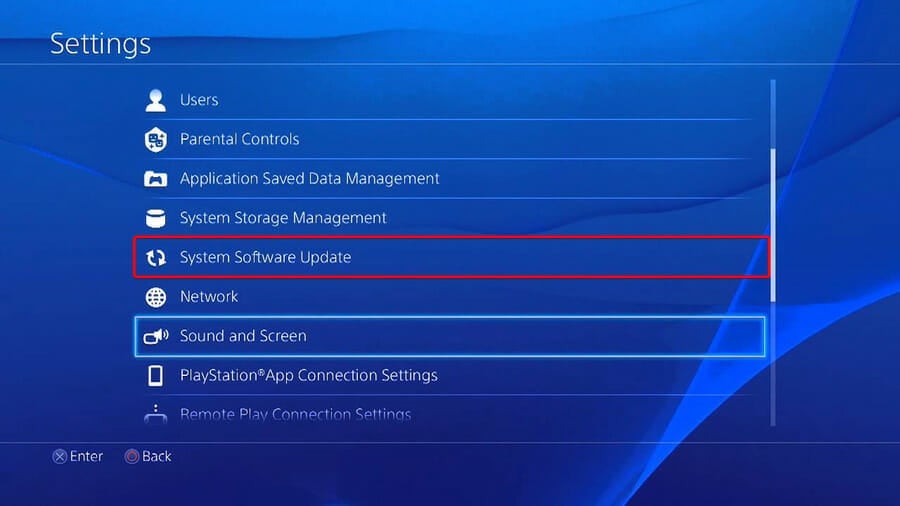
Now, navigate to PS4 Settings.
Click on System Software Update.
Press the X button.
You’ll get a message that informs you if the latest version of your system console has already been installed.
Otherwise, the message will let you know that you should upgrade your system. To install it, click on Upgrade now.
2.1.2 PS5
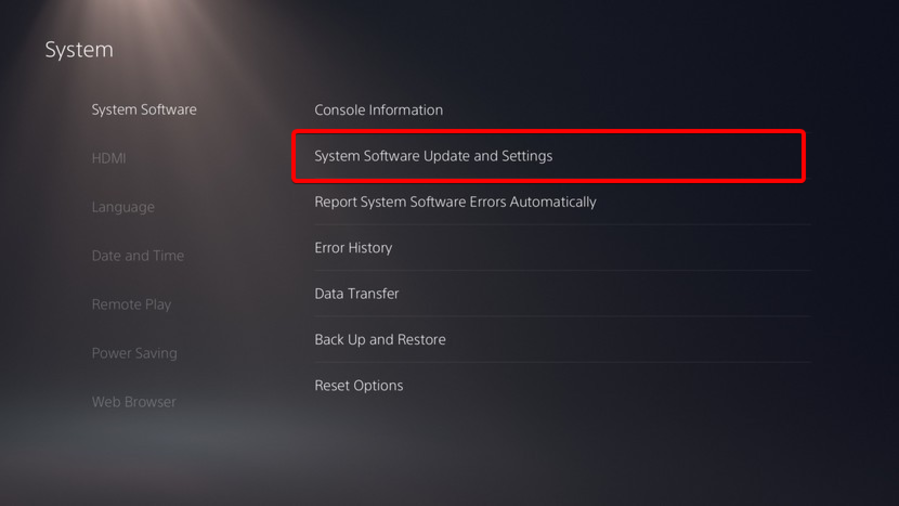
Open Settings.
Go to System.
In the System Software section, click on System Software Updates and Settings.
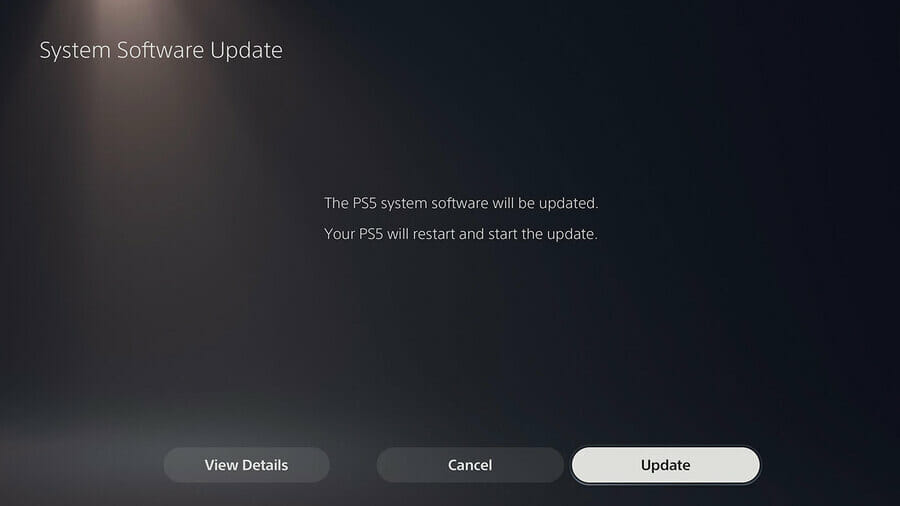
Choose the type of update you want to perform.
Click on the Update button, then wait until your console is updated and restarted.
2.1.3 Xbox
Make sure your console is connected to the Internet, then press the Xbox button to open the guide.
Select Profile & system (Account icon).
Go to Settings.
Select System.
Navigate to Updates & downloads.
Choose to update the console.
1.3 Nintendo Switch
Go to the Home menu, then select System Settings.
Navigate to the System section, then set the Auto-Update Software option to On.
Your system will automatically download updates.
2.2 Check the disk space and free up some
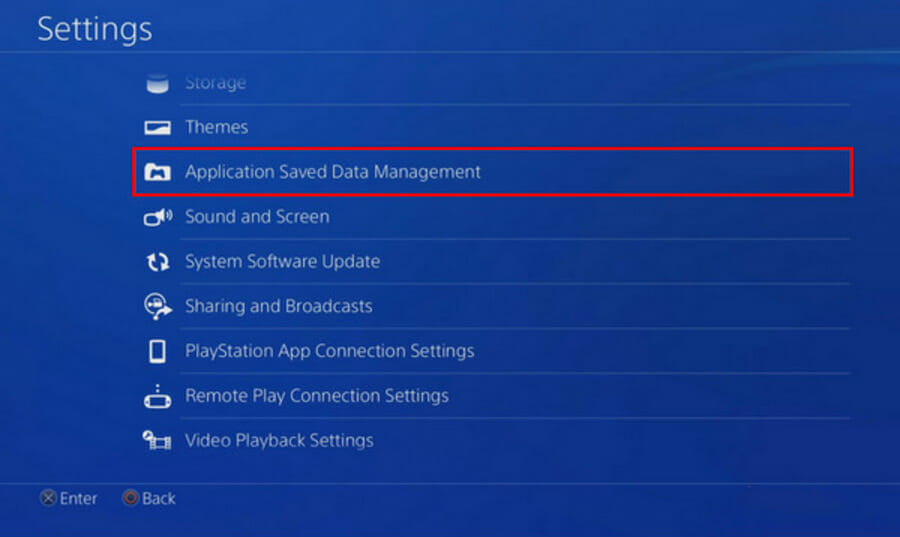
2.2.1 PS4
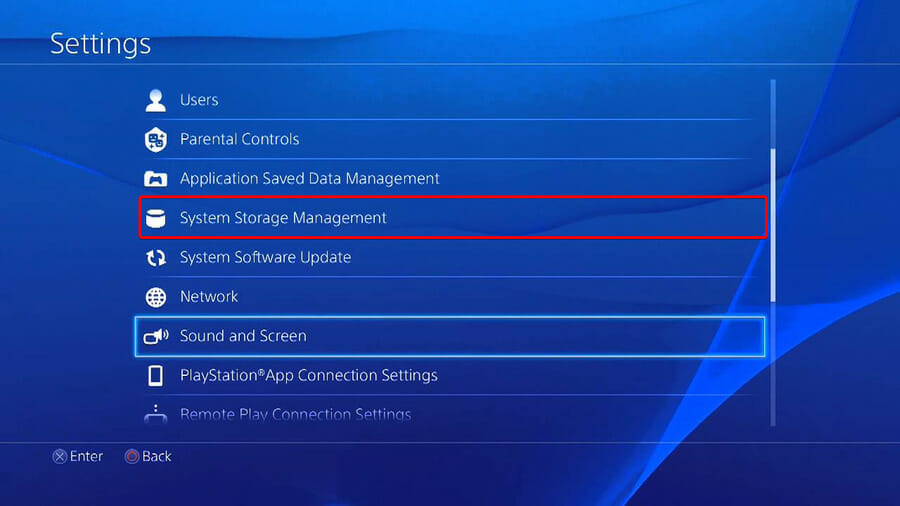
Go to Settings.
Scroll down to System Storage Management.
On the opened page you’ll see how the disk space is distributed and how much free space you have.
If you notice you don’t have enough free space, you should delete other saved data.
To do so, go back to your Settings menu, and choose the Application Saved Data Management section.
Choose what you want to clear.
Click on Delete.
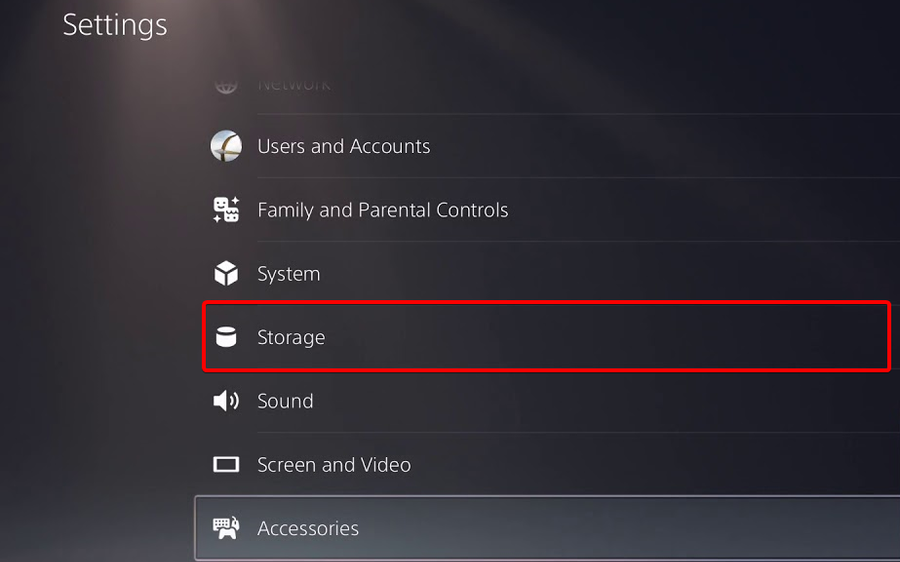
2.2.2 PS5
Open PS5 Settings.
Scroll down to Storage.
There, you’ll be able to view both the Console Storage and the Extended Storage.
Click on each of them and check the free disk space.
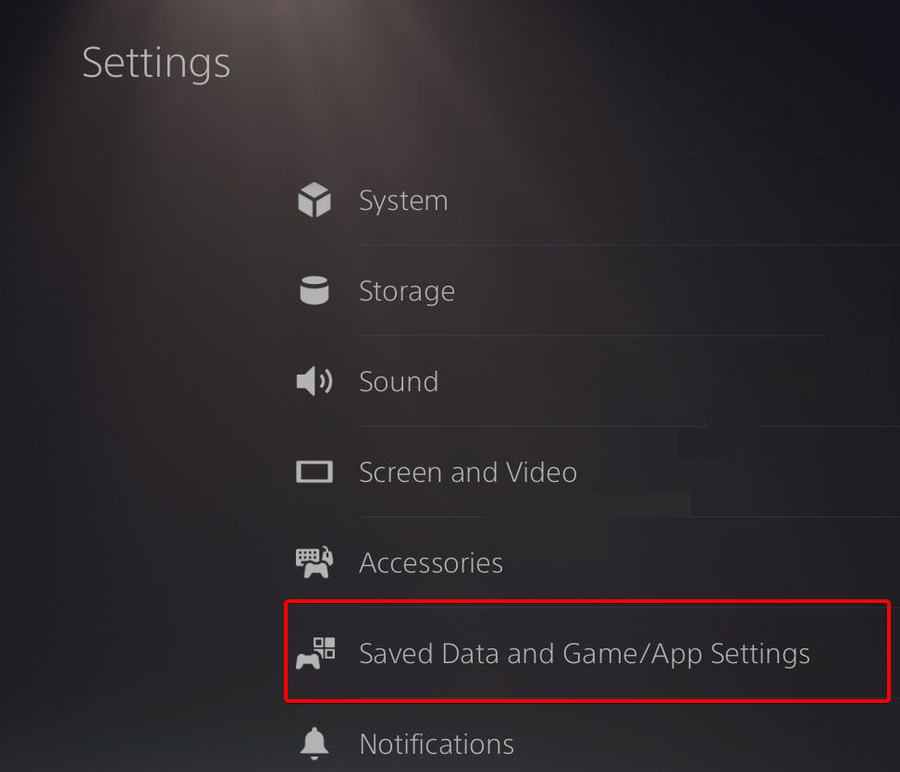
If you don’t have enough, make sure you delete other saved data.
To do so, go back to your PS5 Settings, navigate to Saved Data and Game/App Settings.
Choose from Saved Data (PS5) or Saved Data (PS4).
Select Console Storage.
Click on Delete.
Tick the box next to the files you want to delete and select Delete.
2.2.3 Xbox
Press the Xbox button on your controller to open the guide.
Select Profile & system.
Go to Settings.
Choose System.
Navigate to Storage.
On the Manage storage devices screen, select: Clear local saved games.
This deletes games saved to your hard drive, but they’ll still be saved to the cloud.
2.2.4 Nintendo Switch
Go to the Nintendo Switch Settings.
Scroll down to Data Management.
Choose Manage Software.
Now, you should be able to see the list of your games, sorted by how much space they take up on your console.
You can free up space in the System Memory using Manage Save Data/Screenshots.
Keep in mind that software data (including downloaded software, software updates, and screenshots) can be stored on the System Memory or on a microSD card.
2.3 Rebuild the database/Restart your console
2.3.1 PS4 and PS5
Completely power off your console.
Press and hold the Power button.
Release the button after you hear the second beep.
ForPS4, you’ll need to connect your controller viaUSB, then choose to Rebuild Database.
ForPS5, you’ll now boot into Safe Mode. Plug your controller in with the cable, then go down and select Clear Cache and Rebuild Database.
After that, click on Rebuild Database, then on OK.
2.3.2 Xbox
Hold the Power button until it turns off.
Turn it on by holding the Power button and wait for two quick beeps.
Release the button and you will be automatically redirected to the Recovery menu.
From here, you can restore the file system or rebuild the database.
2.3.3 Nintendo Switch
While your Nintendo Switch console is off, hold down the Volume Up and Volume Down buttons.
Press the Power button.
Continue to hold down the Volume Up and Down buttons until the Recovery menu opens.
There, choose to Initialize the console without deleting save data.
As you can see, there are plenty of solutions you can use to solve the FAR: Changing Tides bugs, regardless of the device you’re running the game through.
In case you’re aware of additional related workarounds, make sure you share them in the comments section listed below.
In this guide, we will show you 5 ways to check your graphics card on Windows 11. This will help you figure out.
With this info, you’ll know what graphics drivers to use, whether to run certain games or apps, and troubleshoot graphics-related errors.
Sounds good? Here’s how to do it.
How can I check the graphics card in Windows 11?
Check the graphics card using Windows Settings
You can quickly check your graphics card using Windows Settings. Under the Display Settings, you can find out all the available information about your graphics card.
1. Press theWin+Ibuttons to openWindows Settings.
2. Select Display on the right side.
3. Scroll down and click on Advanced display.
4. Here, you will see all information including the graphics card model and manufacturer’s name listed for your internal graphics card.
5. Click on Display adapter properties for Display 1 to find information about the graphics card installed on your PC.
Using System Information Tool
Press the Win + R buttons to open the Run dialogue.
Execute the below command: msinfo32
Expand the Components section.
Select Display from the list.
Here you will all information about the graphics card on your Windows 11 PC.
Using DirectX Diagnostic Tool
Press the Win + R buttons to open the Run dialogue.
Type the below command and hit Enter: dxdiag
Switch to the Display tab.
Here you can find all information related to your graphics card installed on your Windows 11 PC.
Using Device Manager
Open the Start menu.
Search for Device Manager and open it.
Expand the Display adapters option.
Your graphics card will be listed.
To know more about it, double-click on the desired GPU to view detailed info in a separate window.
Using Task Manager
Right-click on the Start menu.
Select Task Manager from the list.
Click on the Performance tab.
Details about all the GPUs, i.e., the integrated and the dedicated graphics card will be listed.
Both will be listed under GPU 0 and GPU 1 in the sidebar.
Click on the one that you want information for.
If you’re on an earlier version of Windows, we also have a similar article on how to check your graphics card in Windows 10. You can also check out the official box packaging where you received your laptop. The graphics card name would definitely be mentioned on it.
It is very important that you have the exact information about the graphics card installed on your computer. This will help you quickly locate the necessary drivers for it, in case things go south.
Let us know in the comments section below which one of the above-mentioned methods is your go-to way of checking graphics card information on your Windows 11 PC.
The long-awaited Windows 11 is here with a bang. Users are quickly dishing the impressive Windows 10 to enjoy this overhauled OS with superb features.
But the OS is nothing in itself without matching quality hardware. And with manufacturers constantly churning out Windows 11 compatible hardware, trying to stay ahead of the competition, selecting the right one might be an uphill task.
In this guide, we have simplified that selection task with a list of the best Windows 11 hardware devices in their respective classes for you to choose from.
What are Windows 11’s requirements?
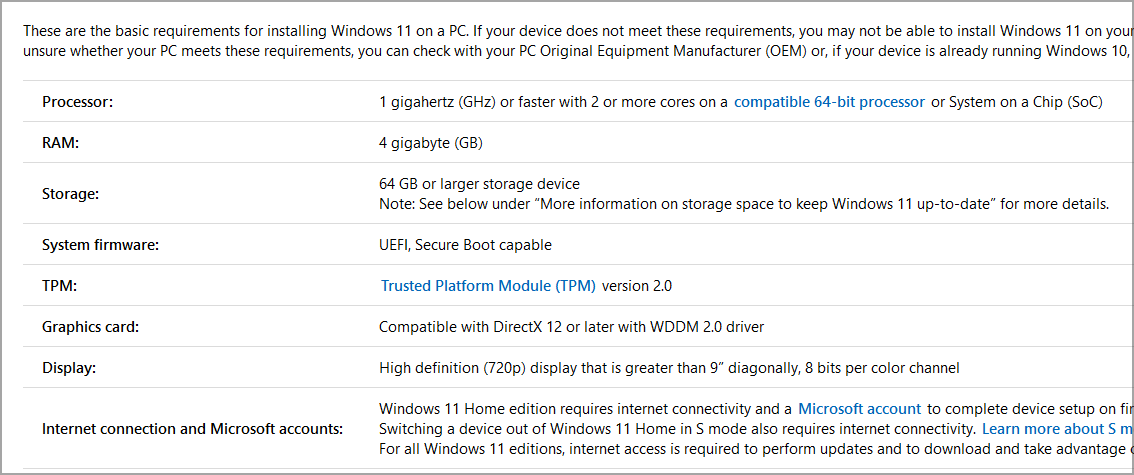
Before delving into some of the best hardware for Windows 11, it is important to know if any hardware you will be choosing meets the minimum requirements.
Below are some of the basic requirements as officially stated:
Processor: 1GHz speed or faster, two or more cores, and 64-bit compatibility
Display: 9-inch minimum diagonal, High definition (720p), 8 bits per color channel
System firmware: UEFI, Secure Boot capable
System memory: Minimum 4GB
Graphics: Direct X 12 API, WDDM 2.0
TPM: TPM 2.0
Storage: 64GB minimum
There are more requirements and specifications for Windows 11 than we have above. But those are the basic ones that hardware devices must have either as a unit or system to be compatible with Windows 11.
What are the best Windows 11 hardware options to pick from?
The LG Gram 14Z90P is a high-level PC with some incredible features. It features an Intel Evo-powered 11th generation Intel corei7-1165G7 processor.
This processor, coupled with its superb Intel Xe Graphics, gives optimum performance and high resolution for content creation and other top-level activities.
The LG Gram 14Z90P has 16GB LPDDR4X RAM that always delivers high-level performance whether you are multitasking, creating content, or just typing.
Finally, it has a whopping 512 SSD storage that is dependable. The LG Gram 14Z90P is just designed to improve your productivity.
If you are looking for an ultra-light tablet with mouthwatering features, you might have come across dynamite in Fusion5 FWIN232.
It is a user-friendly tablet PC with a powerful GPU. It features an upgraded Intel Quad-core N4120 processor that produces top performance at all times.
Furthermore, the 4GB RAM is more than capable of handling your activities on this tablet with assuring speed. There is also Bluetooth 4.0 for effortless wireless connectivity to other devices.
Finally, with its 10.1-inch display, you are guaranteed an amazing display whether you are surfing the web, watching videos, or playing games.
TP-Link is known for quality and standout products, and this product is no different. It combines the power of the latest Bluetooth 5.0 and EDR technology to take its connectivity and data transfer speed to another level.
It is also backward compatible with Bluetooth V4.2/4.0/3.0/2.0 and 1.1. This makes it not just suitable for your latest Windows 11 devices but also for your old devices too.
The TP-Link USB Bluetooth adapter incorporates the BLE technology. This, plus its EDR (enhanced data rate), ensures you get stunning data rates at very low power consumption levels.
It is just your best adapter to turn your non-Bluetooth Windows 11 laptop into a Bluetooth-compatible device.
The HP Pavilion TP01 desktop is a high-level machine with stunning features. It houses a powerful AMD Ryzen 3 5300G (Cezanne) processor that lets it glide through multiple processes easily.
In terms of memory, it features 32GB of high-bandwidth RAM. This allows it to run multiple applications at once without a hiccup. The 1TB SSD storage also speeds up its boot up and makes data transfer a breeze.
As for wired data transfer, the HP Pavilion TP01 desktop has a superfast USB Type-C port, four USB 2.0 Type-A ports, four superfast USB Type-A ports, and a headphone/microphone jack.
This is a super-impressive ethernet adapter that is used for wired network connections. It boasts Gigabit networking for fast and stable data transfer.
It can transfer data at 10/100/1000Mbps which is considerably faster than many wireless connections.
TP-Link is USB powered and, as such, requires no external power to work. Also, it features a USB 3.0 that is backward compatible with USB 2.0/1.1. Lastly, it works as Plug and Play on the Nintendo switch.
The best time to jump on the Windows 11 train is now, at this early stage. You can take advantage of the early features and watch it improve in front of your eyes.
However, without the best hardware, you will never enjoy the superb features of this OS.
This is why we have curated this list of some of the best Windows 11 hardware you can get. We have also listed the requirements of Windows 11 to make it easy for you to choose outside this list.
Now, the onus is on you to make the right choice. Feel free to discuss any hardware you find interesting outside this list in the comments section below.
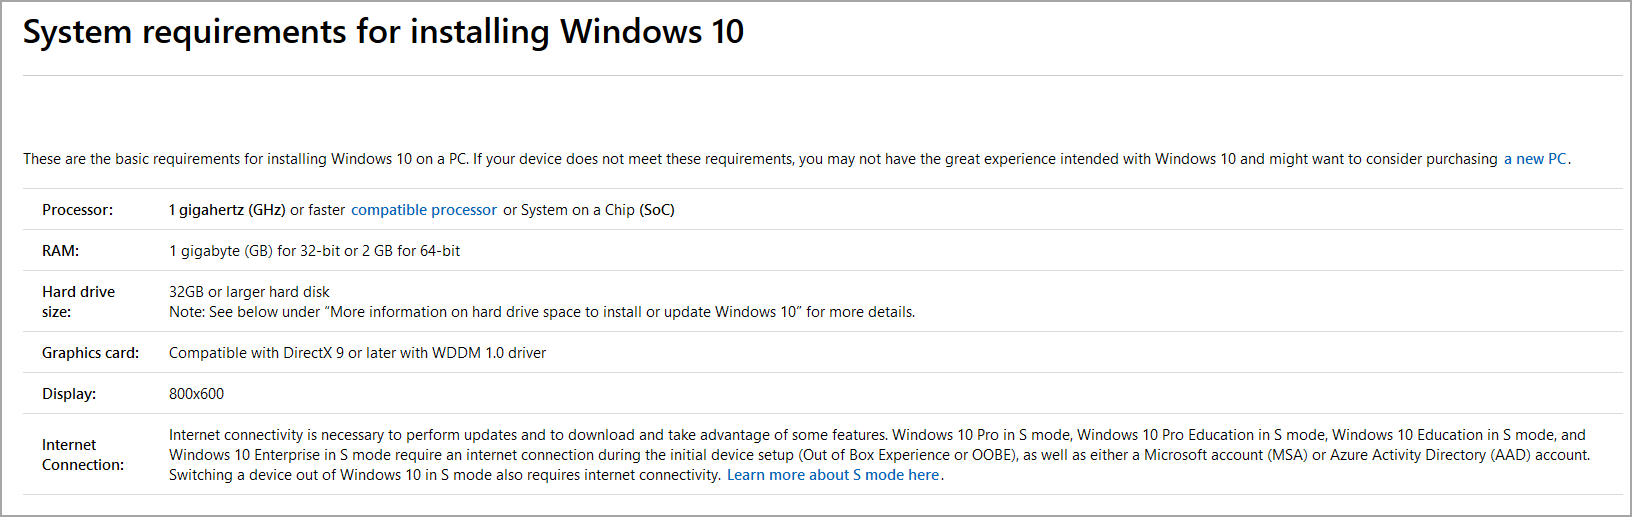
No, Microsoft decided to completely drop the support for 32-bit processors, since they don’t have the same performance as their 64-bit counterparts.
64-bit processors have been a standard for more than 10 years, so it’s no surprise that the previous iteration isn’t supported anymore.
What features have been removed from Windows 11?
Taskbar
Ability to move
The Taskbar in Windows 11 is locked at the bottom position, and it’s impossible to move it. Although this isn’t a feature that we used, it was a welcome customization option for many users.
In the previous versions, you could lock the Taskbar, but you could also move it to any side of the screen to organize your workspace better.
No support for drag and drop
When it comes to multitasking, being able to quickly access files is a must, and many users did this simply by dragging and dropping files to the open applications in Taskbar.
Sadly, it’s no longer possible to do that in Windows 11, which is a shame, since this was an essential multitasking feature that we, and many others, used on daily basis.
You can still drag and drop files to open apps, but for this feature to work, you’ll need to drop the file to the app window and not the Taskbar icon.
Taskbar menu options
Previous versions of Windows had an extensive Taskbar menu, but it has been almost completely removed in the latest version.
While some of the menu options were nonessential, others were useful to some, but sadly most of them are removed to streamline the interface.
The older version allowed you to hide or show certain icons, and this feature is still available, but it’s moved to the Settings app.
There was also an option for Toolbars, and while we never found this feature too useful, we’re positive that many did.
You could also use the Taskbar menu to rearrange open windows or show the desktop, which is something that many multitasking users frequently used.
Our biggest complaint is the removal of the Task Manager option, so you can’t start it any more quickly from the Taskbar.
The old menu had some nonessential features, which made it bigger than it needed to be, however, we think that removal of all these options was unnecessary.
Removal of People and News icons
In Windows 11, there are no more People or News icons on the Taskbar. Instead, the News feature has been moved to the Widgets section.
This is the right move in our opinion, because we didn’t find these two options too useful, and even though they aren’t gone, they have been moved so there’s less clutter on your Taskbar.
Ability to remove system icons
Windows 10 was more customizable than Windows 11, and it allowed you to remove system icons from the Taskbar.
The latest edition allows you to move them to the overflow menu if you want to hide them, but you can’t permanently hide them.
This means that you can’t remove the network, sound, or clock icon from the Taskbar anymore. This is just a minor customization option, and it’s a shame that it’s gone.
Old Volume mixer
The Volume mixer was probably one of the most useful features that users had in their Taskbar since it allows them to adjust the volume levels of each app with ease.
Sadly, this option is no longer available in its old form, and it has been moved to the Settings app. However, many users aren’t happy with this change, since it’s now a bit harder to adjust the volume levels.
However, many have found a workaround in a form of an EarTrumpet app for Windows 11, so if you miss the old Volume mixer, be sure to give it a try.
Ability to use small icons
If you need to have dozens of icons on your Taskbar, you can do that by enabling the small icons option.
This does make the Taskbar tiny, but it allows you to save space which is quite handy if you’re multitasking. Unfortunately, this isn’t available on Windows 11, and you’re stuck with the default icon size.
Resizing
In Windows 10, you could resize the Taskbar as you please, and this was quite helpful if you’re a multitasking user that has dozens of apps open.
Although this was a useful feature to some, increasing the size didn’t look too visually appealing, so Microsoft removed this feature to streamline the UI.
Events in the calendar
Events from the Calendar are gone in Windows 11, and you can’t add or view them from the Taskbar like you could in the previous version.
If you want to view or add events, the only way to do that is from the app, which is a step back in our opinion.
Microsoft did a great job of decluttering the interface, but being able to see your events at a glance was quite useful to many.
Apps customizing the Taskbar
In previous versions of Windows, third-party apps could customize your Taskbar, so allowing you to have a different clock or new icons.
According to users, this isn’t the case anymore, and some apps that had this feature might not properly work on Windows 11.
Aero Peek
This is a feature introduced in Windows 7 that allows you to see the Desktop simply by moving your mouse in the bottom right corner.
This option was present in all previous versions, but in our opinion, it didn’t have too much use, and we never used it, so we assume it was removed to clean up the interface.
Of course, you can still minimize or show all open windows by clicking the bottom right corner.
Tablet Mode
Tablet Mode is no longer available in Windows 11, and you can’t find its shortcut in the Quick Settings anymore. But if you own a touchscreen device, this shouldn’t worry you.
The new version has more space, so it should be able to work with tablets without having to rely on a specialized mode for it.
Ability to disable Bing searches
Windows Search tends to give you results from Bing if it can’t find what you’re looking for on your PC. We never found this feature too useful since it works only with Microsoft Edge.
It seems that we’re not the only ones, since many found a way to disable this feature by modifying the registry.
Microsoft seems determined to keep web searches a part of their operating system since this workaround has been patched. This means that you’re stuck with Bing search in Windows 11, whether you plan to use it or not.
Start Menu
Live Tiles
Live Tiles are completely gone in Windows 11, so they won’t take up any extra space once you open the Start Menu.
Although they were useful, most of them worked as big shortcuts, while some allowed you to view information at a glance.
If you had multiple Tiles added, they could easily take up half of your Start Menu, and sometimes that could be overwhelming for users.
They are now completely gone, and we feel like this change is for the better since it lets the Start Menu look less cluttered.
App groups and folders
If you had multiple pinned apps or folders in your Start Menu, you could organize them into groups or folders.
This feature allowed you to create different groups and move them together across the Start Menu. As for the folders, this allowed you to combine multiple apps or tiles to save space.
With the revamp of the Start Menu, these two features are gone, and while you can pin apps, they won’t take up extra space since they have their panel, so there’s no need to create app groups or folders anymore.
Start Menu resizing
Windows 10 allowed you to resize your Start Menu as you wish since you were able to change the size of pinned apps and Live Tiles.
If you were to add multiple items, you’d soon run out of space, so Microsoft decided to add the ability to resize the menu both horizontally and vertically.
Since Live Tiles are gone, so is the ability to resize the Start Menu, and the current version has a fixed size, with less unused space.
Ability to pin settings
Another useful feature that was removed is the ability to pin settings to the Start Menu. This allowed users to create shorts to certain sections in the Settings app.
This is such a small but incredibly useful option, and although not many users know about it, we’re sure that many will miss it.
Fullscreen Start Menu
Another removed feature is the ability to use Start Menu in full screen. This was first introduced in Windows 8 and it wasn’t well-received.
However, Microsoft still kept this feature for tablet users, but it allowed users to switch between regular and the full-screen version.
With all the changes to the Start Menu, app, and title management, a full-screen version simply doesn’t fit well with the new user interface, so it was removed.
File Explorer
Ribbon menu
The Ribbon menu is completely gone from File Explorer in Windows 11, and all available functions are now pinned to the top of the window.
This is a part of Microsoft’s plan to redesign the UI, and while the new File Explorer looks visually better, the icons take up more space at the top.
Most features are still there, but several such as the disc burning, access restriction, file history, printing, and edit options are gone from the menu.
We approve of this change, since it streamlines the user interface, and since the Ribbon menu was rarely used, it’s no wonder that it was removed.
Quick Access toolbar
One of the rarely used features on Windows 10 was the Quick Access toolbar in File Explorer. By using it, users were able to perform basic commands such as copying, pasting, renaming, deleting, etc. from the toolbar.
One benefit of this toolbar was its size, and since it was so small and right next to the name of the open directory, it didn’t require any additional space.
However, this is also one of the reasons why it wasn’t that often used. Microsoft didn’t remove this feature completely, but instead, it combined it with the functions from the Ribbon menu into a single toolbar.
While the redesigned version looks amazing, icons are larger and positioned below the name of the open directory, taking up extra space.
Cortana
While Cortana isn’t officially removed from Windows 11, it no longer comes enabled by default, and you won’t even see its icon in the Taskbar like in the earlier versions.
You won’t even know that it’s there, for the most part. On our test PC, we had Cortana appear a couple of times randomly while talking to other people.
We can’t pinpoint the cause because we used the default settings, so we assume it’s just an unusual Windows bug.
Open PowerShell window here
This is another small feature that was removed in Windows 11. When you open a context menu, it allows you to open that directory in PowerShell.
Instead of this feature, we got Open in Windows Terminal, which does the same job. This doesn’t mean that PowerShell is gone on Windows 11.
You can still use it inside of the Terminal, but it is no longer the default command-line tool like in Windows 10.
Folder thumbnails missing
On the previous version of Windows, if you had any images inside of a directory, they would show up as a thumbnail of that folder.
This was a useful feature, but it had no customization support, and if you didn’t want to use it, you could’ve just disabled it.
Windows 11 removed this feature, to make the design more uniform, so there are no thumbnails for folders anymore.
Ability to save searches
In the past, it was possible to save searches from File Explorer as shortcuts and use them again. We never used this feature, since it’s somewhat hidden, but we’re sure many users did.
As far as we know, this option is gone from Windows 11, since it doesn’t appear in File Explorer anymore.
Settings
Ability to quickly change default apps
In the previous version of Windows, changing the default apps was a breeze. You had several main categories, such as music player, photo viewer, web browser, etc.
This allowed you to change the default apps in a matter of seconds. However, that’s not the case anymore, the categories are gone, so you have to manually select the file type and assign a default application for it.
This can get tedious, and the process that took a few seconds now takes several minutes. For more information, we suggest visiting our how-to set default apps in Windows 11 guide.
Timeline
Timeline is a feature that allows you to see all the recently opened documents in the past few weeks, allowing you to easily get back to them.
Although this sounds interesting, we never had much use for this feature. Sync support was present, but it was removed recently for unknown reasons.
It seems that Microsoft is ready to pull the plug on Timeline, so it’s no wonder that we don’t see it in Windows 11.
Ability to disable all background apps
In Windows 10 there was a useful little option that allowed you to choose which universal apps can run in your background.
If you wanted to save some battery or you didn’t want your system to automatically update and send notifications from these apps, you could’ve just disabled them.
This is a minor but useful feature, and we’re not sure why Microsoft decided to remove it.
Ability to use a local account on Home edition
To use the Home version of Windows 11, you need to have a Microsoft account, since it’s not possible to use it with a local one.
This is an unusual change, and in the previous version, you didn’t have to use a Microsoft account if you didn’t want to.
Luckily, this affects only the Home version, and Pro and Enterprise users are unaffected by this.
Desktop background synchronization
If you use a Microsoft account on multiple Windows devices, your desktop background won’t sync anymore.
This is such a minor change that might cause inconvenience to some users, and we can’t tell why did Microsoft remove this feature.
Quick Status on the lock screen
In the previous versions, you were able to show information from certain Universal apps on the lock screen.
This included detailed info from one source and a short overview from several other apps. However, the feature has been modified.
In Windows 11, you can see information just from a single app, and you’re not able to see quick statuses anymore.
Multiple apps in Kiosk Mode
Kiosk Mode is a special feature that lets you run only a few apps in demonstration mode. On Windows 10, you can change the configuration files and run more than one app in this mode.
Windows 11 changes that, allowing you to run just a single app. We never used this feature, and most users probably don’t have the technical knowledge to set up this feature properly, so it’s no wonder that it was removed.
Internet Explorer
Over the past years, Microsoft has worked hard to retire Internet Explorer and make Edge the default browser.
With the latest release, Internet Explorer is finally gone, so you’ll have to use another web browser for Windows 11.
In case you’re not familiar, an S Mode of Windows is a special feature that runs your system only with the default settings and apps from the Microsoft Store.
It’s usually enabled on low-end devices or by users that need extra security. We found this feature rather limiting, and so did many users, so Microsoft made it exclusive to Home editions of Windows 11.
3D Viewer and Paint 3D
These two features are completely removed from Windows 11, but if you still want to use them, you can do that from the Microsoft Store.
In case you’re not familiar Paint 3D was a tool that allowed you to create simple 3D models, while 3D Viewer let you view all sorts of models.
These two apps had their audience, but most regular users probably never used any of them, so they were removed.
OneNote for Windows 10
OneNote is probably one of the most useful apps for notetaking, but it’s not available with Windows 11 out of the box.
If you want to use it, you first need to download it from the Microsoft Store. We also have a guide on how to enable OneNote in Windows 11, so be sure to check it out.
Skype
Skype is another feature that was removed from Windows 11, and it doesn’t come preinstalled like on the previous version.
Of course, if you want to use Skype, you can always download it, and we have a great guide on how to enable Skype on Windows 11 that can give you more information.
Microsoft Teams took its place, and if you’re not familiar with it, you might want to check one of our older articles and to learn more about Microsoft Teams.
How long can I use Windows 10?
Windows 10 will be officially supported until October 14th, 2025. After that date, Microsoft won’t release any security updates or patches for it.
Do keep in mind that as the retirement date comes near, some developers might drop support for this version, so you’ll have to upgrade to Windows 11 sooner or later if you want to keep using their software.
Will all of my software work on Windows 11?
Every newer application should be able to work on Windows 11 without issues. So far, we didn’t encounter any compatibility issues.
However, legacy software that hasn’t been updated in years might not work properly with the new version. This isn’t a Windows 11 issue, since this happens whenever a new version of an operating system is released.
Windows 11 is a big step from its predecessor, and it brought many changes to improve the interface and the user experience.
To achieve that, some functionality had to be removed. We’re not happy with this, along with many other users, and we hope that some features will be brought back.
Ultrabooks are superb machines that are synonymous with high performance and fantastic build. This has led to it being one of the most-used PCs.
With Windows 11 being the go-to OS on PCs, ultrabooks compatible with this OS are also starting to flood the market.
And what a sight it has been 0 the compactness, portability, top-performance of ultrabooks paired with the neat interface and visuals of Windows 11. Stunning is an understatement for what the final package looks like.
And that is why it comes as no surprise that users are looking to get in front of the queue early to acquire a new ultrabook with the latest OS. But with the overwhelming number of products available, getting the right one might be a real headache.
We have eased that task for you in this article with a carefully curated list of the best Windows 11 ultrabooks available.
How are ultrabooks different from notebooks?
A notebook is basically a laptop but a bit thinner. In fact, they are identical and depend on the name manufacturer gives a product.
Ultrabook, on the other hand, was a term introduced by Intel. And they were first used to classify lightweight laptops that are not above 1.5cm in thickness, use SSD memory, and incorporate an Intel processor.
Hence, the difference is in the specifics of the specifications of the ultrabook.
The ASUS ZenBook Flip is the dream Windows 11 ultrabook as it matches incredible performance with responsiveness and battery life.
It features an 11th Gen Intel Corei7 processor that guarantees top-level performance and effortless multitasking.
In terms of the display, it has a 13.3-inch OLED full HD 4-way NanoEdge bezel display. This, when matched with the great user interface of Windows 11, makes for magnificent viewing.
The ASUS ZenBook boasts a lightning-fast and adequate storage of 1TB SSD and 16GB LPDDR4X RAM. This is, without doubt, enough for diverse activities from personal to business use.
When you think of colorful expression and display, you can just mention the LG Gram 16Z90P. Endowed with Intel Xe Graphics, it delivers stunning high-resolution that is especially appreciated for content creation and editing.
This ultra-light system comes with the incredible 11th generation core i7-1165G7 Processor. With this, it delivers at a reliable speed and suits a wide range of tasks.
Furthermore, the LG Gram 16Z90P is armed with a 16GB LPDDR4X 4266mhz RAM that delivers memory-intensive contents with high speed and efficiency.
Add this to its 256GB SSD memory, and you know you are set for improved performance.
Samsung is known for its combination of high performance and impressive build, and this product is no different. Equipped with an Intel Evo-certified 11th Gen Core processor, it churns quality performance at exceptional levels.
A typical ultrabook, the Samsung Galaxy Book Pro is lightweight and has satisfying battery life. The battery can last up to 20 hours at full charge.
In terms of memory, it has 512GB SSD storage which is more than enough space needed for many activities.
This is another stunning PC both in design and performance. Dell XPS is a sight to behold with its eye-catching build featuring a remarkably thin and light touchscreen.
It is powered by the powerful 11th Gen Intel Core mobile processors, which guarantee top-level performance.
Unlike other ultrabooks, it features advanced thermal engineering. The two fans are carefully separated over a larger area to allow the heat to spread well.
In terms of graphics, Dell XPS 13 9310 boasts the ever-reliable Intel Iris Plus graphics. This, when paired with its high-quality touchscreen display, takes your streaming and content creation to a whole new creative level.
To round off this review is the Lenovo IdeaPad which is a bit different from the premium cost machines above. While it might not be as expensive, it boasts some good qualities that make it a worthy addition to this list.
It comes with the Intel Celeron N4020 processor that gives high performance for day-to-day activities.
When this processor is paired with its impressive 4GB DDR4 RAM and 164 GB SSD storage, you just know everything is in place for premium performance for your everyday activities.
An ultrabook does not have to cost an arm and a leg to be high quality. However, like everything, the higher the price, the more the features and the better the performance.
Our best Windows 11 ultrabooks list features a mixture of expensive and pocket-friendly products for different purposes.
You can always expect that they are all effective and do their job optimally. In case of still using the previous OS, do not hesitate to check out this list of affordable Windows 10 ultrabooks. From here, we can only wish you happy shopping!
Feel free to discuss any top-notch product you feel deserves mention on our list in the comments section below.
Whether you’re managing stocks, real estate, or your monthly budget, the right investment tracking software will simplify the process, making it accessible to anyone, even if you’re no finance expert.
Let’s check out the top tools for managing your financial portfolio:
What’s the best financial investment tracking software?
Moneyspire is a user-friendly software designed to consolidate your financial life in one place. It offers robust features like account tracking, detailed reports, budgeting, and bill reminders.
With encrypted local storage, your data stays private. Optional online banking makes transactions seamless, even without a direct bank connection.
Other key features of Moneyspire include:
Budgeting setup
Available for all regions and world currencies
Compatible with all major operating systems
No less important, reporting of transactions, monthly comparison reports, and drag-and-drop import files are here included too
Moneyspire
Track your money securely with Moneyspire and simplify your financial life today.
Empower offers a complete overview of your finances, with tools like Fee Analyzer and Investment Checkup to optimize your portfolio.
Its Retirement Planner and personalized advisor support make it ideal for long-term planning. Trusted by millions, Empower brings clarity to complex financial management.
Other key features of Empower include:
Mobile and desktop applications
Net worth calculator
Newsroom
From your dashboard, you can view your net worth, cash flow, portfolio balances and allocations, top gainers and losers, reports, spending, investment returns, and not only.
Empower
That’s your chance to join investors around the world who already use this top finance software!
You can also take charge of your finances with BankTree. The online web application, desktop software tool, and intuitive mobile app are all part of a complete personal finance package.
This financial investment tracking software has a comprehensive interface, so you’ll find it easy to record income/expenditure and gain complete control over your investment tracking.
Those who use BankTree not only get easy-to-understand reports access but they can even pay bills in time by using the robust bill reminder calendar, as well.
First-class investment features of BankTree include:
2048-bit secure connection
Incredibly easy dashboard navigation
Real-time budget stats
Customizable interactive reports with intuitive charts
Up-to-date market values for all your investments
BankTree Mobile app data easily synced with the desktop platform
Comprehensive video tutorials
Therefore, it seems to be the winning combination for all those looking for a personal and business all-in-one application.
BankTree
There’s one place to manage all your finances with ease! Use BankTree and you won’t regret your choice!
With a strong privacy policy, no ads, and bank-grade security, you can rest assured that all your stock trading information and accounts are safe with Quicken
Moneydance simplifies personal finance with an easy-to-navigate interface. It tracks investments, supports multiple currencies, and syncs with banks for online payments.
For the investment part, this software offers support for stocks, bonds, CDs, mutual funds, and more. You can view the total value of your investment or just check the individual performance.
Here are some more features of Moneydance:
Online banking and bill payment
Supports multiple currencies, including cryptocurrencies
Add-on extensions are available
Mobile support
From detailed reports to portfolio analysis, it’s a versatile choice for users seeking functionality without complexity.
Moneydance
Online banking and investment tracking in a single app.
WeVest helps you set and achieve financial goals with tailored recommendations. Track your net worth, forecast future finances, and secure savings plans.
Its encrypted platform ensures privacy while empowering users to make smarter financial decisions.
WeVest is safe and secure with 256-bit SSL encryption and AES-256 database encryption, plus they don’t store your address, credit card, or social security number.
They don’t even need your real name. When you join WeVest, you’ll learn how your net worth stacks up compared to other people like you.
Other key features of Wevest include:
Support for business equity crowdfunding
Marketplace to list your business
Informative online community
Investment accounts can be hard to compare and prioritize but WeVest focuses on net worth benefits and practicality of your different account options so you can make the right choices.
So, which one of these financial investment tracking software sounds good for your investments? Or do you have one you’re currently using that’s not listed here?
Share your opinion with us by dropping your comment in the section below.
Tracking several accounts is not an impossible mission. Just use our Financial management section and learn to master this challenging task.
Malware and other online attacks are more rampant than ever before. You can protect yourself by installing a firewall that acts as a gatekeeper and protects you from being a victim of these attacks that can compromise your data and information. So what are the best Windows 11 firewalls?
In an ocean of options, it can be tricky to find the best firewall for your Windows 11 computer, and once you do, you have to spend extensive time testing if a particular firewall is right for you or not. Keep reading this article as we go over our top 5 firewalls that could be the right fit for you!
How does a firewall work?
It protects your information and the network by managing the network traffic, such as blocking unsolicited incoming network traffic and validating access by scanning network traffic for malicious content such as malware and viruses.
A firewall is like a gatekeeper for your Windows computer. It detects and blocks attempts that try to gain access to your operating system, as well as unwanted traffic and unidentified sources.
Note that a firewall can do this because it acts as a filter between your computer and the Internet – basically, you can think of it as a traffic controller.
How does the firewall work and protect?
A firewall welcomes incoming connections that have been configured to accept them. This is made possible by allowing or blocking individual data packets that are sent over digitally based on predefined security rules. Only trusted IP addresses or sources are allowed.
Firewall vs antivirus
A firewall is a combination of both hardware and software that serves as a barrier to unwanted traffic flowing from the public network to the private network, providing security from cyber attacks coming from outside sources. A firewall can be installed on both individual computers and the whole network.
What is an antivirus? An antivirus is a software that scans files, detects, and removes malware, malicious codes, and viruses from your computer, providing internal security. Antivirus software can only be installed on your computer.
How to choose a firewall?
There are two types of firewalls: hardware and software. A hardware firewall is a physical device like a router, but a software firewall is, as the name suggests, installed on the computer.
Software firewalls are more user-friendly and assist you in filtering network traffic to provide enhanced protection against malicious web sources.
Should you install a hardware firewall or software? It is best to have both installed for superior protection.
What are the best Windows 11 firewalls to choose from?
This tool has all the features to secure your PC against digital threats. It protects your Wi-Fi network connection and ensures robust firewall support for your IP address.
ESET HOME Security Premium comes with multi-layered security for your computer and protects it from online threats such as malware and spyware that are available on malicious websites.
When downloading a file or a program, the tool detects viruses and can notify you about a potential virus if one is found.
The firewall support gives you complete access to prevent malicious sources from infecting your computer. Additionally, you can detect vulnerabilities and secure the connection on your home router by using the network inspector.
Some of the other features include:
Banking & Payment Protection improved
Webcam Protection
Anti-Phishing
Exploit Blocker IMPROVED
ESET HOME Security Premium
This excellent tool provides smart solutions and it also has unique tools that help combat online threats.
Perimeter 81 comes with enterprise-level security and is extremely cost-effective. This software is easy to set up, everything is available and accessible in a single view that makes it easy to secure and control your internet connection.
It can provide firewall protection for both homes and enterprises. It is the go-to option to monitor traffic from an outbound source that is being transferred to your computer.
The interface of Perimeter 81 is easy to use. It has a built-in VPN to use on the go, but it cannot bypass streaming services’ geo-location restrictions. But overall, the VPN system is robust and efficient for other tasks.
Perimeter 81 is an excellent choice for businesses and also for homes that want enterprise-level security at an affordable price that is also packed with numerous security features.
Some of the other features include:
Automatic Wi-Fi security
Single Sign-On Capabilities
Activity & Audit Reports
Perimeter 81
Perimeter 81 provides enterprise-level security and also comes with a VPN.
Bitdefender offers a range of security features along with a firewall. It also comes with antivirus protection.
Furthermore, it protects against ransomware thanks to its multi-layered malware protection. Anti-phishing, anti-fraud, anti-theft options, as well as a performance optimizer, are some of the features that are available to the users.
In terms of privacy protection, it includes anti-tracking, parental controls, and protection for microphones (from being accessed by a third party).
Bitdefender Total Security is available for all OSs and devices, and you can install it on Windows, macOS, Android, and iOS devices to protect them from being attacked by malware and viruses. And you can run this software on up to 5 different devices with a single product license.
Bitdefender Total Security is packed with features and offers a wide range of security features along with a firewall. The pricing also feels reasonable and makes this an affordable option.
Some of the other features include:
Multi-Layer Ransomware Protection
Prevents phishing and online fraud while you shop and browse
While shopping or browsing, it protects you from phishing and online fraud.
Bitdefender Total Security
Bitdefender Total Security is the best of both worlds — this is both a firewall and an antivirus.
Vipre Antivirus Plus is an antivirus software tool that has a built-in firewall that can be activated. Vipre antivirus also offers advanced security features that help protect your internet connection from data theft.
Although you can use the firewall to filter incoming and outgoing traffic, the Vipre also helps fight against threats such as viruses, trojans, malware, and spyware attacks.
Shielding your computer and internet connection with tools like firewalls saves you from becoming a victim of online threats.
Some of the other features include:
Email Security
Advanced Ransomware Protection
Stop Web-based Threats
Immediate Detection of Emerging Threats
Vipre Antivirus Plus
Vipre Antivirus Plus is a great tool that filters your incoming and outgoing traffic as well as fight against numerous online attacks.
Norton is one of the leaders in the industry — they have time and again proved their mettle by keeping up with the fast-paced tech world’s growing challenges.
Their innovative and super responsive attitude helped tackle the growing online security concerns and threats. Norton has tackled the issues by adding new security features that help protect our Internet connection and our data.
The Norton 360 Premium from Norton offers a feature-packed internet security suite, and it just goes beyond providing a firewall. It provides the standard antivirus and anti-malware protection and more.
Note that it includes a VPN, a password manager, cloud backup, and parental controls. It also includes a dark web monitoring feature that can alert you if your details leak on the dark web.
The Norton 360 premium is a bit more pricey than the rest of the options, but the additional features and the robust security protection features seem to justify the price.
Some of the other features include:
SafeCam for PC
100GB Cloud Backup
SafeCam for PC
Norton 360
Norton 360 has all the bells and whistles to protect your computer from any online threat.
The scanning system on this firewall has a commendable HIPS level and is very reliable. The Run Safer feature allows you to set various restrictions on web browsers, emails, download managers, multimedia software, and more. The automatic safe program list also helps in reducing the pop-up screen, enhancing your browsing experience.
After the installation is complete, the firewall performs a system scan of the programs installed on your PC. Once the scanning is complete, the software will impose restrictions by referring to its own database.
If you have a software program that is not listed in the database of Emsisoft, it will request you to label the program as safe or unsafe. You also have the option to change the restriction at any given time.
This firewall is extremely feature-rich and customizable. This firewall is best for both work and home due to its superior security and protection features.
Some of the other features include:
Advanced Persistent Threat (APT) protection
System manipulation prevention
Behavior Blocker
Exploit prevention
Emsisoft Anti-Malware
Emsisoft Anti-Malware is easy to use and customizable.
Both the physical and software firewalls inspect the outgoing and incoming traffic. The firewall has a pre-set filtering system that filters traffic coming from an unauthorized website or IP address and blocks it. The firewall system then warns the user that the site is unsafe to visit.
A firewall protects you from cyber attacks, malicious spam, viruses, and hackers altering the macros like scripts to gain access to your system.
The Internet has become a risky place, and your data is the most valuable asset that you have to protect. In the age of data, hackers are constantly trying to infect your system with malware and viruses to steal your data and sell it on the dark web or corrupt your PC.
Protecting your connection with the firewall is more necessary than ever before. From the list of the five best Windows 11 firewalls, we hope we have successfully helped you pick your next firewall.
Do not hesitate to let us know your choice in the comments area below.
MLB The Show 22 will release next week but if you happen to be a Game Pass member, you’ll be able to play as of April 1 (four days early) with the Early Access Bundle.
In addition to early access to the game, the bundle includes bonuses such as two Gold Choice Packs, 10 The Show Packs, one Ballplayer Pack, double daily login rewards, and 10K Stubs. It should be noted that this Early Access Bundle is intended for Game Pass members and does not include the game itself. Those who are not Game Pass subscribers should not purchase this bundle – for those gamers the MVP Edition or Digital Deluxe Edition is recommended.
Officially releasing on April 5, MLB The Show 22 is a very interesting game from an industry standpoint. The Sony-published game will, for the first time in the franchise (and possibly even for Sony), be coming to Xbox and even Nintendo Switch consoles. It will be a day one Xbox Game Pass title.
Cooking simulation game Epic Chef will be available this weekend via Xbox Free Play Days. The free trial event will run from from Thursday, March 31 at 12:01 a.m. PDT until Sunday, April 3 at 11:59 p.m. PDT.
Epic Chef is much more than just a cooking game, however. Players will take on the role of Zest as he sets off on a story-driven adventure to realize his dreams of becoming a master chef. Along the way you’ll build a farm to source your ingredients, and use them to craft the greatest dishes ever tasted in the land of Ambrosia. You’ll also square off against rival cooks in Epic Chef Battles. It’s all presented with Terry Pratchett-inspired humor and a cast of quirky characters.
Xbox Free Play Days is a perk exclusive to Xbox Game Pass and Xbox Live Gold memberships, where free trials of select games are offered every week. It is a great way to try out something new, and maybe even find a new favorite.
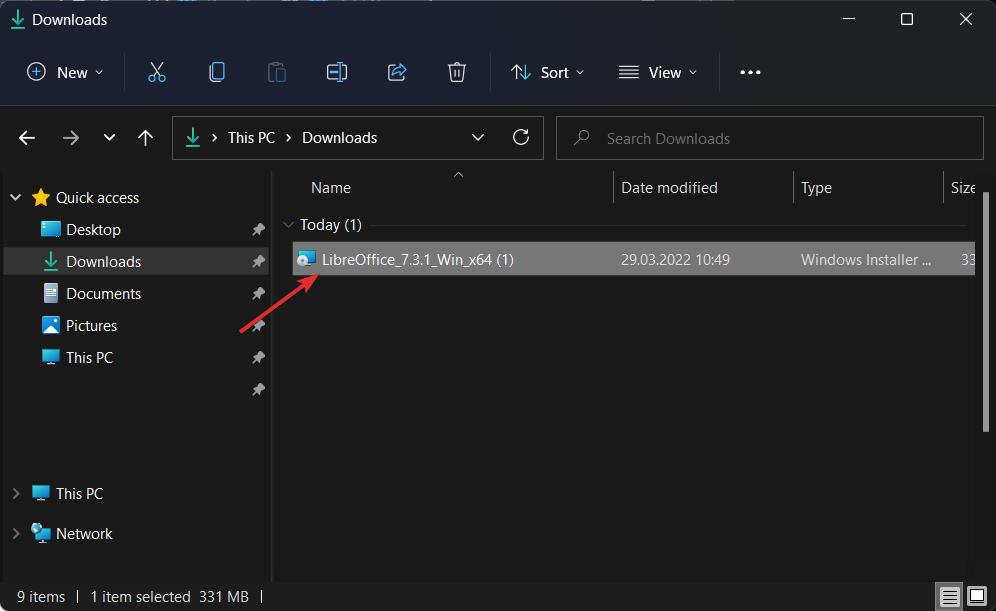
LibreOffice is an open-source editor suite, generally preferred by those running a low-specs system, since it does not consume a lot of resources. But, many have reported that LibreOffice is not working in Windows 11.
In most cases, the issue was ecnoutered after upgrading to the latest iteration, while for some it was installing an update that messed things up. Other than that, misconfigured settings too can lead to this problem.
No matter the underlying cause, there’s is always a fix for it. Just try the methods in the following section in the listed sequence to quickly eliminate the LibreOffice not working in Windows 11 issue.
What do I do if LibreOffice is not working in Windows 11?
1. Disable Skia for rendering
Launch LibreOffice, click on the Tools menu, and then select Options. Alternatively, you can hit Alt + F12 to launch it in a new window.
Click on View under LibreOffice from the navigation pane on the left.
Untick the checkbox for Use Skia for all rendering, and click on OK at the bottom to save the changes.
Click on Restart Now in the prompt that pops up for the changes to come into effect.
After making the changes, check if LibreOffice is now working in Windows 11. In case the problem persists, head to the next method.
2. Disable hardware acceleration
Launch the LibreOffice app, click on the Help menu, and select Restart in Safe Mode.
Click on Restart in the prompt that appears.
Now, select the Configure option, tick the checkbox for Disable hardware acceleration, and then click on Apply Changes and Restart at the bottom.
Hardware acceleration is known to cause the issue for a bunch of users, and disabling it fixed the LibreOffice not working in Windows 11 problem. So, make the changes and verify.
3. Reset factory settings
Open the LibreOffice app, click on the Help menu, and select Restart in Safe Mode from the options here.
Click on Restart in the prompt that pops up.
Now, click on the Advanced entry to view the options under it.
Click on the Archive User Profile button.
Click Close in the prompt that appears after the archiving process is complete.
Next, select Reset to factory settings, tick the checkbox for Reset entire user profile, and click on Apply Changes and Restart at the bottom.
If there’s an issue with the current user profile, resetting it could help get LibreOffice working in Windows 11. Make sure to try this since no other methods can fix this problem.
Press Windows + R to launch the Run command, enter appwiz.cpl in the text field, and either click on OK or hit Enter to launch the Programs and Features window.
Locate the LibreOffice app, select it, and then click on Uninstall at the top.
Click Yes in the confirmation prompt that pops up.
In case the issue lies with the app installation or a bug in the current version, removing it and then reinstalling the latest version should fix both these issues.
Editor’s tip
Another amazing office suite we recommend is WPS Office. It’s free, lightweight, you can view and edit a lot more formats with this, and with the amazing UI and plethora of customizations available, it’s bound to make your work a lot simpler.
One of these methods must have helped eliminate the LibreOffice not working issue in Windows 11. And once that’s done, you can start using the editor to create or modify documents with minimum resource consumption.
The ANT+ technology facilitates the effortless pairing of smart trainers to PC. It is known for seamless connection as the PC monitors, analyzes, and stores the data from the fitness and health sensors.
However, this connection can only occur when you have the ANT+ driver installed on your PC.
This process used to be easy until users started upgrading to Windows 11. Now, users are complaining of pairing failure due to missing and broken drivers, among other complaints.
And with no solution proposed by most big players involved, some users are forced to downgrade back to Windows 10.
This guide will take you through how to install the ANT+ drivers on Windows 11 without having to downgrade your PC.
How do I enable ANT+ on Windows?
Connect the ANT+ device to your PC.
Wait for Windows to detect it.
Once the device is detected, Windows will automatically install its drivers.
After the device is installed, it will be automatically enabled.
Go to the Downloads folder, right-click the download file, and select Extract all.
Choose the destination directory and click on Extract.
Now press Windows key + X and select Device Manager from the list.
Find your ANT+ USB Stick from the list of devices.
Now, right-click the USB Stick and select the Update driver option.
Select the Browse my computer for drivers option from the next window.
Click the Browse button.
Go to the directory in which you extracted the driver. In our case, it’s ant_usb2_drivers in the Downloads directory.
Click on Next and wait for the driver to be installed.
This fix only works if your PC can still recognize your ANT+ USB Stick, i.e., the USB Stick works well and still shows in the Device Manager.
With this, you have the ANT+ drivers installed on Windows 11 and ready for pairing with your devices!
2. Download and install the ANT+ driver automatically
Instead of going through the stress of manually installing the ANT+ driver, you can automate the process with an effective, third-party driver updater.
ANT+ Vs. Bluetooth: Which is better?
Both devices are effective and have plenty of highs and some lows. ANT+ is the clear winner thanks to its ultra-low power consumption feature in terms of power consumption. Although we now have Bluetooth Low Energy (BLE), it is still not at the levels of ANT+.
Regarding data transfer range and speed, Bluetooth is head and shoulders above the ANT+. It transfers data faster and over a longer distance than ANT+.
Lastly, Bluetooth does not come anywhere near ANT+ in terms of interoperability. In fact, this is ANT+ strongest selling point as it can establish a connection from one device to multiple devices and vice versa.
For instance, two people can connect to a single indoor trainer at a time to monitor its results from different devices.
On the other hand, Bluetooth blocks connection once a device is connected to another. This effectively stops a device from connecting to another until it terminates its present connection.
This interoperability is why athletes, especially those who monitor data from various sensors of trainers, simultaneously prefer ANT+ to Bluetooth.
With the impressive features of Windows 11, it is unfair to be unable to pair your trainers and other devices via the ANT+ technology due to broken or missing drivers.
In this guide, you have what you need to install ANT+ drivers manually on Windows 11 to continue enjoying the benefits of the ANT+ technology without downgrading your PC.
When you install a virtual machine, you may have to transfer files between guest and host operating systems. This is essential to interact with documents or install programs on VirtualBox.
There are a few ways to accomplish this. For example, you may set up a virtualization solution to allow you to drag files into a virtual machine, or you may share files from a folder created on the host computer.
Creating a shared folder is a helpful solution when storage peripherals stop working or the functionality to mount an ISO file is malfunctioning.
Whatever your motivation for sharing data, VirtualBox on Windows 11 provides two options: mapping a folder as a network drive and utilizing a shared folder.
In this article, you’ll learn how to share a folder for use on VirtualBox in Windows 11.
How do I create shared folders for VirtualBox in Windows 11?
1. Create a VirtualBox shared folder
Open the VirtualBox app.
Right-click on the virtual machine you need on the left pane and select the Settings option.
Select the Shared Folder option on the left pane, and on the far right corner, click the folder with the plus sign.
Click on the arrow sign on the Folder Path option to confirm the folder’s location to be shared. Alternatively, you can type or paste the path here if you know the path.
In the Folder name field, ensure that the automatically generated name is consistent with the file you intend to share. You can edit the name to match the folder to be shared.
You may select the Read-only checkbox if you do not want your virtual machine to be able to save files in this folder, then click OK.
Once this is successfully done, move to the next step.
Shared folders work only when the required drivers and integration tools are present, so make sure to install VirtualBox Guest Additions before creating or mapping any shared folder on Windows 11.
You can confirm that your VirtualBox environment works correctly by reviewing this guide on how to install Kali Linux on VirtualBox, which helps you understand the setup process before configuring shared folders.
Start the virtual machine by selecting the machine on the right pane and clicking the green start arrow.
At the top menu of your virtual machine, select Devices, then from the drop menu, select Shared Folders, and click on the option for Shared Folder Settings.
Select the Shared Folder option on the left pane, and double click to select the newly added folder from the lists of shared folders.
Check the Auto-Mount checkbox, input the drive alphabet corresponding to the shared folder location in the mount point field, check the Make Permanent checkbox, and click OK.
Click OK again on your virtual machine settings window.
Your chosen folder will mount as a drive on your virtual system when these steps are taken.
Tip
VMware Workstation is a desktop hypervisor that runs virtual machines on Linux or Windows. Its Player and Pro versions could be a great alternative for VirtualBox.
That is how you create a shared folder on a VirtualBox virtual machine on Windows 11. This procedure is basic, and as long as you follow the instructions in this guide, you will be able to share files and essential documents between a host and your virtual machine.
The process will still work if you are using a Windows 10 PC. Also, remember that to share files, you may use a simple drag and drop, but creating a shared folder is great for networking if you constantly need the same resources for all your machines.
Twitch Won’t allow username change? To discover the best solutions to fix it, make sure you follow this guide completely.
Twitch is arguably the greatest streaming platform for gamers. Still, even the greatest tools aren’t perfect. Quite a few users complained that they can’t change their username in Twitch.
Fortunately, this is not a serious issue. However, this can be annoying for some people. One user reported the following:
I can’t change my user name it is greyed out but it says i can change it but when i click the pencil to edit it it just refreshes the page. Please Help?
So, the username is greyed out and when trying to click the edit icon, the browser refreshes the page. Also, we don’t know which browser the OP uses. This information could make all the difference.
Still, this problem can be solved easily and today we will show you how to change your username in Twitch.
Why Twitch won’t allow username change?
Cache and cookies are blocking the app – The browser cache and cookies can cause several problems with Twitch. In these terms, it is recommended to disable them, and we’re going to show you how a bit later in this guide.
Temporary errors – Like any other soft, your browser might get into random and temporary bugs. We suggest trying to change your username from Incognito Mode.
Browser-related problems – If this issue occurs while using your main browser, you should consider another option. We prepared the best solution, that will never disappoint you.
What can I do if Twitch won’t allow username change?
1. Change username from the desktop client
Open Twitch.
Click on your profile image (from the upper corner of the window).
Navigate to Settings.
Now, click on Profile.
Scroll down to the Username section.
Write your new username.
Quite a few users solved this issue by following a more traditional path in changing the username.
NOTE
Keep in mind that you’re allowed to change your username once in two months.
2. Go incognito
2.1 Google Chrome
Press on the Windows key, type Chrome, then open the first result.
Go to the same three vertical dots from the upper-right corner.
Select New incognito window.
It will open an incognito window. Try changing your username in Twitch here.
2.2 Mozilla Firefox
Press on the Windows key, type Firefox, then open the first result.
Click on the 3 horizontal lines in the right-top corner of the window.
Select New private window.
Try changing your Twitch username in this window.
3. Clear your browser cache and cookies
3.1 Google Chrome
Hit the Windows key, type Chrome, then open the first result.
Use the following hotkey: Ctrl + Shift + Delete.
Select All time on the Time range drop-down menu.
Select the Cookies and other site data checkbox.
Click Clear data to erase cookies.
3.2 Mozilla Firefox
Press Firefox’s Ctrl + Shift + Delete keyboard shortcut to open the Clear Recent History window.
Select Everything on the Time rangeto clear the drop-down menu.
Select the Cookies checkbox, then press on the OK button.
What other Twitch issues should I be aware of?
Of course, our today’s problem is not the only one that might occur while using Twitch. Because it’s always important to be aware of the potential glitches, we suggest taking a look at the following list:
Signing up errors – It seems like Twitch won’t let some users to sign up. If it’s happening to be in the same boat, make sure you check some dedicated solutions.
Full-screen issues – Many users reported that Twitch full-screen is not working as it should. This is one of the most annoying problems and it can appear due to several reasons. If you ever encounter it, don’t forget to verify our fixing guide.
Black screen – From what streamers say, it is possible that Twitch is giving a black screen in Chrome. It can be pretty irritating, so if you face it feel free to take a look at some methods to solve it.
Even a great tool like Amazon‘s Twitch could have problems, but fortunately, there are some easy solutions for them. Also, it is quite possible that the culprit is not even Twitch, but your browser.
Just remember to keep your browser (and your computer for that matter) running smoothly. Remove your cache and go incognito in Google Chrome.
Now, after you change your username, you can begin streaming your favorite games online.
Did our solutions work for you? What games do you stream online with Twitch? Do let us know in the comments section below!
Fonts play a significant role in changing the appearance of text which changes the appearance of the entire content.
Each font has different styles; hence many types of fonts on the market. Some of these styles include weight, size, slope, color, or family.
Most apps and software come with default fonts that you can later customize to meet your needs. This article will look at the best Windows 11 fonts for your PC.
How can I download fonts on my Windows 11 computer?
There are several ways of downloading fonts to your PC. These are:
You will find many font managers online that offer both free and paid versions from font managers. The software gives unlimited fonts and is customizable to meet your needs. Some of these fonts managers include Adobe Fonts, FontBase, and Nexus Font.
From websites since many sites on the Internet offer fonts, either free or paid
What are the best Windows 11 fonts to enjoy?
Georgia
It was first released in 1993 by Matthew Carter. It’s a serif font with thick and thin strokes on a vertical axis. First, it was for small computers, but things changed, and the letters now match large computer screens.
Microsoft embraced the font when it was included in Internet Explorer 4.0 web fonts. This made it come with Windows as default and made professionals like designers use it as the first choice.
The default Georgis font uses non-lining numerals compared to the other versions. It is used in a lot of e-book applications.
There are several versions of the Georgia font:
Georgia Pro – Has additional weight and small caps, supporting the extension of character sets and kerning. It has scalable computer fonts like lining, figures, and ligatures. You can access them by visiting the Microsoft App Store.
Ms. Reference Serif – It has a bold weight and is in italic form.
Georgia Ref – Has a single weight with extra characters with Microsoft Bookshelf 2000, Encarta Encyclopedia Deluxe 99, and Encarta Virtual Globe 99.
Verdana
It’s a serif type invented by the Microsoft team. This font has small sizes which are readable on computer screens with low resolution. It has tall lowercase letters with loose letter spacing.
Have wide counters and proportions that make strokes separate from each other.
The letters have closely the same shape so that they appear different from each other and increase the legibility of the text.
From 1996, Microsoft accompanied Windows, Internet Explorer, and Office with the font. Later, users were able to download it from the Microsoft website.
There are several versions of the Verdana font:
Verdana Pro – has semi-bold black styles with italics that can get condensed across all weights. You can access it freely from the Microsoft Store.
Verdana Ref – It works well with Microsoft references and gets used in-office programs, publishers, Deluxe, etc.
Segoe
Also owned by Microsoft and is commonly used in designing materials for online and marketing purposes.
It was first used as the default font for Windows Vista and Outlook before Microsoft designed its logo using the font.
Light and semibold font versions were turned off to improve screen reading. The font supports additional scripts, i.e., Arabian.
It uses rendering technology to ensure the font produces better layouts and readability. Segoe User Interface has variables that display text as small faces explicitly designed for specific font sizes.
It has several key variations:
Segoe UI Mono has monospace characters mainly used in Latin, Greek, Hebrew, and Thai to draw symbols and shapes.
Segoe UI Historic – supports old scripts like Gothic, Coptic, Runic, etc.
Segoe Boot – it’s vertically shaped and mostly stretched to fill the screen, i.e., the BIOS fonts.
Segoe UI Variable was introduced in Windows 11 to scale monitors with dots per inch.
Roboto belongs to the San serif family font developed by Google. It has thin, regular, medium, bold, and black weights that match with slanting styles, not the italic ones.
They have light, regular, and bold condensed styles. It also has matching slanting designs.
There are several variations of Roboto fonts:
Roboto slab consists of five heights(Extra-Light, Medium, Semi-Bold, Extra-Bold, and Black) with font axis ranging from 100 to 900.
Roboto Mono – has a fixed width with seven heights (thin, extra-light, light, regular, medium, semi-bold, and bold).
Heebo – has the Hebrew alphabet.
Roboto Serif – it’s Roboto combined with serifs.
Rockwell
It has an Egyptian origin, and it belongs to the Serif class. Rockwell works well with displays; most designers use it to make banners or posters when conveying a message.
It’s large and bold, making it good to produce large prints. Note that well-known brands mostly use it due to its versatility.
Calibri
Calibri follows the modern style, and it belongs to the San-seif family. Microsoft replaced Times New Roman with Calibri in Microsoft Office and Windows Vista.
They start with the letter C to show that they belong to the ClearType system that allows text to be very clear on flat display devices.
The font has round stems and corners that make the font more visible on large screens. It supports computer scalable fonts that ensure the linings, text figures, and numbers 1-20 are accessible and easy to form glyphs.
It creates fractions by using small caps, caps spacing, superscripts, and subscripts. It is used in design programs like Adobe.
Calibri has similar characters due to confused characters, e.g., lowercase L and capital I.
Why are fonts so important?
It changes the visual presentation of texts by changing the look through the font’s features, i.e., size, color, height, or page arrangement.
They help on how people will receive the messages conveyed. For example, if you issue a warning using a font that looks dangerous with red color, most people will be very keen.
Most big brands and companies are very keen when choosing fonts for their designs, logos, and campaigns.
Fonts have a lot of styles that you need to use in the right way and project. There are a lot of websites and font managers; you can get any font you want.
The webcam can do a lot when paired with the right software and today we’ll help you pick the best camera apps for Windows 11.
Find below the best tools that include features like filters, picture-in-picture, special effects and integration with YouTube & live streaming platforms.
Best Camera Apps For Windows
ManyCam – Professional-Grade Streaming and Extensive Special Effects
ManyCam is a live streaming app that allows you to output professional-grade videos and streams.
People have even streamed online classes with ManyCam. You can use this software to stream on both Facebook and YouTube Live.
It can stream up to 4K resolution and the free version is watermark-free. It supports a wide variety of file formats like MP4, AVI, and MOV.
You also have access to a massive amount of special effects and you get the recording on the same app. A solid app all around.
The paid version offers access to ManyCam Lite, unlimited RTMP stream, and support for multiple devices.
ManyCam
Use ManyCam one time and you’ll see why this is one of the most famous online video apps on the market.
YouCam 9 – User-Friendly Interface with Social Media Integration
Next up is YouCam 9, a great beginner’s webcam app. It has a nice clean user interface that doesn’t bombard you with all the bells and whistles at once.
However, it’s is jammed-packed with features tucked away in its menus. It has scene filters, special effects, stickers, emoticons, and unique lenses.
There are even specialized avatars and animations that you can add to your video. YouCam syncs with communication apps like Skype and Yahoo Messenger and login functionality with Facebook and Twitter, just to name a few.
The Deluxe version adds in live skin smoothing, face logins, presentation recording, and more. You can save images in a variety of formats and record videos in either AVI or WMV.
YouCam 9
Do not hesitate to boost the look of video conferences with this easy-to-learn webcam app.
Movavi Screen Recorder. As its name suggests, the app specializes in screen recording.
It initially launches as a small side menu that gives you the option to either take a screenshot or record your desktop.
Beginners will enjoy the ready-made templates on Movavi as well as the drag-and-drop functionality. You won’t need any special training or knowledge to use this app.
Unfortunately, Movavi will plaster an annoying watermark over your recorded video on the free version, which you can remove if you purchase a premium version.
Movavi Screen Recorder
It’s time to record your screen and control the webcam with the latest version of Movavi.
SplitCam – Easy-to-Use Live Streaming with Basic Editing Tools
SplitCam is not as rich with features and neither can it integrate with social media platforms like Facebook.
Despite what it lacks, SplitCam is very easy to use. As you can see in the image above, its user interface is easy to understand.
There’s a simple button for going live, a chat option, a snapshot feature, and video recording.
And it doesn’t stop there. SplitCam has a ton of filters to add flourish to your live streams. Other features like an audio mixer, screen sharing feature, and the ability to add text.
OBS Studio – Open-Source Flexibility for Advanced Streaming
OBS (Open Broadcaster Software) Studio is an open-source and free live streaming software destined for advanced users.
It’s a huge favorite for Twitch streamers as it offers a powerful performance when capturing and mixing both audio and video in real-time.
OBS’ potential is seemingly endless. You can set up an unlimited amount of scenes and feeds that you can cut between with customized transitions. It has an audio mixer with filters like noise suppression and a noise gate.
It can also work as a virtual webcam which you can use in video conferencing apps like Zoom. OBS also supports picture-in-picture and tons of different hotkey configurations. You can add push to talk, starting or stopping streams, and more.
IP Camera Viewer – Comprehensive Video Monitoring and Multiple Feeds
IP Camera Viewer supports over 2000 camera models from Canon to Sony to Toshiba and more.
You can use the software to change the orientation of the camera, its frame rate, and what it covers. It even adds a zoom-in feature even if your webcam doesn’t have that capability.
Once you’re done, it automatically uploads the recorded video to a server. Plus, it’s super easy to use. Unlike OBS, IP Camera Viewer has a user interface that just makes sense from the get-go.
There are some negatives to this app. For starters, you can’t adjust the quality of the video. What you see is what you get. And there’s no media player built-in so you can’t watch your recordings.
It all comes down to the features. What can your webcam app do?
This is what sets the good from the bad apart.
You should look for the ability to create special effects, picture-in-picture, integration with YouTube, and live streaming to name a few.
Even if one app can’t do everything, that doesn’t mean it’s a bad app. It may be due to specialization. A particular app may be better suited for live streaming while the other is best suited for adding effects on screen.
Is there anything else I should know about webcams on my Windows 11 computer?
One thing you will notice is that a lot of these webcam apps are also used on Windows 10, and in fact, came from that system’s heyday. Other notable webcam apps include the likes of Snapcamera which adds Snapchat filters to your desktop.
If you’re looking for software with a focus on security, there are loads to choose from. For example, the iSpy app is one of them and it can support many different kinds of cameras and is useful for home or office security.
You also may be interested in a screen recorder app with webcam overlay support. These are apps that allow you to add a webcam video on top of a screen recording. Bandicam has this capability.
Feel free to leave a comment below if you have any questions on other Windows 11 apps. Also, leave comments about reviews that you’d like to see or information on other Windows 11 features.
Which camera app is best for a laptop?
For streaming, ManyCam is a fantastic choice. If you’re recording high FPS gameplay, Bandicam is the way to go. Beginners will love how easy YouCam 9 is, and Movavi Screen Recorder is great for straightforward screen captures.
How can I improve my camera on Windows 11?
To boost your camera quality, start by updating your webcam drivers and adjusting your camera settings. Using a better app, improving your lighting, and keeping your lens clean can also make a big difference.
How can I increase camera quality?
For better camera quality, set your app to the highest resolution, make sure you have good lighting and a good camera position, tweak your software settings, and close any other apps that might be using up resources.
While the pandemic has done a number to quite a few in-person events over the past couple of years, E3 has been hit with a handful of non-pandemic related blows prior to today’s cancellation that include both Nintendo and Sony no longer hosting booths, events or gatherings at the event.
Prior to the pandemic, both Sony and Nintendo opted for digital showcases that occurred on different days outside of the E3 schedule, to presumably further control its gaming message for the year.
In light of those transitions, the ESA has been vacillating between hosting an in-person or digital E3 in 2022 to better address its evolving audience and partner base, but now has confirmed it will do neither.
Despite a no show in 2022, the ESA believes it can retrench and return in 2023 with a better showcase to celebrate the gaming community.
E3 will return in 2023 with a reinvigorated showcase that celebrates new and exciting video games and industry innovations.
We previously announced that E3 would not be held in person in 2022 due to the ongoing health risks surrounding COVID-19. Today, we announce that there will also be no digital E3 showcase in 2022.
Instead, we will devote all our energy and resources to delivering a revitalized physical and digital E3 experience next summer. Whether enjoyed from the show floor or your favorite devices, the 2023 showcase will bring the community, media, and industry back together in an all-new format and interactive experience.
We look forward to presenting E3 to fans around the world live from Los Angeles in 2023.
Look for more news and announcements soon.
With Microsoft being the last of the big three scheduled to host a presence at E3 in 2022, it will be interesting to see how the company pivots its gaming message for the year.
It should be noted, in 2021 Microsoft hosted a series of digital gaming events throughout the year to help keep fans up to date and interested in the Xbox platform, it seems fairly safe to assume it may return to form in 2022.
Graphics cards receive so much attention, but the greatest CPUs are now more crucial than ever, particularly in the Windows 11 era.
Many modern CPUs will be enough to get by, but you’ll need one that can multitask effortlessly, especially since there is more running in Windows 11.
The CPU battle has always been a massive battle between AMD and Intel, but which one truly wins in Windows 11?
In this guide, we will do a rundown of the best Windows 11 CPU, and in the end, you should be able to make a more educated purchase.
What should I consider while buying a CPU?
We should start with the obvious one: your budget. You will want to buy a CPU within the price range you can afford. That said, here are a few other factors to consider:
Intended use of the computer
Need for overclocking
AMD / Intel preference
Matching the CPU with the correct socket
What are the best CPUs for my Windows 11 computer?
This AMD Ryzen 9 5900X and the Ryzen 5000 series may be the new CPU gaming kings in town.
The AMD Ryzen CPU model is based on the Zen 3 architecture. The tech seems comparable to Zen 2 on the surface, especially since they’re both 7nm. But in reality, AMD has completely changed the architecture to improve IPC efficiency and performance.
The most significant architectural change between Zen 2 and 3 is that rather than two CCX (Core Complexes) per CCD (compute die), each CCD now only has one CCX, with eight cores on each CCX, as opposed to four cores in Zen 2.
This AMD Ryzen CPU is a 24-thread, 12-core CPU with a boost frequency of up to 4.8GHz.
The AMD Ryzen Threadripper 3960X, released alongside the considerably more powerful Ryzen Threadripper 3970X, may feature the exact core count as the Threadripper 3970X.
It does, however, include a novelle architecture that provides performance benefits and PCIe 4.0, making it one of the finest Threadripper processors available.
The 3960X has a much enhanced single-threaded performance and has effectively removed the quirks that plagued its predecessors. It may be more expensive and needs the TRX40 motherboard and a powerful cooler, but it’s well worth the hype if you can make the most of its capabilities.
You do not often encounter a CPU that destroys anything in its category, but the Intel Core i5-12600K accomplishes precisely that.
This is among the most powerful CPUs available for those who don’t want to spend over a thousand dollars on a single element. This mid-range CPU has ten cores; six of these are multi-threaded Performance Cores.
The first four CPU cores are standard cores, and the next four are for efficiency. That implies you receive the most up-to-date technology even in such a low-cost chip.
This chip arrangement will allow your PC to concentrate on gaming and any other vital activities, without worrying about a Windows 11 update interfering with your framerate and enjoyment.
It’s hard to disagree with the choice of the Core i5 12600K already discussed. It is excellent for gamers, and you would usually not need more.
It’s a beast, without a doubt, but one that requires you to build a system designed around it to shine. You will need a massive PSU and a decent cooler to get the best of this CPU.
This processor leaves lots of capacity for overclocking, which means you can always take it to new heights.
We believe it is about the most powerful gaming CPU available. The issue is that, as expected, it does cost an arm and a leg.
This Core i5 10400F processor is unexpectedly intriguing. It remains available at a reasonable price. Not only is it marginally quicker than the previous-generation Core i5 9400, but the F suffix signifies it no longer uses Intel’s integrated graphics.
Overall, it’s a great value for money option that’s not much more expensive than a Core i3 processor.
It does come with some compromises such as a locked multiplier, which prevents overclocking. However, you might save some money by purchasing an H470 motherboard.
While this CPU may not be the fastest in multithreading, it competes well with AMD’s 3900X which is a decent processor. You should have in mind that in the future, its 6 core capability may be tested with more new upgraded games.
Since the arrival of the Core i5 12400, the Ryzen 5 5600X seems to have fallen the pecking order. However, it is worth noting since it’s a fantastic processor and a lot less expensive if you’re moving from an older AM4-compatible CPU.
If you have a B450 motherboard with a prior version AMD Ryzen processor in your PC today, you might easily upgrade to the Ryzen 5 5600X. This could save you money on a suitable motherboard, something you’d have to forego if you went with any Intel 12th Gen processor.
For gaming, there’s really no difference between the Ryzen 5000 processors, so you’ll get a consistent frame rate with this CPU as you would with the costlier Ryzen 9 5900X. With 6 cores and 12 threads, performing regular tasks would not be a problem.
The Ryzen 5 5600X also includes a Wraith Stealth cooling, which eliminates the need to spend additional money on a cooler.
If you are looking to build a superb Windows 11 PC, any of the processors on this list should work just fine.
Please note that this list has been put together in no particular order. All the CPUs are of excellent quality, and as long as you buy a processor capable of carrying out your daily computing need, it should suffice.
Even though Microsoft has somewhat backtracked on its default browser settings development in Windows 11, some companies such as Mozilla think that “more can be done.”
While the most recent Microsoft default browser settings change gets users closer to the more streamline process of older Windows operating system options, it’s still a rather convoluted process according to Mozilla.
Microsoft’s changes that improve the default browser setting experience for users are a step in the right direction. But more can be done to respect default browser choice on Windows. People should have the ability to simply and easily set defaults and all operating systems should offer official developer support for default status. In practice, we’d like to also see progress on reducing the number of steps required to set a new browser as default, and on opening and making APIs available for apps to set default that other Microsoft applications use.
Mozilla is not alone in their beliefs that Microsoft is muddying the waters with unnecessary hoops to jump through to get the default browser experience people were more accustomed to in Windows 7, 8 and 10.
Over the past year or so, Microsoft has gotten an earful from users and 3rd party browser developers over its curious approach to default settings.
Counter to what Microsoft has done in the past, the company seemed to encourage its Windows team to break down the default browser settings process into both broad and specific selections that involve users understanding what FTP, .svg, .xml, IRC and many other protocols are, less they find Microsoft Edge still popping up in random occasions.
While the company may pitch its Windows 11 default browser change as a granular buffet for IT Admins who are commissioned to assign specific apps to specific protocols, the average user typically wants their default choice to remain their default selection.
As with most software developments, Windows 11 remains an evolving platform and perhaps Microsoft recent moonwalk towards streamlining the default browser experience will be indicative of a future balance for the company, its 3rd party partners and users.
In Microsoft Teams, changing privacy settings like the ability to hide your email, are always the first thing you should configure. Hiding contact information, including email addresses and phone numbers so people that know me and don’t know me can’t find me as easily. When Microsoft announced Chat from Microsoft Teams on Windows 11, I immediately started looking for ways to remove the newly announced app from my PC before I could ever install it.
This guide focuses on making it harder for people to find you on the Chat app from Microsoft Teams on Windows 11. These settings are not available in the Microsoft Teams desktop app for work or school. Here’s what to do.
Hide your email from Chat
1. Open Microsoft Teams
2. Click the three-dot menu (see arrow), then click ⚙️ Settings
3. Click Privacy, click How others can find you and then click Edit contact information
4. Click to toggle your email(s) and/or phone number (s) that you want to remove
5. Click Confirm to confirm that you want to Hide the contact information that you selected from search
By disabling your contact details, your Chat from Microsoft Teams profile will not show up in search results for people who you have never chatted with you in Teams.
The only issue is that people can still find you if you have other Microsoft accounts and Teams profiles. Here’s what you can do to fix that in Chat from Microsoft Teams
1. Go to Your profile and click Manage profile
2. Change the drop down menu next to the email(s) and phone number(s) you want to Hide 3. Click Hide my email to confirm your changes to your primary Microsoft account email address
Of course, you could also choose to make changes to your Microsoft account to lock down what information that you share online publicly.
Samsung is launching a self-repair program for the popular Galaxy S20, S21, and Galaxy Tab S7 products. Beginning this summer, Samsung hopes the program can offer customers a more convenient and accessible way to prolong the use of their devices.
As part of this program, Samsung is partnering with iFixit, and Galaxy owners with the previously mentioned devices will be able to buy genuine device parts, repair tools, and enjoy intuitive, visual, step-by-step repair guides. More information is coming soon, but Samsung says Galaxy device owners will be able to replace parts like display assemblies, back glass, and charging ports. All of the returned parts will go back to Samsung for recycling. Support for additional models under the self-repair program will be coming soon, too.
“At Samsung, we’re creating more ways for consumers to extend the lifespan of our products with premium care experiences,” said Ramon Gregory, Senior Vice President of Customer Care at Samsung Electronics America. “Availability of self-repair will provide our consumers the convenience and more options for sustainable solutions.”
Samsung isn’t the only company to recently launching a self-repair program. Back in November of 2021, Apple announced a Self Service Repair Program, which lets tech-savvy folks complete repairs on iPhone 12 and iPhone 13, and M1 Mac models. Though it’s not a consumer program, Microsoft also partnered up with iFixit back in December. This was to allow repair technicians to buy official Surface repair tools, with the goal of making Surfac repairs faster and easier.
On the consumer side, Microsoft said back in October of 2021 that a third-party organization would study the environmental and social impacts of increasing consumers’ options to repair their devices. It also has taken steps to make Surface devices somewhat repairable with the replaceable SSDs in the Surface Laptop Studio, Surface Pro 8, and Surface Laptop 4, or the all-plastic Surface Laptop SE.
A lot of these policy changes from big tech giants might have to do with new U.S. regulations. Under a recent executive order, U.S. President Joe Biden includes the right to repair. At the time when he signed it, he mentioned Microsoft and Apple by name.
Xbox Game Pass is already one of the best values in gaming, but there’s a chance it could get even better for folks who have multiple game players in one household. According to a report from Windows Central, Microsoft could be working on an Xbox Game Pass Family Plan for launch later this year.
Details on the plan are coming off what Windows Central’s Jez Corden cites as “trusted sources familiar with Microsoft’s efforts.” Per thos sources, Corden believes that the Family Plan could be paid for on a higher tier, with access for “five players for games across an entire library.” This would be cheaper than paying for five Xbox Game Pass accounts, and one person will be able to manage it all, just like Netflix.
It’s not clear if the plan covers both Xbox Game Pass on console, or PC, or both with Game Pass Ultimate. Pricing is also not certain yet either, but it’s good to see that Microsoft is considering this, especially because Netflix and other similar streaming platforms have similar Family Plans. It won’t be new ground for Microsoft, either, as you can already share Office with a single account through Microsoft 365 Family.
While integrated Iris Xe graphics represents what Intel can do with ultra-book-level GPUs, the company is also looking to challenge NVIDIA in 2022 with its new Arc GPU for desktops.
Yesterday, Intel debuted its Arc GPU via a press release and 50 second YouTube teaser. As far as the public is concerned, the only solid information regarding the Arc card is what its physical manifestation will look like.
Intel didn’t get into details regarding turbo boosts, MHz, or clock speeds as of yet, but assured customers that the first retail appearances will be summer of 2022 as “limited edition” releases.
The term “limited edition” may denote a branding scheme similar to its closest competitor in NVIDIA which uses the “Founder Edition” to identify its special brand of GPUs. Along with the “limited edition” Arc cards will come Arc 5 and 7 GPUs and the company’s AI-powered upscaling technology in the XeSS this summer as well.
From a cursory view, the Arc card appears to host an HDMI port alongside three additional DisplayPort connectors which we presume will support 4, 5 and 8K displays.
Intel is doing the long tease for its reemergence in the GPU game with its announcement at CES, its tease yesterday and presumably a few more detail leaks before the systems go on sale this summer. However, AMD and NVIDIA are not sitting by idly as both companies look to push the FidelityFX Super Resolution technology and RTX 3090 and RX6800 respectively.
Perhaps the most interesting thing among these announcements is that GPU makers seem much more confident about acquiring resources in 2022 than scant supplies and deliveries in late 2021.
Fast and Furious Crossroads, a video game based on the Fast and Furious movie franchise, is going to be removed from sale on April 29th just two years after its release back in 2020.
“All product sales of Fast & Furious Crossroads will end on April 29, 2022 – 4 AM CEST (times may vary by region),” the announcement made on the game’s social channels and website reads. “The game & DLCs purchased before this date will still be available to use, and the game’s online modes will remain active.”
As the above mentions, anyone who’s purchased Fast and Furious Crossroads and its downloadable content digitally will still be able to download it and play it at any time in the future. The online servers will also remain active for those still playing its multiplayer modes. This applies to the game on Xbox consoles, Windows PC, and Sony’s PS4.
No reason has been given for the swift removal of the game from sales though its lack of popularity could well be a factor. Fast and Furious Crossroads got a bit of a meh reaction from players and reviewers after it launched in 2020 and it’s possible that it’s been perceived as something that’s tarnishing the Fast and Furious brand which has been super successful globally.
Microsoft’s official Xbox online storefront, Xbox Gear Shop, is in the midst of a massive sale with a large number of items being given discounts as large as 50% off.
While many of the more popular items have already sold out, there’s still quite a few cool products, such as the official Xbox skateboard deck, in stock that are worth checking out.
In addition to the sale, the Xbox Gear Shop has also recently added some new items such as a new Halo Infinite Funko Pop figure based on Escharum and a State of Decay T-shirt and mug.
Drivers on your PC are the most critical piece of component that is responsible for the smooth functioning of not only the hardware that they are related to, but also for the optimal performance of your PC.
You need to ensure that you always have the latest drivers installed on your PC, be it for your mouse, keyboard, webcam, network adapters, display, sound card, etc.
After all, the world has moved to the Internet, and we require an Internet connection for almost every task we do on our PCs or smartphones.
While Wi-Fi drivers come pre-installed and work fine, manufacturers do send out new updates that add new stability features or bug fixes.
This guide is for those who want to know how they can manually update the Wi-Fi driver on their Windows 11 PC.
You can make use of this guide to update the Wi-Fi driver of your Windows 11 PC along with any external wireless adapter. We also have a complete guide on downloading the Realtek Wi-Fi driver for Windows 11.
Why should I download the Wi-Fi drivers? Won’t Wi-Fi work without downloading the drivers?
A software component, aka driver, is very important for your PC to interact with the hardware. It acts as a communication line between the hardware and the PC so that you can perform the intended actions.
For instance, if you wish to change the resolution of your display, then you need to have a dedicated graphics driver or display driver installed that will communicate with the graphics card to change the resolution.
Without a driver installed on your PC, you won’t be able to send signals to the hardware, ultimately making it unusable.
One underlying question is whether the Wi-Fi will work smoothly on your PC if you do not install any drivers for it?
The answer to this is yes. But even if you do not install any drivers for your Wi-Fi, when you plug in a Wi-Fi adapter, your system will detect the device, contact its servers, and install the drivers needed for the device to run automatically.
So, you may think that your Wi-Fi adapter is running without installing a driver, but Microsoft Windows OS does this automatically without bothering you.
Besides, there are several other benefits of downloading a driver on your PC:
Facilitates smooth communication between the PC and the hardware
Includes security tweaks
Resolves all the bugs that may be causing several issues
Will definitely improve the performance
Now that you know about the benefits of downloading Wi-Fi drivers, or any driver for that matter, on your PC, let us take a look at how you can download any Wi-Fi driver on Windows 11.
How can I download any Wi-Fi driver on Windows 11?
1. Download from Windows Update
Press Win + I to open Settings.
Click on Windows Update from the left pane.
Select Advanced options.
Choose Optional updates.
If there is a Wi-Fi driver available to download then, hit the Download & Install button.
Restart your PC.
When you connect the Wi-Fi adapter to your Windows 11 PC, your PC will automatically look for drivers on its servers.
By following the above steps, you can easily download the Wi-Fi drivers without needing to visit the official website of the manufacturer.
2. Download from Device Manager
Open the Start menu.
Search for Device Manager and open it.
Exapnd the Network adapters section.
Select your Wi-Fi adapter.
Right-click on it and choose Update driver.
You can select either the Search automatically for drivers option or Browse my computer for drivers.
We would advise you to select the first option and let Windows install the driver.
Using the Device Manager built-in utility, you can install or update the Wi-Fi drivers on your Windows 11 PC.
It is pretty easy, and again, it negates the need to visit the manufacturer’s website and download the driver.
Instead of making efforts to visit the scanner manufacturer’s website and download the driver for your Wi-Fi, you can make use of a specialized driver updating tool that does the job on your behalf.
4. Download from the official website
If the above methods did not work for you and you weren’t able to download the Wi-Fi driver on your Windows 11 PC, then you can visit the official website of your Wi-Fi adapter and grab the driver from there.
Do note that for this, you need to have an Internet connection. So, you can either make use of the ethernet cable and plug it in directly to your PC or use a mobile hotspot to download the driver.
To identify the Wi-Fi adapter name, open Device Manager and expand the Network adapterssection. Then right-click on your Wi-Fi adapter and select Properties.
Head to the Driver tab, and here, you will find the Wi-Fi adapter name and the version under it.
Sci-Fi movies from even 10 or 20 years ago have envisioned what the future would be like in terms of technology. They didn’t get a lot of things right but they did touch on a very important subject: home automation.
Even in those old movies, you could see that people were aspiring to build homes full of tech that allows for maximum comfort and convenience.
Today’s various gadgets and devices have made that vision true for the most part and people who want to fully automate their homes can finally do so. Of course, devices won’t just magically run and see to people’s every command, so they need software.
In this article, we are going to take a look at the best home automation software for Windows and your best bets for when you want to bring your home “into the future”.
There are quite a few solutions and many of the top picks share some core functionalities that are absolutely necessary for smooth and functional home automation.
However, smaller and less obvious features in some cases compile the bulk of differences.
Between the various automation software solutions that currently dominate the market, and the long list of needs that some homeowners encumber themselves with the hope of creating the perfect automation platform, there are some really nice options out there.
What are the best smart home software for Windows 10?
HomeSeer HS4-Pi Smart Home Software is a very popular choice because it is compatible with hundreds of manufacturers and can be integrated with over 300 web products, apps, and services.
This home automation software is designed to run on Raspberry Pi computers, but it can be managed from other devices as well, as it includes a remote access service.
Users of HomeSeer Software can manage their home devices remotely if they install the dedicated mobile app.
It supports full voice control directly from the application or from one of its integrations.
This smart home management system has tons of free integrations of products and services such as Z-Wave, Harmony Hub, MyQ, Tuya, Chromecast, and more.
We should also note that it works with Amazon Alexa and Google Home Assistant Devices. The tool gives users full control over devices such as door locks and sensors, smart switches, or thermostats.
It also offers support for security camera recordings. These can be accessed from anywhere via the mobile application or web GUI.
Note that Raspberry Pi machines generally use their own operating systems, but users can also install Windows 10 or Windows 11 on them.
Other key features of HomeSeer HS4-Pi include:
Works even without an Internet connection
Privacy and security-oriented
Automatic backups of data on all connected devices
Customizable email and text alerts
To use this automation software you are required to purchase a license. There are a few different packages available, some including additional benefits or integrations.
HomeSeer HS4-Pi
Maintain your home with this advanced smart house software that can work with various smart technologies.
One of the things people are most concerned about when it comes to pairing their devices with software is compatibility.
It can be very frustrating when you implement software that is not fully compatible with all of your machines and gadgets. Luckily, there are solutions such as Domoticz that cover a wide array of home automation devices.
Since Domoticz features support a fairly large range of device families, spreading from the likes of remote controls to sensors and detectors and everything in between, users usually feel safe using this software.
The fact that they can count on a platform that supports all their devices is great and it’s one of the most important things you can look for in automation software.
All the other features aren’t really that great if you can’t get it to communicate with the brand new smart devices you bought.
One of the biggest perks for Domoticz is that it is accessible on a wide range of platforms ranging from your typical computer to smaller things like smartphones and even the ultra-low-cost power solution Raspberry Pi.
On top of the standard software, you also get access to a bunch of additional optional implementations coming from third-party developers.
The software developer features a list of all the third-party perks on their website so it’s easy to see exactly what is available and what you can benefit from personally.
When you put all features together you quickly realize that Demoticz has been developed not just for standard home automation but also the incorporation of much more than that through capabilities such as extensive sharing with both local and external devices.
Being able to use external devices is a great perk in itself, let alone when you integrate them into the overall system.
Speaking of playing with the system, users that go for Demoticz are able to create their own switch codes which can really come in handy in diverse situations.
Other key features of Domoticz include:
Browser-based UI
Compatible with all major operating systems
Auto learning sensors
Another important aspect of this app is that it is open source and free to use, so you will not have to invest anything and get started as soon as you install it.
You definitely can’t talk about home automation without including Calaos into the mix. Home automation has definitely been marked by Calaos, or The Calaos Project as it is also referred to in some circles.
Its intricately designed UIs and strong build with multiple layers make this automation solution a treat. That’s especially true if you’re in need of something you can rely on in terms of community support.
That part has been proven when the community took over from the main development team in rehabilitating and bringing Calao up to speed after being closed in 2013.
If you’re looking for a full-stack platform that serves your every automation need, Calaos might be just what you’re looking for.
Mobility is the key element in the connection between automated homes and the owners that means that you absolutely need a mobile application.
Calaos comes with native software for mobile and caters to both Android and iOS users alike.
The operating system infrastructure is much more complex and developed than that, however, as Calaos provides an additional support software solution through the Linux OS running underneath the mainframe.
The Linux OS is preconfigured and can be of tremendous help when it comes to dabbling with settings and configurations.
The only thing that needs to be noted on the not-so-great side is the fact that a lot of the documentation for Calaos is in French. It’s not universally French however and you’ll still be able to find some English documentation.
However, a big part of the support material is in French including the support forums and a chunk of the instructions included for the software.
Other key features of Calaos include:
Server application
Touchscreen UI support
Web application
If you’re interested in Calaos you should also know that you can find the source files on GitHub. In terms of licensing, it’s featured under GPL v.3.
OpenHAB is the preferred name that this software goes under, but the full name is Open Home Automation Bus.
You can pretty much guess why people are going for the former. That being said, OpenHAB caters to the needs and desires of home automation explorers that have a thing for open source.
This software is supported not just by the developer but also by a thriving community. OpenHAB has quite a large following and it is a well-known home automation solution in specialty circles.
If you’re looking to find a stable and supported platform for your entire array of devices, you can securely give OpenHAB a try as this Java-powered software features many integrations that make your job a lot easier.
Some open-source software tends to cater to more obscure device solutions but that’s not the case with OpenHAB which is going to have no issues with the biggest and most popular tech solutions. In fact, the list of supported devices reaches deep into the hundreds.
However, the thing to know about OpenHAB is that despite its huge compatibility list, it doesn’t strive to cater to any particular device as it is meant to stay clear of “taking sides” if you will.
What that means is that developers have a lot more freedom for adding their own tech into the mix as well as their own plugins.
Device control through OpenHAB can also be done through the associated iOS and Android apps. OpenHAB also comes with design tools that let you play around and come up with your own interface and user experience.
When it comes to making your smart home system truly “yours”, it doesn’t get much more customizable than that.
As you would expect to see from an open-source solution, you can find the source code for OpenHAB on GitHub. More specifically, it’s featured under EPL (Eclipse Public License).
Other key features of OpenHAB include:
Pluggable architecture
Supports 200 technologies and systems
Design rules with time or event-based triggers
Runs the server on Windows, macOS, Linux, Raspberry Pi, Docker
There are multiple things that you should know about this specific software. For starters, this is an open-source meaning that it is highly accessible and it makes for a very easy time on the configuration side of things.
Getting Home Assistant set up on your machines is also going to be a breeze thanks to the special care its developers have put into that specific part of the implementation – the actual deployment.
Home Assistant doesn’t come with a lot of requirements but it does need a device that can run Python 3.
On top of the software, you also get a Docker for getting Home Assistant, which only makes things better considering the fact that you will probably want to hook Home Assistant up to more than just one device.
Some might think that Home Assistant is limited to open source products since Home Assistant itself is open source.
However, that’s not the case as it is compatible with both open source and commercial property, making it the perfect bridge for getting the best of both worlds.
Once again, Raspberry Pi is a viable option in combination with Home Assistant, just like the previously presented software.
If that’s just not in your circle of interest, there are plenty more technologies able to link up with Home Assistant ranging from weather information-related tech to full-blown home assistants like Amazon Echo.
This means that you are able to control a long list of types of technologies and device functions. Another thing that might get you intrigued about Home Assistant is the fact that it features an MIT license and you can find the source code on GitHub as was to be expected.
If you’re still looking for a solution that would cater to your specific home automation needs, you can also take a look at OpenMotics.
OpenMotics comes with some really nice features and one of them is the fact that you can use it for more than just hardware.
This automation system works perfectly fine with hardware and software and it excels at controlling devices in the true sense of the word rather than creating a thin glue layer of sorts around all the involved devices.
You might be wondering what exactly OpenMotics does differently in terms of automation and the answer is simple: it provides a hardwired solution for creating a unified platform. If you’re looking for a retrofitting solution, OpenMotics might not be what you need as this is quite the opposite of that.
OpenMotics however might be the solution you need if you’re looking to get away from some of the usual concerns that come with the task of creating a compatible and unified home automation platform.
OpenMotics does not differ from the other presented solutions in terms of accessibility, but it can be useful if you want to use it for increased convenience, safety, and sustainability, both collectively and individually.
Last but definitely not least, we have ago control. This software comes with some features you might recognize and some that you might be so familiar with.
One of the first things that users pick up when they start using ago control is the fact that even though it provides great support for sustaining a device control framework, it can also be used in other device spectrums than just home automation.
For instance, ago control is acknowledged as a useful solution for agriculture. The ago control backend for communication is supplied by AMQP Enterprise Message Bus which definitely gives it a nice boost right from the get-go.
Another important perk that you get with ago control is definitely the fact that it comes with the lightweight protocol.
What this means is that it’s easy to read regardless of whether a person or machine is doing the reading. This can speed things up considerably throughout the deployment and management process.
Those that want to secure their ability to expand for the future could definitely make use of ago control thanks to its various features that encourage expansion.
For example, it comes with cloud features as well as a modular architecture. It’s also important to mention that ago control makes use of YAML for its device scheme and offers a really nice performance output for the various embedded tech it takes under its wing.
Some examples of this include Raspberry Pi, of course, but also the likes of Guruplug or Sheevaplug, which fall under the plug computer umbrella.
There are a lot of supported protocols for various devices. Some examples of this are KNX, EnOcean, Z-WAVE, 1wire, and of course Asterisk PBX.
Not all of them are going to be featured in your standard home automation setup but you can rest on the thought of having those options in your back pocket.
Home automation is definitely something that will pick up traction in a massive way in the following years and those who want to get a step up on everyone else surely have some enticing solutions at their disposal right now.
While it’s hard to say how the market will evolve, it’s pretty safe to assume that it will bring even more solutions for a better, more robust ecosystem. The core tech is already there. The area in which developers can make the most astounding advancements is that of device connection.
More compatibility and vendor neutrality on top of the already promising list of such existing features will play a big role in bringing complete and true home automation to the average consumer.
Getting the No device drivers were found error while installing Windows 11? It usually means Windows can’t find the drivers it needs to recognize your hardware, like your USB ports or hard drive.
This can happen if the installed driver is missing from Device Manager, disappears after an update, or isn’t showing in the registry.
In this guide, we’ll show you quick, proven fixes to get past the error and finish installing Windows 11 smoothly.
How to fix Driver not found error when installing Windows 11?
1. Use a USB 2.0 port
USB 3.0 ports are relatively new and offer a higher transfer speed, along with other benefits. But, these may be the reason you are encountering the No drivers were found error while installing Windows 11.
USB port
So, if you were indeed using a USB 3.0 port, switch to USB 2.0, and check if the error is fixed. This method has worked for most users, and should be your primary approach while troubleshooting.
In case the error persists, or your PC doesn’t have a USB 2.0 port, try the next method.
2. Set the desired partition as active
Press the power button to force shut down the computer, and then restart it. As soon the Windows logo appears, again hold the power button to turn it off.
Repeat the process a couple of times until Windows initiates the Startup Repair. Once it does, wait for it to complete, and then click on Advanced options.
Next, click on Troubleshoot.
Select Advanced options here.
Now, click on Command Prompt from the six options listed here.
Once here, execute the following command.diskpart
Execute the following command to view the various disks.list disk
Next, paste the following command and hit Enter to select a disk. Make sure to replace X with the disk number you are selecting in this command as well as the ones in the following steps.select disk X
Now, execute the following command to list the partition.list partition
Paste the following command and hit Enter to select the desired partition to store Windows.select partition X
Finally, execute this command to mark the selected partition as active.active
After making the changes, close Command Prompt, and now try installing Windows 11. In most likelihood, the No drivers were found error should not pop up now while installing Windows 11.
The eXtensible Host Controller Interface or XHCI is a setting in BIOS that decides whether the USB ports will be controlled by the BIOS or the OS. When it’s disabled, BIOS is responsible for controlling USB devices, and when it’s enabled, the job lies with the OS.
Enable XHCI Hand-off in BIOS
Now, this setting when enabled is found to fix the No drivers were found error while installing Windows 11. Since the process is different for each system, check the FAQ section on the system manufacturer’s website or look through the PC’s manual for the exact steps.
If your display or external devices still don’t respond after the install, don’t forget to update your graphics drivers separately—especially on gaming laptops or custom builds.
4. Create a new bootable USB or disc
If none of the methods here work, the problem may well be with the disc or bootable USB that you created. The best option here is to create another bootable USB drive for Windows 11, and this time, make sure to be careful with the process.
Once done, you will be able to install Windows 11 without encountering the No drivers were found error anymore.
Tip: Once you get past the install screen, it’s smart to update all your drivers in Windows 11 right away—especially chipset, USB, and storage drivers—to prevent future issues.
Microsoft released Windows 11 in the last quarter of 2021. Since then, Microsoft has gradually rolled it out as an upgrade to more and more users.
Before upgrading to any new platform, you should check the system requirements for it first. The latest version is no exception because its system requirements aren’t entirely the same as those of its predecessor.
If you want to learn more, keep on reading to find out how Windows 11 and Windows 10 system requirements compare.
How do the system requirements for Windows 11 and 10 compare?
What are Windows 11’s system requirements?
Microsoft has provided both minimum system and feature-specific requirements for Windows 11 on its website.
Visual Display Unit: Stand HD monitor with 720p resolution
TPM: Trusted Platform Module 2
What are Windows 10’s system requirements?
Microsoft released Windows 10 in July 2015, which was some time ago. That platform’s system requirements are much the same as those specified for Windows 8.
Processor: One GHz CPU (64 and 32-bit processors supported)
RAM: Two gigabytes for 64-Windows 10 (one GB for 32-bit version)
Storage Space: 20 GB for 64-bit Windows 10 (16 GB for the 32-bit version)
Graphics Card: DirectX 9 compatible graphics card
Visual Display Unit: 800 x 600 resolution VDU required
TPM: Trusted Platform Module 1.2 or higher
What are the system requirement differences between Windows 11 and 10?
As Microsoft released Windows 10 more than five years ago, therefore, it’s not surprising that the latest operating system has some notable system requirement differences. All the minimum system requirements specified above have changed for Windows 11.
CPU
The processor requirement is the first thing to note. Windows 11 doesn’t have a 32-bit bit version, which means it doesn’t support 32-bit CPUs.
If you’re using such a processor, upgrading to the latest version is impossible. Furthermore, a PC’s processor must be the eighth generation or later if you’re using Intel and Zen+ or later for AMD CPUs.
The RAM (Random Access Memory) system requirement for Windows 11 is two gigabytes higher than for Windows 10.
Your PC must have at least four gigabytes of RAM for the latest desktop operating system. If it doesn’t, you can expand your PC’s memory by adding new RAM modules to it.
Storage
The minimum storage space system requirement is up from 20 GB to 64 GB for Windows 11. That means your PC must have at least 64 gigabytes of free storage space available.
It’s not a specification for overall hard drive size. So, make sure you’ve got about 70 GB of free space on your C: drive so you can install future updates and the necessary software.
Display
The visual display unit system requirement primarily specifies a minimum resolution. Your PC needs to have a standard HD 1,280 x 720 resolution for Windows 11.
That system requirement also specifies an 8-bit color channel, which most monitors, even the older ones fully support.
Whilst Windows 10 only needed graphics cards that supported the earliest DirectX 9 API, that won’t do for Microsoft’s new desktop platform.
Your PC must have a GPU that supports DirectX 12. If your PC’s graphics card predates 2014, it might not support DirectX 12.
TPM
Windows 11’s TPM requirement has turned away many users from upgrading. Some users have been dumbfounded by a This PC can’t run Windows 11 error arising even though their PCs meet the system specs above. Those users still can’t upgrade because of the TPM 2.0 system requirement.
TPM 2.0 (otherwise Trusted Module Platform) is a security chip for Windows PCs. It is needed to ensure your PC supports the latest security features and can protect data better.
If your PC is less than five years old, it can probably run TPM 2.0. However, TPM 2.0 might not be enabled by default. To learn more about this feature, visit our Windows 11 TPM guide for more information.
You can check TPM details via the Microsoft Management Console by doing the following:
Press Windows key + R to open the Run dialog.
Now enter tpm.msc and press Enter.
Look for Specification Version to find out which version of TPM is available on your PC.
Keep in mind that if you don’t get the same results, you need to enable TPM 2.0 in BIOS and then try again.
There are multiple versions of this feature available, and if you’re not on version 2.0, you might encounter issues while upgrading. To learn about the differences between the two, read our TPM 1.2 vs TPM 2.0 guide.
If your PC doesn’t meet some of the requirements, you might be able to upgrade it. Desktop users can add RAM, new graphics cards, and even CPUs if need be. However, laptop upgradability is somewhat more limited.
Microsoft has also released a PC Health Check app with which you can check if your PC meets Windows 11’s system requirements.
That app includes a Check now option that tells if your PC meets all the minimal requirements when selected. It also includes some additional system-maintenance tools.
Our download PC Health Check guide provides further details on how you can download, install, and check your PC meets Windows 11’s minimum system requirements with that app.
Is there any way I can try out Windows 11 without upgrading to it?
Overall, Windows 11 is a pretty big step up from its predecessor in terms of system requirements. It needs more RAM, processing power, and storage space to boot.
Many PCs that are more than five years old might not meet all the new platform’s minimal requirements.
If your PC does match all the minimum system requirements, another question is whether it’s worth upgrading to Windows 11.
To learn more about the differences between the two, our Windows 11 vs Windows 10 guide has all the information you need.
Productivity is a very important virtue in life. It helps you complete your tasks and achieve success. However, useful as it may be, it takes time to achieve but with Windows 11 productivity apps, you can up your game.
It’s not hard to spend your day in a state of constant distraction. You can always find something to do, but that doesn’t mean it’s always the most important thing you could be doing.
There are certain factors that help you improve your productivity, such as energy, focus, organization, etc. However, you can also improve your productivity by using tools that are specially designed for that purpose.
To really focus on what is important, you need to eliminate anything that isn’t important. That’s where the right productivity apps come in.
Productivity apps help you get things done. They can remind you to do something, or automate a task that you need to do often. They can also help you focus on your work by blocking distractions or making it easier to concentrate on specific tasks.
In this article, we will take a look at some of the best productivity apps that you can use to make progress and achieve success in life.
It is really difficult to select the best ones to install on your device as there are many, and you probably can’t use them all. So here we are with some of the best productivity apps for Windows 11 that you must try this year.
Quick Tip:
One of the best ways to improve your productivity is to have quick access to the apps you use most. That’s why it’s nice to have quick access to the frequently used apps.
Opera One offers a smart way to improve performance by grouping the most important apps you use into sidebars. Integrated messaging , and features like workspaces and tab islands create a smart way to organize.
Opera One
Organize your work and increase your productivity with intelligent features.
Yes, you can sideload apps on Windows 11. Sideloading is the term used when installing apps directly from the developer rather than downloading from an app store.
On Windows 11, you can download apps from the newly improved Microsoft Store but you’ll find that it does not contain an exhaustive list of all the apps you may need.
This is where sideloading comes in. When using this method, you must be careful as there are a lot of sites that contain malicious software that can harm your system.
If you’re looking for a Windows email client that can handle Gmail, Outlook, and other accounts without any trouble, give Mailbird a try.
Mailbird is an email client that packs in dozens of features while managing to keep things simple and straightforward.
The app strikes the perfect balance between being feature-packed but not overwhelming or hard to use.
Since we’re talking about an email client app, we must mention that it offers some solutions for easier and quicker email management.
These include a speed reader, a snooze feature, and intuitive keyboard shortcuts that help you easily archive, reply, compose, and forward your emails.
The app is also known for its advanced search options. You can find emails, contacts, and attachments with the help of keywords.
The search tool has advanced filtering. You can search by folder, sender or recipient, subject, email size, email date, and more.
Some of the additional features include:
Allows for third-party integration with other apps
Mailbird has an app store that you can use to add additional features
You can customize your layout from the library of themes to match your preferences
Find your contact’s LinkedIn accounts
Mailbird looks great too. Its minimalistic design makes for a clean and distraction-free experience.
Mailbird
Access all your email accounts, categorize your inbox, and organize your contacts with a modern email client.
Monday.com – Best for organizing teams, tasks and project
Monday.com is the most popular project management app on the market, and for good reason. The platform has a simple interface that allows you to create multiple projects and invite team members to collaborate.
With Monday, you can create boards to organize just about anything, including tasks, teams, projects, and more.
On your dashboard, you will get insightful real-time reports on how your projects are progressing.
This information can help you decide what you can do to improve your workflow and determine what past decisions turned out to be successful.
With the help of the Gantt chart feature, you can plan, execute and track your projects with simple visualizations.
What makes it stand out from other similar apps is the automation that helps you work more quickly and effectively.
The free version is limited, but there are other plans available for teams of five or more.
Some of the additional features include:
You can set up your Monday dashboard with color-coded columns so you can organize your tasks better
The platform also has a mobile app to keep tabs on your work while you’re on the go
You can rearrange projects in order of priority by dragging and dropping
Monday.com
Create, assign and keep track of all your projects with insightful information about your progress.
Grammarly is the ultimate app that helps you perfect your writing. It’s perfect for anyone who wants to ensure they have a proper grasp of grammar and spelling.
It is one of the most essential companions in all your Windows 11 programs. It automatically displays common errors and suggests corrections as you type.
This handy tool goes beyond just the basics of grammar and spelling checks to ensure that your writing is actually clear and easy to read.
While most word processors have spell checkers built-in, there’s no substitute for Grammarly’s real-time feedback as you type. For more useful features, you can upgrade to the premium or business plan.
Some of the additional features include:
Integrates other apps o check for any errors
Can adjust the tone of your writing to match your audience
Offers you a readability check and tips to improve your writing
Grammarly
Make sure your written text has impeccable grammar and a logical structure with this easy-to-integrate tool.
Teamwork – Best for tracking projects and team progress
Staying productive is hard. Really hard. You have to remember to follow your to-do list, manage your team, hit deadlines and make sure everyone’s happy, all at the same time.
Teamwork is a platform that allows you to collaborate with anyone, anywhere. It’s not just about managing tasks but also making sure that everyone is aligned on what’s happening across the business or department.
You can create and manage your projects from one central location. You’ll be able to work faster and smarter so you can finish your projects sooner.
Teamwork offers simple but powerful tools for communication including group chat and file sharing.
Some of the additional features include:
Offers a time-tracking feature
You can customize your view from Gantt charts, boards, or list view
Allows third-party app integration
Teamwork
Manage and track your team’s progress and enable easier collaboration with this customizable platform.
If you want to eliminate distractions and get quick access to every tool you need for your work, we can’t think of a better app than Desktop.com.
With this application, you will be able to create neatly organized virtual desktops where you can include every application you use on a regular basis.
It has a modern interface that lets you easily search for every app and resource you need so you can say goodbye to keeping dozen of browser tabs open.
It integrates hundreds of third-party productivity applications such as Google Sheets, MS Office Apps, Slack, and Mailchimp, so you will surely be able to add all you need.
Not only that, but the tool also supports teamwork. Besides creating shareable desktops, the app also supports multiple third-party messengers and VOIP applications.
You can use Desktop.com to access your email, worksheets, email, create presentations, hold meetings, and keep track of all your projects.
Some of the most important features of Desktop.com include:
Bookmark manager to keep track of all your resources
Categorize your applications and workspaces with your own tags
Unified chat that includes all third-party accounts you connect
Powerful encryption and abuse monitoring
This cloud-based application can be accessed on the web, or you can get a native app for your PC. It is also one of the best productivity tools that offer apps for Android and iPhone.
Microsoft 365 is a collection of apps that work together seamlessly to help you get more out of every day.
That can mean automating your budgeting, keeping track of your meetings, keeping your inbox under control, or staying connected to friends and family across the world.
You are getting an all-in-one deal with Microsoft 365. You can collaborate on documents using Google Docs or Google Sheets. Presenting demos is made easier with Google Slides.
If you were to look at only one productivity app in this roundup, it would be hard to find a better choice than Microsoft 365.
Some of the additional features include:
Store photos and videos securely in OneDrive so you can access them anywhere at any time
Trello is a task-management app that allows you to get organized. You can create custom boards to keep track of your big projects or office events. The Trello app makes it simple to stay on top of your tasks without having to pay a dime.
If you have multiple tasks that need to be completed in a short span of time, this is the app that will help you prioritize and check off completed tasks by keeping track so that you don’t miss out on any deadlines.
Once you have an item added to Trello, you can add more information like a description, comments from your team members, due date, attachments, and more.
The free plan has all the basic features you might need but if you are in a large team, you may benefit from more premium features in the premium, business, or enterprise plans.
Some of the additional features include:
Ability to sync across devices so you can use it anywhere
Save on time with the workflow automation feature that streamlines your team’s processes so that you don’t have to worry about which task comes next, who needs to complete it, and when it needs to be done
You can also color-code cards based on categories or progress levels
If you have a lot of tasks on your plate and tend to spend too much time on one, Clockify should be on the list of apps you need.
Clockify makes your workday easier by helping you track how much time you spend on tasks, so you can tell what works for you and what doesn’t.
It has a user-friendly interface, easy to learn, and it’s free. To help you work efficiently, Clockify will help you learn how to structure your workday, get better at planning your tasks, manage meetings, and more.
When you know you have a dedicated amount of time to work on a task, you won’t waste any time and this will help you complete your tasks sooner.
Some of the additional features include:
You can track time from anywhere whether desktop or on a phone
Unlimited number of users and projects
Has tons of integrations with other project management tools like Trello
If you are working on multiple projects at the same time on a laptop, then you are familiar with how frustrating it can be to work with multiple sets of tabs in a browser.
Opening a new tab is easy, but keeping track of your tabs can be tough. TidyTabs makes it easy to declutter your desktop.
The best part about TidyTabs is that it brings tabbed browsing to all of your programs. Once installed, it will allow you to combine multiple instances of the same program into a single window.
With TidyTabs, you can have multiple sets of tabs open without getting overwhelmed or confused by them all. It works with all programs, including web browsers, text editors, terminals, media players, and so on.
Some of the additional features include:
Works everywhere not just on browsers
Easy to use with the drag and drop feature to move tabs around
You can rename and highlight tabs for better management
The first step in being productive and remaining productive is by protecting your eyes. Spending too much time staring only at your screen can affect how you work.
If you don’t get enough sleep because the light from your screen affects you, it is almost impossible to maintain a healthy work routine.
F.lux runs on Windows to adjust the color of your computer monitor to the time of day. It’s designed to reduce eye strain during nighttime use. F.lux is free to use so you don’t have to worry about being light-sensitive anymore.
Some of the additional features include:
You can adjust the color for evening and daytime
It will remind you to take a break or go to sleep when you have been working for too long
You are probably not going to be surprised to hear that the more you use your PC, the more you need Quick Access Popup.
Shortcuts make the world go round and Quick Access Popup delivers just that. It gives you quick access to your most-used folders, documents, and programs via a popup menu.
Its main advantage is that it can be used as an alternative to the standard Windows Start Menu. It offers more functionality and personalization options than the standard one.
You can use it to open any folder, document, or program in a few seconds, without having to browse through the Start Menu or the File Explorer.
Some of the additional features include:
You can personalize the popup menu by adding your favorite items
It also has a powerful filtering feature that allows you to quickly find any item on your computer by typing just a few letters of its name
The application is very lightweight and fast. It does not hog your system’s memory when running in the background.
This is the ultimate productivity tool for everyone. If you are always on the go but need to access your primary PC, TeamViewer is your go-to.
Teamviewer is one of the most widely used software for remote desktop access, online meetings, and file sharing.
It can be installed on Windows and is completely free for personal use but requires you to sign up. You no longer need to put off meetings or tasks if you are away from your desk.
You can easily share your screen and do a demo even without your main computer. However, if you use it for work, you will need a license.
Some of the additional features include:
Remotely administer unattended computers
Gain access to your office desktop with all of its documents and installed applications
No matter how accurate you are, working for hours on end on your screen tends to slow even the best of us.
To stay on top of your game, Lightkey comes in to save the day. It is a text prediction software for Windows, with powerful and advanced features to help you type faster and boost your productivity so you can move on to other tasks.
It will learn the language and words you use frequently and provide them to you as suggestions based on what you have previously typed.
Some of the additional features include:
Dramatically reduce your spelling errors rate
Reduce the time you spend on writing by 50%
Understand your writing context over time to offer better predictions
Slack – Great for team communication and collaboration
Slack is an easy-to-use and powerful messaging platform. But it’s also one of the best Windows 11 apps around, thanks to the ability to run multiple instances of the app.
While there are other popular messaging platforms available, such as Google Hangouts, Slack is arguably the favorite among businesses and those who work in technology.
It’s a great way to keep in touch with your teams and share documents, images, audio files, and more. And because you can use Slack on Windows 11, you can keep in touch from any device or location.
For more advanced features especially if you are part of a large team, upgrading to the plus and enterprise plans is recommended.
In today’s age of social media, you cannot afford to be left behind when it comes to getting and delivering the latest updates in real-time.
Buffer is a great tool for managing your social media presence. Just add your posts and Buffer will publish them for you automatically, according to the schedule you pick.
You can queue up a bunch of posts in advance and have them go out on their own, without having to be at your computer at specific times. If you have a lot of tweets to share this is a pretty handy feature alone.
Some of the additional features include:
Supports multi-media sharing
Gives you access to analytics and insights for each site
Buffer automatically shortens your links across all social networks
Opening and closing a bunch of files throughout the day especially if you are looking for something particular can be time-consuming.
Seer enables you to preview files, folders, and pictures without opening them. You simply hover over the item you want to preview with your mouse cursor and Seer will open a small window that displays a preview of its contents.
It works with all common image formats, PDFs, and text files, so you can preview your work without having to open a bunch of apps just to see which file is which. It can also play videos on full screen or as an overlay in your window so you can preview them easily.
Some of the additional features include:
You can copy content in preview mode
Supports multiple formats of images, videos, and documents
The search function lets you find and open files quickly, even if you don’t know where they are located on your hard drive
Is my system safe if I download apps from unofficial sites?
You can never be too sure. If you want to use apps from third-party sites, you need to make sure that they are safe to install.
Windows 11 has an in-built security system that protects your computer from any malware or virus. However, it cannot do so if you download apps from sites that do not have a good reputation.
There are a few ways you can sideload apps on your computer. You can either go to the official website of the app and download it from there or use third-party sites. The former is recommended as it is always safer and more secure than the latter.
If you want to use third-party sites, make sure that they are legitimate and do not contain any malicious code or software. You can also go for browser plugins like Read and Write if your system is low on storage space.
Speed up everyday work with a quick launcher that opens apps, files, and web searches in one place. See our favorites in this desktop app launchers roundup.
If you were having a problem staying productive, we hope one or more of the apps listed in this guide was able to come to your rescue and your day is a little more organized.
We’d love to know what other apps are helping you stay on top of things. Share your thoughts in the comments section below.
Working without interaction with digital data is equivalent to a day without sunlight for professionals who do their jobs.
An office suite, on the other hand, is not the same as specialized software for a certain file type. An office suite must have a word processor, a spreadsheet, and presentation software in order to be considered ideal productivity software.
We all know there is one piece of software that can meet all of these requirements, but it is also rather pricey. It is therefore a fantastic idea to have an open-source alternative.
LibreOffice, an open-source office suite, is now available to handle all of your everyday document, spreadsheet, and presentation-related needs.
Thus, today we will show you how to download and install LibreOffice on Windows 11, right after we see its advantages in more detail. Follow along!
What are the advantages of using LibreOffice?
Be aware that the design of LibreOffice Writer does not compare to that of Microsoft Office before embarking on your trip with the program. It appears to be old, but this also implies that it will not use a large amount of resources when in use.
This makes it an excellent choice for PCs that are no longer capable of keeping up with the latest Microsoft offerings.
Documents created with LibreOffice are saved in the ODT file format by default. Because this format is not supported by Microsoft Word, it would be impossible to edit the same document on several devices at the same time.
The most effective solution is to ensure that when a document is saved, it is done so in a Word format rather than another format, and LibreOffice offers this ability.
As with Microsoft Office, LibreOffice has the flexibility to alter documents in the same manner that the former does, and let’s not forget that the latter is free to use.
Furthermore, the software operates admirably on slower PCs, but there are moments when things can be a little sluggish. This has a lot to do with memory, and as a result, the solution is straightforward to implement.
As a result, if you notice that things are not moving as swiftly as they could, a few tweaks to the Settings may be necessary. Users may enhance LibreOffice Writer in a similar way to how they can improve Microsoft Word by installing extensions.
Windows introduced biometric sign-in support with Windows 10. It allows you to log into the computer with a fingerprint or face ID.
However, older computers lack the hardware to run Windows Hello sign-in, requiring you to use an external fingerprint scanner. So, what are the best Windows 11 fingerprint readers?
You can use third-party fingerprint scanners if you don’t have the hardware that supports Windows Hello sign-in.
Unfortunately, finding the right scanner could be a challenge. Some are incompatible with Windows Hello, while others are poorly constructed and break down after a few uses.
To make it easy for you, we have curated a list of the best Windows 11 fingerprint readers that will save you time and money and is compatible with Windows Hello. Keep reading to find out more.
How does an external fingerprint reader work?
A fingerprint reader uses three ways to scan a fingerprint: optical sensor, a capacitive scanner, and ultrasonic sensor.
Optical sensor: This takes a digital image of your finger by shining a bright light. It uses a CMOS image sensor, or CCD, a light-sensitive microchip, to create a digital fingerprint image. After analyzing it, the computer then automatically selects the fingerprint and uses a pattern-matching program to convert it into a code.
Capacitive Scanner: A capacitive scanner works by measuring your finger electrically. When your fingers rest on the scanner, the ridges of your fingerprints are pressed into the surface, making the valleys of your fingerprints stand out. The capacitive scanner measures these distances to record your fingerprint.
Ultrasonic Scanner: Ultrasonic scanner uses high-frequency sound waves to map your finger instead of using light.
The Verifi P5100 is superiorly built and is exceptionally reliable. The P5100 uses a larger silicon sensor that is significantly better and more accurate than an optical sensor.
The Verifi P5100 also supports password managers and offers a free password manager, RoboForm. Installing and using the fingerprint reader is seamless.
Plug the device into a USB port.
It will automatically load and install the required drivers. If the drivers are not automatically loaded, you can use the mini-CD to install them manually.
Once the drivers are installed, click on the Start Button > Accounts > Sign-in options to set up Windows Hello.
Tip
You must have activated Windows Hello already by setting up a PIN. Once the PIN is set up, you can add your fingerprints.
The Verifi P2000 is the best Windows 11 fingerprint scanner for people who are tight on budget.
Although this does not have the high-end features of most other fingerprint scanners, it does the job for most people and is affordable.
The slide sensor reads your fingerprint on the first swipe every time. Just like the Verifi P5100, this also comes with the free edition of RoboForm password manager and is also Windows Hello compatible.
The Kensington VeriMark Reader is another small and portable fingerprint scanner for your Windows PC, which is about the size of your thumb’s tip. The Kensington VeriMark Reader comes with a keychain fob that you can use to carry with you when you are on the go.
Although this is Windows Hello compatible, it also comes with FIDO 2nd factor authentication, which you can use to protect your cloud files on Chrome.
The Kensington VeriMark Reader encrypts your fingerprint data, protecting it from being hacked and stolen.
The DigitalPersona Reader is more geared towards businesses. People who want a durable fingerprint reader with tons of purposes can use this reader. The software can be a little tricky to install, but if you are using it at your workplace, the IT department can help install it.
This fingerprint reader is best avoided for home use cases; it is suitable for small-scale to large-scale organizations, and hence, we recommend you use this at your workplace if biometric security is important.
The Lexar Jumpdrive Fingerprint Reader does not only serve as an external fingerprint reader; the fingerprint scanner comes with 64GB of additional storage.
The files are encrypted with 256-bit AES encryption. The best thing about this fingerprint reader is that you can use both the drive and the fingerprint reader simultaneously and register up to 10 fingerprints.
Also, the Lexar jumpdrive does not only offer 64GB of storage capacity. It comes with multiple storage sizes that you can choose from. Remove the device as it is a little bigger and protrudes.
How do I set up my external fingerprint reader?
Setting up your external fingerprint reader is quite simple. Connect your fingerprint reader to your computer. Once connected, it will automatically install the drivers. Once the drivers are installed, restart your computer.
Now to set up your fingerprint, follow these steps:
Press Windows key + I to open the Settings app.
Navigate to Accounts section and select Sign-in options.
Now navigate to Fingerprint recognition (Windows Hello).
Click on Set up.
Enter your PIN or password and follow the instructions on the screen.
As most Windows devices don’t have the required hardware to support biometric login, the best alternative to using them is by using an external fingerprint scanner.
That’s why we picked out the 5 best Windows 11 fingerprint scanners that range from affordable to feature-rich scanners, and we can’t wait for you to try them out.
The iTunes app helps you organize stuff, and also works as a media player. It’s a complete package in that sense. But it’s been a little inflexible when it comes to offering customizing options to users, and iTunes backup location in Windows 11 is an example.
The app doesn’t allow you to change the backup location, but there are ways to do that. However, do remember that the backup location itself is different for the version downloaded from Apple’s official website and the one from the Microsoft store.
You can also use Tenorshare iCareFone, a dedicated app to create backups for iOS devices, run a diagnostics test to eliminate issues, and also identify and remove duplicate files while transferring data.
Let’s now get back to the subject at hand, i.e., find and change the iTunes backup location in Windows 11.
How is changing the location of iTunes backup helpful in Windows 11?
The iTunes backup folder is by default stored in the C: drive and many want to change it. For instance, you have the C: drive on an SSD for better system performance but there isn’t a lot of storage there.
So, you may want to move it to another partition on the HDD to clear some storage. You can do that by creating a symbolic link between the iTunes backup’s default storage location and the new one in Windows 11.
Before we walk you through the actual steps, here are the paths to the backup folder for the iTunes app.
Downloaded from the Microsoft Store:%userprofile%\Apple\MobileSync\Backup
Downloaded from Apple’s official website:%APPDATA%\Apple Computer\MobileSync\Backup
So, now that you know how to find the iTunes backup location in Windows 11, let’s see how you can change it.
How do I change the iTunes backup location in Windows 11?
NOTE
Before you proceed, make sure to create the new folder in the same or another partition where you want to store the iTunes backups from now on.
Press Windows + E to launch File Explorer, paste the path of the iTunes backup location (from the previous section) in the address bar at the top, hit Enter, and delete the Backup folder.
Now, press Windows + S to launch the Search menu, enter Windows Terminal in the text field at the top, right-click on the relevant search result, and select Run as administrator.
Click Yes in the UAC (User Account Control) prompt that pops up.
Next, click on the downward-facing arrow at the top, and select Command Prompt from the list of options.
Now, enter the following command while replacing the initial backup location and final backup location with the paths in your case:mklink /J "Initial backup location" "Final backup location"
For instance, if the iTunes app was downloaded from the official website, and has to be moved to a folder named Backup for iTunes in the E: drive, here’s what the command would look like:mklink /J "%APPDATA%\Apple Computer\MobileSync\Backup" "E:\Backup for iTunes"
Paste the command and hit Enter to execute it.
Once done, a symbolic link will be created. From now on, any file added to the initial backup location will automatically move to the new iTunes backup location you just created in Windows 11.
Xbox Asia Business Lead Jeremy Hinton had this to say “At Xbox, our mission is simple, to bring the joy and community of gaming to everyone on the planet. Bringing PC Game Pass to new countries in Southeast Asia is an important part of how we will achieve this as we strive to reach billions of players.”
Like its Xbox counterpart, PC Game Pass boasts a huge library of games from just about every genre, including blockbuster hits like Minecraft, Halo Infinite, Forza Horizon 5 and many, many others, around 100 titles in all. At this point, there has been no word on whether the service will become fully available in the region, though it seems likely. There has also been no indication that the Xbox version of Game Pass will also be made available in Southeast Asia.
With this week’s Sony announcement, it seems that online gaming service competition is heating up between Sony and Microsoft, so it seems reasonable that Microsoft would be looking to extend the Game Pass reach as far as possible.
The Xbox Insider Hub App is available for anyone to join. Members can enjoy early access and sneak peeks to new Xbox related features. The App is free to download.


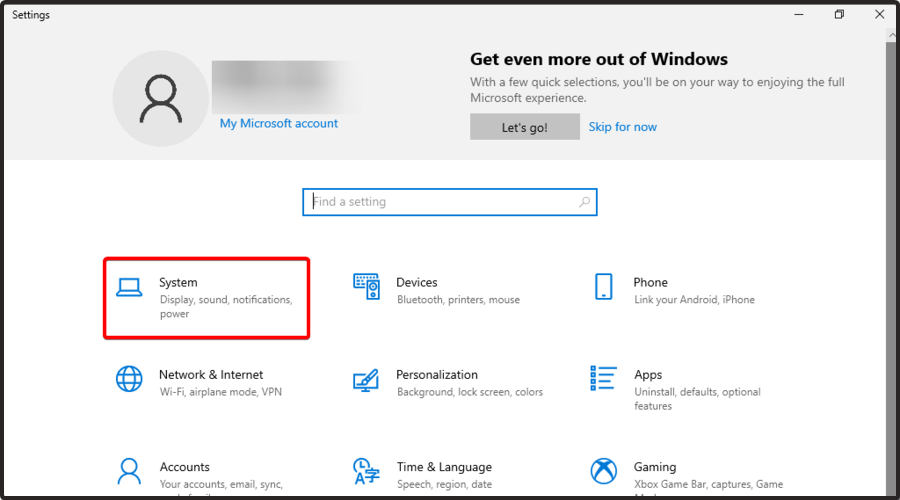
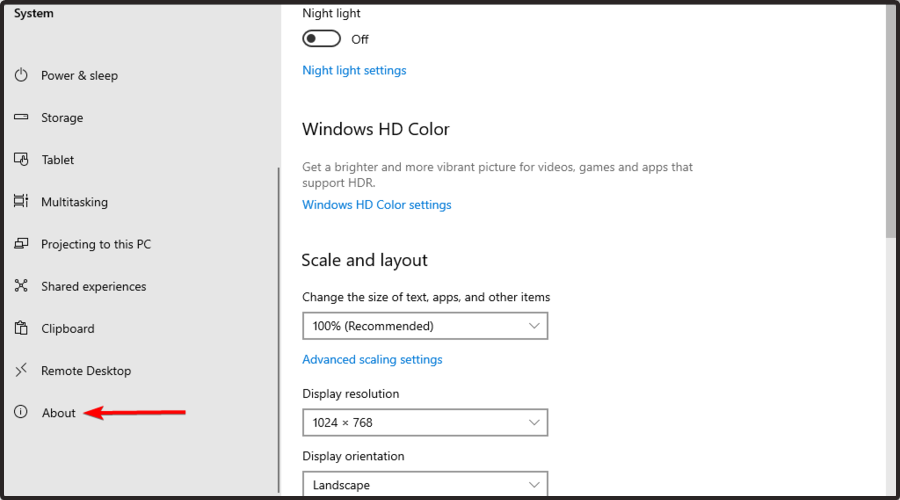

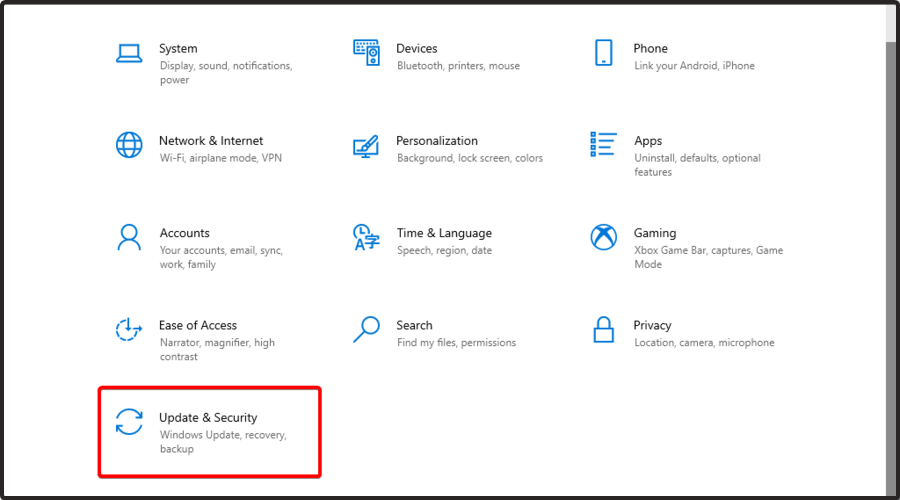 Now, from the right window pane, choose to Check for updates.
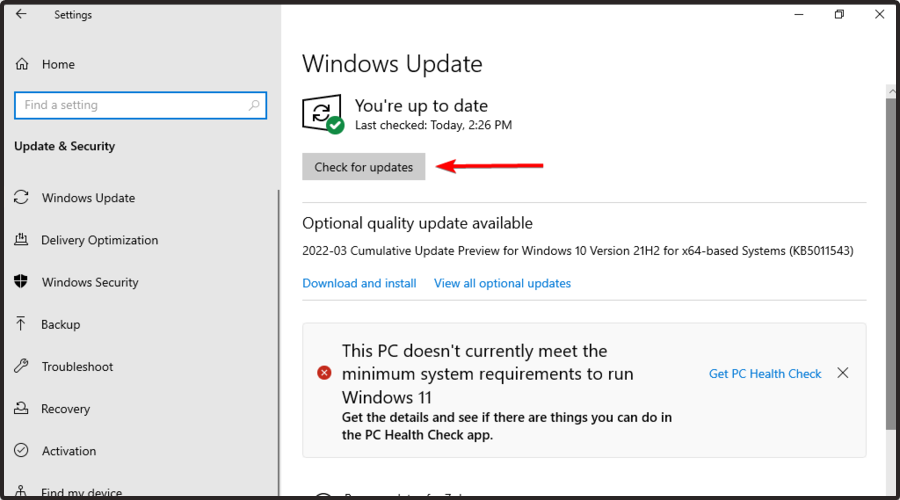


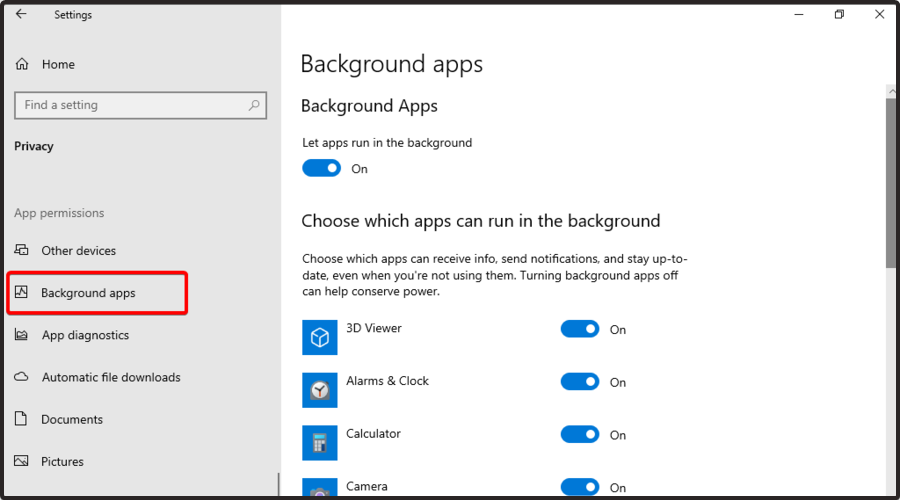
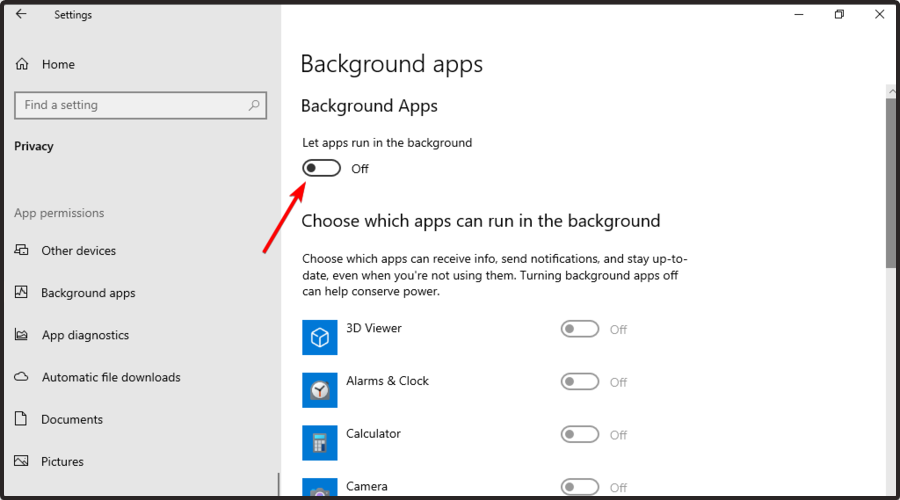
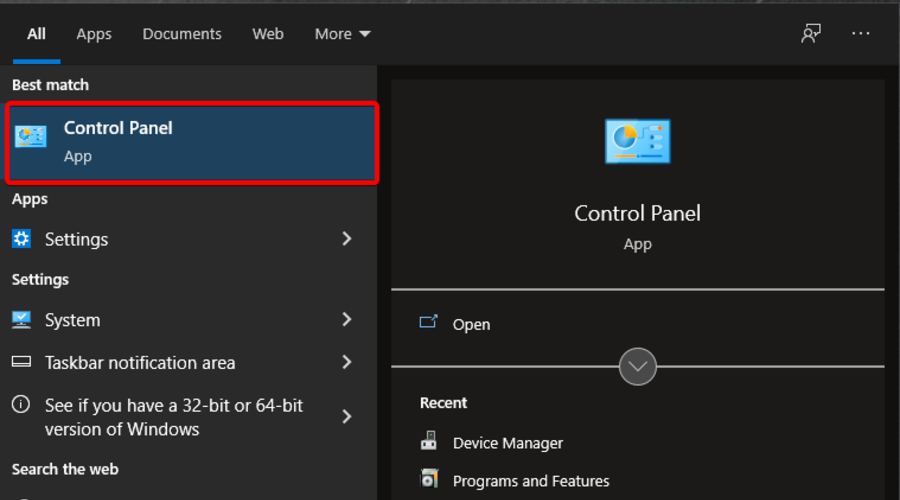
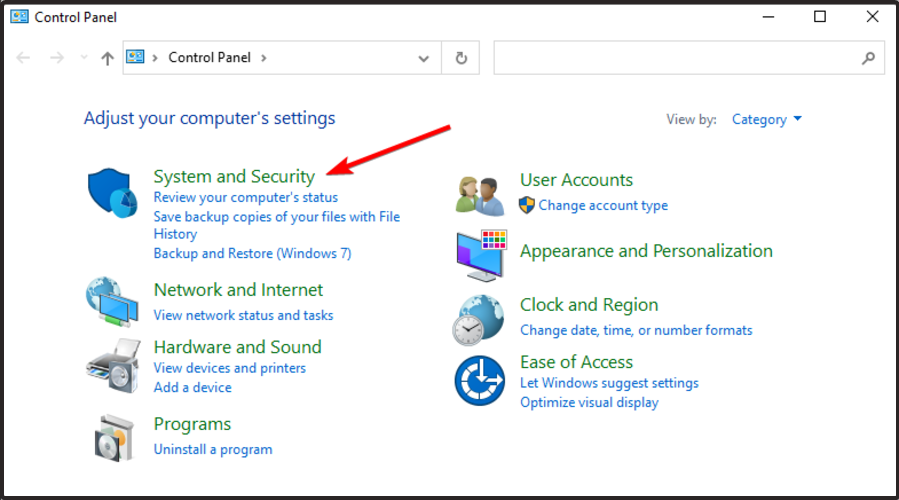
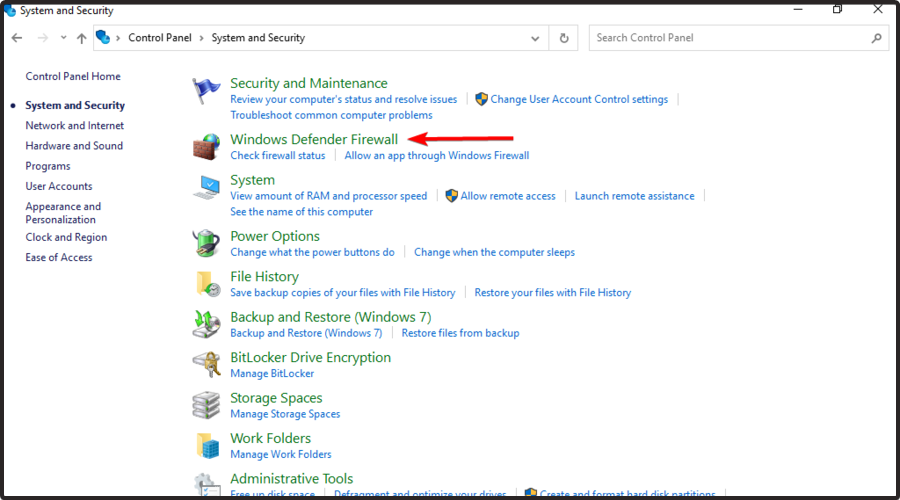
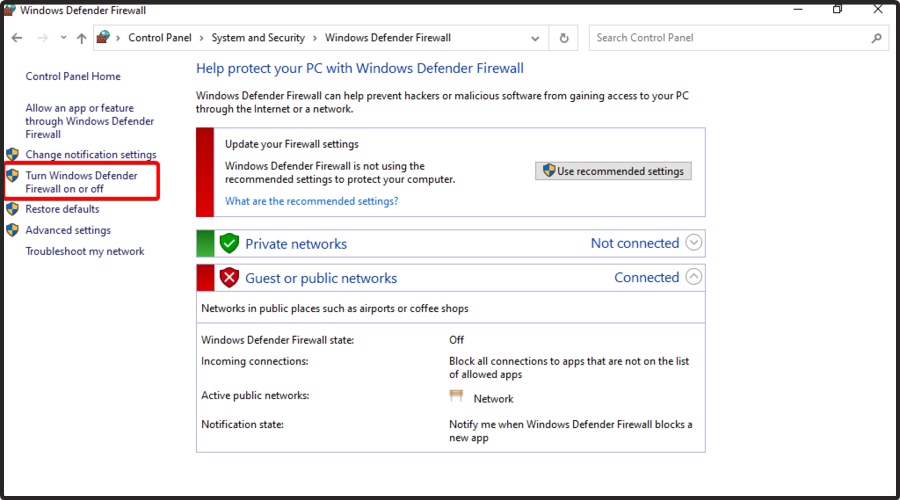
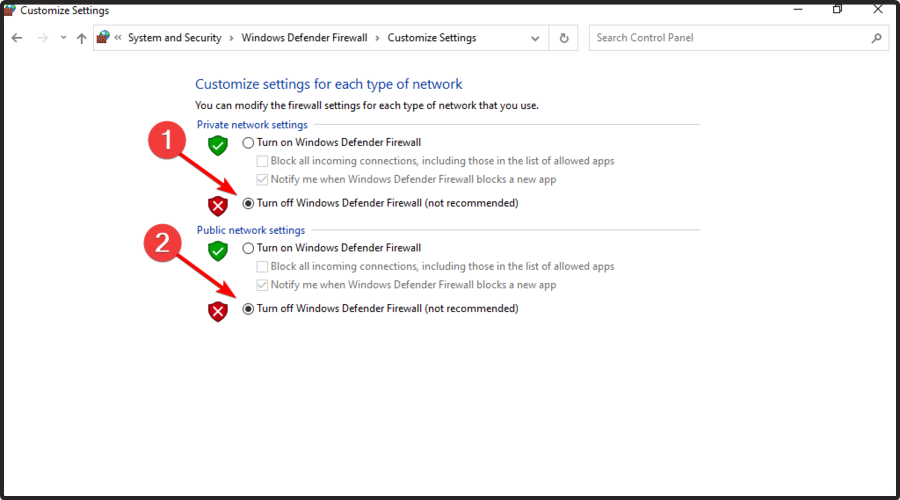
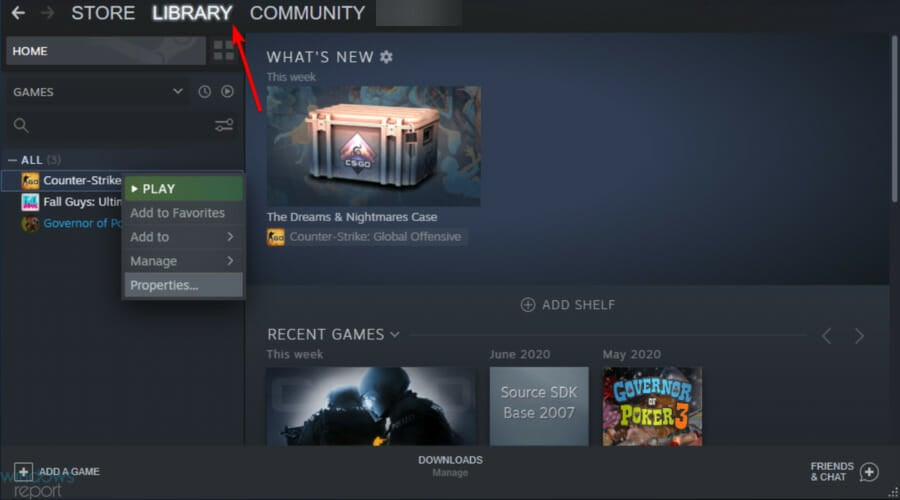
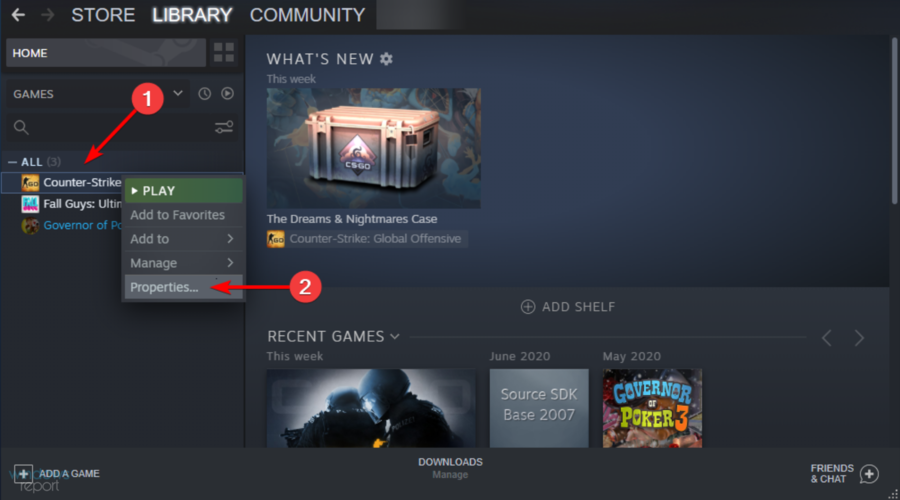


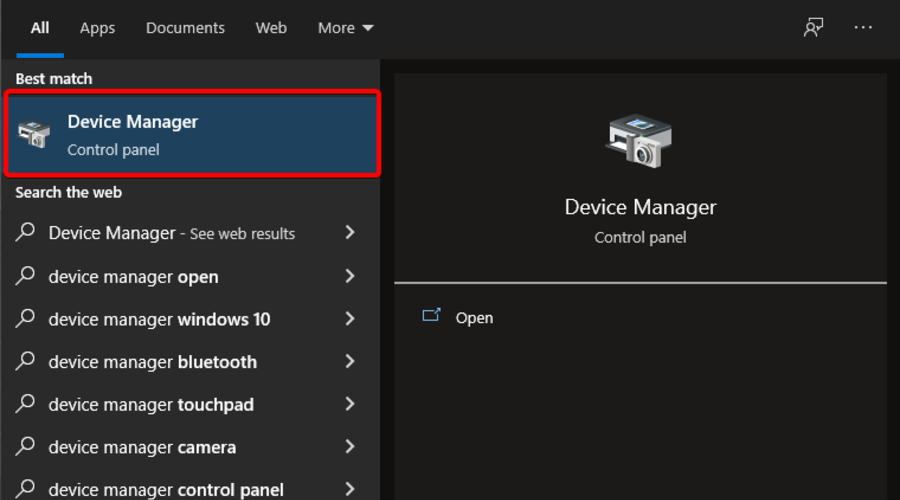
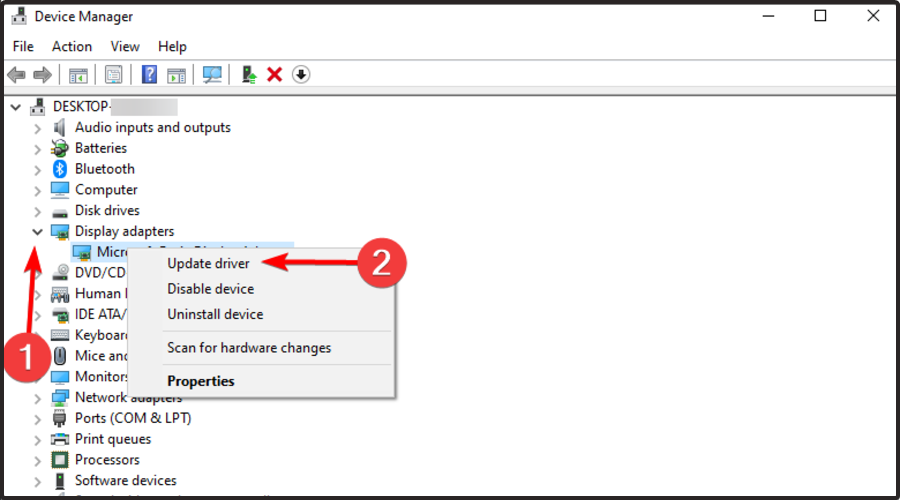
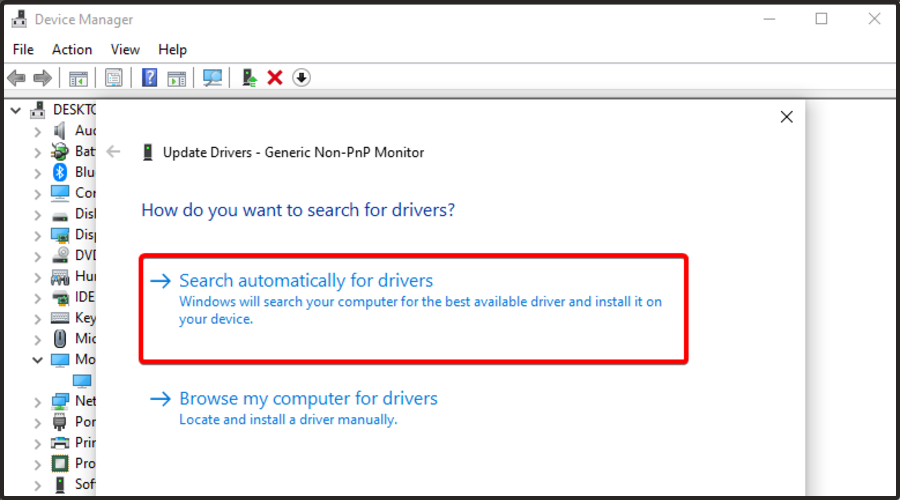
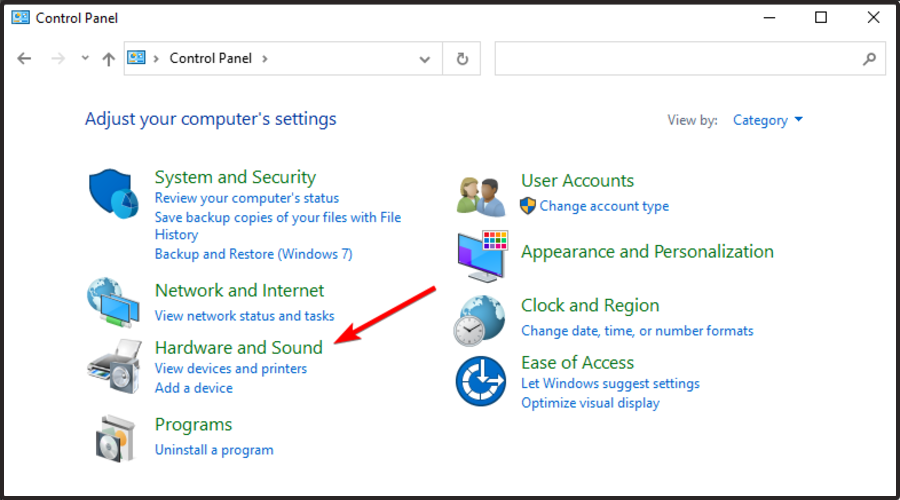


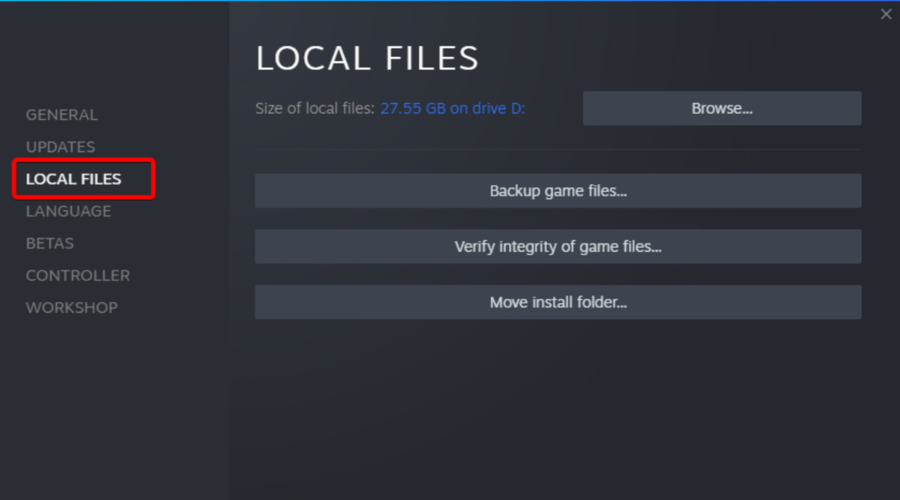
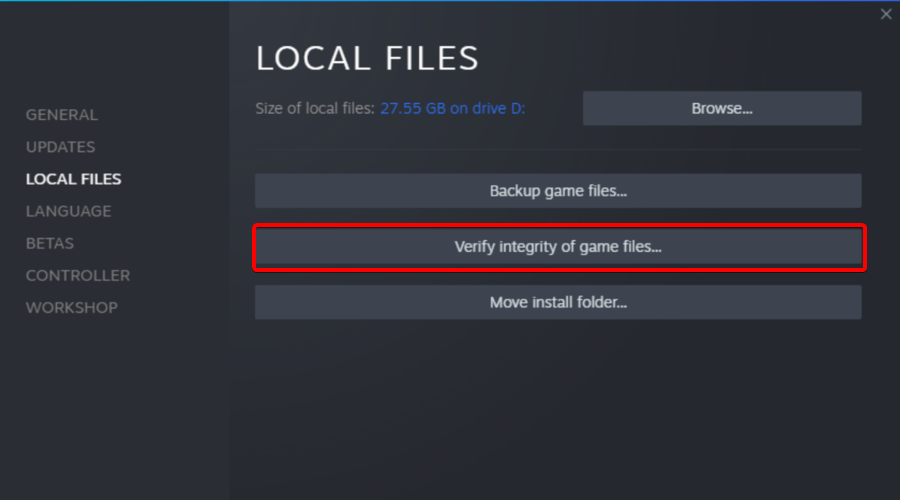
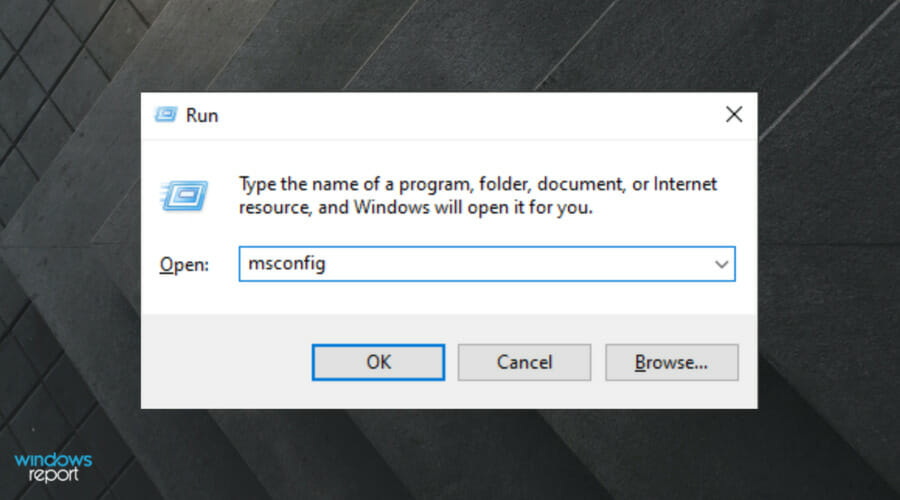


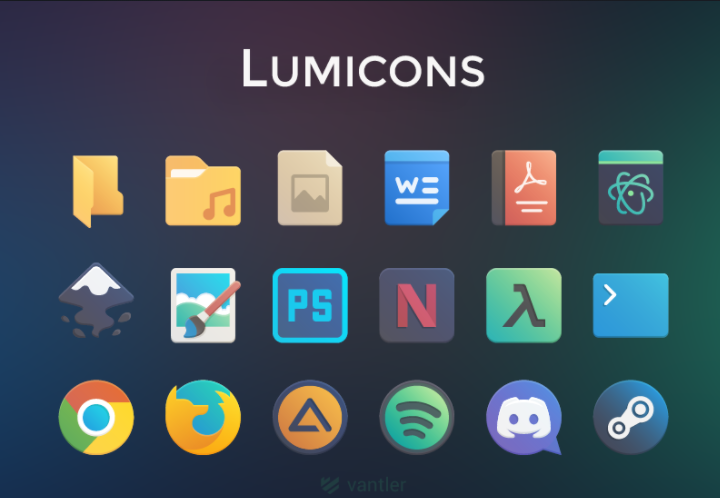
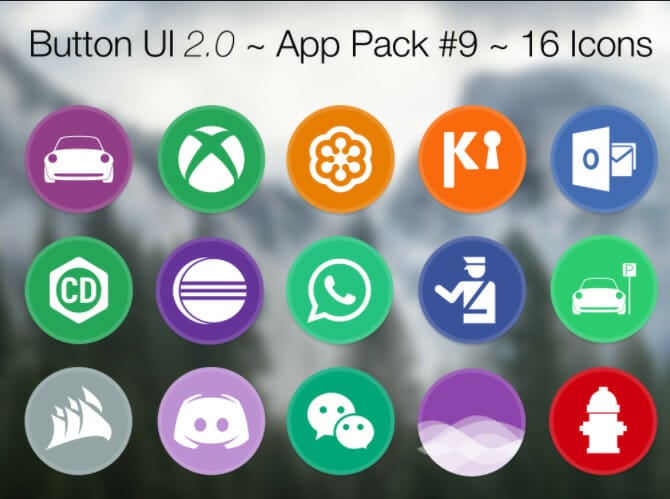

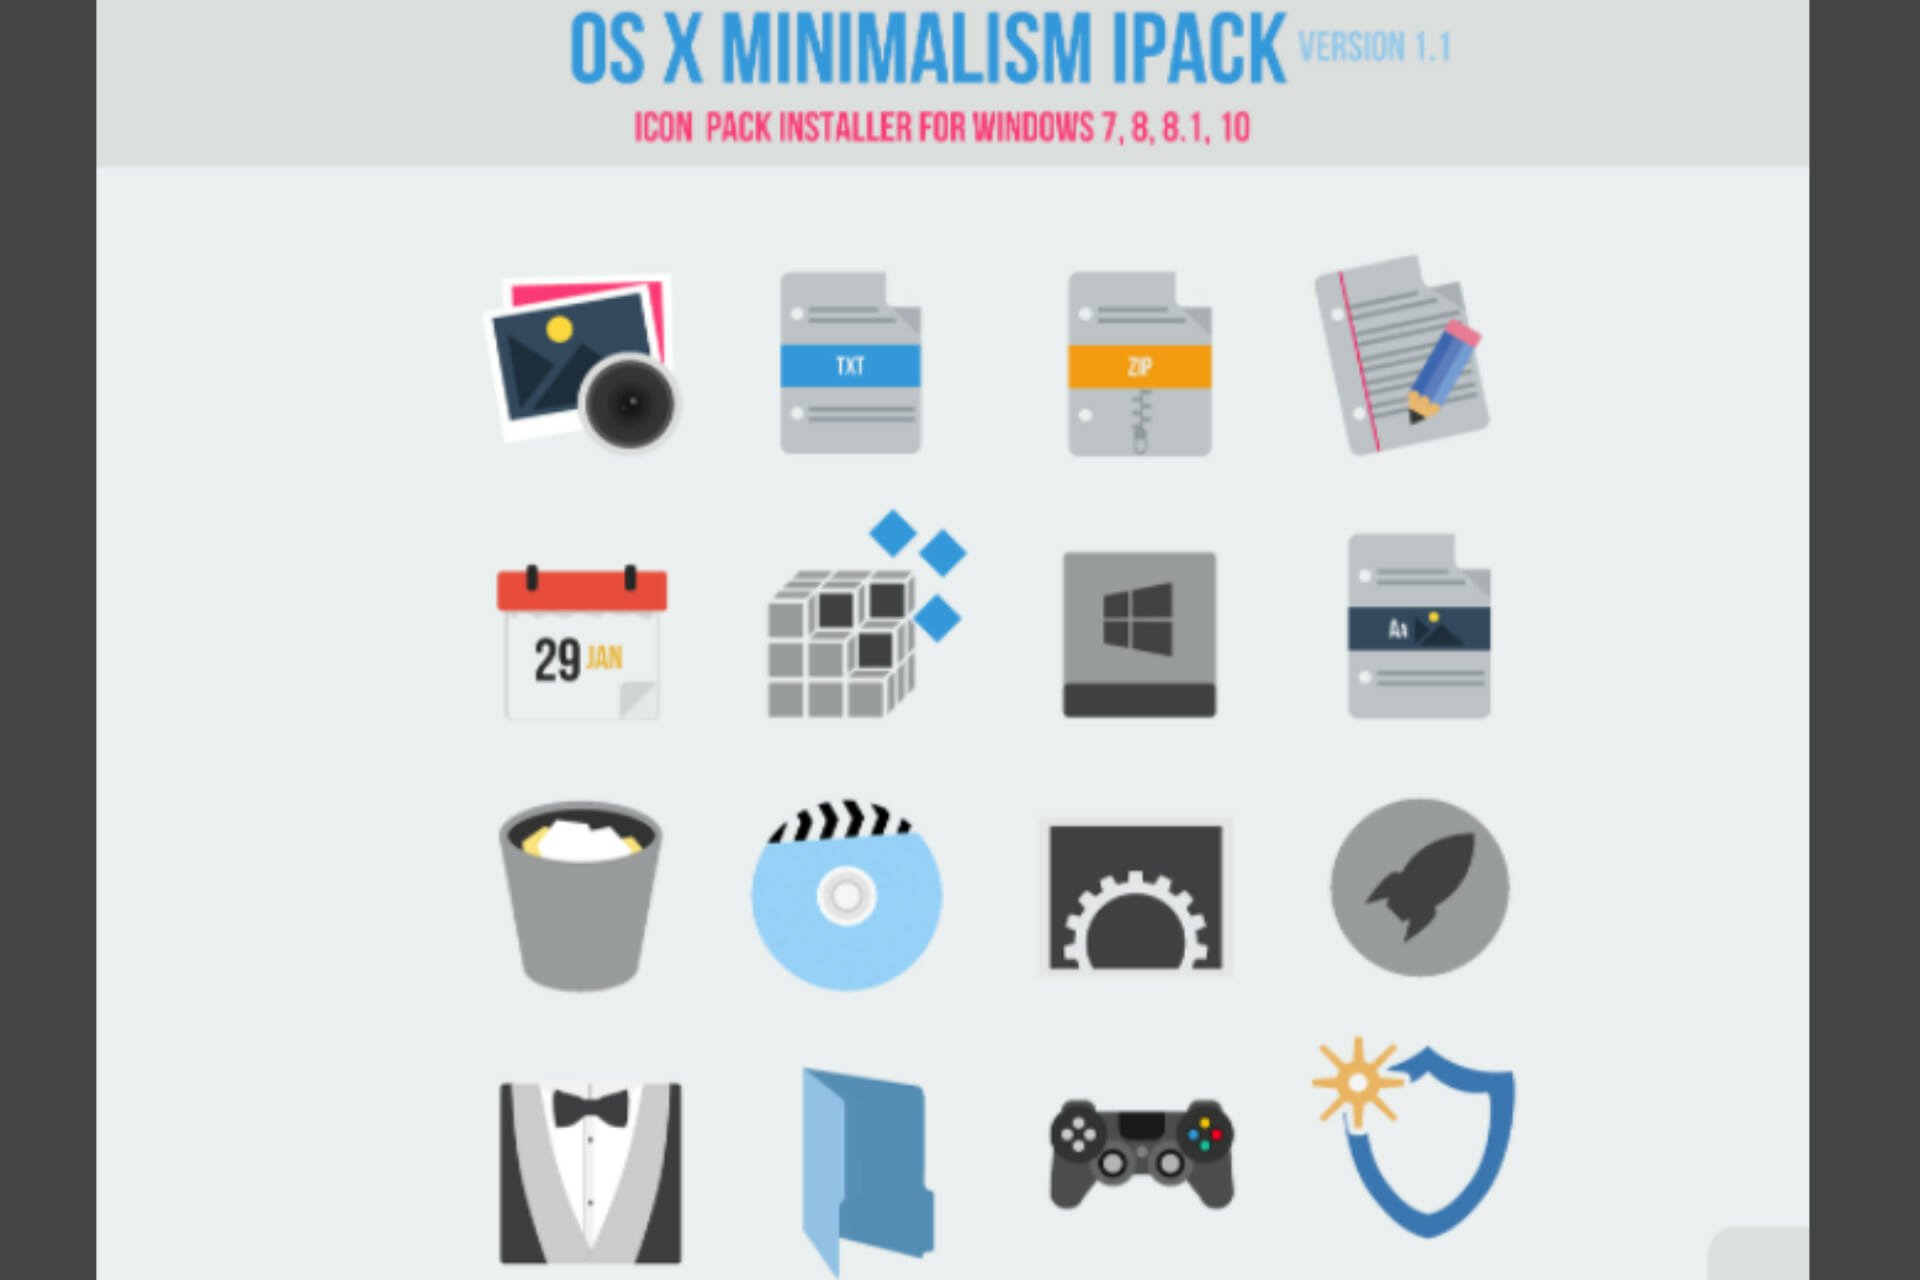



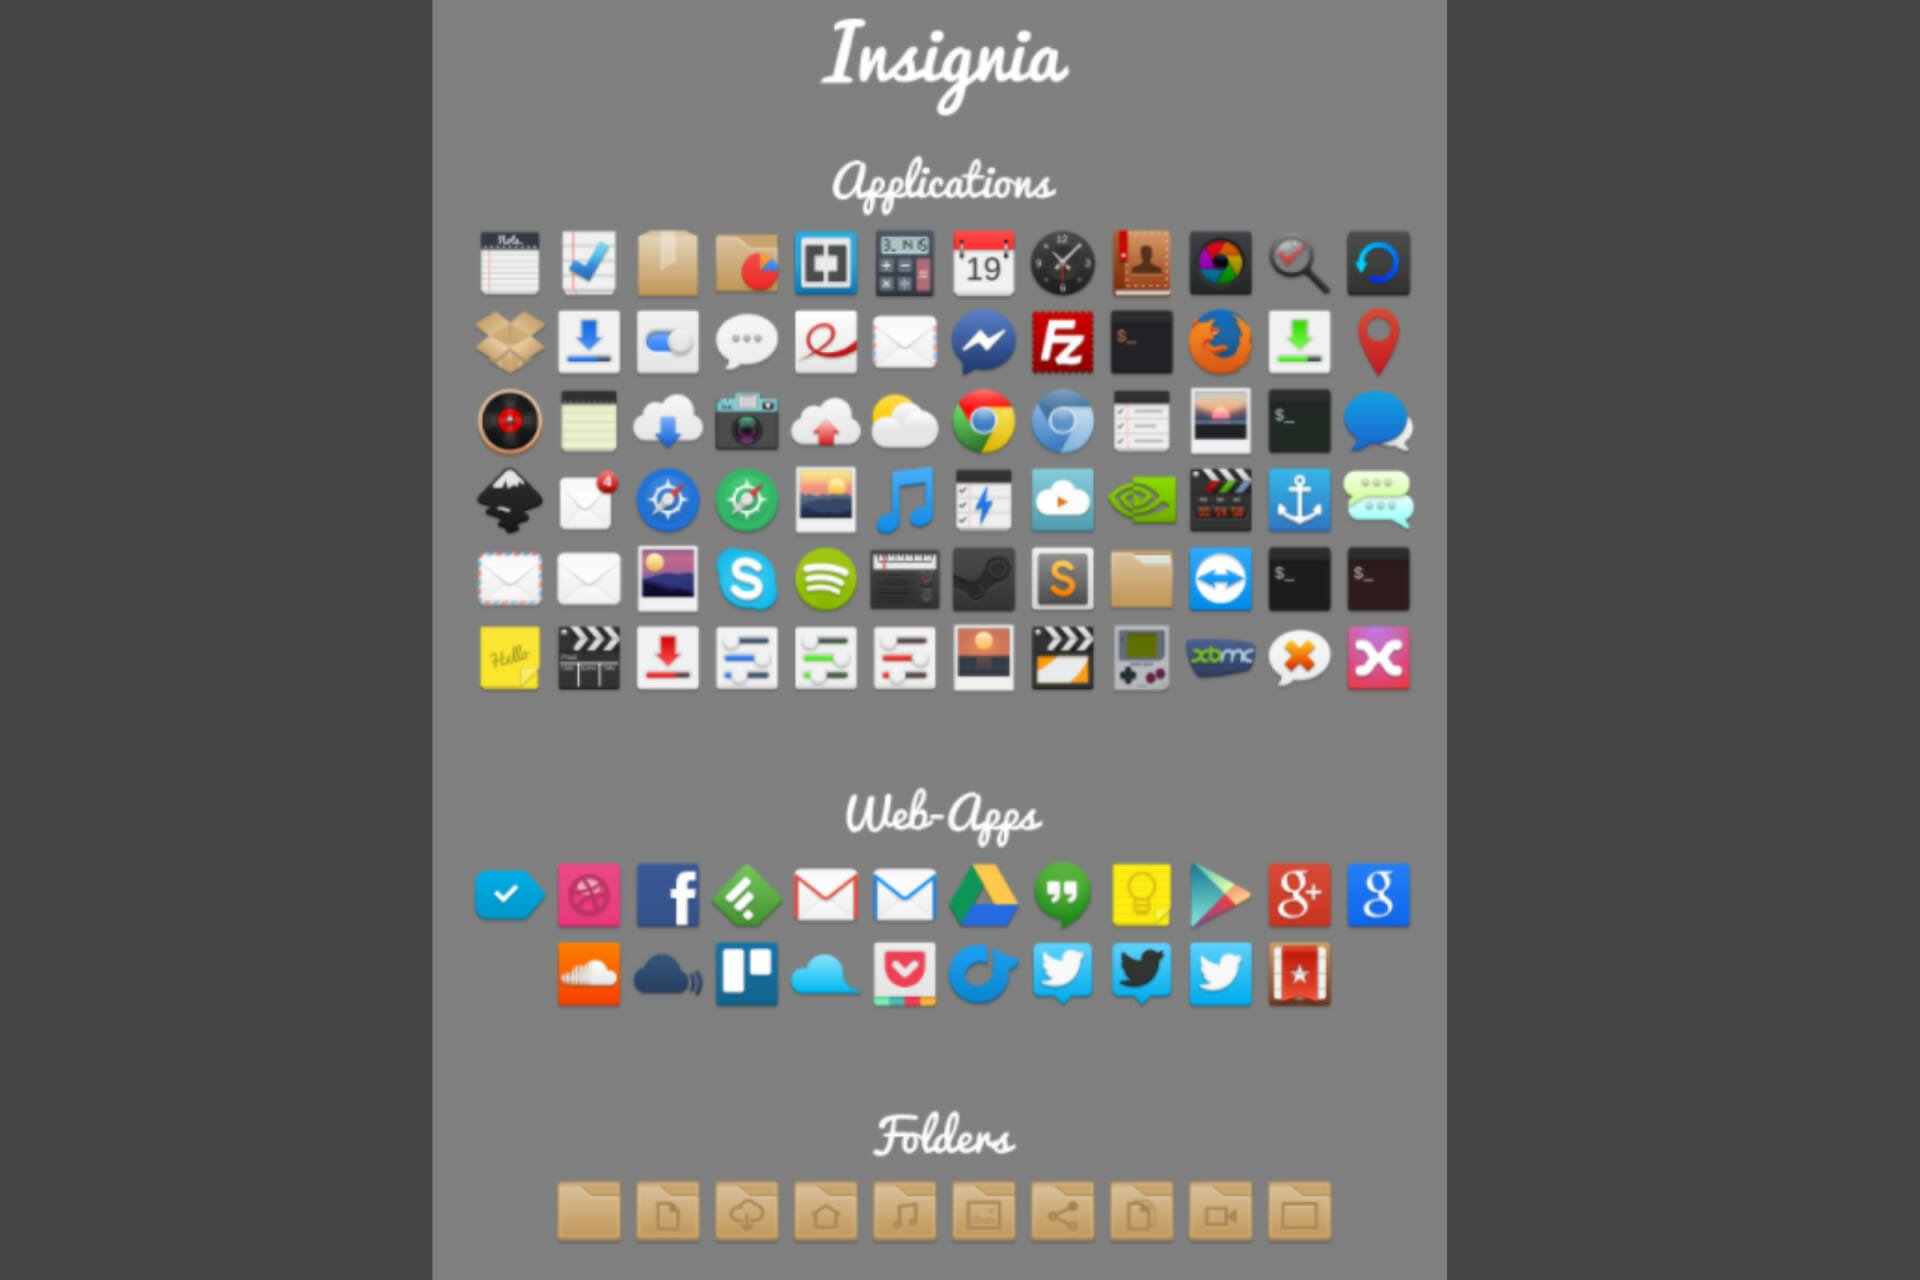
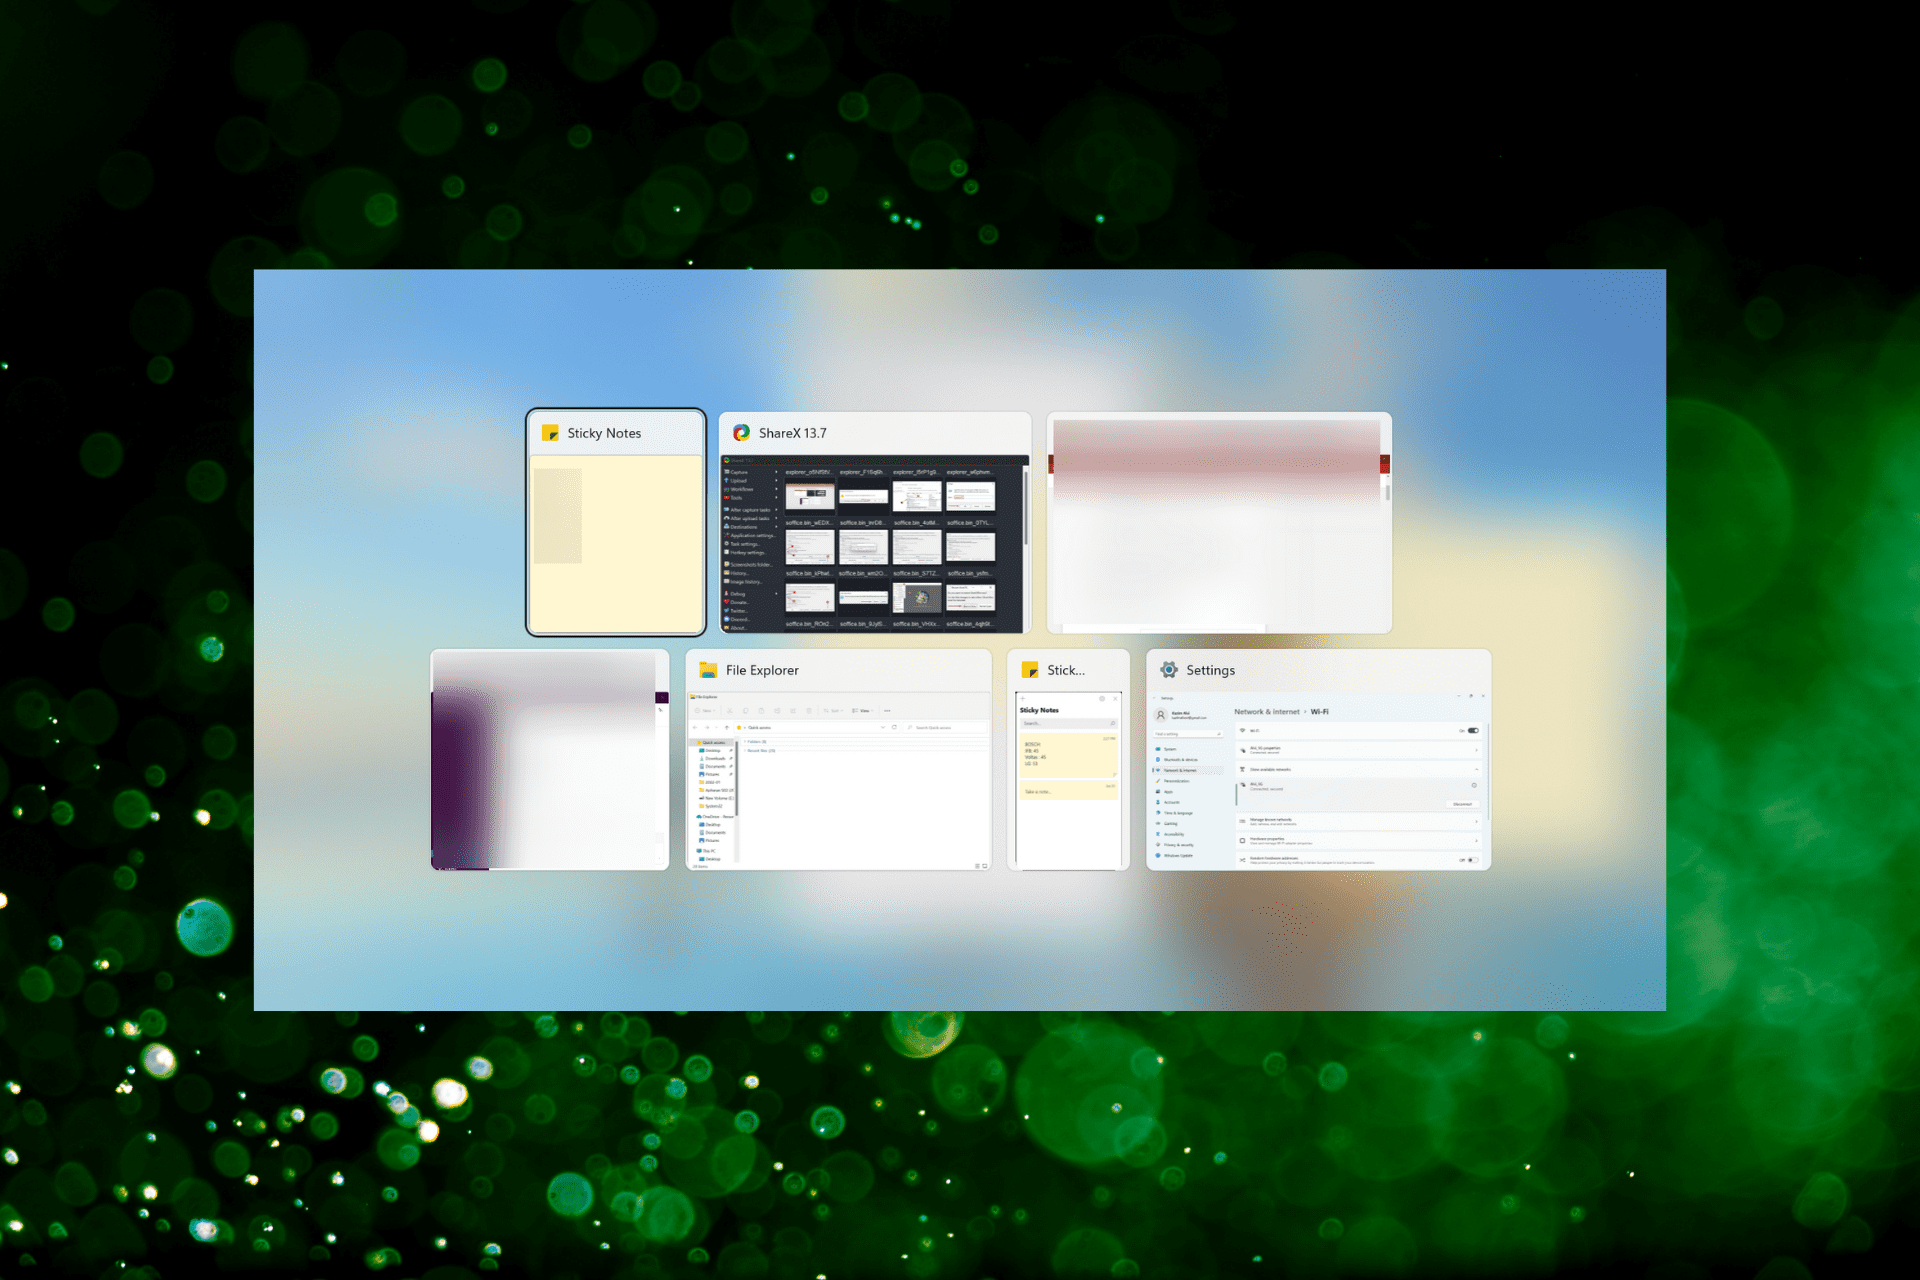
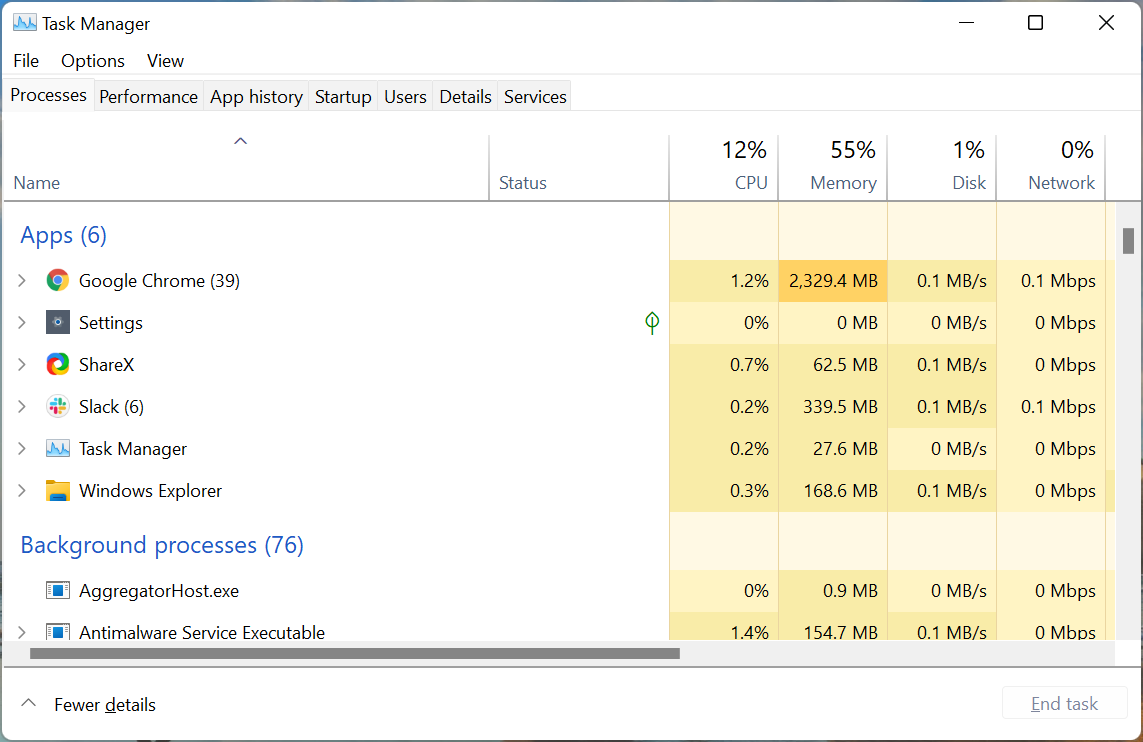
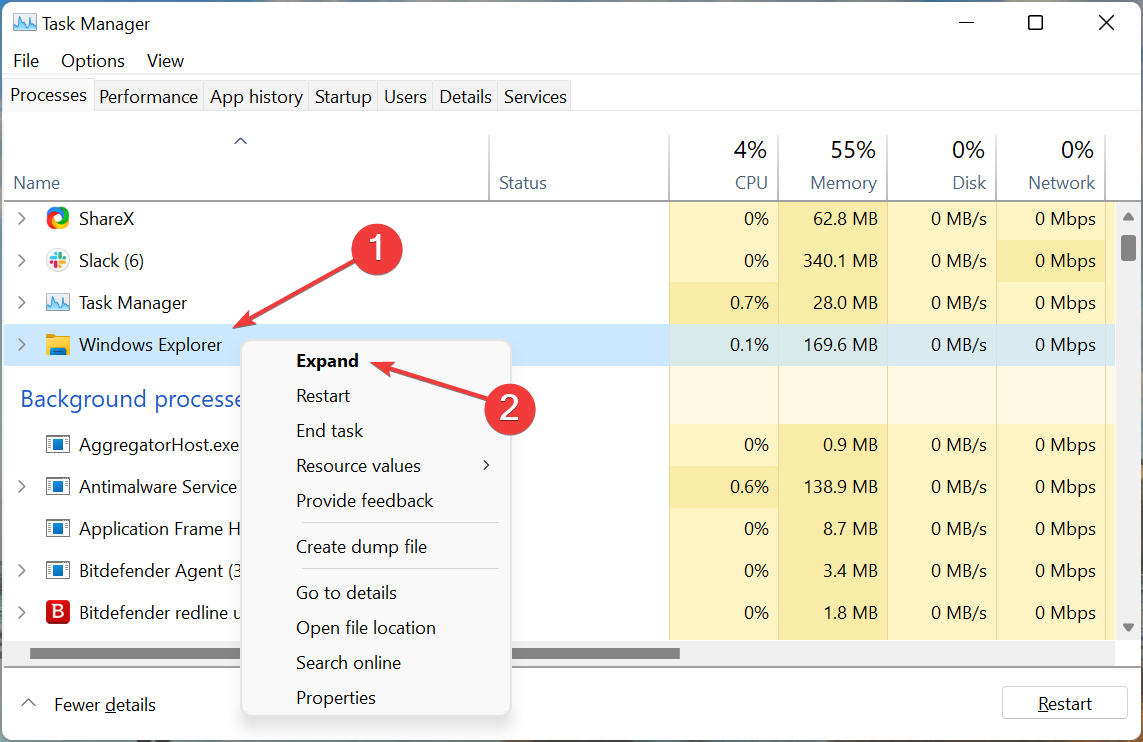
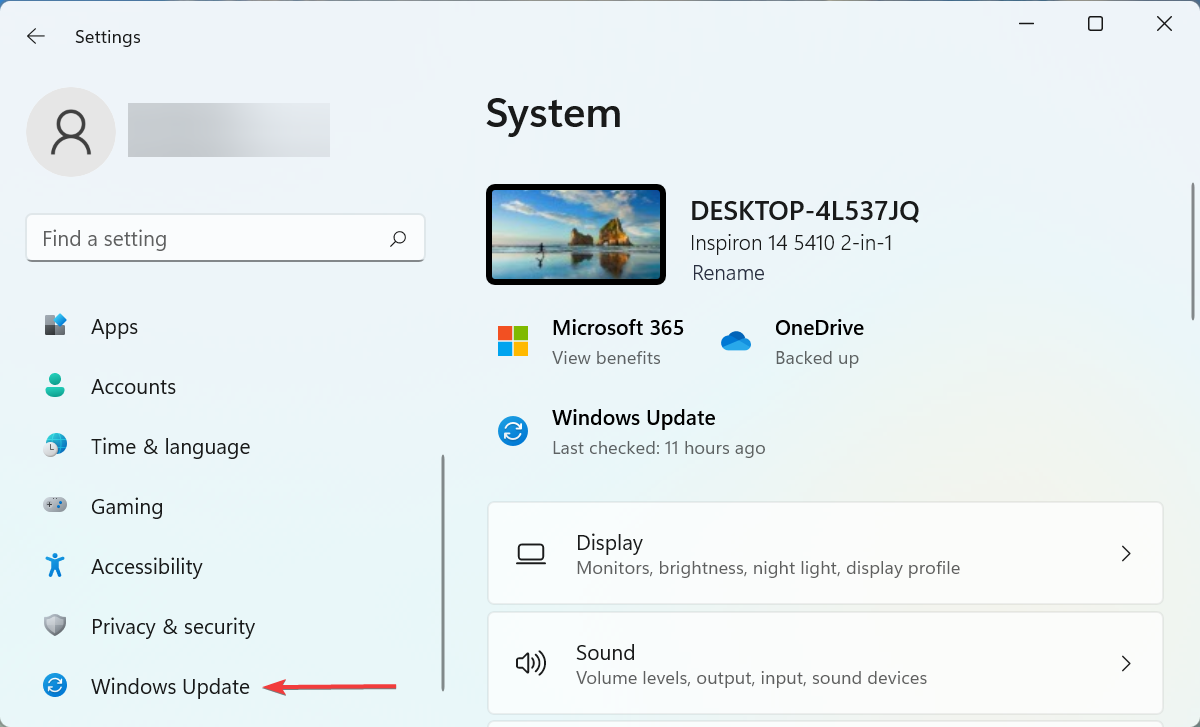
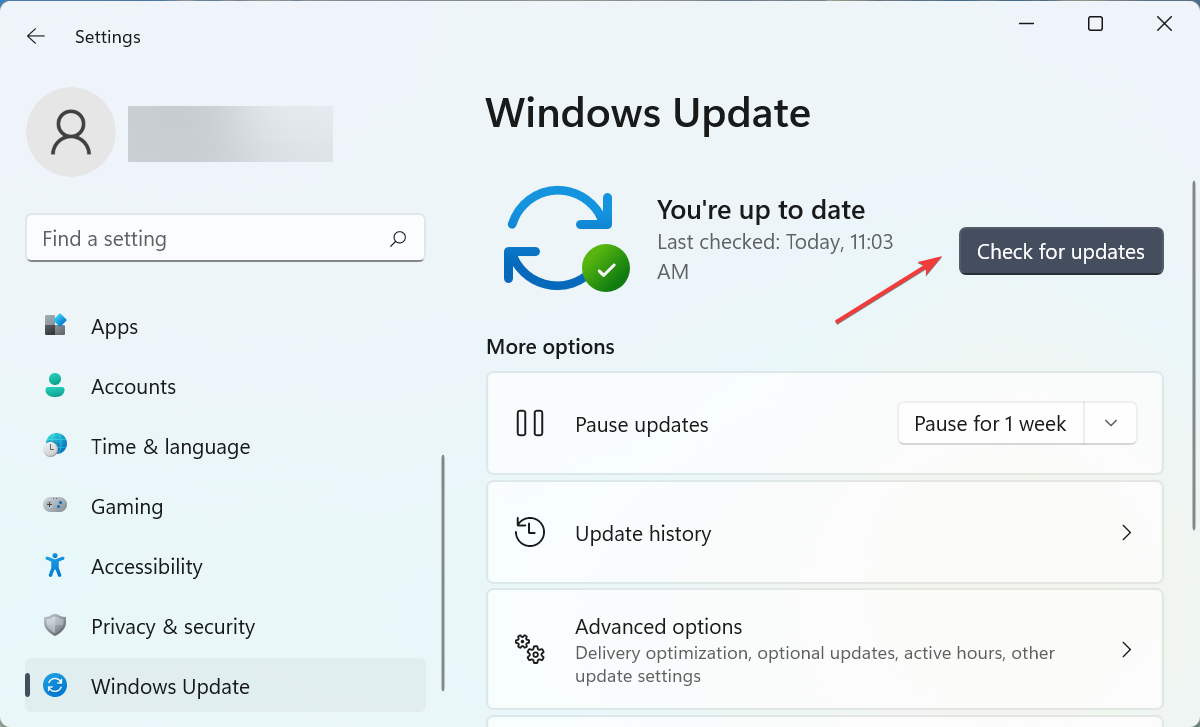
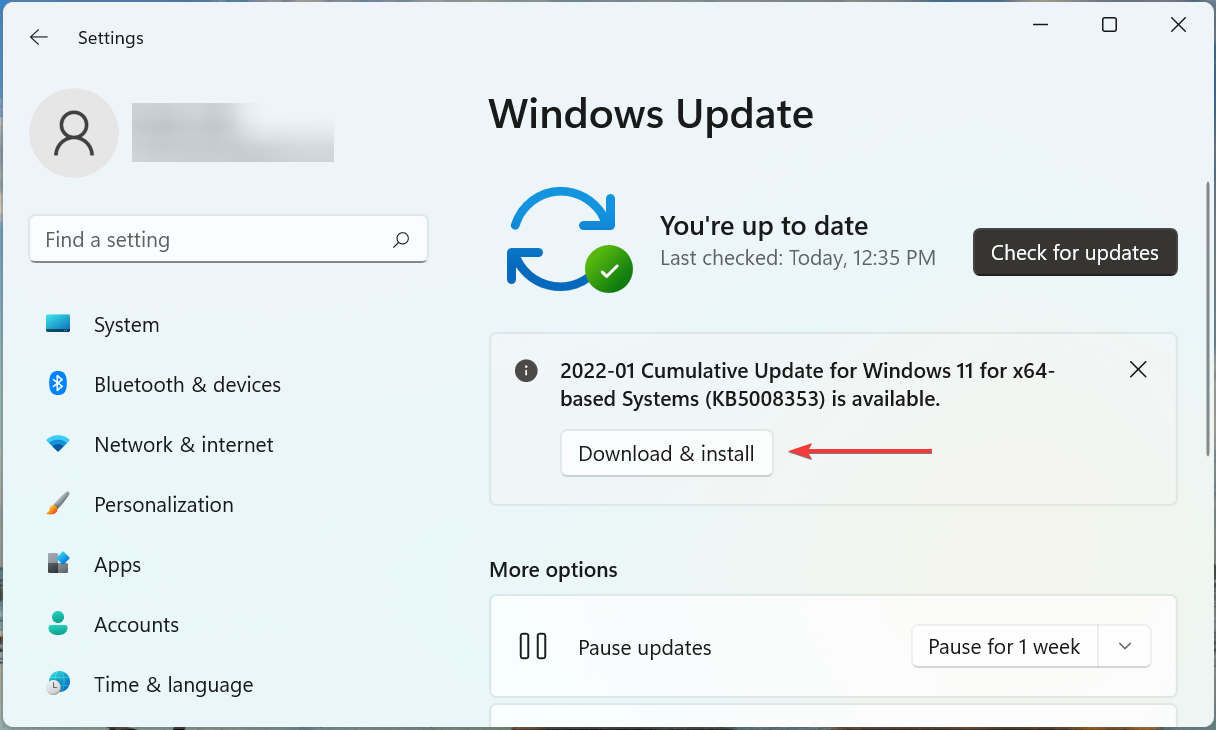
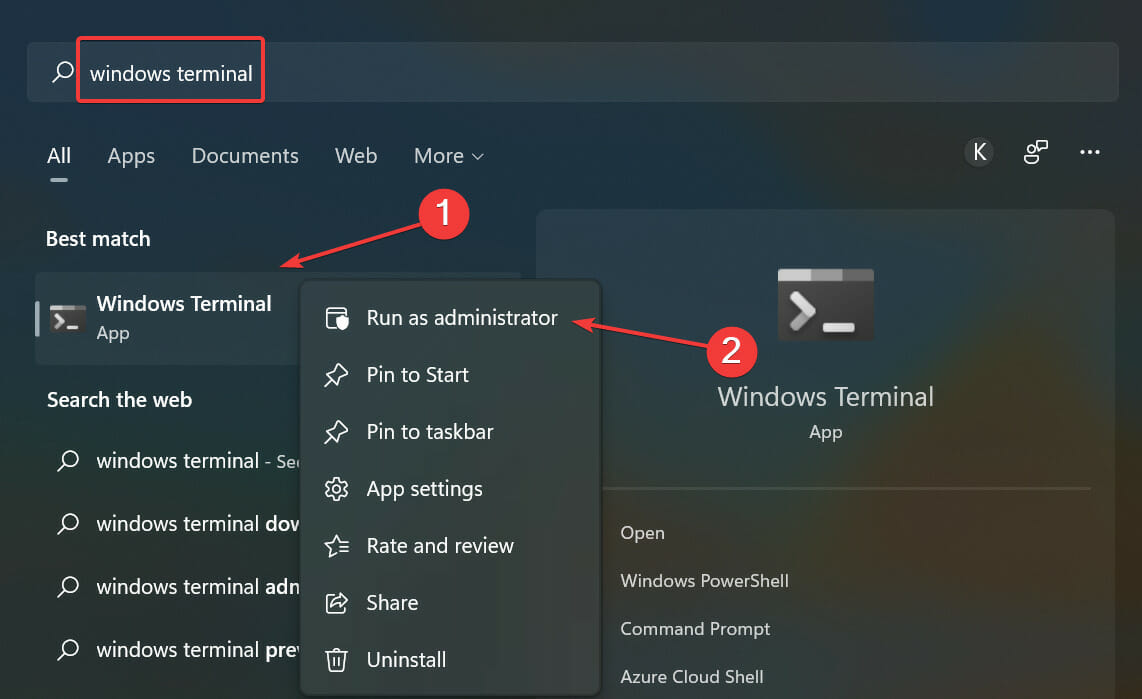
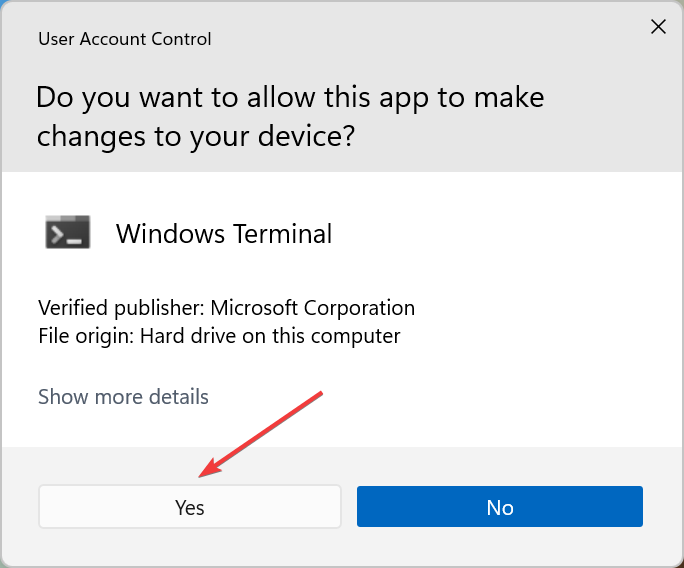
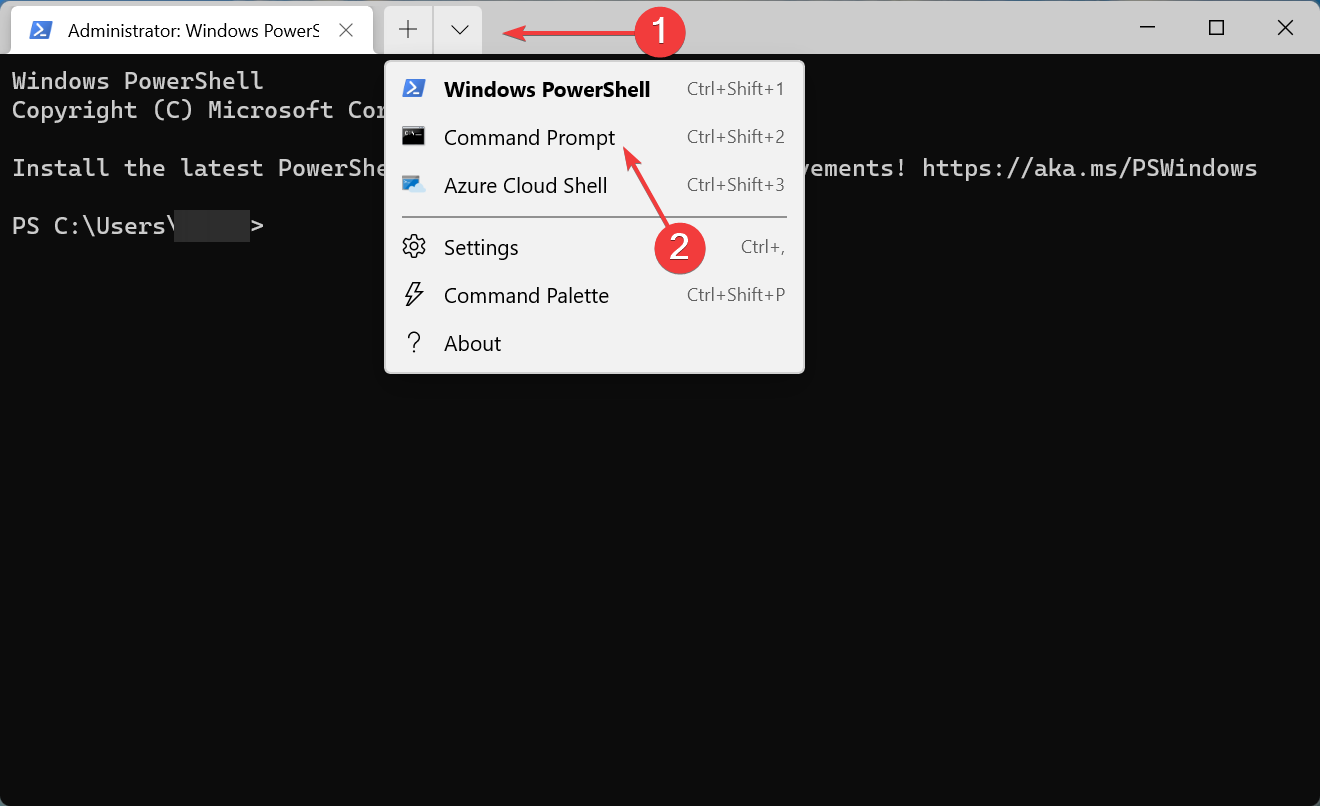
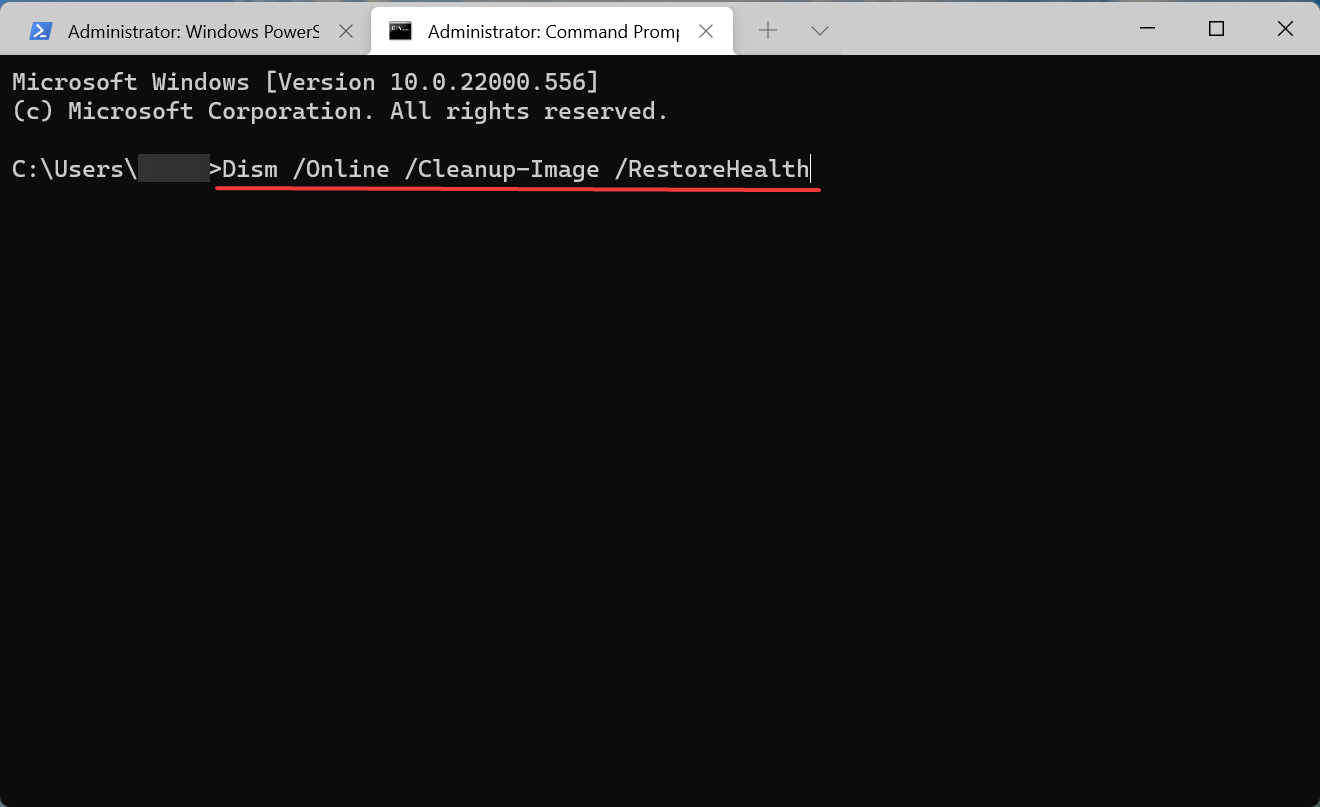
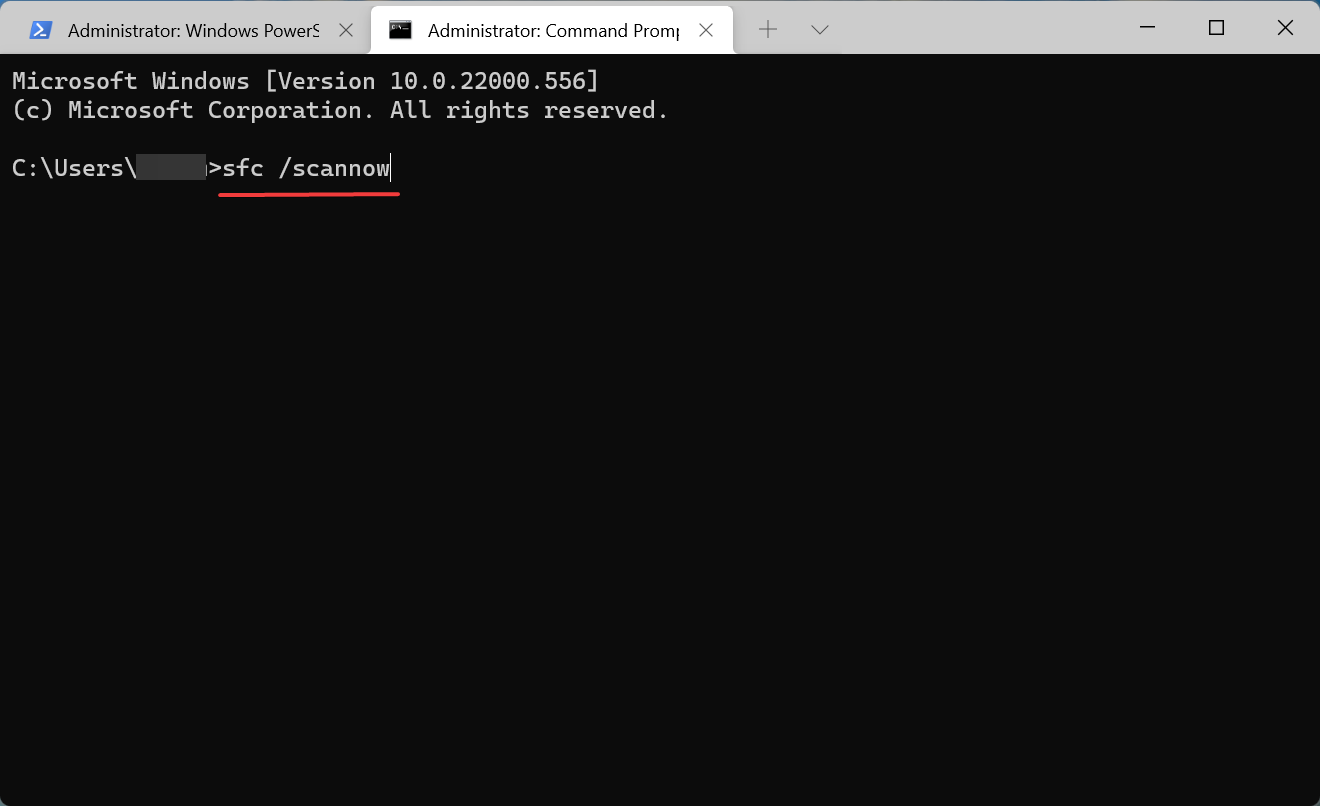
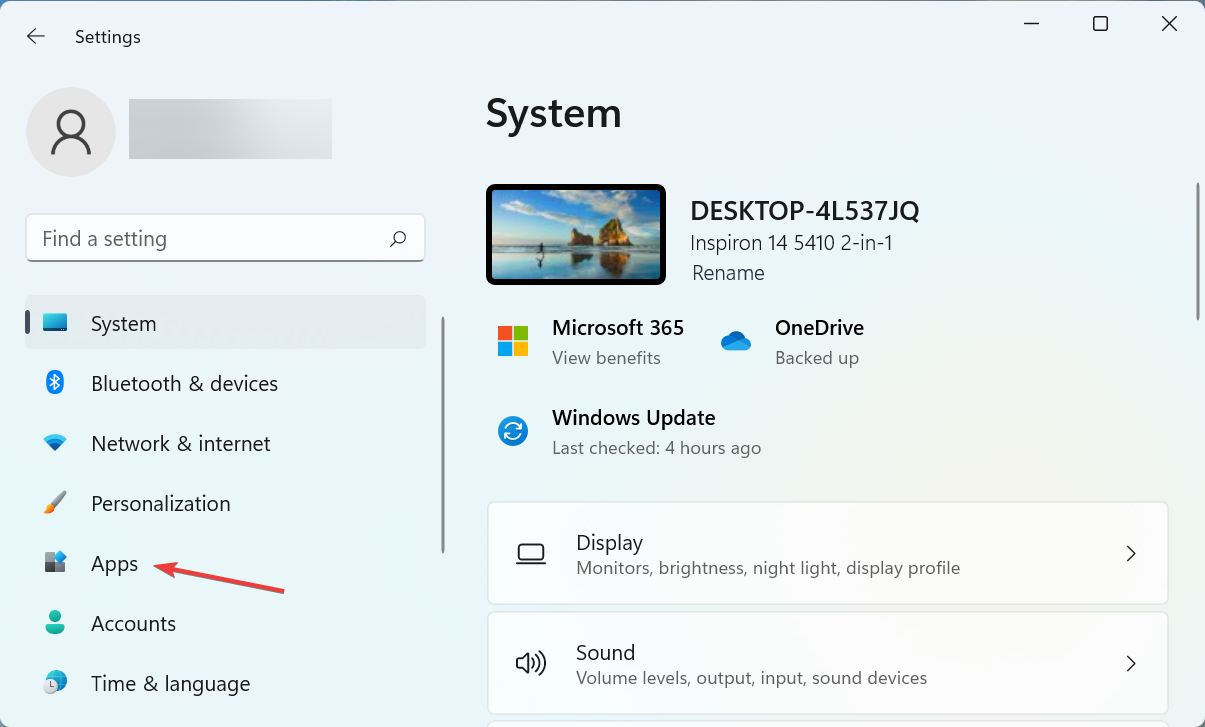
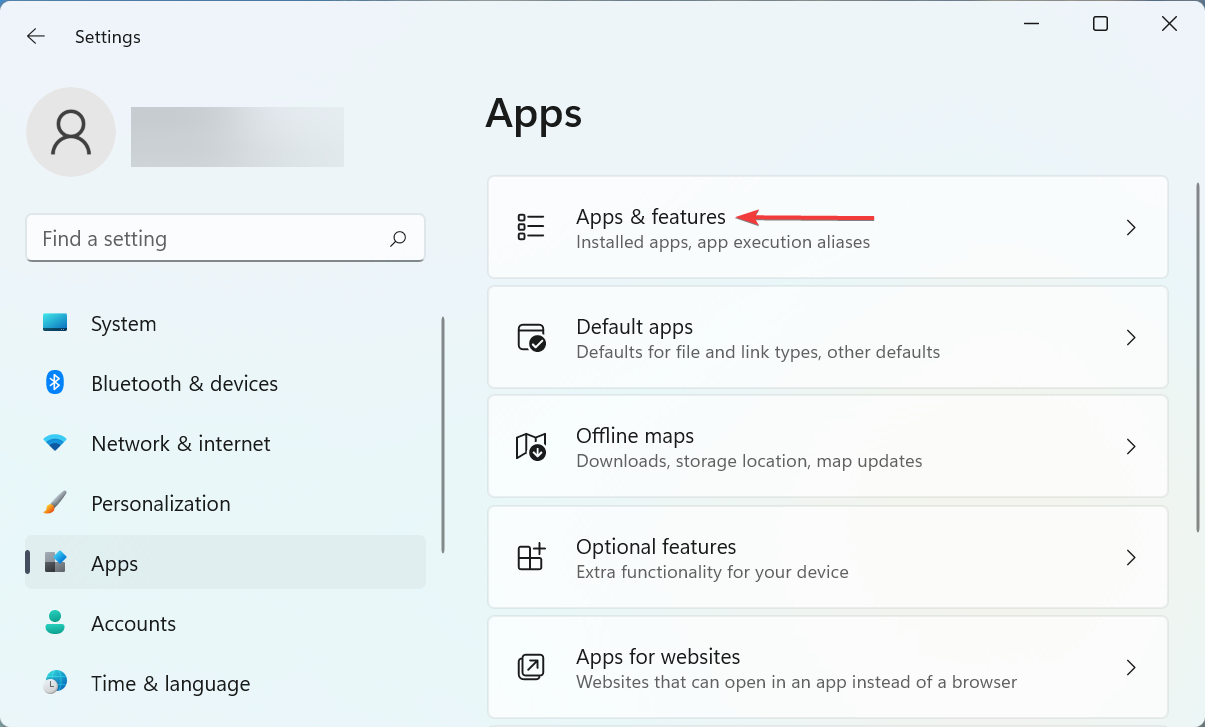
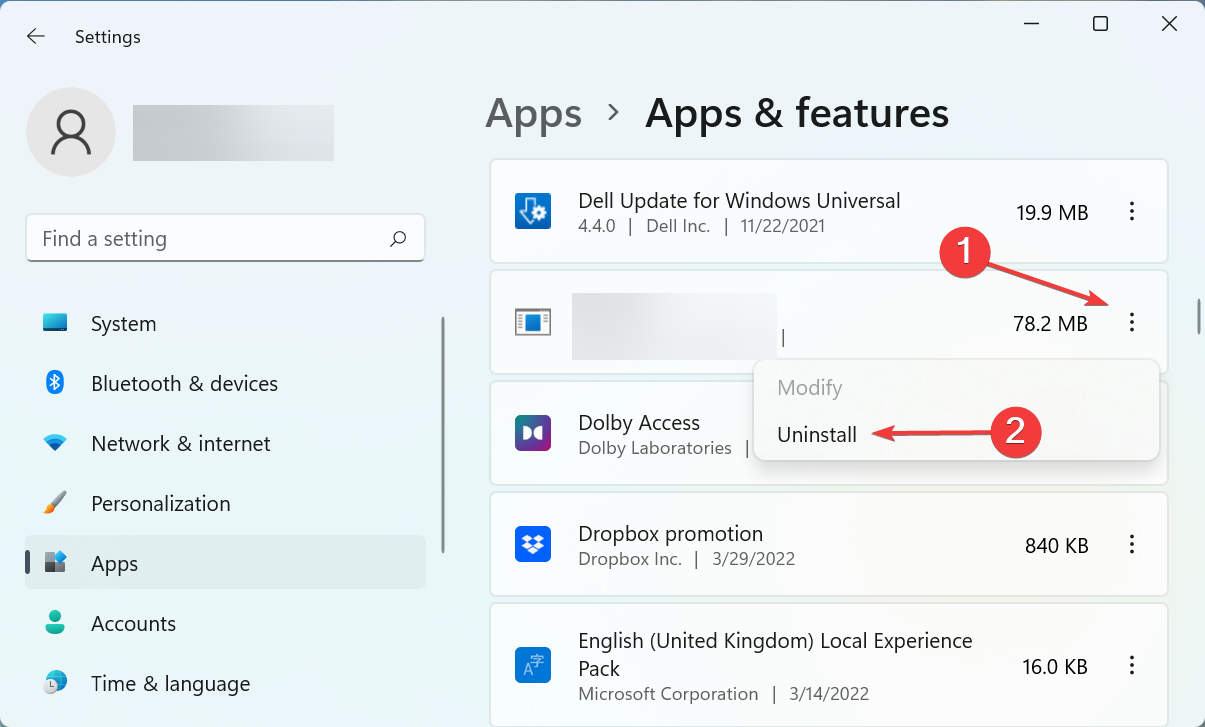
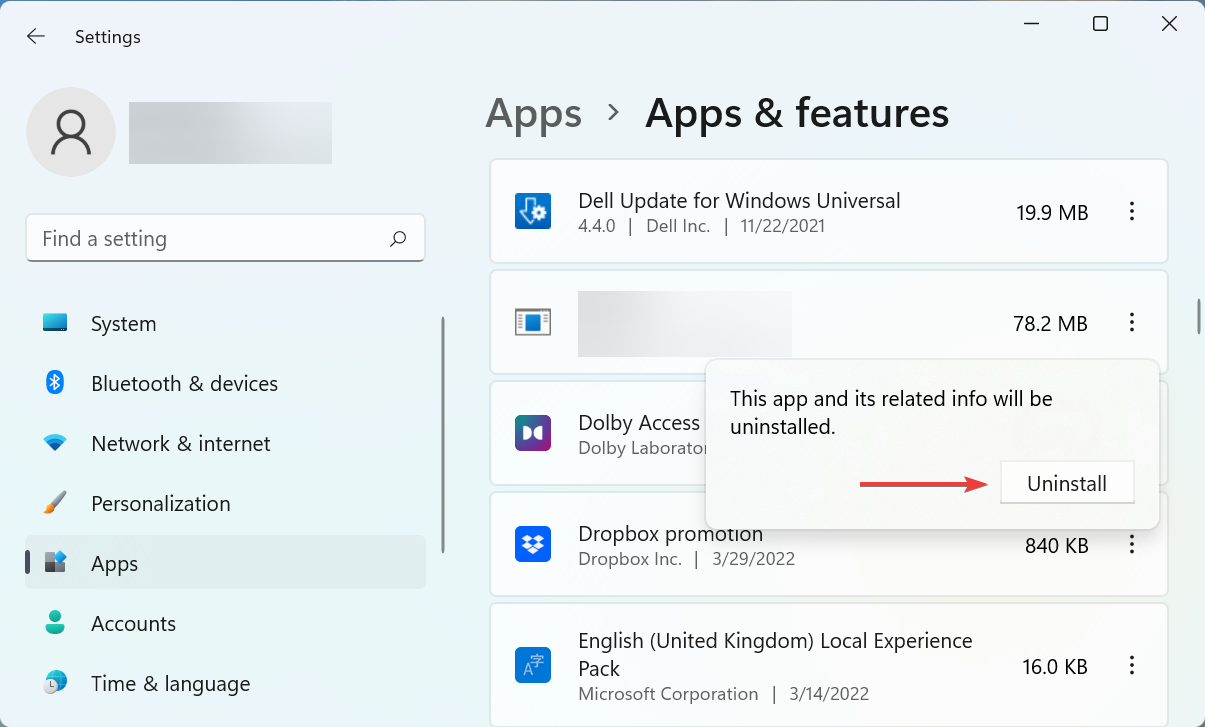
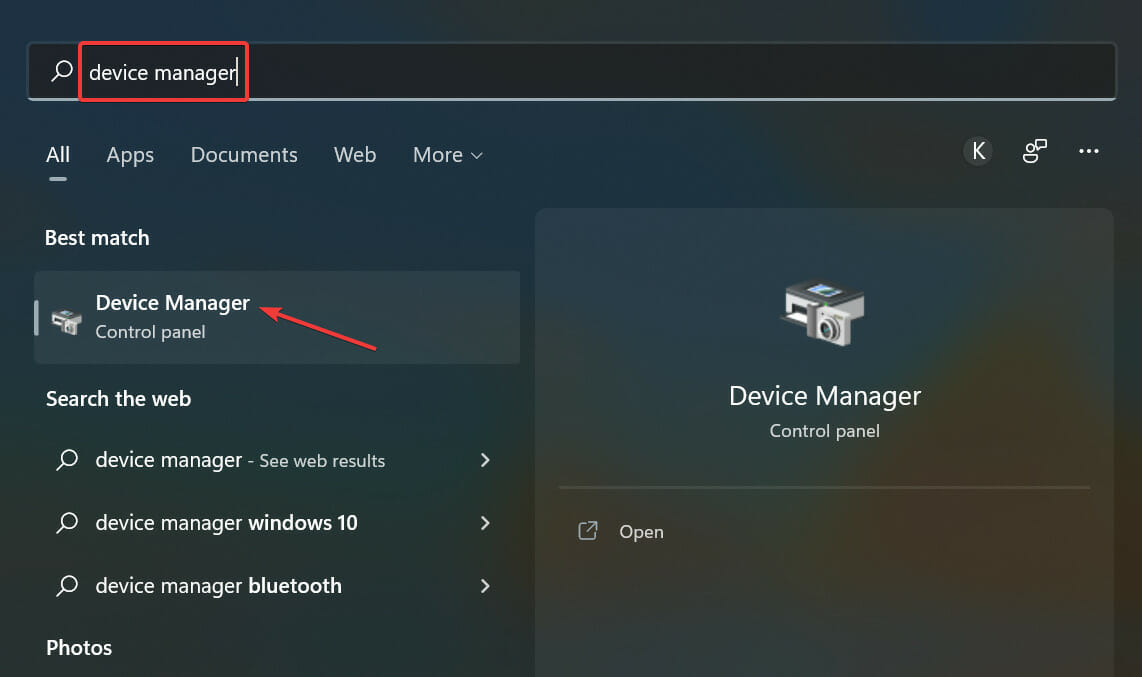
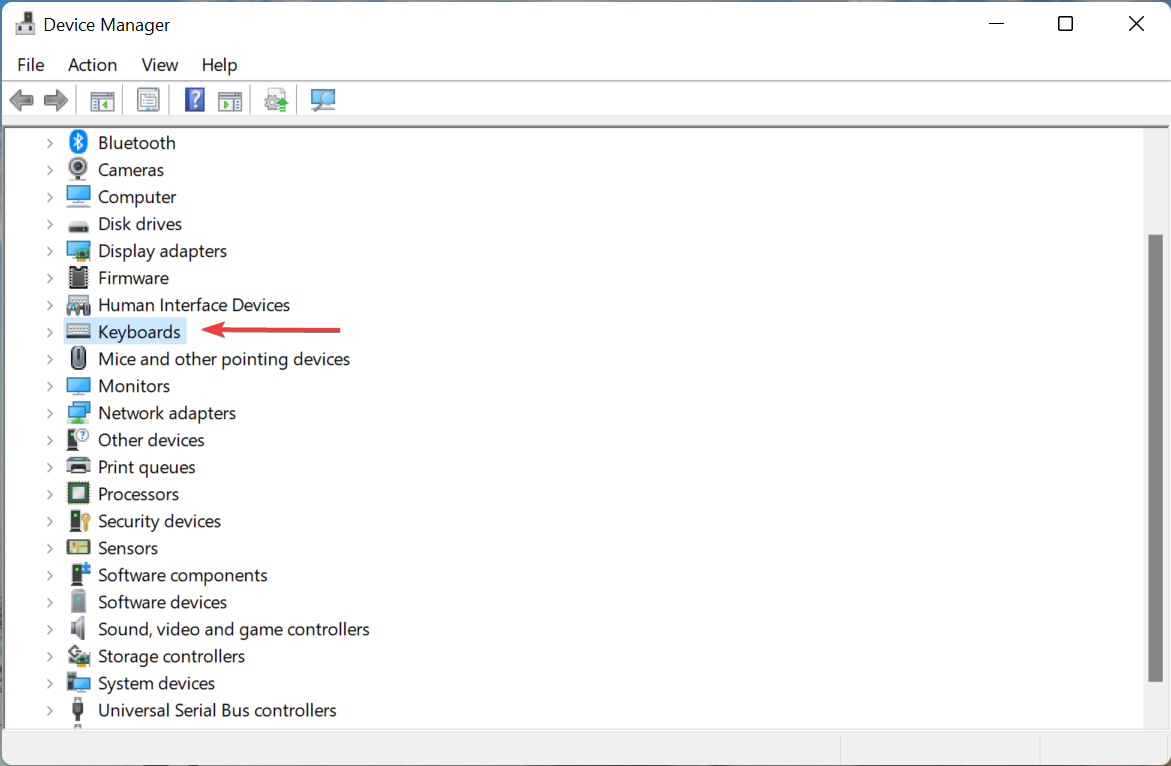
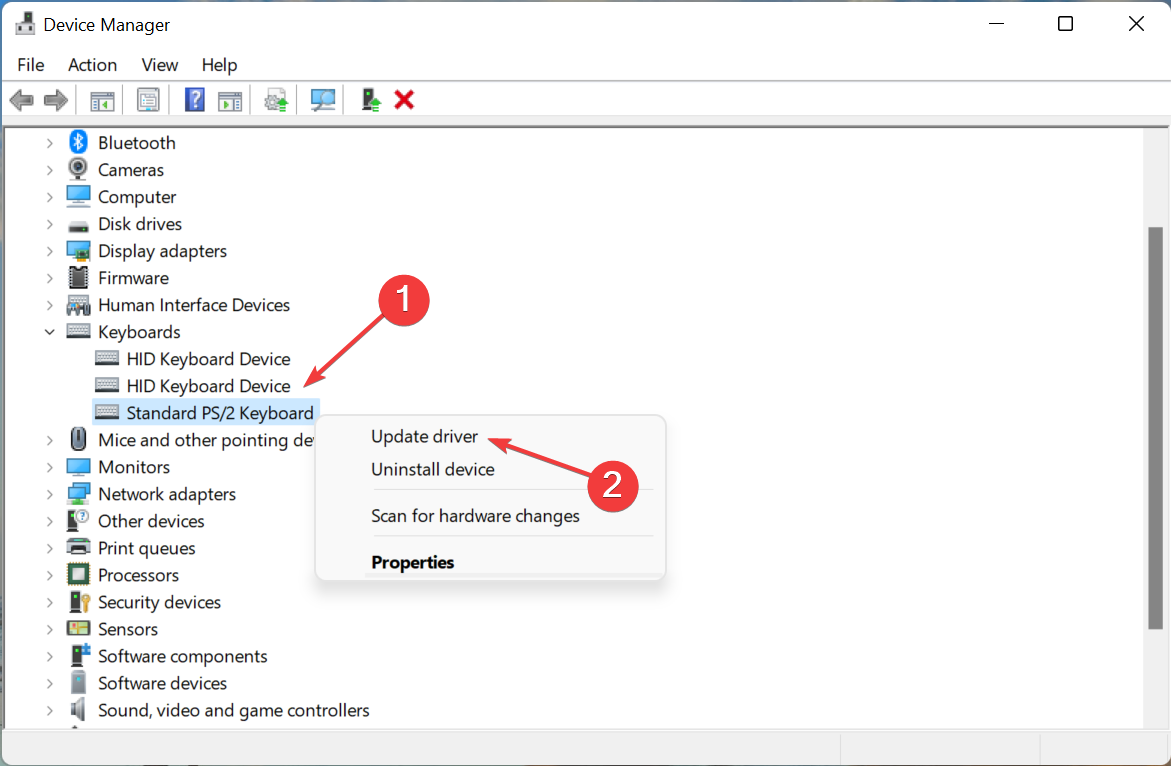
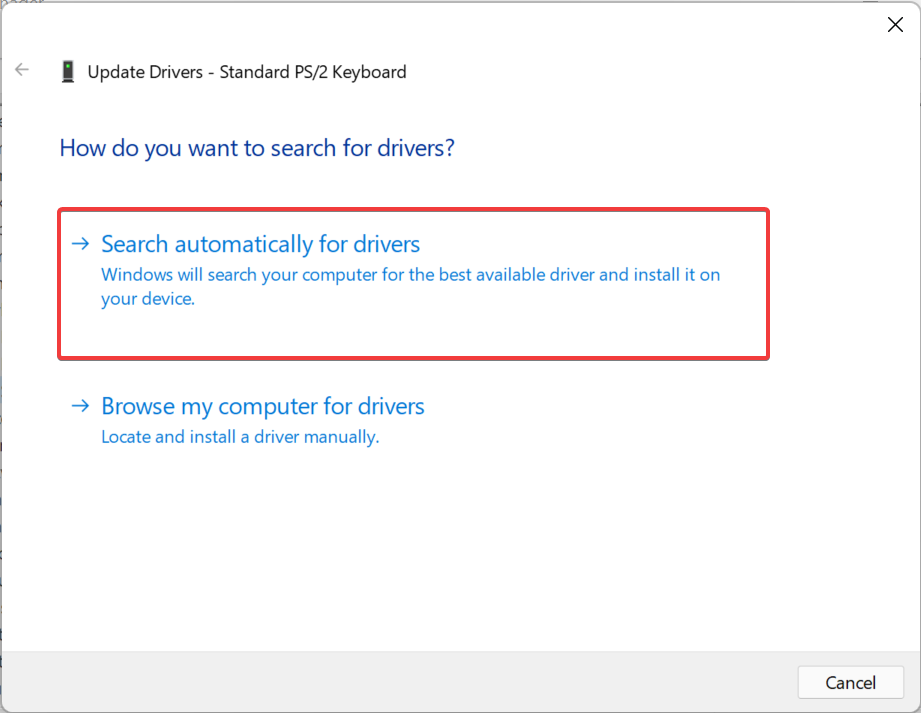
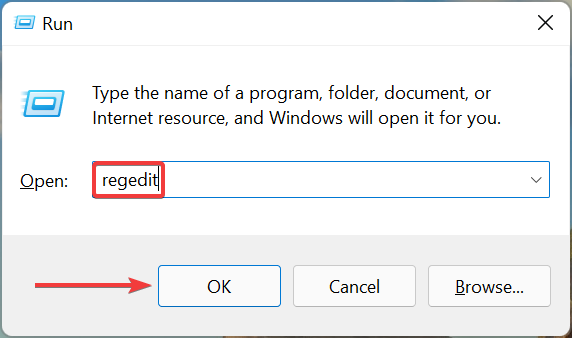
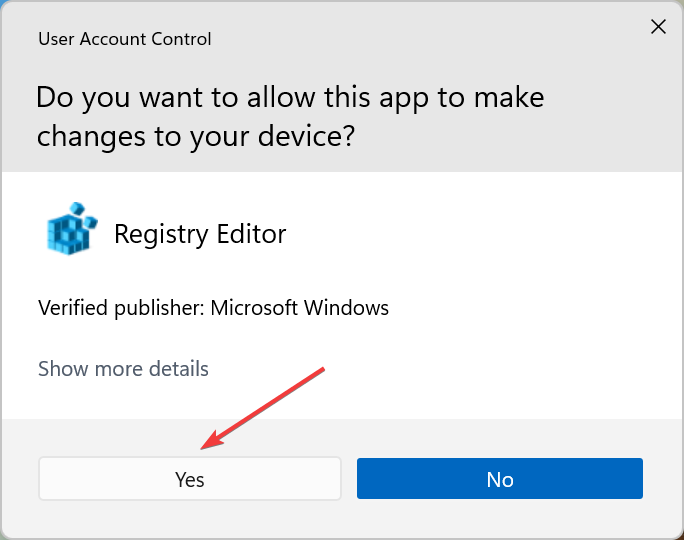
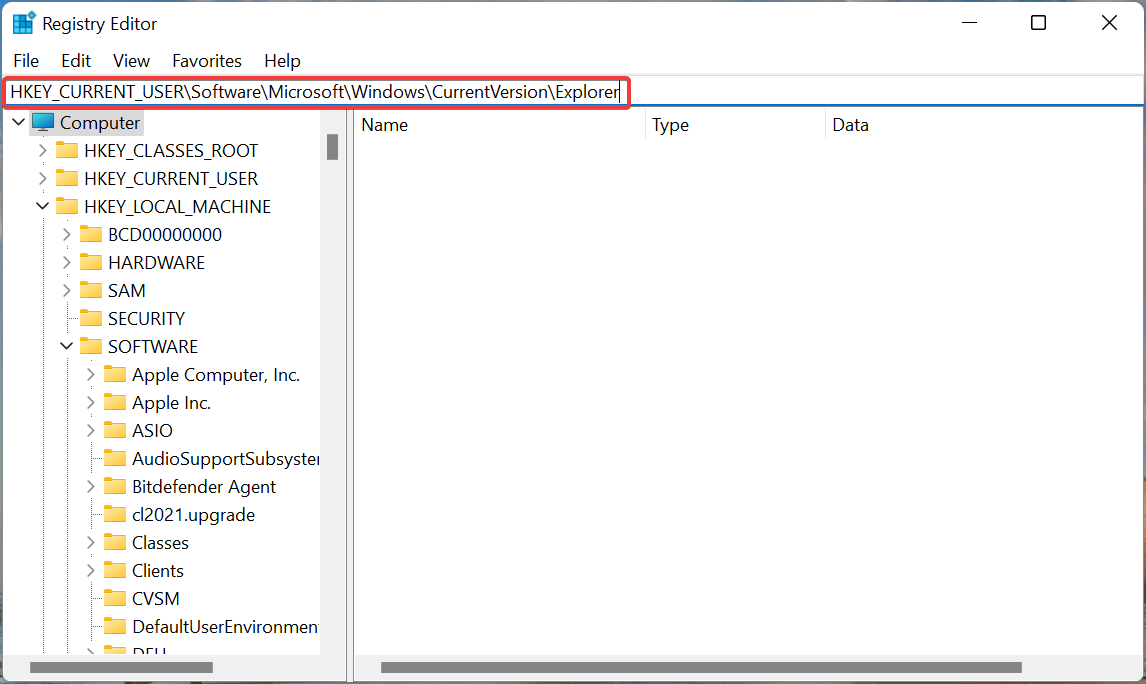
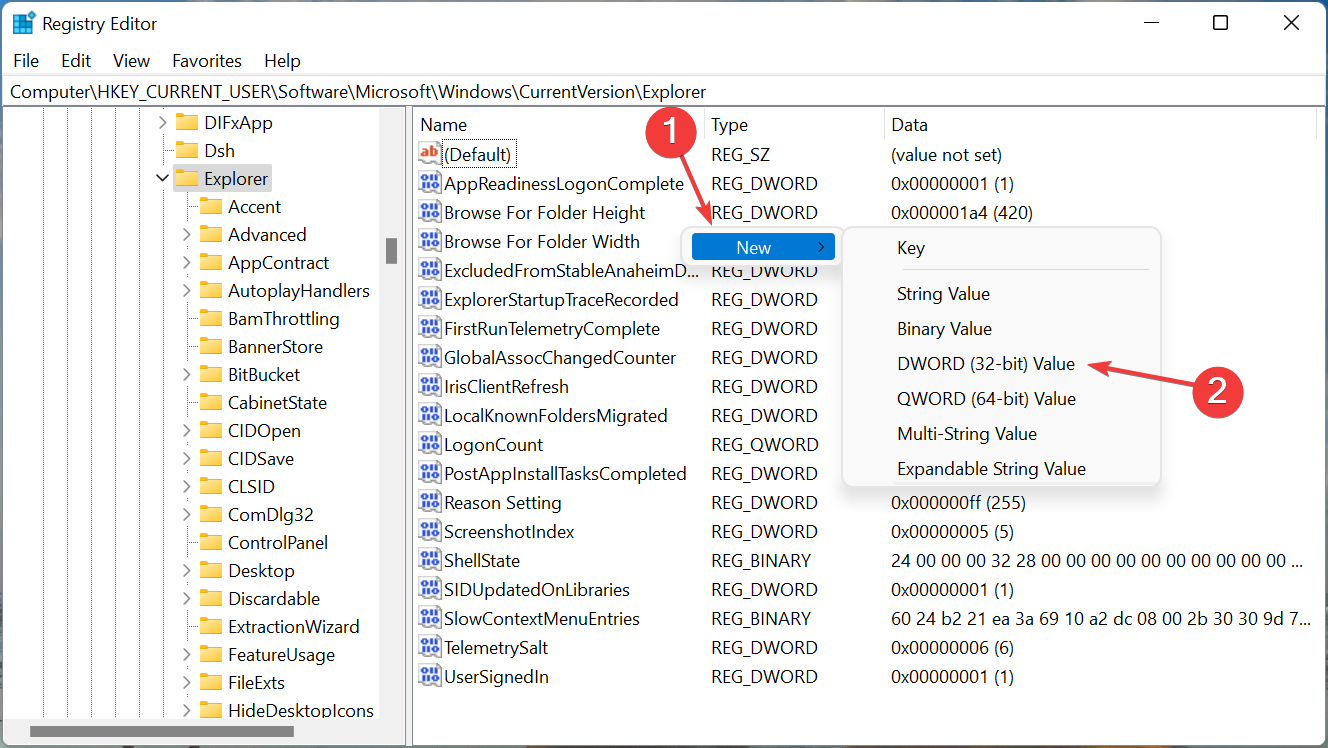
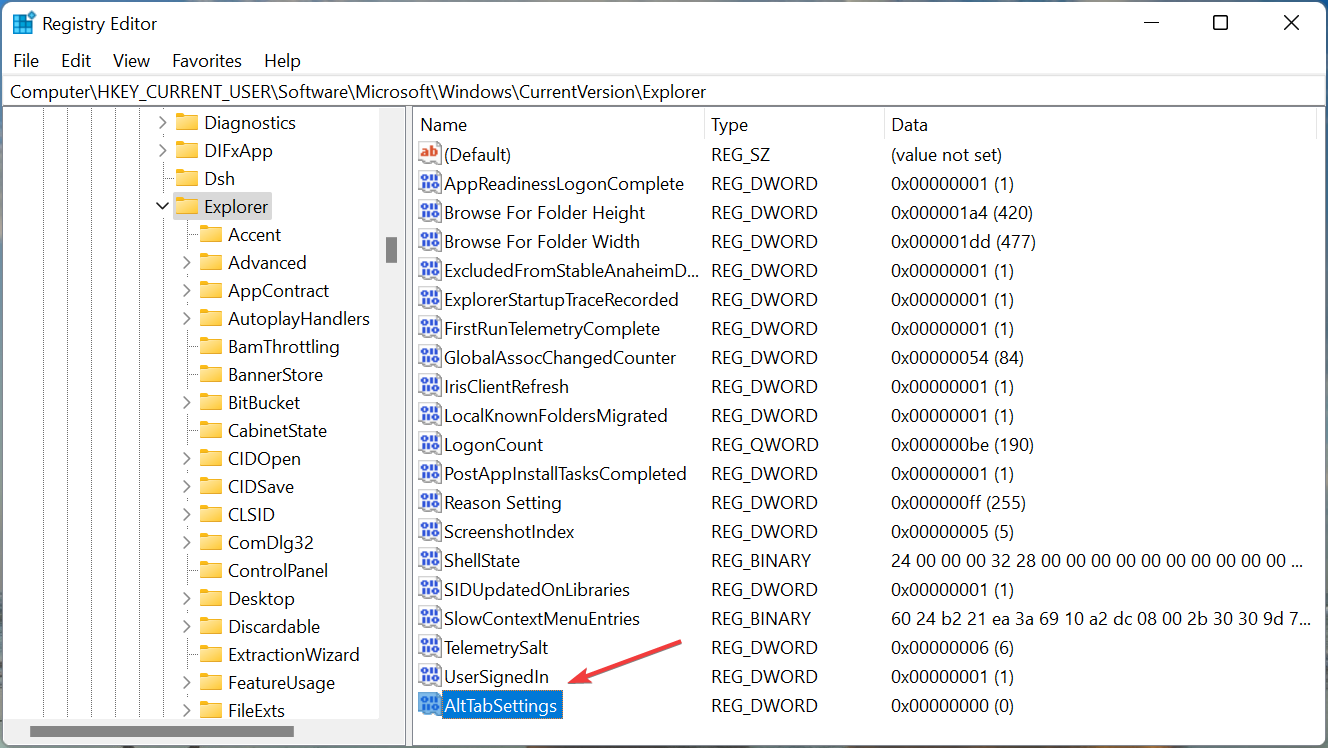
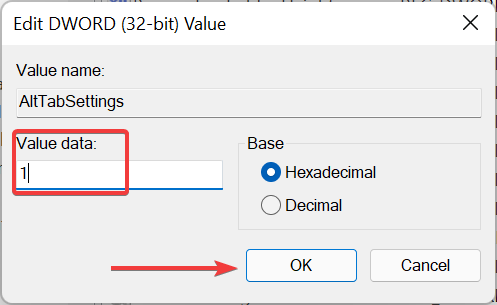

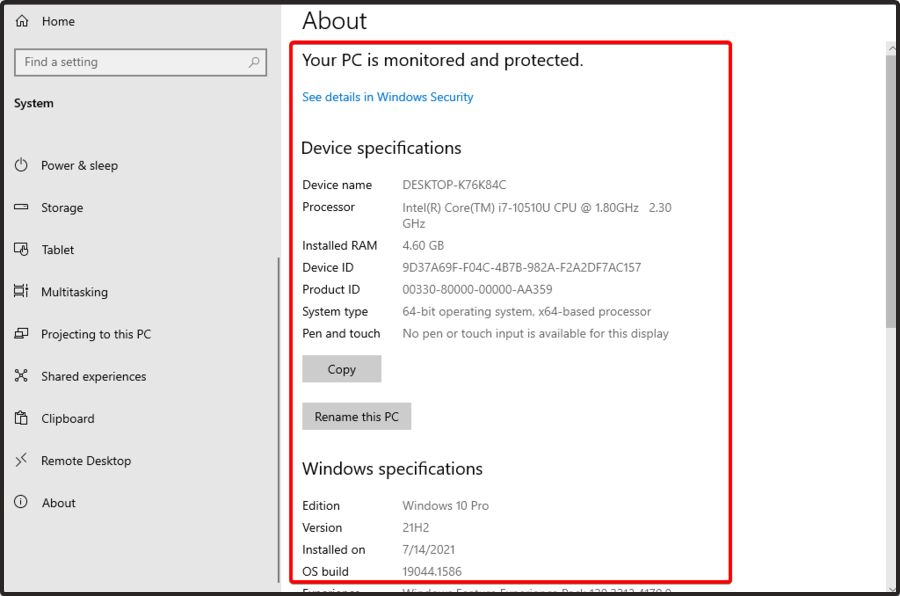
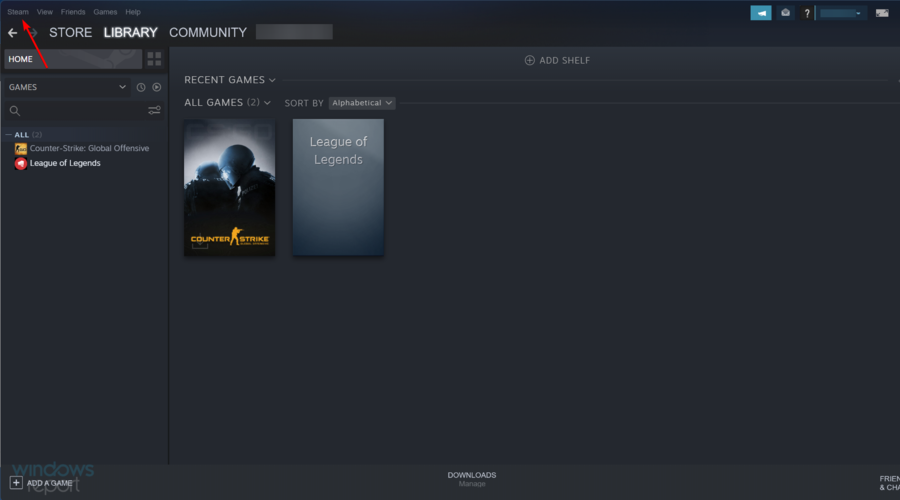
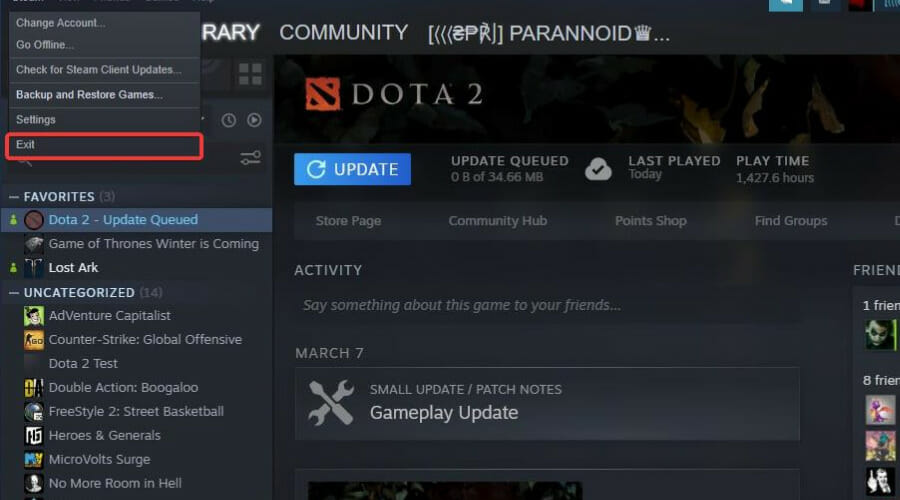
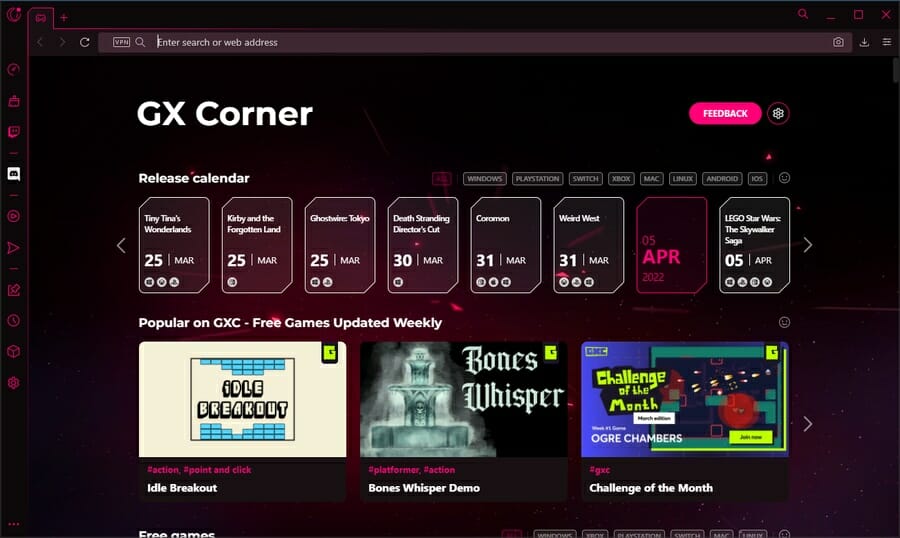
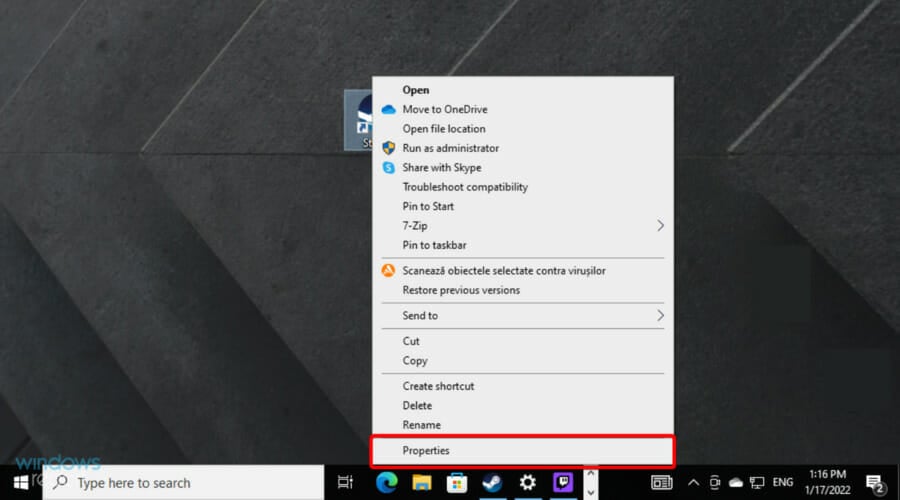
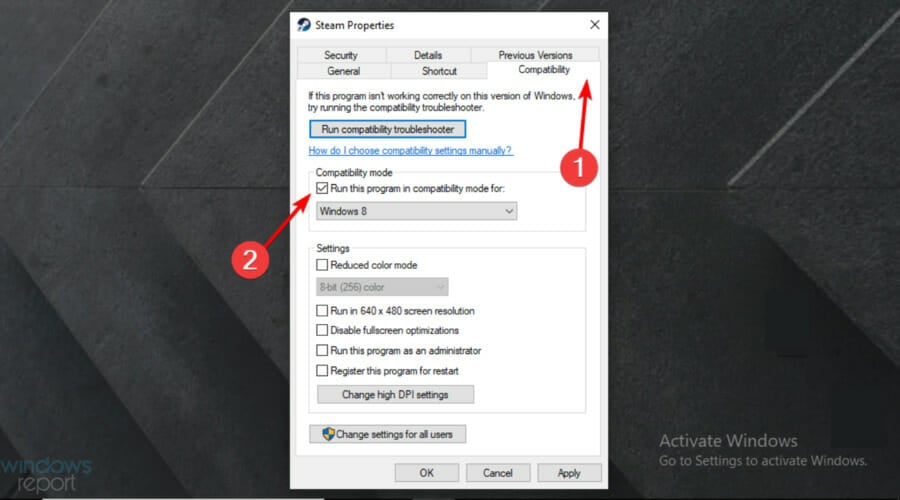
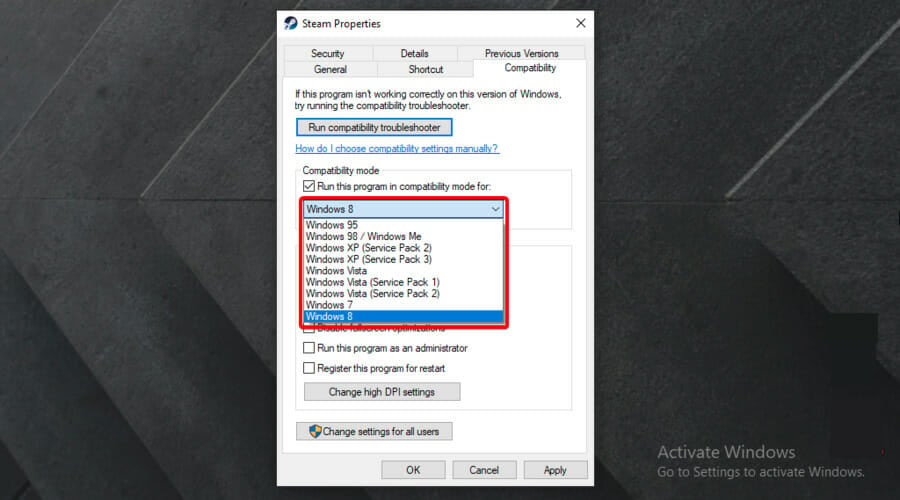
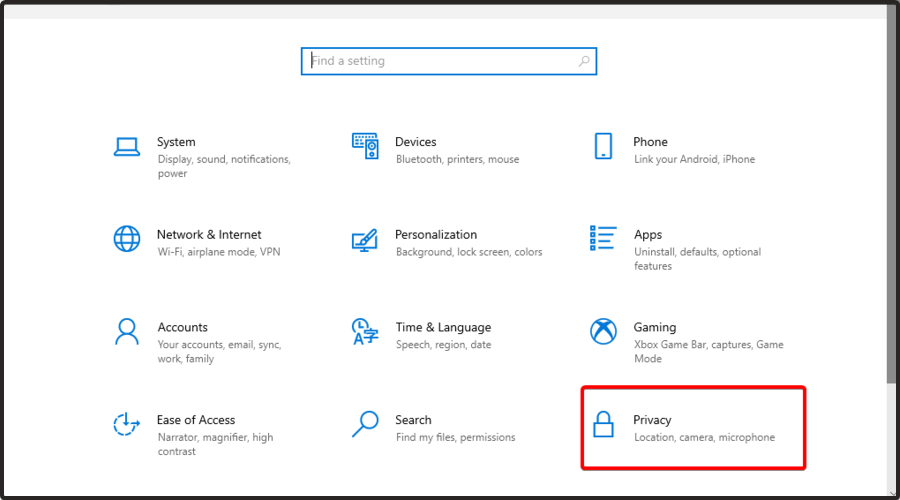
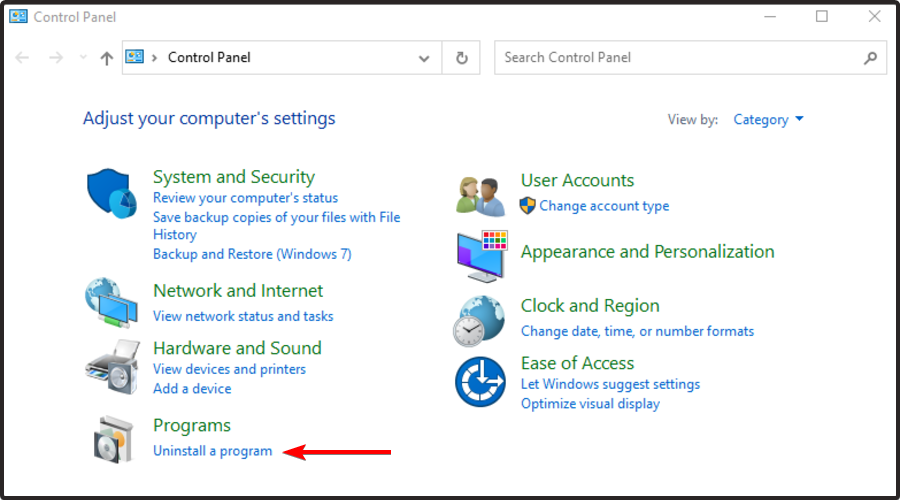
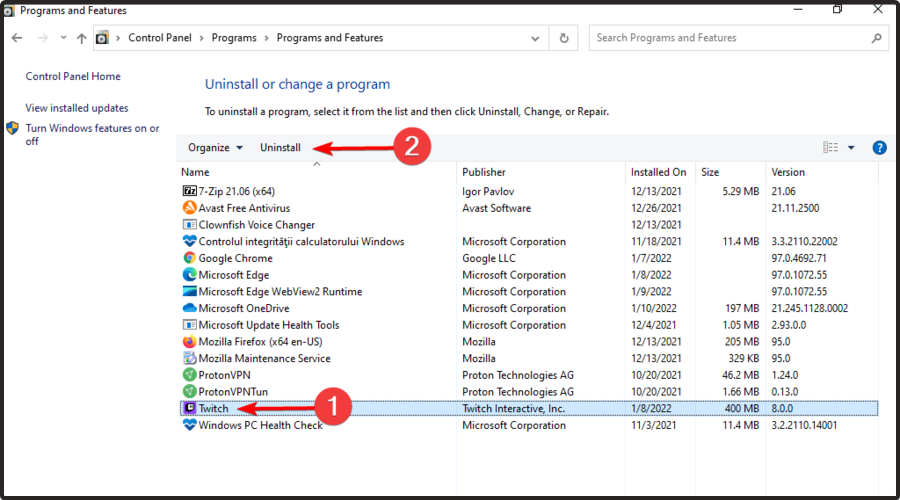
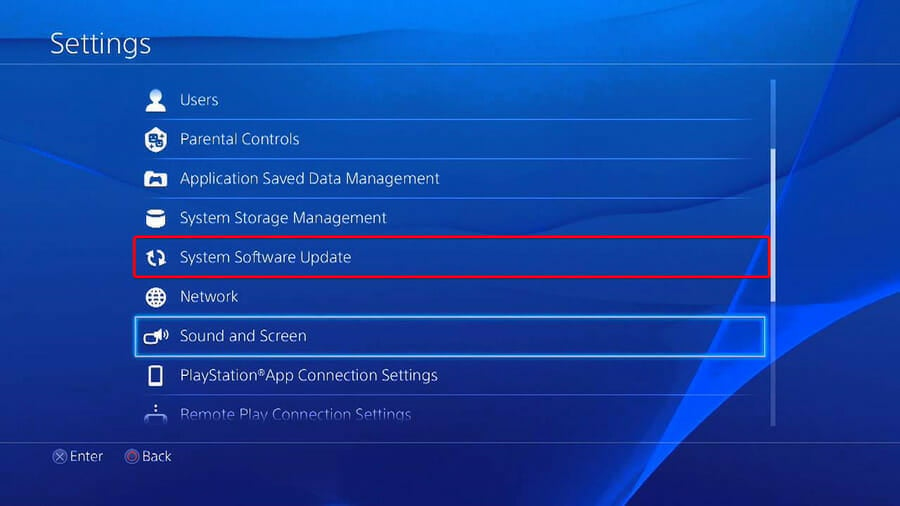
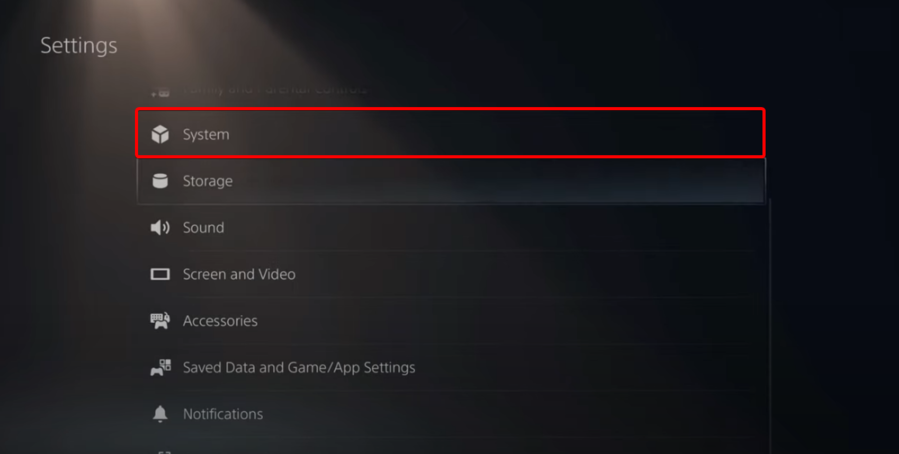
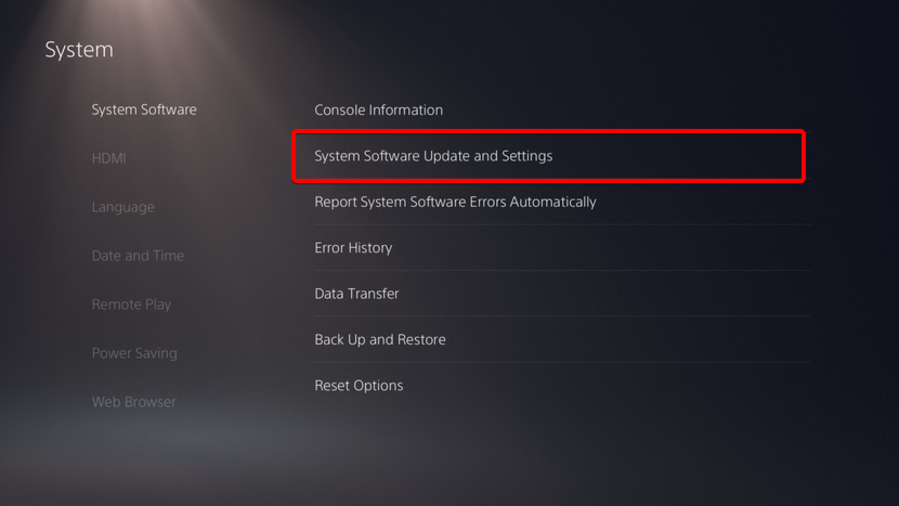
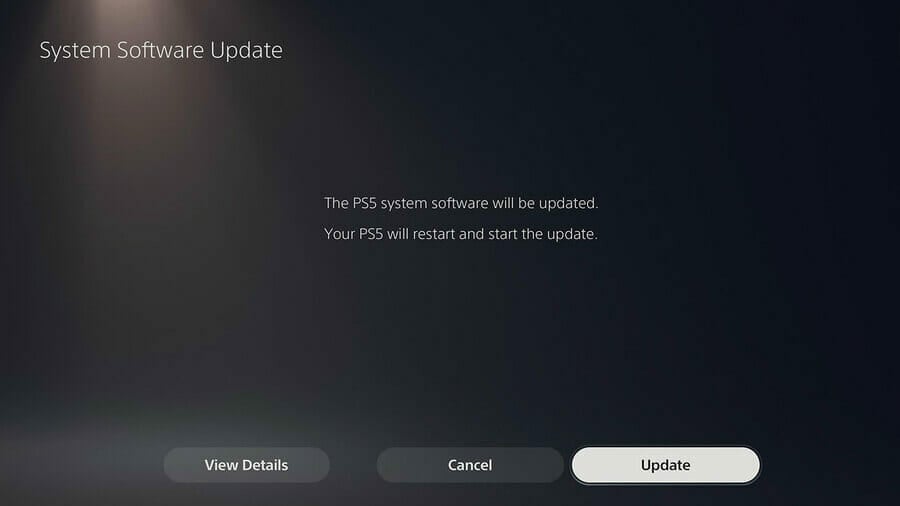
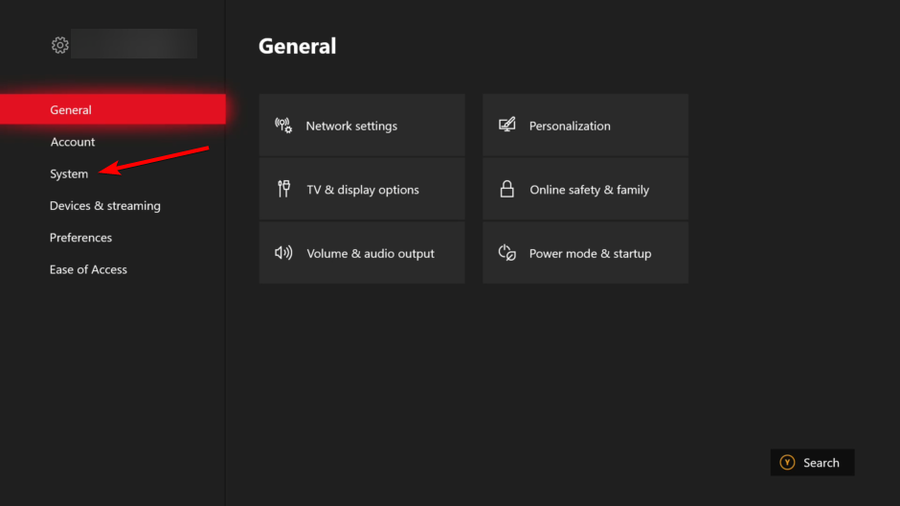
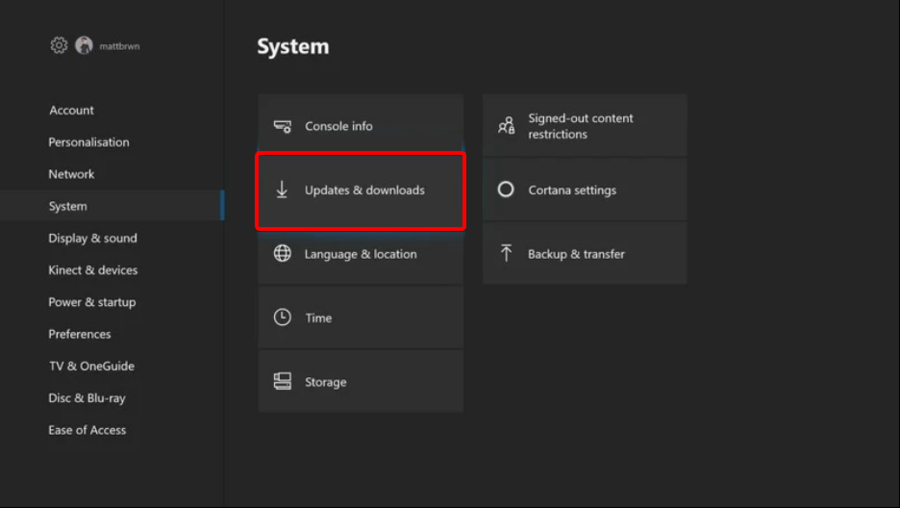
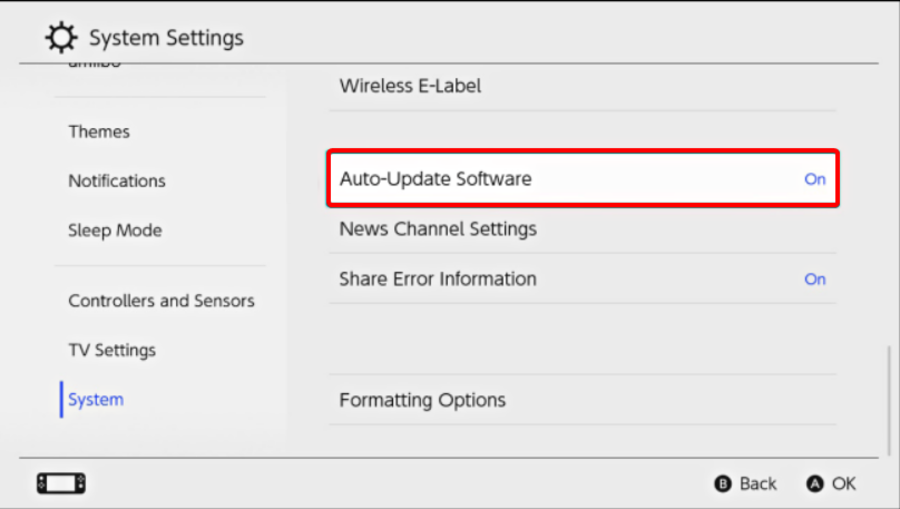
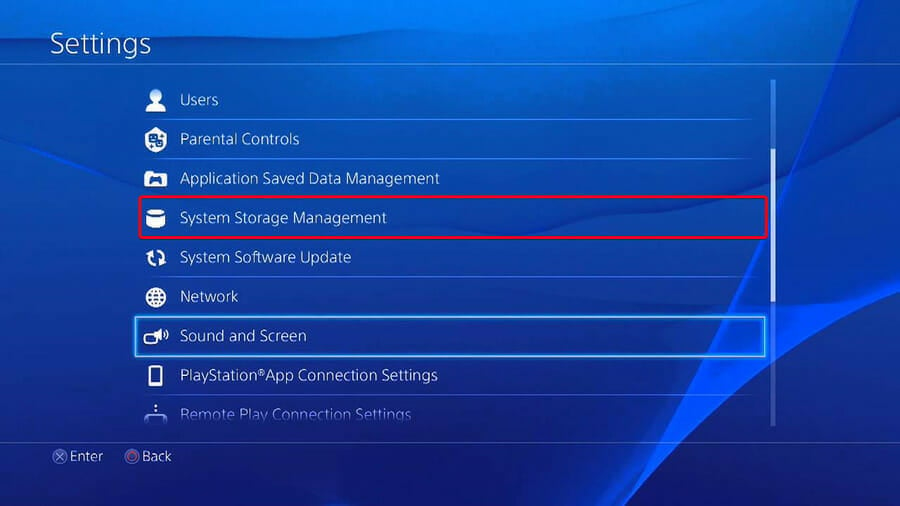
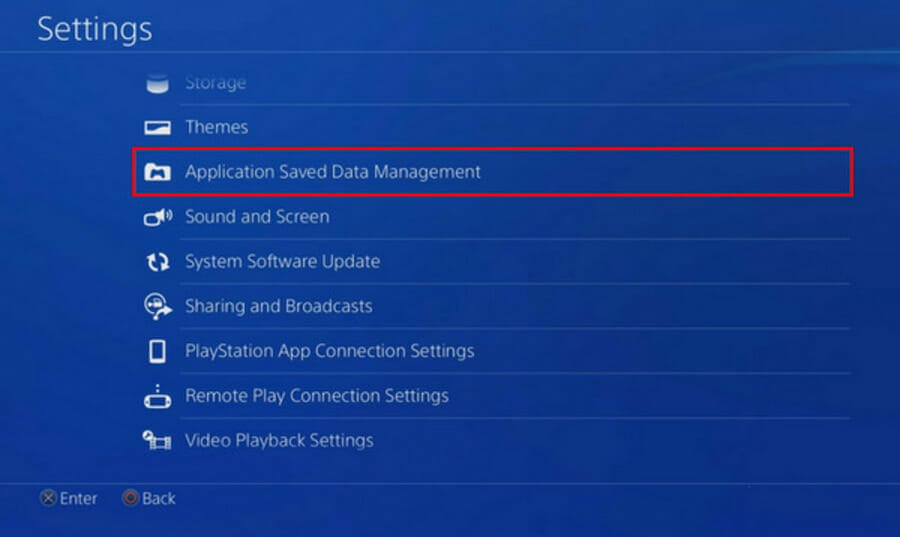
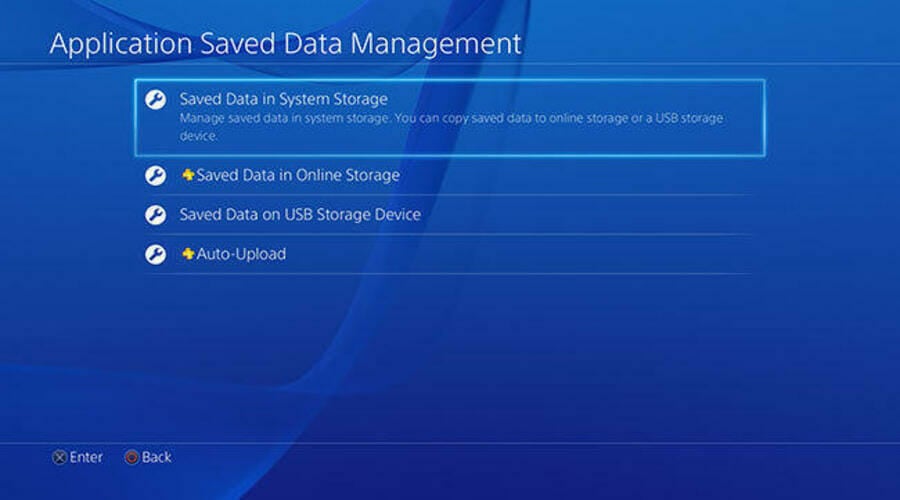
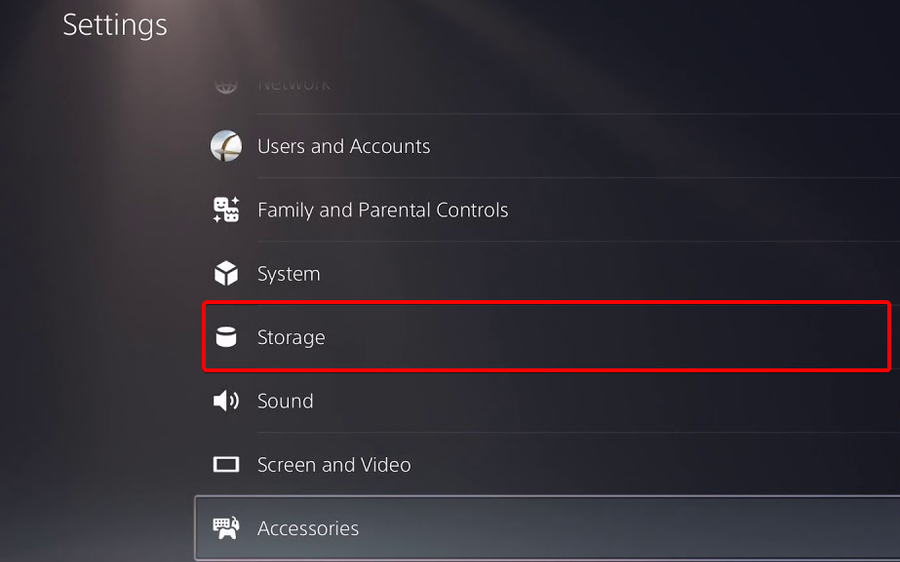
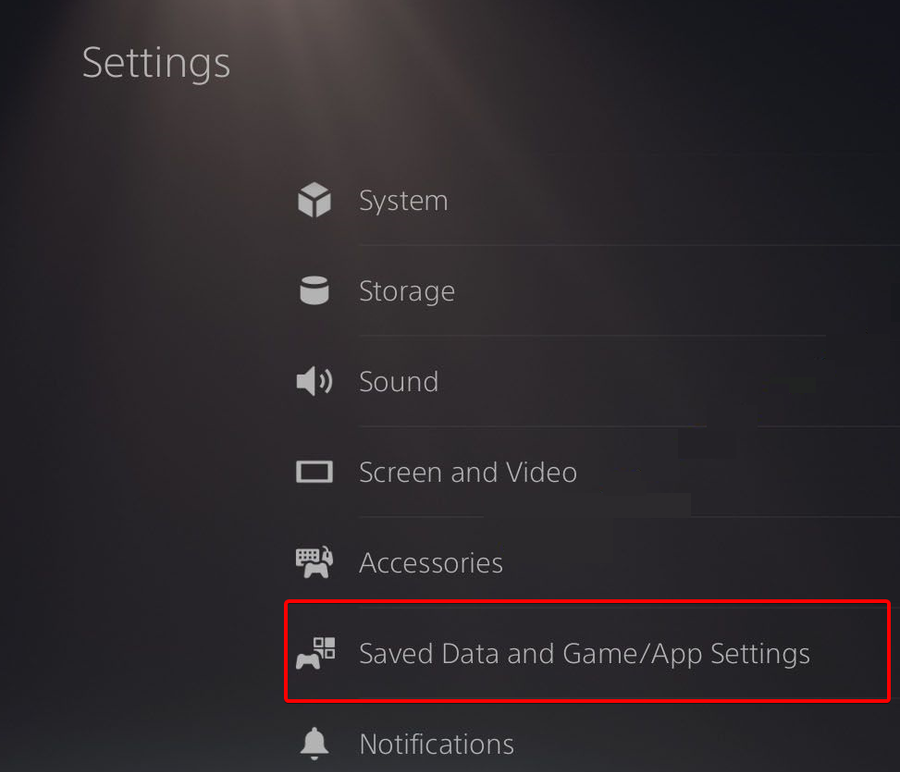

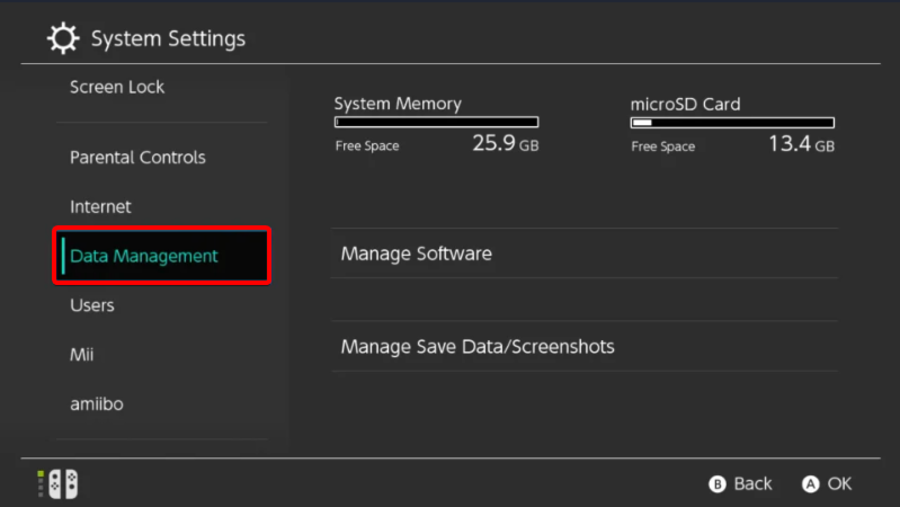
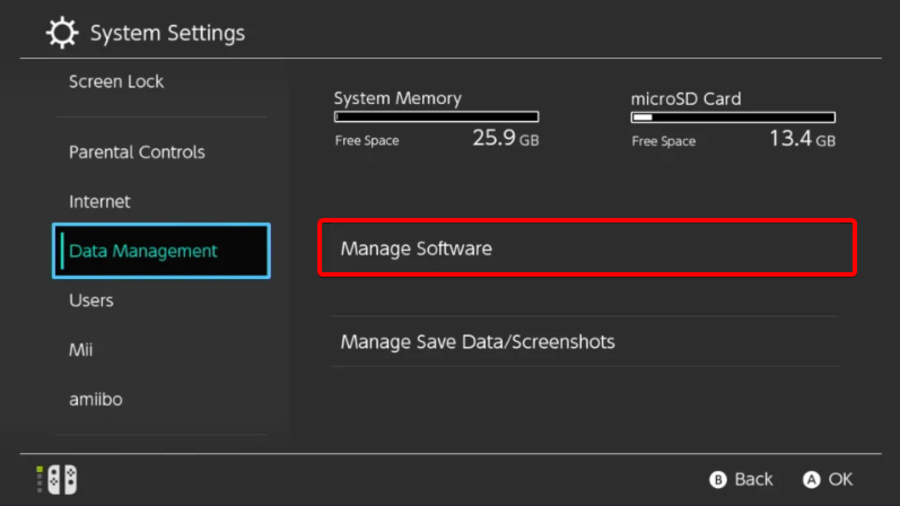
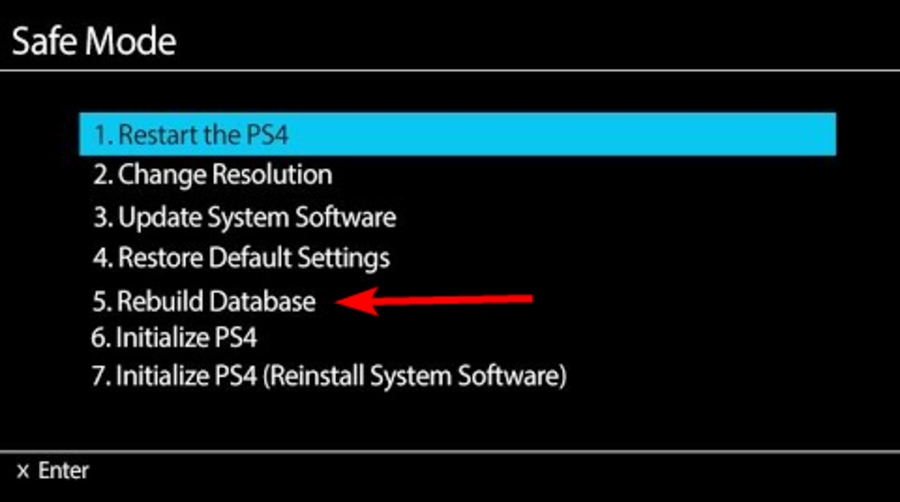
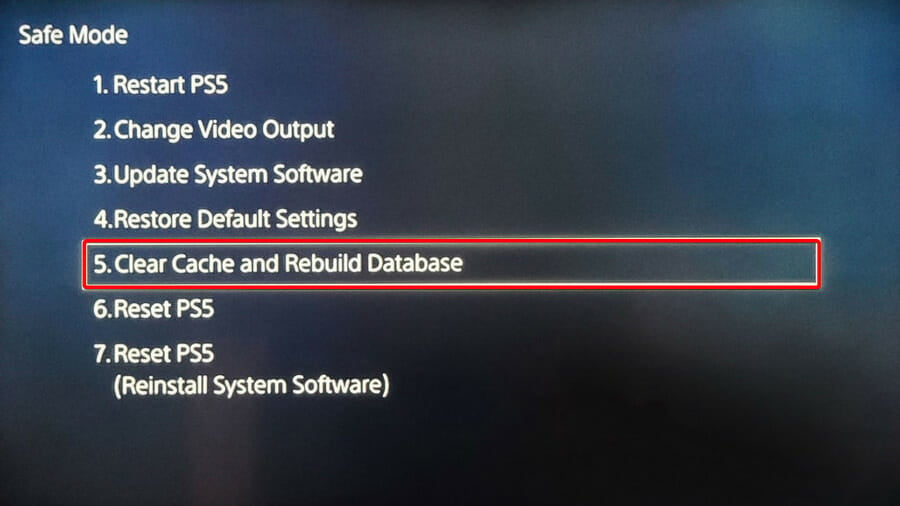
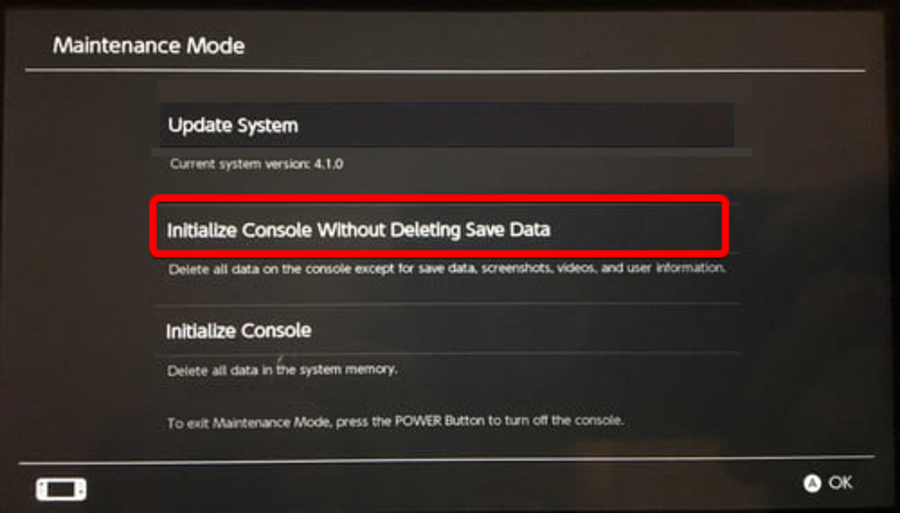

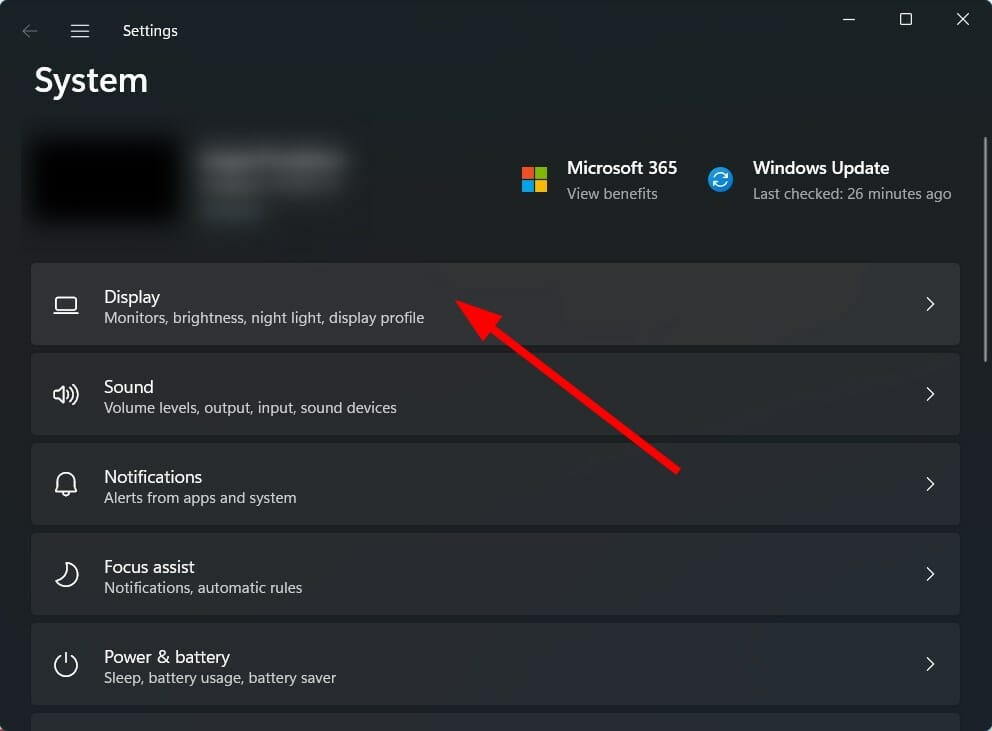
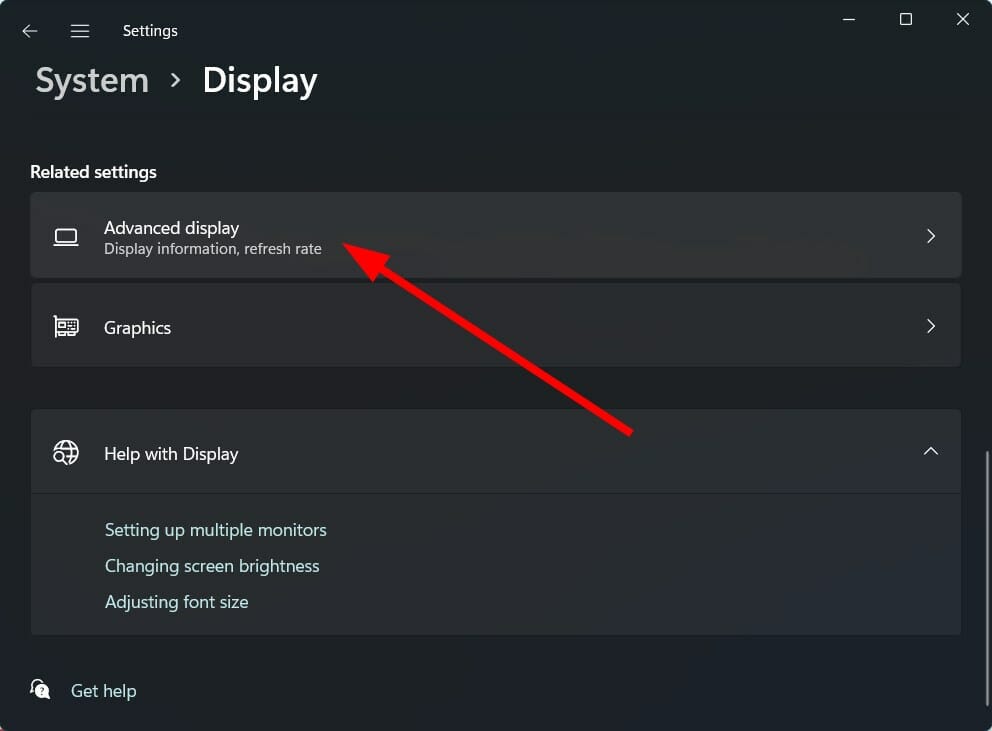
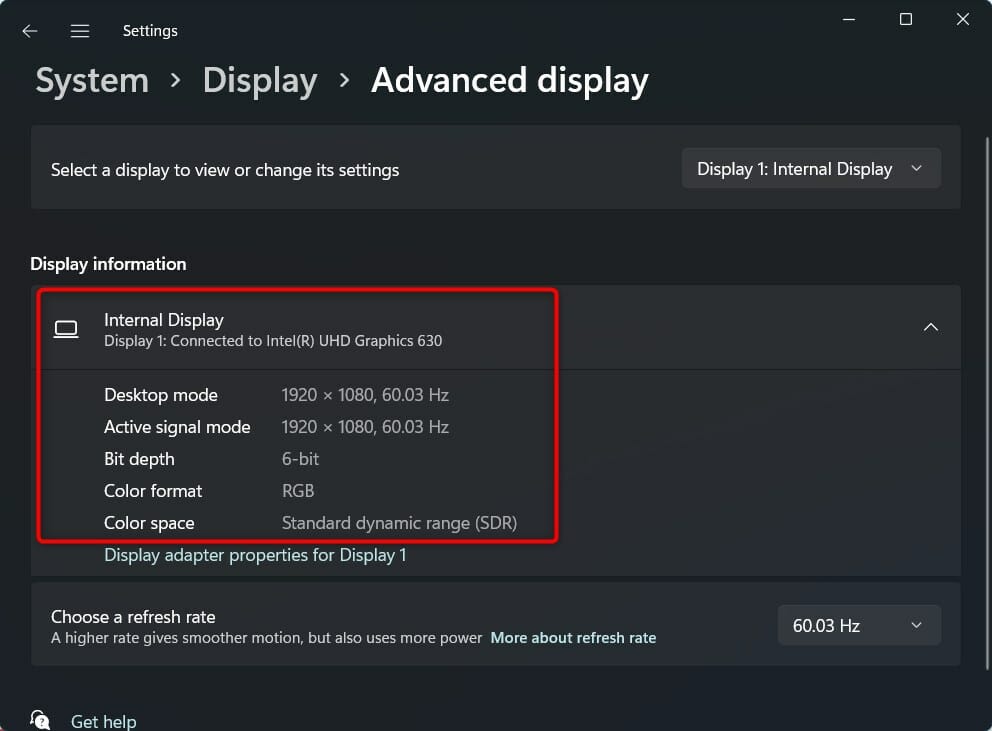
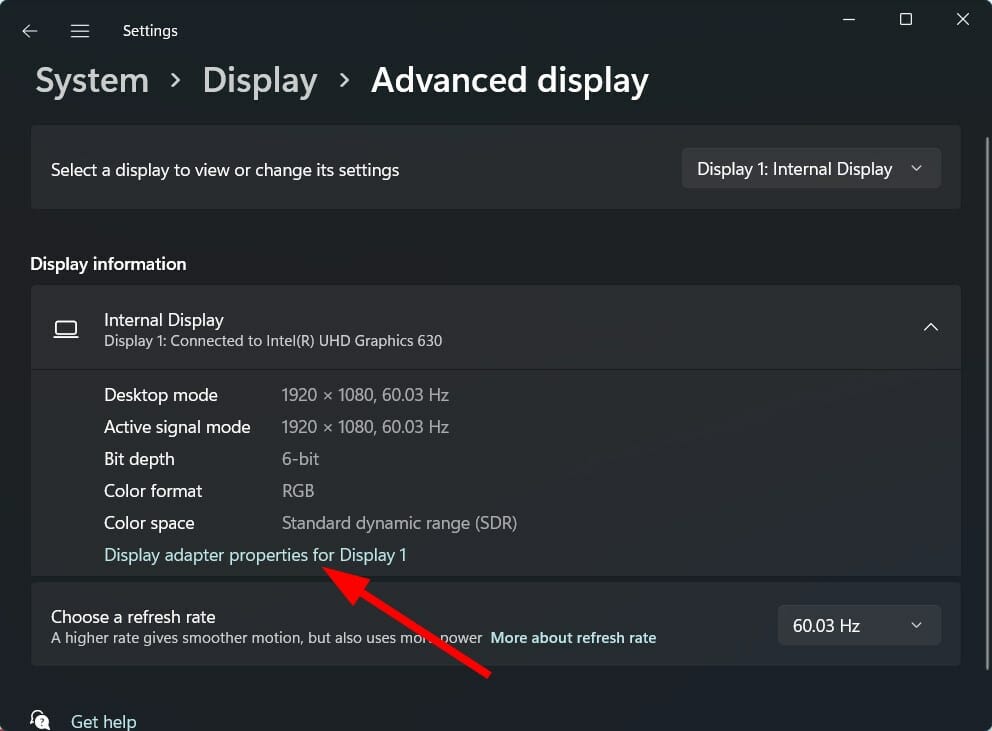
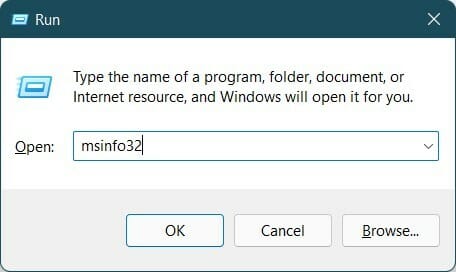
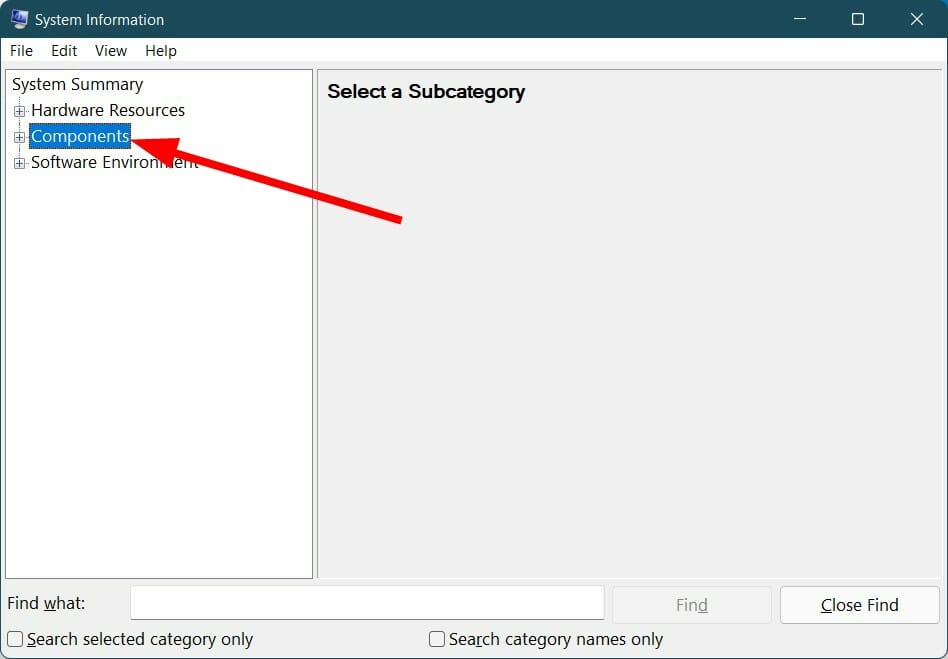
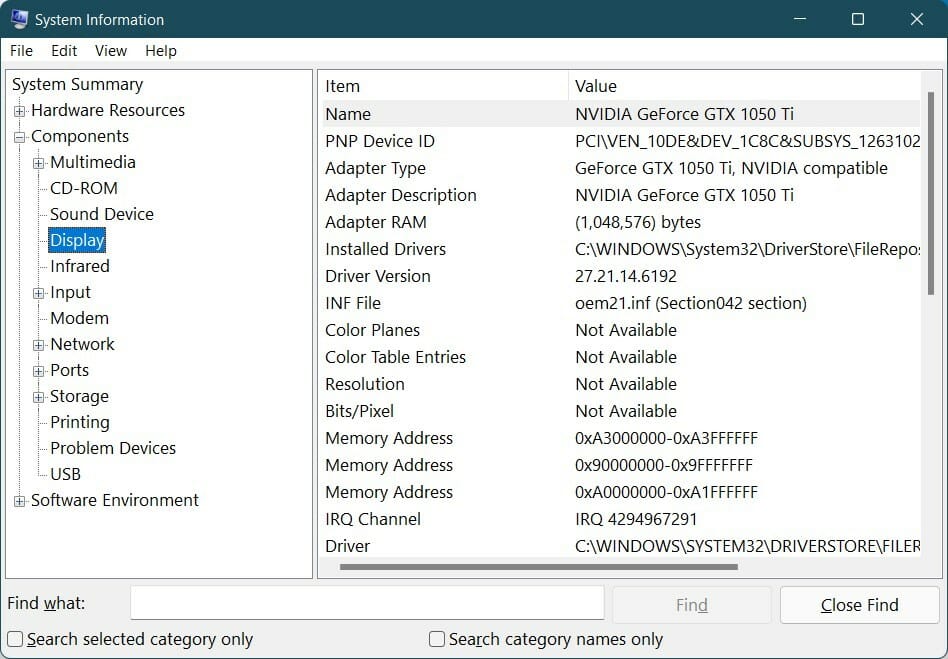
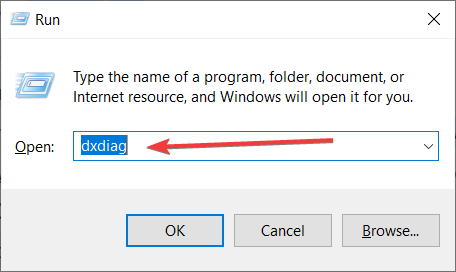
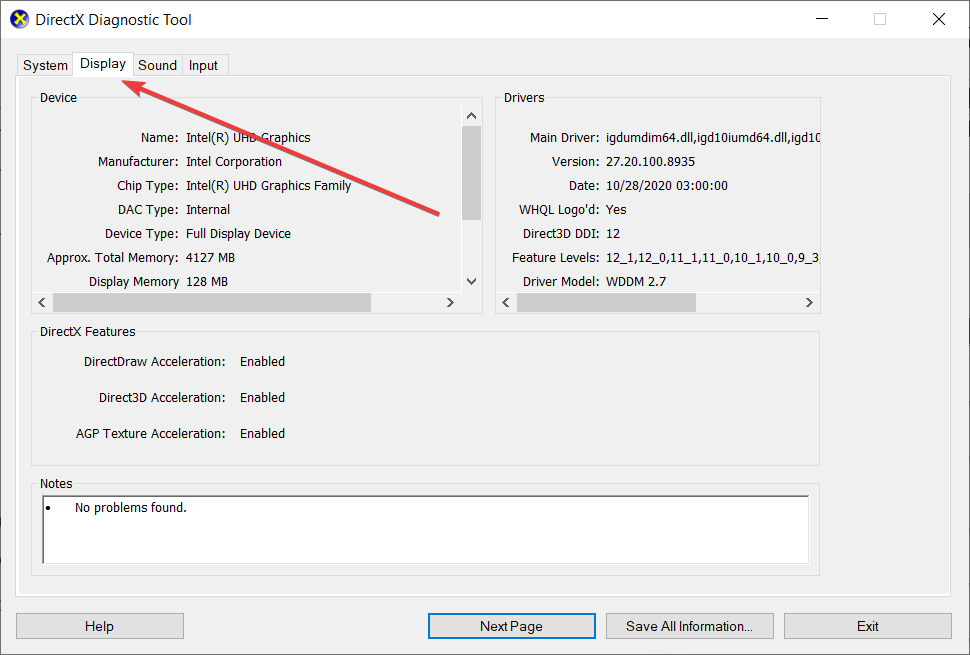
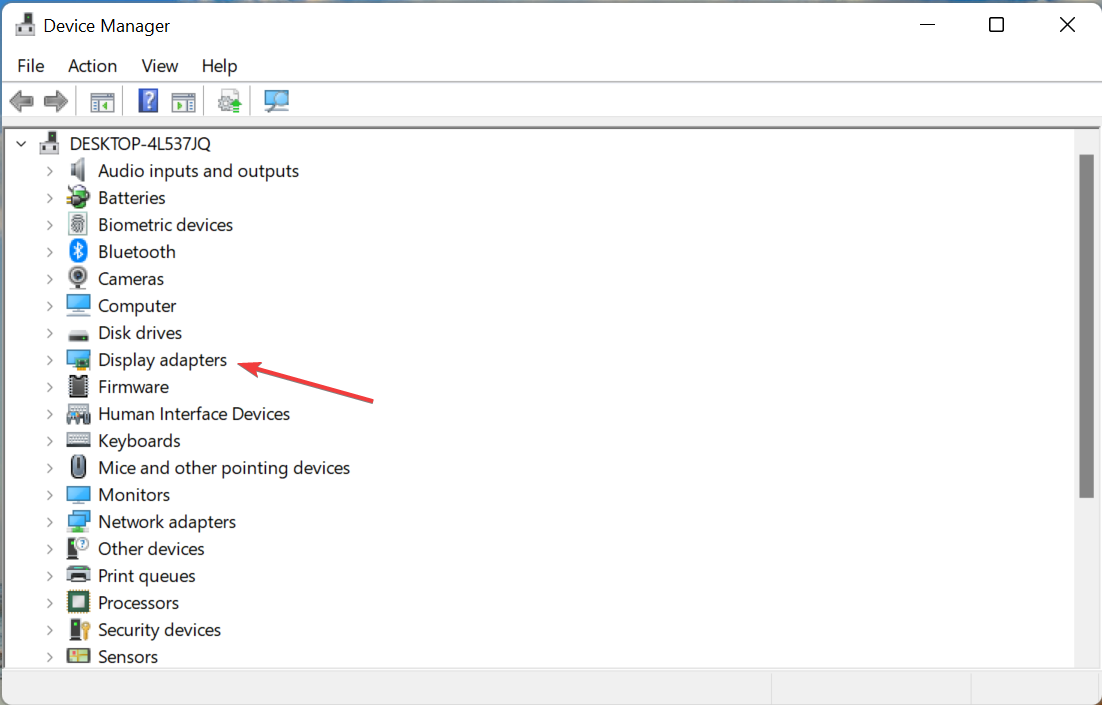
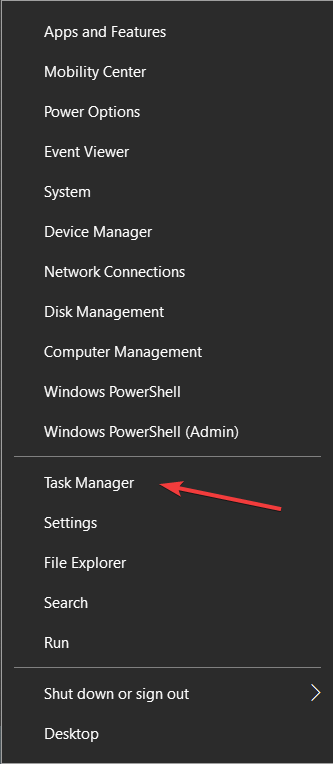
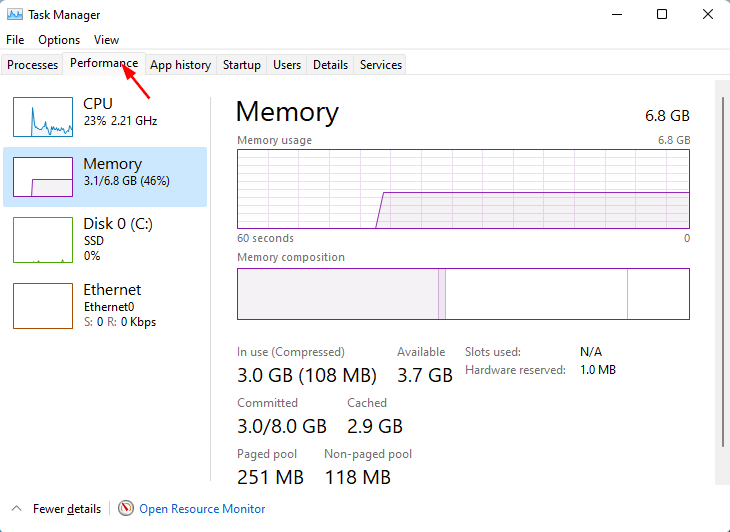
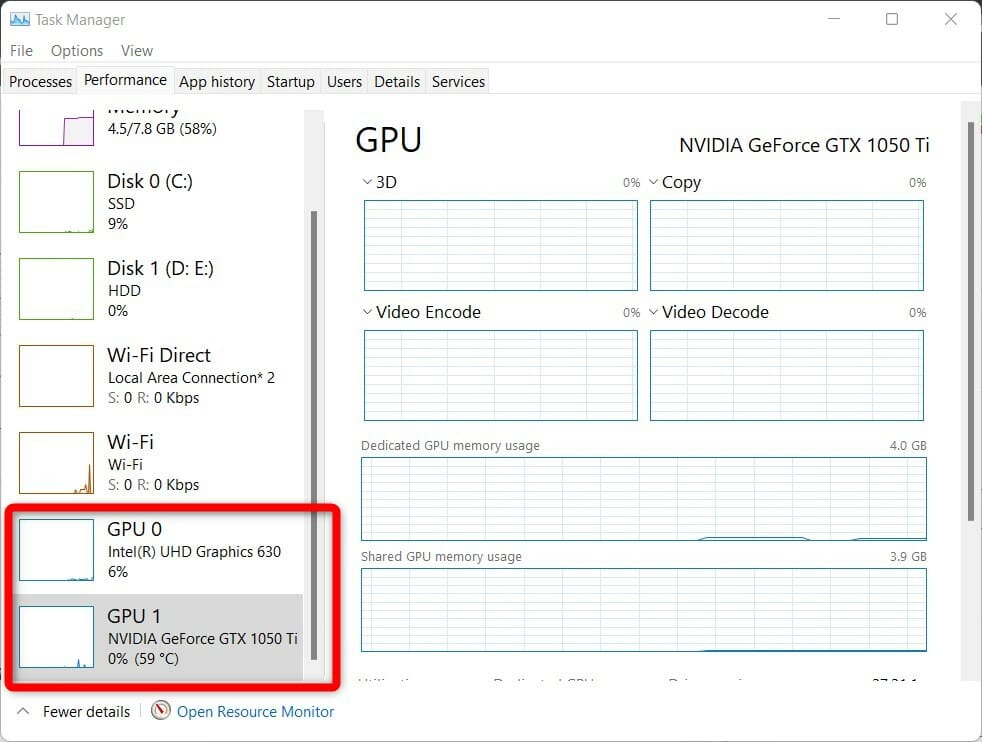
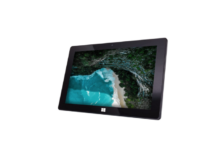
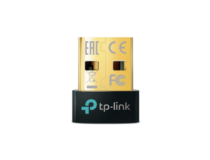
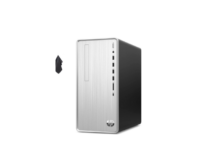
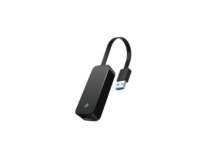
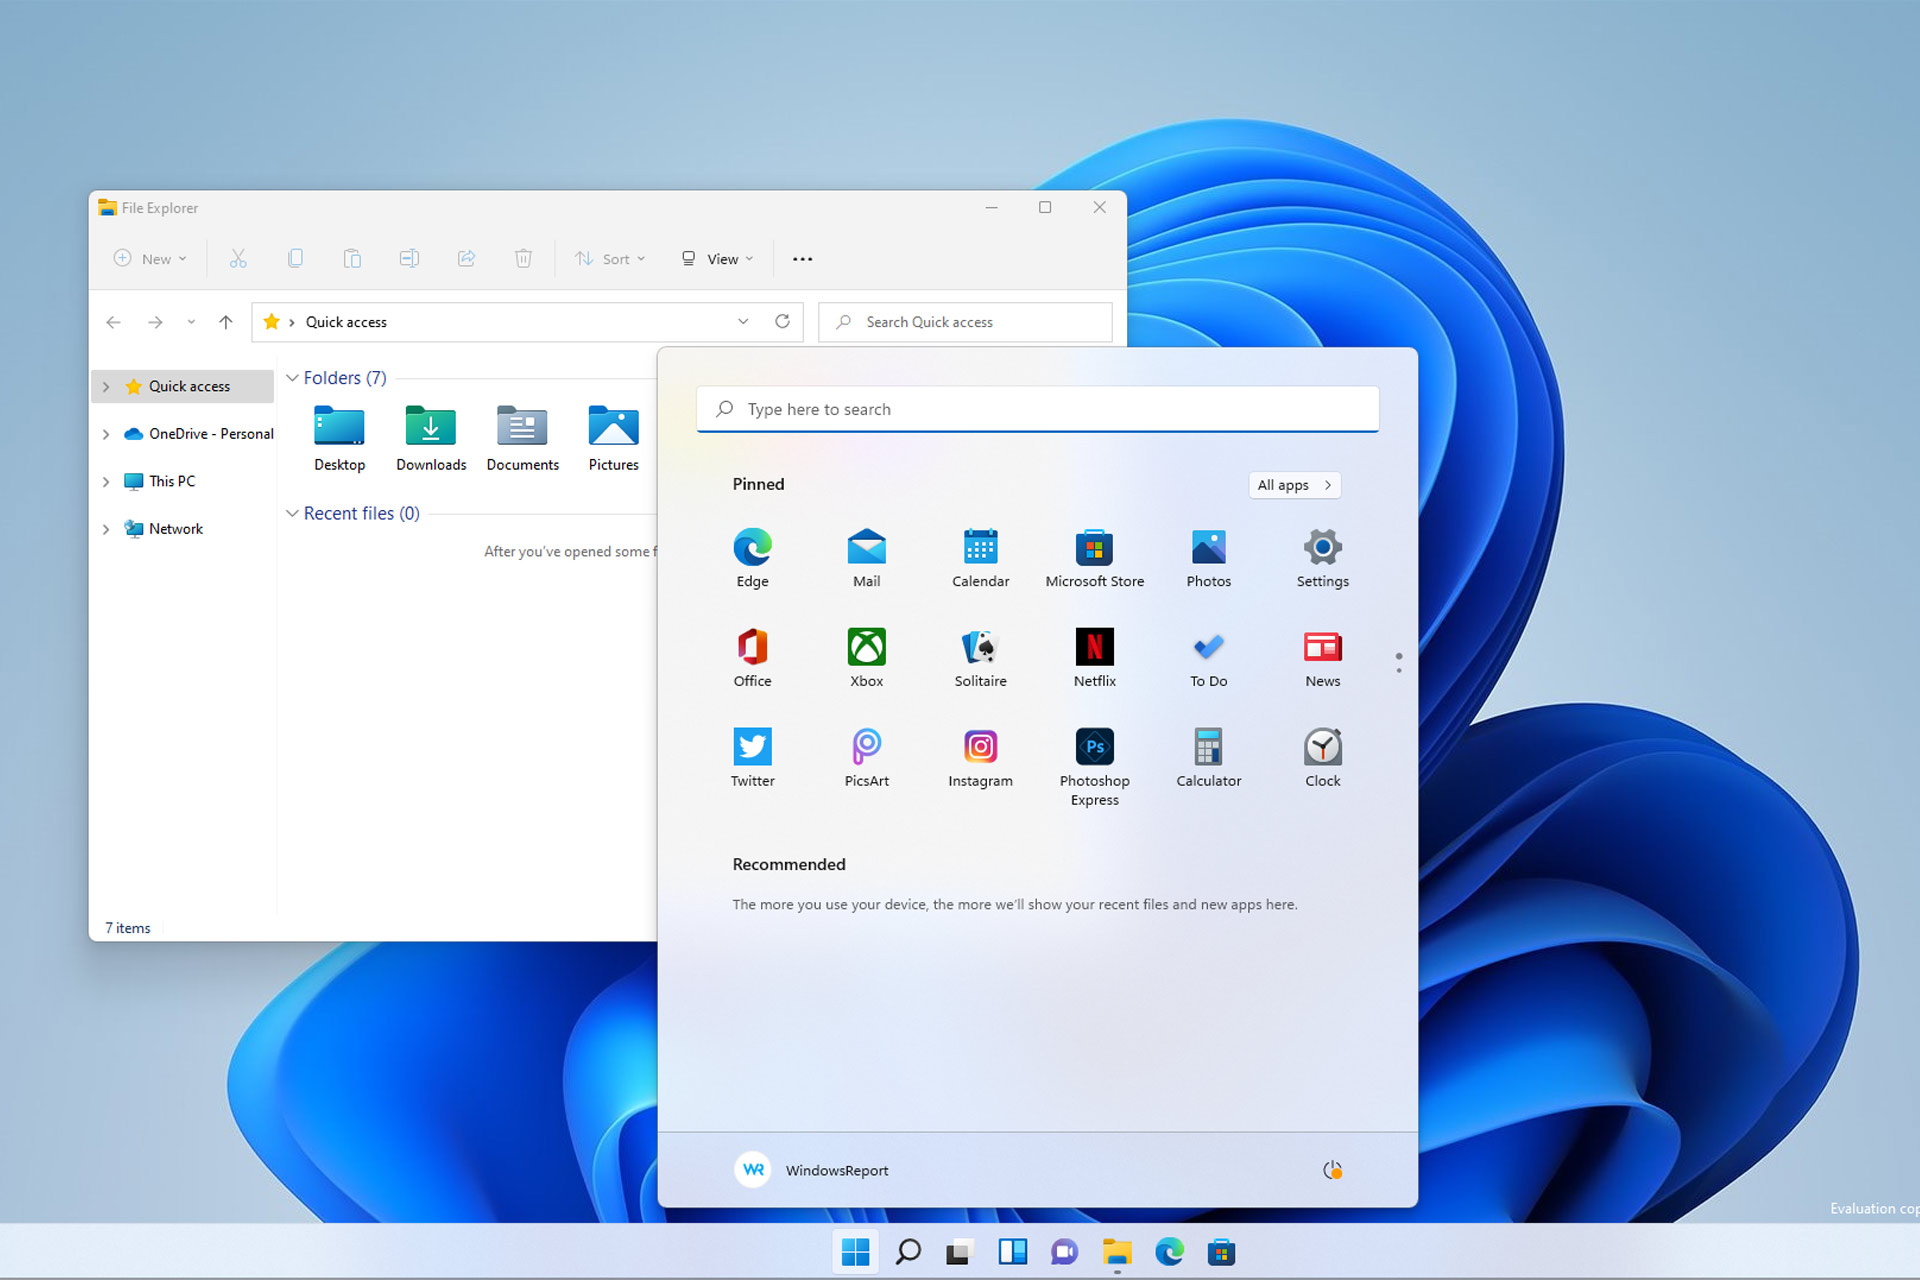
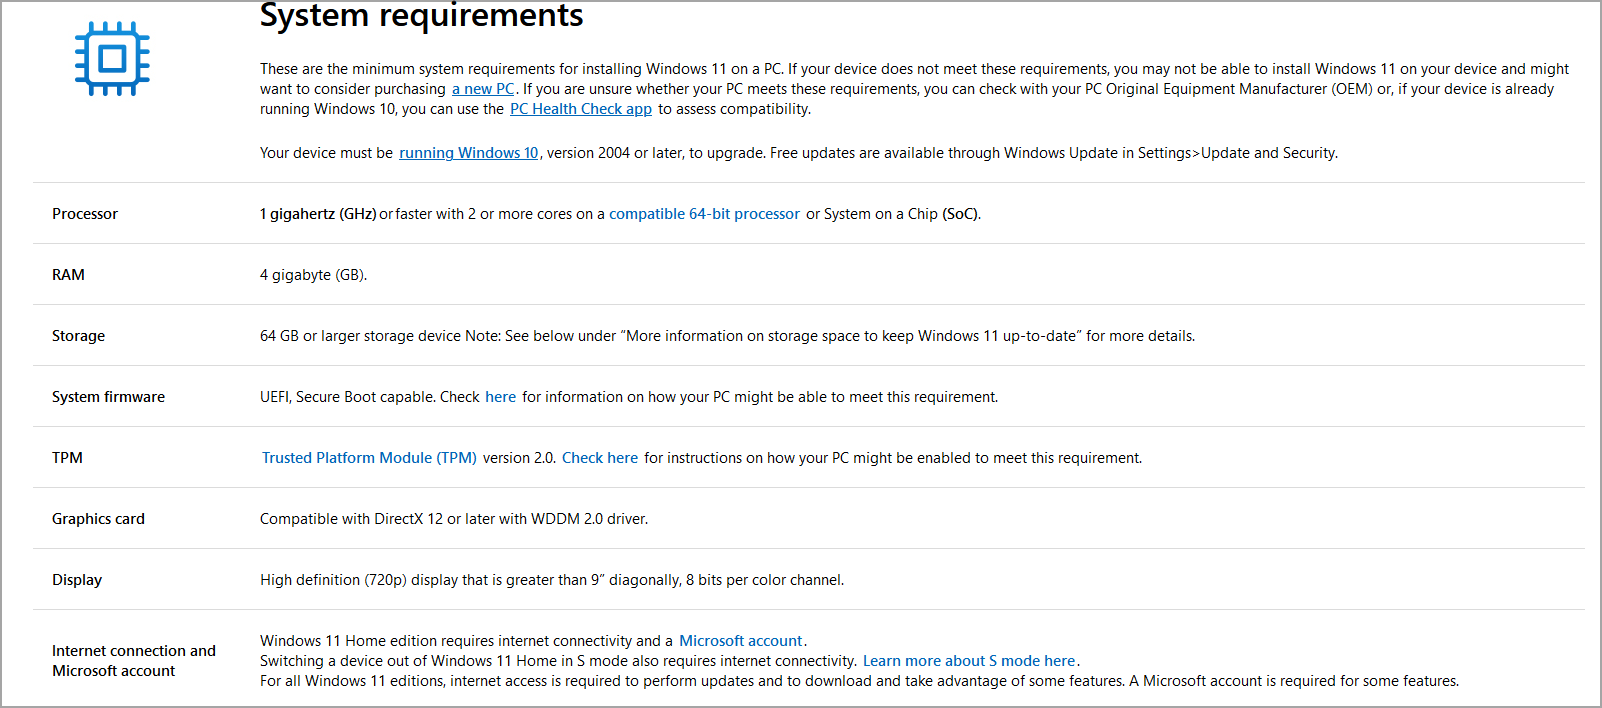

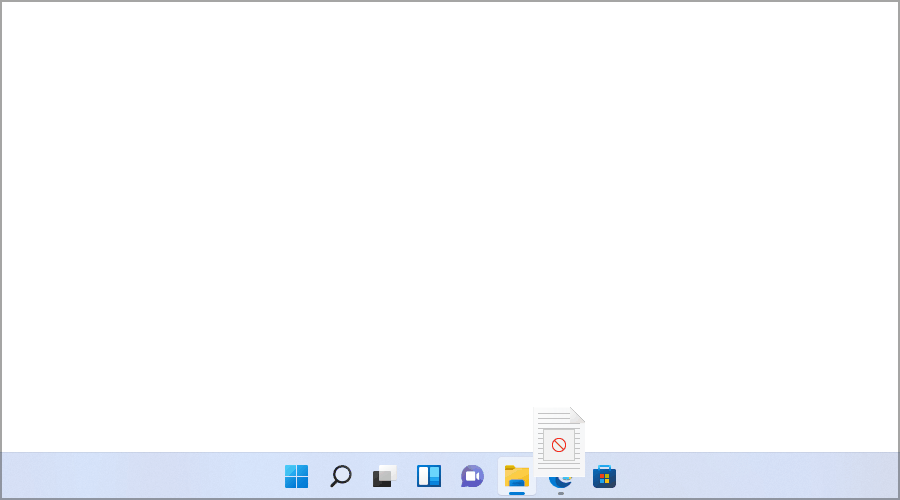
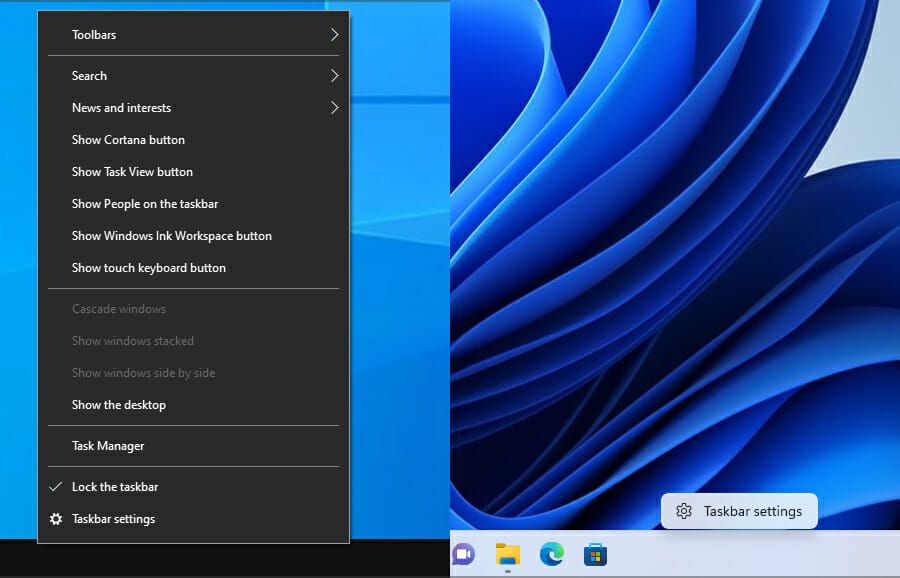
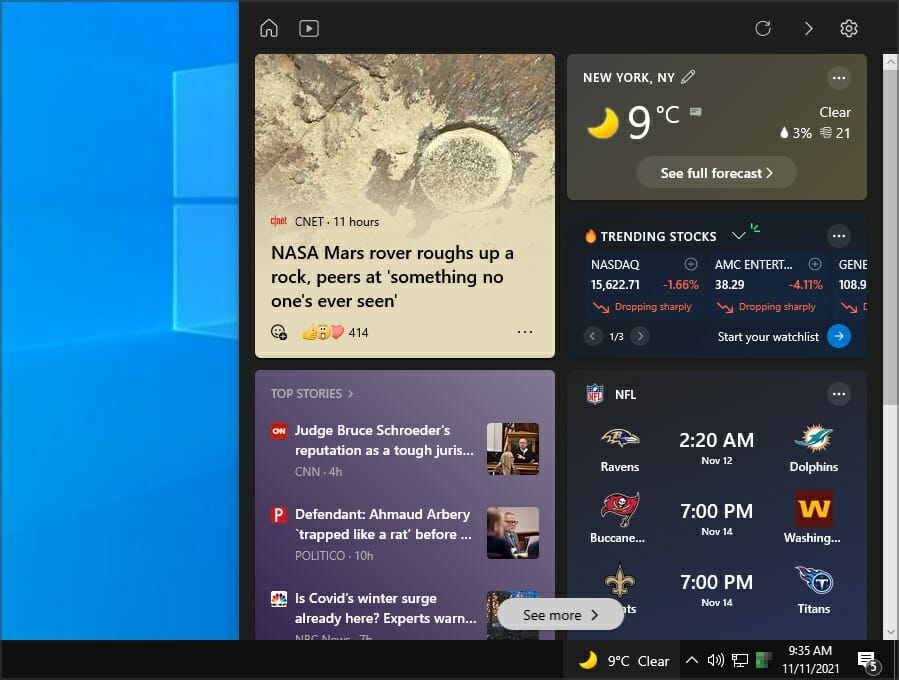
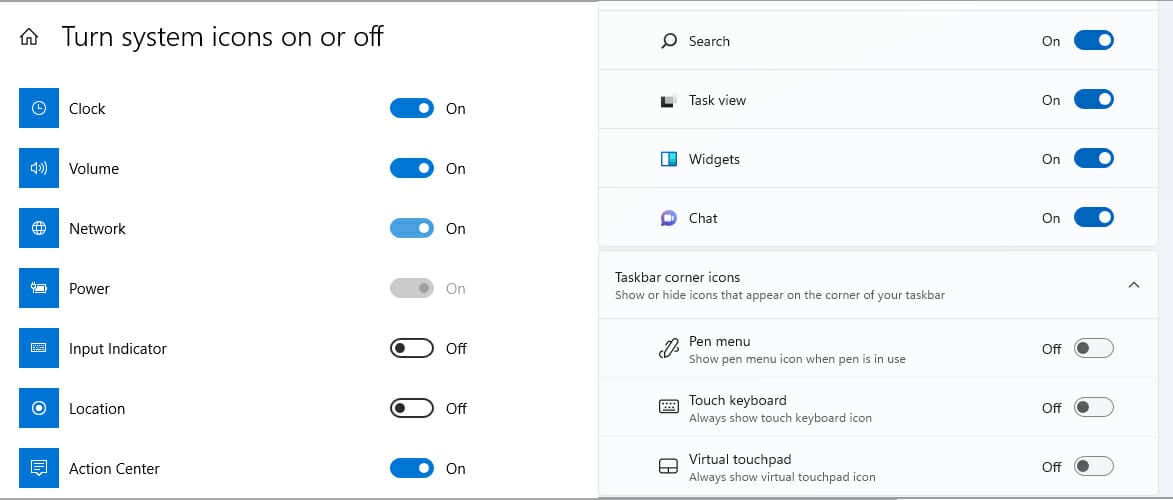
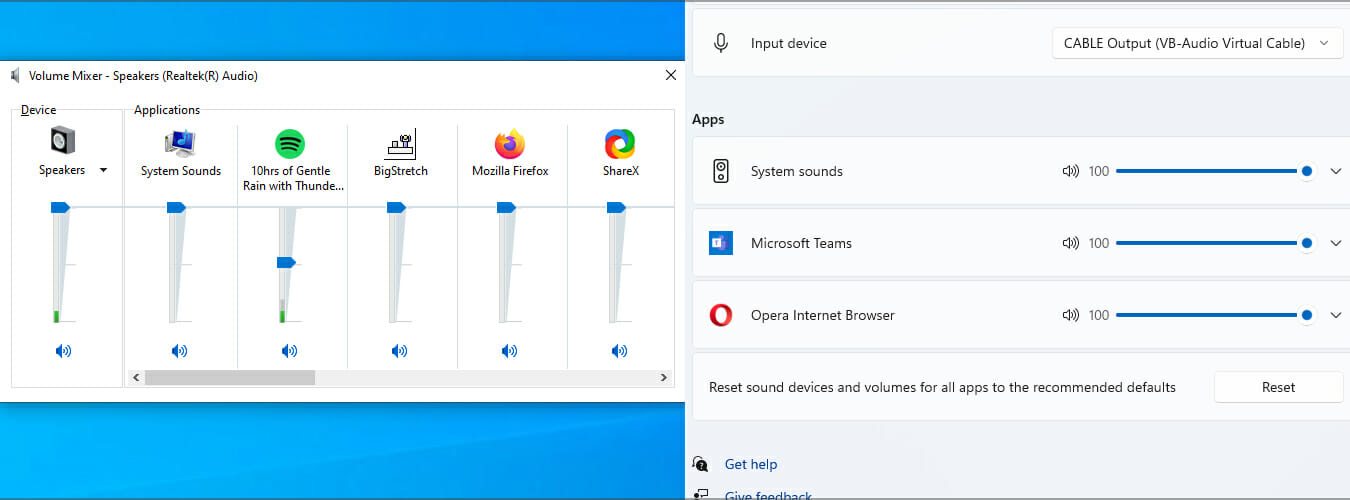
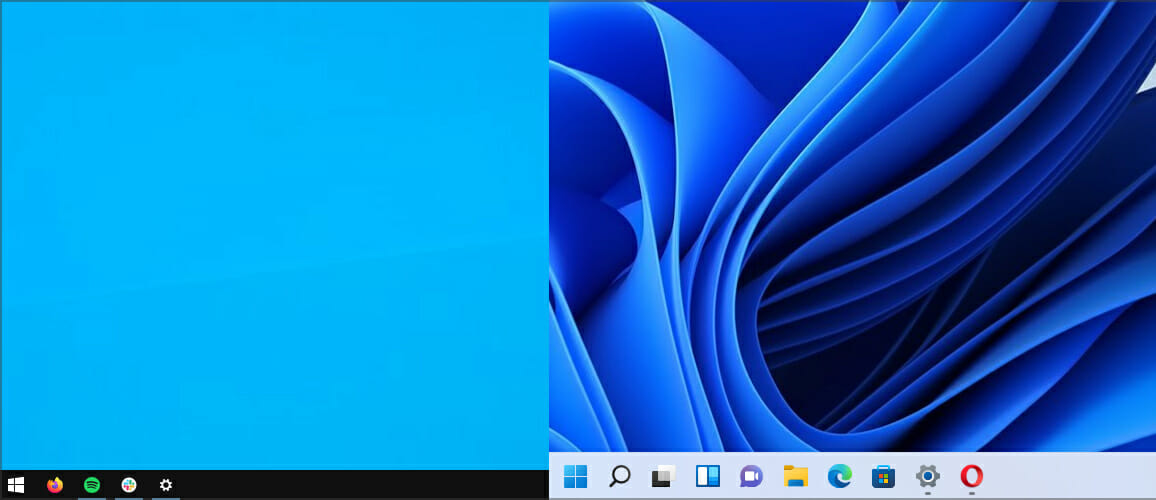

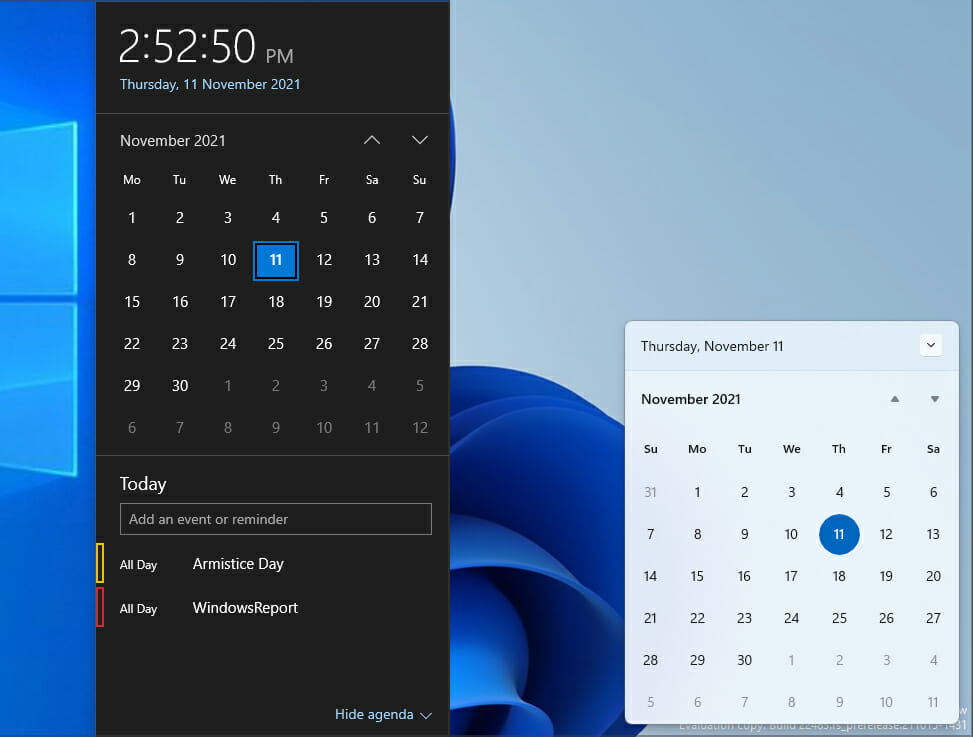
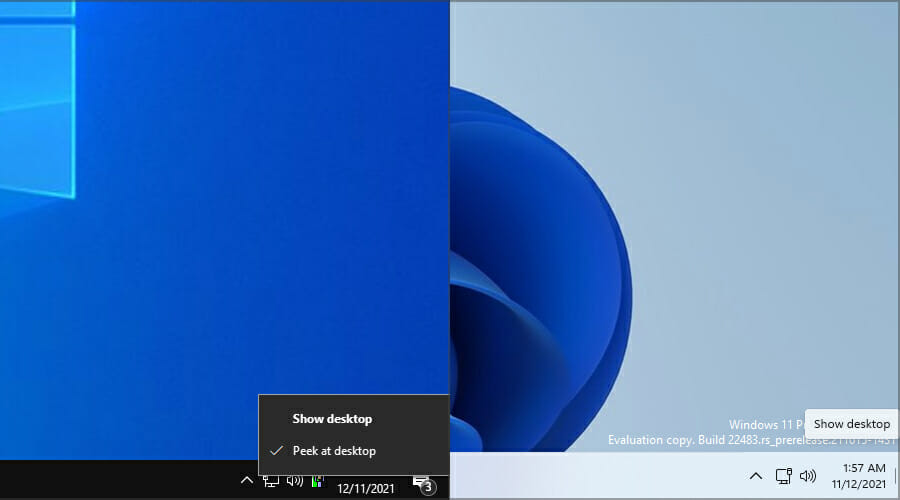
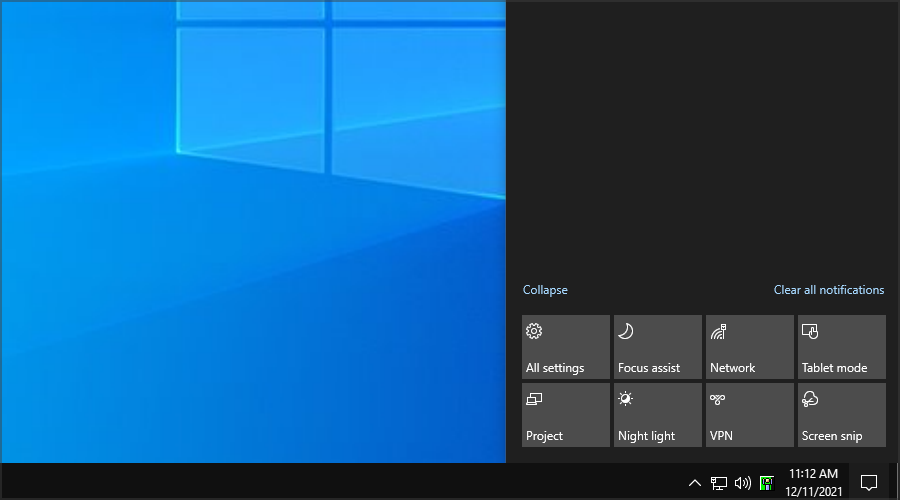
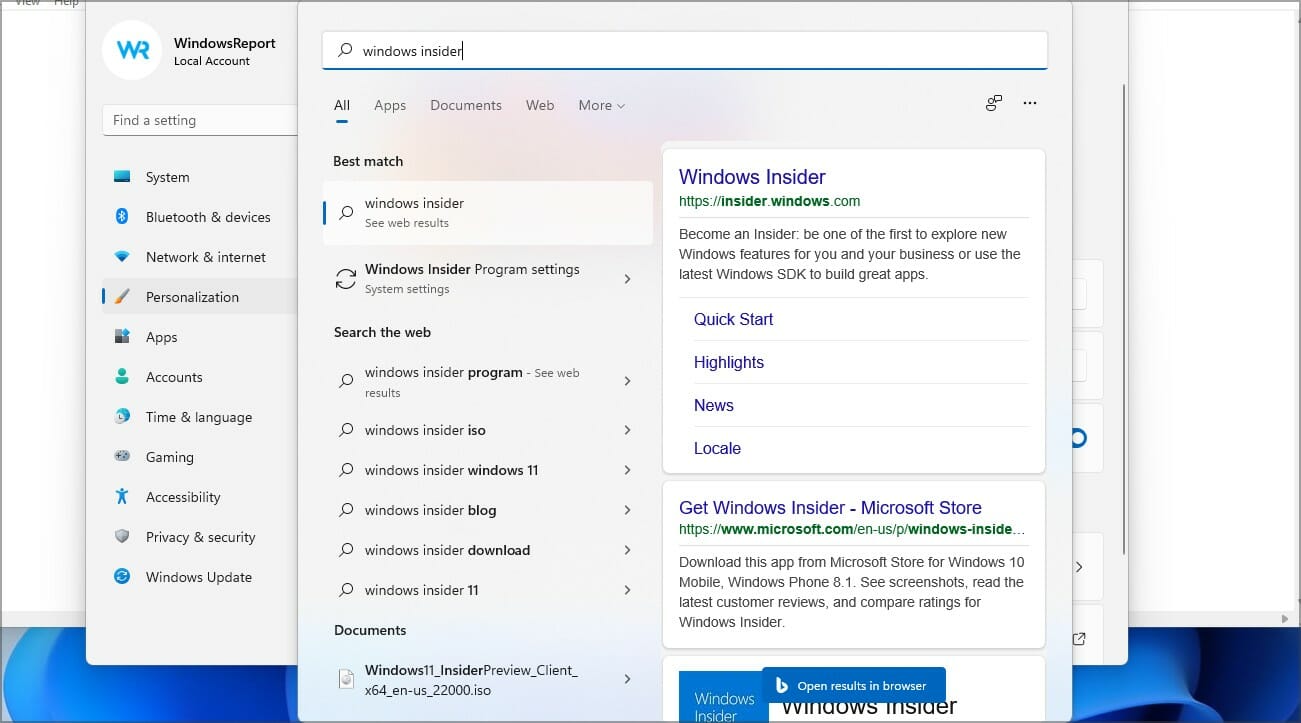
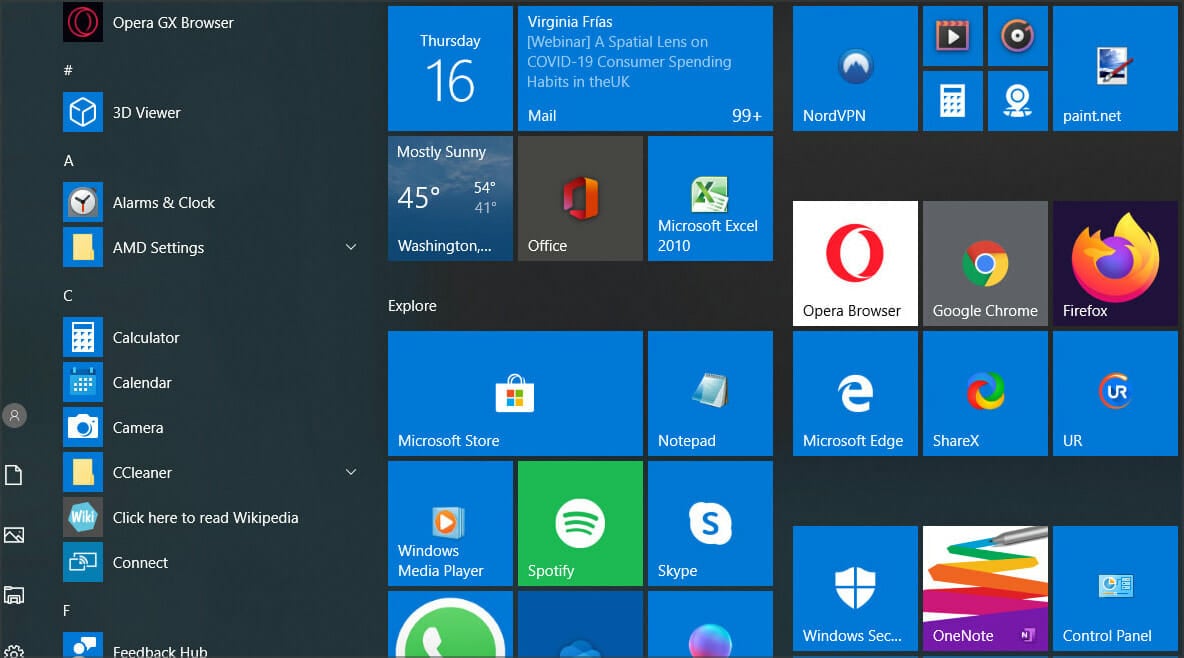
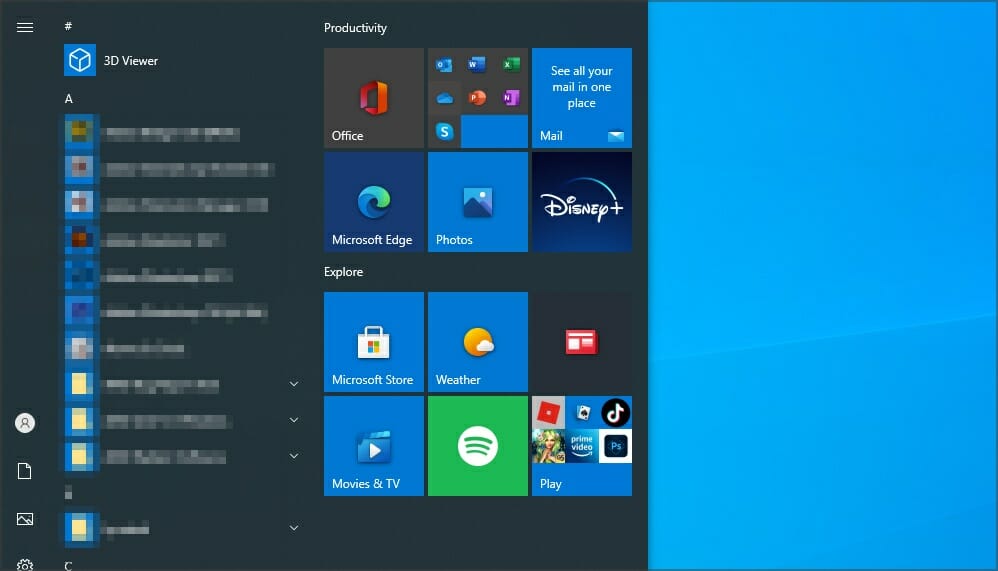


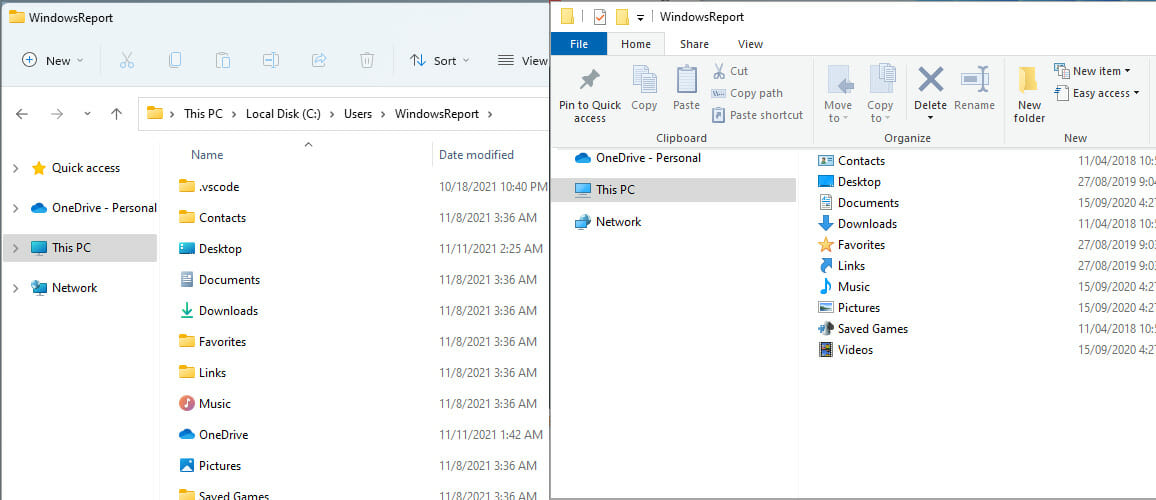
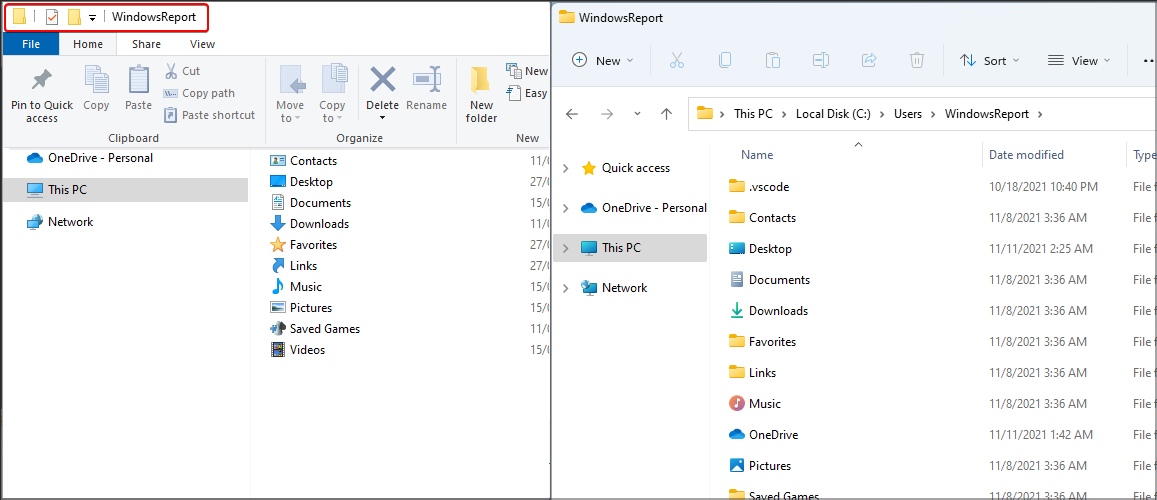
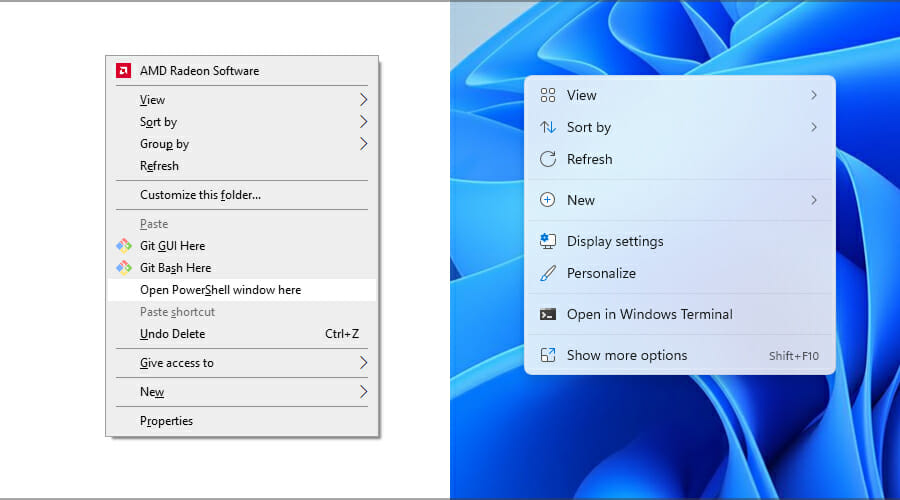

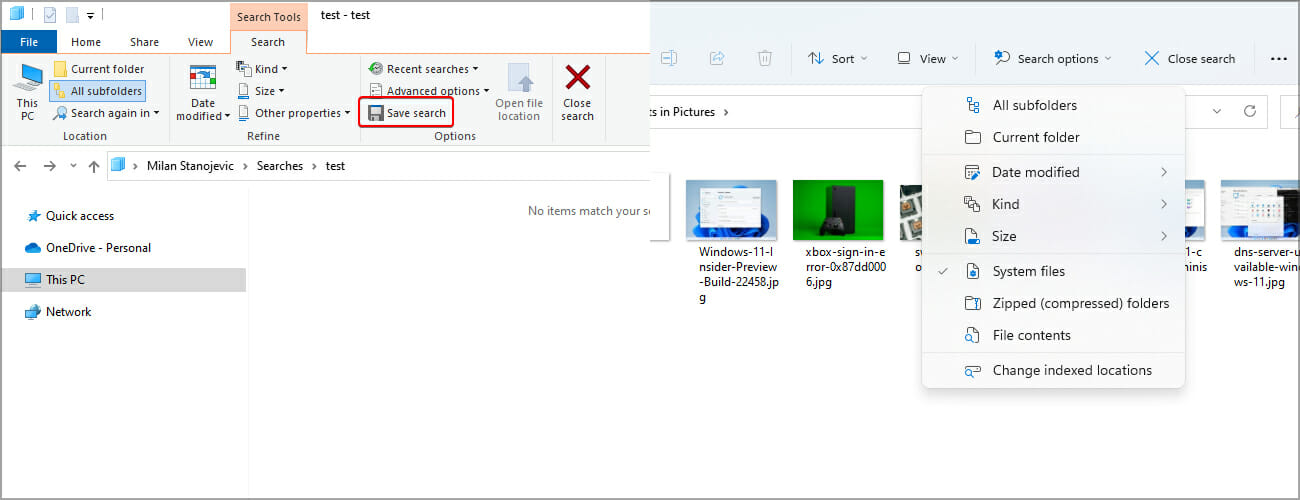

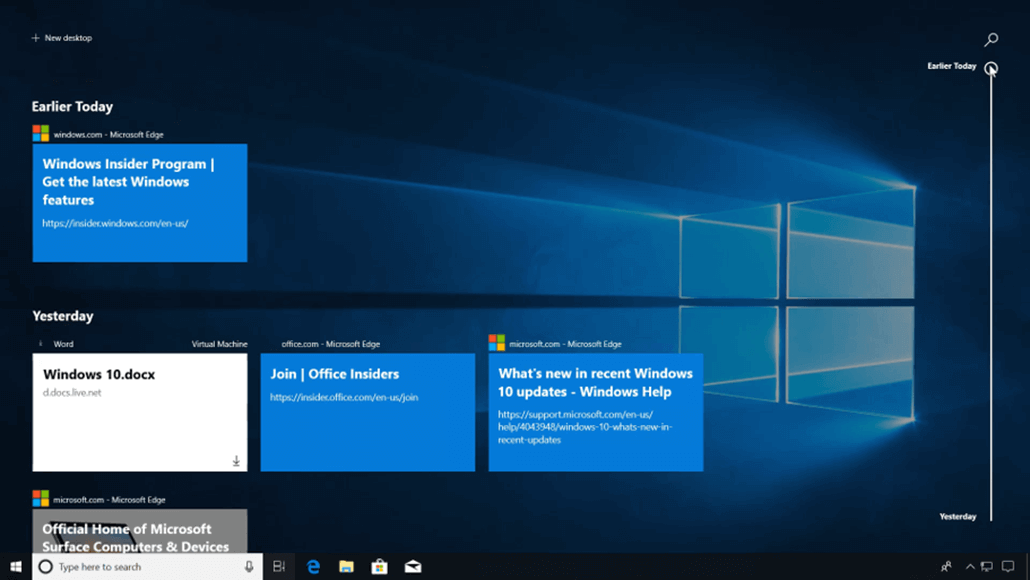
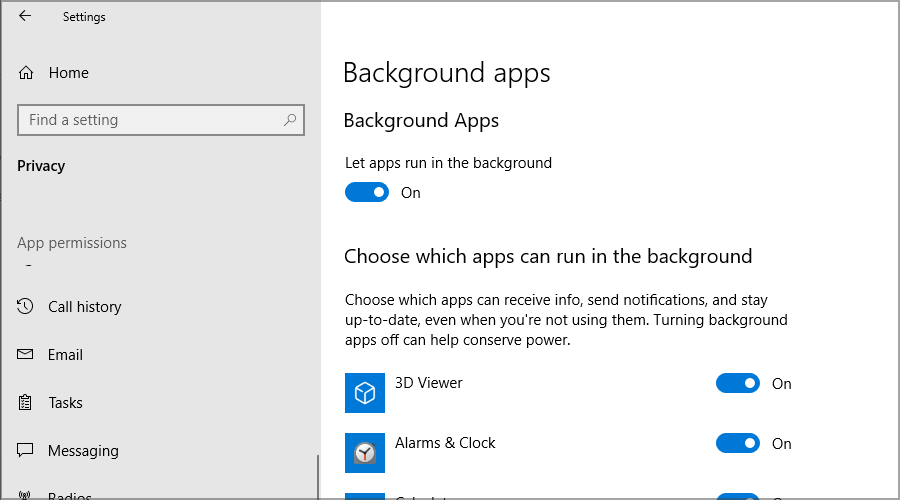
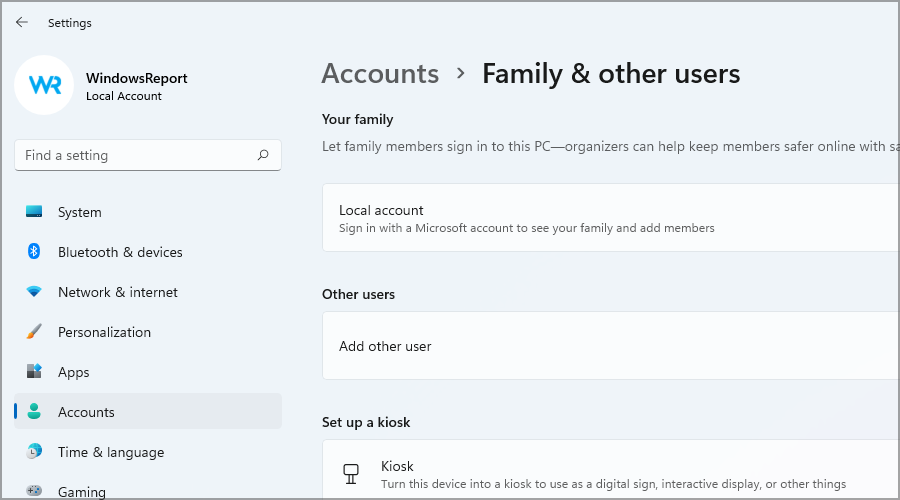
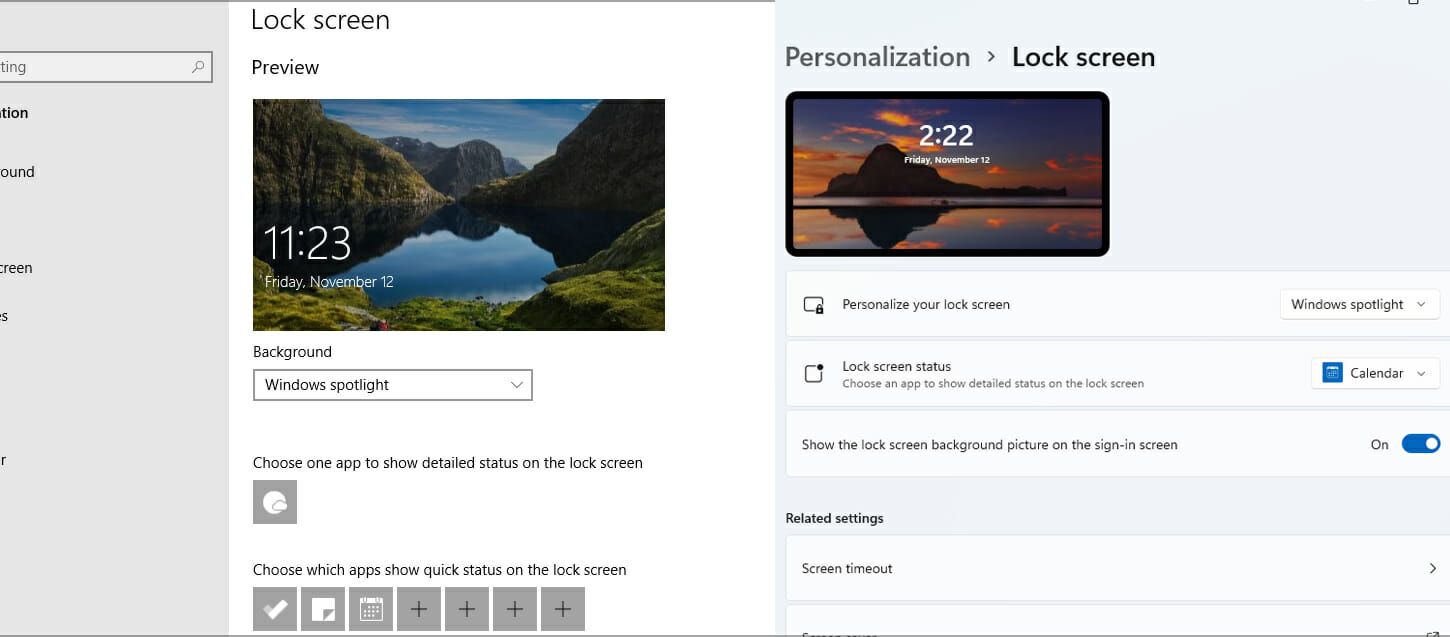
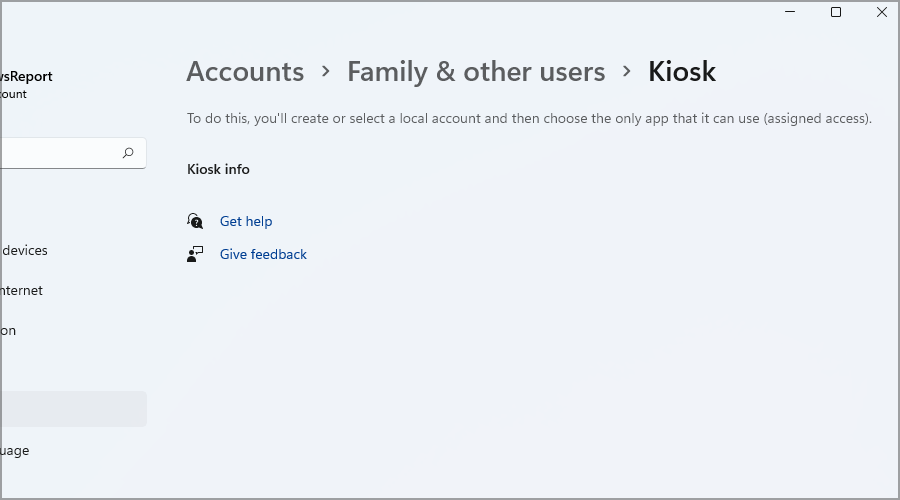
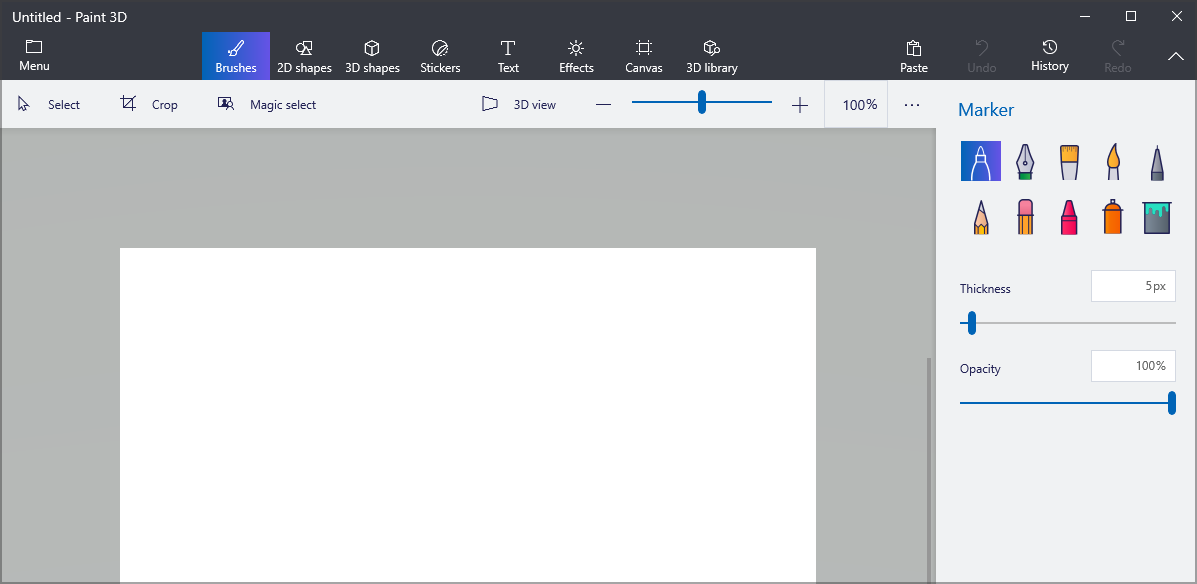
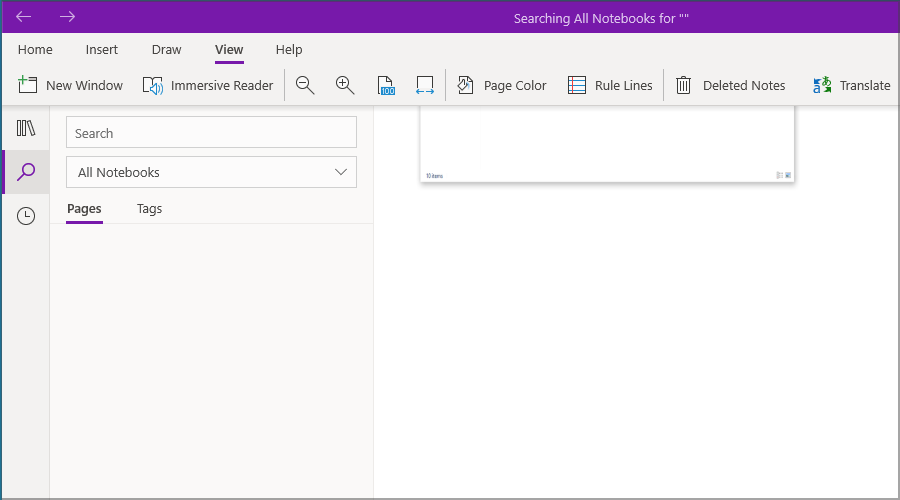
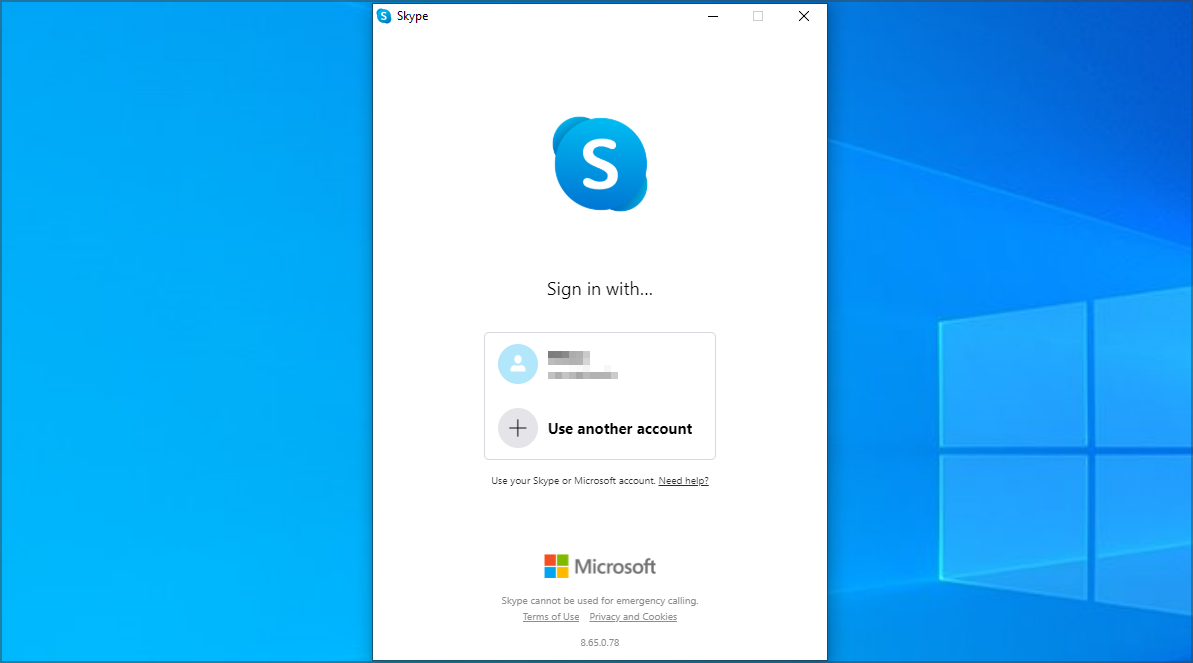
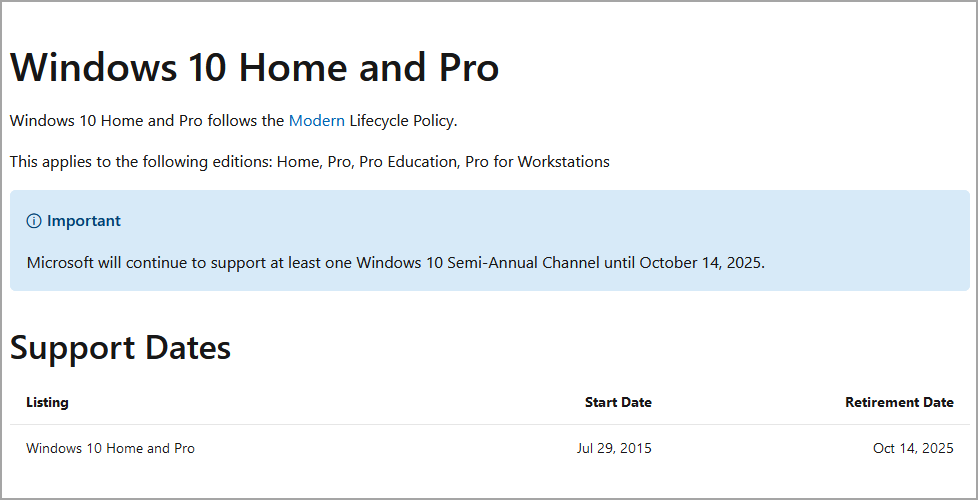



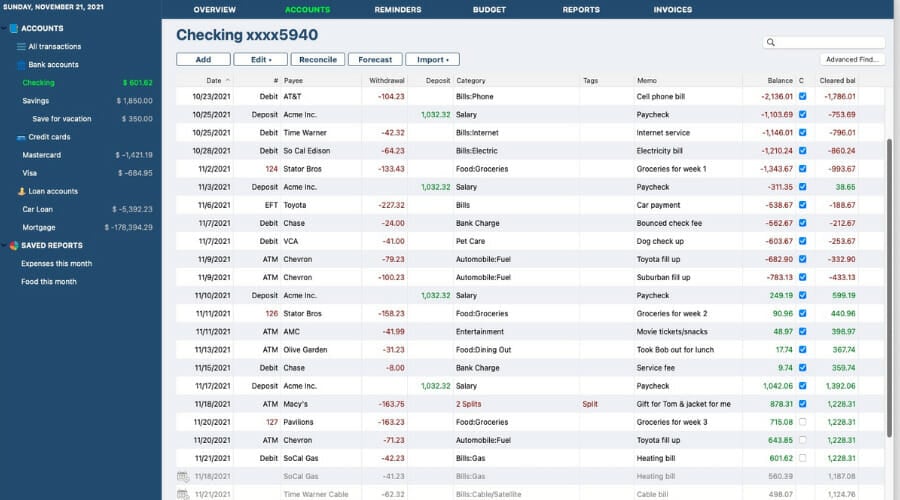

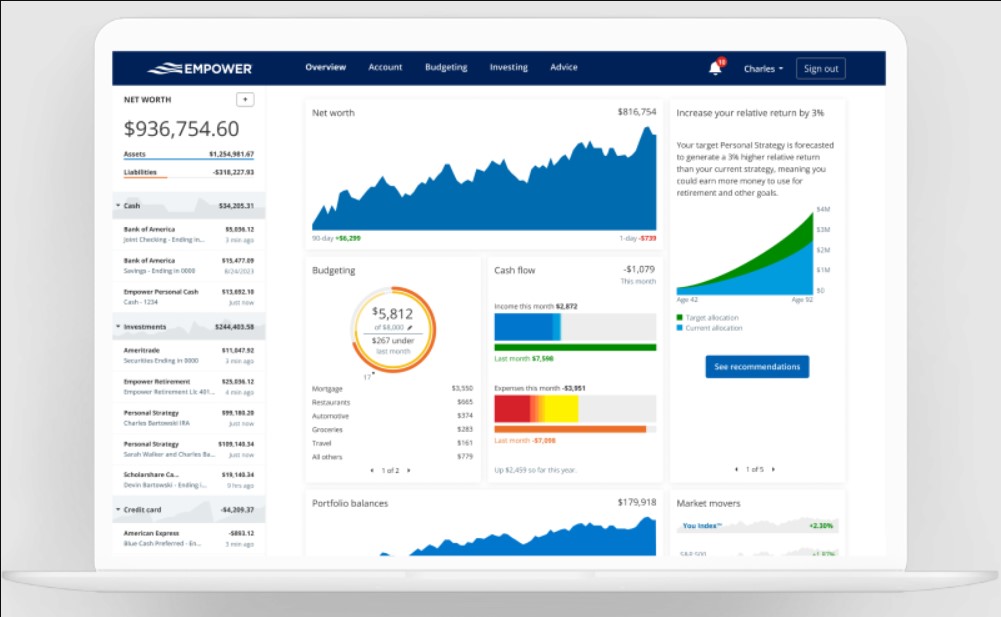

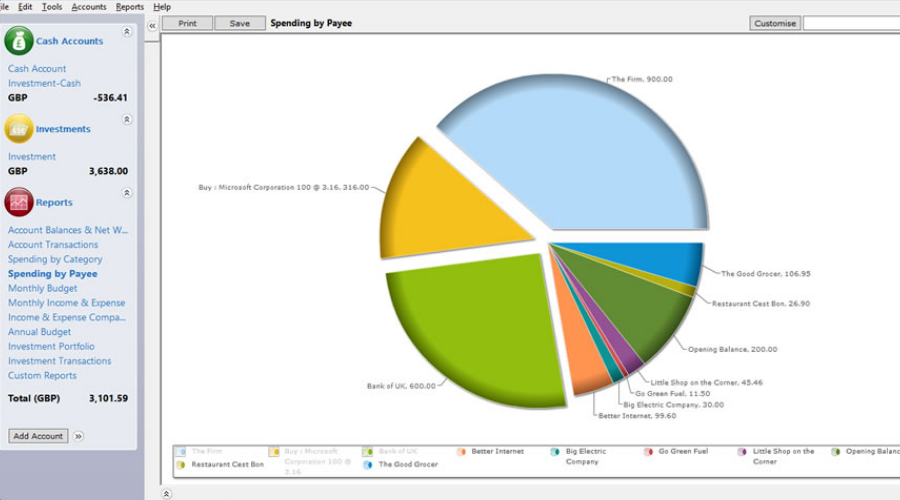

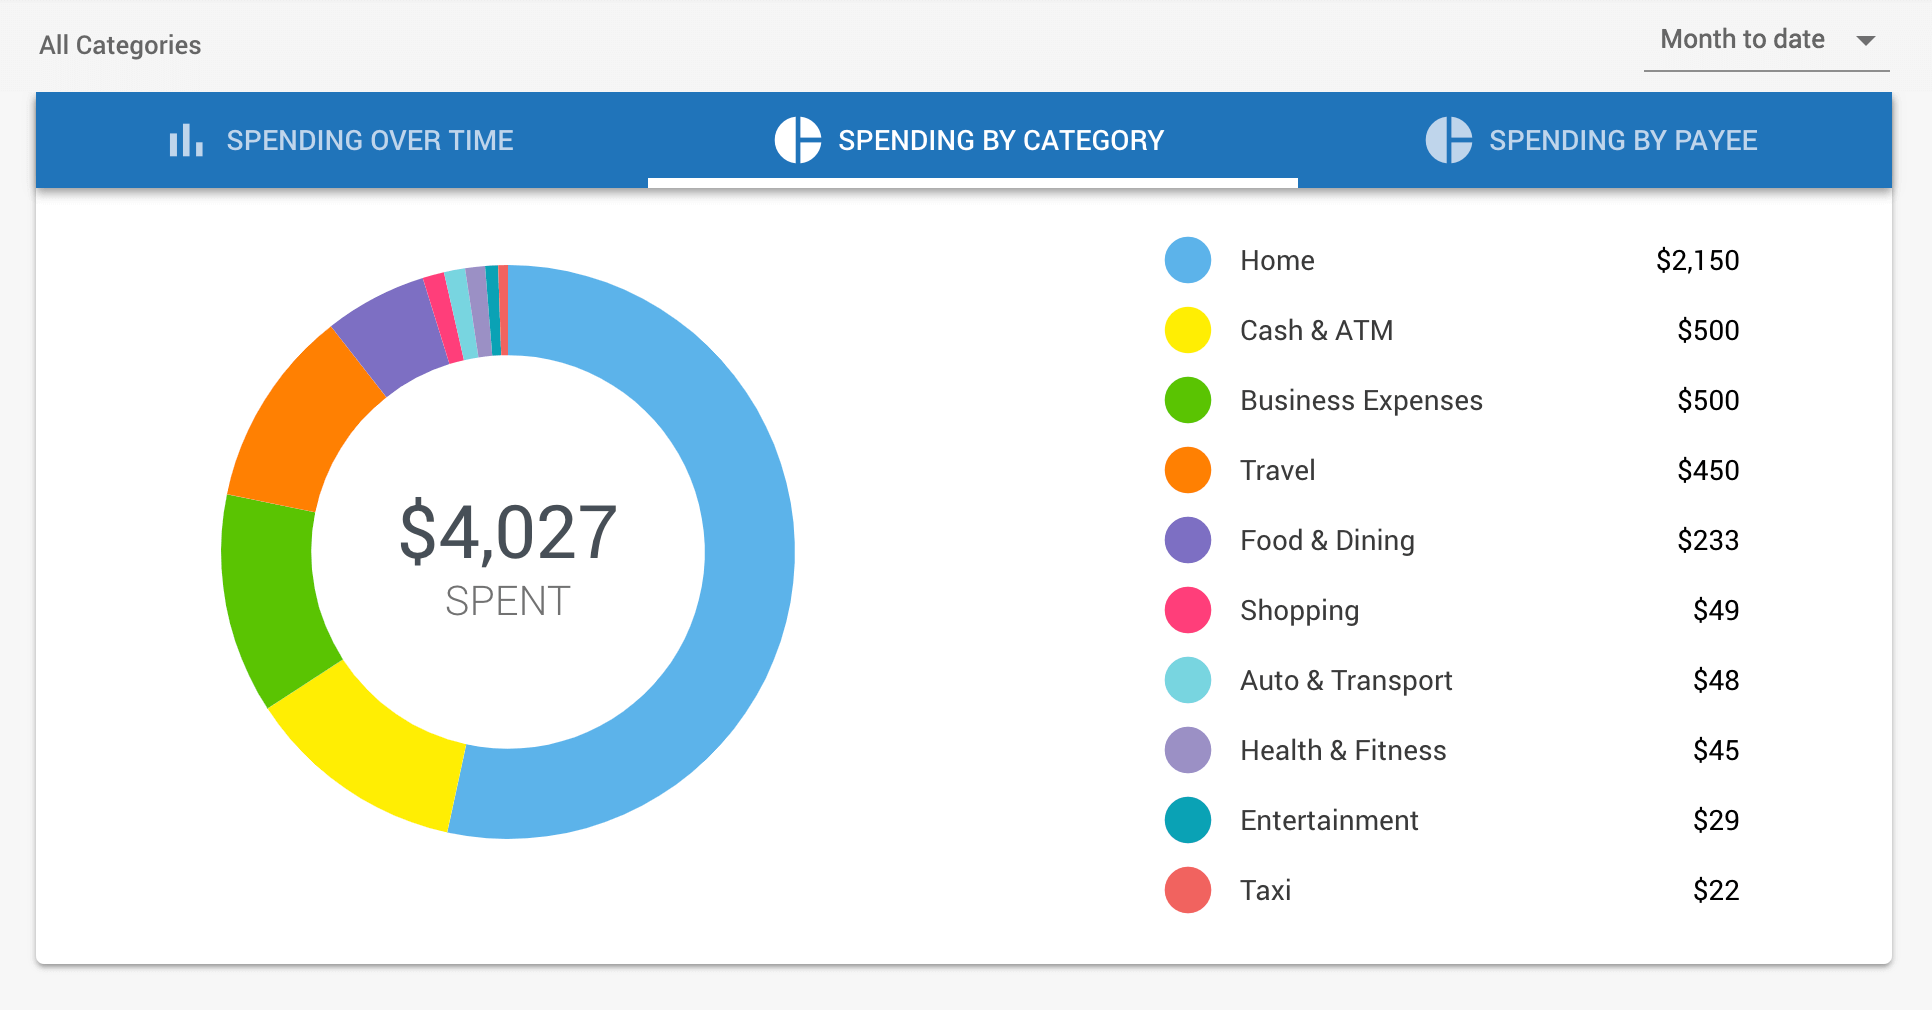

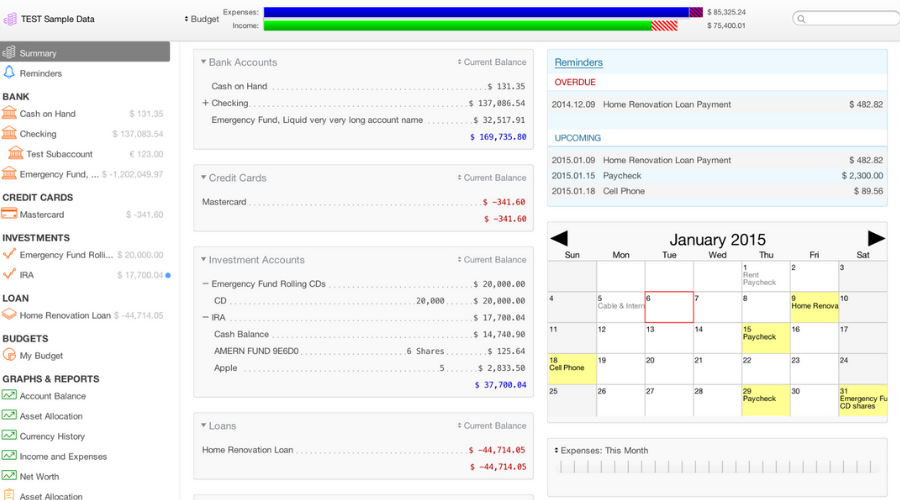

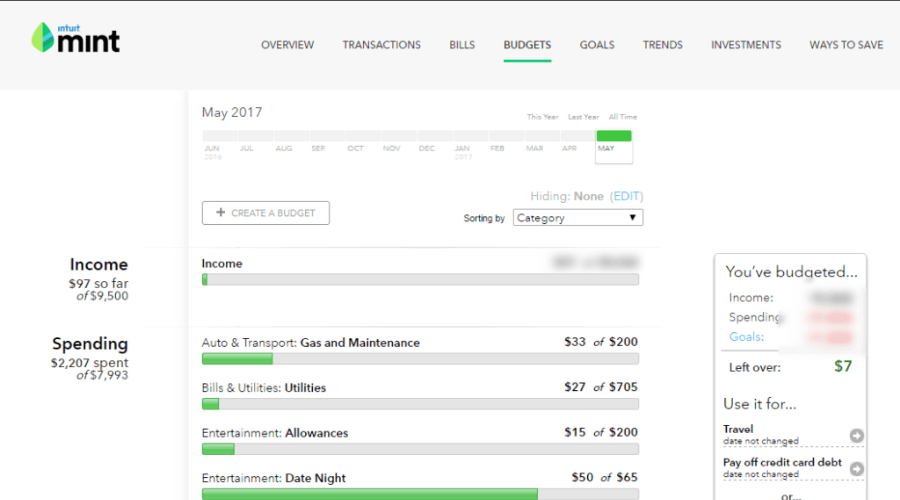

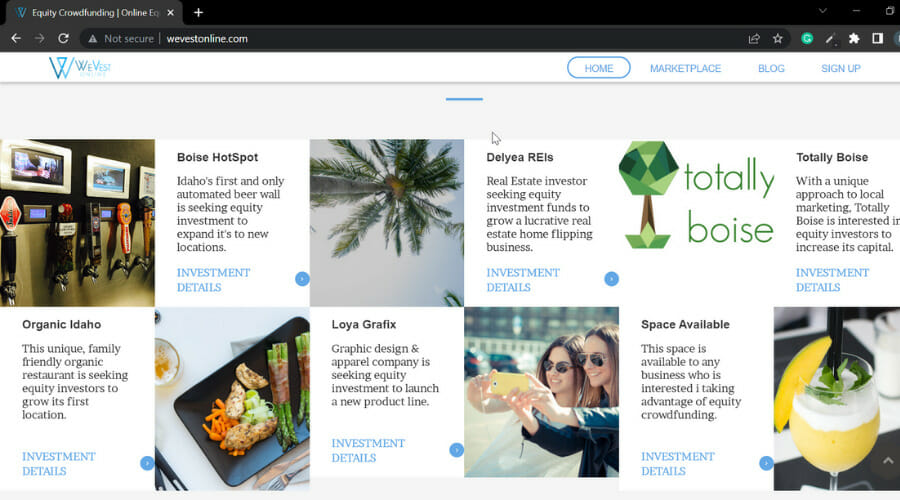
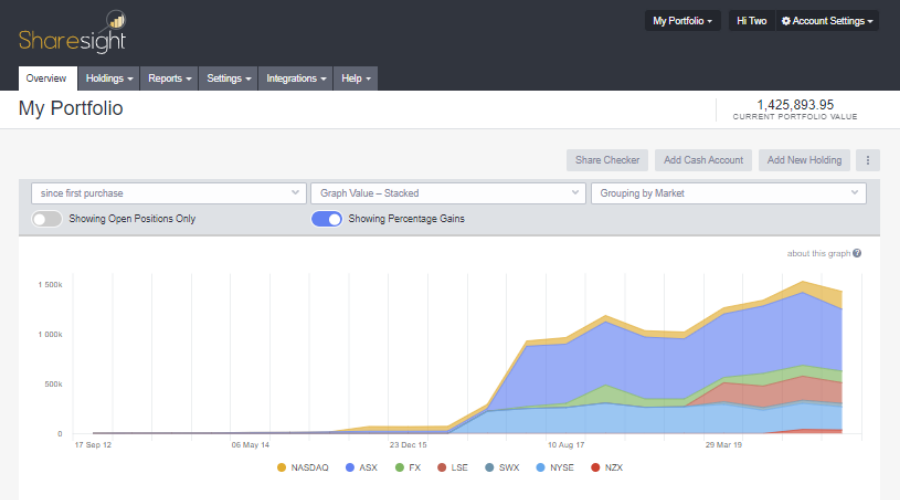
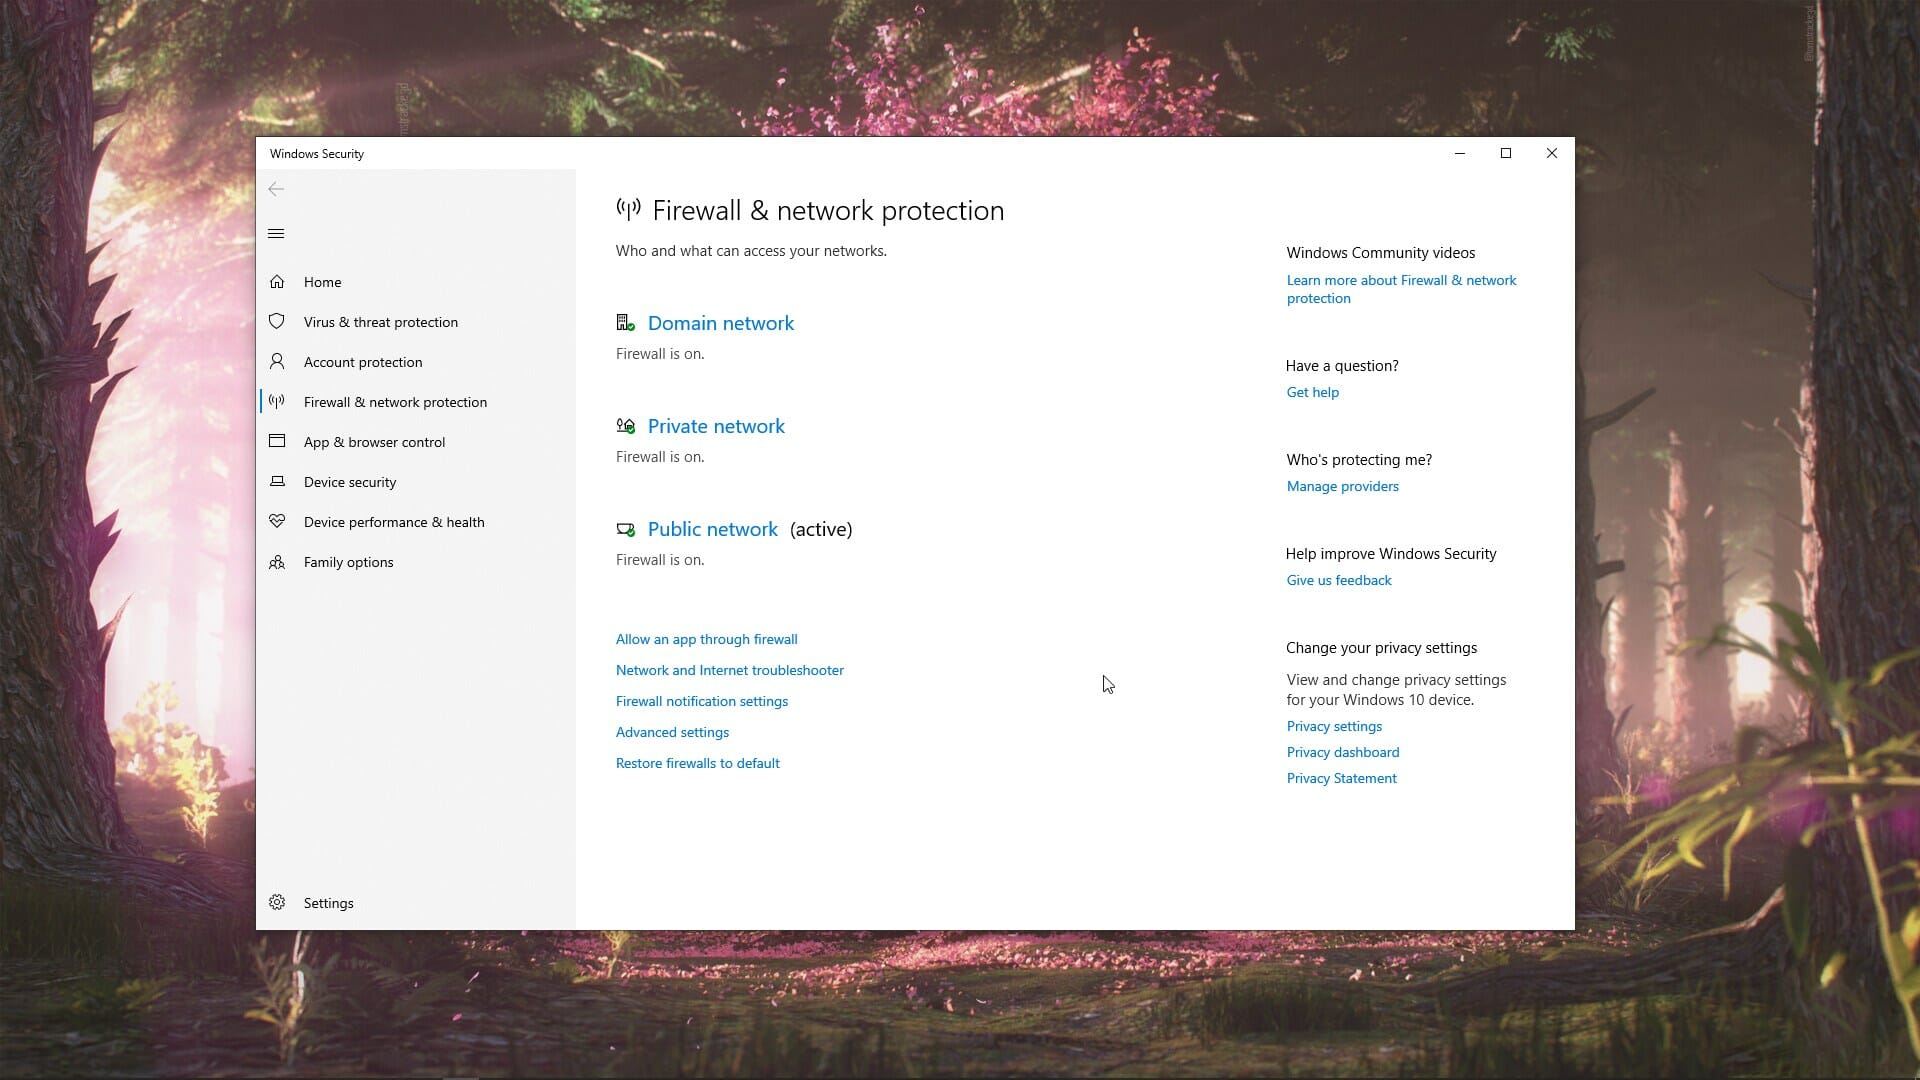
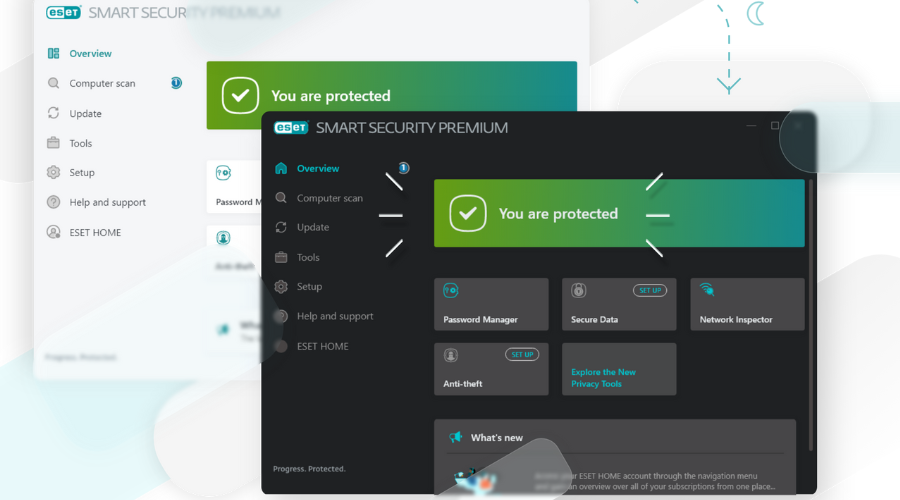

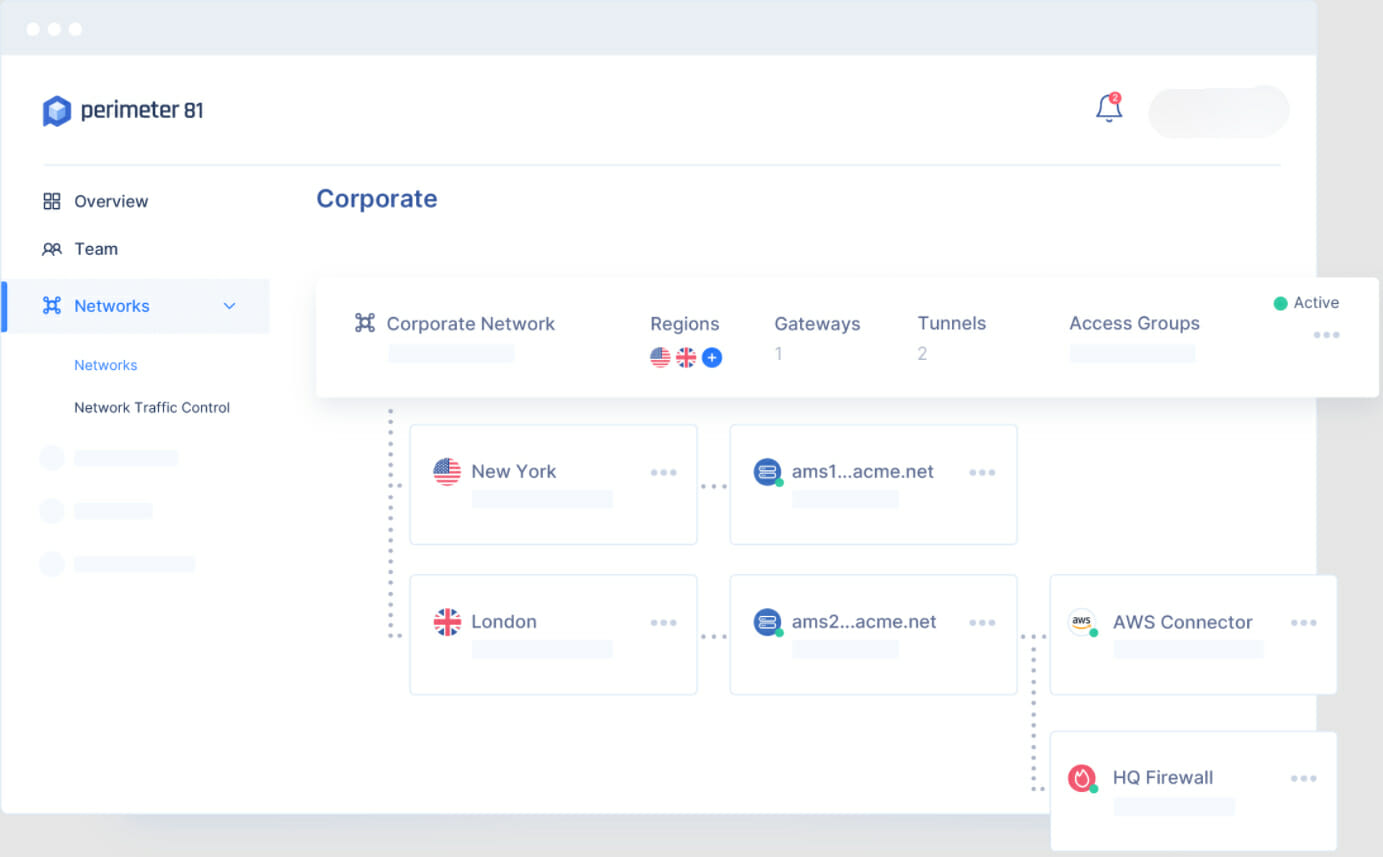

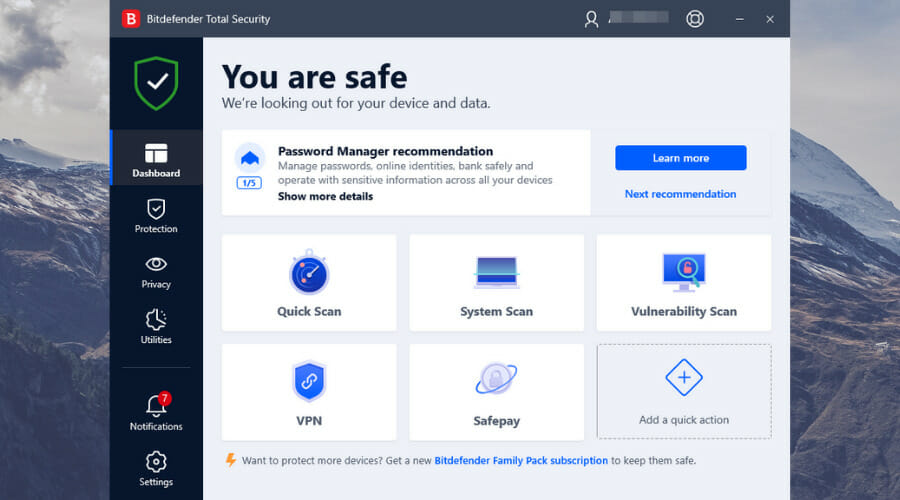
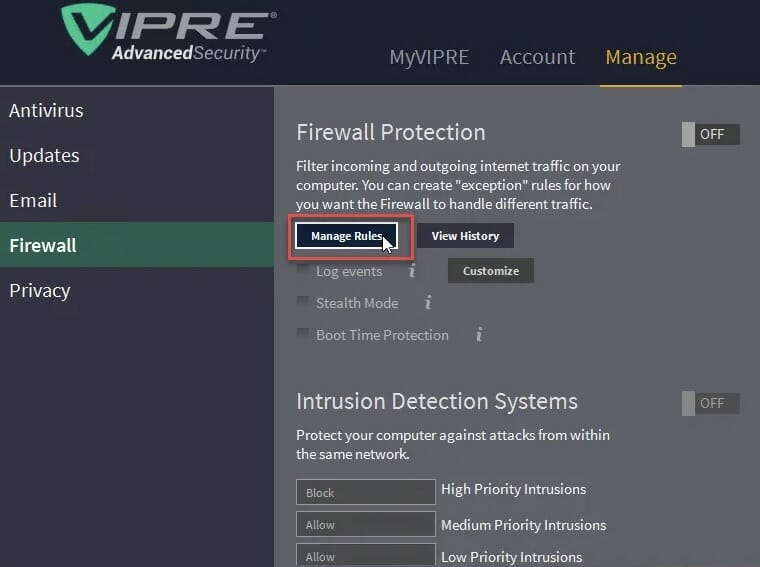

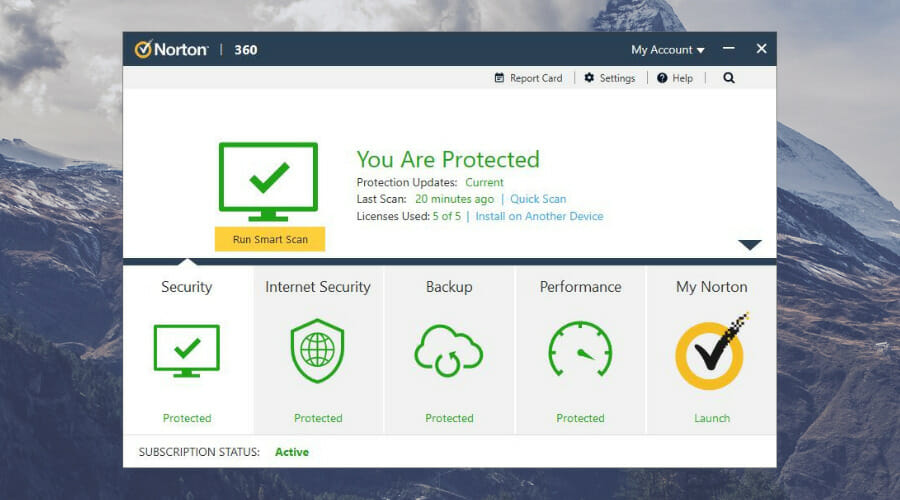
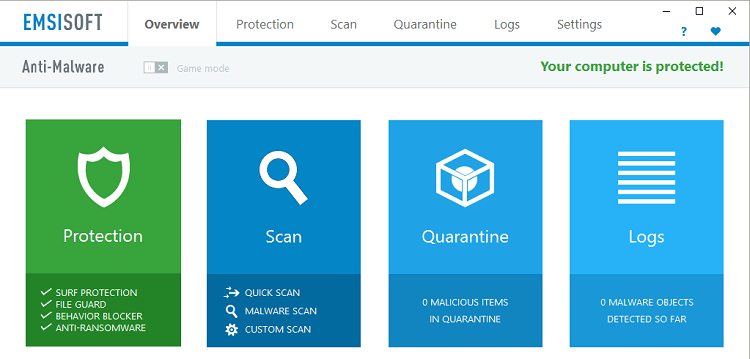


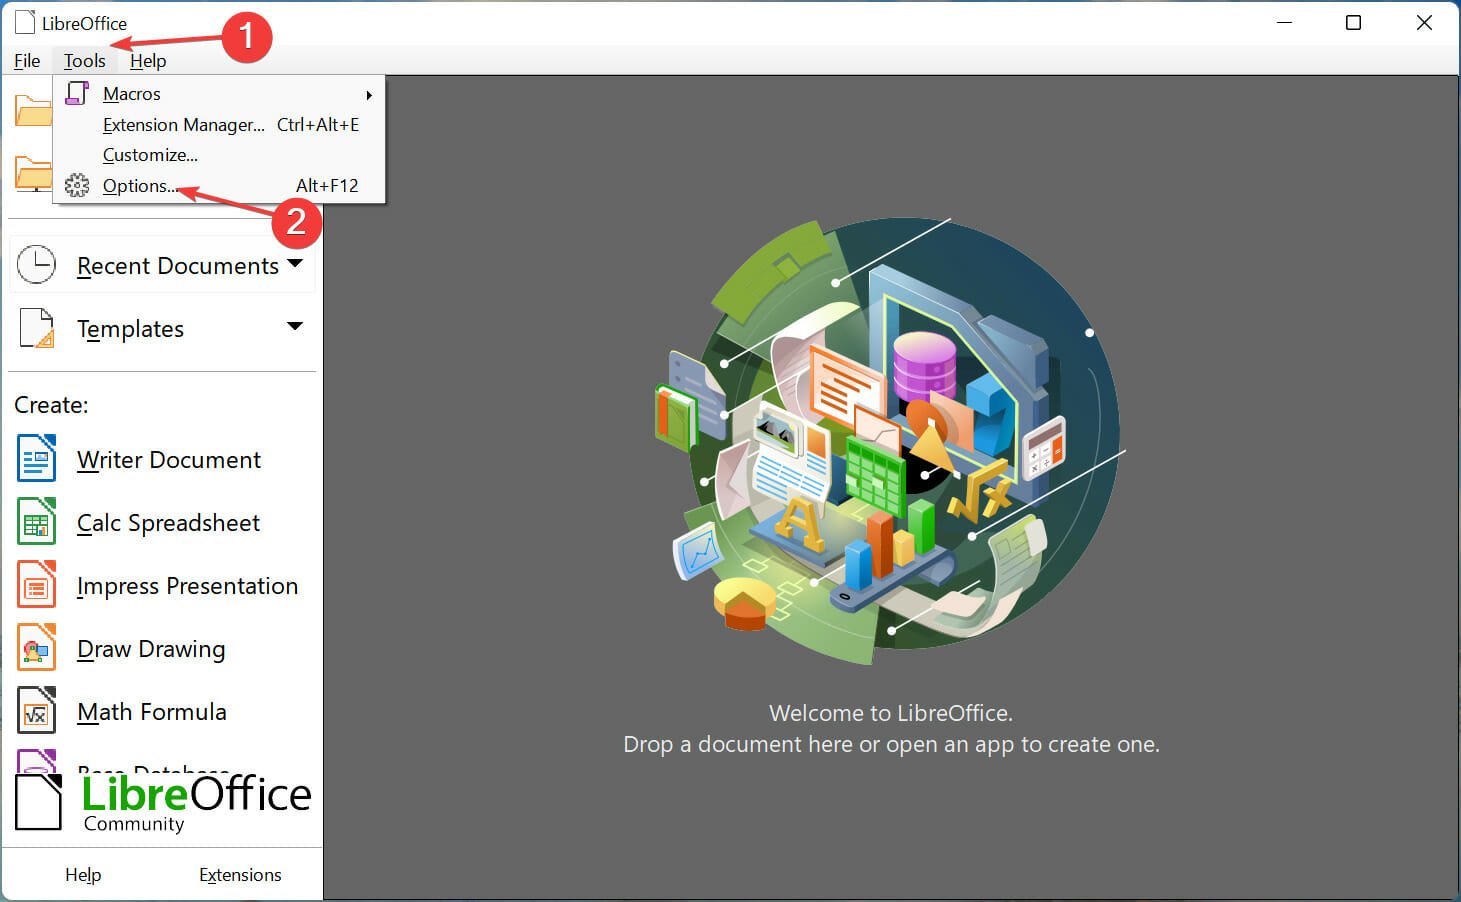
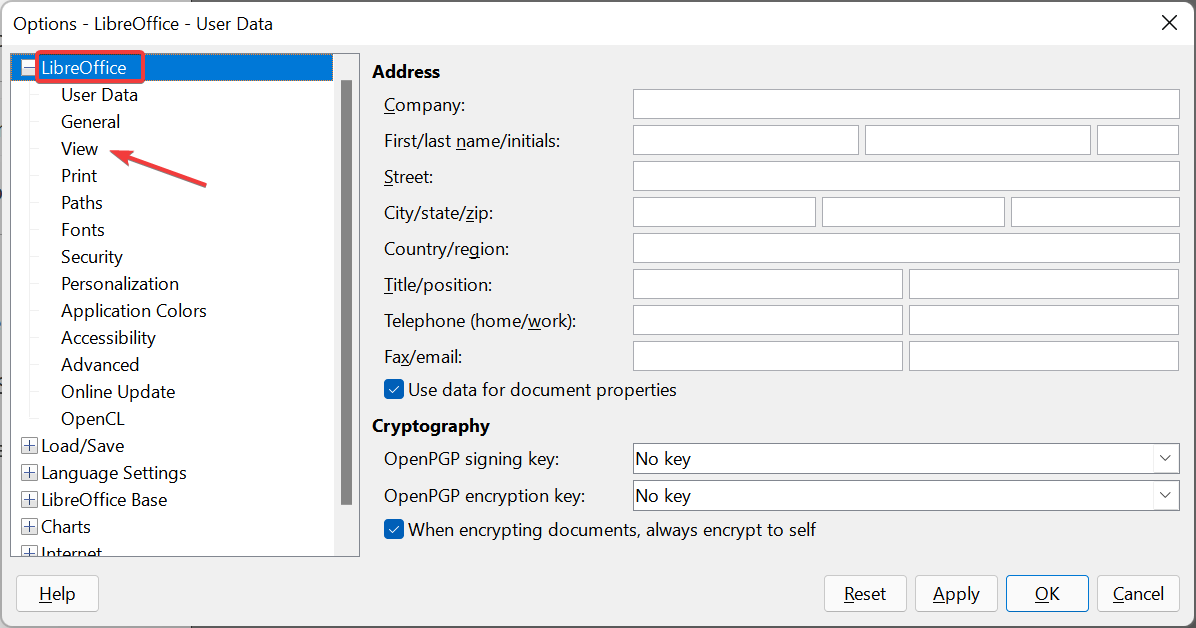
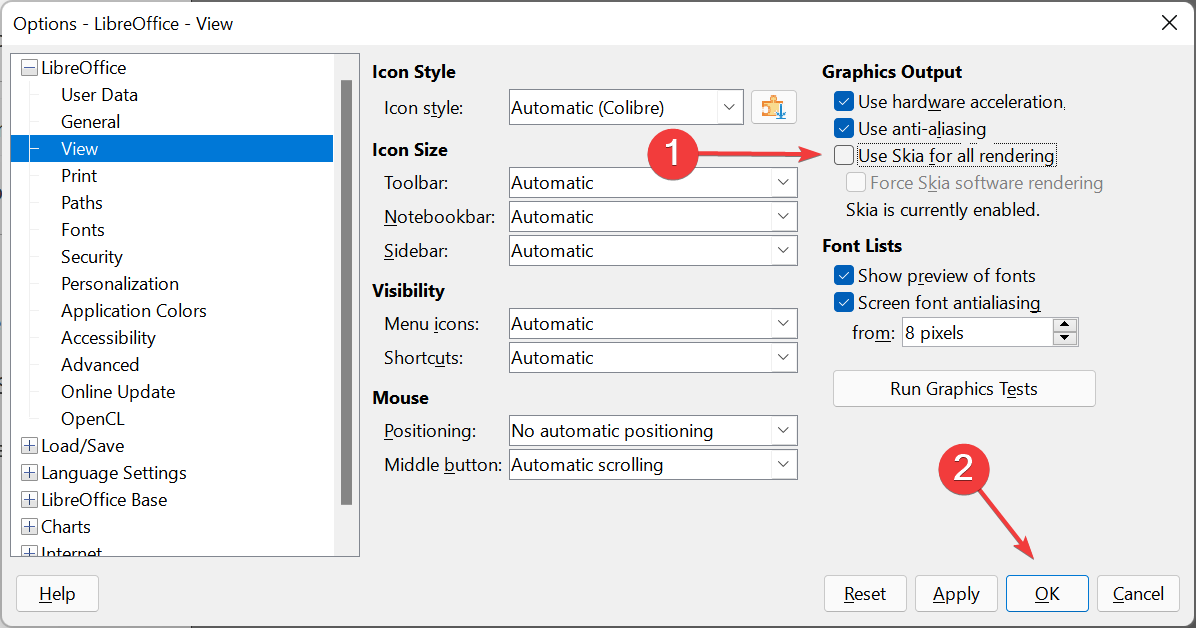
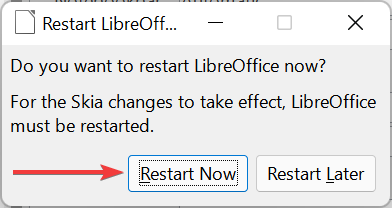
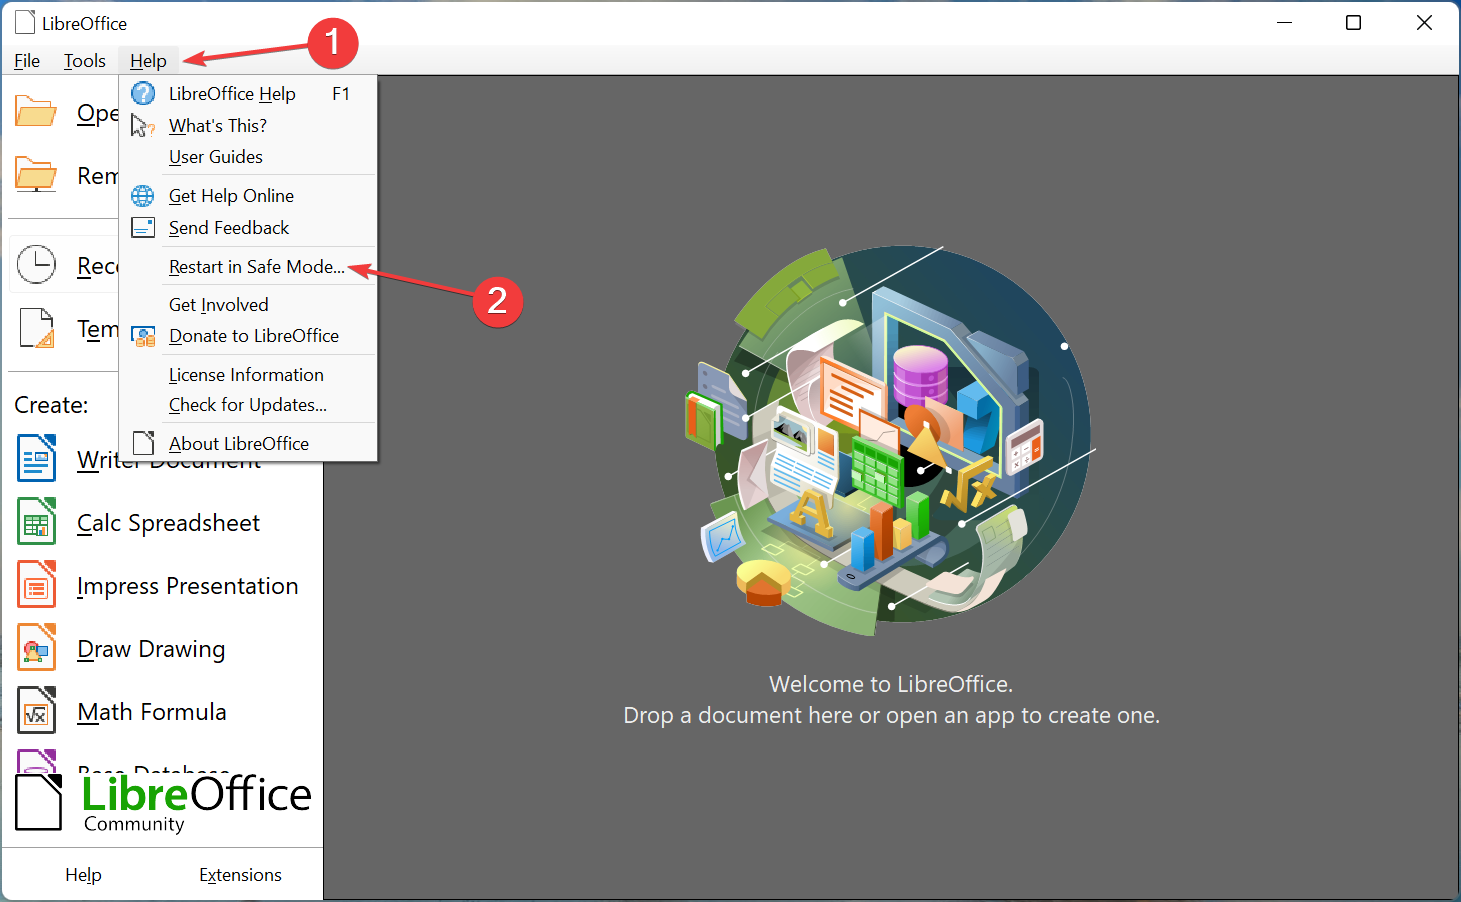
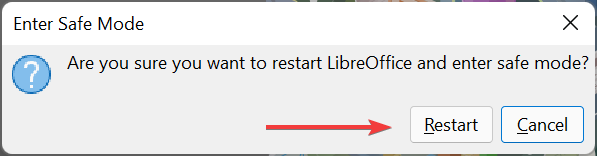
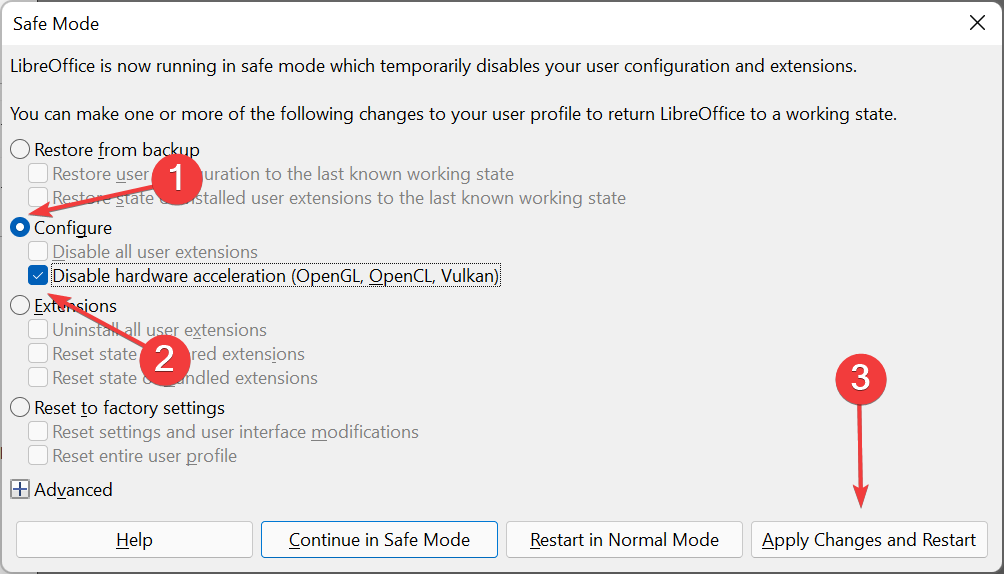
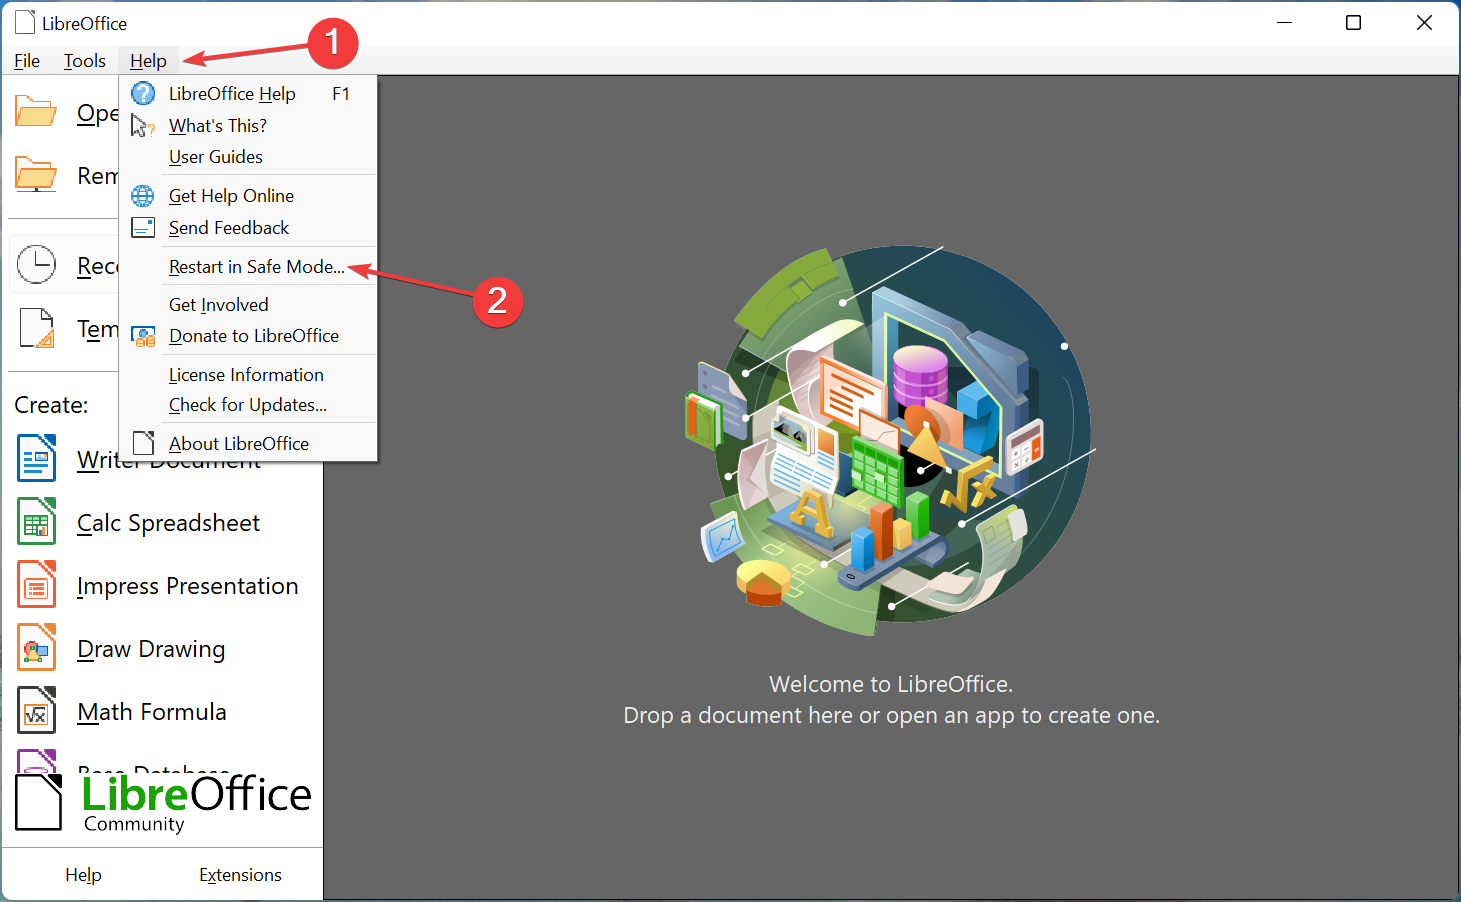
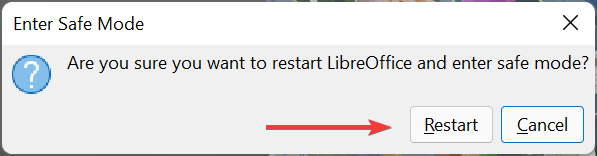
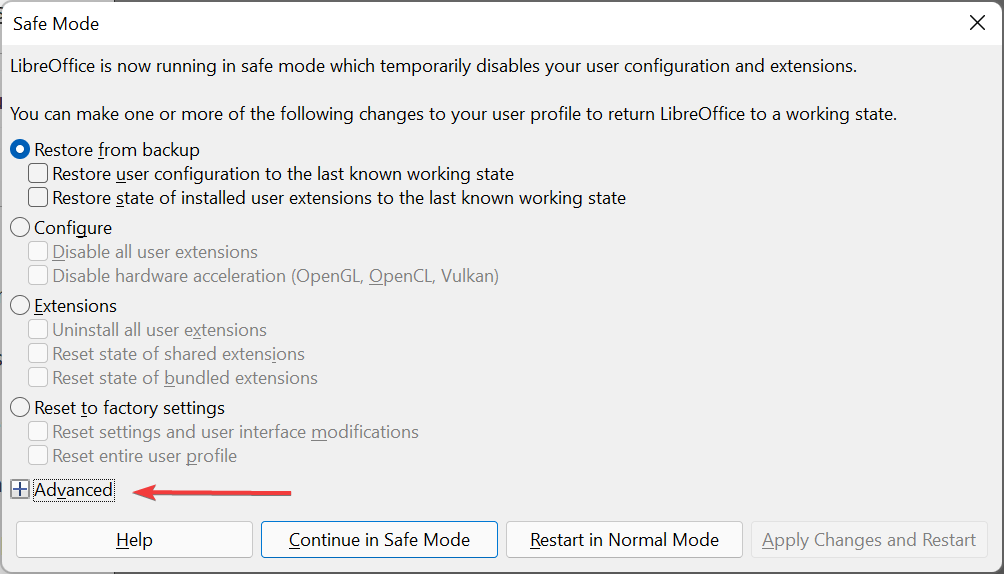
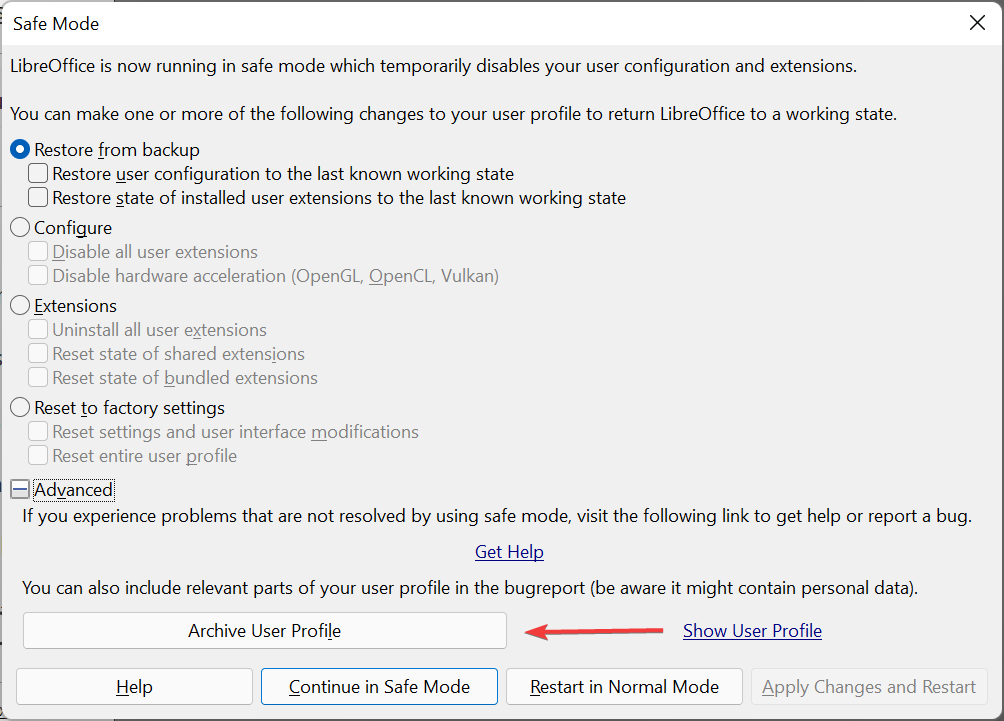
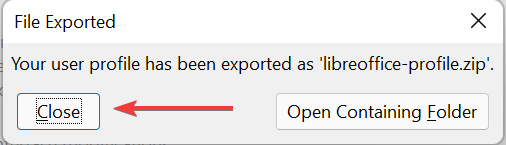
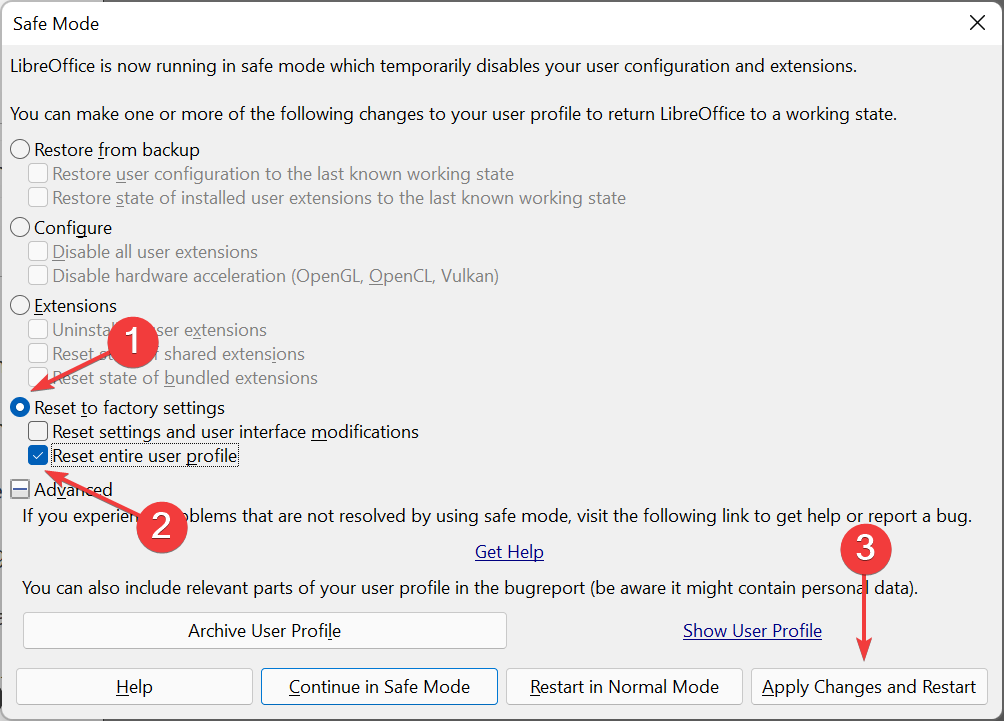
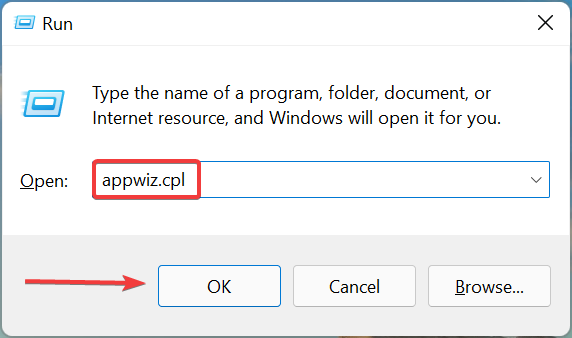
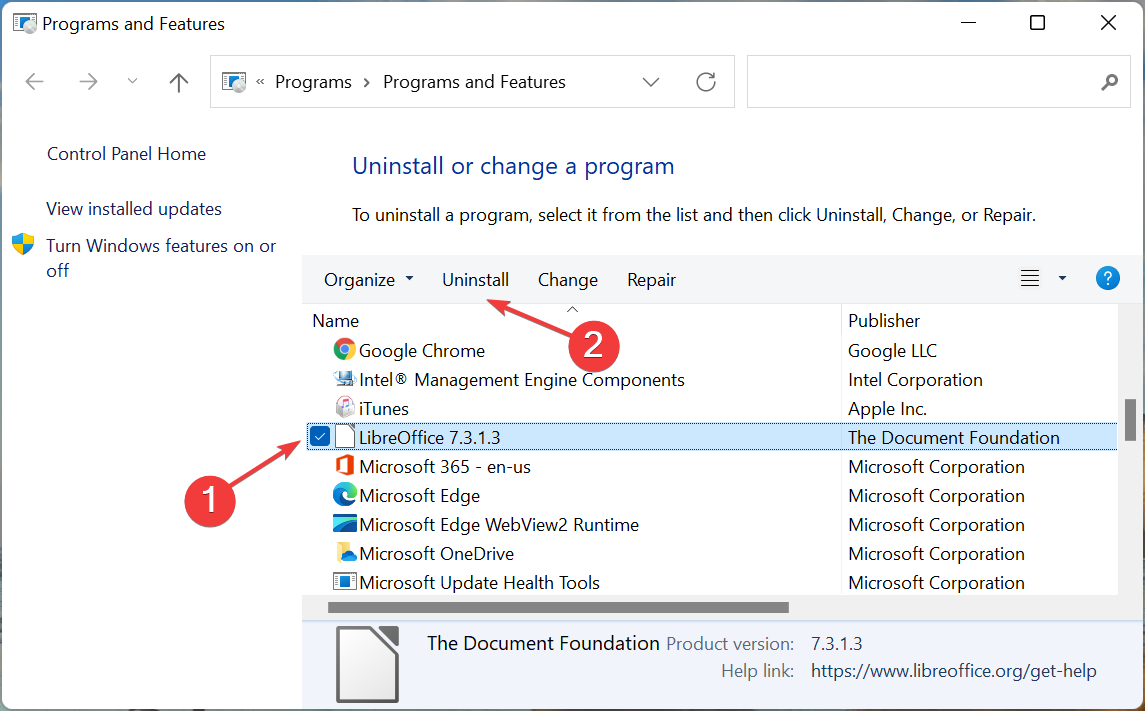
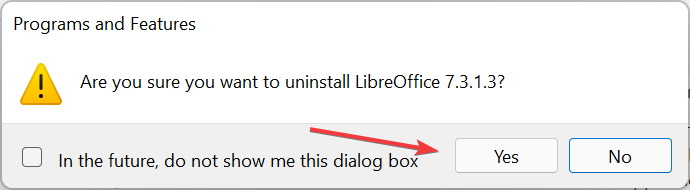

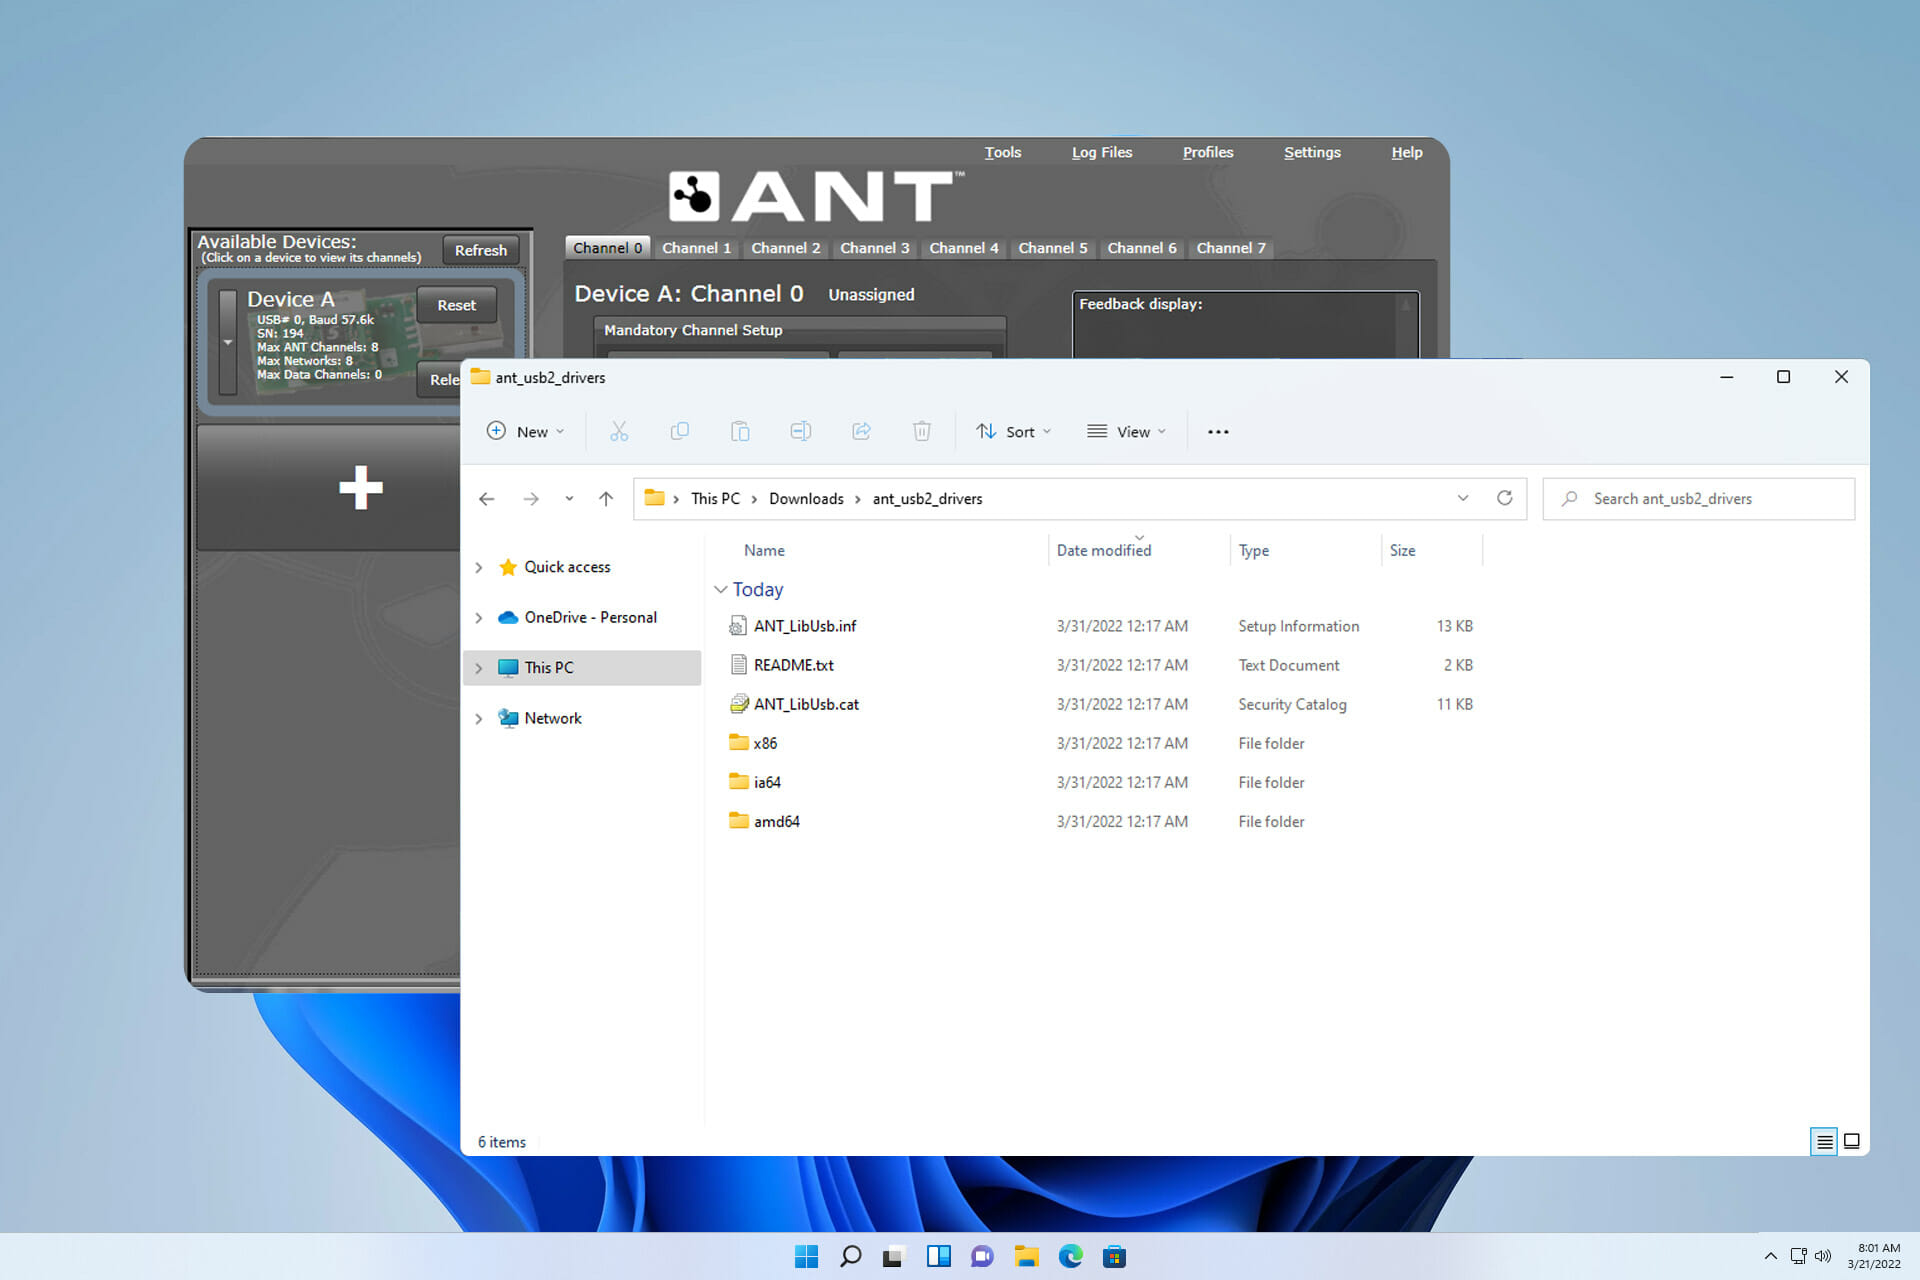


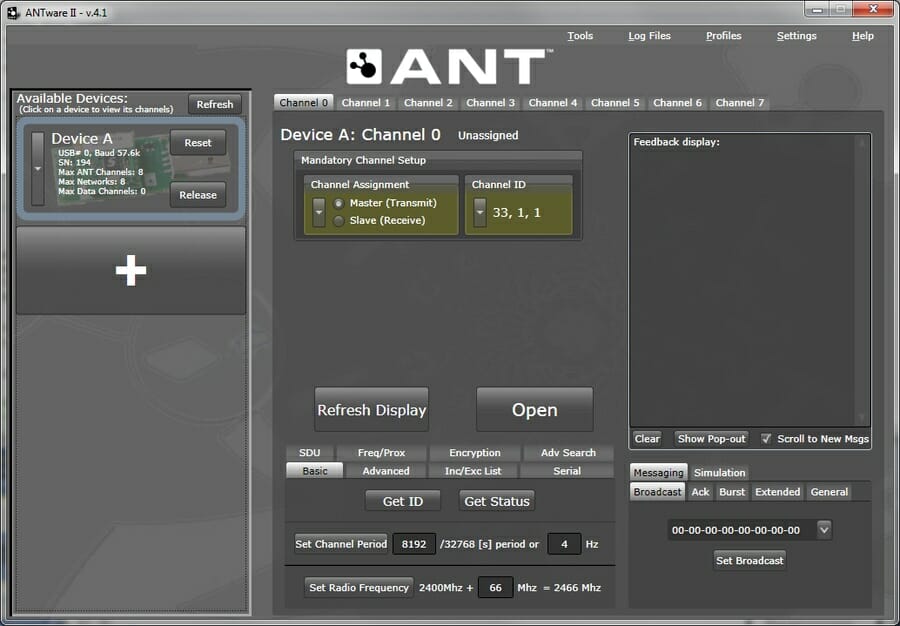
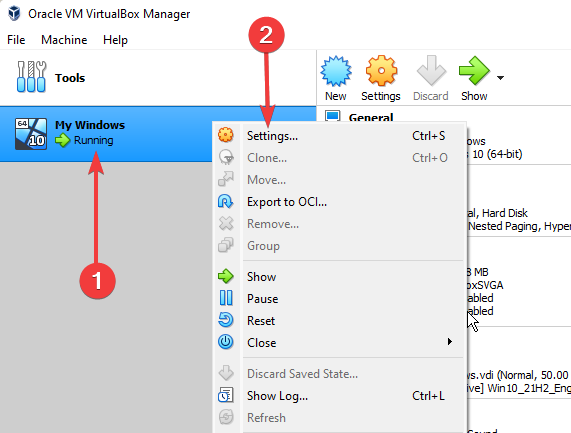
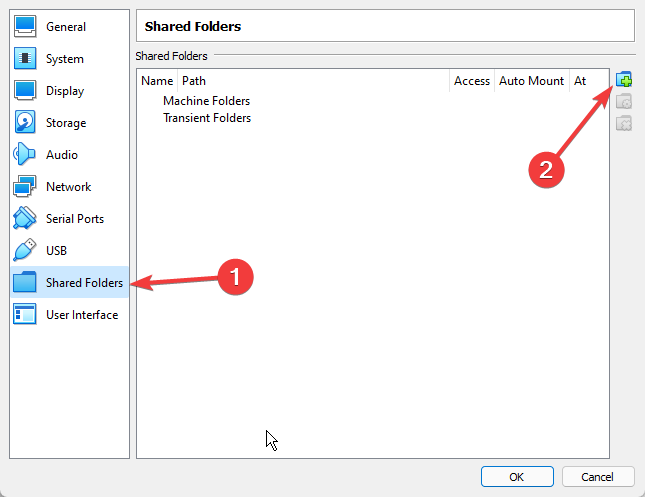
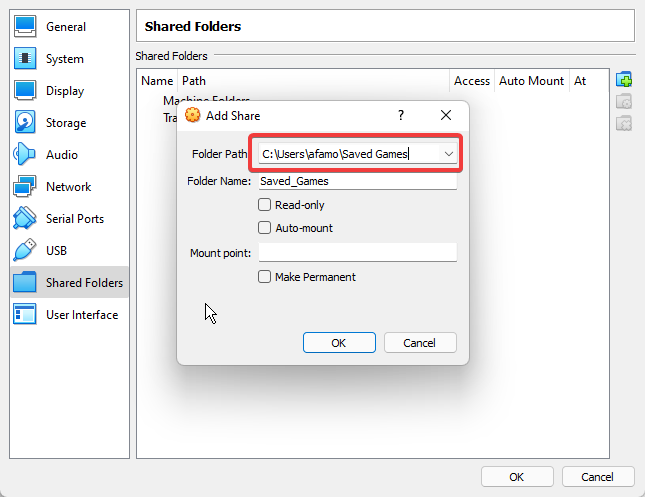
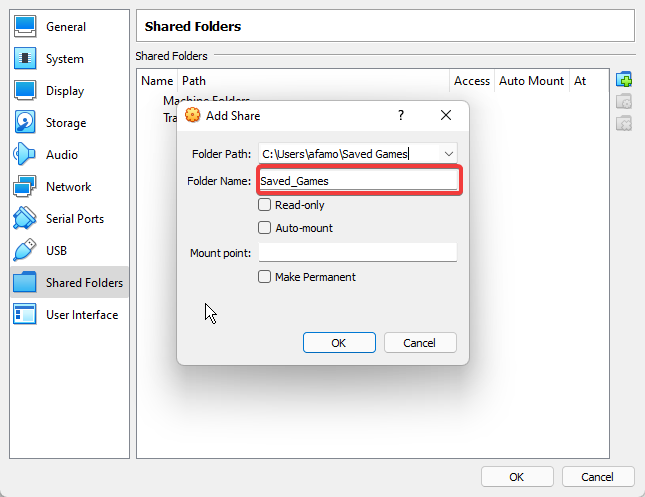
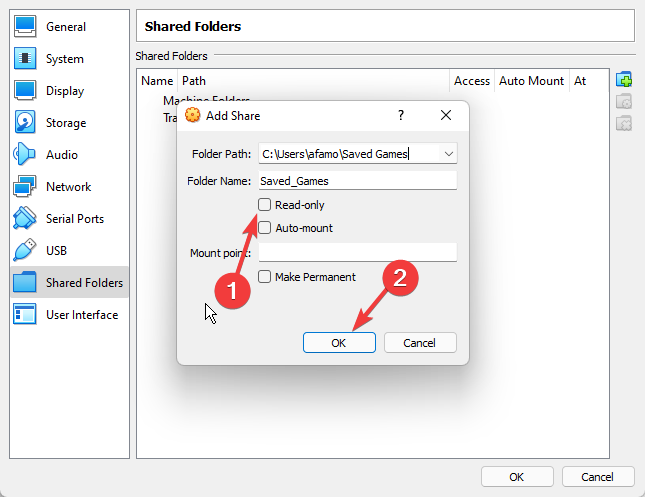
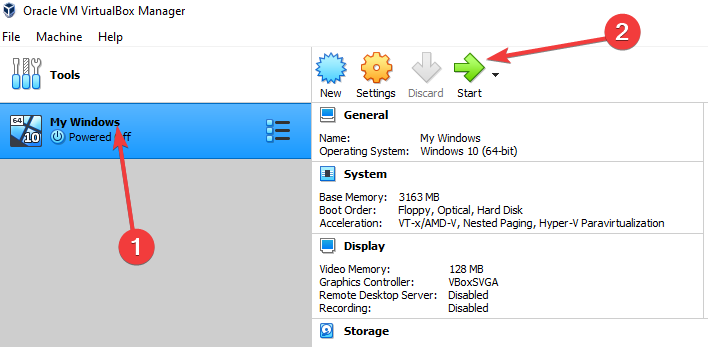
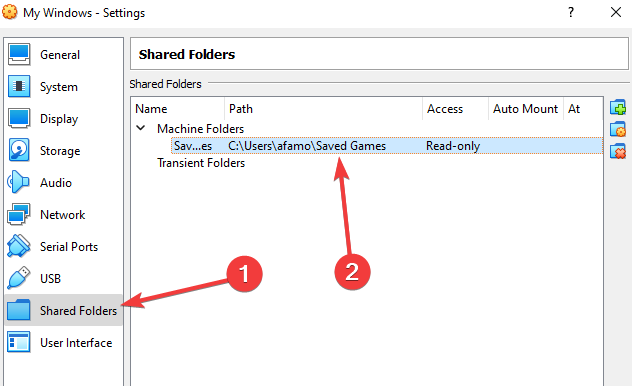


















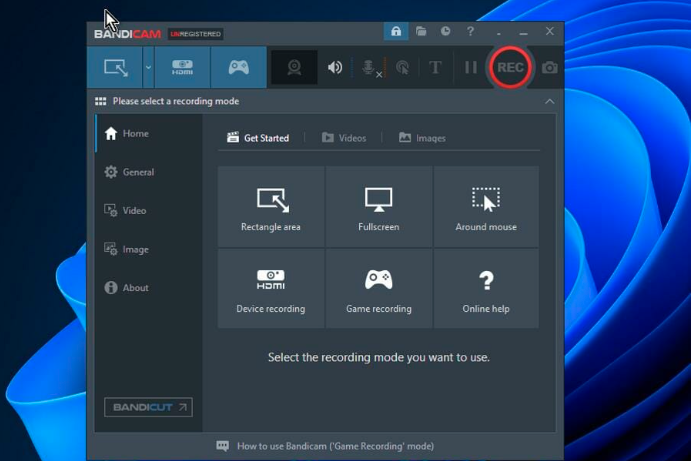

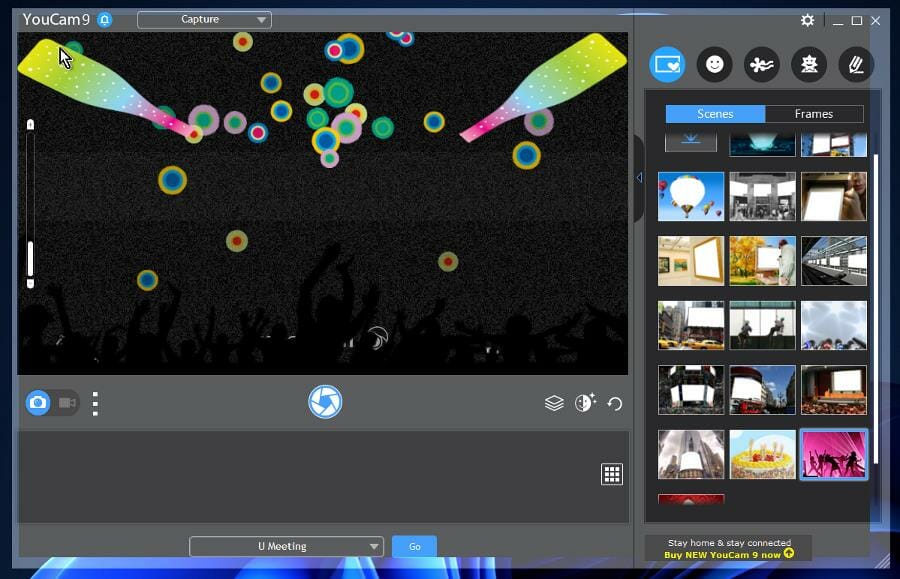


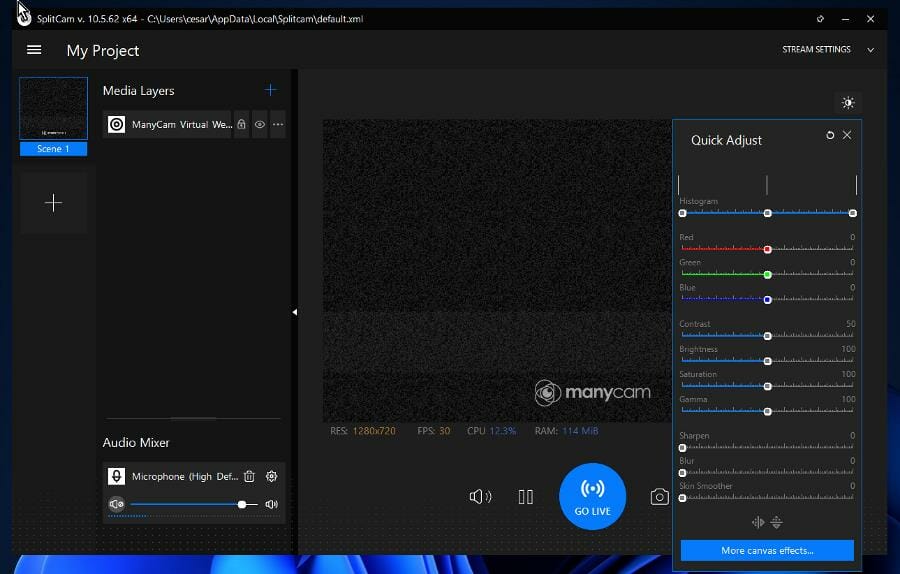
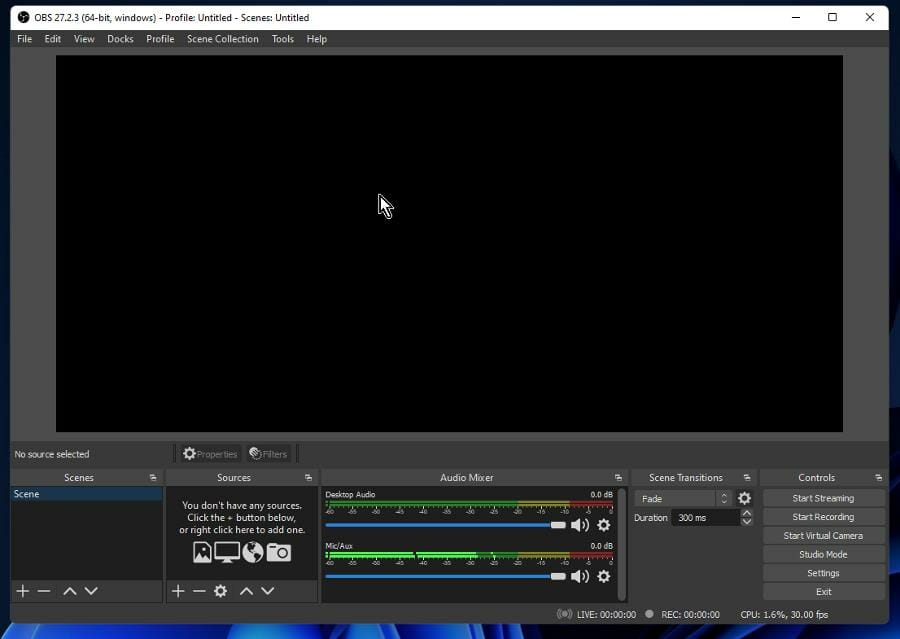
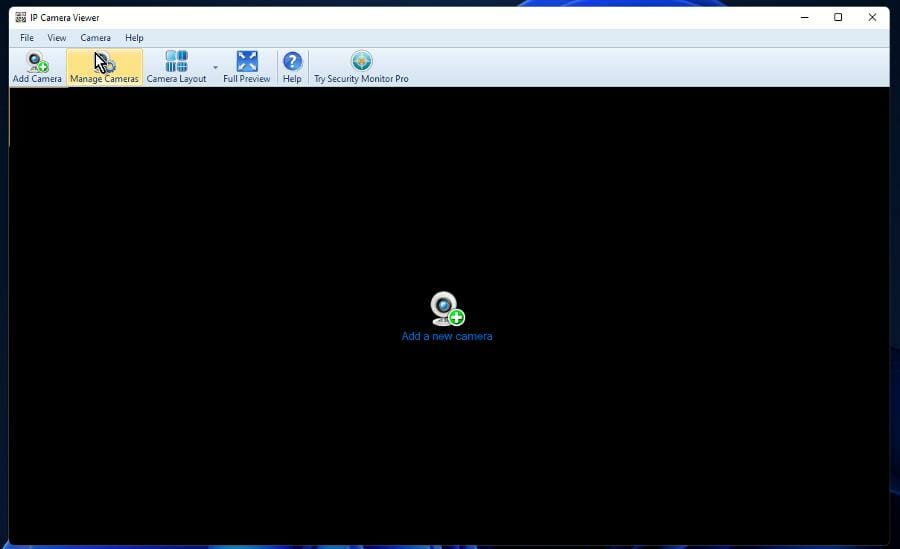
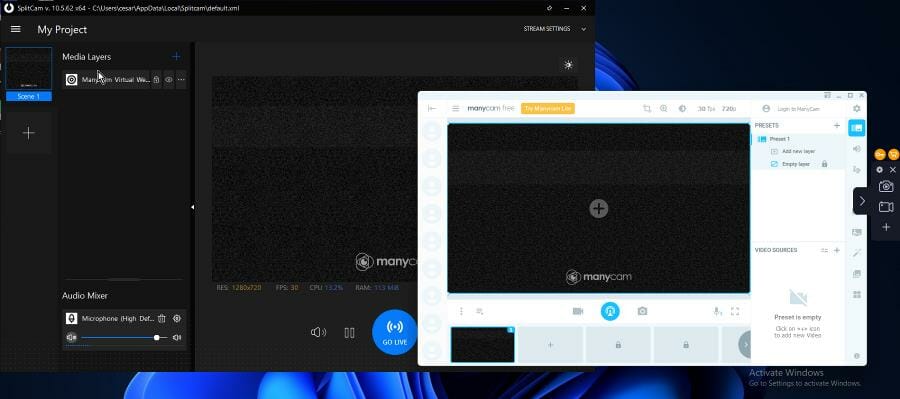
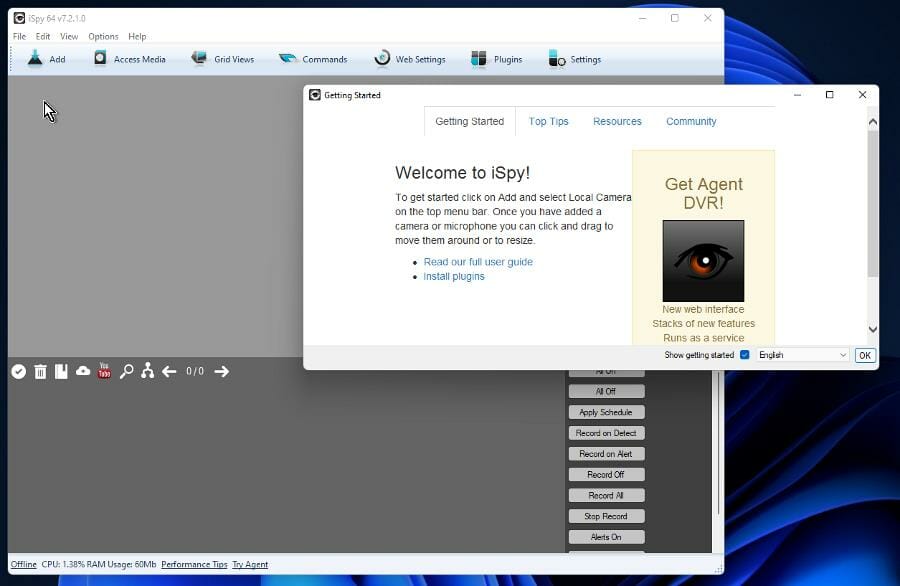




 3. Click Hide my email to confirm your changes to your primary Microsoft account email address