Can’t Map Synology Drive on Windows 10? 4 Ways to Fix it

A number of Synology users have reported that they can’t map the drive on Windows 10. This issue can be highly annoying, as it varies in how it is expressed.

In some cases, the Synology assistant maps the drive for a limited amount of time, and then the entire setup goes back to default settings, and in other cases, the changes aren’t applied at all. Or you may even find that the NAS drive is not showing under Network.

For these reasons, in today’s article, we will explore some of the best troubleshooting steps you can take to deal with this annoying issue. Please follow the steps in this guide carefully to avoid causing other issues.

What can I do if I can’t map Synology drive on Windows 10?

1. Use File Explorer

File explorer Windows 10 - Synology assistant won't map drive

Even though this might sound too easy to be true, some users have used this workaround to map their drives. The issue mentioned above seems to be caused by a conflict between the architecture of Synology and the Windows 10 drives.

Depending on how evolved the problem is, Synology might not be able to map your drives entirely, or if it does, it will be only temporary. To avoid this, you can use Windows 10 File Explorer to map your drive/drives.

You can log into your account with the current account name and password.

2. Turn off password-protected sharing

  1. Press Windows + X keys on your keyboard -> choose Settings from the menu.
  2. Inside the Settings window -> select Network & Internet -> click on Status.
  3. Scroll to the bottom of the page and click Network and Sharing Center.
  4. Click the button Change advanced sharing settings.
  5. Expand All Networks.
  6. Under the Password protected sharing section -> choose Turn off password protected sharing.password protected sharing - synology assistant won't map drive
  7. Select Save changes.

3. Deactivate optional features inside

  1. Press Windows + R keys on your keyboard -> type optionalfeatures.exe -> press Enter.
  2. Scroll down to SMB 1.0/CIFS File Sharing Support -> click the + sign to activate the drop-down menu.
  3. Tick the box next to SMB 1.0/CIFS Client.
    SMB File Sharing Support - Synology assistant won't map drive
  4. Untick the boxes for both SMB 1.0/CIFS Automatic Removal and also SMB 1.0/CIFS Server.
  5. Click the Ok button and restart if prompted to do so.

This should fix the Synology map network drive on Windows 10 not working issue.

4. Modify settings inside Synology

  1. Navigate to Settings -> enable SMB Service.
  2. Inside the Advanced settings tab -> choose Protocol SMB3.
  3. Disable the option Transport Encryption to prevent slow data transfer.
  4. Enable the option Opp Locking.
  5. Disable Press the Win+X keys on your keyboard -> select PowerShell (Admin) -> type the command below: REG ADD HKLM\SOFTWARE\Policies\Microsoft\PassportForWork /v Enabled /t REG_DWORD /d 0 /f
  6. Press Enter to run the command.
  7. After the process is completed, restart your PC.

If you can’t map your Synology drive on Windows 10, the solutions in this guide should help you fix it for good. Similarly, if you want to know how to map network drives over VPN, check our detailed guide for the steps to follow.

We would love to know if this guide helped you solve your issue. Please let us know if this article helped you by using the comment section below.

Microsoft shares more details about XO19 fan event in London on November 14th-17th

Xbox fans won’t want to miss the upcoming XO19 fan event in London in November. Microsoft will offer three days of festivities at the Copper Box Arena on November 14-16, and the Xbox team emphasized that “it’s the biggest Xbox event we’ve ever hosted in the UK.”

The event will kick off with a special Inside Xbox episode on November 14 which will also be live streamed on Mixer and other Xbox social media channels. Moreover, Microsoft will also hold the first Xbox FanFest ever in the UK on the same day.

Xbox FanFest attendees will be able to watch the Inside Xbox broadcast live and in-person, then following the show they will have early and exclusive access to the X019 showfloor, including world premiere hands-on gameplay, special activations, the Xbox Official Gear Store and its exclusive products, plus much more!


XO19 attendees can expect some hands-on gameplay with the biggest new Xbox games launching this Fall, panels with Xbox Game Studio teams, as well as developer meet-and-greets and autograph sessions. Xbox head Phil Spencer will also make the trip along with Xbox Game Studios head Matt Booty and Xbox Director of Programming Major Nelson.

All tickets will go on sale Tuesday, September 24 at £19 per session, and Microsoft said that all proceeds will go to charity. All tickets will be available on a first-come, first-serve basis. Microsoft will have more information about ticketing details in the coming weeks on www.Xbox.com/X019.

PUBG is getting crossplay support between Xbox One and PlayStation 4 in October

PlayerUnknown’s Battleground (PUBG) is getting crossplay support between Xbox One and PlayStation 4 in October. The news was announced today during Microsoft’s special Inside Xbox episode, and it should be an exciting update for fans of the popular battle royale game.

“This has been, hands down, the most requested feature since we launched on consoles and we’re so happy to finally provide this for our console community on Xbox One and PlayStation 4,” wrote Cecilia Lee, Community Manager, PUBG Corporation. Crossplay will go live first in late September on the PUBG Public Test Server, and it will be generally available in early October.

The PUBG team also announced plans to ship new content updates on consoles faster than before, and the goal will be to ship new updates within two weeks of their PC release. “Starting Aug. 27, PUBG Season 4 will release on console and all-in game content will be aligned across all platforms. All subsequent console updates will then land two weeks after its release on PC,” Lee said today.

If you haven’t tried PUBG yet, the battle royale game available for free with Xbox Game Pass. For a limited time, you can get two months of Xbox Game Pass Ultimate (which includes Xbox Game Pass for Console, Xbox Game Pass for PC, and Xbox Live Gold) for just $2.

New Xbox Game Pass additions include Devil May Cry V and Age of Empires Definitive Edition

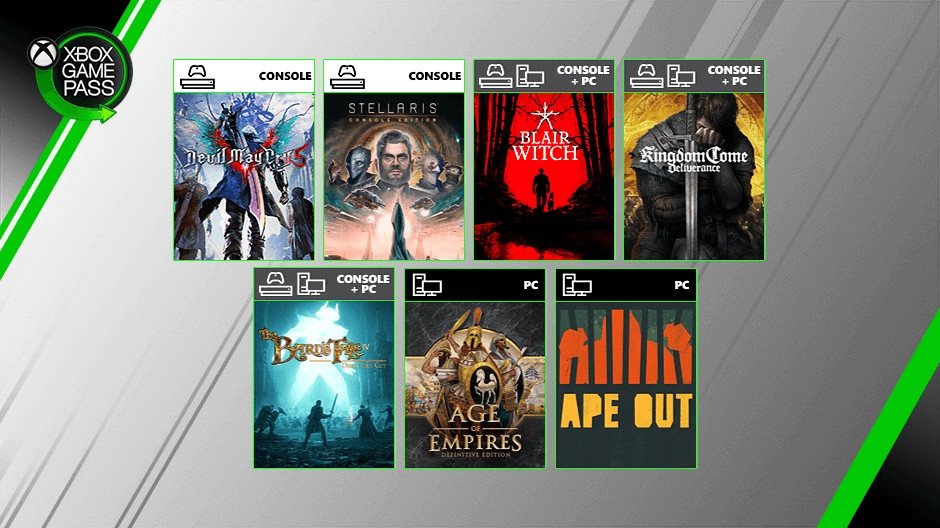
Microsoft has just kicked off its special Inside Xbox episode with some exciting Xbox Game Pass news. Devil May Cry V and Stellaris: Console Edition are now available in the console catalog starting today, and Age of Empires Definitive Edition is also available on PC starting today.

Four more games will be available later this month, starting with Ape Out (PC) and Kingdom Come Deliverance (console) on August 22). The Bard’s Tale IV: Director’s Cut, an Xbox Play Anywhere game will also be available on both console and PC on August 27, and it will be followed by the brand new Blair Witch game (also for console and PC) on August 30.

In addition to these new Xbox Game Pass additions, Microsoft also announced some updates to the new Xbox beta app for PC: There will be new filters, more options to manage downloads, as well as the ability to search for friends from Facebook or Steam. Microsoft is also copying Discord by allowing users to add a link to their YouTube, Twitch, Twitter, Discord, and Reddit accounts on their player cards.

We’re excited about the progress we’re making to deliver a great Xbox Game Pass for PC experience and we will continue to deliver more improvements over the coming months based on your input, so please keep the feedback coming,” the Xbox team said today.

Paint and WordPad both appear as removable optional features in latest Windows 10 Insider build

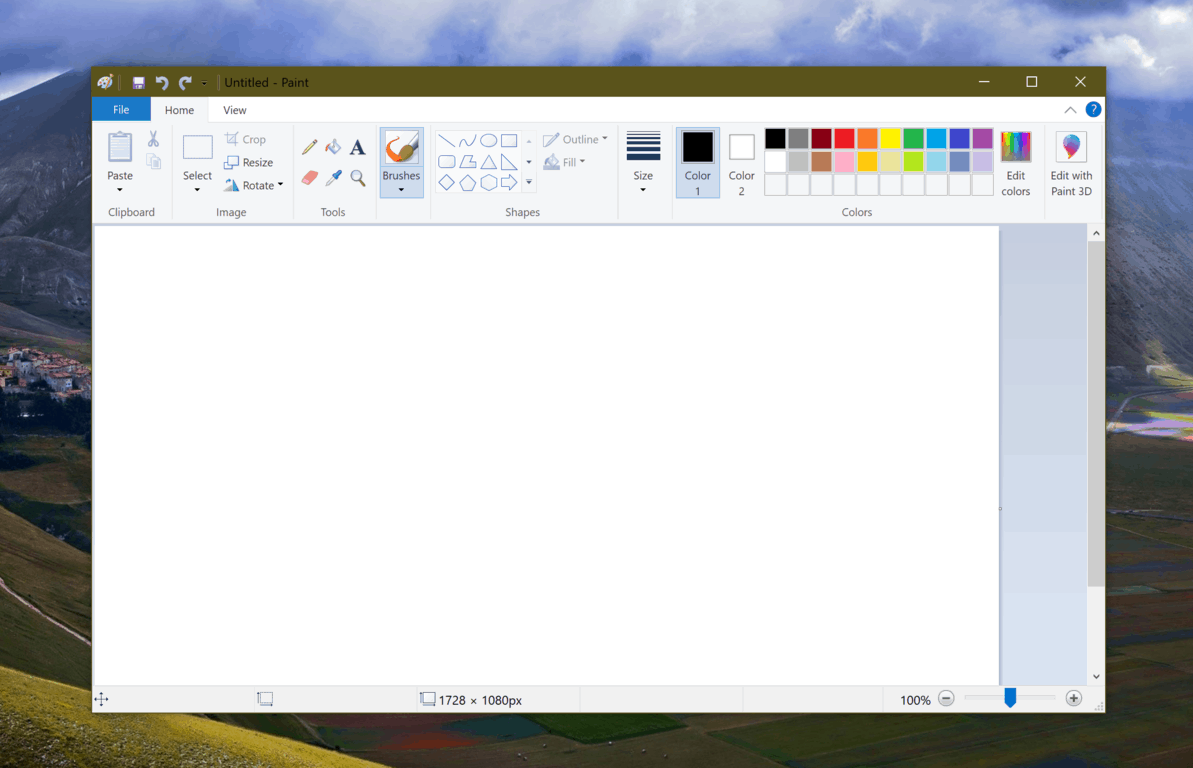
Microsoft Paint and WordPad may soon become optional features on Windows 10 PCs. Microsoft made some changes to the Optional Features page in Settings in the latest 20H1 preview build 18963, and Windows Latest has spotted that Microsoft has added the two aforementioned apps in this section in this build.

This Optional Features section includes other legacy Microsoft apps such as Windows Media Player, and users are free to uninstall apps in this category to free some space. Microsoft previously considered making Paint an optional Microsoft Store download following the release of Paint 3D, but the company eventually did a 180 and decided against removing it from the OS. Actually, the software giant even added new features to Paint in the Windows 10 May 2019 Update.

Paint and WordPad both appear as removable optional features in latest Windows 10 Insider build
Image credit: Windows Latest.

As for WordPad (not to be confused with Notepad), the basic word processor has now been outshined by other free alternatives including OneNote, Office Online, or Google Docs. Microsoft has yet to announce that WordPad is being deprecated, but making this app an optional feature should be a welcome change for Windows 10 users who don’t need it.

It’s weird that Microsoft didn’t announce the addition of Paint and WordPad to the optional features in the release notes for the  build 18963, though it’s certainly not the first time that we discover hidden surprises in new preview builds. We’ll see if the company shares more details soon, but in the meantime let us know in the comments if you plan to remove Paint on WordPad from your PC once you’ll be given the choice.

Microsoft Azure gains optimized Java workload support with jClarity purchase

Microsoft has opened up its wallet recently and purchased the leading contributor to the AdoptOpenJDK project, jClarity.

The details of the acquisition have yet to really surface but both Microsoft and jClarity have issued press releases about the new acquisition whom both tout the continued efforts by both companies to increase performance for Java workloads on Azure.

The team, formed by Java champions and data scientists with proven expertise in data-driven Java Virtual Machine (JVM) optimizations, will help teams at Microsoft to leverage advancements in the Java platform.  At Microsoft, we strongly believe that we can do more for our customers by working alongside the Java community. The jClarity team, with the backing of Microsoft, will continue to collaborate with the OpenJDK Community and the Java ecosystem to foster the progress of the platform.

With jClarity being one of the top dogs in JVM development, the new purchase makes all the sense in the world for Microsoft who can now offer Azure customers better performing Adobe, Daimler and Scoiete Generale workloads.

For current jClarity customers, the company plans to reach out them in the coming weeks to discuss transition efforts with guides on product anqd support issues.

Console streaming from Xbox One to mobile devices gets revealed in leaked screenshots

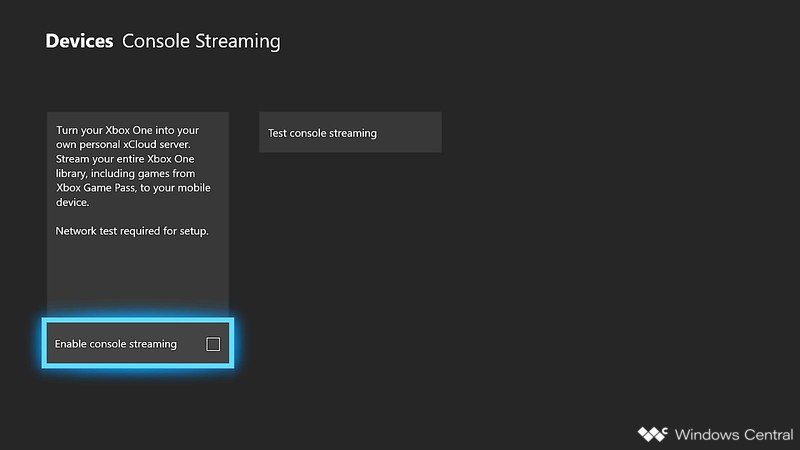
Back at E3 2019, Microsoft announced that an upcoming console streaming feature would allow Xbox One owners to transform their console into a personal xCloud server. This feature will make it possible to stream any game from your Xbox One library to mobile devices, and it will require your console to stay on all the time.

This should be a nice complement to Microsoft’s full-fledged Project xCloud service, which will only launch in beta in select markets in October. The console streaming feature is also expected to make its debut with the 1910 Update for the Xbox One, and Windows Central managed to get some screenshots showing the setup process on the console.

To enable console streaming on Xbox One, a preliminary network test will be necessary to identify any issues related to bandwidth, network latency, and more. The feature will also require a recent Xbox Wireless controller with Bluetooth, and the console will also need to be configured to use instant-on power mode.

Console streaming from Xbox One to mobile devices gets revealed in leaked screenshots

Once all game streaming requirements are met on the console, the setup process will need to be completed on a mobile device using a Preview app that Microsoft has yet to launch. Users will also be required to connect the same Bluetooth-enabled Xbox controller that has been previously paired with the console.

Console streaming from Xbox One to mobile devices gets revealed in leaked screenshots

Microsoft already lets Xbox One owners stream games to a Windows 10 PC using the Xbox Companion app, though this feature require the Windows 10 PC and the Xbox One console must be on the same home network. This new console streaming feature will be just for mobile devices, though it’s still not clear if it will work on both Android and iOS.

Console streaming will likely ship first to Xbox Insiders who are already testing the Xbox One 1910 update. We hope to get more details about this feature later today during the special Inside Xbox episode at 8AM PDT.

Minecraft is getting a new rendering engine and Ray Tracing support on Windows 10

Despite Microsoft canceling the much-anticipated Super Duper Graphics pack for Minecraft, the sandbox game will still get a significant graphical upgrade thanks to a new rendering engine and ray tracing support on Windows 10. Mojang has teamed up with NVIDIA to enable ray tracing on GeForce RTX GPUs, and the result looks quite impressive.

“With the capabilities of this tech, you’ll be able to experience your Minecraft worlds with realistic lighting, vibrant colors, , realistic water that reflects and refracts naturally, and emissive textures that light up,” Mojang explained. You can see how real-time ray tracing will look in Minecraft for Windows 10 in the video below.

Ray tracing will come as an optional feature in an upcoming beta version of Minecraft for Windows 10, and Mojang expects to make it generally available next year. If NVIDIA has been pioneering ray-tracing in its high-end GPUs, Mojang also plans to make the feature available on other platforms that support DirectX raytracing.

In addition to ray-tracing support on Windows 10, the Minecraft developer is also working on a new Render Dragon engine for the Bedrock versions of Minecraft, which will introduce bring graphical improvements such as edge highlighting and new lighting techniques. The company says in the announcement that it actually demoed this new rendering engine during the Minecraft Earth demo at Apple’s WWDC conference back in June.

“Render Dragon supports a range of graphics features, depending on what your device is capable of. Not all devices will support ray tracing, but we will have some graphics enhancements on most devices,” Mojang explained today. The company plans to share more news about this new engine soon, adding that “you’ll see individual Minecraft Bedrock platforms update in the months ahead as we learn the capabilities of our lovely new game engine.”

Power BI visual errors? Fix them with our best solutions

Visualization is crucial in Power BI. Therefore, this feature should run smoothly. But this is not always the case. Many users reported various visual errors in Power BI.

Today we will describe and solve these problems so that your projects in Power BI would be error-free.

Quite a few users encountered the “visual has exceeded available resources” error, as one user reported on the official forum:

Here’s the error I get: Resources Exceeded. This visual has exceeded the available resources. Try filtering to decrease the amount of data displayed.

However, the data is not in a high amount, so, it seems the culprit is the Microsoft server.

Also, many users complained that they get the “This visual contains restricted data” error message. One user said the following on the forum:

I’ve been experiencing some issues sharing an app with one of my colleagues today. He has access to the app, and is able to view it, but all the content is missing behind errors. Now I recognized this as “this person is not a member of the workspace”, it looks very similar to that. But even after adding him to the group as a member, he still sees this error.

power bi restricted data
So, even if the person is a member of the workspace, he still sees the error.

Any user will dread this “Cannot display the visual” error. You can’t see anything in your Power BI, as one user reported:

A report that has been runnig fine suddenly wont display, See pic below. Servers have been rebooted. Latest versions of powerbi installed

power bi can't display visual
So, nothing worked to solve the “Cannot display the visual” error.

As we said at the beginning of the article, these are severe problems, but fortunately, solutions are available.

How to fix visual problems in Power BI?

1. Visual has exceeded the available resources error

The real problem with this error is that no one knows how much resources Microsoft allocates for each user.  So, you may need to try to filter the visual to reduce the amount of data.


2. This visual contains restricted data error

This issue appears when you try to share your data with other users.

  1. To fix it, go to the RLS (Row-Level Security) settings in the online version of Power BI.power bi rls
  2. Select every member of the group and enter their emails again.
  3. Click on Add and then Save.

Looking for the best email client? Here are our top picks.


3. Cannot display the visual error

Check the gateway logs. In On-premises data gateway service logs the error “OLE DB provider ‘MSOLAP.5’ cannot be instantiated – Error: 80040154 Class not registered” should appear.

Solve this issue by deregistering the 32-bit versions below.

  • C:\Program Files (x86)\Microsoft Analysis Services\AS OLEDB\110\msolap110.dll
  • C:\Program Files (x86)\Microsoft Analysis Services\AS OLEDB\120\msolap120.dll

Register the 64-bit version.

  • C:\Program Files\Microsoft Analysis Services\AS OLEDB\120\msolap120.dll

Conclusion

As we can see, the solution to your error could be somewhat technical, but at least, there are methods available to fix these problems.

Did you find our solutions useful? Do let us know in the comments section below.

RELATED ARTICLES YOU NEED TO CHECK OUT:

My computer doesn’t recognize Ledger Nano S

Some users have noticed that their computer doesn’t recognize the Ledger Nano S hardware wallet. This issue can become extremely annoying in the case that you need access to your cryptocurrency.

This issue had some users worried about losing their funds, but that is not the case. This issue seems to be caused by server-side error, and it can be easily fixed if you follow the troubleshooting methods found in this article.

Please follow the steps carefully to avoid complicating things even more. Read on to find out how to do it.


What to do if Ledger Nano S isn’t recognized on Windows 10?

1. Turn off your VPN service and anti-virus software

vpn - Computer doesn't recognize ledger nano s

  1. Depending on what specific VPN and anti-virus software you’re using, the exact steps will vary a lot.
  2. In order to try to see if your security setup is stopping Ledger Nano S from being recognized, the easiest way is to turn both these services off temporarily.
  3. After turning both VPN and anti-virus software off, check to see if the issue persists. If it does, please follow the next method.

2. Update USB Input Device drivers

USB ports - Computer doesn't recognize ledger s nano

  1. Click on Cortana search box -> type in Control Panel -> choose the first option from the top.
  2. Navigate to Devices and Printers.
  3. Double-click the Nano S and select the Hardware tab.
  4. Right-click the USB Input Device -> select Properties.
  5. Click on Change Settings.
  6. Select the Driver tab.
  7. Click on Update driver and select automatic detection.
  8. Repeat the steps for both USB Input Devices.

Looking for a good cryptocurrency VPN? Here are our top picks!


3. Change USB cables

cable USB - computer doesn't recognize ledger nano s
If your computer still doesn’t recognize Ledger Nano S you can try this method: a number of users have solved their issue by simply switching the USB cable they were using to connect their Nano S, with the original USB cable.


4. Update your device firmware

Laptop on desk - Computer doesn't recognize ledger nano s
Note: Please make sure that the 24-word recovery phrase is written down. This will allow you to restore your private keys and recover your access to the crypto assets.

  1. Uninstall all applications from your device.
  2. Open the Manager in Ledger Live.
  3. Select the blue Update button.
  4. Click Continue and check to see if the Identifier matches the one in your Ledger device.
  5. Press the right button on your device to start the update.
  6. Enter your PIN code to confirm access.
  7. Disconnect the USB cable when you see either  Follow device update instructions, or Update.
  8. Press and hold the left button on your device while reconnecting the USB cable.  (release button once Bootloader displays).
  9. Wait for the Update process to completely finish and for the message Firmware updated to appear.

Please feel free to let us know if this guide helped you solve your Ledger Nano S issue. You can do so by using the comment section below.

READ ALSO:

My laptop brightness is stuck on high: 3 steps to fix it for good

All the Windows laptops come with hotkeys to increase and decrease the display brightness. If that does not work, you can use the brightness slider in the Taskbar in Windows 7 or the Brightness control button in Action Center in Windows 10. Sometimes, the brightness hotkey, as well as the slider, will stop working leaving your laptop brightness stuck on high as reported in the Microsoft Community Forums.

Ever since I upgraded to Windows 10, my brightness has been stuck. Possibly at 100%, my eyes hurt when I look at the screen and the battery doesn’t last as long as it used to.

Here are a couple of troubleshooting tips to fix my brightness is stuck on high.

Why can’t I lower the brightness on my laptop?

1. Uninstall Display Driver

  1. Press Windows Key + R to open Run.
  2. Type devmgmt.msc and click OK to open Device Manager.
  3. In the Device Manager, expand the Display Adapter section.
  4. Right-click on your Display Adapter (Intel UHD) and select Uninstall Device.
    my laptop brightness is stuck on high
  5. In the Uninstall Device dialog box, select “Delete the driver software this device” option.
    my laptop brightness is stuck on high
  6. Click on Uninstall.
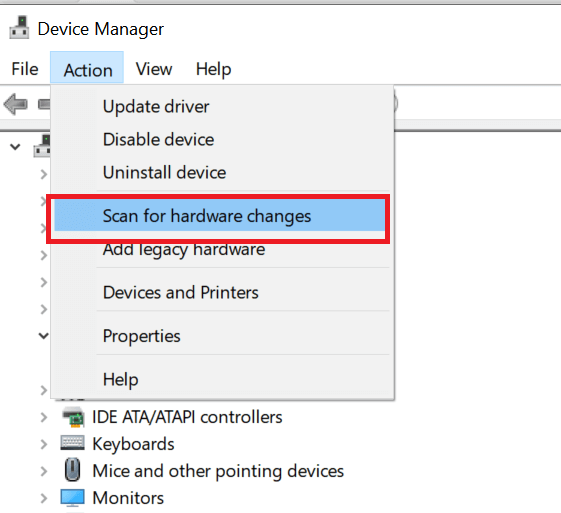
  7. After the device is uninstalled, in the Device Manager, click Action > Scan for Hardware Changes.
    my laptop brightness is stuck on high
  8. Windows will now reinstall the driver for the Display Adapter.
  9. Restart the computer and check if you are able to adjust the screen brightness.

If the issue persists, and even if other solutions in this article also did not work, do the following.

Install Older Version of Display Adapter

  1. If the display adjustment problem started to occur after you upgraded to the latest version of Windows or installing a Windows update, try to install the older version of the Intel Display adapter from the official website manually.
  2. This can help you to resolve the issue temporarily till Microsoft releases a hotfix fixing the issue.

2. Use Registry Editor

  1. Press Windows Key + R to open run.
  2. Type Regedit and click OK to open the Registry Editor.
  3. In the Registry Editor navigate to the following location:
    Computer\HKEY_LOCAL_MACHINE\ SYSTEM\ControlSet001\Control\Class\{4d36e968-e325-11ce-bfc1-08002be10318}
  4. From the right pane double-click on “FeatureTestControl” value.
    my laptop brightness is stuck on high
  5. Set the value to Fb20 and make sure Hexadecimal as “Base” is selected.
    my laptop brightness is stuck on high
  6. Click OK to save the changes.
  7. Restart the computer and check if you are able to adjust the brightness.

Note: After doing this, the lowest brightness level on brightness control will turn off the screen. So, always keep the screen at one level above the lowest one. Also, make sure you adjust the power setting for brightness when in battery mode so that the Windows don’t turn off the screen when in battery saver mode.

Your system doesn’t support the requested display settings error

A number of VMware users have reported encountering the error message Your system does not support the requested display settings when trying to connect to the View desktop.

This error seems to appear when launching the View Client or when using VMware Horizon HTML Access to gain access to a desktop.

The most common issue that causes this error message to appear is that the View Agent display driven was possibly written over by VMware Tools or other software applications.

Another reason for this error occurring is if the VMware Horizon HTML Access Agent (part of the Remote Experience Agent installer package) was installed on the View desktop before installing the View Agent.

Considering all the ideas mentioned above, in this article, we will explore a quick fix for this problem. Please follow the steps carefully.


How can I fix Your system don’t support the requested display settings error?

1. Check if the right driver is being used

Laptop on desk - Your system does not support the requested display settings

  1. Open vSphere Client on your desktop PC and log in.
  2. Click the Start button.
  3. Right-click Computer -> select Manage.
  4. Click on Device Manager.
  5. Scroll through the list and find the Display adaptors.
  6. Click the arrow next to the option to toggle the details of this section.
  7. Check to see if the correct display driver is being used. (click here and look under the section Additional Information to see a list of compatible video drivers).
  8. If the incorrect display driver is being used, please follow the next method presented in this article.

Want to run a different OS on Windows 10? Here are the best virtualization apps for the job!


2. Install the View Agent

VMware website - Your system does not support the requested display settings

  1. Download the View Agent installer from VMware website.
  2. Double-click the installer file and accept the license terms.
  3. If you’re installing View Agent on a Windows Server where Remote Desktop Services (RDS) is not installed, select Install VMware Horizon View Agent in desktop mode.
  4. Select your preferred Internet Protocol (IP) version -IPv4 or IPv6. (you need to install all View components with the same IP version).
  5. Select if you want to enable FIPS mode.
  6. Follow the on-screen instructions by choosing the desired options.
  7. Restart the virtual machine to allow for the changes to be applied.

In today’s article, we explored some of the best troubleshooting steps for the error Your system does not support the requested display settings.

Because seeing this error means that you can not use your VMware software as it was intended, we hope that this guide helped you.

Please feel free to let us know if that is the case by using the comment section found below.

READ ALSO:

3 best GTD software to truly get things done

In everyday life, we ​​are constantly engaged in carrying out activities. It happens sometimes, indeed very often, that the accumulation of an excessive number of things to do does not allow us time to determine what we must focus on, thus generating a strong component of stress and significantly reducing our productivity. The GTD or Getting Things Done is a time management method that helps us to deal with these kinds of situations so we can be more efficient and always know what the “next action” to do. The methodology is based on a 5-step approach:
  1. Capture (inbox): record everything that catches your attention. Free your mind, do not use it as an archive but rely on a reliable external tool.
  2. Clarification: analyses the elements captured in the inbox and enters merit. If the item is not operable, throw it or use it as a reference, otherwise identify the next action required. If the action takes less than 2 minutes, run it immediately, otherwise, delegate (if you can) or put it in a list.
  3. Organize: move items by grouping them based on one or more criteria.
  4. Reflect: perform a periodic review (at least weekly) of all your things to do, projects and lists.
  5. Run: choose your “next action” using the tool you have chosen to implement the GTD methodology.
In the following lines, we will summarize the characteristics of 5 GTD software in order to give you a better insight into available tools.

Best GTD tools to skyrocket your productivity now

Todoist

best GTD software

Todoist is a very simple task management application, with no special additional features. The main screen is divided into two parts: on the left side we find the tree activities, where you can select the priority, the deadline and other parameters of each task; in the right part of the screen, you can enter a description of each task.

The license is freeware, so completely free. The task list is stored in XML format, which offers many opportunities for formatting and printing advanced reports using style sheets.

Get Todoist

Remember the milk

best GTD software

Remember The Milk is an online service. It’s free but you can also sign up for a paid pro account with additional features such as data synchronization, dedicated smartphone apps, and email support. The main screen is made up of cards divided by scope.


Looking for the best apps to take handwritten notes on your Windows 10? Here are the best options.


The inclusion of the different activities is elegant and complete: on the right side of the screen, you can enter expiration dates, labels, places and reminders. You can also add entries by email, just send a message to your dedicated address account.

The Remember The Milk app is full of additional features, most of which can be used with the PRO account. Reminders for activities, for example, can also be sent by e-mail.

Use Remember the milk

Evernote

best GTD software

Evernote is a tool that allows the user to easily create and manage `Notes’ on which different types of information such as text, images, and attachments of any kind can be stored in the Evernote Premium version.

Evernote even if it is not properly an application for the management of activities with some expedient can still be used for this purpose.

The Notes, which can be compared to the activities, are stored in `notebooks’ that act as note containers. An important feature of Evernote are tags, which is a very useful labeling system for organizing Notes; each note can be assigned one or more labels.

Its real strength lies in its ability to synchronize notes. This allows you to create and find information stored in virtually any computer, web browser or mobile phone. Evernote automatically synchronizes notes after a few minutes, or manually at any time by clicking the `Sync ‘button.

Another interesting feature is sharing the ‘Notebooks’. These can be shared publicly via the web or shared with only certain people. Shared notes can only be changed by each recipient if they have premium accounts

The free version has a limit of 60MB notes per month. It is possible to subscribe to an account called Evernote Premium

Get Evernote

As you can see there are many options available to you, and depending on your needs you can use one of them.

Have you used and tried other software for GTD that you think are better than those listed on this page? Share your experience in the comments.

RELATED STORIES YOU SHOULD CHECK OUT:

Fix dataformat.errors in Power Bi with these steps

While trying to make changes to the Power BI Service database like adding additional tables to the SQL database, Power BI users may encounter various data format errors. Some of the error includes DataFormat.Error: We reached the end of the buffer or power bi dataformat.error external table is not in the expected format.

If you are also troubled by this Power BI errors, here are a couple of troubleshooting tips to resolve the issue for a few Dataformat.errors.

How to fix common dataformat.errors in Power BI

1. DataFormat.Error: We reached the end of the buffer

Fix dataformat.errors in Power BI
Check the File Size

  1. If the error occurs when you try to import data from multiple files simultaneously then it can be due to issues with the File Size.
  2. Check the json file size to make sure it is not related to your file size.

Wait, Wait and Wait!

  1. If it is a temporary issue then there is no point in trying to troubleshoot the issue out of your comfort zone.
  2. Users have reported that the data format error was resolved automatically after a day or two.
  3. So, check with the Power BI support in case the issue is at their end.

If the issue persists, do the following.

  1. If you are doing PowerQuery, try to abandon it and set up a staging table in SQL database that parses the JSON using T-SQL.

Learn more about adding filters in Power BI by reading this guide.


2. Power BI dataformat.error external table is not in the expected format

Save the File with Excel

  1. If you are trying to use excel file imported from third-party software like accounting software, then it can have minor XML schema errors.
  2. While these errors can be ignored by the Excel app but results in an error when used with Power Query.
  3. One way to resolve this issue is to open the problematic Excel file in Excel app and resave it.
  4. Now import the same file in Power Query and check if the error occurs again.
  5. This can be a time-consuming task if you have many files to work with. However, as a workaround, you can get through the issue until a reliable fix is found.

Change Type in Applied Steps

  1. First import the file you want to use.
  2. In the Navigator window, click on the Edit button beside the Load button.
    Fix dataformat.errors in Power BI
  3. From the right pane, under Applied Steps, delete Change Type step.
    Fix dataformat.errors in Power BI
  4. Click on Close and Apply.

If the issue persists, try removing initial changed of for date data type from number to text.


3.  Power BI dataformat.error invalid cell value #name/ #ref

Fix dataformat.errors in Power BI

  1. Try to correct the error in the Excel app before importing it.
  2. Check if any of the Excel formulae have #N/A value which is the root cause of this issue. Replace the value with Null or space.

RELATED STORIES YOU MAY LIKE:

You can disable See Records in Power BI in 2 easy steps

When it comes to organizing and visualizing data, Power BI is a great tool. However, there are situations in which certain information must remain hidden. Unfortunately, Power BI doesn’t have a direct way to disable “See Records”.

This is a major problem for many people. One user said the following on the official forum:

There should be an option to disable “see records” for the graphics that support it. It is a huge issue when it comes to security. I know you can hide certain columns but in reports that should only be high level data, the see records item is really an issue.

So, you can hide some columns, but still, you can’t disable the See records option. As we said before, there is no direct way to do that, but there are a few workarounds.

Steps to disable see records in Power BI

1. Hide columns

1. Right-click columns and hide them before publishing from Power BI Desktop.
2. Check if they still appear under See Records.power bi see records

2. Change mechanism to DirectQuery

Change mechanism to DirectQuery and not to Import so you won’t see records in Power BI.

The first one is a better workaround since you won’t be able to use the column in any visuals.


This guide will make you a better Power BI user. Do check it out now.


See Records feature is available, but only in some cases

Generally, the See Records option is used to view all the information about one selected record or data point. Still, the feature has certain limitations.

It appears only in the following visualization types: funnel, pie chart, map, bar chart, column chart, treemap, filled map, and donut chart.

Also, you can’t use See Records when your visual uses a calculated measure and when Power BI is connected to a live multidimensional (MD) model.

So, if the See Records button from the ribbon is disabled, then the selected dashboard doesn’t support this feature.

power bi see records button

Conclusion

Disabling See Records feature is crucial in some cases, and unfortunately, Power BI doesn’t have a direct way to do that. Still, the workarounds described above should help.

Did you find our methods useful? Let us know in the comments section below.

RELATED STORIES YOU NEED TO CHECK OUT:

Gujarati Typing Software: 5 Best to Use in 2026

There are many Gujarati speaking people who may look for a way to type in Gujarati on their systems. While Windows offers support for multiple languages, not many are aware of how to use it. What they are missing is, how to enable integrated language support. Once that is done, users can also take advantage of the different keyboard layouts or Unicode fonts like Shruti. But those looking for advanced features like auto-completion, auto-correct, special characters, etc., would need to download a Gujarati typing software for Windows. Apart from Shruti fonts for Gujarati, there are quite a few other fonts that can be used to type Gujarati. However, since, Windows supports only Shruti font, users would need a separate English to Gujarati typing software. While the other Gujarati fonts may be rare, there is still some software that supports them. Here’s a quick list of some of the best Gujarati Typing software for Windows 10 for typing in Gujarati, proficiently.

Type Gujarati with these software solutions with ease

Google Input Tools

Google Input Tools gujarati typing software

Google Input Tool is a perfect typing utility for all those who wish to communicate in their preferred language from home or work. It offers support for a wide range of languages which includes Gujarati as well.

Any corrections made by the users are saved in its memory and maintained in its custom dictionary creating new and unusual names and words.

The program helps users to communicate in their preferred language and style. There are over 80 languages to choose from and the typing technique is equally easy as typing.

It now displays a demo link and alternative that helps the users to change the keyboard shortcut. Users can also change the keyboard shortcuts using the Keyboard Shortcuts settings page of the Chrome extension.

Price: free

Use Google Input Tool

LipiKaar

LipiKaar gujarati typing software

LipiKaar is a popular typing method that enables users to type in Gujarati with the help of the standard English keyboard. It’s a responsive tool that’s straightforward and easy to use.

While it helps users to type in Gujarati and create word documents, it also enables them to create presentations, Excel sheets, and even write emails in Gujarati. It requires no keyboard stickers, neither does it require the users to be proficient in English.


Looking for the Hindi typing software that has all dialects? Check our top 10 list.


The program works on some easy to follow rules that let you type words correctly. Users can type even the most complex words easily with this program.

It’s a lot different from transliteration as it provides full control to users on typing. Made for business use, Lipikaar is compatible with all Windows versions.

Price: free trial available; pro version starts from Rs. 299/month

Get LipiKaar

Gujarati Typing

Gujarati Typing gujarati typing software

Gujarati Typing is a website that allows users to download the Gujarati Phonetic keyboard layout. They can also choose to download the Hindi phonetic layout if required.

Users can also get the most out of the software by downloading the free Gujarati Unicode fonts and also for Hindi. Shruti and Mangal fonts belong to the Windows package and so, these can’t be downloaded separately.

The Gujarati Phonetic keyboard layout makes it extremely convenient for the users to type in Gujarati on the English keyboard. The software also offers the Gujarati phonetic key mappings for Mac OS X as well.

The website lists all the Gujarati fonts from where the users can download them for Word document and other applications.

Price: free

Get Gujarati Typing

NHM Writer

NHM Writer gujarati typing software

NHM Writer is another great Gujarati writing software for Windows 10 that offers support to write in more than 10 languages. It currently supports even the Tamil Brahmi varieties as well.

What’s interesting is, users can type smoothly in MS office programs using Windows Text services. It’s free software that’s also free of any malware and can be downloaded easily from the library.

For beginners, it offers a context-sensitive key preview and on-screen keyboard. While typing in Gujarati, the “backspace” can be used as Undo that also ensures speed.


Become advanced user by learning these useful keyboard shortcuts in Windows 10


It comes in a compact form as the installation package is of mere 1MB, thereby, taking up minimum space of the system. It’s compatible with all working versions of Windows and can be installed on 32-bit platforms.

It’s also compatible with all major browsers like Chrome, Opera, Safari, Firefox, IE, and more.

Price: free

Get NHM Writer

Gujarati Lexicon

Gujarati Lexicon gujarati typing software

Gujarati lexicon is a website that’s specially dedicated to the Gujarati language. It’s basically a resource bank of more than 45 lakh words. The entire vision of the website is to popularize the language using the power of information technology.

Those who are interested in the Gujarati language can improve their vocabulary, read rare literature, or even enjoy literature using this website.

One of its sub-categories is the Gujarati Writing Pad that allows the users to write in Gujarati. Users can also switch from Gujarati to the English language based on their requirements.

The best part is, users can type the Gujarati words in English and it automatically gets converted to Gujarati fonts. It also allows users to choose from different styles, paragraphs, font family, and fonts.

Export the document, get a print, send an email, or recommend directly through the tool using the small icons placed on top of it.

Price: free

Use Gujarati lexicon

Final Words

With so many language specialty websites, typing in Gujarati is no more a challenge. Simply download one of the best Gujarati typing software for Windows 10 from the above list, and start creating your Gujarati documents easily and efficiently.

RELATED POSTS:

Printer Making a Grinding Noise? 4 Ways to Fix it

If your printer is making a grinding noise when the printer is turned on or when it is printing, you should stop printing and investigate the issue. 

Any weird printer noise should be investigated since it can lead to permanent hardware damage, and in this guide, we will show you the best ways to fix this issue.

Why is my HP Envy printer making a grinding noise?

  • Temporary software or hardware glitches can sometimes cause printing noise.
  • In some rare instances, outdated firmware can cause this problem.
  • Problems with toner or paper can also cause noise to appear.

What can I do if the printer is making a grinding noise?

1. Perform a quick reset

  1. Make sure the printer is turned on and disconnect the power cable from the printer while it is still on.
  2. Disconnect any cable that is connected to the printer.
  3. Once the printer is completely off, press and hold the printer‘s power button for 15 seconds.
  4. Release the button and connect the printer cable to directly to the wall power outlet.
  5. Connect the power cable to the printer and wait for it to turn on automatically.
  6. If the printer does not turn on automatically, press the Power button to do so manually.
  7. Wait for the printer to become silent and proceed with a print job.

2. Perform a firmware update

  1. Make sure the printer is turned on and connected to the computer.
  2. Now go to HP Customer Support – Software and Download link.
  3. From the Let’s identify your product to get started page, click on Printer.
  4. Search for printer model and click on Submit.
  5. Make sure to select the right version of Windows as per your system configuration.
  6. Click on Firmware and then on the Download button.
  7. Run the installer to install the file. In the HP Printer Update window, select your printer model option and click on Update.
    printer making a grinding noise
  8. Click OK to finish the installation.
  9. Restart the computer and check for improvements.

After updating the firmware, check if the printer is still making a grinding noise.

3. Run printer troubleshooter

  1. Click on Start and Settings.
  2. Click on Update and Security.
  3. Choose Troubleshoot.
    printer making a grinding noise
  4. Click on the Printer option and select Run the Troubleshooter.
  5. Windows will now scan the system for any issues affecting the printer and recommend appropriate fixes.

4. Other solution to try

  1. If the noise started after you made any changes to the printer like installing a toner cartridge or cleaning it, turn off the printer and pull off the cartridge. Check it for any issues that can cause the issues. Also, check the toner for any issues that can cause the jam.
  2. Try to make a copy using a blank paper and check if the toner is able to feed the paper. If it fails, try to clean the paper pick roller and the paper path to try and fix the issue.
  3. If nothing seems working, check if the printer has any hardware issue. Contact HP support over the phone to get the best recommendations for the repair.

We hope these steps helped you with your printer making grinding noise. Keep in mind that this isn’t the only issue, and many reported loud clicking noise on their printer, so be sure to check it out.

What method did you use to fix this issue? Share it with us in the comments section below.

Dual boot Windows 10 and Linux issues: Here’s a quick fix

A large number of users that use Linux and Windows 10 in a dual-boot mode have reported that for some reason, they don’t see the menu to choose which OS should the PC boot into. They report that the computer automatically boots to Windows.

This issue can be extremely frustrating considering that the main reason for people installing a dual-boot system is to be able to quickly and effortlessly change their OS.

This issue can have even more of an impact if you set up your dual-boot session in order to run OS-specific apps inside Linux.

For these reasons, in today’s article, we will explore the best way to solve this issue once and for all. Please follow the steps presented here in the order that they were written to avoid any unnecessary complications.

Note: In order to fix this issue, we will have to dive into the boot settings of your PC. To avoid any additional ‘road-blocks’, it is recommended that you create a restore point


How can I fix Windows 10 and Linux dual boot problems?

Run bcdedit command in PowerShell

PC on desk with user - Fix dual boot windows 10 and linux

  1. Press Win+X keys on your keyboard -> select PowerShell (Admin).
  2. Copy-paste the following command: bcdedit /set {bootmgr} path  EFIubuntugrubx64.efi .
  3. Wait for the process to complete, and then restart your computer. This method should have solved your problem.

If the method above didn’t help you solve your issue, you can simply reverse it by following step 1 mentioned above, and running the command: bcdedit /deletevalue {bootmgr} path EFIubuntugrubx64.efi.


Dual boot not working with Windows 10 and Ubuntu? Fix it now with this guide!


Follow these steps if you can’t boot into Windows 10

can't boot windows fix dual boot windows 10 and linux

In the case that you can’t boot into Windows 10 after the restart process, follow these steps:

  1. Insert a Windows installation disk to your PC to get access to the Command Prompt window.
  2. Inside the Command Prompt window -> type in the following command: bcdedit /set {bootmgr} path EFIMicrosoftBootbootmgfw.efi -> press Enter to run it.

In today’s article, we explored the best way to fix the dual boot Windows 10 and Linux issues causing your PC to boot by default in Windows.

We hope this guide helped you solve your boot issue. Please feel free to let us know if it did by using the comment section found below.

[wl_navigator]

Power BI key errors: Fix them with these detailed solutions

Power BI key errors can occur in different ways with a different error message. Some of the Power BI error key messages reported by the Power BI users include Power BI error the given key was not present in the dictionary, power bi error the key didn’t match any rows, and power bi error generating an asymmetric key.

Follow the troubleshooting steps for each error below to resolve Power BI key error.

How to fix various Power BI key errors

1. Power BI error generating an asymmetric key

Fix power bi key errors
Change the Virtual Machine 

  1. If you are using a Virtual Machine and getting the Power BI error generating an asymmetric key, try to install the gateway in a different Virtual Machine.
  2. Users have reported that installing the Gateway on a different virtual machine has resolved the error.

Upgrade the OS (Windows Server)

  1. If you are installing the Gateway on an older version like the 2008 Windows Server, try upgrading to the newer version Windows Server 2012 or later.
  2. Due to incompatibility issues or other glitches, the gateway installation may fail in the older version of Windows Server 2012.
  3. Simply install the Windows Server on a virtual machine and try to install the gateway.
  4. Check if the generating an asymmetric key error is resolved.

Install Data Gateway Manually 

  1. In case the issue is at the Power BI end, you can try to install each gateway manually.
  2. To install the On-Premises data gateway, go to Install On-Premises.
  3. To install the On-premises data gateway (Personal Mode) go to Install On-Premises (Personal Mode) link.
  4. Download and install the data gateways manually and check if the error is resolved.

Change Logon User for Service

  1. If you haven’t already, try changing the logon user for Service.
  2. Press Windows Key + R to open Run.
  3. Type services.msc and click OK.
    Fix power bi key errors
  4. In the Services window, locate and double-click on Power BI Gateway – Enterprise Service.
  5. In the Logon tab, select the “Local System Account” option.
  6. Click Apply and OK to save the changes.
  7. Now try to install the gateway and check if the error is resolved.

Did you know how to refresh data in Power BI? Learn how by following these guides.


2. Fix Power BI error the given key was not present in the dictionary

Fix power bi key errors
Update the Power BI App

  1. If the issue is occurring after installing Windows update, then Microsoft will most likely release an update to fix the issue.
  2. Launch the Microsoft Store app and look for the Power BI.Fix power bi key errors
  3. Download and install if any update is available for the Power BI App.

Upload the files in a Zip File

Fix power bi key errors

  1. To upload a brand pack with multiple files it is important that you zip the folder containing the files and then upload it.
  2. So include the Metadata.xml, logo.png and color.json file in a folder.
  3. Now compress the folder using free compressing software.
  4. Upload the compressed file to the Branding section.

3. Fix Power BI error the key didn’t match any rows

Fix power bi key errors
Revert the Changes Made to Table in Database

  1. If you have recently made any changes to any table in the database and getting this error, then try to revert the changes to resolve the error.
  2. Click Home and select Edit Queries.
  3. Under Applied Steps, remove the navigation.
  4. Click Close and Apply.
  5. Now try to access the table in the database and check if the error is resolved.

RELATED STORIES YOU MAY LIKE:

Top 3 AMR to MP3 converters to change audio formats quickly

AMR (Adaptive Multi-Rate) audio format is the format majority of handheld devices (mainly smartphones) use for voice recordings. Now, a small problem might arise when it comes to the reproduction of AMR files on any other device or platform. As you probably realized, most standard audio players can’t play AMR files. Luckily, that’s where AMR to MP3 converters come into play. We brought to you 4 converters that should allow you for seamless and speedy conversion from AMR to MP3, WAV, or other popular audio formats. Check them out below and take your pick.

Best AMR to MP3 converters for Windows

AMR to MP3 Converter


AMR to MP3 Converter AMR to MP3 converters

Let’s start with the tool that’s specifically advertised as AMR to MP3 converter. As the name itself says, this small tool is quite prolific when it comes to fast converting AMR (Adaptive Multi-Rate) audio format to MP3 in no time.

It works on both Windows and macOS platforms and, besides being quite simple to install and utilize, it is lightweight.

It supports all kinds of audio output formats besides the obvious MP3. So you can use it to convert AMR files to WAV, FLAC, AAC, M4R, AC3, OGG, AIFF and others. The interface is quite self-explanatory and it’s easy to import, convert, and export AMR files in any of the aforementioned formats.

Download AMR to MP3 Converter

AMR Player

AMR Player AMR to MP3 converters

If you are in a hurry and have just a couple of AMR files to convert to MP3, this is a go-to software for you. AMR Player is a simple and yet efficient solution for all users that want to play AMR files and convert them later.


Looking for the best lossless audio converter? Here are the best options.


It comes with quite an intuitive interface and it’s quite easy to utilize it. Just import AMR file and either play it or convert it to MP3 or WAV audio formats. Just like that.

The tool is, like all other entries on this list, completely free of charge. Have in mind that this is a legacy application and that it’s just a practical piece of software, nothing aesthetically pleasing or feature-rich.

Download AMR Player

Any Audio Converter

Any Audio Converter AMR to MP3 converters

Now, if the first two software solutions were a bit outdated, not particularly feature-rich one-trick ponies, Any Audio Converter is so where the real versatility begins.

Besides being an incredibly potent audio converter supporting all known audio and video formats (audio extraction), it allows for audio editing (tags, parameters, lyrics). This, of course, includes AMR format as well.

Also, Any Audio Converter is triple treat so the software suite includes Audio Converter, Video Converter and, YouTube Downloader. Did we mention it’s free?

Download Any Audio Converter

Freemake Audio Converter

Freemake Audio Converter AMR to MP3 converter

Similar to Any Audio Converter, Freemake Audio Converter is a multi-purpose audio editing and converting tool that supports 50+ audio formats. Extracting audio from videos is walk in a park thanks to quite an intuitive interface.

Uploading and organizing audio files, transferring files from your handheld devices to PC and vice versa, and tweaking output files (bitrate, channels, sample rate) are more than welcome features.

What we like about Freemake Audio Converter the most is batch conversion. If you have a lot of AMR files (voice recordings), you can transfer them to your Windows PC and convert all under the same set of rules.

Download Freemake Audio Converter

With that, we can conclude this list of best AMR to MP3 converters. They are all free, with the last two offering premium options. In case you have any questions or alternative application to suggest to our readers, the comments section is below.

RELATED STORIES YOU SHOULD CHECK OUT:

How to disable export data in Power BI

There are many cases in which it is necessary to hide sensitive data, such as personal information. For example, a company shouldn’t be able to export the entire employee table, which has contact info, birthdates, and home address.

This is why many users want to know if they can disable export data in Power BI. Yes, that option is available. In this article, we will show you how you can do that.

One user said the following on the official forum:

Is there a way to disable “Export Data” just to a particular report.
I saw many posts in which we can disable int he admin portal. But would that apply to all the reports in the workspace?
1. I would just need this feature for a particular report
2. I dont see any options in Admin portal except Capacity Settings

power bi disable export capacity settings
So, the OP wants to disable Export Data to a certain report, but there are no options for it in the Admin portal.

Steps to disable export data in Power BI

1. Disable export data for individual reports

  1. Click on the Settings button of the report
  2. Choose Export Data to None

New to Power BI? Here’s everything you need to know about it.


2. Disable export data for all reports

  1. In the Admin portal, go to Tenant Settings.
  2. Select Export Data.power bi export data
  3. Disable the feature and click on Apply.power bi disable export data
  4. Alternatively, you can Enable export.
  5. Apply to The entire organization.
  6. Select Except specific security groups checkbox.
  7. Enter security groups for which you want to keep the function disabled.
  8. Click on Apply.
    power bi export enabled except
  9. Also, you can Enable export for a specific group.
  10. Select Specific security groups.
  11. Select Except security groups checkbox.
  12. Write the groups you want to export data to.
  13. Click on Apply.power bi disable export except

It is worth mentioning that it will take up to 10 minutes for a setting change to take effect for everyone.

Conclusion

So, that’s about it. Exporting data is crucial for a dynamic workflow, but sometimes it is necessary to block certain information.

Fortunately, Power BI has this option and as you can see, there are a few easy steps to disable the export of data.

Did you find our methods useful? How do you disable export data in Power BI? Let us know in the comments section below.

RELATED ARTICLES YOU NEED TO CHECK OUT:

I can’t download OneDrive files on my PC

A number of users have reported that they can’t download OneDrive files. This issue can be extremely annoying, as the entire purpose of storing your files online is to be able to access them whenever you need it.

This is what one user had to say about this issue on the Microsoft Answers forum:

OneDrive won’t download a file to my Windows 10 PC.  OneDrive has been downloading an entire file and working as it should then all of sudden it stopped downloading the entire file. I don’t know what else to try.  The download problem is a problem on all of my computers and the problems started on all the computers at the same time.  I have tried everything I could find to try even deleting a lot of the files and pages.

It seems that this error was caused by a glitch in the OneDrive servers. This error mistakenly flagged some of these files as a possible threat.

Even though the error seems to be on the server-side, in today’s article we will explore some of the best troubleshooting methods to try and solve it. Please read on to find out more.

What to do if I can’t download OneDrive files on Windows 10?

1. Try using your browser

One quick workaround for this issue might be to open OneDrive in your browser and try to download the files manually.

You can use any browser for this purpose, but we recommend making sure yours is stable, quick, and has good security.

We recommend Opera One because it is very easy to use while providing plenty of up-to-date features. Not only does it come with a simple and easy-to-use UI, but it also includes plenty of add-ons and integrations that can help you access your email and social media accounts in seconds.

When it comes to downloading, the software has a good speed rate and you can set it up to save your files into a default download folder, or precisely select the location you want for anything you download.

It has a free built-in VPN that helps keep your data private and allows you to surpass certain geo-restricted content. Plus, it comes with built-in AI.

⇒ Get Opera One

2. Try the ‘uploading again’ workaround


Some users have reported that they found a way to regain access to their OneDrive files.

You can try this method by simply reuploading the files that have issues. This will fix the error message and will allow you to download the files again.

3. Update the OneDrive app on your PC

  1. Press Win+R keys on your keyboard -> type %localappdata%MicrosoftOneDriveonedrive.exe /reset-> press Enter.
  2. Wait for 2 minutes to pass.
  3. Press Win+R keys again -> type %localappdata%MicrosoftOneDriveupdate-> press Enter.

Check to see if the OneDrive icon disappears from your notification area inside the taskbar, and then re-appears after a couple of minutes.

If the OneDrive icon doesn’t reappear, follow these steps:

  1. Press Win+R keys on your keyboard -> type %localappdata%MicrosoftOneDriveonedrive.exe-> press Enter.
  2. This method should solve the issue mentioned above. Follow the next method if it doesn’t.

4. Try re-installing the OneDrive application

To uninstall:

  1. Press Win+X keys on your keyboard -> select Apps and Features.Apps and features - Can't download OneDrive files
  2. Inside the Applications window -> search for OneDrive -> select it -> click the Uninstall button.
  3. Follow the on-screen instructions to complete the process.

To re-install:

  1. Click here to download the latest version of OneDrive.
  2. Install the application to your PC by following the on-screen instructions.
  3. Check to see if the issue persists.

In today’s fix article we explored some of the best troubleshooting methods to try when you can’t download OneDrive files from your account.

Please feel free to let us know if this guide helped you solve your issue. You can do that by simply using the comment section below.

Windows 10 news recap: Notepad coming to the Microsoft Store, Plex leaves the Microsoft Store, and more

Welcome back to our Windows 10 news recap, where we go over the top stories of the past week in the world of Microsoft’s flagship operating system.

Notepad is coming to the Windows 10 Microsoft Store

Microsoft is working on unbundling Windows 10’s default text editor, Notepad, from the OS by bringing it to the Microsoft Store, allowing it to be updated independently of Windows 10.

Windows 10 Halo app is being retired today

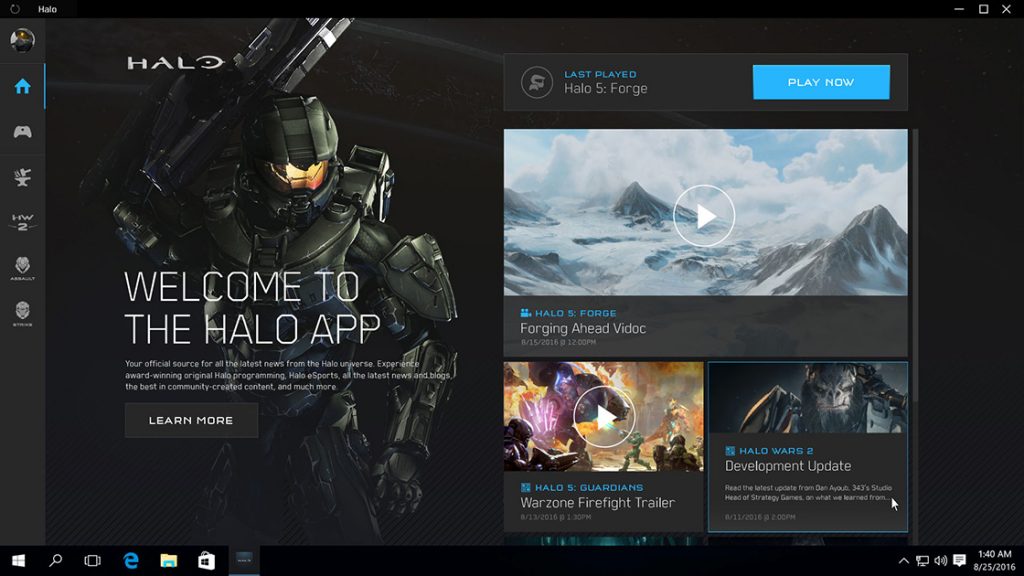
This week saw the Halo app on Windows 10 being retired, as the developer behind the game, 343 Industries, focuses on bringing Halo: The Master Chief Collection to PC, as well as the next instalment in the franchise, Halo: Infinite. The app will no longer receive any updates.

Windows 10 Plex app leaves the Microsoft Store, New desktop version launched

The Plex app for Windows 10 has left the Microsoft Store. Instead, the company has developed a new desktop version. This marks a shift away from Microsoft’s own store offering, and a move back to standalone software.

Plex for Xbox One app

New Windows Search Home experience is now coming to the Windows 10 October 2018 Update

Users on the Windows 10 October 2018 Update are set to receive the new Windows Search Home experience, after Microsoft began rolling it out based on “positive feedback.”

New Windows Search experience is coming to the Windows 10 October 2018 Update

That’s it for this week. We’ll be back next week with more Windows 10 news.

Power BI error in loading a previous table: Fix it with our steps

If you have a Power BI report connected to Data in an Excel file in the Power BI Service or Desktop client, you can refresh the data using the refresh button to update the table. However, some users have reported Power bi error in loading a previous table in their Power BI dashboard.

Follow the steps listed in this article to fix load was canceled by an error in loading a previous table Power BI error.

How to fix the Power BI error in loading a previous table

1. Delete and Recreate Query

power bi error in loading a previous table

  1. Start with saving the affected query M code.
  2. Next, delete the affected query from the dashboard.
  3. Now recreate the query using the previously saved M Code.
  4. Try to refresh the database again and check if the error in loading a previous table occurs again.

If the issue persists, check if any of the queries have incorrect DAX formula.

  1. If you find any incorrect DAX formula in any of the queries, delete the formula.
  2. Load the query again and check for any improvements.
  3. The error can occur due to incorrect syntax that otherwise will skip your attention.

Most users didn’t know that Microsoft Excel uses AI to turn pictures of tables into editable tables. Learn about it here.


2. Change Power BI Options

power bi error in loading a previous table

  1. From the Power BI Dashboard, go to Settings.
  2. Click on Options.
  3. Click on Data Load (this report section).
  4. Uncheck “Enable parallel loading of tables” option.
  5. Now try to load the query and check if the error is resolved.
  6. This error can also occur if the Access app cannot handle Parallel loading that we disabled earlier resulting in the error.

If the issue persists, check if you have deleted or edited a column in a referred table.


3. Undo the Changes

power bi error in loading a previous table

  1. If you are getting the error after you modified the Excel sheet related to your Power BI service, you can fix it by reverting the changes.
  2. Simply undo the changes you made to the Excel file.
  3. Make sure you revert the changes made to the Excel sheet for each query and update the tables manually to resolve the error.
  4. If the issue persists, try with Direct Query instead of Import Query when you get the data.
  5. Another reason why the error can occur is if you have changed the name for any of the tables in Excel and not in PBix. To fix this open the Advanced editor and rename the tables to match the names in Excel file.

RELATED STORIES YOU MAY LIKE:

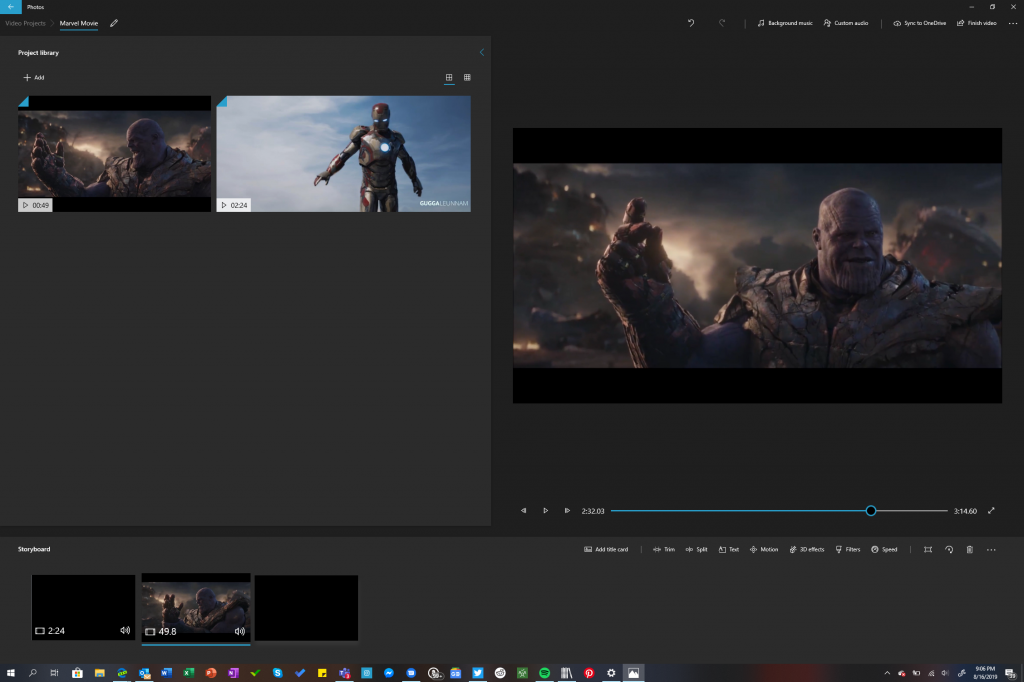
Windows 10 Photos app to lose ability to sync in-progress video projects to OneDrive in January 2020

For reasons seemingly undisclosed to the public, Microsoft has decided to put an end-of-life date for its Photos app video sync to OneDrive.

According to a post on its Windows Support page, January 10, 2020, will be the date that metadata from any video project synced to OneDrive via the Photos app will not only be unsupported but deleted.

What’s happening exactly?

The feature that syncs in-progress video projects to OneDrive is being removed from the Video Editor in the Windows 10 Photos app.

When this happens on January 10, 2020, the metadata for any video projects that are being synced to OneDrive will be deleted. The metadata includes things like the photo and video clip order, music timing, and text for the title cards for a given video project. None of your actual photos, video clips, or anything else you’ve saved to your personal OneDrive will be affected by this change.

With that being said, Microsoft must be hoping its six-month warning is enough time for people to come up with a backup solution; if not, they are offering a couple of options of their own for users.

  • The easiest way to save all of the latest versions of all of your video projects you’ve synced to OneDrive is to select the Turn off sync for all projects link in the app message that you’ll see on the main Video Editor page.
  • Another way is to open each video project one at a time. If the project is synced to OneDrive, you’ll see this message – select Turn off sync now and the latest version of that project will be saved to your device. Again, you’ll only see this message if you’re currently syncing the project to OneDrive.

For any users who may forget to manually switch, Microsoft will automatically do the switch for them after January 10, 2020, but some saved projects my lose their most recent changes during the transition.

Microsoft has yet to explain the move or give any insights into what comes next for the video editing suite in the Photos app that will either supplement or replace the removed sync situation.

Allow Visual Studio Through Firewall: 3 Ways to Unblock it

Visual Studio is a great software for developers, but many are having firewall issues. This is why today we’re going to show you how to allow Visual Studio through a firewall on your PC.

Before we start, check if the firewall is blocking the program, and if it is, follow these steps to fix it properly.

Why does Windows Defender firewall has blocked some features of Visual Studio code message appear?

  • Issues with your firewall settings can cause this error to appear.
  • This is unusual behavior and it’s usually caused by an unknown glitch.

How do I stop Firewall from blocking Visual Studio?

1. Add Visual Studio to Firewall Exception List

  1. Now, this is a very obvious solution to this. You need to add Visual Studio to the Firewall exception list. If you haven’t done already, here is how to do it.
  2. Press Windows Key + R to open Run.
  3. Type Control and click OK.
  4. Click on System and Security.
  5. Click on Windows Defender Firewall.
  6. From the left pane click on Allow an app or feature through Window Defender Firewall.
    Windows 10 firewall blocking visual studio
  7. Click on Change Settings button.
  8. Now scroll through all the apps and locate Visual Studio.
  9. If you don’t find Visual Studio in the list of allowed apps, then click on Allow another app button.Windows 10 firewall blocking visual studio
  10. Click the Browse button and navigate to your Visual Studio installation.
  11. Select the .exe file in the Visual Studio installation folder and click Open. Click the Add button.
    Windows 10 firewall blocking visual studio
  12. That’s it. Visual Studio is now added to the exception list.
  13. Click OK to save the changes.
  14. Now add the following executable files from Visual Studio to the exception list from the same installation folder.
    devenv.exe
    mstest.exe
    mtm.exe
    vstest.executionengine.x86.exe or / vstest.executionengine.exe
  15. Restart the computer and launch Visual Studio and check if the error is resolved. 

2. Check third-party Firewall

  1. If you are using third-party antivirus on your Windows computer it is possible that it may also come with its own firewall.
  2. Launch the third-party antivirus software and check the Firewall settings.
    Windows 10 firewall blocking visual studio
  3. If required, add the aforementioned files to the exception list and save the changes.
  4. Restart the system and check for any improvements.

After doing that, check if the problem is resolved.

3. Disable the Firewall

  1. Click on Start and select Settings.
  2. Click on Update and Security.
  3. Select Windows Security.
    Windows 10 firewall blocking visual studio
  4. Click on Firewall and Network Protection.
  5. Click on your currently active network (Private / Public / Domain).Windows 10 firewall blocking visual studio
  6. Turn off the Firewall for the selected network.
    Windows 10 firewall blocking visual studio
  7. Now launch Visual Studio again and check for the error. If the issue persists, disable Firewall for the remaining networks as well.
  8. Check again for any improvements.

As you can see, it’s easy to allow Visual Studio through a firewall, as long as you follow our instructions.

Firewalls can cause issues with various apps, and we already wrote about Windows Defender Firewall blocking connections in one of our earlier guides.

What method worked for you? Let us know in the comments below.

Notepad is coming to the Windows 10 Microsoft Store

Microsoft is planning to bring and make Notepad as a store-updatable app on Windows 10. This will come as a massive change, and will finally un-bundle the popular text editor from the operating system, allowing for more frequent updates.

The announcement of this change was made today as part of Windows Insider Build 18963. According to Microsoft, future Notepad updates, and starting with build 18963, will be automatically available via the store.

“This will allow us the flexibility to respond to issues and feedback outside the bounds of Windows releases.” As always, if you have any feedback for Notepad, we welcome it in the Feedback Hub under Apps > Notepad,” explained head of the Windows Insider Program, Dona Sarkar.

Previous featured updates to Windows 10 have introduced new features like expanded line ending support, as well as wrap around search, and an indicator for when there is unsaved content. With Notepad coming to the Microsoft Store on Windows 10, the possibilities of new features will likely be almost endless.

Windows 10 20H1 build 18963 is out with improvements for Task Manager, Virtual Desktops, and Windows Search

That was a bit unexpected, but Microsoft has just released a new Windows 20H1 build for Fast Ring Insiders, and it’s a pretty big one. Indeed, The preview build 18963 brings GPU temperature to Task manager for PCs with dedicated GPUs, something that PC gamers should appreciate.

Power users who juggle between multiple virtual desktops all day will also be pleased to know that it’s finally possible to rename virtual desktops in this build, and name changes will persist after a reboot. For now, this feature will only be available for 50% of Fast Ring Insiders, and Microsoft says it will roll it out to more Insiders in the futures.

There are many other new features in this build, including a Mouse Cursor speed in Settings, improvements to Windows Search, and Microsoft also made some changes to make an new account picture in Windows appear more quickly across Windows apps.

Another important change in this build is that Notepad is becoming a Microsoft Store app. After years of neglect, the has been updated with a couple of new features recent in recent months, and this change will allow Microsoft to update it separately from Windows updates.

You can check out everything that’s new in this build below:

GPU temperature comes to Task Manager

One of the longstanding requests we’ve been tracking for Task Manager is to add temperature monitoring support, and with today’s build we’re making progress on that ask. If you have a dedicated GPU card, we will now bubble up the current temperature next to its listing in the Performance Tab.

Showing the temperature of the GPU in Task Manager.

We hope you like the change! If you have any further feedback for Task Manager, please don’t hesitate to share it. To make suggestions or report issues in this space, press WIN+F and file the feedback under Desktop Environment > Task Manager in the Feedback Hub.

Notes:

  • Showing the GPU temperature in Task Manager is currently only supported if you have a dedicated GPU card.
  • You may need an updated graphics driver to see the temperature. Specifically one which supports version 2.4 (or higher) of WDDM is required. To check which version your PC has, press WIN+R and enter dxdiag. Under the Display tab, it will say your WDDM version next to Driver Model.
  • Currently the temperature value is only supported in Celsius.

Renaming your virtual desktops

Showing virtual desktops in Task View, all of which have names set.

Virtual Desktops exist to help you visually and cognitively separate different tasks on your PC. They can also be handy when doing presentations – enabling you to prepare demos on different desktops. Something we’ve heard loud and clear is that you want to be able to set names for your different desktops, in order to help cement the separation between workspaces, and we’re excited to share that rolling out to Insiders in the Fast ring is exactly that!

Wanna try it out? With the change, when you open Task View (by selecting the Task View button in the taskbar, or by pressing WIN+Tab,) clicking the name of your desktop will now switch it to be an editable fiel where you can set the name to be anything you’d like (including emoji). You can also right-click the thumbnail of the desired desktop in Task View, and a context menu with a Rename entry in it should appear. If you don’t have any additional desktops created yet, select “New desktop” in Task View to get started.

And yes, since we know you’ll ask – the names persist reboot. ????

Currently this change is live for 50% of Insiders in the Fast ring, and we’ll be expanding the rollout over the next few weeks as we evaluate the quality of experience.

Improving the Optional Features page in Settings

Based on your feedback, we’ve made a number of usability improvements to the Optional Features page in Settings (Settings > Apps & Features > Optional Features), and they’re now starting to roll out to Insiders in the Fast ring.

  • Multi-select: You can now select and install multiple optional features at the same time.
  • Better list management: You can now search through lists of optional features and sort them by Name, Size, and Install date.
  • More useful information: You can now see the install date for each optional feature in your ‘Installed features’ list. We’ve also added feature dependencies to the description of each optional feature in the list of features available for install.
  • Easier page navigation: View the status of your latest installs/uninstalls/cancels right on the main page in the ‘Latest actions’ section. You can now add optional features and view your history via pop-up dialogues, so you never have to navigate away from the main page

We’re excited for you to try it! Currently these changes are live for 50% of Insiders in the Fast ring, and we’ll be expanding the rollout over the next few weeks as we evaluate the quality of experience. Here’s a peek at what you’ll see once it’s available on your PC:

Showing the landing page for optional features – you can see two optional features installing at the top.

Showing the search box when adding a new optional feature.

Adding Mouse Cursor speed to Settings

As some Insiders have noticed, you can now set your mouse cursor speed from within Settings! This is the latest piece of our larger ongoing effort to converge Settings and Control Panel experiences. You can find the setting under Settings > Devices > Mouse.

Showing the Cursor speed slider in Mouse Settings.

Making Notepad store-updatable

Notepad has been a well-loved text editor in Windows for over 30 years. Over the last few releases, we’ve been making a number of small improvements to Notepad based on your feedback (including expanded line ending support, wrap around search, and indicating when there’s unsaved content.) Starting with this build, we’re making a change so that future Notepad updates will be automatically available via the store. This will allow us the flexibility to respond to issues and feedback outside the bounds of Windows releases. As always, if you have any feedback for Notepad, we welcome it in the Feedback Hub under Apps > Notepad.

Traditional Chinese IME improvements

Thank you everyone who’s shared feedback about the new Traditional Chinese Bopomofo, ChangJie, and Quick IMEs. The developer team has been working on improving the quality and fixing bugs. With today’s build:

  • Toolbar Improvements: We fixed an issue where toolbar shows up even when [Use IME toolbar] is turned off in the setting. We also added [Hide toolbar] button in the toolbar menu.

Showing the IME toolbar with settings menu.

Note: Other ways to show/hide toolbar:

  • From settings: Right click [中/英] icon > Click [Settings] > [General] > [Use IME toolbar]
  • From right click menu: Right click [中/英] icon > [Show/hide IME toolbar]


  • Candidate Window Improvements: We have been working on improving candidate window quality.
    • We fixed an issue where candidate window sometimes only showed limited number of candidates.
    • We fixed an issue where candidates shown in table view cannot be selected by number keys.

Please keep trying out this new IME, and let us know your feedback.

Changes to your account picture in Windows

Changing the picture for the account you use to sign in to Windows is now better than ever! Your updated picture will now show up quickly across Windows, apps, and many of the Microsoft sites you use every day. Previously, you might see as many as three or four different pictures for your account in different apps and sites at one time. Its super easy to try out – just go to Your info in Windows settings and change your picture there!

Steps

  1. Open “Your info” in Windows settings by pressing the Windows key, and typing “Your info,” and selecting “Your account info.”
  2. Use the options in ‘Create your picture’ to select a new picture for your account.
  3. Check if your picture has been updated in Windows, and on the sites and apps you use.

Note: We’re still working with many sites and apps that will need to be updated to work well with this new feature. For example, the account manager control that appears in the upper right of many Microsoft websites currently updates every 24 hours. This will be changed in the next few months to update quickly when your account picture changes.

Other updates for Insiders

Windows Search improvements 

We wanted to take a moment to cover some of the server-side search improvements we’ve been rolling out based on your feedback:

Improved spell correction for Apps & Settings searches

Windows Search has built-in spell correction to help you find what you’re looking for. When you’re typing quickly sometimes mistakes happen – we’re excited to announce that we’ve updated our spell correction technology to intelligently understand and correct small typos like “powerpiont” and “exce;,” which previously would return no results. With these updates, you get better results faster. This feature is now available on both Insider and retail builds in English-language markets.  

Hints to improve Best match results

Showing Windows Search – “free” has been entered in the search box, and “Storage Sense” is the top result. Under it, it says “Related: free up.”

Our goal with Windows Search is to provide a simple, to-use experience, and a key aspect of this is making results easy to understand. Something we’ve heard from you is surprise that sometimes settings search results don’t match your search. To help address this, in certain cases where the Best match result isn’t an exact match for your search, a “Related:” line will be included below the result to help clarify why this result is appearing.  We’ll be expanding this feature to include Apps search in the coming weeks.  This feature is now available on both Insider and retail builds in English (United States).

Bringing the latest Search Home experience to more users

With the Windows 10 May 2019 Update we updated Search Home to help you save time by adding quick access to your Top apps and Recent activities. After receiving positive feedback and comments about this new experience, we’re now making it available to more users by rolling it out to everyone using the Windows 10 October 2018 Update as well. We hope you find them useful and that they help make Search Home more productive for you.

Here’s a glance at what it looks like for those on the Windows 10 October 2018 Update:

Showing Windows Search Home on the Windows 10 October 2018 update. Screen now shows search filters at the top, below which are Top apps and Recent activities.

We hope you like the changes, and if you have any further feedback about search, let us know!

As usual, there are a couple of quality fixes in this new build, including a fix preventing Insiders to setup Windows Hello in Settings in recent builds. Moreover, starting with this build Microsoft is making its Connect app available as an optional download in the Windows 10 Settings app. You can learn more about bug fixes, changes and known issues in our separate post.

Power BI’s August update brings grouping and Analytics features

Microsoft is working hard on their Power BI service and mobile.

After recently highlighting Power BI‘s July updates and implementing some new capacity settings, the Redmond giant now released the changes included in the August 2019 Power Bi Desktop update.

Power BI Desktop’s update brings a lot of new changes

The most important improvement added is the highly anticipated feature from the Microsoft Business Application Summit, grouping.

This new feature allows you to group visuals, shapes, text boxes, images, and buttons together on your report page. But that’s not the only thing that’s changing.

Here’s the full list of improvements:

Reporting

  • Grouping visuals
  • Filter pane auto-update
  • Icon style picker for Icons conditional formatting
  • Conditional formatting warnings

Analytics

  • Key influencers improvements
    • Measure support
    • General availability

Visualizations

  • xViz visualization suite by Visual BI
    • Multiple Axis chart
    • Marimekko chart
    • Variance chart
    • Horizon chart

Data connectivity

  • Support for SAP HANA HDI Containers
  • Edit SAP variables in Power BI Service (preview)
  • PostgreSQL DirectQuery (beta)
  • MarkLogic connector now generally available
  • New Power Platform category within Get Data

Template apps

  • Facebook Pages – Basic Analytics

You can also check out the following video for a summary of the major updates:

If you’re looking to download Power BI Desktop, you can do so from the Microsoft Store.

What’s your opinion on the latest Power BI Desktop improvements? Leave your answer in the comments section below.

READ ALSO:

This is how you can disable drill down in Power BI [SOLVED]

Through the drill down feature, Power BI allows users to add multiple hierarchies. In this way, you’ll have a good insight into your data.

Sometimes, users can opt to disable the drill down option, but this brings issues for quite a few people.

One user reported the following:

Can anyone tell me how to disable the drill on options in the matrix as shown in the image below;

power bi drill down example
So, the OP wants to disable the drill down option (and the hierarchy with it). This operation is unknown to many users, but fortunately, there is a very simple solution. Today we will discuss how to disable the drill down option in Power BI.

Steps to disable drill down in Power BI

  1. Click on the Format panel.
  2. Turn off Visual header.power bi drill down visual header

It is worth mentioning that the option will still be visible in Power BI Desktop because you are in editor mode, but you will see the changes in the reading mode.


We’ve written a nice piece about Power BI, do check it out.


In many cases, the drill down option is extremely useful

Generally speaking, a well-organized piece of information is much easier to understand, and to order information efficiently means creating a hierarchy.

We write hierarchically: we have a heading, a subheading, smaller subheadings, and the text. Also, you pinpoint a geographical location by referring to the country, county, city, street and so on.

So, it is understandable that hierarchy plays a major role in Power BI. Moreover, the drill down feature takes you to the next step in the hierarchical organization of data.

With this option, you can add new levels of information that will allow you to create complex sets of data, such as treemaps.

Conclusion

Sometimes, it is not necessary to have such a complex hierarchical organization to your data. If these situations occur, we come to your help with the solution described above. Also, it is easy to enable back the drill down feature. Just turn on the Visual header!

Is drill down useful for your projects? How did you disable it? Do let us know in the comments section below!

RELATED ARTICLES YOU NEED TO CHECK OUT:

Latest Windows 10 updates trigger random reboots for many

Microsoft recently released its Patch Tuesday updates.

The cumulative updates for all supported versions of Windows 10 brought a lot of improvements and fixes, but at the same time, triggered some weird issues with some versions of Windows 10.

Windows 10 v1903 randomly restarts after KB4512508 update

More specifically, a lot of Windows 10 users complained about the recent patches and random reboots that happen after the installation of those patches. Here’s how some annoyed users are describing the problem:

Since 1903 my PC keeps randomly restarting. There’ll be a small freeze that lasts a couple of seconds, and then it restarts automatically. Outside of this it’s perfectly normal, but I have no idea what is causing this. My computer sounds normal.

Screen goes black, PC shuts down. PC restarts, and goes straight to Desktop. As though it were just restarting normally, were it not for the fact that it doesn’t wait for programmes to close before doing so. I don’t have a login or anything, and it doesn’t go to BIOS either. There’s no way to diagnose this as it is completely sudden and without warning. 100% a problem caused by a recent Windows patch.

It seems like the random restarts happen more often than not on Windows 10 v1903, but other versions are having the same problem, as another user confirms:

Happens on 1809 also, needless to say my hopes of 1903 fixing that when I finally commit are dashed

More problems with restarting after the recent cumulative updates

This is not the only problem with restarts on recently updated PCs, as another user gets prompted repeatedly to restart the PC after installing KB4512508:

My Windows update history reports that “KB4512508” installed successfully. However, Windows 10 repeatedly asks for restarts. I’ve restarted four times already, but it still wants more restarts.

The issue is pretty widespread, and there’s no official solution for now.

It’s worth mentioning that the restarts are usually triggered by intense workloads. Under normal loads, affected PCs work as usual.

Some users managed to solve the problem by turning off Fast Startup, so give it a try as it might solve your problem, as well.


Windows is playing tricks on you and won’t let you turn off Fast Startup? Disable it right now with a few simple steps.


For now, we’ll just have to wait for Microsoft to address the problem and hope for a fix as soon as possible.

READ ALSO:

Installation and reboot issues seem to be affecting latest patch for Windows 10 version 1903

If you’ve been encountering issues during the installation of the latest “Patch Tuesday” update for Windows 10 version 1903, you’re not alone. As reported by Windows Latest, many users have been sharing on Reddit and Microsoft’s Community website that they’re currently unable to install this latest patch and seeing error codes such as 0x800f0982, 0xe0000100, or 0x80073701.

Microsoft has yet to acknowledge these installation issues, but some users have also been complaining about random reboot issues on Reddit. Again, Microsoft hasn’t mentioned it as one of the known issues for the latest Windows 10 1903 build, and and it’s still hard to know if these installation and reboot issues are really widespread. So far, we haven’t seen encountered them on our non-Insider PCs.

Microsoft is now pretty quick to indicate any problems affecting the different versions of Windows 10 on the new Windows 10 Health Dashboard, and the company also releases one or two optional patches with several fixes between the monthly “Patch Tuesday” updates. Again, it’s not clear if these issues are affecting a lot users right now, but in the meantime it might be a good idea to wait before installing the latest Patch Tuesday, or roll back to the previous build if you encounter the random reboots issue.

Lenovo’s PC business marks eight straight quarters of growth

Despite an industry trend of slowing PC sales over the past few years, Lenovo is posting its eighth consecutive quarter of revenue growth as its personal computer division has become responsible for much of the heavy lifting in sales.

In a letter to investors, Lenovo announced that for its FY19/20 quarter the company reached $12.5 billion in revenue with a pre-tax income that more than doubled is year-over-year growth totaling $240 million and $162 million in net income. With returns doubling for the year, investors are should see earnings per share increase $1.37.

“This fiscal year kicked off to an excellent start. Once again, this quarter’s strong results provided solid evidence that Lenovo’s Intelligent Transformation is enabling the company to drive sustainable, profitable growth in today’s dynamic and changing world. Our persistent execution and operational efficiency allow us to bring our vision to life and deliver smarter technology for all,” said Yang Yuanqing, Lenovo Chairman and CEO.

As mentioned earlier, Lenovo’s growth seems largely propelled by the company’s PC efforts, to which the company makes a note in its investor’s letter.

In PCs, volume outgrew the market, which as a whole is experiencing a recovery, by over 13 points, and the group hit an all-time record PC market share of 24.9%. This means one in every four PCs built in the world is a Lenovo PC – cementing Lenovo’s position as the worldwide number one in PCs.

Lenovo is also slowly making inroads with both its Mobile Business Group (MBG) and Intelligent Devices Group both seeing pre-tax income growth to the tune of $100 million and $524 million respectively. Even though it seems as if Lenovo has all but given up on smartphones in the US, the company also highlights that the MBG division “will continue to maintain profitability and seek opportunities to drive profitable growth in new markets and new innovated products.”

Perhaps, in preparation of the looming trade wars the US has engaged in with several countries, Lenovo also bookended its investors call with a warning of increased prices on PC, smartphones and various IoT devices resulting in negative effects on the investors, the extent wasn’t clarified but presumably a hike in prices will undoubtedly slow down the company’s current growth.

Windows 10 Halo app is being retired today

Halo developer 343 Industries announced yesterday they’re sunsetting the Halo app for Windows 10, effective today, August 16. The app will no longer be updated with new content related to Halo and HCS news, though the team noted that Halo Wars 2 game starts will continue to appear in the app until February 16, 2020.

If you ignored that Microsoft had released a Halo app on the Microsoft Store, you’re probably not alone. In addition to providing news, videos, tutorials, and more, the app also served as a launcher for the few Halo games available on Windows 10 such as Halo Wars 2, Halo: Spartan Strike, and Halo 5: Forge.

It’s worth noting that this Halo app is not to be confused with the Halo Channel app, which is a companion app for Halo 5: Guardians and Halo: The Master Chief Collection. The latter is still available on Windows 10, Xbox One, as well as iOS and Android, and it’s not being discontinued for now.

343 Industries is currently hard at work on bringing Halo: The Master Chief Collection on PC, as well as the next episode named Halo: Infinite. Earlier this week, the Halo developer also announced that the RTS game Halo Wars 2 won’t receive any new updates as 343 Industries is now fully focused on the two aforementioned projects.

Halo Channel
Halo Channel
Developer:
Microsoft Studios
Price:
Free

Windows 10 Plex app leaves the Microsoft Store, New desktop version launched

Earlier today, the Plex Media Player app was completely removed from the Windows 10 Microsoft Store app store and it was announced that support for it would completely end by January of next year.

This doesn’t mean that Plex’s support for Windows 10 devices is ending though. On the contrary, this removal was part of a renewed focus on the platform that also includes the launch of a brand new Plex app designed for desktop.

“It’s been a little broken for a while now,” the announcement on the official Plex blog explains. “Back when we first started developing Windows apps, it made a ton of sense to embrace the ecosystem, but over time (???? Windows Phone ????) it made less and less sense to keep investing dedicated development resources to the Metro [sic] platform. We’d much rather invest the effort on a cross-platform app with a best-in-class player engine under the hood, so as of today we’re taking our Windows app out of the store.”

Essentially, Windows 10 users will still be able to use the Plex service. They’ll just need to download the new app (here) going forward.

The new Plex desktop app contains almost all of the functionality of the Microsoft Store app though the TV layout option has been abandoned. They reason behind this decision, according to the announcement, was basically just to encourage more users to use the native Plex apps designed for smart TVs and streaming boxes which they claim work better than mirroring a PC on a TV screen.

None of this news affects the Xbox One Plex app, which is completely separate from the Windows 10 one. The launch of this new desktop app also doesn’t mean that Plex has abandoned the Microsoft Store platform either.

“We don’t have any immediate plans to bring the new app to the Microsoft Store,” the official statement reads. “That said, we’ve also definitely not ruled out that possibility.”

Are you disappointed by the death of the old app? Share your thoughts with the community in the comments below and then follow us on Twitter for more Windows news.

Fix: Outlook does not support connections to Exchange ActiveSync

While trying to connect your Outlook account with Exchange by using ActiveSync protocol the users may get the Outlook does not support connections to exchange by using ActiveSync error. This error is commonly caused if the Outlook does not support connection to a server that is running Exchange server. A similar discussion can also be read on the Microsoft Community forum.

On the same Windows 8 Pro machine, on the same user account – Windows Mail app is connected successfully to my corporate e-mail account (‘Outlook‘ account type, use SSL connection, domain and user name specified).
In Outlook 2013 the same account can’t be connected (selecting ‘ActiveSync’ account type, specifying server name and user name, however there are no options to specify SSL and domain) – getting error message ‘Log onto Exchange ActiveSync mail server (EAS): The server cannot be found.’

Follow the steps listed in the article below to fix Outlook server issue with ActiveSync and Exchange.

Is the Exchange Activesync supported by Outlook?

1. Connect to Exchange using Standard Exchange Connection

  1. Launch the Outlook desktop app.
  2. Click on File and then click on Add Account button.
    outlook does not support connections to exchange by using activesync
  3. Enter your email address and click Connect.outlook does not support connections to exchange by using activesync
  4. Now you will be asked to enter your password again. Enter the password, and click OK.
  5. Click Finish to connect to exchange using standard exchange connection.
  6. Trying to set up your email account manually can create issues like the one mentioned earlier. Try to set up the email account normally and check if the error is resolved.

Deal with spam mails for good with these Exchange anti-spam software for Exchange email server.


2. Configure Outlook 2013 / 2016 Manually

  1. If you want to configure Outlook for Exchange by using ActiveSync do the following.
  2. Launch the Outlook desktop client.
  3. Choose “New Email Account“.
  4. Select “Manual setup or additional server types“.
    outlook does not support connections to exchange by using activesync
  5. Select “Exchange ActiveSync“.
  6. Now you need to fill in the server setting. The username can be in Domainusername format.
  7. Now press and hold the Enter key on the Keyboard until all the boxes go away.
  8. Once the connection goes through. Launch the Outlook client and check if the error is resolved.

For Outlook 2016 / Office 365

  1. Launch the Outlook client in your Windows system.
  2. Click on File and select Add Account.
  3. Now enter the email address for the account and click the Advanced Options.
  4. Select “Let me set up my account manually” option.
    outlook does not support connections to exchange by using activesync
  5. Click the Connect button.
  6. Select “Exchange” option.
    outlook does not support connections to exchange by using activesync
  7. Enter the password for your ID and check if the connection is established without any error.

The EAS protocol provides access to data in exchange mailboxes thus keeping all of your connected devices in sync. Since EAS connection does not provide all the features of an Exchange account, Outlook does not support this method resulting in the error.

RELATED STORIES YOU MAY LIKE:

Posted in Fix