How to build a great Microsoft Store app

It seems like almost every day a new framework or tool is released in the quest to help developers be more productive. While diversity is never a bad thing, a lot of times it feels we are trying hard to reinvent the wheel by solving problems that don’t really exist anymore. While that might be the case with many of the tools and utilities out in the market today, when it comes to Microsoft Store app development the Windows Template Studio extension is king!

What exactly is this magical tool you ask? Well I am about to tell you! As Microsoft continues their quest to lure developers to the now not so new Universal Windows Platform, they ingeniously devised a way for developers of pretty much any skill and experience level to hit the ground running when developing a Universal Windows application. And when I say hit the ground running, I am not kidding! Let’s drive right in!

The first thing you are going to need is Visual Studio 2017 or newer installed. Once we have gotten that out of the way head over to the Visual Studio marketplace and download the Windows Template Studio extension and install it. You can grab that by following this link.

Creating a project using the tool is straight forward.

Open Visual Studio, Click on File -> New -> Project…

Visual Studio 2019 Create New Project

That will launch the Create a new project dialog. From here type “Windows Template Studio” in the search box and select the first option if you are going to use C# or second option for Visual Basic if that is still your thing…

Windows Template Studio Create New Project

On this next dialog you are asked to select the project name, location, solution name. After doing so comes the fun stuff!

Windows Template Studio Configure New Project

Modern Windows application development is demanding. Users expect these applications to support things like notifications, live tiles and deep linking all while remaining very efficient and available. What do I mean by available? Well they expect their application experience to be consistent and available across devices.

The Universal Windows Platform delivers just that, and now with the Windows Template Studio you don’t have to worry about properly implementing these concepts on your own, it does all the heavy lifting for you and generates well-formed, very readable code which follows Microsoft and industry best practices and design patterns.

I am going to take you through some of the available options in the tool as you begin configuring your application.

The first step is to choose a project type. In this context that basically means navigation type. We will select “navigation pane”, many of you may know this simply as a “hamburger menu”.

Windows Template Studio Project Type

The next decision is probably one of the most important, I am partial to MVVM Basic, but Code Behind continues to be a very popular approach. These decisions are not going to necessarily limit what you can do with the application, but they will, depending on your skill level, add an element of difficulty to your implementations.

Windows Template Studio Design Pattern

The next section is where you add pages to the application. There are a lot of common pages Windows Template Studio takes care of for you. These include pages for settings, data grids, media players and more! Creating blank pages is a great way to make place holders for content you expect to add later on, it adds it to the navigation menu and gives you an idea of how to do that later yourself in code.

Windows Template Studio Pages

The final step is to add features. If you thought this tool was great already, your mind is about to be blown away! The features section allows you to, with the click of a button add functionality like deep linking, live tiles, toast notifications and integration with the Windows Timeline.

Windows Template Studio Features

That was it! The last thing we need to do now is hit “Create”.

The result is a buildable, runnable application which can be deployed across any device which supports Universal Windows Platform applications.

Visual Studio Windows Template Studio Application

At this point you can begin to modify and mold this application to fit your needs. The possibilities are endless. While most of the functionality this tool deploys for you was never particularly difficult to implement, the fact remains they were time consuming. This tool eliminates that initial and tedious implementation and deployment of your application framework. Not only that but the resultant code follows industry standards and patterns while providing developers of all skill levels with an extremely robust and extensible foundation for their applications.

Windows Template Studio Application

Now that you have the foundation to a great Microsoft Store App, what story will you tell with it?

For more information on the Windows Template Studio extension for Visual Studio visit the official extension page.
How to revoke Microsoft Store app licenses from a device

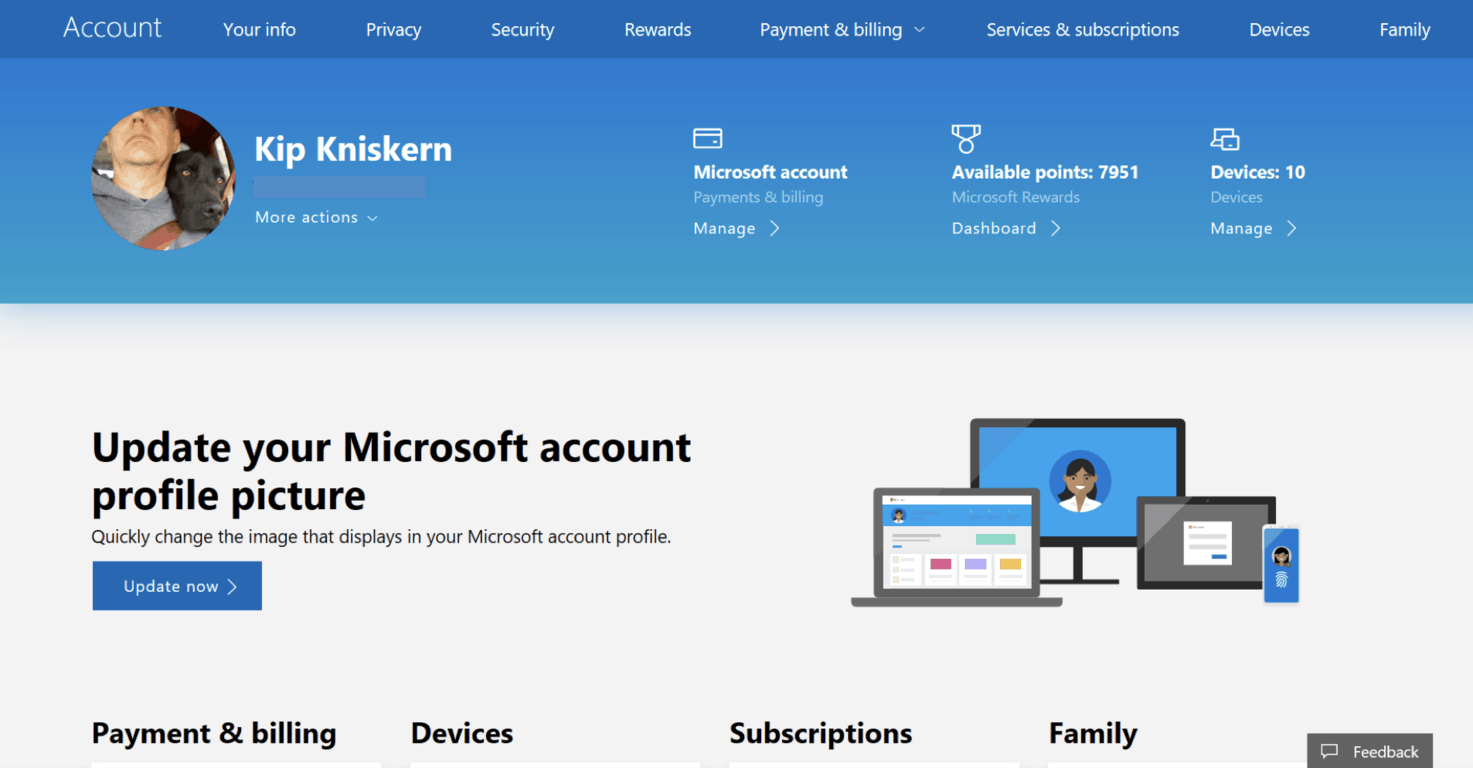
The Microsoft Store permits you to use apps and games on up to 10 of your devices at a time. If you add an eleventh device to your account, you’ll find you won’t be able to install any apps to it. You’ll need to revoke the Microsoft Store license for one of your other devices, so you stay below the limit.

To complete this procedure, start by logging in to your Microsoft account online. The direct link is “account.microsoft.com/devices/content,” which will take you straight to the relevant page. You can also head to Microsoft Account home and follow the “Devices” links. You’ll be prompted to enter your password or confirm a Microsoft Authenticator prompt to verify your identity.

Screenshot of removing a device from Microsoft Store

This screen shows you which of your devices are currently registered for Microsoft Store app installs. You’ll see how many devices are connected, as well as the last usage date of each one. Identify the device you want to remove and click the “Remove” link next to its name.

A popup prompt will give you a final warning before you revoke the device’s license. Tick the checkbox to acknowledge the prompt. Press the “Remove” button to complete the removal process.

Screenshot of removing a device from Microsoft Store

You’ll now have an unused license available, so you can start installing apps on your new device. If you try to use Windows Store apps on your delicensed device, you’ll find they no longer work. Further app installations from the Store will fail, as your device will no longer hold the required license.

While most people are unlikely to use 10 devices simultaneously, it’s possible you may reach the limit as you replace older devices with newer hardware. Getting up and running again takes only a few moments though – head to your Microsoft account, and revoke the Store licenses from your redundant devices.

You can now pre-order and pre-download the NBA 2K20 video game on Xbox One

NBA 2K20 is now available to pre-order and pre-download on Microsoft’s Xbox One consoles ahead of its September 6th release date.

This latest version in the NBA video game series is said to feature improved graphics and gameplay, new game modes, more customization than previous entries, and an open-world neighbourhood to explore.

NBA 2K20 will be available in three versions, each with a plethora of additional digital bonus content. Here’s what comes with each version in addition to the base game:

NBA 2K20

  • 5,000 Virtual Currency
  • 5,000 MyTEAM Points
  • 5 MyCAREER Skill Boosts
  • MyPLAYER Clothing Capsule
  • 10 MyTEAM League packs (delivered one a week)
  • 5 Heat Check packs (delivered one a week beginning at the start of the NBA season)

NBA 2K20 Digital Deluxe

  • 35,000 Virtual Currency
  • 10,000 MyTEAM Points
  • 10 MyCAREER Skill Boosts
  • MyPLAYER Clothing Capsule
  • 10 MyTEAM League Packs (delivered one a week)
  • 10 MyTEAM Heat Check Packs (delivered one a week beginning at the start of the NBA season)
  • 1 Sapphire MyTEAM Cover Athlete Card

NBA 2K20 Legend Edition

  • 100,000 Virtual Currency
  • 50,000 MyTEAM Points
  • 20 MyCAREER Skill Boosts
  • MyPLAYER Clothing Capsule
  • MyPLAYER Apparel Collection
  • ‘Pick 10’ MyPLAYER Shoe Collection (10 shoes, user choice)
  • 20 MyTEAM League Packs (delivered one a week)
  • 20 MyTEAM Heat Check Packs (delivered one a week beginning at the start of the NBA season)
  • 5 MyTEAM Themed Packs (one per theme release across the first five releases)
  • 2 Sapphire MyTEAM Cover Athlete Cards

Are you interested in NBA 2K20? Let us know which version you’re going to pre-order in the comments below and then follow us on Pinterest for more Xbox gaming content.

NBA 2K20 Pre-Order
NBA 2K20 Pre-Order
Developer:
2K
Price:
Free


NBA 2K20 Digital Deluxe Pre-Order
Developer:
2K
Price:
Free


NBA 2K20 Legend Edition Pre-Order
Developer:
2K
Price:
Free

Microsoft new survey tool Microsoft Forms Pro is now generally available

Microsoft’s new survey solution, Microsoft Forms Pro, has finally launched in proper after several months of public preview testing.

The tool is available as part of a Dynamics 365 Enterprise license but can also be accessed by other Office 365 users who can sign up for it via the official website.

Microsoft Forms Pro is a tool for both collecting information for users and for analysing the result data. Each survey can be heavily customized visually and in how it flows with options for advanced branching, skip logic, individualized survey links, and multilingual capabilities being made readily available for developers.

The tool can also be integrated into existing Office 365, Dynamics 365, and Power Platform projects.

The rollout of Microsoft Forms Pro has be surprisingly fast for a Microsoft as it was announced back in February of this year, just four or so months ago.

Are you interested in using Microsoft Forms Pro? Let us know why or why not in the comments below and then follow us on Twitter for more Microsoft news.

Microsoft’s Windows 1.0 tease is likely a Stranger Things Season 3 promotion

Microsoft’s official Windows social media accounts have been having a bit of fun today by “introducing” the new Windows 1.0 operating system to their followers.

The fun started with a post on their Instagram and Twitter accounts with a short teaser video for the “all-new Windows 1.0, with MS-Dos Executive, Clock, and more!!” which was soon followed by subsequent posts about Windows 1.0 software such as “Excel, Chart, and even Flight Simulator” and a Twitter poll quizzing people on how much memory would be required to run the OS.

https://twitter.com/Windows/status/1145731141695168512

The Twitter account has even updated its profile photo and banner to reflect the launch of this retro OS.

Windows 1.0 and Stranger Things

While the first two posts had people wondering if Microsoft was planning some sort of retro/nostalgia product release, the text in the Twitter poll tweet referencing 1985 pretty much gave the true aim of these posts away.

They’re just a clever promotion for the new season of Strange Things.

Strange Things Season 3 is set to debut on Netflix over the next 24 hours and this latest season will be set in the year 1985, the same year that Windows 1.0 actually launched. Microsoft products have appeared in a variety of Netflix TV shows over the years so it’s incredibly likely we’ll see some in Stranger Things as well. Hell, showcasing old-school computer software would actually be a perfect fit for Stranger Things with its heavy emphasis on geek culture nostalgia.

What do you think? Are these posts a Stranger Things tie-in or something else entirely? Share your thoughts with the community in the comments below and then follow us on Twitter for more Microsoft news.

Did you know Windows 10 doesn’t store Registry backups by default?

Microsoft warned Windows 10 users about an existing bug that affected Windows 10 October Update. Surprisingly, the bug is not actually a bug. It’s a feature introduced by Microsoft itself.

Around 8 months ago, the Redmond giant disabled Registry backups in Windows 10. However, the tech giant didn’t bother to inform Windows users about this move.

They still think that the System Restore is backing up their system on a regular basis. In fact, no backup files are stored on your system even though it says “The operation completed successfully”.

Windows 10 Registry backup

Windows backup is an important feature specifically for businesses who can’t afford to lose important data. You can imagine the impact of this change on large enterprises.

Many people want to know why Microsoft decided to disable the feature. The tech giant aims to reduce the disk size occupied by Windows 10.

On a quick note, the registry back is just 50-100MB in size. Therefore, this attempt does not look feasible at all.


Don’t risk losing your data. Install one of these data backup solutions right now.


How to enable Registry Backup on Windows 10

Don’t worry, there is a quick workaround. According to Microsoft, you can still enable the System Restore feature in Windows.

You need to change a Registry key value to enable the functionality.

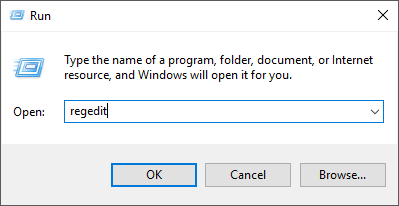
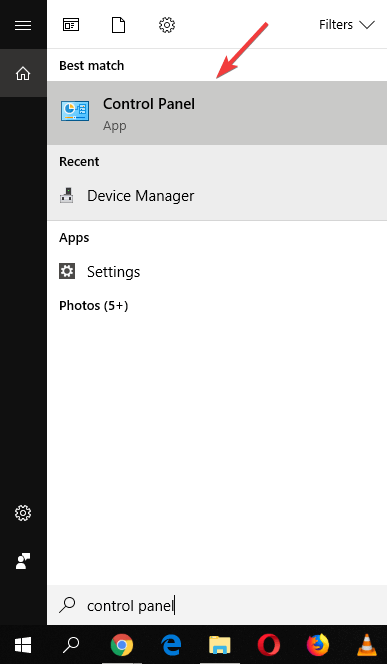
  1. Type regedit.exe in the Start menu. You will see a list of results, click Registry Editor option.
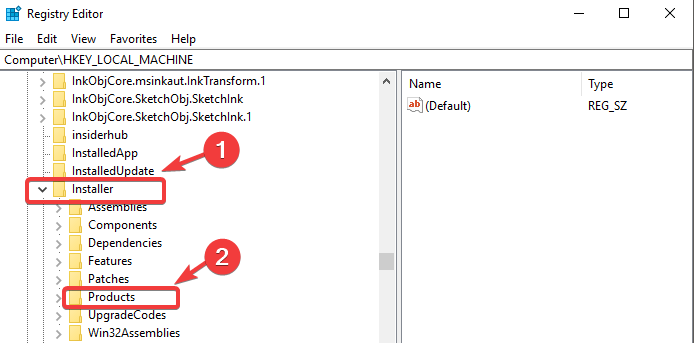
  2. Now look for the Configuration Manager key by navigating to HKLMSystemCurrentControlSetControlSession ManagerConfiguration ManagerEnablePeriodicBackup
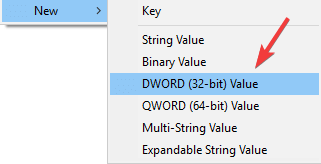
  3. Select Configuration Manager and right-click on it. Create a new entry by selecting New >> Dword (32-bit) Value named EnablePeriodicBackup.
  4. Once the new value is created, change its default value to 1.
  5. Finally, restart the system to activate the new changes.

However, you should keep in mind that the upcoming feature update may disable the feature again. Therefore, you need to repeat the entire process after each upgrade.

Many think Microsoft shouldn’t lie to them

Many Windows users didn’t like Microsoft’s approach at all. According to Redditors, Microsoft should properly notify its users that the System Restore process is now disabled by default.

I don’t care how infrequently this functionality might have been used, folks, intentional breakage like this by Microsoft is just unforgivable. If they wanted to disable it and let the end user know that then fine, but don’t lie to them and let them think that the backup completely normally when in fact it did nothing! 

Others are concerned about the fact that the registry tweak may not be a feasible solution.

RELATED ARTICLES YOU NEED TO CHECK OUT:

Password Failed To Unlock Volume C [Technician Fix]

Windows 10, similar to the earlier version, comes with the BitLocker Drive Encryption. Although the feature is only available for Windows 10 Pro and Windows Enterprise Edition, it is a convenient feature until you run into a problem.

Sometimes, BitLocker may not accept the password and recovery key to unlock the drive, leaving the user locked out of one or all the drive in the system.

If you enter the password to unlock BitLocker Encryption, it may return  Error: The password failed to unlock Volume C. This can also happen with other drives in your system. If you are facing this error, here is how to troubleshoot BitLocker password and recovery key-related issues on your Windows 10 device.

What can I do if the password failed to unlock BitLocker encrypted volume?

1. Disable BitLocker and Unlock the Drive from Control Panel

  1. Press Windows Key + R to open the Run box.
  2. Type control and hit enter to open the Control Panel.
  3. Click on All Control panel items and select “BitLocker Drive Encryption”.
  4. Click on Turn Off BitLocker. It will ask you to enter the BitLocker password to unlock the drive.
  5. Enter the password and click on Unlock

Alternatively, you can unlock the BitLocker from the File Explorer > This PC.

  1. Open “File Explorer” and click on This PC.
    unlock-drive-BitLocker
  2. Right-click on the locked drive (c:) and select Unlock.
    BitLocker Unlock Enter Password
  3. A pop-up window will appear. Enter the password used to lock the drive and click on Unlock.

2. Use Command Prompt to Unlock BitLocker

  1. Press the Windows Key and type cmd.
  2. Right-click on the Command Prompt option and select Run as Administrator.
  3. In the Command Prompt window, type the following command hit Enter. manage-bde -unlock c: -password
  4. In the above command make sure to change the drive letter if you want to unlock D: or E: drive.
    BitLocker Unlock Command Prompt
  5. When prompted, enter the BitLocker password that you used to lock the volume and hit enter. The Password may not be visible while typing, so type the password and hit enter.
  6. If BitLocker accepts the password, you will see “The password successfully unlocked volume D:” message.
  7. However, sometimes BitLocker may show an error after entering the password. This can be resolved by entering the Recovery key in the command prompt.
  8. Open the Command Prompt as admin. Refer to the earlier steps.
    BitLocker Unlock Command Prompt
  1. In the Command Prompt enter the following command and hit enter.
    manage-bde –unlock C: -recoverypassword xxxxx-xxxxxx-xxxxxx-xxxxx-xxx
  2. In the above command, make sure you change the drive letter if you are trying to unlock a drive other than C: and change the xxxx-xxxx with the recovery key that you have saved as a file or uploaded to your Microsoft Account while encrypting the drive.
  3. Upon success, you should see “BitLocker Drive Encryption: Configuration Tool version 6.1.7600. Copyright (C) Microsoft Corporation. All rights reserved. The password successfully unlocked volume D:.” Message.

Let us know your thoughts in the comments area below.

Windows 10 19H2 brings controlled feature roll out this fall

People had the impression that Microsoft was more concerned about 20H1 as compared to the next feature update (aka Windows 10 19H2).

These concerns were laid to rest when Microsoft recently revealed some more details about Windows 10 19H2.

This time Microsoft is completely focusing on performance improvements. However, the company does not plan to introduce any major changes in 19H2.

Windows 10 19H2 is going to be a minor update releasing later this year. According to Microsoft, 19H2 will bring enterprise features, quality improvements, and performance improvements.

Windows 10 Insider Preview Build 18362.10000 (19H2)

Microsoft made it clear that Windows 10 19H1 will be serviced for around 30 months. The company also made the following announcements.

19H2 requirements

Microsoft revealed the upcoming 19H1 feature update will be rolled out to Slow Ring Insiders. However, their PC should be running Windows 10 May 2019 Update.

Cumulative update

These updates will be available as a monthly Cumulative Update. It means that you can quickly install the latest update once it starts rolling out.

Furthermore, the Redmond giant plans to ensure a smooth installation process with the help of servicing technology.


Check out this guide if you want to learn when the next big Windows 10 update arrives.


Controlled feature rollouts (CFRs)

One of the interesting aspects of Windows 10 19H2 is that it rolls out new features to Insiders via controlled feature rollout.

Microsoft stated that you may need to manually turn on some features because they are by default disabled.

Microsoft further explains in a blog post.

This update contains two behind-the-scenes changes designed for OEMs and does not contain anything visible to Insiders. We’re using this update to test our process and servicing pipeline for delivering these updates to customers. 19H2 updates to Insiders will also be cumulative with the latest May 2019 Updates. 

Microsoft says that Windows 19H2 is a work in progress. As of now, the company has not announced any release date.

However, Microsoft stated that 19H2 lands in September this year. If you are interested in 19H2 you can visit Windows Update section to download Windows 10 build 18362.10000. 

Microsoft encourages Windows Insiders to report potential issues via Feedback Hub. 

RELATED ARTICLES YOU NEED TO CHECK OUT:

Outlook Won’t Print in Color [PERMANENT SOLUTION]

Sometimes, when you print your calendar from the Outlook client you may find that it is only printing in black and white color. The issue is known to occur in Outlook 2016 and later versions.

According to Microsoft, the issue may occur due to a bug in the Outlook client that does not respect the Print using the grey shading setting.

When the user goes to the preview, the print screen only shows Black and White option. If you are facing a similar error, here is how to fix this error on your Windows 10 device and Outlook client.

Why won’t Outlook print in color?

1. Disable Print Using Grey Shading

  1. Launch Outlook client.
  2. Click on File and select the Print option.
  3. Click on Print Option and then under Print Style, click on Page Setup button.
    Disable Print using gray shading
  4. Under Shading, Uncheck “Print using grey shading” option.
  5. Close the Outlook client and relaunch it. Check if the color print options are back and you are able to print color documents as well.

If the printer won’t print in color, the solution above will most likely fix the problem quickly.

2. Check your Printer Settings

  1. Click on Start and select Settings.
  2. Click on Devices and then click on Printers and Scanner from the left pane.
  3. Look for your printer in the list of the printer. Click on your printer and select Manage.
    Printers and Scanner - Manager Printer
  4. Under “Manager your Device” click on “Printing Preferences“.
  5. Depending on your printer configuration, find the option and select whether you want to print in color or black and white. Since you want to print in color, check if it is set to Black and White. If so, set it to print color.
  6. Close the Printer properties window and launch Outlook. Try printing any document and check if the color printing option is available.

3. Update the Printer Driver

  1. Press Windows Key +  R to open the Run dialogue box.
  2. Type “devmgmt.msc” and hit enter to open the Device Manager.
  3. In the Device Manager, expand “Print queues“. Printer Queues Device Manager - Update Driver
  4. Look for the affected printer in the list. Select the printer and select Update Driver.
  5. Choose “Search automatically for updated driver software“.
  6. Windows will look for any new update for the driver and download it. After the driver is installed. Close the Device Manager, and launch Outlook. Check for any improvements.

If the manual method of updating your drivers didn’t work out, don’t stress about it. You have a more practical alternative to manage all the PC drivers automatically.

So, you should use effective driver update support for Windows given by a fully automated program. It offers a detailed driver scan and a complete list of outdated drivers you can fix by only pressing one button.

⇒ Get Fortect Driver Updater

4. Repair MS Office

  1. Press Windows Key + R, type Control and hit enter to open Control Panel.
  2. Go to Programs > Programs and Features.
    repair office client
  3. Locate Microsoft Office and click on Change.
  4. In the Office Repair tool, select Quick Repair and click the Repair button. Wait for the troubleshooter to complete the repair.  Check for any improvement.
    Microsoft Office Repair Option
  5. If the issue persists, again launch the office repair tool and select the Online Repair option. Click on Repair button again. This option requires an internet connection to work properly.
Posted in Fix

Install SUSE Linux Enterprise Server 15 SP1 on Windows 10/11

All the Linux fans out there! You can now download SUSE Linux Enterprise Server 15 SP1 from Microsoft Store.

Windows 10 users were previously allowed the install a few Linux distributions on Windows 10 including Arch, Ubuntu, Kali Linux.

They can now install SUSE Linux Enterprise Server 15 SP1 as well. The developer explains:

SUSE Linux Enterprise Server 15 SP1 is a multimodal operating system that paves the way for IT transformation in the software-defined era. The modern and modular OS helps simplify multimodal IT, makes traditional IT infrastructure efficient and provides an engaging platform for developers. As a result, you can easily deploy and transition business-critical workloads across on-premise and public cloud environments.

However, you should be running at least Windows 10 build 14388 (Windows 10 Anniversary Update) to install the new distribution on your system.

You should keep in mind that you can not run SUSE Linux Enterprise Server 15 SP1 in Window 10 S Mode.

Moreover, it also supports Windows Server 2019 version 1709 and later.


Did you know Linux beat Windows 10 v1903 at multi-thread performance?


How to install SUSE Linux Enterprise Server 15 SP1 in Windows 10?

In order to install SUSE Linux Enterprise Server 15 SP1, you should first enable WSL in Windows 10 and Server.

Follow these steps to enable the feature:

  1. Open Powershell as an Administrator and enter the following as a single command:                                     
    Enable-WindowsOptionalFeature -Online -FeatureName Microsoft-Windows-Subsystem-Linux 
  2. Finally, restart your system to enable the changes.

Now you can start the installation process.

  1. Visit the Windows App Store and download SLES-15-SP1. Download SUSE Linux Enterprise Server 15 SP1
  2. Once the download is complete, open the installation file named “SLES-15-SP1.appx” and hit the Install button.
  3. You can see the installation progress in a Command Prompt window.
  4. The initialization process will start after the installation is complete.
  5. Now the system prompts you to enter a username. Remember, you don’t need to choose the same username as you currently have as Windows username.
  6. Next, you need to enter a password against the username.
  7. The system will prompt if you want to use the username administrative (sudo) purposes.
  8. Last but not the least you can use “sudo SUSEConnect -r [registration code]” to register SLES-15-SP1.Register SUSE Linux Enterprise Server 15 SP1

Apart from the Windows 10 Home users, the new distribution is expected to attract large enterprises.

What do you think about SUSE Linux Enterprise Server 15 SP1 arrival in Microsoft Store? Let us know in the comments down below. 

RELATED ARTICLES YOU NEED TO CHECK OUT:

How to fix Surface pro 6 battery drain [EXPERT FIX]

Users have reported that their Surface Pro devices drain the battery too fast to be able to use it properly. This issue can be extremely annoying, especially in the case that you are on the road and need access to the information stored on your Surface Pro.

This is how one user describes the issue on Microsoft Answers forums:

I recently just picked up the new Surface Pro 6 with 128gb 8gbRAM and i5. It has been a great device however the battery life is concerning.I loose 7% of my battery by using Youtube for 20 minutes on recommended battery and suggested brightness. I dont know if this is normal or do I have a defective device.

In this article, we will explore some of the best troubleshooting methods. We will try to figure out what causes the battery to drain so fast, and then we will explore some methods to troubleshoot it. Read on to find out more.

How can I fix battery drain problems on Surface Pro 6?

1. Download the latest firmware for your Surface Pro device

  1. Visit the official Microsoft webpage.
  2. Scroll down and select the version of Surface Pro you own.Surface firmware page - surface pro battery drain
  3. Click the appropriate link, download and install the firmware update.

2. Clean the connector on the power supply

  1. Clean the connector pins.
  2. Unplug the power supply from the wall socket -> clean the pins using a pencil eraser.
  3. Use a cotton swab with alcohol to clean the pins.
  4. After you’ve made sure that the pins are clean, make sure that all pins are dry.
  5. Plug the power supply into the wall socket, plug in the connector, and connect it to your Surface device.

3. Remove and reinstall the battery driver

  1. Open Device Manager -> click on Batteries to expand the section.device manager batteries - surface pro battery drain
  2. Double-tab on the Microsoft Surface ACPI-Compliant Control Method Battery.
  3. Inside the Driver tab, select Uninstall -> Ok.
  4. Navigate to the Action menu -> select the option Scan for hardware changes.

In extension, you should be aware of specialized driver software that can manage your drivers easily by installing or updating them automatically. Plus, you can fix damaged drivers in no time.

⇒ Get Fortect Driver Updater

4. Run the Surface Diagnostic Toolkit

surface diagnostic tool - surface pro battery drain
  1. Click this link to download the Surface Diagnostic Toolkit.
  2. Run the application on your device.
  3. After the diagnostic process is completed, perform a forced shutdown by keeping the power button pressed for 10 seconds.
  4. When you turn on your Surface device, the updates will be applied.

5. Shut down your device and charge it fully

  1. Shut down your device.
  2. Connect the charger and charge your device completely.
  3. Once the device is charged, check if the problem is still there.

6. Reset your Surface software


If all other methods have failed to solve your issue, it is recommended that you reset your device.

In order to reset the software on your Surface device, you will need to navigate to the Fresh Start option and follow the on-screen instructions.

We hope this guide helped you solve your Surface Pro issue. Please feel free to let us know if it did by using the comment section below.

Cannot Delete Files in Windows Media Player [Fix]

The Windows Media Player is one of the best apps for multimedia, but some users reported that Windows Media Player cannot delete a file from the device.

Needless to say, it’s a minor issue at best and can be taken care of easily. Keep reading to find out!

What can I do when Windows Media Player cannot delete files?

1. Delete the file from your PC

  1. Connect your device, either the Windows Phone or MP3 player, to your computer.
  2. Click on Start, and then open File Explorer.
    Connect the device and attempt deleting if windows media player cannot delete a file from the device
  3. Click on This PC from the options on the left.
  4. Your external device should be listed here. Double-click on it to reveal its file structure.
  5. Navigate to the folder where the music or video files are stored.
  6. Locate the file you want to remove, right-click it and choose Delete. 
  7. Click Yes to confirm.

A quick fix when you cannot delete files in Windows Media Player on Windows 7 is to take the manual approach. Locate the file in the File Explorer and remove it.

2. Clear the Windows Media Player cache

  1. Press Windows + R to open Run, paste the following command, and hit Enter: %LOCALAPPDATA%\Microsoft\Media Player
  2. In the window that opens, press Ctrl + A to select all files, and then hit Delete to clear them. Make sure you are deleting only the files and not any folders therein.
    Rebuild WMP Library database if windows media player cannot delete a file from the device
  3. Restart Windows Media Player. This will rebuild the database all over again.
  4. Now, try deleting the file that you wish to.

3. Reset Media Library

  1. Restart your device.
  2. Type Services in the Search box and select the Services app from the search result.
  3. Look for Windows Media Player Network Sharing Service.
    Stop WMP network sharing service if windows media player cannot delete a file from the device
  4. Check the status. If it is running, double-click on the service and click on Stop to prevent the service from running.
  5. Next, paste the following path in the Search box, and hit Enter:%LOCALAPPDATA%\Microsoft
  6. Select the first search result.
  7. Locate Media Player and rename it to something else, say, Media Non Player.
    Rename media player folder if windows media player cannot delete a file from the device
  8. You might have to select the setting to show hidden files and folders if you cannot see the Media Player folder, as the same could be hidden.
  9. Restart Windows Media Player.
  10. Start Media Player again and check if the issue is still there.

That’s it! One of the solutions should have helped if you cannot delete Windows Media players files.

If the problem persists and you are looking for alternatives, we recommend switching to a reliable and universal video player.

Tell us which fix worked for you in the comments section below.

Microsoft provides “one stop shopping” for all Insider programs on this web page

Following the launch of the Windows Insider Program in late 2014, Microsoft has been pursuing a wide “insidering” effort across the company, with new Insider programs for Office, Skype, Xbox, and more. This actually happened so fast that it’s actually hard to keep up with all the various Insider programs that the company created over the years.

Fortunately, the software giant has now put all information about its various Insider programs on a single web page, which was shared on Twitter today by Microsoft Partner Program Manager Scott Hanselman.

This may have passed under your radar, but Microsoft has launched Insider programs for Bing as well as Visual Studio Code in recent years. The last Insider program Microsoft launched is for the new version of Microsoft Edge, which is now based on the open-source Chromium project. Since its official launch in April, the Edge Insider Program has become pretty active with the Canary and Dev channels giving us new builds at a regular pace.

On the Windows Insider side, the program has now crossed more than 16.5 million members this year, but it looks like some changes are incoming. For the first time ever, Microsoft recently made Fast Ring Insiders skip the next Windows 10 update (19H2) to test the first feature update coming in 2020. As for the 19H2 update, the first preview build shipped to Slow Ring Insiders yesterday, and Microsoft explained that this minor update will install just like a regular cumulative update when it’s released later this Fall.

The Windows Insider program isn’t the only one that went through some changes in recent years, as the Xbox Insider program went from an invite-only structure to a more complex organization with five different Insider rings. It’s nice that all information about Microsoft’s Insider programs can be found in one single place, but all programs keep their specificities and it certainly take some time to figure out how to use them best.

Windows Media Player Can’t Skip or Fast Forward [Fix]

Windows Media Player can’t skip forward? This can be a big issue, so today, we will show you how to fix it.

What can I do if Windows Media Player can’t skip forward?

First, just restart your PC. This quick reset could help address minor bugs. Also, try press and hold on to the button for at least 15 seconds for the forward action to take place.

If none work, move to the solutions listed next.

1. Run Windows Media Player Settings troubleshooter

  1. Press Windows + R to open Run, paste the following command, and hit Enter:msdt.exe -id WindowsMediaPlayerConfigurationDiagnostic
  2. On the WMP troubleshooter window, click on Next for the process to begin.
    Troubleshooting WMP settings if windows media player cannot skip forward
  3. Follow on-screen instructions.

2. Run Windows Media Player Library troubleshooter

  1. Press Windows + R, paste the following command, and press Enter:msdt.exe -id WindowsMediaPlayerLibraryDiagnostic
  2. Click on Next for the troubleshooting process to begin.
    Try troubleshooting WMP Library if windows media player cannot skip forward
  3. Follow the instructions on the screen.

The built-in troubleshooters often help fix things when Windows Media Player can’t skip forward 10 seconds or jump by 5 seconds.

3. Register DLL files

  1. Press Windows + S to open Search, type Command Prompt, and click on the relevant search result.
  2. Paste all the following commands individually and hit Enter after each:regsvr32 ntdll.dll /s regsvr32 msdxm.ocx /s regsvr32 dxmasf.dll /s regsvr32 wmp.dll /s regsvr32 wmpdxm.dll  /scommand
  3. Once done, restart the PC.

4. Check file types

This error usually pops up with formats like MKV, FLV, MOV, or older AVI files. These formats often cause skipping issues in Windows Media Player due to compatibility problems.

To fix this, try converting the file to something more compatible, like MP4 or WMV. You can use apps like VLC or online services like Zamzar or Convertio to convert quickly.

For an even faster solution, try the Windows Photos app: open the video in Photos, choose Edit & Create > Save as video, and save. This will re-encode the file in MP4, so it should play smoothly in Windows Media Player.

This should be all that you need to do if Windows Media Player can’t skip forward. Besides, if the problem persists, we recommend you switch to a reliable and dedicated media player.

Tell us which fix worked for you in the comments section below.

How to use Microsoft OneNote in Microsoft Teams

Microsoft Teams is a powerful collaboration service that rivals Slack. It can help bring your employees together from across your company or organization in a digital online space, but did you know Teams also has Microsoft OneNote built right in? That’s right, you can combine the power of Teams and OneNote to share important task lists, drawings, notes, and accomplish more across your organization.

Using OneNote within Teams is easy, and in the fast-paced world of Microsoft blogging, is something we leverage here at OnMSFT and use in our operations. Here’s more on how you can get started with OneNote in Teams.

How to add OneNote to a Microsoft Teams Channel

To get started with OneNote in Microsoft Teams, you will need to add it to one of your Teams general channels. You can do that by heading to the top bar (under where the name of your channel appears) and clicking the add a tab (+) button. Once that is done, you can choose OneNote from the list.

You’ll be presented with the option of opening an existing notebook (as we have in our list) or creating a new notebook from scratch. You also can click on “Paste a OneNote link” and add in the address, and then click “Save” if you want to link an existing notebook from elsewhere in your organization.

If you opt to create a new notebook, you can give it a name, and press save. Regardless, the notebook you opened or created should now show up on the top bar for easy access to all your employees within that Teams channel. If your employee or anyone in the channel is blocked from viewing the notebook, they’ll be able to request access right from the tab, allowing them to view and make edits.

So, how does OneNote in Teams work?

OneNote in Microsoft Teams uses the power of OneNote Online. In simpler terms, that means it works as a web interface, so, you’ll need to be connected to the internet to save all your work or any changes that you may make to notebooks. You’ll have access to some basic editing functionalities while using OneNote within Teams, and you’ll see the File, Home, Insert, Draw, and View tabs. You can still insert tables, files, pictures, and audio recordings, as well as draw certain items on your screen.

You also can press on the “Open in browser” button if you want to edit the Notebook using the OneNote app on your computer, but you’ll be prompted to sign in with your account. Here at OnMSFT, we use OneNote to keep a list of our editorial procedures for our day-to-day operations, making it easier to onboard new employees.

How to use a OneNote Class Notebook in Teams for Education

If you’re using Teams for Education, things are a bit different. Each team in Teams for Education comes with its own linked OneNote Class Notebook. These notebooks come with three components, a Student Notebook, Content Library, and Collaboration Space. The setup process is similar to what we described above, and you can navigate under the General channel of a classroom, and selecting the Class Notebook Tab. Microsoft dives deeper into the process here.

OneNote Class Notebooks (Photo via Microsoft)

How will you succeed with Teams and OneNote?

So, there you have it! Using OneNote with Teams is as simple as adding it to a channel, and clicking on the add a tab button, and creating or opening a OneNote notebook. How will you use OneNote and Teams? Let us know in the comments below, and keep tuned for more Microsoft Teams tricks and tricks.

How to increase the Windows 10 notification timeout

Windows 10 displays notification banners for 5 seconds before moving them into Action Center. This might feel too quick and hurried, especially when you receive a text-heavy alert. It’s possible to change how long notifications stay on screen, giving you more time to read them before they vanish into Action Center.

As is often with the case with Windows 10, the setting for this isn’t necessarily where you’d expect it to be. There’s no reference to the option within the main “System > Notifications” settings screen. Instead, you’ll need to open the Settings app to the “Ease of Access” category – click its tile on the Settings homescreen.

Screenshot of changing Windows 10 notification timeout

You’ll now find the relevant control under the “Simplify and personalise Windows” heading. The “Show notifications for” dropdown gives you a variety of timeout options, ranging from the default of 5 seconds right up to 5 minutes.

There’s no way to enter your own value, so you’ll have to pick one of the six predefined delays. We suspect you’re unlikely to want notification toasts onscreen for longer than 30 seconds, but Microsoft makes it possible to use a very long timeout if you do require the option.

The change will take effect immediately after you select a new value in the dropdown. Subsequent notifications will stay onscreen for the selected duration, before getting moved into Action Center for you to review later on.

How to safely delete Windows Assembly Temp folder? [FULL GUIDE]

The Windows Assembly Temp folder is part of the GAC (Global Assembly Cache) tool that is used to install and uninstall assemblies by using Windows Uninstaller. This feature helps you uninstall and install assemblies in the testing process of installation packages and for servers. (tmp is used for installation, and Temp is used for uninstallation).

A wide range of people has reported having issues with the Temp folder found in Windows Assembly. They say that the automatic cleaning of the Temp folder never happens, so this results in the folder growing to the size of 20-30 GB.

For these reasons, in this article, we will discuss the possible reasons for which your computer doesn’t clean the Temp folders automatically, and also how to safely remove the data from the Temp folder.

How can I delete Windows Assembly Temp folder?

Why isn’t the Windows Assembly Temp folder cleaning itself automatically?


One of the possible reasons for which the Windows Assembly Temp folder isn’t getting cleaned automatically could be the incompatibility with another 3rd party software installed on your PC.

The issue seems to be caused by antivirus software that was found on all the computers that had this issue. This problem has been reproduced on clean installations of Windows Server, by simply installing the antivirus software called ‘G Data’.

This antivirus software seems to somehow block the automatic process of deleting temporary files stored on your PC for installing or uninstalling software. The symptoms have also been reproduced on Windows 7, Windows 10, and Windows 2008 R2.

The user that found out about this software causing the issue, even got a confirmation from the developers of the G Data antivirus software, that they are aware of the issue and that they are working towards solving it.

How to remove the data from the Windows Assembly Temp folder?


Even though a permanent solution to this issue hasn’t been found yet, users have deleted the files stored in the Temp folders manually. They selected all the files stored inside this folder and used the Delete option to send them to the Recycle Bin.

Note: Some of the files stored in the Temp folder (c:>windows>assembly>temp folder) will not be able to be deleted as they are still in use by the operating system.

Users have not reported any sort of issues caused by deleting the contents of the folders manually, but it is strongly recommended to leave both ‘tmp’ and ‘temp’ folders untouched. The contents of these folders can be removed without issues.

In this article we found out what the ‘tmp’ and ‘temp’ folders from Windows Assembly are used for, and that it is safe to remove the contents of these folders, but not delete the actual folders.

To learn more about other temporary folders, check our SquirrelTemp folder guide.

Please let us know if this article helped you by using the comment section below.

Outlook: Your Organization’s Policies Are Preventing [Fix]

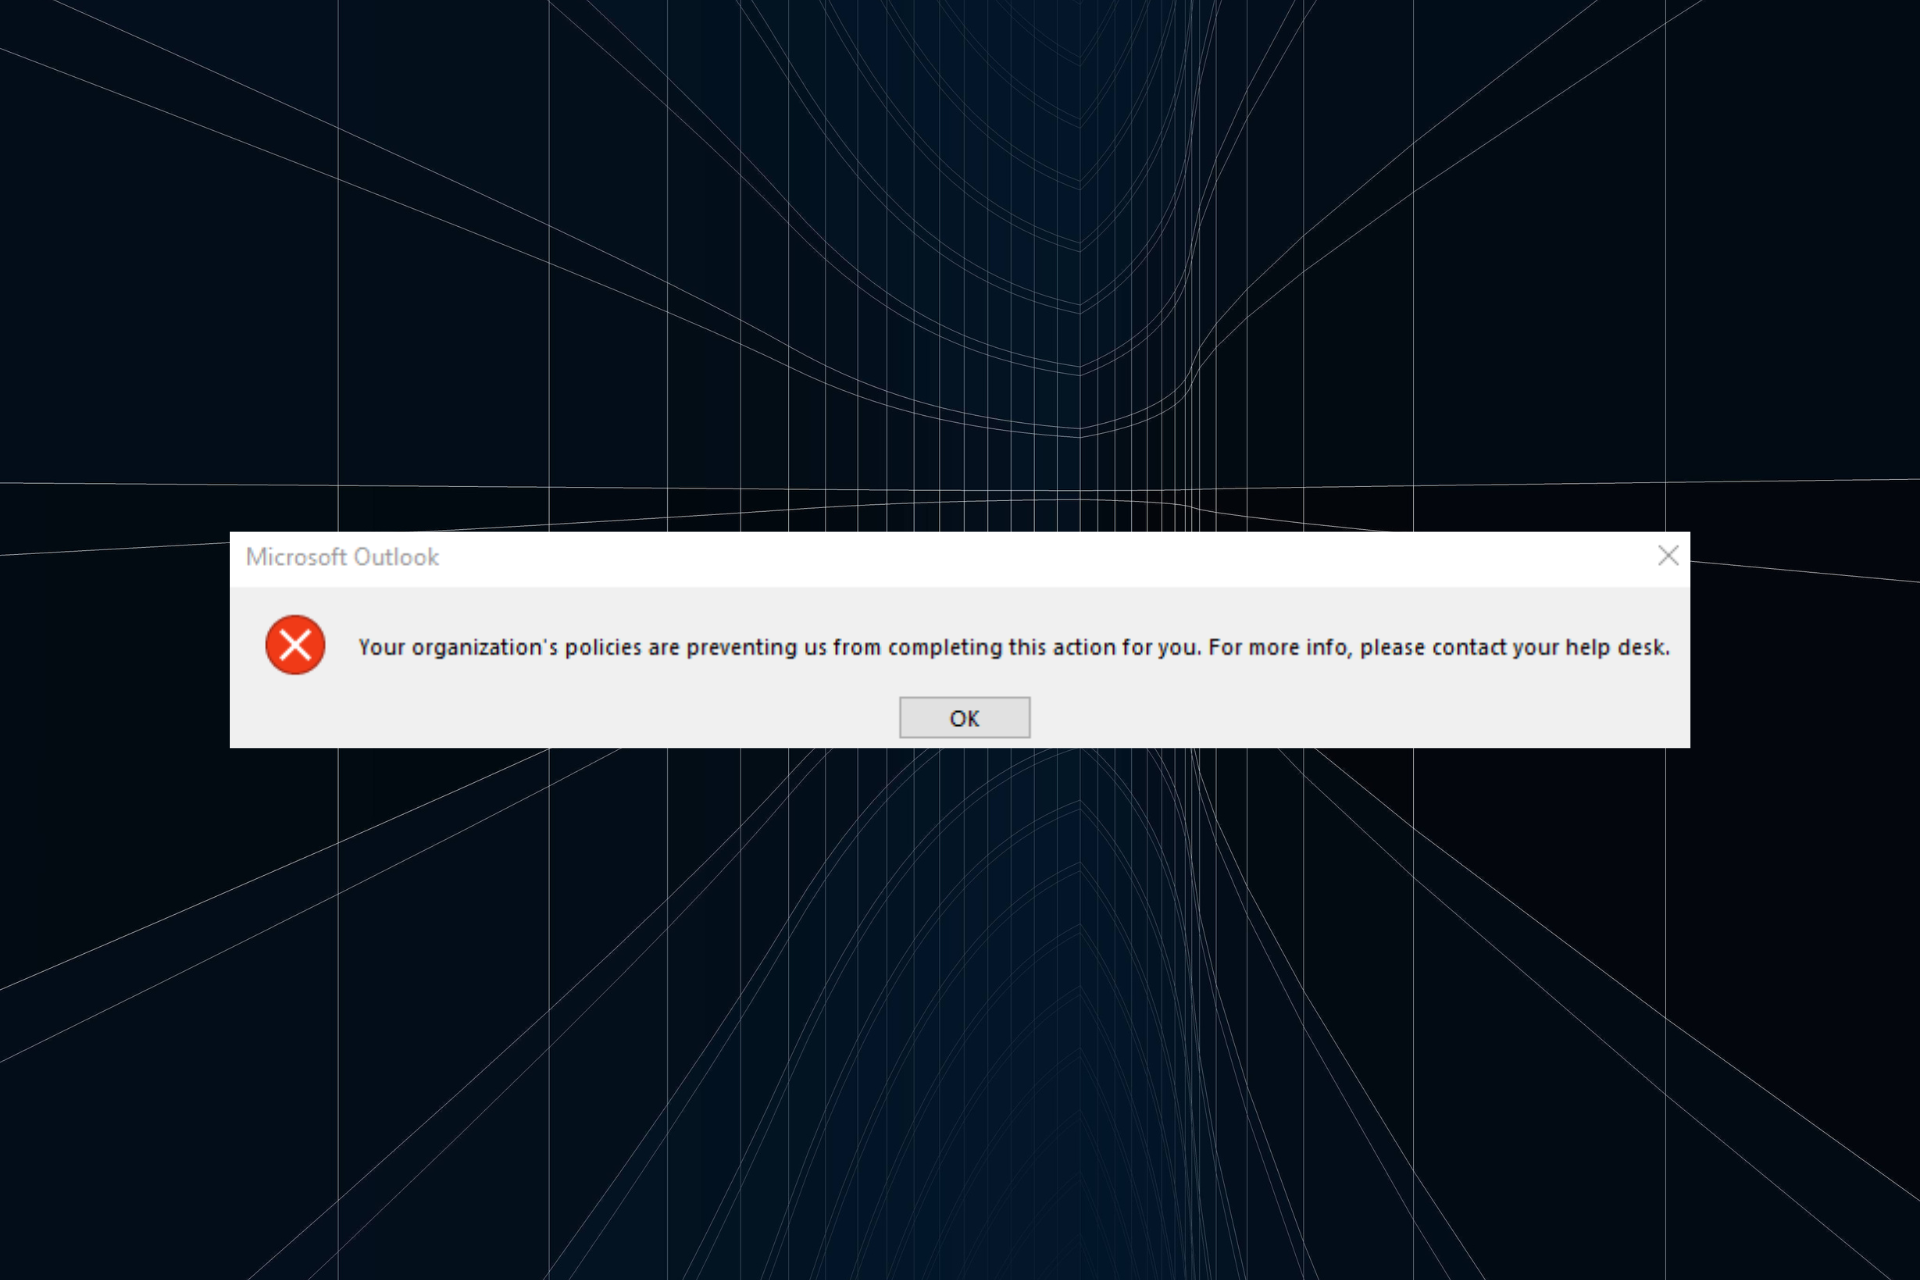
If you use Outlook as your email client, you may see an error while trying to open a hyperlink. The Outlook 2013 error message reads, Your organization’s policies are preventing us from completing this action for you. For more info, please contact your help desk.

The error can occur due to several reasons, and Microsoft suggests multiple solutions to fix the issue. If you are facing a similar error, here are a couple of solutions to fix this error while accessing the Outlook client.

How do I fix Your organization’s policies are preventing in Outlook 2016?

1. Set your browser as default

  1. Click on Start and select Settings.
  2. Click on Apps.
  3. Select the Default Apps tab.Settings - Default Apps Browser
  4. Scroll down to the Web Browser section, and select your current Web Browser (Edge, Firefox, Chrome, etc.)Settings - Change default browser Windows 10
  5. If your preferred browser is already set as default, select a different browser installed on your PC.
  6. Click again on the Browser and select your preferred browser to set it as default.
  7. Restart the computer.

Often, when you come across Outlook Your organization’s policies are preventing errors, changing the default browser does the trick. For some users, selecting Microsoft Edge as the default browser helped.

2. Reset Internet Explorer

  1. Press Windows, type Internet Options, and click on the relevant search result.
  2. Go to the Advanced tab, and click the Reset button, under Reset Internet Explorer settings section.
    Internet Options - Reset Internet Explorer
  3. Restart the computer and open the hyperlink to check for any improvements.

3. Check Registry Key Value using Registry Editor

  1. Press Windows + R to open Run, type regedit, and hit Enter.
  2. Click Yes in the UAC prompt.
  3. Click on HKEY_CLASSES_ROOT and locate the .html key.
  4. Select the .html key, and then double-click on the Default string.
    html regedit default value blank
  5. Enter htmlfile under Value data and click OK.htmlfile data value Default Regedit
  6. Restart the computer for the changes to come into effect.

If the Your organization’s policies are preventing error persists in Excel 2016 or Outlook on Windows 10, reconfiguring the registry should do the trick.

Before you leave, find out how to speed up Outlook when it’s running slow.

Tell us which fix worked for you in the comments section below.

The Sinking City: Is there a way to fix the most common bugs?

The Sinking City has already been out for a few days now, and a fair share of bugs have been reported by the gaming community already.

As mentioned in a previous article, the most common issues players have encountered in The Sinking City are as follows:

  1. Screen tearing
  2. Low FPS
  3. Textures appear and disappear randomly throughout the environment
  4. Lip-syncing is far too off the point
  5. NPCs are sometimes phasing through solid objects
  6. Long loading times that get longer as you progress in the game

Here’s what you can do to fix the issues listed above.

How to fix common The Sinking City on Xbox

1. Fix screen tearing issues

The only solution so far that was found for this issue was activating the Vertical-Sync feature from your Video Settings, as it is the go-to solution for all games when screen tearing is involved

2. Low FPS, textures appear and disappear

No current explanation or fix has been found for these issues, but they will most likely be solved by updating your Xbox’s firmware version, or in a future game patch.

3. Lip-syncing is far too off the point

Unfortunately, this bug is more of a game-related issue rather than something that is caused by your hardware. This means that the only way this issue may be fixed is also through future patching.

4. NPCs are sometimes phasing through solid objects

As with the previous bug, this seems to be a result of faulty game design, and as such can only be fixed in future patches.

5. Long loading times that get longer as you progress in the game

This is most likely caused by an inefficiency in the way data is managed within the game, and can only be solved by a major game patch.

As a general word of advice, try manually saving as often as possible. This is because of the general state of the game and the high amounts of reports of players that claimed they got stuck and couldn’t progress.

As such, in case you do end up stuck somewhere yourself, at least you’ll have a loading point close by.

As you can see, most of these issues can only be solved by the game developer. Hopefully, a major The Sinking City hotfix will land in the coming weeks.

Posted in Fix

How to stop the Office Background Task Handler process for good

Recently, Office users have reported a strange blank pop-up that appears and closes after a few seconds. While the pop-up itself is not harmful in any way, it can be annoying. The pop-up window is caused by a background executable program called Office Background Task Handler and shows the following location as the file path:

“C:\Program Files (x86)\Microsoft Office\root\Office16\officebackgroundtaskhandler.exe”

If you are annoyed with this pop-up window as well, here are a couple of solutions to stop OfficeBackgroundTaskHandler.exe pop on Windows.

How to prevent office background task handler exe pop-ups

1. Update Microsoft Office

  1. Open any Office application like the Word or PowerPoint.
  2. Click on File and select Account.
  3. Under Office Update, check if the automatic update is enabled or not.
  4. If automatic update is disabled, click on Update Options and select “Enable Updates”.Enable Office Updates
  5. When User Account Control prompt is displayed, click Yes.
    Office Update Now
  6. Again, click on Update Options and select “Update now”.
  7. Microsoft Office will automatically download and install any pending update.
  8. Restart the PC and check for any improvements.

2. Run office Background Task Handler as Administrator

  1. Open File Explorer and navigate to the following directory.
    C:-> Program Files (x86) -> Microsoft Office -> root
  2. Double-click on Office16 folder to open it.
    Right-click Office background task handler exe properties
  3. Right-click on officebackgroundtaskhandler.exe and select Properties.
  4. In the Properties window, click on the Compatibility tab.
    Compatability Run as admin Office Background Task
  5. Check the “Run this program as an administrator” option.
  6. Click on Apply and OK to save the changes.
  7. Close the File Explorer and check for any improvements.

Most users have no idea how to properly uninstall Microsoft Office from their PCs. Learn more about it now.


3. Disable Office Background Task Handler from Task Scheduler

  1. Press Windows Key + R to open the Run dialogue box.
  2. Type taskschd.msc and hit enter. This will open the Task Scheduler.
  3. Click on Task Scheduler Local.
  4. Expand the Task Scheduler Library by clicking on the > icon.
  5. Select the Microsoft folder and expand it.
  6. Click on Office folder and look for OfficeBackgroundTaskHandlerRegistration.
    disable officebackgroundtaskhandleregistration task scheduler
  7. Right-click OfficeBackgroundTaskHandlerRegistration task and select Disable.
  8. This should disable the task handler and you should stop seeing the pop-up while using your PC.
  9. The pop-up may return if you download an update for Office which may re-trigger the task.
  10. Repeat the steps to disable the task again.

4. Change User or Group for Office Background Task Handler

  1. Open Task Scheduler by pressing Windows Key + R, type taskschd.msc and hit enter.
  2. In the Task scheduler, expand Task Scheduler Library > Microsoft > Office.
    officebackgroundtaskhandleregistration task schedule propertiesr
  3. In the right-pane, right-click on OfficeBackgroundTaskHandlerRegistration and select Properties.
  4. From the new window, click on “Change User or Group”
    Select User or Group System Task Scheduler
  5. In the Select User or Group window, type System and click on check names.
  6. If found, click on OK.

That’s it. Close the Task Scheduler window and that should resolve the annoying pop-up.


5. Disable Windows Office Telemetry

  1. Download DWS_Lite from the Github, here. Scroll down and download the .exe file from the Assets 3 section.
  2. Close any office applications if running.DWS Telemetry Download
  3. Double-click on DWS_Lite-.exe file to run it.
  4. Go to Settings and check the “Enable professional mode” option at the bottom.
  5. Next, go to the Utility tab.
  6. Under the Utility tab, click on Disable Office 2016 Telemetry button.
  7. When the warning dialogue box appears, click on Yes.
  8. Restart your PC and check for any improvements.

RELATED STORIES YOU MAY LIKE:

NVIDIA Color Banding on Windows 11 Monitor: How to Fix it

Users often start experiencing color banding issues with NVIDIA after installing a recent Windows 11 update or due to several other issues and need to fix it right away.

As reported, tones were being displayed incorrectly regardless of the monitor settings or graphics settings. Regardless of the case, after weeks of testing, a long-lasting solution has been found that prevents this problem from happening any longer. Keep reading to find out!

How do I fix the color banding on my Windows 11 computer?

1. Disable all ICC profiles

  1. Press Windows + S to open Search, type Color Management, and click on the relevant search result.
  2. In the Devices tab, tick the Use my settings for this device checkbox.delete profile
  3. Select any profiles listed here, and click on the Remove button.
  4. Once done, restart the computer for the changes to come into effect.

If you were wondering how to fix color banding on monitor with Nvidia graphics, disabling the ICC profiles should do the trick.

2. Tweak Calibration Loader settings

  1. Press Windows + S to open Search, type Task Scheduler, and click on the relevant result.
  2. Expand Task Scheduler Library, select Microsoft, and then double-click on Windows.windows
  3. Enter WindowsColorSystem, and locate the Calibration Loader task.windows color system settings task scheduler
  4. Right-click on the entry, and select Properties.properties to color banding fix nvidia
  5. Go to the Settings tab, uncheck Allow task to be run on demand, and click OK to save the changes.disable task
  6. Then right-click on the task again and select Disable.
  7. Restart the computer.

That’s it! This will help fix NVIDIA color banding in Windows 11. And you should now have the perfect display.

Tip icon Tip
If the two solutions here don’t work, reinstalling Windows would fix things in no time as it did for other users.

Before you leave, do check the best monitor calibration software for a smoother experience.

If you know any other way of bypassing this issue, do not hesitate to share it with the rest of the community in the comment section below.

Linux is more popular on Azure than Windows Server

It seems that to anybody’s surprise, Linux is now more used on Azure than Windows Server. Despite Microsoft winning the OS battle a long time ago, Linux found its spot on the server side of the computing world.

Although there’s no universal opinion, some users prefer Windows Server while others Linux. The mass transition to Linux is due to its simplicity and ease in use, as some users state:

Ten years ago, Linux and Windows were at their fiercest competition. In the end, Windows 10 won on desktop, and Linux won on server. […] Windows Server is altogether more clunky and less capable than, say, CentOS. I tried running Windows server on a VPS as an experiment and was blown away at how inefficient it was compared to most Linux distros I have tried. Granted it was a pretty low power VPS, but it would freeze up frequently when using RDP with anything remotely intensive. That’s not really acceptable to me when you can SSH into a terminal for next to 0 overhead and overall have a better, more familiar environment (at least for me).

But that’s just half of the story. When it comes to the business side of it, people are more interested in moving or running big workloads in Azure, and the OS preference comes second to that.

Moreover, the problem with Windows Server isn’t in the kernel itself, but in the bloatware that surrounds it, as another user confirms:

Microsoft is contributing some very interesting state of the art stuff to the Linux kernel. Actually, the Windows kernel is very good, it’s just everything around it is bloatware.

If there’s a race for the best OS to use on Azure between Linux and Windows Server, that is great news for Azure users. From the competition, or maybe collaboration, only the end user would win.

What do you think? Can we expect Microsoft and Linux devs to join forces in the near future for a better Azure experience?

Leave your answer along with any other questions in the comments section below.

RELATED POSTS:

Fai.music.metaservices is down for Windows 7 users [HERE’S WHY]

Many Windows 7 users reported that fai.music.metaservices.microsoft is not working on their machines.

As a quick reminder, back in January, Microsoft decided to discontinue support for Windows Media Player and Windows Media Center on Windows 8.1 and Windows 7 PCs.

This explains why many users are now experiencing this problem.

Microsoft says that users can’t view metadata such as title, genre, and artists for songs simply because the metadata hasn’t been updated:

Going forward, you may be unable to view information (metadata) such as the title, genre, and artist for songs, and the director, actors, and cover art for movies in Windows Media Center and Windows Media Player. […] Microsoft decided to discontinue this service. This means that new metadata won’t be updated on media players that are installed on your Windows device. However, any information that’s already been downloaded will still be available.

The good news is that, as Microsoft confirms, this change doesn’t affect the media player’s main functionalities such as playback, navigating collections, and media streaming. Only the features that require downloading new metadata are affected.

Is this a way to force users to update to Windows 10?

Microsoft announced that Windows 7 users would not be able to view metadata on Windows Media Player back in January.

The fact that these features became unavailable shortly after the May Update was rolled out made many users wonder if Microsoft did that on purpose so as to force them to upgrade to Windows 10.

As one user puts it:

This is just to push everyone to win10.
The service works only on win10 so this decision by microsoft falls in line with groove music and the only way to rip an audio cd is with wmp on win10 or add the information manually.
What will be next, not supporting lan, wifi, sound devices, video cards and other new hardware to force us to by only win10 certified devices from MC?

The rage over discontinuing fai.music.metaservices.microsoft.com is understandable. Windows 7 is still a very popular operating system and limiting its features could mean what users say: forcing everyone to update to Windows 10.

There are ways to keep using your Windows 7 forever, but as you can see, this also depends on Microsoft’s decisions.

What’s your stance on this situation? Let us know in the comments below.

RELATED POSTS:

This Code Has Already Been Redeemed in Minecraft [Fix]

A great number of Minecraft players have reported that when they try to redeem their Minecraft code in Windows 10, an error message appears whcih reads, This code has already been redeemed.

This issue has caused a lot of frustration amongst Minecraft players, with endless forum page discussions about how to fix this issue once and for all.

In case you find yourself in the same situation after downloading Minecraft, keep reading to find out the solutions that worked for others!

Why is my Microsoft Minecraft code not working?

Here are a few reasons you are getting the error:

  • Incorrect code: Often, the problem arises when users enter the wrong code. So your primary approach should be to verify that the code is entered correctly.
  • Using another account: Several users reported the error when using a code purchased for another account.
  • Issues with the server: In some cases, it could be a problem with the server that triggered the error or Minecraft server issues at the user’s end.

How do I fix This code has already been redeemed error in Minecraft?

1. Redeem your via Microsoft Store

  1. Login to Windows with the Microsoft account you used to buy Minecraft.
  2. Press Windows + S to open Search, type Microsoft Store, and click on the relevant search result.
  3. Search for the Minecraft edition for Windows 10, and click the Get this app button.
  4. Now, click on Buy.Minecraft in Windows 10 Store - Minecraft win 10 code already redeemed
  5. Type in the email address and password that you used to buy Minecraft.
  6. Windows Store will recognize that you already own this game and will start downloading.
  7. After the download and installation process are completed, you can start playing again.

A quick way to fix things when you get This code has already been redeemed on Minecraft in Windows 10 is to download the game using the Microsoft account the purchase was first made on.

2. Contact official support

  1. Login to Mojang.Mojang.com Log in - minecraft win 10 code already redeemed
  2. Search for Minecraft: Windows 10 Edition and see if the code is marked as being already claimed by checking the date.
  3. If the game is not listed there, you need to contact Mojang Support.
  4. If the game is listed, it means that you redeemed your code with a Microsoft account. When you redeemed the code, you used a specific account that has the code connected to it.
  5. Go to Microsoft’s official website, log into that same account, and check under Recent purchases.
  6. If you can’t find the game in that list, it means you used another Microsoft account to claim it.
  7. In case you don’t know which account you used, contact Xbox support.
  8. They will be able to tell you to which account you used to redeem the code.

In this article, we explored some of the best ways to fix the Minecraft code has already been redeemed error. And if you’ve redeemed it but your purple heart cape is not showing up, we have a detailed article on what to do.

Before you leave, do check some quick tips to make Minecraft use GPU and boost the game’s performance.

We hope this guide helped you solve this issue. Please let us know if it did by using the comment section below.

Office 365 Home vs Personal: Which plan is right for you?

If you’ve been thinking about subscribing to Office 365 to get access to the Microsoft Office suite of applications for an affordable yearly or monthly price, there are two options you can to choose from. Currently, for general consumers, Microsoft offers both Office 365 Home and Office 365 Personal.

While both of these subscription tiers give you similar access to Word, Excel, PowerPoint, Outlook, Publisher, and Access, there are some subtle differences for what you can get for your money. In this guide, we dive a bit deeper and will help you choose the subscription plan that is right for your home.

So, what’s included in both subscriptions?

Before diving into the differences, it is best to look at the software and services you get with both subscriptions. Covered under Office 365 Home and Personal is access to full versions of Word, Excel, PowerPoint, Outlook, and Skype. These all receive monthly updates from Microsoft, and you can install on PCs, Macs, tablets, and phones. If installing on just a PC, you’ll get bonus access to Microsoft Access and Publisher.

As a bonus, both subscriptions also include 1TB of cloud storage on Microsoft OneDrive per user (with paid options for more storage, if needed) and 60 minutes of calling on Skype per month. There are some exclusions and exceptions with who you can call on Skype, however. If you’re using OneNote, you will also gain access to some special features. These include Ink replay, Researcher, Math Assistant, Stickers, and more.

Microsoft Office 365 icons
The Office 365 Icons

Office 365 Personal — For one person only

Now, it’s time to look at the differences. We’ll start first with Office 365 personal. For the price of $6.99 a month, or $69.99 a year, Office 365 Personal is the cheapest way to get Office on your devices. We’d recommend it if you’re  just buying a subscription for one person, with no plans to add users to your plan. 

While the subscription does grant you access to PowerPoint, Word, Excel, Outlook, Access, Publisher, and Skype, there is an important limit.  If opting for this base plan, you only will be able to use the Office applications with one Microsoft account (meaning one user with one license) across multiple PCs, Macs, or tablets. You’ll also only get 1TB of OneDrive cloud storage with that single account.

Keep in mind, however, that while it may seem as though you may be able to install Office on as many computers as you want using this subscription, there are some technical limits. According to Microsoft, you only can stay signed in to Office 365 Personal with five devices at the same time. That means, that if you sign in to a sixth device, you’ll be forced to sign out of one of your other devices via the Microsoft Account page.

You might be able to install Office without signing in on that sixth device, but as Office 365 is activated using a Microsoft Account, you’ll also lose some subscription features and Office might only run in read-only mode.

Office 365 Windows Microsoft Store
Office 365 Personal in the Microsoft Store

Office 365 Home — For up to six people, best for families

Priced at $99.99 a year, or $9.99 a month, Office 365 Home is a subscription that we’d recommend for families. Compared to Office 365 Personal, for the extra $30, this version of Office 365 lets you pay one price to enjoy Office with multiple users, under one paid plan. There’s even a free 30-day trial available if you’re not sure if the subscription is right for you.

With this subscription, six different people can use PowerPoint, Word, Excel, Outlook, Access, Publisher, and Skype across multiple devices. In technical terms, this means you can link up to six Microsoft accounts with a single Office 365 Home subscription. Each person will be able to install Office on all their devices, with their own personal accounts, but only can stay signed in to five devices at the same time.

This means that each person will continue to get all the benefits, including full versions of Word, Excel, and PowerPoint, plus the 1TB of OneDrive cloud storage and more. There’s plenty of value here for families, as adding things up across the six users, you can get up to 360 total minutes of Skype calls, and 6TB of storage on Microsoft OneDrive.

Office 365 Home in the Microsoft Store

For most, Office 365 Home and Personal is the way to go

At the end of the day, both Office 365 Home and Personal are excellent ways to save money and get Office for an affordable price. The alternative to these options would be to buy Office Home and Student 2019, which comes at a one-time cost of $149. However, by going that route, you’ll only be able to install Office on 1 PC or Mac, and you won’t have the ability to update to the next major version of Office for free when it’s available. You’ll own the software forever, and won’t have to worry about paying a yearly subscription fee, but you’ll end up paying more if you want to enjoy Office on multiple PCs or Macs with multiple users.

You can buy Office 365 Personal today from Microsoft by heading to this link here. Stay tuned for more as we continue to dive deeper into the world of Office 365.

Remedy regains control of Alan Wake from Microsoft, could be going multiplatform

Remedy Entertainment, the game developer behind Quantum Break, Max Payne, and Alan Wake is now in control of the publishing rights for the latter. In a message for investors (via Eurogamer), the Finnish company explained today that it would earn “approximately 2.5 million euros of royalties from previously released games” for its first half-year period of 2019, adding that “the publishing rights of Alan Wake games are reverted to Remedy.”

Alan Wake was initially released back in 2010 on Xbox 360, with Microsoft acting as a publisher. A Windows version was released two years later, and despite the game gaining cult following over the years, Remedy cancelled a sequel to work with Microsoft on Quantum Break.

Speaking with Eurogamer, a Remedy spokesperson explained that the game developer remains entirely focused on its next multiplatform game named Control, but owning the IP for Alan Wake means that releasing the game on more platforms is now a possibility.

“The only thing we want to clarify, now that Remedy owns the publishing rights, is that we could bring Alan Wake to different platforms if we so choose,” the Remedy spokesperson said. “We have nothing to announce for now. We are fully focused on Control releasing on 27th August.”

Alan Wake disappeared from the Xbox Store two years ago, but the PC version is still available on Steam and is 70% off during the Steam Summer sale.

DHCP Server Stopped Working: 4 Ways to Fix it

A DHCP Server is a crucial network component but many reported that DHCP server stopped working on their PC.

This can be a problem and if this happens, you won’t be able to access the Internet properly, so it’s important to fix this issue, and today we’re going to show you how to do it.

What causes DHCP server failure?

  • Temporary glitches or missing updates can cause this issue.
  • Incorrect date and time or DNS problems can lead to DHCP issues.
  • Connectivity issues and network failure.

How do I fix my DHCP server if it goes down?

1. Update your Windows version to the latest release

  1. Click on Start button and choose the Settings button.settings button in start menu - DHCP server keeps stopping
  2. Click on Update and Security.Update and security option in Windows settings - DHCP server keeps stopping
  3. Click on the Check for updates button, and install any available updates.

2. Flush the DNS

  1. Press Win + X keys on your keyboard, and choose Windows PowerShell (Admin).Win X menu Windows PowerShell with Admin - DHCP server keeps stopping
  2. Inside the PowerShell window, type in the following command: ipconfig /flushdns
  3. When the process is completed, you should receive the following message: Windows IP Configuration Successfully flushed the DNS Resolver CacheWindows PowerShell Admin flushdns command - DHCP server keeps stopping

3. Reboot DHCP Server

  1. Save any work you’re currently performing on the computer.
  2. Click on Start button and click the Power button.Power button start menu - DHCP server keeps stopping
  3. Select the Restart option.

4. Sync time settings

  1. Make sure that the time settings on your DHCP Server are the same as with the clients terminal.
  2. Any difference in this area can cause issues with the IP packages your DHCP Server can distribute over the network and may cause the DHCP service to stop entirely.
  3. After adjusting the date and time, check if the problem is gone.

5. Fix any connectivity issues between DHCP Server and domain controller

  1. Log into your DHCP server. Next, press Win + R keys to open the Run window.
  2. Enter cmd and press Enter.
  3. Inside the Command Prompt, type the following but be sure to replace server_FQDN with the full domain name of the domain controller: ping server_FQDNPinging server IP address in PowerShell - DHCP server keeps stopping
  4. Press Enter.

If the ping is successful, you will see a reply similar to this : Reply from IP_address: bytes=32 time=3ms TTL=59

Follow these steps to ping the IP address of the domain controller:

  1. Inside the Command Prompt window enter the following but be sure to replace IP_address with the actual address of the domain controller:  ping IP_address
  2. Press Enter.
  3. You should now see the server response time.

If you successfully managed to ping the FQDN but not the domain controller IP address, this means that you might have a problem with the DNS host name resolution.

In case you can not ping the domain controller by IP address, this means that there are possible issues with your DHCP servers firewall configuration, network connectivity, or IPsec configuration.

Unfortunately, this isn’t the only DHCP error, and many reported that users are unable to contact DHCP or that Windows is unable to get DHCP address. This isn’t just a Windows 10 issue, and many reported that DHCP isn’t working on Windows 11.

Please feel free to let us know if this guide helped you solve your DHCP Server issues, by using the comment section below.

How to fix Star Wars Battlefront 2 error codes

Star Wars Battlefront 2 is a popular game available for both the Xbox as well as Windows platform including others. The Xbox and Windows users have reported a string of errors while playing the Star Wars Battlefront 2 game on their devices.

The error can occur when trying to connect online or while trying to search something in the game. Some of the most common Star Wars Battlefront 2 errors with their numerical codes are listed below.

  • 721
  • 1017
  • 2593
  • 524
  • 201

In case you are looking for a way to fix one of these Star Wars Battlefront 2 errors, here is an article with the best possible solutions to fix the error.

How do I fix Star Wars Battlefront 2 error codes?

1. Check if the Server is Down

  1. Go to DownDetector, here.
  2. The first thing you should do is check if the EA server for the Battlefront 2 is down. If it is a widespread issue and the if the EA servers down, then you cannot do much to resolve this error but only wait for the servers to be working again.Star wars battlefront 2
  3. Visit the DownDetector link for Star Wars BattleFront 2 and check the status.

2. Switch Profile

Xbox Switch Profile

  1. From the main menu, select Switch Profile.
  2. Log out and log in to your profile again.
  3. Try to launch the Star Wars Battlefront. This should help you resolve 2593 error code.

Need more ideas on how to fix Star Wars Battlefront 2 issues on Windows 10? Check out this guide.


3. Hard Reset Xbox

  1. Making sure that the Xbox console is up and running, do the following.
  2. Press and hold the Xbox power button (on the console) until the console powers off.
  3. Unplug the console’s power cable from and wait for a minute.
  4. Plug the power cord back and start the Xbox by pressing the Power button again.
  5. After the restart, launch Star War Battlefront 2 and check for any improvements.

4. Reinstall Star Wars Battlefront 2 (PC)

  1. Press Windows Key + R to open Run.
  2. Type control and press OK to open the Control Panel.
  3. Go to Programs > Programs and Features.
  4. Select Star Wars  Battlefront 2 and click on Uninstall.Star Wars Battlefront 2
  5. Re-download the game from the developer and proceed with the installation.

5. Release and Renew IP Configuration  (PC only)

  1.   Press Windows Key + R to open Run.
  2. Type cmd and press Ctrl + Shift + Enter to open the Command Prompt as administrator.
    Ipconfig release command Prompt
  3. In the command prompt, type the following command and hit enter.
    ipconfig/release 
  4. Now you need to renew the IP, so enter the following command and hit enter.
    ipconfig/renew
  5. Close the command prompt window and launch Star Wars Battlefront 2.
  6. Check if the error is resolved and you are able to connect to EA servers.

6. Change Default DNS on Xbox

  1. From the Xbox menu, go to Settings.
  2. Select Network and then go to Advanced Settings.
  3. Select “DNS settings” > “Manual“.
    Xbox DNS Settings
  4. Now, you need to enter the custom DNS server for the primary and secondary DNS. Enter the following address.
    Primary DNS: 8.8.8.8
    secondary DNS: 8.8.4.4
  5. Go back to the home screen and launch Star Wars Battlefront 2 and check for any improvements.

RELATED STORIES YOU MAY LIKE:

How do I fix Xbox Live Zip Code error [PRO FIX]

If you have recently bought the Xbox Live subscription, Xbox will ask you till the billing information. While filling the billing information, users have reported that they are getting postal code error after entering the Zip code. The error reads Enter a valid postal code before continuing.

Here’s one user‘s say on the matter.

I just bought xbox live, and the xbox want’s me to fill in billing information. and so i did. i live in norway, and my postal code. but it wont except my postal code. it says “enter a valid postal code before continuing”

Resolve the problem by following the steps we provided below.

Why Xbox Live won’t accept my postal code?

1. Try to Add Billing Info Online

  1. Go to your Microsoft Account page.
  2. Login to your Microsoft account (Associated with the Xbox Live accounts).
  3. Click on Payment and Billing.Setup Billing Online - Xbox Postal code error
  4. If prompted, sign in again with your Microsoft Account details.
  5. Proceed with adding more details to your Billing Info. Enter the postal code and check if the error is resolved.

Once the billing info is set, log out of your account from Xbox and log in again. You should be able to access the Xbox Live account without any issues now.


We’ve written extensively on Xbox Live billing issues. Check out these guides for more information.


2. Match Details with your Credit Card Company

It is important that your Billing info and the postal code used by your credit company matches. Irrespective of where you are using the credit card, it is necessary that your bolling info matches your credit card company details as well.

Match Billing info with Credit card company

For example, let’ say you have created a UK account but are using the credit from a UAE then you won’t be able to complete the setup without using a credit card from the UK or creating an account from UAE.


3. Check if you Postal Code has Changed

If your postal code has changed recently ( 2-5 years ago) it is possible that Microsoft account is still looking for the old postal code. A user reported that after entering the old postal code, he was able to create the account successfully. So, do check if your postal code has received additional numbers recently and try it to fill the billing info.

The Xbox postal code error is a common error that usually occurs if the details on your payment card and account info mismatches. Follow the troubleshooting tips in this article to fix the error.

RELATED STORIES YOU MAY LIKE:

ASUS Backtracker Windows 10 Issues: How to Fix Them

Backtracker is Asus’s own backup disk software that comes pre-installed with the Asus laptops. However, many reported various Asus Backtracker Windows 10 issues.

This can be a problem since you won’t be able to create backups, so you risk permanent file loss. Luckily, you can fix this issue by following the instructions from this guide.

What is ASUS Backtracker?

  • Asus Backtracker is an official ASUS software that allows you to back up the Windows OS image to a USB drive.
  • You can use it to reinstall the Windows OS using the recovery USB drive after replacing the hard drive due to corruption.
  • The software can delete the recovery partition in case HDD runs out of space.

How can I fix ASUS Backtracker Windows 10 issues?

Use Windows Recovery instead

  1. Insert the USB drive into the computer.
  2. Type Recovery Drive in the search and click Create a recovery drive option.
    Create a Recovery Drive Windows 10
  3. In the Recovery Drive window, select “Back up system files to the recovery drive” option and click on Next. Selecting this option will take more time to create the Recovery Drive, but can help you recover your system faster.
  4. Select the USB drive from the list and click Next.
  5. Click on the Create button to begin the process. Note that, any data in the USB drive will be deleted, so create a backup of the USB drive data before creating a recovery drive.
  6. When done, click on Finish.

Create a System Repair Disc

If you prefer a DVD recovery drive, you can do this using the System Repair Disk.

  1. Insert the DVD into the drive.
  2. Open the Control Panel and go to Backup and Restore (Windows 7).
  3. Click on Create a System repair disc.
    Create a system repair disc
  4. Select the drive and click on Create Disc.
  5. Once done, click on Close.

ASUS Backtracker is incompatible with Windows 10, so you’ll have to use a different solution.

We suggest backing up your files and using data recovery software to ensure that your files remain safe.

What do you use for recovery instead of ASUS Backtracker? Let us know in the comments below.

Operating System is Not Supported by SQL Server Error [Expert Fix]

SQL Server is among the most used relational database management systems out there. Still, sometimes, when trying to use SQL Server you might get Your operating system is not supported by SQL Server error.

This can be a big problem, and we’ll show you how to fix it in today’s article.

What to do if SQL Server does not support your operating system?

1. Run in Compatibility mode

  1. Open the folder containing the files for SQL Server.
  2. Right click on the setup file and select Properties.
  3. In the Setup Properties windows, select the Compatibility tab.
    Run SQL Server in compatibility mode if your operating system is not supported by sql server
  4. Select the checkbox for Run the program in compatibility mode for
  5. From the drop-down box just below it, select the Windows version where you know SQL Server runs smoothly. As a safe bet, select Windows Vista Service Pack 2.
  6. Click on Apply, OK.
  7. Double click on the Set-up file to let the installation process to begin.
  8. In the SQL Server Installation Center window that opens, select the first option, that of – New SQL Server stand-alone installation or add features to an existing installation.
  9. Follow on-screen instructions that show up.

2. Make sure that the SQL Server is compatible with your version of Windows

  1. Windows 10 – the most widely used version of Windows, SQL Server 2008 and SQL Server 2008 R2 is not supported.
  2. For SQL Server 2012, you will need to install at least SQL Server 2012 Service Pack 2 for the installation to be complete.
  3. Similarly, for SQL Server 2014, the minimum requirement is SQL Server 2014 Service Pack 1 for a successful installation.
  4. SQL Server 2016, SQL Server 2017 and SQL Server 2019 are compatible with Windows 10.

This isn’t the only problem you can encounter, and many reported Arithmetic overflow error converting expression to data type int error, but that one can be easily fixed.

In case you still have problems, our unable to install SQL Server guide should be able to help you.

Posted in Fix

Windows 10 news recap: Microsoft and Intel continue to support Huawei laptops, Windows Terminal arrives in the Microsoft Store, and more

Welcome back to our Windows 10 news recap, where we go over the top stories of the past week in the world of Microsoft’s flagship operating system.

Microsoft and Intel to continue support for Huawei laptops

Despite the ongoing feud between the US and Huawei, Microsoft and Intel have confirmed that they will continue to release their software and updates to Huawei laptops, despite the ban. They believe the ban does not prohibit them from doing so.

Microsoft’s new Windows Terminal is now available on the Windows 10 Microsoft Store

Announced last month at Build, Microsoft’s new Windows Terminal app is now available for users to download and install from the Microsoft Store.

Windows Calculator is now available on Android, iOS, and the Web because why not

In a strange move, Microsoft has made its Windows Calculator cross-platform, bringing it to Android, iOS, and the web.

Windows Calculator - Uno Calculator

Latest AdDuplex report shows small but growing use of Windows 10 May 2019 Update

Windows 10’s May 2019 Update is slowly growing in usage, according to the latest AdDuplex report, but its growth has been slow.

That’s it for this week. We’ll be back next week with more Windows 10 news!

You don’t have sufficient privileges to run System Configuration [FULL FIX]

Modifying System Configuration Utility is fairly simple, but some users reported You do not have sufficient privileges to run system configuration msconfig error, so today we’re going to show you how to fix it.

What to do if you don’t have privileges to run System Configuration Utility?

1. Check if you have Admin status

  1. Click on Start > Settings > Accounts.
    admin information you do not have sufficient privileges to run system configuration msconfig
  2. In the Your info page, check if your account has Administrator status.
  3. If it does not have Admin rights, follow the steps here:
  4. In the Accounts page, click on Family & other users from the options on the left.
  5. Click on Add a family member or Add someone else to this PC according to how you wish to add yourself to the PC.
  6. Follow on-screen instructions. Make sure to check the box where it asks if the person is to be accorded Administrator rights.
  7. You might also have to get in touch with the Admin if you wish to get added to a PC that is accessed by several users, like say in an office environment.

2. Do an anti-virus scan

  1. One way you can do this is to launch the anti-virus program installed on your device and do a scan of your PC.
    A full virus scan can help if you do not have sufficient privileges to run system configuration msconfig
  2. Or, you can launch Windows Security center from the Taskbar on the right.
  3. In the Windows Security window, click on Virus & threat protection from the options on the left.
  4. Click on the Quick Scan button, or better still, click on Scan options and opt for Full scan from the options given.
  5. Click on the Scan now button at the bottom for the scan to begin.
  6. Also, ensure you have the latest virus definition files on-board for the scan to be more effective.
  7. For that, launch Windows Security > Virus & threat protection > Virus & threat protection updates.
  8. Click on the Check for updates link.
  9. Preferably, update the virus definition files before going for a full virus scan.

Do you know which antivirus offers 100% malware protection? You won’t believe it!


3. System file corruption

  1. Launch Command prompt. For this, type Command prompt (or just cmd) in the Cortana search box.
  2. Right-click on the Command prompt app and select Run as administrator.
  3. Type sfc /scannow and press Enter.
    Do a system if you do not have sufficient privileges to run system configuration msconfig
  4. This will start the scanning process.
  5. Windows will detect if any system file is corrupt or is missing entirely and the fix too will be applied automatically if so needed.

4. System file errors

  1. Click on Start > File Explorer > This PC.
  2. Right click on Local Disk (C:) > Properties.
  3. In the Properties window, click on the Tools tab.
  4. Under Error checking, click on Check.
    Perform System File Scan if you do not have sufficient privileges to run system configuration msconfig
  5. This will launch the procedure that checks the drive for file system errors.
  6. Follow on-screen instructions.

This should help you deal with the situation where you are faced with the ‘you do not have sufficient privileges to run system configuration msconfig error.

READ ALSO:

Learn how to repair corrupted Notepad files in 4 simple steps

Notepad in Windows is a handy little utility that can be used for many things, from taking notes to creating batch files as well as registry entries. However, the text files created on Notepad or other text editing programs like NotePad++ are prone to file corruption in case of system crashes or freezing.

Users have reported that their notepad files have become corrupted and showing Null characters after their system crashed or froze resulting in a forced restart.

If you have a corrupted file that you want to recover, here are a few troubleshooting tips that you can try to recover the text file.

How do I repair corrupted Notepad files?

1. Restore the Previous Version

  1. Open “File Explorer” from the taskbar.
  2. Now navigate to the location where the text file stored.
    Restore Previous Version recover corrupted txt file
  3. Right-click on the stored file and select Restore Previous Version.
  4. Select the Previous Version and click on Restore.
  5. If successfully restored, open the Text file in Notepad to see if the corrupted text file is repaired.

Note: Restore Previous version option will be mostly available for old files. However, do give this method a try to see if your text file has a previous version that can be restored.

2. Run Recuva Recovery Wizard

  1. Download and install Recuva free version.
  2. Run Recuva wizard and click on Next.
  3. Under File type, select Documents.
  4. For File Location, select “In my specific Location“.
    Recuva select file location
  5. Click on the browser button and select the folder where your corrupted text file stored.
  6. Click on Next.
  7. Check “Enable Deep Scan” option.
    Recuva enable Deep scan recover corrupted text file
  8. Click on the Start button to begin the scanning.
  9. Wait for the scanning to finish.
  10. Recuva will list all the recovered documents. Select your File and Restore it.

If  Recuva couldn’t find the backup file, search for the undeleted files.

  1. Start Recuva.
  2. If the Wizard appears, select the document type, location and start scanning.
  3. Once the scanning starts. click the Cancel button.
    Recuva Recover Undeleted Files
  4. In the Recuva window, click on Switch to Advanced Mode.
  5. Click the Options button.
    Recuva Recover Corrupted Txt files
  6. In the Options window, click the Actions tab.
  7. Under the Scanning section, check the “Scan for non-deleted files” option.
  8. Click OK.
  9. Select the drive to scan and click on the Scan button again.
  10. Wait for the Scan to finish.
  11. If Recuva has recovered the text file, select the file and click on Recover.

3. Run Chkdsk Tool

  1. Type cmd in the search bar.
  2. Right-click on Command Prompt option and select Run as Administrator.
  3. In the command prompt, enter chkdsk C: /f and hit enter. chdsk
  4. Wait for the Check Tool to complete the scan and repair any bad section in the hard drive.
  5. Now restart your Windows system. Check if the text has been recovered by the chkdsk tool.

4.  Use Word Recovery Any File Tool

  1. Launch the MS Word app.
  2. Select a blank document.
  3. Click on File and select Options. It will open the Word Options window.
  4. Click on the Advanced tab.
  5. Scroll down to General section.
    MS Word confirm file format conversion for text file
  6. Check the “Confirm file format conversion on open” option.
  7. Click OK to save the changes.
  8. Now click on File and select Open.
  9. Click on Browse button.
  10. In the Open window, click on All Files and select “Recover Text from any files (*.*)”.
    MS Office Recovery corrupted Notepad file
  11. Select the corrupted text file you want to recover and click Open.
  12. Will now try to repair the text file.

FIX: Mf Media Engine Err Src Not Supported in Windows 10/11

Windows OS comes with its own apps store, Microsoft Store. However, users can download and install third-party software just as easily. At times, the third-party apps, like Plex, may create an issue with the system resulting in Mf Media Engine Err Src Not Supported.

The Mf Media Engine Err Src Not Supported error can occur with any third-party app including media and server apps. This error occurs due to incorrect system settings which can be fixed easily.

In this article, we have listed all the possible fixes to help you resolve this error.

How to fix Mf Media Engine Err Src Not Supported BSOD error?

1. Run the Apps Troubleshooter

  1. Download the Microsoft Apps Troubleshooter from here.
  2. Run the troubleshooter and wait for the Windows Store Apps window to pop-up.
  3. Click on Next button.
  4. The Troubleshooter will scan the system for apps related issues.
    Apps troubleshooter mf_media_engine_err_src_not_supported
  5. If you are on Windows 10, the troubleshooter will ask you to “Run the Windows 10 Apps Troubleshooter“.
  6. Run the Troubleshooter and click on Next.
  7. After the changes have been applied, restart the PC and check for any improvements.

2. Reset the App

  1. Click on Start and select Settings.
  2. Open Apps > Apps and Features.
  3. Click on the problematic app and click Advanced Options.
    Reset App mf_media_engine_err_src_not_supported
  4. Click on the Reset button. Confirm the reset by clicking on Reset again.
  5. Close the Settings and reboot the system.

After the restart, open the app and check if the error is resolved.


Is Plex perpetually failing to work on Windows 10? We’ve got the right fix for you.


3. Disable Antivirus / Firewall

If you have antivirus software running, disable it temporarily. Also, disable the Windows Firewall by following these steps.

  1. Click on Start and select Settings.
  2. Go to Windows and Security.
  3. Click on Firewall and network Protection.
  4. Click on the Private Network.
    Turn off Firewall mf_media_engine_err_src_not_supported
  5. Turn off Windows Defender Firewall. 
  6. If the UAC prompt asks you confirm the action, click on Yes.
  7. Now launch the app and check if the error is resolved.

4. Install from the Official Website

  1. Press Windows Key + R to open Run.
  2. Type control and hit enter to open Control Panel.
  3. Go to Programs > Programs and Features. 
  4. Select the problematic app and click Uninstall.
  5. Now open the official website of the app and download the latest version of the software.
  6. Install the software. Now you should be able to run the program without any error.

5. Reset Microsoft Store

  1. Click on Start and select Settings.
  2.  Click on Apps.
  3. Search for Store and click on Microsoft Store.
  4. Click on Advanced Options.
    Reset Windows Store mf_media_engine_err_src_not_supported
  5.  Scroll down and click on the Reset button under Reset.

After resetting the Microsoft Store, reboot the system. Try to launch the app again and check if the error is resolved.

RELATED STORIES YOU MAY LIKE: