Microsoft BitLocker encryption key got hacked via cheap FGPA

Security researchers identified a new vulnerability in Bitlocker as they attempted to use the tool in its basic and least intrusive configuration.

BitLocker is basically a full volume encryption system that allows users to encrypt even entire volumes for the protection of data. The tool leverages AES encryption algorithm in XTS mode (128-bit or 256-bit key) or AES encryption algorithm in cipher block chaining (CBC).

It has been an integral part of each and every version of Windows starting from Vista. As a quick reminder, users of Windows 10 systems with a TPM 1.2 or 2.0 chip are required to upgrade and run on a Pro, Enterprise or Education versions. 

Researcher unlocked a Surface Pro 3 and HP laptop

Researchers have been targeting this highly popular Windows encryption platform to demonstrate its flaws.

One of the latest attempts includes a novel technique published last week by an employee of Pulse Security Denis Andzakovic.

The idea has been explained as:

You can sniff BitLocker keys in the default config, from either a TPM1.2 or TPM2.0 device, using a dirt cheap FPGA (~$40NZD) and now publicly available code, or with a sufficiently fancy logic analyzer. After sniffing, you can decrypt the drive.
The idea behind this is that if the laptop is stolen, and the attacker does not know your login password, they cannot pull the drive and read the contents.

However, the Redmond giant already mentioned that users should use any type of additional security measures including PIN while using this technology.

How to stay protected?

The researchers suggest staying protected by following two protection measures. The easiest one is to avoid using BitLocker with TPMs in this default state.

Secondly, you can also follow these simple steps:

  1. Configure a USB flash drive containing a startup key
  2. Set up PIN access

Notably, you can use both at the same time by adding multifactor authentication. 

RELATED ARTICLES YOU NEED TO CHECK OUT:

Microsoft prepares for looming AI risks

With Facebook, Twitter, Google, and Amazon in the headlines seemingly every week for another controversial business or ethical decision from their past, a Benjamin Franklin quote comes to mind.

“By failing to prepare, you are preparing to fail.”

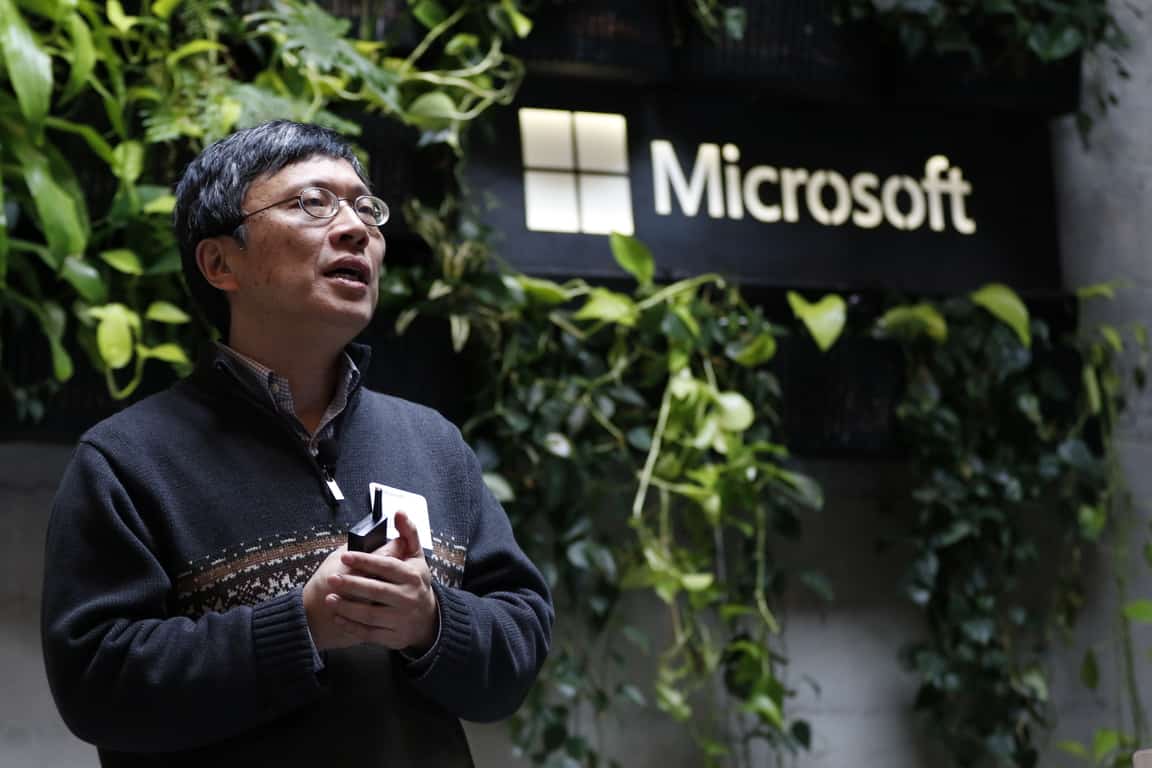
Perhaps, in an effort to avoid the setbacks, complications and legal ramifications that rapid growth fueled by technological advancements has wrought, Harry Shum, Executive Vice President of Artificial Intelligence & Research at Microsoft, warns that people need to anticipate the risks involved with the growth of artificial intelligence.

In a piece published by the MIT Technology Review and originally addressed during EmTech Digital conference, Shum warns that now is the point in the development cycle where developers and engineers can build in safeguards to help mitigate the number of unbridled risks that come with AI that’s increasingly becoming capable of being more like human beings.

“This is the point in the cycle …  where we need to engineer responsibility into the very fabric of the technology,” 

Even with that being said, Shum also noted that most in the industry have already been derelict in their duties to anticipate technological flaws as well as the potential negative impact of current real-world applications of AI. Items such as facial recognition come to mind when reviewing Shum’s claims as the technology has been historically bad at recognition and attribution of darker skin tones while simultaneously being weaponized by countries as surveillance and suppression tools.

Neither application of facial recognition point to a concerted effort by the industry to corral and mindfully think of the potential outcomes of the technology before they were released to the public.

While it’s one thing to caution the industry with a wagging finger, Microsoft is also taking action to help address present and future AI predicaments, by improving its own facial recognition with the arduous tasks of adding multiple skin variations to its photo recognition algorithm.

Microsoft’s facial recognition improvements are incremental in comparison to the other major action the company is taking with its AI ethics committee and its presence in the Partnership on AI. Microsoft’s vision does not only add an AI ethics review step to its own checklist of privacy reviews and accessibility audits but that the entire industry adopts the same methods.

“We are working hard to get ahead of the challenges posed by AI creation. But these are hard problems that can’t be solved with technology alone, so we really need cooperation across academia and industry. We also need to educate consumers about where the content comes from that they are seeing and using.”

However, unlike the mess that Facebook, Google, the US Congress, and the European Union lawmakers find themselves in today, Microsoft would like government agencies to step in early to help sort out the gritty details of oversight and regulation of AI technology.

Only time will tell, how the industry prepares for the tidal wave of AI-related technologies and applications, but there does appear to be sensible fear of AI getting ahead of regulation, oversight, and accountability.

Microsoft Edge got hacked at Pwn2Own 2019, patch incoming

Security researchers hacked Microsoft Edge and Mozilla Firefox right and earned a cash prize of $270K at Pwn2Own hacking event. 

The Firefox 66 browser was announced on March 19, so the company let friendly hackers to attack it in order to detect any potential security vulnerabilities.

The researchers identified two issues in the web browser.  On the very next day, the company decided to release a patch to fix both of them in Firefox 66.0.1 update. 

Those who are not aware of Pwn2Own, it is basically an annual hacking competition. It provides a great opportunity to security researchers so that they can demonstrate new zero-day bugs.

In return for their efforts, Trend Micro’s Zero Day Initiative (ZDI) rewards them with a handsome amount. 

Pwn2Own Roundup

The researchers who demonstrated new vulnerabilities in Oracle VirtualBox, Apple Safari and VMware workstation were awarded $240,000 on the first day of Pwn2Own 2019.

Moving towards the second day, ZDI awarded an amount of $270,000 to those researchers who identified new bugs in Microsoft’s Edge and Mozilla Firefox browser. 

This is how researchers managed to hack Edge:

That’s all it took to go from a browser in a virtual machine client to executing code on the underlying hypervisor. They started with a type confusion bug in the Microsoft Edge browser, then used a race condition in the Windows kernel followed by an out-of-bounds write in VMware workstation

Most importantly, the kernel escalation flaw in Firefox 66 was demonstrated by Richard Zhu and Amat Cama officially known as Fluoroacetate received an award for $50,000. Niklas Baumstark used a sandbox escape technique to exploit Firefox 66.0 and received an award of $40,000. 

All of these vulnerabilities have been reported to Microsoft and Mozilla, and the companies are working on the patches are expected to release in the next updates. 

RELATED ARTICLES YOU NEED TO CHECK OUT:

Singapore Changi Airport caught using Microsoft Kinect sensors

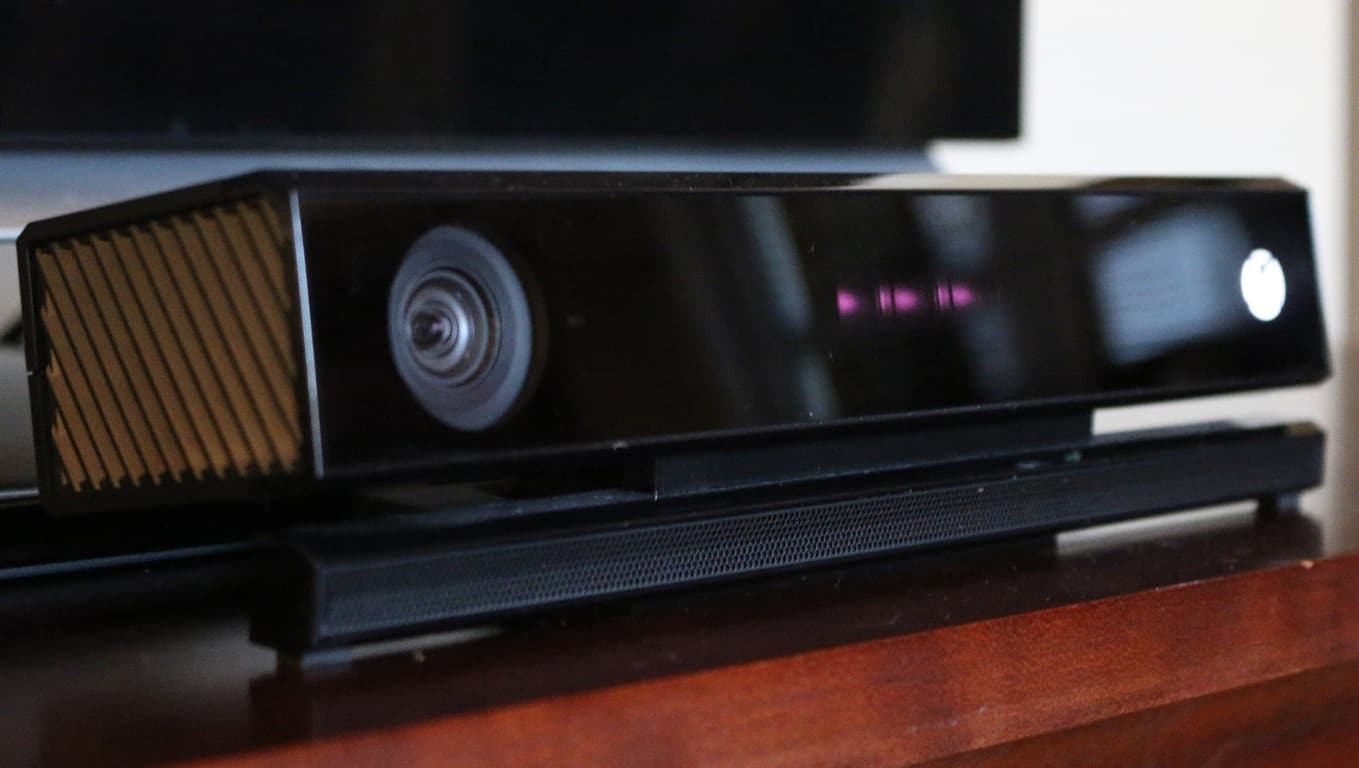
After a rather public rebuke from a gaming community more concerned with speeds and visual fidelity, Microsoft’s motion sensing Kinect technology efforts is finding a second life in more commercial endeavors. From hospitals to research labs, Microsoft’s Kinect technology has been retrofitted for a much broader use than the company’s original intent for the product.

Adding to the list of use cases for the Kinect outside of the home and gaming is a new finding by Redditer @WilliamCCT, who realized three days ago, that his airport was using the Kinect as a baggage scanner.

While becoming less surprising these days, it’s always interesting to see how Microsoft’s Kinect SDK and technology are being used by companies that have the furthest association with the gaming market. During MWC 2019, Microsoft introduced its Azure Kinect kit that would allow businesses to intergrate the Kinect technology into IoT devices and work in conjunction with Microsoft’s Azure cloud.

In the Reddit thread post by @WilliamCCT, many of the commentors seemed rather versed in the shifting landscape for Kinect offering nuanced replies speculating on the impetus of an airport using a Kinect for checking luggage.

The remainder of the Reddit conversation devolves into glowing recounts of anecdotal experiences with Kinect and the Xbox One’s version 2 release.

With Microsoft moving on from bundling the Kinect with its Xbox One consoles, ideally, the company will shift from using it as a purely motion tracking tool to a service that sit atop Microsoft’s Azure ambitions for creating a platform that collects and stores sensory data from around the world.

Intel makes it easier to check your integrated graphics settings on Windows 10 with new Graphics Command Center app

Intel has released a new app for Windows 10, titled Intel Graphics Command Center, to allow users to adjust the image settings for the various games and apps that they may have on their systems (via Windows Central). Many users with Intel-powered computers are likely already familiar with the Intel Graphics Control Center, however the new app brings most of its features in a more aesthetically appealing and intuitive interface.

One of the new features that Intel highlights on the store listing is the help option, which is said to “simplify” the “confusing ‘tongue twister’ features like tessellation and anisotropic filtering.” The company has also implemented a blur effect to the UI, giving it a somewhat of a Fluent-influenced design aspect.

As far as its feature set goes, users can optimize settings for games and videos, and make adjustments to their display configurations. It definitely serves as an easy way to make such, especially considering the limited options available from within Windows 10’s own Settings app.

Intel promises to provide continued updates to the app and will introduce “more features and functions in later phases and will keep the improvements coming.” For now, anyone with a PC running Windows 10 version 1709 or newer and an 6th generation or newer Intel CPU should be able to install the app straight from the Microsoft Store.

Intel® Graphics Command Center

Getting The User Account Code is Null Error? Here’s How to Fix it

Microsoft Outlook is a personal information manager from Microsoft’s Office suite, and it’s available to both individual users and organizations alike.

Although often used as an email client, it also includes a calendar, task manager, contact manager, note-taking, journal, and web browsing helper.

New features were added to Outlook, which now features bill payment reminders and proxy support. Proxy support is available for Android and iOS, which is helpful in situations where Internet access is restricted by the use of SOCKS proxies.

How can I fix The user account code is null Outlook error?

  1. Modify the registry
  2. Change the policies

1. Modify the registry

This type of error occurs when you have multiple Microsoft Office versions on the computer. This eventually leads to a conflict of registry entries, which can affect users that have an Exchange account too.

If the returned value from your User Account is 0 on Outlook, then we have a problem. The normal value should be 512, which means that your account is enabled.

Always remember:

  • Whenever changing the Windows registry, first create a Restore Point, so you can go back to previous settings.
  • Import your contacts from the previous Outlook accounts into the one you currently wish to use.
  • Before attempting the fix, close all Microsoft Office applications that may be running.

You can fix that by following these steps:

  1. Firstly, click the Start button.
  2. Click the Run menu and enter the regedit command.
  3. Click the OK button, and the Registry Editor should now start.
    regedit User Account Code Null
  4. Navigate to the HKEY_CLASSES_ROOTWow6432NodeTypeLib{00062FFF-0000-0000-C000-000000000046} registry key.
    typelib registry editor User Account Code Null
  5. If there are multiple key values displayed, delete all but the latest Microsoft Office version you wish to keep.
  6. Close the Registry Editor and restart your computer.

2. Change the policies

Now that we’ve figured that one out, what do we do when we’re receiving a null address? This type of error applies to Administrators who are responsible for managing gateway policies.

This fix involves setting up the rules to receive all inbound emails.

  1. Go to Options and select all inbound rules, then click on Applies from Everyone.
  2. In the same Option field, select Applies to and set it to Internal Addresses.

We hope these fixes were of help to you to solve the User account code null in Outlook. In the meantime, what other issues have you experienced when using Microsoft Outlook?

What to do if your browser address bar doesn’t search

Despite being excellent browsers, Google Chrome and Mozilla fire are occasionally affected by some bugs.

For example, the address bar doesn’t search in these browsing software making it difficult for you to conduct smart searches when working from either browser.

The program either flatly fails to carry out any searches from the bar or does it intermittently. It might also display the relevant URL but refuse to actually go there.

It won’t even load the wanted website’s icon or even make the slightest attempt to retrieve your desired web pages. And such issues.

Now, this article focuses on how to restore normal address bar search function in the two browsers.

But let’s briefly highlight why the address bar doesn’t search at times in the two applications.

Why the address bar doesn’t search in Chrome/Firefox

  • Malware: Your PC might have been invaded by malicious software which subsequently sneaked into your browser.
  • Browser Extensions: It’s a well-known fact that some of the extensions we add to our browsing apps mess their standard processes.
  • Program conflict: Your Chrome/Firefox version may be conflicting with another software you may have downloaded.
  • Change in the default search engine: Modifying your primary search engines for some reason brings search hiccups sporadically.

How to solve the search bar issues

  1. Set the address bar (omnibox) to act as your default search box
  2. Enable Predictive Search
  3. Scan Your PC for Malware
  4. Check and Uninstall Messy Extensions
  5. Create a New Browser Profile/Account
  6. Reset Your Browser Settings
  7. Uninstall and Reinstall your Browser

1. Set the address bar (omnibox) to act as your default search box

You can specify the address bar(Omnibox) to operate as a search box. It’s set to automatically use Google though you can still set a different default search engine.

Google Chrome

  1. Open Chrome.
  2. Click the More button (the three dots near the top right) then choose Settings.address bar doesn't search
  3. Select the Down arrow next to the text Search engine used in the address bar under the Search engine segment.firefox address bar not working
  4. Confirm Google as the default or choose another default search engine by right-clicking then selecting make default.
  5. You can also click add to search for and add other search engines like DuckDuckGo.
  6. Close and reopen your browser.

B. Firefox (Awesome bar)

  1. Start Mozilla Firefox
  2. Click on the menu button(three horizontal bars top right corner)  then choose Options.google chrome address bar search not working
  3. Select Search from the left pane. Select Google (Or your preference).cannot type in google search box in chrome
  1. Close and restart Firefox.

2. Enable Predictive Search

If you’ve not yet enabled predictive search, then do it.

Google Chrome

  1. Repeat steps 1-2 as listed under Chrome in fix 1
  2. Click Settings then Show advanced.firefox address bar not working
  3. In the Privacy section, set the button next to Use a prediction service to help complete searches and URLs typed in the address bar to on.google search predictions not working

Mozilla Firefox

  1. Repeat steps 1-2 as listed under Firefox in fix 1.
  2. Ensure you mark the checkbox next to the option show search suggestions in address bar results and Show search suggestions ahead of browsing history in address bar results.google suggestions not working chrome
  3. Close and restart Firefox.

3. Scan Your PC for Malware

If the address bar doesn’t search still, scan your entire computer for malware and clean any infections.

Use a good antivirus and update it before starting the scan.

For chrome, you may run this powerful Chrome Cleanup tool. It is very effective in removing  stealth software that could be causing Chrome to experience the address bar issues.

4. Check and Uninstall Messy extensions

Some extensions are known to hijack the search function in browsers so investigate if you could unknowingly install such and get rid of them.

Chrome

  1. Open Chrome.
  2. Click the More button (the three dots near the top right) then More tools then choose Extensions.chrome omnibox settings
  3. Find the suspicious extension and click Remove.can't type in google chrome search box
  4. Confirm by again clicking Remove. Close and restart your Chrome version.chrome not searching from address bar

Firefox

  1. Start Mozilla.
  2. Click on the menu button(three horizontal bars top right corner)  then choose Add-ons.firefox address bar not working
  3. Find the Extensions/Themes panel then select the adds-on you want to remove and click the Remove firefox search bar not working 2018
  4. Click Restart now (if prompted). Your browser will restart possibly with the address bar search ability fully functional. 

5. Create a New Browser Profile/Account

Once in a while, the issue is with your personal profile. Hence create a new browser profile and see how it pans out.

Chrome

  1. Open Chrome.
  2. Click Profile (top right).
  3. Click Manage people.chrome address bar not working
  4. Click on Add person.
  5. Select a name plus a photo then press Add.use a prediction service to help complete searches and urls typed in the address bar not working

6. A new window opens asking you to sign in.  Do that and remember to turn on sync.  Try searching from the address bar using this new profile.google search not working in chrome

B. Firefox

  1. Type about:profiles in the address bar then press Enter. This loads the About Profiles

can't type in google chrome search box

  1. Click Create a New Profile then follow the steps as you’ll be prompted in the subsequent Create Profile Wizard.chrome address bar not working
  2. After you’re done, your profile will be listed alongside the rest in Firefox’s Profile Manager. Select Set as default profile under this profile to use it after you restart Firefox.

6. Reset Your Browser Settings

You can return your browser settings back to default if everything else has so far repulsed your efforts to recover your address bar complete search ability.

In most cases, this succeeds.

Chrome

  1. Open Chrome.
  2. Click the More button (the three dots near the top right) then
  3. Scroll down, find and click the Advanced link.
  4. Again scroll till you locate the Reset and cleanup. Then click Restore Settings to their original defaults.chrome address bar not working
  1. Choose Reset settings and confirm. google search bar not working on pc

Firefox

  1. Open Mozilla Firefox.
  2. Click on menu (press the three bar buttons at top right corner) then tap on.chrome address bar not working
  3. Click on Troubleshooting information.chrome omnibox not working
  4. Click Refresh Firefox.address bar doesn't search
  5. Click Refresh Firefox again and wait for the wizard to run to completion.I'm unable to search from the address bar or awesome bar

7. Uninstall and Reinstall your Browser

Now you may consider uninstalling and then freshly installing the latest Mozilla Firefox or Chrome program.

It’s cumbersome but if successful, you will no longer complain that your address bar doesn’t search.

MORE ARTICLES SELECTED JUST FOR YOU:

Windows 10 news recap: Surface app now lets you know when warranty ends, Firefox adds Windows Hello authentication, and more

Welcome back to our Windows 10 news recap, where we go over the top stories of the past week in the world of Microsoft’s flagship operating system.

Windows 10 Surface app now tells users when their warranty ends

To make it easier for Surface device owners to know when their warranty expires, Microsoft now lets you know when the warranty ends on your Surface device via the Surface companion app.

Microsoft releases patch to notify Windows 7 users about upcoming end of support

As support for Windows 7 nears its end, Microsoft is issuing a new patch to Windows 7 that notifies users of the upcoming end of support date, 14th January 2020.

Mozilla Firefox browser adds Windows Hello authentication support

Firefox’s latest version, 66.0, adds support for Windows Hello authentication. When browsing supported websites, users will be able to use their Windows Hello authentication method (fingerprint, face, etc) to log-in to the website.

Mozilla Firefox browser on Windows 10

Leonardo drawing app comes to the Windows 10 Microsoft Store

Graphics programs just seem to keep popping up in the Microsoft Store on Windows 10. The Leonardo drawing app is the latest app to arrive in the Microsoft Store, allowing you to unleash your creativity.

That’s it for this week – we’ll be back next week with more Windows 10 news!

Microsoft news recap: 2 new data centres planned for Sweden, advertisers can target LinkedIn audiences using Bing Search data, and more

Microsoft news recap is a weekly feature highlighting the top Microsoft news stories of the past week. Sit back, grab some coffee, and enjoy the read!

Microsoft plans two new data centres in Sweden

Microsoft is reportedly planning to build 2 new data centres in Sweden, following 130 hectares of land it acquired last year. A press release by the company stated that it plans to build them to meet “sustainable and environmentally-friendly” standards.

Bing Maps adds coloured traffic info to routes

Bing Maps users are now able to view traffic levels on routes using a new toggle, making it easier to see the level of traffic in areas at a glance, denoted by blue, orange and red markings. Additional visualisations will also be shown where routes traverse through different environments, such as rivers.

Advertisers can now target LinkedIn audiences using Bing Search data

LinkedIn advertisers will soon be able to target LinkedIn audiences by using Bing Search data. It will allow targeting of Lookalike Audiences, interest-based targeting, and more. The new targeting options are currently available on the Bing Data platform, but are heading to the LinkedIn advertising platform.

Microsoft launches Windows Virtual Desktop and Microsoft Defender ATP for macOS in public preview

Microsoft has spent the last few years branching out to third-party platforms outside of Windows. Now in public preview for macOS, Microsoft is bringing Windows Virtual Desktop and Microsoft Defender ATP to Apple’s desktop platform. Microsoft Defender ATP is only available for business users and offers anti-malware protection.

That’s it for this week. We’ll be back next week with more Microsoft news.

Here’s how to fix XAML Parse error once and for all

XAML or Extensible Application Markup Language, is a language based on XML(Extensive Markup Language). Its use ranges from creating to initializing .NET objects. It’s primarily used in .NET Framework 3 and 4 platforms, and especially for Windows Presentation Foundation or WPF or Windows Silverlight.

XAML elements are directly mapped to the Common Language Runtime or CLR object instances, while XAML attributes are tied directly to properties and events. Always remember that conditional statements are evaluated at runtime, with those that evaluate to true being parsed, while those that don’t evaluate are ignored. With this information in mind, let’s move over to the troubleshooting side.

Before applying the following solutions, don’t forget that the .NET is working out what metadata would be required to work with optimal efficiency. Elements that you aren’t using are removed, as not to burden the compilation time and increase file size.

However, it might not pick up on what you’re doing at runtime (e.g. Visual Studio), so it can remove things you actually use. When the crash does occur, it will give out an Exception class, which represents an error that occurs during the application execution.

How can I fix XAML Parse error?

  1. Forward Slash workaround
  2. Standard Resource Fix
  3. FontFamily Fix

1. Forward Slash workaround

The key to solving any issue related to XAML is to track what’s going on in the code that’s causing the issue. Sometimes the solution can be an easy one, such as in this case, when a source image was not compiled correctly. This fix can be applied to numerous instances, so be sure to use forward slashes when describing file or URL addresses.

<Image Source=”Assets11.png” Stretch=”None” HorizontalAlignment=”Left”/>

<StackPanel Orientation=”Horizontal”>

  1. Replace <Image Source=”Assets11.png” with <Image Source=”/Assets/11.png”
  2. Save changes, and you’re good to go.

2. Standard Resource Fix

code parse error

A spelling mistake can happen from time to time. If this happens, you’ll receive an error on the grounds of:

An exception of type ‘Windows.UI.Xaml.Markup.XamlParseException’ occurred in myproj.UWP.McgInterop.dll but was not handled in user code

Additional information: The text associated with this error code could not be found.

Cannot find a Resource with the Name/Key category [Line: 0 Position: 0]

To fix it, do the following:

  1. Look for Page.Resources/App.Resources or Standard Resources and check for spelling mistakes.
  2. Correct the spelling mistake and save the changes.

3. FontFamily Fix

This happens when you’re loading a XAML with a font that’s not present in your application or assigning a value to the FontFamily and the value is blank. A FontFamily is an object specifying the preferred font family, or a primary preferred font family with one or more fallback font families.

Let’s say your primary font is Arial and your fallback is Calibri, it would look like something on the lines of: <object FontFamily=”Arial”/>  – or –  <object FontFamily=”Arial, Calibri”/>. But what do we do when we receive the following error?

A first chance exception of type ‘Windows.UI.Xaml.Markup.XamlParseException’ occurred in HelloWorld.exe

WinRT information: Failed to create a ‘Windows.UI.Xaml.Media.FontFamily’ from the text ”. [Line: 52 Position: 63]

  1. Search for StandardStyles.xaml and inspect all instances of FontFamily where the value is blank(<object TextBlock.FontFamily=”value”…/>);
  2. Change the value to any font that you are currently using(e.g. Arial), then save your changes.

There you go, these are some solutions that can help you fix XAML Parse error, so be sure to try them all.

RELATED STORIES TO CHECK OUT:

Something went wrong, your device couldn’t connect error [Fix]

Whether using the new Surface Pro or any machine that runs Windows, sometimes you wish to connect with other devices. However, the device simply won’t connect, and errors keep showing up.

In most cases, this is related to driver issues, especially if the driver update isn’t working properly. This can lead to various issues with the device that you want to use. However, we made a list of solutions that might help you fix that problem.

How to fix Something went wrong, your device couldn’t connect error?

  1. Install the latest updates
  2. Reinstall your drivers
  3. Run the troubleshooter

1. Install the latest updates

The first step involves searching for updates. To check for updates, simply do the following:

  1. Click the Start button, and then go to Settings.
  2. Navigate to Update & Security.
    update and security device couln't connect
  3. Now click on Windows Update and select Check for updates.
    check for updates device can't connect
  4. If this works for you, proceed to connect your device.

Now you just need to connect your device:

  1. Go to Start and select Settings.
  2. Next, select Devices and click on Connected Devices.
  3. Click Add a device, and then click on the desired device.

If checking for updates doesn’t work, download the Windows Update Troubleshooter and open it. Next, follow the steps displayed to solve update-related errors. It should be noted that the Update Troubleshooter works for Windows 7, 8 and 10.

2. Reinstall your drivers

This fix addresses compatibility issues that might arise from installing Windows Updates. Once you’ve uninstalled the faulty driver, try the newest version of it.

  1. Go to the Cortana search bar and type in devmgmt and press Enter.
  2. Select the driver that’s causing issues, then right-click on it and select Properties.
    uninstall device something went wrong
  3. Go to the Driver tab and select Uninstall Device.
  4. Restart your machine.

3. Run the troubleshooter

This step will allow you to detect any incompatible driver that’s preventing your system from connecting to the desired device.

  1. Access Control Panel, type in troubleshooting on the top right corner of Control Panel’s search bar.
  2. Next, click Troubleshooting from the list of results.
    troubleshooting device couldn't connect
  3. On the left pane, click on View All, and look for Hardware and devices.
  4. Right-click on it and choose Run as Administrator.
    hardware and devices device couln't connect
  5. A dialog box has appeared, now follow the onscreen instructions.

Alternatively, use the System File Checker or SFC to scan Windows files and restore them. For Windows 10 you should always first run the inbox Deployment Image Servicing and Management or DISM, and then the System File Checker.

For the DISM fix:

  1. Open a Command Prompt as Administrator and type dism.exe /Online /Cleanup-image /Restorehealth then press Enter.
  2. Wait for the operation to complete and close the Command Prompt.

For the SFC Fix:

  1. Open a Command Prompt as Administrator and type sfc /scannow then press Enter.
  2. Do not close the window until the process has been completed.

We also have a guide on The remote device won’t accept the connection error, so don’t miss it.

We hope these solutions helped. Do let us know in the comments below if you have your own solutions.

How to block Windows driver updates with wushowhide.diagcab in Windows 10

Windows 10 automatically updates drivers to fix hardware that isn’t working correctly. However, in rare circumstances, updated drivers can sometimes cause other problematic hardware issues. If that happens, you’ll need to roll back the driver and block Windows Updates from installing it again.

However, Windows 10 doesn’t include a built-in tool with which you can select driver updates to block. So, if you uninstall a driver, Windows Update will automatically install it again. As a compromise, Microsoft’s wushowhide.diagcab tool for Windows – otherwise known as the Show or hide updates package – enables you to block unwanted driver updates.

Here’s how to block Windows driver updates

  1. Roll Back the Driver Update
  2. The Show or Hide Updates Tool

1. Roll Back the Driver Update

  1. Before you block a driver with the Show or hide updates tool, you’ll need to roll the updated driver back. To do that, open the Device Manager window by entering ‘Device Manager‘ in Cortana’s search box.device manager
  2. Next, select the device that has the driver you need to uninstall.
  3. Right-click the device and select Uninstall from its context menu.
  4. That opens the Confirm Device Uninstall window in the shot below. Select the Delete the driver software for this device check box on that window.uninstall the device uninstall
  5. Press the OK button to roll back the driver.
  6. Alternatively, select Properties on the device’s context menu and select the Driver tab on the window below.
  7. Select the Roll Back Driver option.


roll back drivers

2. The Show or Hide Updates Tool

Windows Update will probably automatically reinstall the driver unless you turn it off. Instead, save the Show or hide updates tool to your HDD by clicking Download the “Show or hide updates” troubleshooter package now on this page. Then, you can temporarily block driver updates with that tool as follows.

  1. Open the folder you saved Show or hide updates to and click wushowhide to open the window shown below.hide updates
  2. Press the Next button to scan for updates.hide updates
  3. Next, select Hide updates to open a list of available updates as below.
  4. Now, select the update package that’s updating the driver from the list to block it.
  5. Press the Next and Close buttons to exit Show or hide updates.


Now the update package will not reinstall the driver you removed. You can always open Show or hide updates again and deselect the blocked update package when required. Also, note that Windows Pro and Enterprise include a new built-in Group Policy Editor option with which users can select to exclude drivers from updates.

RELATED STORIES YOU NEED TO CHECK OUT:

Posted in Fix

Windows Cannot Access Samba Share: 3 Ways to Fix it

Samba is an application-layer network protocol, with its primary purpose to provide shared access to files. However, many users reported that Windows cannot access the Samba share message while using it.

Samba runs on most Unix-based systems, such as Linux OS for example. Samba also takes its name from Server Message Block or SMB. Most of the time, you’ll be using SMB to connect to devices that aren’t running Windows.

Starting from build 1709, Samba has a hard time working well since Windows disables unauthenticated access to shares using SMB2 with guest access enabled. However, there’s a way to fix this problem!

What can I do if Windows cannot access Samba share?

1. Change Group Policy settings

  1. Press Windows + R to open Run, type gpedit.msc, and hit Enter.gpedit.msc
  2. Select Computer Configuration and click on Administrative Templates from the navigation pane.
  3. Select Network and choose the name of your Workstation.
    group policy network Unable to access Samba share
  4. Open the Enable insecure guest logons policy and select Enabled.
  5. Apply the changes and restart your machine.

Oftentimes, when you see Windows cannot access Samba share and you do not have permission, modifying the relevant policy should help get things up and running.

2. Enable SMB 1.0

  1. Open the Control Panel, and click on Programs.
    programs Unable to access Samba share
  2. Click on Turn Windows features on or off.
    turn windows features Unable to access Samba
  3. Expand the SMB 1.0/CIFS File Sharing Support option.
  4. Check the SMB 1.0/CIFS Client option, and then click OK.
    Unable to access Samba share smb cifs
  5. Once done, restart the computer.

The SMB1 protocol has been disabled since recent updates to Windows 10 but was never fully removed. Merely stowed away, meaning you can temporarily enable this protocol on your Windows 10 machine. And this should fix things when Windows cannot access Samba share.

3. Disable Digitally sign communications policy

  1. Open the Local Computer Policy, then select Computer Configuration.
  2. Next, go to Windows Settings and select Security Settings.
  3. Select Local Policies and click on Security Options.
  4. Locate a policy named Microsoft network client: Digitally sign communications (always) and select Disabled in its properties.
    security options Unable to access Samba share
  5. Apply changes and restart your machine.

Say you’re in a situation where you have a network with two workstations. One is running Windows, and the other is Linux, and you’re using Samba to share a local storage device. But sometimes, Samba might mismanage the session’s security negotiations with Windows.

Always remember to keep your Lan Manger’s authentication level to Send LM & NTLM – use NTLMv2 session security if negotiated. And if there’s any firewall involved, configure them correctly.

One of these solutions should have helped fix things when Windows cannot access Samba share for Linux or Ubuntu, and the error code 0x80070035 shouldn’t appear again.

Before you leave, find some quick tips to increase the Internet speed in Windows.

Tell us which fix worked for you in the comments section below.

Dota 2 Fails to Launch? Fix it in 4 Quick Ways

When it comes to the Steam service, Dota 2 is untouchable in the number of active participants. With vivid graphics and immersive gameplay, it is an amazing multiplayer experience.

Nevertheless, software without bugs is a non-existent, unicorn-like category. So, yes, Dota 2 has its technical issues. One of the issues that seamlessly showed up was the game launch failure.

Most of the time, the crash is followed by the Failed to Start Game (Missing Executable) message. So, we’ve prepared some possible solutions for this annoyance.

What to do if Dota 2 fails to start

1. Let the Steam tool verify game files

  1. Restart PC and open Steam client.
  2. Open Library.
  3. Right-click Dota 2.
  4. Click Properties.
  5. Select the Local Files tab.
  6. Choose VERIFY INTEGRITY OF GAME CACHE.
  7. The process execution time is proportional to the game size.steam client verify game files
  8. If there is a corrupted file, Steam will highlight it.

Corrupted/incomplete file issues can be quite a challenge for some older titles. Back in the day, you would probably have to reinstall the game in order to make it work.

This is not the case with Steam nowadays. With the implemented File integration tool, you can check and fix any game in your library.

2. Tweak Antivirus

Antivirus/antimalware/antispyware programs are known causes for Dota 2 malfunctioning. The last resort would be disabling them while playing the game. However, if you are attached to your security, try out these tweaks:

  • Make your antivirus exclude the folders where the Steam client is installed. By default, it is: C:\Program Files\Steam
  • Start Game Mode if the antivirus supports that feature.
  • If the antivirus reports some Dota 2/Steam-related files as malware, mark them safe.

3. Disable background applications

task manager

There are reports that some background processes interfere with the client and the game. The ones that are most problematic are connection-dependent.

Besides the already mentioned antivirus programs, you should look out for firewall software, torrent clients, VPN and proxy software, VoIP apps, and IP masking programs. Be sure to disable them before you start the Steam client.

4. Reinstall Dota 2

  1. Launch Steam and click the Library tab.
  2. Right-click Dota 2 and select Manage.
  3. Now, click Uninstall.
    uninstall dota 2 fails to launch
  4. Finally, click the Uninstall button to verify the removal.
    verify

The last step you can try to follow through is a complete reinstallation. In addition, make sure that your graphics drivers are up to date and also redistributables and DirectX. Reinstalling a Steam game is a rather simple task, as shown above.

Of course, re-downloading might be a drag if you have a slow bandwidth. The game should work better afterward.

If none of these solutions actually worked, you should send the Steam Support Ticket. That way, Steam technicians can address the issue and provide additional details.

In the same vein, if Dota 2 can’t connect to the game after accepting a match, check our guide to fix it.

If you know some alternative solutions and are keen to share them, please do so in the comments.

ID@Xbox set to launch Game Pass show with new game announcements

The ID@Xbox has just announced the upcoming launch of a new live show that will highlight new indie games coming soon to Xbox Game Pass. The debut episode of the ID@Xbox Game Pass show will be on Tuesday, March 26 at 9AM PDT, and here is what you can expect:

In our debut, we’ll dive into games previously shown at E3 and X018. Expect hits such as Afterparty, Void Bastards, and Supermarket Shriek to be highlighted. In addition to new game announcements, we’ll also share a visit to Night School Studio, the creative team behind the hit game Oxenfree, for a behind-the-scenes look at their upcoming game Afterparty.

Interestingly, the first episode will be live streamed exclusively on the YouTube Xbox channel, and not on Microsoft’s own Mixer service. The company already created many regular shows on Mixer including Major Nelson Radio or the weekly Mixer Green Show, so the decision to ignore the ID@Xbox channel on Mixer is a bit surprising.

Microsoft plans two new data centers in Sweden

Microsoft is reportedly building two new datacenters in Sweden, according to Swedish Newspaper Gefle Dagblad (via MSN). It was previously reported in December that the company had acquired 130 hectares of land in the municipalities of of Gävle and Sandviken, near the Swedish capital Stockholm.

“We intend to develop land areas for the establishment of world-class data centers that meet sustainable and environmentally friendly standards,” Microsoft said in a translated press release obtained by the Gefle Dagblad. The report mentions that there is still a legal dispute between the municipality of Gävle and some of its citizens who appealed the decision to sell the land to Microsoft, fearing that the new data centres could lead to a shortage of electricity in the area.

Microsoft’s new Swedish data centers are not visible yet on the company’s Azure website, though it’s worth noting that two Azure regions have also been announced in Norway. The Redmond giant currently has 54 Azure regions worldwide, more than any other cloud provider.

Thanks for the tip!

Windows 10 Surface app now tells users when their warranty ends

The Surface companion app in the Microsoft Store is getting a new update rolled out that will now inform the time left on a device’s two-year warranty (via MSPU).

While most people keep a mental note of their device’s lifespan and where they are in the warranty cycle, it’s still a neat little convenience to have in a dedicated app where other Surface related customizations, features and services are all located.

Visiting the Microsoft Store should surface the new update but if it’s not there yet, retry later today.

Sekiro: Shadows Die Twice is now live on Microsoft’s Xbox One consoles

One of the most-hyped video games of the year, Sekiro: Shadows Die Twice, is now live and ready to play on all Xbox One consoles.

The game is an action-adventure title set in Japan during the late-1500s. While launching today, Sekiro: Shadows Die Twice has already garnered a lot of buzz about its visuals, gameplay, and story with many speculating that it could be one of the biggest games of 2019.

Here’s the official game description and launch trailer:

In Sekiro: Shadows Die Twice you are the “one-armed wolf”, a disgraced and disfigured warrior rescued from the brink of death. Bound to protect a young lord who is the descendant of an ancient bloodline, you become the target of many vicious enemies, including the dangerous Ashina clan. When the young lord is captured, nothing will stop you on a perilous quest to regain your honor, not even death itself.

Explore late 1500s Sengoku Japan, a brutal period of constant life and death conflict, as you come face to face with larger than life foes in a dark and twisted world. Unleash an arsenal of deadly prosthetic tools and powerful ninja abilities while you blend stealth, vertical traversal, and visceral head to head combat in a bloody confrontation.

Take Revenge. Restore your honor. Kill Ingeniously.

Sekiro: Shadows Die Twice is playable on any Xbox One console but does receive some visual improvements when played on an Xbox One X in addition to gaining HDR10.

Looking for a new Xbox One console to play Sekiro on? Earlier today, Microsoft announced a very rare Sekiro-themes Xbox One complete with its own sword. Check it out here.

Have you been looking forward to Sekiro: Shadows Die Twice or are you feeling a little indifferent? Share your thoughts with the community in the comments below and then follow us on Pinterest for more Xbox gaming content.

The app was not found in the store. ?

This Sekiro: Shadows Die Twice Xbox One console is stunning and up for grabs

The official Xbox Twitter account revealed a stunning custom Xbox One console inspired by the new video game, Sekiro: Shadows Die Twice, earlier today.

The Sekiro: Shadows Die Twice Xbox One console features a wooden design that gives it the appearance of a box. On top of it sits a replica of a sword from the video game. The Xbox controller that comes with the console is also customized with a wooden appearance and features the name, Sekiro, written in Japanese writing.

To win the Sekiro: Shadows Die Twice Xbox One console and controller, all you need to do is retweet the original tweet before March 24th.

The competition is open to residents of the United States and Canada (excluding Quebec). The full competition rules can be read here.

Sekiro: Shadows Die Twice launched on Xbox One consoles today and is already getting a positive response from press and players with many praising its visuals, gameplay, and storytelling.

Are you excited for Sekiro: Shadows Die Twice and are you going to enter this competition? Let us know in the comments below and then follow us on Pinterest for more Xbox gaming content.

DirectX 12 now supports VRS to increase GPU performance

The Redmond giant has recently announced the Variable Rate Shading feature for DirectX 12. This new feature helps developers to increase graphics quality, enhance performance and reduce system requirements for gaming. 

VRS improves performance, increases graphics quality and lowers the system requirements for games.

How does VRS Work?

One of the sides in the picture below is 14% faster when rendered on the same hardware, thanks to a new graphics feature available only on DirectX 12.

Those who are not aware of VRS (Variable Rate Shading), the developers are able to take advantage of this powerful and latest API so that they can efficiently use the GPU.

The shading rate actually determines the color of every pixel on your screen.

Game developers are now able to prioritize shading quality for some specific parts of the images where it is required the most. The prioritization process allows us to be able to save resources.

The resolution at which shaders in an image are called is basically determined by the shading rate. The quality of the shader will be high with a higher shading rate. However, more system resources will be consumed in this way.

In VRS various shading rates are applied to different areas of a specific image. So, reducing the shading rate on areas where the visual fidelity is not affected can simply enhance PC performance and save resources. 

Big names are interested in VRS

Most of the big names are now interested to take the most benefit out of it, keeping in mind the features offered by the VRS technology.

Some of those names are Playground Games, 343 Industries, Activision, Massive Entertainment, Epic Games, and Unity. 

Furthermore, at the Game Developers Conference (GDC) 2019 that is scheduled this week, Microsoft plans to conduct sponsored sessions on VRS.

The tech giant will upload a getting started guide along with a sample for the developers, in case you do not plan to attend the Conference. 

If you are interested to find out more about the variable rate shading in DirectX 12, you can check out Microsoft’s official blog. 

RELATED ARTICLES YOU NEED TO CHECK OUT:

Getting Something went wrong Netflix error? Here’s how to fix it

Netflix is one of the foremost movie-streaming services that users can utilize within browsers or with its app. However, Netflix also throws out Something went wrong error messages for some users. Those error messages can vary slightly, but users can’t watch Netflix files when the errors occur. Netflix’s Something went wrong” error messages might state:

  • Oops, something went wrong. An unexpected error has occurred.
  • Whoops, something went wrong (F1)
  • Whoops, something went wrong… Unexpected error.
  • Sorry, something went wrong. Please try again later.

The above error messages can appear for both Netflix browser and app users and have alternative codes. So, there are various alternative fixes for them. These are some of the resolutions that might fix the Something went wrong error messages quoted above.

How can I fix Something went wrong Netflix error?

  1. Is Netflix Down?
  2. Clear the Browser’s Cache
  3. Reset the Browser
  4. Update the Browser
  5. Reinstall the Netflix App
  6. Add Netflix to Trusted Sites for Internet Explorer
  7. Reset Windows 10

1. Is Netflix Down?

First, check if Netflix is down. Netflix isn’t down very often, but there was a global Netflix outage in 2018. Then Netflix returned the following error message: Sorry, something went wrong. Please try again later. However, it didn’t take long for the usual service to be resumed.

Users can check if Netflix is down at Downdetector.com. Enter the keyword ‘Netflix’ in that site’s search box, and press the Return key. That will open a page that tells users if Netflix is generally down or not. If Netflix.com is down, users will need to wait for Netflix Inc. to fix things.

Something went wrong Netflix downdetector


2. Clear the Browser’s Cache

The Whoops, something went wrong… Unexpected error Netflix error message highlights that users need to reset their browser data. Therefore, clearing browser cache is among the best resolutions for that specific error message. Chrome users can clear that browser’s cache as follows.

  1. Click the Customize Google Chrome button at the top right of its window.
  2. Click More tools > Clear browsing data to open the window shown directly.
    clear data Something went wrong Netflix
  3. Select the Advanced tab.
    Something went wrong Netflix advanced tab
  4. Select the All time option on the Time range drop-down menu.
  5. Select the Cached images and files check box.
  6. Then click the Clear data button.

3. Reset the Browser

Resetting browsers is another way to clear their caches and other browser data. That will also restore the browsers to their default settings and at least turn off additional extensions. So, refreshing a browser is another potential resolution. Users can reset Google Chrome as follows.

  1. Input chrome://settings/ in Chrome’s URL bar, and press the Enter key.
  2. Click Advanced at the bottom of the Settings tab.
  3. Scroll down to the Restore settings to their original defaults option shown directly below.
    restore settings to the original defaults Something went wrong Netflix
  4. Then press the Reset settings button.

4. Update the Browser

Something went wrong error messages can often be due to antiquated browser versions. So, some users might need to update their browsers. This is how users can update Google Chrome.

  1. Press the Customize Google Chrome button.
  2. Select Help > About Google Chrome to open the tab shown below.
    about chrome Something went wrong Netflix
  3. Then the browser will automatically check for updates. Press the Relaunch button after the update.

5. Reinstall the Netflix App

Reinstalling Netflix might fix the Something went wrong (F1) issue for those who utilize the app for movie streaming. That error message can be due to data or settings on Windows 10. Follow the guidelines below to reinstall Netflix.

  1. Open Cortana’s search box by pressing the Windows key + Q hotkey.
  2. Input the keyword apps in Cortana’s text box to find Apps & features.
  3. Click Apps & features to open that part of Settings as in the shot below.
    apps and features Something went wrong Netflix
  4. Then select the Netflix app, and press its Uninstall button.
    uninstall button Something went wrong Netflix
  5. Click Uninstall again to provide further confirmation.
  6. Next, open Netflix’s MS Store page.
  7. Click the Get button to reinstall Netflix.

6. Add Netflix to Trusted Sites for Internet Explorer

This is a resolution more specifically for fixing the Something went wrong issue (error code:H7361-1253-80070006) in Internet Explorer. Explorer users can fix that error code by adding Netflix to trusted sites. Follow the guidelines below to add Netflix to IE’s trusted websites.

  1. Open the Internet Explorer browser.
  2. Press the Tools button on IE’s toolbar.
  3. Select Internet options to open the window in the image directly below.
    internet properties Something went wrong Netflix
  4. Select the Security tab.
  5. Click Trusted Sites, and press the Sites button.
    Something went wrong Netflix trusted sites
  6. Deselect the Require server verification option if it’s selected.
  7. Enter *.netflix.com in the text box, and press the Add button.
    trusted sites netflix Something went wrong Netflix
  8. Click the Close option.

7. Reset Windows 10

Some users have also confirmed that they’ve fixed the Something went wrong Netflix error (code W80072EE4) by resetting Windows 10. Resetting Windows reinstalls the OS. That might seem a little drastic for fixing a movie-streaming service error, but users have confirmed that resetting Windows does the trick.

  1. To reset Windows 10, input the keyword reset in the search box.
  2. Click Reset this PC to open the window directly below.
    recovery settings app Something went wrong Netflix
  3. Click Get started to open the Reset this PC window directly below.
    chose an option reset Something went wrong Netflix
  4. Select the Keep my files option.
  5. Select the Next and Reset options to reinstall Windows 10.

Those are a few of the resolutions that can resolve Something went wrong errors so users can enjoy Netflix movies once more. Netflix users who have found other fixes for the above error messages are welcome to share their resolutions below.

RELATED ARTICLES TO CHECK OUT:

KB4489890, KB4489888 and KB4489889 bring many issues of their own

Microsoft rolled out a new series of cumulative updates for three Windows 10 versions: v1709, v1703 and v1607.

The updates don’t come with any security fixes this time.  Instead, they fix some major bugs that have been affecting the functionality of the OS.

Apart from the bug fixes, the cumulative updates come with a long list of known issues.

KB4489890, KB4489888 and KB4489889 known issues

1. Stop error prompts

Those users who have installed kb4489890 can come across a stop error while stating the Secure Shell (SSH) client program from Windows Subsystem for Linux (WSL).

Microsoft suggests the users have to disable forwarding of the authentication agent connection. It can either be done with the help of a configuration setting or a command line switch (ssh –a).

2. IE 11 authentication issues

The installation of the KB4489889 update might trigger authentication issues for IE 11. The issue arises if the same account is being used by two or more users on a Windows Server system.

Some of the issues that you might face after the installation are:

  • Keyboard shortcuts fail to work
  • Zero or empty location and cache size
  • File download issues
  • Credential prompts bugs
  • Webpage loading issues

Microsoft stated that if you are using a Windows Server machine, the problem can be resolved by creating a unique user account. Furthermore, you also need to disable multiple RDP sessions for an account.

This is a temporary workaround, and Microsoft has promised to release a bug fix with the next Windows Update.

3. Cluster service fails to start

The cluster service does not start following the installation of KB4489889. If the users configured the Minimum Password Length of the group policy with more than 14 characters, you might encounter the error  “2245 (NERR_PasswordTooShort)”. 

Microsoft said that a temporary solution to fix the problem is to set a value of less than or equal to 14 characters as the minimum password length. 

4. Applications not responding

Microsoft acknowledges the fact that the installation of the KB4489888, KB4489889, and KB4489890 update triggers a bug in MSXML6. This bug further forces different applications to stop responding and throw an exception error. When a user attempts to edit a Group Policy Object (GPO), the Group Policy editor may stop responding. 

Microsoft is currently working to resolve the bug and promises to release a fix in the next release.

Maybe the following troubleshooting guides could help you fix the problem:

5. Device start-up issue

The kb4489889update brings another bug for the users when a Windows Deployment Services (WDS) server’s device that uses Variable Window Extension is started with the Preboot Execution Environment (PXE).

As a result when the user attempts to download an image the WDS server connection might terminate prematurely. However, those devices or clients that are not using Variable Window Extension does not have to tackle the bug.

The tech giant is currently working on the bug and for the time being, it can be resolved by following one of these solutions:

  • Solution 1
    Open an Administrator Command prompt and type the following:

    • Wdsutil /Set-TransportServer /EnableTftpVariableWindowExtension:No
  • Solution 2
    • Use the Windows Deployment Services UI.
    • Open Windows Deployment Services from Windows Administrative Tools.
    • Expand Servers and right-click a WDS server.
    • Open its properties and clear the Enable Variable Window Extension box on the TFTP tab.
  • Solution 3:
    • Set the following registry value to 0:
    • HKLMSystemCurrentControlSetServicesWDSServerProvidersWDSTFTPEnableVariableWindowExtension.

Keep in mind that the WDSServer service needs to be restarted following the Variable Window Extension is disabled.

6. Blue screen bug

Microsoft warns the users that they will have to face a system failure and a startup blue screen bug if they enable per font end-user-defined characters (EUDC).

The particular setting needs to be avoided by those users who are currently residing in the non-Asian regions and have installed the latest updates.

The company suggests the users refrain from enabling per font EUDC till a bug fix has been released.

Let us know in the comments section below if you have experienced any issue apart from those mentioned in the article.

RELATED ARTICLES  TO CHECK OUT:

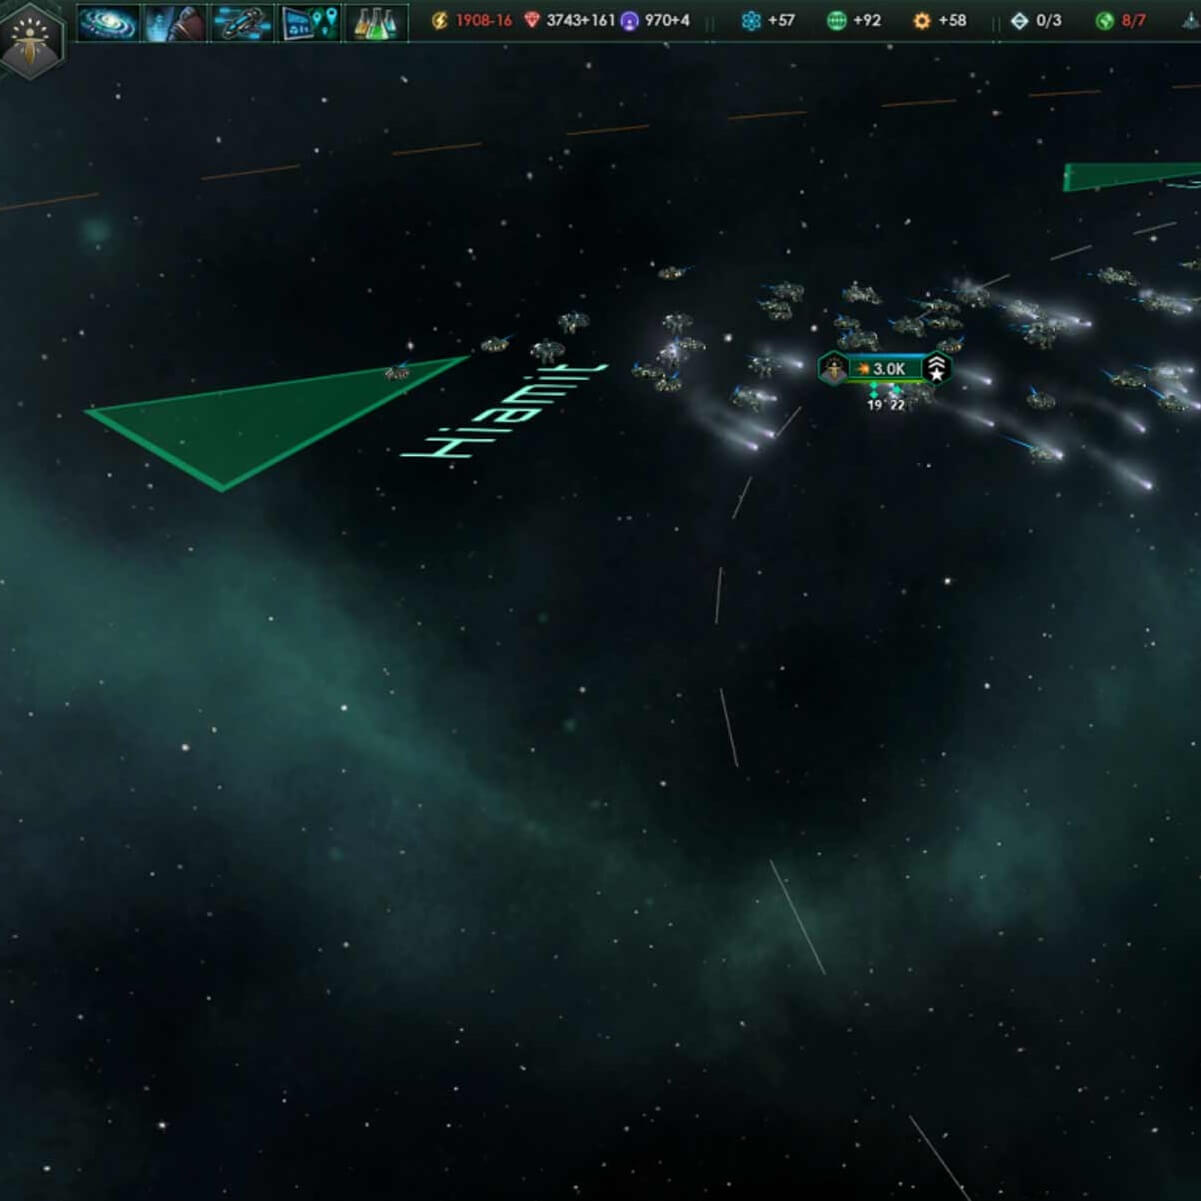
How to fix common Stellaris bugs on PC

Stellaris is a spectacular space-exploration game. As a player, you’ll explore the Universe, discover, interact and learn more about the species you will encounter. The game challenges you to forge your galactic empire, colonize remote planets and subdue alien civilizations.

Unfortunately, Stellaris is sometimes affected by various technical issues, limiting the gaming experience. In this article, we’re going to show you how to fix the most common Stellaris issues reported by players.

How to fix frequent Stellaris bugs

  1. Stuttering
  2. Stellaris crashes
  3. Re-run Redistributables
  4. Stellaris won’t start/ launch
  5. Low FPS issues
  6. Not getting any achievements

1. Stuttering

Install the latest game patch and disable your gamepad. Gamepads seem to cause stuttering problems for some players. Also, verify your game cache:

  1. Go to your Steam Library
  2. Right click > Properties on Stellaris
  3. Click the “Local Files” tab
  4. Click on the “Verify Integrity of Game Cache…” button

2. Stellaris crashes

  1. Try disconnecting your controller > launch the game again
  2. Run the game in windowed mode
  3. Try running Steam as an administrator:
  • Go to c:program filessteam
  • Right click >Properties on steam.exe
  • Click the Compatibility tab
  • Check “Run this program as an administrator
  • Go to c:program filessteamsteamappscommonstellaris
  • Right click >Properties on stellaris.exe
  • Click the Compatibility tab
  • Check “Run this program as an administrator.

3. Re-run Redistributables

Perform this action even if you have DirectX installed. Run the following files and then restart your computer:

  • Steamsteamappscommonstellaris_CommonRedistDirectXJun2010DXSetup.exe
  • Steamsteamappscommonstellaris_CommonRedistDotNet4.0 Client ProfiledotNetFx40_Client_x86_x64.exe
  • Steamsteamappscommonstellaris_CommonRedistvcredist2010vcredist_x64.exe
  • Steamsteamappscommonstellaris_CommonRedistvcredist2010vcredist_x86.exe

4. Stellaris won’t start/ launch

1. If this happens after you’ve changed some video settings, go to My DocumentsParadox InteractiveStellarissettings.txt and just delete this file. The game will then create a clean video settings file.

2. Disable any user made mods

3. Verify the game cache: right click Stellaris in Steam > Properties > Local Files > Verify integrity of game cache”

4. Install the latest video card drivers and then restart your computer. Follow the links below to download and install a specific driver:

5. Low FPS issues

  • Install the latest graphics drivers on your computer
  • Break our empire into smaller sectors.
  • Reduce in-game graphics settings.

6. Not getting any achievements

You must play in Ironman Mode to get achievements. This requires you to log on Steam and have Steam Cloud enabled.

If you’ve encountered other issues, check out this forum thread for more information.

RELATED STORIES YOU NEED TO CHECK OUT:

Posted in Fix

Friday the 13th bugs: Database Login Failure, mouse sensitivity issues, and more

Friday the 13th: The Game brings Jason back. As a player, you’ll take either on the role of Jason Voorhees, or that of a Camp Crystal Lake counselor. Then, together with six other innocent souls, you’ll try to stay alive while the most well-known killer in the world tracks you down.

Gamers report that Friday the 13th is affected by a series of technical issues, ranging from server connection issues to DLC key problems.

Friday the 13th: The Game reported bugs

  1. Database Login Failure on the server connection
  2. Mouse sensitivity issues
  3. The game won’t work on the latest Windows 10 build
  4. Profile data won’t save
  5. The controller randomly turns on players’ voices
  6. Savini and clothing DLC Key Issues

1. Database Login Failure on the server connection

Many players report that they can’t connect to the game’s servers due to the “Database Login Failure” error. It appears that this error occurs because servers are overloaded.

Database login failure – Verify your internet connection?
My internet is on and working and I couldn’t get the game to get online the entire day.

If you’ve encountered this error, use the following two workarounds to fix the problem:

  • Go to your anti-virus/firewall and turn off all scanning of the network traffic for the game.
  • Reinstall the game and the anti-cheat program

Some players reported that these two solutions helped them connect to Friday the 13th’s servers. Hopefully, they’ll do the trick for you as well.

2. Mouse sensitivity issues

its either super slow or super fast, super fast sometimes on .01 sens and super slow somtimes on the highest sens. i play at 600 dpi so nothin crazy, wtf is going on.

3. The game won’t work on the latest Windows 10 build

Players running Windows 10 build 16199 can’t launch Friday the 13th due to the “Invalid Game Executable” error.

I am experiencing the same issue on this build of Windows. Launching the game throws an error “Invalid Game Executable…” and then the path to SummerCamp.exe

4. Profile data won’t save

Whenever I unlock and place a grab kill for jason it gets stuck while saving every time. I can only get out by joining a friend’s game through steam tray but other than that only solution is Alt+F4 ing the game and when I open it once more all my kill grab slots are emptied. Any help would be appreciated..

5. The controller randomly turns on players’ voices

For some reason if I use my controller it just has my voice turned on all the time.

For the time being, there is no workaround available to fix this problem. You can try repairing the game with the Steam client. We can’t say with certainty whether this will help.

6. Savini and clothing DLC Key Issues

Some players can’t access the Savini skin and clothing packs. When they click the “Login to claim” option, the game takes them to the full game DLC code.

[…] Something is funky with the Savini skin and clothing packs. Those backers that got those items; we are working on trying to figure out what the issue is.  Literally working on it at this moment, should know soon! Keys should be downloading…but for some reason the content is not showing in-game.

If you’ve come across any workarounds to fix these issues, feel free to list the troubleshooting steps in the comment section below.

RELATED STORIES YOU NEED TO CHECK OUT:

Can’t adjust screen brightness on Surface Pro 4? We have the fix

Surface Pro 4 has been affected by a series of screen issues ever since its launch. We’re sure that most users still have vivid memories of all the annoying screen problems that they encountered.

Fortunately, there are many solutions available for most of these issues. However, there’s one bug that’s affecting screen brightness settings which is pretty difficult to fix.

If you can’t adjust screen brightness on your Surface Pro 4 device, you’re in the right place. In this article, we’ll show you how to quickly fix this problem so that you can customize your device the way you want.

How to fix Surface Pro 4 screen brightness adjustment issues

  1. Detach the keyboard
  2. Update your drivers
  3. Discharge the device

You can use this fix on all Windows 10 versions, including the Fall Creators Update. Indeed, Windows 10 version 1709 fails to fix this issue, forcing users to find a fix themselves.

1. Detach the keyboard

  1.  Turn on your Surface device and wait until the bootup process is completed the desktop or such alike.
  2. Detach the keyboard.
  3. Use the touch screen in order to perform a reboot.
  4. When at the desktop again, bring out the notification center. You can do that by swiping the screen from the right. Then use the touch screen to change the brightness level.
  5. Connect the keyboard and check if the issue persists.

If the option is still not available after you detach the keyboard, unplug all the other peripherals that you may have connected to your Surface Pro 4. Disable all peripherals connected via Bluetooth as well.

It seems that this issue often occurs when you close your Surface Pro without the keyboard attached and then attach it while in hibernating mode or after waking up the device.

2. Update your drivers

  1. Go to Start > search for ‘drivers’ > select ‘Update device drivers‘
  2. Go to Display Adapters > select Intel HD Graphics 520update surface pro 4 display driver
  3. Click the Driver tab > Update the driver.

Your device will install the latest display drivers and the brightness button should be fully functional now.

Moreover, you have the alternative to update any drivers on your PC, with the help of expert tools that can do it automatically.

So if you need to update your device driver individually or install the latest version of all drivers at once, you can simply perform this using the Fortect Driver Updater solution.

3. Discharge the device

Finally, there might be a hardware issue and we suggest discharging the device. Just power off your Surface and remove the adapter and battery. Press and hold the power button for approximately 60 seconds. Re-attach everything and power up Surface Pro 4. After that, the problem should be resolved.

If you used other troubleshooting methods to fix this screen brightness adjustment issue, you can list the steps to follow in the comment section below.

Microsoft and UW demo automated data storage in fabricated DNA

Microsoft has, with the help of researchers from the University of Washington, successfully created its very first automated system for storing data within DNA strands. The company had previously purchased 10 million strands of DNA for the purpose of research and testing, and today marks some of the first is successful results in their experiments.

According to the company’s blog post, the researchers were able to successfully encode the word “hello” into the fabricated DNA strands, then retrieve the data and convert it back to digital information using their fully automated end-to-end system. This is especially interesting given the fact that DNA is capable of storing data in a much more compact size than current digital devices, and could potentially last much longer, too.

In the words of Microsoft’s principle researcher Karin Strauss:

“Our ultimate goal is to put a system into production that, to the end user, looks very much like any other cloud storage service — bits are sent to a datacenter and stored there and then they just appear when the customer wants them. To do that, we needed to prove that this is practical from an automation perspective.”

The process is somewhat complicated. It involves taking the 1’s and 0’s of digital information and converting them into the A’s, T’s, C’s, and G’s that DNA is made of by using the required liquids and chemicals that are used to manufacture the snippets and store them in a storage device. Retrieval also involves preparing the DNA with more chemicals ejected from the system, then using a microfluid pump to push the liquids into a device that can read the information and translate it into digital data. The blog post has all of the details for those wishing to read this in depth.

While it’s not exactly a cost-effective method just yet, it does serve to prove that automation is possible for data storage and retrieval within DNA strands. Perhaps with a little more research and development, it could serve to innovate in in a much broader sense than anything we’ve seen.

Microsoft releases patch to notify Windows 7 users about upcoming end of support

As we have already reported, Microsoft is getting ready to end support for the almost 10-year-old Windows 7 operating system. As spotted by TechCrunch, the company has already pushed its first patch which includes the popup informing users of the deadline on January 14th, 2020. However, users should begin receiving notifications on April 18th, giving them plenty of time to consider other options.

Should they continue using the operating system after that time, he or she will be forgoing on security updates and will be at a much greater risk of malware and cyberattacks. Microsoft strongly recommends them to buy a new PC with Windows 10 pre-installed, but those who already have computers that work fine should be able to upgrade relatively easily.

For businesses, Microsoft will also provide them an option to continue receiving security updates and technical support after the expiration date for an annually fee, which will gradually increase overtime. That said, upgrading to Windows 10 would likely be more cost effective, and the company is even willing to assist businesses in upgrading and making sure that all applications work just fine.

Interestingly, Windows 7 still holds a major cut of the desktop market according to Net Applications, as noted by TechCrunch. With the operating system quickly becoming obsolete, it shouldn’t be long before that number begins to rapidly shrink.

Microsoft launches Windows Virtual Desktop and Microsoft Defender ATP for macOS in public preview

Microsoft has announced several Microsoft 365 updates this morning that should help IT Pros reduce costs and increase security. First of all, Windows Virtual Desktop, the company’s new cloud-based desktop and app virtualization service is now available in public preview.

“Windows Virtual Desktop is the only service that delivers simplified management, multi-session Windows 10, optimizations for Office 365 ProPlus, and support for Remote Desktop Services (RDS) environments in a shared public cloud. With Windows Virtual Desktop, you can deploy and scale your Windows desktops and apps on Azure in minutes, with built-in security and compliance,” explained Jared Spataro, Corporate Vice President for Microsoft 365.

You can sign up for the Windows Virtual Desktop preview on this page, and you can also find more information about the requirements on this support page. Microsoft didn’t say today when Windows Virtual Desktop will be generally available, but the company will use the public preview to scale its new cloud-based service. With the upcoming end of support for Windows 7 in January 2020, it’s also worth noting that Windows Virtual Desktop will provide IT Pros Windows 7 virtual desktops with free extended security updates through January 2023.

The other big announcement Microsoft made today is the public preview of Microsoft Defender ATP for macOS. The extension of the Microsoft 365 advanced endpoint security platform to non-Winds devices actually led Microsoft to rename Windows Defender Advanced Threat Protection (ATP) to simply “Microsoft Defender ATP.”

The public preview of Microsoft Defender ATP for Mac is only available for business users, and Microsoft didn’t say if a consumer version would be available at some point. The macOS client will provide anti malware protection on macOS Mojave, macOS High Sierra, or macOS Sierra, and it will be updated though Microsoft’s AutoUpdate service that the standalone Office for Mac apps also use.

Microsoft Defender ATP customers can now apply for preview here, and the company shared more details on this separate blog post as well as the video below:

Other announcements Microsoft made today include the Microsoft Teams app now shipping with Office 365 PRoPlus, as well as the general availability of the Microsoft 365 admin center. The latter can be accessed on admin.microsoft.com and provides a common entry point for managing all Microsoft 365 services.

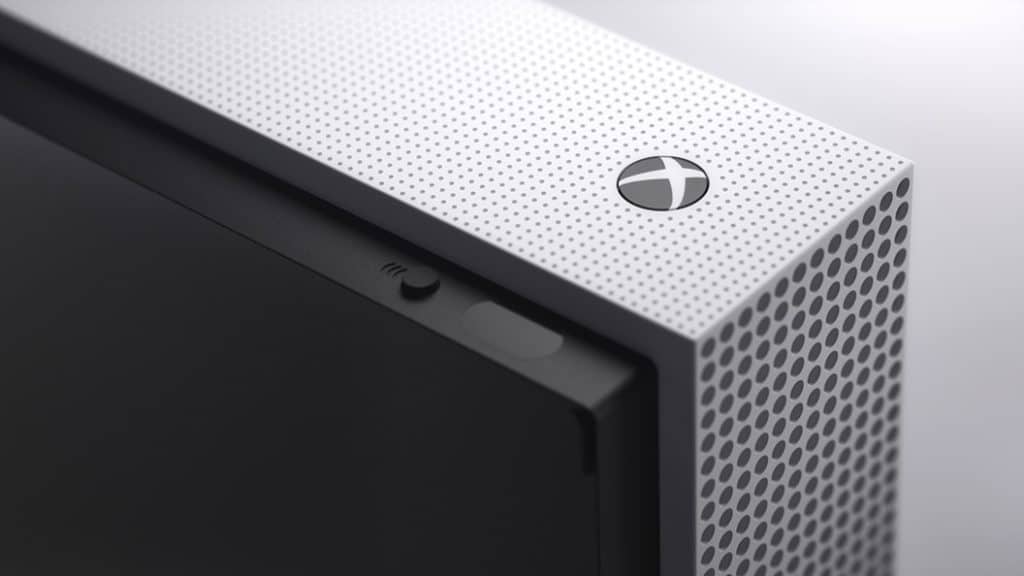
Xbox One S All Digital Edition will reportedly come with a 1TB hard drive and three games, with a possible May 7 launch

Microsoft is launching a disc-less version of its Xbox One S console this Spring which could be the most affordable Xbox One console ever. Windows Central previously revealed that the console would be named “Xbox One S All-Digital Edition,” and the reputable blog is reporting today that the console could be announced in April with a possible May 7 launch.

Windows Central has also seen the box for the new Xbox One S All Digital Edition, and they published the following mockup today. “The product shots we received seem to indicate that it will come with a 1TB HDD and with Forza Horizon 3, Sea of Thieves, and Minecraft digital codes bundled into the box. It doesn’t look as though it will be bundled with Microsoft’s Netflix-like subscription service for games, Xbox Game Pass,” the report says.

If this mockup is accurate, it looks like this disc-less version of the Xbox One S will keep the same design but in a slightly smaller form factor. The Xbox One S is already one of the best-looking consoles on the market, so Microsoft is probably right not to deviate from a winning formula.

Pricing for the Xbox One S All Digital Edition is still unknown, but Microsoft may well use the next Inside Xbox episode in April to officially announce the new console. That’s not the only new Xbox hardware that the software giant could reveal this year, as the next-gen “Scarlett” consoles could also be a big part of Microsoft’s E3 2019 conference.

Edge’s Personal Shopping Assistant just updated its icon to the new Microsoft design aesthetic

The Microsoft Personal Shopping Assistant browser extension for the Windows 10 Microsoft Edge browser is the latest Microsoft property to update its icon to the new design aesthetic the company revealed back in November of last year.

While the original icon for Microsoft Personal Shopping Assistant was a fairly basic outline of a shopping bag, the new icon (see above image) features two shades of blue, that add the illusion of depth, and a white down arrow.

This new look for Microsoft apps and services has been rolling out gradually rather than one massive launch, which is admittedly unusual. Office.com began using the new icons last month and the Outlook app for Apple’s iOS devices updated with its new look icon just a few days ago.

We actually liked the new design aesthetic so much that we even revamped this site’s social media icons to match it. (Give them a click!)

Microsoft Personal Shopping Assistant is a free extension for Microsoft Edge that lets users add products from stores to a built-in collection board. After an item is added, the extension compares its price across online retailer websites and can actually tracks price changes and notify the user.

Do you use Microsoft Personal Shopping Assistant? Do you like the new icon? Share your thoughts with the community in the comments below and then follow us on Pinterest for more Microsoft content.

Microsoft’s Office desktop apps are now available on Windows Store

Microsoft’s Office desktops apps just reached the Windows Store, coinciding with the launch of the brand new Surface Laptop running Windows 10 S.

The Office suite was brought to the Windows Store by Microsoft’s Project Centennial desktop app bridge and is available to all the Surface Laptop users who are part of a preview install and update process. The news was brought to the public via an Office on Windows 10 S FAQ which was originally spotted by Microsoft enthusiast and leaker known as the WalkingCat.

Available apps for the Surface Laptop owners running Windows 10 S

Microsoft made it very clear that even if the install and the update processes are still in preview, the apps themselves are not. Here are the applications that are currently available:

  • Excel
  • Word
  • PowerPoint
  • OneNote for Windows 10
  • Outlook, Access, and Publisher (which are not available in preview for Office 365 Education plans)

The apps are the 32-bit versions and the 64-bit versions are still not available in the Windows Store.

Regarding the Office Mobile apps, they were previously the only versions of the Office apps available on the Windows Store. Now, the company repositioned them in tablets and smartphones featuring screens under 10.1-inches. If we take into consideration Microsoft’s Mobile designation for the apps, this probably makes more sense.

It’s important to note that the preview period limits the Office apps to Surface Laptops running Windows 10 S. The apps will become available for purchase and installation on other Windows 10 devices after the end of this preview.

Microsoft is offering Surface Laptop owners a cool bonus, consisting of a year of free Office 365 Personal for laptops that arrive during the preview period.

RELATED STORIES TO CHECK OUT:

Microsoft Teams gets customized backgrounds, live subtitles and more

Microsoft rolled out new features to Microsoft Teams — an enterprise chat-based collaboration solution.

Enterprise users will find there is a new Microsoft Whiteboard integration option during meetings, customized backgrounds during video call, and secure private channels among with others.

Migration to Microsoft Teams

The Redmond giant surprised its users by announcing its transition from Skype for Business to Microsoft Teams within four months. About 180,000 employees and vendors have been successfully migrated to the platform within a short span of time.

Currently, all the meetings, calls and chat communication are currently being conducted via Teams.

The software is currently available to the users 181 countries and supports 44 languages.

The company also plans to release support for nine additional languages including Filipino, Hindi, Tamil, Gujarati, Malayalam, Bengali, Marathi, Kannada, and Telugu.

New features added to Microsoft Teams

1. Customized backgrounds for video chat

That user who is working from home has to attend a video call or a meeting can set a custom background. It is possible with the latest intelligent background blur technology introduced by Microsoft.

This feature is expected to be released later this year. It aims to minimize the distractions and definitely enhances the effectiveness of remote meetings.

2. Content cameras and Intelligent Capture support

Most of the users are interested to capture tricky content like the information on analog whiteboards. The good news is that you can capture this type of content with an additional camera offered by Microsoft Teams Rooms.

The technology makes use of the latest Intelligent Capture processing in order to focus, capture, enhance and resize the whiteboard images and text. The whiteboard brainstorming sessions can be improved to a great extent specifically for the remote attendees.

This feature is also expected to arrive later this year.

3. Microsoft Whiteboard Support

This feature allows the participants to use an infinite digital canvas so that they can directly work in teams. Furthermore, the contribution from the in-person attendees is possible with the whiteboard support in Microsoft Teams Rooms.

Surprisingly, you won’t have to recreate the content from scratch by directly adding content from a physical whiteboard onto the Whiteboard canvas.

The active participation by the participants is possible either remotely or from the meeting room via Whiteboard in Teams.

The public preview is currently available for Windows 10 users.

4. Live captions & subtitles available

The participants who either have different levels of language proficiency, deaf or hard of hearing or they are connecting from a loud location can actively participate in Team meetings.

They will be able to read real-time speaker captions. The English preview will be rolled out in the next few months.

5. Protect private channels

Microsoft is currently testing a highly requested feature that is going to be launched this year. The customization feature for each team member now lets you provide them access to the files and conversations.

You will no longer have to limit the visibility of the channel as the channel participation and exposure can be restricted as per your requirements.

6. Avoiding conflicts with Information barriers

Another feature in Microsoft Teams allows you to limit the communication and collaboration to avoid organizational conflicts of interest.

This feature is releasing soon with the aim to control the communication among the colleagues by limiting the disclosure of information.

In this way, the organization will be able to stick to their industry standards and regulations.

7. Data Loss Prevention (DLP) in chats and conversations

The customers will be able to detect, automatically screen and protect the sensitive information during channel and chat conversations. The sensitive information can no longer be unintentionally leaked or shared within or outside the organization with the DLP policies.

The feature has been rolled out to all Office 365 and Microsoft 365 plans that are equipped with Office 365 Advanced Compliance.

8. Microsoft 365 Live and on-demand events

Organizations can encourage compelling communications between partners, customers, and employees, by creating live and on-demand events. The interactive and video-based discussions can be conducted across Stream, Teams and Yammer through Live events.

The feature allows the real-time participation of up to 10,000 participants. Moreover, the automatic transcription and other powerful artificial intelligence (AI) features allow the participants to catch up later. The feature is available to the general public.

As a matter of fact, the Microsoft Teams has successfully completed its two years as it was announced in March 2017. Its extreme popularity is encouraging more and more enterprise users to skip Skype for business.

RELATED ARTICLES YOU NEED TO CHECK OUT:

Dark Souls 3 Issues: How to Fix Them All in One Go

Dark Souls III is an action role-playing game that takes players into a universe filled with colossal enemies and hostile environments, with fast gameplay and intense combat. But issues tend to affect Dark Souls 3 more than you would imagine.

This ranges from low FPS to controller bugs in Dark Souls 3. Today, we’re going to list a series of workarounds that will help you fix some of the most frequent Dark Souls III bugs.

How do I fix common Dark Souls III issues?

1. FPS drops on NVIDIA

  1. Install the latest NVIDIA driver updates.
  2. Edit the Dark Souls 3 profile on NVIDIA’s control panel, disable all FXAA and Texture filtering options
  3. Choose the maximum performance on every option, enable only triple buffering, VSync, segmented optimization, max of pre-rendered FPS = 4, VR pre-rendered FPS = 1.
  4. In the NVIDIA Control Panel, go to Manage 3D Settings, select your Dark Souls 3 profile, and change the Power Management Mode to Prefer Maximum Performance.prefer max performance to fix dark souls 3 issues
  5. Change your OS power management settings to maximum performance as well.

These changes will fix FPS drops and other performance-related Dark Souls 3 issues in no time.

2. FPS drops on AMD or Intel

  1. Install the latest driver updates.
  2. Start the game, press Ctrl + Shift + Esc to open the Task Manager, right-click on Darksouls3.exe, hover the cursor over Set priority, and select High from the menu.high
  3. Increase the FPS of the main thread, go to your computer’s BIOS, and disable the Intel H.E.I.S.T or SPEEDSTEP, or in the case of AMD, the Cool & Quiet option.
  4. If you’re using a quad-core, hexacore, or octa-core CPU, disable Hyper-Threading.
  5. If you’re using a CPU with dual-core CPUs, enable Hyper-Threading.

3. Dark Souls 3 crashes

  1. Go to the game’s settings, and put the Effects, Shadow, and Light quality on Low.
  2. Disable Steam Overlay. To do that, go to the Steam menu, choose Settings, select the In-Game Settings tab, and uncheck the box next to Enable the Steam Overlay while in-game, then click OK.overlay
  3. Uninstall the game and then download it all over again.

4. Fix game stutters in Dark Souls 3

Move the GameOverlayRenderer.dll and GameOverlayRenderer64.dll from the Steam installation folder to another folder, and transform GameOverlayRenderer.log into a read-only file.

Also, consider updating your GPU drivers. Alternatively, in the dual-GPU configurations, we suggest disabling the onboard graphics.

5. Dark Souls 3 controller won’t work

  1. Update the controller drivers. When doing so, make sure you also check the official website for the latest version.
  2. If you’re using a DS4 controller, go to the DS4 Windows settings, and check the first option to Hide DS4 Controller. Then,  launch the game. The controller should now work.

This should fix most Dark Souls 3 issues in no time. Also, it’s bound to improve the PC’s performance in general.

Before you leave, do check some quick tips to improve the gaming performance in Windows.

If you’ve come across various solutions to fix other Dark Souls III bugs that we didn’t mention in this article, list the troubleshooting steps in the comment section below.

Microsoft Solitaire error 102: Use these 3 solutions to fix it

We all love to unwind from time to time, whether between breaks or just honing our card skills. Let’s face it, we all tried Solitaire every once in a while. But when we receive error code 102, the card are off the board.

The problem with this error is most the time it’s related to a pending update or the game‘s internal connection to the internet.

You should check Microsoft Updates and see if there are updates pending for installation. Follow up with installing those updates and restart your computer once you’re done. But sometimes, that won’t do the trick.

Steps to fix Microsoft Solitaire error 102

Before going ahead with these steps, try clearing your Windows Store Cache by typing wsreset.exe into the Run window and pressing Enter.

1. Launch the Windows App Troubleshooter

  1. Run the Windows App Troubleshooter and then installing any missing required, recommended, or optional updates.;
  2. Restart and see if that works;
  3. If that doesn’t work, try running the Windows App Troubleshooter.windows apps troubleshooter

2. Create a new user account

This easy solution involves you creating a new user account, and logging in with that account.

  1. Select the Start button, then select Settings, then Accounts , and next click on Family & other people
  2. Click Add someone else to this PCadd someone else to this PC limited access
  3. Type a user name, password, password hint, and then select Next
  4. Login with this new account and see if the problem is solved.

3. Reinstall Solitaire

If the issue persists, we suggest you uninstall and re-install the Microsoft Solitaire Collection app from the Windows Store .

Steps to uninstall Microsoft Solitaire

  1. Go to the Start menu and search Microsoft Solitaire Collection
  2. Right-click on it, then select Uninstall.uninstall microsoft solitaire collection

Reinstalling Microsoft Solitaire

  1. Go to the Store and search for Microsoft Solitaire Collection and press Enter
  2. Click on Microsoft Solitaire Collection tile to visit its official page on the Store
  3. Click the Free button to download and install the game.

In the event that none of these steps work, there may be a more serious issue with your Store. Try contacting Windows Store support.

In the meantime what are your solutions to this issue and what’s your all-time highscore in Solitaire?

RELATED GUIDES TO CHECK OUT:

Write to Disk Error in uTorrent: 3 Ways to Fix it

There are many great torrent clients available, and uTorrent is the most popular choice. However, even popular software has issues, and many reported Write to disk errors in uTorrent.

This can be a problem since you won’t be able to download anything, so today we’re going to show you the best ways to fix this problem on your PC.

Why am I not able to download from uTorrent?

  • You don’t have the necessary privileges to access the save directory.
  • Your hard drive might be damaged, and that’s causing the issue.
  • Antivirus or firewall might be blocking uTorrent and preventing downloads.

How do I fix the Write to disk error in uTorrent?

Before we start fixing this issue, there are a few preliminary checks that you can perform:

  • Check HDD health using Disk Repair to ensure your hard drive is working properly.
  • Make sure that your download location is properly set because you might not have permission to save to certain locations.
  • Disable the antivirus or make an exception for uTorrent to ensure that it doesn’t interfere with the download.

1. Run the software with administrative privileges

  1. Right-click the uTorrent shortcut on the desktop and choose Properties.
  2. Open the Compatibility tab.
  3. Check the Run as Administrator box.
  4. Confirm the selection and look for changes.

2. Check the firewall settings

  1. Press Windows key + S and type windows firewall. Select Windows Defender Firewall.
  2. Now click on Allow an app or a feature through Windows Defender Firewall.
  3. Click on Change settings.
  4. Click on Allow another app and select uTorrent.
  5. Locate uTorrent on the list and make sure that both Private and Public checkboxes are checked.

After doing that, check if the Write to disk error uTorrent is gone.

3. Delete update files

  1. Press Windows key + R and enter %appdata%.
  2. Open the uTorrent directory.
  3. Delete the updates.dat file.

These steps should help you address the Write to disk error uTorrent. For more solutions, perhaps our System cannot write to the specified device guide can help you.

That should do it. If you have any questions or suggestions, well look forward to hearing from you. The comments section is just below.

How to fix Something went wrong Cortana error message

Cortana is a virtual assistant app that’s an integral part of Windows 10. Yet, some users have said that they can’t set up Cortana after upgrading to Win 10. One user stated: “I’m trying to set up Cortana on Windows 10. Every time it wants to log in to my Microsoft account, it loads and then says Something went wrong.” Consequently, those users can’t fully utilize Cortana.

The above error is actually linked with a Something went wrong sign up error for Microsoft accounts. It occurs when Windows 10 can’t establish a connection with Microsoft servers. Thus, fixing that issue can also resolve Cortana’s Something went wrong error. Here are a few resolutions for fixing the Something went wrong error in Windows 10.

Here’s how to fix Cortana’s Something went wrong error

  1. Reinstall Cortana
  2. Check the Microsoft Account Sign-in Service is Enabled
  3. Set Up a New Admin Account
  4. Update Windows 10
  5. Reset Windows 10

1. Reinstall Cortana

  1. Users have confirmed that they’ve fixed the Something went wrong error by reinstalling Cortana with PowerShell. To do that, press the Windows key + R keyboard hotkey.
  2. Then enter powershell in Run, and click the OK button.
  3. Input Get-AppXPackage -AllUsers | Foreach {Add-AppxPackage -DisableDevelopmentMode -Register “$($_.InstallLocation)\AppXManifest.xml”} in the PowerShell window as shown directly below.
    Something went wrong powershell
  4. Press the Enter button.

2. Check the Microsoft Account Sign-in Service is Enabled

Some users might need to enable the Microsoft Account Sign-in Assistant service. Cortana can’t log in to MS Accounts with that service off. Users can turn on the MS Account Sign-in Assistant service as follows.

  1. Open the Run text box with the Windows key + R keyboard shortcut.
  2. Input services.msc in the Open box.
  3. Double-click the Microsoft Account Sign-in Service to open the window in the snapshot directly below.
    microsoft account sign-in assistant service Something went wrong
  4. Press the Start button if required.
  5. Then click the Startup type drop-down menu and select Automatic.
  6. Click the Apply button. Select the OK option to close the window. Thereafter, restart Windows.

3. Set Up a New Admin Account

The Something went wrong error is often due to a specific user profile issue. Thus, the “Something went wrong” error message might not pop up within an entirely new account. Users can set up a new user account with the Command Prompt as follows.

  1. Press the Windows key + X hotkey.
  2. Select Command Prompt (Admin) to open the Prompt’s window.
  3. Input net user <user name> <password> /add in the Command Prompt, and press the Enter key. Remember to replace <user name> with an actual user account title.
    net user add command prompt Something went wrong
  4. Then input net localgroup Administrators <username> /add and press Return to turn the new user account into an admin one.
    net localgroup administrators Something went wrong
  5. Thereafter, restart the desktop or laptop; and log back in with the new admin account just set up.
  6. Set up Cortana within the new user account.

4. Update Windows 10

Some Microsoft updates include fixes for Cortana issues. Users have also stated that Windows updates fix the Something went wrong error. So, check that Windows 10 isn’t missing any updates as follows.

  1. Click Settings app on the Start menu.
  2. Select Update & Security to open the options shown directly below.
    check for updates Something went wrong
  3. Then click the Check for updates button.
  4. Press the Download button if there are updates available.

5. Reset Windows 10

Resetting Windows 10 is the last resort for fixing the Something went wrong error. That will reinstall the platform without deleting your files. Users can reset Windows 10 as follows.

  1. Press the Settings button on the Start menu.
  2. Click Update & security > Recovery to open the options shown directly below.
    recovery Something went wrong Cortana
  3. Click Get started to open the window shown directly below.
    reset this PC window Something went wrong Cortana
  4. Select the Keep my Files option.
  5. Click Next > Reset to reinstall Windows 10.

Some of those resolutions might fix the Something went wrong error so that users can sign in to Microsoft account to set up Cortana. Users who have discovered other fixes for the error message are welcome to share them below this post.

RELATED ARTICLES TO CHECK OUT: