Many gamers prefer the Xbox console over other options because of the many possibilities the Microsoft product has to offer.
However, quite a few users encountered several issues with Xbox. One of them is the error code 0x82d40007.
A user reported the following on the official Microsoft forum.
Hello, we receive the following message when we try to play a game. ‘ To play this, the owner needs to sign in. Alternatively, guests can play if the owner makes this their home Xbox ( 0x8240007).’ This message doesn’t appear when we try to play other games. My profile is set to automatically sign on when the Xbox is turned on so we’re confused as to why it’s showing that the owner needs to sign on. Thank you!
So, this looks like a sign-on issue. However, as the error message describes, the user is not the owner of the game.
In any case, today we will show you how to fix the Xbox error code 0x82d40007.
How to fix Xbox error code 0x82d40007?
1. Make sure your game is indeed yours
If someone else owns the game, you need to have them sign in so you can play the game. Alternatively, the person who bought the game could make the console their home Xbox.
You can still play other games as a user on this console, although this is not very convenient.
To set the Xbox as the game owner’s console, you need to follow the steps below.
Go to System.
Select Settings.
Click on Personalization.
Select My home Xbox.
2. Check the subscription’s status
Sign in to the Microsoft account.
On the Services & subscriptions page, check if the subscription is still valid.
If not, select Renew.
3. Re-add your profile
If the methods above are unsuccessful, try re-adding your profile. Delete your account from the Xbox console, and then add it back.
Select System, then click on Settings, Account, and then Remove accounts.
Click on the account that you want to remove, and then select Remove to confirm.
Select Close when you’re finished.
Now, to add the account, follow the steps below.
From the upper-left corner of the screen, select your gamer picture.
Select Add new.
Write the email address for the Microsoft account that you want to add, and then select Enter.
Do not select Get a new account. That will create a brand-new Microsoft account.
Follow the steps to configure your Sign-In & Security preferences to add your Microsoft account to your Xbox One console.
Conclusion
As you can see, the error code 0x82d40007 refers mainly to a sign-in issue. However, there are a few easy steps that will help you solve the problem.
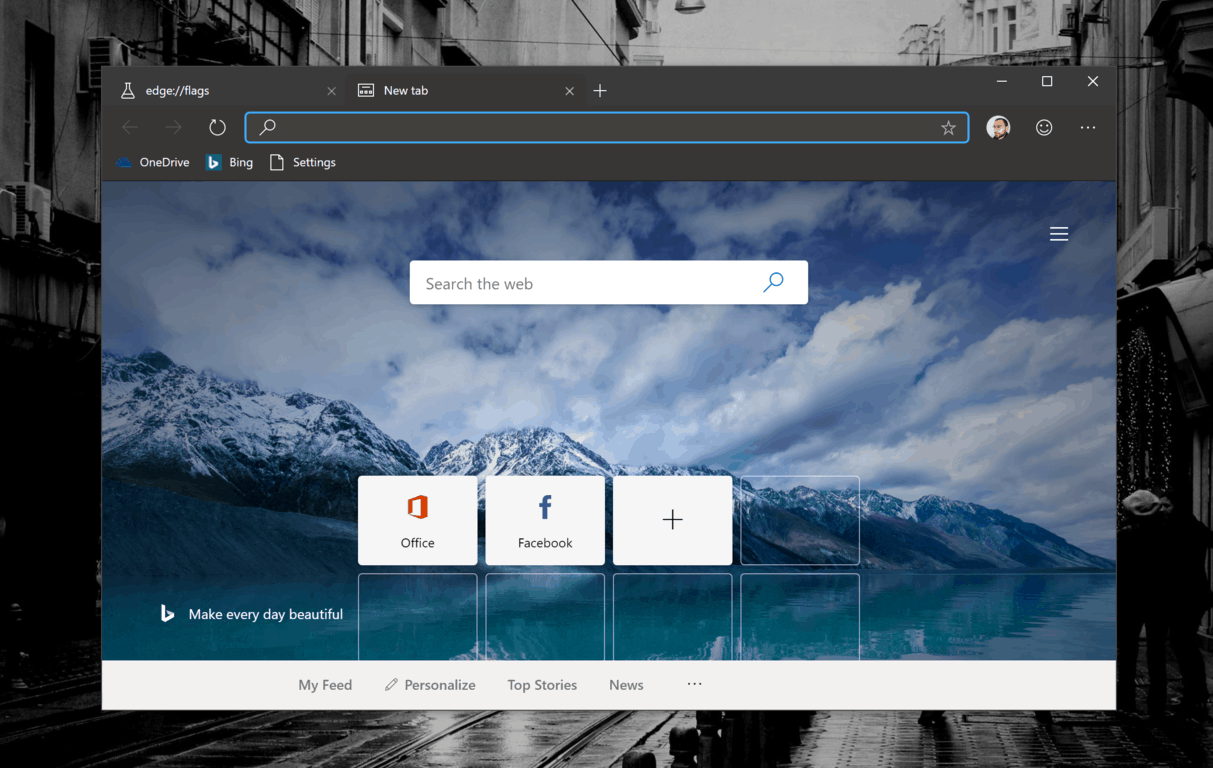
The stable version of the upcoming Chromium-based Microsoft Edge browser might have just leaked online, but that doesn’t mean it’s complete. While the browser has come a long way since it was first accounced, Microsoft knows there’s still plenty to do before it can replace its old and rusting version of Edge.
Over the coming months, the company plans to release a multitude of additional features and improvements as well. Next month, the company players to roll out a feature allow those to disable the auto-playing of video and audio from websites, as well as scrolling improvements and a favorites button on the browser’s toolbar. The company also plans to bring back PDF inking in October, in addition to:
When you sign-in to the browser, your sign-in profile picture will accurately be kept up to date.
When you have more than one profile, better handling for opening links and attachments in the appropriate profile.
An option to set your own photos as the background image on the New Tab Page
Enable search in the extensions store
A bug fix for users who receive an “Administrator Mode Detected” notification (advising them to close and relaunch the browser in non-administrator mode) each time they launch Edge
ClickOnce deployment of Windows applications from web pages
Microsoft says it continues to listen to feedback about the experience of the browser, and encourages those to continue providing feedback so that it can improve the browser even further. Some areas that users frequently suggest need improvement include better CPU and memory optimizations, improvements to scrolling, fixes to the drop-down menus in webpages, as well as improvements to the update process. The company says it’s also looking into other feature requests including:
Feature requests for the New Tab Page, including the capability to turn off the news feed, to hide the Bing search bar, to change the search provider, to rename tiles, and to support Dark Theme
Bring back features from the current version of Microsoft Edge such as tab set aside, tab preview, “Ask Cortana”, and the reading list
Make it easier to share web content with other users and apps
Provide an option to set a custom home page
Update the user interface with the Fluent Design System, including less rounded tabs
Support themes from the Chrome Web Store
Allow sign-in to the browser with a Google account
Provide different options for sorting favorites
Provide run / open / save / save as options when downloading files
Users are encouraged to continue providing feedback and reporting bugs as the new Edge gets closer to official launch. Also, we encourage you to share your thoughts on the overall progress and what new features the company need to implement in the comment area below.
Microsoft is in the midst of semi-moderate redesign that is emphasizing new iconography across its various apps and services. Most recently, the company redesigned the look of its Office 365 icons to match a new modern and flat aesthetic.
The effort to change the Office 365 apps seemed to be an arduous one, but now it seems that the same effort is being ported over the company’s UWP apps. A new leak from Italian blogger Aggioramenti Lumia shows a potential redesign of the Windows 10 UWP Mail and Calendar app icons.
This morning I shared the Android icons of mail and calendar???? These icons below are from the Windows UWP apps pic.twitter.com/NaMb0zJynT
As with most things crowdsourced for feedback, Microsoft’s iconography change has been met with equal parts criticism and praise and we suspect people will have opinions on these new icons as well. At this point in time, it’s unclear if or when Microsoft plans to release and test the new design and on what build as well as for how long.
While the revised icons do match the aesthetic profile, the leaked renders would just be internal suggestions that never see the light of day.
We’ll update with any new information, accordingly.
Gamescom has opened its doors in Cologne, Germany today for trade visitors and the media, and it’s definitely the place to be if you want to check out the big AAA games launching later this Fall. All the big video game publishers are in the place this week, and that includes Microsoft, Sony and Nintendo, as well as other tech giants such as Google and even Facebook.
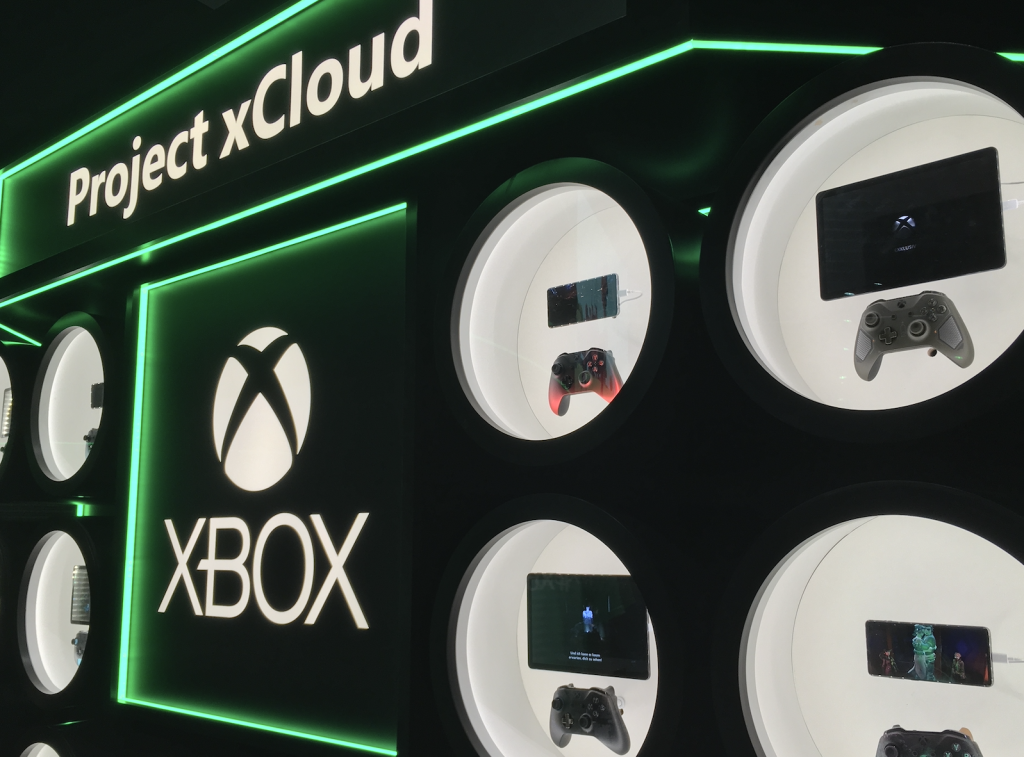
After Microsoft announced a couple of weeks ago that all Gamescom attendees would be able to try Project xCloud at the Xbox booth, I decided that it wasn’t something I’d want to miss. I’ve been able to check out both Project xCloud and Google Stadia today, and even though I just had a couple of minutes of hands-on time with both services I’ve been quite impressed by what I’ve seen.
It’s still very early days for video game streaming, and Microsoft and Google have both chosen a different approach about this new technology. The Redmond giant will be targeting mobile gamers first and leverage its existing Xbox One architecture, while Google Stadia will be a true next-gen platform that will also be available on TVs, laptops, and mobile devices. Both approaches have their merits, and it will be interesting to see what happens when Project xCloud and Google Stadia launch in October and November, respectively.
Project xCloud works well, but playing Xbox games on a phone is weird
Microsoft had a couple of Xbox exclusive games on display at the Project xCloud booth today, and I got to try Forza Horizon 4, ReCore, and Ori and the Blind Forest. I played all these games before on my Xbox One S, and I have to say I felt right at home playing them using an Xbox controller plugged into an Android phone. The graphics looked good, and controls were also very responsive.
I’ve been told that Microsoft was using a nearby datacenter for these Project xCloud demos, and this exactly why the company building Azure datacenters around the world should really help Project xCloud to deliver a great gaming experience. Input lag was almost imperceptible, and I was able to handle tense turns in Forza or difficult jumps in Ori without breaking a sweat.
Unfortunately, capturing photos and footage of the screens wasn’t allowed today, and that’s because Project xCloud is still a work in progress. Microsoft is using different Android phones for its Project xCloud demos at gamescom, including a Razer gaming phone and the Samsung Galaxy S10+. Microsoft also had some Android tablets on display, but the company isn’t demoing the service on these devices for now. A Microsoft rep also told me that Project xCloud won’t be available on iOS devices at launch, but the company is working on supporting iPhones and iPads down the road.
Overall, I came away pretty impressed by Project xCloud, but playing Xbox games on a phone isn’t as great as it seems. Until Microsoft releases something as convenient as the detachable Nintendo Switch Joy-Cons, I’m afraid using an Xbox controller or touch controls (which Microsoft isn’t demoing at Gamescom) is going to feel a bit weird and clunky. Does anyone really wants to carry a bulky Xbox Wireless Controller on the road? I’m really not sure about that.
It’s also worth reminding that Microsoft is putting Xbox One S consoles in server blades for Project xCloud, which means that you can’t expect 4K graphics or any Xbox One X enhancements such as smoother frame rates, at least until the Xbox One S server blades are replaced by Project Scarlett blades, something Microsoft plans to do. Performance was solid on Forza Horizon 4 (a game that runs great on the Xbox One S), but the already poorly optimized Recore didn’t feel really smooth during my short hands-on time. Performance is probably the area where Google Stadia could have an edge, though my experience with Google’s service didn’t leave me entirely convinced.
Google Stadia feels like the future, but performance is inconsistent
Google has two Stadia games on demo at Gamescom, Mortal Kombat 11 and the upcoming Doom Eternal. I only got the chance to play three rounds of Mortal Kombat 11 against a fellow journalist, and it felt great most of the time.
All Stadia games will be targeting 4K at 60FPS, but there were frequent framerate dips during my hands-on session. This didn’t prevent me from smashing my enemy and ending the combat with a perfectly executed Fatality, but overall Google Stadia felt more like a PC experience with an inconsistent framerate, than a console experience where games are targeting a specific framerate and mostly sticking to it.
Still, with more than 10 teraflops of computing power under the hood, Mortal Kombat 11 on Project Stadia looked absolutely amazing. I also didn’t notice any input lag, and I guess the fact that the Google Stadia controller is directly connected to Google’s servers really helps. The demo was powered by a Google Chromebook Pixel connected to a 4K screen, but Stadia will also be available on TVs with a Chromecast Ultra, PCs with the Google Chrome browser, or select Google Pixel Android phones. Google isn’t demoing Stadia on these other platforms at Gamescom, but at launch the game streaming service will be available on more devices than Microsoft’s Project xCloud
Let the game streaming services war begin
Google has already announced all pricing details for its Stadia service, and this year access to the service will require a $9.99/month Stadia Pro subscription that will include Destiny 2 plus all of its DLCs. Stadia Pro subscribers will be able to play games at 4K 60FPS, but they’ll have to purchase games separately on Google’s digital store. Next year, Google will also launch a free tier for Stadia which will provide a slightly inferior 1080p 60FPS gameplay experience. Developers will also need to port their games to the Linux-based Stadia infrastructure, but Google has already managed to get some big upcoming games such as Doom Eternal, Borderlands 3, and Cyberpunk 2077
Microsoft has yet to reveal the business model for Project xCloud, but the service will likely have deep ties with Xbox Game Pass, a service that is often referred to as a “Netflix for games.” Because Project xCloud is leveraging the existing Xbox One hardware, it will also be compatible with all existing and upcoming Xbox One games, though it will be up to developers to decide if they want to make their games available via Project xCloud.
Game streaming services don’t mean that gaming consoles are on the way out, and it will be probably be years before the technology can provide the same consistent experience that PCs and gaming consoles can provide today. Still, game streaming is all about reaching the 2 billion people playing games worldwide, and I think Microsoft and Sony (which was an early leader in game streaming with PlayStation Now) shouldn’t underestimate Google Stadia. Amazon, the owner of Twitch, is also working on its own game streaming service, and you can also add EA and Verizon to the list of companies interested in game streaming.
Forget the console wars, we’re about to see a new type of competition between platforms allowing gamers to play games anytime, anywhere, on any device. This should be an exciting evolution for the video games industry, and competition is always a very good thing. Let’s just hope that this won’t lead to more walled gardens, though Google is already committed to support crossplay on its Stadia platform.
Bill Stasior, the former Apple Vice President of AI and head of the Siri team will now be a part of Microsoft’s VP of Technology and reporting to CTO Kevin Scott as early as this month, August 2019.
Stasior is going to Microsoft with the intention of helping to bridge the company’s technology strategies across platforms and services alongside the business’ recently promoted CTO.
According to a report from The Information, “At Microsoft, Stasior will lead an artificial intelligence group, a person familiar with the matter said.”
While it might be easy to infer that the former head of Siri will naturally be working to organize Microsoft’s digital assistance mess, Stasior’s new job description as listed on LinkedIn doesn’t make mention of Cortana or search, despite his history at Apple and his time as Amazon’s VP of search.
Microsoft has stated in the recent past, that Cortana remains a project the company is interested in pursuing but has also made a clear delineation between its machine learning and AI platforms that it sees operating independently of the Cortana branding.
Perhaps Stasior will be tasked with not only filtering Microsoft’s AI technologies throughout the company’s portfolio of software and services but also figuring out a way to rebrand Cortana as a users one-stop-shop for aggregated data parsing.
Pre-orders are now open for Ghostbusters: The Video Game Remastered on Microsoft’s family of Xbox One consoles.
The game is a re-release and a remaster of the original Ghostbusters: The Video Game title and features higher res graphics on the Xbox One and Xbox One S and 4K Ultra HD resolution when played on an Xbox One X console.
Here’s the official game description and teaser trailer:
Authentic Ghostbusters Experience – The game features the voices and in-game likenesses of Bill Murray, Dan Aykroyd, Harold Ramis, and Ernie Hudson in an original story penned by the writers of the original films – Dan Aykroyd and Harold Ramis.
Unique Gameplay – Experience unique ghost hunting, wrangling and trapping with upgradeable weapons in widely destructible environments. Test the team’s mettle with large scale boss fights. Storyline Campaign – Play through a unique storyline as the player battles and captures ghosts – both well-loved and brand new – throughout New York.
Ghostbusters: The Video Game Remastered will launch on the Xbox One on October 4th.
The popular video game, Final Fantasy VIII, is finally getting the modern re-release treatment and will be available on Microsoft’s Xbox One consoles as Final Fantasy VIII Remastered on September 3rd.
This release of Final Fantasy VIII features all of the content from the original versions and has been upgraded with a fresh HD resolution and character models, an option to disable random encounters, and a variety of settings for speeding up gameplay and reducing the grind.
It is a time of war. The Republic of Galbadia, under the influence of the sorceress Edea, mobilises its great armies against the other nations of the world. Squall and other members of SeeD, an elite mercenary force, join hands with Rinoa, a resistance fighter, to fight against Galbadia’s tyrannical rule and to prevent Edea from fulfilling her ultimate goal.
This product is a remaster of FINAL FANTASY VIII, featuring multiple enhancements including additional options to customise your gameplay experience and difficulty.
This will be the first time Final Fantasy VIII has been released on an Xbox console. It joins a plethora of other Final Fantasy games which have also launched on Xbox One recently including Final Fantasy X, Final Fantasy VII, and Final Fantasy IX.
During this year’s Gamescom, Microsoft unveiled two brand new Xbox Wireless Controller designs, the Night Ops Camo Special Edition (see above image) and the Sport Blue Special Edition (see below).
The Sport Blue Special Edition is set for release on September 17th and will retail for $69.99 while the Night Ops Camo Special Edition will hit shelves on October 8th and will sell for the same price. Pre-orders are now open on the Microsoft Store website here and here.
Xbox Wireless Sport Blue Special Edition Controller
Each controller sports the latest Xbox controller features such as Bluetooth connectivity, etched trigger grip, a headphone jack, and full support for all Xbox One consoles and Windows 10 PCs or tablets. These controllers will also work with Microsoft’s unnamed next-gen console due for release in late-2020.
While Windows updates are supposed to bring new features and bug fixes, these sometimes create more issues. After upgrading to the latest Windows version, the system no longer recognizes the SSD. This also happens when you have accidentally deleted the EFI partition.
So, if you, too, are in a similar situation and want to restore the deleted EFI partition in Windows 10, keep reading for the exact steps.
Boot PC with an installation media. Change the Boot order in BIOS to boot from the installation media if necessary.
Press Shift + F10 to launch the Command Prompt.
Run the following command one by one and then hit Enter after each, while replacing N with the disk containing the deleted EFI partition:diskpartlist diskselect disk Nlist partitioncreate partition efiformat quick fs=fat32list partitionlist volumeexitbcdboot C:\windows
The last command will copy the boot from the Windows partition to the EFI system partition and create a BCD store in the partition.
If you did not get any error during the process, shut down the computer.
Remove the installation drive and boot the computer normally.
Finally, verify whether you can access the EFI partition after you accidentally deleted it in Windows 10.
To better understand how the EFI system works before restoring it, see our detailed guide on what EFI is in Windows.
2. Take a backup and clean install Windows
Insert the USB drive into your computer and boot from the installer.
Make sure you change the boot order in the BIOS to boot from the USB drive.
In Windows Setup, choose the Repair your computer option.
Choose Troubleshoot.
Click on Advanced.
Choose Command Prompt.
In the command prompt, type notepad and hit Enter.
Click on the File menu and select Open to access the File Explorer.
Now copy anything that is important in the C: drive to the USB or external hard drive.
Once you have taken the backup, boot from the Installation Media again and fresh install Windows 10.
That’s it! If you accidentally deleted an EFI partition, these solutions will help restore the partition in Windows, or backup the data and reinstall the OS.
Used in a versatile and powerful IDE software, compilers can help you transform programming code from one programming language to another. For example, this process enables you to write code in C++, and then transform it into any other language of your choosing.
Because there are more than 8000 main programming languages in existence, it is very hard to choose an IDE software. Most people choose their IDE software by first figuring out what kind of input and output programming language would be best suited for your project, and start from there.
There is a wide range of IDE software as well, and because of that, it can get very confusing when trying to pick the right one.
It wouldn’t be an efficient tactic to examine all the software options found on the market and then analyze the 8000 programming languages that can be used.
But what we can do is to choose some of the most versatile IDE software options that work with a variety of programming languages, and then observe their capabilities, features, and area of expertise.
Use these IDE compilers for almost any programming languages
Microsoft Visual Studio
Microsoft Visual Studio in an incredibly powerful IDE software that you can use to create a wide range of programs – web applications, mobile apps, video games, etc.
This software contains a great range of tools that allow you to test for compatibility, and also allows you to customize your version of the software by extending its capabilities with very useful plugins.
When it comes to the programming languages supported by MVS, you can use ASP.NET, DHTML, JavaScript, JScript, Visual Basic, Visual C#, Visual C++, Visual F#, XAML, etc.
You can extend these options even more by the use of plugins, making this software compatible with Batch, Clojure, CoffeeScript, Dockerfile, Go, Jade, HandleBars, Ini, Lua, Makefile, Objective-C, Perl, PowerShell, Python, R, Razor, Ruby, Rust, SQL, and XML.
You can use this software to navigate, write, and fix your code errors fast, and also to debug your code, create custom profiles, and diagnose your project with just a few clicks.
Visual Studio has a wide range of auto-complete tools, but one of the most well known and used is Microsoft’s Intellisense.
This application can help you wrote code faster, and without taking the risk of making errors. For example, if you use this plugin for C# programming, Visual Studio can automatically correct the casing of an erroneous function name.
This allows you to avoid annoying compiler errors and also to streamline your coding process.
One downside of Microsoft Visual Studio is its computer system requirements. This software will require a medium to the top of the range PCs in order to run without issues.
If you want to use it on a low spec computer it would take a long time to create small edits on some devices.
It might be a better option to choose a lightweight IDE software in order to create small edits.
Here are some of the best features found in Microsoft Visual Studio:
Incredibly large database of various extensions
Can easily customize dashboard and dockable windows to fit your needs
Easy to understand workflow and hierarchy of files
Allows you to monitor the performance of your code in real time
Great automation tools – helps you focus on more important tasks, and allow VS to automate the repetitive tasks
Code snippet insertion with easy refactoring options
Split screen support
It includes very useful error list – gives you an overview of the errors found in your code and allows you to start debugging while building
Approval checking when deploying apps via Windows Installer (.exe), ClickOnce, or Publish Wizard
Eclipse is a very close contender of Microsoft Visual Studio. This software is a very powerful IDE environment that is written mostly in Java, and its purpose is to develop Java applications.
This IDE software can be extended almost infinitely and is designed to work perfectly on a medium performance PC.
What makes Eclipse stand out from the crowd is the level of customization that can be applied with ease.
You can choose from a wide range of plugins that can extend the supported programming languages of Eclipse – Ada, ABAP, C, C++, C#, Clojure, COBOL, D, Erlang, Fortran, Groovy, Haskell, JavaScript, Julia, Lasso, Lua, NATURAL, Perl, PHP, Prolog, Python, R, Ruby (including Ruby on Rails framework), Rust, Scala, and Scheme.
Besides these programming languages, you can also use a wide range of development environments that include Eclipse Java development tools for both Java and Scala, Eclipse CDT for C/C++, and also Eclipse PDT for PHP coding.
Beyond its incredible customization power, Eclipse also allows you to organize your project into collection windows and layout settings that can simplify the process of searching for the right tool. This feature is called perspectives.
You can simply switch between perspectives in order to get access to the specific tools needed in that part of the process of coding. As an example, you can use a specialized perspective for Java coding, another for SVN, etc. Users have reported this tool to be extremely useful.
Compared to Visual Studio, Eclipse gives you access to the main download page as soon as you open it up. You can download any of the languages you are interested in using.
In order to make the installation process even easier, the Eclipse downloads are packed in a config file that is specifically designed to be recognized and adopted by the software.
You can download the version of Eclipse you need at first, and then customize it to your specific needs.
Eclipse is a fully open-source project, that means that anybody with programming skills can use it, and also contribute to its evolution, bug fixes, feature tweaking, etc.
As in the case of Visual Studio, Eclipse can import statements automatically when coding in Java.
Because of its open-source availability, this software allows you to easily create a new one or expand an existing programming language.
It is hard to choose the best IDE software that allows you to use compilers to transform your code language, and in order to choose one, we need to understand the best environment to use them in.
If you want to use the software for front-end processing, Microsoft Visual Studio is clearly the more effective option. In the case of back-end processing, Eclipse offers you all the tools you need to achieve great results.
You can choose one depending on the stage of development you are in, or use them both as you move through your project.
Please feel free to let us know what your opinion is in the comment section below.
Surfing the Internet is one of the most frequent activities of modern man. So, it is not unusual that many people encounter problems with their browsers.
One of these is a pop-up message saying “This web page wants to run the following add on Apple from Apple Inc”, as one user described the issue on the official Microsoft forum:
Daily this message appears on random websites. Today it’s the government website for driving licences!! PLEASE advise how I can stop this happening. I’m currently using IE11.
So, we know that the message appears on random websites opened with Internet Explorer 11.
This is an annoying issue for many users. Today we will show you how to solve this problem once and for all.
Fix This webpage wants to run apple from apple inc pop-up message
1. Run the Troubleshooter
The first method you can try is the simplest. Run the Windows Troubleshooter.
Click on the Start button.
Write and select Settings.
Choose Update & Security.
Select Troubleshoot.
Choose Internet Connections.
2. Run an antivirus scan
If the solution above didn’t work, your browser might be infected with malware. So, run an antivirus scan. You can do this with Windows Defender, or you may try a third-party antivirus tool.
3. Install another browser
To avoid annoying problems such as the “This webpage wants to run apple from apple inc” pop-up message, make sure to use a stable and secure browser such as Opera One.
Opera One is light and gets constant updates that keep it performing really well on all sorts of deveices. This browser has a simple and intuitive user interface and you can customize it to your liking with add-ons, integrations and even visual themes.
Moreover, the tool is very secure and private. It has anti-phishing technology, as well as an adblocker and a built-in VPN. Not only that, but Opera One also comes with a built-in AI.
The error “This webpage wants to run apple from apple inc” that pops up on browsers is annoying and can signal a malware infection.
However, there are easy solutions to fix this issue. You need to keep your computer virus-free by installing an antivirus tool. Also, to make sure this issue doesn’t reappear, install a different browser, such as UR.
So, that’s about it. As you can see, the problem is not as serious as it seems with our simple methods.
Did our solutions work for you? How do you solve pop-up messages such as these? Do let us know in the comments section below!
While trying to open the Power BI desktop app you may encounter access to the path error. This error can be caused by a glitch in the app, outdated Power BI software or incompatible software in the system. Several users have reported similar errors in the Power BI Community.
We have listed a few troubleshooting tips to help you resolve the Power BIerror access to the path.
Unable to start Power BI due to Access to path error
1. Run Power BI as Administrator
Type Power BI in the search bar.
Right-click on Power BI and select Run as Administrator.
Click Yes if prompted by the User Access Control.
Check if the Power BI app starts without any error.
2. Check Security Software
Power BI users have reported this error can also occur due to the antivirus software.
First, try to disable the antivirus temporarily and exit.
Now try to launch the Power BI app.
If the app opens without any error, you need to add the Power BI app to the exception list.
You can find the settings to add the Power BI app to the exception list in the Antivirus settings.
Some users might spot a mysterious FOUND.000 folder in Windows 10’s File Explorer and wonder what exactly the folder is for.
Unknown folders can make any user cautious, so it’s important to know what those folders do. Speaking of which, we have a great guide on the WindowsApps folder that you might want to read.
So join us, while we take a closer look at this folder to learn what it does.
What is found.000 folder?
The folder is associated with chkdsk feature.
It stores damaged, partial or corrupted files found by chkdsk.
Is found.000 folder a virus?
No, this is a legitimate Windows folder, and it doesn’t contain any malware, nor is it associated with malware.
Press Windows key + X and select Windows PowerShell (Admin).
Run the following command but be sure to use the correct drive letter: rmdir C:\found.000 /s /q
Wait for the process to finish.
Keep in mind that you might need to take ownership of the folder before you can remove it, especially if you encounter found.000 folder not accessible or access denied message.
We hope that this guide helped you understand what this folder is and how it works.
To learn more about folders, we have a great guide on how to open a folder in Command Prompt that you might want to check out.
Have you ever encountered this directory before? Let us know in the comments below.
Microsoft has silently released new Cumulative Updates for a number of Windows 10 versions.
This is slightly uncommon, as Patch Tuesday was less than a week ago. Nonetheless, the CUs come with a long list of non-security bug fixes and improvements, but also with some known issues.
The new CUs bring a lot of fixes
The new Cumulative Updates are available for Windows 10 version 1809, 1803, 1709, 1703, 1607, and 1507.
Keep in mind that these are optional updates, and won’t arrive automatically. If you want to install them on your PC, you’ll have to open the Settings app and navigate to Update & Security > Windows Update, and click on the Check for updates button.
If you’re on the Windows 10 October 2018 Update (v1809), you’ll get KB4512534 which comes with the following changes:
Updates an issue that prevents Windows Hello face recognition from working after you restart a device.
Allows Microsoft Edge to print PDF documents that contain landscape and portrait-oriented pages together correctly.
Allows Microsoft Edge to open PDFs that are configured to be opened only once correctly.
Updates an issue with downloading copyrighted digital media (music, TV shows, movies, and so on) from certain websites using Microsoft Edge and Internet Explorer.
Here’s the full list of improvements and fixes:
Improves the reliability of push notifications about app deployments to Microsoft HoloLens 1 devices.
Addresses an issue that prevents Windows Hello Face Authentication from working after a restart.
Addresses an issue with downloading digital rights management (DRM) files from certain websites using Microsoft Edge and Internet Explorer.
Addresses an issue that prevents the Universal C Runtime Library from returning the proper value for time zone global variables in certain conditions.
Addresses an issue that causes Deployment Image Servicing and Management (DISM) to intermittently stop responding while deprovisioning some preinstalled apps using the Microsoft System Center Configuration Manager (SCCM).
Addresses an issue in which the default keyboard for the English (Cyprus) (en-CY) locale was not set properly.
Addresses an issue to enable Microsoft Edge to print PDF documents that contain landscape and portrait-oriented pages correctly.
Addresses an issue with PDFs that are configured to be opened only once in Microsoft Edge.
Addresses performance issues for the Win32 subsystem and Desktop Window Manager (DWM).
Addresses an issue with the input and display of special characters that occurs when an app usesimm32.dll.
Addresses a composition handle leak in Universal Windows Platform (UWP) apps.
Addresses a memory leak indwm.exethat may lead to a loss of functionality and cause a device to stop working.
Addresses an issue that fails to bypass automatic sign in (Autologon) when you press and hold the Shift key during startup.
Addresses an issue that causes the Windows Management Instrumentation (WMI) classWin32_PhysicalMemoryto report that 32 GB memory chips have a missing Capacity value.
Addresses an issue that prevents an App-V application from opening and displays a network failure error. This issue occurs under certain circumstances, such as when a system’s battery is low or there is an unexpected power failure.
Addresses an issue with User Experience Virtualization (UE-V) that may sometimes prevent exclusion paths from working.
Addresses a rare issue that causes Windows Defender Advanced Threat Protection (ATP) to temporarily prevent other processes from accessing files.
Addresses an issue that causes a workstation to stop working when you sign in using an updated user principal name (UPN) (for example, changing[email protected]to[email protected]).
Addresses an issue in which Windows Defender Application Control will not allow third-party binaries to be loaded from a Universal Windows Platform application. CodeIntegrity event error 3033 appears as, “Code Integrity determined that a process (<process name>) attempted to load <binary name> that did not meet the Store signing level requirements.”
Addresses an issue that prevents some Trusted Platform Module (TPM) devices from being used for Next Generation Credentials.
Addresses an issue that causes applications on a container host to intermittently lose connectivity because of a port conflict with applications running on a container.
Addresses an issue that prevents some users from receiving a TTL value when they are added as members of Shadow Principals. This occurs for users who have distinguished names (DN) that contain an escape character. The TTL value is now added as expected.
Addresses an issue with thedisabledattribute of theinputelement, which doesn’t allow a scope to be passed to the authorization endpoint.
Addresses an issue with leaks in Windows notification sockets that causes Windows to run out of ports.
Addresses an issue that prevents server editions from activating with a Multiple Activation Key (MAK) in the graphical user interface (GUI). The error is, “0x80070490”.
Addresses an issue that may break the domain trust when the Recycle Bin is configured on the domain that carries the trust.
Increases the number of supported interrupts per device to 512 on systems that have x2APIC enabled.
Addresses an issue that may prevent devices from starting when they start up using Preboot Execution Environment (PXE) images from Windows Deployment Services (WDS) or System Center Configuration Manager (SCCM). The error is, “Status: 0xc0000001, Info: A required device isn’t connected or can’t be accessed.”
Addresses an issue that may cause the following to stop responding:
Applications that were made using Visual Basic 6 (VB6).
Macros that use Visual Basic for Applications (VBA).
Scripts or apps that use Visual Basic Scripting Edition (VBScript).
And here are the known issues with this update:
Symptom
Workaround
Certain operations, such asrename, that you perform on files or folders that are on a Cluster Shared Volume (CSV) may fail with the error, “STATUS_BAD_IMPERSONATION_LEVEL (0xC00000A5)”. This occurs when you perform the operation on a CSV owner node from a process that doesn’t have administrator privilege.
Do one of the following:
Perform the operation from a process that has administrator privilege.
Perform the operation from a node that doesn’t have CSV ownership.
Microsoft is working on a resolution and will provide an update in an upcoming release.
After installingKB4493509, devices with some Asian language packs installed may receive the error, “0x800f0982 – PSFX_E_MATCHING_COMPONENT_NOT_FOUND.”
Select Check for Updates and install the April 2019 Cumulative Update. For instructions, seeUpdate Windows 10.
NoteIf reinstalling the language pack does not mitigate the issue, reset your PC as follows:
Go to theSettingsapp >Recovery.
SelectGet Startedunder theReset this PC recovery option.
SelectKeep my Files.
Microsoft is working on a resolution and will provide an update in an upcoming release.
We are investigating reports that a small number of devices may startup to a black screen during the first logon after installing updates.
To mitigate this issue, press Ctrl+Alt+Delete, then select the Power button in the lower right corner of the screen and select Restart. Your device should now restart normally.
We are working on a resolution and will provide an update in an upcoming release.
Applications and scripts that call theNetQueryDisplayInformationAPI or theWinNT providerequivalent may fail to return results after the first page of data, often 50 or 100 entries. When requesting additional pages you may receive the error, “1359: an internal error occurred.” This issue occurs in this update and in all the updates before June 18, 2019.
We are working on a resolution and will provide an update in an upcoming release.
If you’re on the Windows 10 Fall Creators Update (v1709), you’ll get KB4512494. This update is available for Windows 10 Enterprise and Education, but not for Windows 10 Home or Pro users.
If you’re on Windows 10 Anniversary Update (v1607) or Windows Server 2016, you’ll get KB4512495. This is available only for Long-Term Servicing Channel customers.
Keep in mind that all the updates have a series of fixes and improvements, but also some known issues. Be sure to carefully check their changelogs to see what has been changed.
We all know how great Xbox is for many video game players. However, things are not always as good as they seem.
Many users encountered the error 0x82d40004 on their Xbox One console.
One user reported the following on the official Microsoft forum:
When I insert the game into my Xbox one system I get an error code 0x82d40004. No games will work on my system as this error code happens with every game CD I enter. I need help or information on how to resolve this issue. I am trying to find out if there is a major issue with my Xbox that I may need to send it in to Microsoft.
So, no games will work because every time the player inserted a CD, the Xbox console shows the error code 0x82d40004.
Luckily, there are a few easy solutions that will solve this issue in no time.
How to solve error code 0x82d40004 on Xbox?
1. Check your disk
If the error 0x82d40004 appears on your Xbox console, your disk may be physically damaged. Check your DVD/CD for scratches or other signs of wear.
You can clean your disk with a damp and soft piece of cloth.
2. Restart your console
Go to the Main Menu.
Press and hold for at least ten seconds the power button of the console.
If the methods above don’t work, try re-adding your account. Delete your account from the Xbox console, and then add it back.
Select System, then Settings, Account, and then Remove accounts.
Click on the account that you want to remove, and then select Remove to confirm.
Select Close when you’re finished.
Now, to add the account, follow the steps below.
From the upper-left corner of the screen, select your gamer picture.
Select Add new.
Write the email address for the Microsoft account that you want to add, and then select Enter.
Do not select Get a new account. That will create a brand-new Microsoft account.
Follow the steps to configure your Sign-In & Security preferences to add your Microsoft account to your Xbox One console.
Conclusion
The error code 0x82d40004 is a severe issue for many players. They can’t play anything, but fortunately, there are some easy and quick solutions to fix this.
Some of them are pretty obvious. Your disk is probably damaged. However, you might need to re-add your account.
Did our solutions work for you Let us know in the comments section below!
A number of Synology users have reported that they can’t map the drive on Windows 10. This issue can be highly annoying, as it varies in how it is expressed.
In some cases, the Synology assistant maps the drive for a limited amount of time, and then the entire setup goes back to default settings, and in other cases, the changes aren’t applied at all. Or you may even find that the NAS drive is not showing under Network.
For these reasons, in today’s article, we will explore some of the best troubleshooting steps you can take to deal with this annoying issue. Please follow the steps in this guide carefully to avoid causing other issues.
What can I do if I can’t map Synology drive on Windows 10?
1. Use File Explorer
Even though this might sound too easy to be true, some users have used this workaround to map their drives. The issue mentioned above seems to be caused by a conflict between the architecture of Synology and the Windows 10 drives.
Depending on how evolved the problem is, Synology might not be able to map your drives entirely, or if it does, it will be only temporary. To avoid this, you can use Windows 10File Explorer to map your drive/drives.
You can log into your account with the current account name and password.
2. Turn off password-protected sharing
Press Windows + X keys on your keyboard -> choose Settings from the menu.
Inside the Settings window -> select Network & Internet -> click on Status.
Scroll to the bottom of the page and click Network and Sharing Center.
Click the button Change advanced sharing settings.
Expand All Networks.
Under the Password protected sharing section -> choose Turn off password protected sharing.
Press Windows + R keys on your keyboard -> type optionalfeatures.exe-> press Enter.
Scroll down to SMB 1.0/CIFS File Sharing Support -> click the + sign to activate the drop-down menu.
Tick the box next to SMB 1.0/CIFS Client.
Untick the boxes for both SMB 1.0/CIFS Automatic Removal and also SMB 1.0/CIFS Server.
Click the Ok button and restart if prompted to do so.
This should fix the Synology map network drive on Windows 10 not working issue.
4. Modify settings inside Synology
Navigate to Settings -> enable SMB Service.
Inside the Advanced settings tab -> choose Protocol SMB3.
Disable the option Transport Encryption to prevent slow data transfer.
Enable the option Opp Locking.
Disable Press the Win+X keys on your keyboard -> select PowerShell (Admin) -> type the command below: REG ADD HKLM\SOFTWARE\Policies\Microsoft\PassportForWork /v Enabled /t REG_DWORD /d 0 /f
Press Enter to run the command.
After the process is completed, restart your PC.
If you can’t map your Synology drive on Windows 10, the solutions in this guide should help you fix it for good. Similarly, if you want to know how to map network drives over VPN, check our detailed guide for the steps to follow.
We would love to know if this guide helped you solve your issue. Please let us know if this article helped you by using the comment section below.
Xbox fans won’t want to miss the upcoming XO19 fan event in London in November. Microsoft will offer three days of festivities at the Copper Box Arena on November 14-16, and the Xbox team emphasized that “it’s the biggest Xbox event we’ve ever hosted in the UK.”
The event will kick off with a special Inside Xbox episode on November 14 which will also be live streamed on Mixer and other Xbox social media channels. Moreover, Microsoft will also hold the first Xbox FanFest ever in the UK on the same day.
Xbox FanFest attendees will be able to watch the Inside Xbox broadcast live and in-person, then following the show they will have early and exclusive access to the X019 showfloor, including world premiere hands-on gameplay, special activations, the Xbox Official Gear Store and its exclusive products, plus much more!
If you think gamescom is big, just wait. Get ready for “the biggest Inside Xbox show of the year” at X019!
XO19 attendees can expect some hands-on gameplay with the biggest new Xbox games launching this Fall, panels with Xbox Game Studio teams, as well as developer meet-and-greets and autograph sessions. Xbox head Phil Spencer will also make the trip along with Xbox Game Studios head Matt Booty and Xbox Director of Programming Major Nelson.
All tickets will go on sale Tuesday, September 24 at £19 per session, and Microsoft said that all proceeds will go to charity. All tickets will be available on a first-come, first-serve basis. Microsoft will have more information about ticketing details in the coming weeks on www.Xbox.com/X019.
PlayerUnknown’s Battleground (PUBG) is getting crossplay support between Xbox One and PlayStation 4 in October. The news was announced today during Microsoft’s special Inside Xbox episode, and it should be an exciting update for fans of the popular battle royale game.
“This has been, hands down, the most requested feature since we launched on consoles and we’re so happy to finally provide this for our console community on Xbox One and PlayStation 4,” wrote Cecilia Lee, Community Manager, PUBG Corporation. Crossplay will go live first in late September on the PUBG Public Test Server, and it will be generally available in early October.
You’ve never seen the Battlegrounds like this before. PLAYERUNKNOWN’S BATTLEGROUNDS Season 4 is here.
The PUBG team also announced plans to ship new content updates on consoles faster than before, and the goal will be to ship new updates within two weeks of their PC release. “Starting Aug. 27, PUBG Season 4 will release on console and all-in game content will be aligned across all platforms. All subsequent console updates will then land two weeks after its release on PC,” Lee said today.
If you haven’t tried PUBG yet, the battle royale game available for free with Xbox Game Pass. For a limited time, you can get two months of Xbox Game Pass Ultimate (which includes Xbox Game Pass for Console, Xbox Game Pass for PC, and Xbox Live Gold) for just $2.
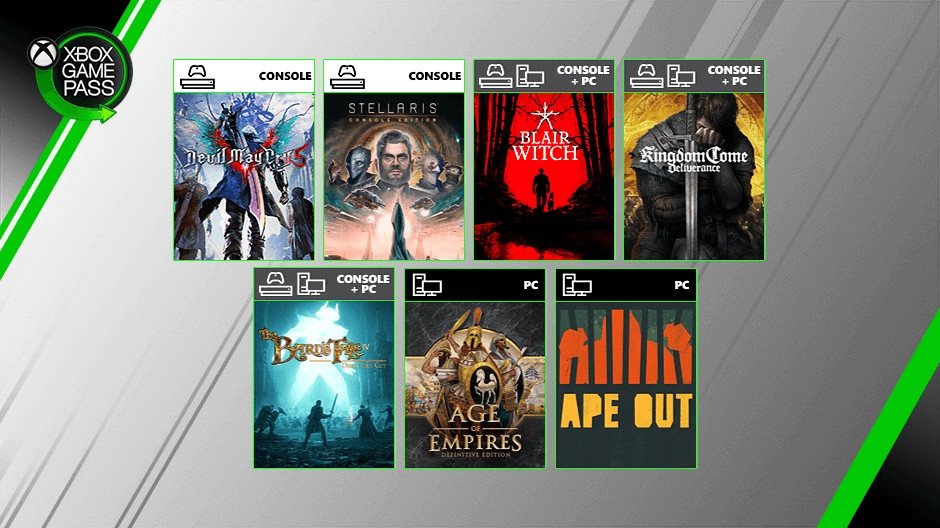
Microsoft has just kicked off its special Inside Xbox episode with some exciting Xbox Game Pass news. Devil May Cry V and Stellaris: Console Edition are now available in the console catalog starting today, and Age of Empires Definitive Edition is also available on PC starting today.
Four more games will be available later this month, starting with Ape Out (PC) and Kingdom Come Deliverance (console) on August 22). The Bard’s Tale IV: Director’s Cut, an Xbox Play Anywhere game will also be available on both console and PC on August 27, and it will be followed by the brand new Blair Witch game (also for console and PC) on August 30.
In addition to these new Xbox Game Pass additions, Microsoft also announced some updates to the new Xbox beta app for PC: There will be new filters, more options to manage downloads, as well as the ability to search for friends from Facebook or Steam. Microsoft is also copying Discord by allowing users to add a link to their YouTube, Twitch, Twitter, Discord, and Reddit accounts on their player cards.
We’re excited about the progress we’re making to deliver a great Xbox Game Pass for PC experience and we will continue to deliver more improvements over the coming months based on your input, so please keep the feedback coming,” the Xbox team said today.
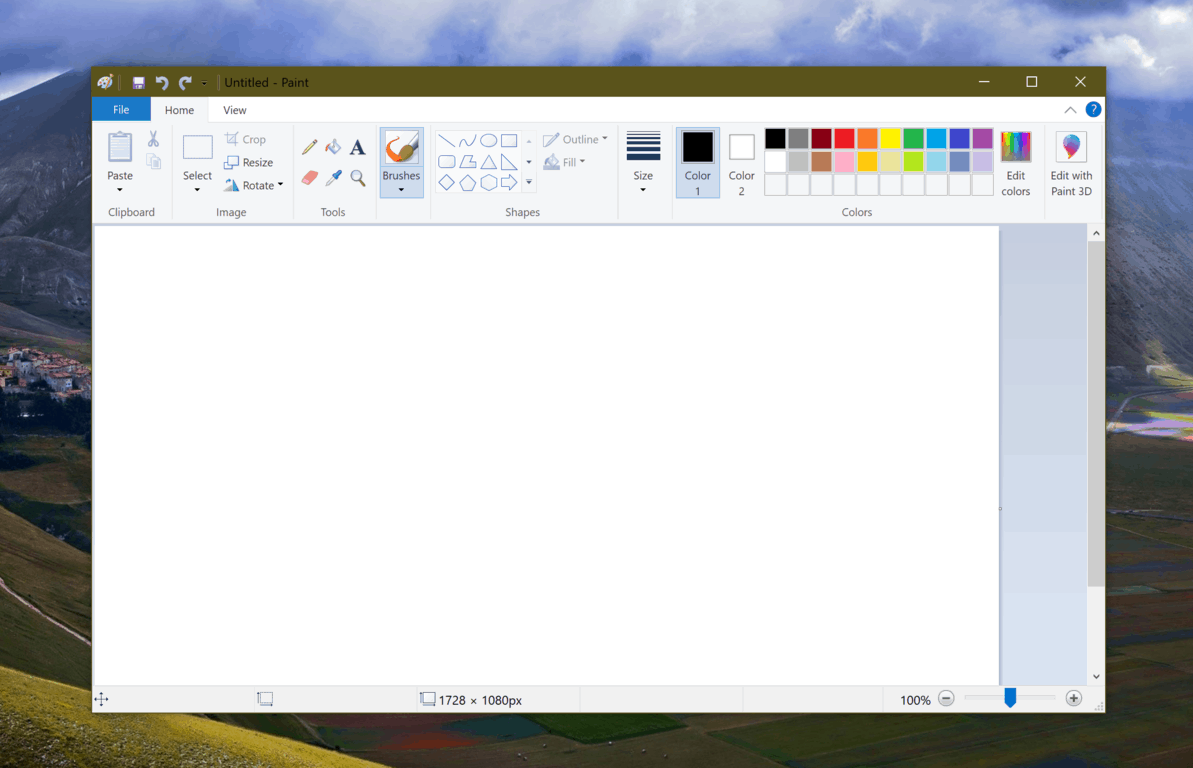
Microsoft Paint and WordPad may soon become optional features on Windows 10 PCs. Microsoft made some changes to the Optional Features page in Settings in the latest 20H1 preview build 18963, and Windows Latest has spotted that Microsoft has added the two aforementioned apps in this section in this build.
This Optional Features section includes other legacy Microsoft apps such as Windows Media Player, and users are free to uninstall apps in this category to free some space. Microsoft previously considered making Paint an optional Microsoft Store download following the release of Paint 3D, but the company eventually did a 180 and decided against removing it from the OS. Actually, the software giant even added new features to Paint in the Windows 10 May 2019 Update.
Image credit: Windows Latest.
As for WordPad (not to be confused with Notepad), the basic word processor has now been outshined by other free alternatives including OneNote, Office Online, or Google Docs. Microsoft has yet to announce that WordPad is being deprecated, but making this app an optional feature should be a welcome change for Windows 10 users who don’t need it.
It’s weird that Microsoft didn’t announce the addition of Paint and WordPad to the optional features in the release notes for the build 18963, though it’s certainly not the first time that we discover hidden surprises in new preview builds. We’ll see if the company shares more details soon, but in the meantime let us know in the comments if you plan to remove Paint on WordPad from your PC once you’ll be given the choice.
Microsoft has opened up its wallet recently and purchased the leading contributor to the AdoptOpenJDK project, jClarity.
The details of the acquisition have yet to really surface but both Microsoft and jClarity have issued press releases about the new acquisition whom both tout the continued efforts by both companies to increase performance for Java workloads on Azure.
The team, formed by Java champions and data scientists with proven expertise in data-driven Java Virtual Machine (JVM) optimizations, will help teams at Microsoft to leverage advancements in the Java platform. At Microsoft, we strongly believe that we can do more for our customers by working alongside the Java community. The jClarity team, with the backing of Microsoft, will continue to collaborate with the OpenJDK Community and the Java ecosystem to foster the progress of the platform.
With jClarity being one of the top dogs in JVM development, the new purchase makes all the sense in the world for Microsoft who can now offer Azure customers better performing Adobe, Daimler and Scoiete Generale workloads.
For current jClarity customers, the company plans to reach out them in the coming weeks to discuss transition efforts with guides on product anqd support issues.
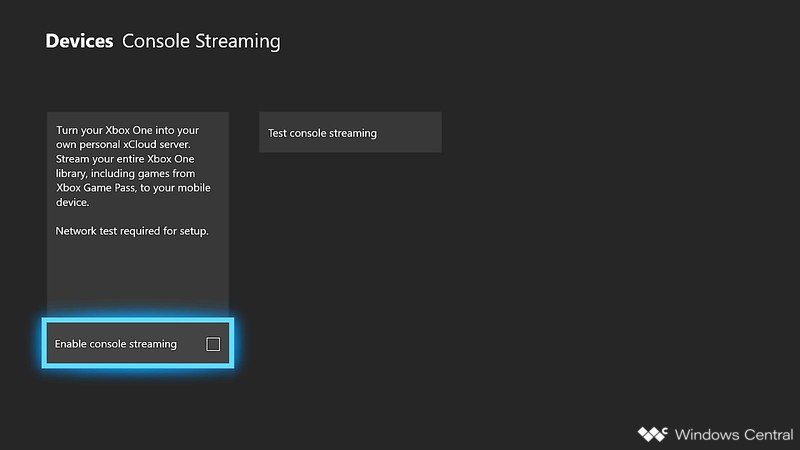
Back at E3 2019, Microsoft announced that an upcoming console streaming feature would allow Xbox One owners to transform their console into a personal xCloud server. This feature will make it possible to stream any game from your Xbox One library to mobile devices, and it will require your console to stay on all the time.
This should be a nice complement to Microsoft’s full-fledged Project xCloud service, which will only launch in beta in select markets in October. The console streaming feature is also expected to make its debut with the 1910 Update for the Xbox One, and Windows Central managed to get some screenshots showing the setup process on the console.
To enable console streaming on Xbox One, a preliminary network test will be necessary to identify any issues related to bandwidth, network latency, and more. The feature will also require a recent Xbox Wireless controller with Bluetooth, and the console will also need to be configured to use instant-on power mode.
Once all game streaming requirements are met on the console, the setup process will need to be completed on a mobile device using a Preview app that Microsoft has yet to launch. Users will also be required to connect the same Bluetooth-enabled Xbox controller that has been previously paired with the console.
Microsoft already lets Xbox One owners stream games to a Windows 10 PC using the Xbox Companion app, though this feature require the Windows 10 PC and the Xbox One console must be on the same home network. This new console streaming feature will be just for mobile devices, though it’s still not clear if it will work on both Android and iOS.
Console streaming will likely ship first to Xbox Insiders who are already testing the Xbox One 1910 update. We hope to get more details about this feature later today during the special Inside Xbox episode at 8AM PDT.
Despite Microsoft canceling the much-anticipated Super Duper Graphics pack for Minecraft, the sandbox game will still get a significant graphical upgrade thanks to a new rendering engine and ray tracing support on Windows 10. Mojang has teamed up with NVIDIA to enable ray tracing on GeForce RTX GPUs, and the result looks quite impressive.
“With the capabilities of this tech, you’ll be able to experience your Minecraft worlds with realistic lighting, vibrant colors, , realistic water that reflects and refracts naturally, and emissive textures that light up,” Mojang explained. You can see how real-time ray tracing will look in Minecraft for Windows 10 in the video below.
Ray tracing will come as an optional feature in an upcoming beta version of Minecraft for Windows 10, and Mojang expects to make it generally available next year. If NVIDIA has been pioneering ray-tracing in its high-end GPUs, Mojang also plans to make the feature available on other platforms that support DirectX raytracing.
In addition to ray-tracing support on Windows 10, the Minecraft developer is also working on a new Render Dragon engine for the Bedrock versions of Minecraft, which will introduce bring graphical improvements such as edge highlighting and new lighting techniques. The company says in the announcement that it actually demoed this new rendering engine during the Minecraft Earth demo at Apple’s WWDC conference back in June.
“Render Dragon supports a range of graphics features, depending on what your device is capable of. Not all devices will support ray tracing, but we will have some graphics enhancements on most devices,” Mojang explained today. The company plans to share more news about this new engine soon, adding that “you’ll see individual Minecraft Bedrock platforms update in the months ahead as we learn the capabilities of our lovely new game engine.”
Visualization is crucial in Power BI. Therefore, this feature should run smoothly. But this is not always the case. Many users reported various visual errors in Power BI.
Today we will describe and solve these problems so that your projects in Power BI would be error-free.
Quite a few users encountered the “visual has exceeded available resources” error, as one user reported on the official forum:
Here’s the error I get: Resources Exceeded. This visual has exceeded the available resources. Try filtering to decrease the amount of data displayed.
However, the data is not in a high amount, so, it seems the culprit is the Microsoft server.
Also, many users complained that they get the “This visual contains restricted data” error message. One user said the following on the forum:
I’ve been experiencing some issues sharing an app with one of my colleagues today. He has access to the app, and is able to view it, but all the content is missing behind errors. Now I recognized this as “this person is not a member of the workspace”, it looks very similar to that. But even after adding him to the group as a member, he still sees this error.
So, even if the person is a member of the workspace, he still sees the error.
Any user will dread this “Cannot display the visual” error. You can’t see anything in your Power BI, as one user reported:
A report that has been runnig fine suddenly wont display, See pic below. Servers have been rebooted. Latest versions of powerbi installed
So, nothing worked to solve the “Cannot display the visual” error.
As we said at the beginning of the article, these are severe problems, but fortunately, solutions are available.
How to fix visual problems in Power BI?
1. Visual has exceeded the available resources error
The real problem with this error is that no one knows how much resources Microsoft allocates for each user. So, you may need to try to filter the visual to reduce the amount of data.
2. This visual contains restricted data error
This issue appears when you try to share your data with other users.
To fix it, go to the RLS (Row-Level Security) settings in the online version of Power BI.
Select every member of the group and enter their emails again.
Check the gateway logs. In On-premises data gateway service logs the error “OLE DB provider ‘MSOLAP.5’ cannot be instantiated – Error: 80040154 Class not registered” should appear.
Solve this issue by deregistering the 32-bit versions below.
Some users have noticed that their computer doesn’t recognize the Ledger Nano S hardware wallet. This issue can become extremely annoying in the case that you need access to your cryptocurrency.
This issue had some users worried about losing their funds, but that is not the case. This issue seems to be caused by server-side error, and it can be easily fixed if you follow the troubleshooting methods found in this article.
Please follow the steps carefully to avoid complicating things even more. Read on to find out how to do it.
What to do if Ledger Nano S isn’t recognized on Windows 10?
1. Turn off your VPN service and anti-virus software
Depending on what specific VPN and anti-virus software you’re using, the exact steps will vary a lot.
In order to try to see if your security setup is stopping Ledger Nano S from being recognized, the easiest way is to turn both these services off temporarily.
After turning both VPN and anti-virus software off, check to see if the issue persists. If it does, please follow the next method.
2. Update USB Input Device drivers
Click on Cortana search box -> type in Control Panel -> choose the first option from the top.
Navigate to Devices and Printers.
Double-click the Nano S and select the Hardware tab.
Right-click the USB Input Device -> select Properties.
Click on Change Settings.
Select the Driver tab.
Click on Update driver and select automatic detection.
If your computer still doesn’t recognize Ledger Nano S you can try this method: a number of users have solved their issue by simply switching the USB cable they were using to connect their Nano S, with the original USB cable.
4. Update your device firmware
Note: Please make sure that the 24-word recovery phrase is written down. This will allow you to restore your private keys and recover your access to the crypto assets.
Uninstall all applications from your device.
Open the Manager in Ledger Live.
Select the blue Update button.
Click Continue and check to see if the Identifier matches the one in your Ledger device.
Press the right button on your device to start the update.
Enter your PIN code to confirm access.
Disconnect the USB cable when you see either Follow device update instructions, or Update.
Press and hold the left button on your device while reconnecting the USB cable. (release button once Bootloader displays).
Wait for the Update process to completely finish and for the message Firmware updated to appear.
Please feel free to let us know if this guide helped you solve your Ledger Nano S issue. You can do so by using the comment section below.
All the Windows laptops come with hotkeys to increase and decrease the display brightness. If that does not work, you can use the brightness slider in the Taskbar in Windows 7 or the Brightness control button in Action Center in Windows 10. Sometimes, the brightness hotkey, as well as the slider, will stop working leaving your laptop brightness stuck on high as reported in the Microsoft Community Forums.
Ever since I upgraded to Windows 10, my brightness has been stuck. Possibly at 100%, my eyes hurt when I look at the screen and the battery doesn’t last as long as it used to.
Here are a couple of troubleshooting tips to fix my brightness is stuck on high.
Why can’t I lower the brightness on my laptop?
1. Uninstall Display Driver
Press Windows Key + R to open Run.
Type devmgmt.msc and click OK to open Device Manager.
In the Device Manager, expand the Display Adapter section.
Right-click on your Display Adapter (Intel UHD) and select Uninstall Device.
In the Uninstall Device dialog box, select “Delete the driver software this device” option.
Click on Uninstall.
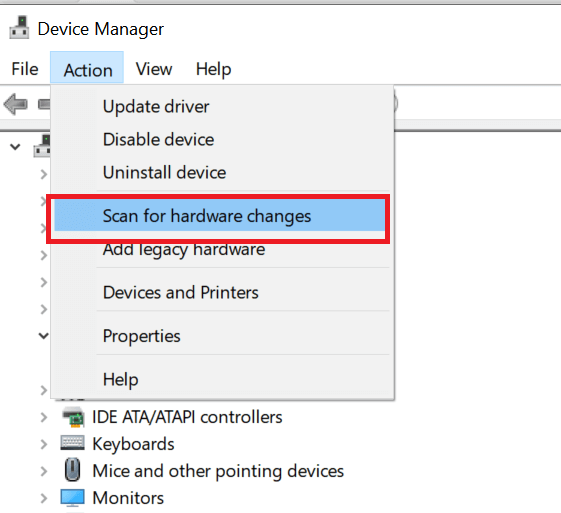
After the device is uninstalled, in the Device Manager, click Action > Scan for Hardware Changes.
Windows will now reinstall the driver for the Display Adapter.
Restart the computer and check if you are able to adjust the screen brightness.
If the issue persists, and even if other solutions in this article also did not work, do the following.
Install Older Version of Display Adapter
If the display adjustment problem started to occur after you upgraded to the latest version of Windows or installing a Windows update, try to install the older version of the Intel Display adapter from the official website manually.
This can help you to resolve the issue temporarily till Microsoft releases a hotfix fixing the issue.
Type Regedit and click OK to open the Registry Editor.
In the Registry Editor navigate to the following location: Computer\HKEY_LOCAL_MACHINE\ SYSTEM\ControlSet001\Control\Class\{4d36e968-e325-11ce-bfc1-08002be10318}
From the right pane double-click on “FeatureTestControl” value.
Set the value to Fb20 and make sure Hexadecimal as “Base” is selected.
Click OK to save the changes.
Restart the computer and check if you are able to adjust the brightness.
Note: After doing this, the lowest brightness level on brightness control will turn off the screen. So, always keep the screen at one level above the lowest one. Also, make sure you adjust the power setting for brightness when in battery mode so that the Windows don’t turn off the screen when in battery saver mode.
A number of VMware users have reported encountering the error messageYour system does not support the requested display settings when trying to connect to the View desktop.
This error seems to appear when launching the View Client or when using VMware Horizon HTML Access to gain access to a desktop.
The most common issue that causes this error message to appear is that the View Agent display driven was possibly written over by VMware Tools or other software applications.
Another reason for this error occurring is if the VMware Horizon HTML Access Agent (part of the Remote Experience Agent installer package) was installed on the View desktop before installing the View Agent.
Considering all the ideas mentioned above, in this article, we will explore a quick fix for this problem. Please follow the steps carefully.
How can I fix Your system don’t support the requested display settings error?
1. Check if the right driver is being used
Open vSphere Client on your desktop PC and log in.
Click the Start button.
Right-click Computer -> select Manage.
Click on Device Manager.
Scroll through the list and find the Display adaptors.
Click the arrow next to the option to toggle the details of this section.
Check to see if the correct display driver is being used. (click here and look under the section Additional Information to see a list of compatible video drivers).
If the incorrect display driver is being used, please follow the next method presented in this article.
Double-click the installer file and accept the license terms.
If you’re installing View Agent on a Windows Server where Remote Desktop Services (RDS) is not installed, select Install VMware Horizon View Agent in desktop mode.
Select your preferred Internet Protocol (IP) version -IPv4 or IPv6. (you need to install all View components with the same IP version).
Select if you want to enable FIPS mode.
Follow the on-screen instructions by choosing the desired options.
Restart the virtual machine to allow for the changes to be applied.
In today’s article, we explored some of the best troubleshooting steps for the error Your system does not support the requested display settings.
Because seeing this error means that you can not use your VMware software as it was intended, we hope that this guide helped you.
Please feel free to let us know if that is the case by using the comment section found below.
READ ALSO:
Hybrid networking simplifies moving VMware resources to Azure
In everyday life, we are constantly engaged in carrying out activities. It happens sometimes, indeed very often, that the accumulation of an excessive number of things to do does not allow us time to determine what we must focus on, thus generating a strong component of stress and significantly reducing our productivity.
The GTD or Getting Things Done is a time management method that helps us to deal with these kinds of situations so we can be more efficient and always know what the “next action” to do.
The methodology is based on a 5-step approach:
Capture (inbox): record everything that catches your attention. Free your mind, do not use it as an archive but rely on a reliable external tool.
Clarification: analyses the elements captured in the inbox and enters merit. If the item is not operable, throw it or use it as a reference, otherwise identify the next action required. If the action takes less than 2 minutes, run it immediately, otherwise, delegate (if you can) or put it in a list.
Organize: move items by grouping them based on one or more criteria.
Reflect: perform a periodic review (at least weekly) of all your things to do, projects and lists.
Run: choose your “next action” using the tool you have chosen to implement the GTD methodology.
In the following lines, we will summarize the characteristics of 5 GTD software in order to give you a better insight into available tools.
Best GTD tools to skyrocket your productivity now
Todoist
Todoist is a very simple task management application, with no special additional features. The main screen is divided into two parts: on the left side we find the tree activities, where you can select the priority, the deadline and other parameters of each task; in the right part of the screen, you can enter a description of each task.
The license is freeware, so completely free. The task list is stored in XML format, which offers many opportunities for formatting and printing advanced reports using style sheets.
Remember The Milk is an online service. It’s free but you can also sign up for a paid pro account with additional features such as data synchronization, dedicated smartphone apps, and email support. The main screen is made up of cards divided by scope.
The inclusion of the different activities is elegant and complete: on the right side of the screen, you can enter expiration dates, labels, places and reminders. You can also add entries by email, just send a message to your dedicated address account.
The Remember The Milk app is full of additional features, most of which can be used with the PRO account. Reminders for activities, for example, can also be sent by e-mail.
Evernote is a tool that allows the user to easily create and manage `Notes’ on which different types of information such as text, images, and attachments of any kind can be stored in the Evernote Premium version.
Evernote even if it is not properly an application for the management of activities with some expedient can still be used for this purpose.
The Notes, which can be compared to the activities, are stored in `notebooks’ that act as note containers. An important feature of Evernote are tags, which is a very useful labeling system for organizing Notes; each note can be assigned one or more labels.
Its real strength lies in its ability to synchronize notes. This allows you to create and find information stored in virtually any computer, web browser or mobile phone. Evernote automatically synchronizes notes after a few minutes, or manually at any time by clicking the `Sync ‘button.
Another interesting feature is sharing the ‘Notebooks’. These can be shared publicly via the web or shared with only certain people. Shared notes can only be changed by each recipient if they have premium accounts
The free version has a limit of 60MB notes per month. It is possible to subscribe to an account called Evernote Premium
While trying to make changes to the Power BI Service database like adding additional tables to the SQL database, Power BI users may encounter various data format errors. Some of the error includes DataFormat.Error: We reached the end of the buffer or power bi dataformat.error external table is not in the expected format.
If you are also troubled by this Power BI errors, here are a couple of troubleshooting tips to resolve the issue for a few Dataformat.errors.
How to fix common dataformat.errors in Power BI
1. DataFormat.Error: We reached the end of the buffer
Check the File Size
If the error occurs when you try to import data from multiple files simultaneously then it can be due to issues with the File Size.
Check the json file size to make sure it is not related to your file size.
Wait, Wait and Wait!
If it is a temporary issue then there is no point in trying to troubleshoot the issue out of your comfort zone.
Users have reported that the data format error was resolved automatically after a day or two.
So, check with the Power BI support in case the issue is at their end.
If the issue persists, do the following.
If you are doing PowerQuery, try to abandon it and set up a staging table in SQL database that parses the JSON using T-SQL.
2. Power BI dataformat.error external table is not in the expected format
Save the File with Excel
If you are trying to use excel file imported from third-party software like accounting software, then it can have minor XML schema errors.
While these errors can be ignored by the Excel app but results in an error when used with Power Query.
One way to resolve this issue is to open the problematic Excel file in Excel app and resave it.
Now import the same file in Power Query and check if the error occurs again.
This can be a time-consuming task if you have many files to work with. However, as a workaround, you can get through the issue until a reliable fix is found.
Change Type in Applied Steps
First import the file you want to use.
In the Navigator window, click on the Edit button beside the Load button.
From the right pane, under Applied Steps, delete Change Type step.
Click on Close and Apply.
If the issue persists, try removing initial changed of for date data type from number to text.
3. Power BI dataformat.error invalid cell value #name/ #ref
Try to correct the error in the Excel app before importing it.
Check if any of the Excel formulae have #N/A value which is the root cause of this issue. Replace the value with Null or space.
When it comes to organizing and visualizing data, Power BI is a great tool. However, there are situations in which certain information must remain hidden. Unfortunately, Power BI doesn’t have a direct way to disable “See Records”.
This is a major problem for many people. One user said the following on the official forum:
There should be an option to disable “see records” for the graphics that support it. It is a huge issue when it comes to security. I know you can hide certain columns but in reports that should only be high level data, the see records item is really an issue.
So, you can hide some columns, but still, you can’t disable the See records option. As we said before, there is no direct way to do that, but there are a few workarounds.
Steps to disable see records in Power BI
1. Hide columns
1. Right-click columns and hide them before publishing from Power BI Desktop.
2. Check if they still appear under See Records.
2. Change mechanism to DirectQuery
Change mechanism to DirectQuery and not to Import so you won’t see records in Power BI.
The first one is a better workaround since you won’t be able to use the column in any visuals.
This guide will make you a better Power BI user. Do check it out now.
See Records feature is available, but only in some cases
Generally, the See Records option is used to view all the information about one selected record or data point. Still, the feature has certain limitations.
It appears only in the following visualization types: funnel, pie chart, map, bar chart, column chart, treemap, filled map, and donut chart.
Also, you can’t use See Records when your visual uses a calculated measure and when Power BI is connected to a live multidimensional (MD) model.
So, if the See Records button from the ribbon is disabled, then the selected dashboard doesn’t support this feature.
Conclusion
Disabling See Records feature is crucial in some cases, and unfortunately, Power BI doesn’t have a direct way to do that. Still, the workarounds described above should help.
Did you find our methods useful? Let us know in the comments section below.
There are many Gujarati speaking people who may look for a way to type in Gujarati on their systems. While Windows offers support for multiple languages, not many are aware of how to use it. What they are missing is, how to enable integrated language support.
Once that is done, users can also take advantage of the different keyboard layouts or Unicode fonts like Shruti. But those looking for advanced features like auto-completion, auto-correct, special characters, etc., would need to download a Gujarati typing software for Windows.
Apart from Shruti fonts for Gujarati, there are quite a few other fonts that can be used to type Gujarati. However, since, Windows supports only Shruti font, users would need a separate English to Gujarati typing software.
While the other Gujarati fonts may be rare, there is still some software that supports them. Here’s a quick list of some of the best Gujarati Typing software for Windows 10 for typing in Gujarati, proficiently.
Type Gujarati with these software solutions with ease
Google Input Tools
Google Input Tool is a perfect typing utility for all those who wish to communicate in their preferred language from home or work. It offers support for a wide range of languages which includes Gujarati as well.
Any corrections made by the users are saved in its memory and maintained in its custom dictionary creating new and unusual names and words.
The program helps users to communicate in their preferred language and style. There are over 80 languages to choose from and the typing technique is equally easy as typing.
It now displays a demo link and alternative that helps the users to change the keyboard shortcut. Users can also change the keyboard shortcuts using the Keyboard Shortcuts settings page of the Chrome extension.
LipiKaar is a popular typing method that enables users to type in Gujarati with the help of the standard English keyboard. It’s a responsive tool that’s straightforward and easy to use.
While it helps users to type in Gujarati and create word documents, it also enables them to create presentations, Excel sheets, and even write emails in Gujarati. It requires no keyboard stickers, neither does it require the users to be proficient in English.
The program works on some easy to follow rules that let you type words correctly. Users can type even the most complex words easily with this program.
It’s a lot different from transliteration as it provides full control to users on typing. Made for business use, Lipikaar is compatible with all Windows versions.
Price: free trial available; pro version starts from Rs. 299/month
Gujarati Typing is a website that allows users to download the Gujarati Phonetic keyboard layout. They can also choose to download the Hindi phonetic layout if required.
Users can also get the most out of the software by downloading the free Gujarati Unicode fonts and also for Hindi. Shruti and Mangal fonts belong to the Windows package and so, these can’t be downloaded separately.
The Gujarati Phonetic keyboard layout makes it extremely convenient for the users to type in Gujarati on the English keyboard. The software also offers the Gujarati phonetic key mappings for Mac OS X as well.
NHM Writer is another great Gujarati writing software for Windows 10 that offers support to write in more than 10 languages. It currently supports even the Tamil Brahmi varieties as well.
What’s interesting is, users can type smoothly in MS office programs using Windows Text services. It’s free software that’s also free of any malware and can be downloaded easily from the library.
For beginners, it offers a context-sensitive key preview and on-screen keyboard. While typing in Gujarati, the “backspace” can be used as Undo that also ensures speed.
It comes in a compact form as the installation package is of mere 1MB, thereby, taking up minimum space of the system. It’s compatible with all working versions of Windows and can be installed on 32-bit platforms.
It’s also compatible with all major browsers like Chrome, Opera, Safari, Firefox, IE, and more.
Gujarati lexicon is a website that’s specially dedicated to the Gujarati language. It’s basically a resource bank of more than 45 lakh words. The entire vision of the website is to popularize the language using the power of information technology.
Those who are interested in the Gujarati language can improve their vocabulary, read rare literature, or even enjoy literature using this website.
One of its sub-categories is the Gujarati Writing Pad that allows the users to write in Gujarati. Users can also switch from Gujarati to the English language based on their requirements.
The best part is, users can type the Gujarati words in English and it automatically gets converted to Gujarati fonts. It also allows users to choose from different styles, paragraphs, font family, and fonts.
Export the document, get a print, send an email, or recommend directly through the tool using the small icons placed on top of it.
With so many language specialty websites, typing in Gujarati is no more a challenge. Simply download one of the best Gujarati typing software for Windows 10 from the above list, and start creating your Gujarati documents easily and efficiently.
If your printer is making a grinding noise when the printer is turned on or when it is printing, you should stop printing and investigate the issue.
Any weird printer noise should be investigated since it can lead to permanent hardware damage, and in this guide, we will show you the best ways to fix this issue.
Why is my HP Envy printer making a grinding noise?
Temporary software or hardware glitches can sometimes cause printing noise.
In some rare instances, outdated firmware can cause this problem.
Problems with toner or paper can also cause noise to appear.
What can I do if the printer is making a grinding noise?
1. Perform a quick reset
Make sure the printer is turned on and disconnect the power cable from the printer while it is still on.
Disconnect any cable that is connected to the printer.
Once the printer is completely off, press and hold the printer‘s power button for 15 seconds.
Release the button and connect the printer cable to directly to the wall power outlet.
Connect the power cable to the printer and wait for it to turn on automatically.
If the printer does not turn on automatically, press the Power button to do so manually.
Wait for the printer to become silent and proceed with a print job.
2. Perform a firmware update
Make sure the printer is turned on and connected to the computer.
Now go to HP Customer Support – Software and Download link.
From the Let’s identify your product to get started page, click on Printer.
Search for printer model and click on Submit.
Make sure to select the right version of Windows as per your system configuration.
Click on Firmware and then on the Download button.
Run the installer to install the file. In the HP Printer Update window, select your printer model option and click on Update.
Click OK to finish the installation.
Restart the computer and check for improvements.
After updating the firmware, check if the printer is still making a grinding noise.
Click on the Printer option and select Run the Troubleshooter.
Windows will now scan the system for any issues affecting the printer and recommend appropriate fixes.
4. Other solution to try
If the noise started after you made any changes to the printer like installing a toner cartridge or cleaning it, turn off the printer and pull off the cartridge. Check it for any issues that can cause the issues. Also, check the toner for any issues that can cause the jam.
Try to make a copy using a blank paper and check if the toner is able to feed the paper. If it fails, try to clean the paper pick roller and the paper path to try and fix the issue.
If nothing seems working, check if the printer has any hardware issue. Contact HP support over the phone to get the best recommendations for the repair.
We hope these steps helped you with your printer making grinding noise. Keep in mind that this isn’t the only issue, and many reported loud clicking noise on their printer, so be sure to check it out.
What method did you use to fix this issue? Share it with us in the comments section below.
A large number of users that use Linux and Windows 10 in a dual-boot mode have reported that for some reason, they don’t see the menu to choose which OS should the PC boot into. They report that the computer automatically boots to Windows.
This issue can be extremely frustrating considering that the main reason for people installing a dual-boot system is to be able to quickly and effortlessly change their OS.
This issue can have even more of an impact if you set up your dual-boot session in order to run OS-specific apps inside Linux.
For these reasons, in today’s article, we will explore the best way to solve this issue once and for all. Please follow the steps presented here in the order that they were written to avoid any unnecessary complications.
Note:In order to fix this issue, we will have to dive into the boot settings of your PC. To avoid any additional ‘road-blocks’, it is recommended that you create a restore point
How can I fix Windows 10 and Linux dual boot problems?
Run bcdedit command in PowerShell
Press Win+X keys on your keyboard -> select PowerShell (Admin).
Copy-paste the following command: bcdedit /set {bootmgr} path EFIubuntugrubx64.efi .
Wait for the process to complete, and then restart your computer. This method should have solved your problem.
If the method above didn’t help you solve your issue, you can simply reverse it by following step 1 mentioned above, and running the command: bcdedit /deletevalue {bootmgr} path EFIubuntugrubx64.efi.
Power BI key errors can occur in different ways with a different error message. Some of the Power BIerror key messages reported by the Power BI users include Power BIerror the given key was not present in the dictionary, power bierror the key didn’t match any rows, and power bierror generating an asymmetric key.
Follow the troubleshooting steps for each error below to resolve Power BI key error.
How to fix various Power BI key errors
1. Power BI error generating an asymmetric key
Change the Virtual Machine
If you are using a Virtual Machine and getting the Power BIerror generating an asymmetric key, try to install the gateway in a different Virtual Machine.
Users have reported that installing the Gateway on a different virtual machine has resolved the error.
Upgrade the OS (Windows Server)
If you are installing the Gateway on an older version like the 2008 Windows Server, try upgrading to the newer version Windows Server 2012 or later.
Due to incompatibility issues or other glitches, the gateway installation may fail in the older version of Windows Server 2012.
Simply install the Windows Server on a virtual machine and try to install the gateway.
Check if the generating an asymmetric key error is resolved.
Install Data Gateway Manually
In case the issue is at the Power BI end, you can try to install each gateway manually.
AMR (Adaptive Multi-Rate) audio format is the format majority of handheld devices (mainly smartphones) use for voice recordings. Now, a small problem might arise when it comes to the reproduction of AMR files on any other device or platform.
As you probably realized, most standard audio players can’t play AMR files. Luckily, that’s where AMR to MP3 converters come into play.
We brought to you 4 converters that should allow you for seamless and speedy conversion from AMR to MP3, WAV, or other popular audio formats. Check them out below and take your pick.
Best AMR to MP3 converters for Windows
AMR to MP3 Converter
Let’s start with the tool that’s specifically advertised as AMR to MP3 converter. As the name itself says, this small tool is quite prolific when it comes to fast converting AMR (Adaptive Multi-Rate) audio format to MP3 in no time.
It works on both Windows and macOS platforms and, besides being quite simple to install and utilize, it is lightweight.
It supports all kinds of audio output formats besides the obvious MP3. So you can use it to convert AMR files to WAV, FLAC, AAC, M4R, AC3, OGG, AIFF and others. The interface is quite self-explanatory and it’s easy to import, convert, and export AMR files in any of the aforementioned formats.
If you are in a hurry and have just a couple of AMR files to convert to MP3, this is a go-to software for you. AMR Player is a simple and yet efficient solution for all users that want to play AMR files and convert them later.
It comes with quite an intuitive interface and it’s quite easy to utilize it. Just import AMR file and either play it or convert it to MP3 or WAV audio formats. Just like that.
The tool is, like all other entries on this list, completely free of charge. Have in mind that this is a legacy application and that it’s just a practical piece of software, nothing aesthetically pleasing or feature-rich.
Now, if the first two software solutions were a bit outdated, not particularly feature-rich one-trick ponies, Any Audio Converter is so where the real versatility begins.
Besides being an incredibly potent audio converter supporting all known audio and video formats (audio extraction), it allows for audio editing (tags, parameters, lyrics). This, of course, includes AMR format as well.
Also, Any Audio Converter is triple treat so the software suite includes Audio Converter, Video Converter and, YouTube Downloader. Did we mention it’s free?
Similar to Any Audio Converter, Freemake Audio Converter is a multi-purpose audio editing and converting tool that supports 50+ audio formats. Extracting audio from videos is walk in a park thanks to quite an intuitive interface.
Uploading and organizing audio files, transferring files from your handheld devices to PC and vice versa, and tweaking output files (bitrate, channels, sample rate) are more than welcome features.
What we like about Freemake Audio Converter the most is batch conversion. If you have a lot of AMR files (voice recordings), you can transfer them to your Windows PC and convert all under the same set of rules.
With that, we can conclude this list of best AMR to MP3 converters. They are all free, with the last two offering premium options. In case you have any questions or alternative application to suggest to our readers, the comments section is below.
There are many cases in which it is necessary to hide sensitive data, such as personal information. For example, a company shouldn’t be able to export the entire employee table, which has contact info, birthdates, and home address.
This is why many users want to know if they can disable export data in Power BI. Yes, that option is available. In this article, we will show you how you can do that.
Is there a way to disable “Export Data” just to a particular report.
I saw many posts in which we can disable int he admin portal. But would that apply to all the reports in the workspace?
1. I would just need this feature for a particular report
2. I dont see any options in Admin portal except Capacity Settings
So, the OP wants to disable Export Data to a certain report, but there are no options for it in the Admin portal.
Steps to disable export data in Power BI
1. Disable export data for individual reports
Click on the Settings button of the report
Choose Export Data to None
New to Power BI? Here’s everything you need to know about it.
2. Disable export data for all reports
In the Admin portal, go to Tenant Settings.
Select Export Data.
Disable the feature and click on Apply.
Alternatively, you can Enable export.
Apply to The entire organization.
Select Except specific security groups checkbox.
Enter security groups for which you want to keep the function disabled.
Click on Apply.
Also, you can Enable export for a specific group.
Select Specific security groups.
Select Except security groups checkbox.
Write the groups you want to export data to.
Click on Apply.
It is worth mentioning that it will take up to 10 minutes for a setting change to take effect for everyone.
Conclusion
So, that’s about it. Exporting data is crucial for a dynamic workflow, but sometimes it is necessary to block certain information.
Fortunately, Power BI has this option and as you can see, there are a few easy steps to disable the export of data.
Did you find our methods useful? How do you disable export data in Power BI? Let us know in the comments section below.