Sony smart TV HDMI not working? Here’s what to do

The new Sony Bravia lineup comes with HDMI support to connect your set-top box as well as a gaming console and other HDMI devices. Sometimes, the users may encounter Sony smart TV HDMI not working issues while using an external device connected to the HDMI port.

The HDMI issues can occur due to multiple reasons including a defective HDMI port or incorrect configuration.

If you are also troubled by this issue, here are a couple of troubleshooting tips to fix Sony smart TV HDMI not working issue with ease.

What can I do if my Sony smart TV’s HDMI is not working?

1.  Check the video input

  1. To receive the HDMI signal, make sure the TV is set to the correct video input. You can access the input option using the Input button on the remote control.
  2. Press the Input button repeatedly until the correct HDMI input is displayed on the TV screen. Also, make sure that you are connecting to the right TV input.
  3. After that, make sure the input device is turned on and working fine.

2. Disconnect and reconnect HDMI cable

  1. The Sony Smart TV HDMI not working issue can also occur due to bad connection.
  2. Turn off all the devices including your Sony TV, gaming console, Blu-ray player, etc.
  3. Disconnect the HDMI cable from the HDMI input terminal on the TV.
  4. Disconnect the HDMI cable from the HDMI output terminal on the source device that is your gaming console etc.
  5. Leave all the devices idle for a few minutes.
  6. Reconnect the HDMI cable back to your TV and the output devices.
  7. Turn on the TV along with the output devices. Turn off all the devices and turn on again.
  8. Now check if the HDMI connection is working fine.

3. Update TV firmware

Sony smart TV HDMI not working
  1. Outdated firmware can create issues with the new HDMI devices and technologies. Make sure your TV has the latest firmware is installed.
  2. Press the Home button and select Help.
  3. Select “System software update”.
  4. If the automatic update is disabled, then select “Check for a System software update” to check for the update manually.
  5. If the TV has a new update, proceed to install it by clicking the Update button.
  6. The process may take a few minutes to hours depending on your internet connection.
  7. After the update is installed, restart the TV. Make sure you unplug and reconnect all the source devices to the TV.

4. Check for HDMI port issue

  1. If none of the troubleshooting tips in this article helped, the issue can be with the HDMI port.
  2. Contact Sony support and describe the issue.
  3. The support staff will walk you through some troubleshooting tips again.
  4. If that did not work, Sony will repair the HDMI board depending on the warranty availability.

Conclusion

It is important to have a functioning HDMI as it is required to connect your TV box, gaming console, and even projectors. By following the troubleshooting tips in this article, hopefully, you can fix Sony smart TV HDMI not working problems by yourself.

The Custom Form Cannot be Opened in Outlook: 5 Ways to Fix

The custom form cannot be opened error in Outlook can cause many problems, especially if you rely on forms for your business or school projects.

Without custom forms you won’t be able to gather the necessary user information, but luckily, there are a couple of solutions that can help you with that.

Why does The custom form cannot be opened message appear in Outlook?

  • Outlook configuration isn’t correct and you might not be using the correct form.
  • The corrupted cache is a common culprit for this problem.
  • Third-party add-ins can sometimes lead to this and other errors.

What can I do if Outlook can’t open a custom form?

1. Check if Microsoft Outlook item uses a correct Form

  1. Go to the navigation pane
  2. Locate the folder where you want to create a new item.
  3. Right-click it and choose Properties from the context menu.
  4. In the pop-up dialog box, under the General tab, you can see its form in When posting to this folder, use: 
  5. You should know that the form:
    • for emails it is IPM.Post
    • for calendar items it is IPM.Appointment

If this doesn’t work, proceed to the next solution listed below.

2. Try to manually clear form cache

  1. Navigate to: C:\Users\%username%\AppData\Local\Microsoft\FORMS
  2. Back up all items from this folder and then remove them. outlook the custom form cannot be opened clear form cache
  3. Check if the issue persists


If this method doesn’t work either, you should check the integrity of your Microsoft Office install.

3. Install third-party repairing software for Outlook

  1. Download and launch Stellar Repair for Outlook.
  1. Use Choose Location and look for the Outlook data file (OST/PST).
  1. Let the software scan and repair the Outlook data file.
  1. After the Repair Complete message box appears, click OK.

Stellar Repair for Outlook

Make sure you never miss important mails and recover lost email communication with this dedicated repair software.
Check Price Visit Website

4. Open Microsoft Outlook in Safe Mode

4.1. Press and hold the CTRL key to open an Office application

  1. Go to Microsoft Outlook‘s shortcut icon.
  2. Press and hold the Ctrl key and double-click the shortcut.
  3. When a window appears asking if you want to start the application in Safe Mode, click Yes.

4.2. Use the /safe option to open an Office application

  1. Press Windows + R.
  2. Type in the following and click OK: outlook /safe
outlook the custom form cannot be opened safe mode

5. Uninstall any third-party add-ins

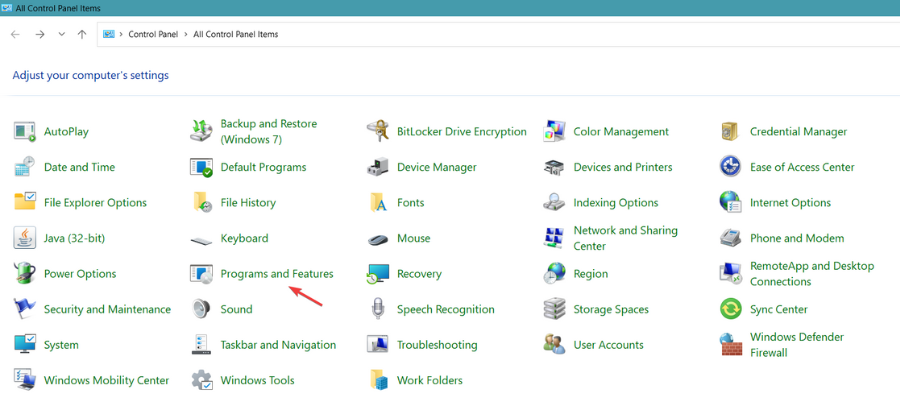
  1. Press Windows + R and type control.
  2. Go to Programs and Features.

  3. Look for the add-in in the list.
  4. Select it and click Remove.

How do I manage forms in Outlook?

  1. Click the File tab and choose Options.
  2. Click Advanced.
  3. In the Developers heading, click Custom Forms.
  4. Lastly, click on Manage Forms.

If none of the methods listed above work, you could also try repairing your Office Installation or uninstall Microsoft Office and install it again.

Did our solutions help with The custom form cannot be opened, Outlook will use an outlook form instead error? If you have found a different solution, feel free to share it with us in the comments section.

Drive That Contains The Data File is Out of Disk Space [Fix]

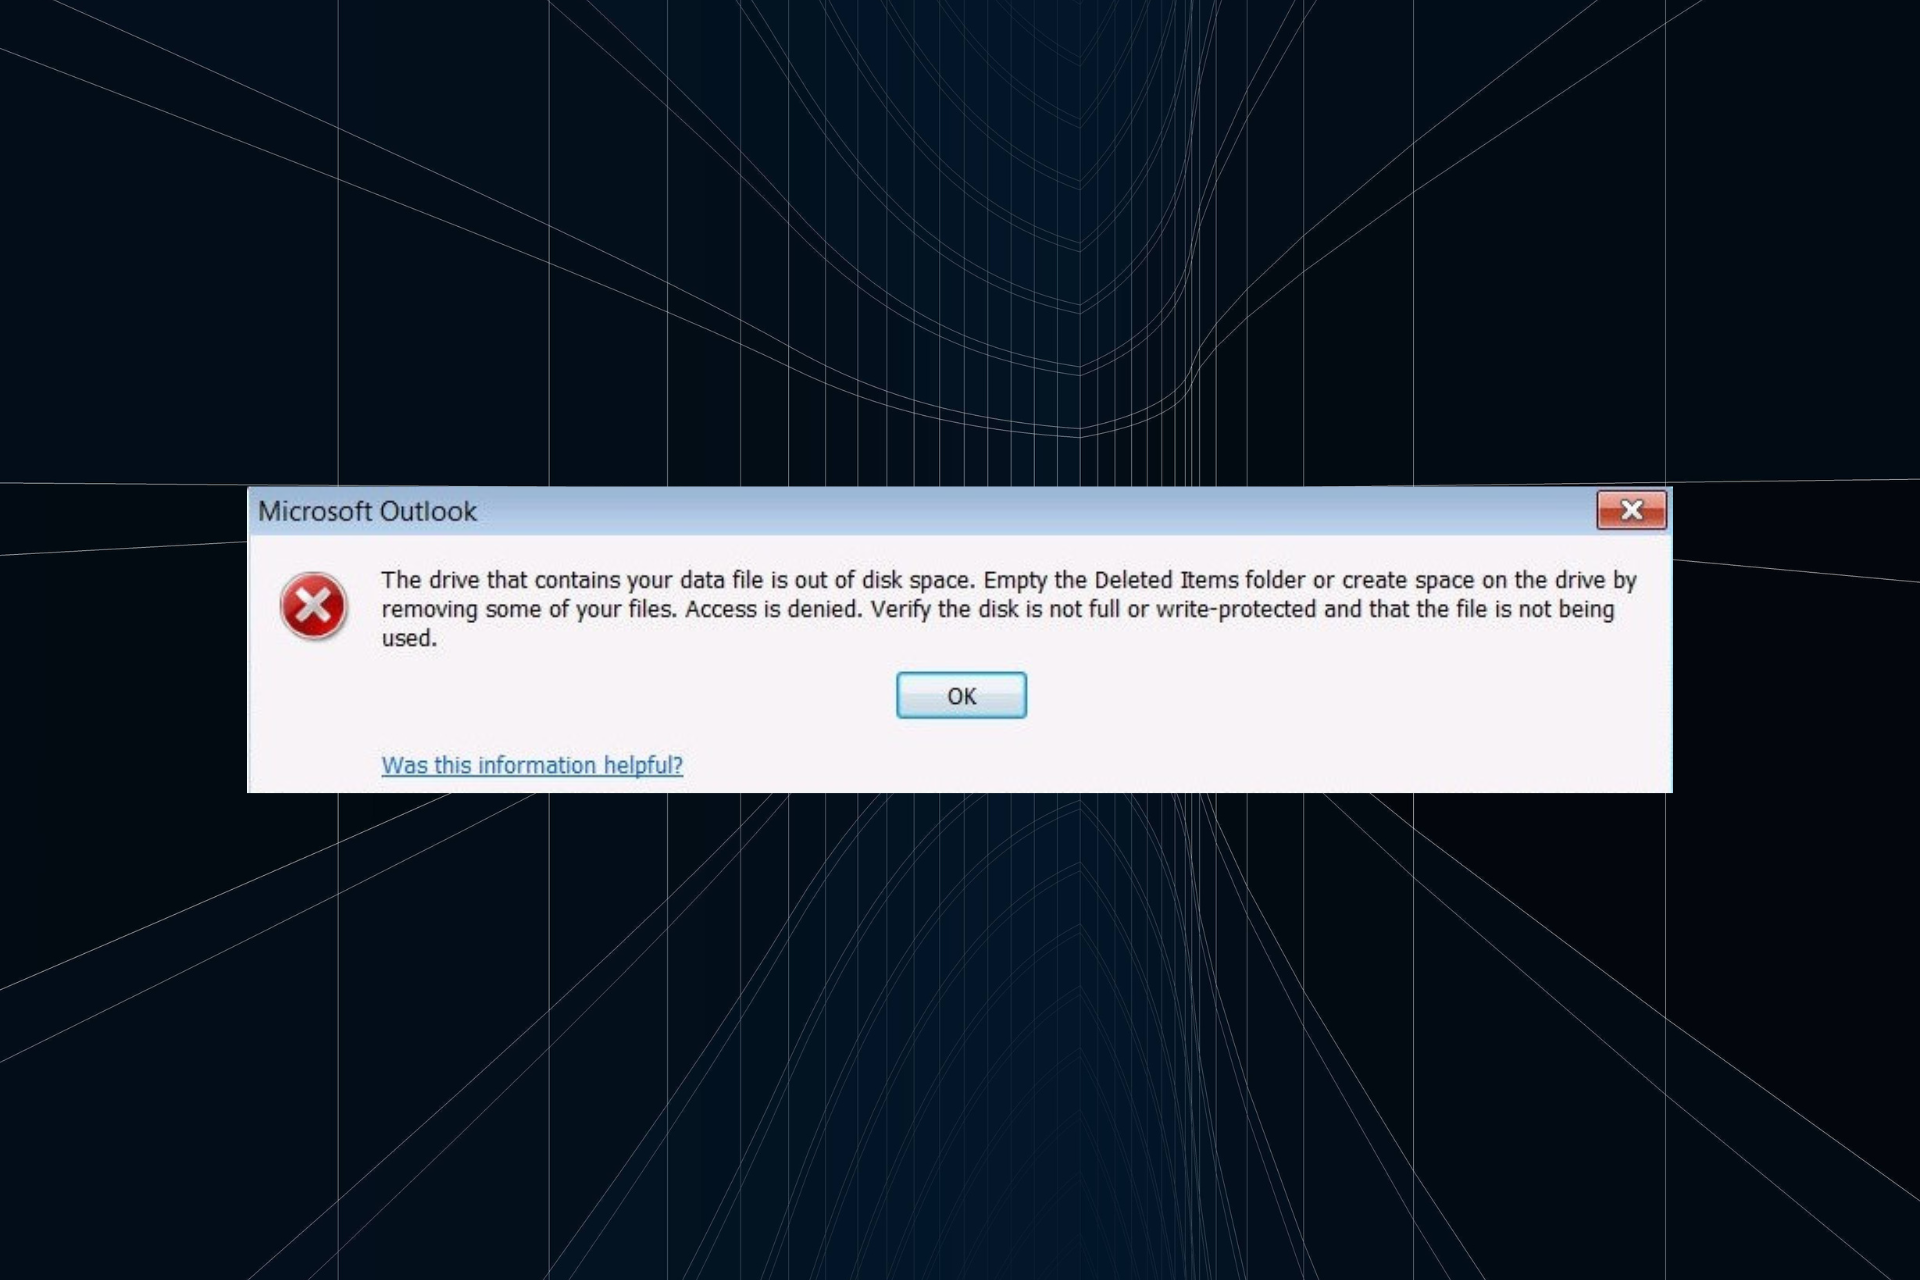
Outlook errors are common, given the complex functioning of the email client. One error that bothers many is The drive that contains your data file is out of disk space. Empty the Deleted Items folder or create space on the drive by removing some of your files. Access is denied.

Users can’t receive any emails in Outlook when that error arises. The problem usually arises when users run out of storage space on the drive that contains the PST file. So, let’s find out how you can fix things!

How do I fix the Drive that contains the data file is out of disk space Outlook error?

Before we proceed, here are a few quick solutions to try:

  • Restart the computer.
  • Clear the contents of the Recycle Bin. To do that, right-click on the desktop entry, and select Empty Recycle Bin from the context menu.

If none help fix The drive that contains your data file is out of disk space error, move to the fixes listed next.

1. Set up a New Outlook Profile

  1. Press Windows + R to open Run, type Control Panel in the text field, and hit Enter.
  2. Select Large icons from the View by dropdown menu.large icons
  3. Then click Mail to open Mail Setup.mail
  4. Select the Show Profiles button, and then click on Add in the General tab.Mail Setup window outlook the drive that contains your data file is out of disk space
  5. Enter a profile title in the New Profile window, and click OK.
  6. Then fill out the text boxes on the Add Account window.
  7. Click the Finish button.
  8. On the Mail window, click the Always use this profile option.
  9. Then select the new profile to be the default one for Outlook.
  10. Finally, click Apply and OK to save the changes.

Often, the easiest way to fix things when you get The drive that contains your data file is out of disk space error is to create a new Outlook profile.

2. Set up a new Outlook Data file

  1. Click the New Items button in Outlook, choose More Items, and then select the Outlook Data File option.Outlook Data File option outlook the drive that contains your data file is out of disk space
  2. Then enter a file title for the data file.
  3. You can enter an optional password by selecting the Add optional password option.
  4. Click the OK button.
  5. You can also select the new data file to be the default one for Outlook by opening Mail from the Control Panel.
  6. Click the Data Files button in the Mail Setup window.
  7. Then select the new PST file on the Data Files tab.Data File tab outlook the drive that contains your data file is out of disk space
  8. Click the Set as Default option.
  9. Click the Close button.

Another quick solution to The drive that contains your data file is out of disk space error is to set up a new Outlook data file, preferably in another drive.

3. Convert the C: Drive to NTFS Format

  1. Open File Explorer by pressing Windows + E.
  2. Right-click the C: drive to select Properties.
  3. The General tab directly above lists if their HDDs are FAT32 hard drives.The HDD Properties window outlook the drive that contains your data file is out of disk space
  4. If it’s currently using the FAT32 filing system, press Windows + R to open Run, type cmd, and hit Ctrl + Shift + Enter.
  5. Paste the following command and hit Enter: convert c: /fs:ntfsThe convert command outlook the drive that contains your data file is out of disk space

If the previous solutions didn’t help fix The drive that contains your data file is out of disk space error in Outlook, changing the filing system for C: from FAT32 to NTFS should do the trick.

In case the problem persists and you are looking for Outlook alternatives, check the best email clients for Windows.

We also wrote about Error Handle Disk Full in our latest guide, so you might want to check it out for more information.

For any queries or to share more solutions with us, drop a comment below.

Sony TV Won’t Connect to Internet [Fix]

Everyone nowadays has a Smart TV in the house, but many reported that Sony TV won’t connect to the Internet.

This is a big problem since you won’t be able to connect to Netflix on Sony Smart TV. The same goes for other streaming services. Luckily, there is a way to fix this problem, and today we’re going to show you how to do it.

Why is my Sony TV not connecting to the Internet?

  • Issues with the network cable or network hardware.
  • Problems with the network configuration.
  • The wireless network isn’t properly set up.

What can I do if my Sony Smart TV won’t connect to the Internet?

1. In case you are using a wired connection

  1. Using the original Sony remote, press the Home button.
  2. Go to Settings.
  3. Select Network.

  4. Go to Network Setup.

This is where you should verify the following on the View Network Status screen:

  • Your physical Connection should be OK – This means an Ethernet cable is detected from the TV to the router or modem.
  • Local Access should be OK – This means that the TV sees the router
  • Internet Access should be OK – This indicates that the TV is connecting to the Bravia Internet Video (BIV) server.

If any of the settings are shown as Failed, check for some of the following:

  • Check the Ethernet cable to see if it is secured – If needed, change the LAN ports or the cable altogether.
  • Check whether the cable is actually giving off the signal by testing it on another device (e.g. a PC)
  • Make sure the TV is obtaining an IP address – If the IP Address flashes or starts with 169, then the IP address needs to be changed, and you need to perform a manual IP assignment.

It’s important to check these settings, especially if Sony TV has issues obtaining the IP address.

2. In case you are using a wireless connection

  1. Press the Home button on the remote.
  2. Go to Settings.
  3. Go to Network.
  4. Select Network setup.

  5. Choose Set up network connection or Wireless Setup.
  6. Choose the desired connection method.
  7. Follow the on-screen instructions to complete the setup.

If all else fails, you could also try resetting your network equipment. We also have a detailed guide on connecting Sony Smart TV to Wi-Fi, so feel free to check it out.

This involves resetting the cable modem and router by turning them off and unplugging them for 1 minute. You could also try turning the TV off and unplugging it from the wall for 1 minute.

Unfortunately, this isn’t the only problem, and many reported that their Sony Smart TV is not working, but we covered that issue in one of our older guides.

If you also have a Sony Smart TV experiencing network connectivity issues, please let us know in the comments section below.

The Duration of the Appointment Must be Shorter: How to Fix

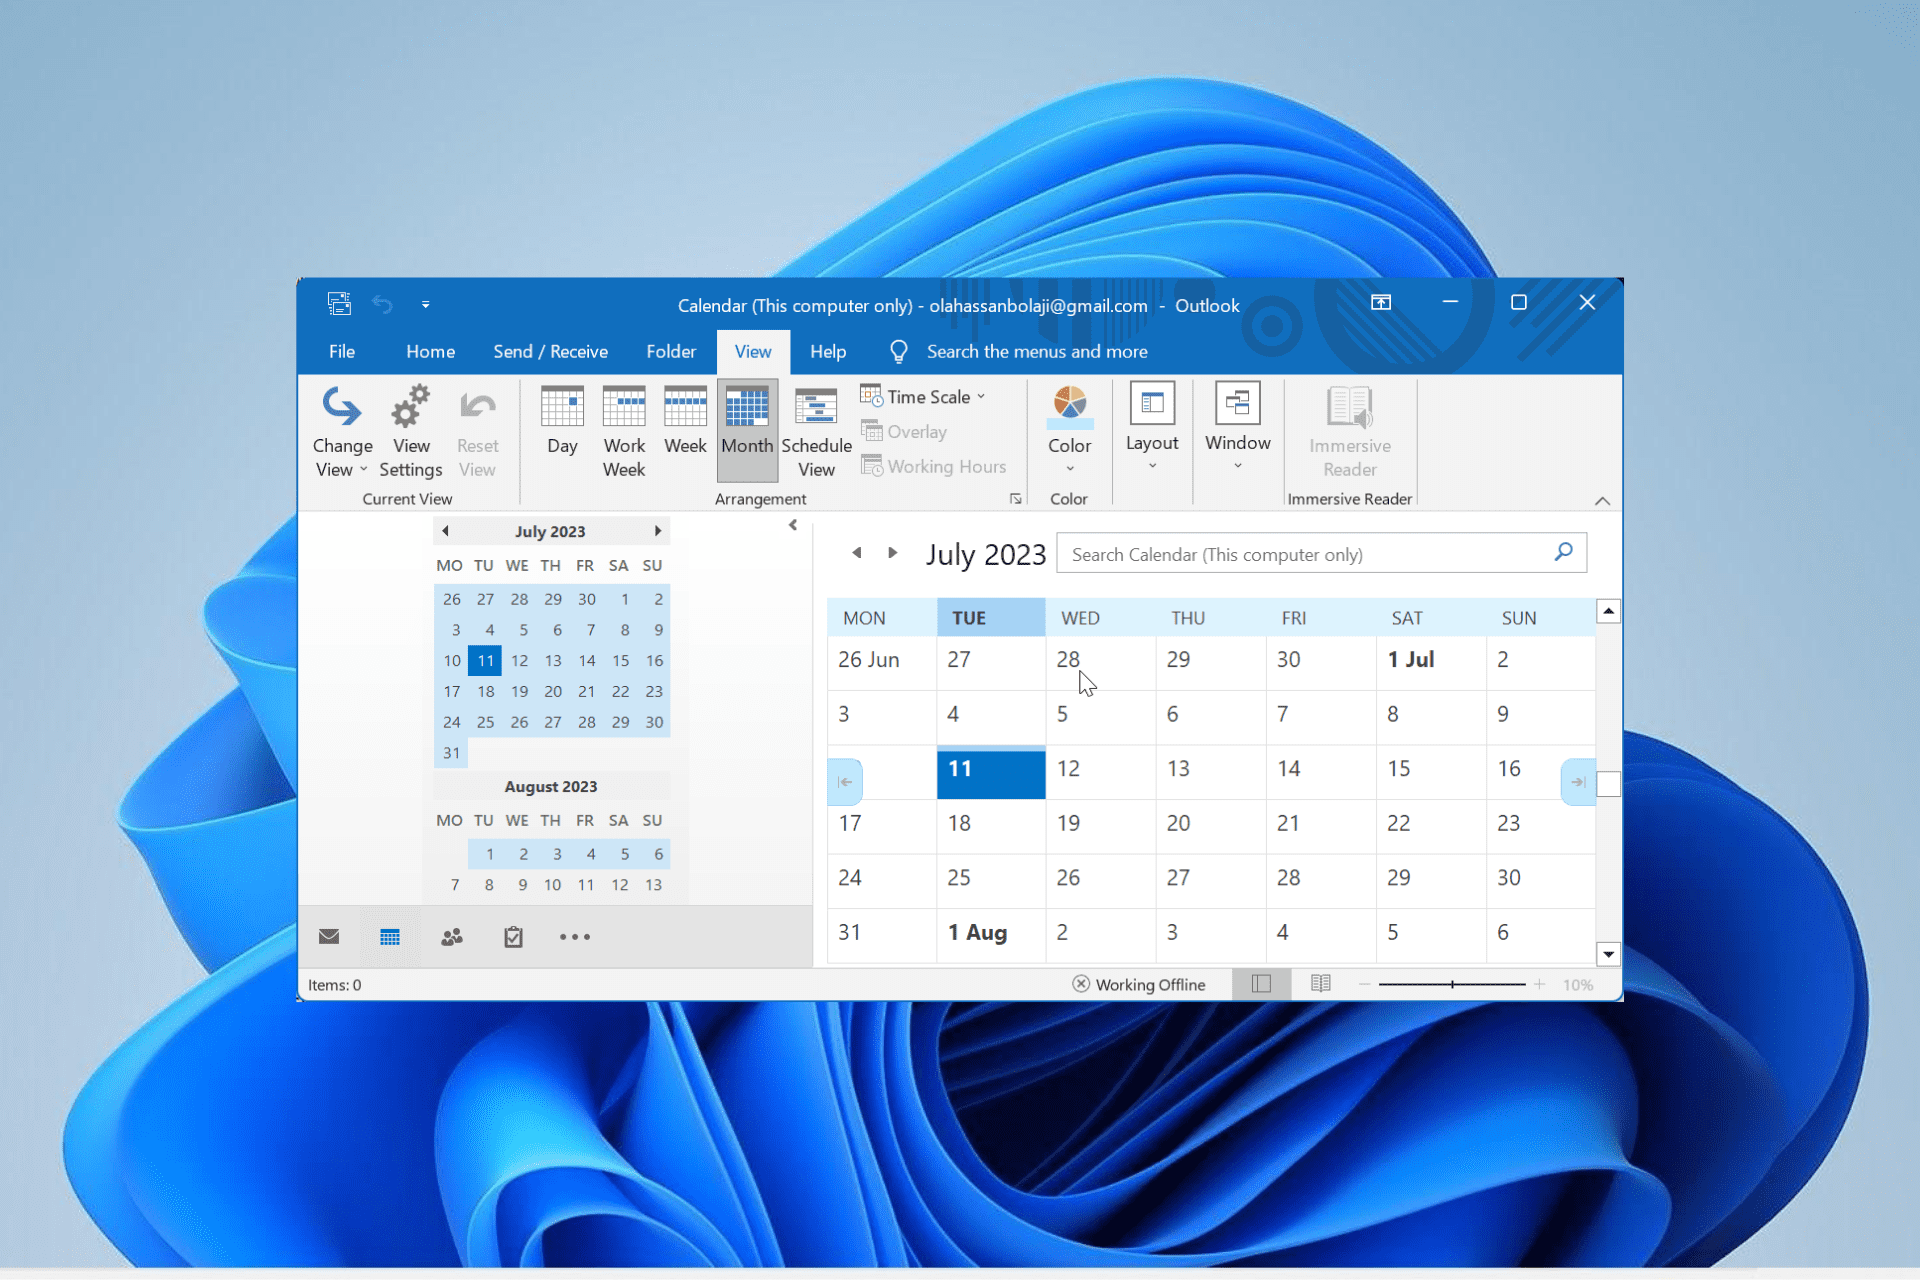
A lot of Outlook users utilize that application’s calendar to schedule appointments. However, users are reporting the duration of the appointment must be shorter than how frequently it occurs error while trying to schedule an appointment.

If you are also dealing with this error and need to schedule shorter appointments, the solutions in this guide will help you do it effortlessly.

How do I shorten appointments in Outlook Calendar?

1. Adjust the default time scale settings

  1. First, open the Outlook application.
  2. Click Calendar to switch to the calendar view.
  3. Select the View tab.
    view the duration of the appointment must be shorter
  4. Then press the View Settings button.
    view settings
  5. Users utilizing Outlook 2007 will need to click the View menu. Then select the Current View and Customize Current View options on the menu.
  6. Click the Other Settings button on the Advanced View Settings window.
    other settings
  7. Then click the Time Scale drop-down menu.
  8. Select 15 minutes, or less, as the default duration for scheduled appointments in Outlook.
  9. There are also some additional formatting options there that users can select to adjust the calendar fonts. Click the Font button to change the font for calendar appointments.
  10. Press the OK buttons to exit the windows.
  11. Alternatively, users can change appointment lengths in Outlook by clicking the Time Scale button on the View tab. Then select 15 minutes or less on the drop-down menu.
  12. Users can also select a Change Time Zone to adjust the time zone the calendar displays for an appointment if required.

2. Set Up a Macro

  1. Launch the Outlook app and press the Alt + F11 hotkey.
  2. Click ThisOutlookSession on the left of the macro editor.
  3. Now, copy and paste the VB code below in the macro editor: Private WithEvents objInspectors As Outlook.Inspectors
    Private WithEvents objAppointment As Outlook.AppointmentItem
    Private Sub Application_Startup()
    Set objInspectors = Outlook.Application.Inspectors
    End Sub
    Private Sub objInspectors_NewInspector(ByVal Inspector As Inspector)
    If TypeOf Inspector.CurrentItem Is AppointmentItem Then
    Set objAppointment = Inspector.CurrentItem
    End If
    End Sub
    Private Sub objAppointment_Open(Cancel As Boolean)
    'Set the default duration of new appointment
    If objAppointment.CreationTime = #1/1/4501# Then
    objAppointment.Duration = "15"
    End If
    End Sub
    Private Sub objAppointment_PropertyChange(ByVal Name As String)
    'When you disable the "All Day Event"
    'Change the default duration of the current appointment
    If Name = "AllDayEvent" Then
    If objAppointment.AllDayEvent = False Then
    objAppointment.Duration = "15"
    End If
    End If
    End Sub
  4. Next, click the Disk button to save the changes.
  5. Go back to the Trust Center’s Macro settings tab and select Notifications for all macros option.
  6. Finally, select Enable all macros and click the OK button to launch Outlook with the appointment duration macro enabled.
    enable all

The macro above changes appointment durations to 15 minutes. Users will need to edit the objAppointment.Duration values in the macro to change the duration to a shorter time period.

With this, you should be able to fix the duration of the appointment must be shorter on Outlook. If you want to make your Outlook calendar private, check our detailed guide to do it easily.

Feel free to let us know the solution that helped you fix this issue in the comments below.

FIX: Intune App Failed to Retrieve Information (0x87d30065)

Many users reported that the Intune app failed to install, displaying errors such as Failed to retrieve information (0x87d30065). Similar to 0x87d101f4 Intune compliance error, it won’t let you use the service to full capacity.

Join us while we take a closer look at this Intune error.

How can I fix Intune app failed to install?

1. Check the installation error details

  1. Users can find more specific installation error details via the Troubleshoot tab in Intune. To find installation details, sign in to the MS Azure portal.The Intune portal microsoft intune not installing apps
  2. Then click Intune to open the Intune service.
  3. Next, click the Select user option to select a user for whom the app installation error needs to be fixed.
  4. Click Troubleshoot at the bottom left of the Intune page to open a troubleshooting tab.
  5. Select the device to fix the installation error for.
  6. Then select Managed Apps to open an app list. That list will include the app which didn’t install.Managed Apps tab microsoft intune not installing apps
  7. Select the app with a failed installation status to open an Installation blade (or sidebar) that provides further installation error details in the form of an error code. Then users can note down the error code and other details for further reference.

2. Check Event Viewer’s logs

  1. Users can get further Intune installation error details for Windows apps from the Event Viewer. To do so, launch the Run accessory by pressing the Windows key + R hotkey.
  2. Enter eventvwr.msc in the Open box and click OK to open the window in the snapshot directly below.Event Viewer microsoft intune not installing apps
  3. Click Event Viewer on the left of the window.
  4. Select Applications and Services logs, Microsoft, and Windows in the Console Tree.
  5. Then click AppxPackagingOM and Microsoft-Windows-AppxPackaging/Operational to open the event log in the snapshot directly below. There look for and select recent 404 and 465 app installation error events for further details on them.Event Viewer log microsoft intune not installing apps
  6. In addition, click AppXDeployment-Server and Microsoft-Windows-AppXDeploymentServer/Operational to check events pertaining to deployment errors.

If Intune app failed to install, be sure to try these steps and check if error is resolved.

3. Issue a support request

  1. Intune admin users with Azure AD roles can then issue support requests that includes error code details to Intune’s help and support. First, select a feature area within Intune’s Device Management dashboard.
  2. Then select the Help and support option.
  3. Click the ? Icon at the top right corner from the Device Management portal node.
  4. Select Microsoft Intune on the service drop-down menu to open the Help and support page.
  5. Then fill out the text box there with the error details, and click the Get help button.The help text box microsoft intune not installing apps
  6. To send an email request, click Get support.
  7. Click New service request by email, and then enter an email address for help and support to respond to.
  8. Then press the Send button.

When Intune’s help and support replies, users can provide further error code details noted from the Installation blade and Event Viewer.

Thereafter, Intune’s support service can provide users with some resolutions for the installation errors.

If you are getting an error code 80180006 while trying to login to Intune, read this guide to fix the issue.

We hope that this guide helped you fix the problems with Intune app that failed to install. In case you’re having more issues, check our guide on Intune not syncing.

Did you find a different solution? If so, share it with us in the comments below.

Here’s what the Surface Pro X wallpaper blended with Windows XP’s “Bliss” looks like

If you’ve been following the last week of Microsoft news recently, you might have noticed that the company’s new Surface devices sport some impressive new wallpapers themed towards natural landscapes. We’ve already have shown you where you can download them all, but someone else has taken things a bit further, blending the Surface Pro X wallpaper with Windows XP’s classic “Bliss” wallpaper.

As seen in the first slider image below, Redditor Castetorch worked some graphic design magic and switched out the usual orange-colored landscape from the Surface Pro X wallpaper: He instead added some touches of green, switched around the cloud, and mountain top to replicate the classic Windows XP wallpaper which many have come to love. You can compare the various wallpapers by going through our sliders.

It’s a really visually impressive scene, but Castletorch also has switched things up and created variants for different seasons. Some other variations of the Surface Pro X wallpaper include one with a stormy sky, one with a dark sky, and another one themed for the fall. These can all be found here.

What do you think of this wallpaper? Does it bring back memories? Feel free to let us know in the comments below.

Mike Ybarra, Corporate Vice President for Xbox Live, Game Pass, and Mixer, is leaving the company

Change is in the wind, apparently. After yesterday’s announcement that Windows Insider chief Dona Sarkar was moving to a new role, today we get news that 20 year Microsoft veteran and well known Xbox gamer Mike Ybarra is leaving Xbox:

Ybarra, who started at Microsoft as a Systems Engineer in 2000, according to his LinkedIn profile, and after working on Windows 7, moved to Xbox in October 2009. Ybarra promises to continue to “giving every ounce of energy I have to try and make gaming better for everyone,” but no word yet on where this next adventure of his will occur.

Ybarra had his hands in Xbox Live, in Game Pass, and Mixer, and is leaving Xbox in a very good place indeed. We wish Mike all the best and we’re looking forward to seeing what’s next. Good Luck!

Microsoft’s Xbox Wireless Controller shows up in … the Apple Store

It seems Apple is serious about its gaming efforts. The company has listed the Xbox Wireless Controller on the Apple Store, allowing anyone to order one for their Apple devices or for the Xbox One console.

The Cupertino giant has added support for Xbox wireless gamepads, as well as bluetooth Playstation Dualshock controllers, to its mobile devices with iPadOS/iOS 13, as well as Macs with macOS Catalina and the Apple TV with the tvOS 13 update. Part of Apple’s decision to support these controllers is because of its Apple Arcade subscription service, which brings users a handful of games for just $4.99 per month. Of course, the gamepad should still work for any any game that supports third-party controllers.

Apple’s bringing the Xbox wireless controller to its online store is definitely unexpected, but makes sense. Gaming has never been a big appeal on macOS devices or the Apple TV (Mojang even pulled the plug on Minecraft for Apple TV due to low player usage). So maybe a popular brandname controller is just the push that Apple needs to appeal more for casual gamers.

The Xbox Wireless Controller is available for $59.95, and can be delivered to your door or shipped to your local Apple Store for pickup. If you prefer saving money, Amazon also sells various colors on its website, typically for less than $50.

Would you order an Xbox One controller for your Apple device, or do you prefer playing higher-quality games on consoles? Feel free to share your thoughts below.

Yes, the new Surface devices have USB-C, but here’s why you need to be careful

If you’ve been thinking of buying any of the new Surface devices, you’ve likely heard good things about its support for USB-C. After years of releasing devices sporting older USB-A ports, Microsoft finally is adopting a newer technology on its hardware. However, there are some pitfalls of USB-C that you should be aware of. Here’s why you need to be careful.

All dongles and USB-C hubs are not created equal

First off, there’s the need to address dongles and USB-C Hubs. Since older USB-A accessories obviously can’t fit inside the USB-C port, you’ll need to purchase one of the two to connect things like USB drives, printers, and more.

You can find these dongles for cheap on Amazon. Our quick search for USB-C hubs turned up this third-party option for around $10, as well as an official option from Anker for $40. We also found the Amazon Basics USB-C to USB-A dongle for $8, as well as this third-party option for $9.

However, when buying these dongles, you need to be careful. While you could cheap out and go for something that fits your budget, you could be putting your new Surface device at risk by doing so.

The reason why? Not all USB-C hubs and dongles support the same protocols. Some don’t support power and will need you to plug in an external USB-C connector for pass-through charging to give it juice. This means you could perhaps plug a display into a USB-C hub, only to have it possibly cause damage or to see it not work with your device.

Additionally, some dongles and hubs draw extra power from your device. If they are not properly equipped with the circuity inside to handle it, you could end up damaging your new Surface and causing electrical shortages and other issues.

That’s why we recommend you pay the price and pick an official option from Microsoft, Belkin, Google, etc when shopping around for dongles and USB-C hubs. You’ll know that what you’re buying will work, and won’t damage your new Surface.

The dangers of USB-C charging and cables

Next up there are the dangers of USB-C charging. While USB-C has been billed as a convenient and easy method of charging Surface devices, it also can be a dangerous endeavor.

You see, just like USB-C hubs and dongles, not all USB-C charging cables are created equal. You should always make sure that a USB-C cable is compliant with the USB-C specification before buying it. This is a particular issue with cables that feature USB-A on one end, and USB-C on the other — for connections to your typical power brick.

But why? Most USB-C devices support fast charging, which means that the device will output a lot of power at a fast rate — up to 100W to be exact. Some cables are not properly equipped to handle this. There needs to be circuitry inside the cable to prevent it from drawing too much power. Badly designed and/or cheap cables don’t have this tech inside and can pull too much power and put your device at risk.

Our best advice when looking for charging and USB-C cables with your Surface is to make sure that what you’re buying is clearly labeled. We’d recommend buying Amazon Basics cables, as they list what you’ll be getting. You can clearly see markings and which speeds the cable support, and more. You also won’t have to worry about the cable being easily damaged, or the connectors breaking off and damaging your Surface.

We also recommend you to check out the USB-C compliant website for where you can buy additional cables that fit compliancy standards.

New USB4 standard is now finalized, with first devices expected for 2020

Just stick to Surface Connect

Worst come to worst, if you’re truly afraid, you can use the Surface Connect port for charging instead. That’s part of the reason why we think Microsoft is still keeping the port onboard its devices, and why the company was reluctant to make the move to USB-C. This is a proven foolproof method, as the power brick handles all the electrical conversions, and not the cable itself. Microsoft even sells an adapter, which lets you convert Surface Connect to USB-C if needed.

Xbox Game Pass for PC to welcome The Outer Worlds, Saints Row IV: Re-Elected, and more in October

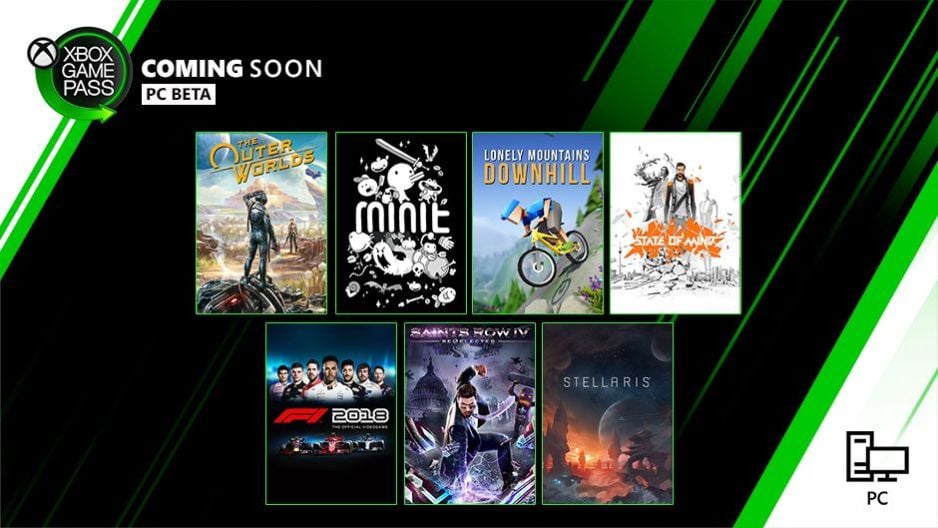
Following the additions of Dishonored 2 and Cities Skylines last week, Xbox Game Pass for PC is about to welcome 7 new games in October. The headliner is The Outer Worlds, the upcoming role-playing video game developed by Obsidian Entertainment, a game studio Microsoft purchased last year. The game will be available on Xbox Game Pass for PC and console on launch day, October 25.

Microsoft didn’t announce any release dates for the six other titles joining Xbox Game Pass for PC later this month, but there are two games that are already available on Xbox Game Pass for console, F1 2018 and Stellaris. The four other new games include Saints Row IV: Re-Elected, the futuristic thriller game State of Mind, the indie adventure game Minit, as well as Lonely Mountains Downhill, a Downhill Mountain Biking Game launching on October 23.

Thanks to Xbox Game Pass for PC, Microsoft is finally bringing more PC games to the Windows 10 Microsoft Store, with some of them coming with Xbox Live achievements as well. However, there’s still a long way to go before the Microsoft Store catches up to Steam, Gog, or even the Epic Games Store, especially when the latter offers higher margins to developers and publishers, as well as two PC games for free every week.

Still, Xbox Game Pass remains a very good deal for PC gamers, and there are already many quality games in the catalog including Gears 5, Forza Horizon 4, Metro: Exodus, Wolfenstein 2: The New Colossus, or Prey. It can only get better once big publishers (Capcom, Square Enix) that are already supporting Xbox Game Pass for Console do the same for Xbox Game Pass for PC.

KB4517389 causes Critical Error, Search bugs, and more

Microsoft has just released the October 2019 Patch Tuesday updates and they include a lot of security improvements.

Besides the security updates in Internet Explorer and Microsoft Edge, there are also many fixes and some known issues that are still unresolved.

Strange enough, there’s nothing from Adobe and some users are intrigued by that:

Relative small patch Tuesday, and nothing from Adobe

Amongst the Windows 10 versions that received updates, Windows 10 v1903 seems to be the one that is currently affected by the above mentioned unresolved issues and also by some new ones.

KB4517389 causes Critical Error

Some users are complaining that after installing the KB4517389 on their PC’s, they can’t use the Start Menu and encounter a Critical Error:

KB4524147 originally caused a critical error when using Start Menu AND it prevented my printer from printing. The latter was because of some mess up with the print spooler. I uninstalled KB4524147 and BOTH problems disappeared. This morning, I updated with KB4517389. The printer seems to work, BUT I receive a critical error when using the Start Menu. 

The problem doesn’t seem isolated, as other users reported it on Reddit:

Off to an inauspicious start… KB4517389 broke my W10 1903 test VM. After installing, I get “Critical Error. Your start menu isn’t working.” Rebooting doesn’t change, but uninstalling the patch gets it back.

For now, there isn’t an official resolution. The only thing that seems to work is to uninstall the update.

Also, if you didn’t updated yet and want to avoid similar bugs and issues, you can block the update.

Printer drivers issue

As we already know, Microsoft has released a silent update on October 3rd to solve an issue with printer drivers. Supposedly, the issue was solved then.

Again, with the release of the October 2019 Patch Tuesday updates, the tech giant confirmed that the issue was solved:

Addresses an issue with applications and printer drivers that utilize the Windows JavaScript engine (jscript.dll) for processing print jobs.

Despite that, some users are still encountering the problem:

Tested on one computer, still broken. Edit: Removing KB4524147 / KB452148 before installing the October cumulative update seems to work

For now, the only workaround is to remove KB4524147 / KB452148 before installing the October Patch Tuesday updates.

Search is still not working for some

Windows Search is causing problems for a lot of Windows 10 users. The problem was first reported months ago, and it’s still not working for some, despite Microsoft addressing it several times.

Here’s what one user says:

will test on if Windows Search works and report back EDIT: it doesn’t EDIT: it doesn’t and it might be because I have VMware Pro 15 apparently.

If you encounter the same issue, besides uninstalling the update, there is another unofficial workaround.

You’ll need to copy ActivationStore.dat from another Windows 10 working PC to C:ProgramDataMicrosoftWindowsAppRepositoryPackagesMicrosoft.Windows.Cortana_1.13.0.18362.

If you can’t view/copy in the AppRepository folder, edit the folder permissions to authorize yourself. As we already said, this is an unofficial workaround, but it worked for some.

Give it a try, as it might work for you, too.

Mouse issues after the update

Other users are reporting problems with their peripherals after the update:

After updating to the 1903 i have experienced an issue with my mouse cursor. It started when i tried to load any page on my browser and when gaming (Football Manager 2019). The cursor at some points just jumps or skips. Dont know why..no cpu spikes or any spike of any kind. i kind of fixed it when i updated some drivers on device manager but then another cumulative update came a week ago and the issue started again. i reinstalled windows to the 1903 build and nothing changed.

If you bump into the same issue, don’t worry. We’ve already dealt with this problem. Follow the simple steps from this guide and you’ll get rid of the problem in no time.

Bluetooth problems

Connectivity issues are not that uncommon when it comes to Windows 10 updates. But some users claim that the latest KB4517389 broke their Bluetooth all-together:

I am running windows 10 pro 64 bit, my computer is at this update, and it broke bluetooth completely.[…]One thing that is weird, is after I tried checking the device manager on **** is going on, it shows a broke entry under the USB controllers called “Unknown USB Device (Device Descriptor Request Failed)”.

This can happen if files get corrupted and Bluetooth gets reassigned as a USB controller. There isn’t yet a confirmed solution for this problem, but there are a couple of things that you can try:

  1. Update that certain USB driver in Device Manager.
  2. Update your drivers and your BIOS.
  3. Update the Bluetooth driver from the manufacturer’s website.
  4. Uninstall the Bluetooth driver and let Windows install the default driver.

If you don’t know how to update your BIOS, check out this awesome guide and get the job done without any problems.

Qualcomm Atheros AR9485 not working properly

As we already mentioned, connectivity issues are not that uncommon after an update, but they usually get resolved pretty quickly. That’s not the case with Qualcomm Atheros AR9485, as some users reported:

Devices with Qualcomm Atheros AR9485 experience problems with WiFi dropping and network adaptor needing to be reset. Microsoft are aware there is a problem with their Windows 10 updates since their 1607 upgrade, yet seem incapable of rectifying the problem.Their latest update is showing same problem.

This is a pretty old problem, but we already dealt with it. You can try the steps in this dedicated guide, as it may help you solve the connectivity issues quickly and easily.

Besides these problems, there are also a lot of installation issues and boot errors affecting the latest KB4517389. Check out this article to find out more info about that.

Also, Microsoft Edge seems to stop working on some Windows 10 PCs after updating to KB4517389. If you want to know more, take a look at this dedicated article.

Have you encountered any other issues after updating to KB4517389?

Share your experience in the comments section below and we’ll be sure to take a look.

READ ALSO:

How to permanently delete your Arc Games account

Arc Games has one of the largest collections of free-to-play games. From MMORPGs to shooter and fantasy Games, Arc offers something for everyone. However, what if you want to delete Arc game’s account?

At times you may want to delete your Arc account because it is old and you want to start from scratch again.

In this article, we walk you through the process of deleting the Arc games account as well as uninstalling the Arc client from the Windows system.

Steps to delete your Arc Games account

1. Uninstall the Arc Client

  1. If for some reason you want to uninstall the Arc Client, you can do it from the Control Panel.
  2. Press Windows Key + R to open Run.
  3. Type control and click OK.
    Delete arc account
  4. In the Control Panel, go to Programs > Programs and Features.
  5. Select Arc Client and click on Uninstall.

You can also uninstall the Arc Client from the installation folder.

  1. Open the File Explorer.
  2. Open the Perfect World Entertainment folder.
  3. Click on the Arc folder.
  4. Click on the Uninstall Arc option and follow the on-screen instructions.

To ensure the process has been performed correctly, we recommend using a professional uninstallation tool that removes unwanted software and any files that are left behind in the system or registry.

Residual files are hard to detect when you uninstall an app or program manually. Over time, they can affect your computer’s performance and clog your operating system.

This type of tool is ideal because it performs these actions automatically and in a secure way.

2. Contact Arc support

  1. Unlike other game distribution platform, Arc does not offer an option to delete the account from its client.
  2. Even if you log in to the web app, there is no way to delete the Arc game account by yourself.
  3. The only way to delete your Arc account is to contact the support.
  4. Go to Arc game support.
  5. Open a ticket asking the support to delete your Arc account. You may be asked to confirm the account before it can be deleted.
  6. Once the email is verified, your Arc account will be removed from the database.

Note that once the account is deleted, you can’t recover it in the future. All the data and the transaction associated with the account will be removed.

So if you want to remove one of the Arc games or the Arc client from the PC, follow the next set of steps.

3. Uninstall an Arc game

  1. You can uninstall any game download via the Arc Client from the client itself.
  2. Launch Arc Client on your PC.
  3. Sign in using the username and password for the account.
  4. Under the “Charge” section, click the Title icon. This will show all the games installed on your Arc Client.
    Delete arc account
  5. Right-click on the game you would like to uninstall.
  6. Select the “Uninstall” option.
  7. Arc will delete the game from the system. Click on Yes if asked to confirm the action.

Games deleted from your Arc Client are still available for download. Simply browse the Store to install the games.


By following the steps in this article, you can delete your Arc account. However, if you only want to uninstall some Arc games or Arc Client, follow the second and third methods.

KB4519338 brings plenty of security updates and fixes

The October 2019 Patch Tuesday is finally here with an assortment of new features.

It seems that with KB4519338 Microsoft focused on improving security when using Internet Explorer and Microsoft Edge, as well as some improvements with username and password recognition.

Additionally, the major update also contains changes for Microsoft HoloLens (OS Build 17763.806) released October 8, 2019.

KB4519338 still has a lot of unresolved issues

Check out the full list of quality improvements and changes:

  • Addresses an issue in the Keyboard Lockdown Subsystem that may not filter key input correctly.
  • Addresses an issue in security bulletin CVE-2019-1318 that may cause client or server computers that don’t support Extended Master Secret (EMS) RFC 7627 to have increased connection latency and CPU utilization. This issue occurs while performing full Transport Layer Security (TLS) handshakes from devices that don’t support EMS, especially on servers. EMS support has been available for all the supported versions of Windows since calendar year 2015 and is being incrementally enforced by the installation of the October 8, 2019 and later monthly updates.
  • Addresses an issue with applications and printer drivers that utilize the Windows JavaScript engine (jscript.dll) for processing print jobs.
  • Security updates to Windows Shell, Internet Explorer, Microsoft Scripting Engine, Microsoft Edge, Windows App Platform and Frameworks, Windows Cryptography, Windows Authentication, Windows Kernel, and Windows Server.

Unfortunately, some users should be aware that it also comes with a few issues.

For example, devices with some Asian language packs installed may receive the error, “0x800f0982 -PSFX_E_MATCHING_COMPONENT_NOT_FOUND.”

For the full list of known issues, be sure to check out this link.

If you have your Windows 10 set to perform automatic updates, you will get this update immediately.

However, if you prefer manual downloads, you could simply get the update from the Microsoft Update Catalog.

If you’ve also installed this update and have found some issues, please let everyone else know in the comments section below!

Download Windows 7 KB4520003, KB4519976 Patch Tuesday updates

It’s Patch Tuesday again, and Windows 7 users have not been forgotten.

If you’re still using Windows 7 and want to update your PC, you should see two new updates: KB4520003 and KB4519976. The first one is a security-only update, while the second one is the monthly rollup.

While last month the Patch Tuesday updates for Windows 7 shared a similar changelog, this time they’re a bit different.

KB4520003/KB4519976 changelog

Here’s the full list of improvements and fixes for KB4520003:

  • Addresses an issue in security bulletin CVE-2019-1318 that may cause client or server computers that don’t support Extended Master Secret (EMS) RFC 7627 to have increased connection latency and CPU utilization. This issue occurs while performing full Transport Layer Security (TLS) handshakes from devices that don’t support EMS, especially on servers. EMS support has been available for all the supported versions of Windows since calendar year 2015 and is being incrementally enforced by the installation of the October 8, 2019 and later monthly updates.
  • Security updates to Windows Authentication, Microsoft JET Database Engine, Windows Kernel, Internet Information Services, and Windows Server.

And the full list for KB4519976, which also includes the changes from KB4516048 (released September 24, 2019):

  • Addresses an issue that may fail to disable VBScript in Internet Explorer by default after installing KB4507437 (Preview of Monthly Rollup) or KB4511872 (Internet Explorer Cumulative Update) and later.
  • Addresses an issue with applications and printer drivers that utilize the Windows JavaScript engine (jscript.dll) for processing print jobs.
  • Security updates to Windows Authentication, Microsoft JET Database Engine, Windows Kernel, Internet Information Services, the Microsoft Scripting Engine, and Windows Server.

There are currently no known issues for both of the updates.

It’s worth mentioning that Microsoft recommends that you first install some SSU’s before trying to install the Windows 7 updates:

  1. The March 12, 2019 servicing stack update (SSU) (KB4490628). If you are using Windows Update, this SSU will be offered to you automatically. To get the standalone package for this SSU, search for it in the Microsoft Update Catalog.
  2. The latest SHA-2 update (KB4474419) released October 8, 2019. If you are using Windows Update, the latest SHA-2 update will be offered to you automatically. For more information on SHA-2 updates, see 2019 SHA-2 Code Signing Support requirement for Windows and WSUS.
  3. The latest SSU (KB4516655). If you are using Windows Update, the latest SSU will be offered to you automatically. To get the standalone package for the latest SSU, search for it in the Microsoft Update Catalog.

If you want to manually install the October 2019 Patch Tuesday updates for Windows 7, you can do so by following the links below.

Just keep in mind that you will have to download the servicing stack updates prior to the October 2019 Patch Tuesday updates.

This Modification is Not Allowed in MS Office: 5 Quick Fixes

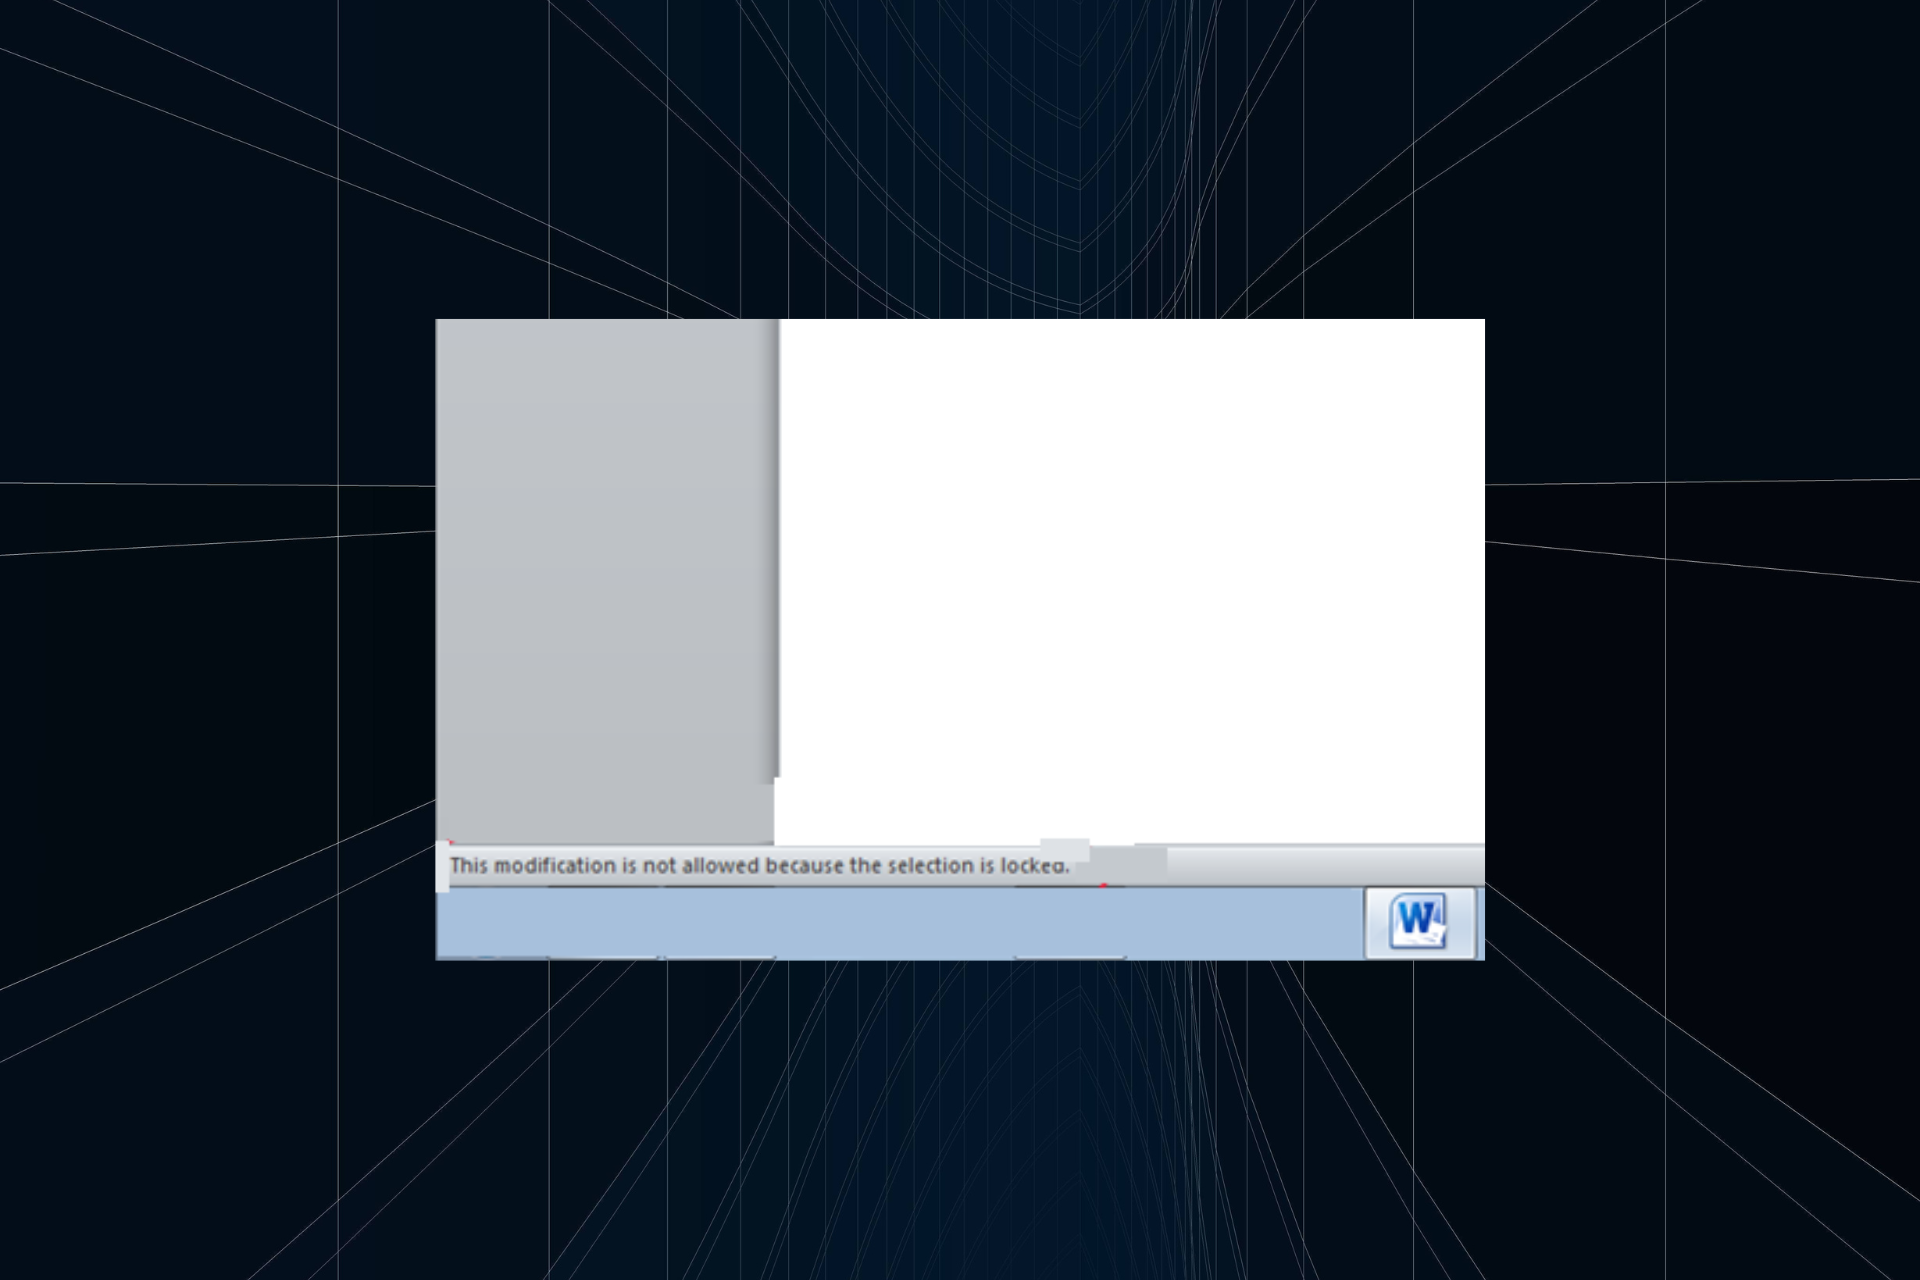
While editing a Microsoft Office document, you may encounter a warning message stating that the selection is locked. The full error message reads This modification is not allowed because the selection is locked.

This is a common error and occurs if your Office app is not activated when there are multiple instances of Office installed, or if the file is being edited by someone else.

If you are also troubled by this error, here are a couple of troubleshooting tips to fix the This modification is not allowed because the selection is locked in Word 2016.

How do I fix Modification is not allowed because the selection is locked?

Before we move to the slightly complex solutions, try these quick ones first:

  • Restart the computer.
  • Make sure the file is stored on the physical drive and not on an online server.
  • Check whether another user is editing the file you are trying to edit. Try making a copy of the file and make the necessary edits.

If none work, head to the fixes listed next.

1. Check Office activation

  1. To activate the office, launch any Microsoft Office app.
  2. Click on File and select Account.
  3. You will see the activation message if the app is not activated. Enter the product key to activate the Office app.activate office to fix this modification is not allowed because the selection is locked

To fix the error, make sure your Office version if activated. You can encounter the modification locked error when Office 2016 is not activated.

2. Check for multiple instances of Office

  1. Press Windows + R to open Run, type appwiz.cpl, and then click OK.
  2. Select the trial version of Microsoft Office and select Uninstall.this Modification not allowed because selection locked
  3. Try editing the file again and check for any improvements.

If you have multiple versions of Microsoft Office installed, uninstall the older version. Most of the time, you have a trial version of Office Installed, which needs to be uninstalled to fix the This modification is not allowed because the selection is locked error.

3. Change file attributes

  1. Close Microsoft Office, and navigate to the location where the file is stored.
  2. Right-click on the file and then select Properties.
  3. Click the Advanced button.
    Microsoft Office document locked error
  4. Uncheck the File is ready for archiving and Allow this file to have contents indexed in addition to file properties options.
    Microsoft Office document locked error
  5. Click OK to save the changes.
  6. Click Apply and then OK again.

Many users reported that the misconfigured file attributes triggered the modification locked error in Office 2019. Reconfiguring the changes fixed things in no time and they could edit the file.

4. Remove file restriction

  1. Open the Microsoft file with the error.
  2. Click on the Review tab.
    Microsoft Office document locked error
  3. Click on the Restrict Editing option.
    This modification is not allowed
  4. Uncheck the Allow only this type of editing in the document and Limit formatting to a selection of style options.
  5. Save the changes and then open the file again.

Microsoft Office users can apply restrictions on the file to prevent editing. Check if your file also has any restrictions and remove them if any are found.

5. Remove grouping

  1. Open the file with the error.
  2. Click on the Developer tab.
  3. Click on Group and then select Ungroup.

If the group content control has been applied to part of your document, ungrouping the file will resolve the issue. And this should, in all likelihood, fix the This modification is not allowed because the selection is locked error.

Before you leave, find out to speed up Microsoft Office if it’s running slow.

Do let us know which fix worked for you in the comments.

Low Bandwidth on Firestick: 4 Ways to Fix it

The Amazon Fire Stick is a great device to watch your favorite shows. However, many users encountered the error saying that bandwidth is low on the Firestick.

This is a lot different that Firestick not connecting issue that we covered earlier and it will prevent you from browsing and watching online content. Luckily, there are ways to fix that.

Why does my FireStick have low bandwidth?

  • Issues with application cache can sometimes cause this problem to occur.
  • Temporary glitches with your network or Firestick can cause this issue.

How do I fix low bandwidth on Firestick?

1. Clear the cache

  1. Open Settings.
  2. Go to Applications.
  3. Select Managed Installed Applications.
  4. Click on the applications you are using to clear the cache.
  5. Select Clear Cache.

2. Restart the Amazon TV Fire Stick

  1. Open Settings.
  2. After that choose My Fire TV.
     
  3. Select Restart.
  4. Confirm that you want to restart the device.

Once the device restarts, check if Firestick bandwidth is still low.

3. Restart your router

  1. Turn off your modem or router by pressing the Power button on it.
  2. Keep it off for 30 seconds.
  3. Press the Power button again and wait for it to boot.
  4. Once the device fully boots, check if the problem is resolved.

4. Reconnect your network

  1. Open Settings and navigate to Network.
  2. Locate your network and press the Menu button.
  3. Now press Select button twice to forget the network.
  4. Connect to the network again and check if that solves the problem.

So, we have a few solutions available for you to fix this issue in no time. Clear the cache, restart the Amazon TV Fire Stick or restart your router.

Also, reconnect your network to solve this major issue. In case the problem is still there, you might have to factory reset Amazon Firestick.

Did our solutions help you solve the problem? Which method worked for you? Do let us know in the comments section below!

KB4520008 fixes Bluetooth hardening updates and more

Windows 10 fans rejoice as the October 2019 Patch Tuesday hit live and brings an assortment of new features.

KB4520008 boasts several neat highlights, including:

  • Improvements to general keyboard input
  • several necessary Bluetooth updates
  • Several security updates for Internet Explorer, Microsoft Edge and more

Download KB4520008 [DIRECT DOWNLOAD LINK]

KB4520008 Changelog

  • Addresses an issue in the Keyboard Lockdown Subsystem that may not filter key input correctly.
  • Addresses an issue with the Bluetooth hardening updates, released August 13, 2019, that may cause a “0x133 DPC_WATCHDOG_VIOLATION” error.
  • Addresses an issue in security bulletin CVE-2019-1318 that may cause client or server computers that don’t support Extended Master Secret (EMS) RFC 7627 to have increased connection latency and CPU utilization. This issue occurs while performing full Transport Layer Security (TLS) handshakes from devices that don’t support EMS, especially on servers. EMS support has been available for all the supported versions of Windows since calendar year 2015 and is being incrementally enforced by the installation of the October 8, 2019 and later monthly updates.
  • Addresses an issue with applications and printer drivers that utilize the Windows JavaScript engine (jscript.dll) for processing print jobs.
  • Security updates to Windows Shell, Internet Explorer, Microsoft Edge, Windows App Platform and Frameworks, Windows Cryptography, Windows Authentication, Windows Datacenter Networking , Windows Storage and Filesystems, Windows Kernel, Microsoft Scripting Engine, and Windows Server.

Several issues come with KB4520008 as well

There have been some reported issues with this update, such as issues renaming folders from CSVs, and that some devices startup with a black screen.

There have also been reported an issue with Mixed Reality users, probably caused by a bad implementation of the Microsoft HoloLens update.

If you are running an older update, only the newest features will be downloaded and applied to your device.

Have you installed the latest update? Is it causing any issues with your PC?

Let us know in the comments section below!

KB4517389 brings Microsoft HoloLens updates and more

For those of you eagerly waiting for a new update to your Windows 10, know that October 2019 Patch Tuesday is here.

It would seem that KB4517389 (OS Build 18362.418) is mainly focused on bringing updates to the Microsoft HoloLens (OS Build 18362.1034).

Additionally, this patch sees the beginning of the end of the support of e-books that use the .epub file extension over the next several months.

There are also updates to improve security when using Internet Explorer and Microsoft Edge.

Additionally, KB4517389  brings updates for verifying user names and passwords. Lastly, KB4517389  brings updates for storing and managing files.

KB4517389 Changelog

Check out the full list of changes and improvements:

  • Addresses an issue in security bulletin CVE-2019-1318 that may cause client or server computers that don’t support Extended Master Secret (EMS) RFC 7627 to have increased connection latency and CPU utilization. This issue occurs while performing full Transport Layer Security (TLS) handshakes from devices that don’t support EMS, especially on servers. EMS support has been available for all the supported versions of Windows since calendar year 2015 and is being incrementally enforced by the installation of the October 8, 2019 and later monthly updates.
  • Addresses an issue with applications and printer drivers that utilize the Windows JavaScript engine (jscript.dll) for processing print jobs.
  • Security updates to Windows Shell, Internet Explorer, Microsoft Edge, Windows App Platform and Frameworks, Windows Cryptography, Windows Authentication, Windows Storage and Filesystems, Windows Kernel, Microsoft Scripting Engine, and Windows Server.

Fortunately, no issues were discovered with this update. Make sure you read our report before you download the update!

Update: Several important issues with KB4517389 have been reported. Be sure to check them out in the articles below:

Have you set your Windows 10 to automatically update to the latest version? If you did, then the update will automatically install on your PC.

However, if you want to manually install KB4517389, you can follow the direct download link below.

If you encounter any problems or bugs with the new updates, make sure to share your experience in the comments section below.

Amazon Fire Stick cannot obtain an IP Address? Try this

The Amazon Fire Stick is an accessory to the digital media player and its micro-console remote control developed by Amazon.

It provides users with a neat way of streaming content from Amazon, as well as other services in High-Definition.

Since the device is a small network appliance that can deliver digital audio/video content streamed via the internet, it requires a stable connection.

However, some users have been complaining that their Amazon Fire Stick is having issues connecting to an IP address:

[…]It continually drops connection. All day today it will not connect at all. It shows my network and says strong signal but just keeps saying obtaining ip address….it will change to saved momentarily but then changes back to obtaining ip address. […]

How do I make my Amazon Fire Stick connect to an IP Adress?

1. Reboot the Amazon Fire Stick

  1. Remove the Amazon Fire Stick from the TV for around 30 seconds
  2. Plug it back in
  3. Wait for it to boot
  4. Try connecting the Amazon Fire Stick to the network again

Reboot Fire Stick

2. Reboot your router

The problem may be in your router and not your Amazon Fire Stick.

As such, rebooting it is the only solution:

  1. Reboot the router from the GUI on your computer or the switch at the back of the router
  2. Leave it turned off for around 30 seconds
  3. Turn it back on and give it time to boot
  4. Try connecting the Amazon Fire Stick to the network again

reboot router

3. Make your Amazon Fire Stick “forget” the network

  1. Go to the Fire TV Stick menu
  2. Select Settings
  3. Go to Network
  4. Select the network it is connected to, and then select Forget

fire stick forget network

4. Recheck your router’s security

Make sure MAC address filtering is not enabled, and if it is, add your Firestick’s MAC address to the allowed list.

But first, you need to find out the Fire Stick’s MAC address:

  1. Go to the Fire TV Stick menu
  2. Select Settings 
  3. Go to About
  4. Select Network and look for MAC Address (Wi-Fi).
  5. Add the MAC address to the allowed list on the router
  6. Save the change

5. Check your IP Address pool

Most routers have a limited amount of dynamic IP addresses (around 155).

Check to see if your router has any IP Addresses to spare for your Amazon Fire Stick.

By using the methods above, you will surely get rid of any IP address connectivity issues plaguing your Amazon Fire Stick.

If you know any other methods, feel free to make them public in the comments section below.

RELATED ARTICLES YOU SHOULD CHECK OUT:

  1. Your Amazon Fire TV Stick is not booting? We got the fix
  2. Amazon Fire Stick not downloading apps? Try these methods
  3. Is your Amazon Fire Stick not recognized by my TV

Is your Microsoft HoloLens not updating? Try this

Microsoft HoloLens is a pair of mixed reality smartglasses developed and manufactured by Microsoft, similar to Oculus Rift.

HoloLens was Microsoft’s response to the ever-growing mixed reality market running the Windows Mixed Reality platform under the Windows 10 computer operating system.

Seeing that it runs on an OS, it receives updates quite frequently with the sole purpose of improving functionality and removing issues.

However, some users have been reporting on official Microsoft forums that they are having problems updating their HoloLens.

My Company has 3 HoloLens. Today I tried to update the HoloLens OS to latest version. One of them cannot be updated. […]The download progress bar keep 11%, after a while, it will try to update, but the update keep fail[…]

Apparently, when trying to update they are greeted by a message exactly like this one:

Error message (0x80073712)


How do I update the OS of my Microsoft HoloLens?

Normally, your HoloLens will automatically download and install system updates whenever it is plugged-in and connected to Wi-Fi.

However, sometimes you just need to force it to perform a manual update.

1. Manual update

  1. Press Windows
  2. Go the Settings app (the cogwheel-shaped button in the Start Menu)
  3. Go to Update & Security 
  4. Select Windows Update
  5. Select the Check for updates button
  6. Restart the device once the update is complete

Windows 10 Check for Updates

Please remember to turn not turn off your Microsoft HoloLens while your update is in progress.

2. Downgrade to a previous version

Your Microsoft HoloLens doesn’t update even after following the above-mentioned steps?

You should consider downgrading to a previous version and try triggering a manual update again.

  1. Remove all phones or Windows devices from your PC
  2. On your PC, download the Windows Device Recovery Tool (WDRT)
  3. Download the HoloLens Anniversary Update recovery package
  4. Extract the file
  5. Connect your Microsoft HoloLens to your PC using the original USB cables
    • In theory, pretty much any USB cable will work, but the original ones ensure maximum functionality
    • The tool will automatically detect your HoloLens
  6. Select the Microsoft HoloLens tile
  7. Proceed to the next screen and select Manual package selection
  8. Browse to where you extracted the folder contained in the zip from Step 4
  9. Select Install software

Windows Device Recovery Tool (WDRT)

There is a chance the tool may not detect your Microsoft HoloLens, and if that is the case, simply restart the PC.

If that doesn’t work either, select My device was not detected, choose Microsoft HoloLens, and follow the on-screen instructions.

Once the downgrade is complete, attempt manually updating your Microsoft HoloLens again.

Are you having issues updating your Microsoft HoloLens OS, or do you know another solution?

Please let us know in the comments section below.

RELATED ARTICLES YOU SHOULD CHECK OUT:

The Delegates Page is Not Available: 3 Ways to Fix

The Delegates page is not available error is one that arises for some Outlook users. The error can be problematic and prevent you from sending emails.

In case you haven’t tried Outlook, we have a great guide on how to download and install Outlook, so we encourage you to visit it.

Fixing this issue isn’t as hard, and today we’re going to show you the best ways to fix it.

Why the delegates page is not available?

  • The calendar isn’t shared with the delegate properly.
  • Certain rules in Outlook are interfering and causing the issue.
  • Your current Outlook profile might be damaged or corrupted.

How do I fix the delegates page is not available in Outlook?

1. Share the Calendar with the delegate

  1. Microsoft’s official resolution for the delegates page error is to share the Outlook calendar with the delegate, which will set up a new, temporary delegate. To do that, log in to the Outlook web app.
  2. Then click the Calendar button to open Calendar.Calendar button outlook the delegates page is not available
  3. Click the Share button to open the window shown directly below.Sharing and permissions outlook the delegates page is not available
  4. Input a user group in the text box.
  5. Select Delegate on the drop-down menu.
  6. Then click Share and Done.

2. Delete Outlook’s rules

  1. Some users have confirmed they’ve fixed the delegates page error by deleting corrupted Outlook rules. To do that, click the Home tab in the Outlook software.
  2. Then select the Rules button to expand its menu.
  3. Select Manage Rules & Alerts to open an E-mail Rules tab.
  4. Select rules on that tab, and click the Delete button to erase them.
  5. Alternatively, users can start Outlook with rules disabled with a command line switch. Press the Windows key + R keyboard shortcut.
  6. Input the following and click OK: Outlook /CleanRules
    The Run accessory outlook the delegates page is not available

After doing that, check if The delegates page is not available, cannot access Outlook folder message is still there.

3. Set up a new Outlook profile

  1. Setting up a new Outlook profile might also help resolve the delegates page error. Open the Outlook application.
  2. Click the File tab.
  3. Select Account Settings and Manage Profiles.
  4. Press the Show Profiles button.
  5. Then click the Add button.
  6. Enter a new profile title in the open text box, and press the OK button.
  7. Then switch to the new profile by clicking File, Account Settings, and the Change Profile option.
  8. Select the new profile on the Choose Profile window, and click the OK button.The Choose Profile window outlook the delegates page is not available
  9. Click the Options button.
  10. Select the Set as default profile option.

Those are three resolutions that might fix the delegates page not available Outlook error. In addition, users can try fixing the error with the Microsoft Support and Recovery Assistant for Office 365 utility.

For more information about Outlook, we have a great guide if you’re unable to add email account to Outlook 365.

Did you find a different solution? If so, don’t hesitate to share it with us in the comments below.

How to Update Uplay Games: Simple and Efficient Solution

Ubisoft has plenty of well-known titles under their belt, and their own desktop client to act as a game launcher and library manager. This client is known as Uplay, and while it may not be the most stable program of its type, it does a pretty good job.

However, many of our readers have been complaining that they are having problems updating their games through Uplay.

Other users stated that whenever they pressed the Update button that’s right under the game‘s icon within Uplay, nothing would happen. However, if they try to verify the game‘s files, it will fail to validate the game.

How do I update my Uplay games?

Keep note that this is more of a workaround rather than an official fix, so make sure you make a backup of your game‘s install files before trying this.

  1. Go to the install location of your Uplay games
    • This location varies depending on where you chose to install Uplay
  2. Rename the folder of the game that you cannot update into something else, but do NOT delete it
  3. Launch Uplay
    • In your list of installed games, the game which you renamed should now be missing from your library
  4. Proceed to look for the game in your game‘s list and click on Download
  5. Before pressing Continue after you chose the install location, go back to your Uplay folder and rename the game back to what it used to be
  6. Now return to the install wizard and click Continue
    • Now instead of downloading the files, Uplay will discover the ones already installed
  7. Uplay will now finish downloading whatever update was NOT installed until that very moment.
  8. Launch the game
Rename Ubisoft game

If you follow these steps, you should be able to successfully update pretty much any Uplay game.

An alternative solution would be to download the game through Steam instead since most Ubisoft games can be found there as well.

However, keep in mind that there are some incompatibilities between Uplay and Steam and that a Ubisoft game downloaded through Steam can only be handled through Steam.

More so, before trying any of these solutions, check to see if you have the disk space to spare.

This is because a lot of Ubisoft titles have patches that are quite big.

Download the October 2019 Patch Tuesday updates right now

Patch Tuesday is right around the corner and a new set of cumulative updates will be released for all the supported Windows 10 versions.

Microsoft just released the following updates:

  • Windows 10 version 1507 — KB4520011 (OS Build 10240.18368)
  • Windows 10 version 1607 — KB4519998 (OS Build 14393.3274)
  • Windows 10 version 1703 — KB4520010 (OS Build 15063.2108)
  • Windows 10 version 1709 — KB4520004 (OS Build 16299.1451)
  • Windows 10 version 1803 — KB4520008 (OS Build 17134.1069)
  • Windows 10 version 1809 — KB4519338 (OS Build 17763.806)
  • Windows 10 version 1903 — KB4517389 (OS Build 18362.418)

Windows 10 October Patch Tuesday updates

Although we’ve gotten used to big Patch Tuesday updates and lots of features and changes, it seem that Microsoft will deviate this time from the classic deployment.

A smaller number of updates is expected, mainly because .NET, Exchange, and SharePoint got some big changes in September.

Also, Chrome and Firefox next major releases are set for later this month. As a result, there will be minimal or no improvements at all in this Patch Tuesday.

Hopefully, there will be some changes involving Adobe Flash. Considering the fact that Flash got only one security update in the last three months, now is probably the time for another one.

SSU’s and Windows 10 v1909

Speaking of security updates, it’s also possible to see some new SSU’s (service stack updates). Microsoft is releasing them separately because they are critical for stability and maintenance.

SSU’s usually contain CVE fixes and they should be installed prior to any update to make sure that everything goes well.

Last month we saw for the first time SSU’s released for all the operating systems, but Microsoft has released them more often in recent times. So we might see new ones in the October 2019 Patch Tuesday.

Another thing to keep in mind is that the tech giant releases major feature updates on a semi-annual cycle, usually in April and October.

This means that Windows 10 v1909 will finally show up. It has been tested in the Insider Program for months, and now it’s finally ready for deployment.

19H2 will be a smaller update without many new features. Basically, it will be a stepping stone for 20H1 which will be released sometime in the spring of 2020.

Download October 2019 Patch Tuesday updates

If you have enabled automatic updates, the October 2019 Patch Tuesday updates will automatically install on your PC. If you want to manually install them, you can do so from Setting. check for updates october patch tuesday

Keep an eye on our latest news if you want to be the first one that gets the download links and changelogs for October 2019 Patch Tuesday, as we will keep you updated with all the important info.

READ ALSO:

How to stack or cascade your app windows in Windows 10

Windows 10’s most commonly used window management function is Snap, which lets you drag apps to the corners of your display to “snap” them side-by-side. However, the operating system also comes with a couple of other options, Stack and Cascade, which can be more helpful when you’re working with a large number of apps.

You can find Stack and Cascade by right-clicking your taskbar. You’ll see the two options as “Cascade windows” and “Show windows stacked”. Click the function you’d like to use.

Cascading windows

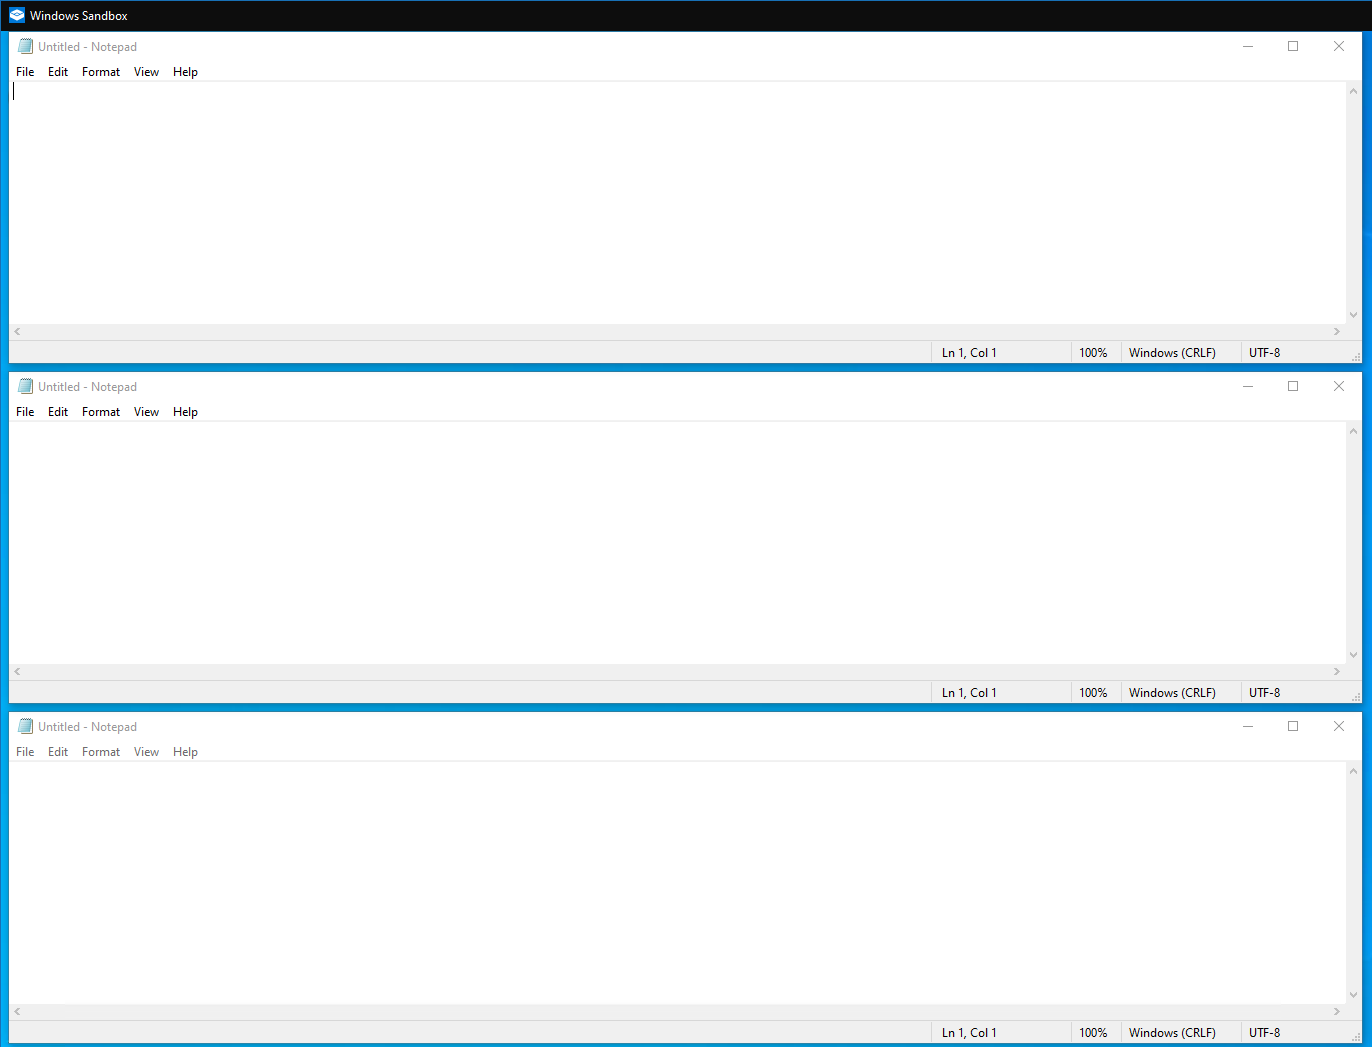
The cascade function repositions your windows so that each one is slightly nested inside another, like a stack of cards. This is intended to help you quickly identify all your open apps by looking at their titlebars. You can rapidly minimise or close apps using the titlebar buttons.

Cascading Windows in Windows 10

In Windows 10, Cascade is perhaps less useful than it once was. Its functionality has been largely replaced by the Task View interface, which gives you an overview of all your apps while providing a preview of each.

Stacking windows

Stacked windows appear as a vertical stack of apps. Like Cascade, it’s unlikely you’ll be using this one often. Users of monitors in portrait orientation will find Stack helpful though, as it enables you to make the most of your vertical pixels.

Stacking Windows in Windows 10

A separate option in the taskbar right-click menu, “Show windows side by side,” is similar to stack but works on the horizontal axis. It automatically arranges all your open apps so they’re visible as columns across your monitor. It feels like Snap but with support for more than two apps.

Stacking Windows in Windows 10

Whether you use these features is entirely up-to-you. They’ve been a component of the Windows desktop for decades and remain available in Windows 10. While Cascade is now largely redundant, Stack gives you a window tiling solution that’s somewhere between Snap and the new FancyZones app.

Microsoft to expand TV white spaces Airband Initiative globally

Microsoft is expanding its Airband Initiative—an effort to bring broadband Internet access to unserved 3 million residents in the U.S.—to become a global initiative. The company now aims to support as many as 40 million individuals who have little or no access to high-speed broadband internet.

Microsoft will begin with “areas with significant underserved populations”—Latin America and Sub-Saharan Africa—which also have government interest in improving connectivity for its residents. The company aims to cover the 40 million individuals between these two areas over the next three years.

Vacant broadcast frequencies known as TV White Spaces have proven to be quite effective for improving broadband coverage in rural America, so this technology will be a big part of Microsoft’s plan expand high-speed internet access in a very cost effective way. Microsoft also has other plans for achieving its goal, including:

  • Partnering with local internet service providers (ISPs) to provide affordable, reliable internet services.
  • Enabling rural digital transformation in newly connected areas, with a focus on supporting agriculture, education, rural entrepreneurship and telemedicine, as well as off-grid energy sources where necessary in order to improve rural productivity and livelihood.
  • Building a larger ecosystem of support, with a focus on stimulating international financing, to scale connectivity projects beyond our own direct investments.

Microsoft has seen an interest in expanding internet services across the world for some time now. The company has also used TV White Spaces to improve connectivity in other parts of the world—including India, Kenya, and Ghana.

What do you think of Microsoft’s ambitions? Be sure to share your thoughts in the comments area below.

Hacking group linked to Iranian gov’t tried to break into US Presidential candidate’s email, says Microsoft

Reporting of nation-state attacks has been increasing over the past handful of years as both journalists and targeted entities are becoming more transparent about the data and personal information of citizens, customers and users that are put at risk.

Either directly or by proxy tech companies have increasingly been getting involved with local and state governments to help combat meddling as well as protect their users from the growing wave of nation-state attacks, some of which are directed at disrupting the democratic processes within countries.

Microsoft most notably has developed and cultivated its AccountGuard service to help “monitor accounts of campaigns and other associated organizations related to election processes in democracies around the world, publishing this information should help others be more vigilant and take steps to protect themselves.”

In doing so, Microsoft was able to monitor and help notify the Iranian government to 2,700 attempts from a threat group they dubbed Phosphorus, to identify consumer email accounts that were linked to specific Microsoft customers. Being a nation-state attack, Phosphorus targeted 241 accounts associated with “U.S. presidential campaign, current, and former U.S. government officials, journalists covering global politics and prominent Iranians living outside Iran.”

Phosphorus used information gathered from researching their targets or other means to game password reset or account recovery features and attempt to take over some targeted accounts. For example, they would seek access to a secondary email account linked to a user’s Microsoft account, then attempt to gain access to a user’s Microsoft account through verification sent to the secondary account. In some instances, they gathered phone numbers belonging to their targets and used them to assist in authenticating password resets.

Unfortunately, four accounts had been compromised and Microsoft obviously is mum on the information regarding those breaches but has notified the customers directly and helped to resecure them.

In the wake of the attacks and breach, Microsoft is calling on not only governments to help combat these constant attacks but on customers to be aware and take the necessary steps to help keep themselves safe from sophisticated and, in this instance, unsophisticated but persistent attacks.

Yooka-Laylee and the Impossible Lair video game is now live on Xbox One consoles

Yooka-Laylee and the Impossible Lair, the direct sequel to the original Yooka-Laylee (itself a spiritual successor to the Banjo-Kazooie video game series), is now available to download and play on Microsoft’s family of Xbox One consoles.

Like its hit 2017 predecessor, Yooka-Laylee and the Impossible Lair is a colorful 2.5D platforming title with a strong focus on puzzles and problem-solving. The game is a purely single-player experience but does support 4K Ultra HD visuals when played on an Xbox One X.

Here’s the official game description and trailer:

Yooka and Laylee return for a platform hybrid adventure. Yooka & Laylee are back in a brand-new platform adventure from Playtonic Games! With their arch-nemesis Capital B up to no good, the buddy duo needs to spring into action once again to save the day. To thwart his evil plan of using a “Hivemind” device to enslave an entire kingdom of bees, our heroes need to take the fight to Capital B’s “Impossible” Lair. Things look tough, but with the help of Queen Phoebee and her Royal Beettalion , Yooka and Laylee might just have a chance!

Have you been waiting for Yooka-Laylee and the Impossible Lair and are you a fan of this new video game franchise? Share your thoughts with the community in the comments below and then follow us on Pinterest for more Xbox gaming content.

Can’t Access WindowsApps Folder? 3 Ways to Fix Permissions

The WindowsApps folder in Windows 10 stores the data related to the Microsoft Store apps. However, if you try to, you might get a message saying that you can’t access the WindowsApps folder.

Many reported that the WindowsApps folder is missing, but that’s a completely different issue we covered in a separate guide.

Today we’re going to focus on access problems related to this directory, so let’s get started.

Why don’t I have access to the WindowsApps folder?

  • This is a system file, and you don’t have ownership over it.
  • Even if you’re an administrator, you’ll need to obtain ownership over this directory to access it.

How do I give myself access to WindowsApps folder?

1. Use the Take Ownership registry hack

  1. Since the error is due to permission issues, you can resolve it using a registry hack. This can also be done manually, but first, we will try the easy ready-made method.
  2. First, download the Take Ownership file to your computer.
  3. Extract the ZIP file.
    can't access Windowsapp folder
  4. Open the extracted folder and double-click on InstallTakeOwnership file to execute it.
  5. Follow the on-screen instructions to install the registry hack.
  6. Once done, navigate to the Windowsapps folder location.
    C:\ProgramFiles
  7. If the folder is not visible, click the View tab in the File Explorer and check the Hidden items box.
    can't access Windowsapp folder
  8. Right-click on the Windowsapps folder.
  9. Select Take Ownership from the context menu.
  10. Click Yes when the User Account Control prompts for administrator access.
  11. Wait for the PowerShell commands to be executed.
  12. Once done, try accessing the Windowsapps folder and check if the error is resolved.

2. Change Windowsapps folder permission manually

  1. If the issue persists, try changing the permission for the Windowsapps folder manually.
  2. Navigate to the location where the Windowsapps folder is stored, which is generally in the following location:
    C:\ProgramFiles
  3. Right-click on the Windowsapps folder and select Properties.
  4. Click the Security tab.
    destination folder access denied
  5. Click on the Advanced button.
  6. In the new window, click the Change link beside the Owner: tag.
    can't access Windowsapp folder
  7. Type the username you want to assign the permission to and click on Check Names.
  8. If found, select the username and click OK.
    destination folder access denied
  9. Make sure you check the Replace owner on sub-container and objects box.
  10. Click Apply to save the changes.
  11. Click OK. Windows will now start changing the permission for the Windowsapps folder. This process may take some time, so wait till it is complete.
  12. Once done, try to access the Windowsapps folder and check for any improvements.

After doing that, you should be able to access this directory without issues:

3. Rename the Windowsapps folder

  1. After changing the folder permission, if you face the Bad data error, try to open File Explorer and navigate to the following location:
    C:\ProgramFiles
  2. Select the Windowsapps folder and click Rename.
    destination folder access denied
  3. You can rename it to whatever you want but keep it close. Rename it to Windowsapp123 etc.
  4. Click Yes if prompted to confirm the action.
  5. Now try to access the Windowsapps folder and check for any improvements.

By following the steps in this article, you can fix all problems with the WindowsApp directory. To learn more, we have a great guide on how to find and access WindowsApps folder, so be sure to check it out.

Did we miss a solution? If so, let us know in the comments section below.

Windows 10/11 updates ignore active hours? Try this

Updating Windows 10 is an integral part of what it means to keep your OS in neat condition.

It presumes downloading the latest upgrades, tweaks, and fixes for some of the most common problems reported.

However, restarts are usually needed for update downloads to take effect.

Unfortunately, having to forcefully restart your PC isn’t all that convenient, especially when you are running a network of multiple PC’s.

Because of this, it is usually recommended to set your Windows Updates to not start downloads during active hours.

How to set up active hours on Windows 10:

  1. Press Windows
  2. Go to Settings (The cogwheel-shaped button)
  3. Click Update & Security
  4. Select the Change active hours option
  5. Enter a time interval you wish to not have any updates downloaded
    • You can only input a time interval of up to 18 hours, anything over that value will be deemed invalid
  6. Click Save

You can also make the computer to automatically change your active hours based on your average PC usage.

However, some users are complaining that Windows 10 is ignoring this feature:

How can I stop Windows 10 from performing it’s very large Windows Updates download during normal business hours? I have ‘Active Hours’ set to non-business hours but Windows 10 will still download massive amounts of data over a limited WAN connection. […] I want the download to be done after hours when the office is closed and the computer left on as to have no negative business impact.

How do you make your Windows 10 to stop ignoring your active hours?

Please remember that active hours are not for controlling the download of Windows updates, but for installing the downloaded Windows updates.

It will keep downloading updates but will install only during specified active hours.

You absolutely have no control over the timing of Windows updates download.

As such, all you are left with is controlling when will your PC restart for certain updates to take effect.

1. Schedule update installation

These steps can only be followed by a group administrator running Windows Server 2019 version 1903 and later:

  1. Press Windows
  2. Type in Group Policy
  3. Go to Group Policy
  4. Access Configure Automatic Updates
  5. Select option 4 – Auto download and schedule the install
  6. Input time in the Scheduled install time dropdown

Configure Automatic Updates

By following these steps, you will force restart after the specified installation time.

This will also let you configure a timer to warn a signed-in user that a restart is going to occur.

2. Stop Automatic Updates altogether

If all else fails, simply consider shutting down automatic updates on Windows 10, and installing them manually when you have the time.

3. Wait it out

If the problem persists even after both you and the administrator have followed these steps, all you can do is wait for a new patch that may fix this issue.

If you have any other suggestions or questions, don’t hesitate to leave them in the comments section below and we’ll be sure to check them out.

READ ALSO:

FIX: Windows Server Change product key does not work

Usually, activating your Windows Server or changing the product key shouldn’t be a major problem. However, there are evidently users that have a hard time with Windows Server as the Change product key option doesn’t work for them. In case you are in that group, check the solutions we have to offer below.

Windows Server won’t accept the product key

1. Try adding the product key during the installation

Primarily, you can try and enter the product key during the installation instead of activating Windows Server later on. This seems to work for a lot of affected users, as they reinstall the server and insert the product key prior to the installation.
Windows Server Change product key does not work

Just back up your data and go for the reinstall. Once you are prompted, insert the product key and then go through with the installation. That should resolve the problem with the product key. It applies if you want to change it or activate Windows Server for the first time.


Learn how to add a user on Windows Server with this detailed tutorial. Check it out now.


2. Run the CMD script

Alternatively, you can run the CMD script that includes your product key. With it, you’ll be able to force the activation and avoid further issues. You can, of course, use this approach to change product key on Windows Server as well. It seemingly works on both Windows Server and standard Windows versions.

Follow the instructions below to change the product key on Windows Server via the Command Prompt:

  1. Open the Command Prompt (Admin).
  2. Type the following command in the command line and press Enter: SLMGR.VBS -IPK XXXX-XXXX-XXXX-XXXX (instead of XXXX-XXXX-XXXX-XXXX insert your license key).
    Windows Server Change product key does not work
  3. Restart your PC and check if the procedure has resolved your issues.

With those steps, you should be able to change the product key without any issues whatsoever.

If you have succeded, tell us in the comments section below.

RELATED STORIES YOU SHOULD CHECK OUT:

GOG games won’t open in full-screen? Here’s what you can do

GOG is a popular video game distributing and management client for the Windows platform. However, multiple users have reported the GOG games won’t open in full-screen issue when playing.

This issue mostly occurs with the classic games that may not support modern display resolutions. This results in black bars at the side of the games (windowed mode).

If you are also troubled by this issue, here are a couple of troubleshooting tips to help you fix GOG games won’t open in full-screen issue Windows.

What can I do if GOG games won’t open in full-screen?

1. Turn off GPU frame rate software

  1. If you are using frame rate software that helps you match the graphic card frame rate with the monitor frame rate, it can create issues with the display resolution.
  2. Several users have reported that turning off software like Vsync has helped fix the GOG games full-screen issue.
  3. Try turning off Vsync or any other similar software and check for any improvements.

Fix: Frame rate problems in Windows 10


2. Check your graphic card settings

  1. If the issue persists, check your graphic card settings for the scaling.
  2. If the automatic scaling option is disabled, the graphic card will not scale the games to your display resolution.
  3. Follow these steps to turn on GPU scaling for AMD and NVIDIA graphics.

Turn on AMD GPU scaling 

  1. From your desktop, right-click on anywhere and select AMD Radeon Settings menu from the options.
  2. In the AMD Radeon Settings window, click the Display tab (top menu).
  3. Click on the GPU Scaling option and toggle the switch to turn it on.
    GOG games won't open Full-screen
  4. Choose the Scaling Mode. If you are not sure which scaling mode to choose, select one from the option, apply it and check if it resolves GOG games won’t open in the full-screen issue.
  5. If the issue persists, change the scaling mode again until you find the right mode.

Turn on NVIDIA GPU scaling

  1. Right-click on your desktop and select NVIDIA Control Panel.
  2. In the NVIDIA Control Panel, open the Display tab.
  3. Click on Adjust desktop size and position option.
    GOG games won't open Full-screen
  4. Click the drop-down many under “Perform scaling on”  and select GPU.
  5. Here you can choose all the available scaling mode and accompanying options according to your needs.

3. Run the game in compatibility mode

  1. If the issue persists, try running the game in compatibility mode in Windows.
  2. Right-click on the game shortcut on the desktop. If you don’t have a shortcut, then navigate to the installation folder and right-click on the game.exe file.
  3. Select Properties.
  4. In the Properties window, click the Compatibility tab.
    GOG games won't open Full-screen
  5. Check the box “Run this program in compatibility mode for” option.
  6. Click the drop-down menu and select the Windows OS. Select the older version of the OS.
  7. Click on Apply > OK to save the changes.
  8. Launch the games again and check for any improvements.

By following the steps in this article, you can fix GOG games won’t open in full-screen issue in Windows computers. Do let us know which fix helped you in the comments.

RELATED STORIES YOU MAY LIKE:

How to link PayPal to a bank account in just a few steps

PayPal is probably the world’s most well-known company operating a worldwide online payment system.

This system supports online money transfers and has become the go-to solution when it comes to making cross-border payments, or general online shopping.

However, you need to remember that PayPal is only a messenger and that you need to actually have your own funds in order to make any transfers or purchases.

As such, the most common way to provide PayPal with funding is by linking it to your bank account.

Remember that all Paypal payments are secured with multiple layers of protection.

Additionally, your own bank may have its own multiple-step verification systems that needs clearing before PayPal transactions can be made.

How do I link my PayPal account to a bank account?

  1. Go to the official Paypal website
  2. Log in to your PayPal account
  3. Click Wallet at the top of the page
  4. Click Link a bank account
    • A number of various banks will be displayed, which are chosen based on the region you are currently logged in from
    • You may have an option to link your bank instantly using your online banking login information (This depends on the bank you select)
      • This means you have to log in with the account and password you have with your bank
    • If your bank is not on the list, click I have a different bank at the bottom right
  5. Select Checking or Savings
  6. Type in the bank’s routing number and your account number
  7. Click Agree and Link
  8. Double-check if the information you wrote down is correct
  9. Click Continue

Here’s a list of common things you may need to know when linking a bank:

  • Your routing number is made up of the first set of numbers at the bottom of your check. It is also usually made up of 9 digits.
  • Your bank account number is the second set of numbers at the bottom of your check.
  • If during the linking process you receive a Check and Try again message, you may have typed the wrong number, or PayPal doesn’t accept your bank.
  • Remember to always check your account balance before making a PayPal purchase.
  • If you close your bank account, remember to unlink the back from your account.

As you can see, linking your PayPal account to a bank account is not that hard. Just follow the steps from this guide and you’ll be done in no time.

If you have any other questions, reach for the comments section below.

RELATED ARTICLES YOU SHOULD CHECK OUT:

How to fix there are problems with your account Office errors

Some Microsoft Office users might encounter account error messages that state: There are problems with your account. To fix the, please sign in again. Users might see that error message when they click File > Accounts to update Office. When that issue arises, the Office activation isn’t working; and users can’t fully utilize their Office software.

How can Users Fix the Problems With Your Account Error?

1. Click the Fix me Button

The problems with your account error message include a Fix me option under it. First, try clicking that Fix me button. The Fix me button probably won’t always work for all users, but it might still resolve the issue for some users.


2. Reset the Office Account Password

  1. Some users have said they’ve fixed the account error for Office 365 by resetting their account passwords. To do that, log in to your Office 365 portal with a web browser.The sigin page for Office 365 microsoft office account error there are problems with your account
  2. Click the user account title at the top right of the Office 365 portal and select My account.
  3. Click Security on the left of the portal’s page.
  4. Press the Manage security button, and select thePassword option.
  5. Then fill out the password fields, and click the submit button.

3. Edit the Registry

  1. Some Office 365 Click-to-run users (within VMware UEM 9.3 environments) have fixed the problems with your account error by deleting the Identity registry key. To do that, launch the Run accessory (press the Windows key + R hotkey to open).
  2. Input ‘regedit’ in the Open text box, and click the OK button.
  3. Office 2016 and ‘19 users should open this key in the Registry Editor: HKEY_CURRENT_USER\Software\Microsoft\Office\16.0 \Common\Identity. If using earlier Office versions, open HKEY_CURRENT_USER\Software\Microsoft\Office, click the version number key, and then Common > Identity.The Registry Editor microsoft office account error there are problems with your account
  4. Next, right-click the Identity key and delete.
  5. It’s recommended that users set up System Restore points before deleting registry keys. So, set up a System Restore point as outlined in the post below before editing the registry.

4. Check for Expired Product Keys

  1. The problems with your account error can be due to expired or fake Office product keys that need deleting. To check the Office product keys, open the Win + X menu with the Win + X hotkey.
  2. Input ‘cmd’ in the Open box, and click the Ctrl + Shift + Enter hotkey.
  3. Open the Office folder in the Command Prompt by entering cd in the Prompt followed by the full MS Office path. For example, users would enter this command to open the default path for MS Office 2016: cd C:\Program Files (x86)\Microsoft Office\Office16.
  4. Then enter ‘cscript ospp.vbs /dstatus’ in the Prompt’s window, and press the Return key. That command will show users their Office product keys.The cscript command microsoft office account error there are problems with your account
  5. To uninstall a fake or expired product key, input ‘cscript ospp.vbs /unpkey:XXXXX’ and press Enter. Replace the XXXXX in that command with the last five letters or numbers of the expired or fake product key.
  6. Then enter ‘cscript ospp.vbs /act’ to activate the valid Office product key.

The above resolutions should fix the Microsoft Office account error There are problems with your account. In addition, check out the Microsoft Report and Recovery Assistant, which might also come in handy for fixing Office activation errors.

Windows Insider Program looks for a leader as Dona Sarkar moves to new role at Microsoft

Dona Sarkar, the energetic and charismatic head of the Windows Insider Program, is moving on to a new role at Microsoft. Sarkar succeeded to Gabe Aul back in June 2016, and the Microsoft veteran announced today that she’ll be joining the Microsoft Developer Relations team to lead advocacy for Microsoft’s Power Platform ((Microsoft Flow, PowerApps, Power BI).

“Currently, we are conducting a search for a new leader of the Windows Insider Program,” wrote Eran Megiddo, CVP of Windows and Education today. “In the meantime, I and the Insider crew (including Brandon, Jennifer, Blair, Jason, Vivek, Eddie) look forward to continuing to engage with you each week as we ship new builds.”

Dona Sarkar left quite a big mark on the Windows Insider program over the years. She launched the #Insiders4Good initiative, aiming to help Insiders around the world to solve problems creatively with Microsoft products. The Windows Insider team also increased engagement with Insiders under her leadership, especially with the regular Windows Insider webcasts on Mixer.

In addition to her work at Redmond, Sarkar is also an author and fashion designer. We wish her all the best in her new role at Microsoft, and we’re looking forward to see who Microsoft will chose as new leader of the Windows Insider Program.

Microsoft may be prepping multiple color options and a rear facing camera for Surface Duo

After the flood of camera flashes and 360-degree spanning slow-mo videos, we’re finally able to take a breather and fully examine Microsoft’s new Surface Duo and a few internet sleuths are starting to pose some interesting questions, like, will there be more than just the off-white color option for the device?

While Microsoft paraded around its white/off-white Surface Duo to the press and for the cameras on October 2, 2019, there have been captures and brief moments in video that have spotted a black version of the device in use.

Alongside @galayder’s observation, Microsoft’s CPO of hardware, Panos Panay has been spotted, in this Marques Brownlee YouTube video, using a black version with a reference area in place for what could be a future camera module.

Following its relatively dazzling unveiling last week, Microsoft’s miniature foldable offering has received a lot of press attention. Some journalists have gotten some hands-on with the dual 5.6-inch screened device powered by Android while others have had opted to speak at length with Microsoft’s chief product officer about the ins and outs of the company’s new foldable.

Over the past, 120 hours or so, Panay and his team of executives have stated consistently that the hardware for the Microsoft Duo is locked in and will likely not change over the next year as the company prepares to court developer for apps and services for the device. Despite their vocal convictions, there appears to be a couple of unanswered questions about the hardware of the Duo including final color options and camera inclusions (note that the black Duo Panos is holding does have what appears to be a rear facing camera, unlike the white version shown last week) as well as final chipset offerings.

The Surface Duo is currently running a custom Snapdragon 855 chipset, however, by holiday season 2020, chip designer Qualcomm will presumably be offering as a beefier upgrade for mobile devices.

Microsoft has doubled down on its matte black color options for the Surface Pro, Surface Laptop and now the Surface Pro X and it would seem its newest foldable options, the Neo and Duo will probably follow suit, especially if the head of the division is already rocking a black version.