Windows 10 Mail and Calendar app updated for select Insiders with new inking capabilities

If you’re a Windows Insider with a touch-screen device, you’re in for a treat. Indeed, Microsoft has updated the Windows 10 Mail and Calendar App with new inking capabilities that’ll let you write an entire email with a stylus (via The Verge.)

At the moment it looks as though this new feature is currently in A/B testing, as we’re not seeing it on any of our devices just yet. Anyway, you can find the new inking capabilities by composing a new email and clicking on the new “draw” option on the ribbon. From here you can select different pen types, a highlighter, and an eraser. You also can press on the (+) icon to add another area to the email for more drawings and inkings.

Inking in the Mail app (image via Tom Warren/The Verge)

Any inked messages will be sent as a PNG file for the recipient to see. It’s definitely nice that Microsoft is more inking features added to Windows 10 apps, and we’re hoping this inking feature in the Mail app will roll out to everyone soon. Feel free to update via the link below and let us know in the comments if you’re seeing this feature or not.

Mail and Calendar
Mail and Calendar
Price:
Free

New Xbox One Preview Alpha & Alpha Skip Ahead 1806 System Update fixes download pausing

A new update for Xbox Insiders running the Preview Alpha & Alpha Skip Ahead 1806 System has begun to rollout. This new update fixes a bug that was affecting the ability to pause an app or game installation and also has some minor general system improvements as well.

Here’s the full release notes.

Fixes:

My Games and Apps

  • Fixed an issue with the Pause function when installing an App or Game.
  • System Performance
  • Misc. performance fixes in the platform.

Known Issues

Game Pass Tab: Preview Alpha and Alpha – Skip Ahead users will notice that the Entertainment tab has been replaced on the dashboard with Game Pass content. This new tab allows for easy access to the Game Pass catalog and is only available in the US region at this time, so Preview Alpha and Alpha Skip Ahead Insiders in regions outside of the US will continue to see the Entertainment tab.

Groups: You may see issues with Groups if you frequently switch between your non-Preview console and your Preview console. Workaround: Reset your Groups locally on the Preview console through “My games & apps” > Groups, then using the “Delete all groups” button at the bottom of the page to resync from the service.

Profile Color: Sometimes users may encounter an incorrect Profile color when powering on the console.

Networking: When the console wakes from Instant on/connected standby with a wired connection, the console may not recognize that the Ethernet cable is plugged in. Workaround: Please reboot the console via Guide -> reboot.

Are you an Xbox Insider and have you installed this update yet? Let us know if you’ve found any bugs in the comments below and then make sure to follow us on Pinterest, Twitter, and Facebook for more Xbox One content.

Disable Java Security Warning Pop-up in Windows 10/11

As you might know, a new Java update has been released with new security features included. While these security features are protecting your Windows 10, 8, or Windows 8.1 system, you might find the new update quite stressful and annoying as you might get various pop-up messages or alerts asking for permissions in order to run or block programs.

Of course, this protection is highly recommended especially for entry-level or regular Windows 10 /Windows 8 / Windows 8.1 users, because in this way you can safely install or run programs or navigate through various online platforms.

But, if you are an advanced user and you are tired of the same Security Warning pop-up alert each time you want to perform a new action on your computer, then you should consider disabling this built-in Java feature.

How can you disable the Security Warning pop-up? Well, that’s quite easy as you only have to change some changes within the Java system. But, before changing anything, remember that the best is to protect your computer by applying all the security features you can.

So, complete the steps below only if you are an advanced user and only if you know what you are doing and what you are dealing with.

Anyway, you can enable the Java security feature by following the same steps from below, so this guide can be also used for undoing this operation.

How do I disable the Java Security Warning in Windows?

  1. Open Java Settings within Control Panel.
  2. From there pick the Advanced tab.
  3. From the list of options that will be displayed expand the Security one.java settings
  4. Under Security click on Mixed Code and check the Disable verification box.
  5. Then expand the Miscellaneous option and enable the “Display mixed content” box.

Restart your computer and check if the problem persists. If this is the case, then temporarily disable your antivirus software. Sometimes, antivirus tools may block Java deployment, and disabling your security solution may help you fix it.

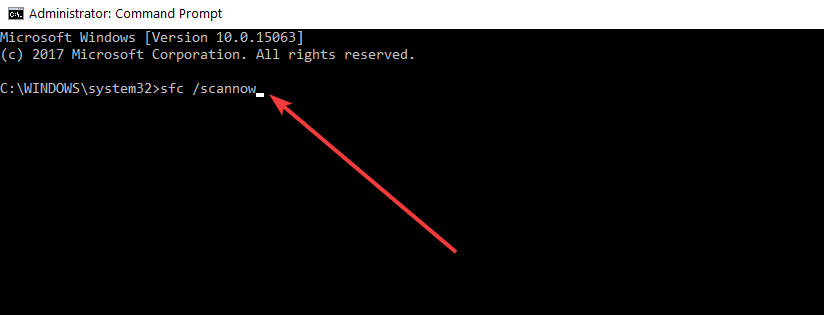
If the issue persists, try running a SFC scan. Launch a new Command Prompt window, type sfc /scannow, run the command, wait until the scanning process completes, and then restart your computer.

SFC scan

That’s about it. That is how you can easily disable the Java Security Warning pop-up in Windows 10, 8, and Windows 8.1.

If you have something to share with us or if you need extra help related to this topic, don’t hesitate and use the comments field below as we will assist you as soon as possible.

How do I Wipe my Hard Drive in Windows 10/11?

Wiping a hard drive in Windows 10, Windows 8, or Windows 8.1 is not hard, but before doing so, you must be sure that you are aware of the risks that are implied. Do note that a wipe is not similar to a format operation or with a clean install of Windows.

When you delete information from your hard drive and even when you format it, you aren’t permanently removing your data.

The file systems will be removed, but your data will become invisible. With a proper and dedicated software or hardware solution, you, or someone else, can easily restore what you thought was permanently deleted.

That’s why if you want to get rid of programs, info, or personal data for good, you have to perform a wipe.

How do I completely wipe my hard drive?

There are several ways in which you can erase your data. You can, of course, choose to use a degausser to disrupt the magnetic domains on the drive, or you can even choose to destroy the hard drive physically.

But if you want to perform a more elegant operation, then you should use free distributed and dedicated software.

This data destruction software will automatically wipe your hard drive by permanently removing all files that are stored on it.

All you have to do is to download the program, install the same on your Windows 10, 8 devices, and follow the on-screen prompts.  We already have a list of the best hard drive eraser software. So, check it out for the top options you can use.

Using dedicated software to wipe your hard drive is better than using other obscure methods that might permanently damage your hard drive.

So, that’s how you can anytime wipe a hard drive on Windows 10, Windows 8, or Windows 8.1. If you have questions or if you need other info related to this topic, don’t hesitate and share your thoughts with our team by using the comments below.

PC Bricked: Get It Fixed With These 4 Simple Solutions

A bricked PC is one of the situations you would not want to be in as a computer user. Sometimes, it may imply that your device is no longer functional.

While this may sound alarming, it does not mean it is an impossible problem to fix, and sometimes the solutions are easier than we expect. We will explore all options and help you unbrick your computer.

What does a bricked PC mean?

This is a reference for unresponsive computers, unable to boot or function normally. A bricked PC could be a factor of many elements, and some of the major causes are the following:

  • Corrupted system files – It is possible that vital files that help your system execute common system processes are now corrupt.
  • Failed firmware updates – You may have attempted a BIOS update that failed. This may brick your PC.
  • PC overclocking – If core components like your GPU and CPU are overclocked, it may lead to a bricked PC.
  • Power outage or sourge – For some users, this is the primary cause since this power outage may damage some vital hardware components.
  • Hardware failure – If a hardware component is no longer functioning, it may render the computer unresponsive.
  • Program installation problems – You may have installed a program that is not very compatible with the OS or has been compromised by malware.

Can a bricked PC be fixed?

Some bricked PCs may be fixed, but this is not a given. There is a rare occasion when you will have to replace your computer.

Note that fixing a bricked computer may imply changing some hardware components, like the motherboard. Other times, it could require less drastic approaches, as discussed in this article.

Let us show you the best options for dealing with a bricked PC.

What can I do if my PC is bricked?

1. Update your video drivers in Safe Mode

  1. First of all, unplug or disconnect the external devices that are connected to your device.
  2. Then try to boot your computer by keeping the Shift key pressed. This way, you should get the Recovery Screen displayed.
  3. From there, choose See Advanced Repair Options.
    pc bricked
  4. Up next, pick Troubleshooting, then select Advanced options.
    pc bricked
  5. Go towards Startup Settings.
    pc bricked
  6. Now, press F5 to select Safe Mode with Networking.
  7. You should download and install the latest video card driver from your manufacturer web site. This process will differ for manufacturers, but for HP, navigate to the driver website and continue with the steps below.
  8. Select your device from the options.
  9. Click Let HP detect your product, then click on your PC when detected.
  10. Identify the OS and the version, then click Submit.
    pc bricked
  11. Select the Detect my drivers option.
    pc bricked
  12. Select the video driver, hit Download, and install it.
  13. Restart your computer.

2. Run the built-in troubleshooter

  1. Start your computer in Safe Mode with Networking using steps 1 to 6 of solution 1.
  2. Press Windows + R, type control, and hit Enter.
    pc bricked
  3. Type Troubleshoot in the search box and click on the Troubleshoot option.
    pc bricked
  4. Click View all.
    pc bricked
  5. Select and run a troubleshooter from the list, depending on what you think may have provoked the bricked PC.
    pc bricked

Windows 10 features dedicated troubleshooters, allowing you to fix general issues affecting your computer quickly. Depending on the type of issues you’re dealing with, select the appropriate troubleshooter, run it, and then restart your machine to see if this solves the problem.

3. Uninstall recently installed programs

  1. Start your computer in Safe Mode with Networking using steps 1 to 6 of solution 1.
  2. Press Windows + R, type control, and hit Enter.
    pc bricked
  3. Select Uninstall a program.
    pc bricked
  4. Choose the recently installed program from the program list and select Uninstall.
  5. Follow the wizard to complete the process, then restart the computer.

If the issues you’re dealing with occurred after installing a new software or program on your machine, try removing the respective software.

4. Use a restore point

  1. Start your computer in Safe Mode with Networking using steps 1 to 6 of solution 1.
  2. Press Windows + R, type rstrui, and hit Enter.
  3. Select Choose a different restore point and hit Next.
  4. Select a restore point and hit Next.
  5. Follow the wizard and wait for the process to complete.

Suppose you recently changed your Registry or operated any changes on your computer, and this action bricked your machine. In that case, you should use a restore point to revert the changes and restore a working Windows version on your device.

So these are the most common troubleshooting solutions to apply to a bricked PC.

If you know other solutions, or if you want to share something with our readers and with us, don’t hesitate and share your thoughts by using the comments field below; in the end, we will update this tutorial accordingly.

Sorry, This app Is No Longer Available on Windows Store[FIX]

When Microsoft introduced Windows 10, 8, the company stated that the new OS was designed in order to perfectly fit the user demands, who are heading their attention towards portability and usability. Thus, Windows 10, 8 is created especially for portable and touch based devices, whether we are talking about tablets, laptops or smartphone. And, due to same reasons, Windows Store was introduced, which is Microsoft’s own store from where you can anytime download your favorite apps and programs.

Everything’s perfect so far; but what to do when noticing that Windows Store isn’t working properly? Of course, considering the already mentioned aspects, Windows Store represents the Windows 10/ Windows 8 / Windows 8.1 core, as everything is related to the same. In that matter, a common issue that has been recently reported by Windows 10, 8 and Windows 8.1 users is referring to Windows Store access, in term that the following error message is being displayed when an app is being downloaded: “Sorry, this app is no longer available on Windows Store”.

windows store issue

Of course, there is nothing wrong with this message, but in fact the app it refers is actually available on Windows Store; so where’s the trick here? It seems that this is a system error or alert caused by your Windows 10/ Windows 8 / Windows 8.1 OS, which is preventing you from downloading content from Windows Store. Sure, this is frustrating and annoying but worry as I will show you how to easily fix the “Sorry, this app is no longer available on Windows Store” error.

FIX: This Item is no Longer Available on Windows Store

  1. Uninstall KB2862768
  2. Run the Windows Store App troubleshooter
  3. Reset the Windows Store App
  4. Clean boot your computer

1. Uninstall KB2862768

Apparently, your error is nothing but a bug which has been introduced with a system update. Windows recently released a new security update to address several issues, but besides fixing problems, the same update is causing some Windows Store malfunctions. Therefore, until Microsoft releases a new software in order to automatically resolve the “This Item is no longer available” alert, you will have to fix the problem by yourselves.

In order to do so, you have to uninstall the mentioned update. The firmware is dubbed as KB2862768 and can be uninstalled by following the steps from below:

  • Go to your Start Page.
  • From there press Wind + R keyboard keys.
  • The Run box will be displayed on your Windows 10/ Windows 8 / Windows 8.1 system.win + r
  • On the same box introduce “appwiz.cpl” and press Enter.
  • Up next, under Programs and Features windows select the “View Installed Update” option.
  • Search for the KB2862768, right click on the same and click “remove”.
  • In the end reboot your device and check if you have fixed your problems.

2. Run the Windows Store App troubleshooter

Windows 10 features a dedicated Microsoft Store troubleshooter page that allows you to fix general issues preventing Store app from properly running. To run the troubleshooter, go to Settings > Update & Security > Windows Update > Troubleshoot > locate and launch the Windows Store app troubleshooter as shown in the screenshot below.

windows store app troubleshooter

If you’re running Windows 8 or Windows 8.1, then go to Control Panel > type ‘troubleshoot’ in the search box > click on ‘Show all’ in the left hand pane to display the whole troubleshooter list and select Windows Store Apps.

windows store app troubleshooting tool

3. Reset the Windows Store App

If the issue persists, try clearing the Windows Store app cache by running the WSReset.exe command in a Run window. Restart your computer and check if this workaround solved the problem.

4. Clean boot your computer

App and software compatibility issues may trigger this error message. Clean booting your computer so as to run only a mimum set of drivers and programs may help you fix the problem. For more information on the steps to follow, go to Microsoft’s support page.

So, there you have it; that’s how you can easily fix your Windows 10/ Windows 8 / Windows 8.1 “This Item is no longer available” in Windows Store system error.

Your Power Plan Information Isn’t Available: 3 Quick Fixes

As you know, you can plan how to power off your device or set your own power plans in Windows. You can configure the device’s power plan depending on the requirements. But, users often see, Your power plan information isn’t available.

You can try to reboot your device or run a system scan, but the power plan issue will not be addressed. Subsequently, the power plan settings are missing. If you want to fix the problem, keep reading to discover the solutions!

How do I fix Your power plan information isn’t available error?

1. Tweak the Registry

  1. Press Windows + R to open Run, type regedit, and press Enter.
    win+run
  2. Navigate to the following key:HKEY_LOCAL_MACHINE\SYSTEM\CurrentControlSet\Control\MUI.
  3. Up next, right-click on the MUI key and select New, click on Key, and name it StringCacheSettings.
  4. Now, right-click the empty space, select New, choose DWORD (32-bit) Value, and name it StringCacheGeneration.
  5. Double-click on the DWORD, change the Value data to 38b, and click OK to save the changes.
  6. Close your Registry Editor window and restart your computer as you are done.

A quick solution when you come across the Your power plan information isn’t available error in Windows 10 is to modify the registry. Make sure to be attentive and follow the steps as it is.

2. Run the Windows Update/ Power troubleshooter

Many users encountered this error message after installing the latest Windows updates on their machines. This indicates that this issue might be directly related to an update, and running the Windows Update troubleshooter may help you fix it.

Don’t forget to run the Power troubleshooter as well. This tool helps you fix general issues with your computer’s power settings.

run power troubleshooter windows 10

If these two don’t work, uninstall recent Windows updates to get rid of the problematic one.

3. Run a full system scan

Malware may cause your computer to behave erratically and block it from displaying various system information, including power plan details. Run an in-depth antivirus scan to ensure your computer is not infected by malware.

You can use Windows’s built-in antivirus, Windows Defender, or a reliable third-party antivirus solution.

By now, you should have gotten rid of the Your power plan information isn’t available error in Windows 11 and the previous iterations of the OS.

Before you leave, learn about the Ultimate performance power plan since it improves the computer’s speed.

If you are still experiencing issues with this alert, don’t hesitate and share your problems in the comments field below. Of course, our team will try to help you as soon as possible.

How to Fix Limited WiFi on Windows 10/11

Nowadays a Network connection is often established by using a wireless adapter, thus all those cables are now useless and that’s a great thing. But, what should you do when you can’t use or connect to your WiFi network, or when you get the annoying limited access error? Well, if your device is running Windows 8 or Windows 8.1 systems, you should try the troubleshooting solutions from below.
dropping-wifi-connection
The limited connection issue often occurs even when the WiFi signal is good (4 or five bars or signal displayed and still no connection available) so, you will be tempted in reconnecting your Windows 8 device to your WiFi adapter, or even in uninstalling the network adapter. Well, these operations might or might not solve your problem, so if you really want to address the WiFi issues, then you should take a look over the guidelines from below.

Read Also: Fix: ‘Bluetooth Won’t Turn on’ in Windows 8, Windows 8.1

Fixing limited WiFi in Windows 8 / Windows 8.1 implies various troubleshooting methods, though below I will detail only the best solutions that you can anytime apply on your device – also these procedures can be easily completed even by a newbie.

How to Fix Limited WiFi on Windows 10, Windows 8.1/8?

Reset TCP/IP Stack

You might experience limited WiFi connection due to some problems with your TCP/IP stack. Well, in order to fix this issue you should use the Windows 8 Netsh utility. By using this default Windows feature you will be able to address the limited WiFi connection by resetting TCP/IP address, so let’s see how to manage these things:

  • First of all, open a Command Prompt Window with administrator rights on your Windows 8 / Windows 8.1 based device – in order to do so, from your Start Screen press “Wind + x+ a” keyboard keys.cmd windows 8
  • In the cmd window type: “netsh int ip reset C:resetlog.txt”.
  • Press Enter and close the cmd box.
  • Restart your computer and that’s it, your WiFi connection should be working properly now.

Disable your Network Adapter Sleep Mode

If the above-explained method only temporarily resolves your WiFi issues try to check your Network Adapter settings. In some cases, you might see that the Adapter is conserving energy by using a so-called “sleep mode”. Well, for fixing your problems you should disable this mode, thus follow the next steps in order to achieve the same:

  1. From your Start Screen press dedicated keyboard keys “Wind +W”.
  2. The Settings search panel will be then displayed on your Windows 8 / Windows 8.1 device.wind 8 settings
  3. Now, on the search box type “Network and Sharing Center” and press Enter in the end.
  4. Select your WiFi network and go ahead and pick the “Proprieties” option.
  5. Select “Configure” and go to “Power Management” tab.wifi wind 8
  6. Uncheck the box dubbed as “Allow the computer to turn off this device to save power”.
  7. Done.

Disable Autotuning for TCP/IP stack

In some cases, Windows 8 / Windows 8.1 system might mess your TCP/IP address. TCP/IP auto tuning refers to the feature that allows reliable connectivity by buffering your network IP; the process is not complex, though it is quite important when establishing a network connection. Anyway, you can resolve your WiFi limited connection issue by applying the steps from below.

Open a Command Prompt window with admin rights, just as I have already shown you above.
Then, on the same window type (press Enter after each command): “netsh int tcp set heuristics disabled”; “netsh int tcp set global autotuninglevel=disabled”; “netsh int tcp set global rss=enabled”.

So, each time you are experiencing problems with your Windows 8 or Windows 8.1 WiFi connection and get error messages such as “limited connection” don’t hesitate and apply the guidelines from below. If you need more help on that matter, feel free and share your thoughts with us by using the comments field from below.

Change the used driver (Broadcom 802.11 users)

For many users with Broadcom 802.11 card, there’s an easier solution that they can use in order to fix WiFi issues on their PC’s – changing the driver. Here’s how to do it:

  • Open Device Manager
  • Select ‘Network Adaptor’ and then double-click on Broadcom 802.11/802.11n Network Adaptor
  • Go to the driver tab and click ‘Update Driver’
  • Select ‘browse my computer for driver software’
  • After ‘Select ‘Let me pick from a list of device drivers on my computer’
  • Select the “Broadcom 802.11n Network Adaptor (Broadcom)” entry from the list, and click Next
  • Try to connect to WiFi network

That’s it for this one, you can try it even if it is not a Broadcom card that you are using. Don’t forget to let us know in the comment section which solution worked for you.

[wl_navigator]

Microsoft announces judges for Imagine Cup 2018 finals, and a special guest

Microsoft’s 16th annual Imagine Cup challenge is already well underway, and the finals are coming up on July 23-25 at their headquarters in Redmond, Washington. Fittingly so, the company today announced the judges for the Imagine Cup 2018 finals, and a special celebrity judge too.

Judging the contestants this year will be Peggy Johnson, Anil Dash, and Erica Brescia. Peggy Johnson is the EVP of business development at Microsoft, Anil Dash is the CEO of FogCreek Software and well known in social media and coding circles, and Erica Brescia is the Co-founder and COO of Bitnami. All three judges have big experience in tech, and will likely be very critical of Imagine Cup contestants who are being tasked with resolving some of the world’s toughest challenges.

Microsoft CEO Satya Nadella is also set to attend the Imagine Cup Finals, as is a special guest, Chloe Kim. At age 17, Chloe recently made Olympic history by becoming the youngest woman to win an Olympic snowboarding medal.

Imagine Cup contestants are going up for more $700,000 in prizes, cash, travel, and Azure credits. The champion also will have a one-on-one mentoring session with Satya Nadella.

The Finals will be hosted by Corey Sanders, the corporate vice president for Azure Compute. You can watch the finals yourself live at ImagineCup.com on Wednesday, July 25 at 9 AM PT.

Windows 10 news recap: Twitter PWA adds Windows 10 Share support, “nasty bug” stops new Windows Insider builds, and more

Welcome back to our Windows 10 news recap, where we go over the top stories of the past week in the world of Microsoft’s flagship operating system.

Twitter PWA now supports the Windows 10 Share dialogue

Twitter continues to update its Progressive Web App (PWA) that supports Windows 10, now adding support for another Windows 10 feature, the Share dialogue, making it easier to share content across other apps and services.

New Windows Insider build unlikely this week due to “nasty bug”

A “nasty bug” is causing a delay in a new Windows Insider build being released, as the team work to resolve the bug and prevent Insiders receiving any nasty surprises if they were to receive a new build. The bug could potentially stop people being able to log-in to their machine after updating.

WhatsApp enabling group call feature on Windows Phone

Windows Phone users are receiving group calling on WhatsApp, as Facebook enables the group call feature for Microsoft’s mobile platform.

Slack drops support for Windows Phone in latest update, no further app updates

While WhatsApp is busy adding new features for Windows Phone users, Slack has dropped support for the platform, however, the app will remain available in the Store, but will not receive any future updates and could stop working at any point.

Slack (Beta) for Windows Phone

That’s it for this week. We’ll be back next week with more Windows 10 news!

Microsoft Store to receive Wish List, remote app installs, and more new features

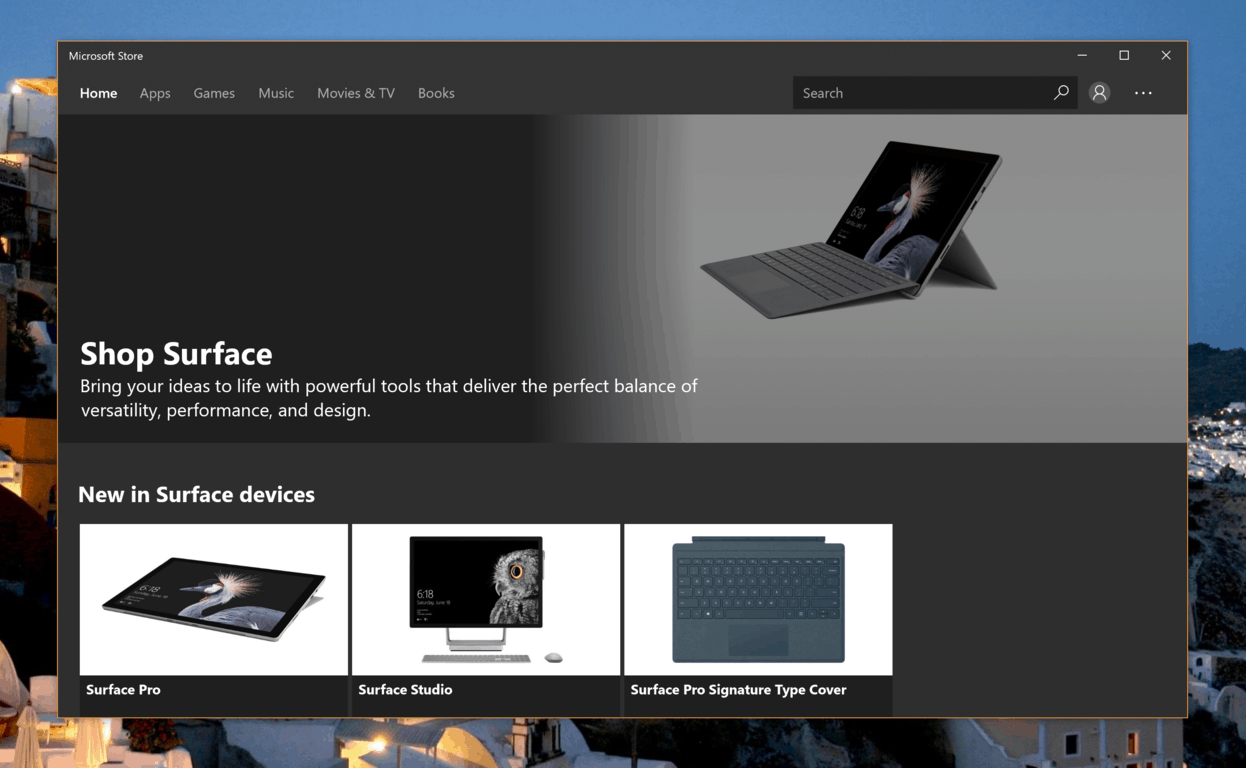
Microsoft is currently working on a major update to the Microsoft Store. As we reported 2 weeks ago, Microsoft is adding the ability for apps to be installed remotely to your other Windows 10-based devices. Now, select users are receiving an even bigger update that makes a number of other changes, as well as adding a highly-requested feature.

Microsoft Store Wish List

First up, the company is testing a new Wish List feature (via Windows Latest). This will allow you to add items you’re interested in to a Wish List, which you will be able to purchase at a later date. This makes it easy to go back to interesting items you found previously but didn’t wish to purchase at the time. Unfortunately however, there’s currently no feature to share a Wish List with a friend or family member.

The navigation menu is also being adjusted. The search bar will no longer show by default, instead requiring a click or tap on a magnifying glass icon to reveal the search bar. The menu will show sub-categories, instead of just the top-level categories, making it easier to dive deeper into the Store, without having to load a number of individual pages.

In addition to the visible changes noted above, there are a number of minor improvements and bug fixes rolling out to users.

Have you received the new Microsoft Store? Let us know your thoughts in the comments below.

Fix: Android Studio Windows 10/11 errors in 4 quick steps

The most used OS in the world has the most active developers, as well. Of course, we’re referring to Android and its applications. Now, the majority of users will run Android Studio on Linux, but a substantial number develops apps on the Windows OS. As of lately, users who upgraded from Windows 7/8 to Windows 10, have had a hard time running Android Studio.

We made sure to enlist a few solutions for the issue at hand. If you’re unable to run Android Studio on Windows 10, follow the steps we provided below.

Can’t run Android Studio on Windows 10? Here’s what to do

  1. Make sure you have installed SDK
  2. Run application as admin and in a compatibility mode
  3. Disable UAC and antivirus
  4. Reinstall all associated applications

1: Make sure you have installed SDK

The strange occurrence of applications working on Windows 7 or Windows 8 and suddenly failing on Windows 10 is nothing new. However, in this case, the majority of users were able to run Android Studio on Windows 10 as seamlessly as they did on previous Windows iterations. Just some users weren’t able to do run this development tool, even after multiple tries.

Even though this is rare, we still must advise you to check the Java SDK (Software Development Kit) from Oracle. Without it, Android Studio won’t work. Even if you upgraded to Windows 10 over previous iterations, reinstalling this tool might help. Maybe some pieces haven’t migrated with the system and that’s what’s causing the problem in the first place.

2: Run application as admin and in a compatibility mode

Another applicable approach whenever a third-party application won’t work is to grant it the administrative permission. In addition, running the program in a compatibility mode might help as well. Lots of third-party applications won’t work as intended on Windows 10 due to a more restrictive nature of the system.

However, you can, as we said, troubleshoot this by tweaking the compatibility options. Follow the steps below to allow the administrative permission to Android Studio:

  1. Right-click on the Android Studio shortcut and open Properties.
  2. Check the “Run this program in compatibility mode for” box.
  3. Select “Windows 7” from the drop-down menu.
  4. Check the “Run this program as an administrator” box.android studio windows 10 error
  5. Confirm changes and restart your PC.

3: Disable UAC and antivirus

Even we can’t openly recommend disabling UAC (User Account Control) in Windows (due to obvious security reasons), you can try it out temporarily. When it comes to more delicate and complex applications, which Android Studio certainly is, the system-imposed restrictions might be too much.

Here’s how to disable UAC in Windows 10:

  1. In the Windows Search bar, type UAC and open “Change User Account Control settings” from the list of results.android studio windows 10 error
  2. Drag the slider to the bottom and confirm changes.android studio windows 10 error
  3. In case the system prompts you, enter your password.
  4. Restart your PC.

Moreover, while we’re talking about restrictions, a third-party antivirus can occasionally block the execution of various applications. For that reason, if you’ve entrusted system protection to a third-party solution, make sure to disable it temporarily. Certain users managed to get Android Studio to work when real-time protection was off.

4: Reinstall all associated applications

Finally, all remaining solutions we can grasp and include in this list point towards the reinstallation. Now, as we already mentioned, a system upgrade to Windows 10 should allow you to use all applications from previous Windows iteration. However, in this scenario, we highly recommend reinstalling everything and starting from a scratch.

Of course, if you have some projects, make sure to back them up before uninstalling Android Studio and SDK. Hopefully, you’ll be able to continue with your work later on. Here’s where to download Java SE Development Kit. And the latest Windows 10 – compatible version of Android Studio is to be found, here.

That should do it. Don’t forget to share any alternative solutions in the comments section below. We’ll be thankful for your participation in the matter.

RELATED STORIES YOU SHOULD CHECK OUT:

Please Do Not Power Off or Unplug Your Machine [SOLVED]

Are you getting stuck during Windows Update? Did you get the Please do not power off or unplug your machine prompt after Windows Update? This post will show you how to fix this issue.

Many  Windows users reported getting stuck after Windows Update due to this prompt. Their PCs simply get stuck at the prompt for hours without rebooting.

This could be due to several reasons such as outdated system drivers, missing Windows Registry keys, outdated BIOS, and even errors due to incomplete Windows OS installation.

Windows Report has compiled the best solutions applicable in solving this problem on your Windows PC.

Fix: Please do not power off or unplug your machine

  1. Perform a Clean Boot
  2. Repair PC registry
  3. Reset BIOS Settings
  4. Run System Restore in safe mode
  5. Run Windows Update troubleshooter
  6. Run Automatic Repair (Windows 10)
  7. Reset Windows Updates components

1- Perform a Clean Boot

One of the quick fixes to this issue is to clean boot your Windows PC. This involves pressing the “power off” button until your PC shuts down. Afterward, you can boot up your PC and log in to Windows.

Meanwhile, in order to successfully perform a clean boot on Windows 10, you have to be logged on as the administrator, and then follow these steps:

  • Go to the search box, and then type “msconfig”
  • Select System Configuration to open the dialog box as below:
  • Find Services tab, and then select Hide all Microsoft services box
  • Click Disable allhide all microsoft services
  • Go to Startup tab > Open Task Manager
  • Disable startup programs
  • Finally, reboot your PC

However, if this solution did not fix the error problem, you may proceed to the next solution.

2. Repair PC registry

Another way of fixing the “please do not power off” error problem is to repair your Windows registry. You can use Windows built-in SFC to check for system file corruption.

SFC utility program verifies system files integrity and repairs files with problems when possible. Here’s how to run an SFC scan on all Windows versions:

  • Go to Start > type cmd > right-click Command Prompt > select Run as Administrator.please do not power off or unplug your machine
  • Now, type the sfc /scannow command.please do not power off or unplug your machine
  • Wait for the scanning process to complete and then restart your computer. All corrupted files will be replaced on reboot.

Isn’t it a little counterproductive to manually solve Windows bugs and errors? It allows for a lot of human error and oversight.

That’s why we recommend utilizing a third-party registry cleaning tool to search your device for corrupted or damaged files and then fix them so that everything runs properly again.

This is just one of the many reasons why you should make sure your registry is clean and healthy, with no obsolete, corrupted, or unnecessary entries stored in it.

3. Reset BIOS Settings

Another way of fixing the error is by resetting your BIOS to its default settings. BIOS consists of system settings that determine the order and how your PC boots up.

Before you proceed with these steps, ensure you disconnect connected external drives on your PC. Here’s how to reset BIOS:

  • Restart PC.
  • Hit the “F2” key repeatedly until a System Setup screen window appears.(The BIOS function key varies; you may have to check during boot which Function key to use so as to access the BIOS settings).
  • Now, Hit on the “Right Arrow” on your keyboard and wait until “Exit” menu is highlighted.
  • Next, hit on the “Down Arrow” on your keyboard and select “Load Optimized Defaults” option.
  • Finally, hit the “Enter” button.

Alternatively, you can flash your PC’s BIOS if resetting it does not work. For more information about flashing your PC’s BIOS, check out our guide.

4. Run System Restore in safe mode

Safe mode is a diagnostics mode in Windows that starts your PC in a limited state. Hence, running system restores in safe mode can revert your system back to a certain restore point before you carried out Windows Update that generated the “please do not power off” error problem. Here’s how to do this:

  • Forcefully shut down your PC and turn it on again.
  • Navigate to the “Run in Safe Mode” option and hit “Enter”.
  • Go to Start > Type “system restore” and then hit “Enter”.
  • Follow the prompts to revert back to a certain restore point.
  • Wait for the process to complete, and then reboot.

Note: Ensure you are able to identify the restore point dated before the “please do not power off” error problems waxed. System restore does not affect any of your files, documents, and personal data.

5. Run Windows Update troubleshooter

Windows Update troubleshooter is Windows 10’ built-in program that automatically detects and fixes most incorrect settings on your PC resulting in Windows Update failure. Here’s how to run the troubleshooter:

  • Click Start
  • In the search field box, type Troubleshooting
  • Click Troubleshooting
  • Click View all in the left pane
  • Select Windows Update
  • Click Next to run Windows Update Troubleshooter, then follow the instructions on the screen

If you still cannot fix the “please do not power off” error after running the Windows Update troubleshooter, try the next solution.

6. Run Automatic Repair (Windows 10)

You may consider running Startup repair so as to fix the “Please do not power off or unplug your machine” prompt. The system may be corrupted due to irregularities caused during Windows installation. You need to create a Windows bootable USB or DVD drive before you proceed with automatic repair. Here’s how to do this:

  • Download the Windows 10 ISO file, to create a bootable device for Windows 10.
  • Insert the bootable USB or DVD and boot Windows from it.
  • In the “Windows Setup” window, select the “language to install”, “Time and Currency format”, and the “keyboard or input method”.
  • Hence, click on “Repair your computer” and select “Troubleshoot”.please do not power off or unplug your machine
  • Click on “Advanced options”, select “Automatic Repair”, and then select the Operating System.please do not power off or unplug your machine
  • After the repair process, follow the prompts notification to boot up your Windows PC.

7. Reset Windows Updates components

Disclaimer: This solution contains steps that are part of modifying the registry. Please note that serious problems may occur if you do this incorrectly. Ensure you follow these steps correctly, and carefully.

This method involves modifying your Windows registry; hence, it is very necessary that you back up the registry before you modify it. Also, you can restore the registry in case a problem occurs.

Here’s how to manually reset the Windows Updates Components:

  1. Right click Start
  2. Select Command Prompt (Admin)please do not power off or unplug your machine
  3. Click Yes when asked for permissions
  4. Stop the BITS, Cryptographic, MSI Installer, and Windows Update Services by typing the following commands at a command prompt:
  • net stop wuauserv
  • net stop cryptSvc
  • net stop bits
  • net stop msiserver

(Press Enter after each command you type)

  1. Rename the SoftwareDistribution and Catroot2 folder by typing the commands below in the Command Prompt then press Enter after each command you type:
  • Ren C:WindowssoftwareDistribution SoftwareDistribution.old
  • Ren C:WindowsSystem32catroot2 Catroot2.old
  1. Restart the BITS, Cryptographic, MSI Installer, and Windows Update Services by typing the following commands in Command prompt:
  • net stop wuauserv
  • net stop cryptSvc
  • net stop bits
  • net stop msiserver
  1. Type Exit in the Command Prompt to close it

After trying out the steps above run Windows Updates again and follow the prompts to complete Windows Update process.

However, some Windows users reported getting “Access Denied” prompts when trying the step above. Here’s what to do if your access is denied:

  • Log in first as administrator or use administrator user account
  • Stop the windows Update service and try to rename SoftwareDistribution folder
  • Right click Start
  • Select Run
  • Type services.msc and press OK or enter
  • Scroll down and locate Windows Update service
  • Right click and select Properties
  • Stop the service
  • Follow the steps again to reset Windows Update Components

After you complete the process, go to the “Services” window again, now start the Windows Update service, and then restart the computer.

Note: We highly recommend that you check the “Give me updates” menu for other Microsoft products when using the Windows update option. Windows Updates downloads and installs updates required to run Windows efficiently.

If you have any comments on any of the steps or success using another method not listed above please leave a comment below.

Fix bugs in older Windows 10 versions with these new updates

Patch Tuesday on the second Tuesday of each month is the traditional day for Microsoft to release new cumulative updates. However, Microsoft is beginning to break with tradition by releasing cumulative updates twice in a month on other days of the week. The software giant has just released further cumulative updates for three older Windows 10 versions on a Thursday.

Microsoft has released the latest cumulative updates for Windows 10 Fall Creators Update, the Creators Update and Anniversary Update versions. Note that those are cumulative updates which don’t add anything new to the versions. Cumulative updates only fix bugs in Windows 10 versions.

KB4284822, KB4284830, KB4284833

The latest cumulative updates fix a variety of issues that are too numerous to list here. This page lists all the KB4284822 fixes for the Fall Creators Update. Open this page for a full list of KB4284830 fixes for Windows 10 Creators Update. This Windows support page provides further details for the KB4284833 cumulative update.

Alas, none of the cumulative updates are for the latest April 2018 Update, which has rolled out faster than any other version. There are a few April 2018 Update bugs that really need cumulative update fixes. For example, the Do not allow web search Group Policy Editor option that turns Cortana web searches off no longer works in Windows 10 Pro since the April 2018 Update. This post provides further details about some of the other bugs in the latest Windows version.

Hopefully, Microsoft will also release a cumulative update for the April 2018 Update (version 1803) soon. The cumulative updates for older Windows 10 versions will be automatic ones unless you’ve adjusted Windows Update settings. You can manually check updates by entering ‘updates‘ in Cortana’s search box and selecting Check for updates.

Fix Windows 8, 10 gadget issues with these 5 easy solutions

Like any other platform developed by Microsoft, Windows 8 and Windows 8.1, 10 can be easily customizable by any user. So, in order to personalize your Windows 8, 10 device and for being able to ease your daily work you can anytime use dedicated apps, features and gadgets. But, what can you do when you notice that you can’t properly use the Windows 8 / Windows 8.1/ Windows 10 gadgets?
wind 8 gadgets
Of course you will have to find a proper troubleshoot solution to apply on your device in order to fix these issues. The Windows gadgets are great as by using the same you can get your precious info right on your Desktop and within a single tap or click. So, having problems with the gadgets means that you can’t properly use your Windows 8, or Windows 8.1, 10 device, thus a troubleshoot solution must be performed as soon as possible.

In that matter you can anytime use the steps from below where I have posted various methods that can be used in order to address the Windows 8, 10 gadgets not working problems. Therefore, don’t hesitate and try these guidelines for fixing your Windows laptop, tablet or desktop.

How to fix Windows 8, 10 gadgets?

  1. Restore your Gadgets to default settings
  2. Use Registry Editor
  3. Fix XML Registration
  4. Close background apps
  5. Create a new user profile

1. Restore your Gadgets to default settings

  1. Go to your Start Screen and press the “Wind + R” keyboard keys.
  2. The Run box will be displayed.win 8 control panel
  3. There enter “control” and press enter.
  4. From Control Panel pick “Appearance and Personalization”.
  5. Just click on “Restore Desktop Gadgets” and you are done.
  6. If this method isn’t working for you, try to apply the following solutions.

2. Use Registry Editor

  1. From the Start Screen of your Windows 8 device press “Wind + R” keyboard buttons in order to use the Run box.
  2. Type regedit and press ok.win+run
  3. Then from Registry Editor go to path HKEY_CURRENT_USERSoftwareMicrosoftWindowsCurrentVersionInternet SettingsZones.regedit
  4. From left panel of Registry, under Zones right click on the ASCII symbol.
  5. Select “Delete” and then “ok”.
  6. Exist Registry Editor and reboot your Windows 8 / Windows 8.1 device.

3. Fix XML Registration

  1. On your computer go to Start Screen and right click on the Start button.cmd
  2. From the menu that will be displayed choose “Open Command Prompt Window as Administrator”.
  3. Then, in the cmd window type “regsvr32 msxml3.dll”, agree with the prompt and click “Ok”. Then type “regsvr32 scrrun.dll” and agree with the alert and click “ok” and finally type “regsvr32 jscript.dll”, agree with the message and click “ok”.
  4. In the end reboot your device.

4. Close background apps

Sometimes, your Windows 8, 10 gadgets may not work properly due to compatibility issues. After all, you’re using a feature that was initially developed for another Windows version. You can quickly fix this problem by reducing the number of active apps and programs running in the background. You can do this either by clean booting your computer or simply disabling apps from Task Manager.


5. Create a new user profile

Some users reported they managed to fix this problem by creating a new user profile. This leads to the conclusion that corrupted user profiles may prevent Windows 8, 10 gadgets from working properly.

That should do the trick; now you should know how to fix the Windows 8 or Windows 8.1, 10 gadgets issues with ease, by applying one of the above explained methods. Use the comments filed from below in case you need more help in this matter.

RELATED STORIES TO CHECK OUT:


Download and install Windows 10/11, 8 GadgetsPack with ease

As you know on Windows 8, 10, we can’t use the classic Windows 7 desktop gadgets, as Microsoft replaced these software with Windows Store, from where you can anytime download and set various apps that are similar with the desktop gadgets that have been introduced to us since Windows Vista.
windows 8 gadgets
But, if Windows 8, 10 isn’t enough for you and you want to personalize your system by your own taste then you should know that you can still use the Windows 7 desktop gadgets on your Windows 8 or Windows 8.1, 10 based tablet, laptop or desktop. How is that possible? Well, all you have to do is to download the stock desktop gadgets on your device and that’s pretty it. You can then choose which gadget to use or how to organize your desktop in order to have access to the latest info, whether we are talking about the business field or just about your entertainment purpose.

Since Microsoft haven’t included desktop gadgets in Windows 8, or Windows 8.1, 10 in order to download these features you will have to get a third party tool. There are several apps to use, though the most popular software is

Download 8GadgetPack on Windows 10

8GadgetPack. With this app you will basically be able to download Windows 7 default desktop gadgets on your Windows 8, 10 based device. Then you will be able to pick which gadget to show on your desktop and also how to organize your computer in order to easily access your favorite gadgets.

In case you want to test the 8GadgetPack app, just download the same from here – don’t worry the app is free distributed and works without bugs or issues on any Windows 8 or Windows 8.1, 10 system. Then install the tool on your device by following the on screen prompts and in the end launch 8GadgetPack. First, test all the options in order to manage your desktop and then pick which desktop gadget to set on your computer.

Fortunately, 8GadgetPack is not the only gadget app that you can use to bring Windows 7 gadgets to Windows 10. There are other similar apps that you can use, including Gadgets Revived, Win10 Widgets, Gadgetarian, and so on. For more information about each of these tools, you can check out this list of the best gadget apps that you can use on your Windows 10 computer.

That’s all; now you know how to download, install and use desktop gadgets on your Windows 8 / Windows 8.1./ Windows 10 based device. If you need other advices or extra help on how to use 8GadgetPack, don’t hesitate and use the comments field from below – we will assist you as soon as possible and we will update this guide accordingly.

RELATED STORIES TO CHECK OUT:


KMS Activator errors on Windows 10/11 [QUICK GUIDE]

Windows 10 is a great OS, especially for those who are using the first time the Microsoft platform. This OS is user friendly and are compatible with portable and touch based devices and also with desktop or classic computers.

Unfortunately, there are some bugs present in Windows 10 that might give us some hard time when trying to resolve the same.
windows-8-professional
This situation can be applied when talking about the already common KMS activator error that is often located on the Windows 10 system.

So, if you are getting the Windows 10 KMS error message (0xC004F074), don’t panic, as you are not the only one and luckily for you, now you can easily fix this bug.

If you choose to read the guidelines from below, then you will be able to use two methods that can address the Windows 10 KMS activator error: first we will be checking how to manually resolve this issue and then I will show you how to automatically fix it by using a third party software.

Therefore, if you want to get rid of the activator bug (which is nothing but a compatibility problem) complete the steps from below.

How can I fix the Windows 10 KMS Activator error?

  1. Use Command Prompt
  2. Use a Run window
  3. Use a third-party app
  4. Use Microsoft’s solutions

Method 1: Use Command Prompt

  1. First of all, on your Windows 10 device open an elevated Command Prompt Window – you can do it by going to your Start Screen from where you need to press “Wind” keyboard key; then on the search box type “cmd” and right click on the result; from there choose “run as administrator”.cmd
  2. On the CMD Window enter “slmgr.vbs –ipk xxxxx-xxxxx-xxxxx-xxxxx-xxxxx (x should be replaced by your 25 digit product key)”.
  3. Then press enter.
  4. Up next on the same cmd window type “slmgr.vbs –ato” and hit enter.
  5. Finally close the cmd window as you are done.

If you’re having trouble accessing Command Prompt as an admin, then you better take a closer look at this guide.


Method 2: Use a Run window

  1. Go to your Start Screen and press “Wind + R” keyboard keys.win + r
  2. On the Run Box type “Slui 3” and press enter.
  3. Now enter your product key and press enter.
  4. Click on Activate and that’s it.

Most users don’t know what to do when the Windows key stops working. Check out this guide and be a step ahead.


You can’t find your Windows product key? Check out this amazing guide that will help you do just that.


Method 3: Use a third-party app

You can fix the Windows 10 KMS activator issue by using a third party app. With the software you will have to perform a scan which will fix your problem automatically.

So, just download the tool from here and install the same on your Windows 10 device. Then run the app and follow the on screen prompts and you are done.

Method 4: Use Microsoft’s solutions

If you’re experiencing KMS errors 0x8007232b or 0x8007007B, Microsoft has has already published a list of solutions that you can use to fix this problem. For more information on the steps to follow, go to Microsoft’s support page.

There you have it; that’s how you can easily fix your Windows 10 KMS activator problem. Use the comments field from below if you have questions or if you need other details related to this topic; we will assist you as soon as possible.

Also, if you came across additional solutions and workarounds to fix KMS Activator errors, feel free to list the troubleshooting steps in the commends below.

RELATED STORIES TO CHECK OUT:

How to Easily Disable Office 2013 Sign-in Feature

If you are using Office 2013 on your Windows 10, 8 or Windows 8.1 device, then you are probably familiar with the “sign in” feature and with the in-built cloud support offered by the Office package. Now, if these features might be useful in some situations, in others you might find it useless and also annoying. So, because of that, in this guide, I will show you how to easily disable/enable Office 2013 sign in and cloud features.
Office-2013
Office 2013 is great especially for those who are using the Office package on a daily basis. The program comes with useful features and capabilities that can really ease your work. Furthermore, Office 2013 has an easy to use interface, so even a newbie can manage this Windows service.

The “sign in” feature which is included on Office 2013 can be used for saving data or accessing saved data online, on any device that is running Windows 10, 8 and Windows 8.1 along with Microsoft Office 2013. A cloud service is used in that matter which means that you can store your documents without using your own device and furthermore you can have your personal docs on the go.

But, if you don’t use this feature, the best will be to disable it, as it can become quite annoying. Thus, don’t hesitate and use the guidelines from below and learn how to disable Office 2013 sign in feature on Windows 10, Windows 8 and Windows 8.1.

How to Disable Office 2013 sign in prompt

  1. Use the Registry Editor
  2. Use the GroupPolicy

1. Use the Registry Editor

  1. On your computer, notebook or laptop go to your Start Screen.
  2. From there press “Win + R” dedicated keyboard keys.
  3. The Run box will be displayed.
  4. There enter “regedit” in order to run Registry Editor.win+run
  5. Good; on Registry go to path “HKEY_CURRENT_USERSoftwareMicrosoftOffice15.0CommonSignIn”.
  6. Then, go to the right panel of Registry and right-click on a blank space.
  7. Select “New” and pick “DWORD Value”.
  8. Name this new value “SignInOption”.office 2013 sign in
  9. Right-click on the new key and set its value to 3.sign in value
  10. Close Registry Editor and reboot your Windows 8 or Windows 8.1 device.

2. Use the GroupPolicy

Keep in mind that the Group Policy Editor is available only on Windows 10 Pro, so you can use this method only if you use this particular OS version. Here are the steps to follow:

  1. Download the Office 2013 Administrative Template files
  2. Go to Start > type gpedit.msc > hit Enter to launch the Group Policy Editor
  3. Go to this path: Local Computer Policy > User Configuration > Administrative Templates > Microsoft Office 2013 > Miscellaneous
  4. You should now see the option ‘Block signing into Office‘ > double click on it
  5. Select ‘None allowed’ to disable the sign-in prompt.

That’s it. The Office 2013 “sign in” feature should be disabled now, so test the same. If you are still having issues in removing the cloud feature from Office 2013, don’t hesitate and use the comments field from below and we will assist you as soon as possible.

RELATED STORIES TO CHECK OUT:


Most gamers still prefer physical video game releases instead of digital

During E3 2018, Microsoft spoke fondly of its intentions to move its gaming platform toward a digital future backed by its growing cloud infrastructure; this is a concept the company has been chasing since the introduction of the Xbox One.

Despite being figuratively run out of town for its lofty ambitions to pit gamers against traditional brick and mortar retailers, Microsoft has subtly put pillars in place, such as its increasingly popular digitally powered Games Pass service, software driven Backward Compatibility and tweaks to its digital store front to provide a more convenient shopping experience, all in the hopes of  eventually actualizing its digital-first dream.

However, when taking the industry temperature on whether digital is the way forward, survey companies are finding that Microsoft may still be putting the cart before the horse.

According to the published annual Games 360 report from survey provider Nielsen, it seems over 66 percent of console gamers still prefer physical games over digital downloads. Additionally, it seems PC gamers are among the most progressive audience as they account for a massive 71% of users who now prefer to engage with digital downloads over wanting other

“Among the most pronounced and historically persistent characteristics of the gaming population is the divide between PC gamers and console gamers. Those who prefer to play on consoles have a strong preference for physical packaged media, but tend to spend less time playing than players who prefer PCs. The opposite is true of PC gamers, who vastly prefer digital media and who tend to spend more time playing games. PC gamers also tend to spend more money on games than console gamers. Over the past year, however, those preferences have become slightly less pronounced as publishers continue to enhance the appeal of their digital shops with more titles and improved user experiences.”

Other tid bits from the annual Games 360 report show that spending on games increased overall, digital downloaders tend to spend less ironically.

It should be noted that Nielsen’s report is based on responses via consumer online surveys in Q1 of each year using the company’s proprietary e-Panel technology available in the US only. The annual Gamers 360 report survey’s a sample group of 2,000 gamers ranging in ages of 13 and up living in the US.

With that being said, much of the reports extrapolations seem to be holding true as taking a stroll down comment/forum-ville lane, the response to Microsoft’s insistence on a digital first future was met with less vitriol than when it was pitched a few backs, but the industry seems to be just as tepid in its acceptance in the face of growing change in distribution and gameplay.

Disable You have new apps that can open this file message

Windows 10, 8 brought great features and capabilities to its users, the new OS released by Microsoft being designed especially for the touch based and portable devices. Anyway, there are so many in built features included on Windows 10, 8 and Windows 8.1 that some protocols might be useless or even annoying for some users, especially for the advanced Windows customers.
New_apps
In that matter we can talk about the “You have new apps that can open this type of file” message that is featured in Windows 10, 8 and Windows 8.1. Getting “You have new apps that can open this type of file” is really frustrating as this message will be displayed each time you will install a new program on your computer.

For example, if you download a new photo editor tool, when you will try to open an image the same message will be displayed on your device asking you which program to use for viewing your picture. And the same thing will happen with all your actions, which means that you might want to get rid of the Windows 10/ Windows 8 / Windows 8.1 “you have new apps that can open this type of file” message or alert.

In order to help you out, I decided to develop this tutorial. The guidelines from below can be easily completed and work perfectly for enabling or disabling the protocol that has been described during the lines from above.

How to disable You have new apps that can open this type of file message in Windows 10, 8, 8.1?

  1. Tweak your Registry
  2. Block app install notification in Group Policy

1. Tweak your Registry

  1. On your device, from Start Screen, press “Win + R” keyboard buttons.
  2. You should notice the Run box displayed.
  3. There enter “regedit” – Registry Editor will then be launched on your Windows 10, 8 device.win+run
  4. On Registry Editor from left panel go to HKEY_LOCAL_MACHINESOFTWAREPoliciesMicrosoftWindowsExplorer.
  5. Good; then head your attention on the right panel of Registry.
  6. On a blank space right click and choose “New” followed by “DWORD value”.

    disable Wind 8 protocol

  7. Rename the new value as NoNewAppAlert.
  8. Double click on NoNewAppAlert and set its value to 1.
    NoNewApp value
  9. Close Registry and restart your Windows 8 system.  You can enable this protocol by setting the NoNewAppAlert value to 0.

2. Block app install notification in Group Policy

You can also disable this alert by using the Group Policy. Keep in mind that the Group Policy may not be available on your Windows 10 Home computer. Anyway, here are the steps to follow:

  1. Go to Start > type gpedit.msc > hit Enter.
  2. Launch the Group Editor and follow this path: Computer Configuration > Administrative Templates > Windows Components > File Explorer.
  3. Locate the option Do not show the ‘new application installed’ notification > double-click on it.do not show new app installed
  4. Enable it to block the notification from appearing on the screen.

You have learned how to easily disable the “you have new apps that can open this type of file” alert in Windows 10, 8 and Windows 8.1.

RELATED STORIES TO CHECK OUT:


Windows Insiders can now preview Microsoft Teams on Surface Hub

Microsoft Teams has become the go-to collaboration tool for many organizations, and Microsoft is now getting ready to launch a dedicated Teams app on the Surface Hub interactive whiteboard. As spotted by Aggiornamento Lumia (via Petri.com) Windows Insiders can now preview Microsoft Teams on Surface Hub.

If you’re lucky enough to have a Surface Hub you can preview the app by clicking here. There’s not much to the app at the moment and it is pretty much the usual Microsoft Teams experience, but built for bigger screens. Features on Surface Hub include calling and meeting capabilities, one-touch join, and up to four incoming video streams.

Microsoft recently announced the launch of Surface Hub 2, so the timing of the Teams preview seems very appropriate. Surface Hub 2 is scheduled to launch in 2019, and there’s no word on how long the preview of Teams on Surface Hub will last.

Play The Crew 2 Open Beta on Xbox One right now for free

The open beta for The Crew 2 is now, well, open on Xbox One consoles until June 25th. Interested gamers can head on over to the Microsoft Store to download it on their Xbox and get a taste of the game before it officially launches on June 29th.

Here’s the official description for the open beta and game.

Play The Crew 2 for free during Open Beta: 06.21.2018 – 06.25.2018!

Get behind the wheel before the game launches and dominate the land, sky, and seas with planes, cars, and boats! Explore the USA from coast to coast in a huge, varied open world. Try the innovative Fast Fav feature and seamlessly switch between vehicle types instantly. Team up or compete with your friends in a variety of motorsport disciplines. Upgrade your American road trip by pre-ordering the Gold Edition and play the full game three days early on June 26! Gold Edition also includes the season pass with immediate access to three exclusive vehicles (plus early access to 22 more as they are released), a permanent 20% discount on all in-game purchases, and much more! An internet connection is required. Please visit thecrewgame.com/BetaFAQ if you have questions.

Do you like participating in open betas? Let us know what you think of The Crew 2 in the comments below and then follow us on Pinterest for more Xbox content.

The Crew® 2 Open Beta
Developer:
Ubisoft
Price:
Free

Nintendo Switch Minecraft players now viewable on Xbox One friend lists

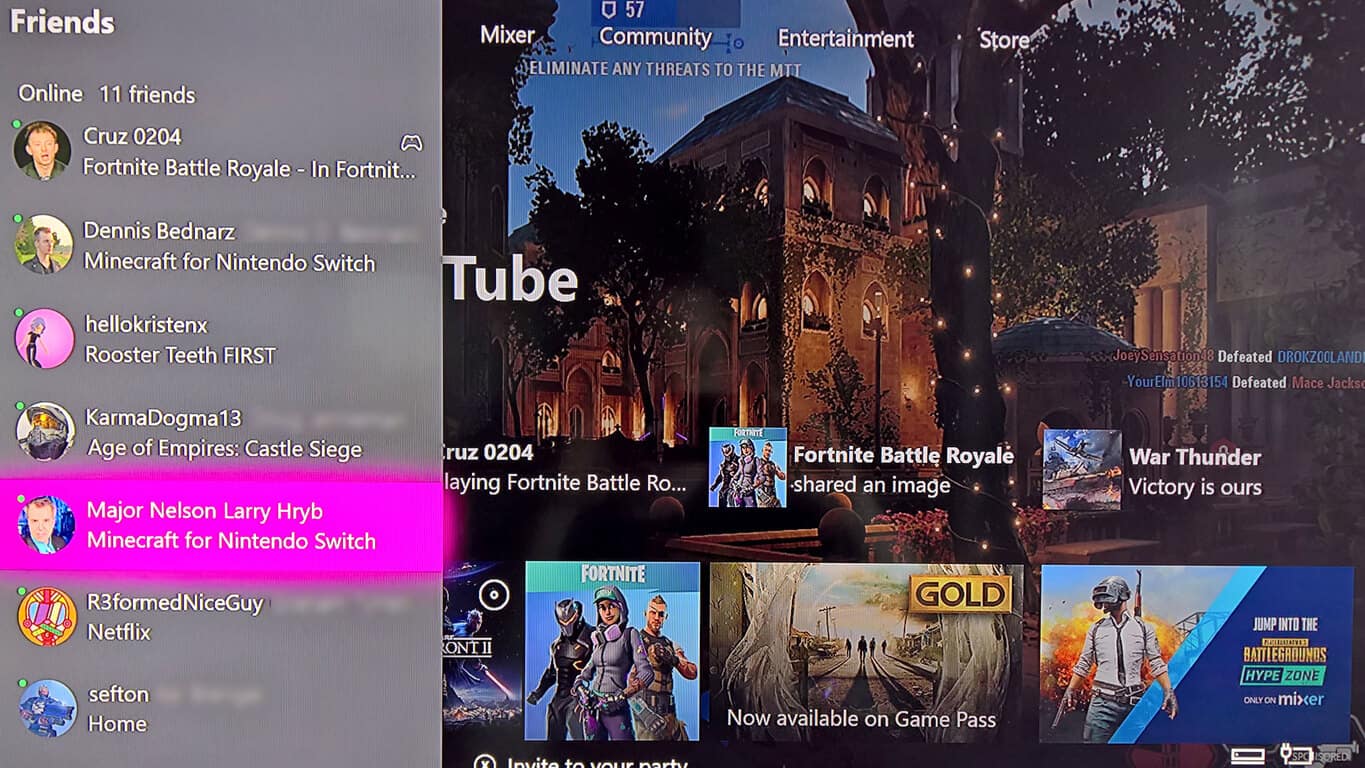
We’ve known for a while now that Minecraft on the Nintendo Switch would be getting Xbox Achievements and crossplay with Xbox One consoles but something a lot of people hadn’t thought of is that with today’s update, Nintendo Switch players will now start showing up on Xbox One consoles’ friend lists.

This is possible due to Nintendo Switch Minecraft players being required to log into the game with a Microsoft account. If that Microsoft account is also linked to an Xbox Live account (they’re essentially the same thing) and that account has friends on Xbox then those gamers will now see when they’re logged into their Switch and playing Minecraft.

Minecraft for Nintendo Switch on Xbox One

As can be seen in the above image, the online status not only states that the Xbox account is online while on the Nintendo Switch but it even specifies that they’re playing “Minecraft for Nintendo Switch.” It also looks like Microsoft’s Larry Hryb is giving the game a go on his Nintendo Switch today.

The listing of what video game Xbox gamers are currently playing has always been a useful tool for game discovery and promotion and now, with today’s Minecraft update, it’s turned into a bit of free promotion for the Nintendo Switch console as well.

It’s a shame Sony’s so against cross-platform play as they could be advertising their PlayStation 4 right now directly on their rival’s console.

Let us know what you think. Do like seeing a Nintendo presence on your Xbox One and would you like to see more cross-play initiatives like this? Share your thoughts with the community in the comments below and make sure to follow us on Twitter for more video game news.

Check out this Windows 7 2018 Edition concept: You’ll love it

For many users, Windows 7 was, and still is, one of Microsoft’s best ever platforms. As such, Win 7 has retained a substantial user base that was eventually eclipsed by Windows 10.

However, Microsoft is totally committed to Windows 10 and will end support for Win 7 by 2020.

Nevertheless, the YouTuber Mr. Advan has added a new, completely unofficial, Windows 7 2018 Remastered Edition design concept video to YouTube that shows how Microsoft could revamp Win 7.

windows 7 2018 edition


Did you know you can keep using your Windows 7 forever? Learn how to do that from out detailed guide!


A very stylish edition of Windows 7

Mr. Avdan’s Win 7 video is a short clip that runs for about a minute and a half. Nevertheless, that video provides a tantalizing glimpse of what a remastered Windows 7 edition is like.

The video showcases a Windows 7 edition with the Acrylic UI design style incorporated within Windows 10. The remastered edition’s Start menu looks more like the one in Windows 10, but it retains the orb button from Win 7.

The remastered edition’s Start menu also includes white-on-blue tile icons instead of the multicolored tiles.

The video also includes transparent windows. Microsoft largely abandoned the Windows Aero transparency effect in both Windows 10 and 8. However, some users prefer the transparency of the Win 7 windows.

The most interesting aspect of the design concept video, however, is perhaps the dynamic wallpaper.

Speaking of wallpapers, maybe you’re interested in some Windows 10 skins for Windows 7. You came to the right place for that. Choose a skin pack from our fresh list!

The video shows us a remastered Windows 7 that includes dynamic wallpaper which changes along with the time of day. As such, the OS switches to a dark theme mode at night.

That dynamic wallpaper shown in the video is comparable to macOS Mojave’s time-shifting Dynamic Desktop. Dynamic wallpaper is a great addition to Windows 10 and 7.

windows 7 design concept 2018

Microsoft has never released a remastered edition of any of its platforms. The closest thing was Windows 8.1, which was basically Win 8 with a Start menu.

So the big M will probably never launch a Windows 7 Remastered Edition. The software giant is doing all it can to convince Windows 7 users to embrace Win 10.

That began with its free one-year upgrade offer, and now the company is launching many of its latest games and MS Office exclusively for Win 10.

Nevertheless, the design concept video might provide Microsoft with some great ideas that could be incorporated in Windows 10.

Dynamic wallpapers would be a great addition to Windows 10 that Microsoft could include in future updates.

One developer has even released a WinDynamicDesktop app that ports Mojave’s Dynamic Desktop to Windows 10, which you can download from this webpage.

RELATED STORIES TO CHECK OUT:

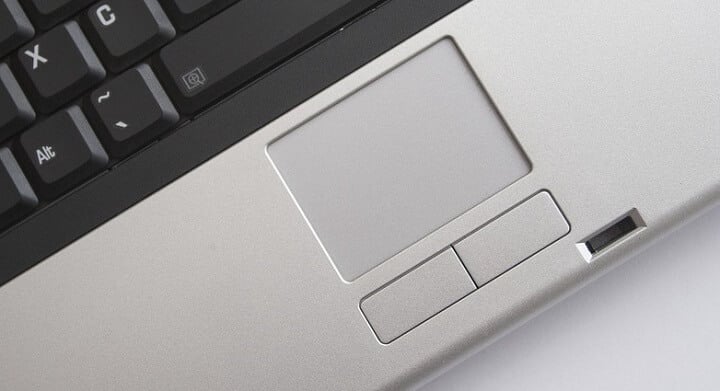
How to Fix Right and Left Click Not Working On Laptop’s Touchpad

If you can’t properly use your touchpad on Windows, especially when the left and right click is not working on the laptop, we got good news. The problem is easy to fix and we explain below all the steps.

The problem affects all devices, but it’s commonly seen that the HP laptop’s touchpad left and right click is not working. Though Lenovo, Dell, and Acer are no exceptions. Keep reading to find out the solutions!

How do I fix the left and right click on a laptop?

Begin with a simple PC restart and try disconnecting non-critical peripherals. If these won’t work, follow the steps below:

1. Check delay settings

  1. Press Windows + S to open Search, type Touchpad settings, and click on the relevant search result.
  2. Make sure Touchpad is turned on.
  3. Now, appropriately configure the Pointer speed and make sure you verify the settings underneath. Use the touchpad in accordance with these or reconfigure them.mouse settings to fix left and right click not working on laptop

The first thing you should verify when the left and right click buttons are not working on a laptop is that the settings are configured correctly. Reconfiguring them will get things up and running in no time!

2. Update the drivers

  1. Press Windows + X to open the Power User menu, and click on Device Manager.
  2. Locate your touchpad drivers, expand the list, right-click on the touchpad, and select Update driver.update touchpad driver
  3. Choose Search automatically for drivers and wait for the process to complete.

Running outdated touchpad drivers may cause various issues and this is often why the left and right mouse buttons are not working on a laptop.

You can fix this with Device Manager, or if you prefer automatic support, you can use a driver update software.

3. Reset touchpad settings

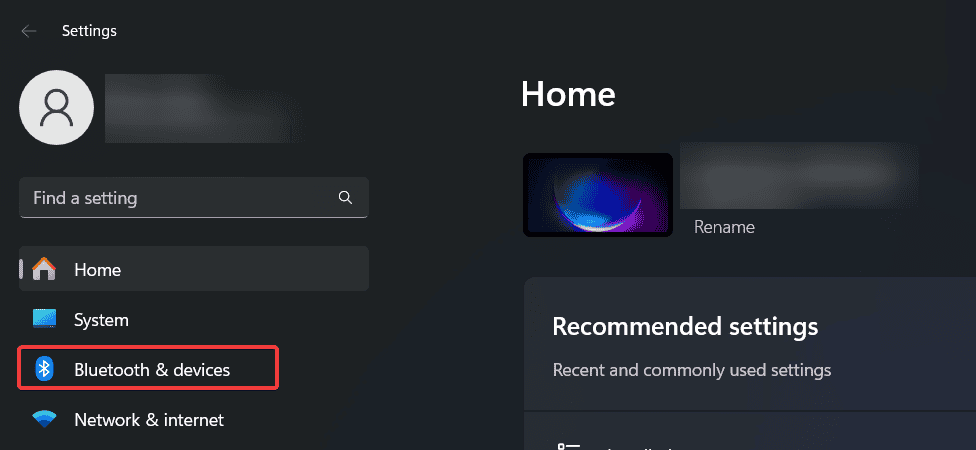
  1. Press Windows + I to open Settings.
  2. Go to Bluetooth and Devices.bluetooth and devices settings
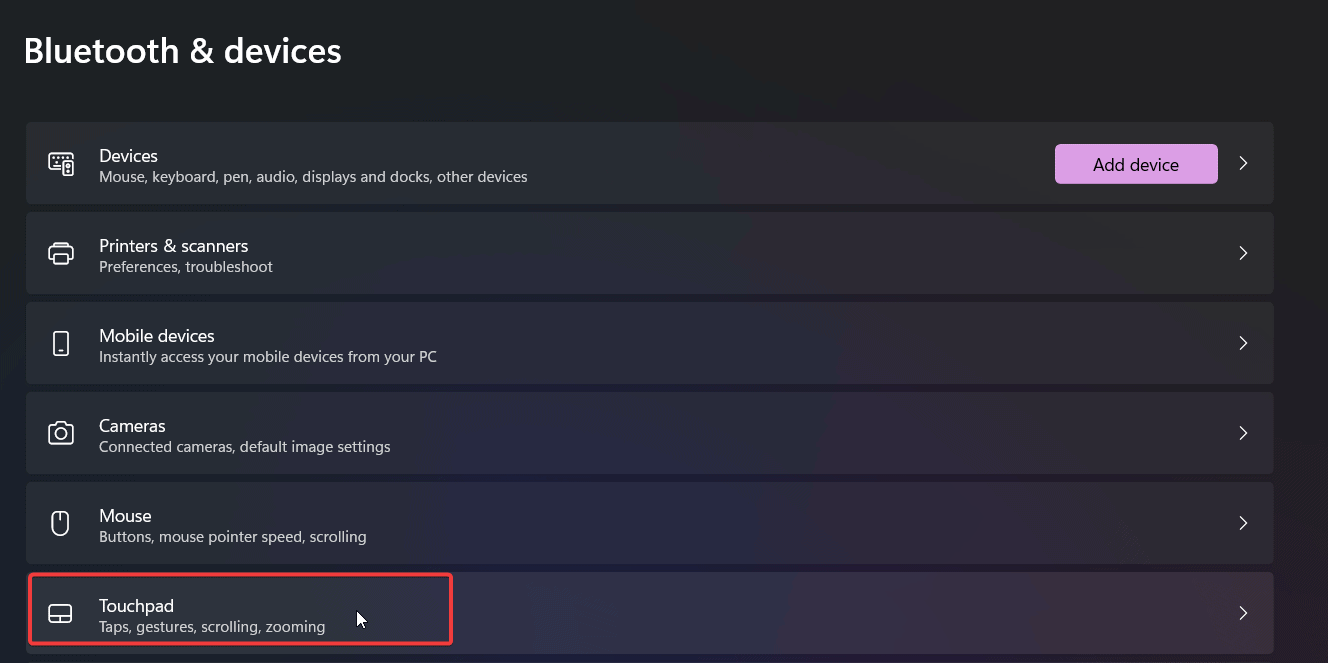
  3. Select Touchpad.touchpad settings
  4. Scroll down and click Reset to restore the default touchpad settings.reset touchpad
  5. Check if the right and left click works.

4. Get a new touchpad

If all solutions fail to work, maybe it’s time to buy a new touchpad. Hardware issues can’t be fixed with a software-focused approach; only a repair or replacement can fix things.

We also have a curated list of the best touchpads to purchase for Windows, so don’t forget to check it out.

That’s it! If the left and right click was not working on the laptop earlier, it should now. Before you leave, find out the best mouse settings for improved performance in Windows.

Need more help with different click or pointer problems? See our complete mouse not working on laptop guide for additional fixes.

Tell us which fix worked for you in the comments section below.

This Program Might not Have Installed Correctly on Windows 8, 8.1, 10

If you want to learn how to disable or remove the Windows 10, 8 and Windows 8.1 “This program might not have installed correctly” error message, then you should use the guidelines from below, where I have described the easiest way to use in order to get rid of the mentioned and annoying Windows alert.
program compatibility assistant
“This program might not have installed correctly” represents a general troubleshooting message displayed by Windows in its in built feature dubbed as Program Compatibility Assistant. This feature has been included in Windows platforms since Windows Vista which means that we have to deal with the same on Windows 10, 8 and also on Windows 8.1. Even though this compatibility assistant might be useful in some cases, on other situations is rather useless: for example the alert message might be displayed even with portable apps which don’t have installers at all.

Therefore, if you are tired of getting “This program might not have installed correctly” message on your Windows 10, 8 and Windows 8.1 device, learn how to disable this feature by using the guidelines from below.

FIX: This program might not have installed correctly in Windows 10, 8.1

1. Use the Program Compatibility Troubleshooter

  1. On your computer, go to your Start Screen.
  2. From there press Win + R keyboard keys in order to open the “run” box.
  3. On the same type “services.msc” and click on “ok”.servicemsc
  4. From the Services window that will be displayed on your device search and click on the “Program Compatibility Assistant” service.
  5. Double click on the mentioned service and on “startup type” choose “disabled”.Program compatibility assistant disabled
  6. Save and Exit.
  7. Reboot your Windows 8 or Windows 8.1 device and that’s it.

On Windows 10, you can run the troubleshooter straight from the Settings page. Here are the steps to follow:

  1. Go to Start > type ‘settings’ > double click on the first result to open Settings
  2. Go to Update & Security > Troubleshoot > select the Program Compatibility Troubleshooterrun program compatibility troubleshooter
  3. Run it > restart your computer and check if the issue persists.

2. Repair problematic programs

Certain apps and software also offer a built-in repair option that allow you to fix general issues. Repairing your programs may help you fix any install issues that might have occurred during the process.

You can also repair programs by going to Control Panel > Programs > Programs and Features > right click on the problematic program > select Repair.

repair software windows 10

Perfect, you have successfully disabled the Program Compatibility Assistant service from your Windows 10, 8, 8.1 device. So, now you will no longer get the “This program might not have installed correctly” alert message, which means that you can easily complete your daily tasks.

RELATED STORIES TO CHECK OUT:


Programs still need to close: Disable alert in Windows 10/11

If you are in a hurry and you want to power off your Windows 7, 8, 8.1 or Windows 10 device quickly you might experience an annoying alert saying that “Programs still need to close”. Well, if you want to disable this inbuilt Windows feature, don’t hesitate and use the instructions from this step by step guide.

Almost every time you want to restart or power off your Windows 7, 8, 8.1 or Windows 10 device, the OS will prompt you with the following message “A number of Programs Still Need to close” where a number of programs might be 1, 2 and so on. These programs might have unsaved data and that’s why Windows is preventing you from shutting down. But, in most cases, the programs that must be manually closed aren’t using any data at all, so the alert message isn’t useful. Due to some reasons, the “Programs still need to close” Windows 7, 8, 8.1 or Windows 10  message will become quite annoying.

So, if you know that you are always saving your data before closing a program, or before shutting down or rebooting your Windows-based device, you can now choose to disable this in-built feature. In order to do so, you just have to complete the steps below.

How to block ‘Programs still need to close’ alert

  1. First of all, go to your Start Screen.
  2. From there press Win + R dedicated keyboard keys in order to open the “run” box.win+run
  3. Type “regedit” and press on “ok”.
  4. The Registry window will now be displayed on your Windows 8 device.
  5. On Registry go to path “HKEY_CURRENT_USERControl PanelDesktop”.registy editor
  6. On the right panel of Registry right click on a blank space. Select “New” and then create a string value –name this new value as “AutoEndTask”.
  7. Double click on AutoEndTask and set its value to 1.auto end task
  8. Close Registry and reboot your Windows 7, 8, 8.1 or Windows 10 device as you are done.

Keep in mind that this solution might trigger some issues on your computer. More specifically, your apps and programs might close before saving important data. This means that you could lose all your work in a second. So, do use this method only if you really need it.

That is how you can disable the “Programs still need to close” feature on Windows 7, 8, 8.1 or Windows 10. Now, you will be able to reboot or power off your device without having to force close programs or without dealing with any other prompts or alerts. So, we are done for today; stay close as further Windows 10, 8 tips, tricks and guides will be developed for your tablet, laptop or desktop.

RELATED STORIES TO CHECK OUT:


Microsoft and EY launch what could be one of the world’s largest enterprise blockchain ecosystem

EY, the global leader in assurance, tax, transaction and advisory services, has partnered with Microsoft to launch a blockchain network for content rights and royalties management with an aim to streamline the costly and time-consuming processes in the media and entertainment industry.

The blockchain network will encompass thousands of business partners and process millions of transactions per day once it is operational, making it one of the world’s largest enterprise blockchain ecosystems.

The solution is designed to serve any industry where intellectual property or assets are licensed to other parties and where the creators are paid royalties based on royalty agreements (with calculations that are mostly done manually). Within this value chain – which can include authors, songwriters, production houses, developers and more – the intellectual property generates millions of transactions aggregating to billions of dollars per month in royalties to be paid.

The rights and royalties management solution will enable increased trust and transparency between industry players, significantly reduce operational inefficiencies in the rights and royalties management process, and eliminate the need for costly manual reconciliation and partner reviews.

The underlying network is built using the Quorum blockchain protocol and Microsoft’s Azure cloud infrastructure and blockchain technologies.

According to Paul Brody, EY Global Innovation Leader – Blockchain, the scale, complexity and volume of digital rights and royalties transactions makes this a perfect application for blockchains. A blockchain can handle the unique nature of each contract between digital rights owners and licensors can be handled in a scalable, efficient manner with an audit trail for the participants.

Microsoft intends to deploy the rights and royalties blockchain network with its game publisher partners in a phased manner. Ubisoft, one of the world’s leading game publishers and a Microsoft gaming partner, is testing the solution as one of the early adopters of this solution.

This solution represents a coming of age for enterprise blockchain adoption, and it will help Microsoft demonstrate its ability to enhance trust with its gaming partners, and strengthen security, transparency, and payment accuracy through the power of blockchain.

Fix Windows 10 KB4284835 reboot loop bug for good

The Windows 10 April Update came with a lot of problems, and one of the most stringent ones is the infinite reboot issue. The latest cumulative update for the Windows 10 v1803 came in June and its KB4284835. It was included in Patch Tuesday, and it came with security and non0-security related fixes, killing a bunch of bugs incuding the BSOD errors that affected some computers when upgrading to the latest Windows 10 version.

Th infinite reboot bug annoys users

Many users have been complaining that the KB4284835 pushes their computers into an endless reboot state. Even if the update seems to be successfully installed it will be downloaded again, and you already know that Windows Update needs a reboot to be completed. So, it’s all just a vicious neverending circle. Fortunately, most users figured out a way of their own to solve it. They did this by just restarting the Windows Update service altogether.

Fix KB4284835 reboot loop issues

For starters, it’s important to be logged in to the system with an admin account because a standard one doesn’t have the right to control system services. So, launch a Command Prompt window with admin privileges and click on Start. Type cmd and right-click Command Prompt. The option that says Run as administrator will open.

In the Command Prompt, type the following commands line by line:

  • net stop wuauserv
  • net stop cryptSvc
  • net stop bits
  • net stop msiserver
  • Ren C:WindowsSoftwareDistribution SoftwareDistribution.old
  • Ren C:WindowsSystem32catroot2 Catroot2.old
  • net start wuauserv
  • net start cryptSvc
  • net start bits
  • net start msiserver

Now, go to Windows Update and check for new updates. If the cumulative update awaits for you there, install it and repeat the process described above. If the update is not there, this means that your problem has been fixed.

RELATED STORIES TO CHECK OUT:

How to Restore Thumbnails in Windows 10 in 6 Quick Steps

Resetting or restoring thumbnails in Windows 10 is something that users tend to do on their computers, almost now and then. This happens if the icons and/or thumbnails are in some way corrupted such that they are blank or have been taken over by other apps, or they’re just not being displayed as they should in a normal situation.

In this case, restoring the thumbnails by resetting the icon cache can help resolve the issue. The same goes also for thumbnail cache, which is usually used to keep image previews, as well as previews of videos and documents.

Windows 10 usually keeps a cache database that houses thumbnail images for each folder, document, video, and photo on your computer system, which is used to display a preview of the file quickly or help you see the contents of a folder before opening it.

This problem grows over time as more folders and files are created, so the database can get corrupted, which manifests as the File Explorer displays incorrect thumbnails the files don’t show previews of the same, or they could just not be there at all.

Thankfully, there are several solutions you can use to restore thumbnails in Windows 10 as listed below.

How to restore thumbnails in Windows 10?

1. Use Disk Cleanup

  • Click Start and open File Explorer.
Windows 10 error applying security
  • On the left pane, click This PC.
windows 10 error applying attributes
  • Right-click the C:drive where your Windows 10 operating system is installed
  • Select Properties.
  • Click the Disk Cleanup
  • Check the Thumbnails option, and uncheck all the other options.
  • Click OK.
  • Click Delete Files to confirm and finish the task.

2. Using an elevated Command Prompt

If you try using the disk cleanup tool and it doesn’t work to restore thumbnails in Windows 10, try using command lines from the elevated Command Prompt option. To do this:

  • Open Start.
  • Type CMD and right-click Command Prompt.
  • Select Run as administrator
  • Type the following command to stop File Explorer and press enter: taskkill /f /im explorer.exe

Type the following command to delete all the thumbnail database files without asking for confirmation: del /f /s /q /a %LocalAppData%MicrosoftWindowsExplorerthumbcache_*.db

  • Press enter:
  • Type the following command to start File Explorer and press Enter: start explorer.exe
  • Close Command Prompt to complete the task.

Your files and folders should be able to have thumbnail previews showing up properly now.

3. Check folder settings

If you still cannot restore thumbnails in Windows 10, someone may have interfered with your folder settings. In this case, do the following to fix it:

  • Open File Explorer.
  • Click on the View
  • Click Options to open Folder Options.
  • Click on the View
  • Make sure to clear the check mark for the Always show icons, never thumbnails
  • Click Apply.
  • Click OKand exit

Your files and folders should be able to have thumbnail previews showing up properly now.

4. Use the Run command

To do this:

  • Right click Start and select Run
Windows Defender won’t update
  • Type: cleanmgr.exe
  • Press Enter
  • Scroll down and check the box next to Thumbnails and click OK

5. Use Control Panel

  • Click Start and click Control Panel
  • Click All Control Panel Items
  • Select System
  • On the left side, go to Advanced system settings and click on it
  • Under Advanced tab, select Performance Settings
  • Under Visual Effects tab, you’ll see Show thumbnails instead of icons, and ensure the option is checked
  • Click Apply and exit, then restart File Explorer if required to

6. Reset and rebuild thumbnail cache

To do this, start by resetting and then rebuild the cache as outlined below:

Reset cache:

  • Right click on empty area of the desktop and click on Personalize. 
  • Click on the Display Properties link.
  • Under Colors, select Medium (16-bit) and click on Apply. If you already have Medium (16-bit) selected, then select Highest (32-bit) instead. Sometimes you will need to do a restart first, then proceed to the next step. Try both ways, then click yes to confirm the new settings.
  • Select Highest (32-bit) and click OK. If you already have Highest (32-bit) selected, then select Medium (16-bit) instead.
  • Click on Yes to confirm the new settings.

Rebuild cache

  • Open Folder Options to select (dot) Show hidden files and folders
  • Open a Windows Explorer window.
  • Go to C:Users(User Name)ImageAppDataLocal 
  • Right-click on ImageIconCache.db and click on Delete. 
  • Click on Yes to confirm the deletion. This deletes the file to the Recycle Bin. It is safe to empty the Recycle Bin when finished.
  • Close the window and empty the Recycle Bin then restart the computer.
  • When you go back, you will notice the Size of the ImageIconCache.db file is smaller, and the Date Modified is now the current date. If for some reason ImageIconCache.db is not there or the size has not changed much, then just restart the computer again. You may need to restart a couple of times in some cases.
  • The icon cache has been rebuilt.

Were you able to restore thumbnails in Windows 10 using the solutions above? Let us know in the comments section below.

Thumbnail issues can appear in Chrome as well, but you can learn how to bring back Google thumbnails effortlessly from one of our other guides.

Did you manage to fix this problem? Let us know in the comments.

Better Together Update comes to Minecraft on Nintendo Switch, complete with Xbox Live achievements

The folks behind Minecraft have announced today that the Better Together Update is now available for Minecraft on the Nintendo Switch. This newest version of the game is available for free for those who own Minecraft: Nintendo Switch edition, and brings crossplay support, Xbox Live achievements and other cool new elements to the experience.

As you can tell from the trailer above, Microsoft and Nintendo are setting their rivalry aside and are going all in on marketing the Better Together Update and the crossplay functionality. This is very significant, especially as Sony continues to block crossplay on Minecraft, Rocket League, and the massively popular Fortnite.

To recap, the Better Together Update brings the new Minecraft Bedrock engine, and it previously launched on Xbox One, Windows 10, iOS, Android and Windows 10 Mobile. The primary purpose of this update is not only unifying players but also helping further customize the game via the Minecraft Marketplace. Gamers still can’t cross-play with those on PS4, though, as Sony refuses to get in due to a “necessity to protect younger gamers.”

You’ll actually need a Microsoft Account to sign-in and enjoy the updated version of Minecraft, but this will give you access to the crossplay functionality, MINECOINS, and Marketplace. Please be aware that all of the existing DLC content will be also transferable from Minecraft: Nintendo Switch Edition to the new version of Minecraft.

Crackdown 3 loses co-developer and original creator

Following its initial announcement at E3 2014, Xbox One/Windows 10 exclusive Crackdown 3 has had quite a troubled development process. The game has once again been delayed to early 2019, and Polygon learned this week that series creator and original co-developer Dave Jones is no longer working on it.

Crackdown 3 was initially co-developed by Sumo Digital, Ruffian Games, and Jones’ studio Reagent Games, where he assumed the role of creative director for the action-adventure title. Crackdown 3 was also said to be using the cloud computing technology from Cloudgine, a company that Jones created and which has since been acquired by Epic Games. As a result, Jones, now director of cloud and esport strategies at Epic is no longer involved in Crackdown 3’s development, and it seems that the game won’t be using Cloudgine’s technology after all.

In previous years, Xbox head Phil Spencer made it clear that Cloudgine would be responsible for the core engine of Crackdown 3, and Dave Jones himself showcased an early demo of the game’s destructible environments back at Gamescom 2015:

Speaking with Polygon at E3 this year, head of Microsoft Studios Matt Booty didn’t provide a clear answer on whether Microsoft had to abandon Cloudgine’s technology in favor of an in-house alternative. “You know, I’m not going to get into the actual technical breakdown,” the exec said. “Let’s just say that we’ve got access to a great infrastructure, and the game’s got some great tech in it, and we’re going to put those two together in the way that makes the most sense.”

Microsoft revealed a new trailer for Crackdown 3 at E3 2018, and this one ignored the skyscraper destruction fun to focus on the series’ classic over-the-top action and its charismatic hero modeled after Hollywood actor Terry Crews.

Crackdown 3 is now set to be released in February 2019, and Microsoft will likely show more about the game at Gamescom later summer. After both Sea of Thieves and State of Decay 2 received mixed reviews this year, Microsoft knows it can’t really afford to disappoint with Crackdown 3. Hopefully, the game suffering many delays (and now being developed mainly by Sumo Digital) was for the best.

Office 365 launcher now rolling out to the Microsoft Teams web app

Earlier this week Microsoft Teams saw the addition of Evernote integration, but there’s also a small but nifty change on the way to the chat-based collaboration tool. According to a tweet from Microsoft EDU PM Mike Tholfsen, the Office 365 launcher is now rolling out to the Microsoft Teams web app.

Since we’re using Teams here at OnMSFT, we were especially interested in the App Launcher, but we didn’t see the change as of yet. Tholfsen tells us that it is still rolling out and it will take a little while. The addition of the App Launcher should make it easier for users to switch out to other Office 365 experiences like Outlook or OneDrive.

Microsoft has steadily improved on the Teams experience and is apparently working on a free tier of the collaboration tool. Teams is also used in many classrooms and comes with assignments and grading features built right in. There’s even a Windows 10 S version of the app, and Teams supports more than 300 file type previews.

Xbox One US sales achieved new all-time May high

Even though Microsoft’s Xbox One is now a distant second behind Sony’s Playstation 4 (which has now sold more than 73.6 million units since launch), May was a very good month for Xbox sales in the US. According to NPD analyst Mat Piscatella, the Xbox One achieved all-time high sales for a May month, beating the previous May 2015 record.

NPD’s data also shows that Sony had the best hardware unit sales in the US in May, as well as the best software sales thanks to hit games God of War and Detroit: Become Human. However, Xbox/Windows 10 exclusive game State of Decay 2 was May’s best-selling title in the US, which is quite impressive considering the game launched on May 22 and was also available through Xbox Games Pass on launch day.

AS Piscatella pointed out in a separate tweet, “subscriptions are likely helping drive full game sales too, it’s not zero sum.” If that’s indeed the case, then Microsoft’s decision to add all future Microsoft Studios titles to Games Pass on launch day was a very good one: it makes the service more valuable for subscribers, and it’s also a good thing for game developers who probably care more about active users than unit sales. That’s also why Microsoft is now focusing more on Xbox Live active users rather than console sales.

We may be slowly approaching the end of the 8th console generation, but the competition between Sony, Microsoft and Nintendo may well become much more interesting over the next couple of months. Sony is currently under fire for blocking crossplay on the Playstation 4 versions for games such as Fortnite and Minecraft, and the whole situation could quickly become a PR nightmare for the console maker.

On the other hand, Microsoft has released the most powerful console on the market, and the company deserves credit for pushing crossplay and encouraging a more inclusive video games industry. Xbox Games Pass, which celebrated its first anniversary this month has also often been compared to the “Netflix of video games,” and it increasingly appears to be a must-have service for Xbox One owners. A combination of pure computing power plus a growing list of quality games seems like a pretty good way to fix the early missteps of the Don Mattrick era.

Full Fix: Windows Spotlight issues in Windows 10/11

Microsoft introduced a lot of aesthetic novelties with Windows 10, and on of the most praised is Windows Spotlight. Windows Spotlight enables your OS to change the Lock screen background before every sign in. Basically, it uses Bing to download fresh and trendy covers. A simple thing that makes the first impression more enjoyable and versatile.

Users are mostly satisfied with Spotlight, but not everything goes so smooth every time. Namely, even this simplistic Windows 10 feature occasionally causes issues. To be precise, some users reported failed loading or that the cover gets stuck on one picture. Some users decided to disable Spotlight while others are more keen to perform the troubleshooting. If you like Spotlight and want to resolve the pressing issue, follow the steps below.

How to deal with Windows Spotlight bugs in Windows 10

Windows Spotlight is a useful feature, but many users reported various issues with Windows Spotlight. Speaking of issues, here are some common problems that users reported:

  • Windows Spotlight stuck on one picture – According to users, this is one of the most common problems with Windows Spotlight. However, you can fix the issue by temporarily disabling this Spotlight feature.
  • Windows Spotlight not showing – If Windows Spotlight isn’t showing, you might be able to solve the issue simply by resetting Spotlight process.
  • Windows Spotlight not working on boot – Many users reported that Windows Spotlight isn’t working on boot. This can occur due to issues with your network connection, so be sure to check it.
  • Windows Spotlight images not changing, doesn’t change – According to users, sometimes the image on Windows Spotlight won’t change at all. To fix this issue, temporarily set your lock screen to use a static picture.
  • Windows Spotlight stopped working – This issue can occur if you’re using PIN log in on your PC. Simply disable PIN sign-in and the problem will be permanently resolved.

 Solution 1 – Check your connection and restart PC

As we already said, Windows Spotlight is dependent on your connection since the pictures are depleted from Bing. So, make sure your connection is on point before moving on. You can check your connection status in the bottom right corner.

Moreover, you should reboot your PC if the error occurred and possibly resolve this issue. After the restart, you should see a new background. If that’s not the case, move on to next step.


Solution 2 – Disable Spotlight and enable it again

Additionally, you should perform a standard troubleshooting procedure recommended by any technician that ever lived. Turn it off and then on. In this case, you can switch to Picture or Slideshow and enable the Spotlight after. Here’s what you need to do:

  1. Right-click on the desktop and open Personalize.
  2. Open Lock Screen tab. Under Background, switch from Windows Spotlight to a Picture or the Slideshow.
    Windows Spotlight stopped working
  3. Click OK and close the Window.
  4. Now Log off and log in.
  5. Navigate to Lock screen and enable Windows Spotlight again.

Solution 3 – Reset Spotlight process

If none of the previous solutions proved helpful, your best bet to resolve Spotlight issues is to reset it. However, that’s not as simple as it seems. Namely, since Spotlight isn’t a third-party app but built-in Windows feature, we’ll need to use alternative ways to fix it. And below is a step-by-step explanation.

  1. Set Spotlight to a Slideshow or a Picture like in the previous solution.
  2. Press Windows + R to open the Run command line.
  3. Copy-paste the following command and press Enter:
    • %USERPROFILE%/AppDataLocalPackagesMicrosoft.Windows.ContentDeliveryManager_cw5n1h2txyewyLocalStateAssets
      Windows Spotlight stuck on one picture
  4. The windows will open with the list of used images. Delete all files.
  5. Press Windows + R to summon the Run command line again.
  6. Copy-paste the following command and press Enter:
    • %USERPROFILE%/AppDataLocalPackagesMicrosoft.Windows.ContentDeliveryManager_cw5n1h2txyewySettings
  7. Right-click settings.dat and rename it to settings.dat.bak
  8. Right-click roaming.lock and rename it to roaming.lock.bak
  9. Restart the PC.
  10. Now enable Spotlight once again.

Additionally, you can use another workaround to address this issue.

  1. Set Spotlight to a Slideshow or a Picture.
  2. In Windows Search type Windows PowerShell.
  3. Right-click Windows PowerShell and Run as Administrator.
    Windows Spotlight stuck on one picture
  4. In the command line, type the following command:
    • Get-AppxPackage -allusers *ContentDeliveryManager* | foreach {Add-AppxPackage "$($_.InstallLocation)appxmanifest.xml" -DisableDevelopmentMode -register }

  5. Restart your computer.
  6. This should restart Windows Spotlight and fix your issue.

Solution 4 – Check if the necessary background apps are running

In order for Windows Spotlight to work properly, you need to enable certain background apps. If the required apps aren’t enabled, you might encounter this and other issues. However, you can fix the problem by doing the following:

  1. Press Windows Key + I to open the Settings app.
  2. When Settings app opens, go to Privacy section.
    Windows Spotlight stopped working
  3. In the left pane, select Background apps. In the right pane, make sure that Microsoft Edge and Settings are set to On.
    Windows Spotlight doesn't change

After making these changes, check if the issue is still there.


Solution 5 – Reset your default apps

According to users, sometimes issues with Windows Spotlight can occur due to your default app settings. If your settings aren’t correct, you might encounter this and many other problems in some cases. However, you can fix the issue simply by resetting default apps configuration to the original values.

This is rather simple, and you can do it by following these steps:

  1. Open the Settings app and go to the Apps section.
    Windows Spotlight stuck on one picture
  2. Select Default apps from the menu on the left. Now scroll down in the right pane and click the Reset button under Reset to the Microsoft recommended defaults option.

After doing that, all your default apps will be changed to the original settings. Now you just have to restart your PC and check if the issue still appears.


Solution 6 – Turn off PIN sign-in

Many users use a PIN to sign-in to their PC, but sometimes your PC can cause Windows Spotlight to stop working. If you’re having this issue, it’s recommended to disable PIN sign-in and instead use password login. To do that, you just need to follow these steps:

  1. Open the Settings app and go to the Accounts section.
    Windows Spotlight images not changing
  2. In the left pane select Sign-in options. In the right pane, click Remove in the PIN section. When the confirmation message appears, click Remove again.
    Windows Spotlight not working on boot
  3. Enter your password and click OK to remove the PIN.
    Windows Spotlight not showing

Once your PIN is removed, check if the problem with Microsoft Spotlight is resolved.


Solution 7 – Create a new user account

If you’re having problems with Windows Spotlight, you might be able to fix the problem simply by creating a new user account. Your account might get damaged, and that can cause this and other errors to appear. However, you can fix the issue simply by creating a new user account. To do that, you just need to follow these steps:

  1. Open the Settings app and go to Accounts section.
  2. In the left pane select Family & other people. In the right pane click on Add someone else to this PC.
    Windows Spotlight stopped working
  3. Select I don’t have this person’s sign-in information.
    Windows Spotlight images not changing
  4. Now choose Add a user without a Microsoft account.
    Windows Spotlight not working on boot
  5. Enter the desired username and click Next.
    Windows Spotlight not showing

Once you create a new user account you need to switch to it and check if that solves the problem. If the issue is resolved, you might have to switch to the new user account and start using it instead of your old one.


Solution 8 – Make sure that your PC is up to date

According to users, sometimes issues with Windows Spotlight can occur if your system is out of date. In order to ensure that your system is bug-free, it’s recommended to keep your system updated. Windows 10 installs the latest updates automatically for the most part, but sometimes you might miss an update or due to various issues.

However, you can always check for updates manually by doing the following:

  1. Open the Settings app and go to Update & Security section.
  2. Now click Check for updates button.

Windows will now check for available updates. If any updates are available, they will be downloaded automatically and installed once you restart your PC. After updating your Windows to the latest version, the issue with Windows Spotlight should be resolved.


Solution 9 – Disable proxy settings

Windows Spotlight uses your Internet connection to obtain information that will be displayed on the lock screen. However, if there are any issues with your Internet connection, you might encounter various problems.

One of the common causes for Windows Spotlight issues is your proxy, and in order to fix the problem, it’s advised to disable it. To do that, you just need to follow these steps:

  1. Open the Settings app and navigate to Network & Internet section.
    Windows Spotlight not working on boot
  2. From the menu on the left select Proxy. Now in the right pane uncheck all options.
    Windows Spotlight not showing

After doing that, your proxy will be disabled and Microsoft Spotlight should start again. If you’re worried that disabling your proxy will affect your privacy online, it might be a good idea to consider using a VPN.

VPN works similarly to proxy, and if you’re looking for a good VPN that will protect your privacy online, we suggest you try Private Internet Access VPN.

If you have any additional issues or questions regarding Windows Spotlight, don’t hesitate to ask us in the comments section.


RELATED STORIES YOU NEED TO CHECK OUT:

How to fix common Bayonetta issues

Bayonetta is an action game that follows the story of the last survivor of an ancient witch clan who keeps a balance between light, dark, and chaos. The title’s main character, Bayonetta, is thus revived after five centuries to continue this struggle. With only one clue about her past, she sets out on a quest to find out who she really is, facing hordes of enemies and giant foes.

Bayonetta gamers will also face various technical issues. They report that the game is sometimes affected by a series of bugs that limit the gaming experience. In this article, we’re going to show you how to fix common Bayonetta bugs.

Fix: Bayonetta frequent issues

Bayonetta is a great game, but many PC users reported various issues with it. Speaking of Bayonetta issues, here are some common problems that users reported:

  • Bayonetta PC black screen – This is a common problem with many games, and it can be caused by your graphics drivers, so be sure to update them to the latest version.
  • Bayonetta choppy, PC stuttering – Many users reported stuttering in Bayonetta. This can be caused by your settings, so try changing your resolution or disable Vsync.
  • Bayonetta performance, sound issues – According to users, many have encounter performance issues. This can be caused by your graphics card drivers, so try switching to an older driver and check if that helps.
  • Bayonetta white screen – Many users reported white screen in Bayonetta. This isn’t a serious issue, and you can fix it by running the game in Compatibility mode.

Solution 1 – Disable Vsync and run the game in Borderless Window

Vsync is a useful feature that allows you to sync your FPS with the refresh rate of your monitor. This feature is great if you want to ensure that your game sessions are smooth and without any screen tearing.

However, many users reported that Vsync actually caused an FPS drop in Bayonetta. To fix this problem, disable Vsync completely. In addition to disabling Vsync, users are suggesting running the game in Borderless Window mode, so you might want to try that as well.

After making these changes, the issue should be completely resolved.

Solution 2 – Run the game in Offline Mode

According to users, sometimes running the game in Offline mode can improve your FPS. If you notice any FPS drops or stuttering, be sure to go Offline in Steam and try to start the game again.

After starting the game in Offline mode, check if the problem is still there.

Solution 3 – Use resolutions with a 16:9 aspect ratio

If you have FPS issues in Bayonetta, you might be able to fix the problem by switching to a different resolution. Many users reported that switching to a 16:9 aspect ratio resolution fixed the problem for them, so be sure to try that.

After switching to a 16:9 resolution, check if the problem is still there.

Solution 4 – Keep your system up to date

If you want to ensure that Bayonetta is running smoothly on your PC, it’s recommended that you keep your system up to date. Certain glitches and issues can occur if your system is out of date, and for the most part, you can fix those issues by updating your system.

Windows 10 automatically installs the missing updates, but you can also check for updates by doing the following:

  1. Press Windows Key + I to open the Settings app.
    Bayonetta PC crash
  2. Now go to Update & Security section.
    Bayonetta choppy
  3. Click Check for updates button.

Once your system is updated, check if the issue is still there.

Solution 5 – Check your graphics card drivers

According to users, you can fix various Bayonetta issues simply by checking your graphics card drivers. Several users claim that the latest Nvidia drivers might not work properly with Bayonetta, so you might want to uninstall them and install older drivers.

To do that, you just need to follow these steps:

  1. Use Display Driver Uninstaller to remove your graphics card driver.
  2. Once you do that, visit your graphics card manufacturer’s website and download the driver that is at least a couple of months old.
  3. After downloading the driver, install it.

After installing an older driver, check if the issue is resolved.

Solution 6 – High Precision Event Timer in the PC’s BIOS

According to users, sometimes certain settings in BIOS can cause issues with Bayonetta to occur. To fix the problem, it’s advised to disable the High Precision Event Timer in BIOS. This is relatively simple to do, and you can do it by following these steps:

  1. While your PC boots, keep pressing Del of F2 button on the keyboard to enter BIOS.
  2. Now look for High Precision Event Timer option and disable it.
  3. Once you disable this feature, save changes and restart your PC.

After doing that, check if the problem is resolved. If you have problems entering BIOS or if you can’t find this feature, be sure to check your motherboard manual for detailed instructions.

Solution 7 – Disable HDR and Steam Overlay

According to users, sometimes features such as HDR can interfere with Bayonetta and cause FPS drops to occur. To fix the problem, simply find and disable HDR feature and the issues should be resolved.

In addition to HDR, users are suggesting disabling the Steam Overlay feature, so be sure to try that as well.

Solution 8 – Install vcredist files and make sure that the game is installed on your system partition

Like many other games, Bayonetta requires Visual C++ Redistributables in order to run. If these components are missing, you might be able to fix the problem simply by installing them manually. To do that, just go to Bayonetta’s installation directory and look for a vcredist directory.

Once you open this folder, be sure to install all available files. Once the necessary components are installed, try to run the game again.

Several users reported that they fixed the issue by installing the game on their system drive, so be sure to try that as well.

Solution 9 – Use a specific resolution

Many users reported duplicated and picture-in-picture cutscenes in Bayonetta. This can be an annoying issue, and it’s usually caused by your resolution. This issue can appear when using 16:9 aspect ratio resolution, and to fix the problem, you just have to change the resolution to 1920×1080 or 3840×2160.

Solution 10 – Run the game in Compatibility mode

Many users reported a white veil while using a Full-screen mode. To fix this problem, you just have to run the game in Compatibility mode. To run Bayonetta in Compatibility mode, do the following:

  1. Go to Bayonetta’s installation directory, locate its .exe file, right-click it and choose Properties from the menu.
    Bayonetta performance
  2. Now go to Compatibility tab and check Run this program in compatibility mode for. Select Windows 7 from the menu and click Apply and OK to save changes.
    Bayonetta white screen

After doing that, try to start the game and check if the problem is resolved.

Solution 11 – Edit the .exe file with Hex editor

To enable 21:9 aspect ratio support, you need to use a Hex editor and edit the .exe file. More specifically, replace 39 8E E3 3F with 55 55 15 40 save the file, and launch the game again.

Solution 12 – Use x360ce

If you want to use Xbox 360 controller while playing Bayonetta, you just need to do the following:

  1. Go to GitHub and download the x360ce tool for 32-bit games
  2. Extract x360ce.zip in same directory as Bayonetta.exe. The file should be located at this address: C:Program Files (x86)SteamsteamappscommonBayonetta
  3. Run x360ce.exe > create xinput1_3.dll > configure it
  4. Run Bayonetta.exe or from Steam. Your gamepad/ controller should work now.

Solution 13 – Use back+RB on your controller

Although this is not an issue per se, many players are annoyed by having to pause the game and then go to Options in order to skip the cutscenes. On an Xbox controller, you can simply use the back+RB combo to quickly skip the cutscenes.

We hope that the workarounds listed above have improved your Bayonetta gaming experience. If you’ve come across other quick fixes, feel free to list the troubleshooting steps in the comment section below.

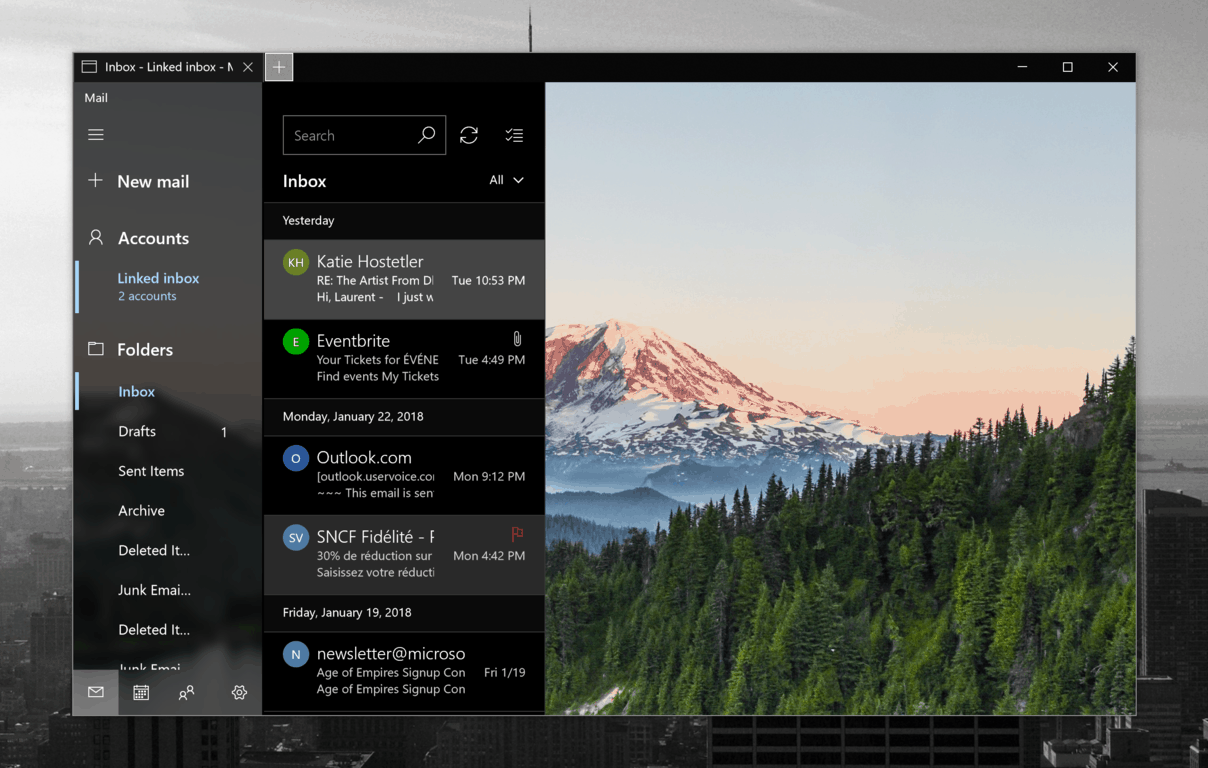
Posted in Fix