How to Uninstall Windows 11 Default Apps Using PowerShell

Windows 11 has many pre-installed apps, including Mail, Cortana, Phone Link, Xbox, and Weather. These built-in apps could be helpful for some but can act as bloatware for others.

In this guide, we will discuss removing these default Windows apps using a single command via Windows PowerShell to declutter your Windows 11 devices.

How do I uninstall Windows 11 apps using PowerShell?

Before proceeding with any steps for uninstalling the program, go through the following preliminary checks:

1. Get the list of apps

  1. Press the Windows key, type powershell, and click Run as administrator to launch Windows Terminal as PowerShell.Powershell 2 remove Windows 11 apps powershell
  2. On the Windows Terminal window, type the following command to list all apps, including third-party apps and system apps on your Windows 11 computer, and press Enter: Get-AppxPackage powershell_Get-AppxPackage remove apps on Windows 11
  3. You will get the list of installed apps with details such as Name, FullPackageName, Publisher, Version, InstallLocation, Architecture, ResourceId, and more.
  4. In case you don’t want to get all the details but just the name and full package name for the program installed for the current user profile, copy & paste the following command and hit Enter: Get-AppxPackage | Select Name, PackageFullNameGet-AppxPackage | Select Name, PackageFullName
  5. Type the following command to get the list of apps for the specific user after replacing Name with the user account name, and press Enter: Get-AppXPackage -User NAME | Select Name, PackageFullName
  6. To get the list of apps for all the user profiles, copy & paste the following command and hit Enter: Get-AppxPackage -AllUsers

2. Uninstall an app

To uninstall an app, you need either the AppName or the PackageFullName, and to find that follow these steps:

  1. Once you get the list of apps, you can go to the title bar of the Windows Terminal window, right-click and select Edit, then Find.Edit, then Find remove apps Windows 11 PowerShell
  2. On the Find dialog box, type the app name you want to uninstall and click Find Next. The app name will be highlighted, locate PackageFullName, and copy down the value in front of it.powershell_Find Next.

Now that you have the AppName or PackageName handy check out the commands to delete system apps:

  1. Type the following command and replace the PackageFullName with the value you copied or saved to uninstall a single app and press Enter: Remove-AppxPackage <PackageFullName>Get-AppxPackage | Remove-AppxPackage Powershell Windows 11 remove apps
  2. If you want to remove the program from the current user account, copy & paste the following command after replacing the App_Name with the name of the app and hit Enter: Get-AppxPackage <App_Name> | Remove-AppxPackagepowershell_Get-AppxPackage | Remove-AppxPackage
  3. To remove the app from all the user accounts on your computer, type the following command after replacing [App Name] with the name of the app, and press Enter: Remove-AppxPackage -allusers [App Name]
  4. If you don’t want a system app to preload in a new user account on Windows 11, type this command after replacing the AppName with the application name and hit Enter: Get-AppxProvisionedPackage –online | where-object {$_.packagename –like "AppName"} | Remove-AppxProvisionedPackage –onlinedoesnt load pre-installed apps on a new user account

3. Delete all system apps

  1. Copy & paste the following command to remove all the pre-installed apps from the current user on Windows 11 using single command and press Enter: Get-AppxPackage | Remove-AppxPackagepowershell_7Get-AppxPackage | Remove-AppxPackage Deleting all system apps on Windows 11
  2. To uninstall all the system apps from all the user profiles, type the following command and hit Enter: Get-AppxPackage -allusers | Remove-AppxPackagepowershell_uninstall app from all user account
  3. If you want to delete all the default apps from a specific user account, use this command after replacing the <Username> with the user account name and hit Enter: Get-AppxPackage -user | Remove-AppxPackage

4. Use Wildcards to uninstall multiple programs from the same publisher

If you don’t want to look for an app name in the list or want to delete multiple programs from the same keyword, you can use wildcards (*) and add a keyword in the command.

  1. Type the following command after replacing the common word with the keyword, and hit Enter: For example, if you want to remove all apps related to Web experience, you use it as a keyword. Get-AppxPackage *Common word* | Uninstall-Packagepowershell_remove an app Windows 11
  2. To remove them from a user account, copy & paste the following command after replacing <UserName> with the account’s name, AppName with the app’s name or keyword with wildcards, and press Enter: Get-AppxPackage -user <UserName> <AppName> | Remove-AppxPackagepowershell_wildcards
  3. To uninstall apps from all accounts, type the following command after replacing the <AppName> with the app name or keyword with wildcards and hit Enter: Get-AppxPackage -alluser <AppName> | Remove-AppxPackage

While removing multiple apps, sometimes your Windows PowerShell may not stop responding, so to prevent that, make sure you don’t launch any other resource-intensive apps simultaneously.

How do I use the DISM command to uninstall apps?

  1. Press the Windows key, type powershell, and click Run as administrator.Powershell 2 remove Windows 11 apps powershell
  2. To get the list of system apps on your computer, type the following command and hit Enter: DISM /Online /Get-ProvisionedAppxPackages | select-string Packagenamepowershell_use the DISM command to uninstall apps
  3. Locate the bloatware you want to remove, note down the PackageName, then copy & paste the following command after replacing PACKAGENAME with the name you copied and press Enter: DISM /Online /Remove-ProvisionedAppxPackage /PackageName:PACKAGENAMEpowershell_remove apps Windows 11 DISM command

How can I remove apps using the Winget command?

  1. Press the Windows key, type store, and click Open to launch Microsoft Store.Microsoft Store -
  2. Go to the Search bar, type app installer, and check if it is installed. If not, click Get. GET App installer
  3. Once installed, press the Windows key, type command prompt, and click Run as administrator.CMD elevated remove Windows 11 apps PowerShell
  4. Copy & paste the following command to get the list of all apps installed on your device, and hit Enter: winget listcmd_winget list
  5. If prompted to agree on the terms, type Y to proceed. Once you get the list, locate the app you want to remove and copy the app name.
  6. Type the following command after replacing AppName with the app’s name and press Enter: Winget uninstall AppNamecmd_remove apps Windows 11 winget
  7. If there are other apps with the same name as the app you try to uninstall, you should note the ID instead of the name. Copy & paste the following command to replace the ApplicationID with the one you noted down and hit Enter: winget uninstall --id=ApplicationIDcmd_Use ID on Windows 11 to remove apps using winget PowerShell

How do I reinstall system apps on Windows 11?

  • Open PowerShell as administrator, then type the following command to get list of system apps available in Windows image: Get-AppxPackage -allusers | Select Name, PackageFullName
  • Note down the PackageFullName for the app you want to restore and use this command after replacing the PackageFullName with the one you copied: Add-AppxPackage -register "C:\Program Files\WindowsApps\PackageFullName\appxmanifest.xml" -DisableDevelopmentMode
  • To reinstall all apps, type the following command: Get-AppxPackage -AllUsers| Foreach {Add-AppxPackage -DisableDevelopmentMode -Register "$($_.InstallLocation)\AppXManifest.xml"}

Reinstalling default apps could help you when you are not able to open a Windows app, as it has been corrupted or deleted by mistake.

Removing Windows 11 default apps using PowerShell, Winget, or DISM can help you eliminate unwanted programs, thereby reducing clutter, improving system performance, and recovering disk space.

Before executing any commands to uninstall an app, ensure you know about the app and its role in your system functionalities to avoid any trouble.

Before you leave, please find out how to install programs for all users so you don’t have to download them separately across profiles.

If you have any questions or suggestions related to app management on Windows 11, feel free to mention them in the comments section below.

Unleash your creativity with Bing Chat AI in Microsoft Edge

In this modern digital age, whether you’re crafting a persuasive PowerPoint presentation, composing a captivating article, engaging on social media, or nurturing innovative ideas, creativity is the linchpin of your success. Fortunately, the integration of Artificial Intelligence (AI) into our digital landscape has unlocked new horizons. Let’s explore how harnessing the capabilities of Bing Chat AI in Microsoft Edge can elevate your creativity and streamline your search endeavors.

Accessing Microsoft’s Bing Chat AI in the Edge sidebar

Unlocking a streamlined process, let’s delve into a straightforward step-by-step guide on accessing the Sidebar Experience in Edge:

  1. Find the Bing Icon: Look for the Bing icon located in the upper right corner of your Edge browser toolbar.
  2. Click the Icon: Click on the Bing icon to activate the sidebar experience.
  3. Sign In: If you’re not already signed in, make sure to sign in with your Microsoft account.
  4. Ask Questions: Once the sidebar is open, you can ask questions using everyday language.
  5. Get Answers: You’ll receive complete answers right alongside your screen, making it easy to see and understand.

That’s it! You’ve successfully opened the sidebar experience and can now start asking questions and getting answers with Bing.

How to remove the Bing Chat button in Microsoft Edge on Windows 10, Windows 11, Mac, and Linux

What Bing Chat can do for you

Bing Chat AI

Bing Chat in the Edge sidebar harnesses the full power of Bing Chat AI. It acts as your virtual assistant, readily available to aid you in various ways:

  • Ask complex questions: No matter how intricate your queries, Bing Chat AI can handle them.
  • Find comprehensive answers: It provides thorough responses to your questions.
  • Get summarized information: For quick overviews, Bing Chat AI has you covered.
  • Seek inspiration for your projects: All without the need to switch between tabs, making your creative process more efficient.

Bing Chat AI is more than just a source of factual information; it’s a wellspring of inspiration. Whether you’re in search of detailed travel itineraries, concise summaries of lengthy articles, imaginative ideas, or even advice on veganizing a recipe while maintaining its protein content, Bing Chat has your back. Beyond expanding your knowledge, it sparks creativity by introducing fresh perspectives and ideas that might otherwise remain hidden.

Features & tips for optimal use

1. Summarize online content

With Bing Chat in the Microsoft Edge sidebar, you can now easily summarize the online content you’re viewing. This feature is especially handy for longer documents, including PDFs, Word files, and extensive website content. Say goodbye to information overload!

2. Seamlessly explore the web

When you click on citations from the sidebar, your content opens in a new Edge tab. Meanwhile, your Chat remains on the side of your screen, ensuring you don’t lose track of your important conversations and research.

3. Make informed decisions

Whether you’re shopping or comparing products, Bing Chat in the sidebar has you covered. It can compare products right in your sidebar, even generating tables to help you make the most informed choices.

4. Bing Chat on mobile

You can access Bing Chat directly from Microsoft Edge on your iPhone or Android. This mobility ensures that you can take your chat with you wherever you go, allowing you to ask questions about web content and find answers on the fly.

5. Effortless task completion

Microsoft Edge, with Bing Chat at your side, makes online tasks a breeze. From streaming movies to organizing your browser tabs, Bing Chat is your versatile assistant, ready to assist you with a wide range of tasks.

Other AI tools in Edge

Compose

Crafting engaging content can be a formidable challenge, especially when you’re searching for the perfect words to convey your ideas. Whether you’re a writer, poet, artist, social media influencer, or any other type of creator struggling to unleash your creative side, Compose is the solution.

By selecting the Bing Chat icon in the upper-right corner of your browser and choosing Compose, you can type a few words and unlock a treasure trove of creative suggestions. These suggestions can breathe new life into your emails, website content, blogs, social media posts, and more. Compose not only speeds up your writing process but also allows you to fine-tune your tone, format, and length. Plus, you can easily paste your drafts into your browser with a single click.

bing chat ai

Use Compose to draft your ideas and refine your spelling, tone, and organization. Whether you’re struggling to craft the perfect social media caption or seeking a writing prompt to ignite your imagination, Compose is your creative companion. With AI-generated suggestions at your fingertips, you can swiftly overcome creative blocks and get back to making things happen.

Microsoft Designer

Do you require eye-catching visuals for an event invitation, blog post, presentation, or social media campaign? Look no further. Microsoft Designer is a web-based design application seamlessly integrated into your Microsoft Edge browser. This innovative tool takes AI-driven creativity to new heights. Design visually striking and impactful social media posts with meticulously designed images.

bing chat ai

You can find Designer in the Microsoft Edge sidebar by selecting the Bing Chat icon in the upper-right corner of your browser and choosing Designer from the apps in your sidebar. This creative AI tool empowers you to focus on your content while it handles the visual aspects.

Microsoft Edge is your all-in-one browser for enhancing your creativity whenever and wherever you need it. Use Bing Chat to brainstorm fresh ideas, Compose to craft expressive and captivating text, and Microsoft Designer to transform your content into visually captivating experiences. Allow your creativity to flourish and try Microsoft Edge to supercharge your imaginative endeavors like never before.

Parallels Desktop 19 for Mac is here, adds Touch ID Windows sign-in and more

The latest version of Parallels Desktop for Mac, version 19, is now available. It is designed to improve the virtualization experience for Mac users who need to run various operating systems, such as Windows and Linux. Notably, it is compatible with the latest macOS version, macOS Sonoma, and allows for printing from Windows using IPP. Here is the info on version 18, released last year.

Adding Apple’s Touch ID for Windows sign-in adds convenience and enhances security within the virtual Windows environment. Additionally, the new OpenGL support up to version 4.1 could be good news for architecture, engineering, and design professionals who rely on Windows-only CAD software.

Users of Apple silicon can enjoy an improved virtual machine on macOS, which offers smoother installation, basic operations, and two-finger Trackpad gestures. Additionally, developers who run x86 Docker containers or Microsoft SQL Server on Apple silicon can utilize a pre-configured Ubuntu Linux Arm virtual machine powered by Rosetta 2 technology.

Lastly, the focus on device management with the ability to enroll Windows 11 in Microsoft Intune through Parallels Desktop 19 for Mac Business Edition shows that Parallels aims to address organizations’ needs and make administering Windows devices more efficient.

In short, Parallels Desktop 19 consists:

  • Optimized for macOS Sonoma 14
  • Touch ID-enabled for Windows sign-in
  • OpenGL 4.1 Support in Windows
  • Designed to run CentOS 9 Stream on a Mac with Apple silicon
  • Designed to run Intel-based software in Arm-based Linux
  • New improvements for macOS virtual machine on Mac computers with Apple silicon

Overall, it’s clear that Parallels Desktop 19 for Mac brings various enhancements for a more integrated and seamless experience when using multiple operating systems on a Mac.

Microsoft to offload Activision’s cloud gaming to Ubisoft – what it means for gamers

In its latest bid to appease the CMA, Microsoft has restructured its deal to acquire Activision Blizzard by selling off Activision’s cloud gaming to Ubisoft.

Now, just hours after the announcement was made, there is already some confusion online over exactly what this will mean for Activision games on the cloud and for gamers.

While many of the details are still to be revealed, we do know that this does not mean that gamers will need Ubisoft+ to stream Activision Blizzard games. However Ubisoft has said that it will bring some of these games to its cloud service in addition to “licensing the games to a range of cloud streaming and subscription services.”

By adding Activision Blizzard gamest to Ubisoft Plus Multi Access, members will be able to access Activision games through PC, Xbox, Amazon Luna, and PlayStation.

While there has been no word on the topic as of yet, it is also presumed that Activision Blizzard games will still show up on Game Pass and Microsoft’s cloud gaming service, Xbox Cloud Gaming. Microsoft president Brad Smith said in the announcement post on the Microsoft blog,

Under the restructured transaction, Microsoft will not be in a position either to release Activision Blizzard games exclusively on its own cloud streaming service – Xbox Cloud Gaming – or to exclusively control the licensing terms of Activision Blizzard games for rival services.

All this means that Microsoft will have little control over Activision Blizzard’s cloud offerings, just as this remedial effort was intended. What it means for gamers, at least in theory, is that they will have greater choice when it comes to playing Activision Blizzard games on cloud gaming services.

Featured image via Wccftech. 

Microsoft integrates Python natively into Excel – now in preview

Microsoft Excel has announced that it has integrated Python directly into its platform by releasing a Public Preview of Python in Excel. This integration enables users to employ Python’s analytical capabilities in Excel. By incorporating Python libraries, data visualization, and analysis can be conveniently executed in Excel. This comes after Microsoft Excel updated one of the spreadsheet’s oldest features earlier this month.

Aggregation

Python in Excel is now natively integrated into the Excel grid. Users can input Python code directly into Excel cells using the new “=PY” function. Excel users can seamlessly use Python alongside formulas, charts, and PivotTables.

Dataframe Simple

Python libraries such as pandas, matplotlib, and scikit-learn provide a range of analytics capabilities, including data visualization, data cleaning, machine learning, and predictive analytics. This integration grants access to these capabilities via Python.

It leverages the Anaconda Distribution for Python, a widely-used repository for Python libraries. This ensures that users can access various popular Python libraries and tools that Anaconda securely built, tested, and supported.

Anaconda CEO and co-founder Peter Wang said

I am thrilled to announce the integration of Anaconda Distribution for Python into Microsoft Excel – a major breakthrough that will transform the workflow of millions of Excel users around the world.

Moreover, users can share workbooks containing Python code with teammates. Collaboration can occur through familiar tools such as Microsoft Teams and Outlook, and sensitivity labels ensure compliance with information protection policies.

Microsoft to sell off Activision’s cloud gaming rights to Ubisoft as it seeks to conclude ABK deal

Microsoft has restructured its plans to merge with Activision Blizzard. In an effort to gain the CMA’s approval and finally wrap up the ABK deal over a year and a half after the $68 billion merger was first announced. Microsoft will offer to divest Activision’s cloud gaming rights by selling them to Ubisoft.

The CMA initially blocked the merger in the U.K. earlier this year, citing concerns over Microsoft’s perceived dominance in the nascent cloud gaming market. However, the regulator seemed to alter its stance in the wake of Microsoft’s legal triumph against the FTC. The two parties (Microsoft and the CMA) have agreed to pause litigation of the former’s appeal, and have pushed back the deadline for the CMA’s final decision to October 18, which is the deal’s new expiration date after it was extended back in July.

Cma Site Custom
RG4795 The Competition and Markets Authority (CMA) website seen through a magnifying glass

Today’s announcement marks a major point in this ongoing story, and it could finally spell the end of regulatory opposition as the CMA stands as the sole major regulatory agency opposing the merger. As Microsoft president Brad Smith states in the post,

Under the restructured transaction, Microsoft will not be in a position either to release Activision Blizzard games exclusively on its own cloud streaming service – Xbox Cloud Gaming – or to exclusively control the licensing terms of Activision Blizzard games for rival services.

While this restructuring of the deal will of course trigger more investigation, Microsoft has stated that it still expects to reach an agreement with the CMA by the October deadline. On the announcement Activision CEO Bobby Kotick had this to say,

We welcome Microsoft’s decision to enter into this agreement and submit a new application to the CMA, which Microsoft believes will address the CMA’s concerns…We will continue to work closely with Microsoft and the CMA throughout the remaining review process, and we are committed to help Microsoft clear any final hurdles as quickly as possible.

Kotick closed by saying “This has been a longer journey than expected.” On that, he speaks for all of us.

Microsoft Edge introduces Smart Find via Microsoft 365 Roadmap

Microsoft has announced a new feature for its Edge browser called Smart Find as part of its Microsoft 365 roadmap. This update aims to simplify searching for words or phrases within a webpage by utilizing AI technology. This comes after the improvement to the “Find on Page” feature with sidebar access and sentence-based results on Microsoft Edge.

With Smart Find, searching for content on a webpage becomes more user-friendly. The feature assists in accurate searches and adapts to misspelled search terms. Microsoft Edge will suggest related matches and words, making it easier for users to find what they want. When a search is conducted, users can select the suggested link quickly to locate the desired word or phrase.

Smart Find
Smart Find

To use Smart Find, users can press CTRL + F and input the specific word or phrase they want to search for. This functionality streamlines the search process and enhances the overall browsing experience.

Screenshot 2023 08 22 At 6.48.32 Pm

It’s important to mention that Smart Find is currently available only on devices running most versions of Windows, limiting its accessibility to Windows only.

Administrators have the option to control the availability of the Smart Find feature through the RelatedMatchesCloudServiceEnabled policy. This gives them the flexibility to tailor its usage based on their requirements.

The feature has been assigned the ID 165696 and was added to the Microsoft Edge roadmap on August 18, 2023. The anticipated rollout is set to begin in September 2023. It will be accessible on the web platform under the General Availability release phase across the worldwide standard multi-tenant cloud instance.

3 Ways to Save Your Desktop Icon Position Layout on Windows 11

Windows 11 brings a lot to the table in terms of user experience, but the iteration is not entirely error-proof. Users come across problems from time to time, and changes to icon positioning are common. So, how does one save the desktop layout in Windows 11?

There are both built-in and third-party solutions for the task, be it to save the screen resolution of the current window or the arrangement of desktop icons. This becomes all the more important for users with a bunch of icons on their desktops.

Why doesn’t Windows 11 save icon layout positions?

  • Changes to the display settings: When you modify the display settings, the configured custom layout may change automatically.
  • Third-party applications: A security software could corrupt the Windows 11 desktop layout registry that stores the layout. The ESET antivirus affected many.
  • A remote desktop session: The app icons and layout options might change during a remote desktop session.
  • Corrupt system files: Corrupt system files are a probable cause if the desktop arrangement of icons is changing automatically. 
  • Misconfigured settings: When you have Auto arrange icons enabled, the layout choices won’t be stored.

How do I save my desktop layout in Windows 11?

Before we move to the slightly complex solutions, try these quick ones first:

  • Refresh the computer before the shutdown, and Windows 11 should automatically save the desktop layout.
  • Open Notepad, enter anything in the text editor, and then shut down the computer without saving the work. When asked to confirm, click on Cancel. This will prevent Windows from logging off and save the desktop icon arrangement.

If none work, head to the fixes listed next.

1. Use Snap Layout 

  1. Hover the cursor over the Maximize icon, and select one of the available orientations from the flyout menu. Alternatively, you can use the Windows + Z keyboard shortcut.snap layout
  2. There will be different options available, depending on the display size. Larger monitors will have more layout choices.another layout
  3. After you choose a layout, the other active app windows will be listed on the remaining part. Choose one that should occupy the space.  
  4. Similarly, you can have 4-6 active applications on the monitor visible simultaneously.

Snap Layout in Windows 11 is a useful feature that allows users to lock several applications to the desktop without any overlapping one another.

2. Run a VBScript

An option to save the desktop layout in Windows 11 is to create a VBScript. This is more of an advanced task, primarily for users who understand the intricacies.

You may find a few scripts that work well on the web. We don’t recommend using them as is. It’s imperative that you verify the entire code before executing it. 

An advantage of using a script and configuring it to load at startup is that it will allow you to open a predefined set of apps in the desired custom layout. This works great for multi-monitor setups. Also, it allows configuring how often the new layout is stored and the older files are cleared. 

3. Use a third-party app to save layout choices

  1. Go to SoftwareOK’s official website and download the .zip file for DesktopOK.
  2. Head to the Downloads folder, right-click on DesktopOK.zip, and select Extract All.extract all
  3. Now, paste the desired extraction path in the text field or click Browse to select one, and click Extract.
  4. Once done, double-click the DesktopOK tool to launch it.
  5. Now, click the Save button to store the current desktop icon layout.save desktop layout in Windows 11
  6. If you want to revert to an earlier layout, simply select it from the list, and click the Restore button.restore a windows 11 save desktop layout
  7. In case you want to restore the current icon layout at the next restart, click on the Options menu, then enable Save on Windows shutdown, Restore on Windows startup, and Start DesktopOK with Windows.automatically restore layout 

If the manual methods seem like a hassle, you can always rely on a third-party solution to save and restore the desktop layout in Windows 11. And DesktopOK appears to be the best available option based on user reviews. The best part, it’s free to use!

Besides, DesktopOK can be used for a range of other customizations and to personalize the OS. If you find that the desktop icons are blank, fix that first and then save the layout.

Some users prefer to create an icon for a personalized Windows experience. While there’s no absolute need for it, you should know the process. But remember, this won’t work when the desktop icons are not showing.

For any queries or to share the VBScript that worked for you, drop a comment below and help fellow members of the Windows community.

Can I Hide the Battery Icon From the Taskbar in Windows 11?

Taskbar is a critical part of any functional Windows PC. It allows seamless navigation between apps and lets users quickly access the System Tray. But many are wondering how to hide the battery icon in Windows 11.

Located in the System Tray along with Network and Sound/Volume icons, the Battery icon is just a waste of space for laptop users with no battery attached. Some even reported that Windows detects their UPS as a battery, all the more reasons to hide the battery icon. 

Can you hide the battery icon in Windows 11?

No, Windows 11 doesn’t allow users to hide the battery icon, or for that matter, even network and volume in Windows 11. This is because the Windows 11 Taskbar is built rather differently and is linked to Quick Settings.

More so, Microsoft believes these three are critical and has, thus, removed the ability to hide system icons in Windows 11.

Since Windows 10 offered the functionality to remove the power button, there is a chance that Microsoft would introduce some changes in the near future to better customize the system tray, but for now, you can’t do that. However, you can make taskbar icons bigger for increased visibility.

How do I hide the battery on my taskbar in Windows 11?

1. Hide icons in the System Tray

  1. Press Windows + I to open the Settings window, select Personalization from the navigation pane, and click on Taskbar on the right.taskbar settings to hide battery icon in windows 11
  2. Under System tray icons, enable the toggle for the ones you want visible. The entries here include:
    • Pen menu
    • Touch keyboard
    • Virtual Keyboardsystem tray icons
  3. You can also show or hide the entries under Other system tray icons. These are visible when you expand by system tray by clicking on the upward-facing angular bracket (arrow icon) before the Network icon.other system tray icons
  4. To prevent the Other system tray icons from being visible, simply disable the toggle for Hide icon menu.hidden icon menu

Except for the laptop battery or other critical system icons, i.e., network and volume, you can show or hide all other entries in the system tray on Windows 11 from the Taskbar settings.

This includes Microsoft OneDrive, Windows Update status, the Windows Security notification icon, Task Manager, and the Safely Remove Hardware and Eject Media notification, amongst others.

2. Hide Taskbar icons

  1. Press Windows + I to open the Settings app, select Personalization from the left, and then click on Taskbar.
  2. You can now show or hide the entries listed under Taskbar items. Just turn on (or off) the toggle for the relevant entry.taskbar items to hide battery icon in windows 11

The Taskbar settings in Windows 11 also allow users to configure which icons are listed in the Taskbar itself. This includes Search, Task View, Widgets, and Teams Chat.

3. Add or remove Quick Settings

  1. Go to the desktop and click on any of the three icons, network, volume, or battery. 
  2. Now, click the Edit quick settings (pencil) icon.edit quick settings
  3.  To remove a Quick Settings icon, click the unpin option near the top-right of the individual entries, and click Done to save the changes.unpin
  4. To include another Quick Setting, click on Add, and then select one from the menu.add 

Quick Settings in the Action Center are an easy way to access a range of options and reconfigure the PC. Be it to enable Airplane mode, set up a VPN, or turn on Battery Saver.

4. Use a third-party solution to modify the Taskbar

If the built-in customizations don’t offer what you are looking for, use a third-party app. Remember, there are a wide array of changes you can make, but since Windows doesn’t offer a direct option, you will have to edit the Registry, which is a risky task.

A software solution comes to your aid in this case. You can check out the best Windows 11 taskbar customization apps and get one today. For the Taskbar, we particularly recommended these two:

The app’s user interface and functioning are simple, and you should be up-to-speed within minutes. Be it to show hidden system tray icons, reposition the Taskbar, or change its color and transparency, a dedicated tool will do it!

In all, while you can’t hide the battery icon in Windows 11, there is still a range of customizations available. And if any of these don’t work or the taskbar icons are missing, it’s usually the corrupt system files to blame.

For an enhanced OS experience, we recommend you enable Enhanced Taskbar in Windows 11. And if you find flashing taskbar icons, a problem many reported of late, fix that first.

For any queries or to share your favorite Windows 11 customization, drop a comment below.

This is The Outlook PST File Location in Windows 11

Microsoft Outlook uses PST files for storing user information, and sometimes, you need to access the file location of Outlook PST file on Windows 11 to fix specific issues.

File corruption can affect the PST file and cause the loss of information, so today we’re going to show you how to properly access this file so you can easily back it up or repair it.

How do I locate the Outlook PST file in Windows 11?

1. Use the Run dialog

  1. Press Windows key + R.
  2. Now enter %localappdata% and press Enter.
  3. Navigate to the following directory: Microsoft\Outlook

In addition, you should also do the following:

  1. Open the Run dialog using the Windows key + R shortcut.
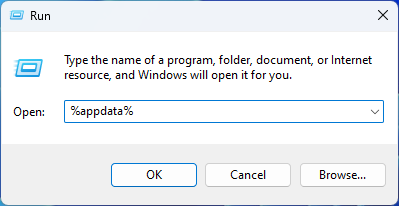
  2. Enter %appdata% and press Enter.
  3. Lastly, navigate to the following directory: Microsoft\Outlook

This is the default location for the PST file, so be sure to check it out. Keep in mind that your file can be located on either of those paths. Many reported that PST cannot be found, but we covered this issue in a separate guide.

2. Use Outlook account settings

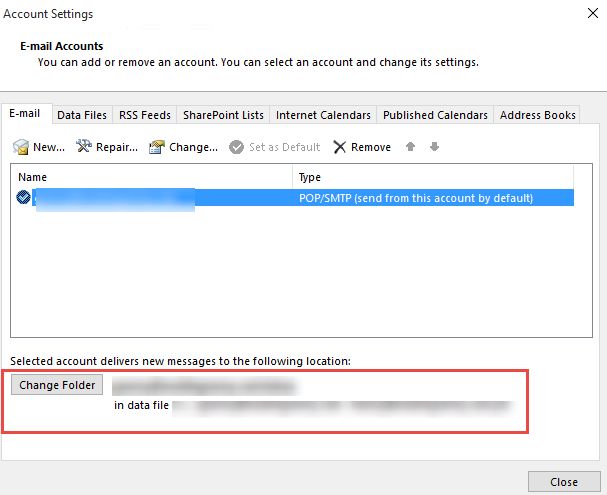
  1. In Outlook, go to File and select Info.
  2. Next, expand Account Settings and select Account Settings.
     
  3. Navigate to the Data Files tab.
  4. Select your email account.
  5. Lastly, click on Open File Location.

How do I change the location of my PST file in Outlook?

1. Change Outlook settings

  1. In Outlook, go to File and select Info.
  2. Next, click on Account Settings and choose Account Settings from the menu.
  3. Click on Change Folder and then select the desired email account. After that, click on Inbox.
  4. Now click on New Folder and set the desired name.
  5. Lastly, click on the New folder again. After that, select the Inbox folder and click on OK.
  6. Restart Outlook and check if changes have been applied.

2. Use Registry Editor

  1. Press Windows key + R and enter regedit.
  2. Navigate to the following path: HKEY_CURRENT_USER\Software\Microsoft\Office\16.0\Outlook
  3. Right-click the right pane, and choose New and then Expandable String Value.
     
  4. Name the new string ForcePSTPath and double-click it.
  5. Now set the value data to the desired location and click OK.

This is an advanced method to change PST file location, so be sure to try it. Make sure to use it only if you’re an experienced user.

  1. Press Windows key + S and enter the command prompt. Choose Run as administrator from the list of results.
  2. Now run the following command: mklink "C:\Users\%username%\AppData\Local\Microsoft\Outlook\outlook.pst" "C:\Users\WindowsReport\Outlook\outlook.pst"
  3. After doing that, the symbolic link will be created.

Keep in mind that this method won’t change the file’s location, but it will point to the file at a new location. This method also works as a backup for Outlook PST file, so be sure to try it.

Finding the PST file location in Windows 11 is important since it allows you to recreate or back up your data and fix issues such as the PST file is not valid or the Outlook data file cannot be accessed.

While Outlook uses PST files, many are wondering how to import mbox file to Outlook, and we have a special guide that can help you with that.

Did we miss your preferred method of finding the Outlook PST file? If so, let us know in the comments section below.

Betternet VPN is Connected but not Working: 3 Ways to Fix it

Betternet is a VPN that allows you to access the web safely, securely, and anonymously. It used to be free but now, only the browser extension is free.

Anyhow, many of our readers reported that Betternet VPN is connected it is not working, and in this article, we will tackle this problem.

Why is Betternet VPN not working?

Betternet has only over 1000 servers in 80 countries. Having some free trial versions for mobiles and browsers, millions of users are eager to connect to the available servers, and you can probably guess why your Betternet isn’t connecting even after several attempts. Here are some other reasons that might cause this problem:

  • Local connection problem – Check if your internet connection is working without the VPN. If it doesn’t, you might consider repairing any DNS issues you might experience.
  • Your firewall might be blocking the VPN – Firewalls are frequently the source of connection issues. To resolve this, go to your firewall settings, and add Betternet VPN app to the list of permitted apps.
  • Outdated VPN software – Check your VPN updates to ensure you have the most recent version installed, as older software may be filled with flaws and vulnerabilities.
  • Misconfigured VPN settings – Reset the VPN to its default settings to see if that resolves the issue.
  • Blocked ports – Many different providers and protocols use various ports, but VPNs typically use port 443 TCP and 1194 TCP/UDP. You can manually change your system to one of these ports.

Now that we know what we’re dealing with, let’s see how we can fix Betternet if it’s not working.

What can I do if Betternet VPN is connected but not working?

But before you get to more complicated solutions, start by performing a few simple tasks:

  • Check your internet connection and see if it’s working without the VPN.
  • Disable your antivirus and firewall temporarily and check if you can connect to the Betternet servers.
  • Try another server in Betternet and see if it works. Also, avoid peak hours when most users use the VPN.
  • Make sure that the Betternet app is updated. It should do that automatically whether you’re using it on Windows, macOS, Android, or iOS. If it doesn’t, head over to the Betternet website, download a fresh copy, and reinstall the app.

Although the main issue for Betternet not working even though it’s connected is that the servers are overflowing with requests, there are still a few workarounds you may try.

1. Switch to a different DNS server

  1. Disconnect Betternet.
  2. From the Start menu, click on Settings.
  3. Select Network & Internet, then click on Change adapter options.
  4. Right-click on your active adapter, then click on Properties.
  5. Select the Internet Protocol Version 4 and choose Properties.
  6. Now, select Use the following DNS server addresses and set the Preferred DNS server to 8.8.8.8 and the Alternate DNS server to 8.8.4.4.
  7. It is the Google DNS so it should work unless your ISP needs to input their specific values. In that case, revert this solution and select Obtain DNS server address automatically.
  8. Save the settings, restart your device, and check if you can connect with the Betternet VPN.

2. Change the VPN protocol

  1. Open Betternet VPN and access the Settings menu.
  2. Now, click on the VPN protocol. By default, it’s Automatic.
  3. You can choose from three options: Smart, Hydra, and Wireguard. Change between them and see if you can connect the VPN again.

3. Use a better VPN

Betternet is not the best VPN option you can install on your Windows PC. It has a pretty small server network; as you could see, they are not always working.

This is added to the fact that Betternet had issues with DNS leakage within its free Chrome extension.

However, we have a great list of VPNs for Windows 11 that are a lot better, with high-speed servers all over the world. Furthermore, they guarantee a no-logs policy and offer complete online safety.

How to Change Network Type to Private or Public in Windows 11

Setting up a wireless network is common and quite easy. However, choosing or changing the network type can be confusing, especially if you don’t know the repercussions.

If you’re looking for advice on changing the network type from public to private or vice versa in Windows 11, read on for some useful information.

Windows 11 comes with several network profiles, which are essentially sets of settings that can be used to configure various network connections.

This is useful if you have multiple connections at home or in the office, so you don’t have to go through all the settings whenever you connect to a new network.

Private and public network profiles are the two common types in Windows 11, but generally, there are three:

  • Public – This profile is used when connecting to untrusted networks, where there’s no way to verify the identity of other computers or devices. If you must connect to untrusted networks you can turn on the strict NAT network type which acts as a firewall.
  • Private – This is the default mode for the network profile. In this mode, the computer is connected to a private home or work network and can only see other devices.
  • Domain – This is an assigned network profile and is used when a computer is joined to a domain. It includes settings for authentication, encryption, and caching. The domain profile also includes settings for user logon and resource access.

Now that you know the different scenarios where you’d apply these networks, let’s highlight a few differences

 PrivatePublic Domain
Trusted networkTrustedUntrustedTrusted
SharingEnabledDisabledLimited within the domain
DiscoverableEnabledDisabledLimited within the domain
SecurityFairly secureUnsecuredHighly secure

Network profiles are a powerful tool as they can be used to control the behavior of Windows computers in your network as they move from one environment to another.

Equipped with this information on the different types of network profiles, if you ever need to change it, below is how to tweak your Windows 11 network settings.

How can I change my network profile in Windows 11?

1. By using the Settings app

  1. Hit the Windows key and click on Settings.
    settings windows 11
  2. Select Network & internet settings on the left pane, then click on Wi-Fi (Select Ethernet connection if connected).
  3. Choose one of your Wi-Fi networks and click on it.
  4. Under Network profile type, switch to your preferred profile.

In some instances, you may find that the network profile type is missing. This is most likely a case of outdated drivers, so a quick driver update should resolve this issue.

2. By using the PowerShell command line

  1. Hit the Windows key, type Powershell in the search bar, and click Run as administrator.
  2. Type in the following command and hit Enter: Get-NetConnectionProfile
  3. Note down the name of the network you want to change and type in the following command. Remember to replace network name with the one you noted and Type with a network profile such as Public, Private or Domain : Set-NetConnectionProfile -Name "network name" -NetworkCategory <Type>

3. By using the Registry Editor

  1. Hit the Windows + R keys to open the Run command.
  2. Type regedit in the dialog box and hit Enter.
  3. Navigate to the following location: HKEY_LOCAL_MACHINE\SOFTWARE\Microsoft\Windows NT\CurrentVersion\NetworkList\Profiles
  4. Click on Profiles to expand the subkeys. Each will have its profile name listed on the right as the last entry.
  5. Double-click on Category, and in the Value data, enter 0, 1, or 2 to change to Public, Private, and Domain respectively, then hit OK.
  6. Close the Registry Editor and restart your PC to effect the changes.

Remember editing the registry can be catastrophic if anything goes wrong, so ensure you back up or create a restore point prior to making any changes.

4. Use the Local Security Policy

  1. Hit the Windows + R keys to open the Run command.
  2. Type secpol.msc in the dialog box and hit Enter.
    secpol.msc Windows Task Scheduler Failed to Launch The Action
  3. Click on Network List Manager Policies, and on the right, double-click on your chosen network.
  4. In the Network properties dialog box, navigate to the Network Location tab, and under the Location type option, choose Private or Public profile.
  5. Also, set the User cannot change location under User permissions, then hit Apply and OK to save the changes.

It is important to note that this solution may be limited as the Local Security Policy is not available in all Windows versions. However, you’re safe if you’re using the Windows 11 Pro, Enterprise, and Education editions.

Some users complained that they encountered network issues after changing their current network type. Windows cannot connect to this network was the most common, so if you’re in the same predicament, check out our expert article on resolving this issue.

Hopefully, now you better understand how and when to change your network profile in Windows 11 to either public or private. To learn more about your network connection, we advise you to check network connection details for more information.

When managing different network profiles across devices, you can also review the Network and Internet settings in Windows 10 to keep older systems configured correctly.

Let us know what network profile you use, in what setting, and why it’s your choice.

5 Best VPNs for eHarmony in 2026 [Simple Guide]

eHarmony is a brainchild of the German mass media company ProSiebenSat.1 Media and a famous online dating website.

However, eHarmony is not available throughout the world so you will have to rely on a VPN service to unblock your favorite dating website from anywhere.

Why should I use a VPN on eHarmony?

eHarmony matches you with the people within your area so it would be hard to meet people from another part of the world.

A VPN masks your original IP address through an alternate IP address. Consequently, you can easily spoof your online locations and surf the web securely and anonymously.

Moreover, it encrypts your data and safeguards your devices including desktops, laptops, smartphones, and tablets from hackers and other cyber goons.

Similarly, a VPN allows you to access region-blocked websites including eHarmony on these above-mentioned devices from anywhere.

For your convenience, we have compiled a list of the best VPN services that help you access eHarmony without exposing your actual whereabouts online.

What are the best VPN services for eHarmony?

Express VPN – Best for eHarmony

If you prefer a top VPN service with high-speed servers all over the world, then shift your attention to ExpressVPN, the no.1 choice right now.

ExpressVPN has servers in 160 locations and 94 countries. It also runs zero-knowledge DNS servers to ensure your online traffic remains private.

You can use this VPN app to unblock eHarmony and other streaming services from any location and safely browse the internet even if you’re connected to an unsecured Wi-Fi hotspot.

It supports a kill switch called Network Lock and a Smart DNS feature called MediaStreamer.

Moreover, you may use ExpressVPN on any device you can imagine, so if you’re using the eHarmony app on your Android or iOS device, this VPN has got you covered.

You may even test it on your smartphone for a week to see if it matches your requirements.

Here are some of its best features:

  • Can be used on Windows, Mac, Linux, iOS, Android, Chrome, Firefox, Edge, routers
  • A zero-logging policy backed by TrustedServer technology
  • Up to 5 simultaneous connections
  • 30-day money-back guarantee
  • 7-day free trial for iOS and Android

ExpressVPN

Get this VPN service on eHarmony to help you meet people from all over the world.
Check price Get it now

Private Internet Access – Great for streaming

Private Internet Access is a US-based VPN service that provides over 32000 VPN and proxy servers in more than 75 countries across the globe.

Besides, the service does have impressive security features in its armory, including 256-bit encryption, WebRTC leak protection, etc. that let you remain secure and anonymous while surfing the web.

Through a 256-bit military-grade encryption, you can comprehensively protect your personal eHarmony payment information from the prying eyes of hackers and other unwanted personnel.

Similarly, you can safeguard your actual IP address with a WebRTC leak protection feature when browsing eHarmony that does not reveal your original IP address online.

In addition, Private Internet Access (PIA) is compatible with various operating systems and devices like Windows, Mac, Android, iOS, Smart TVs, Apple TV, and others.

It means you can easily access eHarmony on all these devices after connecting to your desired server accordingly. By doing so, you can continue your online romance with your potential partner from anywhere.

Here are some great features of PIA:

  • Protects 10 devices at a time with a single account
  • Offers a user-friendly no-logging policy feature to its users
  • Users can avail live chat customer support 24/7 throughout the year
  • Provides a risk-free 30-day money-back guarantee

Private Internet Access

With this VPN, you may access your eHarmony account from up to 10 devices simultaneously.
Check price Visit website

NordVPN – Secure connection

NordVPN is another impressive VPN service security-wise that guarantees the no logs policy.

Furthermore, the service provides server locations in over 60 countries worldwide that allows you to unblock eHarmony by connecting to your preferred server instantly.

Likewise, the service provides obfuscated servers that allow you to improve your online privacy considerably in restrictive countries like China, Cuba, Iran, etc. When you connect to these obfuscated servers, they mask your VPN traffic and enable you to access eHarmony anonymously.

If you cannot access eHarmony while using NordVPN, you should enable obfuscated mode before you connect to any VPN server. This way, you can disguise your VPN traffic from the prying eyes of ISPs and other surveillance agencies and browse the popular dating site easily.

Regarding compatibility, NordVPN supports various platforms and devices such as Windows, Mac, Android, iOS, Smart TVs, Apple TV, etc.

Let’s review a few of its best features:

  • Provides 5700 servers in 60 countries
  • Offers 6 simultaneous connections
  • 6730+ Mbps connection speed
  • Does have dedicated apps for different operating systems and devices
  • Comes with a 30-day money-back guarantee policy

NordVPN

Connect to eHarmony with a high-speed VPN and meet your matches from around the world.
Check price Visit website

CyberGhost VPN – Great server network

CyberGhost VPN primarily operates from Romania and provides 6800 servers worldwide.

Apart from this, the service offers an exclusive password manager that lets you generate and store strong passwords for your different online accounts all in one convenient place.

eHarmony was attacked by hackers in the past, so the CyberGhost password manager comes in handy when you want to protect your eHarmony accounts from various cyber risks like hacking and data theft in particular.

By using CyberGhost password manager, you can securely access your official eHarmony accounts and interact with your potential partner on a wide range of devices without any hassle.

In terms of compatibility, the VPN provider supports all the leading platforms and devices, such as Windows, Mac, Android, iOS, Apple TV, Smart TVs, and many more.

Overall, you can go with CyberGhost as it lets you browse your favorite dating website from anywhere without sacrificing your online privacy.

Above all, this impressive VPN service comes with a 1-day free trial that helps you to check numerous attractive features free of cost.

Here are some of its prominent features:

  • Offers 6800 servers around the world
  • Protects up to 6 different devices at a time with a single subscription
  • Offers 24/7 live customer support service
  • Provides a generous 45-day money-back guarantee
  • Apps for different operating systems and devices

CyberGhost

Protect your eHarmony account and access your favorite dating website securely.
Check price Visit website

Surfshark – Strict no-logs policy

Surfshark is another impressive VPN service that operates from a user-friendly jurisdiction i.e. BVI (British Virgin Islands).

Furthermore, the service provides 10 GBit servers in 100 countries throughout the world. It means you will not face any issues when connecting to your preferred server while residing in any country.

As a result, you can access eHarmony from anywhere without compromising your online privacy. Similarly, you can activate Surfshark’s internet kill switch feature on your desired devices while browsing eHarmony.

The kill switch feature does not expose your original IP address online since it disconnects your devices from the internet as soon as the Surfshark VPN app suddenly stops working.

Some of the key features of Surfshark VPN include:

  • Provides ultra-fast servers in 100 countries
  • Offers a 30-day money-back guarantee
  • Provides unlimited simultaneous connections
  • Apps for different operating systems and devices

Surfshark

Access your eHarmony account from any country and enjoy high-quality streaming wherever you are.
Check price Visit website

Are these VPN services safe to use?

All the VPN services mentioned above are safe to use as they encrypt your data through industry-standard AES 256-bit military-grade encryption and route your internet traffic with the help of well-secured servers.

Additionally, they keep your web surfing activities safe from the prying eyes of cybercriminals such as hackers, internet stalkers, identity thieves, etc.

So, there you have it! We expect you must have enjoyed reading our guide on the best VPNs for eHarmony. That said, you have to use a VPN service when it comes to accessing the popular online dating platform from anywhere without revealing your personal whereabouts.

That being said, we also recommend our complete guide on how to change your virtual location using a VPN.

Did you use any of these products? Drop us a line in the comments section describing your experience.

How to Run CHKDSK on Windows 11: Find & Fix Disk Errors

Running CHDSK commands on Windows 11 will help you find out important information about your hard drive, and in today’s guide, we’re going to show you how to use it on Windows 11.

How do I scan and repair drivers in Windows 11? 

1. Use chkdsk from CMD

  1. Press Windows key + X and choose Windows Terminal (Admin). You can use Command Prompt or PowerShell since the command works in both command line tools.
  2. Once the command line starts, type chkdsk C: and press Enter. Of course, you can use any other drive letter instead of C.
  3. The scan will now scan your PC for disk errors and let you know if there are any damaged sectors on your drive.

2. Use chkdsk from File Explorer

  1. Open File Explorer, and navigate to This PC.
     
  2. Locate the drive you wish to scan. Right-click the drive and select Properties from the menu.
  3. Navigate to the Tools tab and click on the Check button.
  4. Click on Scan drive to start the scan.
  5. Disk integrity check will now start.

This method is simpler than using chkdsk in command line, and this is why many prefer it.

3. Use chkdsk from the W11 installation disk

  1. Boot your PC from the installation media.
  2. Click Next, and then choose Repair your computer.
  3. Select Troubleshoot.
  4. Next, navigate to Advanced options.
  5. Lastly, click on Command Prompt.
  6. Run the chkdsk /f command.

List of CHKDSK commands

The following are the most commonly used commands to run chkdsk in the command line:

  • chkdsk /f – will scan and try to repair the bad sectors
  • chkdsk /r – will scan and try to recover data from damaged sectors

Chkdsk parameters and exit codes

What do chkdsk parameters mean?

/fused to fix bad sectors
/r locates the bad sectors and recovers readable information
/vdisplays the name of each scanned file
/xforces the drive to dismount
/iperforms a less vigorous check (only on NTFS drives)
/cdoesn’t check cycles within the folder structure (only on NTFS drives)
/I[:<size>]changes the size of the log file
/bclears the bad clusters and scans all allocated and free clusters for errors (only on NTFS drives)
/scanruns an online scan (only on NTFS drives)
/forceofflinefixit’s used with /scan to bypass online repair and queue defects for offline repair (only on NTFS drives)
/pref it’s used with /scan in order to allocate more resources in order to complete the scan faster (only on NTFS drives)
/spotfixruns spot fixing on the volume (only on NTFS drives)
/sdcleanupit cleans unnecessary security descriptor data (only on NTFS drives)
/offlinescanandfixit performs an offline scan and fixes the drive
/freeorphanedchainsfrees orphaned cluster chains (only on FAT/FAT32/exFAT)
/markcleanmarks the volume clean if no corruption was detected (only on FAT/FAT32/exFAT)
/?displays the list of all supported parameters

Some of these commands will need to lock your drive. In case there are any issues, we have a guide on what to do if chkdsk cannot lock current drive.

What do chkdsk exit codes mean?

0the scan found no errors with your drive
1the errors have been found and fixed
2performed disk cleanup or didn’t perform it because /f parameter wasn’t used
3couldn’t check the disk or fix the errors; errors weren’t fixed because /f was not specified.

FAQ

What does CHKDSK do on Windows 11?

CHKDSK scans and repairs file system errors and bad sectors, helping maintain the health of your hard drive.

Can CHKDSK fix slow performance issues?

Yes, by repairing file system errors and bad sectors, CHKDSK can improve your system’s performance.

Does running CHKDSK affect my files?

Running CHKDSK is safe but may prompt you to fix any detected errors, which could lead to minor changes in file systems. Always back up important data.

How long does CHKDSK take to complete?

The duration depends on the size of your drive and the number of errors. It can range from a few minutes to several hours.

Using chkdsk on your PC is important since you want to diagnose and fix hard drive problems before the file loss occurs. However, if chkdsk is stuck on your PC or CHKDSK is not working with Vanguard, we have a special guide to fix it.

To learn how to effectively fix issues, be sure to learn the difference between CHKDSK, SFC and DISM on your PC.

To understand why CHKDSK.exe runs every boot and how to resolve it, check out this CHKDSK.exe runs every boot guide.

This is a great tool if you want to run hardware diagnostics on Windows, so be sure to know how to properly use it.

How often do you use chkdsk on your PC? Let us know in the comments below.

Skype apologizes for bug causing flood of repeated notifications to users

Skype experienced a bug causing users to receive repeated push notifications. This issue affected some users and was attributed to a glitch in the app, resulting in multiple notifications from the app.

Skype acknowledged the problem and apologized through a tweet, stating they were actively working to resolve the issue as quickly as possible. They assured users that they would provide updates on the progress of fixing the bug and would inform them when the issue was resolved.

Certain users have reported receiving frequent notifications, with some receiving them as often as every hour for specific features. In addition, some users have experienced an excessive amount of notifications for a single new message. These notifications have included information about chats and new features.

In addition to addressing the push notification issue, Skype introduced a few new updates last week to enhance user experience and functionality, including auto download and easy file saving.

via Neowin

Skin your Xbox! Series X console wraps to launch later this year

Microsoft has announced that Xbox Series X console wraps will launch later this year. These custom skins will allow Series X owners to game in style like never before. Preorders for these Series X wraps begin today.

We know gamers want to be able to customize their consoles and show support for their favorite games, and we are delivering an option that’s more affordable and more sustainable than purchasing a special edition or limited edition console. With the launch of Series X Console Wraps, you can customize the console you already have.—Xbox Wire.

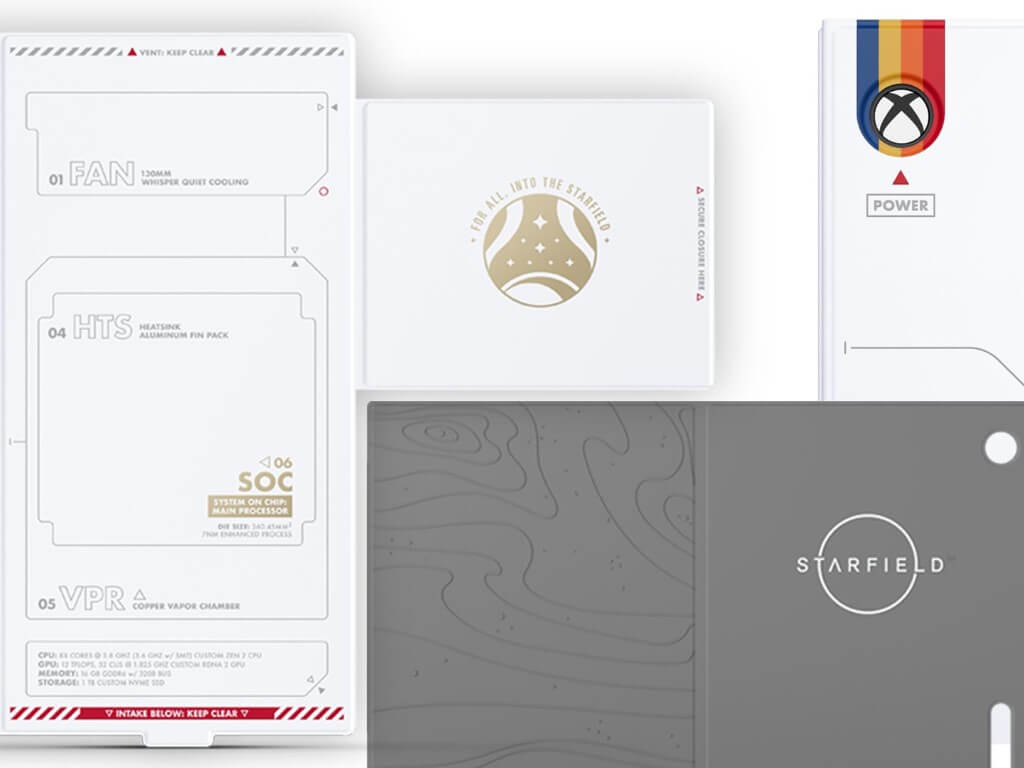
The launch is headed up with a Starfield wrap that is a perfect match for the recently released Starfield Controller and Headset.

With the release of Starfield now imminent, this gorgeous Starfield wrap is sure to be a big hit. It will launch on October 18 for $49.99 USD in the United States, Canada and Europe.

Also releasing for this launch and not to be overlooked are two camo-themed wraps: Arctic Camo and Mineral Camo.

Arctic Camo and Mineral Camo Xbox wrap image

These camo wraps will be available on November 10 at $44.99. Preorders for each start today over on the Xbox Store.

Featured image via Xbox Wire. 

Microsoft announces Bing Chat Enterprise for faculty in preview

Bing Chat Enterprise is being introduced in preview to provide AI-powered chat capabilities for educators, staff, and researchers. This tool aims to help them save time, access better answers, and focus on more meaningful tasks.

Microsoft 365 A3 and A5 faculty users can enable Bing Chat Enterprise through their accounts. If not opted out, Microsoft will enable it by default for eligible users after a certain date.

Here are some use cases:

  1. Draft Content: Bing Chat Enterprise can help educators create lesson plans and assignments by providing detailed information on specific topics, including learning objectives, materials, and activities.
  2. Personalize Learning: Bing Chat Enterprise helps educators generate personalized reading materials for students of different levels by providing content tailored to specific Lexile reading levels.
  3. Brainstorming: Teachers can use AI-powered chat to develop creative ideas for projects, assignments, or classroom activities. They can request unique project ideas related to their subject, which can help plan engaging lessons.
  4. Summarize PDFs: Bing Chat Enterprise can assist in summarizing complex research papers or documents. Educators can ask the AI to recap the findings of a specific research paper and provide recommendations and challenges mentioned in the paper.
  5. Improve Efficiency: The AI can be an expert consultant for various tasks. For example, educators can seek help reviewing and optimizing school schedules, identifying problems, and suggesting changes to provide more planning time for teachers.

With all this, Search Progress for Teams for Education was also announced. It is a tool that provides real-time coaching to students during online research, helping them develop effective search queries and identify credible resources.

New feature converts handwriting to text in Microsoft Edge Canary

For aficionados of handwriting and old-school penmanship, Microsoft Edge has prepared a delightful surprise in a novel flowering of tradition meeting modernity. The popular browser has introduced a handwriting-to-text feature, transforming scrawls and scribbles into clean, digital text.

Tech enthusiast @Leopeva64 on Twitter led to the discovery of the flag enabling this conversational feature lurking in Microsoft Edge Canary.

Edge Canary acts as a playground for testing and refining experimental aspects of the browser before its public unveiling.

Previously, this functionality allowing writing in any text field was only accessible to a chosen group of Windows insiders. Now, however, thanks to the continuous effort to refine the system, the feature thrives with a larger audience. Following a series of tests, the feature has been given the green light in Windows 11 Insider Preview Build 23481.

Allows inking via pen to be converted into typed text on most text input fields in Microsoft Edge. This is available on devices where handwriting is supported. To check whether Handwriting to Text is enabled on your device, look for “Use your handwriting to enter text” in Windows Settings. – Windows, the description reads.

The feature flag can be unearthed by navigating to edge://flags embedded within the browser’s address bar. Once activated, the user can freely unwind the creativity stored within their ink pen and watch as their handwriting morphs seamlessly into digital text before their eyes.

As the veil lifts from technological advancements, with surprise awaiting at every corner, the handwriting feature in Edge pays homage to a time-honored art form while bridging it to the contemporary world of digital communication.


Via MSPoweruser

Microsoft introduces new tool in Microsoft Teams for Education to enhance students’ online research skills

We all know how tough it can get when you’re looking for a particular thing, but you don’t have the right skills or words to search for it, especially when crafting a research paper. However, Microsoft’s latest tool, Search Progress, has arrived on the Microsoft Teams for Education platform to alleviate these challenges. These tools empower students by enhancing their online research skills, critical thinking abilities, and capacity to evaluate sources.

Search Progress provides real-time coaching to students during online research, helping them develop effective search queries and identify credible resources. Educators can also gain insights into students’ search methods to tailor teaching approaches.

  • It helps students develop critical thinking skills by evaluating source credibility and promoting independent learning.
  • It could help students distinguish between facts and opinions online, enabling them to make informed decisions.
  • Search Progress in Teams Assignments helps students conduct better online research with an augmented Search Coach.
  • Search Progress saves students’ work in real-time, allowing them to leave and return to their research as needed.

Search Coach launched earlier, offers a secure environment for students to practice creating effective search queries. By guiding students in crafting well-structured queries, the tool aims to help them avoid unreliable sources.

  • It teaches students to query construction patterns to help them find reliable information faster, and these skills can be applied to other search engines.
  • Coach in Teams for Education helps students develop online research skills with classroom and independent options.
  • Search Coach helps educators teach students how to construct effective queries for online research.
  • In an assignment’s “My work” section, students find Search Coach on the left and a source collection pane on the right.

Search Coach And Search Progress

Education Insight, which is coming soon:

  • Educators receive metrics about the assignment and a breakdown of students’ search processes, highlighting filter usage and search queries.
  • Education Insights features allow educators to dive deeper into data, compare student searches, identify learner progress, and tailor future assignments to class needs.

Microsoft also announced they are advancing Search Progress with export and citation features. Tablet support will expand in weeks, followed by phone support in months. These enhancements reflect Microsoft’s commitment to improving Search Progress.


Microsoft adds partnerships with energy companies, Aramco and Petronas, to drive innovation and sustainability

Microsoft has collaborated with Aramco and Petronas, two prominent energy industry companies, in two projects to drive innovation forward.

Microsoft and Aramco
Rondo Energy, a startup based in California, has received support from Aramco and Microsoft, via its Climate Innovation Fund, for their innovative solution called Rondo Heat Batteries. The idea behind this concept is to store excess renewable energy in heated bricks, which could help reduce emissions.

It involves using electric heating elements to raise the temperature of large quantities of bricks to extremely high levels. When needed, these bricks can then release superheated air or steam. The primary objective is to offer industries a cost-effective way to reduce carbon emissions and operational expenses.

The focus is on industries heavily reliant on high-temperature heat, such as steel manufacturing and food processing, which contribute significantly to global carbon pollution and energy consumption.

Microsoft with Petronas and Cegal
Petronas has collaborated with Microsoft to enhance innovation in the upstream value chain. The partnership aims to utilize Microsoft’s Azure High-Performance Computing (HPC) and AI Infrastructure to boost the operational efficiency of Petronas Upstream.

The energy industry uses the term “upstream” to describe the early stages of oil and gas production, including exploring, drilling, and extracting crude and natural gas. Additionally, the upstream value chain is the part of the value chain responsible for obtaining raw materials and converting them into intermediate products.

By establishing an Azure HPC and AI Infrastructure platform, the collaboration seeks to optimize various aspects of energy operations, including AI, machine learning, and efforts toward decarbonization. The goal is to enhance energy offerings and operational efficiency across the broader energy industry.

Microsoft Excel introduces monospaced font to the formula bar

Excel, the versatile spreadsheet synonym for professionals across industries, is undergoing a significant update to simplify the intricate process of formula crafting and editing. Microsoft has introduced the monospaced font in Excel’s formula bar, providing users with more streamlined readability and functional advantages.

We are excited to announce a change that will make your formula editing experience easier and more enjoyable: monospaced font in the formula bar. A monospaced font is a type of font where each character has the same width, regardless of its shape or style. This means that your formulas will be aligned and spaced evenly, making them easier to read and debug, the tech titan declared in a recent blog post.

Formulas, a core Excel feature driving calculations, data analysis, and report creation, are set to undergo a noticeable yet non-intrusive transformation for improved value delivery.

Monospaced Font: What Makes It Special?

Monospaced fonts, carrying alternative names like fixed-width or typewriter font, contain a unique characteristic: each character uniformly shares the same horizontal width. The structural plan offered by this font might seem mundane but have significant functional implications in a coding landscape.

Noted benefits primarily focus on heightened readability and error detection:

  1. Alignment and Readability: Monospaced font ensures neat alignment and readability. By allocating equal space to each character, the formula structure remains organized, improves indentation visibility, and allows formulae to be read with ease.
  2. Error Detection and Visual Parsing: The uniform character spacing enables fast error and typo detection, aiding quick resolution. It also simplifies understanding complex structures, helping users quickly grasp patterns, nested levels, and relationships within the formula, catching mistakes early in the process.
  3. Cross-Platform Consistency: Monospaced font shines by maintaining the formula’s structure and readability across different platforms, providing a unified user experience. The copy-pasting of code while preserving the formatting is a standout functionality.

Experience the Formula Upgrade:

Trial the change by editing or authoring a formula in the formula bar. This subtle yet essential transformation solely affects the formula bar’s appearance, leaving the actual spreadsheet aesthetics untouched.

The new formula bar font, currently under Beta testing on Windows, will first be rolled out for Excel for Windows users later. Microsoft also hypothesized the possibility of implementing the monospaced font in PowerPoint’s formula bar following the response and feedback.

Following Trello, Microsoft’s Planner to Integrate with Loop via Microsoft 365 roadmap

Microsoft has announced a new update on its Microsoft 365 roadmap. Soon, users of Planner and Loop will be able to integrate their plans into Loop-enabled applications using a dedicated Planner component. This move comes shortly after Trello, a comparable platform, introduced its integration with Loop last week.

Microsoft Planner is a task management tool that helps teams organize and track their work.

With the help of Loop, this integration offers users the ability to access and modify their plans while working on other tasks. The Planner feature will first be introduced in the Loop app. It will later become available in other Loop-enabled apps.

This new integration is assigned Feature ID 161955 and was officially added to the roadmap on August 16, 2023. The integration is set to cover a wide user base, with the global cloud instance under the Standard Multi-Tenant model. The integration will primarily be accessible through the web platform and is expected to reach General Availability status.

The rollout of this integration is scheduled to commence in September 2023, offering users coordination in their planning and task management processes.

ZSCMALLS portable monitor 17.3″ review – good value, fantastic display

Portable monitors are all the rage right now, and why not? These devices are useful as all-get-out, and are typically lightweight and easy to carry around—hence the portable part. A portable monitor allows you to create a multi-monitor setup pretty much anywhere and boost productivity even when not at your office or main workstation. Or when you’re on the road, a portable monitor is indispensable.

Given the current popularity of portable monitors, it’s no wonder there are so many quality ones on the market right now. While there are plenty of options from big-name brands out there, companies like ZSCMALLS also have some budget-friendly portable monitor choices. Today we’ll be checking out a 17.3” portable monitor from ZSCMALLS. If you’ve never heard of this company, you can read its about statement below.

Founded in 2014, ZSCMALL GLOBLE Group is a global professional seller of notebook computers and portable displays integrating R&D, production and trade. The products sell well in global markets such as North America, Europe, Southeast Asia, and Latin America, and are well established in key countries and regions around the world. The sales network and after-sales service system support 7*24 hours a full range of professional sales customer service, and provide global consumers with branded products of high quality and price. Special notebooks and portable display screens for office learning are advanced in technology, and the products are excellent and trustworthy.

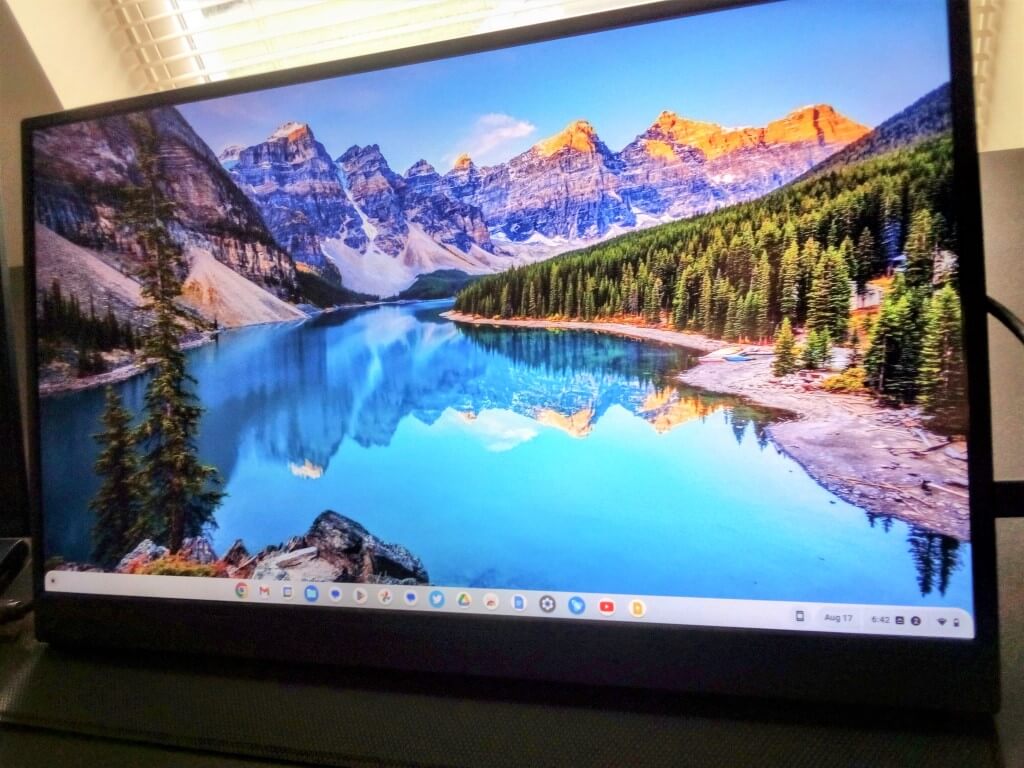
Img 20230817 185727 Edit 2

ZSCMALLS portable monitor 17.3″ specs

Display  17.3” IPS
Monitor dimensions 15.55″D x 9.65″W x 0.49″H
Display modes
  • Duplicate screen
  • Extended screen
  • Second screen
Compatibility
  • Laptop/desktop PC
  • Smart phone
  • PlayStation 3/4/5
  • Xbox One/Series X|S
  • Nintendo Switch
Resolution 1920 x 1080 FHD 1080p 
Features
  • 178° viewing angle
  • 100% RGB
  • HDR
  • Scratch resistant, waterproof screen
Refresh rate 144Hz
Brightness 250 Candela
Connections
  • Micro USB
  • Full-featured USB Type-C x2
  • 3.5mm Audio output
  • HDMI
Package contents
  • Portable monitor
  • Detachable smart cover
  • User manual
  • USB-C to USB-C cable 
  • USB-C to USB-C cable  (power only)
  • HDMI to mini HDMI cable
  • Power adapter

Summary

As with many new portable monitors, this one is purely plug and play, and you don’t need to install any drivers or deal with any setup in that regard. You may or may not wish to fine-tune the picture via the OSD, which allows customization of a range of display settings like contrast, sharpness, color temp and so on. For most this probably won’t be needed (unless to bump up the brightness) as you are met with a fantastically crisp display upon booting it up for the first time. A gamut of other options are also available on the OSD including audio settings and even language settings.

The unit features a good array of connectivity options including HDMI and a pair of full-featured USB type-C ports. What this means is that you can get a wide range of use out of this monitor (and most like it) in that it can connect to your smartphone, laptop, digital cameras, home gaming consoles and more.

Img 20230817 184808 Edit 2

Lastly, the monitor also has a 3.5mm audio jack, and you will definitely need it. Even at max volume, the speakers’ output is barely audible. Sound is adequate with headphones, and either these or an external audio device will be essential if you want to play audio through the monitor.

And really, this is the only caveat I found with the ZSCMALLS portable monitor 17.3.” Well, that and the fact that the button labeling could have been better implemented. As it is, button labels are on the back of the monitor, and I found this really inconvenient. This of course becomes a non-issue once you get used to the button functions (which took a bit, at least for me) and is on the whole only a minor nuisance.

Back to that display, you get up to 144Hz refresh rate at 1080p. The picture quality with this is excellent: sharp, plenty bright, and color that is full and vivid. The monitor itself is very lightweight at 1.25 lbs. without the smart cover, and easy to carry. Build quality is good on both the monitor and the smart cover.

Img 20230819 165720 Edit 2 Custom

The verdict

The ZSCMALLS portable monitor 17.3″ offers a great option for a second screen that won’t bust your budget too badly at $199.99 USD currently. It’s an ideal addition to your workstation, and the extra screen real estate can do great things for your productivity by making multitasking so much easier.

And games and video both look great on this—particularly on the big 17.3” model like the one featured here. All in all this is a rock-solid buy if you’re in the market for one of these weather for the office or entertainment.

Cons:

  • Poor audio output means headphones or external speakers are a must

Pros:

  • Big, beautiful screen
  • Plug and play

The ZSCMALLS portable monitor 17.3″ can be found on Amazon, and currently retails for $199.99. And while your there you can check out the ZSCMALLS Amazon storefront for other great products like this one.

Microsoft news recap: AI-powered review summaries in Microsoft Store, Xbox 360 Marketplace to close, and more

Microsoft news recap is a weekly feature highlighting the top Microsoft news stories of the past week. Sit back, grab some coffee, and enjoy the read!

Minecraft’s Xbox Series X/S Version Tease Sparks Speculations of Native Release and Ray Tracing

Minecraft has recently been classified for Xbox Series X and S consoles in Germany. This has led to speculation that a native version of the game for these consoles is in development, which would mean people not having to rely on the backwards compatible version, as is currently the case. Some fans are also hoping that the new version will support ray tracing, a cutting-edge graphics technology that can produce more realistic lighting and shadows.


Xbox Series X And S Side By Side Custom

Microsoft’s ‘Special Event’ in New York Next Month Hints at New Surface Hardware

Microsoft has announced that it will be holding a “special event” in New York City on September 21st. The event is rumored to focus on new Surface hardware, such as a beefier Surface Laptop Studio sporting an Intel 13th gen H-series processor, among other product updates. There’s also a chance of some Windows announcements focused on AI. One thing that’s unlikely to feature is the Surface Duo, following significant layoffs and other restrictions on that particular division.

Microsoft Store Now Offers AI-Powered Review Summaries, No More Scrolling Through Reviews

The Microsoft Store has recently added a new feature that automatically generates AI-powered review summaries for games and apps. These summaries are designed to give users a quick overview of the key points and sentiment of the reviews left, without the user having to read all of the reviews. Whilst this feature was initially being tested in the Insider program, it is now rolling out to users but is only available to those in the United States at the moment.

Xbox 360 Marketplace to Close in July 2024

Microsoft has announced that it will be closing the Xbox 360 Marketplace in July 2024. This means that users will no longer be able to purchase new games, DLC, or movies from the Xbox 360 marketplace. However, users will still be able to download and play games and movies that they have already purchased. The Microsoft Movies & TV app will also be sunset on Xbox 360 consoles.

Xbox 360

That’s it for this week. We will be back next week with more Microsoft news.

5 Ways to Close all Windows Apps at Once on Windows 11

Multitasking often requires you to open multiple windows of the same app simultaneously. And while opening these windows doesn’t seem so hard, managing them can be a pain.

If you’re looking for an easy way to close all window apps at once aside from using the dedicated keyboard shortcuts, this article will be of much help to you. 

How do I close all programs at once in Windows 11?

1. Use the Taskbar 

  1. Find a program on your Taskbar with multiple active programs open.
  2. Right-click on its taskbar icon, then select the Close all windows option.

This is probably the easiest and fastest method, but if you have too many background processes with multiple windows open, you’ll have to repeat this process several times until you clear your Taskbar.

Alternatively, you can use the good-old emergency keyboard shortcut Alt + Tab. A preview panel will display all open programs’ window menus, and you can hover your mouse to close select apps.

2. Use the Resource Monitor

  1. Hit the Windows key, type Resource Monitor in the search bar, and click Open.
  2. In the Overview tab, check all boxes for programs with currently active windows that you wish to close.
  3. Right-click on the program(s) selected, then choose End process.

One advantage of the Resource Monitor over the Taskbar and Task Manager is its auto-recovery feature. You may have accidentally selected and closed critical system processes, but by following the above process, selecting the Resume Process option will reopen them.

3. Use the Command Prompt

The Command Prompt is a powerful tool that not only troubleshoots your PC for issues but can also be used to run a variety of useful commands on your computer.

By entering a simple command into the Command Prompt window, you can close all active windows for apps on your computer.

Once you open the command line as an administrator, you can enter the taskkill /f /im chrome.exe command, and all Chrome windows will be closed. Remember to replace Chrome with the name of the app you want to close.

Still, its main disadvantage is that you have to execute successive multiple commands since there’s no single command to close all windows from multiple apps at the same time.

You can also manage open programs more effectively by using this guide on how to close running apps, which explains additional ways to stop active processes in Windows 11.

4. Batch Scripts for Advanced Users

  1. Click on an empty space on your desktop and select New Text Document.
  2. Double-click on the text file created and enter the following command. If you have multiple windows from different apps, repeat the same command replacing Chrome with the name of each app: taskkill /f /im Chrome.exe /T > nul
  3. Next, click on the File tab, then select Save as.
  4. Enter Close all Windows Apps Simultaneously.bat in the file name entry, then hit Save.
  5. Go back to your desktop and double-click on the document you just saved in 5 above to run the script. This will close all windows from the corresponding apps as entered in 2 above.

Batch scripts are essentially command lines that perform multiple actions at once. This is a simple text file consisting of commands that Windows will execute one after another.

They’re a great way to automate repetitive tasks but can also be used for simple day-to-day tasks like closing all programs at once. 

So if you’ve been looking for a way on how to stop all processes, batch scripts are the way to go.

5. Use Third-Party solutions

Finally, if you feel that the manual methods are a bit too much, you can opt for third-party tools. Our top pick has to be the Close All Windows tool for its intuitive interface.

It is a simple yet powerful tool that allows you to close all running programs with a single mouse click. All you have to do is select and then click OK when done.

It shares some similarities with the Resource Monitor but with extra features such as the group by parent folder and a search box for easier navigation. 

We’ve demonstrated different ways to close all apps on Windows 11 at once. Each one is convenient in its own right, and you are free to choose any of these methods or mix them up to suit your needs.

If your PC was running slow or you were having problems launching apps quickly, closing high-resource processes will hopefully help you reclaim some system resources.

Alternatively, if you don’t mind shutting down your PC, holding down the power button will also close all active items, but you run the risk of a situation where Windows apps won’t open because they weren’t shut down properly.

We’d like to hear about your preferred method to close all app windows, so leave us a comment down below on your choice and why it’s your go-to.

Fix Microsoft Flight Simulator not Connecting to Server in 6 Ways

It is one of the best games for aviation fans, but the Microsoft Flight Simulator not connecting to the server error can be extremely frustrating.

In this article, we look at what could cause this problem and what you can do to get back in the air. 

Why isn’t Microsoft Flight Simulator connecting to the server?

Below are the most common reasons:

  • The online functionality is disabled – The game has an option called Online functionality; if that gets disabled, the game won’t connect to the server.
  • Poor internet connection or speed – The game needs a good connection to work properly.
  • Insufficient bandwidth – You are using too many apps or devices on the same network.
  • System firewall/ antivirus – Your security software has blacklisted Microsoft Flight Simulator.
  • Outdated Game Version – Use the latest development of the game to avoid errors.

Keep in mind that sometimes the problem can also be on their end. The servers can be down or under maintenance, in which case, you’ll have to check their Online System Monitoring website to see if everything is alright or not.

How to fix Microsoft Flight Simulator Connector issues?

Recommended requirements for Microsoft Flight Simulator

  • CPU: Intel Core i5-4460 or AMD Ryzen 3 1200 or better.
  • RAM: 8 GB.
  • OS: Windows 10 64-bit.
  • VIDEO CARD: Radeon RX 570 or GeForce GTX 770 or better.
  • PIXEL SHADER: 5.0.
  • VERTEX SHADER: 5.0.
  • FREE DISK SPACE: 150 GB.
  • DEDICATED VIDEO RAM: 2048 MB.

1. Turn on the Online functionality

  1. Start Microsoft Flight Simulator.
  2. Go to Options, access the DATA tab, and see if the Online functionality option is turned On.
  3. If it’s on Off, you will not be able to access the server.

Many of our readers said that the Online functionality option in Microsoft Flight Simulator turned to Off by itself. So, try this solution that worked for many.

2. Free up bandwidth 

  1. On your PC, press CTRL + Alt + Del and open Task Manager.
  2. Check all running applications.
  3. Select the ones that you don’t need at the moment and click on the End task button.

Having multiple applications running means there is more competition for the system bandwidth and would result in a shortage of processing power for the Microsoft Flight Simulator to function seamlessly. 

Like most other online games, the Microsoft Flight Simulator requires considerable bandwidth to function without lag. Ending unnecessary tasks can also help with CPU usage.

3. Use a fast VPN with gaming servers

The issue of the Microsoft Flight Simulator not connecting to the server can be fixed. One of the most reliable solutions is to use a VPN.

The online simulation game currently supports macOS, Windows, and Linux operating systems. 

Microsoft Flight Simulator may not connect to the server if your system is not up to par with the software requirements. 

Using a VPN allows you to connect to the game server from any location. Luckily, we have a list of the best VPNs for gaming that will bypass any restrictions and improve the latency.

For example, Express VPN is professional software that offers you great speed and will help you bypass possible throttling caused by local ISPs.

Plus, this VPN offers many servers to connect through, allowing you to switch if you feel like the one you are using is not working properly.

⇒ Get ExpressVPN

4. Check system firewall and permissions

  1. On your PC open, Windows Defender Firewall.
  2. Select Allow app through Windows Defender Firewall.
  3. Click on the Change settings button at the top.
  4. Select the Allow another app option.expressvpn unexpected error
  5. Find the Microsoft Flight Simulator app and add it.

Basic system security is not exactly friendly to every software application and website. Your firewall may block your game’s access to the Internet.

Finding that Microsoft Flight Simulator is not connecting to the server should not be a worry for you. Provided you follow these solutions, you will be closer to solving the issue.

You can also:

  • Restart the game and the PC.
  • Restart your router and ensure that you have a steady connection. The recommended internet speed for Microsoft Flight Simulator is 50 MBps.
  • Make sure that the game is updated. You will usually see an update prompt within the game. If not, check the game in the Microsoft Store.
  • Check the game requirements below and make sure that your PC is compatible.

We also recommend reading our guide on how to fix Microsoft Flight Simulator issues, which will provide even more solutions.

Other games can have similar problems and we wrote about solving Splatoon 3 connection issues with these techniques in a separate guide.

Did you manage to fix the issue by following the solutions above? Use the comments section below to tell us all about it.

How to Update Global Address List in Outlook

A global address list is an electronic address book containing the contact information of all users of a specific organization. To keep this information correct, sometimes you must update Outlook’s global address list.

This feature allows users to communicate more easily with the members of their organization, and in today’s guide, we’re going to take a closer look at it and see how it works.

How do I update my information in the global address list?

1. Use the Download Address Book option in Outlook

  1. In Outlook, click on File.
  2. Navigate to Account Settings. Then click on Download Address Book.
  3. Next, check Download changes since the last Send/Receive, select your address book, and click OK.
  4. Wait for the process to finish.

This will update the address book in Outlook. To learn more about contacts and address books, check our guide on how to download contacts in Outlook.

2. Use PowerShell

  1. Open PowerShell.
  2. Next, run the following command: Update-GlobalAddressList -Identity "Default Global Address List"
  3. Wait for the process to finish.

Keep in mind that command is only available in on-premises Exchange.

How to update the offline global address list in Outlook?

The steps for updating the offline global list are exactly the same as the ones described in the previous section.

However, keep in mind that only the first method will update offline Outlook address books.

Why can’t I update my global address list in Outlook?

  • Depending on your configuration, updating the global address list might take 24 to 48 hours.
  • Issues with the local copy of the list or permission issues can prevent it from updating.
  • Your mailbox might not be mounted properly, or you’re not running the correct command to update it.
  • Sometimes, your settings aren’t correct, or you’re having issues with Microsoft Exchange Address Book and Microsoft Exchange System Attendant services
  • Incorrect entries in the global list can cause this and other problems.

Global address list is an incredibly useful feature, and keeping its information up to date should be your priority.

Remember that issues with address books can sometimes occur, and we covered Outlook address book error and can’t download the address book, issues in separate guides.

And don’t forget to find out all about printing Outlook contacts and keeping them safe from file corruption.

Are there any other methods of updating the global address list that we missed? If so, let us know in the comments section below.

A short guide on surviving the closure of the Xbox 360 Store

It’s official: Xbox 360 Store is coming to an end next year, on July 29, 2024, according to Microsoft. You should also know that the Microsoft Movies & TV app will no longer be functional on Xbox 360 as well, on that date, which means you won’t be able to watch TV or movies on your Xbox 360.

On July 29, 2024, Xbox will stop supporting the ability to purchase new games, DLC, and other entertainment content from the Xbox 360 Store on the console and the Xbox 360 Marketplace (marketplace.xbox.com)

Xbox

However, the Redmond-based tech giant is making sure that the Xbox 360 Store closure won’t impact you so much, as there are multiple solutions to this. The Xbox 360 Store closure will also not have any impact on your ability to play games on your Xbox 360 console, You’ll still be able to play them.

And if you own an Xbox Series X/S or an Xbox One, then you’ll be able to play your Xbox 360 games via Backwards Compatibility. So, it’s not really the end of an era, per se, but just the end of a part of it.

Truth is, given the fact that Xbox 360 was released almost 18 years ago, the console, which is the most popular one in the Xbox’s history, has become a legendary one. A lot of people are still playing games so, so it’s quite understandable why the Xbox community will see the Xbox 360 Store closure as the end of an era.

But we’ve prepared a short guide for you on how to get ready for it. And you have more than 11 months to do it, so if you take small steps, the Xbox 360 Store closure will hardly affect you when it’s going to happen.

The Xbox 360 Store closure: everything you need to know & do

You’ll still be able to play your Xbox 360 games after July 2024

  • Any games that you purchased on your Xbox 360 will still be playable on the console, after the Xbox 360 Store closure, no matter if the purchase was physical or digital.
  • You’ll even be able to re-download old games that you purchased and deleted, in case you want to play them again.
  • Multiplayer games are also going to be playable long after the Xbox 360 Store closure as long as the publishers still support the online servers, so you don’t need to worry about it.xbox 360 store closure
  • You don’t need to worry about your savings and your progress either. Everything will be saved to the cloud, and if you want to continue your progress on Xbox S/X or Xbox One, those saves will transfer over.

You’ll still be able to purchase and play Xbox 360 games

  • As long as they support backward compatibility, you should be able to buy and play Xbox 360 games at any time
  • A lot of old Xbox 360 games will be enhanced with additional features and improvements if you decide to play them on Xbox Series X/S.
  • Xbox 360 games will still be updated, even after the Xbox 360 Store closure. If there are updates for the game, they will prompt and install when you launch the game.

Which items are affected by the Xbox 360 Store closure

According to Xbox, any kind of content distributed via the Xbox 360 Store will no longer be available to purchase after the closure. These include:

  • Games
  • Trials
  • Add-ons
  • Avatar items
  • Apps
  • Gamerpics
  • Game trailers
  • Videos
  • Gamertag changes on Xbox 360
  • Xbox subscriptions on Xbox 360
  • In-game purchases
  • Video content via the Microsoft Movies & TV app

You’ll be able to stream and download TV series and movies that are eligible for the Movies Anywhere app

  • All the content that you purchased on your Xbox 360, including TV series and movies will remain in your Xbox 360 library and you’ll be able to stream them
  • And if any of the TV series and movies are eligible for the Movies Anywhere app, then you can download and stream them there

At the same time, Microsoft is also offering support for any question that you might have regarding the Xbox 360 Store closure and its impact on your Xbox library.

However, there is still a lot of time until July 2024, and until then you have more than enough time to get ready for the closure.

But what do you think? Let us know in the comments section below.

7 Automatic Color Correction Software for Photos & Videos

If you have ever tried to make a photo look better, you know that the first step is to correct the colors. This is one of the most basic things that can be done in image editing programs, but it’s not always easy to get right.

With the right photo editing apps, you can get professional results with just a few clicks. Automatic color correction software analyzes your photo and automatically adjusts its colors to improve its quality.

Fortunately, there are lots of automatic color correction tools out there that can help take care of these issues quickly and easily. 

Each one tends to have its own strengths and weaknesses, so depending on your needs and preferences, one may work better than others.

What is automatic color correction?

Color correction is a term that gets thrown around a lot in the photography world. But what does it mean? Simply put, color correction is the process of adjusting your image’s overall look and feel to make it more pleasing to the eye.

When it comes to automatic color correction, this type of image processing automatically adjusts an image’s color balance.

The software does this by analyzing the colors in your photos and then adjusting them to make them more vibrant and realistic.

What are the best automatic photo color correction tools?

InPixio Photo Studio – The most intuitive photo editing tool

InPixio Photo Studio is a professional photo editor for everyone. It has an intuitive interface makes it easy to use, even for inexperienced users. It features robust and easy-to-use tools that make editing photos with a single click possible.

InPixio Photo Studio offers many filters, allowing users to apply different effects to their pictures.

The app lets you work with multiple images simultaneously, making it ideal for batch-processing photos or creating collages.

Additional features:

  • Has presets to create specific looks in different settings
  • Comes with AI-powered templates to help you color-correct your images faster
  • InPixio Photo Studio does not require any training before you can start using it effectively since most of the functions can be performed with just a click
  • Supports multiple languages
inPixio Photo Studio 12 Pro

inPixio Photo Studio 12 Pro

The color-detecting feature in the selection tool assists you in modifying the photo automatically.
Check Price Visit website

Adobe Photoshop – Powerful color correction software

Photoshop is a powerful photo editing and retouching tool and the ultimate automatic color correction software for beginners. It is the number one choice for professional photographers, graphic designers, and artists.

Its features are so diverse that it can be used as a complete design tool by professional photographers and graphic designers or to make simple edits to your photos.

You can certainly do more with Photoshop auto color correction actions to make your images stand out but still look natural and beautiful.

Additional features:

  • Comes with great plugins that extend its functionality and help you automatically color-correct your images
  • Supports multiple file types: JPEGs, PNGs, TIFFs, and BMPs
  • Has a tutorial section to help you perfect your skills in editing

Photoshop

Color a scene quickly, mix numerous landscapes, and move colors from one image to another.
Free trial Visit website

Clip Studio Paint – Most versatile

Clip Studio Paint is a versatile painting and animation software, used by professionals and amateurs alike. It has many features that make it an excellent choice as an auto color correction tool.

The software is available for Windows and macOS and can be purchased in two different versions, Clip Studio Paint and Clip Studio Paint Pro.

One feature that makes it stand out is its rich library of paintbrushes that is updated every month. You’ll be spoilt for variety when selecting one for editing.

Additional features:

  • Customizable paintbrushes that allow you to control every aspect of your strokes.
  • Has a one-off purchase offer.
  • The fill tool automatically detects missed spots during color correction to enhance your work.
  • Has a tutorials and tips section to help sharpen your skills.

Clip Studio Paint

Discover endless methods to correct color, by selecting from other screens or applying complex color palettes.
Free trial Visit website

Luminar Neo – Most flexible

Luminar Neo is a video auto-color correction software. It features a drag-and-drop interface and an array of presets to get you started.

Luminar Neo automatically analyzes your image and applies the best adjustments for each and every photo. You can fine-tune these adjustments for even greater results

Additional features:

  • You can use this tool to adjust individual colors in your image, especially if you want a color to stand out.
  • Can edit images in layers.
  • Also comes in the form of a plugin that can be used alongside other photo editing software.

It’s not as powerful as some of the other programs on this list, but it’s easy to use and offers much flexibility for anyone who wants to try out some simple edits before moving on to something more advanced.

Luminar Neo

It analyzes your photos and quickly improves the color quality, details, and tone by choosing the appropriate color balance.
Check price Visit website

What is the best color correction software for video?

Adobe Premiere Pro is the best color correction software for video. It’s used by professionals and enthusiasts alike. It has many features that can help you get the job done quickly and easily.

Although the software is geared toward professional users, it also has many features in common with basic video software but with advanced capabilities that aren’t found in such software.

Additional features:

  • Professional editing tools that give you total control over your footage.
  • Advanced color correction tools that let you change the mood and look of your film in an instant.
  • motion graphics templates for creating title sequences and other visual effects.

If you’re looking for a professional video editing tool that’s easy to learn and use, then Adobe Premiere Pro is a good choice.

Adobe Premiere Pro

Auto-Match powered by Adobe Sensei AI makes it simple to adjust, tweak, and match colors quickly and accurately.
Free trial Visit website

2. Movavi – All-in-one video editor

Movavi Video Editor offers a wide range of features that make it one of the most versatile and powerful video editing software available today.

The software includes tools for editing soundtracks, adding titles, effects, and transitions, as well as advanced tools for color correction, noise reduction, and other video-enhancing features.

Additional features:

  • It comes with a ton of training videos, so even if you’ve never edited a video before, you are sorted.
  • Has 4K support with real-time effects to help you color-correct your video.
  • Supports a wide range of formats.

The program’s interface is simple and intuitive, making it easy for beginners to learn how to use it. However, advanced users will also appreciate its powerful features, such as tracking options and motion effects.

Movavi

Provides fully redesigned aesthetics, improved navigation, easy content structure, and color customization.

3. Filmora Wondershare – Most creative

If you’re looking for video color correction software, Filmora Wondershare is one of the best options. It has a wide range of features that make it easy to use, even for beginners.

For beginners, it has a user-friendly interface and is easy to use with just a few clicks. It also provides many advanced features that can help you get the best results if you are a pro user.

Additional features:

  • You can choose from four automatic modes, each with its own presets and effects.
  • Filmora Wondershare also gives you plenty of options for customizing the colors and looks of your video clips.
  • Includes a tutorial section on how to get the best out of color correction.

You can use its color correction feature to adjust the color balance of your videos according to your taste or preference.

Filmora Wondershare

Filters are added to match relevant hues, and color tuning may be used to unify the color with scene color presets.
Free trial Visit website

Where can I use automatic color correction?

If you’re new to video editing, automatic color correction is a great way to learn about color correction.

You can use automatic color correction in a variety of applications. You can use it to correct the color of photos, video clips, graphics design, game development, and web design.

Color correction vs. color grading, what’s the difference?

Color correction is adjusting the colors in a video clip to match the colors captured at the time of the shooting.

It is more about fixing problems. This is the feature to use if you want your footage to have consistent color throughout a project.

Color grading, on the other hand, is an advanced technique that you can use to achieve specific looks in a project. It is more about enhancing the look of your project overall.

It involves manipulating specific parts of an image — such as shadows, mid-tones, or highlights, using color masks or curves. 

With this comprehensive list, we hope you found software that meets your needs, and you can now create beautiful. natural-looking photos and videos without much fuss.

For more advanced users who would like to edit their images even further, be sure to check out our library of photo retouch correction software.

In the comment section below, let us know what other photo editing features you enjoy and the corresponding software you use to achieve the final look.

What Does JWT Expired Mean & How to Easily Fix it

JWT, or the JSON web token, is an Internet standard for creating data with an optical signature or payload. These tokens are then signed using a private secret or a public/private key.

While managing JWT tokens, some problems might occur during their authentication. Recently, many of our readers have been complaining about the JWT expired error.

If that’s something you’re having trouble with, read this post to learn how to fix it.

What does JWT has expired mean?

JWT provides a standard way of secure communication between two parties. Currently, it is used to access safe ways on API.

These tokens expire after a designated time to protect data integrity. The expiration time identifies the time after which the JWT token won’t be accepted for processing.

What happens when JWT expires?

A JWT token that doesn’t expire could cause harm. If stolen, someone can access and leak the user data.

After the token expires, you can use the refresh token to get a new JWT. Once the refresh token gets revoked, the operation will fail, and the user will have to log in again.

What to do after JWT expires?

Another thing you can try once you face the JWT expired error is making the system call another refresh token. This request will cause the expired JWT to pass, and the server will issue a new JWT, which the system can further use.

Make sure to use separate services to issue the refresh token as it won’t update the expiration of the existing JWT token.

What do I do if JWT expired?

1. Use a different browser

If the JWT expired error is troubling you, try opening the website in a different browser before starting with different troubleshooting methods.

There are some that specialize in different aspects, so make sure to choose a browser that is both fast and secure, for instance, Opera One.

It offers high-speed levels to prevent different types of browsing errors and helps users enjoy a seamless browsing experience.

It also has enhanced privacy and security, erasing all traces of your activity. Moreover, it has a built-in ad blocker to get rid of annoying notifications and distractions.

Opera One

Secure your browsing activity and improve your online safety with Opera One app.

If the error still appears in another browser, follow the below steps.

2. Clear browser cookies and cache

2.1 On Chrome

  1. Open Google Chrome and click on three vertical dots at the top right corner and select Settings.
  2. Navigate to Privacy and Security and click on Clear Browsing Data.
    jwt expired error
  3. Check the options Cookies and other site data and Cached images and files.
  4. Once done, click on Clear Data.
    Clear-Data-1

2.2 On Firefox

  1. Open Firefox and click on the hamburger icon at the top right corner and select Settings.
  2. Navigate to Privacy & Security.
  3. In the Cookies and Site Data section, click on Clear Data.
    jwt expired error
  4. Now click on Clear to confirm the process.

We have shown you how to clear cache and cookies in Chrome and Firefox but if you’re using another browser, the procedure is similar.

3. Check your Internet connection

  1. Visit Fast i.e., a speed test website.
  2. As soon as the website opens it’ll automatically start testing your network’s speed.
  3. Wait while your connection is being tested.

If you don’t prefer this, you can use any other Internet speed tester to check your connection and fix JWT expired error.

How to check if the JWT token is expired or not?

There are two methods to do so. In the first one, you check the token expiration every time the Route changes and call the App component logout method.

And the second one requires you to dispatch the logout event to App component when the response status tells that the token is expired.

How to set an expiration time for the JWT token?

The JWT expiry date of a token can be configured while registering it. You can set the expiration time by calling the API Manager. To do so, you need to make a PUT request to the endpoint /api-manager/api/v3/access-tokens/{code}.

This was how you can fix the JWT expired error. Follow the steps mentioned above to fix the JSON web token error.

If you still have any issues, feel free to drop a comment below. We’re eager to hear from you.

How to Reset the Outlook View to its Default Settings

Outlook has become the go-to email manager and it needs to be uncluttered for a pleasant experience. An easy to do that is through a quick reset of the Outlook view.

If recent changes made working on Outlook difficult or the custom views changed the positioning of icons, it will hinder productivity. Why waste time getting used to the new interface when you can simply reset the view? Keep reading to find out all about it!

How do I customize or reset the current view?

1. Resetting the view with the built-in settings

  1. Open Outlook, select the inbox you want to reset the view for, and click on View in the menu bar.
  2. Now, click on Change View, and then select Compact from the menu.
    compact
  3. Alternatively, you can click on the Reset View button.
    reset Outlook view
  4. Click Yes in the confirmation prompt.

In case the Reset view button is greyed out in Outlook, it’s either that the view is not set to Compact or no changes have been made to the original settings.

2. Resetting Outlook view with a command 

  1. Press Windows + R to open Run.
  2. Now, paste the following command in the text field, and then hit Enter: outlook.exe /cleanviews
    command to reset Outlook view
  3. This will relaunch Outlook, with all the custom views set to default.

The dedicated command clears all custom or mail views applied in Outlook. 

3. Hiding the To-do bar

  1. Launch Outlook, and click View in the menu bar on the top.
  2. Now, click on the To-Do Bar option, and then select Off from the dropdown menu.
    disable to-do bar

If you want to disable or hide the To-Do Bar in Outlook, it can easily be done via built-in settings. Remember, selecting Off will disable all three, Calendar, People, and Tasks.

4. Disable the installed add-ins

  1. Open Outlook, and then click the File menu near the top-left corner.
  2. Click on Options.
  3. Go to the Add-ins tab, select COM Add-ins from the dropdown menu, and click Go.
    add-ins
  4. Now, untick the checkbox next to the problematic add-in or all of them if you can’t identify the one that’s changing the Outlook view, and then click OK.
    disable add-in

Though not exactly a way to reset the Outlook view, disabling Outlook add-ins may help fix things when the display, zoom level, or positioning of icons keeps changing. If you can’t disable the add-ins, launch Outlook in Safe Mode.

Why did my Outlook view change?

Here are the primary reasons you find the icons rearranged or the Outlook inbox view changed to small:

  • Accidental changes: You could have inadvertently modified the display view settings, which changed the position of icons in Outlook. 
  • Running an outdated version: Often, running an outdated version of the app could introduce inconsistencies.
  • Updates to Outlook: Some updates change the UI and if the Outlook view changed recently, it could be a new update to blame.
  • Corrupt user profile: This can change the scaling settings, make the inbox look smaller or bigger, or even lead to Outlook view not showing email content.
  • Conflicting add-ins or third-party applications: While add-ins are meant to enhance functionality, these can be the reason Outlook view changed itself.

FAQs

Why did my Outlook view suddenly change?

Your Outlook layout might have changed due to accidental customization, an update, or corrupted view settings. Resetting the view restores the default folder layout and removes unwanted filters or column changes.

How do I reset the Outlook view to default?

Open Outlook and go to the folder you want to reset. Click the View tab, select Reset View, and confirm your choice. You can also use the shortcut Alt + V + R to quickly reset the current folder view.

Can I reset all folders at once in Outlook?

Yes. Open Outlook, press Windows + R, type outlook.exe /cleanviews, and hit Enter. This command resets every folder’s view to the default layout across all mailboxes.

Will resetting the Outlook view delete my emails or folders?

No. Resetting the view only restores the default layout and display settings. Your emails, folders, and account data remain safe and unaffected.

With the information presented here, you can reset the Outlook layout or view. Remember, resetting is the easier part. The trick lies in identifying what changed the view. And once you figure that out, the problem won’t appear again.

Often, a byproduct of misconfigured settings is Outlook view not showing the subject, but that can be fixed easily. And similarly, you can speed up Outlook when it’s running slow in no time.

Need to let colleagues know you are away? Set up an automatic reply in Outlook to keep everyone informed while you focus on fixing or customizing your layout.

For any queries or to share what triggered the change in Outlook view in your case, drop a comment below.

How to Change Sounds in Opera GX: Keyboard, Notifications & More

Changing keyboard typing sounds in Opera GX as well as notifications sounds and adjusting volume is pretty easy. You can change typing sounds, adjust the volume, and disable them completely. 

How to change browser sounds in Opera GX?

Change typing sound in Opera GX

  1. Go to Easy setup, which is three horizontal lines in the top-right corner of the browser.
  2. Scroll down to find Browser sounds under the Features panel. By default, the toggle is switched ON.
    Change browser sounds Opera GX
  3. Click on Configurations to launch the settings.
  4. Browser sounds Settings page will open. The first setting is Typing. You can choose from two sets of sounds and adjust the volume as well.
    Change custom browser sounds on Opera GX

Alternatively, you can go to Settings from the settings provided in the left sidebar and search “music” to launch browser sound settings.

For more keyboard sounds, click on the “Get More” button in the upper right corner.
Mods to change background sound in Opera GX browser

This will take you to the Mods store from where you can choose to install custom sounds.

The moment you install any background music mod, it will get changed right away.

Take, for instance, we have selected LoFi Chill mod here. This is a mod, which means it includes combinations of different personalization options.

LoFi Chill mod

It can change background music as well as browser sounds all at once. This mod changes keyboard sounds, wallpapers, browser sounds, and themes as well.

All the Browser sounds settings will show “Modded” beside them. Clicking any one of them navigates you to the installed mods page.

Opera GX browser sounds

Changing the volume is easy as well. You can see a volume bar beside every browser sound. You just have to adjust the volume.

So, this is how you manage sounds on the Opera GX browser.

How do I disable browser sounds in Opera GX?

You can turn browser sounds off on Opera GX if you don’t want the browser to make sounds while you’re hovering over something, typing, clicking, or flipping switches.

  1. Go to Easy setup
  2. Scroll down to find Browser sounds under the Features panel. Toggle the switch off and the browser will stop making any sounds.

Similarly, you can turn off the background sound on Opera GX. Follow the same path and just toggle the switch off.

The browser lets you manage even the smallest things for that tailor-made experience so that the browsing doesn’t feel dull.

Apart from personalization options, the Opera GX gaming browser lets you manage passwords, organize bookmarks, and try some AI prompts to boost your productivity.

You can set Opera GX as your default browser if you have been enjoying using it. Let us know in the comments below if you managed to change the sounds in Opera using our solutions.

Opera Crypto Browser: What is it & How to Download it

Opera has released its Crypto Browser, which focuses on cryptocurrency trading, and in today’s guide we’re going to take a closer look at this browser and see if it’s still available for download.

What is Opera Crypto Browser?

This browser offered a wide array of features, including a built-in crypto wallet, as well as support for blockchains. It also allowed users to access their crypto without extensions.

Opera Crypto Browser main page

Another key difference that separates this browser from others is its support for Web3. Web3 is the future of the internet that supports a blockchain-based, decentralized internet. In other words, Web3 is the best way to deal with all things crypto.

With Opera Crypto Browser users can seamlessly access decentralized applications (DApps) and metaverse platforms.

Is Opera Crypto Browser being discontinued?

Yes, this browser has been discontinued in 2023, and it’s no longer available for download from Opera’s website.

Is it possible to download Opera Crypto Browser?

Since this project is discontinued, the only way to download it is from third-party sources, but they might not be the most reliable choice.

With the lack of updates, Opera Crypto Browser is unsafe to use, so you shouldn’t use it.

What is the safest browser for crypto?

This depends on your personal preference, but we suggest using any browser from our best browsers for trading guide.

While this browser is extremely secure, it never hurts to have an extra layer of protection. Check out our picks for the best VPNs for cryptocurrency trading.

Despite the browser’s discontinuation, some of its features are available in Opera. And speaking of which, we have a guide on how to fix Opera crypto wallet connection error, so don’t miss it.

How to Import & Export Start Layout in Windows 11

On Windows 11, the Start menu was redesigned and now comes with a simplified set of apps arranged in a grid of pages, unlike its predecessor, which had folders, apps, and groups. 

You can customize the Start menu Layout and import & export it to other Windows machines per your preferences.

In this guide, we will discuss step-by-step instructions to Import-StartLayout on Windows 11 to customize the default layout.

What is Import-StartLayout?

The Import-StartLayout is a cmdlet used in Windows 10 and earlier versions to import the customized layout of the Start menu into a mounted Windows image. 

Unfortunately, the Import-StartLayout command doesn’t work for Windows 11 as it only supports XML file format, and the Export-StartLayout cmdlet on the latest version of Windows exports the JSON file.

However, you can use Mobile Device Managers, Microsoft Intune, or copy the start.bin file in a user profile to achieve the desired outcome.

Apart from the Start menu layout, many other things have changed with Windows 11, like the Start menu position; if you don’t like the newer arrangement, you can move the Start menu to the left in a few simple steps.

How do I import the start layout in Windows 11?

Before we go to the detailed steps to customize the Start menu, here are some prerequisite checks you need to perform:

  • Log in to your computer using admin privileges.
  • Keep the JSON file containing the Pinned apps and their order handy.
  • Back up important data before performing this action.
  • Must have access to Mobile Device Managers like Microsoft Intune.
  • Verify the devices on which you want to make the change are enrolled.

1. Create a profile using Microsoft Intune

  1. Sign in to the Intune admin center.
  2. Go to Devices from the left pane, select Configuration profiles, then click Create profile.Configuration profiles - Devices  Import & Export Start Layout in Windows 11
  3. For Platform, select Windows 10 and later from the drop-down list, and for Profile, choose Templates, then select Custom as the Template name.Creating profile -
  4. Choose Create.
  5. Next, under Basics, fill in the Name & Description fields and click Next. Basics, fill in Name & Description
  6. For Configuration settings, select OMA-URI and click the Add button.Click Add
  7. On the Add Row pop-up, use the following information:
    • Name – Windows 11 Start Menu Layout
    • Description – Enter the suitable description. This field is optional
    • OMA-URI: Enter – ./Vendor/MSFT/Policy/Config/Start/ConfigureStartPins
    • Data type – String
    • Value – Paste the JSON file content you created or exported
  8. Choose Save, then click Next.Fill in the info on Add Row
  9. Configure the rest of the policy to customize the profile settings; once done, click Create to save the custom configuration profile.Create

You can customize the Start menu layout by turning on or off context menus, hiding apps, etc.

2. Deploying the changes to user profiles

  1. Once the policy is created, you can deploy it anytime by double-clicking the profile to open Properties.open properties
  2. Go to Assignments, and click Edit.
  3. Add all users and groups or selected ones and click Review & save to apply.Save & Review
  4. When you click save, the policy is assigned, but the groups will receive the settings whenever the devices check in with the Intune service.

Once you deploy the policy, the existing layout of the Start menu for the default user profile will be replaced with the new one. To ensure everything is in place, you can check the registry entries of the PC.

If these steps are too tricky, you can always get to the Windows 10 classic view on your Windows 11 computer.

How do I export the start layout in Windows 11?

  1. Press Windows + E to open Windows File Explorer.
  2. Go to C, or your system drive, click New, then Folder, and name it Layout.Create new
  3. Next, press the Windows key, type powershell, and click Run as administrator.Powershell 2
  4. Now copy & paste the following command to export the Start menu layout and hit Enter: Export-StartLayout -Path "C:\Layouts\LayoutModification.json."powershell_code to export  import Start layout in Windows 11
  5. You can access the layout file by right-clicking it and selecting Visual Studio or Notepad ++.Visual Studio code to open JSON
  6. In the layout file, you can see the Pinned apps on your Windows 11 Start menu; you can add or remove the apps or links or change their order of appearance.JSON file

Importing customized Start menu layouts in Windows 11 on single or multiple machines can help you focus on what’s important, giving you a cleaner interface.

However, if you still don’t like it, you can always change it to the classic menu; go back to the simpler times and access all the modern features in a traditional setting, giving the sense of complete control.

Stuck somewhere while following the instructions? Feel free to drop in your query in the comments section below! We will be happy to help!

Xbox Series X Game Loading Issues: 20+ Tested Solutions

Xbox Series X is not without its flaws, just like any new console, but it had a surprisingly smooth launch despite reports of smoking consoles that were later proven unfounded.

Now, our readers are reporting Xbox Series X game loading issues that we have addressed here for you to enjoy games again.

Follow along as we will discuss various errors, why they happen, and how you can fix them in no time.

Why are my Xbox Series X games not loading?

Unfortunately, there are a lot of errors and problems you may face with your games on the Xbox Series X console but here we will outline the most important.

Error codeConsole issueGame/app issueSoftware issue
0x87e0000f★
0x80bd0009★
0x8027025a★
0x80010108★★
0x87de0017★
0x97e10804★
0xc0000189★
0x87e50031★
0x800708ca★
Something Went Wrong★★
0x87e50007★
0x87e10007★
0x87e1000F★
0x8b0500b6★
0x87c40000★
0x87e0012d★

If you come across any of these error codes or messages, you can check out our linked guides, but you will also find all the solutions you need in this article.

You should also perform preliminary checks How can I fix Xbox Series X installed games issues?

How can I make Xbox Series X load my games again?

1. See the known issues

It can be extremely frustrating when you have issues with your Xbox Series X|S or Xbox One console while playing games.

For example, a game may freeze, crash, or quit unexpectedly, or it may have difficulty starting.

When troubleshooting any of these issues, check to see if there are any known issues that may be interfering with your gameplay before moving on.

Alternatively, check whether any of the Xbox services are down due to an outage.

2. Restart your game

  1. Press the Xbox button on your controller to open the guide then select the specific game you want to restart then press the Menu button.
  2. Finally, select Quit in order to restart the game.

An intermittent problem such as a game freeze or startup problem can sometimes be caused by a temporary issue that can be resolved by simply closing and re-launching the game.

3. Power cycle your console

  1. Hold the Xbox button on the front of your console for at least 10 seconds in order to turn it off.
  2. Turn your console back on by holding the Xbox button on your console or controller.
  3. Now your games should be loaded and run properly. If you don’t see the green boot-up animation when the console restarts, try again by following the instructions above.

Power cycling your Xbox is a good starting point. When you perform a complete power cycle, your console will be completely rebooted. This will not remove any of your games or data from your computer.

Restarting your console using this method could also help you clear the cache on Xbox Series X; read this guide to learn more.

4. Test your network connection

  1. With the console turned on, press the Xbox button in order to open the guide.
  2. Navigate to Profile & system, followed by Settings.
  3. Now go to General and Network settings. Any outages will be shown under the Current Network Status section.
  4. Select Test network connection under the Network settings screen. In case the test is successful, your console will be connected to the Xbox service. However, if you are asked to update your console software, do select Yes.

5. Use a different profile

  1. Press the Xbox button to open the guide and select Profile & system.
  2. Then, select the Add or switch button and choose a different profile to use.
  3. When testing a game on your Xbox, if you don’t already have a different profile set up, you can either create a new one specifically for testing purposes.
  4. If the games load after you changed your profile, press the Xbox button and go to Profile & system followed by Settings.
  5. Next, go to Account and Remove accounts.
  6. Select the account that doesn’t load your games and select Remove.
  7. Press again the Xbox button and go to Profile & system followed by Add or switch and then Add new.
  8. Type in the email address and password credentials of the account you have previously removed. Follow the on-screen steps that will guide you through the account setup and then enjoy playing your games again.
  9. Check whether your games run after changing your profile. If they don’t, move on to the next solution.

6. Resync with the cloud

  1. Press the Xbox button to open the guide and select My games & apps followed by See all and Games.
  2. Select the game title and press the Menu button from your controller.
  3. Choose Manage game and add-ons then Saved data in order to press the Delete all button to remove the local save of the game.
  4. Restart your console by pressing the Xbox button and selecting Restart console. Afterward, re-sync your game to the cloud as it is automatically stored there. Do this for all the games from your Xbox Series X that aren’t running properly.

How do I fix Xbox Series X Disc Game Installations issues?

1. Clear your local saved games

  1. Eject the disc from your console and press the Xbox button to open the guide.
  2. Select Profile & system followed by Settings.
  3. Now go to System then Storage devices in order to select Clear local saved games.
  4. Select Yes to confirm the process and then try installing the game again.

The selection of this option will not result in the deletion of any games or progress that you have saved in the Xbox cloud. It will only delete data that has been saved locally on your computer.

If you’re trying to install an Xbox game from a disc and the installation process freezes at or near 0 percent, it’s possible that the console is attempting to download an update for the game while the game is still in the installation process.

2. Install the game offline

  1. Press the Xbox button to open the guide and select Profile & system followed by Settings.
  2. Navigate to General followed by Network settings and select Go offline.
  3. Open the guide again and select My games & apps followed by See all.
  4. Select Manage then Queue and choose the game title you are trying to install in order to press the Menu button to select Cancel.
  5. Eject the game disk and press the Xbox button from your controller in order to Restart your console.
  6. If the console appears to be frozen, press and hold the Xbox button on the console for approximately 10 seconds, or until the console turns off. If the console appears to be frozen again, repeat the process.
  7. After the console restarts, insert the disc and follow the on-screen steps to install the game.
  8. Press the Xbox button to navigate to Profile & system followed by Settings.
  9. Go to General then Network settings in order to select the Go online option.

How can I fix Xbox Series X game software issues?

1. Check the account you are using

  1. Sign in to your Microsoft account and go to Payment & billing followed by Order history.
  2. Click on the Details button for more information about your transactions.

For a downloaded game to work properly on your Xbox console, the account that was used to purchase the game must be the same account that is used to sign into the Xbox service.

Checking your Xbox purchase history will allow you to confirm that the game was bought using the account you’re signed in with.

Keep in mind that in order to view your purchase history, you must first log in with your Microsoft account email address and password.

If you do not have this information and need to learn how to reset your password, check the article linked.

2. Reinstall a game after a console reboot

  1. Press the Xbox button and go to My games & apps followed by See all and Games.
  2. Choose the game title you want to uninstall and press the Menu button in order to select the Uninstall and Uninstall all buttons.
  3. Press and hold the Xbox button in order to select Restart console after the game is uninstalled.
  4. Hold the Xbox button and navigate to My games & apps followed by See all, Full library, and All owned games.
  5. Select a game and then press Install all. It’s possible that the installed game data was corrupted before. By uninstalling and reinstalling it, you will solve this potential cause.

3. Check for console updates

  1. Press the Xbox button to open the guide and select Profile & system, then choose Settings.
  2. Select System, then pick Console info. You will see all the data about the console, including the OS build and Shell version.
  3. Now, go back and hit the Updates option and if there are any, install them.

It’s important to note that if your Xbox is disconnected from the Xbox service or if your console is in energy-saving power mode, it may not be updated automatically.

Check to see if the operating system on your Xbox console is up to date. In the event that your system is out of date, you should update it with the latest build.

If you encounter other problems while updating your console, check out Xbox’s support page for troubleshooting system updates errors.

4. Save the game to an external storage device

  1. Press the Xbox button, select My games & apps, then choose See all.
  2. Highlight a game, press the Menu button, then select Manage game and add-ons.
  3. Select the game box in the upper right corner of the screen, then choose Move or copy.
  4. Select the checkboxes for the items you want to move or copy, choose a drive to move or copy to, and then press Copy selected or Move selected.

If you have another storage device (such as an external hard drive or USB flash drive), we can check to see if the internal drive of your Xbox console causes the problem.

To store games on an external drive, you’ll need to meet a few requirements: a storage device with a capacity of at least 128 GB and a USB 3.0 connection.

The internal drive of your console is most likely to blame if your game issue occurs only when the game is saved to the console rather than when it is saved to an external storage device.

5. Check for a game-specific ban

For example, game developers can incorporate game-specific security into their titles and enforce their community policies to help ensure that players are treated fairly and respectfully.

Different developers have different approaches to game bans. This game-specific security is completely separate from the rest of the Xbox system.

Xbox Support is unable to reverse Microsoft-imposed game bans or respond to ban-related questions for games that are not developed or published by Microsoft.

Please check to ensure that you have not been banned from the game if you are still experiencing difficulties with the game loading.

The method by which you are notified of a game ban varies but may include: an in-game message, a connection error when you try to access the online features, or being unable to access certain game features. If this is not the case for you, proceed with the next solution.

6. Delete all saved data

Note icon NOTE
When you delete both your local and cloud saves for your game, you will lose all of your previous progress.
  1. Hold the Xbox button to open the guide and choose Profile & system.
  2. Select the Add or switch button and choose a different profile to log into.
  3. Press the Xbox button and go to My games & apps followed by See all and Games.
  4. Choose that game title you want to fix and press the Menu button.
  5. Select Manage game and add-ons then choose the Saved data option. Select your gamertag and tap on the Delete everywhere option.
  6. After you have deleted everything, try reloading the game and creating a new save to see if the issue reoccurs.

If you could load and play the game after switching your accounts, it’s possible that your local and cloud saves for your game have been corrupted.

If none of the preceding solutions were successful, and if you are willing to start over with a completely new save for this game, take this step as a last resort.

7. Reset your console

  1. Press the Xbox button and select Profile & system followed by Settings.
  2. Go to System followed by Console info and select Reset console.
  3. From the Reset your console? screen, choose Reset and keep my games & apps. If you choose this option, the operating system will be reset and all potentially corrupted data will be deleted, while your games and apps will remain intact.

Possibly, an issue with your console’s operating system (OS) prevents the game from functioning properly. You can reset your console without losing any of your games or apps.

Make certain that you don’t select Reset and delete everything. It is possible to restore the console to its factory settings, but all user data, including accounts, saved games, configurations, home Xbox associations, and all games and apps, will be deleted as a result.

Only in the most extreme of circumstances should you resort to that option in other troubleshooting situations.

After you’ve completed the process of resetting your console, try to see if your games are loaded and run successfully.

If the console reset is successful, you may be prompted to repeat some general console set-up steps before returning to the Home screen.

Xbox Series X vs Xbox Series S comparison

If we had to point out three significant differences between the consoles, they would be as follows: a 4K UHD Blu-ray drive that is capable of playing physical games and movies is included with the Xbox Series X, whereas the Xbox Series S does not have such a drive.

The Xbox Series X has a large 1TB SSD that can store, on average, around 16 games, whereas the Series S has a 512GB SSD that can only store four to five games.

And the Series X renders games in native 4K at 60 frames per second, whereas the Xbox Series S targets 1440p.

Here’s a more detailed chart of the Xbox Series X and Xbox Series S technical specifications:

Xbox Series XXbox Series S
CPU Eight-core 3.8GHz (3.6GHz with SMT) custom AMD 7nmEight-core 3.6GHz (3.4GHz with SMT) custom AMD 7nm
GPU12 teraflops 1.825GHz (locked)4 teraflops at 1.550GHz
RAM16GB GDDR610GB GDDR6
Frame rate Up to 120 fpsUp to 120 fps
ResolutionUp to 8K1440p with 4K upscaling
OpticalHD Blu-Ray disk driveNo disk drive
Storage1TB NVMe SSD512GB NVMe SSD

The rest of the time, both will have the same user interface, controller, and Xbox Velocity Architecture, allowing for features such as Quick Resume.

Both have access to the same media apps, such as Netflix, Amazon Prime Video, and Hulu and, more importantly, both can play the same video games.

That said, you could also be interested in checking out our list of video games optimized for Xbox Series X.

You can try moving some of the games to an external drive as a workaround but playing Xbox games from an external hard drive does have a few limitations, so keep them in mind.

Another game-loading error is the dreaded xbox.com/errorhelp 0x87e50031 message, but we have a dedicated guide that can help you fix it.

Was this guide useful to you? Let us know by sharing your thoughts with us in the comments section below. Thanks for reading!

2 Ways to Remove Shortcut Arrows in Windows 11

We’ve all moved important documents or apps to our desktops for quick access. While these shortcuts are a convenient way to access the programs and files you use often, they can be unsightly when accompanied by arrows.

If you like a neat and clean desktop and don’t need the visual reminder of your shortcuts, here’s a quick tutorial on how to get rid of them.

What are shortcut arrows?

Shortcut arrows are the small icons usually placed in the lower left corner of the app icon on your desktop.

Although similar to the actual files, shortcuts are not to be confused with the original files. Some key differences include:

  • You can always create a custom icon, or revert to old icons if you don’t like the new look in Windows 11.
  • The actual file remains in its location, and the name remains the same as the original file with a shortcut arrow overlay.
  • Shortcuts do not contain any data, and their space on your desktop is almost insignificant.
  • If you delete the original file, the shortcut will not work, but if you delete the shortcut, it won’t affect the original file in any way.

The arrow’s purpose is to indicate a link to the original file or folder on your computer. This can be an important source of information if you want to find out the exact location of certain files.

How can I remove the shortcut arrow from Windows 11 icons?

1. Edit the Windows Registry

  1. Back up your registry or create a restore point before making any changes.
  2. Hit the Windows + R keys to open the Run command.
  3. Type regedit in the dialog box and hit Enter to open the Registry Editor.
  4. Navigate to the following location: HKEY_LOCAL_MACHINE\SOFTWARE\Microsoft\Windows\CurrentVersion\Explorer
  5. Create a new registry key by right-clicking on Explorer, select New Key and name it as Shell Icons.
  6. Click on the newly created folder, right-click on an empty space on the right, select New String Value then name is as 29.
  7. Double-click on the newly created string value, and in the Value data field, enter the following code and hit Enter: %windir%\System32\shell32.dll,-50
  8. Close the Registry Editor and restart your PC. Your shortcut arrows should have disappeared.

2. Use a Registry hack

  1. Navigate to your browser and download the associated registry file to remove the shortcut arrows.
  2. Locate the zip file, extract the files, then copy the BlankIcon folder to the following folder. C:\Windows
  3. Go back to the extracted files and double-click on the remove_shortcut_arrow_icon.reg file and click Yes on all prompts.
  4. Restart your PC, and the shortcut arrows should have disappeared.

Since not everyone likes going through multiple steps or editing the registry at all, a registry hack will come in handy in such situations. This is one of the many automatic hacks you can apply to hide your shortcut arrows.

How can I restore the Shortcut arrow?

If you ever change your mind, you can reverse-engineer the solutions above to restore your arrows.  In editing the registry, you just have to delete the String 29 and restart your PC. For the registry hack, locate the BlankIcon folder and delete it.

In summary, desktop shortcut icons can indeed be removed. Even better, you can restore them if you want to. Just choose which aesthetic best goes with your style. For more Windows 11 customization ideas, check out our helpful guide.

And if you run into an issue where icons are not showing, visit our helpful guide to find out how to easily resolve it.

Which method do you think works best? Are there any other methods that you’d like to suggest as well? Share with us in the comments section below.