The Device Manager usually lists COM ports for desktops. However, those COM ports can sometimes disappear from the Device Manager window after users upgrade their Windows platforms.
It’s only natural to wonder where the COM ports have gone. Thus, you might need to restore missing COM ports so they can configure them via Device Manager.
Why is COM port not detected in Windows 10?
If the COM port isn’t detected, you’ll get a Unable to open serial port message on your PC. This can occur if the software can’t recognize the device you want to connect to the PC.
Other ports can also encounter issues, and users reported that USB ports aren’t working on their PC. This is most likely a driver issue, and it can be fixed with a update.
Speaking of issues, there are reports that Arduino port isn’t showing up for some users, and this is most likely caused by driver issues, so reinstall or update them.
How can I restore missing COM ports?
1. Select the Show hidden devices option
Open the Win + X menu and click the Device Manager.
Then click the View menu.
Select the Show hidden devices option.
You can also use dedicated motherboard information software. These can give you precious specs about your motherboard, CPU, BIOS, or memory. They can also detect issues such as the one at hand and help you fix them.
2. Update motherboard drivers
One way to restore missing COM ports in Device Manager is to update antiquated motherboard drivers.
You can do that either manually or using a dedicated driver updating tool, which will scan for devices and components that need driver updates.
3. Add COM ports
Open Device Manager as explained above.
Click the Action menu.
Select Add legacy hardware.
Press the Next button on that window.
Select the Install the hardware that I manually select from a list radio button.
Click the Next button to open a list of hardware to add.
Then select Ports (COM & LPT) on the list, and press the Next button.
Select the manufacturer for the ports or the Standard port types option, and click the Next button.
Press the Finish button.
So those are some of the potential fixes that should restore COM ports in Device Manager. Afterward, you can configure the ports as required.
If you used another method to fix this problem, share it with the community using the comments section below.
Learn how to master your Windows OS from our extensive tutorials in the Windows 10 Hub.
GameGuard or GG as it is commonly known as an anti-cheating software installed alongside multiplayer online roleplaying games (MMORPGs) like 9Dragons, Cabal Online, and others, to block malicious apps and other common cheating methods.
GG hides the game app process while monitoring the memory range, and terminating apps defined by the vendor of the games as well as INCA Internet cheats, plus it blocks some calls to DirectX functions, Windows APIs and makes automatic updates with every new threat that arises.
This tool works like a rootkit so it may have some unwanted side effects, like blocking hardware installation and activation of peripherals while the programs are running. It also monitors your computer’s memory, so it will affect performance when the game that is being protected loads more resources at the same time.
Some users of GameGuard have reported that they’ve experienced issues on their computers, and we’ll look at some of the common Windows 10 GameGuard error types, and how to fix them.
GameGuard is a delicate tool, so one of the things you can do to resolve the Windows 10 GameGuard error includes ensuring that GameGuard is not being interrupted by your antivirus.
Most Windows 10 GameGuard error problems are caused by the large use of proxy servers such as restricted internet connections due to security software like firewalls or antivirus, which makes GameGuard not update.
In this case, add GameGuard and PSO2 to the real-time protection whitelist in the control panel of your antivirus. Multiple antivirus software on your computer may be one of the causes of the problem.
Also, ensure your operating system is up to date. You can also run a system file checker scan to check the operating system files for corruption and attempts to repair them, plus check your hard drive for consistency issues.
If a proxy server is on, launch your browser, and disable or turn it off by doing the following:
Open Internet Explorer and clickTools
Select Internet Options
Click Connections tab
Select LAN settings
Uncheck the option: Use a proxy server for your LAN
You can also fix Windows 10 GameGuard errors by modifying the hosts’ file, which can change an internet address to a different one, due to modifications by spyware or viruses. Here’s how to fix it:
Open the hosts file from File Explorer in the System32 folder
Select Notepad in the Open With window
Delete all game and GameGuard related lines (lines without #) and save them
2. Use a reliable antivirus
For each computer, we recommend having good protection software installed. You can’t always depend on common sense only to evade malware. Get a good antivirus solution and keep it updated.
As far as reliability goes, we highly recommend TotalAV. This anti-malware guarding software can offer anti-phishing tools and no slowdowns on your PC while you’re playing or watching anything.
Moreover, this multi-layered antivirus can protect the operating system from spyware or ransomware attacks, and without interfering with GameGuard software or other applications on your PC.
TotalAV
This lightweight antivirus tool is perfectly suited for malware without compromising GameGuard software.
In order to do this, you need to delete the GameGuard folder in your blade and soul folder, then run the repair from the launcher, and start the game. It should download a new version of GameGuard. This also works for the 4049 Windows 10 GameGuard error.
4. Common Windows 10 GameGuard error types and their fixes
Error 100, it means your computer has a virus infection. Update your antivirus to the latest and then scan your computer. If the error persists, it may be a virus that cannot be easily detected.
Error 110 indicates that NProtect has been loaded once but still resides in your computer’s memory. Open Task Manager from CTRL+ALT+DELETE, select Processes, and end process for u_skidprogram and GameMon.des. If this doesn’t help, restart your computer.
Error 112: to resolve this error, ensure your computer is virus free and you have enough memory available. Update your antivirus, and ensure you have few programs open at the same time. Disable any security software, temporarily, as these may prevent GameGuard from executing, then scan your computer with an updated antivirus to remove any viruses that are affecting GameGuard, and check your computer for minimum system requirements.
Error 114 is very common, but there’s no specific solution to this error. However, it generally indicates that some software on your computer is hindering NProtect from loading. Check that you have admin access to your computer and you have shut down any unnecessary software. You can also end processes or system services that aren’t necessary, and temporarily disable your security software which may prevent GameGuard from executing. Restart your computer and see if the Windows 10 GameGuard error 114 goes away.
Error 115: This indicates that the game has executed multiple times, or that GameGuard is running already. Close the game and reboot your PC.
Error 120/124/141/142: this Windows 10 GameGuard error indicates that NProtect is either incomplete or damaged. In this case, delete the GameGuard folder and repatch it, or try to click on the Check Files button.
Error 150/153: This means the setup file for GameGuard either doesn’t exist, or has been corrupted. Delete the GameGuard folder and restart your computer, then download GameGuard all over again. You can also download the setup file for GameGuard and install the GameGuard folder.
Error 155: this error indicates your computer has a severe virus or your OS/Hard disk are corrupted. Check with Microsoft support to help restore the file in your specific operating system version. You can also check for viruses and reinstall your browser or rsabase.dll in the system folder based on the version of Internet Explorer you use.
Error 157: if you get this Windows 10 GameGuard error, the tool may still be running, but close 9Dragons if it is open, then wait for about one to two minutes and restart the game. If it persists, restart your computer.
Error 170: this is caused by a problem with GameGuard INI, so the program doesn’t launch. Delete the GameGuard folder and re-run the game again to download the NProtect files. You can also delete the folder, restart your computer and let the launcher download the GameGuard folder again, or reinstall the setup file and try running the game again.
Error 174: this is also called the completer skill bug, and it is caused by overlapping computer and other skills and can cause frequent DC’s leading to a permanent ban as it is considered speedhacking. Reinstall GameGuard and ensure the client is functional to fix this Windows 10 GameGuard error.
Error 200: this indicates that an illegal program has been detected. Close all unnecessary programs and try again (check for third party tool programs as well). Launch Task Manager and terminate any illegal or unnecessary programs and processes. Scan your PC with an updated virus scanner to remove viruses that may be in the NProtect blacklist. Run Windows in Diagnostic startup by right clicking Start>Run>type msconfig>OK then under General, select Diagnostic startup and reboot your PC
Error 230: this is an initialization error. Update DirectX and your graphics card drivers. If this doesn’t help, delete the GameGuard folder and restart the game to reinstall and update GameGuard.
Error 340: this indicates that NProtect patches failed to download either due to network issues or an overly restrictive firewall leading to failed downloads. Check your firewall or antivirus settings and let GameGuard patch its files. if the network is not stable currently, the internet or firewall settings might be having some issues so you need to manually adjust them. If GameGuard still doesn’t update, find the hosts files from C:WindowsSystem32drivers and right click on the host file, select properties, then ensure the read only option is unchecked. Open the hosts file with Notepad, and delete all lines and text under …. # …….. 127.0.0.1 …….. localhost. Close the hosts file, accept changes, and restart your computer. Ensure you have enough bandwidth and no upload/download is crowding your internet connection. If using WiFi, ensure it is stable and no one else is using it, then close any other apps besides 9Dragons.
Error 350: GameGuard has been canceled by the computer’s user, so restart and do not cancel GameGuard option. You can also try connecting again or confirm if the network status by pressing retry button.
Error 360: this means the NProtect patch process has failed due to corrupted files or an overly restrictive firewall. To fix this Windows 10 GameGuard error, allow NProtect access through your firewall, and if it persists, delete GameGuard directory. If the update isn’t successful or GameGuard file is corrupted, try again later or check firewall settings. Also scan GameGuard folder from the game directory and download it using the manual link, install and try again.
Error 361: this means GameGuard did not install well, probably it was canceled or something happened. You can download GameGuard again, or go to Internet>Settings>Network>Check security program is working or not. Also check if you need authorization to use the internet before connecting to it.
Error 380: this indicates the problem is with your internet connection, and security software. You can either wait and try later, or verify your firewall settings. If you fail to connect to GameGuard update server, download GameGuard manually and install it again.
Error 405: this relates to invalid timestamp or the timestamp is out of the acceptable boundaries, encountered when entering dungeons so it is a failsafe to stop bots from entering dungeons using fake or forged packets. You need to trace all cases to either multiple people in a team trying to enter a dungeon at the same time so each will get the error as the team is DC, or, the people’s connection is unstable due to excessive uploading/downloading on the network, or inefficient networking hardware (router/WiFi cards/WiFi Ariels). Resolve it by checking the connection status and identify the source of the weak connection, then remove the problem.
Error 421: this is due to a GameGuard error, so delete the GameGuard folder and reinstall it or let the launcher download a fresh copy, or replace with the one that works (from another person)
Error 500: indicates that there’s a program that conflicts with GameGuard. Check Task Manager for such a program and close it by clicking End Process.
Error 610/620/102/1013/1014: this indicates that GameGuard files are not found or have been changed. Delete the GameGuard folder and try again.
Error 905/1015: This is related to animations and GameGuard too. Reinstalling GameGuard and ensuring the client is functional will resolve this Windows 10 GameGuard error.
Error ____ (no numbers): indicates that your computer is lagging
5.Other errors
If you get an error such as ‘Cannot display video mode’, reinstall the game or reinstall the graphics card. If you keep getting DC’ed a few minutes into the game, go to C:ProgramFilesGamersFirst9dragonsNDLAUNCHERprogram. Right-click and select Properties>Compatibility>Change to other lower ones.
Did any of these solutions help resolve the Windows 10 GameGuard error for you? let us know in the comments section below.
This article is part of the Gaming series where we write about the latest games news but also troubleshoot any errors or glitches they have.
You can scroll through our multiplayer section on the site to read news about new game launches and other tools. Or search straight for your favorite game.
Nowadays, carrying your laptop wherever you go is practically mandatory, whether you use it for work or entertainment.
But it becomes a matter of security when you connect to the Internet, especially over public Wi-Fi hotspots.
If you’re a privacy-concerned user with a Toshiba notebook, you can use various security solutions, such as a trustworthy antimalware tool. But you should get a VPN, too.
A VPN works differently than a proxy server because it’s designed to encrypt every data packet you send and receive over the Internet.
If you’re wondering how this affects you, remember that anyone with a few computer skills can pull off a man-in-the-middle attack to acquire your Internet data.
That means someone else could steal your email login info or online banking details, to name a couple of examples. But a VPN keeps you safe because it uses encryption to defend your data from cybercriminals.
Last but not least, the VPN solution, ExpressVPN, provides strong privacy and security for your Toshiba PC.
By choosing this VPN, you highly contribute to your online anonymity, which can solve privacy issues when you access various websites or applications.
You also have stronger encryption for your network connection, which means you can be relaxed regarding cookies or tracking ads present everywhere on the web.
There are also remarkably fast servers in 94 countries that confirm the security of every user, plus unrestricted content for blocked streaming platforms or social apps anywhere you are.
What else you should know aboutExpressVPN:
160 servers in 94 different regions
Integrated platforms for many devices
Unrestricted content from censored websites
Network lock kill switch
Split tunneling functionality
Private DNS on each server
No connections log
ExpressVPN
Increase the security of your Toshiba device with this advanced VPN solution.
Private Internet Access deservingly takes the first spot on the list of top VPNs for your Toshiba notebook.
A solid infrastructure, including stable VPN connections, a large network of servers, and advanced settings, sustains PIA.
You can use PIA to connect to more than 3,300 VPN servers spread across 48 different countries. It can avoid geoblocks and unlock Netflix US even if you’re outside of the United States.
At the same time, PIA uses advanced techniques to improve your security and prepare your laptop for gaming, such as a kill switch, port forwarding, and split tunneling.
What else you should know about PIA:
Private DNS servers
10 connections
No logs
24/7 live chat support
30-day money-back guarantee (no free trial)
Private Internet Access
Take control of your laptop’s online security and privacy using PIA.
NordVPN is one of the most secure VPNs for your Toshiba laptop.
It contains many advanced safety options that other similar services lack, such as obfuscated servers and integration with the Tor anonymous network.
The VPN service includes an emergency kill switch, an ad, and a malware blocker named CyberSec.
It encrypts your data traffic with OpenVPN and has a network of more than 5,100 VPN servers in 59 countries.
Although it doesn’t have native support for split tunneling, you can achieve this by independently controlling its browser extension from the desktop client.
What else you should know about NordVPN:
Private and custom DNS servers
6 connections
No logs
24/7 live chat support
30-day money-back guarantee (no free trial)
NordVPN
Take your Toshiba notebook’s security to the next level by downloading and installing this VPN.
If you have a limited budget and a large family, you can use Surfshark.
It has affordable subscription plans and can protect any devices using the same account. It’s the top budget-friendly VPN for your Toshiba laptop.
Made by Surfshark LTD, this tool has the fewest VPN servers on this list: over 1,700 in more than 63 countries.
But it makes up for it by implementing a few advanced security options, such as obfuscated servers.
Plus, if you want to maximize your security and fix network congestion, you can stay connected to two VPN servers at the same time by taking advantage of Surfshark’s multi-hop VPN feature.
It also supports split-tunneling mode.
What else you should know about Surfshark:
Exclusive DNS on each VPN server
Unlimited connections
No logs
24/7 live chat and email support
30-day money-back guarantee (no free trial)
Surfshark
Install this VPN on your Toshiba notebook to protect all household devices using only one account.
CyberGhost VPN is the best free VPN for your Toshiba laptop.
We advise against trusting a free VPN with your data because it might be compromised. However, CyberGhost VPN doesn’t fall into this category because it’s a premium service that offers a limited free trial.
This VPN service has the largest network of VPN servers on this list (over 6,500 in 89 countries), which is ideal for exploring IP addresses from countries worldwide. You can also connect to the nearest VPN server for the best speed.
CyberGhost VPN is wrapped in a good-looking interface with intuitive options, where you can easily access the VPN servers dedicated to streaming and torrenting. It has a split-tunneling mode and a kill switch.
What else you should know about CyberGhost VPN:
Exclusive DNS servers and DNS leak protection
7 connections
No logs
Up to 45-day money-back guarantee
1-day free trial for Windows
7-day free trial for Android and iOS
CyberGhost VPN
Use this free VPN on your Toshiba laptop to access an impressive network of VPN servers.
To sum up, you can safely install one of the VPN desktop clients from above on your Toshiba laptop if you want to get the best out of your Internet connection, including better security and entertainment.
If you can’t make up your mind about which virtual private network service to use, we suggest opting for Private Internet Access since it’s the best overall VPN for Toshiba notebooks.
And you are in the right place as well if you are also looking for a VPN with Pittsburgh servers. Take a closer look at our dedicated guide and avoid any TV restrictions.
Social media started out as a new way for people to connect and share their life experiences.
In time, it has evolved into big platforms that offer a way to consume news (Twitter), create fan communities (Facebook), search for a job (LinkedIn), create and promote your own brand (Instagram), and so much more.
This means that keeping your accounts secure is more important than ever.
Whether you are a person or a business, there are tools you can use to lower the risks of damaging your own image or losing access to your social media accounts.
From free tools to premium solutions that cost a pretty penny, here’s how to choose the right one for your needs.
How can I protect your privacy on social media? [Best tools]
1. Use a password management tool
You don’t want a cybercriminal to take over your online identity and steal all of your personal information. However, social media is a vulnerability through which hackers may gain access to all of this.
There are several tools out there that can help keep your online accounts safe, and the one that got our attention, particularly in this case is RoboForm.
Make your passwords unique and tough to guess, and save them securely with the RoboForm application.
Thus, benefit from this free trial service to encrypt all passwords online and also consider the premium plans to sync up all your devices.
Furthermore, with this trustworthy password manager for social media accounts, you won’t have to remember where you placed your passwords because everything is in one place, safe on the cloud.
Password managers frequently provide supplementary security measures in addition to an encrypted vault. For example, RoboForm allows you to autofill and autosave passwords while you’re browsing the internet.
RoboForm
Have social media passwords encrypted and hidden with this full-featured manager.
The most important aspect of the security of an online account is the login password. Many people choose a very weak password, so it’s best to begin there. A good rule of thumb is to make it as long as possible – aim for at least 12 characters.
Most social networks will ask you to use at least one upper case letter, one number, and one special character, but in reality, it’s just better to aim for a lengthy password that you can easily remember.
You can find tools that can help you generate secure passwords, but you’ll have to keep those safe.
Password Managers are growing in popularity, and they provide a lot of convenience and security in both free and paid versions.
Notable examples are LastPass, Enpass, Dashlane, RoboForm, and 1Password, but there’s no shortage of options out there.
A password manager will also do the remembering for you. You will only have to use a master password, which is the key to a vault where all the login details are stored encrypted.
Paid versions analyze the strength of your passwords, and notify you to change them if a service has been hacked.
Lastly, make sure to use multi-factor authentication whenever possible, as it’s free and easy to set up using a mobile phone and QR codes.
Popular tools like Google Authenticator, LastPass Authenticator, and Microsoft Authenticator will provide you with a one-time security code every time you log in on a new device, ensuring you’re the real owner of that account.
3. Use an antivirus to avoid scams and phishing
If you’re not already using an antivirus on your Windows PC, we strongly recommend you do. Dedicated tools are more robust and capable than the built-in Windows Defender.
In short, online threats have only grown with the rise of social media. In turn, the antivirus has evolved to match the increased complexities of online security.
Good antiviruses with high detection rates protect your computer in real-time. They have built-in vulnerabilities detectors that always run in the background.
They can send quick notifications whenever they detect suspicious activity such as an unsafe Wi-Fi network that may monitor your online endeavors.
Modern-day antiviruses are generally light and configured to be as non-intrusive as possible, whilst still providing top-level security.
Many of them can also detect whether there are any problems in your system such as missing security updates for your OS and software.
This way, you can rest assured that rogue software will not take control of your computer and use the social media accounts that you are connected to in order to spread malware to your friends.
4. Taking it to the next level with cloud protection
Perhaps you are a parent looking to keep your children safe online. You may be interested in filtering the content they find on social media and protecting them from cyber-bullying and stalking.
There are many options available, and choosing between them can get a little confusing. But let’s talk about what might be the best – even if it’s not exactly the cheapest.
Net Nanny is a great internet filtering tool, which greatly reduces profanity and blocks adult sites. It also has a social component, designed specifically to monitor children’s activity on popular sites.
This includes Facebook, Twitter, and Tumblr, among others. From instant messaging to image and video posting, Net Nanny Social records everything – even what friends are doing.
Parents have access to a dashboard where they can see an overview of their kids’ activities. This includes the current threat level for stalking and bullying.
You’ll get notified by SMS only when action is necessary, and there’s no need for any software installation. This is a cloud-based service, which means you can set up and do everything from the comfort of your browser.
5. Cloud protection is a must for business owners
If you own a business, managing your always-on social media presence is very important.
Protecting your brand image isn’t just about what happens on your official pages, but also about making sure you track what your employees are doing on their pages.
A simple bad tweet can do irreparable damage, but there are ways to reduce these risks to a minimum.
One good example is Hootsuite, which is great even for professionals who work alone.
This cloud service allows you to do monitoring, analytics, engagement, and security in one package. Security is actually provided via a platform called Zerofox, which integrates seamlessly with your Hootsuite stream.
It works great with content curation software. Using these tools will help you set an approval system for social posts. This will give you control of the level of access for each user, and flag sensitive content.
On top of that, you get automated protection against hijacking. Nothing is worse than brand impersonation or having an executive lose control of their social media account.
A good rule of thumb is that security is only as good as the weakest link. Attackers have devised ways to piece together the information they need by targeted phishing, which can translate into data leaks.
In today’s fast-moving world, using a service like Hootsuite is just as important as having a contingency plan.
These are our top suggestions when it comes to social-media security tools. We hope we helped you establish a good system. If you have any questions or suggestions, feel free to use the comment section below.
If you want more suggestions, the articles in the Software Hub will help you stay ahead in this game of protecting your personal information as much as possible.
If you are interested in more advanced online security and privacy, check out the VPN Hub on our website.
Whether you work from home or often travel to various parts of the world for business, you need a VPN for your Acer laptop to keep your work documents safe.
A virtual private network solution is ideal for Internet-enabled Acer notebooks.
You can use it to protect your device from cyber-criminals when connecting to public Wi-Fi in airports, restaurants, pubs, hotels, etc.
But a VPN also adds entertainment value to your laptop. For example, you can watch your Netflix library anywhere in the world while traveling.
Whatever the case, if you wish to fit your Acer laptop with a reliable VPN, here are the 5 best options.
By the way, if you want to replace your old notebook, check out the best Acer laptops for business and gaming.
ExpressVPN markets itself as a premium option and costs accordingly. This implies that it is more expensive than most of its competitors, but the features and services it provides are well worth the money.
When you have an ongoing need to travel with your Acer laptop, for personal or business purposes, it may be risky to encounter dodgy hackers whenever you connect to a public WiFi network.
ExpressVPN has the Traveler VPN feature to keep you connected with friends and family, can let you access your social networking accounts, unblocks your favorite entertainment sites, and secures your online business.
Why chose ExpressVPN as your security assistant:
3000+ servers in 160 different locations, 94 countries
Military-grade 256-bit AES encryption, no leaks, split tunneling
24/7 user support
30-days money-back guarantee
Best for working abroad, or doing online business
ExpressVPN
Travel, work, shop safely with military-grade encryption and 24/7 user support with the fastest VPN on the market!
Private Internet Access (PIA) is the best overall VPN for your Acer notebook, thanks to its VPN connection speed, security features, number of simultaneous connections, and cost.
PIA uses OpenVPN to encrypt your data without sacrificing the connection speed. It has an integrated kill switch, port forwarding, split tunneling, and private DNS servers to protect your DNS requests.
You can even disable VPN encryption if you need more speed, although this shouldn’t be necessary. The virtual private network solution allows 10 simultaneous device connections and provides 24/7 live chat support.
What else you should know about PIA:
+3,300 VPN servers in 48 countries
No logs or leaks
Compatible with all major platforms
30-day money-back guarantee (no free trial)
Private Internet Access
Protect your Acer laptop from the dangers of the Internet using this dependable VPN.
NordVPN is the most secure VPN for your Acer laptop, thanks to its advanced safety options that can be easily toggled.
It has VPN servers organized in various groups, such as dedicated VPNs and Onion-over-Tor VPNs, if you want to maximize your security by joining the Tor anonymous network while staying connected to the VPN.
What’s more, NordVPN has an obfuscation mode in case your VPN gets blocked. If the remote host rejects your regular VPN connection, you just have to connect to an obfuscated VPN server to make it look like typical HTTPS traffic.
What else you should know about NordVPN:
+5,100 VPN servers in 59 countries
No logs or leaks
Compatible with all major operating systems
30-day money-back guarantee (no free trial)
NordVPN
Make your journeys more secure by installing this reliable VPN on your Acer laptop.
Developed by Surfshark LTD, Surfshark is a budget-friendly VPN solution for your Acer notebook.
What’s more, you can use it to protect the devices of your entire family by installing the VPN client, since one Surfshark account allows any number of simultaneous connections.
But its functionality doesn’t end there. Surfshark also boasts some top-notch security features that other VPNs envy, including an ad and malware blocker, split-tunneling mode, and obfuscated servers.
Plus, if you want to change your GPS location with a VPN, Surfshark is the only app we know that does that by default. Although it has the lowest count of VPN servers here, it protects each of them with private DNS.
What else you should know about Surfshark:
+1,700 VPN servers in +63 countries
No logs or leaks
Compatible with all major operating systems
30-day money-back guarantee
7-day free trial for iOS and Android
Surfshark
Protect all your household devices using a single and affordable VPN account.
CyberGhost VPN is the best free VPN for your Acer notebook, thanks to the fact that it’s a premium service that offers a free trial (no credit card required).
CyberGhost VPN has the biggest network of VPN servers on this list. It can be used to circumvent geo-restrictions and unlock all popular Netflix catalogs, including Netflix US, UK, Australia, Germany, and Canada.
It supports exclusive DNS servers, trusted Wi-Fi networks, a kill switch, an ad and malware blocker, OpenVPN, and up to 7 device connections at the same time.
Vypr VPN is one of the fastest VPNs for streaming on PC and Mac. You can use it to secure all incoming and outgoing Internet connections, making sure that you’re safe from hackers.
The VPN service is produced by Golden Frog, a renowned security company. You can easily set it up on your Acer notebook to shield your router from cyber-criminals, as well as use it in your travels to unblock streaming services like Netflix.
Vypr VPN supports OpenVPN. It can be installed on 5 devices to protect all of them using the same account. However, it’s possible to set it up on your router to share your VPN account with all connected devices (it doesn’t matter how many they are).
What else you should know about Vypr VPN:
DNS protection
Secure kill switch in case the connection drops
Public Wi-Fi protection
Access to Chameleon protocol
700+ servers nd 30, 000 IP addresses
No logs policy
Vypr VPN
Connect your Acer laptop to a Vypr server and get complete online privacy.
To sum up, it’s not mandatory to download and install a VPN on your Acer laptop. But it’s highly recommended to increase its security level and protect your online identity this way, especially if you’re always on the move.
Granted, you can set up a VPN between two PCs to connect to the workplace and use your company’s internal resources as if you were on the same LAN.
But a VPN comes with numerous other benefits, including anti-hacker and anti-DDoS protection.
If you can’t decide between the 5 VPNs, we suggest opting for Private Internet Access since it’s the best overall. And local TV content availability can be one of the reasons you need something as specific as Pennsylvania VPN servers. In such a case, we’ve got you covered as well.
One of the most popular games in the past few years was Minecraft, but many users reported Minecraft black screen issues that prevent them from starting the game.
This can be a big problem for gamers, so today we’re going to show you how to fix this issue.
There are many issues that can occur with Minecraft, and speaking of issues, here are some common problems that users reported:
Minecraft launcher black screen Windows 10 – Sometimes problems with Minecraft can be caused by your antivirus or drivers. To fix the issue, we advise you to temporarily disable your antivirus and make sure that your graphics card drivers are up to date.
Minecraft Windows 10 edition black screen – Problems with the Windows 10 edition of Minecraft can occur due to your graphics card settings, so be sure to disable 3D Display Mode and the Stereoscopic 3D feature.
Minecraft black screen on startup, after launch, crash – These are some common problems that can occur with Minecraft, but you should be able to fix most of them by using one of our solutions.
Minecraft black screen when alt tabbing – This can be caused by an incompatible or incorrectly set resolution from its settings.
How do I fix Minecraft black screen issues on Windows 10?
1. Check your antivirus
If you’re unable to start Minecraft, the first thing that you need to check is your antivirus software.
Many third-party antivirus tools tend to interfere with certain applications, and sometimes your antivirus can prevent you from running Minecraft and other games.
If you’re getting a black screen while trying to run Minecraft, be sure to check if your antivirus is blocking Minecraft. You can also add Minecraft to the list of exclusions in your antivirus and check if that helps.
If Minecraft isn’t blocked, try disabling certain antivirus features or your antivirus altogether. Sometimes this might not be enough, so your best choice would be to uninstall the third-party antivirus.
Once you remove the antivirus, try running Minecraft again.
If removing the antivirus solves the problem, you might want to consider switching to a different antivirus.
If you’re a gamer, and you want to be sure that your antivirus doesn’t interfere with your gaming sessions, you might want to try out antivirus software with gaming modes.
2. Reinstall your graphics card drivers
Open Device Manager by pressing Windows Key + X and choosing Device Manager from the list.
Locate your graphics card driver, right-click it and choose Uninstall device.
If available, check Remove driver software for this device Now click on Uninstall.
After the driver is removed, click Scan for hardware changes icon.
Of course, you can use Device Manager or you can even look for the driver by visiting your graphics card manufacturer’s website and downloading the latest drivers for your model.
However, the easiest way to update your driver is by using a third-party tool such as Outbyte Driver Updater that will work through the whole process automatically.
You only need to download and install Outbyte Driver Updater, then open it. You don’t have to click on anything because the software will automatically run a driver scan on your PC.
After a short while, there is only one step left, deciding whether to install the drivers separately or all together.
For the first option, you have to check the boxes on the left of the drivers and then click the update boxes from their right. For the second, you just click on the Select All box.
Outbyte Driver Updater
Reinstalling your graphics card driver is a breeze with Outbyte Driver Updater because the whole process is automatic.
If you’re using a Java version of Minecraft, perhaps the black screen is caused by your file archiver software.
In order to run the Java version of the game, your PC needs to be able to unzip the Java files, and if that doesn’t happen, you might have to switch to a different file archiver software.
According to users, they reported that the problem was fixed after switching to WinZipsoftware, so you should definitely try it out.
The procedure is as easy as right-clicking the Java files and selecting the extract option.
After solving the Minecraft problem you will still have an excellent compression tool that also connects to Dropbox orGoogle Drive.
4. Disable the 3D Display Mode feature
Open the Settings app. The fastest way to do that is to use the Windows Key + I shortcut.
When the Settings app opens, navigate to the System section.
In the right pane scroll down and select the Advanced display settings.
Locate 3D Display Mode option and disable it.
Note: Bear in mind that not all PCs support this feature, so if it’s not available on your PC, you should try a different solution.
5. Disable the SLI mode
According to users, you can experience Minecraft black screen issues if you’re using two graphics cards in SLI mode. In case you don’t know, some users tend to use two graphics cards for gaming in order to get better performance.
Although this feature can be useful, sometimes it can lead to various issues, such as this one. To fix the problem, users are suggesting disabling the SLI feature and the problems with Minecraft should be resolved.
If you’re having issues with Minecraft black screen on your PC, the problem might be the Stereoscopic 3D feature.
Some graphics cards support this feature, and if you have it enabled, it might give you problems while trying to run certain games.
To fix the issue, it’s advised that you check your graphics card control panels software, such as the Nvidia Control Panel or Catalyst Control Center, and disable this feature.
Once you find and disable the Stereoscopic 3D feature on your PC, start Minecraft again and check if the issue is still there.
7. Run the game in compatibility mode
Locate the Minecraft.exe file, right-click it and choose Properties from the menu.
Navigate to the Compatibility tab and check Run this program in compatibility mode for option.
Select the desired version of Windows and click Apply and OK to save changes.
Note: Bear in mind that you might have to experience different settings until you manage to find the one that works for you.
It’s also worth mentioning that this solution doesn’t work for the UWP version of Minecraft, so if you’ve downloaded your copy from the Microsoft Store, this solution won’t work for you.
8. Use the Ctrl + Alt + Del shortcut
Start the game normally.
When the black screen appears, press the Ctrl + Alt + Del keys.
Click Cancel to return back to Windows.
The black screen should be gone and you’ll be able to run the game again without any issues. Bear in mind that this is just a workaround, so if this solution works for you, you’ll have to repeat it every time this problem appears.
9. Run the game with integrated GPU
If your PC or laptop has both integrated and dedicated graphics, the problem can occur if you’re using the dedicated graphics to run Minecraft.
The dedicated graphics almost always offer better performance, but sometimes it can cause issues with games.
If you’re having Minecraft black screen problems on your PC, perhaps you should try running the game using the built-in graphics. To do that, just right-click the shortcut and choose the Run with graphics processor option.
If this method works, you might want to change your graphics card settings and set your built-in graphics as the default GPU for Minecraft.
Bear in mind that your integrated graphics don’t have the same performance as your dedicated one, so use this solution as a temporary workaround.
Of course, the list is not exhausting and users reported many other related issues including Minecraft black screen when joining the server, blank screens, and of course, variations across various Windows versions including Windows 11.
But one particular problem caught our attention due to its apparently harmless nature (that can easily turn into a nightmare, though). We’re talking about the Minecraft black screen when Alt-tabbing/fullscreen.
My Minecraft goes black screen when alt tabbing:
In fact, users mentioned that this happens across all versions of Minecraft, sometimes when using the Alt + Tab shortcut, other times when exiting the game and there’s nothing they can do about it.
The interesting part is that none of the solutions mentioned above seem to work here. But that does not mean it’s a lost cause.
Here’s what we suggest:
Make sure your display resolution as well refresh rate match the in-game settings
Disable HDR and check if that solves the issue
Run the game in full-screen Windowed mode (which is different from full screen)
Minecraft black screen issues can be quite problematic, but in most cases, these problems are caused by your settings or drivers, and we hope that you managed to solve them using one of our solutions.
Microsoft’s Pluton chip promises a lot of advancements for keeping your device safe from the latest security threats, but not every PC maker is fully on board with the technology just yet. As first reported by The Register, Dell says that it isn’t fully ready to include the Pluton chip in “most” commercial PCs.
More specifically, in a statement to The Register, the laptop maker said that “Pluton does not align with Dell’s approach to hardware security and our most secure commercial PC requirements.” The reason why? It has to do with the fact that Intel isn’t using Pluton technology in 12th generation processors, instead opting for the Platform Trust Technology. Dell’s commercial PCs mainly have these types of processors inside, which also use Platform Trust Technology to meet FIPS 140-2 standards.
But all hope is not lost. Another statement from Dell indicates that the company will “continue to evaluate” Pluton ” to see how it compares against existing TPM implementations in the future.” This builds on Dell’s own software and hardware technology, which can help defend against cyber attacks. Microsoft also offered this statement to the publication on the matter.
Microsoft and our partners are giving customers the flexibility and choice to configure Pluton to meet their specific needs. Microsoft is committed to working with partners and customers in the coming months and years to continue to bolster security with Pluton.
Dell isn’t alone in this decision though. Lenovo’s latest Intel-powered ThinkPads do not support Pluton at launch, yet AMD Ryzen Powered ThinkPads do, even though it is disabled by default. The ThinkPad X13s, meanwhile, does have the Microsoft Pluton chip inside, as we detailed just a few weeks ago.
Some Oculus Rift users have posted on the NVIDIA forum about an Oculus has detected a problem with graphics drivers error.
When that issue arises, the Oculus Rift headset doesn’t turn on or display anything for users. That issue typically arises after updating Oculus software.
What can I do if Oculus has detected a hardware issue?
There are many problems that can occur with Oculus, and according to users Oculus not working on Windows 11 for many users. This is mostly a driver issue and it can be easily fixed.
If you have this or any other issue, we suggest reading our VR problems on Windows guide to see how to properly deal with those issues.
How can I fix the Oculus problem with the graphics driver error?
1. Use Outbyte Driver Updater
First, try updating your graphics card driver with driver updater software, such as Outbyte Driver Updater. Outbyte Driver Updater Pro will download and automatically install the latest drivers for your PC hardware.
Outbyte Driver Updater has a big driver database that includes more than 18 million drivers. Furthermore, this software also scans very quickly so that you don’t have to wait about much to see what drivers need updating.
Other useful Outbyte Driver Updater features
Enables users to schedule driver scans
Includes a download manager that displays download progress
Live chat support provided for Outbyte Driver Updater
Includes a driver backup utility
Outbyte Driver Updater
Fix any issues with Oculus by quickly installing the missing drivers today!
Dropbox is one of the most established and dependable cloud storage platforms available. Since its inception in 2008, it has provided one of the most user-friendly graphical user interfaces. Thus, we will show you today what to do if the Dropbox installer failed to start.
Cloud storage has fully eliminated the need to carry about actual portable storage devices as a result of the rising prevalence of the internet and our need for convenience.
The app can work wonders for you if you are someone who frequently sends and receives data to people in your immediate vicinity or if you do not always have access to your personal computer while traveling.
Follow along as we will show you how to troubleshoot the Dropbox installer failed to start error, right after we see in more detail what Dropbox’s main functionality is. Keep up with us!
What does Dropbox do?
In addition to being a file-hosting service, Dropbox is sometimes referred to be a cloud storage service. Despite the fact that it is one of the most established and widely used cloud storage systems available today, there are numerous competitors such as Microsoft OneDrive, Box, Sync, and Google Drive.
Whenever you sign up for Dropbox, you will be given a set amount of storage space on an online server, which is referred to as the cloud.
Following the installation of the app on your computer, or mobile device, any files that you keep in your Dropbox locally will be copied to the server as well as the server’s backup. If you make modifications to these files in a single location, the changes are automatically replicated throughout the system.
By synchronizing your Dropbox files both locally and online, you will be able to access them from any location and share them with others with greater ease and accuracy than before. But now, let’s jump into the methods to fix the Dropbox installer failed to start.
How can I fix Dropbox installer failed to start?
1. Run a quick SFC scan
Right-click on the Windows/Start icon from your Taskbar and choose Windows Terminal (Admin).
Now type or copy-paste the following command and let it run: sfc /scannow
2. Run DISM
If you exited the Windows Terminal as an admin, you should access it again as we have shown above.
Now, type or paste inside it the following commands, pressing Enter after each one of them: Dism /Online /Cleanup-Image /ScanHealth Dism /Online /Cleanup-Image /CheckHealth
The DISM tool will report whether the picture is healthy, repairable, or non-repairable based on the results of the analysis. Assuming that the image can be repaired, type or paste in the following command: Dism /Online /Cleanup-Image /RestoreHealth
That’s it! The Dropbox failed to install error should now be gone. However, we also recommend that you try out alternative software applications that have the same or similar functionality as Dropbox. One of them is Sync which we use on a daily basis and support in you doing the same.
What are the advantages of using Dropbox?
When you sign up for a Dropbox account, you’ll automatically receive 2 gigabytes (GB) of storage space for your photos and videos.
There are no upfront fees or additional charges once you begin using the service, and there are several ways to increase storage space, including sending out fan mail about Dropbox, connecting it to social media, and inviting others to join it.
An additional paid option, which will provide you with 2 TB of space, which can be used to store numerous backups of your hard drive, is available as well.
Dropbox is simple to use, and everyone who has access to the Internet can take advantage of this technology. You can easily install the application on your smart devices as well as your computer. Every file will always be the most recent version available to you.
In order to share files using the software, all you have to do is place the files in a folder that has been marked for sharing with authorized users and if you need to exchange files with colleagues or other stakeholders, Dropbox makes the process simple and straightforward.
Developer Gustave Monce has been working on installing Windows 11 on their own Surface Duo for a while now and now you can try it on your own at your own risk as a guide of sorts is now available (via Neowin.)
Available on Github, this new guide is the result of Gustave’s tweaking. It is only for the 128GB Surface Duo (the Duo 2 is not supported,) and is not an easy task, to say the least. As you’d expect, it involves using a custom UEFI and dealing with drivers and other sensitive things. You’ll also have to unlock the bootloader, and create custom partitions, too.
If all goes well, you can end up enjoying native Windows 11 on your Duo, though some things in Windows like touch, cellular, cameras, might not work right. Fair warning, as another developer puts it, “almost nothing works right now.”
So, if you decide to try this at your own risk, you’ll pretty much end up with a niche device that can’t do much. Still, it’s a nice little side project, especially if you’re highly technical, and want a peek at what things would have been like if the dual-screen Surface Neo tablet was never canceled.
Many users noticed aggregatorhost.exe in Task Manager, and naturally, some are curious about this process.
In today’s guide, we’re going to take a closer look at this process and see what it does.
How can I know if aggregator host.exe is safe in Windows 11?
1. Run the SFC scan
Start by pressing the Windows + S keys together to bring up the Search box. Type cmd into the search bar, and then right-click on the most relevant result to run it as an administrator.
Type or paste in the following command and press Enter: sfc /scannow
2. Run the DISM scan
To access the Search bar, press the Windows + S keys. Type cmd and right-click on the most relevant result to run it as an Administrator.
Type or paste in the following commands and press Enter after each: DISM /online /Cleanup-Image / ScanHealth DISM /Online /Cleanup-Image /RestoreHealth
Relax and wait patiently for the process to be completed in its entirety. The process could take up to ten minutes, so please keep this in mind.
3. Run a virus scan
Click on the carrot arrow in the right corner of your taskbar to locate the antivirus program you’ve installed, then right-click on it and select the option that opens the app interface.
Now click on the button that performs a Smart scan or anything similar to a virus scan.
We strongly recommend that you use a professional antivirus software that will take care of your computer’s security such as TotalAV.
4. Check the location of the file
Press CTRL + SHIFT + ESC to open the Task Manager window, locate the aggregator host.exe process, and right click on it to choose Open file location.
If it takes you to this folder, then it means it is a safe process that has to do with the Windows OS: C:\Windows\System32
Is Aggregator Host a virus?
No, this is a legitimate Windows file, and it poses no threat to your PC. If you suspect that it’s malicious, you can always scan it.
And lastly, users have reported that their virus and threat protection is not working in Windows 11, to which we have responded with a guide on how to fix it. Make sure to check the article linked below if you encounter the same problem.
Customizing your operating system is a fantastic way to make your regular life a little more enjoyable. You have the ability to change the user interface, apply a custom theme, add widgets, and much more. Thus, we will show you today how you can install Classic Shell on Windows 11.
The program has been around for a long time and allows you to modify the OS. Volunteers have now taken up the running of the organization, which was disbanded in 2017. The new project is titled Open Shell, and it is presently available on Github for those who are interested.
Follow along as we will show you how you can download and install the software on your computer, right after we see a little bit of its history. Keep up with us!
How are Open Shell and Classic Shell related?
A derivative of the popular but now-defunct Original Shell program for Windows, Open Shell can be used to restore the classic Start Menu, Explorer, and Internet Explorer shells to a computer’s operating system.
You can learn more about restoring the classic interface by reading this guide on the Open Shell Classic Start Menu.
Classic Shell was a popular software that allowed users to restore functionality to OS iterations that had been discontinued by Microsoft. After the first introduction of Windows 8, the software gained in popularity as users chose to operate with a traditional Start Menu rather than the Start UI.
It was not the only program to see an increase in user numbers as a result of the record-breaking amount of Start Menu programs that were downloaded.
Classic Shell’s principal developer said in 2017 that he would no longer be working on the project. He made the decision to make the software’s source code public in order to allow other developers the opportunity to fork the program and continue development.
The name of one of the very first forks was Classic Start. It was published in June 2018 that the initial version of Classic Start was made available. When the first stable version of the application was launched in September 2018, the program was renamed Open Shell.
Their project is not defunct, as work on the Nightly versions of the software is still ongoing. Users are welcome to download and install these Nightly versions, which can be seen on the main GitHub page. Below, we will show you how you can get Classic Shell on your Windows 11 PC.
Now click on OpenShellSetup_4_4_169 to download the file to your PC.
Double-click on the setup file and follow the on-screen instructions in order to install OpenShell on your system.
Once installed, you can launch the app from your Start menu and customize Windows 11 according to your liking. Optionally, some computers may require a reboot.
2. Use a third party website
There are other secure websites from which you can download Classic Shell from such as SourceForge.
The interface of all of them is simple enough to just click a button and get delivered what you had came for.
Keep an eye out for websites that appear to be untrustworthy by having Not secure next to their link at the top of your browser’s window. You should definitely refrain from interacting with them.
To ensure your computer’s privacy and security, we recommend that you use a specialized and trustworthy tool such as TotalAV.
Why shouldn’t I use an old iteration of Windows?
Unlike other items in our lives, computers are not something that we replace frequently. When compared to cellphones, which typically have a lifespan of two to three years, a computer has a lifespan of more than five years.
If it’s of good quality, it should be able to last for at least 10 years after you initially purchased it. However, a large number of people have a propensity not to update their hardware at all.
Windows 7 and Windows XP are two Windows iterations that we all hold dear to our hearts. However, if we were to go on a nostalgia trip and use them on an older system, we would most likely want to keep that machine away from the Internet in order to maintain privacy.
The problem with obsolete and discontinued Windows iterations extends beyond simply upgrading to a newer iteration of the operating system. The underlying problem is that the company has already stopped providing maintenance for these systems.
This implies that if a severe security vulnerability is discovered in Windows XP or Windows 7, you will not be able to receive any updates to address it. In the coming years, Windows 8.1 and 10 will be confronted with the same problem, and you can anticipate that viruses will emerge.
However, if a vulnerability is severe enough, Microsoft has been known to defy its own standards on occasion. For example, it is well-known for issuing patches for the Meltdown and Spectre vulnerabilities in Windows XP.
But, for the vast majority of reasons, Microsoft considers Windows XP and 7 to be out-of-date platforms that they no longer provide support for. Other difficulties, such as major browsers or even device drivers ceasing to support your system, could potentially result in your PC being inoperable.
Virtual private network tools, including ASUS laptops, are indispensable for your computer’s privacy and security.
You can use a VPN to protect your browsing sessions from phishing and keep hackers at bay by encrypting all Internet traffic. But there are countless other cases where a VPN can help your laptop.
For instance, if you can’t access restricted content due to your geographical position, you can use a VPN to bypass firewalls, circumvent geo-blocks, and access blocked websites. For example, we’ve carefully selected the best VPN services with Pennsylvania servers.
Although you might be tempted to use a free VPN, we advise against it. Free VPN service providers are dangerous, but a premium VPN is worth the money.
Here are the 5 best VPNs for your ASUS laptop, designed to maximize your laptop’s security and help you freely navigate the Internet.
Express VPN is another suitable option for Asus laptops. It has an extensive set of features that provide everything you need from a VPN.
The tool focuses on providing high levels of privacy and performance without compromising.
It has applications dedicated to all major operating systems, including Windows, macOS, and Linux. It is easy to configure; you can connect to a private network with just one click.
It fights against online attackers that try to steal your sensitive data. ExpressVPN hides your real IP address and uses AES-256-bit encryption to protect your privacy.
Express VPN uses private DNS on every server, contributing to even better privacy and increasing speed rates.
Other key features of Express VPN:
Network kill switch in case the connection drops
No logs policy
VPN split tunneling
Compatible with all devices
Blocks trackers and threats
ExpressVPN is available under several subscription plans. Each plan includes a 30-day money-back guarantee.
For example, if Instagram isn’t working on a VPN because the social media site rejects VPN connections, you can connect to NordVPN’s obfuscated servers to hide the VPN identifier and make it look like HTTPS traffic.
The virtual private network tool is compatible with all major platforms and has CyberSec malware blocker.
More about NordVPN:
+5,100 VPN servers in 59 countries
An integrated kill switch
6 simultaneous connections
No logs
30-day money-back guarantee (no free trial)
You can install it on your computer or on your ASUSWRT router. It features 24/7 live chat support.
NordVPN
Ensure the security and privacy of your ASUS laptop using a premium VPN app.
Developed by Surfshark LTD, Surfshark is another great VPN for ASUS notebooks.
It’s the most affordable VPN on this list and can be installed on all major platforms without any problems. You can also use it to block bandwidth limitations set by your ISP, such as AT&T throttling.
This VPN app supports OpenVPN, WireGuard, and IKEv2 protocols, together with the Shadowsocks proxy server. It has obfuscation mode and a malware blocker.
CyberGhost VPN is another top VPN for your ASUS laptop. It uses the OpenVPN protocol to encrypt your traffic. You can even install it on ASUSWRT and other firmware at the router level.
This VPN tool comes with private DNS servers and DNS leak protection. You can use it to increase the security of your ASUS notebook and fix VPN errors.
What makes CyberGhost VPN one of the best VPNs for Windows 10 laptops is its impressive network of VPN servers, top-grade security features, and the fact that it can unblock most Netflix catalogs.
More about CyberGhost VPN:
Plus, it’s the only free VPN for ASUS laptops that you can trust with your data.
Taking everything into account, you can use the best VPNs for your ASUS laptop to raise its security level, maintain your online anonymity, and safely navigate the web.
If you can’t make up your mind about the 5 VPNs we handpicked for you, we recommend going for Private Internet Access because it hits all marks.
Terraria is an action-adventure game available on Steam, where you can explore a voxel-based world to dig, build, and engage in combat. It’s the 2D equivalent of Minecraft, making it possible to seek fortune, fight various creatures to survive, and construct towns for others to move in.
Terraria is one of the best survival games on Steam. It hosts many gaming servers all over the world, including the US, UK, Europe, Russia, Brazil, Turkey, and Germany.
If you are having trouble when trying to play Terraria on your computer, use a VPN to improve your ping. The way it works is easy: you connect to a VPN server close to the game server, launch Terraria, and start playing.
What a VPN does is hide your IP address to make it look like you’re closer to the Terraria game server. And a shorter distance means better connection speed. But you need the best VPN software to play Terraria, and we’re here to help.
Made by Kape Technologies, Private Internet Access (PIA) is our first choice when it comes to VPN software to play Terraria and reduce ping.
It’s also evaluated as one of the best Terraria VPNs for Android users.
It has numerous fast VPN servers from which you can choose, along with exclusive DNS servers to further optimize your Internet connection.
If you’re not sure how to begin, you can quickly connect to the PIA recommended server and join a Terraria server to inspect your ping.
Private Internet Access secures your data even in rare cases when the connection drops. The kill switch feature automatically triggers when you get disconnected and blocks all traffic data.
This protects you against any malicious third-parties getting access to your personal information but also prevents your ISP from throttling your traffic.
What you need to know about PIA:
More than +3,200 VPN servers in 46 countries
Install it on Windows, Linux, macOS, Android, iOS, Chrome, Firefox, Opera
Connect up to 10 devices from the same PIA account
30-day money-back guarantee (no free trial)
Private Internet Access is a subscription-based software. Users can benefit from frequent offers and sales.
You generally get the best deal if you subscribe for a longer period of time. Each plan includes a 30-day money-back guarantee.
Private Internet Access
Decrease your ping time with PIA when playing Terraria on Steam.
Another reliable VPN software that can help reduce ping and lag is NordVPN.
This tool has an impressive number of over 5 000 fast-responding servers across 60 countries all around the globe.
It uses advanced encryption and privacy features in such ways that not even the fact that you use a VPN in the first place can be detected by third parties.
This removes the risk of your ISP placing restrictions on your traffic and it ensures that you will be able to bypass geo-restrictions and access international websites as platforms with no hassle. NordVPN has a strict no-logs policy. They keep no record of your identity, browsing history, or location.
They use their own version of the WireGuard protocol which has been thoroughly tested and proven to provide both high-speed rates and great security.
Other key features of NordVPN include:
Anti tracking
Split tunneling
Secure kill switch
Malware blocker
Obfuscated servers
Compatible with most devices
NordVPN is a subscription-based VPN service with multiple plans available. Each plan includes a 30-day money-back guarantee.
Nord VPN
Connect to a fast and secure NordVPN server and enjoy Terraria without interruptions.
Also owned by Kape Technologies, CyberGhost VPN is another excellent VPN to help you improve ping when playing Terraria.
Just like PIA, it automatically detects the fastest VPN server based on your current location.
At the same time, you can explore a wide range of servers all over the world. Ideally, you should connect to a VPN server that’s in the same region as your Terraria game server.
CyberGhost VPN, just like the other options on this list, combines multiple security features to make sure your connection stays private.
This is essential especially when you frequently engage in online gaming. Unfortunately, many malicious third parties try to steal data from gaming platforms users.
Thankfully, a good VPN like CyberGhost will hide your IP address and encrypt all your traffic data with powerful end-to-end encryption, so no one will be able to detect your activity or identity.
What you need to know about CyberGhost VPN:
Over 6,400 VPN servers in 89 countries
Compatible with Windows, Linux, macOS, Android, iOS, Chrome, Firefox
Supports up to 7 simultaneous connections
CyberGhost VPN users can try out the VPN for free for one day. The software is subscription-based and each subscription includes a 45-day money-back guarantee.
CyberGhost VPN
Boost your Terraria gaming experience by eliminating lag with this VPN tool.
Netflix is a fantastic streaming service, but it doesn’t offer the same library of movies and TV shows to all countries. Due to copyright issues, Netflix only provides a limited range of titles for each region.
However, you can fix this problem with a VPN. By concealing your true IP address and connecting to a VPN server from another country, you can change your region to unblock Netflix libraries from other countries.
For example, if you live in the US and want to watch Netflix UK, you just have to connect to a UK VPN server and then fire up the Netflix app or access the streaming service in your web browser. You just need a VPN for Netflix UK.
It’s all incredibly easy but only if you have the right VPN in your hands. Because Netflix has a no-VPN, no-proxy policy, you can rarely find a VPN that won’t get blocked.
Fortunately, you don’t have to buy and test numerous VPNs just to find one that works with Netflix on your Mac since we already handled it.
What are the best VPNs that work with Netflix on Mac?
Developed by Kape Technologies, Private Internet Access (PIA) is one of the fastest VPNs for streaming on Mac. It supports numerous VPN servers and comes bundled with some cool security features.
For instance, PIA runs an ad and malware blocker to protect your browsing sessions. It works with OpenVPN and WireGuard, as well as SOCKS5 and Shadowsocks proxy. You can even temporarily disable the VPN encryption if you need a speed boost.
PIA is compatible with all major platforms, including Mac and iOS. It has port forwarding, split tunneling, and a kill switch. Plus, it’s one of the few VPNs with 24/7 live chat support. It’s also one of the best VPNs for Microsoft Edge.
More about PIA:
+3,300 servers in 48 countries
Unblocks Netflix US
10 simultaneous connections
No logs
30-day money-back guarantee (no free trial)
Private Internet Access
Start watching Netflix US on your Mac by masking your true location with PIA.
NordVPN is one of the best VPNs for Windows 10 and Mac. You can use it to unblock a wide range of streaming services, including Netflix, by connecting to its numerous VPN servers spread across the globe.
Created by Tefincom & Co., NordVPN has its own antimalware tool for browsers called CyberSec. It also supports private and custom DNS servers, P2P activities like torrenting, OpenVPN, and a kill switch.
Moreover, you can connect to NordVPN’s obfuscated servers to defeat censorship and access blocked websites in case your VPN connection gets blocked. It’s compatible with all major devices.
More about NordVPN:
+5,100 servers in 59 countries
Unlocks Netflix US, UK, Canada, Australia, Germany, France, Japan, the Netherlands
Allows 6 simultaneous connections
No traffic logs
30-day money-back guarantee (no free trial)
NordVPN
Watch the most awesome Netflix catalogs using this reliable VPN.
Surfshark can help you unblock websites on your Mac, including streaming services like Netflix. It’s a virtual private network created by Surfshark LTD, which can be installed on all major platforms.
This VPN service has servers optimized for streaming and torrenting. It can encrypt your data traffic using OpenVPN, IKEv2, WireGuard, or L2TP, depending on your preferences. Furthermore, it runs private DNS on each VPN server.
Similar to NordVPN, Surfshark has obfuscation mode. It also contains an ad and malware blocker, a kill switch, and a split-tunneling mode to isolate your VPN traffic from the rest of your Mac.
More about Surfshark:
+1,700 servers in +63 countries
Unlocks Netflix US, UK, Canada, Australia, France, Japan, India, and others
Unlimited connections
No data logs
30-day money-back guarantee (no free trial)
Surfshark
Get access to numerous Netflix libraries, including the US and UK, using this trustworthy VPN.
CyberGhost VPN is also a virtual private network solution that belongs to Kape Technologies. It has the most impressive network of VPN servers on this list, and you can use it to circumvent geoblocks and watch Netflix on your Mac.
The tool features exclusive DNS servers that protect your DNS queries and make your Internet connection faster. It can be installed on all major devices, including Mac, and it’s the only free VPN for Netflix on this list.
CyberGhost VPN supports OpenVPN, an ad and malware blocker, split tunneling, and a kill switch. What’s more, it has a special category of VPN servers optimized for streaming.
More about CyberGhost VPN:
+6,500 servers in 89 countries
Works with Netflix US, UK, Canada, India, France, Germany, and others
7 connections at once
Zero logs
Up to 45-day money-back guarantee (1-day free trial)
CyberGhost VPN
Unlock the entire Netflix catalog on your Mac with the help of this VPN service.
There’s no need for a fancy introduction to this software because its services speak for it. ExpressVPN is definitely your solution when you want to access blocked websites.
This software features useful options in terms of browsing speed, data encryption, or multifunctionality. Above all, it has the capability to give access to streaming platforms like Netflix or more.
Except for a few locations where Netflix can’t be accessed, you have the doors open for servers worldwide who can give you access to restricted content. Thus, anyone can watch preferred content from Netflix or other streaming websites on Mac or other operating systems
More about ExpressVPN:
More than 20 devices support
Available content for Netflix US, UK, Canada, Australia
Network lock kill switch
3000 servers in 94 countries
30 days money-back guarantee
ExpressVPN
Enlarge your content library from Netflix with immeasurable help from ExpressVPN.
ProtonVPN is a Swiss VPN software that will unblock your streaming content on Netflix or other platforms with secure servers worldwide.
Using such VPN support on your Mac device will be of great help to encrypt the internet connection and improve privacy on every web destination.
Back to streaming benefits, this VPN is packed with servers in 60+ countries that give you access to thousands of TV shows or series on Netflix and other popular streaming apps.
Plus, you have double safety due to Secure Core functionality which routes the traffic through multiple servers.
More about ProtonVPN:
High-speed server connections
NetShield feature to block ads and trackers
Strict no-log security
Maximum encryption with AES-256 bits
ProtonVPN
Watch all your Netflix shows without geo-blocking limitations using this unblocking VPN tool.
If you’re a hockey fan looking for the best ways to watch NHL Gamecenter, all games, or preseason, you need a powerful VPN that can quickly connect you to the NHL streaming website.
The role of a VPN isn’t only to conceal your IP address and encrypt your Internet traffic. You can also use a virtual private network solution to speed up your Internet connection for gaming, get better online deals like cheaper flights, as well as lift geo-restrictions on streaming services.
We handpicked the 5 best VPNs to help you watch NHL games, whether you’re interested in the preseason, Gamecenter, or all games.
Created by Kape Technologies, Private Internet Access (PIA) is the best VPN for streaming. You can use it to not only watch NHL games but also unlock Netflix libraries from all over the world, including Netflix US.
PIA is a great solution to evade geoblocks and access blocked websites. You can use it to defeat online censorship, protect your browsing sessions from malware attacks, and even host game servers for you and your friends.
PIA supports exclusive DNS servers, OpenVPN and WireGuard, static and dynamic IP addresses, SOCKS5 and Shadowsocks, port forwarding, split tunneling, and a kill switch. Plus, it comes with 24/7 live chat support.
What else you should know about PIA:
+3,300 VPN servers (48 countries)
10 simultaneous connections
No logs
Private Internet Access is a subscription-based VPN service with several plans available. Each plan includes a 30-day money-back guarantee if you are not satisfied with the service.
Private Internet Access
Watch NHL Gamecenter, preseason, and all games using this fast and secure VPN.
NordVPN is one of the most secure VPNs on the market and is ideal for watching NHL online.
Owned by Tefincom & Co., this app has a lot of cool features under its hood, including obfuscation mode.
Therefore, if your VPN gets blocked by the remote host, you can connect to obfuscated servers to hide the fact that you’re using VPN.
NordVPN uses OpenVPN to apply encryption. It has exclusive DNS servers, a malware blocker called CyberSec that protects your browsing sessions, along with a built-in kill switch.
What else you should know about NordVPN:
+5,100 VPN server (59 countries)
6 connections at the same time
A strict no-logging policy
NordVPN is a subscription-based service with a 30-day money-back guarantee.
NordVPN
Unblock NHL streaming services and watch hockey games using this VPN app.
Surfshark is an excellent VPN service to help you watch NHL preseason, Gamecenter, or all games. Developed by Surfshark LTD, you can use it to optimize your entire network for streaming. It provides you with exclusive DNS on each VPN server.
You can use Surfshark not only to unlock streaming services but also to get around censorship, find cheaper prices online, and enhance your gaming experience by fixing lag and minimizing jitter.
Surfshark has an ad and malware blocker for browsers, Shadowsocks proxy server, kill switch, and split-tunneling mode.
What else you should know about Surfshark:
+1,700 VPN servers across +63 countries
Unlimited connections
No logs
Surfshark is a subscription-based service with a 30-day money-back guarantee available for all plans. The mobile applications have free trial versions.
Surfshark
Watch NHL online streaming by connecting to the high-speed servers of this VPN.
Also a product of Kape Technologies, CyberGhost VPN can be used to spoof your IP address and connect to another region to unlock NHL streaming. It has an extensive number of VPN servers and can be used to redirect your entire network traffic through VPN.
CyberGhost VPN has special categories dedicated to streaming and torrenting. Plus, you can connect to the recommended VPN server to get the best possible speed and fix network congestion.
This VPN service features private DNS servers and DNS leak protection, a built-in ad, and a malware blocker to protect your browsing sessions from phishing, together with a kill switch and split-tunneling mode.
What else you should know about CyberGhost VPN:
+6,500 VPN servers (89 countries)
7 connections at the same time
No identifying logs
CyberGhost users can get various subscription plans, depending on how long they want to keep the service. Each plan has a 1-day free trial and a 45-day money-back guarantee.
CyberGhost VPN
Watch NHL streaming from anywhere in the world with the help of this reliable VPN app.
Vypr VPN is a reliable VPN service that allows users to bypass restrictions and watch NHL GameCenter. The VPN can automatically detect the best server for your particular configuration, but you can also select it yourself.
It offers the possibility to connect to multiple types of ports such as Chameleon, WireGuard, Open VPN, and L2TP/IPSec.
All these ports are well tested and promise high-speed rates and great security. Vypr VPN secures your connection with powerful AES-256-bit encryption.
Other key features of Vypr VPN include:
Automatic Troubleshooting
Public Wi-Fi safety
Kill switch
Automatic reconnect
To connect to Vypr VPN servers, you will have to get a subscription. There are two major plans available, each with a 30-day money-back guarantee.
VyprVPN
Protect your data and watch NHL at the top-level video quality.
In conclusion, you can watch NHL Gamecenter, preseason, or all games by getting equipped with a reliable VPN service. The 5 VPNs we presented above should meet your expectations. However, if you can’t decide between them, we suggest going with PIA.
If you’re looking for the best VPN for your laptop running Windows 10, it means that you want to protect your device from hackers when connecting to public, unencrypted Wi-Fi hotspots.
That’s just one of the benefits of using a virtual private network solution on laptops.
You can also use a VPN on Windows 10 while waiting at airports, checking in to hotels, getting online at pubs or restaurants, or when trying to work at your local Starbucks.
It’s also possible to stay connected with your country’s Netflix library while traveling abroad. Needless to say, a VPN is indispensable for traveling.
However, not VPNs are equal. If you’re interested in finding the top VPN for your personal notebook, don’t hesitate to check out our recommendations below for Windows 10.
Private Internet Access is the top-ranked VPN on this list. It’s wrapped in a super-intuitive interface and features advanced options to preserve your online anonymity.
You can use it to redirect your entire network traffic through a VPN and keep your confidential information away from prying eyes.
PIA can be installed on all major operating systems and devices, including Windows 10 laptops.
You can use it to get around geographical restrictions, watch Netflix US from anywhere in the world, and protect your financial info while shopping online.
What else you should know about PIA:
+3,300 VPN servers in 48 countries
10 connections at once
No logs
24/7 live chat support
30-day money-back guarantee (no free trial)
Private Internet Access supports port forwarding, split tunneling, a kill switch, exclusive DNS servers, an ad and malware blocker, together with OpenVPN and WireGuard.
Private Internet Access
Protect your Windows 10 laptop from hackers and other Internet dangers using this reliable VPN.
NordVPN excels in security, which is the most important feature you should take into account when looking for a VPN for your Windows 10 laptop.
This VPN service has obfuscated servers that help you bypass firewalls if your remote connection is refused by the host. It’s practical for accessing blocked sites that intentionally reject VPN traffic.
Furthermore, NordVPN supports OpenVPN, a malware and ad blocker called CyberSec, and a kill switch. You can also create a list of hotspots to prevent the VPN from auto-connecting to trusted networks.
What else you should know about NordVPN:
+5,100 VPN servers in 59 countries
Protects up to 6 devices
No tracking logs
Most secure VPN for Windows 10 laptops
30-day money-back guarantee (no free trial)
NordVPN
Maximize the security of your Windows 10 laptop by turning to this dependable VPN.
Surfshark is frequently a top choice in the VPN user community, thanks to its affordable subscription plans. Developed by Surfshark LTD, this tool is one of the best VPNs for your Windows 10 laptop.
CyberGhost VPN is the top free VPN for your notebook. Unlike the other VPNs on this list, it’s a premium-level service that offers a limited free trial for Windows 10 users (no credit card required).
Plus, it has a huge network of VPN servers worldwide and comes delivered in an intuitive graphical interface.
But there aren’t too many configuration options available for skilled individuals.
Nevertheless, CyberGhost VPN has an integrated kill switch, exclusive DNS servers, DNS leak protection, split-tunneling mode, and special categories of VPN servers dedicated to streaming and torrenting.
What else you should know about CyberGhost VPN:
+6,500 VPN servers in 89 countries
7 simultaneous connections
No logs
24/7 live chat support
45-day money-back guarantee
1-day free trial for Windows (no credit card)
7-day free trial for iOS and Android
CyberGhost VPN
Use one of the best VPNs for your Windows 10 laptops while traveling.
ExpressVPN offers a well-rounded set of features. The tool provides pretty much everything you need from a VPN and packs it all up in a simple-to-use application.
This VPN allows you to connect to virtual locations across the whole globe. It has 160 server locations in over 90 countries.
You can benefit from a fast connection regardless of your actual location. It can also help you access geo-restricted websites or content platforms.
Express VPN combines several privacy-oriented features to make sure that your data is private. It masks your IP address, activates a kill switch in case the connection drops, and more.
Other key features of ExpressVPN include:
Split tunneling
Trusted server technology
Unrestricted torrenting/P2P
Unlimited data
Dedicated apps for multiple platforms
You can install ExpressVPN directly to your new laptop, but you can also secure your whole household by adding it to your router. ExpressVPN is subscription-based, with a 30-day money-back guarantee.
Express VPN
Secure your laptop and benefit from unlimited data and fast servers.
All aspects considered, you can use the best VPNs to strengthen the security of your Windows 10 laptop, especially when you’re always on the move and must often connect to public hotspots.
If you have a hard time deciding which VPN service to choose between the five options, we recommend going with Private Internet Access.
If you’re a Macbook user who often travels, you can use a VPN to increase your online safety and privacy. With a virtual private network service, you can fake your IP address, change your geo-location, and access restricted content on the Internet.
Furthermore, a VPN provides the necessary security when you must use public, unencrypted Wi-Fi to get online and send confidential data.
By encrypting your traffic, you are basically protecting your data from hackers. Even if a cybercriminal manages to get hold of your critical documents, they won’t be able to unscramble the coded message.
Besides, a VPN can also make your Internet browsing sessions more entertaining. For instance, you can watch Netflix US with a VPN even if you’re not currently in the United States territory.
However, not all VPNs are the same. Here are the 5 best VPNs for your Macbook to boost its security, improve your Internet connection speed, and protect multiple devices at the same time.
ExpressVPN is another great option for Macbook users. It has a native macOS application that is very easy to use. Users can access a secure virtual server in just a few clicks.
This VPN provides a good balance when it comes to data privacy and performance. It encrypts all traffic without negatively impacting speed rates.
ExpressVPN has servers all over the world. Users of this VPN can access over 160 virtual locations and bypass any geographical restrictions.
ExpressVPN uses AES-256-bit encryption and private DNS so no third party can have any information regarding your activity or identity.
The tool also implements advanced VPN features such as a kill switch, split tunneling or public Wi-Fi protection.
Other key features of Express VPN include:
Works with streaming services
Suitable for torrenting and P2P
Zero logs policy
24/7 support
ExpressVPN is a subscription-based service with a 30-day money-back guarantee for each plan.
Express VPN
Install ExpresVPN to your Macbook and connect to a fast and secure server in just a few clicks.
Created by Kape Technologies, Private Internet Access (PIA) is a premium VPN service that has a bit of everything: a vast network of VPN servers, great connection speed, and advanced security settings.
PIA protects your Macbook using the OpenVPN or WireGuard protocols, depending on what technology you prefer. It keeps your DNS requests safe by rerouting them through exclusive DNS servers. Plus, you can use the VPN to access Binance or other blocked sites.
The virtual private network solution supports port forwarding, split tunneling, a kill switch, SOCKS5 and Shadowsocks proxy, malware blocker for browsers, and 24/7 live chat support. You can even enable debugging mode to monitor your VPN connection and detect any issues.
More about PIA:
+3,300 VPN servers (48 countries)
No logs or leaks
10 connections
30-day money-back guarantee (no free trial)
Private Internet Access
Protect your Macbook when you’re on the go using this fast and secure VPN.
NordVPN is a popular tool for users interested in a premium VPN solution. Created by Tefincom & Co., it’s a top VPN for your Macbook because it offers a bunch of advanced security options that other VPNs lack.
For example, if you don’t want to trust the VPN provider with your VPN traffic, you can join the Tor anonymous network to increase your online privacy. But you don’t have to do it by downloading the Tor browser since NordVPN has integrated support for Onion-over-VPN servers.
Additionally, NordVPN can obfuscate your VPN traffic to bypass VPN blocks. It supports OpenVPN, a malware blocker called CyberSec, exclusive and custom DNS servers, and a kill switch. You can even use it to stop Verizon throttling or other ISP limitations.
More about NordVPN:
+5,100 VPN servers (59 countries)
No logs or leaks
6 connections
30-day money-back guarantee (no free trial)
Nord VPN
Maximize the security of your Macbook by turning to this dependable VPN app.
Last but not least, Surfshark makes the cut on the list of best VPNs for Macbook thanks to its affordable subscription plans and unlimited device connections. You can basically connect any number of devices using the same VPN account to protect your entire family’s devices.
But Surfshark brings other cool features to the table, too. For instance, it features support for obfuscation mode to make your VPN traffic look like HTTPS traffic. It’s a great way to access websites that normally block VPN connections. The service is owned by Surfshark LTD.
Furthermore, Surfshark is the only VPN that can spoof your GPS location (that we know of). It has private DNS on each VPN server, OpenVPN, WireGuard and Shadowsocks, split-tunneling mode, and a kill switch.
More about Surfshark:
+1,700 VPN servers (+63 countries)
No logs or leaks
Unlimited connections
30-day money-back guarantee (no free trial)
Surfshark
Ensure the protection of your entire family’s devices using this budget-friendly VPN solution.
CyberGhost VPN is the best free VPN for your Macbook since it’s a premium service that offers a limited free trial. Owned by Kape Technologies, the tool has the most extensive network of VPN servers on this list.
You can unblock Netflix libraries from all over the world if you can’t watch your favorite movies or TV series due to geo-restrictions. Moreover, you can enable split tunneling on networks with limited bandwidth.
CyberGhost VPN has private DNS and DNS leak protection, streaming and torrenting categories, OpenVPN, ad blocker, trusted Wi-Fi networks, and a kill switch. Also, it’s wrapped in a user-friendly UI.
More about CyberGhost VPN:
+6,500 VPN servers (89 countries)
No logs or leaks
7 connections
Up to 45-day money-back guarantee (1-day free trial)
CyberGhost VPN
Ensure the online privacy and security of your Macbook using this reliable VPN service.
All you have to do now is find and install the appropriate VPN for your Macbook. And, if you’re having trouble deciding, we’re confident that these articles will help you clarify your thoughts and pick the best product for your specific needs.
Elden Ring players pointed out that after starting the game, the sound either cuts out, or there’s no sound to begin with. Today we’ll show you how to quickly fix this audio issue in just a few easy steps.
Let’s get started.
How can I fix the sound problems in Elden Ring?
1. Check volume mixer
Click on the speaker icon in the system tray.
Open Volume Mixer and adjust Elden Ring sound volume.
Make sure it’s set to an audible volume and unmute it if necessary.
2. Verify integrity of game files
Open Steam and go to your games.
Right-click on Elden Ring and select Properties.
Click Local Files.
Check game file integrity for Elden Ring.
3. Reinstall audio drivers
Open Device Manager by right-clicking the Start button.
Expand Sound, video, and game controllers.
Right-click your audio device and choose Uninstall device.
Restart PC. Windows will automatically re-install them.
Hopefully, you won’t have to install the audio drivers, and checking game file integrity will be enough. If it isn’t, however, go ahead and do that as well.
Have you managed to restore proper audio functionality in Elden Ring? Share your experience with us in the comments section below.
Stardew Valley is a country-life RPG with an open world and no story mode but plenty of unique content. It’s available on Windows (Steam), macOS, Linux, PlayStation 4, Xbox One, Nintendo Switch, PlayStation Vita, iOS, and Android.
After inheriting your grandfather’s old farm and starting from the ground up, you can work the field using various tools, grow crops, raise animals, improve your skills, and join the local community.
The game has plenty of solo content, and you can also switch to multiplayer mode and invite up to 3 other players to help you build your farm. As such, you can join online sessions and host game servers.
Unfortunately, many players stumble upon Stardew Valley lag when trying to enjoy the game with their friends. If you’re one of them, you can easily reduce high ping and go back to a smooth gaming experience by getting equipped with a powerful VPN app.
Not only can a VPN lower your ping, but it can also protect your online privacy, defend your router from hackers, and provide anti-DDoS protection. However, not all VPNs work best with Stardew Valley, so here are the ones that interest you.
Private Internet Access (PIA) is your best shot to eliminate Stardew Valley lagging, thanks to its blazing-fast VPN servers and superior security features. The virtual private network solution can fix packet loss and enhance your Internet connection speed.
Made by Kape Technologies, PIA is compatible with all popular devices and allows 10 simultaneous connections. It’s the only VPN on this list that supports port forwarding. Plus, it has 24/7 live chat support.
With NordVPN it’s possible to resolve gaming lag issues and enjoy this relaxing game in your free time without experiencing latency.
Using a VPN tool is beneficial for improving gaming performances, and also protecting your online privacy against cyber attacks.
With secure internet servers worldwide, it’s easy to connect to various locations and have better results in this RPG gameplay.
You can as well profit from double protection and change your IP address twice for increased security. Plus, there is a private DNS and no data leaks for your data.
NordVPN key features:
One account for up to 6 devices
5400+ servers across 60 countires
Unlimited content on restricted locations
Access for content limitations
Threat protection for malware or data theft
Strict no-log policty
NordVPN
Fully appreciate Stardew Valley without any lag or high ping in the game using this proficient VPN.
CyberGhost VPN is a tool that deserves your attention when it comes to fixing Stardew Valley cursor lag and other latency issues. It’s owned by Kape Technologies and can be used to fix Wi-Fi packet loss.
The VPN service can minimize jitter and significantly improve your gaming experience, thanks to its extensive network of VPN servers optimized for streaming, gaming, and torrenting.
You can install it on all popular devices, even if you want to deal with Stardew Valley PS4 lag. It’s the only free VPN on this list and allows up to 7 connections at the same time.
CyberGhost VPN’s key features:
+6,400 VPN servers in 89 countries
Protects your DNS queries using exclusive DNS servers
To conclude, Stardew Valley is a highly entertaining game that can be best enjoyed with your friends. However, if high ping in Stardew Valley is causing hosting issues, use a VPN like Private Internet Access to lower it in no time and fix all latency-related problems.
Europa Universalis IV (EU4) is a grand strategy game part of the Europa Universalis series, where you can evolve a nation from the Late Middle Ages through the Early modern period.
It has diplomacy, military, colonization, administration, and trade features. You can play it on Windows, OS X, and Linux. It’s available on Steam.
The game has a multiplayer mode, where you can join online sessions or host game servers for others to join. However, a lot of players experience EU4 lag, which can become really annoying. If you’re looking for a quick EU4 lag fix, you can use a VPN to improve your ping and gameplay.
Although the main purpose of a virtual private network solution is to conceal your IP address and encrypt your Internet traffic, it can also be used to achieve better connection speeds during gameplay and to circumvent geoblocks.
If EU4 late-game lag is your biggest issue during gameplay, you can count on Private Internet Access (PIA). It’s one of the best VPN apps for your computer that can fix packet loss and speed up your Internet connection.
Made by Kape Technologies, PIA gives you the possibility to disable VPN encryption if you need a speed boost. It comes with private DNS servers, port forwarding, and 24/7 live chat support.
Choosing NordVPN to enhance your digital security and privacy is exactly what you need, plus improving gaming results as well.
With the fastest servers on the market, this VPN tool can definitely protect your digital presence or secure the internet connection with unbreakable encryption.
You can pick from thousands of servers across 60 regions and connect right away to resolve privacy issues. Plus, you can fix the lag in EU4 gameplay by connecting to faster servers.
In addition, you have unlimited content from restricted areas to access streaming shows or have game updates unavailable in certain areas.
What you should know about NordVPN:
5400+ server locations
AES 256-bit encryption
Automatic kill switch option
Reliable and fast P2P
Threat Protection against malware
Worldwide access from 60 countries
NordVPN
Take advantage of this leading VPN software and reduce high ping on the EU4 strategy game.
When every click causes lag in EU4, you can use the high-speed VPN servers provided by CyberGhost VPN. It’s a virtual private network solution that can minimize jitter and enhance your gaming experience by lowering your ping time.
Owned by Kape Technologies, CyberGhost VPN has an extensive network of servers optimized for gaming. It also comes with exclusive DNS servers and split-tunneling mode to create whitelists and blacklists, so that you can optimize your Internet traffic for gameplay.
In conclusion, if you’re experiencing EU4 lag, you don’t have to join another group of players or exit multiplayer mode and try again later. The quickest way to reduce your ping in the game is by connecting to a VPN server that’s in the same region as the remote host.
Whenever your VPN service throws unknown errors, consider visiting our VPN Troubleshooting area. As well, join the Gaming VPN Hub if you often have ping and packet loss issues in games.
You just need the right VPN app for the job. And, if you can’t decide between the three options for Europa Universalis IV, we suggest picking Private Internet Access, thanks to its superior speed and excellent security features.
What else can be said about Elden Ring, except that most people consider this title to be an actual masterpiece?
That it’s a terrible game, a rip-off, a buggy disappointment, or that it’s a complete waste of time. At least, that’s what the other people are saying about Bandai Namco’s latest game.
Whichever side you want to take, make sure that you at least try it, as the adventures and foes in Elden Ring are both really fun, and incredibly challenging.
However, on the off chance you do decide to take it for a test drive and have to deal with all sorts of bugs and errors, you came to the right place.
Lately, a lot of Elden Ring users have been complaining about not being able to summon ashes in the game, such as the wolves or the jellyfish.
Before you do that though, you have to keep in mind that there are certain things you have to consider when summoning.
Why can’t I summon ashes in Elden Ring?
Not being able to summon wolves, jellyfish, or other help in Elden Ring can be very frustrating.
It’s true that it isn’t always obvious why players can’t use ashes to get help from spirits, which can lead to confusion, anger, and rage quits.
Generally, gamers can’t summon spirits in Elden Ring because they are in an area where they can’t summon, they don’t have enough FP for the summon cost, or they don’t yet have the Spirit Calling Bell.
When you are in an area where spirit summoning is available, a purple icon appears on the left side of the screen.
Needless to say, if you aren’t in one of the above-mentioned areas, you will never ever be able to do that.
How can I fix this?
Usually, this is down to players not knowing enough about the summoning ritual in order to properly perform it and get the results they want.
There have been documented cases in which all the criteria were fulfilled, but the feature still wouldn’t work. All that was fixed with a simple restart of Elden Ring.
If that’s not the case for you, just make sure you look for the purple icon on the left side of the screen to know when you can summon.
Also, either use your flash to recover FP or level up to get more max FP. These are pretty much the choices you are looking at right now.
What other bugs have you come across while playing Elden Ring? Share your experience with us in the comments section below.
Microsoft has published its annual sustainability report, looking at its progress on the effort in 2021. The report looks at how Microsoft is moving closer to becoming a carbon negative, zero waste company by 2030. In addition, a separate post from the Xbox team also looks at how Xbox is looking to stay green heading and deliver on Microsoft’s goals.
Generally speaking, Microsoft says that it has seen an overall reduction in scope 1 and scope 2 emissions of about 17% year over year. This is through purchasing of renewable energy. Meanwhile, scope 3 emissions went up 23% year over year.
For those unfamiliar, scope 3 emissions are hard to control. It includes the materials in Microsoft buildings, the business travel of its employees, and the full life cycle of its products, including the electricity customers may consume. As for scope 1, and scope 2, those are direct carbon emissions, and indirect emissions like exhaust, and the things that come from energy production. Microsoft explained this in a separate post from 2020.
Microsoft is hoping to reduce scope 3 emissions by accelerating work to set business-group-specific annual carbon intensity targets. Also in the plan is restructuring and increasing Microsoft’s internal carbon fee to better match the underlying cost of carbon abatement.
As for what’s in the plans for Xbox, there’s a lot in the docket. Microsoft is planning to design Xbox products and accessories to be 100% recyclable by 2030. This builds on the fact that Microsoft switched to using post-consumer recycled resins on Xbox Series S consoles. Elsewhere, Microsoft is also allowing system and game updates to be downloaded while an Xbox is in Energy Saver mode.
Other plans include the fact that Microsoft has embedded an enhanced power monitoring system in a small subset of consoles. This is for anonymous, telemetry collection. Basically, this helps Microsoft identify the best opportunities to introduce future improvements to help save power. You can learn more about these changes over on the Xbox Wire.
The Steam Deck launched without official support for Windows, but the moment has finally arrived if you’re one of the lucky few who have one in your hands. As spotted by The Verge, it’s now possible to install Windows 10 on the Nintendo Switch-like portable gaming console, and it’ll work without any big issues.
Valve has an official support page for running Windows on the Steam Deck, which explains how Microsoft’s operating system works on the device. Now that Wi-Fi, GPU, and Bluetooth drivers are available through the page, you can install Windows 10 in place of SteamOS. However, it’s important to note that Dual-Boot is not supported, and if you opt to run Windows, you’ll have to wipe your Steam Deck. A separate support page provides instructions on how to do that.
This is because while Steam Deck is fully capable of dual-boot, the SteamOS installer that provides a dual-boot wizard isn’t ready yet. Valve says support will ship alongside SteamOS 3 once it’s complete. Some other notes with running Windows on the Steam Deck involve the speakers and headphone jack not working. As The Verge notes, you’ll have to use Bluetooth or USB-C audio to enjoy your games properly with Windows.
If you’re hoping to upgrade your Steam Deck to Windows 11, then there’s more bad news. Valve is still preparing a BIOS update that will enable fTPM, which is needed to install Windows 11. You can stay tuned to this support page for more information on when that becomes possible.
In other news, Microsoft did provide an update on which Xbox Game Studios games will work on the Steam Deck. You should expect most titles to work fine. However, Gears 5, Halo: The Master Chief Collection, Halo Infinite, and Microsoft Flight Simulator won’t run for anti-cheat reasons.
As with other online multiplayer games, what’s the point of getting the best armor pieces and weapons in the game if you can’t compare your gear to other players?
Inspecting a fellow Lost Ark player you find on the map can tell you a lot about his experience, the places he’s been so far, and the foes he managed to defeat.
You can pretty much learn whatever you want about that specific person just by looking at skills, stats, character and item levels, PvP rank, guild, and much more.
However, many Lost Ark players don’t know how to do that yet but don’t worry, because we’re here to show you exactly that.
So, next time you find someone on the map and you need a bit of background information, you’ll know exactly what to do.
How can I inspect other players in Lost Ark?
It’s actually easier than you might think, considering the commands you have to input in order to get this done are used in many other games or software.
So let’s get right into it and find out how to inspect any players we find in the open world of Lost Ark.
First of all, you need to start the game, as this can’t be done outside of the title itself. This is not World of Warcraft, so we don’t have an Armory where we can stalk our friends or rivals.
Run Lost Ark.
Hold Ctrl and right-click on the character you want to inspect.
Click on Character Profile.
Get all the info you need.
That’s basically all you have to do if you feel like peaking at some other players and finding out what weapons they’re using, or what build they are running.
This type of information can be really useful to people just coming into Lost Ark for the first time, as they can see other players with the same class and learn something from them.
Next time you need to balance stats or change a piece of gear and you aren’t sure, peek at other Lost Ark users with the same type of character and learn.
If you’re looking for an easy way to fix Titanfall 2 ping spikes, just use a VPN.
Created by Respawn Entertainment and published by Electronic Arts, Titanfall 2 is a first-person shooter released in 2016. It’s available for Windows, PlayStation 4, and Xbox One. You can find it on Steam and Origin.
In multiplayer mode, the game runs dedicated servers so that you can join an existing network of players or start your own and invite friends. Unfortunately, many users experience Titanfall 2 ping spikes and lag issues in the online PvP mode, which negatively affect their gameplay.
To reduce Titanfall 2 multiplayer lag on PC, you can update your operating system and get the latest game patches, minimize your graphics settings, and switch from a wireless to a wired Internet connection.
However, if these steps don’t fix your Titanfall 2 network lag, use a VPN to improve your ping. By rerouting your gaming traffic to a VPN server that’s closer to the remote host, you can speed up your Internet connection and lower ping.
Furthermore, you can minimize packet loss with a VPN. You just need a powerful Titanfall 2 VPN that provides you with a wide network of high-speed servers and gaming security features.
What are the best VPNs to fix Titanfall 2 ping spikes?
Private Internet Access (PIA) is the best VPN that can deal with severe lag in Titanfall 2. Made by Kape Technologies, PIA can help redirect your entire network traffic through VPN if you want to protect all your web-enabled applications, not just your games.
PIA gives you the possibility to forward ports without configuring router settings, thanks to a built-in feature. This is actually a VPN requirement if you’re interested in hosting game servers for you and your friends.
Moreover, PIA can encrypt your gaming traffic to fix Titanfall 2 ping spikes using OpenVPN or WireGuard, depending on your preferences. You can bypass geo-blocks and pick between static and dynamic IP addresses. Plus, PIA offers 24/7 live chat support.
More about PIA:
+3,300 VPN servers (48 countries)
10 simultaneous connections
Works with Windows, PS4, Xbox One
No traffic logs
30-day money-back guarantee (no free trial)
Private Internet Access
Get rid of PC lag in Titanfall 2 by turning to this fast and secure VPN.
Another way to fix Titanfall 2 PC laggy issues is by using NordVPN. Designed by Tefincom & Co., this VPN solution can not only make your Internet connection faster but also minimize jitter. It puts a huge network of VPN servers at your disposal.
NordVPN supports private DNS servers, an ad, and a malware blocker to protect your browsing sessions (CyberSec) while fixing Titanfall 2 ping spikes, together with an emergency kill switch. It uses the OpenVPN protocol to secure your Internet traffic.
Besides fixing Titanfall 2 unstable ping, you should also know that NordVPN lets you connect to obfuscated servers if you need to get around VPN blocks. It’s an advanced technology that cloaks your VPN traffic to make it look like HTTPS.
More about NordVPN:
+5,100 VPN servers (59 countries)
Connect up to 6 devices at the same time
Can be installed on Windows, PS4, Xbox One
No-logging privacy policy
30-day money-back guarantee (no free trial)
NordVPN
Get rid of Titanfall 2 ping issues on PS4, Windows, and Xbox One with this VPN.
If you’re looking for a simple way to lower in-game high ping for Titanfall 2, check out Surfshark. Operated by Surfshark LTD, this VPN tool has an extensive range of VPN servers, together with private DNS on each server. You can also use it to fix network congestion.
Surfshark features support for OpenVPN, IKEv2, WireGuard, L2TP, and Shadowsocks. Besides speeding up your connection to fix Titanfall 2 ping spikes, you can use an integrated ad and malware blocker for all your browsers, a kill switch, and split-tunneling mode.
You can quickly handle Titanfall 2 extreme lag issues by resorting to the fast VPN servers provided by Surfshark. Moreover, you can connect to the recommended server to automatically get the best possible speed while applying encryption to your entire data traffic.
More about Surfshark:
+1,700 VPN servers (+63 countries)
Allows an unlimited number of simultaneous connections
Works with Windows, PS4, Xbox One
Zero logs
30-day money-back guarantee (no free trial)
Surfshark
Easily eliminate Titanfall 2 lag on PC, Xbox, and Windows using this powerful VPN.
CyberGhost VPN is an excellent VPN for Titanfall 2 that can optimize your Internet connection. Owned by Kape Technologies, this VPN service has a vast network of VPN servers for gaming, streaming, torrenting, and secure browsing.
With the help of CyberGhost VPN, you can quickly fix Titanfall 2 ping spikes on Xbox One and other platforms, minimize Wi-Fi packet loss, defend your router from hacker attacks, and protect your DNS queries with exclusive DNS servers and DNS leak protection.
Furthermore, CyberGhost VPN supports split tunneling mode so that you can easily create whitelists or blacklists if you don’t wish to encrypt your entire network traffic. It supports the OpenVPN protocol. Plus, it’s the only free VPN on this list.
More about CyberGhost VPN:
+6,500 VPN servers (89 countries)
Up to 7 connections at once
Compatible with Windows, PS4, Xbox One
Zero-logging policy
45-day money-back guarantee (1-day free trial)
CyberGhost
Lower your Titanfall 2 high ping on PS4, Xbox One, and Windows with this VPN.
With ExpressVPN you have all-around protection in the digital world and increase gaming results with extremely fast servers.
If you need to improve low FPS on Titanfall 2 gameplay, you can definitely start by employing this VPN with thousands of servers in 90+ locations.
This VPN solution works perfectly on multiple devices and ensures unrestricted content regardless of your location. You can access free content online without region limitations.
Hence, there is powerful encryption for your data and rapid connectivity to reach the maximum game results on Titanfall 2.
More about ExpressVPN:
160 server location across 94 countries
Access on multiple devices (Windows, Mac, Linux, iOS, Android)
Increased anonimity for financial activities
VPN split tunneling
TrustedServer technology
Kill Switch option
ExpressVPN
Maximize the security and privacy of essential information stored online with this capable VPN tool.
In conclusion, you can use a dependable VPN tool to easily fix Titanfall 2 latency issues and packet loss, no matter which platform you’re using. And, if you can’t decide which of the five VPNs is best for gaming, we suggest going with PIA.
You can join our Titanfall 2 Hub to find out what else you can do to improve your gameplay. If you often have in-game ping spikes and packet loss, visit the Gaming VPN area.
You’ve surely heard talk of the first major update for Windows 11, so you must have an idea about what this software package brings to the table, besides all the bugs.
The 2022 update for the latest Microsoft-designed operating system will also revamp certain areas of the OS, making it more practical and easy to access.
We are going to show you some of the features you can expect in the near future, most likely towards the end of this month, and even in early January 2023.
Some of these new features you’ve already seen in our cumulative update articles, which means that some of you are already familiar with the upcoming changes.
What improvements to look for in the near future
Let’s start by saying that the tech giant is now working on updating the weather widget on Windows 11’s taskbar.
On that note, the latest Windows 11 preview build brings a new set of theme-aware icons to make the widget easier on the eyes and improve its glanceability.
These above-mentioned icons’ overall design remains the same, but now they feature slightly different shades and colors with improved contrast on dark and light backgrounds.
Microsoft says the higher contrast ratio and new tones make the information clearer, especially for users with low sight.
Keep in mind that Microsoft updates Windows 11’s widgets using the so-called Windows Web Experience Pack from the Microsoft Store.
Therefore, you can expect the updated weather icon to show up on Windows 11 22H2 and 21H2 once the company is done with testing them in the Dev Channel.
Tech-savvy users have now found a dedicated Settings page for USB4 devices inside the new build 25314, which was recently released to the Canary Channel.
The screenshot of the Settings app shows a new USB4 Hubs and Devices page inside the USB section, so there’s something to look forward to.
We can understand that the USB4 devices that are connected, which, in this instance, are none as the user did not have any USB4 devices.
You should know that, on the previous Dev channel build, the USB page is pretty much like how it is on Windows 10 as well, ie, it shows notifications when USB devices have issues connecting to the system.
This new USB4 page is hidden which means it is disabled by default. However, it can be enabled using velocity ID 39305332, not recommended since these are work-in-progress features and are often quite unstable).
This means that there’s a lot to look forward to in terms of Windows 11, so if you haven’t upgraded yet, you should definitely get on it.
Microsoft is also testing a new and modern-looking Windows 11 volume mixer accessible via the taskbar Quick Settings panel that helps adjust the volume on a per-app basis and switch between audio devices.
Indeed, this new feature was announced earlier this week and is now rolling out to Insiders in the Dev Channel running the Windows 11 Insider Preview Build 25309.
Insiders now need to open the Quick Settings panel to access it after clicking the volume icon in the Windows tray or use the new global keyboard shortcut Win + Ctrl + V for even faster control.
Please keep in mind that, while Redmond just announced it, the feature has been available since at least January, and it could be enabled using the ViVe tool.
This Windows 11 Dev build also adds a quick access list for additional available spatial sound options such as Dolby and DTS, and you can find out more in our dedicated article.
In case you didn’t already know this, Windows 11’s Settings app is about to get a host of new features and improvements.
Indeed, Microsoft is working on letting you add VHD/VHDX drives, improved keyboard options, a brand-new Home section, and more.
As the Twitter leaks suggest, Windows 11 users will soon be able to create virtual hard drives inside the Settings app.
You might have missed it because the feature is buried deep inside the operating system and has no ID for the Vivetool app yet.
However, unearthing it lets you generate a fixed or dynamic VHD (up to 2TB in size) or VHDX (up to 64TB plus resilience to power failures), specify the location, and select a partition style (GPT or MBR).
Another important change will please those with two or more keyboard languages, as the updated Keyboard section lets you rearrange the language order in the input language flyout and set a keyboard to use by default on the sign-in screen and boot.
Keep in mind that, unlike the option for creating virtual hard drives, you can already test the updated keyboard settings using the Vivetool app.
We’ll continue by saying that it appears that Microsoft is preparing to give users more taskbar customization features.
On this note, newly found strings in Windows11 build 25300, the latest Dev release, point to the option responsible for toggling on and off the taskbar clock and date.
Tech-savvy users discovered that we will soon benefit from features such as:
Hide taskbar clock
Hide time and date in the System tray
Turn this on to hide your time and date information in the corner of your taskbar
It is also worth noting that the existence of those strings does not mean Microsoft will implement the ability to disable the taskbar clock.
That being said, it is undoubtedly interesting to see Microsoft considering adding such an option while ignoring customers wanting to separate the Wi-Fi, volume, and battery indicators or refusing to allow Windows 11 users to place the taskbar on top of the screen.
Soon, Microsoft will add a new way to end unresponsive processes in Windows 11 in the form of a new option that will show up when right-clicking an app’s taskbar icon.
A tech-savvy Windows Insider that usually spots changes discovered and tweeted about the feature and shared a screenshot showcasing it earlier this week.
While this Microsoft’s efforts to add additional features will be welcomed, this could likely mean trouble for those accidentally clicking the new End Task option and closing their apps without saving.
Many think that a better idea would be to have this show up when pressing a modifying key like CTRL or ALT in a similar fashion as the one used by Apple’s macOS to hide some (context) menu options.
If you also want to enable this hidden feature, you can use the ViVe tool. However, we have to warn you that these experimental features can be unstable and cause crashes.
Know that once toggled on, the new End Task option will be displayed in the Jump List shown when right-clicking apps’ icons in the Windows 11 taskbar.
This new and interesting functionality is currently in development as a hidden feature of Windows 11 build 25300 in the Windows Insider Dev Channel.
The new icons play neat animations when you click them, a feature that will be accessible through the Settings app soon.
The visual change is pretty discreet, so if you were expecting full-blown animations, you might be waiting in vain, at least for the time being.
Still, this will be a nice addition, considering that even such a small change will make the operating system seem more alive and responsive.
Finding stuff on your PC will become even easier once Microsoft permanently adds the new search bar to the taskbar.
An apparent insignificant change that will make all the difference when you are multitasking and time is of the essence.
Even though clicking on the Start menu icon and then typing in your query wasn’t complicated at all, the tech giant sought to further simplify the process.
We’ve first shown you this new feature when we presented Dev Channel Insider Build 25252, so you were probably already familiar with it.
After already getting significant improvements, the Windows 11 Task Manager is also getting a search bar for itself.
Needless to say, this will make finding the processes you are looking for a lot easier, thus allowing you to quickly and efficiently optimize your device’s performance at any given time.
When talking about upcoming features for Windows 11, it would be impossible to mention the new Dark Mode button that will be added to the Action Center.
Users seeking a more eye-comfortable experience will soon have the ability to turn the Dark Mode feature on or off with only a couple of clicks.
We’re also going to get an improved version of Widgets in the upcoming Windows 11 22H2 updates, so let’s also keep that in mind.
With build 25201, we’ve explained that Microsoft is introducing an Expanded View in Widgets, which you can use to expand or collapse the size of your widgets board.
Also, since we’re on the topic of Widgets, since Dev Channel build 25227, both vertical and horizontal header position styles were being tested.
Now, the Redmond company has now begun rolling out the update to all Windows 11 users and the change was once again first spotted by Twitter users.
However, Microsoft says it will be a gradual rollout and if you don’t find it immediately, there is nothing to be anxious about.
Even though it is not exactly the same thing, it looks like a part of that change will now be available to the wide public.
Furthermore, there is a home button now, and a video button, though it looks different from the one that was in Build 25227 before.
Not to mention that it also replaces the section where previously time was displayed and clicking on the section loads up MSN weather news.
Another interesting and equally useful upcoming feature is the change the clock on the taskbar is about to undergo.
We are actually talking about the fact that we will also be able to see seconds displayed on the clock, something that was missing so far.
You might remember enjoying this feature while using the good old Windows 10, so Microsoft decided to do right by its users and add it to Windows 11 as well.
As many of you know, Microsoft keeps refusing to give up and allow users to disable the Recommended section on the Start menu.
Furthermore, the company is actually proceeding with the idea to the extent of displaying ad-like recommendations of various websites.
So, we will soon be able to access our most visited websites directly from the Start menu, with only one or two clicks.
Don’t worry, you will still be able to force-disable website recommendations in the Start menu if you really don’t want to see them there.
You should also know that, since there were so many users unhappy with Windows 11 showing more ads on the Start menu, developers removed recommended websites in the latest preview build.
Thus, Microsoft is removing the suggestion action for searching copied text in Microsoft Edge and showing recommended common websites on the Recommended section in Start, both of which began rolling out with Build 25247.
Based on feedback from Insiders, features, and experiences you see in the Dev Channel may get removed and never released beyond the Dev Channel.
It is really interesting, to say the least, to see Microsoft removing the ability to search highlighted text in Edge, especially considering that Windows 11 lets you modify it to work with other browsers.
The tech giant might bring the feature back in future updates or remove it for good due to negative feedback, low usage among insiders, or other factors.
That being said, whatever the motivation behind the decision, most users will be happy to see Microsoft making the Start menu arguably less annoying.
Let’s also talk about the new Windows Search box on the Start menu, which we’ve shown you above, and the Search Highlights we will start seeing on it.
What are those? They are small images representing holidays and other events, which Microsoft place in that box almost on a daily basis.
Many say that, apart from confusing the users with constantly changing graphics, those highlights create an illusion of extra misaligned apps on the taskbar.
Then again, we as people, have a tendency to be reluctant to new things, so maybe we will get used to it in the future.
Another interesting change to look for in this new version of the Windows 11 operating system is the helpful banners Microsoft has now implemented for the Search feature.
If you remember, kept Microsoft displaying banners above the taskbar to promote the new Edge, so you’re pretty much going to get deja vu with this one.
Yes, those are back to drive attention to Windows Search filled with ads, which has many wondering why they have to put up with this.
The Redmond-based tech company tries to excuse itself, claiming that the change is here to improve the value of Search shortcuts and reduce friction in the broader Windows Search experience.
On the more useful side of things, we are getting an easier way to find what we need on the Internet, with just a couple of clicks.
It all starts with the fact that Microsoft does not want to deal with the idea that some users prefer browsers other than Edge.
Therefore, the latest improvements to the Suggested Actions feature are yet another way to impose Edge on unsuspecting users.
Selecting text in Windows 11 now displays a small banner with a button allowing you to search the internet with Bing and Microsoft Edge only.
We are also going to get a lot more notifications and warnings where we expect them the least, so don’t be surprised when stumbling across them.
That being said, Microsoft will now place various Settings-related alerts in the menu that appears on the screen when you click your profile on the Start menu.
This new feature can display ad-like prompts to set up OneDrive, sign in with a Microsoft Account, back up files (in OneDrive), or complete your profile.
Most of these recommendations can live peacefully in the Settings app, where I will most likely change or enable something.
And, to make these recommendations look more critical, it uses the same orange dot that appears on the power button when Windows wants to complete the update procedure.
These are only some of the upcoming tweaks that the operating system is about to undergo, but we will probably be looking at more.
We’ll keep you posted on any important changes coming to Windows 11 in the future, so make sure to keep an eye on us.
What other utility features do you think Windows 11 should receive? Share your thoughts with us in the comments section below.
Today we’ll show you how to get rid of the Elden Ring 60 FPS caps. Developers of Elden Ring didn’t want this, but thanks to some players, you can add a mod to your PC that supports higher FPS.
Here’s how to install it:
How to unlock the FPS cap using a mod for Elden Ring
The creator of this mod also states that no game files are modified. It also should work with any Steam version. Besides FPS, it also lets you remove the 60 Hz limit, allowing you to use high refresh rate monitors.
That being said, there’s also added support for widescreen monitors and an option to keep your Runes upon death.
Once you finish installing this mod, you will have a menu that you can open to change your FOV, refresh rate, FPS limit, and more.
However, Lost Ark players are now wondering how they can add their buddies from different servers to the friend list.
People from other servers can’t be added as friends or guildies
A little while back we discussed character server transfer for Lost Ark and found out that this feature is only available in Korea, with little hopes of us getting it as well.
And, since this is impossible, unfortunately so is adding people that play on a different server than your own to your friend list.
This is a question that has been asked since Lost Ark first became available and nothing has changed in the meantime.
Bottom line is, you can’t add cross-server players to your friend list or guild, which means that you definitely can’t create a PvP premade with someone from another server.
Also, guild versus guild, as well as stronghold visits, are server limited. Basically, you are looking at these restrictions:
Cross Server (region wide)
Raids
Dungeons
Cube
Platinum Fields
Auction House
Character Name
Boss Rush
Ranked PvP Arena
Server specific
Guilds
Friends (list)
Islands
Open World
Strongholds
Guild versus Guild (not available at launch)
Life Skills
Arena Premade (unranked only)
That being said, if you still want to play with your friends, the answer is the group finder. All you have to do is create a group, select the dungeon or raid you want to run, and have them join.
If you are unsure where to find the group finder, look under the Community Button in your Lost Ark UI.
A lot of things can still change though, we just have to be patient and hope that enough players request certain features, that developers feel obligated to add them in the game.
Until then, however, if you really want to be able to do everything with your friends in-game, make sure you are both on the same server.
What’s your impression of Lost Ark so far? Share your thoughts with us in the comments section below.
Having fun playing Bandai Namco and From Software’s latest title? Yes, we are talking about Elden Ring and everything that comes with this experience.
Ever since the game was officially released, on the 25th of February, users have both enjoyed and raged over Elden Ring.
Why rage? Well, even though developers mentioned that they are doing everything in their power to make it as stable as possible, Elden Ring came with a ton of bugs.
But users are now wondering about the haptic feedback feature that the game was also supposed to have but is somehow missing for some players.
Only PC and Xbox players apparently get haptic feedback
Recent reports have people that spent their hard-earned money on Elden Ring a bit concerned, as one of their favorite features is not even in the game.
Yes, we are talking about haptic feedback, which is a mode of communication rather than a specific technology or application.
In short, it’s nothing less than an entirely new way for machines and humans to communicate. In this case, we’re talking about the controller feedback you get when something happens in the game.
PlayStation 5 Elden Ring players, in particular, complain about not getting even the slightest vibration in their controller while playing.
That being said, other PS users claim that all they can feel is a discreet rumble, but nothing more. To make matters worse, Xbox players say that they have haptic feedback for Elden Ring.
Yes, the Xbox Series X controller also has haptic feedback, but it is not as advanced as what you experience when using the DualSense controller on the PS5.
Apparently, this works so if you also want to enjoy everything Elden Rings has to offer, including haptic feedback, you have to play it on PC or Xbox.
This, however, doesn’t appear to be a certain thing. Although some PC players report haptic feedback working while using a PS5 controller, others say it’s missing altogether.
From Software and Bandai Namco promised Elden Ring would have this feature for all platforms, so we might see a fix for this issue coming soon.
Have you got haptic feedback for your Elden ring game on the platform you are playing it on? Share your experience with us in the comments section below.
A few Slack users have had a hard time uploading files to the shared channel or via direct messages. Allegedly, the upload was stuck and Slack was processing the file without any signs of success.
Slack, the team collaboration service, is one of the most used services in the niche. There’s a large array of available features, and it covers everything an organization needs.
Now, if you’re facing the same issue, firstly, make sure that the file isn’t corrupted. Secondly, there’s a size limit, so uploading files over a few dozens of megabytes won’t work all that well.
In case you encounter this problem, you should definitely check first if Slack servers are down. To easily do it, just access the Slack status official page.
On the other hand, if you’ve covered those two and the issue persists, check the alternative steps we enlisted below.
What files can I upload on Slack?
To improve your work efficiency with your team, you can add files to your Slack workspace. Files are searchable and shareable across Slack, so it’s handy for everyone to find the information they need and work together.
Keep in mind that you can share just about any file type up to 1GB in size in Slack from your device, or add them from a file management app like Box, Dropbox, Google Drive, or OneDrive.
Posts let you collaborate and share fully-formatted documents with your teammates directly in the app. Do not forget that even if you’re allowed to view posts on Slack’s mobile apps, you’ll need to use the desktop client to create and edit them.
Now, let’s see what you can do if Slack got stuck while processing the uploaded file.
What can I do if Slack is stuck while processing uploaded file?
1. Check your Internet connection
First things first. A mere glance at this issue is enough to concur something’s wrong with your connection. Uploading files should be an integral part of the application, both for desktop and in the browser.
We suggest trying to upload some files in the desktop app (if uploads get stuck in the web app) or the web app. If you’re still unable to upload files to Slack, some connection troubleshooting is more than welcome.
Here are some steps you should follow:
Update Slack.
Restart your PC and router.
Update router’s firmware.
Use a wired connection instead of Wi-Fi.
2. Use an alternative browser
Sometimes, the best way to get rid of Slack issues is by switching to a specialized browser and accessing the app from its main context menu. In this matter, we strongly recommend trying Opera One.
When you switch Internet browsers to Opera One, you will automatically be prompted to import whatever data you want from your old web browser.
For those of you who are already using Opera One, keep in mind that you can import everything by following the steps below. Lose nothing, gain everything when you switch Internet browsers.
This option offers a Sidebar, located in the left window pane. There, you’re allowed to quickly access your Workspaces, Messengers, Speed Dials, Flow, bookmarks, personal news, tabs, history, extensions, downloads, and preferences.
Thus, you’ll always be able to add Slack to Opera One Sidebar and use it in no time.
If you choose Opera One, you can easily customize it to meet your needs, find thousands of extensions in the Opera One add-ons store, and use Chrome extensions as well.
The built-in ad blocker not only removes distractions and speeds uploading but also includes cryptocurrency mining protection. So, you won’t have to worry about data leakage when keeping in touch with your colleagues on Slack.
Check out Opera One’s best features:
Built-in VPN and Ad Blocker
Easy to use and fully customizable
Workspaces and Tab Islands
Native AI and modular AI-ready design
Opera One
If Slack got stuck while processing the uploaded file, try Opera One and never worry about this kind of issue.
In the long run, this can affect the performance of the browser: slow down the loading and prevent traffic on the individual pages.
It can, as well, inflict the issue at hand. You can discover above how to clear browsing data on the 3 most-used browsers for Windows 10 or 11.
If Slack is still stuck while processing the uploaded file, make sure you also verify the other listed solutions.
3. Disable antivirus temporarily
Hit the Windows key, type Control Panel, then navigate to the first result.
Navigate to System and security.
From the left window pane, choose to Allow an app through Windows Firewall.
Now, in the right side of the window, select Turn Windows Defender Firewall on or off.
Make sure you turn of both sections shown below.
Some users in distress addressed the issue by disabling the antivirus temporarily. Namely, the best Windows 10/11 antivirus software may slow down or even block Slack’s execution.
This mostly concerns the desktop application, but the web-based app can be blocked by the protective solutions, too.
Even though this mostly doesn’t apply to Windows Defender, you can try disabling the web-based protection for the time being and look for improvements.
In the Windows Search bar, type Firewall, and open Allow an app through Windows Firewall.
Click Change settings.
Allow Slack to communicate freely by checking both Private and Public boxes.
Confirm changes and restart your PC.
Start Slack and look for changes.
For free team communication, which includes files sharing, Slack needs to works freely. The common limitation which affects Slack’s performance is Windows Firewall.
Namely, even though it should be allowed by default, we encourage you to check the related settings and confirm it.
If Slack still seems to be stuck while processing the uploaded file, we have one more option you can try, but you should use it only in the last instance.
5. Reinstall the app
Use the following keyboard shortcut to open Windows Settings: Windows + I.
Go to Apps.
In the right window pane, search for Slack.
Once you see the result, click on it, then choose to Uninstall the app.
Confirm the process by clicking again on the Uninstall button.
Finally, if Slack got stuck while processing the uploaded file and you’re using the desktop client for Slack, reinstalling it should be a good idea. Even though it’s unlikely, the corruption of installation files can happen.
And if that’s indeed the case, the best way to fix it is to completely reinstall the app. In addition, Slack comes in various versions.
So, if you’re having a hard time with the desktop client, the UWP version from Microsoft Store might do you good.
That’s it. If you’re aware of some alternative solutions, we encourage you to share them with us in the comments section below.
How do I stop processing upload in Slack?
Slack stuck on the upload screen is a temporary error that was reported frequently and you can quickly stop the processing loop with a Reload from the Menu (or using the shortcut: Ctrl + R).
In conclusion, this is what you can do if Slack got stuck while processing the uploaded file. We ensured to deliver only the best options, so you’ll surely manage to fix today’s annoying issue.
If you encounter any additional questions, do not hesitate to leave a comment in the section below.
As many of you know, Windows provides the ability to adjust the screen resolution. However, it does provide certain fixed numbers, thus users need to create a custom one. Unfortunately, custom ratios aren’t supported on internal displays, only on internal ones such as a second monitor.
The ability to choose the optimum display settings for their PC based on the monitor they are using is something that some users desire. They might want to modify the screen resolution or color depth or refresh rate, among other things.
By altering or personalizing the resolution settings, you can alter the appearance of your screen, including the size of icons, the size of fonts, and the depth of color. Which tool to use will be determined by your system’s hardware specifications.
Setting the correct ratio for your monitors is critical while using a computer. The appearance of things will be off if you use a resolution that is too low for your current monitor. Similarly, certain older apps will perform better at lower ones.
Follow along as we will show you what to do if custom resolution is not working in Windows 11, right after we see what the correct aspect ratio is for your monitor. Keep up with us!
What is the correct screen resolution for my monitor?
Computer displays, like many other types of hardware components, are available in a range of designs and sizes. When attempting to determine what aspect ratio your monitor should be set to, there are a few factors to take into consideration.
The term native resolution refers to the highest number of pixels that your monitor is capable of displaying. As a matter of fact, all liquid crystal displays (LCDs) have a set number of pixels. Even when a signal of variable size is fed into the monitor’s input, the no. of pixels displayed remains constant.
Instead, the LCD’s technology adapts the image to fit the panel’s native resolution, which is displayed on the screen. The image on the screen may appear blurry or unclear when it is scaled since there is no longer a one-to-one pixel mapping relationship between the pixels in the image.
As a result, whenever possible, set your display’s ratio to the original resolution of your LCD screen. Many of today’s displays have extremely high ones, which makes them ideal for gaming. In the case of computer gamers, these can be extremely taxing on the system.
Consider the following scenario: if you have recently purchased a 4K display but are using an older video card, you may need to scale the resolution of your monitor down in order to get acceptable frame rates.
For those who do wish to do so, we recommend that you select a resolution that has the same ratio as the native one of your monitor. If you don’t, you’ll see black bars at the top and bottom of the screen, as well as on the left and right sides.
What can I do if custom resolution isn’t working in Windows 11?
1. Use the Intel Graphics Command Center
First and foremost you need to keep in mind that you can’t set a custom resolution for an internal display, but only for an external one such as a second monitor. To access Intel Graphics Command Center, press Windows + S and type in the name of it, then click on the most relevant result.
Now head to Display from the left panel followed by General on the right side.
Under general you will find the Resolution section which has a drop down menu next to it and a plus button. To create a custom resolution press on the plus button.
You might need to restart your computer to apply the changes made in case you won’t see the resolution applied right away.
2. Update Windows
Press the Windows key + I to open the Settings app and tap on Windows Update from the left sided menu.
Now click on Install now or Check for updates depending on what you get.
It is possible that the problem is caused by an older version of Windows, and that it can be remedied by upgrading to the most recent version. It is almost guaranteed that the problem will be rectified in a future software update.
3. Update drivers
To launch the Settings app, press the Windows key + I on your keyboard. Then select Update & Security from the left-hand panel, followed by Advanced settings on the right-hand side.
Scroll down until you find the Additional options section, then click on Optional updates.
Now click on the Driver Updates option then select all the driver updates you are presented and lastly click on the Download & install button.
Despite the fact that Windows is normally in charge of driver updates, if you are having trouble, you can manually search for updates. However, we strongly advocate using a specialist program such as Outbyte Driver Updater to do automatic scans for out-of-date drivers.
Is a 4K monitor worth it?
The value of a 4K monitor is determined by the applications for which it will be used. They are worth the investment for both professional and everyday use, especially now that they are becoming more inexpensive.
For PC gaming, we don’t suggest them since the UHD resolution is quite demanding, and the boost in visual quality over a good 1440p monitor is rarely worth the speed impact caused by the higher ratio.
As a result, 4K monitors are more appropriate for console gaming, as most games are designed to run at a fixed frame rate of 30FPS or 60FPS, depending on the title at hand.
With more and more content being available in high quality on a daily basis, purchasing a 4K display appears to be an unavoidable decision. High details and better image quality for your favorite television shows, movies, and games as well as more screen real estate are all attractive benefits.
Like we said, whether or not investing in a high-resolution monitor for your computer is a good choice depends on what you want to use your computer for. Do you enjoy video games, do you work as a content developer, or do you simply want everything to be as clear and sharp as possible?
If you are a content creator, investing in a 4K monitor may be a tempting option because you will be able to present your subscribers with the highest possible visual quality on your screen.
It is also more pleasurable to do video or photo editing because of the greater image quality with more vivid details and the larger screen real estate.
One aspect to consider is your computer’s hardware configuration. Rendering high-resolution footage necessitates a large amount of RAM, a powerful GPU/CPU, and additional storage space, which varies depending on how sophisticated your videos are and whatever format you’re utilizing.
Indeed, the Bug Bash event is back and Microsoft is again relying on its Insider community to find and flag whatever bugs still remain embedded in the system.
You can now find a lot of special quests in the Feedback Hub, as a part of this second 2021 fresh Bug Bash. This includes completing tasks that involve the Start Menu, Snapping or Windows,
Other activities you can undertake address the Notification Center, app animations, Snapped layouts, as well as Widgets. In total, there are 22 quests currently available, including the above-mentioned ones.
You might also need to install a progressive web app on Microsoft Edge or test out the new tablet rotation animation.
A smart move from Microsoft, engaging people into this new experience even more and making sure they constantly have a continuous supply of reports.
From March 16th to March 22nd, the Redmond tech giant will host a Bug Bash covering the latest Insider Preview builds.
Interested parties should keep an eye on the Feedback Hub under the Announcements section where new details will be posted as the start date approaches.
Insiders who participate in the Bug Bash by completing Quests and filing feedback during this time will be awarded a Bug Bash badge in Feedback Hub.
Remember that you need to be a Windows Insider and have the new operating system installed on your device, in order to participate in this online event.
If you aren’t an Insider yet, you can learn all about how to become one from our detailed article.
Activating your copy of Windows 11 is the main thing to do after you have installed the latest operating system on your PC.
Not only does it unlock the true potential of the Windows 11 OS, but it will get rid of the annoying message that says “Activate your Windows 11.”
However, for several users, the smooth process of activation is being hurdled by the Windows 11 activation error 0xc004f074.
This error notably prevents the user from activating Windows 11 and forces them to use the OS with limited features.
The Windows 11 activation error code 0xc004f074 is related to the Key Management Service. When the KMS becomes unavailable, you will run into this problem.
Well, that is where this guide comes into the picture. Here, we have listed some of the best solutions, that can help you resolve the Windows 11 activation error 0xc004f074.
What are the reasons for the Windows 11 activation error 0xc004f074?
Reportedly, when users try to activate the Windows 11 KMS (Key Management Service) client, they are treated with an error message “The Key Management Server (KMS) is unavailable.”
Similar to other error codes, this error code doesn’t just appear for Windows 11 users. It is a pretty common error for Windows 10 OS users as well.
It can be because of a mismatch between the KMS client and the KMS host server. So, for this error to vanish, the KMS client needs to be updated to match the KMS host server version.
Moreover, Windows 11 activation error 0xc004f074 could also appear for multiple other reasons. Some of these are mentioned below:
Because of a time difference between the KMS client and KMS host machine.
It can occur after the installation of a cumulative update.
Not using a genuine serial key to activate Windows 11.
The product key is already used in another copy of Windows 11.
Corrupt Windows 11 system files.
It could be because the Windows Firewall or Windows Defender is interfering with the activation process.
Now that you have understood the reasons that could trigger Windows 11 activation error 0xc004f074 on your PC, let us take a look at the remedies for it.
How can I fix Windows 11 activation error 0xc004f074?
1. Use the Software Licensing Management Tool
Open the Start menu.
Search for Command Prompt and run it as an administrator.
Type the below command and press Enter.slmgr.vbs/dlv
Execute the below command to uninstall the existing product key.slmgr.vbs /upk
Type the below command to re-install product key and press Enter.slmgr.vbs /ipk <New_product_key>
In the last command, you need to replace the <New_product_key> with the actual product key of your Windows 11 copy.
Once the command executes, reboot your PC and see if this fixes the issue or not.
2. Use specialized software
Another feasible method to solve this Windows activation error is with a dedicated repair tool. You can thus fix system errors, including the annoying Blue-Screen of Death error, Windows update errors, etc.
These tools can also fix damaged DLL files, detect apps that are crashing frequently, remove privacy threats and malware from your PC, and much more.
3. Repair Windows system files
Open the Start menu.
Search for Command Prompt and run it as an administrator.
Type the below command and press Enter.sfc /scanow
You PC will start scanning and in the process, will try to fix the issue as well.
Reboot your PC.
Open command prompt again.
Type in the below command and hit Enter: chkdsk C: /f /r /x
After process completion, enter the below command and press Enter: DISM.exe /Online /Cleanup-image /Restorehealth
You will see “The operation completed successfully” message.
Follow the on-screen instructions to complete the activation.
5. Run Windows update troubleshooter
Open the Start menu.
Search for Troubleshoot other problems and open it.
Hit the Run button next to Windows update.
The troubleshooter will begin detecting the problem.
Apply the recommended fixes.
Restart your PC.
As mentioned above, there is a chance that because of a recently installed cumulative update, you are experiencing the Windows 11 activation error 0xc004f074.
Alternatively, if your copy of Windows 11 isn’t activated, then you can follow the steps below to open the Windows Activation troubleshooter.
Press Win + I buttons to open System.
Click on Activation.
Select Troubleshoot.
6. Disable Windows Firewall and Windows Security
Open Control Panel.
Select Windows Defender Firewall.
From the left-side select Turn Windows Defender Firewall on and off.
Check the box next to Turn off Windows Defender Firewall on the Domain and Public network settings.
Press OK to close the tab.
7. Turn off Fast Startup
Press Win + R buttons to open the Run dialogue.
Type the below command and hit Enter. powercfg.cpl
Click on Choose what the power button does from the left side.
Select Change settings that are currently unavailable.
Uncheck the Turn on fast startup (recommended) option.
Hit Save changes and restart your PC.
What if I don’t activate my copy of Windows 11?
Well, there are a few caveats if you do not activate the Windows 11 operating system. Below are some of the limitations:
You cannot tweak or modify personalization settings.
You won’t be able to set wallpapers, change lockscreen, etc.
The taskbar cannot be customized.
There will be an “Activate Windows” watermark visible on your desktop.
You will receive a persistent notification to activate Windows 11.
The above list is good enough to make you understand that you should activate your copy of Windows OS to enjoy the latest and greatest from Microsoft.
We hope that this guide helped you fix the Windows 11 activation error code 0xc004f074. Do let us know in the comments below which solution did the job for you. You can also let us know if there are any other solutions to fix this problem.
The ability to set your Microsoft Teams status automatically can help break up your workday so you don’t feel chained to your PC as you work from home. Of course, you can always go into Microsoft Teams to manually change your status, but wouldn’t it be better to have the ability to change your Microsoft Teams status without ever opening the app?
Built for Microsoft 365, using Power Automate saves time by streamlining tasks and workflows through automation. No need to worry if you’ve never created or automated a workflow, or “flow,” as there are many popular app templates available.
Set your status
This guide is based on a guide by Damien Bird, a Microsoft MVP who created a post on how to perform a Teams Status Update via Power Automate. I will reiterate the warning Damien Bird left at the beginning of his guide as well.
This is an undocumented method and should not be used in production flows, it works, but not all the time, and there is a limit on the number of flows you can perform per day. So, it’s important to keep your expectations in check.
In the USA?? Or using a US tenant? You might need to use https://noamdf.presence.teams.microsoft.com or https://presence.gcc.teams.microsoft.com or you will get a Status 301 error when the action runs.
Here’s what to do to set your Microsoft Teams status in Power Automate:
1. In Power Automate, click My flows from the navigation pane on the left.
2. Click New flow.
3. Here, you have three options: Automated cloud flow, Instant cloud flow, or Scheduled cloud flow. For this example, we will use Instant cloud flow. 4. Create a Flow name and click an option under Choose how to trigger this flow. For this example, we will use Manually trigger a flow. Click Create when you are finished to confirm.
5. After you click Create, you will find your new flow is created and it starts with a manually trigger, so you must pick the next step, click Next step.
6. Search for “SharePoint” in the search box and scroll and click Send an HTTP request to SharePoint.
Set your Microsoft Teams status
1. In the next menu, you will need to complete the HTTP request to SharePoint. Your SharePoint request should look exactly like the image below.
You can change your “availability” status in the body of the flow to “Available”, “Busy”, “BeRightBack”, “DoNotDisturb”, or “Away”. I was unable to get the option for offline/offwork to function, so I can’t include it in this guide.
2. Click Save when finished.
3. Next, your flow is ready to go, so you need to test it. It is not only recommended that you test it, but it’s also required when you set up your first flow. Click Test.
4. At the next screen, you need to indicate how you want to test your flow, either Manually (you trigger it) or Automatically (based on a previous run of another flow). Select Manually, the only choice at first flow setup. Click Test to confirm.
5. Depending on your permissions level, Power Automate may prompt you to sign into your Microsoft account to confirm your permissions to make the flow function. As indicated, I am ready to go because I already have the necessary permissions already as designated by the green check mark. Click Continue.
6. Finally, click Run flow to run the flow.
Once you click Run you will see a green check mark showing that your flow successfully started with a link to check the flow status on the Flow Runs Page. You can also check your Microsoft Teams status to see if it changed when you ran the flow.
Set your status message
To set your status message, you just need to create another Power Automate flow almost identical to the one above, except for a couple of changes. Here’s what your flow should look like.
After following along with his guide, I found that another Microsoft MVP, Luise Freese provided a more efficient solution for the flow. So, my end result is a combination of both of their combined work combined with trial and error. Their guides were missing important explanations of dynamic values and expressions and what they do, but their guides are not meant for new Power Automate users either. After following both their guides, I created a Spotify custom connector with Microsoft Teams that aligns more with Freese’s solution, but if you have an even better solution, please share it.
If you are looking for an easier option, copy the code exactly as it appears below to either:
1. Set your Microsoft Teams status to Away {"id":"6e453f83-f22d-4715-bdb6-5cbe7b44b6fa","brandColor":"#036C70","connectionReferences":{"shared_sharepointonline":{"connection":{"id":"/providers/Microsoft.PowerApps/apis/shared_sharepointonline/connections/5d9bafd92370456789caa39b6c3f2277"}}},"connectorDisplayName":"SharePoint","icon":"https://connectoricons-prod.azureedge.net/releases/v1.0.1554/1.0.1554.2707/sharepointonline/icon.png","isTrigger":false,"operationName":"Set_Microsoft_Teams_status_to_Away","operationDefinition":{"type":"OpenApiConnection","inputs":{"host":{"connectionName":"shared_sharepointonline","operationId":"HttpRequest","apiId":"/providers/Microsoft.PowerApps/apis/shared_sharepointonline"},"parameters":{"dataset":"https://presence.teams.microsoft.com","parameters/method":"PUT","parameters/uri":"/v1/me/forceavailability","parameters/headers":{"content-type":"application/json"},"parameters/body":"{\n\n\"availability\": “Offline”, \n\"activity\": “OffWork”\n\n}"},"authentication":{"type":"Raw","value":"@json(decodeBase64(triggerOutputs().headers['X-MS-APIM-Tokens']))['$ConnectionKey']"}},"runAfter":{},"metadata":{"operationMetadataId":"e3433a3c-7e7c-40d5-b804-696b2b1d0398"}}}
2. Update your status message note {"id":"638a81c6-7d9b-481a-8875-97a08dcf18b7","brandColor":"#036C70","connectionReferences":{"shared_sharepointonline":{"connection":{"id":"/providers/Microsoft.PowerApps/apis/shared_sharepointonline/connections/5d9bafd92370456789caa39b6c3f2277"}}},"connectorDisplayName":"SharePoint","icon":"https://connectoricons-prod.azureedge.net/releases/v1.0.1554/1.0.1554.2707/sharepointonline/icon.png","isTrigger":false,"operationName":"Set_Microsoft_Teams_status_message_note_","operationDefinition":{"type":"OpenApiConnection","inputs":{"host":{"connectionName":"shared_sharepointonline","operationId":"HttpRequest","apiId":"/providers/Microsoft.PowerApps/apis/shared_sharepointonline"},"parameters":{"dataset":"https://presence.teams.microsoft.com","parameters/method":"PUT","parameters/uri":"/v1/me/publishnote","parameters/headers":{"content-type":"application/json"},"parameters/body":"{\n\n\"message\": \"I am away from my desk. I went to grab lunch\"\n\n}\n "},"authentication":{"type":"Raw","value":"@json(decodeBase64(triggerOutputs().headers['X-MS-APIM-Tokens']))['$ConnectionKey']"}},"runAfter":{},"metadata":{"operationMetadataId":"05f65dba-6bef-458a-81ac-b4fc08c290db"}}}
You can paste it straight into Power Automate by going to New step > My clipboard. Paste it directly to the clipboard when you set up your Power Automate account.If you have any questions or need any help setting up this flow, have advice, or can give me input to make a better flow, please reach out to me on Twitter.
Of course, it’s frustrating to discover a corrupted database on your SQL Server for apparent reasons. You can’t access the information, and your work stops.
However, you can fix this problem in many ways with manual solutions or by using a smart, dedicated third-party tool called Recovery Toolbox for SQL Server.
But before starting the troubleshooting, let’s understand and investigate why this problem is happening in the first place.
What is an SQL Server, and how can we identify the database?
An SQL Server is a database system developed by Microsoft that is used for managing, storing, and retrieving data by other applications.
There are three types of files to store and manage data in an SQL Server: primary files (with a .MDF extension), secondary files (with the .NDF extension), and log files (with the .LDF extension).
We are particularly interested in those MDF files because those are the ones that provide the database storage.
Why does a database become corrupted on an SQL Server?
There are a lot of possible reasons why your SQL server database can become corrupted, from a simple overwrite or accidental file deletion to virus infections and incorrect configuration.
Let’s go through some of the most common causes for this issue:
Overwriting a file – If you write over an existing MDF file by mistake, you risk corrupting the database
Trying to unlock the SQL database – If you forgot the SQL password and enter it wrong too many times, this can lead to SQL Server Corruption
Failure on your storage drive – It goes without saying that a drive malfunction can produce file corruption, including the database
Problems with SQL database configuration – If the SQL configuration changes, that can disable the access on MDF files
Virus infection – This is a common problem for any file corruption, not only the SQL database files and even if you remove the virus by using the best antiviruses, unfortunately, you might still lose some data
SQL internal bugs – Although it’s a strong solution, it may still have its bugs that can cause MDF files corruption
That said, follow our step-by-step guide to learn how to repair an SQL database file on an SQL Server.
How can I repair a corrupted database in SQL Server?
NOTE
Before starting anything, perform a backup of the SQL library.
1. Restart the SQL Server
Open a terminal and enter the following command to stop the SQL Server: systemctl mysql stop
To check the status of the SQL Server, type the following command and press Enter: status mysql.service
Now restart the SQL Server by performing the following command in the terminal: restart mysql.service
Sometimes, you can solve the problem just by restarting the SQL Server. Of course, it doesn’t work every time but it’s so easy to perform that it wouldn’t hurt to perform.
2. Repair a damaged table
Start the SQL Server.
Type the following command and press Enter to run it: CHECK TABLE name_of_the_table;
If it detects any problems with the table, type the following command and press Enter: REPAIR TABLE name_of_the_table;
The REPAIR TABLE will help you repair a table and you can do the same for any other corrupted ones but this way, you might lose some data from the table.
3. Use the mysqlcheck command
Open a terminal and type or paste the following command to reach the database folder and press Enter: cd /var/lib/mysql
Now, type the following command to test a table and press Enter. Make sure you replace <database> and <table name> with the actual names: mysqlcheck <database> <table name>
If you get the message that the table is corrupted, type the following command to repair it and press Enter: mysqlcheck -r <database> <table name>
4. Use the ALTER TABLE commands
Type the following command to check your table type (in our case, it’s an MyISAM table): SHOW CREATE TABLE <table name>;
To rebuild the table, type the following command and press Enter: ALTER TABLE <table name> ENGINE = MyISAM;
If you have a InnoDB database, type the following command instead: ALTER TABLE <table name> ENGINE = InnoDB;
Install the app after choosing the language and accepting the license agreement.
Click Finish to launch the SQL Server MDF repair tool.
Select the corrupted *.mdf file by clicking the source folder icon.
Once you’ve selected it, click the Next button.
You will now be able to preview the data that can be retrieved from the corrupted Microsoft SQL Server database. Click Next on the Microsoft SQL MDF recovery tool window to start the process.
Now, you only need to choose the method of the data export. You can save it as SQL scripts to disk and even execute the SQL script directly on the database.
Finally, choose what data to save and click on Start Recovery.
So, this is how to repair SQL server database files with this simple and effective tool. As you can see, it will get the job done much faster.
The MS SQL server recovery tool will also help you if you’re facing the following problems with the MDF database:
Microsoft SQL Server error 5172 – The FILE SIZE property is incorrect
SQL Server Detected A Logical Consistency-Based I/O error – It’s an incorrect Checksum, otherwise known as error 824 in the SQL Server
The Index Allocation Map (IAM) page is pointed to by the Next Pointer of an IAM Page – It’s a pretty common problem
I/O error, bad page ID, detected when reading at offset 0x###### in file FileName.mdf – This doesn’t appear too often, but you can still repair it with this small tool
File appears to have been truncated by the Operating System error – Most likely caused by a configuration problem
An Error Occurred At Log Record ID – It occurs during the redoing of a logged operation in the database
Actually, the Recovery Toolbox for SQL Server repairs all objects of corrupted .mdf files, including data types, table cell data, views, stored procedures, custom functions, triggers, indexes, primary and foreign keys, restrictions, and others.
And the great advantage is that you can seamlessly export the repaired data into the Microsoft SQL Server from the app.
This is it! Now you know how to repair your SQL Server database manually, or by using a dedicated tool, you can export it to Excel and open it to analyze the data.



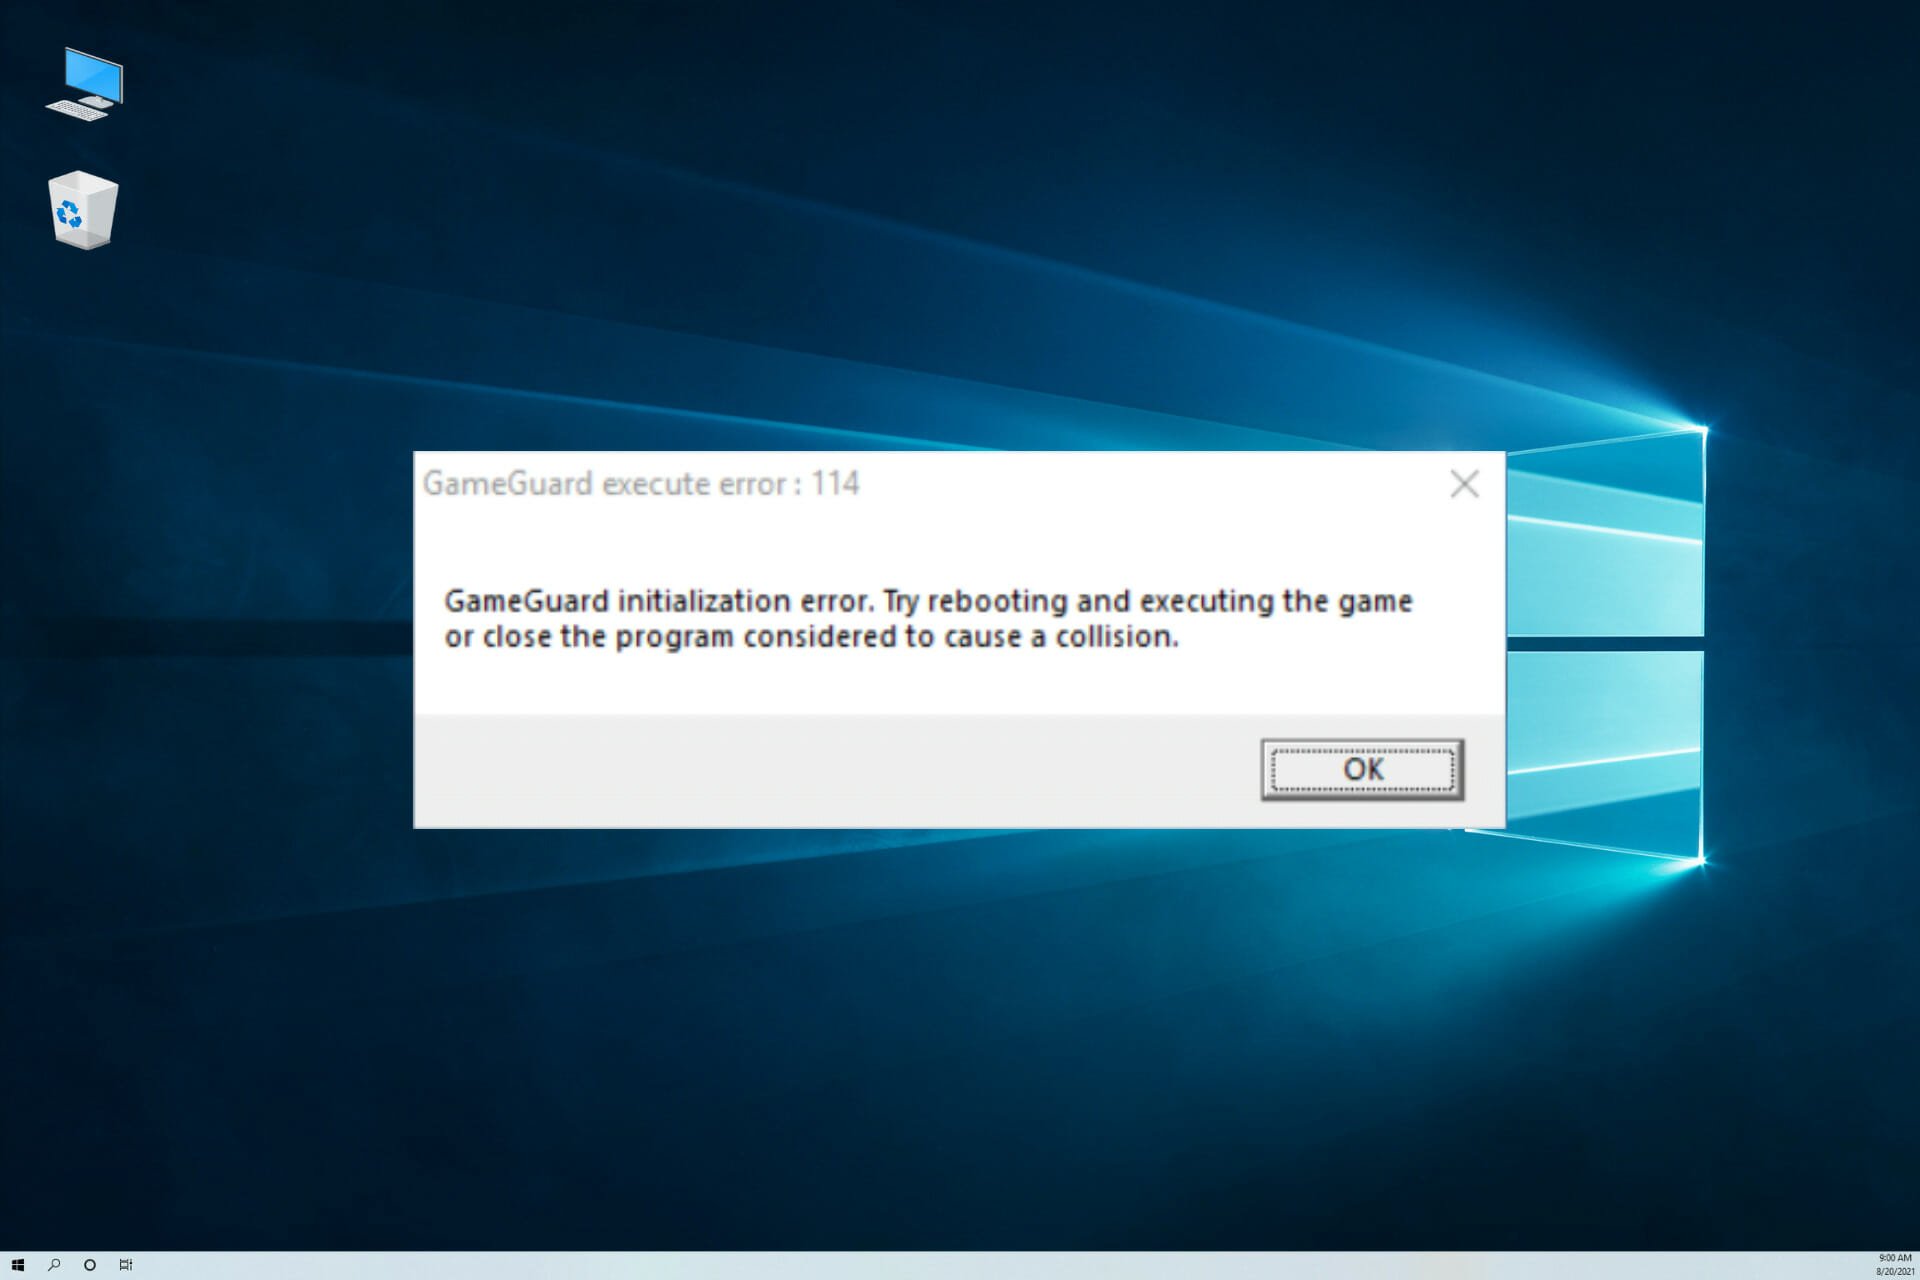
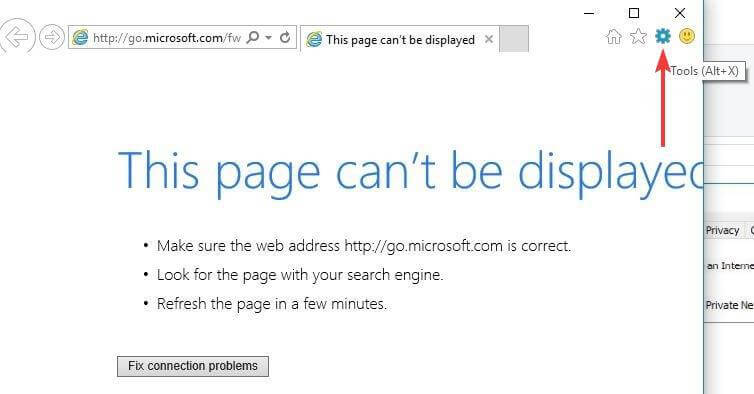
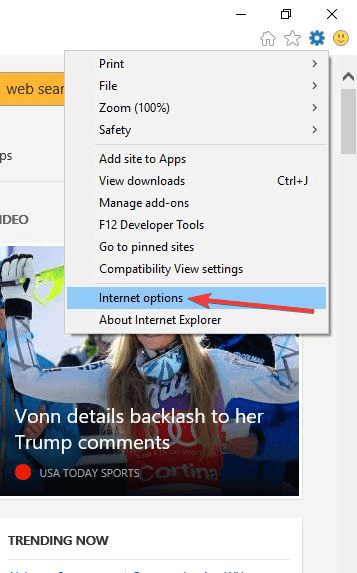
















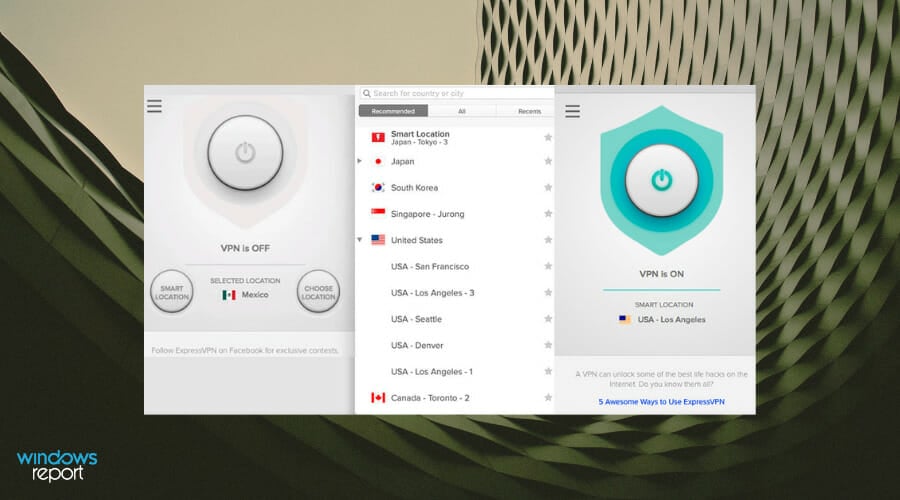


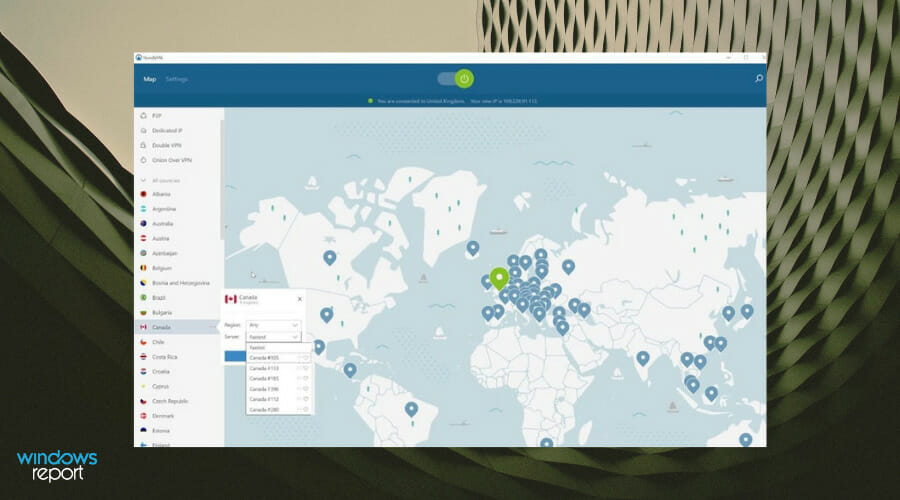

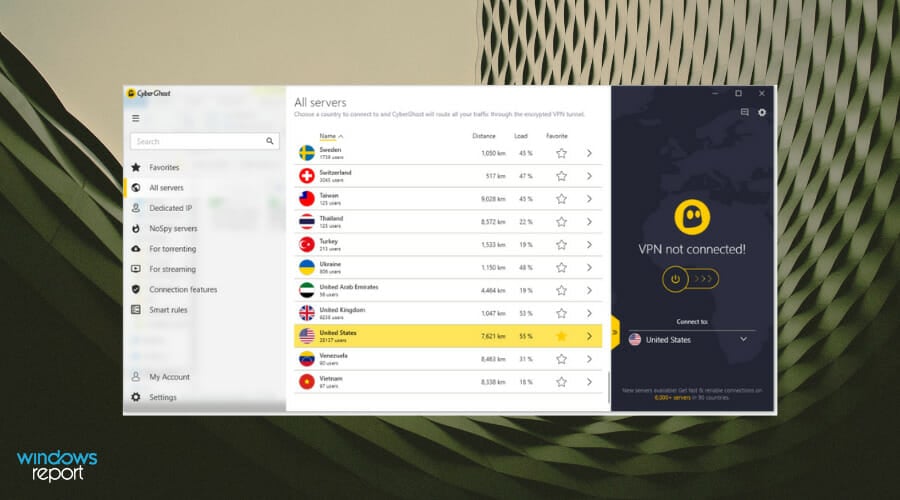
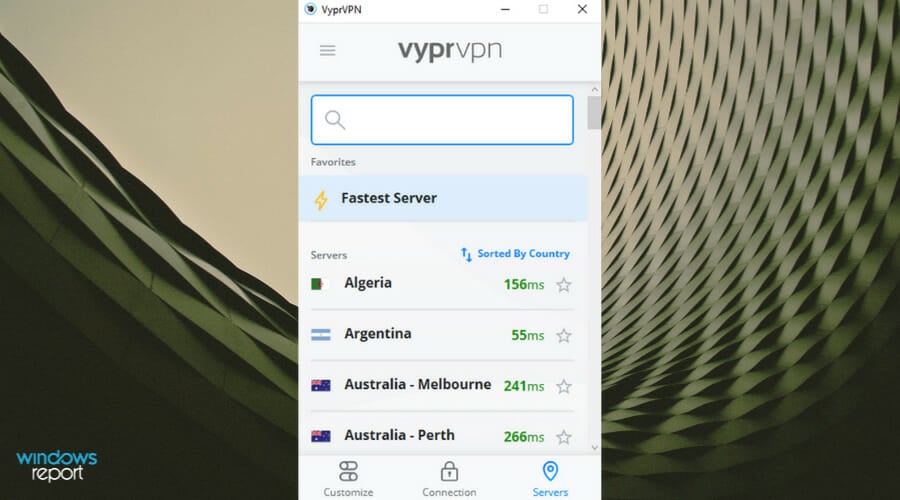










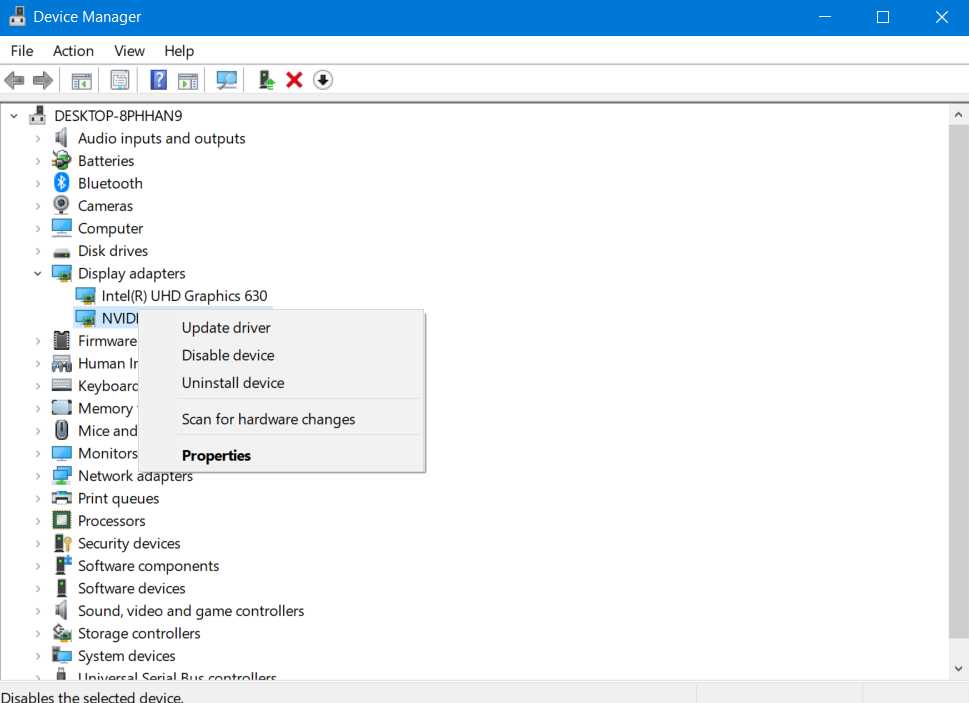



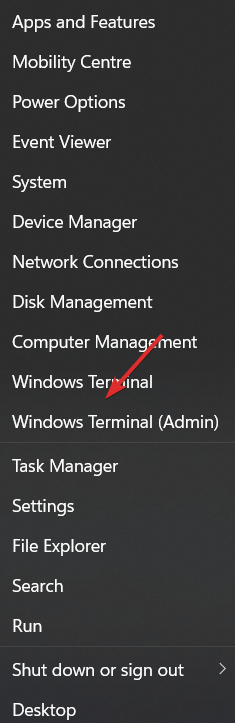
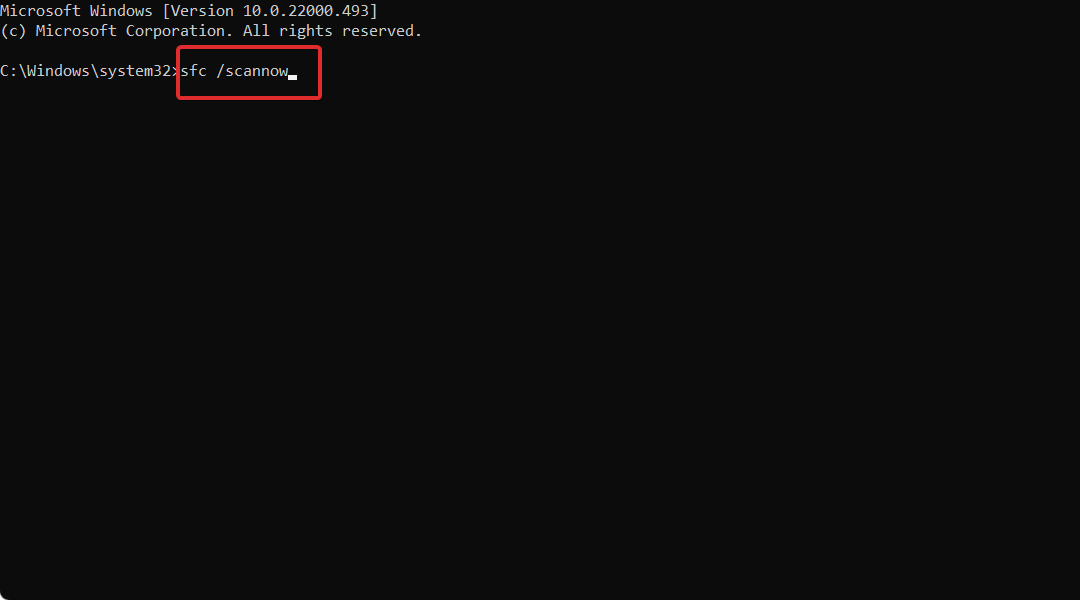
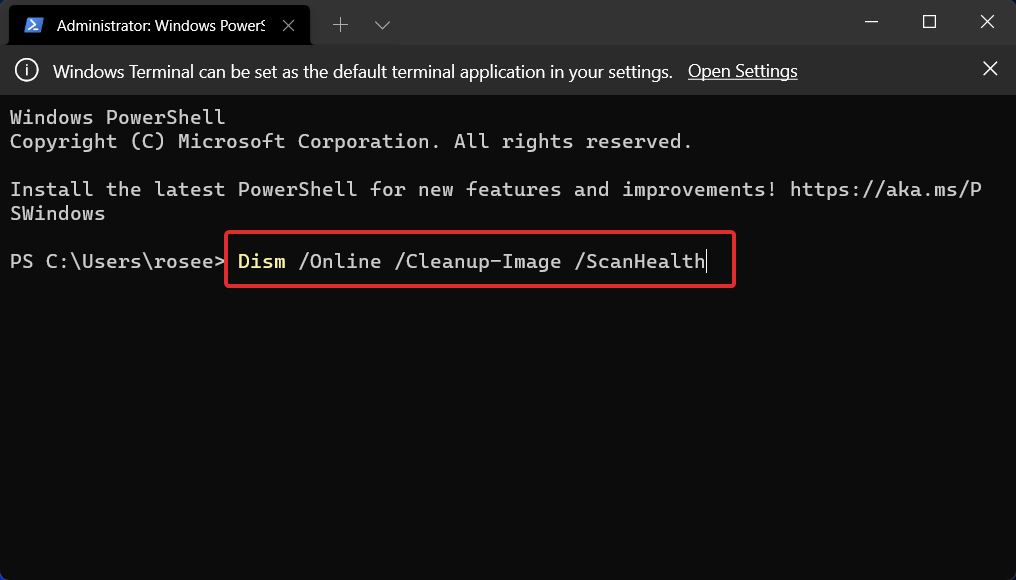
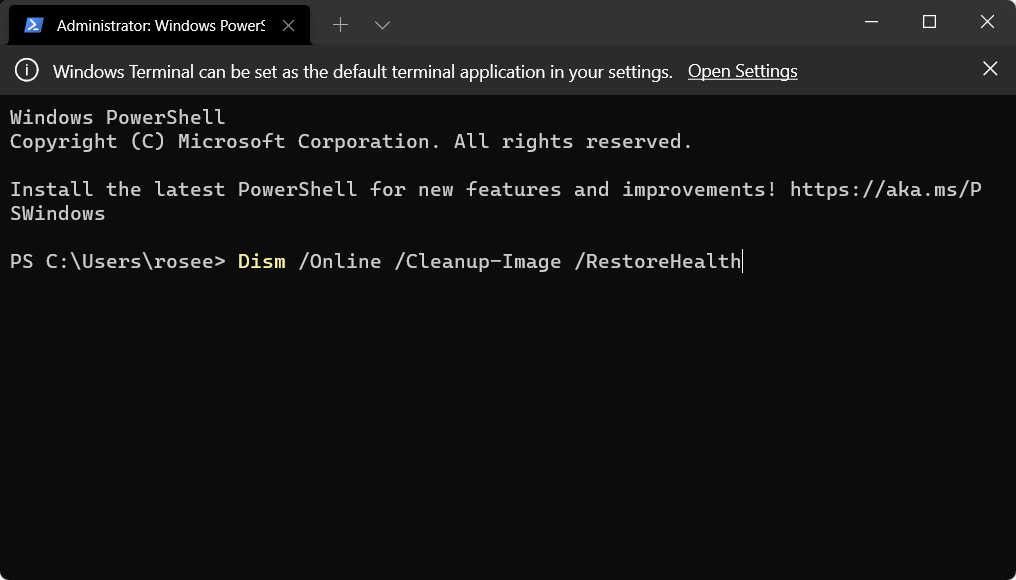

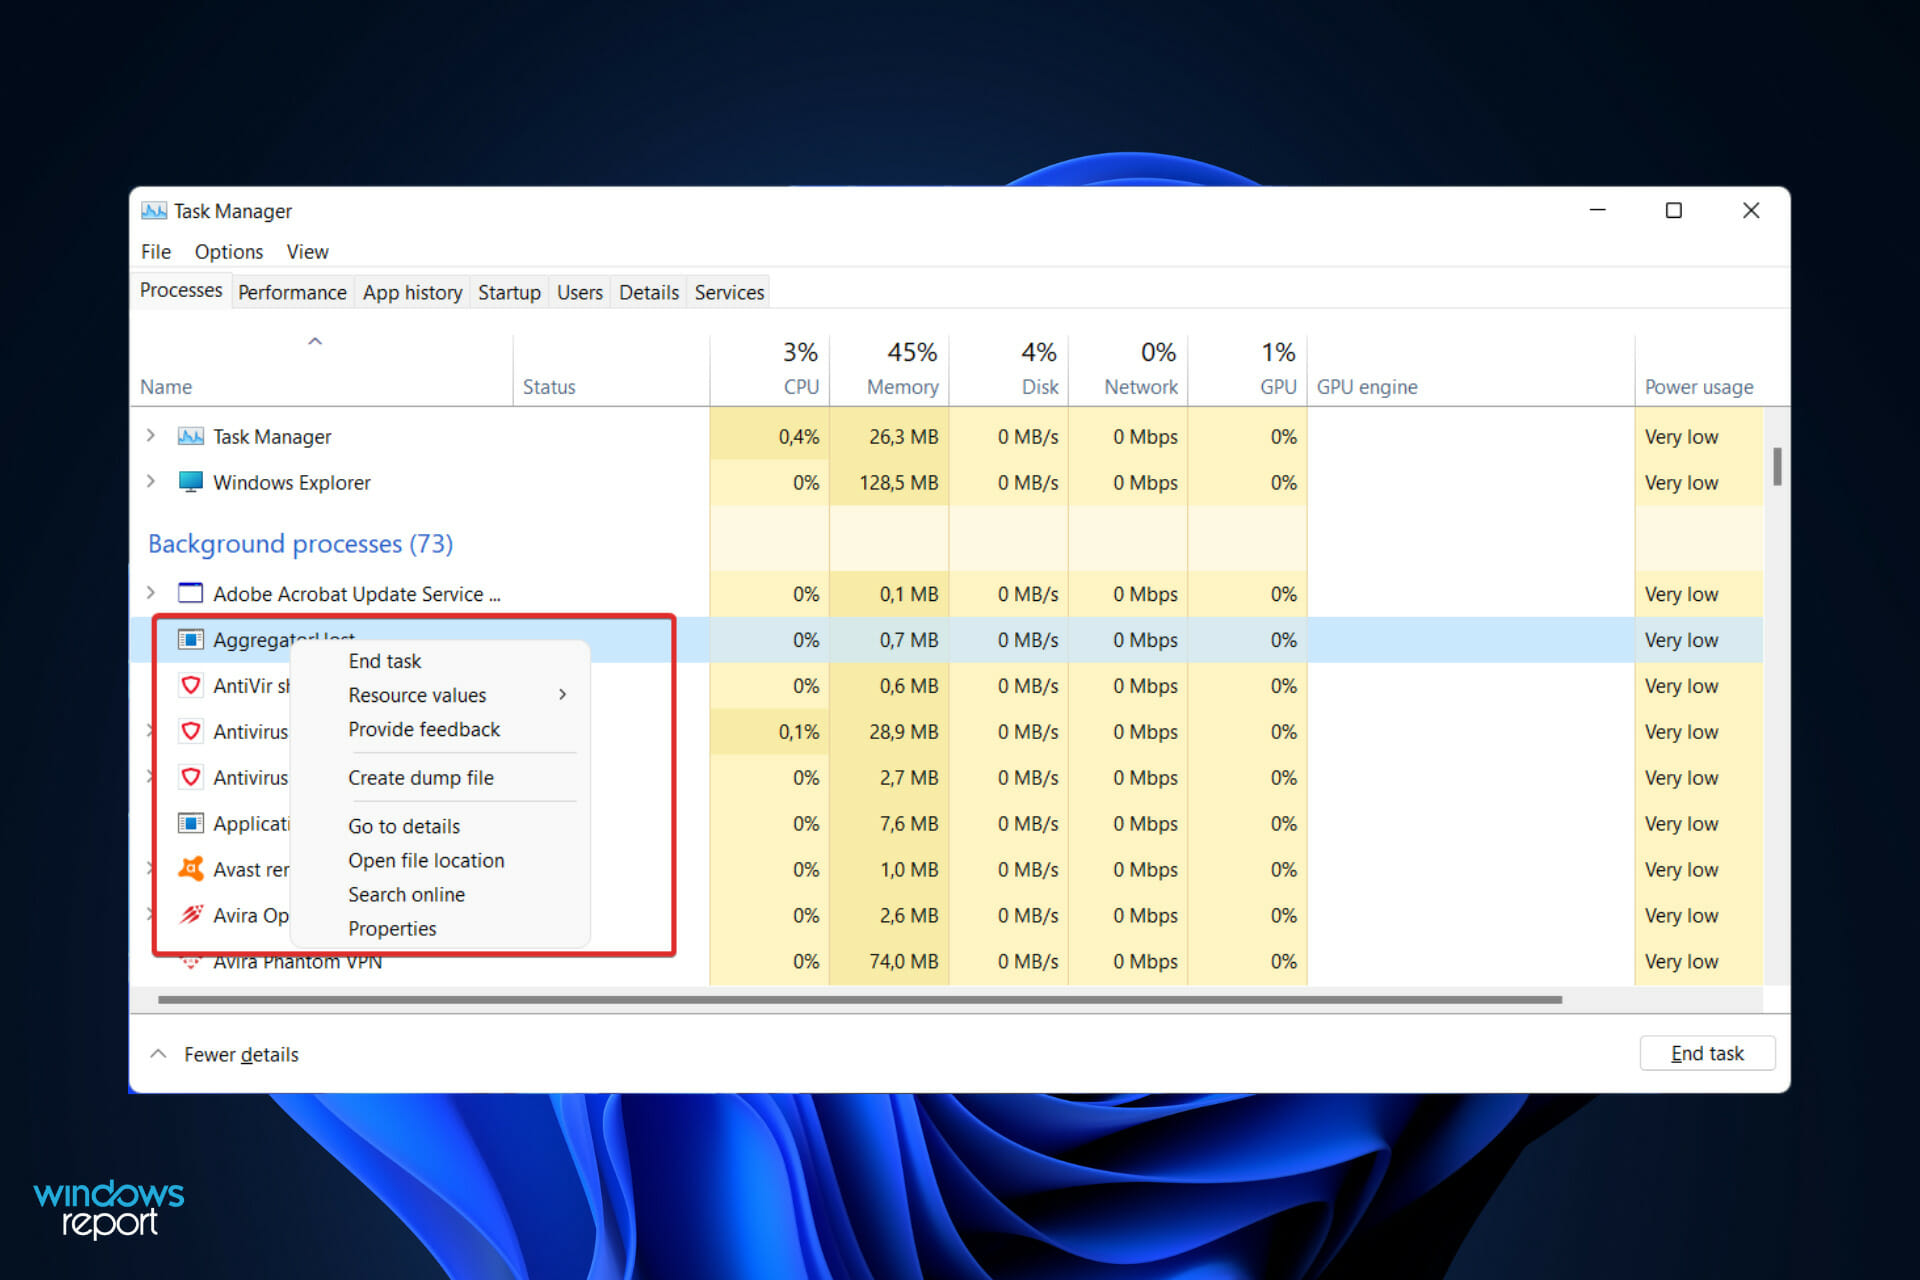
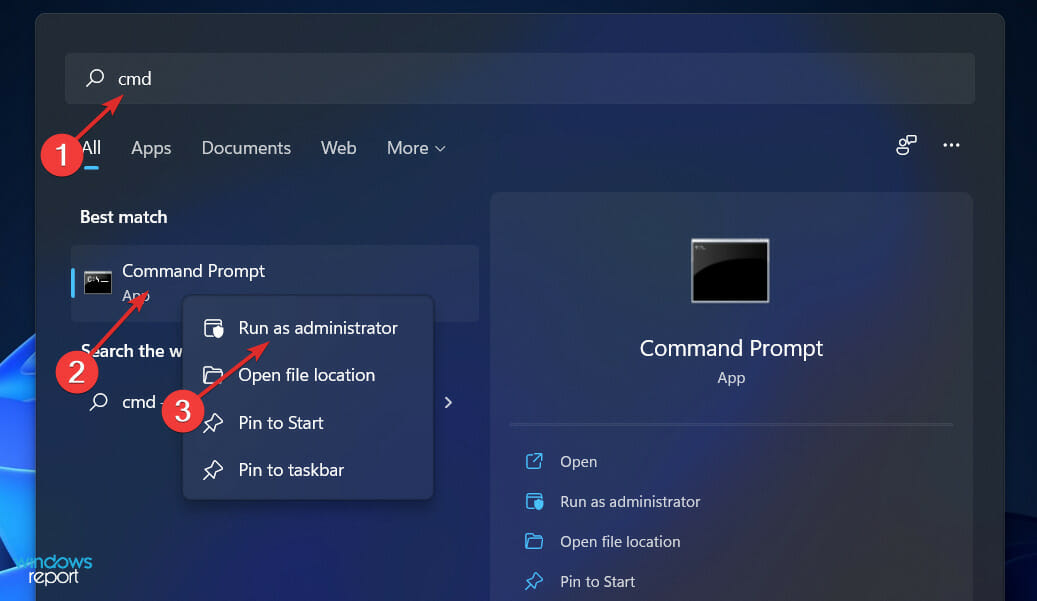
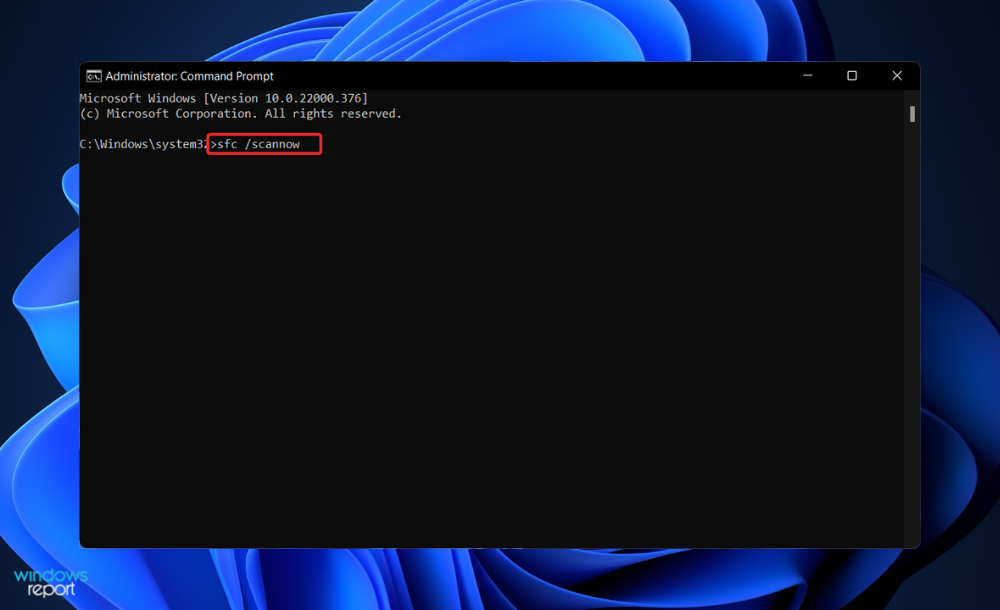
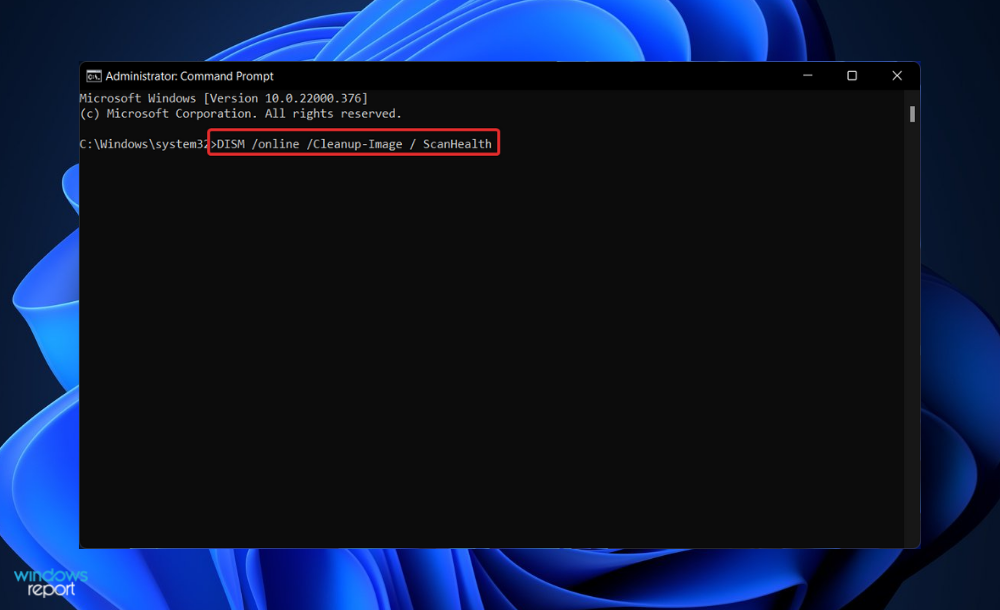


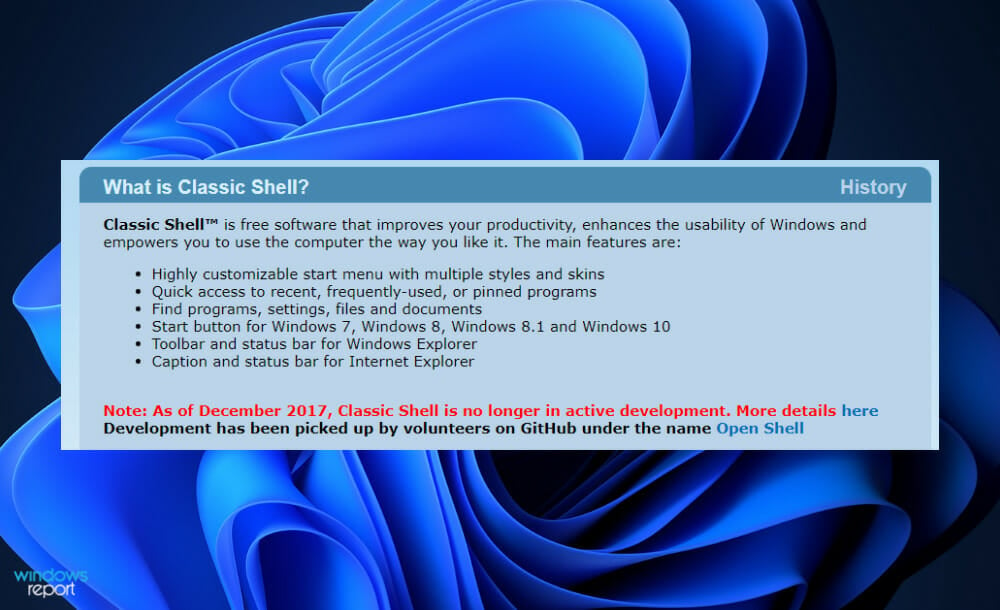


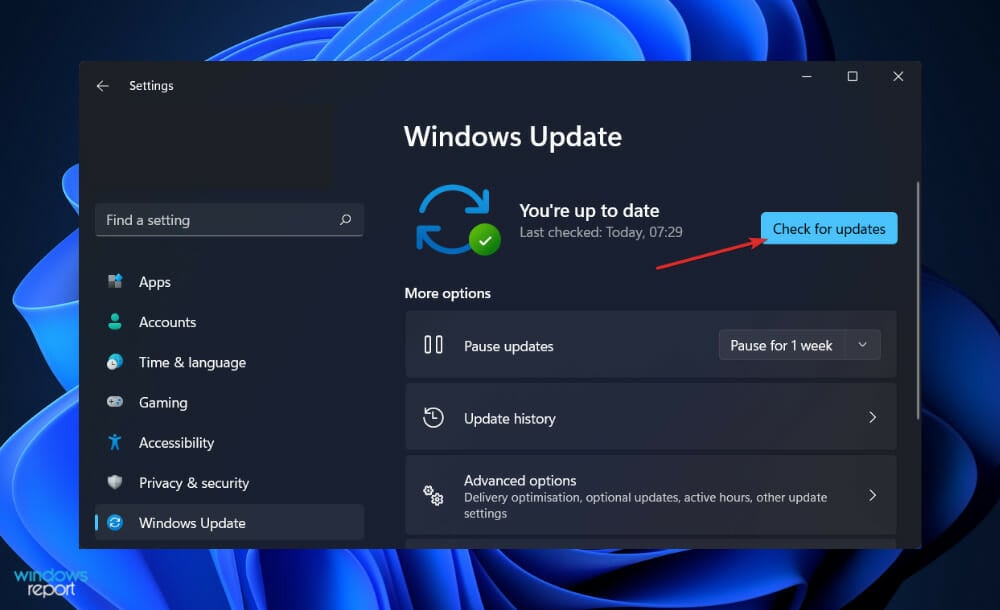
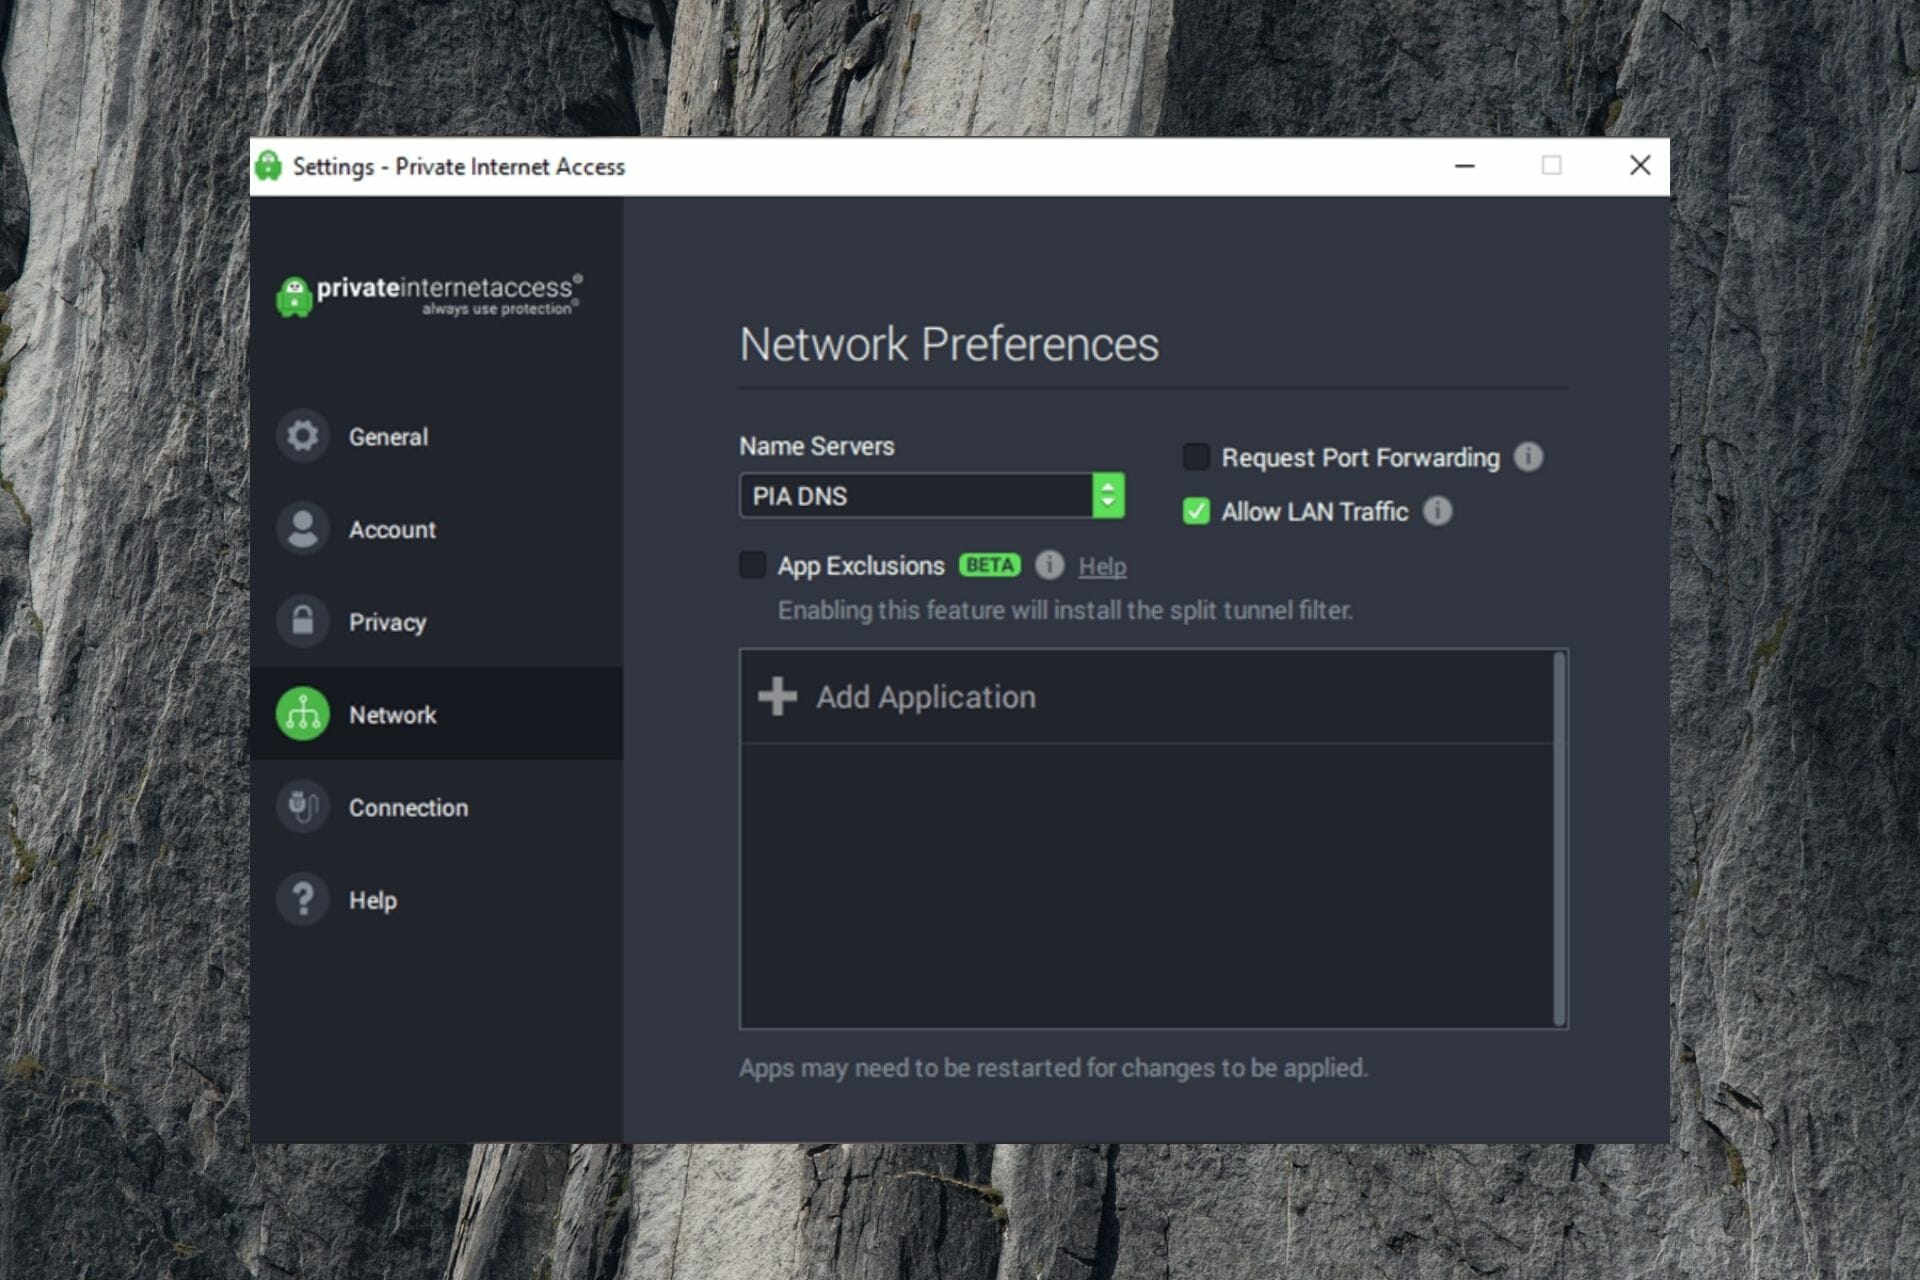
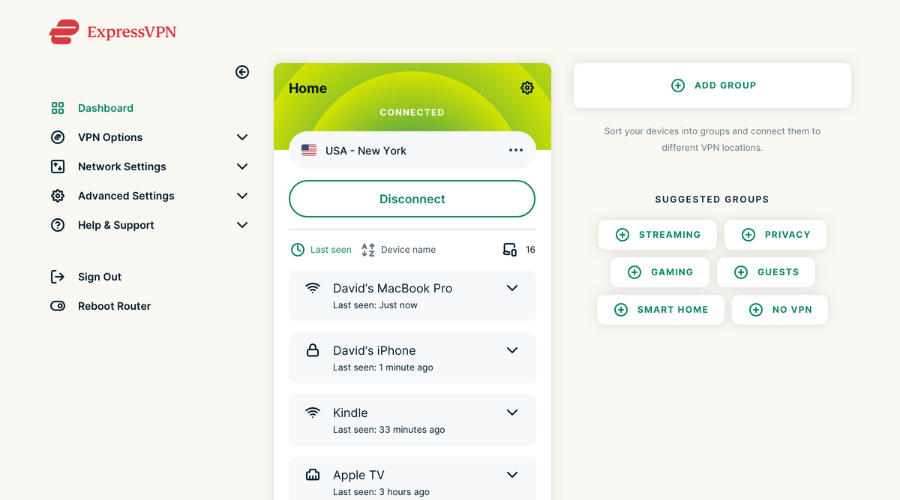

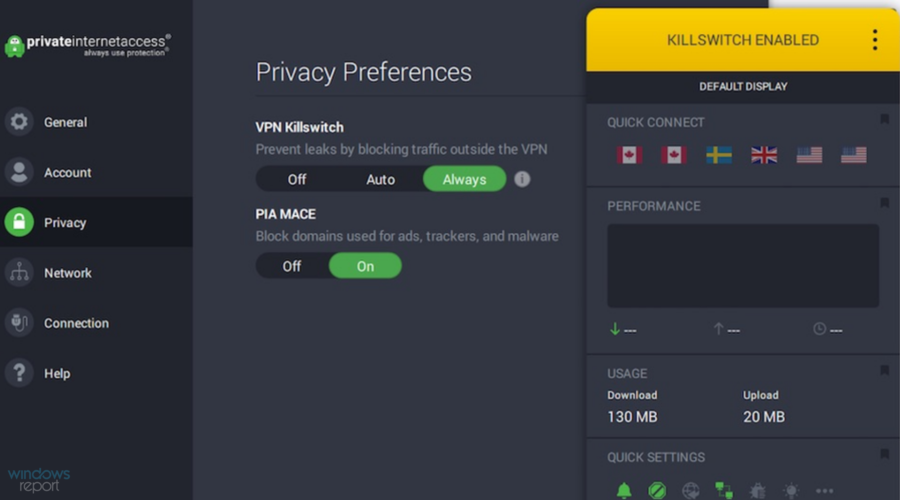
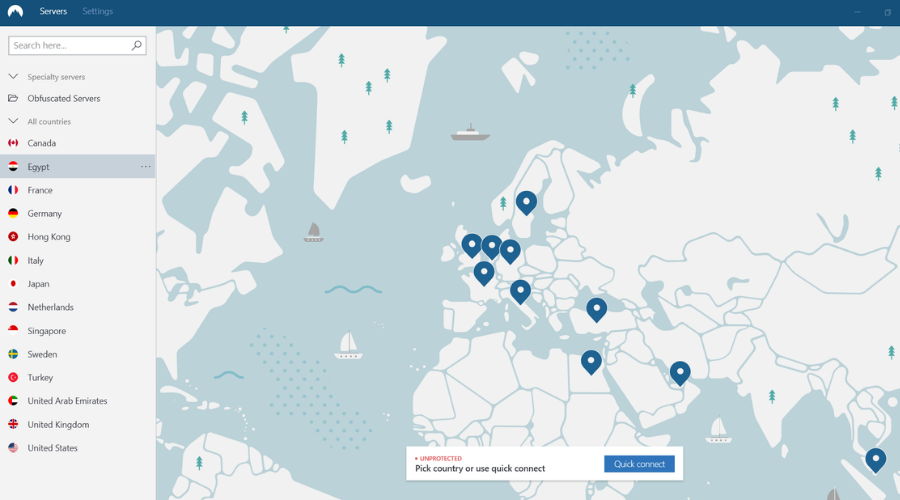
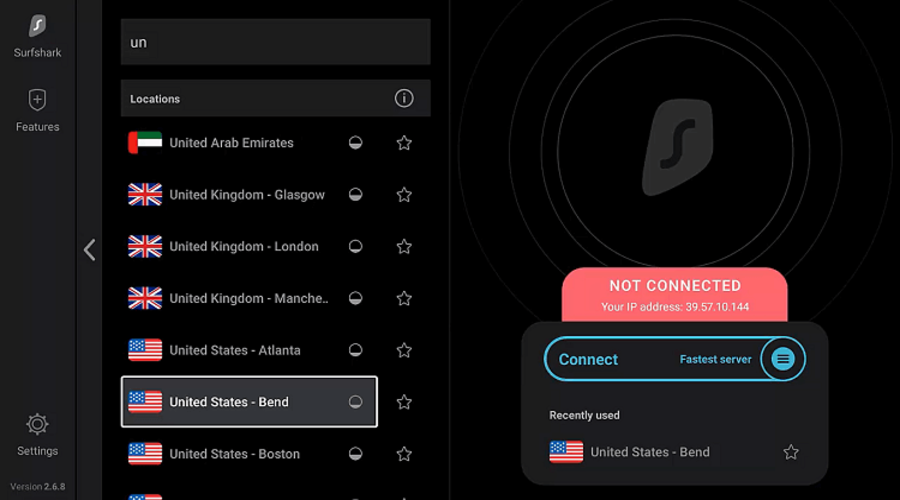


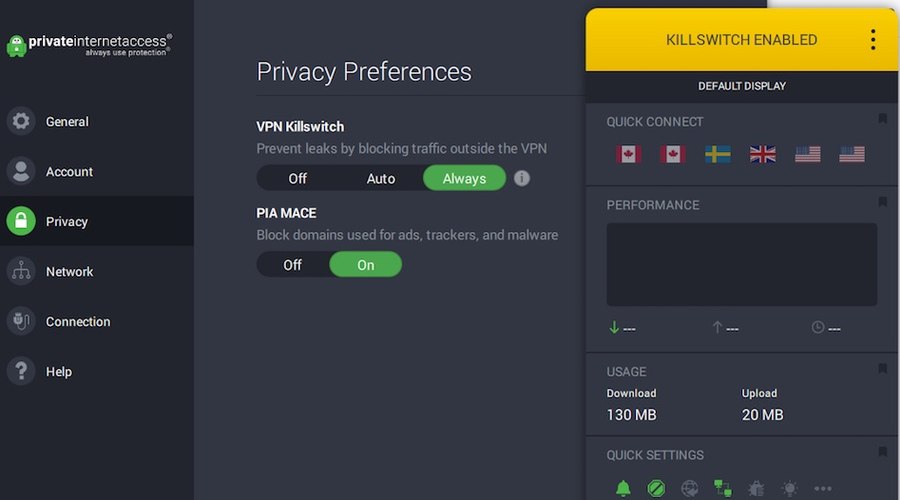










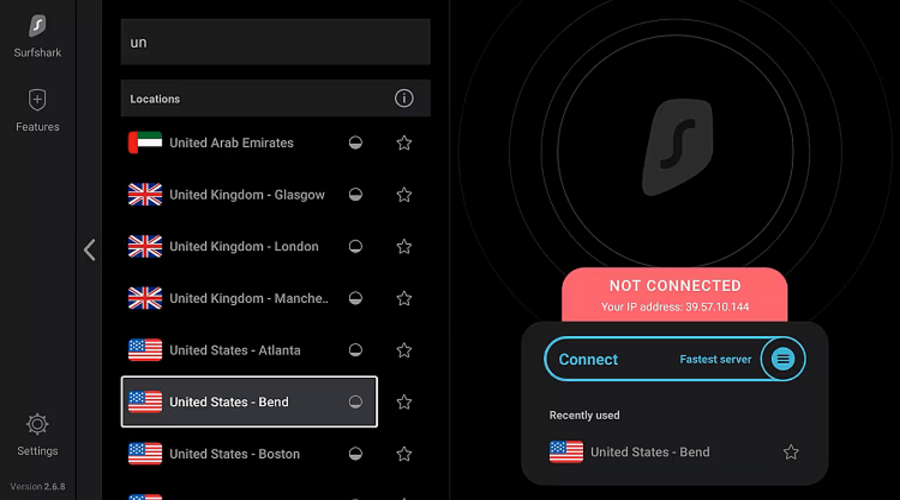


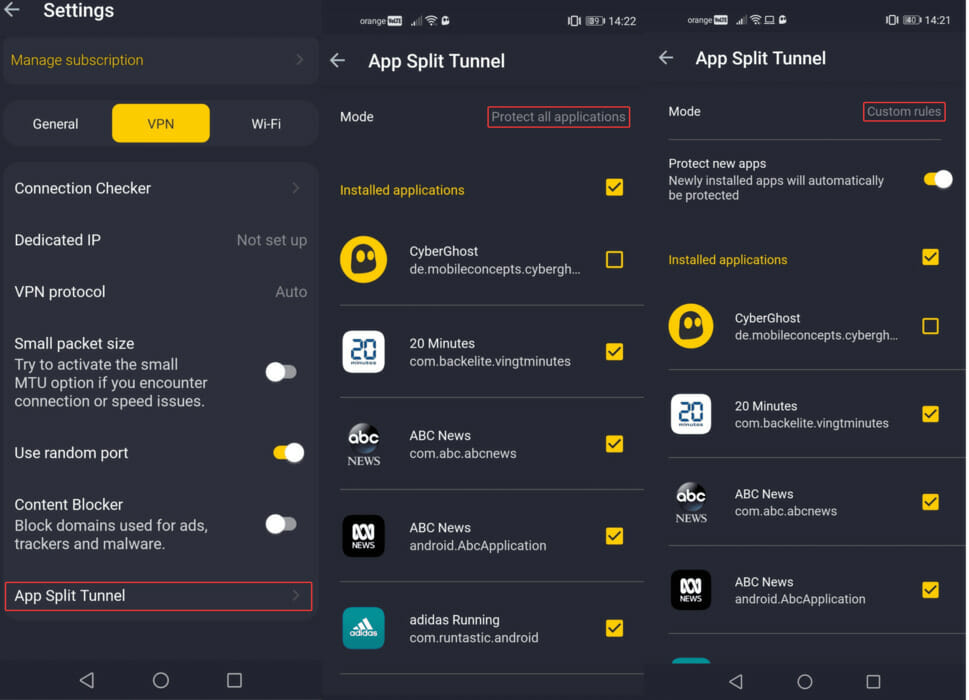







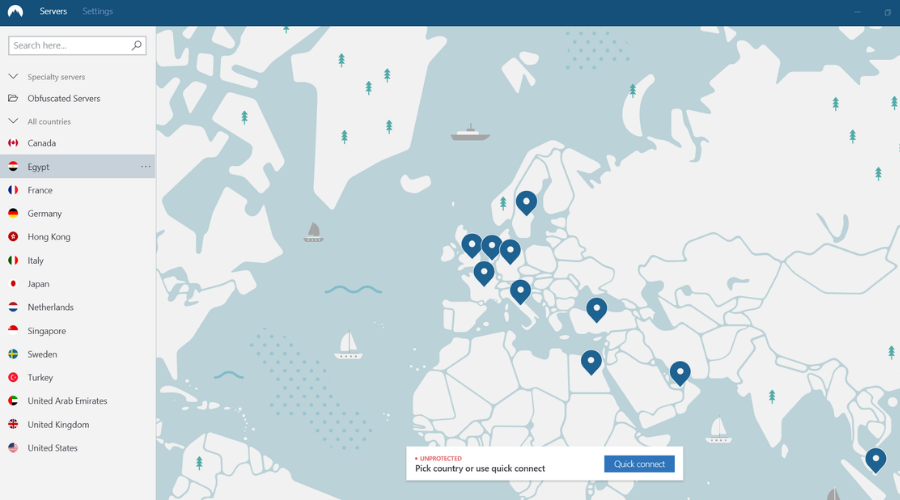






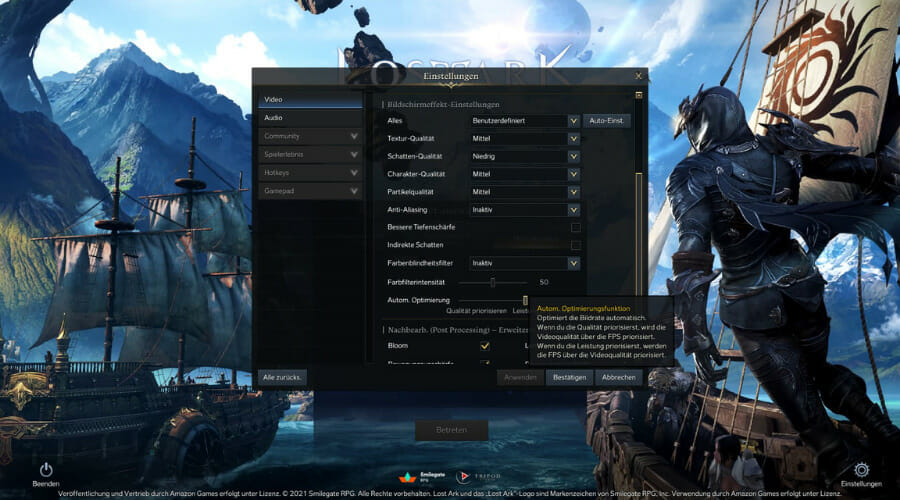

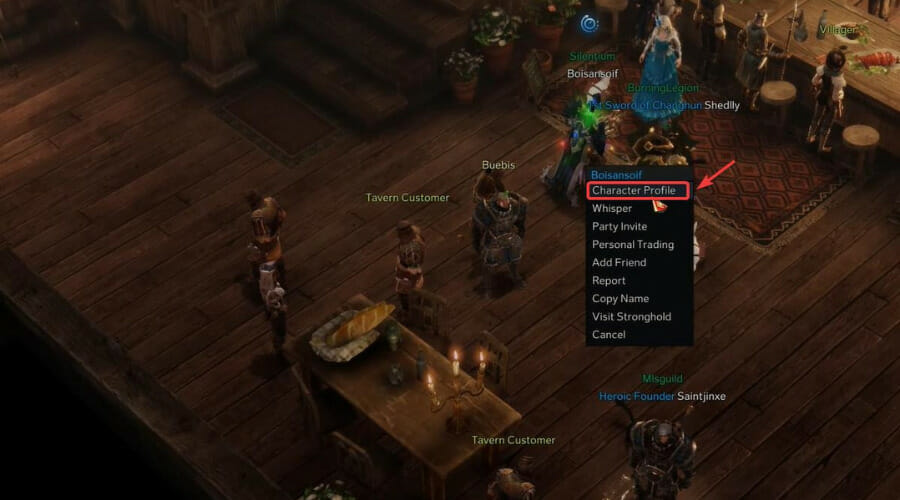
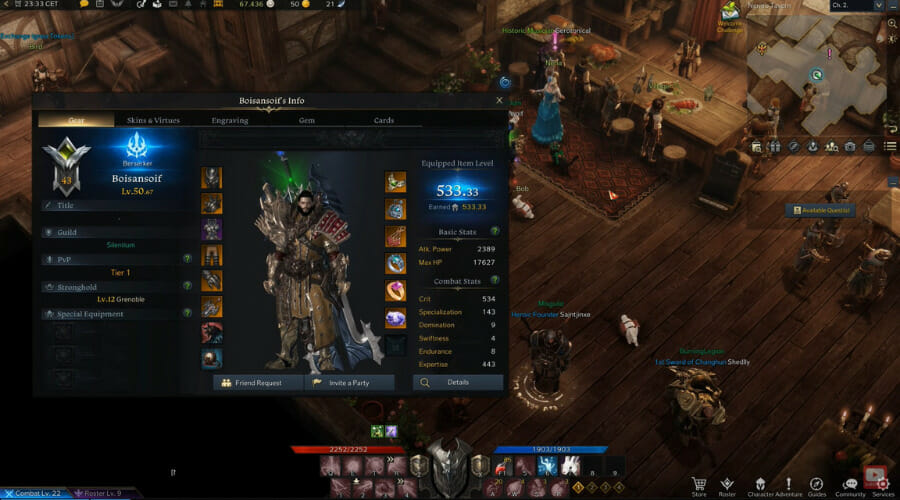





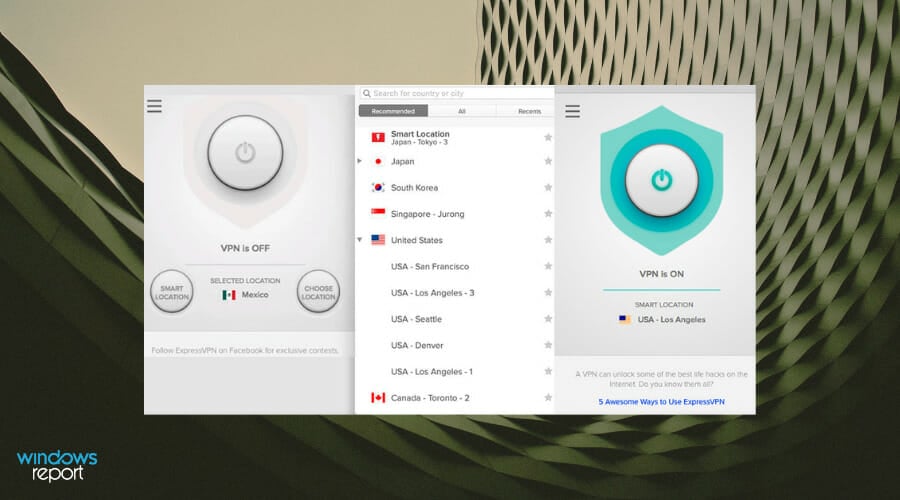










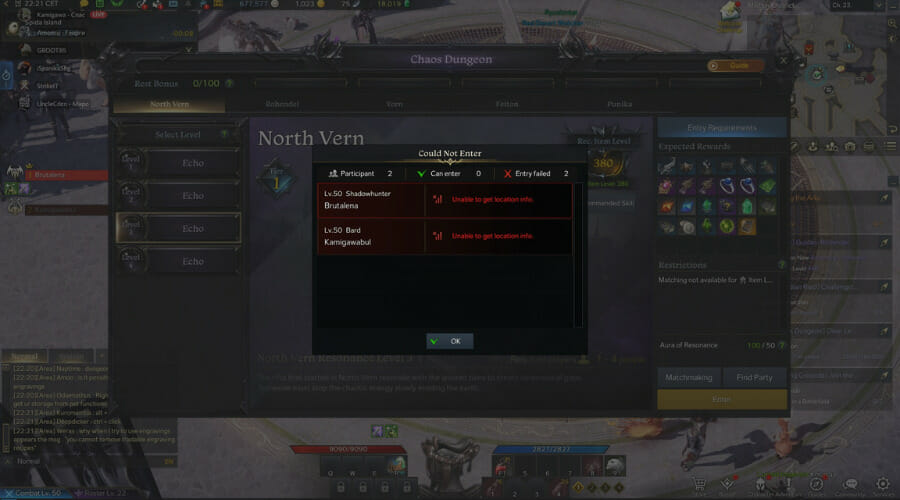






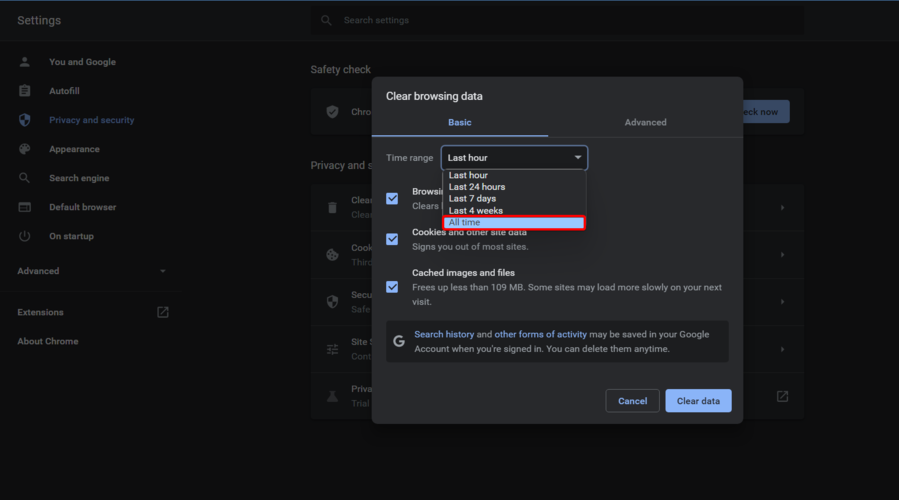
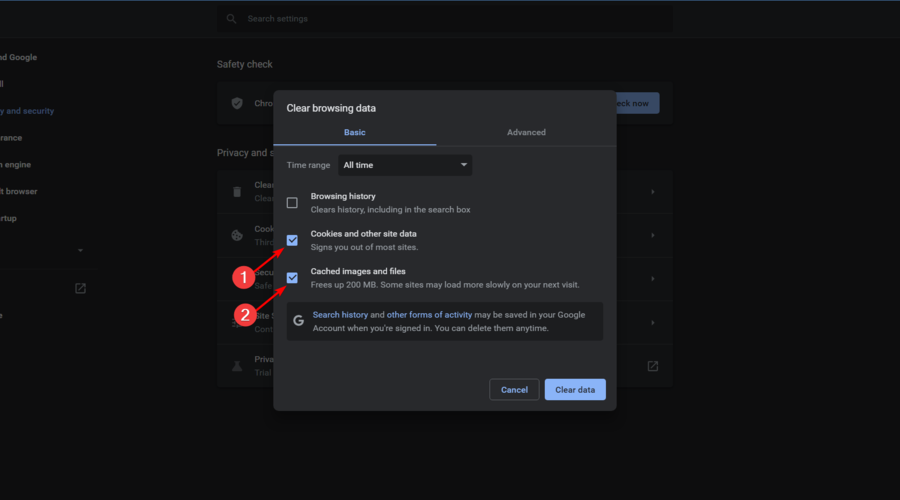


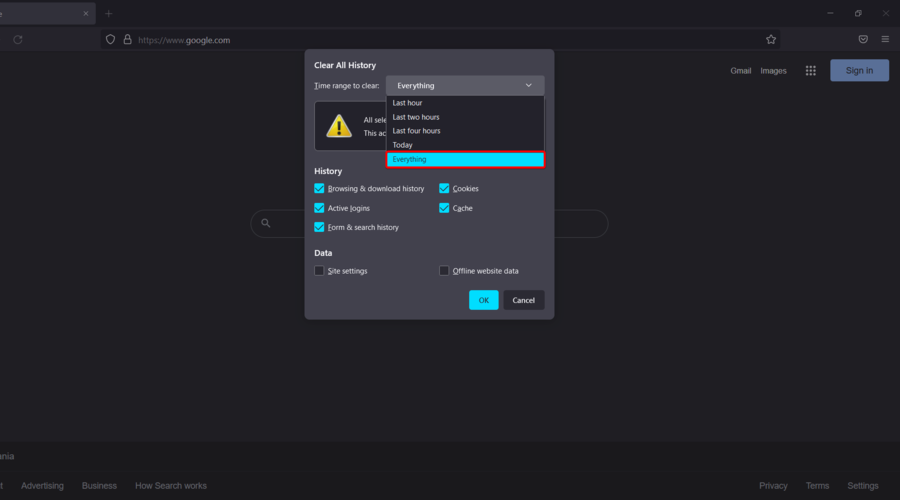
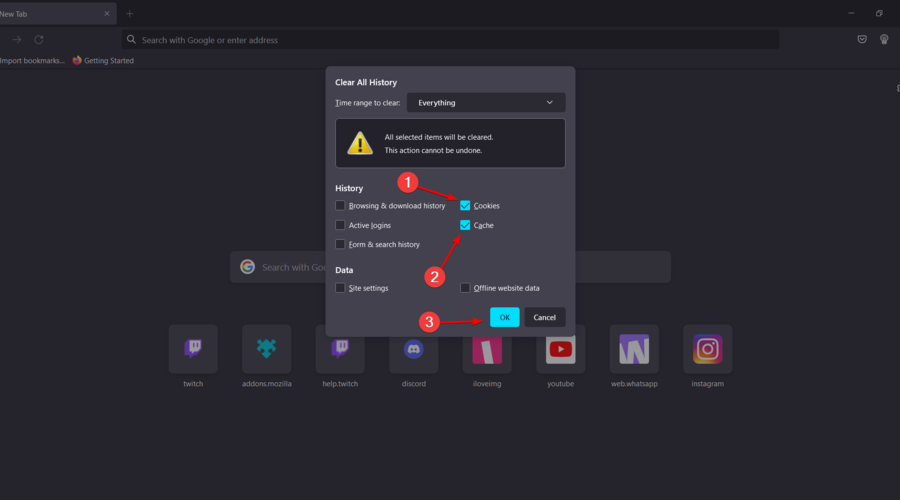
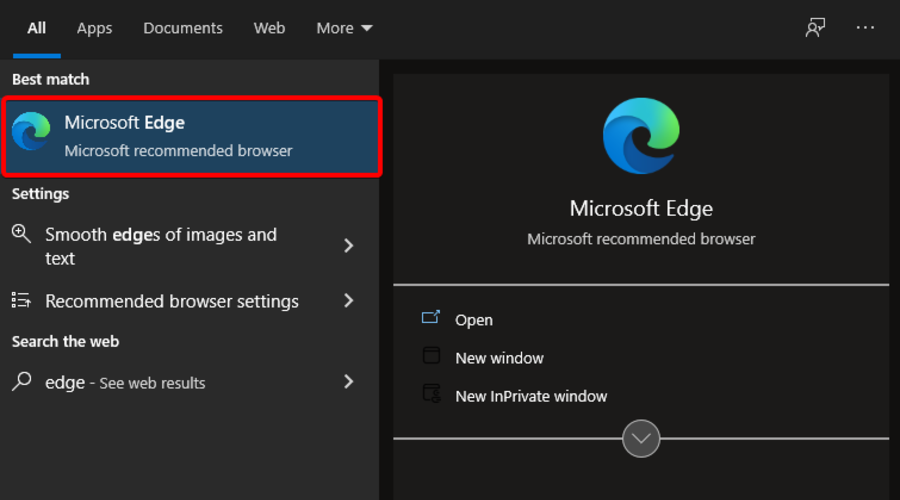
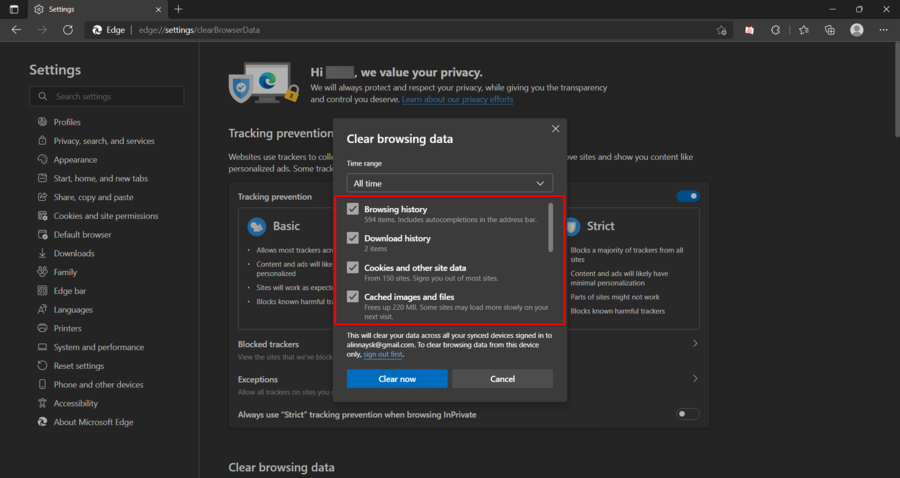
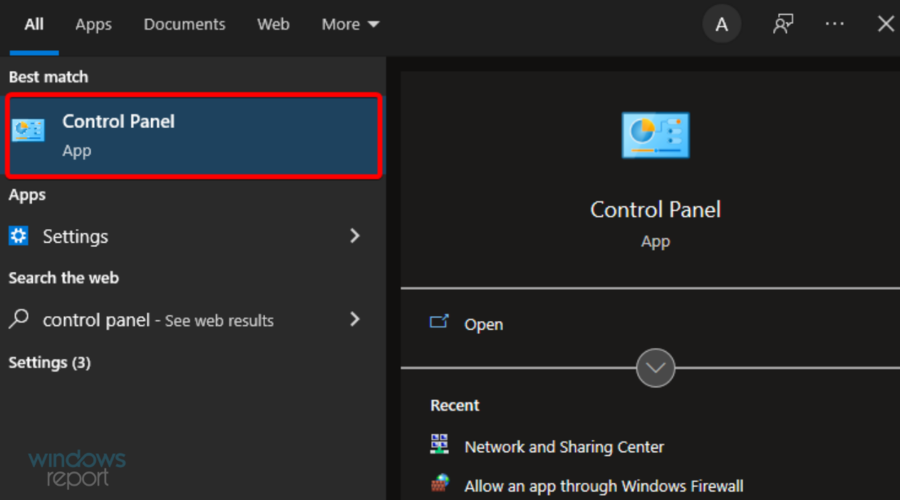
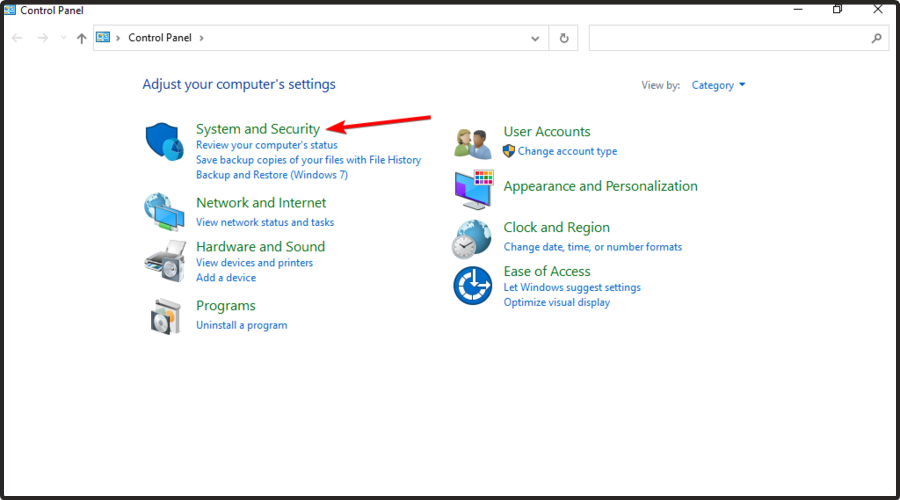
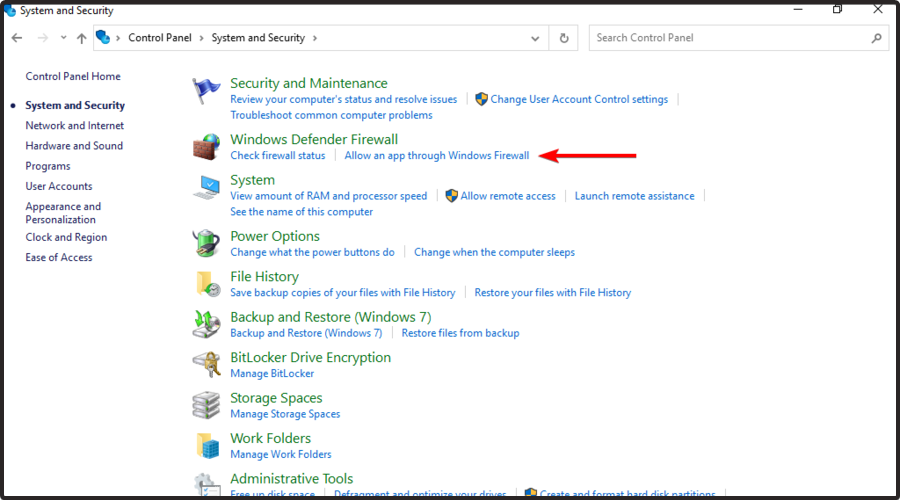
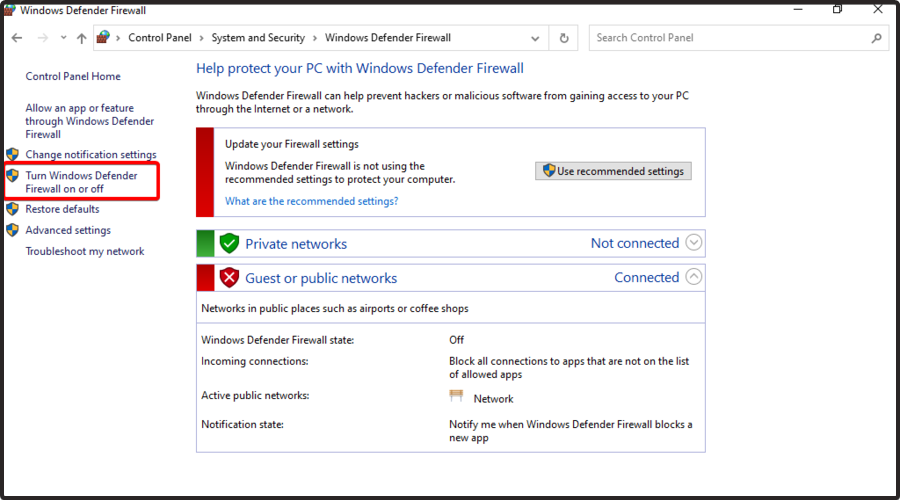
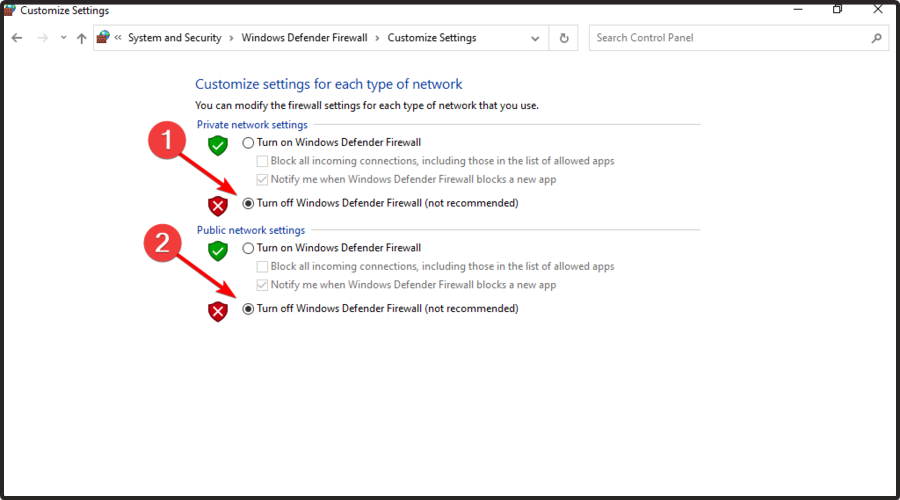
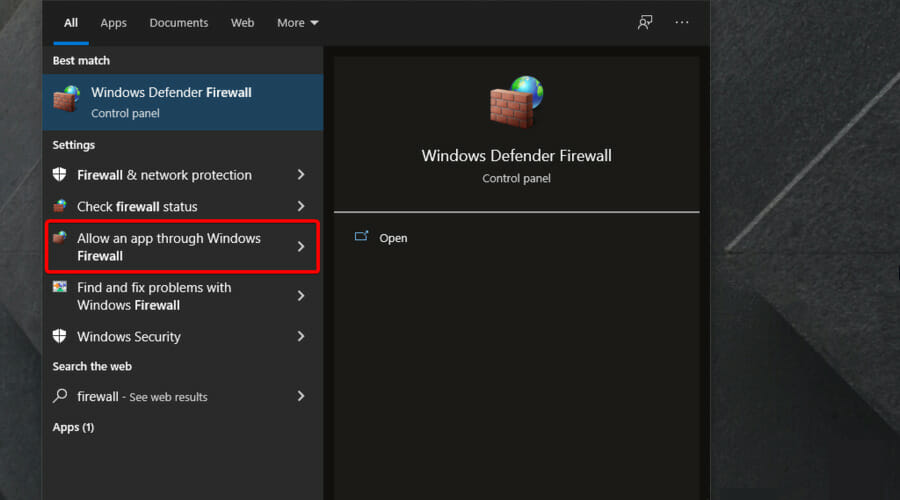
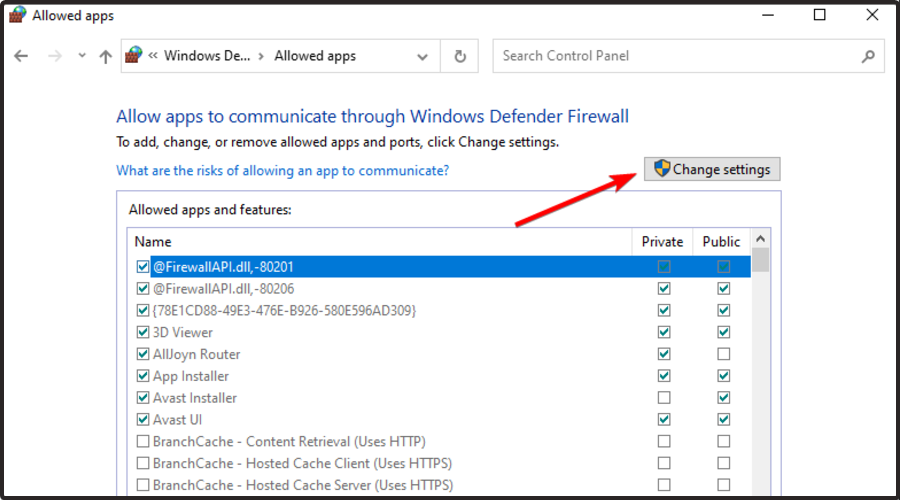
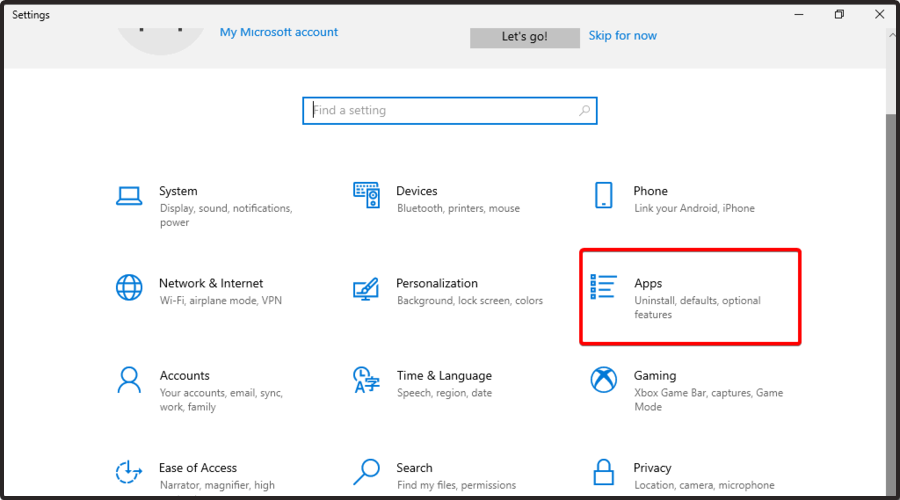
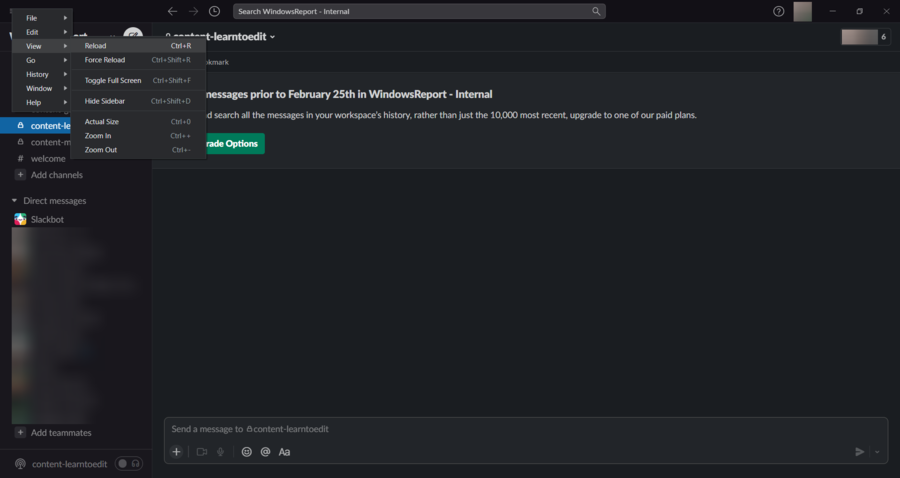
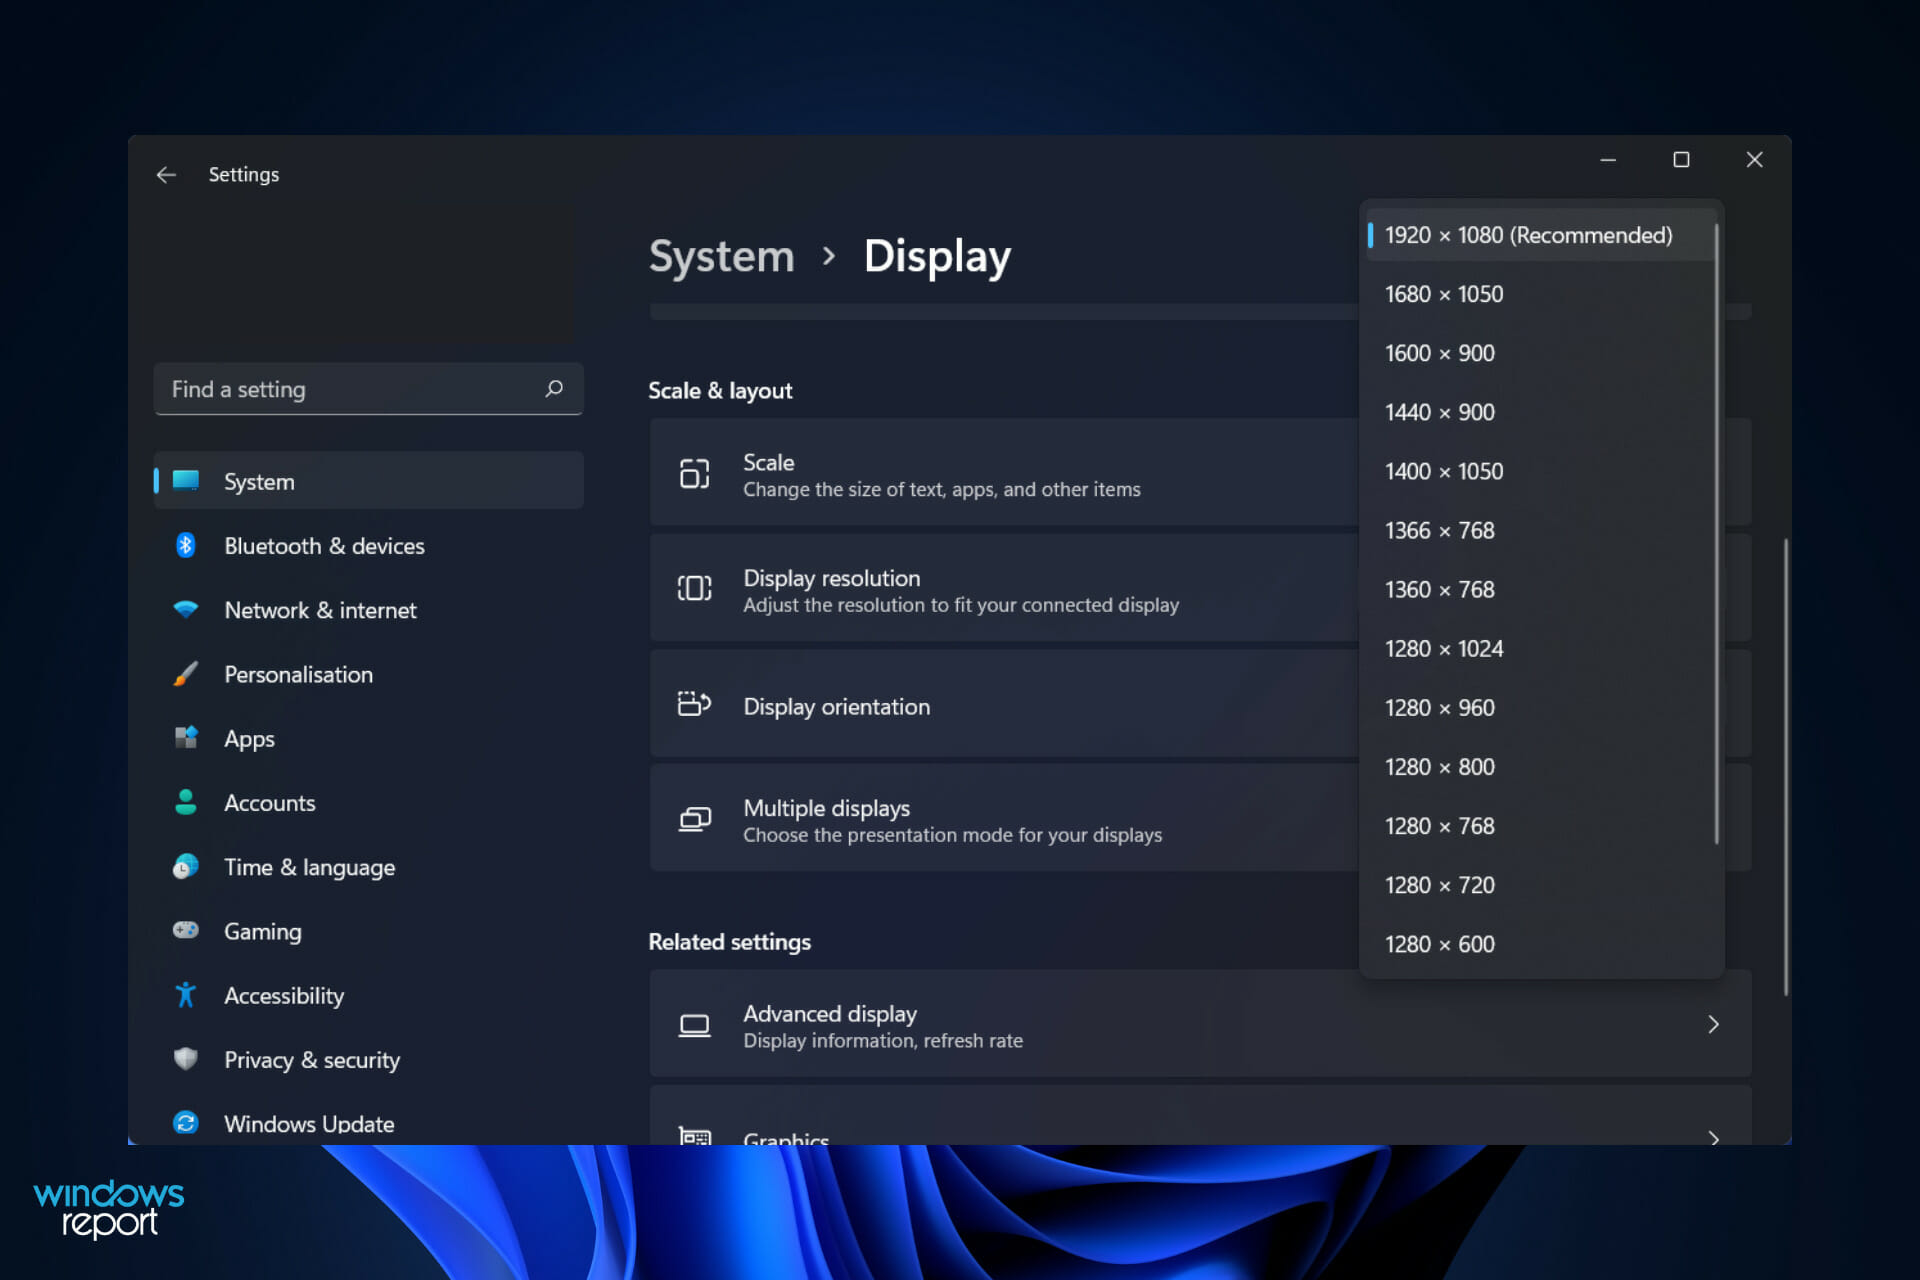
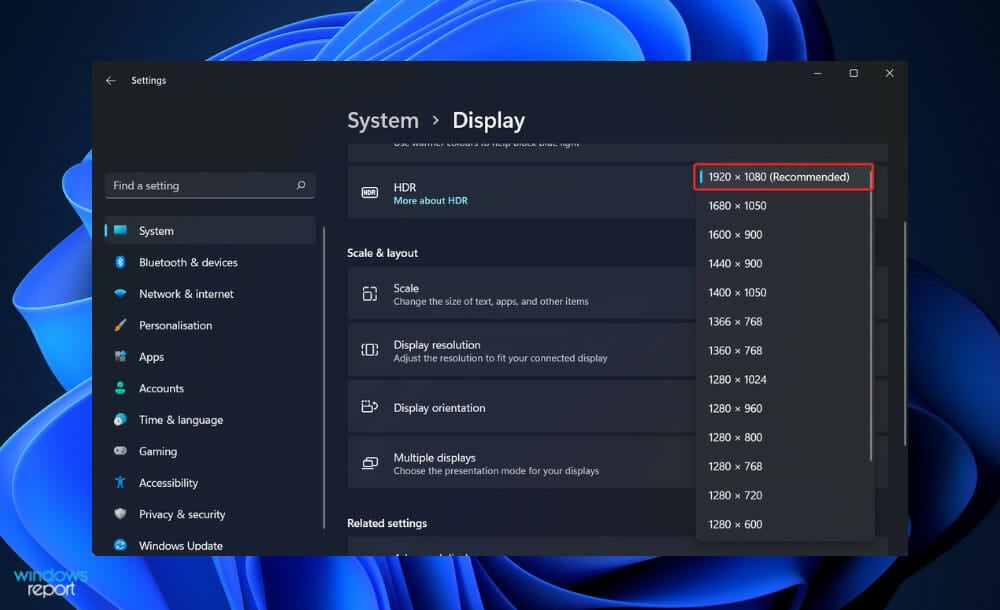


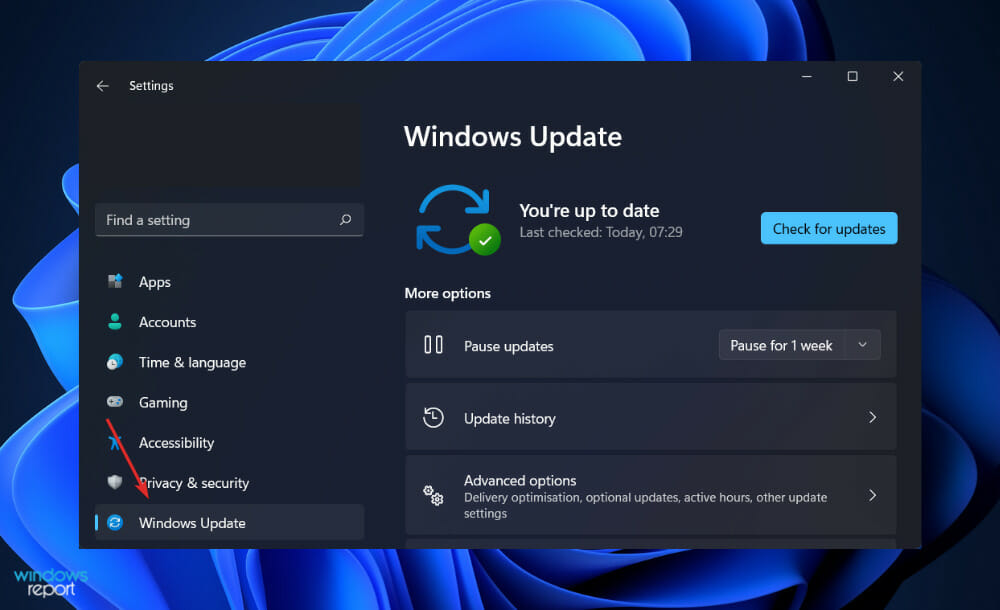
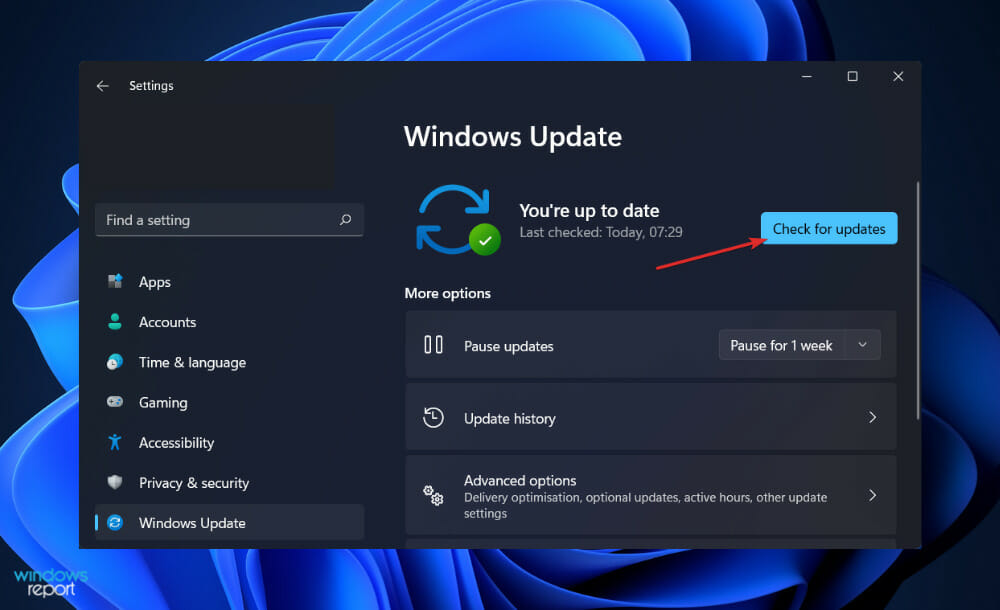
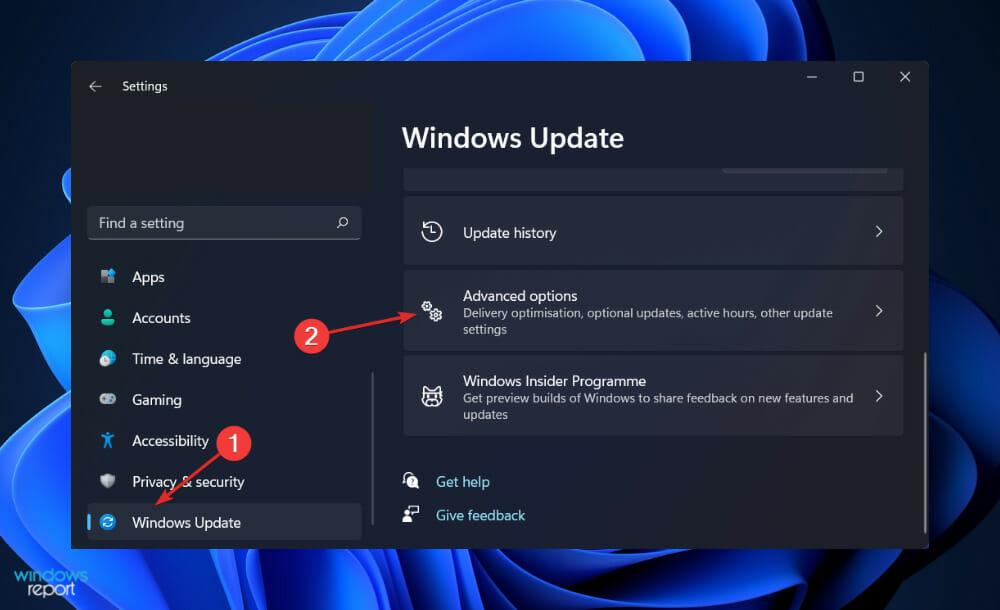
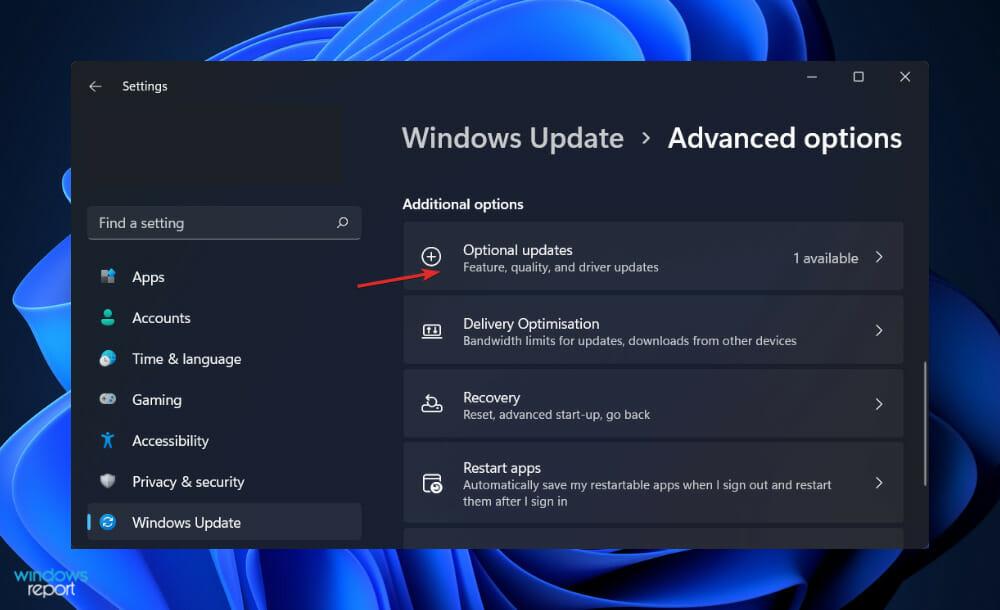
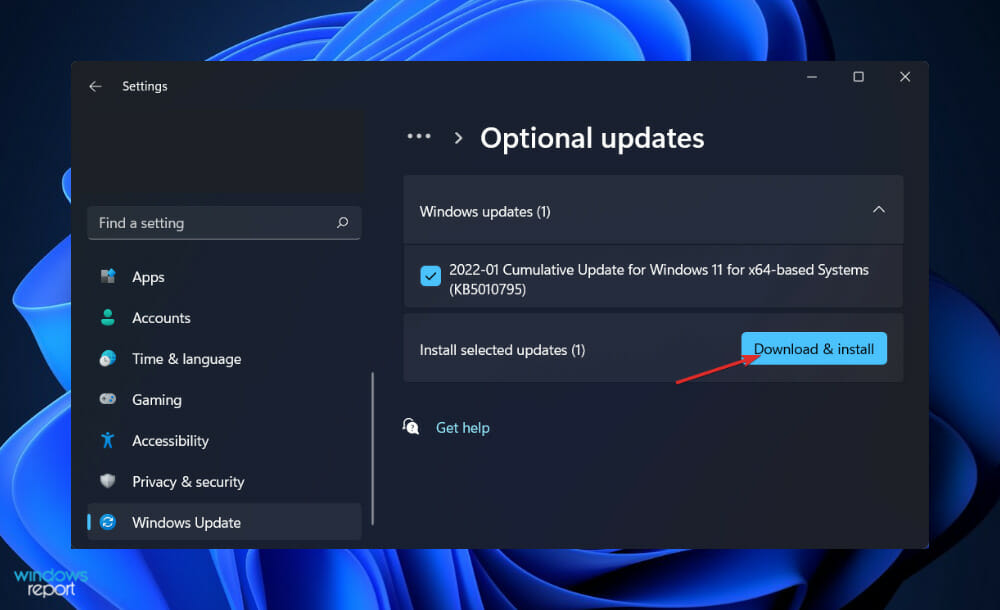
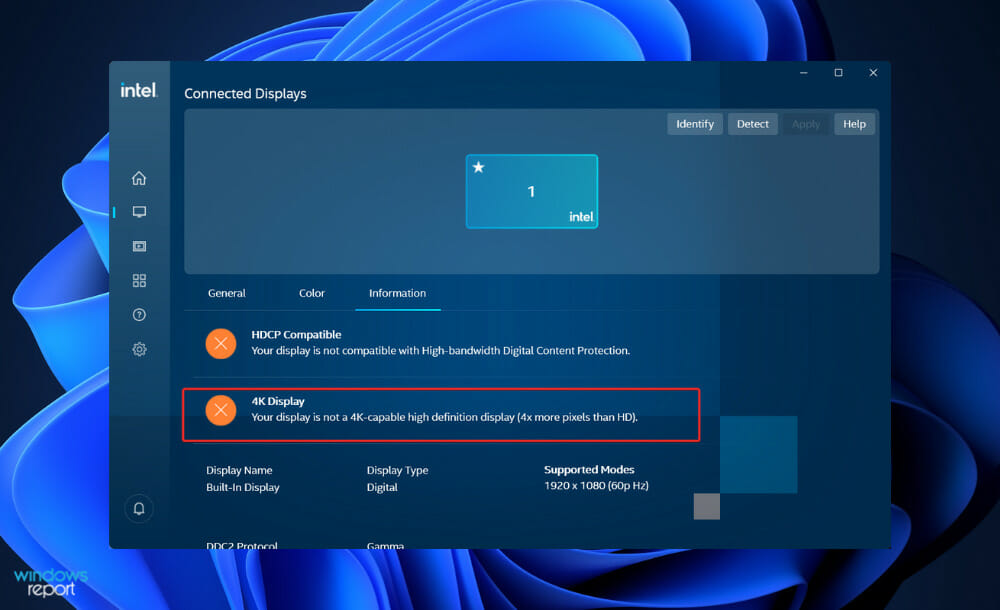


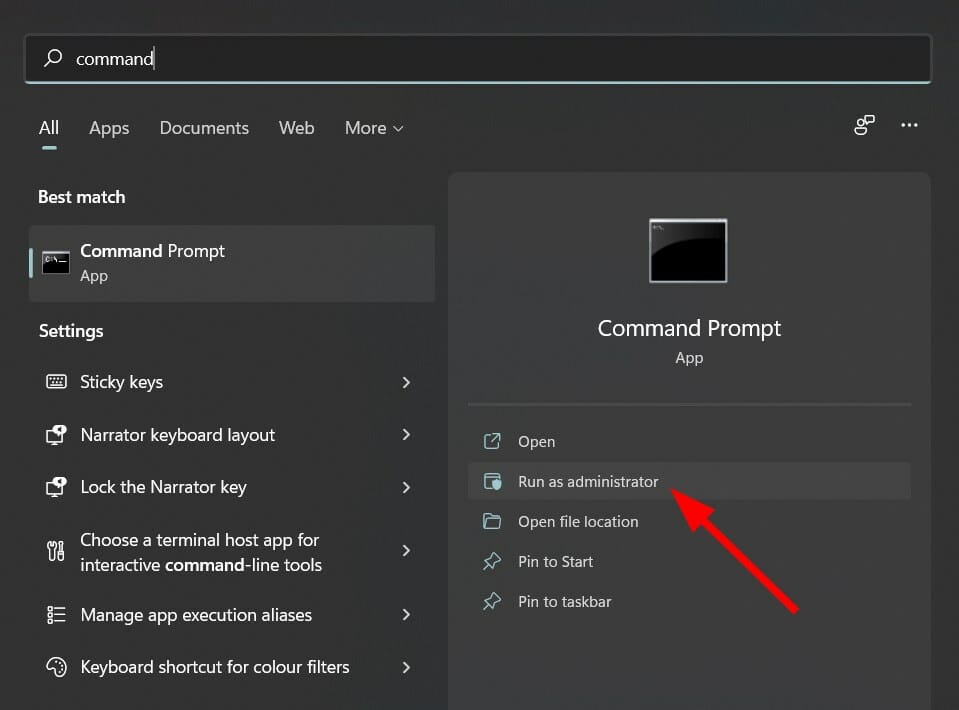


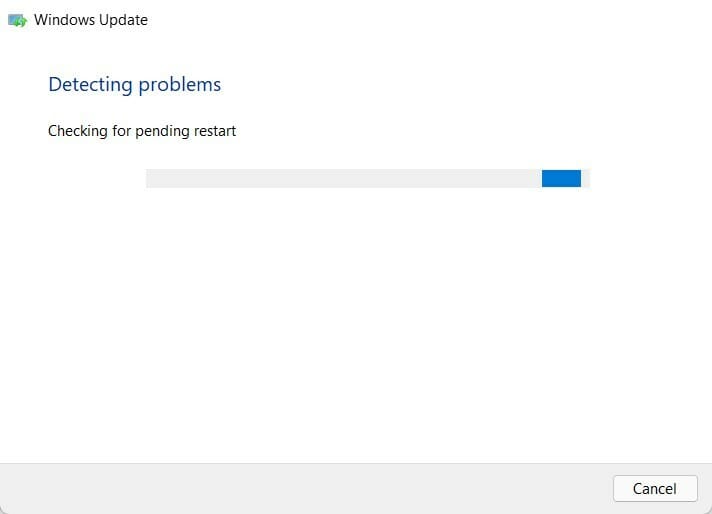



 If you have any questions or need any help setting up this flow, have advice, or can give me input to make a better flow, please