Amharic is a Semitic language from the family of Afro-Asiatic languages. It is spoken mainly by the Amharas of Ethiopia with approximately 30,000,000 speakers.
The language is however not left behind where technology is concerned, and in this article, we’re going to show you some of the best Amharic typing software for Windows.
What’s the best Amharic typing software?
Amharic Keyboard
The Amharic keyboard was developed by Snack Apps and available on Microsoft Store. The app was released on the 15th of May 2016, and it should work on both your phone and desktop PC.
The keyword works like any other virtual keyboard allowing you to add various symbols and punctuation marks, and it’s incredibly simple to use.
The Keyman Desktop application allows Windows users type in multiple languages including the Amharic. Keyman Desktop is an open-source application that automatically re-configures Windows OS to accept and understand the Amharic language.
The application is available on Android, iOS, Windows, macOS, and Linux, and there’s also a web version available as well. Overall, the Keyman Amharic should work on any device, regardless of the platform you’re using.
Lexilogos is a web service that works as an Amharic Keyboard. The service allows you to letters simply by clicking them with your mouse, or you can type certain combinations of letters in order to generate specific characters. The service is quite simple to use, and there are dozens of other languages available, which makes Lexilogos a web-based virtual keyboard.
Windows Servers, up to Windows Server 2016, don’t include support for the Bluetooth. However, some Windows 7 users seem to be running into the Windows Server does not support Bluetooth error, despite Windows 7 fully supports the Bluetooth connectivity. If you are troubled by the said error and Bluetooth won’t work on your system, follow the steps below to fix it.
How do I connect Bluetooth to Windows Server?
1. Make Sure Your Bluetooth Button Is ON
Many branded laptops like HP Pavilion and TouchSmart have a Bluetooth button in the keyword, which can be used to start or stop the Bluetooth connectivity. moreover, in some Laptops this button is situated at the sides.
Sometimes, users forget to use this button. If this button is OFF, you will not have Bluetooth connectivity on your laptop. Before jumping onto the software troubleshooting of this Bluetooth problem, make sure that your Bluetooth connectivity is enabled.
PerfLogs (short for Performance Log) is a system-generated folder in Windows 10. It stores the system issues and other reports regarding performance.
You can find the folder in C:, but you can remove it or relocate it in another partition or directory.
It is not recommended to remove this folder (or any system file for that matter), because it might affect your computer.
However, many people want to relocate this folder to another directory, as one userreported on a forum:
I would like to know what is the proper way to move the PerfLogs folder to a location other than the Windows 10 root install directory. Is ti done through Performance Monitor’s data collector set settings or maybe the ones for traces? I looked there but I couldn’t find such an option. Tried stopping some of the traces temporarily to see if that will make the file path fields editable. It didn’t… Or maybe we’re supposed to edit a config file somewhere?
So, this user wants to remove the folder from the Windows 10 root install directory. He already tried to edit the file paths field but to no avail.
When it comes to removing or relocating this system folder, things are not so simple as they seem, and today we will show you how to remove the PerfLogs folder in Windows 10.
How to remove the PerfLogs folder in Windows 10?
Use Command Prompt
You can move C:\PerfLogs folder into the C:\Windows folder by using the commands below, but first, you need to open Command Prompt.
Press the Windows key and type Command Prompt.
Right-click on it and select Run as administrator.
Java is one of the most important software needed to run Windows 8 and Windows 8.1, so if you are wondering what are the exact and safe download links for your 32 and 64-bit system, follow the information below to learn all about it.
First of all, before rushing to the download links at the end of the article, you need to understand that you might already be running Java, so the best way would be to first check for that and then install it.
Also, Java won’t run in the Modern interface, meaning you won’t be able to verify if you currently have Java installed if you’re not on the Desktop mode. For those who aren’t aware, Java won’t work on Windows RT devices, either.
Java has recently received quite a big overhaul, as it has reached version 8 on March 18, 2014.
The last update was on July 28, 2011, and this new version comes with big improvements. Briefly, here are the most important improvements that Java 8 is bringing to the table:
enables the Internet of Things
reduced code clutter
modernized apps
will enable impressive graphics capabilities
integrated with JavaScript
However, we won’t be providing links to the 8th version of Java, since it’s currently available for developers only in early access mode.
We will provide links once it goes public, but for now you can follow the download links from below to download it on your Windows 8 and Windows 8.1, 10 32 and 64 bit systems.
To access the Java Control Panel in Windows 8 and Windows 8.1, 10 you just need to go to search and type there “Java Control Panel”.
Before downloading the latest Java version, you need to make sure that the old one has been uninstalled.
You can just go to the Control Panel and uninstall it like any other software, or you can choose to use the Java uninstall tool.
Also, before the installation process, don’t forget to disable your Internet firewalls, as they might be blocking it.
Update – Windows 10 is just around the corner and we’ll make sure to release a standalone guide in order to help you get the latest version of Java on there, as well, so stay tuned.
Java Version 8 Update 66
This update was released on November 16, 2015, and while it doesn’t bring any major new features or options, it contains fixes for security vulnerabilities, so it’s required to download and install this version to minimize risks in your environment.
A recent release of Java for Windows 8, 10 contains fixes for security vulnerabilities, but the links from below will still work, so follow them safely.
Download Java for Windows 8, 8.1, 10 – 32 bit Download Java for Windows 8, 8.1, 10 – 64 bit
UPDATE: With Windows 10 well established as the main operating system from Microsoft, we recommend reading this detailed guide to learn everything there is to know about downloading Java 10 to your PC.
Windows 10’s May 2019 Update overhauled the search experience by separating it from the Cortana assistant interface. As part of this change, Microsoft also revised search itself, adding a new “enhanced” mode which is more effective at finding files.
Previously, the taskbar searchbar would only search through files on your desktop and in your libraries. The new enhanced mode lets you search all the files on your device, irrespective of where they’re located. This means search is more likely to deliver a result, especially if you store files in non-standard locations.
Because enhanced search has a much broader scope, you might notice slightly reduced performance and battery life when lots of new files are being indexed. Nonetheless, if you use search a lot, the benefits of the new system should significantly outweigh the few caveats.
Enabling Enhanced Search
To enable Enhanced search, open the Settings app (Win+I keyboard shortcut) and then click the new “Search” category. Choose the “Searching Windows” page from the left sidebar. Next, click the “Enhanced” radio button option under “Find My Files.”
Enhanced search will now be turned on. If this the first time you’ve used it, Windows will commence indexing your files. You can track the progress under the “Indexing Status” heading.
Indexing might take a long time, especially on low-end devices. The process automatically pauses if you’re running on battery power. Until the index is complete, some files might not appear in search results, so it’s best to connect your device to power and wait for the procedure to finish.
Excluding folders from Search
You can stop folders from showing up in search using the “Add an excluded folder” button further down the Searching Windows page. Use the filepicker to browse for the folder to exclude. Any files within the location will be removed from the index, so you won’t see them in search.
Generally, you should exclude all root directories which don’t contain your own files. Some locations, such as the Windows system directory, are excluded by default as you’re unlikely to ever search them. Excluding folders which only contain system files reduces the index size and improves performance, so spend the time to blacklist any locations you’ll never need to search.
With the configuration complete and the index built, you can now press Win+S to search all the indexed files on your PC. You should find many more results display, compared with the libraries-only search of previous Windows 10 releases.
Microsoft Power Bi is a business analytics tool that helps to formulate strategies and commercial reports. Users often encounter Power Bi binding errors. If you are one of them, do not worry. We have brought you a guide to fix this error.
How to deal with the Power BI Binding error
There are two easy ways to get rid of this Power Bi binding error. You can use each of these two.
1. Try Debugging
Debug Visual Visual debugging helps to get rid of Power Bi Binding error. If you can’t find the debug visual in the visualizations tab, please enable it by going into Power Bi settings.
Upgrade NodeJS If you are facing an error that says ‘Pbiviz’ command not found then run Pbiviz in terminal’s command line. If you do not see help screen after running it, it is due to an incorrect or older version of NodesJS. Upgrade your NodeJS to NodesJs version 4.0 or above.
Reinstall SSL Certificates If you are getting an error that says ‘Can’t connect visual server’, please make sure that your SSL certificates are valid and properly installed.
This error is usually caused if the column names are changed in the wrong way.
Solution
Binding Error of Visual data can be fixed by avoiding ‘&’ variable. Many users report that the error in visual data is due to this variable in table visuals.
Power Bi binding error is quite frustrating for most users. Nevertheless, it can easily be resolved in a very short time. Also by using the above-mentioned ways, you can tackle almost all common errors regarding Microsoft Power Bi.
Microsoft Outlook 2016 does not support manual setup for an Exchange account directly from the add accounts interface. The add account now has only two options, i.e. Outlook.com or Exchange ActiveSync compatible service or POP or IMAP. While you can add the Exchange account directly from the Outlook app’s Add account section, Outlook client does not support manual setup for exchange.
In this article, we have created a detailed guide to help you resolve Outlook 2016 does not support manual setup for exchange problem.
How do I set up my Exchange email in Outlook 2016?
1. Setup Exchange for Outlook Manually
Press Windows Key + R to open Run.
Type control and click OK.
In the Control Panel, search for Mail.
Click on “Mail (Microsoft Outlook 2016) (32-bit)” option.
In the pop-up window, click on Show Profiles button under the Profiles section.
Click on the Add button.
Enter a name for your profile and click OK.
Select “Manual setup or additional server types” option and click Next.
Select “Microsoft Exchange Server or compatible Services” option and click Next.
Now enter the Server Settings as follow: Server: outlook.office365.com User Name: Your Office 365 complete email address
Click More Settings.
Open the Security tab.
Uncheck “Always prompt for logon credentials” under User Identification.
Click the drop-down menu under “Logon Network Security” and select “Anonymous Authentication“.
Click OK to save the changes.
Open the Connection tab.
Check the “Connect to Microsoft Exchange using HTTP” option.
Click on Exchange Proxy Settings and enter the following details:
Use this URL to connect to my proxy server for Exchange – outlook.office365.com.
Check “Connect using SSL Only” box. Then, check “On fast networks, connect using HTTP first, then connect using TCP/IP ” box. Check “On slow networks, connect using HTTP first, then connect using TCP/IP” box.
Under the Proxy Authentication, select Basic Authentication.
Click OK to save the changes.
Click Next. In the Window Security window, enter your Office 365 email address and password. Also, check “Remember my credentials” box.
Click Finish.
Click OK when the “You must restart Outlook for these changes to take effect” window appears.
Close and relaunch Outlookclient. Outlook will automatically load the profile and ask you to enter the password to log in.
That’s it. You have successfully added your Exchange account manually for Outlook.
Sometimes, while trying to connect with a 32-bit access database from Power BI-64bit Dekstop, you may encounter not registered error. The error can occur with different messages depending on the user. The Power Bi error the provider is not registered can also occur when refreshing on service as reported by the users in the Power Bi community forum.
I built a report using PBI Desktop – the source is an Excel file on a public website (not OneDrive). When I publish it and then try to use the Power BI site to refresh the dataset, I get this error: Data source errorExcel Workbook: The ‘Microsoft.ACE.OLEDB.12.0’ provider is not registered on the local machine. The 64-bit version of the Access Database Engine 2010 Access Database Engine OLEDB provider is required to connect to read this type of file
Follow the steps in this article to fix Power Bi error the provider is not registered issues with Power Bi desktop and service.
How to fix Power Bi error the provider is not registered
1. Install the 64-bit version of the Microsoft Access Database Engine
If the error specifically states issues with the Microsoft Access Database Engine 2010 and asks you to install the 64-bit version of the software, then do the following.
Go to Microsoft Access Database Engine 2010 Redistributable page.
Select the language and click the Download button.
Install the software on the machine where Power Bi is installed.
After the software is installed, try to connect access DB from the Power BI desktop. Check if installing the 64-bit version of the software has resolved the error.
Install the app and check if the not registered Power Bi error is resolved.
4. Other Solutions to Try
Power Bi doesn’t support ApiKeyName. So, if you are trying to use ApiKeyname with Power Bi service, you may want to switch to basic authentication and try to refresh again.
Verify your Excel file format and make sure you are using .xlsx or .xlsm file type. Also, make sure that the file size is under 1 GB. If the file format is not in the aforementioned file type, make sure you change it and republish the file.
Conclusion
We have tried to include all the possible solutions to fix Power Bi error the user is not registered by the provider in this article. Do let us know which one worked for you in the comments.
Many users encountered an interesting option in Google Chrome. It is a button beside the bookmark star in the right part of the address bar.
If you hover over it, the message “this page wants to install a service handler” will appear. Very few people know what that means. One user asked the following question on the official Google forum:
why is gmail requesting to install a service handler?
In this case, we can say that Google Chrome is making the request and not Gmail.
But what does this button stands for? In this article, we will explain what it means and how to disable or enable it.
What is this page that wants to install a service handler message?
When you open a page, some links can open certain programs. These links are called logs and they use handlers as programs. For example, web services, such as Gmail and Google Calendar use handlers.
When you click on the button, it will show you a small box with three options: Use, No, and Ignore. The Ignore option is set as default.
If you click on Manage handler settings, it will take you to the Privacy section of the Chrome settings.
It is worth mentioning that “this page wants to install a service handler” message can be ignored. There’s no danger to your computer or your privacy.
Still, if you want to disable or enable the option, follow the steps below.
1. Disable the option
Type chrome://settings/content in the address bar.
Go to Handlers.
Choose Do not allow any site to handle protocols.
2. Enable the option
Follow the same steps to open Handlers, but choose Allow sites to ask to become default handlers for protocols (recommended).
Conclusion
So, there is not much to say about the message “this page wants to install a service handler”. It is just a simple option in Google Chrome regarding some actions in your email client.
You can enable, disable, or simply ignore the option. It is entirely up to you.
Firefox is usually the best replacement for users who are troubled by Chrome. However, Mozilla Firefox isn’t based on Chromium and thus it might have limitations. There are other efficient browsers that have all the Chrome features, plus integrated apps and high security. The one we recommend is Opera One.
Did our explanations help you? What do you do when the “this page wants to install a service handler” message appears? Do let us know in the comments section below!
Windows 10 has a built-in Disk Cleanup utility that lets you maintain the disk by removing unwanted files from the hard drive. Sometimes, while running the Disk Cleanup utility, it may get stuck while scanning or cleaning up the files.
Windows 10 freeing up space stuck is a common issue as users with similar issues are looking for help in the Microsoft Community Forums.
Windows “free up space” stuck on cleaning up windows update files – was this ever resolved?this yet another botched feature from Msft? I see a lot of older questions about this but no real answers and obviously Msft has done nothing to address the problem they created. This is on a W10 machine updated from W7. I’ve tried troubleshooting W update but that does nothing
Follow the troubleshooting tips in this article to fix the issue in your Windows computer.
What can I do when Free Up Space is stuck in Windows 10?
1. Turn off Storage Sense
Click on Start and select Settings.
Click on System.
From the left pane, click on Storage.
Scroll down to Storage Sense section.
Turn off Storage Sense if it is turned on.
When turned on, Storage Sense allows the Windows to automatically free up space by deleting unwanted files. However, at times it may create conflict with the Disk Cleanup utility.
Try to run the Disk Cleanup tool manually after disabling Storage Sense and check if the issue is resolved.
If the issue persists, run the built-in System File Checker utility to scan for system file corruption and fixes.
Type cmd in the search bar.
Right-click on Command Prompt and select Run as Administrator.
In the Command Prompt type, the following command and press Enter. sfc /scannow
Wait for the System File Checker to scan the system and fix any issues.
Reboot the system and check for any improvements.
If this option doesn’t seem to work out for you, there is specialized repair software. These tools will run deep scans on your PC and fix the corrupted files automatically.
4. Manually Delete Windows Update Files
If the Windows 10 Disk Cleanup utility is stuck while trying to clean Windows 10 update files, you can abort the current cleanup process and try to delete the files manually.
A major reason why your Epson projector won’t turn off lies in its configuration. This can be a minor problem and it’s not as serious as when your projector is not showing computer screen.
Nevertheless, this can be an issue and cause some inconvenience along the way, so it’s important to fix it, and this guide will show you how to properly do it.
Why won’t my Epson projector turn off?
You’re not turning it off properly. Some models require you to press the Power button twice to turn off.
Temporary glitches with the projector can cause this problem.
Sometimes outdated firmware can cause this issue on your projector.
In the worst-case scenario, hardware damage can cause this issue.
How do I turn off my Epson projector?
1. Double-press the Power button
Some projectors are configured to avoid accidental power-offs/shutdown and require the users to press the Power key or the power button on the remote twice to turn off.
So, if you haven’t tried, already, try to press the Power button on the projector or on the remote twice and check if that helps.
If that doesn’t work, press and hold the power button on the projector for 30 sec to turn off the projector forcefully.
Forcing your project by long-pressing the power key won’t have any adverse effects.
2. Force shutdown the projector
If the issue persists, to diagnose the projector you need to reboot it again. To do that, you probably need to force turn off the projector by pulling the power plug from the projector.
While this process should not have any adverse on your projector, do it at your own risk.
Once the projector is off and you have pulled off all the plugs, make sure you let the projector lamp/bulb cool down for about 30 minutes.
After 30 minutes, turn on the projector and check if you can turn it off using the power button.
If the projector is turning off normally, you need not do anything else as it was a temporary glitch.
If the issue persists, it is possible that the projector has internal hardware issues. Contact the projector maker to get better troubleshooting ideas for your projector.
Check if the projector has any pending firmware updates which may include bug fixes. So, try to update the projector to the latest version of the firmware available and check for any improvements.
You can perform the firmware update on your own using the computer or send it to the projector manufacturer’s authorized dealer. The failed projector firmware update is not covered under warranty. So do it at your own risk.
These are some of the solutions that you can try if the Epson projector won’t turn off. Most of these solutions are general, so they should work on other brands as well.
Many users reported a different issue and stated that their projector is not turning on. This is a more serious issue, and we covered it in detail in a separate guide.
What solution did you use to fix this problem? Share it with us in the comments section below.
The computing sector has seen its fair share of programming languages ever since the advent of modern computer decades back. However, not all have survived to this day though what applies to all languages is that they were built to a purpose.
Most were a success too until changes in technology or people’s approach towards computers forced the advent of new programming languages.
As things stand at the moment, the entire computing landscape can be described by a handful of platforms. Needless to say, focus turned towards programming languages that could support the development of applications compatible with most platforms, if not all.
Mentioned here are a few such programming languages that are well suited for writing cross-platform applications.
What also needs to be mentioned here is that there is no one programming language that can be deemed the best here. Rather, it depends on the project on hand which dictates the sort of programming language to be used.
What’s the best cross-platform GUI language?
C#
If its performance that happens to be the primary criteria, then C# is one of the best languages you can use to code your app. For instance, if the app has to do with image manipulation and/or audio/video processing, then it’s almost imperative that you go for C# for the code work.
Thanks to the various frameworks, you can use C# on a wide range of platforms.
Here’s a list of frameworks for specific platforms:
.NET core – used for Linux, Windows, Mac
Unity – used for game development
Xamarin – Used for native mobile apps
C/ C++
This is another powerful language that can be used to create a wide variety of apps, both basic as well as those with higher performance rating.
However, you will need to use Android NDK to make the code suitable for use on Android while a Swift wrapper will make the code iOS ready.
The great thing about C++ is that you can write and compile it any platform, but in order to use the compiled application, you’ll need to use certain wrappers.
If you need to have an app ready really fast, JavaScript should be your best bet. With React Native, a JavaScript framework, you can make the app suited for use on both Android and iOS.
This is possible thanks to React Native using the same basic UI elements as can be found on both iOS and Android. This will also make the app have the look and feel as native iOS and Android apps.
While JavaScript can allow you to create web apps, you’ll still require some knowledge of HTML/CSS in order to create a GUI.
Python
If it’s a simple app that you are working on then Python can be the best coding choice. Python again is one of the simplest languages to code, which means you can get your job done really fast if you have a talented team at your disposal.
With tools such as PyMob, you can convert the Python code into the source code used for other platforms.
Again, it must be mentioned the choice of programming language to be used has a lot to do with the type of project you are faced with. Nonetheless, the above can be a healthy guide for you to get started.
Each language has its own set of pros and cons and it is upon the developer to make his choice depending on what exactly is the requirement.
Meanwhile, here are some related resources for you to browse.
The Radeon Software: Host Application has stopped working error arises for some users with AMD Radeon graphics cards. That error message generally appears when users play games, but there are other instances of it.
The problem was widely reported after a driver update, with AMD users across the globe reporting critical issues with it, which sometimes even led to a crash. So, let’s find out all about it.
Why did my Radeon software stop working?
Here are a few reasons you may get the radeonsettings.exe application error:
A buggy driver update: Since the problem was widely reported by many at the same time, it’s likely a bug in the driver to blame.
Corrupt user profile: In some cases, it was a corrupt user profile that triggered the crash, and creating a new one did the trick.
High CPU usage: Though an after-effect of the update, the resulting high CPU usage when running the Radeon software could also lead to the error.
What can I do if Radeon Software Host Application has stopped working?
Before we start with the slightly complex changes, try these quick ones:
Restart the PC and check whether the crash takes place again. In many cases, it was a one-time thing.
Check the computer’s temperature and take the necessary measures to reduce overheating.
Make sure the PC is not overclocked.
If these don’t work, move to the solutions listed next.
1. Terminate processes in the Task Manager
Press Ctrl + Shift + Esc to open the Task Manager.
Select the Radeon Host Application process and click End task.
Similarly, terminate the Radeon Desktop Overlay process here.
One of the simplest ways to get things up and running when you have the Radeon Software Host application has stopped working error is to terminate both the Radeon processes in the Task Manager. You can then relaunch the program.
2. Reinstall the driver
Press Windows + X to open the Power User menu, and select Device Manager.
Expand the Display adapters entry, right-click on the graphics adapter, and choose Properties.
Go to the Drivers tab, and note the value next to Driver Version.
Now, right-click on the AMD adapter, and choose Uninstall device.
Untick the checkbox for Attempt to remove the driver for this device and click Uninstall.
Once done, restart the computer and again launch the Device Manager.
Right-click on the AMD adapter, and select Properties.
Head to the Drivers tab and check whether the previous version is now installed. If not, you may have to repeat the steps a few times.
A user suggested reinstalling the previous graphics driver version when you persistently get the Radeon Software Host application has stopped working error. Remember, it may take a couple of attempts, and make sure to restart the computer after uninstalling the current driver.
For this purpose, you can manage your PC drivers with a reliable driver updating tool that will find graphics driver and install them right away.
3. Clean install the latest Radeon Graphics Card Driver
First, download the installer for the latest AMD graphics card driver from AMD Drivers and Support.
Press Windows + R to open Run, type services.msc, and hit Enter.
Double-click on the Windows Update service to open its Properties.
Select Disabled from the Startup type dropdown menu, and click the Stop button.
Click the Apply and OK buttons.
Press Windows + E to open File Explorer, paste the following path in the address bar, and then hit Enter:C:\AMD
Press Ctrl + A to select all the files here and then hit Delete to clear them.
Again, press Windows + R to open Run, type appwiz.cpl, and hit Enter.
Select the AMD Software from the list and click Uninstall.
Follow the on-screen instructions to complete the process.
Similarly, remove any other AMD software listed here.
Press Windows + R to open Run, type msconfig, and click OK.
Navigate to the Boot tab, select Safe boot, and then choose Minimal under it.
Click on Apply and OK.
Click Restart in the prompt that appears.
There shouldn’t be any third-party antivirus utilities running in Safe Mode. However, double-check that third-party antivirus utilities are disabled.
Uninstall the Radeon Graphics Card driver with Display Driver Uninstaller, which will thoroughly remove the driver. To do that, select the AMD option on DDU’s drop-down menu, and click the Clean and restart button.
Now, install the AMD driver you downloaded earlier using the setup.
Finally, relaunch System Configuration, uncheck the Safe boot option, click Apply and OK, and restart the computer.
That’s it! Removing the problematic driver and installing the latest one using the DDU should get things running when you are continuously getting the Radeon Software Host application has stopped working error.
Press Windows + I to open Settings, and click on Accounts.
Go to the Family & other users tab, and click on Add someone else to this PC on the right.
Click on I don’t have this person’s sign-in information.
Select the Add a user without a Microsoft account option.
Enter the account name and password, and click Next.
Once the account is created, choose it, and click on Change account type.
Select Administrator from the dropdown menu, and click on OK.
If the solutions listed previously didn’t work and you still get Radeon Software Host application has stopped working message, creating a new user profile should do the trick. After creating the new account, transfer the data between the two.
Do I need Radeon Settings Host application on startup?
The Radeon Settings Host Application, though helps in optimizing the performance of the graphics card, is not an essential requirement. So, you can disable the startup app.
Disabling it won’t have any untoward effect, but the gaming performance might be slightly affected. For that, you can always check our expert tips to optimize the PC for gaming.
Also, before you leave, check some quick tricks and changes to make Windows faster.
Tell us which fix worked for you in the comments section below.
Windows 10 OS by default comes with the Snipping Tool installed and enabled. However, for some users, the Snipping Tool gets blocked by a software restriction policy.
If you haven’t disabled the tool manually and still getting Windows cannot open this program because it has been prevented by a software restriction policy error, here is how to fix it in Windows 10.
Follow the steps in this article to enable the snipping tool in Windows 10 to fix the Snipping tool blocked by software restrictions policy issue.
Type gpedit.msc and click OK to open the Group Policy Editor.
In the Group Policy Editor, navigate to the following location: User Configuration > Administrative Templates > Windows Components > Tablet PC > Accessories.
From the right-pane, double-click on “Do not allow Snipping Tool to Run“.
In the Properties window, select the Disabled / Not Configured option.
Click Apply and OK to save the changes.
Close the Group Policy Editor and launch the Snipping Tool.
If the error occurs, reboot the system and check again for any improvements.
If you are running an older version of Windows such as Windows 7, you can enable the Snipping Tool feature from the Windows Features On or Off section.
Press Windows Key + R to open Run.
Type control and click OK.
In the Control Panel, click on Programs > Programs and Features.
From the left pane, click on “Turn Windows Features On or Off” link.
In the Windows Features window, scroll down and check the “Tablet PC Options Components” option.
Click OK to save the changes.
Reboot the system and check if the Snipping Tool software restriction error is resolved.
Microsoft has just announced the release of the Windows 10 20H1 build 18965 for Fast Ring Insiders. This is a minor update that introduces a new app restart setting that will give users more control over restarting apps at sign-in. This new setting will be turned off by default, but turning it on will automatically save your restartable apps when you sign out and then restart them after you sign in.
Microsoft is also rolling out some UI changes for its Feedback Hub app that are based on Insider Feedback, and the Windows Insider Achievements page has also been refreshed to make achievements more discoverable. These updates to the Feedback Hub are apparently rolling out to all Fast Ring Insiders, not just those who will install the build 18965 today.
You can learn more about what’s new in this build in the release notes below:
What’s new in Build 18965
Control over restarting apps at sign-in
As some of you already know, apps have the ability to register for restart, which helps in a few situations, including enabling you to get back to what you were doing if you need to restart your PC. Previously this option was tied to the “Use my sign-in info to automatically finish setting up my device” option under Sign-in options in accounts settings. We’ve heard feedback that some of you would prefer more explicit control over when Windows automatically restarts apps that were open when you restart your PC, and with 20H1 we’re bringing that option to you.
Windows now puts you in control with a new app restart setting. When turned on, Windows automatically saves your restartable apps when signing out, restarting, or shutting down Windows, and restarts them next time you sign in. This setting is off by default and you can change it any time in Settings > Accounts > Sign-in options, and can find it by searching for “restart apps” in Start or the search box.
Other updates for Insiders
Feedback Hub updates
The Feedback Hub team has been hard at work lately to bring you some app updates based on your feature requests, and we have a few changes and improvements to share about the latest version that’s currently rolling out to Insiders in the Fast ring.
Feedback Search UI updates
On the Feedback section of the app, you will now be able to more clearly see the differentiation between Problems and Suggestions, with each showing an icon, color, and labels Problem or Suggestion displayed above each feedback entry. We also have updated iconography and displays for Adding similar feedback to problems, upvoting suggestions, and adding comments to feedback.
Adding similar feedback
In the past, Feedback Hub allowed two kinds of participation on feedback: upvoting and adding more details. The notion of voting on Suggestions makes a lot of sense – engineers at Microsoft want to know which features the community wants us to build next, and voting on feature suggestions is a great way to see where your interest lies.
However, voting on Problems was trickier – roblems are not a matter of popularity, and what helps engineers here resolve problems is having clear descriptions of how the issue arose. Feedback is especially helpful if it includes a reproduction of the problem, diagnostics that help our teams pinpoint what went wrong so they can fix issues faster. Voting on the search page often did not provide enough detail as to what was happening, and we saw that few people went into existing feedback to add their personal reproductions of the issues.
With the new Add similar feedback feature, selecting a problem with symptoms that match your own will take you to the feedback form, with the title pre-filled. You edit the title or add your own description to let us know exactly what was happening when you encountered the problem. We’ll already have your category selected to ensure the right feature team sees your feedback, and in our new Similar Feedback section, the feedback you selected will already be selected. As usual, the last step involves optionally adding your own reproduction of the issue or any attachments you like.
Windows Insiders Achievements
We are excited to announce a refresh of the Windows Insider Achievements page. We’ve made achievements more discoverable by moving them from your profile page to their own landing page, and we added additional features that allow you to categorize and track your progress. Be sure to check it out today and begin unlocking badges. We would love to hear your feedback on social media by using the hashtag #Builds4Badges.
The information previously found in your profile (Device ID and User ID) is now located in the settings section of Feedback Hub.
As always, we appreciate your feedback – if you have any suggestions or problems to report, you can share them in the Feedback Hub under Apps > Feedback Hub.
There are also a couple of bug fixes in this build, and Microsoft has fixed an issue that could result in background tasks not working in certain apps. You can learn more about other changes and known issues in this build in our separate post.
With all the news coming out of Gamescom 2019 this week, one question begs an answer; Should Microsoft make an Xbox Phone? Imagine Windows 10 Mobile coming back but with ridiculous specs similar to the Asus ROG Phone 2. But instead of being another attempt at Windows Phone, you use your phone to play Xbox games. No need for game streaming to your phone from the Xbox One, just sign directly into your Xbox Live account from your phone and start playing games.
ASUS ROG Phone 2 (screenshot from Unbox Therapy)
An Xbox Phone is likely an idea that will never come to fruition; instead, Microsoft may look to release their own mobile gaming device similar to the Nintendo Switch. Provided the phone specifications are there, Xbox Phone would be a better choice for gamers if they want to experience Project xCloud and play Xbox games natively, without the need for using another app or mobile operating system. Don’t get me wrong, the Nintendo Switch is a great gaming platform, but I think people would love to have the regular features of a smartphone too.
Even if Windows Phone is dead, Microsoft could decide to release an Android phone with a focus on Microsoft apps. While there are endless rumors about the Surface Phone, it appears doubtful that such a phone would ever be released. Microsoft has made it clear that Windows Phone is dead, as Microsoft continues to push out their apps on Android and iOS. Microsoft wants people playing Xbox games. Microsoft keeps buying developers left and right and makes Xbox more accessible to everyone with Xbox Game Pass Ultimate, Xbox Play Anywhere, and Project xCloud. Microsoft makes it easier to play games on your Windows 10 PC, Xbox One, and your smartphone.
Project xCloud
We’ve seen what Project xCloud can do on Android and iOS, but what if Microsoft could find a way to make happen with an Xbox Phone? While Microsoft already has a patented gaming controller, I believe Microsoft and Xbox could work together and quickly figure out a way to integrate its own unique controller scheme into their own phone. I think Microsoft can figure out a way to make an Xbox Phone without the need to carry around extra accessories.
As we found out with our hands-on comparison of Project xCloud, playing Xbox games on a phone is weird. Personally, I think the logical next step for Microsoft is to make an Xbox Phone. I doubt there are many people out there that want to carry a controller with them any time they want to play games on their phone using Project xCloud. What do you think? Take our poll below
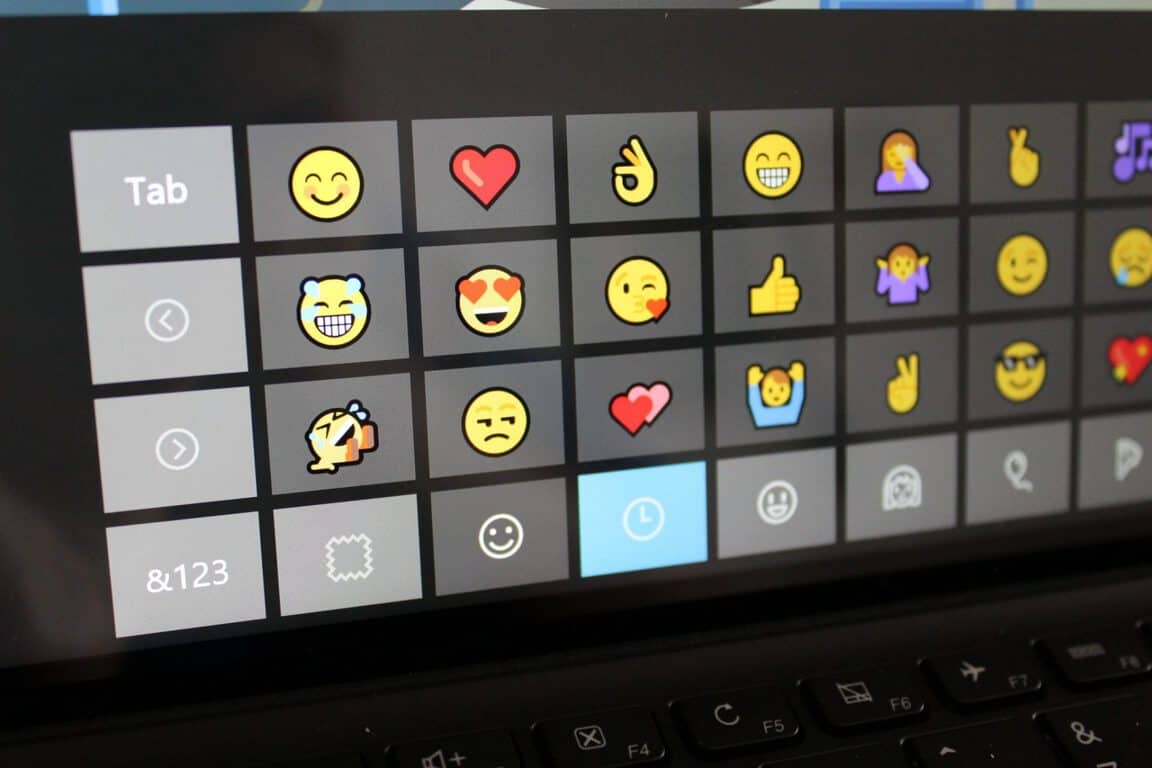
Windows 10’s emoji picker has been expanded in the May 2019 update, build 1903. The panel now includes a selection of kaomoji and symbols, the latter making it much easier to access infrequently used characters.
Like many other recent features, the emoji picker is simple to use but not particularly discoverable. To access it, use the Win+. (Windows key +period) or Win+; (Windows key + semi colon) keyboard shortcut. The panel will appear at the bottom-right of your display, or next to the cursor if you’re already typing in a text field.
The panel is separated into three distinct sections – emoji, kaomoji and symbols. Within these sections, different categories can be selected from the tab strip at the bottom.
A searchbar is available to rapidly sort through the available emoji. This lets you continue typing after hitting Win+. to immediately search for an emoji to use. Press enter to insert the currently highlighted emoji; use Escape to hide the panel once you’re done.
The symbols section is effectively a replacement for the legacy Character Map application. Compared to Character Map, it’s much quicker and simpler to use. The symbols are divided into several clear categories, such as currency and geometrical symbols. As you select symbols, they’ll be added to the recently used tab which appears by default.
Win+. may not be something you use everyday, depending on how frequently you add emojis to your text. The addition of symbols functionality makes it a more complete tool, which finally offers a compelling alternative to Character Map or the Symbols popup in Microsoft Word. Give it a try next time you’re hunting for an elusive foreign currency symbol!
Microsoft has been investing a lot of time and effort into their Chromium-based browser. More so lately, when Chromium Edge got so many new features.
Until now, the Chromium version of Edge was available through its Dev and Canary branches.
Microsoft Edge Beta is finally available
As a next step to the final release, Microsoft just announced the availability of the Beta branch to all supported versions of Windows and macOS:
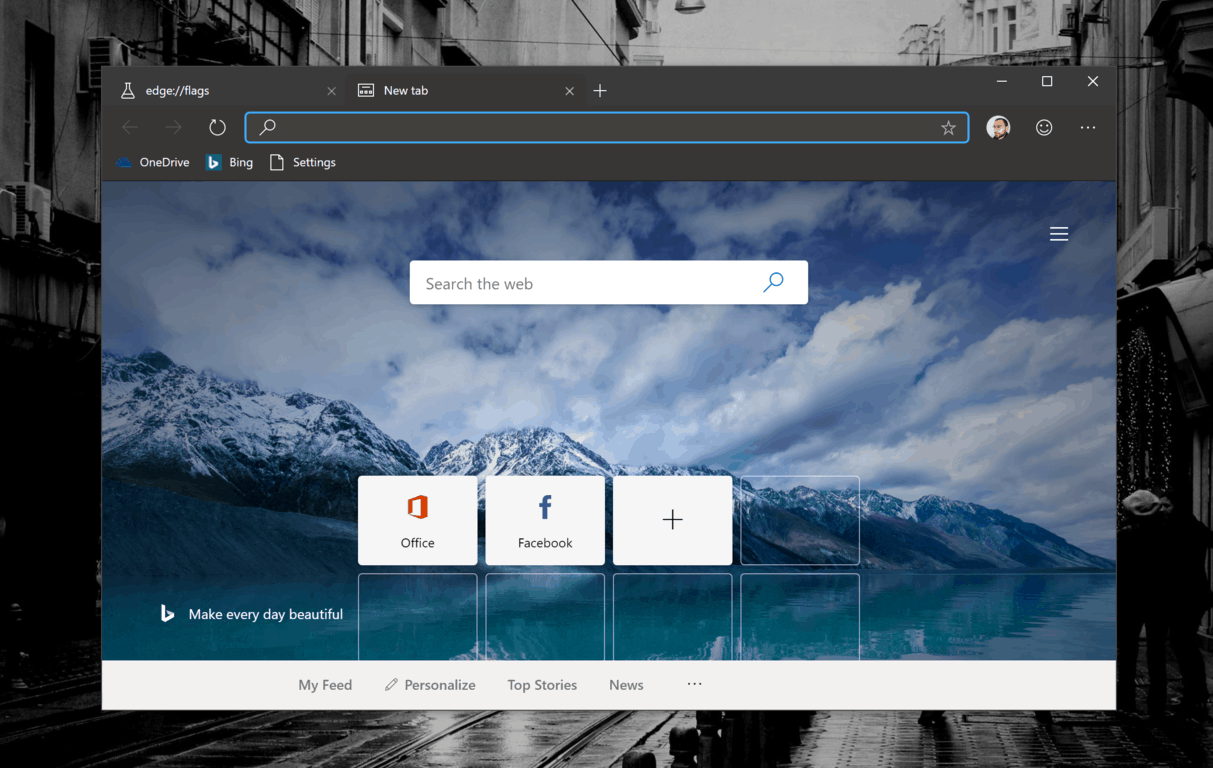
While still in the preview stage, with this announcement the next version of Microsoft Edge is ready for everyday use. In the Beta today, you will see new ways to personalize your experience, along with support for 14 languages. With new tab page customization, you have the ability to choose what you want to see when you open a new web page by selecting either a Focused, Inspirational or Informational layout. You can also set a dark theme or visit the Microsoft Edge Insider Addons store or other Chromium-based web stores, such as the Chrome Web Store, to add your favorite extensions.
Unlike the other channels, the Beta channel will be updated every six weeks.
The Beta is more stable than Canary or Dev
Despite the fact that some earlier announced features still aren’t available, things like dark theme, tracking prevention, and Internet Explorer mode can be tested by anyone who downloads the build.
This is great news for Edge fans, as the Beta version should be more stable than the Canary or the Dev one. This brings us one step closer to the final release of Edge.
If you want to try Microsoft Edge Beta yourself, you can download it from Microsoft’s official page.
Don’t forget to tell us your opinion about the new Beta release in the comments section below.
READ ALSO:
Dark Mode for New Tab page is now enabled in latest Canary Edge
Cars are quite a pricey acquisition most of the time and it’s a risky business buying a used vehicle without double-checking everything beforehand. Luckily, the digital era brought a unified online database that allows buyers to check specifics about a car they want to purchase.
What you need is an online VHR (Vehicle History Report) and you can get it with a car history check software.
Today, we have 3 software solutions for you. They should give you access to both abbreviated and detailed car history. You’ll need to pay a small fee for the latter, but there are evident benefits.
With those tools, you’ll know if the car had any collisions, car service history, ownership history, and a variety of public records.
Check these tools below and avoid any risks with your further four-wheeled purchases.
Check car history before you purchase it with these 3 tools
AutoTrader Vehicle History App
The AutoTrader Vehicle History software is another reliable application for verifying car history before making any purchase decision. With other five million downloads currently, the application offers users an easy to navigate platform.
It allows sellers and dealers to connect to make a purchase but also makes it possible to verify the antecedents of the car.
The intending buyer enjoys multiple functionalities transferable across platforms once sign up for a ‘My Autotrader’ account. The intending buyer can connect via email or text to discuss and ask questions about their intended purchase.
CarMax offers a user-friendly car history check software with other 50,000 cars available on checks. The application has been downloaded over 1,000,000 times and intending car buyers get to enjoy multiple functionalities.
To help ensure that the user gets enough information about the vehicle of interest the app provides comprehensive vehicle history for free. The car verification software gives users access to customer reviews and CarMax’s expert comments to help make an informed purchase.
CarFax is a leading car history check software with over one million installations so far. The app allows the user to search through a list of millions of used cars. CarFax software gives users access to its free CarFAx application to access their CarFax Car History checks and get a detailed report.
The report cover issues relating to theft, damage and more under the CarFax certified the pre-owners report. With just the registered plate number or Vehicle Identification Number (VIN) the intending buyer gets a detailed report. The application is not only easy to navigate but fast and simple to understand.
Using the best car history check software makes it possible not to get burnt when hunting for a car. However, it would pay the intending buyer more to make use of any of the above tools as well as government agencies to verify vehicle history.
The National Insurance Crime Bureau offers reliable information on insurance claims, thefts or cases of a total loss of cars. Also, the National Motor Vehicle Title Information System offers more comprehensive data on car history. With these free and paid tools, the intending buyer can enjoy better guarantees on car purchase decisions.
While trying to create a table visualization in Power BI with calculated columns that contains measures that also based on that table, you may encounter Power bIerror a circular dependency was detected in Power BI Service. This seems to have affected many users with different formulas as reported in the Power BI community.
I am trying to create a table visualization in Power BI. Where I am showing sales by category and target %. Now I am creating 2 calculated columns in it. The first column tells me Yearly Sales target. Which is as below: Monthly Sales Target = (1 + Target%) * [MonthlySales]. I am getting the error as “A circular Dependency was detected”.
Follow the troubleshooting tips to fix the error at hand.
How to resolve Circular dependency error in Power BI
1. Check Power BI Limitations
If you are trying to have two calculated columns that contain measures that are also based on that table, then it is not supported by Power BI.
So you need to tweak the formula so that the measures are different in two tables.
For more information on Power BI Circular Dependencies, read Understanding Circular Dependencies in Tabular and PowerPivot article by Alberto Ferrari.
If you are trying to do such data preparation in PowerPivot, you may want to try Excel to do the same preparation.
In case the data volume is not too large, you can use Excel for data preparation and then import it into PowerPivot.
If the data volume is too large to prepare data in the Excel app, consider using Power Query to fix the issue.
3. Other Solutions to Try
If the issue is not with your calc column, the issue can occur if you already have other calc columns already.
Also, if your table doesn’t have a primary key, Power BI won’t allow you to create multiple calc columns.
The Circular Dependencies concept can get complex if you miss the basics while creating the tables and prepare the data. Try to follow the troubleshooting tips in this article and check if you are able to resolve “a circular dependency was detected” Power BIerror.
Many gamers prefer the Xbox console over other options because of the many possibilities the Microsoft product has to offer.
However, quite a few users encountered several issues with Xbox. One of them is the error code 0x82d40007.
A user reported the following on the official Microsoft forum.
Hello, we receive the following message when we try to play a game. ‘ To play this, the owner needs to sign in. Alternatively, guests can play if the owner makes this their home Xbox ( 0x8240007).’ This message doesn’t appear when we try to play other games. My profile is set to automatically sign on when the Xbox is turned on so we’re confused as to why it’s showing that the owner needs to sign on. Thank you!
So, this looks like a sign-on issue. However, as the error message describes, the user is not the owner of the game.
In any case, today we will show you how to fix the Xbox error code 0x82d40007.
How to fix Xbox error code 0x82d40007?
1. Make sure your game is indeed yours
If someone else owns the game, you need to have them sign in so you can play the game. Alternatively, the person who bought the game could make the console their home Xbox.
You can still play other games as a user on this console, although this is not very convenient.
To set the Xbox as the game owner’s console, you need to follow the steps below.
Go to System.
Select Settings.
Click on Personalization.
Select My home Xbox.
2. Check the subscription’s status
Sign in to the Microsoft account.
On the Services & subscriptions page, check if the subscription is still valid.
If not, select Renew.
3. Re-add your profile
If the methods above are unsuccessful, try re-adding your profile. Delete your account from the Xbox console, and then add it back.
Select System, then click on Settings, Account, and then Remove accounts.
Click on the account that you want to remove, and then select Remove to confirm.
Select Close when you’re finished.
Now, to add the account, follow the steps below.
From the upper-left corner of the screen, select your gamer picture.
Select Add new.
Write the email address for the Microsoft account that you want to add, and then select Enter.
Do not select Get a new account. That will create a brand-new Microsoft account.
Follow the steps to configure your Sign-In & Security preferences to add your Microsoft account to your Xbox One console.
Conclusion
As you can see, the error code 0x82d40007 refers mainly to a sign-in issue. However, there are a few easy steps that will help you solve the problem.
The stable version of the upcoming Chromium-based Microsoft Edge browser might have just leaked online, but that doesn’t mean it’s complete. While the browser has come a long way since it was first accounced, Microsoft knows there’s still plenty to do before it can replace its old and rusting version of Edge.
Over the coming months, the company plans to release a multitude of additional features and improvements as well. Next month, the company players to roll out a feature allow those to disable the auto-playing of video and audio from websites, as well as scrolling improvements and a favorites button on the browser’s toolbar. The company also plans to bring back PDF inking in October, in addition to:
When you sign-in to the browser, your sign-in profile picture will accurately be kept up to date.
When you have more than one profile, better handling for opening links and attachments in the appropriate profile.
An option to set your own photos as the background image on the New Tab Page
Enable search in the extensions store
A bug fix for users who receive an “Administrator Mode Detected” notification (advising them to close and relaunch the browser in non-administrator mode) each time they launch Edge
ClickOnce deployment of Windows applications from web pages
Microsoft says it continues to listen to feedback about the experience of the browser, and encourages those to continue providing feedback so that it can improve the browser even further. Some areas that users frequently suggest need improvement include better CPU and memory optimizations, improvements to scrolling, fixes to the drop-down menus in webpages, as well as improvements to the update process. The company says it’s also looking into other feature requests including:
Feature requests for the New Tab Page, including the capability to turn off the news feed, to hide the Bing search bar, to change the search provider, to rename tiles, and to support Dark Theme
Bring back features from the current version of Microsoft Edge such as tab set aside, tab preview, “Ask Cortana”, and the reading list
Make it easier to share web content with other users and apps
Provide an option to set a custom home page
Update the user interface with the Fluent Design System, including less rounded tabs
Support themes from the Chrome Web Store
Allow sign-in to the browser with a Google account
Provide different options for sorting favorites
Provide run / open / save / save as options when downloading files
Users are encouraged to continue providing feedback and reporting bugs as the new Edge gets closer to official launch. Also, we encourage you to share your thoughts on the overall progress and what new features the company need to implement in the comment area below.
Microsoft is in the midst of semi-moderate redesign that is emphasizing new iconography across its various apps and services. Most recently, the company redesigned the look of its Office 365 icons to match a new modern and flat aesthetic.
The effort to change the Office 365 apps seemed to be an arduous one, but now it seems that the same effort is being ported over the company’s UWP apps. A new leak from Italian blogger Aggioramenti Lumia shows a potential redesign of the Windows 10 UWP Mail and Calendar app icons.
This morning I shared the Android icons of mail and calendar???? These icons below are from the Windows UWP apps pic.twitter.com/NaMb0zJynT
As with most things crowdsourced for feedback, Microsoft’s iconography change has been met with equal parts criticism and praise and we suspect people will have opinions on these new icons as well. At this point in time, it’s unclear if or when Microsoft plans to release and test the new design and on what build as well as for how long.
While the revised icons do match the aesthetic profile, the leaked renders would just be internal suggestions that never see the light of day.
We’ll update with any new information, accordingly.
Gamescom has opened its doors in Cologne, Germany today for trade visitors and the media, and it’s definitely the place to be if you want to check out the big AAA games launching later this Fall. All the big video game publishers are in the place this week, and that includes Microsoft, Sony and Nintendo, as well as other tech giants such as Google and even Facebook.
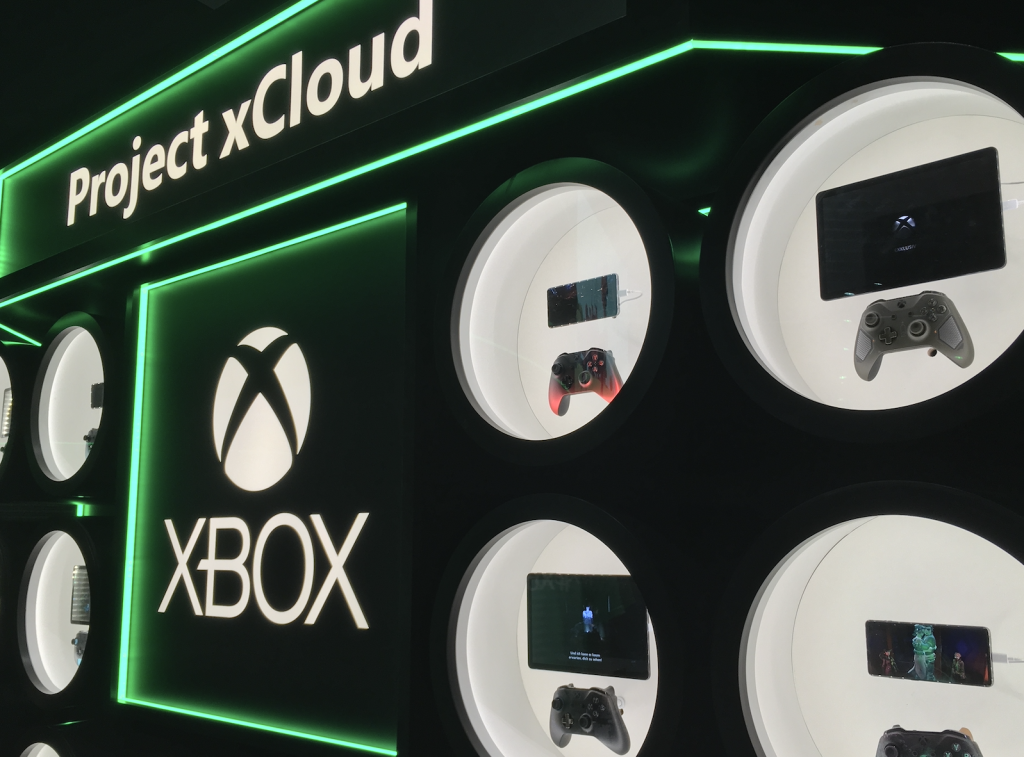
After Microsoft announced a couple of weeks ago that all Gamescom attendees would be able to try Project xCloud at the Xbox booth, I decided that it wasn’t something I’d want to miss. I’ve been able to check out both Project xCloud and Google Stadia today, and even though I just had a couple of minutes of hands-on time with both services I’ve been quite impressed by what I’ve seen.
It’s still very early days for video game streaming, and Microsoft and Google have both chosen a different approach about this new technology. The Redmond giant will be targeting mobile gamers first and leverage its existing Xbox One architecture, while Google Stadia will be a true next-gen platform that will also be available on TVs, laptops, and mobile devices. Both approaches have their merits, and it will be interesting to see what happens when Project xCloud and Google Stadia launch in October and November, respectively.
Project xCloud works well, but playing Xbox games on a phone is weird
Microsoft had a couple of Xbox exclusive games on display at the Project xCloud booth today, and I got to try Forza Horizon 4, ReCore, and Ori and the Blind Forest. I played all these games before on my Xbox One S, and I have to say I felt right at home playing them using an Xbox controller plugged into an Android phone. The graphics looked good, and controls were also very responsive.
I’ve been told that Microsoft was using a nearby datacenter for these Project xCloud demos, and this exactly why the company building Azure datacenters around the world should really help Project xCloud to deliver a great gaming experience. Input lag was almost imperceptible, and I was able to handle tense turns in Forza or difficult jumps in Ori without breaking a sweat.
Unfortunately, capturing photos and footage of the screens wasn’t allowed today, and that’s because Project xCloud is still a work in progress. Microsoft is using different Android phones for its Project xCloud demos at gamescom, including a Razer gaming phone and the Samsung Galaxy S10+. Microsoft also had some Android tablets on display, but the company isn’t demoing the service on these devices for now. A Microsoft rep also told me that Project xCloud won’t be available on iOS devices at launch, but the company is working on supporting iPhones and iPads down the road.
Overall, I came away pretty impressed by Project xCloud, but playing Xbox games on a phone isn’t as great as it seems. Until Microsoft releases something as convenient as the detachable Nintendo Switch Joy-Cons, I’m afraid using an Xbox controller or touch controls (which Microsoft isn’t demoing at Gamescom) is going to feel a bit weird and clunky. Does anyone really wants to carry a bulky Xbox Wireless Controller on the road? I’m really not sure about that.
It’s also worth reminding that Microsoft is putting Xbox One S consoles in server blades for Project xCloud, which means that you can’t expect 4K graphics or any Xbox One X enhancements such as smoother frame rates, at least until the Xbox One S server blades are replaced by Project Scarlett blades, something Microsoft plans to do. Performance was solid on Forza Horizon 4 (a game that runs great on the Xbox One S), but the already poorly optimized Recore didn’t feel really smooth during my short hands-on time. Performance is probably the area where Google Stadia could have an edge, though my experience with Google’s service didn’t leave me entirely convinced.
Google Stadia feels like the future, but performance is inconsistent
Google has two Stadia games on demo at Gamescom, Mortal Kombat 11 and the upcoming Doom Eternal. I only got the chance to play three rounds of Mortal Kombat 11 against a fellow journalist, and it felt great most of the time.
All Stadia games will be targeting 4K at 60FPS, but there were frequent framerate dips during my hands-on session. This didn’t prevent me from smashing my enemy and ending the combat with a perfectly executed Fatality, but overall Google Stadia felt more like a PC experience with an inconsistent framerate, than a console experience where games are targeting a specific framerate and mostly sticking to it.
Still, with more than 10 teraflops of computing power under the hood, Mortal Kombat 11 on Project Stadia looked absolutely amazing. I also didn’t notice any input lag, and I guess the fact that the Google Stadia controller is directly connected to Google’s servers really helps. The demo was powered by a Google Chromebook Pixel connected to a 4K screen, but Stadia will also be available on TVs with a Chromecast Ultra, PCs with the Google Chrome browser, or select Google Pixel Android phones. Google isn’t demoing Stadia on these other platforms at Gamescom, but at launch the game streaming service will be available on more devices than Microsoft’s Project xCloud
Let the game streaming services war begin
Google has already announced all pricing details for its Stadia service, and this year access to the service will require a $9.99/month Stadia Pro subscription that will include Destiny 2 plus all of its DLCs. Stadia Pro subscribers will be able to play games at 4K 60FPS, but they’ll have to purchase games separately on Google’s digital store. Next year, Google will also launch a free tier for Stadia which will provide a slightly inferior 1080p 60FPS gameplay experience. Developers will also need to port their games to the Linux-based Stadia infrastructure, but Google has already managed to get some big upcoming games such as Doom Eternal, Borderlands 3, and Cyberpunk 2077
Microsoft has yet to reveal the business model for Project xCloud, but the service will likely have deep ties with Xbox Game Pass, a service that is often referred to as a “Netflix for games.” Because Project xCloud is leveraging the existing Xbox One hardware, it will also be compatible with all existing and upcoming Xbox One games, though it will be up to developers to decide if they want to make their games available via Project xCloud.
Game streaming services don’t mean that gaming consoles are on the way out, and it will be probably be years before the technology can provide the same consistent experience that PCs and gaming consoles can provide today. Still, game streaming is all about reaching the 2 billion people playing games worldwide, and I think Microsoft and Sony (which was an early leader in game streaming with PlayStation Now) shouldn’t underestimate Google Stadia. Amazon, the owner of Twitch, is also working on its own game streaming service, and you can also add EA and Verizon to the list of companies interested in game streaming.
Forget the console wars, we’re about to see a new type of competition between platforms allowing gamers to play games anytime, anywhere, on any device. This should be an exciting evolution for the video games industry, and competition is always a very good thing. Let’s just hope that this won’t lead to more walled gardens, though Google is already committed to support crossplay on its Stadia platform.
Bill Stasior, the former Apple Vice President of AI and head of the Siri team will now be a part of Microsoft’s VP of Technology and reporting to CTO Kevin Scott as early as this month, August 2019.
Stasior is going to Microsoft with the intention of helping to bridge the company’s technology strategies across platforms and services alongside the business’ recently promoted CTO.
According to a report from The Information, “At Microsoft, Stasior will lead an artificial intelligence group, a person familiar with the matter said.”
While it might be easy to infer that the former head of Siri will naturally be working to organize Microsoft’s digital assistance mess, Stasior’s new job description as listed on LinkedIn doesn’t make mention of Cortana or search, despite his history at Apple and his time as Amazon’s VP of search.
Microsoft has stated in the recent past, that Cortana remains a project the company is interested in pursuing but has also made a clear delineation between its machine learning and AI platforms that it sees operating independently of the Cortana branding.
Perhaps Stasior will be tasked with not only filtering Microsoft’s AI technologies throughout the company’s portfolio of software and services but also figuring out a way to rebrand Cortana as a users one-stop-shop for aggregated data parsing.
Pre-orders are now open for Ghostbusters: The Video Game Remastered on Microsoft’s family of Xbox One consoles.
The game is a re-release and a remaster of the original Ghostbusters: The Video Game title and features higher res graphics on the Xbox One and Xbox One S and 4K Ultra HD resolution when played on an Xbox One X console.
Here’s the official game description and teaser trailer:
Authentic Ghostbusters Experience – The game features the voices and in-game likenesses of Bill Murray, Dan Aykroyd, Harold Ramis, and Ernie Hudson in an original story penned by the writers of the original films – Dan Aykroyd and Harold Ramis.
Unique Gameplay – Experience unique ghost hunting, wrangling and trapping with upgradeable weapons in widely destructible environments. Test the team’s mettle with large scale boss fights. Storyline Campaign – Play through a unique storyline as the player battles and captures ghosts – both well-loved and brand new – throughout New York.
Ghostbusters: The Video Game Remastered will launch on the Xbox One on October 4th.
The popular video game, Final Fantasy VIII, is finally getting the modern re-release treatment and will be available on Microsoft’s Xbox One consoles as Final Fantasy VIII Remastered on September 3rd.
This release of Final Fantasy VIII features all of the content from the original versions and has been upgraded with a fresh HD resolution and character models, an option to disable random encounters, and a variety of settings for speeding up gameplay and reducing the grind.
It is a time of war. The Republic of Galbadia, under the influence of the sorceress Edea, mobilises its great armies against the other nations of the world. Squall and other members of SeeD, an elite mercenary force, join hands with Rinoa, a resistance fighter, to fight against Galbadia’s tyrannical rule and to prevent Edea from fulfilling her ultimate goal.
This product is a remaster of FINAL FANTASY VIII, featuring multiple enhancements including additional options to customise your gameplay experience and difficulty.
This will be the first time Final Fantasy VIII has been released on an Xbox console. It joins a plethora of other Final Fantasy games which have also launched on Xbox One recently including Final Fantasy X, Final Fantasy VII, and Final Fantasy IX.
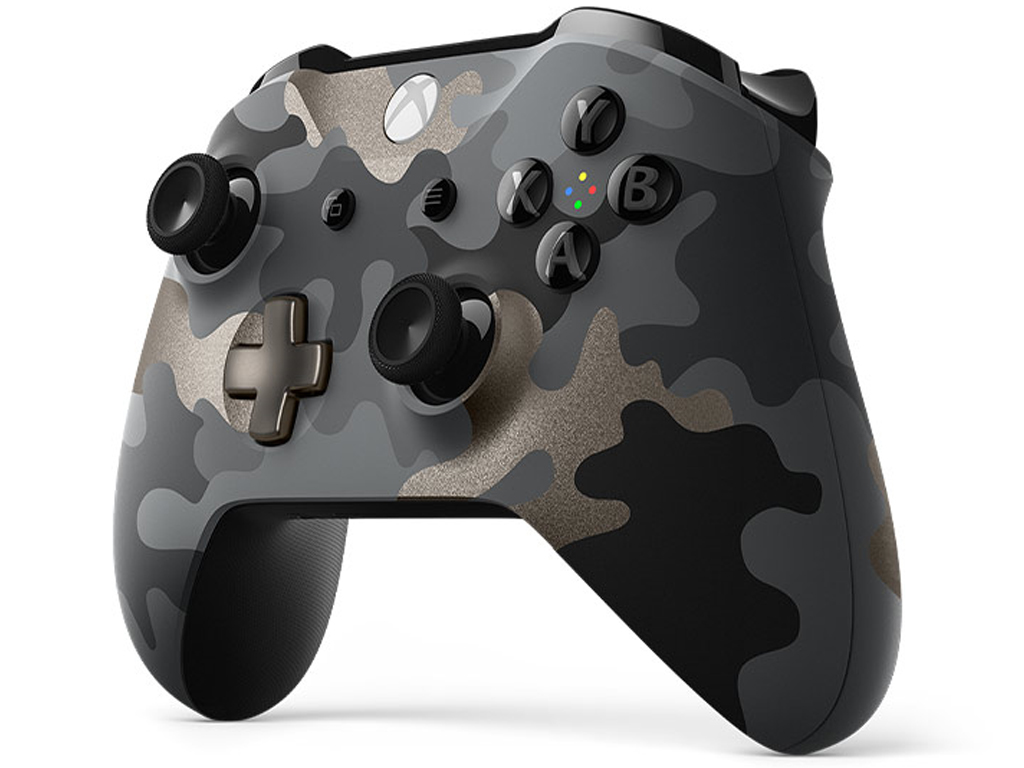
During this year’s Gamescom, Microsoft unveiled two brand new Xbox Wireless Controller designs, the Night Ops Camo Special Edition (see above image) and the Sport Blue Special Edition (see below).
The Sport Blue Special Edition is set for release on September 17th and will retail for $69.99 while the Night Ops Camo Special Edition will hit shelves on October 8th and will sell for the same price. Pre-orders are now open on the Microsoft Store website here and here.
Xbox Wireless Sport Blue Special Edition Controller
Each controller sports the latest Xbox controller features such as Bluetooth connectivity, etched trigger grip, a headphone jack, and full support for all Xbox One consoles and Windows 10 PCs or tablets. These controllers will also work with Microsoft’s unnamed next-gen console due for release in late-2020.
While Windows updates are supposed to bring new features and bug fixes, these sometimes create more issues. After upgrading to the latest Windows version, the system no longer recognizes the SSD. This also happens when you have accidentally deleted the EFI partition.
So, if you, too, are in a similar situation and want to restore the deleted EFI partition in Windows 10, keep reading for the exact steps.
Boot PC with an installation media. Change the Boot order in BIOS to boot from the installation media if necessary.
Press Shift + F10 to launch the Command Prompt.
Run the following command one by one and then hit Enter after each, while replacing N with the disk containing the deleted EFI partition:diskpartlist diskselect disk Nlist partitioncreate partition efiformat quick fs=fat32list partitionlist volumeexitbcdboot C:\windows
The last command will copy the boot from the Windows partition to the EFI system partition and create a BCD store in the partition.
If you did not get any error during the process, shut down the computer.
Remove the installation drive and boot the computer normally.
Finally, verify whether you can access the EFI partition after you accidentally deleted it in Windows 10.
To better understand how the EFI system works before restoring it, see our detailed guide on what EFI is in Windows.
2. Take a backup and clean install Windows
Insert the USB drive into your computer and boot from the installer.
Make sure you change the boot order in the BIOS to boot from the USB drive.
In Windows Setup, choose the Repair your computer option.
Choose Troubleshoot.
Click on Advanced.
Choose Command Prompt.
In the command prompt, type notepad and hit Enter.
Click on the File menu and select Open to access the File Explorer.
Now copy anything that is important in the C: drive to the USB or external hard drive.
Once you have taken the backup, boot from the Installation Media again and fresh install Windows 10.
That’s it! If you accidentally deleted an EFI partition, these solutions will help restore the partition in Windows, or backup the data and reinstall the OS.
Used in a versatile and powerful IDE software, compilers can help you transform programming code from one programming language to another. For example, this process enables you to write code in C++, and then transform it into any other language of your choosing.
Because there are more than 8000 main programming languages in existence, it is very hard to choose an IDE software. Most people choose their IDE software by first figuring out what kind of input and output programming language would be best suited for your project, and start from there.
There is a wide range of IDE software as well, and because of that, it can get very confusing when trying to pick the right one.
It wouldn’t be an efficient tactic to examine all the software options found on the market and then analyze the 8000 programming languages that can be used.
But what we can do is to choose some of the most versatile IDE software options that work with a variety of programming languages, and then observe their capabilities, features, and area of expertise.
Use these IDE compilers for almost any programming languages
Microsoft Visual Studio
Microsoft Visual Studio in an incredibly powerful IDE software that you can use to create a wide range of programs – web applications, mobile apps, video games, etc.
This software contains a great range of tools that allow you to test for compatibility, and also allows you to customize your version of the software by extending its capabilities with very useful plugins.
When it comes to the programming languages supported by MVS, you can use ASP.NET, DHTML, JavaScript, JScript, Visual Basic, Visual C#, Visual C++, Visual F#, XAML, etc.
You can extend these options even more by the use of plugins, making this software compatible with Batch, Clojure, CoffeeScript, Dockerfile, Go, Jade, HandleBars, Ini, Lua, Makefile, Objective-C, Perl, PowerShell, Python, R, Razor, Ruby, Rust, SQL, and XML.
You can use this software to navigate, write, and fix your code errors fast, and also to debug your code, create custom profiles, and diagnose your project with just a few clicks.
Visual Studio has a wide range of auto-complete tools, but one of the most well known and used is Microsoft’s Intellisense.
This application can help you wrote code faster, and without taking the risk of making errors. For example, if you use this plugin for C# programming, Visual Studio can automatically correct the casing of an erroneous function name.
This allows you to avoid annoying compiler errors and also to streamline your coding process.
One downside of Microsoft Visual Studio is its computer system requirements. This software will require a medium to the top of the range PCs in order to run without issues.
If you want to use it on a low spec computer it would take a long time to create small edits on some devices.
It might be a better option to choose a lightweight IDE software in order to create small edits.
Here are some of the best features found in Microsoft Visual Studio:
Incredibly large database of various extensions
Can easily customize dashboard and dockable windows to fit your needs
Easy to understand workflow and hierarchy of files
Allows you to monitor the performance of your code in real time
Great automation tools – helps you focus on more important tasks, and allow VS to automate the repetitive tasks
Code snippet insertion with easy refactoring options
Split screen support
It includes very useful error list – gives you an overview of the errors found in your code and allows you to start debugging while building
Approval checking when deploying apps via Windows Installer (.exe), ClickOnce, or Publish Wizard
Eclipse is a very close contender of Microsoft Visual Studio. This software is a very powerful IDE environment that is written mostly in Java, and its purpose is to develop Java applications.
This IDE software can be extended almost infinitely and is designed to work perfectly on a medium performance PC.
What makes Eclipse stand out from the crowd is the level of customization that can be applied with ease.
You can choose from a wide range of plugins that can extend the supported programming languages of Eclipse – Ada, ABAP, C, C++, C#, Clojure, COBOL, D, Erlang, Fortran, Groovy, Haskell, JavaScript, Julia, Lasso, Lua, NATURAL, Perl, PHP, Prolog, Python, R, Ruby (including Ruby on Rails framework), Rust, Scala, and Scheme.
Besides these programming languages, you can also use a wide range of development environments that include Eclipse Java development tools for both Java and Scala, Eclipse CDT for C/C++, and also Eclipse PDT for PHP coding.
Beyond its incredible customization power, Eclipse also allows you to organize your project into collection windows and layout settings that can simplify the process of searching for the right tool. This feature is called perspectives.
You can simply switch between perspectives in order to get access to the specific tools needed in that part of the process of coding. As an example, you can use a specialized perspective for Java coding, another for SVN, etc. Users have reported this tool to be extremely useful.
Compared to Visual Studio, Eclipse gives you access to the main download page as soon as you open it up. You can download any of the languages you are interested in using.
In order to make the installation process even easier, the Eclipse downloads are packed in a config file that is specifically designed to be recognized and adopted by the software.
You can download the version of Eclipse you need at first, and then customize it to your specific needs.
Eclipse is a fully open-source project, that means that anybody with programming skills can use it, and also contribute to its evolution, bug fixes, feature tweaking, etc.
As in the case of Visual Studio, Eclipse can import statements automatically when coding in Java.
Because of its open-source availability, this software allows you to easily create a new one or expand an existing programming language.
It is hard to choose the best IDE software that allows you to use compilers to transform your code language, and in order to choose one, we need to understand the best environment to use them in.
If you want to use the software for front-end processing, Microsoft Visual Studio is clearly the more effective option. In the case of back-end processing, Eclipse offers you all the tools you need to achieve great results.
You can choose one depending on the stage of development you are in, or use them both as you move through your project.
Please feel free to let us know what your opinion is in the comment section below.
Surfing the Internet is one of the most frequent activities of modern man. So, it is not unusual that many people encounter problems with their browsers.
One of these is a pop-up message saying “This web page wants to run the following add on Apple from Apple Inc”, as one user described the issue on the official Microsoft forum:
Daily this message appears on random websites. Today it’s the government website for driving licences!! PLEASE advise how I can stop this happening. I’m currently using IE11.
So, we know that the message appears on random websites opened with Internet Explorer 11.
This is an annoying issue for many users. Today we will show you how to solve this problem once and for all.
Fix This webpage wants to run apple from apple inc pop-up message
1. Run the Troubleshooter
The first method you can try is the simplest. Run the Windows Troubleshooter.
Click on the Start button.
Write and select Settings.
Choose Update & Security.
Select Troubleshoot.
Choose Internet Connections.
2. Run an antivirus scan
If the solution above didn’t work, your browser might be infected with malware. So, run an antivirus scan. You can do this with Windows Defender, or you may try a third-party antivirus tool.
3. Install another browser
To avoid annoying problems such as the “This webpage wants to run apple from apple inc” pop-up message, make sure to use a stable and secure browser such as Opera One.
Opera One is light and gets constant updates that keep it performing really well on all sorts of deveices. This browser has a simple and intuitive user interface and you can customize it to your liking with add-ons, integrations and even visual themes.
Moreover, the tool is very secure and private. It has anti-phishing technology, as well as an adblocker and a built-in VPN. Not only that, but Opera One also comes with a built-in AI.
The error “This webpage wants to run apple from apple inc” that pops up on browsers is annoying and can signal a malware infection.
However, there are easy solutions to fix this issue. You need to keep your computer virus-free by installing an antivirus tool. Also, to make sure this issue doesn’t reappear, install a different browser, such as UR.
So, that’s about it. As you can see, the problem is not as serious as it seems with our simple methods.
Did our solutions work for you? How do you solve pop-up messages such as these? Do let us know in the comments section below!
While trying to open the Power BI desktop app you may encounter access to the path error. This error can be caused by a glitch in the app, outdated Power BI software or incompatible software in the system. Several users have reported similar errors in the Power BI Community.
We have listed a few troubleshooting tips to help you resolve the Power BIerror access to the path.
Unable to start Power BI due to Access to path error
1. Run Power BI as Administrator
Type Power BI in the search bar.
Right-click on Power BI and select Run as Administrator.
Click Yes if prompted by the User Access Control.
Check if the Power BI app starts without any error.
2. Check Security Software
Power BI users have reported this error can also occur due to the antivirus software.
First, try to disable the antivirus temporarily and exit.
Now try to launch the Power BI app.
If the app opens without any error, you need to add the Power BI app to the exception list.
You can find the settings to add the Power BI app to the exception list in the Antivirus settings.
Some users might spot a mysterious FOUND.000 folder in Windows 10’s File Explorer and wonder what exactly the folder is for.
Unknown folders can make any user cautious, so it’s important to know what those folders do. Speaking of which, we have a great guide on the WindowsApps folder that you might want to read.
So join us, while we take a closer look at this folder to learn what it does.
What is found.000 folder?
The folder is associated with chkdsk feature.
It stores damaged, partial or corrupted files found by chkdsk.
Is found.000 folder a virus?
No, this is a legitimate Windows folder, and it doesn’t contain any malware, nor is it associated with malware.
Press Windows key + X and select Windows PowerShell (Admin).
Run the following command but be sure to use the correct drive letter: rmdir C:\found.000 /s /q
Wait for the process to finish.
Keep in mind that you might need to take ownership of the folder before you can remove it, especially if you encounter found.000 folder not accessible or access denied message.
We hope that this guide helped you understand what this folder is and how it works.
To learn more about folders, we have a great guide on how to open a folder in Command Prompt that you might want to check out.
Have you ever encountered this directory before? Let us know in the comments below.
Microsoft has silently released new Cumulative Updates for a number of Windows 10 versions.
This is slightly uncommon, as Patch Tuesday was less than a week ago. Nonetheless, the CUs come with a long list of non-security bug fixes and improvements, but also with some known issues.
The new CUs bring a lot of fixes
The new Cumulative Updates are available for Windows 10 version 1809, 1803, 1709, 1703, 1607, and 1507.
Keep in mind that these are optional updates, and won’t arrive automatically. If you want to install them on your PC, you’ll have to open the Settings app and navigate to Update & Security > Windows Update, and click on the Check for updates button.
If you’re on the Windows 10 October 2018 Update (v1809), you’ll get KB4512534 which comes with the following changes:
Updates an issue that prevents Windows Hello face recognition from working after you restart a device.
Allows Microsoft Edge to print PDF documents that contain landscape and portrait-oriented pages together correctly.
Allows Microsoft Edge to open PDFs that are configured to be opened only once correctly.
Updates an issue with downloading copyrighted digital media (music, TV shows, movies, and so on) from certain websites using Microsoft Edge and Internet Explorer.
Here’s the full list of improvements and fixes:
Improves the reliability of push notifications about app deployments to Microsoft HoloLens 1 devices.
Addresses an issue that prevents Windows Hello Face Authentication from working after a restart.
Addresses an issue with downloading digital rights management (DRM) files from certain websites using Microsoft Edge and Internet Explorer.
Addresses an issue that prevents the Universal C Runtime Library from returning the proper value for time zone global variables in certain conditions.
Addresses an issue that causes Deployment Image Servicing and Management (DISM) to intermittently stop responding while deprovisioning some preinstalled apps using the Microsoft System Center Configuration Manager (SCCM).
Addresses an issue in which the default keyboard for the English (Cyprus) (en-CY) locale was not set properly.
Addresses an issue to enable Microsoft Edge to print PDF documents that contain landscape and portrait-oriented pages correctly.
Addresses an issue with PDFs that are configured to be opened only once in Microsoft Edge.
Addresses performance issues for the Win32 subsystem and Desktop Window Manager (DWM).
Addresses an issue with the input and display of special characters that occurs when an app usesimm32.dll.
Addresses a composition handle leak in Universal Windows Platform (UWP) apps.
Addresses a memory leak indwm.exethat may lead to a loss of functionality and cause a device to stop working.
Addresses an issue that fails to bypass automatic sign in (Autologon) when you press and hold the Shift key during startup.
Addresses an issue that causes the Windows Management Instrumentation (WMI) classWin32_PhysicalMemoryto report that 32 GB memory chips have a missing Capacity value.
Addresses an issue that prevents an App-V application from opening and displays a network failure error. This issue occurs under certain circumstances, such as when a system’s battery is low or there is an unexpected power failure.
Addresses an issue with User Experience Virtualization (UE-V) that may sometimes prevent exclusion paths from working.
Addresses a rare issue that causes Windows Defender Advanced Threat Protection (ATP) to temporarily prevent other processes from accessing files.
Addresses an issue that causes a workstation to stop working when you sign in using an updated user principal name (UPN) (for example, changing[email protected]to[email protected]).
Addresses an issue in which Windows Defender Application Control will not allow third-party binaries to be loaded from a Universal Windows Platform application. CodeIntegrity event error 3033 appears as, “Code Integrity determined that a process (<process name>) attempted to load <binary name> that did not meet the Store signing level requirements.”
Addresses an issue that prevents some Trusted Platform Module (TPM) devices from being used for Next Generation Credentials.
Addresses an issue that causes applications on a container host to intermittently lose connectivity because of a port conflict with applications running on a container.
Addresses an issue that prevents some users from receiving a TTL value when they are added as members of Shadow Principals. This occurs for users who have distinguished names (DN) that contain an escape character. The TTL value is now added as expected.
Addresses an issue with thedisabledattribute of theinputelement, which doesn’t allow a scope to be passed to the authorization endpoint.
Addresses an issue with leaks in Windows notification sockets that causes Windows to run out of ports.
Addresses an issue that prevents server editions from activating with a Multiple Activation Key (MAK) in the graphical user interface (GUI). The error is, “0x80070490”.
Addresses an issue that may break the domain trust when the Recycle Bin is configured on the domain that carries the trust.
Increases the number of supported interrupts per device to 512 on systems that have x2APIC enabled.
Addresses an issue that may prevent devices from starting when they start up using Preboot Execution Environment (PXE) images from Windows Deployment Services (WDS) or System Center Configuration Manager (SCCM). The error is, “Status: 0xc0000001, Info: A required device isn’t connected or can’t be accessed.”
Addresses an issue that may cause the following to stop responding:
Applications that were made using Visual Basic 6 (VB6).
Macros that use Visual Basic for Applications (VBA).
Scripts or apps that use Visual Basic Scripting Edition (VBScript).
And here are the known issues with this update:
Symptom
Workaround
Certain operations, such asrename, that you perform on files or folders that are on a Cluster Shared Volume (CSV) may fail with the error, “STATUS_BAD_IMPERSONATION_LEVEL (0xC00000A5)”. This occurs when you perform the operation on a CSV owner node from a process that doesn’t have administrator privilege.
Do one of the following:
Perform the operation from a process that has administrator privilege.
Perform the operation from a node that doesn’t have CSV ownership.
Microsoft is working on a resolution and will provide an update in an upcoming release.
After installingKB4493509, devices with some Asian language packs installed may receive the error, “0x800f0982 – PSFX_E_MATCHING_COMPONENT_NOT_FOUND.”
Select Check for Updates and install the April 2019 Cumulative Update. For instructions, seeUpdate Windows 10.
NoteIf reinstalling the language pack does not mitigate the issue, reset your PC as follows:
Go to theSettingsapp >Recovery.
SelectGet Startedunder theReset this PC recovery option.
SelectKeep my Files.
Microsoft is working on a resolution and will provide an update in an upcoming release.
We are investigating reports that a small number of devices may startup to a black screen during the first logon after installing updates.
To mitigate this issue, press Ctrl+Alt+Delete, then select the Power button in the lower right corner of the screen and select Restart. Your device should now restart normally.
We are working on a resolution and will provide an update in an upcoming release.
Applications and scripts that call theNetQueryDisplayInformationAPI or theWinNT providerequivalent may fail to return results after the first page of data, often 50 or 100 entries. When requesting additional pages you may receive the error, “1359: an internal error occurred.” This issue occurs in this update and in all the updates before June 18, 2019.
We are working on a resolution and will provide an update in an upcoming release.
If you’re on the Windows 10 Fall Creators Update (v1709), you’ll get KB4512494. This update is available for Windows 10 Enterprise and Education, but not for Windows 10 Home or Pro users.
If you’re on Windows 10 Anniversary Update (v1607) or Windows Server 2016, you’ll get KB4512495. This is available only for Long-Term Servicing Channel customers.
Keep in mind that all the updates have a series of fixes and improvements, but also some known issues. Be sure to carefully check their changelogs to see what has been changed.
We all know how great Xbox is for many video game players. However, things are not always as good as they seem.
Many users encountered the error 0x82d40004 on their Xbox One console.
One user reported the following on the official Microsoft forum:
When I insert the game into my Xbox one system I get an error code 0x82d40004. No games will work on my system as this error code happens with every game CD I enter. I need help or information on how to resolve this issue. I am trying to find out if there is a major issue with my Xbox that I may need to send it in to Microsoft.
So, no games will work because every time the player inserted a CD, the Xbox console shows the error code 0x82d40004.
Luckily, there are a few easy solutions that will solve this issue in no time.
How to solve error code 0x82d40004 on Xbox?
1. Check your disk
If the error 0x82d40004 appears on your Xbox console, your disk may be physically damaged. Check your DVD/CD for scratches or other signs of wear.
You can clean your disk with a damp and soft piece of cloth.
2. Restart your console
Go to the Main Menu.
Press and hold for at least ten seconds the power button of the console.
If the methods above don’t work, try re-adding your account. Delete your account from the Xbox console, and then add it back.
Select System, then Settings, Account, and then Remove accounts.
Click on the account that you want to remove, and then select Remove to confirm.
Select Close when you’re finished.
Now, to add the account, follow the steps below.
From the upper-left corner of the screen, select your gamer picture.
Select Add new.
Write the email address for the Microsoft account that you want to add, and then select Enter.
Do not select Get a new account. That will create a brand-new Microsoft account.
Follow the steps to configure your Sign-In & Security preferences to add your Microsoft account to your Xbox One console.
Conclusion
The error code 0x82d40004 is a severe issue for many players. They can’t play anything, but fortunately, there are some easy and quick solutions to fix this.
Some of them are pretty obvious. Your disk is probably damaged. However, you might need to re-add your account.
Did our solutions work for you Let us know in the comments section below!
A number of Synology users have reported that they can’t map the drive on Windows 10. This issue can be highly annoying, as it varies in how it is expressed.
In some cases, the Synology assistant maps the drive for a limited amount of time, and then the entire setup goes back to default settings, and in other cases, the changes aren’t applied at all. Or you may even find that the NAS drive is not showing under Network.
For these reasons, in today’s article, we will explore some of the best troubleshooting steps you can take to deal with this annoying issue. Please follow the steps in this guide carefully to avoid causing other issues.
What can I do if I can’t map Synology drive on Windows 10?
1. Use File Explorer
Even though this might sound too easy to be true, some users have used this workaround to map their drives. The issue mentioned above seems to be caused by a conflict between the architecture of Synology and the Windows 10 drives.
Depending on how evolved the problem is, Synology might not be able to map your drives entirely, or if it does, it will be only temporary. To avoid this, you can use Windows 10File Explorer to map your drive/drives.
You can log into your account with the current account name and password.
2. Turn off password-protected sharing
Press Windows + X keys on your keyboard -> choose Settings from the menu.
Inside the Settings window -> select Network & Internet -> click on Status.
Scroll to the bottom of the page and click Network and Sharing Center.
Click the button Change advanced sharing settings.
Expand All Networks.
Under the Password protected sharing section -> choose Turn off password protected sharing.
Press Windows + R keys on your keyboard -> type optionalfeatures.exe-> press Enter.
Scroll down to SMB 1.0/CIFS File Sharing Support -> click the + sign to activate the drop-down menu.
Tick the box next to SMB 1.0/CIFS Client.
Untick the boxes for both SMB 1.0/CIFS Automatic Removal and also SMB 1.0/CIFS Server.
Click the Ok button and restart if prompted to do so.
This should fix the Synology map network drive on Windows 10 not working issue.
4. Modify settings inside Synology
Navigate to Settings -> enable SMB Service.
Inside the Advanced settings tab -> choose Protocol SMB3.
Disable the option Transport Encryption to prevent slow data transfer.
Enable the option Opp Locking.
Disable Press the Win+X keys on your keyboard -> select PowerShell (Admin) -> type the command below: REG ADD HKLM\SOFTWARE\Policies\Microsoft\PassportForWork /v Enabled /t REG_DWORD /d 0 /f
Press Enter to run the command.
After the process is completed, restart your PC.
If you can’t map your Synology drive on Windows 10, the solutions in this guide should help you fix it for good. Similarly, if you want to know how to map network drives over VPN, check our detailed guide for the steps to follow.
We would love to know if this guide helped you solve your issue. Please let us know if this article helped you by using the comment section below.