New partnership with Microsoft and LinkedIn to power up Adobe Experience Cloud

When Microsoft acquired the business-oriented social networking site LinkedIn, economists and cynics alike wonder how it planned to monetize the new product.

Thus far, there haven’t been any glaring Microsoft inspired changes to the site aside from some Bing advertisement synergies, but it looks like the company may be leveraging its existing Adobe partnership to add value and financial incentive to LinkedIn users.

Earlier this week, Adobe, Microsoft and LinkedIn announced a new partnership amongst the three businesses that are intended to enhance account-based experiences (ABX) with new integrated marketing solutions.

“The ability to leverage the power of data to find the right opportunities and use insights helps marketing and sales to plan their next move with a member of the buying committee,” said Alysa Taylor, corporate vice president of Business Applications and Global Industry at Microsoft. “Together with Adobe and LinkedIn, Microsoft can help to deliver an end-to-end solution that ultimately accelerates lead conversion and can create opportunities for improved servicing and better cross-sell, resulting in the higher lifetime value of the account.”

The intended effect is that Microsoft and Adobe will work together to source key data points to create profiles in Adobe Experience Cloud, Microsoft Dynamics 365 for Sales and Marketo Engage. The profiles created by this collective data will now be accessible to B2B platforms, to which LinkedIn will amongst the first to use in conjunction with its marketing platform.

According to a report from BusinessWire, the new partnership will offer at least three pillars of opportunity for marketing using LinkedIn’s Marketing Solutions:

  • Gain a deeper, real-time understanding of targeted accounts: Marketing and sales teams will be able to leverage data from Marketo Engage and Microsoft Dynamics 365 for Sales to get a deeper, real-time understanding of targeted accounts, including insights into individual roles, influence, and preferences. By integrating LinkedIn’s Matched Audiences with Marketo Engage, the combined account-based targeting capabilities will help marketers identify the right contacts within an account to reach on LinkedIn.
  • Target audiences more effectively by leveraging richer account profiles: To identify the best-fit accounts to pursue, Marketo Engage’s Account Profiling capability combines the power of intelligence-driven predictive modeling and automation in a single ABX solution, empowering marketers to identify these accounts out of 25 million companies within minutes.
  • Power people-based campaigns with more precision than ever before: Adobe Audience Manager, the company’s Data Management Platform (DMP), on Azure, will enable brands to stitch together audience data to power contact-based campaigns on LinkedIn and other channels while informing media buys with more precision than ever before. Data governance and privacy controls help to ensure that customer data is kept secure and helps brands to comply with their privacy policies and data privacy compliance objectives.

As with most marketing efforts, Microsoft, Adobe and LinkedIn are trying to implement a more personalized ad experience by creating a platform layer of relevant data points used to ultimately deliver more meaningful content.

While this may seem like a hyper-niche audience of both Adobe and Microsoft users who also happen to be LinkedIn members, a cursory view of resumes and skills listed in profiles seem to overwhelmingly include intersections of Office and Adobe CC experts.

New Pinterest app shows up on the Windows 10 Microsoft Store

Pinterest, the popular social media service that lets you save content you find on the Internet and share it with your followers, now has a dedicated app on Windows 10 PCs (via MSPoweruser). The new Pinterest app in the Microsoft Store is actually a web app, and it doesn’t seem to offer much added value compared to the Pinterest website.

Unlike the well-made Twitter Progressive Web App (PWA), this new Pinterest app doesn’t support Live Tiles, Jump Lists, offline mode, and it also doesn’t appear in the Share Menu in Microsoft Edge. As a result, the app can’t replace yet the Pinterest Save button Edge extension that was released a couple of years ago.

Despite Microsoft wanting to make PWAs first-class citizens on Windows 10 thanks to support for service workers and other modern features, we have yet to see many high-quality PWAs appear in the Microsoft Store. A basic web app may be better than nothing, but we hope that more developers will follow Twitter’s lead and make their PWAs offer as much functionality as native apps.

Pinterest
Pinterest
Developer:
Pinterest Inc.
Price:
Free

Windows 10 Huawei MateBook laptops have major security flaws

Hackers have targeted Windows 10 PCs once again compromising the kernel’s security. Microsoft spotted a local privileged execution vulnerability that existed in the Huawei PC Manager driver software.

So, if you own a Huawei MateBook Windows 10 laptop, install the latest updates as soon as possible to patch the security vulnerability.

The patch was released in January

Microsoft uncovered this high-level local privilege escalation threat in the Huawei PC Manager driver program a few months ago. The flaw existed only in the Windows 10 MateBook laptops.

The good news is that a patch to fix this flaw was released in January. However, it’s only now that the company officially acknowledged the problem.

These days, attackers are targeting third-party kernel drivers in order to reach the Windows kernel.

They use an expensive zero-day kernel exploit. The Windows 10 October 2018 Update introduced the new kernel sensors that have identified the flaw in Huawei software.

Windows Defender ATP will detect similar flaws in the future

Microsoft launched an investigation because most of the Windows 10 devices received Defender ATP alerts through the Huawei’s PC Manager.

Later on, the researchers spotted the executable MateBookService.exe as a result of the investigation. The attackers were able to gain elevated privileges by creating a malicious instance of MateBookService.exe.

Keep in mind that this type of vulnerability can compromise your entire machine. Huawei warned MateBook users that the flaw enabled the attackers to trick them into running a malicious app.

The news has been devastating for Huawei as the company has been already under accusations to be working for the Chinese government.

Microsoft is of the opinion that the Defender ATP will be able to detect similar security flaws in the future. Thus, the service has proved to be extremely valuable for Windows users.

RELATED STORIES TO CHECK OUT:

This Publisher has Been Blocked: How to Unblock in Windows 10

Having a hard time unblocking an application publisher on your Windows PC? Is it blocked, and you’re not even sure why that’s the case? We have a plethora of applicable solutions for you to unlock a published in Windows 10.

The need arises when you come across Windows has blocked this software because it cannot verify the publisher or The publisher has been blocked from running software on your machine errors. And simply unblocking the publisher should fix things. Keep reading to find out how!

How do I unblock a publisher in Windows 10?

1. Use Command Prompt

  1. Press Windows + X, and select Command Prompt (Admin).
    cmd
  2. When Command Prompt opens, use the cd command to navigate to the directory that has the application setup file.
  3. After you navigate to the desired directory, enter the name of the setup file, for example, setup.exe, and press Enter.
  4. Your installation should now start normally.

According to users, one way to circumvent the problem is to use the Command Prompt to run the application. This isn’t a permanent solution, but it will allow you to install the desired application even if your publisher is blocked.

2. Reinstall the problematic application

  1. Press Windows + I to open the Settings app.
  2. Navigate to the System section.
  3. Now navigate to the Apps & features section, select the problematic application on the list, and click on Uninstall.

If you’re getting the message that a specific publisher is blocked, you can fix it sometimes simply by reinstalling the problematic application. This will eliminate the need to unblock the publisher in Windows 10.

3. Download the application from a different source

If you can’t install an application because the publisher is blocked, you might want to try downloading it from a different source. Be sure to download the application from the original source. If that doesn’t work, try downloading the application from a third-party source and check if that solves the problem.

4. Try using a different web browser

A few users reported getting the publisher blocked message while trying to install a certain application. According to them, you can fix the problem by downloading the setup file again using a different browser.

Users reported that their publisher was blocked after using Internet Explorer to download files. To fix the problem, open Microsoft Edge or any other web browser and try to download the file again. After that, run the setup file and check if the problem is resolved.

Besides that, you could make use of an alternative browser that has in-built apps and services like sidebar AI bots and messengers. You can also get a redesigned homepage and integrated VPN support.

➡️ Get Opera One

5. Check if the publisher is blocked

  1. Press Windows + S, enter internet options, and click the relevant search result.
  2. Go to the Content tab and click on the Certificates button.
  3. Click the right arrow in the Certificates window and navigate to Untrusted Publishers tab. Select the publisher that you want to unblock from the list and click the Remove button.
  4. Save changes and check if the problem is resolved.

Sometimes these problems can occur if the publisher is blocked on your PC. If you manually blocked a certain publisher, it will appear in Internet Options. And you can then unblock the publisher in no time.

6. Unblock the file manually

  1. Right-click the setup file that you can’t run. Choose Properties from the menu.
  2. Go to the General tab, and in the Attributes section, you should see the Unblock option. Check the Unblock option and click Apply and OK to save changes.
  3. After doing that, try to run the setup file again.

7. Check the certificate and download the file again

  1. Locate the problematic setup file. Right-click it and choose Properties from the menu.
  2. Navigate to the Digital Signatures tab and click on the Details button.
  3. In the General tab, click on View Certificate button.
  4. Look for the Valid from the field and check if your certificate is still valid.

Many developers use digital certificates to protect their software from tampering. However, if the certificate is expired, you might have some issues installing that application. In addition, if the certificate is expired Windows will block that publisher in order to protect you.

If the certificate is expired, you need to download the installation file again and install the application using that file to unblock the publisher in Windows 10.

8. Make sure that you download the latest version

Several users reported that they had this issue while installing a certain driver on their PC. According to them, the driver wasn’t the latest, and it wasn’t fully compatible with Windows 10, thus causing this problem to occur.

To fix the problem, be sure that you’re downloading the latest version of the software that you’re trying to install. By doing so, you’ll ensure that most compatibility issues don’t occur.

9. Use Task Manager

  1. Press Ctrl + Shift + Esc to start Task Manager.
  2. Click on the File menu and choose Run new task.
  3. Check the Create this task with administrative privileges box and click on Browse button.
  4. Find the problematic setup file.
  5. After doing that, click the OK button or press Enter to run it.

Task Manager is a useful tool that can close any application or disable startup items. However, you can also use Task Manager to start any application on your PC. A few users also reported that they fixed the problem with the blocked publisher on their PC simply by running the setup file from Task Manager.

We have to mention that this isn’t a permanent solution, so you’ll have to repeat it every time you encounter this issue.

10. Use the hidden administrator account

  1. Open Command Prompt as administrator.
  2. Paste the following command and hit Enter: net user administrator /active:yes
  3. Log out of your current account and log in to the administrator account.
  4. Try to install the application again using the administrator account.

A few users reported that they managed to fix this issue simply by using a hidden administrator account to install the application. This account is hidden by default, but you can enable it with a quick command.

If the process is successful, return to your main account and check if the application works properly. If so, you can disable the hidden administrator account yet again.

11. Change Group Policy and use File Unsigner

  1. Press Windows + R and enter gpedit.msc. Then, click OK.
  2. When Group Policy Editor opens, in the left pane, navigate to User Configuration, select Administrative Templates, click on Windows Components, select Attachment Manager, and then double-click on Include list for low file types.
  3. Select the Enabled option, and in the Options sections, add .exe. Now click Apply and OK.
  4. Download FileUnsigner.
  5. Open the archive and extract all files. Keep in mind that you’ll need a WinRAR or any other tool that can open .rar files.
  6. Now locate the setup file and drag and drop it to the FileUnsigner icon. If the process was successful, you’d see a Command Prompt message saying that the file was unsigned successfully.
  7. After that, simply double-click the setup file to start it, and it should work without any issues.

12. Turn off SmartScreen Filter

  1. Open Control Panel, and click on Security and Maintenance.
  2. Security and Maintenance window will now appear. Click on Change Windows SmartScreen settings in the left pane.
  3. Select Don’t do anything (turn off Windows SmartScreen) and click OK.

SmartScreen is a useful feature that can protect you from malicious websites and files, but it can also prevent certain applications from running. To unblock publishers in Windows 10, you might have to disable SmartScreen.

After turning off SmartScreen, try to install the application again. Disabling SmartScreen can slightly affect your security, but if you have an antivirus, you shouldn’t have any problems.

13. Temporarily disable your firewall

A firewall is important because it can prevent certain applications from accessing the Internet. However, sometimes Windows Firewall can interfere with certain applications and cause this problem to occur.

If you have problems installing applications because your publisher is blocked, you might want to try disabling your firewall temporarily or whitelisting the affected application with the blocked publisher.

14. Disable the security warning

  1. Open Internet Options, go to the Security tab, and click on the Custom level button.
  2. In the Miscellaneous section, locate the Launching applications and unsafe files option and set it to Prompt or Enable, then click OK to save changes.

15. Run the application in Compatibility Mode

  1. Locate the setup file, right-click it, and choose Properties from the menu.
  2. Go to the Compatibility tab. Check Run this program in compatibility mode for and choose a desired version of Windows. Now click Apply and OK to save changes.
  3. After doing that, check if the problem is resolved. If the issue still persists, try using a different compatibility mode.

16. Disable Always ask before opening this file option

  1. Run the downloaded file.
  2. When the security warning opens, uncheck Always ask before opening this file option. Now click the Run button.

Windows usually give you a security warning when you try to open a downloaded file. To fix the problem with blocked publishers, you have to disable one option when running downloaded files. This should unblock the publisher in Windows 10.

17. Change Group Policy settings

  1. Open Group Policy Editor, go to User Configuration, select Administrative Templates, choose Windows Components, and expand Attachment Manager. In the right pane, double-click on Do not preserve zone information in file attachments.
  2. Select the Enabled option and click on Apply and OK to save changes.

18. Use PowerShell

  1. Press Windows + S and enter PowerShell. Right-click PowerShell from the list of results and choose Run as administrator.
  2. When PowerShell opens, execute the following command:get-childitem "C:Usersyour_usernameDownloads" | unblock-file
  3. Be sure to enter the address that matches your download folder.

This issue can affect multiple files, and if you can’t install new applications, you might be able to fix this problem by using PowerShell. We must mention that PowerShell is an advanced command line tool, and you can cause certain issues with it if you’re not careful.

In this solution, we’ll assume all your setup files are in the Downloads folder. If you store your downloaded files in a different location, use that location instead.

That’s it! With these solutions, you can unblock a published in Windows 10 when applications can’t run. Before you leave, find out how to speed up Windows.

Tell us which fix worked for you in the comments section below.

How to Turn off Narrator in Windows 10

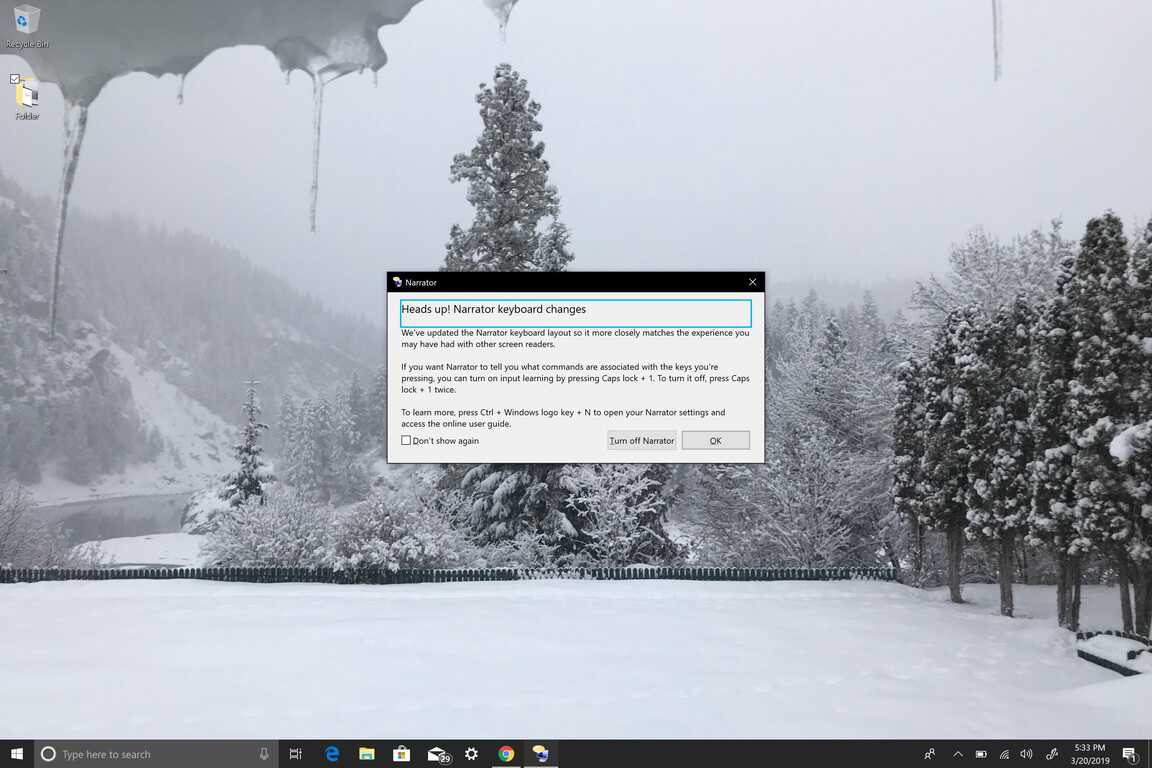
Narrator is a tool in Windows 10 that provides audio feedback about everything that is displayed on your PC’s screen. There is a keyboard shortcut that initiates Narrator and personally, I find that I inadvertently turn it on at the worst possible times. Wherever I might be where silence is expected, like the library, somehow I accidentally type the Windows logo + Ctrl + Enter command to turn on Narrator.  While Narrator is helpful to those that are have visual impairments, I don’t want it on my Windows 10 PC. As helpful as Narrator can be, for those that don’t need it, Narrator can quickly become an annoyance.

Microsoft makes a point that to equip each iteration of Windows with a number of accessibility and ease of access features to make using Windows easy for people with disabilities. Thankfully, if you don’t need it, turning off Narrator in Windows 10 is relatively simple. This is what you need to do:

1. Use the keyboard shortcut to go directly to Windows Settings: Windows logo + I
2. Go to Ease of Access.
Microsoft, Windows, Windows 10, Settings
3. In the left pane, Go to Narrator.
Microsoft, Windows, Windows 10, Settings
4. In the right pane, locate the toggle underneath Narrator and turn it Off.
5. Clear “Allow the shortcut key to start Narrator” box to disable the Narrator keyboard shortcut.

Now, you have successfully turned off Narrator. However, if you are like me and have no use for Narrator, you can take it a step further and disable Narrator completely. In the near future, I hope Microsoft would allow users to be able to uninstall Narrator. Until that time, this is what you need to do to completely disable Narrator in Windows 10.

In order to disable Narrator completely in Windows 10, you need to revoke its Windows 10 app permissions for your user account.
Here are the steps you need to follow:
1. Go to the search bar and type Narrator and Open the file location of Narrator
Microsoft, Windows, Windows 10, Settings2. Once you have the Narrator file location, right-click Narrator and choose Properties.
Microsoft, Windows, Windows 10, Settings
3. Under Narrator Properties, Go to the Security tab and choose Edit to edit user account permissions.
Microsoft, Windows, Windows 10, Settings
4. Select the user account(s) that you want to disable the Narrator app and click Deny full control. By checking deny full control, all check boxes will be checked Deny by default and thus disable all Narrator app permissions.
5. Click Apply for the changes to take effect for the each user account.
Microsoft, Windows, Windows 10, Settings
6. Click OK when you are finished.

If for some reason you want to enable Narrator in Windows 10, you can renew the permissions and toggle Narrator on and off, as well as enable the Narrator keyboard shortcut through the Ease of Access menu in Settings. If you completed the steps above, you’re done! You will never see Narrator in Windows 10 on your PC again.

New AdDuplex surveys sees only 26.4% of Windows 10 PCs running version 1809

The propagation of the latest Windows 10 update is still quite slow according to AdDuplex’s latest data. The ad network once again surveyed more than 100,000 Windows 10 PCs running AdDuplex ads, and found out that only 26.4% of them were running Windows 10 version 1809 in March.

“Windows 10 October 2018 Update has added just a little over 5% to its market share this month, and it looks more and more likely that Microsoft seems to be giving up on it in favor of upgrading users straight to the next version,” noted AdDuplex.

It’s clear that current situation is pretty unique in the history of Windows 10 updates. We don’t have any official data about the Windows 10 ecosystem, except for the 800 million active Windows 10 devices that Microsoft announced earlier this month. However, after the software giant had to delay the public rollout of Windows 10 version 1809 to November, the company made pretty clear that it would check telemetry data very closely before pushing this update to all users. The result could be a situation where the next Windows 10 update (19H1) starts rolling out before the majority of Windows 10 users have already received the version 1809.

Did you also notice in your entourage that many Windows 10 version 1809 is rolling out at a slower pace compared to previous Windows 10 updates? Let us know in the comments below.

Chrome automatically changes between dark and light mode on PC

Good news for Google Chrome users: the new version for Google Chrome 74 will come up with a series of improvements that you’ll definitely love.

Also, for those who use Windows 10, there will be a few special features included.

New Chrome features on Windows 10

  1. Dark Mode support for Windows

The browser will automatically update when the default app mode. This means that you enabled dark mode on Windows 10, the browser will also automatically switch to dark mode.

This also works for the Light theme. It will be quickly applied for tabs, for bookmarks, new tabs and different menus.

  1. New options: Reduce motion or Remove animations

This feature will help a lot the users that get motion sickness when they will look at WebPages with zooming effects, parallax and transition animations.

While many users enjoy such animations, some users dislike them because they feel distracted or slowed down from them. In the worst case, users may even suffer from motion sickness as if it were a real life experience, so for these users reducing animations is a medical necessity.

  1. Better protection against malicious downloads

Google Chrome 74 it will offer also solutions for better protection against malicious downloads. Besides the well known flag that that is available already, Google wants to provide users with additional protection.

Even though additional security checks are done in Chrome and the operating system, we feel blocking downloads in sand-boxed iframes also fits the general thought behind the sandbox. Apart from security concerns, it would be a more pleasant user experience for a click to trigger a download on the same page, compared with downloads starting automatically when a user lands on a new page, or started non-spontaneously after the click.

The final version of Google Chrome 74 is expected to land on April 23. The beta version is already available and you can test these improvements before they hit the general public.

RELATED STORIES TO CHECK OUT:

System and Compressed Memory High Disk Usage [Fix]

If System and compressed memory cause high disk usage on your computer, look no further. In this article, we’ll show more than a couple of ways to solve this problem.

How can I fix System and Compressed Memory issues?

1. Check for memory leaks

We usually start our articles with easier solutions, but not this time. First, you should ensure there are no memory leaks in your system that might cause System and Compressed Memory high disk usage.

Since this can be a complicated and lengthy process, we’ll save some space for this article.

So, make sure to check out our article about memory leaks, where the whole problem is explained in details, including solutions, of course.

2. Set the paging file size for all drives back to automatic

The paging file size for all drives in Windows 10 is usually set to automatic. And that’s how it should be. However, there’s a chance that some external factor, like an update changes these settings. Or even you accidentally did.

If the paging file size is not set to automatic, that can lead to possible memory leaks and, you guessed it, high disk usage.

So, the obvious solution, in this case, is to set the paging file size back to automatic.

If you’re not sure how to do that, follow these instructions:

  1. Go to Search, type performance, and go to Adjust the appearance and performance of Windows
  2. Go to Advanced tab, and click Change… under Virtual memorychange virtual memory settings
  3. Make sure Automatically manage paging file size for all drives is checkedAutomatically manage paging file size all drives

3. Turn off “Show me tips about Windows”

Microsoft implemented a new feature into Windows 10 that gives you tips and mini-tutorials about the system as you use it.

Even though Microsoft imagined it to be a helpful guide for new Windows 10 users, this feature is rather annoying and resource-consuming.

In fact, “Show me tips about Windows” can actually cause high disk or CPU usage, which for example is also the case with Runtime Broker error in Windows 10. And it could also be the main cause of our problem here.

So, in order to resolve the high disk usage issue, we’ll try disabling this feature.

And here’s how to do that:

  1. Go to the Settings app
  2. Go to System > Notifications & actions
  3. Now, disable Get tips, tricks, and suggestions as you use WindowsGet tips, tricks, and suggestions as you use Windows
  4. Restart your computer

After disabling this option, you won’t be getting these annoying messages anymore. And hopefully, your disk will be relieved of the heavy load.

4. Disable Desktop Notifications in Chrome

If you use Google Chrome as your primary browser, there’s a chance you have Chrome Desktop notifications enabled. While this might be useful to you, it’s surely resource-consuming.

So, if you’re dealing with high disk usage, disabling this feature is recommended.

Here’s how to do that:

  1. Open Google Chrome, click the menu (three dots), and go to Settings
  2. Under Privacy and security, click Content settings.
  3. Click Notifications.
  4. Choose to block or allow notifications:
    • Block all: Turn off Ask before sending.
    • Block a site: Next to “Block,” click Add. Enter the site and click Add.
    • Allow a site: Next to “Allow,” click Add. Enter the site and click Add.

5. Update Windows

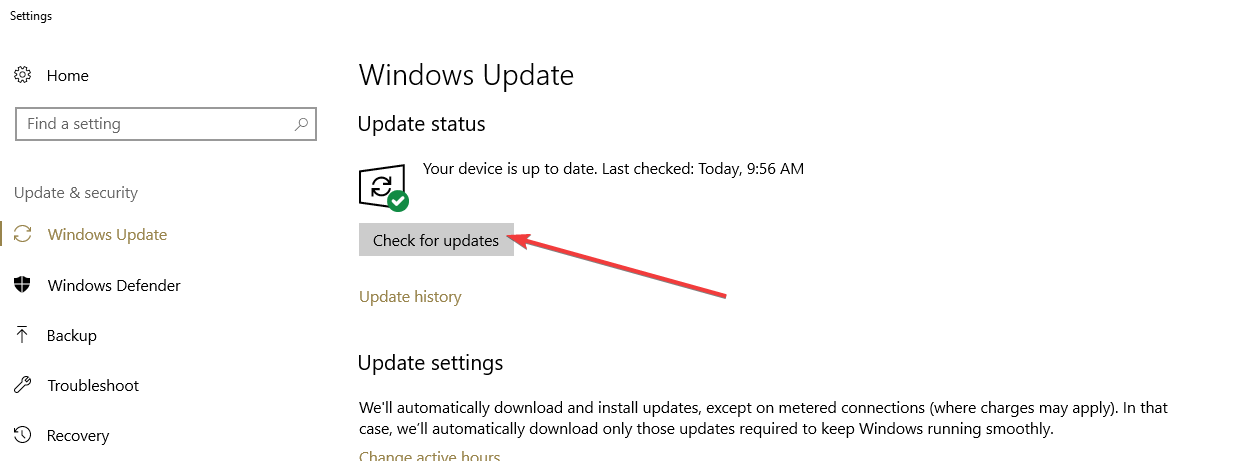
There’s a chance an update you installed some time ago interferes with some system feature, which causes, you guess, high disk usage. So, it won’t hurt if you check for updates once again.

Maybe it’s a known issue, and Microsoft development team has already prepared the solution.

check for updates

To update your system, simply go to Settings > Update & security, and check for updates.

6. Roll-back updates

If updating Windows doesn’t solve your problem, we’ll do the exact opposite. Maybe the latest update you installed is exactly the one that causes high disk usage.

In that case, your best bet is to delete the update, and wait for Microsoft to release the new one.

Here’s how to delete updates in Windows 10:

  • Go to Settings > Updates & Security > Windows Update
  • Go to Update history > Uninstall updatesSystem and Compressed Memory
  • Now, find the latest update installed on your computer (you can sort updates by date), right-click it, and go to Uninstall
  • Restart your computer

7. Repair Corrupt System Files

If none of the solutions from above solved the problem, we’re going to try running the SFC scan. This built-in tool is made for dealing with various system errors and interferences.

While it doesn’t necessarily mean the SFC scan will solve the problem, it certainly won’t hurt if we try.

In case you don’t know how to run SFC scan, follow these instructions:

  1. Go to Search, type cmd, right-click Command Prompt, and select Open as Administrator
  2. Enter the following command, and press Enter: sfc/scannow
  3. Wait for the process to finish
  4. Restart your computer

8. Run DISM

If the SFC scan found no solutions for the problem, we’ll try with the Deployment Image Servicing and Management Tool (DISM).

This tool basically does the same thing as the SFC but with higher accuracy and deepness.

Here’s how to run DISM:

  • Press Windows key + X and start Command Prompt (Admin).
  • In the command line type following command:
    • DISM.exe/Online /Cleanup-image /RestorehealthSystem and Compressed Memory
  • In case the DISM can’t obtain files online, try using your installation USB or DVD. Insert media and type following command:
    • DISM.exe /Online /Cleanup-Image /RestoreHealth /Source:C:RepairSourceWindows /LimitAccess
  • Be sure to replace ”C:RepairSourceWindows” path of your DVD or USB.
  • The operation should last no more than 5 minutes.

9. Disable the Superfetch service

Superfetch and Prefetch services are there actually to improve your system’s speed and responding time. However, having these services enabled can also lead to high disk usage. So, maybe it would be better for you to disable at least one of them.

Disabling these services helped some users who were facing high disk usage problems before, and maybe it’ll be helpful in this case, as well.

Here’s how to disable the Superfetch service:

  1. Go to Search, type services.msc and open Services
  2. Find Superfetch service, right-click on it and go to Propertiessuperfetch properties System and Compressed Memory
  3. Click on Disable, and then OK

10. Disable the Prefetch service

You can also disable the Prefetch service. Disabling this service is a little more complicated, but it shouldn’t be a problem if you follow these instructions:

  1. Go to Search, type regedit and open Registry Editor
  2. Navigate to the following path:
    • HKEY_LOCAL_MACHINESYSTEM
      CurrentControlSetControlSession Manager
      Memory ManagementPrefetchParameters
  3. Double-click on EnablePrefetch. You can configure EnablePrefetch by entering some of the following values into the Value Data box:
    • 0 – Disables Prefetcher
    • 1 – Enables Prefetch for Applications only
    • 2 – Enables Prefetch for Boot files only
    • 3 – Enables Prefetch for Boot and Application files
  4. As the default value is 3, set it to 0
  5. Restart the computer

11. Kill the Speech Runtime Executable process

Speaking of services, there’s another service called Speech Runtime Executable that can also cause the System and Compressed Memory high disk usage. So, we’re going to kill this process, and see if anything’s different. Here’s how to do that:

  1. Right-click the taskbar, and open Task Manager
  2. Go to the Processes tab
  3. Find the process named Speech Runtime Executable, and select it
  4. Click End Task

12. Limit CPU Usage

And if none of the solutions listed above managed to solve the problem, we’re going to try with limiting CPU usage. This solution helped some users who were facing high CPU usage caused by MsMpEng.exe, and maybe it’ll be also helpful in this case

Here’s what you need to do:

  1. Go to Task Manager > More details > click on the Details tab
  2. Right-click msmpeng.exe > select  Set affinity > select the CPU limit threshold.

That’s about it. We certainly hope at least one of these solutions helped you resolve the System and Compressed Memory high disk usage problem.

If not, maybe it’s time to reinstall your system or check if everything’s okay with your computer’s hardware.

You might also be interested in reading our guide on how to enable or disable Memory Compression on Windows 11.

If you have any comments, questions, or suggestions, don’t hesitate to let us know in the comment section below.

Windows 13: What are the chances of Microsoft releasing the OS?

For some time now, people have looking left and right for any confirmation whether there will be a Windows 13 launch or not.

Call the number unlucky, but all we have is user speculation and no solid evidence to go around this.

Windows 10 will get a new update coming in April. The upcoming update known as Windows 10 version 1903 or 19H1, is part of Microsoft’s plans to release two major updates every year.

Is there a Windows 13 operating system?

After the rumors surrounding Windows 12, users have started speculating about the possibility of getting Windows 13 as well. Call it April Fools, call it soul-searching, but numerous threads have been created on this topic, with more questions than answers.

Is Microsoft going to release a new Windows 13 OS? The short answer is no, as the company already confirmed Windows 10 would never get replaced. Instead, the big M will release two major Windows 10 OS updates every year.

Quora users were also quick to point out that there won’t be any Windows 13, setting the record straight until there’s more solid information.

No…..After releasing the latest updates of windows 10….Microsoft will skip windows 10 and release Windows 12…the next version of windows…

Another user added, that aside from current versions of Windows, nothing was planned for the unluckily numbered OS.

No, Windows 13 OS not launched in anywhere in the world.

So, ladies and gentlemen, until we have further info on this topic, we can call this mystery debunked, for now.

Windows 13 release date

Taken into account the details listed above, we can also answer the question related to Windows 13’s release date.

So, when will Microsoft release Windows 13? Never. Plain and simply.

Does anyone have any news on the Loch Ness Monster?

RELATED STORIES TO CHECK OUT:

Forza Motorsport 7 bugs: FPS drops, input lag, and more

Forza Motorsport 7 is now live. If you’re a car racing fan, you can now show off your skills and push the pedal to the metal leaving your rivals behind.

Just as it happens with every newly launched game, FM7 is also affected by a series of bugs that limit the gaming experience. For example, many gamers are still struggling to download the game, but hopefully, these download problems will get fixed as soon as possible.

In this article, we’re going to list the most frequent Forza Motorsport 7 issues reported by gamers, as well as their corresponding solutions, if available.

Forza Motorsport 7 reported bugs

  1. Strange car sounds
  2. Private lobbies need a fix
  3. Input lag on wheels/pedals
  4. Voice channel issues
  5. FPS drops
  6. Asphalt changes color
  7. Player don’t get CR or XP after finishing the race

1. Strange car sounds

Gamers reported that some of the car sounds are really disappointing. While this is not a game-breaking issue, it’s still very frustrating because it’s limiting the gaming experience. Hearing your car engine purring is one of the greatest joys in the world for car racing gamers and drivers in general.

I am just wondering how they can make it so bad? (confused) Look at Horizon 3 i think there are some problems with the sound there es well but ok generale i would say it’s a lot better still then FM7.
In horizon 3 the cars that should have a characteristic sound do have it but in FM7 all is just the same in cockpit view the sounds are also a lot louder then outside! All the v12’s just sound rubbish.

Hopefully, Turn 10 Studio will fix this bug with a future patch.

2. Private lobbies need a fix

Many gamers criticized Turn 10 Studios for the overall aspect and functionality of private lobbies. More specifically, players say that the lobbies are not fully functional and there are many elements missing from the scheme.

It’s well known by now – the private lobbies are absolutely unfinished and won’t even work properly 50% of the time.

Where is the Drag Racing, at least for private lobbies?
Where is the AI for private sessions with 2 or 3 friends?
Why can’t I create my own Server WITHOUT the need to invite my friends first, so I could set stuff up BEFORE they join?

Who was in charge of this mess? I know the game was just released, but come on… in its current state Multiplayer is absolutely lackluster and utterly useless.

3. Input lag on wheels/pedals

Having a reliable system that transfers your input with lightning-speed is essential in car racing games. Unfortunately, some FM7 players can’t fully enjoy the game due to input lag issues.

Is anyone else having input lag on their wheels/pedals? I have a G27 which works great on all games…except Forza7. I’ve used other USB ports, same results. It’s just a very small lag, but noticeable enough to be a game-stopper. TIA

4. Voice channel issues

Gamers reported that sometimes the voice channel changes automatically, preventing them from communicating with their friends in multiplayer mode.

I can not believe in 2017 not being able to talk to my friends in a party because the game automatically pulls me in and out of the multiplayer from one audio channel to another, it’s unbearable, turn10 has new programmers??? I could not believe they’re still the themselves

READ ALSO: Here are the upcoming DLC cars in Forza Horizon 3

5. FPS drops

Low FPS issues affect both PC and Xbox One players. The problem occurs in single player and multiplayer mode, and randomly affects races.

I’m experiencing a bunch of frame drops / stuttering in multiplayer. Regardless of cars/track/weather used. Playing with my friends private lobby, most of us experiencing this frame drop. It’s really difficult to play well. I’m on Xbox One S, but I know some of the guys are on base XB1 as well. It gets really bad when someone joins or leaves the party and the XB notification pops up on the screen, all of us would freak out experiencing a hefty stutter of what felt like ages but was probably closer to the 1 second time frame.

6. Asphalt changes color

Some players noticed that the asphalt changes color from time to time. This is not a game-breaking bug, but it’s quite annoying because it can ruin your focus.

I was playing in cockpit view on Le Mans during rain conditions and I swear the asphalt flickers blue and grey and so on. Seems like a bug. Anyone else notice?

7. Player don’t get CR or XP after finishing the race

After investing hours into the game, the worst thing that can possibly happen is to realize that you didn’t get any CR or XP to reward your efforts.

Yeah having this problem too. not only in free play but also with career, but only when race length is set to long or extra long, tried restarting game and this still happens.The XP rewards will show up in the tab on the main menu but no credits appearing. hope this gets fixed soon its quite infuriating doing 30+ laps in a race and then having the game skip the XP and CR, pointless playing the game any further if Im not getting anything for the effort.

These are the most common Forza Motorsport 7 bugs reported by gamers. If you came across various solutions to fix them, you can help the gaming community by listing the troubleshooting steps in the comments below.

RELATED STORIES TO CHECK OUT:

How to Make Emulators Run Faster on Windows PC

Ever wondered why emulators run so slow on your PC? Are you looking to optimize the running speed and improve performance? We have compiled a set of solutions – tips and tricks – for you in this tutorial.

With the advancement of emulator engines that are now capable of simulating the system specs and configuration of gaming consoles, you can run console games on your PC, albeit at reduced speed and performance.

The speed reduction arises as a PC attempts to interpret an emulated hardware instruction set (machine commands) and then translate it into a readable language that the PC understands. Although various factors contribute to the slow-running of emulators, the factor described here is the basic one.

To make emulators run faster on Windows PC, there are various tips and tricks you can try, and we have outlined some of these tips in this article.

How can I make emulators run faster?

Note icon NOTE
Different emulators require different system specifications (and configurations). As such, the tricks herein are not universal i.e. they do not apply to all emulators.

1. Check system specifications

make emulators faster hardware

Emulators are powerful engines that require high system specs to operate at optimum capacity. Basically, components like processor, GPU, ROM, RAM, and the like should be top-notch if you want emulators to run at optimal speed on your PC.

Aptly put, high-performance PCs, with Windows 10 (64-bit), advanced AMD or Intel processor (octa-core), 8 GB RAM, and high-end GPU setup (with support for OpenGL 2.0 and above), among others, would typically perform better with emulators than lower spec PCs.

So, if you are running a low-spec PC, the ultimate solution might be to update/upgrade your computer.

2. Reduce resolution

  1. Navigate to the config menu and select Plugin/BIOS Selector.
  2. Under the Plugin tab, click on the Configure icon beside the GS dropdown menu.
  3. Follow the on-screen instructions to reduce resolution.
  4. Restart PC.
  5. After this, your emulators should run at an improved speed.

Normally, the higher a system’s resolution, the more hardware power is required and the slower the emulators run. Hence, reducing resolution speeds up system performance to some extent. Consequently, emulators also run at improved speed. In the same vein, you can reduce the resolution of an emulator in order to get better performance.

This method works best with gaming console emulators like PCSX2, PPSSPP, and ePSXe.

3. Boost up graphics cards

As emphasized earlier, most emulators require a standard GPU setup to function properly. Hence, you can make emulators run faster on Windows PCs by improving the performance of your system’s graphics cards. To do this, simply follow the step-by-step guide below:

NVIDIA:

  1. Right-click on your PC‘s desktop.
  2. Select NVIDIA Control Panel from the context menu.
  3. Click Manage 3D settings.
  4. Go to the Global Settings.
    manage 3d settings make emulators faster
  5. Select High performance NVIDIA processor, under the Preferred graphics processor drop-down menu.

With this, NVIDIA’s performance would be boosted.

AMD:

  1. On your desktop, click the Start button.
  2. Select Programs.
  3. Under Programs, go to Catalyst Control Center and click on it.
  4. Locate and select Power.
  5. Under Power, click on Switchable Graphics Application Settings.
  6. Locate the emulators on your PC.
  7. Set each emulator to High performance.
  8. Restart your PC.

If the above steps are followed as appropriate, your PC‘s graphics cards will be enhanced. Consequently, this would result in improved emulator speed/performance.

4. Disable redundant apps & processes to free up memory

If your system is congested, the running speed and performance of all apps and emulators will automatically reduce. This is especially worse if you run multiple high-powered apps or processes simultaneously.

Hence, to make your emulators run faster in this case, you might have to free up some memory on your system. The only way to do this is by “killing” or disabling some of the running apps/processes.

To do this, simply follow the guidelines below:

  1. On your system’s desktop window, click on the Start.
  2. Locate and select Run or simply press Windows key + R keys, to open the run dialog box.
  3. Input msconfig in the box.make emulators run faster on windows msconfig
  4. Go under Services tab, to bring up all running apps and processes.make emulators run faster windows pc
  5. Kill off or disable redundant processes or apps (this could be antivirus programs or nonessential emulators).
  6. By disabling these programs/processes, more resources are allocated to the remaining processes, thus increasing their performance.

In extreme cases, you may have to uninstall some high-performance programs on your system to create room for essential emulators.

There are other notable tweaks, tricks, and solutions that can be employed to boost emulators‘ running speed on PCs. Some of these entail enabling VT – Virtual Technology – in BIOS and disabling debugging windows, among others.

Now that you know how you can optimize your PC while running an emulator, check out this guide on PS3 emulators for PC and Nintendo 3DS emulators to get started.

In any case, the above-listed tricks, if properly implemented, would boost up the running speed of all (or some) emulators on your PC.

How to fix ‘Do you own this game’ error code 0x803F8001

Error code 0x803f8001 “Do you own this game or app?” is an error message that appears on the Xbox One, Xbox One S or on Windows. Users have reported getting this error after leaving a game they are playing idly for a while.

In this article, we look into some troubleshooting methods that can be used to fix the issue.

How do I fix error code 0x803F8001 ‘Do you own this game’ on Xbox?

  1. Power cycle your Xbox
  2. Check the Xbox Live status
  3. Hard Reset your Xbox
  4. Clean the Windows Store cache (Windows 10)
  5. Try Reinstalling the game/app (Windows 10)

Solution 1 – Power cycle your Xbox

  1.  Plug your Xbox console in.
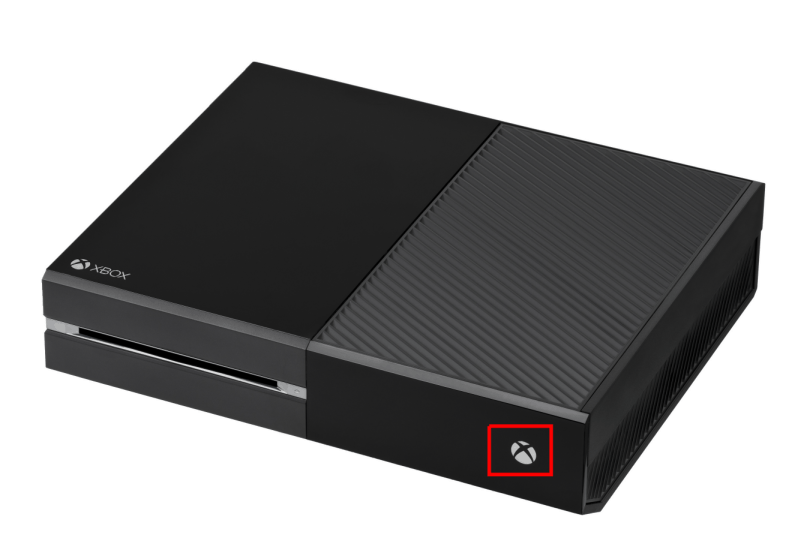
  2. Now, press and hold the power button for 10-15 seconds until the console turns off. The power button is shown in the picture below:
  3. Unplug the Xbox. Wait for a moment.
  4. Plug it back in and turn it on (press the Power button).

xbox one power

Hopefully, this will resolve the 0x803f8001 error. If it doesn’t, move on to the next solution.

Solution 2 – Check the Xbox Live status

Sometimes the reason behind the error could be in the Xbox services. Perform a quick Xbox Live status check so as to see if all the services are up and running. To check the Xbox live status, click on the following link: https://support.xbox.com/en-US/xbox-live-status

Ideally, all the services should have a Tick mark and “Normal” written next to them.

Solution 3 – Hard Reset your Xbox

If both of the previous solutions failed to resolve your issue, you should try hard resetting your Xbox. Hard resetting your console will restore its settings back to the factory default. This method will resolve error code 0x803f8001.

Note: Before you proceed on to do a hard reset of your Xbox, make sure you are connected to Xbox Live so that all of your data and settings are synced to it. If any of your dates haven’t been synced and you proceed on with the reset anyway, you will lose it.

To hard reset your Xbox, follow these steps:

  1. Press the left button on the navigation pad.
  2. In the Menu that opens, find All Settings and select it by pressing A.
  3. Go to System > Console Info & Updates.
  4. Select “Reset Console”.

reset xbox one

This will almost certainly resolve your issue.


How to fix error code 0x803F8001 on Windows?

With some users, error code 0x803F8001 also appears when using the Windows Store in their computer. There are two solutions to this problem:

Solution 1 – Clean the Windows Store cache

  1. Open the Run dialogue by pressing Win + R.
  2. Type in the command: “wsreset.exe” in the Run dialogue and press Enter.

wsreset.exe

Once the system confirms that the cache has been cleared, restart your PC. Hopefully, this will resolve your issue. If error code 0x803f8001 persists, move on to the next solution.

Solution 2 – Try Reinstalling the game/app

Before reinstalling the app, you can try and resolve the problem by clearing the cache from the app firstly. Stored cache might lead to issues and errors alike, so we need you to clear the app‘s cache. Here’s how to do it in Windows 10:

  1. Open Settings.
  2. Choose Apps.
  3. Navigate to the app causing you trouble.
  4. Right-click and open Advanced Options.
  5. Click Reset.

Uninstalling the application/game that is throwing the error, and then reinstalling it can help resolve the issue. Follow these steps:

  1. Press Windows + S keys to open Windows search box.
  2. Type in the name of the application causing the error and hit Enter.
  3. Right-click on the app and click “Uninstall”. Wait for the process to continue.uninstall app
  4. Open the Windows Store. Type in the name of the app and hit Enter.
  5. Select “Install” to install the app again. Follow the on-screen instruction.


With that said, we can conclude this article. In case you have any additional questions or suggestions, feel free to tell us in the comments section below. Also, if you’re bothered by the error for an extended period of time, consider sending a report ticket to Microsoft.

RELATED STORIES YOU NEED TO CHECK OUT:

Here’s why “Windows Lite” is important – Google’s commanding lead in the classroom

If Windows PCs can still be found in most classrooms around the world, Microsoft is well aware that Chromebooks have been on the rise since a couple of years. Chromebooks have pretty much taken over the K-12 mobile PC market in the US in recent years, and even though Windows PCs perform much better outside of the US, Microsoft may need a better answer than cheap Windows 10 PCs to remain relevant in the classroom.

According to the latest K-12 market report from Futuresource Consulting (via Digital Information World), Windows PCs accounted for 40% of total mobile PC shipments worldwide in 2018 (down 7% in unit volume YoY). Windows devices remained slightly ahead of Chromebooks, which represented 35% of mobile PC shipments in the global K-12 market last year.

The situation is much more worrying for Microsoft in the US, with Chromebooks representing 60% of total shipments in the last year. “The USA remains the largest Chromebook market worldwide, accounting for 85% of global Chrome OS shipments into the K-12 market during 2018,” noted Futuresource Consulting.

Chart source: CNBC.

Microsoft’s latest response to the Chromebook threat has been the release of affordable PCs running Windows 10 in S mode, a streamlined version of Windows 10 providing better security and performance. However, Google has also been making good progress on its Chrome OS operating system, which can now run Android apps in addition to web apps. Chromebooks are no longer cheap PCs that can’t work offline, and they also remain very easy to manage and update for organizations that use them.

According to various reports, Microsoft is currently hard at work on “Windows Lite,” a new lightweight OS for PCs and mobile devices. Lite is reportedly one of the different shells that will be running on top of Windows Core OS (WCOS), the modular version of Windows that Microsoft created for new form factors and devices like HoloLens 2 and Surface Hub 2X.

Microsoft has yet to officially discuss this new Lite OS, but it’s expected to provide a fast and light platform for Chromebook-like devices. It’s still not clear if devices running Windows Lite will be able to run all existing Windows apps, but making these devices easy to manage for IT Pros will be key to make a dent in the K-12 market.

“Moving forward, as the penetration of mobile devices continues to expand, there will be increasing focus on what the OS supplier can offer beyond device functionality and price point,” said Ben Davis, Senior Market Analyst at Futuresource Consulting. “Consequently, there will be growing emphasis on the platform application ecosystem and how each OS can be incorporated within existing learning and IT management solutions. The future is converging on the amount of incremental value that a device can deliver within teaching environments,” the analyst added.

Microsoft’s Brad Smith calls tech giants to take action after tragic events in New Zealand

In a somber post on Microsoft’s On the Issues blog, company president Brad Smith spurs a conversation about the role of technology in very public tragedies and what, if any, are the accountable measures businesses can take to prevent all terrorists from spreading intolerable acts of violence on the Internet.

Words alone are not enough. Across the tech sector, we need to do more. Especially for those of us who operate social networks or digital communications tools or platforms that were used to amplify the violence, it’s clear that we need to learn from and take new action based on what happened in Christchurch.

In particular, Microsoft offers the case study of investigating how its own software and services were used in an attempt to spread video footage of the recent Christchurch killings, and motivate other companies to act in a similar fashion to identify improvements to the sector collectively.

Microsoft identified the distribution tunnels that worked in conjunction with its software and services and used employees and internal technologies to stop feeds. Microsoft also plans to preemptively broaden that effort by identifying and classifying extremist violent content, while also changing the processes that enable users to flag content to better improve identification, among other improvements.

Despite already taking its own preventative measures, Microsoft acknowledges that it doesn’t have all the answers, but as a collective the tech industry can do a lot to help save human lives while also protecting human rights. Here are some of the outlines Microsoft is proposing to the rest of the industry to try and adhere to a higher decency requirement.

Focus on prevention

We must work across the industry to continue advancing existing technologies, like PhotoDNA, that identify and apply digital hashes (a kind of digital identifier) to known violent content. We must also continue to improve upon newer, AI-based technologies that can detect whether brand-new content may contain violence. These technologies can enable us more granularly to improve the ability to remove violent video content.

Respond more effectively to moments of crisis

Even with better progress, we cannot afford to assume that there will never be another tragedy. The tech sector should consider creating a “major event” protocol, in which technology companies would work from a joint virtual command center during a major incident.

Foster a healthier online environment

In many ways, anonymity on the internet can free people to speak and behave in ways they never would in person. This is why we believe it’s important to continue to promote four tenets to live by when engaging online. Namely, we all need to treat others with respect and dignity, respect each other’s differences, pause before replying and stand up for ourselves and for others. This too is an area on which we can build further.

Smith concludes his appeal for action after the tragic events in New Zealand by broadening his message to include key partners outside of the technology industry to also step in and lend a hand. Presumably, Smith is referring to governments, local and state officials and first responders when explaining that “it requires us to expand and deepen industry wide groups focused on these issues, including key partners from outside of the industry.”

As with many in the tech industry, Microsoft is expanding its online decency requirements to address multiple issues prevalent in a collective world culture still adapting to the rapidly evolving landscape of communication and information. Hopefully, other companies will either follow suit or enact policies similar to or better than what Smith is proposing today.

Boot From SSD Instead of HDD: 4 Ways to Do It

If your PC has both an HDD and an SSD, sometimes you need to boot from SSD instead of HDD.

In some instances, you just need to change the boot order on your PC, but sometimes more adjustments are required.

So, why and how can you correct this annoying inconvenience in Windows computers? Let’s start by answering why this issue appears.

Why is Windows booting from HDD instead of SSD?

  • Internal errors in your SSD usually block SSD boot attempts.
  • Windows problems can sometimes cause this issue.
  • Recent Windows updates can sometimes cause bugs to appear.
  • Cloning-related errors can cause boot issues on your PC.
  • Incorrect boot order will prevent your PC from booting properly.
  • Hardware problems can also affect the boot on your PC.

How do I boot from SSD instead of HDD?

1. Connect the SSD using a SATA cable

  1. Open your PC case.
  2. Locate your SSD and make sure that it’s properly connected.
  3. You can try using a different SATA cable or port.

2. Correct the boot order

  1. Power on your PC.
  2. Continuously press the applicable keyboard key to enter BIOS (typically F12, F2, F8, Esc, Del).
  3. Using the arrow keys, move up/down the displayed Boot Options until you set the cloned SSD as the number 1 booting device.
  4. Exit while saving the changes and then proceed to boot.

This is the best method to use if you want to boot from SSD instead of HDD.

3. Enable AHCI Mode

  1. Press Windows key + R on your keyboard. This opens the run dialogue box.how to boot from ssd regedit
  2. Type regedit and click OK.
  3. Click/tap Yes if prompted by the UAC. The Registry Editor will appear.
  4. From the left pane of the Registry Editor window, navigate to the following location:
    HKEY_LOCAL_MACHINE\SYSTEM\CurrentControlSet\Services\iaStorV
  5. Double click the Start DWORD (on the right pane). It becomes editable.
  6. Type 0(zero) and select OK(as shown).hdd boot instead of ssd iaStrorV
  7. Now again navigate to this new location(from the left pane): HKEY_LOCAL_MACHINE\SYSTEM\
    CurrentControlSet\Services\iaStorAV\StartOverride
  8. Locate the StartOverride key then tap on the shown 0 DWORD(right pane). Enter 0 (zero) as the Value Data then click OK.
    startoverride registry editor HDD boot
  9. Now head to this new key location: HKEY_LOCAL_MACHINE\SYSTEM\
    CurrentControlSet\Services\storahci
  1. Look for the Start then click it.
  2. Type 0(zero) as previously for the AHCI standard and tap OK.storahci registry editor
  3. Moving on, access the following path and see if the StartOverride DWORD is there. If it isn’t, close the Registry Editor: HKEY_LOCAL_MACHINE\SYSTEM\
    CurrentControlSet\Services\storahci\StartOverride
  1. If the StartOverride key is present, double-click it and ensure it reads 0 (zero) then click OK.
  2. Then close Registry Editor.

Now change the BIOS settings:

  1. Restart the PC and press the correct key to enter your BIOS/UEFI firmware settings.
  2. While in BIOS/UEFI firmware settings, look for and enable AHCI from the options.
  3. Save and exit to save changes.
  4. Windows will automatically install the essential AHCI drivers.
  5. When done, select Restart Now to restart once more.

Please note that you’re supposed to select startup repair your Windows if you encounter an error when rebooting after AHCI installation.

This is a more advanced solution, but it can help to boot from SSD instead of HDD.

4. Carry out a clean Windows installation

If the clone won’t function at all and the system is still persisting with the HDD boot instead of SSD, it’s best to carry out a clean install of Windows on your SSD.

Remember to back up any data you had saved there before commencing the clean reinstall.

How do I move my OS to SSD without reinstalling Windows?

You can move Windows to SSD simply by cloning it to the SSD. This will preserve all your files and installation.

Keep in mind that you need cloning software to do this since the feature isn’t available natively in Windows.

There you go, these are some solutions you can try if you’re having a hard time booting Windows 10 from SSD.

Let us know if you found this guide helpful and if you managed to fix the problem with your SSD.

Microsoft Edge Insider addons webpage is back online, now includes 113 extentions

The Microsoft Edge Insider addons webpage is back online today, making for a quick way to obtain new extensions for the upcoming Chromium-based browser. The web page was available for a brief period last week, although the Redmond giant was quick to remove it shortly after it was spotted.

Interestingly, Microsoft also appears to have expanded the list from when it was last available, which appeared to have totaled 82 extensions before it went offline. That number has grown to 113 by our more recent count, suggesting the company is hard at work to quickly bring the new browser to Insiders who signed up to preview it.

We’ve already seen the Microsoft Edge Insider extension make its way to the Microsoft Store, which allows users on the old Edge to easily stay up to date as far as announcements, issues, and updates for the three development channels (beta, dev, and canary) the browser will run on. Now that the Extensions page for the new Edge is back online, it seems the public preview should be out anytime now.

For those who are not quite sure what to expect, we also got our own hands on impressions for the new web browser, which is currently being rebuilt to support the same web rendering engine as the widely-adopted Google Chrome. If Microsoft can pull this off, it could give users less have a reason to download Chrome, as the new Edge will be held to the same web standards as that of Google’s browser.

Microsoft’s File Explorer might see renewed UI design push in 2019

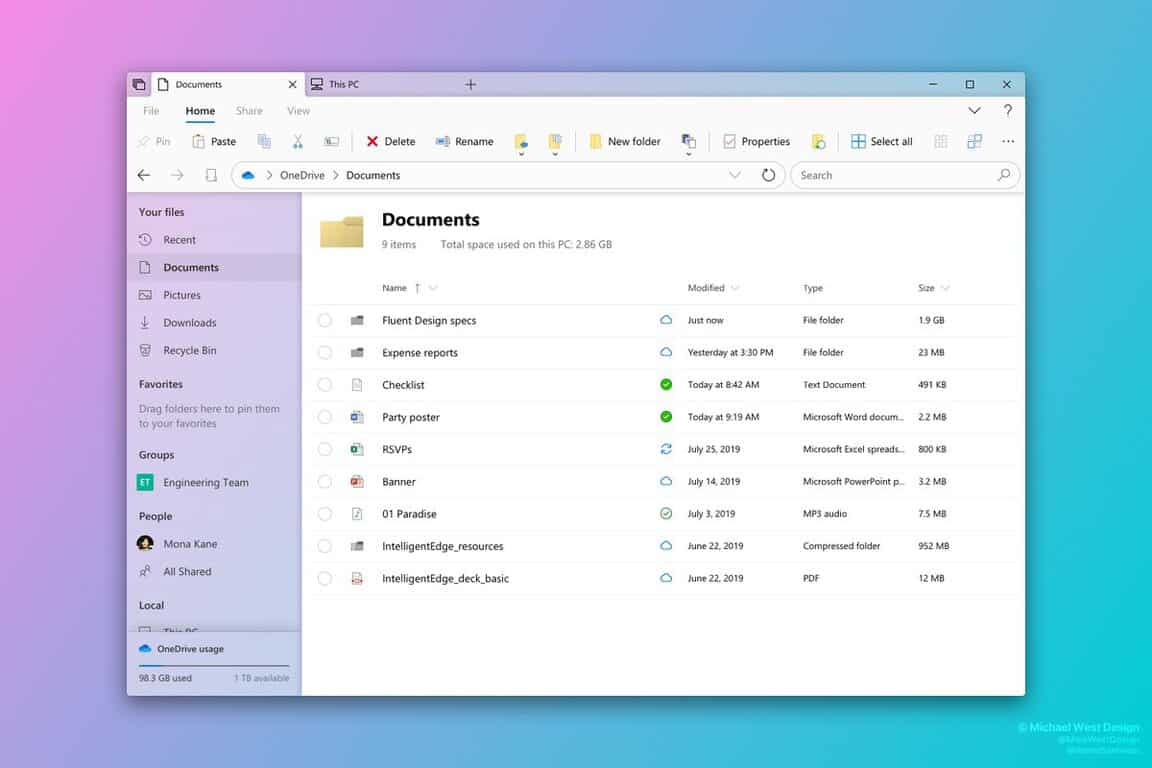
Updated: It appears the rumors were derived from a mock that Microsoft Design intern Michael West post a few weeks ago. While it would be ideal for Microsoft to syphon design elements from West’s post, the idea that the company will act upon the inspiration anytime soon was misguided. 

Microsoft had been on a real Fluent Design push for the past several Windows 10 Update releases but thanks to a botched roll out of the 2018 October Update, the Windows team has seemingly yanked the reigns on pushing out any new features or massive design changes over the past couple of preview releases.

However, the level of design restraint the Windows team has held staunch for the past handful of Insider previews and ultimately official updates with incremental changes to the File Explorer may be coming to an end.

There are rumors surfacing that the Windows team intends to churn out a revamp to one of Windows most visually glaring UI elements in the File Explorer.

According to a posting from the Italian HTNovo site, Microsoft will be introducing Fluent Elements to the File Explorer quite possibly as soon as the company’s premier developer conference in May and could materialize for regular users by 2020.

A captured screenshot of the proposed UI change highlights a mix of Windows 10 Mail sidebar elements and the new right click menu present in Microsoft’s new Chromium Edge browser leaked download.

Aside from the Windowed aspects of Microsoft’s operating system the other corner-stone of the OS for many has been the File Explorer and its management of content, and until now it’s stayed relatively untouched by official Windows design teams.

As imagined by so many creative designer and artists over time, the (as of yet, unofficial) proposed overhaul looks to take several cues from the litany of fantasized reincarnations of the File Explorer and reintroduced Microsoft’s short-lived Sets platform.

We must keep in mind, nothing has been confirmed and the leaked image (if true) could be months if not years away. However, as Microsoft looks to revamp its Edge browsing experience and build a lighter OS to compete with Chrome, it’s not out of the realm of possibility that new File Explorer UI bits begin to make their way to Insiders sometime this year.

Microsoft BitLocker encryption key got hacked via cheap FGPA

Security researchers identified a new vulnerability in Bitlocker as they attempted to use the tool in its basic and least intrusive configuration.

BitLocker is basically a full volume encryption system that allows users to encrypt even entire volumes for the protection of data. The tool leverages AES encryption algorithm in XTS mode (128-bit or 256-bit key) or AES encryption algorithm in cipher block chaining (CBC).

It has been an integral part of each and every version of Windows starting from Vista. As a quick reminder, users of Windows 10 systems with a TPM 1.2 or 2.0 chip are required to upgrade and run on a Pro, Enterprise or Education versions. 

Researcher unlocked a Surface Pro 3 and HP laptop

Researchers have been targeting this highly popular Windows encryption platform to demonstrate its flaws.

One of the latest attempts includes a novel technique published last week by an employee of Pulse Security Denis Andzakovic.

The idea has been explained as:

You can sniff BitLocker keys in the default config, from either a TPM1.2 or TPM2.0 device, using a dirt cheap FPGA (~$40NZD) and now publicly available code, or with a sufficiently fancy logic analyzer. After sniffing, you can decrypt the drive.
The idea behind this is that if the laptop is stolen, and the attacker does not know your login password, they cannot pull the drive and read the contents.

However, the Redmond giant already mentioned that users should use any type of additional security measures including PIN while using this technology.

How to stay protected?

The researchers suggest staying protected by following two protection measures. The easiest one is to avoid using BitLocker with TPMs in this default state.

Secondly, you can also follow these simple steps:

  1. Configure a USB flash drive containing a startup key
  2. Set up PIN access

Notably, you can use both at the same time by adding multifactor authentication. 

RELATED ARTICLES YOU NEED TO CHECK OUT:

Microsoft prepares for looming AI risks

With Facebook, Twitter, Google, and Amazon in the headlines seemingly every week for another controversial business or ethical decision from their past, a Benjamin Franklin quote comes to mind.

“By failing to prepare, you are preparing to fail.”

Perhaps, in an effort to avoid the setbacks, complications and legal ramifications that rapid growth fueled by technological advancements has wrought, Harry Shum, Executive Vice President of Artificial Intelligence & Research at Microsoft, warns that people need to anticipate the risks involved with the growth of artificial intelligence.

In a piece published by the MIT Technology Review and originally addressed during EmTech Digital conference, Shum warns that now is the point in the development cycle where developers and engineers can build in safeguards to help mitigate the number of unbridled risks that come with AI that’s increasingly becoming capable of being more like human beings.

“This is the point in the cycle …  where we need to engineer responsibility into the very fabric of the technology,” 

Even with that being said, Shum also noted that most in the industry have already been derelict in their duties to anticipate technological flaws as well as the potential negative impact of current real-world applications of AI. Items such as facial recognition come to mind when reviewing Shum’s claims as the technology has been historically bad at recognition and attribution of darker skin tones while simultaneously being weaponized by countries as surveillance and suppression tools.

Neither application of facial recognition point to a concerted effort by the industry to corral and mindfully think of the potential outcomes of the technology before they were released to the public.

While it’s one thing to caution the industry with a wagging finger, Microsoft is also taking action to help address present and future AI predicaments, by improving its own facial recognition with the arduous tasks of adding multiple skin variations to its photo recognition algorithm.

Microsoft’s facial recognition improvements are incremental in comparison to the other major action the company is taking with its AI ethics committee and its presence in the Partnership on AI. Microsoft’s vision does not only add an AI ethics review step to its own checklist of privacy reviews and accessibility audits but that the entire industry adopts the same methods.

“We are working hard to get ahead of the challenges posed by AI creation. But these are hard problems that can’t be solved with technology alone, so we really need cooperation across academia and industry. We also need to educate consumers about where the content comes from that they are seeing and using.”

However, unlike the mess that Facebook, Google, the US Congress, and the European Union lawmakers find themselves in today, Microsoft would like government agencies to step in early to help sort out the gritty details of oversight and regulation of AI technology.

Only time will tell, how the industry prepares for the tidal wave of AI-related technologies and applications, but there does appear to be sensible fear of AI getting ahead of regulation, oversight, and accountability.

Microsoft Edge got hacked at Pwn2Own 2019, patch incoming

Security researchers hacked Microsoft Edge and Mozilla Firefox right and earned a cash prize of $270K at Pwn2Own hacking event. 

The Firefox 66 browser was announced on March 19, so the company let friendly hackers to attack it in order to detect any potential security vulnerabilities.

The researchers identified two issues in the web browser.  On the very next day, the company decided to release a patch to fix both of them in Firefox 66.0.1 update. 

Those who are not aware of Pwn2Own, it is basically an annual hacking competition. It provides a great opportunity to security researchers so that they can demonstrate new zero-day bugs.

In return for their efforts, Trend Micro’s Zero Day Initiative (ZDI) rewards them with a handsome amount. 

Pwn2Own Roundup

The researchers who demonstrated new vulnerabilities in Oracle VirtualBox, Apple Safari and VMware workstation were awarded $240,000 on the first day of Pwn2Own 2019.

Moving towards the second day, ZDI awarded an amount of $270,000 to those researchers who identified new bugs in Microsoft’s Edge and Mozilla Firefox browser. 

This is how researchers managed to hack Edge:

That’s all it took to go from a browser in a virtual machine client to executing code on the underlying hypervisor. They started with a type confusion bug in the Microsoft Edge browser, then used a race condition in the Windows kernel followed by an out-of-bounds write in VMware workstation

Most importantly, the kernel escalation flaw in Firefox 66 was demonstrated by Richard Zhu and Amat Cama officially known as Fluoroacetate received an award for $50,000. Niklas Baumstark used a sandbox escape technique to exploit Firefox 66.0 and received an award of $40,000. 

All of these vulnerabilities have been reported to Microsoft and Mozilla, and the companies are working on the patches are expected to release in the next updates. 

RELATED ARTICLES YOU NEED TO CHECK OUT:

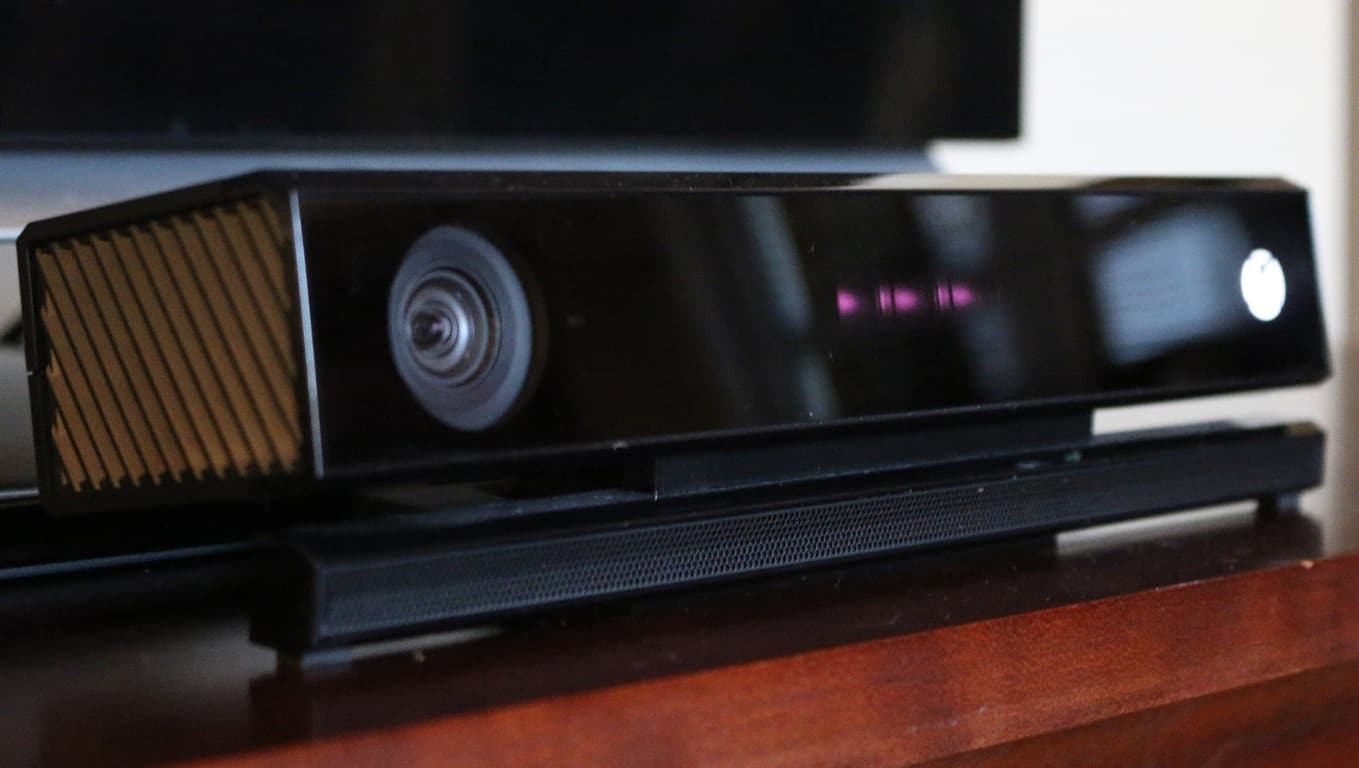
Singapore Changi Airport caught using Microsoft Kinect sensors

After a rather public rebuke from a gaming community more concerned with speeds and visual fidelity, Microsoft’s motion sensing Kinect technology efforts is finding a second life in more commercial endeavors. From hospitals to research labs, Microsoft’s Kinect technology has been retrofitted for a much broader use than the company’s original intent for the product.

Adding to the list of use cases for the Kinect outside of the home and gaming is a new finding by Redditer @WilliamCCT, who realized three days ago, that his airport was using the Kinect as a baggage scanner.

While becoming less surprising these days, it’s always interesting to see how Microsoft’s Kinect SDK and technology are being used by companies that have the furthest association with the gaming market. During MWC 2019, Microsoft introduced its Azure Kinect kit that would allow businesses to intergrate the Kinect technology into IoT devices and work in conjunction with Microsoft’s Azure cloud.

In the Reddit thread post by @WilliamCCT, many of the commentors seemed rather versed in the shifting landscape for Kinect offering nuanced replies speculating on the impetus of an airport using a Kinect for checking luggage.

The remainder of the Reddit conversation devolves into glowing recounts of anecdotal experiences with Kinect and the Xbox One’s version 2 release.

With Microsoft moving on from bundling the Kinect with its Xbox One consoles, ideally, the company will shift from using it as a purely motion tracking tool to a service that sit atop Microsoft’s Azure ambitions for creating a platform that collects and stores sensory data from around the world.

Intel makes it easier to check your integrated graphics settings on Windows 10 with new Graphics Command Center app

Intel has released a new app for Windows 10, titled Intel Graphics Command Center, to allow users to adjust the image settings for the various games and apps that they may have on their systems (via Windows Central). Many users with Intel-powered computers are likely already familiar with the Intel Graphics Control Center, however the new app brings most of its features in a more aesthetically appealing and intuitive interface.

One of the new features that Intel highlights on the store listing is the help option, which is said to “simplify” the “confusing ‘tongue twister’ features like tessellation and anisotropic filtering.” The company has also implemented a blur effect to the UI, giving it a somewhat of a Fluent-influenced design aspect.

As far as its feature set goes, users can optimize settings for games and videos, and make adjustments to their display configurations. It definitely serves as an easy way to make such, especially considering the limited options available from within Windows 10’s own Settings app.

Intel promises to provide continued updates to the app and will introduce “more features and functions in later phases and will keep the improvements coming.” For now, anyone with a PC running Windows 10 version 1709 or newer and an 6th generation or newer Intel CPU should be able to install the app straight from the Microsoft Store.

Intel® Graphics Command Center

Getting The User Account Code is Null Error? Here’s How to Fix it

Microsoft Outlook is a personal information manager from Microsoft’s Office suite, and it’s available to both individual users and organizations alike.

Although often used as an email client, it also includes a calendar, task manager, contact manager, note-taking, journal, and web browsing helper.

New features were added to Outlook, which now features bill payment reminders and proxy support. Proxy support is available for Android and iOS, which is helpful in situations where Internet access is restricted by the use of SOCKS proxies.

How can I fix The user account code is null Outlook error?

  1. Modify the registry
  2. Change the policies

1. Modify the registry

This type of error occurs when you have multiple Microsoft Office versions on the computer. This eventually leads to a conflict of registry entries, which can affect users that have an Exchange account too.

If the returned value from your User Account is 0 on Outlook, then we have a problem. The normal value should be 512, which means that your account is enabled.

Always remember:

  • Whenever changing the Windows registry, first create a Restore Point, so you can go back to previous settings.
  • Import your contacts from the previous Outlook accounts into the one you currently wish to use.
  • Before attempting the fix, close all Microsoft Office applications that may be running.

You can fix that by following these steps:

  1. Firstly, click the Start button.
  2. Click the Run menu and enter the regedit command.
  3. Click the OK button, and the Registry Editor should now start.
    regedit User Account Code Null
  4. Navigate to the HKEY_CLASSES_ROOTWow6432NodeTypeLib{00062FFF-0000-0000-C000-000000000046} registry key.
    typelib registry editor User Account Code Null
  5. If there are multiple key values displayed, delete all but the latest Microsoft Office version you wish to keep.
  6. Close the Registry Editor and restart your computer.

2. Change the policies

Now that we’ve figured that one out, what do we do when we’re receiving a null address? This type of error applies to Administrators who are responsible for managing gateway policies.

This fix involves setting up the rules to receive all inbound emails.

  1. Go to Options and select all inbound rules, then click on Applies from Everyone.
  2. In the same Option field, select Applies to and set it to Internal Addresses.

We hope these fixes were of help to you to solve the User account code null in Outlook. In the meantime, what other issues have you experienced when using Microsoft Outlook?

What to do if your browser address bar doesn’t search

Despite being excellent browsers, Google Chrome and Mozilla fire are occasionally affected by some bugs.

For example, the address bar doesn’t search in these browsing software making it difficult for you to conduct smart searches when working from either browser.

The program either flatly fails to carry out any searches from the bar or does it intermittently. It might also display the relevant URL but refuse to actually go there.

It won’t even load the wanted website’s icon or even make the slightest attempt to retrieve your desired web pages. And such issues.

Now, this article focuses on how to restore normal address bar search function in the two browsers.

But let’s briefly highlight why the address bar doesn’t search at times in the two applications.

Why the address bar doesn’t search in Chrome/Firefox

  • Malware: Your PC might have been invaded by malicious software which subsequently sneaked into your browser.
  • Browser Extensions: It’s a well-known fact that some of the extensions we add to our browsing apps mess their standard processes.
  • Program conflict: Your Chrome/Firefox version may be conflicting with another software you may have downloaded.
  • Change in the default search engine: Modifying your primary search engines for some reason brings search hiccups sporadically.

How to solve the search bar issues

  1. Set the address bar (omnibox) to act as your default search box
  2. Enable Predictive Search
  3. Scan Your PC for Malware
  4. Check and Uninstall Messy Extensions
  5. Create a New Browser Profile/Account
  6. Reset Your Browser Settings
  7. Uninstall and Reinstall your Browser

1. Set the address bar (omnibox) to act as your default search box

You can specify the address bar(Omnibox) to operate as a search box. It’s set to automatically use Google though you can still set a different default search engine.

Google Chrome

  1. Open Chrome.
  2. Click the More button (the three dots near the top right) then choose Settings.address bar doesn't search
  3. Select the Down arrow next to the text Search engine used in the address bar under the Search engine segment.firefox address bar not working
  4. Confirm Google as the default or choose another default search engine by right-clicking then selecting make default.
  5. You can also click add to search for and add other search engines like DuckDuckGo.
  6. Close and reopen your browser.

B. Firefox (Awesome bar)

  1. Start Mozilla Firefox
  2. Click on the menu button(three horizontal bars top right corner)  then choose Options.google chrome address bar search not working
  3. Select Search from the left pane. Select Google (Or your preference).cannot type in google search box in chrome
  1. Close and restart Firefox.

2. Enable Predictive Search

If you’ve not yet enabled predictive search, then do it.

Google Chrome

  1. Repeat steps 1-2 as listed under Chrome in fix 1
  2. Click Settings then Show advanced.firefox address bar not working
  3. In the Privacy section, set the button next to Use a prediction service to help complete searches and URLs typed in the address bar to on.google search predictions not working

Mozilla Firefox

  1. Repeat steps 1-2 as listed under Firefox in fix 1.
  2. Ensure you mark the checkbox next to the option show search suggestions in address bar results and Show search suggestions ahead of browsing history in address bar results.google suggestions not working chrome
  3. Close and restart Firefox.

3. Scan Your PC for Malware

If the address bar doesn’t search still, scan your entire computer for malware and clean any infections.

Use a good antivirus and update it before starting the scan.

For chrome, you may run this powerful Chrome Cleanup tool. It is very effective in removing  stealth software that could be causing Chrome to experience the address bar issues.

4. Check and Uninstall Messy extensions

Some extensions are known to hijack the search function in browsers so investigate if you could unknowingly install such and get rid of them.

Chrome

  1. Open Chrome.
  2. Click the More button (the three dots near the top right) then More tools then choose Extensions.chrome omnibox settings
  3. Find the suspicious extension and click Remove.can't type in google chrome search box
  4. Confirm by again clicking Remove. Close and restart your Chrome version.chrome not searching from address bar

Firefox

  1. Start Mozilla.
  2. Click on the menu button(three horizontal bars top right corner)  then choose Add-ons.firefox address bar not working
  3. Find the Extensions/Themes panel then select the adds-on you want to remove and click the Remove firefox search bar not working 2018
  4. Click Restart now (if prompted). Your browser will restart possibly with the address bar search ability fully functional. 

5. Create a New Browser Profile/Account

Once in a while, the issue is with your personal profile. Hence create a new browser profile and see how it pans out.

Chrome

  1. Open Chrome.
  2. Click Profile (top right).
  3. Click Manage people.chrome address bar not working
  4. Click on Add person.
  5. Select a name plus a photo then press Add.use a prediction service to help complete searches and urls typed in the address bar not working

6. A new window opens asking you to sign in.  Do that and remember to turn on sync.  Try searching from the address bar using this new profile.google search not working in chrome

B. Firefox

  1. Type about:profiles in the address bar then press Enter. This loads the About Profiles

can't type in google chrome search box

  1. Click Create a New Profile then follow the steps as you’ll be prompted in the subsequent Create Profile Wizard.chrome address bar not working
  2. After you’re done, your profile will be listed alongside the rest in Firefox’s Profile Manager. Select Set as default profile under this profile to use it after you restart Firefox.

6. Reset Your Browser Settings

You can return your browser settings back to default if everything else has so far repulsed your efforts to recover your address bar complete search ability.

In most cases, this succeeds.

Chrome

  1. Open Chrome.
  2. Click the More button (the three dots near the top right) then
  3. Scroll down, find and click the Advanced link.
  4. Again scroll till you locate the Reset and cleanup. Then click Restore Settings to their original defaults.chrome address bar not working
  1. Choose Reset settings and confirm. google search bar not working on pc

Firefox

  1. Open Mozilla Firefox.
  2. Click on menu (press the three bar buttons at top right corner) then tap on.chrome address bar not working
  3. Click on Troubleshooting information.chrome omnibox not working
  4. Click Refresh Firefox.address bar doesn't search
  5. Click Refresh Firefox again and wait for the wizard to run to completion.I'm unable to search from the address bar or awesome bar

7. Uninstall and Reinstall your Browser

Now you may consider uninstalling and then freshly installing the latest Mozilla Firefox or Chrome program.

It’s cumbersome but if successful, you will no longer complain that your address bar doesn’t search.

MORE ARTICLES SELECTED JUST FOR YOU:

Windows 10 news recap: Surface app now lets you know when warranty ends, Firefox adds Windows Hello authentication, and more

Welcome back to our Windows 10 news recap, where we go over the top stories of the past week in the world of Microsoft’s flagship operating system.

Windows 10 Surface app now tells users when their warranty ends

To make it easier for Surface device owners to know when their warranty expires, Microsoft now lets you know when the warranty ends on your Surface device via the Surface companion app.

Microsoft releases patch to notify Windows 7 users about upcoming end of support

As support for Windows 7 nears its end, Microsoft is issuing a new patch to Windows 7 that notifies users of the upcoming end of support date, 14th January 2020.

Mozilla Firefox browser adds Windows Hello authentication support

Firefox’s latest version, 66.0, adds support for Windows Hello authentication. When browsing supported websites, users will be able to use their Windows Hello authentication method (fingerprint, face, etc) to log-in to the website.

Mozilla Firefox browser on Windows 10

Leonardo drawing app comes to the Windows 10 Microsoft Store

Graphics programs just seem to keep popping up in the Microsoft Store on Windows 10. The Leonardo drawing app is the latest app to arrive in the Microsoft Store, allowing you to unleash your creativity.

That’s it for this week – we’ll be back next week with more Windows 10 news!

Microsoft news recap: 2 new data centres planned for Sweden, advertisers can target LinkedIn audiences using Bing Search data, and more

Microsoft news recap is a weekly feature highlighting the top Microsoft news stories of the past week. Sit back, grab some coffee, and enjoy the read!

Microsoft plans two new data centres in Sweden

Microsoft is reportedly planning to build 2 new data centres in Sweden, following 130 hectares of land it acquired last year. A press release by the company stated that it plans to build them to meet “sustainable and environmentally-friendly” standards.

Bing Maps adds coloured traffic info to routes

Bing Maps users are now able to view traffic levels on routes using a new toggle, making it easier to see the level of traffic in areas at a glance, denoted by blue, orange and red markings. Additional visualisations will also be shown where routes traverse through different environments, such as rivers.

Advertisers can now target LinkedIn audiences using Bing Search data

LinkedIn advertisers will soon be able to target LinkedIn audiences by using Bing Search data. It will allow targeting of Lookalike Audiences, interest-based targeting, and more. The new targeting options are currently available on the Bing Data platform, but are heading to the LinkedIn advertising platform.

Microsoft launches Windows Virtual Desktop and Microsoft Defender ATP for macOS in public preview

Microsoft has spent the last few years branching out to third-party platforms outside of Windows. Now in public preview for macOS, Microsoft is bringing Windows Virtual Desktop and Microsoft Defender ATP to Apple’s desktop platform. Microsoft Defender ATP is only available for business users and offers anti-malware protection.

That’s it for this week. We’ll be back next week with more Microsoft news.

Here’s how to fix XAML Parse error once and for all

XAML or Extensible Application Markup Language, is a language based on XML(Extensive Markup Language). Its use ranges from creating to initializing .NET objects. It’s primarily used in .NET Framework 3 and 4 platforms, and especially for Windows Presentation Foundation or WPF or Windows Silverlight.

XAML elements are directly mapped to the Common Language Runtime or CLR object instances, while XAML attributes are tied directly to properties and events. Always remember that conditional statements are evaluated at runtime, with those that evaluate to true being parsed, while those that don’t evaluate are ignored. With this information in mind, let’s move over to the troubleshooting side.

Before applying the following solutions, don’t forget that the .NET is working out what metadata would be required to work with optimal efficiency. Elements that you aren’t using are removed, as not to burden the compilation time and increase file size.

However, it might not pick up on what you’re doing at runtime (e.g. Visual Studio), so it can remove things you actually use. When the crash does occur, it will give out an Exception class, which represents an error that occurs during the application execution.

How can I fix XAML Parse error?

  1. Forward Slash workaround
  2. Standard Resource Fix
  3. FontFamily Fix

1. Forward Slash workaround

The key to solving any issue related to XAML is to track what’s going on in the code that’s causing the issue. Sometimes the solution can be an easy one, such as in this case, when a source image was not compiled correctly. This fix can be applied to numerous instances, so be sure to use forward slashes when describing file or URL addresses.

<Image Source=”Assets11.png” Stretch=”None” HorizontalAlignment=”Left”/>

<StackPanel Orientation=”Horizontal”>

  1. Replace <Image Source=”Assets11.png” with <Image Source=”/Assets/11.png”
  2. Save changes, and you’re good to go.

2. Standard Resource Fix

code parse error

A spelling mistake can happen from time to time. If this happens, you’ll receive an error on the grounds of:

An exception of type ‘Windows.UI.Xaml.Markup.XamlParseException’ occurred in myproj.UWP.McgInterop.dll but was not handled in user code

Additional information: The text associated with this error code could not be found.

Cannot find a Resource with the Name/Key category [Line: 0 Position: 0]

To fix it, do the following:

  1. Look for Page.Resources/App.Resources or Standard Resources and check for spelling mistakes.
  2. Correct the spelling mistake and save the changes.

3. FontFamily Fix

This happens when you’re loading a XAML with a font that’s not present in your application or assigning a value to the FontFamily and the value is blank. A FontFamily is an object specifying the preferred font family, or a primary preferred font family with one or more fallback font families.

Let’s say your primary font is Arial and your fallback is Calibri, it would look like something on the lines of: <object FontFamily=”Arial”/>  – or –  <object FontFamily=”Arial, Calibri”/>. But what do we do when we receive the following error?

A first chance exception of type ‘Windows.UI.Xaml.Markup.XamlParseException’ occurred in HelloWorld.exe

WinRT information: Failed to create a ‘Windows.UI.Xaml.Media.FontFamily’ from the text ”. [Line: 52 Position: 63]

  1. Search for StandardStyles.xaml and inspect all instances of FontFamily where the value is blank(<object TextBlock.FontFamily=”value”…/>);
  2. Change the value to any font that you are currently using(e.g. Arial), then save your changes.

There you go, these are some solutions that can help you fix XAML Parse error, so be sure to try them all.

RELATED STORIES TO CHECK OUT:

Something went wrong, your device couldn’t connect error [Fix]

Whether using the new Surface Pro or any machine that runs Windows, sometimes you wish to connect with other devices. However, the device simply won’t connect, and errors keep showing up.

In most cases, this is related to driver issues, especially if the driver update isn’t working properly. This can lead to various issues with the device that you want to use. However, we made a list of solutions that might help you fix that problem.

How to fix Something went wrong, your device couldn’t connect error?

  1. Install the latest updates
  2. Reinstall your drivers
  3. Run the troubleshooter

1. Install the latest updates

The first step involves searching for updates. To check for updates, simply do the following:

  1. Click the Start button, and then go to Settings.
  2. Navigate to Update & Security.
    update and security device couln't connect
  3. Now click on Windows Update and select Check for updates.
    check for updates device can't connect
  4. If this works for you, proceed to connect your device.

Now you just need to connect your device:

  1. Go to Start and select Settings.
  2. Next, select Devices and click on Connected Devices.
  3. Click Add a device, and then click on the desired device.

If checking for updates doesn’t work, download the Windows Update Troubleshooter and open it. Next, follow the steps displayed to solve update-related errors. It should be noted that the Update Troubleshooter works for Windows 7, 8 and 10.

2. Reinstall your drivers

This fix addresses compatibility issues that might arise from installing Windows Updates. Once you’ve uninstalled the faulty driver, try the newest version of it.

  1. Go to the Cortana search bar and type in devmgmt and press Enter.
  2. Select the driver that’s causing issues, then right-click on it and select Properties.
    uninstall device something went wrong
  3. Go to the Driver tab and select Uninstall Device.
  4. Restart your machine.

3. Run the troubleshooter

This step will allow you to detect any incompatible driver that’s preventing your system from connecting to the desired device.

  1. Access Control Panel, type in troubleshooting on the top right corner of Control Panel’s search bar.
  2. Next, click Troubleshooting from the list of results.
    troubleshooting device couldn't connect
  3. On the left pane, click on View All, and look for Hardware and devices.
  4. Right-click on it and choose Run as Administrator.
    hardware and devices device couln't connect
  5. A dialog box has appeared, now follow the onscreen instructions.

Alternatively, use the System File Checker or SFC to scan Windows files and restore them. For Windows 10 you should always first run the inbox Deployment Image Servicing and Management or DISM, and then the System File Checker.

For the DISM fix:

  1. Open a Command Prompt as Administrator and type dism.exe /Online /Cleanup-image /Restorehealth then press Enter.
  2. Wait for the operation to complete and close the Command Prompt.

For the SFC Fix:

  1. Open a Command Prompt as Administrator and type sfc /scannow then press Enter.
  2. Do not close the window until the process has been completed.

We also have a guide on The remote device won’t accept the connection error, so don’t miss it.

We hope these solutions helped. Do let us know in the comments below if you have your own solutions.

How to block Windows driver updates with wushowhide.diagcab in Windows 10

Windows 10 automatically updates drivers to fix hardware that isn’t working correctly. However, in rare circumstances, updated drivers can sometimes cause other problematic hardware issues. If that happens, you’ll need to roll back the driver and block Windows Updates from installing it again.

However, Windows 10 doesn’t include a built-in tool with which you can select driver updates to block. So, if you uninstall a driver, Windows Update will automatically install it again. As a compromise, Microsoft’s wushowhide.diagcab tool for Windows – otherwise known as the Show or hide updates package – enables you to block unwanted driver updates.

Here’s how to block Windows driver updates

  1. Roll Back the Driver Update
  2. The Show or Hide Updates Tool

1. Roll Back the Driver Update

  1. Before you block a driver with the Show or hide updates tool, you’ll need to roll the updated driver back. To do that, open the Device Manager window by entering ‘Device Manager‘ in Cortana’s search box.device manager
  2. Next, select the device that has the driver you need to uninstall.
  3. Right-click the device and select Uninstall from its context menu.
  4. That opens the Confirm Device Uninstall window in the shot below. Select the Delete the driver software for this device check box on that window.uninstall the device uninstall
  5. Press the OK button to roll back the driver.
  6. Alternatively, select Properties on the device’s context menu and select the Driver tab on the window below.
  7. Select the Roll Back Driver option.


roll back drivers

2. The Show or Hide Updates Tool

Windows Update will probably automatically reinstall the driver unless you turn it off. Instead, save the Show or hide updates tool to your HDD by clicking Download the “Show or hide updates” troubleshooter package now on this page. Then, you can temporarily block driver updates with that tool as follows.

  1. Open the folder you saved Show or hide updates to and click wushowhide to open the window shown below.hide updates
  2. Press the Next button to scan for updates.hide updates
  3. Next, select Hide updates to open a list of available updates as below.
  4. Now, select the update package that’s updating the driver from the list to block it.
  5. Press the Next and Close buttons to exit Show or hide updates.


Now the update package will not reinstall the driver you removed. You can always open Show or hide updates again and deselect the blocked update package when required. Also, note that Windows Pro and Enterprise include a new built-in Group Policy Editor option with which users can select to exclude drivers from updates.

RELATED STORIES YOU NEED TO CHECK OUT:

Posted in Fix

Windows Cannot Access Samba Share: 3 Ways to Fix it

Samba is an application-layer network protocol, with its primary purpose to provide shared access to files. However, many users reported that Windows cannot access the Samba share message while using it.

Samba runs on most Unix-based systems, such as Linux OS for example. Samba also takes its name from Server Message Block or SMB. Most of the time, you’ll be using SMB to connect to devices that aren’t running Windows.

Starting from build 1709, Samba has a hard time working well since Windows disables unauthenticated access to shares using SMB2 with guest access enabled. However, there’s a way to fix this problem!

What can I do if Windows cannot access Samba share?

1. Change Group Policy settings

  1. Press Windows + R to open Run, type gpedit.msc, and hit Enter.gpedit.msc
  2. Select Computer Configuration and click on Administrative Templates from the navigation pane.
  3. Select Network and choose the name of your Workstation.
    group policy network Unable to access Samba share
  4. Open the Enable insecure guest logons policy and select Enabled.
  5. Apply the changes and restart your machine.

Oftentimes, when you see Windows cannot access Samba share and you do not have permission, modifying the relevant policy should help get things up and running.

2. Enable SMB 1.0

  1. Open the Control Panel, and click on Programs.
    programs Unable to access Samba share
  2. Click on Turn Windows features on or off.
    turn windows features Unable to access Samba
  3. Expand the SMB 1.0/CIFS File Sharing Support option.
  4. Check the SMB 1.0/CIFS Client option, and then click OK.
    Unable to access Samba share smb cifs
  5. Once done, restart the computer.

The SMB1 protocol has been disabled since recent updates to Windows 10 but was never fully removed. Merely stowed away, meaning you can temporarily enable this protocol on your Windows 10 machine. And this should fix things when Windows cannot access Samba share.

3. Disable Digitally sign communications policy

  1. Open the Local Computer Policy, then select Computer Configuration.
  2. Next, go to Windows Settings and select Security Settings.
  3. Select Local Policies and click on Security Options.
  4. Locate a policy named Microsoft network client: Digitally sign communications (always) and select Disabled in its properties.
    security options Unable to access Samba share
  5. Apply changes and restart your machine.

Say you’re in a situation where you have a network with two workstations. One is running Windows, and the other is Linux, and you’re using Samba to share a local storage device. But sometimes, Samba might mismanage the session’s security negotiations with Windows.

Always remember to keep your Lan Manger’s authentication level to Send LM & NTLM – use NTLMv2 session security if negotiated. And if there’s any firewall involved, configure them correctly.

One of these solutions should have helped fix things when Windows cannot access Samba share for Linux or Ubuntu, and the error code 0x80070035 shouldn’t appear again.

Before you leave, find some quick tips to increase the Internet speed in Windows.

Tell us which fix worked for you in the comments section below.

Dota 2 Fails to Launch? Fix it in 4 Quick Ways

When it comes to the Steam service, Dota 2 is untouchable in the number of active participants. With vivid graphics and immersive gameplay, it is an amazing multiplayer experience.

Nevertheless, software without bugs is a non-existent, unicorn-like category. So, yes, Dota 2 has its technical issues. One of the issues that seamlessly showed up was the game launch failure.

Most of the time, the crash is followed by the Failed to Start Game (Missing Executable) message. So, we’ve prepared some possible solutions for this annoyance.

What to do if Dota 2 fails to start

1. Let the Steam tool verify game files

  1. Restart PC and open Steam client.
  2. Open Library.
  3. Right-click Dota 2.
  4. Click Properties.
  5. Select the Local Files tab.
  6. Choose VERIFY INTEGRITY OF GAME CACHE.
  7. The process execution time is proportional to the game size.steam client verify game files
  8. If there is a corrupted file, Steam will highlight it.

Corrupted/incomplete file issues can be quite a challenge for some older titles. Back in the day, you would probably have to reinstall the game in order to make it work.

This is not the case with Steam nowadays. With the implemented File integration tool, you can check and fix any game in your library.
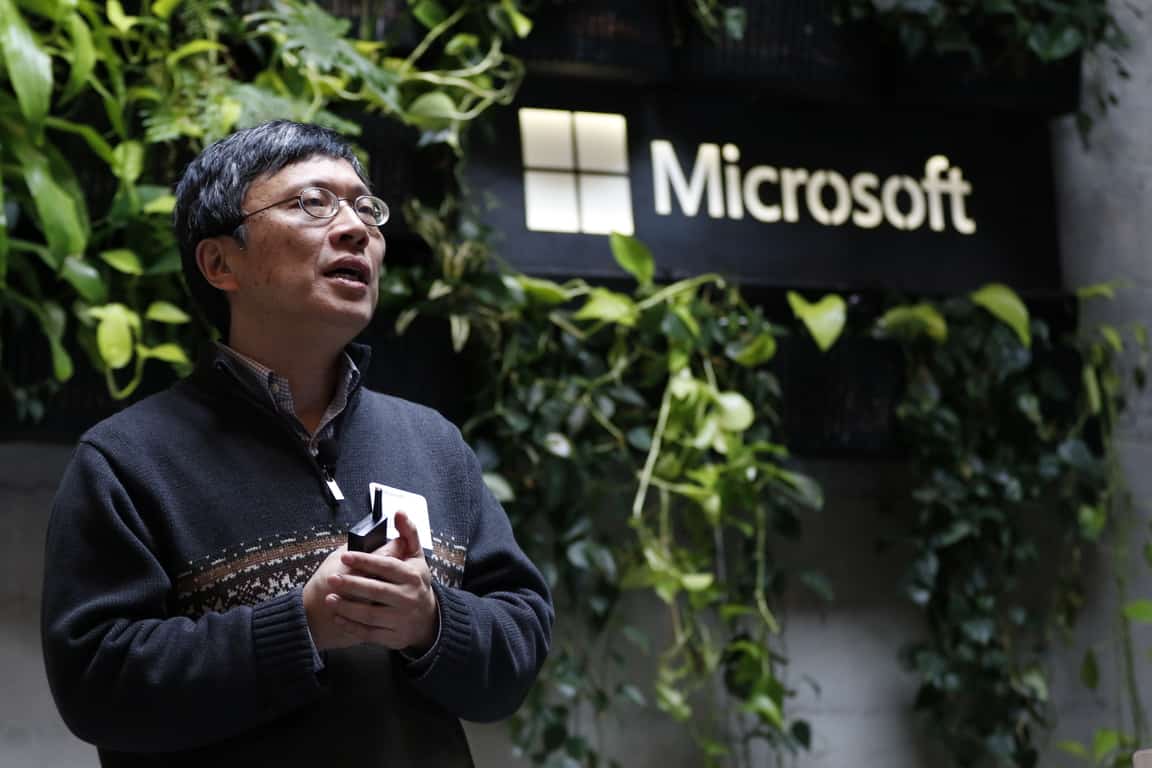
2. Tweak Antivirus

Antivirus/antimalware/antispyware programs are known causes for Dota 2 malfunctioning. The last resort would be disabling them while playing the game. However, if you are attached to your security, try out these tweaks:

  • Make your antivirus exclude the folders where the Steam client is installed. By default, it is: C:\Program Files\Steam
  • Start Game Mode if the antivirus supports that feature.
  • If the antivirus reports some Dota 2/Steam-related files as malware, mark them safe.

3. Disable background applications

task manager

There are reports that some background processes interfere with the client and the game. The ones that are most problematic are connection-dependent.

Besides the already mentioned antivirus programs, you should look out for firewall software, torrent clients, VPN and proxy software, VoIP apps, and IP masking programs. Be sure to disable them before you start the Steam client.

4. Reinstall Dota 2

  1. Launch Steam and click the Library tab.
  2. Right-click Dota 2 and select Manage.
  3. Now, click Uninstall.
    uninstall dota 2 fails to launch
  4. Finally, click the Uninstall button to verify the removal.
    verify

The last step you can try to follow through is a complete reinstallation. In addition, make sure that your graphics drivers are up to date and also redistributables and DirectX. Reinstalling a Steam game is a rather simple task, as shown above.

Of course, re-downloading might be a drag if you have a slow bandwidth. The game should work better afterward.

If none of these solutions actually worked, you should send the Steam Support Ticket. That way, Steam technicians can address the issue and provide additional details.

In the same vein, if Dota 2 can’t connect to the game after accepting a match, check our guide to fix it.

If you know some alternative solutions and are keen to share them, please do so in the comments.

ID@Xbox set to launch Game Pass show with new game announcements

The ID@Xbox has just announced the upcoming launch of a new live show that will highlight new indie games coming soon to Xbox Game Pass. The debut episode of the ID@Xbox Game Pass show will be on Tuesday, March 26 at 9AM PDT, and here is what you can expect:

In our debut, we’ll dive into games previously shown at E3 and X018. Expect hits such as Afterparty, Void Bastards, and Supermarket Shriek to be highlighted. In addition to new game announcements, we’ll also share a visit to Night School Studio, the creative team behind the hit game Oxenfree, for a behind-the-scenes look at their upcoming game Afterparty.

Interestingly, the first episode will be live streamed exclusively on the YouTube Xbox channel, and not on Microsoft’s own Mixer service. The company already created many regular shows on Mixer including Major Nelson Radio or the weekly Mixer Green Show, so the decision to ignore the ID@Xbox channel on Mixer is a bit surprising.

Microsoft plans two new data centers in Sweden

Microsoft is reportedly building two new datacenters in Sweden, according to Swedish Newspaper Gefle Dagblad (via MSN). It was previously reported in December that the company had acquired 130 hectares of land in the municipalities of of Gävle and Sandviken, near the Swedish capital Stockholm.

“We intend to develop land areas for the establishment of world-class data centers that meet sustainable and environmentally friendly standards,” Microsoft said in a translated press release obtained by the Gefle Dagblad. The report mentions that there is still a legal dispute between the municipality of Gävle and some of its citizens who appealed the decision to sell the land to Microsoft, fearing that the new data centres could lead to a shortage of electricity in the area.

Microsoft’s new Swedish data centers are not visible yet on the company’s Azure website, though it’s worth noting that two Azure regions have also been announced in Norway. The Redmond giant currently has 54 Azure regions worldwide, more than any other cloud provider.

Thanks for the tip!

Windows 10 Surface app now tells users when their warranty ends

The Surface companion app in the Microsoft Store is getting a new update rolled out that will now inform the time left on a device’s two-year warranty (via MSPU).

While most people keep a mental note of their device’s lifespan and where they are in the warranty cycle, it’s still a neat little convenience to have in a dedicated app where other Surface related customizations, features and services are all located.

Visiting the Microsoft Store should surface the new update but if it’s not there yet, retry later today.

Sekiro: Shadows Die Twice is now live on Microsoft’s Xbox One consoles

One of the most-hyped video games of the year, Sekiro: Shadows Die Twice, is now live and ready to play on all Xbox One consoles.

The game is an action-adventure title set in Japan during the late-1500s. While launching today, Sekiro: Shadows Die Twice has already garnered a lot of buzz about its visuals, gameplay, and story with many speculating that it could be one of the biggest games of 2019.

Here’s the official game description and launch trailer:

In Sekiro: Shadows Die Twice you are the “one-armed wolf”, a disgraced and disfigured warrior rescued from the brink of death. Bound to protect a young lord who is the descendant of an ancient bloodline, you become the target of many vicious enemies, including the dangerous Ashina clan. When the young lord is captured, nothing will stop you on a perilous quest to regain your honor, not even death itself.

Explore late 1500s Sengoku Japan, a brutal period of constant life and death conflict, as you come face to face with larger than life foes in a dark and twisted world. Unleash an arsenal of deadly prosthetic tools and powerful ninja abilities while you blend stealth, vertical traversal, and visceral head to head combat in a bloody confrontation.

Take Revenge. Restore your honor. Kill Ingeniously.

Sekiro: Shadows Die Twice is playable on any Xbox One console but does receive some visual improvements when played on an Xbox One X in addition to gaining HDR10.

Looking for a new Xbox One console to play Sekiro on? Earlier today, Microsoft announced a very rare Sekiro-themes Xbox One complete with its own sword. Check it out here.

Have you been looking forward to Sekiro: Shadows Die Twice or are you feeling a little indifferent? Share your thoughts with the community in the comments below and then follow us on Pinterest for more Xbox gaming content.

The app was not found in the store. ?