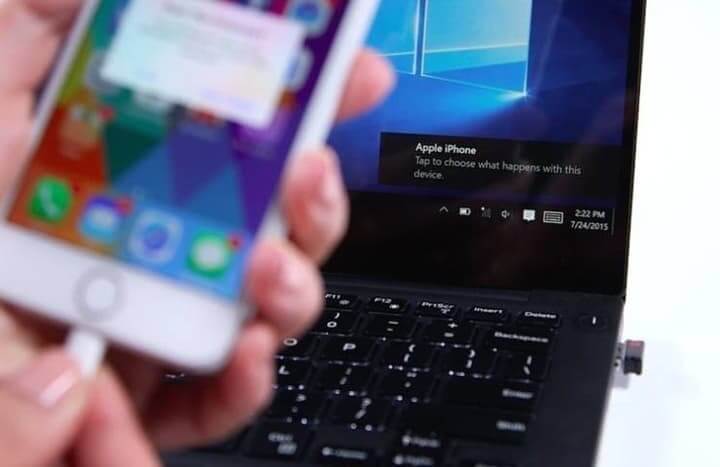
Fix: Can’t Upload Photos from iPod/iPad to Windows 10, Windows 8.1

How to import photos from iPhone or iPad on Windows PC?

  1. Install iTunes
  2. Update Apple driver manually
  3. Use File Explorer

I know most of you had issues while trying to upload photos from your iPod or iPad directly to the Windows 10 or Windows 8.1 device but I can tell you now that there is a very easy fix to this issue and you will learn a couple of lines below what you need to do in order to fix your Windows 8.1 or Windows 10 and upload photos from the iPod or iPad.
Fix Upload photos from iPod ,iPad to Windows 8.1, Windows 10
Although in Windows 7 or older when you connected your iPad or iPod directly via a USB device the Windows operating system would of automatically detect but this is no longer the case for Windows 10 and Windows 8.1. So following the tutorial below will show you what other modifications you need to make to the system and also from where you can download the latest version of the iTunes that should be compatible with the latest versions of Windows systems.

How to upload photos from iPod or iPad to Windows 10 and Windows 8.1 PC?

1. Install iTunes

  1. Left click or tap on the link presented below in order to download the latest version of iTunes.
  2. Download here iTunes
  3. From the apple website you will need to left click or tap on the “Download Now” icon .
  4. Left click or tap on the “Save File” button to save the executable file to your Windows 8.1 or Windows 10
  5. After the download is completed go to the directory where you saved it and double click on it to open.
  6. Follow the instructions on the screen to finish the installation of iTunes.

2. Update Apple driver manually

  1. While on the Start screen of your Windows 8.1 or Windows 10 left click on the arrow pointing down to access the “Apps” window.
    Note: Another way to open the “Apps” feature is by right clicking on an open space on the screen and selecting “All Apps” from the menu that pops up.
  2. While on the Apps window you need to swipe to the right side of the screen and find the “Windows System” topic.
  3. Now within the “Windows System” category open the “Control Panel” icon.
  4. Find and double-click to open the “Hardware and Sound” icon.
  5. Left click or tap on the “Devices and Printers” feature.
  6. You will have there a topic named “Unspecified” and your iPad or iPod should be present there if you properly connected it to the Windows 8.1 or Windows 10 device.
  7. Right-click or hold tap on the iPad or iPod from that menu and left click or tap on the “Properties” feature.
  8. In the “Properties” window you need to left click or tap on the “Hardware” tab situated on the upper side of this window.
  9. In the “Hardware” tab left-click or tap on the “Properties” button in the lower right side if this window.
  10. Left click or tap on the “General” tab situated in the upper side of this window.
  11. Left click or tap on the “Change Settings” button situated on the lower left side of this window.
    Note: Left click or tap on the “Yes” button if you are prompt by a user account control pop up message.
  12. Left click or tap on the “Driver” tab situated on the upper side of this window.
  13. Left click or tap on the “Update Driver” button in this window.
  14. Left click or tap on the “Browse my computer for driver software” option.
  15. In the next window that pops up you will need to left click or tap on the “Browse” button to select another path.
  16. Go to the “C:Program FilesCommon FilesAppleMobile Device SupportDrivers “directory and left click on the “open button.
    Note: if you don’t have the path specified above you will need to go to “C:Program Files (x86)Common FilesAppleMobile Device SupportDrivers”
  17. Left click or tap on the “Next” button after you selected the path above.
  18. Left click or tap on the “Close” button.
  19. Try connecting your iPad or iPod once more to the Windows 8.1 or Windows 10 system and see if it works for you now.

3. Use File Explorer

  1. Connect your iPhone or iPad through a USB cable
  2. Launch Windows Explorer from the search bar or press ‘Windows Key’ + ‘E’
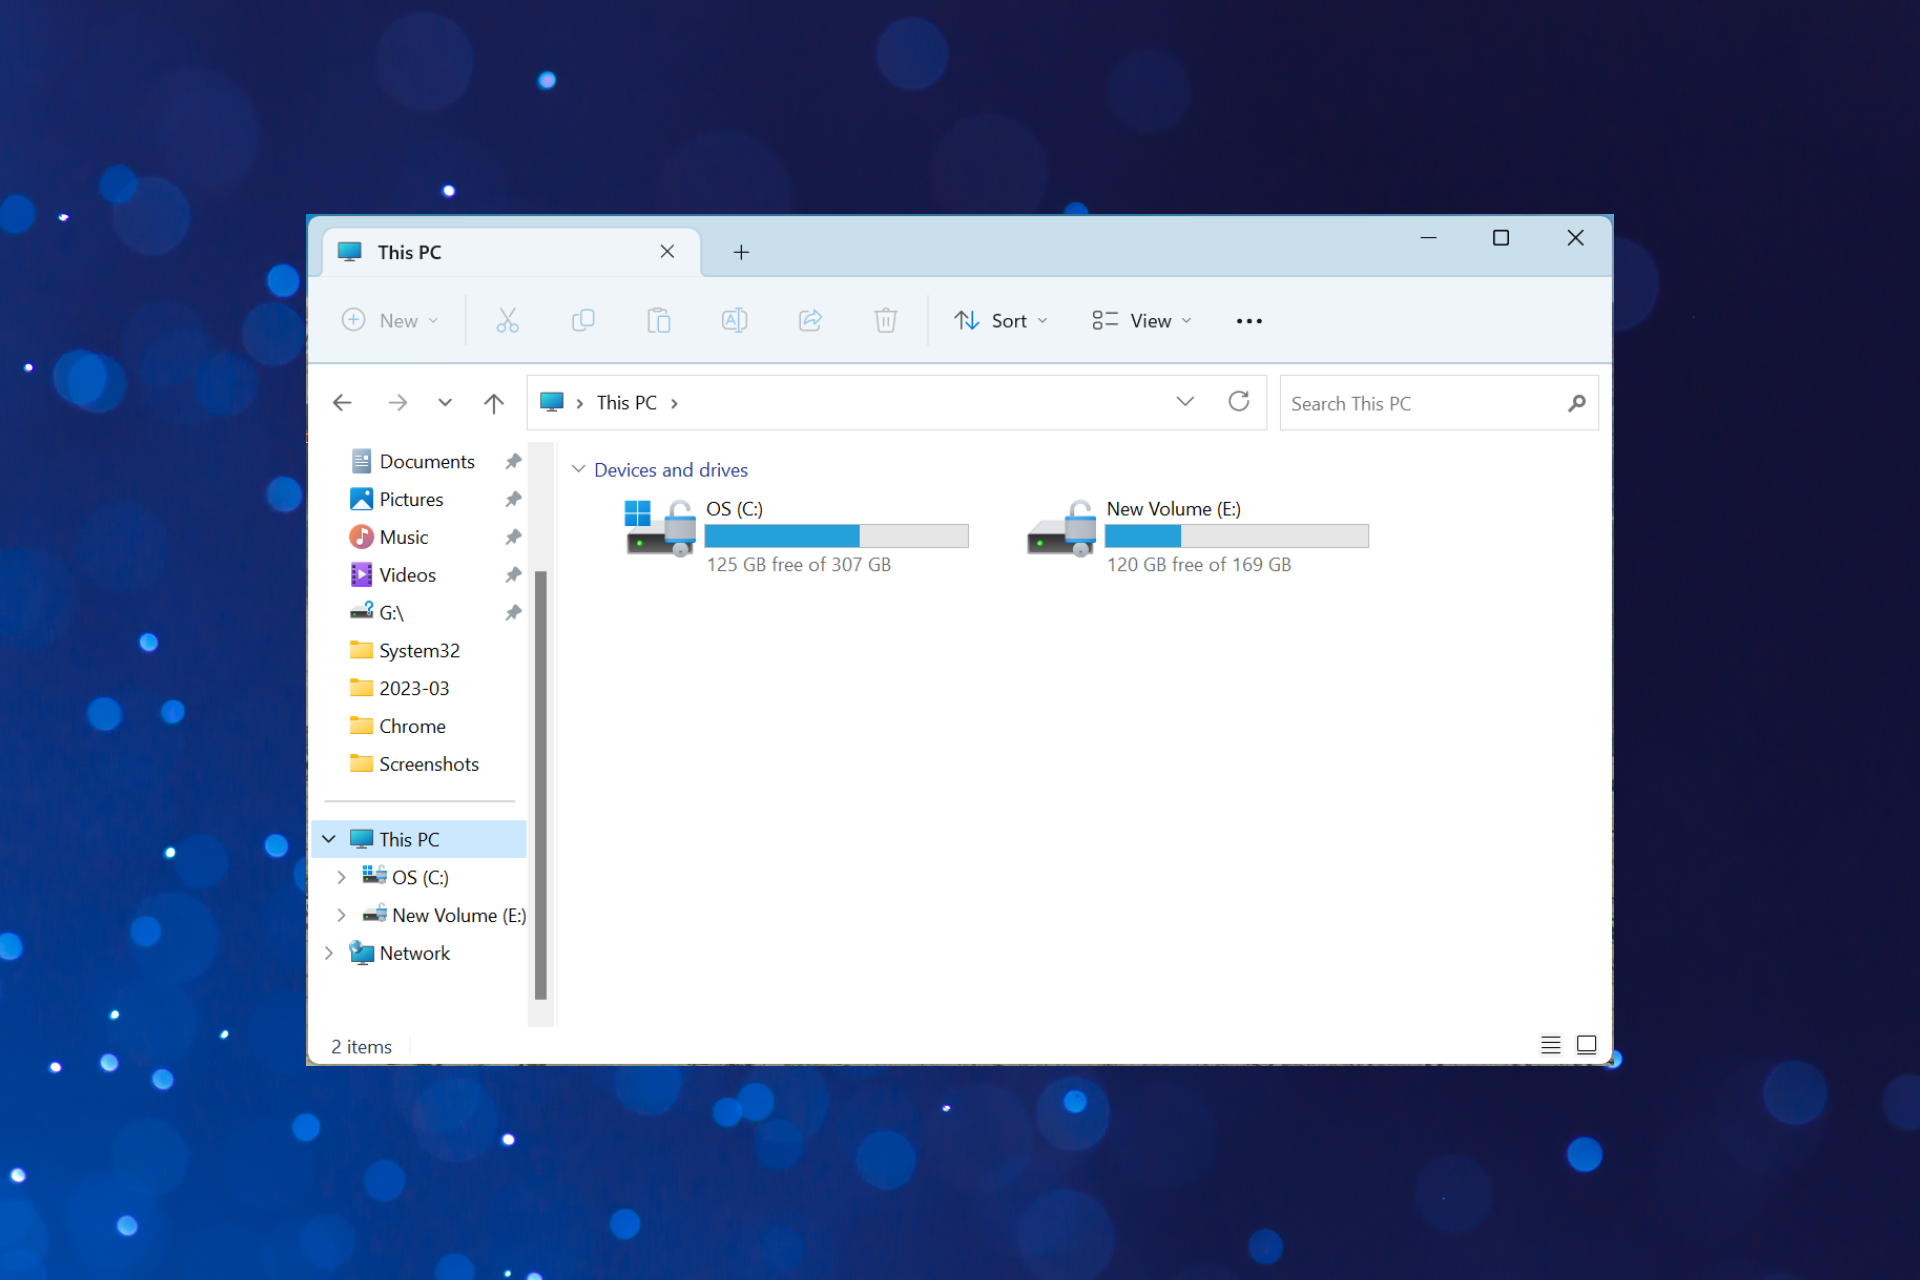
  3. Expand ‘This PC’ by using the arrow at its leftexpand this pc in windows screenshot
  4. Click the name of your Apple device
  5. In the window that shows the drives inside your device, double-click on ‘Internal storage’ and then double-click on ‘DCIM’
  6. Click on a folder (it should contain the images). The folder’s name should look like that: 100APPLE (or something similar)
  7. Find your photo/photos, copy it/them to the folder you need or try to export them and ‘save as’ in a folder you want.

We also recommend you to check our guide on how to import photos from iPhone/iPad on Windows 10 only. In case, your PC or Apple device has a serious malfunction and it cannot get the job done, let this to a third-party software that can import data for you.

Now that you have the methods for uploading photos from your iPod or iPad to your Windows 8.1 or Windows 10 device you only have to go and try them yourself. Please write us below in the comments topic of the page a little bit below if you have any other questions on this tutorial and I will help you further with your issue as soon as possible.

READ ALSO: You can now mount iPods as USB storage devices on Windows 10
Next Xbox Insiders Alpha builds delayed until Wednesday

In a post on Twitter, Brad Rossetti detailed that a fix for an audio issue on current Preview Alpha Skip Ahead and Alpha builds will be released tomorrow, instead of today.

Recently, Rossetti took responsibility on Twitter for this audio issue and worked to get this issue resolved as quickly as possible.

Rossetti is the Xbox Program Manager responsible for Platform and Hardware Previews. Rossetti plays a big role in managing and communicating system updates, including posting release notes on The Xbox Insider blog and answering questions by Xbox Insiders on Twitter, Reddit, and more. Rossetti and his team use user feedback to correct bugs and performance issues with Xbox Insider builds.

In addition to Rossetti’s work on the Xbox Insider program, he still finds time to play on Xbox Live (Wombatman) and you can reach out to him on Twitter too (@WorkWombatman). He is a valuable member of the Xbox Insider program and Xbox community. His transparency in keeping Xbox Insiders updated with the latest issues and fixes on new builds make being an Xbox Insider a real pleasure. Keep up the great work, Brad!

Here’s how to connect your Microsoft Movies & TV accounts to Movies Anywhere

Now that Microsoft has finally and officially joined the Movies Anywhere club, it’s time to for an unspecified amount of Window users to move their film and TV collections from the prison of Alcatraz to the city of San Francisco proper, figurately speaking.

With Microsoft finally gaining (regaining depending on the timeline) support for Movies Anywhere, Windows 10 users who sunk hundreds of dollars into digital media on the platform now have a way of migrating their collection to a platform for longevity.

The process to free your Movies & TV collection from Windows 10 platform to the Movies Anywhere platform is pretty straightforward, but for those who may still need a helping hand, we’ve gone ahead and compiled a quick walkthrough.

Step One

Visit Movies Anywhere

This can be done on a desktop or via mobile. For the purposes of this walkthrough, we chose desktop. We like to watch movies on large screens, and for those of you choosing your smartphone to watch your movies, stop it!

Step Two

Get Started

If you have already signed up for Movies Anywhere, then log in is pretty simple. You can either long in using Facebook, Google or the email you have on file. The same login process is applied to first timers as well when signing up, you can either choose Facebook ( personally I’ve been avoiding using them as a log in source), Google or email.

Step Three

Connect

Once logged in or signed up, you’re greeted with the list of participating platforms. If you have entertainment on multiple platforms and want to connect them all, you’ll have to go through a similar login/sign up process for each.


Fortunately, Microsoft has streamlined its authentication process and uses the same sign in/sign up front end for most of its properties, so users should be familiar with what to do when requested.

Step Four

Grant Permissions

As with most things these days, users are greeted with the permissions page acknowledging what permissions are being granted when using Movies Anywhere to integrate with Microsoft’s Movies & TV platform.

Following this screen is the import screen. It is not listed as a step, as there is nothing a user has to do but click a button. The import process happens in seconds. The process is so quick that there is no prompt UI or loading screen.

Step Five

Enjoy

Once your content in imported from all available sources, you’re greeted with a pretty bland movie library UI that shows all the movies or TV shows at your disposal. It should also be noted that your entire library may not transfer over as there appear to be licensing issues that are preventing a handful of studios from being listed. If you don’t see all your movies or TV shows, this is not a Microsoft issue but a studio issue, at the moment.

Lastly, on desktop movies play in the browser instead of a dedicated media player. On mobile, there appears to be a proprietary app that plays your media. Unfortunately, due to some licensing screen tech, we were unable to grab in-action screen shots of player. However, because Movies Anywhere syncs license property versus physical media, you will notice that once connected, movies from other platforms will populate your library home of choice. Once populated, movies purchased on iTunes, for example, will now appear in the Movies & TV app and can be viewed using the Microsoft Movie & TV app to view.

For those stunted and in fear of purchasing Movies or TV shows from the Movies & TV app because of how Microsoft handled its similar Music streaming service, feel free to grab latest season of Preacher the watch Deadpool 2 tonight as your purchases are now part of a bigger online movie streaming community, and not the next sunken cost of being a Windows user.

Brightness issues on Windows 10/11 [SIMPLEST FIXES]

A lot of Windows users have upgraded their operating system to the new Windows 10 but unfortunately, this operating system still has some bugs that need fixing and one of them being the brightness problem many of us experienced.

You don’t need to worry because applying the steps posted below will show you exactly what you need to do in order to fix in Windows 10 any issue you might have regarding the brightness feature.
Fix brightness issues in Windows 8.1
If you are using a keyboard to adjust your brightness level in Windows 10, it might show you the level changing but nothing actually happens and your screen will remain the same.

This is not really a problem with your keyboard and neither with your Power options but instead, Windows 10 might not really recognize your drivers correctly.

So we will see below what we can do from the Device Manager feature and fix the brightness level in Windows 10.

How can I fix brightness issues in Windows 10?

  1. Move the mouse cursor over to the lower right side of the screen.

  2. Move the mouse cursor over the “Search” feature in the menu that shows or simply tap on the “Search” feature.
  3. Write in the search box the following: “Device Manager” but without the quotes.
  4. After the search is finished you will need to left click or tap on the “Device Manager” icon that shows up.
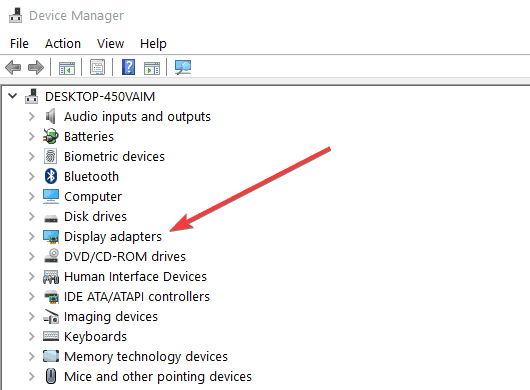
  5. On the left side in the “Device Manager” window you will need to search for the “Display Adapter” icon.
  6. Left click on the “Display Adapter” icon in order to expand it.
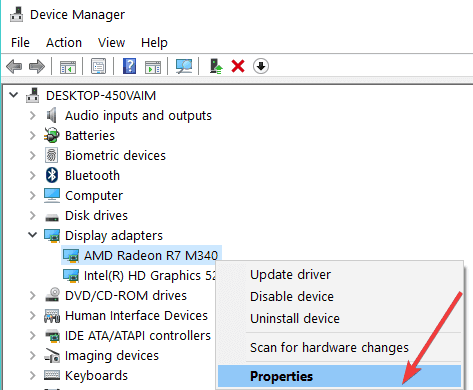
  7. Right-click or hold tap on the graphics card you have installed on your Windows 10 device.
  8. Left click or tap on “Properties” feature you get in the menu that appears.
  9. Left click or tap on the “Driver” tab you have in the “Properties” window.
  10. In the left side of this tab, you will need to left click or tap on the “Update Driver” button.
  11. After you selected it you will need to choose the second option which is “Browse my computer for driver software”.
  12. Now in the next window that pops up, you will need to left click or tap on the “Let me pick from a list of device drivers on my computer”.
  13. You should have in the next list under the “Model” topic several device drivers. You will need to select the “Microsoft Basic Display Adapter” option.
  14. Now save the changes you made and reboot your Windows 10 operating system.
  15. You should now be able to adjust your brightness as you wish.
  16. After you adjust the brightness according to your needs you can follow the steps above in order to select the correct driver of the graphics card you have.

If you want detailed information on how to update your graphics card driver on Windows 10, take a look at this dedicated article.


Want the latest GPU drivers? Bookmark this page and always stay updated with the latest and greatest.


Various Windows 10 brightness-related issues and their fixes

Sometimes you might not change the brightness as it may simply be unavailable. We’ve prepared a dedicated guide for such an occasion.

Other users reported problems with the adjustment feature.

For all Windows 10 v1903 users that encountered problems with the brightness, check out this article.


Windows won’t let you adjust the screen brightness? Don’t worry, we’ve got the right solution for you.


I know this is a long workaround just for adjusting the brightness of your Windows 10 device, but as soon as we have some new available information we will share it with you as soon as possible.

Also, you can write us below if you have any additional questions regarding this subject and we will help you further with this issue.

READ ALSO:

DVD Drive Only Reads & Plays CDs: 3 Ways to Fix it

If the DVD drive only reads CDs, you won’t be able to read any DVDs on your PC, and that can be a problem, especially if you have multimedia stored on it.

This can be a big problem if you still rely on a DVD drive, and in today’s guide, we’re going to take a closer look at this issue and show you how to fix it.

Why won’t my DVD drive read my DVD?

  • If the DVD-ROM drive reads CDs and not DVDs, it is likely because the red laser for DVD reading is malfunctioning. There is a different IR laser for reading CDs, and that is still working.
  • The DVD drive isn’t correctly configured in the registry editor.
  • The drive might be dirty or have hardware issues.
  • In rare instances, third-party software can cause this problem.

What can I do if the DVD drive only reads CDs?

1. Modify the registry

  1. Press the Windows key + R and type regedit. Click OK.
     
  2. Navigate to: HKEY_LOCAL_MACHINE\System\CurrentControlSet\Control\Class\{4D36E965-E325-11CE-BFC1-08002BE10318}
  3. Now, on the right side panel, look for UpperFilters, right-click it, and choose Delete feature.
  4. Confirm that you want to delete it.
  5. Do the same for the LowerFilters.

Many reported that they don’t have these values on their PC. If that’s the case, just move on to the next solution.

2. Physically clean the laser

  1. Open your CD/DVD like you do when you want to place a CD or DVD inside.
  2. You will have there a laser head, and you will need to clean the area around it.
    Note: It is very important to clean the area around the laser head with a very clean, dry material, and it is also recommended to clean it with what you use to clean your monitor or with the material you use to clean any eyeglasses.
  3. After you finish cleaning, insert the CD/DVD bay back in.
  4. Reboot your Windows operating system.
  5. After the device is up and running again, inject your CD/DVD bay and insert a DVD.
  6. Check and see if you still have issues reading it.

After doing that, check if the issue is resolved.

3. Check the DVD and disable the burning software

  1. If you are only trying to read a single DVD please try multiple ones.
  2. The DVD you are trying to read might also be damaged, and we will need to check if there is an issue with a specific DVD or the drive itself.
  3. Also, if you have third-party burning software that you use, you will need to close it or uninstall it for the duration of this step.
  4. After you uninstall the software, please reboot your Windows device.
  5. When the Windows device starts, place a DVD in the drive and check to see if it can read it.

What is the difference between an optical drive and a DVD drive?

  • Optical drives are designed to read optical discs. This includes CDs, DVDs, and Blu-Ray discs.
  • DVD drive is an optical drive that can read DVDs and CDs.
  • All DVD drives are classified as optical drives by definition.

How do I get my computer to recognize my DVD drive?

If your DVD drive isn’t recognized, ensure it’s properly connected. Updating its drivers can also help if the drive is not recognized. We covered this issue in detail in our DVD not working guide and in our DVD drive not detected guides, so don’t miss them.

These steps are required if the DVD drive only reads CDs, and we hope you found them helpful. It’s also essential to fix AutoPlay not working if you have problems with your DVD drive.

Please write us in the comments section below if you have any additional questions related to this article, and we will help you further with your issue.

Emperor Palpatine and Ewok Hunt return to Star Wars Battlefront II on Xbox One

A small, but important, update has been pushed out to all versions of Star Wars Battlefront II. The update is now live on Xbox One consoles.

This update brings back the popular Emperor Palpatine character, who was removed due to being made too powerful in the previous update, and also adds back in the Ewok Hunt mode which was incredibly popular when it launched but was also removed due to a bug in the previous update.

Other changes with this update include some adjusting of the stamina on lightsaber heroes and objective markers in the Extraction game mode. Here’s the full official list of changes:

  • Palpatine has been added back to the game
  • Fixed an issue with Palpatine being very overpowered by restricting the angle from which the player could lock on with his lighting ability
  • Fixed an issue with Palpatine being able to lock onto targets through walls
  • Ewok Hunt has been added back to the game
  • Fixed an issue in Ewok Hunt where Stormtroopers were unable to board the shuttle
  • Rebalanced stamina for lightsaber heroes
  • Fixed an issue with Extraction where objective markers were misplaced on Kessel and Jabba’s Palace

A bigger update is expected before the end of the month which will fix a major server ping issue that’s been affecting players. This update will also add more Trooper appearances and the ability to buy emotes and poses with credits.

Have you downloaded the updated yet? Are you happy with these changes? Let us know in the comments below and then follow us on Pinterest for more Xbox gaming news.

How to Add AVI Codec to Windows Media Player in Windows 10

If you are looking to add an AVI codec to your Windows Media Player in Windows 8.1 or Windows 10, then this is the place to be.  In this guide, we’ll show you how to play AVI on Windows Media Player. Follow the instructions below, and you’ll learn how to run the AVI codec on your Windows 8.1 or Windows 10 operating system, as well as any other codecs your Windows Media Player might not support.
How to add an AVI codec to windows media player in Windows 8.1 and Windows 10
Unfortunately, Microsoft has not provided support yet in the Windows Media Player application for the AVI codec you get when you install the operating system. Also, the AVI file format is created with the help of the video encoding process DivX. By applying some tweaks in Windows Media Player we will get this done and get your AVI formats playing in the application.

When the Windows Media Player fails to play AVI, you may get one of the following error messages:

  • Invalid File Format Error=8004022F
  • Cannot play back the file. The format is not supported. Error=80040265
  • Cannot play back the video stream: no suitable decompressor could be found. Error=80040255
  • No combination of filters could be found to render the stream. Error=80040218
  • The source filter for this file could not be loaded. Error=80040241
  • Windows Media Player cannot open filename. You may need to reboot to complete installation of a downloaded component. Please verify that the path and filename are correct and try again. Error=80004005
  • One or more codecs required to open this content could not be found. Error=C00D10D1
  • Video not available, cannot find ‘VIDS:xxxx’ decompressor.
  • Unable to download an appropriate decompressor Error=80040200

Steps to add AVI codec to Windows Media Player

  1. Double click on an AVI file you want to view in Windows Media Player.
  2. Windows will prompt you with a message telling you that you don’t have the necessary codecs to run this file format.
  3. You will then have to left click or tap on the “Web Help” button situated in the lower right side of the message.
  4. Right after you left click on the “Web Help” your Windows operating system will open the default web browser you are using.
    Note: In most of the cases the default web browser is Internet Explorer.
  5. It should take you to a website from where you will need to download the specified codecs.
  6. Search for the” MPEG-4 (Xvid) codec” on the website.
  7. Left click or tap on the “WMPlugins” link you have on this website.
  8. After you left clicked on the link above it should take you to the Xvid Codecs download site.
  9. Left click or tap on the Download button in the Xvid Codecs download site.
  10. Follow the instructions on the screen to download the codec to your PC.
  11. After the download is completed, you will need to left click or tap on the “Run” button in order to run the installation process of the codecs.
  12. Follow the instructions on the screen to finish the installation.
  13. Now you will need to left click or tap on the “Close” button from the message that Windows Media Player prompts you that you don’t have the necessary codecs to run the specified file.
  14. Close Windows Media Player Application.
  15. Reboot your Windows 8.1 or Windows 10 operating system.
  16. After the System starts up again you will need to try to open again the AVI file and check if it works.

Speaking of Windows Media Player codecs, the K-Lite Codec Pack is one of the most comprehensive codec packs that you can download on your computer. So, if you already downloaded some codec packs, yet the WMP still won’t play AVI files, try adding K-Lite to Windows.

Go to CodecGuide and get the K-Lite package as a standard download. Complete the install process and check if this solved your problem.

If the Windows Media Player still won’t play AVI files, this means that there’s a severe technical issue affecting it. We also compiled a detailed troubleshooting guide on what to do if the Windows 10 Media Player won’t play AVI files.

This is all you need to do in order to play your AVI file format on the Windows 8.1 or Windows 10 Media Player. Also, you can use the comments section below if you have any other questions regarding this post.

RELATED STORIES TO CHECK OUT:


SOLVED: Xbox sign in error 0x80a30204

How can I fix Xbox error 0x80a30204?

  1. Confirm that Xbox Live services are not down
  2. Inspect the connection
  3. Hard reset the console

Microsoft is famous for the error nomenclature they enforce on all their platforms. That way, Xbox  (from Xbox to Xbox X), has a dozen different sign in errors. One of the most prominent errors goes by the code 0x80a30204. As basically all other errors, this error prevents users to sign in to Xbox Live on their consoles.

We provided you with a few suggestions on how to solve this.

How to fix Xbox Sign In error 0x80a30204

1: Confirm that Xbox Live services are not down

Firstly, check are the dedicated servers down for maintenance or any structural error crashed Xbox Live services. This does not occur frequently, but it’s still a possibility. Usually, when some global issue occurs, it’s fixed in a matter of hours.

You can check for Xbox Live services status, here. Or, if you prefer Twitter, you can track everything there. Here’s the official Twitter account.

2: Inspect the connection

In order to sign in to Xbox Live on your console, the fully-functional network is invaluable. That’s why we suggest troubleshooting your connection and confirming that everything is indeed good on your side.

Here are some steps you can follow to confirm that connection isn’t the reason for the “0x80a30204” error:

  • Make sure you use a wired connection instead of wireless.
  • Run diagnostics
  1. Press the Xbox button to open the guide.
  2. Choose Settings.
  3. Tap All Settings.
  4. Choose Network.
  5. Select Network settings.
  6. Select “Test network connection“.
  • Set a static IP address
  1. Open Settings and then All Settings.
  2. Choose Network.
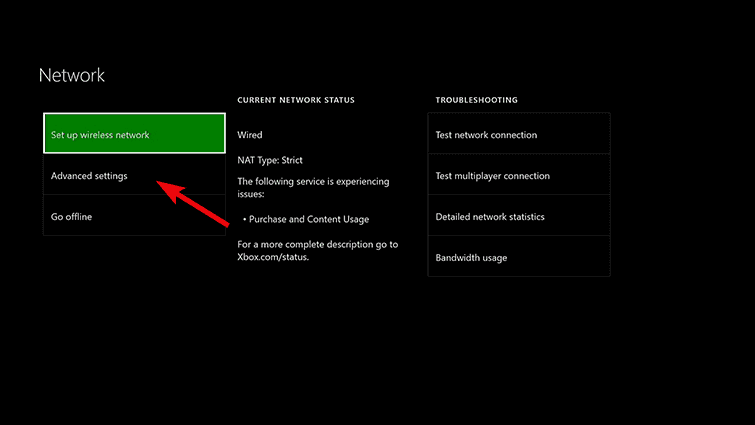
  3. Open Network settings > Advanced settings.xbox sign in error 0x87dd000f
  4. Write down your IP and DNS values (IP, Subnet mask, and Gateway).
  5. Under the Advanced settings, open IP settings.
  6. Select Manual.
  7. Once here, open DNS and write down DNS input.
  8. Enter the values you wrote and confirm changes in the Advanced settings.
  9. Restart Xbox

3: Hard reset the console

Finally, try power cycling your console to remove a possible temporary stall. This is an essential troubleshooting step on all Xbox consoles and it should address the majority of issues.

If you’re not sure how to hard reset your Xbox, follow the steps we enlisted below:

  1. Press and hold the Power button for 10 seconds or so.
  2. Wait until the console shuts down.
  3. After a minute, turn on the console again and look for changes.

That should do it. In case you’re still plagued by the same error, we suggest posting a query on the support forum, here. If you have any additional questions or suggestions, feel free to tell us in the comments section below.

[wl_navigator]

Posted in Fix

Click Here to Enter Your Most Recent Password [Fix]

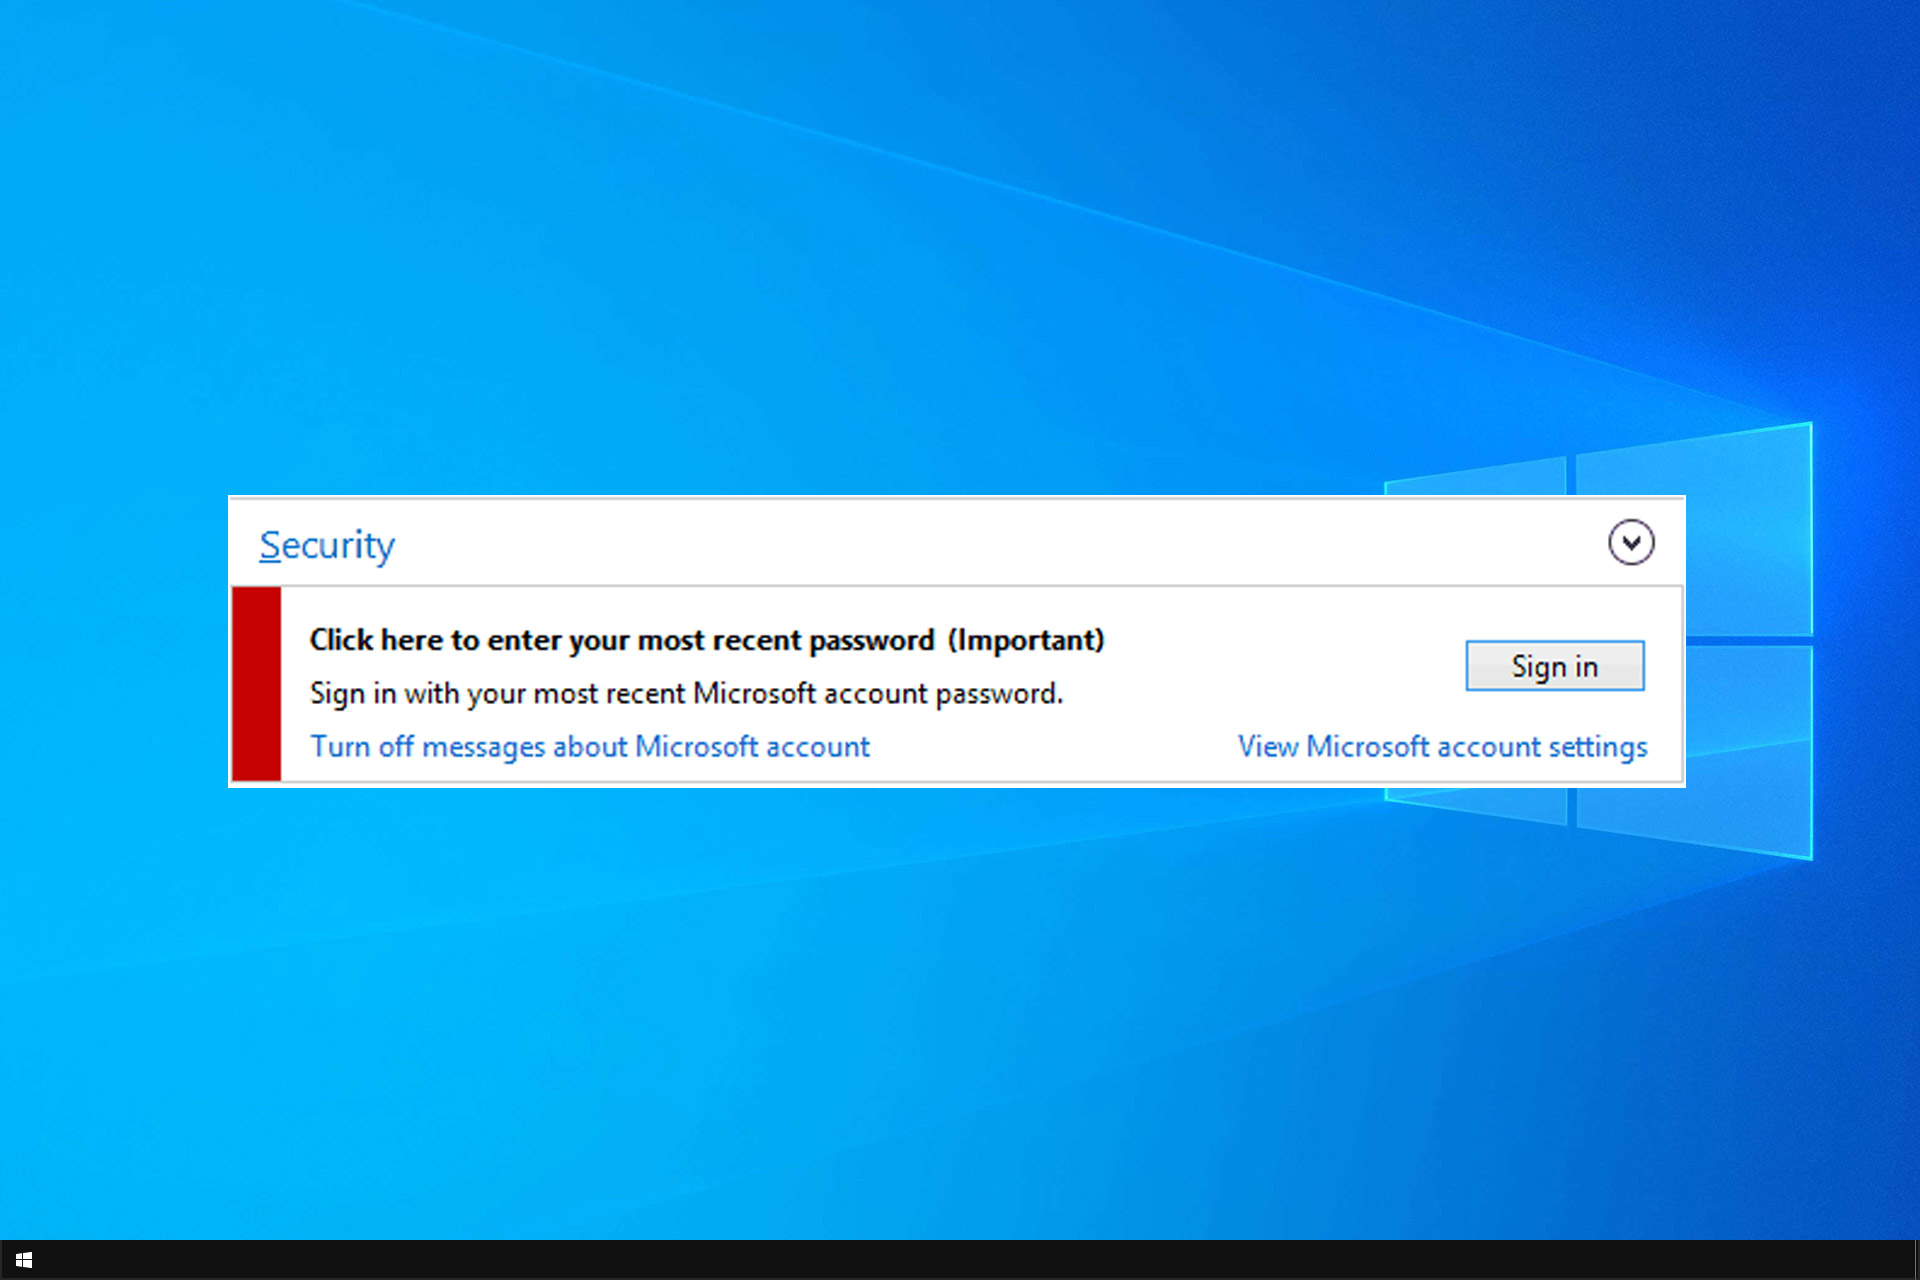
Sometimes you might get Click here to enter your most recent password (important) message on your PC. This isn’t a major issue, but it can be quite tedious.

Some users are even considering removing their Windows password, but there’s a better way to fix this issue, and today we’re going to show it to you.

Why does the Click here to enter your most recent password (important) appear?

  • Issues with your password can cause this error to appear.
  • In some rare cases, third-party software may cause this problem.
  • Problems with your Microsoft account can cause this error.

How can I fix Click here to enter your most recent password (important)?

1. Change Windows credential settings

  1. From the Start menu you will need to start writing the following: Control Panel.
  2. Click Control Panel to access it.
  3. In the Control Panel window Left, click or tap on the User Accounts and Family Safety feature.
  4. In the User Accounts and Family Safety, left-click or tap on the Credential Manager feature to open it.
  5. Left-click or tap on the Windows Credentials feature to open it.manage credentials control panel windows 10
  6. Look for the Generic Credentials topic in this window.
  7. Left click or tap to select MicrosoftAccount:user=your username
    windows credentials control panel
  8. Left-click or tap on Edit.
  9. Set a new password and save changes.

2. Change notification settings

  1. Navigate to the Settings app.
  2. Select System and then Notifications & actions.
    turn off windows 10 notifications
  3. From there you should be able to disable this type of notifications.

After doing that, check if the problem is gone.

3. Disable clean network password in CCleaner

  1. Open CCleaner application menu.
  2. Go to the Windows Explorer section on CCleaner.
  3. Now, from here, you will need to turn off the option of cleaning the Network Password.
  4. Save the changes you made and close the CCleaner application.
  5. Reboot your Windows 10 device.
  6. Check again to see if you still get this message after the device starts up.

4. Switch to a local account

  1. Open the Settings app.
  2. Go to Accounts and select your account.
  3. Navigate to Sign in with the local account instead.
  4. Set the new password for the local account.

The steps listed above should help you solve your Click here to enter your most recent password (Important) message in Windows 10.

For more information about passwords, check our guide on how to bypass the admin password on Windows.

If you do have further questions on this particular topic, please write us in the comments section below, and we will help you further with this issue.

Fix Safe Mode issues with K9 Web Protection in Windows 10/11

If you are using the K9 Web Protection application, then you might of tried running it in Safe Mode on  your Windows 8.1 or Windows 10 computer. This application worked fine in Safe mode in the previous versions of Windows. However, it seems that it often causes some issues in Windows 8.1 and Windows 10. So, if you want to learn how to run the K9 Web Protection in Safe Mode, follow the instructions below.
Safe Mode Problem - K9 Web Protection in Windows 8.1 and Windows 10
In this tutorial we will be trying to run the K9 Web Protection application using the “Safe Mode” feature in Windows 8.1 or Windows 10 with networking because in order to run it you will also need to have access to the internet as well as have administrative rights on the operating system itself.

How to run K9 Web Protection app in Safe Mode on Windows 10

1. Update K9 Web Protection

  1. You will first need to go on the manufacturer’s website of the K9 Web Protection application and search for the latest version compatible with the Windows 8.1 or Windows 10 operating system there.
  2. If you do not have the latest version, then you will have to uninstall the version you currently have and install the latest one.
  3. After you installed it, try again the Safe mode feature to see if your application is working for you now.

2. Use the Recovery option

The following steps apply to Windows 8.1. The instructions that apply to Windows 10 are listed below.

  1. Move the mouse cursor over to the lower right side of the screen.
  2. From the Charms bar that opens up you will need to left click or tap on the “Settings” feature.
  3. From the Settings menu left click or tap on the “Change PC Settings” option.
  4. You will have next a “PC settings” topic and you will have to left click or tap on the “Update and Recovery” feature.
  5. Left click or tap on the “Recovery” feature.
  6. Now under the “Advanced Startup” topic left click or tap on the “Restart Now”
  7. Now after the Windows 8.1 reboots you it will get you to a ‘Choose an Option” window.
  8. Left click or tap on the “Troubleshoot” feature.
  9. Left click or tap on the “Startup Settings”.
  10. Left click or tap on the “Restart” button.
  11. It will get you to a Startup screen where you will need to choose the Safe Mode feature including networking.
  12. Log in to your Windows 8.1 device using the administrator account.
  13. Try again your k9 Web Protection application from here.
    Note: Seeing that in Safe mode only the essential application from Windows are set to start, you will have to go to the directory where you have the K9 Web Protection application and manually start it from there.
  14. Check to see if the K9 Web Protection app is working now.

If you’re running Windows 10, you can quickly access the Recovery options by typing ‘Recovery’ in the search menu. Double click on the first result to open the respective page. Select Advanced Startup and follow the on-screen instructions to enable Safe Mode.

advanced startup windows 10

These are the steps you need to take to ensure your K9 Web Protection application starts properly from Safe Mode. If you cannot manage to start the application, then you can go on the K9 Web Protection official website to learn more about the compatibility details between the Safe Mode feature and the app. If you have additional questions regarding this article, you can also write us in the comments section below and we will help you further.

UPDATE:  K9 Web Protection is now available only as a free version. The paid version is no longer available for sale.

RELATED STORIES TO CHECK OUT:


Remove Uninstall Option on Boot in Windows 10: How to Do it

Those who installed Windows 10 might have the Uninstall option on boot, another menu that appears when you restart the OS. And many users look for ways to remove the uninstall option on boot in Windows 10.

This boot selection feature offers you the possibility to remove the Windows 10 OS completely. If you wait approximately 30 seconds in this boot menu, it will automatically boot the OS normally.

While this has been addressed in later releases of Windows 10, if you still find the option to uninstall Windows 10 during boot, keep reading to find out how to remove it!

How do I remove the Uninstall option on boot in Windows 10?

1. Use Command Prompt (cmd)

  1. Press Windows + S to open Search, type cmd, and click on Run as administrator.
  2. Click Yes in the UAC prompt.
  3. Type the following command and hit Enter: bcdedit /timeout 0remove Uninstall option
  4. Now reboot your Windows 10 system.

That’s it! You should not find the Uninstall option on boot anymore in Windows 10 on subsequent reboots. It’s gone for good.

2. Delete the files for the previous Windows installation

You can disable Uninstall on Boot by removing the old OS files stored in the Windows.old folder. It’s stored in the C: drive. Simply delete the Windows.old folder after it’s found.

And when you restart the PC the next time, the Uninstall feature during boot on Windows 10 will be removed.

3. Run Disk Cleanup

Disk Cleanup is a built-in Windows utility that helps clear disk space on the PC when there isn’t enough storage available. Many run the tool regularly to free up disk space.

The best part, when you run Disk Cleanup, it allows you to delete the previous Windows installation files. So, select the option, clear the files, and you are good to go!

How can I get back the Uninstall feature in Windows 10?

  1. Launch Command Prompt as administrator.
  2. Execute the following command: bcdedit /timeout 1enable uninstall option
  3. Reboot your Windows 10 system and check if this Uninstall feature is running again.

If you want to uninstall the Windows 10 system, you will have to have the passwords for the accounts you used on the previous Windows operating system. At some point, the uninstall process will ask you to enter your password.

So there you have it; you now have all the information needed to properly use or remove the uninstall option on boot available in the Windows 10 operating system.

Before you leave, find out how to make Windows 10 run faster than ever.

If you have any other questions, let us know in the comments section below, and we will help you further with this subject.

How to Solve Issues with Inventec – LAN driver for Windows 10

If you found it a bit strange that you got the optional update driver from Inventec – LAN driver in Windows 10 then you should read the lines below and find out exactly how to handle this in Windows 10 Technical Preview.
How to handle Inventec – LAN driver for Windows 10 (9879)
Basically, even if you choose the “More information” option in Windows 10 Technical Preview that is supposed to enlighten you a bit more about the Inventec – LAN driver the information, unfortunately, is not available.

How to disable Inventec – LAN driver optional update in Windows 10?

If you have a look at your device manager you might also notice that you do not even have any hardware from Inventec thus rendering this optional driver update useless. So basically all you have to do is cancel the optional update you receive from Inventec – LAN driver and you are all set to use your Windows 10 Technical Preview operating system without any other problems from this part.

So seeing that you cannot switch off a specific update what you can do is enable the feature to “’Check for updates but let me choose whether to download and install them” and in this way when you get the optional driver update for Inventec – LAN driver in Windows 10 Technical Preview you can choose not to install it.

Inventec Lan driver  update: causes

Why this update appeared? Is this a scam, or a simple error? There are many questions about this subject, but there is no reason to worry. Until now, this update has not done anything to any system and it even has some technical explanations and arguments that it can be simply denied. You will find more information about this update in this forum thread.

There you have it, folks, you now know how to properly handle the Inventec – LAN driver in Windows 10 Technical Preview but if you have any other additional questions regarding this specific subject please don’t hesitate to write us in the comments section of the page situated a little bit below.

READ ALSO: Free AutoDesk Pixlr Photo Editor App for Windows Lands on the Store

Fix: UEFI Boot only but Bios is not working [Windows 10/11]

Do you have issues when booting into Windows 10 Technical Preview? The Bios feature is not working as well as you would expect? Following the tutorial below will explain exactly what you need to do and fix Windows 10 Technical Preview if it is only booting from the UEFI BOOT feature and not from the normal Bios boot feature available for the Windows operating systems.
Fix Can only boot into UEFI BOOT. Bios not working in Windows 10
The usual way the issues occur is when you normally start the Windows 10 Technical Preview system and the screen is blank but the device is running and also if you try to reboot it or power it off several times it might boot to a certain point but it will give you an error message like: “cannot find intel pxe rom”, “insert media disk and restart” or errors while trying to access certain resources from your network card, graphics card and so on.

How to boot normally the Windows 10 Technical Preview system?

  1. Reboot your Windows 10 Technical Preview operating system.
  2. When the devices powers up you will need to continuously press the “F12” button on the keyboard or the button you usually use to get into the boot options menu.
  3. Now that you are in the Boot menu you will need to change the boot options to first boot from the CD/DVD ROM and as a second boot option select your Windows 10 Hard Drive.
  4. Insert the Windows 10 Installation media disk into the CD/DVD ROM.
  5. Save the changes you made in the boot menu and restart your Windows 10 Technical Preview.
  6. When the operating system starts you will get a message saying: “Press and key to boot from CD or DVD” and in that moment you will need to press a button on the keyboard, “Space” button for example.
  7. In the first window that pops up, you will need to select the time and the type of keyboard you are using.
  8. You will have a button in the lower left corner of the screen which says “Repair”, left click or tap on the “Repair” button to enter this feature.
  9. Left click or tap on the “Troubleshooting” feature you get in the next window.
  10. From the Troubleshooting menu left-click or tap on the “advanced options” feature.
  11. Now in the “advanced options” window left-click or tap on the “Startup repair” feature.
  12. Follow the instructions on the screen to finish the startup repair process.
  13. Now after the startup repair has finished you will need to go on the manufacturer’s website of the device and download the latest drivers and updates that you know are compatible with Windows 8.1 or Windows 10 systems.
  14. Reboot the Windows 10 Technical Preview system once more.
  15. Check to see if the system boots up correctly without having to use the UEFI Boot feature you tried before.

Various Windows 10 boot problems

The solution above will surely fix booting malfunctions but keep in mind that you can have other boot-related issues. We also noticed that many users reported other problems. Here are the dedicated fix articles related to boot malfunctions in Windows 10:

We hope that you will find the right solution to your problem. If it is not here, try to search for it in our site’s search bar.

There you have it, a quick way on how to fix your Windows 10 Technical Preview if it is not booting correctly or you get a certain driver or update error while the system boots up. If you have any other additional questions related to this article please write us in the comments section of the page situated below and we will help you further with the support needed.

READ ALSO: Got the A2 boot error? You can fix it in 3 quick steps

Microsoft Pay picks up support for Masterpass by Mastercard

Microsoft Pay, the company’s solution for making online payments as safe and easy as possible has just picked up support for Masterpass by MasterCard. For those unfamiliar, Masterpass is a free digital wallet service that can store your shipping address and payment information to speed up the checkout process. Masterpass also supports credit and debit cards from other networks than MasterCard, while delivering the same extra layers of security provided by the company.

After linking their Microsoft account with Masterpass, consumers in the US will be able to quickly checkout with participating merchants, which can be identified by the above logo. There’s just one downside, this payment method is only supported on Microsoft Edge on Windows 10, unlike other payment methods like Paypal.

“We are always seeking to enhance our users shopping experience in a secure and simple manner and this latest release does that by leveraging the growing Masterpass network,” said Will White, partner group program manager at Microsoft. “We will continue to seek opportunities to enhance the shopping experience by leveraging standards and working with innovative partners like Mastercard.”

Unlock Hidden Windows 10 Features [How to]

Even though Windows 10 has been out for a while, many aren’t familiar with some of the hidden Windows 10 features.

These features aren’t as powerful as the ones from GodMode in Windows, but they still might be useful, so be sure to keep reading to find out more.

What is God Mode in Windows 10?

God Mode is a hidden shortcut in Windows that lets you access various hidden features. It allows you to see hidden settings in neatly organized categories for quick access.

All of these settings are available from Control Panel and other applets, but they are easier to access with God Mode.

How do I enable hidden Windows 10 features?

1. A complete redesign of the system tray clock/ the calendar

  1. Press Windows key + R and enter regedit.
  2. Navigate to HKEY_LOCAL_MACHINE\Software\Microsoft\Windows\CurrentVersion\ImmersiveShellimmersive shell windows registry
  3. Now on the right side right click on an open space.
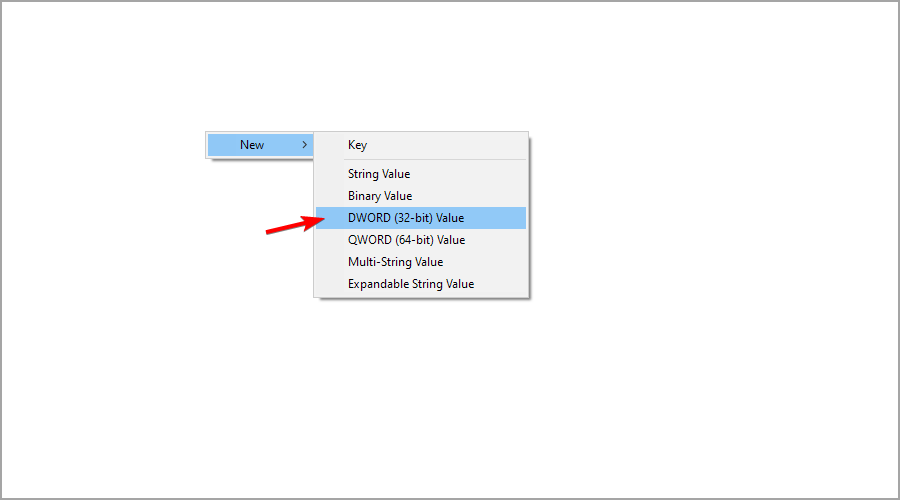
  4. Left-click or tap on the New option. Choose from the list DWORD(32-bit) Value.
  5. Name the DWORD as follows: UseWin32TrayClockExperience.
  6. Close the Registry Editor and reboot the system and you will have a new system tray clock and calendar.

Speaking of hidden features, we have a great guide on how to show hidden files on Windows, so you might want to check it out.

2. Unlock a new logon screen

  1. Open Registry Editor again.
  2. Head to HKEY_LOCAL_MACHINE\SOFTWARE\Microsoft\Windows\CurrentVersion\Authentificationwindows authentication registry editor
  3. Expand the Authentification key and go to LogonUI\TestHooks
  4. Now on the right side double-click on the Treshold key.
  5. Change the value for that key to 1.
  6. Save the changes and reboot the operating system and you are done.

To revert back to the old logon screen, change the value of the Treshold key to 0.

3. Switch back to a previous Start menu version

  1. Open the Registry Editor as you did in above.
  2. Head to HKEY_CURRENT_USER\Software\Microsoft\Windows\CurrentVersion\Explorer\Advancedwindows explorer advanced registry editor
  3. Now on the right-side panel right click on an open space and left-click on the New option and select DWORD (32-bit).
  4. Name the DWORD as follows: EnableXamlStartMenu.
  5. Restart your PC to apply changes.

After that, your Start Menu should change.

4. Change File Explorer from Quick Access to This PC

1. Change folder options

  1. Open the Options feature in File Explorer.change folder search options windows 10
  2. Choose the This PC option that is situated right next to Open File Explorer to.open file explorer to this PC
  3. Save your change and close the File Explorer.
  4. You should then have the This PC feature activated.

2. Modify the registry

  1. Open the Registry Editor window as you did above.
  2. Navigate to HKEY_CURRENT_USER\Software\Microsoft\Windows\CurrentVersion\Explorer\Advanced
     
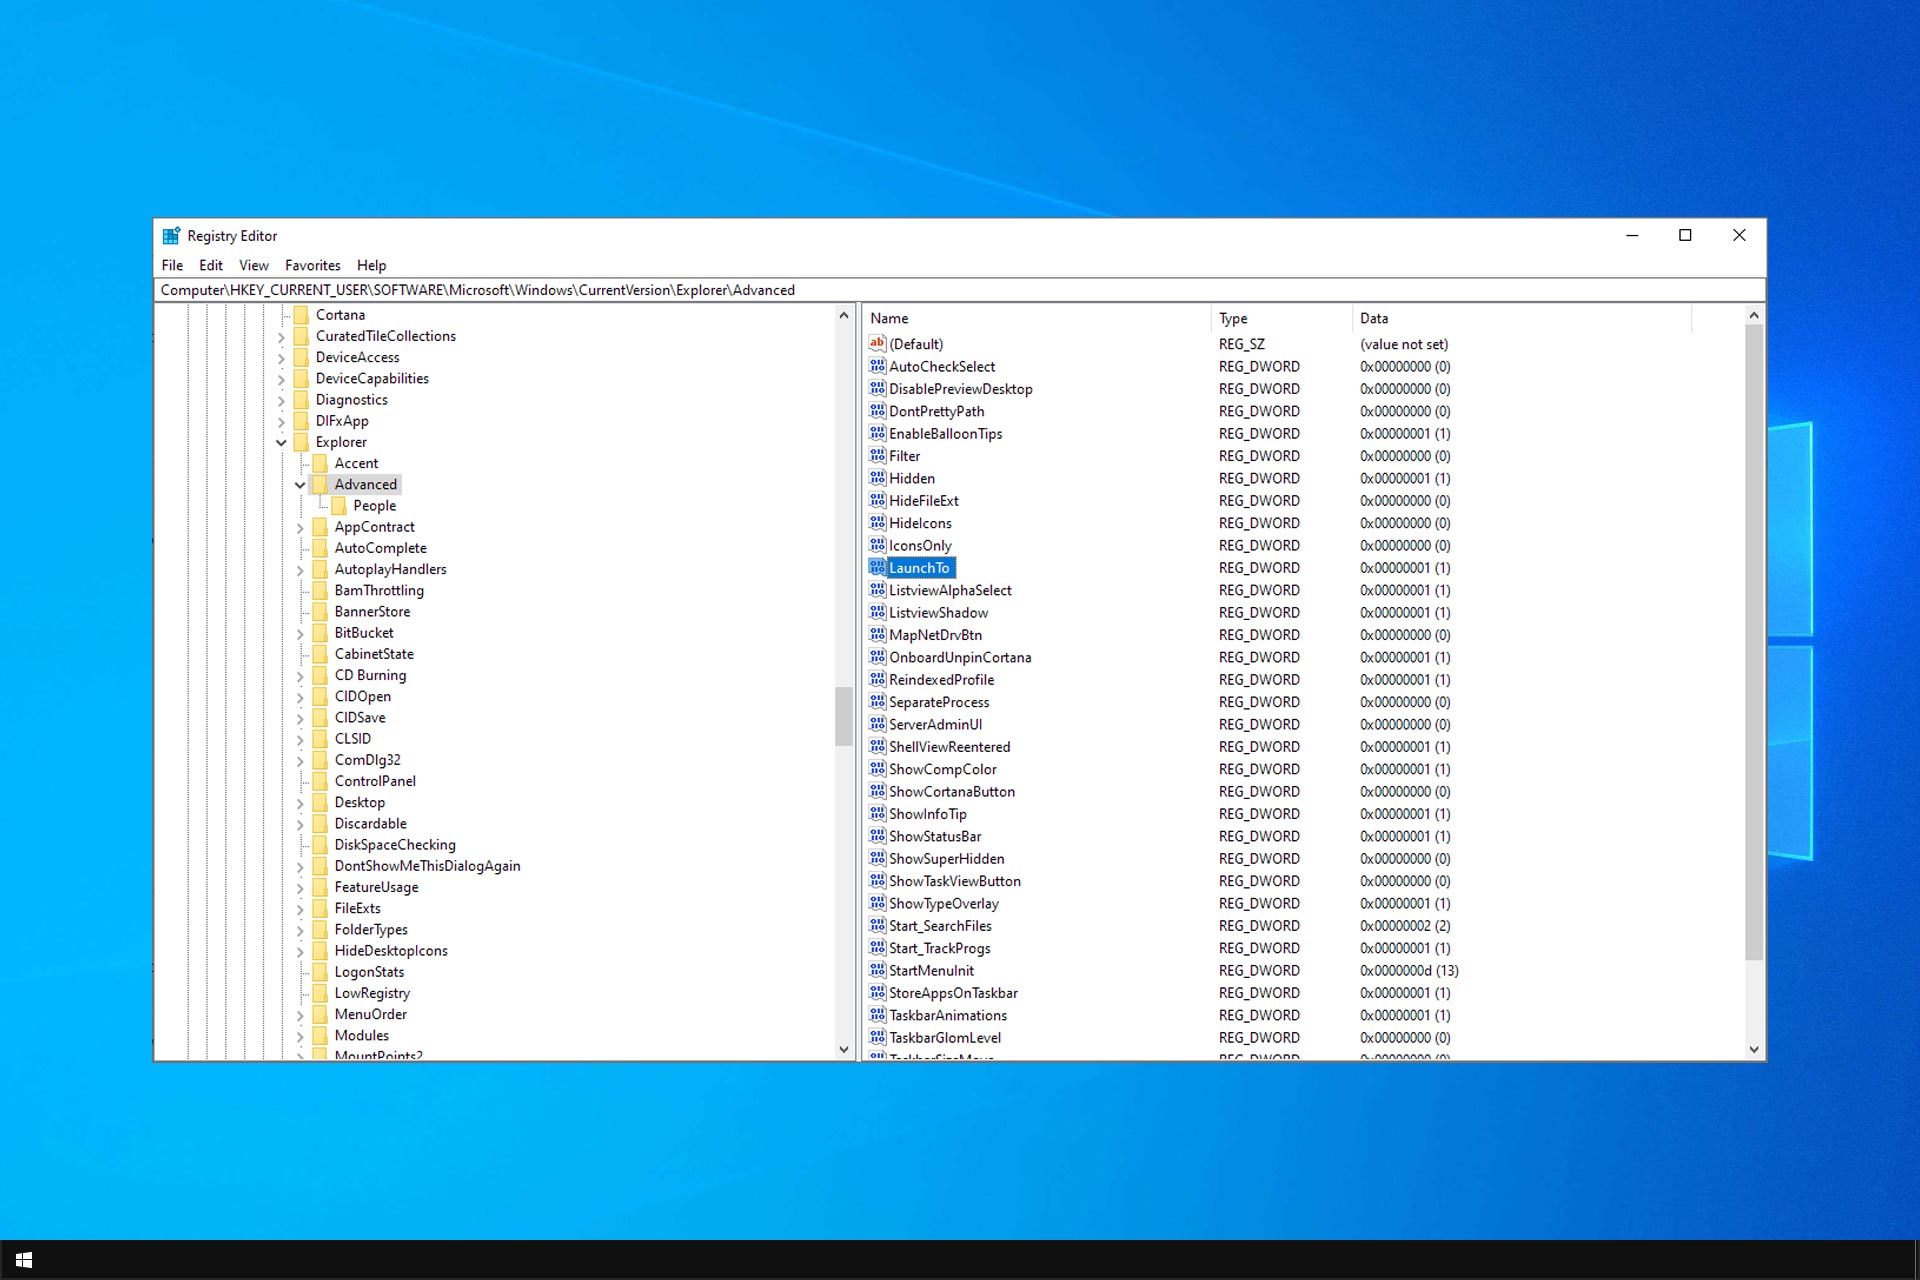
  3. On the right side pane, double-click the LaunchTo DWORD.
  4. Change the value of the LaunchTo DWORD to 1 in order to change the File Explorer to This PC view.
  5. Close the Registry Editor and check to see if File Explorer changed to This PC feature.

3. Control Cortana using your voice

  1. Click on the Cortana icon. open the hamburger menu and choose Settings.
  2. Enable the Let Cortana respond when you say Hey Cortana option.
  3. Save changes.
  4. You can disable the Search bar situated in the taskbar of your Windows 10:
  5. Right-click or tap on the taskbar.
  6. From the Search feature select the Hidden option.

After doing that, you’ll be able to use Cortana by voice.

4. Enable hidden Windows 10 features with Mach 2

  1. Download Mach 2 from GitHub.
  2. Run the software.
  3. Choose which features you want to disable.

To learn more, visit our guide on how to use Mach 2 to enable hidden features. Keep in mind that Mach2 is not an official Microsoft program

These are some of the most important and useful hidden Windows 10 features. Since these solutions require you to modify the registry, check our guide on how to undo registry changes.

If you want to share any additional information regarding this subject, please write us below in the comments section of the page.

Windows 10 for ARM Tablets: What are Microsoft’s Plans?

Seems that Microsoft has shown their plans for the ARM tablets and these are showing up to get to a promising conclusion. The ARM devices will still be supported by the new Windows 10 operating system but it will not be supporting the Microsoft Surface and Surface 2 tablets which run on the ARM Technologies Windows RT as these will not be available anymore in the Windows 10 systems.
Windows 10 for ARM Tablets
The ARM devices supported by the new Windows 10 that is yet to be released on the market as a stable operating system also include the ARM technology phones and the small tablets that are within the 8 inches range. The Windows 10 Technical Preview version has also not been released for phones but Microsoft is working hard to get this done in the shortest time possible.

ARM Tablets using Windows 10 operating system

The reason as for why the Windows 10 operating system will not be available for tablets larger than 8 inches is due to the fact that most of the hardware partners collaborating with Microsoft decided to stop activities on the low-power chips on tablets right after the year of 2012.

One of the top-selling partners as Lenovo also stopped selling the Windows RT products right after their initial launch and the reason as why they did this is simple; the new Intel chips simply took out the necessity of using the ARM-powered Windows tablets.

Dell is also one of the main contractors that interrupted the activities regarding the Windows RT tablets at the start of 2013 thus leaving Microsoft as the only company who still provided the Windows RT tablets.

Basically, it is safe to say that in the discussions had so far by Microsoft the new Windows 10 operating system will work on some ARM tablets but not larger than 8 inches. We will also have to wait for further announcements from Microsoft and see what else they have in plan for the ARM Technology tablets used on the market.

The Windows 10 Technical Preview will be released on the market for our Smartphone’s at the start of March 2015 but we will have to wait at least a couple of months more for a detailed explanation on the ARM tablets using Windows 10 and a fixed date on when it will be available but it will mainly be very close to the structure and interface used on the Windows 10 for Smartphone’s.

Windows 10 ARM devices and features [2018 update]

Here we come with some fresh information about Windows 10 ARM tablets: they are on their way! One of the first great ARM-based devices is the Lenovo Miix 630 which you can use as a tablet but also as a laptop. HP also released a great PC/tablet based on Snapdragon 835 and you can have a quick review of it here.

We also have to mention that Windows 10 on ARM runs x86 apps so that could cover a wide range of Chromebook devices powered by ARM processors. We have great news for those of you who want to use the old Win 32 apps on their ARM-based devices – they are supported by Windows 10 on ARM. Windows phones and Surface devices based on ARM are still in development but we will update our article as soon as some information is offered by Redmond giant.

So there you have it, folks, you now have some information on how and when Microsoft will release the Windows 10 operating system for the ARM tablets smaller than 8 inches as well as for the Smartphone’s we so love to use. If you have any other news on this subject or you have further questions you can ask us below in the comments section of the page and we will get back to you as soon as possible.

READ ALSO: Windows 10 on ARM gets tested on Raspberry Pi 3B [VIDEO]

Fix: Unable to Connect to Wi-Fi After Update [Windows 10/11]

How to fix Wi-Fi connection issues after updates in Windows 10?

  1. Disable and re-enable the driver
  2. Manually install WiFi driver
  3. Update drivers automatically
  4. Physically reset the router
  5. Run a system recovery
  6. Troubleshoot your internet connection
  7. Use commander

It seems that on a number of specific laptops and Desktop devices that are upgraded with the new Windows 8.1 or Windows 10 operating system the Wi-Fi connection suddenly stopped working.

Fix Unable to connect to Wi-Fi after updates Windows 8.1, Windows 10

Whether it was in the form of limited connectivity or unable to recognize the wireless network you will see by following the lines below how to solve the Wi-Fi connectivity and get your Windows 8.1 or Windows 10 up and running.

Basically, after the upgrade to Windows 8.1 or Windows 10 your Wi-Fi adapter drivers will suffer some issues and this is mainly because they are not compatible with the new operating system you installed.

We will check below in the device manager feature to see if the driver is operating as expected and if it is we will also going to make sure it is compatible with the system.

How to fix Wi-Fi connection after updates in Windows 10

1. Disable and re-enable the driver

  1. Right click on an open space from the start screen and left click or tap on the “All Apps” feature.
  2. Now under the “Windows System” topic left-click or tap on the “Control Panel” icon.
  3. From the Control Panel window left-click or tap on the “Hardware and Sound” option.
  4. Now from the Hardware and Sound window left-click or tap on the “Device Manager” feature.
  5. On the left side of the “Device Manager” window left-click or tap on the “Network Adapters” topic to expand it.
  6. Find your wireless adapter driver there and first check to see if it has a yellow exclamation mark beside it.
  7. Right-click or tap on the wireless adapter driver.
  8. Left click or tap on the “Disable” feature.
  9. Now right click again on the driver and left click on the “Enable” feature.
  10. Reboot the Windows 8.1 or Windows 10 device and check if the Wi-Fi works.
  11. If the Wi-Fi connection is still the same then go again to the Wireless adapter in the Device manager window.
  12. Right-click again on the driver.
  13. Left click or tap on the Properties option.
  14. From the Properties window left-click or tap on the Driver tab situated in the upper side of the window.
  15. Left click or tap on the Update Driver feature.
  16. Follow the instructions on the screen to finish the update.

2. Manually install Wi-Fi driver

  1. Download the latest Wi-Fi driver from the manufacturer’s website.
  2. Go to the executable file of the Wi-Fi driver after you completed the download.
  3. Right-click on the executable file of the driver.
  4. From the menu that pops up, you will need to left-click or tap on the Troubleshoot Compatibility feature.
  5. Left-click or tap on the Troubleshoot Program option.
  6. Now if the driver worked in the previous version of Windows you were using then check the box next to The program worked in earlier versions of Windows but won’t install or run now.
  7. Left click or tap on the Next button.
  8. Now check the box next to the previous version of Windows you know the driver worked.
  9. Left click or tap on the Next button.
  10. Now follow the instructions on the screen to finish the driver install.
  11. Reboot the Windows 8.1 or Windows 10 device after the installations are completed and check your Wi-Fi connectivity.

3. Update the drivers automatically

You may experience Wi-Fi not working in Windows 10 owing to outdated or faulty Wi-Fi drivers. So, if you are experiencing problems with Wi-Fi or other driver-related difficulties, you should install the most recent drivers or update those that are already installed.

Unfortunately, the manual update of the drivers is time-consuming and it’s not always successful, even after installing the correct piece of software.

That’s why we recommend a professional utility that will update and repair your drivers automatically and quickly with just a few clicks from your side.

This means you only need to install Fortect Driver Updater, and it will communicate with your PC to locate the necessary driver for your situation.

⇒ Get Fortect Driver Updater

4. Physically reset the router

  1. Unplug the Wireless Router from the power socket.
  2. Wait approximately one minute.
  3. Plug the wireless router back into the power socket.
  4. Reboot the Windows 8.1 or Windows 10 device and try connecting again to the Wi-Fi network to see if it works.

5. Run a system recovery

  1. Move the mouse cursor over to the upper right side of the screen.
  2. From the Charms bar that pops up left click or tap on the “Settings” feature.
  3. From the Settings window left-click or tap on the “Change PC Settings” feature.
  4. Left click or tap on the “Update and Recovery” feature.
  5. Left click or tap on the “Recovery” feature.
  6. Now you will have a “Refresh your PC without affecting your files” topic and under it you will need to left click or tap on the “Get Started” button.
    Note: This feature will not affect your files and folders so you won’t need to make a backup copy in order to proceed further with this step.

6. Troubleshoot your internet connection

  1. Move the mouse cursor over to the upper right side of the screen.
  2. Left click or tap on the “Search” feature situated in the Charms menu.
  3. In the search box write the following: “troubleshooting” without the quotes.
  4. After the search has finished left-click or tap on the “Troubleshooting” icon.
  5. Left click or tap on the “Network and Internet” feature.
  6. Left click or tap on the “Internet Connections” feature.
  7. Left click or tap on the “Advanced” button in the next window that pops up.
  8. In the “Internet Connections” window check the box next to “Apply repairs automatically” and left click or tap on the “Run as Administrator”.
  9. Left click or tap on the “Next” button to proceed.
  10. In the next window left-click or tap on the “Troubleshoot my connection to the Internet” feature.
  11. Left click or tap on the “Next” button to proceed.
  12. Follow the instructions on the screen to finish the troubleshooting and find out what exactly is causing issues with your Wi-Fi connection.

7. Use commander

  1. In Windows search box type cmd and right-click on it to open as administrator:open cmd as admin screenshot
  2. Enter this command in Commander (without the quotes): ‘reg delete HKCRCLSID{988248f3-a1ad-49bf-9170-676cbbc36ba3} /va /f’, and press Enter</li>
  3. After that, enter this command as well: ‘netcfg -v -u dni_dne’, and hit the <strong>Enter key</stron
  4. Restart your PC and check the connections available.

These are the simple steps you need to follow and fix your Wi-Fi connectivity issues in Windows 10. And if you happen to be the owner of an HP laptop, rest assured that troubleshooting HP laptop won’t connect to WiFi in Windows 11 is incredibly easy as well.

Please write us below in the comments section of the page if you need further assistance with the Wi-Fi connection and I will help you further as soon as possible.

Can’t Move Files on Your PC: 5 Methods That Will Help You

Windows is one of the most used operating systems in the world and is deemed straight and user-friendly. But as is the case with any operating system or device, it’s bound to throw minor issues every now and then. One such is when users can’t move files in Windows.

In some cases, users can copy but can’t move files or can’t drag and drop in Windows. All these problems are linked to similar underlying issues and, in most cases, can be easily fixed. Let’s find out!

Why can’t I move files in a folder?

Here are the reasons you can’t move files on desktop or in Windows Explorer:

  • Corrupt system files: A PC with corrupt system files will keep showing such signs and, in rare cases, crash with a BSOD error.
  • Issues with the user account: Sometimes, problems with the current user account, misconfiguration, or corruption, can lead to a situation where users can’t move files in Windows. Here, you should either repair the user profile or create a new one.
  • Missing permissions: When the problem is limited to a folder, and the file moving operation works great across the PC, it could be the permissions to blame.
  • Issues with the disk: Frequently, it’s an issue with the disk that triggers the error because Windows can’t read or select the file you are trying to move.
  • Conflicting third-party apps: For some users, it was a third-party app, often one for performance optimization, that led to the error.

What do I do if I can’t move files in Windows 10?

Before we start with the intricate changes, here are a few quick ones you should make:

  • Restart the computer.
  • In case you are facing the problem on a standard one, switch to an administrator user account.
  • Check for any prompt that might appear when moving files and choose the appropriate response. Also, minimize every open Window because these sometimes get hidden between the running apps.

If these don’t work, move to the fixes listed next.

1. Repair corrupt system files and check for disk issues

  1. Press Windows + S to open Search, type Command Prompt in the text field, and click on Run as administrator.cmd
  2. Click Yes in the UAC prompt.
  3. Paste the following commands individually and hit Enter after each to run the DISM tool:DISM /Online /Cleanup-Image /CheckHealth DISM /Online /Cleanup-Image /ScanHealth DISM /Online /Cleanup-Image /RestoreHealth
  4. Now, execute the following command for the SFC scan:sfc /scannowsfc scan to fix can't move files
  5. Next, use this command to run the Check Disk utility:chkdsk /f /r /xcheck disk to fix can't move files
  6. When asked, press Y and then hit Enter to confirm running the utility after a reboot.check disk
  7. Finally, restart the computer and wait for Check Disk to run.

The commands we are running here will help get rid of corrupt system files, as well as, fix issues with the disk. It may take up to an hour to complete the whole process.

2. Uninstall conflicting programs

  1. Press Windows + R to open Run, type appwiz.cpl, and click OK.appwiz.cpl
  2. Select the app installed around the same time the first appeared, and click Uninstall.uninstall to fix can't move files
  3. Follow the on-screen instructions to complete the process.
  4. Similarly, uninstall other apps that might be the underlying cause. You may have to remove a few before the problematic one is finally identified.
  5. Once done, check whether you still can’t move files or if the problem is resolved.

3. Take ownership of the folder

  1. Right-click on the folder which stores the affected file(s), and select Properties.properties
  2. Now, go to the Security tab, and click Advanced.advanced
  3. Click on Change.change
  4. Enter the currently active user account name, click on the Check Names button, and then OK.check names to fix can't move files
  5. Now, tick the checkbox for Replace owner on subcontainers and objects and Replace all child object permission entries with inheritable entries from this object, and then click on Apply.replace owner to fix can't move files
  6. Click Yes in the confirmation prompt.yes
  7. Click OK.
  8. One in the Properties, click on Edit.edit
  9. Click the Add button.add to fix can't move files
  10. Again, enter the same user account name you added earlier, click Check Names, and then OK.account name
  11. Finally, select the account you just added, make sure it has full permissions, and click OK to save the changes. full permissions to fix can't move files

In some cases, when the permissions are to blame for the problem, taking folder ownership might help get things running when you can’t move files in Windows 11.

4. Create a new user account

  1. Press Windows + R to open Run, type netplwiz in the text field, and hit Enter.netplwiz
  2. Now, click the Add button.add
  3. Choose Sign in without a Microsft account (not recommended).without microsoft account
  4. Click the Local account button.local account to fix can't move files
  5. Enter the details for the account, i.e., username and password, and click Next.account details
  6. Verify the details and click Finish.create account to fix can't move files
  7. Select the account you just created, and click Properties.properties
  8. Navigate to the Group Membership tab, select Administrator, and click OK.administrator account to fix can't move files

Finally, sign in with the new user account and check whether you can now move the files. If yes, transfer all the data from the previous user account to the new one and use it as the primary account from here on.

5. Perform an in-place upgrade

  1. Go to Microsoft’s official website, choose the desired edition from the dropdown menu, and click Download.download
  2. Choose your preferred language and click on Confirm.language
  3. Click on the download link available here.iso to fix can't move files
  4. Double-click the ISO file you downloaded, and click Open.open
  5. Run the setup.exe file.setup.exe to fix can't move files
  6. Click Yes in the UAC prompt.
  7. Click on Next to proceed.next
  8. Now, click Accept to agree to the license terms.accept
  9. Make sure the setup reads Keep personal files and apps, and click on Install.in-place upgrade to fix can't move files

That’s it! If the previous solution didn’t work, an in-place upgrade would help fix things when you can’t move files in Windows. And the best part, the process won’t affect the stored data, and the files and apps will remain as it is.

If you are interested, check our curated list of the best file managers for Windows and get one to keep such issues at bay.

For any queries or to share the solution that worked for you, drop a comment below.

Windows 10 news recap: iFixit slams Surface Go’s repairability with 1/10, myTube gets a huge update, and more

Welcome back to our Windows 10 news recap, where we go over the top stories of the past week in the world of Microsoft’s flagship operating system.

It’s been out one day, but iFixit already has a full teardown of the Surface Go

Microsoft’s Surface Go only released this weekend, but already iFixit has released its teardown of Microsoft’s latest Surface product. In its teardown, it slams the repairability of the device, owing to the amount of tape, hidden screws, and adhesive, giving it an overall repairability of just 1/10.

Windows YouTube client myTube gets a big update, includes Windows Timeline support

myTube, a third-party YouTube app for Windows, has received a large update that adds Windows Timeline support, as well as a number of other new features and changes:

  • Added myTube Rooms (beta), which allows you to watch videos together and chat with friends
  • Added Private Mode to settings, which prevents watched videos from being recorded to history or the Windows Timeline
  • Reduced memory usage of the WebView player after it’s finished being used
  • Added Theatre Mode
  • Watched videos are added to the Windows timeline
  • Zoom in animation on thumbnails when moused over
  • (PC & Mobile) Added playlist history to history page
  • (PC & Mobile) Added individual video tile pinning
  • (PC & Mobile) Added small size template to live tiles
  • (PC & Mobile) Added “Up next” experience to the end of videos (same as on Xbox)
  • (PC & Mobile) Slightly modified layout for account section
  • (PC & Mobile) Fixed bug that caused the comment section header to sometimes have the title of the video, instead of “Comments”
  • (PC & Mobile) Fixed issue where the text selection highlight wasn’t visible in the search box

Windows phone Telegram app updates with major new Telegram Passport feature

Telegram for Windows phone has been updated to add Telegram’s new Passport feature. Passport is a method of storing personal information and identity documents in the cloud so that you can securely carry them around with you.

Telegram Passport

Windows Community Toolkit hits 1 million downloads on GitHub

The Windows Community Toolkit, which helps developers build UWP apps for any Windows 10 device, has recently hit 1 million downloads on GitHub. Microsoft now promises further feature updates following the milestone.

That’s it for this week. We’ll be back next week with more Windows 10 news!

Microsoft news recap: Bing Maps lets you build your own travel itineraries, $99/year Xbox Game Pass appears on Microsoft Store, and more

Microsoft news recap is a weekly feature highlighting the top Microsoft news stories of the past week. Sit back, grab some coffee, and enjoy the read!

Build your own custom travel itineraries with Bing Maps

Bing Maps now lets you build out your own travel itineraries. Through conversational actions, you can create a new itinerary and add/remove activities from it. Below are some of the features included:

  • Add the attractions you want to visit
  • Remove or re-order attractions to optimize your day
  • Add or remove days to fit your schedule
  • Save your itinerary to My Places for future editing
  • Share your itinerary with friends and family
  • Take your itinerary on the go – view it on your mobile phone

New $99/year Xbox Games Pass subscription appears on the Microsoft Store

Those of you interested in Xbox Game Pass, it looks as though Microsoft has added a new subscription length, a yearly subscription, at $99/year. No more worrying about monthly payments for Microsoft’s game subscription service. The annual pass provides a small saving compared to if you were to pay monthly.

Xbox One’s new Sport White Controller is now available to buy

Featuring a custom design and rubberised grip, Microsoft’s new Sport White Controller for the Xbox One and Windows 10 PCs is now available to purchase, offering a spectacular-looking white design.

Xbox Wireless Controller – Sport White Special Edition

Microsoft awards grants to expand rural broadband access in five states

This years winners of Microsoft’s Airband Grant Fund have been announced. The fund aims to expand rural broadband, this time across five states.New York, West Virginia, California, Maine, and Texas all won funding.

Microsoft Logo New

That’s it for this week. We’ll be back next week with more Microsoft news.

FIX: Cannot connect external monitor to Surface Pro 3 laptop

How can I do if my external monitor won’t connect to Surface Pro 3?

  1. Update your OS
  2. Uninstall display drivers
  3. Run the display driver in compatibility mode
  4. Run the built-in troubleshooter
  5. Check your VGA/ HDMI cord

Have you tried connecting an external display on your Surface Pro 3 device using Windows 10? Well, if you have issues connecting it, read the tutorial below to learn what you can do to fix this issue and get your Surface Pro 3 with Windows 10 running in just five minutes of your time.
How to fix external display adapter using Windows 10 with Surface Pro 3 deviceThe display issues usually occur when one or more Windows 10 updates are not installed. So, in this tutorial, we will check if the updates you installed so far are the latest ones. If not, you will learn how to bring your Windows 10 to the latest version available and this fix your external display on your Surface Pro 3 device.

What to do if Surface Pro 3 won’t connect to external display

1. Update your OS

  1. Check the Windows Update feature of your Windows 10 computer to see if there are any available updates that need to be installed.
  2. If there are any, please start the update process by following the on-screen instructions and reboot your Windows 10 system after they have installed correctly.

2. Uninstall display drivers

Note: You will need to have the setup file of your display driver in order to proceed with this step below.

  1. Press and hold the button “Windows” and the button “R”.
  2. You now have the “Run” window in front of you.
  3. In the run box write the following: “devmgmt.msc” without the quotes.
  4. Press the “Enter” button on the keyboard or just left click or tap on the “OK” button.
  5. You now have the “Device manager” window in front of you.
  6. On the left side panel in Device Manager, left click to expand the “Display Adapter” topic.
  7. Right click on the display driver you are using.
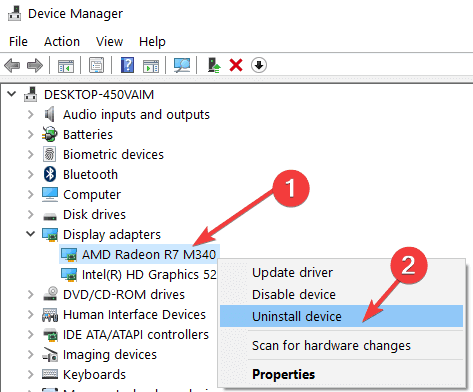
  8. Left click or tap on the “Uninstall” feature.
  9. After the driver has uninstalled, please reboot your Windows 10 operating system.

3. Run the display driver in compatibility mode

  1. When the Windows 10 OS has started again, please go to the directory where you have the display adapter setup file > right click on it.
  2. From the menu that pops up, you will need to left click or tap on the “Properties” feature.
  3. Left click or tap on the “Compatibility” tab situated in the upper side of the Properties window.
  4. From there you will need to select the operating system on which the external display worked for you (perhaps Windows 8.1 or Windows 10).
  5. Left click or tap on the “Apply” button after you chose the operating system.
  6. Left click or tap on the “OK” button to close this window.
  7. Follow the instructions on the screen to finish the installation process.
  8. After you successfully installed the driver please reboot your Windows 10 operating system.
  9. When the device starts check to see if the external display is working on your Surface Pro 3 device.

4. Run the built-in troubleshooter

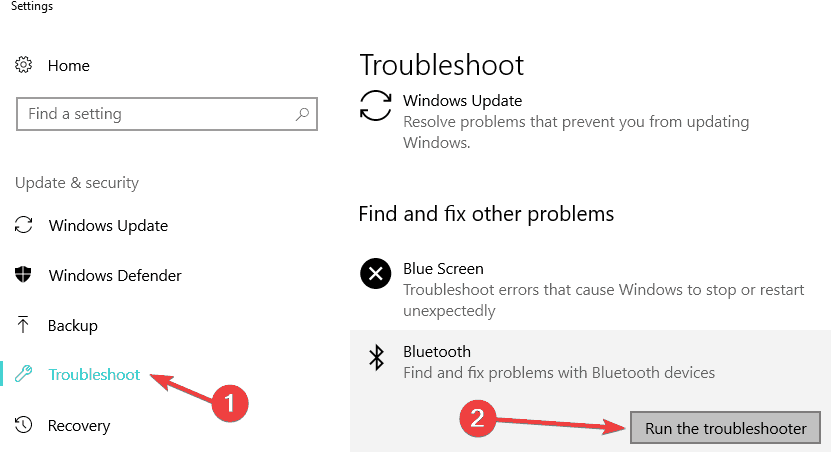
If you use a  Bluetooth connection to connect your external display to your computer, you can run the Bluetooth Troubleshooter. If the issue persists, you can also run the Hardware and Devices troubleshooter as well.

bluetooth troubleshooter windows 10

5. Check your VGA/ HDMI cord

If you use a cable to connect your external display to your computer, make sure that the respective cable is not faulty. You can replace with a different cable to check if the problem persists.

There you go, these are a few easy steps to get your external display up and running on your Windows 10 computer. If you have any other questions regarding this article, you can write us in the comment section below and we will help you further as soon as possible.

RELATED STORIES TO CHECK OUT:


Fix Windows Host Process using too much CPU

How can I fix Windows Host Process high CPU usage?

  1. Run a PowerShell script
  2. Install a software to fix high CPU usage
  3. Clean boot your computer
  4. Scan your computer for malware/virus infections

It seems that more and more users are having issues with their Surface Pro 3 devices running various Windows 10 OS versions. One of the main issues is the host process for the “Synchronization” setting. In most of the cases, it uses around 25 % or 30 % of the CPU on the Surface Pro 3 device. Following the instructions below, you will most certainly get your host process for setting synchronization  fixed in Windows 10 so you don’t have to worry about the high CPU usage of the device.
Fix Host Process for Setting Synchronization High CPU (Windows 10)Most of Windows 10 users have tried turning off the Synchronization feature in the system. Unfortunately, this is only a temporary solution because it will pop up again after just a couple of minutes. In the tutorial below, we will implement a script that will check for the Synchronization feature inside your system and every time it pops up this script will shut it down. Note that this is only a temporary solution but is the only one we have until Microsoft updates Windows 10  system and prevent this from happening again.

SOLVED: Host process causes high CPU usage in Windows 10

1. Run a PowerShell script

  1. Right click or hold tap on an open space in your Windows 10 desktop.
  2. Left click or tap on the “New” feature present in the menu.
  3. From the “New” sub-menu left click or tap on the “Text Document”
  4. Now that you have created the text document, you can name it as you wish. For example: “High CPU Fix”
  5. Double click to open the new text document that you made.
  6. In the text document, please copy paste the lines presented below in bold:
  7. Get-ScheduledJob | ? Name -eq “Kill SettingSyncHost” | Unregister-ScheduledJob
    Register-ScheduledJob -Name “Kill SettingSyncHost” -RunNow -RunEvery “00:05:00” -Credential (Get-Credential) -ScheduledJobOption (New-ScheduledJobOption -StartIfOnBattery -ContinueIfGoingOnBattery) -ScriptBlock {
    Get-Process | ?{ $_.Name -eq “SettingSyncHost” -and $_.StartTime -lt ([System.DateTime]::Now).AddMinutes(-5) } | Stop-Process -Force
    }
  8. Left click or tap on the “File” button situated in the upper left side of the text document.
  9. From the “File” menu left click or tap on the “Save As” feature.
  10. Now right, next to the “File Name” option, you will need to delete the “.txt” extension of the folder and instead write the following: “.ps1” without the quotes.
  11. Left click or tap on the “Save” button situated in the lower side of the “Save As” window.
  12. Now go on your desktop where you saved the file and right click or hold tap on it.
  13. From the menu that pops up, you will need to left click or tap on the “Run with PowerShell” feature.
    Note: You will need to have administrative privileges to be able to run this script so be sure to be logged in with your administrator account.
  14. After the script has finished, the process you will have to check the Synchronization process if it is still active.
  15. If the process is still active, please reboot your Windows 10 OS and run again the PowerShell script as you did above.

2. Install a software to fix high CPU usage

If the problem persists, you can also install a dedicated software to fix high CPU problems. We already compiled a list of the best tools to use in order to fix high CPU usage issues. Read the description of each tool and download the one that suits your needs.

3. Clean boot your computer

Using this method, you’ll boot up your computer using only a minimum set of programs and drivers.

  1. Go to Start > type msconfig > hit Enter
  2. Go to System Configuration > click on the Services tab >  check the Hide all Microsoft services check box > click Disable all.hide all microsoft services
  3. Go to the Startup tab > Open Task Manager.
  4. Select each startup item > click Disable > close Task Manager > restart the computer.disable startup programs windows 10

4. Scan your computer for malware/virus infections

High CPU usage may also be triggered by malware or virus infections. You can run a full system antivirus scan using Windows 10’s built-in antivirus software or a third-party antivirus solution.

This is all you have to do in order to fix your CPU high usage for the Surface Pro 3 device running the Windows 10 operating system. We will get back to you as soon as Microsoft has released an update that will solve this issue. You can write us in the comments section below,  if you have any further questions. We will help you as soon as possible.

RELATED STORIES TO CHECK OUT:


FIX: AMD Drivers Disabled after Windows 10 update

My PC disabled AMD drivers, how do I fix it?

  1. Uninstall AMD driver
  2. Run AMD driver in compatibility mode
  3. Change Boot options
  4. Delete AMD driver and AMD Catalyst from Control Panel
  5. Roll back to a previous OS version
  6. Additional solutions

If you are one of the users who upgraded their operating system to a newer Windows 10 version, you might have experienced some issues regarding the graphics driver. You can fix AMD driver issues after installing the latest Windows 10 updates by following the steps listed below in the order they are described. This will take you no more than ten minutes of your time.
So even though you have the latest AMD graphics drivers installed, usually after a reboot, the Windows 10 operating system will either tell you that the drivers are not compatible with the OS or they cannot be installed properly. You will also be surprised to hear that for the previous Windows 10 version, these drivers work quite well.

How to fix AMD drivers in Windows 10

1. Uninstall AMD driver

  1. Press and hold the buttons “Windows” and the “R” button.
  2. You now have the Run window in front of you.
  3. Write in the run dialog box the following : “devmgmt.msc” without the quotes.
  4. Press the Enter button on the keyboard.
  5. Now the Device Manager Windows is in front of you.
  6. On the left side, you will have to search for the Display adapter driver.device manager display drivers
  7. After you found the driver, right click or hold tap on it.
  8. From the menu that pops up, left click or tap on the “Properties” feature.display driver properties
  9. In the Properties window, left click or tap on the “General” tab.
  10. Check in the General tab dialog box for any errors you may get on this driver, they should be pretty straight forward and tell you exactly what is the cause of the driver failure.
    Note: Even if you get error messages or you do not, proceed with the steps below.
  11. Left click or tap on the “Driver” tab situated in the upper side of the Properties window.
  12. Left click or tap on the “Uninstall” button situated in the Drivers tab.uninstall AMD driver device manager
  13. Now close the Device manager window after the uninstall process has finished.
  14. Reboot your Windows 10 Technical Preview system.
  15. After the device starts check to see if your display is working as intended with the build-in model for the display adapter.

A faster solution would be to use an automatic uninstaller, that deletes any trace of unwanted programs. We recommend this type of program because it has built-in tools that remove all the junk files left behind in your system. It can perform an in-depth clean-up and keep your OS in optimal condition.

2. Run AMD driver in compatibility mode

  1. Go to the directory where you have the setup file of the latest AMD driver.amd install folder windows 10
  2. Right click on the setup installation file of the AMD driver.
  3. Left click or tap on the Properties feature from that menu.
  4. Left click or tap on the “Compatibility” tab situated in the upper side of the “Properties” window.
  5. Left click or tap on the “Run this program in compatibility mode for:” feature.
  6. From the drop down menu choose the operating system where you know this driver worked without issues.
  7. Left click or tap on the “Apply” button.
  8. Left click or tap on the “OK” button.
  9. Follow the instructions on the screen to finish the driver installation process.
  10. Reboot the Windows 10 Technical Preview system after the installations has finished.
  11. When the device starts check to see if your AMD driver works without issues in your Windows 10 operating system.

3. Change Boot options

  1. Reboot the Windows 10 system.
  2. When the operating system starts keep the “Esc” button or the button that you use to enter the BOOT options in Windows 10.
  3. Change the Boot options to EFI + legacy feature.boot options BIOS
  4. Start the operating system.
  5. Install the AMD display drivers by right clicking on the Setup file.
  6. Left click or tap on the “Run as Administrator” feature.
  7. Follow the instructions on the screen to finish the installation of the driver.
  8. Reboot the Windows 10 Technical Preview again and be sure to have the EFI-Legacy feature activated.
  9. Check again for the driver issue and see if it reacts the same.

4. Delete AMD driver and AMD Catalyst from Control Panel

  1. Press and hold the “Windows” button and the “R” button.
  2. In the run dialog box write the following: “devmgmt.msc” without the quotes.
  3. Press the Enter button on the keyboard.
  4. Now from the Device Manager, locate the display driver you have installed.
  5. Check the box next to “Delete the driver software for this device”.
  6. Right click on the driver and left click or tap on the “Uninstall” button.uninstall AMD driver windows 10
  7. Follow the instructions on the screen to finish the uninstall process.
  8. Open the Control Panel window.
  9. Left click or tap on the “Programs and Feature” option.uninstall program control panel
  10. Uninstall from there the AMD driver and AMD Catalyst Control Center.
  11. Left click or tap on the “View Installed Updates” feature.
  12. Uninstall the “KB3036140” update from Microsoft.
  13. Reboot the Windows 10.
  14. When the device starts open the Settings feature in your Windows 10.
  15. Left click or tap on the “Check for Updates” feature in the Settings window.
  16. Install all the updates available there.
  17. Reboot the Windows 10 computer again and see if everything works now.

5. Roll back to a previous OS version

Seeing that most of the users affected by this issue are Insiders running new Windows 10 Technical Preview builds, we suggest you roll back to a previous build in order to solve your issue if the steps above did not work. The same is valid for non-Insiders. You can use System Restore in order to roll back to a previously working version of Windows 10.

Another solution to this issue is to upgrade your Windows 10 Technical Preview build to the latest version – if you haven’t already. The latest Insider builds usually bring fixes for all the major issues affecting previous releases, so maybe this quick workaround will help you fix your AMD driver issue.

6. Additional solutions

If the issue persists, here is some additional workaround that you can apply:

  • Disable/ Uninstall overclocking software — If you use specific tools to increase your CPU/GPU performance, temporarily disable them and check if this solved the problem.
  • Temporarily disable antivirus software — In rare cases, your antivirus software may trigger various app and software issues, including AMD driver problems. Make sure that your antivirus solution is not the culprit. Temporarily disable it, reboot your computer and check if the AMD driver is available on the list.
  • Roll back your driver — Some users confirmed that rolling back their AMD drivers fixed this problem.

That’s it, folks, these are a few methods that will get your AMD drivers up and running on your Windows 10 operating system. Also if you have other questions related to this article, please let us know by posting a comment below.

Halo MCC prepares for next big update and Xbox Game Pass

343 Industries is making good progress on the incoming update for Halo: The Master Chief Collection, the anthology released on the Xbox One back in 2014. Over the past couple of months, the developer opened the Halo: MCC Insider program to test various updates with beta testers, including 4K enhancements for the Xbox One X, matchmaking improvements, and a new “intelligent delivery” system to only download parts of the game you really need.

All Halo: MCC Insiders can now download to the latest beta update (access is provided through the Xbox Insider Hub), which includes all MCC in its current state except the Halo 3: ODST DLC. If everything goes well, 343 Industries said yesterday that the first big patch could be generally available very soon:

Assuming ongoing work progresses as planned and the expanded MCC Insider Flights perform as expected, the team is closing in on the official release of the first significant patch for retail MCC. We can’t quite announce that date yet – but we’re in the home stretch and quickly closing in on that huge milestone.

The Halo developer is waiting for this first retail update to ship to reveal when Xbox Games Pass subscribers can expect to see the anthology land in the catalog. “We’ll have more details to share here soon but final timing is still pending the current flight and overall status for the retail patch itself,” 343 Industries noted.

Last but not least, the Halo: MCC Insider program will also live on once the public version of the game gets patched in the coming weeks. “We’re still working through some of the final details but a persistent “test realm” is going to live alongside the retail product where the team will continue working and iterating,” the developer said yesterday.

Quick Search Not Working Windows 10: 4 Ways to Turn it on

The ability to search for files is crucial, but many reported that quick search is not working in Windows 10. This can be a problem, but this issue differs greatly from the File Explorer search not working that we covered.

In today’s guide, we will show you the best ways you can fix this problem on your PC, so let’s get started, shall we?

Why is Windows Quick Search not working?

  • Third-party applications might be interfering with the search process.
  • File corruption can prevent this search from working properly.
  • Glitches with the File Explorer can cause this and many other issues.

How can I fix Quick Search if it’s not working on Windows 10?

1. Run a selective startup

  1. Press and hold the Windows button and the R button. Enter msconfig and click OK.
  2. Left click or tap on the Services tab. Check the Hide all Microsoft services and click the Disable All.
  3. Go to the General tab and select Selective Startup feature. Uncheck the box next to Load Startup items.
  4. Click Apply and OK and restart your PC.

If the issue doesn’t appear, you need to enable disabled services one by one until you find the one that is causing the problem.

2. Run an SFC scan

  1. Press Windows key + X and choose Windows PowerShell (Admin).
  2. Run the following command: sfc /scannow
  3. Let the System file checker finish the process.
  4. After the process has finished, restart your PC.

3. Use the Windows Feedback app

  1. In the search box in Windows, you will have to enter feedback.
  2. Left click or tap on the Feedback Hub application.
  3. From the Windows Feedback application, you can follow the instructions on the screen and explain your issue regarding the Instant search feature of Windows 10.

This isn’t the most reliable method, but at least with it Microsoft will be aware of the problem and hopefully fix it in future versions.

4. Restart Windows Explorer

  1. Press Ctrl + Shift + Esc to open Task Manager.
  2. Now find Windows Explorer, right-click on it, and select Restart.
  3. Wait until all disappear from the screen and come back. Check if the search feature works.

If the quick search is not working on Windows 10, these steps should help you fix the issue.

There are many search-related issues you can encounter, and one of them is the inability to type in Search bar, but we covered that in a different guide.

What method did you use to fix this problem? Let us know in the comments section below.

Full Fix: Dell Venue 8 Pro Driver Bluetooth Issues in Windows 10

Have you installed Windows 10 Technical Preview operating system on your Dell Venue 8 Pro device? It seems that some of the users that have the Dell Venue 8 Pro running Windows 10 have run across some driver installation issues.

The most common of them is the error STATUS_DEVICE_POWER_FAILURE brought by the Bluetooth feature but you can rest assure because in the tutorial posted below you will find out what to do in order to fix your Dell Venue 8 Pro drivers and use your Windows 10 in no time.
Dell_Venue_8_Pro_Driver issues in Windows 10
In order for the tutorial to work you will also need to sign in to the Windows Insider Program to download the ISO file of the Windows 10 Technical Preview from there and update some necessary drivers to the system and because the Windows 10 Technical Preview system is not yet a stable version you should not expect everything to be working properly the first time around.

Dell Venue 8 Pro driver issues on Windows 10: how to fix them?

  1. Left click or tap on the link posted below
  2. Click here to go to Windows 10 Insider Program
  3. Now that you are in the Windows Insider Program page, you should be able to see and select the “Get Started” purple button.
  4. Follow the instructions on the screen to finish the registration process.
  5. Download the ISO file for Windows 10 Technical Preview from the site after you registered.
  6. Double click to open the “programs” folder on your device.
  7. Now double click or tap on the “dell” folder.
  8. Search for “My Dell” and double-click on it to open.
  9. Now search for “Drivers & Updates” feature and left click or tap on it.
  10. From there you will need to download and install all available updates for your machine.
    Note: Be sure to download and install the Network drivers because this is the main reason why you get the STATUS_DEVICE_POWER_FAILURE on your Bluetooth.
  11. Go to the directory where you downloaded the Windows 10 Technical Preview ISO file.
  12. Open the Folder and search for the “Setup.exe” file.
  13. Right click on the “Setup.exe” file from the Windows 10 folder and left click or tap on “Run as Administrator”.
    Note: This will not work if you do not run it as administrator.
  14. Now follow the instructions on the screen to finish the installation of your Windows 10.
  15. After the Windows 10 Technical Preview has installed press and hold the “Windows” button and the “R” button.

  16. You should have the “Run” window in front of you.
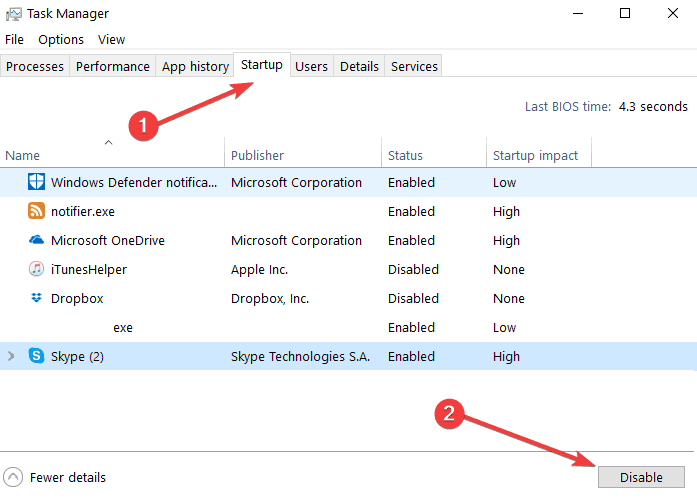
  17. Write in the run dialog box the following: “devmgmt.msc” without the quotes.
  18. Press the “Enter” button on the keyboard.
  19. Now you have the “Device Manager” window in front of you.
  20. On the left side in the Device Manager you will need to search to see if you have all the drivers installed properly.
    Note: If you have an exclamation mark beside them then that driver is not installed properly and you need to proceed with the steps below.
  21. Search in the directory where you installed the Operating system and to be more exact the Deployment Driver files.
  22. In the folder above look for the “package.xml” file.
  23. Now open it in a Notepad folder or any kind of text editor.
  24. In the “package.xml” file you will have to search for ‘majorVersion=”6”’ entries and replace the “6” number with “7”.
  25. Search for every entry with the name ‘minorVersion=”2”’ and delete it.
  26. Now save the “package” file in the same directory as the other one was.
  27. From the same directory that you are in search for “Setup.exe”
  28. Right click on it and left click or tap on the “Run as Administrator” feature.
  29. After the process has finished reboot your device.
  30. Now open the “Drivers” folder in Windows.
  31. From the “Drivers” folder double click to open the “production” folder.
  32. From the “production” folder double click to open the “Windows8.1×86”
  33. From “Windows8.1×86” folder double click to open the “BlueTooth–Driver” folder.
  34. Search for the “qcbtuart.inf” file.
  35. Right click on it and left click or tap on Install.
  36. After the driver has installed reboot your device.
  37. When the Windows operating system starts you will probably see on the task-bar the installation of the Bluetooth drivers.
  38. Press and hold the “Windows” button and the “R” button again.
  39. In the run dialog box write the following: “devmgmt.msc” without the quotes.
  40. Press the “Enter” button on the keyboard.
  41. Now in Device Manager look on the left side if you still have the Bluetooth driver with an exclamation mark just to make sure it has installed correctly.

Status_device_power_failure error: specific fix

This error may be fixed by using other solutions. Before trying a complicated procedure, we would suggest you to check the solutions from our ‘status_device_power_failure’ fix article:

– Check for Windows 10 system updates. They might fix this error;
– Remove a recent update as it can be the cause;
– Update all drivers

That’s all you need to do and fix your Bluetooth driver on your Dell Venue 8 Pro using the Windows 10 Technical Preview system. You can write us below in the comments section of the page if anything is unclear or if you need more help regarding this issue and I will help you as soon as possible.

READ ALSO: Bluetooth Not Recognized in Windows 10, 8 on BootCamp [FIX]

Chrome 68 reduces browser RAM utilization for faster performance

Google rolled out a new Chrome beta version. Chrome 68 is the latest beta release of Google’s flagship browser that incorporates new APIs. The latest beta version includes a new API that reduces Chrome’s RAM utilization.

Google Chrome might be one of the fastest web browsers, but it also hogs a lot of RAM when you open lots of tabs in it. Thus, opening lots of tabs in Chrome can slow down the browser quite a bit. It is a bloated browser that utilizes more RAM than many of the alternatives. So Chrome is not ideal for lower specification laptops and desktops.

Google announced the Chrome 68 beta on the Chromium Blog, which is a more system resource efficient version of the browser. That is largely due to Chrome 68’s new Page Lifecycle API which enhances system resource optimization. That API enables the browser to pause inactive page tabs and then restart them when needed. Thus, Chrome can discard inactive pages to reduce tab RAM consumption. A Google engineer stated:

Modern browsers today will sometimes suspend pages or discard them entirely when system resources are constrained. In the future, browsers want to do this proactively, so they consume less power and memory. The Page Lifecycle API, shipping in Chrome 68, provides lifecycle hooks so your pages can safely handle these browser interventions.

Mozilla also plans to reduce Firefox’s system resource utilization. Mozilla has established Project Fission to minimize Firefox’s RAM utilization. Fission MemShrink is a big aspect of Project Fission that Mozilla hopes will cut its flagship browser’s RAM usage by at least seven MB. This newsletter page provides further details for Fission MemShrink.

So both Google and Mozilla are refining their browsers to enhance their system resource efficiency. Chrome might become a much more system resource efficient browser with the Page Lifecycle API. You can add Chrome 68 to Windows, macOS and Linux platforms from this webpage.

Microsoft launches Surface Go today in the US and Canada, says it’ll save you more time at work compared to Apple devices

After an unceremonious reveal last month, the Microsoft Surface Go is now officially available for purchase at the Microsoft Store and other major retailers in the in the US and Canada. Availability in other markets will come on August 28th, but you can now grab either a model with a 64 GB eMMC drive and 4GB RAM for $399, or an 128GB model with 8GB RAM for $549 at Microsoft (Type Cover and Pen sold separately). There’s even a variant with 4GB RAM and 128GB SSD and Type Cover bundle at Costco.

To mark the availability, Microsoft’s Yusuf Mehdi, Corporate Vice President, Windows and Devices Group, took to a blog post this morning. He penned the Surface Go as an “important inflection point in our Surface journey,” mentioning Microsoft’s pioneering of the 2-in-1 category. Interestingly, he also cited a Microsoft-commissioned Prowess study which shows that Surface is better than Apple devices for work.

According to Mehdi:

Surface devices are great for work and are proven to save you more time vs using an Apple device…. People using Surface devices consistently perform tasks faster, more easily, and in fewer steps than those using Apple devices. When a 200-employee company uses Surface Pro instead of iPad Pro for teaming, they save more than 72 workdays per year.

Mehdi goes on to mention some additional Microsoft Research which looked at the consumer relation which technology. He claims their research shows that people are conflicted about how devices fit into lives, frustrated by the limits of their tablets, and want devices associated with productivity. He adds:

This data reinforces the trend we have been seeing in the marketplace of 2:1 devices growing, while tablets continue to decline*. It speaks to what we have been hearing loud and clear from you – you want your devices to enable you to feel empowered and productive throughout your increasingly complex and blended life.

All that said from Microsoft, it will be interesting to see how Surface Go is actually taken with consumers in the next few months. Initial reviews of the device from various media outlets seem to be pretty good, and we also really enjoyed the device in our first testing. We’ll be diving deeper into Surface Go with own review in the next few weeks, so be sure to stay tuned for more.

Microsoft launches new Xbox Game Pass Twitter account with insane new commercial

Microsoft has just launched a separate Twitter account for its Xbox Game Pass subscription service and to get people to follow it, they’ve produced a rather insane little video ad. The commercial’s completely crazy and super-random but also really funny and hits the mark perfectly. You can check it out right here.

The entire Xbox Game Pass Twitter account seems to be just as random as the promo video with a very detailed account description that reads, “100% hand-typed tweets” and a solid sarcastic vibe with its personal replies to gamers.

Xbox Game Pass has grown substantially in regards to the general Xbox brand since it first launched so it makes sense that Microsoft would want a new account where it could heavily promote it further without annoying followers of the main Xbox account who have no interest in Game Pass. The company has also stepped up promotion of the service on Xbox One consoles by adding an Xbox Game Pass section to the dashboard this week.

Are you an Xbox Game Pass user? Do you like the new ad? Let us know in the comments below and then make sure to follow us on Twitter for more Xbox news.

How to fix Hulu issues on Xbox One

How do I fix frequent Hulu bugs on Xbox One?

  1. General troubleshooting
  2. Check your subscription
  3. Check your password
  4. Check your email address
  5. Test your network connection on your Xbox console
  6. Reinstall Hulu app
  7. Check Language and Location settings
  8. Clear System cache
  9. Delete saved data
  10. Update Hulu
  11. Check the error and find its fix

Are you experiencing Hulu issues on Xbox One? In this guide, we’ll list a series of solutions to help you fix this issue.

Hulu is a media streaming service that offers its audiences a decent range of live and on-demand videos that can be viewed on different devices, including the Xbox One.

Using Xbox One, you can stream media content using the Hulu app, though a number of users have reported that they’re facing Hulu issues on Xbox One, preventing them from enjoying the content.

These issues are known to arise from various reasons, including a poor internet connection. Hulu app streams videos so you can expect some buffering and shuttering while loading the content, and in most cases, it is normal for the connectivity to behave this way.

With this in mind, we sought to find solutions to help you fix Hulu issues so you can troubleshoot the error on your own, and enjoy watching Hulu content.

How to fix Hulu issues on Xbox One

1. General troubleshooting

If you’re experiencing Hulu issues on Xbox One, here are some quick first things you can try before using any of the solutions that follow.

Perform a speed test on your connection. Once complete, compare the results of the same against the Hulu requirements for internet speed and connectivity. If they exceed the requirements, do the following:

  • Power down and unplug your Hulu device, modem and router for one minute
  • Power the three back on
  • Connect your device directly to your router using Ethernet cable
  • Disconnect other devices from your network
  • Check your router settings and configuration to improve the network strength
  • Contact your ISP for further assistance
  • Reduce the devices using your network connection as these reduce internet speeds. For optimal streaming, ensure only a limited number of devices are using your WiFi, to boost up the speeds. Hulu requires 1.5 Mbps to stream SD videos and 3.0 Mbps for HD videos respectively.

Note: Hulu streams video in different ranges of picture quality adjustable according to your internet speed. Ensure your connection can achieve sustained download speeds of 3.0 Mbps for Hulu on-demand, and 8.0 Mbps for Hulu with Live TV. Watching multiple videos (or using the internet for other activities such as gaming, etc.) may require additional bandwidth.

2. Check your subscription

Are you able to log in to your Hulu account? If you can, are you able to watch videos or log in another device? If any of these are true for you, do the following to resolve it:

  • Go to your Account page and check your billing status
  • Update your billing information as required and try using Hulu again

3. Check your password

Sometimes Hulu issues on Xbox One could be due to your password, thus you may not log in easily. In this case, reset your password.

4. Check your email address

If your email address has issues, check if your Hulu account is registered to a different email address and try to sign in again. If this doesn’t help, try and recover your email.

5. Test your network connection on your Xbox console

If you still have Hulu issues on Xbox One after trying the general troubleshooting, test the connection directly on your console using the built-in network connection test. This helps identify any wireless interference and other network issues specific to your device.

To do this:

  • Go to the home screen on your Xbox One
  • Select Settings
  • Click Network
  • Click Detailed Network Statistics
  • Check if the results match that of the speed test you did earlier, and the speed requirements for Hulu.

6. Reinstall Hulu app

To do this:

  • Log out of Hulu from the app
  • Highlight the Hulu app tile
  • Press Menu on your Xbox One controller
  • Select Manage App
  • Select Internal
  • Go to Uninstall
  • Go to the right and select Hulu to reinstall the app

7. Check Language and Location settings

Ensure these are set to the U.S. by going to the main menu, select Settings>System>Location

8. Clear System cache

  • Turn off your Xbox One
  • Once the indicator lights are off on the console and its power brick is off, unplug the power brick from the console
  • Wait a few seconds, at least 30 or so
  • Plug back the power brick to your console and power it on

9. Delete saved data

This is a permanent step and you cannot undo it so back up your saved data to a USB storage or online (cloud) storage before deleting the data.

To do this:

  • Go to Xbox Home
  • Go to Settings
  • Select System
  • Select Storage
  • Select Manage storage
  • Select View contents
  • Highlight a game, press the Menu button
  • Select Manage game
  • Select Saved data
  • Choose a game to access it’s saved data
  • Use Options Menuto delete files or get more information about a specific file

10. Update Hulu

If Hulu app is outdated, you can get Hulu issues on Xbox One, thus you need to update it right away. Visit Microsoft Store and download the update.

11. Check the error and find its fix

Hulu issues on Xbox One can come in different error codes as described below:

  • Error code 3343, 3322, 3307, 2203, and 3321 – for these, the fix is to uninstall and reinstall the Hulu app and clear caches.

If you’re on a newer Xbox, we also have a guide on what to do if Hulu is not working on Xbox Series X.

Were you able to fix Hulu issues on Xbox One using these solutions? Let us know what worked for you in the comments section below.

RELATED STORIES TO CHECK OUT:

Full Fix: Solitaire stops working in Windows 10/11

Solitaire is one of the three built-in games that Microsoft has introduced in its operating system, but when the Windows 8 was released, the game was removed and users were able to get it from the Metro apps store. Microsoft brought it back in Windows 10, but while most users were enthusiastic to have it pre-installed on the latest OS, others complained on forums that the game stopped working and asked solutions from strangers.

Solitaire not working on Windows 10, how to fix it?

Solitaire is one of the most popular games on Windows, but many users reported that Solitaire stops working on their PC. Speaking of Solitaire, here are some similar issues that users reported:

  • Microsoft Solitaire Collection not opening – Sometimes Microsoft Solitaire won’t open at all on your PC. However, you should be able to fix this issue simply by running a built-in troubleshooter.
  • Microsoft Solitaire Collection not working Windows 8 – This error can affect Windows 8.1 as well, but since Windows 10 and 8.1 are so similar, you should be able to apply almost all of our solutions to Windows 8.1.
  • Microsoft Solitaire Collection Windows 10 won’t open – Sometimes the application might not open because there’s a pending update available. To fix that, open Microsoft Store and check if the game needs to be updated.
  • Solitaire has stopped working – Solitaire can sometimes suddenly crash on your PC. This is a relatively common problem, and if you encounter it, install the missing system updates and check if that helps.

Solution 1 – Run the troubleshooter

If Solitaire stops working on your PC, the problem might be fixed by using the troubleshooter. Windows 10 has many built-in troubleshooters that can fix various problems, and there’s even a troubleshooter for Windows Store apps.

To fix the problem, you need to do the following:

  1. Press Windows Key + I to open the Settings app.
  2. When Settings app opens, go to Update & Security section.
    Microsoft Solitaire Collection Windows 10 won't open
  3. Select Troubleshoot from the menu on the left. Choose Windows Store Apps from the menu on the right and click Run the troubleshooter.
    Microsoft Solitaire Collection not working Windows 8
  4. Follow the instructions on the screen to complete the troubleshooter.

Once the troubleshooter is finished, check if the problem is resolved.


Solution 2 – Reset Windows Store cache

According to users, sometimes Store cache can cause problems with Solitaire and other games on your PC. However, you can fix that issue by clearing the Store cache. The cache can sometimes get damaged and cause this and other issues to appear, but you can fix that with this simple trick:

  1. Press Windows Key + R to open the Run dialog.
  2. Enter WSReset.exe and press Enter or click OK.
    Microsoft Solitaire Collection not opening
  3. The process will now start. It usually takes a couple of seconds.

Once the cache is cleared, check if the problem is still there.


Solution 3 – Make sure that your Taskbar isn’t set to auto-hide

Few users reported that Solitaire stops working on their PC due to Taskbar settings. Apparently, if the Taskbar is set to hide automatically, you might encounter this and other problems. To fix this issue, users are suggesting to reinstall the application and then change the Taskbar properties.

To do that, follow these steps:

  1. Right-click the Taskbar and choose Taskbar settings from the menu.
    Solitaire has stopped working
  2. Now disable Automatically hide the taskbar in desktop and tablet mode.
    Microsoft Solitaire Collection not opening

After doing that, check if the problem is still there. This is a peculiar solution, but some users reported that it works, so you might want to try it out.


Solution 4 – Make sure that you don’t need to update the application

Sometimes Solitaire won’t run on your PC because the application needs to be updated. To check if an update is required, you just need to do the following:

  1. Open Windows Store.
  2. Now look for Solitaire application and check if it needs to be updated. If an update is available, be sure to download it.

Once you update the application to the latest version, check if the problem is still there.


Solution 5 – Just reinstall the application

According to users, the best way to fix this problem might be to reinstall the application. Sometimes there might be a glitch with the installation, and the only way to fix the problem is to reinstall the game.

If Solitaire won’t start on your PC, simply uninstall the game and download it again from the Windows Store.


Solution 6 – Install the latest updates

If Solitaire stops working on your PC, the issue might be the missing updates. Sometimes there might be certain glitches with your system, and that can cause this and other errors to appear. However, you can fix the problem by installing the latest updates.

By default, Windows 10 automatically installs the latest updates, but sometimes you might miss an update or two due to certain bugs. However, you can always check for updates manually by doing the following:

  1. Open the Settings app and go to the Updates & Security section.
  2. Now click Check for updates button.
    Microsoft Solitaire Collection Windows 10 won't open

Windows will now check for available updates and download them automatically in the background. Once the updates are downloaded, restart your PC in order to reinstall them. After your system is up to date, check if the issue is still there.


Solution 7 – Create a new user account

If Solitaire can’t run on your PC, it might be because your user account is corrupted. This can occur due to various reasons, and in order to fix the issue, it’s advised to create a new user account. To do that, you just need to follow these simple steps:

  1. Open the Settings app and navigate to the Accounts section.
    Microsoft Solitaire Collection not working Windows 8
  2. Now choose Family & other people from the pane on the left. In the left pane, click Add someone else to this PC.
    Microsoft Solitaire Collection Windows 10 won't open
  3. Select I don’t have this person’s sign-in information.
    Solitaire has stopped working
  4. Now choose Add a user without a Microsoft account.
    Microsoft Solitaire Collection not opening
  5. Enter the desired username and click Next.
    Microsoft Solitaire Collection not working Windows 8

Once you create a new account, switch to it and check if the issue still appears. If the problem doesn’t appear on the new account, move your personal files to it and start using it instead of your old account.


Solution 8 – Change the font scaling

If you’re using an ultra-high resolution, you might have font scaling enabled. This is a useful feature, however, this feature can sometimes lead to issues with certain applications.

In fact, if Solitaire stops working on your PC, it’s possible that font scaling is the issue. To fix this problem, you need to change font scaling settings by doing the following:

  1. Open the Settings app and go to the System section.
    Microsoft Solitaire Collection not working Windows 8
  2. Now set the size of text, apps and other items to the recommended value.
    Microsoft Solitaire Collection Windows 10 won't open

After doing that, try to start the game again and check if the issue is resolved.


Solution 9 – Change your display resolution

In some cases, Solitaire won’t run on your PC properly due to your resolution. In order to fix this problem, we advise you to try several different resolutions until you find the one that works.

Several users reported that they changed their resolution from 1366 X 768 to 1360 X 768 and that fixed the problem for them. To change the resolution on your PC, follow these steps:

  1. Open Settings app and go to the System section.
  2. Now in the Scale and layout section select the desired resolution.
    Microsoft Solitaire Collection not opening

After changing your resolution, check if the problem with the game is resolved.


Solution 10 – Rename the cache folder

If you have problems with Solitaire on your PC, you might be able to solve them simply by renaming the cache folder. This is relatively simple, and in order to do it, you just need to follow these steps:

  1. Press Windows Key + R and enter %localappdata%. Now press Enter or click OK.
    Solitaire has stopped working
  2. Navigate to PackagesWinStore_cw5n1h2txyewyLocalState directory.
  3. Locate the cache directory and rename it to cache.old.
  4. Now create a new folder and name it cache.

After doing that, check if the problem with the game is resolved.


Solution 11 – Perform a System Restore

In case Solitaire isn’t working properly on your PC, you might be able to fix that problem simply by performing a System Restore. This is an incredibly useful feature that allows you to restore your system and fix various issues. To do that, you just need to follow these steps:

  1. Press Windows Key + S and enter system restore. Choose Create a restore point from the menu.
    Microsoft Solitaire Collection not working Windows 8
  2. System Properties window will appear. Click System Restore button.
    Microsoft Solitaire Collection Windows 10 won't open
  3. When System Restore window opens, click Next.
    Solitaire has stopped working
  4. If available, check Show more restore points option. Now select the desired restore point and click Next.
    Microsoft Solitaire Collection not opening
  5. Follow the instructions on the screen to complete the restoration process.

Once your system is restored to the previous state, the problem with Solitaire will be resolved.


READ ALSO:

Windows Community Toolkit hits 1 million downloads on GitHub

Microsoft’s Windows Community Toolkit has just crossed one million downloads on GitHub, a new milestone for the tool previously known as the UWP Community Toolkit. Nikola Metulev, Senior Program Manager for UWP development at Microsoft announced the news on Twitter yesterday, teasing that more features would be coming soon.

The Windows Community Toolkit can be used for developers to be used to build UWP apps targeting any Windows 10 device, including PCs, phones, Windows Mixed Reality, Xbox One consoles and IoT devices. The toolkit received its biggest update yet two months ago with version 3.0, which introduced Fluent Design updates to existing controls with support for light and dark themes, and much more.

Developers wanting to get started with the Windows Community Toolkit can learn more on GitHub or this support page. With more than 150 contributors, the project is seeing frequent updates and it should continue to be a great resource for UWP app development.

Windows YouTube client myTube gets a big update, includes Windows Timeline support

If you’re using myTube for watching YouTube videos on your Windows 10 PC, Xbox, or Windows Phone, you’re up for a treat. Noted by Windows Central, the developers of the app have just pushed out a version 3.3 update, adding in support for Windows Timeline, a new “Rooms” feature, and much more.

All of the new features in this version are documented by developer Ryken Studio in a post on their website. The latest features mostly target the Windows 10 April 2018 Update, and you can have a look below for more on what’s new.

  • Added myTube Rooms (beta), which allows you to watch videos together and chat with friends
  • Added Private Mode to settings, which prevents watched videos from being recorded to history or the Windows Timeline
  • Reduced memory usage of the WebView player after it’s finished being used
  • Added Theatre Mode
  • Watched videos are added to the Windows timeline
  • Zoom in animation on thumbnails when moused over
  • (PC & Mobile) Added playlist history to history page
  • (PC & Mobile) Added individual video tile pinning
  • (PC & Mobile) Added small size template to live tiles
  • (PC & Mobile) Added “Up next” experience to the end of videos (same as on Xbox)
  • (PC & Mobile) Slightly modified layout for account section
  • (PC & Mobile) Fixed bug that caused the comment section header to sometimes have the title of the video, instead of “Comments”
  • (PC & Mobile) Fixed issue where the text selection highlight wasn’t visible in the search box

In the event that you’re using myTube on your Xbox, you also will see a separate set of improvements. You should now have the ability to leave TV mode and use the PC UI, and see the share button in video details. There’s also a new next up UI and fixes for jumping with the trigger buttons not working properly.

It’s defintley nice to see these features, as myTube remains one of the most complete third-party YouTube clients in the Microsoft ecosystem. The app is actually available for 99 cents, but a free trial is available. Update or find it via the link below, and let us know your thoughts on this update by dropping us a comment.

Buy myTube from the Microsoft Store

TypeScript 3.0, Microsoft’s extension of JavaScript, his general availability

Microsoft this week announced the general availability of TypeScript 3.0, their extension of JavaScript. This version comes with a few breaking changes, and a new scalable way to structure projects (via Neowin.)

To grab up this latest version of TypeScript, all you need to do is enter the “npm install -g typescript” command in your Node Package Manager. Once updated, you’ll see the following new changes.

  • Project references allow TypeScript projects to depend on other TypeScript projects – specifically, allowing tsconfig.json files to reference other tsconfig.json files. Specifying these dependencies makes it easier to split your code into smaller projects.
  • TypeScript 3.0 allows us to better model scenarios by now allowing rest parameters to be generic, and inferring those generics as tuple types.
  • TypeScript 3.0 introduces a new type called unknown. Much like any, any value is assignable to unknown; however, unlike any, unknown is assignable to almost nothing else without a type assertion.
  • In TypeScript 3.0, error messages can provide messages on other locations so that users can reason about cause-and-effect of an error.
  • Support for defaultProps in JSX
  • TypeScript now provides two new productivity features around JSX: providing completions for JSX closing tags
    and providing collapsible outlining spans for JSX

With TypeScript 3.0, editor support will be in Visual Studio 2017 (for version 15.2 or later,) Visual Studio 2015 (which requires update 3,) and Sublime Text 3 via PackageControl. It also will come to other popular editors over time. Microsoft’s Daniel Rosenwasser dives deeper into the changes over on the MSDN Blog, so be sure to check it out.

Microsoft awards grants to expand rural broadband access in five states

Microsoft has announced today (August 1st) the winners of the annual Airband Grant Fund. There were four winners across five states here in the US, all of which are aiming to help bring broadband internet access to rural communities. Microsoft will be providing these grant winners financing, technology, mentorship, and other support to help scale their new technologies, services, and business models.

The winners in the US span across New York, West Virginia, California, Maine, and Texas. In New York, CvWireless was the grant winner, for using innovative broadband solutions to connect 300 households in Essex County. Additionally, in West Virginia, the winner was Skylark Wireless, for their work to extend broadband access to 10,000 households and businesses in Mingo County.

California’s winner was both Tribal Digital Village and Numbers4Health.   Tribal Digital Village (TDVNet) plans to bring broadband to tribal land in the rural community of Valley Center, California, and Numbers4Health will deploy a solution to bring telemedicine and improve healthcare outcomes in Compton, California. Numbers4Health also won in Maine, and Texas for their work to help support telemedicine and improve healthcare outcomes in rural Maine.

There were also four international grant winners in Rwanda, Nigeria, Kenya, and Bangladesh. In the same order, these winners were Mesh Power, Cold Hubs, Agsol, and ME Solshare. You can learn more about Microsoft’s Airband initiatives and the use of TV White Spaces by clicking here.