Don’t know what to play on Game Pass? With so, so many games across nearly every genre out there (and even a few that defy categorization) it can be tough to know where to start. Thankfully, we’ve got you covered with these Game Pass recommendations for those who have always wanted to play the superhero. Let’s get started.
The fourth installment of the Batman: Arkham series, which includes some of the best superhero games ever made. Arkham Knight introduces the Batmobile as a gameplay element, allowing Batman to get around the open world of Gotham City.
The Batmobile is much more than a means of getting around though: it has a Pursuit Mode focused on driving challenges and a Battle Mode in which the Batmobile becomes a tank outfitted with its own special armory, including a Vulcan rotary cannon and anti-tank missiles. The Batmobile can also be upgraded for even more awesomeness.
Not only is Arkham Knight one of the best superhero game on Game Pass right now, it is also one of the most underrated games on the service, full stop.
Crackdown 3
Coming almost a decade after the release of its predecessor, the third game in the Crackdown franchise picks up where Crackdown 2 left off and goes further. It offers cooperative play in campaign as well as in the “Keys to the City” free-roam mode.
Time to step up your boom and stop crime as a super-powered Agent in Crackdown 3’s sandbox of mayhem and destruction. Explore the heights of a futuristic city, race through the streets in a transforming vehicle, and use your powerful abilities to stop a ruthless criminal empire.
We already discussed Injustice 2 in our “What to play on Game Pass: Fighting Games” post, but we thought it would also be worth a mention here. Injustice 2 gathers all your favorite characters from the DC Comics universe – Batman, Wonder Woman, Harley Quinn, The Flash, and many others – and pits them against each other in this glorious fighter.
Marvel’s Avengers
Developed by Crystal Dynamics and published by Square Enix, this Marvel-themed beatemup supports up to four-player online cooperative play. The game features characters, costumes and abilities from “all corners of the Marvel Universe,” including the comic books.
The plot centers around Kamala Khan (recently of Miss Marvel fame, from the television series). Without giving it away, Kamala is tasked with reassembling the disbanded Avengers team to take down an A.I.M. scientist who wants to eliminate all Inhumans.
Marvel’s Avengers is a solid choice for brawler fans, and practically a must-play for Game Pass members who happen to be Marvel fans.
In this game players take control of Peter Quill (Star-Lord) and his elemental guns. The other members of the GotG team are present in non-playable form: Gamora, Groot, Rocket Racoon and Drax the Destroyer. Each has their own unique special abilities, and can be issued basic commands when the player enters Guardians mode whilst in combat.
Though not exactly a non-linear experience, Marvel’s Guardians of the Galaxy blends action and exploration to great effect. It is definitely a worthwhile undertaking for fans of the Marvel Universe.
Wrap up
So there you have it: the best superhero offerings on gaming’s best service. What do you think of the games featured here? Are there any personal favorites on this list? Let us know in the comments section below.
If you don’t already have a subscription to Xbox Game Pass, you can sign up here. You can also learn more about Game Pass over on its FAQ page. And don’t forget to check out our other “What to play on Game Pass” posts for other Game Pass recommendations.
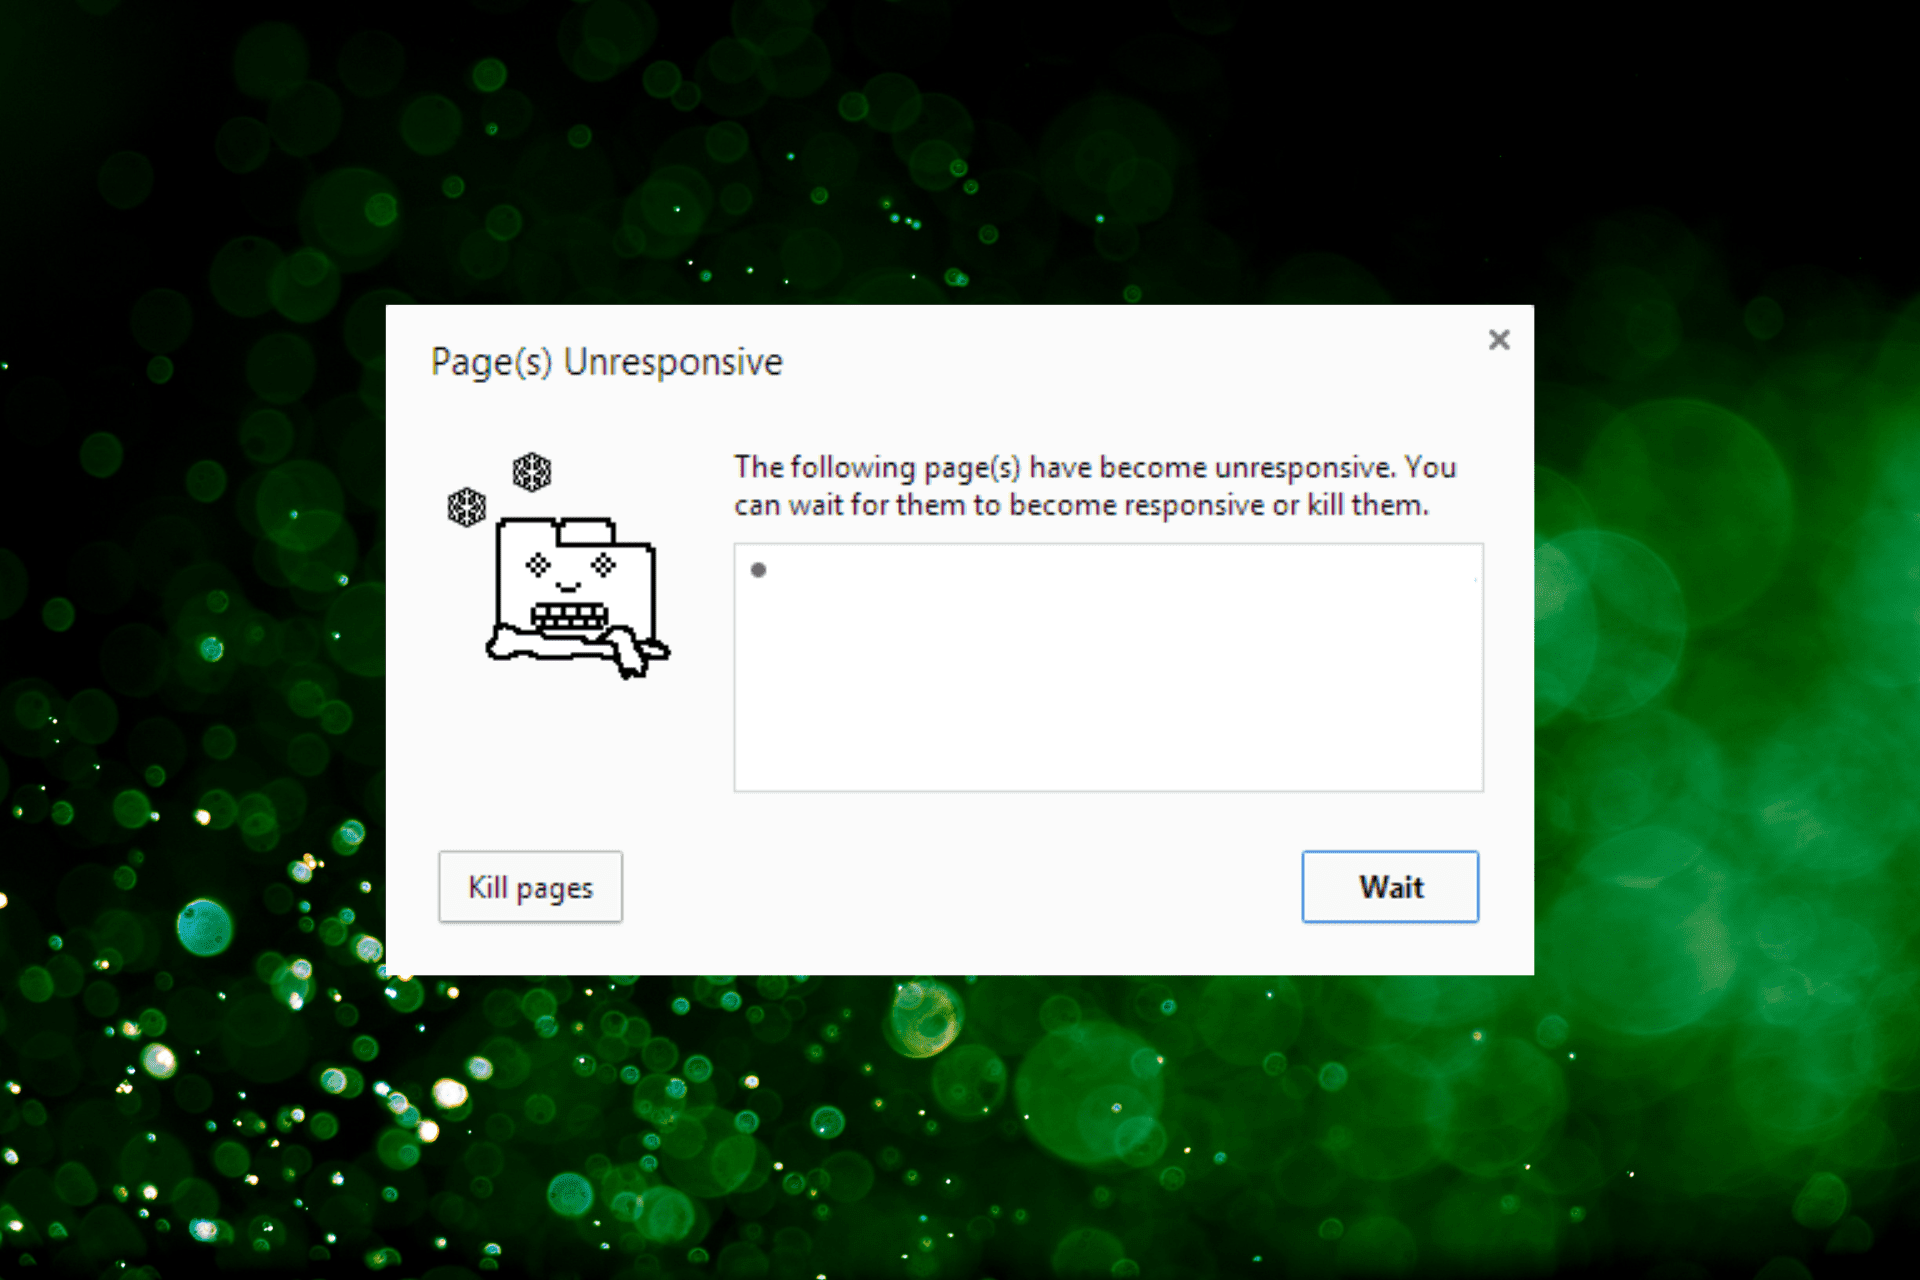
Google Chrome is the most popular browser among Windows users, and even though this browser has changed over the years, some common problems remain the same. The Page Unresponsive error on Chrome in Windows 10 is one of these.
Along with the error message, there will be a Kill pages button near the bottom-left in case you want to close the page.
Other similar issues encountered by the users include:
Google Chrome keeps killing my pages – Many users reported that Google Chrome is constantly killing their pages. If you encounter this issue, try to reinstall Chrome.
Chrome kill pages unresponsive – If your pages are unresponsive, the issue might be caused by one of your extensions. Therefore, disable unnecessary extensions or remove them and check if that helps.
Kill pages Chrome not responding – Many users reported that Chrome stopped responding after this message. Try to disable the Sandbox mode in Chrome.
Page Unresponsive. You can wait for it to become responsive or exit the page – Exiting and then reopening the page generally does the trick.
So, let’s find out all about the Page Unresponsive error on Chrome in Windows 10 and its most effective solutions.
Why is my Google Chrome unresponsive?
This problem can occur due to your Internet connection or a certain website script. If your Internet connection is slow, there will be issues loading certain scripts, making pages unresponsive.
In addition, many websites use multiple scripts, and sometimes it’s possible that one of those scripts is unresponsive.
The computer configuration can also cause this problem, especially since Google Chrome is a resource-intensive browser. If you open multiple tabs with several applications running in the background, it might lead to the Page Unresponsive error on Chrome in Windows 10.
The Page Unresponsive error causes data loss in some cases. But fortunately, there are a few solutions that would help get rid of the error in no time.
Quick Tip:
Now would be a great time to make a switch to another browser with all your saved data from Chrome. Opera One has gone through a complete overhaul, with constant updates and improvements.
Opera One is also privacy-oriented and the user experience can be pleasant, thanks to the easy interface and workspace management to avoid clogged pages you visit.
Opera One
Allow different perspectives and try a brand-new browser when Chrome is unresponsive.
If you’re getting a Page Unresponsive error on Chrome in Windows 10, Trusteer Rapport might be the problem. This security software can sometimes interfere with your browser and cause this issue to appear.
In case you’re not familiar, uninstaller software is a special application that can remove any program from your PC. It will remove all files and registry entries associated with the application you want to remove.
It’s better than a regular uninstallation because it performs a deeper scan and finds various leftover files. These files are scattered all over the disk, so they take up useless space.
Once you remove the problematic application, check if the problem still persists.
If Trusteer Rapport was the problem, you should consider switching to a different antivirus solution that still offers the best protection.
There is no shortage on the market so look for the very best you can afford while making sure it has an award-winning virus detection engine.
The newest antivirus tools combine artificial intelligence and machine learning to successfully detect malware without the need to download virus signatures. TotalAV is no exception to the rule.
2. Turn off Sandbox mode
Locate the Google Chrome shortcut, right-click on it, and choose Properties from the menu.
Go to the Target field and add the following to the end after a space:–no-sandbox
Your Target field should look like this after making the change:C:Program FilesGoogleChromeApplicationchrome.exe" –no-sandbox
Once you’re done, click Apply and OK.
If the Page Unresponsive error keeps popping up on Chrome in Windows 10, disabling Sandbox might help. In case the error persists, head to the next method.
3. Disable third-party cookies
Open a new tab in Google Chrome, paste the following path, and hit Enter:chrome://settings/content
Click on Cookies and site data.
Select the Block third-party cookies option.
Disabling third-party cookies isn’t the best solution, especially because some websites rely heavily on cookies.
But if you’re frequently getting Chrome’s Page Unresponsive error in Windows 10, you might want to try this solution as a potential workaround.
4. Delete/rename the Default folder
Press Windows + E to launch File Explorer, paste the following path in the address bar, and hit Enter. Make sure to replace Username with the actual account name in your case.C:\Users\Username\AppData\Local\Google\Chrome\User Data
Inside the User Data folder, you should see a Default folder. Rename it to Default Backup or delete it.
Close the File Explorer and relaunch Chrome.
5. Use a High-Performance profile
Press Windows + S and enter power settings. Select Power Options from the menu.
Select Additional power settings.
If the High performance plan isn’t available, click the Show additional plans option, and then select High Performance.
Bear in mind that this profile will use more of your battery power, thus draining it faster, but you should achieve better performance while using it. Once done, check if the Chrome Page Unresponsive Javascript error in Windows 10 is fixed.
6. Disable hardware acceleration
Launch Chrome, paste the following path in the address bar, and hit Enter:chrome://settings/system
Disable the Use hardware acceleration when available option here.
7. Reinstall Chrome
Press Windows + R to launch the Run command, enter appwiz.cpl in the text field, and click OK.
Next, select Google Chrome from the list of programs, click Uninstall, and follow the on-screen instructions.
Once done, restart the computer for the changes to come into effect.
Launch Chrome, click on ellipsis near the top-right corner, hover the cursor over More tools, and then select Extensions.
A list of installed extensions will now appear.
Now locate the disabled extensions you don’t use anymore, and click the Remove button.
When the confirmation dialog appears, click Remove to confirm.
Once you uninstall the old extensions, check if the problem persists.
If the issue is still present, some of the available extensions might be causing the problem. To find the problematic extension, you need to do the following:
Repeat the steps from above and open the Extensions tab.
Now disable all extensions by clicking the toggle icon next to them.
Once you disable all the extensions, restart Chrome.
If the issue doesn’t appear after restarting Chrome, it means that one of the disabled extensions was causing the problem.
To find the problematic extension, enable them one by one until you find the problematic one. Once you find it, remove the extension to solve the problem.
9. Consider using Beta or Canary versions
If you’re constantly getting the Page Unresponsive error on Chrome in Windows 10, you might consider switching to the Chrome Beta or Chrome Canary versions of the browser.
In case you’re not familiar, the Beta version is a version of Chrome that offers the upcoming features and patches. Therefore, if you’re having any issues with your version of Chrome, consider trying out the Beta version.
There’s also a Canary version available, which is more experimental and offers some upcoming features. This version is less stable than the Beta version but should offer the latest fixes.
10. Switch to a 32-bit version of Chrome
According to users, you might be able to solve this problem simply by switching to a 32-bit version of Chrome.
Downloading the 32-bit version of Chrome
It’s worth mentioning that the 32-bit version might not offer the same performance as a 64-bit version, so keep that in mind. This is just a workaround, but until a permanent solution is available, you might want to continue using the 32-bit version.
What is the Chrome cleanup tool?
The Chrome Cleanup Tool is a feature in the browser that allows you to check for harmful and malicious software and remove it. It’s effective and can help fix several errors with Chrome or the computer itself.
Chrome Cleanup Tool
The Chrome Cleanup Tool can be found on the following path:chrome://settings/cleanup
Also, there’s an option to send a report to Google regarding the malicious software or processes found on the computer. This helps Google stay up-to-date, but you can disable the feature.
The Page Unresponsive error on Google Chrome in Windows 10 can be a hindrance and cause various problems, but you should be able to fix it using one of our solutions.
Minecraft.net is the official website for the video game Minecraft where players can sign up and purchase the title. It’s also a one-stop shop for Minecraft-related news, fan creations, merchandise, and a helpful library of resources.
Having access to Minecraft.net is pretty invaluable so you can imagine not having access to the website to be pretty debilitating. There are multiple reasons as to why access denial occurred and this guide will help you overcome this.
Why do I not have permission to access Minecraft?
For starters, the website could just be under maintenance. This happens randomly so if you encounter this, just come back later. Other times, you may have to clear browser data.
We also recommend resetting your browser to solve this problem. Some people have complained that certain extensions and proxy server settings have caused access problems too.
This guide will show you on to fix this problem on Firefox and Chrome which are two of the most popular web browsers out there.
Quick Tip:
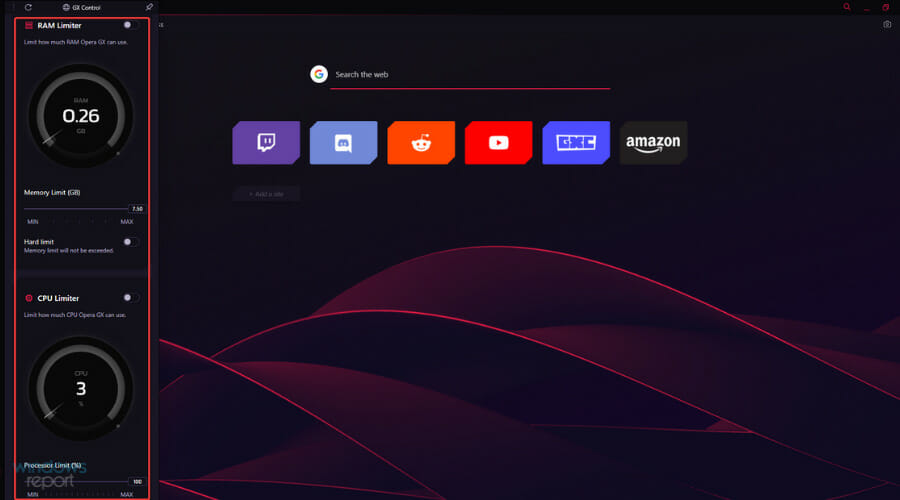
Instead of fixing this issue on Minecraft on your own, you have an easier alternative to change your browser to Opera GX.
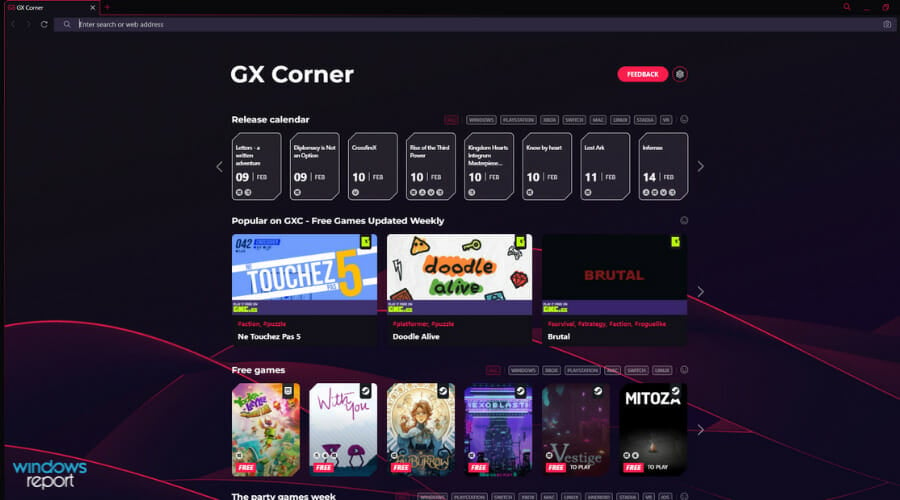
This way, you have quicker and more flexible navigation for accessing joyful games features like GX Corner or system resources optimization.
Opera GX
Take this opportunity to utilize this flexible and fully secured browser to access Minecraft easily.
How can I fix you don’t have permission to access Minecraft.net?
1. Clearing out browser data
On Firefox, press the CTRL, SHIFT, and DEL keys at the same time. This will open the Clear Recent History menu.
In the new window, make the boxes next to Browsing & download history, Cookies, and Cache are checked.
Click OK to erase everything.
On Chrome, you can also press CTRL, SHIFT, and DELETE to open the Clear browsing data menu.
Make sure the boxes for Browsing history, Cookies and other site data, and Cached images and files are checked off.
Click the Clear button to erase everything.
2. Reset the browser
In Firefox, type in about:support into the address bar and hit Enter on your keyboard.
On the right-hand side, click the Refresh Firefox button.
A window will appear telling you that resetting the browser will remove all your extensions and customizations. Essentially, the browser will return to its default settings.
Click the red Refresh Firefox button.
On Chrome, type in chrome://settings into the address bar and hit Enter on your keyboard.
Click Reset and clean up on the left-hand menu.
Click Restore setting to their original defaults in the middle.
In the new middle, click the Reset settings button.
3. Disable extension
Some people have complained that certain extensions cause the access problem. Dark Reader in particular has been known to cause a lot of problems.
In the address bar, type about:addons into the address bar and hit Enter.
Click the toggle switch next to an extension to disable it.
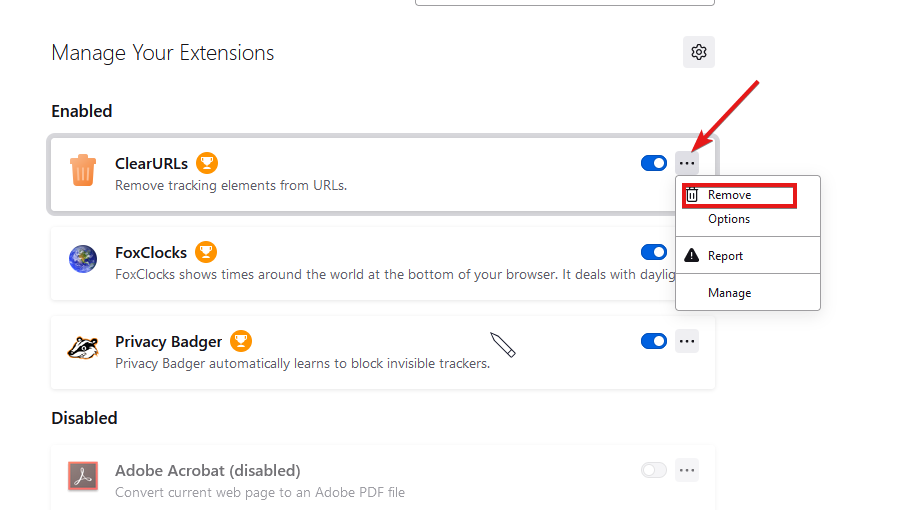
Conversely, you can click the three dots next to the extension to make a context menu appear.
Click Remove to get rid of the extension.
On Chrome, type chrome://extensions into the address bar and hit Enter.
Scroll down to the extension you want remove.
You can either click the toggle switch to turn it off or click Remove.
A small window will appear. Click the Remove button.
4. Disable proxy server
Click the magnifying glass icon and search for Internet Options.
Click the entry that appears.
In the Internet Properties window, select the Connections tab.
Click the LAN settings button located at the bottom of the window.
Make sure the box next to Use a proxy server for your LAN is turned off. If it isn’t, click the box to turn it off.
Click OK to close the window and finish.
How do I allow Minecraft through my firewall?
Sometimes your computer’s firewall will prevent you from playing Minecraft as it won’t recognize the game and see it as malicious. To get past this, you’ll have to give the game permissions in the firewall.
You can do this by opening Windows Defender Firewall and select the option that reads Allow an app or feature through Windows Defender Firewall. Click Change settingsthen Allow another app.
Find the Minecraft app on your computer and then click Add to give the game Firewall permissions.
Feel free to leave a comment below if you have any questions on Minecraft updates. Feel free to leave comments about guides that you’d like to see or other information.
New build alert! Or, in this case, new builds alert, since Microsoft decided to launch two new Insider builds for the Windows 11 Beta Channel.
Yesterday we discussed the latest addition to Windows 10, which is Build 19044.1862, so it’s only right that we now focus on the latest operating system.
So, if you are ready and eager to find out more about what’s in store for your new favorite OS, let’s dive right into it and see what we’re dealing with.
What’s new with builds 22621.436 and 22622.436 (KB5015888)?
As Microsoft specified in the official blog post, today we are receiving Windows 11 Insider Preview Build 22621.436 and Build 22622.436 (KB5015888)to the Beta Channel.
Build 22622.436 = New features rolling out.
Build 22621.436 = New features off by default.
Keep in mind that Insiders who landed in the group with new features turned off by default (Build 22621.xxxx) can check for updates and choose to install the update that will have features rolling out (Build 22622.xxx).
Not to mention that the Redmond tech giant is also kicking off a Bug Bash for the Beta Channel starting tomorrow, so there’s a lot going on.
We’re about to go more in-depth and check out each individual of the above-mentioned builds, discovering all of the improvements, fixes, and known issues that come packaged.
Windows 11 Build 22622.436
We’re going to start with the fact that the discovery of devices under nearby share when sharing a local file from the desktop, File Explorer, Photos, Snipping Tool, Xbox, and other apps that use the built-in Windows share window has been enhanced by using UDP (Network needs to be set to private).
Bluetooth has also been added, to discover nearby devices, which means you will now be able to discover and share to more devices including desktop PCs.
Also, when sharing a local file from the above-mentioned sources that use the built-in Windows share window, you can choose OneDrive as a target to directly upload the file to OneDrive and share it further along with access control options.
Know that absolutely all this can be done right from sharing local files in File Explorer without any context switches or opening the OneDrive app.
NOTE
This feature is currently only available for Microsoft accounts. A user will need to switch to their Microsoft account via the top right profile icon in the share window if logged in via AAD. AAD support will be added in a future update.
Changes and improvements
[Windows Terminal]
Windows Terminal is now the default terminal in Windows 11. This means, all command line applications will open in Windows Terminal automatically (Command Prompt and PowerShell, for example). The setting for this change can be found via Settings > Privacy & security > For developers. Please note that Windows Terminal version 1.15 or greater is required for this feature.
[Input]
You can now report animated gifs that you feel are inappropriate from the emoji panel (WIN + .)
Fixes
[File Explorer]
Fixed an issue where the tab order when using CTRL + Tab would be wrong if you’d rearranged the tabs in File Explorer.
Fixed an explorer.exe crash when dragging tabs around.
If “Show all folders” is enabled, the dividers in File Explorer’s navigation pane should no longer show. With this change, it should also address the issues where dividers were unexpectedly showing in some other folder pickers.
Opening a zipped folder in a new tab should no longer have a blank tab name.
Removable drives should no longer unexpectedly be displayed in a section by themselves in the navigation pane, which was breaking up the section with This PC and Network.
Fixed an issue where the add new tab button wasn’t clearly visible when using Aquatic or Desert contrast themes.
A faint line should no longer display between the current tab and the command bar.
Updated the tooltip when hovering over a tab to suggest using CTRL + W to close the tab (rather than CTRL + F4, which didn’t work).
If focus is on the tab row, CTRL + W will no longer unexpectedly close two tabs instead of just the tab in focus.
Fixed an issue where the tab row might unexpectedly expand vertically, covering the command bar contents.
[Start]
Fixed a Start crash which was impacting some Insiders on Build 22622.160.
Fixes included for Build 22621.436 & Build 22622.436
Fixed an issue that prevents troubleshooters from opening.
Fixed an issue that causes the Smart App Control to block catalog-signed files.
Fixed an issue that might highly distort photos you take using the Camera app. This issue occurs when using certain cameras under certain low light conditions.
Fixed an issue that throws an exception when you debug drivers using Visual Studio 2022 version 17.2 or later.
Fixed an issue that causes the Windows profile service to fail sporadically. The failure might occur when signing in. The error message is, “gpsvc service failed to sign in. Access denied”.
Fixed an issue that prevents virtualized App-V Office applications from opening or causes them to stop responding.
[General]
Fixed an issue resulting in a small number of Insiders in the Beta Channel experiencing cyclical crashes in Explorer.exe and other Windows UI components, making the screen look like it’s flickering. Please note, this fix should stop more Insiders from being newly impacted, however if you are already impacted by this, you will need to run the following command in PowerShell to resolve it: Add-AppxPackage -Register -Path C:\Windows\SystemApps\Microsoft.UI.Xaml.CBS_8wekyb3d8bbwe\AppxManifest.xml -DisableDevelopmentMode -ForceApplicationShutdown
Fixed an issue which was causing some Insiders on the previous Beta Channel flight to have their PCs stuck on a black screen after waking from sleep.
Fixed an issue which would lead to losing network connectivity after turning on mobile hotspot.
Fixed an issue causing Build 22621.290 / 22622.290 to fail to install with error 0x800f081f for some Insiders.
Known issues
[File Explorer]
The up arrow is misaligned in File Explorer tabs. This will be fixed in a future update.
These are the changes, improvements, fixes, and known issues that come with the two new Beta Insider Preview Builds 22621.436 and Build 22622.436 (KB5015888) for Windows 11.
Have you noticed any other issues after installing these builds? Share your experience with us in the comments section below.
TurboTax is a U.S. tax return application and web app widely utilized in the United States, providing excellent accessibility to its users.
However, some clients have said the same thing on the TurboTax support forum. TurboTax is not letting me file return forms – is what they claim – with the software or web app.
If TurboTax e-filing isn’t working for you, check out these proven solutions to resolve it quickly.
Does TurboTax allow you to file electronically?
Rest assured that TurboTax allows you to file your tax return electronically in a few simple steps. The process might sound time-consuming, but this is faster and safer than mailing your tax return since it’s transmitted electronically to the IRS computer systems.
Browser-related problems – Since common characteristics of the browsers compatible with filing software are privacy and speed, make sure to choose one of the best browsers for Turbotax.
Cache and cookies – You may need to clear your cache and cookies, so make sure your return is saved in the account, sign out, then clear the cache and delete the cookies on your PC. Using a cookie cleaner tool will help you to free up space, then you may sign back into your account and try entering your information again.
An outage – If the TurboTax server is not found, there could be an outage. Check if the server has outage problems for everyone or just for you.
You should also pay attention to how you’ve filled the form, background software, or outdated TurboTax app (especially with so many users saying: TurboTax won’t let me e-file because of update). Let us guide you step by step and get rid of the issue in no time.
What can I do if TurboTax’s e-filing isn’t working?
1. Try a different browser
If you’re trying to e-file a return form with the TurboTax web app, try utilizing a different browser. Opera One is a highly-rated browser that’s compatible with TurboTax. In addition, it is a Chromium-based browser with two extension libraries and one of the most original designs.
When you switch to Opera One, you won’t miss Chrome or Firefox much as it incorporates many unique features. Its battery saver, built-in VPN, customizable Speed Dials, integrated YouTube player, and tab search tool are some of the Opera One features you won’t find in Google Chrome.
Other useful Opera One features:
It includes an integrated YouTube player within its sidebar
Let’s you create workspaces and tab islands
Opera One’s built-in ad blocker removes ads for faster browsing
Offers a native AI and modular AI-ready design
Opera One
Never encounter e-filling problems on TurboTax by using this great browser software today.
You should double-check how you’ve filled out your return form. A few non-IT issues can stop users from e-filing their return forms. You can’t e-file a TurboTax return form if it:
It doesn’t include any taxable income
Includes non-final forms
Includes override (you’ll need to undo them)
Includes a W-2 in which box 16 has a value greater than box 1 or you leave box 1 blank
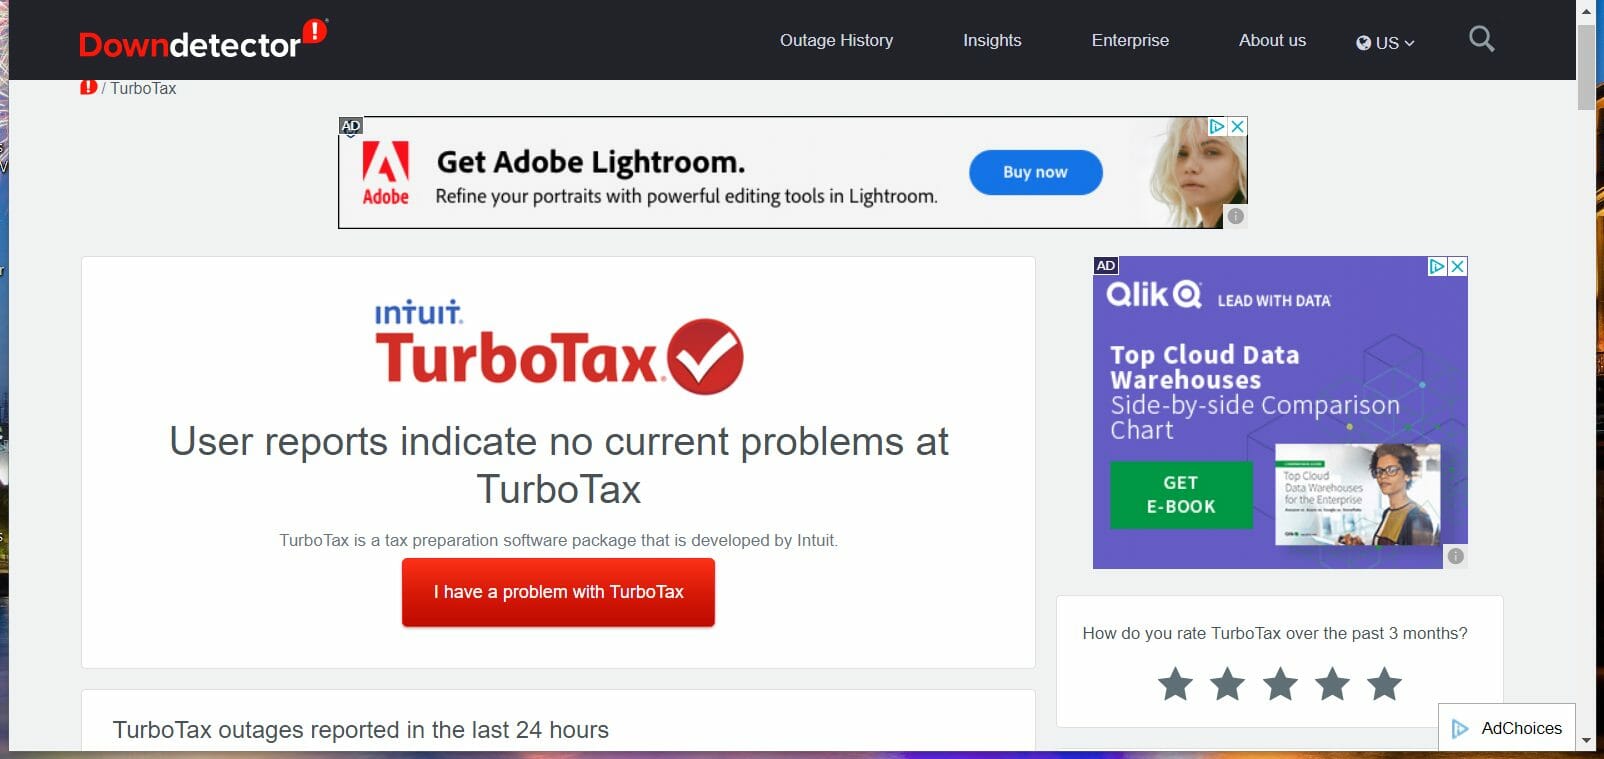
It might just be that TurboTax is down when you’re trying to e-file a return form. To check if there’s a general outage, open Downdetector for TurboTax.
That page tells you if there’s any notable TurboTax outage. If there is, wait a day or two, and then try e-filing your form again.
4. Update TurboTax
TurboTax won’t let me file without upgrading – that’s what some users claim, but before getting there, make sure your TurboTax software actually is fully updated by clicking its Online menu option. Then you can select the Check for Updatesoption on that menu.
TurboTax will then check for and install available updates. You can also manually update the Windows software via this TurboTax Help page.
5. Close all background software
Right-click the taskbar to open a menu from which you’ll need to select Task Manager.
Click the Processes Task Manager tab to select it.
Select programs listed under Apps, and click the End task buttons for them.
Some programs might be listed under Background processes. If you see any third-party programs listed, click their End task buttons to close them.
Also, check if background programs are on your system tray (on the right of the taskbar). Right-click system tray programs and select the Exit options on their context menus to close them.
6. Clear your browser’s cache and cookies
Google Chrome
Click the Customize Google Chrome button on the very far right of that browser’s URL toolbar.
Select the More tools submenu.
Then select the Clear browsing data option.
Select the Cached images and files checkbox.
Click the Cookies and other site data option to select it.
Press the Clear data button.
Firefox
Click the Open Application Menu button at the top right of Firefox.
Select Settings on the menu that opens.
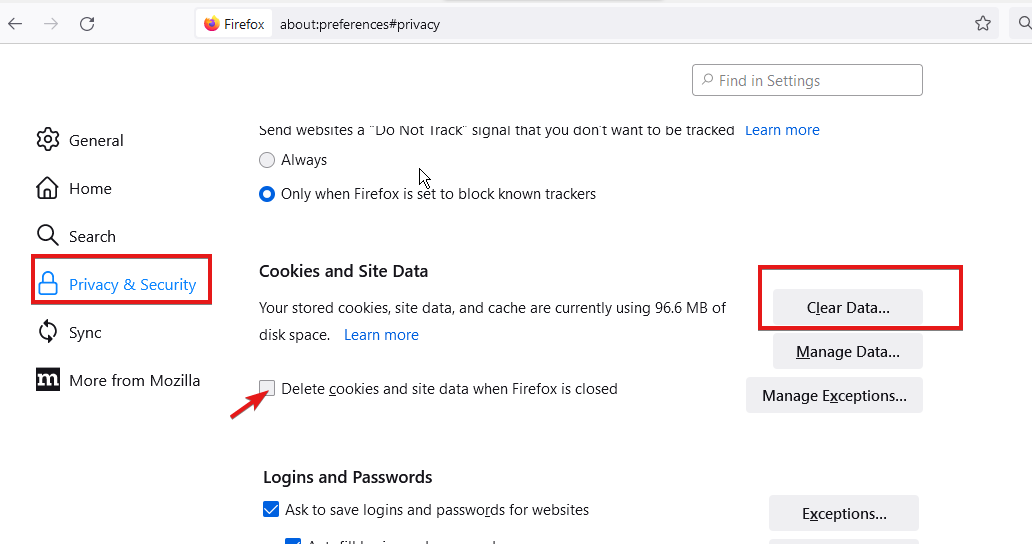
Click Privacy & Security on the left side of Firefox’s Settings tab.
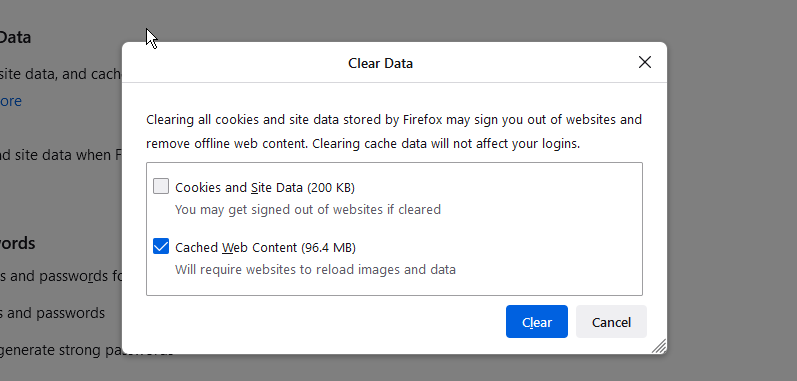
Then press the Clear Data button to open the window in the snapshot below.
Select the Cached and Cookies options on that window.
Click the Clear button.
Edge
Press the Alt and F keys at the same time in Edge.
Click the Settings option on the menu.
Then click Privacy, search, and services on the left side of Settings.
Press the Choose what to clear button to open the tool below.
Select the checkbox for Cookies and other site data.
Click the Cached images and files checkbox to select it.
Press the Clear now button to erase Edge’s cache and cookie data.
NOTE
This resolution is specifically for users trying to e-file returns with the TurboTax web app. Also, note that cookies must be enabled in browsers so that the CAPTCHA appears.
Those resolutions for fixing TurboTax e-filing are undoubtedly worth a shot. However, if you still need other potential fixes, contact TurboTax’s support on its Contact Us page.
Sometimes Server not Found messages can appear in Firefox and prevent you from accessing your favorite websites. This can be a big problem, but today we’ll show you how to tackle this issue properly.
If you are using Mozilla Firefox, it is very likely that you have experienced the following error message:
Problem loading page. Firefox server not found.
As with all the error messages out there, troubleshooting this error is not easy and consists of several steps one must follow. First, we have to zero in on the cause to sort out this error.
However, if you prefer to stick to Firefox, follow the troubleshooting steps listed below to fix the Server not found error.
Why Firefox can’t establish a connection to the server?
This is a common problem that users face, and there are many reasons for it. On the top of the list are the following:
Bad internet connection
Wrongly configured network settings
Compatibility issues with app and antivirus
Note that some users have complained that the server is not found, but they are connected to the internet. Regardless of the situation, we should help you connect to your server in this article.
Quick Tip:
If nothing worked in your case using the Firefox browser, you are left with no choice but to consider the possibility of using a different browser.
We recommend Opera One due to its Chromium-based browser, extensive addon support, and lack of notorious resource use, making it one of the most lightweight browsers on the market today.
Opera One
Use this faster and private web browser, only limited by your Internet connectivity.
This is one of the most primitive yet effective methods of checking out why the problem loading page Firefox server was not found.
Check if the same website opens on other browsers; if not, check with other websites.
Ensure that the Internet security software and the Firewall settings are not hindering your connection. If you are connected but behind a firewall, the server connection may not go through.
If you are using a proxy server, make sure that the proxy server can connect to the internet.
Please follow the troubleshooting steps mentioned below if the website opens and renders correctly on the other browsers.
2. Check Firefox proxy settings
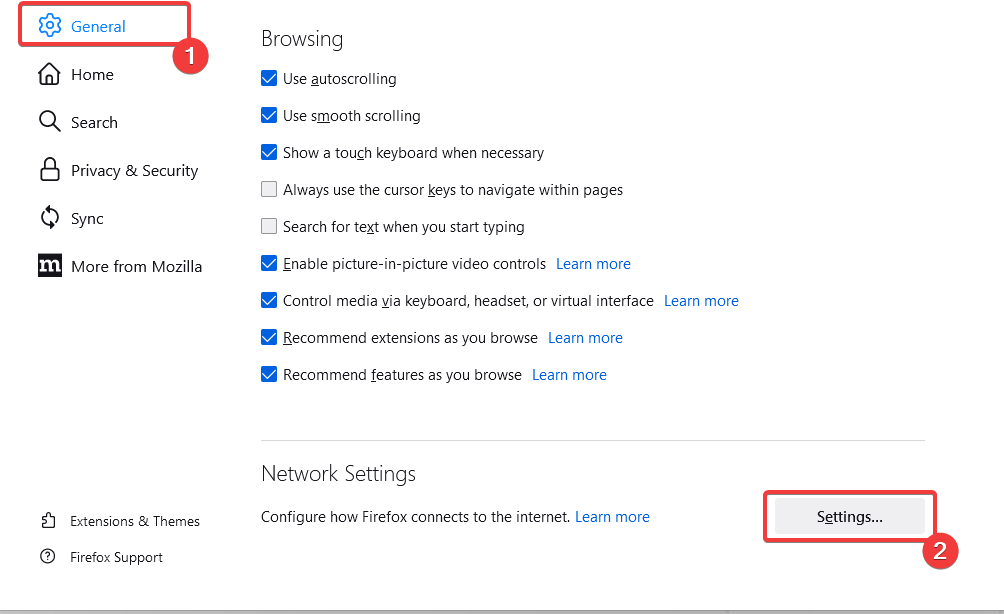
Click the Menu icon (the three horizontal lines), and select the Settings option.
Under the General tab, scroll down and click the Settings button under the Network Settings section.
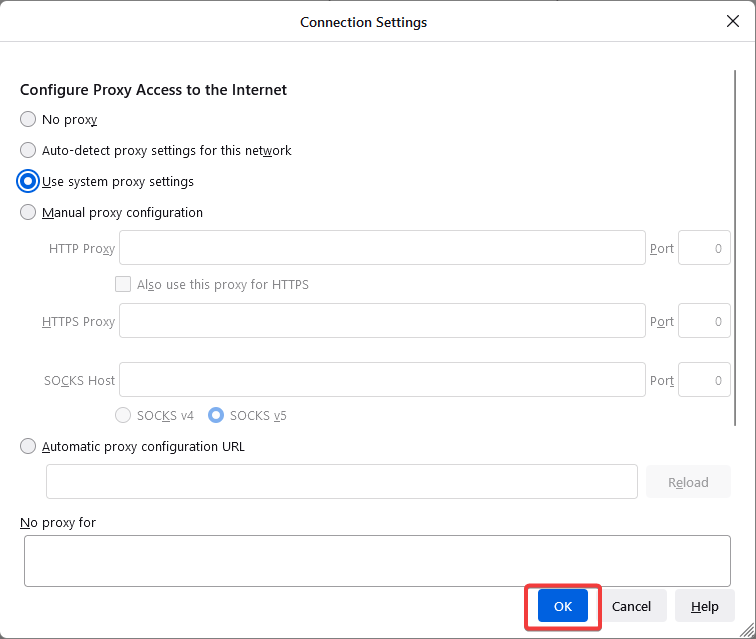
In case you don’t use Proxy Server, select No Proxy.
If you connect via a Proxy Server, check the Proxy Settings with the other browser’s Proxy settings.
Once done, click OK; all the changes made will be automatically saved.
Following this step is a proper way to check that Firefox has permission to access the web.
3. DisableDNS Prefetching
Launch the Firefox browser.
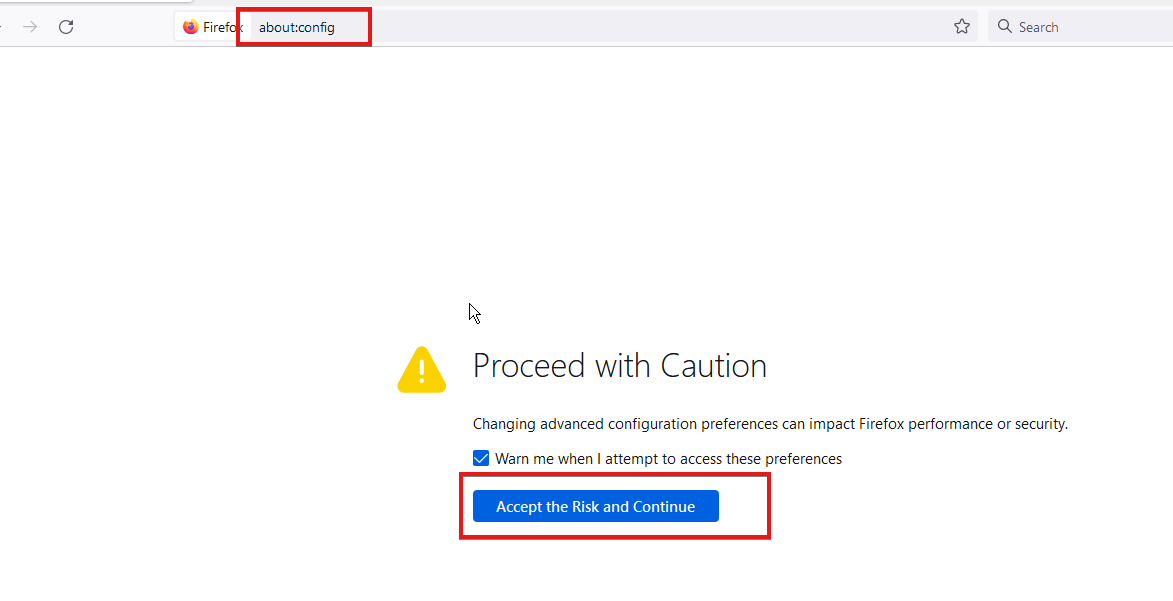
On the Address bar, enter the link below and hit Enter. about:config
The following warning might appear, Proceed with Caution, ignore the message, and click on Accept the Risk and Continue button.
Click the Show all option at the top of the page.
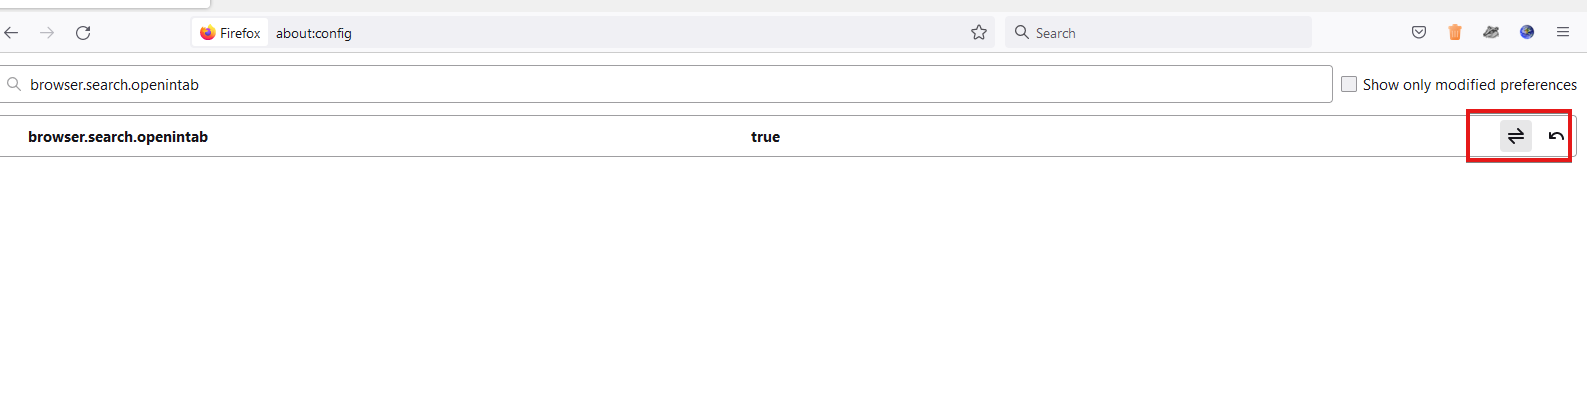
In the search bar at the top of the windows, copy and paste the element below: network.dns.disablePrefetch
Double click on the network.dns.disablePrefetch option, so the value becomes True.
Firefox uses DNS prefetching technology to render the web pages much faster; sometimes, this might play the spoilsport.
4. Turn off the IPv6
Launch the Firefox browser.
On the Address bar, enter the link below and hit Enter. about:config
The following warning might appear, Proceed with Caution, ignore the message, and click on Accept the Risk and Continue button.
Click the Show all option at the top of the page.
In the search bar at the top of the windows, copy and paste the element below: network.dns.disableIPv6
Double click on the network.dns.disableIPv6 option, so the value becomes True.
Firefox switches on IPv6 by default, and this tends to cause issues in specific scenarios. You can try disabling the IPv6 and then check if the problem loading page firefox server not found problem is solved.
5. Check your antivirus
This is a very peculiar problem; it usually happens when your Internet security software restricts Firefox from connecting to the internet. Also, remember that some of the internet security suites are capable of blocking access to the Internet despite being in an inactive state.
Also, try to add and remove Firefox from the list of trusted or recognized programs.
If your antivirus is the problem, perhaps this would be a good moment to consider switching to different antivirus software. There are various antivirus tools on the market.
You can indeed find a good Windows 10 and 11 compatible antivirus that will not interfere with your browser. All good antivirus software nowadays includes good Internet protection features.
6. Restart your modem/router
If you’re getting Server not found error in Firefox, you may fix the problem simply by restarting your modem or router. This issue can occur due to various glitches; to fix it, you should restart your modem/router. To do that, follow these steps:
Press the Power button on your modem/router to turn it off.
Wait for 30 seconds.
Now press the Power button to turn the modem/router back on.
Wait while the device boots.
Once your router boots, check if the problem is still there. I would also suggest Firefox users Clear Recent History and select Everything in the Time Range to Clear. Also, consider using cleanup tools like CCleanerand maybe uninstall and reinstall the Firefox browser.
The solutions listed above are equally great if you encounter the following issues:
When Firefox starts all of the open tabs say server not found – This happens when Firefox is set to open multiple tabs on startup but lacks connectivity to any of them.
Server is not found Firefox Ubuntu – This happens even when running Firefox on Ubuntu.
Firefox not connecting to the server – This usually happens due to server timeouts.
If you have read to this point, we believe you must have fixed this connection issue. Use the comments section to let us know which solutions worked for you.
Firefox is among the best browsers for Yeezy Supply, eBay, and other online stores. It has numerous security features for keeping your details safe when shopping online.
However, users are complaining that eBay is not working or loading correctly on Firefox recently. This issue has been largely reported to be due to one of its security features.
To help you get back to closing deals on the top-notch online store, we have gathered proven solutions to fix this issue quickly.
Why is eBay not loading properly? The Firefox Enhanced Tracking Protection feature is the popular reason for eBay not loading correctly. This is because the feature blocks some files from eBay that it thinks are being used for tracking.
These files hold some of eBay’s core functionality, making it impossible to load the site properly. Another known cause of this issue is the activity of installed extensions.
These can be counter programs to eBay or simply an extension frustrating the website’s processes.
Which browser is best for eBay? The best browser for eBay is undoubtedly Opera One. While other browsers can claim the title, Opera One beats them to it, thanks to its excellent built-in features.
Also, you can use any of the recommended browsers for eBay on different devices. So, you are not short of options.
Quick Tip:
If you can’t make eBay work on Firefox with any solutions, you might need to try an alternative browser, namely Opera One. The browser comes with a built-in AI and amazing organizational features such as workspaces and tab islands.
It can deliver excellent browsing speed, ensuring a page is not stuck during a transaction. Plus, it has a built-in VPN that allows you to access products that might be unavailable in your country.
Opera One
Navigate any e-commerce website like eBay using this extremely secure browser.
Click the Shield icon to the left of the address bar.
Toggle the switch before Enhanced Tracking is ON Protection backward to disable it.
Wait for the site to reload automatically.
If eBay is not working correctly or loading on Firefox, it might be due to your browser’s security features. The Enhanced Tracking Protection interrupts the activities of any site with any noticeable tracking files.
This might prevent eBay from working well. Disabling the feature for eBay alone should instantly fix the issue and might also fix the eBay 403 forbidden error that some of our readers encountered.
2. Restart Firefox in Safe Mode
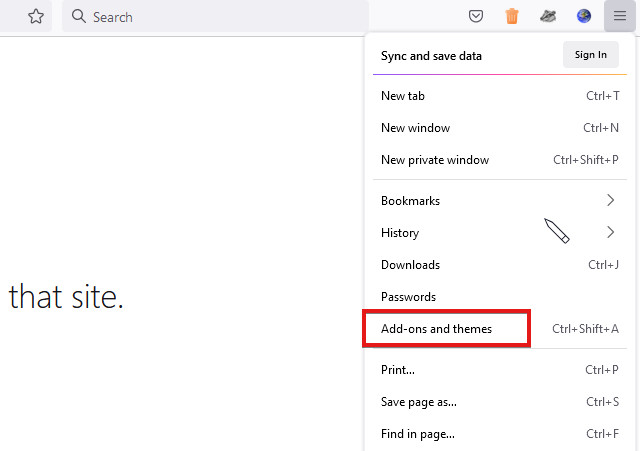
Launch Firefox and click the menu button.
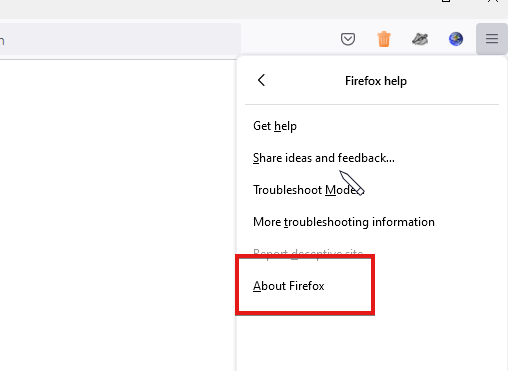
Select the Help option.
Choose the Troubleshoot mode… option.
Click the Restart button when prompted.
Sometimes, it might be extensions or custom settings you have made to your browser that are causing the eBay not working on Firefox issue. Restarting in Safe Mode will automatically disable all extensions and themes and override your custom settings.
If you have installed a search engine extension on Firefox, you might need to remove it to eliminate the eBay search. But if you don’t have such an extension, deleting the profile with the eBay search should do the trick.
You can miss many deals and offers when eBay is not working on your Firefox browser. Fortunately, it is not the most difficult issue, as shown in this guide.
WhatsApp is the most popular instant messaging platform. The app’s ever-growing popularity meant more and more brands now want to use WhatsApp as a marketing platform.
WhatsApp Web allows you to access your WhatsApp account on a web browser. However, the web app does not have an option to send bulk SMS, which is required for a marketing campaign.
WhatsApp extension for bulk messages allows you to connect with your customer on WhatsApp and send bulk messages. You can send messages daily, add intervals and do more.
In this article, we have put together a list of the best WhatsApp extensions for bulk messages that you can use to reach out to existing and potential clients.
Quick Tip:
Opera One browser comes with integrated messengers, thus preventing the hassle of installing third-party extensions. The WhatsApp in Opera One’s sidebar lets you send text and voice recordings and even make calls.
From sending documents and media to having a regular group chat, the WhatsApp shortcut on Opera One can do it all and more. All the WhatsApp notifications instantly appear on your sidebar, and you can interact without leaving the browser.
Opera One
Get quick and easy access to your Whatsapp messaging app directly from this privacy-inclined browser.
It’s not really as difficult as it may sound! You can use third-party software or install an extension on the browser to send bulk messages on WhatsApp.
The extensions available today are advanced and offer several customizations, including adding attachments, setting a delay between messages, and more. Though some of these features might be a part of the paid version.
Is sending bulk WhatsApp messages legal?
WhatsApp has stated on its FAQ Page that sending bulk messages through its app would attract legal action, though it offers the WhatsApp Business app to help businesses interact with clients.
So, it all comes down to what platform or extension you are using to send bulk messages and whether it can evade being detected by WhatsApp. But in all, sending bulk messages using a third-party platform is in violation of WhatsApp’s policies.
What are the best WhatsApp extensions for bulk messages?
WhatsWeb is a Chrome extension for sending bulk WhatsApp messages from your browser. It allows you to send automated, customized WhatsApp messages in bulk.
As per the developers, the users can send messages to unlimited numbers. You can send images, videos, and documents directly from your browser.
You can further customize the app by setting random delays between messages. All the contacts can be imported through a .CSV file. So, use WhatsWeb to send bulk messages today!
WA Sender Free Bulk Messaging is an advanced tool that not only allows users to send bulk messages but also to create groups with a single click.
It allows you to create a ChatBot on WhatsApp Web and seamlessly perform the functions. Also, with the Pro version, you get the option to add a delay between messages and add attachments, amongst other features.
WA Self Sender is a free extension that allows users to send messages to individuals or in bulk through WhatsApp Web.
All you have to do is upload the CVS file with contacts, provide the message, and WA Self Sender will take care of the rest. Also, there’s the option to add a delay.
How to send bulk WhatsApp messages without getting banned?
There are two ways you can do that. If you are using WhatsApp to target a small section of users or engage with your client base, see if manually sending messages works.
In case that’s too hectic, you can always use the official WhatsApp Business App or Platform to send bulk messages without violating WhatsApp’s policies and Terms of Service.
WhatsApp extension for bulk messages can help you reach out to your audience with customized messages.
Also, you would find several Firefox Extensions as well to send bulk WhatsApp messages, like WAToolkit (Port).
However, the number of genuine WhatsApp bulk message extensions is very limited. Explore the list to find the one that works for you.
We take a look at the RSS reader options for Windows. These days, keeping up to date with news and updates is easier than ever, thanks to the concept of RSS reader.
RSS stands for Rich Site Summary and represents a family of web feed formats that relay frequently updated websites like blogs, news websites, etc.
Thanks to RSS feeds, users don’t have to check the websites regularly or subscribe to newsletters.
And people who have installed Windows 10 and 11 on their machines have the opportunity to use some handy apps that will manage the RSS feeds for all the sites users are interested in following.
Windows OS users may also be interested in reading about the Edge RSS reader.
Does Windows 10 & 11 have RSS?
Natively, Windows 10 and 11 do not have an RSS reader, meaning that it is not built-in with the OS. However, getting a suitable RSS reader on the Windows operating system is not a complex process. In this article, we show some of the best you can use.
How do I get an RSS feed in Windows?
One of the easiest ways is installing a browser with an RSS reader. If you do not want the load of a different browser, there are many applications from the Microsoft Store that you may rather install.
What to look for in an RSS reader?
Feed structures: A good tool should be able to organize the curated articles or feeds into well-defined categories.
Customizable: It must give enough room for your personalization. You should be able to modify the structure, look, and search requirements.
Keeps track of reading materials: An RSS feed should permit you to pick up from where you stopped reading regardless of the article type.
Powerful search feature: To find the articles or content you look for in just a few seconds, the RSS feed should have a perfect search structure that reduces your search to the tiniest possible queries.
Offers dedicated applications for your device(s): Especially for those that work both on computers and mobile devices, you may want a dedicated app that gives you notifications as soon as something new is curated.
Now let us discuss the best Windows 10 and 11 RSS reader options.
With Opera One, anyone can keep their personalized news and stories in one place, surfing the web securely without problems.
This modern browser is the choice for millions of users who need streamlined navigation and RSS feeds on their homepage.
You can benefit from selective news and customized sources in your preferred format. Plus, you get convenient and free access to your newsfeed integrated into the sidebar.
In this way, you can read every story or article in one glance on your categorized list of personal news.
If you wonder how to use the RSS feed on Opera One, it’s so simple you can do it with a click. You have the Add Sources button that will save your websites in one place.
In addition, you have many more benefits like different workspaces and pinboards to keep the information uncluttered.
Other key features of Opera One include:
Integrated apps in the sidebar (Instagram, Whatsapp, Messenger)
Built-in free VPN and ad blocker
Customizable news feed section on the homepage
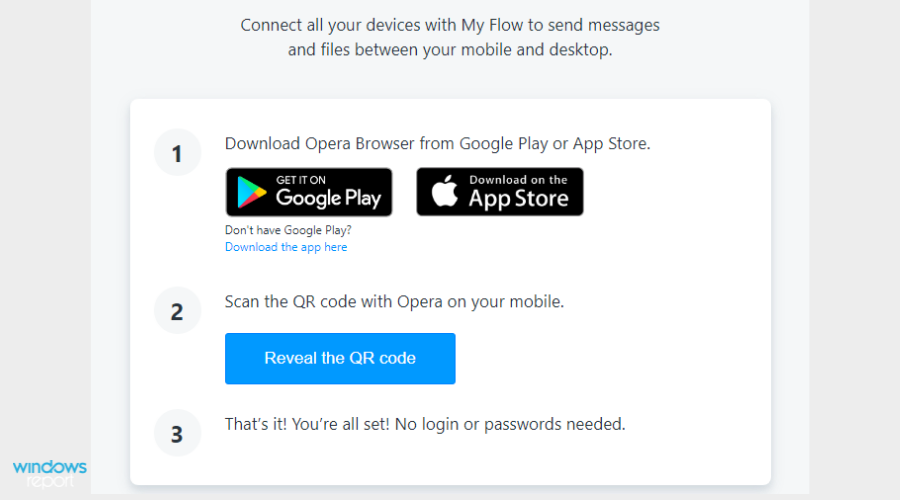
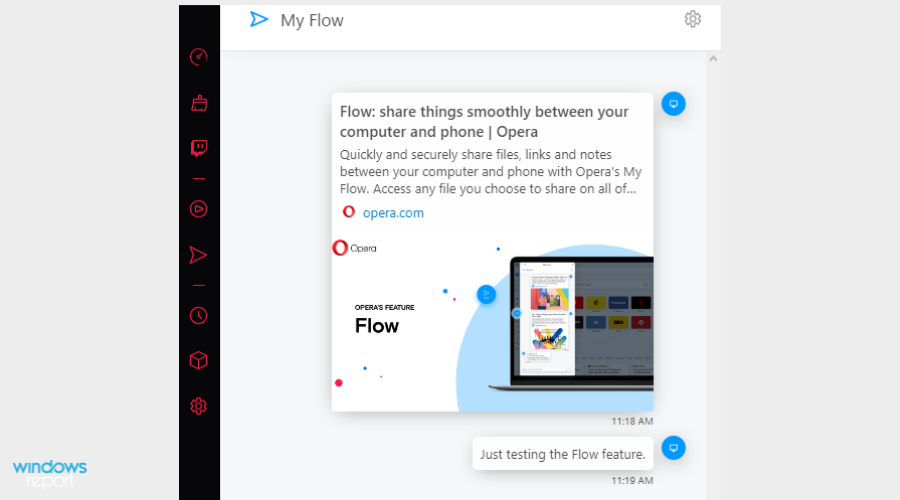
Flow feature to transfer files between devices
Video pop-out functionality
Syncing news on different devices
Opera One
Take advantage of this organized browser and navigate through any stories using its practical RSS feed.
This news feeder is so advanced that it has its own AI assistant, Leo, to help you prioritize information. As you already know, getting your feeds from all the websites is no longer enough.
That is because the quantity of information can become overwhelming. That’s where Leo comes in to help.
The AI assistant will prioritize information in your feed based on your keywords, topics, and trends so that you only get the relevant information.
Moreover, Feedly will show you exactly why certain information appears in your feed so you can further refine your criteria.
Did you discover interesting information? You can share it with a click with your friends or with your team on the spot.
Feedly has a simple interface that lets you sort out your favorite sources based on topic.
It also supports sharing and integrates popular social media and collaboration tools.
If you are interested in using this tool, you should know that it offers 3 major subscription plans, each with its own specific features. The significant differences are the number of sources and the included integrations.
Omea Reader is a free RSS Reader and newsgroup aggregator with lightning-fast speed and excellent organizational features.
Not only can this tool allow you to read even your Atom feeds but it also keeps track of your bookmarks. Additionally, the dedicated desktop search function makes it easy to find specific information.
This is not just an RSS reader; it’s a workspace you can customize to separate and organize your data from different projects.
And if you can’t see an RSS link on a webpage, don’t worry because Omea finds it directly from your browser. You can even create clippings from articles.
Omea offers several options when it comes to sorting out your information. For example, it lets you create files and subfiles, add tags, and more.
It also automates routine filling and associates resources in handy ways.
This app has a straightforward interface, is easy to use, and offers good space between elements for a smooth reading experience.
You can easily set up the categories you are interested in and then add your favorite sources to the feed with the latest news.
When you add an RSS feed, there are enough options to customize it on your preferences.
Among its many features, you can read articles using extended readability without opening them in the web browser and watch YouTube and HTML videos inside the app.
Newsflow sends notifications regarding the newest news and gives quick and easy sharing options.
Users can browse around using keywords. Not only that, but they can also organize their feed thoroughly. Newsflow lets you create categories, reading lists, favorites, and more.
Lastly, Newsflow is a free RSS reader. It is compatible with computers operated by Windows 10 version 15063.0 or higher and Xbox
The Veen Feed Reader offers a pretty similar interface to Nextgen Reader. The feeds are all aptly organized in different categories ranging from Health and Science to Business and Technology.
However, this app will feature an integrated search charm that allows users to look for the most exciting things. The Import and Export of OPML files are also possible within the app.
Veen Feed Reader also keeps track of your unread materials and lets you create favorite lists and add bookmarks.
Users can also create their own folders to better organize the content in their feed.
You can connect your Feedly account to Veen Reader, but you can also log in locally.
Veen Feed Reader is a reliable and customizable RSS reader solution that you can use to sort out the content smartly and efficiently.
If you need a general information feed manager, Inoreader is the tool to get.
As you probably guessed, this is not just an RSS reader but can aggregate data from multiple sources like Podcasts, Twitter, Blogs, Facebook, and even Email Newsletters.
The only work you need to do is at first to set up the whole workflow and decide whether you want to get push notifications, email, or to set rules for ignoring certain information.
This is a perfect information-mining tool as you can use its Active Searches feature to create search queries to get all the posts mentioned that are key in a news feed.
And if you use Inoreader at night, you will be happy to know it also has a Dark Mode.
Inoreader lets you make your personalized dashboard based on your preferences.
The tool lets you save your web content to third-party applications such as OneNote, Evernote, or platforms such as Google Drive or Dropbox.
Inoreader has a free version and paid versions that require a subscription. The unpaid version is more limited and includes ads.
One of the most well-known RSS readers used to be Google Reader, but the application got shut down. So why did Google decide to pull the plug on everybody’s favorite news provider?
According to official information provided by the company’s CEO, Google is trying to consolidate its services and, in the process, concentrate on what’s really important.
The strategy included bringing together services like Reader and Picasa under the Google+ plus umbrella and several shutdowns, including iGoogle and Reader.
Windows users were left out like everyone else, and in this article, we have provided the best alternatives for RSS readers. As a result, you will be able to get the best out of our RSS reader list for Windows 10 and 11.
Note that while we may have left them out of this article, there are also some good options for open source RSS readers for Windows.
Please share your opinion with us in the comments section below and tell.
Could the latest installment of Ubisoft’s open-world sandbox FPS be making its way to Game Pass in the near future? A banner image for the game that recently appeared on the Xbox dashboard alongside other newer Game Pass additions seems to suggest this is the case.
This would be a rather curious move given that Far Cry 5 came to Game Pass only a few weeks ago. However, there has been a slew of Ubisoft titles making their way to the service as of late, such as Assassin’s Creed Origins and – just a few days ago – Watch Dogs 2.
Of course, the game’s appearance on the Game Pass section of the Xbox dashboard could have been a simple mistake, with the Far Cry 6 cover image accidentally being used in place of that of Far Cry 5. This seems likely enough, and it would not be the first time such an error has occurred.
Besides, fans would scarcely have time to explore all of Hope County (the setting of Far Cry 5) if Far Cry 6 does in fact come to Game Pass soon. Hopefully, we will get clarification on the matter soon.
Today we’ll show you how you can record macros in Chrome using screen recorder software or browser extensions like DéjàClick and iMacros.
Let’s get started:
How do I record a macro in Chrome?
1. Record macros with DéjàClick
Open Chrome’s web store and click on Add to Chrome next to the DéjàClick extension.
Once you’ve added the extension to Chrome, you should find the extension on the browser’s toolbar. Click that button to open the sidebar in the snapshot directly below.
Before you start recording a macro, enter chrome://extensions into Chrome’s address bar, and select Details under the DéjàClick extension.
Now turn on the Allow in Incognito option. This activates Simulate New User that ensures macros record without cookies.
Now press the Begin recording button on the DéjàClick for Chrome window.
Next, open Bing and Google in two Chrome page tabs.
Press the Stop record/replay button. You’ve recorded a script that opens Bing and Google in two alternative page tabs, and the DéjàClick window includes the script for that as shown below.
Close the Google and Bing page tabs, and then press the Begin replay button. That plays the macro which opens Google and Bing in Chrome.
To save the macro, click the Save your recording as script button. Then you can enter a title for it and press the Save button.
You can press the Open a recorded script button to open any saved macro.
To adjust the macro replay speed, click the Properties tab and Replay Timings to open the options below.
There you can select Faster from the Replay speed drop-down menu. Now you can record browser actions in Chrome.
DéjàClick is one Chrome and Firefox extension that enables point-and-click browser recording to generate web scripts. We regarded it as the best Chrome macro extension due to its features and intuitive interface.
Next, click the iMacros button on Chrome’s toolbar to open the extension’s window.
You can use the Record Macro button under the Record tab to record new macros, as well as the Stop button in order to stop the recording. Quite easy to record browser actions in Chrome, right?
To play the macro, select it on the Bookmarks tab, then click the Play tab and press the Play Macro button.
Press the Play Loop button to replay the macro a certain number of times. Enter a value in the Max box to configure how many times the macro playback loops.
Note that iMacros also includes some demo macros for you to try. Click Demo-Chrome on the Bookmarks tab to open a list of recorded macros.
You can right-click the macros to open the context menu shown in the shot below. Then you can select some extra options to add new folders, edit and erase macros.
3. Use a screen recorder software
Alternatively, you can use a screen recording tool. Though not specifically built for recording macros, these tools could also work.
If you want editing options and advanced controls over your recording, we recommend looking at third-party software.
But if you want to start right away without installing anything on your PC, you can use the Snipping Tool:
Type Snipping Tool in the search bar and open the app.
Click on the video camera icon.
Hit the New button.
Go to Chrome.
Select the screen area you want to record and hit start.
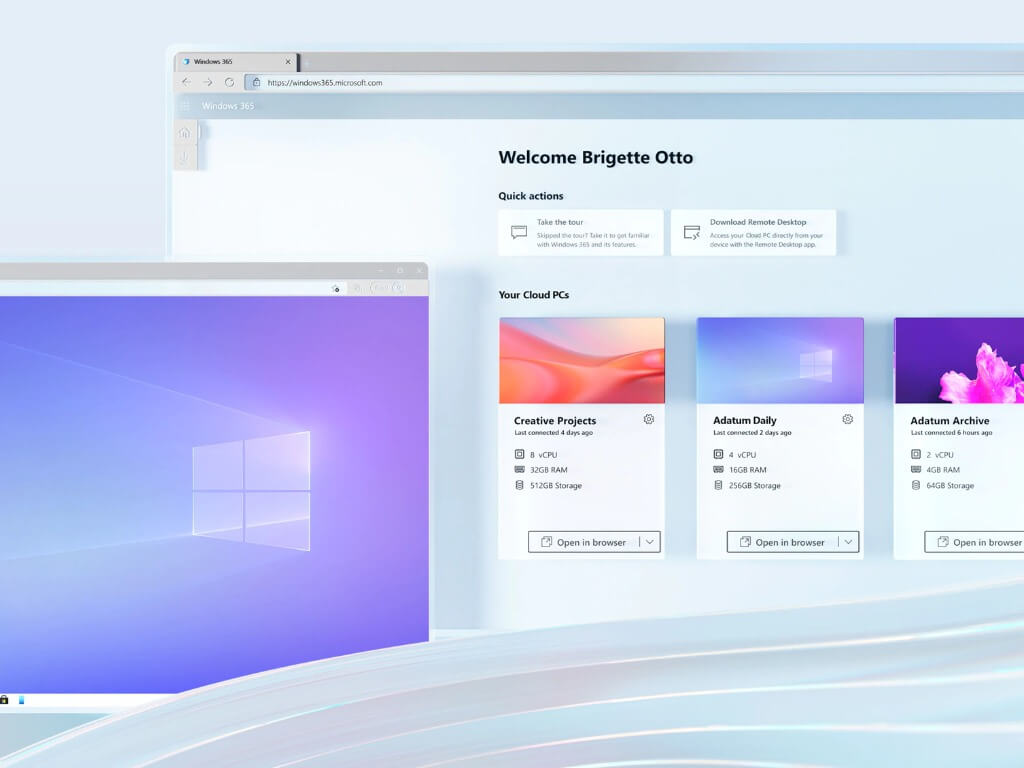
There’s been a lot of stories out of Inspire 2022, and one of the biggest relates to Windows 365. It’s been almost a year since Microsoft first revealed the service, and to celebrate, the company added some new features.
In total, there are three tweaks. The first is Citrix HDX Plus for Windows 365. This is a new add-on for Windows 365 that should add support for a broader range of endpoint devices and peripherals and security and policy controls. Second up is Windows 365 government expanding to government community cloud and government community cloud high.
Finally, there are tweaks for Windows 365 Business edition. Changes here make it even easier to sign up and seamlessly sign into cloud devices using a Microsoft account and restore a computer to an earlier point in time with point-in-time restore.
Chrome is one of the best browsers striving to limit resource usage through its tab management features. It automatically freezes inactive tabs to save PC battery and memory.
However, users are starting to face issues that are not part of the tab management of Chrome. This is in the form of tabs closing by just clicking on them.
This causes frustration, as you need to stay on a tab to use it. Thankfully, you can easily fix this issue, as we will show in this guide.
Why does my mouse close tabs when I click on them?
There are several reasons Chrome closes a tab when you click on it. It could be down to hardware failure and problems with your browser, among other causes.
Below are some of the popular ones:
Faulty mouse/trackpad
Issues with installed extensions
Glitches with browser
How do I keep a tab active in Chrome?
Launch Chrome and copy and paste the command below in the address bar. chrome://discards
Press the Enterkey.
Locate the tab to keep activity and click the Load option in the last cell.
With the deactivation of the tab discarding and freezing options, your opened tabs will always be active. Note that this will affect your PC resources. This is because Chrome freezes and discards tabs in the background to limit resource usage.
Quick Tip:
Use an up-to-date browser with lower error rates. A good alternative to Chrome is Opera One. Running on a Chromium engine as well, the browser offers a similar experience, whilst being lighter and faster.
You can integrate all your preferences, bookmarks, and passwords in just a few clicks and use them for good. It has performance-oriented features like hardware acceleration, a battery saver, and an adblocker.
Opera One
Upgrade your web browsing experience using this highly responsive and error-free tool!
How do I stop Google Chrome from closing tabs when I click on them?
1. Restart your PC
Sometimes, the reason Chrome closes the tab when clicked might be hard to pinpoint. It might just be due to some issues with Chrome’s processes.
In this case, the easiest and fastest fix is to reboot your PC and relaunch Chrome. This fix has proved effective for other users, and you should try it too before other sophisticated solutions.
2. Check mouse/trackpad
The most well-known cause of the Chrome closes tab when clicked is a faulty mouse or trackpad. This is especially true when the middle mouse button is sticky.
The middle mouse button is a known shortcut for closing tabs on Chrome. So when it is sticky, you might experience this issue.
You can perform basic troubleshooting on your mice, like cleaning and servicing. If this does not work, you should employ the service of a professional.
Toggle the switch in front of each extension to disable it.
Too many extensions sometimes make your browser misbehave. In this case, it might cause Chrome to be closing tabs automatically when clicked.
Disabling the extensions and relaunching your browser should restore normal service.
Need a clean slate for troubleshooting? Follow this guide to close all open tabs in seconds.
The Chrome closes tab when clicked problem can be frustrating. This is because it keeps you reopening tabs only for them to be closed when you try to access them. With the fixes provided in this guide, you should be able to solve the problem effortlessly.
If you are facing other issues like Chrome not responding, check our guide on how to fix it.
Feel free to let us know the fix that helped you resolve the Chrome tab issue in the comments below.
Some users have posted about Gmail buttons not showing or working on Google and Mozilla forums.
Those users can’t see all the buttons they’re supposed to in Gmail, or some of the buttons don’t work when clicked.
Also, here are some other similar errors that may come across on Gmail:
Gmail settings button not working
Gmail toolbar missing
Refresh button missing in Gmail
Gmail gear icon missing
Send button not working in Gmail
Gmail next page button missing
Reply button missing in Gmail
Gmail compose button missing
Gmail attachment button not working
So, let’s find out what’s causing the issue and the potential resolutions for it.
Why are my buttons missing in Gmail?
In most cases, it was an extension or add-on installed to the browser that caused the problem. If you have changed Gmail’s theme, it too could be responsible for the issue.
Also, make sure to check the antivirus software installed on the computer or any other tool that could modify the network properties. Besides, misconfigured browser settings or corrupt browsing data could be the reason behind the problem.
Quick Tip:
Users might find that an alternative browser displays Gmail’s buttons without any issues. So, try opening Gmail in another browser. That won’t fix the issue for the original browser, but users can at least still utilize Gmail if the buttons are ok in other browsers.
Gmail supports the latest versions of Edge, Google Chrome, Internet Explorer, Safari, and Firefox. Alternatively, you can try using Opera. This browser is quite similar to Chrome, but unlike Chrome, it’s not associated with Google, so it won’t send your data to Google.
Opera
Access and manage your Gmail inbox using this fast and private browser!
Press Windows + I to launch Settings, and select Network & internet from the tabs listed on the left.
Click on Advanced network settings on the right.
Now, click Network reset.
Click the Reset now button.
Finally, click Yes to confirm the change.
Some users have confirmed that they fixed the Gmail icons missing problem by resetting the network components to their default setting.
2. Reset the Browser to its default settings
Paste the following path in Chrome’s address bar, and hit Enter:chrome://settings/reset
Click on Restore settings to their original defaults.
Next, click on the Reset settings button to confirm.
Resetting a browser will clear its cache and turn off or remove extensions, which should fix the Gmail buttons not showing problem. If it doesn’t, head to the next method.
3. Check the Button label setting
Click on the Settings icon in Gmail, and select See all settings.
In the General tab, scroll down and select Icons next to the Button labels entry.
Scroll down to the bottom and click on the Save Changes button.
4. Select the default Gmail theme
Click on the Settings icon at the top-right corner in Gmail, and select See all settings.
Select Themes.
Click on the Set theme button.
Select the Default theme, and click on Save at the bottom.
After reverting to the default theme, the problem with Gmail’s buttons should be resolved. If it persists, head to the last method.
5. Open Gmail in basic HTML view
Gmail has a Basic HTML View for browsers that it doesn’t support. Gmail’s buttons might work just fine and start showing in the Basic HTML View.
So, try switching to Basic HTML View and select the I’d like to use HTML Gmail option. And this would fix the Gmail button not showing problem once and for all.
How do you add buttons in Gmail?
Go to Gmail Button by cloudHQ extension in the Chrome Web Store, and click on Add to Chrome.
Next, click on Add extension.
Once installed, you will find the Insert button option when composing a new email in Gmail.
Click on the Insert button icon, and select Button from the flyout menu.
Now, customize the button using the various available options, and click on the Insert into email button.
These resolutions have fixed the Gmailbuttons issue for most users and should have worked for you as well.
Remember that Gmail users can also open their emails within client software, such as Mozilla Thunderbird, which can be better alternatives to the Google web app.
Tell us which fix worked for you in the comments section below.
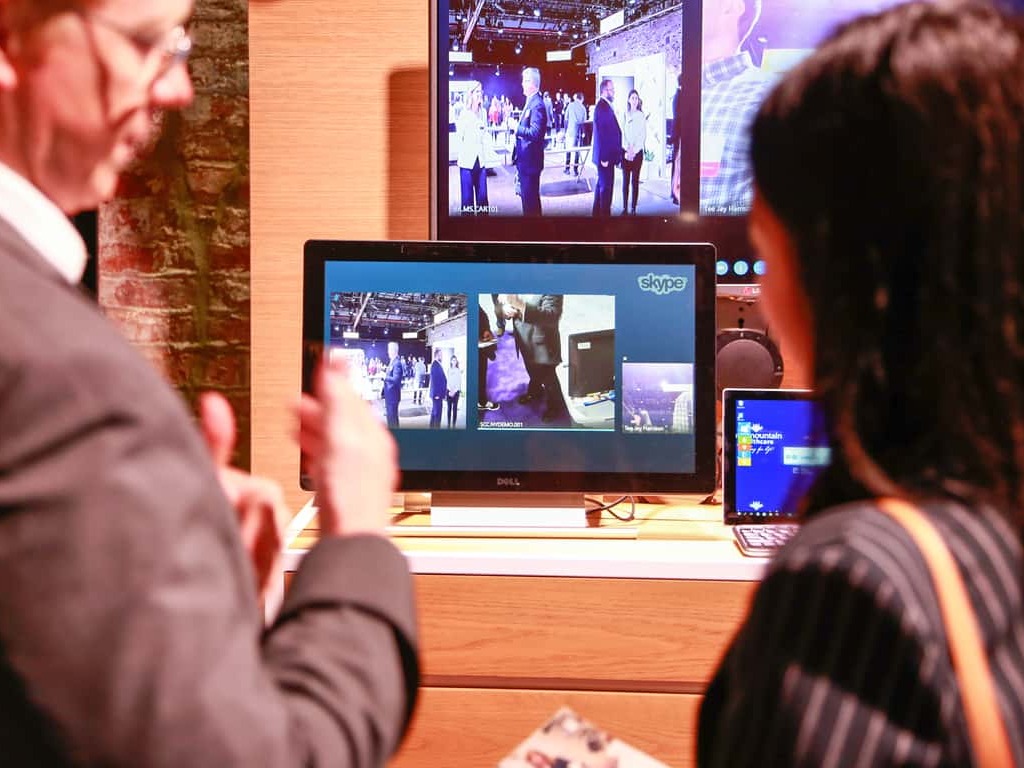
Microsoft Skype is getting a cool new call screen, as it has now been transitioned from the beta channel. The feature is already enabled by default. It will be interesting to see the impact this feature has on the screen sharing experience and how it impacts features such as Zoom-In.
Moreover, Call captions have also been included in this release. Essentially, this means that meeting attendees will be able to follow through the meeting. Users can easily enable this feature directly while the call is on display.
Aside from these two new features, Microsoft has also released a couple of bug fixes designed to enhance and improve the user experience. Here’s what you can expect:
Skype not connecting to audio/video devices on Windows 7 and 8.1
Skype crashing on iOS
Navigation with opening chats in chats and contacts tabs on Android
Missing ‘send button’ after recording a video on Android Chromebook
And as usual, these features will be rolling out gradually over the next couple of days. If you’re not already a Skype Insider, you can sign up here to gain access to these features and more.
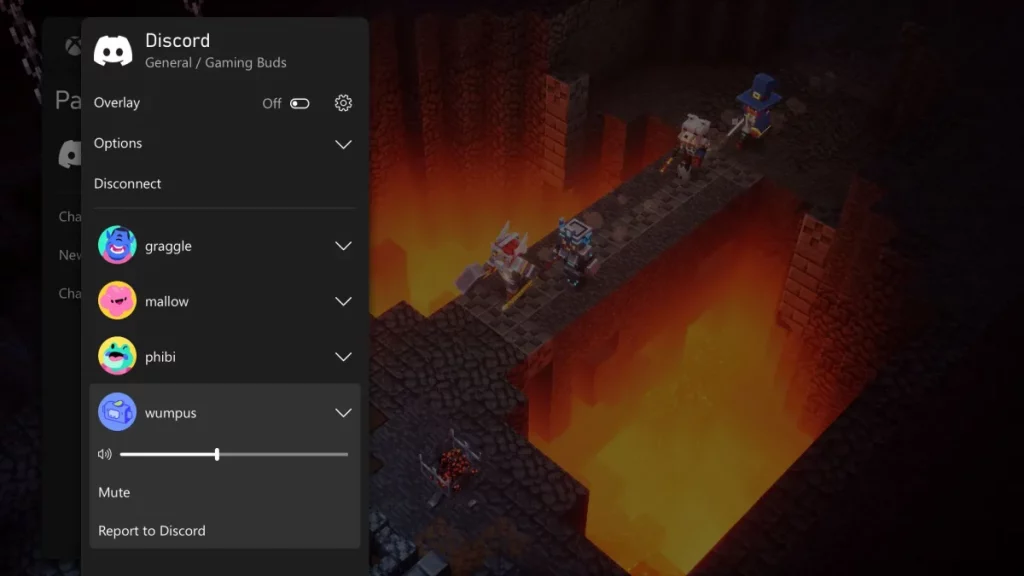
Discord voice chat is coming to Xbox consoles. The feature is currently in beta testing with Xbox Insiders, meaning select gamers will be able to chat with their fellow Discord users via voice channels or group calls directly on Xbox. The feature will also come to everyone else outside of Xbox Insiders soon.
With Discord voice chat on Xbox, you’ll be able to see who is on your call and who is speaking, and even adjust the volume between Discord voice and your Xbox game. However, the process to get started with it in the Xbox Insider Program is a bit complicated as you’ll have to transfer your calls from Discord on mobile to your Xbox console since there’s no Discord app on Xbox.
To begin, you’ll have to go to Parties & chats and click Try Discord Voice on Xbox. You’ll then have to scan a QR code, and set up a two-way link between both your Discord account and Xbox (even if you’ve linked your accounts previously.) From there, you can go into a Discord channel as normal, and in the Discord mobile app, you’ll see a new option to Join on Xbox. The Xbox app will then launch and let you connect the Discord Voice chat to your Xbox Series X|S or Xbox One console.
Again, this is only for select Xbox Insiders right now, and Microsoft promises that it will be available for everyone else “soon.” No specific date was given, but that usually means a few weeks, or months, as Xbox Insider features usually rollout down to everyone else within those timeframes. More information is available in a support document if you’re still confused.
It is really interesting to see this Discord voice chat and Xbox integration. As you might recall, rumors had that Microsoft was interested in buying Discord, but that was put to rest when Discord said it ended talks to sell itself to potential buyers. Sony has an interest in Discord as a minority investor, and PlayStation gamers can actually link PSN to Discord.
Want to know how to download and install Roblox on Windows 11? This quick guide shows you how to get started in minutes. Whether you’re setting up Roblox for the first time or reinstalling it, the steps are simple.
Use this guide to get the official Roblox download for PC, install the Roblox Player, and start playing on your Windows 11 computer. Roblox is free, easy to install, and ready to run on most PCs.
Alternatively, you can download Roblox APK for your Android smartphone or Tab and install it easily.
4. Get Roblox on Chromebook
You can download Roblox from the play store and play it free on a Chromebook without any problem. However, not all Chromebook will support this. The devices that support Android have this capability only.
For ChromeOS, the download link is the same as for Android.
5. Download on iOS, Xbox, and other platforms
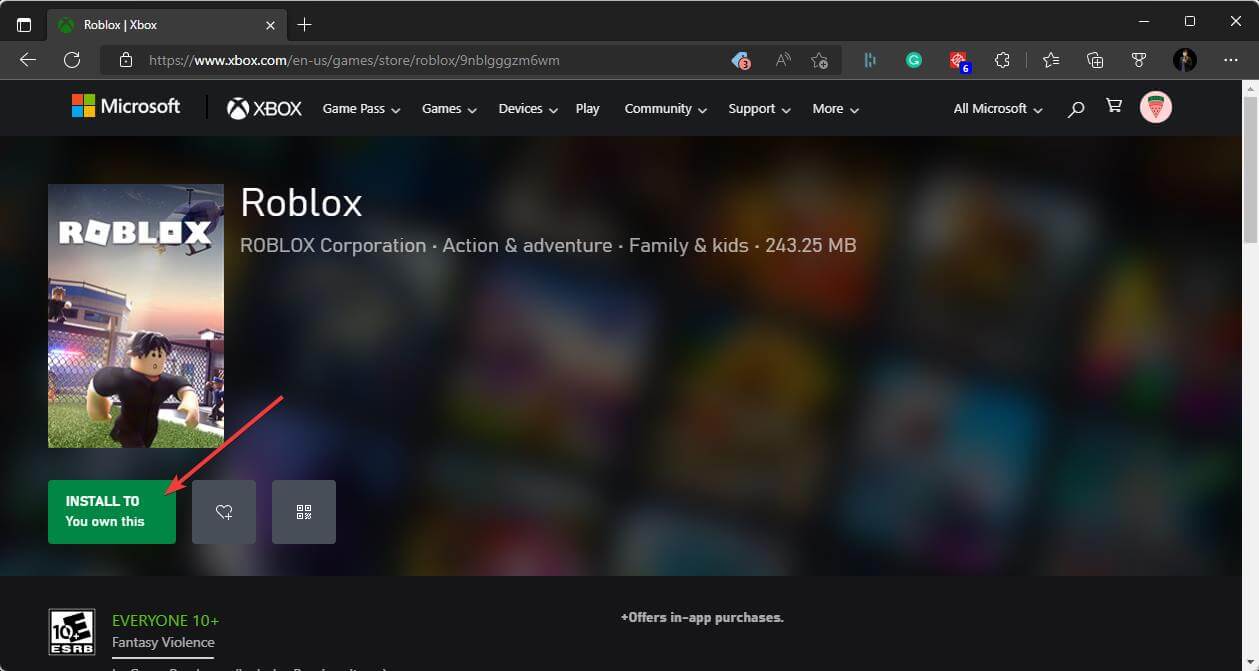
Roblox is also available on iOS and Xbox too. You can get the game for these platforms by following any of the appropriate links given below:
For Xbox and iOS, the official store is the only way to free download as these platforms don’t support sideloading apps like you can install Roblox APK on Android OS.
Roblox is free to download and play. So, you won’t have to worry about anything else.
This is a user-generated game. You can create anything you want and be whoever you want to be. In this game, imagination rules supreme.
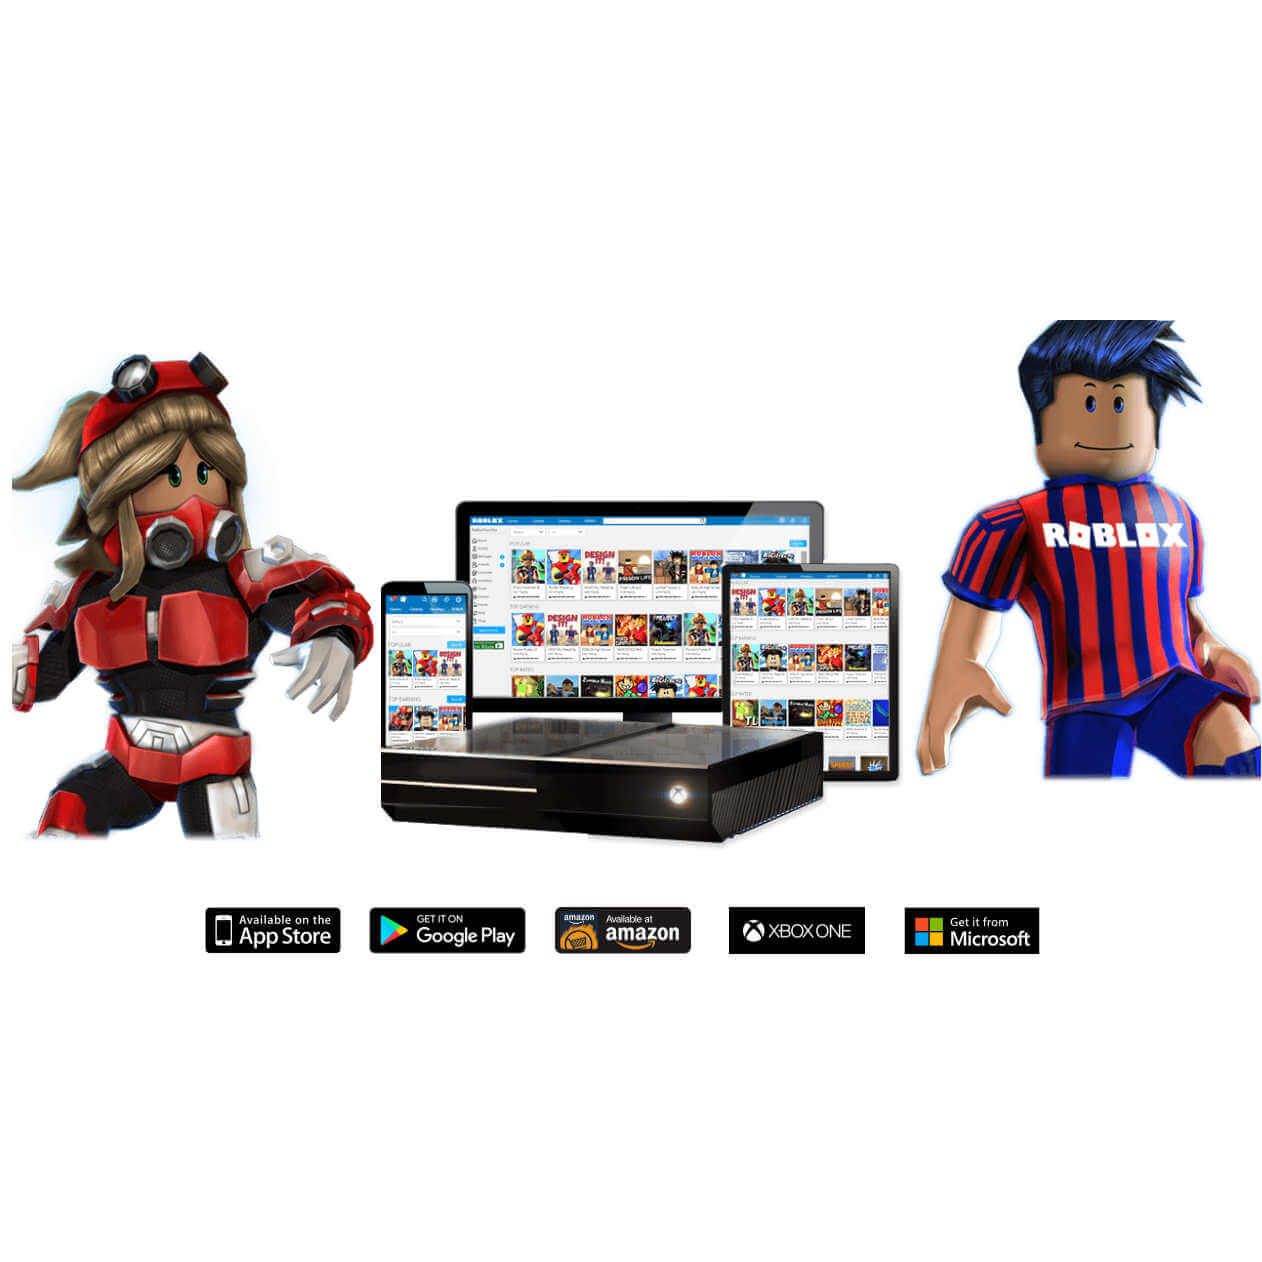
Moreover, this title is a cross-platform game. You can immerse yourself in the Roblox world using your computer, tablet, Xbox One console, smartphone; you name it.
If you want to play Roblox without installing it on your device, unfortunately, there is no way. You can only browse its website from your web browser and click on the play button to launch the game. But, the game launch will require a download.
This article has explained how you can download Roblox free on any supported platform and play the game. If you have any opinion or have any helpful, relevant information, feel free to let us know in the comment box.
Because most of the reading we do in the 21st century is performed on a hand-held device, it is essential to choose a suitable device, but the browser you use, also matters.
The online reading tool is vital because it can offer you a wide range of features that can provide a better experience.
Because of the wide range of browsers available on the market today, it is a daunting task to find the perfect one for your needs. Some browser options offer better speeds, and other software options are better at blocking ads.
Other options have a low impact on your system resources; others look good without valuable capabilities.
For these reasons, we will explore some of the best browser software options available on the market that allow you to have a beautiful and calm reading experience.
Many browsers offer a reading mode. In fact, most modern browsers have this feature built-in. A few that should make your go-to are:
Opera One
Microsoft Edge
Google Chrome
UR browser
Firefox
While these are our top choices, browsers like Brave, Vivaldi, Safari, Epic, and Chromium all have a reader mode.
Note that for a browser software to qualify for this list, it should offer you:
A fast and stable experience without getting bugged by ads
No pop-ups and other distracting elements
Good web-page loading times
Possibility to extend features
The browsers on our list are also among the best browser options for use on Windows 10/11. Let’s jump right to it.
What are the best browsers for reading?
Opera One– Best for social integration and sharing
Opera One is a highly versatile browser that you can use for various purposes, including reading text and online books.
If you prefer to read your news online, Opera One has a very nifty personal news feature. This feature supports the RSS feed and lets you personalize your news feed, choose your news sources, highlight particular news categories, and choose the language you want to display news in.
There are two view modes available: Timeline, where you get an estimated reading time, and Magazine.
Have you found something interesting that you want to read later? Bookmark the respective page for later use. Use the Bookmark Manager to organize your bookmarks better.
If you need additional information on the content you’re reading, you don’t need to leave the website you’re on. Thanks to the Instant Search feature, you can look at something on the web within the active tab.
If you find an exciting piece of information, you can use the integrated messengers to share it with your friends.
As you can see, Opera One has all the features you need for a fantastic in-browser reading experience.
Additional features:
Workspaces
Snapshot tool
Search in tabs
Opera One
A constant pioneer, Opera One offers multiple ways of reading text on websites.
UR Browser is an incredibly powerful and reliable browser software that offers many valuable features, helping you read on your Windows device. Beyond this, you can customize and edit how this software reacts, looks, and works with just a few clicks.
This browser was built with privacy in mind, offering you one of the best privacy packages you could ever find. When using UR Browser, you won’t have to install third-party extensions to protect yourself from ads, malware, trackers, and even sites that collect cookies.
All of these protection elements come built into UR Browser. You also have the option of modifying the level of privacy you need by being able to choose from low, medium, and high privacy settings.
If the latter option is selected, UR Browser will automatically start its powerful VPN (Virtual Private Network) service to ensure your personal information is protected.
UR Browser’s impact on your system resources is barely noticeable, but that doesn’t mean the software developers cut corners to achieve this. Our tests have proven that UR Browser clocks some of the best speeds when it comes to web page loading speeds.
All the above features make choosing the best browser for reading on your Windows device a straightforward decision. UR Browser is one of the best reading options, but it also trumps other browser capabilities in other areas.
Additional features:
Viru scanner
Third-party cookies blocker
No complicated settings
UR Browser
One of the browsers with rising popularity provides Reader Mode.
Mozilla Firefox is another excellent browser, offering strict and efficient online security, privacy, and protection from ads and malware. Even though these features are good in their department, they can’t compare to the privacy and security features in our top pick, UR Browser.
In our malware tests with default security settings for each of the browsers, Opera One and UR Browser performed the best, with a second-place for Firefox and third for Google Chrome.
Even though UR Browser is superior, Firefox can still offer you a good reading experience by eliminating any possible distractions from pop-ups and ads.
One of Firefox’s downsides is that your access to your bookmarks is very complicated, the ‘Home screen’ is usually hard to understand and use, and it also contains a lot of ads and suggested links. However, it is still regarded as one of the best browser options for reading Manga.
We consider this to be the best browser for reading articles.
In Windows, Immersive Reader in Microsoft Edge streamlines web page layouts, clears the clutter, and lets you personalize your reading experience. Edge Immersive Reader has many fantastic study and accessibility features that may aid with reading and learning comprehension.
Its Immersive Reader was first created for dyslexic and dyspraxia readers. However, this program might be helpful for everyone who wishes to make reading on a portable device more convenient!
Additionally, it contains a Read Aloud function, a simple yet effective tool that reads your web page contents out loud.
Apart from this, it is based on the Chromium engine and allows a variety of expansions utilizing extensions from the Chrome library, which is why we adore it.
Google Chrome is one of the best-known browsers on the market, and it shouldn’t come with any surprise, considering the behemoth that runs this software. It should be your pick if you need the best browser for PDF reading.
Because of Google’s databases, Google Chrome has a very powerful engine that runs its processes fast but still can’t match the speeds that UR Browser clocked in our tests.
Regarding privacy level, ad blocking, and malware security, Chrome falls short even when compared to Mozilla Firefox and can’t even be compared with our top pick, UR Browser.
The Chrome architecture is built so that every tab you open counts as another executable file running in your computer’s processes.
The high system impact this browser has, qualifies Google Chrome only for the fifth place in our top best browsers for reading. It can become very frustrating to wait for pages to load, and slowing down your computer further doesn’t help either.
In this article, we explored some of the best browser software options on the market that have the necessary speeds and features to help you read online. UR Browser stands out for its speed and ease of use, but Microsoft Edge has the most advanced Reader Mode.
Please let us know your experience with the browsers on our list in the comment section below.
If you are having a Steam Link input lag issue, you’re in the right place. The platform is a step in the right direction if you want to enjoy phone games on your PC.
When all goes well, you will get a native gaming-like experience. However, for this to work, you need good internet. Follow the steps below to improve your connection for better Steam Link endeavors.
How do I get rid of input lag on Steam Link?
1. Connect to a wired network using the Ethernet cable
Use an Ethernet cable to connect the Steam Link host PC to your router.
Connect the gaming PC to your router using anEthernetcable (make sure to use a newer and faster router).
A wired connection will always significantly reduce the Steam Link input lag as it is much faster and more stable than a wireless connection.
2. Connect to a 5 GHz wireless network
Do not hesitate to connect both your gaming PC and Steam Link to a 5 GHz Wi-Fi network. Also, make sure to use a router that supports 5 GHz Wi-Fi.
You can try this solution, too, as the wireless Internet connection is a proper means to decrease the Steam Link input lag. Consider that the 5 GHz Wi-Fi connection is, without a doubt, superior to a 2.4 GHz one.
To fully benefit from its advantages, make sure you are not using a router that doesn’t support 5 GHz Wi-Fi.
3. Modify your PC’s streaming options
Open the Steam app on the host device.
Click on Steam from the top menu and click on Settings.
Go to Remote Play.
Click on Advanced Host Options.
Check all Enable hardware encoding boxes.
The boxes from the Enable hardware encoding are set to default. By checking them, you will ensure maximum performance for your device and make Steam Link display latency issues a thing of the past.
Enabling this setting help to reduce Steam Link input lag as well as remote play lag on Apple TV, Samsung TV, or any other smart TV or device.
If Steam Link is not going full screen, as many users claim these days, just check out this dedicated guide, and you will be able to solve the problem.
4. Change Steam Link’s streaming settings
Open Steam Link and navigate to the Settings menu.
Select Streaming.
Select Fast for video.
Steam Link has a setup composed of three options: Fast, Balanced, and Beautiful. The device has the Balanced option set as default. Choose Fast if you have encountered poor performance.
Select Beautiful if you have good performance and verify if you benefit from an increased picture quality and only a few delay moments.
These simple settings should actually prevent all Steam Link input lag issues on remote devices like smartphones, smart TVs, NVIDIA shield TV, etc.
Another thing is, If you use an outdated version of the Steam Link app, there may be various issues you may face. Whether you are playing the game on a smartphone, TV, or a Rasberry Pi device, updating the app will always help to reduce the Steam Link input lag.
Also, make sure the game you are playing is also up to date. Otherwise, you will experience remote play lag and also poor performance on the host device together.
The above methods will help you to fix the Steam Link input lag issue. If you want, you can leave us a comment about the efficiency of our solutions in the comments section.
If you were a fan of the Who wants to be a millionaire TV show, then you’ll certainly be excited to know about the online game of the same name.
The online free version is based on the highly popular knowledge gameshow, including similar themes and sound effects.
As expected, the online game is an excellent way to put your knowledge to the test and mix fun with some learning.
Is Who Wants to be a Millionaire game multiplayer?
With several before unheard game options, the game provides a complete multiplayer experience for up to 10 players on LAN and as many as 100 players online.
The Modes consist of:
Family mode: This mode was specially made with kid-friendly questions, so players of all ages may play together as a family.
Cooperative – Join forces with up to three other players in this mode and collectively produce the correct response.
Taking Turns – In this game, you share the controller with about nine players through LAN; one mistake, and you’re out.
Battle Royale – In this game, you compete online against 99 other players to see who has the most general knowledge.
For the best Who wants to be a millionaire multiplayer gaming experience, we recommend usingOpera GXas the main browser. Apart from the main Opera browser, Opera GX offers gamers a couple of exclusive features.
You will indeed find the free ad blocker very useful and the network limiter that allows you to set up a bandwidth limit and enjoy a smooth gaming session while continuing to run other programs in the background.
Moreover, OperaGX comes with a built-in VPN to secure your online activity.
Opera GX
Experience incredibly fast web browsing with some great added gaming features that you will enjoy to the fullest.
Select a country using the dropdown country selection.
Start playing.
Yes, you have a free online version of the game, and one of the good things about the online game is that you get straight into the hot seat, skipping the preliminary test.
As you might know, the game consists of 15 general knowledge questions, and the difficulty level increases with each question, and so does your (potential) wealth.
While playing, you get three Lifelines to assist you if you get stuck on a question – 50:50, Ask the audience, and Phone a friend.
Since this is an online game, for the last two, the potentially correct answer is offered randomly, with a high chance that it be the wrong choice, the same as in real life.
As mentioned, there’s a free online version of the game that you can play here. This web version will only work online in a web browser. Unfortunately, it has little interaction, so it’s suitable for solo players. It also comes with localized versions for Russia and Ukraine.
If you want to level up the gaming experience, there are also the Who wants to be a millionaire apps for both iOS and Android.
Apart from the free version, they come with in-app purchases, allowing you to get experts, unlock cities, travel worldwide for new experiences, and play with friends and family. Finally, and most importantly, the app also has an offline mode.
There you go. Now you can play Who wants to be a millionaire online game for free. In the comments section, let us know which of the two online platforms suits you best.
Note that the Who wants to be a millionaire online game is great for students and will enlarge their knowledge about different subject matter. You can also select the kid-friendly version for younger students or for playing with families with young children.
Are you looking for an in-depth comparison of Opera GX vs. Brave vs. Vivaldi? If yes, this article can be a perfect source.
The browser market is dominated by major browsers such as Chrome and Firefox, but many lesser-known browsers are just as good, if not better, than them.
Vivaldi and Brave have a long history, but Opera released a new browser recently called Opera GX, which comes with some exciting features.
In this guide, we’re going to compare Opera GX, Brave, and Vivaldi and find out what is the best browser for you.
Does it matter what browser I use?
Yes. It matters what browser you use. A web browser is a medium to explore the web. If the browser is bad, your whole internet experience will be bad. So, It is wise to use the perfect web browsers.
How do I choose a good web browser?
A good web browser has specific features. If you find them on any of the browsers, you can use that. Here are what to pay attention to when choosing a browser:
Is the browser using a good engine like Chromium, Gecko, WebKit, etc.?
Has the browser anti-tracker and cookie management feature?
Does the browser support extension and add-ons?
Does it have a security feature that can protect you from online threats?
Have the browser have other useful features?
Does a reputable company manage the browser?
You can choose the web browser if you find positive answers to these questions. But make sure it has the features you need in your daily web life.
Opera GX vs. Brave vs. Vivaldi – what browser to choose?
Opera GX: Opera browser designed for gamers
Opera GX has a sleek user interface that lets you customize its colors any way you like. The interface is minimalistic with a cyberpunk feel, which is a plus in our book.
The browser inherits all the great features from its predecessor, allowing you to organize your tabs with the Workspaces feature easily or to share texts, links, and files between devices with the Flow feature.
For better tab management, there’s a specialized feature that lets you search for open tabs at a glance. Opera GX doesn’t lack privacy features, and it comes with a built-in ad blocker and tracking protection.
Lastly, there’s an unlimited and completely free VPN available that should give you an extra layer of privacy.
Opera GX brings a fair share of unique features, most notably resource allocation, with its GX Control feature. With it, you can limit CPU, RAM, and network usage in your browser.
By doing so, you’ll stop your browser from using valuable resources and allow other applications and games to use them instead, thus ensuring better performance.
Hot Tabs Killer is another great feature that lets you view CPU and RAM usage per tab. If any tab is using more resources than it should, close it instantly with this feature.
GX Center is another unique feature that brings you the latest game news, trailers, and deals at your fingertips.
With it, you can see all the upcoming releases in the calendar and the latest free games on all major digital distribution platforms.
Pros
Sleek and customizable interface
Twitch and Discord integration
Resource allocation
Free and unlimited VPN
Cons
No light theme
Certain features must be enabled manually
With all these features as part of the package, no gamer can refuse to give a try to this unique browser as soon as possible.
Opera GX
Stylish interface, tuning for audio and video, and GX Control for balanced resource usage.
Brave Browser: Secure browser with a focus on privacy
Brave browser has a large focus on user privacy and security, and right of the bat, you’ll start with an ad blocker and tracking protection enabled.
At any time, you can expand the Brave Shield feature and configure which elements you want to block for the currently opened website.
You can also keep a close eye on the number of trackers and ads blocked on your start page. Also, you can see information such as the amount of bandwidth and time you saved.
The brave browser also supports cryptocurrencies, and it works with services such as Binance, Crypto.com, and Gemini.
The browser allows you to view specific ads that don’t violate your privacy to earn a small commission that you can use to tip the websites and creators that you want to support.
Regarding the interface, it’s worth mentioning that the browser can organize your tabs into groups.
You can set a color for a specific tab group, move it like any other tab, or minimize it to save space. If you’re working with multiple tabs, this feature will surely help you organize.
Another feature that we found useful is the built-in task manager for tabs, so you can easily monitor resource usage and close the tabs that you want with a single click.
The brave browser also has an advanced private browsing mode that uses DuckDuckGo as its default search engine, and it comes with Tor enabled by default, so your private browsing sessions will truly be private.
Pros
Privacy-oriented
Comes with ad blocker and tracking protection enabled
Tor integration
Tab grouping
Cons
Has a couple of non-essential features
If security matters the most to you, then don’t hesitate to give a try to this browser as soon as possible.
Vivaldi is another Chromium browser that is best known for its customization options. You can customize almost anything in this browser, from the main menu to the status bar.
The browser allows you to choose between several themes, but you can also create your color themes from scratch if you wish to do so.
Tabs can be customized as well, and you can choose one of four available positions for tabs or choose to show tab previews. If you want, you can even completely hide the tab bar.
The same goes for the address bar, you can choose to show it on top or bottom, or you can completely hide the address bar if you’re going for the minimalistic look.
It’s important to mention that Vivaldi supports a wide array of shortcuts and mouse gestures, and you can customize them any way you like and even create new gestures from scratch.
The browser supports tab stacking, so you can easily separate tabs into groups and switch between groups.
Managing tabs with Vivaldi is simple, and thanks to the Quick Commands feature, you can switch to open tabs or perform various commands simply by entering the name of a tab or the name of the command.
The browser also supports page tilling, so you can view open tabs side by side, which is perfect for multitasking and large-resolution monitors.
Thanks to the built-in sidebar, you can quickly access certain features and take notes, or you can pin a website to the sidebar and view it side by side with other tabs.
Pros
Extremely customizable interface
Tab stacking
Extensive mouse and keyboard gestures
Page tilling
Quick commands for faster navigation
Cons
No built-in VPN
If you happen to find this Chromium browser to be precisely what you’re looking for, don’t hesitate to download it right away.
Opera GX vs. Brave Browser vs. Vivaldi: Our verdict
Picking the best browser between these three isn’t an easy task because each browser has its advantages.
Opera GX offers great customization, and the resource allocation feature will come in handy for both gamers and regular users alike.
Support for social networks, instant messengers, Discord, and Twitch can also be useful to gamers.
Brave browser is focused on privacy and will block ads and trackers out of the box. For an extra layer of security, there’s Tor support in the private browsing mode, which will come in handy if you want to protect your privacy online.
Vivaldi offers extensive customization features, and even though it has built-in ad blocking and tracking protection, it doesn’t come with a built-in VPN.
To help you make the final decision, we suggest you choose Opera GX. Why? You have strong privacy like Brave Browser or better customization features than Vivaldi, plus much more.
If you compare Opera GX vs. Brave, you will find a lot of similarities, including ad blocker and anti-tracker, as well as a built-in crypto wallet. On the other hand, comparing Vivaldi vs. Opera GX also finds many similarities like theme customization and many more.
But, you will see a lot of differences when you compare Vivaldi vs. Brave. It means Opera has the essential features that the other two browsers have. You will always get something convincing while comparing Opera GX vs. other browsers. That makes it a very appealing web browser.
Overall, the Opera browser takes the winning ticket for experience in the field. With 25+ years of activity and continuous development, this browser covers all privacy or navigation needs for both gaming and standard browsing.
It’s worth knowing that Opera GX offers gaming messenger apps in your sidebar, Fast Action Button (FAB) for the mobile browser, GX Corner with a game-release calendar, or the best games deals.
Opera GX
Choose this fast browser specifically designed for gaming to create the perfect hub directly in your browser.
If the 9Now app keeps freezing or buffering every now and then on your computer or TV, you are at the right place. Slow internet, multiple connected devices as well as background tasks can cause this.
Follow the steps below to troubleshoot freezing and buffering in 9Now.
What can I do if 9Now keeps buffering?
1. Clear browser cache
Open Chrome and click on the three-dot menu in the upper-right corner.
Select Settings.
Scroll down and click Privacy and Security and select Clear browsing data.
Click Clear browsing data.
In the pop-up window, select Cookies and other site data and Cached images and files.Choose the time range (select All time for a thorough clean).
Click Clear data to finish.
2. Stop bandwidth consuming apps
Press Ctrl + Shift + Esc to open Task Manager.
Go to the Processes tab.
Sort the apps by Network to see which ones are consuming the most bandwidth.
Right-click on unnecessary apps consuming bandwidth.
Click End Task.
3. Reduce video quality
Play a video on the 9Now website.
Click the settings gear icon in the video player.
Select a different quality, e.g. HD, SD.
4. Restart your router
Switch off the router and unplug the cable. Leave it for a minimum of 30 seconds.
Plug the router back again after 30 seconds and turn it on.
Once you see its lights are stable, turn on your device and 9now keeps freezing issue should be fixed
5. Switch from Wi-Fi to a cable connection
Shut down your PC/laptop and connect one end of an Ethernet cable to your modem.
Now, connect the other end to your PC/laptop.
Next, disconnect the modem from its power source and let it be on standby for 30 seconds.
Connect the modem back again to the power source after 30 seconds.
Now, turn on the modem and wait till all its lights are stable.
You can now boot your PC and check if the 9Now videos are playing. This also helps with 9Now Error Code P2.
6. Improve your Wi-Fi signal
Try to shift your router to a new location, preferably a centralized location.
Check for any interference like cordless phones, microwaves, or similar other wireless devices, and try to keep them away from your Wi-Fi router.
Try to keep your router in a raised position like on a shelf, and it performs best that way.
This should help you get rid of the 9Now keeps buffering issue and continue to watch your favorite shows.
Alternatively, according to some Reddit users, you can install the Kodi app on the tv and watch 9Now using the Aussie Add-ons.
Back in June, it was discovered that Microsoft was testing a spotlight-like launcher for quick commands in the Edge browser. It has been a while, but Microsoft has now come out and officially announced the feature as “DevTools Command Palette” (via Neowin.)
This feature is available in Microsoft Edge Canary version 105. Microsoft says that it should make it easier to access browser management and developer tools in Edge. Once enabled, all you need to do to get to it is click Ctrl+Shift+Space. This shortcut will then give you access to tabs, bookmarks, and collection management options. You even can use it to summon developer tools like simulating a mobile device.
Note that this feature is just an experiment at the moment. You’ll need to enable it before use. To enable it, follow these steps below.
Go to edge://flags.
In the Search flags text field, type DevTools Toaster or Command Palette.
In the DevTools Toaster or Command Palette dropdown menu, select Enabled:
Click the Restart button which appears in the lower right.
In Microsoft Edge, press Ctrl+Shift+Space. Command Palette opens.
After enabled, you can type “tabs” to manage tabs, and type “bookmark” to manage bookmarks. You can also click on the down arrow or up arrows to select a command and then click enter. Developer options can be accessed by clicking the “>” at the bottom of the tool. Additional ways to use the tool can be seen on Microsoft’s website.
Reddit is a platform where people can discuss topics from different areas of knowledge. F, users can access Reddit on their browsers across various operating systems.
However, users encounter some issues while accessing Reddit on Firefox. One error users complain about is Reddit not working on Firefox.
There are several reasons why Reddit might not work on Firefox. If you’re plagued by this issue, don’t panic, as this article will take you through the solutions for it.
How do I access Reddit in Firefox?
Launch your Firefox browser.
Press the Ctrl+Alt+B keys to prompt the Library of the browser.
Go to the Bookmarks Toolbar and select the New Bookmark option.
Fill in the following fields: (Select any name you want under Name. Use https://reddit.com/r/%s as the location. Add a keyword, e.g., re.)
Click Add to complete the process.
Why is Reddit not working in Firefox?
1. Cache and cookies issue
Caches and cookies are data stored by the browser to help it load websites faster and smoothly. However, when they are corrupt, they can cause difficulties with websites working on the browser. Hence, it leads to Reddit not working on Firefox error.
2. Extension interference
For someone with lots of extensions running at the same time on the browser, it is easier to encounter difficulties with some websites like Reddit.
3. Outdated browser
When Firefox is not up-to-date, it can encounter difficulties when loading sites like Reddit. It lacks some features that should have been in the patches and updates.
Quick Tip:
You can also opt-in for a different method that can surely help with Reddit problems. Switching your browser to Opera One can fix it as we speak.
This modern browser comes with multiple app integrations like messaging chats, plus the option to add different social platforms like Reddit. Plus, it comes with built-in AI and a modular AI-ready design.
Opera One
Navigate on your favorite social apps and access them right away from the Opera One homepage.
In the Firefox window, it will automatically search for updates and downloads.
Updating your browser helps it fix the bugs disturbing the previous versions.
Is Firefox safe to use Reddit?
Firefox has reliable security and privacy system which is what you need to use Reddit on your browser. Hence, it is safe to use Reddit on Firefox because it prevents threats from malware and viruses.
Some users might prefer to keep their Outlook emails confidential. You can’t password protect specific emails in Outlook. However, you can set up a password for an Outlook user PST data file. Doing so will effectively apply a password to all emails within your Outlook user profile.
How do I password protect an email in Outlook?
Set up PST password
You can easily password protect an email in Outlook if you set up an user PST password for your account. All your files within Outlook will be password protected in this way.
1. Open Outlook.
2. Select the File tab.
3. Click the Account Settings button, and select the Account Settings option.
4. Click the Data Files tab on the Account Settings window.
5. Select the PST data file to set up a password for.
6. Click the Settings button, which opens a window.
7. Press the Change Password button.
8. Enter something in the New Password text box.
9. Then enter the password in the Verify Password box.
Add DataNumen Outlook Password Recovery to Windows
It might also be worth adding DataNumen OutlookPassword Recovery to Windows. That’s a freeware program that enables users to retrieve Outlook PST files. So, it will come in handy if ever you forget the original password for the Outlook PST.
Click the Free Download button on the DataNumen Outlook Password Recovery page to get the installer for the software with which you can install it.
When you open Outlook, you’ll need to enter a password for your user data PST. That will apply only to your own user account. Thus, those with other user profile PSTs will still be able to open their emails.
In this guide, we’ll show you how to download and play The Legend of Zelda: Breath of the Wild on a Windows PC. Yes, officially it’s only available on Nintendo Switch and Wii U, but you can get it on your computer with an emulator.
Below, we’ll walk you through the best options available, and explain how to use them to install and play Zelda.
Let’s get started.
How to Play Breth Of The Wild On PC Wihth Emulators
Yuzu is a great open-source emulator that will allow you to play many of the games released exclusively on the Nintendo Switch console.
It is available on Windows, Linux, and Android. So you can enjoy games on almost any type of device you want.
To use it, head to Yuzu official website and jus hit download. The software is easy to install and you’ll see it work great with Zelda Breath of the Wild.
As you can see in the screenshot below, Yuzu lists a high compatibility score with Zelda:
That said, you should be aware that emulating a console game to Windows is quite a taxing task for your computer. So the minimum system requirements might be higher than you expect.
Your CPU needs to be Intel Core i5-4430 / AMD Ryzen 3 1200 / Qualcomm Snapdragon 460 or higher.
Then, your graphic card has to be NVIDIA GeForce GT 1050 4GB / AMD Radeon RX 550 4GB or higher.
The minimum RAM should be 8GB if you have a dedicated video card or 12GB with integrated one.
In final words, you should also know that you can also use Yuzu emulator to apply updates to your game or use mods, since Zelda: Breath of the Wild comes with so many mods you could use.
The CeMU emulator is a great software that allows you to play Wii U games on your Windows computers.
Depending on the complexity of the game you want to play, CeMu will require that your PC has at least 4GB of RAM., minimum OpenGL 4.1 compatibility, and a powerful processor and video card.
It only supports 64-bit processors. One of the best features it has is the fact that it can run games in 4K quality.
This software is perfectly compatible with NVIDIA and AMD GPUs, but it doesn’t support Intel GPU.
When it comes to controller inputs, CeMu has a wide range of emulated options available. These include DRC, pro and classic controllers, Wiimotes with native support, keyboard, and USB controllers.
Now, running a game on CeMu is as simple as clicking on File, selecting Load, and choosing the .rpx game file of your choice. Breath of the Wild comes with a very good compatibility score for this emulator.
Playing Breath of the Wild on your PC looks great thanks to the big resolution, but you can make it look even better by using the newly released Clarity FX pack from CeMu.
If you want to find out more information about this pack and try it out, click here.
You can find more information regarding CeMu by visiting the official FAQ page. If you want to download CeMu Emulator, head over to their official website for the latest release.
Zelda Breath of the Wild and Zelda: Tears of the Kingdom are the latest games in the great Legend of Zelda saga. With the help of emulators these can be now enjoyed by an even larger number of players.
Some gamers prefer using a gaming console because they are specifically made to play games at the best graphics quality possible, and because it allows the use of a controller.
Other gamers prefer the versatility and ease of use of a computer. If your PC is powerful enough, you can also play games with the best quality graphics, and use any game controller.
If you have any trouble running The Legend of Zelda: Breath of the Wild on PC, leave us a comment below.
Firefox is one of the best browsers in the market. It has features that help users get an interesting and productive browsing experience. One major feature of Mozilla Firefox is Security. It protects its users from external and internal browser threats.
However, it can sometimes lead to the Firefox application blocked by security settings issue. It means some features of the protection system are causing difficulties in apps, preventing them from working properly.
Nonetheless, this article will go through what causes the ‘Firefox application blocked by security settings’ issue and some solutions you can use for it.
Why are applications blocked by security settings?
1. Caches and Cookies are corrupt
Cache and Cookies are information that the browser gathers from your activities on the website. It uses the information to help you load websites faster and easier. So, bad cache and cookies can cause the Firefox application to be blocked by security settings.
2. Running an old version of Java on your computer
The Firefox application blocked by security settings issue can occur due to running an old or outdated version of Java on your computer. It prevents applications from running with insecure or old JRE.
3. Java content fails to validate for some reason
It can occur due to different reasons. However, it can be that the Java content is running with an expired certificate or some other Java component corruption. Hence, it prevents the Java contents from running because it doesn’t have online certificate validation.
4. Distorted Java settings and components
Sometimes, users can encounter issues with Java settings, and they can be difficult to fix. So, it can cause issues with apps like Firefox, blocking them from running.
Quick Tip:
An alternative to fix this security issue on Firefox would be to switch your browser to another effective choice.
Hence, Opera One comes with plenty of app integrations and customization possibilities so you can allow secure apps to access your browser or PC. It also comes with integrated AI, VPN and Ad blocker.
Opera One
Browse securely on this modern browser with flexible security tools and complete privacy.
Restart your computer for the update to sync better with your apps.
How do I stop Java from being blocked?
Install a new certificate
Contact the vendor of the program and report the issues.
Request for a new certificate.
Install the new certificate on your computer.
By doing this, you will be able to stop Java from being blocked. A new certificate will clear the errors in the previous one.
Another solution you can try if the above options don’t work is uninstalling Java and downloading a new one on your computer. Hence, read through our article on how to download Java on your Windows 10/11 PC.
Intel Atom processors are less powerful, but they can handle web browsing especially if you’re using a lightweight browser optimized for Intel Atom.
The standard browsers like Chrome, Mozilla, and Edge, are excellent and have a lot of features, but they aren’t the best choice for Intel Atom computers.
Which browser uses the least RAM and CPU?
As we all know, not all browsers are made the same. Differences range from the number of customization options to the browsing speed, site optimization, stability, privacy, and many others.
The most crucial difference between the browsers available on the market is the number of resources they require to run optimally. So naturally, a browser with low resource requirements is the best option, but a balance between stability is the best choice.
For the test to be correct, each of these browsers was tested on the same system, with the same OS, and with the same general circumstances:
no other apps running in the background
the same video playing at 720p quality was used
Here are the results we got:
Browser
CPU Usage
Memory Usage
Opera One
0.7 - 1.0 %
400- 620 MB
UR Browser
0.8 - 2.0 %
657 - 651 MB
Falkon
2.3 - 3.1 %
387 MB
Slim Browser
1.9 - 2.8 %
410 - 420 MB
SeaMonkey
2.2 - 3.1 %
336 - 353 MB
Maxthon
2.2 - 3.1 %
290 - 336 MB
Firefox
1.4 - 2.3 %
415 - 478 MB
K-Meleon
1.4 - 2.5 %
160 - 170 MB
Lunascape Orion
2.2 %
259 MB
Midori
2.4 - 3 %
355 MB
Pale Moon
1.5 - 2.9 %
539 MB
Mypal
2.6 - 3.1 %
569 MB
As you can see from the benchmark results, Opera One comes out at the top of the list, using only 0.7 to 2.0% of the CPU and around 600MB of RAM.
What to consider when choosing a browser for Intel Atom?
When creating our list, our team of expert testers has considered a wide range of elements, but here are the most important ones:
RAM usage
CPU usage
Feature numbers
Privacy
Security
UI design
Extensions and addons
Suppose a browser has optimized performance for both RAM and CPU usage, allows you access to loads of useful features, provides privacy and security, and has a good-looking UI. In that case, that is the perfect browser to use on an Intel Atom PC.
Explore the list we created below to see some of the best options available on the market.
What are the best lightweight browsers for Intel Atom computers?
Opera One is one of the best lightweight browsers available that you can download for free and use on slow computers.
It uses less processing capacity than other browsers and features a built-in ad blocker that helps you load webpages faster. Moreover, the ad-block feature also protects your privacy and speeds up your browsing.
Another great feature is the integrated free VPN integration. It helps you when you don’t want to be tracked while surfing the web.
Other useful features:
Highly customizable
Light on resources
Built-in socials and AI
Twitter and Instagram integration
Workspaces and tab islands
Opera One
Looking for a secure and lightweight browser? You found the chosen one.
UR Browser is a versatile browser with many modern features but is still perfect for old computers.
It loads web pages very fast and does not load any ads or trackers, which can slow down your browser. It is also very secure thanks to the alerts for dangerous websites and a built-in virus scanner.
UR browser comes with a Privacy Suite that helps you set a certain privacy level for a particular website and save the preferences. This way, your website will always load at the privacy level you chose.
Other useful features:
Lightweight
Built-in VPN
Alerts for harmful websites
Blocks tracking cookies
Doesn’t send data to Google
UR Browser
UR Browser is a lightweight and secure browser that protects your privacy with a built-in VPN.
Pale Moon is an open-source web browser available for Microsoft Windows and Linux focusing on efficiency and customization.
It’s based on Firefox but unlike Firefox it does not use much memory, so it’s a perfect lightweight browser for Intel Atom computers. It also features grouped navigation buttons of a decent size and a bookmarks toolbar that is enabled by default.
Pale Moon browser has minimum requirements like at least 1 GB RAMmemory, 300 MB available on the hard drive, and Windows 7 OS or later.
Maxthon is another great choice if you need a lightweight browser to use instead of Chrome.
It provides technical support for blockchain apps and makes it easier for you as a user. It supports the NBdomain protocol and helps you access the blockchain content.
Maxthon 6 features extensive cloud synchronization and backup options so that you can seamlessly sync data across devices. It also has advanced encryption to ensure your data security.
K-Meleon is an old web browser that is fast and lightweight, making it one of the best browsers for Intel Atom computers.
It shares a few similarities with Mozilla Firefox because is based on the Gecko layout engine, which was developed by Mozilla, the same software company that developed Firefox.
K-Meleon browser doesn’t require too many resources from your computer. It needs only 256MB RAM and 70MB of storage space. It runs on old Windows OS like Windows 95, XP, and Vista. You can also use it on the newer Windows 10.
In the early days of the Internet, Netscape was the most popular browser on the market, but that has since changed.
Is Netscape still available, and what are some of the features that the Netscape browser had? In this article, we’ll try to answer those questions.
What is Netscape?
Netscape Communications Corporation, formerly known as Mosaic Communications Corporation, was an American independent computer services company
Its creation, the Netscape web browser, was once dominant but lost to Internet Explorer and other competitors in what was called the first browser war.
An early Netscape employee also created the JavaScript programming language, the most widely used language for client-side scripting of web pages, while another created HTTP cookies.
Is the Netscape browser still available?
To provide a short yet accurate answer, Netscape was discontinued and support for all Netscape browsers and client products was terminated on March 1, 2008.
So, if you were looking for any Netscape browser download links, you better give up now, as this chapter has been closed a long time ago.
Quick Tip:
While it’s possible to download Netscape from third-party sources, the browser is out of date and vulnerable to malware, so it’s better to use a secure browser such as Opera One.
Regarding your safety, the browser has tracking protection that will block tracking scripts and cookies and make your pages load faster. There’s also a free unlimited VPN available.
Opera One
The days of Netscape are already over, why not give Opera One a shot?
The first version of Netscape Navigator was released at the end of 1995, and it soon became the most popular web browser on the market.
There were nine major versions of Netscape available, and the latest version was released in October 2007.
During its development, Netscape had a code name Mozilla, and some of its source code was eventually used to create a spin-off browser called Firefox.
Netscape lost most of its market share in 2002 to Internet Explorer, and in March 2008 it was officially discontinued.
What were the features of the early Netscape browser?
Netscape was available free of charge for non-commercial use which was unusual at the time, and it’s one of the main reasons why Netscape gained such popularity.
Unlike other browsers at the time that had to download the entire page before displaying it, Netscape showed graphics and text as the website loaded.
This was a revolutionary feature, especially in the era of low Internet speeds and dial-up Internet.
The early version also had support for cookies, proxies, frames, and JavaScript in version 2. As for availability, Netscape was available on Windows, Macintosh, Linux, and OS/2.
Netscape was the dominant browser in the ’90s, but now it’s almost completely forgotten. Have you ever used Netscape? Let us know in the comments below.
VMware is an incredibly useful tool that allows you to run multiple operating systems at once, without the need to buy another PC.
You can get the full experience of Windows 10, Windows 7, and other operating systems, just by installing a simple program.
Even though VMware can be installed on a PC as well, the developers at the company made it possible for you to use it from your browser as well.
In order to reach our browser for VMware list, the browser software will need to have the following main features fast speeds for loading web pages and to be internal processes privacy oriented.
These types of browsers should also have the ability to block trackers, cookies, ads, adware, and malware.
How do I access VMware through a browser?
In order to access VMware through a browser, you’ll need to download and install the vSphere Client Integration Plugin for your web browser.
The version required will depend on the version of vCenter Server you’re using:
vCenter Server 6.5 or 6.7 – no need to install the Client Integration Plug-In. For more information, you can visit the VMware KB article 2145066.
vCenter Server 5.5 or 6.0 – you will be required to install the Client Integration plugin. Follow the steps described in this official guide.
For more in-depth information on this topic, don’t hesitate to check out the official VMware vSphere Documentation.
In this article, we will explore some of the best VMware browsers available on the market. Read on to find out which browser wins.
What are the best browsers to use with VMware Web Client?
Opera One – Lightning-fast speeds and awesome privacy
The Opera Browser is a great tool to install on your PC if you want to use the Web Client from VMware.
The browser gives you a wide range of tools that allow you to launch and use your virtual machines smoothly.
Opera One has a major advantage over other browsers thanks to its built-in VPN service and ad-blocker, making this app the best VMware web browser for Windows 10 and Windows 11.
The efficiency of these features has already been proven in countless tests.
Opera One also comes equipped with built-in tools that block cookies and trackers. You can use the privacy settings to set the level of privacy you wish to use.
This means that websites load faster. It also means that the browser needs less CPU power to render everything putting less pressure on the virtual machine.
Therefore, the experience feels snappier inside VMware than with other browsers.
Opera One
Install this lightweight and fast browser to enjoy privacy and quick browsing.
UR Browser is an incredibly fast and reliable software option that gives you all the tools you need in order to successfully run a VMware Web Client.
This software has by far one of the fastest processing power when used with VMware Web Client when compared with other options on the market.
The speeds at which UR Browser loads the pages are astonishing, you can’t blink twice until everything is loaded and ready to use.
One other very important factor when it comes to running VMware on UR Browser is its ability to block any ads from showing on your screen, without installing any third-party extensions.
The ad-blocker features come bundled with the installation package. If you want to feel safe online no matter what you’re doing, UR Browser is the software to help you with that.
This VMware web browser for windows 10 was developed with privacy and security in mind, offering you an incredible array of ‘weapons’ against any online threat.
Opera can blocks malware and adware by identifying key markers before having the chance to appear on your screen. It also doesn’t allow trackers and cookies to be loaded when visiting web pages.
You also have 3 levels of privacy to choose from Low, Medium, and High, in addition, it provides a built-in VPN service.
An awesome characteristic is that all downloads and websites are scanned for viruses automatically, this way it keeps your PC secure from cyber-attacks.
UR Browser
Don’t miss out on this lightweight browser with enhanced privacy features, and high-speed capabilities.
Mozilla Firefox – Versatile and customizable with lots of addons
Mozilla Firefox is another excellent browser option for using the VMware Web Client.
This tool offers you good web-page loading speeds, gives you the power to customize how it works, and even extends its native capabilities with plug-ins.
Even though you can install plug-ins to deal with malware, ads, cookies, and trackers, Mozilla offers those features by third-party installations.
This can be a massive gap in your online privacy desires, as several cyber-attacks can be performed using plug-ins as a gateway.
When it comes to the level of protection against your data being stolen online, UR Browser is more efficient than Firefox.
The wide range of features in this software allows you to use virtual machines quickly, but the speeds at which it does so are under the ones clocked by UR Browser.
Firefox occupies the second place in this list for the reasons mentioned above.
But what makes it look not good compared with UR Browser is Firefox’s capabilities regarding system resources impact; UR Browser is far superior in this department.
Many gamers with dual monitor setups are wondering how to move a game to another monitor, and this guide will help you with that.
Moving a game to another monitor has many advantages, so let’s see how we can move a fullscreen game to a second monitor.
Why won’t my game run on the second display in fullscreen?
Most applications, including games, will start on your primary monitor when you launch them. If you want to start your game on a second display, you need to set it as your default screen.
How to move a fullscreen game to another monitor?
1. Move a full-screen game to a second monitor on Windows 10
1.1 Change your display settings
Right-click your desktop and choose Display Settings.
Click the Identify button to observe how the displays are numbered.
Scroll down to the Multiple-display section and click on the drop-down list.
Choose the monitor number identified in the steps before you want to use it to display the game.
This is a pretty simple solution, but it works. If you want more options while gaming on multiple displays, we suggest using the DisplayFusion software.
1.2 Run the game in Windowed mode
Launch League of Legends
Navigate to Display/Video Settings.
Look for the Display Mode setting.
Change it to Window or Borderless Window and save changes.
Next, drag the game window to your preferred monitor.
Change the preferred monitor to primary, and set it as a priority.
1.3 Set the second monitor as the primary monitor
Plug the second monitor into your computer.
Right-click your desktop and choose Display settings from the menu.
The Display Settings window will open next, scroll till you find Multiple Displays, and select the second monitor.
When you select the second monitor, a checkbox will appear labeled ” Make this my main display.
Ensure you select the checkbox to finish up the procedure.
2. Move a full-screen game to a second monitor on Windows 11
2.1 Change your display settings
Right-click your desktop and choose Display settings.
Scroll down to the Multiple displays.
Select Show only on and select the second monitor.
2.2 Run the game in windowed mode
Open the game you want to play.
Navigate to Display settings.
Set the Display mode to Borderless window.
Move the window to the second screen.
Adjust the game resolution, so it matches the display size.
3. Move a full-screen game to a second monitor on Mac
3.1 Use Mission Control
Start the desired game.
Start Mission Control by using the three-finger swipe on your trackpad.
Now move the game window to the desired monitor.
3.2 Assign the app to the second display
Right-click the app on your Dock.
Choose Options, and select the desired display on the Assign To menu.
Now run the app.
4. Move a full-screen game to a second monitor with keyboard shortcuts
4.1 Use the move window shortcut
Make sure that your game is running.
Now press the Windows key + Shift + Left or Right arrow to move the window.
Your window should now appear on the second screen.
Can I use multiple monitors with different resolutions?
Yes, you can use multiple monitors with different resolutions without any problems. The two will be fully compatible, but the difference in image quality will be noticeable.
What’s the difference between fullscreen and borderless window mode?
Fullscreen mode offers better performance since it controls the display output completely. However, if you want to switch to a different application, you need to minimize the game with a keyboard shortcut.
With a borderless window, you might get slightly lower performance, but you can quickly open any application on top of your game or move the game to a different screen.
How to move the mouse to a second monitor in-game?
Ensure that the second monitor is still plugged in.
Also, make sure the game is launched and ready.
Next, move the cursor towards the direction of the gaming screen until it pops into the screen.
When that is done, the cursor will disappear from the secondary and appear on the primary gaming screen.
How to move League of Legends to another monitor?
Duplicate your preferred monitor to the other
Right-click a space on your desktop, and choose Display Settings.
Select the display you want to use.
Click Identify and check your monitors to ensure you choose the right one.
Open the drop-down menu close to the Identify button, and choose to Duplicate this display.
This is how your settings will look after doing so.
Set your preferred monitor as the main screen
Right-click a space on your PC’s desktop, and choose Display settings.
Select the display you want to use.
Click the Multiple Displays drop-down.
Choose the Make this my main display option by ticking the box.
The same methods apply even if you want to know how to move a fullscreen window to another monitor, so follow the steps strictly.
While moving games to a second monitor is easy, you can encounter issues, such as a mouse that won’t move to a second monitor, but we tackled this issue in a separate guide.
Users often try to take advantage of Spell Check but they at times get disappointed due to Spell Check not working on Firefox.
Firefox web browser has a built-in inline Spell Checker. This automatically checks for spelling mistakes as you type in forms or text boxes on web pages.
At times, after installing Firefox, especially if you are installing it fresh for the first time, the spelling check may not work. As a result of this, Firefox won’t highlight with red dotted underline any word that is misspelled.
If you are struggling to understand why Spell Check quit working properly, here we have jotted down the best potential solutions to troubleshoot this with ease.
Why is spell check not working in Firefox?
The reason the spelling checker is not working in Firefox is probably caused by the missing dictionary, or no dictionary installed. For this, you need to ensure and double-check that the Firefox spell checker is enabled.
To check, simply right-click on any user type-able field. Then, if you see an option Add dictionaries, that means no dictionaries existed in Firefox. So, the spelling check won’t work.
Quick Tip:
Before trying anything else, you may consider another browser option with integrated spell checker.
Opera One is more than suited for getting faster navigation and app integrations with messaging apps, plus customizable spell check functionality on your settings. Also, it comes with it’s own AI.
Opera One
Go for this personalized browser and write on any website or chat without spell check issues.
Telegram is a popular messaging service, and it’s available on almost all desktop and mobile platforms. But did you know that you can use Telegram in your web browser as well?
That’s right! Telegram can just as easily work in your web browser, and in today’s article, we’ll show you how to use it.
Can I open Telegram in browser?
Yes, Telegram has a web version that you can access on any browser. The process is simple, and you have two options to sign in, either using your phone number or scanning the QR code.
Telegram Web, or the online version, offers the same set of functionalities and features as the mobile app, so wouldn’t really be missing out on anything.
Can I use Telegram Web without a phone?
Yes, you can use Telegram web without a phone, but you would need one during the verification, i.e., the initial setup. Both methods to sign into the Telegram web require a phone with an active Internet connection.
Remember, once the verification is complete, you will remain signed in unless you choose to manually log out or are inactive for a certain period which can be set in the Telegram settings.
Quick Tip:
Use a browser with dedicated support for Telegram. We recommend looking into Opera One’s sidebar integrations feature. It lets you connect your account and access it quickly, without having to open a new tab.
You’ll have to scan a QR code with your phone and Opera One will automatically connect to your chat within seconds. The browser has anti-tracking and VPN for a more private and seamless experience.
Opera One
Open Telegram, Facebook Messenger, or WhatsApp right from the sidebar.
Visit theTelegram webpage, and click Log In By Phone Number.
Select your country from the dropdown menu, enter your phone number, and click Next.
A verification code will be sent to your Telegram mobile app. Enter it in the text field, and Telegram will automatically verify the code and sign you in.
2. Use Telegram web by scanning QR code
After opening Telegram Web, launch the mobile app, and tap on Settings at the bottom.
Now, tap on Devices.
Tap on the Link Desktop Device button.
Now, scan the QR code displayed on the computer screen with the mobile phone, and Telegram will automatically sign you in.
This would be the perfect method if you were trying to access Telegram in the Chrome browser. It’s quick and seamless.
Why Telegram Web is not working?
If Telegram web is not working, it could be a problem with your Internet connection. Also, it’s likely that Telegram is blocked in your region or country since several have imposed restrictions on it, so make sure to verify that.
The issue might lie with the browser itself, in which case switching to a more reliable option, like Opera One, would help.
Besides, there’s also a chance that Telegram’s servers are facing an outage, and here, you will have to wait for some time for things to be up and running again.
Telegram is a great app, and with the web version available, you should be able to use it on any platform without any issues. We recommend opening Telegram in the Opera One browser for the best experience.
To learn more about Telegram and see how it compares to other services, we also have a great guide on Discord vs Telegram, so don’t miss it. Moreover, you can get Telegram for Windows 10 so you can use it on your desktop, too.
And if you’d like the speedier version with more customizable features, try Telegram X.
Are you going to use Telegram in your web browser? Let us know in the comments below.
Opera GX is a new browser from Opera, and it’s touted as the world’s first gaming web browser. The browser is optimized for online gaming and comes with a wide array of features for gamers.
In today’s guide, our gaming team has spent quite some time researching, testing, and comparing features for various browsers. Now we’ll look closer into Opera GX and see what it can offer its users and whether it’s worth checking out.
It’s one of the best browsers with gaming features built into its design, and this is the conclusion of real-world gamers.
Let’s dive deeper into this subject and understand what makes this browser a good choice in today’s market.
Opera GX
The world’s first gaming web browser is worthy of your attention. Ready to give it a try?
Opera has been present for more than two decades. The browser underwent various changes and is still available on almost all desktop and mobile platforms.
Their gaming-oriented Opera GX is the latest product from the company with a similar name, and it was initially released in 2019. As mentioned earlier, this web browser is optimized for gamers, with some unique features.
In this guide, we’ll look in-depth and see what Opera GX can do.
➡ Installation
The installation process is simple as it can be. You can complete this task with a single click of a button, so there’s no need for additional configuration, you just hit the Install button, and that’s it.
The setup process took more than a minute on our test PC, and once it was finished, the browser started automatically.
➡ Interface
The browser comes with its dark theme out of the box with red highlights, bringing a cyberpunk look that gamers would like. In addition, the theme looks minimalistic and easy on the eyes, which is a significant plus.
The interface is divided into two parts, the main area you’ll use to navigate websites and perform other online activities and the sidebar, which is used for quick access.
➡ Sidebar
The sidebar works like a powered-up shortcut center, and you can use it to access crucial features of the web browser.
You can also quickly access your history, installed extensions, or settings right from the sidebar, which will surely come in handy.
Of course, you can customize the sidebar and choose what features and shortcuts you want to be available in the sidebar.
Additionally, extensions from the Opera Store are right in your sidebar for quick and easy access.
➡ Sidebar customization
While the sidebar works excellently if you need to access certain features quickly, some users prefer an extra workspace in their browser.
If that’s the case, you can hide the sidebar entirely from Settings and choose which elements are activated on it.
Click on Settings from the sidebar.
Scroll down through the list and click on the Manage sidebar option.
Tick the boxes next to any option that you want to appear in the sidebar, or unclick to deactivate.
As you can see, there are various options, including Instagram, Bookmarks, Speed Dial, and many others.
This ensures that only the most essential information for you is always accessible by simply clicking on the respective icon in the sidebar.
➡ Browser customization
Customization is a big part of the Opera GX experience, and the browser comes with 23 different color themes, so you can easily find the best one that works for you.
Of course, there are custom theme options to choose between several predefined primary and secondary colors.
For even more customization, advanced settings allow you to adjust the hue, saturation, and lightness of primary and secondary colors for any theme you choose in the previous step.
To reach the advanced settings for themes, follow these simple steps:
In the Settings window, click Configuration from the Themes section.
Next, toggle the Advanced Configuration button.
Next, move the sliders and choose the exact values you want for every element.
If you prefer, you can set a HEX value for your primary and secondary colors to get the perfect results.
➡ Browser sound customization
In addition to visuals, there’s an option for customizing sounds, and you can set the volume of browser sounds or turn them off completely. Sadly, there’s no option for using custom sounds.
Customizing what sounds the browser produces is a valuable feature, especially if you’re running the browser on a different display while playing your favorite games.
This way, you will always only get notified with the most critical updates while ensuring that you keep your focus where you need to.
➡ Background music
Background music is also available, and you can choose between 5 different ambient tracks using the software. But, of course, you can turn this feature off whenever you want.
This is a very thoughtful addition to this type of software and will be handy, especially when reading texts, working, or simply browsing the internet.
Besides choosing the track you want as your background music, you can activate the Dynamic audio visualizer option for some visual effects.
Even more, if the Mute automatically option is toggled on, the ambient music will automatically stop if playing a video online or any content with sound.
This ensures you don’t need to waste any time first turning off the ambient music and then playing whatever content you want to listen to.
➡ Browser wallpapers
Opera also has a feature that lets you force dark pages so that they could blend better with the dark theme of Opera GX.
Lastly, you can customize the Speed Dial page with several available wallpapers or download additional wallpapers from the Opera’s Addon page.
If you dislike any wallpapers, you can always use any picture from your PC as wallpaper for Opera GX.
➡ Unique features
➡ GX Corner
GX Corner works as a news hub for gamers. You can easily view the release date of new gaming titles so that you won’t miss out on the latest games.
In this section, you also have access to free games and deals, which is perfect since you won’t have to monitor services such as Steam for discounts constantly.
Lastly, there are trailers and news sections; staying up to date with the latest gaming news has never been easier.
➡ GX Control
This feature allows you to manage your resource usage in Opera GX. In addition, thanks to the Hot Tabs Killer feature, you can monitor CPU and RAM usage at a glance.
If a particular tab is slowing down your PC or using too many resources, you need to click it, and it will be automatically closed.
We found this feature incredibly useful, especially on low-end PCs that aren’t suitable for heavy multitasking, and we wish that other browsers would incorporate this feature.
The Network Limiter is another welcome feature that will limit bandwidth usage in the browser. With this feature, you can see both download and upload speeds in your browser at a glance.
If needed, you can choose between one of the 15 available presets according to your needs. Sadly, this feature doesn’t support custom values, and there’s no option to set the upload limit.
Overall, Network Limiter will surely be helpful and ensure you have enough bandwidth for game downloads or other network-intensive tasks on your PC.
Lastly, there are RAM and CPU Limiter features. Certain websites can use more resources than you’d like, negatively affecting your gaming sessions or other tasks.
To prevent that, you can limit CPU and RAM usage in Opera GX. However, remember that restricting CPU and RAM usage can negatively impact your browser performance, so use this feature carefully.
The GX Control feature is handy, especially on lower-end PCs, since it will limit resource usage and provide more hardware power to other PC applications.
DigitalTrends has a detailed explanation of why RAM and CPU limiting feature is essential:
You can also limit memory usage, which is arguably the more important throttle. Modern web pages can chew through enormous sums of memory if given free reign, so Opera GX has a built in limiter with a soft and a hard edge to it. The soft one does its best to stay roughly within your set limit, however many gigabytes you decide is OK. The toggleable hard limit means any new tabs you open once you’ve hit that limit will start killing old ones.
Quick access to these features simplifies the process and allows you to manage your PC’s resources quickly.
➡ GX Cleaner
GX Cleaner is a feature that lets you easily clean your cache, cookies, and browsing history with just a couple of clicks.
With this feature, you can observe the amount of space the browsing data occupies on your PC and choose one of three available presets to clean your files quickly.
You can select the data type you want to remove and set the desired time range.
This feature doesn’t bring anything new, but it lets you quickly and easily clean your cache and other data, which will surely come in handy.
➡ Integrations
Opera GX offers integration with various services, allowing you to access them from the sidebar easily. First, Twitch integration lets you quickly see your favorite channels and notifications.
You can even watch Twitch in the sidebar while working on different tasks.
➡ Music Player
Music player integration is also available, allowing you to access services such as YouTube Music, Apple Music, Deezer, Soundcloud, Tidal, and Spotify right from the browser sidebar.
Sadly, you can’t use the seek bar while the player is minimized, so if you want to skip a specific part of a song, you’ll need to open the player in the sidebar.
Ensuring quick access to any media player of your choosing proves extremely useful no matter what workspace you’re using at that time.
➡ Messaging services
Opera GX supports many messaging services, such as Facebook Messenger, WhatsApp, Telegram, and VK. In addition, of course, support for Discord is also available.
If you’re a fan of social networks, we’re pleased to inform you that Opera GX has full integration with Instagram and Twitter so that you can keep up with your feeds at all times.
Most of these integrations aren’t available out of the box, and you’ll have to enable them from the Sidebar settings, but that takes only a couple of moments.
Here’s how to activate them:
First, click the Settings button from the bottom of the sidebar.
Then, scroll down through the list, choose and click on Manage sidebar.
Tick the boxes of the messaging services you want to activate and remove any ticks to remove apps from the sidebar.
After choosing which messaging apps you want to use, they will appear in the sidebar and allow instant access to write new messages and even respond.
➡ Other features
Opera GX inherits many features from the regular version, so you get all the significant elements that Opera offers, plus all the unique ones we mentioned above.
As for regular Opera features, let’s take a closer look at what Opera GX offers.
➡ Workspaces
One of the most valuable features that Opera GX offers is the Workspaces feature. That’s your chance to organize all your open tabs into workspaces.
An icon on your sidebar represents each workspace, and you can switch between them with a single click. This is perfect if you need to separate tabs into groups.
Of course, you can move the tabs between workspaces by right-clicking the desired account and choosing the appropriate option from the menu.
This feature isn’t enabled out of the box, but you can help it quickly by following these steps:
First, click the Sidebar settings shortcut represented by three dots.
Next, activate the Workspaces toggle by clicking it.
Finally, customize the workspaces as you see fit, set icons and names, and create new ones.
Optimizing your workspaces allows you to configure settings for each, thus considerably simplifying your experience, whether you’re using the browser for work, casual browsing, or gaming.
➡ Privacy protection
Another great feature of Opera GX is privacy protection, and just like with Workspaces, this feature is disabled out of the box, but you can enable it by following these steps:
First, click the Easy setup button from the top-right corner.
Next, scroll down to the Privacy & Security section.
Finally, activate it by clicking the respective toggles.
The browser has a built-in ad-blocking feature that should block all ads with a single click. In our testing, it stopped ads on all websites we visited.
Regarding tracking protection, this feature will block websites such as Facebook and others from tracking your online activity.
These two features are customizable, and you can easily manage exceptions or add blocklists to filter ads better, which is a welcome addition.
➡ VPN
Opera GX also has a built-in VPN, which can be used to protect your online privacy. The VPN offers three locations to choose from, which should be enough for basic needs.
A helpful graph can also show you your network usage for a week. As for bandwidth, we have to mention that Opera GX offers unlimited VPN for free, which is a significant plus.
As for the VPN speed, that is a bit of a mixed bag. While using servers closer to our location, we didn’t notice any changes in the download speed.
However, when using servers on a different continent, the speed dropped drastically, so be sure to choose the location closest to you to avoid this issue.
The VPN works great as long as you pick the correct location. Our only complaint is that the VPN feature is disabled and somewhat hidden, and you must manually enable it from the settings page.
➡ Flow
Opera Flow is another great feature that lets you share content between your PC and phone. After you download the Opera app for your phone, you need to set up Flow and connect your phone to your PC.
The process is simple and seamless, and you’ll instantly get a notification on your phone. The feature works like an instant messenger, and you can share links, files, or texts from your devices.
Flow is a unique and simple way to share data between devices, but it’s not available on the sidebar by default, so you’ll need to adjust your settings to enable quick access.
Opera GX offers a vast number of features, and PCMag had this to say about the features:
These features work as advertised, and individually are very straightforward. But it’s the sheer number of them that really impresses. If anything, it’s overwhelming. I didn’t always immediately know where I needed to go to access certain features, because there are so many things to potentially click.
Is Opera GX Chromium-based?
Yes, Opera GX is based on the Chromium architecture, allowing you to use compatible add-ons and extensions to supplement the already stocked-up built-in features.
Is Opera GX safe?
Opera is based on Chromium, so it’s safe as any other Chromium browser. In addition, it has a share of unique features, such as DLL hijacking prevention and homepage hijacking protection, that should keep you safe.
With its tracking protection and built-in VPN, Opera GX is slightly safer than most other browsers on the market.
As many users have been interested in finding out if Opera is safe on forums like Reddit, we have initiated a benchmark test called on the BrowserAudit website to test this statement and see how well this browser performs when it comes down to safety.
This website allows anybody to freely test their browser online for the most common security standards and features. The benchmark is comprised of a total of 400 tests, so let’s see the results Opera GX had:
Browser
Passed tests
Warnings
Critical issues
Skipped
Opera GX
357/400
26
1
20
As you can see from the table above, Opera GX has crushed 357 of the total of 400 tests, making it a handy and safe browser.
That being said, a few users are worried about data collection and the fact that the software isn’t open-source. However, these are minor concerns; most users shouldn’t be worried about this.
Speaking of privacy concerns, the review from LifeHacker states the following:
The other drawback is how the browser tracks user data. Opera GX tracks certain data (just like the normal Opera browser), including your IP address and browsing activity, plus some activity from connected third-party accounts like Twitch. Opera shares this data with advertisers and other third-party partners, but Opera’s tracking doesn’t feel any worse than Google Chrome’s—and users can disable (some) data-sharing from the settings menu.
Is Opera GX good?
The simple answer to this question is a resounding Yes. Opera GX offers an incredible array of standard and gaming-related features that no other browser can match.
People have been trying to find this information by searching if Opera GX is good on forums like Reddit, and this guide will provide you with all the answers you need.
Additionally, the browsing speed Opera GX offers, combined with the ability to control the RAM and CPU usage, makes it an excellent browser.
Is Opera GX a virus?
No, Opera GX is not a virus; it is a Chromium-based browser built with gaming in mind and has some fantastic features that will surely expand your gaming experience.
Is Opera GX better than Chrome?
To answer this question, we have tested both browsers through rigorous tests to find the best option.
To run the tests, we will be using the Browserbench website tests, which include three different testing grounds:
JetStream 2 – JavaScript and WebAssembly test to ensure that browsers can start quickly, run optimally, and run code efficiently. More significant scores are better.
MotionMark – Graphics benchmark tests check if the browser can animate complex scenes with a specific frame rate value. More significant scores are better.
Speedometer – Measures how many and how reasonable the browser deals with Web applications with multiple actions performed in a row. More significant scores are better.
If you want more details regarding this comparison, feel free to explore our Opera GX vs. Chrome guide.
Now that we understand what the actual tests aim for, we can better understand the results of our thorough tests:
As you can see from the results above, when it comes to JavaScript and WebAssembly, Opera GX scored 161.531, while Chrome scored only 152.992 points for the JetStream 2 test, making Opera GX the winner in this department.
When looking at the MotionMark test results, you will see that Chrome performs better than Opera GX. This means that Chrome can better animate complex scenes.
In our Speedometer test, Chrome lost again, scoring 119 points, while Opera GX had 129 points. This makes the Opera GX browser a faster browser than its competition.
Conclusion:
Opera GX wins the testing session in front of Chrome, with 2 out of 3 tests won. Of course, that doesn’t mean Chrome is the wrong choice of browser, but still, Opera GX takes the crown.
Opera GX is a more advanced and specialized version of the original Opera, with some added gaming features like a built-in CPU, GPU, and Network limiter.
Any gamer will know that controlling all these aspects gives you an edge, both in professional gaming but also for casual users.
➡ Similarities
Both are based on Chromium
Very similar privacy policies
Same built-in VPN service
Both versions have an Ad-blocker and Block trackers features
Built-in music player
➡ Differences
GX Corner – this handy feature ensures you can access a helpful overview of all your gaming settings in the browser and tweak them according to your needs.
GX Control – offers you access to all the critical gaming-related features and settings like RAM limiter, CPU limiter, etc.
GX Cleaner – as the name suggests, this tool enables you to efficiently clear browsing data, and it can be easily accessed from the sidebar
Interface design (Opera GX offers a more gaming-inclined interface)
➡ Benchmark tests
In this section, we will compare the capabilities of these two software options using a benchmark test. Let’s have a look at the results we’ve obtained:
As you can see from the information presented above, choosing between the Opera and Opera GX versions will come down to a straightforward question: Are you a gamer?
If the answer to that question is Yes, then choosing Opera GX is the best option.
If the answer to that question is No, then the classic Opera will ensure you have all the tools you need to browse the internet safely and securely.
You can, of course, use Opera GX even if you’re not a gamer. However, in this case, looking at all the differences and similarities will help you make an informed decision. For more information, explore our Opera GX vs. Opera guide.
Is Opera GX trustworthy?
Opera GX offers users the same level of trustworthiness as Chrome and other popular browsers, so you don’t need to worry about this element.
Even though the software employs some data tracking, it doesn’t go overboard with this detail. It offers users the capability to utilize the built-in VPN service while providing users the choice to deactivate some of the tracking features.
Don’t hesitate to find out how Opera GX compares with Edge to ensure you have all the information required to make an informed decision.
Opera GX impresses with its beautifully-designed user interface while offering quick shortcuts and customization features, making it one of the most trustworthy browsers on the market.
Is Opera GX free?
Yes, Opera GX is free to download and use, so you don’t need to worry about this. Added to that, this browser also works without issues on Windows 7.
You get all this app’s fantastic features without a subscription or extra premium options hidden behind a payment. As a bonus, you can play offline browser games on Opera GX.
Certain advanced features need to be enabled manually
No light theme
Opera GX offers a sleek and customizable interface, so it’s perfect if you’re a gamer or prefer a dark and minimalistic interface.
Features such as GX Control are welcome because they will limit your browser’s resources and ensure that other applications work smoothly.
We were pretty pleased with the available integrations, and if you rely heavily on music services, Twitch, social networks, or instant messengers, Opera GX will provide you with a way to keep a close eye on them.
Features such as Hot Tabs Killer, Workspaces, and Flow impressed us with their usability, and we hope that other browsers will start adding them to their list of features.
We had a few minor complaints, and the most notable is that the features we found the most exciting and valuable are hidden in the settings and had to be manually enabled.
This takes a couple of seconds, but if you’re a first-time user and want to try these features, you’ll need to adjust your settings before using them.
How does Opera GX compare to other similar software?
As we all know, not all browser software is the same, with some offering a plethora of valuable elements that improve your overall experience and some offering a limited amount.
As you can see from the image presented above, even though there are some other helpful browser alternatives on the market, none of them come close to the gaming features that Opera GX contains while ensuring fast speeds and quick access to your favorite social media platforms.
Downloading and installing the software to your PC is even easier than in the case of some other well-known browsers:
First, open the Opera GX download page.
Then, click the Download Opera GX button.
In the window that pops up, navigate your PC and choose the location for the installer to download.
Wait for the download process to complete, and run the installer.
Click Run inside the pop-up window that appears on the screen (appears for any executable files that have been downloaded).
Click the Install button to initiate the process.
Wait for the installation process to complete.
Opera GX will start automatically.
As you can see, the download and installation process forOpera GX is intuitive, and the same principle applies to using the software on your PC.
Besides the fantastic gaming features it offers, you also get quick access to your favorite social media accounts, Discord integration, and lightning-browsing speeds.
Make sure to try it out!
As we come to a close with the review for this helpful software, Opera GX not only provided us with an easy-to-understand interface that allows full customization but also ensures that your online privacy is respected at all times.
Even more than that, the gaming-specific elements included in the build of Opera GX allow all gamers, no matter what kind, to find a use for these features while also having a breakneck Internet-browsing speed.
Try this excellent software today to make your browsing experience your own without compromising security, efficiency, and versatility.
You must use any of the best Hotstar browsers to get the best streaming experience on this platform. This article featured a list where you can find the most recommended web browsers for this purpose.
Hotstar is India’s largest premium streaming platform, with more than 300 million viewers. The service offers everything from live sports to web series, exclusive TV shows, and movies.
Hotstar is available in both free and premium versions. While the largest user base of Hotstart uses the Hotstar app, the service is also accessible from the web.
Can I watch Hotstar on a browser?
Yes. You can easily watch Hotstar on a browser as long as you have a valid subscription and a compatible web browser.
However, the web browser you use to access the Hotstar service can, at times, make a huge difference in the viewing experience.
If you are looking for a change from your old browser, here are the best browsers for Hotstar that you can use to stream videos without any issues.
Opera One didn’t use to the trendiest browsing. That’s a thing of the past, and we can ensure you you’re missing out on quite a gem.
This browsing solution has evolved tremendously and has built its own niche audience. The latest design overhaul has given the browser the much-needed design upgrade with some cool features up its sleeves.
Here’s what makes Opera VPN perhaps the best browser to stream Hotstar videos.
Coming to the streaming capabilities, the Opera One browser offers excellent page loading speed thanks to the built-in ad blocker.
The browser also comes with built-in VPN support to access the restricted websites blocked by your ISP or access the region-restricted contents.
Other features offered by the browser include built-in Facebook messenger support. You can take screenshots of the web pages without using any third-party tool.
Let’s quickly look at its key features:
Comes with support for VR Players, standard security protocols
Instant search and integrated ad-blocker
News feeder, battery saver mode, currency unit, time zone converters, etc.
Countless customization options for a friendlier-than-ever UI
Speed tab to further accelerate your workflows and more
Opera One
Reimagine Hotstar streaming with the most powerful browser: faster, better, 100% private, and ad-free.
This solution is one of our top choices for the best browser to watch Hotstar content.
UR Browser is the newest kid in the block but comes with some cool tricks up its sleeves. It is fast, secure, and optimized for privacy.
This web browser comes with tools to speed up the page-loading process. The browser loads websites faster without the ads, tracker, and cookies that can slow down the loading speed.
It has three levels of privacy. Low Privacy mode offers HTTPS Redirect and Anti-Fingerprinting protection.
Let’s quickly look at its key features:
Medium Privacy blocks ad trackers and ads, third-party cookies
The High Privacy mode offers everything in Medium privacy
Ninja Mode allows you to open Incognito mode without opening a new window
Built-in VPN connection that can help you bypass ISP restrictions or access region-restricted content
UR Browser
Enjoy fast, private, and secure Hotstar streaming with a top-range browsing solution!
Mozilla Firefox – Streaming friendly browser with great privacy features
Mozilla Firefox is another popular browser that received a complete overhaul. Now Firefox claims to offer 2x more speed than its predecessor.
Firefox comes with better memory management as well as more privacy options. Plus, it has a great number of extensions to enhance your video-watching experience.
Better memory management means Firefox now leaves more resources to run apps and stream content while also increasing the page loading speed.
Let’s quickly look at its key features:
Numerous customization options (users can choose from thousands of themes to give Firefox a look they want)
Improved sync between devices and better add-on and extension support
Bookmark manager, more powerful private browsing, and ad tracker blocking features
Google Chrome is the most popular web browser as of now in the Windows ecosystem. The browser is popular for its clean interface, extensive extension support, as well as better security.
To watch Hotstar, Google Chrome offers a password manager with automatic login support. The web streaming service works without any issues on the browser.
Let’s quickly look at its key features:
Built-in smart search features, including translation and more
Can detect unsafe sites and block user access with a warning
Auto-updates every six weeks to keep up with the newest security protocols
Not to mention that Chrome has a Hotstar party extension that allows you to enjoy your favorite programs remotely and sync with friends from various locations.
Microsoft Edge is one of the best browsers for Hotstar. It is based on the Chromium engine, which makes it a very powerful option to stream any type of video content on different platforms.
If you access Hotstar using Edge and login into that platform, this browser will remember your login and also save your credentials if you want without any issue. As it is from Microsoft, it has a very good privacy reputation.
Edge Key features:
Built-in VPN powered by Cloudflare
Microsoft SmartScreen to protect you from online threats and unsafe sites
Auto update
Performance and privacy mode
Like Chrome, you also can use the Hotstar Party extension on Edge to enhance your experience.
There can be numerous reasons why Hotstar is not working in your browser. The reasons can be any of the followings:
Incompatible version of browser
A third-party extension is interrupting
Slow network speed
Low-quality VPN and proxy
Your primary steps are to disable unnecessary extensions and ensure that your internet connection can stream videos well. Then, make sure you have always updated the browser. You must use a different option if you still get the error, particularly with a VPN.
For this, we suggest using the Private Internet Access for Hotstar. PIA also works great on any video streaming services like Netflix, Hulu, and Disney Plus.
If you are streaming live sports events on Hotstar or other types of video content, watching it on the large screen of your desktop would make more sense.
To enhance the browsing experience, you can use one of the Hotstar web browsers listed in this article.
We recommend you try Opera first as it has a built-in VPN and is optimized for streaming media online. Do let us know your pick in the comments.
Using the Firefox browser can streamline your work. For example, you can keep your email page open and provide technical support to your clients and guidance to your employees while you browse the Internet by opening each page in its own tab.
The tabs enable you to easily organize your pages and works. Tabs can be moved in Firefox, so you can also rearrange the pages based on their importance.
When you click on a link, the way it will open by default depends on the webpage settings. It can either open in a new tab or in the same tab.
But, what to do when links that ought to open in a new tab are not working in Firefox? Worry less as we have provided some fixes in this article.
Why links are not opening in the new tab?
Most likely, problems with opening hyperlinks are connected with either the security restrictions of your Internet browser that doesn’t allow opening pop-up windows.
It can also be with your Flash player plug-in that prevents you from opening URLs in local Flash files.
First of all, make sure that the hyperlink has been created correctly: put your mouse cursor over a hyperlink and see if it changes to a hand.
Quick Tip:
Try opening links using a more stable browser. A good option that includes standard browsing features like bookmarking and private browsing, plus tools like an ad blocker, VPN and Ai is Opera One.
Sometimes, it’s possible that the pages you try to access are not configured to be opened in a new tab, in which case the site is at fault. In Opera One, you just have to right-click the link and select Open in a new tab.
Opera One
Surf the web with up-to-standard features for error-free and secure browsing that let you open as many new tabs as you need!
How do I force Firefox to open links in a new tab?
1. Use the Adds-on Store
The Firefox Browser Add-ons Store contains several extensions that can open links in new tabs. Just install it, and every link that you come across should open in a new tab.
How do I get Firefox to open a new tab with the keyboard?
Use the dedicated shortcut
Hover the cursor over the link that you want to open in a new tab.
Now, press and hold the Ctrl key, and then left-click on the link.
If you always want to have Firefox open all links in a new tab when you normally click on them, modifying the advanced configuration settings would do the trick.
Both methods presented above are easy and effective ways to fix your Firefox if the new tab does not open or is not working.
From now on, you can have Firefox open the link in a new tab without switching, no matter the default site settings.
Just choose the method you feel more comfortable with. Let us know your pick in the comments area too.