Windows 11 Multiple Desktops: How to Create, Use & Manage

Microsoft’s latest operating system, Windows 11, includes a new design, improvements to Microsoft Teams, support for Android apps, and the ability to use multiple desktops, among other things.

Many of these new features are beneficial for increasing productivity and multitasking, whether you’re trying to organize files for school or trying to do three things at the same time for work.

Among these features are virtual desktops, which allow you to organize multiple workspaces on a single monitor.

Find out what you should know if you’re unsure about upgrading from Windows 10, and let’s move on to more productivity features that are included in Windows 11. Follow along!

Windows 11 Productivity features you should know about

Many professionals are hesitant to own two-in-one laptops or touchscreen displays because of their perceived security risks. This is due to the fact that navigating Windows with your fingers is less intuitive than it should be.

With Windows 11, this is no longer the case. Microsoft created the operating system to be usable with both your hands and a mouse. When used in computer mode, Windows 11 retains the familiar user interface.

In tablet mode, on the other hand, the interface is tweaked to make it more user-friendly. When compared to cursors, fingers are less precise, and we cannot see what we are tapping.

As a result, they increased the size of the touch targets and the amount of space between icons. Using visual cues to make resizing and moving apps is even more straightforward.

    How to use multiple desktops in Windows 11

    You can easily set up multiple desktops on your Windows 11 PC directly from the built-in Taskbar. All it takes is a few clicks, then you can enjoy this new Windows feature.

  1. 1. Hover over the Task View icon from your Taskbar. A small preview of your current desktop(s) should appear, and if you click the button, a preview of the apps that are currently open on your current desktop will appear as well.

    task-view windows 11 multiple desktops
  2. 2. Click on the New desktop button or alternatively use the Windows + CTRL + D shortcut.

    new-desktop windows 11 multiple desktops
  3. 3. You can also rename the desktops if you click on the Desktop X text. Or if you right-click on the desktop.

    rename-bg windows 11 multiple desktops
  4. 4. Moreover, you can use different backgrounds on multiple desktops in Windows 11 as well, by clicking on the Choose background option.

  5. 5. In order to remove a desktop, you can hover over the Task View icon, then hover again over the specific desktop and click on the X button.

    x-desktop windows 11 multiple desktops

Users have been asking if they can have different icons on multiple desktops in Windows 11, or if they can have a different Windows 11 Taskbar on multiple desktops.

Unfortunately, this is not supported as of now, but Microsoft might introduce this feature in the near future.

When you group apps and windows together, Snap Layouts, a new feature in Windows 11, allows you to better organize your desktop.

It’s similar to how you can group your apps on Android and iOS devices, or how you can use Split Screen on a Mac computer.

Microsoft Teams, a messaging and collaboration application, is integrated into the OS. This new feature enables you to send messages and make video calls directly from your desktop computer.

Despite the fact that it is not as popular as other services such as Zoom and Messenger, it is a useful new feature. You can now communicate with anyone, regardless of whether or not they have a Teams account, directly from your desktop.
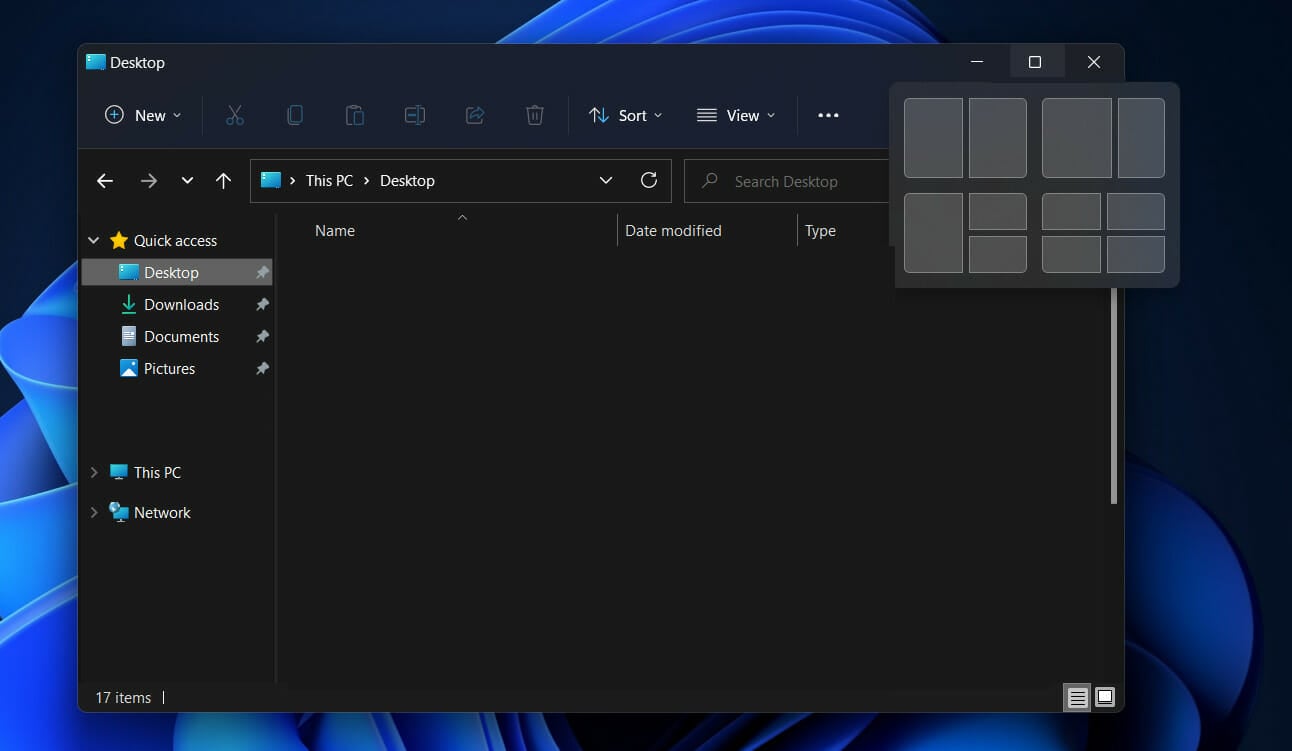
 snap layout windows 11 multiple desktops

Additionally, Microsoft Teams is available on iOS and Android devices, which means it has the potential to reach a larger audience. However, only time will tell whether or not this feature will be adopted by the rest of the general public.

If you use our guide, your virtual desktops will look the same and function the same, the only difference being what apps or windows you have open.

For more information, check out our post on how to manage virtual desktops in Windows 10.

Alternatively, here are the best virtual desktop software tools for Windows 10/11 that will help you declutter and organize your apps and windows.

Leave us a comment in the section below and tell us what you think about our post. Thanks for reading!



Download the Adobe April 2022 Patch Tuesday updates

No doubt, many of you are waiting for the Patch Tuesday monthly batch of security updates and we’re here to make it a bit easier for you to find what you’re looking for.

It goes without saying that Microsoft isn’t the only company that has such a rollout on a monthly basis. So, in this article, we’re going to talk about Adobe and some of the patches for their products.

As we’re pretty sure you know by now, we will also include links to the download source, so you don’t have to scour the internet to find them.

Acrobat and Reader required the most fixing this month

Last month, Adobe only released three patches addressing six CVEs in Adobe Photoshop, Illustrator, and After Effects.

Pretty light, considering that these last few months really tested major companies in terms of software malfunctions and hacking.

However, April comes with only four updates addressing 70 CVEs in Acrobat and Reader, Photoshop, After Effects, and Adobe Commerce.

Adobe Acrobat and Reader updates are by far the largest, with no less than62 CVEs being addressed just for the two.

And to answer your next question, yes, the more severe vulnerabilities being fixed are the Critical-Rated Use-After-Free (UAF) and Out-of-Bounds (OOB) Write bugs.

Developers pointed out that these vulnerabilities could actually allow an attacker to execute code on a target system if they can convince a user to open a specially crafted PDF document.

If Photoshop is your go-to Adobe software, note that there are 13 CVEs fixed in the patch for the photo editing app.

After Effects patches for April 2022 address two Critical-rated CVEs that could allow for code execution, with both bugs listed as stack-based buffer overflows.

The patch for Adobe Commerce fixes a single, Critical-rated vulnerability, which Adobe rates as a CVSS 9.1, explaining that authentication would be required to exploit this bug.

Admin privileges are also required but, still, if you’re using Commerce, test and deploy this patch as soon as you are able.

Another important aspect is that none of the bugs fixed by Adobe this month are listed as publicly known or under active attack at the time of release.

Have you encountered any other bugs while using Adobe software? Share your experience with us in the comments section below.

Fix: Windows 11 Not Recognizing iPad

Some users need to connect their Apple iPads with Windows 11 PCs to transfer files. However, Windows 11 doesn’t always recognize iPads when some users connect them with PC. When an iPad isn’t recognized, it doesn’t appear within the iTunes software. One user’s MS forum post said this:

When I plug my new iPad Pro 9.7 into any USB port on my desktop PC, it is not recognized. I have other Apple devices, all of which are recognized. I installed the latest iTunes software on my laptop PC and that recognizes my iPad Pro!

Some users might see an 0xE error message when an Apple device isn’t recognized. That error message says this, iTunes could not connect to this iPad because an unknown error occurred (0xE8000003). As a result, users can’t share files between their Apple tablets and Windows 11 PCs.

Do you need also need to fix Windows 11 not recognizing an iPad as well? Maybe one of the potential resolutions below might get that issue sorted on your PC.

How Come Windows 11 isn’t recognizing my Apple iPad?

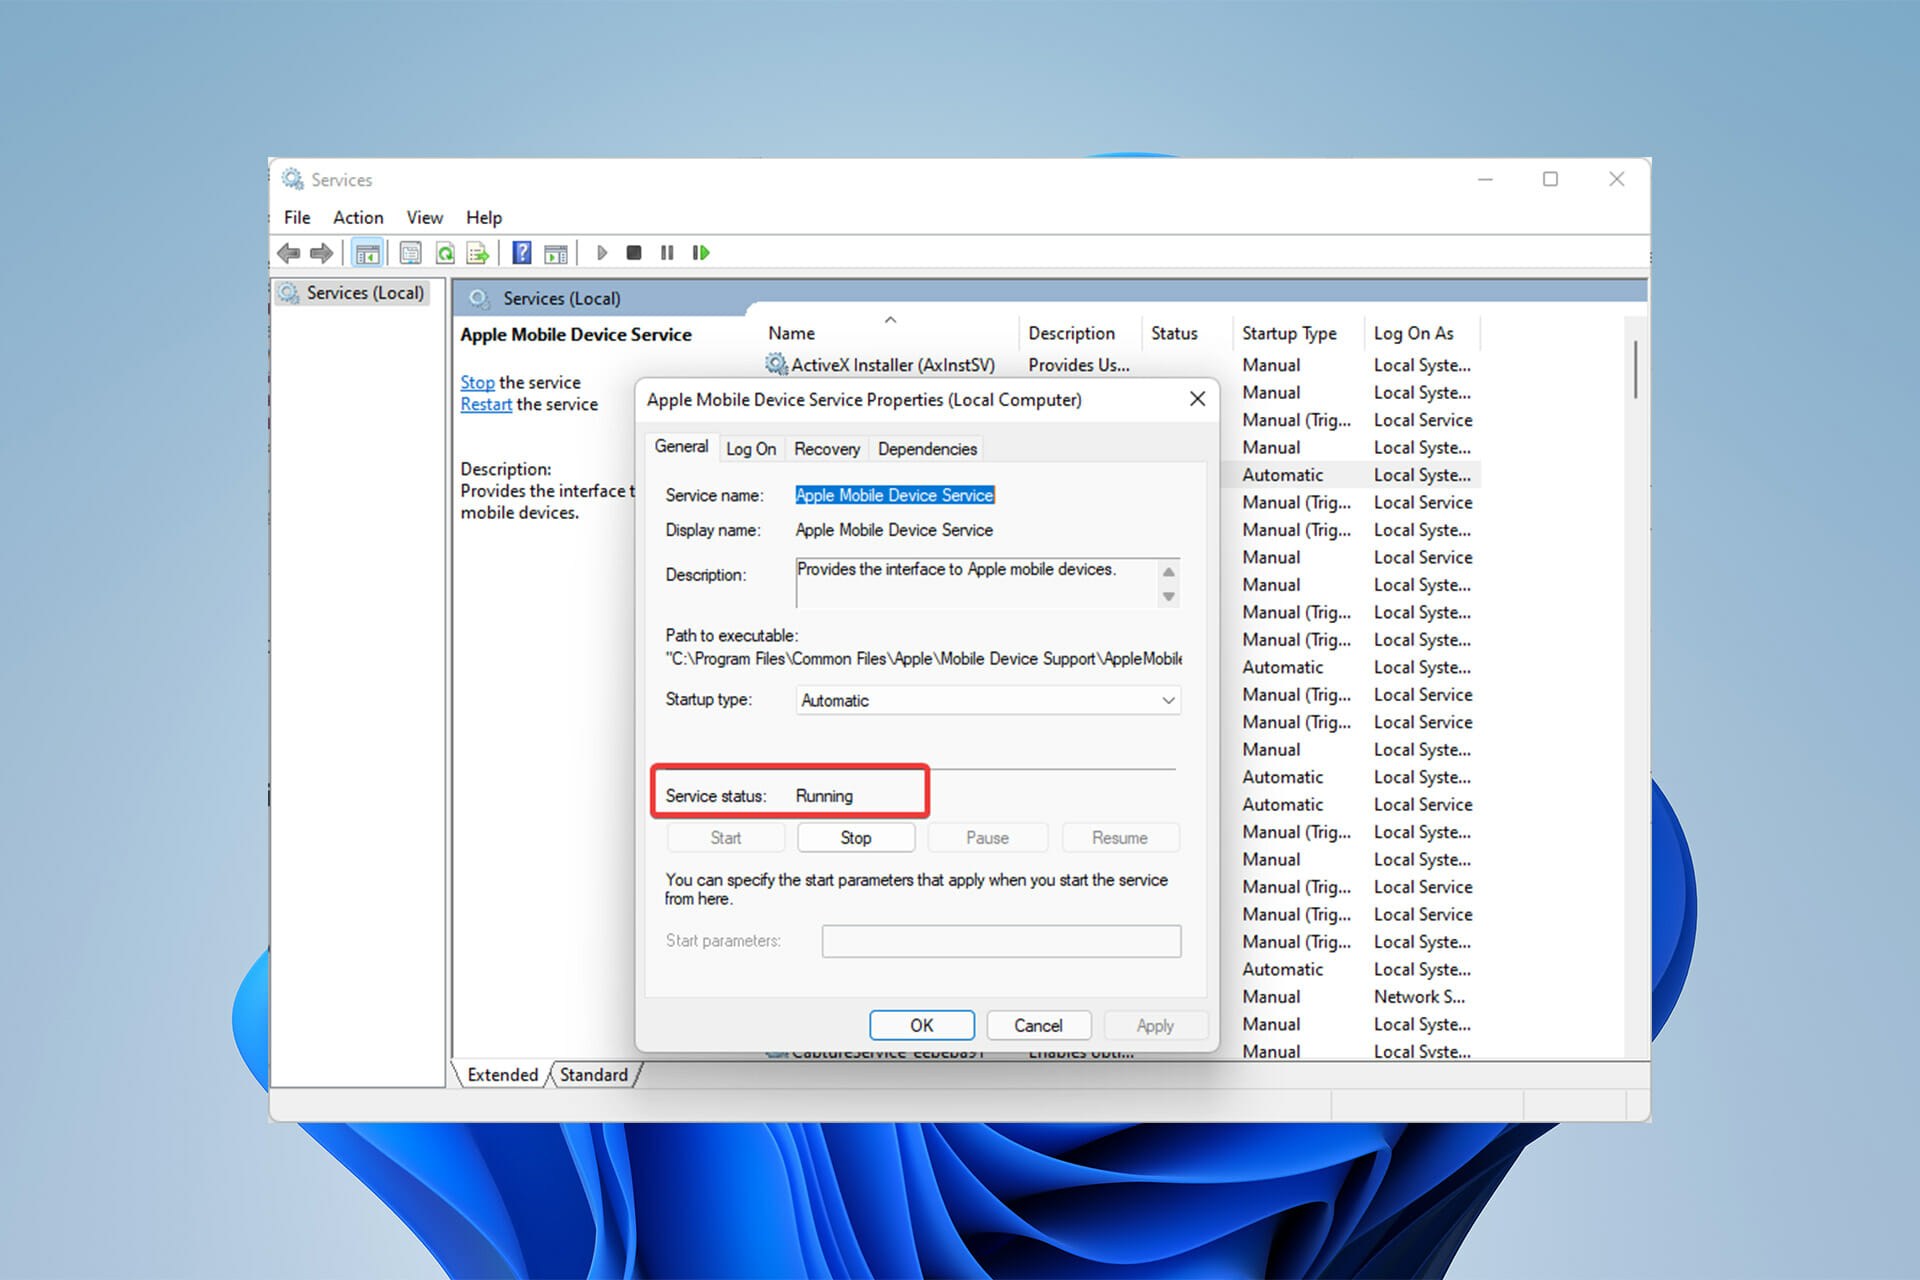
The iTunes software has an Apple Mobile Device Service that detects Apple devices connected to your PC. Windows 11 won’t recognize your iPad if that service isn’t enabled and running. So, some users might need to enable that service to resolve this issue.

Another possibility is that there’s an issue with the Apple Mobile Device USB Driver. If there is, you might see an exclamation mark by that device in Device Manager. Reinstalling that Apple device driver could be the solution in such a scenario.

There might be something up with the Apple software on your Windows 11 PC. In this case, reinstalling iTunes or at least selecting Repair options for other related Apple software could be a potential remedy.

Or it might just be that you’re utilizing an outdated iTunes version. An outdated iTunes won’t recognize the latest Apple devices. So, maybe you need to update your software.

How can I fix Windows 11 not recognizing my Apple iPad?

1. Remember to Select the Trust Option

  1. When you connect an Apple device with Windows PC for the first time, you need to select a Trust option. Insert your iPad into a USB port on your PC. 
  2. Wait for the Trust option to appear. Then tap that option on your iPad.
    Trust option Windows 11 not recognizing iPad

  3. Then input the required passcode.
    Device passcode keypad Windows 11 not recognizing iPad
  4. Also, make sure you haven’t accidentally tapped the Don’t Trust option by mistake. To do so, you’ll need to reset that option on your iPad by selecting General and Reset in the iPad’s Settings app.
  5. Tap the Reset Location & Privacy option.

2. Update the iTunes Software

  1. Click the taskbar button for the Start menu.
  2. Type Apple Software Update in the Start menu’s search box to find that app, which comes bundled with iTunes.
    The Apple Software Update keyword windows 11 not recognizing ipad
  3. Click Apple Software Update to open its window.
  4. That app will automatically check for new iTunes software versions. Select the iTunes checkbox if it finds an available update.
    Apple Software Update window windows 11 not recognizing ipad
  5. Press the Install item button.

3. Run the Hardware and Devices Troubleshooter

  1. Open Windows 11’s search box by clicking the taskbar icon shown directly below.
    The search button windows 11 not recognizing ipad
  2. Then input the keyword cmd to look for the Command Prompt app.
  3. Select Command Prompt to open it.
  4. To open the Hardware and Devices troubleshooter, input this command and press Return: msdt.exe -id DeviceDiagnosticThe msdt.exe command windows 11 not recognizing ipad
  5. Click Advanced to select the Apply repairs automatically option.
  6. Press the Next button to initiate the device troubleshooting.
  7. Select the Power and Restart options on the Start menu if the troubleshooter detects and fixes something.
    Restart option windows 11 not recognizing ipad

4. Try Connecting the iPad with Different USB Ports

A USB port Windows 11 not recognizing iPad

Windows 11 might not recognize your iPad because there’s an issue with its USB connection. So, try connecting your tablet with alternative USB ports. Also, don’t connect your iPad with any kind of USB hub. Plug the tablet into a direct USB port on the PC if you were utilizing a USB hub.

Aside from that, check the condition of the Apple USB cable. If it looks like it might need replacing, that could be why Windows 11 doesn’t recognize the iPad. Try connecting your iPad with a different USB cable.

5. Disconnect all other non-essential peripheral devices

It’s recommended users unplug all superfluous devices and accessories connected to their PC when Windows doesn’t recognize Apple devices. So, that means unplugging anything like gamepads, external hard drives, USB sticks, and joysticks from USB slots. Then, plug the iPad into a USB slot.

6. Repair Apple iTunes, Mobile Device Support, and Software Update

  1. Press the Windows + X keyboard keys both at the same time.
  2. Click Run to open that command window.
    Run option windows 11 not recognizing ipad
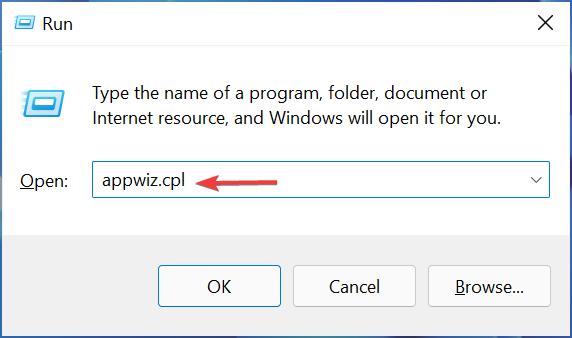
  3. Open Programs and Features by inputting this Run command and pressing Return: appwiz.cpl
  4. Then select the iTunes software.
  5. Click the Repair option for it.
    Repair option windows 11 not recognizing ipad
  6. Select the Repair options for Apple Software Update and Apple Mobile Device in Programs and Features as well.

7. Check that Apple Mobile Device Service is Enabled and Running

  1. First, launch Run as covered in steps one and two of resolution six.
  2. Open this Run command in the Open text box: services.msc
  3. Click OK to bring up the Services window.
    The Services window windows 11 not recognizing ipad
  4. Double-click Apple Mobile Device Service in that window.
  5. If that service is disabled, select the Automatic startup option.
    Automatic option windows 11 not recognizing ipad
  6. Click Start if the service isn’t running.
    Start button windows 11 not recognizing ipad
  7. Then go and press the Apply button, which will save your selected settings.
    The Apply option windows 11 not recognizing ipad
  8. Click OK to close the Apple Mobile Device Service window.
  9. Repeat the steps above for the Bonjour Service.

8. Reinstall the Apple Mobile Device USB Driver

  1. Bring up the Power User menu, which opens when you right-click the Start button.
  2. Select the Device Manager option from there.
  3. Double-click the Universal Serial Bus controllers category to view all its devices.
    Universal Serial Bus controllers category windows 11 not recognizing ipad
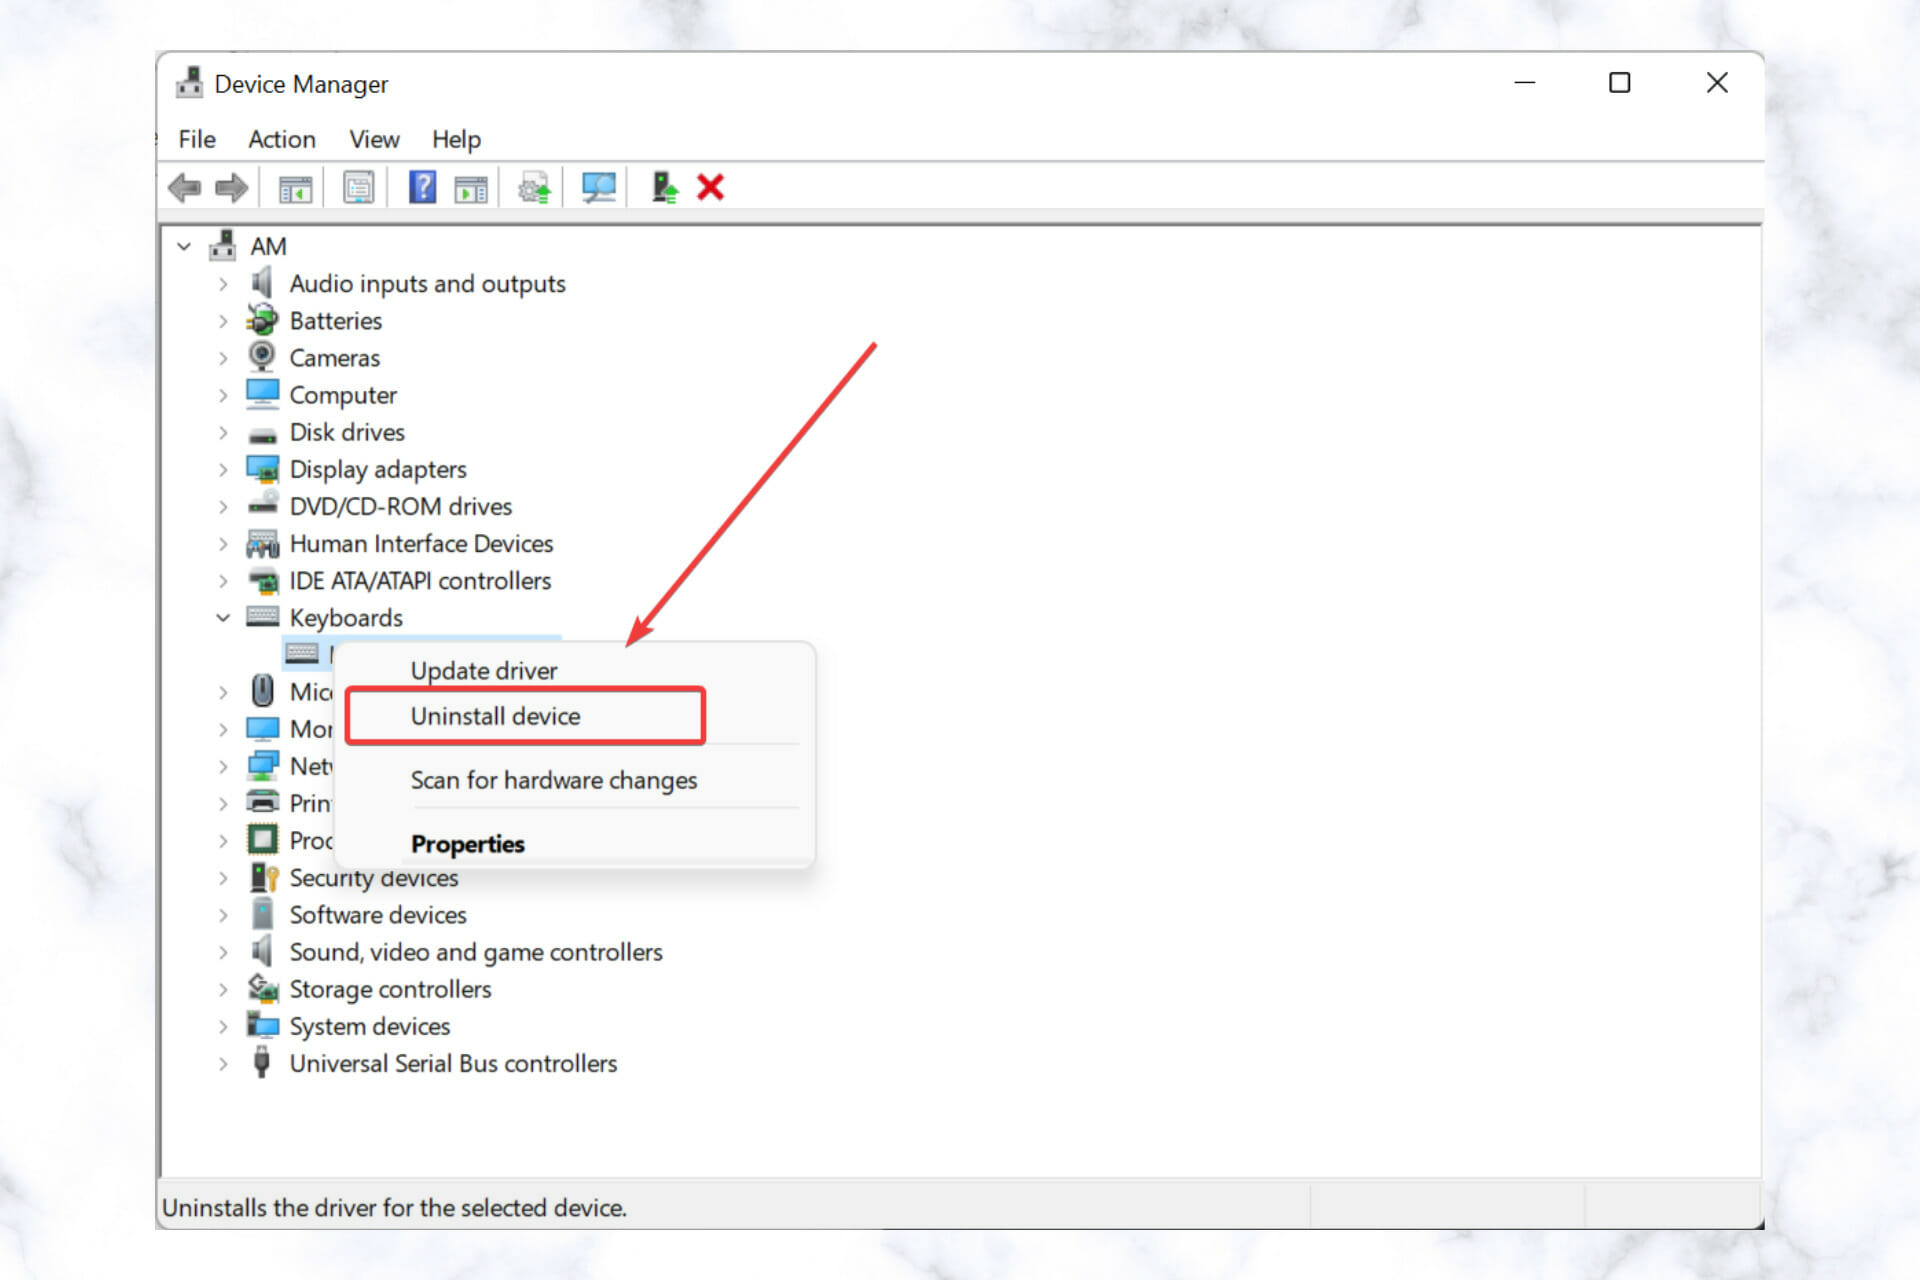
  4. Right-click the Apple Mobile Device USB Driver to select an Uninstall device option for it.
    Uninstall device option windows 11 not recognizing ipad
  5. Select the checkbox for the Remove device driver software option on the confirmation prompt.
  6. Click Uninstall to remove the driver.
  7. To reinstall the driver, click the Universal Serial Bus Controllers category with the right mouse button to select Scan for hardware changes.
    Scan for hardware changes option windows 11 not recognizing ipad

Driver updater software, such as Outbyte Driver Updater, can also fix missing or faulty drivers in Windows. Running a Outbyte Driver Updater scan will show you if the Apple Mobile Device USB driver is outdated, missing, or faulty. Then you can select to install the latest driver for that device with the software.

9. Reinstall iTunes

  1. Open the Programs and Features Control Panel applet as outlined in the first steps of resolution six.
  2. Then select the iTunes software listed there.
  3. Click the Uninstall option for iTunes, and select Yes on any confirmation prompts.
    The Uninstall option windows 11 not recognizing ipad
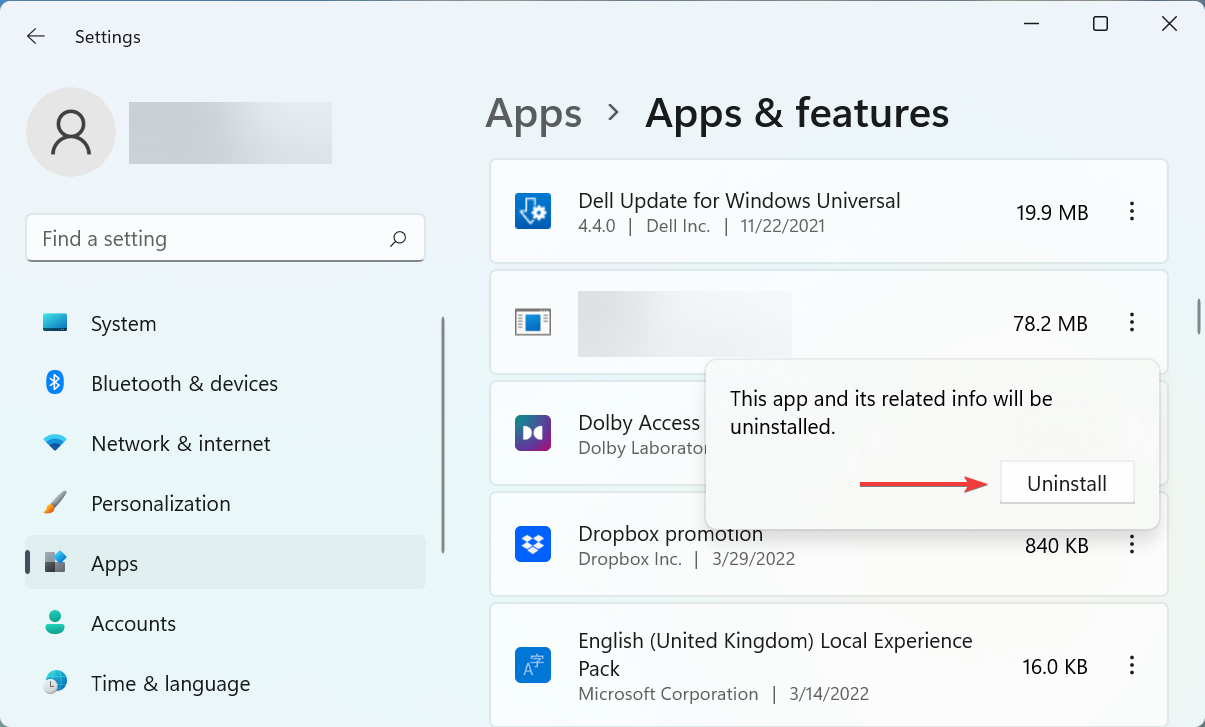
  4. In addition, uninstall associated Apple Software Update, Mobile Device Support, Quicktime, and Application Support software.
  5. Restart your Windows 11 PC after uninstalling the software.
  6. Click the File Explorer taskbar button to open that file manager.
    File Explorer button windows 11 not recognizing ipad
  7. Check if there are any leftover folders from the uninstalled Apple software in the Program Files (x86) folder. If you find any leftover Apple software folders there, select them and click Explorer’s Delete option.
  8. Open iTunes’ download webpage within your browser software. Click the iTunes 12.10.11 for Windows (Windows 64-bit) download link there.
    The iTunes download link windows 11 not recognizing ipad
  9. Reinstall iTunes with the setup wizard you downloaded for it.

You can uninstall iTunes and delete its leftovers with third-party uninstaller software. For instance, the freeware IObit Uninstaller includes options you can select to erase leftover residual files and registry keys from uninstalled software.

Those are the most likely fixes for Windows 11 PCs not recognizing iPads. Some of the above potential resolutions might also fix the same issue for Apple iPhones and iPod devices Windows doesn’t recognize.

If Windows 11 doesn’t recognize your iPad after applying all the resolutions above, try connecting it to a different Windows PC if possible. Does the same thing happen on an alternative PC? If yes, consider contacting Apple’s help service about the issue from the big A’s Get Support page.

Once things are up and running, find out how to use the iPad as a second monitor in Windows.

You can also chat about Windows 11 PCs not recognizing iPads by adding some comments below. The comments section is a good place to ask questions or even share other potential resolutions for fixing Windows 11 not recognizing iPads.

Opera GX vs Safari: Which One is Better, Safer, and Faster?

When talking about Opera GX vs Safari, we must mention that, even though they cater to distinct audiences, they overlap in some aspects.

Both focus to increase speed and efficiency. But Opera GX markets itself as the world’s first gaming browser and is cross-platform, while Safari prioritizes integration with the Apple ecosystem.

Let’s take a closer look overlapping and distinct features between the two:

Is Safari better than Opera GX?

Installation process

Safari is seamlessly integrated into the Apple ecosystem and it works flawlessly on macOS, respectively iOS.

You don’t even need to bother installing it since it’s the default tool for browsing.

However, this is only true if you’re running on Apple devices. On Windows, it’s an entirely different story. While it had a short multi-platform run, Apple decided to make Safari a macOS exclusive back in 2012.

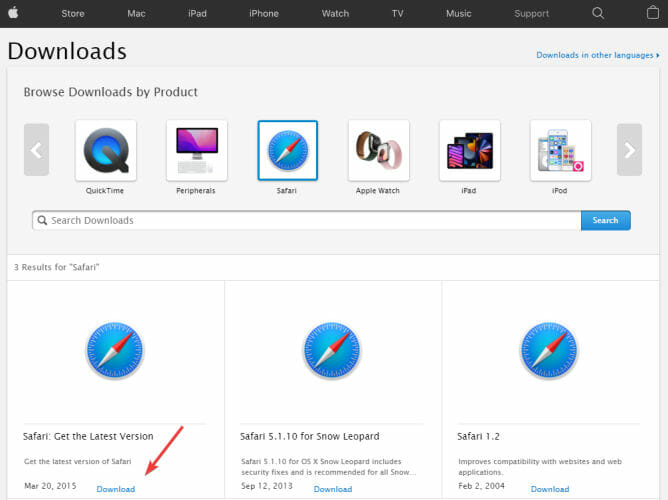
If you wish to download and install Safari on Windows 11, for instance, you will have to settle for an older (and yes, deprecated) version of Safari, such as 5.1.7.

  1. Open the Safari download page and click the Download button. Download Safari for Windows 11
  2. Select a directory and press the Save button.
  3. Next, open the installer folder via the File Explorer of your Windows 11 PC.
  4. Double-click the SafariSetup.exe file and press Install.
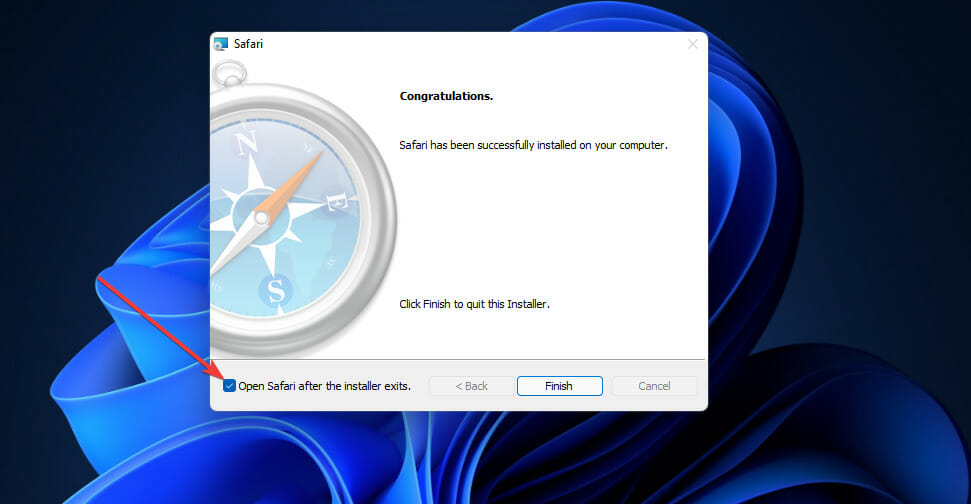
  5. Finally, check the Open Safari after the installer exits option and hit Finish. download-safari-windows-11

Needless to say, you cannot expect the same speed or functionality enhancements since it’s essentially an outdated piece of software.

On the other hand, Opera GX’s installation process is as simple as it can be both on Mac or Windows.

It took no longer than a minute to install on our breezy ASUS SonicMaster notebook with Windows 11 Home, plus it started automatically.

Here’s how to install it:

  1. Open the Opera GX download page.
  2. Click the Download Opera GX button.
  3. Next, choose the destination for your install files and click Run as soon as you’re prompted.
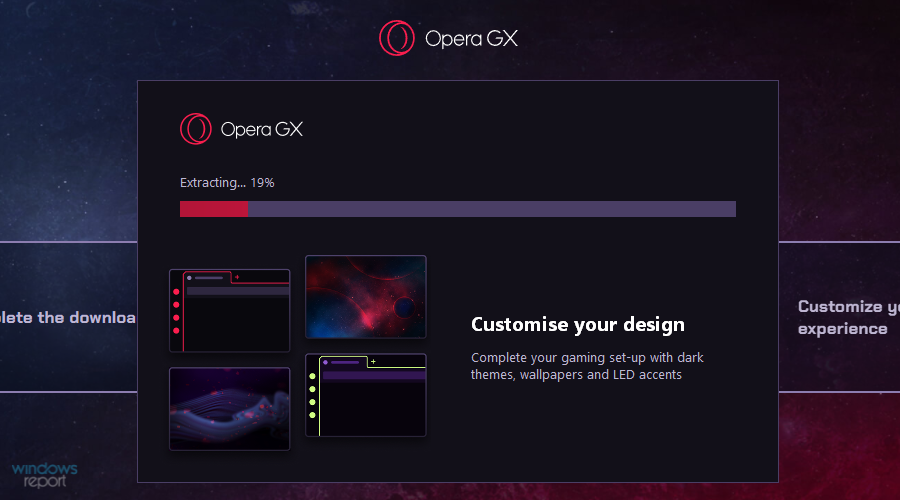
  4. Finally, hit the Install button and you’ll be soon ready to enjoy Opera GX. installing opera gx

Interface esthetics, functionality, and design

Both practical and sleek, Opera GX’s interface will definitely appeal to gamers. The dark theme with neon red highlights makes it the perfect match for your RGB lighting.

Here’s how to do that:

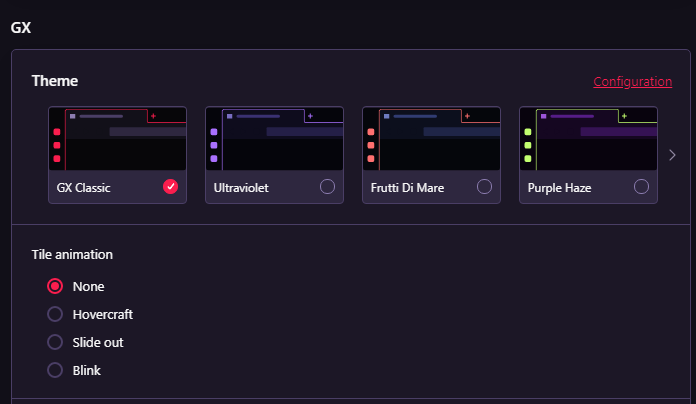
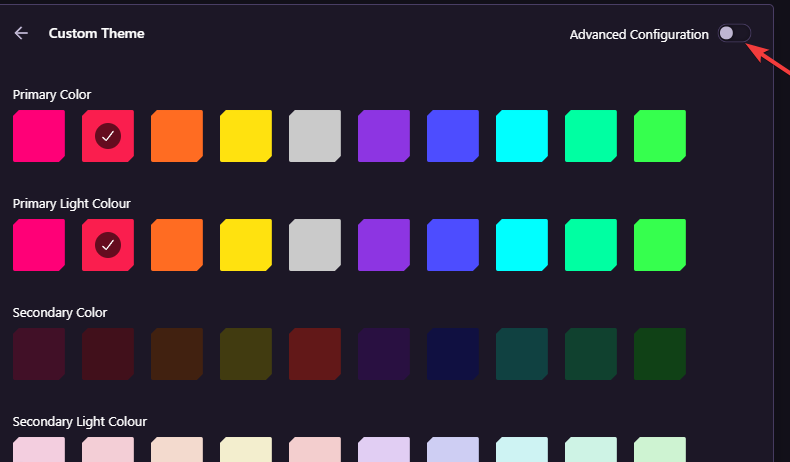
  1. Open Settings, then go to the Theme section. opera gx themes
  2. Click Configuration and switch the Advanced Configuration button to On. Advanced Configuration for Opera GX theme
  3. Here, you can use the sliders or set a HEX value to get that perfectly crisp look you always wanted.

Now, as far as the overall interface is concerned, you will immediately see the main area and the sidebar.

The latter is a super-concentrated shortcut center that allows you to quickly access extensions from the Opera Store, history, and messengers, plus it houses a ton of customization features.

Safari also boasts a sleek interface, and many appreciate its minimalistic look that provides an overall airy experience without the claustrophobic feel.

However, customization options are scarcer, mostly because Apple likes to hold a tight grip on its environment.

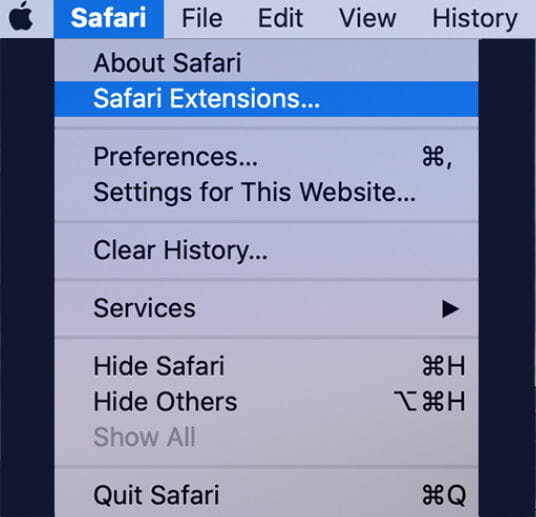
Extensions are available via the Safari Menu (in the Safari Extensions section), but diversity is not one of its hugest perks.

In fact, the number of add-ons is limited, so keep that in mind if you’re looking for a versatile, modular, and highly customizable browser. And speaking about the wolf…

➡ Customization and gaming-focused features

Opera GX takes great pride in its fine-tuned features that caters to gamers, known as one of the most pretentious and rigorous breeds of users out there.

FeatureDescription
SoundsBrowser sound customization, background music, and Dynamic audio visualizer option to add visual effects as well
Speed DialFeature for quick access (pinned pages, shortcuts, and so on)
WallpapersGenerous wallpaper selection and the possibility to force dark pages into matching the dark theme seamlessly
GX CornerA great hub to get the freshest updates, news, and deals from the gaming world
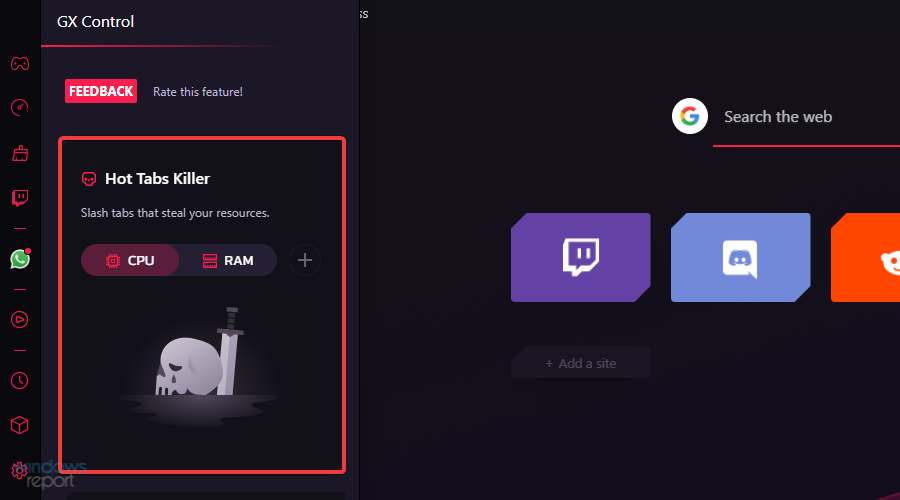
GX ControlManage resource allocation and monitor CPU, Network, and RAM consumption through the Hot Tabs Killer. This function identifies which tab is hogging resources and closes it automatically, plus it allows you to keep a close eye on both download and upload speeds in your browser.
GX CleanerEasily clean your cache, cookies, and browsing history. You can select the type of data you want to remove, set the desired time range, and check the amount of space occupied on your PC by browsing data.
IntegrationsEasily accessible via the sidebar: Twitch and Discord for gamers, Music Player with direct access to popular services such as YouTube Music, Spotify, Apple Music, or Deezer, trending messaging services such as WhatsApp, Telegram, or Facebook Messenger, and of course, social media support (Instagram and Twitter).
Workspace and FlowProductivity-focused features that allow you to organize all your open tabs into workspaces and share, but also sync content between your PC and phone.
Opera GX’s features and customization options

Safari only goes so far when it comes to customization options.

While it does not flaunt flashy options and seems keen on minimalism, it does put out a good fight, boasting some nifty features that allow it to blend irreproachably with the Apple ecosystem.

FeatureDescription
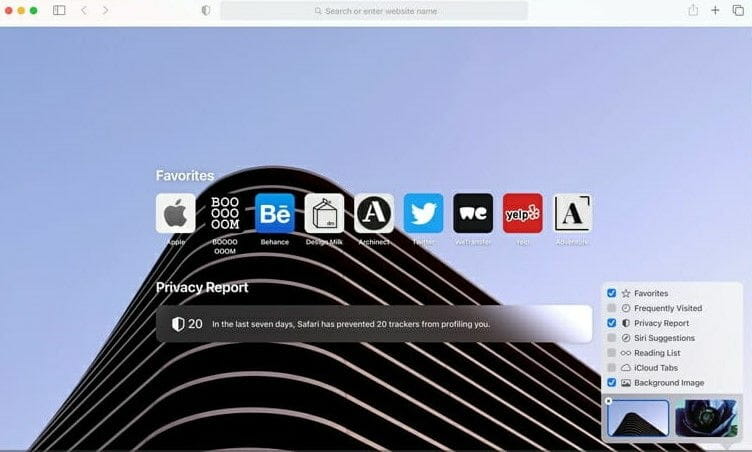
Customizable home page Pin your favorite websites, reading list, Siri suggestions, or add backgrounds
Tab management It shows all your tabs in a grid layout that guarantees an easy access
iCloud syncing/Apple ContinuityYou can seamlessly sync your bookmarks, history, tabs, images, and text between Safari and your iOS (it covers all your Apple devices)
Native 4K support Excellent for streaming on YouTube, gaming, and entertainment
Excellent OS X compatibilityFast page rendering and flawless OSX compatibility compared to other browsers
Safari’s features and customization options

Security and privacy features

Opera GX shares many privacy and security features with the Opera browser, and the legacy speaks for itself. Here’s what to expect:

  • Privacy and tracking protection (that prevents third parties from monitoring your online activity, collecting your data, and so on)
  • DLL hijacking and homepage hijacking protection (specific to Chromium-based browsers)
  • Built-in ads blocker to prevent aggressive/intrusive marketing techniques and targeted ads
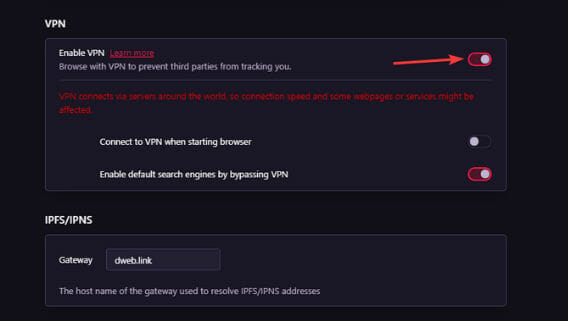
  • Integrated VPN with no data caps and unlimited bandwidth

Security is a big deal for tech companies, and Apple does not fall short in this department. All Apple products are built with security in mind, and the entire ecosystem reflects this principle graciously.

Here’s what to expect from Safari:

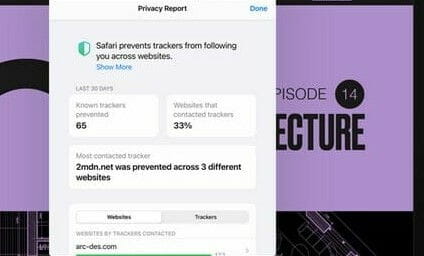
  • Machine learning-powered Tracking Prevention to keep websites from spying on your browsing history and online searches + Privacy Report
  • Fingerprint lock with rigorous defense mechanisms in place against browsing habits’ recognition
  • Password and anti-phishing protection to quickly identify and flag fraudulent websites
  • Apple Pay-ready for secure online payments (with the possibility to add a Touch ID or a Face IDe as part of the purchase authorization process)

Battery saving

Safari is adamant about battery consumption and missed no opportunity to flaunt its very high battery duration when compared to rival browsers.

We turned on Netflix and gave it a go. While we did not get that one and half hours of extra battery lifetime, we were pleased to confirm that it outlasted other browsers that received the exact same treatment.

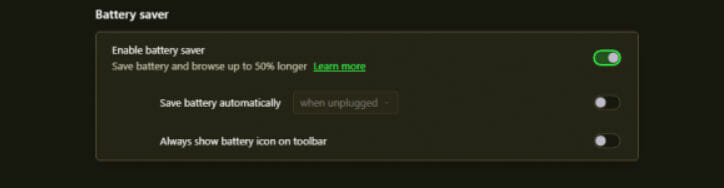
Now, Opera also competes ruthlessly in this department. The built-in battery saver feature allows you to get more juice and increase the lifetime of your battery with every charge.

And it is useful in more than one way. We received a notification when the battery level went under 20%.

Moreover, you can see at any point how much of your battery is left and take measures to avoid drainage and tempestuous shutdowns.

So, where does that leave us?

Minimalistic, neat, and distraction-free Safari is a great choice for Apple products. It delivers seamless synchronization across all your iOS and macOS devices, and its excellent OS X compatibility enables smooth page rendering.

However, we must stress that the same elitism is also its major befall. As opposed to Opera GX, Safari:

  • Has limited customization options, and its extension library is capped
  • No cross-platform support (it’s only suitable for OS X and does not support other platforms, Windows included)
  • The proprietary infrastructure makes it not suitable to support open-source formats
  • Its WebKit rendering engine makes it particularly reluctant to embrace new technologies as opposed to Blink-based browsers (Opera included)
  • There is no adblocker or VPN included for privacy enhancement

When comparing Opera GX vs Safari, we can see that both browsers are strong contenders for privacy-loving netizens who don’t feel like compromising on performance.

As far as Opera GX is concerned, the only drawback we could find is that enabling all the additional features requires some tweaking since they are not ready to use out of the box.

If gaming is on your mind more than anything else, we’d say that Opera GX is the perfect browser for you, on PC or Mac.

However, if you’re keen on a minimalistic browser that blends perfectly with the Apple ecosystem solely, then Safari is probably a better option. So, what’s it gonna be?

We also put Safari and Firefox toe to toe so if you want to compare it with another one, check out our comprehensive breakdown.

Don’t be shy to share your choice (and maybe a bit of the motivation behind it) with us, we would love to hear you out!

Windows 10 & 11 April Patch Tuesday [DIRECT DOWNLOAD LINKS]

Yes, you guessed it! The third round of the monthly Patch Tuesday updates of 2022 have arrived, and they bring an entire array of changes for both Windows 10 and Windows 11, regardless of whether it is a newer or an older version.

As we announced earlier today, the April Patch Tuesday updates are expected to fix some of the issues that were still pending, and in the article below we will be looking to see exactly what we get.

We’ve included detailed changelogs for each cumulative update, and we will also be providing you with direct download links from Microsoft’s Windows Update Catalog, so you know that they are secure.

Alternatively, you can always use other methods to get the latest updates, including:

  • The Windows Update menu on your OS
  • The WSUS (Windows Server Update Service)
  • Group Policies set up by your admins if you’re part of a larger network.

Changes included in the March Patch Tuesday Updates

Windows 10 versions 21H2, 21H1, and 20H2

Windows 10 v21H2 is the latest major version of Windows 10, and as such has the most experimental features on it.

Fortunately, most bugs that were first present when it was first made available have been weeded out, and this version of Windows 10 is far more stable.

Cumulative update name

KB5012599 

Improvements and fixes

  • Addresses an issue that causes a Denial of Service vulnerability on Cluster Shared Volumes (CSV). For more information, see CVE-2020-26784.

Known issues

  • Devices with Windows installations created from custom offline media or custom ISO image might have Microsoft Edge Legacy removed by this update, but not automatically replaced by the new Microsoft Edge. This issue is only encountered when custom offline media or ISO images are created by slipstreaming this update into the image without having first installed the standalone servicing stack update (SSU) released March 29, 2021 or later.
  • After installing the June 21, 2021 (KB5003690) update, some devices cannot install new updates, such as the July 6, 2021 (KB5004945) or later updates. You will receive the error message, “PSFX_E_MATCHING_BINARY_MISSING”.
  • After installing this update, when connecting to devices in an untrusted domain using Remote Desktop, connections might fail to authenticate when using smart card authentication. You might receive the prompt, “Your credentials did not work. The credentials that were used to connect to [device name] did not work. Please enter new credentials.” and “The login attempt failed” in red.
  • After installing the Windows updates released January 11, 2022 or later Windows versions on an affected version of Windows, recovery discs (CD or DVD) created by using the Backup and Restore (Windows 7) app in Control Panel might be unable to start.
Note icon NOTE
Devices that connect directly to Windows Update to receive updates are not affected. This includes devices using Windows Update for Business. Any device connecting to Windows Update should always receive the latest versions of the SSU and latest cumulative update (LCU) without any extra steps. 
  • After installing the June 21, 2021 (KB5003690) update, some devices cannot install new updates, such as the July 6, 2021 (KB5004945) or later updates. You will receive the error message, “PSFX_E_MATCHING_BINARY_MISSING”.
  • After installing this update, when connecting to devices in an untrusted domain using Remote Desktop, connections might fail to authenticate when using smart card authentication. You might receive the prompt, “Your credentials did not work. The credentials that were used to connect to [device name] did not work. Please enter new credentials.” and “The login attempt failed” in red.

[DIRECT DOWNLOAD LINK]

Windows 10, version 1909

As the Redmond-based tech company said not long ago, Windows 10, version 1909 reached the end of service on May 11, 2021, for devices running the Home, Pro, Pro for Workstation, Nano Container, and Server SAC editions.

Devices still running this version of the OS will no longer receive monthly security and quality updates that contain protection from the latest security threats.

So, if you still want to receive security and quality updates, Microsoft recommends updating to the latest version of Windows 10.

Cumulative update name

KB5012591 

Known issues:

  • After installing the Windows updates released January 11, 2022 or later Windows versions on an affected version of Windows, recovery discs (CD or DVD) created by using the Backup and Restore (Windows 7) app in Control Panel might be unable to start.

[DIRECT DOWNLOAD LINK]

Windows 10, version 1809

This version of the OS is outdated and will no longer receive any updates from the tech company. Users that are still running this old version on their devices are strongly advised to choose a more recent one to update to.

If you still want to use Windows 10 and are not willing to upgrade to 11, you don’t have to do so right away. After all, Microsoft announced that the support for Windows 10 will go on until 2025.

Cumulative update name

KB5012647 

Improvements and fixes:

  • Addresses an issue that causes DNS stub load failures on a Windows Server that is running a DNS Server. 
  • Addresses an issue that causes a Denial of Service vulnerability on Cluster Shared Volumes (CSV). For more information, see CVE-2020-26784.
  • Addresses an issue that prevents you from changing a password that has expired when you sign in to a Windows device.

Known Issues:

  • After installing KB4493509, devices with some Asian language packs installed may receive the error, “0x800f0982 – PSFX_E_MATCHING_COMPONENT_NOT_FOUND.”
  • After installing KB5001342 or later, the Cluster Service might fail to start because a Cluster Network Driver is not found.
  • After installing updates released January 11, 2022 or later, apps that use the Microsoft .NET Framework to acquire or set Active Directory Forest Trust Information might have issues. The apps might fail or close or you might receive an error from the app or Windows. You might also receive an access violation (0xc0000005) error. 
  • After installing the Windows updates released January 11, 2022 or later Windows versions on an affected version of Windows, recovery discs (CD or DVD) created by using the Backup and Restore (Windows 7) app in Control Panel might be unable to start.
Note icon NOTE
For developers: Affected apps use the System.DirectoryServices API.

[DIRECT DOWNLOAD LINK]

This wraps up our brief overview of this month’s Patch Tuesday updates, and we hope that by reading the changelogs above, you will make a more informed decision regarding whether to update or not.

However, keep in mind that if you choose not to update for too long, you will risk exposing yourself to subsequent malware attacks that usually follow the Patch Tuesday updates, called Exploit Wednesday.

However, if you do prefer to wait out until Microsoft fixes the issues detected in this month’s updates, know that you can always choose to delay the Update notification that you get for up to 35 days.

All in all, it is important to remember that the Patch Tuesday updates are released for a reason, so installing them, eventually, is something that you should do.

Was this article helpful to you? Let us know in the comments section below.

Xbox Cloud Gaming on consoles comes to Brazil in beta

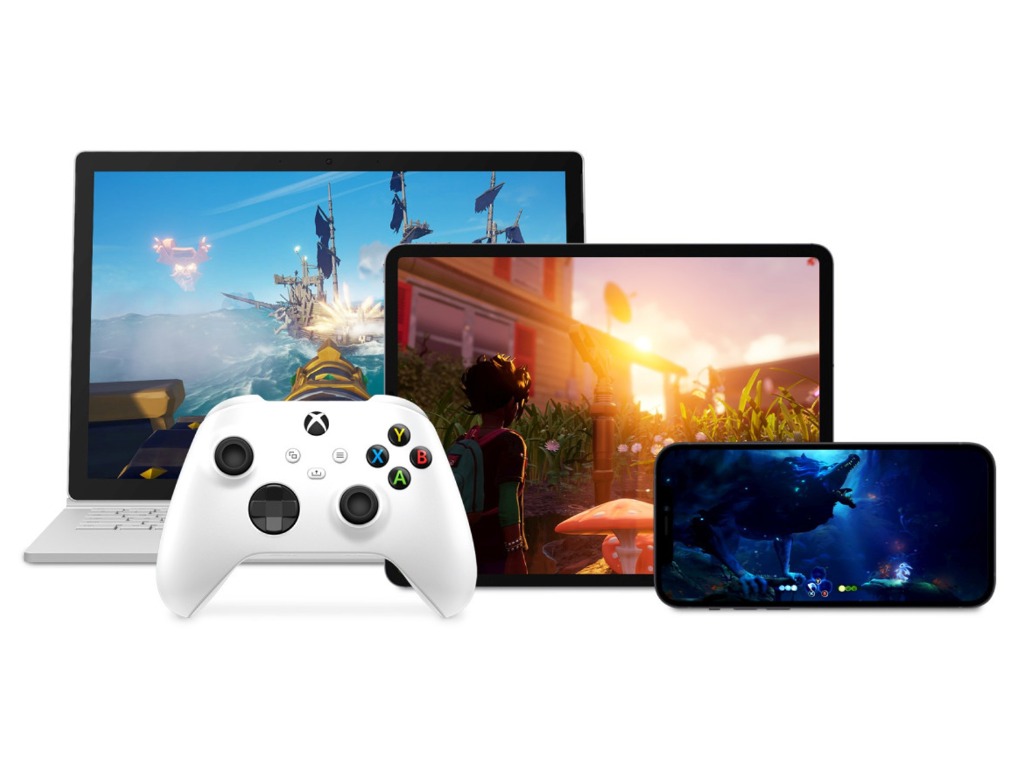
Xbox Cloud Gaming (Beta) launches on Xbox One and Series X/S consoles today in Brazil.

The cloud gaming service, alongside Xbox Game Pass or Game Pass Ultimate, allows users to find and try out different Game Pass titles before installing them. Gamers can also join a game they haven’t yet downloaded when receiving an invite from a friend, and Xbox One owners can even play games that aren’t normally playable on that console – such as Microsoft Flight Simulator – via the cloud service if they have Game Pass Ultimate. Such is the beauty of cloud gaming.

To be clear, Xbox Cloud Gaming (Beta) launched in September 2021 in Brazil for Game Pass Ultimate users with PCs, tablets and mobile devices. Today’s launch makes the service available in Brazil for Xbox consoles. Xbox Cloud Gaming (beta) has now brought cloud gaming to over 1 billion devices worldwide.

PSA: The latest Windows Insider Dev, Beta Channel builds lets you disable all app icons in your system tray

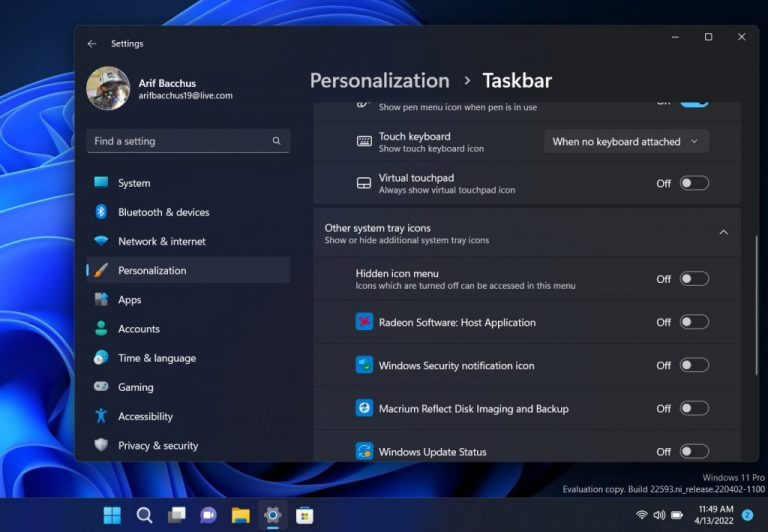
Microsoft released Windows 11 build 22593 last week to both Dev Channel Windows Insiders and Beta Channel Insiders, and there was an interesting feature that wasn’t mentioned in the release notes. As spotted by Neowin, it recently became possible in this build to disable all icons in the system tray to the left of the clock area.

It already was possible to hide system tray icons in Windows 11, by adding them to an overflow menu by going to Windows 11’s settings (Personalization, Taskbar, Taskbar corner overflow.) Yet, this new option lets you remove them entirely. In the Dev channel, Windows 11 now shows a new third option in this settings menu called Hidden icon menu. And when this is clicked, along with toggling all the other switches for icons to off, you’ll see a clean space to the bottom right of your taskbar with just the time and usual indicators for Wi-Fi, volume, and battery on laptops.

Of course, it might not make sense to do this, as some apps will only quit from the system tray, but it is nice to see that you can clean up this area a bit. Do note, though, that this doesn’t mean the feature will make it to the retail version of Windows 11.

Features that are tested in the Windows Insider program are known to come and go. Yet, the fact that this feature is in testing with the Beta Channel, too, could hint at a possible release for all Windows 11 users in a future update, but don’t hold your breath for it.

Nintendo and Sony will no longer bill unused game subscriptions in UK

Just Like Microsoft, both Nintendo and Sony have followed suit and stopped billing dormant game subscriptions in the UK. Earlier this year, Microsoft had indicated that they will no longer bill dormant Xbox Live Gold and Game Pass subscriptions in the UK, instead, they would notify their customers about their dormant accounts, and if no action was taken they would then stop the payments. (via Engadget)

UK’s Competition and Markets Authority and Sony are already in agreement that they will no longer charge dormant PlayStation Plus accounts. Sony has also taken it upon themselves to send out reminders to dormant users on how to end these payments.

On the other hand, Nintendo does not auto-renew its Switch Online Subscriptions. This move has led to the conclusion of an investigation launched by the CMA back in 2019 that was mainly focused on auto-renewals and how difficult it was for one to get a refund back.


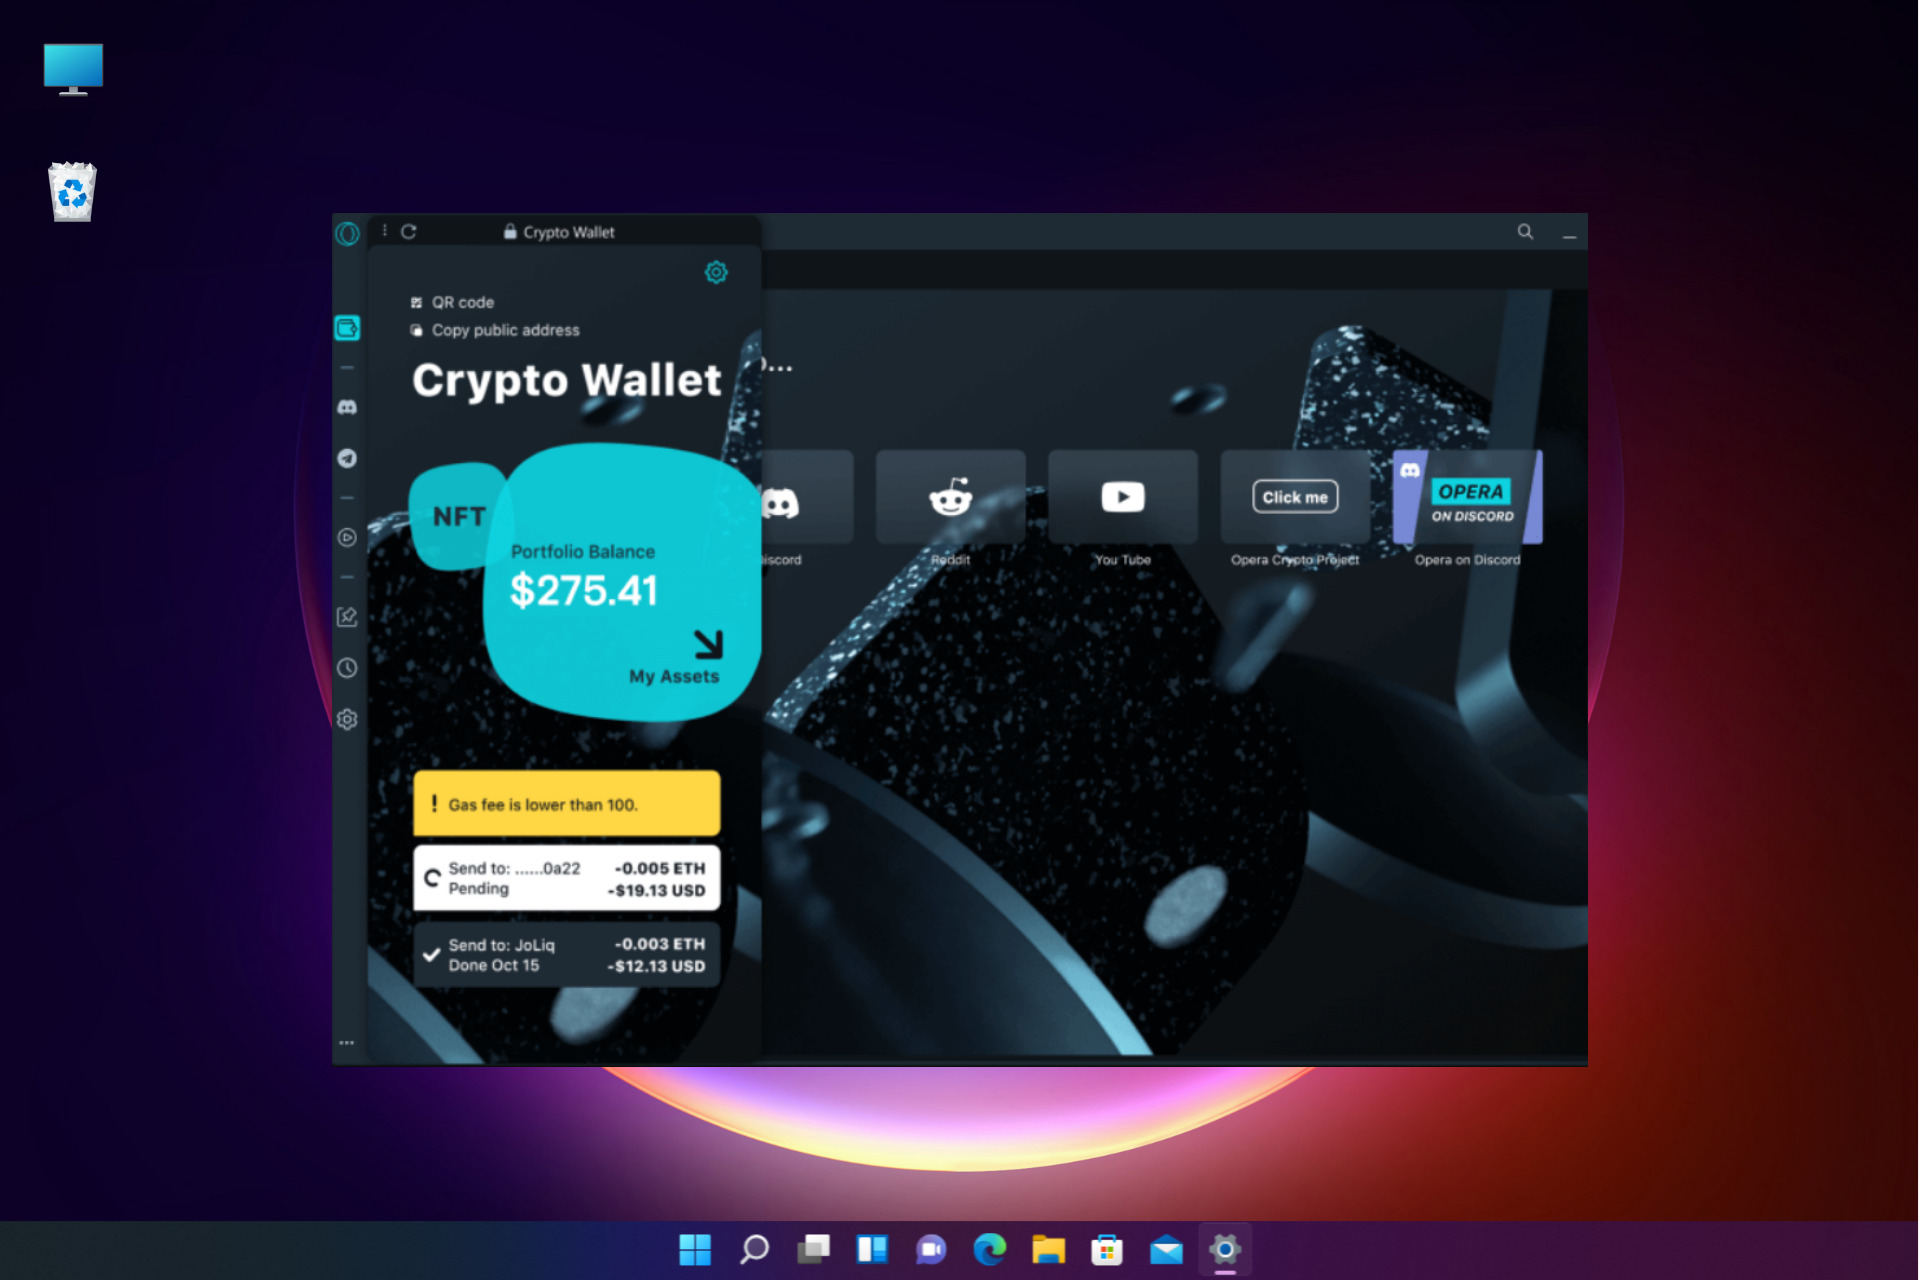
Fix: Opera crypto wallet Something went wrong error

Most of the apps crash, making users annoyed and stressed with the services they were to get. Like the other apps, Opera crypto wallet crashes and displays the Something went wrong error.

Opera crypto wallet has over 2 million users worldwide, and from time to time, it crashes.

Luckily enough, there are several options for fixing that. Many users report the error daily, and there are several things you have to look at.

This guide will look at different ways of fixing something that went wrong error on the Opera crypto wallet.

What causes the Opera crypto wallet Something went wrong error?

Many things can make you get the error when trying to access your opera crypto wallet. This error arises typically due to the following reasons:

  • Sometimes system updates may bring issues that may make Opera throw the error
  • You may be having storage issues that affect the performance of the browser
  • The cache memory may affect the Opera crypto wallet, making it raise the error
  • The user’s internet connection is unstable, making it hard to reach the wallet servers
  • Several browser extensions block the IP addresses causing the wallet to be unreachable

There are a few things you can do before going into the steps we prepared for you so try to perform them as preliminary measures:

➡ Wait and try again after a few minutes

Sometimes, the system handles a lot of users, which affects the server’s performance, making it slow and down.

When you get the error, take a break and resume after a few minutes, there will be less congestion, and the error will be gone.

➡ Restart your PC

When we’re talking about Windows, we all know how this goes. Restarting the PC will refresh the processes and if the system installed any updates, they will be completed.

So, most of the issues you might have, even the one with your Opera crypto wallet may be gone mysteriously after a restart.

➡ Make sure you have a stable Internet connection

If your internet connectivity is weak, you may face the Something went wrong error so try to verify if your network devices and cables are all in good order.

Also, if you’re connected to a public network, try changing it into a private one to remove the poor Internet routing. It gives you more privacy and unlocks the geo-restricted IP addresses.

How do I fix the Opera crypto wallet Something went wrong error?

1. Clear Opera cache and cookies

  1. Launch the Opera browser and click on the Settings tab on the left menu of the browser.
  2. Select the Advanced option.
  3. Click on Privacy and Security.
  4. Click on the Clear browsing data option to expand.
  5. Choose the timeline and data you want to clear and click on the Clear data button.

This solution will help remove any cookies and files that may interfere with your wallet.

You can use a specialized tool like CCleaner to automatically clear cache and cookies. It works as a browser cleaner allowing you to remove temporary files, history, and cache from all your browsers.

2. Update Opera to the latest version

  1. Click on the Opera logo to open the menu, go to the Help option and select About Opera.
  2. The browser will show your version, and if there are any pending updates, the browser will install them.
  3. After this, try accessing your wallet once more.

3. Remove all the extensions

  1. Click on the Opera logo at the corner, choose Extensions then Extensions to see the list of all the installed add-ons.
  2. Click on the X sign of each extension to delete them.

Sometimes, an extension you might have installed lately can cause interference with others, including your crypto wallet so uninstalling it is the logical choice.

4. Reset the browser

  1. Click the Settings icon from Opera.
  2. Click on the Advanced option to expand all the other menus.
  3. Choose the Reset options and select the Restore settings to their original defaults option.
  4. Click the Reset button.

Resetting the browser removes all the tabs and default settings, disables all extensions, and deletes cookies and cache.

5. Delete the Opera profile from the PC

  1. Close the Opera browser and press the Windows + E keys on the keyboard to open File Explorer.
  2. Go to your local disk and locate the following path: C:\Users\UserName\AppData\Roaming\Opera Software\Opera Stable
  3. Click the Profile folder to open it and delete all the files in that folder.
  4. Go to the Opera Local app data folder. Navigate to this path: C:\Users\UserName\AppData\Local\Opera Software\Opera Stable
  5. Delete the cache from that folder.
  6. Now, try re-accessing the wallet.

6. Uninstall and install the Opera browser

  1. Click the Start button and select Settings.
  2. Choose Apps.
  3. Now scroll through the list of apps on the right pane, click on Opera to expand it, and select Uninstall, then follow the procedure to uninstall the browser.
  4. Head over to the official website of Opera and download the installation file.
  5. Double click the file to start the installation process and follow the prompts until completion.

7. Visit Opera’s official website 

If all the methods above don’t work, try to visit their official website or social media handles to see if they reported an outage on that day.

In case of an outage or maintenance, they usually publish on their platforms to alert their users of the issue.

You can contact them through their email or the support forum.

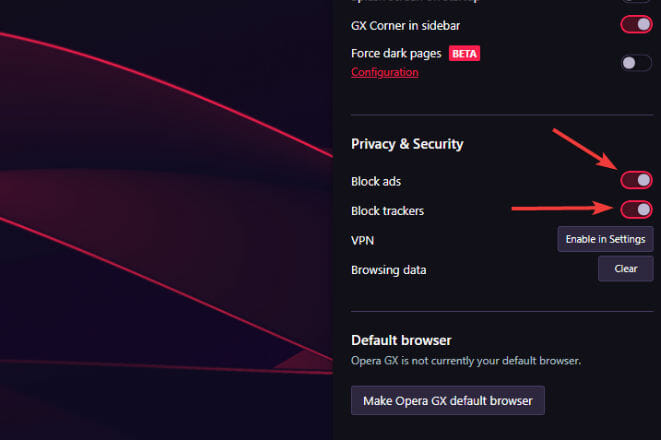
8. Disable the built ad blocker

  1. Open Opera.
  2. Click on Settings and turn off the ads and tracker blockers by flipping their switches to the left.

Opera comes with an ad blocker which should be disabled. Enabling an ad blocker affects the wallet and makes the page not load.

After disabling the blocker try accessing the wallet to see if the error still exists.

9. Disable the Antivirus

  1. Click on the Start Search box, type windows security, and hit Enter.
  2. Click on the Virus and threat protection tab.
  3. Under Virus & threat protection settings, choose Manage Settings.
  4. Toggle the Real-time protection button to turn it off. Try accessing your wallet once again to see if the error exists.

If you have a third-party antivirus installed, go through its menus and disable it at least temporarily and see if you can access the Opera crypto wallet.

Should you discover that the antivirus was blocking your wallet, consider installing a better antivirus that won’t interfere with your apps and services.

Can I solve the Something went wrong error without investing money?

Yes, it is possible to solve the error without spending any money. All you need is to follow our step-by-step guide, and everything will be okay.

You have to be careful when dealing with your crypto wallets due to the targets from malicious hackers by making sure everything is up to date.

Apart from the Opera browser, the Brave browser supports the same business and pays using blockchain.

Several crypto wallets can help you transact your cryptocurrencies on a PC. Drop a comment by letting us know which method worked for you.

This guy made a cool one-handed Xbox One controller

Youtuber and hobbyist Akaki Kuumeri has released a blueprint for a 3D-printable mod that allows Xbox Series X/S controllers to be used one-handed.

The modification uses multiple snap-on parts that allow buttons on the right side of the controller to be accessed with the left hand. The right thumbstick is used by laying the controller on a flat surface and swaying it, manipulating the thumbstick via an attached mechanism.

Kuumeri has also made a similar one-handed mod for the PlayStation 5 Dual Sense controller. He says he is looking to complete the set by making a one-handed solution for the Switch JoyCon controllers. He has made the blueprints for the Xbox controller mods available on printables.com. The mod can also be purchased through Kuumeri’s Etsy store.


3 best browsers for dApps to explore the decentralized Web

dApps take out the middleman and are slowly shaping a new digital experience that aims to eliminate obsolete concepts such as monopoly, censorship, and others alike.

Instead of depending on a single computer, dApps run on decentralized networks such as blockchain and rely on peer-to-peer services, thus taking out the control factor provided by an intermediary authority.

End users get full control of their data, privacy, and finances and there is no organization to mediate this flow.

How do dApps work?

Contrary to centralized apps that are operated by a single company, dApps don’t require you to interact with controlled servers.

Instead, you will be able to pursue transactions directly without revealing confidential information or paying a cut to the central authority.

Thus that ring a bell? It should. The entire cryptocurrency market is based on similar principles. For instance, the famous Bitcoin is a dApp.

BitTorrent or Tor are other relevant examples of popular decentralized apps and platforms and the line-up goes on and on. All it takes to get in the game is a suitable browser for dApps.

What is a dApps browser and how do they work?

To run on decentralized networks, you need a browser that is equally focused on placing control in the user’s hands. This is where the Web 3.0 browsers come in.

Web 3.0 browsers are changing the online experience by liberating the digital economy. They leverage blockchain technology in order to shift control points from institutions to individuals, allowing everyone to keep track of their data, make a profit, and more in a secure, private, and economically viable environment.

So, where does one find such a browser? Is there a Web3 browser? In fact, most Web 2.0 browsers allow you to access Web 3.0 apps. You just need to add a Web 3.0 wallet in order to become fully operational.

But there are some great options that you can use directly to surf the decentralized Web.

What is the best Web3 dApps browser?

Opera One

Opera One is a well-known browser with a high focus on privacy and productiveness. It provides a plethora of functionalities, integrations, and workflows designed to streamline your digital experience and make it as smooth as possible.

What you probably did not know is that it’s also one of the few browsers to support a native Web 3.0 experience on both mobile and desktop platforms.

Opera One integrates Web 3 functionalities that are crucial for dApps’ usage such as a cross-network crypto wallet to store your tokens and cryptocurrencies. It can also act as a hardware wallet that allows you to store private keys on your smartphone.

This best browser for dApps supports networks and assets such as TRX, CBK, and ETH, but many others are planned to come on board in the near future.

It’s safe to say that Opera One is at the forefront of new technologies and fully embraces the concept of decentralization through a tailored browsing experience that includes a privacy VPN, an ad-blocker, a crypto wallet, and a native AI.

Opera One

Explore the decentralized market securely and on your own terms thanks to Web 3.0-ready Opera One!
Free Download Visit website

Opera Crypto Browser

Just when we thought we’ve seen it all, Opera manages to surprise us once again. Recently, Opera decided to take things even further on the evolutionary ladder and launched a separate, Web 3.0 dedicated browser called the Crypto Browser.

Chromium-based, this nifty tool boasts a tighter wallet integration, full support for interacting with decentralized apps without the need for any other additions (such as extensions), and focuses on Web 3 services in particular.

One of its most interesting features, the Crypto Corner delivers educational content, news, and fresh updates from popular crypto communities, NFT galleries, and more, thus making sure you’re always up to date and up to speed with your topics of interest.

It also features a non-custodial Crypto Wallet that currently supports Ethereum tokens and NFTs, allowing you to purchase, swap, and trade cryptocurrencies directly from the browser. Easy, right?

⇒ Get Opera Crypto Browser

Brave Browser

First things first: Is Brave browser dApp? Actually, it’s one of the chosen few, alongside OperaOne. But unlike Opera One, Brave brings a slightly different approach.

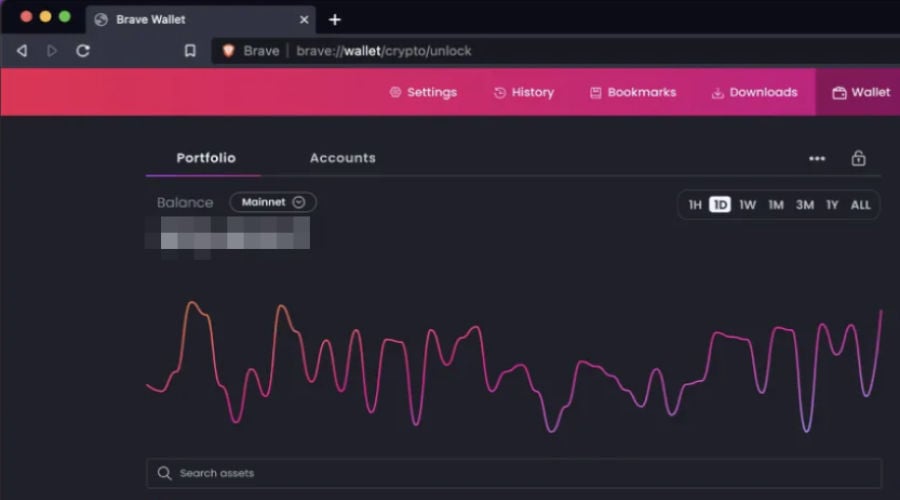
Brave has a built-in cryptocurrency wallet that allows you to purchase and swap tokens with great ease, but with a twist. It focuses on BATs, which are basically Ethereum-based tokens designed to reward you for viewing ads.

Of course, you can customize the amount of attention you want to invest in advertisement viewing and even turn it off completely.

In addition to this mutually beneficial transaction, Brave also boasts IPFS support. This highly praised feature facilitates native and implicitly decentralized file storage to reduce the pressure coming from data clumping.

Open source and decentralized to the core, Brave thrives thanks to its Web 3 functionalities as well as its privacy-focused nature that makes it one of the most reliable browsers to not save your history and personal data.

⇒ Get Brave

Bottom runners

➡ Tor Browser

Due to its unprecedented levels of privacy, the Tor browser has garnered a large audience base and is globally used by people from different sectors, including crypto mining and crypto trading.

Tor browser directs traffic through a global network of servers called Onion routers whose layers of encryption make it particularly appealing for dApps users who value their privacy.

➡ Osiris Browser

This innovative browser incorporates Web 3 functionalities including support for multiple blockchain networks, an in-built crypto wallet, and extended dApp compatibility.

Is Osiris a good browser? With a sleek interface and all the privacy features you could dream of, Osiris makes for a top contender for the title of the best browser for dApps.

We reckon it could make it to our top 3 anytime soon as long as it keeps up the good work.

➡ Metamask extension for Edge or Chrome

Is MetaMask a dApp or a Web3 wallet? In this case, it’s a browser extension that facilitates interaction with decentralized apps. And it acts both as a dApp intermediator and as a cryptocurrency wallet.

While most Web 2.0 browsers such as Chrome, Firefox, Safari, and so on allow you to access Web 3.0 domains, they require an additional item such as a wallet for working with dApps.

MetaMask is that missing link that helps bring everything together.

There you go, now you know where to find the best browser for dApps that can support you in all your ventures, no matter how experimental or audacious they are.

Getting started with Microsoft To Do

Microsoft To Do is an app that can help you increase your productivity by helping you remember the tasks you need to accomplish each day. It’s designed for users of all ages and skill levels, and it’s compatible with other Microsoft apps like Outlook, Teams, and more.

It is a powerful tool that syncs across several computers and devices and works across different platforms and can sync to other smartphones via the Microsoft cloud. This makes it a great app for the average user who wants to be able to view their lists anywhere.

The app can be downloaded for free on Windows, Android, and iPhones. The system works integrally with Cortana which makes using it super easy. You don’t have to worry about remembering your tasks when you are away as they will sync automatically so that they are ready for you when you need them on your computer or any other device you’ve synced the app onto.

Recently, Microsoft introduced new features to the app, smart due date, and reminder recognition. These features are geared toward providing a better, fast, and convenient way for users to add due dates, reminders, and repeat information by naturally typing all the necessary information in a task title.

Integrating Microsoft To Do with Microsoft Outlook

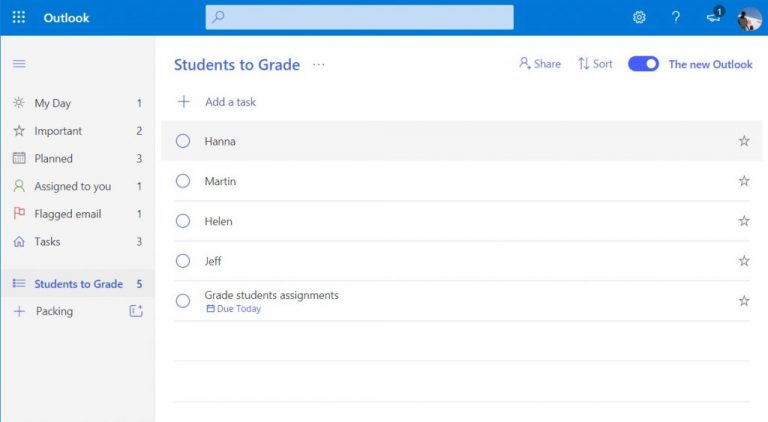
Microsoft To Do is available across a number of different platforms, making it easy to stay organized no matter where you are or what device you’re using. It works well on its own, but it can also be integrated with Microsoft Outlook, letting you manage your tasks from the same place as your email. Furthermore, the flagged emails can be renamed, assigned due dates, and even given reminders.

However, Microsoft To Do is not yet able to support all the varied features of Outlook Tasks. The information users enter in additional details in Outlook tasks is securely stored, but will not be reflected in Microsoft To Do. “Microsoft To Do doesn’t currently support the start and end dates, task status, task completion percentage, multiple priority levels, task work hours, task colors, or categories that are available in Outlook Tasks.” You can also check out our detailed guide on How to use To Do in Outlook with Microsoft 365 for your productivity advantage to get started.

Note: If you want to escalate the importance of a particular task, then you can mark the email flag in Microsoft Outlook as high-priority. It will then appear in Microsoft To Do starred.

Microsoft To Do and Cortana integration

Cortana is a digital assistant that works across your devices and other Microsoft services. Depending on the capabilities of your device and the version of Cortana you’re using, Cortana can provide a range of functionality, including the ability to answer questions; send emails and text messages and other important details; set reminders and alarms; create and manage lists, join a meeting in Microsoft Teams; and more.

Microsoft To Do’s integration with Cortana allows users to use the app from any Cortana-enable device, be it Windows, Smart Home devices, Android, or iOS. Moreover, through this integration users are able to create both reminders and to-do lists directly from the app, as opposed to the conventional way where you have to use Cortana. Cortana has access to all the tasks that you have created and can read them out.

To Do and Microsoft 365 integration

Users have the ability to integrate Microsoft To Do with Microsoft 365 apps, however, some of the apps come with in-built integrations.

There are some instances where you will be required to customize your own.  Here you will need an assistance tool, Microsoft Power Automate. The main focus of Power Automate is on automating workflow processes and business logic across applications and services. It uses connectors to interact with applications such as SharePoint, Office 365, and others.

Enhance your productivity with Microsoft To Do

For an app to be effective, it has to be easily accessible and used. Microsoft To Do is an app that can help you increase your productivity by helping you remember the tasks you need to accomplish each day. It’s designed for users of all ages and skill levels, and it’s compatible with other Microsoft apps like Outlook, Teams, and more.

To Do makes it easy to keep track of everything in one place. You can add, organize, complete and review tasks on your phone or computer, so no matter where you are, you’ll always have access to what needs to get done.

.NET MAUI Release Candidate Announced

Yesterday brought us some exciting news, .NET MAUI hit Release Candidate. In a nutshell the SDK is almost ready for General Availability. This is huge news for those of us which tempted fate and built commercial production apps on this platform. We can now breathe easy as this news means Microsoft will begin offering production support.

What’s included?

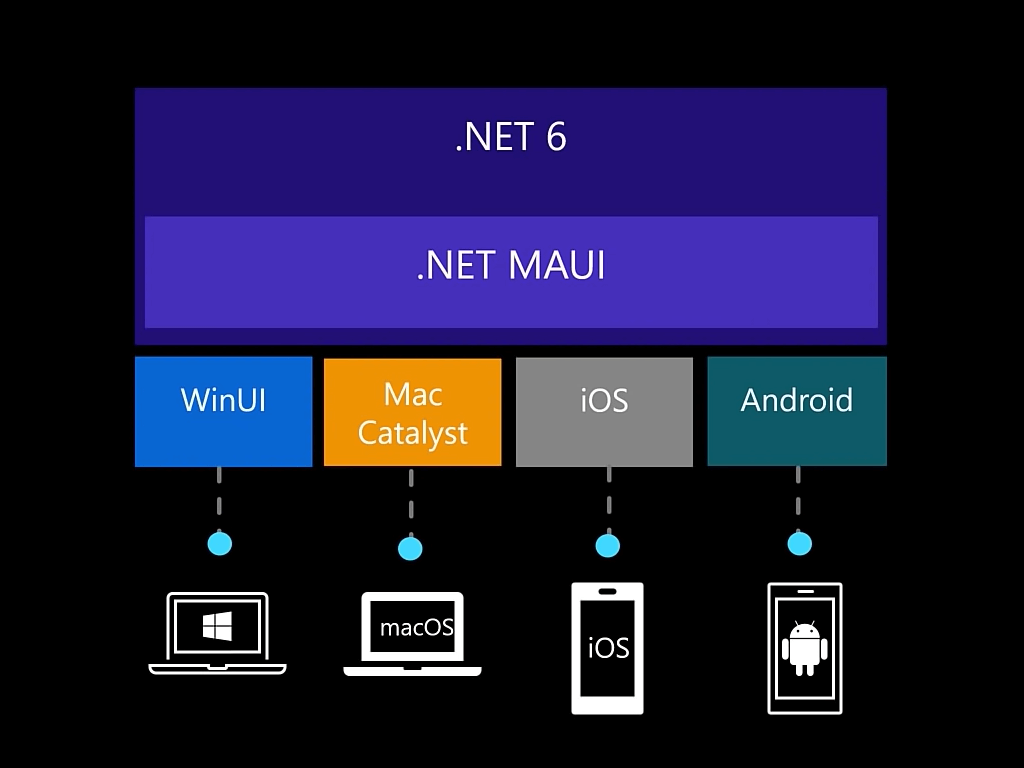
For those that have not been keeping up with .NET MAUI here is a quick overview. The project leverages platform specific SDKs to give developers the ability to target Android, iOS, macOS and Windows directly from C# and a shared code base. This means build once, release on multiple platforms.

For those familiar with Xamarin.Forms, you get access to every UI control you’re already familiar with plus additional controls like BlazorWebView, Border, GraphicsView, MenuBar, Shadow, and Window. The XAML language you know and love is also present, which means making the jump from Xamarin or WPF will be extremely easy.

How to get started?

The first thing I would recommend is to give the official documentation a quick read.

.NET Multi-platform App UI documentation

After you are familiar enough to get started, then you need to make sure you’re using the latest preview version of Visual Studio 2022 which you can get here.

Visual Studio 2022 Preview

When you run the installer, be sure to select .NET MAUI (preview) under “Mobile Development with .NET workload” and you’re off to the races!

To read more about what’s included, coming and even what might be broken, check out the release notes on .NET MAUI’s repository on Github.

Opera vs Qwant: A complete comparison

Having the right browser may make the difference regarding your customizations, workflow, and user data.

It can be tempting to use the default browser that came with your PC or mobile device, but we recommend that you move outside of the defaults of your devices to get a better sense of the web.

While several of the most prominent search engines include comprehensive filtering options and customized plugins/workflows, not every one of them can provide customers with an entirely worry-free surfing experience.

Indeed, numerous big-name tech companies are renowned for selling off user data, raising concerns about the security of your personal information and browsing history while accessing some of these robust online databases.

This article compares Opera and Qwant, two browsers we like.

How does Opera compare to Quant?

➡ Features

opera vs qwant

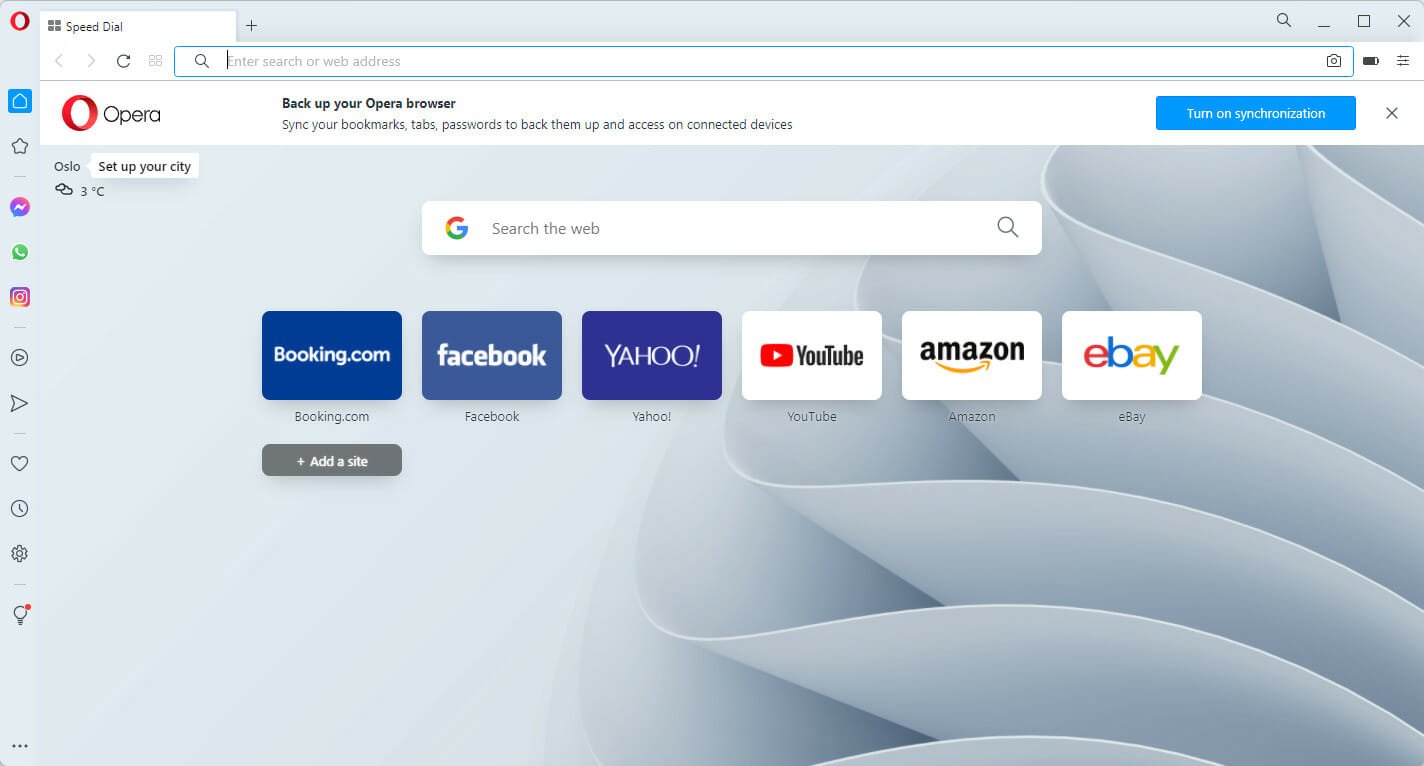
Since 2013, Opera has run on Google’s open-source Chromium (the foundation of Chrome). You may modify your experience by installing web extensions from Google’s vast library.

One of Opera’s most valuable and attractive features is messaging and social app integration. Popular platforms are available directly in the browser.

You may also use Opera to search on Google and utilize its auto-fill prediction feature, or you can select from several other popular search engines. 

With My Flow, you may transfer encrypted material and links (such as photographs, articles, and videos) across devices. It also has an ad blocker built-in.

opera vs qwant

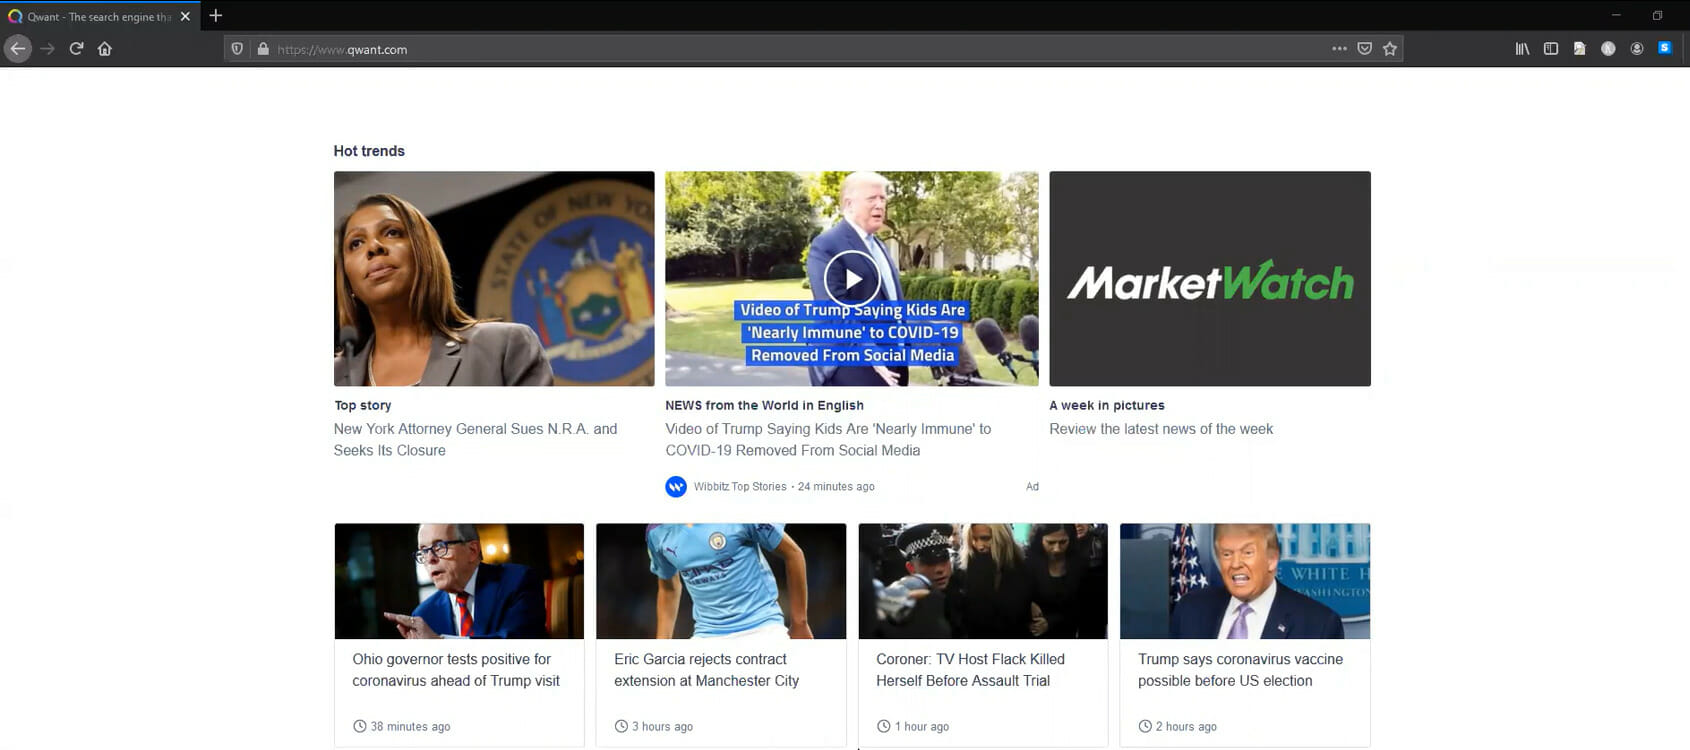
Qwant, on the other hand, is a wholly autonomous search engine, which means that all its algorithmic replies to your queries are based on Qwant’s indexing rather than the recorded data of everyone who uses the search engine.

Qwant seems and functions like an Opera on the surface. Users input their first searches into a primary search box on the landing page, which takes them to the results page.

Web, Images, News, Maps, Videos, Settings, and a Music tab are presented on the page’s left side, with tabs for filtering at the top.

Qwant’s customization options include changing languages, switching between bright and dark display settings, adjusting adult content filters, and more (These features also exist on Opera).

Note that since Qwant does not utilize cookies for tracking reasons, you’ll need to set up a custom cookie on the browser if you want to preserve your site settings.

➡ Privacy

Opera remains one of the few browsers with an internal virtual private network (VPN), which allows you to hide IP addresses as needed.

However, when it comes to IP masking, Opera’s VPN only lets you pick between the Americas, Europe, and Asia. That severely restricts your ability to access certain services around the globe — most VPNs allow you to decide your target country.

Other than HTTPS, it lacks encryption and a tunneling mechanism, leaving privacy concerns unanswered.

On the bright side, Opera includes several privacy settings standards in most online browsers. For example, you can erase your browser history or disable cookies. You can change the settings to prompt Opera to seek your permission before using your camera or revealing your location.

When you shut the window in private browsing mode, your cookies, history, and data are instantly removed.

Qwant is leaps ahead when securing your browsing history and data. Unlike Opera, Qwant does not collect user data and provides impartial results based only on the query.

You will discover quickly with Qwant that your most recent queries are never saved. The search history is erased as soon as you close the browser. 

Because there are no cookies to save your browsing history, you may choose a more conventional search engine to remember specific searches. However, if you seek the highest level of privacy, Qwant’s security features are unrivaled.

➡ User experience

Opera is responsive and fast, and the left sidebar includes a short, non-obtrusive collection of icons.

A slide-out appears over the current page when you click on one, such as the bookmarks list or Facebook Messenger. If you re-click, it vanishes, and nothing changes with the remainder of the window.

The browser takes less than one minute to install and set up on iOS and Android. It has a fast-action button that you push firmly to bring up a menu of alternatives.

A right-pointing arrow represents the My Flow sharing function on both the mobile and desktop versions. You may share material between devices with this button.

My Flow has a great feature where you may leave yourself a message that will appear on your mobile device and your PC’s browser.

The Qwant search engine is fast to offer relevant links and performs smoothly. The initial block of sites, similar to competitor browsers, is all advertisements, however, after scrolling down, you will find the actual results of your search.

With a few exceptions, the mobile UI is identical to the PC version. For one thing, unlike the desktop version, which is intended for private surfing, Qwant mobile has a distinct private browser mode that can be set on or off.

A handy tab button also indicates the number of open tabs. All of your open tabs are sorted in rows and columns when you hit this button. 

Conclusion

In conclusion, the Qwant browser and Opera are great options for navigating the web. They are similar but have some sharp differences. For example, if you do not want to go through the pains of remembering your previous searches, then Opera will be a preferred choice. On the other hand, Qwant will be an excellent choice for more privacy-conscious users.

It is not possible to pick a clear winner because your personal preferences should guide your browser choice.

Let us know in the comments which browser you would rather use.

⇒ Get Opera

⇒ Get Qwant

If you’re on mobile, you’ll be interested in our Opera vs Kiwi Browser guide.

Fix Surface Type Cover driver missing / keyboard not working

Microsoft Surface users that use Surface Type Cover are having issues where their keyboard have stopped responding. The Surface type cover driver is missing, after a recent update by Windows. Due to this update, the keyboard has become totally unresponsive.

Trying to fix this issue can be a pain as most solutions that are available on the internet are either general fixes or they outright don’t work.

But, we’ve got your back with the solutions that will make your keyboard work again! 

Keep reading to find out!

How can I fix Surface Type Cover driver missing

1. Reboot your Surface device

  1. Disconnect the keyboard.
  2. Restart your Surface device.
  3. Try reconnecting your keyboard.

By following the above steps, you can check and see if it is really missing the drivers, or if it is an error. If it was an error for you, the keyboard should connect and work just fine. If it wasn’t an error, try the next steps to resolve this issue.

2. Use the two-button shutdown method

  1. Press and hold the power button for 30 seconds and then release it.
  2. Now, press and hold the power button and the volume up button for 15 seconds, and don’t remove your finger from either button for the next 15 seconds.
  3. The Surface Logo will pop-up, and make sure you are still holding onto the buttons (power and volume up).
  4. Wait for 10 seconds.
  5. Turn on your Surface device.

By using the two-button shutdown, you force shutdown your Surface Pro, Surface Pro 4, and Surface Book, helping get rid of any corruption issues that are affecting your Surface device when connecting with the keyboard and using it.

You can also force shut down the Surface 3, 2, and RT by holding the power button for 10 seconds and then releasing it. Power it on by pressing the power button and confirming if the keyboard works.

3. Use the Keyboard Troubleshooter

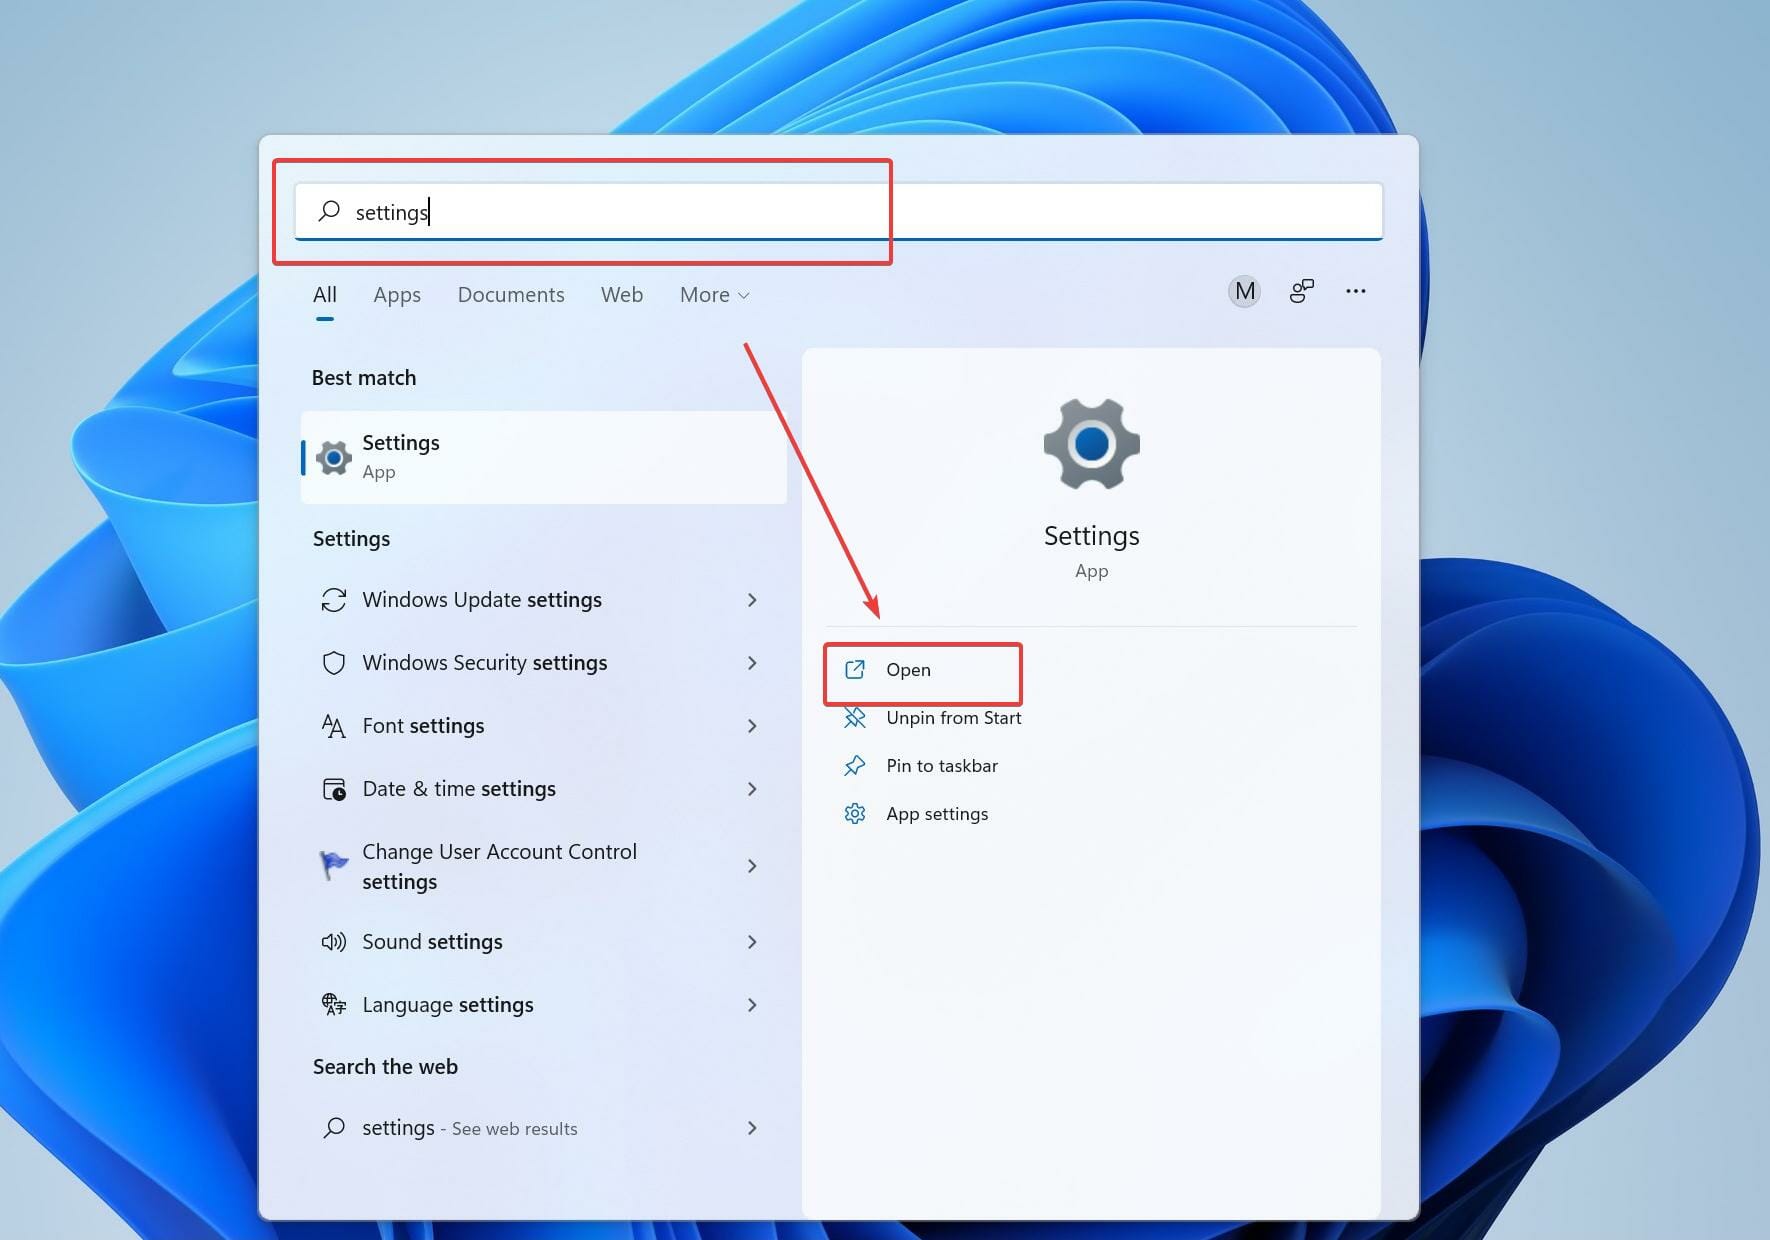
  1. Press the Windows key and search for Settings.Opening Settings from the Start page
  2. Click on System.Opening troubleshoot by clicking on system
  3. Now, click on Troubleshoot followed by Additional troubleshooters.
  4. Select Run the troubleshooter after selecting Keyboard.

Allow some time for the troubleshooting process to run and gather information on what’s causing the surface cover to not work.

4. Update the drivers

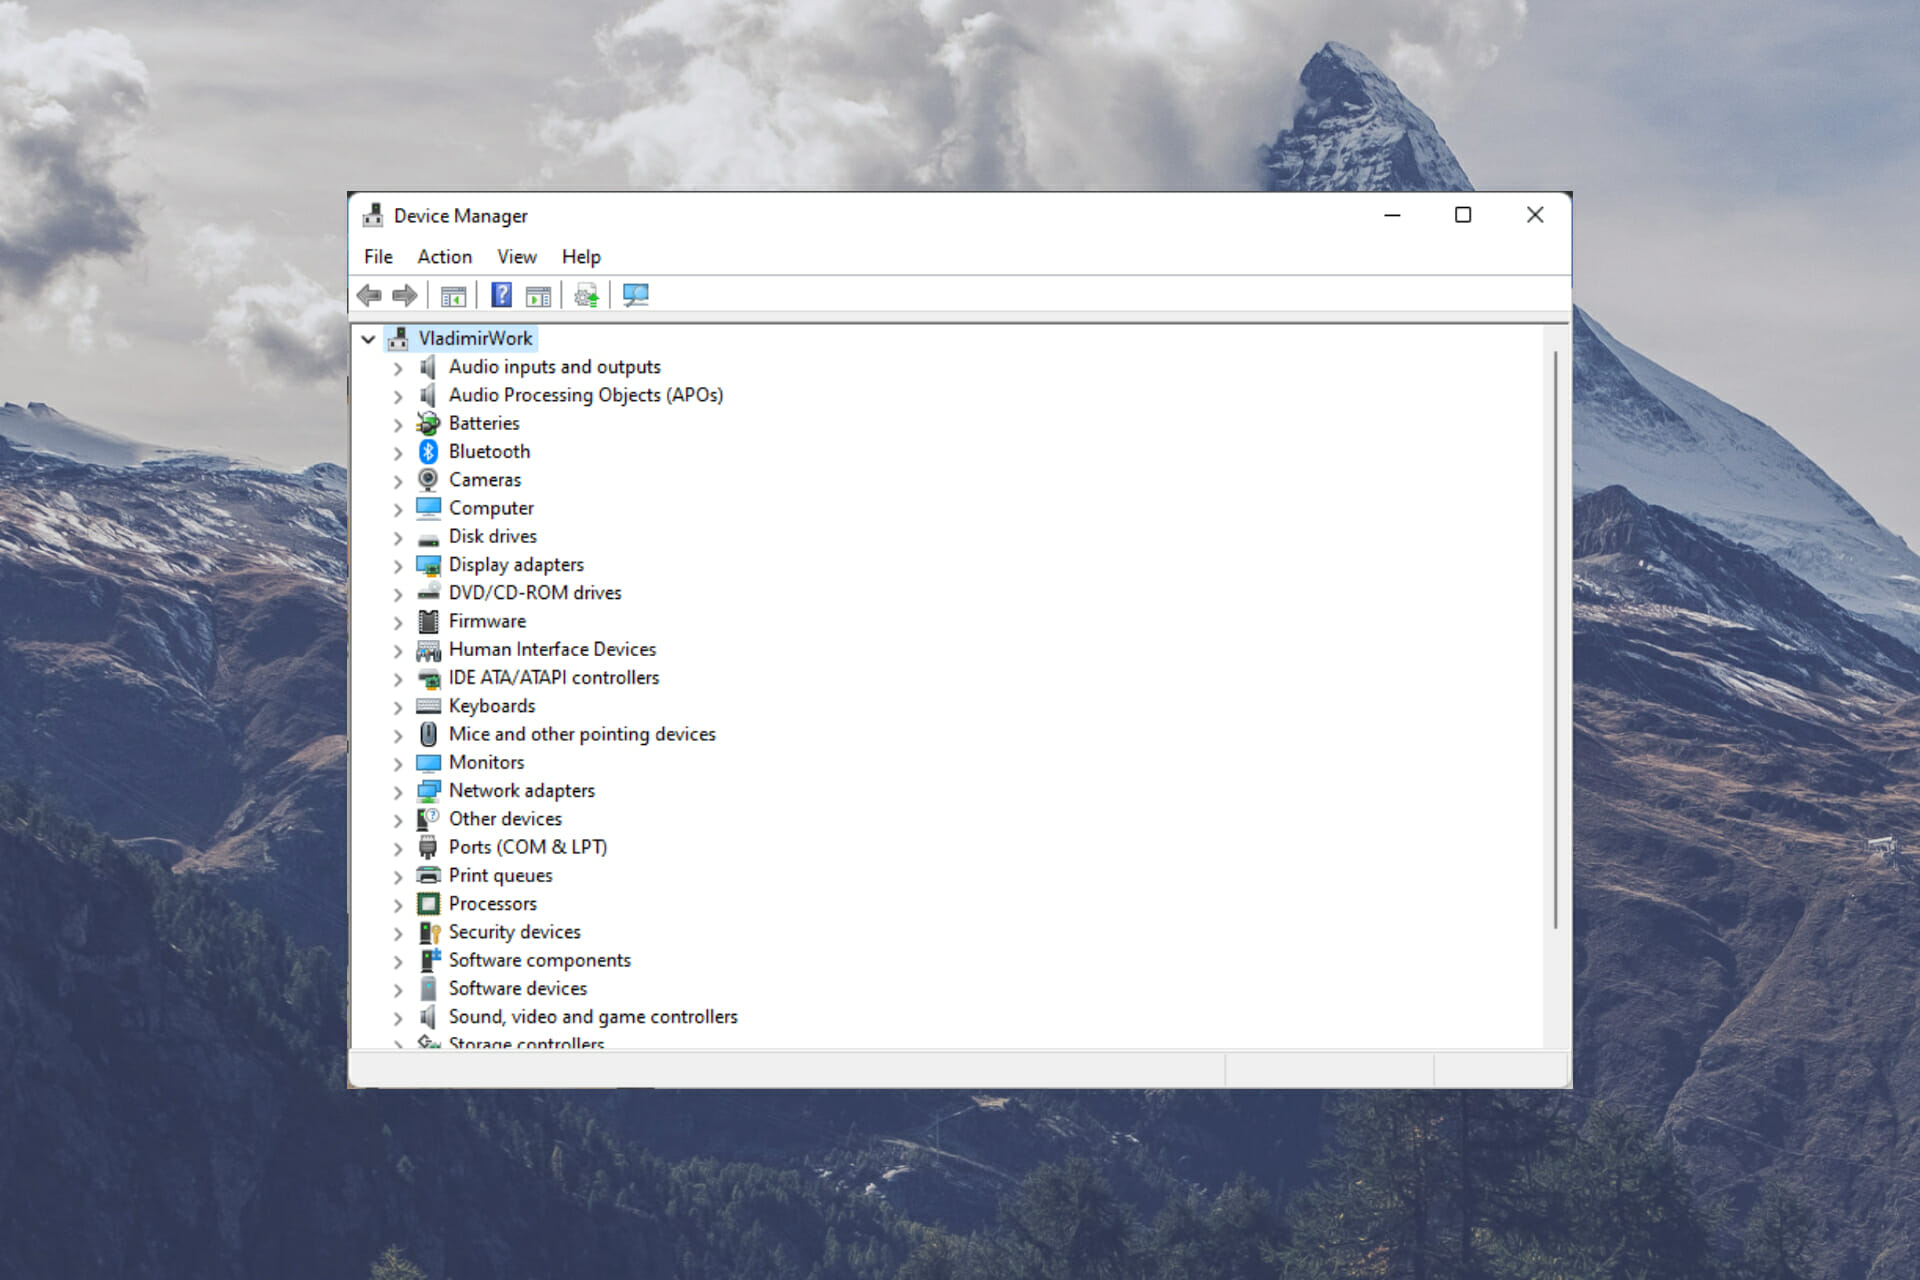
  1. Click on the Windows icon and search for Device Manager.Opening device manager from Start menu
  2. Click on Keyboards.Clicking on Keyboards in device manager
  3. Select your Surface cover driver, right-click on it, and click on Uninstall.Uninstalling the keyboard drivers
  4. After uninstalling, right-click on keyboards and select Scan for hardware changes.
  5. The updated drivers will be re-installed.

Windows automatically detects the peripherals that are connected to your device. And this is why when you select Scan for hardware changes, Windows detects the keyboard and installs its drivers.

Keeping your drivers updated helps your computer run smoothly and efficiently. If you have outdated drivers, you can face performance issues or device and app failures.

It is always a great idea to employ the help of professional driver updaters when performing this task. They are able to quickly scan your computer and identify the drivers you need, plus they can act a long-term maintenance tools so you never have to worry about driver issues again.

5. Check for updates

  1. Open Settings by searching for them in the search bar.Opening Settings from the Start page
  2. Click on Windows Update and click on Check for Updates on the right side window pane.Opening Windows update by clicking on it
  3. After Windows looks for the latest updates, click on Download and Install.
  4. Restart your computer. 

Some Windows updates can install with corrupted drivers and files, that can cause issues. The recent Windows update for the Surface devices made the Surface type cover driver missing.

This can be fixed by following the above steps, such as by re-installing the drivers, checking for new updates, and everything that is mentioned above.

Microsoft’s Xbox Gear Shop adds loads of Wasteland 3 video game merch

The official Xbox Gear Shop online store this week added a variety of merchandise and collectibles inspired by the Wasteland 3 video game.

Amongst the new Wasteland 3 merch are Cult of the Holy Detonation T-shirt and hoodie, Major Tomcat T-shirts and sweatshirt, Wasteland 3 stickers, a Battle of Steeltown print, a Major Tomcat mug, and a Los Payasos hoodie.

In non-Wasteland 3 merch news, the Xbox Gear Shop has also added the official Halo Infinite Marc V and Escharum Funko Pop figures.

Xbox Gear Shop merch

The Xbox Gear Shop is an official online storefront products based on and inspired by Xbox video games. It ships to most major regions and often sells products that are unavailable anywhere else.

Want to get future news on Xbox merch? Follow us on Twitter and Facebook.

Fix: Teredo is not in the Device Manager list of hardware

Problems with your Teredo Tunnelling Device are usually serious enough to affect your communication with other systems and consequently, your workflow. 

When such issues occur, like with many device issues on most Windows computers, it is usually an indication of misconfiguration. 

Usually, the fix is simple and easy. 

What do I do if Teredo is missing from the Device Manager list?

1. Install the Teredo Adapter manually 

  1. Start by clicking on the Windows key + R to open a dialogue box. 
  2. Type devmgmt.msc. open runbox
  1. Click on Network Adapters and then click on Action. device manager
  1. Add Legacy Hardware. This will open the Add hardware dialogue box and click Next. hardware wizard
  1. Check the Install Hardware that I manually select from a list and click Next. Hardware installation wizard
  1. Click on Microsoft and then Microsoft Teredo Tunneling Adapter on the right side. Click Next and finish.
  2. Now go back to your device manager and click View. click-view
  1. Select Show hidden devices. Show hidden devices
  1. Double click on Network adapters to see if the Teredo Tunneling adapter is available. 

Sometimes, you might lack the time or technical expertise to fix driver issues. Truth be told, not all driver issues are straightforward and the manual maintenance of drivers can be tasking.

This requires a modern and easy-to-use solution such as Outbyte Driver Updater. This one-click software keeps your drivers in shape and saves you valuable time by updating the drivers automatically.

Make sure to update this software from a free version to fully enjoy the services.

2. Use CMD to re-enable the Teredo adapter

  1. Start by clicking the Windows key + R.
  2. Type cmd into the dialogue box. run-box-cmd
  1. Another dialogue asking you to allow this app to make changes on your device, and click Yes. Command prompt
  1. Type the following command in the terminal netsh interface Teredo set state disable
  2. Restart your computer.
  3. Once done, start by running cmd as an administrator. Run CMD as admin
  1. Type the following command in the terminal netsh interface Teredo set state type=default.
  2. Start your Run box again to access the Device Manager.
  3. Type devmgmt.msc and click Ok. open runbox
  1. Click View to show hidden files. Show hidden files
  1. Double click on Network Adapters to see if the Teredo Tunneling adapter is available.

3. Check Your Registry Settings

  1. Start by clicking the Windows key + R.
  2. Type cmd into the dialogue box. run-box-cmd
  1. It will probably open another dialogue asking you to allow this app to make changes on your device. Click Yes. 
  2. Type the following command in the terminal: reg query HKLM\System\CurrentControlSet\Service\iphlpsv\Teredo
  3. If you see Type EG_DWORD 0x4 is present on your command prompt terminal, your Teredo is disabled on your computer. You can enable it by typing the following command: netsh interface Teredo set state type=default
  4. If you don’t see Type EG_DWORD 0x4, type the following command in your terminal:  HKLM\System\CurrentControlSet\Services\TcpIp6\Parameters
  5. Check if the value is 0x8e for the example DisabledComponents REG_DWORD 0X8e. It means that the adapter is disabled on your computer.
  6. Activate it by typing the using this command: reg add HKLM\System\CurrentControlSet\Services\Tcpip6\Parameters /v DisabledComponents /t REG_DWORD /d 0x0
  7. If the value shows 0x0, i.e. DisabledComponents REG_DWORD 0x0, go back to the device manager through steps 1-3, click View, and select Show hidden files. 
  8. Double click on Network Adapters and see if Teredo is present. 

This should fix your Teredo issues and help you use the software as you wish. 

If you are having problems downloading the Teredo adapter to your Windows machine, then consider checking out our guide for more information. 

Also, if you have any more solutions you might want to share, feel free to share them with us in the comment section. 

Fix: Windows Explorer High CPU Usage on Windows 11

Unlike issues with Explorer.exe high CPU usage in Windows 11, a computer at one time or the other is likely to experience high CPU usage. This is perfectly normal provided it happens seldomly and does not significantly affect the performance of the PC.

This however becomes a problem when it is recurrent. It may make the system heat up, delay load time and probably freeze when you are working on an important task.

Why does my computer experience Explorer.exe high CPU usage?

Generally, a computer might experience high CPU usage due to one of the following:

  • Running a program that requires a higher CPU requirement: Video editing and gaming software triggers a high CPU usage. These applications could be problematic if run on a computer with lesser features compared with the recommendation of the publisher. If you will be running them at all, they should be launched one at a go instead of being used simultaneously with other apps.
  • Browser extensions and system add-ons: Browsers such as Chrome and Edge tend to consume cause high CPU usage especially if you have lots of extensions downloaded on them. Similarly, some add-ons such as those designed for Microsoft Word, Excel, etc., may also cause high CPU usage. A computer with compatible features should not have any problem handling them efficiently.
  • Computer viruses: Different kinds of malware can chew a chunk of your CPU. As a matter of fact, viruses developed by cybercriminals like crypto miners are programmed specifically for such purposes.
  • Startup applications: Some applications launched on the startup of the computer can be responsible for high CPU usage. This is because, even though they are not shown to be active in the taskbar, they usually continue running in the background.

Meanwhile, Windows 11 users complain that the Explorer.exe high CPU usage issue started they updated their Windows.

We understand this is just one of the many reasons that can cause high CPU usage. Read along as we highlight processes that could fix the problem, irrespective of the cause.

How can I fix Explorer.exe high CPU usage in Windows 11?

1. Close the Explorer.exe file in the Task Manager

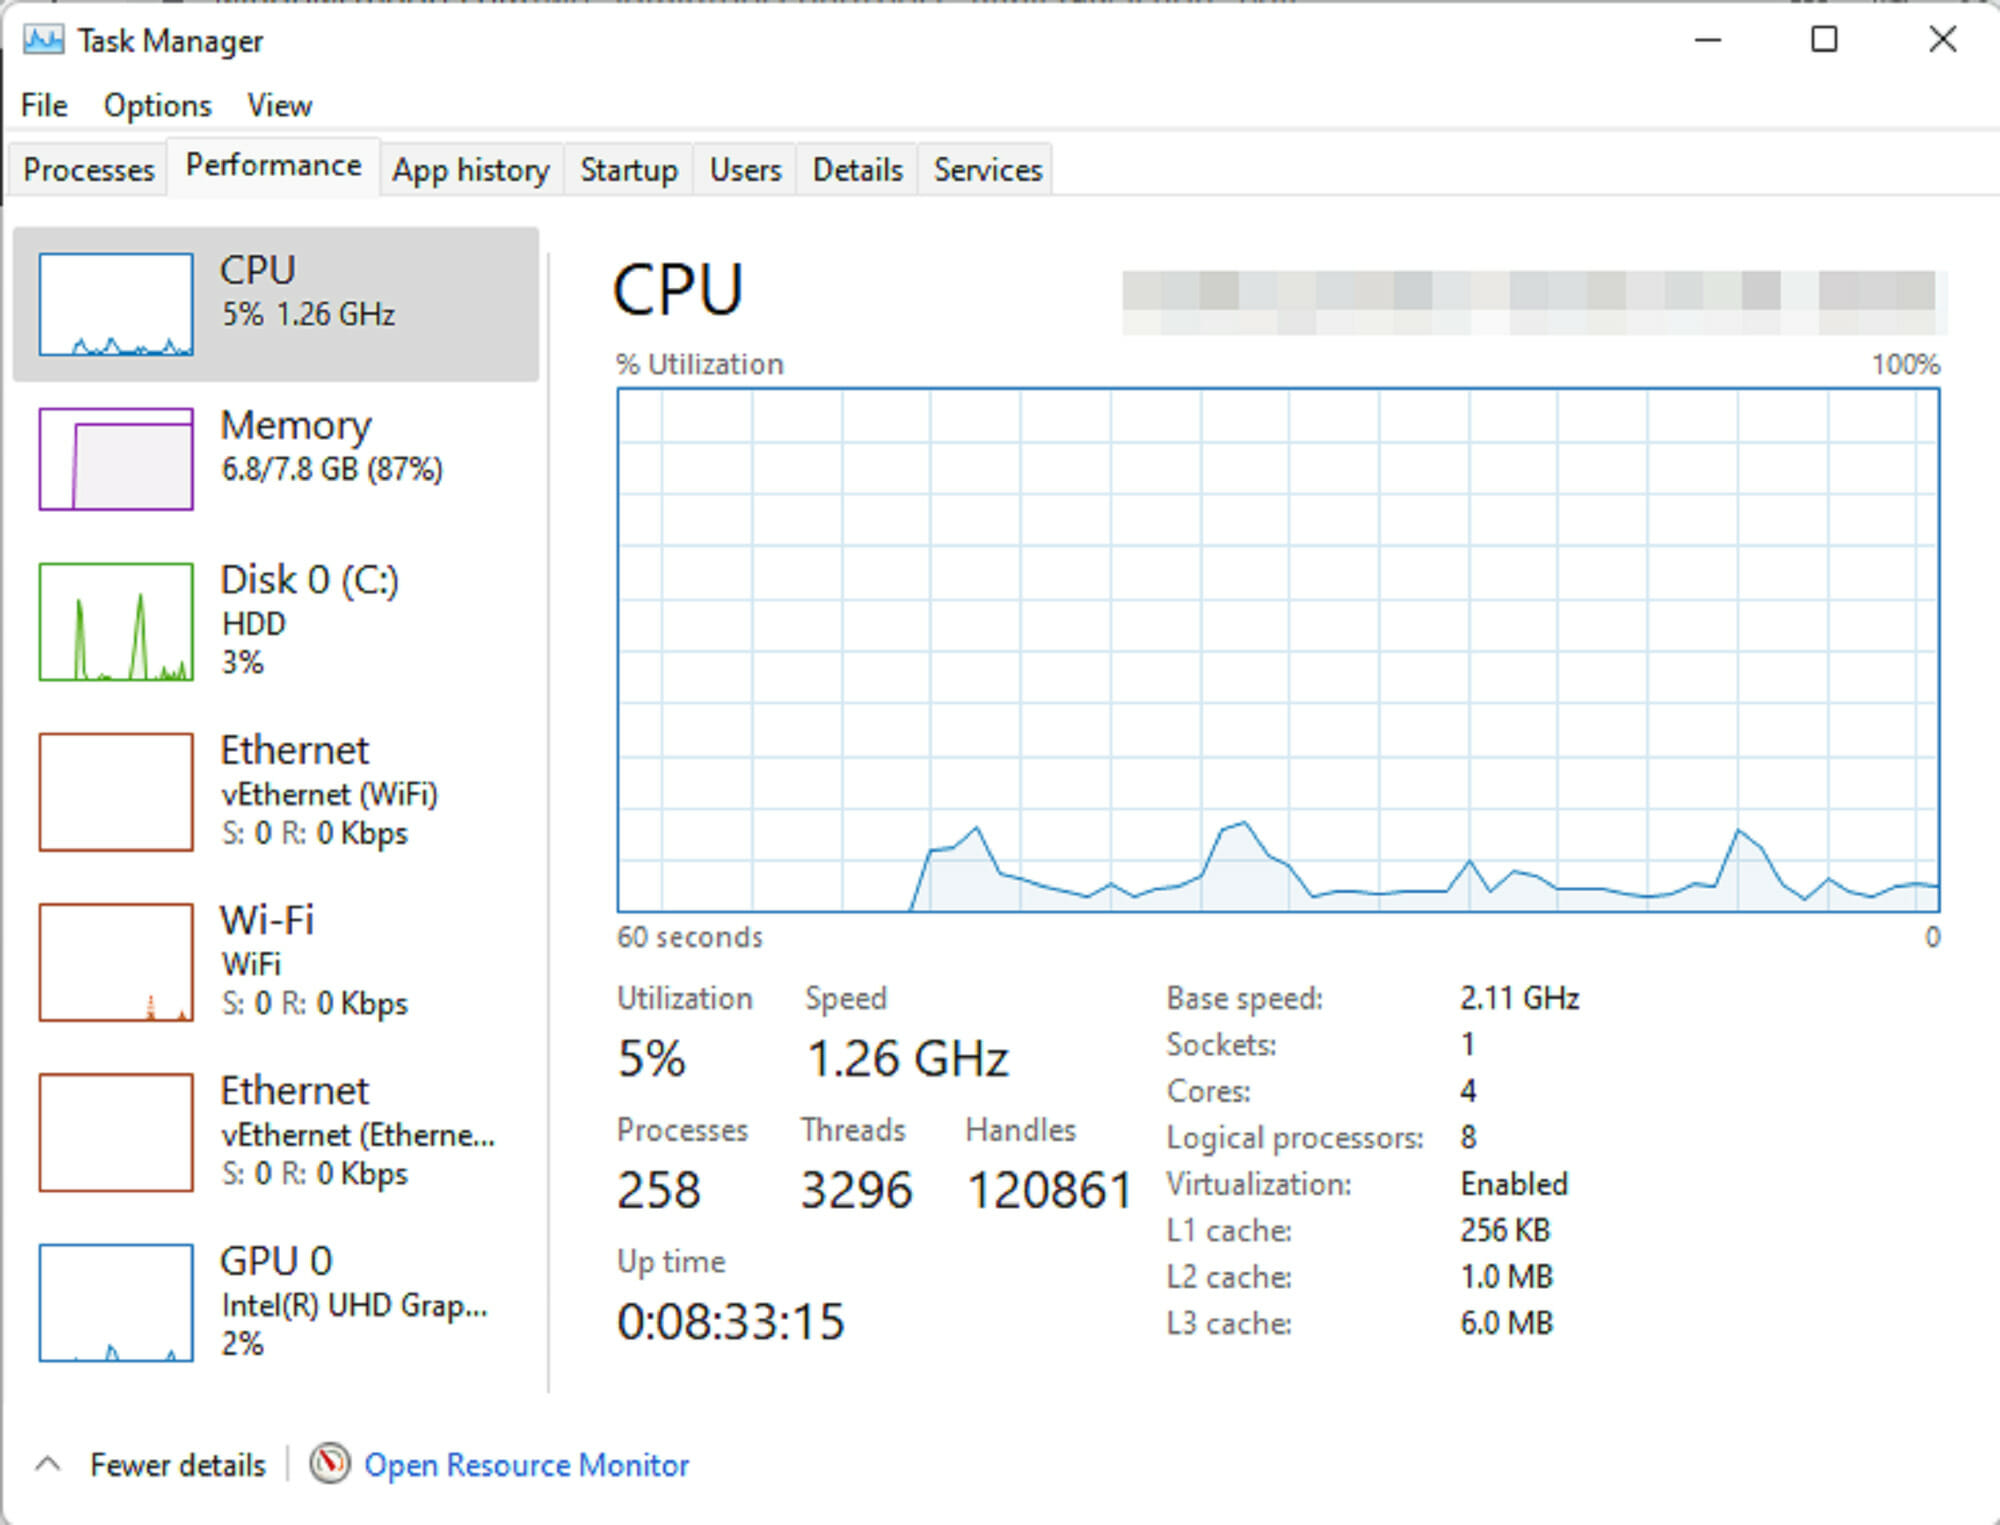
  1. Press Ctrl + Shift + Esc keys to launch the Task Manager. Right-click on Explorer.exe.
  2. Next, select End task.

Repeat the process above for any other program that may be causing the high CPU usage. If this does not fix the issue or you are unable to open the Task Manager altogether, read on for other solutions.

2. Use the system file checker

  1. Open Windows search by selecting the search icon in the taskbar or left-clicking on the Windows logo in the taskbar. Type CMD, then select Run as administrator. Next, select Yes, to launch the Command Prompt.
  2. Type the command below:
    DISM.exe /Online /Cleanup-image /Restorehealth
    Observe the space in between. To avoid any error, you can copy and paste. Next, press Enter.
  3. Wait for a few minutes (might take up to 30 minutes) until you see a prompt that reads The operation completed successfully.
  4. Next, type the command below:
    sfc /scannow
    Observe the space in between. You may want to copy and paste it from here. After this, press Enter.
  5. Wait until you see a message that reads Verification 100% complete. Then, type exit.

3. Update Windows

  1. Open Run by pressing Windows key + R.
  2. Type Control Update. Press Enter.
  3. Select Check for updates. If an update is available, then download it.
  4. Restart PC to install.

4. Disable cloud storage

By default, Windows 11 comes with a OneDrive cloud storage. This storage helps to backup your system file in case you are attacked by ransomware. For clarity, ransomware is a type of virus used by cybercriminals to extort users.

It can be unknowingly downloaded along with files online and once installed, takes over all your files such that they would be impossible to open.

The attackers after this will display a message to make a certain payment before you can get a key to regain access. Even after payment.

Some users have reported disabling their OneDrive account helps to fix this issue. In case you don’t know how to go about this, take a look at our guide on how to uninstall any app on Windows 11.

If you are not using OneDrive but other cloud storage such as Dropbox, try to do the same and observe if it fixes the problem.

5. Check the desktop for any files with missing icon

During the creation of shortcuts, some apps may fail to create icons. Even though this looks like something that shouldn’t be a problem, it surprisingly could cause Explorer.exe high CPU usage.

Observe your desktop screen if there is any file with a missing icon. If there are any, delete them. Check if the problem or resolved. You may also restart your PC to confirm.

6. Uninstall the latest Windows updates

  1. Launch Command Prompt by typing CMD in Windows search, right-click on Command Prompt and Run as administrator.
  2. Type or copy and paste the command below:
    appwiz.cpl
  3. Select View installed updates.
  4. Right-click on the most recent Windows update(s). Select uninstall.

It is typical of Microsoft to always release patches to solve one issue or the other observed with the usage of the Windows Operating System (OS). Sometimes, these updates may be the origin of problems for your PC.

In all fairness to the company, they are only trying to help and ensure you have the best experience possible. But, just like it is with any software, glitches are inevitable.

Users have noted that the KB5010414 update is the cause of their Explorer.exe high CPU usage, and it was fixed immediately after it was uninstalled.

7. Disable startup applications

  1. Open Task Manager. Select Startup.
  2. Right-click on displayed applications to select Disable; except for Windows Defender.

8. Run a virus scan

Malware may be the reason your system is experiencing Explorer.exe high CPU usage. If you have any antivirus/antimalware software installed, it is time to get them to use. Do a deep scan to detect any virus on the system.

Make use of more than one antivirus software to ensure you are not missing anything. Don’t know which antivirus software to use? There are some free antivirus apps you may want to consider, such as Get TotalAV due to its effectiveness in protecting any Windows operating system from malware, ransomware, and phishing.

⇒ Get TotalAV

9. Adjust system for best performance

  1. In File Explorer, right-click on This PC from the left side panel (you can launch the File Explorer window by pressing the Windows key + E).
  2. Select Properties. Choose Advanced system settings in Related links.
  3. Locate Settings under Performance., and click on Performance.
  4. Next, select Adjust for best performance. Click Apply. Then left-click on OK.
  5. Restart the system to completely effect changes.

If none of the methods above seemed to work, you can still try optimizing your hard drives with the defragment tool.

10. System restore

  1. Open the Run prompt by pressing Windows logo key + R.
  2. Type or copy and paste the command below:
    rstrui.exe
  3. Press Shift + Enter keys to launch it with admin permission.
  4. Wait for the System Restore to start. Then select Next.
  5. Choose a preferred restart point to restore your computer to the state it was in before the issue arises.
  6. Scan for affected programs before clicking Next. If the affected programs are things you don’t want to lose, you can choose another restore point if available.

11. Optimize system hard drive

  1. Launch the Run prompt by pressing the Windows key + R.
  2. Type the command below:
    dfrgui
  3. Select your choice hard drive. This is usually Windows C:, then click on Optimize.
  4. Wait until the defragmentation is complete. You can do this for all other drivers too to reduce overall CPU usage.

To skip the process above, you can use O&O Defrag 25 to optimize with ease. Instead of the long list of processes highlighted, you would only need to install the software and relax while it takes care of the rest.

There you have it all. At this stage, we believe one of the solutions explained so far would have helped you in solving the Explorer.exe high CPU usage problem.

Share your experience in the comment section, and let’s know if you were able to solve it using a different method.

M.2 SSD not Showing up in Windows 11? How to Enable it

Windows 11 had a very bumpy launch. Launched in October of 2021, users are reporting several types of issues that they ran into, such as Windows 11 not recognizing NVMe SSD, broken features, compatibility issues, and so on.

All in all, a very unstable and underdeveloped version of Microsoft for a long time.

While Microsoft is hard at work and has been releasing updates addressing the issues slowly, the number of issues present in Windows 11 is overwhelming. 

Here’s where we try to help fix the issues that could be ruining your experience with the latest Windows version, Windows 11.

Keep reading to find out more about how you can make your PC detect your NVMe SSD drive.

What are NVMes and why does Windows 11 fail to detect them?

NVMe, short for Non-Volatile Memory Express, is an advanced new storage access and protocol for the next generation of SSDs and flash devices. It provides a fast response rate and accelerated data transfer speed for all kinds of business workloads.

The NVMe protocol accesses flash storage via the PCI Express (PCIe) bus, which delivers lower latency and provides high bandwidth.

Windows 11 can fail to recognize NVMe SSDs for the following reasons:

  • The SSD is not properly installed or plugged in.
  • In BIOS, the drive is disabled.
  • Drivers are outdated or are not installed.
  • The SSD partition’s drive letter is missing.
  • The SSD could be damaged or broken.

What are the pros, cons, and use cases of NVMes?

The pros of NVMe:

When compared to SATA, the NVMe provides superior storage because the PCIe socket transfers 25x more data.

NVMe SSDs are super fast as it sends commands 2x faster than SATA, It directly communicates with the CPU, support all operating systems, offer below 10 microseconds of end-to-end latency, support tunneling protocol, and have higher bandwidth than SATA.

The cons of NVMe:

An NVMe SSD costs more than the standard SSD and they are not cost-effective when it comes to storing large amounts of data. Also, the legacy NVMe is not supported by older systems.

The use cases of NVMe

NVMe’s can provide real-time customer interaction, and NVMe’s are also used for machine learning, artificial intelligence, and running advanced analytical apps and data.

NVMe’s can significantly reduce the scan time of large databases, and they are also used for high-performance computing for applications where low latency is vital.

How to fix Windows 11 not recognizing NVMe SSD

1. Confirm if the NVMe SSD is properly installed

Confirm that the SSDs’ cables are properly plugged in and make sure they are not damaged. Oftentimes, the connection can have loosened or maybe the wires could have burnt due to a voltage issue or heat.

If the SSD cables are properly plugged in and are also not damaged, try fixing the issue by following the below steps.

2. Configure BIOS settings

  1. Reboot your computer.
  2. Press the F2 key and then press the Enter key.
  3. Find SATA configuration menu.
  4. Set Configure SATA as to IDE.Setting the SATA configuration to IDE
  5. Press Enter.
  6. Save the changes made.
  7. Restart your computer and the SSD should appear in BIOS.

3. Repair using Disk Management

  1. Open Disk Management by searching for create and format hard disk portions.Searching Create format hard disk partitions
  2. Select a partition and right-click on it.
  3. Click on Format to repair the drive.Formatting the drive

By formatting your SSD the corrupted data will be removed and Windows can detect your SSD again. But by formatting, you will lose your data.

4. Update the SSD drivers

  1. Click on the Start menu.
  2. Type Device Manager and press Enter.
  3. Go to Disk Drives.Updating disk drive
  4. Right-click on every item and click on the Update driver.Updating drivers in device manager
  5. Restart your PC.

Updating drivers manually can be challenging, but if you don’t update them frequently, your PC cannot run efficiently and suffer from performance problems. 

Hence, there is a standout solution that automatically installs all the latest drivers and keeps your device up-to-date with no disk errors.

➡️ Get Outbyte Driver Updater

5. Change/Assign SSD drive letter

  1. Go to start menu and search for Create and format hard disk partitions.Searching Create format hard disk partitions
  2. Right-click on the SSD volume you would like to add or change the drive letter.
  3. Click on Change Drive Letter and Paths.Changing or adding drive letter path
  4. Click Change to change the drive, and Add to add the drive.Updating the drive letter
  5. Choose the new drive letter from the list and then click on ok, followed with yes.Assigning the new drive letter
  6. Click Ok.

How to fix Windows 11’s not recognizing M.2 SSD

1. Confirm if your SSD is installed properly

If your M.2 SSD is not working or being recognized by Windows. The first thing you have to do is confirm if your M.2 SSD is inserted properly into your M.2 slot. If the label on the SSD is facing towards you, then it is installed properly, but if it is not facing towards you, install it properly.

2. Confirm if the BIOS detects your SSD.

  1. Reboot your PC.Rebooting the computer
  2. Press F2 to access the BIOS settings page.
  3. Find the Boot menu page and confirm if your SSD is listed there.
  4. If not, go to Storage Options > Serial ATA > SATA Configuration.
  5. Select IDE Compatibility Mode from the drop-down menu.Setting the SATA configuration to IDE
  6. Save the changes and restart your computer.

3. Initialize your SSD

  1. Click on the Start menu.
  2. Search for Create and format hard disk partitions.Searching Create format hard disk partitions
  3. Right-click on the SSD that is not being identified and select Initialize Disk.Initialize disk to fix windows 11 not recognizing ssd
  4. Now, select the SSD disk you want to initialize and select the partition style.Selecting the partition style
  5. Click on Ok.clicking on Ok
  6. Now, go back to Disk Management and right-click your SSD volume, and choose New Simple Volume.
  7. Follow the on-screen instructions to assign the SSD volume and drive letter.
  8. Restart your PC for the changes to take effect.

4. Update Storage Controller Drivers

  1. Press the Windows key and search for Device Manager.Opening device manager from Start menu
  2. Locate Storage controllers.Opening storage controllers to update drivers 
  3. Expand the group and click on Update Drivers.Updating drivers
  4. Select Search automatically for updated driver software for all the items that are listed under it.

5. Detect SSD by fixing memory issues.

  1. Go to the start menu and type Windows Memory Diagnostic 
  2. Select Run as administrator.
  3. Click on Restart now and check for problems (recommended).Running the memory diagnostic tool
  4. The Windows Memory Diagnostic Tool will begin testing and will take several minutes to complete.Running the Windows memory diagnostic tool

Once it is completed, check if your Windows 11 is able to detect your NVMe SSD.

What is M.2 SSD?

An M.2 SSD is a compact SSD that is like an expansion card that is mounted internally. Unlike SSDs or HDDs that are connected to the motherboard via a cable, M.2 SSDs are directly plugged into the motherboard using the dedicated M.2 connector slot. You can learn more about how these drives work in this comprehensive M.2 SSD guide.

An M.2 SSD is capable of using both the SATA interface as well as the PCIe interface. 

M.2 drives help keep your PC interior clean and less cluttered because of fewer cables that are used in the set-up process.

NVMe VS M.2 SSD Which is better?

NVMe and M.2 SSDs are almost equivalent in all aspects. M.2 is the more compact version that connects to the motherboard through the M.2 connector. It supports both the SATA interface and the PCIe interface (which NVMe uses).

M.2 SATA is affordable compared to NVMe and M.2 NVMe. But if you are working on AI, ML, or handling huge amounts of data where low-latency and high-bandwidth count, NVMe is the default choice as every second counts in those kinds of operations.

For most consumers, M.2 SATA is generally enough for everyday tasks, gaming, and more.

SSD technology has come a long way, and there are also multiple interfaces that help users with their dedicated usage and operations.

But, SSDs are likely to crash or run into compatibility issues. They are exceptionally superior when compared with HDDs in terms of their life, longevity, speed, and more.

Speaking of issues, many also reported that their NVMe is not showing up in BIOS, but we have a special guide that addresses that.

But like any product, it can sometimes run into issues. To minimize such errors, downloading the latest version of your drivers, such as the Samsung NVMe for Windows 11, can ensure it is at peak performance always.

To set up your Samsung NVMe SSD on Windows 11, make sure to install the Samsung NVMe driver and properly format the SSD before use.

We hope this guide was useful in resolving your Windows 11 not recognizing your NVMe SSD issue. You can talk to us in the comments to let us know how this guide helped you successfully fix the issue.

5 Realities That Prove Windows 11 is Not User Friendly

Windows 11 has been out for half a year now and is gaining more popularity than its predecessors. However, it has its own shortcomings. Users who updated the OS have mixed reactions to its general performance.

Some say that Windows 11 is the worst Windows ever. That’s hard to judge; it depends on your needs and preferences. The biggest problem users have with Windows 11 is that it’s not what they’re used to. 

A section of users say Windows 11 came up with many new features to enhance user experience and security and is the best version of Windows yet.

Others say the minimum system requirements are too stringent and hence face performance problems due to insufficient RAM. To run Windows 11, you need at least 4 GB of memory space.

While opinions differ, not everything is sunshine and rainbows. There are some undeniable realities that make the OS not user-friendly.

What are some of the realities that make Windows 11 not user-friendly? 

1. Hardware requirements

Windows 11 is not free like previous versions of the operating system were. Because Windows 11 is so feature-packed than Windows 10, its hardware requirements have also gone up. Unfortunately, they might be too high for some people.

If you’re planning to upgrade your current PC to Windows 11, make sure that it meets the minimum hardware requirements by using the PC Health Check App.

Failure to which, your device may not have enough processing power and memory to run Windows 11 efficiently.

In some cases, some users have been able to upgrade by bypassing some of the requirements. Their devices have however been lagging and facing a bunch of performance issues.

Such experiences take away from the beauty of enjoying all that Windows 11 has to offer. This ends up leaving a bad taste in your mouth.

2. Interface overhaul

By now, you already know that the Windows 11 interface is quite different from its predecessors. The new user interface will take some getting used to. 

Microsoft has made improvements in the Start Menu and Settings app. However, some people still prefer to use the old interface.

If you’re one of those people who like the old desktop UI more than the new Start Menu in Windows 11, you can easily revert back to the old desktop UI.

3. Offline accounts

If you’re a Windows 11 Home user, you may find your laptop or desktop will not be able to sync with your Microsoft account.

The Offline account option has been removed. By default, the only way to get online is by manually going through the online activation process.

Since Microsoft is not able to support offline accounts, this means that you need an internet connection to access your files and documents.

This is a huge disadvantage for those who want to use their computer in the office or at home and work on documents offline.

4. Default apps

Microsoft has altered the process of changing default applications in Windows 11 or at least how it appears to many users who are unable to find options that they believe should be included.

The process is now harder as more options have been included in the context menu. When you open it now, you have to click on each one individually to set them as your default applications. What’s even worse, once you select the individual app, there is no option to set for all.

5. App-related upgrades

As Microsoft works on improving Windows 11, so are the related apps to ensure they follow the same interface. As such, applications such as Photos are also getting some useful features scrapped off.

If you enjoy these apps, you may wake up and find out one day that some favorite features are missing. This can be frustrating but it is a harsh reality that the updates are across the board and are likely to affect more apps.

What are the disadvantages of Windows 11?

Some of the disadvantages of using Windows 11 include:

  • You have to sign in with a Microsoft account to use Windows 11. If you want to set up Windows without signing in with an online ID, you can’t. You must sign in with a Microsoft account or create one during setup. 
  • Some built-in OS functions and features are exclusive to the Edge browser. Therefore, if you use Firefox or Chrome instead, you won’t be able to take advantage of them.
  • There’s no way to change where the taskbar is located, which has been a staple of Windows. You can’t move it to the top or side of the screen anymore. It’s locked to the bottom only. You can still auto-hide it, and there are new settings that let you show or hide labels on icons in the taskbar. However, if you want to move the bar somewhere else, you’re out of luck.
  • There are also some glitches and bugs with the new operating system. While this is not unusual, it can be annoying if you are trying to upgrade your computer. These issues interfere with your ability to use the software correctly.
  • The Windows 11 trial period is short and gives you just ten days to test out the new operating system. That might be enough time for some before you commit. After that period has passed, there is no going back.
  • Since the OS will require more resources than its predecessors, if you are using an older computer, you might experience slower performance when using Windows 11. You need to have a powerful computer to run this OS smoothly. This means you have to spend more money on updating your current computer or buying a new one!

What do you dislike about Windows 11?

Like any OS, there are some features that will not sit well with users. The features may be functional but after years of getting accustomed to a certain way of things, suddenly making changes could spark up a dislike.

Some of the common disliked features include:

  • Start Menu – The Windows 11 Start Menu is newly improved with more features than its predecessors but compared to Windows 10, the Windows 11 version is somewhat annoying. There is no option to see recently used apps instead, you only get to see recommended and pinned apps.
  • Pre-installed apps – Previous Windows versions had some pre-installed apps whenever you made the upgrade but in Windows 11, a majority of these apps only appear as shortcuts whereby you have to go to the Microsoft Store if you want to use them. 
  • Default browser – Although Microsoft is not forcing you to select Edge as the default browser, it is making it harder to include other apps and limiting some functions when you use other browsers. 
  • Cortana – If you would like to use Cortana in Windows 11, you have to download it from the App Store. The same goes for Skype and other apps that were previously in-built. 

Each user is different so the dislikes on this list may actually be some of the best features for another user. 

Windows 11 is still fairly new in the market and Microsoft is still working on updates so at some point, some of these features may get a major boost that makes them more user-friendly.

In the meantime, we have some tips and tricks to boost your Windows 11 performance so that you can get the most out of the OS.

If you are yet to upgrade to Windows 11, we also have an in-depth Windows 10 versus Windows 11 comparison to help you make an informed decision.

We’d love to hear from you what are the Windows 11 features that you detest as well as the improved features that you dislike in the comment section below.

How to delete drivers of Logitech G Pro Wireless mouse

Sometimes the Logitech G Pro Wireless gaming mouse might malfunction and the best option to fix it would be to delete the drivers and probably reinstall.

It is also likely that you are no more interested in using the mouse product from Logitech and would want all related drivers and software removed from your PC.

If any of the above is your issue, relax and read along as we highlight quick and easy tips on how to delete drivers of the Logitech G Pro Wireless gaming mouse.

Why do I need to remove Logitech drivers?

Drivers help establish a successful communication between peripheral hardware such as the Logitech G Pro Wireless gaming mouse and your PC.

Merely uninstalling a Logitech driver from your system does not completely get rid of it. There are usually residual files on your computer.

This might become problematic in many cases as it may cause drivers’ conflict especially when you are trying to install a new one.

Take, for instance, you are trying to fix your Logitech driver issue by installing a driver pack software. Any residual file from the uninstalled Logitech driver may affect the operation of the driver pack; thus making the problem more complicated and nearly impossible to fix.

How can I delete drivers of the Logitech G Pro Wireless mouse?

1. Use the rollback option

  1. Open the search menu. Type CMD to locate the Command Prompt App. Next, left-click on the Run as administrator.
  2. In the User Account Control panel, when asked Do you want to allow this app to make changes to your device?, select Yes.
  3. Type the command below or copy and paste it into the Command Prompt:
    SET DEVMGR_SHOW_NONPRESENT_DEVICES=1
  4. Type the code below or copy to paste:
    devmgmt.msc
  5. Click the small arrow beside the Mice and other pointing devices. This should display a drop-down of options. Select Properties.
  6. Select Driver.
  7. Click on the Roll Back Driver option. Please note that the option is not clickable in the screenshot below because there is no recent update on the driver.
  8. On the Driver Package rollback window, select the reason for the rollback. Next, select Yes.

This method is most likely to work for users who recently updated their Logitech G Pro Wireless driver and would like to delete it to install the previous update instead. It usually helps to fix issues that arise after updating the driver. If this does not apply or work for you, read on to check another method.

2. Manually uninstall the Logitech driver

  1. Right-click on the Windows logo on the taskbar. Select Device Manager.
  2. Locate Mice and other pointing devices. Click the small arrow beside it, then select Properties.
  3. Select Drivers.
  4. Click on Driver Details.
  5. Note the names of the files.
  6. Open the File Explorer by pressing Windows key + E.
  7. Type the code below or copy and paste it into the search box in Windows Explorer:
    C:\Windows\System32\drivers
  8. Remember the noted file names in the Driver Details? Scroll down in the Drivers folder to locate and delete them all.
  9. Now, you need to delete the driver file itself (.INF). Go back to the Device Manager.
  10. Right-click on your mouse name under Mice and other pointing devices. Click on Properties. Select Details.
  11. Click on the small drop-down arrow in front of Device Description. Drag the mouse pointer to the Inf name. Click and write down the displayed name.
  12. Open File Explorer. Type the location below in the address bar:
    C:\Windows\System32\DriverStore\FileRepository
  13. Scroll to locate the folder with a corresponding name with the INF file. Select the folder, and find the driver file. The file Type is usually Setup Information.
  14. Restart your system to effect the changes.

3. Use a dedicated software

As stated before, uninstalling the Logitech G Pro Wireless driver may leave some residual files. Dedicated tools like Revo Uninstaller will scan your system for any additional files that may have been ignored during the uninstallation. It will delete them all.

This software is capable of not just helping you delete drivers of Logitech G Pro Wireless successively, but can also do the same for any driver you may want to get rid of.

⇒ Get Revo Uninstaller

These are the methods to delete drivers of Logitech G Pro Wireless to prevent them from any interference with your future installations.

Does any of these work for you? Let’s know in the comments section below. We’ll also be glad to answer any other questions you may have.

Windows 11 Won’t Restart? 5 Ways to Fix it

We may have, at some point, come across the issue when a Windows PC doesn’t turn on. A similar problem is encountered by many on the latest iteration, where Windows 11 won’t restart, but the shutdown feature works fine.

This could happen due to various reasons, but since it’s just the restart feature affected, we can rule out problems with the hardware. In this case, some users are stuck on the Restarting screen, while for others, the system freezes, and the display turns black.

So if you, too, are facing it, here are the most effective ways to fix the Windows 11 won’t restart problem.

What can I do if Windows 11 won’t restart?

Note icon NOTE
If you are unable to turn on the system, boot Windows into Safe Mode, and then try executing the fixes listed here.

1. Disconnect all non-critical devices

More often than not, it’s a malfunctioning piece of hardware that’s leading to the Windows 11 won’t restart problem. And in this case, simply identifying and removing it should do the trick.

To do that, turn off the computer, remove all non-critical devices while just keeping the keyboard, mouse, and monitor connected. Now, turn on the PC, and check if the error is fixed. In case it is, start reconnecting the devices one at a time until you identify the problematic one.

Once done, contact the device manufacturer or search the web for solutions pertaining to that particular device.

2. Reinstall the graphics driver

  1. Press Windows + S to launch the Search menu, enter Device Manager in the text field, and click on the relevant search result that appears.Device manager to fix windows 11 won't restart
  2. Double-click on the Display adapters entry.Display adapters
  3. Now, right-click on the graphics adapter, and select Uninstall device from the context menu.Uninstall device to fix windows 11 won't restart
  4. Next, tick the checkbox for Attempt to remove the driver for this device, and click on Uninstall.Uninstall
  5. After uninstalling the driver, restart the computer.

Once done, you will notice the display clarity to have downgraded a notch because the current driver has been removed, and the OS automatically installed a basic one. After you restart the computer, it will reinstall a fresh set of drivers, which will fix things when Windows 11 restart is not working.

Also, you can use an app to keep the drivers up-to-date and reduce the chances of encountering such errors. We recommend a dedicated tool that scans all the sources for updates and ensures the installation of the latest version for every driver.

3. Run the built-in troubleshooter

  1. Press Windows + I to launch the Settings app, and select Troubleshoot on the right in the System tab.Troubleshoot to fix windows 11 won't restart
  2. Click on the Other troubleshooters entry.Other troubleshooters
  3. Now, locate the Power troubleshooter and click on the Run button next to it.Power to fix windows 11 won't restart
  4. Wait for the troubleshooter to diagnose and eliminate issues, and choose the appropriate responses along the way when prompted.

If Windows 11 won’t restart after an update, it could be a bug in the OS or changes introduced to the settings, and a quick fix is to run the dedicated troubleshooter.

4. Uninstall conflicting third-party applications

  1. Press Windows + I to launch Settings, and select Apps from the list of tab in the navigation pane on the left.Apps
  2. Click on the Apps & features option on the right.Apps & features
  3. Locate the problematic app, click on the ellipsis next to it, and select Uninstall from the menu.Uninstall app to fix windows 11 won't restart
  4. Again, click Uninstall in the prompt that pops up.Confirm

You could just as well be encountering the Windows 11 won’t restart error because of a conflicting third-party app. And in this case, it’s best that you uninstall the application to get things back up and running.

Remove the apps that were installed around the same time you first encountered the error one at a time, and restart the computer after each. As soon as the restart process goes through, the app removed last was the conflicting one.

Once it has been uninstalled, you can safely reinstall the others that were removed during the process.

5. Reset Windows 11

If none of the methods listed here have worked, it’s likely a problem that only resetting Windows 11 to its factory settings could fix. When resetting the PC, you will have the option to keep your files or remove them during the process.

After you are done with the reset process, the Windows 11 won’t restart problem should be fixed for good. But this should be the last resort since a lot of changes would be made during the reset process.

In case you are facing this problem on the previous iteration, learn what to do if Windows 11 won’t restart.

Also, if your Windows 11 PC is stuck in a reboot loop, the fixes for it may help eliminate this error as well and vice versa.

If you have any queries or know a method that’s not listed here, drop a comment in the section below.

Windows 11 Not Recognizing iPod? How to Reinstall its Drivers

There are times when Windows 11 does not recognize iPod. It’s frustrating when you cannot upload your best-loved music or videos. 

Like iPhone and iPad, Apple has made iPod compatible with Windows 11. However, sometimes, you run into problems when you connect your iPod to a PC or laptop.

This problem may arise from many reasons, such as faulty connections. So, first, let’s check out what exactly causes Windows not recognizing iPod.

What causes Windows 11 not to recognize iPods?

There are a bunch of reasons why Windows can’t detect your iPod. For example, a damaged cable is one of the most common reasons.

Additionally, it’s possible that you haven’t connected your iPod properly to your PC or laptop.

Also, an outdated iTunes version can cause this problem. iTunes is the best program to organize and back up your files on your iPod. If your iTunes is not opening on Windows 11 PC, check out this article.

Let’s get down to the business of resolving the problem.

What can I do if Windows 11 is not recognizing iPod?

1. Check the connection

Checking USB cables or sockets is an easy-breezy way to fix Windows 11 not detecting iPod. So, first, check the two sides of the iPod cable to see whether it is damaged.

If not, try alternative cables. Make sure that you use qualified Apple peripherals such as lightning connectors.

Additionally, you can plug your iPod into a different USB slot. Sometimes, PC USB ports may be damaged, and you need to switch to another port to check connection issues.

If the problem still exists, we head to the next solution.

2. Repair your iTunes

  1. Open your Start menu and type Settings in the search bar then press Enter.
  2. Now click on Apps then select Apps & features. After that look for the iTunes app.Apps and features
  3. Select the three-dot menu on the right side and opt for the Advanced option. If the option is grayed out, select Modify.iTunes repair
  4. Finally, select the Repair button.

If the problem persists, we recommend that you install a PC repair tool because the issue could be caused by your computer’s operating system. Such a tool will run a comprehensive scan after installation, find faulty files, and replace them to fix errors and improve computer performance.

3. Update your iTunes

  1. First, download iTunes.Download iTUnes
  2. Install and launch it then go to the menu bar.
  3. Now, click on Help, then select Check for Updates.Checking for updates
  4. If there are any available updates, the following screen will appear. Click on Download iTunes.Updating iTunes

One of the helpful ways to fix Windows 11 not recognizing iPod is to update your iTunes.

There are two ways available for updating iTunes: Downloading the latest version of iTunes from the Apple website or updating it from the Microsoft Store.

Now, let’s show you how to update with Microsoft Store.

  1. Click on the Start menu then type Microsoft Store and hit Enter.
  2. Open Microsoft Store and click on the library icon on the bottom left side of the window.Library menu in Microsoft Store
  3. Now, scroll down and look for iTunes. To see available updates, click on Get updates. If there is any available update for iTunes, click on the Update option.

4. Update driver

  1. Click on the Start menu, type Device Manager, and hit Enter.
  2. Next, double-click on the Universal Serial Bus controllers section and select Apple Mobile Device USB Driver. Apple Mobile Device USB Driver
  3. Right-click on it and select Update Driver. Follow on-screen prompts to complete updating the driver.

A good option for those who are not tech-savvy is Outbyte Driver Updater, which can automatically update your computer’s driver.

This utility does a check to see if any drivers are missing or outdated and then updates them to hopefully fix your problem.

⇒ Get Outbyte Driver Updater

5. Open Services

  1. Click on the Start menu, type Services, and press Enter.
  2. Look for Apple Mobile Device Services and double-click on it. Apple Mobile Device Services
  3. Make sure your Service status is Running.Apple service status
  4. If your Apple Mobile Device Services is not running, click on Start then set Startup type on Automatic, and select OK.
  5. Restart your system.

Can I transfer my music from my iPod to Windows without any software?

  1. Yes. All you need is to open your File Explorer.
  2. Click on the View tab, select Show, then check the Hidden item option. View option
  3. Now go to the iPod_Control folder and drag and drop your music folder where you want to save it.

We recommend that you check the cable and ports on both devices before moving on to more advanced solutions. If the connection isn’t working, any solution you come up with won’t help.

The computer’s port may be tested by attaching another device, and the iPod’s port can be tested by plugging it into a wall outlet.

It’s possible that a problem with the drivers is to blame for Windows 11 not recognizing iPod.

It is worth noting that, you should keep your computer’s drivers up-to-date regardless of whether or not you’ve had any problems.

If you are looking for the best software to transfer music from iPod to PC, take a look at this article.

How to Resolve Firewall Blocking Printer on Windows 11

Firewalls monitor network traffic and can block network connections for some programs and hardware.

Windows 11 includes its own Windows Defender Firewall that might block printers from accessing the Web.

Thus, the affected users can’t utilize their Brother printers when firewalls block them. Keep in mind that this issue affects other brands as well, but today we’re going to show you how to fix that.

Why is my Brother printer blocked by the firewall?

There are multiple reasons for this issue, and it’s rather likely that you need to open certain ports before your printer can access the web.

The printer software can also cause problems, so be sure to update it as well as your printer drivers. Keep on reading to find out how to do that.

What can I do if the Windows 11 firewall is blocking my printer?

1. Turn Off the Windows Firewall

  1. Open Windows Search.
  2. Type firewall and select Windows Defender Firewall.
  3. Click Turn Windows Defender Firewall on or off to open the options shown directly below.
  4. Then select the two Turn off Windows Defender Firewall radio buttons to turn off the WDF.
  5. Press the OK button.

2. Set Up Inbound Rules for printer ports

  1. Open Windows Search.
  2. Type firewall and select Windows Defender Firewall with Advanced Securirty.
  3. Next, click Inbound Rules on the window shown directly below.
  4. Select New Rule on the right to open the New Inbound Rule Wizard.
  5. Select the Port option, and click the Next button.
  6. Select the UDP and Specific local ports. Enter 54925 as the desired port.
  7. Press the Next button.
  8. Select the Allow the connection option, and click the Next button.
  9. Select all the profile check boxes, and click the Next button.
  10. The enter a title for the new rule. Users can also add some extra rule details in the other text box.
  11. Press the Finish button.
  12. Repeat the above steps to set up two more inbound rules for Brother port numbers 137 (for printing and remote setup) and 54926 (network PC fax).
Note icon NOTE
These instructions are for Brother printers, so you might have to adjust the port numbers if you’re using a different brand.

3. Install the latest printer software and drivers

  1. Visit your printer’s manufactuer’s website.
  2. Locate your model on the website.
  3. Now download the latest drivers.
  4. Once the drivers are downloaded, install them.

Downloading drivers manually can be a tedious process, especially if you don’t know the printer model or how to download the latest drivers.

Luckily, there are tools such as Outbyte Driver Updater that can help you with that. This software will scan your system for any outdated or missing drivers and let you update them with a single click.

By using this software, you can rest assured that all your devices will function properly and always be up to date.

⇒ Get Outbyte Driver Updater

4. Check the File and Printer Sharing Firewall Permission Setting

  1. Open Windows Firewall.
  2. Click Allow an app or feature through Windows Defender Firewall.
  3. Press the Change settings button.
    change settings firewall windows 11
  4. Select all the check boxes for the File and Printer Sharing setting.
  5. Select the OK option.

How can I allow printer through Firewall on Windows 11?

To allow the printer through the firewall, it’s crucial to know the ports that your printer is using. You can find this information in your printer manual.

After doing that, you just need to create a custom rule in your firewall, and allow those ports to access the web.

If Windows 11 firewall is blocking your printer, you should be able to fix this issue by following the instructions mentioned in this guide.

There are other issues that you can experience with your printer, and to fix this issue, visit our printer not working on Windows 11 guide.

Did you manage to fix this problem on your PC? Let us know which solution worked for you in the comments section below.

How to Update BIOS Without USB [Easy Steps]

If you don’t have a USB or a flash drive and you want to update your computer or system’s BIOS, don’t worry, because you don’t need a USB flash drive to complete this process.

All you have to do is download the BIOS Updater utility from the manufacturer’s website or go to the EZ Flash Utility in BIOS and select Internet.

After that, your computer will reboot, and the BIOS will be updated. Be careful! A botched update can damage the motherboard, especially if you choose the wrong version.

How can I update BIOS without a USB?

Use the Update utility

  1. Open Microsoft Store, type MSI center in the search bar then select it.
    MSI center
  2. Click on Get to download it.
    Downloading MSI Center
  3. Now open the app, navigate to the Support tab, and select the Advanced option.
  4. Finally, select the BIOS update and wait for the process to complete.

There are several ways to update BIOS, but you only have two options if you don’t have a USB flash drive.

One is to use the motherboard manufacturer’s BIOS updater utility, and the other is to use the Internet, which we shall explain in the next method.

Note icon NOTE
Be aware that the MSI Center tool only works with MSI motherboards, so if you have one from another manufacturer, be sure to check their website to see whether they have a BIOS updater program as well.

2. Using UEFI firmware settings

  1. To begin, use the Windows + I keys to bring up the Settings menu.
  2. On the left menu, pick System, then Recovery.
    Recovery menu
  3. After that, click on Restart now.
    Restart Now
  4. Select the Troubleshoot option in the Advanced startup menu. After that, click on Advanced options then UEFI Firmware Settings.
    UEFI option
  5. Enter Advanced Mode then, go to the Tool menu. after that, select Asus EZ Flash Utility, then press Enter. 
  6. Select by Internet.
  7. Now, press the Left / Right arrow key to select your desired internet connection, then hit Enter. 
  8. Follow on-screen instructions and let the update be completed.

Most UEFI BIOS motherboards can be updated using this method.

Is it dangerous to update BIOS?

Generally, Windows users don’t need to update their BIOS that often. Installing or flashing a whole new BIOS can be dangerous sometimes, and updating it is safer.

If anything goes wrong during updating or flashing your BIOS, it can end up damaging your motherboard completely.

You won’t see a huge change or improvement after updating your BIOS because the update doesn’t introduce any new features or a noticeable speed boost in your system. 

What is the difference between UEFI and traditional BIOS?

UEFI stands for Unified Extensible Firmware Interface. It works exactly the same as a BIOS and both work as an interpreter between the computer hardware and the operating system.

Both are used at the computer startup and they initialize the hardware parts and the operating system. UEFI has one fundamental and basic difference.

UEFI stores all your data in an .efi file instead of the firmware. The data file is stored on the hard drive in a special partition named EFI System Partition (ESP), and it contains the boot loader.

It is recommended to update your BIOS once in a while to help the motherboard function better and identify new hardware parts such as RAM, CPU, etc. 

💡 Read this article if your computer automatically enters BIOS mode.

And if you want tailored guides for your specific hardware, check this guide on how to update BIOS on Acer Swift 3 and these steps for updating the BIOS on ASUS laptops.

Summary

You can update your BIOS without a USB flash drive. Some motherboard manufacturers offer you up to three options to update your BIOS: BIOS/UEFI, DOS, and Windows.

Also, you may update your BIOS using DOS with a thumb drive, but it may be installed on a different and separate hard drive.

BIOS can be updated by Windows itself but it is not recommended because it’s dangerous and may ruin your system. This is also not supported by all motherboard manufacturers.

Your PC Won’t be Entitled to Updates: How to Bypass [100% Safe]

When Microsoft released Windows 11, one of the first things people noticed was that it drastically increased the minimum hardware requirements.

You need brand-new CPUs in particular. Microsoft eventually stated that you can use an ISO to install Windows 11 on unsupported PCs, but you won’t be able to receive updates.

People who adopted this technique, it turns out, are receiving updates. Unsupported devices were put on the same track as everyone else with the Windows 11 updates. However, this is not recommended by Microsoft.

So, if you have recently installed Windows 11 and have run into this particular message regarding your device not being entitled when trying to update, your PC or laptop is probably quite old by now.

But that’s why we’re here: to let you know what you can do about it.

Why are the system requirements for Windows 11 so much higher?

The only reason Microsoft has given us so far for such strict requirements is to improve the operating system’s security. The company also released a video a while back that explains the significance of security measures that are essential to run Windows 11.

Microsoft has stated that the Windows 11 operating system has been created with security as a top priority. Windows 11 is the most secure version of Windows ever, according to the company.

Reliability’ is the first and most important reason behind the demanding system requirements. “maintaining reliability over time is highly correlated with OEM and IHV driver support.

The processors supported on Windows 11 are within OEM and IHV support and use modern (DCH) drivers, says Microsoft.

If you want to install Windows 11 on an unsupported PC, follow the instructions outlined in this article.

Why do you receive not entitled to updates mean on Windows 11?

The message Not entitled to receive updates basically means, in our opinion: you’re using Windows 11 on a system that we don’t support.

As a result, you may or may not receive updates, depending on whether or not your computer meets the operating system’s minimal requirements.

Also, it implies that Microsoft will not be found accountable for anything that happens to your computer in that case.

There’s a reason Microsoft uses ambiguous terms like ‘entitled’ or ‘may not’ rather than just saying: we won’t be sending any updates to devices that aren’t supported.

It is worth noting that, that language is meant to safeguard Microsoft in case someone files a lawsuit claiming that installing Windows 11 caused their PC to crash or malfunction.

How can I bypass the Windows 11 not entitled to receive updates message?

Ignore the message and click Accept

  1. Go to Windows 11 download page, and scroll down to find the Download Windows 11 Disk Image (ISO) section.
  2. In the bar pictured below, choose the Windows 11(multi-edition iso) option and click on Download. windows 11 iso download
  3. Wait a moment for the next part to show up. Then choose your desired language for Windows 11 which is English International in our case and press Confirm.windows 11 language
  4. And finally, you are provided with the Windows 11 download link after a few moments. Click on 64-bit Download for it to start downloading the ISO file.  windows 11 iso download link
  5. After installing the software, right-click on the Windows 11 ISO file, and choose Mount from the pop-up menu.
  1. When the file is correctly mounted, go to file explorer and find it, and double click on it to run the setup.
  2. In the first Windows 11 setup screen, click on Next. Windows 11 setup start
  3. This next page is the one where you can see the infamous message. Go ahead and click on Accept.Accept Entitled to updates
  4. And here you can press Install for the main process to commence. The PC should upgrade to Windows 11 when you finish the procedures, bypassing the TPM 2.0 and processor restrictions.

If you have encountered this message, it means that you are trying to upgrade to Windows 11 using an ISO file because your device is not officially supported by Microsoft.

To avoid any issues, we gave you step-by-step instructions to upgrade to Windows 11 using an ISO file.

Is it possible to roll back to Windows 10?

If you’re having problems downloading updates or your computer’s performance has reduced dramatically since upgrading to Windows 11, you should certainly roll back to Windows 10.

To do this, follow the steps below:

  1. Press Windows + I keys to open the Settings menu on your Windows 11 PC.
  2. After that, go to System and scroll down to find the Recovery option.Recovery in Settings
  3. Here you can see a few options. Click on Go back. Go back to windows 10
  4. Now you should be able to see the Go back to Windows 10 screen. Here you are asked why are you going back to Windows 10. Put a check on any option you want and then click Next. Rollback-reasons
  5. On the next screen, it asks you to check for updates so that maybe they would solve your windows 11 issues. Select No, thanks. check for updates
  6. After that, you will be informed that if you go back to Windows 10, you will probably have to reinstall some apps and you would lose all the settings you had changed on your Windows. Hit Next. check for updates
  7. As shown on the next page, remember your Windows 10 password so you don’t get locked out of Windows after you go back to it. To continue, click Next. Select Next
  8. On this last screen, you can finally click on Go back to Windows 10 for the main process to begin.Select Go back to Windows 10
  9. After clicking on go back to Windows 10, your system restarts. Then, you’ll see the screen that says Attempting to recover installation. attempting to recover installation
  10. After a few seconds, the screen Restoring your previous version of Windows will appear. This process takes some time depending on your system’s hardware and the amount of data you have stored.
  11. After that, your system will restart again and this time you can see the Windows 10 boot screen. windows 10 boot screen
  12. In a few seconds will be able to see the Windows 10 login screen.
  13. After logging in, just to make sure, you can check your Windows version. To do that, click on the Start menu, type Winver and hit Enter.

In terms of design, Windows 11 is a significant departure from Windows 10, yet the two operating systems are pretty similar under the hood.

You should upgrade to Windows 11 if you have a compatible device to give it a try. However, there is a catch. You will only have 10 days to go back to Windows 10 after upgrading.

In this article, we provided all the steps necessary to make that as simple as possible, just make sure you have given it some thought before the 10 days are up, or else it will be a bigger issue.

With that said, you should expect Windows 11 to feature a number of bugs and issues since it came out just a couple of months ago.

Microsoft, on the other hand, is usually quick to respond to these problems in its monthly Patch Tuesday updates which you will receive even if your device does not meet the minimum requirements.

Make your Windows 11 experience even better by checking out this list of programs that will help you customize it to your liking.

Ready For The May Microsoft Security Summit?

Security is definitely the most important aspect to take into consideration when talking about an ever-growing, ever-changing online environment.

Keeping your business and your family protected is paramount and big companies are competing with each other in providing the most secure solutions.

And since we were on the topic of security, you might want to know that the Microsoft Security Summit will kick off on May 12, starting with 9:00 AM-12:00 PM Pacific Time (UTC-7).

It will be an online event where you can learn more about the company’s security tech and thought processes as well as ask questions during a live chat Q&A.

Did we get you excited at the prospect of Microsoft sharing further insight with its community? Let’s see what else is there to know about this event.

The Microsoft Security Summit 2022 starts on May 12

The speaker roster for the major event will include notable Microsoft employees such as Jeff Pollard, Rani Lofstrom, Vasu Jakkal, and Charlie Bel.

All of the above-mentioned Redmond employees authored numerous security posts for Microsoft’s blogs in the past, offering a more in-depth look into Microsoft’s monitoring.

To innovate fearlessly in a changing world, your organization needs end-to-end security it can trust. Attend this one-day event to learn how Microsoft Security can help you eliminate security vulnerabilities and lay the foundation for a safer, bolder, more innovative future.

People that register for this highly-anticipated online event will also be able to:

  • Hear exciting announcements from leading voices in security—including Vasu Jakkal, Corporate Vice President of Security at Microsoft.
  • See demos of brand-new technologies from Microsoft Security and get a closer look at the latest innovations in security, compliance, identity, privacy, and management.
  • Get fresh insights on threat intelligence and security during a Live Chat Q&A with leading security experts.
  • Hear from front-line defenders about how they are helping Microsoft to stay ahead of threats.
  • Discover solutions you can use to deliver high-quality end-to-end security to your organization.

How do I register for the Microsoft 2022 Security Summit?

Doing this is actually easier than pronouncing Microsoft Security Summit. All you have to do is visit the official event page and click the big register button.

Follow the necessary steps and input your contact information and you’re in. If security is an area in which you have expertise, or you’re simply passionate about it, this is the online event for you.

We won’t have to wait very long for it, as the Security Summit is around the corner, only a month away. Hopefully, no other major security breaches will impede Microsoft from hosting the event.

Are you going to attend Microsoft’s 2022 Security Summit? Share your thoughts with us in the comments section below.

Latest Patch Tuesday update improves notifications experience in Windows 11

Happy Patch Tuesday! As is routine, Microsoft has just released the monthly round of security updates for all shipping and supported versions of Windows today. On Windows 11 this month, the patch brings some tweaks for notifications, and on Windows 10, security tweaks. Here’s what you need to know.

If you’re running Windows 11, you’ll be seeing KB5012592 (OS Build 22000.613) in Windows update. Microsoft’s official changelog mentions that this build updates security for Windows, integral to OS functionality, as documented here. Yet, there’s also a video on the changelog page that mentions tweaks to notifications in Windows 11.

Per that video, it’s now possible to show up to four different toast notifications simultaneously, three high priority and one normal notification. There’s also a fix for OneDrive, where files might lose focus. The final new feature covers Widgets, where you now can find the proper settings option when searching in the settings for it. All of these features were in Windows 11’s March preview update.

On Windows 10 version 21H2, and version 21H1, meanwhile, you’ll be seeing KB5012599. This bumps the OS to builds 19042.1645, 19043.1645, and 19044.1645. Yet unlike on Windows 11, this just brings security patches. As always you should automatically see these updates in Windows Update as a download. If not, you can manually download it through the Microsoft Update catalog.

Check out Tiny Tina’s Wonderlands patch notes

Tiny Tina’s Wonderlands has been recently updated with the 1.0.1.0B version and fortunately for all of the worldwide fans the patch notes are pretty impressive.

Why are we saying that? Because the latest update comes up with more than just fixing a bug. Hotfix 1.0.1.0b includes Dark Magic, the latest tyre in the Borderlands universe, and a fantasy theme in Wonderlands.

The new 1.0.1.0B version of Tiny Tina’s Wonderlands went live via all platforms on the 1st of April 2022, but we’re here to let you discover what you’ve probably missed.

This is what developers had to say alongside the latest news:

There are two methods that we deliver updates to players. One will be the weekly changes that will cover smaller adjustments and the other will be downloadable updates to the game that will include more impactful bug fixes and changes.

Now, let’s see what are the patch-changing notes announced this month (April 2022).

What are the Tiny Tina’s Wonderlands patch-changing notes?

According to developers’ declarations on the PlayWonderlands official website, these are the most notable changing notes that come up alongside the 1.0.1.0B update version.

  • Dark Magic scaling on Weapons has been improved to match other elemental weapons
  • Legendary Spells have been updated to change color to their respective element when viewed in Item Inspection
  • Legendary Spells have been updated to use the icon that matches their casting style when viewed in Item Inspection
  • Chaos Bunnies and Chests have been updated to include Chaos Chamber-specific loot

So, this is all you have to know about the Tiny Tina’s Wonderlands’ latest patch notes included in the 1.1.0B update version.

Of course, you need to consider that developers will surely bring up some new improvements, so make sure you keep an eye on our dedicated guides to be the first who discover more about them.

Even if these improvements will definitely allow you to enjoy a smooth and complete gaming experience, keep in mind that you’ll still probably face some related problems.

We’ve compiled a list of solutions on how to fix the most annoying Tiny Tina’s Wonderlands bugs, so make sure you verify it, just in case you’ll ever run into troubles.

Because your opinion is important to us, do not hesitate to share it by leaving a comment in the section below.

Microsoft could face antitrust “tying” charges amid customer complaints about cloud contracts

Microsoft has seemingly dodged the mainstream antitrust scrutiny that’s hounded similarly rooted tech companies such as Google, Amazon, and Facebook; but that could be coming to an end soon as the volume of customer complaints over a 2019 contract change increase.

According to a report from Bloomberg, current Microsoft customers are raising concerns in the way the company is handling licensing of its products to interoperate with competing platforms.

Back in 2019 Microsoft made a head scratching decision to overhaul the licensing of its famed Windows and Office platforms that raised the price across the board for customers, however it has now become apparent that the move was arguably a smoke screen to inject “discounts” for existing customers who continue to use Azure platform rather than rival ones.

Rather than simply raising the price for customers who choose to use Microsoft platforms alongside competitor services, which would likely be seen as a direct anticompetitive move, the company raised the price of all its products while offering those who unilaterally use its services steeper discounts as financial incentives to boost its cloud market share.

Unfortunately for Microsoft, some customers are beginning to connect the dots and are requesting European regulators investigate the matter.

“The excrement is about to hit the fan,” said Wes Miller, an analyst at Directions on Microsoft, a research firm that advises customers on Microsoft licensing. He said that using the company’s software on a competing cloud service is “significantly more expensive than it used to be, and more expensive than it costs you to do the same thing on Azure.”

Other stories conveyed to Bloomberg include:

A person familiar with the company said it started using AWS when it began rolling out mobile devices to employees. The company used its Amazon and Windows combination successfully for several years, until the changes in late 2019. The conflict came to a head more recently, when the company began renewing its contracts with Microsoft—to keep using Windows on virtual desktops via Amazon’s cloud, the customer is required to buy a license that was formerly included, adding millions of dollars to the total cost.

The company considers this a penalty, the person familiar said, because Azure customers get that additional license for free. The customer isn’t allowed to run Office software through a competing cloud at all without violating the terms of its license with Microsoft, the person said. The company spent months negotiating with Microsoft on the issue, eventually getting a reprieve of several years. After that expires, this customer will again be out of compliance.

Anecdotal cases alone may not be enough to warrant the ire of the dreaded antitrust microscope but given Microsoft’s past along with the totality of the market, the company could be on the hook for a “tying” antitrust violation.

As defined by the Federal Trade Commission:

For competitive purposes, a monopolist may use forced buying, or “tie-in” sales, to gain sales in other markets where it is not dominant and to make it more difficult for rivals in those markets to obtain sales. This may limit consumer choice for buyers wanting to purchase one (“tying”) product by forcing them to also buy a second (“tied”) product as well. Typically, the “tied” product may be a less desirable one that the buyer might not purchase unless required to do so, or may prefer to get from a different seller. If the seller offering the tied products has sufficient market power in the “tying” product, these arrangements can violate the antitrust laws.

According to customers and rivals such as Amazon and Google, Microsoft is not unaware of the request to address the issue as all parties have issued complaints directly.

Microsoft President and vice chair Brad Smith has acknowledged some of the concern and issued the following statement, “there definitely are some valid concerns, it’s very important for us to learn more and then make some changes.”

While Microsoft hasn’t officially made any changes to its 2019 licensing overhaul, the company has also acknowledged that rival platforms can in fact offer their own discounts to win over seemingly disgruntled and unsatisfied customers, an argument sure to be used if the company is hauled into court over the matter.

As customers and rival platforms await movement on their complaints from either Microsoft or regulators, competitors such as Amazon face their own scrutiny as the House Judiciary Committe follows up on their 2020 report targeting AWS titled Investigation of Competition in Digital Markets.

In the end, Microsoft, AWS, Google, IBM and the like will all come under further scrutiny as each jockey for customer acquisition and retention in a shrinking pool. At this point, antitrust violations may be less a matter of “if” and more a matter of “when” depending on how aggressive each platform provider becomes.

Microsoft testing some key extension improvements in Edge Canary

Earlier this week, we highlighted Microsoft’s new addition to Edge Canary, the option for PWAs to better handle and open external links. And now, its latest version comes with enhancements for managing extensions, as spotted by Neowin, and Redditor u/Leopeva64-2.

Once this feature reaches general availability, users will be able to turn on and turn off extensions easily. This will enhance security where users can easily turn off the extensions and prevent third-party applications from accessing their credentials.

To disable extensions from your browser, open the extension flyout then click on the ellipses in the upper-right corner and select Pause extensions on this site. Microsoft Edge will then notify you that the extensions have been disabled. However, if you wish to restore this setting then click on the Resume extensions button.

Moreover, Microsoft has also incorporated a new setting that will detect websites with sensitive information and automatically turn off the extensions. This setting is set to work when using banking and payment sites.

Edge Pause Extensions setting

Currently, this setting is available to some Edge Insiders in the Canary channel as part of A/B testing. However, most users will have to wait till it is past the testing phase and see if it will make it to general availability.


How to stop Microsoft Teams from opening in browser

Microsoft Teams is a great platform for sharing and communicating amongst peers and coworkers in a professional environment. Teams offer a workspace for users to collaborate, chat, store files, and more in a business or organization.

Users have reported that when opening a Microsoft Teams hyperlink for an invitation, they are redirected to their browser instead of the Teams desktop app. Keep reading for a quick solution to this issue.

How do I stop Microsoft Team from opening in browser?

1. Set to always open in app

  1. Click on the invite to open it in your browser.
  2. Select Open Teams (work or school). Select Open Teams.
  3. In the pop-up, check Always allow teams.microsoft.com to open links of this type in the associated app and then select Open Microsoft Teams. Check always allow Microsoft Teams.

By default, the first meeting invite will open in your browser where you can select how you would like to open the meeting. Choose open in the Teams app and then be sure to check the box in the pop-up so your browser remembers your selection next time you get an invite.

2. Clear app cache

  1. Right-click Start and select Run (or press Windows + R).
  2. Type %appdata%\Microsoft then click OK. Run command then click OK.
  3. Locate the Teams folder. Select Teams.
  4. Right-click and select Delete. Delete Teams cache.
  5. Relaunch Microsoft Teams.

Clearing the cache is a quick and easy way to get rid of any corrupted files that may be impacting Teams opening in your browser.

To avoid future issues with corrupt and unused files, we recommend using CCleaner. This tool automatically scans your PC for any unnecessary files and cleans them out to help make your computer run smoother and faster.

⇒ Get CCleaner

3. Set Microsoft Teams as the default

  1. Open the Microsoft Teams app.
  2. In the top right corner, click on the three dots. Click on the three dots.
  3. Select Settings. Click on settings.
  4. Click on Files then select Teams from the drop-down menu under File open preference. Set Teams as the default.

If you were having issues with files shared in Microsoft Teams opening in the browser, perhaps Teams wasn’t set as the default application to open these files.

4. Reinstall Microsoft Teams

  1. Click on Start and search Control Panel then hit enter.
  2. Under Programs select Uninstall a program. Control Panel.
  3. Locate Microsoft Teams and select it. Find and select Microsoft Teams.
  4. Click Uninstall then restart your PC. Uninstall Microsoft Teams.
  5. Go to the Office 365 portal and sign in.
  6. Download the Microsoft Teams desktop app. download and install Microsoft Teams.
  7. Follow installation instructions.

A clean restart might fix any issues or bugs regarding Microsoft Teams. This will also install the latest version of Teams if you had a version that hadn’t been updated in a while.

5. Adjust browser protocols

  1. Click Start and search Registry Editor then hit enter.
  2. Under HKEY_CURRENT_USER expand Software. Expand software.
  3. Expand Policies. Expand policies.
  4. If Google is listed expand it, then Chrome. If these keys are not listed, you can create them under Edit. Expand Google then Chrome or create them.
  5. Create the key URLWhitelist if it’s not already listed.
  6. While URLWhitelist is selected, click Edit then click New, and select String value. Add string value.
  7. Name it 1, then double-click it to edit the string value.
  8. Under Value data type msteams://* and click OK. Add value data.

This is a solution for those who have Google Chrome as a default browser and are not offered the option to always set Microsoft Teams to open the link. Many users have reported this issue when using Chrome.

This solution also applies to Microsoft Edge users but instead of the key URLWhitelist, it is URLAllowlist.

We hope these solutions helped stop Microsoft Teams from opening in the browser. If you’re having other issues with Teams, such as problems with the camera not working in Microsoft Teams, we have solutions for that too.

What’s new with the latest release of .NET Community Toolkit

Preview 3 of version 8 of the .NET Community Toolkit just dropped and it comes packed with a ton of goodies. For those unfamiliar with what this is, it a set of APIs and helpers to assist .NET developers with a large number common tasks regardless of the UI platform they chose to build with. Today we are going to dig into a couple of new features headed our way, let’s get to it.

Microsoft MVVM Toolkit

This new MVVM Toolkit version expands on the source generator functionality released in previous releases. These APIs are intended to significantly simplify the necessary boilerplate when dealing with MVVM, with help ranging from observable properties to commands and more. Here are some of the features.

Cancellation support for commands

The [ICommand] attribute now contains a new property that can be used to direct the source generator to generate a cancel command in addition to the original command. This cancel command can be used to stop an asynchronous command from running. Check out the example implementation below.

[ICommand(IncludeCancelCommand = true)]
private async Task DoWorkAsync(CancellationToken token)
{
    // Do some long running work with cancellation support
}

Revamped observable grouped collections

These APIs are especially handy for working with grouped items, and they now feature improvements to substantially simplify basic tasks such as adding an item in the correct location within a group. Starting with this release all the observable grouped collection types from the CommunityToolkit.Common moved to to CommunityToolkit.Mvvm. Sergio Pedri Software Engineer II at Microsoft shows us a sample of this in the GIF below.

mvvm_toolkit_collections

This was just a glimpse at the changes coming our way with the latest Preview release of the Community Toolkit. As always be sure to watch out for breaking changes, as some are in fact included.

For more details on what we just discussed here plus more information on other improvements, please visit the original blog post here or check out the official Community Toolkit’s Github repository for a more comprehensive view of all new features and changes.

How to download Pale Moon browser for PC

The browser market is vast with many lesser-known browsers that offer some unique features, and one of those browsers is Pale Moon.

Although this isn’t a well-known browser, it still offers a unique share of features, and it has a large number of users around the world.

In today’s guide, we’re going to show you how to download the Pale Moon browser for your PC and how to use it to browse the web.

Is the Pale Moon browser safe to use?

Yes, the browser is based on legacy Firefox code, so it’s pretty secure. Thanks to the legacy code, it ensures that the browser can’t track you by using any of the modern features.

There are a few drawbacks to this, most notable issues with certain websites that rely heavily upon these modern features, so you should keep that in mind while using this browser.

How can I download the Pale Moon browser for PC?

1. Use the official installer

  1. Visit the Pale Moon’s download page.
  2. Now click the desired download link.
  3. Once the download is finished, run the setup file.
  4. Click Next to proceed.
  5. Select Standard and click Next.
  6. Confirm the install location and click on Install.
  7. After the setup is finished, check Launch Pale Moon now and click on Finish.

2. Use an alternative browser

Pale Moon is a solid browser, but it lacks many features that modern browsers have, so you might want to consider using different software.

Opera One is a modern browser, and it’s based on Chromium, so it can run Chrome extensions out of the box. Thanks to the built-in tracking protection and ad block, you can enjoy an ad-free browsing experience.

The browser also has a built-in VPN and AI, so that makes it not only the safest choice but also the smartest.

Opera One

If you need a modern browser that can protect your privacy, then Opera One is the perfect choice for you.
Free Download Visit website

3. Use the official zip archive

  1. Go to the Pale Moon’s download page.
  2. In the 7-ZIP packed versions section select the version, you want to download.
  3. Once the download is finished, open the downloaded archive.
  4. Extract the palemoon directory to the desired location.
  5. Go to the extract location and run palemoon.exe.

This method is great if you don’t want to install the software, but keep in mind that this isn’t a portable version, so it won’t work from a flash drive.

Does the Pale Moon browser have Adblock?

By default, Pale Moon doesn’t come with an ad-blocking feature, so you’ll need to rely on extensions if you want to block ads.

Since the browser uses legacy Firefox code, it’s not compatible with modern extensions, so you might have issues finding the right ad blocking extension for your software.

As you can see, it’s simple to download the Pale Moon browser for your PC, and you can do that by following the instructions from this guide.

This browser is popular for being lightweight, and it’s perfect if you need a web browser for an old computer that can’t handle modern software.

Have you ever used Pale Moon? Let us know in the comments section below.

Fix: Windows Memory Diagnostic Results Not Showing

When troubleshooting a Windows PC, one of the most common issues is when the Windows Memory Diagnostic returns no results.

If your computer’s RAM is defective, you may experience issues. Application crashes, system freezes, blue screens of death (BSODs), data corruption, and other issues might occur as a result of this.

This is when you need to check your RAM to see if anything is wrong with it. To do that, you can use a hidden tool in Windows called Windows Memory Diagnostic.

However, If you don’t get any results after performing the scan, here’s how to fix it.

How can I fix the Windows Memory Diagnostic with no results?

1. Check out the Windows Logs

  1. To run the Windows Memory Diagnostic tool, press the Windows key on your keyboard, type Windows Memory Diagnostic and select it. Windows Diagnostic tool
  2. Click Restart now and check for problems (recommended) to agree. restart to perform Windows Diagnostic
  1. The Windows Memory Diagnostics Tool screen will show after your computer restarts. Simply leave it alone and let it run the test. This could take a few minutes. memory diagnostic in progress
  2. Your system will reboot and return to the Windows desktop after it is finished. The test results will show after you log in.
    However, sometimes that does not happen and the results are not automatically shown on the screen. In that case, follow the steps below.
  3. Right-click on the Start button and then click on Event Viewer. Alternatively, search event viewer in the search box and find it there.Even Viewer
  4. Following that, navigate to Windows Logs, then select System from the menu. Right-click on System and select Find.Event viewer system find
  5. Type MemoryDiagnostic and click on Find Next.
  6. The result, as well as further information about your RAM, will be displayed by double-clicking on the event. memory diagnostics information

If for whatever reason, the Windows Memory Diagnostic tool has no results, try the method below.

2. Change System properties in Even Viewer

  1. Hold down the Windows + R key at the same time. This will launch Run.
  2. Right-click on the Start menu and then click on Event Viewer. Alternatively, search event viewer in the search box and find it there.Even Viewer
  3. Expand Windows Logs.
  4. Right-click System and select Properties from the menu.system properties
  5. Check the option Enable Logging under the General tab, then select the option that says Overwrite events as needed (oldest events first). Finally, click on Apply and then OK. change system properties

3. Enter the BitLocker recovery key

  1. Wait for the Windows Memory Diagnostics tool to finish.
  2. You will probably come across this message that says Enter the BitLocker recovery key of your drive. When you see this, enter the recovery key.
  3. Finally, your PC would now reboot and the results can be found in Event Viewer.

It is worth noting that this issue only occurs when you use PTT instead of TPM for BitLocker.

To sum it up, it is possible to troubleshoot an issue with your computer by running the Windows Memory Diagnostic tool.

This program can be used when your computer begins to perform slowly, freezes, displays a blue screen, or reboots on its own.
Windows Memory Diagnostic tool may discover issues with installed applications on a computer, regardless of whether the issues are caused by memory errors.

Fixing issues related to Windows Memory Diagnostic with no results is quite easy, and all you need to do is to change the system properties.

This article will show you how to run thorough hardware diagnostics on Windows 10.

Sky Go Unable to Load Configuration? Fix It Now

Unable to load configuration on Sky Go is one of the most vexing issues that might occur when trying to watch a show.

Sky Group provides this streaming app for Sky TV subscribers for free. With the help of Sky Go, users can now watch live Sky TV on their Windows computers.

While Sky Go is one of the best streaming apps available, it has flaws, such as when it fails to launch or play content.

The most recurring of these errors is error code 200: Sky Go Unable to Load Configuration. We’ll walk you through a few simple solutions to fix the error in this article, but first, let’s talk about why this happens.

Why does the error code 200 Unable to load configuration happen?

When you read the prompt, you can see a description that says, Unable to load configuration.

You should ensure your device has an active network connection and try again. This is a clear sign that Sky Go is not functioning correctly. Several reasons can cause this error, such as:

  • Sky Go is not connected to a stable network connection
  • Some corrupt files exist in the %LocalAppData% folder
  • Your hardware is problematic
  • You have set your device’s date and time incorrectly

What can I do if Sky Go is unable to load configuration?

1. Restart router/gateway

  1. Unplug your modem/router from power. You can do it from the mains or the power cable at the back of it).
  2. Let it be unplugged for half a minute.
  3. Plug it back to power and turn it on.
  4. Wait for it to reinitialize and gain its stability back. This can take between 30 seconds to 5 minutes.

One of the main reasons for Sky Go’s unable to load configuration error is an unstable network connection.

Rebooting the gateway/modem/router/hub can fix this, give you a more stable connection, and avoid issues like Sky on Demand not working.

2. Reset network

  1. Click on the Start menu, type Settings, and open it.Open Settings
  2. From the left-side panel, choose Network & Internet. Afterwards, click on Advanced network settings.Go to Advanced Network Settings
  3. Then, click on Network Reset.Click on Network Reset
  4. Finally, click on Reset Now. Click on Reset Now

Restarting your network can also give you a more stable internet connection and help you fix Sky Go unable to load configuration error.

3. Turn off the Firewall

  1. Press Windows + S to open the search utility, type firewall in the search box, then open the Windows Defender Firewall.Open Windows Defender Firewall
  2. Click on Turn Windows Defender Firewall on or off.Click on Turn Windows Defender Firewall on or off
  3. Now, choose the Turn off Windows Defender Firewall option and click on the OK button.Click on Turn Off Windows Defender Firewal

Firewalls don’t always mix so well with streaming service apps. A firewall can block the internet connection from Sky Go and lead to the Sky Go unable to load configuration error.

If you use other firewalls on your Windows 11, refer to its manual to disable it. Turn off or uninstall third-party antivirus services that contain firewalls.

Mostly, you can right-click the antivirus tray icon and disable it from there.

4. Check the Date and Time

  1. Right-click on the Clock in the bottom right corner of the Windows Taskbar and select the Adjust Date and Time option.Adjusting Date and time
  2. Activate Set the time automatically, Adjust for daylight saving time automatically, and Set the time zone automatically. Change Date and Timezone to Automatic

Most online applications fail to work appropriately when the date and time of the device are not properly set.

In addition to the steps above, ensure that you have set the short and long date format of your Windows 11 to dd/MM/YY.

5. Close screen recording apps

  1. Right-click on the Start menu and select Task Manager.
  2. Under the Processes tab, find any screenshot/screen-recording application from the list. Click on End Task to close it.Task Manager

Screen capturing services can stop Sky Go from working expectedly. So, ensure to close them by following the steps above.

6. Clean boot your Windows

  1. Press Windows + R keys to open the Run window.
  2. After that, type msconfig and hit Enter to open the System Configuration.
  1. Under the General tab, select Selective Startup, Load System Services, and Use Original Boot Configuration then, deselect the Load Startup Items checkbox. Now click on OK. Change System Config Options
  1. Under the Services tab, select Hide All Microsoft Services and Disable All options. Finally, click on OK.Change System Config Options
  1. Reboot your computer.

Some third-party applications, such as CiscoVideoGuard, are not compatible with Sky Go.

Clean-booting your windows helps you eliminate them from being opened at startup and therefore, you will not run into Sky Go unable to load configuration.

7. Uninstall CiscoVideoGuard and Sky Go 

  1. Press Windows + R to open the Run dialog box then type appwiz.cpl in the box and hit Enter.Type appwiz.cpl in Run dialog box
  1. Select CiscoVideoGuard from the list right-click on it and select Uninstall.
  2. Then, select Sky Go and click on Uninstall.
  3. Go to the Start menu and click on File Explorer.File explorer
  4. Go to following patchs and delete the VideoGuardPlayer folders:
    C:/User/<username>/AppData/Local/Cisco
    C:/User/<username>/AppData/LocalLow/Cisco
  5. After that, delete the Sky Go and Sky folders from this path:
    C:/User/<username>/AppData/Roaming.App Data
  6. Reboot your system.
  7. Finally, go to the Sky Go download page and click on Download Now for Windows.
  8. Then, Reinstall Sky Go by following the steps from the installer.

Uninstalling CiscoVideoGuard and Sky Go and deleting the remaining files help you reinstall Sky Go from a clean slate.

Sky Go’s unable-to-load configuration error will surely be gone after this process.

8. Contact the Sky Go support team

If the error persists after trying all the steps above, it is best to contact the Sky customer support team.

They are professionals who will figure out the exact problem you are facing and help you fix it.

Be sure to let them know the troubleshooting steps you have done so that they better understand what exactly the problem is.

What are the benefits and drawbacks of Sky Go?

You can use Sky Go on up to 2 devices. If you pay extra for a monthly fee, you can go up to 4 devices. To play content on computers, you need a deprecated browser plugin called Microsoft Silverlight 3.0.

Not all programs are available on Sky Go. Because of viewing rights, specific programs are blacked out from the schedule.

If you’re looking for the best browsers to stream Sky Go on PC, take a look at this article. Or if you have the box connected to the TV, find out how to fix the red light on Sky Q.

To access the complete list of live TV channels that Sky Go supports, subscribe to the corresponding Sky TV packages.

Sky Go unable to load configuration error is a common error, but it is not the only error you might run into.

You might encounter login problems, hit the maximum number of downloads, or weird errors, such as Sky Go error 202. Sky boxes are also prone to issues, and we already wrote about the Sky Mini box not working or the Sky Glass remote being unresponsive in one of our previous guides.

Also, whether the app is connected or not, stuttering and buffering are signs of a problem with a LAN connection or an unstable connection.

Last but not least, ensure you haven’t left a VPN running if you’re seeing geo-blocked restrictions.

If you run into Sky Go unable to load configuration in Windows 10, read this article. We also have a guide to help you if Sky Glass won’t turn on, so be sure to check it out.

If you can’t watch your favorite channels on your Sky Glass due to stuck at software update in-progress issue, read this guide.

If you have any questions or suggestions about the subject, please mention them in the comments section below.