VCE to PDF Converter Tools: 7 Best We Tested in 2026

Using the VCE file extension is not always practical, because Visual CertExam suite is required for accessing the files, and not all computers have it installed.

But if you need to access VCE files, there’s one better way of doing so – converting it to PDF. And in order to convert VCE to PDF in Windows 10, you’ll need a VCE to PDF conversion tool.

VCE is a file extension we associate with the Visual CertExam Suite. This simulator uses many of the leading companies for IT certifications.

This tool is quite useful for regular users as well because it allows them to create an examination environment wherever they are.

When you convert a VCE file you’ll be able to access it on practically any device, share it with others, or store it in the cloud. Converting VCE to PDF might look like a complex task, but it’s far from that.

There are tons of online and offline tools for converting VCE to PDF. We created the list of the very best VCE to PDF converter tools, you can use to convert your examination files in just a few moments.

So, check out our list, and pick the best VCE converter for you.

ProductConvert PDF toDescription
pdfFillerVCE, Word, PPT, JPEG, PNG, TEXTExcellent online converter
Wondershare PDF ElementVCE, Word, Excel, PPT, TEXT, JPG, PNG, TIFF, BMPFast usage
doPDFVCE, DOCX, XLSX, PPTX, HTML, TXT, PDF, EPUB, PNG, BMP, GIF, JPG, ODD, SVG, SWF, TIFF, CSVReliable free option
Convert VCE to PDFVCESimple online app
VCE to PDFVCEEasy to use
VCEPlusVCEUnlimited conversion
CutePDFVCE, Word, Excel, PowerPointIntuitive interface

What’s the best VCE to PDF converter for Windows 10?

pdfFiller – Excellent online converter

pdfFiller is an outstanding converter that you can use to convert VCE to PDF online and execute other editing actions.

You can upload your documents using its drag-and-drop feature and convert them to PDF, edit, sign, and share them easily.

Besides VCE, it also supports PDF, Word, PowerPoint, JPEG, PNG, and TEXT formats so you don’t have to worry if you have different file types to edit and convert.

Furthermore, pdfFiller lets you email documents or request them via mail from any device to simplify your sharing experience.

pdfFiller

Convert your VCE files with ease and give pdfFiller a try.
Free Trial Visit Website

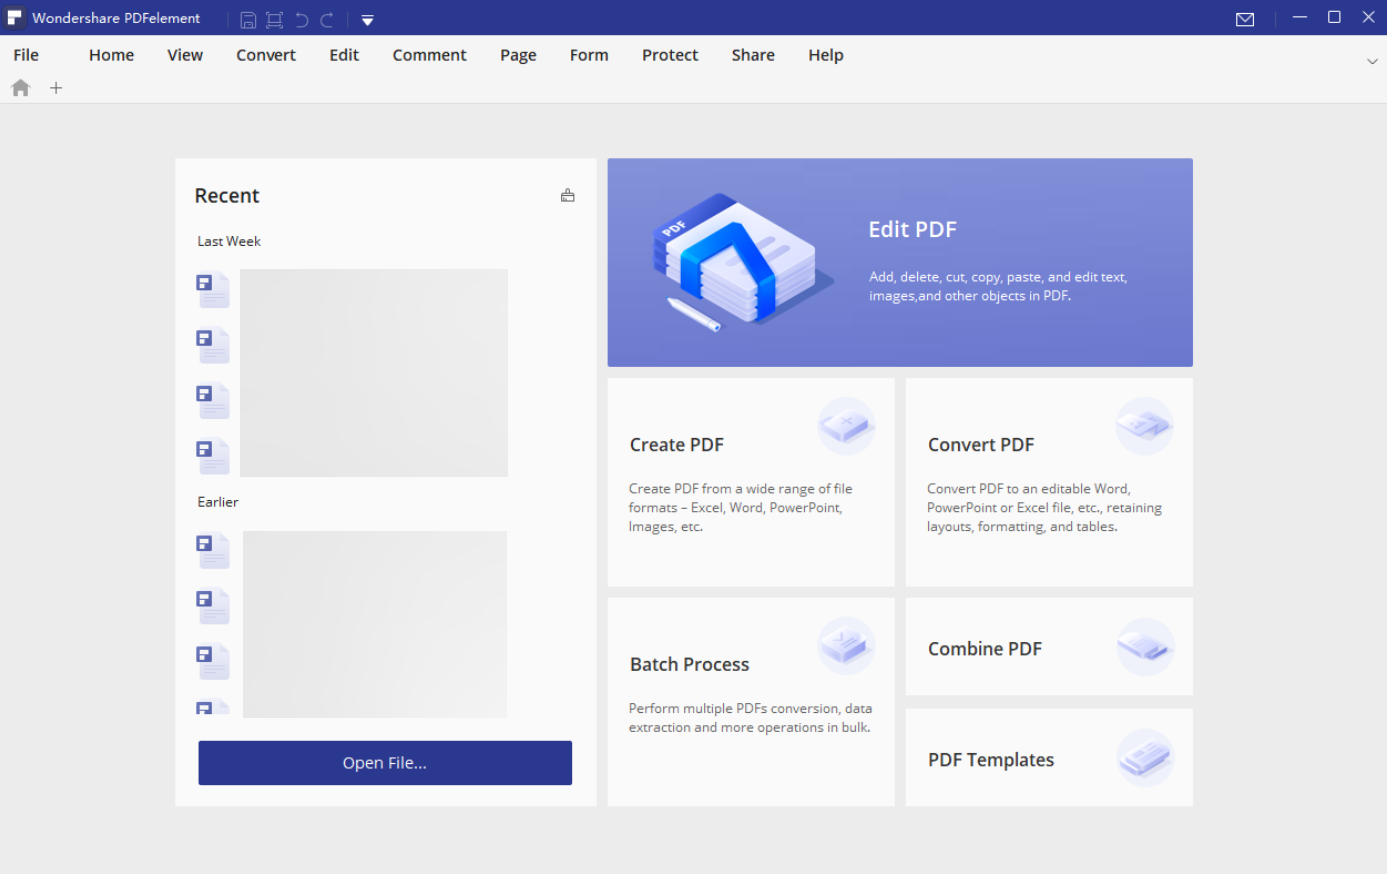
Wondershare PDF Element – Fast usage

Another handy option is Wondershare PDF Element with which you can convert, edit, and print your VCE files.

It is a convenient converter, especially for our non-technical users, so everyone can use it with minimal effort.

PDF Element can convert files very fast and at the highest quality while keeping your documents safe and secure.

Moreover, you can batch-convert your files in multiple formats, including Word, Excel, PowerPoint, and text.

Wondershare PDF Element

Get this AI-powered PDF tool and convert your VCE files in no time.
Free Trial Visit Website

doPDF – Reliable free option

dopdf windows

doPDF is a great VCE to PDF free converter tool that helps you convert various file types to PDF, including VCE. When you install doPDF on your computer, it acts as a virtual printer, which you can use for printing PDF files.

As soon as you install it on your computer, it will appear in your Printers and Faxes list, as well as All Programs.

To convert VCE files to PDF using doPDF, you’ll actually need one more tool called VCE Designer. This basically is a VCE player that allows you to view, and print VCE files.

So, after you install both doPDF, and VCE Designer on your computer, open the VCE file you want to convert with VCE Designer, go to File > Print, select the doPDF virtual printer, follow further on-screen instructions, and you’ll have your VCE file converted to PDF in seconds.

Both doPDF and VCE Designer are available for free, and you can download them from these links:

⇒ Get doPDF

⇒ Get VCE Designer

Convert VCE to PDF – Simple online app

With this one, you can convert VCE files into PDF files online. However, it doesn’t offer free services, as each conversion is charged an amount of money.

So, if you don’t mind paying for your VCE files to be converted, you should definitely consider using this tool.

All you have to do is to visit their website, upload your VCE file, purchase the service, and give your email address. As soon as you complete the payment, a freshly converted PDF file will be sent to your email address.

The site often offers limited-time deals, like getting the 2nd conversion free, and more. Considering there are other paid services that charge more, this is actually the best option available.

But if you don’t want to pay for converting your files, make sure to check other tools from this list.

⇒ Get Convert VCE to PDF

VCE to PDF – Easy to use

vce to pdf windows

VCE to PDF is perhaps the fastest way to convert your VCE files to PDF. It’s a freeware software that takes very little on your hard drive, so all you need to do is to install it and start converting.

The tool is as simple as it can get, just browse for the VCE file and convert it right away. VCE to PDF also needs VCE Designer to be installed on your computer, so keep that in mind.

Don’t confuse VCE to PDF with an online tool of the same name. The online tool can also be a decent converter, but it allows you to convert a limited number of VCE files for free.

⇒ Get VCE to PDF

VCEPlus – Unlimited conversions

VCEPlus is a web-based tool that converts VCE files to PDF for free. It is one of the best online tools for converting files because it allows you to convert an unlimited number of files for free.

However, VCEPlus is not an instant tool, as it takes 12-24 hours to finish converting.

Using VCEPlus might be a little complicated, and requires more effort than using other tools from this list.

To be able to convert a VCE file with VCEPlus, you need to upload that file to any cloud service (OneDrive, Google Drive, Dropbox, etc.), send the link to that file to VCEPlus, and the guys behind it will email you the PDF file, once it’s done.

So, if you don’t need your VCE files to be converted immediately, you can try this VCE to PDF converter free of any charge.

⇒ Get VCEPlus

CutePDF – Intuitive interface

cutepdf windows

CutePDF serves as a virtual PDF printer, just like doPDF does. You just need to download it, install it on your computer, and it will show up along with other printers.

CutePDF also requires a VCE Designer and the procedure of printing is identical to doPDF.

You just open the VCE file you want to convert with VCE Designer, go to Print, select CutePDF, and the file will be converted.

⇒ Get CutePDF

That’s about it for our list of the best VCE to PDF converters for Windows.

If you use a lot of VCE files you know that sometimes they can give out errors, check out our solution for when A+ VCE is not working, now that you no longer need to wonder ‘How do I convert VCE to PDF files?

What do you think about these choices? Is there any VCE to PDF converter tool you’d like to add to the list? Let us know in the comments below.

FIX: Paint 3D shows no export option

Paint 3D is a very useful Windows 10 application, but some users have complained that there is no export option available.

This issue has caused a lot of stress, especially if you used Paint 3D to create a complex work of art only to find yourself stuck in this situation.

Here is what one user had to say about this problem on the Microsoft Answers forums:

I have created a 2d project which saves okay into paint 3D in exactly the same way as many times before.  I have never had any problems saving to a file but today I cannot save it to a file – it saves but the file is empty – I cannot print it or share it.  The export option has disappeared so how do I get the image out of paint 3D so that I can use it?

It seems that the possible cause for this issue might be related to one of the latest updates. Some users have experienced this issue after updating, and others have not.

This makes solving this issue a bit tricky, but we provide you with the fastest solutions for this issue. Read on to find out what the troubleshooting methods are.

What can I do if Paint 3D shows no export option?

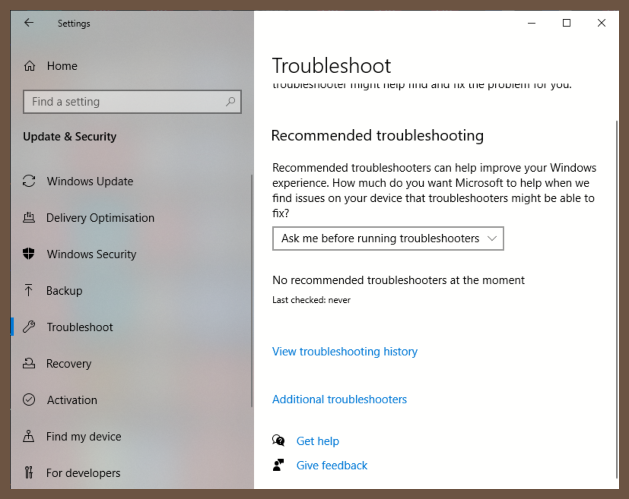
1. Troubleshoot Windows apps

  1. Press the Win+X keys, and select Settings.
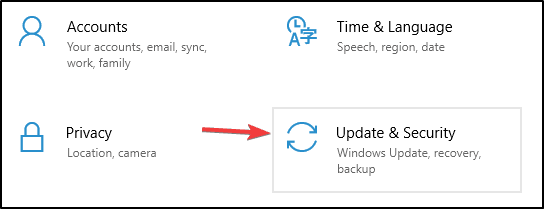
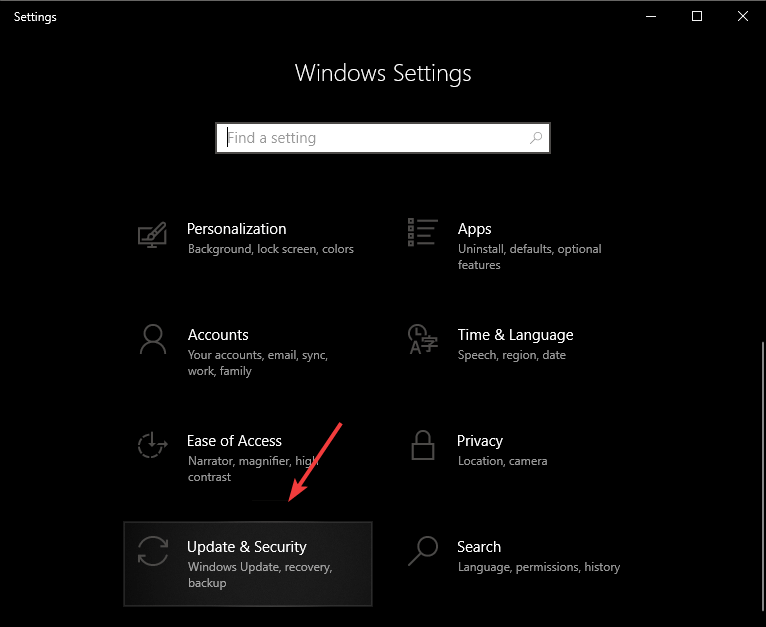
  2. Inside the Settings window choose Update and security.Update and security - Paint 3D no export option
  3. Choose Troubleshoot from the left-side menu.
  4. Scroll down and select the option Microsoft Store Apps.
  5. Click Run the troubleshooter and wait for the process to complete.

2. Use a keyboard shortcut to open the export menu

In the case of some users, pressing the Alt+F keys on their keyboard opened the export menu, and they were able to export their project normally.

Check to see if this is also the case for you. If the menu opens, but you still can’t see an Export option, follow the next method.

3. Update your Windows 10 OS

  1. Press the Cortana search box, type Update, and choose the option Windows Update Settings.windows update - Paint 3D no export option
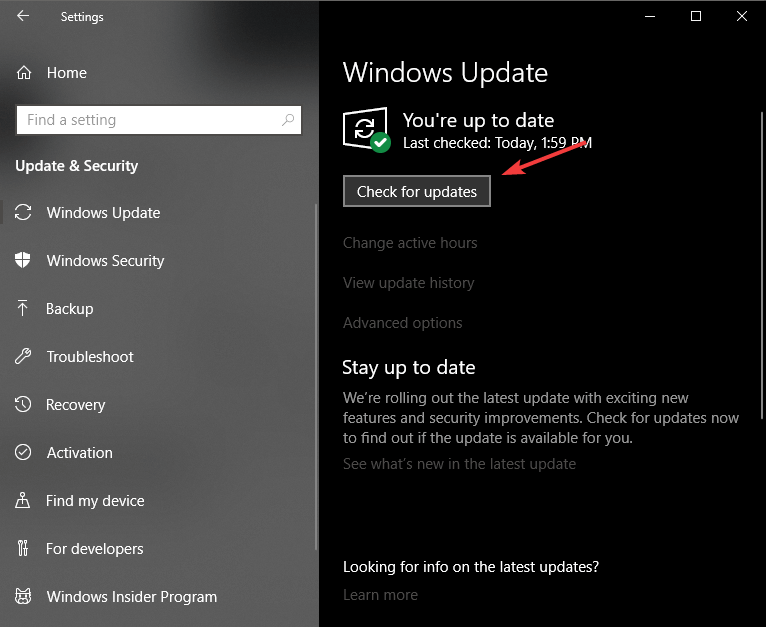
  2. Inside the window that opens, please click the Check for updates button.
  3. Wait for the process to complete, and install any available updates for your system.
  4. Restart your PC if requested to do so.

This error could be caused by a Windows 10 update, or the improper download and install process of the update. For this reason, it is recommended that you try searching for any updates.

4. Remove and then re-add Microsoft Paint 3D

To uninstall:

  1. Press the Win+X keys, and select Windows PowerShell (Admin).
  2. Copy-paste this command and press Enter: Get-AppxPackage Microsoft.MSPaint | Remove-AppxPackage PowerShell command - Paint 3D no export option

To reinstall:

  1. Inside the PowerShell (Admin) window, type the following command: Get-AppxPackage -allusers Microsoft.MSPaint | Foreach {Add-AppxPackage -DisableDevelopmentMode -Register “$($_.InstallLocation)AppXManifest.xml”}
  2. Press Enter to run the command, and wait for the process to complete.

5. Try out Adobe Photoshop

You’re entitled to be frustrated when Paint 3D shows no export option. You want the very best from every single creative project you’re planning, right?

That’s precisely why we’re telling you about this tool. Adobe Photoshop can help you achieve all your photo editing and graphic design tasks without looking over your shoulder, afraid that a new error might show up.

You’ll have plenty of cutting-edge tools at your disposal, not to mention that you can enjoy the creative power of Photoshop even on your iPad.

Adobe Photoshop

Try Adobe Photoshop now and you can forget about the problems with export options of other tools.
Free trial Visit website

Feel free to let us know if this guide managed to solve your issue caused by Paint 3D not allowing you to export your file.

You can use the comment section below to let us know if you found this article helpful.

Google Play Store Error Checking for Updates: How to Fix it

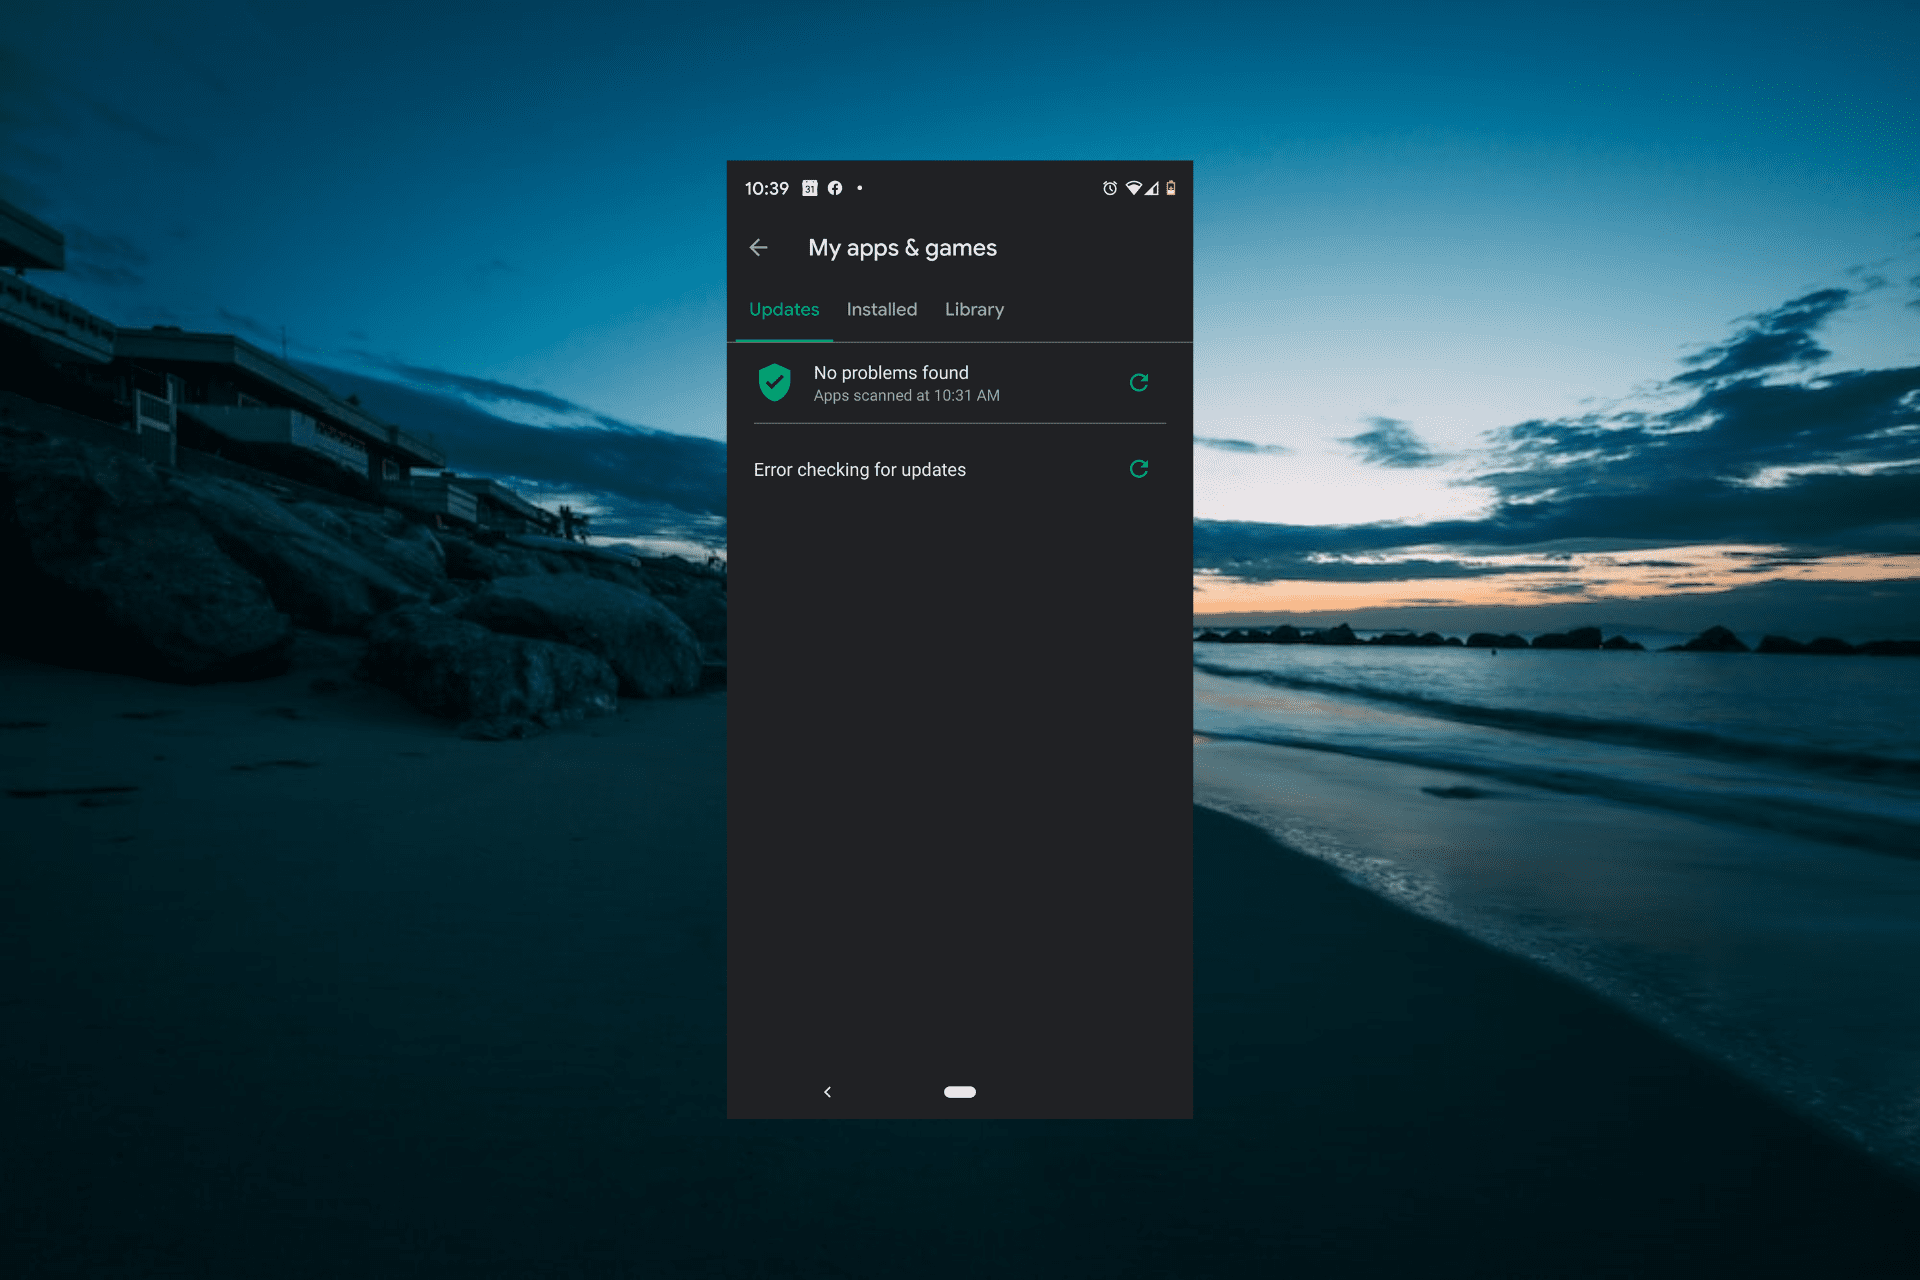
The Google Play Store is an integral part of Android devices. However, many users reported Checking for updates in Google Play error.

This error will prevent you from downloading or updating your apps, which can be quite problematic for some users. Luckily, there’s a quick and easy way to fix this issue.

Why do I get Google Play Store error loading updates?

If you are dealing with the Google Play Store error loading updates, below are some of its potential causes:

  • Incomplete update: If the last update you installed or the current one is incomplete, you will likely get this error. You can fix this by uninstalling the latest Google Play Store update.
  • Corrupt cache: In some cases, this issue might be due to a corrupt app cache. The solution to this is to clear the Google Play Store cache.

How do I fix Google Play error checking for updates?

1. Uninstall updates

  1. Go to the notifications panel.
  2. Click on the Settings icon.
  3. Select Applications.
  4. Check out the list displayed and choose Google Play Store. If this icon is not available, tap the icon with the three dots in the top right corner.
  5. Click on Show System Apps.
  6. Select Three Dots from the top right corner of the screen.
  7. Choose Uninstall Updates.
uninstall updates android

After uninstalling updates, check if the Google Play system update failed message is still there. This also helps fix Google Play error code 492.

2. Clear cache

  1. Choose the notifications panel.
  2. Click Settings.
  3. Scroll down and select Applications.
  4. Click on Apps.
  5. From the list, select Google Play Store.
  6. Click on the Storage option.
  7. Choose the option named Clear Cache.
  8. Wait for the cache to be cleared.

If you keep getting No updates available in the Google Play message, clearing the cache might be able to fix that.

3. Clear Data

  1. Select the notifications panel.
  2. Click Settings.
  3. Scroll through the list and choose Applications.
  4. Click on the Apps option.
  5. Verify the list contents and choose Google Play Store.
  6. Select Storage.
  7. Select the Clear Data option.

Clearing the data should help if the Play Store is stuck on Checking for updates message.

Google Play Store is a very useful application for all Android users. Unfortunately, when the Google Play system update fails, that will often give you different errors.

One of them is Google Play: error checking for updates. This could be the result of poorly installed updates or the consequence of a corrupted cache or data.

Check out our solutions and apply them to your Android smartphone or tablet device whenever your Play Store checks for updates failed.

If you get the OR-RWE-O3 payment error on Google Play, this guide will provide the right solution.

In case you encounter the OR-CCSEH-26 error, then it could be due to a corrupted cache; read this guide to learn more.

They should make the Google Play system update failure a thing of the past. Give them a go, check out your device, and leave us a comment if our solutions have proven helpful.

How to get rid of the black tinted screen in Valheim

Valheim hit a record 500k+ simultaneous players on Steam a few days ago and the number keeps increasing. So it seems that the amount of bugs that plague the game’s early access version doesn’t scare off players. On the contrary.

Perhaps that’s because the developers have promised fixes for all inconveniences. Until then, gamers are left to discover fixes on their own.

It’s also the case with colored-tinted screens (red, blue, black) recently noted by some players. According to their experiences, their screen gets colored. While this doesn’t affect the gameplay in any way, it’s still visually disturbing.

The issue appears randomly when played in full-screen mode or influenced by other items in the game, as one user says:

I’ve had this issue where objects in the game become little mini suns, and looking around will turn other objects into little mini suns. After a few seconds, the suns calm down, and the screen with either tint blue or red.

A trick that one gamer used was to notice when the Valheim blue screen appeared – it started from an object and then spread out. So she figured out that moving the mouse or camera away from it would prevent the screen from coloring.

But here are other tested solutions that worked for players so far.


How can I fix a Valheim black screen?

1. Update the graphics driver

update graphics driver

Display issues are oftentimes caused by outdated drivers. While these are automatically updated along other Windows processes and apps, sometimes they need manual updates.

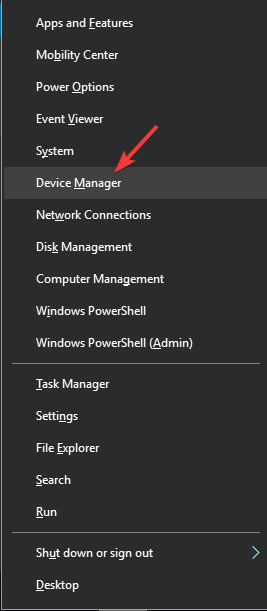
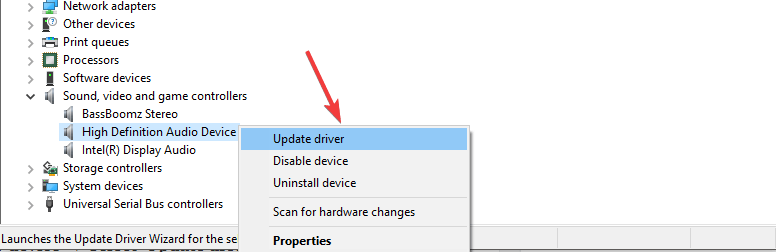
One way to make sure your drivers are up to date is to open Device Manager, right-click on your display driver and click on Update driver.

It is possible that this process tells you that there are no updates for your driver. But maybe there are details that you don’t know about the process.

This is why we recommend using a dedicated driver updating software such as Outbyte Driver Updater. With just one click, it will scan your device and inform you of all the necessary driver updates.

Setting up the tool is extremely easy, so is using it. Not to mention that you can periodically scan your device and make sure that the system is in top shape.

Outbyte Driver Updater

Outbyte Driver Updater

Get rid of any game glitches by easily updating all your system drivers with just a few clicks.
Get it freeVisit website

2. Log off the server

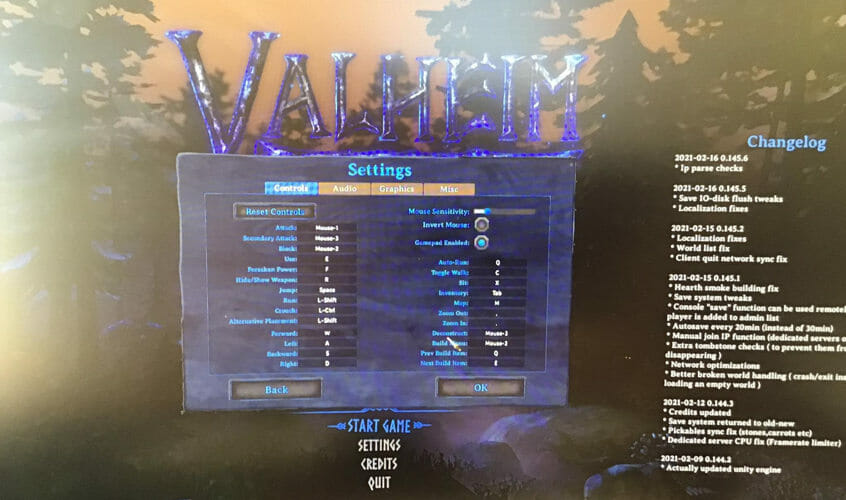
fix blue tinted screen valheim

An easy, yet a bit cumbersome, way of getting rid of a tinted screen is to interrupt your game and log out of your server.

This is probably causing the game to reload and it also eliminates glitches; however, it’s only a workaround and you can’t use this method all the time.


Facing server lag while playing Valheim with your friends? Here’s the fix!


3. Use the windowed mode

play valheim windowed mode

Launching games in windowed mode is helpful if you have a low-end PC or if the game is too demanding on graphics resources.

Also, running a game in windowed mode usually eliminates performance bugs and some users confirmed that it helped them not get the colored screen anymore.

You can easily enable windowed mode from your game display settings.


So this concludes our list of confirmed fixes for a red or blue-tinted screen in Valheim. We hope that this is the only bug you’ve faced with the game so far. Users have also complained of missing characters or low FPS.

Get the most recent Valheim version and play it by yourself or with your friends on your PC.

Valheim

Valheim

Get your friends tribe online and start playing the most engaging survival game to date.
Check priceVisit website

And whatever solution you might find to existing game bugs, leave your feedback with the community or share it in the comments section below.

Office Insiders can now generate PowerPoint presentations from Word documents

Microsoft is adding a nifty new intelligent feature to Word on the web that will let users automatically convert text-based documents to PowerPoint presentations. This capability is currently rolling out in preview to Office Insiders (Targeted release customers), and it will soon be available for all web users.

“Have you ever wished you could easily transform an existing Word document into a great PowerPoint presentation? If so, the wait is over! When you use the Transform command, it creates a presentation based on all the summarized sections of the document. It also adds imagery, icons, videos, themes, and fonts using AI,” the company explained in the Office Insider Blog.

PowerPoint presentations

To try out this feature, click File >> Transform, and then select the “Transform to PowerPoint presentation” option. In the Transform to presentation window, select a design theme to apply to the presentation, and click on the “Open presentation” button. The browser will automatically open a PowerPoint tab on the web with the newly created PowerPoint presentation. The file will be automatically saved to the OneDrive cloud storage service.

Microsoft noted that the new experience is currently available in English, and it doesn’t support other languages. In addition, the feature only works with text-based documents, and users will need to manually insert their media into the presentation (if required).

Overall, it’s a welcome addition for students to help them save some time and effort by quickly summarizing large Word documents into brief presentations. While this feature is initially coming to the Word for the web, there is no word on if or when it will be available for desktop and mobile users.

How to restore disappearing items in Valheim [Quick guide]

Vallheim is the hit survival game title right now and everyone is playing it for its great gameplay and mechanics. And speaking of mechanics, the game’s fuel is to mix and match items from your inventory.

So, it’s not funny at all to work hard for chests and items only to find out later that they disappeared from your inventory.

One user expressed his frustration on Reddit for losing his chests:

logged into valheim today to see that 4 of my chests full of important stuff just disappeared and don’t exist anymore? is this a bug that’s happening to other people too? seems pretty game breaking for chests to just despawn with everything in them?

Unfortunately, that’s not all because other users complained too about other missing items from their inventory or from the game so below, we are trying to give you some solutions for this annoying issue.


How can I get back my lost items from Valheim?

1. Restart the game

  1. Start by backing up your game saves to save your progress whatever you do.
  2. You will typically find your saved games in the following location: C:Users<Username>AppDataLocalLowIronGateValheim
  3. Press Alt + F4 to terminate the game if you can’t see any structures in the game.
  4. Start the game again and see if the items are back.

Some users also reported that they can’t see any structures in the game and a forced termination of the game can get that fixed.


2. Restore the game files

  1. Start Steam and locate Valheim.
  2. Right-click on the game and select Properties.
  3. Navigate to the Local Tab.
  4. Click on Verify Game Files.

One of the problems that can cause this kind of issue is using third-party Valheim mods. They change some files that can get damaged. However, you can restore them with the easy solution above.

In the process, Steam will verify if there are any missing or damaged files and restore them. After the verification, start the game and see if the problem has been fixed.


Unfortunately, this is only one problem from many from Valheim. Some gamers even reported that their character has vanished.

Other users have experienced lag on the dedicated servers, but you can try our quick fix article for that one.

We also have good news. You can boost your FPS in Valheim a lot by using the method described in this small guide.

No matter how odd or frustrating are the issues, check the links below to get Valheim for your PC.

Valheim

Valheim

Get your items back and get back full speed in your Valheim survival adventure online.
Check priceVisit website

If you managed to fix your missing items problem by using our solutions or if you have other ones, leave us a line in the comments section below.

Google’s been lobbying for more scrutiny into Microsoft’s liability for SolarWinds hack

Over the past couple of years, Microsoft has attempted to put the screws to Google through public statements and private lobbying while the company fends off several antitrust cases globally.

Fortunately, for Google, the time has come to enact a bit of political retribution as Microsoft has come under recent fire for its involvement in the unprecedented SolarWinds hack.

According to a report from Politico, Google has been whispering in the ear of Senate Intelligence Committee members to poke and prod Microsoft’s defense of its products amid the many failure points a nation-state exploited in its hack of hundreds of businesses who relied on various services from the company.

The Politico report highlights the circumstances that led to some questions asked during Tuesday’s public congressional inquiry regarding the SolarWinds hack.

On Monday, Google offered up a list to lawmakers of more than a dozen questions that one Senate aide said were aimed at scrutinizing the security of Microsoft products, such as Windows 10, Azure and Office 365. The aide spoke on the condition of anonymity in order to discuss the matter freely.

It’s unclear if every lawmaker on the 16-member panel received the list of queries from Google.

The aide said some, but not all, of the questions are intended for Smith, who will appear before the committee Tuesday afternoon alongside executives from SolarWinds and the cybersecurity firms FireEye and CrowdStrike. The latter two companies have been at the forefront of uncovering the breadth and scope of the likely Russian espionage operation that officials believe specifically targeted nine federal agencies and roughly 100 companies.

A second Senate aide who also spoke on the condition of anonymity described Google’s questions as “bad” and that committee members had been told to be wary of them.

Google’s political joust is as expected when it and Microsoft have held a historic rivalry in various sectors, especially in enterprise productivity software where security blemish of this nature for Microsoft could result in greater adoption of Google’s alternative.

Since its discovery two months ago, Microsoft has been on the defense regarding what extent its Microsoft 365 and Outlook services were at fault for the proliferation of the breach. Yesterday, Microsoft reaffirmed its recent position that while Outlook helped spread the phishing scheme through exploited source code, none of its services were actually breached and offered up user data.

Going forward Microsoft is calling on its partners and customers to be more proactive in its cybersecurity protocols. Prior to yesterday’s hearings, Microsoft has already deployed updates to Windows Defender, moved to sinkhole, and applied digital certificates to trustworthy files.

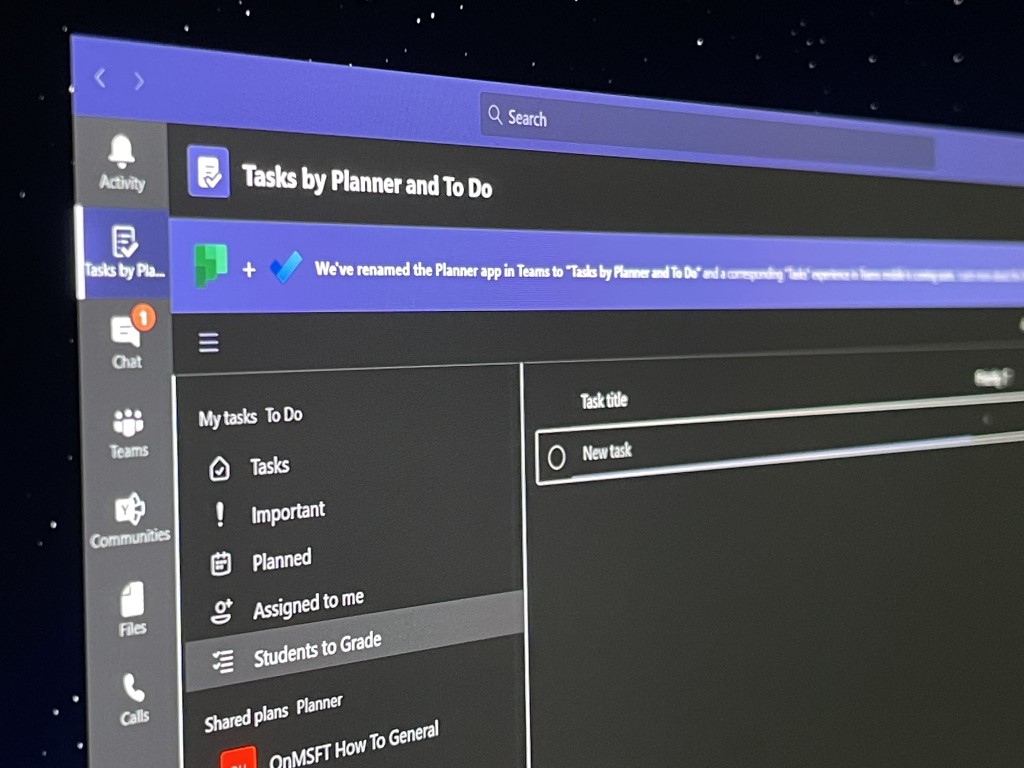
Tasks in Planner and Microsoft Teams are getting support for up 25 labels and colors

At Ignite 2020, Microsoft announced a new set of capabilities coming to its task management tool, Microsoft Planner. The company detailed that it’s increasing the number of task labels and colors to 25. This update will start rolling out to the Planner app and Tasks in Teams in late February, according to the Microsoft 365 Admin Center.

Microsoft says that it’s one of the popular requests from Microsoft Planner users, and it has been incorporated based on the feedback received from customers. This is a major change than before, where users could only add up to 6 labels for a given plan. With this update, users will now be able to choose up to 25 colored labels to embed directly into each task card’s detailed view.

“More labels allows for greater flexibility when organizing tasks. Use labels to flag risks, signal delays, help fine tune task prioritization, clarify accountabilities, or categorize tasks around a theme spanning multiple buckets,” the company explained.

In Microsoft Planner, users can apply filters to their tasks in order to increase visualization of those tasks on the Planner board. They help users to quickly look at essential details such as locations, requirements, or important time constraints. This new experience aims to make labels are now more accessible and easier to use. Do you think that this update will help you categorize the tasks in your plans better? Let us know in the comments down below.

5 Best Code Writing Software for Windows 10/11 & Mac

Programmers and web developers alike see the world in lines of code. Day in and day out they read or write line after line of code to create programs or other elements.

If you fall in this category, and if you are a Mac or a Windows 10 user, then the software that we will be recommending will be a great addition to your device.

While some prefer using Notepad++ to write the codes, in some cases, what they need is a simple and lightweight program that will allow them to edit code pages or create them as easily as possible.

We will be looking over software that will be exactly what you need, programs that provide support for most types of coding, allowing the user to get the job done easily.


What are the best code writing software?

Adobe Dreamweaver – Best code writing software

Topping out our list is a software tool that simplifies code writing to the point where you don’t need to know any at all.

Adobe Dreamweaver is a proprietary web development tool, and it is probably best known as a web design tool that doesn’t need to know any coding to create great websites.

Of course, those curious about the backend of things can also use Dreamweaver as a code writer. This makes the program highly recommended for both beginners and veterans alike.

The UI is incredibly simplistic, and the program’s library is filled with resources and templates that make code creation and editing easy to pull off.

More so, Dreamweaver integrates seamlessly with other Adobe programs like Photoshop or Premiere Pro, allowing easy file importation.

Here are some of the advantages of using Adobe Dreamweaver:

  • It can highlight your coding for quicker scans
  • Extremely useful for beginners who have little experience coding
  • Features code suggestions
  • Coding is checked in real-time
  • Can be tested for free for 7 days

Adobe Dreamweaver

Write your code and build beautiful sites for any browser or device with one of the best software available.
Free trial Visit Website

Code Writer for Windows 10 – Built-in compiler

Code Writer autocomplete

Code Writer is a solid tool, and in this article, we’re going to cover the following topics:

Code Writer is a simple code editor for Windows 10 and Windows 8, and in this article, we will show you some of its features and how to use it.

The autocomplete is a useful feature that many code editors have. Code Writer doesn’t have full support for auto-complete, which can be a flaw for some users.

Just like other code editors on the market, Code Writer supports various keyboard shortcuts. Using these shortcuts you can perform various actions without having to open additional menus.

Unfortunately, Code Writer doesn’t have a built-in compiler, so if you’re looking for this feature, you might want to consider using a different application.

Here are some of the main features of Code Writer for Windows 10:

  • It is a simple code editor
  • Comes with a helpful autocomplete function
  • Features a built-in compiler
  • Support keyboard shortcuts
  • Completely free

⇒ Download Code Writer for Windows 10


Notepad++ – Extensive plug-in support

Notepad ++ is a software tool used for code writing that is probably as old as time itself. This tool has an incredibly simplistic UI, but the main feature is its readability.

This is because Notepad++ has a feature where it can easily recognize and then display various coding languages with colored syntax. This form of labeling lets users more quickly and efficiently read code.

More so, readability is further enhanced by the program’s detailed character location information. This, in turn, allows it to display the exact column space, line number, character selection.

Here are some of the best features of Notepad ++:

  • Can open documents containing different coding languages
  • Displays different coding languages using different colors
  • Extensive plug-in support
  • A very efficient auto-save feature
  • It is completely free

⇒ Download Notepad ++


TextWrangler – Can double as text editor

TextWrangler is a powerful text editor filled with many useful features and is also available as freeware.

The UI is made to be extremely easy to navigate and understand, and browsing files and project work is also made easy.

The program features several advanced search and replacement tools, and all the files and projects that you are working on can later be saved directly to FTP and SFTP servers.

The program supports syntax highlighting of many programming languages, and you can even use it to transform the character encoding of text documents.

These are some of the main features of TextWrangler:

  • Can easily double as a text editor
  • Support syntax highlighting for many programming languages
  • Features many search and replace tools
  • An overall easy-to-use program
  • Freeware license

⇒ Download TextWrangler


Sublime Text – Customizable UI

The last on our list is definitely not a code-writing tool that should be underestimated.

Sublime Text is the epitome of what it means to be a cross-platform code editor since it is available for Mac, Windows, and Linux.

Besides the OS versatility, it has all the features you would expect from a powerful code editor and then some more.

Strictly from a visual point of view, it looks great, and you can even modify the appearance of the UI to suit your tastes even better.

The program’s core code editor is very advanced, as it features tools that allow you to autofill, autocomplete, reference function in a file, multiple selections, split editing, and much more.

Here are some of the main features of Sublime Text:

  • Available on Mac, Windows, and Linux
  • A very powerful code editor
  • Sleek UI design that can be further customized
  • It has several useful tools such as autofill, auto-complete, and more
  • Can be tested for a Trial period

⇒ Download Sublime Text


With the help of these tools, you should be able to read, edit, and compile code all on your own, and some of the entries will even allow those with no coding experience to do the same.

If you have any suggestions or other software that we should include in our list, please leave us a comment below. And if you’re looking for the best code editor for low-end PCs, make sure to take a closer look at our selection.


What to do when Paint.net is not installing

Paint.net is one of the most popular freeware digital photo editing software out there. It’s a great solution for both professionals and hobbyists, at least when it works as intended.

Paint.net has a simpler and more intuitive UI than Photoshop. But Paint.net does support a series of advanced image editing tools such as layers and effects, just like Photoshop.

Sadly, some interested users fell on the first hurdle, while trying to install Paint.net. Seemingly, Paint.net doesn’t install as intended.

We have made a detailed instruction list on how to make it work. Check it out below.

How do I fix the Paint.net fatal error during installation?

1. Check the system requirements

To install Paint.net on Windows 10, you need at least version 1607 Anniversary Update, or a newer one. It can also be installed on Windows 8.1, or Windows 7 SP1 with Platform Update.

As per the minimum hardware requirements, your device needs to have at least a dual-core processor with 1GHz.

To run the software optimally, your system has to include at least 1GB of RAM. The optimal performance comes on the 64-bit system architectures, but the 32-bit option is available as well.

As you can see these requirements are not too high, but you need to consider it if you know your system is a little older.

Paint.NET is safe, virus-free software. To make sure you’re downloading the genuine version of the tool, get it directly from the official website.

⇒ Get Paint.Net

2. Install Microsoft .NET Framework separately

  1. Close the installer of the program if you have started it.
  2. Download the Microsoft .NET Framework 4.7.1.
  3. Install it.
  4. Try to run the installer again.

Hopefully, this would be enough to get you over the error and allow you to install Paint.net successfully.


3. Update Windows 10

  1. Press Windows key + I to open Settings.
  2. Choose Update & Security.
  3. Click Check for updates in the left pane.Paint.net doesn't install
  4. Install all updates and reboot your PC.
  5. Try running the Paint.net installer again and look for improvements.

Keep in mind that if you have Windows 10, you have to run the 1607 version or a newer one. You can see the Windows version by right-clicking on the Start button and selecting System.

4. Run the installer as admin

  1. Right-click on the installer and open Properties.
  2. Open the Compatibility tab.
  3. Check the Run this program as an administrator box.Paint.net doesn't install
  4. Save changes and try installing Paint.net again.

Alternatively, if you are interested in spending some bucks on this solution, consider getting the UWP version from Microsoft Store.

The above solutions will help you successfully install this free program for image editing.

If you have any other suggestions or solutions that we should at to this guide, please write us a comment below.

How to fix lags in Photoshop and Illustrator on Surface Book

Just like Surface Pro 4, Microsoft’s Surface Book is also very suitable for artists, especially graphic designers.

And of course, some of the most popular tools that all serious artists and designers use are Adobe Photoshop and Adobe Illustrator.

But users are complaining about various lags in these programs, which makes it almost impossible to use them:

MS is pitching the Surface Book as the Ultimate laptop and for Creative people. I found that there is considerable lag in Illustrator and just a bit better in Photoshop while drawing and zooming in and out. The lag is so bad in Illustrator that its not even worth running.

The complaints started to appear in early October of 2015, and Microsoft still didn’t announce any possible fix for lags in Adobe’s software.

The company is actually aware of the problem, as a few Microsoft employees contacted users on forums, but they didn’t provide any useful info.

They didn’t even announce the actual fixing update, which means that the company doesn’t pay a lot of attention to this problem.

They actually only advised users to apply the latest updates, but you can judge yourself how much is that helpful.


How do I fix lags in Photoshop or Illustrator on Surface Book?

1. Get the latest Adobe Photoshop/Adobe Illustrator CC version

grab most recent Adobe version

Editing and prepping up photos for your professional projects can’t go wrong when using Adobe Photoshop.

The same goes for those times when you are eager to create unique graphics for a variety of purposes like brochures, book covers, and flyers.

As for those of you using Adobe Illustrator, you are also accustomed to getting the very best from this industry-standard vector graphics software tool.

Therefore, you should better make sure that the lagging issue isn’t actually the result of having an old version of Adobe Photoshop/Adobe Illustrator CC version.

To rule out this option, simply visit the official Adobe homepage, grab the most recent version of the program and install it.

⇒ Download Adobe Photoshop

⇒ Download Adobe Illustrator CC


2. Try installing the NVidia Control Panels

  1. Download and install GeForce Experience.
  2. When installed, right-click on your desktop, and go to NVIDIA Control Panel.
  3. Go to Manage 3D Settings.
  4. Go to the Program Settings tab, and select Adobe Photoshop (Photoshop.exe) from the dropdown list.
  5. Now, head to the Specify Settings list, and find the Power Management Mode settings.
  6. Change it from Adaptive to Maximum Performance.
  7. Restart your computer.

One user has managed to find a working solution too. It requires installing the NVidia Control Panels and changing a few settings., as described above.

This Insider from Microsoft forums even explained to us what was causing the lagging problems. Namely, Adaptive Performance saves power, but it doesn’t work well with Adobe’s products.

Unlike 3D games or video editing, which exploits the GPU to the fullest, working in Adobe Photoshop only accelerates certain tasks.

As a consequence, there’s a delay in the time you do a certain action (start drawing, for example) and the time system directs more power to the GPU.

But, when you set the GPU to Prefer Maximum Performance, the GPU will always have the necessary power. Using this, there will be no delay, therefore the lagging problem will be eliminated.

This was a serious issue, and Microsoft or Adobe should at least give some advice to users on how to deal with it, even though it doesn’t require any update or actions from the companies.

Luckily, users managed to find the solution by themselves, but that won’t be the case every time, with every problem, and the experience of using Surface Book could be significantly damaged.

UPDATE: according to some users, the issue was later solved by an NVidia update. Still, users say that the lagging problems continue. For that, you can use the solutions mentioned above.


Even recently, the lagging issue persists. Generally, it has to do with Surface Book not using the maximum performance necessary for running Adobe Photoshop and Illustrator.

Please leave us a comment if the above solutions helped you with the error, or if you have any other suggestions.


OneNote and Word for Web now lets users embed Pinterest pins

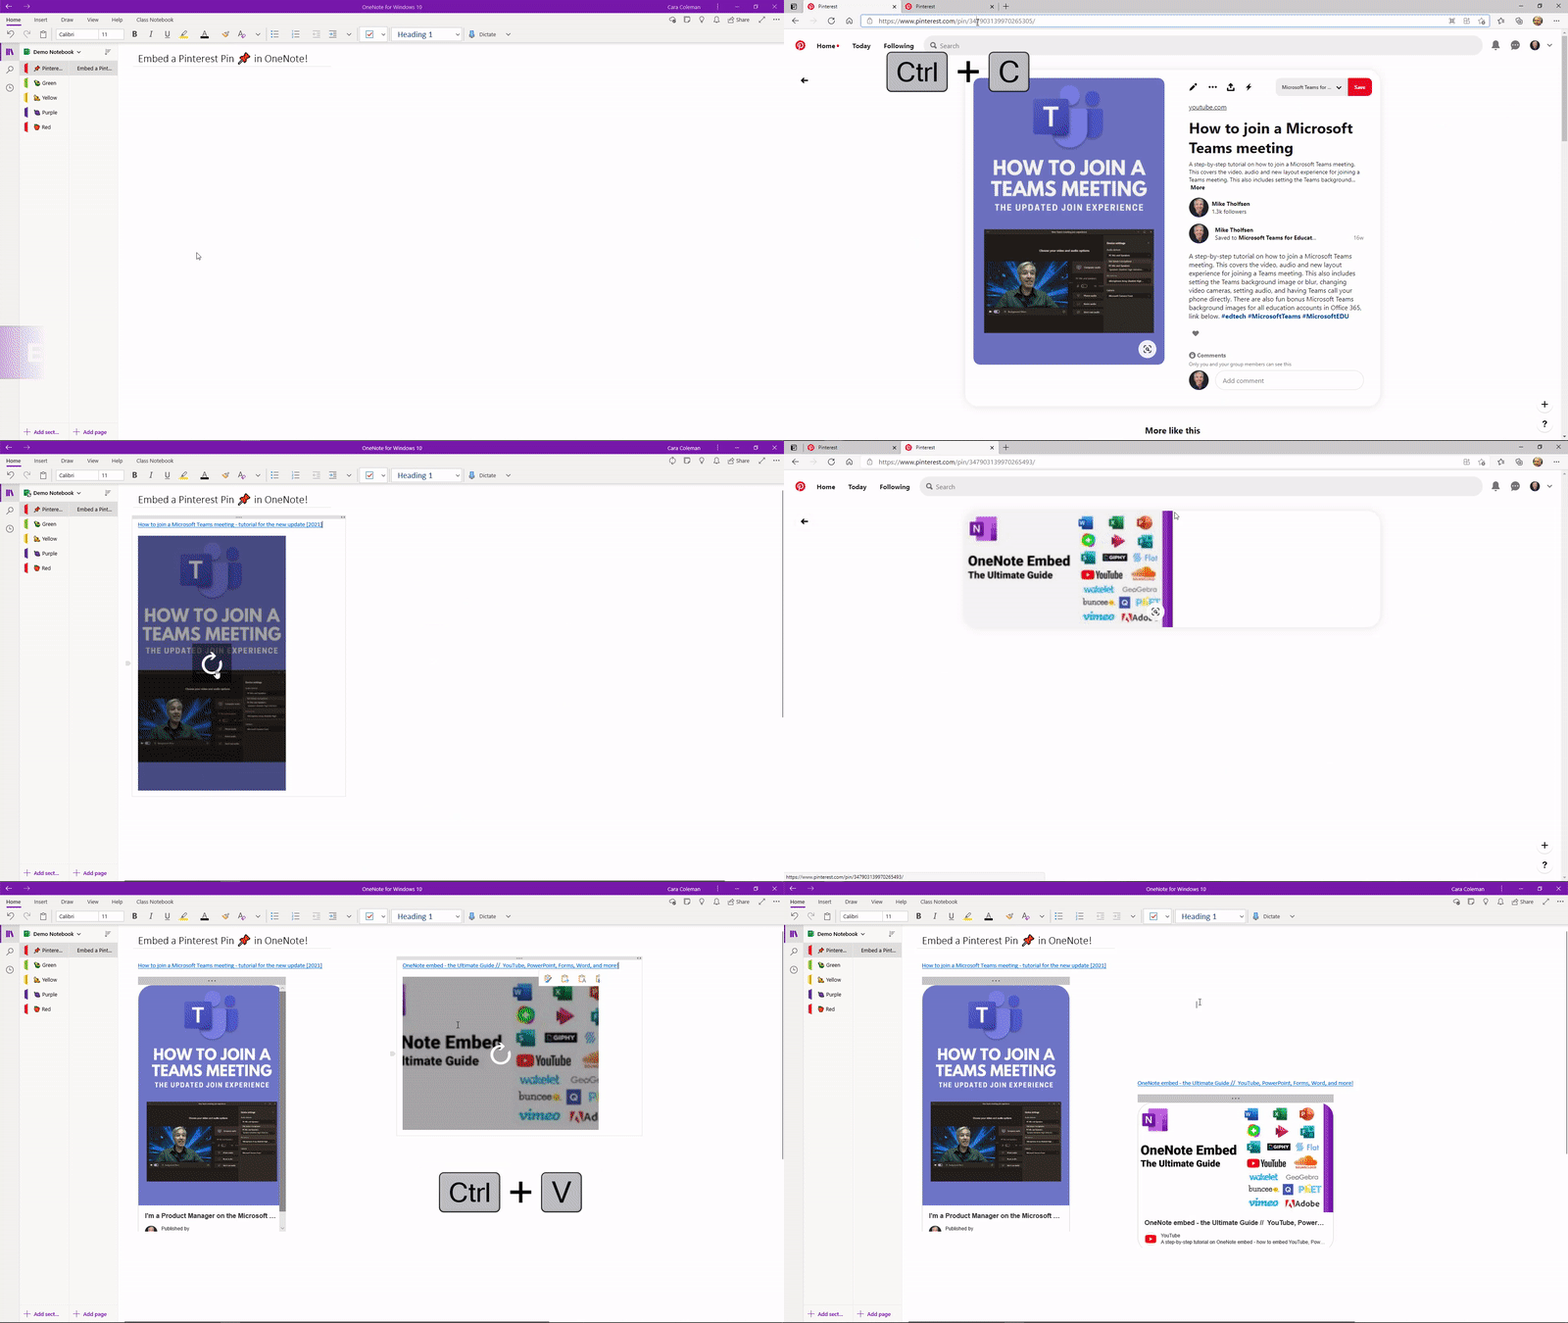
Microsoft has announced a new Pinterest integration for OneNote and Word on the web that lets users embed Pinterest pins directly into their documents. The new feature should be particularly beneficial for educators, and it makes it easier to add interactive Pinterest content into their lesson plans and shared class notebooks.

“Over the past few years, we have heard many requests for a Pinterest integration with OneNote. The OneNote binder metaphor, and the ability to easily embed Pinterest Pins interactively in OneNote, organize them, or distribute to others in OneNote Class Notebook, seemed like a great match. In addition, with our recent announcement of Microsoft Word for web support for interactive content, we’ve also added Pinterest support here as well,” Mike Tholfsen, PM on Microsoft’s EDU team, explained in a blog post.

thumbnail image 1 of blog post titled Pinterest Pins can now be interactively embedded into OneNote and Word

With this update, OneNote users will now be able to create pages, individual sections, as well as complete notebooks with interactive Pinterest content. This new capability is supported on all major versions of OneNote on desktop, OneNote 2016, iPad, Android, and the Web app.

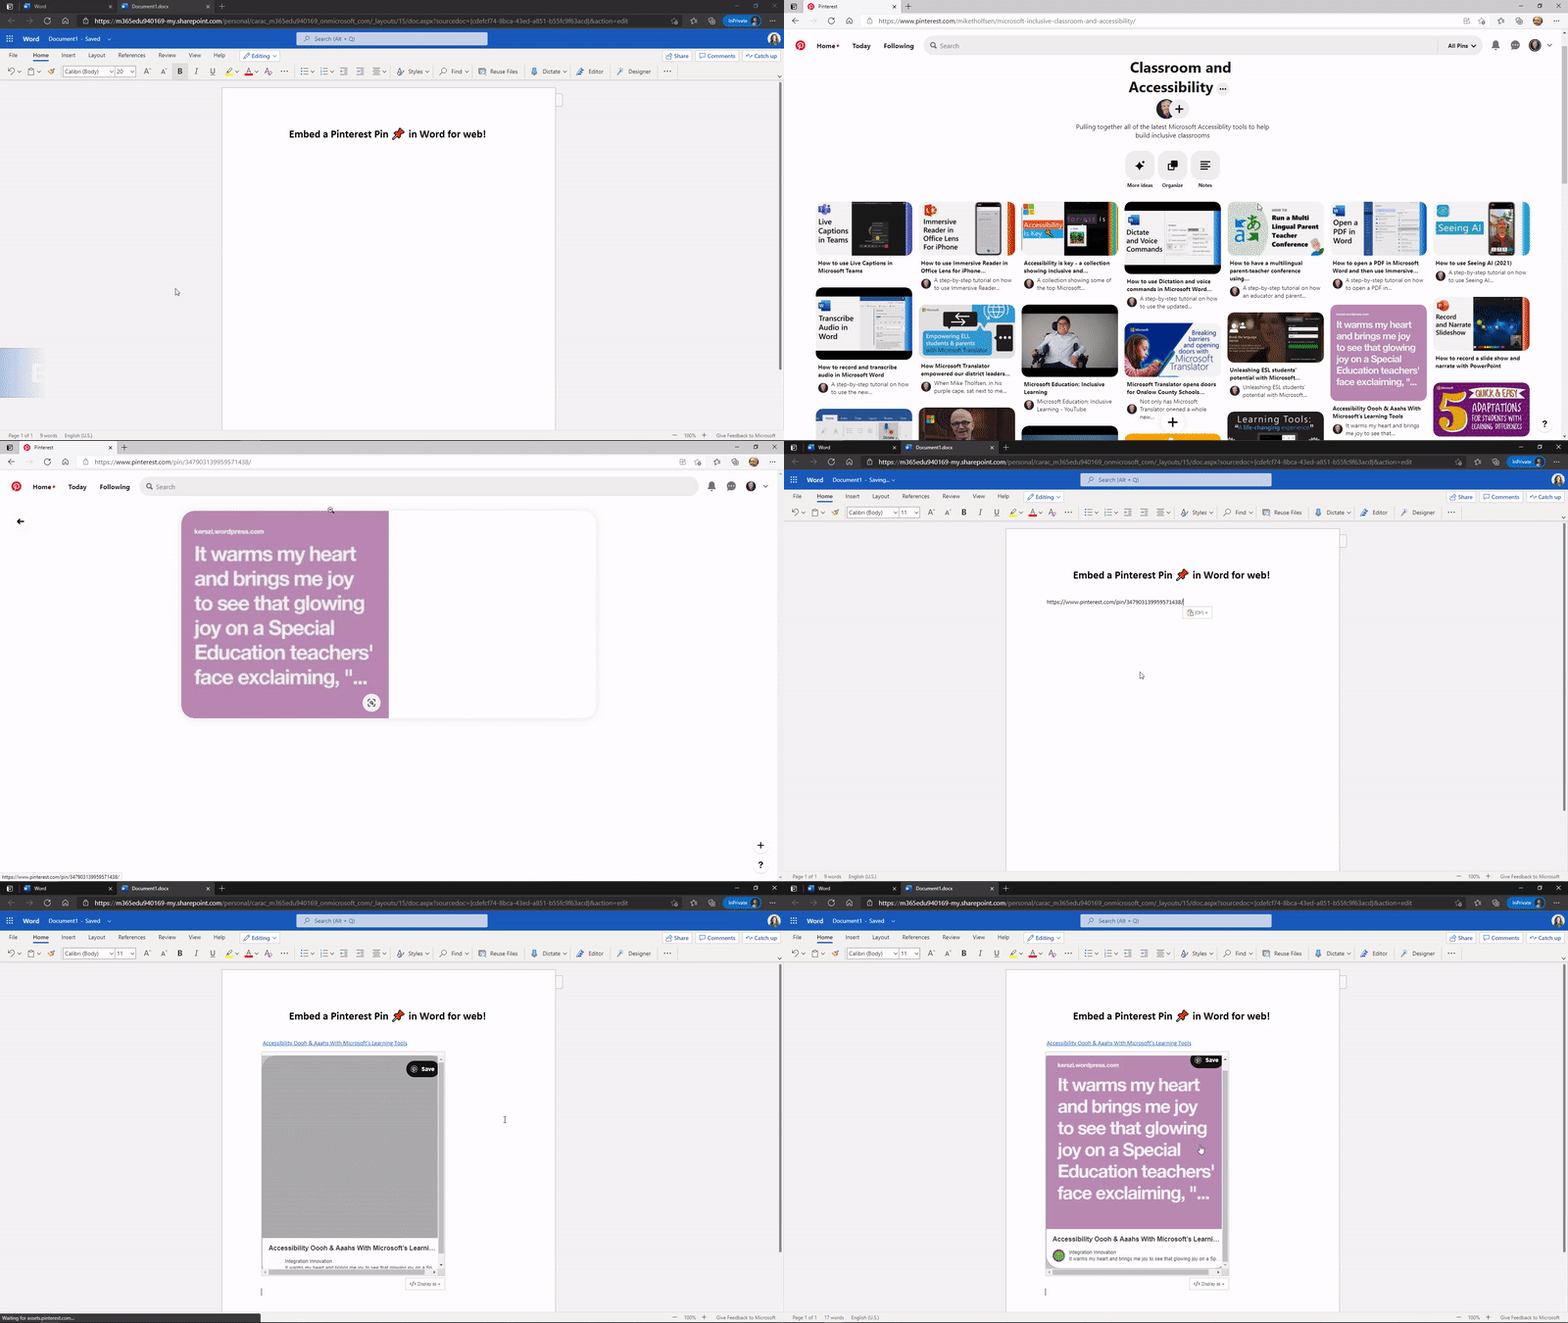
For Microsoft Word, the embedded pins only work in the web version of the app at this time. However, Educators will be able to use the Web app to add Pinterest content into their Word documents, and it should show up for students who open the document on their mobile devices or Word for Web.

thumbnail image 2 of blog post titled Pinterest Pins can now be interactively embedded into OneNote and Word

To get started, Pinterest users will simply need to copy the URL of the specific pin they want to embed and then paste it into a Microsoft Word document or OneNote page. The app will automatically pick up the relevant information from the content to create an interactive card for the pin.

This new integration appears to be rolling out gradually to all OneNote and Word users, so it’s possible that you may not be able to use it just yet. We hope that this functionality will be generally available for everyone within the next few days.

FIX: This document restricts some Acrobat features

A Portable Document Format (also known as PDF), is probably one of the most common and versatile file formats available.

These can contain text, images, links, and pretty much anything else, all within a single unified format. They can be used securely thanks to certain security restrictions, making the files uneditable.

However, what happens when you are on the receiving end of a restricted PDF, file and you can’t edit it at all?

Plenty of users have been reporting that they have been receiving error messages when trying to open PDF documents, stating that:

This document restricts some adobe acrobat features to allow for extended features in adobe acrobat reader. To create a copy of the document that is not restricted, click save a copy.

This error message usually appears when you open a document created by a designer that restricted the editing, commenting, Bates stamping, etc of the PDF file.

Whenever you receive this error message, you should know that by default there are several things that you may not be able to do with the document.

These vary depending on the restrictions applied by the creator, so you may not be able to copy the content of a document, sign the document as your own, or cannot use the document as a template.

Also, printing the document may be prohibited, document assembly may not be possible, page extraction may not be allowed or form filling may be disabled.

How do I remove docs restrictions from Acrobat features?

1. Install the original version of Adobe Acrobat

There is no better tool than Adobe Acrobat if you want to easily create, edit PDFs, and convert them to Microsoft Office formats.

Choosing it from a variety of professional PDF apps was a smart move indeed. However, it’s time to ask yourself if you’re running the original Adobe Acrobat.

Maybe you’ve used Adobe Reader and decided to step up to the pro league. Have you downloaded it from a supposedly trustworthy third-party source?

If it happens to discover that you’ve been scammed, correct that right away and grab the original version of Adobe Acrobat.

Adobe Acrobat

One of the best software available in the market that helps you to easily create, edit and manage PDF files.
Free trial Visit website

2. Use third-party PDF unlockers

If you do not own a subscription to Acrobat Pro, you could try some third-party PDF unlockers. Using them varies from program to program, but the general consensus is that they are all easy to use.

They come in the form of a downloadable desktop client, as well as online services that you can access straight from your browser.

Here are some good examples of reliable PDF unlockers.

SysTools PDF Unlocker is a great tool to use for removing PDF restrictions: like printing, copying, editing, and page extraction. The app gives the option to Save or Print unlocked PDF documents.

SysTools PDF Unlocker is compatible with all Windows versions (32 & 64 bit) OS. If you are using a Mac system, it supports Mac OS X 10.8 (Mountain Lion) and the above versions.

PDFelement Pro is another great software that helps you to edit, convert, create, secure, sign, or share your PDFs, including scanned documents.

The tool will help you to easily transform your documents by extracting, cropping, replacing, inserting, and splitting pages smoothly while modifying page boxes or adding page labels.

Wondershare All-in-One PDF Editor helps you to make PDF forms and documents with ease.

It features powerful editing and conversion tools. You can convert or scan to PDF a wide range of file formats, and also transform any PDF to Word, Excel, or PowerPoint.

By following these steps, you should be able to edit a PDF file in however way you please and get rid of the This document restricts some acrobat features issues.

Did you find this article to be useful to you? Let us know in the comments section below.

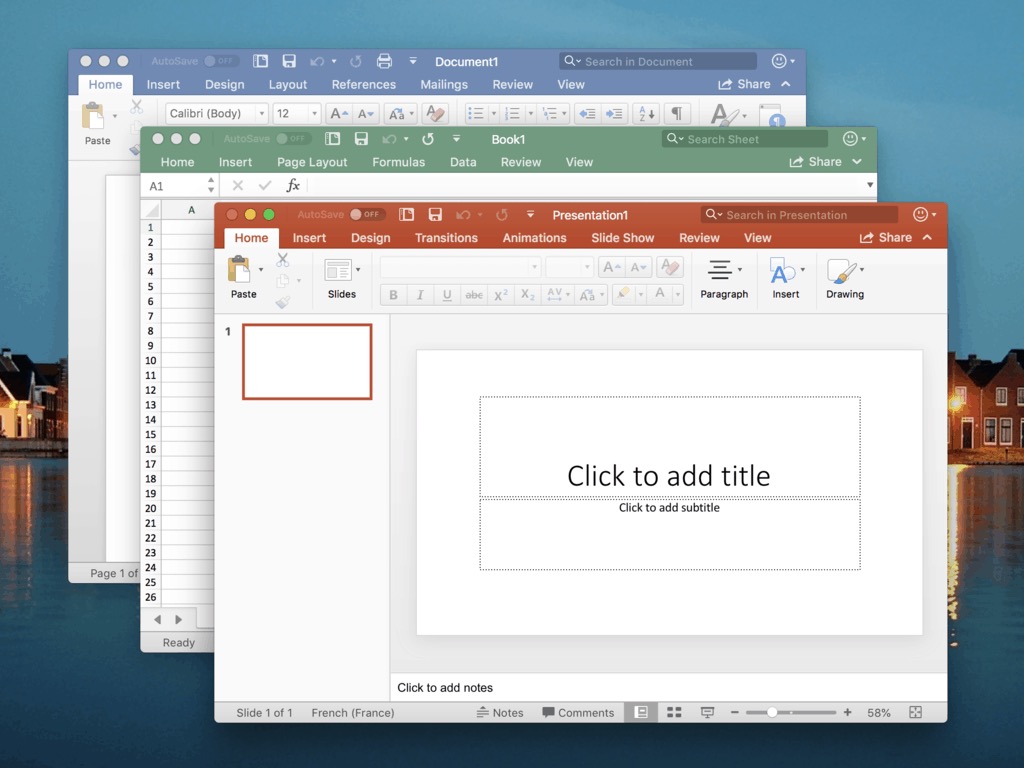
How to Zoom in PowerPoint

Microsoft released PowerPoint way back in 1990 to become one of the most used applications in the world. This is no surprise since it comes with many features to create presentations.

If you are a fan of using PowerPoint to create awesome presentations, now you have a new tool. The new  Zoom feature will allow you to create interactive, non-linear presentations easily.

According to Microsoft, using Zoom during a presentation will allow you to go from any point in your presentation to any other in any order you want.

The Slide Zoom option will make the presentation more dynamic, meaning you can navigate without any problems between slides in any order you like.

On the other hand, Section Zoom will give you the freedom to go back to the sections you want to focus on.

How do I use Zoom in PowerPoint?

1. Create a Slide Zoom

  1. Open a PowerPoint presentation.
  2. Go to Insert and select Zoom.
  3. Choose Slide Zoom.

  4. The Slide Zoom dialog box opens
  5. Choose the slides you want to use in your Slide Zoom.
  6. Once you select all the slides you want to use, select Insert.
  7. Your Slide Zoom is created.

2. Create a Section Zoom

  1. Open a PowerPoint presentation.
  2. Go to Insert and select Zoom.
  3. Choose Section Zoom.

  4. Choose the section you want to use in your Section Zoom.
  5. Once you are done selecting the section, select Insert.
  6. Your Section Zoom is created.

3. Use an alternative tool for these types of procedures

If you want to use Zoom in PowerPoint to create awesome presentations, why not go a step forward and choose a product that makes fabulous presentations by default?

Adobe Creative Cloud Express is a suite of programs that allows you to design visual content that can be used for businesses, education, and social media. Creating a presentation should come as second nature for this program.

The UI is extremely simplistic, and the library of already-present templates is extensive, allowing you to create fantastic projects with minimum effort.

By following these steps, you should be able to create better-looking presentations by using the Zoom feature in PowerPoint.

We also have a helpful guide on how to jump to a slide in PowerPoint whether you’re presenting or editing.

If you have any suggestions, ideas, or problems with the Zoom option, please let us know in the comment below.

25 Best Animated GIF Creators [+Bonus Tools]

In the digital communication age, animated GIFs have emerged as captivating visual assets. These creative graphics can add life, humor, and emotion to our interactions, making them perfect for business and personal use.

In this post, we will discuss some of the best GIF creators that can help you provide a canvas for your imagination and create engaging animations.

What are the best features of a GIF creator?

A GIF creator should be simple to use and must have some customization options to create animations; here are some other essential features to look for:

  • Import options – It should be able to import various media types, including videos, images, and existing GIFs.
  • Frame control – Should have an option to control individual frames and adjust timing as it is important for fine-tuning animations.
  • Editing options – Powerful tools allowing you to crop, trim, resize, and add effects to refine your animated content.
  • Preview – Real-time previews to visualize the GIFs as you develop them to ensure the final output matches your vision.
  • Transitions and effects – Options to add transition effects, overlays, and animation presets to enhance the visual appeal.

What is the best tool to create GIFs?

Adobe Photoshop – Professionals’ choice

Choose File > Export > Save for Web (Legacy)...

To create an excellent GIF image in Photoshop, all you need to do is follow the steps mentioned below, and you’ll have a cool animation in no time.

Upload your photo series, go to Timeline, then choose Create Frame Animation. Each frame should have its own layer. Next, go to the Layer menu and select Make Frames From Layers.

Choose how long each frame should appear and how many times the frames should loop. Once you have customized the graphic, preview it. If satisfied, save it or export it to use as you want.

Adobe Photoshop is one of the most versatile graphics and image editors on the market, which can also edit existing GIFs.

Each GIF’s frame will be in a separate layer; you can modify, add, remove, or adjust layers to change the animation & save the changes.

More features of Adobe Photoshop:

  • Comes with various tools, including selection tools, brushes, clone stamp, and more.
  • Offers a range of text tools for adding & formatting text in your images
  • A vast collection of filters and effects
  • Allows you to adjust colors, including levels, curves, hue/saturation, & color balance

Adobe Photoshop

Rely on this high-quality image editor with advanced features that can help you create amazing visuals!
Free trial Visit Website

Wondershare Filmora – Intuitive interface

Wondershare Filmora

This application is a video editor, but it can also create GIF images from videos. The application offers a modern user interface and comes with a free trial, so it’s perfect for all users.

To create GIFs using video, import the videos, drag & drop the video clip, or trim the video clip, and right-click the video to select Add to GIF Maker. Now, customize the start & end points, adjust the frame rate, set the dimensions, and then save it.

To create a GIF using the image, import the photos in sequential order, adjust the duration of each image, add transitions or effects, and then click the Create GIF button.

A frame-by-frame preview is available, and you can adjust colors or apply various effects to your videos before saving or exporting.

The application has support for advanced text editing, & screen recording, and it also comes with an audio mixer.

Some key features of Wondershare Filmora:

  • Works with AVI, MPEG, WAV, DAT, EVO, MKV, MP4, WMV and other formats
  • Allows you to crop, rotate, speed up, or slow down your GIF
  • Lets you apply color correction to your GIF or add text and other effects
  • Enables you to play two or more clips simultaneously

⇒ Get Wondershare Filmora

ScreenToGif – Portable GIF maker

ScreenToGif

If you’re looking for a simple application to create GIFs, ScreenToGif can be perfect for you. The application works as a screen recorder, so you can record any part of the screen and convert it to an animated GIF.

This is especially useful for creating tutorials or converting videos to GIFs. You can use the Screen Recording feature or a webcam to capture video.

With the Sketchboard feature, record your sketches in real-time and share the GIFs or videos of the creation on social media.

The tool allows you to resize the window and move it over a desired screen section to record it. Once the screen is captured, you can edit the images or video, add transitions, and more.

It also has options to select the number of frames from 1fps to 60fps, but remember that increasing the frame rate will create a larger file.

A snap-to-window feature allows you to select a window you want to record simply by dragging and dropping.

More important features of ScreenToGif:

  • Use the built-in icons or F7 and F8 keyboard shortcuts to start/stop recording
  • Comes with a built-in editor to check and remove the unnecessary frames in your GIF
  • Reverse the playback or use the Yoyo effects
  • Allows to add text, captions, and even text for keystrokes

⇒ Get ScreenToGif

Visme GIF Maker – Free & easy to use

Visme GIF Maker

Boost customer engagement and spice up your brand image by customizing the easy-to-edit GIF templates by Visme online GIF Maker. From icons, & illustrations to design elements, you can animate everything to give your design an edge.

The GIF editor can help you create high-quality GIFs, adjust the animation speed, and add photos, brand color & font to personalize it according to your needs.

This powerful GIF maker allows you to use stock photos with color overlays and adjust the animation settings for an element in a GIF.

Easy drag-and-drop design tools make it easier to animate and personalize your graphics, use them as calls-to-action for leads, and share them on social media & email newsletters to engage your audience.

The process is simple: choose a template, select fonts, colors, and illustrated icons that match your brand, choose animations for each element, & download the image as GIF.

Some of the key features of Visme GIF Maker:

  • Hundreds of templates and stock images to choose from
  • Allows to share on social media or embed on a website
  • Lets you download the GIF into MP4, PDF, PNG, JPG, HTML5 or PPTx
  • Offers to add background music to your GIF

⇒ Get Visme GIF Maker

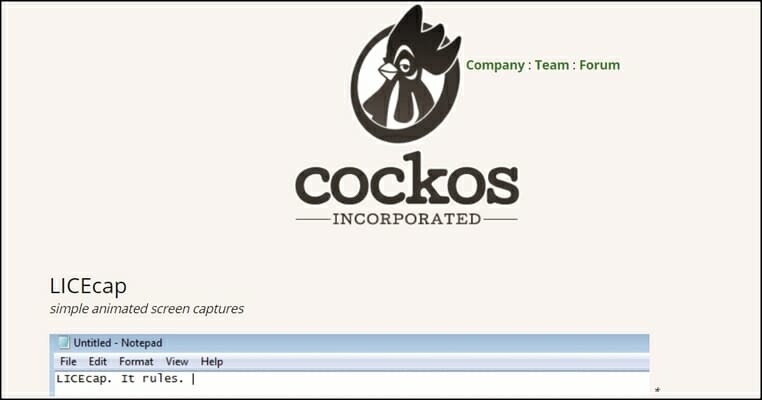
LICEcap – Easy on system resources

LICEcap

If you’re looking for a simplistic GIF tool, consider LICEcap. The application has a simple interface that allows you to record any part of your screen and turn it into an animated GIF.

To do that, simply move the LICEcap window over the part of the screen that you want to record and resize the window to the desired size.

You can set the fixed size or number of max frames per second if needed. After that, you need to click the record button, and you’re good to go.

As for saving options, you can add a title frame or elapsed time to your GIFs. In addition, you can also show mouse button clicks, which can be somewhat helpful for tutorials.

You can use keyboard shortcuts to pause the recording or set your GIF to repeat. You can also set the recording to stop after a specified number of seconds.

Some key features of LICEcap:

  • Supports two output formats, GIF and LCF
  • Records mouse clicks.
  • Pause & restart recording, with optional inserted text messages
  • Press Shift+Space to toggle pausing while recording

⇒ Get LICEcap

GifCam

GifCam

Another tool that can create GIF animations is GifCam. This application works as a screen recorder, so you can easily record any part of the screen simply by moving the application window.

As for recording, three modes are available: 10FPS, 16FPS, and 33FPS. You can customize the general frame rate options if needed and choose options like show the cursor & record a full screen.

This GIF editor can detect if the previous frame is the same as the new one and add delays instead of new frames. By doing so, the application creates GIF files that are smaller in size.

The application adds transparent pixels after comparing frames to reduce the size of the GIFs. After that, it analyzes the frames and adds only different pixels to the animated GIF.

Thanks to this method, the size of the output file is much smaller, which is rather important when creating GIFs for the web.

The application has a simple editor; you can quickly delete frames, add text, and resize or crop your frames. In addition, you can also adjust hue and saturation or add a green screen for every frame.

As for saving, you can preview the animated graphics you create and save your GIF using six different presets. In addition to GIFs, you can also export your animation to AVI format.

⇒ Get GifCam

GIMP

GIMP
Created with GIMP

If you’re looking for a powerful image editor that can also create GIFs, you should consider using GIMP. This is a cross-platform image editor, and it’s available for Windows, Linux, and macOS.

The application is free, so that you can download and use it without any restrictions.

GIMP is perfect for graphic designers and comes with all options that a photo editor needs. You can easily edit your images, change their color, hue, saturation, or brightness, and add special effects.

In addition, you can create unique creations thanks to the built-in layer system. It’s worth mentioning that the application also supports programming algorithms, so you can easily edit your images using scripts.

Another great feature of GIMP is the ability to enhance it with various plug-ins. Speaking of plug-ins, you can easily create animated GIFs from videos by using the GIMP Animation Package plug-in.

After you download the plug-in, you’ll be able to create GIFs from videos with ease. This app is one of the best animated GIF software and is perfect for everyone who needs an image editing tool to create GIFs, so feel free to try it out.

⇒ Get GIMP

AnimateGIF

AnimateGIF

Another simple application that can create GIFs is AnimateGIF. The application is relatively simple and doesn’t support screen capture or videos.

To create a GIF, you must manually insert your picture to use them as frames. After that, you need to set the frame delay and the quality of your GIF.

You can also enable the loop option to repeat your animation if needed. AnimateGIF doesn’t have much to offer, so there are no options for editing or screen capture.

However, if you already have images or frames exported from a video, you can easily combine them and create a GIF image with this tool.

Even though this application is simple to use, it can create the most basic GIF images, which is its biggest flaw.

You might have to use a different tool if you need to create GIFs from videos or capture your screen. If you’re still interested in AnimateGIF, you can download it and use it for free.

⇒ Get AnimateGIF

QGifer

QGifer

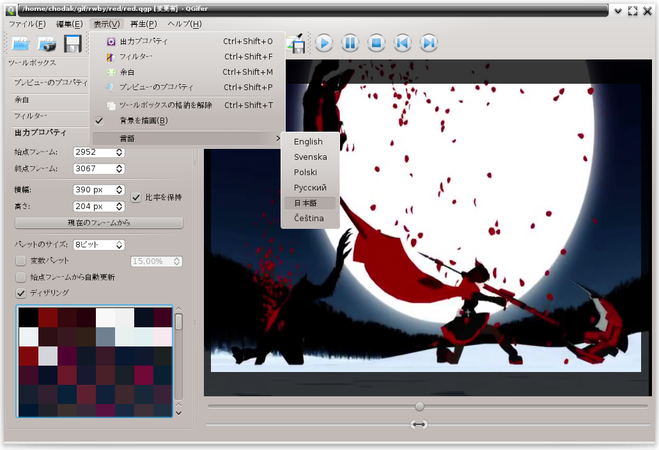
QGifer is another tool to create GIFs from video files, including AVI, MP4, and MPG files.

Once you open a video, playback controls are available to quickly find the section you want to use for a GIF image. There’s also another slider that allows you to choose your GIF’s start and endpoints.

The application has a toolbox in the left pane; you can use it to adjust FPS, zoom level, & looping options.

QGifer also supports margins as well as various filters. If needed, you can also change your GIF image’s hue, saturation, or brightness.

As for output options, you can choose the starting frame and the ending frame. If needed, you can also adjust the width and height of your image and change the palette size.

The application allows you to add images and text to your GIF images. Also, you can position text and photos any way you like and choose the frames they will appear.

After that, you need to extract your animation as a GIF file. Once the animation is rendered, you can preview it, append a reversed copy, or save it to your PC.

⇒ Get QGifer

Giffing Tool

Giffing Tool - GIF creator

Another application that can help you create animated GIFs is Giffing Tool. This application allows you to record any part of your screen and convert it into a GIF file.

After you record a video, you can preview it, cut, paste, and copy specific frames. In addition, you can change the size of your GIF, quality, and frame rate.

As for editing, you can add captions and apply grayscale or luminance effects. You can also crop an image or import new files. You can also re-record the same area or choose a different one to record.

After editing, you can save your GIF image locally, upload it online, and share it with others.

Using this tool, you can also convert video files, including AVI, MP4, and .web, to GIF images.

The application also has a few preset sizes that you can use to convert videos from popular video streaming websites such as YouTube, Vimeo, or Twitch.

⇒ Get Giffing Tool

Gyazo

Gyazo

Gyazo is a simple tool that allows you to take screenshots and convert them to GIFs easily. To capture a screenshot or record a video, go to Taskbar, select Gyazo, and choose the relevant option.

After selecting the desired area, the screenshot will be uploaded online, and you’ll get a direct link.

All your screenshots are saved on Gyazo servers, and you can effortlessly search them by app name, web address, or date.

In addition to images, you can also create animated GIFs with the Gyazo GIF application. This application allows you to create GIF animations up to 7 seconds in length, and it will automatically upload saved images online.

Just like with regular screenshots, you can select the screen section that you want to record. Unfortunately, no editing options exist, so you can’t edit or preview your GIF file.

Gyazo is completely free, but it comes with certain limitations. If you want to remove these limitations and create one-minute GIF animations, you might want to consider purchasing the Gyazo Pro monthly package.

⇒ Get Gyazo

GIF Animator

GIF Animator

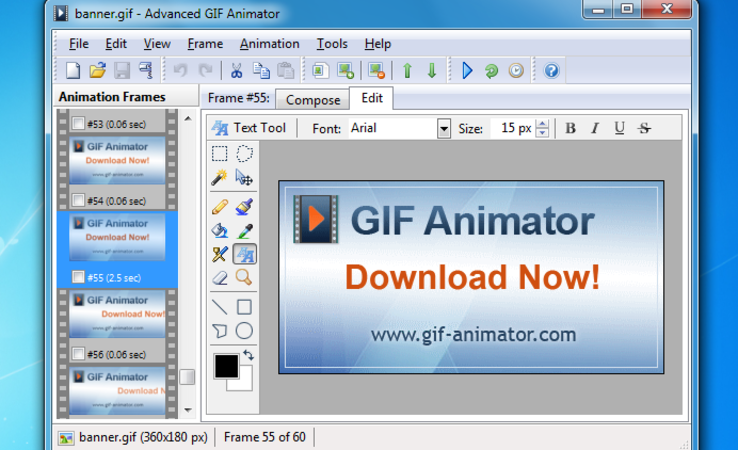
Another great tool that can help you create animated GIFs is GIF Animator. This application is simple to use, so you can easily create animated banners, buttons, and other GIFs.

Using this tool, you can view all animation frames in the left pane, crop, resize, delete, or rotate your frames, and preview your GIF image anytime.

To create a GIF, you must add all images you want to use as frames. The application supports various formats, such as JPEG, PNG, TIFF, GIF, BMP, PSD, ICO, etc.

You can also convert a local video to a GIF image or edit existing GIF files. The application has a batch mode that uses the command line interface and can generate HTML code so you can easily insert GIF images into your projects.

The application is available for free trial, but if you want to continue using it, you need to purchase a license.

⇒ Get GIF Animator

Easy GIF Animator

Easy GIF Animator

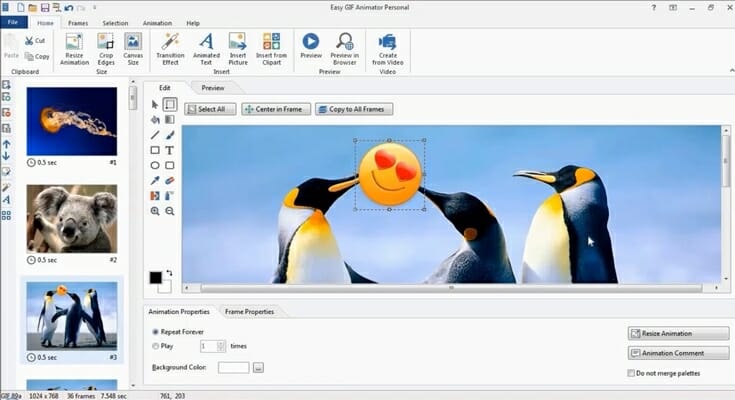
IIf you’re looking for a GIF tool that can create animated pictures, banners, and buttons, consider Easy GIF Animator.

The application offers an excellent user interface that is similar to Microsoft Office and is available with a 20-day trial.

You can see all your available frames in the left pane, which makes deleting or rearranging and making other changes to them easy.

In addition, there’s a built-in image editor, so you can easily edit any frame with ease and add various transition effects or create animated text.

It allows you to produce an optimized & high-quality animated image, and you can also save your project as an SWF Flash file or as an AVI video.

As for advanced options, Easy GIF Animator has a built-in Color picker, Color replacer, and a transparency tool.

The application also supports image web search, so you can easily find images online and use them for animation.

⇒ Get Easy GIF Animator

Instagiffer

Instagiffer

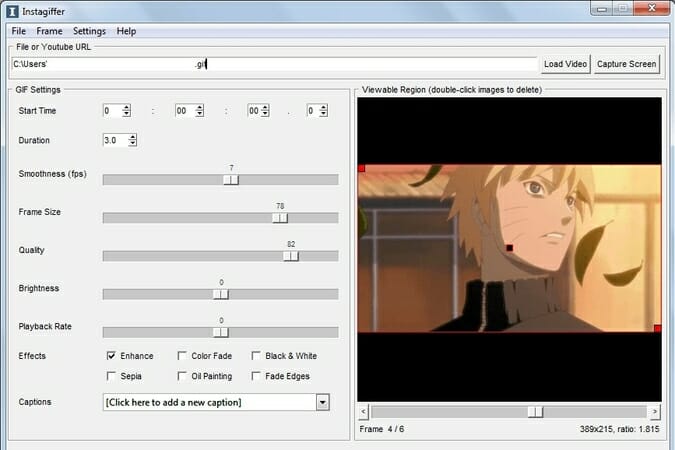
Instagiffer is another simple application that allows you to create animated GIFs on your PC and comes with a wide range of features.

The application allows you to easily convert local videos, YouTube URLs, and online videos to GIFs.

You can also capture specific parts of a screen and turn them into a GIF. To do that, select the desired area, set the desired length of the video, and click the Start button.

As for video extraction, after you load the video, you need to set the start time using the built-in slider. You can also set the exact time in minutes, seconds, and milliseconds to make precise selections.

After selecting the start position, you need to set the desired length and smoothness. In addition, you can also change other options, such as frame size, quality, brightness, and playback rate.

If needed, you can also add captions or various effects and filters. As for text, you can add it as a caption, change its color, font, or size, and assign animations to it. In addition, you can also choose the start and end frames for your text.

As for effects, there are about 10 visual effects available to choose from, and you can also add your background sound.

The preview is always available; you can use it to crop your GIF image easily. The application also can edit other GIF files and allows you to import, export, or delete specific frames.

⇒ Get Instagiffer

Free GIF Maker

Free GIF Maker

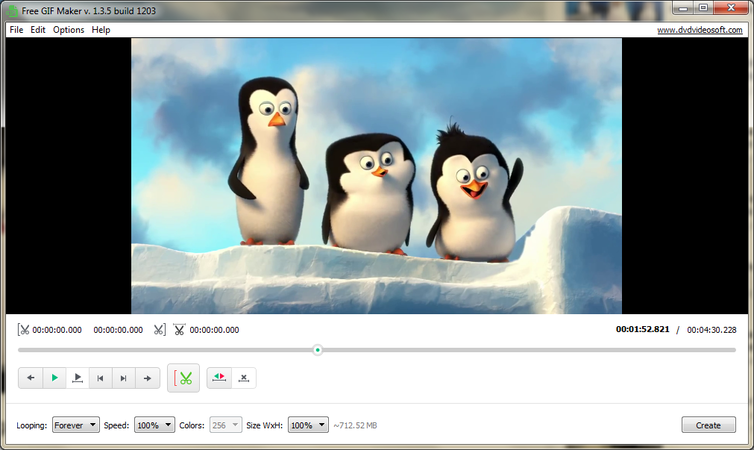
An intuitive app, Free GIF Maker by DVDVideoSoft, can convert video files to GIFs. The application has a simple interface allowing you to preview your video and select the section you want to turn to GIF.

You can use playback controls to easily select desired sections or navigate frame by frame for accurate selections. Streamline this by using keyboard shortcuts for playback or frame-by-frame navigation.

After you select the desired segment, you need to choose some output options. For example, you can set your animation to loop or change its speed, colors, and size.

As for supported formats, the application works with AVI, MPG, MP4, MKV, FLV, 3GP, WEBM, WMV, and other file types. Free GIF Maker is a free application, but some options aren’t available in the free version.

Even though this application is simple to use, it doesn’t offer advanced options such as frame-by-frame editing or screen capture.

⇒ Get Free GIF Maker

Animated Gif Editor

Animated Gif Editor

If you need to create GIFs from your screen recordings, you can easily use the Animated Gif Editor. To create a GIF, launch the portable app, select the part of the screen you wish to record, and click the Record button.

In addition, you can also use this application to edit other GIF files. After you load the desired GIF, you can see all available frames and preview, edit, or remove them.

As for editing, the application doesn’t have a built-in editor, so you have to rely on third-party applications.

You can change the frame delay, reorganize your frames, and add a subtitle to your frames right from the application.

The tool lets you set the animation to repeat or change the subtitle style by editing its CSS code. Speaking of coding, you can also export HTML code for your image and add it to other projects.

In addition, you can also export the entire animation to GIF or only the selected frames. If needed, you can also export GIF to AVI or resize your GIF.

⇒ Get Animated Gif Editor

Amazing Video to GIF Converter

Amazing Video to GIF Converter

Another GIF creator, Amazing Video to GIF Converter, has a simple-to-use interface to convert video files to GIFs easily.

To convert a video to GIF, choose the desired file from your hard drive. After adding the video, select the segment you wish to convert to GIF.

If needed, you can also crop your image before the conversion. As for additional options, you can change the output file size, frame rate, and GIF speed or even set your GIF to loop.

You can also add text or a logo to your GIF but remember that the text support is limited, so unfortunately, you can’t choose in which frames the text will appear.

The application is free but adds a watermark to all your GIFs, so you’ll need to purchase the full version to remove it.

⇒ Get Free Video to GIF Converter

Express Animate

Express Animate

Express Animate is animation software, but you can also use it to create GIFs from videos. The application allows you to add objects and various effects to your videos.

It allows you to create smooth animations using the keyframe feature and add other video and image files to your video.

You can quickly move, resize, or rotate them, add various effects, and change the clips’ brightness, contrast, etc. Moreover, you can add text and animate it the way you want.

This application supports vector masks as well as blending modes, and by combining them, you can create some impressive results.

To make the editing process simpler, you can group your objects in order to organize them better. Each object is available on the timeline, so you can easily access it or set in which frames it will appear.

Express Animate is a video animation software that lets you save animations to Flash, GIF, or HTML5 format.

⇒ Get Express Animate

PhotoScape

PhotoScape

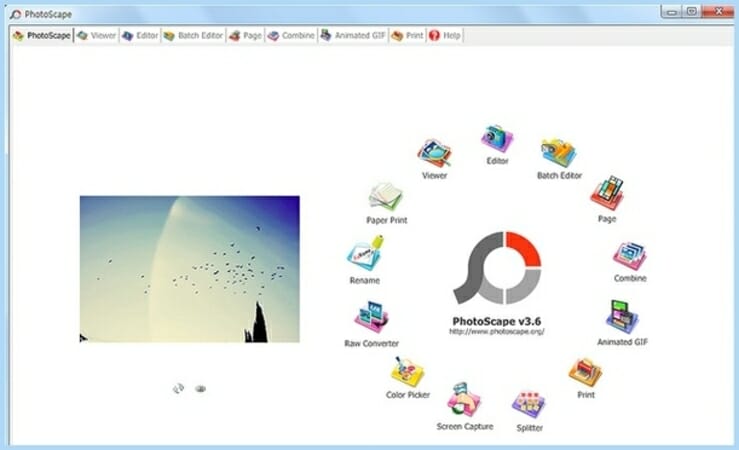
PhotoScape is an image editing software that can create animated GIFs with multiple photos.

However, the GIF animation feature of the tool is rather basic, requiring you to insert your frames to create an animation.

You can choose different transition effects, set delays for each frame, and even resize your image to a specific size or preview the animation at any time.

The editor allows you to resize, crop, adjust brightness & color, white balance, correct backlight, change frames, add text, & filters, and remove red eye.

It also has advanced editing tools such as paint brush, clone stamp tool, and effect brush.

The Batch editor and Batch rename lets you work on multiple photos simultaneously, and with the Combine feature, you can attach multiple photos on a page frame to create a single photo.

The application also has a screen capture tool, so you can easily create screenshots, and it comes with a RAW converter, which lets you convert an image to JPG.

⇒ Get PhotoScape

GIF Movie Gear

GIF Movie Gear

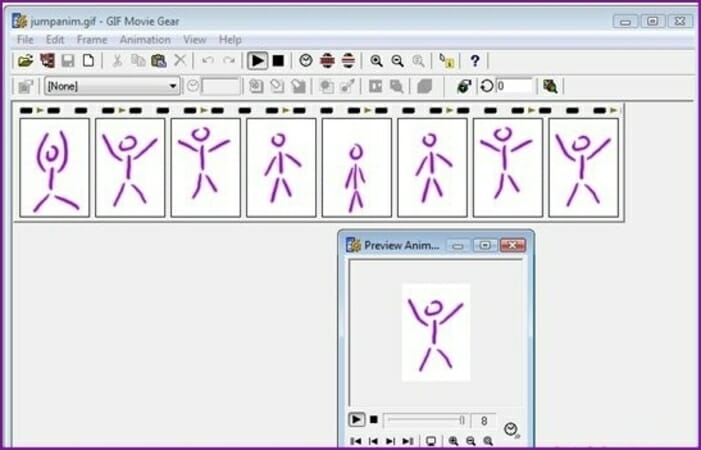
Another application that can help you create animated GIFs is GIF Movie Gear. The application has a simple user interface that allows you to see all available frames & comes with a 30-day trial.

If needed, you can select multiple frames to edit them and quickly set the delay for each frame. You can easily move, crop, rotate, or flip your frames or crop an entire animation.

In addition, there’s a LiveEdit feature that allows you to edit a single frame or entire animation in a third-party image editor.

The application also has a palette reduction feature so you can easily optimize the size of your GIF image. Speaking of image optimization, there’s an inter-frame feature to help you minimize the image size.

With the preview window, you can easily preview your animation with a single click. The application also has infinite undo steps, so you can easily correct any mistakes.

GIF Movie Gear works with various formats, and you can even import a video and convert it to GIF. In addition to image formats and AVI videos, the application also works with Photoshop files.

As for additional features, you can easily edit the transparency or generate the HTML code and import your GIF to any website.

⇒ Get GIF Movie Gear

Falco GIF Animator

Falco GIF Animator

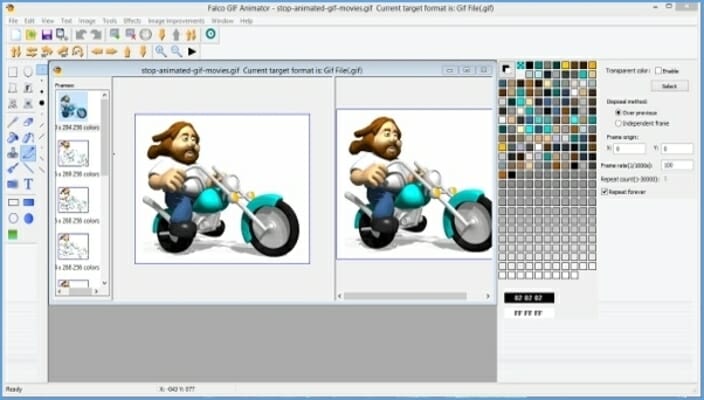
If you want to create your GIF images from scratch, you can use Falco GIF Animator. As for supported formats, you can work with BMP, GIF, PNG, JPG, ICO, CUR and ANI files.

The application supports unlimited undo and redo steps, so you can quickly correct any mistake.

It comes with basic image editing tools, so you can easily create simple shapes. If needed, you can also rotate, flip, or change the contrast or brightness of your image.

It’s worth mentioning that this application has about 25 different visual effects to choose from. In addition to effects, you can also use one of 13 different image improvements.

The application also has a built-in wizard that you can use to create animated GIFs or banners. Falco GIF Animator is a decent tool, but it has a slightly outdated interface, so it might be confusing.

⇒ Get Falco GIF Animator

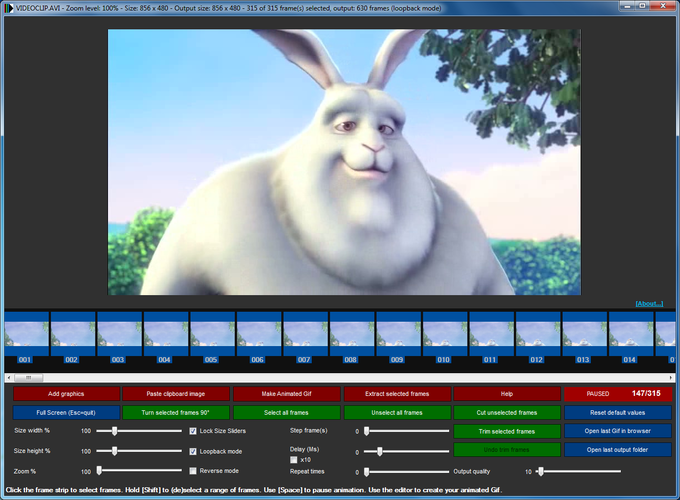
KickMyGraphics

KickMyGraphics

Another application that can create animated GIFs is KickMyGraphics. It even allows you to create animated GIFs from local images.

In addition, you can also paste images from your clipboard directly to the application. The application also supports video files, but you need to convert the video before you can edit it.

The application offers a live preview to see your animation’s appearance anytime. You can also see all available frames and remove unnecessary frames with ease.

As for editing, you can’t add your text or adjust the brightness of your frames, but you can change their width, height, and zoom level.

You can also enable Loopback or Reverse mode and set delay, step frames, and number of repeats. You can also configure output quality right from the application. The screen recorder feature is available, but we couldn’t start it.

KickMyGraphics is a simple application that doesn’t offer advanced features. Even though you can convert videos to GIFs, the process could be faster and more complicated than in other applications.

However, if you still want to use this tool to convert a video to GIF, we recommend you use shorter videos.

⇒ Get KickMyGraphics

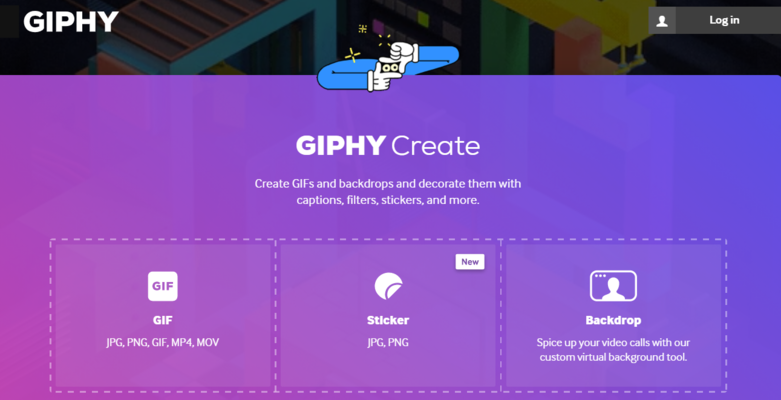
Giphy

GIPHY

Giphy is a famous GIF hosting website, but in addition to hosting GIF files, this website comes with a useful web app that can create GIFs.

Choose images, stickers, a backdrop, or any URL from GIPHY, YouTube, or Vimeo to create a GIF.

After choosing your video, you need to set your GIF’s start time and duration. You can also add a caption and position it anywhere you want.

As for the caption, you can choose between 8 different colors and three different styles. A preview section is available that allows you to see your changes.

The preview is slow, making it harder to select the desired segment. After you create your GIF, you can copy its link, download it, or view its embed code.

Giphy also allows you to combine images or GIFs to create animated GIF slideshows. In addition, you can add captions and animated text to your GIFs.

It also has a GIF Editor available, which allows you to add stickers and filters to your GIFs.

⇒ Get Giphy

Gfycat

Gfycat

Another popular GIF hosting website is Gfycat, which is entirely free to use and allows you to create your GIFs from web videos.

The service works with YouTube, Facebook, and other video-hosting websites. In addition, you can also upload video files from your hard drive and turn them into GIFs.

After you select your video, you need to choose the segment you want to use for your GIF. Gfycat has a 15-second limitation for GIFs, which is more than enough for most users.

You can also add various captions to your GIFs, but you can’t move them freely or change their appearance.

We must mention that you can add multiple captions and choose how long a certain caption will be visible on the screen.

The service doesn’t offer many editing options, and that’s its only flaw. Despite this flaw, Gfycat is still a solid service, and you should try it out.

⇒ Get Gfycat

Gifs

gif creator

If you’re looking for a powerful web app that can easily convert online videos to GIFs, we recommend the Gifs tool. You can also drag & drop or select a file to start with.

The platform allows you to add padding, crop your GIF, and change hue or saturation. You can also invert color, blur the selected portion, or flip your GIF. In addition, you can also add various captions and stickers to your GIFs.

You can freely move your captions and stickers and even choose a specific time to show or hide effects and captions.

After creating a GIF, you can share it via social networks. If you want, you can also copy its link or the embed code.

⇒ Get Gifs

Imgur

Imgur

Another famous image hosting service that can help you create GIFs with ease is Imgur. To create a GIF, paste the video URL and wait for the web app to process it.

After doing that, you need to set your GIF’s start time and duration. It’s worth mentioning that Imgur can create GIFs that are up to 15 seconds in length, which is more than enough for most users.

In addition, you can also add captions to your GIFs, but you can’t customize them in any way. This means you can’t change the appearance or move the captions freely.

Imgur offers a solid GIF creation service, but we must admit that some advanced options still need to be included. On the other hand, the service is simple perfect for first-time users who want to create a GIF from a web video.

⇒ Get Imgur

With these amazing GIF creators, you can create animation for a quick laugh or to send an impactful message to your audience.

Choose any of the tools from the list, as most of them are free, and it will be fun to try out some before choosing the best for you.

Missed your preferred GIF maker? Feel free to mention it in the comments section below; we will be happy to add it to the list.

FIX: Adobe Audition could not find a supported audio device

A great number of users have encountered an issue when they wanted to use their version of Adobe Audition. The error message says: Adobe Audition could not find a supported audio device on Windows 10.

Alternatively, the displayed message is the following:

  • The currently installed sound card driver does not support DirectSound input
  • Adobe Audition does not support DirectSound input.

This issue can cause a lot of people to lose their temper, as normally, Audition would automatically select the default input mode for a new installation. For some reason, this doesn’t happen in some cases.

From the research our team did on this issue, it seems that the common issue that causes this error to appear is an incompatibility between your sound card drivers and the drivers that run on Adobe Audition.

In order to achieve good results, finding a compatible driver that works both for your computer’s input and output is essential.

In this article, we will explore some of the best-proven troubleshooting methods to solve this issue. Please make sure to follow the steps presented in this article closely, in order to avoid any other issues. Read on to find out how to do it.


What can I do if Audition does not support DirectSound input?

1. Update your computer’s audio drivers

  1. Press Win + X keys on your keyboard -> select Device Manager.Win x device manager - adobe audition doesn not suppor tdirectsound input
  2. Inside the Device Manager window, select ‘Sound, video and game controllers’.
  3. Right-click on ‘High definition audio device’ -> select ‘Update driver’.updating audio driver in device manager - Adobe auditions does not support directsound input
  4. Wait for the process to complete, and then try to see if the issue is solved.

2. Update your Windows version

  1. Press Win + X keys on your keyboard -> select Settings.
  2. Click on Update and Security.Update and security option - Adobe audition does not support directsound input
  3. Click on the Check for updates button.Check for updates - Adobe Audition does not support directsound input
  4. Wait for the process to complete and install any updates, and then try to see if this issue persists.

3. Add ASIO4ALL driver to your computer’s hard-drive

  1. Download ASIO4ALL driver package.
  2. Install it by following the on-screen instructions.Asio4all driver installation - adobe audition does not support directsound input
  3. Open Adobe Audition and click on Edit.
  4. Go to Audio Hardware Setup and click on drop down-menu.
  5. Select the newly installed ASIO4ALL driver for Edit View, Sound recorder, and Multi-track view.
  6. Apply settings and try to see if this fixes your issue.

ASIO drivers should provide a low-latency and high fidelity interface between Audition and your computer’s sound card, and so the error should not reappear.

4. Download the latest Adobe Audition version

Before going through any of the troubleshooting steps mentioned below, make sure that the root of the problem isn’t just an old Adobe Audition installation.

That being said, always remember to keep your program updated, especially if you are still using a version from the pre-CC era.

Adobe Audition is fourteen years old and was designed to function correctly on any operating system that was available at the time.

By getting the latest version, you will benefit from all of the latest features and updates, along with all the fixes that were implemented in the meantime.

It’s almost surprising that it works at all on much newer ones, and its compatibility with Windows 10 is, to say the least, sketchy. It works great on some systems but refuses to run correctly on others, but not always for obvious reasons. Even so, having the most recent version can improve your chances of resolving the issue.

In this article, we explored a quick way to select a different input and output device for your Adobe Audition software. Following these steps closely will surely help you move past this annoying error, and will allow you to start using Audition at its full capability.

Please feel free to let us know if this guide helped you solve your problem by using the comment section found below.


FIX: Microsoft Office Picture Manager not printing

All the photo viewer apps offer printing functionality. However, some users have reported Microsoft Office Picture Manager not printing issues on their computers.

One user reported in the Microsoft Community explaining a similar issue:

Three days ago Office Picture Manager stopped printing pictures (HP laptop/HP C4450 Photosmart printer/Windows7). I can still download and edit the pictures. I CAN print the pictures in Picasa.

This error can occur due to incorrect printer setting configuration or outdated printer drivers. Some users have also searched for the following error message:

Print pictures error windows can’t find this picture

In this article, we discuss a couple of troubleshooting tips to help you resolve the Microsoft Office Picture Manager is not printing error in Windows 10.

How can I fix Microsoft Office Picture Manager?

1. Use photo editing software

There’s no doubt that you usually see Microsoft Office Picture Manager as a flexible way to manage your pictures. However, there are better tools out there that may handle all your picture printing tasks with ease.

Adobe Photoshop is a great example. You can do so much more than you’re used to from Picture Manager with any of them.

Besides directly printing photos, do note that those easy-to-use tools available in Photoshop are suitable for web and mobile too.

As for the intuitive Adobe Sensei machine learning, it always recognizes people and themes, so that creating an organized album is a matter of mere minutes.

2.  Change the default printer

  1. Press Windows Key + R to open Run.
  2. Type control and click OK to open Control Panel.
  3. Click on Hardware and Sound.
  4. Click on Device and Printers.
  5. Right-click on the printer and select Set as default printer.
  6. Open Microsoft Office Picture Manager.
  7. Proceed to print the image you want to print.
  8. Make sure you select your default printer in the Print to option.
  9. Click on Print and check for any improvements.

If the issue persists, open Device and Printers again and set Microsoft XPS as the default printer. Try to print again and check for any improvement.

3. Update printer drivers

  1. Press Windows Key + R to open Run.
  2. Type devmgmt.msc and click OK to open the Device Manager.
  3. On the Device Manager, expand the Print Queues option.
  4. Right-click on the printer you are having issues with and select Update Driver.

  5. Select Search automatically for updated driver software option.
  6. Windows will now scan the internet for any pending update and download and install the update if found.
  7. Close the Device Manager and reboot the computer.
  8. After the restart, open Microsoft Office Picture Manager and try to print the document.

Windows can’t automatically find and download new drivers? Don’t worry, we’ve got the right guide for you.

4. Check your antivirus program

  1. If you have a third-party antivirus installed, check if it has the Application and Device Control option enabled.
  2. If enabled, the antivirus program can block and disable the functionalities of your printer and other devices.
  3. Open your antivirus program and check the Device Control logs.
  4. If any file is blocked by the application, a file like dllhost.exe, remove it from the list.
  5. Open Microsoft Office Picture Manager and check if you can print now.

Depending on the antivirus you are using, the settings to access the Application and Device Control option may vary.

As the feature can block certain apps from running in a certain location, disabling the feature or removing the file from the blocked app list can help.

5. Use a Restore Point

  1. Click on Start and type create a restore in the search bar.
  2. Click on Create a Restore Point option.
  3. In the System Properties window, click on the System Restore button.
  4. Click Next.
  5. Check the box Show more restore points. This will show all the available restore points.
  6. Select the most recently created Restore Point and click Next.
  7. Confirm the action and click Finish.
  8. System Restore will now restore your PC to an earlier point where it was working fine.
  9. Once the PC is restored, open the Picture Manager and check for any improvements.

If System Restore isn’t working, don’t panic. Check this useful guide and set things right once again.

This option is particularly helpful if the Picture Manager stopped printing after a power outrage or completing the installation of a new program.

Note that, while the Restore Point does not affect your personal files and data, it will remove any programs installed after the restore point was created.

If you still have problems, you might need to reinstall and download Microsoft Office Picture Manager to fix them permanently.

For any other questions or suggestions, feel free to reach in the comments section below.

How to annotate and manage PDF files [Best Apps]

Are you looking for ways to create and annotate PDF files in Windows 10 ? You have quite a few options, namely dedicated programs that you can use to do just that.

Most come with a free trial period or as a freeware version, with just a few functions. So you might want to try all of them, to see which one suits your needs.

No matter the program you choose, they are all great tools for engineers, construction workers, architects, students, teachers, travelers, and just anybody that needs to mark up a PDF document.

Some users have also searched for the following:

  • drawboard pdf merge documents
  • drawboard pdf portable

So let’s dig in and see our recommendations and what each one has to offer.


How can I create, annotate, and manage PDF files?

1. Use Adobe Acrobat to annotate PDF files

install Adobe Acrobat
  1. Start by downloading Adobe Acrobat.
  2. Install it.
  3. Open a PDF file in Acrobat.
  4. Then, select the Comment tool.
  5. Choose Add PDF annotations to your file. Highlight text, strikethrough content, add text boxes, or sticky notes – these are all convenient options to choose from for the best results.
  6. After making the desired changes, don’t forget to save your file.

While on the run, <span id=”urn:local-text-annotation-2e7szmy3b9j96ytxgorjn0yrxwfrf9nt” class=”textannotation disambiguated wl-thing wl-link” itemid=”https://data.windowsreport.com/windowsreport/softwareapplication/download_adobe_acrobat_reader_dc_for_windows_7_ keeps the workflow going across multiple platforms. Use it on desktop, while at work, or on the mobile, to make sure your long commute isn’t a waste of time.

Creating, annotating, and managing PDF files will all be like a walk in the park thanks to all the advanced tools included and that user-friendly interface.

You may even take advantage of that Share With Others option to send the file to your coworkers. However, do note that only select annotations are supported.

Adobe Acrobat Reader

Adobe Acrobat Reader

Annotating or creating PDF files has never been easier. Download Adobe Acrobat and see for yourself.
Free trialVisit website

2. Try Icecream PDF Editor to edit documents

  1. Download Icecream PDF Editor.
  2. Install the program.
  3. Double-click to open it.
  4. Once you’ve opened a new file, the rest of the pocess is self-explainatory.
  5. Do what you wish with the given tools.

Icecream PDF Editor is a notable software alternative to Adobe’s Reader to manage PDF documents. It is intuitive, lightweight, and it offers just what you need to edit your files.

The tool has 4 major PDF editing modes: Edit, Annotate, Manage pages, and Fill in forms to help your stick with the needed action. All of these do not necessarily need a step-by-step guide.

The software is pretty self-explanatory, so trust us when we say that you don’t need any external guidance. Additionally, you can also edit objects, password-protect files, and even add custom stamps.

⇒ Download Icecream PDF editor


3. Use the Drawboard PDF app to create and annotate PDF files

Drawboard PDF app
  1. First of all, download the Drawboard PDF app.
  2. Create a new PDF by going to Drawboard and clicking the + sign.
  3. Click Create New PDF Document next.
  4. You may easily annotate by using the extensive array of available tools. Feel free to show, flatten, clear annotations, and not only.
  5. Save your file.

When it comes to this Windows 10 app, we may only remind you that it is very fast and has a very nicely polished user interface.

Moreover, Drawboard distinguishes itself by its intuitive stylus and touch input separation, smooth and natural pen, and an array of other tools.

Thanks to the included Document Builder, you can merge, re-order, and arrange PDFdocuments.

As for the Calibrated Annotations feature, it lets you calibrate documents so as to scale and add linear and area measurements.

⇒ Download Drawboard PDF app

What do you think of the three tools that we’ve told you about? How do you find creating and annotating PDF files while using them?

In case you need a different tool, you might want to try the Kami Chrome extension instead. For live on-screen markup over PDFs during lessons and demos, try the Epic Pen tool to draw directly on any window without changing the file.

Let us know how it all worked out. Give us some feedback in the comment section below.

CBR Files Reader: 6 Best Free to Download

A CBR file, or a comic book file, is like an archive of several images put together back to back. If you open such a file with a dedicated CBR reader, you will be able to read and control it as if it were a comic book.

You could also open a CBR file with an archiving tool such as WinRAR. However, if you do this the images will just be extracted, and not be paired in any particular way.

Since comic books are reaching the digital age, comic book readers are appearing and evolving as well.

There are many such programs out there, so choosing the right one can be confusing. That is why we’ve compiled a list of the best programs that can open CBR files efficiently.


What programs can I use to open CBR files?

Adobe Acrobat Reader

One of the best programs to view Comic books is for sure Adobe Acrobat Reader. The software is a popular tool to view PDF files , used by millions of people, being part of the Adobe suite.

Since Comic books are usually PDF formats, you will effortlessly open them with Adobe Acrobat Reader.

Check out some of Adobe’s key features:

  • Convert Word/PPT/JPG to PDF.
  • The software is cross-platform.
  • It comes with a free trial.
  • It is connected to the Adobe cloud.
  • Allows for digital signatures.
  • Can customize PDF, zoom, add bookmarks, and many others.
Adobe Acrobat Reader

Adobe Acrobat Reader

View your favourite Comic books and witness epic adventures effortlessly with Adobe Acrobat Reader!
Free trialVisit website

Icecream Ebook Reader

When it comes to reading comic books in a simple manner, nothing beats Icecream Ebook Reader. The program is extremely lightweight, so you can enjoy reading your favorite vintage comic on your not-so-favorite vintage PC.

Additionally, it memorizes where you left off when reading a comic, so you don’t waste time backtracking to see where you left off.

Check out some of its core features:

  • Clean and customizable UI
  • More lightweight than other similar programs
  • Tracks your reading history, so getting back at a comic is easy

⇒ Get IceCream Ebook Reader


Soda PDF Comic book reader

Soda PDF is a well-established developer when it comes to readers. While their comic book reader is capable of opening CBR and CBZ files without a problem, the 3D page-flipping effect is what makes it shine.

Every time you finish reading a page, just click the corner of the page and it will flip right in front of your eyes, and if you are using a touchscreen device, this will feel even more realistic.

Take a look at its main features:

  • Comes with a free version
  • Great-looking built-in 3D page-flipping technology
  • 100% compatible with all CBR & CBZ files

⇒ Get Soda PDF Reader


CDisplay Ex

CDisplay Ex is a light, efficient CBR Reader, and it is also one of the most popular comic book readers. It is able to read all comic book formats and even Manga files

It loads fast, it allows you to view the pages in single or double-page mode, it features color correction technology that makes it great for low-quality scanned comic books and more.

Check out CDisplay’s key features here:

  • Intuitive interface
  • lightweight design
  • Great for files that are low quality
  • Allows you to add bookmarks

⇒ Get CDisplay Ex


Comixology

The main feature of Comixology is not that it is a comic book reader, but it is an entire comic book distribution platform, the way Steam is to video games.

You can use this platform to get all the comic books you may ever need, and the simplistic comic book reader it also provides is great as well.

Additionally, the program is available on all platforms, including mobile ones, allowing you to read your favorite series wherever you go.

Let’s see some of Comixology’s main features:

  • The platform is great for getting any comic
  • They have occasional sales
  • They sometimes even offer freebies to subscribers
  • Their comic book reader is available for all platforms

⇒ Get Comixology


Value Bundle Comic Book Software

The Value Bundle Comic Book Software is an entire suite of programs dedicated to digital comic book fans everywhere.

It comes packed with 3 different and very lightweight comic book readers, namely Comic Book Reader, MComix and HakuNeko Manga.

HakuNeko Manga also lets you download manga off of a specific website, making it great for fans of this genre.

Let us take a quick glance at some of its great features:

  • Fits pages to window, to width, to height, or to a percentage
  • Crisp image resizing
  • Intuitive interface
  • Opens CBR (RAR) and CBZ (ZIP) comic book archives
  • Displays JPEG, PNG, GIF, and TIFF images

⇒ Get Comic Book Bundle


Comic books are viewed by many as a work of art. They tell stories new and old in a  way that appeals to both younger and more mature audiences, and they don’t seem to be losing any popularity any time soon.

That is why comic book reading programs exist so that these works of art can reach even those that prefer the digital version as opposed to the physical one.


What is BIOS: Everything You Need to Know Explained

BIOS is one of the critical parts of the computer and is responsible for the most important task, turning on the PC and booting the OS. But most of us often overlook its importance or don’t have the slightest clue about what BIOS is.

You can easily access the BIOS when turning on the computer using the dedicated keyboard shortcut or through the Recovery Mode in Windows. Users who can’t boot Windows choose the former option. Let’s now find out the role played by BIOS.

What does BIOS stand for?

BIOS stands for Basic Input/Output System, and is the first thing that loads when you hit the power button on the computer. Here are the primary functions of BIOS:

  • Checks for issues: When you turn on the PC, the BIOS first runs POST (Power On Self Test), checking whether the connected hardware works fine and wouldn’t impede the startup process.
  • Loads the hardware: After POST, the next course of action on the part of the BIOS is to load the critical hardware and its drivers.
  • Boots the OS: Most importantly, the BIOS is responsible for identifying and booting the installed version of Windows.

Remember, while older computers came with BIOS, the new-generation ones offer UEFI (Unified Extensible Firmware Interface), basically a newer and advanced version that helps either bypass or eliminate the limitations of the former. And in most cases, having either of the two works just fine.

Why is BIOS needed?

BIOS is much more than it’s perceived to be. While most are unaware of this aspect, BIOS can also be used to enhance security by adding a password. Once the protection is enabled, no BIOS activity will occur unless the password is entered.

Besides, it can also relay commands between the OS and the device where accuracy and timing are vital, especially with the graphics adapter.

Where is BIOS stored?

BIOS is stored on flash memory or EEPROM (Electronically Erasable and Programmable Read Only Memory) to allow quick changes to it to upgrade the BIOS and introduce new features or settings.

Remember, this wasn’t the case earlier, and the BIOS was originally stored on a read-only chip in the computer’s motherboard because back then, there were no frequent updates or upgrades.

Is BIOS hardware or software?

BIOS is a software component that kicks in when the computer is powered on. Also, you can get into the BIOS to configure several critical settings on the PC or even change the boot order.

Though a software, the BIOS is responsible for effectively functioning the connected hardware and critical components.

What is a BIOS update?

Like any other software on the PC, the BIOS, too, receives periodic updates. The updates are meant to enhance its functionality, add new features, and introduce patches for any previously known bugs, though that’s extremely rare.

Updating the BIOS can often be tricky because the process is completely manual, and even the slightest of mistakes can render the PC unusable, at least for the time being, until a fresh BIOS is loaded. So, we recommend you check the manufacturer’s website for the exact steps and follow them as it is.

What is BIOS flashback?

BIOS flashback, as the name suggests, is a quick way to update the BIOS without the need to enter it or access the operating system, generally Windows.

The process involves connecting a USB drive holding the updated BIOS to the relevant port on the motherboard and then pressing the dedicated flashback button for 5 seconds. You should then see a light blink as an indication of when the process starts and finally completes.

Even for the BIOS flashback, we recommend checking the manufacturer’s website or contacting a professional because the process is way more intricate than it initially appears.

Can a PC run without BIOS?

A computer can very well run without the BIOS. But here’s the catch, it can’t boot the OS without one.

While the BIOS is stored on the motherboard, the operating stored is stored on the drive. And for the OS to load, the drive has to be active or enabled, which is the core function of the BIOS, as discussed earlier.

But you can always remove the BIOS chip after the computer has been turned on and Windows (or another operating system) has taken over.

Can BIOS be repaired?

Since the BIOS plays such a vital role on the PC, there’s always a chance that it might corrupt or run into other errors, which leads to a situation where users need to repair the BIOS.

There are plenty of ways to go about it, starting from resetting the BIOS, going for a flashback, removing the motherboard battery, or using a dedicated tool.

That’s all there’s to the subject, and by now, you should have a fair understanding of what BIOS is.

Before you leave, find out what to do when the PC won’t boot after a BIOS update, a common problem reported by many. Besides, discover some quick tips to make Windows faster than ever.

For any queries or to share any additional information on the subject, use the comments section below.

Windows 10 Stan app updates with support for Stan Sports and lots of Rugby

The official app for the Australian streaming service, Stan, updated for Windows 10 devices this week.

The app update was a rather small one but it added support for the new Stan Sport content which launched this month. Unlike the various TV shows and films, access to the Stan Sport content will set users back an additional $10 on top of whatever subscription plan they’re currently on. A free 30-day trial of Stan Sport is available for those who want to try it before they buy.

Currently Rugby, Wimbledon, and Roland-Garros matches and content is included with Stan Sport though more is expected to be added over time.

Stan is a popular Australian streaming service that features a combination of both local and international films, series, and now, sports.

Do you use Stan and are you going to upgrade to Stan Sports? Let us know in the comments below and then follow us on Twitter and Pinterest for more Windows 10 content.

Stan
Stan
Price:
Free

System Information Software: Best to Use in 2026

There are many reasons for which you might have to get a detailed description of both the hardware and software components of your Windows 10 PC.

If you have the appropriate experience, you could check the computer components on your own by taking off your PC’s case. Even in this situation, you would need to do specific research on all specifications for each part of your computer.

This type of software is called a system information tool, and it is built to allow you to get detailed information about the monitor, how your system is running, and temperatures, and helps you find any possible issues with your hardware.

This type of tool can help to see if the specifications of a game match your PC‘s capabilities, or if you want to buy new hardware, and need to know details about the architecture of the previously used parts.

In this article, we will explore some of the best software options on the market that can help you gather all the information you need about your system.

What are the best tools to check the Windows 10 PC specifications?

Speccy – Intuitive interface

server temperature monitor software

Speccy is one of the best system information tools found on the market. This software has a great-looking and intuitive user interface.

You can easily check on the details of your computer’s hardware by just simply running the program and waiting for the results to come in.

Once you start this software up, it will automatically start scanning your PC for hardware specifications.

The information in the reports of Speccy includes the type and version of the operating system, CPU, RAM, motherboard brand and model, and the type and processing speed of your graphics card.

The tool also offers information about optical drives, audio hardware, network connection, and storage devices (both internal and external drives).

One added benefit of using Speccy is the easy way to navigate the components tree.

This allows you to have a quick overview of the state of your system, and it can also give you reports about the temperature of your CPU, motherboard, and hard drives.

Belarc Advisor – Simple usage

Belarc Advisor comes in very close to the previous software option we discussed in this article.

Even though Belarc isn’t as detailed as the other options we presented in this top, it still gives you a good range of reports regarding hardware configuration and other important information.

Belarc also can show you detailed reports about software installed on your PC, local network details, and any hard drives available (both internal and external).

One of the best features of Belarc is its ability to show you all the product keys of the software you bought a license for. (Windows activation key, Microsoft Office, etc.)

You can also use Belarc Advisor to get a list of all the security updates your Windows version doesn’t already have.

Beyond this, this software can also show you all the installed hotfixes, the frequency of usage for specific programs, and version details for Microsoft products.

After the scan is completed, Belarc Advisor will automatically open up a new web browser page (using your default internet browser), on which you will get a full list of all the details produced from the scan.

⇒ Get Belarc


HWiNFO – Detailed information

HWiNFO - system specs software

HWiNFO is another great software option that lets you find out any information about the hardware and software installed on your PC.

This software can show you detailed information about your computer’s CPU, motherboard, monitor, audio setup, network, etc.

This software also allows you to monitor both the average and current rates/speeds of your memory, HDD, and CPU. It also can run a benchmark to test these items.

All the features found in HWiNFO can also be extended by using the official plugins available on the official site, and you can also have a look at the HWiNFO forum.

⇒ Get HWiNFO


Free PC Audit – Free app

As the name suggests, this software is completely free to use and offers you the possibility to easily find out what software and hardware your PC is running.

You can see detailed information about your computer’s motherboard, memory, and printers, shows you the Windows product key and ID, a list of installed software, the processes your computer is running at that time, etc.

After the report is generated, you can export it into a simple text file so you can have the information available to you whenever you need it.

This software’s small size also allows you to copy it on a USB drive and use it for a portable system specification audit on any PC.

⇒ Get Free PC Audit


Everest Home Edition – Easy to use

Everest Home Edition is another useful free tool that lets you get detailed information about your system, works quickly, and automatically sorts the results in 9 categories.

This allows you to move around the software quickly and check the scan’s details easily. This tool scans the motherboard, network, storage devices, and display, and after the scan is completed, it can generate an HTML report.

Even though this tool can offer you some information, it is on the low end of the spectrum compared to the other software options we presented in this article.

⇒ Get Everest Home Edition

In this article, we explored some of the best software options that allow you to stay informed about the status of your hardware, model names, and versions and have an overview of the entire architecture of your PC.

Now that you know your basic system information, you might be interested in solving the estimation of software size with functionality measurement, and we have more information on that in a separate guide.

You can also check the CPU Z tool for a more detailed report on your system information or if that doesn’t d it for you, check out CPU-Z alternatives.

Please tell us your opinion about the software we presented in this article by using the comment section below.

Tony Hawk’s Pro Skater 1 + 2 video game is getting a next gen Xbox Series X release next month

Tony Hawk’s Pro Skater 1 + 2, a modern rebuild of the two classic video games, came out on Microsoft’s family of Xbox One consoles in 2020 and now a newer version of this new version has been announced for the Xbox Series S and X consoles.

Unlike other Xbox One titles which unlock improved visuals and other features for free when played on the newer Xbox Series S or Xbox Series X consoles, Tony Hawk’s Pro Skater 1 + 2 is actually getting a separate release which will be sold separately.

Current owners of the Xbox One version will be able to pay $10 USD to unlock the Xbox Series X version in their Microsoft/Xbox account while newer players can buy the new Cross-Gen Deluxe Bundle which went up for pre-order today and contains both versions. Buying this new bundle will also unlock the secret skater Ripper, retro gear for Create-A-Skater, and retro skins for Tony Hawk, Steve Caballero, and Rodney Mullen.

The next gen version appears to be basically the same game as the Xbox One version though it will get a significant performance boost with support for 120 FPS at 1080P and 60 FPS in native 4K. When played on an Xbox Series S, the game will play at 1440P with an upscaled 4K resolution. Improved dynamic shadows, reflections, lens flare, and textures are also promised.

The Tony Hawk’s Pro Skater 1 + 2 Cross-Gen Deluxe Bundle is set for release on March 26th though buying it now will immediately unlock the Xbox One version.


Diagram and Flowchart Software: 8 Best to Use in 2026

Flowcharts are essential for system designers and programmers. System analysts and programmers design IT systems and software with data flow diagrams and algorithm flowcharts.

A flowchart is a diagram that portrays a system, process, or computer algorithm that is used in various domains to research, enhance, and communicate usually complex information in easy-to-understand diagrams.

You can layout basic flowcharts, presentations, and even word processor software; but dedicated flowchart applications have more extensive diagram options and tools.

Certain diagram software or flowchart maker can merge with other design tools and can offer collective platforms so multiple users can edit diagram files simultaneously.

These are a few of the best flowchart applications for Windows with various advanced features that can help you perform tasks effortlessly.

What are the best Diagram and flowchart tools for Windows?

Edraw Max – Specific flowchart templates

Edraw Max is an all-in-one diagram application that has one of the most extensive collections of shapes and symbols for flowcharts and other diagrams you’ll likely find in any software.

With more than nine million downloads, Edraw is the diagram software of choice for many. This is multiplatform software compatible with Windows 10/8/7/Vista, Linux (Ubuntu, Debian, and Fedora), and Mac OS X platforms.

Edraw’s publisher boasts that you can set up more than 260 diagram types with this software. When Edraw users first open the application, they can select from a wide variety of template categories.

The software is perfect for business, flowchart, engineering, organizational, network, database, software, presentation, and wireframe diagrams.

The software includes more specific flowchart templates for data flow, audit, highlight, SDL, cross-function, and basic flowchart diagrams.

Edraw users can select more than 12,000 vector symbols and add infographics to flowcharts with URL hyperlinks, document attachments, and annotations.

If that isn’t enough, it also provides a presentation mode and PDF and HTML export options for sharing diagrams.

Edraw Max

Create flowcharts and enjoy specific flowchart templates and over 12,000 vector symbols.
Free Trial Visit Website

Canva Diagram Maker – Thousands of shapes and illustrations

Canva Diagram Maker is a great application that lets you create and design diagrams of all shapes and sizes to help you show the overall picture.

Whether it is a personal or professional project, you can design any diagram and show structures, ranks, relationships, processes, and complex information.

It has more than 20 professional types of graphs from which you can choose, plus a data vizualisation that makes it uncomplicated to learn.

You can insert your diagrams in your presentations, reports, and many others with professionally-designed templates which makes it easy to accelerate your workflow.

Moreover, with Canva Diagram Maker, you can accomplish any data visualization project with easy drag-and-drop tools alongside thousands of shapes and illustrations.

You can also make diagrams with your colleagues by sending a link to an editable version of your project so that each one can provide information, review, and oversee the design.

Canva Diagram Maker

Create fun or professional diagrams with ease for your marketing campaigns, reports, and more.

Lucidchart – Perfect for businesses

Lucidchart is an intelligent diagramming program that helps you create diagrams with professionally-looking templates.

You can visualize your team’s processes, systems, and organizational structure and offer an overall presentation of complex ideas faster and clearer.

Lucidchart helps you increase collaboration and communication by offering a common visual space to brainstorm with your teammates.

Furthermore, it is integrated with applications like Google Workspace, Microsoft, Slack, and many more to maintain teamwork and increase interaction.

It has intuitive drag-and-drop features to map out your business processes and pinpoint inefficiencies so you can improve your work.

You can organize your teams by skill sets, location, and key capabilities for the business strategy and assign each one where it will make a great impact.

Lucidchart

Create diagrams with professionally-designed templates without any effort.

Adobe Illustrator – Interactive interface

Adobe Illustrator shoe design

Adobe Illustrator is one of the best flowchart and diagram software alternatives, as it includes the most powerful vector-based features.

This software is part of Creative Suite apps, and you can add it to Windows (XP to 10) together with other graphic tools like Adobe Photoshop, Adobe Indesign, and other apps.

The program is also compatible with iPad platforms, so you can design diagrams and flowcharts with touch or Apple Pencil if you feel this way is easier for you.

Your work will be saved to the cloud, so your team will be able to access it no matter where they are.

Adobe Illustrator users can draw out flowcharts and many other types of diagrams with the software. UML, network, circuit, and assorted diagrams are a few of the diagrams you can draw out in Adobe.

This is also a good choice for database designers as it includes objects for entity-relationship diagrams.

The most attractive thing is the fact that all the changes made to your work will be seen in real-time and your workflow will be improved considerably as you will use complex vector graphics.

In order to add more creativity to the flowchart, you can use, as well, typography designs by adding powerful effects and font styles.

Adobe Illustrator has an interactive interface for a beginner as for a graphic specialist, so you can easily edit diagrams in multiple tabs. The program also enables you to add alternative layers to diagrams.

Furthermore, the software supports the most notable diagram file formats as .ai, .eps, .ait, .svgz, and .svg.

Adobe Illustrator

If you are a system designer, Adobe Illustrator is the best software for designing flowcharts.
Free trial Visit Website

Microsoft Visio – Extensive toolkit

Microsoft Visio for Windows 10/8.1/7 is an intuitive software that you can utilize to set up flowcharts and many other types of diagrams.

Visio Standard 2016 is retailing at $299.99, and there’s also a Visio Professional that’s available at $589.99. Ok, $299.99 might not sound like especially great value.

But this application packs in an extensive toolkit for diagrams and has a lot of exclusive features you won’t get in most freeware alternatives.

Visio Professional also includes data linking and more sharing and collaboration options than the standard version. Few other flowchart applications can match Visio’s rich set of design tools.

Visio 2016 enables its users to set up the full gamut of diagrams, such as basic and cross-function flowcharts, UML, wireframe, network, Venn, and technical engineering diagrams.

You can also utilize the software to set up Gantt charts, calendars, and organizational charts. The software includes 70 diagram templates and starter diagrams.

Visio also provides real-time collaboration so that multiple users can edit a diagram, a presentation mode, HTML and PDF export tools, and a clipart gallery including shapes, symbols, and other décors for flowcharts.

⇒ Get Visio Standard

⇒ Get Visio Professional

ClickCharts (NCH) – Incredibly simple UI

ClickCharts (NCH)

The purpose of diagrams is to simplify and oversimplify the teaching and learning process of a particular topic. As such, you are taking a complex set of information and turning it into something more understandable.

So, a program that is made to create diagrams should be just as simple to use. That would be the case with ClickCharts (NCH), an incredibly easy-to-use diagram creation tool that will get you set up in minutes.

The UI is incredibly simple and uncluttered with unnecessary tools, and the only limit to how fast you can create diagrams with it is your own knowledge of the subject at hand.

There are plenty of things that you can use ClickCharts for, including visualizing complex processes and organizations, creating value stream and data flow diagrams, identifying bottlenecks, and finding opportunities to optimize processes.

As for the diagrams themselves, they can be customized in whatever manner you see fit, from the style of the diagram (Venn, Pie chart, etc) to the colors, placements, number positioning within the page, you name it.

All in all, it is an extremely good tool for anyone that relies on diagrams for teaching, learning, studying, and doing research, allowing better optimization of a system’s flow through better visual understanding.

⇒ Get ClickCharts (NCH)

yEd Graph Editor – Extensive palette of flowchart symbols

The yEd Graph Editor is Java-enabled software compatible with the Windows, Linux, and Mac OS X platforms. Thus, you also need Java JRE installed to run this flowchart application.

This is a freeware program that includes plenty of tools for flowchart creation, and you can download it from this website page.

The yEd Graph Editor application provides an extensive palette of shape nodes, edge types, flowchart symbols, group nodes, entity-relationship symbols, BPMN symbols, and other diagram elements.

You can design a wide variety of diagrams or charts with those elements. The software has plenty of annotation options so that you can add an icon, multi-line text, or HTML labels to them along with tooltips and URLs.

The automatic layout feature is a great addition to the software that automatically arranges flowchart diagram parts for end-users.

This application also supports lots of import and export file formats, such as XML, GraphML, PDF, HTML, GIF, JPG, SVG, PNG, BMP, and more besides. Check out this gallery to see some yED Graph Editor diagram output.

⇒ Get yEd Graph Editor

Diagram Designer – Standard drawing tools

Diagram Designer is a straightforward and lightweight vector-based flowchart application for Windows.

This isn’t really a match for the likes of Visio and Edraw, but it still provides a decent selection of tools for drawing flowcharts. This is also open-source software that’s compatible with all the more recent Windows platforms.

Diagram Designer users can utilize this application to draw a flowchart, UML design, GUI design (for UI storyboards), and electronic circuit diagrams.

It includes standard drawing tools for rectangles, lines, arrows, ellipses, curves, and arrows, and enables its users to add shapes to alternative layers so they can edit them without changing any of the shapes on other layers.

Diagram Designer users can save their own template palettes or download them from the software‘s website. In addition, this application packs in a graph plotter, slideshow viewer, and pocket calculator for equations.

⇒ Get Diagram Designer

Those were some flowchart applications that are worth noting. Edraw Max and Visio are the heavyweights, but Diagram Designer, yEd Graph Editor, and Dia are decent freeware and open-source alternatives.

Note that you can also design flowcharts with web apps such as Lucidchart and Gliffy. Feel free to give us any feedback regarding the subject in the comment section below.

The offer is not available right now [Error code: 100]

Windows errors will appear sooner or later, and one that users reported is The offer is not available right now error code: 100.

This error can be problematic, but you should be able to fix it by following the solutions from this guide.


How do I fix The offer is not available right now error code 100?

1. Starting SQL Server service

  1. On the Windows Search bar, type Services.
  2. From the right pane, below the Services, click on Run as administrator.
  3. Right-click on SQL/MSSQLServer service and select Start.
  4. Close the Services window and check to see if the issue is solved.

If the required services aren’t running, you may encounter The offer is not available right now error code: 100, so be sure to enable them by following the steps from above.


2. Check the default access permissions

  1. Press Windows and R keys at the same time, to open the Run window. 
  2. Type dcomcnfg and press Enter. The Component Services window has opened. 
  3. Click the arrow in front of Component Services and Computers, then right-click on MyComputer and select Properties. 
     
  4. Go to COM Security tab and click on Edit Default.

  5. If System and Interactive are not listed in the Default Security box, add them by clicking the Add button.
  6. After adding them, for both System and Interactive, check the box below Allow for Local Access.
  7. Click OK to close the windows.
  8. Reboot the computer and log in again.

Solving Windows system errors can be complicated and tricky because the error code message is not always very clear. The steps above will help you to fix The offer is not available right now error code: 100.

If the problems still persist, you can try to take a look in Event Viewer and see exactly what application is generating this issue. Here you can also check when the issue occurred.

Knowing the time might give you an idea about what computer activity caused the problem.

[FIX] Raspberry Pi relay not working

The Raspberry Pi is a miniature computer that can do simple things at a low cost, but sadly, some users reported that Raspberry Pi relay is not working.

This can be a big problem in your projects, and today we’re going to show you how can you easily fix this problem for good.


How do I fix my relay not working on Raspberry Pi?

1. Reconnect your relay

  1. Connect the 5V Pi pin to the Vcc pin on the relay board.
  2. Then connect the ground pin of the Pi to the ground pin of the relay board.
  3. Connect GPIO pin to the input of the transistor circuit above and the output to IN1 pin of the relay board.
  4. If you have other relays repeat the process for each of them

Note: Each relay requires a separate transistor circuit,  drawing approximately 72mA from the Pi when activated, given that the Pi itself required 500mA.

Make sure the Pi’s power supply can power all of them. A 1.5 Amp power supply would be the safest choice.

Your issue might come from a relay that is not connected properly to your Raspberry Pi. Sometimes a misplaced pin will not allow the circuit to function and you will be left wondering why it doesn’t work.

The steps above will help you if your Raspberry Pi relay is not working.


2. Check the power supply

The power supply can cause a series of problems to your Raspberry Pi. If it doesn’t have the right voltage, your relays will not be powered, and in some cases, the Pi itself will fail to boot.

Make sure you have a stable PSU that is compatible with your model of Raspberry Pi. Many people use smartphone chargers to power their Raspberry Pis, although they are not reliable.

You should make sure you use a dedicated, suitable PSU instead.


3. Check the operating system

Your Raspberry Pi needs an operating system to work. Even if you successfully connected your relay, you still need to program it using scripts.

Make sure that your Raspberry Pi has one of the many available OS installed on it. If you do have an OS installed, check for corrupted files that might alter its functionality.

Install an OS

  1. Download the required software and files on another device.
  2. Get your SD Card and Card Reader.
  3. Go to My Computer and find the mounted SD Card.
  4. Format your SD Card.
  5. Write the Operating System you downloaded on the card.
  6. Insert it into your Raspberry Pi and install your OS.

Installing a new Operating System on your Raspberry Pi is pretty simple. You just need to download the OS you chose on another device and copy it on an SD card compatible with your Pi.

There are a lot of great OS choices out there, including Windows, Linux, and Ubuntu.

After checking your OS, be sure to check if your Raspberry Pi relay is still not working.


4. Check the condition of your relay

If the other solutions didn’t fix your problem, make sure your relay is in pristine condition. In other words, your device might be physically damaged and not working at all. Check for any visible dents or missing parts.

This is not a universal solution, but it might help if Raspberry Pi relay is not working properly.


If you wanted to play around with your Raspberry Pi and control the devices in your house using a relay, but you couldn’t get it to work, the aforementioned steps will provide you with all the information needed to fix your issue.

We hope that our article helped you with your problem. If you’d like to add anything else to the article, feel free to do so in the comment section below.

What to do if the camera keeps spinning in Valheim

Since you’re here, you’re probably one of the many players that are annoyed with the many bugs Valheim seems to have. After game lag, low FPS or missing characters, gamers reported that they can’t seem to control their camera as it keeps spinning.

This is how a player described the experience:

As soon as I enter the world, the camera rotates to face the sky and just keeps spinning slowly. I can fight it with the mouse, but can’t get it to stop if I let go. 

Just like the other game issues, this one too has been acknowledged by the developers, with a promise for a patch. In this case, they also provided a fast fix.


How can I fix camera bugs in Valheim?

  1. Open your game settings.
  2. In the Controls tab.
  3. Make sure that the Gamepad Enabled option is disabled.
  4. Click OK.
disable gamepad valheim

Players also mentioned that they resolved the camera spinning issue by simply unplugging their joystick. However, in this case, you’ll have to find another way of continuing the game.

Additionally, you can also change your controller support settings.

  1. Quit the game.
  2. Open the Steam launcher.
  3. From the top left corner, select Steam, then Settings.
  4. Scroll down to the Controller option.
  5. Click on General Controller Settings.
  6. Here, check the controller support you want to use.

Luckily, the game is only in early access, so players are somewhat permissive with all these bugs as they discover them. Make sure you have the latest Valheim version download on your PC.

Valheim

Valheim

Get your official copy of Valheim and forget about spinning camera or any other issues. Just play!
Check priceVisit website

So, at this point, if you find any other glitches in the game you are encouraged to hit the feedback button and submit them for further review.

FIX: Start with and end with error Internet Explorer 11

Internet Explorer has been around for ages and many users reported that Internet Explorer 11 will start with and end with error.

This can be a frustrating issue, but in this guide we’re going to show you how to fix this problem once and for all.


Quick tip:

Internet Explorer is a decent web browser, but it’s not being updated, therefore it’s prone to all sorts of issues. If you’re having issues with Internet Explorer, why not switch to a new, more reliable and secure browser?

Opera is a Chromium browser, and it’s designed to be safe, reliable, and lightweight. The browser works with Chrome extensions, and thanks to the built-in VPN and ad-block, you’ll enjoy an ad-free and private browsing experience.

Opera

Opera

Having issues with your web browser? Switch to Opera and enjoy in error-free browsing.
Get it freeVisit website

How do I fix Internet Explorer if it starts and ends with error?

1. Run the Internet Explorer troubleshooter

  1. Go to Start Menu and click Settings.
  2. Select Access & Security, then Troubleshoot from the left panel.
  3. Pick the troubleshooter you want then select Run the troubleshooter.

This is a simple workaround, but it might help if Internet Explorer 11 starts with and ends with error.


2. Check the processor speed to spot if an add-on is causing the issue

  1. Access the Start Menu, click Settings, go to System then select About.
  2. Look under Device Specification and see System Type.
  3. Depending your processor speed (64 bytes or 32 bytes) copy/paste one of the codes into the Search box on the toolbar:
    For 32-bit: C:\Program Files (x86)\Internet Explorer\iexplore.exe -extoff
    For 64-bit: C:\Program Files\Internet Explorer\iexplore.exe -extoff
  4. Internet Explorer will open and you’ll see which add-on was causing the problem.

3. Run the browser without add-ons

  1. Open the Internet Explorer window and go to the Tools button and click Manage add-ons.
  2. Click All add-ons under the Show tab, pick the add-ons you want to turn off or the ones you want to delete.
  3. Select Disable or Remove, then Close.

4. Reset Internet Explorer

  1. Access Internet Explorer click Tools go to Internet Options
  2. Click the Advanced tab.
  3. From the Reset Internet Explorer Settings dialog box pick Reset
  4. Select Reset in the dialog box that says Are you sure you want to reset all Internet Explorer settings?
  5. After Internet Explorer finishes applying the default settings, click Close then OK.
  6. Restart your PC in order for the changes to take place.

As we’ve demonstrated there are multiple solutions to fixing the Internet Explorer errors and in this article we brought you all the information you need to troubleshoot any type of problems by yourself.

If Internet Explorer 11 starts with and ends with error, be sure to try all of our solutions.

Tell us which method suited you the best and what recommendations you may have by accessing the comment section below.

How to retrieve a corrupted or missing character in Valheim

Although there’s a lot of hype around Valheim presently, the game has a lot of unaddressed bugs. Among others, players say that after prolonged gameplay, their character goes missing.

Here’s what gamers say about their character disappearing:

After a crash, when I started the game up again my main character was gone after over 60 hours of gameplay on it.

And another report:

I logged back in after I got home to play this game and my character was replaced with a default character named STRANGER 

While still in early access, game developers are gathering feedback and are promptly responding to such issues, though not with prompt solutions but with a there’s no solution for this right now reply.

Game developers also mention that this could also be related to how the game is closed. Namely, using ALT+F4 + shutting down the computer without properly closing the game will likely affect file integrity.

So it’s basically up to the players to find some workarounds until a final patch. And here’s what they’ve done.


How can I recover a missing character after a crash?

fix valheim corrupted character
  1. Press the Windows key and type %appdata% to get to AppData. (Normally, this can also be opened via File Explorer, provided that you can see hidden files.)
  2. Go to LocalLow > IronGate > Valheim.
  3. You should see 2 files named CharacterName.fch and CharacterName.fch.old. The former is the corrupted one, while the latter is an older version of your character.
  4. Back up both files.
  5. Then, delete the one ending in just .fch.
  6. Rename the remaining file by deleting the .old. It should say only CharacterName.fch.
  7. What should happen is that the game replaces your character with its slightly older version, but functioning one.

Those who have tried this approach experienced two outcomes:

  1. They got their character back, only a version dating some tens of minutes before the game crash, but at least with most of the acquired features.
  2. They only saw a stranger.

The latter situation might happen because some players continue to play with a corrupted character for longer and the game automatically backs up a glitchy version.

The same method should work in case you experience a corrupted world. In case you notice that you’ve got also some items missing (like chests, weapons, food), the steps are different.

Additionally, it’s recommended to have a separate folder with backups on your desktop, and store in it good character and world files.

Should you ever need to have a fresh, full-featured copy of your game, download it from this source below.

Valheim

Valheim

Get your official copy of Valheim and start your survival adventure in its awesome and dangerous realm.
Check priceVisit website

Tell us if you’ve tried the same steps and what the result was You can use the comments section.

Fix mup_file_system BSOD in Windows 10/11

The mup_file_system is also known as Error Code 0x103 which usually means that mup has encountered invalid or unexpected data.

This error will result in a completely blue screen, as all BSOD errors do, and it happens instantly without any warning.

Nevertheless, this does not mean that the issue cannot be solved. In fact, thanks to the code the error provides is easier to identify which part of the device caused the failure.

There are a few simple steps you need to follow in order to fix the mup_file_system BSOD and we will explore them in this article.

How can I fix the mup_file_system BSOD in Windows 10?

1. Use a dedicated software

When the mup_file_system error appears due to faulty hardware or software corruption the best thing to do first is to use dedicated software to try and fix the faulty file.

These kinds of tools are reliable and can repair faulty system files, remove malware, detect malicious websites, and even replace damaged Windows files.

2. Check for Windows update

  1. Type Device Manager on the Search box.
  2. Check for updates for the driver that is causing the issue by right-clicking it and choosing Update.
  3. When the process has finished, restart your computer to complete the update process.

3. Update your drivers

Since the mup_file_system Error Code 0x103 can appear due to a faulty or outdated driver as well, the easiest thing to do is to locate it and fix it.

You can do this manually but we recommend that you use the automatic update using a dedicated tool since this will avoid installing a different version of the driver and causing even more issues.

In that matter, driver updater software is the go-to software, thanks to its impressive built-in library that will ensure your drivers are updated correctly.

⇒ Get Outbyte Driver Updater

4. Unplug any external hardware

Check and see if there are is any new hardware connected to your device and unplug it. This error can just as well be caused by a newly installed hardware that was not installed properly.

Removing the hardware is essential in order to see if this will solve the issue. Make sure to restart your device once the hardware has been removed.


5. Uninstall recently installed software

  1. Type Control Panel on the search box.
  2. In the opened window, click Uninstall a program.
  3. In the Programs and Features window is the list of all installed programs. Locate the ones that are installed just before you received the BSOD warning.
  4. Now, right-click the software and select Uninstall.
  5. Follow the direction to uninstall and then restart your device once the process is completed.

Solving the mup_file_system error can be solved quickly if you follow the exact steps we have indicated in this article.

Please let us know in the comments section below which solution worked best for you, we would love to know.

What is a .TBL File and How to Open it on Your Computer

Almost surprisingly, the .tbl file extension is fairly common. A large variety of programs use it. Despite its general ubiquity, you may still be curious about what information a TBL file contains.

As you might have guessed, TBL is a shortened version of the word table, and thus what we can say that it contains tabular data for programs to use.

What is a .tbl file?

This may confuse you a bit. Why would a program use a .tbl file instead of a database or database file?

TBL files can be more flexible and easier to work with than databases, especially if you’re working with a small set of data. They’re particularly great for handling and archiving directory list data.

While software like Adobe InDesign, Creo, FX AccuCharts, Chem3D Ultra, and AutoCAD Civil 3D can be used to create and access .tbl files, you can create and modify your own using Microsoft Excel.

All you need to do is create a table using Excel then save it as a .csv file. You need to make sure every entry of the table is separated by a comma (comma-delimited) before saving the file.

Once the file is saved to your computer you can then convert it into a .tbl file by changing the extension. In gaming, .tbl files are used for creating mods.

Computer games usually save information in the form of XML and TBL files. These can be accessed and changed using a text editor or Excel.

How do I open a .tbl file on my computer?

1. Use Microsoft Excel

  1. Run Microsoft Excel. Any version post-2010 should do.
  2. Click on Open from the left pane.
  3. Select This PC or Browse.
  4. Use the Open dialog to navigate to your .tbl file and open it. But make sure that All Files (.) is selected from the file-type menu.Open .tbl using Excel
  5.  This will then open the Text Import Wizard. On the first screen of the wizard, make sure that the radio button marked Delimited is selected. You can leave everything as is and then click on next.Excel Text Import Wizard 1
  6.  The next screen allows you to select which delimiters separate the data in the .tbl file. In most cases, a comma or semi-colon acts as the delimiter. You can check the Data Preview to see what separates the data.
  7. Once you’re certain, you can set the list of delimiters by ticking the right checkboxes. Alternatively, you can tick all the boxes, except the one marked others.
  8. Also, make sure you tick the Treat consecutive delimiters as one checkbox. Check that the data preview looks right and then click on Next.Import Wizard Screen 2
  9.  On the next screen, you review the data as well as format it. If you’re unsure, leave everything as is and click on the Finish button.

2. Use third-party programs

Use Adobe InDesign

Adobe InDesign is a professional layout program for print and digital content. Many of you have heard of it before as the ideal tool to create multicolumn pages with rich graphics, images, and tables.

However, it does much more than help you accomplish your professional or individual layout and page design needs.

The authority of Adobe InDesign is being constantly challenged and it’s pretty much up for every single task, as difficult as it may seem.

If you are new to this program, then let us tell you that opening documents and template files requires minimum effort, .tbl files included.

You may do it the very same way you do in other programs and even better, feel free to use the File > Open command any time your wish is to open files from earlier versions of InDesign.

This also applies to InDesign Markup (.idml) files, InDesign Interchange (.inx) files, and even QuarkXPress Passport 4.1 files.

⇒ Get Adobe InDesign

Use Autodesk Civil 3D

  1. Download Autodesk Civil 3D and install it.
  2. Windows should assign Autodesk Civil 3D as the default file-opener for .tbl file-types.
  3. After setting up Autodesk Civil 3D, you should be able to open the .tbl file by simply double-clicking on it.

You may have noticed that a long list of CAD (computer-aided design) programs use .tbl files. An especially popular one is Autodesk Civil 3D.

If you can’t use Autodesk to open the file, then a good alternative is Microsoft Excel. If neither Autodesk Civil 3D nor Excel can open the file, then you can try using a text editor to open the text.

Be careful not to modify or change anything in your file, as this may stop some programs from working.

If you have any other questions or suggestions, leave them in the comments section below and we’ll be sure to check them out.

4 best tools to record audio with timestamp [Windows & Mac]

Audio production is one of the most important parts of media creation as it allows the listener to be fully immersed into the complexity of a project/creation.

We, as listeners, should be aware that behind every recording there are thousands of elements that require careful changes and alterations in order for the finished piece to be pleasant to listen to.

Production and audio experts spend hundreds of hours making sure that every sound wave that ends up hitting your ear-drum is perfectly tuned and calibrated.

Knowing what are the best tools to reach the required results is critical. If a particular audio part doesn’t sound right, you can quickly isolate it using a timestamp.

This article covers both sides of the spectrum. We’ll show you what are some of the best low-end home user audio recording tools with timestamp support as well as advanced professional tools.

Of course, the first category is compatible with low-end PCs and the second one can run perfectly find on high-end machines.


What are the best timestamp audio recording software tools?

Adobe Audition CC

Adobe Audition CC - audio recorders for Win 10

Adobe Audition CC is a professional and very powerful audio workstation that offers many features that allow you to record audio, synchronize it, restore/repair audio files, and more.

The variety of effects Audition has to offer makes it one of the most complex audio/video editing tools.

Its features allow you to easily apply effects one-at-a-time by selecting them in the effects menu or as a batch (list of effects) from the effects rack. You can use as many timestamps as you want to navigate the recording with ease.

Using the latter option allows you to try multiple combinations of audio effects without applying them to the file you’re trying to edit.

One of the best features of Audition is the fact that it offers the possibility to choose from a long list of presets with very detailed controls allowing modification of any aspect of the audio/video file.

Key features include:

  • Multi-track or waveform views for easy editing
  • Sound effects design allows you to customize any aspect of the audio files
  • Automated sound clean-u options
  • Audio restoration/repair
  • Batch processing allows you to apply/edit effects on multiple files at the same time
  • Spectral frequency display that allows you to visually remove beeps, hisses and other noises
  • Adobe offers a variety of tutorials regarding using their software
  • Timestamp processing
Adobe Audition CC

Adobe Audition CC

You can use Adobe Audition CC for precision editing down to the millisecond, so give it a try!
Free trialVisit website

Audacity

Audacity - Audio recorders with timestamp

Audacity is one of the most popular open-source software when it comes to audio recorders/editors. Of course, timestamp capabilities are also included.

Even though it was created in 1999 by two students, it quickly managed to attract attention because of its light-weight, user-friendly interface that packs a lot of power under the seemingly simple hood.

Audacity is used across the globe for a variety of different tasks including recording/playback of sounds, multi-track mixing, audio spectrum analysis, editing, etc.

It offers a large array of digital effects and plug-ins with the option to create your own effects from scratch.

⇒ Get Audacity


Total Recorder

Total Recorder - Audio recorders with timestamp

Total Recorder is a simple light-weight software that allows you to effectively record streaming audio from players such as Real Player and Windows Media Player.

The tool also includes a time shift-feature for automated off-hours recording. This program can display the time that a particular position in a recording was recorded, on the basis of the timestamp tag.

Key features include:

  • Captures audio/video played either by your computer or as a streamed online video or audio
  • Ability to schedule a recording, internet broadcast or online television in order for you to listen/watch them whenever you want to
  • Records sounds through a microphone or other external devices such as tape players, portable music players, etc.
  • Offers you the ability to process digital audio using different add-ons – equalizer, noise cancellation, audio cleaning, etc.
  • Easily convert different audio and video formats – AVI, WMV , FLV, 3GP and uncompressed MP3, WAV, FLAC without any loss of quality

⇒ Get Total Recorder


Wavosaur

wavosaur - audio recording for win10 with timestamps

Wavosaur is another light-weight alternative that can help you reach your audio-editing goals while having the option to use timestamps for the effective processing of audio files.

Comparing it to Audacity, Wavosaur gives you the power to edit multiple projects at once by using tabs the same way you would use them in Google Chrome.

Even though it is having a simple-looking interface, it offers a few very important advanced features – auto-trim, silence remover, crossfade looping, exportation of audio regions, etc. The tool supports VST plugins as well.

One of its best features is its portability. It is a bit harder to master than Audacity, but it’s worth the effort considering the increase in productivity that the tab feature allows.

On the official download page you can find useful items like: manuals, audio tools, tutorials, and also skin editors to make your Wavosaur your own.

⇒ Get Wavosaur


The software options presented in this article are some of the best audio recording software with timestamp capabilities. Some of them are free, others are paid.

They’re all compatible with a variety of computer configurations, starting from low-end Windows 10 PCs to high-end professional platforms.

Having these tools at your disposal will surely help you reach your goals regarding audio recording and editing. With these programs, you can quickly finish your audio projects in the most efficient and practical way possible.


How to fix corrupted Ableton files on Windows 10

There is nothing worse than getting an error message when trying to open your Ableton Live set.

All the hard work you put in seems lost. Your files got corrupted and you can no longer access them. In this case, you need to find out what the issue is.

To avoid these keep your PC clean and up to date. There might be situations in which files can become corrupted due to unexpected events such as a computer crash, power cut, or software bugs.

It’s also recommended to create back-ups of your files regularly. Using cloud-based backup software allows you to access your files remotely and keeps them safe from any hardware failure.

If your Ableton Live files got corrupted, you will see this error message: The document […] is corrupt.

This message is followed by a more specific reason for the file corruption issue, such as: First automation event has invalid time, Track grouping corrupt or Unknown Compound Stream Type.

Other reasons you can meet are: Non-unique list IDs, Invalid Pointee ID, Not well-formed (invalid token), Unexpected node Default Color or Member Track Device of Class PreHearTrackDeviceChain is missing.

How do I fix Ableton Live corrupt files?

1. Re-trigger the file recovery process

Ableton waves settings - High CPU usage Ableton
  1. Go to the following location, which is normally a hidden folder – C:Users[Username]AppDataRoamingAbletonLive x.x.xPreferencesCrash
  2. In the Crash folder, the files and folders will have the date and time of the crash in their names:
  • 2018_12_12__16_02_35_BaseFiles (this is a folder)
  • 2018_12_12__16_02_35_Crash.als
  • 2018_12_12__16_02_35_CrashRecoveryInfo.cfg
  • 2018_12_12__16_02_35_Undo (this is a folder)
  1. Remove the dates from the file names. After doing so, they will look like this :
  • Basefiles
  • Undo
  • CrashRecoveryInfo.cfg
  1. Drag the 3 files mentioned above into the source Preferences folder and replace the correspondent files.
  2. Now you can start Ableton Live. The file recovery process should be reactivated.

Note: Crash.als does not need to be renamed and can be left in the same folder

In some cases, it might be possible to restore a temporary copy of the Project file in one of Ableton Live’s crash report folders. The temporary file is usually an older version of your set that was successfully saved.

 If you want to recover your corrupted files, the recovery must be done with the same version of Ableton Live which created the save, and also the same Windows platform.

2. Ask Ableton for support

If the first solution presented in this article doesn’t work, it is recommended that you ask for help from Ableton. The Ableton team will try and fix your Live Set.

You can send the corrupted .als file to Ableton Support. This option doesn’t guarantee a fix but they will try to help you recover your corrupted file as best as possible.

Ableton corrupted files can cause you to lose your precious audio projects, and after working so hard on them, it is a very frustrating problem.

3. Switch to Adobe Audition

If you’ve stuck with Ableton for some time now but the thing keeps crashes and makes you lose your work then, maybe it’s time to consider a switch?

It is a cross-compatible audio editing and recording software, offering a non-destructive mix environment, and other tools for accelerating video production and polishing the audio sounds.

Here are the key features of Adobe Audition:

  • Adaptive Recording inputs
  • Essential sound and categorizing audio in multi-track mode
  • An excellent choice for making podcasts or radio shows
  • Part of the Adobe family means great integration with Premiere Pro and a familiar interface from other programs

In other words, using Audition you have uninterrupted professional audio services that help anyone produce studio soundtracks or effects.

⇒ Get Adobe Audition

We hope that the solutions presented in this article solved your issue and that now you can go back to creating amazing music in Ableton Live.

Let us know if this fix worked for you in the comment section below.

Microsoft introduces Surface Pro 7 Plus specific SSD replacement kit

The Surface Pro 7+ is not the flashiest upgrade from Microsoft, but it is a device that checks a lot of boxes fans have been clamoring for from Microsoft’s flagship computer.

While retaining an arguably dated chassis, the Surface Pro 7+ adds LTE, improved graphics support, and a swappable SSD configuration. Adding to the list of pluses for the Surface Pro 7+, Microsoft is now officially offering an SSD kit for replacing the storage on its 2021 flagship tablet computer.

SSD kits consist of a single certified refurbished SSD —plus SSD screw. All volume sizes are available: 128GB, 256GB ,512GB or 1TB.  After the initial US rollout, we plan to gradually roll out the kits to all Surface regions.

Dubbed the Microsoft Surface rSSDs, the company will be offering the kit through regional resellers or Surface specialists in the US, to begin with.

The company is offering this SSD kit as a solution for enterprise-level IT Admins to swap out the SSD on a Surace Pro 7+. Belaboring the point further of how intricate the replacement process can be, Microsoft jumps through hoops to advise against casual replacements.

Does installation require a trained technician?

  • We recommend only a skilled IT technician perform the SSD replacement and while following Microsoft instructions in the Surface Pro 7+ removable SSD guide available on the Microsoft Download Center.

Can I upgrade Surface Pro 7+ devices by installing larger SSDs, or do I have to replace them with the same size SSD that is removed?

  • While technically possible, Microsoft strongly discourages users from installing an SSD that has not been tested for your device configuration. Microsoft takes measures to ensure product quality and tests the hardware configurations offered for sale. Installing a non-Microsoft or a Microsoft SSD of a different volume than the one provided originally may lead to reduced performance and unsupported configurations.

Other tidbits Microsoft offers to help with replacements is using the Surface Data Eraser tool to wipe content off the SDD that’s being erased as well as confirming that users need to use BitLocker recovery to image the replacement SSD.

Replacement kits will come in 128GB, 256GB, 512GB and 1TB storage capacities. Microsoft does mention that “we plan to gradually roll out the kits to all Surface regions,” despite only launching in the US for now.

5+ best nature sounds generator software [+Online Tools]

When you are stressed out or distracted, an ambient sound could help you relax and stay focused.

However, not just any ordinary noise/sound generator, you need to utilize some of the best nature sound generator software. The nature of sound – is what we generally miss experiencing while in a workplace.

But, with the help of sound generator tools, you can get to experience it when needed. You may find a lot of sound generators out there.

Although encountering the sound generators with nature sounds in it, could be a difficult task. It is because most of the popular sound generators (back then) are no longer in active development.

You will either find them at the software repositories or on a couple of malicious websites. In this article, we have filtered out the best nature sound generator software.


What is the best nature sound generator software?

Adobe Audition

Adobe Audition

You know that when you use an Adobe product you are talking about top-of-the-line products and outcomes, and that also seems to be the case with Adobe Audition.

Down to its very core, this program is a digital audio workstation that features both a multi-track, non-destructive mix and edit environment and a destructive-approach waveform editing view.

Of course this already rich library can be further enhanced with even more sound effects that you can download from both Adobe and users.

Once you have all the sounds you are interested in, you can use Audition’s tool set to mix and arrange them naturally, so that a handful of generic nature noises will sound like actually recording a typical day in the wilderness.

More so, Adobe Audition is so popular that finding tutorials on how to use it will be easy.

Here are some of the best features for Adobe Audition:

  • A great audio digital workstation
  • Comes with an extensive library of stock sounds
  • Its library can be enriched with even more Adobe-provided sounds
  • Tutorials for this program are easy to come by
  • Can be tested out for free during a 7-day trial period
Adobe Audition

Adobe Audition

Adobe Audition is an excellent choice thanks to the extensive library of sounds that it comes with, so give it a try!
Free trialVisit website

Atmosphere Deluxe

Atmosphere Deluxe is unquestionably one of the best nature sound generator software. It comes packed with a lot of preset nature sounds. Also, being a premium sound generator, it offers high-quality sound files.

The UI is decent enough with a bunch of helpful options to make the most out of it. You can create a custom background music with the help of preloaded sound files.

It lets you pick a schedule, set the alarm to stop, record the music and also change the theme color with a couple of other options.

You can download it for free and utilize it for the trial period of 21-days. After the trial period ends, you can choose to purchase the license key.

In either case, you can opt for Atmosphere Lite, which is completely free with limited sounds, no scheduling ability and a scaled down user interface.

⇒ Get Atmosphere Deluxe/Lite


Ambiance


If you need access to a large repository of nature sounds, Ambiance should be a perfect pick as one of the nature sound generator software. You can utilize it for a trial period of 14-days.

After the trial period ends, you could think of purchasing it. It lets you set a timer and pick a cycle to change the sound as well.

Ambiance features a simple user interface with few options on board. You can either choose to play the sounds already available in your Library (offline) or simply select a sound from the store to download it.

⇒ Get Ambiance


White Noise

White Noise is one of the best sound generator software available on the Windows Store. Unlike others, it does not offer you the ability to create custom background sound.

You will observe a similar approach to Groove Music app regarding its UI (not that good!). Also, you do get the ability to set a timer.

It is a free nature sound generator software with an optional in-app purchase offered. So, if you upgrade it to the pro version, you can get rid of the in-app advertisements, unlock stereo audio, and the privilege for unlimited market imports.

⇒ Get White Noise


Noizio.net

Noizio.net is a pretty simple nature sound generator software which is completely free. You can find it listed on Sourceforge with the latest update to the software on 2016.

When you launch the software, it sits on your tray for quick access. You can click on it again to launch the application window in order to tweak the intensity of the nature sounds and then finally clicking on the play button to get started.

You will not get the ability to set the alarm or set a timer for the sound to stop. So, you will have to again click on the icon in the tray to access the application window and halt the playback.

⇒ Get Noizio.net


Sound Valley

Sound Valley is yet another freeware which isn’t in active development but still works as expected. It is one of the best nature sound generator software with limited options.

You can set a sleep timer, enable visualizations, and enable shuffling of the sounds. However, you cannot create a custom background music.

⇒ Get Sound Valley


Listening to nature sounds would boost your productivity and keep you relaxed. According to a variety of researchers, nature sounds also help you improve concentration.

All things considered, you definitely need to utilize the best nature sound generator to get the benefits.

If you want the best quality experience along with the access to a lot of nature sounds, then Atmosphere Deluxe and Ambiance would be your best pick.

If you do not want to spend a lot for a sound generator software, get the White Noise app from the Windows Store.â

Fret not, if you do not want to spend a penny to get a nature sound generator software, Noizio.net, and Sound Valley would be the best bet.

Do you happen to know of a better nature sound generator software? Let us know in the comments below.
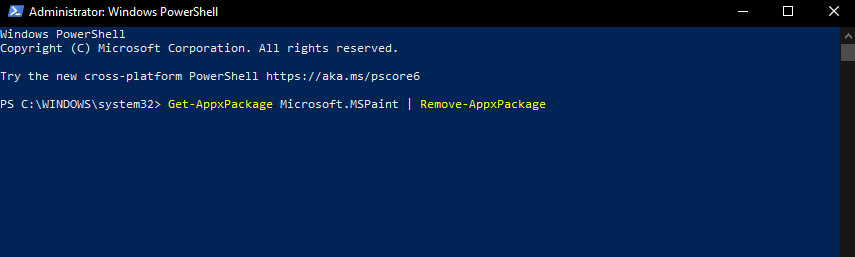

Yearbook Design Software: 6 Best to Use in 2026

Yearbooks are a great way to highlight and/or commemorate the past year in terms of events and other treasured occasions of a school, or other institution.

This is especially used with elementary, high and middle schools, as well as colleges. However, with the advent of social media, the use of yearbooks has decreased.

There are digital yearbooks as well which hold memories of a specific time or moment, with a particular group of people in a school year or particular school – in digital form.

Digital yearbooks have the advantage of incorporating different interactive media forms like audio and video, compared to the old, hard copy type of yearbooks.

These type of digital yearbooks can also be stored on CD-ROM or DVD, or in e-book format.

If you’re looking for the best yearbook software to get you started and save your best memories in a format that can be preserved for future use, here are our favorites.

What are the best yearbook software tools?

Adobe InDesign

Since yearbooks are special and will be there for years to come for you to admire, designing them in a perfect way is a must.

Of course, you can’t just use any crummy software tool, so shifting your focus to the truly professional ones becomes a requirement.

Adobe InDesign is the perfect example of one such tool, allowing you to create posters, flyers, brochures, magazines, newspapers, presentations, books, and e-books as if they were nothing.

Given the capabilities, creating yearbooks should be and actually is second nature for this program, as you can easily use a wide variety of templates to create the perfect memory book.

Here are some of the benefits of Adobe InDesign:

  • Great for creating any type of publishing material
  • A large library or resources and templates that make designing much easier.
  • Not hard to master, especially for avid Adobe fans
  • Compatible with other Adobe products
  • You can test it for free for 7 days

Adobe InDesign

Adobe InDesign helps you create the perfect yearbook that you and your classmates will enjoy for years to come.
Free trial Visit website

Canva

best yearbook software

Canva is the best yearbook software that is also popular among designers, whether amateur or professional what with its simple templates and easy-to-use tools and interface.

With Canva, you can design brilliant yearbooks using online templates and the drag and drop editor to capture memories in an amazing yearbook.

You can also chronicle a whole academic year using this tool’s yearbook maker. Simply drag and drop photos, move around design elements and customize each page to perfection.

Let Canva do the heavy lifting in designing your yearbook, so you can go back and create more memories.

You can also change images from a stock library of more than 1 million images and illustrations, fonts (over 130 fresh fonts to use), backgrounds, and colors for extra flair.

Other features include pre-set filters like Epic, Retro or Cali, which you can apply for consistency in your design.

You can edit your image down to details using sliders to control lighting and contrast or tint, plus use effects like blur, vignette, and x-process.

Add quotes and captions using the add text tool and customize using the fresh fonts and hues on the color wheel to make it look extra cool.

The tool works on the cloud, so your teammates can also access the design anytime from any laptop or device and chip in their edits.

⇒ Get Canva

Fusion Yearbook

best yearbook software

This yearbook software lets you encompass everything your school does in a book that mirrors its diversity and style.

It comes with hundreds of templates, unique designs, and simplistic features, and is entirely customizable.

Fusion makes creating stunning high school yearbooks so easy, anyone can do it, as it gives you all the tools you need to create high school yearbooks just as special as the people inside.

You get to create beautiful yearbook cover designs, by using stunning and professionally designed layouts, and an arsenal of design tools at the tip of your cursor to create phenomenal pages.

Explore over 150 different fonts, and hundreds of custom backgrounds, add personality to your photos and pictures using Instagram type of filters and effects.

You can also add clip art or custom-designed graphic elements and get the most of your one-of-a-kind yearbook.

Your designs are also easily accessible from any PC, so the school community can deliver content and collaborate as students and also with faculty to create the best yearbook ever.

There are free images from which you can pick out layouts, shapes, icons, frames, and more, or pay $1 for each premium image. And when you’re done, generate a PDF to check and approve for print.

⇒ Get Fusion Yearbooks

Yearbook Machine

best yearbook software

This isn’t a literal machine, but a digital powerhouse that lets you create and print beautiful yearbooks for groups, which you can create together online.

It does the heavy lifting from what was a time-consuming and stressful job, what with the fast online content collection, automated page layout, and design.

Plus, you can manage printing, quality control, and delivery for a hassle-free experience. Build your yearbook anywhere and at any time with this powerful and best yearbook software.

It’s simply done in a few clicks, using the MagicFlow page layout tool which makes your content and fits it automatically into elegant professional page designs.

Everything else is covered, and you can pay online via PayPal or credit card, if you need help, you can enjoy free unlimited support by phone or email.

Whether it’s a primary or secondary school, university, or corporate, military, and another group, Yearbook Machine will create magical yearbooks for you.

⇒ Get Yearbook Machine

Pictavo

best yearbook software

Creating a yearbook is no little job, but with this best yearbook software, it can be more about collaboration and creativity, than stress and deadlines.

Pictavo is great for use by elementary and high schools. For high schools, you can create events, assign tasks, and keep staff on task using the dashboard.

With the Ladder view, you can see the yearbook at a glance, assign pages, and color-code your book’s sections for better organization.

It comes with an art library with stunning collections that have your yearbook design in mind what with its sophisticated templates, snippets, and style guides developed for high school yearbooks.

For elementary and middle schools, you can see the entire project via Ladder view and color code sections plus tap into Pictavo’s extensive online help.

You can plan, stay organized and be confident regardless of whether it’s your first yearbook design or not.

Other features include interchangeable and coordinating backgrounds, templates, accents, and snippets, so you can create impressive books with little or no experience and effort on your part.

⇒ Get Pictavo

TreeRing

best yearbook software

This tool lets anyone create yearbooks filled with personal photos and memories that the whole school will remember, using personalized and printed pages with each student’s memories and photos.

It is customizable as you can add photos from anywhere like your device or social media or a file, and capture memories throughout the year like songs or where you traveled to.

You can create pages and add photos and memories to one-of-a-kind pages, and finally get a uniquely printed copy of the yearbook.

The advantages of using TreeRing include personalized pages, its strong commitment to the environment, and affordable prices.

It’s easy software without the stress and time consumption, premium quality when it comes to printing, plus it is collaborative as teams can work on it.

⇒ Get TreeRing

See your favorite yearbook software on the list. If not, let us know which one you use, or which one you’ll check out from this list, by leaving your comment below.