Microsoft news recap: Xbox One S All-Digital Edition gets a launch date, Minecraft Movie gets a release date, and more

Microsoft news recap is a weekly feature highlighting the top Microsoft news stories of the past week. Sit back, grab some coffee, and enjoy the read!

“Monumental” Minecraft Movie gets a release date – March 4, 2022

After much anticipation, the long-awaited Minecraft Movie has finally been given a release date. Launching on March 4, 2022, Mojang noted that the long wait is due to “making a live-action, full-length feature film is really complicated.”

Microsoft’s Xbox Game Pass Ultimate subscription is official and launching later this year

Microsoft’s new subscription that bundles Xbox Live Gold and Xbox Game Pass into one subscription has been confirmed. The new subscription will launch later this year, coming first for Xbox Insiders.

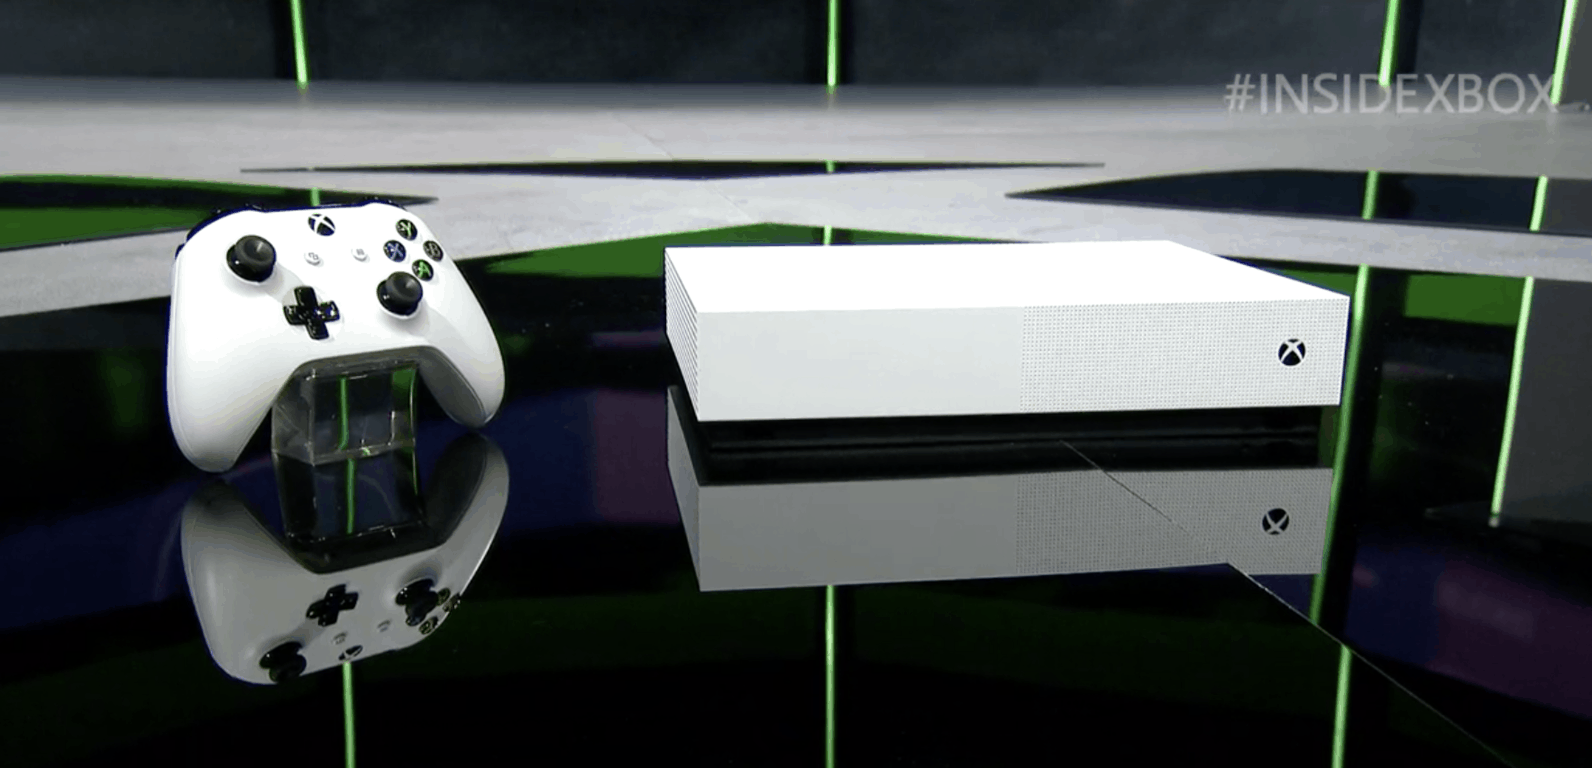
Xbox One S All-Digital Edition is launching on May 7 and will cost $249.99

Microsoft’s disk-less Xbox One has been officially announced. Dubbed the Xbox One S All-Digital Edition, it will cost $249.99 and launches on May 7. But some have raised concerns at how the price difference between this version and the standard Xbox One S is, well, not much of a discount.

Cortana ends support for Wunderlist

Wunderlist, a task management app acquired by Microsoft in 2015, has had its integration with Cortana removed. It looks as though this move is due to the new integration between Microsoft’s To-Do app and Cortana.

That’s it for this week. We’ll be back next week with more Microsoft news!

How to fix common Anno 1800 bugs and errors

The industrial revolution is out in Anno 1800, the newest instalment in the city builder/realt time strategy game franchise, Anno.

As with the pursuit of progress, no game launch is perfect. Anno 1800 has had its fair share of bugs and glitches, with framerate drops, game client issues and some quest bugs. B

ut we have a list of solutions that could work for you, so let’s get to building.

How can I fix Anno 1800 bugs?

This is the list of bugs that we’re going to cover in this troubleshooting guide:

  1. Framerate fix
  2. Game crashing fix
  3. Quest bugs fix
  4. Game not downloading fix
  5. Graphical bugs fix
  6. Uplay DLC bug fix
  7. Uplay friend request bug fix
  8. Steam and Uplay activation issues fix

1. Framerate fix

There have been reports on numerous issues related to low framerates, but there’s a fix for that. In order to do so, follow these steps:

  1. Open your Nvidia Control Panel.
  2. Select Manage 3D Settings and select Anno 1800 from the Program Settings and set the Power Management to Prefer Maximum Power.
  3. Save your changes and exit.

2. Game crashing fix

If you experience lock up or the occasional freeze, you may try to force the game in running in DirectX 11. To do this, follow these steps:

  1. Go to your Steam Library.
  2. Find the game and right-click it, then select Properties.
  3. Under the General Tab, click Set Launch Options and a dialog box will appear.
  4. Type in the dialox box at the end of the target string -force-d3d11 and click OK.
  5. Close the Properties window.
  6. Run the game.

3. Quest bugs fix

Some aspects of the game haven’t been ironed out, but a quick verification of your game files to ensure you don’t have corrupted files can do the trick. Simply follow these steps:

  1. Open up the Steam window.
  2. Click Library to open the game collection.
  3. Then right-click on Anno 1800 and select Properties.
  4. Press the Verify integrity of game files button.verify integrity of game files steam games not working

4. Game not downloading fix

For your Steam client you should repeat the same steps in verifying your game files, in the previous solution. In the case of Uplay, open the client and click on the Games option, right click on Anno 1800 and select Verify files.

5. Graphical bugs fix

Make sure to keep your graphic card up to date. A solution would be disabling vertical sync, since it can reduce graphical tearing. If after this, you are facing tearing while playing Anno 1800, we suggest you toggle vertical sync to back on in your game settings.

Alternately, you can try going into Windowed Mode if the game is acting up, it works to solve black screen issues aswell:

  1. Start your game.
  2. Press “ALT + ENTER” to make the game go into windowed mode.
  3. Access video settings in the game and adjust its resolution to your screen’s resolution.
  4. Save changes, you can now play the game in fullscreen mode.

6. Uplay DLC bug fix

In order to fix this issue, we recommend you go to offline mode in Steam. On the top left corner on Steam , click on Steam and select Go Offline. Now try your Uplay client.

7. Uplay friend request bug fix

You might be facing some connectivity issues here. Add an exception to your antivirus for Anno 1800 game, and whitelist your game in Windows Firewall. In order to do so, follow these steps:

  1. Open your Start Menu.
  2. Now select Control Panel.
  3. Then click on Windows Firewall.
  4. Now, click on Allow an app or feature through Windows Firewall.
  5. Now, the Allowed App windows will open.
  6. Click on the Change Settings
  7. Check the boxes next to the apps or programs you want to allow through Windows Firewall, or network connections.
  8. Click OK to save your new settings.

8. Steam and Uplay activation issues fix

In order to do this, simply restart your Steam and click on Play. Next.  Uplay will ask you to link to your Steam account.

Additional tips to fix Anno 1800

If you experience that your characters are warping around the map or getting stuck on the map, you might be experiencing connection issues. Check your internet connection and troubleshoot it.

Always remember to take a look at the minimum system requirements when running any game. The requirements for Anno 1800 are the following:

  • Operating System: Windows 7, Windows 8.1, Windows 10
  • RAM: 8GB
  • Processor: Intel i5 3470, AMD FX 6350
  • Graphics Card: NVIDIA GeForce 670 GTX or AMD Radeon R9 285 (2 GB of VRAM, Shader Model 5.0)
  • DirectX: Version 11
  • Hard drive space: 60 GB

We hope that these solutions were of help to you. In the meantime, let us know what other issues you have stumbled upon playing Anno 1800. Comment below.

RELATED STORIES TO CHECK OUT:

What to do if Windows standalone updater got stuck

For a while now, Windows 10 has been allowing its users to download and install individual update packs.

Even though this is a great feature that many users like, sometimes using it can get a bit tricky.

Windows standalone updater is stuck: How can I fix it?

We compiled a list of several steps that you can follow to fix this problem. We hope that after you use one, or more of these methods, you will be able to freely make any change you like regarding your updates.

  1. Run the Windows Update Troubleshooter
  2. Reset BITS
  3. Reset other update services
  4. Antivirus interference

1. Run the Windows Update Troubleshooter

Sometimes, the most obvious solution is the correct one. If your Windows Update Service seems to be hanging at some point, just try and run the Windows Update Troubleshooter.

In order to do so, you can follow a few simple steps:

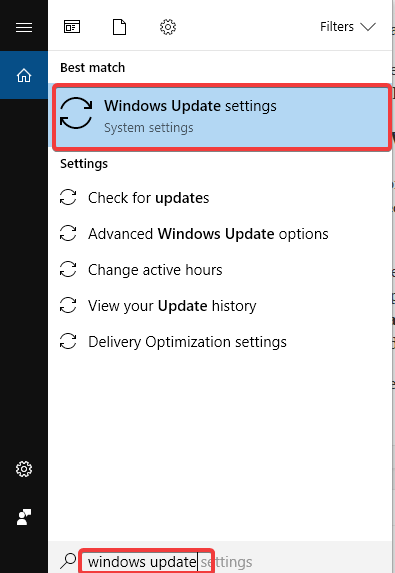
  1. Open  Windows Update Settingswindows update settings
  2. From the left side, open the Update Troubleshootercheck for udpates troubleshooter
  3. Select Windows Update and wait to see if it finds your problem.

2. Reset BITS

Sometimes, old updates can prevent you from installing new updates. Resetting the update services could help you to solve this issue.

For you to do this, you can try following the next steps:

  1. Press Windows key+R, type in services.msc and press Enter
  2. Search for Background Intelligent Transfer Service and see if the status is set to running
  3. If it’s blank, right click it and press Startstart BITS windows 10
  4. Right-click once again but this time select Properties
  5. Under the Recovery section verify that First and Second failure are set to Restart device.BITS Recovery Restart Device

After you follow these steps, you can be sure that the service is working and you can try to install the update again.

3. Reset other update services

If restarting the BITS service did not work for you, there might be another update service that interferes with  your update.

We know that it can be frustrating to encounter unexpected errors in your work, so we have a fix that will hopefully fix the update problem:

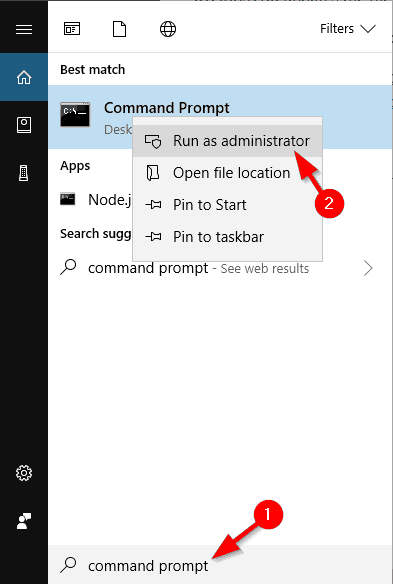
  1. Press Windows key, then type command prompt
  2. Right click the icon and select run as administratorstandalone windows update stuck
  3. In the window that will follow, you will need to paste all the following commands at once:

net stop wuauservnet stop cryptSvcnet stop bitsnet stop msiserver

ren C:WindowsSoftwareDistribution SoftwareDistribution.old

ren C:WindowsSystem32catroot2 catroot2.old

net start wuauserv

net start cryptSvc

net start bits

net start msiserver

After the process ends, close the Comand Prompt by typing Exit then pressing Enter.

Now, test to see if the Windows Standalone Update is fully functional now.

4. Antivirus interference

Sometimes your security software might be preventing you from running certain updates. Although there are no pop-ups or alerts displayed, certain antivirus solutions may still interrupt the update process.

In order to make sure this is not the case, disable any third party antivirus software.

It is advisable that you turn back on your antivirus as soon as you are sure that it is not the culprot, or as soon as you manage to install the problematic update.

READ ALSO:

WordPad doesn’t support all features of this document’s format [Fix]

WordPad is a Windows application that you can easily use to create a variety of documents, but sometimes you might encounter WordPad does not support all of the features of this document’s format error.

The computer may proceed to add that it’s unable to show all the file contents or may display it improperly. As you can see, this can be a major problem, so in today’s article, we’ll show you how you can fix it for good.

How to fix the WordPad does not support all of the features of this document’s format error?

  1. Open the file from Inside Word
  2. Open the doc with Microsoft Word
  3. Resave the document
  4. Reinstall Microsoft Office

1. Open the file from Inside Word

Opening docs from within Word program can sometimes help with WordPad does not support all of the features of this document’s format error.

  1. Start Microsoft Word.
  2. Go to File then Open.
  3. Navigate to the file that you’re to open, select it and then click Open.open file WordPad does not support all of the features of this document's format

2. Open the doc with Microsoft Word

Another super easy way to solve WordPad that does not support all of the features of this document’s format error is by using the built-in Microsoft word inter-platform tools which allows you to open files created using other apps.

  1. Navigate to where you have saved your document.
  2. Then right-click on the file.
  3. Scroll down the menu options that appear and click Open with Microsoft Word.open with can you open a wordpad document in microsoft word
  4. Voila, your file should open.

3. Resave the document

If WordPad does not support all of the features of this document’s format error is still there, try to re-save the document but in a different format. For instance, if it’s in Office 2013 format, you could open it but this time you save it under a different file name and use a format such as Word 97-2003.

  1. Go to your current document location and right-click to open it (as Word document).
  2. Ignore the warning that WordPad does not support all of the features of this document’s format and click File (or the office button), then Save As.save as wordpad does not support all of the features of this document's format
  3. Choose another folder to save in such as Documents. Type an alternative file name, and finally choose Word 97-2003 under Save as type:
  4. Now attempt to reopen this freshly saved version and check if everything is showing properly.

4. Reinstall Microsoft Office

If you can’t open .doc files, and you’re getting WordPad does not support all of the features of this document’s format error, perhaps it’s your Office suite that’s causing the complications.

Reinstalling it could hence be the only way to recover the software’s full features. Grab your installation disk or download the Office 365 trial and install a new Office copy.

You can even consider downloading Office alternatives such as WPS Office and see how they work for you.

There you go, these are some of the solutions that can help you fix WordPad that does not support all of the features of this document’s format error, so be sure to try them all.

MORE GUIDES SELECTED JUST FOR YOU:

Windows 10 Chromium ARM64 vs. X86: Which one is better?

Recent reports suggest that there is a huge difference in processor usage between Windows 10 on ARM and the emulated x86 version. 

It seems like we are getting some fruitful results due to the recent collaboration between Microsoft and Google. An unofficial version of the Chromium rendering engine for Windows 10 on ARM is already available online.

Now we can see that this unofficial version is worth downloading.The ARM64 Chromium browser for Windows 10 ARM was recently compared to its x86 version. We’ll list the results below.

Huge difference in CPU usage

The experiment proved that the native ARM version used around 10% processor resources. However, the x86 version on Asus Snapdragon-powered Windows 10 system consumes more than 60% CPU.

There is a significant difference between both versions of Chromium. The ARM64 version of Chromium starts faster as compared to the native Microsoft Edge and ARM64 beta of the Firefox browser. The browser also provides faster browsing in its first release. 

You must be eager to use the ARM browser but we can not deny the fact that the ARM version crashes a lot more as compared to the other version.
Furthermore, users are also experiencing problems while signing in to their Google account. That is the reason you should not rely on the ARM browser just yet.
Microsoft has not shared an ETA for the official Chromium release. There are various speculations regarding the features that are going to be part of the final version. 
Are you are still interested in testing Chromium ARM64? It is recommended that you use a virtual machine to try it out.

Dependency Service Failed to Start: 3 Ways to Fix it Quickly

Our lives have become so dependent on the Internet that we literally live there. And if something cuts off the Internet connection, our work is severely affected, and it is likely that error The dependency service or group failed to start error is the culprit.

So, it can be that your Windows PC’s connection to the Internet has indeed been cut off. Pointless to say you need to get it fixed as soon as possible.

What does the dependency service or group failed to start mean?

The dependency service or group failed to start error means there is an issue with a Windows service. This error occurs when you are troubleshooting your internet connection, and it makes your network limited.

This error can be caused by not using the normal startup to load your services and drivers, among other potential factors.

What do I do if the dependency service or group failed to start?

1. Use Normal Startup to load all the services and drivers

  1. Click the Windows start icon, type msconfig, and hit Enter to bring up the System Configuration folder.
    dependency service failed to start
  2. In the window that comes up, tick the Normal startup radio button and click OK.
  3. After the PC restarts, check to see if the error still comes up. If it does, proceed to this next fix.

Using the normal start-up to restart your PC will force load all drivers and services and hopefully resolve the connection error.

The other startup types – diagnostic and selective startups will only load the basic services and, with the selective startup, only those you will have pre-selected.

2. Add localservice and networkservice to your administrator group

  1. Press the Windows key, type cmd, and click Run as administrator under Command Prompt.
  2. Type the command below and hit Enter to run it: net localgroup administrators localservice /add
  3. Now, type the command below and press Enter: net localgroup administrators networkservice /add
    dependency service failed to start
  4. Type exit to close the command prompt.

In the majority of cases where this error crops up, restoring the local and networkservice back under your administrator privileges is usually all you need to do.

Restart your PC after applying the fix, and try connecting to the internet again. You should be good to go. If the error still comes up, try this next fix.

3. Enable all network-related services to start automatically

  1. Click the Windows start icon, type services.msc, and hit Enter,
    dependency service failed to start
  2. Double-click the Application Layer Gateway Service to open its properties.
  3. Now, set its Startup type to Automatic and click the Start button.
    dependency service failed to start
  4. Click OK to save the changes.
  5. Finally, repeat the steps above for the following services:
    • Network Location Awareness (NLA)
    • Network Connections,
    • Plug and Play
    • Remote Access Connection Manager
    • Remote Procedure Call (RPC)
    • Telephony
    • Remote Access Auto Connection Manager

There are cases where some of your PC’s services will need to be enabled and set to automatically run on startup for you to restore your internet connection.

This is important, as setting the Startup type to Automatic helps the services run from when you start the PC, while setting it as Manual requires you to enable the services every time you face connection issues, which is exhausting.

Failing to connect to the internet is rough. You can’t work, or play, which is an absolute disaster for some people.

The fixes we have discussed here should help solve The dependency service or group failed to start error. Remember, though, to scan and clean your PC of viruses if you notice it behaving strangely or suffering more bugs than usual.

Feel free to let us know the solution that helped you fix this issue in the comments below.

Svchost.exe (netsvcs -p) High RAM or CPU Usage [Fix]

Svchost.exe (netsvcs -p), otherwise Service Host, is a shared service process in Windows. It is a subprocess of Svchost.exe that loads numerous services within the netsvcs group.

For those wondering what is netsvcs group, it includes User Manager, Task Scheduler, Windows Update, BITS, Themes, Remote Desktop Configuration, and a few more that are fairly essential to Windows 10.

The big idea behind Svchost.exe is that a group of services share a single process to preserve system resources. However, some users have found that Svchost.exe (netsvcs -p) has excessively high CPU, RAM, or bandwidth usage. Keep reading to find out the solutions!

How do I fix high resource consumption by netsvcs -p?

Before we move to the slightly complex solutions, try these quick ones:

If none work, head to the fixes listed next.

1. Clear the Event Viewer logs

  1. Press the Windows + R to open Run, type eventvwr, and click OK.
  2. Now, double-click Windows Logs.
  3. Next, you should right-click Application and select Clear Log from its context menu.
    clear log to fix netsvcs -p
  4. In addition, clear the logs for Setup, System, and Security, and finally, restart the device.

The Svchost.exe (netsvcs -p) high CPU or RAM usage issue can also be due to an overly full Event Viewer log. Thus, clearing the Event Viewer’s log is another potential fix.

2. Run the Windows Update Troubleshooter

  1. Press Windows + R to open Run, type the following command, and hit Enter: msdt.exe /id WindowsUpdate
    troubleshooter to fix netsvcs -p
  2. Now, follow the on-screen instructions and make the recommended changes to complete the process.
  3. Alternatively, you can run the troubleshooter from the Settings app.

When faced with high bandwidth usage or RAM consumption by netsvcs -p, the Windows Update troubleshooter comes to the aid. Run the troubleshooter and let it make the required changes.

3. Delete the SoftwareDistribution Folder

  1. Press Windows + E to open File Explorer, paste the following path in the address bar, and hit Enter:C:\Windows\SoftwareDistribution
  2. Press Ctrl + A to select all the files here and hit Delete.
    software distribution folder
  3. Then restart your desktop or laptop, and check for Windows updates.

SoftwareDistribution is a folder that stores updates, and clearing that out can also help fix Windows Update.

4. Switch off the Windows Update service

  1. Press Windows + R to open Run, type services.msc, and click OK.
  2. Double-click the Windows Update service.
  3. Select Disabled from the Startup type dropdown menu, and click on Stop.
    stop service
  4. Click the Apply and OK buttons.

Switching Windows Update off should be the last potential fix. Windows Update is not exactly an essential service, but you’ll miss out on updates with it turned off. Update patches fix bugs in Windows, and the major updates add new options and apps to the OS.

After that, you can manually check for updates by temporarily switching wuauserv back on every few months.

Those fixes can ensure that Svchost.exe (netsvcs) doesn’t drain system resources so much. You can also try switching off other services in the netsvcs -p group, much the same as Windows Update, but some of those might be essential to the OS.

Before you leave, find out to make Windows run faster than ever. You can also learn the fundamentals of Service Host in this clear svchost.exe overview to better understand netsvcs -p and its resource usage.

Tell us which fix worked for you in the comments section below.

New Edge Insider browser can change user agent strings based on what website you’re visiting

One of Microsoft’s biggest reasons for making the switch from EdgeHTML as a rendering engine to Chromium has been that certain sites just don’t work well in Edge. Other sites, however, especially video focused properties like Netflix and HBONow, because of the way the old Edge handles PlayReady DRM video content, work better in Edge.

In order to get the best of both worlds, according to BleepingComputer.com, the New Edge can change user agent strings, the bits of code that tell a website what browser a visitor is using, based on a .json file that the new browser downloads from Microsoft when the new Edge fires up. A section of that json file, which you can see by visiting

https://config.edge.skype.com/config/v1/Edge/75.0.131.0?osname=win&channel=dev&clientId=[id]&osver=10.0.18875&osarch=x86_64&osring=WIF&osedition=professional&ostelemetrylevel=full

from a new Edge session (BleepingComputer says this is for the Canary Channel, but we were able to return the .json using Edge Dev), contains a section called EdgeDomainActions. There, the file will identify certain websites, and set the user agent string based on preset domain names. For example, once the user agent string policies are set, applications can be named and the user agent changed from ChromeUA to EdgeUA:

{  
   "EdgeDomainActions":{  
      "user_agent_override":{  
         "version":1,
         "policies":[  
            {  
               "name":"EdgeUA",
               "type":"partialReplacement",
               "value":"AppleWebKit/537.36 (KHTML, like Gecko) Chrome/64.0.3282.140 Safari/537.36 Edge/18.17763"
            },
            {  
               "name":"ChromeUA",
               "type":"edgeTokenReplacement",
               "value":""
            }
         ],
         "applications":[  
            {  
               "domain":"netflix.com",
               "applied_policy":"EdgeUA"
            },
            {  
               "domain":"facebook.com",
               "applied_policy":"ChromeUA"
            },

and so on. This way, the new Edge can serve up PlayReady DRM features to sites like Netflix using the Edge user agent string, and perhaps better performance and fewer glitches for other sites, like Facebook.com, by mimicing the Chrome user agent string.

Microsoft as of yet hasn’t released a lot of documentation on how the new Edge will work, or in fact even gotten around to posting changelogs for Dev and Canary builds, but we expect to hear lots more about exactly how Edge/Chromium will work, beginning at Build in just a couple of weeks.


Here’s how to fix Windows 10/11 Language Pack error 0x800f0954

Windows 10 Language packs are useful, but some users reported Language Pack error 0x800f0954 on their PC. This error can keep popping up, for example, when adding language features, and cause many issues on your PC, so let’s see how to fix it.

Causes of the Windows 10 Language Pack error 0x800f0954

The error is thought to be brought about by some of the following factors:

  • Windows update: Depending on your settings, some update files seem to impede the proper functioning of the services required to install language packs triggering the hiccup.
  • Corrupt/erased files: Critical Windows system files may have become impaired or erased. Windows 10 language packs won’t work properly if an important program file is missing/wrongly configured.
  • Internet connection: Another trigger of this error is a weak/limited Internet connection.

Features affected by the Windows 10 Language Pack Error 0x800f0954

The 0x800f0954 matter in Windows 10 tends to affect the English Optical Character Recognition, English AU Speech Recognition utilities, and handwriting recognition tools.

Incidentally, they’re some of the most essential features in localizing PC languages input.

How to fix Windows 10 Language Pack error 0x800f0954?

  1. Change Wi-Fi settings
  2. Edit your Wuauserv settings
  3. Manually add the pack

1. Change Wi-Fi settings

If you have a metered connection, turn it off until you finish installing chosen language packs.

  1. Go to your Windows 10 Search box and type Wi-Fi settings to access your wireless network.change wi-fi settings error code 0x800f0954
  2. Select the name of the appropriate connection.wi-fi network 0x800f0954 windows 10
  3. Toggle off your metered connection by toggling the button off.metered connection error code 0x800f0954 windows 10 language
  4. Be patient until the message We’re installing new features pops up then click on it.
  5. Continue waiting until everything installs.
  6. Now you can turn your metered Internet connection back on.

2. Edit your Wuauserv settings

Wuauserv is a service that provides the wuauserv.dll library, a tool vital for the Windows 10 Update. If there’s an issue with this service, you might encounter Language pack error 0x800f0954.

If the issue is due to this service and its configuration, modifying the configuration will remove the error.

Steps:

  1. Press the Win+R keys on your keyboard to open the run dialog.
  2. Type regedit and press  Enter. This will start the Registry Editor (click Yes if prompted by UAC-User account control).regedit Language Pack error 0x800f0954
  3. Navigate to this location:
    • HKEY_LOCAL_MACHINE\SOFTWARE\
      Policies\Microsoft\Windows\WindowsUpdate\AU
  4. Find the registry key UseWUServer and change its value to 0.error 0x800f0954 dword
  1. Close your registry.
  2. Click the Start Menu and go to the Search box. Type cmd.
  3. Locate and right-click the cmd option from the results and choose Run as administrator.cmd run as administrator Windows 10 Language Pack Error 0x800f0954
  4. Now type these commands (press Enter after each entry):
    • net stop wuauserv
    • net stop bits
    • net stop appidsvc
    • net stop cryptsvc
    • ren C:\Windows\SoftwareDistribution\ SoftwareDistribution.old
    • ren C:\Windows\System32\catroot2 catroot2.old
    • net start bits
    • net start wuauserv
    • net start appidsvc
    • net start cryptsvc
      windows 10 language pack download command prompt
  5. Go back to your PCs Region and Language settings and retry downloading the packs that have been failing to install.

 Alternatively:

For some Windows 10 versions including the enterprise edition, just type the following commands to eliminate the windows 10 language pack error 0x800f0954.

  1. Repeat steps 1-3 as above.
  2. Find the UseWUServer Click and edit the DWORD value to be more than 0.error code 0x800f0954 UseWUServer
  3. From cmd type (launch it as listed above) the following commands:
    • Net stop wuauserv
    • Net start wuauserv
      Windows 10 Language Pack Error 0x800f0954 command prompt 2
  4. Close cmd and then restart the installation process.

3. Manually add the pack

If you’re still getting Language Pack error 0x800f0954, you can manually add the required Language pack via the settings instead of going through the features as follows:

  1. Click Start then click Settings.start settings app error code 0x800f0954
  2. Choose Time and Language.time and language error code 0x800f0954
  3. Go to Region and Language settings.
  4. Tap on Add a Language, then choose your preferred language.error code 0x800f0954 language pack add a language
  5. Follow the remaining on-screen instructions.

Windows 10 Language Pack error 0x800f0954 can be problematic, but we hope you managed to solve it using one of our solutions.

RELATED ARTICLES SELECTED JUST FOR YOU:

NES, SuperNES, and Game Boy Castlevania games will soon be playable on Xbox One

The complete list of all eight games for the Castlevania Anniversary Collection have been announced (via Polygon). Konami, the publisher of the series, announced back in March the first four titles to join the collection: Castlevania (NES), Castlevania II: Belmont’s Revenge(Game Boy), Castlevania III: Dracula’s Curse (NES), and Super Castlevania IV (Super NES).

Now it appears the last four titles to join the collection have been officially revealed—Castlevania: The Adventure (Game Boy), Castlevania II: Simon’s Quest (NES), Castlevania: Bloodlines (Sega Genesis), and Kid Dracula (Game Boy). So those who have enjoyed the classic games from the ‘90s will soon be able to enjoy them again not just on the Xbox One console on May 16, but also for the PS4, PC (Steam), and the Nintendo Switch.

In other news, the Arcade Classics Anniversary Collection has been released today. As we have already reported, the bundle comes with 8 classics from the 80s—Haunted Castle, Typhoon (A-Jax), Nemesis (Gradius), Vulcan Venture (Gradius II), Life Force (Salamander), Thunder Cross, Scramble and TwinBee.

As of now, we’re still waiting on the Contra Anniversary Collection, of which only eight titles have been revealed: Contra, Super Contra, Super C, and Contra III: The Alien Wars. This bundle will be released in the summer, and like the previous two collections will only be available digitally.

Konami brings 8 retro 80s video games to Microsoft’s Xbox One consoles

Konami is bringing eight of their classic 80s video games to the Xbox One today with the release of the Arcade Classics Anniversary Collection.
Arcade Classics Anniversary Collection comes with the full versions of Scramble, TwinBee, Nemesis (also known as Gradius), Salamander (also known as Life Force), Typhoon (also known as A-Jax), Haunted Castle, Vulcan Venture (also known as Gradius II), and Thunder Cross which are all presented in their original retro styles.

Each game also features new functionality such as game saves, difficulty levels, visual settings, and an ebook containing artwork and interviews on the creation of each title.

Here’s the official description or Arcade Classics Anniversary Collection:

KONAMI starts its 50th anniversary celebration with this first installment of the Anniversary Collection series of the all-time classics! This collection includes 8 arcade masterpieces of the 80s, from Nemesis to Haunted Castle. Experience these KONAMI classics in all their retro glory, now enhanced with modern features.

  • New Features: For the first time, these classic titles support mid-game saves, difficulty levels, and display options which provide a fresh experience to longtime fans.
  • Bonus Book: Also includes a bonus eBook packed with new information about the titles, including interviews with the development staff, behind-the-scenes insights, and sketches and design documents never before revealed to the public!

Are you a fan of 80s video games and will you be picking this bundle up? Let us know in the comments below and then follow us on Pinterest for more Xbox gaming content.

The app was not found in the store. ?

Windows 10’s Twitter app just updated with a new nav menu

The official Twitter app for Windows 10 devices just updated with a bit of a menu change. In addition to the menu icons being noticeably bolder, links for Twitter Bookmarks and Twitter Lists have also been added.

Twitter Bookmarks are a way to save specific tweets for viewing later or just for future reference. Any tweet can be bookmarked by clicking on its share icon next to the like/heart icon and selecting Add Tweet to Bookmarks.

Lists on Twitter are an incredibly easy way to curate your Twitter feed by creating groups of certain accounts. Some of the perks of using Twitter Lists is that all tweets in them appear chronologically and sponsored tweets don’t appear at all.

No release notes have been published yet so it’s unclear if anything else has changed with this update. Have you noticed anything different in the Windows 10 Twitter app? Let us know in the comments below and then follow us on Twitter for more Windows news.

The app was not found in the store. ?

FIX: Error loading player: No playable sources found

The Error loading player: No playable sources found message signals a problem that happened while an online video was loading on your browser.

Shortly, when this error message is displayed you cannot stream online videos and that’s a bummer.

However, we are not talking about a major issue, but about a minor bug which can be now easily addressed with the help of the troubleshooting methods that are explained in this tutorial.

How can I fix player loading errors in Windows 10:

  1. Solution 1: Reinstall Adobe Flash Player.
  2. Solution 2: Clear browser cache.
  3. Solution 3: Update the browser.
  4. Solution 4: Add flash exceptions.
  5. Solution 5: Check for Windows updates.
  6. Solution 6: Enter Safe Mode with Networking.

1. Reinstall Adobe Flash Player

If you receive the Error loading player: No playable sources found message while using different web browser clients, you should reinstall Adobe Flash Player on your Windows 10 device:

  1. You can access this page and download the uninstaller from Adobe – run the uninstaller, follow on-screen prompts and wait while Adobe Flash Player is removed.
  2. Then, on your browser type Adobe Flash Player and access the Adobe official web page.
  3. From there you can download the latest version of Flash Player for your own Windows 10 system.
  4. So, download the software and then click on the downloaded file in order to run the installer.
  5. Follow on-screen prompts and complete the installation process.
  6. When done restart your browser as the Error loading player: No playable sources found should have been solved.

2. Clear browser cache

The Error loading player: No playable sources found bug might be happening because of the recent files saved within your browser. So, a good solution to fix the issue will be in clearing your browser cache.

Below you have the steps that can be used on Google Chrome, but you can similarly clear cache on any other web browser software.

  1. Open Google Chrome.
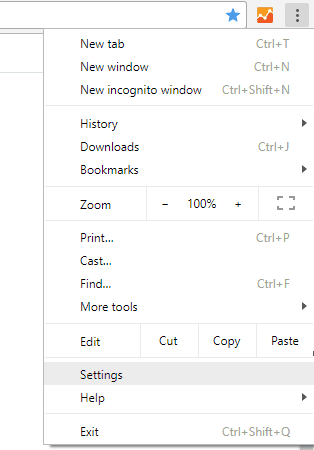
  2. Click on the three vertically dots displayed in the top right corner of the main window.
  3. From the list of options that will be displayed click on More tools.google chrome settings
  4. Next, select Clear browsing data.
  5. Choose to ‘clear the following items from the beginning’.
  6. And make sure that ‘cached images and files’ and ‘cookies and other site data’ options are checked.
  7. Restart your browser in the end.

If you also want to clear the auto-fill data in Google Chrome, be sure to check out this useful guide.


3. Update the browser

You can experience issues while trying to stream an online movie if you are using an outdated browser.

So, you should update your browser before trying anything else (again, the steps from below are for Google Chrome, though you can easily complete this operation for all the other web browser apps):

  1. Open Chrome.
  2. Click on the Menu button, as showed above.
  3. From the displayed list of options select Help.
  4. Pick About Google Chrome.update chrome
  5. If an update for your browser is available you will be prompted with the implied update.
  6. Just follow on-screen prompts and wait while all the patches are installed.

4. Add flash exceptions

  1. Run Google Chrome.
  2. Click on the Menu icon and go to Settings.
  3. Scroll down and click on Advanced settings.advanced chrome settings
  4. Under Privacy field find and click on the Content Settings entry.content settings chrome
  5. From there locate and access the Flash feature.
  6. And from this page you can add any website to the list.
  7. That should resolve the Error loading player: No playable sources found message.

5. Check for Windows update

If a Windows update cannot be installed or if an update is waiting in the background for your approval, you might experience different issues while using your web browsers. So, make sure that all the updates are applied:

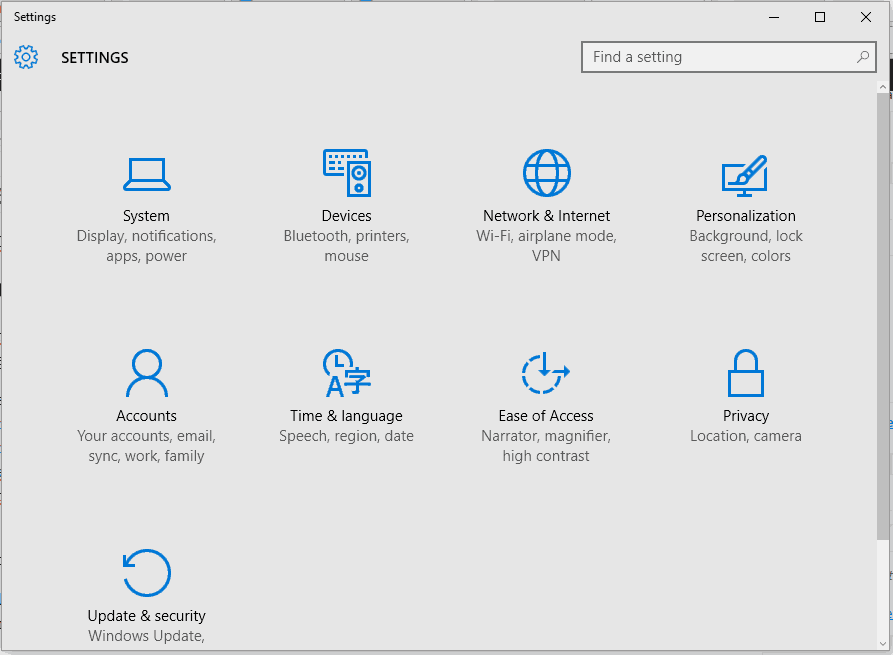
  1. Press the Win+I keyboard keys.
  2. The System Settings window will be displayed.fix update and security not working windows 10
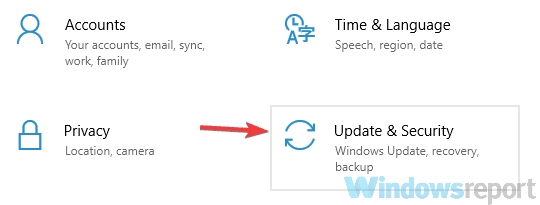
  3. From there click on Update & Security.
  4. From the next window click on Windows Update (located in the left panel).
  5. If there is an update available you will see it displayed.
  6. So, apply the updates and then restart your Windows 10 device.

If you can’t open the Setting app, take a look at this article to solve the issue.


Having trouble updating your Windows? Check out this guide that will help you solve them in no time.


6. Enter Safe Mode with Networking

If the problem is caused by a third party app or by a recently added web browser extension, you should test your browser from Safe Mode. In Safe Mode all third party apps and software will be disabled by default.

Thus, if the issue will not exist in safe mode you will have to remove recently installed apps that might interfere with the Adobe Flash Player client. Here is how you can reboot your Windows 10 system into Safe Mode with Networking:

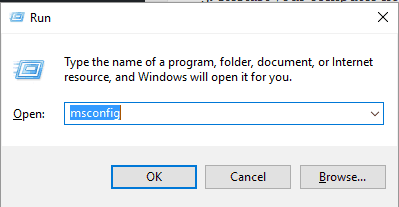
  1. Press Win+R keyboard hotkeys.
  2. The RUN box will be displayed.
  3. There, type msconfig and then press Enter.msconfig windows 10
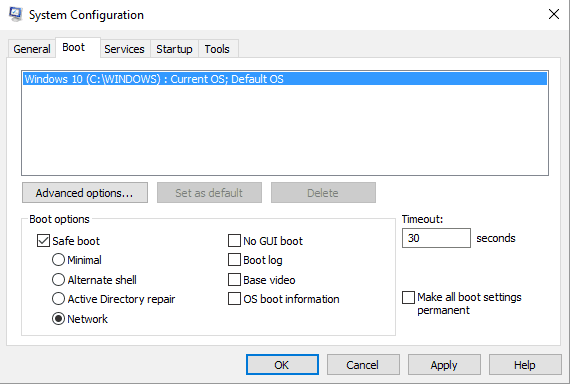
  4. From System Configuration switch to Boot tab.
  5. Under Boot Options check the Safe boot box.safe mode with networking
  6. And, from below, also check the Network feature.
  7. Save your changes and restart your Windows 10 system.

Safe mode is not working? Don’t panic, this guide will help you get past the booting problems.


These are the troubleshooting solutions that can be applied when the Error loading player: No playable sources found problem occurs.

Tell us which method worked for you. Don’t forget to mention in the comments section below other similar fixes you used because that’s the only way in which we can still help other users who are facing the very same issue.

[wl_navigator]

Your connection to matchmaking servers is not reliable [Fix]

Steam is a platform on which lots of competitive games can be played, but sometimes you might encounter Your connection to matchmaking servers is not reliable message.

This issue can be tracked back to Stream, especially when there is a problem with their servers. So, always check the status of their servers online. If the servers are running smoothly, it means that the cause of the error is from your side.

In this article, we have outlined some solutions that are capable of resolving this error for you.

How to fix Your connection to matchmaking servers is not reliable?

  1. Use IPconfig command
  2. Give Steam administrator access permission

1. Use IPconfig command

The IPconfig, known as internet protocol configuration is a console application used for displaying all current configuration of IP/TCP on your computer. IPconfig is also used to adjust the Domain Name System (DNS) and Dynamic Host Configuration Protocol (DHCP).

The IPconfig can forcefully refresh DHCP IP address of the host PC and fix Your connection to matchmaking servers is not reliable message. To do that, follow these steps:

  1. Press the Windows key and R key to launch the Run application. Type cmd in the dialog box and wait for a Command Prompt.
    Your connection to matchmaking servers is not reliable run window
  2. While the Command Prompt is running, type ipconfig/release.
    command prompt Your connection to matchmaking servers is not reliable
  3. Type ipconfig/renew as soon as this is done. This will demand a new IP address from the server. Note that if the computer is connected to a cable or DSL modem, it should be connected directly to the modem network to dodge the router. After, you can use ipconfig/release. Turn off the power for a few minutes. This action will enable the old IP to be taken by another computer.
  4. Then type ipconfig/flushdns.
  5. Lastly, reboot your system, right-click on the client and run Steam, then select Run as administrator. Now try matchmaking again.

2. Give Steam administrator access permission

Steam needs a read and writes access on both its folder and the disk. In addition, Steam needs to get administrator access to work without any sudden errors.

To ensure that Your connection to matchmaking servers is not reliable message doesn’t appear, be sure that these two conditions are met.

Follow these steps to grant steam administrator access

  1. Navigate to C:Program Files (x86)Steam.
  2. Look for the main Steam launcher by searching for an .exe file called Steam.exe. Right click on it and select Properties on the list. After this, select the Compatibility tab at the screen top. Just below the small dialog box, you will see a checkbox that says Run this program as an administrator check it and save the changes made before you exit.
    compatibility tab matchmaking servers connection issue
  3. Make a search for a .exe file GameOverlayUI.exe. Set this file to run as administrator as well.
  4. Locate the Steam directory in C:Program Files.
  5. Right-click on the directory and select Properties. Go to the Security tab and select Advanced, located at the bottom of the window.
    security settings Your connection is not reliable
  6. At this command, a window will pop up. The last two rows on the window are not editable but the four first rows are editable. At this point, you can see that full access has been granted.
  7. Repeat this action on all the editable rows. Click on the row and hit the Edit button. This will open a window full of checkboxes. Tick all the boxes and also tick the Full Control option. Then, click on Apply and save the changes done.
  8. At this point, you won’t encounter the error message while matchmaking. So, restart your PC to confirm that all the changes have been applied, then run the Steam.

Hope these solutions helped you fix Your connection to matchmaking servers is not reliable message on your PC.

READ ALSO:

Posted in Fix

How to Download And Run iOS Apps on Windows

Many users want to run iOS apps on their PC, and today, we will show you a couple of ways to download and run iOS apps on Windows.

This process requires third-party software, so keep reading to find out which software can help you with this task.

How can I download and run iOS apps on Windows?

1. iPadian Emulator

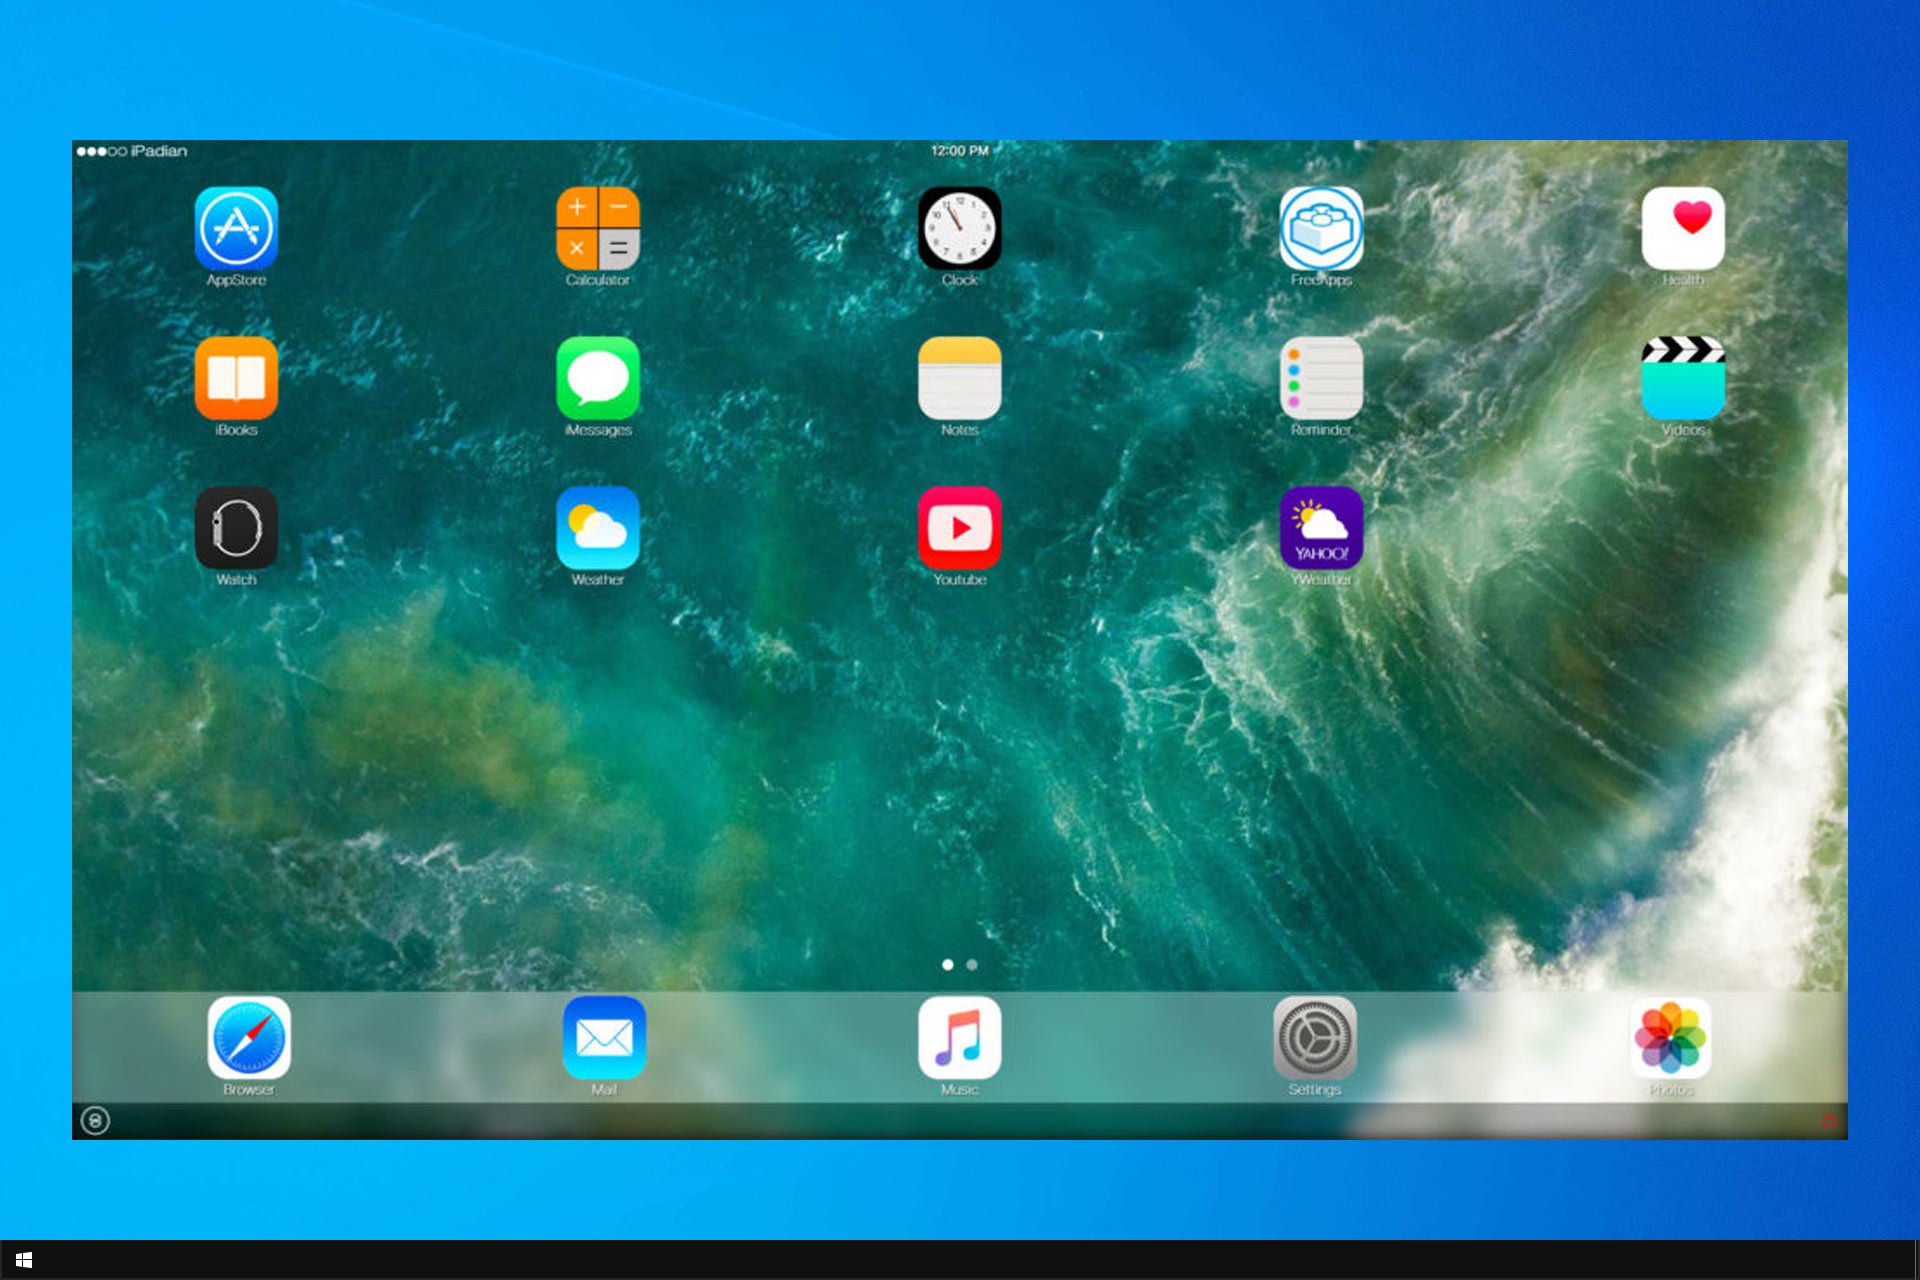
Perhaps the best iOS emulator for Windows 10 currently available is iPadian. This emulator allows you to run many iOS apps on your computer in an iPad-like interface.

ipadian

Of course, as running iOS apps on Windows 10 is not supported by default, using iPadian has its downsides. The biggest flaw of this emulator is (ironically, the same as Windows 10) the limited number of apps and games. Namely, iPadian doesn’t support iOS’s app store, as it uses its own custom app store.

Compared to the original app store, iPadian’s store looks poor. In the games category, there are less than 10 games you can install and play on your computer. However, if the app you want to run is featured in iPadian’s store, it’s a good choice.

ipadian store

You can install iPadian just like any other program. Download and install the emulator, and you can start using apps and games. Also, keep in mind that you need .NET Framework and the latest version of Adobe Flash Player, for security reasons.

iPadian comes with a few essential apps pre-installed, like Facebook or YouTube. For everything else, download what you want from the store. The interface combines Windows and iPad-like environments, so you’ll have a feeling that you’re indeed using an iPad.

⇒ Get iPadian Emulator

2. Air iPhone Emulator

Another way to run iOS apps and games on Windows 10 is Air Iphone Emulator. It’s a simple Adobe AIR application that mirrors iPhone’s GUI in Windows. For this to work, you will need the AIR framework.

This app is mainly targeting developers and is not supposed to be a real replacement for the iPhone, but more like a clone without the hardware. If you would like a one-on-one experience with a virtual iPhone, check out this emulator.

Steps to install the Air iPhone emulator:

  • First, download the file and save it on your PC
  • Once the download is complete, double-click to open the .exe file and follow the onscreen instructions.
  • Once installed, launch it, search, and download iOS apps on your PC for free.

⇒ Get Air iPhone Emulator

Note icon NOTE
This software is available for download only from third-party sources, so use caution.

What is the best iOS emulator for PC?

  • iPadian iOS Emulator
  • Air iPhone
  • Xamarin Testflight
  • MobieOne Studio
  • Smartface
  • Ripple Emulator

To learn more about each of these tools, check our best iOS emulators for Windows 10 guide for more information.

Many emulators can help you run iOS apps and games on Windows 10, but not all can get the job done or are easy to understand. In case you’re looking for something different, we have a great guide on iOS apps to control PCs remotely and our guide on how to mirror your iOS device to PC.

Feel free to tell us about your experience with these emulators in the comments section or recommend others who helped you.

Edge Insider Dev and Canary builds get updates, add support for Windows Mixed Reality headsets

Microsoft’s move to rebuild its Edge web browser using Chromium hits another landmark today with the first Edge Insider Dev update. The releases place Edge both Dev and Canary at version 75.0.131.0, and although so far the Canary channel still hasn’t quite reached “nightly build” status, it’s a lot more frequent than Old Edge users are accustomed to seeing.

As for a changelog, that’s still in the works, but a couple of things to note with these latest builds. First, both Edge Insider Dev and Canary channels now contain support in preview form for WebVR/WebXR content for Windows Mixed Reality headsets:

Make sure either the WebVR or WebXR flag in edge://flags is enabled, and try it out on your WMR device! ???? Requires build 75.0.131.0 or later.

In addition, today’s release now allows for running Edge Insider on 32-bit machines with the Edge Canary channel.

If you have been waiting for 32-bit support to try out Edge Insider, there’s no reason to wait and you can download Edge Dev or Edge Canary channels from this Edge Insider download page. Remember too that you don’t have to choose between channels, either, as you can run Edge Insider Dev, Edge Insider Canary, and even the “old” EdgeHTML-based Edge side by side by side. And if you’re not sure if your Edge Insider build has been updated or not, you can quickly check:

So far, although it’s very early, Edge Insider (as we like to call it, nothing like having one name for multiple completely different products, eh Microsoft?) has been getting good reviews and seems to be fully functional for the most part, so if you’ve been hesitating, we recommend giving Edge Dev or Edge Canary (or both) a try. Worst case scenario, you just close the browser and go back to what you were using before!

How to: Overwrite existing files during download

Google Chrome is one of the most popular web browsers on Windows 10, and rightfully so. Chrome supports the latest standards as well as a wide array of features and extensions. Despite all these features, Google Chrome has one annoying flaw. Users are complaining that Chrome doesn’t allow you to overwrite existing files while downloading, and this can be sometimes annoying. If you’re having problems with this feature, today we’re going to show you how to overwrite existing files while downloading in Chrome.

How to overwrite existing files while downloading in Chrome?

  1. Change Chrome’s settings
  2. Use third-party extensions

Solution 1 – Change Chrome’s settings

By default, Chrome will automatically save all files to the Downloads folder without asking the user for confirmation. This process is quite straightforward and you just have to click the download link and the file will be saved directly to your PC. You won’t see any prompts, and the saved file will have the default name, so you won’t be able to change it. Since you can’t change the file name while downloading, files that have the same names will usually have a number in brackets that allows you to easily differentiate duplicated files.

This is a useful feature because it will allow you to quickly and easily download files, but at the same time it will prevent you from overwriting your files by accident. However, this can be an issue for some users that want to overwrite certain files in order to keep just a single copy of a specific file. This eventually leads to a number of duplicated entries in the Downloads folder and it can make certain files harder to find. To fix this problem, you need to change Chrome’s settings, and you can do that by following these steps:

  1. In the top right corner click the Menu icon and select Settings from the menu.

    chrome settings
  2. Once the Settings tab opens, scroll all the way down and click on Show advanced settings.
  3. Scroll down to the Downloads section and check the Ask where to save each file before downloading option.
    ask where to save each file before downloading chrome
  4. After doing that, close the Settings tab.

After making these changes, you’ll be asked to set a download location as well as a name for the file that you want to download. In case you have the same file in your download directory, you’ll be asked to overwrite that file.

This method requires a few more steps when downloading files, but it offers more options in return. In addition to choosing a download location for your files, you’ll be also able to overwrite your files.

Solution 2 – Use third-party extensions

If you want to overwrite existing files while downloading, you can do so by using third-party extensions. There are several Chrome extensions available that can help you with this problem. Two most popular ones are Downloads Overwrite Existing Files and Downloads Overwrite Already Existing Files.

Both extensions work the same way, and they will scan your download folder for any files that have a same name. If the file you’re trying to download exists in your download folder, it will be automatically overwritten. We have to warn you that these extensions only compare file names and not the size of the files or their contents. As a result, you might accidentally overwrite important files. If you decide to use any of these extensions, we highly recommend that you be extra cautious in order to prevent file loss.

These extensions allow you to download files quickly and without any additional dialogs, but at the same time they don’t offer any warning massages, so you can accidentally overwrite important files if you’re not careful.

Overwriting existing files while downloading is simple, and the best way to do that is to change your browser settings. By doing so, you’ll have to select the download location and file name for each file, but you’ll be also able to overwrite files easily. If you want more automatic solution, you can also use the extensions that we mentioned, but be careful not to overwrite important files by accident.

READ ALSO:

Fix Win32 Error Code Returned by the Print Processor

The Win32 error code error is one that can occur when attempting to print locally or from Terminal Services.

Whenever this issue occurs, you can’t print documents even though the printer shows up on Windows. No error message dialog window pops up when this issue occurs, but Event Viewer logs it with the following details:

The document Untitled – Notepad, owned by blin, failed to print on printer 041hp4050 (redirected 4). Try to print the document again, or restart the print spooler.Data type: RAW. Size of the spool file in bytes: 23044. Number of bytes printed: 0. Total number of pages in the document: 1. Number of pages printed: 0. Client computer: laptop. Win32 error code returned by the print processor: 5. Access is denied.

This is an especially frequent issue for the Windows Server platforms. It can be due to the printer‘s driver, insufficient RAM or the spooler receiving invalid data.

The Windows Print Spooler is usually the source of this issue. Check below for a few potential resolutions for the “Win32 error code” issue.

Having Win32 errors on your PC? Here’s how you can fix them

  1. Run the Printer Troubleshooter
  2. Assign Permission to the Print Spooler
  3. Restart the Print Spooler
  4. Clear the Spooler Directory
  5. Install a new Printer Driver

1. Run the Printer Troubleshooter

The Printer Troubleshooter included in Windows is the first thing you should open to fix printer issues. This doesn’t always help, but it can fix numerous printer issues nonetheless.

The Print Spooler is one of the things this troubleshooter checks. This is how you can open the print troubleshooter in Windows 10.

  • Click the Cortana button, and then enter ‘troubleshoot’ in the search box.
  • Click Troubleshoot to open the window directly below.
  • Select Printer and Press the Run the troubleshooter button to open the window directly below.
  • Then you’ll also need to select a printer to troubleshoot if you have multiple printers. Choose a printer, and press the Next button.

2. Assign Permission to the Print Spooler

This is more specifically a Terminal Service fix for the “Win32 error code” error. This resolution utilizes the Cacls.exe command-line utility to assign permission to the spooler. You can do that as follows.

  • First, open the Command Prompt as an administrator.
  • Input ‘“C:” w/o’ in the Command Prompt, and press the Enter key.
  • Input ‘CDWindowsSystem32Spool’ to navigate to the Spool folder, and then press the Enter button.
  • Enter ‘Cacls.exe PRINTERS /e /g users:C’ in the Prompt window, and press the Return key.
  • Then restart the Windows OS.

3. Restart the Print Spooler

The Event Viewer log for the “Win32 error code” error states that you should restart the Print Spooler. So that’s another potential resolution confirmed by some to work. This is how you can restart the spooler in Windows.

  • Press the Win key + R to open Run.
  • Enter ‘cmd’ in Run’s text box, and then click the OK button.
  • Input ‘net stop spooler’ in the Command Prompt window and press Enter to switch off the Print Spooler service.
  • Enter ‘net start spooler’ and press the Return key to restart the service.

4. Clear the Spooler Directory

  • If the above resolution doesn’t do the trick, you can take it a step further by clearing out the spooler directory. First, stop the Print Spooler service via the Command Prompt as outlined above.
  • Then enter ‘del %systemroot%System32spoolprinters* /Q’ in the Prompt window, and press the Return key.
  • Restart the spooler by entering ‘net start spooler’ in the Command Prompt.

5. Install a new Printer Driver

As the “Win32 error code” error can be due to the printer driver, replacing it with a fresh and update one can also resolve the issue.

You can download a fresh driver from the printer manufacturer’s website. This is how you can install a new printer driver in Windows:

  • First, enter ‘system info’ in Windows’ search box; and then select to open System Info.
  • Click System Summary on the System Info window, which includes a System Type detail that tells you if your laptop or desktop is 64 (x64) or 32-bit (x86). You’ll need that detail to download the compatible printer driver.
  • You’ll also need the printer model detail, which is usually included on the printer. If not, check the printer‘s manual.
  • Then open your printer manufacturer’s website.
  • Open the download or drivers section on the printer manufacturer’s website.
  • Enter your printer model in the site’s driver search box, or select it from a drop-down menu.
  • Then download an update printer driver. Make sure that the 64 or 32-bit driver is the right one for your platform.
  • Click the Download button to save the printer driver to Windows.
  • After downloading the driver, click Run on the Download Complete dialog box. Thereafter, you might need to extract some files to a folder.
  • Install the printer driver via Device Manager. Press the Win key + R hotkey to open Run, and enter ‘devmgmt.msc’ to open the window directly below.
  • Right-click your listed printer and select Update driver to open the window below.
  • Select the Browse my computer for driver software option, and then click Let me pick from a list of device drivers on my computer.
  • Press the Have Disk button, and click Browse to select the folder you extracted the driver files to.
  • Click an INI file in the extracted driver folder, and press the Open button.
  • Press OK on the Install From Disk window.

Those are five resolutions that might fix the Win32 error code error to get your printer going againg. Note that the issue can also occur when RAM is limited.

So make sure that you also close superfluous taskbar windows and background software with the Task Manager, as covered in this article, before printing.

Share your experience in the comments section below or tell us about any other solutions you have encountered.

Here’s how to fix Astroneer low FPS issues

Astroneer is a promising game that takes players to the edge of space, challenging them to find rare resources and use them to build various vehicles and machines in order to expand their bases.

Astroneer’s gameplay is pretty addictive, but the gaming experience is often affected by various issues. As we already reported, sometimes Astroneer crashes, players may experience low FPS issues, steering is far from perfect, and others. Considering the game is still work in progress, players should expect to encounter some technical issues.

Fortunately, there are already a few workarounds available to fix Astroneer crashes and 2015 C++ Runtime errors. The good news is that players can now fix the annoying low FPS issues as well. One resourceful Astroneer player has come up with a quick solution to stabilize the game‘s FPS rate.

Also, before moving to the actual steps, ensure that your graphics drivers are up to date. It’s of utmost importance to have everything up to date. In addition, we can’t skip on system requirements so make sure you meet them accordingly.

Fix Astroneer low FPS

All you need to do is to find a particular config file in the Astroneer game folder and alter a series of values. Follow these steps:

  1.  Find the file %appdata%localastrosavedconfigwindowsnoeditorengine.ini usually located in C:Users@USERNAME@AppDataLocalAstro
  2. Open and paste the code Paths=../../../Engine/Plugins/2D/Paper2D/Content below:

[/script/engine.renderersettings]
r.DefaultFeature.MotionBlur=False
r.LightFunctionQuality=0
r.ShadowQuality=0
r.Shadow.CSM.MaxCascades=1
r.Shadow.MaxResolution=512
r.Shadow.RadiusThreshold=0.1
r.Shadow.DistanceScale=0.6
r.Shadow.CSM.TransitionScale=0
r.DistanceFieldShadowing=0
r.DistanceFieldAO=0
r.DepthOfFieldQuality=0
r.RenderTargetPoolMin=300
r.LensFlareQuality=0
r.SceneColorFringeQuality=0
r.EyeAdaptationQuality=0
r.BloomQuality=4
r.FastBlurThreshold=0
r.Upscale.Quality=1
r.TonemapperQuality=0
r.LightShaftQuality=0
r.TranslucencyLightingVolumeDim=24
r.RefractionQuality=0
r.SSR.Quality=0
r.SceneColorFormat=3
r.TranslucencyVolumeBlur=0
r.MaterialQualityLevel=0
r.SSS.Scale=0
r.SSS.SampleSet=0
r.EmitterSpawnRateScale=0.75

Most players who used the solution listed above confirm that Astroneer’s FPS rate increases by 40 to 50. There are also players who didn’t notice any FPS improvements after following the above mentioned troubleshooting steps, too. If this is the case for you as well, try unlocking the FPS.

If you want to unlock Astroneer’s FPS, simply type %appdata% in the Search Menu > select the Astro folder > Config > open the GamerUserSettings file with Notepad > change the FrameRateLimit 144 value to your Monitor RefreshRate or above.


Game Fire is a game booster that will get rid of freezes, lags, low FPS and other issues while playing. Download it now (free) for a better gaming experience.


Other Astroneer players suggest that adding the startup command -NOSOUND increases the game‘s FPS. Most likely, the players who experience FPS increases with NOSOUND are using on-board audio. Gamers with dedicated sound cards probably won’t see any improvements.

If you’ve come across other workarounds to fix Astroneer’s FPS issues, feel free to list the troubleshooting steps in the comments below.

RELATED STORIES YOU NEED TO CHECK OUT:

Windows 10 18362 SDK is out in final form, with go-live license

Following the release of Windows 10 May 2019 Update in the Windows Insider Release Preview Ring last week, app developers can now download the Windows 10 18362 SDK in its final form. The SDK is compatible with both Visual Studio 2017 and Visual Studio 2019, the latest version of the IDE released earlier this month.

Microsoft has a long list of New APIs and Features for developers in this SDK on the Windows Dev Center. Highlights include the ability to access Linux files from the Windows File Explorer thanks to recent updates to the Windows Sub-system for Linux, as well as the ability to package Progressive Web Apps (PWAs) for Xbox One consoles. Windows Windows UI Library 2.1 can also add the latest Fluent design elements and controls to their UWP apps.

Microsoft notes that Visual Studio will use this new SDK as default once the May 2019 becomes generally available next month. There’s still no exact release date, as this time Microsoft will make good use of the Release Preview ring to make sure that the latest Windows 10 update doesn’t ship with critical bugs.

How to fix Conan Exiles stuttering and freezes on AMD CPUs

Conan Exiles is a great game, perfect for the survivor in you. This game will challenge you to survive in extreme environments, where everything and everyone is out to get you. Conan Exiles wouldn’t be a complete surviving game if it didn’t put your problem solving skills to the test as well. And by that we mean you PC troubleshooting skills.

We already reported that Conan Exiles is affected by a series of issues, but the good news is that Funcom releases a new patch every two days or so, reducing the number of issues bugging players.

Now, if you’re playing Conan Exiles on a computer powered by an AMD CPU and you’re experiencing stuttering and freezes, you’ve come to the right place. In this article, we’re going to show you to how fix these issues.

But first, here’s how one user describes this issue:

“Game permanently freezes if Alt-TABing, Windows key, etc. Anything that would cause the game window to lose focus. Fullscreen, borderless, windowed mode do not matter. Happens 100% of the time. Game continues to use CPU resources, but the amount is inconsequential.”

Fix: Conan Exiles stuttering and freezes

  • Disable all audio in the game settings (set every single audio bar to 0).
  • Locate the config folder. Usually, you can find it at this address: SteamLibrarysteamappscommonConan ExilesEngineConfig .
    There, locate Baseengine.ini and find the [Audio] section. Change maxchannels to 0.
  • Bring up the taskbar > go to the Details tab > locate ConanSandbox.exe > right click and choose Set affinity.
    Disable all but CPU 0 or CPU 1, whichever is first in your list. If this doesn’t work, enable another CPU. Keep enabling CPUs until it works. If you’ve enabled all your CPUs, but you’re still experiencing stuttering and freezes, then the CPU method simply doesn’t work for you.
  • Move the XAudio2_7.dll DirectX Audio Component from its default System32 folder to your desktop and launch the game again. Audio won’t be available, but at least the game won’t freeze and crash that frequently.
  • Check the game files integrity with the Steam client. Open the client, right click on Conan Exiles in the Library and open Properties. Under the Local files tab, choose Verify integrity of game cache…

If you’ve come across other workarounds to fix Conan Exiles issues on AMD CPUs or boost the game‘s performance on these CPUs, feel free to tell us more about it in the comment section below.

RELATED STORIES YOU NEED TO CHECK OUT:

Posted in Fix

Microsoft acquires IoT microcontroller software company Express Logic

Microsoft announced today the acquisition of Express Logic, a San Diego-based company that creates specialized software for IoT devices powered by microcontroller units (MCUs). One of Express Logic’s most important products is ThreadX, a real time operating system for MCU based devices with already over 6.2 billion deployments.

With this acquisition, Microsoft wants to combine ThreadX with its existing IoT tools including Azure Sphere, and make it easier for manufacturers to create MCU-powered devices that can connect to Azure. While we recommend Azure Sphere for customers’ most secured connections to the cloud, where Azure Sphere isn’t possible in highly constrained devices, we recommend Express Logic’s ThreadX RTOS over other RTOS options in the industry because of its additional certifications and out-of-the-box connectivity to Azure IoT Hub,” explained Director, Head of Azure IoT at Microsoft.

The Redmond giant didn’t share financial details about the acquistion, but Express Logic William E. Lamie said today in a separate post that the company’s engineering team was joining Microsoft immediately.  “We look forward to continuing our efforts to help simplify embedded IoT development and continuing to build customer loyalty by helping our customers get to market quicker with solutions that are simple, safe, secure and that can take full advantage of the IoT,” the exec said.

Xbox One S All Digital is basically just a One S with the drive removed

Microsoft finally revealed its Xbox One S All Digital Edition earlier this week, and even though the most important details about the new console had leaked beforehand, we had yet to know if the hardware was significantly changed compared to the standard Xbox One S. As it turns out, the Xbox One S All Digital Edition is pretty much what we thought it would be: an Xbox One S without the disc drive.

The YouTuber Austin Evans got its hands on the new console and published a teardown video earlier this week (via Windows Central), showing that dedicated ports for connecting the disc drive are still present on the motherboard . Additionally, the eject button is still there, though it’s hidden behind the new casing.

The new $249.99 console also ships with the same 1TB hard drive and internal power supply, so Microsoft apparently didn’t try to cut costs by doing more hardware changes. However, Brad Sams, who was the first to report on the discless Xbox One S also wrote in his initial report that Microsoft was planning a newer version of the Xbox One S for later this year that would keep the disc drive but still be a cost saver for the company. “Microsoft is moving forward very carefully with this product as it knows that a sizeable portion of its users do prefer to buy physical games and not download them,” Sams wrote back in November.

So far, the Xbox One All Digital Edition has received a polarized reception, to say the least. The YouTube video shows 42% of dislikes as of this writing, with several comments highlighting the fact that’s it’s quite easy to find cheaper Xbox One S bundles with more interesting games without sacrificing the 4K Blu-Ray player.

Microsoft still deserves credit for its forward-thinking approach, and the fact that the company is testing waters with this discless version of the Xbox One S doesn’t mean that the “Anaconda” family of next-gen Xbox consoles won’t come with a disc-drive. Since Sony’s PlayStation 5 is now confirmed to have a disc drive, Microsoft would pretty much shoot itself in the foot if it was going all digital for its next console generation.

The Xbox One S All Digital Edition will start shipping on May 7, and it remains to be seen if it can appeal to gamers who are not interested in physical disks and the used games market. You can already pre-order the new console on the Microsoft Store, let us know in the comments if you’re interested in purchasing one.

Feature image credit: Austin Evans.

PC status at risk? Use these 5 fixes to restore it

While using your computer, you may come across a few errors or warnings, but if you get the PC status at risk warning, you need to check it ASAP.

This is because the PC status at risk error or warning message is usually associated with or caused by a malware infection.

Malware is simply malicious software or programs that are hostile or intrusive like ransomware, spyware, viruses, Trojans, and other programs meant to harm your computer or files.

In this case, you need to get your computer restored to normalcy and you can do this using the solutions in this article.

PC status at risk: Here’s what you can do to fix it

  1. Restart your computer
  2. Remove malware from your computer
  3. Perform a System Restore
  4. Run DISM tool
  5. Run a System File Checker scan

Solution 1: Restart your computer

This is usually the first thing to do when you experience an error because sometimes programs running in the background could cause some problems on your computer that could lead to the PC status at risk warning. Try restarting your computer and see if it helps. If it persists, try the next solution.

Solution 2: Remove malware from your computer

In order to do this, you need malware removal tools because some of these harmful or malicious programs reinstall themselves after detection and removal. But with malware removal tools, you can permanently remove them.

To permanently remove malware from your computer, there are several things you need to do as ordered below:

  1. Install the latest updates from Microsoft Update
  2. Use Microsoft Safety Scanner
  3. Use Windows Malicious Software Removal tool
  4. Remove rogue security software manually
  5. Install and run MSE and Windows Defender

Install latest updates from Microsoft Update

Follow these steps to do this:

  1. Click Start
  2. Select Settingssettings windows 10
  3. Click Update & Securityupdates & security xbox one controller
  4. On the left pane, click Windows Update
  5. Select Check for updatescheck for updates device can't connect

Use Microsoft Safety Scanner tool

This is a free online tool from Microsoft which you can use to scan and remove potential threats such as malware from your computer.

Use Windows Malicious Software Removal tool

This tool also helps remove specific, prevalent malware from your computer, especially if you’re running Windows 7 and below versions, as well as Windows Server 2008 or XP.

Remove rogue security software manually

If malware or rogue security software isn’t detected or removed by the Microsoft Safety Scanner, or Malware removal tool, do the following:

  1. First write down the name of the malware or rogue software
  2. Restart your PC
  3. When the computer manufacturer’s logo is displayed, press F8 repeatedly
  4. Use arrow keys to highlight Safe Mode with Networkingsafe mode with networking
  5. Press Enter
  6. Click Start to see if the malware or rogue program is on the menu, if not, click All Programs to check if the name you wrote is on the list
  7. Right click on the rogue program’s name
  8. Click Properties
  9. Click Shortcut tab
  10. In Properties, check the rogue program’s path listed under Target (the folder name is usually a random number)
  11. Click Open File Location
  12. Click Program Files in the window
  13. Scroll until you find the rogue program
  14. Right click the folder
  15. Click Delete
  16. Restart your PC
  17. Go to the Microsoft Safety Scanner website then click Download now
  18. Click Run
  19. Scan your computer to remove the rogue program completely

Install and run MSE and Windows Defender

MSE, or Microsoft Security Essentials, is a free malware removal program offered by Microsoft that protects your computer from infections.

Follow these steps to download it:

  1. Visit Microsoft Security Essentials website
  2. Choose your preferred language and Windows OS to begin the download processSecurity Essentials
  3. Click Run and follow installation instructions
  4. Restart your computer
  5. Click Start
  6. Click All Programs
  7. Click Microsoft Security Essentials
  8. Go to the Home tab
  9. Select Full scan
  10. Click Scan Now

If these steps didn’t clear the PC status at risk of error, try the next solution.

Solution 3: Perform a System Restore

If you get a PC status at risk warning on your computer, use System Restore to create restore points using the steps below and see if it helps:

  1. Right click Start
  2. Select Control Panel
  3. Click System Security
  4. Click Systemsystem control panel
  5. Enter your administrator account password or grant permissions if prompted to
  6. In the System Properties box, click System Restore then click Nextsystem restore system settings
  7. Choose a different restore point
  8. Click Next
  9. Click a restore point created before you experienced the problem
  10. Click Next
  11. Click Finish

Restoring doesn’t affect your personal files. It however removes apps, drivers, and updates installed after the restore point was created.

To go back to a restore point, do the following:

  1. Right click Start
  2. Select Control Panel
  3. In the control panel search box, type Recovery
  4. Select Recovery
  5. Click Open System Restoresystem restore control panel
  6. Click Next
  7. Choose the restore point related to the problematic program/app, driver or update
  8. Click Next
  9. Click Finish

Did this clear the issue? If not, try the next solution.

Solution 4: Run DISM tool

If you still get the PC status at risk error, run the DISM tool, or Deployment Image Servicing and Management tool.

The DISM tool helps fix Windows corruption errors when Windows Updates and service packs fail to install due to corruption errors, like if you have a damaged system file.

Here’s how to run the DISM command on your PC to check if it helps you when you can’t install updates on Windows:

  1. Click Start
  2. In the search field box, type CMD
  3. Click Command Prompt in the search results listcommand prompt
  4. Type Dism /Online /Cleanup-Image /ScanHealth
  5. Type Dism /Online /Cleanup-Image /RestoreHealth

Once the repair is complete, reboot your computer and check if the error persists, after which you can run an SFC scan as described in the next solution.

Solution 5: Run a System File Checker scan

A System File Checker scan checks or scans all protected system files, and then replaces the incorrect versions, with the genuine, correct Microsoft versions.

Here’s how to do this:

  1. Click Start
  2. Go to the search field box and type CMD
  3. Select Command Prompt
  4. Right click and select Run as Administratorrun cmd as admin
  5. Type sfc/scannowsfc scannow
  6. Press Enter
  7. Restart your computer

Did any of the solutions above work for you? Let us know in the comments section below.

The server key used to start playback has expired Hulu error [Fix]

Hulu is an incredibly popular video streaming service, but some users reported The server key used to start playback has expired error. This issue can prevent you from viewing any content on Hulu, but today we’ll show you how to fix it once and for all.

This error appears when the user tries playing the video, but the server doesn’t send a response. This can also occur when the Hulu service is far from the user’s location. In some cases, the user has no other option but to wait for Hulu to resolve this issue.

If you want to fix this error yourself, there are some steps to take which are all outlined in this article.

How to fix Hulu playback failure runtime error?

  1. Ensure that your Internet connection is fast enough
  2. Restart your device
  3. Reduce the number of connected devices
  4. Stream Video in a low-quality mode
  5. Do a check on Hulu
  6. Ensure that your browser or app is up to date

1. Ensure that your Internet connection is fast enough

Streaming on Hulu requires a decent network connection. When the speed is excessively low, you might encounter The server key used to start playback has an expired error. To avoid this issue, make sure that you have a fast and stable Internet connection.

2. Restart your device

Sometimes in order to fix The server key used to start playback has expired error you just have to restart your device. If the issue persists, perhaps you should try restarting your modem/router.

3. Reduce the number of connected devices

If you are using a Wi-Fi connection, it is advisable to reduce the number of devices connected to it. Multiple devices will use more bandwidth, thus leaving you with less bandwidth for Hulu.

To fix this problem try disconnecting several devices from your Wi-Fi network and check if that helps.

4. Stream Video in a low-quality mode

If you encounter The server key used to start playback has expired error, perhaps you can avoid it by switching to the low-quality mode. In case your Internet connection is not the best, switching to low-quality mode might help you.

Bear in mind that the quality of the video will be reduced while using a low-quality mode.

5. Do a check on Hulu

Sometimes, Hulu services are on hold for a short time as the app might be undergoing technical issues and maintenance. During these periods, it may display The server key used to start playback has expired error.

It is advisable that you do a check on Hulu’s social media pages on Facebook, Twitter and other platforms. Hulu has a large number of users, so maintenance is expected from time to time. All a user needs to do in this period is to be patient until the Hulu staff resolves the problem.

6. Ensure that your browser or app is up to date

The old version of the Hulu app can give the user a handful of issues. Therefore, updating the app might be a very good step. After updating the app to the latest version, check if the problem is still there.

In case that is still not working, consider switching to another streaming provider, such as Disney+, a digital service offering unlimited streaming of exclusive films, animates series, TV shows, comedy specials, and original content for one monthly subscription fee.

⇒ Get Disney+

If any of these solutions were able to fix The server key used to start playback has expired error, your comments will be appreciated.

READ ALSO:

Tor browser secure connection failed error [FIX]

Did you try to access a page on your TOR browser but this error message keeps popping up?

Are you not able to access any page and you just cannot seem to find the issue?

We know that this can be rather frustrating, so we managed to compile a list of several possible issues. We recommend you to follow these few steps and you should be able to solve this inconvenience in no time.

Tor browser fails to establish a secure connection

We hope that the following steps will come in your aid when it comes to the secure connection on The Onion Router.

  1. More instances of the browser running
  2. Antivirus software interfering
  3. Tor and Kaspersky Error
  4. Temporarily disable your firewall
  5. Re-install Tor
  6. ISP issue
  7. Cannot establish a circuit
  8. Restrictive network

1. More instances of the browser running

Sometimes this error can occur when there are more instances of Tor Browser running. If you tried shutting down other instances, maybe there is a process that you cannot see.

If you are not sure if there are other instances of Tor Browser running, try restarting your computer and your issue might be solver.

2. Antivirus software interfering.

Make sure that any antivirus program you have installed is not trying to prevent Tor from running. Sometimes you may need to consult the antivirus documentation if you don’t know how to work around this.

3. Tor and Kaspersky Error

If you do use one of Kaspersky antivirus software versions, this might just be the reason for your issue. In order to solve this problem, we have managed to find a solution that we hope will be helpful to you.

In your Tor Browser, you need to go to Settings > Specify trusted applications > Exclusions for Applications. Under that tab, you need to check the Do not scan encrypted traffic box.

Another way to go around this is to access Settings>Network>Encrypted Connections Scanning and to select Do not scan encrypted connections.

4. Temporarily disable your firewall

Sometimes your Windows firewall can interfere with Tor Browser — that being the reason why you cannot access any web page. If you do not know how to turn off your Windows firewall, you can find the required steps by accessing this article.

5. Re-install Tor

In some cases, the only fix is a rather rough one. Even though this seems like a rudimentary solution, in some cases it might be just what you need.

You can also try and update Tor. If doing so, do not just overwrite your previous browser files, but rather ensure that they are fully deleted beforehand. To complete this task, you may use one of the software removing tools listed in this guide.

6. ISP issues

If you still cannot connect, your Internet Service Provider might be the one censoring your connections to the Tor network.

If you think this is the case, you might find a solution under the Circumvention section of Tor Project.

7. Cannot establish a circuit

You should try and check your system clock. If it is off by more than a few hours, Tor will not build circuits. Try and sync your clock under the Internet time tab.

Also, correct the date under the Date & Time tab.

8. Restrictive network

If you are located in China, or if you are behind a restrictive corporate network firewall, you should try and read more about Tor Bridges.

READ ALSO:

Microsoft’s Surface Hub 2S to start shipping in June, new 85-inch version coming in 2020

Microsoft invited the press for a Surface event in New York City this morning, where the company shared more details about the successor to its Surface Hub digital whiteboard. The Surface Hub 2S was officially revealed back in May 2018, but we finally know how much it will cost and when it will start shipping.

The original Surface Hub was an enterprise-focused device, and that’s not changing with the Surface Hub 2S. Indeed, the new device will be priced at $8,999.99 in the US and start shipping in the country in June, with additional Surface Hub markets to follow “shorlty thereafter,” the company said today.

The Surface Hub 2S’ premium pricing is somewhat justified by the much better specs found in the new digital whiteboard: there is an Intel 8th gen Core i5 processor inside with 8GB of DDR4 Ram and a 128GB SSD, but there’s also a 4K+ 50-inch multi-touch display that is 60 percent thinner than the previous version. The device itself is forty percent lighter than its predecessor, and Microsoft has teamed up with Steelcase to create a stand and wall mounts that will be sold separately.

One of the most interesting results from Microsoft’s partnership with Steelcase is the new Steelcase Roam Mobile Stand and APC Charge Mobile Battery that will transform the Surface Hub 2S into a mobile PC. The mobile battery will also be sold separately for $1,400, and it will provide up to 2 hours of battery life, according to The Verge.

If the Surface Hub 2S is an impressive hardware upgrade, the device will still run the Windows 10 Teams OS that currently ships on the original Surface Hub. This customized version of Windows 10 is optimized for team work and comes with Microsoft Teams built-in and support for universal Windows 10 apps.

Thanks to a new cartridge system that Microsoft unveiled last year, the Surface Hub 2S will be upgradable to the Surface Hub 2X next year. The cartridge will include beefier specs to unlock new software features powered by Windows Core OS, including display rotation and the ability to combine four different Surface Hub 2X displays together. According to The Verge, Microsoft is also exploring support for Win32 apps on the Surface Hub 2X.

The Surface Hub 2X cartridge isn’t the only thing that will ship next year, as Microsoft said today that it will start testing a 85-inch version of its new Surface Hub with select customers in early 2020. Interestingly, the company will also release a Surface Hub 2 display only model featuring the same 4K+ 50-inch multi-touch display found in the upcoming Surface Hub 2S, but without the compute cartridge, and this should be much more affordable for companies interested in the innovative display technology. Lastly, Microsoft will also offer enterprise customers the option to run Windows 10 Pro or Enterprise on the Surface Hub 2S instead of Windows 10 Teams, which currently doesn’t support all app scenarios.

Unfortunately, there was no livestream for today’s Surface event, but the full video should be available later today. The Surface Hub 2S will be the first new Surface device to ship in 2019, and it certainly manages to meet the high expectations we’ve come to have about Surface products in recent years. While this new Surface device will target enterprise consumers, Microsoft should have new Surface products for consumers later this year including a heavily redesigned Surface Pro tablet, and we’ve also learned about new Surface earbuds earlier this week.

YouTube commenters roast Xbox One S All Digital Edition as too expensive

Microsoft has already officially announced the Xbox One S All Digital edition (or Xbox One SAD, as it’s being dubbed), which is exactly the same as the original One S, just without a disk reader. The company is pitching this as “the most affordable way to play Xbox games,” but that isn’t stopping the whopping 40% dislikes the video has received on YouTube along with the roasting comments.

The console starts at $249 and comes with three digital games included—Forza Horizon 3, Minecraft, and Sea of Thieves. Despite the slight reduction in price, many users feel that the starting point is simply too high to be willing to commit to a single locked-down ecosystem.

Via YouTube

Some have also mentioned their disappointment that the console is just a downgrade, holding no real advantage over the current Xbox One S that does include the disk drive.

Via YouTube

Both commenters make compelling arguments, especially given that there are many cheaper Xbox One S bundles on other retailers such as right now. Amazon, Walmart, and Best Buy are selling the systems for the same price if not less than the diskless version right now, which not only doesn’t accept physical games but also can’t read DVDs and BluRays.

Of course, Microsoft seems to be willing to help those commit to an all-digital gaming life, as Thurrott’s Brad Sams has recently pointing out that “there will be a ‘disc-to-digital’ program that, as the name states, turns your physical games into digital downloads. The idea is that you can take your disc to a participating retailer (like the Microsoft store) and trade in your disc for a digital download.”

For now, we’ll just have to wait and see how well consumers can adapt to digital-only games and movies, if they’re willing at all. Could you see yourself living inside of Microsoft’s walled ecosystem?

Here’s how Skype manages the data of 4 billion users leveraging Azure Cosmos DB

For anyone paying attention, Microsoft’s consolidation of its Skype development has been a messy reoccurring pitch where the company announces a  singular vision going forward, to then follow through with several different engineering solutions that overlap and Frankenstein features from one app to the next.

To their credit the Skype team has handle multiple moving parts as well as a migration of four billion total users and thankfully, the team has managed to scale their development using a small, in-house tool called Azure Cosmos DB.

Azure Cosmos DB Program Manager Parul Matah, breaks down the ins and outs of modernizing Skype’s backend infrastructure to help scale support and services for over 300 million monthly users.

Prior to 2017, PCS ran in three data centers in the United States, with data for one-third of the service’s 4 billion users represented in each data center. Each location had a large, monolithic SQL Server relational database. Having been in place for several years, those databases were beginning to show their age. Specific problems and pains included:

  • Maintainability: The databases had a huge, complex, tightly coupled code base, with long stored procedures that were difficult to modify and debug. There were many interdependencies, as the database was owned by a separate team and contained data for more than just Skype, its largest user. And with user data split across three such systems in three different locations, Skype needed to maintain its own routing logic based on which user’s data it needed to retrieve or update.

  • Excessive latency: With all PCS data being served from the United States, Skype clients in other geographies and the local infrastructure that supported them (such as call controllers), experienced unacceptable latency when querying or updating PCS data. For example, Skype has an internal service level agreement (SLA) of less than one second when setting up a call. However, the round-trip times for the permission check performed by a local call controller in Europe, which reads data from PCS to ensure that user A has permission to call user B, made it impossible to setup a call between two users in Europe within the required one-second period.

  • Reliability and data quality: Database deadlocks were a problem—and were exacerbated because data used by PCS was shared with other systems. Data quality was also an issue, with users complaining about missing contacts, incorrect data for contacts, and so on.

As most users can attest to, there was a period of reaccuring outages with Skype not to long ago and Matah attributes many of those service failures to deadlocks produced by an aging backend infrastructure that was unable to scale to the demand of increased traffic. Depsite best efforts to add extra code to throttle database request to maintain connections and workaround deadlocks, the Skype team was ultimately pushed to change due to the recent General Data Protection Regulation (GDPR).

The previous systems in place were non-compliant which complicated matters for the Skype team by adding a clock to their development efforts.

To make sure Skype wouldn’t run into issues similar to previous one, the team decided that owning its own data store was the only viable solution.

Skype found the perfect fit in Azure Cosmos DB, the globally distributed NoSQL database service from Microsoft. It gave Skype everything needed for its new People Core Service (PCS), including turnkey global distribution and elastic scaling of throughput and storage, making it an ideal foundation for distributed apps like Skype that require extremely low latency at global scale.

The Skype team began migrating of its backend in October 2017 and moving the records of 4 billion users interestingly enough, only took two months. With the switch came the additional benefits of

  • Cross-partition transactions and the ability to integrate other services
  • Separate read and write paths and data models for optimal perforce
  • Custom change feed processing
  • Event-driven architecture

Now Skype request are processed using Azure Cosmos DB to the tune of 15,000 reads and 6,000 writes per second and over 140 terabytes of data stored.

The Sims 4 video game gains keyboard and mouse support on Xbox One consoles

The Sims 4 is the latest Xbox One video game to gain support for mouse and keyboard controls. This added support comes as part of today’s free update which should now be rolling out to all Xbox One consoles.

In addition to these new control options, this update also added a host of (late) Lunar New Year content.

Here’s the release notes for the new content and control changes:

Mouse & Keyboard support is available to all console players of The Sims 4. Simply connect your mouse & keyboard of choice and away you go.
You may be wondering how to adjust the mouse sensitivity or switch to left handed play. PlayStation 4 and Xbox One handle these settings for you. Just head to the following locations on your console to make changes:

PlayStation 4 – Settings > Devices> Mouse

Xbox One – Settings > Kinect & devices > Mouse

Lunar New Year came a little late to console but now you can extend the celebrations with

  • New Recipes
  • Vegetable Dumplings – Requires Level 1 Cooking Skill
  • Mud Carp – Requires Level 7 Cooking Skill
  • New Objects: ,Shadow of the Moon Table – A six seat round dining table — perfect for family meals!, Moon-Gazing Dining Chair, Fiery Moon Gift Centerpiece, Wealth of the Moon Envelopes, Lucky Citrus Tree of the Moon, Paper Lantern of the Wiseacre Moon, Symbols of the Watery Moon, Sycee of the Prosperous Moon, Moon Panda Toy, Year of the Pig Statuette.
  • New Clothing & Accessories

A variety of minor fixes and changes were also made with this update. You can read about all of these here.

Keyboard and mouse functionality was added to Xbox One consoles in late-2018 and has since been added gradually to more and more games ever since. One of the most-recent video games to gain support for mouse and keyboard was Sea of Thieves which got it during an update last month.

Do you like to use mouse and keyboard when playing Xbox One games or do you prefer the controller? Share your thoughts with the community in the comments below and then follow us on Pinterest for more Xbox gaming content.

A mailbox couldn’t be found for Office 365 [Fix]

If you have a received a new email address from your university or company and you’re trying to setup it with Office 365 account, you may encounter a few temporary and common errors.

One such error is Something went wrong A mailbox couldn’t be found for <email address> Office 365 error. This error usually occurs with when you try to access new Outlook account via Office 365 Suite.

This error can occur due to lack of access to the license, or it can be a temporary issue that will resolve by itself. In this article, we take a look at the best solutions to fix this error once and for all.

How can I fix we couldn’t find your Office 365 mailbox error?

  1. Restart your PC
  2. Wait for 48 hours
  3. Check for Online Exchange License
  4. Add an Alias

1. Restart your PC

restart PC A mailbox couldn't be found for

If you recently installed Microsoft Office and didn’t restart your PC, it is recommended to restart your PC soon after the installation regardless whether the program asks you to perform a reboot.

Restarting your PC usually applies any pending changes and it can sometimes fix Something went wrong A mailbox couldn’t be found for <email address> Office 365 error.


2. Wait for 48 hours

The new email address may take some time to work properly mainly due to network or licensing issues.

You can wait for 48 hours and see if the error is resolved by itself. If not, contact your university admin and let them know about the issue.


3. Check for Online Exchange License

If you’ve got a new Office 365 account with an Office license, it is important to know if the admin has been assigned the Exchange Online License to your account.

If the user has not assigned the required license, you may face Something went wrong A mailbox couldn’t be found for <email address> Office 365 error. Contact the admin or anyone in charge and check if the required license has been assigned to your account.


4. Add an Alias

This is an official workaround suggested by Microsoft to fix the issue. The user has to add an alias to their Microsoft account and then use the alias to log in to Microsoft services.

If you already have an Alias, you can use it. If not, create a new Alias and associate it with your email address to access Outlook account.  Here is how to do it.

  1. First, go to Add an Alias. Sign in to your Microsoft account if prompted.
  2. Under Add an Alias, select any of the two options.
  3. To create a new email address and add it as an alias, enter your new email address and click on Add alias.
    Microsoft Outlook Add an alias A mailbox couldn't be found Office 365 error
  4. Alternatively, click on Add an existing address as a Microsoft account alias, enter any of existing aliases and click on Add alias.
    Make Alias Primary Outlook something went wrong Office 365 error
  5. In the next screen, you can see the newly created Alias. Click on the Make primary link to make it primary.
  6. Click OK to save the changes.

Now try to log in using your new alias on the Office 365 account and see if the error is resolved.

The Something went wrong A mailbox couldn’t be found for <email address> Office 365 error can be a temporary glitch at the Microsoft’s end or it can be caused by Online Exchange license assignment issue.

Follow the solutions in this article and you should be able to fix the error.

RELATED STORIES YOU MAY LIKE:

This change in Windows 7 updates might trigger some nasty bugs

You may not know, but the April 2019 monthly roll up for Windows 7 no longer packed the PciClearStaleCache.exe component. This tool automatically fixed system consistencies and compatibility issues thus ensuring a smooth update process.

Unfortunately, Microsoft confirmed this tool would no longer be shipped with future Windows 7 updates.

The news was confirmed when the tech giant shipped KB4493472 update without PciClearStaleCache.exe.

Microsoft recommends System Administrators to make sure the monthly roll ups released between April 2018 and March 2019 are installed on their systems.

These updates are mandatory before the installation of the April 2019 updates and future updates because they came with the PciClearStaleCache.exe tool. 

Microsoft says that this tool is necessary to resolve potential consistencies that might exist in the internal PCI cache. That is why you are required to install an update that comes with PciClearStaleCache.exe in any of these situations.

Microsoft pulls Windows 7 Updates

Windows 7 and Windows 8.1 users got security-only updates on April 9, 2019. These updates were released to fix security issues that existed in both versions of Windows.

 However, these Patch Tuesday Updates came with system crash issues for Windows 7 and Windows 8.1 users.

Thankfully, the  bugs did not affected Windows 1o April Updates as those users were already dealing with buggy October 2018 update released last year.

Most Windows 7 users reported they failed to boot their systems after the installation of latest Windows 7 April Updates.

Microsoft has not yet released a fix for this bug. This situation forced Microsoft to halt Windows 7 And 8.1 April Updates to avoid any further issues.

Microsoft has temporarily blocked devices from receiving this update if the Sophos Endpoint is installed until a solution is available.

Apart from Sophos Endpoint, the bug also affected users running Avast antivirus security solution.

Although Microsoft said nothing Microsoft Security Essentials users, some reports suggest they are also facing the same issue.  

RELATED ARTICLES YOU NEED TO CHECK OUT:

Microsoft confirms Outlook data breach, change your password now

Microsoft confirmed that a recent attack exposed the content of many user emails. Hackers accessed a subset of Outlook email accounts by compromising the credentials of a Microsoft Support Agent.

Last week, a Reddit user shared a screenshot of an email that was sent by Microsoft. The email warned him that  hackers managed to access some details of his account.

Microsoft claims that the attack  affected only a limited set of user accounts. Furthermore, the tech giant states that the attackers got access to just 6 % of the content of user emails.

Email address  and email subjects leaked

microsoft outlook data breach info

Microsoft says that attackers first breached its  support agent’s credentials that allowed them to access some user account information.

However, the tech giant claims that the attackers were not able to access attachments or emails.

The leaked information includes the user’s email address, subject of emails, folder names, along with the email addresses that were communicated by the specific users between January and March 2019.

Notably, Microsoft confirmed it notified a limited subset of users that  hackers also got access to wider email content.

The Redmond giant is offering additional support and guidance to the respective users. The company has not shared the total number of accounts that were compromised by the breach.


In case you want to be secure while surfing the internet, you will need to get a full-dedicated tool to secure your network.  Install now Cyberghost VPN and secure yourself. It protects your PC from attacks while browsing, masks your IP address and blocks all unwanted access.


What does it mean to you?

Meanwhile, Microsoft warns its users that they should avoid clicking on links they receive from unrecognized email addresses.

The company says that the incident can increase phishing and spam emails in your inbox. Microsoft is currently investigating the matter and it is not clear how the hackers managed to compromise the credentials of a Microsoft’s employee.

Although Microsoft claims your password details were not affected as a result of the breach.

The company is also continuously monitoring the affected accounts. Change your password as soon as possible to avoid further issues.

RELATED ARTICLES YOU NEED TO CHECK OUT:

Ninja Gaiden 2, Fable 2 and four other Xbox 360 games are now Xbox One X enhanced

Microsoft’s monthly Inside Xbox live show is still ongoing, and the company has just announced a batch of new backward compatible games that are now enhanced for the Xbox One X. Ninja Gaiden II is becoming backward compatible today and will run better on Xbox One X, but Microsoft is also giving the same enhanced treatment to five existing backward compatible games, including three Tom Clancy’s games and two Fable games.

Tom Clancy’s Splinter Cell Double agent, Tom Clancy’s Splinter Cell Conviction, Tom Clancy’s Splinter Cell Blacklist, and Fable 2 and Fable 3 are now Xbox One X enhanced. This means that these games will now run in 4K on the high-end console, and Microsoft and its team of Xbox engineers are improving the pixel count on these titles without doing changes to the game’s code. This is a great way to breathe new life into old-gen games, and the list of Xbox 360 titles enhanced for the Xbox One One X already includes several classics such as Fallout 3, Halo 3, Gears of Wars 2, or Final Fantasy XIII.

Microsoft regularly markets the Xbox One X as the best console to play games from the past, present and future, and Sony has apparently been paying attention. We got the first official details about the PlayStation 5 earlier today, and the next-gen console will be able to run all existing PlayStation 4 games thanks to its x86 architecture.

Xbox One S All-Digital Edition is launching on May 7 and will cost $249.99

It’s official, Microsoft is launching a discless version of its Xbox One S console on May 7. The Xbox One S All-Digital Edition was previously revealed in multiple leaks, and the information we had so far was accurate: This is just a 1TB Xbox One S without the disc drive, and it comes with three games: Minecraft, Sea of Thieves, and Forza Horizon 3.

The Xbox One S All Digital Edition will be priced at $249.99, which is quite expensive considering that it’s not too difficult to find cheaper Xbox One S bundles right now. The standard Xbox One S also remains one of the cheapest 4K Blu Ray players you can find on the market today, and the disc drive also gives gamers access to the used games market.

“The Xbox One S All-Digital Edition was created for those who prefer to find and play their games digitally and are looking for the most affordable way to play Xbox games,” Microsoft said in today’s announcement. “The Xbox One S All-Digital Edition is $50 USD less than Xbox One S, and we expect to maintain at least that price difference between the two consoles going forward.”

The new console is available to pre-order on the Microsoft Store starting today, and it will also be available at select retailers worldwide including Walmart, Best Buy and Amazon.com starting on May 7. Sound off in the comments if you think this discless version will resonate with consumers.

Tune in to Inside Xbox at 2PM PST to get exclusive Sea Of Thieves and RAGE 2 MixPot content

Microsoft’s Inside Xbox monthly live show will air later today at 2 p.m. PT / 5 p.m, and those of you who watch it on Mixer will get another free “MixPot.” This time, the digital rewards will include an Xbox avatar item from the upcoming game Rage 2, as well as the Ebon Flintlock in-game accessory for Sea of Thieves.

Today’s episode should be quite interesting as we expect Microsoft to finally announce the new Xbox One S All Digital Edition console, and the company may also unveil a new Xbox Game Pass Ultimate subscription that combines Xbox Game Pass and Xbox Live Gold in a $15/month bundle.

There are many other things on today’s agenda including some “exciting Xbox Game Pass news,” as well as new backward compatible games to play on Xbox One. Rod Fergusson, Studio Head of The Coalition will also be here to talk about new Gears of War game, including the new Gears Pop! mobile game that is now available in closed beta on iOS (we just got our invite today!).

If you haven’t done it yet, make sure to link your Mixer account to your Microsoft account, and don’t miss today’s episode at 2 p.m. PT / 5 p.m on mixer.com/xbox.