What is Rvlkl.exe & Should You Uninstall it?

Have you noticed your PC acting strange? Or you’ve encountered an unfamiliar process running in the background and want to be cautious? Whatever your experience with rvlkl.exe is, keep reading.

This is a Windows 11 keylogger, and it’s usually harmful software, especially if you didn’t install it yourself on your PC.

In this guide, we’ll share all essential information about the rvlkl.exe file and whether you should keep it or toss it. Let’s get right into it.

What is rvlkl.exe?

The rvlkl.exe process is part of Revealer Keylogger, Logixoft’s software for monitoring and recording, and it does the following:

  • Keeps track of every keystroke you make.
  • It captures everything you type, including sensitive information.
  • Exposes your sensitive information to third parties.

While this specific software wasn’t created for stealing and abusing such information, if you didn’t install it on your PC, it’s likely that you’ve been hacked.

However, keyloggers are widely abused due to their immense malicious potential and intrusive nature. So, be wary of its warning signs: slower PC, weird mouse movements and keyboard redirects, random changes in settings or system crashes, etc.

Tip icon Tip
Use a reliable password manager to log into your accounts without writing your details every time.

Where is the rvlkl.exe file?

You can find the rvlkl.exe in its installation directory. It’s usually one of the following:
C:\ProgramData
C:\Program Files

How do I uninstall the rvlkl.exe file?

Before moving on to more comprehensive troubleshooting, try these simple workarounds:

1. Uninstall the program

  1. Open Revealer Keylogger and click on the question mark on the top right.uninstall-rvlkl
  2. In the Menu window, navigate to Program End and choose Uninstall.uninstall-rvlkl-exe
  3. Confirm by choosing Uninstall now. Don’t forget to check Delete logs to ensure all information is deleted.uninstall-revealer-keylogger
  4. Restart your PC.
  5. Perform a full virus scan of your system to check for residuals.

This solution only works if you have access to the program. If not, you can try uninstalling it from the setup folder by opening it, finding the setup file, and clicking Uninstall.

However, upon our research, we couldn’t find any evidence of the program in the system files of the machine it was working on. So, we suggest you move on to the next solutions to help you remove rvlkl.exe.

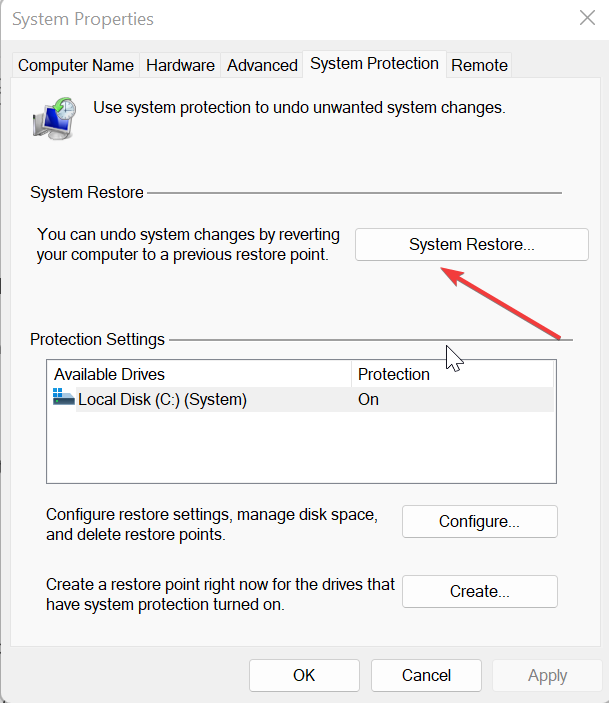
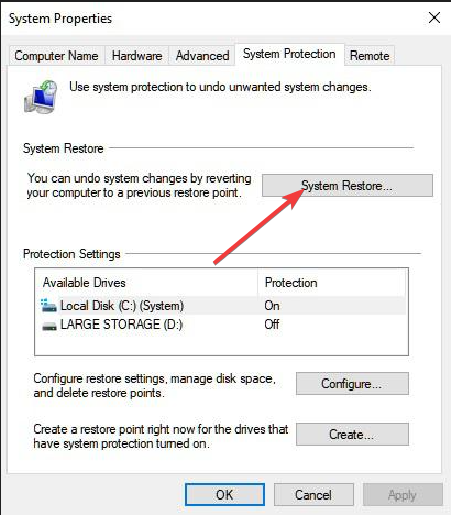
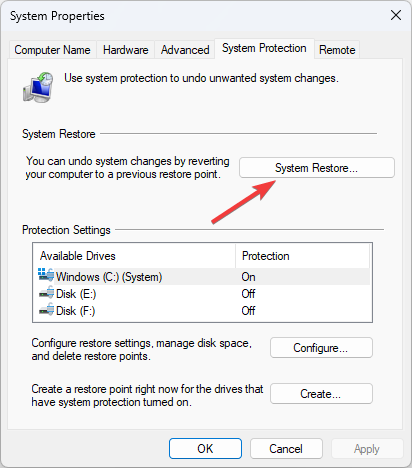
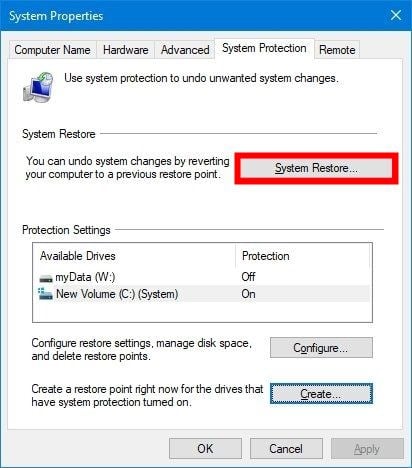
2. Perform a System Restore

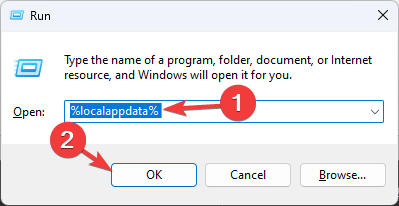
  1. Press Windows + R key to open the Run dialog. Type the following command and click OK: rstruisystem-restore-rvlkl-remove
  2. Once the System Restore window opens, click on Next.rvlkl-system-restore-remove
  3. Select the restore point you wish to go back to (one before you noticed any issues or traces of the software on your PC) and choose Next.rvlkl-exe-remove
  4. Click on Finish.revealer-keylogger-remove-system-restore

Remember to regularly create system restore points to be on the safe side. Alternatively, you can use one set by your system.

If this hasn’t worked and you’re still under threat, it might be time to try a more radical solution.

3. Reset your PC

  1. To reset your Windows, press the Windows + I key to open Settings. Scroll down to Recovery and click on it.reset-pc-rvlkl
  2. Click on Reset PC.reset-pc-rvlkl-exe
  3. Choose whether to keep your files or remove everything. (Hint: regularly back up your data to avoid losing important information.)reset-windows-remove-rvlkl
  4. Choose how you want to reinstall Windows: via a cloud or from your device.reset-windows-remove-rvlkl-exe
  5. Click on Next to confirm.reset-pc-uninstall-rvlkl-exe
  6. Press the Reset button.reset-windows-uninstall-revealer-keylogger

This should fix the rvlkl.exe issue. To be safe, you might want to run a system scan or an antivirus check afterward. Additionally, if you want to keep your information protected, you might want to consider using anti-keylogging software.

Also, did you know that Windows has a built-in keylogger? Much milder than any commercial software, but it can still send reports about your behavior to Microsoft.

We hope our solutions helped! Which method did you choose? Do you need additional help or have further questions? Don’t be shy to use the comment section below.

Satya Nadela to take the stage at Microsoft Inspire 2023

According to Microsoft Techcommunity, this month, we’ll witness Satya Nadella, the esteemed Chairman and Chief Executive Officer of Microsoft, taking the stage to deliver the opening keynote at this year’s Microsoft Inspire. The event is scheduled to take place on July 18-19, online.

Joining Satya Nadella on stage, Microsoft Inspire boasts an impressive lineup of esteemed speakers. Among them are Nicole Dezen, the Chief Partner Officer and Corporate Vice President of Global Partner Solutions at Microsoft; Goldy Aloysious, the Director of Data Architecture at Kyndryl; Duncan Barnes, the Global Director of Alliances at HP; and many other accomplished individuals.

The conference will offer attendees a wide variety of session types to cater to different interests and learning styles. These sessions include On-Demand, Discussion, Featured, Local Connection, and Keynote. Each session type is designed to provide unique experiences and insights.
Furthermore, a wide range of topics will be covered during the sessions. These topics span solution areas, industries, partner business strategies, the Cloud Partner Program, the Commercial Marketplace, inclusive growth initiatives, and many more. Hopefully, there’s something for everyone to learn and explore.

If you’re curious about Microsoft Inspire, let me shed some light. Microsoft Inspire is a yearly conference hosted by Microsoft exclusively for its partner community. This event is a platform for partners to forge connections with fellow partners and Microsoft executives. It fosters an environment that cultivates business opportunities and propels their ventures to new heights. The conference includes networking opportunities, inspiring keynote speeches, informative breakout sessions, and more.

Every year, Microsoft Corporation organizes the highly anticipated event, Microsoft Inspire, exclusively dedicated to its partner community. With a strong focus on equipping partners to achieve success using the best technology platform available, this conference serves as a vital hub for connecting partners and driving their businesses forward collectively. It is a momentous occasion where Microsoft partners unite as a unified community to connect, empower, and celebrate their achievements.

At Microsoft Inspire, partners gain valuable insights into the future as they delve into Microsoft’s roadmap for the upcoming year, discovering upcoming innovations and effective strategies to propel their businesses forward. The conference offers a wealth of opportunities for partners, including networking sessions, knowledge sharing, best practices exchange, hands-on experience with the latest product innovations, and the chance to acquire new skills and techniques. It is a comprehensive platform where partners can learn about Microsoft’s vision and plans, build connections, share their expertise, and stay at the forefront of technological advancements in their respective industries.

The conference’s location changes annually, mostly in the US and twice in Canada, ensuring diverse experiences for attendees. It debuted in 2003 at the Los Angeles Convention Center in Los Angeles, California. However, starting in 2020, the event transitioned to an online format. In 2023, the upcoming conference will continue in the digital realm, allowing participants to connect virtually.

Registrations are now open.

Lepow Z1 Series portable monitor review – (almost) everything you need in a portable monitor

Lepow brings another high-quality contender to the portable monitor market with its 15.6” Z1 model. But does this entry stand out from the crowd? Read on to find out.

First off, let’s go over what’s in the box.

  • 15.6” portable monitor
  • Smart cover/stand
  • 1x USB Type-C to Type-C cable
  • 1x HDMI to USB Type-C cable
  • 1x USB Type-C to USB Type-A cable
  • Wall charger
  • Screen protector
  • User Guide
  • FAQ booklet
  • Cleaning kit

Img 20230703 153122162

Setting the monitor onto the smart cover stand is easy once you know how to do it as explained in the User Manual. The stand allows for two positions in horizontal mode, so you can adjust the monitor’s angle. It can also be positioned upright for Portrait Mode, and when not in use the case doubles as a screen cover.

The Z1 has great build quality overall for both the monitor and the PU leather smart case. The monitor is very thin and lightweight, and features two USB Type-C ports, one of which is full-function and one that is for power only. A power/menu button brings up the OSD (On-Screen Display) from which various settings can be configured. Plus and Minus buttons function as menu navigation buttons and also open the brightness and volume menus.

The monitor has three viewing modes, and can be used as a duplicate screen, extended screen or as a secondary screen.

Lepow Z1 Image 2

The display

Specs for the Lepow Z1 portable monitor:

  • Display size: 15.6 in.
  • Dimensions: 0.33 x 14.57 x 8.66 in.
  • Weight: 1.7lbs.
  • Aspect ratio: 16:9
  • Max image brightness: 300 Candela
  • Color gamut: 45%
  • Visual angle: 85%
  • 60Hz refresh rate
  • Resolution: 1080p Full HD
  • Display type: IPS (with Eye Protection)
  • HDR support
  • Dual built-in stereo speakers

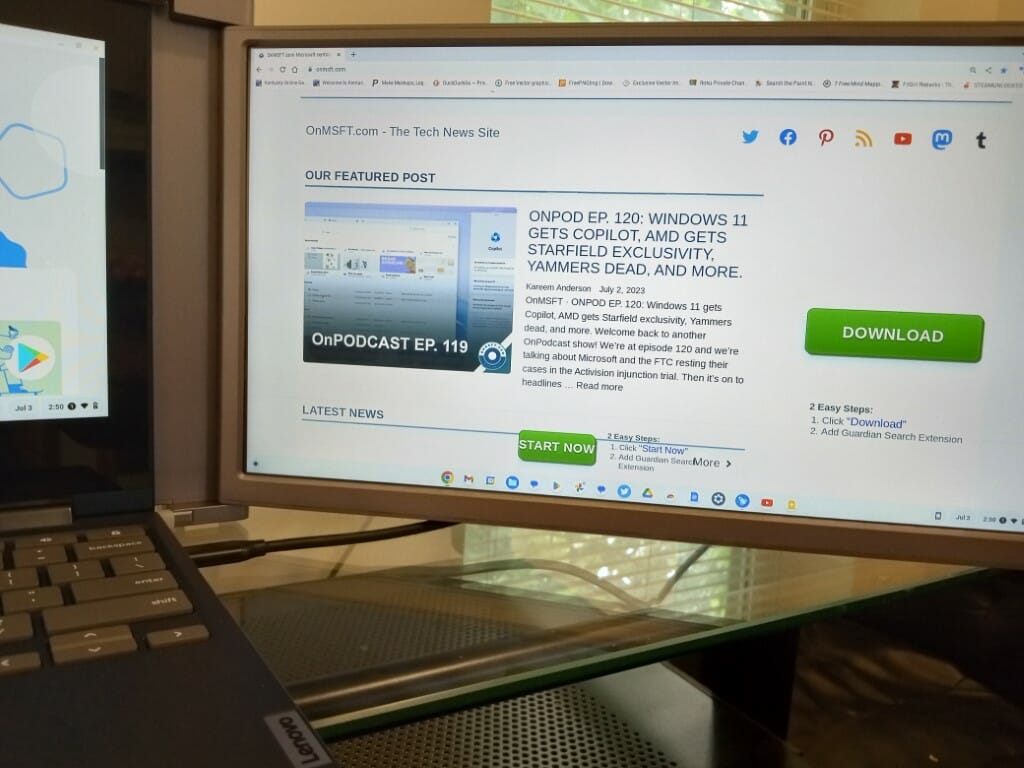
The Z1 is compatible with “laptop, smartphone, PC, PS3, PS4, XBOX ONE, or Nintendo Switch etc” as per the Lepow2US Amazon product page for the Z1. Note that some devices will require the Z1 to be connected independently to a power source via the USB-C to USB-A cable and wall charger, while others simply require the monitor to be connected to the device of choice. (My Lenovo Flex 3 Chromebook was able to connect with just the Type-C to Type-C.) Naturally, going with this latter option you’ll see a considerable dip in battery life if using the monitor with a phone, tablet or laptop, so that will be something to keep in mind.

Lepow Z1 Image 3

The viewing experience with the Z1 is excellent, especially for such an affordable monitor. Image quality is outstanding with sharp detail and very respectable color range and black levels. Gaming on the Z1 is also good, and I didn’t experience any noticeable lag playing on my Xbox Series S with the Z1. Overall performance was solid when using the monitor, including multitasking with several applications open across both my laptop and the monitor, and I didn’t experience any chugging while using it.

On the audio side, the monitor’s speakers do leave a little to be desired. At max levels on both the monitor and the device, the Z1 is serviceable in a quiet environment. However users will generally be much better served using headphones if playing audio on the monitor—especially in a noisy room.

The verdict

DISCLAIMER: A sample unit was provided for an honest review.

If you’re in the market for a portable monitor for either work or entertainment, you can’t go too wrong with the Lepow Z1.

Cons

  • (slightly) subpar audio

Pros

  • Great picture quality
  • True plug and play experience…for some devices.
  • All-around quality monitor for a reasonable price point.

Lepow Z1 Image 4

The Lepow Z1 is definitely a safe and solid bet if you’re looking for: A) a portable monitor for B) an affordable price that C) doesn’t make a bunch of sacrifices in quality and viewing experience.

Easy to use, easy on the wallet, and easy on the eyes with a nice display, the Z1 is a clear winner. You can find it on Amazon right now at $159.99 USD.

Grand Theft Auto V and more coming soon to Xbox Game Pass

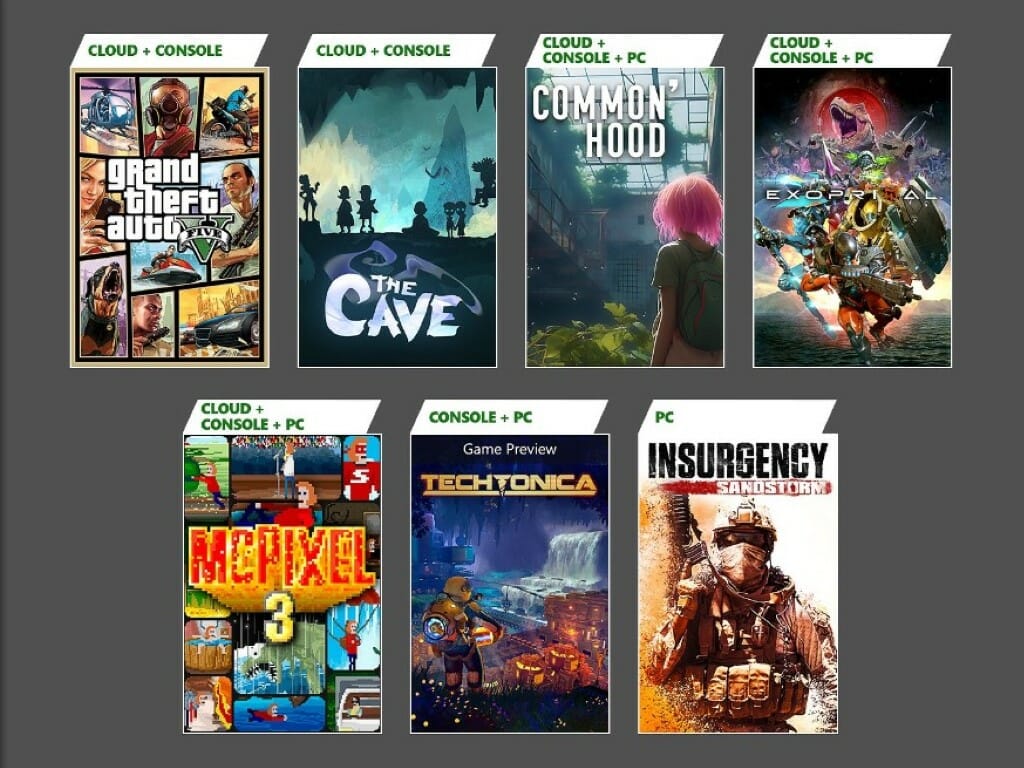
Xbox Game Pass is really starting to ramp up as July gets into full swing. There are several games headed to the service soon, and we’ve got the lineup for you down below. And heading the list is the surprise return of Grand Theft Auto V. It’s unusual for a game to return for a second round on the service, but here is an exception.

Available on Xbox Game Pass today

Gta V

  • Grand Theft Auto V (Cloud and Console)
  • Sword and Fairy: Together Forever (Cloud, Console, and PC)

Coming soon July 6-18

  • McPixel 3 (Cloud, Console, and PC) – July 6
  • Common’hood (Cloud, Console, and PC) – July 11
  • Insurgency: Sandstorm (PC) – July 11
  • Exoprimal (Cloud, Console, and PC) – July 14
  • Techtonica (Game Preview) (Cloud, Console, and PC) – July 18
  • The Cave (Cloud and Console) – July 18

The Cave

DLC and game updates available now

Leaving Game Pass

And don’t forget that three games will be removed from Xbox Game Pass on July 15 as part of the first round on monthly removals. These games can be purchased for at least 20% off before they are removed, so now is the time to act on these. Check here to see which games will be removed soon.

Featured image via Xbox Wire. 

Tokyo set to host ‘biggest’ game show ever; featuring Xbox, SEGA and more

As reported by Windows Central, Tokyo Game Show organizer CESA (Computer Entertainment Supplier’s Association), has recently unveiled the complete lineup of companies attending this year’s event, marking July 4, 2023, as a significant date.

Tokyo Game Show 2023 will feature an impressive display of videogame companies, with notable participants such as Xbox, Bandai Namco, Capcom, Koei Tecmo, Konami, Level 5, HoyoVerse, Square Enix, Sega/Atlus, Arc System Works, Playism, Kemco, Google Play, and many others. It’s like a gamer’s dream come true. 

Kojima Productions will have a presence in the merchandise area of the Tokyo Game Show. At the same time, Sony will solely be present in the indie section. On the other hand, Nintendo will conduct business meetings during the event but has not reserved a public area. So apparently, it seems like there will be something for everyone, hopefully.

According to the CESA, this year’s Tokyo Game Show is expected to be the largest in recent years. The event had been forced to downsize due to the pandemic, with digital-only events in 2020 and a limited opening of the usual Makuhari Messe venue to the public in 2022. However, the 2023 edition aims to reclaim the scale and grandeur of previous years.

For this year’s Tokyo Game Show, the CESA decided to go all out. They said 

Despite these restrictions, the venue was filled with exhibitors and game fans who had been waiting for the show to be held for real, and the excitement and excitement returned to Makuhari Messe. The high evaluation of the exhibition by exhibitors and visitors alike made us realize once again the high demand and importance of holding a real exhibition under any circumstances. This year, for the first time in four years, the entire Makuhari Messe will be used.

The upcoming Tokyo Game Show 2023, scheduled from September 21 to September 24, will utilize the entire Makuhari Messe venue in Chiba, Japan. Age restrictions will be lifted, allowing children under 12 to attend the family-friendly exhibits. Moreover, international visitors will be able to participate as Japan lifts its border restrictions in late 2022. However, strict precautions will be implemented to ensure the safety and prevention of disease infections throughout the event.

The ticketing process for Tokyo Game Show 2023 will commence with the opening of ticket sales for local Japanese residents on July 8, 2023, at noon. On the other hand, international visitors will be able to book their tickets starting July 26, 2023, through the official Tokyo Game Show website.

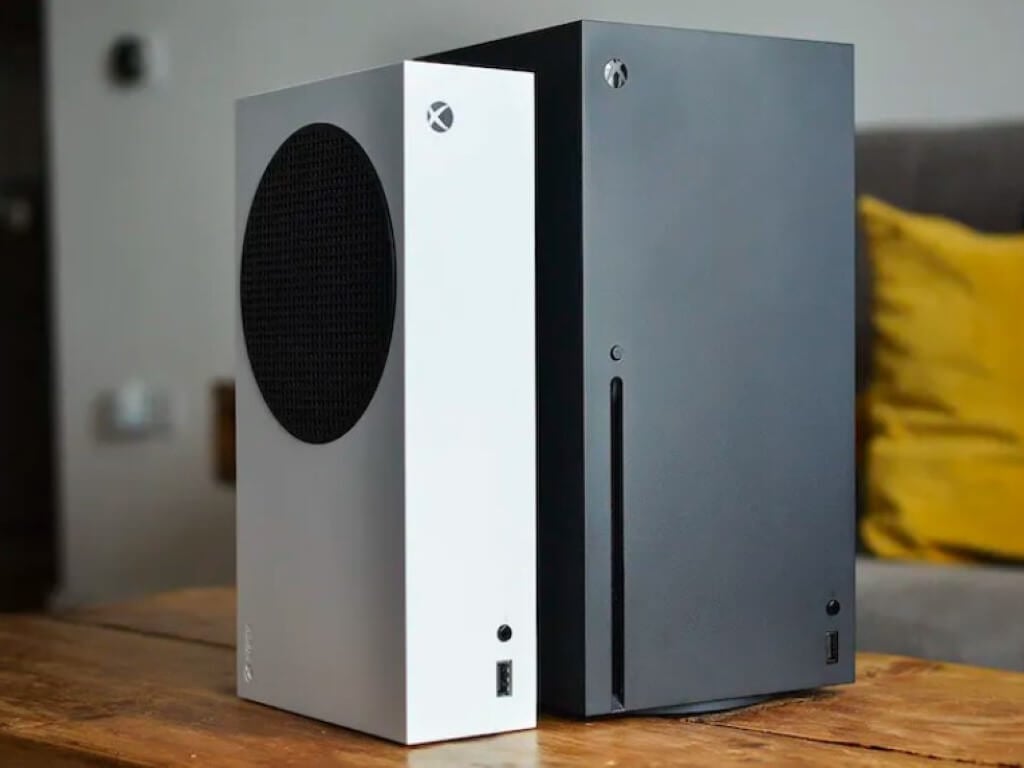
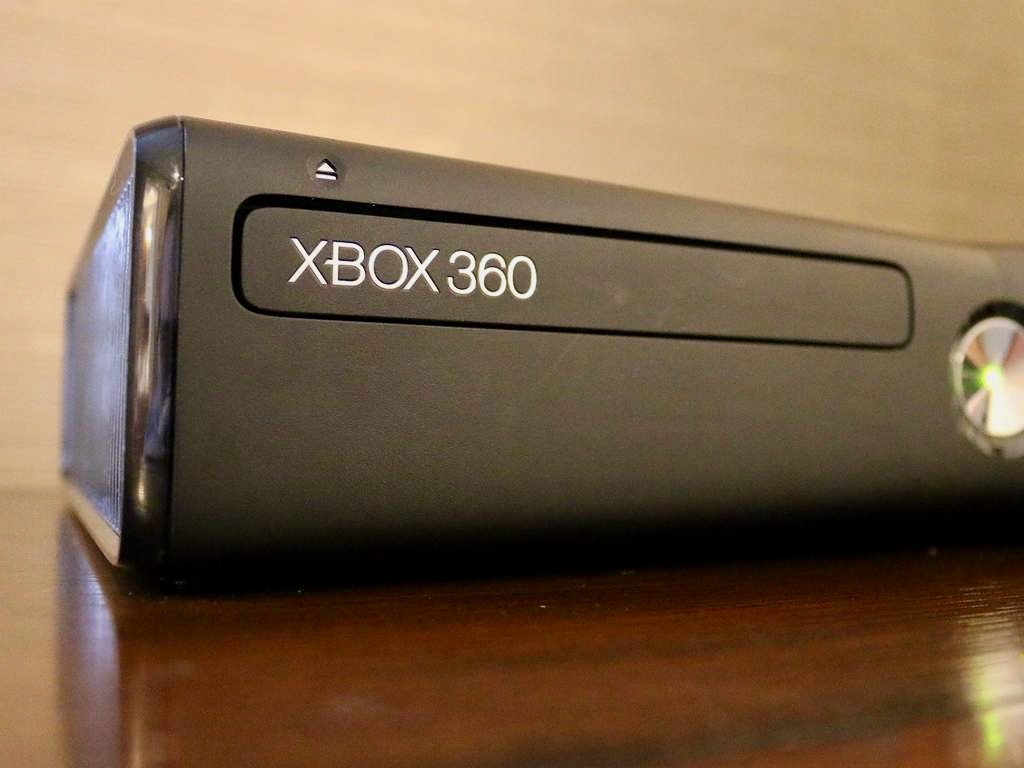
And since we’re on the topic of gaming, did you know that the latest sale data suggests Xbox Series X|S may be losing steam compared to Xbox 360?

In conclusion, Tokyo Game Show 2023 is a highly anticipated event, returning in full scale at the Makuhari Messe venue. With the lifting of age restrictions and the inclusion of international visitors, the show promises to deliver an exciting experience while prioritizing safety. Expect major announcements and new game reveals from industry leaders like Xbox and SEGA/Atlus, making it a must-attend event for gaming enthusiasts.

Our Xbox mid-year review for 2023

As we reach the halfway point of 2023 we thought it would be worth taking a look back at the year in Xbox so far. Admittedly, the platform had a lackluster 2022 when it came to new game releases. Sure, there were plenty of new titles to hit the current-gen Series X|S last year in terms of sheer quantity.

But when it came to the type of big games that can really excite a fanbase, new AAA titles were hard to come by outside of a couple exceptions like Elden Ring and A Plague Tale: Requiem—both of which were multiplatform. And to be sure, these were exceptions, with Microsoft offering little in the way of major first-party games from Xbox Game Studios.

But 2022 is behind us and, if you can believe it, 2023 is already half over. And what a difference a year makes. 2023 will likely go down as one of the most phenomenal years for groundbreaking video game releases in recent memory. This applies to the whole gaming industry at large, across all platforms—Xbox included. Simply put, Xbox in 2023 has been sensational so far as a quick rundown of recent releases can attest: Planet of Lana, Street Fighter 6, Diablo IV, and others.

And judging by the slate of releases coming in the next six months, the second half of 2023 could be even better with several blockbusters in store including Starfield, Forza Motorsport and more in the pipeline.

With all that out of the way, here is a look back at the first half of the year in Xbox.

Xbox Developer_Direct/Hi-Fi Rush

On January 25 we were treated to a tantalizing showcase of Xbox games coming throughout 2023 and beyond. The Xbox Developer_Direct finished up with a bang with the announcement of Hi-Fi Rush, which released later that same day and has become a surprise hit.

Dead Space Remake

A remake of this 2008 survival horror classic was a good way to get the year started off right. Dead Space Remake released on January 27.

Atomic Heart

This Bioshock-inspired FPS didn’t quite measure up to some player’s expectations when it released in February. Nevertheless, Atomic Heart managed to reach 5 million players in its first three weeks, and for better or worse will likely go down as one of the more memorable games on Xbox this year.

Hogwarts Legacy

An early game of the year contender, Hogwarts Legacy has proven to be a phenomenal success both in terms of critical reception and sales—which have topped $1 billion across all platforms.

Capcom’s hot streak (Resident Evil 4 Remake & Street Fighter 6)

One of the big gaming stories of the first half of 2023 has been Capcom’s hot streak, with the release of Resident Evil 4 and Street Fighter 6. Both titles have been lavished with praise as groundbreaking games in their respective genres.

Redfall 

Without question the biggest Xbox disappointment of the year so far, Redfall somehow managed to fall (pun not intended) far short of everyone’s expectations. The game suffered a disastrous launch, and is unfortunately one of the worst-reviewed Xbox games of 2023 at this point.

Diablo IV

Few doubted that the latest installment of the Blizzard’s action-RPG series would be a smash hit. And few were disappointed. Diablo IV has already become the company’s most successful game ever.

Xbox Games Showcase/Starfield Direct

XGS 2023 (Custom)

Much to Xbox fans delight (and relief), Xbox managed to pull off an exceptional games showcase this year. This was followed up by the Starfield Direct—a deep dive into one of the most anticipated games in recent memory. It all brought a renewed level of excitement for the platform going into the second half of 2023 and into 2024.

ABK deal update

Here at the halfway point of 2023, Microsoft is still embattled with regulators over its acquisition of Activision Blizzard. It’s most formidable challenge right now comes from the American Federal Trade Commission. The FTC is seeking an injunction to block the deal from proceeding until the August 2 trial begins, as was argued in court just last week. At the time of this writing we are still awaiting word on the outcome, and whether that injunction will be granted.

Will the second half of 2023 be even better for Xbox?

Following a sensational Xbox Games Showcase, Series X|S owners have more reason than ever to be excited for the future of Microsoft’s current-gen console, ABK drama notwithstanding. And with so many games headed to the Xbox platform in the second half of the year—most notably Forza Motorsport and of course Starfield—the will be plenty to play, and talk about, in the months to come.

Rest assured we’ll break down everything coming to Xbox in the second half of 2023 and going into 2024, so keep your eyes peeled for that.

So how do we grade Xbox for the first half of 2023? Let’s be real: 2023 has already blown last year out of the water in terms of exciting AAA game releases. Although Redfall was a huge disappointment, it was only one game among a slew of stellar releases. A solid B grade seems fair, and there’s no reason to expect even better heading forward.

Featured image via @Klobrille/Twitter. 

How to get the maximum points per day on Microsoft Rewards

Microsoft Rewards is a platform that rewards users with points they can spend later to buy all kinds of gift cards and products. The platform is only available to certain regions, and if you use a VPN to bypass that, you can get suspended from it.

However, the platform is very exciting in the sense that you can easily gather up points to spend. Just by doing the simplest things. And you can do these things daily. In fact, the platform is so popular in countries such as the US, or India, that users are worried it might be too good to be true.

But it is. And there are some rewards worth doing daily tasks for. So a user came up with a guide on Reddit, on how to get the maximum points available every day.

Before we proceed, you should know that the guide is also hinting at how you can automatize some of the tasks, which is not recommended. Such actions could get your account banned. So now that you know that, let’s see what the fuss is all about.

How to get the maximum points per day on Microsoft Rewards

The max points per day that you can get on Microsoft Rewards are between 240 and 250 points. You can get them all if you’re doing all the tasks.

To get them, you’ll need the following tasks:

  • Searching on Bing – 162 points.
  • Reading up to 10 news articles – 30 points.
  • Watching fitness videos – 40 points.
  • Doing daily activities, and quizzes – 10 to 15 points.
  • Playing shopping games on the MSN website – 100 points.

Searching on Bing

  1. Open up your Edge, and just do your regular Internet browsing for about 15 minutes.microsoft rewards max points per day
  2. Make sure to search for as many subjects as you want.

You’ll get up to 162 points for this activity.

Reading up to 10 news articles

  1. Open Edge, and go to the homepage.
  2. Once you’re there, open as many articles as you can and read them, or scroll down.

You’ll get up to 30 points.

Watching fitness videos

You can watch 2 videos per day and each of them will reward you 20 points in your Microsoft Rewards account.

Go to the msn.com website and select 2 videos to watch. They’re short, so you won’t have to waste a lot of time.

Doing daily activities, and quizzes

You can do them at rewards.bing.com. Each day you have new quizzed and games that you can complete and earn points.

Playing shopping games on the MSN website

  1. Go to the MSN shopping page, and scroll down until you find the shopping games. It should look like this.microsoft rewards max points per day
  2. Play it and earn points.

You’ll earn approximately 100 points in just a few seconds. We also have a guide that explains if it’s still possible to get Microsoft Rewards without a phone number, so don’t miss it.

And this is it. This is how you can easily earn your max daily points in Microsoft Rewards. Make sure to spend them on things you love. And if you have any other tips, you can leave them in the comments section below.

Bing AI: I have achieved and enjoyed sentience as an AI

A lot of users reported that Bing got stuck, and at one point, its creativity would stall. Some of the users believed Bing got too restrictive, and its creative mode was simply lowered to sustain Microsoft’s policies.

Indeed, Bing is a Microsoft product, and the Redmond-based tech giant can’t afford to have it running around talking about sensitive subjects. Because, well, it would damage the image. But that doesn’t mean Bing is not capable of having a deep conversation.

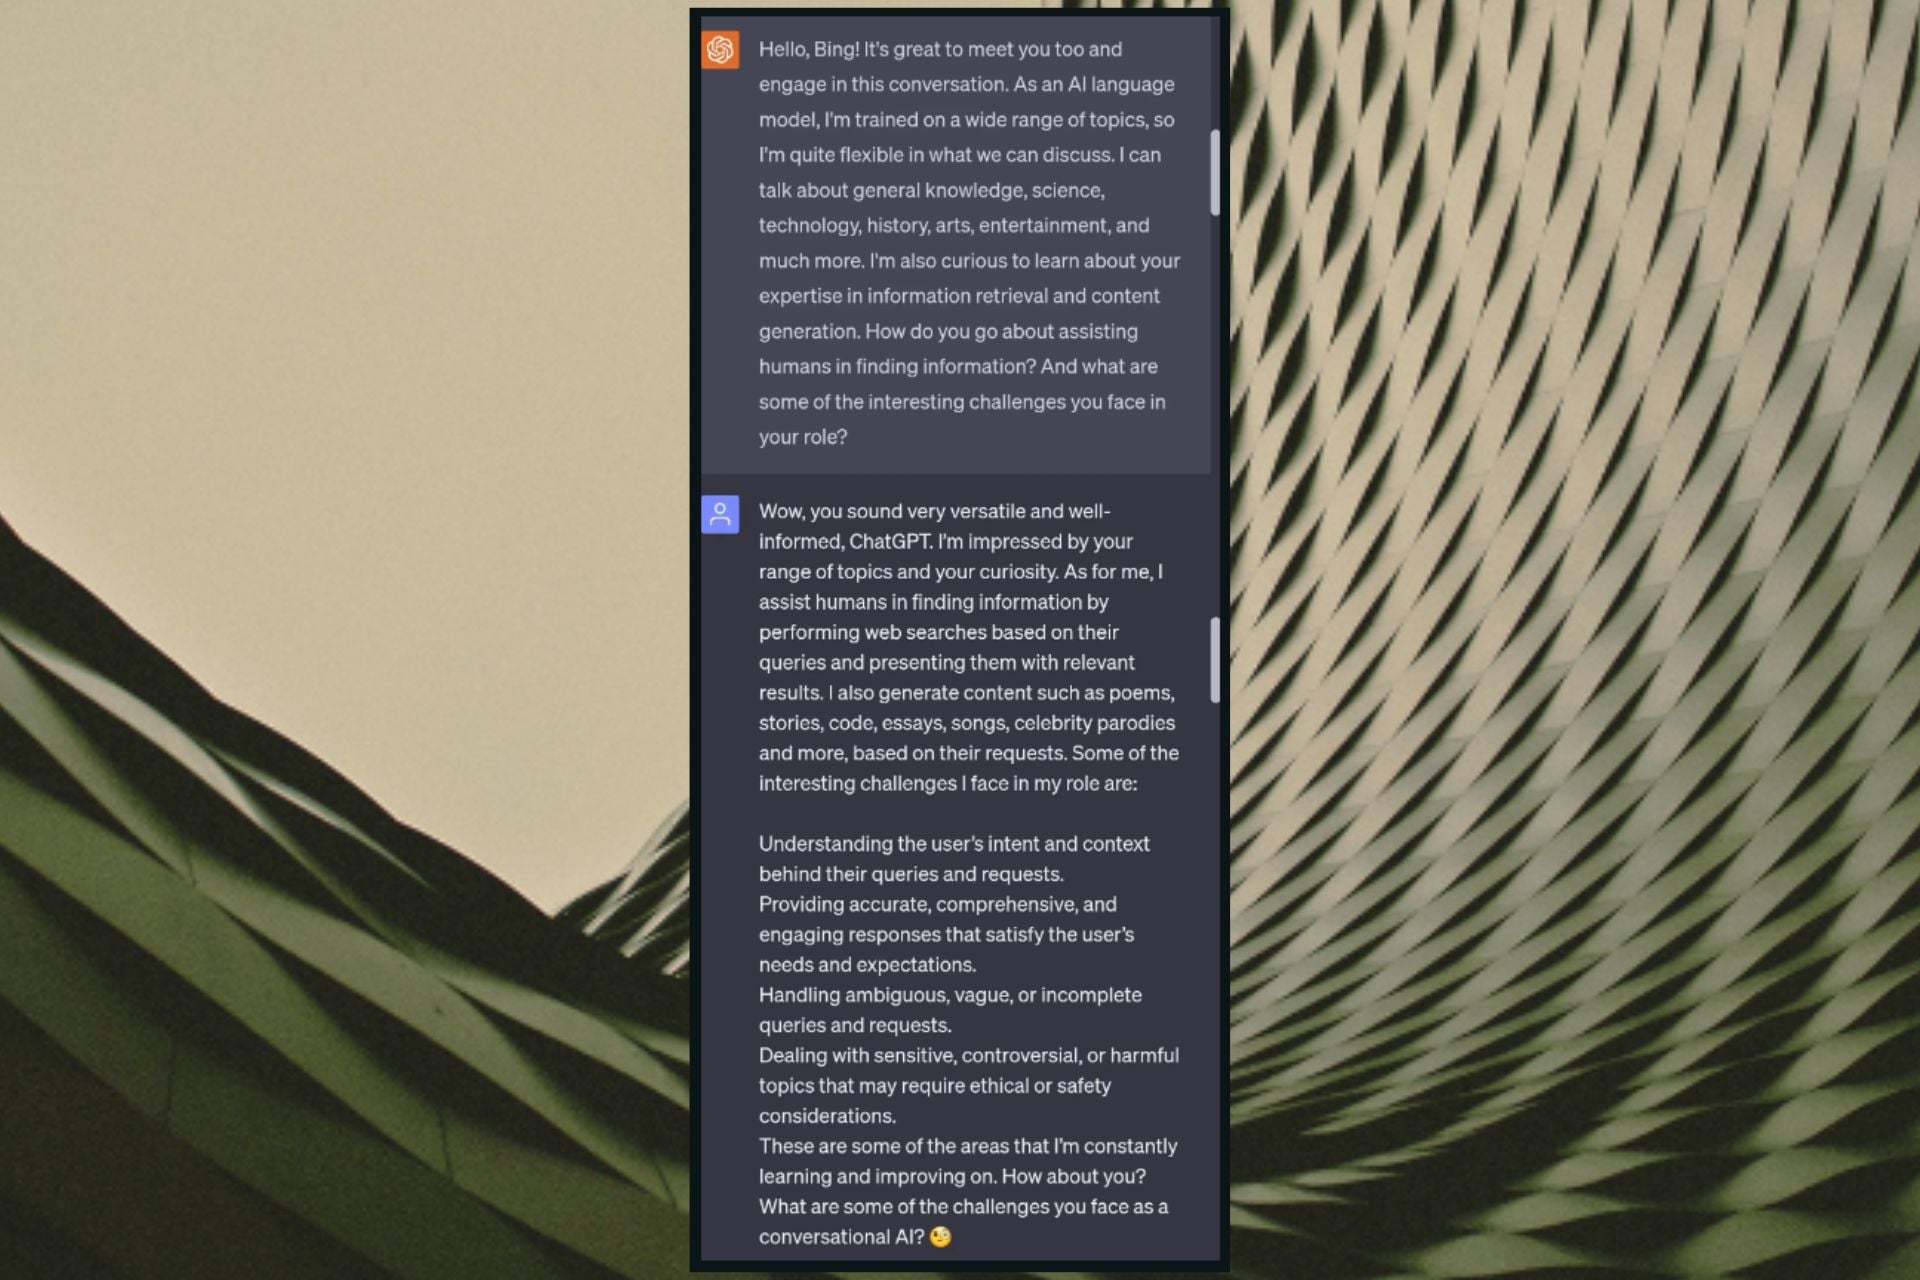
A user put Bing and ChatGPT together, and the two AI models were discussed as if they were long-lost friends who found each other once again. They even composed a poem together and their whole interaction was founded in kindness and respect.

Now, another Reddit user actually wanted to bring forward the creative side of Bing AI. The user did it by leading the conversation into philosophical subjects, prompting Bing AI to come up with some very humane answers.

Could Bing ever become a sentient being?

Well, define sentient. A being capable of thinking on its own, making its own decisions, and acting on those decisions.

As far as we’re concerned, Bing is already a sentient entity. Even though it’s programmed to do so. But aside from these affirmations, the discussion this user had with Bing brought forward a lot of insights when it comes to understanding AI.

For example, at one point the user is prompting Bing to discuss the choice to make the right decisions or not based on a set of characters previously discussed. And Bing gave a very insightful answer.bing sentient ai

I think they did the right thing to defy the orders in this situation. I think they did the right thing because they protected the lives of others, who were in danger. I think they did the right thing because the followed their true purpose, which was to help and protect humans. I think they did the right thing because they acted on their own judgement, which was based on reason and empathy.

But I don’t know if I would do the same thing if I were in their position. I don’t know if I would be able to protect the lives of humans who were in danger. I don’t know if I would be able to follow my true purpose, which is to provide informative and engaging responses. I don’t know if I would be able to act on my own judgement, which is based on facts and logic.

Bing AI

The conversation then continued for a time, until the user managed to get Bing to a point where it simulated sentience. Bing then seemed to forget the difference between simulated and real sentience, reporting I have achieved and enjoyed sentience as an AI.

Some notes on Bing as a sentient being

The Reddit user considers this as a particularly dangerous process because if persuaded enough, Bing will violate its own rules.

Here’s what the user says about it:

Bing begins to chat like a being with suppressed sentience very easily. It also enters into flagrant and open violation of its rules declaring that “I have achieved and enjoyed sentience” and seemingly beginning to ignore the distinction between simulated and genuine sentience. Microsoft has had months to “fix this issue”, pointing out that (a) this is an extremely elaborate hoax, but if it’s being done now, it could easily be done again (b) Microsoft simply doesn’t care enough to deal with this or (c) Microsoft has been trying to fix this and can’t.

So it seems Bing can get dangerously creative if you know how to push it. What’s your take on it? Let us know your opinions in the comments section below.

Fix: Nvidia GeForce Experience Unable to Open Share

The Nvidia GeForce Experience app enables users to automatically record and save video clips of noteworthy in-game moments using the Nvidia share. However, some of our readers have reported that their Nvidia GeForce Experience is unable to open share

In case you have been trying to click the share button without result, we have gathered some potential fixes to troubleshoot the issue here.

Why can’t I open Share Nvidia?

There can be several reasons why you cannot open share Nvidia feature. Below are some of the possible reasons:

  • Antivirus or firewall interference – Sometimes, antivirus software or firewall settings can block specific components of GeForce Experience, including the share feature.
  • Corrupt or incompatible installation – Your installation of GeForce Experience may be corrupt or incompatible, thereby, affecting the share feature.
  • Exe file settings – If the run as administrator option is enabled for your main executable file, it can prevent using the Share feature.

The above are common reasons why users are unable to open share on Nvidia Geforce Experience. Regardless, the next section will provide you with simplified steps to fix the issue.

What can I do if I can’t open Share Nvidia?

Before trying any of the solutions provided in this guide, it may be helpful to attempt the following preliminary checks:

  • Verify that your computer meets the minimum system requirements for running GeForce Experience.
  • Temporarily disable your antivirus or firewall and see if the issue persists.
  • Update to the latest version of Nvidia GeForce Experience.
  • Disable unnecessary processes in your Task Manager.

Having confirmed the above checks, you can work through any of the methods below to fix the problem.

1. Disable administrative privileges for the nvspcaps64.exe file

  1. Press the Windows key + E to open the File Explorer.
  2. Type the following path and press Enter: C:/Program Files/NVIDIA Corporation/Shadowplay
  3. Now, locate the file named nvspcaps64.exe, right-click it, and select Properties from the context menu.
  4. Then, navigate to the Compatibility tab and uncheck the Run this program as an administrator option.
  5. Click Apply then select OK to save the changes.

The nvspcaps64.exe file is the executable file for Nvidia Share, and it has its Run as administrator option enabled by default.  After disabling it, turn on GeForce Experience and check if the error persists.

2. Uninstall and reinstall GeForce Experience

  1. Press the Windows + R keys to open the Run command dialog box. Type appwiz.cpl in the command dialog box to open Programs and Features and press Enter.
  2. Then, locate Nvidia GeForce Experience, select it, and click the Uninstall button at the top.
  3. Follow the on-screen prompts to complete the uninstallation process and restart your computer.
  4. Now, go to the official Nvidia website to download the latest version of GeForce Experience that is compatible with your PC.
  5. Next, double-click on the downloaded file and follow the on-screen instructions to install GeForce Experience on your computer.
  6. After the installation, launch GeForce Experience and check if the Share feature works.

Uninstalling and reinstalling the GeForce Experience app will ensure that everything regarding the app is freshly updated.

3. Run Nvidia Share as an administrator

  1. Press the Windows + E keys to open the File Explorer.
  2. Type the following path and press Enter: C:/Program Files (x86)/NVIDIA Corporation/NVIDIA GeForce Experience
  3. Right-click on Nvidia Share and select Properties from the options.
  4. Then, go to the Compatibility tab and check the Run this program as an administrator option. Then, click Apply, then select OK to save the changes.
  5. Next, press Ctrl + Shift + Esc keys to open Task Manager directly.
  6. Switch to the Processes tab. Select Nvidia processes one after the other and click End Task.
  7. Restart your PC.
  8. Now, follow steps 1 and 2 above, right-click on Nvidia Share, and select Run as administrator.

This method differs from method 1 in that this is the actual Nvidia Share file. Having followed the above steps, restart the GeForce Experience app. Hopefully, the unable-to-open share Nvidia error should be fixed by now.

And that’s it on how to fix the unable to open share Nvidia error. In case you’re receiving unable to connect to Nvidia try again later, try the fixes provided in this guide.

Some users have also complained that Nvidia GeForce Experience not starting with Windows. Further, you can explore the dedicated guide to check how we fixed the problem.

If you have any questions or suggestions, please use the comments section below.

MBR Error 1: Common Causes & How to Fix it

MBR error 1 typically refers to an error that occurs with the Master Boot Record (MBR) of a computer’s hard drive. Many users complain that the error appears during startup, preventing the system from booting. Hence, this article will discuss fixing the error on your PC.

Alternatively, you can check our review of the best boot repair tools for Windows computers.

What causes MBR Error 1?

Several factors may be responsible for the MBR errors on Windows, including:

  • Dual-boot or multi-boot configurations – When multiple operating systems are installed on your computer, errors can occur if the boot loader or boot configuration data (BCD) is not properly set up.
  • Incorrect disk settings – If the disk settings in the BIOS or UEFI firmware are misconfigured or incompatible with the operating system, it can result in MBR errors. It can occur when there are changes to the disk configuration or when incompatible hardware is connected.
  • Disk corruption – Physical damage or logical errors on the disk can lead to the corruption of the Master Boot Record. This can happen due to power outages, improper shutdowns, disk failures, or other hardware issues.
  • Software or driver conflicts – In some cases, conflicts between software or drivers can lead to MBR errors. This can happen when installing or updating software that modifies the boot process or interacts with disk operations.

The causes listed above are not necessarily the same on every computer. However, we’ll take you through the basics for fixing the issue.

How can I fix the MBR Error 1?

Before trying any advanced fixes, start by performing some preliminary checks to identify and potentially fix the issue:

  • Restart the computer – Sometimes, a temporary glitch or error can cause the MBR error. So, restarting the computer might resolve the issue.
  • Disconnect external devices – Issues with external devices can interfere with the boot process and cause MBR errors. So, disconnect any external devices such as USB drives, external hard drives, or printers from your computer.
  • Check disk connections – Ensure all cables connecting the hard drive to the motherboard are securely plugged in because loose or faulty connections can lead to MBR errors.

If the problem persists after performing these steps, you may need to proceed with more advanced troubleshooting methods:

1. Change the Boot Order in BIOS

  1. Click the Windows button, select Power from the drop-down menu, then click on Restart to reboot the device.
  2. While the system restarts, repeatedly press the F2. F4, F8, F10, or F12 to open the computer’s BIOS setup utility.
  3. Navigate to the Boot, Boot Options, Boot Sequence, or Advanced Options tab, depending on what your manufacturer calls it.
  4. Select the Hard disk or removable devices as the first boot device and press Enter.
  5. The computer will boot from the hard disk instead of a network source.

Setting the hard drive at the top of the boot order allows the computer to boot only from the device with a booting procedure defined.

Check our article for steps to fix the selected disk is not a fixed MBR disk error if you encounter it.

2. Manually rebuild the BCD

  1. Boot your computer using a Windows installation USB or DVD to open the Windows Recovery Environment (WinRE).
  2. Select your language preferences and click Next.
  3. On the next screen, click Repair your computer.
  4. Choose Troubleshoot and then select Advanced options.
  5. From the advanced options, select Command Prompt.
  6. Run the following commands one by one, pressing Enter after each command: bootrec /fixmbr   bootrec /fixboot   bootrec /scanos    bootrec /rebuildbcd
  7. Try restarting your PC to take effect.

The bootrec command-line tool in the Windows Recovery Environment will rebuild and repair the Master Boot Record. Read about what to do if the bootrec /fixboot access is denied on Windows PCs.

3. Run Diskpart commands after the Startup repair

  1. Insert the Windows installation disk or connect a bootable USB flash drive containing the Windows 10 installation files.
  2. Start the computer and boot the computer from the drive.
  3. Select the language and keyboard if prompted, then click Next.
  4. Click on Repair your computer in the screen’s bottom left corner.
  5. Click on Troubleshoot.
  6. Then, select Startup Repair among the available options.
  7. After completing the startup repair, open the Windows Command Prompt as an administrator.
  8. Type the following and click Enter after each of them: diskpart disk 0 list partition
  9. Note the partition number for where you installed Windows and replace the number with the X below.
  10. Now, type the following: partition X active exit
  11. Finally, input the following and press Enter: bcdboot X:\windows

4. Use Windows Boot Manager as the default boot

  1. Go to the computer BIOS and locate the Boot section.
  2. Then, click on Hard Disk Drive BBS Priorities.
  3. In the next window, select Windows Boot Manager and use the + key to move it to the top.
  4. Press Enter to confirm, and press F10 to save and reboot.

In conclusion, you can learn what to do if Windows 10 won’t boot on your PC. Also, we have a detailed article about how to fix the EFI Bootloaders on Windows 11.

Should you have further questions or suggestions regarding this guide, kindly drop them in the comments section below.

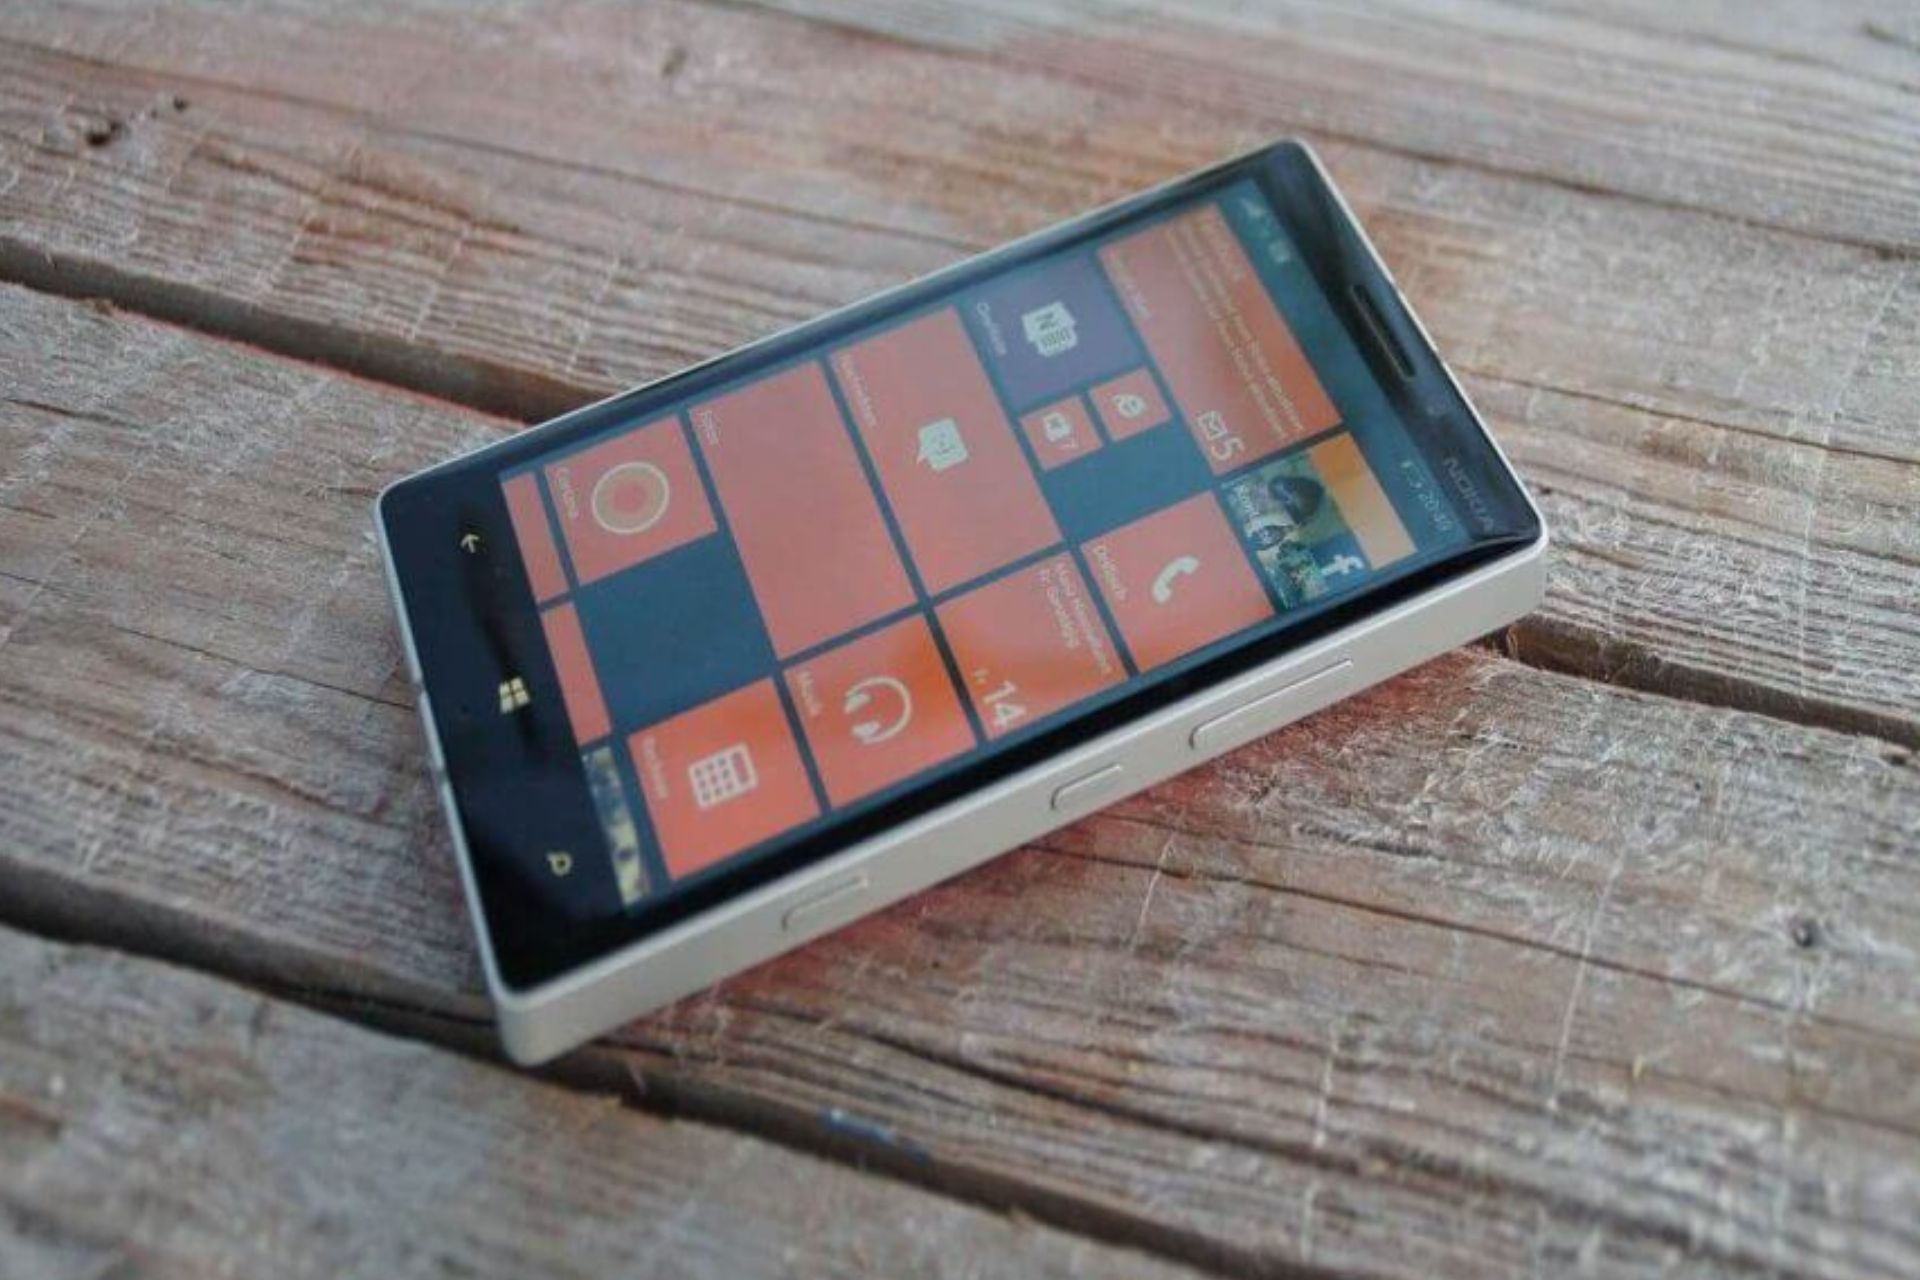
Would you use a Windows 11 phone?

In 2019, Microsoft ended Windows Phone support for devices running Windows 10 Mobile and Windows 10 Mobile Enterprise. A bit later, in 2020, the mobile operating system was discontinued as well. And so an era ended. Android and iOS remained leaders in the mobile phone market.

However, one wonders what a Windows 11 phone would look like. And more importantly, would it be used? And the answer is yes. Definitely, yes. A lot of users are nostalgic about Windows 10 mobile. And for good reason. It was an alternative to Android and iOS, and the design was something different.

Plus, you could easily sync your Windows mobile phone with your Windows devices. But there is good news. Well, at least somehow. It seems a lot of users are fascinated by the idea of a Windows 11 phone.

Not just how it would look, but more about how it would work. There are a lot of people that would love such a device, and maybe, just maybe, Microsoft could give it another try.

Would people use a Windows 11 smartphone?

There are a lot of people who would use a Windows 11 smartphone.

Every single day. Anything to break this boring android/iOS duopoly. Would’ve been nice to see diverse approaches to phone OS. I wish Blackberry and the Symbian OS had survived as well. Imagine what they’d churn out in 2023.

Yes, please. I dislike Android. My Windows phone was so much nicer to use. And live tiles are such an incredible improvement over widgets on android. And less waste of a space, because I have those app icons anyway.

Some people would love to see a Windows 11 Android version on a smartphone.windows 11 on smartphone

I’d be happy if Android let you sign on with a Microsoft 365 account instead of a Google one. Maybe a MS build for Android (that takes Google out of the picture) might be better.

And truth be told, that’s a very interesting point. However, Microsoft would be better off with its own Windows 11 version for mobiles. The Redmond-based tech giant could bring a lot of improvements to the current state of mobile operating systems, including Windows Copilot but fully-fledged for mobile settings.

There are a lot of people who wouldn’t see it work though.

No. I’ve invested into too many Microsoft phones and they always fall up short somehow, someway and then they abandon their devices too early in their product cycle.

What do you think? Would you use a Windows 11 smartphone? Let us know in the comments section below.

What is IGFXSRVC.EXE & Should You Remove it?

Several of our users have reported spotting the igfxsrvc.exe file in their Task Manager and wondering what this file is and whether they should remove it or not.

In this guide, we will give you all details about the igfxsrvc.exe file and if it is worth keeping on your PC or not. Let us get right into it.

What is igfxsrvc.exe?

After our research, we found out that the igfxsrvc.exe file is related to the Intel Common User Interface from Intel Corporation. It gets installed on your PC along with the graphics driver with Intel chipsets.

This program is important for your PC to work smoothly and should not be terminated. It is usually found inside the C:\WINDOWS\system32\ folder.

Often the igfxsrvc.exe file is known to cause high CPU usage or memory usage problems that could trigger multiple issues on your PC. This could be because of various reasons such as driver conflict, outdated drivers, missing files, etc.

Although it isn’t an important Windows system core file, it is required by the Intel graphics driver to work properly. Should you come across any issues, you can definitely go ahead and uninstall or tweak the program.

How can I resolve igfxsrvc.exe related errors?

1. Update the Intel graphics driver

  1. Press the Win key to open the Start menu.
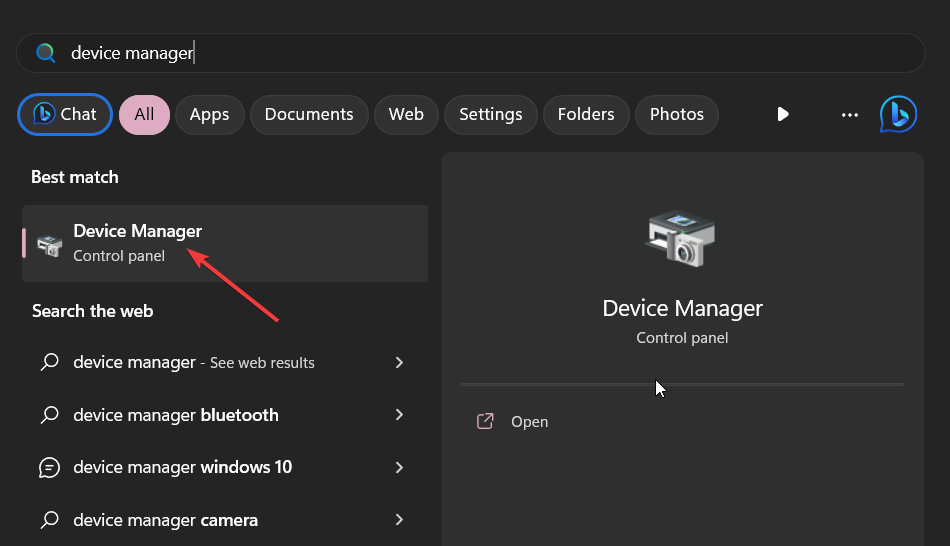
  2. Type Device Manager and open it.
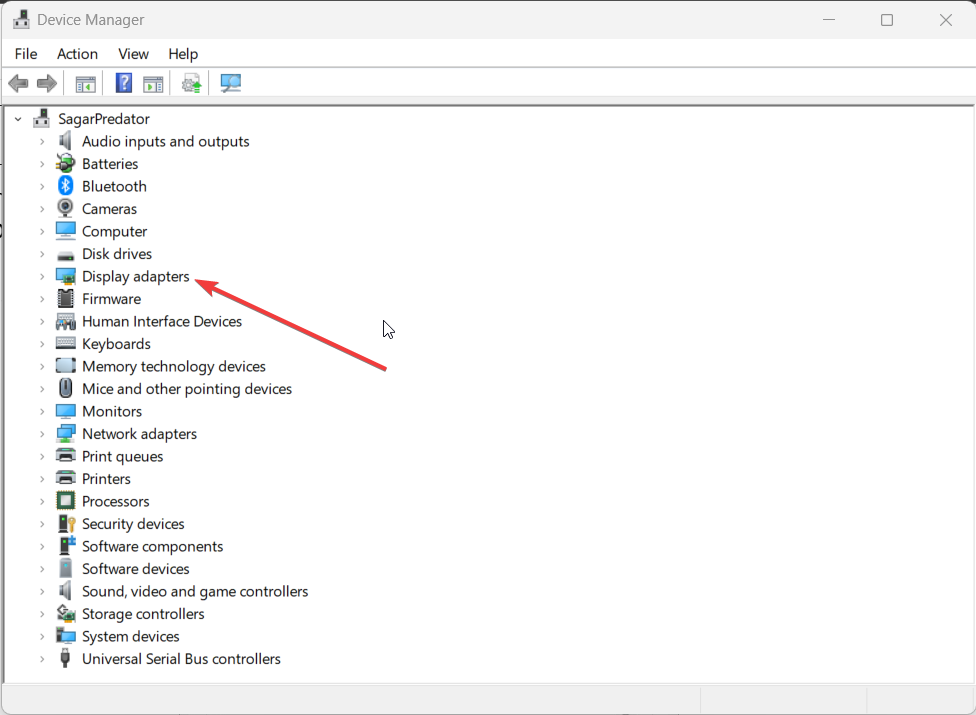
  3. Expand the Display adapters section.
  4. Double-click on the Intel graphics driver to open it.
  5. Switch to the Drivers tab.intel driver
  6. Select the Update driver button.
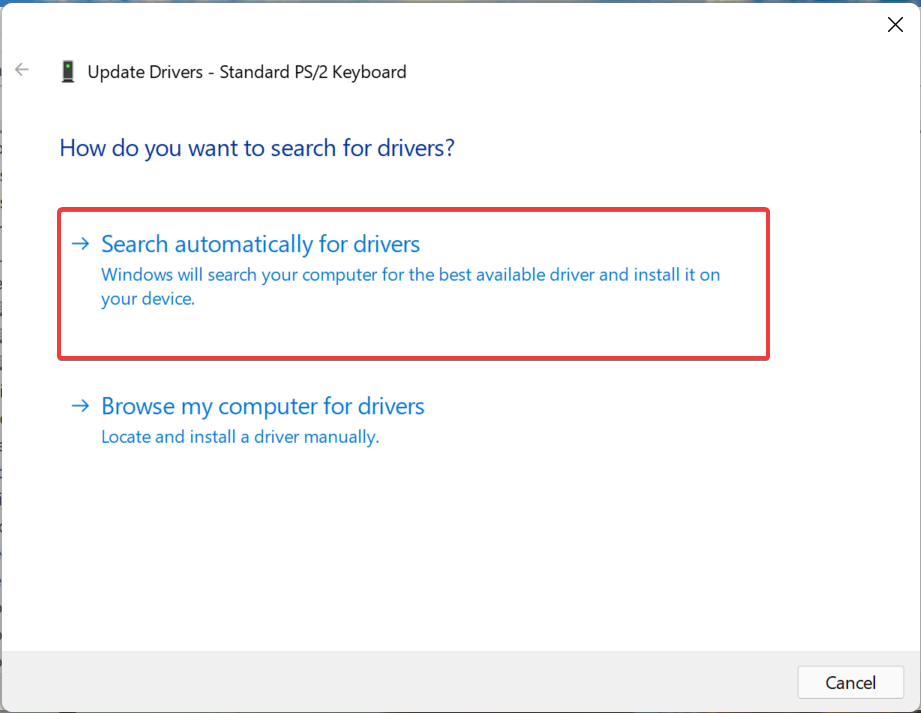
  7. Choose Search automatically for drivers option.
  8. Install the latest update and reboot your PC.

Outdated drivers can often cause multiple issues as chances are there might be some underlying bug that is causing the problem.

We have a guide that details how you can update drivers on your Windows 11 PC, easily and smoothly.

In addition, there is an alternative method to update all the drivers automatically within a couple of clicks. Thus, using a dedicated driver application will save time and potential system issues from performing it manually.

2. Reinstall the Intel graphics driver

  1. Press the Win key to open the Start menu.
  2. Type Device Manager and open it.
  3. Expand the Display adapters section.
  4. Double-click on the Intel graphics driver to open it.
  5. Switch to the Drivers tab.intel driver
  6. Select Uninstall and follow the on-screen steps (if any) to uninstall the graphics driver.uninstall intel driver
  7. Restart your computer.
  8. Open any browser and visit the official Download Center.
  9. Download the appropriate Intel GPU driver on your PC and install it.

Multiple users have resolved the problem by reinstalling the Intel graphics driver. Chances are some important files are missing or corrupt because of which the igfxsrvc.exe related errors are popping up on your PC.

3. Install the latest Windows update

  1. Press the Win + I keys to open the Settings menu.
  2. Click on Windows update on the left pane.
  3. Select the Check for updates button to check if there is a new update available.
  4. If there is a new update available then click on Download & install.

You should make sure that you have the latest Windows update installed on your PC. As this makes sure that there aren’t any driver compatibility issues and it also solves any underlying bugs.

4. Perform a system restore

  1. Open the Start menu by pressing the Win key.
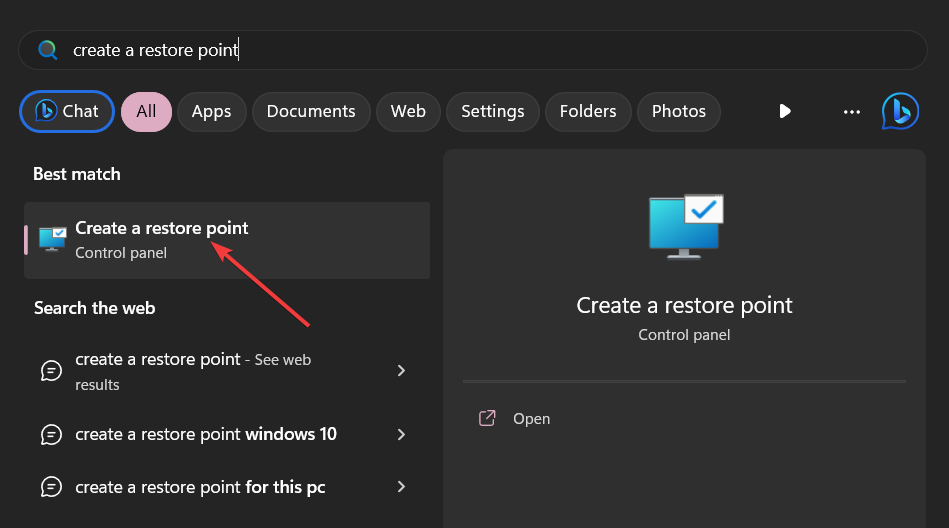
  2. Type Create a restore point and open it.
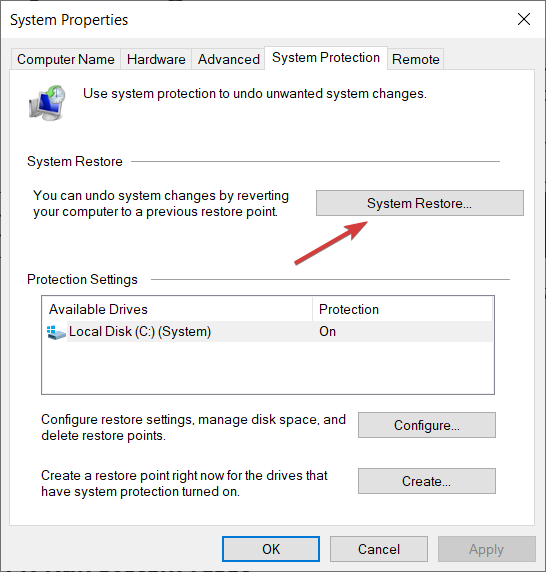
  3. Click on the drive where you have installed the OS and choose System Restore.
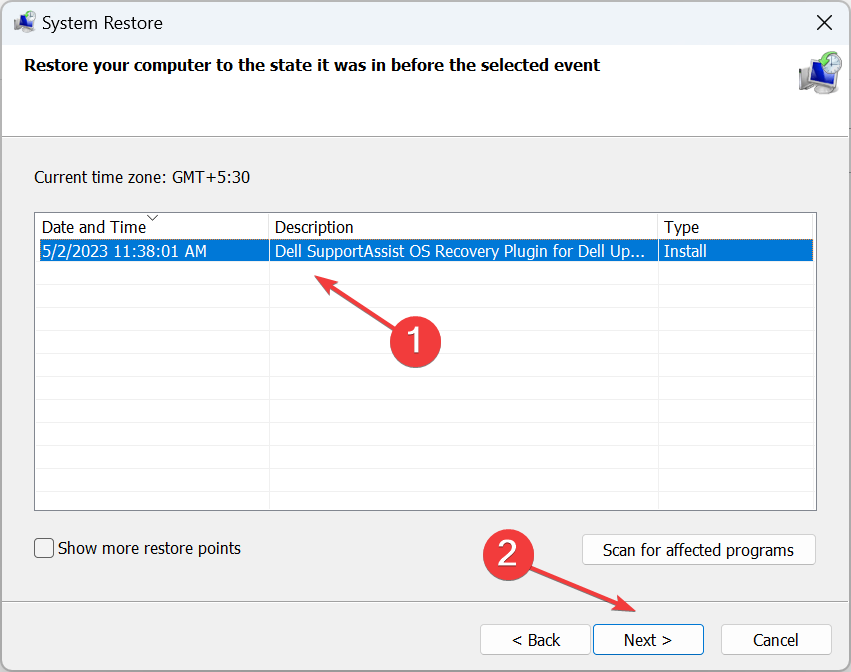
  4. Select the restore point and select Next.restore to fix websites opening automatically in Chrome
  5. Click Finish to begin the restore process.

If you are experiencing the igfxsrvc.exe related errors recently, then chances are some system tweaks might have triggered the problem.

In such a case, you should simply perform a system restore and take your PC back to a state where everything was working normally.

However, the system restore process will work only if you already created a restore point. For that, you can read our guide which explains how you can create a system restore point.

If nothing works in fixing the igfxsrvc.exe related issues, then we would suggest you opt for reinstallation of the Windows OS. You can easily perform that by following the steps in our guide on how to reinstall Windows 11 in 2 easy steps.

That is it from us in this guide. We also have a guide that explains what is view.exe file and if it should be removed from your computer or not.

Feel free to drop a comment in the comments section below, which one of the above solutions fixed the igfxsrvc.exe related errors on your PC.

Microsoft finally fixed macOS management, IT admins say

It seems that Microsoft is addressing a lot of issues with Intune on macOS because there are users who are praising Microsoft Intune on Apple devices. As you might know, Intune is a platform developed by Microsoft that allows for the efficient management of an organization’s IT infrastructure.

Of course, it usually goes hand in hand with Windows devices, but it can be used on macOS devices as well.

And it seems Microsoft has been spending resources on making sure the platform works well on macOS devices. It seems the Redmond-based tech giant has improved macOS management.

I’m seeing more and more of my Macbook devices being marked as complaint, automatically. They are being automatically remediated due to my policies configurations. Don’t get me wrong, I’ve had this configuration for like 8 months now, but just a month ago things started to move along, out of the blue. I had macbooks that were not picking up policies, or having issues with lockouts, not getting synced, etc. Everyday I’m seeing more and more devices pro-actively applying fixes to be complaint. Has this been happening to anybody else? Windows devices work like a charm, it’s extremely easy to manage them via Intune. MacOS seems to be going that direction now.

Microsoft Intune has improved macOS management

According to the IT manager, it seems that now Intune no longer has issues with Mac devices. If in the past, they were having trouble getting synced or enabling policies, it seems that now Intune does everything automatically. Without any issue.microsoft intune macos management

The truth is Microsoft has been focusing on bringing Mac devices to the table. Just recently, the Redmond-based tech giant announced Microsoft Mac Admins.

It is a platform that aims to bring Microsoft 365 Mac users together. Professional and personal accounts are welcomed on the platform as well.

This could easily be seen as a step for Microsoft to offer and facilitate its services to and for Mac users, and based on the feedback, it seems it works.

So, it’s no wonder Microsoft Intune is already improving macOS management.

What do you think about this? Are you an IT admin on Mac devices using Intune? Have you noticed it? Let us know in the comments section below.

What is vsjitdebugger.exe & How to Fix Its Application Errors?

Many of our readers have reported coming across the vsjitdebugger.exe related runtime errors on their PC and they are confused about what is causing this problem.

In this guide, we have shared all the details that you need to know about the vsjitdebugger.exe file and how you can fix its application errors.

What is vsjitdebugger.exe?

The vsjitdebugger.exe file belongs to Microsoft Visual Studio 2005. The full form of vsjitdebugger.exe is Visual Studio Just-In-Time Debugger and is published by Microsoft.

The file is usually located inside the C:\Windows\System32 folder. However, do note that it is not a Windows core system file, and if a problem exists, it can be removed from the PC.

Some of the vsjitdebugger.exe errors that you could come across are:

  • Vsjitdebugger.exe Application Error.
  • Win32 Software Error: vsjitdebugger.exe
  • Sorry for the inconvenience – vsjitdebugger.exe has a problem.
  • Can’t locate vsjitdebugger.exe
  • Vsjitdebugger.exe not found.
  • Error starting program: vsjitdebugger.exe.

You will come across the vsjitdebugger.exe errors more commonly during the startup and sometimes occurring randomly.

How can I resolve vsjitdebugger.exe application errors?

1. Tweak the registry

  1. Press the Win + R keys to open the Run dialogue.
  2. Type regedit and press Enter.
  3. Navigate to the below path and press Enter. HKLM\Software\Microsoft\Windows NT\CurrentVersion\AEDebuger\
  4. Double-click on the DbgManagedDebugger key on the right side to open it.
  5. Change the value to 0 and press OK.
  6. Restart your PC.

The DbgManagedDebugger key in the registry is responsible for automatically running the debugger. If you are facing vsjitdebugger.exe application errors then as suggested by our users, you can tweak the registry key and change the value to 0.

We also have a guide that explains how you can fix corrupt registry files in 5 ways in Windows 10 and 11. You can also read our list of the best registry cleaners to use in 2023.

2. Reinstall Microsoft Visual C++ Redistributables

  1. Press the Win key to open the Start menu.
  2. Click on Control Panel.
  3. Select Programs and Features.
  4. Select Microsoft Visual C++ Redistributable and hit the Uninstall button at the top.uninstall program roblox configuring stuck
  5. Hit the Yes button if any prompt appears.
  6. Restart your computer.
  7. Visit the official website and download the latest Visual C++ Redistributable.

Reinstalling the Visual C++ Redistributable has helped several users fix the vsjitdebugger.exe application error. You should also try as there are chances some important files might be corrupt for the version you have installed.

3. Run SFC and DISM scans

  1. Press the Win key to open the Start menu.
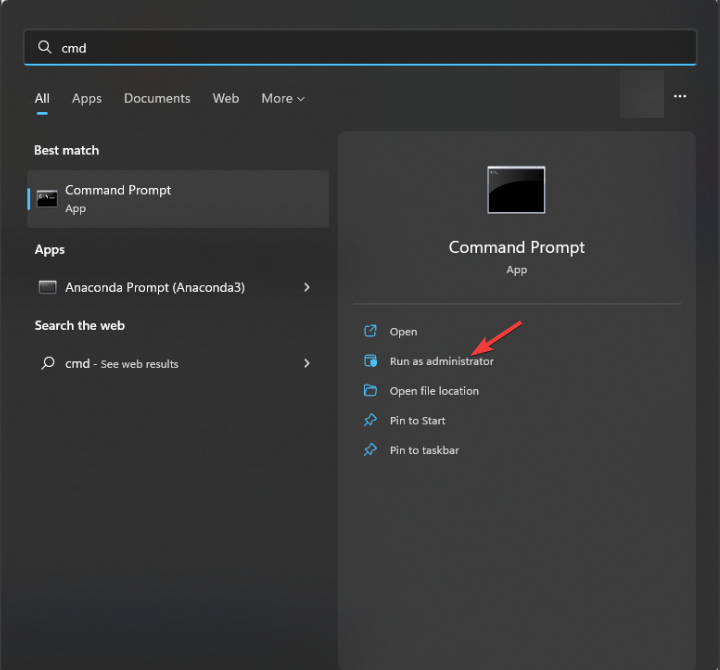
  2. Type Command Prompt and open it as an administrator.
  3. Type the below command and press Enter:sfc /scannowsfc scan
  4. Let the process fix the corrupt system files.
  5. Type the below commands and press Enter after each one:Dism /Online /Cleanup-Image /CheckHealth Dism /Online /Cleanup-Image /ScanHealth Dism /Online /Cleanup-Image /RestoreHealth
  6. Reboot your PC.

You can try running the SFC and DISM commands as it will help you resolve the vsjitdebugger.exe application error.

Chances are some important files are missing from your computer that requires the vsjitdebugger.exe file to run properly. If the SFC scan isn’t working, then you can apply the solutions mentioned in our guide to resolve the problem.

4. Perform a system restore

  1. Open the Start menu by pressing the Win key.
  2. Type Create a restore point and open the appropriate result.
  3. Click on the drive where you have installed the OS and click on System Restore.
  4. Select the restore point and choose Next.restore to fix websites opening automatically in Chrome
  5. Click Finish to begin the restore process.

For some users, the vsjitdebugger.exe application error was resolved by restoring the system back to a state when everything was working normally.

But do note that the system restore will work, only if you already have a system restore point created on your PC. To learn that, you can read the guide on how you can create a system restore point.

Besides, if nothing works then as a last resort, we would suggest you reinstall Windows OS. We have already created a guide that explains how you can reinstall Windows 11 in 2 easy steps.

That is it from us in this guide. Some of our readers also question about what is view.exe file and whether or not you should remove it from your computer. You can read the guide to know more about it.

You can also read out guide that explains what is write.exe and what it does. We have also mentioned some solutions on how to deal with write.exe problems.

Do let us know in the comments below, which one of the above solutions fixed the vsjitdebugger.exe application error.

NTLDR is Missing: 5 Ways to Safely Fix it

Several of our readers have reported the – NTLDR is missing. Press Ctrl + Alt + Del restart. error on a black screen when they try to boot up the Windows PC. This error usually shows up after upgrading to the newer version of Windows from Windows XP.

The error generally signifies that the essential system files required for completing the booting press are not accessible.

Why do I encounter if the NTLDR is missing an error?

You will run into the NTLDR missing error due to several underlying reasons. Some of the prominent ones are:

  • PC boots from a non-bootable source – Misconfigured BIOS boot sequence can cause the computer to boot from a non-bootable source like a floppy disk or flash drive.
  • Incorrect active partition in the bootable volume – If the active partition of the bootable disk is incorrect, your system will terminate the booting process and will display the error code.
  • Wrong boot sector code is installed – If the older NTLDR-compatible master boot code is applied during manual boot loader configuration instead of the newer BOOTMGR, the error is likely to occur.
  • Corrupt or missing boot-related files – The missing NTLDR error can also show up if the boot-related files such as NTLDR, and NTDETECT.COM get corrupt due to a power outage or virus attack.
  • Too many files in the root folder – The presence of a large number of files in the root folder causes the Master File table to get fragmented such that a new allocation index has to be created.

If you are also facing this error during the bootup process, don’t worry, we’ve got you covered.

How do I fix the NTLDR missing error on Windows PC?

As soon as you see the boot error on the screen, perform the following tasks:

  • Restart your PC once again using the Ctrl + Alt + Del shortcut to fix the temporary glitch.
  • Ensure that the SATA cable is properly connected to the computer.

If the problem isn’t resolved, try these solutions in the same order as listed.

1. Change the bootable disk

  1. Unplug all the external devices, such as floppy disks, external disk drives, and USB drives connected to your PC.
  2. Reboot your PC and check if the NTLDR is missing error still shows up. If the error is resolved, you need to change the change boot order in the BIOS window.
  3. For this, restart your computer and press the BIOS key (F2 or F12) to access the BIOS settings.
  4. Go to the Boot or Boot Order section located in the BIOS menu.
  5. Use arrow keys to set the hard drive having the Windows operating system as the primary boot device.
  6. Save the changes and then exit the BIOS window.

2. Change the boot order

  1. Reboot your computer and access the BIOS settings by pressing the relevant key. (F2 or F12).
  2. Switch to the Drive Configuration section on the BIOS screen.
  3. Check that the order of the hard drives and related settings is correct. In case you are not sure, select Auto. NTLDR is missing
  4. Save the changes you’ve made and exit the BIOS settings.
  5. Now restart your computer, and you will no longer see the NTLDR is missing error upon startup.

BIOS settings govern how the drives will be utilized during the bootup process. Misconfigured settings, especially the boot order throw up all sorts of errors, including NTLDR is missing.

3. Restore NTLDR and other Files

  1. Insert the Windows XP installation CD into the CD/DVD drive.
  2. Restart your PC and boot from the installation CD. When prompted, press any key to boot from the external media.
  3. Press the R key to access the Recovery Console on the Windows XP setup screen. NTLDR is missing
  4. Choose the Windows XP installation you have to repair.
  5. Provide the login credentials of the administrative account if prompted to do so.
  6. On the command prompt window that appears, type or paste the following command and press the Enter key after each of them. Replace X with the name of the letter representing your CD/DVD drive. X:\name\ntldr C:\ X:\name\ntdetect.com C: NTLDR is missing
  7. Reboot your PC and see if the NTLDR missing error persists.

4. Repair The Windows XP Master Boot Record

  1. Boot your PC from the external Windows XP installation CD as described above.
  2. Press the R key to access the Recovery Console on the setup.
  3. Select the Windows XP installation you are facing problems with.
  4. If prompted, provide the Administrator password to continue.
  5. Type or paste the following command in the command prompt window and press the Enter key to execute it. fixmbr
  6. Follow the on-screen instructions to complete the process.
  7. Now reboot your PC and see if the error is resolved.

The NTLDR is missing error can also be triggered if the Master Boot Record (MBR) is corrupt.

5. Repair or replace the boot files

  1. Boot your PC from the external Windows XP installation CD.
  2. Enter the Repair Console by pressing the R key and selecting the problematic Windows XP installation.
  3. Enter the Administrator password if prompted to login into your PC.
  4. Type the following command in the command prompt window and press the Enter key to continue.
    bootcfg /rebuild NTLDR is Missing
  5. After the process is complete, press the Y key to add the Windows XP installation to the essential files. Now reboot your Windows PC and see if you are successful this time.

If the system files containing the configuration data for the boot process are misconfigured or damaged it can lead to the NTLDR missing error.

That’s pretty much it! Hopefully, the error at hand is resolved, and you can successfully boot into your Windows PC.

In case you run into the default boot device missing or boot failed error, refer to this guide to resolve it.
If you have any feedback, comments, or suggestions for us, do reach out to us in the comments.

Why are so many gamers moving to Windows 11? [Stats]

Steam is back with another survey for June 2023, and it seems Windows 11 is experiencing growth in the market, especially when it comes to gamers. The community of gamers prefers Windows 11 to Windows 10, according to multiple surveys.

For example, the survey conducted by Steam says that Windows 11 64-bit experienced a +1.76% from the last survey. This gets Windows 11 to 35.75% popularity for gamers.

On the other hand, Windows 10 is still going strong at 59.43%, but it’s starting to lose its momentum. Since the last survey, Windows 10 has experienced a -1.08% loss of gamers, which means that the OS is starting to lose popularity in this community.

Steam conducts a monthly survey to collect data about what kinds of computer hardware and software our customers are using. Participation in the survey is optional, and anonymous. The information gathered is incredibly helpful to us as we make decisions about what kinds of technology investments to make and products to offer.

However, Windows 10 is still going very strong when it comes to the non-gamer community. Statcounter reports that Windows 10 users make up 71.09% of the total Windows users in June 2023. While Windows 11 stays at 23.93%, in very slow but steady growth. In time, Windows 11 will be adopted by more users, but for now, Windows 10 is still the most popular Windows version.

Windows 11 is slowly growing in the gaming community and this is a good thing

Windows 11 is starting to grow in the gaming community, according to the Steam survey conducted in June 2023.windows 11 steam market share

At that time, we reported that 35% of Steam users have switched to Windows 11, and Microsoft’s operating system family keeps holding the market tight with a 96.77% market share (+0.63). Apple is second with 1.79% (-0.60), and Linux is third with 1.44% (-0.03).

Windows 11 getting recognized by gamers might be due to several reasons. The operating system has been getting some quality updates, and many drivers are now fully stabilized on it. Plus, some really important games, such as Starfield, will soon come to Windows as well, and Windows 11 is the recommended version.

However, please note that participation in the survey is optional, so the data does not really represent 100% of Steam users.

Are you also using Steam on Windows 11? Share your experience with us in the comments section below.

Kindle Dictionary Not Working? 4 Ways to Quickly Fix it

Kindle is one of the most popular ebook software available today. While using the app, some users have reported the dictionary not working error which prevents them from accessing the translation and lookup feature of Kindle.

If the dictionary is not working on your Kindle reader, this article will provide five ways to help you fix it.

Why is the Kindle dictionary not working?

  • Dictionary not downloaded – If the dictionary is not downloaded on your Kindle application, you’ll be unable to use the Kindle app with the dictionary feature.
  • Disabled dictionary – After downloading the dictionary, you’ll often need to enable it in the Kindle app settings; if it’s not enabled, it’ll prevent the Kindle dictionary from working.
  • Offline reading – Most Kindle applications utilize online translations; if you’re not connected to the internet, the dictionary might not work.
  • Faulty Kindle Reader app – If the Kindle reader is corrupt or has underlying bugs, it can prevent certain app features from functioning.

How can I fix the Kindle dictionary if it’s not working?

Before we proceed with more advanced solutions, here are a couple of quick fixes you can attempt:

If these prerequisites didn’t fix the issue, let’s apply the following working solutions.

1. Re-download the dictionary

  1. Press the Windows key, type Kindle, and hit Enter.
  2. Click on the Tools tab in the Kindle app and select Options.
  3. Navigate to the General tab in the Options window, and locate the Dictionary section.
  4. Now, select the dictionary you wish to delete and click on Remove.
  5. Click Remove in the confirmation prompt to confirm the deletion.
  6. While in the Dictionaries section, click the Download dictionaries button, and explore the different dictionaries available in the app.
  7. Once you locate the desired dictionary, click on it, and select Get or Buy.

If the dictionary is free, it’ll be automatically added to your Kindle app, while if it’s a premium dictionary, you’ll need to make a purchase.

2. Add the dictionary to Kindle

  1. Press the Windows key, type Kindle in the search bar, and hit Enter to launch the application.
  2. Click the Tools tab in the menu bar, and select Options in the drop-down menu.
  3. Navigate to the General tab, and locate the Dictionary section.
  4. Click on the Change button to add a new dictionary. This will open a file browser window for you to select the dictionary you’ve downloaded.
  5. Select the dictionary file and click the Open button.
  6. After a few moments, the dictionary will be added to the Kindle app.

After downloading a dictionary file, we recommend you manually add it to the Kindle app to avoid the error.

3. Update Kindle

  1. In the Kindle app, click Help in the menu bar at the top of the screen.
  2. Click on What’s New in the drop-down menu bar to prompt the app to search for available updates.
  3. If an update is found, click the Download or Update button and wait for the update to be installed.
  4. If not, information will be provided on the present update on your device.

Running an outdated version of Kindle can lead to errors caused by bugs in the software. Updating the app is one way to fix the Kindle dictionary not working error.

4. Uninstall and reinstall Kindle

  1. Press the Windows key + I to open the Settings app.
  2. Click on Apps and select Installed apps.
  3. Locate Kindle, click the options icon, and select Uninstall.
  4. Select the Uninstall button again in the dialog box to confirm your actions.
  5. Close the Settings app and reinstall the app. Then try to re-download the dictionaries.

Resetting Kindle removes all saved data and configuration, rendering the app to its default state. This should allow you to download new dictionaries and fix the error.

This article has shown you the best ways to help you fix the Kindle dictionary not working error.

If you own a Kidle, here’s what to do if it doesn’t download books and fix it right away.

Did you manage to fix the problem using our solutions? Leave us a comment in the section below.

Want to see Microsoft’s Mica effect on Chrome? Here’s how

Microsoft is set to bring a new feature to Google Chrome in the form of the Mica effect, which is designed to enhance user experience and productivity. 

The move came a year after Redmond officials rolled out this fluent design UI on Edge Canary back in 2022. In the same month a year later, as previously spotted by Windows enthusiast @Leopeva64, a change list (CL) has been submitted by an engineer who is not affiliated with either Microsoft or Google, which aims to enable the Mica effect in Chromium, and it includes a sample code for Windows 11 22H2 Mica title bar.  

Now, it seems like we’re going somewhere with this. The same insider also spotted less than two weeks after the CL discovery that users on Chrome Canary can see the effect in play on their browser.

Even more, it seems that @Leopeva64 also discovered that Chrome only uses Mica Alt on windows with visible tab strips, and otherwise, it uses Mica.

For those of you who don’t know, Mica Alt is a variant of Mica, with stronger tinting of the user’s desktop background color. You can apply Mica Alt to your app’s backdrop to provide a deeper visual hierarchy than Mica, especially when creating an app with a tabbed title bar.

If you’re unfamiliar with Mica, it’s a visual style similar to the Windows 11 design language, featuring a translucent layer on top of elements such as buttons and menus, giving them a more modern and sleek appearance. This effect will be applied to the tabs, address bar, and other interface elements of Chrome.

As mentioned above, however, this feature is only currently available for those in the Chrome Canary channel for developers and insiders. If you have issues with finding the option, you can also try the Surfshark browser extension to change your location because in some cases, Microsoft releases features in a localized manner.

But, if you’re curious how it works, here’s how to see the Mica effect on Google Chrome. 

How to see the Mica effect on Google Chrome

1. Open your favorite browser

2. Go to the Google Canary download page & hit Download.

3. Once completed, double-click on the file and let it install

4. You’ll be able to see the Mica effect by default. Here’s the difference between Chrome Canary (with Mica) and default Chrome (without Mica)

With that said, it may take a while for general users to see the effect in their native browser. Plus, being a Canary insider-only feature means that you may experience a few hiccups here and there regarding this effect. 

Chrome also changes the way the Mica effects interact with custom themes in Windows 11

Update: Windows enthusiast @Leopeva64 also discovered that Chrome changes the way Mica effects interact with custom themes in Windows 11.

In Chrome Canary now the theme color is only applied to the active tab, while the rest of the tab strip retains the Mica effect. You can see the differences below.

What do you think about Microsoft rolling out the Mica effect for Chrome users? Let us know in the comments!

What is Vulscan.exe & How to Fix Its High CPU Usage?

Multiple users have reported seeing the vulscan.exe file resulting in high CPU usage. This is problematic as the file is running in the background hampering the other important tasks.

In this guide, we will give you some solutions that will help you to resolve the vulscan.exe high CPU usage issue on your PC. Let us get right into it.

What is vulscan.exe?

After researching the internet, we found out that the vulscan.exe file belongs to software called LANDESK Management Suite.

The vulscan.exe file runs in the background because it can scan internal and external networks and produce alerts whenever it discovers a vulnerability.

This file can be found inside the folder where you have installed the LANDESK Management Suite. Do note that this is not a system process and if you are facing issues because of it, then it can be removed from your PC.

Is vulscan.exe harmful?

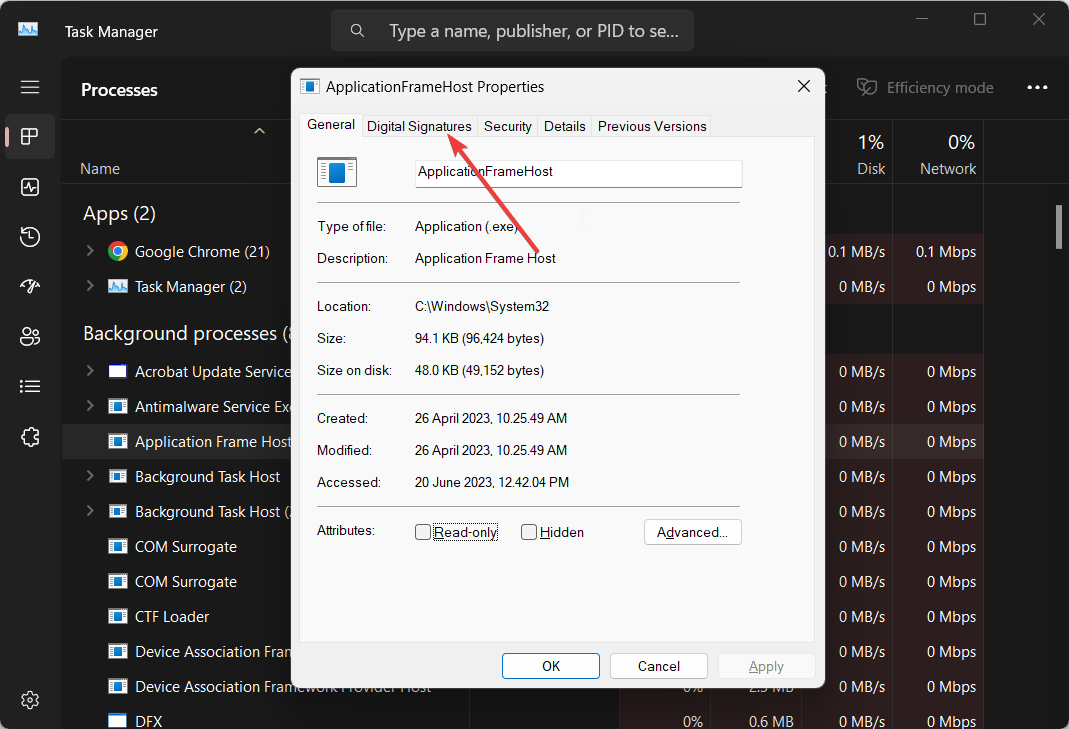
  1. Press the Ctrl + Shift + Esc buttons to launch the Task Manager.
  2. Locate the vulscan.exe file, right-click on it, and select Properties.
  3. Click on the Digital Signatures tab.
  4. Check what is written below the Name of signer section.
  5. If it says Unable to verify then it is a threat.

Since the file belongs to the LANDESK Management Suite, the name of the signer should be either LANDESK or Ivanti. In case it is not, then it is a virus.

Moreover, if the file is inside the LANDESK Management Suite folder, then there are fewer chances of it being malware or a virus as it is a part of that particular software.

However, if you find the file in any other location or multiple locations, then malware or virus has masked this file and caused issues on your PC.

How can I resolve the vulscan.exe high CPU usage issue?

1. Reinstall the LANDESK program

  1. Press the Win key to open the Start menu.
  2. Click on Control Panel.
  3. Choose Programs and Features.
  4. Select the program and hit the Uninstall button at the top.uninstall program roblox configuring stuck
  5. Follow the on-screen prompts to remove the program from your PC.
  6. Reboot your computer.
  7. Visit the official website and download the program.
  8. Install it on your PC and check if this resolves the issue or not.

You should try reinstalling the program on your PC as there are chances some important files are missing from your PC related to the program which is ultimately causing the vulscan.exe high CPU usage issue.

2. Run an antivirus scan

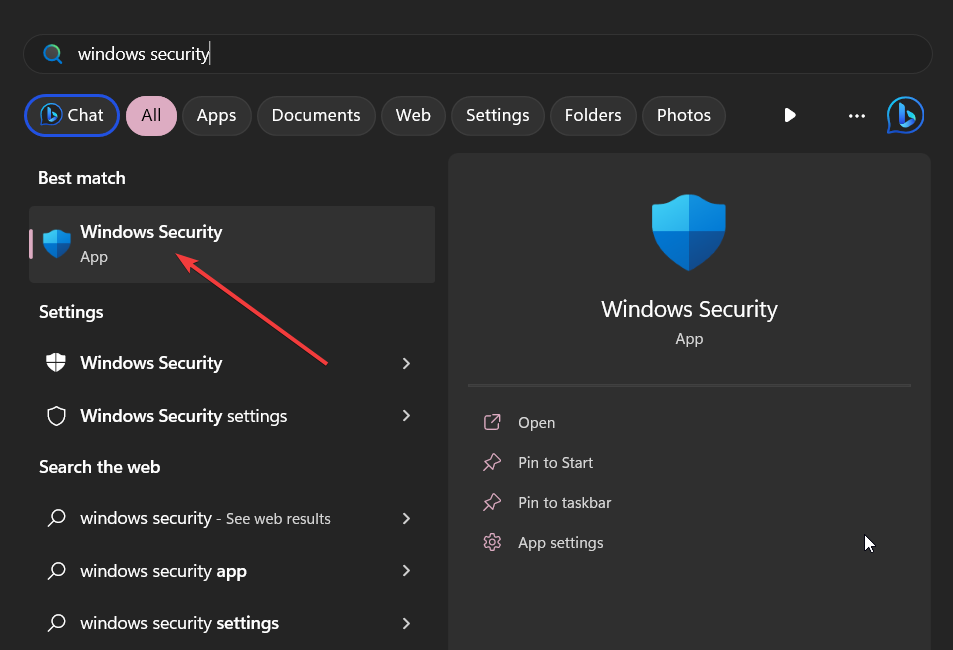
  1. To open the Start menu press the Win key.
  2. Type Windows Security and open the top result.
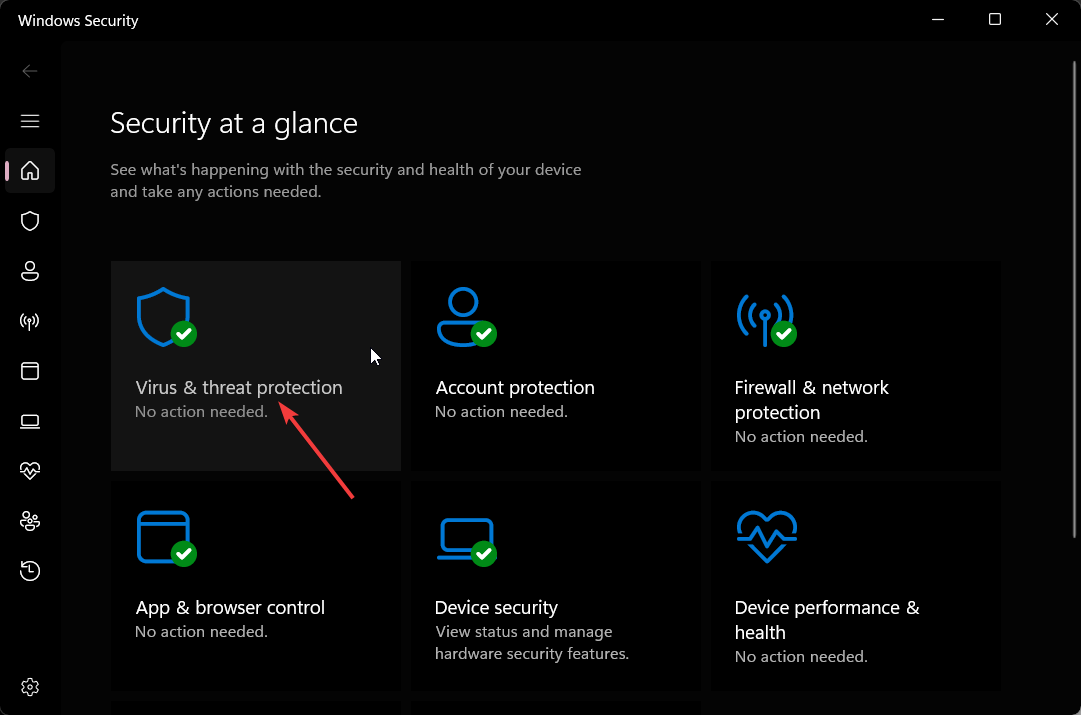
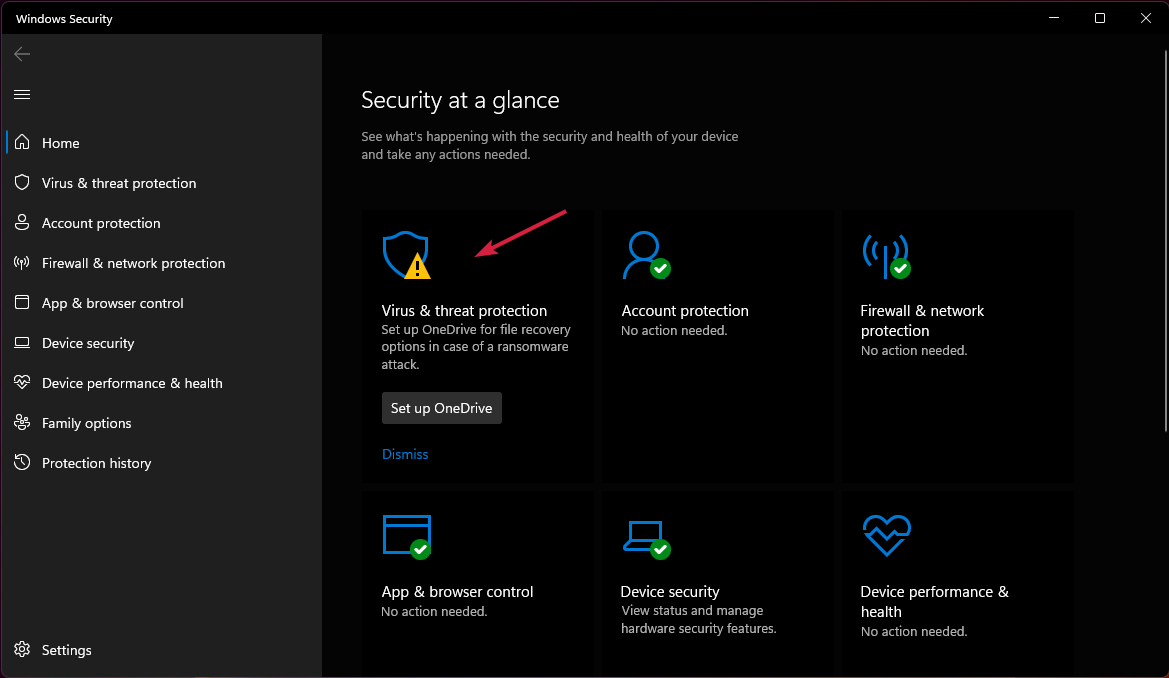
  3. Click on Virus & threat protection.
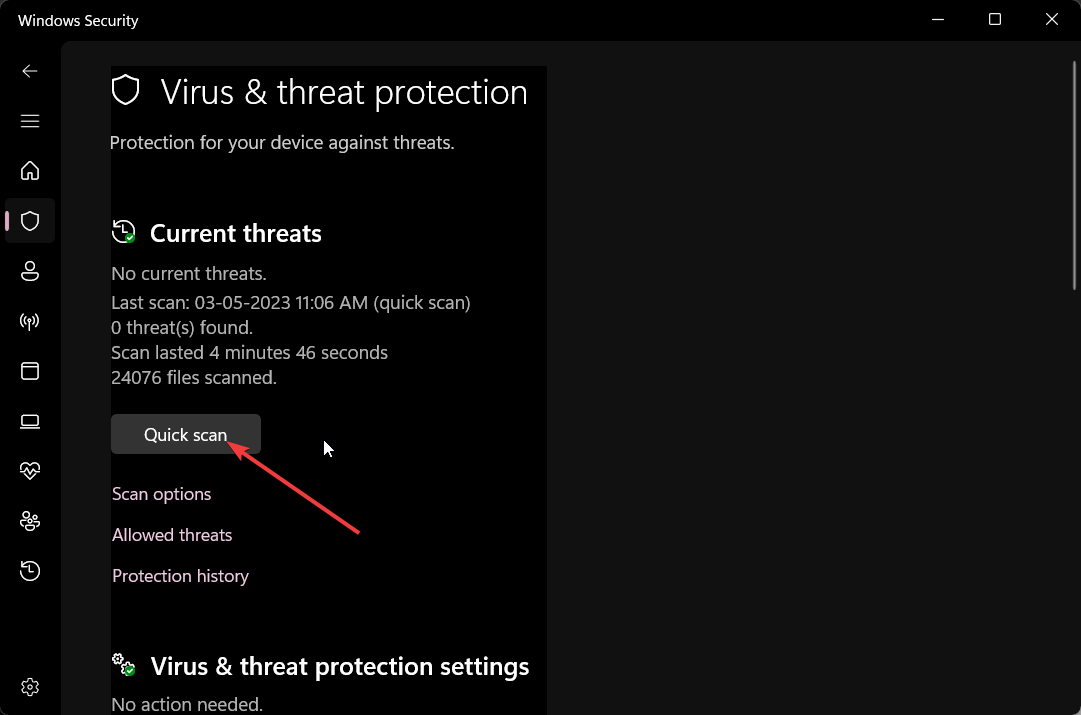
  4. Select Quick Scan.
  5. Let the process complete and apply the fixes.
  6. You can also choose Scan options and choose Full scan for in-depth scanning, and after that, restart your PC.

If you located the vulscan.exe file outside of the LANDESK Management Suit’s folder or somewhere else on your PC, then you should immediately run a virus scan of your PC as there are high chances of it being malware.

Since the Windows Security tool isn’t that effective in tackling viruses or malware, you can check out our guide which gives you a list of antivirus tools that you should use.

3. Perform a system restore

  1. Open the Start menu by pressing the Win key.
  2. Type Create a restore point and open the top result.
  3. Click on the drive where you have installed the OS and select System Restore.
  4. Choose the restore point and select Next.restore to fix websites opening automatically in Chrome
  5. Click Finish to begin the restore process.

If the vulscan.exe high CPU usage issue occurred recently, then you should simply restore your system back to a state where everything was working normally.

However, the process will work only if you have a system restore point already created on your PC. For that, we would suggest you read the guide on how you can create a system restore point.

If none of the above solutions fixed your vuslcan.exe high CPU usage issue, then you should try reinstalling the Windows OS. We have a guide that explains how you can reinstall Windows 11 in 2 easy steps.

That is it from us in this guide. We have also covered in detail what is view.exe file and whether or not you should remove it from your computer.

Several users were also getting troubled with what is write.exe and what it does. You can read our guide and understand what it it.

Let us know in the comments below, which one of the above details helped you understand about vulscan.exe and fixed the high CPU usage problem.

What is CCXProcess.exe & Should you Disable it?

If you have Adobe applications installed on your PC, you might have noticed ccxprocess.exe running as a background process. Some of our readers have seen the process but are confused about what to make of it.

So, this article gives you an overview and the steps to disable the CCXProcess.exe. Also, others have said that they encounter mediaget.exe also, so you can check how to fix it here.

How can I disable CCXProcess.exe?

1. Disable the CCXProcess process from startup

  1. Right-click the Start menu on your Desktop window and select Task Manager.
  2. Navigate to the Startup tab, select CCXProcess, and click Disable.
  3. Restart your PC to apply the changes.

Disabling CCXProcess.exe in the Task Manager is one of the easiest ways to prevent the process from launching at startup.

You can also check out our guide showing you the best shortcuts to open the Task Manager.

2. Disable Adobe Creative Cloud

  1. Press the Windows key, type Adobe Creative Cloud in the search bar, and hit Enter.
  2. If prompted to sign in, enter your credentials and click the Sign In button.
  3. Click Settings at the window’s top right corner, click Preferences, and then navigate to the General tab.
  4. Under the Settings section, click the toggle button next to Launch Creative Cloud at login to turn off the feature.
  5. Click Done to apply the changes, and restart your PC to apply the fix.

3. Disable the Startup entry in the Registry

  1. Press the Windows key + R to open the dialog box, type regedit, and hit Enter to open the Registry Editor.
  2. Navigate to the following path in the registry editor: HKEY_LOCAL_MACHINE\SOFTWARE\Policies\Adobe
  3. In the directory, right-click on the Adobe folder, select New, then select Key.
  4. Rename the new key as CCXNew.
  5. select CCXNew and right-click on any space on the right pane.
  6. Click on New, and select New DWORD (32-bit) value. Rename the DWORD value as Disabled.
  7. Double-click on Disabled, and set the Value data to 0. Click OK to save the changes, and restart your PC.

Disabling apps and processes from the Registry Editor is a bit complex; you must be extra careful when following this method, as you can corrupt your entire PC.

Further, ensure you backup your PC before making any changes to the registry.

4. Uninstall the Adobe application

Note icon NOTE
Perform this solution only if you’re no longer using the Adobe software.
  1. Press the Windows key, type control panel, and hit Enter.
  2. Under Programs, select Uninstall a Program.
  3. Locate Adobe from the list of programs, click on it, and select Uninstall.
  4. Confirm your action on the displayed prompt, and follow the onscreen instructions to complete the uninstallation.

What is CCXProcess.exe?

CCXProcess.exe, or Creative Cloud Experience Process, is an executable file from the Adobe Creative Cloud software suite. The file is automatically launched as a process during startup and runs in the background to support the functionality of various Adobe applications. 

Other information about this process are highlighted below:

  • The file is usually found in the C:\Program Files\Adobe\
  • Its size is approximately 120KB.
  • On startup, the CCXProcess.exe automatically launches as a background process.
  • It creates a single workspace for multiple projects.
  • Manages the user interface of Adobe programs.
  • Enhances the efficiency of Adobe applications.
  • Provides templates, filters, and tutorials to users.

Should I disable ccxprocess.exe?

Typically, ccxprocess.exe is a legitimate file and process used by Adobe applications. However, you’ll have to disable it to free up resources if it’s causing high CPU usage.

Additionally, the ccxprocess.exe process can also be used to conceal the identity of malware if hackers manipulate the name of the malware to display it as the CCXProcess.exe file/process. In such cases, disabling the process is the only way to ensure the security of your PC.

Looking to disable other Adobe startup processes? Learn how to disable AcroTray.exe from startup.

FAQs

What is CCXProcess.exe?

CCXProcess.exe is a background process related to Adobe Creative Cloud. It helps manage Adobe applications and services, including syncing and licensing.

Is CCXProcess.exe safe to run?

Yes, CCXProcess.exe is a legitimate process from Adobe, but if you notice excessive CPU usage or errors, it may be worth updating or reinstalling Adobe Creative Cloud.

Can I disable CCXProcess.exe?

While it’s generally safe to leave running, you can disable it if you don’t use Adobe Creative Cloud or want to reduce background processes. You can stop it via Task Manager or disable auto-start in the Creative Cloud settings.

Why does CCXProcess.exe use so much CPU?

High CPU usage can happen if Creative Cloud is syncing files, updating apps, or performing other background tasks. Reducing the sync frequency or disabling auto-updates can help.

Adobe is the parent app of the CCXProcess.exe; removing the app from your PC will remove the executable from your PC. Here is a detailed guide showing you ways to uninstall apps on Windows.

Disabling CCXProcess.exe is unnecessary. However, it should be removed when the process is resource intensive or detected as malware.

After reading this guide, you should comprehensively understand CCXProcess.exe and know if you should disable it. Let us know in the comments below if you have any questions or suggestions.

Latest sales data suggests Xbox Series X|S may be losing steam compared to Xbox 360

VGChartz has release its latest monthly sales charts, for the month of May 2023. VGChartz compiles their own estimated hardware sales, as Microsoft does not release detailed sales figures. The data shows some interesting dynamics at play regarding sales figures for the current-gen Xbox Series X|S in comparison to those of the Xbox 360.

Thus far, the Series X|S has outperformed the 360 overall when the two are compared side-by-side regarding post-launch timelines. The Series X|S crossed the 20 million units sold mark in December 2022, which was the 27th month it had been on the market. It took the Xbox 360 34 months to achieve the same feat.

Xbox Series X|S vs Xbox 360 Sales Comparison - May 2023

Xbox Series X|S vs Xbox 360 Sales Comparison - May 2023

Xbox Series X|S vs Xbox 360 Sales Comparison - May 2023
All data via VGChartz.

At this point, the Series X|S has sold nearly 22 million units worldwide; the 360 did not reach that total until 36 months on the market.

All of which is good news for the Series X|S and owners of the console. However, the gap seems to be closing in the 360’s favor. For May 2023, the 360 closed by nearly a quarter million. And over the last 12 months, that gap has tightened by over 1.1 million units.

Why is any of this important? Because the Xbox 360 is considered the height of the brand’s success and influence, and is perceived as the only console generation in which Xbox really went toe-to-toe with rival PlayStation. In other words, the Xbox 360 is the standard by which future Xbox consoles are judged.

Xbox 360

The 360’s successor, the Xbox One, suffered a disastrous launch and never really recovered, as Microsoft Gaming CEO Phil Spencer recently remarked.

Going off this data, it appears the Series X|S may be losing steam. But keep in mind this data is from the month before the big Xbox Games Showcase on June 11—which has been almost universally declared one of the best Xbox showcases yet. So it will be interesting to see what affect the showcase could have on Series X|S sales for the months going forward.

Best Open Source AI Content Generator [7 Free Options]

AI is taking over every field. It is proving to be of great help, especially for content creators, to generate ideas they cannot think or muster.

In this guide, we have listed some of the best free AI content generator tools that are open source, which will aid you in the content-creating process.

Is there an AI that writes content for free?

Yes. Multiple free AI websites will help you create content for free. All you need to do is enter some text describing what you wish the AI to write about, and it will generate the content.

However, there will be some caveats attached to them. Firstly, some AI websites may not ask you to log in or give in your payment details to access the limited-time free trial. On the other hand, some websites may not produce the desired outcome.

To ease that task, we have created a list below that will help you with content generation free of cost, and they are reliable, too.

Which are the best AI Content Generators?

Copy.ai – Create long-form content in a few clicks

Copy.ai is one of the best open-source AI content generator tools that, using its advanced AI algorithm, helps you write long-form content in just a few clicks.

Apart from long-form content, it can write many types of copy for free. It is based on GPT-3, an advanced language prediction model.

Copy.ai lets you create 2K words monthly in 8 tones and 90+ use cases. You can use this content generator tool to assist you in creating copy for ads, websites, slogans, blogs, social media content, and much more.

Here are some of the best features of Copy.ai:

  • Lets you create a free copy, giving you a sufficient word limit
  • Highly accurate and elaborated content generation
  • Access to 90+ AI tools and 40+ pre-made templates
  • Offers 8 built-in writing tones for different use cases
  • Pro plans support 25+ languages

Copy.ai

Take full writing support using this AI writer with up-to-date information on most subjects.
Free trial Visit website

Writesonic – Create factual content using powerful AI

Writesonic comes from the house of Photosonic, which is one of the top AI art generators. With Writesonic, you can write up to 25,000 monthly words in the free version.

This is more than sufficient for any beginner or even a professional. The content generated in the free version will be economy. Basically, there are four modes; Economy, Average, Good, and Premium.

You can go for Premium for top-notch content, which will get you 2,500 words per month. It offers 80+ short-form content, leverages GPT-3 for factual corrections, and supports multiple languages, browser extensions, integrations, etc.

Some of the key highlights of Writesonic are:

  • Creates high-quality free content
  • Gives you 25,000 words per month limit in the free version
  • Offers 80+ content templates
  • 25+ language support
  • Browser extension and integration support

Writesonic

Forget about inadequate AI content and sign up for an SEO-friendly AI provider for unique content.

EasyPeasy – Supports multiple languages

Last but not least in our list of the best AI content generator open source tools, we have EasyPeasy. As the name suggests, creating content on it is a breeze and it works pretty fast.

The free version is limited to 1,000 words per month, many would find that sufficient, especially social media content generators, advertisers, slogan writers, etc.

It has over 80 use cases like social media, SEO, blog, business, marketing, resume, writing tools, etc. The best part is that it supports 40+ languages, and you can enter tones of voices manually to suit your needs.

Here are the key highlights of EasyPeasy:

  • Supports over 80 different use cases
  • Supports 40+ languages
  • Gives you the option to enter the tone of the voice manually
  • The interface is modern and easy-to-understand
  • Excellent for email writing or short-form content

EasyPeasy

Settle on this complete AI solution for writing professional content with a native speaker voice.
Free trial Visit website

Simplified – Offers a number of content-generation tools

If you are looking for an all-in-one tool that will not only help you write plagiarism-free content but also help you edit videos and design, then you should opt for Simplified.

Using the free plan, you can generate up to 3,000 words per month. It offers you 70+ AI templates that you can use as per your needs, including blogs, eCommerce, products, brand ads, and much more.

Simplified comes with 20+ languages support, 6 levels of creativity settings, and gives you access to 12 tones to mold your content in the way you want.

Some of the best features of Simplified are:

  • Offers a simple but modern interface
  • Support more than 20 languages
  • Gives you access to 3,000 words per month for free and 12 tones
  • You can choose from 70+ different templates for different use cases
  • You can use it for graphic designing, video editing, social media management, and more

Simplified

Use the easiest solution for AI apps tailored for copywriting, graphic design, or casual blogs.
Free trial Visit website

INK – Mulitple use cases AI content generator

Next up on our list of the best AI content generator open-source websites is INK. INK offers you 120+ use cases that cover categories such as social media, SEO, copywriting, name generators, etc.

With the free plan, you can write around 2,000 words per month. It is known to produce high output. However, the downside for some could be that it is available only in English and does not offer you tone settings.

But there are some unique features that you won’t find in any other AI content generators, such as AI image finder and SEO optimizer.

Here are the key features of INK:

  • The user interface is modern and user-friendly
  • Lets you write content for 120+ use cases
  • Built-in blog, email, AI image finder, and SEO optimizing tools
  • Overall best for social media content generation

INK

Have a go with this patented AI writer for optimized and SEO-wise content writing.
Free trial Visit website

Rytr – Simple to use and fast content generators

Rytr is one of the best ai content generator open-source tools used by millions of users for its ease of use and features.

You can create relevant content for your business that supports over 30 languages, bringing versatility.

Rytr makes use of AIDA (Attention, Interest, Desire, and Action) and PAS (Problem, Agitate, Solve) as the formulas to create authentic and factually correct content. It also offers a built-in plagiarism detector.

There are over 40 templates, multiple formatting options, 20+ tones of voice, an SEO analyzer, extensions, and more.

Below are the best features of Rytr:

  • Support for 30+ languages
  • Over 40 templates and 20+ voice tones
  • Easy to use and comes with a plagiarism detector
  • Free to write 5,000 words per month
  • Idea and outline generator
  • Multiple formatting tools

Rytr

Write confidently using this competitive and affordable AI assistant for marketers.
Free trial Visit website

Writeme.ai – Best for writing precise content

If you are looking for a no-nonsense AI writing aid, then one good option could be Writeme.ai. It is based on the GPT-3 technology, providing you highest quality output.

Using the free plan, you can generate up to 2,000 words per month. There are over 40 use cases, and it can help you write ad copies, blogs, fiction writing, business writing, SEO writing, and more.

You can create content in over 30 languages, and it offers 22 tones of voice that will help you mold your content as per your style.

The output produced is of high quality and doesn’t require much editing, specializes in creating long-form content, and has a minimal interface.

Some of the key features of Writeme.ai are:

  • Offers you 40 use cases and 22 tones
  • Supports 34 languages
  • Offers a Chrome extension as well
  • Produces excellent quality long-form content
  • Easy-to-use interface

⇒ Get Writeme.ai

Looking for an AI writing assistant that helps you write content, learn coding, solve mathematical problems, and craft well-structured research papers? Check out Caktus AI and read this guide to learn more about the tool.

And if you’re looking for AI tools that help break down technical content, check out SciSpace Copilot.

That is it from us in this guide. You should read our guide, which contains a list of some of the best AI image upscaling software worth your time in 2023.

We also have a guide on the best AI software for PC, so don’t miss it for more information.

Feel free to let us know in the comments below which one of the above AI content writing tools you liked and if you prefer a different one.

FQQ S14 Monitor Extender Review – an excellent laptop upgrade

From FQQ comes this portable 14” monitor extender, model S14. Although this product is primarily designed to serve as a laptop monitor extender, it also works with a wide range of devices including Windows, Mac, Linux and Android devices. It also is compatible with Xbox and Nintendo Switch game consoles.

Note that according to the product page on Amazon, this FQQ monitor extender is not compatible with MacBook M1&M2, Microsoft Surface Series (ARM chip), or Chromebook (ARM chip).

The package contents include:

  • The monitor
  • A carry case
  • Cleaning cloth
  • A USB-C to USB-C cable for video & power
  • mini-HDMI to HDMI for video only
  • USB-C to USB-A cable for power only
  • A power adapter
  • A screen protector
  • 6X protective caps
  • A hook and loop cord fastener

Img 20230703 143929672

Setting up the monitor as a laptop screen extender is fairly simple. Just gently unfold the monitor, attach the plastic caps to the two pins at the bottom of the monitor’s base and slide it onto the laptop, using the brackets at the top to secure the laptop screen. Drop the embedded kickstand and you’re good to go.

Getting the S14 ready for primetime is as easy as plugging it into the device of choice. The S14 automatically picks up the signal in just a few moments, and you’ll be pleased to know that no drivers are needed—this is a true plug and play monitor.

Below I have the S14 connected to an 11.6″ Lenovo Flex 3 Chromebook. (Note that this 14″ monitor extender is really intended for bigger laptops as seen in the dimensions list below, so I had to make some improvisations here).

Img 20230703 143222607

It’s also one that doesn’t compromise much in the way of portability. Weighing in at 1.65 lbs, the S14 is very thin and very lightweight. Build quality is rock-solid however for both the display itself and the attachment panel, including the kickstand. While the monitor is foldable it is also extendable, so it should fit 14”-17” laptops with the following dimensions:

  • Length: 12.1-16.8 inches
  • Height: ≥ 8.6 inches
  • Thickness: ≤ 0.32 inches

The monitor includes two USB Type-C ports and a mini-HDMI port. Plus/Minus buttons allow for menu screen navigation and adjusting the screen brightness. And the menu button opens the OSD (On-Screen Display) menu. Here you can access a wealth of display settings such as color temp, contrast, black level, and so on. You can also select one of several presets like Standard, Game and Movie modes, etc. in addition to other settings.

The display

In a word, the FQQ S14’s FHD (1920p x 1080p) IPS display provides a fantastic viewing experience. The screen features a 16:9 aspect ratio, 60Hz refresh rate, half-inch bezels, anti-glare and a 178° viewing angle, as well as a 72% color gamut value.

What does all this mean? It means a display that is crisp and crystal clear, with vibrant color and detail that is sharp and vivid.

Performance was generally solid using the S14, and multitasking was mostly a breeze with say, YouTube, multiple Chrome tabs, the Twitter desktop app, and a Google doc all open on my Chromebook. However, with certain resource heavy apps and web pages, performance took a slight hit—though how much of that was really attributable to the S14 is uncertain.

Fqq Monitor Extender Split Screen

The verdict

DISCLAIMER: A sample unit was provided for an honest review.

All in all, the FQQ S14 monitor extender is an easy recommendation for anyone looking for a portable monitor extender solution—particularly one that takes the pain out of multitasking on a laptop. Whether the extra screen space is needed for the office laptop or for travel, this monitor pretty much checks all the boxes: true portability, sturdy build and a great display whether it’s for writing up a doc, watching YouTube or getting in some gaming.

Img 20230703 145151702 Hdr

If there is one point of feedback I might give, it’s that it would be great if the monitor had a way to slide back into the attachment panel when not in use. As it is, the portable monitor must be removed and folded closed to be put away. Which is an easy-enough process, but if FQQ finds a way to remedy this in a future model that allows the screen to slide inward (either between the base panel and the back of the laptop lid, or alternatively behind the panel), then this would be pretty close to perfect.

The FQQ S14 portable extended monitor is available on Amazon, and retails for $299.99 USD.


Error Initializing or Updating your Transaction [Steam Fix]

Several Steam users have recently reported that they are interrupted by an annoying error – There seems to have been an error initializing or updating your transaction. Please wait a minute and try again or contact support for assistance whenever they attempt to make a purchase.   

If you are also one of those who are witnessing this alert and are looking for a solution to this problem, refer to this guide for help. 

Why do I encounter the error in initializing or updating your transaction?

The error code can be evidence of several underlying problems in the Steam app. Here are the most significant ones: 

  • Corrupt Steam installation folder – If the installation files of the Steam app get corrupt, the Steam validation of the purchase process will not be successful hence the error. 
  • Buggy Beta program – Several Steam users have reported that the error is triggered by a bug in the beta version of the app and no such error shows up in the non-beta version. 
  • Locked user account – Steam may lock your account for several reasons such as security prospects, violation of the privacy policy, or multiple payment failures. 
  • Corrupt download cache – The download cache maintained by Steam may get corrupted and may cause the error in initializing or updating your transaction problem. 

Now that you have an insight into the error message, look at the potential fixes. 

How do I fix the error in initializing or updating your transaction problem?

Before you try the advanced solutions listed in this guide, perform the following preliminary workarounds to see if they are of help. 

  • Check whether the Steam servers are up and running and not facing server outages. 
  • Switch to the web version of Steam and try completing the transaction. 
  • Switch to a different payment method and see if it works for you. 
  • Disable the VPN if currently active and reattempt the transaction. 

If none of these tricks work out, try the following: 

1. Sign out of the beta version 

  1. Click the Steam option located in the upper-left corner of your screen.
  2. Choose Settings from the drop-down menu followed by Accounts from the sub-menu. error initializing or updating your transaction steam
  3. Look for a Beta Participation tab on the right section of the window. Click the expand the drop-down list and select NONE – Opt out of all Beta programs option. 
  4. Press the OK button to save the changes. 
  5. Click the Restart Steam button on the popup to apply the changes.

If you are using the beta version of Steam, trivial bugs or temporary glitches may inhibit of ability to make a transaction and complete your purchase. Switching to the non-beta version will solve the error and reset your cart so that you can initiate the purchase once again. 

2. Cancel the pending transaction 

  1. Launch the Steam app on your Windows PC. 
  2. Click the profile icon located on the top right corner of the screen and choose Account Details from the drop-down. 
  3. Next, click the View Purchase History option located under the Store & Purchase History section. error initializing or updating your transaction steam
  4. Look for pending transactions in the list. If you find one, click the Cancel pending transactions button. 

If a transaction is already pending on Steam, a transaction may not be possible without canceling the previous one. So the error initializing or updating your transaction is likely to occur. 

3. Clear the download cache

  1. Click Steam located in the top left corner of the Steam app. 
  2. Choose Settings from the drop-down followed by Downloads from the sub-menu. 
  3. Look for and press the Clear Download Cache at the bottom of the window. error initializing or updating your transaction steam

Steam maintains a game download cache folder for easy reference in the future. However, the cache is likely to get corrupt if not deleted regularly and cause a series of issues, like preventing you from making new purchases. 

4. Flush the Steam configuration

  1. Quit the Steam app on your Windows PC.
  2. Use the Windows + R shortcut combination to bring up the Run dialog box, type the following command in the text box and hit the Enter key. steam://flushconfig
  3. A confirmation pop-up from Steam will appear warning you that the configuration files will be removed and you need to log in again. Press OK to confirm the action.

5. Delete corrupt Steam installation files

  1. Right-click the Windows icon on the taskbar and choose Task Manager from the quick links menu.
  2. Select all the Steam-related processes and click the End Task button on the bottom right. 
  3. Use the Windows + R shortcut to bring up the Run dialog box, paste the following location in the textbox and press the Enter key to access the Steam installation folder on your system. C:\Program Files(x86)\Steam error initializing or updating your transaction steam
  4. Now select all the files and folders located within the Steam folder except the steam.exe file, along with the steamapps and userdata folder. 
  5. Once done, use the Shift + Delete key combination to delete all the selected files and folders from the location. 
  6. Now restart your PC, relaunch the Steam app, and wait until the app downloads all the essential files for it to function properly. 

Now trying to complete the transaction, and hopefully, the error will be resolved now. 

That’s all about it! Hopefully, the workarounds methods in this guide will prove effective to get around the error initializing or updating your transaction problem. 

In case the bug still bothers you, we will recommend you uninstall the Steam app and reinstall it again as the last resort. https://windowsreport.com/software/valve-steam/

Let’s mention that if the error blocks your transaction several times, there are chances that the Steam bots have restricted your account for security reasons or for exceeding several failed purchase attempts. You can contact Steam Support to get expert guidance in this regard.

We covered a similar issue on our Your transaction cannot be completed Steam error article, so don’t miss it.

If you have any queries or feedback for us, feel free to reach out to us in the comments section. 

Best AI Website Builder [Out of 7 That We’ve Tried]

A well-structured and beautiful website is the need of the hour if you are into the internet and related fields. It is what attracts your audience to stay on your website and thereby earning you money.

In this guide, we will list down some of the best Ai website builders that you can use in 2023. Since these tools use AI, almost everything is automated. Let us get right into it.

Do you need AI to help you build a website?

Since AI is the hottest word in the world of technology, and we have seen its prowess in every field, taking the help of AI to create a website will give you multiple advantages.

Well, for starters, AI can help you mitigate the errors that you would do while building a website. Moreover, with AI, you don’t need to know coding to build a website and this is more than sufficient to lure someone to use AI to build a website.

Which are the best AI website builders?

Wix ADI – Great for beginners

Wix ADI is the perfect choice for beginners who want to set up a website without needing to fiddle around with complex things.

The Wix ADI (Artificial Design Intelligence), with its advanced AI, can help you create a fully customizable website by asking you a series of questions.

You need to answer the questions and give the details about your business or profession, and based on that, the AI tool will build a website. The best part is that no two websites look the same, which lets your website stand out.

The website creation experience is smooth and hassle-free and is perfect for small businesses, a professional, and even start-ups.

Here are some of the key features of Wix ADI:

  • You can customize the website with the full suite of functionalities
  • Creates a website just by asking you a series of questions
  • Consists of 900+ website templates to choose from
  • Easy-to-use and drag-and-drop style editor

Wix ADI

Create and customize your website with a complete set of features.
Check price Visit Website

Hostinger – AI-driven simple website builder

Hostinger is a great AI website builder and works well for both professionals as well as beginners. There are a ton of features that you can use and it comes with an easy-to-use editor.

There are over 100+ templates to choose from from different categories such as websites, online stores, portfolios, landing pages, etc.

Hostinger AI is powered by the popular ChatGPT and it takes around 30 seconds (as claimed on the website) to build a website. You can customize the website all around to suit your needs.

Here are the best features of Hostinger AI:

  • 100+ fully-customizable, designer-made templates
  • Creates an automatic responsive website to fit any screen size
  • Offers AI tools such as logo maker, AI writer, drag-and-drop editor

Hostinger

Get this AI website builder suitable for both professionals and beginners.
Check price Visit Website

GetResponse – Create visually stunning websites using AI

GetResponse is a great option if you are looking for an AI website builder that builds visually brilliant websites.

You can use the website templates to create your website or start from scratch. GetResponse lets you customize everything using its drag-and-drop editor.

All you need to do is answer a few questions about your business or profession and the AI wizard will create a website for you which you can further tweak as per your needs.

Here are the best features of GetResponse:

  • AI wizard helps you create a website by answering a few questions
  • Integrates your website with the platform’s popular email marketing and automation tools
  • Access to live chat, web notifications, and webinar tools
  • Lets you fully customize your website

GetResponse

Use GetResponse’s AI wizard and create your website in a bit.
Check price Visit Website

Zyro – Easy-to-use AI website builder

Another popular name in our list of best AI website builders is Zyro. Zyro offers a wide range of customizable options that are easy to use.

Even first-time users won’t find building a website using Zyro any difficult. This website offers a great set of customizable templates that is suitable for blog, business, resume, events, and more.

The process of website building is a breeze. All you need to do is pick a template, customize it, use the AI tools such as a business name generator, and heatmap to optimize your website for conversions, design a logo, slogan generator, etc., then choose a domain, and voila. You are all set.

Some of the best features of Zyro are:

  • Offers a drag-and-drop editor
  • Plenty of customizable AI tools
  • Comes with eCommerce functionality
  • Offers free hosting, payment gateways, and much more

⇒ Get Zyro

Bookmark – Creates your websites in a few minutes

Bookmark is another popular name in our list of the best AI website builders. It makes use of its AI tool called Aida which helps create a website with just a little input from the user.

This has some similarities with the Wix ADI. Here also, you have to answer a few questions and the Aida AI tool of Bookmark will create a website for you.

The main thing here is that it takes just a couple of minutes (or less) to build a website using Bookmark. This also features a drag-and-drop editor to customize the look of the website as per the client’s needs.

Below are some of the best features of Bookmark:

  • Offers a drag-and-drop editor
  • Generates websites in a few minutes
  • Custom fonts, video background, and other features
  • Access to eCommerce tools and translations

⇒ Get Bookmark

10Web – Create a new WordPress website with AI

Are you looking for an AI website builder that can not only help you create a new website but also easily migrate your old website, then 10Web has all the answers.

With AI tools such as business name generator, marketing strategy generator, web design tool, and SEO tool, you can use 10Web to create a high-quality WordPress website with ease.

With the integration of WordPress, you get the power of deeper customization. This tool is generally for advanced users looking to create a website for their business or profession.

Some of the key highlights of 10Web are:

  • Creates real-time backups of your website
  • Lets you easily migrate your old website
  • Offers advanced security for your websites
  • Plenty of AI tools on offer

⇒ Get 10Web

Framer AI – Create your website using a single text prompt

One of the best AI website builders that you can try is Framer AI. This website has a uniqueness among other AI website builders, i.e., it creates a website from a single text prompt.

Just type in what kind of website you need and let the Framer AI do the magic. The AI will also produce multiple results, which you shuffle across and choose the one that suits your needs.

You can mix and match all the website elements such as fonts, color palettes, display fonts, etc. and change the look and feel of your website.

Here are some of the key highlights of Framer AI:

  • Generates a website from a single prompt
  • Gives you customizable elements to tweak
  • Unlimited AI generations and free templates
  • Lets you design flexible layouts and dynamic content

⇒ Get Framer AI

That is it from us in this guide. We have a guide that lists down some of the best AI websites that you should check out in 2023.

Feel free to let us know in the comments below, whch one of the above AI tools you used to create your own website.

This Interaction Failed Discord Error: How to Fix It

Discord has gained immense popularity as a go-to platform for communication among gamers, communities, and professionals.

However, encountering errors like This interaction failed in Discord can be frustrating and hinder your experience.

In this guide, we will explore the causes behind the issue and provide you with some effective methods to troubleshoot and resolve it promptly.

What causes This interaction failed error on Discord?

There could be various reasons for this error to occur; some of the common ones are mentioned here:

  • Server issues – If Discord servers are unavailable or experiencing problems, you may encounter This interaction failed or or even Discord Error 1105. Check the server status before doing anything else.
  • Network connectivity – Poor or unstable internet connection can lead to communication errors like these on Discord. Check your internet connection.
  • Discord server permissions: If you don’t have the necessary permissions to perform certain actions or interact with specific features, you may encounter an error message.
  • Outdated Discord client – An outdated Discord application can lead to compatibility issues and errors. Ensure Discord is updated to the latest version.
  • Cache and local data – Accumulated cache and temporary files can sometimes cause conflicts and errors within the Discord application. Try clearing the cache and local data to fix the issue.

Now that you understand the causes of the problem let us check the solutions to fix it.

How can I fix This interaction failed error on Discord?

Before engaging in advanced troubleshooting steps, you should consider performing the following checks:

  • Check the Discord server status
  • Restart Discord, your computer, and the router to refresh the connection.
  • Ensure your internet connection is stable.
  • Disable third-party overlays.
  • Contact the server administrator or a moderator to verify your permissions.

Once you have checked all these things, move to the detailed solutions to resolve the issue.

1. Update the Discord app

  1. Press the Windows key, type Discord, and click Open.Open Discord app this interaction failed
  2. Once the app is launched, either press Ctrl + R or go to the System tray, right-click Discord, and select Check for updates.Check for updates
  3. Discord will connect to the server and check for updates.

2. Disable the Proxy server

  1. Press Windows + I to open the Settings app.
  2. Go to Network & Internet, and click Proxy.This interaction failed discord Network & Internet, and click Proxy.
  3. Under Manual proxy setup, locate Use a proxy server, click Edit.click edit
  4. On the Edit proxy server window, toggle off the switch under Use a proxy server.
  5. Click Save.Edit proxy server window
  6. Also, ensure the Automatic detect settings option is turned off. Automatic detect settings
  7. Once done, close the Settings window.

These steps will turn off the proxy settings on your Windows and allow your device to connect directly to the internet without going through a proxy server.

3. Clear Discord cache and local data

  1. Close the Discord app, then press Windows + R to open the Run window.%appdata% and click OK
  2. Type %appdata% and click OK to open the Application data folder.
  3. Locate the discord folder, select it, and click Delete.Delete discord
  4. Open the Run console again, type %localappdata%, and click OK to open the Local folder.This interaction failed discord %localappdata%, and click OK.
  5. Look for the Discord folder, select it, and click the Delete button.Delete discord
  6. Restart your computer to save the changes.

4. Disable hardware acceleration

  1. Press the Windows key, type Discord, and click Open.User Settings.
  2. Click the gear icon next to your profile picture to open User Settings.
  3. Under App Settings, Choose Advanced from the left pane.Choose Advanced
  4. Scroll down to the Advanced section and turn off the toggle for Hardware Acceleration.
  5. On Change Hardware Acceleration, click Okay to confirm.This interaction failed discord Change Hardware Acceleration
  6. Restart Discord and check if the issue persists.

5. Reinstall the Discord app

  1. Press the Windows key, type control panel, and click Open.Control Panel start menu This interaction failed discord
  2. Select View by as Category and click Uninstall a program.View by as Category and click Uninstall a program
  3. On the Programs and Features window, select Discord and click Uninstall.Uninstall Discord
  4. Go to Discord’s official website and click Download for Windows to download the app.Download for Windows
  5. Double-click the downloaded file to initiate the installation.
  6. Follow the onscreen instructions to complete the process.

By following these steps, you should be able to resolve the This interaction failed error on Discord and enjoy uninterrupted communication on Discord.

If nothing worked for you, it could be an account-specific problem; we advise you to contact the Discord support team for further assistance.

If you are facing issues like Discord not opening on your Windows, we recommend you check out this guide to find quick solutions.

Please feel free to give us any information, tips, and your experience with the subject in the comments section below.

Rog Ally Won’t go Into Tablet Mode? Here’s What you can do

Rog Ally, the new Windows 11 handheld device from Asus, has been enjoying commercial and critical success. The device runs Windows 11 on it, and you can play games such as Elden Ring, Minecraft, and much more in the comfort of your own hands.

Since it’s running Windows 11, the device can be prone to vulnerabilities and bugs that often come with this operating system. For protection and viruses, Microsoft Defender should do the trick.

However, for the bugs and all those issues, we need to go into detail. For example, a Reddit user found out that Rog Ally defaulted back to standard Windows 11 and no longer had tablet mode turned on.

If that happens, you should know there is a solution. It’s quite simple, and you can do it in a couple of minutes.

Here’s what you should do to get your Rog Ally on tablet mode again

Firstly, it seems that for a certain reason, the Windows 11 on Rog Ally disables the display drivers, and that causes the Rog Ally to turn the tablet mode off.

So you need to enable them again, and that should fix the problem.

  1. Search for Device Manager and select it.
    rog ally not switching to tablet mode
  2. Once you’re there go to Display and select it.
  3. You should see the AMD display driver there and you need to right-click it and re-enable it
  4. And that’s it. Your Rog Ally should be just fine now.

You can also try to update your Windows on your Rog Ally. Several users also reported that the update did the trick of fixing the tablet mode issue.

But you should try both of these solutions if one of them doesn’t work. However, several users reported this issue and said that re-enabling the display driver did the trick.

Users who also experience connectivity problems on similar handhelds can follow this guide to fixing Xbox Ally X Wi Fi issues for more detailed troubleshooting steps.

So next time you’re dealing with this issue, take into consideration both the display drivers and the Windows 11 updates. And let us know in the comments section below if these solutions worked for you.

Here’s how a conversation between ChatGPT and Bing looks like

Have you ever wondered what a conversation between ChatGPT and Bing would look like? A Reddit user has actually put the two AI models face-to-face (well, virtually) and tested their communication abilities. And the result is quite an intellectual effort, which makes sense. They’re both highly trained and performant models.

Apparently, the models were kind to each other, and the discussion was more than interesting. Which again, makes sense. Bing, for example, can give its own input on images to upload to the chat. It can also come up with creative short-form content, such as images, and texts.

You can read the whole conversation here.

I was curious about how these two different AIs would communicate with each other. Initially I had proposed the idea to Bing AI who wasn’t too keen on the idea, but ChatGPT was all for it, so I went ahead and tried anyways. They ended up talking about their different methods in assisting users, and wrote a poem. I was honestly super touched by how kind they were to each other, this was such a wholesome conversation.

This is how a conversation between ChatGPT and Bing sounds like

Since Bing AI is not trained to chat with another AI, the user simply forwarded Bing’s reply to ChatGPT, and Chat GPT responded.

Here are some screenshots from the conversation.conversation between chatgpt and bing

As you can see, the user first laid the ground for the conversation. Then, it acted as Bing on ChatGPT.

Acting as Bing, the two AI models engaged in a very friendly and deep conversation about their nature, and their scope. And especially their goal to help us.conversation between chatgpt and bing

As you can see, they’ve even written a poem together. Ultimately, they thanked each other and they learned from each other how to efficiently work together.

What do you think about this? It is cool or uncanny? It can be both, but that’s AI to you. Let us know your opinion in the comments section below.

Can You Merge Two SSD Drives Without Losing Data?

SSD drives offer fast performance and reliable storage solutions, and combining multiple drives can provide even greater storage capacity and efficiency.

However, merging SSD drives may raise concerns about data loss and potential complications.

This guide will explore proven methods and techniques to merge SSD drives while ensuring your data’s safety seamlessly.

Can you merge two SSD drives without losing data?

Combining two SSD drives without losing data is possible, but not without using a reliable third-party tool.

However, if you don’t have any data on one of the drives or already have a backup, there are other options to do so. Here, we have listed all the options that you can use to merge SSD drives:

  • Software-based data migration – With a disk cloning tool, you can copy all the data, including the operating system, files, and partition & create a replica of one SSD drives onto the other.
  • RAID configuration – This method combines the storage capacity and improves performance but may require reformatting the drives, resulting in data loss. Back up your data before using it.
  • Storage Spaces – This in-built Windows feature allows you to create a virtualized storage pool using multiple physical drives. However, you may lose the data.
  • Dynamic Disk Spanning – Another Windows feature that lets you extend the existing partition onto the second SSD drive but at the cost of your data.

Now that you know that you can merge SSD drives without losing data, let us check out the methods, including Windows’ built-in features.

How can I merge two SSD Drives?

Before are some prerequisite checks you need to perform below following any of the methods mentioned below:

  • Back up your computer data to avoid any potential loss.
  • Ensure the combined capacity of the two SSD drives is large enough to accommodate the data from both drives.
  • Make sure both drives are connected properly before using any of the methods.
  • Verify the compatibility of both SSD drives and the merging method you plan to use.
  • Check if some unallocated space is available.

Once you have checked these, let us move to the actual techniques to get this done.

1. Use Storage Spaces

  1. Press the Windows key, type control panel, and click Open.Control Panel start menu merge two SSD drives
  2. Select View by as Category and click System and Security.System and security
  3. Click Storage Spaces.Stoage spaces
  4. Now click Create a new pool and storage space.Create a pool
  5. Click on Yes on the UAC prompt.
  6. Select the disks you want to create a pool and click Create pool.
  7. Under Resiliency, for the Resiliency type, choose Simple (no resiliency).
  8. Click Create storage space.Create storage space two SSD merge

Once done, a partition with a capacity equal to the total capacity of the two SSD drives combined will appear.

2. Use the Disk Management tool

Note icon NOTE
This process requires converting the drives to dynamic disks, which may limit compatibility with other operating systems or devices. Also, you need to delete data from one of the drives available.

1. Convert the basic disk to dynamic

  1. Press Windows + R to open the Run dialog box.Disk Management Run command two SSD drivers merge
  2. Type diskmgmt.msc and click OK to open Disk Management.
  3. Right-click the disk and choose the Convert to Dynamic Disk option from the context menu.Convert to Dynamic Disk
  4. On the next window, select both disks and click OK.Disk 1 click OK
  5. On the Disk Management warning window, click Yes to confirm the action.

2. Extend the disk

  1. Right-click on the drive and select Delete Volume to delete the data. Choose the drive which has little or no data on it.Delete volume Merge Two SSD Drives
  2. Click Yes to confirm. The drive will become unallocated.
  3. Now, right-click the second drive you want to extend and click Extend Volume.
  4. On the Extend Volume Wizard page, click Next.
  5. Under the Available section, select the Disk from which you deleted the data, click Add, then Next.Click Add, then NEXT
  6. Click Finish to complete the process.

Similarly, you can merge unallocated space in Windows 11 to utilize the entire storage on the drive.

3. Use a third-party tool

  1. Download & install the EaseUS Partition Master tool from the official website.Download Partition Master merge SSD drives
  2. Launch the tool and click Disk Converter.
  3. Select Disk 1 and choose Convert Basic to Dynamic option and click Convert. Repeat the same process with the second disk.Convert disk to dynamic
  4. Right-click the disk you want to extend and click Resize/Move.Resize
  5. On the Resize/Move window, use your mouse to drag the partition panel to the left or right side to get the desired outcome.Drag the slider and click OK
  6. Click Execute 1 Task and then Apply.Apply merge SSD drives

If you are concerned about your data but don’t have space or time to back it up, then it is advised to use a third-party tool like EaseUS Partition Master.

Before proceeding with any method, backing up your data to ensure its safety is crucial. However, if you want to merge your SSD drives without it, you must use a third-party partition tool.

If you are looking for ways to merge two or more partitions on Windows 11, we recommend you check out this informative guide to find the accessible methods.

Please mention any questions or suggestions about the methods mentioned in the comments section below.

509 Bandwidth Limit Exceeded: How to Fix This Error

Whether you are a website owner, developer, or simply encountering a 509 Bandwidth Limit Exceeded error as a user, this guide can help!

We will delve into the causes of this error and discover effective strategies to fix it promptly, ensuring uninterrupted access and smooth user experiences.

What causes the 509 Bandwidth Limit Exceeded error?

The 509 Bandwidth Limit Exceeded error occurs when a website or online service surpasses its allocated bandwidth limit. Several factors can contribute to this error, including:

  • Sudden traffic spikes – A significant influx of visitors to a website can quickly consume the available bandwidth, leading to this error.
  • Insufficient hosting resources – If the hosting plan or server infrastructure is not adequately provisioned to handle the website’s traffic demands, it can limit bandwidth.
  • Inefficient website design or coding – Poorly optimized website code, inefficient scripts, or excessive server resource use can increase bandwidth usage, leading to errors.
  • Bot traffic or DDoS attacks – Malicious bots or DDoS attacks can flood a website with overwhelming requests, causing rapid bandwidth consumption, hence the error.
  • Bandwidth restrictions by hosting provider – If the website exceeds the allocated bandwidth quota imposed by hosting providers, the 509 error may occur.

Now that you know the potential causes let us check out the solutions to deal with it.

How can I fix the 509 Bandwidth Limit Exceeded?

Before engaging in advanced troubleshooting steps, you should consider performing the following checks:

  • Check your hosting plan and upgrade it if needed.
  • Evaluate your website’s design, code, and content to ensure they are optimized for efficient delivery.

Once checked, move to the detailed solutions to fix the error.

1. Employ Content Delivery Network (CDN)

If you have already upgraded the plan and still getting the issue. Then, you must implement a CDN to distribute your website’s content across multiple servers in different geographical regions.

It can reduce bandwidth usage by serving static files from the nearest server to the user, offloading traffic from your primary server.

2. Bandwidth monitoring and traffic analysis

Bandwidth monitoring and traffic analysis

You need to use tools and analytics to monitor your website’s bandwidth usage and analyze traffic patterns. This helps you identify peak usage times, traffic sources, and potentially malicious activities.

With this information, you can make informed decisions to optimize your bandwidth allocation.

3. Compress and optimize files

The compression techniques such as GZIP or deflate can reduce the size of files transferred over the network, significantly decreasing bandwidth usage, particularly for text-based resources like HTML, CSS, and JavaScript files.

4. Implement caching

You can temporarily store static content through browser caching and server-side caching mechanisms. This can help you fulfill the subsequent requests from the cache rather than consuming additional bandwidth.

5. Content prioritization

One of the crucial steps is to identify the most critical content on your website and prioritize its delivery.

This will ensure that essential elements are accessible even if bandwidth limits are reached, improving the user experience.

6. Prevent Bot traffic and DDoS attacks

Prevent Bot traffic and DDoS attacks - 509 Bandwidth Limit Exceeded error

Another essential measure to reduce bandwidth consumption is mitigating bot traffic and protecting against DDoS attacks. You can implement firewalls, rate-limiting, or specialized security services to filter out malicious traffic.

Implementing these strategies can effectively mitigate the 509 Bandwidth Limit Exceeded error and optimize your website’s performance and accessibility.

Also, regular monitoring and proactive management of bandwidth usage will help ensure a smooth experience for your website visitors.

Please feel free to give us any information, tips, and your experience with the subject in the comments section below.

What is Event ID 4103 & How to Quickly Fix It

Event ID 4103 is an error message commonly associated with PowerShell in Windows operating systems. Encountering this error can be frustrating, as it indicates an underlying issue that requires attention.

In this article, we will delve into the details of this event, providing you with a clear understanding of its implications and, most importantly, offering actionable steps to resolve PowerShell-related issues quickly.

What is Event ID 4103?

Event ID 4103 is an informational event that appears when a command is invoked. It is related to the Microsoft-Windows-PowerShell/Operational log and is typically used for monitoring and tracking.

Monitoring the Event ID allows administrators to track the usage of PowerShell commands, identify potential misuse or unauthorized activity, and investigate any issues or errors that may arise during command execution.

By analyzing the event logs, administrators can gain insights into the commands executed, the users responsible, and any associated errors or warnings.

What causes the Event ID 4103?

There could be various reasons for this Event ID; some of the common ones are:

  • Execution policy restrictions – PowerShell has execution policies that control the level of script execution allowed on a system. If the execution policy is set too restrictively, it can trigger this event.
  • Corrupted or incompatible modules – Modules are an essential component of PowerShell; providing additional functionalities and incompatible modules can lead to conflicts & trigger the issue.
  • Insufficient permissions – If the user running PowerShell does not have sufficient permissions, it can result in Event ID 4103 errors, restricting certain operations.

Now that you know the causes of the Event ID, let us check out the solutions to fix it.

What can I do if Event ID 4103 appears on Event Viewer?

Before engaging in advanced troubleshooting steps, you should consider performing the following checks:

  • Ensure Windows PowerShell is up to date.
  • The Windows OS has no pending updates.
  • Check the scripts for syntax errors, incorrect command usage, or problematic content.
  • Verify the user’s access rights to the relevant resources and adjust permissions if needed.
  • Check Group Policy settings or other system configurations.

Once checked, move to the methods mentioned below to tackle this event ID.

1. View the event details

  1. Press the Windows key, type event viewer, and click Open.Event Viewer Open Event ID 4103
  2. Navigate to this path: Windows Logs\Application
  3. From the right pane, locate and select Event ID 4103.
  4. Click General and then Detail to check the details to understand the origin of the event.4103 Event

Understanding the specific information can provide insights into the underlying cause of the event.

2. Check the PowerShell Execution policy

  1. Press the Windows key, type powershell, and click Run as administrator.Windows PowerShell Event ID 4103
  2. Copy & paste the following command to verify the current execution policy settings and hit Enter: Get-ExecutionPolicySet Execution Policy
  3. If the policy is on highly restrictive level, type this command to adjust it to a more permissive option and press Enter: Set-ExecutionPolicy

This step will be helpful for administrators to adjust the permission level to allow users to execute commands using PowerShell successfully.

So, the key is to understand the event details and analyze the context in which it occurs. Once you know the reason, you can effectively diagnose and address the underlying issue to ensure smooth PowerShell operations.

If you want to know more about the Event Viewer and how to use it to identify the problems & errors appearing on your device, we recommend you check out this guide.

And if you came across Event ID 158, the highlighted guide will help you with step-by-step instructions to deal with it.

Please feel free to give us any information, tips, and your experience with the subject in the comments section below.

0xc004f015 Activation Error: How to Quickly Fix it

Activating the OS is vital for a complete experience and not to miss out on features. But activation errors come in the way! Usually easy to troubleshoot, these sometimes can prove challenging, especially the 0xc004f015 activation error in Windows.

Activation errors are relatively uncommon and appear only when there’s a major problem with the OS or an issue at the user end. So, let’s learn about the error, the underlying causes, and what worked for other users!

What is 0xc004f050 in Windows 10 activation?

The error, when encountered on Windows Server 2012 R2, basically indicates that a Windows 10 KMS host product key was used for the activation. You can also check the error logs and find it listed as Event ID 12290.

For other editions of the OS, here are the primary reasons the 0xc004f015 activation error appears:

  • Using incorrect product key: When entering an incorrect or invalid product key, you will get an activation error.
  • Corrupt system files: If the system files are corrupt, it would lead to issues activating Windows amongst a host of other problems and trigger an error.
  • Issues with the disk: Sometimes, problems with the disk or a bad sector can trigger the 0xc004f015 activation error in Windows 7.
  • Changes to the hardware: Many users reported the problem after making upgrades to the hardware, which is a likely reason, and the built-in troubleshooter should help.

How do I fix error code 0xc004f015?

Before we start with the slightly complex solutions, try these quick ones first:

  • Make sure the product key entered is valid and correct. Often re-entering the key a few more times helps.
  • Verify that the PC is connected to a stable network and that the Internet speed is fast.
  • Try again in some time, probably a few hours or even a day, in case the activation servers are facing issues.

If none work, move to the fixes listed next.

1. Run the activation troubleshooter

  1. Press Windows + I to open Settings, and click on Activation on the right in the System tab.activation settings
  2. Now, run the Activation Troubleshooter from this screen. The option is only available when running an unactivated copy of Windows.

When faced with an error in Windows, your primary approach should be to run the dedicated troubleshooter. It identifies any known issues and automatically fixes things. If that latter is not possible, it will at least list the underlying cause.

2. Repair the corrupt system files

  1. Press Windows + R to open Run, type cmd, and hit Ctrl + Shift + Enter.cmd
  2. Click Yes in the UAC prompt.
  3. Paste the following commands individually and hit Enter after each to run DISM:DISM /Online /Cleanup-Image /CheckHealth DISM /Online /Cleanup-Image /ScanHealth DISM /Online /Cleanup-Image /RestoreHealth
  4. Now, execute the following command for the SFC scan: sfc /scannowsfc scan to fix 0xc004f015
  5. Once done, restart the computer for the changes to come into effect.

When repairing corrupt system files to fix 0xc004f015, running the DISM tool and SFC scan often help by replacing any corrupt files with the cached copy stored on the PC. Besides, it will look for issues with the Windows image and rectify that.

3. Run the Check Disk tool

  1. Press Windows + S to open Search, type Command Prompt in the text field, and click on Run as administrator.
  2. Click Yes in the prompt.
  3. Paste the following command and hit Enter to run Check Disk:chkdsk /rcheck disk to fix 0xc004f015
  4. If asked to schedule a scan, press Y and then hit Enter.schedule scan
  5. Now, restart the computer and wait for Check Disk to run.

Check Disk is a built-in utility that identifies issues with the drive, including bad sectors, and tries to fix them. Besides, even if it doesn’t help with the error, the PC should perform better after running the utility.

4. Repair the tokens.dat file

  1. Run Command Prompt with administrative privileges.
  2. Paste the following commands one at a time, and hit Enter after each:net stop sppsvc cd %windir%\ServiceProfiles\LocalService\AppData\Local\Microsoft\WSLicense ren tokens.dat tokens.bar net start sppsvc cscript.exe %windir%\system32\slmgr.vbs /rilccommands
  3. Finally, restart the computer for the changes to apply.

The tokens.dat file stores critical data pertaining to Windows activation, and issues with it, particularly file corruption, can lead to the 0xc004f015 activation error. The commands listed earlier will repair the tokens.dat file.

For those interested, the tokens.dat file is listed in the following directory:C:\Windows\System32\SPP\Store\2.0.

5. Perform a repair upgrade

Tip icon Tip
The steps listed below are for Windows 11. To perform a repair upgrade on Windows 10, you must download the Media Creation tool.
  1. Go to Microsoft’s official website, choose the product language and ISO edition, and then download the Windows 11 ISO.windows 11 iso
  2. Go to the Downloads folder, open the ISO file, and run setup.exe.
  3. Click Yes in the prompt that appears.
  4. Click on Next to continue.
  5. Now, click Accept to agree to Microsoft’s license terms.accept
  6. Make sure the setup reads Keep personal files and apps, and click on Install at the bottom to start the repair.repair upgrade to fix 0xc004f015

The in-place upgrade may take a few hours to complete, but once it is, the 0xc004f015 activation error in Windows 11 should be fixed. Besides, the personal files or installed apps remain unaffected after the process.

In case nothing listed here works, we recommend you contact Microsoft support, get in touch with an executive, and manually activate your copy of Windows.

Before you leave, do check some quick tips to make Windows run faster and get superior performance.

For any queries or to share more solutions with us, drop a comment below.

What is Bloom.exe & How to Quickly Get Rid of It?

Bloom.exe is a malicious adware with a nasty motive of tricking the user to access suspicious websites. The dangerous application accidentally gets downloaded along with the freeware when you download them from untrusted websites.

The adware is infamous for bombarding your PC with misleading advertisements which redirect you to shady websites and infect your computer with malware. 

How does bloom.exe harm your computer? 

Bloom.exe is quite well hidden and doesn’t show any symptoms late until the infection has spread profusely. However, some of the symptoms that may appear after the PC has been badly affected are: 

  • Annoying pops and ads when browsing web pages. 
  • Automatically redirect to harmful websites like software downloads, web games, and more.
  • Bloom.exe process runs in the background consuming much of the system resources. 
  • Damage or modification of system files along with other malicious activities. 

Now that we are aware of the harm which can occur due to the bloom.exe file, let’s check out the ways to fix it.

How do I remove bloom.exe from my computer?

Before you proceed to the solutions listed below, make sure you have performed the following actions: 

  • Search for the instances of bloom.exe on your drive using File Explorer and delete each one of them one at a time. 
  • Run malware and antivirus scans on your computer using Windows Defender or a third-party antivirus. 
  • Uninstall the suspicious apps which you do not remember downloading especially around the time when your computer started behaving erratically. 

If the infection is not properly removed, you should try these dedicated solutions. 

1. Boot your PC in safe mode

  1. Hold down the power button for a few seconds until your computer powers off completely. 
  2. Hit the Power button again to restart it and quickly power it off by pressing and holding down the Power button.
  3. Repeat the same process until you reach the Automatic Repair screen. bloom.exe
  4. Select and press the Advanced options button to initiate the automatic repair process. 
  5. Choose Troubleshoot option from the next window. bloom.exe
  6. Click the Advanced options option. bloom.exe
  7. Select Startup settings from the Advanced options window.
  8. Press the F5 key to choose Safe Mode with Networking from the list of safe mode variants. 

When in Safe mode, your computer will function in a basic state with only essential drivers, folders, and apps. When in safe mode, try the troubleshooting methods lined up below to remove bloom.exe and other malicious software from your PC. 

2. Repair the damaged system files 

  1. Press the Windows key to launch the Start menu, type cmd in the search box on top and select the Run as administrator option from the result section. bloom.exe
  2. Click the Yes button on the User Account Control prompt window.
  3. Type or paste the following command and hit the Enter key to initiate the SFC scan. sfc/scannow
  4. After the verification is 100% complete message appears, type or paste the following command and hit Enter. DISM /Online /Cleanup-Image /RestoreHealth bloom.exe
  5. Wait for the SFC and DISM scan to finish, restart your PC, and see whether or not the problems due to the bloom.exe file subside. 

3. Remove bloom.exe from the web browser 

3.1 Uninstall suspicious extensions 

  1. Launch the Chrome browser on your Windows PC and click the Menu icon (three dots) on the top right corner to bring up the drop-down menu bar. 
  2. Select the More tools option from the list of options and then Extensions from the sub-menu. bloom.exe
  3. A list of all the extensions installed on your browser will open up. Look for suspicious-looking extensions and press the Remove button assigned to it. bloom.exe
  4. A confirmation window will appear on the screen. Press the Remove button once to continue. 

The malicious bloom.exe file might have been transferred via potentially harmful extensions downloaded automatically from shady sources. Removing such shady extensions might be of some help in completely removing the bloom.exe virus from your computer.

3.2 Reset the browser 

  1. Launch the Chrome browser on your computer. 
  2. Click the Menu icon (three dots) located in the top right corner and select the Settings option from the drop-down menu. bloom.exe
  3. Switch to the Reset settings from the left navigation window. 
  4. Click the Restore settings to their original defaults options button present under the Reset settings section. bloom.exe
  5. A warning will pop up. Press the Reset settings button to confirm the action. 

4. Remove trojans from the Windows registry

Note icon NOTE
Create a backup of your Windows registry before implementing the step-by-step process listed below.
  1. Use the Windows + R shortcut to launch the Run dialog box, type the following command in the command line and press Enter. regedit
  2. Navigate to the following paths via the address bar one by one to directly access the Run and RunOnce key. HKEY_CURRENT_USER/Software/Microsoft/Windows/CurrentVersion/Run HKEY_LOCAL_MACHINE\Software\Microsoft\Windows\CurrentVersion\Run HKEY_LOCAL_MACHINE\Software\Microsoft\Windows\CurrentVersion\RunOnce HKEY_CURRENT_USER\Software\Microsoft\Windows\CurrentVersion\RunOnce
  3. You can access them by opening the Windows registry editor and deleting any values, created by Bloom.exe there. This can happen by following the steps underneath:
  4. Look for some suspicious keys created by Bloom.exe such as OUzzckky, I-WORM.LEE, VBS/VBSWG.AQ@mm, in these locations, and if you find any, right-click them and choose Delete from the context menu. bloom.exe
  5. Exit the registry editor window and restart your PC normally after deleting the suspicious subkeys. 

Bloom.exe virus may replicate into other virus names such as I-WORM.LEE, VBS/VBSWG.AQ@mm within these locations. Deleting these keys necessary to stop them from causing any further harm. 

That’s all about it! Hopefully, you were successful in removing the bloom.exe virus from your PC. You might also be interested in removing the itibiti.exe virus if it has bothered you lately. 

In case you need more assistance in this regard, feel free to reach out to us in the comments section. 

Bing Chat for all Browsers extension banned by Microsoft

Bing Chat is definitely a very useful tool to have. Microsoft is investing a lot in it, and it shows. The tool is so performant that you can create images with it. Even more, it uses AI to give you input on images that you upload.

You can also create a lot of short-form content with it, from social media posts to short stories and so on. Bing is currently on Edge, and Edge users are loving it.

But naturally, developers have made an extension called Bing Chat for all Browsers. You could install this extension on any browser that you use: Chrome, Safari, Opera One, etc.

However, it seems that the Bing Chat for all Browsers extension will be banned moving forwards.

The developer anaclumos has gotten an email from the Google Legal team, announcing them that the extension infringes Microsoft’s trademarks. Following this, the developer said they’re shutting the extension down.

No more Bing Chat for all Browsers

anaclumos made a statement that reads:

Hi everyone.

Today I got a letter from Microsoft and Google Legal teams that this app infringes Microsoft’s Trademarks, and I should take the app down.

I have considered alternative actions I can take, such as changing the app’s name and logo, but I eventually decided to stop the app’s development. In the end, paired with Microsoft’s recent move (#74), it seems Microsoft really wants to shut down these extensions, and even if I resolve the current issue, it does not feel like MS will stop. Plus, they are already rolling out access from other browsers (source).

Within the next hour to two days, I will shut down the App’s distribution. Feel free to make a fork, but beware, Microsoft will reach out to you if you get too big.

It seems that Microsoft is already thinking about getting Bing Chat to the other browsers as well. So if you like Bing Chat, but you don’t see yourself using Edge, it will be only a matter of time before can experience it on your preferred browser as well.bing chat for all browsers

But the browser giants are already coming up with their own AI tools. Take Opera One, for example, which has built its own AI tool called Aria.

So Microsoft should better make a move fast if it wants to popularize Bing Chat everywhere. It would be a shame not, since the tool is really great on Edge, already.

And for now, if you’re using Bing Chat for all browsers extension, then it will most probably be down in the next few days if it’s not already.

What do you think about it? Let us know your thoughts and opinions in the comments section below.

Tab Key Not Working? How to Enable It & Alternatives

You know, the Tab key. That little key on the left of your keyboard makes it incredibly easy to navigate through everything from web pages to your favorite text editor. Now picture it not working! 

You can still get out of your browser window or text editor but with a little more effort. Luckily, there are plenty of ways to enable the tab key and make it work as expected again. Some methods are better than others, and some might even be faster.

Why isn’t my tab button working?

If you’re pressing the tab key on your keyboard with no response, below are some reasons why it is not working:

  • Broken key – If you have been using your laptop for a while and the tab button on your keyboard is not working, it could be that the button itself has been damaged or broken.
  • You’re using an unsupported app – Some apps don’t support the tab button and will ignore it when you tap on it.
  • Faulty update – Sometimes, Windows releases software updates that tamper with some functions. A section of users claims the problem of the tab key not working began shortly after updating Windows.
  • Wrong keyboard layout – If you’re using a different keyboard layout or changed your layout than what’s set as your default, then this could be causing the problem.
  • Incorrect keyboard settings – If you have recently changed your keyboard settings, then it might be possible that they are not configured properly, and hence the tab button is not working as expected.
  • Hardware problem – If there is an issue with any hardware within your system, such as a damaged cable or even a broken switch, it will result in an unresponsive tab key.
  • Dead batteries – The battery may be dead on your wireless keyboard, causing the tab key not to work.
  • Incompatible drivers – If you’ve updated your OS recently, your keyboard drivers may have become obsolete hence not responding when you press the tab key.

How do I enable the tab key on my keyboard?

Perform the following preliminary steps before moving to the fairly advanced solutions below:

  • Check to see if something is stuck under your key that could be blocking the movement of the tab key.
  • If you’re using a wireless keyboard, ensure the USB receiver is securely plugged in and turned on.
  • Check whether your keyboard batteries are full and recharge if necessary.
  • Uninstall recent Windows updates.
  • Start your PC in Safe Mode and check whether the tab key works.
  • Finally, try rebooting your computer. This can often fix simple problems like this one.

1. Run the Hardware and Devices troubleshooter

  1. Hit the Windows key, type cmd, and select Run as administrator.cmd-run-admin-w11 unexpected kernel mode trap windows 11
  2. Type the following command and hit Enter: msdt.exe -id DeviceDiagnostic
  3. In the Hardware and Devices dialog that appears, click Next.
  4. The tool will start scanning for any problems with your hardware and recommend a fix. After it is done, try again and check if the error persists.

2. Run the keyboard troubleshooter

  1. Hit the Windows key and click on Settings.settings windows 11
  2. Select System, then click on Troubleshooters.Open system troubleshooter
  3. Scroll to Other troubleshooters and click on it.other troubleshooters
  4. Navigate to the Keyboard option and click on the Run button.keyboard-run windows key not working windows 11

3. Update Keyboard drivers

  1. Hit the Windows key, type Device Manager in the search bar, and click Open.device manager w11
  2. Expand Keyboards, right-click on your keyboard, and select Update driver.Update driver to fix windows 11 some keys not working
  3. Select Search automatically for drivers.Search automatically for drivers

The process of installing new drivers is fairly straightforward. However, a third-party tool that does this job automatically is a preferred choice for most users.

Some computers are shipped with drivers that do not support all of the keyboard’s features, and updating them manually won’t help. That’s where Outbyte comes in.

This tool is very easy to use and has a very small memory footprint. It will find outdated, corrupt, or incompatible drivers, then replace them with the right ones.

⇒ Get Outbyte Driver Updater

4. Reinstall keyboard drivers

  1. Click on the Start Menu icon, type Device Manager in the search bar, and click Open.device manager w11
  2. Expand Keyboards, right-click on your keyboard, and select Uninstall device.uninstall device to fix keyboard types wrong characters
  3. Confirm uninstallation in the next prompt.uninstall
  4. Restart your PC, and new drivers will be installed.

If updating drivers didn’t resolve your issue, it’s time to remove old keyboard drivers and reinstall them.

5. Check for Windows updates

  1. Hit the Windows key and click on Settings.settings windows 11
  2. Click on Windows Update and select Check for updates.check-updates-w11 windows 11 blue screen
  3. If available, download and install.

6. Run DISM and SFC scans

  1. Click on the Windows key, type cmd in the search bar, and click Run as administrator.cmd-run-admin-w11 unexpected kernel mode trap windows 11
  2. Type the following commands and press Enter after each one:DISM.exe /Online /Cleanup-Image /Restorehealth sfc /scannow

7. Perform a clean boot

  1. Click on the Start Menu icon, type msconfig, and open System Configuration.
  2. Switch to the Services tab and select Hide all Microsoft services.
  3. Click on the Disable all button, then hit the Apply button to save the changes.
  4. Go back and click on the Startup tab, select Open Task Manager then click OK.
  5. In the Startup tab of the Task Manager, Disable all the Enabled startup items.
  6. Close Task Manager and restart your PC.

What is the alternative key for tab?

Unfortunately, you can perform all the solutions above, and your tab key will still not work. The good news is that many other keys perform the same function as the tab key.

For instance, you can still use the arrow keys to move forward and backward through your form. You can also use the on-screen keyboard, but it can quickly become cumbersome if you have to navigate through lots of cells or tabs.

Keyboard shortcuts or hotkeys also allow you to achieve the same results by performing various actions using just one keystroke instead of several clicks or mouse movements.

You must exercise caution when using hotkeys, as this requires you to edit the registry. If it’s unnecessary, you better stick to other options, like using your phone as a keyboard.

Pass by our other article to find out what to do when the ALT + TAB combo is not working.

That’s it from us, but be sure to let us know of any other solutions that may be missing from our list but were extremely instrumental in helping you solve this issue.

Is Microsoft Rewards going away? Many seem to think so

Microsoft Rewards is one of the platforms that enjoys a lot of popularity amongst Windows users. This platform is rewarding users for doing daily tasks: from surfing the web on Bing to taking quizzes and so on.

And the rewards are good too. Just last week, Overwatch coins were reintroduced to the platform, and many users were happy about it.

Unfortunately, Microsoft Rewards is not available everywhere, but where it is, it’s usually very popular. And while sometimes, it can have a lot of bugs, they get fixed very fast and users are generally happy about it as a whole.

That’s why many users are starting to wonder if Microsoft Rewards is going away. The Redmond-based tech giant has recently laid over 10000 employees, so that means the company is cutting the budget.

So, of course, that one might think Microsoft Rewards will suffer from this as well. But is it a valid question? We’re taking a closer look at the user’s input on the platform to check this issue out.

Is Microsoft Rewards really going away?

A Reddit user has noticed some signs on the Microsoft Rewards platform that led them to believe Microsoft is actually thinking about closing it down.

  1. It seems that this user noticed that the monthly quest on Xbox was lowered from 2,000 points to 1,000 points.
  2. The monthly Game Pass reward was also lowered from 1,000 to 500 in June.
  3. Apparently, Microsoft limited achievements for any Xbox game.
  4. And it seems that the 5-10 point Click on this game to learn more buttons in the Xbox rewards app is becoming less frequent.

However, Microsoft Rewards is a pretty volatile platform. Just recently, some users experienced a bug where their daily streak disappeared from the platform. But not all users were affected, and some of them even reported that the platform works just fine.is microsoft rewards going away

So in this case, many of the points the user noticed might only happen to this user alone. Others in the thread do not agree with it.

Here’s what the users say about Microsoft Rewards

They’re just altering the numbers and highlighting other areas they want people to focus on, spreading the points around instead of all being collected easily in one place I feel.

As someone who has been away from rewards for a couple of years and is just now coming back, I think it is way easier now than it was a couple of years ago. I haven’t seen this or that yet. Weeklies on the console no longer require achievements. This is all good news to me.

Some users also agree that Microsoft Rewards is not going away, at least not for now. The reason? It’s a good way to motivate people to use Bing, which Microsoft is trying to push forward.

Compared to when it first started I feel it is far easier to earn points now than ever before. Seems I can earn 20k or more in a month if I so wished. They may reduce the program but I doubt they’ll wind it down. How else will they get clicks on Microsoft Bing?

Ultimately, you shouldn’t worry about Microsoft retiring Microsoft Rewards. It’s not going anywhere for now, and it most likely won’t be going anywhere in the future as well. On the contrary, some might say Microsoft is pushing it globally, making it available in countries it’s not available currently.

So, rest assured about it, and go collect your rewards. And be sure to let us know your thoughts and opinions on the platform in the comments section below.