Yea, it’s that time of the year again. Wait, just so that we avoid any type of confusion, we’re not actually talking about Easter or Christmas.
It’s the time of the year when all the major software and hardware companies announce their upcoming projects and endeavors.
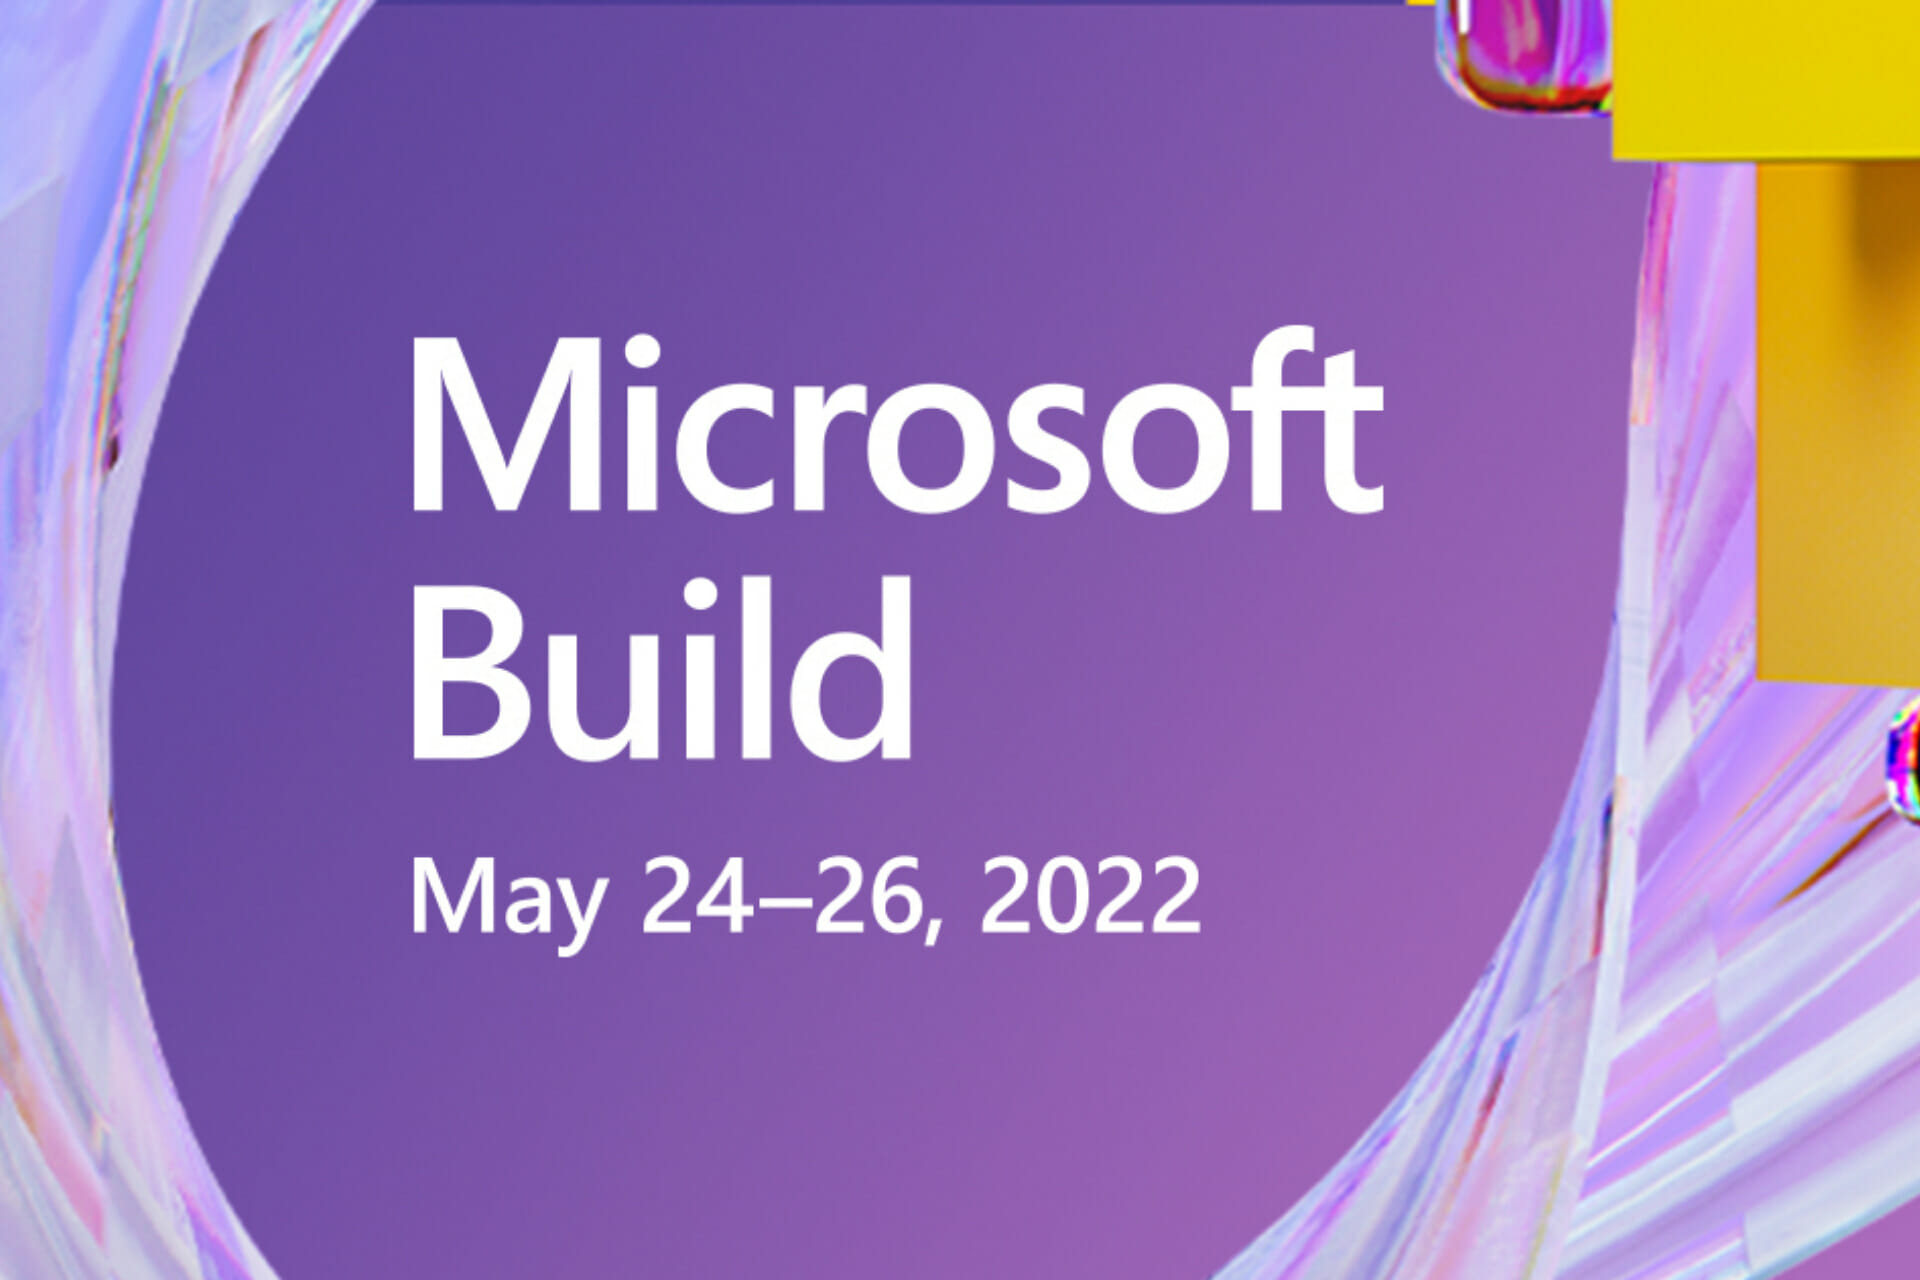
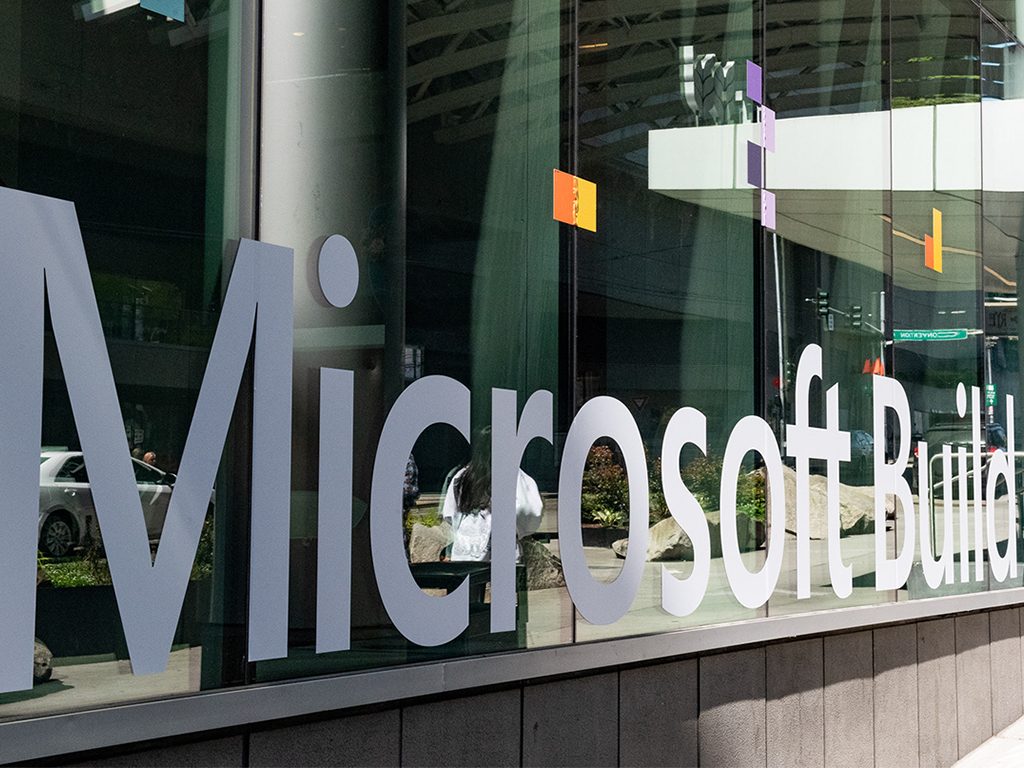
We also covered last year’s Build conference, However, in 2022, Microsoft decided to reveal the dates of its upcoming Build conference first.
Thus, we’re happy to announce that the Microsoft Build 2022 event will go live starting on May 24th, all the way up to May 26th.
Microsoft opened up free registration for everyone interested
As most of you are already familiar with, the Microsoft Build 2022 showcase will be a three-day developer conference.
During these three days, the software giant will unveil its latest developer tools, technologies, and updates for various software products.
In 2020 and 2021, due to the pandemic, Microsoft had to shift from in-person to virtual events. Build 2022 will be exactly the same, as Microsoft apparently is not ready to host a large in-person conference.
It’s only natural for all of us to want to go online, check out this conference, and learn more about the latest dev tools and innovations from the software giant.
Doing so is very easy, as you can quickly register on the official Build website. Yes, registration is now open for everyone and is absolutely free.
The Redmond tech company says Build 2022 will help developers innovate without compromise, develop creatively, and build the next generation of apps for more than one billion devices.
This main event will actually feature 13 speakers from Microsoft, among which Satya Nadella, Kevin Scott, Amanda Silver, Scott Guthrie, Kathleen Mitford, and others.
Of course, all present attendees will get a chance to learn during live sessions and book time with Microsoft experts.
Now, you might be wondering what differentiates Build 2022 from previous developer conferences held by Microsoft is new regional spotlights.
Microsoft strongly aims to provide keynote analysis, trending news, and topics for specific regions, such as France, Germany, Japan, Latin America, and the UK.
You can watch the event live on the official site, but also on YouTube, as it was in previous years as well.
Apple will also host its WWDC 2022 soon enough, on June 6-10. This year’s Worldwide Developer Conference will be an online-only event, the same as Microsoft’s.
Did you already get your front-row virtual invitation to this magnificent tech event? Share your thoughts with us in the comments section below.
Were you expecting another weekly Edge update from the Redmond tech giant? If the answer is yes, then this is exactly up your alley.
Last week, we discussed how build 102.0.1227.0 brought a new management policy to control if the Network Service Sandbox is Enabled.
However, now, Microsoft has released another weekly Edge update for the Dev channel. Version 102.0.1235.1 is now available for all users with an improved Tab Actions menu and a traditional list of bug fixes.
What to expect from Edge Dev build 102.0.1235.1
The 102.0.1235.1 version for Microsoft Edge doesn’t come with an impressive array of new features, but it does bring important changes to the table.
By far, the only visible change is a slightly improved Tab Actions menu that now lets you access tabs from other devices.
Now, the Tab Actions menu offers the ability to enable or disable vertical tabs, tab search, recently closed pages, add tabs to a new collection, and now tabs from other devices.
If you use Edge Stable, you can access tabs from other devices in the History flyout. We know you want to see the entire changelog for the brand new build, so we’re going to provide that for you as well.
Added features:
Added a link to Tabs From Other Devices in the Tab Actions menu.
Enabled support for a management policy from Chromium to control if the javascript engine behavior to Set Timeout Without 1 Ms Clamp is Enabled, which controls if calls to setTimeout() with a 0ms timeout are changed to have a 1ms timeout. Note that updates to documentation and administrative templates may not have occurred yet.
Improved reliability:
Fixed an issue where all tabs crash with an error code: FACILITY_VISUALCPP/ERROR_PROC_NOT_FOUND.
Fixed a crash on mobile when sending feedback.
Fixed an issue where WebView2 apps crash when setting User Data Folder Access options (Issue 2363).
Fixed a crash on Xbox when using Tab Search.
Changed behavior:
Improved how many types of tabs can be put to sleep.
Reduced the number of tabs that are discarded due to memory pressure in certain situations.
Fixed an issue where Tab Search doesn’t work.
Fixed an issue where printing and print preview sometimes doesn’t work.
Fixed an issue where certain search engines can’t be removed from Settings.
Fixed an issue where certain languages aren’t available in Spell Check.
Fixed an issue where IE mode sometimes can’t be enabled or configured.
Fixed an issue in Application Guard windows where downloads are sometimes blocked when they shouldn’t.
Fixed an issue where work/school results don’t appear in the search engine when searching from the address bar.
Mobile:
Fixed an issue where Top Sites can’t be edited because the edit button is too hard to hit.
Fixed an issue where Read Aloud sometimes doesn’t highlight words that it should, or says words that it shouldn’t.
Fixed an issue where the Read Aloud controls sometimes don’t appear in the notification shade.
Known issues:
Users of certain ad blocking extensions may experience playback errors on YouTube. As a workaround, temporarily disabling the extension should allow playback to proceed. See this help article for more details.
Some users are still running into an issue where all tabs and extensions immediately crash with a STATUS_INVALID_IMAGE_HASH error. The most common cause of this error is outdated security or antivirus software from vendors like Symantec, and in those cases, updating that software will fix it.
Users of the Kaspersky Internet Suite who have the associated extension installed may sometimes see webpages like Gmail fail to load. This failure is due to the main Kaspersky software being out of date, and is thus fixed by making sure the latest version is installed.
Some users are seeing “wobbling” behavior when scrolling using trackpad gestures or touchscreens, where scrolling in one dimension also causes the page to subtly scroll back and forth in the other. Note that this only affects certain websites and seems to be worse on certain devices. This is most likely related to our ongoing work to bring scrolling back to parity with Edge Legacy’s behavior, so if this behavior is undesirable, you can temporarily turn it off by disabling the edge://flags/#edge-experimental-scrolling flag.
Be sure to download the correct version of the update, depending on the channel you are currently using Microsoft’s Edge browser on.
Have you updated your Edge browser lately? Share your experience with us in the comments section below.
The Windows Recovery Environment, also called WinRE, is an important tool in the Windows operating system that can help you fix a host of problems in your Windows computers.
In this article, we’ll dig a little deeper into the exact processes of Windows Recovery Environment (WinRE). Let’s get started.
What Is the Windows Recovery Environment (WinRE)?
The WinRE is a handy Windows tool that helps you fix your Windows environment.
“The Windows Recovery Environment (WinRE) is a companion operating system installed alongside Windows 10, typically in a separate partition, that can help with troubleshooting, recovery, or booting from external media, such as a USB stick.
WinRE is also used during the Windows update process to apply updates in specific paths or phases. (This process is sometimes referred to as SafeOS.),” says Aaron Lower from Microsoft.
So, now that we know its function, let’s look at how we can access it.
You can learn more about the underlying environment that WinRE relies on by reading this clear explanation of what Windows PE is, which helps you understand how recovery tools run on your system.
Accessing the Windows Recovery Environment (WinRE)
A peculiar specialty of WinRE is that if you’re facing any problems, the tool will get launched automatically.
However, even if you’re currently not facing any issues with your PC’s working, you can still access the WinRE without any hassles. But, before you get going, make sure that it’s enabled in the first place.
Here’s how you can do that:
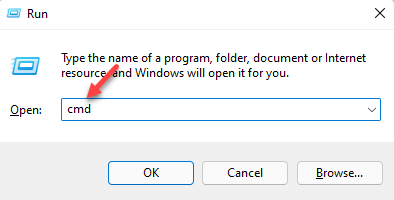
Go to the Start menu search bar, type in ‘cmd,’ and launch the cmd as an administrator.
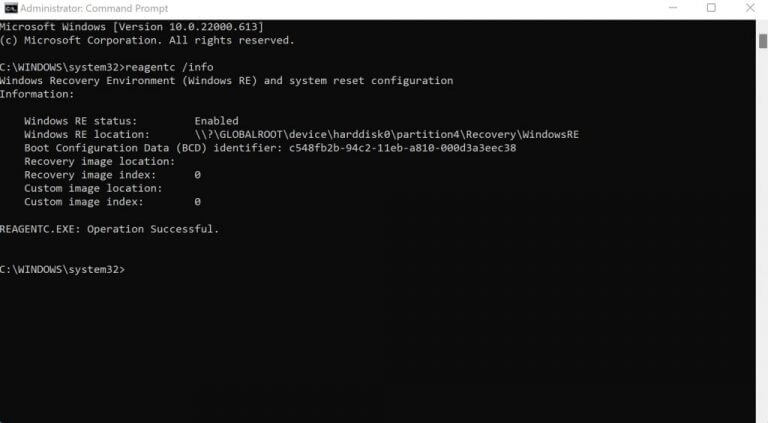
In the cmd, type in the following command and hit Enter: reagentc /info
Check the Windows RE Status. It should be set to enabled. In the case it’s disabled, run the following command below: reagentc /enable
So now that you’ve verified the Win RE status to be enabled, you can get going by launching the WinRE manually.
Here’s how you can launch the WinRE:
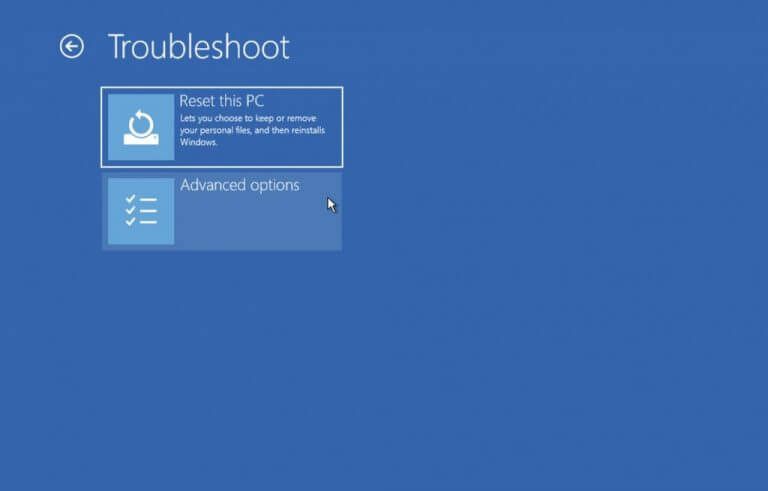
Turn off your PC and the next time you power it on, press the F11 key while you boot into it. However, depending on your PC manufacturer, you might’ve to use press different keys, such as F9 or F12.
Alternatively, you can also boot into WinRE using Windows Settings. Go to the Start menu search bar, type in ‘settings,’ and select the best match. Alternatively, press the Windows key + I.
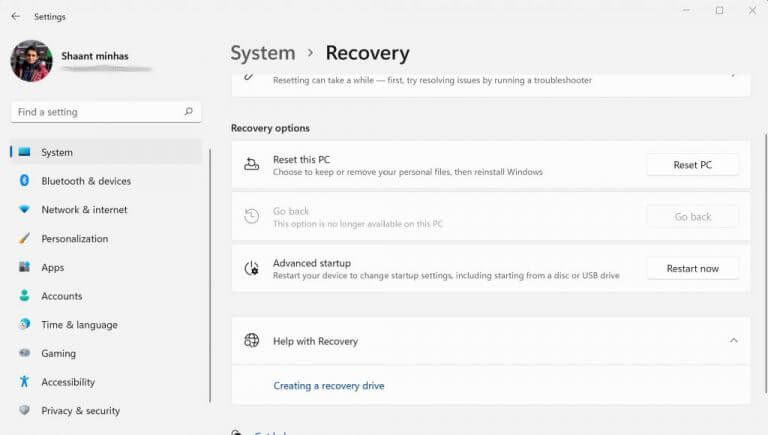
In the Settings menu, click on System > Recovery. Now, from under the Advanced start-up section, click on Restart Now. This will push your computer into a restart and take you straight to WinRE.
Things to do with Windows Recovery Environment
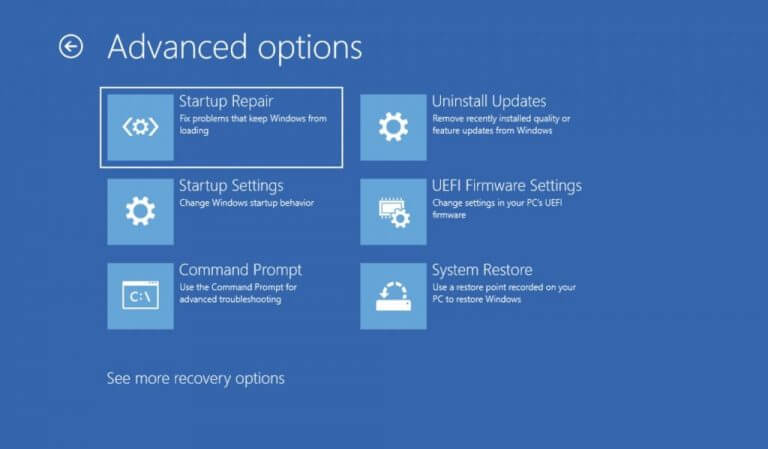
But, what are the exact tools that Windows Recovery Environment has to offer us? Let’s take a look at all the tools we’ve at our disposal.
1. Reset your PC
If your PC has been bogged down for a while now, you can rely on the factory reset through WinRE. Although you can reset your PC through Windows Settings as well, WinRE comes in handy when you’re unable to access your PC.
2. Startup Settings
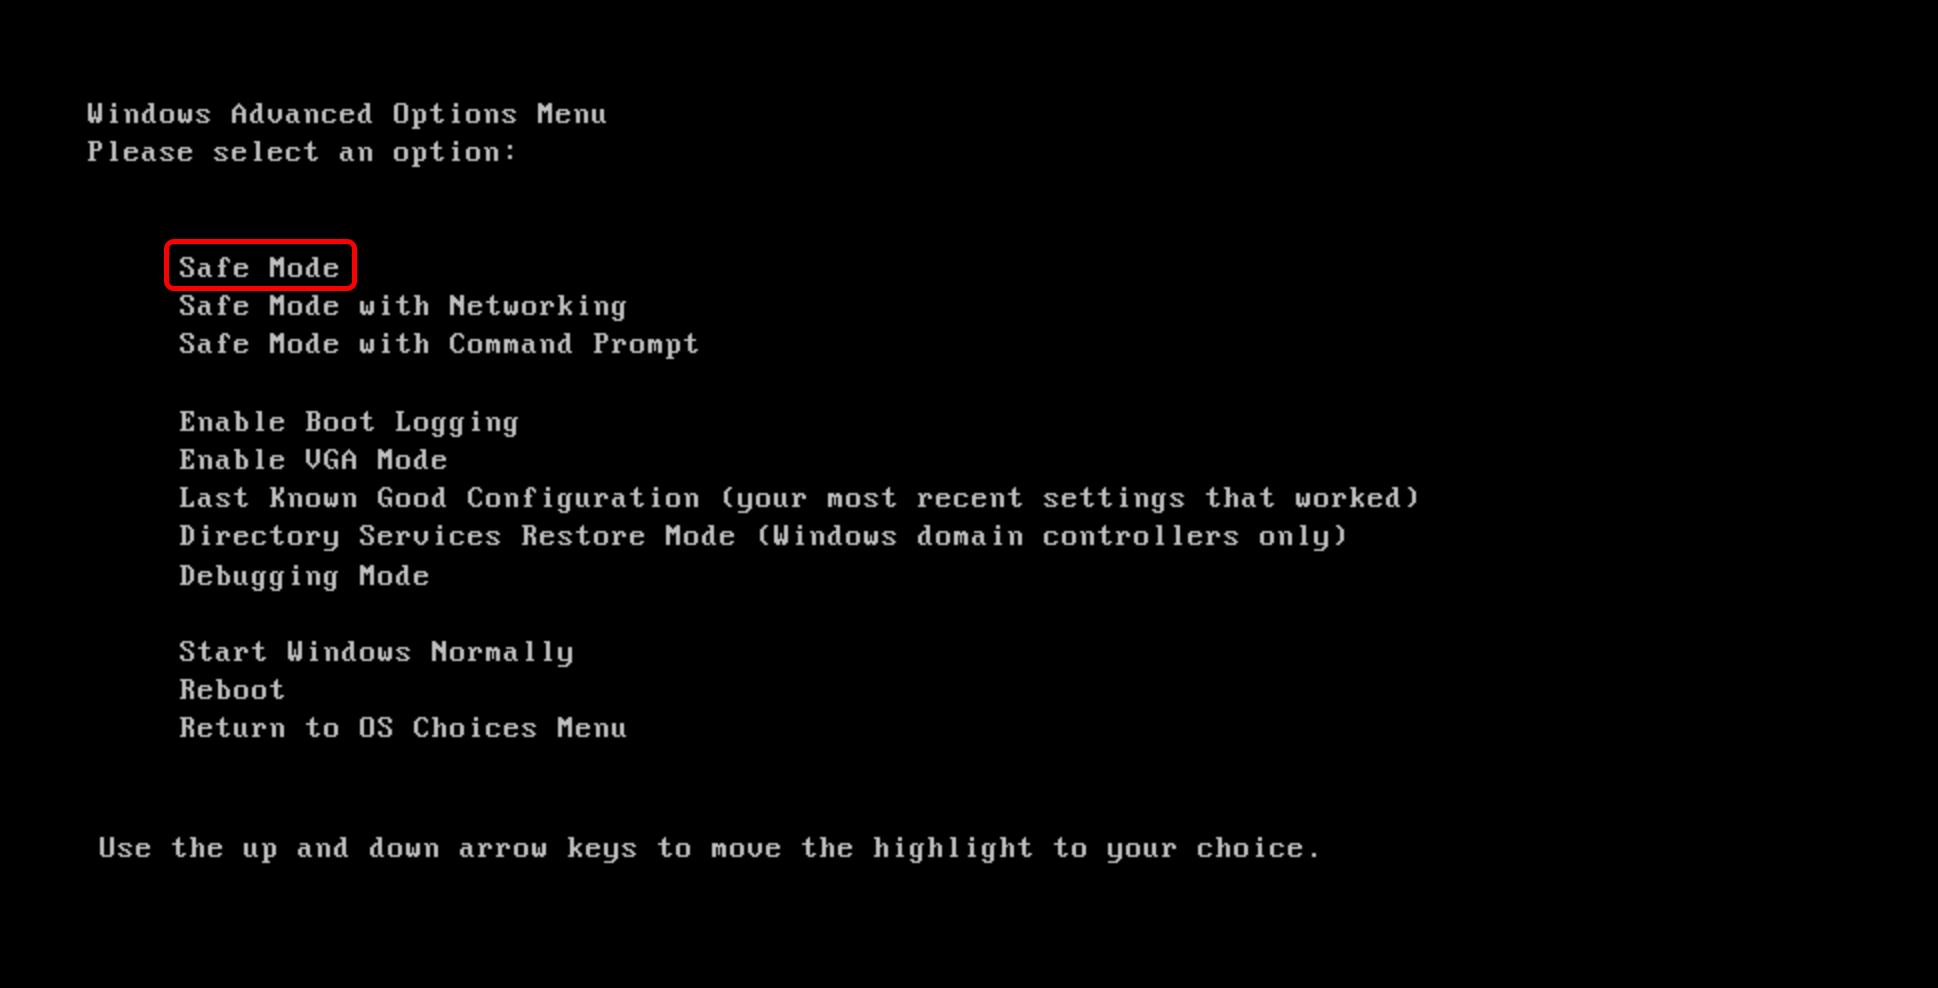
So you want to change how your PC behaves at the startup? The Startup Settings feature is what you should put your stakes in. For instance, after you’re in the Startup Settings through WinRE, you can then enter into Safe mode, which helps you launch your Windows with minimal programs.
3. Do a System Restore
Through the WinRE feature, you can use the restore a Restore Point.
A System Restore creates a Restore point, an image of your PC based on past settings, where everything works smoothly. You can then resort to these settings when something goes off with your PC.
All about Windows Recovery Environment
And that brings our brief introduction to Windows Recovery Environment to a close. As a complementary solution to WinRE, you should have a nice Windows backup set up beforehand. After all, precautions are better than cure and data loss is a huge annoyance for almost all computer workers.
Remember that Microsoft announced its community that it was currently working on a capability that would allow users to switch between different accounts with ease when using Microsoft 365 web apps?
You probably didn’t know how long it was going to be until it was actually going to happen, so we’re here with an update.
Indeed, the Redmond-based tech giant stated that this feature has started to roll out and will become available to everyone within the next couple of months.
You don’t have to sign out in order to switch accounts
Before this new way was perfected, users had to first sign out of a Microsoft 365 web app and then sign in to a different one.
Not to mention that the multi-factor authentication when signing in each time further hindered overall productivity and workflow as well.
We won’t have to worry about that anymore, as seamless account switching has finally started to roll out.
All you really need to do is simply click on the account switcher on the top-right corner of your Microsoft 365 web app and then choose between other accounts that have previously signed into the service.
The switch should be seamless, and you wouldn’t have to sign out from your current account and then sign in again to the other one.
However, you can only be active on one account per app. Thus, you can’t have two active apps with different Microsoft accounts running in the same browser instance.
Seamless account switching for Microsoft 365 web apps has started rolling out to Worldwide environments of Office, Word, Excel, PowerPoint for the web, Outlook on the web, OneDrive for the web, SharePoint, and Microsoft 365 admin center.
The tech giant is also working to expand this to more services but the rollout for the current scope is expected to be complete by June.
You should keep in mind that the featre is not available for Microsoft 365 operated via 21Vianet, Microsoft 365 Government, and Germany cloud environments.
There are no admin controls to turn off the feature but Microsoft has assured IT admins that data integrity and privacy will be maintained.
Microsoft has announced the release the GitHub Desktop 3. From the onset, GitHub was specifically designed to help simplify developers’ workflow. But now, with the GitHub Desktop 3 comes more enhancements, such as squashing, reordering, or amending commits that are geared toward improving git operations.
A key enhancement is the ability to review the status of your pull requests, which in return helps developers confirm whether the code is indeed ready for production. The blog post further provides an illustration of how to use it:
Just click on the badge with the pull request number, and start diving into the checks, jobs, and steps to better understand and fix whatever problem you might run into. You still can’t find out why your checks failed? Don’t worry! You can just re-run your checks to give them another chance to succeed. Users also now have the ability to re-run failed or individual GitHub Action checks.
The GitHub Desktop 3.0 also provides support for high-signal notifications. Essentially, this will help the user sieve through the numerous notifications that keep on popping up, it will instead only alert the user about important notifications that occur in the repository the user is on.
Developers will also be able to get ahead of failed pull request checks, in that GitHub Desktop 3 will notify them when they fail to file commits. It redirects users to a new dialog with a detailed account of what transpired. In return, this makes it easier for the developer to identify where the problem is and rectify it.
It is Microsoft’s hope that the new enhancements that come with the GitHub Desktop 3 will help promote effectiveness, and efficiency and cut down on distractions.
This article explores the Paging file error on Warzone, identifying causes and recommending solutions.
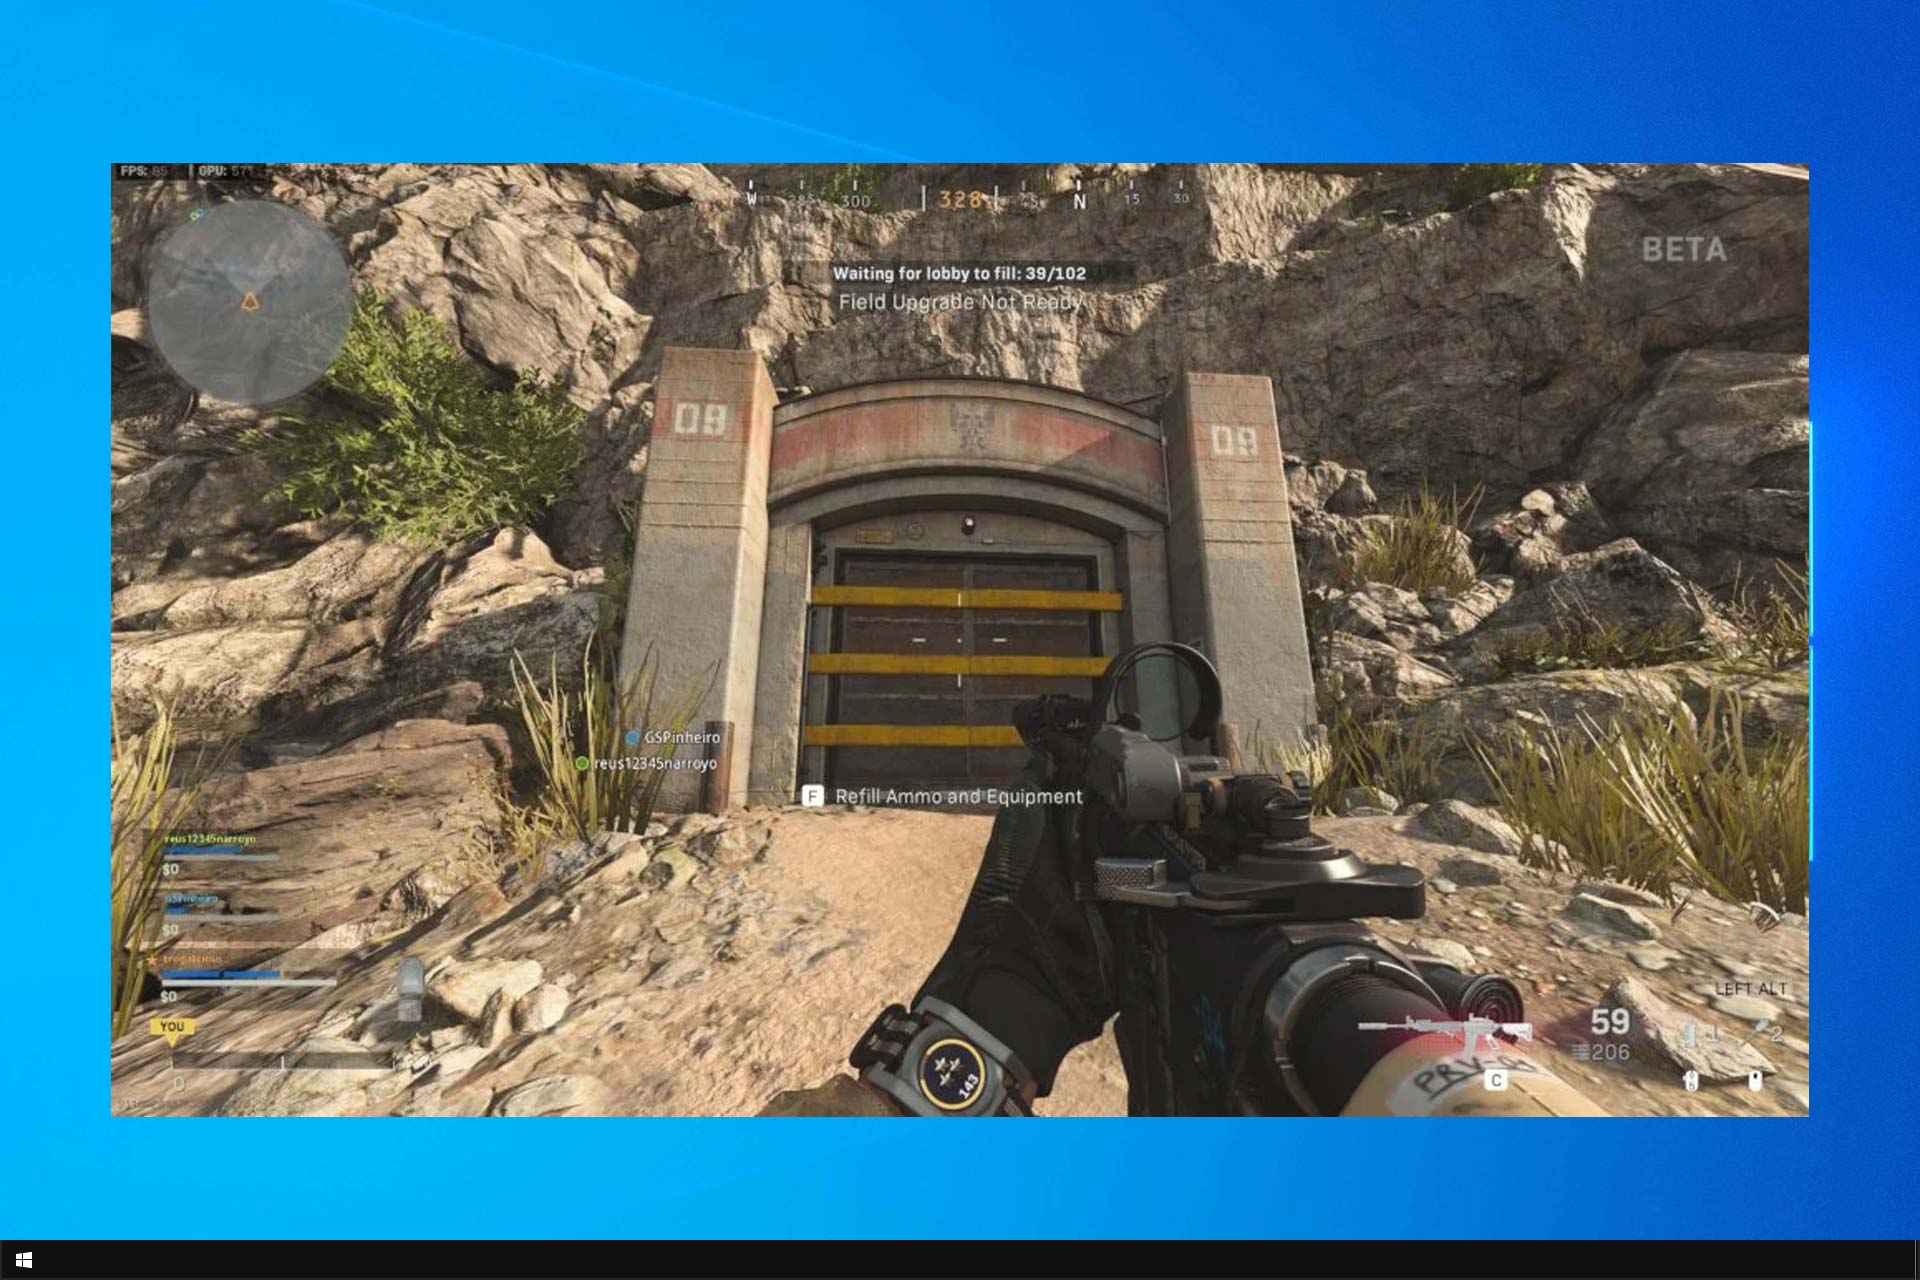
The Call of Duty: Warzone is one of the trendy games that has taken users’ gaming experience to another level. However, things are not all rosy, as users face problems with it.
One of the earliest problems was the Warzone stuck on the loading screen, which proved frustrating. Now, the Warzone paging file error deprives users of the pleasure of doing what they love.
Thankfully, we have gathered seven effective and proven fixes for this problem. The fixes are not far-fetched, and you should find them practicable.
What causes paging file error?
The causes of the paging file error on Warzone are numerous. Below are some of the common ones:
Outdated Windows – When the OS is outdated, many applications and processes may stop functioning properly. For some users, this results in the Warzone paging file error
Outdated or broken drivers – A few users had also reported that they experienced the error when drivers, especially the graphics driver, became outdated.
Insufficient virtual memory allocation -All applications need to use some system resources. Low virtual memory will trigger this error.
Running counter programs – Conflicting programs on a device often result in errors and bugs and may trigger the Pagging file error.
We will now show you the best steps to restore the game to normal functioning after experiencing this error.
How do I fix the paging file error in Warzone?
Before starting with these solutions, check your RAM and ensure it sits properly. A loosely-fitted RAM causes all sorts of problems on PCs. For example, it has proved to be one of the major causes of the paging file error on Warzone.
1. Update Windows
Press Windows + I to open the Settings app.
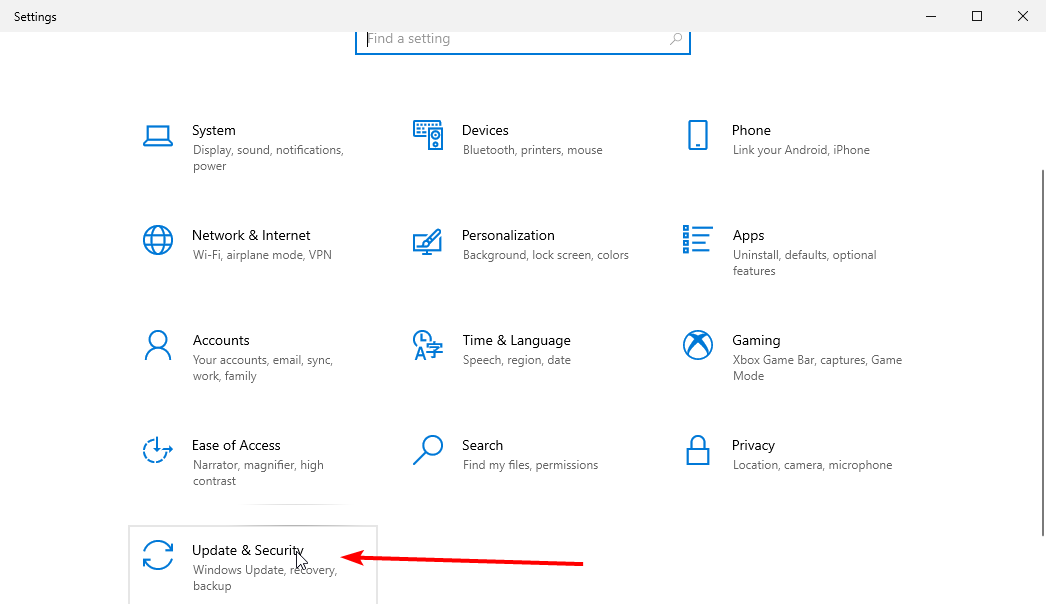
Select the Update & Security option.
Click the Check for Updates button.
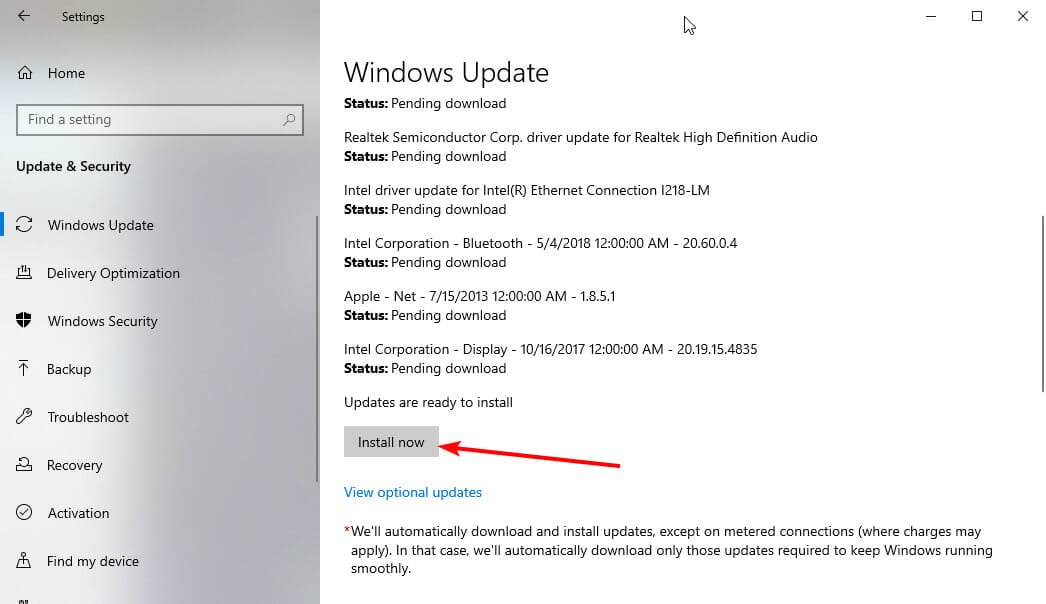
Click the Install now button to download and install all available updates.
2. Update graphics card drivers
2.1 Update manually
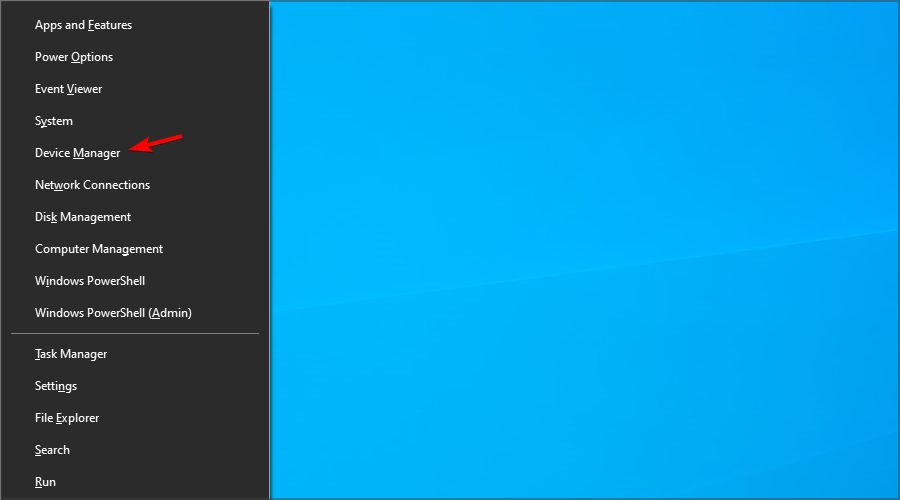
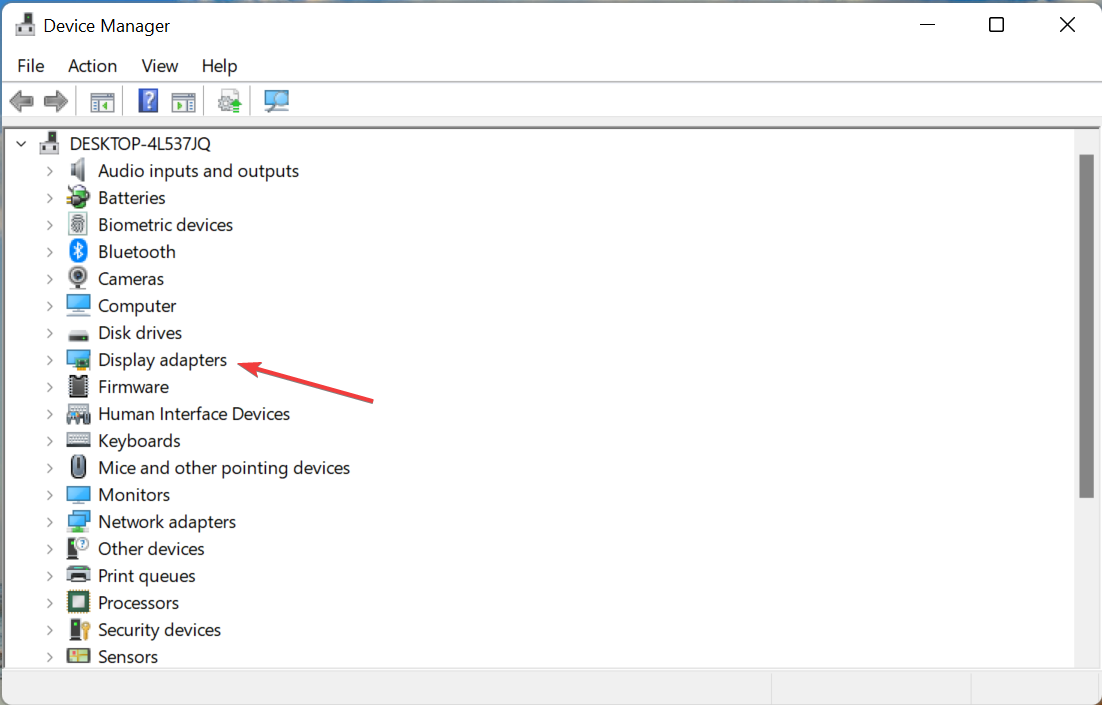
Press the Windows key + X and select the Device Manager option.
Click on the Display adapters option to expand it.
Right-click on any of the drivers there and select the Update drivers option.
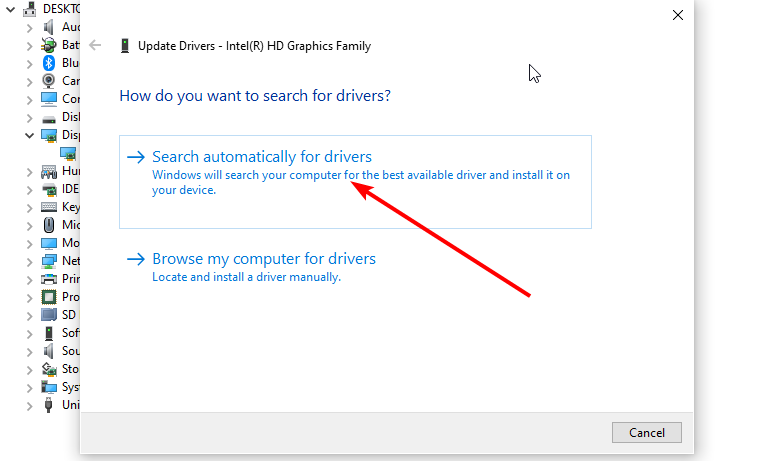
Select the Search automatically for drivers option.
From here, follow the simple on-screen instructions to install any driver update shown.
2.2 Update automatically
Instead of going through the steps above, you can automate the process with a top-notch driver updater in Outbyte Driver Updater.
Outbyte Driver Updater is renowned software that automatically scans, recommends, and installs drivers. Whether outdated, missing, or broken drivers, this incredible software leaves no stone unturned.
It has a whooping database of 18 million original drivers from trusted manufacturers worldwide. This assures you that it indeed has everything you need in-store already.
What’s more, you can schedule driver scans on Outbyte Driver Updater. This lets you focus on other things and let it take care of your drivers’ functionality. It is everything you need, never to be bothered by driver problems on your PC again.
Click System and Security, and click the System option.
Click the Advanced system settings option on the left pane.
Switch to the Advanced tab in the System properties window.
Click the Settings button under the performance tab.
Switch to the Advanced tab in the Virtual Memory window.
Go to the Virtual Memory section and click the Change button.
Now, check the Automatically manage paging file size for all drives checkbox and click the Ok button to save the changes.
4. Increase Video memory scale value
Press Windows + E to open File Explorer and click the Documents folder on the left pane.
Select Call Of Duty Warzone.
Now, select the Players option.
Double-click on adv_options.ini file.
Select Notepad as the app to open it.
Finally, increase the value of VideoMemoryScale.
Allocating more video memory to the Call of Duty Warzone game is an excellent solution to the paging file error. This is because the increased VRAM allocation helps eliminate many graphical problems that could lead to it.
However, it is essential that you only allocate as much VRAM as your graphics card can take. To ensure you get it right, increase the value slowly and test your game to see if it runs with stability.
Press the Windows key + X and select the Task Manager option.
Right-click all the apps in the Apps section and choose the End task option.
Relaunch Warzone.
6. Repair game files
Launch the Battle.net app.
Choose the Call of Duty Modern Warfare.
Click the Settings Cog and choose Scan and Repair option.
There you have it: the seven practicable fixes for Warzone paging file error. As frustrating as this error could be, it is not difficult to solve, as we have shown.
If you face other issues like Warzone lag spikes, you can check out our detailed guide on fixing it quickly.
In the comments section below, let us know the fix that helped you get back to your gaming best.
By now, we are all conversant with set system requirements that a user is required to have under the hood to run the Windows 11 OS. These restrictions have led some users to use workarounds to get the OS on their unsupported devices. As it now appears, even Microsoft employees have now joined the bandwagon too.
It has been established that it is possible to run Windows 11 on an unsupported device. According to Microsoft, though, the downside to this is that the user will not receive any security updates which potentially exposes them to a lot of risks. Of course, this hasn’t been proven to be true. Unsupported Windows 11 systems are still getting monthly security updates today, but Microsoft could reserve the right to pull these updates at any time.
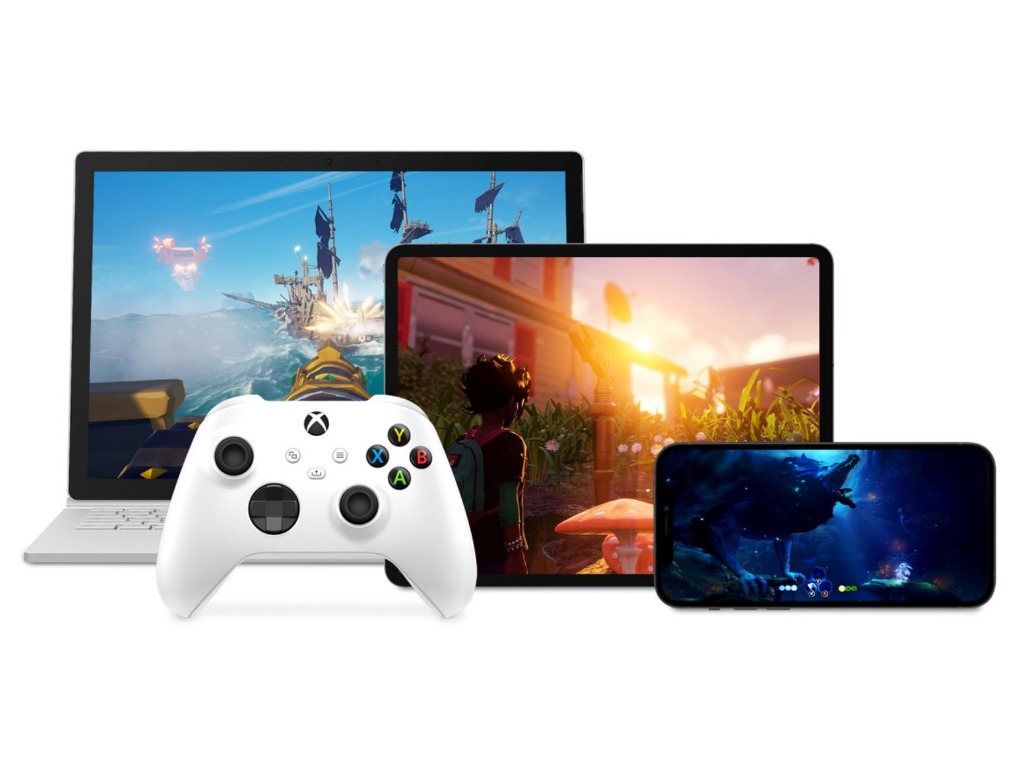
Over 10 million people have streamed games via Xbox Cloud Gaming, according to Microsoft CEO Satya Nadella. The announcement was made as part of the company’s third quarter earnings report for fiscal year 2022. Microsoft Communications Lead Frank Shaw confirmed the milestone in a tweet on April 26.
With Xbox Cloud Gaming… more than 10 million people have streamed games to date, and we expanded the service to four new countries.
Xbox Cloud Gaming is only available through Xbox Game Pass Ultimate. Game Pass currently has over 25 million subscribers across all three variants of the service, a number which is steadily growing year by year and is up from 18 million subscribers from the same time the year previous. With Xbox Cloud Gaming reaching the 10 million streamers mark, along with recent news that Xbox had a record-setting month in March, it seems that the Xbox brand as a whole is on quite a roll as of late.
Xbox Cloud Gaming is available on several platforms in addition to Xbox consoles: PC, Android, and even iOS, and features an ever-expanding library of compatible games.
The convenience of a headset is priceless in delivering the gaming experience you deserve. With a headset, you can communicate with your teammates and make the right call to win a game, or you can enjoy your banter and trash talk with fellow gamers during a match, which is half the fun.
Having a Xbox One headset mic that is not working is one of the more frustrating issues you might run into while trying to play on Xbox Live. Without your mic, you can’t make call-outs unless you type them into in-game chat, which takes time.
While you could use the in-game chat function, it’s not ideal, especially if you play with a lot of teammates or are playing an online co-op game.
There are many reasons why your headset mic may not be working. It could be due to a simple update or hardware issue. Or specific settings and misconfigurations could be the cause of this issue.
What can I do when Xbox One mic is not working?
1. Connect the controller and headset again
The first thing you should check is whether or not the headset is muted. If your headset is muted, you won’t be able to hear anything. You can easily unmute the device by pressing the mute button on the back of the headset.
If your headset isn’t muted, it may not work if the connection between your controller and your headset is loose. To fix this, just plug both devices again and resync your controller.
2. Install the Xbox Controller Update
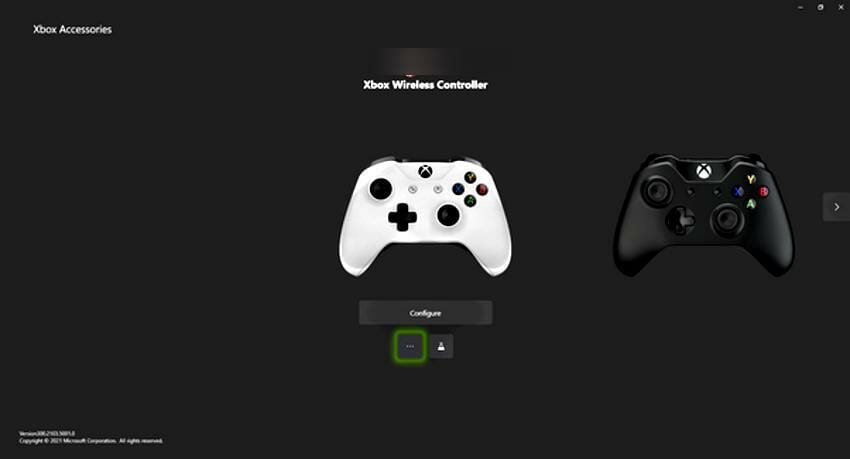
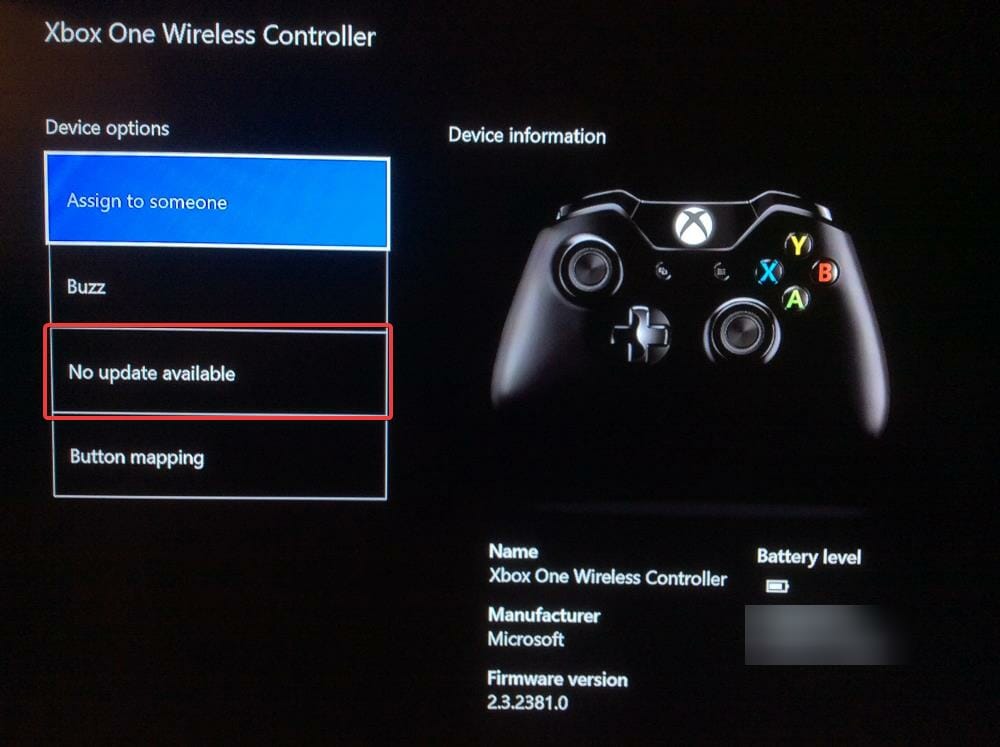
Go to the Xbox Accessories on the Xbox and choose your controller.
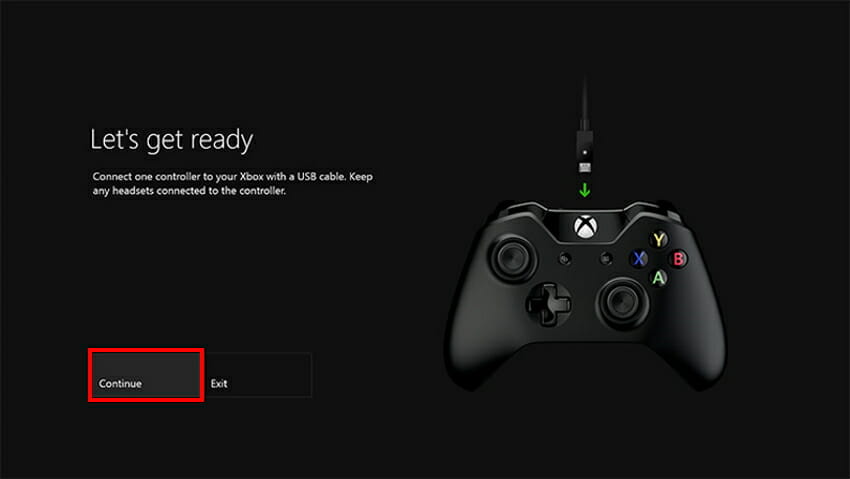
Make sure your headset is connected to the controller and that your controller is either already charged or connected to the Xbox One via USB cable.
Click on the update if available.
Confirm the update prompt.
The Xbox headset can stop working if the controller is out of date. So it is necessary to update it regularly.
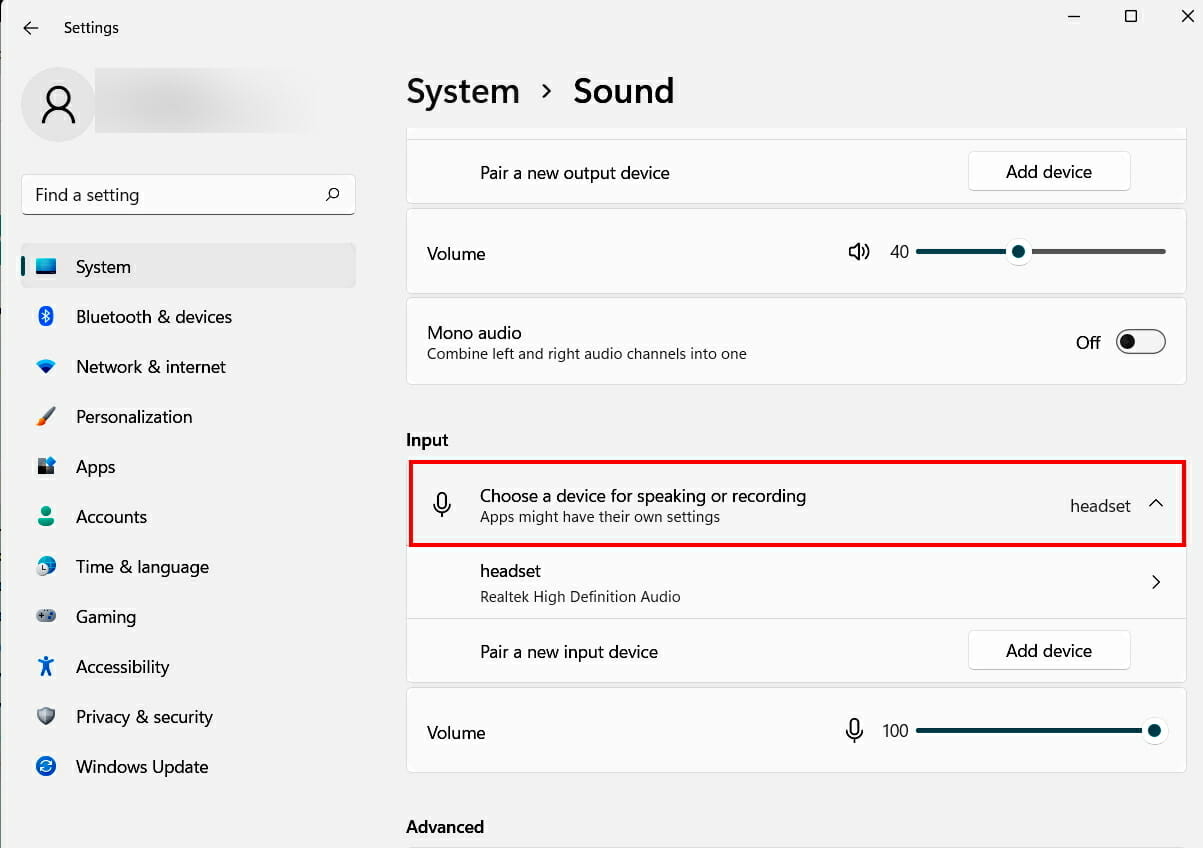
Go to the Input section and select or add your headset device in the Choose a device for speaking and recording option.
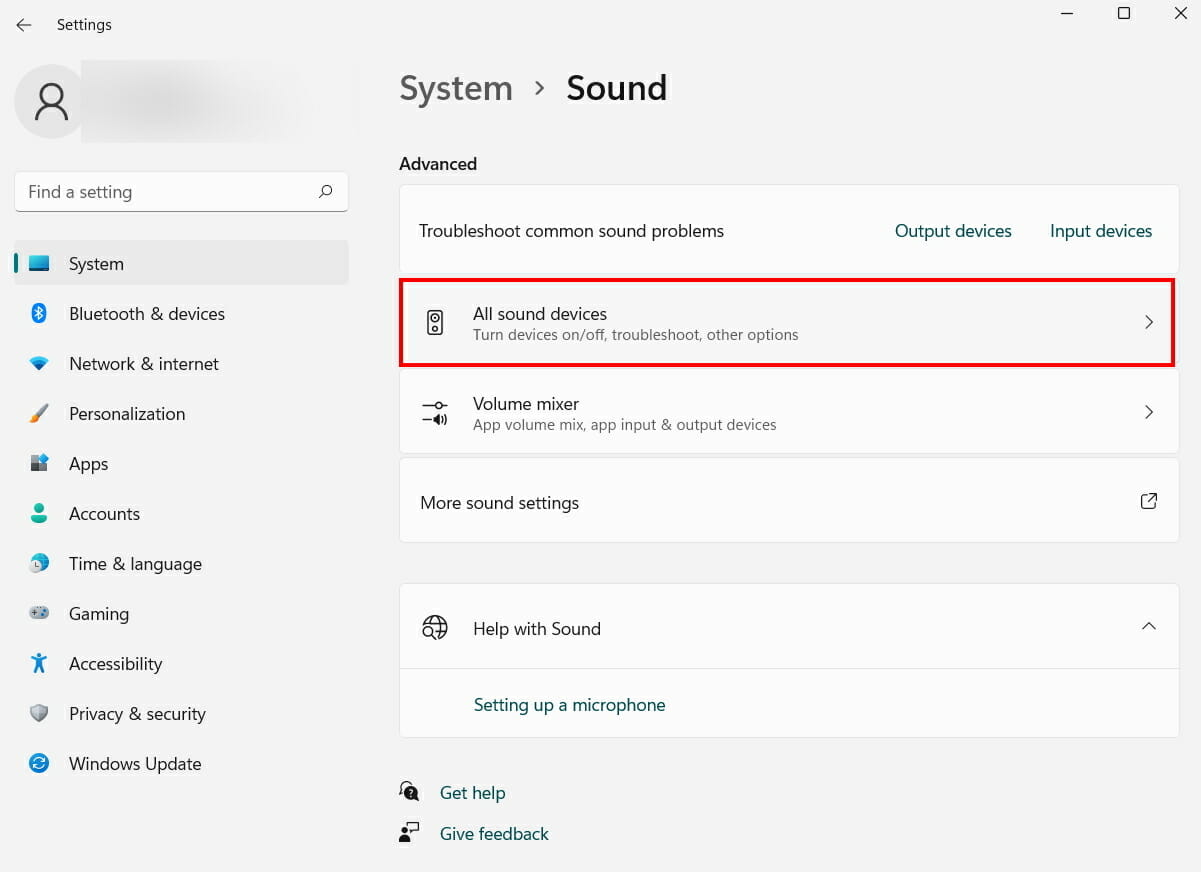
Next, go to the Advanced section and select All sound devices.
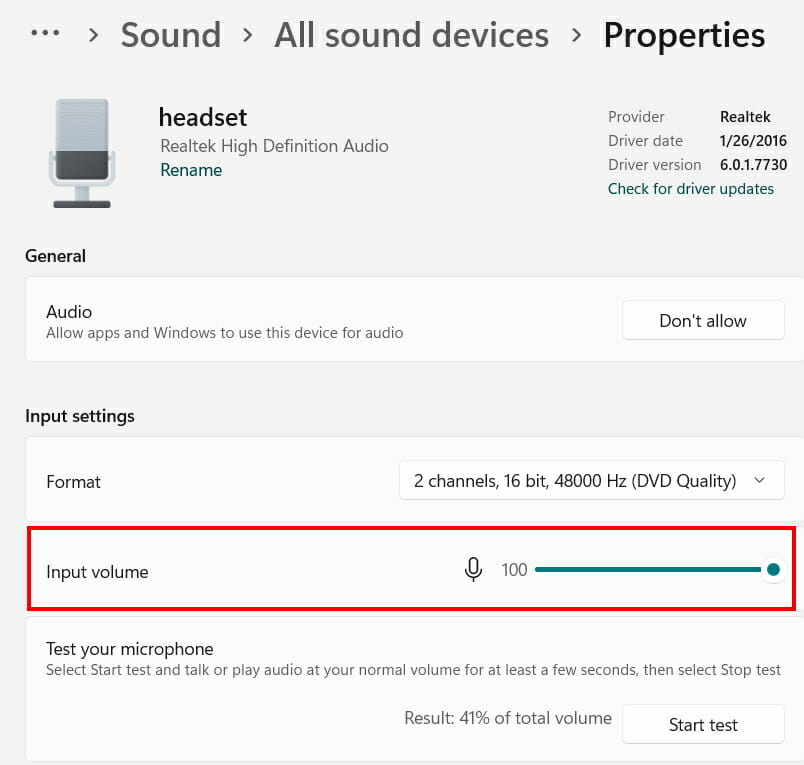
Select your device from the Input devices.
Set the Input volume under the Input settings to its maximum.
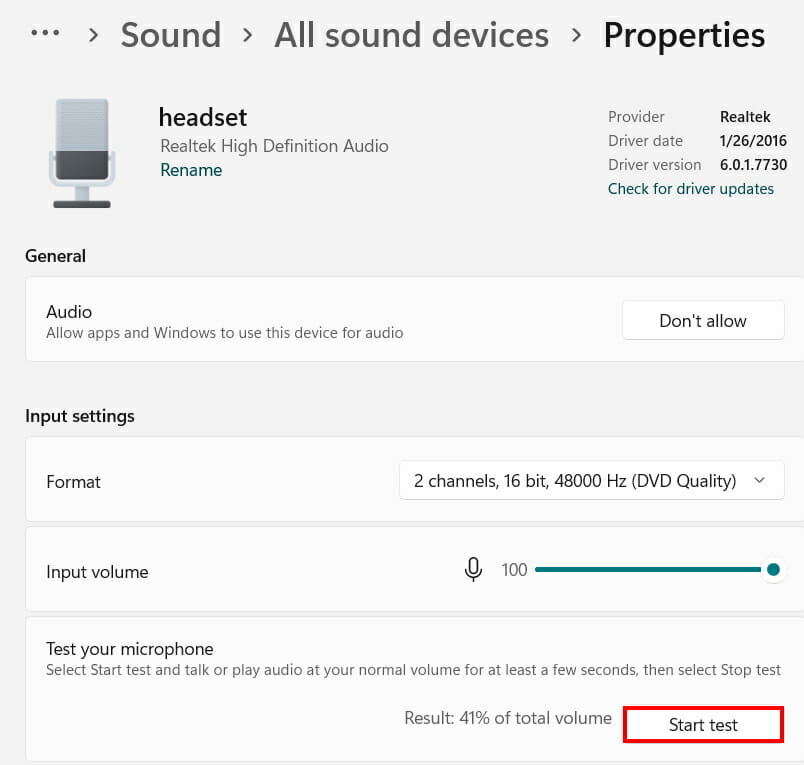
Test your device by clicking on Start test to check if your device is working properly.
After the test, click on Stop test.
It will combat any issues that could originate from system misconfiguration. Try the next method to resolve the mic issue in Fortnite.
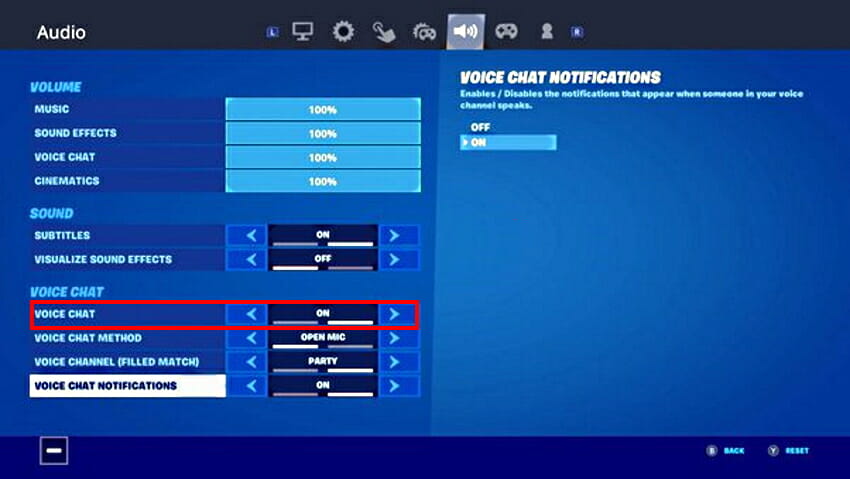
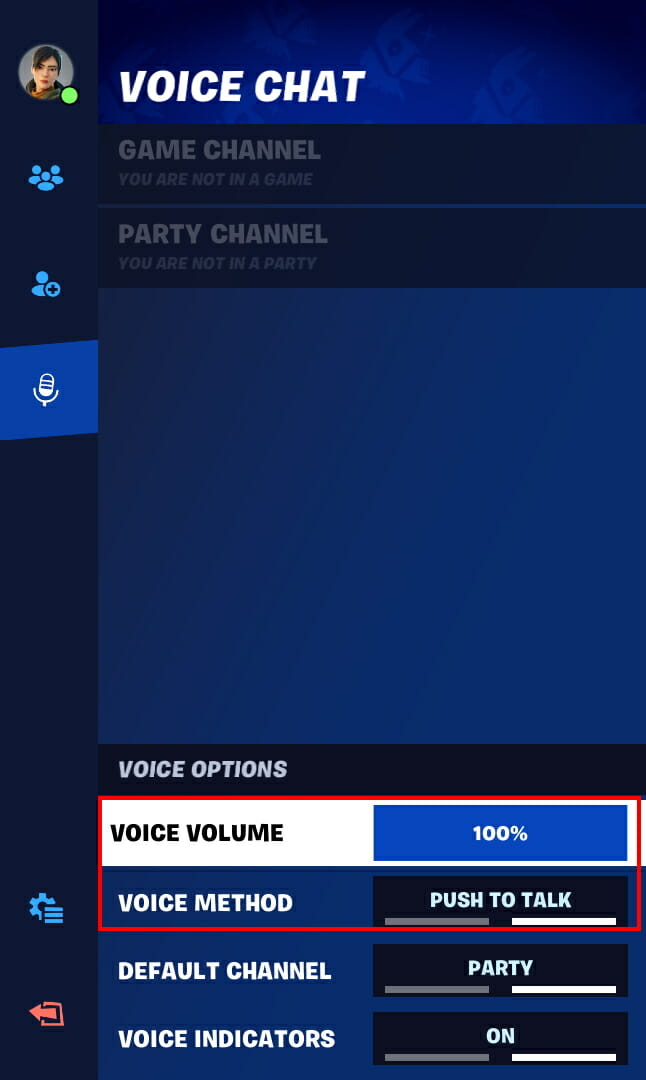
4. Configure voice chat settings in Fortnite
Open Fortnite and Click on the gear icon from the side toolbar.
In the audio toolbar, click on the speaker icon.
Change the voice chat to ON.
Next, go back home and click on the mic icon on the side toolbar.
Turn the voice volume in the voice options to the maximum.
Turn the voice method to push to talk.
If your Xbox headset mic is not working in certain games like Fortnite, it can be caused by in-application settings.
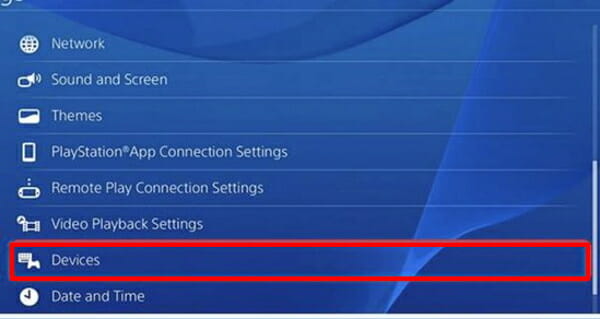
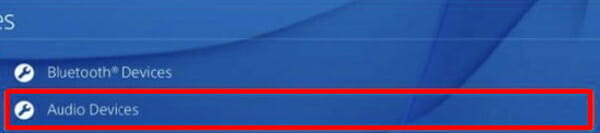
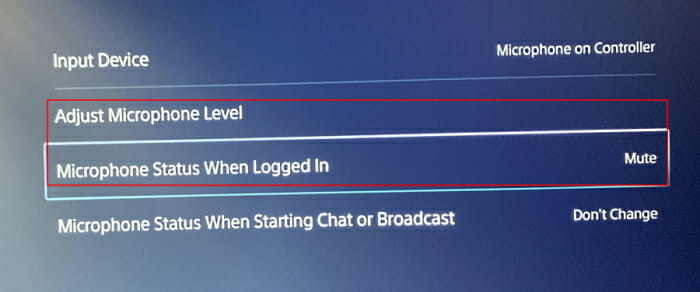
5. Customize PS4 device settings
Go to Settings > Devices.
Next, go to the Input Device.
Go to the Adjust Microphone Level and turn it to its maximum.
Go to Microphone Status When Logged In and select Unmute.
The Xbox One headset is compatible with the PS4 as they both use 3.5mm input. But before using them, you have to make sure that their level is adjusted and they are not muted.
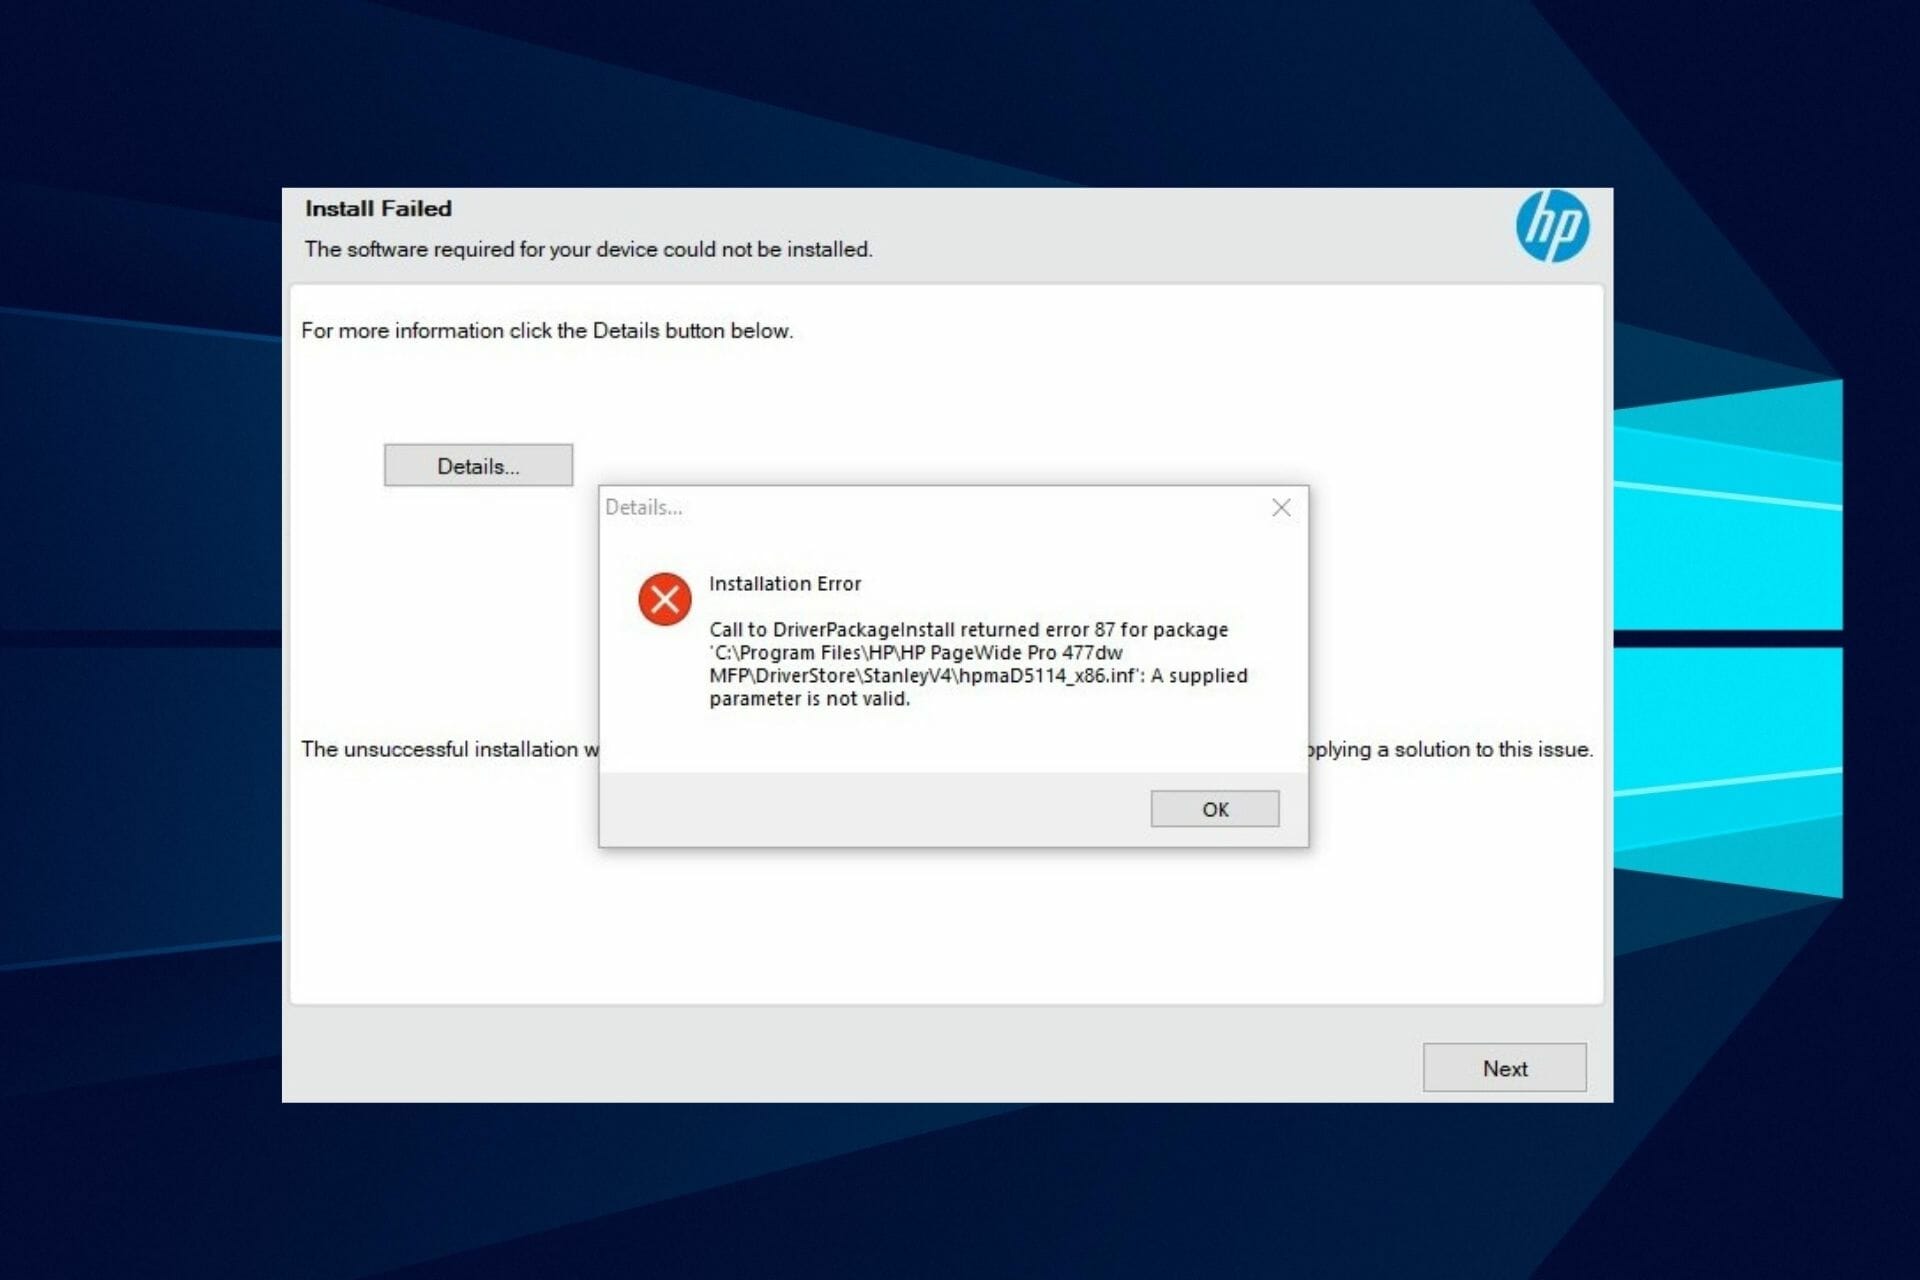
Are you getting stuck trying to install HP LaserJet P1606pn driver on your PC? This can be quite frustrating because you can’t use your printer.
Many users have reported that they cannot download the latest HP LaserJet P1606pn driver and this can occur based on different reasons such as incorrect installation or residue of the previous driver is still active.
Whatever the cause may be, it is still a common issue that is associated with laser printers.
What causes a download issue that prevents the HP LaserJet P1606dn driver from installing?
While there are many causes of this, the issue usually stems from incorrect software installation. Abrupt interruption during drivers update can prevent new drivers from being installed.
Hence, this article will provide different troubleshooting solutions that apply to different potential causes of this issue. Follow the instructions strictly to ensure optimal results to fix the issue.
How can I fix the HP LaserJet P1606dn driver not installing?
1. Disable Spooler Service and Restart
1.1 Disable Spooler Service
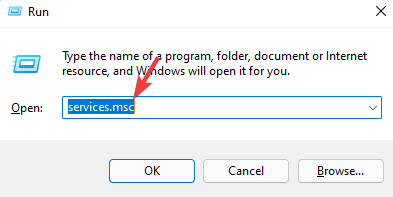
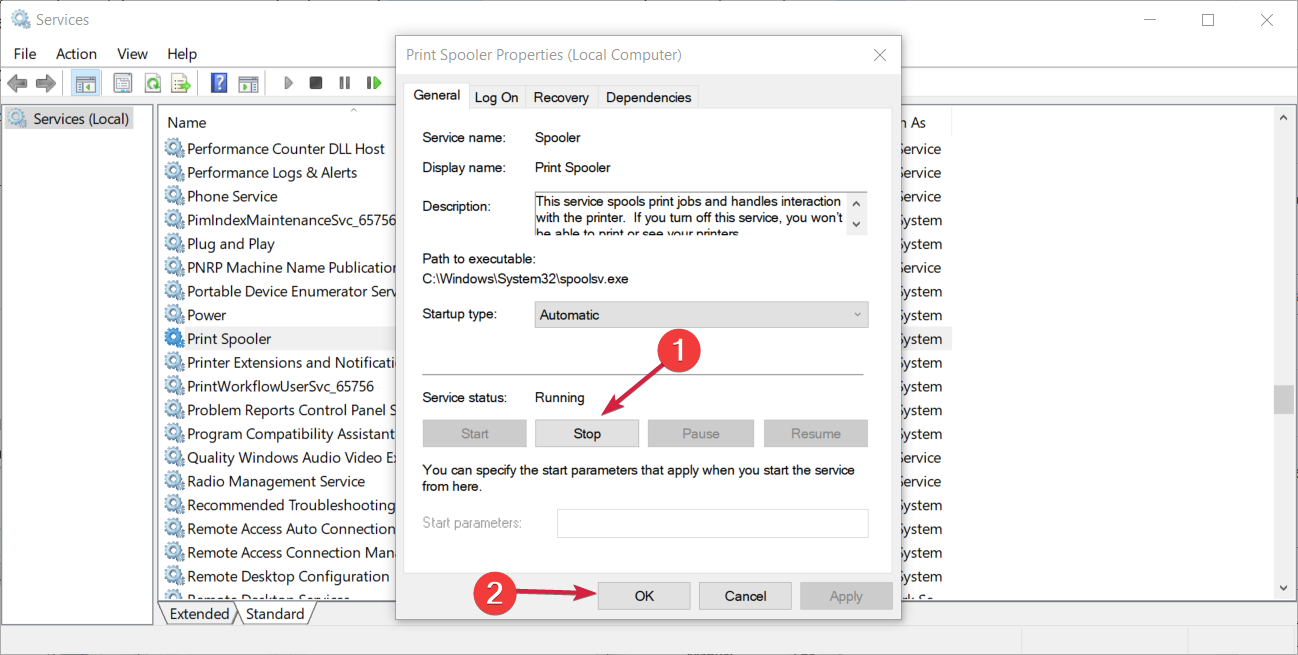
Press Windows + R, input services.msc and click OK or press Enter key.
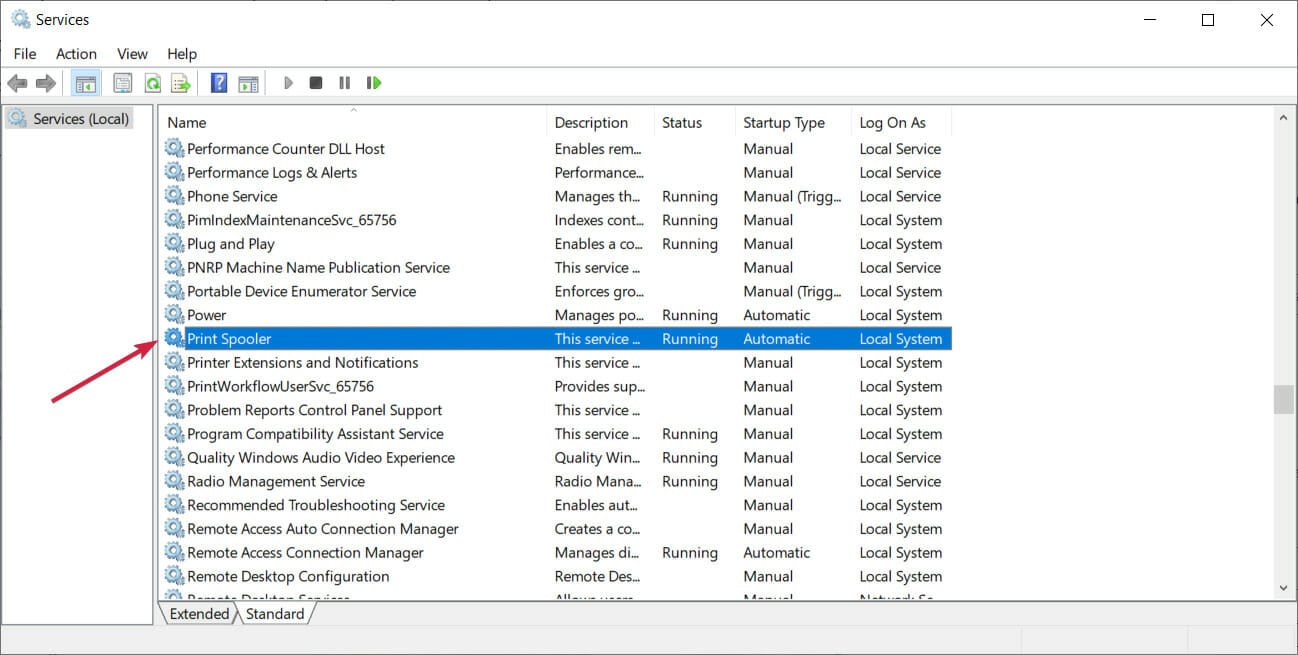
Choose Print Spooler from the list.
Double-click to open Properties.
Click the Stop button, and press OK to apply changes.
1.2 Delete Printer files
Launch File Explorer with Windows key + E.
Navigate to the following path on your computer: C:\Windows\System32\spool\Printers
Delete all files inside the folder.
1.3 Restart Spooler Service and Install drivers
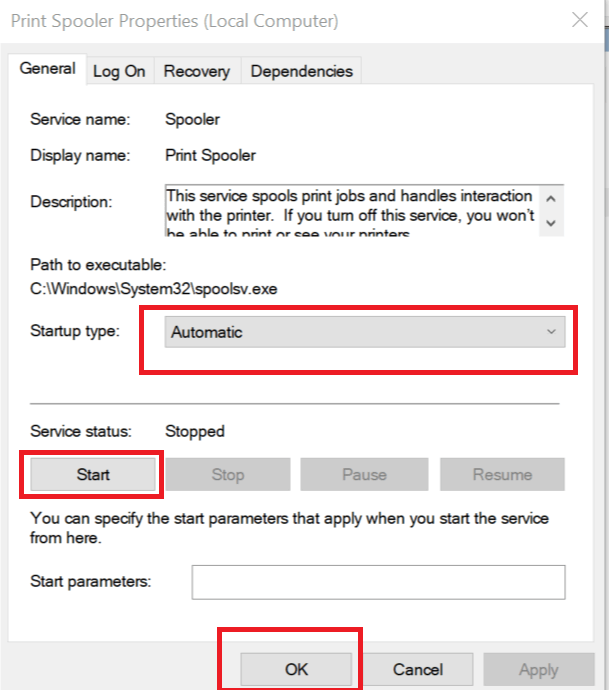
Return to Print Spooler Service.
Click Start and set the Automatic startup type.
Install the printer drivers again.
Then Restart the PC to take effect.
The Spooler Service is integral for the smooth functioning of the printer. It can sometimes be compromised and this can prevent the installation of drivers. Deleting the corrupted files should fix the problem.
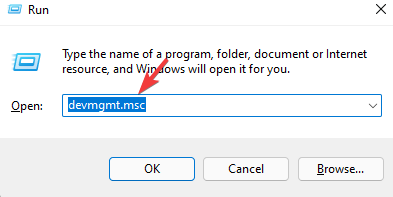
Press Windows key + R, Input devmgmt.msc and press OK to launch Device Manager.
Locate hardware and expand it.
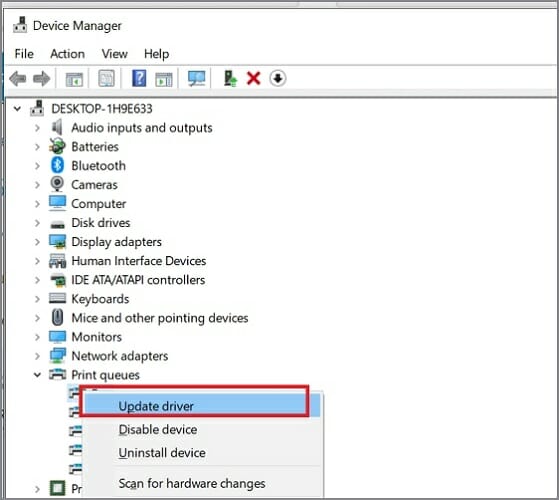
Right-click your device and choose Update Driver.
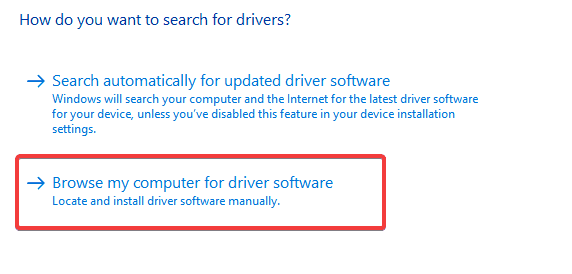
Choose Browse my computer for driver software and select the driver to install from your device.
Restart PC to take effect.
By choosing the driver manually, you can update the driver by selecting from the available update on your device.
An alternative that saves all these hassles is to use dedicated software for your updates. It can be used to generate the latest driver updates for all drivers on your device automatically and update all at once.
Press Windows key + R, Input devmgmt.msc and press OK to launch Device Manager.
Locate hardware and expand it.
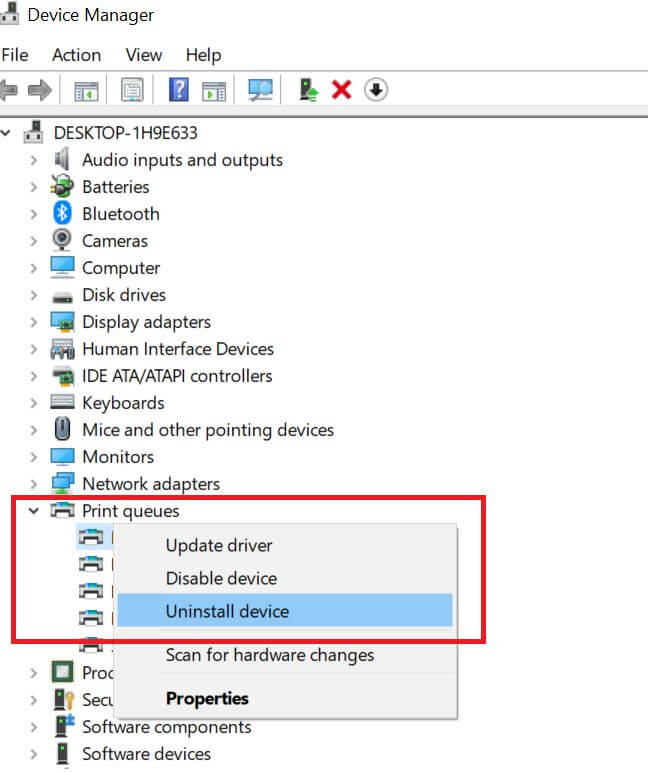
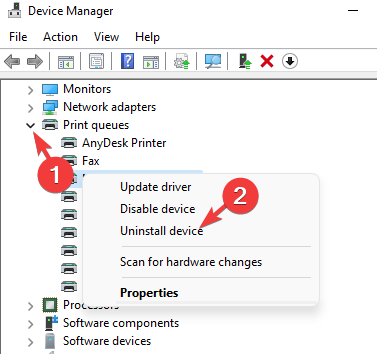
Right-click your device and choose Uninstall device.
Restart PC to take effect.
By uninstalling the drivers and rebooting the PC, Windows will automatically search for the latest updates that are more compatible with the printer device.
Hence, downloading new drivers should be possible after this step. If this fails, then try the next fix.
4. Run Printer Troubleshooter
Press Windows + Ito launch Settings.
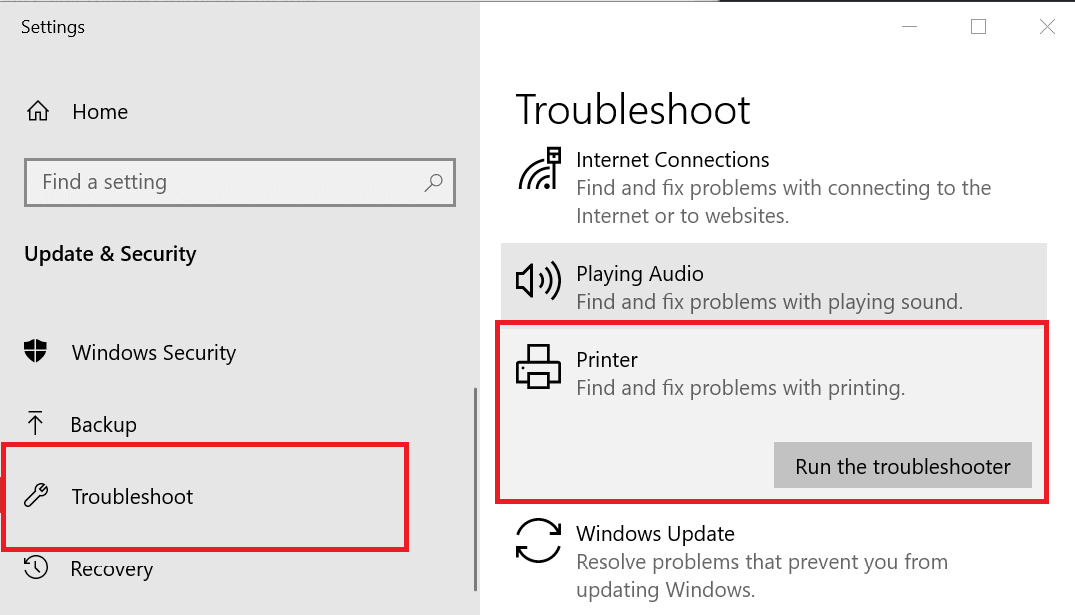
Open Update & Security from the left pane and select Troubleshoot.
Choose Printer from the options. Click Run the troubleshooter.
Follow the instructions and Restart the PC after the process.
Since Windows has an inbuilt troubleshooter, it can override the printer issues.
This fix should resolve the problem since Windows is expected to fix all previous registry entries that could prevent the installation of new printer drivers.
5. Run HP LaserJet P1606dn driver Printer software
Ensure to install the software immediately after downloading. When you start the reinstallation for drivers, it will select from the drivers available in the app.
6. Install Windows updates
Press Windows key + Ito launch the Settings app.
Choose Updates & Security.
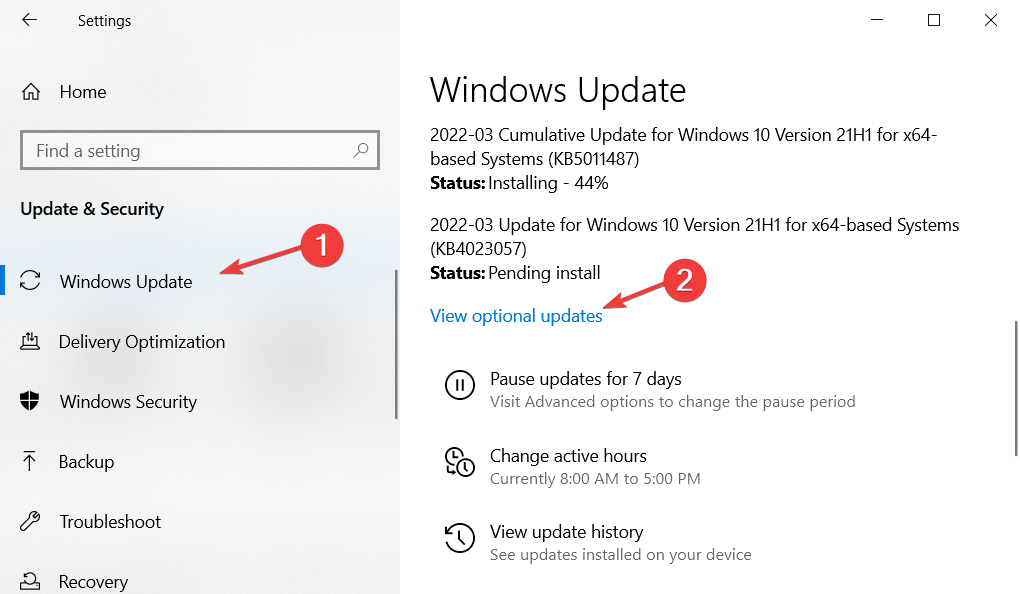
Select Windows Update from the left pane.
If there are available updates, click Install now.
By updating Windows, you can troubleshoot all the issues with your device. Simply update the printer drivers according to recommendations from your windows.
These are the most efficient solutions to fixing the HP LaserJet P1606dn driver not installing issue.
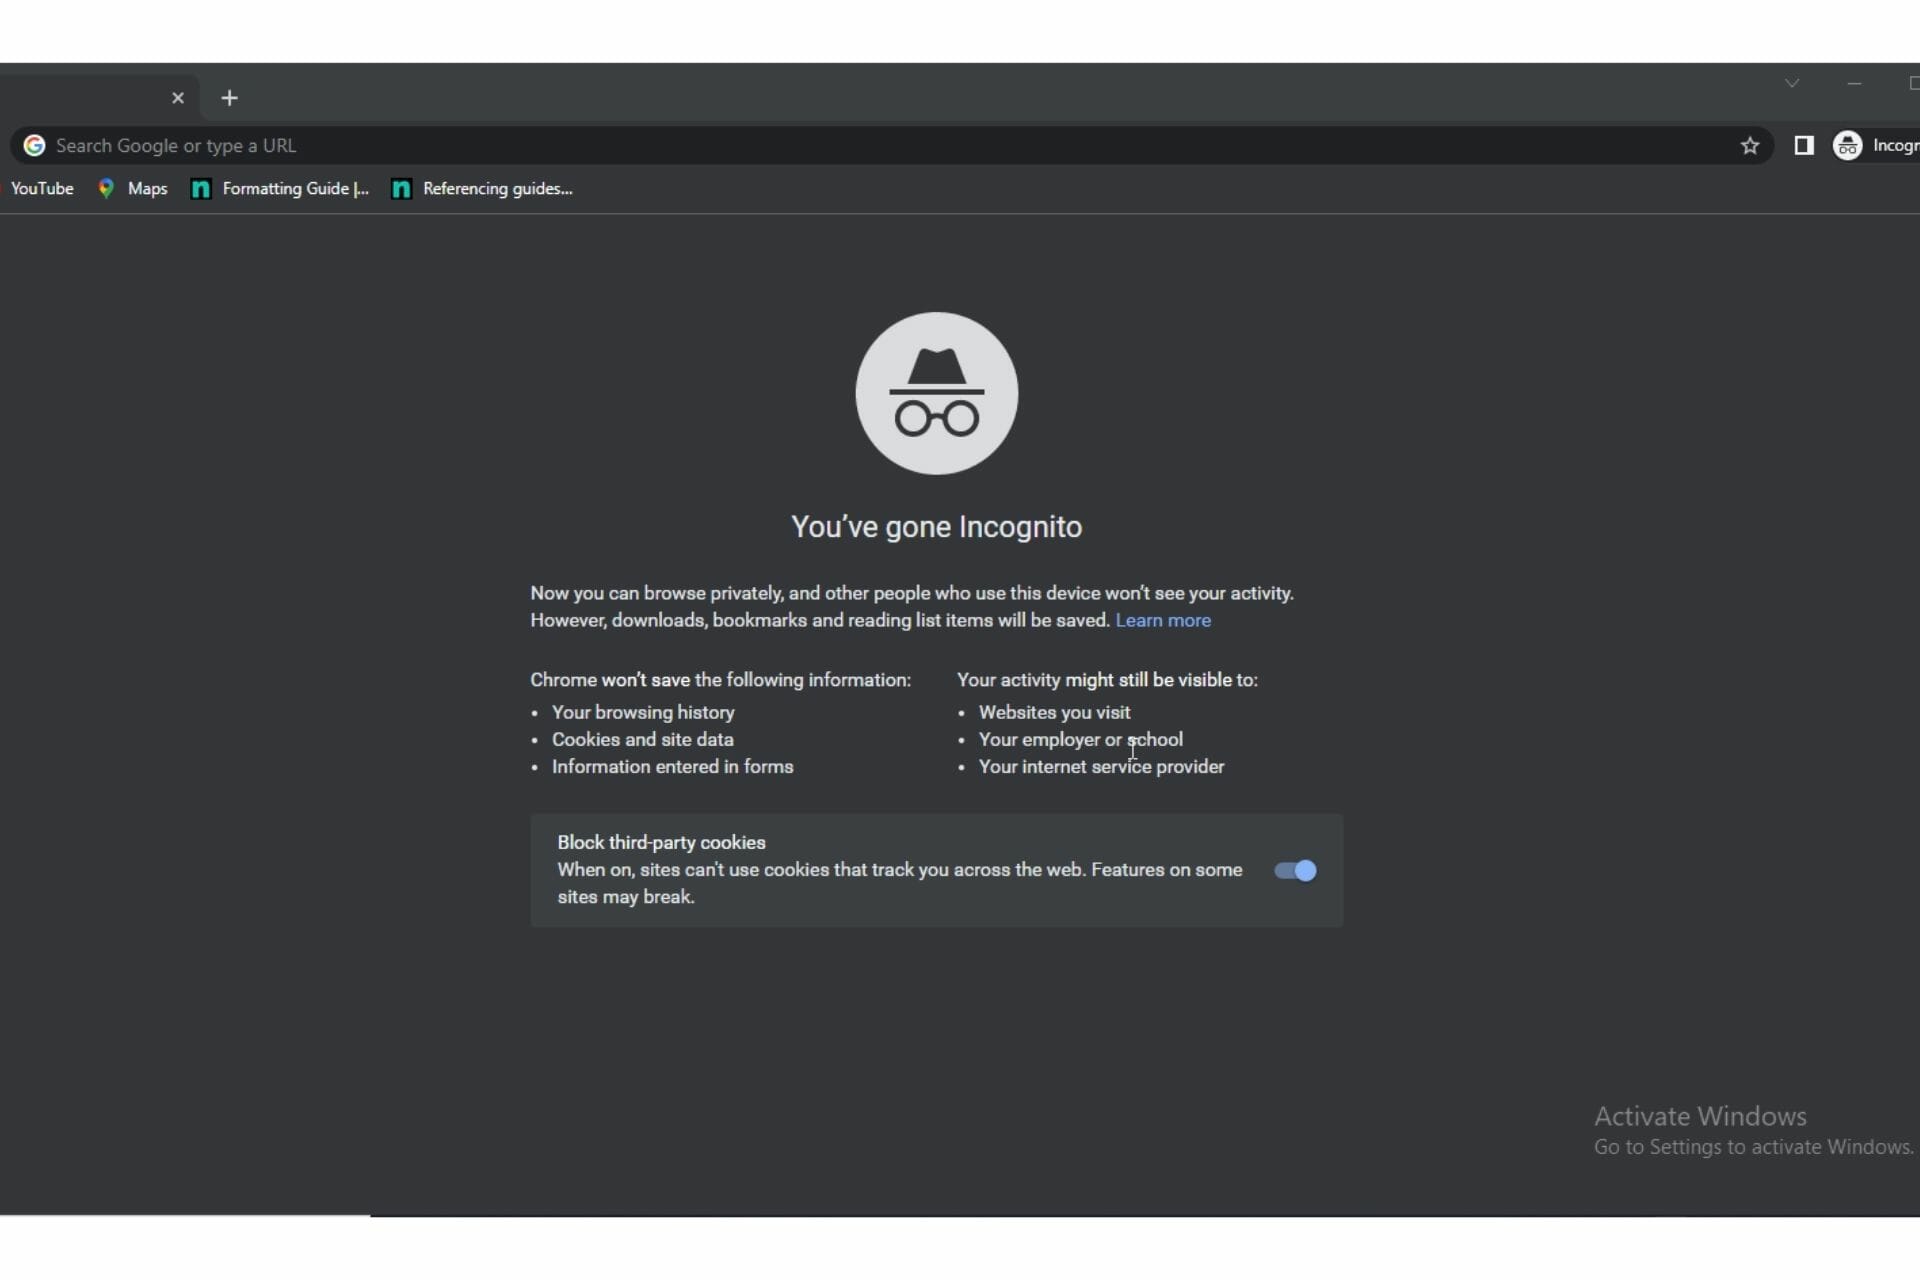
Chrome Incognito is often favored by most users because it’s a much safer way to surf the web without saving your activities in browser history.
However, some users have reported that their Chrome Incognito is not loading pagesdespite the main Chrome working properly.
Hence, this article will provide 3 quick fixes to solve this problem without hassles. Before that, let’s understand how the Incognito mode works.
How does Chrome Incognito work?
The Incognito mode is considered the safer version of Chrome since it doesn’t remember your activity. In addition, browsing history, login information, site cookies, and data will not be remembered after the session close.
Meanwhile, downloads and bookmarked pages will still be visible after the session.
Chrome Incognito is not working?
Many reasons can cause Chrome Incognito not to load pages and they will be highlighted in the article.
You should note that these reasons could also be responsible for the following also: Chrome Incognito is not available, not secured or not responding.
What can I do if Chrome Incognito won’t load any pages?
1. Reset Chrome to Default settings
Launch Chrome and go to Google.com.
Click Settings in the bottom right-hand corner.
Expand Advanced from the left pane, select Reset and clean up.
Click Restore settings to their original defaults.
Choose Reset settings.
Restart Chrome to take effect.
Most users with this problem have resorted to this means only after everything else has failed because of the implications of resetting to default.
By doing this, all the data will be erased and chrome will be restored to its basic settings and overwrite all entry errors that were causing Chrome Incognito not to load pages.
Click Processes and locate Google Chrome from the list, select it and click End task below.
PressAlt + F4to launch the Shutdown window.
Select Restart from the options and click OK.
If Chrome Incognito won’t load any pages, ending all processes involved in the running of Chrome might be effective before rebooting your PC. Thus enhancing its performance and might fix the issue.
3. Try a different browser
Google Chrome is not the only browser with Incognito mode. If you must go Incognito and Chrome isn’t working, we recommend using the OperaOne browser.
Also, the Opera One browser prioritizes user privacy and security. It has an in-built VPN and anti-tracking features for an extra layer of anonymity. Plus, this browser comes with it’s own built-in AI.
Opera One
Browse privately in Incognito mode using one of the leading browsers in terms of privacy and security.
These fixes should solve Chrome Incognito not loading pages. In case this issue extends to the whole Chrome, we have solutions for that in our article on Google Chrome not loading properly.
If there is one thing the enterprise market cares about more than anything else, it would have to be security.
For the most part, Windows 10 is well protected from danger, but users are still required to install antivirus software for even more protection.
Why do I need antivirus on Windows 10 / 11 Enterprise?
You’re undoubtedly concerned about maintaining tens of thousands of Windows endpoints healthy, up-to-date, and secure.
If you’re wondering if your company needs antivirus protection, the short answer is yes. Despite the fact that Windows 10 and 11 come with their own well-rated built-in antivirus tool, Windows Defender, investing in a specialized Windows enterprise antivirus solution can provide complete security.
We have done proper research and we put down a list of the best antivirus for Windows 10 Enterprise.
What are the best antiviruses for Windows 10 / 11 Enterprise?
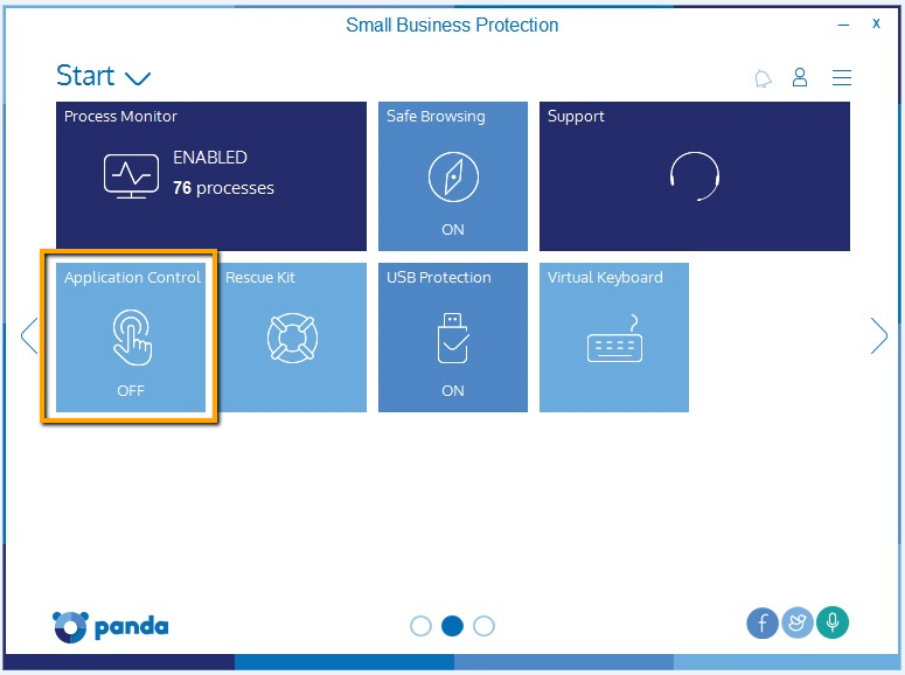
Panda Small Business Protection is one of the most basic cost-effective solutions you may get for Windows 10 and 11 Enterprise.
You can manage your product’s services, find out when it expires, renew the license, receive your product’s unique documentation, and report difficulties to technical support.
Let’s see what are the main features of Panda Small Business Protection:
Identifies computers with an alias
Wi-Fi auditing
Connection history
Blocks unknown computers from accessing your computer.
Panda Cloud Cleaner
The Wi-Fi monitor tool displays the Wi-Fi networks to which you are connected as well as the devices to which you are connected. This is very useful for determining whether or not someone is hijacking your Wi-Fi connection.
The application control is an excellent function that creates a secure and closed environment. As a result, it provides an excellent additional layer of defense against zero-day threats.
The application control not only lets you choose which applications can run on your computer, but it also lets you specify what actions should be taken when an unfamiliar software tries to install itself.
Panda Cloud Cleaner is an innovative disinfection utility that uses the cloud scan to run a deep scan and eliminate viruses that regular antivirus products cannot identify.
Panda Small Business Protection
Protect your company’s Wi-Fi network, keep all of your private information virus-free, and receive daily automatic updates from a user-friendly, non-intrusive application.
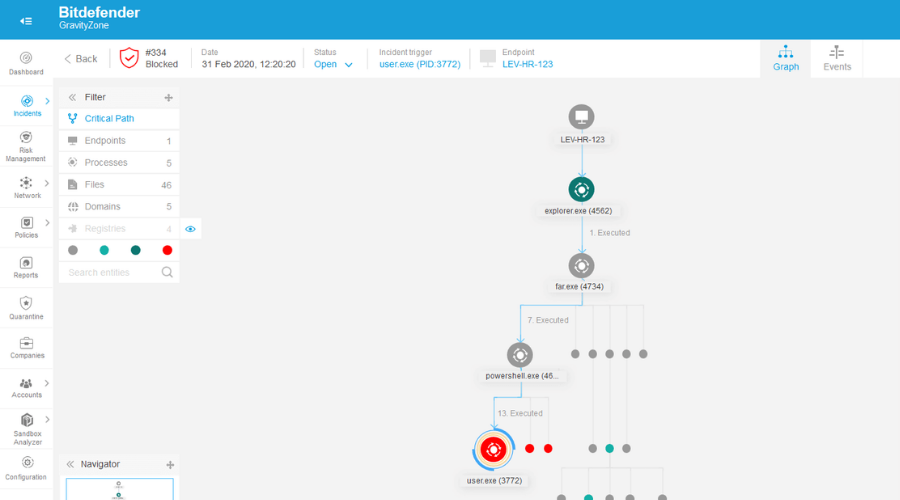
Bitdefender’s GravityZone is a business security solution that is constantly ranked first in independent security tests, and that’s a good start for choosing the tool for your company.
And if you’re wondering why it’s because of the combination of machine learning and heuristics with signatures and other technologies for protection against all types of threats.
Whether it’s malware, ransomware, exploits, or any type of malware including zero-days, this enterprise tool covers all endpoints and servers equally.
And with all modern solutions, you can control everything from a centralized management point that is easy to use and configure.
Take into consideration some of its best features:
Risk management and vulnerability assessment
All actions are managed from a single console and by a single agent
Best ranked by independent security tests
AI and machine learning technologies
Layered protection against all threats
Bitdefender GravityZone
This enterprise security tool will mold on your business requirements no matter the size.
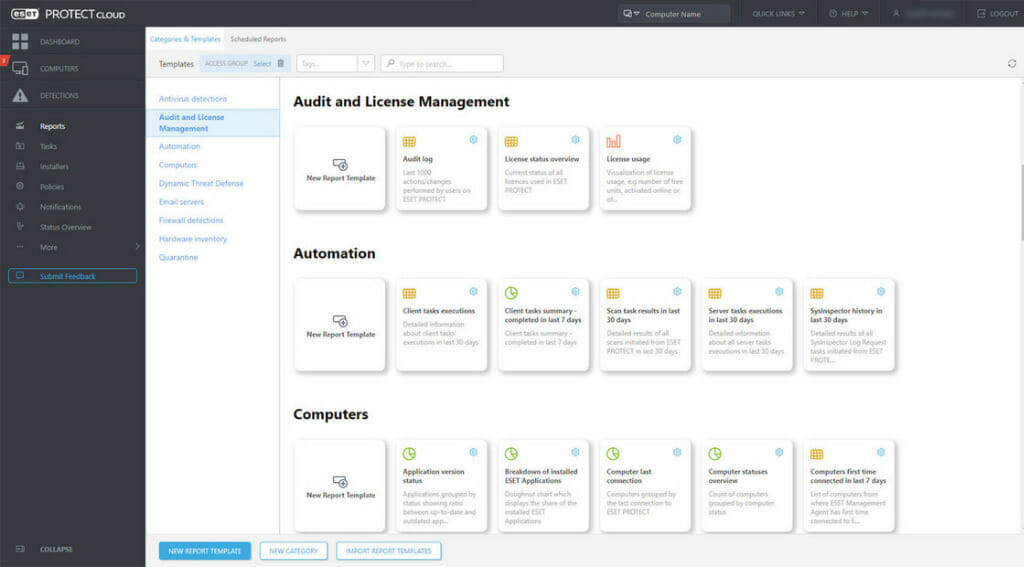
Is there a perfect security solution for your business? That is up to you and ESET PROTECT Advanced is an enterprise solution for any size o scale of business.
This tool combines anti‑malware scanning, spam filtering, and anti‑phishing to perfectly secure all the computers in the network against malware and email-based attacks.
In these troubled times, it’s important to be able to control everything from afar. That’s perfect because the ESET tool comes with a cloud-based management solution console in that regard.
This solution can be tuned for your specific needs because it also provides file server security, full disk encryption, cloud app protection, e-mail security, and many more.
Let’s see what are its best features:
Single click management for a lot of actions
Advanced reports from over 1000 data points
Easy installation and deployment
Advanced multilayered protection for all devices, including mobile
Ransomware prevention
ESET PROTECT Advanced
Secure your business with the most versatile and advanced solution on the market!
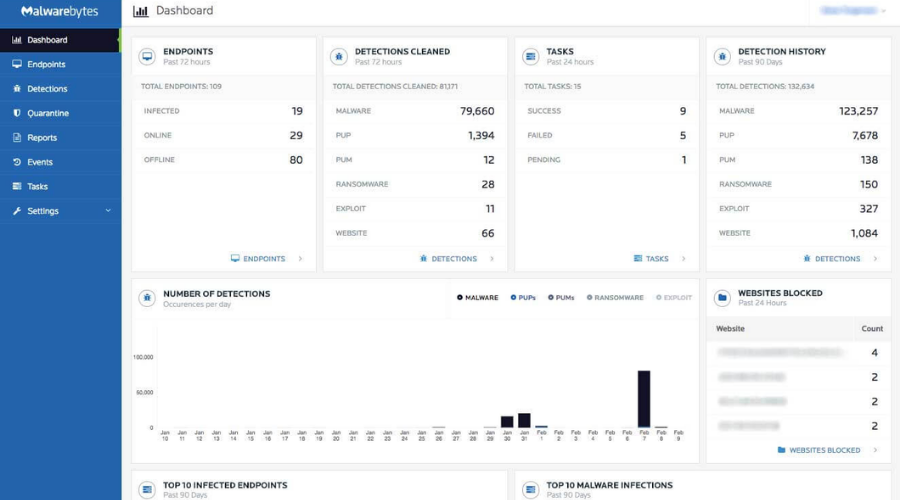
Malwarebytes for Small Business or Malwarebytes for Teams is intended to safeguard small enterprises’ data and devices for multiple operating systems, including Windows 10 and 11. It provides real-time threat detection and response, as well as priority phone and email assistance.
You don’t need prior cybersecurity or IT experience to manage security for your team with Malwarebytes for Teams; it’s simple to use and has straightforward features.
Let’s have a glance at the features Malwarebytes for Teams can offer:
Advanced anti-malware, anti-spyware, and anti-virus
Tamper protection
Brute force protection
Device alerts
Monthly reports
Priority phone call support
With proactive protection from downloads, hack attempts, and infected advertisements, it detects and avoids contact with fraudulent websites and harmful links. It works in the background and targets active threats with quicker analysis thanks to its lightning-fast Hyper Scan mode.
Malwarebytes for Teams is currently not available for trial. If you’re not familiar with Malwarebytes features and want to try it out, you can first sign up for Malwarebytes Security and Antivirus trial, post which you can switch to Malwarebytes for Teams subscription.
Malwarebytes for Teams is a group membership for up to 20 devices that you may purchase for your team.
Malwarebytes Small Business
Employs 4 separate technology modules anti-malware, anti-ransomware, anti-exploit, and harmful website protection to detect and eradicate known and hidden threats.
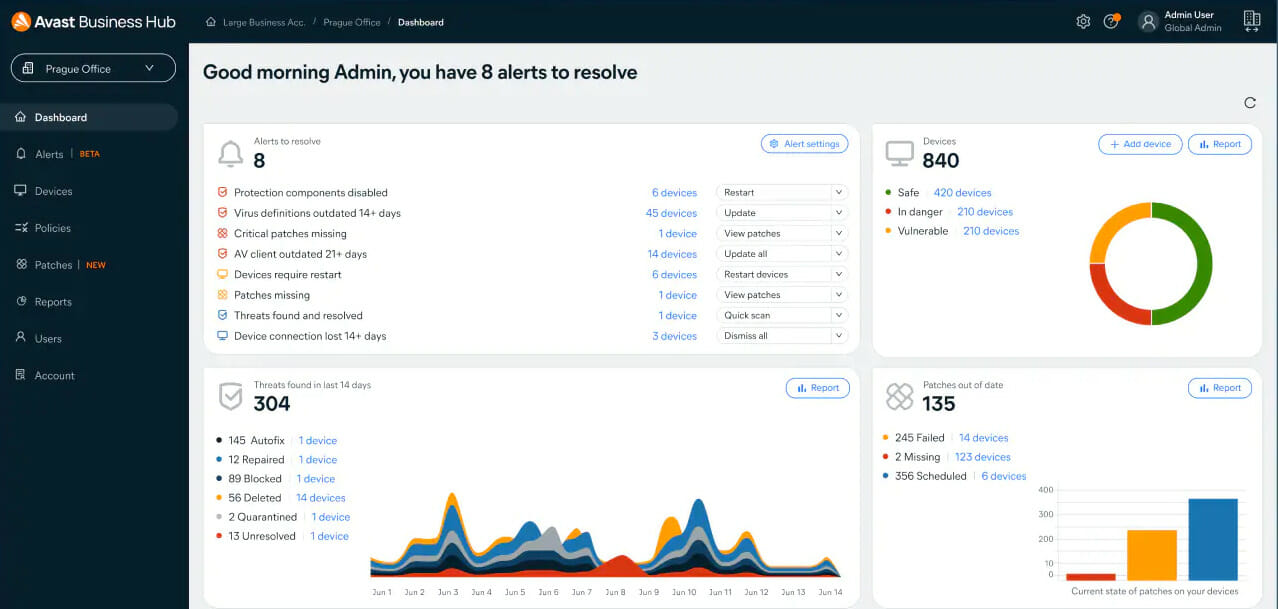
It’s important for antivirus not only to provide excellent protection for your business but also to be able to deploy very fast and easily, and Avast Endpoint Protection Advanced promises just that.
Although it’s a simple solution, it offers sophisticated tools for protection against all threats and data or identity theft.
The result is that you will be able to use banking tools on any device and keep off the hackers by using an excellent firewall. It even takes care of your webcam security.
And security is not the only concern of this solution. The built-in Patch Management option can be used for Windows and the installed applications maintenance directly from a unified console.
Let’s take a look at some of its top features:
Easy to use and installs in minutes without any prior experience
Multi-OS support (Windows, Mac, iOS, and Android) and platform
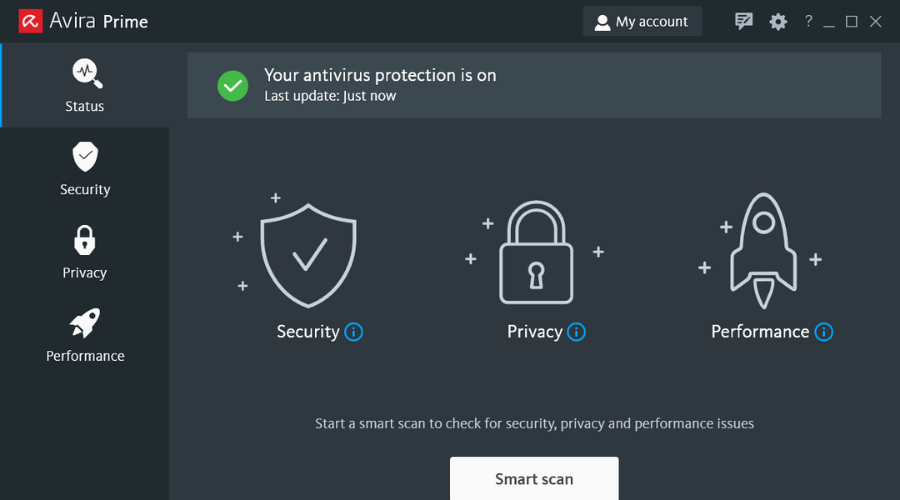
If you have a small business, Avira Prime is dedicated to security that will fit right away to your needs.
This tool is tailored for a maximum of 25 devices for a subscription and it offers strong but classic protection that you would also get from an antivirus for home users.
However, this software has some aces down its sleeves as it also offers a free, buit-in VPN and a password manager that will add to the overall protection features.
Apart from security, Avira Prime also takes care of the software and system updates or the correct functionality of the drivers on your PC. In that respect, it can replace other costly solutions.
Take a look at this solution’s top features:
Free and unlimited VPN
Password management features
Endpoint real-time protection against malware and online threats
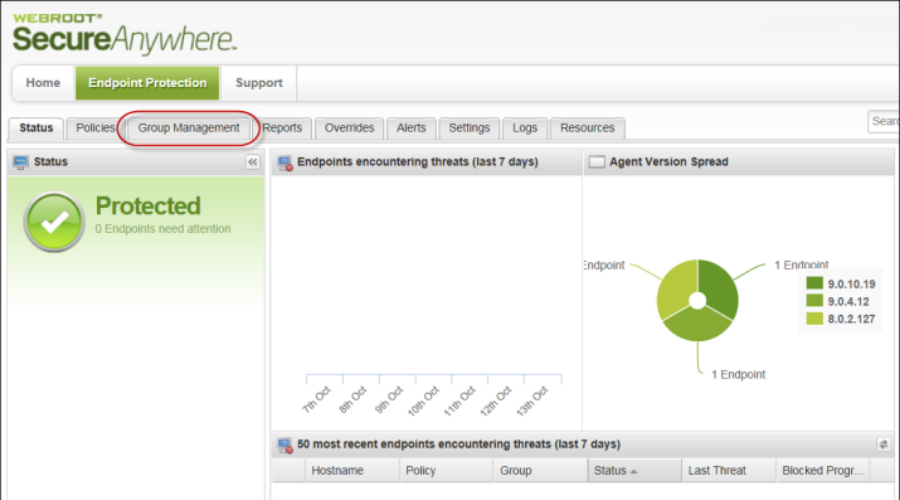
Even when an endpoint is not connected to the internet, Webroot Business Endpoint Protection uses patented technologies to identify, track, and control infections for Windows enterprise devices.
Offline protection for system and user data is also offered, rather than relying on Windows volume shadow copy, which might cause issues.
Webroot security utilizes an approach that is less vulnerable to malware assault. It employs a new approach to preserving and safeguarding device data, preventing the local host disk from becoming corrupted or demanding to reformat.
Let’s have a look at the features Webroot Business Endpoint Protection offers:
User and device protections that are layered
Multi-shield defense
Malicious script defense
Identity and privacy protection for users
Dynamic risk prevention using infrared
Extremely efficient heuristics
Security indicates that you no longer require the services of an expert in IT security, people, or resources on hand to ensure your company’s digital fitness. Furthermore, with fewer infections and security events, as well as fewer remediation cases and productivity losses, administrators can focus on what is most essential.
Webroot Business Endpoint Protection
Service application for securing internet devices and network communication through prevention with web filtering and antivirus.
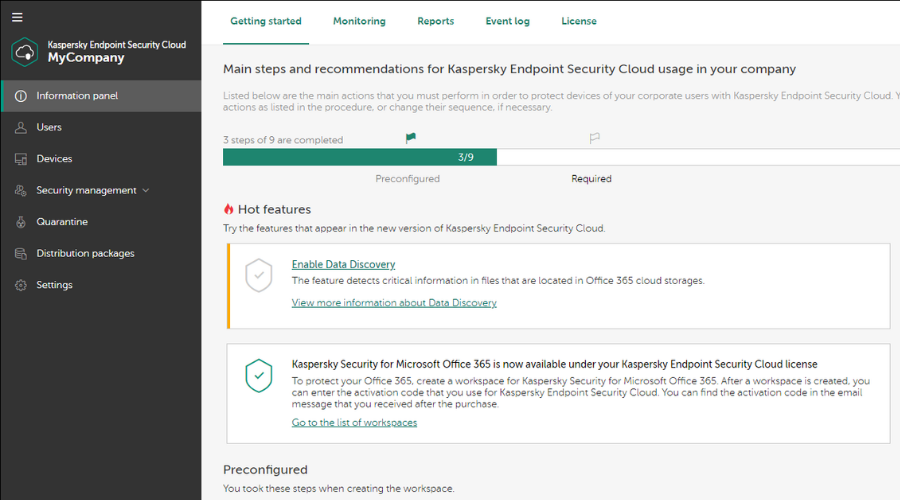
If you have a home or small business, you should also consider trying Kaspersky Endpoint Security. However, you can use it for more than 5 devices, including servers or mobile devices.
As is the case with all the above solutions from our list, the Kaspersky antivirus can be easily controlled from a cloud-based main console.
Its interface is so friendly and simple to use that you or your IT management team won’t need any special training to implement it.
In line with the defined schedule, Kaspersky Endpoint Security automatically scans the entire computer or specific regions of the computer.
Again, you will benefit from multi-layered protection aided by machine learning to protect all your devices from any possible online or offline threats.
How do I pick the ideal professional antivirus for my business?
Your requirements will define the best antivirus for your company. If you run a small business that does not store or handle sensitive information like credit card numbers or other private information, you may be fine with a simple-to-use antivirus like Windows Defender, Avira, or Kaspersky.
If your organization is large, you may need to adopt a more powerful antivirus system. The best solution will be one that meets all of your company’s needs. It should be able to protect you against all forms of threats, including viruses and malware, spyware and Trojan horses, and hackers.
It should also be able to defend you from internal dangers like as data loss, employee emails, computer abuse, and so on. The best solution will be one that is easy to use, has a good detection rate, and is updated regularly.
This was our selection including the best antiviruses for Windows 10 Enterprise. Do not hesitate to make a pick as soon as possible.
Moreover, if you’re interested in server solutions instead, take a look at the best antiviruses for Windows Server. You won’t be disappointed, be sure of that.
Do you agree with the findings? Let us know in the comment section below!
Avast is a popular antivirus that offers free and premium versions for users to try. As one of the oldest antivirus applications on the market, Avast is experienced in protecting devices.
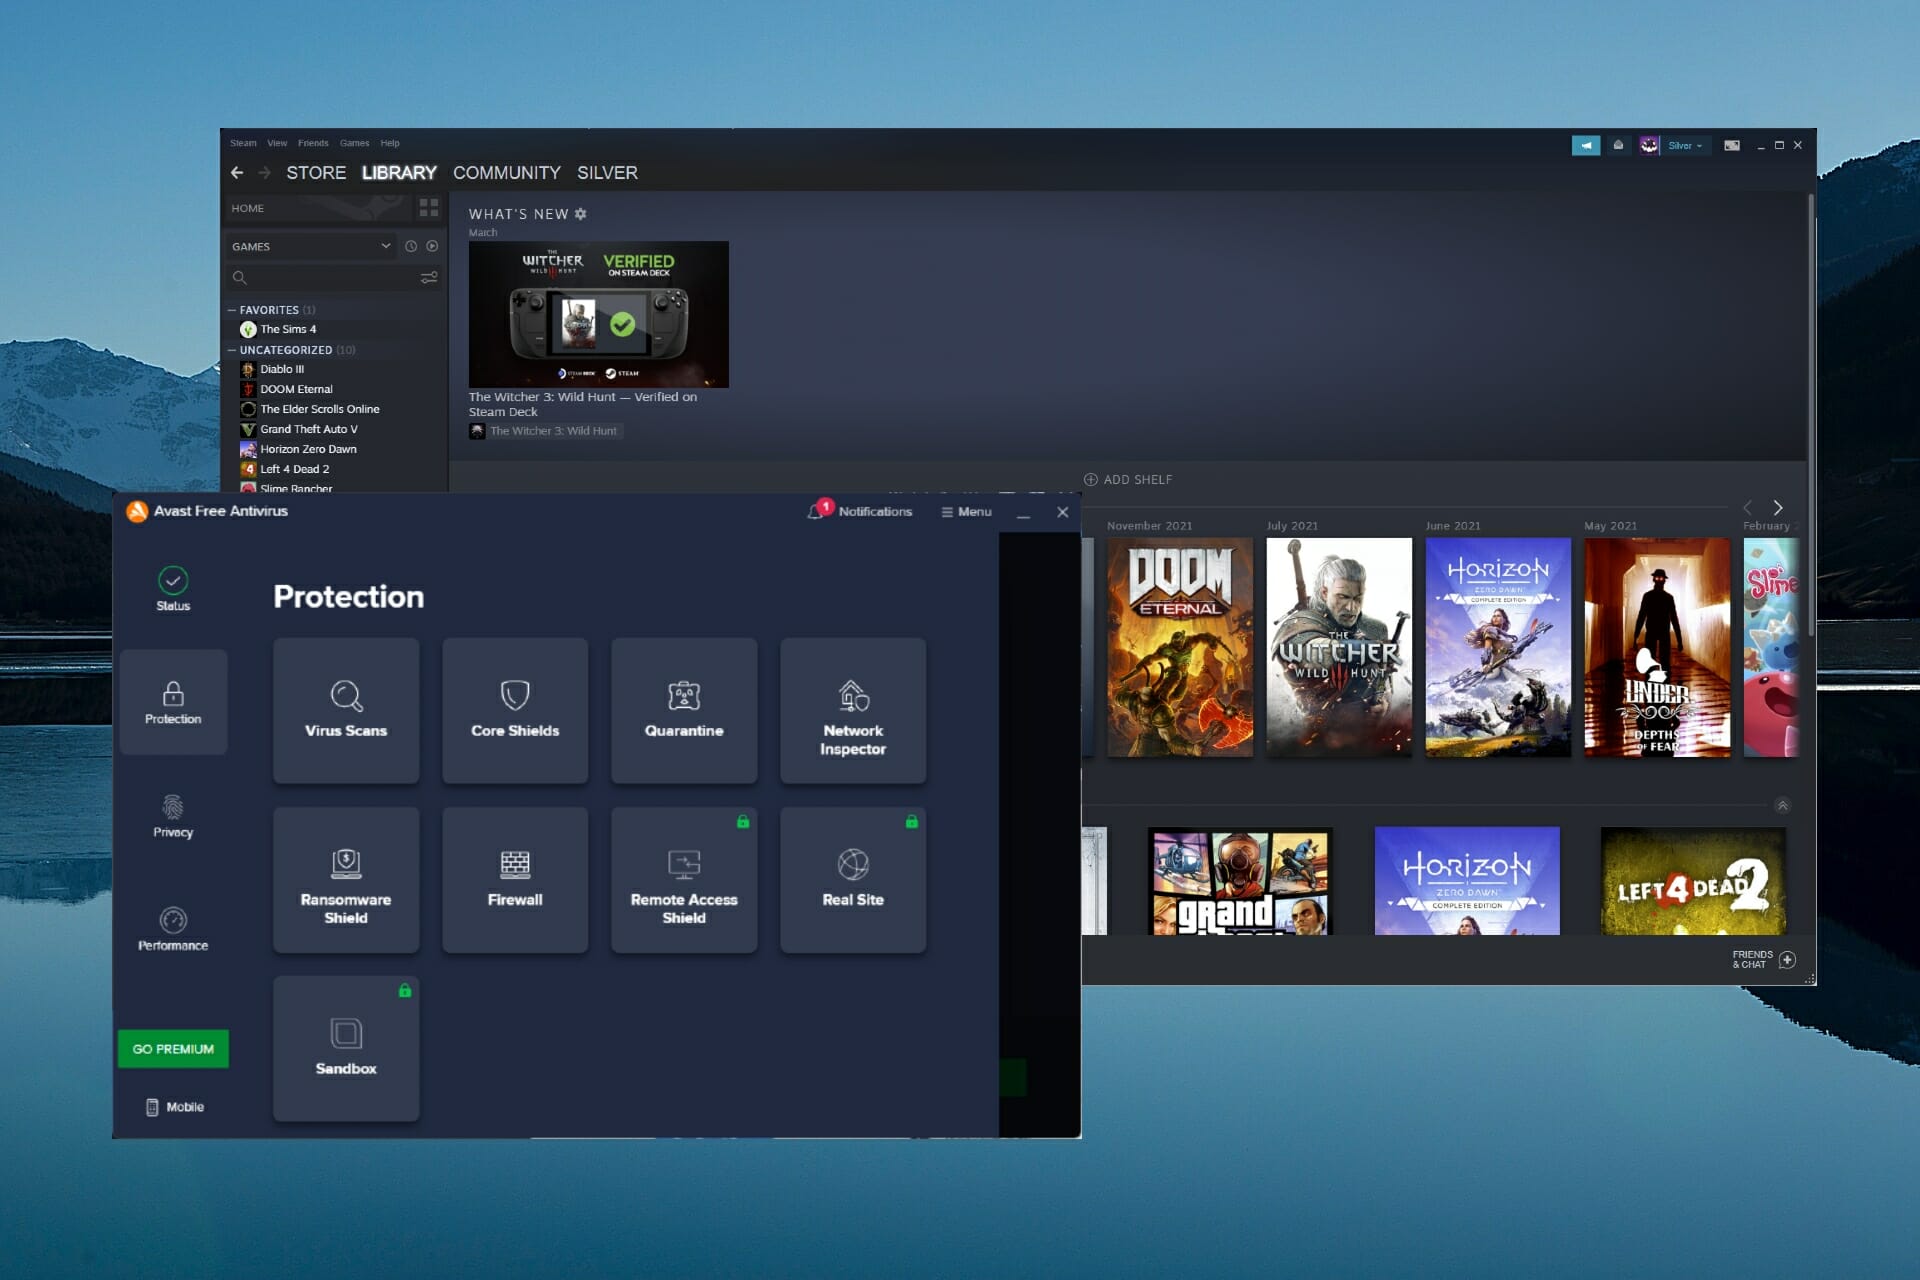
However, users have reported that the antivirus is giving false positives when trying to run a program or access certain websites. These reports include Avast blocking Steam games from running. Steam is a free, downloadable service for video games.
If your issue is with Steam games lagging, we have another guide for that. Keep reading for ways to stop Avast from blocking Steam games.
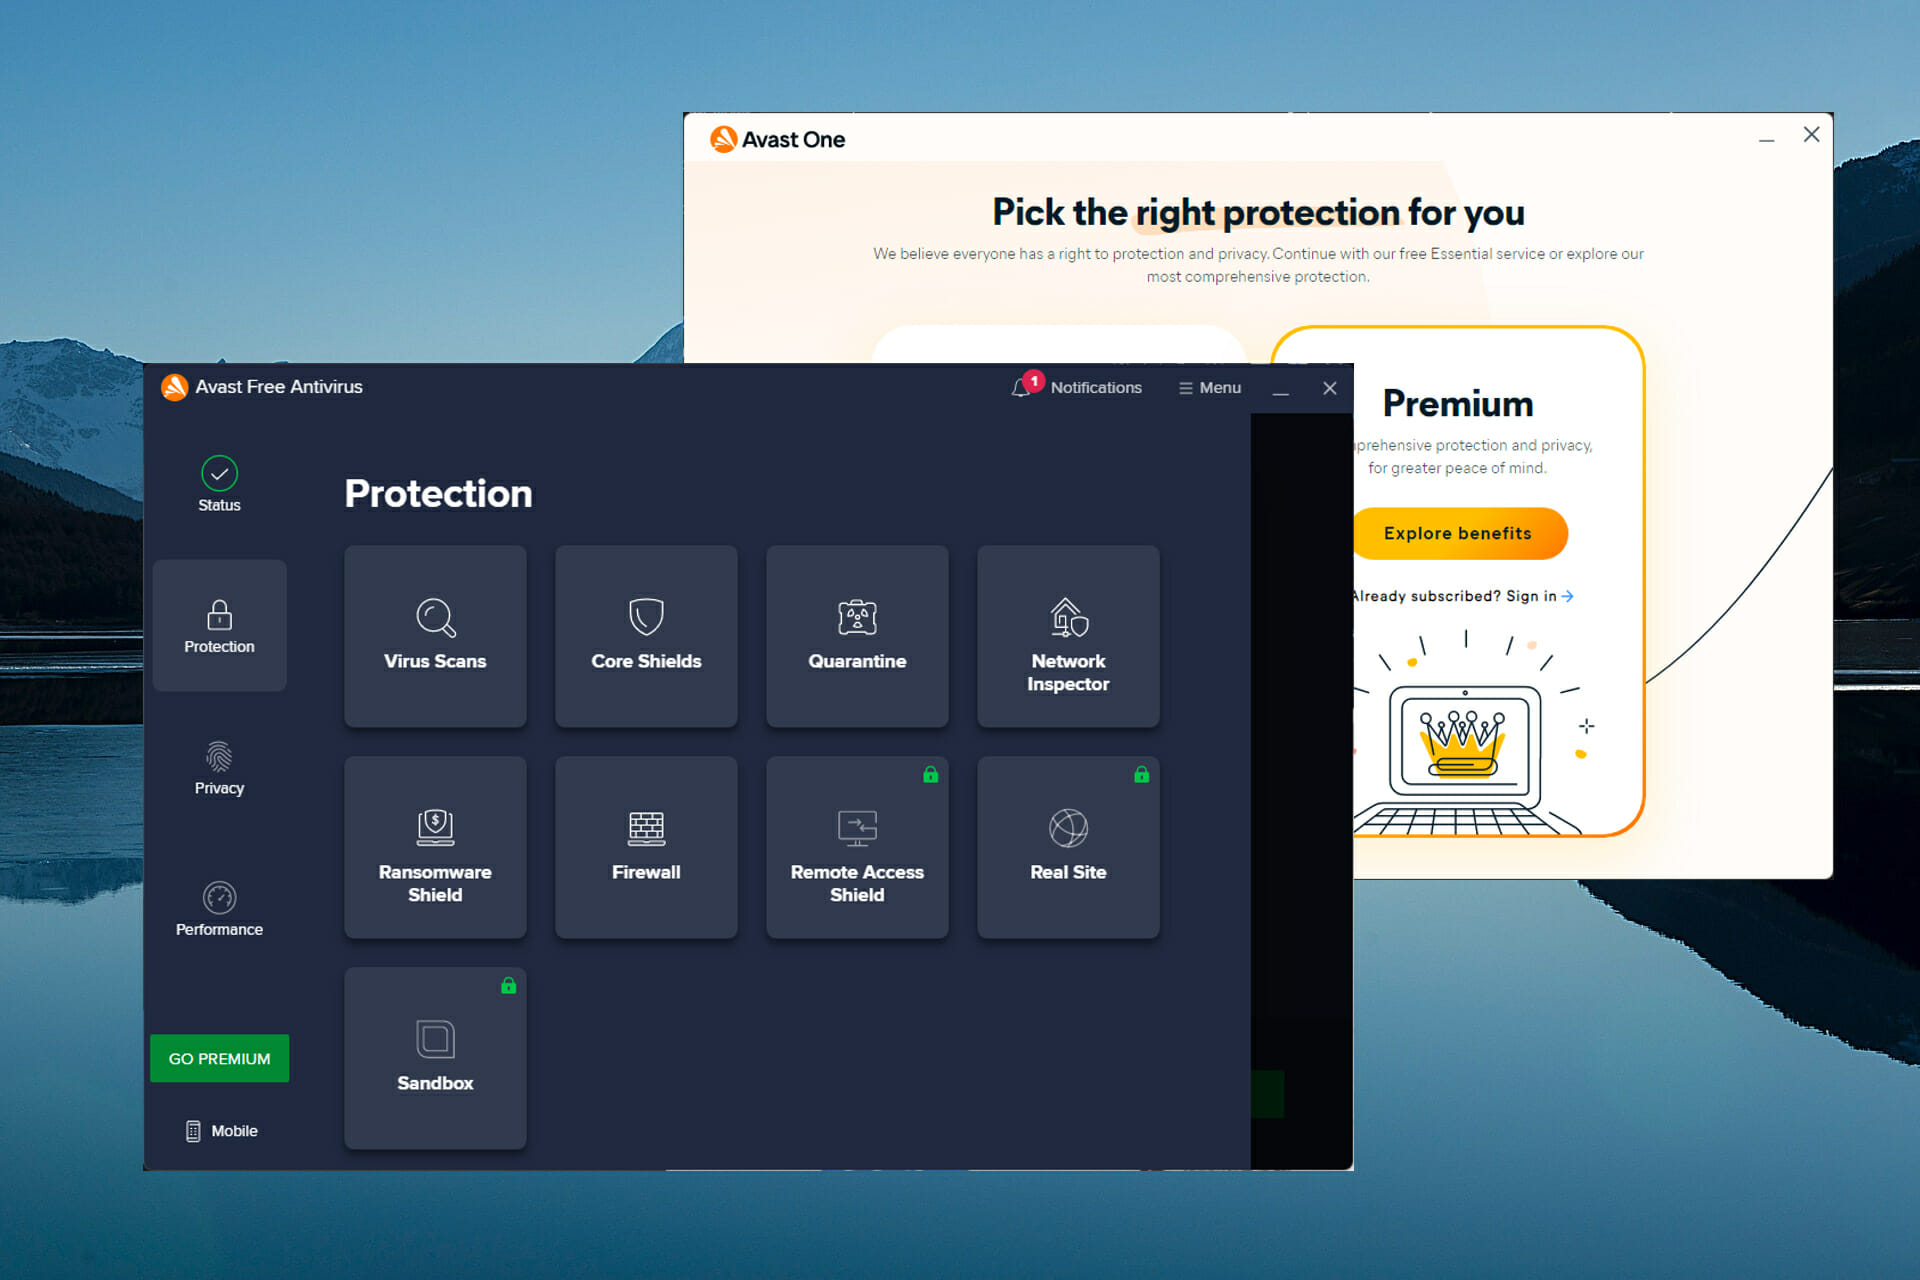
What’s the difference between Avast Antivirus and Avast One?
Avast One is the latest security and protection service from Avast. Its purpose is to have all Avast security features in one central hub for easy management so users don’t need to have multiple subscriptions.
Avast One offers features like a VPN, firewall, antivirus, and more all in one. Avast is encouraging users to switch to Avast One from Avast Antivirus and Premium Security. Users can only have one Avast service installed on their PC at once.
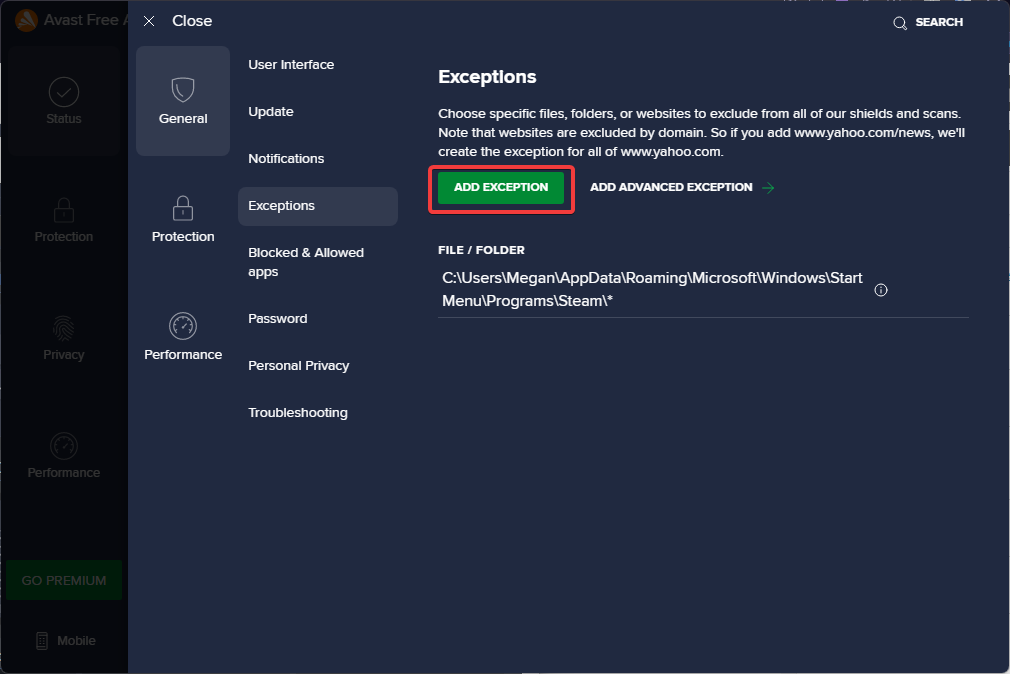
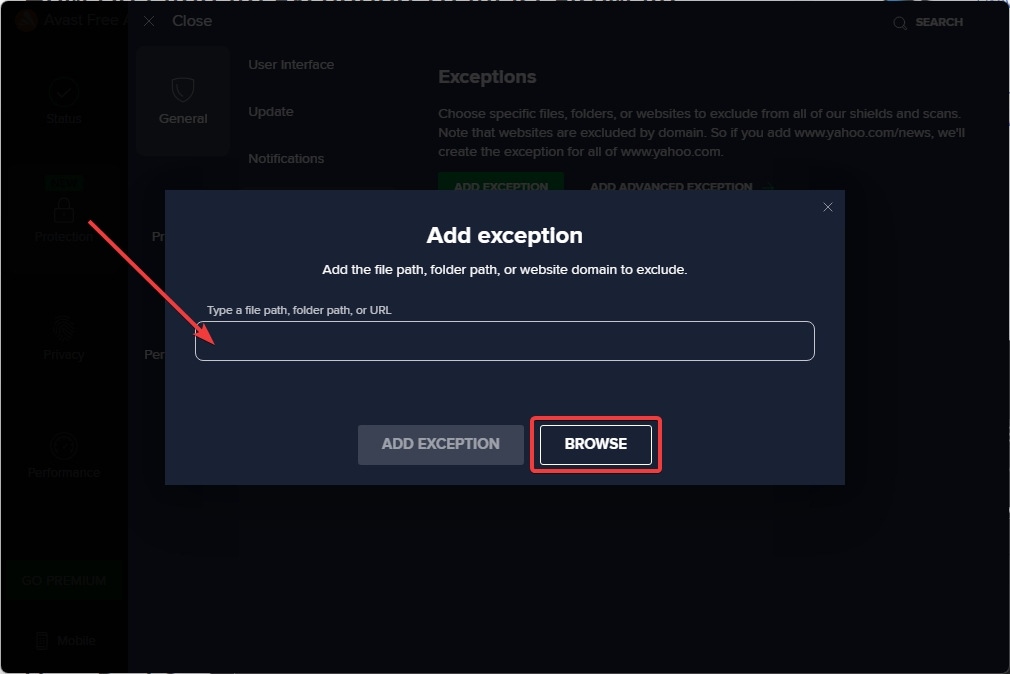
Either copy and paste the file path where Steam is located on your PC or select Browse and locate Steam.
Click AddException.
This will add Steam and its directory to the exceptions list and thus should solve the issue of Avast blocking Steam games. When installing new games, be sure to add them to the exceptions list.
2. Add Steam games to allowed apps
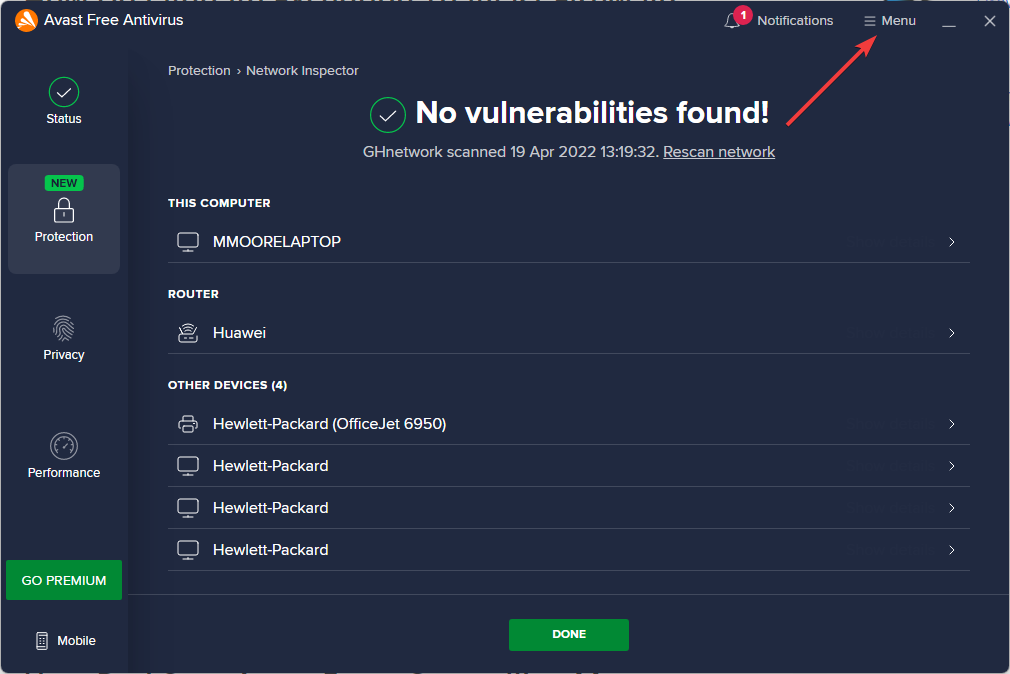
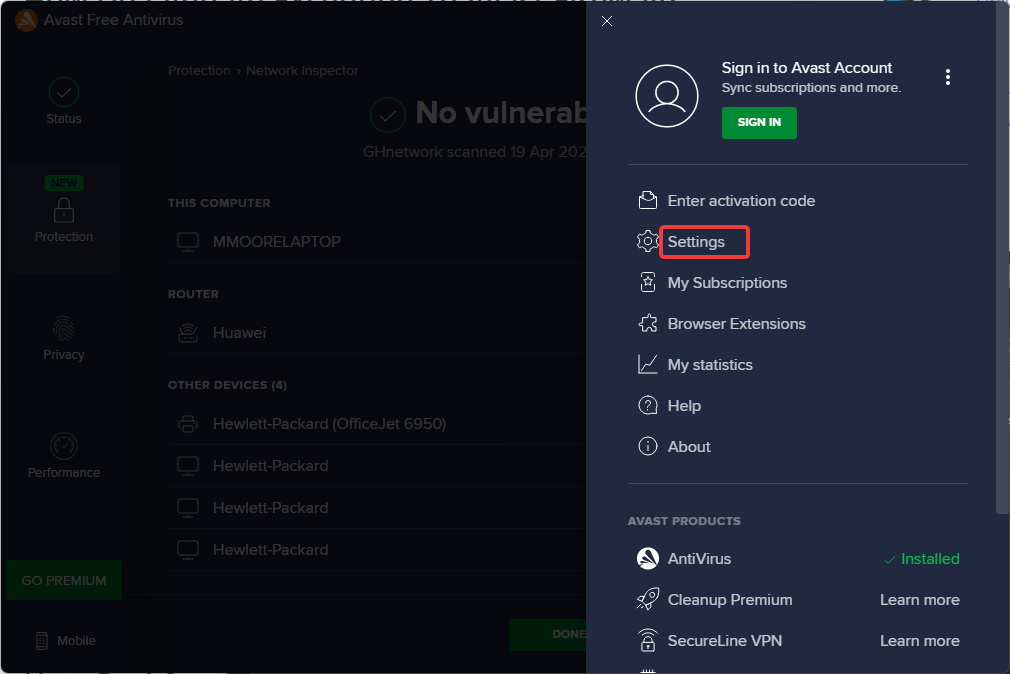
In Avast Antivirus, click on Menu.
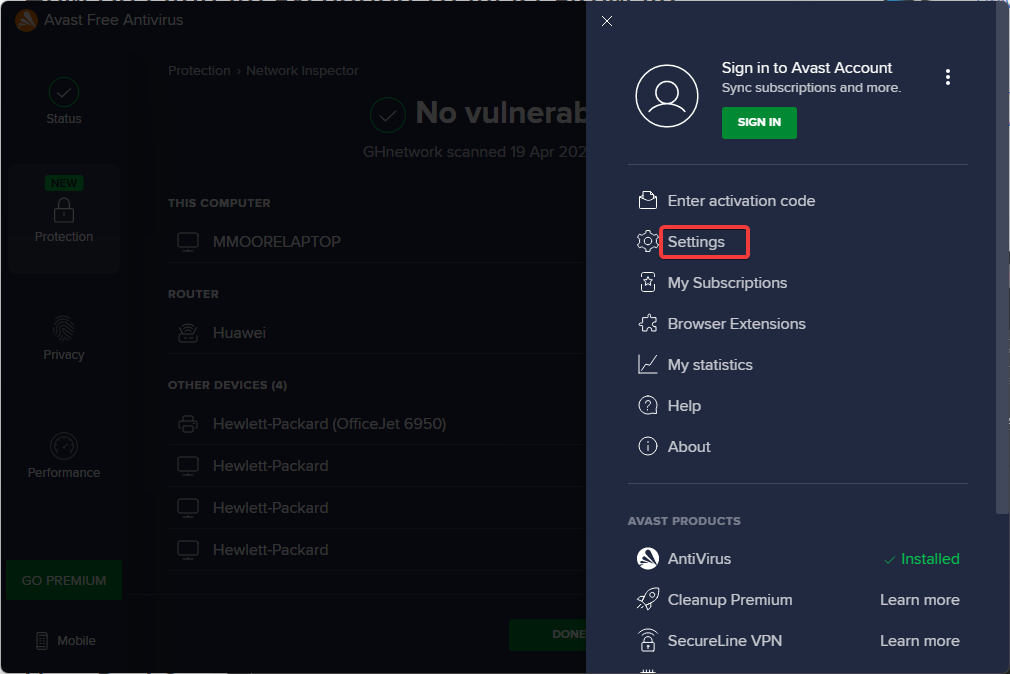
Select Settings.
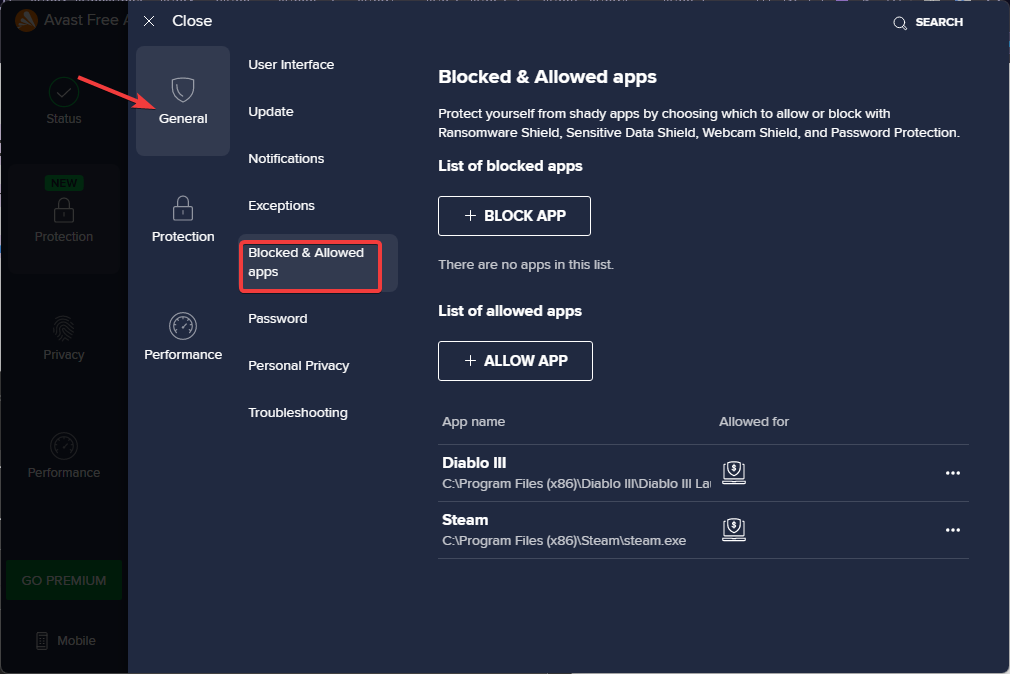
Under General select Blocked & Allowed apps.
If a game or the Steam app is listed under blocked apps, remove it.
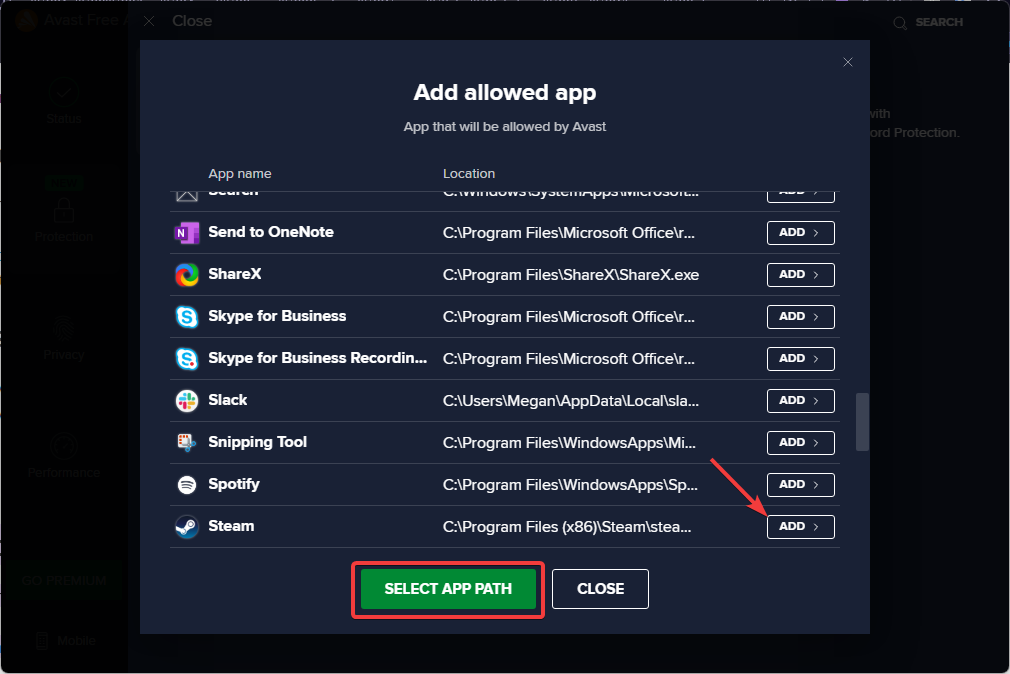
Under List of allowed apps click Allow App and add steam and any games.
Adding all the games you play through Steam to Avast will prevent the firewall from blocking them. Be sure to also include Steam itself on this list.
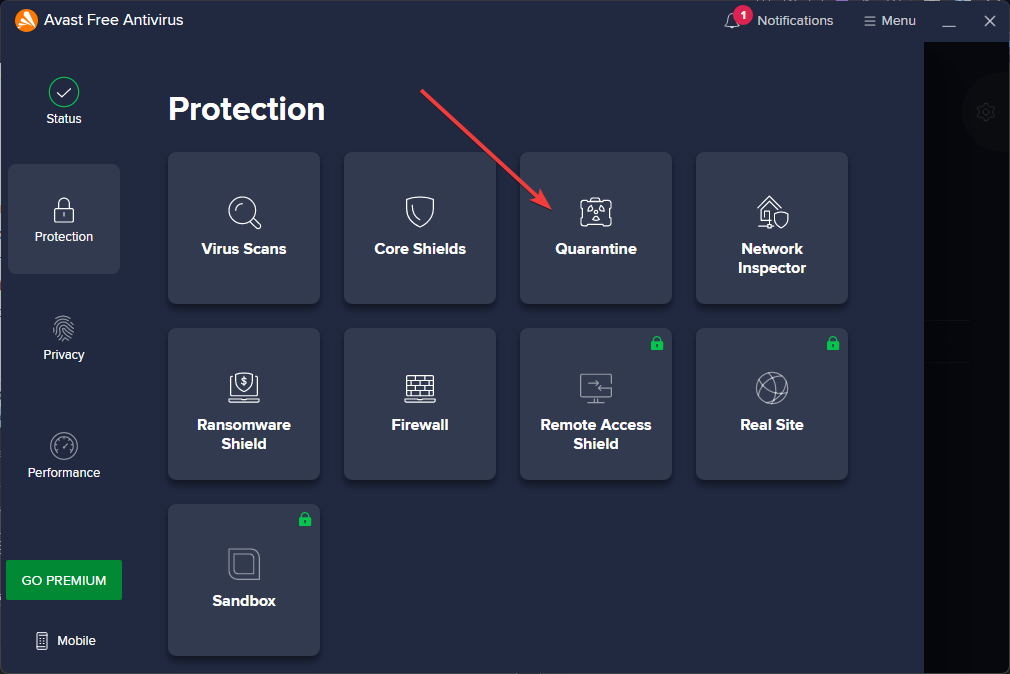
Select Quarantine (previously known as Virus Chest).
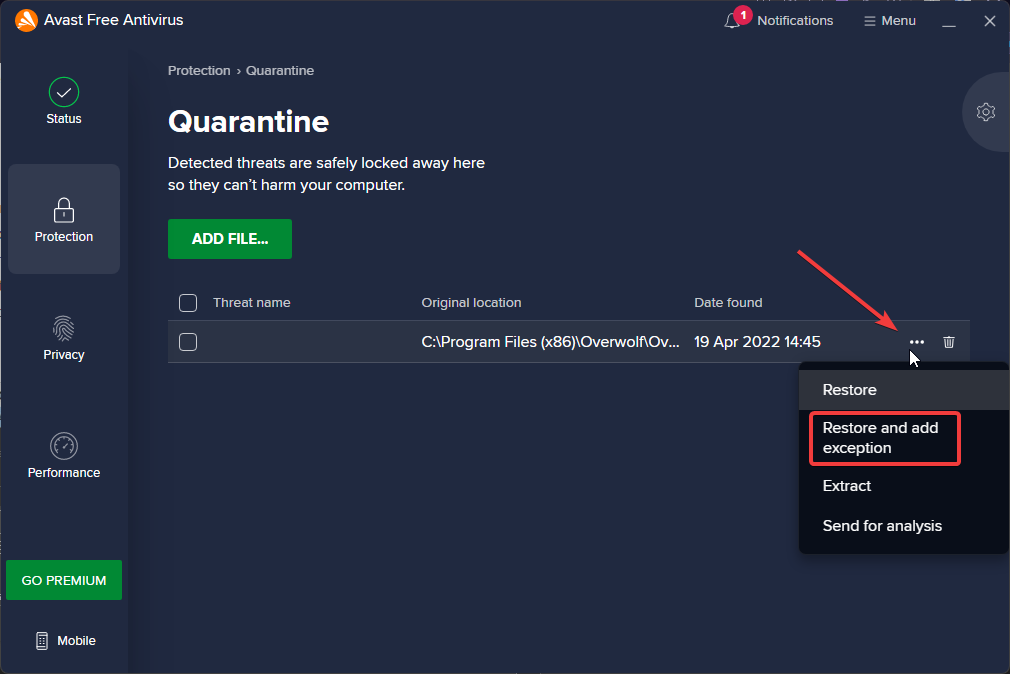
Locate the game file and click on the three dots.
Select Restore and add exception.
Avast places any potential threats detected in quarantine to be reviewed. If Avast blocked your Steam game from opening, the file can be found in quarantine. Restoring and adding the file as an exception will prevent Avast from blocking the game in the future.
4. Temporarily disable Avast
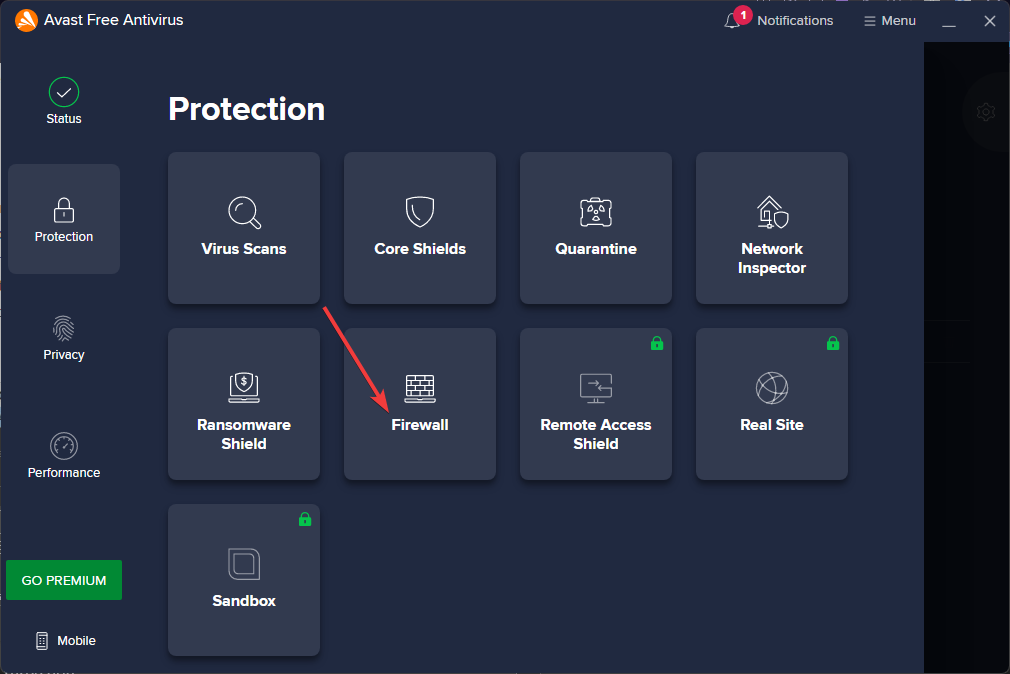
In Avast Antivirus, click on Protection.
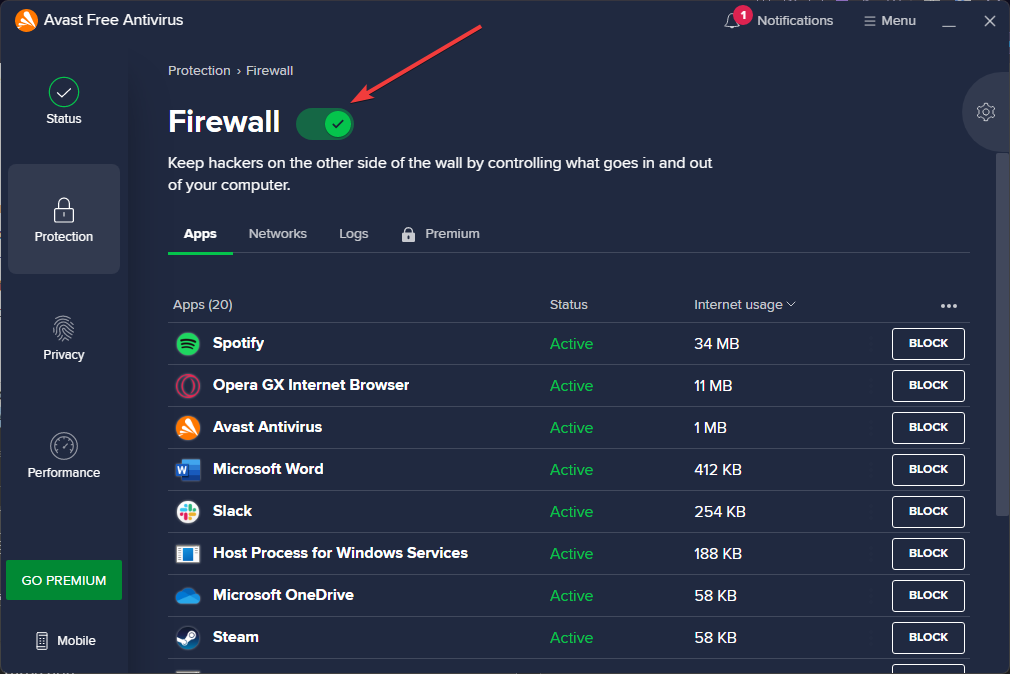
Click on Firewall.
Toggle the Firewall off.
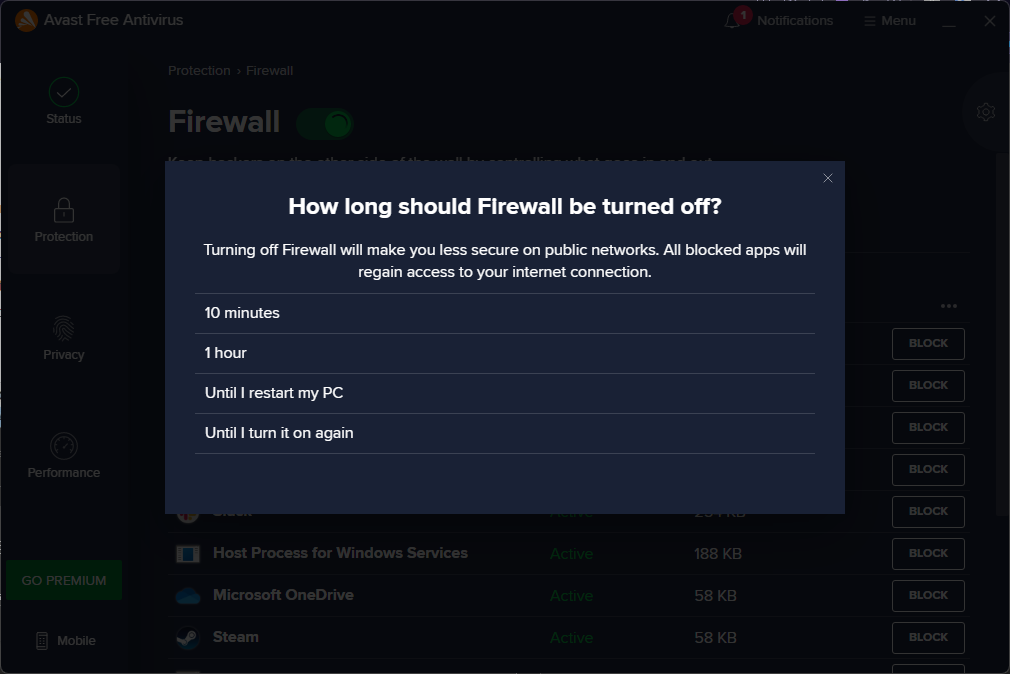
Select the duration of time to turn off the firewall.
Launch the Steam game.
Turning off the firewall is not recommended, but it will prevent Avast from blocking Steam games. Setting a duration will disable the firewall for a set amount of time so it will automatically turn back on if you forget.
We hope the above solutions fixed the issue of Avast blocking Steam games from running. Avast is one of the most popular antiviruses out there, and it does a great job at protecting devices from potential threats and malware.
Users can have peace of mind while using Avast and with the knowledge that their device is protected. However, it can be frustrating when the antivirus blocks programs that are safe to use like Steam.
Comment down below what solution worked for you, or let us know if there is a different solution that is not listed that worked.
Debugging is a big part of the software development life cycle that eliminates errors in code. Debuggers are invaluable tools for game design that enable developers to identify and remove glitches, or bugs, that may have crept in.
So if you’re looking for game design software, you should select one that comes with an integrated debugging tool tailored for games. These are a few game design packages that include built-in debuggers so that you can fix code without any separate standalone debugger tools.
Why is a debugging toolkit important in game design?
Human beings are not flawless, no matter how much we try to deny it. We all make errors, and that’s okay. When you have the chance to correct flaws and errors, is better to understand the importance of using a debugging tool when you decide to make a project that is based on game development.
Bugs come in a variety of shapes and sizes, and there are even formal classifications for them, such as syntax issues, logic bugs, and design flaws. Debugging is not limited to programming, and it is an essential component of any game design project.
What if you need to resolve a server problem in a massively multiplayer game? Can you really afford to take hundreds of gamers down while you rebuild, test, repair, and restart the server? Sometimes you won’t have any other alternatives, but issue response is something you should keep in mind when creating games that may have a non-trivial problem.
Now, let’s take a look at the best game design software with built-in debugging to start your awesome project and awe gamers worldwide.
What is the best game design software with built-in debugging?
3DS Max is considered faster for demanding hard surface modeling projects. As a matter of fact, some of our editors felt that its UV projection tools and smoothing groups are immensely better than almost every other tool from Autodesk. Consequently, there’s a widespread impression that 3DS Max is the benchmark as far as hard surfaces are concerned. Well, when we scanned its abilities, it’s hard to disagree.
First, you can create models in numerous intuitive ways. You can also easily extract information for your model to help inform planned modifications. You can as well blend and mix up to six materials to create realistic hard surface models. The software’s spline-based modeling features have also been earning rave reviews as they are super-efficient when creating/ editing poly formats in surface modeling.
Second, 3ds Max developers allow a user to debug its models, and pretty much everything is created in 3ds Max with the MAX Script Debugger. You will be able to detect and fix all the glitches you may get in your 3D models.
Bottom-line? The 3DS Max software offers 3D hard surface models of the highest possible quality in much less time.
Autodesk 3ds Max
With this professional 3D modeling and animation toolkit you will create dynamic, customizable gaming projects faster than ever.
Unity is one of the industry-leading design applications tailored for the Unity engine that lots of publishers develop their games with.
This is a multiplatform game engine with which you can develop software for Windows, PlayStation 4, Xbox One, iOS, Android, Wii U, 3DS, Mac, and Oculus Rift. The software has Personal, Plus, Pro, and Enterprise versions to design games with.
Unity boasts a flexible editor with which you can develop both 2D and 3D games with C# and Javascript scripting. The software includes extensive animation, graphics, audio, and 2D and 3D physics design tools; and you can also extend the Unity editor with more than 1,700 extensions.
The game engine has been used to create several of the world’s highest-grossing games on multiple platforms. All-time successful game projects like Pokémon Go, Hearthstone, Cuphead, Monument Valley, Assassin’s Creed, and Beat Saber demonstrate Unity3D game production’s tremendous potential. The nicest part about this game engine is that the free web-based version is rather strong and well-equipped. You don’t have to rush to grasp a premium version as a beginner game creator.
Furthermore, Unity has a MonoDevelop IDE debugger tool with which to debug JavaScript, Boo, and C# scripts. This tool enables users to inspect code by executing the scripts step by step. You can also establish conditional breakpoints at lines that you need to analyze more closely with Unity’s debug tool.
Unity
Join one of the Unity plans and learn to create gaming content at ease as professional builders do.
Microsoft Visual Studio is an excellent game development software that includes a debugging tool that supports the node.js and Mono platforms. JSON is the project file format for debugging, which we much appreciated during testing.
Depending on the size and code you want to build within the software, Visual Studio provides three distinct subscriptions. Visual Studio Community is a free open-source, feature-rich IDE for students and independent developers just starting out in game development.
If you have a team and want to enhance mobile experiences for Android, iOS, and Windows through unfettered code sharing and debugging, Visual Studio Professional is for you.
Create cloud-powered apps for numerous devices, PCs, and the web, all built on top of your existing applications and expertise. Cross-platform technologies enable you to design programs for Windows, Android, and iOS using a single development environment.
The Visual Studio Professional subscription includes Azure DevOps, a set of services that allows you to design, create, and ship apps quicker to any cloud or on-premises environment.
Graphics Studio Enterprise features comprehensive capabilities for historical game creation, cloud apps, visual, mobile apps, debugging, and testing. You may get free training, support, and partner offers with this membership.
Visual Studio from Microsoft is omnipotent, it is compatible with virtually all programming languages, it can be tailored to your programming requirements.
Unreal Engine 4 is another of the most renowned development kits in the industry that big publishers design games with.
It includes a full suite of creation tools for game design and supports all the major gaming platforms, such as Xbox One, PS4, Windows, Wii U, Oculus, etc. It’s a great software for designing first-person shooters, MMORPGs (multiplayer RPGs), and stealth games.
Perhaps the best thing about Unreal Engine 4 is its Blueprint system that enables users to design games without a source code editor. Blueprint is effectively visual scripting for game design with which you can set up and edit scripting node networks, and the editor also incorporates various debugging and analysis tools.
For debugging, the Blueprint Editor includes Play in Editor and Simulate in Editor modes that enable you to pause game executions and step through Blueprint graphs with breakpoints. With that built-in debugger, you can then inspect the game‘s property values and make changes when required. Unreal Engine 4 also includes a Gameplay Debugger tool that displays overlaid real-time game data for specific data debugging.
GDevelop is ideal for beginner developers as coding isn’t so essential to design games with it.
This is open-source software with which you can develop games for Windows, Linux, and web browsers. The software is compatible with the Windows, Ubuntu, Mac OS X, iOS, and Android platforms.
GDevelop enables you to design games by inserting object and event elements, and it translates those into machine code. The software provides tons of objects for games, such as text, 3D boxes, tiled maps, sprite, and particle engine objects. Users can design more advanced levels and interfaces with GDevelop’s scene editor.
Even though minimal coding is required, GDevelop still has an integrated debugger tool for native games. That enables developers to view and modify scene data, play through or render scenes frame by frame and insert new variables and objects. Overall, this software is ideal for developing HTML 5 web games; but you might need something with more extensive tools for 3D game design.
Godot is also open-source game design software packed with plenty of handy tools. This software supports both 2D and 3D game design and has its own custom scripting language. Godot is compatible with Windows, Linux, and OS X; and you can design games for those platforms and PlayStation 3, iOS, Android, Haiku, HTML 5, and Blackberry 10 with the software.
Godot has innovative scene-based design architecture with which developers can combine multiple scenes (a collection of game elements) into larger scenes.
Developers can design games in Godot either with C++ or the software‘s custom GDScript that’s optimized for the scene-based architecture.
The software has a dedicated engine for 2D game design, and you can also develop 3D games by importing 3D models. Godot includes a timeline animation editor with which users can animate 2D or 3D graphics.
In addition, the program’s built-in editor incorporates a debugger tool with which users can lay down some breakpoints and program stepping to go through code one line at a time.
GameMaker: Studio 2 is one of the best-established game design packages for Windows. With this program, you can deploy games for PlayStation 4, Xbox One, Windows, Mac, iOS, Android, Linux (Ubuntu), HTML 5, and PlayStation Vita.
There’s a freeware version of the software, as well as a Studios Professional and Masters Collection. Studios Masters Collection enables users to export their games to all platforms, while the freeware is limited to just Windows.
GameMaker: Studio 2 is a developer software that incorporates an intuitive drag-drop-drop UI for game design. It also has its own GML scripting language that’s comparable to C but provides greater flexibility when combined with the software‘s drag-and-drop UI. In addition, the software supports the Box2D and LiquidFun particle physics engines to add realistic motion; and it also boasts integrated cross-platform shader support.
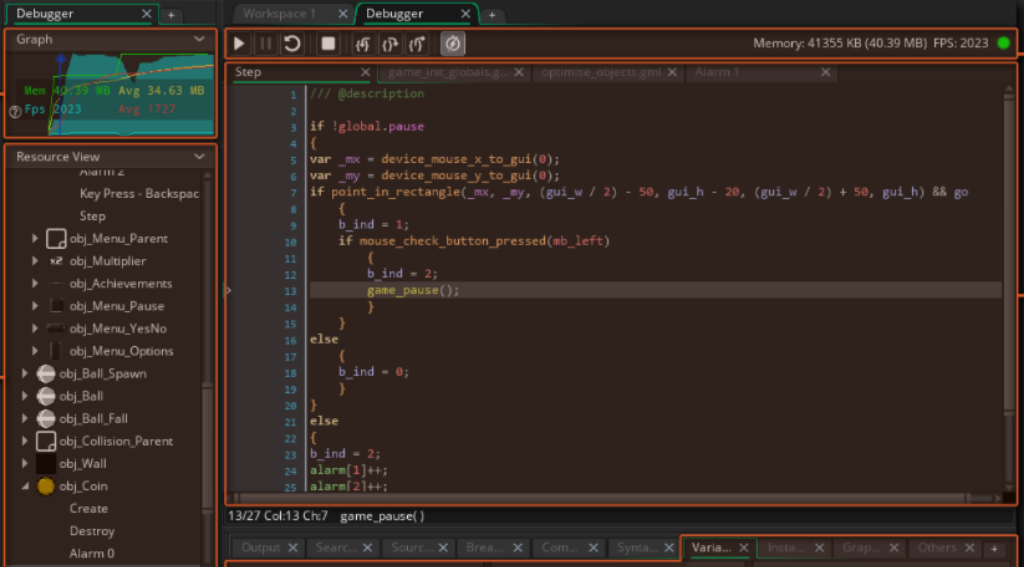
GameMaker incorporates a Debug Mode that launches a Debug Module when you run your game. With that, you can inspect the finer details in games down to individual instances and variables.
The Debug Module includes watching windows that display source code, global variables, step properties, instance variables, buffer data, call stack events and more besides to give you a comprehensive overview of the game. Furthermore, users can add debug breakpoints (a stopping point in the game code) within the Debug Module or from the Studio IDE with a hotkey. GameMaker’s comprehensive error reporting for scripts can also further assist developers to discover bugs in their games.
So those are seven developer toolkits with which you can design games for Windows, Mac, Linux, and consoles. As all the design suites include debugger tools, you can track down and fix bugs in the games more quickly without any standalone debugger required.
Game designers vs. game programmers. What is the difference?
Game designers are in favor of creating the game’s stories and storylines interesting, as well as designing characters and building up to level themes, rules, goals, and difficulties.
Game programmers must be well-versed in software coding and frequently have a background in computer science.
The heart of the game creation process is believed to be game programming. It entails converting the game designers’ ideas into code in order to build an enjoyable video game that everybody can understand. Once the game’s concept and design has been finalized, it is up to the programmers to bring it to life.
NOTE
For similar software from any other domain out there, see our Dev Tools section. In the Gaming Hub, you’ll find lots of dedicated reviews, recommendations, and news.
Debugging and experimenting are the only ways to obtain a precise understanding of what is going on when you design your game. And that’s when things start to fall into place and you can get your game up and running.
If you’ve been heard of another software that you think it’s worth mentioning, tell us in the comments and we’ll check it out.
The best things in life are free, and this list includes truly free antivirus software.
If you’re not ready to purchase a full antivirus package for your computer or device, then you can opt for the best and truly free antivirus to use while you decide to get the paid version.
Even if your computer has Windows Defender, you can still pony up and get free third-party security software that delivers more effective security protection for your PC or devices.
They need to constantly perform checks to prevent such threats in real-time, and they need antispam and anti-phishing protection for your internet security, among other simple features.
If you want an antivirus for business, consider a fully paid security suite, but if you’re considering one for your personal use and you’re cash-strapped, here are the best truly free antivirus solutions for you.
These software solutions pack advanced security features that will block almost all malware attacks.
Of course, premium antivirus tools offer additional features that guarantee your PC is safe from virtually all the cyber threats out there.
Is there an antivirus completely free?
Yes, you have free antivirus software with reliable services out there that gives you the peace of mind to keep surfing and protect your online identity.
Although, you should know that this choice doesn’t include complete security against the most complex malware threats or cyber-attacks.
This is why our editors handpicked the best free antivirus tools available in today’s market, so read further and choose the one that entirely fits your needs.
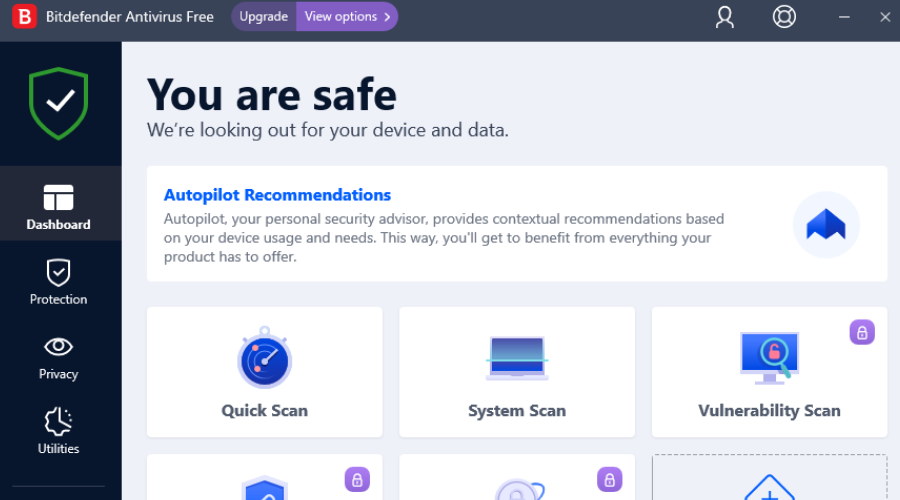
Bitdefender Antivirus Free Edition is a completely free antivirus with powerful protection bundled into a user-friendly product.
With this security software, you can be sure all threats are dealt with while you’re browsing, using advanced technologies like machine learning to protect you from phishing and other frauds.
Features include on-demand virus scanning and removal, advanced threat detection using behavioral detection, anti-phishing, and anti-fraud whenever you visit porn, casino, money loan schemes, and other scammer sites.
It is easy to set up and configures, efficient on your system resources, doesn’t slow down your computer, and doesn’t send annoying upgrade messages.
Although the free version is a good choice for PC protection, it’s not the best. Check out these Bitdefender solutions instead.
Other useful features you should know of:
Customizable scans
Advanced threat defense
Web attack prevention
Network threat prevention
Bitdefender Antivirus Free Edition
Enjoy a wide variety of security-related features with Bitdefender, one of the most trusted antivirus.
Next, we have a security tool that provides high-class protection even though it does not come in the form of regular antivirus software.
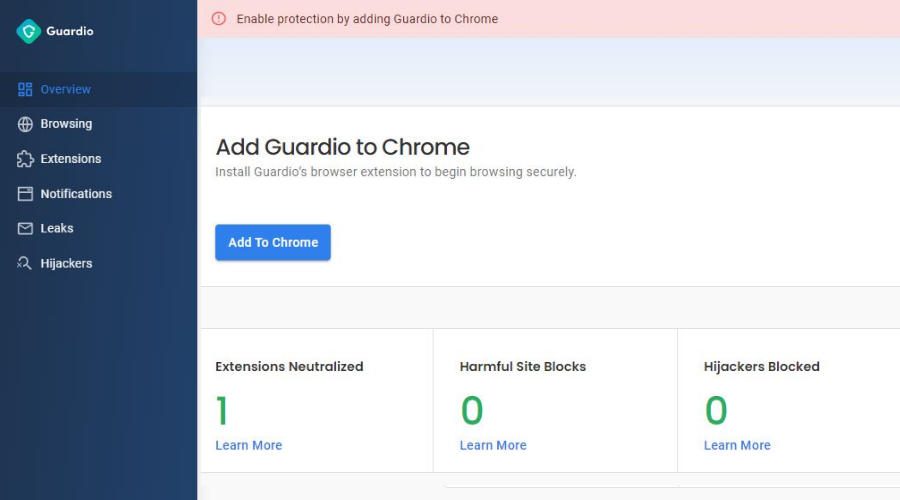
Guardio is a lightweight browser extension built with powerful antivirus and online protection shields. Its aim is to block threats before they even get the chance to infect your PC.
Most cyber-attacks come from the web which is the reason why this tool employs powerful cloud-based detection technologies in order to detect and remove day-one threats so they don’t reach your PC.
The logic behind this tool is to diminish the need to recover lost files and repair your system after a malicious attack. Not giving threats a chance to enter your system essentially means that your data is safer.
Guardio is of course able to detect pre-existing viruses on your system and remove them for good. It also contributes to a cleaner browsing experience by removing trackers, blocking ads, and popups, and detecting malicious links, websites, and browser extensions.
While a regular antivirus is capable to detect and successfully remove threats, this tool will block them from the get-go so they have no time to cause damage.
Other notablefeatures include:
Block suspicious webpages
Stop unwanted notifications
Data breach monitoring
Fast browser cleanup
This innovative antivirus browser extension is compatible with Edge, Chrome, and Firefox and you can use the same account on your Android and iOS devices.
Guardio
Detect and block web threats before they get a chance to reach your system!
Avira Free Security is a completely free antivirus that doesn’t run any type of ads and doesn’t lock its features behind a trial period or a paywall.
With the software, you will benefit from multilayered protection, scanning, and removal of malware, as well as anti-data theft systems that will keep your identity and information private.
Moreover, Avira includes an optimization tool to speed up your computer, and a cleanup tool to remove any leftover junk files.
In fact, let’s see the core features Avira has in store for you:
Anti-scam, identity theft, malware, adware, and spyware protection
Free VPN
Speeds up PC
PC Cleaner
Phone locator tracker
Network scanner
Avira Free Security
A feature-rich premium antivirus software that is completely free and doesn’t run ads of any kind.
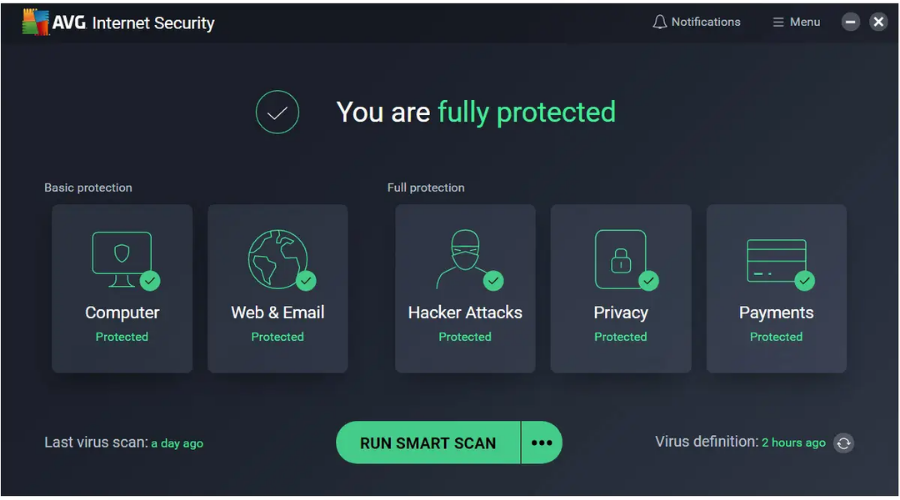
AVG has a truly free antivirus, simply called AVG Antivirus Free. It’s fully loaded and refreshingly easy with real-time security updates, as it scans for malware and other performance issues before they reach your computer.
Its new design is simple and shows you exactly how you’re protected, all without slowing down your PC.
Whether you use the free or paid/full protection, you get impressive security that automatically updates itself, with a cutting-edge virus scanner to block and remove viruses, thereby protecting you and your family from the latest threats.
Benefits include blocking unsafe links, downloads, and attachments from emails, real-time updates, performance scanning, and much more.
You also get to enjoy 30 days of total online privacy all for free so you can browse, bank, and shop privately using AVG Secure VPN, which protects your online activity in bank-grade, 256-bit AES encryption.
AVG Antivirus Free is ideal for personal and family use only, not business or enterprise use, plus it is available in multiple languages.
The free antivirus tool provides minimal protection. To ensure your PC’s safety, check out these AVG security solutions.
Here are some other key features:
Sensitive data shield
Anti-theft phone tracker
Phishing protection
Malware protection
Phone and chat support
AVG Antivirus Free
AVG offers premium protection against harmful software with security-related tools, all for free.
Panda’s truly free antivirus protection tool is called Panda Free Antivirus, and it’s the best-rated free security software for 2018, with new and advanced features for safer web browsing, shopping, and even banking.
It comes in three different packages: basic, advanced, and complete protection.
With Basic protection, you protect devices from viruses and other threats, plus you can browse the web safely.
Advanced protection, on the other hand, does this but also lets you download and share files without nasty surprises, on an unlimited number of devices.
Complete Protection combines Basic and Advanced, but also optimizes and makes the most of your devices, letting you shop and pay online with zero risks. It also comes with a parental control module.
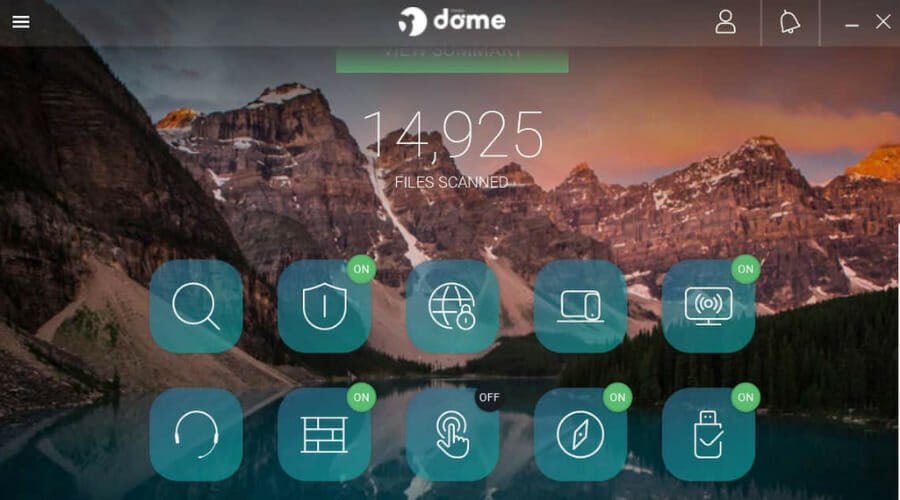
Panda Protection automatically picks threat detection techniques from other users who have installed it, and this helps protect against any new or upcoming attacks, what with its on-access or resident protection tool.
It is lightweight, easy on your system’s resources, offers gaming or multimedia mode, has a built-in web monitor to safeguard against malicious links, but contains ads.
Take a look at these other good features:
Application control
Real-time monitoring
Personal firewall
Wi-Fi protection
USB protection
Panda Dome Essential
A secure and premium choice for both you and your family that will ensure no data is stolen from you.
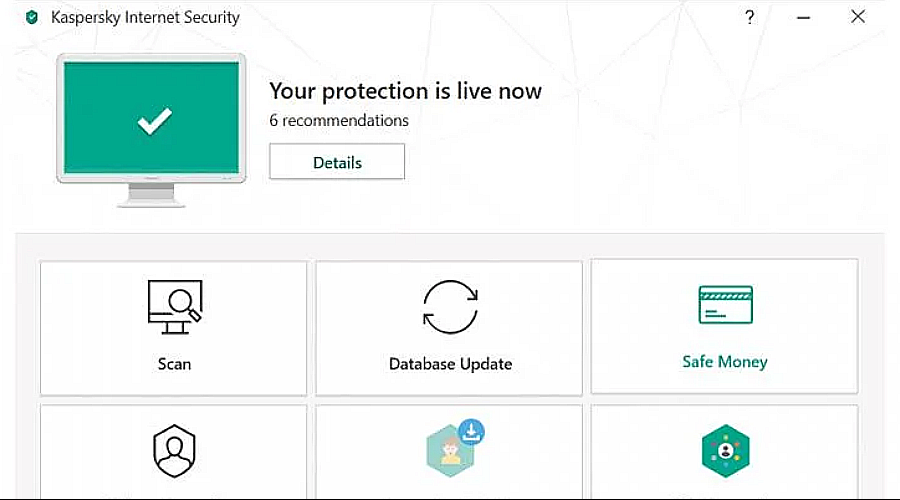
Kaspersky Basic Security offers free and fast protection for you and your computer by blocking dangerous files, sites, and other threats while protecting your personal information.
You can choose your protection level between Kaspersky Free Antivirus, Kaspersky Internet Security, or Kaspersky Total Security.
However, for the free version, you get features such as advanced protection from malware, hackers, and network attacks, and security for your computer and devices with just one license for you to buy.
The privacy protection will help stop criminals from accessing your webcam or tracking digital activities, and safe money tool for extra security when shopping or banking online.
Other practical features include:
Protects online transactions
Blocks ads
Prevents data collection
Protection against ransomware
Kaspersky Standard
Kaspersky is one of the most popular antivirus software in the world, protecting millions of people.
Avast Free Antivirus is a light, powerful, award-winning, and truly free antivirus that’s recognized for its low impact and 100 percent protection against zero-day threats.
It is also easy to install and effortless to use while scanning for security and performance issues in real-time and letting you know how to fix them instantly.
New features include a beautifully intuitive interface, advanced app protection, passive mode for running multiple security products in parallel, and gaming mode for uninterrupted play with maximum processing power.
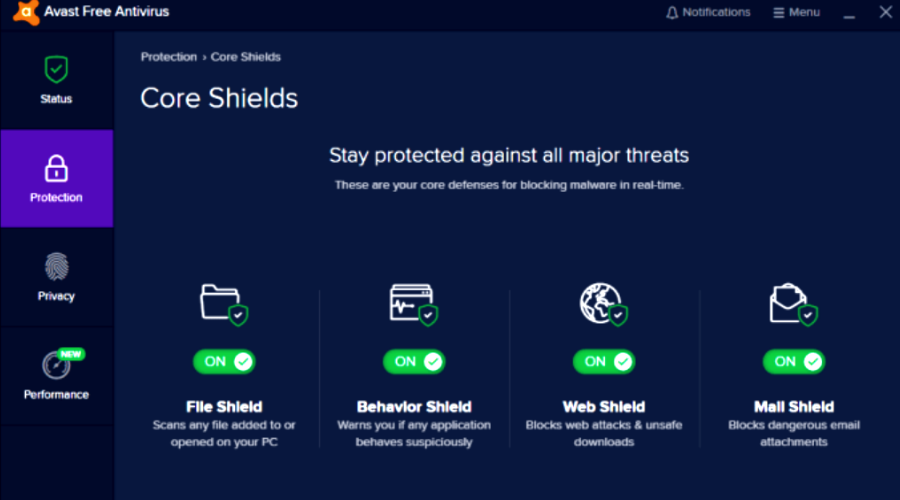
It also has the Behavior Shield that monitors malware behavior to ensure they don’t go rogue all of a sudden.
Other key features include password manager, Smart Scan to find cracks that let malware in, Wi-Fi inspector to detect weaknesses automatically, and strangers riding on your network.
The CyberCapture feature captures and sends suspicious files for analysis in the cloud, and smart analytics to stop threats before they get to you.
Here are some other convenient features:
Remote access shield
Password protection
Data shredder
Sensitive data shield
Easy to download and navigate
Avast Free Antivirus
Avast Free Antivirus will constantly protect, stopping the current and newest threats.
The Oculus Quest 2 controllers cannot be charged while inside the headset. If you are looking for a way to charge without the charging dock, there is a workaround.
Most people charge their Quest 2 controllers with the charging dock that comes with the headset. The dock uses a USB-C port, so you can plug it into your computer or another power source with a USB-C cable.
Although the Oculus Quest 2 is one of the best VR headsets on the market, there are other great VR headsets that are equally high-performance and give them a run for their money.
One of the few areas that Oculus Quest 2 is slacking on is the charging of the headsets. There is no easy way to charge both controllers at once when they’re not attached to the headset.
If you want to charge your controllers without the dock, you need to find another way. For instance, when you’re on the go and don’t have access to a computer.
The good news is that there’s a way around it. If you have an extra pair of AA batteries around, this is the best way to charge your Oculus Quest 2 controllers.
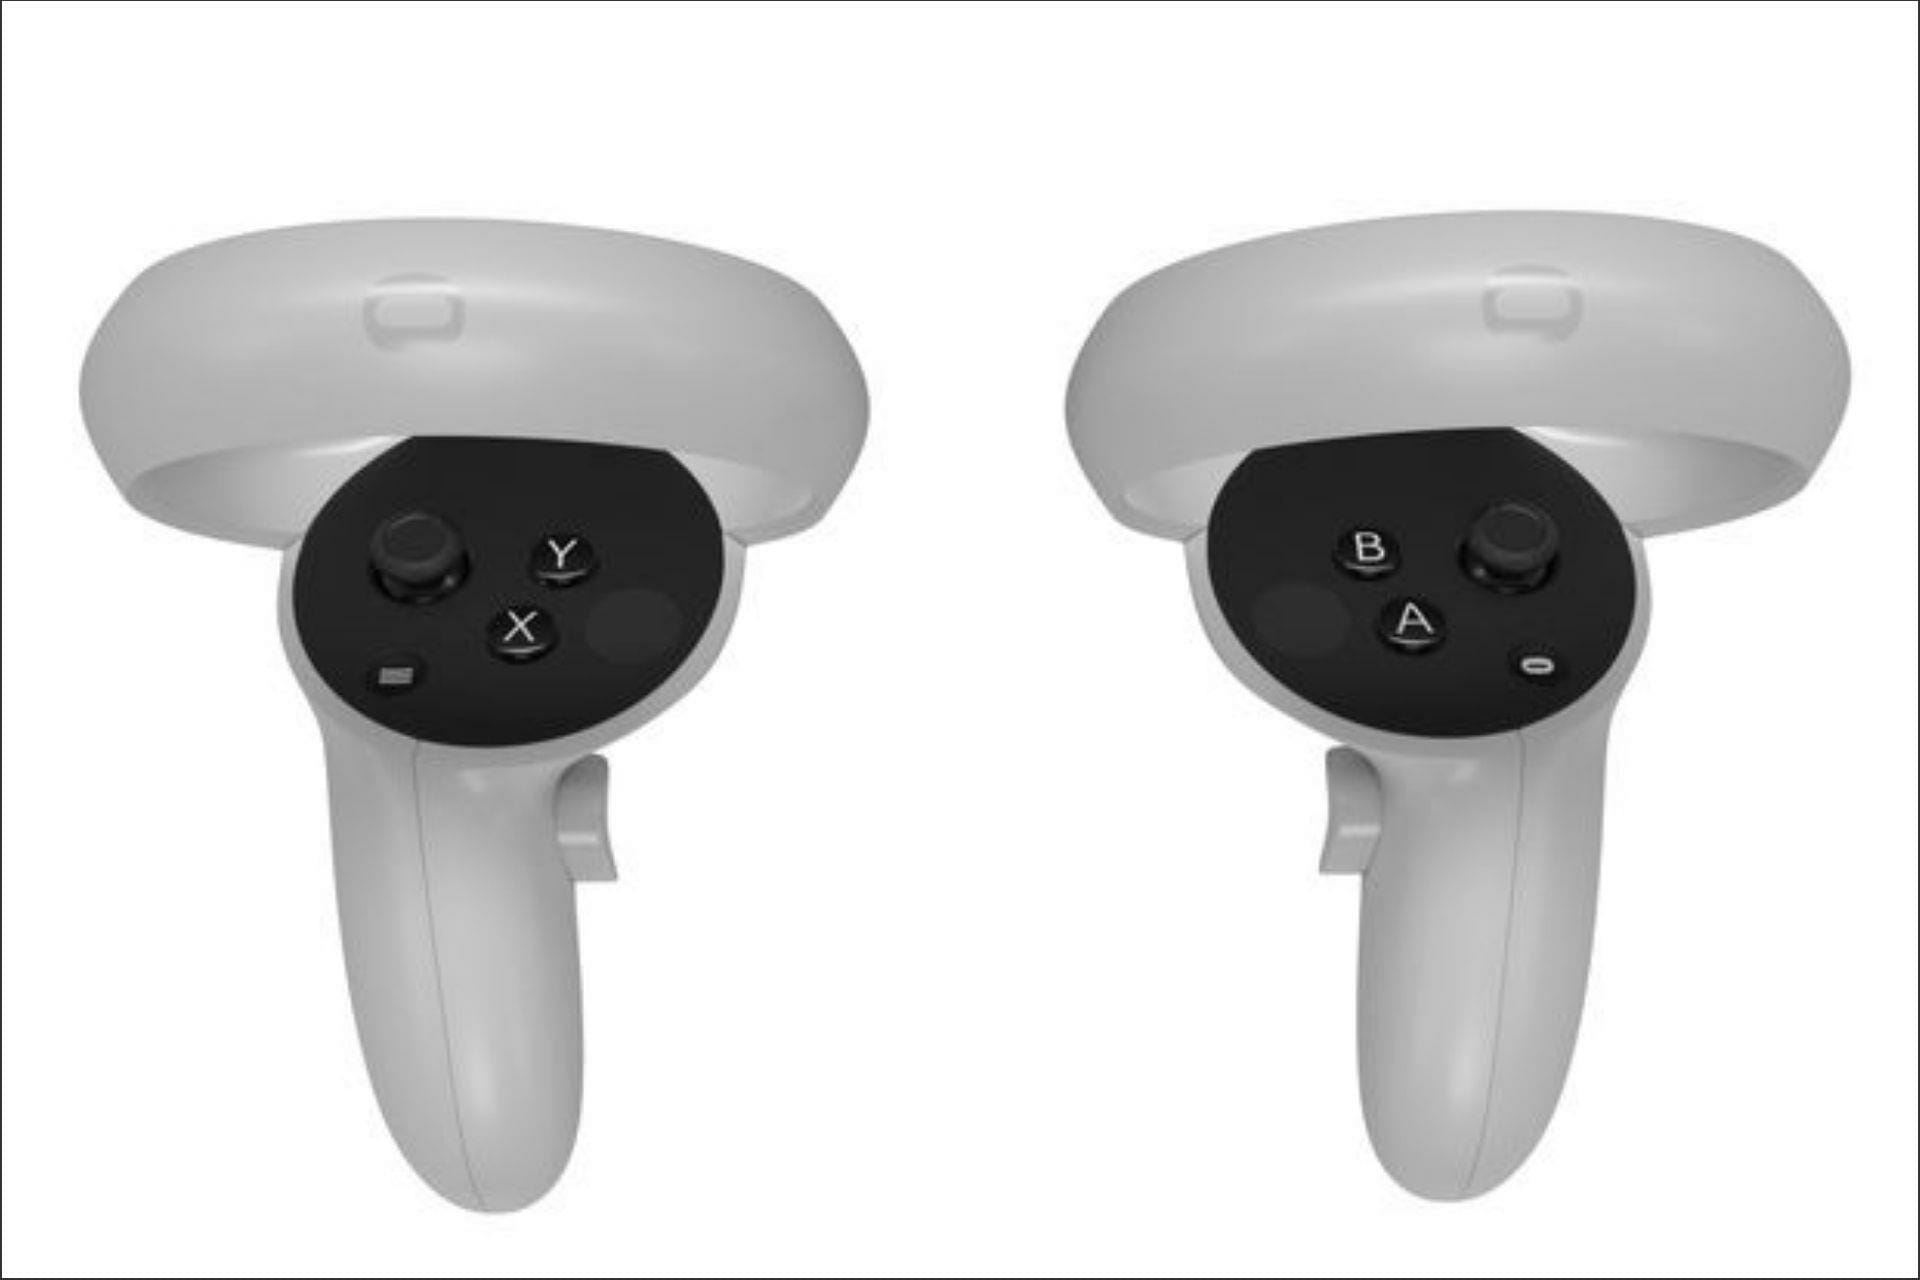
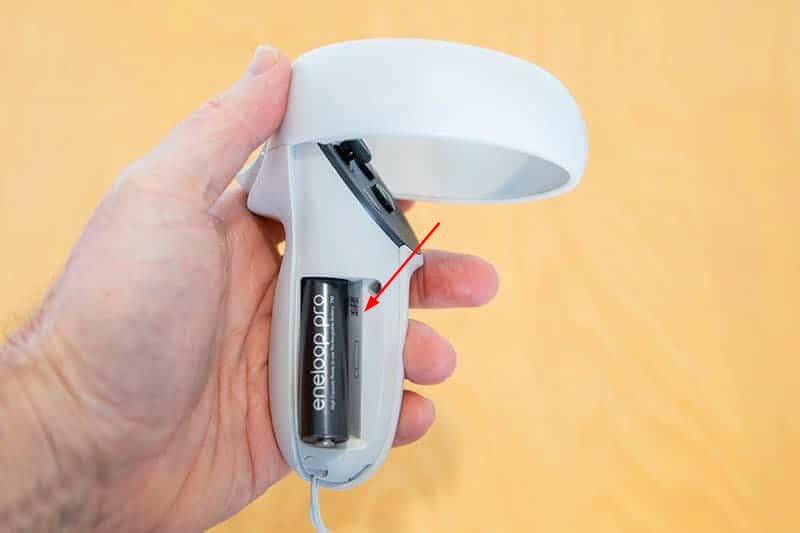
Though it’s not too obvious, the Oculus Quest 2 controllers do have a slot for you to charge them. It’s the same slot where you add AA batteries. There are plenty of options so you shouldn’t have trouble finding something that suits your needs.
If you feel this method is too cumbersome and not sustainable in the long run, you can consider getting one of the best gaming controllers that guarantee you perfect play.
How can I charge Oculus Quest 2 controllers without a dock?
Use rechargeable batteries
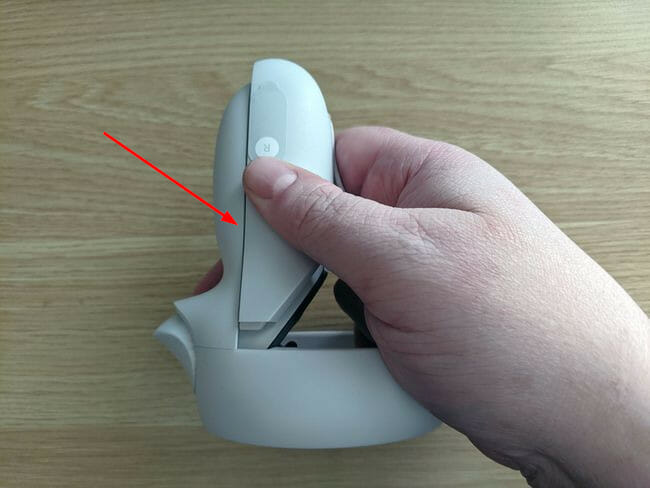
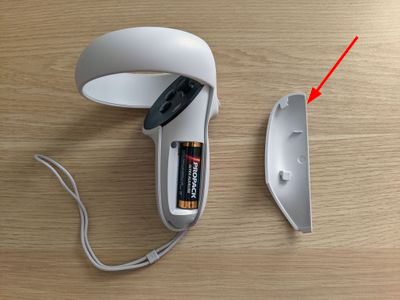
Hold your Oculus Quest 2 controller in an upright manner and slide the eject compartment upwards.
Remove the battery from the battery compartment and replace it with new ones.
Restore the cover and your Oculus Quest 2 controller is charged.
Can I check my Oculus Quest 2 controller battery levels?
If you’ve ever played a VR game for hours on end, chances are the low battery warning screen has popped up in the middle of a heated battle.
Sure, you can keep playing if you’re willing to risk losing battery power at any given time. However, it is not ideal. Your best bet is to stop and charge.
To keep enjoying your game, you need to check for the battery level and replace them when they are drained.
The thing with rechargeable batteries is that there will come a time when they run out of charge.
If you decide to buy replacement batteries then we recommend getting some good quality ones. There are a lot of bad ones out there, so make sure you check reviews before purchasing.
A decent pair of replacement batteries should serve you for a while before you need to change them again.
But what if there was a way to check your battery levels so you are never caught unaware? Well, with Oculus Quest 2 controllers, you can foresee the future.
Getting an idea of how much battery is left will allow you to play uninterrupted or recharge before they run out.
To check for the battery level of your Oculus Quest 2 controllers, follow the steps below:
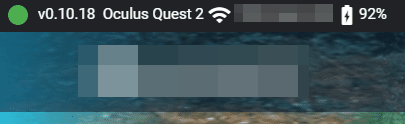
Navigate to your menu on Oculus Quest 2.
The battery levels of your headset and controllers will be displayed.
We hope this guide was able to help you charge your Oculus Quest 2 controllers. Now, you can enjoy your game uninterrupted.
Should you encounter any other related problems such as Oculus not working, feel free to refer to our expert guide on the steps to take to bypass the issue.
We are always down to hear about all the tricks you have up your sleeve. Let’s meet in the comment section as you share more.
Genshin Impact is a game that features anime-style graphics and an action-driven battle system with elemental magic and character swapping. Since it is an open-world adventure game, many users face issues like the Genshin Impact controller not working.
One of the things we find strange about Genshin Impact is the controller support. Most of the games that have been released recently have XInput, which makes it easy for them to detect controllers.
However, Genshin Impact is an exception. It has a buggy implementation of XInput or employs other methods to identify controllers.
That being said, there are some workarounds we can try to fix the issue. In this guide, we’ve listed a 5 a step solution that we have found to be effective, and we hope it helps you solve the problem in the long term.
Why is the Genshin Impact controller not working?
The Genshin Impact controller is not working issue can be due to certain bugs. Games that are played online are no exception to this problem, sometimes suffering from specific code errors and logical problems. It is an online game so it isn’t the only one to fall victim to this issue.
Thus, if your controller stops working while you play the game, stay calm and read on. Below we highlight some of the easiest 5 step methods to solve this problem and get you back on track. Make sure to attempt them in sequential order until the problem has been resolved.
What should I do if the Genshin Impact controller not working?
1. Delete the executable file
Press the Windows key on your keyboard and type Genshin Impact into the Search bar.
In the right pane, select Open file location to open up Programs.
Right-click the exe. file, select the delete icon and copy as the path.
An executable file is a type of computer file that contains all of the codes or instructions necessary to run a program. When the file is opened, it executes these instructions on the system. Therefore, you must copy the folder path and continue with step 2 of the process.
2. Configure controller settings on Steam
Click the icon on the top left corner of your desktop to open up Steam.
Once you have opened it, select Big Picture Mode which is next to minimize.
Next, double-click the Settings option and go to Controller Settings.
In the Control settings window, check the Xbox Configuration Support and Generic Gamepad Configuration Support.
If you have a DS4 controller, you should check the Guide Button Focuses Steam option.
You must configure controller settings on Steam as it can help solve the problem. Once done, continue with step 3 of the process.
3. Connect Genshin Impact with Steam
Go toSettings and then back to the home page.
Click the Power option and selectExit Big Picture from the window that pops up.
Click the + icon beside Add a Game on the bottom left corner of your screen.
From the pop-up window, choose the option Add a Non-Steam Game.
Scroll down and open theBrowse tab of the dialog box,paste the file path nameyou had copied in Step 1, and select Open.
Select the executable program (.exe file) and click Add Selected Programs.
Connecting Genshin Impact with Steam is important if you want your controller to work effortlessly. Once done, continue with step 4 of the process.
With this, our guide on the Genshin Impact controller not working error has reached its conclusion. We hope the methods listed above have helped you resolve the problem for good.
If you have any questions or queries, do let us know in the comments section below.
Dual monitors can be fun, but it’s often affected by video lags issue on the second monitor.
Having two monitors for your PC setup is a common practice, especially if you are an avid gamer or love highly detailed images and a wider screen view.
The flickering video issue is noticed on all GPUs irrespective of how powerful it is, or even if the game runs on a high FPS.
Moreover, this issue is especially prevalent on the dual monitors with 144hz and 60hz refresh rate setups.
In this post, we have listed 7 ways to get rid of video lags on the second monitor. Read to know more.
How can I fix the video stuttering issue on the dual monitor?
1. Change the refresh rates for both monitors
Press the Win + I keys to launch the Settings app.
Next, click on System.
Navigate to the right side and click on Display.
Next, on the right side, scroll down and click on Advanced display.
On the next screen, on the right side, click on Display adapter properties for Display 1 (for monitor 1).
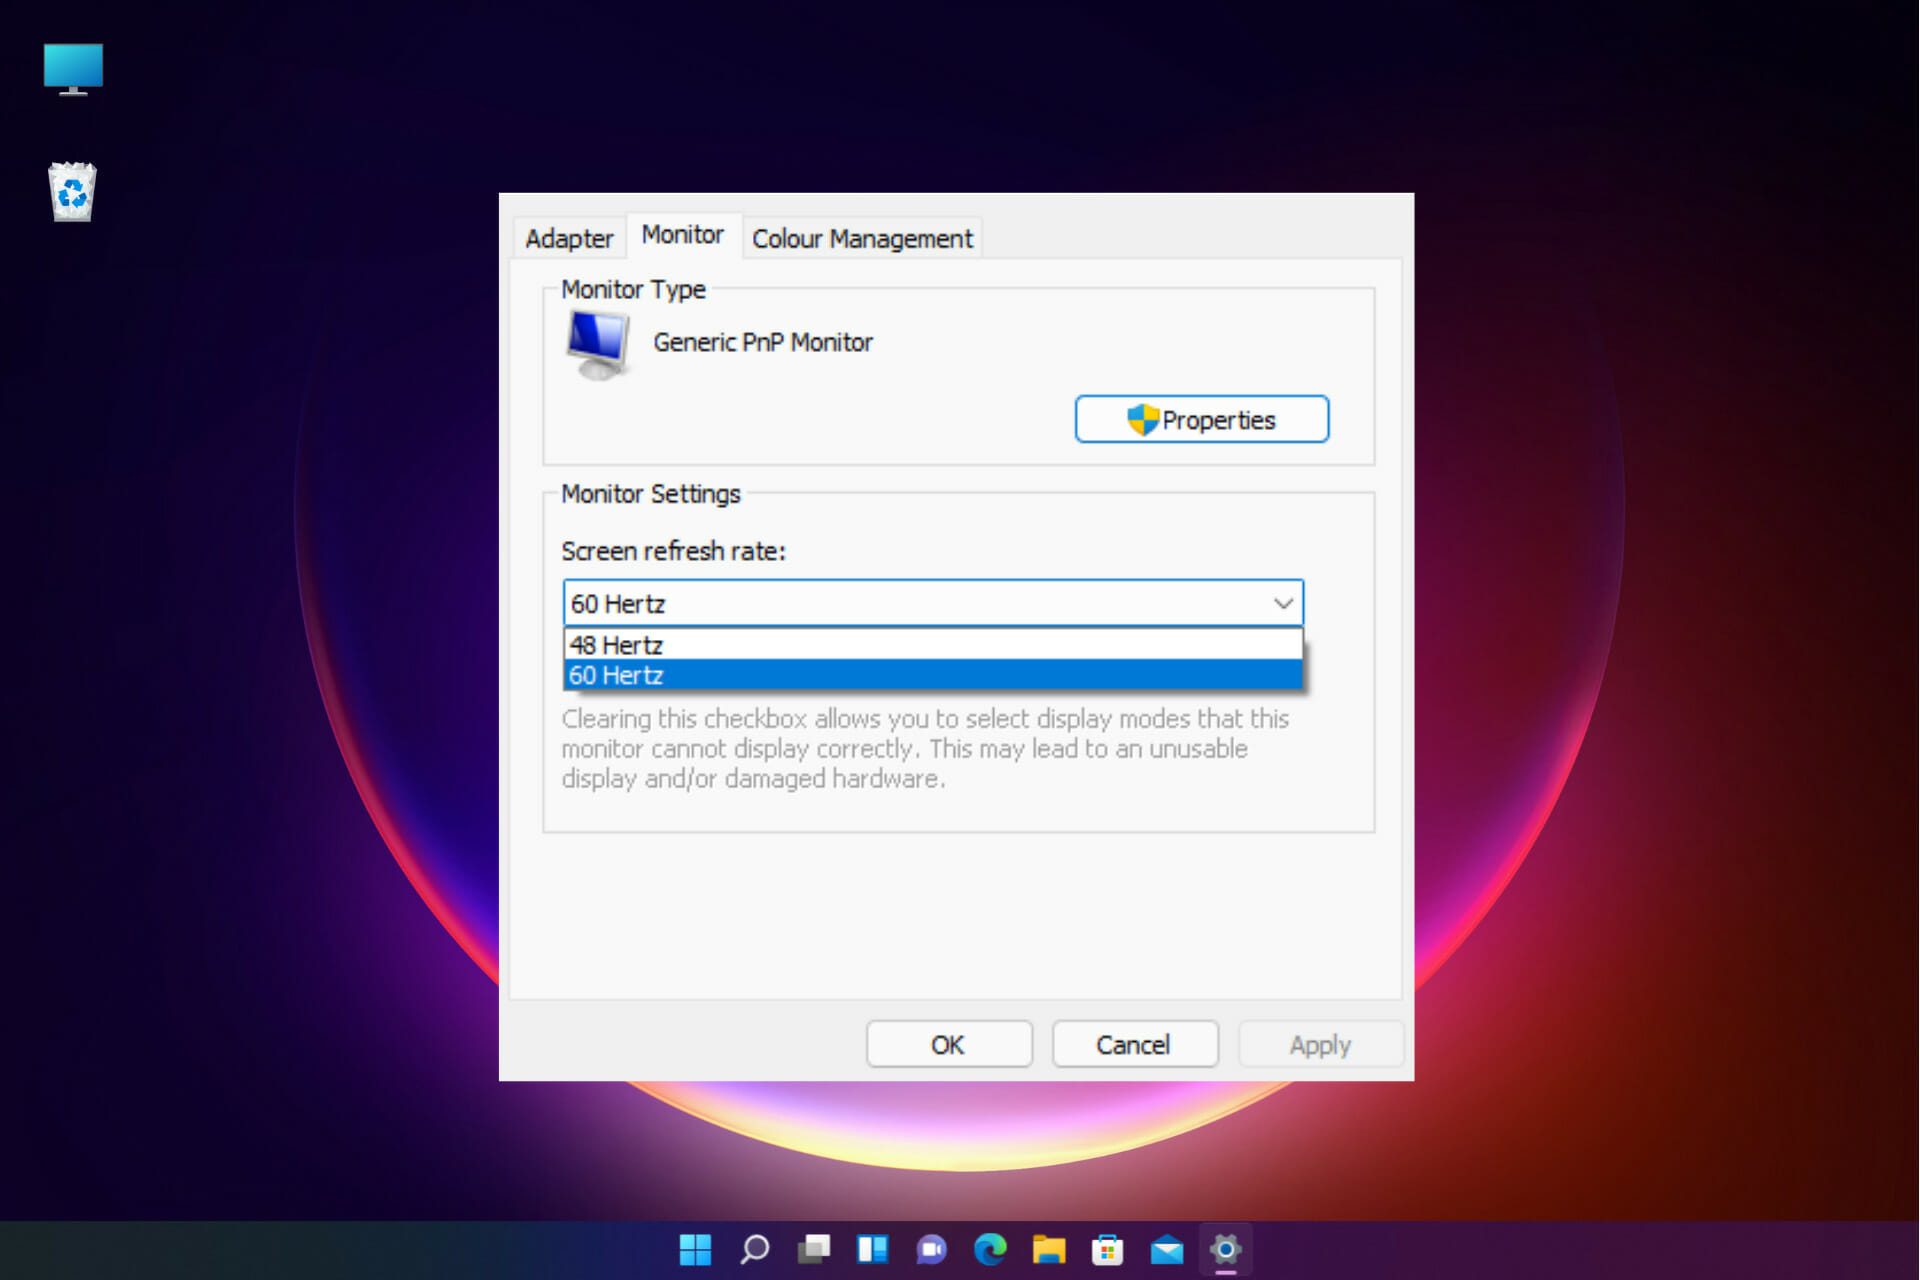
Go to the Monitor tab, navigate to the Monitorsettings field, and set the Screen refresh rate to 60 Hz.
Press Apply and OK to save the changes and exit.
Alternatively, you can change the refresh rate for the second monitor.
If it’s set to 144 Hertz, you can reduce it to 60 Hertz.
The idea is to keep the same refresh rate for both monitors, for example, 60 Hertz for both monitors.
If the refresh rate of your monitors is too high, maybe the video graphics card can’t cope with the load.
Try to set the refresh rate lower for both monitors and keep it the same and that will most likely fix the stuttering and lag on the dual monitor setup.
2. Turn off the hardware acceleration on your browser
Open the browser, click on the three vertical dots on the top right, and select Settings.
Search for hardware acceleration in the search box and hit Enter.
Go to Use hardware acceleration when available and turn it off.
Click on Relaunch to restart Chrome and check if the video lag issue still persists.
This problem is prevalent in Chrome browsers, and hence, while this solution is useful if you use it, this can also be applied to other browsers with similar issues.
3. Run the hardware troubleshooter
Navigate to Start, right-click and select Run to launch the Run console.
In the search box, type cmd and press CTRL + Shift + Enter shortcut key to open Command Prompt in admin mode.
Run the below command in the elevated Command Prompt and hit Enter: msdt.exe -id DeviceDiagnostic
This will open the Hardware and Devices window. Click on Advanced.
Check the box next to Applyrepairsautomatically. Press Next.
The troubleshooter will now start detecting any issues. If any are found, it will display the solutions.
Select to apply the repairs automatically.
Once done, close the troubleshooter, reboot your PC and check if the video stuttering on the second monitor is fixed.
In the Device Manager window, go to Monitors, right-click on the device, and select Update driver.
Here, click on Search automatically for drivers.
Now, wait till Windows looks up for any latest drivers. If available, it installs the driver automatically.
Now, reboot your PC and check if the video still lags on the second monitor.
You can also use an automated tool like Outbyte Driver Updater and save some time and hassle. It’s a dedicated utility that’s able to repair and update any type of Windows driver using its own database.
It can take care of specific drivers or scan your whole system and update or fix any outdated or corrupt drivers. Set it up to automatically scan your drivers on a regular basis and never have this issue again.
Navigate to Monitors and expand the section. Right-click on the device and select Properties.
In the Properties window, select the Driver tab and press the Roll Back Driver button if it’s available.
Press OK to save the changes.
Now, restart your PC and the video on your second monitor should be fine now.
If you don’t see the Roll Back Driver button, don’t worry. That means that there are no older drivers installed and you can skip this step.
6. Change the monitor’s screen resolution
Press the Win + I keys simultaneously to launch the Settings app.
Now, click on System on the left side.
Next, navigate to the right side and click on Display.
In the Display settings screen, go to Scale & layout. Here, navigate to Display resolution and select your preferred resolution.
This should fix the video stuttering issue on the second monitor.
7. Disable windows transparency
Right-click on the Windows Start button and click on Settings.
In the Settings window, click on Personalisation.
Now, move the cursor to the right and click on Colours.
Next, go to the right and turn off Transparency effects.
Now, close Windows settings, reboot your PC, and check if this helps fix the issue.
You can also try disconnecting and connecting the cable, however, this could be a temporary solution.
For NVIDIA graphics cards, you can try disabling the G-Sync, turning the V-Sync on and off, or playing the game in full screen and checking if it resolves the issue.
Alternatively, you can simply restart the PC, try switching cables between both monitors, or replace any old cables.
Additionally, check for any damaged connection ports, or turn off Aero themes and it may help you get rid of the video lag issue on the second monitor.
The latest Windows Insider builds tweak the Task Manager in Windows 11 to make it more modern with features like dark mode and a new hamburger menu, but Microsoft isn’t done just yet. Spotted by Neowin, the company recently teased a custom color support for the Task Manager utilization area in Windows 11.
As talked about in the recent Windows Insider Webcast (at the 16:00 mark) Microsoft says it came up with this feature for a very specific reason. It is because Windows Insiders didn’t exactly like the yellow mustard color of the utilization area in the Task Manager.
Apparently, it doesn’t fit well with the new user interface. So, the company teased a new way for the Task Manager to support a user’s favorite colors based on whatever is picked in the colors section of Windows 11’s personalization page. Microsoft showcased how you can switch to pink, red, orange, blue, and even, white. It even highlighted how the colors carry over to dark mode, too.
Based on comments in the live stream, reaction to the feature was pretty great, especially with Microsoft’s own Jen Gentleman, who said, “YAY, Pink!” Brandon Leblanc also mentioned how the new colors add contrast between different shades.
Microsoft didn’t mention when Windows Insiders can specifically expect these color options. However, per the chat and Brandon LeBlanc, these are all improvements coming to a future build. That means we don’t know when we’ll see it yet, but there’s hope down the line. We haven’t had a major build last week, so a big build with a cool feature like this is overdue.
If you’re a Teams user with an Apple Mac that has an M1 chip, we’ve got some good news for you. Spotted by Neowin, Microsoft has just released a new Apple M1 optimized version of Teams, though it’s still in beta.
Available for download on Microsoft’s website, (warning, direct download link!) the beta version of this Teams app no longer runs under Rosetta 2 emulation. While Teams on M1 Macs was never as slow as it is on Windows, this should mean that the M1 optimized version of Teams should be a lot faster than the current version coded for Intel Macs. The Teams app is now what Apple calls a “Universal” app, which are apps that are specially coded for the ARM-based M1 chip as well as Intel processors.
Apple’s M1 chip first hit the scene back in 2020, and since then, Microsoft has worked to optimize its apps for Macs with ARM-based silicon. The Microsoft Edge web browser is already optimized, as well as the Microsoft Office suite of apps. Even the OneDrive sync client is optimized, too.
The link we’ve shared for the M1 version of Teams isn’t listed on Microsoft’s website. Rather, it’s a direct download, so it appears that Microsoft is quietly testing it. We will keep you posted, as a full-on release should not be too far out.
Mouse freeze, or mouse lag, is a notorious problem in AutoCAD software. It can be infuriating if you are right in the middle of a drawing session and all of a sudden your cursor freezes up and refuses to move.
Although AutoCAD is a powerful software on its own, there are times when you may experience performance issues or bugs. This can be frustrating, but there are ways to work around some of those issues.
The screen jitters or sticks and sometimes, the only thing you can do is to wait it out. One reason is if you have more than one monitor attached to your computer.
This causes issues with the mouse control inside AutoCAD, so you will need to turn off the secondary monitor.
Why I’m I facing an AutoCAD mouse lag?
It’s really hard to use AutoCAD when there is a mouse lag. The most common reason for a slow mouse in AutoCAD is that you are running out of physical memory (RAM).
Because Windows 11 is a memory hog OS, it is essential that you ensure your PC meets the minimum system requirements. A 64-bit system will allow you to allocate more memory to AutoCAD.
Also, make sure you have the most current version of your graphics card. If your system is running slowly, this could be related to graphics or video driver settings.
AutoCAD is primarily a graphics and graphics-intensive program. You can download the most current drivers from your computer manufacturer or graphics card vendor.
You can also use a dedicated tool that can automatically download and install corresponding driver versions. This will save you some time and you’ll be sure to have the correct up-to-date drivers.
For most users, a mouse lag in AutoCAD does not indicate any major underlying issue. Just make sure to check your system memory and follow the instructions in this guide.
What can I do to fix an AutoCAD mouse lag?
Disable hardware acceleration
Open your AutoCAD interface, type Options in the Command line, and press Enter.
Select the System tab, and click Graphics Performance in the Options dialog box that pops up.
In the Graphics Performance dialog box that pops up, toggle Hardware Acceleration off then click OK.
Is AutoCAD GPU-intensive?
AutoCAD is a heavy application, it needs at least 8 GB of RAM and a good graphics card to run smoothly. A budget processor won’t cut it.
When it comes to CPU, AutoCAD works best with a fast CPU. If you have just 2 cores then your CPU is probably too slow.
A 4 core CPU will still work, but if you are running other programs at the same time then more cores will help AutoCAD run better.
We hope this guide was helpful in fixing your AutoCAD mouse lag issues. Also, we’d love to hear from you on any additional thoughts you may have on this topic. Don’t forget to interact with us in the comments section below.
When the System Reserved partition and the system partition are not on the same disk, you encounter the System Reserved partition on the wrong drive issue.
After you install a new Windows OS, a special disk partition called the System Reserve partition is created. These partitions are only visible in the Disk Management utility since they do not have any drive letter.
This special partition contains the Boot Configuration Data, Boot Manager, Windows Recovery Environment, and some space for the startup files.
These files are crucial for the functioning of the BitLocker drive encryption. The partition should be on the same disk as the system partition which is usually the C: drive.
But when both the partitions are not on the same disk, it means you installed the Windows OS on a PC with multiple hard drives.
The good news is that you can move the System Reserved partition to another drive. Read on to learn how to do that.
How do I move the System Reserved Partition to another drive?
Use the Disk Management utility
Navigate to Start on the taskbar, right-click and select Run to open the Run console.
In the search field, type diskmgmt.msc and hit Enter to launch the Disk Management tool.
Now, look for the disk to which you want to place the System Reserved Partition.
Here, look for a block name Unallocated or Free space. Right-click on it and select New Simple Volume.
If you do not find any Unallocated/Free space, you can create one. For this, you can go to any existing drive/partition that is empty/unused, right-click and select Delete Volume.
Alternatively, you can also right-click on this existing partition and select Shrink Volume.
In the Shrink dialogue box, go to Enter the amount of space to shrink in the MB field and type the volume you want to reduce, and press Shrink.
Once done, right-click on this Free space and select New Simple Volume.
It will open the New Simple Volume Wizard. Press Next to continue.
Follow the on-screen instructions to specify the volume size, assign a drive letter, and format partition.
Designate a drive letter to the old reserved system partition for it to show on the File Explorer.
Move the Boot folder, bootmgr, and BOOTSECT.BAK from the old partition to the new one.
Now, go to the new System Reserved partition, and delete the drive letter.
Next, right-click on the new reserved partition and select Mark Partition as Active.
Once done, reboot your PC and check if it boots normally. If it does, you can now delete the original partition.
But if the system fails to boot use the system repair disc to perform the Startup Repair.
If you lack the patience to work with this built-in Windows utility or are worried about doing something wrong, you can use a dedicated disk partition management software.
It will help you skip some of the above-mentioned steps, allowing you to safely transfer your system partition to a different drive in just a few clicks. It’s proven to work well without the risk of data loss.
Tenorshare Free Partition Manager automates most of the process and includes other handy features that help you create, clone, split, format, and resize partitions.
Creating a clone of the system reserved partition in the system disk, and then deleting the old partition can help fix the issue.
Since the reserved partition contains files for booting the system, in order to prevent operation errors or other situations, please make a system repair disc first.
Tip
The size of the reserved partition is 500 MB for Windows 10 and Windows 11. You can rename the new partition as System Reserved while formatting.
While the System Reserved Partition on a wrong drive is a common issue, we recommend not to delete the original reserved partition since it can create a further mess.
If you come across any other errors related to the System Reserved partition, you can leave your comments in the comments box below.
Microsoft announced in late March that its Build developers’ conference, yet again a free virtual event, would be held on May 24-26, and today they’ve opened registration:
Although the event is free, you still have to register to gain access to the sessions, but you then gain access to the session agenda (when it becomes available, we’ll keep you posted), a Connection Zone and Learning Zone, Regional spotlights, and a lot more.
Remember to stay tuned to OnMSFT.com for all the latest on Build 2022 and everything Microsoft!
The Steam gift cards are perfect if you want to make a gamer or, why not, yourself, happy. And that’s because it’s the most popular gaming platform.
However, lately, Steam received more and more reports of scams with wrongdoers contacting unsuspecting victims, convincing them to buy Steam Wallet Gift Cards.
They pretend that the cards will help users cover a lot of payments including bail, debt, and receive money from sweepstakes.
The scammers pose as officials for certain agencies and even the I.R.S. which should sound suspicious enough.
The modus operandi implies buying the gift cards from a local shop in the area of the victim and then scratching the codes and communicating the data over the phone.
Of course, if all that sounds familiar, you have been the victim of a scam and you will never get anything in return.
What is a Steam card and how does it work?
Essentially, Steam Gift Cards and Wallet Codes are like any gift certificates, but they can only be redeemed on Steam.
Users often have one important question: Can Steam cards be converted into cash? And the answer is yes; in fact, that is the whole point of the cards.
After you redeem the card, its value is converted into cash within your Steam account so you can use it to purchase games, software, and various other items within the store.
But once again, we emphasize the fact that the cards can only be activated on Steam and don’t have any value within other services.
Why would a scammer want a Steam card?
The question is legitimate because you would think that the scammer will just buy games and software on Steam but that’s not the case.
Once they get the code and the pin from your Steam card, they immediately sell the data online for a smaller amount of money.
And as it seems, they are in real demand for people who just wait for a bargain to get that awesome game they’ve been waiting to purchase.
Another way of getting the real cash is to immediately buy items and then send a sad letter to the Steam support team to freeze the transaction and send back the money into their account.
The story often involves an alleged kid who took his parents’ credit card and made the purchase without their knowledge or something similar.
User is approached by scammer to get a Steam gift card
Here are the top platforms where Steam cards scams are happening:
Steam
Reddit
Instagram
Facebook
Paypal
Steam scam statistics
1. What are the most common Steam scams?
1.1 The PayPal scam
Unfortunately, there are no precise statistics on Steam scams but the PayPal scam is one of the most popular among fraudsters.
It is actually very simple to create a fake invoice and even on the official PayPal forms you can add text to the Terms and conditions and Note section below.
That is where the scammer can get creative and reinforce your belief that the money has been sent but, as you can see from the screenshot above, they will take 24 hours to reach your account.
In the meantime, they will put pressure on you to send them the items you’ve bargained for because they’ve provided sufficient proof that they have sent the money, right?
Wrong! You will never see the money and your precious item will be lost forever because the Steam support time will not duplicate the item.
Another trick here is to actually send you the money, providing a real invoice, but then charge it back.
Forums, chats, Facebook groups, and emails can all be used by wrongdoers to invite you to websites that look almost exactly like the original ones.
However, the more you look at it, you will start noticing some elements that are not as they should be, starting with a tiny difference in the URL address.
Then, as a pretext of redeeming some bogus prize you just won, they invite you to log into your Steam account.
Of course, this way, your credentials will be stolen, and your account emptied out in a matter of minutes.
1.3 Pay with gift card scam
In a recent consumer alert from the Federal Trade Commission, you can find out how the scam is orchestrated and mostly how you can be approached.
Obviously, if someone asks you to pay something by giving them the data of your Steam or any other gift card for that matter, it’s definitely a scam.
1.4 Steam Wallet Scam
The Steam Wallet scam is as simple as it gets. Out of nowhere or with prior convincing from the fraudster, you get an offer for an item for real cash.
If you don’t know that already, you can’t send cash within Steam so it’s only you parting with your item in exchange for a wild assumption that you will be paid.
1.5 The Steam administrator scam
This is a more elaborate scam that we learned through one of the Malwarebytes blog posts about common scams within the Steam realm.
The scammer approaches you with a sorry note that he reported you for a scam by mistake (ironic, isn’t it?) and your account will be suspended shortly if you don’t do anything about it.
This person also suggests contacting a Steam or game developer administrator who will clear out your problem.
Obviously, that user switches to a very well disguised profile of an alleged official that will threaten you with account deletion unless you send details that contain your credentials.
Finally, the outcome is the same. You lose everything from your account and eventually it gets closed so that the scammer can cover its trace.
2. What are the most affected countries by Steam scams?
Although we don’t have any data about the top countries affected by Steam scams, starting with the pandemic, the reported cases multiplied considerably.
For instance, in a news report from the FTC, in the first nine months of 2021, consumers lost $148 million only from gift card scams.
That was more than in the whole year of 2020. According to their data, almost 40,000 consumers filed reports for such scams in the U.S. and that is not counting the cases with users who didn’t bothered to complain and try to get their money back.
On top of the most used gift card scams are the ones from iTunes, Google Play, and Amazon but Steam also holds an honorable fourth place on the list.
How do I secure my Steam account?
After the installation of the desktop app, you will be prompted to verify your email, and Steam Guard will be activated.
That means that if someone attempts to log into your account from another device, they will need to provide a code sent to either your phone or email address.
However, you can also install the Steam Guard Mobile Authenticator on your Android or iOS. Here’s how you can do that:
After you install it and log into your account, click on the Menu button and tap on Steam Guard.
Now, tap the Add Authenticator button.
Next, add your phone number and touch the Add phone button.
Lastly, you will receive a confirmation code on your phone that you will need to enter in the Step 2 window.
If you entered the code correctly, you will receive a very important recovery code which you need to store safely for later use.
When the process is done, you will receive another code, that will refresh every time you log into your Steam account.
So, every time you log in, Steam will request the code so you will need to open your mobile app and get the code from there.
It may seem a little bit tedious but this way, no one can steal your account unless they have access to your phone or, of course, if you give them your code.
Apart from the mobile Steam Guard app, the best protection from scammers is to use your better judgment.
Look carefully at the websites that ask you for your credentials, don’t engage in conversations that lead to them asking you for such favors.
Also, if an offer from a stranger seems to be too good to pass, then it definitely is and you should definitely end the conversation there.
Avoid dealing any items games or goods outside the Steam platform. The risks outweigh the benefits almost all the time.
Never, ever, give your account details and screenshots that contain them to anyone. The officials from Steam would never ask for such details.
Be careful about who you make friends with. Someone who added you to their friend’s list might not be doing that because they admire your play style.
But sometimes, all the caution in the world can’t help you from malware and virus attacks on your PC. That’s why we also prepared a short list of the best antiviruses for gamers.
What is the best security software for gamers?
ESET HOME Security Essential – Although it’s light on your system, it will protect your PC from any possible intrusions.
Bitdefender Antivirus Plus – Apart from the much-needed Game Mode, you will also have multi-layered protection impossible to overcome by any wrongdoers.
Total AV: Real-time virus protection, it takes care of your privacy with a built-in VPN, and also prevents in-game lag with its own disk cleaning feature.
What are the other scam platforms you should worry about?
When it comes to gift card scams, according to an FTC report, iTunes and Google Play definitely lead the way.
And the operation mode is identical. The fraudster is demanding payment with a gift or reload card, scammers posing as business representatives, family members, well-known agencies, or simply friends.
For instance, if you are contacted by IRS and they tell you that they cannot accept other payments because of your tax problems, that’s an obvious scam.
According to FTC, sometimes, the wrongdoers even call the iTunes cards payment vouchers and instruct the victim to buy the cards from different stores and not talk about this with anyone, just to avoid alerting the salespersons from the store.
As for the most notorious scamming platforms, a study released by SocialCatfish.com offers an insight picked up from asking 726 of their readers about this experience.
Facebook clearly leads the way with 151 victims and most of them were the victims of profile cloning.
The scammer uses the photos and data from the profile of the victim to create an almost identical fake one, then asks the friends for money or sends malicious links.
On Google Hangouts there were 99 scam reports. Here, romantic impostors fall in love quickly, gaining the trust of the victims and asking for money or personal information.
The scammers have a different approach on Instagram. They pretend to be representatives of a famous brand and offer giveaways in exchange for important personal data that involve credit card data.
You should also be aware if you receive a six-digit verification code on WhatsApp from a friend who desperately needs it to get back into his/hers account.
Most likely, they already broke into their account, and if you give them the code, they will also hijack yours and demand money from your friends, pretending to be you.
The most important thing is that if you are the victim of any of these scams, report it immediately to the authorities.
You can always contact FTC,IC3, IdentityTheft.gov, and even the FBI and make a complaint because these scammers have to be stopped.
Dell is launching a series of new Latitude and Precision products. The list includes the Latitude 9330, as well as the Precision 7670, and Precision 7770. There’s even a special Precision 5470 25th Anniversary Edition, too. The highlight is the Latitude 9330, the world’s first laptop with a unique new collaboration touchpad.
Somewhat going the route of the Asus Screenpad 2.0, which is a touchscreen in the touchpad on Asus laptops, the Latitude 9330 brings conference call features right at your fingertips. The touchpad has controls for microphones, camera, sharing screen, as well as chat options for when in meetings (they disappear when the meeting ends.) This is an all-new 13.3-inch ultra-premium 2-in-1 and it looks a lot like an XPS 13 2-in-1 with a slim bezel 90% screen to body radio 16:10 aspect ratio display that can be configured up to QHD+
CPU options include 12th generation Intel Core i7 vPro processors, and LPDDR5 memory can be configured up to 32GB, with Storage going up to 1TB or a 256GB self-encrypting drive. Other cool features include upward-firing speakers with intelligent running, 4G and 5G options, fast charging support, and AI-based background noise elimination. Note that the webcam is also FHD. Pricing has not yet been announced, but availability is set for June 2022 worldwide.
As for the Precision 7670 and 7770, these laptops are quite powerful. The Precision 7670 gives you a best-in-class front-of-screen experience that doesn’t compromise on power in a 16-inch form factor. It is available in two chassis options—thin and performance—allowing added configurations. The Precision 7770, meanwhile, is the world’s most powerful 17-inch mobile workstation offering the highest scalability across the portfolio and providing desktop-like performance on the go. Both laptops are set for release FYW2 worldwide, with pricing to be confirmed nearer to the shipping dates. CPU options include Intel’s most powerful options, Core i9 55 watts, and Intel VPro. GPU options include up to Nvidia RTX A5500 graphics.
Note that these Precision models include Dell’s CAMM (Compression Attached Memory Module) technology. This enables a thinner chassis, without giving up on performance. It also helps reduce waste when making components, too.
Moving along to the Precision 5470 25th Anniversary Edition, this is a special laptop for Dell fans. The laptop marks 25 years of Precision and comes with a special cobalt finish and etching to mark the occasion. Otherwise speaking, it’s the same as the Precision 5470 that was released last month.
Java is an important component for many applications, and some applications require you to have Java installed if you want to run them.
We’ll show you how to download and install Java on your Windows PC. Don’t worry, it’s simpler than you think.
Installing Java is incredibly simple, and it takes only a couple of minutes, and in today’s guide we’re going to show you how to install it on Windows 10 and 11.
Do I still need Java on Windows 10 and 11?
Most applications don’t require Java in order to run, so there’s no need to have it on your PC. If you try to install an application that is built in Java, then you’ll have to install it.
Java was used in the past for web applications, but after the removal of the browser plugin a few years ago, there’s no need to have Java on your PC anymore.
Yes, Java is perfectly safe to install, but in order to minimize any chances of security issues, it’s always a good practice to install the latest version.
Java browser plugin on the other hand is unsafe to use, but no major browsers support it, and most websites have dropped support for Java, so you don’t have to worry about it.
Java can be useful, and sometimes even necessary if you’re using applications that are built on it. As you can see, downloading and installing Java is pretty simple, regardless of the Windows version.
Now that you know how to install the necessary components, you might want to check our how to run JAR file on Windows article to learn how to properly run Java apps.
Did you find our guide helpful? Let us know in the comments section below!
The HP scanner not working on Windows 11 is a common issue and is often encountered after a Windows 11 upgrade. A similar issue with scanners is also noticed in other brands like Canon, Epson, Panasonic, etc.
First of all, make sure that the scanner or the multifunctional printer like the HP Deskjet 3755 scanner is turned on. At least a light on the printer’s panel should be lit to let you know about its status.
Also, check if the cables are properly attached to the PC and the scanner. If the scanner is built into the printer, printing a test page could confirm that it’s functioning properly.
What can I do if the HP scanner is not detected in Windows 11?
1. Enable related Windows services
Navigate to Start, right-click and select Run to launch Run Command.
In the search field, type services.msc and press OK.
In the Service Manager window, go to the right side, and under the Names column, look for the Windows Image Acquisition (WIA) service.
Double-click on it to open its Properties window.
In the Properties dialogues box, under the General tab, go to theStartup type field. Set it to Automatic.
Now, check if the Service status is running. If not, click on Start.
Press Apply and then OK to save changes and return to the Service Manager window.
Repeat the above process for the DCOM Server Process Launcher service and, Shell Hardware Detection, Remote Procedure Call, and RPC Endpoint Mapper services as well.
Once done, close the Services window, restart your PC and check if the HP scanner is working now.
2. Run the hardware troubleshooter
To open Run Console, press the shortcut keys Win +R simultaneously.
Write cmd and press the Ctrl + Shift + Enter hotkey to launch the elevated Command Prompt.
Now, run the below command in the Command Prompt (admin) window to open the hardware troubleshooter: msdt.exe -id DeviceDiagnostic
As the Hardware and Devices pop up, click on Advanced.
Check the box next to Apply repairs automatically and press Next.
Now, wait till Windows detects any issues. If any issues are found, it will apply the fix automatically.
Once the process is over, reboot your PC. Check if your HP scanner not working issue is resolved now.
A troubleshooter may help pull up the issues if your scanner won’t run due to a glitch.
3. Update drivers
To manually update drivers follow these steps:
Go to Settings from Start.
Go to Windows Update, then select Advanced options.
Select Optional updates.
Expand the Driver updates section, then checkmark the scanner drivers.
Reboot the computer.
If the scanner driver is outdated or corrupt, your HP scanner can stop working on Windows 11 hence, make sure to keep the drivers updated at all times.
To update the drivers, you may also visit the manufacturer’s website to download the latest driver and install it on your PC.
4. Enable compatibility mode
Press the Win + R shortcut key to launch the Run console.
Type control printers in the search bar and press Enter.
In the Devices and Printers window, right-click on the HP scanner and select Properties.
In the Properties window, select the Compatibility tab. Now, go to Compatibility mode and enable the option – Run this program in compatibility mode for. Then, select any older Windows version from the drop-down.
Press Apply and then OK to save changes and exit.
Now that you are done, check if the HP scanner is working fine.
Windows 11 brought many changes and improvements over its predecessor, as we can easily see in our detailed Windows 11 review. One of these changes was reducing the dependency on the Control Panel and increasing the same for the Settings window.
The Settings app comes inbuilt with Windows 11, and no download is needed. The app has been a Windows computer staple for a while, but it’s still not the most straightforward software. Finding your way around between the different sections and limited search functionality can be a bit difficult.
Luckily, the Settings app isn’t without some tricks up its sleeve that can help you find what you’re looking for.
The original Settings app for Windows 10 made things difficult to find and manage because it was so cluttered with options. Windows 11 has been redesigned from scratch with simplicity in mind, making it much easier for users to understand.
What are the main features of Windows 11’s Settings app?
Settings is an all-in-one app that allows you to configure everything from how it looks to how you connect to the internet or add accounts. Here, you can customize the look and feel, connect peripherals, configure networking settings, and change language settings.
The search bar at the top of the page now includes breadcrumbs for navigation sub-menu buttons, making it easier for you to find what you are looking for in the menu.
It also has a section for managing privacy and security settings. This is called the Privacy section, and it contains features such as location, camera, microphone, and other controls.
The new app is the control center for your computer that stores settings for most Microsoft apps, including your display, colors, and keyboard. You can also use this app to configure gestures and touch shortcuts if you have a touch-screen device.
While it would be rare for the Settings app not to be present in Windows 11, if it happens, try the following solutions:
What can I do if the Settings app is not present in Windows 11?
1. Run a quick SFC scan
Go to the Windows Search bar and type CMD to open Command Prompt.
In the right pane, select Run as Administrator.
Once the Command Prompt window opens, type the following and hit Enter: sfc/scannow
Wait for the process to complete and then reboot your computer.
SFC stands for System File Checker. It is an inbuilt utility in Windows that checks for any corrupted or missing system files and repairs them if any discrepancy is found. Therefore, running SFC Scan may resolve the Settings app missing issue.
If doing this scan manually overwhelms you, you might consider utilizing a third-party safe repair tool that specializes in Windows repair.
These tools analyze and diagnose your damaged PC, then repair it using technology that restores your Windows Operating System and reverses the harm done with a comprehensive database of replacement files.
When the setting’s app is corrupted or missing, these troubleshooters will repair it, restore the registry, and even offer a thorough hardware analysis.
2. Reset the PC
Windows has a Reset this PC feature that restores the system to factory default settings, which can resolve and fix the most common problems and improve performance. Resetting also means all default features, like the Settings app, will be back on your computer.
The Reset this PC feature has been available since Windows 10, and on Windows 11, it also allows you to reinstall Windows with multiple options.
For instance, you can restore your system to factory settings while keeping your files and settings, or do a complete removal for improved memory usage, the performance of apps, or battery drainage.
Press Windows + R and type CMD into the dialog box.
Then, type in the following command and hit Enter: start ms-settings:
The Settings app window will be launched on your computer screen.
Keep in mind that the Run dialog box is a special interface that you can use to access programs that regular shortcuts don’t activate. It can also be used to open the Settings app.
4. Through the Win-X menu
Press Windows + X simultaneously. You can also right-click on the Start button and choose Settings.
The Settings app will open on your screen as soon as you do that.
The WIN-X menu in Windows 11 contains shortcuts to important system tools and various programs, including Settings.
The Settings app is where you can configure and control how your computer operates. The app is organized into different tiles representing individual settings categories, such as System, Device, Network & Internet, Personalization, and Accounts.
Within each of these categories are further subcategories that cover individual settings controls. Some settings are available in multiple locations.
Many users have reported the error Trezor One stuck in bootloader mode on their PC while trying to update the firmware using the Trezor Suite. In case you encounter this error, try the solutions in this guide.
Bootloader mode is a feature on the Trezor One device that allows firmware updates to be completed.
This is the age of cryptocurrencies and people are shifting to blockchain-based currencies from hard cash. However, the volatility of the currencies is often questioned.
If you’re serious about crypto and have a nice stack of coins that you’d like to hold, you have to have a crypto wallet.
The easiest form to store your cryptocurrency is online, however, it certainly isn’t the safest. The online exchanges come under the scrutiny of the government and can also be hacked by cyber-criminals. Thus, an offline wallet would be a good idea for keeping your money safe.
What is Trezor?
Trezor is an offline wallet similar to your leather wallet which stores cash. The data in your wallet cannot be hacked or even contacted by anyone online. To access your money, a person would have to physically access your Trezor device which is difficult.
What are the Trezor Suite and Trezor wallet?
Now while the Trezor device is physical hardware, you cannot check all information in detail on the device’s LED screen. So, a dashboard using software is required. This software is the Trezor Suite.
Other than checking the status of your wallet and managing coins, when connected to the internet, the Trezor suite can also be linked to exchanges.
The link between the Trezor Suite and the Trezor wallet is that the online wallet is connected to the server and the suite that works offline as well as online.
If there’s an issue with the suite, it could be due to a problem with the app. And if the online Trezor wallet doesn’t work across multiple browsers, then the problem has to be with the server.
What should I do if Trezor One is stuck in bootloader mode?
1. Use the online Trezor wallet instead of the Trezor Suite
Users have reported that simply using the online Trezor wallet to update the firmware resolved the problem. So, you can try using the online wallet instead of the offline one.
2. Press both buttons on the Trezor device
Unplug the Trezor device from your computer.
Now, keeping both the buttons on the Trezor device pressed, plug the device into your computer.
Enter the bootloader mode as you tried earlier.
Proceed to update your firmware from the online Trezor wallet as usual. It will work this time.
While the online wallet workaround is helpful, you might also want to fix the case with the Trezor Suite. The best solution would be to reinstall the software.
We hope that at least one of the above methods worked for you in resolving the Trezor One stuck in bootloader mode error.
With Microsoft OneNote, users can now use the handwriting recognition feature to convert handwriting to text. In return, this makes the notetaking process easy and enhances readability. Once your handwriting is converted into text, it appears as though it has been typed on a keyboard.
Moreover, Microsoft OneNote allows users to move around the notes in any order and even categorize them into multiple notebooks. Here’s what you will need to do to get started with Microsoft OneNote’s handwriting recognition feature:
Using Microsoft OneNote to take Handwritten notes
Launch the application, and click on the Draw option at the top of the window.
Once you get to the drawing tab click on any pen or highlighter tools to start note-taking.
The cursor will change shape once you select one of these tools, this is an indication that you can begin the note-taking in your own handwriting.
Depending on the pen or highlighter you select, there is a variety of settings available to you that will help you change the size and color of the tool. To access this, click on the tool and a drop-down menu will appear with these options.
If you happen to fill the page and you are not yet done taking notes, click on the Add page button at the bottom.
Convert your handwritten notes to text
Click on the Lasso Select tool in the top toolbar.
Draw a selection around the section of your handwritten notes that you wish to convert to text.
Then, click on the Ink to Text option to convert your handwriting into text.
Note: Lasso Select is in place to help users select the section of the handwritten notes that they want to convert to text.
Take your note-taking experience to the next level with Microsoft OneNote
In the end, the feature is certainly powerful, but it’s also very natural in how it interacts with the user. It makes for a fluid note-taking exercise as compared to when the user is actually typing. You can make handwritten notes on your PC, and edit them in real-time as you would any other piece of content.
According to market research by NPD Group, Xbox had its best March on record, outperforming its previous March records from 2014 in dollars, and 2011 in units sold.
It is interesting to note that the Xbox Series X|S was the best selling console in dollar terms not only for March 2022 but for the first quarter, while the Nintendo Switch led the way in units sold for both March and throughout the first three months of the year. It was also recently revealed that the Xbox Series X|S is nearly 4.5 million units ahead of the Xbox 360 in terms of total sales after the first 17 months each system’s respective lifespans.
I still need to go through the NPD figures, but here are @VGChartz estimates for March 2022 before adjustments are made:
NS: 595K XSX|S: 555K PS5: 259K
The order matches NPD and has Xbox Series X|S setting an Xbox record for the month, which we know is true.
February saw the Xbox Series X|S outsell the PlayStation 5 in Europe for the first time. Though both Sony and Microsoft have been crippled by worldwide chip shortages, the Series X and particularly the Series S have consistently been more readily available than the PS5.
It should be noted that total industry hardware sales are drastically down from this time in 2021. At present, the Xbox Series X|S has sold right around 14 million units.
Mastercard has put measures into place to help avoid the further occurrence of this issue by enhancing its Digital Transaction Insights solution with next-generation authentication and real-time decisioning intelligence capabilities.
Microsoft will be the first partner to share its insights and integrate with the new Digital Transaction Insights solution across several lines of business. Building on a long history of cross-collaboration, Microsoft’s Dynamics 365 Fraud Protection’s proprietary risk assessment, which leverages adaptive AI to assist in real-time fraud detection by identifying risky behaviors across purchase, account and in-store activities, has been integrated with Mastercard’s Digital Transaction Insights to better enable real-time intelligence sharing in an easily consumable and actionable format.
Mastercard’s network insights will now be paired with the shop’s own data, which will in return help them verify the buyer’s true identity. It will also provide financial institutions with all the necessary information that is required before making any authorizations, thus, fostering transparency when payments are made.
If you are constantly working on your laptop for a lengthy period, it is necessary to adjust the screen brightness to protect your eyes and also to save the battery lifespan due to maximum performance.
However, users have been reporting that they cannot adjust screen brightness on their HP Envy x360. Most users claim that their screen brightness is always on max after upgrading their windows version.
If you cannot modify the brightness at all, you can resort to the basic solution of restarting your PC. Though basic, it is more effective in solving most PC problems.
That apart, this article will provide troubleshooting fixes that have been effective for other users with a similar situation. It is advisable to follow the instructions in the fixes strictly.
How can I fix HP Envy X360 brightness not working?
1. Change the Graphics Properties
Right-click on your desktop and select Graphics Properties.
Select Advanced Mode and click on OK.
Click Display from the left pane and select Color Enhancement. Proceed to adjust the Brightness using the slider till you are comfortable with it.
Click Apply button below to save the brightness setting.
Adjusting the brightness from the Graphics properties menu can be helpful. Since this is controlled by the Graphics card driver, it may not work for some users with lesser versions.
Start by right-clicking on the Start icon then click on Device Manager to open it.
Expand the Display adapters section then right-click on the GPU and lastly click onUpdate driver.
Select Search automatically for updated driver software and wait for your OS to install the appropriate driver.
Restart PC to take effect.
Most users have reported that their issues was related to their graphics card drivers. Hence, this solution will likely solve your screen brightness problem.
In case your driver couldn’t update automatically, we strongly recommend you download Outbyte Driver Updater for your driver updates. You can get the latest updates for all your drivers installed faster and it is also easier to use.
Start by right-clicking on the Start icon then click on Device Manager to open it.
Expand the Monitors and right-click Generic PnP Monitors. Select Enable device.
Restart PC to take effect.
The Monitor driver can get disabled during other driver updates and this will prevent you from adjusting screen brightness on the HP Envy x360. It should be fixed after being enabled.
4. Change Power Options settings
Press Windows key + R and input powercfg.cpl. Click OK to launch.
Choose Change plan settings and click change advanced power settings.
Select Display and click the + sign to expand Display brightness. Adjust the screen brightness manually.
Select Dimmed display brightness and set it to mirror step 3. Turn off Enableadaptive brightness.
Microsoft Windows Malicious Software Removal Tool is a free security tool that protects your computer from viruses and other malicious software. However, there are times when it may not install correctly on your computer. In this article, we will discuss six ways to fix the problem.
Malware can be disruptive on your computer and if left unchecked, can cause irreparable damage. There are many anti-malware tools, but most are premium and may be out of reach for a regular user. This is where the Windows Malicious Software Removal Tool comes in. It may be free but is highly effective at dealing with all types of malware.
However, it’s common to run into installation problems once in a while. If your Windows Malicious Software Removal Tool update takes forever then you’ve come to the right place. Read this to the end to know how to fix Microsoft Windows Malicious Software Removal Tool not installing.
What can I do if the Microsoft Windows Malicious Software Removal Tool is not installing?
1. Use the Safe Mode
Restart your computer and press F8 before the Windows logo appears.
From the menu that appears, select Safe Mode and press Enter.
Once your computer is in Safe Mode, try installing the tool again.
Open the Registry Editor by pressing the Windows key and R at the same time. Type regedit.exe and hitEnter
Navigate to the following key: HKEY_LOCAL_MACHINE\SOFTWARE\Policies\Microsoft\Windows\Installer
If this Installer key doesn’t exist, you’ll need to create it.
To do this, right-click on the Windows key and select New then go to Key.
Name the new key Installer and press Enter
Right-click on the Installer key and select New then scroll to DWORD (32-bit) Value and press Enter
Name the new value DisableMSI and press Enter
Double-click on the DisableMSI value and set the Value data to 0.
Close the Registry Editor and try installing the tool again.
4. Delete temporary files
Open the Search function and type in Disk Cleanup, and click Open.
Select the drive you want to clean up. Make sure the Temporary files option is checked and select OK.
This will delete all of the temporary files on your computer, which may resolve the issue.
5. Use a third-party tool
You can also save yourself time and the headache of handling things manually by using a third-party tool. These tools help you uninstall anything problematic with simple clicks. Of the many that exist, the one I’d highly recommend is the IObit Uninstaller.
It features complete uninstallations, in-depth cleaning, safe surfing, software health, and even monitors your installations to ensure everything runs smoothly. The price plans are cheap and you can also use a Free version just to test drive how it works.
6. Contact Microsoft Support
If the Windows malicious software removal tool update stuck problem continues after all this, you can contact Microsoft support for help. They’ll be able to help you troubleshoot the problem and get the tool appropriately installed on your computer.
These are six ways to fix the Windows Malicious Software Removal Tool not installing properly on your computer. Try each of these methods until you find one that works for you. You can check out our website for more quick fixes for all your Windows issues.
Launcher error code 15 has been reported by dozens of gamers. This error has been reported for almost all major games on the Steam Client.
This is not the only error that Steam users come across very often. If you are facing issues where the downloaded game does not show up in the library, you can check out this guide for solutions. Moreover, if games on Steam are lagging or running slow, then we have a guide that can help you fix the issue.
When this Launcher error code 15 occurs, it shows a message The game was not launched via the Steam client. Some gamers have reported that due to this Launcher error code 15, they are unable to play the game.
And for others, this error pops up after the game is launched, but it does not let them get into the match or play the game.
Imagine wanting to play your favorite game only to come across this Launcher error code 15. It could be pretty annoying not being able to play your favorite game. Sadly, there isn’t any specific reason for this issue, and it can surface for several reasons.
Thankfully, we have prepared this guide for you that lists down all the possible reasons along with the method to resolve them.
What are the reasons for Launcher error code 15 on Steam Client?
The Steam Client on PC is known to throw up different errors. One of the most common and irritating errors gamers have reported is the Steam error code 105. This prevents gamers from connecting to the game server and playing the game or downloading in-game content.
Luckily, we have a guide that contains some expert solutions that would surely help you fix the problem of Steam error code 105.
Coming to the problem at hand, as mentioned there isn’t any specific reason why this Launcher error code 15 shows up.
Although there isn’t any specific reason, there are a few common reasons that are responsible for causing this error.
Server outages.
Windows Firewall or antivirus conflict.
Unstable internet connection.
Corrupt game files.
VPN might be interfering with the Steam client.
Corrupt cache files.
Presence of virus or malware.
The game doesn’t have the necessary permissions to run.
Outdated drivers.
The steam client is out of date.
Presence of cheating software.
To be specific, this launcher error code 15 on the Steam client has the majority of affected users who are trying to play the GTA V game.
Be it GTA V or Battlefield 2042, this issue has been troubling users, and below we have a curated list of solutions that will possibly help you fix the issue.
How can I fix the GTA V launcher not opening, or Launcher error code 15 on Steam?
1. Check the server status
There are chances that the error may not be from your side but from the game’s side. Several users have reported that because of a server outage, the game failed to load and the Steam client showed Launcher error code 15 with a message The game was not launched via the Steam client.
So, before you go ahead and look for a solution at your end, you should check if the game server is functioning fine or facing an outage.
To find out about server issues, we would advise you to check the game’s official website, game forum, the game’s official Twitter account, and other social media handles, as such server outages are informed to the people via these channels.
2. Check Firewall settings
Open the Start menu.
Search for Windows Defender Firewall.
On the left side, click on Allow an app or feature through Windows Defender Firewall.
Click on the Change settings button.
Select your game and tick both the checkboxes.
Click on OK.
If you cannot find your game, then click on Allow another app option. Navigate to the directory where the game is installed and select the game and again click on both the checkboxes.
Restart your PC and see if this fixes the issue or not.
Following the above steps, you are basically allowing the game through the firewall. In order to protect your data, the firewall on your PC may restrict the game from connecting to the internet, which could be the reason you are experiencing Launcher error code 15 The game was not launched via the Steam client.
3. Check your internet connection
An unstable internet connection is also one of the reasons you can come across the Launcher error code 15 with the error message The game was not launched via the Steam client.
Not only this, you will come across several other problems if your internet connection is unstable. In such a scenario, we would suggest you test your internet connection and see if it is providing a stable and fast data connection as per your data plan.
You can make use of websites such as Fast.com or Speedtest in order to check the internet speed. If you are experiencing any issues with your internet, then we would advise you to contact your ISP to resolve the problem.
4. Check integrity of game files
Open the Steam client.
From the main menu, click on LIBRARY section.
Right-click on the faulty game and select Properties.
Select LOCAL FILES.
Click on Verify the integrity of game files.
The process will begin.
Once the process completes, try relaunching the game and see if this fixes the issue or not.
If your PC has missing game files, then it will cause issues with the Steam client and ultimately show you multiple errors.
In such a case, we would suggest you follow the above steps and verify the integrity of the game files to fix missing or corrupt game files and see if this fixes the issue or not.
5. Update drivers
Open the Start menu.
Search for Device Manager.
Expand the Display adapters section.
Right-click on your GPU and select Update driver.
Select Search automatically for drivers.
Your system will look for new updates for GPU drivers and will prompt you to install if the new one is available.
Repeat the same steps for audio, DirectX, and other drivers.
If the drivers for GPU, audio, etc. aren’t up to date on your PC, then not only you will come across this error, but you will also experience other errors with game and overall system performance.
To resolve this, it is advised to keep all the drivers on your PC up to date. Steam doesn’t work efficiently if the required drivers are corrupt, missing, or outdated.
While you can follow the above steps to manually update the drivers, there is a much quicker way to do it.
Notably, you can make use of the reliable driver updating tool known as Outbyte Driver Updater. It’s lightweight and lets you perform a full system scan automatically on startup, find any outdated, damaged, or missing drivers, and update them with just a simple click.
All you have to do is select the drivers you’re interested in updating, and Outbyte Driver Updater will take care of the rest automatically.
If you are making use of VPN tools, Steam will not work perfectly. This is not true for every VPN service, but for some. The issue arises only for free VPNs because they use public IP addresses.
In such a case, we would suggest you either disable your free VPN service or if you want to use one, you can use a premium VPN or a free VPNs which we have suggested in this guide.
Select Ctrl + A to select all files and press the Del button on your keyboard.
The presence of corrupt cache files not only causes issues with the Steam client but also with the overall performance of your PC.
It is advised that you clear the temporary folder periodically in order to clear out the junk files, create more free space, and delete all the corrupt cache files.
8. Scan for viruses or malware
Click on the upward arrow located on the bottom right taskbar.
Click on Windows Security.
Select Virus & threat protection.
Select Quick Scan to let Windows Security scan your PC for viruses and malware.
Alternatively, you can also click on the Scan options button, and opt for a Full scan to deeply scan your PC for viruses or malware.
Here, to give you an example, we used Windows Defender to scan our PC for viruses or malware. But you can use any third-party antivirus software to do that.
We would recommend you install and use the TotalAV antivirus tool. It comes with an intuitive UI and features such as antispyware, ransomware shield, banking and payment protection, firewall, network inspector, etc.
9. Run as administrator
Open the Steam client.
Head to the Library.
Right-click on your game and choose Properties.
Click on Manage > Browse Local Files.
Search for the EXE file inside the installation folder.
Right-click on the game’s EXE file and select Properties.
Switch to the Compatibility tab.
Select Run this program as an administrator.
Click Apply and check if this fixes the issue or not.
10. Change DNS servers
Open the Run dialogue by pressing Win + R keys.
Type the below command and press Enter. ncpa.cpl
Right-click on your network connection and select Properties.
Select Internet Protocol Version 4 (TCP/IPv4) then click on Properties.
Choose the Use the following DNS server addresses option.
Enter the below values:
Preferred DNS server: 8.8.8.8
Alternate DNS server: 8.8.4.4
Click OK.
Restart your PC and check if this fixes the error code 15 with the Steam client or not.
In the above method, we used the free, public, and secure DNS servers provided by Google Public DNS. Alternatively, you can try out Cloudflare or OpenDNS.
What else can I do to fix the Launcher error code 15 on the Steam Client?
If none of the above methods helps you fix the problem, then there are a few other methods that you can try and possibly fix the Launcher error code 15 The game was not launched via the Steam Client.
➡ Update the Steam client
Open the Steam Client.
Click on the Steam button on the top menu bar.
Select the Check for Steam Client Updates option.
Steam will automatically look for a new update and if available, will download it.
Often, due to a faulty internet connection, the Steam Client fails to download and install the latest available update. And if the latest update is not installed, you won’t be able to enjoy all the latest features and the bug fixes it brings.
So, you can follow the above steps and check if you have the latest version of the Steam Client installed on your PC to avoid different problems.
➡ Delete cheating software
Many users make use of trainers and other cheat engines that help them play the game with ease. While this software makes the gameplay easy, it can conflict with the Steam Client and will show you multiple errors, one of which is the Launcher error code 15.
We would suggest you delete any cheating software or mod and check if it fixes the issue or not.
The above-listed methods are some of the effective ones that have helped users fix the Steam Client launcher error code 15.
Let us know in the comments below which one of the above methods helps you fix the Launcher error code 15 The game was not launched via the Steam Client.