A number of users have reported that they can’t download OneDrive files. This issue can be extremely annoying, as the entire purpose of storing your files online is to be able to access them whenever you need it.
This is what one user had to say about this issue on the Microsoft Answers forum:
OneDrive won’t download a file to my Windows 10 PC. OneDrive has been downloading an entire file and working as it should then all of sudden it stopped downloading the entire file. I don’t know what else to try. The download problem is a problem on all of my computers and the problems started on all the computers at the same time. I have tried everything I could find to try even deleting a lot of the files and pages.
It seems that this error was caused by a glitch in the OneDrive servers. This error mistakenly flagged some of these files as a possible threat.
Even though the error seems to be on the server-side, in today’s article we will explore some of the best troubleshooting methods to try and solve it. Please read on to find out more.
What to do if I can’t download OneDrive files on Windows 10?
1. Try using your browser
One quick workaround for this issue might be to open OneDrive in your browser and try to download the files manually.
You can use any browser for this purpose, but we recommend making sure yours is stable, quick, and has good security.
We recommend Opera One because it is very easy to use while providing plenty of up-to-date features. Not only does it come with a simple and easy-to-use UI, but it also includes plenty of add-ons and integrations that can help you access your email and social media accounts in seconds.
When it comes to downloading, the software has a good speed rate and you can set it up to save your files into a default download folder, or precisely select the location you want for anything you download.
It has a free built-in VPN that helps keep your data private and allows you to surpass certain geo-restricted content. Plus, it comes with built-in AI.
Some users have reported that they found a way to regain access to their OneDrive files.
You can try this method by simply reuploading the files that have issues. This will fix the error message and will allow you to download the files again.
3. Update the OneDrive app on your PC
Press Win+R keys on your keyboard -> type %localappdata%MicrosoftOneDriveonedrive.exe /reset-> press Enter.
Wait for 2 minutes to pass.
Press Win+R keys again -> type %localappdata%MicrosoftOneDriveupdate-> press Enter.
Check to see if the OneDrive icon disappears from your notification area inside the taskbar, and then re-appears after a couple of minutes.
If the OneDrive icon doesn’t reappear, follow these steps:
Press Win+R keys on your keyboard -> type %localappdata%MicrosoftOneDriveonedrive.exe-> press Enter.
This method should solve the issue mentioned above. Follow the next method if it doesn’t.
4. Try re-installing the OneDrive application
To uninstall:
Press Win+X keys on your keyboard -> select Apps and Features.
Inside the Applications window -> search for OneDrive -> select it -> click the Uninstall button.
Follow the on-screen instructions to complete the process.
Welcome back to our Windows 10 news recap, where we go over the top stories of the past week in the world of Microsoft’s flagship operating system.
Notepad is coming to the Windows 10 Microsoft Store
Microsoft is working on unbundling Windows 10’s default text editor, Notepad, from the OS by bringing it to the Microsoft Store, allowing it to be updated independently of Windows 10.
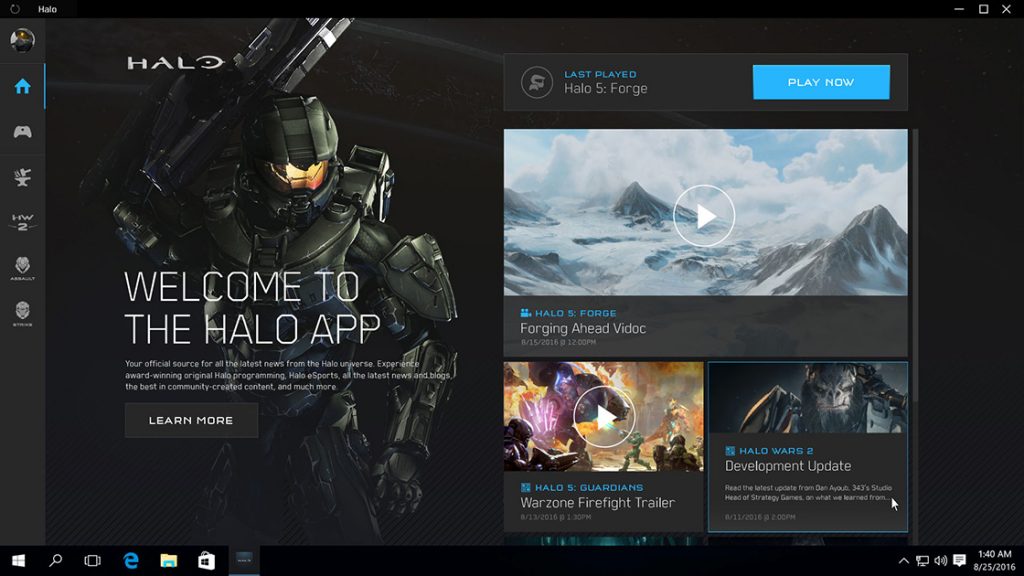
Windows 10 Halo app is being retired today
This week saw the Halo app on Windows 10 being retired, as the developer behind the game, 343 Industries, focuses on bringing Halo: The Master Chief Collection to PC, as well as the next instalment in the franchise, Halo: Infinite. The app will no longer receive any updates.
As we look to the future and future projects, we have to say goodbye to some existing ones. Today, we are letting you know of plans to officially sunset the Halo App for Windows PC beginning August 16. Read more: https://t.co/MJAh1ynqCSpic.twitter.com/HKH4hqHQsx
Windows 10 Plex app leaves the Microsoft Store, New desktop version launched
The Plex app for Windows 10 has left the Microsoft Store. Instead, the company has developed a new desktop version. This marks a shift away from Microsoft’s own store offering, and a move back to standalone software.
New Windows Search Home experience is now coming to the Windows 10 October 2018 Update
If you have a Power BI report connected to Data in an Excel file in the Power BI Service or Desktop client, you can refresh the data using the refresh button to update the table. However, some users have reported Power bierror in loading a previous table in their Power BI dashboard.
Follow the steps listed in this article to fix load was canceled by an error in loading a previous table Power BI error.
How to fix the Power BI error in loading a previous table
1. Delete and Recreate Query
Start with saving the affected query M code.
Next, delete the affected query from the dashboard.
Now recreate the query using the previously saved M Code.
Try to refresh the database again and check if the error in loading a previous table occurs again.
If the issue persists, check if any of the queries have incorrect DAX formula.
If you find any incorrect DAX formula in any of the queries, delete the formula.
Load the query again and check for any improvements.
The error can occur due to incorrect syntax that otherwise will skip your attention.
Uncheck “Enable parallel loading of tables” option.
Now try to load the query and check if the error is resolved.
This error can also occur if the Access app cannot handle Parallel loading that we disabled earlier resulting in the error.
If the issue persists, check if you have deleted or edited a column in a referred table.
3. Undo the Changes
If you are getting the error after you modified the Excel sheet related to your Power BI service, you can fix it by reverting the changes.
Simply undo the changes you made to the Excel file.
Make sure you revert the changes made to the Excel sheet for each query and update the tables manually to resolve the error.
If the issue persists, try with Direct Query instead of Import Query when you get the data.
Another reason why the error can occur is if you have changed the name for any of the tables in Excel and not in PBix. To fix this open the Advanced editor and rename the tables to match the names in Excel file.
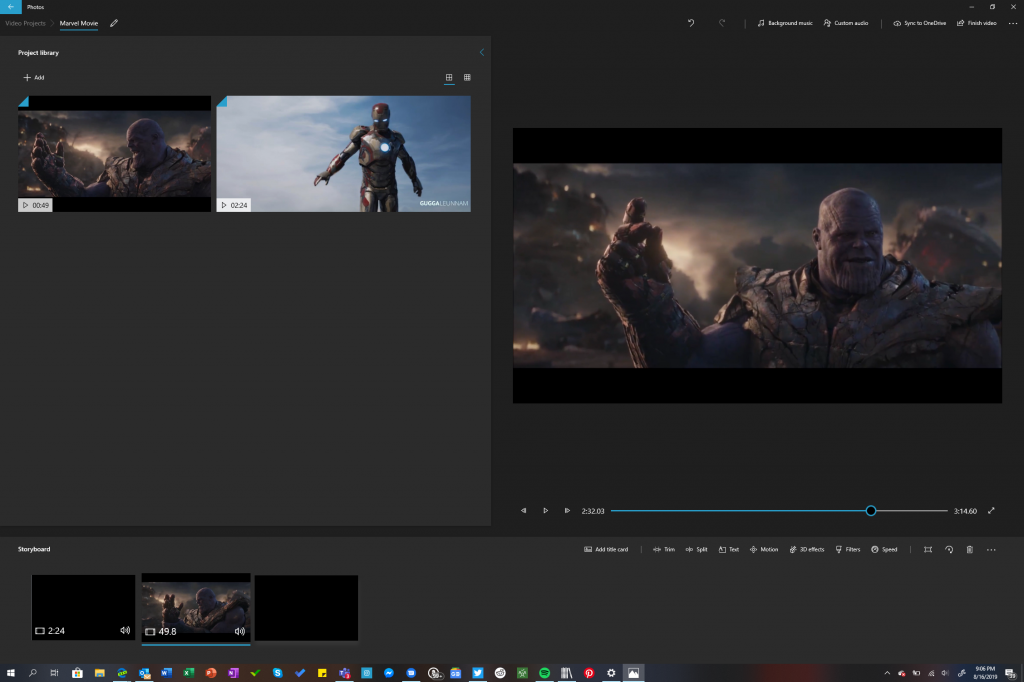
For reasons seemingly undisclosed to the public, Microsoft has decided to put an end-of-life date for its Photos app video sync to OneDrive.
According to a post on its Windows Support page, January 10, 2020, will be the date that metadata from any video project synced to OneDrive via the Photos app will not only be unsupported but deleted.
What’s happening exactly?
The feature that syncs in-progress video projects to OneDrive is being removed from the Video Editor in the Windows 10 Photos app.
When this happens on January 10, 2020, the metadata for any video projects that are being synced to OneDrive will be deleted. The metadata includes things like the photo and video clip order, music timing, and text for the title cards for a given video project. None of your actual photos, video clips, or anything else you’ve saved to your personal OneDrive will be affected by this change.
With that being said, Microsoft must be hoping its six-month warning is enough time for people to come up with a backup solution; if not, they are offering a couple of options of their own for users.
The easiest way to save all of the latest versions of all of your video projects you’ve synced to OneDrive is to select the Turn off sync for all projects link in the app message that you’ll see on the main Video Editor page.
Another way is to open each video project one at a time. If the project is synced to OneDrive, you’ll see this message – select Turn off sync now and the latest version of that project will be saved to your device. Again, you’ll only see this message if you’re currently syncing the project to OneDrive.
For any users who may forget to manually switch, Microsoft will automatically do the switch for them after January 10, 2020, but some saved projects my lose their most recent changes during the transition.
Microsoft has yet to explain the move or give any insights into what comes next for the video editing suite in the Photos app that will either supplement or replace the removed sync situation.
Visual Studio is a great software for developers, but many are having firewall issues. This is why today we’re going to show you how to allow Visual Studio through a firewall on your PC.
Why does Windows Defender firewall has blocked some features of Visual Studio code message appear?
Issues with your firewall settings can cause this error to appear.
This is unusual behavior and it’s usually caused by an unknown glitch.
How do I stop Firewall from blocking Visual Studio?
1. Add Visual Studio to Firewall Exception List
Now, this is a very obvious solution to this. You need to add Visual Studio to the Firewall exception list. If you haven’t done already, here is how to do it.
Press Windows Key + R to open Run.
Type Control and click OK.
Click on System and Security.
Click on Windows Defender Firewall.
From the left pane click on Allow an app or feature through Window Defender Firewall.
Click on Change Settings button.
Now scroll through all the apps and locate Visual Studio.
If you don’t find Visual Studio in the list of allowed apps, then click on Allow another app button.
Click the Browse button and navigate to your Visual Studio installation.
Select the .exe file in the Visual Studio installation folder and click Open. Click the Add button.
That’s it. Visual Studio is now added to the exception list.
Click OK to save the changes.
Now add the following executable files from Visual Studio to the exception list from the same installation folder. devenv.exe mstest.exe mtm.exe vstest.executionengine.x86.exe or / vstest.executionengine.exe
Restart the computer and launch Visual Studio and check if the error is resolved.
2. Check third-party Firewall
If you are using third-party antivirus on your Windows computer it is possible that it may also come with its own firewall.
Launch the third-party antivirus software and check the Firewall settings.
If required, add the aforementioned files to the exception list and save the changes.
Restart the system and check for any improvements.
After doing that, check if the problem is resolved.
Microsoft is planning to bring and make Notepad as a store-updatable app on Windows 10. This will come as a massive change, and will finally un-bundle the popular text editor from the operating system, allowing for more frequent updates.
The announcement of this change was made today as part of Windows Insider Build 18963. According to Microsoft, future Notepad updates, and starting with build 18963, will be automatically available via the store.
“This will allow us the flexibility to respond to issues and feedback outside the bounds of Windows releases.” As always, if you have any feedback for Notepad, we welcome it in the Feedback Hub under Apps > Notepad,” explained head of the Windows Insider Program, Dona Sarkar.
Previous featured updates to Windows 10 have introduced new features like expanded line ending support, as well as wrap around search, and an indicator for when there is unsaved content. With Notepad coming to the Microsoft Store on Windows 10, the possibilities of new features will likely be almost endless.
That was a bit unexpected, but Microsoft has just released a new Windows 20H1 build for Fast Ring Insiders, and it’s a pretty big one. Indeed, The preview build 18963 brings GPU temperature to Task manager for PCs with dedicated GPUs, something that PC gamers should appreciate.
Power users who juggle between multiple virtual desktops all day will also be pleased to know that it’s finally possible to rename virtual desktops in this build, and name changes will persist after a reboot. For now, this feature will only be available for 50% of Fast Ring Insiders, and Microsoft says it will roll it out to more Insiders in the futures.
There are many other new features in this build, including a Mouse Cursor speed in Settings, improvements to Windows Search, and Microsoft also made some changes to make an new account picture in Windows appear more quickly across Windows apps.
Another important change in this build is that Notepad is becoming a Microsoft Store app. After years of neglect, the has been updated with a couple of new features recent in recent months, and this change will allow Microsoft to update it separately from Windows updates.
You can check out everything that’s new in this build below:
GPU temperature comes to Task Manager
One of the longstanding requests we’ve been tracking for Task Manager is to add temperature monitoring support, and with today’s build we’re making progress on that ask. If you have a dedicated GPU card, we will now bubble up the current temperature next to its listing in the Performance Tab.
We hope you like the change! If you have any further feedback for Task Manager, please don’t hesitate to share it. To make suggestions or report issues in this space, press WIN+F and file the feedback under Desktop Environment > Task Manager in the Feedback Hub.
Notes:
Showing the GPU temperature in Task Manager is currently only supported if you have a dedicated GPU card.
You may need an updated graphics driver to see the temperature. Specifically one which supports version 2.4 (or higher) of WDDM is required. To check which version your PC has, press WIN+R and enter dxdiag. Under the Display tab, it will say your WDDM version next to Driver Model.
Currently the temperature value is only supported in Celsius.
Renaming your virtual desktops
Virtual Desktops exist to help you visually and cognitively separate different tasks on your PC. They can also be handy when doing presentations – enabling you to prepare demos on different desktops. Something we’ve heard loud and clear is that you want to be able to set names for your different desktops, in order to help cement the separation between workspaces, and we’re excited to share that rolling out to Insiders in the Fast ring is exactly that!
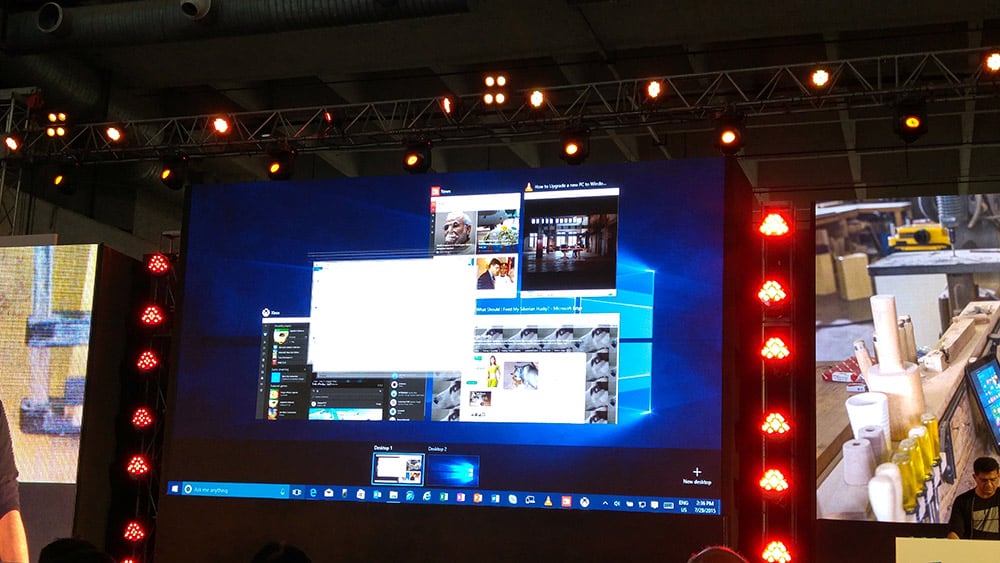
Wanna try it out? With the change, when you open Task View (by selecting the Task View button in the taskbar, or by pressing WIN+Tab,) clicking the name of your desktop will now switch it to be an editable fiel where you can set the name to be anything you’d like (including emoji). You can also right-click the thumbnail of the desired desktop in Task View, and a context menu with a Rename entry in it should appear. If you don’t have any additional desktops created yet, select “New desktop” in Task View to get started.
And yes, since we know you’ll ask – the names persist reboot.
Currently this change is live for 50% of Insiders in the Fast ring, and we’ll be expanding the rollout over the next few weeks as we evaluate the quality of experience.
Improving the Optional Features page in Settings
Based on your feedback, we’ve made a number of usability improvements to the Optional Features page in Settings (Settings > Apps & Features > Optional Features), and they’re now starting to roll out to Insiders in the Fast ring.
Multi-select: You can now select and install multiple optional features at the same time.
Better list management: You can now search through lists of optional features and sort them by Name, Size, and Install date.
More useful information: You can now see the install date for each optional feature in your ‘Installed features’ list. We’ve also added feature dependencies to the description of each optional feature in the list of features available for install.
Easier page navigation: View the status of your latest installs/uninstalls/cancels right on the main page in the ‘Latest actions’ section. You can now add optional features and view your history via pop-up dialogues, so you never have to navigate away from the main page
We’re excited for you to try it! Currently these changes are live for 50% of Insiders in the Fast ring, and we’ll be expanding the rollout over the next few weeks as we evaluate the quality of experience. Here’s a peek at what you’ll see once it’s available on your PC:
Adding Mouse Cursor speed to Settings
As some Insiders have noticed, you can now set your mouse cursor speed from within Settings! This is the latest piece of our larger ongoing effort to converge Settings and Control Panel experiences. You can find the setting under Settings > Devices > Mouse.
Making Notepad store-updatable
Notepad has been a well-loved text editor in Windows for over 30 years. Over the last few releases, we’ve been making a number of small improvements to Notepad based on your feedback (including expanded line ending support, wrap around search, and indicating when there’s unsaved content.) Starting with this build, we’re making a change so that future Notepad updates will be automatically available via the store. This will allow us the flexibility to respond to issues and feedback outside the bounds of Windows releases. As always, if you have any feedback for Notepad, we welcome it in the Feedback Hub under Apps > Notepad.
Traditional Chinese IME improvements
Thank you everyone who’s shared feedback about the new Traditional Chinese Bopomofo, ChangJie, and Quick IMEs. The developer team has been working on improving the quality and fixing bugs. With today’s build:
Toolbar Improvements: We fixed an issue where toolbar shows up even when [Use IME toolbar] is turned off in the setting. We also added [Hide toolbar] button in the toolbar menu.
Note: Other ways to show/hide toolbar:
From settings: Right click [中/英] icon > Click [Settings] > [General] > [Use IME toolbar]
From right click menu: Right click [中/英] icon > [Show/hide IME toolbar]
Candidate Window Improvements: We have been working on improving candidate window quality.
We fixed an issue where candidate window sometimes only showed limited number of candidates.
We fixed an issue where candidates shown in table view cannot be selected by number keys.
Please keep trying out this new IME, and let us know your feedback.
Changes to your account picture in Windows
Changing the picture for the account you use to sign in to Windows is now better than ever! Your updated picture will now show up quickly across Windows, apps, and many of the Microsoft sites you use every day. Previously, you might see as many as three or four different pictures for your account in different apps and sites at one time. Its super easy to try out – just go to Your info in Windows settings and change your picture there!
Steps
Open “Your info” in Windows settings by pressing the Windows key, and typing “Your info,” and selecting “Your account info.”
Use the options in ‘Create your picture’ to select a new picture for your account.
Check if your picture has been updated in Windows, and on the sites and apps you use.
Note: We’re still working with many sites and apps that will need to be updated to work well with this new feature. For example, the account manager control that appears in the upper right of many Microsoft websites currently updates every 24 hours. This will be changed in the next few months to update quickly when your account picture changes.
Other updates for Insiders
Windows Search improvements
We wanted to take a moment to cover some of the server-side search improvements we’ve been rolling out based on your feedback:
Improved spell correction for Apps & Settings searches
Windows Search has built-in spell correction to help you find what you’re looking for. When you’re typing quickly sometimes mistakes happen – we’re excited to announce that we’ve updated our spell correction technology to intelligently understand and correct small typos like “powerpiont” and “exce;,” which previously would return no results. With these updates, you get better results faster. This feature is now available on both Insider and retail builds in English-language markets.
Hints to improve Best match results
Our goal with Windows Search is to provide a simple, to-use experience, and a key aspect of this is making results easy to understand. Something we’ve heard from you is surprise that sometimes settings search results don’t match your search. To help address this, in certain cases where the Best match result isn’t an exact match for your search, a “Related:” line will be included below the result to help clarify why this result is appearing. We’ll be expanding this feature to include Apps search in the coming weeks. This feature is now available on both Insider and retail builds in English (United States).
Bringing the latest Search Home experience to more users
With the Windows 10 May 2019 Update we updated Search Home to help you save time by adding quick access to your Top apps and Recent activities. After receiving positive feedback and comments about this new experience, we’re now making it available to more users by rolling it out to everyone using the Windows 10 October 2018 Update as well. We hope you find them useful and that they help make Search Home more productive for you.
Here’s a glance at what it looks like for those on the Windows 10 October 2018 Update:
We hope you like the changes, and if you have any further feedback about search, let us know!
As usual, there are a couple of quality fixes in this new build, including a fix preventing Insiders to setup Windows Hello in Settings in recent builds. Moreover, starting with this build Microsoft is making its Connect app available as an optional download in the Windows 10 Settings app. You can learn more about bug fixes, changes and known issues in our separate post.
Microsoft is working hard on their Power BI service and mobile.
After recently highlighting Power BI‘s July updates and implementing some new capacity settings, the Redmond giant now released the changes included in the August 2019 Power Bi Desktop update.
Power BI Desktop’s update brings a lot of new changes
The most important improvement added is the highly anticipated feature from the Microsoft Business Application Summit, grouping.
This new featureallows you to group visuals, shapes, text boxes, images, and buttons together on your report page. But that’s not the only thing that’s changing.
Can anyone tell me how to disable the drill on options in the matrix as shown in the image below;
So, the OP wants to disable the drill down option (and the hierarchy with it). This operation is unknown to many users, but fortunately, there is a very simple solution. Today we will discuss how to disable the drill down option in Power BI.
Steps to disable drill down in Power BI
Click on the Format panel.
Turn off Visual header.
It is worth mentioning that the option will still be visible in Power BI Desktop because you are in editor mode, but you will see the changes in the reading mode.
We’ve written a nice piece about Power BI, do check it out.
In many cases, the drill down option is extremely useful
Generally speaking, a well-organized piece of information is much easier to understand, and to order information efficiently means creating a hierarchy.
We write hierarchically: we have a heading, a subheading, smaller subheadings, and the text. Also, you pinpoint a geographical location by referring to the country, county, city, street and so on.
So, it is understandable that hierarchy plays a major role in Power BI. Moreover, the drill down feature takes you to the next step in the hierarchical organization of data.
With this option, you can add new levels of information that will allow you to create complex sets of data, such as treemaps.
Conclusion
Sometimes, it is not necessary to have such a complex hierarchical organization to your data. If these situations occur, we come to your help with the solution described above. Also, it is easy to enable back the drill down feature. Just turn on the Visual header!
Is drill down useful for your projects? How did you disable it? Do let us know in the comments section below!
The cumulative updates for all supported versions of Windows 10 brought a lot of improvements and fixes, but at the same time, triggered some weird issues with some versions of Windows 10.
Windows 10 v1903 randomly restarts after KB4512508 update
More specifically, a lot of Windows 10 users complained about the recent patches and random reboots that happen after the installation of those patches. Here’s how some annoyed users are describing the problem:
Since 1903 my PC keeps randomly restarting. There’ll be a small freeze that lasts a couple of seconds, and then it restarts automatically. Outside of this it’s perfectly normal, but I have no idea what is causing this. My computer sounds normal.
Screen goes black, PC shuts down. PC restarts, and goes straight to Desktop. As though it were just restarting normally, were it not for the fact that it doesn’t wait for programmes to close before doing so. I don’t have a login or anything, and it doesn’t go to BIOS either. There’s no way to diagnose this as it is completely sudden and without warning. 100% a problem caused by a recent Windows patch.
It seems like the random restarts happen more often than not on Windows 10 v1903, but other versions are having the same problem, as another user confirms:
Happens on 1809 also, needless to say my hopes of 1903 fixing that when I finally commit are dashed
More problems with restarting after the recent cumulative updates
This is not the only problem with restarts on recently updated PCs, as another user gets prompted repeatedly to restart the PC after installing KB4512508:
My Windows update history reports that “KB4512508” installed successfully. However, Windows 10 repeatedly asks for restarts. I’ve restarted four times already, but it still wants more restarts.
The issue is pretty widespread, and there’s no official solution for now.
It’s worth mentioning that the restarts are usually triggered by intense workloads. Under normal loads, affected PCs work as usual.
Some users managed to solve the problem by turning off Fast Startup, so give it a try as it might solve your problem, as well.
If you’ve been encountering issues during the installation of the latest “Patch Tuesday” update for Windows 10 version 1903, you’re not alone. As reported by Windows Latest, many users have been sharing on Reddit and Microsoft’s Community website that they’re currently unable to install this latest patch and seeing error codes such as 0x800f0982, 0xe0000100, or 0x80073701.
Microsoft has yet to acknowledge these installation issues, but some users have also been complaining about random reboot issues on Reddit. Again, Microsoft hasn’t mentioned it as one of the known issues for the latest Windows 10 1903 build, and and it’s still hard to know if these installation and reboot issues are really widespread. So far, we haven’t seen encountered them on our non-Insider PCs.
Microsoft is now pretty quick to indicate any problems affecting the different versions of Windows 10 on the new Windows 10 Health Dashboard, and the company also releases one or two optional patches with several fixes between the monthly “Patch Tuesday” updates. Again, it’s not clear if these issues are affecting a lot users right now, but in the meantime it might be a good idea to wait before installing the latest Patch Tuesday, or roll back to the previous build if you encounter the random reboots issue.
Despite an industry trend of slowing PC sales over the past few years, Lenovo is posting its eighth consecutive quarter of revenue growth as its personal computer division has become responsible for much of the heavy lifting in sales.
In a letter to investors, Lenovo announced that for its FY19/20 quarter the company reached $12.5 billion in revenue with a pre-tax income that more than doubled is year-over-year growth totaling $240 million and $162 million in net income. With returns doubling for the year, investors are should see earnings per share increase $1.37.
“This fiscal year kicked off to an excellent start. Once again, this quarter’s strong results provided solid evidence that Lenovo’s Intelligent Transformation is enabling the company to drive sustainable, profitable growth in today’s dynamic and changing world. Our persistent execution and operational efficiency allow us to bring our vision to life and deliver smarter technology for all,” said Yang Yuanqing, Lenovo Chairman and CEO.
As mentioned earlier, Lenovo’s growth seems largely propelled by the company’s PC efforts, to which the company makes a note in its investor’s letter.
In PCs, volume outgrew the market, which as a whole is experiencing a recovery, by over 13 points, and the group hit an all-time record PC market share of 24.9%. This means one in every four PCs built in the world is a Lenovo PC – cementing Lenovo’s position as the worldwide number one in PCs.
Lenovo is also slowly making inroads with both its Mobile Business Group (MBG) and Intelligent Devices Group both seeing pre-tax income growth to the tune of $100 million and $524 million respectively. Even though it seems as if Lenovo has all but given up on smartphones in the US, the company also highlights that the MBG division “will continue to maintain profitability and seek opportunities to drive profitable growth in new markets and new innovated products.”
Perhaps, in preparation of the looming trade wars the US has engaged in with several countries, Lenovo also bookended its investors call with a warning of increased prices on PC, smartphones and various IoT devices resulting in negative effects on the investors, the extent wasn’t clarified but presumably a hike in prices will undoubtedly slow down the company’s current growth.
Halo developer 343 Industries announced yesterday they’re sunsetting the Halo app for Windows 10, effective today, August 16. The app will no longer be updated with new content related to Halo and HCS news, though the team noted that Halo Wars 2 game starts will continue to appear in the app until February 16, 2020.
As we look to the future and future projects, we have to say goodbye to some existing ones. Today, we are letting you know of plans to officially sunset the Halo App for Windows PC beginning August 16. Read more: https://t.co/MJAh1ynqCSpic.twitter.com/HKH4hqHQsx
If you ignored that Microsoft had released a Halo app on the Microsoft Store, you’re probably not alone. In addition to providing news, videos, tutorials, and more, the app also served as a launcher for the few Halo games available on Windows 10 such as Halo Wars 2, Halo: Spartan Strike, and Halo 5: Forge.
It’s worth noting that this Halo app is not to be confused with the Halo Channel app, which is a companion app for Halo 5: Guardians and Halo: The Master Chief Collection. The latter is still available on Windows 10, Xbox One, as well as iOS and Android, and it’s not being discontinued for now.
343 Industries is currently hard at work on bringing Halo: The Master Chief Collection on PC, as well as the next episode named Halo: Infinite. Earlier this week, the Halo developer also announced that the RTS game Halo Wars 2 won’t receive any new updates as 343 Industries is now fully focused on the two aforementioned projects.
Earlier today, the Plex Media Player app was completely removed from the Windows 10 Microsoft Store app store and it was announced that support for it would completely end by January of next year.
This doesn’t mean that Plex’s support for Windows 10 devices is ending though. On the contrary, this removal was part of a renewed focus on the platform that also includes the launch of a brand new Plex app designed for desktop.
“It’s been a little broken for a while now,” the announcement on the official Plex blog explains. “Back when we first started developing Windows apps, it made a ton of sense to embrace the ecosystem, but over time (???? Windows Phone ????) it made less and less sense to keep investing dedicated development resources to the Metro [sic] platform. We’d much rather invest the effort on a cross-platform app with a best-in-class player engine under the hood, so as of today we’re taking our Windows app out of the store.”
Essentially, Windows 10 users will still be able to use the Plex service. They’ll just need to download the new app (here) going forward.
The new Plex desktop app contains almost all of the functionality of the Microsoft Store app though the TV layout option has been abandoned. They reason behind this decision, according to the announcement, was basically just to encourage more users to use the native Plex apps designed for smart TVs and streaming boxes which they claim work better than mirroring a PC on a TV screen.
None of this news affects the Xbox One Plex app, which is completely separate from the Windows 10 one. The launch of this new desktop app also doesn’t mean that Plex has abandoned the Microsoft Store platform either.
“We don’t have any immediate plans to bring the new app to the Microsoft Store,” the official statement reads. “That said, we’ve also definitely not ruled out that possibility.”
While trying to connect your Outlook account with Exchange by using ActiveSync protocol the users may get the Outlook does not support connections to exchange by using ActiveSync error. This error is commonly caused if the Outlook does not support connection to a server that is running Exchange server. A similar discussion can also be read on the Microsoft Community forum.
On the same Windows 8 Pro machine, on the same user account – Windows Mail app is connected successfully to my corporate e-mail account (‘Outlook‘ account type, use SSL connection, domain and user name specified).
In Outlook 2013 the same account can’t be connected (selecting ‘ActiveSync’ account type, specifying server name and user name, however there are no options to specify SSL and domain) – getting error message ‘Log onto Exchange ActiveSync mail server (EAS): The server cannot be found.’
Follow the steps listed in the article below to fix Outlook server issue with ActiveSync and Exchange.
Is the Exchange Activesync supported by Outlook?
1. Connect to Exchange using Standard Exchange Connection
Launch the Outlook desktop app.
Click on File and then click on Add Account button.
Enter your email address and click Connect.
Now you will be asked to enter your password again. Enter the password, and click OK.
Click Finish to connect to exchange using standard exchange connection.
Trying to set up your email account manually can create issues like the one mentioned earlier. Try to set up the email account normally and check if the error is resolved.
If you want to configure Outlook for Exchange by using ActiveSync do the following.
Launch the Outlook desktop client.
Choose “New Email Account“.
Select “Manual setup or additional server types“.
Select “Exchange ActiveSync“.
Now you need to fill in the server setting. The username can be in Domainusername format.
Now press and hold the Enter key on the Keyboard until all the boxes go away.
Once the connection goes through. Launch the Outlookclient and check if the error is resolved.
For Outlook 2016 / Office 365
Launch the Outlookclient in your Windows system.
Click on File and select Add Account.
Now enter the email address for the account and click the Advanced Options.
Select “Let me set up my account manually” option.
Click the Connect button.
Select “Exchange” option.
Enter the password for your ID and check if the connection is established without any error.
The EAS protocol provides access to data in exchange mailboxes thus keeping all of your connected devices in sync. Since EAS connection does not provide all the features of an Exchange account, Outlook does not support this method resulting in the error.
There are times your usually trusted printer might begin playing pranks on you. And one of the ways it does so is when the printer is making indents on paper.
However, that is among the more common problems with the printer that is usually related to the printer’s roller. Irrespective of the cause of the problem, you can fix it with the solutions in this guide.
Why is my printer creasing the paper?
Below are some of the factors that can cause the printer to make indents or creases on the paper:
Presence of dirt in the roller: In most cases, this issue is usually due to the accumulation of debris in the roller. Clearing the dirt should do the trick here.
Issues with the roller: If you have been using the same roller for a long time, it might encounter problems such as this. You should be able to fix this by rejuvenating the roller or replacing it totally.
What can I do if my printer is making indents on the paper?
1. Clearing roller debris
Detach the paper tray from the printer.
You might also be required to remove the printer cartridge holder as well if that is blocking access to the rollers.
Once you have a clear view of the rollers, check to see if there is any debris that might be hampering its normal operations.
In any case, you will do well to clean the roller as well as its surrounding regions with a lint-free cloth.
The rollers are made of extremely soft rubber, so make sure you don’t end up damaging the roller during the clean-up process.
Re-insert the toner and paper into the feed tray.
Print a test page and see if this solves the issue.
Sometimes the roller might harden up due to years of usage. This might cause it to press harder on the paper, thereby causing indents while printing.
To remedy such issues, you can use roller rejuvenators to infuse some new life in the rollers. Those work by softening up the rubber as well as cleaning its surface.
The first step will be to procure some over-the-shelf printer roller rejuvenators.
Remove the paper tray, cartridges/toner, or anything else that might be blocking your access to the roller.
Spray a generous amount of the rejuvenator on a piece of lint-free cloth or paper scrub and use the same to wipe the rollers gently. Do this for a couple of times.
Re-insert the paper and cartridge tray or anything else that you might have removed.
Print a page and check if the indentation issue is resolved.
3. Replace the roller
Get to the roller as before by detaching the paper and cartridge tray.
Detach the roller as well. For this, follow instructions for the same as applicable for the particular make and model of printer.
Insert the new roller.
Re-fix the paper tray and cartridges as well as everything else that you might have removed before.
Check if this solves the indentation issue.
Get in touch with the support staff if everything fails or you aren’t too comfortable dealing with the hardware aspect of your printer.
Usually, you can install updates on Windows Server without any issue. However, quite a few users encountered problems when trying to update Windows Server.
A user reported the following on the official Microsoft forum:
I have Windows Server 2019. A 2019-03 Cumulative Update became available. Windows Server 2019 started to download it, and it got stuck at “Downloading updates 95%”. I rebooted the server, and tried again. Same thing. Stuck at 95%. Then the 2019-04 Cumulative Update became available, and it is doing the same thing, “Downloading updates 95%”.
So, the OP tried to install two Cumulative Updates on Windows Server 2019 but with no avail. Even after rebooting the server, the user encountered the same problem: downloading was stuck at 95%.
Also, the user ran Windows Troubleshoot, but the response was “Troubleshooting could not identify the problem”.
Being unable to install updates on Windows Server could bring major security issues. Today, we will show you what to do if Windows Server won’t update.
Windows Server won’t install updates? Here’s what to do
1. Run an SFC scan
ClickStart.
TypeCMD in the search box.
Right-click onCommand Prompt (Admin).
Typesfc/scannowand pressEnter.
2. Use Disk Cleanup
Disk Cleanup will clear your temporary files that could this issue.
Press Windows Key + S and enter “disk cleanup”. Select Disk Cleanup from the menu.
Make sure that your System drive, by default C, is selected and click OK.
Wait while your PC scans the C drive.
Select the files you want to remove and then click OK.
3. Use Command Prompt
Open Command Prompt like in the first solution.
Type the command below. Each line must end by pressing Enter:
As we said at the beginning of the article, being unable to install the latest updates for Windows Server could bring some serious issues. The major concern here is the security problem of an outdated Windows Server.
Therefore, it is important to find a quick and efficient solution and we offered just that.
Did you find our solutions helpful? Do let us know in the comments section below!
Outlook is an amazing email client, but many reported Outlook currently delivers items into an Outlook 97-2002 data file.
This can be an issue and it can lead to other problems, such as the inability to add email account to Outlook. Luckily, there are a few fixes that you can use right away.
What is Outlook 97 2002 data file?
This file contains local copies of messages, events, and other Outlook data.
It is used to make email data available offline.
This is a stand-alone file so it doesn’t have any external dependencies.
How can I fix Outlook currently delivers items into an Outlook 97-2002 data file error?
1. Create a New Outlook Profile and Data File (.pst)
Create a new Outlook profile
Launch Outlook and click on File.
Click on Account Settings and select Manage Profiles
Click on Show Profiles in the new dialog box.
Click the Add button.
Add a name for your profile and click OK.
Create a New Outlook data file
Launch Outlook client.
Click on New Items > More Items > Outlook Data File.
Enter a File Name.
If you want to add a password, check Add Options Password box.
Click OK. If prompted, enter a password for the file. Click OK again.
Close and relaunch the Outlook client again.
Try to connect your Microsoft Account and check if the error is resolved.
2. Create a new user profile
Click on Start and select Settings.
Click on Accounts.
Click on Family and Other Users.
Click on Add Someone Else to this PC.
Click on “I don’t have this person’s sign-in information“.
Click on Add a user without a Microsoft Account.
Enter aUser name and then enter a password or leave it blank, it is optional.
Click on Next to create a new profile.
Click the new profile and select Change account type.
Change the account type to Administrator from Standard User.
Click OK.
Press Windows key + L.
Now sign in using your newly created Profile.
Launch Outlook and login with your Microsoft account.
Check if you are able to connect to Outlook client without any error.
These are some simple solutions that can help you with Outlook currently delivers items into an Outlook 97-2002 data file message.
Ever wondered if you could play every song that you saw in a book or web page instantly? This is where the sheet scanning programs help you to scan printed or digital sheet music from computers and smartphones.
Whether you want to compose a complex score or start with a basic one, music notation programs can help you to create an original composition using different file types and offers music playback and edit features.
The sheet music scanning software takes the traditional sheet music scanning to a whole new level using the Optical Music Recognition technique.
To make things a bit easier for you, we have reviewed the best sheet music scanning software and came up with this list consisting of only the best software depending on the price and features on offer.
In this article, we take a look at the best software that scans and understand the standard music notations and can play all kinds of sheet music and score.
Top 3 tools to play sheet music for newbies and pros
Notion 6
Price – $149
Notion 6 is a feature-rich music notation program available for both Windows and Mac platform. It comes with all the important editing tools including support for MIDI keyboard, virtual piano, and guitar fretboard.
The program is easy to install but requires registration. It will instantly recognize your connected hardware such as the MIDI keyboard as your fire it up.
You can write the notation by hand and convert it to digital notation and also scan the pre-written notation and start playing from it automatically.
The One Native Effect Limiter, Compress, and Pro EQ plug-ins allow you to process the audio with precision. You can perform scores using Notion as a live instrument and save performances.
In addition, you can send audio and MIDI data directly to and from Studio One anywhere on the network, use the video window to compose pictures and import/export files from Finale and Sibelius suing MusicXML.
On the flip side, Notion 6 is not the easiest to use for beginners. And the fact it costs $149 doesn’t help with being pocket-friendly as well.
However, for anyone looking for a professional-grade software with tons of features, Notion 6 can fit the bill just fine.
From music hobbyist to the choir director, and advanced music students, Forte Home offers something for everyone. The program offers immediate access to its advanced music notation features thanks to its easy to use intuitive user interface.
Downloading and installing the program is easy. You can begin with downloading the free trial that is available on the official website to try the software without any risk.
The latest version of the tool comes with a virtual piano and drum notation making it an almost complete music composition program for basic to advanced users.
For playing sheet music, Forte Home 10 offers ScanScore. This feature allows you to scan in printed or digital sheet music in no time. Apart from music sheet scanning, it also offers all the tools you need to create, edit and perform music with a score notation engine.
Other notable features offered by Forte Home includes the ability to import audio to play in conjunction with your composition, export data in MP3 or WAVE format, customize text alignment for adding lyrics to your score and more.
SharpEye is a music scanning software that scans music from the sheet and delivers high-quality scores and instrumental parts. It can also create music arrangements by scanning and converting printed sheet music into printable music notation or MIDI files automatically.
SharpEye uses OMR (optical music recognition) technique to scan and convert the printed music sheets into music notations or MIDI files. It can also make changes to the OCR results to correct any errors or add additional symbols.
You can use the SharpEye Music Reader with MagicScore Maestro 7 to edit music notation on the fly. Apart from MagicScore, it is also compatible with other music notation software from Forte and MuseScore.
Price – Free / $19.92 a month (yearly subscription)
Avid Sibelius is a music notation programs that comes in three versions. Sibelius First is the free version of the software while Sibelius and Sibelius Ultimate comes with a monthly and perpetual license with more features.
For music sheet scanning the software uses a free scanning program called PhotoScore Lite that comes integrated with the Sibelius program. It can scan simple music from small ensembles. For complex scanning, it offers PhotoScore Ultimate that can read text such as dynamics, chord symbols or lyrics, articulations, slurs, hairpins, etc.
Sibelius allows you to input notes from a computer, virtual piano, guitar fretboard and also MIDI keyboard. Sibelius automatically adds the correct rests and note appearances to speed up the composition process. You can begin with any of the 40 genre-specific templates to spark your imagination.
Sibelius Ultimate is for more advanced users who need more voices per stave, support for all symbols, customizable page numbers and instruments, graphics file support, multiple audio recording export format support and more.
There are a variety of reasons to use sheer music software. Beginning with, its ability to transpose music by changing keys through sheet scanning easily.
You can also convert sheet music to MIDI files, scan and play only specific parts of the notion, convert handwritten music into a publishable digital or print format and play sheet music back on a virtual instrument.
All the software listed in this article makes it easy to convert handwritten or printed music sheets into chores with a simple click.
While the accuracy of these programs may not be 100% accurate all the time, you can always edit missing notes after scanning music sheet.
If you’ve ever asked yourself the question ‘Can Windows 10 drivers work on Windows 7, then you came to the right place.
In some specific cases, you might want to try using Windows 10 drivers on your Windows 7 platform.
In today’s article, we will try and explore this possibility, and we’ll also discuss the details about why this option could or could not work.
Can I install Windows 10 drivers on Windows 7?
The short answer to this question would be: Possibly. It mostly depends on the driver you want and the software used for installing it.
Because of the large number of differences between the way different devices are built and work, there is no definitive answer to this question.
Are Windows 10 drivers backward compatible?
What we do know is that the Windows Device Model (WDM) drivers are forward-compatible and not backward-compatible.
This is just another fancy way of saying that Windows drivers are meant to work on newer versions of Windows rather than older ones.
This means that the WDM allows you to use drivers from Windows 7 on Windows 10 by default.
If that wasn’t the case, the drivers could not make use of the new features introduced in the new version of the operating system.
Can you make Windows 10 drivers work on Windows 7?
Note: Please be careful with what drivers you install on your operating system. To avoid any issues, it is recommended that before installing any drivers you create a restore point for your system.
This will allow you peace of mind that you can always return to the previously installed driver setup without losing any data in the process.
Even though generally the drivers are not meant to be used by another OS, some drivers from Windows 10 will work on Windows 7.
In some cases, the driver itself is compatible with the newer version of Windows, but the installer package is not.
In order to overcome this hurdle, you can simply right-click the setup file and set it to run in compatibility mode. After doing this, you can simply follow the on-screen instructions and use the recommended settings.
How to install Windows 10 drivers on Windows 7?
To install a driver, you just need to run the setup file and follow the steps on the screen. If that doesn’t work, you can install the drivers manually by doing the following:
Open Device Manager.
Locate the device which driver you want to update. Right-click it and choose Update driver.
Select Browse my computer for driver software.
Now click the Browse button.
Select the folder where the driver is located. This folder is usually created by the driver setup or by extracting the driver from the archive.
Click OK, then Next, and follow the instructions on the screen.
We hope this guide helped you understand the reasons for all the answers given in this article. Feel free to let us know if you have any other questions relating to this issue in the comment section.
When choosing budgeting applications, you’re often faced with two major choices: You can either pick the best platform-specific budgeting app or the best cross-platform budget app.
This article focuses on the latter but first, let’s look at how the two home finance software differs.
Now, platform-specific budgeting applications are strictly coded to run from a single system, that is, one operating system such as Windows or handheld devices.
In contrast, cross-platform budgeting programs (also multi-platform budgeting software) run from any of your preferred operating system– Windows, Linux, or macOS and mobile devices.
There are a number of compelling options each of whom presents a strong case to be considered the best cross-platform budget app.
Here are the most impressive budget software for your mobile and PC operating systems.
Keep track of your expenses on all devices with these budget apps
GnuCash
GnuCash has for long been considered one of the very best personal and small-business budgeting and financial-accounting software.
The app is available for Windows, Mac OS X, Linux, BSD, and even Solaris and is licensed under GNU/GPL meaning it’s free.
For your Android phone, you can download the GnuCash for Android version. It permits to capture everything on the go and later import into your desktop version.
On the whole, it’s quite easy to use, but make no mistake: it’s an immensely powerful and flexible system.
Indeed, its solid collection of magnificent features will allow you to craft not just simple individual budgets but also complex budgetary statements.
Plus, it allows you to retrieve extremely detailed budget reports to help you see where your money is going when comparing your actuals with the plan.
Lastly, it’s quick and super intuitive to use not to mention that it is set on professional budgeting principles to ensure that you always obtain accurate statements.
The free Mint cross-platform budget app goes beyond the typical budgeting monitoring tasks to function as your dependable financial assistant. I especially love its bill tracking feature.
You see, it will not just track each one of your bills…the app goes out of its way to send you timely alerts when pay time nears so you’ll never miss one.
This way, you will finally say goodbye to the irritating late payment fees. My other favorite component is its brilliant money-saving tips.
Mint is one of the few budgeting apps that use artificial intelligence to understand your spending habits and will regularly give you suggestions to help cut your expenses.
For instance, it will advise you of unusual account charges as well as how else you can save money from your budgets.
It even gives you a free credit score accompanied by practical proposals to help you improve your credit rating. In a nutshell, not many budgeting software can match Mint cross-platform budgeting app’s brilliance.
YNAB is another cross-platform budgeting apps that you can trust to help you take charge of your financial destiny now.
If you want to grasp why this award-winning finance management software has its multitude of users singing its praises, just skim through its remarkable assembly of awesome features.
From bank syncing (links your bank accounts), on the go real-time spending info, debt paydown tool (get out of bad debt), all the way to financial goals tracking, this app has it all.
The app has one of the best reporting tools and will display colorful graphs and pie charts to help you make sense of your coins.
In addition, the company has an excellent personal support team who readily holds your hand until you can comfortably operate the program.
You can try the YNAB cross-platform budget free for the first 34-Days but in case you want to subscribe directly, the monthly rate is $6.99 and it’s very worthy.
From your home PC to your mobile device, Goodbudget is built to help you control your expenditure and ultimately make savings through shrewd budgeting.
Actually, Goodbudget uses the highly effective envelope budgeting system to help you mend your finances.
For starters, envelope budgeting involves putting cash into a designated number of ‘envelopes’ depending on your spending categories.
It helps you become financially prudent as exhausting an envelope means you have to cease spending until next month.
The app lets you easily set and manage your cash (per ‘envelope’) and eventually rein in on any careless expending habits via this revolutionary technique.
Like the rest of the apps vying for the title of the best cross-platform budget app, this software is available for use on your iPhone, Android, and the Web.
When it comes to the pricing, the forever free version gives you up to 20 envelopes ( 10 regular plus 10 extra) and access from two devices and should serve most of the basic need.
However, upgrading unlocks more capabilities including unlimited envelopes.
And at $6 per month, even the program’s pricing is budget conscious!
Because of their expansive features, intuitiveness, and stability across all platforms including Linux, Gnucash, Mint, YNAB, and Goodbudget rank highly in the cross-platform budget apps category.
For this reason, it wouldn’t come as no surprise if one of them is recognized as the best cross-platform budget app.
Importantly, all of them should help you achieve your financial goals of getting out of debt, saving more money, and to stop living paycheck to paycheck.
As Square Enix is getting ready to release the episode 4 of Life is Strange 2 on Xbox One and other platforms next week, the third episode released back in May is now playable with Xbox Game Pass (via Reddit). Earlier this year, Square Enix announced that future Life is Strange 2 episodes would join Xbox Game Pass 3 months after their release, which means that episode 4 should join Xbox Game Pass in November of this year.
Episodic games like Life is Strange 2 are a great fit for game subscription services like Xbox Game Pass, though developer Dontnot Enternaintment is taking its time to complete the second main entry of the series. The first episode of Life is Strange 2 was released back in September 2018, and the fifth and final episode is expected to be released on December 3, 2019. That’s an awfully long time to wait, though it’s not as bad as Square Enix get people to talk about the game every couple of months.
Here’s the official description for the game’s third episode:
After their narrow escape from Beaver Creek, Sean and Daniel’s dangerous journey to Mexico continues. This episode, the brothers reunite with Cassidy and Finn in California, befriend a community of drifters who live on the fringes of society, and try to scrape together money working on an illegal farm.
New friendships and relationships create friction, and put the brothers’ unity to the test. As tensions rise, can their strong bond survive?
Square Enix has been an early supporter of Microsoft’s Xbox Game Pass game subscription service, bringing many of its high-profile games such as Shadow of the Tomb Raider and Just Cause 4 to the Game Pass catalog just a couple months after their official debut. However, the publisher has yet to bring its games to the new Xbox Game Pass for PC.
Power BI service allows the users to create and share apps (content types) that combines related dashboard reports. All the users with access to the Power BI dashboard can access the Apps menu and install the apps. However, some users have reported that they can’t find the app in Power BI Service as reported in the Power BI community forums.
Fix this by following the steps below.
How do I access Power BI apps?
1. Get Share Apps Button
If one of the users in your organization is unable to access the Get Apps option in Power BI service, do the following.
Login to your Power BI Service.
Publish a random app running in premium to that user.
Copy the link of the published app and send it to the user over email or messaging apps.
Ask the user to click on the app link. The app link will take the user to the report section.
Ask the users to click the Apps icon in the Power BI Dashboard. The users should be able to see the Get Apps button in the dashboard now.
2. You can’t Share App to People Outside Organization
While the Power BI service allows the users to share the resources between the users within the organization, one of the limitations of the Power BI Service is that you cannot Share Apps with people outside the organization.
The External B2B Guests can only consume the contents provided including viewing apps, dashboard, and report but can’t access the workspace or publish their own content.
Share App feature is currently not available for the Power BI Mobile users. Check if your mobile app store for any updates in case the feature becomes available in the future.
3. Get Shared Apps in the Get Apps menu
After you publish and share the app, you need to visit the Get Apps menu to access it.
Shared apps are not available in any app workspace.
Alternatively, you can share the app link directly with the user to install on their workspace. All the users can access the published app and can view their content directly.
Make sure you publish all the organization content pack to the new workspace to be able to access the data from the organization content pack.
By following the above steps you should be able to fix Power BI can’t find app problem with your Power BI Service account. Make sure you leave any other tips that worked for you in the comments below.
A number of users have reported encountering the error 0xea on their Epson printer. This is an extremely frustrating error message since it will prevent you from using your printer normally.
This issue usually happens when a new Epson printer is undergoing the first setup and installation. For safety reasons, the Epson printers have a piece of foam covering the nozzle of the ink cartridge.
Thankfully, the error 0xea is a very commonly known error that Epson printers give, so with the help of today’s article, you will be able to fix this issue once and for all.
How can I fix the Epson error code 0xea?
Check your cartridges
Turn off your printer and disconnect the power cable from the wall socket.
Take out the ink cartridges and check them carefully for any material left over (foam, tape, paper).
Open up the printer‘s cover and check for any jammed paper. If you find some there, please remove it carefully.
Reconnect the power cable to your printer.
Check that the ink cartridges are properly installed.
Turn on your printer and try to print your documents once again. This method should have solved your issue.`
In today’s fix article, we discussed the most common reason for the Error 0xea on Epson printers, and we gave you a quick fix consisting of a few steps to solve the issue.
We hope this guide helped you get back to printing your documents with ease. Similarly, if you Epson printer on prints but not copy, check our detailed guide to fix it.
We would love to know if this guide helped you solve your printer’s error message in the comments below.
Virtualization software enables users to utilize alternative platforms within Windows. However, many reported This computer doesn’t have vt-x/amd-v enabled while using it.
It can be a major issue and completely block virtualization from working on your PC. However, you can fix it with these few guidelines.
Why does this computer doesn’t have VT-X/AMD-V enabled message appear?
Hyper V isn’t installed as an optional feature on your PC.
VT-X isn’t enabled properly in BIOS.
How can I fix This computer doesn’t have VT-X/AMD-V enabled error?
1. Turn Off Hyper V
Press the Windows key + R keyboard shortcut.
Open the Programs and Features applet by entering appwiz.cpl in Run and clicking OK.
Then click Turn Windows features on or off on the left of the Control Panel applet to open the window shown directly below.
Then deselect the Hyper V checkbox.
Click OK to uninstall Hyper V.
Restart Windows 10 after uninstalling Hyper V.
This is the simplest way to fix This computer doesn’t have vt-x/amd-v enabled error, so don’t hesitate to try it.
2. Enable VT-x/AMD-v via the BIOS
Press the Windows key + S hotkey.
Enter the keyword recovery options in the search box.
Then select Recovery options to open the window shown directly below.
Click the Restart now button.
After it restarts, click the Troubleshoot button on the Choose an option screen.
Click Advanced options and UEFI Firmware Settings.
Then select the Restart option to reboot to the UEFI BIOS.
Press F10 on the Startup Menu to enter the BIOS Setup.
Select the System Configuration tab in the BIOS.
Select the Virtualization Technology option, and press the Enter key.
Then select Enabled.
Press F10 to save the settings and exit BIOS.
Press the Y key to confirm.
So, that’s how users can enable VT-x or AMD-v to fix the This computer doesn’t have vt-x/amd-v enabled error. Note, however, that not all UEFI BIOS settings include an option that enables VT-x.
Also, you can choose to move all your work on one of these image-editing tools. So, there will be no need to copy and paste the curved text on Paint 3D.
Yes, Paint 3D no longer comes preinstalled on Windows. This is probably because Microsoft wanted to remove unnecessary and less-used applications.
However, you can always download Paint 3D from the Microsoft Store. To learn more, we suggest reading our guide on how to download Paint 3D for Windows 11.
As we can see, Paint 3D is a limited tool, and Paint 3D doesn’t natively support curved text. The only way to add it is by creating it in a different software and pasting it to the editor.
It is not entirely uncommon for even the best laser printers to leave black marks on their printed output. This makes users wonder why their printer is printing black shades/smudges all over the pages.
While this can be caused by different factors, it is actually easy to fix, and we will show you how to go about it in this guide.
Why is my printer printing black smudges?
Below are some of the reasons why your printer might be printing black shades/smudges all over the pages:
Dirty laser printer: If your printer is leaving black streaks, it might be because the laser printer is dirty. Deep cleaning should do the trick here.
Faulty toner cartridge: In some cases, your HP laser printer might be leaving spots on the paper because the toner cartridge is faulty. You need to replace it to fix the issue.
What can I do if my printer is printing black shades all over the pages?
1. Clean the Laser Printer
Try cleaning a laser printer that leaves black marks on the printed output. To do so, turn the printer off at the wall first.
Remove the toner cartridge as outlined in the printer’s manual.
Wipe the toner off the cartridge with a toner cloth.
Then gently wipe inside the printer with a square toner cloth to wipe away excess toner and other dirt from its internal surfaces. Alternatively, users with toner vacuums can utilize those vacuums to clean inside their printers.
Wipe the printer’s rollers and the transfer belt (if it has one) with a lint-free cloth.
Users can also clean more intricate components, such as cables, with isopropyl alcohol and a cotton swab.
Thereafter, insert the toner cartridge back into the printer.
Plug the printer back in, and then try printing again.
Some users might need to replace leaking toner cartridges when black marks show up on their printed pages. To check if the cartridge is leaking, remove it from the printer.
Then place the cartridge on blank A4 paper. Shake or tap the cartridge a little to see if it emits toner onto the paper. If so, get a new toner cartridge and insert that into the printer.
3. Open the Printer Troubleshooter
Windows 10 Printer troubleshooter might also shed some light on why a printer’s leaving black marks and might even provide some resolutions. To open that troubleshooter, press the Windows key + S hotkey, which will open the search box.
Input ‘troubleshooter’ as the search keyword, and then click Troubleshoot settings.
Click Printer in Settings.
Press the Run this troubleshooter button to open the troubleshooter shown directly below.
Then select a printer to fix, and click the Next button. Go through the troubleshooting steps included within the troubleshooter.
With this, we can conclude this guide on the printer printing black shades all over the pages issue. You should be able to fix this issue for good with the solutions therein.
I’m facing this strange problem from yesterday where if I select NAT as the network adapter in VMWare, I’m not getting any internet connection in the VM. I have a requirement where I have to have the network adapter as NAT. Internet is working properly in my host machine but not working in my VM. It shows that the internet cable is unplugged. I’m getting a ‘X’ mark on the internet icon. Even if I’m connected in Wi-fi or LAN, I’m getting the same issue.
So, the OP didn’t get any internet connection in the VM, although the connection is working just fine on the host machine.
Also, other users complained that WMware is not connecting to the server. One user reported the following on a forum:
I have installed VMWare player and running a virtual machine, as instructed by the tutorial. However, I cannot connect to my Guest machine from Host, no matter what I try. The default is NAT mode.
Therefore, the user can’t connect the Guest machine to the host server, no matter what he tried.
VMware not connecting to server error? Here’s how you can fix this!
1. Edit the Virtual Network
For the first issue, you can make a few changes in the Virtual Network Editor.
Open VMware Workstation.
Click Edit and select Virtual Network Editor.
Select Change Settings and grant Admin privileges.
Click on Restore Defaults.
2. Switch to VirtualBox
For the second issue, use VirtualBox.
Open VirtualBox.
Select Virtual Box Host-Only Ethernet adapter.
Create a new Virtual Machine.
Select the .vmdk file as Hard Drive to import it from VMware.
3. Use a browser for VMware Web Client
Opera One is a great and future-designed browser that can make a difference in terms of fast connectivity and built-in services.
It can offer you suitable online browsing services like a free VPN, built-in ad blocker tool or native Ai. Besides that, you will optimize your speed and avoid internet problems.
VMware can be a great tool for using multiple operating systems at once on the same computer, but as you can see, the program is plagued by various errors.
Luckily, there are solutions to these problems and also there is UR Browser that may prevent further issues.
Did you find our solutions useful? Do let us know in the comments section below!
Lightroom reported encountering the An error occurred when attempting to change modules message on their PC.
This error message can appear in many situations, in some cases, it happens when you start Lightroom, attempt to change modules, or even while performing other functions.
In this article, we will explore the official troubleshooting steps for dealing with this error.
How to fix An error occurred when attempting to change modules?
1. Install the latest Lightroom update
Open your Lightroomapp -> click on Help.
Inside the Help menu -> select Check For Updates.
Wait for the process to complete and download the latest version to your hard-drive.
Restart Lightroom for the changes to be applied, and check to see if the issue is resolved.
After you’ve completed this step, start Lightroom for the preference file to be automatically created again. If this didn’t solve your issue, please follow the next method.
3. Uninstall and re-install your Lightroom app
For Lightroom:
Open the Creative Cloud app -> sign in using your Adobe ID and password.
Select the Apps tab.
Inside the Installed Apps section -> find the Lightroomapp -> click the arrow next to Open or Update -> select Manage from the drop-down list.
Select Uninstall and follow the on-screen instructions.
After the uninstall process is completed, restart the Adobe Creative Cloudapp -> select the Apps tab -> All apps -> click the Install button next to Lightroom.
Follow the on-screen instructions to complete the setup.
For Lightroom 6 and earlier versions:
Press Win+X keys on your keyboard -> select Apps and features.
Inside the Programs list -> select the Adobe Photoshop Lightroom -> click Uninstall.
If you want to remove the preference files as well, follow the steps at Method 2, above.
After this process is completed -> clickthis link to visit the official Creative Cloud apps direct download page -> download the Lightroomapp for your operating system.
Run and install the application by following the on-screen instructions.
In today’s article, we explored the best troubleshooting methods to deal with the message An error occurred when attempting to change modules inside Lightroom.
Please feel free to let us know if this guide helped you in any way, by commenting below.
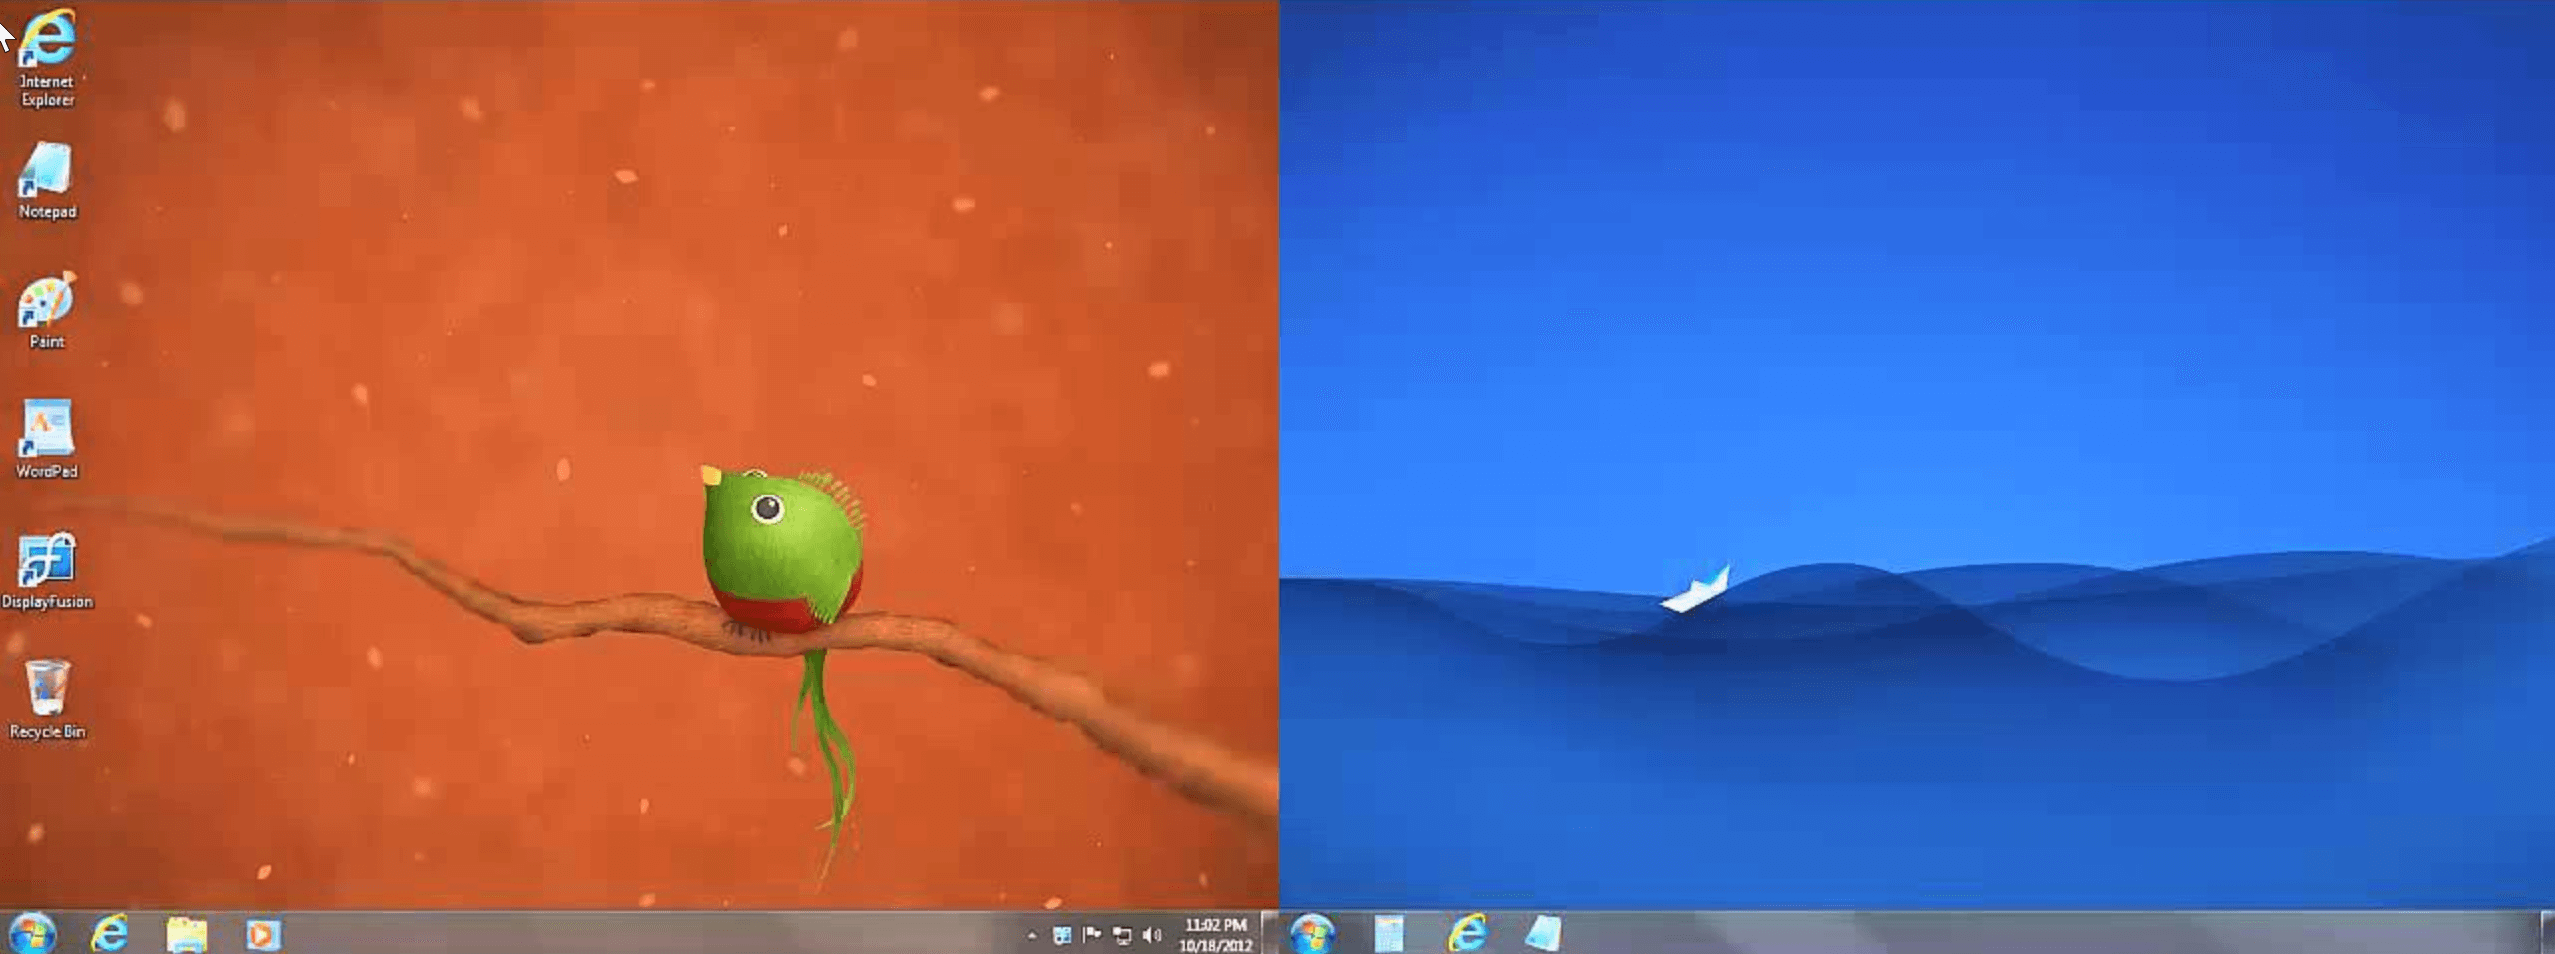
Multitasking is often the buzzword in this age to make the most of the given time. And why not, what with computers becoming more powerful by the day and being able to handle several applications simultaneously.
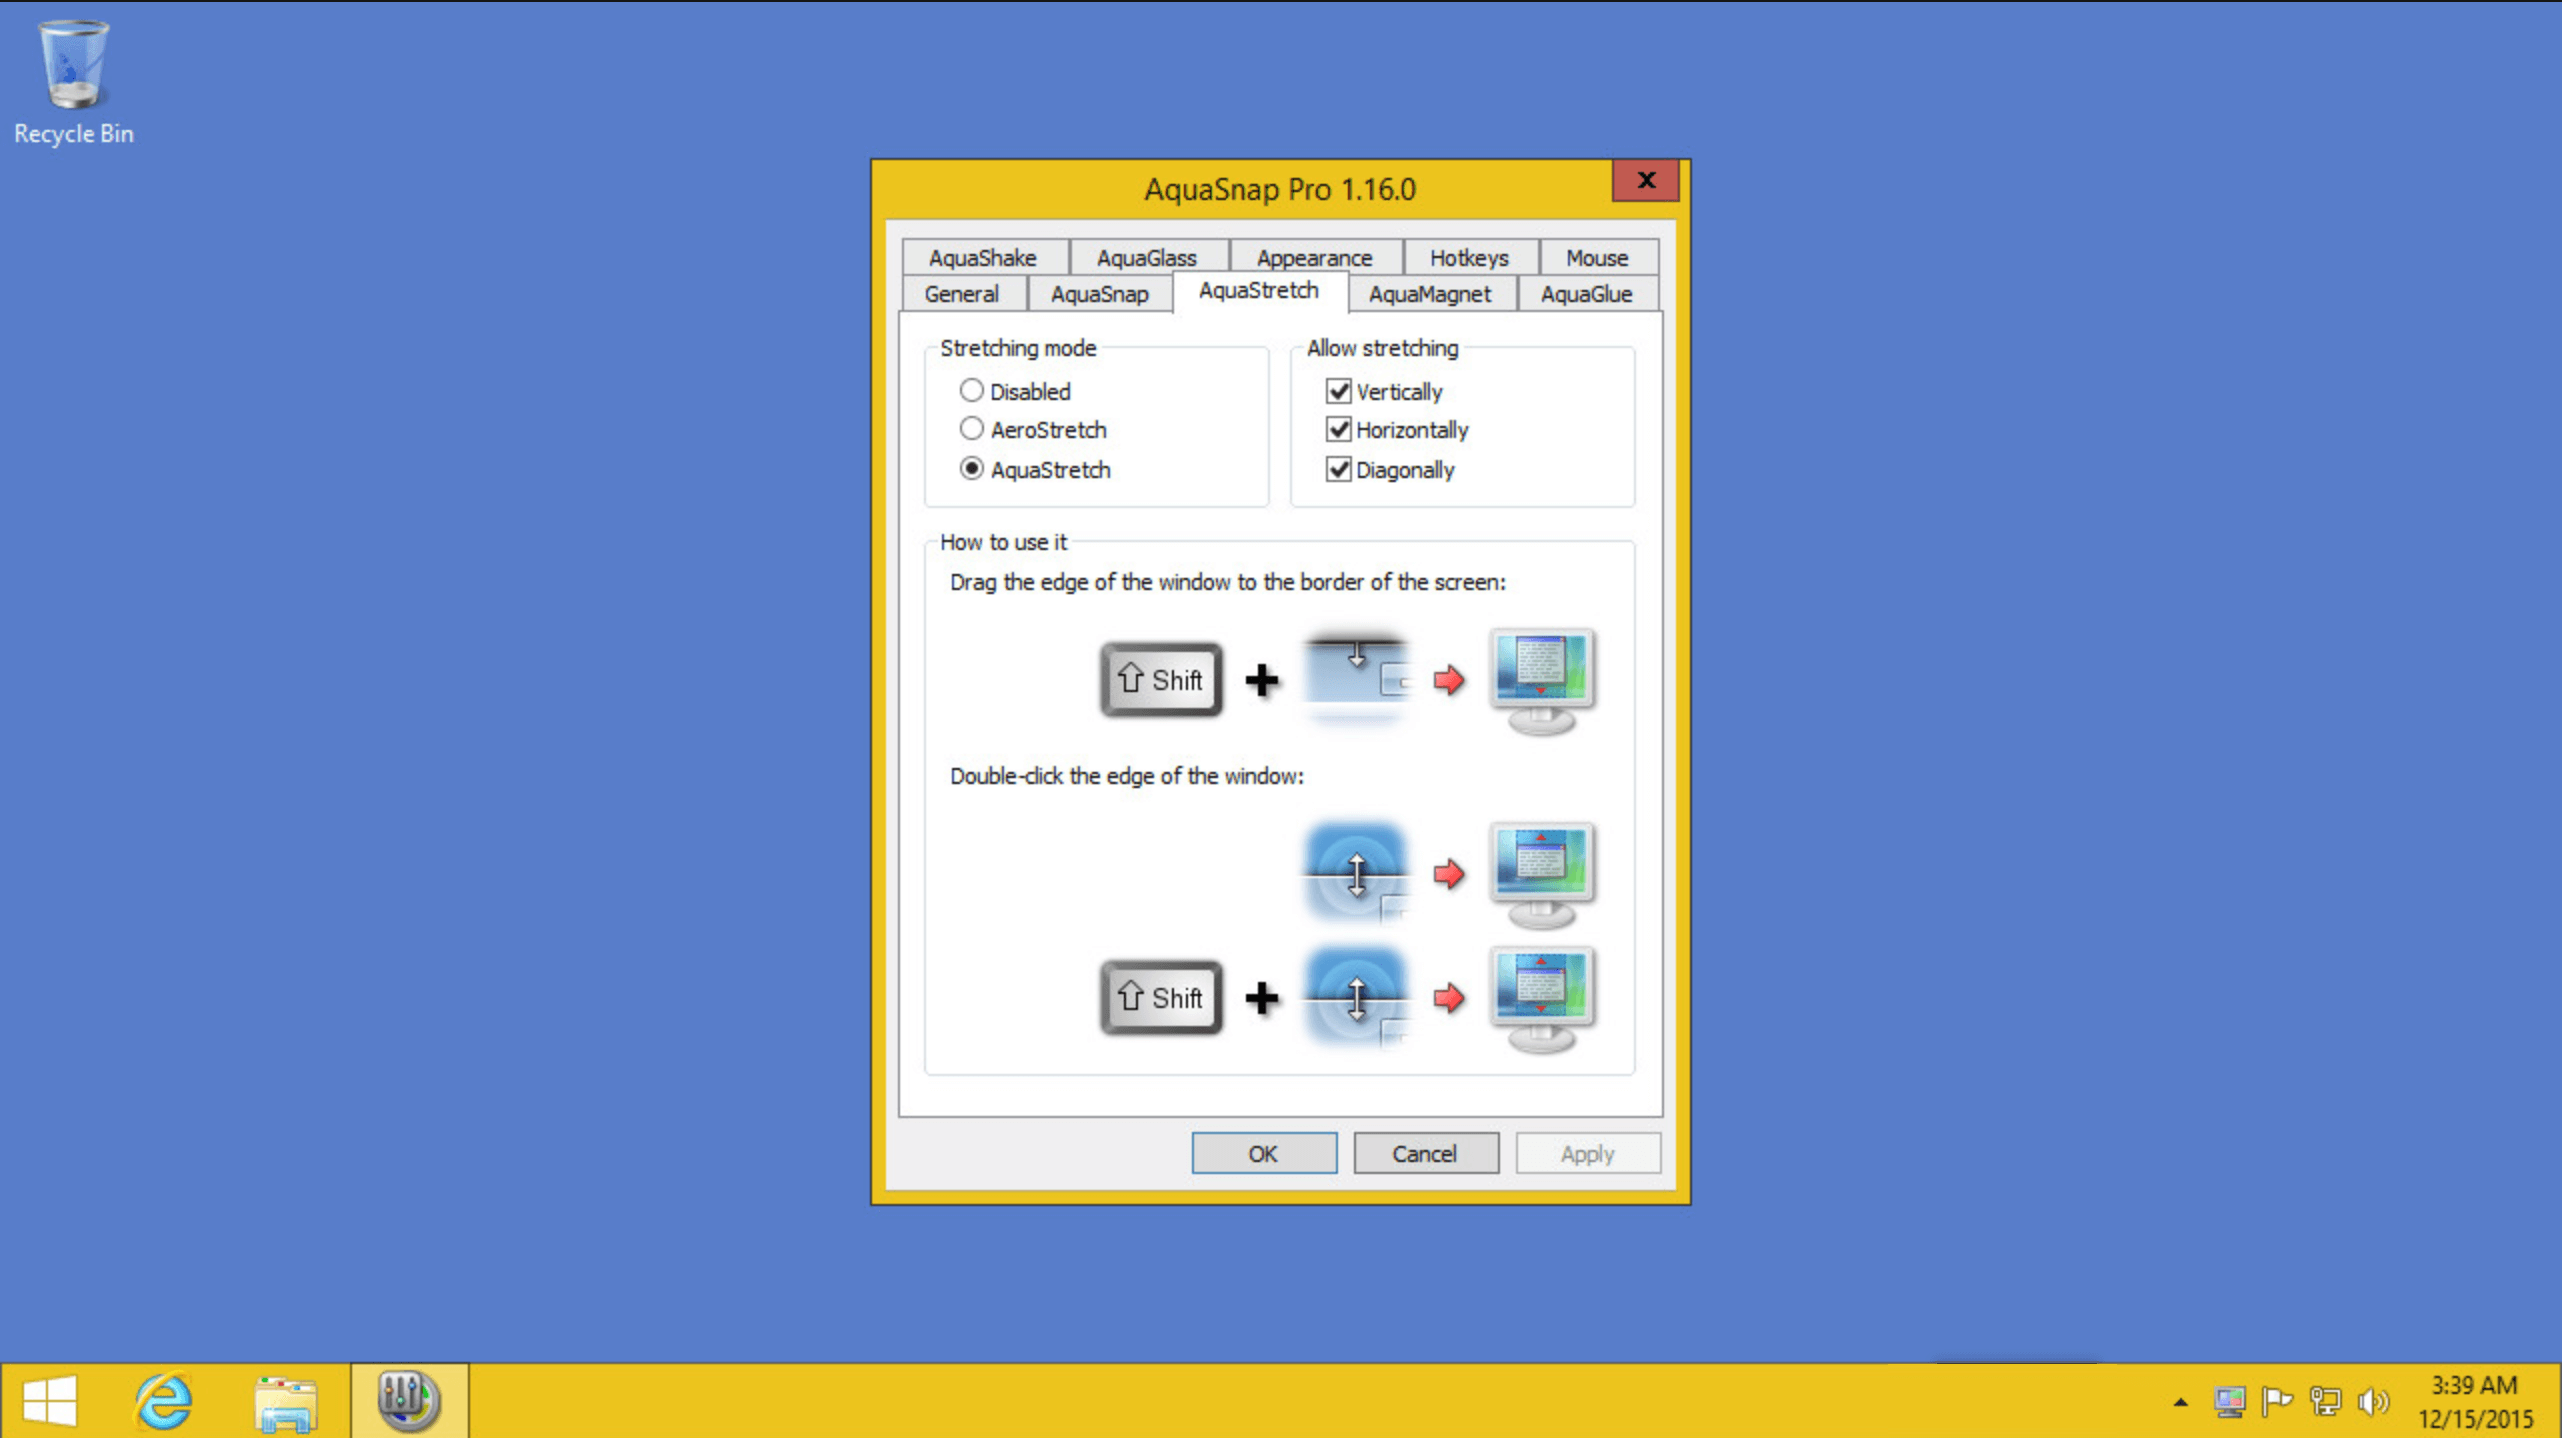
If you need to deal with multiple apps simultaneously, here are a few software solutions for you to do that.
What’s the best software for splitting my PC screen?
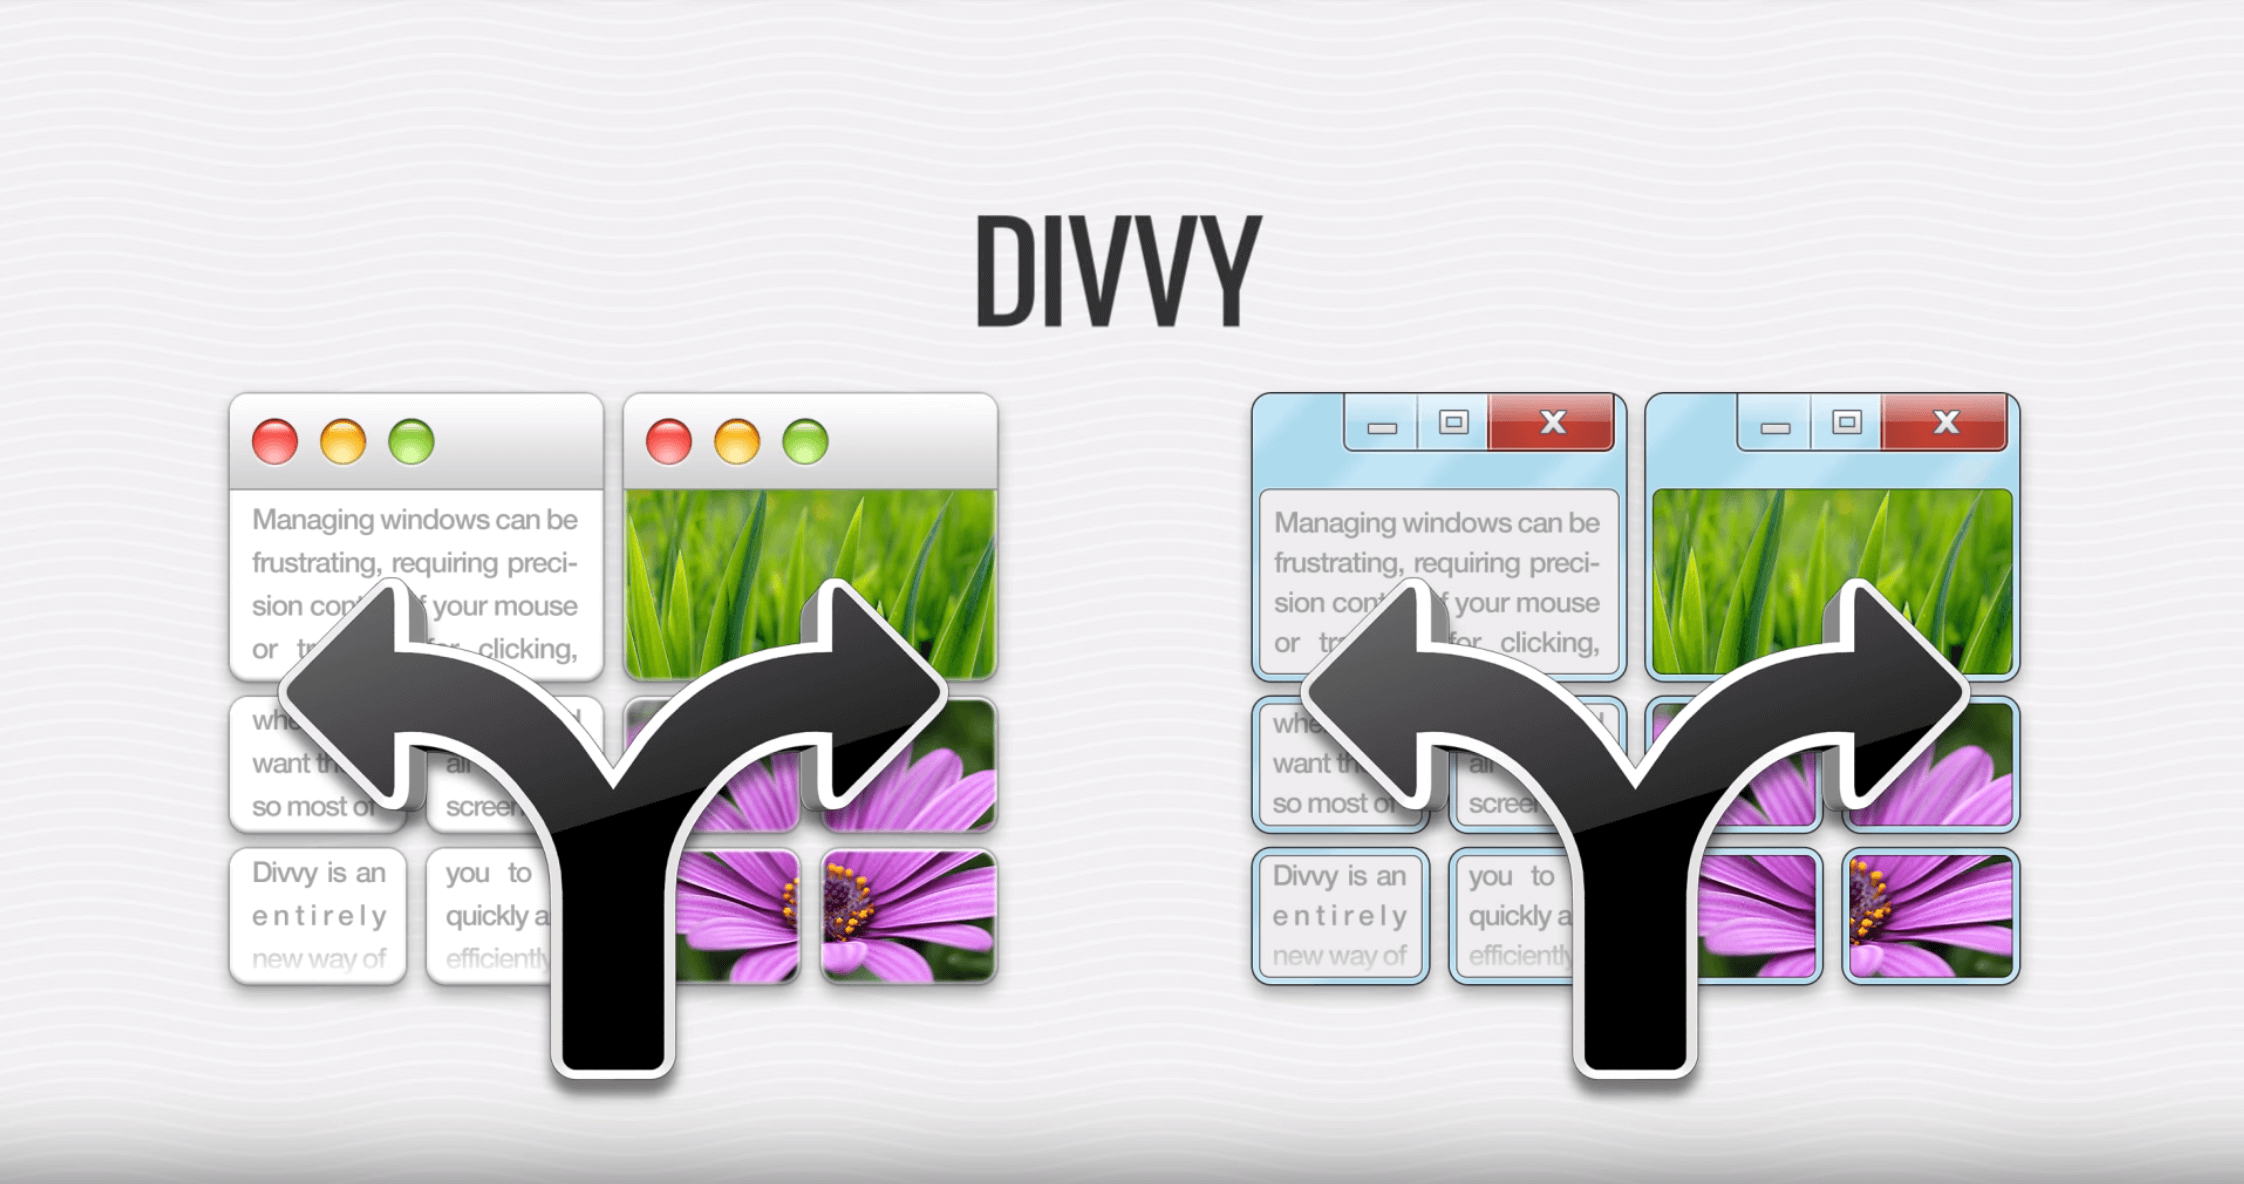
Using the Divvy software is as simple as just dragging and dropping the windows. All you need to do is split up your available screen space into the portions that you need.
Once you have that done, just launch the individual windows followed by dragging and dropping those at the spot that suits you best. The windows resize on its own and you are ready to go. It’s as simple as that.
There you go, those are some of our picks for the best apps for splitting your screen while multitasking. Be sure to try them all and let us know which application worked best for you.
If your projector is giving you No signal on Windows 10, it means that it’s not properly configured or there’s another issue.
This can be a big problem and interrupt your presentation since the projector won’t show the computer screen or anything at all. Luckily, there are a few ways you can fix this issue.
Why is my computer projector saying no signal?
Temporary glitches with the PC or projector can cause connection errors.
Features such as Auto Source on the projector can cause this issue.
Some older projectors can’t handle higher resolutions properly.
How do I get Windows 10 to recognize my projector?
1. Disconnect and reconnect
Click the Actions center icon from the taskbar.
Click on Project option.
Now select PC Screen Only.
Disconnect the HDMI / VGA cable from the projector.
Restart your computer.
Reconnect the Projector to the computer.
Press Windows key + P.
Click on Duplicate.
This should help you resolve No Signal error.
2. Disable auto source selection
If you have enabled Auto Source selection on the projector, it might be creating conflict with the source device.
Begin with turning off the auto source selection in the Projector menu.
Use the Project menu and select your Windows 10 device manually as the source.
Now press Windows key + P on your Windows computer.
Select Duplicate from the options.
Check if the projector is showing your Windows screen. If not, proceed with other steps.
Check source display resolution for resource
Click on Start and select Settings.
Click on System.
From the Display tab, scroll down to Scale and Layout section.
Click the Drop-down menu for Resolution.
Select HD resolution 1024×768.
Check if that works. If not change the Display resolution to Full HD 1920 x 1080.
Make sure the resolution is supported by your projector.
After doing that, check if the problem is still there.
Check if the cable you are using to connect the Projector to the Source device is supported.
Press the Home Search button and wait for a few seconds for the projector to display the image.
Press the Home button on the remote control to select from a list of available sources.
If you are using a longer HDMI cable, if possible try to replace it with a shorter HDMI cable. This is one of the official recommendations from Epson.
Try to connect the projector to the video source directly in case you are using any third-party device to create a connection between the projector and the source device.
Reset the Projector settings to factory default. Refer to your projector’s user guide for clear instructions on how to do it. Resetting your projector can fix any issues due to a corrupted configuration.
If the projector is giving a No signal message on Windows 10, our solutions should be able to help fix that.
In case the issue is still there, we have a great guide on what to do if a VGA projector is unable to display properly, so be sure to check it out.
Did you use a different solution? If so, share it with us in the comments section below.
Microsoft is getting ready to release the Windows Virtual Desktop—or WVD for short—to the general public, as the service has become “feature complete,” according to its group manager Scott Manchester.
We are feature complete with #WVD and will be moving to the final phase for GA. Spin up your VMs and start testing your scenarios. Got issues? Engage our community: https://t.co/2amQHtQqwI#WVD#Azure#Microsoft
The service has been in public preview since March, and allows testers to virtualize Windows 7 and 10, Office 365 ProPlus, and other apps and software from within their Azure virtual machines. Additionally, it will also support multiple sessions of Windows 10 as well as Windows Server RDS desktop and its apps.
Microsoft still has yet to provide the availability date and pricing details, but users will need an current Azure subscription and to set up a virtual machine with the amount of storage they need. ZDNet’s Mary Jo Foley suggests that the release could happen by the end of September 2019 as per information from her contacts.
On an interesting note, users of the WVD are also expected to be able to virtualize Windows 7 desktops as well. The company will continue to provide security updates for Windows 7 after its discontinuation in January of 2020, thanks to free Extended Security Update support all the way through January 2023.
Is the WVD something you or your company can benefit from? Feel free to share what you think in the comment area below.
If you’re currently looking to install Office 365 on your Windows 10 PC, there’s two ways you can get it done. One way involves downloading through the Microsoft Store on Windows 10, and another involves direct downloads from Microsoft through a code from a retailer. While both methods will give you the same end result, there are quite a few differences between the two. In this guide, we’ll help you make sense of which download method is best for you.
Office 365 in Microsoft Store is more convenient
The Microsoft Store is home to many Windows apps and games, and if you’re looking for a easy way to grab Office 365, this is your best bet. Installing will just take a few steps and searching for “Office 365 Home” or “Office 365 Personal” from the Store. You won’t need to visit websites, deal with entering product keys, or have to worry about activation.
By downloading through the Microsoft Store, the processes is seamless, taking just a few clicks. As a bonus, you’ll also be able to pay for Office 365 using your Microsoft Account balance, or Microsoft gift cards if you’ve been using Microsoft Rewards. Payment is also much seamless process, as everything is already linked to your account.
Another reason to download through the Microsoft Store is if you’re using a device with Windows 10 in S Mode. With this mode, you only can install apps from the Microsoft Store. This means the typical .exe Office installer won’t work on your PC. As each Office app will install individually through the Microsoft Store, some may find this more simple than having to use the installer.
Keep in mind, though, that the Microsoft Store in Windows 10 is sometimes known to have its fair share of issues from time to time, so it might not always be as reliable as a direct download. You also won’t get access to the complete suite of Office products. Only the core apps like Word, Excel, PowerPoint, Outlook, Publisher, Access, and the OneNote UWP are included with the Windows Store version.
Office 365 in the Microsoft Store
Office 365 retail download is for those who are more technical
Installing Office on the Microsoft Store might be the easy way to go, but for more technical people, the retail download is the better option. With the retail version, you can install and activate Office on multiple PCs if need be. That’s something that is not possible with the Microsoft Store version. It is more useful for large organizations and for IT departments.
Another benefit of the retail download is that it comes with tools that can help you if you’re having install issues. Microsoft has an offline office installer that is available from the Office.com website. This tool will help you in cases where the retail installer fails, or gives you an error code.
The retail version also grants you access to some additional Office 365 apps. That includes Access, as well as Publisher. If these are important, then this is the way for you to go.
Office 365 Icons
Which version will you use?
These are just some of the differences between the retail version of Office 365, and the Microsoft Store version. Which version do you think is right for you? Fell free to check out our other Office 365 content, and let us know your thoughts in the comments below.
I’ve been using Surface Headphones throughout my day-to-day life since I first picked them up on the day they launched in November. However, I most recently put them to the ultimate test during my three-day long vacation to Los Angeles. I left my usual Sephia Noise Isolating in-Ear Earphones at home in New York, as I figured it’d be the perfect chance for me to write a full-on review.
Keep in mind, I’m not a audiophile. I will mention some specs, but this is primarily a non-technical and “on the road” review of how Surface Headphones fit in with my life during my vacation.
Also, I won’t lie, I’m a big Microsoft fan. From Xbox, to Windows Phone, to Surface, I want to have it all. That’s why, when Microsoft announced Surface Headphones, I was quite excited and passionate.
For the first time, Microsoft expanded the Surface lineup past the typical laptop, tablet, 2-in-1, or mouse and keyboard, or pen accessory. This was a new territory for the now-famous Surface brand. It was something Microsoft has never been done before, and so I went out and happily purchased it.
The design will get you noticed
One of the first things that stuck out to me with the Surface Headphones is its design. Inspired by the other devices in Microsoft’s lineup, the light grey headphones fit right in with my Surface Pro 4. Compared to the typically colorful or black headphones offered from Beats, it contrasts against my shirt when hanging around my neck. When worn on my head, meanwhile, it looks a bit bulky. That’s mainly due to the way that the control dials stick out from the sides. Dimensions are 8.03 x 7.68 x 1.89, if you’re curious.
In fact, with my Mets jersey and Surface Pro 4, I had quite a few people at LAX airport come up to me and ask me about the headphones around my neck. When sitting at the gate, one woman asked me if I was a DJ. I’m assuming these folks never seen Surface Headphones in the wild before, just like how Surface Pros were once a rarity in coffee shops and libraries across America.
Aesthetics wise, Surface Headphones feature aluminum extenders (that hold the cups) and a steel headband. A reflective Microsoft logo on the tips of the yokes also adds a touch of fanciness. The cups, meanwhile, are primarily made of a plastic, but at 0.64 pounds, it feels very light in the hands. I was quite surprised at how light it when I initially took it out of its box, but overtime, it was something I got used to. For my time moving around L.A. that lightness made it easy to quickly pull on and off and down to my neck as I walked between my destinations.
Elsewhere, Surface headphones feature a plush memory foam material on the ear cuffs, and a rubbery material on the headband. With most other over-the-ear headphones, my ears would normally get “locked” in, and I would experience some discomfort over long periods of wear. That wasn’t the case with Surface Headphones, as I was able to wear it comfortably for a six-hour long cross-country flight. I found the materials to be very cozy, as it didn’t put too much pressure on ears or the top of my head.
Wearing the Surface Headphones
Dial out the noise
Airports and airplanes can be quite noisy, and for me, Surface Headphones saved me from the chaos. My return flight from New York from Los Angeles was delayed by over five hours, so I had to make a new home at the airport. Sitting at a little marketplace inside LAX, I put on Surface Headphones to separate myself from the rest of the world to try and get some peace of mind. It worked.
Surface Headphones feature 13 points of active noise cancellation. What makes the noise cancellation unique and simple, though, is the way it is controlled. The rounded dial on the left ear cup controls the noise cancellation levels in two pre-set options. There’s no need to fiddle with buttons or switches. Touching the dial will also pause, play, or skip music, or even activate Cortana.
When I gave my parents a call on WhatsApp, noise cancellation was very effective. It felt like I was back home and they were talking right into my ears. Their voices were clear and concise, and I didn’t need to turn the volume on my phone past 50% to hear them. From the other end, my parents also told me my voice was clear, despite the noisy background. According to Microsoft, Surface Headphones support up to 30 dB for active noise cancellation. It’s accomplished with a total of eight microphones on board.
Left side of Surface Headphones
During my flight, I found that the maximum noise cancellation level was perfect. My seat was conveniently right next to the airplane engine, a personal favorite spot of mine. That said, Surface Headphones were able to filter out the constant “whirring” noise experienced when flying. It also muted out the passengers around me, including the chatter from flight attendants serving coffee and other snacks.
Interestingly, there’s also a passive noise cancellation setting. This goes up to 40 dB, and is activated by turning the dial on the left cup all the way to the bottom. I found this useful for listening to PA announcements from the captain, or when I wanted to eavesdrop on conversations happening next to me. When I turned the dial down, and the ambient voices around me were suddenly more prevalent. When my music was playing too loud, though, it was a bit hard to make out the noises around me on on this setting. I had to pause my music to get the most out of this feature.
Wearing Surface Headphones
Control and rock out to your music with a touch
On the right side of Surface Headphones is another dial dedicated to controlling the volume, and summoning Cortana. You’ll also find the USB C port for connectivity, as well as the AUX jack, mute button for the microphone on this side as well. The AUX jack is a nice option for when the battery drains, but hooking up to it will also disable Cortana (which only works via Bluetooth) and the touch features of the dial, unless you’re connected via USB and AUX to a PC. While connected via AUX when riding public transit around L.A., I noticed that the audio quality is slightly more washed out than when connected via Bluetooth.
Anyway, during my stay in the airport, and during my flight I found the dials quite useful. A tap on the dial quickly paused music, allowing me to talk to flight attendants, or someone asking me questions at the gate. A triple tap will skip through music, double tap to go back to a previous song, which I found useful mid-flight. It is quite cool, as I was able to keep my phone in the pocket in the seat in front of me and control my music.
The right side of Surface Headphones
I should also note that if you pull the headphones off your head, it will auto-pause the music. This was amazing to me, and it helped avoid awkward situations. In one instance, a JetBlue employee approached me and asked to see my ticket, and had to suddenly pull off my headphones. Thanks to auto-pause, loud music wasn’t blaring in front of her, as it would have if I were using any other pair of headphones.
Sound quality overall is fairly great. I’m not an audiophile, but the audio was just as good as what I experienced with my Sephia in-ear earphones. When listening to the opening of The Cab’s Angel with Shotgun, I felt the bass rocking through both my ears. The 40 mm edge speakers really deliver on Microsoft’s promise for clear audio. When customizing the sound profiles to “pop” via the Cortana App on Android, I also got a truly lively and energetic experience when listening to MKTO’s American Dream. The headphones really were able to highlight the vocals, and the songs constant beats.
The left side of Surface Headphones
Battery to last you all day
As I said before, my flight was delayed by 5 hours when coming back home to New York City. I needed to check out from my hotel at around 9 AM PT, so I was at the airport by 10 AM PT. My flight didn’t end up leaving until 7 PM, and I didn’t arrive home in NYC until around 1 AM PT (that’s +1 day in NYC time.) All that time, Surface Headphones were connected to Bluetooth to my phone. My phone needed to be charged one time in between, but the Surface Headphones outlasted it.
Microsoft rates Surface headphones with a 15 hour battery life, and based on my experience, I can say it’s true. With the headphones just taking two hours to charge via USB-C, that battery life is really impressive. However, it might fall behind what you can get with other products like Sony’s 1000x M3 headphones.
Surface Headphones with my Surface Pro 4
Cortana’s here to help
Another big feature of Surface Headphones is Cortana. You can summon the assistant with a long press on any of the two dials. Cortana has always been limited compared to other voice assistants, but it’s the core part of Surface headphones. Whenever I turned the headphones on, Cortana greeted me with battery estimates, and the name of the device I am a connected to. That’s great, especially since I didn’t have the time to head into the dedicated app to see battery levels during my rush to get to the airport.
Cortana also can be used for certain tasks like calling someone or playing a specific song, setting a meeting, or reminders. I never really used Cortana for meetings or reminders, but i used Cortana to call my mom without touching my phone. Cortana also picked up my voice very well when I asked her to play Coldplay’s Paradise. She’ll even dim the music you’re listening to so you can hear her answers more clearly.
Some of the settings on the Cortana App
Pairing and Connectivity
To connect and pair with Surface Headphones via Bluetooth on iOS and Android, you’ll need to download the Cortana app. Pairing on Windows 10 or MacOS involves using the standard Bluetooth pairing procedure. There’s also a special Cortana Devices app on Windows 10, which helps manage the device once paired. I would have liked to see a separate Surface Headphones app on iOS and Android too, but I’ve been using the Cortana app for a while now, so it wasn’t an issue for me. The interface is informative. At a quick glance, it will show information on battery and noise cancellation.
Pairing is quick, and the headphones can be used with up to 10 devices. I paired with my phone and Surface, and was easily able to switch between the two by turning Bluetooth off on the device I didn’t need anymore. It proved useful for when I was listening to music on my phone, but then wanted to switch over to my Surface to watch a Mets game.
Elsewhere with connectivity, I was also able to stay about 30 feet away from my phone with the headphones before it disconnected — which was basically equal to a quick trip to the lavatory in the airplane. As a side note, Microsoft is still using Bluetooth 4.2 with these headphones though, which is behind the Bluetooth 5.0 you can get with other headphones.
More Cortana Settings
It’s easy to pack and go … sometimes
One of the hardest things to do before going on vacation is packing, and, Surface Headphones didn’t make that easier for me. I love technology, and alongside Surface Headphones, I traveled with my Surface Pro 4. Fitting that all in my carry-on bag, with extra clothes and souvenirs for my return trip, proved quite tricky.
The carry case for the Surface Headphones is very huge. It’s thick along the sides, and the top, which makes it hard to fit in a jam packed book bag like I traveled with. There is a “loop” to clip the case to the side of a bag, but I didn’t trust it enough to hang on my bag. In fact, I just ended up putting the case in my bag, and hanging the headphones around my neck, just because it was more convenient.
Reliability issues, and the end
Really bummed out right now. I'm a big Surface fan, but my Surface Headphones just died on me. No sound coming from the right ear. Reset it, paired it, tried everything, and it's still broken. I hope this isn't a quality control issue.
At the end of the day, the Surface Headphones make for a nice accessory to pair up with any Microsoft device. Despite me having to exchange my headphones once for an issue with the right side audio (I got a free replacement from Microsoft,) it was absolutely reliable for me during my trip to LA.
At $250 for the Sony WH-1000X M3, and $300 for the Bose QuietComfort 35 II Wireless Bluetooth Headphones, other headphones are cheaper and have better noise cancellation. However, no other Headphones will fit into the Microsoft ecosystem like Surface Headphones do. From the power of Cortana, great noise cancellation features, touch controls, as well as a very comfortable design, this is all I could have asked for in premium Microsoft headphones.
An HP printer making noise when not in use is quite common, which HP acknowledges as a bug with some printer models.
The company, however, explains these printer noises are a known issue with laser printers in general and not just from HP, which means the solutions mentioned here apply to just about any laser printer.
What can I do if the HP printer is making noise when not in use?
1. Check the cartridge ink level
Launch the printer application and select Maintenance.
Click on the tab that lets you see the estimated ink level remaining. It could be a separate tab, or one included under Maintenance.
Check if the ink level is less than 20 percent.
Generally, according to HP, the cartridges are usable up to 75 percent.
The noise is created if the ink level falls below 25 percent. In that case, replace the cartridge immediately.
Check to see if the noise is eliminated.
Modern HP printers come with HP Instant Ink service, which checks ink levels automatically, so this step may not be available.
2. Re-install the cartridges
Remove all the cartridges and re-insert them again.
Make sure you plug the printer in directly to the mains and not to a UPS, power strip, and such.
Also, printers have definite power ratings. Ensure you are matching the voltage rating for it to perform optimally.
You will also do well to turn off the printer, remove the power cables, and connect it again to see if this solves the issue.
4. Remove stuck paper or other debris
Turn the printer off.
Gently remove the paper tray (if it’s detachable) or bring out the paper sheets.
Check if any paper is stuck inside. If so, remove the paper. You can tilt the printer if needed for this operation.
Also, check if any debris or a foreign object is lodged inside. If so, remove them.
You might also need to open the cleanout door underneath the printer to check for jammed paper or debris.
Reattach the panel after you are done.
Similarly, open the cartridge door to check for any foreign object that might have intruded the space and is hampering normal functioning.
Reattach the panel after you have cleaned the section.
5. Ensure the carriage path is devoid of obstructions
For this, you will need to turn the printer on.
While the printer is still turned on, remove the power cable from the rear of the printer. It’s extremely vital to disconnect the power source from the printer to prevent the chances of an electrical shock.
Check if any paper stuck or other foreign objects are restricting the carriage’s free movement.
Also, move the carriage manually to ensure free movement later on.
For instance, if the carriage is stuck on the right, move it to the left and vice-versa.
Move the carriage to the right if it is stuck in the middle.
Check if the carriage can be moved freely.
Reconnect the printer and print a test page.
This is pretty much all you do if your HP printer is making a buzzing noise when not in use. However, if the sound is still persisting, get in touch with the support staff.
Projectors can be quite useful for presentations or media sharing, but many users reported that the projector lamp is not turning on.
This seems like a big problem, and if this happens, the projector won’t show the computer screen or anything else. As you can see, it’s crucial to fix this issue as soon as possible and today we’re going to show you how to do that.
How do I know if my projector lamp is blown?
A popping noise followed by a dark image is the clearest indicator that your lamp is broken.
An indicator message will appear alerting you that there are issues with your lamp.
Dim light from the projector is an early sign that something is wrong with your lamp.
Color changes can appear on your projection if the lamp is having issues.
Image flickering is a clear sign that something is wrong with your lamp.
What can I do if my projector lamp is not turning on?
1. Check the bulb light
Your projector comes with some LED indicators that can help you to understand what’s the issue with your projector.
Check the image above that shows the LED indicators and what it means.
Now if the Lamp LED is flashing red, it means the Lamp has a problem.
If it is flashing orange, you need to replace the Lamp.
If the Lamp LED is off, that means the problem is with the sensor or the fan.
If the Lamp LED is flashing orange, there is an obstacle around the projection window. Remove the obstacle or clean the obstacle sensors.
If the Lamp LED flashing Red, it is an internal Project error.
2. Other solutions to try
Make sure the power cable is connected properly to the projector. Check the power cord for issues.
Check if the projector’s buttons are locked for security reasons. Unlock if locked.
Check the projector has entered sleep mode.
If the Projector’s lamp has turned off and the Power and Temp lights are on, it means the projector has overheated and shut down to protect the projector from any damage.
If nothing seems working, send the projector for repair if it is under warranty.
If the projector lamp is not turning on, it’s most likely a glitch or a hardware issue with your projector.
To avoid these types of issues, always be sure to properly connect the projector to a PC and ensure that everything is working properly.
We hope that this guide helped you fix the projector light that was not working. In case you found a different solution that worked for you, share it with us in the comments below.