More shots of Windows 10 Fluent Design makeover for Mail and Calendar apps

Interestingly enough, as Microsoft makes efforts to combine the underlying and visual elements of its premier email client across web and desktop begin to surface, the Windows team seems to be moving in a different direction with the current Mail and Calendar apps for Windows 10.

Instead of adding the ribbon alterations for the Mail and Calendar app, the Windows team is doubling down on its Fluent Design to touch up the emailing and scheduling experiences for desktop users.

With the Fall Creators Update behind them, the Windows team is testing out some new Fluent Design inspirations for the Mail and Calendar app with a few lucky Skip Ahead Release Insider testers. Zac Bowden over at Windows Central was able to grab a few more screenshots of the Mail and Calendar updates in action.

With Microsoft’s Groove app being the poster child for Fluent Design implementation, now being shuttered in favor of Spotify integration, it’s nice to see the Windows team working on bringing its other apps up to par.

Microsoft Research brings full offline translations to the Huawei Mate 10

Huawei’s Mate 10, the company’s latest Android flagship announced earlier this week features some unique Microsoft technology. In addition to an OS-level integration of LinkedIn, the handset can also deliver full neural offline translations thanks to a customized version of the Microsoft Translator app for Android, which will be pre-installed on the Mate 10.

“Microsoft achieved this breakthrough by partnering with Huawei to customize Microsoft’s new neural technology for Huawei’s new NPU (Neural Processing Unit) hardware,” the company explained today on the Microsoft Translator blog. “This results in dramatically better and faster offline translations as compared to existing offline packs.”

The Huawei Mate 10 with its “Kirin AI” processor is the first phone that comes with a dedicated Neural Processing Unit, which can dramatically improve the speed and quality of offline translations. Using the industry standard BLEU score to evaluate translation quality, Microsoft’s internal tests showed “up to a 23 percent better offline translation quality over competing best-in-class offline packs, and often a difference of less than 1 BLEU point between Microsoft state-of-the art online neural and offline neural translations.”

Out of the box, the Microsoft Translator app on the Huawei Mate 10 can instantly translate text in 60+ languages, and it also has exclusive neural translation packs for 12 languages: Arabic, Chinese, English, French, German, Italian, Japanese, Korean, Portuguese, Russian, Spanish, and Thai. If you’re wondering, the NPU on the Mate 10 has many other use cases including intelligent photography with AI-powered bokeh effects.

Some of Microsoft’s Android apps already come preinstalled on many Android apps on the market today, but it’s interesting to see Microsoft’s neural technology being used in new ways on flagship Android handsets. CEO Satya Nadella recently shared that Microsoft needs to “make sure our software and applications are used on iOS and Android,” so you can probably expect more partnerships like this one going forward.

Windows 10’s Edge browser FINALLY gets a fullscreen mode

It’s been just over two years since its launch but Microsoft’s Edge internet browser has finally added a proper fullscreen option this week with the rollout of the Windows 10 Fall Creators Update.

A fullscreen option for Edge has been a long time coming as its predecessor, Internet Explorer, had it in Windows 8. Bizarrely, Edge’s fullscreen mode still lacks all of the functionality of Internet Explorer’s as there is currently no way to pull up the browser’s address bar to change websites while the mode is activated. Users currently need to exit fullscreen mode every time they want to search or enter a website address.

  • To turn on the new fullscreen mode in Edge, simply expand the … menu in the top-right corner and click on the arrow icon next to Zoom.
  • To exit fullscreen mode in Edge, users can swipe down from the top of the screen, if on a touch-enabled Windows 10 device, and press the arrow icon or move the mouse cursor to the top-right corner of the screen to reveal it.
  • Fullscreen can also be turned on and off by pressing the F11 key when the Fn key is activated.

Have you been waiting for the fullscreen mode to come to Edge and are you satisfied with it? Let us know in the comments below.

Round-up of Windows 10 Fall Creators Update bugs: BSoD, high CPU usage, and more

Microsoft released Windows 10 Fall Creators Update to the general public, bringing a series of new features, improvements and bug fixes to the table. If you’re interested to learn more about the complete update changelog, check out this article.

Unfortunately, Windows 10 version 1709 also brings issues of its own despite Microsoft’s efforts to detect and squash all the bugs prior to the official release.

In this article, we’re going to list the most frequent issues reported by users after installing the update as well as their corresponding workarounds, whenever available.

Fall Creators Update reported bugs

1. Activation errors

If you can’t activate the OS, you’re not the only one: many users encountered various activation issues and are still unable to activate the new OS. One of the most common Fall Creators Update activation errors is error code 0x803F7001.

Here’s how one user describes this problem:

Today, when the Fall Creators Update was released through Window Update, we installed it on two of our computers […] After the update was complete, both of these computers showed that Windows was not activated. After the upgrade, the last 5 characters of the product key was changed to the same sequence of characters on these two computers, but it is completely different from our actual volume license.
When we enter our product key to try to reactivate Windows, we get error code 0x803F7001.

In this case, wait a few days and the OS should activate automatically as the machines have a digital license, which should allow them to maintain their activation status.

For more information on how to fix various Windows 10 activation errors, check out this guide.


2. Blue Screen of Death errors on install

Many users are still struggling to install the Fall Creators Update on their computers. The download and install process sometimes fails with various error codes or BSoD errors, as this user reports:

Windows 10 automatically downloaded and attempted to install the Fall Creators Update, however it blue screened during the update after rebooting. Specifically, it got stuck at 15% for about 5 minutes, then immediately jumped to 28%, then immediately rebooted, and upon rebooting it blue screened. […]
I can’t turn off or restart my computer now, because it will just try to install the update again and blue screen again. I tried a sfc /scannow but there were no integrity violations.

If you can’t install the Windows 10 FCU on your PC, this troubleshooting guide can help you to fix various install errors and issues.


3. Remote Desktop Connection crashes

If you often use remote desktop connections, don’t hurry to install Windows 10 version 1709. Users report that Remote Desktop Connection crashes when they try to connect to another device that’s not running the Fall Creators Update.

I just installed the Fall Creators Update on Windows 10/64 bit, and now Remote Desktop Connection crashes every time I try to connect to another PC running Windows 10 64 bit (which I haven’t updated yet). Moreover, my Surface 3, running Windows 10 (but also not yet updated) can successfully connect to the same target PC.
To be clear, the connection goes through. But, invariably, within 30 seconds the Remote Desktop Connection app crashes on the machine running the Fall Creators Update.


4. High CPU usage

Other users noticed that certain processes are now causing high CPU usage, whereas this problem didn’t occur prior to the update.

high CPU usage Fall Creators Update

This issue may appear after Windows update gets stuck when downloading an update or a corrupted Windows service causes the Service Host to consume more CPU usage than normal.

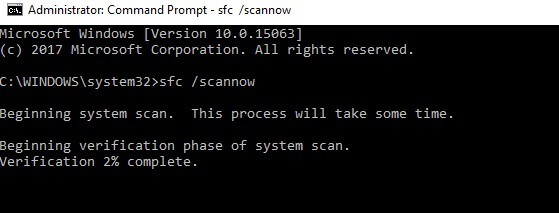
To fix high CPU usage with the Windows 10 version 1709, run the System File Checker followed by DISM to repair damaged system files.

Here are the steps to follow:

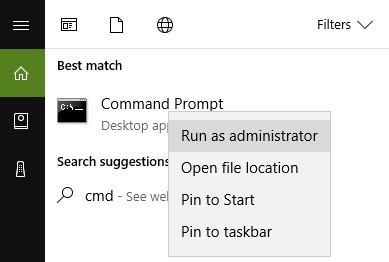
1. Go to Start > type cmd > right-click Command Prompt > select Run as Administrator

2. Type the sfc /scannow command

3. Wait for the scanning process to complete and then restart your computer. All corrupted files will be replaced on reboot.

4. Launch Command Prompt again and type the following command: DISM.exe /Online /Cleanup-image /Restorehealth

5. Launch Task Manager to check if the issue persists.

For more information on how to fix high CPU issues on PC, follow the steps available in this guide.


5. Edge Favorites are gone

If you lost Edge Favorites after the upgrade, don’t worry, we have a solution.

Tonight I downloaded and installed the Windows Fall Creator’s Update on both my desktop PC and my Surface Pro 3. When the desktop finished updating, I checked various items including the Edge browser. On the desktop PC, most of my bookmarks had vanished.

Here are the steps to follow to restore Favorites on Edge:

  1.  Go to this location and check of the Favorites folder is empty: %localappdata%PackagesMicrosoft.MicrosoftEdge_8wekyb3d8bbweACMicrosoftEdgeUserDefaultFavorites
  2. If this is the case, look at your backed up data for a similar path. Your bookmarks should be there.
  3. Copy them to %userprofile%Favorites, the Favorites folder for Internet Explorer
  4. Import your Favorites from there into Edge then go to this location: %localappdata%PackagesMicrosoft.MicrosoftEdge_8wekyb3d8bbweACMicrosoftEdgeUserDefaultDataStore
  5. Locate the Spartan.edb file usually located at the bottom of the folder tree
  6. Replace the current Spartan.edb with the copy from the backup. That should bring back your Favorites list.

ALSO READ: Here’s how the Fall Creators Update lets you customize Favorites in Edge


6. Certain apps are missing

Many users reported that the icons for some of the Store apps are missing after the upgrade. While the apps are already on the computer, the problem is in how users can’t access them unless they go to the Store, search for the respective apps and click the play button from within the store to launch the apps.

It simply appears that the PC can’t detect the apps:

I just upgraded to the Windows 10 Fall creators update after the update I now have missing icons for some of my store apps they are completely gone from the start screen and if I search through Cortana they do not come up some of the icons on the task bar are missing […]
if I go to the store and search for the missing apps I get the prompt saying they are installed and when I click launch they will launch properly from within the store, but that is the only way.

For the time being, there is no solution available to fix this problem.


7. PC keeps asking for Defaultuser0 password

Users also reported that their PCs keep asking them to enter the password for Defaultuser0. However, users are unable to enter Defaultuser0 account since it’s locked, and they can’t access Windows 10 at all.

If you encountered this problem, this troubleshooting guide can help you solve it.

These are the most common Windows 10 Fall Creators Update bugs reported by users. If you encounter other issues, tell us more about your experience in the comment section below!

RELATED STORIES TO CHECK OUT:

Fall Creators Update improves gaming performance, but only for some

The Windows 10 Fall Creators Update is now available for download. You can install it automatically via Windows Update, or download its ISO files.

This new OS brings a bevy of new features, improvements and bug fixes that will make Windows more stableoverall.

One of the most important and useful changes this update brings is related to gaming performance. As a quick reminder, the Windows 10 Creators Update broke many games and players hoped this release would fix all the gaming issues triggered by the previous update.

Gaming performance on the Fall Creators Update

Indeed, the latest version of Windows 10 adds a series of important improvements that will enhance your gaming experience. The bad news is that not all players will be able to enjoy a smooth gaming experience.

As we already reported, Windows 10 version 1709 fixes the stuttering present in Forza Motorsport 7 and boosts the framerate in other games, something players have already confirmed.

However, other titles such as Black Desert Online are affected by severe issues that often include freezes and crashes. Some players complained that the Fall Creators Update actually makes things worse, claiming that FPS significantly dropped after installing the update.

How to fix game issues on the Fall Creators Update

gaming fall creators update

As we stated above, some gamers still encountered various issues after upgrading their OS. If you’re experiencing stuttering on the Fall Creators Update, you need to completely delete the files related to Game DVR. Simply disabling it won’t eliminate stuttering.

Overall, most gamers will enjoy better gaming sessions after installing Windows 10 version 1709. If you’re into gaming, we recommend you to install the update as soon as possible.

Windows 10 3D printing support brings Minecraft creations to real life

Early on, Microsoft checked a feature off its Windows 10 list that many had seemingly glossed over because the barrier for entry at the time was a bit pricey. When Microsoft announced that Windows 10 held support for 3D printing, I, like most, gave a concerted shrug and moved on.

However, with the price of 3D printers coming down and a market for handmade toys, memorabilia, and gadgets growing, perhaps it’s time to revisit the world of 3D printing.

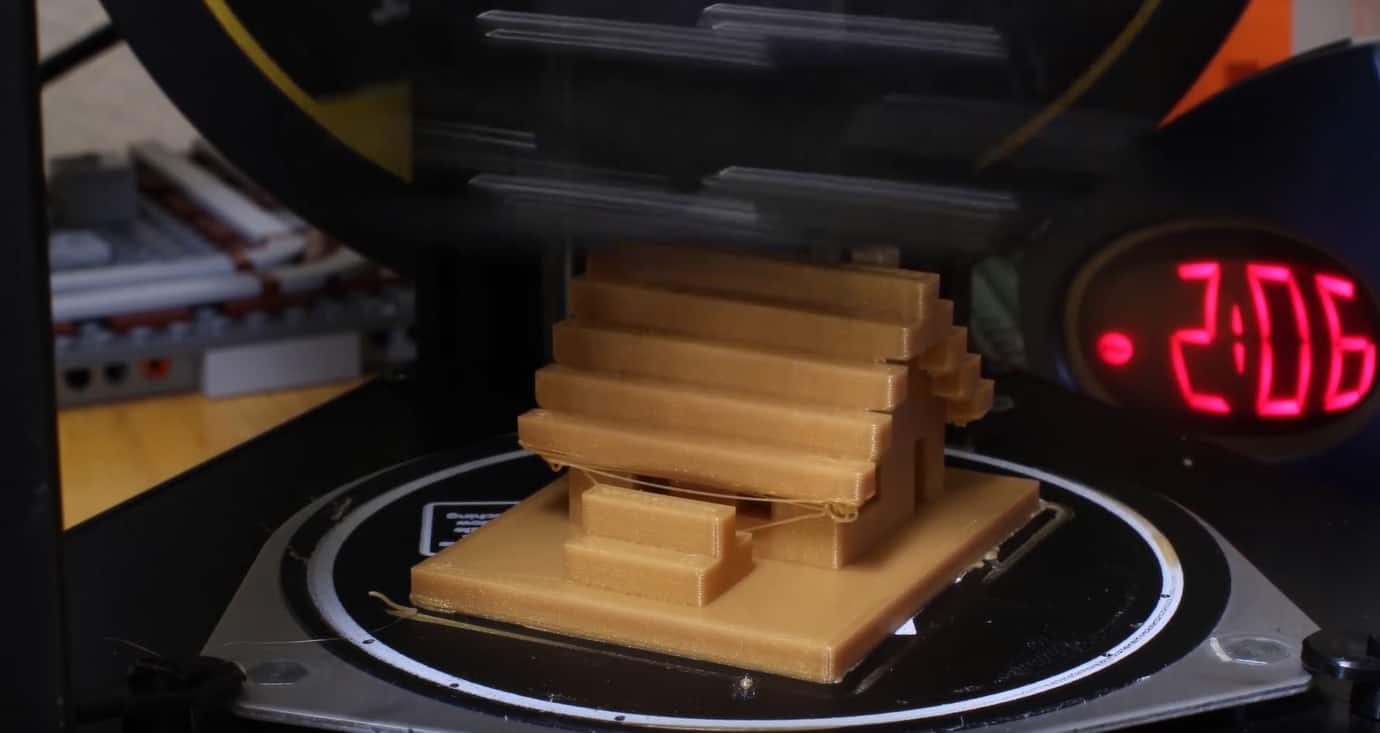
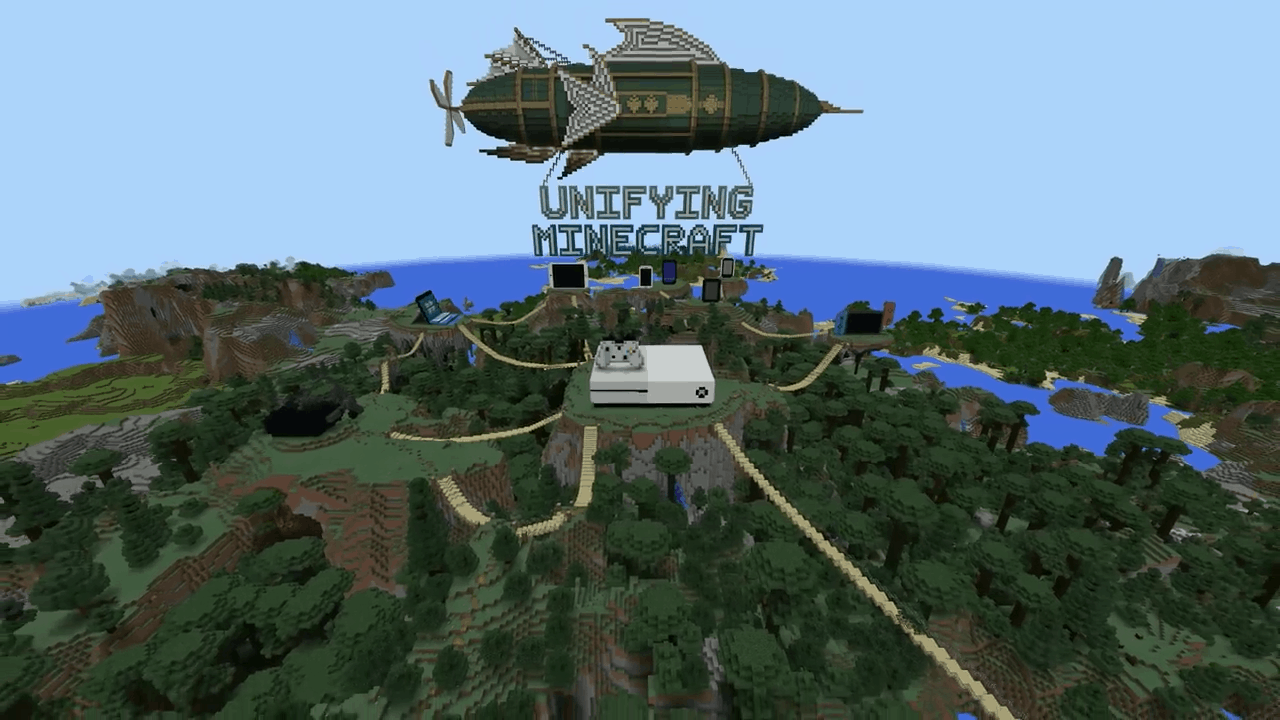
Going after some low hanging fruit, Microsoft recently announced that Minecraft players can now port their in-game creations to the real world thanks in part to Windows 10 3D printing support.

Aside from the digital creation of a Minecraft object, the process is fairly simple. Porting is done by placing a printing (or special) block in-game, next to an object or sculpture. Windows 10 does the rest by exporting that selected object to Remix 3D where fans can then polish it up a bit before hitting the print button.

For a handful of beta testers, the feature may seem like old news, but for the majority of Minecraft fans, being able to do all the heavy creative lifting digitally and then allowing Windows 10 to transfer those creations into the real world could be a major selling point for both the game and Microsoft’s OS.

Forza Motorsport 7 crashes: Here’s how to fix it

Are you experiencing Forza Motorsport 7 crashes on your computer? We’ve got solutions.

One of the most exciting gaming action is the Forza Motorsport 7, what with the adrenaline, the cool car designs, and speed – every gamer loves speed!

Most gamers who have downloaded and played the Forza Motorsport 7 game have however mused about the consistent crashes they get.

Some say the game crashes when they’re designing the car, going too fast, or at different points of the gameplay. This can be pretty frustrating, especially when you’ve just downloaded the game and you’re all set to get on the track.

One of the known issues of Forza Motorsport 7 crash issue on Windows computer is when Benchmark mode experiences long load times, or even crashes after you run the benchmark test. Annoying, right?

But, worry not, there’s always a way around some of the common game issues faced. Here are some quick fixes to resolving the Forza Motorsport 7 crash issue.

How to fix FM7 crashes on your PC

  1. Disable Internet and antivirus
  2. Check if the issue is related to a driver bug
  3. Use Administrator privileges to fix Forza Motorsport 7 crash
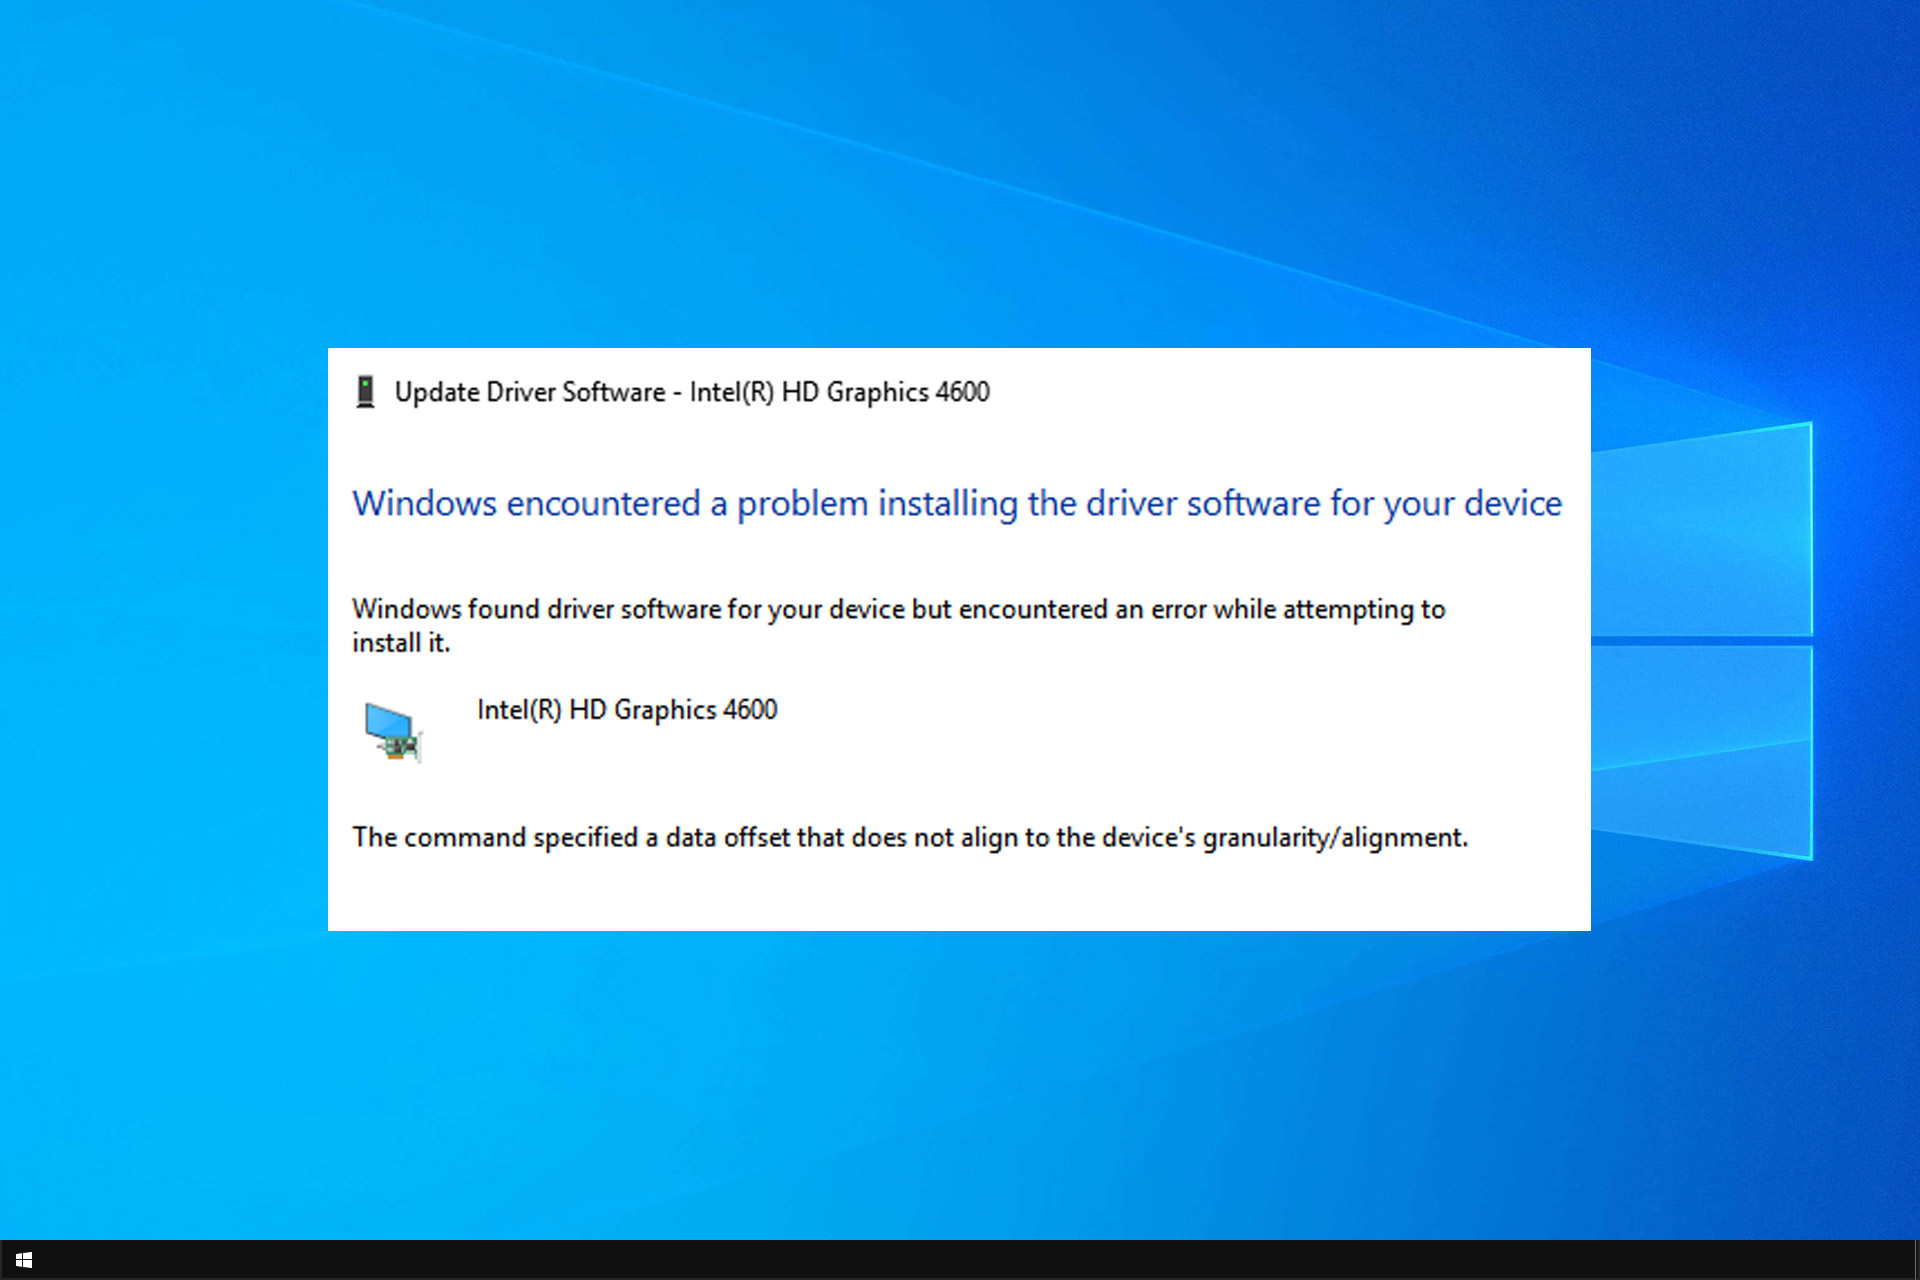
  4. Update your video card or graphics driver to fix Forza Motorsport 7 crash
  5. Downgrade the video card driver to an older version to fix Forza Motorsport 7 crash
  6. Uninstall and reinstall Forza Motorsport 7

Solution 1: Disable Internet and antivirus

You can try turning off your Internet connection, and antivirus program as well, then try to play the Forza Motorsport 7 game.

If this doesn’t work, try the next solution.


Solution 2: Check if the issue is related to a driver bug

Do the following to check this:

  1. Right-click Start
  2. Select Event viewer
  3. Expand Windows Logs
  4. Click System

If you see any recent red exclamation marks, click on it to see what it says then troubleshoot for the issue it brings back.


Solution 3: Use Administrator privileges to fix Forza Motorsport 7 crash

If you don’t have any, you can ask the administrator to create a user profile for you and give you the rights.

Here’s how to create a new user profile and give administrator privileges:

  1. Click Start
  2. Select Settings
  3. Select Accounts
  4. Click Add someone else to this PC
  5. Fill in the form with the user name and password. Your new user account will be created.
  6. Click on Change account type
  7. Click the drop-down arrow and choose Administrator to set the account to administrator level
  8. Restart your computer
  9. Log in to the new account you just created

Try playing the game using the new account.

You can also right-click on the Forza Motorsport 7 game icon, then click Run as Administrator.

Not yet there? More solutions ahead.


Solution 4: Update your video card or graphics driver to fix Forza Motorsport 7 crash

Here’s how to update drivers on Windows:

  1. Right-click Start button
  2. Select Device Manager
  3. Click on Universal Serial Bus Controllers to expand the list
  4. See whether there are any devices with either a yellow exclamation mark, question mark, down-arrow mark, or an error notification or code.
  5. If the driver has a yellow exclamation mark on it, double click on it then open Properties
  6. Under the Drivers tab, choose Update Driver

Windows will find the appropriate driver for your video card or graphics driver.

Note: You may need to know the name of your graphics or video card, for instance, if it is NVIDIA, AMD or Intel because then you’d have to download directly from the website of either of these.


Solution 5: Downgrade the video card driver to an older version to fix Forza Motorsport 7 crash

Here’s how to go about this:

  1. Right-click Start.
  2. Select Device Manager.
  3. Click Display Adapters.
  4. Right-click the Display adapter.
  5. Select Properties.
  6. Check the version.display adapter PC
  7. Find a previous version and install it.


Solution 6: Uninstall and reinstall Forza Motorsport 7

You can always uninstall, then clean your system, and reinstall the game back again.


Game Fire is a game booster that will get rid of freezes, lags, low FPS and other issues while playing. Download it now (free) for a better gaming experience. 


We do hope one of these solutions worked for you. If not, share with us the specifics of your issue in our comments section below.

Happy gaming!

RELATED STORIES TO CHECK OUT:

Latest Xbox One update lets you set privacy on your Activity Feed

On Monday, Microsoft released the Xbox One Fall Update, enhancing several of the experiences on all Xbox One consoles. Turns out the update also introduces some new privacy-related settings, helping you further control your Activity Feed.

Shared by Major Nelson, the changes allow you to decide who can see your posts to your activity feed. You can set it to everybody, friends, or block altogether. Subsequent tweets from Major Nelson reveal this also allows you to set your game, party, invite and messages privacy as desired, but still allow others to see feed content. The settings can be found on the web, or on the console by navigating to My Profile, Privacy, View Details, Communications, and Multiplayer.

This is definitely a welcome change, helping users, and even parents, control the content shared on Xbox Live. Do you find this feature useful? Drop us a comment below to let us know your thoughts!

Halo: the Master Chief Collection to get Xbox One X enhancements next year and lots more Halo news

343 Industries made some pretty exciting announcements for Halo fans yesterday. First, the Overtime Content release for Halo 5: Guardians brings back the Oddball game mode, a weapon tuning update, Team Skins and more. For those of you interested in Halo e-sports, you can watch the HCS Fall 2017 Finals this weekend on Mixer or Twitch, and get ready for the Halo World Championship 2018. You can read more details about these Halo 5 updates on Halo Waypoint.

Along with Halo 5: Guardians, Halo Wars 2 will soon be improved with 4K graphics for the Xbox One X, and an upcoming update for the RTS game will also bring support for Xbox Arena as well as cross-platform play between Xbox One and Windows 10. As the game already supports Xbox Play Anywhere, this latest addition really makes sense.

Halo: The Master Chief Collection, the Xbox One anthology including Halo: Combat Evolved and Halo 2, 3 and 4 will also be enhanced for the Xbox One X and get new patches to fix remaining issues with the game and more. The team plans to kick off a public flighting program with iterative patches next spring, and more details will be shared with fans when the time comes.

For now, it doesn’t look like all games in Halo: The Master Chief Collection will get 4K upgrades, like Halo 5: Guardians and Halo Wars 2 will. However, it’s good to see that the Xbox One anthology is still being supported by 343 Industries three years after its release.

Fluent design comes to Windows 10 Mail & Calendar app for some Insiders

The Windows 10 Fall Creators Update shipped yesterday, and with it came Microsoft’s new design language known as Fluent Design. Turns out the company is not done experimenting with Fluent Design yet, as some Windows Insiders are now seeing touches of the new design language in the Windows 10 Mail and Calendar app (via Windows Central.)

At the moment, only a small set of Windows Insiders in the Skip Ahead ring appear to be seeing these changes in version 8700.40315 of the Mail and Calendar app. The Fluent Design inspired features includes a redesigned UI for where email accounts are listed, and an acrylic-looking window and reveal effects on submenus.

Fluent Design in the Mail app, photo from Windows Central

Given how things have gone in the past, this version of Mail and Calendar might be rolling out to a broader audience soon. But for now, it just being tested out with Insiders. Do you like the touches of Fluent Design in the Mail and Calendar app? Or do you prefer the standard look? Let us know your thoughts below.

How to upgrade to Fall Creators Update from Windows 7

Upgrading to a new system has never been easier.

In order to upgrade from Windows 7 or 8.1 to Windows 10 Fall Creators Update, you’ll need only basic Windows-related knowledge, some spare time, and a firm determination.

Even after 8 years, Windows 7 still stands firm as the most reliable system Microsoft has ever made.

But, regardless of what Windows 7 has to offer (and if you ask us, that’s a lot), things are changing and we must eventually embrace the improvements in order to keep up-to-date security and expect Microsoft‘s support to tend to our needs, as both home and professional users. The same goes for Windows 8 or 8.1.

Therefore, if you’re certain that Windows 10 Fall Creators Update is your cup of tea, check the step-by-step explanation we provided below.


Epic guide alert! Everything you need to know about upgrading to Windows 10 for free!


Here’s how to upgrade to Windows 10 Fall Creators Update from Windows 7

  1. Windows 7
  2. Windows 8

Upgrade to Windows 10 Fall Creators Update from Windows 7

Even though the free upgrade prompt is long gone, you can still, taking into account that you have a valid Windows 7 license, upgrade to Windows 10.

Without charges whatsoever. Just that this time, the procedure is not as automated as it was before but you can still do it with a little effort.

So, if you finally decided to switch from good old Windows 7 to Windows 10,  make sure to follow the steps below and the upgrade should be as simple as possible:

  1. Boot to Windows 7 on your PC and make sure to:
    • Have enough space (up to 20 GB depending on a Windows 10 version).
    • Unplug temporarily all peripheral USB devices.
    • Uninstall a third-party antivirus.
    • Backup your data from system partition just in case something goes south.
    • Alternatively, you can update your BIOS but that’s rarely a problem.
  2. Download Media Creation Tool by following this link.
  3. Right-click on the tool and run it as an administrator.upgrade to Fall Creators Update from Windows 7/8.1
  4. Accept the Licence Terms.upgrade to Fall Creators Update from Windows 7/8.1
  5. If you’re asked to install Windows 7 updates before the upgrade commences, make sure to do so.upgrade to Fall Creators Update from Windows 7/8.1
  6. Choose Upgrade this PC.upgrade to Fall Creators Update from Windows 7/8.1
  7. Select the preferred architecture, language, and system version. Make sure that it responds to your license.
  8. Once it downloads files, Media Creation tool will prompt will ask you what to keep:
    • Keep personal files and apps – keeps everything you had in Windows 7
    • Keep personal files only – removes programs, keeps only personal files.
    • Nothing – wipes everything and it’s closely related to a clean reinstallupgrade to Fall Creators Update from Windows 7/8.1
  9. Click Install and follow the further instructions.

Later on, you can configure your brand new Windows 10 Fall Creators Update system to your liking.


Learn everything there is to know about downloading and installing Windows 10 Fall Creators Update!


Upgrade to Windows 10 Fall Creators Update from Windows 8 or 8.1

In comparison to fan favorite Windows 7, Windows 8 and 8.1 respectively received a huge backlash. Nonetheless, these are still reliable platforms and not only a mere transition like highly-criticized Vista was.

But, design-wise, if you have a good time with Windows 8 or 8.1, you’ll enjoy Windows 10 Fall Creators Update in all its glory.

The upgrade procedure is almost the same as the one on Windows 7, but the things should even go smoother and faster.

Just make sure that you have enough space, unplug peripheral devices that can cause drivers compatibility issues, and double-check your license. Furthermore, ensure that a third-party antivirus is disabled.

Once you prepared everything, follow the instructions below:

  1. Backup sensitive data from the system partition to a data partition or external storage media.
  2. Download Media Creation Tool from this link.
  3. Right-click on the Media Creation Tool setup and run it as an administrator.upgrade to Fall Creators Update from Windows 7/8.1
  4. Accept the License Terms Agreement.upgrade to Fall Creators Update from Windows 7/8.1
  5. If prompted with available updates for current system version, install them accordingly.
  6. The setup should check your system for compatibility.upgrade to Fall Creators Update from Windows 7/8.1
  7. Select the preferred architecture, language, and system version.
  8. Click Next and wait for the downloading procedure to start.upgrade to Fall Creators Update from Windows 7/8.1
  9. The next windows will ask you what to keep, so make sure to choose carefully.
  10. Click Next and then Install.
  11. Your PC will restart several times before the upgrade process ends.

That should do it. Now you’ll have the latest Windows 10 iteration installed, so you can start with the customization and tweaks immediately.

With this, we can conclude this how-to article. We do hope that Windows 10 Fall Creators update will live up to your expectations. In case you have any questions or suggestions, make sure to share them with us in the comments below. 

READ ALSO:

Got problems with Fall Creators Update? Here’s how to roll back

The long awaited Fall Creators Update for Windows 10 is finally here, and it brought us many new features. Unfortunately, with major Windows updates various issues can also occur, and sometimes the only way to fix them is to roll back to the previous build.

How to roll back from Fall Creators Update?

Solution 1 – Use Settings app

The simplest way to roll back from Fall Creators Update is to use the Settings app. Before you roll back to the previous build, it’s advised to back up your important files. After doing that, you can roll back by following these simple steps:

  1. Press Windows Key + I to open the Settings app.
  2. Once Settings app opens, navigate to Update & security.
    Fall creators update 1
  3. Navigate to the Recovery tab in the left pane and click on Get started button in Go back to the previous version of Windows 10 section.
    Fall creators update 2
  4. Now you need to select the reason for going back to the previous build. After doing that, click on Next.
  5. You’ll be offered to download the latest updates. Click on No, thanks button.
  6. Now click on Next to continue.
  7. Click on Next once again and select Go back to earlier build.

Rolling back process will now start. This process can take a while, sometimes more than an hour, so be patient and don’t interrupt it.


Solution 2 – Use Advanced startup

If you have major problems with Fall Creators Update and you can’t access Windows 10 at all, you might be able to roll back using Advanced startup. To do that, follow these steps:

  1. Click the Power button, press and hold the Shift key and choose Restart from the menu. You can do that right from the Windows 10 login screen. If you can’t even access the login screen, simply restart your PC a couple of times while it boots.
  2. Now click on Troubleshoot > Advanced options > Go back to the previous build.
  3. Choose Go back to the previous build and follow the instructions on the screen.

We have to mention that roll back option is available only for 10 days after the upgrade, so if you have any major problems with Fall Creators Update be sure to roll back as soon as you can.

If you’re unable to roll back, it’s rather likely that the roll back period expired or that you deleted Windows.old files manually or by using Disk Cleanup. In that case, you’ll have to stick with Fall Creators Update or perform a clean install.

Fall Creators Update offers many new features, but if you want to roll back to the older build, feel free to do so by using one of our solutions.

READ ALSO:

Operating system version is incompatible with Startup Repair [FIX]

Startup Repair, also known as Automatic Repair, is a tool used in Windows operating system to automatically repair your computer when it cannot start – or is unbootable.

There are several reasons your computer may be unbootable, and Startup Repair tool helps sort out issues such as:

  • A corrupted Registry
  • Missing or damaged system, and driver files
  • Corrupted Disk metadata
  • Corrupted File system metadata
  • Installation problems
  • Incompatible drivers
  • Incompatible errors that come with installation of Windows service packs, and/or patches
  • Corrupted boot configuration data
  • Bad memory
  • Disk hardware errors

If you’re experiencing some of these (if not all) issues, then the Startup Repair tool should help you out.

You’ll need to run the tool at the early stages so that your computer is not affected by any eventual problems that could come up as a result. If you encounter secondary effects, follow a reinstall guide or contact your machine’s technical support, or Microsoft Support for further guidance.

However, your computer could also bring up a troubleshooting to do with the Startup Repair tool, when it’s incompatible with your operating system.

This article describes what you can do in order to fix the Startup Repair incompatibility issue with Windows 10 operating system.

Windows 10 is incompatible with startup repair [FIX]

  • Disconnect all devices
  • Go into Safe Mode then do a Clean Boot
  • Perform Automatic repair from WinRE

Solution 1: Disconnect all devices

If you’re unable to boot to the start screen on your computer, try disconnecting all the devices plugged in to your computer, with exception to the keyboard and mouse. Try booting again.

If this doesn’t work, try the next solution.


Solution 2: Go into Safe Mode then do a Clean Boot

Safe Mode starts up your computer with limited files and drivers but Windows will still run. To know whether you’re on Safe Mode, you’ll see the words at the corners of your screen. If you can’t start your computer on Safe Mode, follow the steps listed in this troubleshooting guide.

How to get your computer into Safe mode

There are two versions:

  • Safe mode
  • Safe mode with Networking

The two are similar, though the latter includes network drivers and other services necessary to access the web and other computers in the same network.

Follow these steps to start your computer in Safe Mode:

  • Click on Start button
  • Select Settings – the Settings box will open up
  • Click Update & Security
  • Select Recovery from the left pane
  • Go to Advanced startup
  • Click Restart nowfix OS incompatible with Startup Repair
  • Select Troubleshoot from the choose an option screen, then click Advanced options
  • Go to Startup Settings and click Restartfix OS incompatible with Startup Repair
  • Once your computer restarts, a list of options will come up.
  • Choose 4 or F4 to start your computer in Safe Mode

ALSO READ: 4 best PC repair toolkits to restore your PC’s health

A quicker way to get into Safe Mode is to restart your computer then do the following:

  • From the Choose an option screen, select Troubleshoot > Advanced options > Startup Setting s> Restart
  • Once your computer restarts, a list of options will come up.
  • Choose 4 or F4 to start your computer in Safe Mode

If the problem isn’t there while in Safe mode, then your default settings and basic drivers are not contributing to the issue.

Do the following to exit Safe Mode:

  • Right click Start button
  • Select Run > type msconfig
  • A pop up will open
  • Go to the Boot tab > uncheck Safe Boot option box
  • Restart your computer

If the issue doesn’t persist with Safe Mode, perform a Clean Boot to check whether a third party app is causing the issue.

How to perform a clean boot

Performing a clean boot for your computer reduces conflicts related to software that can bring up the root causes of the Startup Repair incompatibility with your operating system. These conflicts can be caused by applications and services that start up and run in the background whenever you start Windows normally.

In order to successfully perform a clean boot on Windows 10, you have to be logged on as the administrator, then follow these steps:

  • Go to the search box
  • Type msconfig
  • Select System Configuration
  • Find Services tab
  • Select Hide all Microsoft services box
  • hide all microsoft services windows 10
  • Click Disable all
  • Go to Startup tab
  • Click Open Task Manager
  • Close Task manager then click Ok
  • Reboot your computer

You will have a clean boot environment after all these steps are carefully followed, after which you can try booting your computer again.

Didn’t help? Try the next solution.


Solution 3: Perform Automatic repair from WinRE

If you still experience the issue with the Startup Repair tool, try booting from Windows 10 media then perform Automatic repair from Windows Recovery Environment (WinRE).

In order to perform Automatic repair, do the following;

  • Insert a USB or DVD
  • Restart your computer
  • Press F12 on your computer to open Windows Setup
  • Select the drive you inserted your USB or DVD into
  • Click Next
  • Choose Repair your computer
  • A blue screen will come up with options
  • Choose Troubleshoot
  • Select Advanced options
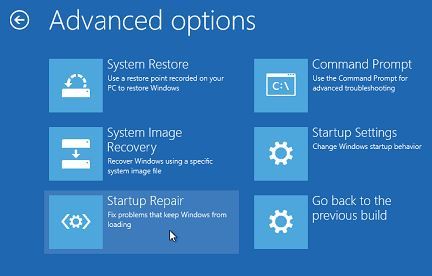
  • Choose Startup Repair (or Automatic Repair) from Advanced boot option

Operating system version is incompatible with Startup Repair

Once the repair is complete, try booting your computer again to see whether the issue persists.

RELATED STORIES TO CHECK OUT:

Mouse Without Borders: How to Download and Use

Microsoft Garage is a great Microsoft project that brings a lot of interesting Windows applications. Microsoft developers develop applications like Mouse Without Borders, making them much more trustworthy and better optimized.

Compatibility is not an issue for a program as useful and well-designed as Truong Do’s Mouse Without Borders. But there have been some issues with Windows 10, though these are fixable. Keep reading to find out!

What is Mouse Without Borders?

Mouse Without Borders is a great and simple freeware KVM (Keyboard, Video, Mouse) tool that covers one too often neglected function. It employs a single mouse and keyboard for up to 4 different computers or other computing devices.

Now, one could assume that this isn’t exactly a novelty, but there’s a catch. With the Mouse Without Borders app, you can transfer files across PCs in a seamless manner as all connected devices share one clipboard.

You’ll need to configure one host PC and ensure that others share the same wireless or LAN network. That’s quite a simple procedure, and you don’t need to be a tech-savvy user to get things working.

mouse without borders in windows 10

The user interface is as well-designed and combined with detailed instructions. You’ll have an easy time learning how to take full advantage of Mouse Without Borders and multiple interconnected devices. And all of that on various Windows versions that you can combine (only Windows for now, though).

Nonetheless, the ”Windows versions” part is also where the problems start. Namely, this program (believe it or not) doesn’t support Windows 10.

At least, not officially. As we can confirm, the developer provided an alternative in Windows Store, but, as stated by some users, the desktop version is better in many aspects.

mouse without borders in windows 10

Now, it seems that it works well, but there are minor problems, especially when users combine different systems, e.g., Windows 10 as a host and Windows 7 as a slave.

So, how can Mouse Without Borders work in Windows 10 without minor issues like in Windows 7? We have a few ideas, so check them out below.

How do I run Mouse Without Borders on Windows 10?

  1. Download Mouse Without Borders.
  2. Run the setup and follow the on-screen instructions to complete the installation process.installer
  3. Right-click on the application’s launcher and select Properties.
  4. Navigate to the Compatibility tab.
  5. Now, tick the Run this program in compatibility mode for checkbox, and select Windows 7 from the dropdown menu.compatibility mode to run mouse without borders
  6. Once done, click on Apply and OK to save the changes.

Some users managed to use Mouse Without Borders with some peculiar workarounds. Namely, you’ll need to keep a surplus mouse plugged in on Windows 10 PC for the application to work. Furthermore, you can try and run the application in a different compatibility mode.

Repeat this procedure for all Windows 10-powered PCs you want to connect. Additionally, you can run Mouse Without Border as an administrator, which might improve the overall performance.

Besides, do not forget to check some of the best customization apps for Windows to reconfigure things.

Have you tried Mouse Without Borders? What’s your favorite KVM application for Windows 10? Tell us in the comments section below.

New security report pegs Microsoft Edge as the safest browser against phishing attacks

Ever since Microsoft Edge was released, the browser has been battling out with the other browsers including Chrome and Firefox. The Edge browser initially faced a lot of criticism for lack of features but the recent builds have improved greatly.

Yes, the extension collections on the Edge browser is not really exhaustive and this is one aspect that might make you abandon the browser.

Edge browser Android iOS

All said and done the Edge browser has often been lauded for its security features. Cyber security consultancy firm NSS Labs has published a Security Comparative Reports on the web browsers and the report has pitted the browsers against each other to test their resistance against a phishing attack.

A phishing attack is when a hacker attempts to take hold of sensitive information like bank credentials, usernames and other data for personal or monetary gains.

Usually, the attacker wears the guise of a trustworthy entity or will employ social engineering tactics. Phishing has been one of the most infamous methods of obtaining information and as per Microsoft, the annual impact of phishing is pegged at US$5 billion.


As per the report, Microsoft Edge is better than Chrome or Firefox when it comes to the phishing attack. The report has studied in 36,120 different instances wherein 1,136 suspicious URL’s were opened in a span of 23 years.

Microsoft Edge successfully blocked 92.3% of the phishing attacks while Chrome and Firefox managed to block 74.6% and 61.1% respectively.

Zero-day threats are released even before the security patch is released. Even in the zero-hour protection test, the Edge Browser could ward off 81.8% of the attacks as opposed to the 58.6% for Chrome and 50.7% for the Firefox. Microsoft Edge also has a better reaction time when it comes to warding off the attacks.

The Microsoft Edge browser has come a long way and even as we speak the browser is being updated for the new feature. I have used personally used the Edge browser and apart from being fast, it has also helped me save on my laptop battery.

Do you use Microsoft Edge as your primary browser? Let us know your thoughts in the comment section below.

RELATED STORIES TO CHECK OUT:

Microsoft adds Follow Me guided navigation for Windows 10

Windows 10 users usually rely on the Tips and Get Started apps to provide furthe guidance for getting around the OS and configuring its settings.

However, a new video leaked by a reliable tipster highlights that’s about to change with the addition of Follow Me to Cortana. Although nothing has been officially announced, the video highlights how guided audio navigation may become a new feature for Windows 10.

Cortana is the virtual assistant included with Windows 10 and Microsoft has enhanced that app in previous updates. Follow Me could be the next new Cortana feature, providing audio and visual prompts to guide a user on how to configure various settings in Windows.

They would be something like screencast tutorials for Windows, except that you don’t need to open any videos to launch them.

Follow Me improves guided navigation on Windows 10

The YouTube video includes one example of the Follow Me guided navigation. In it, Cortana provides details for how you can connect a Bluetooth device with Windows 10 via the Settings app.
Follow Me guided navigation includes a blue circle and red rectangles to highlight the cursor and other options.

Cortana’s Follow Me is comparable to Guided Help in that it appeared in pre-release builds of Windows Vista. Vista’s Guided Help option also had a Show me step-by-step option that showed users where to click. It looks like Microsoft is resurrecting Guided Help in Windows 10 with Follow Me.

When Microsoft will add Follow Me to Windows 10 is somewhat unclear. The Windows 10 Fall Creators Update rolling out this October probably isn’t going to include any last-minute surprises. However, Follow Me could be a part of a spring 2018 update.

Cortana’s Follow Me could be a great new addition to the virtual assistant’s repertoire. Cortana is becoming an ever more essential part of Windows 10, and with Follow Me the app will provide invaluable guided navigation for new users.

How to download and install Windows 10 Fall Creators Update

Microsoft finally releases the freshest major update for Windows 10, the Fall Creators Update, on October 17. When the rollout officially starts, millions of Windows 10 users around the world will get the new version of the system. As there are multiple ways to obtain the new update, you can pick one that suits you.

How to download Windows 10 Fall Creators Update

There are two legitimate ways to obtain the Fall Creators Update. And you’re probably familiar with both of them. Of course, we’re talking about updating through Windows Update and manually installing the update. And in case you’re not sure how to download it, we’ll be talking about it in a bit.

System requirements

But first, let’s quickly check the system requirements. System requirements haven’t changed since the Creators Update. So, if you’re running the current latest version of Windows 10, you’ll also be able to run the Fall Creators Update. Here’s the complete list, as a quick reminder:

  • Processor: 1GHz or faster processor or SoC
  • RAM: 1GB for 32-bit or 2GB for 64-bit
  • Hard disk space: 16GB for 32-bit OS or 20GB for 64-bit OS
  • Graphics card: DirectX9 or later with WDDM 1.0 driver
  • Display: 800×600

So, if you’re a ‘regular’ user you probably won’t have any problems downloading and using the Fall Creators Update. But, if you want to exploit the full potential of Windows 10 version 1710, you’re going to need much more than just minimum system requirements.

Of course, we’re talking about Mixed Reality and 3D objects. Which are, more or less, the main highlight of the Fall Creators Update. To check if your computer is ready for Mixed Reality, download official Microsoft’s tool which will tell you exactly that.

Install through Windows Update

The most popular, easiest, and straightforward way to install Windows 10 Fall Creators Update (and just about any other update) is through Windows Update. If you choose to install the new update like probably 90 percent of other users, you’re choosing the easy path. All you have to do is go to Settings > Update & security and check for updates.

As soon as the Fall Creators Update becomes available in your region, the download process will start automatically. Just wait for everything to download and install, restart your computer, and follow further instructions. After the process is finished, you’ll end up with the freshly installed Fall Creators Update on your computer. As simple as that.


But knowing the nature of Windows 10 and its updates, there’s a chance you won’t be getting the Creators Update on the very first day of its availability. We’re not going to discuss reasons, as there are a couple of them. But if you don’t want to wait for the update to eventually appear in Windows Update, there’s another way to install it.

Install Manually

As soon as Windows 10 Creators Update becomes available, Microsoft will also release installation files. You’ll be able to obtain them from Microsoft’s site (link still unavailable). You’ll get the installation files in form of a Media Creation tool. When you start the tool, you can choose whether you just want to download the ISO file, and mount the USB later, or create an installation media right on the spot.

If you’re not sure how to perform the whole process, you can check out our article about installing Windows 10 Creators Update manually. The procedure is pretty much the same.

That’s about it. We hope you’ll get the Creators Update on time and that it will serve you well. If you have any questions, just let us know in the comments section below.

RELATED STORIES YOU NEED TO CHECK OUT:

Microsoft adds two new members to its board of directors

Microsoft announced yesterday two new additions to its board of directors, Penny S. Pritzker, founder and chairman of PSP Capital and Arne Sorenson, former U.S. Secretary of Commerce. These nominations follow the appointment of Hugh Johnston, vice chairman and chief financial officer of PepsiCo last month.

The new board members will be presented for election at the company’s annual shareholders meeting on Nov. 29, 2017, when ValueAct Capital President G.Mason Morfit will also leave the board. “Penny and Arne are both strong leaders with impressive accomplishments and contributions that span business and public service,” said John Thompson, independent Microsoft board chairman. “They will serve as valuable additions to the board.”

With these two additions, Microsoft’s board of directors will soon have 14 members including Reid Hoffman, LinkedIn co-founder and partner at Greylock Partners, Microsoft co-founder Bill Gates and CEO Satya Nadella. You can learn more about Board of Directors members on Microsoft’s website.

The process is not in background processing mode [Fix]

System errors can appear on almost any PC, and one of those errors is ERROR_PROCESS_MODE_NOT_BACKGROUND. This error comes with The process is not in background processing mode error message, and today we’re going to show you how to fix it.

How to fix ERROR_PROCESS_MODE_NOT_BACKGROUND?

Fix – ERROR_PROCESS_MODE_NOT_BACKGROUND

Solution 1 – Restart the problematic services

According to users, this error appears while trying to download software updates in ConfigMgr. If you’re experiencing this error, you might be able to solve it by restarting certain services. To do that, follow these steps:

  1. Logon to the ConfigMgr server or WSUS server.
  2. Press Windows Key + R and enter services.msc. Press Enter or click on OK.
  3. Services window will now appear. Locate Background Intelligent Transfer Service and stop it. To do that, right click the service and choose Stop from the menu.
  4. Disable Windows Update service as well.
  5. Minimize the Services window.
  6. Press Windows Key + R and enter %appdata% press Enter or click OK.
  7. Navigate to the MicrosoftNetworkDownloader directory. Locate and delete qmgr0.dat and qmgr1.dat files.
  8. Navigate to C:Windows directory, and delete the SoftwareDistribution folder.
  9. Go back to Services window and start Background Intelligent Transfer Service and Windows Update services.
  10. Open the ConfigMgr console and click on Software Updates > Software Repository > Run Synchronization.

After doing that, you should be able to download software updates without any problems. If the problem still persists, some users are recommending to edit Anonymous Authentication for the IIS website. Simply change it from Specific User to Application pool identity and the problem should be fixed.

Solution 2 – Change the deployment settings

Users reported this error while trying to deploy an update with SCCM. According to users, you might be able to fix this problem by changing your deployment settings. Simply change Deployment settings from Download software updates from Internet to Download software updates from a location on my network. After that, you just have to point to the file share that uses WSUS and the update should be downloaded without any problems. This solution applies only to SCCM users, so if you’re not using it you should skip this solution.

Solution 3 – Export the public key

If you’re using ePO and you’re having this problem while trying to perform UNC pulls, you might want to try exporting the public keys. According to users, you just have to export the public key from third-party ePO server and install it on your ePO. After doing that, the issue should be resolved completely. This is an advanced solution, so if you’re not familiar with ePO servers you should skip it entirely.

Solution 4 – Update the Sophos UTM exceptions

This error usually appears when trying to deploy an update with SCCM. According to users, you can fix it simply by updating Sophos UTM exceptions. After doing that, you should be able to deploy updates without any problems.

Solution 5 – Configure your proxy

Many users use proxy to protect their privacy online, but sometimes your proxy can interfere and cause this and other errors to occur. This error appears while using SCCM and it can prevent you from downloading update packages from WSUS. To fix the problem, you just have to configure proxy to bypass the local addresses and the problem will be resolved.

Solution 6 – Enter your proxy credentials

Users reported this error message while using SCCM server and proxy. According to them, you can avoid this error simply by logging in to the SCCM server and opening your browser. After doing that, you just need to enter your proxy credentials and everything should be in order.

Solution 7 – Recreate your repository

If you’re getting this error while using ePO, you might be able to solve it by deleting the whole repository and recreating it. Several users reported this error, but they were able to solve it by deleting and recreating the repository. After doing that, the problem should be resolved entirely.

The process is not in background processing mode error message can cause some problems, but you should be able to fix it by using one of our solutions.

READ ALSO:

Fix: Windows Resource Protection could not start the repair service

Windows has several mechanisms for protecting itself from malware and other security threats.

It’s a well-known secret that the registry values are compromised in most of the cyber attacks. It is for this reason that Microsoft has something called as Windows Resource Protection, a tool that protects registry keys and folders apart from the critical system files.

In cases where the Windows Resource Protection file is missing or corrupted the Windows will not work as expected. The System File Checker tool can be used to scan for errors and repair the computer however if the WRP file is missing then even the SFC tool cannot be run.

Why is my PC showing ‘Windows Resource Protection could not start the repair service’?

The Windows Resource Protection works in tandem with a service called Windows Modules Installer. The Windows Module Installer has complete access to the WRP.

In this case, when we try to run the WRP resources the Windows Module Installer is disabled and this the error ‘Windows Resource Protection could not start the repair service’ will be displayed.

At this juncture, I would also like to mention that the SFC service sometimes needs to be run multiple times or in safe mode.

How to fix ‘Windows Resource Protection could not start the repair service’ error?

One can fix the WRP error by following the steps below,

  • Press Windows key+R in order to open a Run box. Now type “services.msc” in the box and then click OK.
  • Once the Services window is open find the “Windows Modules Installer” and double click on the same.

Windows Modules Installer

  • In the next step, the properties pane opens and its here that you need to select “General”
  • Go to the “Startup” type drop down and select the “Manual” option. Before exiting click on “Apply” and “OK” to save the settings. Now you can exit the services Window.
  • Now one needs to open the CMD by searching for the same in the Start Menu. Right-click and select the “Run as administrator.” If prompted by User Account Control click on Yes.
  • Once the CMD window is open click the commands listed below and don’t forget to press “Enter” after each line.

sc config trustedinstaller start= demandnet start trustedinstaller

net start trustedinstaller

Now try to run the sfc.exe on the Windows and everything should work as intended. As an alternative approach, you may also use tools like Reimage which will repair the Windows file corruption in a single click.

RELATED STORIES TO CHECK OUT:

Microsoft compares AWS and Azure in new Cloud Service Map

Today, Microsoft released a cloud service map showing users why they should choose Microsoft Azure over Amazon Web Services (AWS). The cloud service map goes over the cloud capabilities of Azure and AWS in all categories. Depending on what service, you choose, Microsoft shows what you need ot keep in mind when choosing either available cloud service.

Microsoft, AWS, Amazon, Azure
Excerpt from the Compute Section from the Cloud Service Map for AWS and Azure

The cloud service map lays out 13 areas that pits AWS against Microsoft Azure and shows the pros and cons of each cloud service. Here are the 13 areas that the cloud service map covers.

  1. Marketplace
  2. Compute
  3. Storage
  4. Networking & Content Delivery
  5. Database
  6. Analytics and big data
  7. Intelligence
  8. Internet of Things (IoT)
  9. Management & monitoring
  10. Mobile services
  11. Security, identity, and access
  12. Developer tools
  13. Enterprise integration

Microsoft provides a very informative cloud service map to help you make the choice that is right for your organization.

The Turing Test & Medal of Honor: Airborne now free for Xbox Live Gold members

We’re about halfway through the month of October, which means a new set of games have just gone free for Xbox Live Gold subscribers. Gamers can now grab up The Turing Test & Medal of Honor: Airborne for free for a limited time with their membership.

The Turing Test:

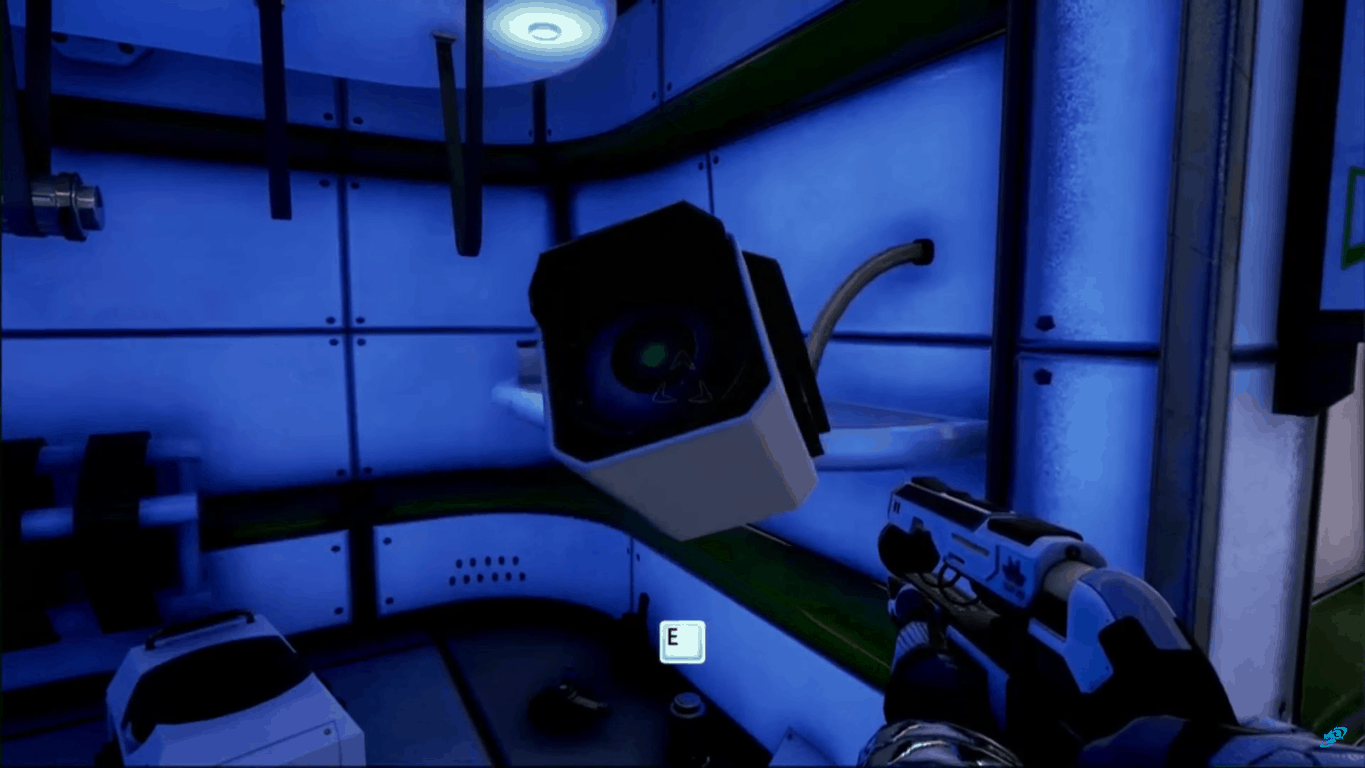
The Turing Test is a first person puzzler that explores the phenomena of consciousness and challenges the meaning of human intuition. Take control of Ava Turing, an engineer for the International Space Agency (ISA), and progress through a narrated story of introspection and morality whilst uncovering the hidden mysteries of Europa. Delve into The Turing Test’s human interaction puzzles and arm yourself with logical and methodical thinking. Take on tests designed in such a way that only a human could solve them. In an evolving story based on mankind’s inherent need to explore, protect and survive; players search deeper into Europa’s ice crusted core and transcend the line between man and machine.

Medal of Honor Airborne:

Take to the skies in Medal of Honor Airborne, where your choices will turn the tide of WWII. Starting with your jump from a C-47, every choice you make can seal your fate. In the air, control your parachute to select the landing spot that brings you the greatest strategic advantage. On the ground, explore the open, vertical environment for positions that will provide you a tactical edge against your enemies. Then, head onto Xbox LIVE for furious multiplayer battles in three different modes, including all-new Airborne modes! You decide where to drop, you decide how to fight. It’s a different war every time.

Valued at $40, these are two good games to play on your Xbox One. Let us know in the comments which games would you like to see go free next month.

Microsoft highlights several Fluent Design System components in new video

Last week, Microsoft held its second Windows Developer Day where the company highlighted everything that’s new for developers in the Fall Creators Update. One of the big theme of the event was Fluent Design, Microsoft’s new design language for Windows 10 which is already visible in the Windows Shell as well as several stock Windows 10 apps.

Yesterday, the company published the following video on its Windows Developer channel to showcase several Fluent Design System components (via Neowin): beyond the “acrylic” transparency effects, you can see the “Reveal” lighting effects when the mouse is over the desired areas, and there are also some cool parallax scrolling effects in some apps such as Photos and MSN News.

Microsoft previously explained at Build 2017 that Fluent Design will evolve and become more complex (and hopefully prettier) in future major Windows 10 updates. It’s now up to developers to embrace Fluent Design in their Windows 10 apps, and you can learn more technical details about the new design language by checking all videos from last week’s Windows Developer Day.

What is $Windows.~WS folder in Windows 10/11

Just like all previous Windows iterations, Windows 10 has some unique features and unique folders. One of those is the $Windows~WS folder, which stores upgrade-related files.

Today, we’ll try to explain what this folder stands for, why it is important, and why you can or can’t delete it without a second thought. You can find everything you need regarding this folder just below.

What’s $Windows~WS folder and can you safely delete it?

What’s the Windows~WS folder?

$Windows~WS is a hidden folder in which you can find essential files of the previous system version. Basically, it stores the most important data and provides you with backup in case you want to downgrade your system back to Windows 7 or Windows 8.

what is $windows.~ws folder

Thus, this folder is only visible to users that upgraded to Windows 10 on Windows 7 or 8 foundation, rather than performing the clean installation.

what is $windows.~ws folder

It can be found in the system partition, once you enable the Hidden items. You can do so by checking the Hidden items box under the View section.

Even though ‘WS’ stands for Windows Setup, it stores mostly configuration files and not the setup files. Still, if you’re rethinking switching back to Windows 7 or 8 respectively, it’s quite important to keep this file and not delete it.

Another similar folder is $Windows~BT, which, on the other hand, stores major updates and installation files, so it’s also worth keeping.

Can I delete $Windows.~WS?

On the other hand, these folders combined can take dozens of gigabytes of storage space. And if you’re satisfied with what Windows 10 offers, you can delete their content immediately. You can do it manually — by deleting the folder, or with the bit of help of the built-in Disk Cleanup tool. Details about Disk Cleanup can be found in this article, so make sure to check it out.

Follow the instructions below to clean them and free some storage space on your system partition:

  1. In the Windows Search bar, type Disk and open Disk Cleanup.
  2. Select the system partition (C: most of the time).
  3. Click on the ”Clean Up System Files” button.
  4. Check all the boxes.what is $windows.~ws folder
  5. Click OK to confirm the start of the cleanup procedure.what is $windows.~ws folder

After that, you can navigate to C:$Windows~WS and delete its content completely. And, don’t worry, you can delete this folder without consequences.

This isn’t the only issue you can encounter, and a few users reported 2 Windows folders on the C drive, but we covered that issue in a separate guide.

That should do it. If you have related questions regarding this or other folders, post them in the comments section below. We look forward to hearing from you.

Fix: ‘No .natvis files found’ error on Windows 10

The ‘No .natvis files found‘ error on Windows 10 occurs when users try to run DX commands in the Windows 10 kits debugging tools. Alternatively, when users click DML links generated by other commands such as X or DV, this error appears.

The error message looks something like this:

  • “No .natvis files found at C:Program Files (x86)/Windows Kits/10/Debuggers/x64/Visualizers”

As the error message suggests, the reason behind this error are some missing files (the .natvis files). These files typically help the debugger understand how a particular data types should be visualized.

With the files missing, the error is thrown. In this article, we look into how you can resolve the ‘No .natvis files found’ error on Windows 10.

How to fix the ‘No .natvis files found’ error on Windows 10

.Natvis files are typically included with the debuggers of Windows 10 kits, Visual Studio 2013 comes with a slightly modified version of these files. Hence, doing a clean installation of Visual Studio 2013 (not 2015, as its Natvis files are not supported by the debuggers of the Windows 10 kits).

Once the installation is complete, follow these steps:

1. Find the Visual Studio 2013 Natvis files. Press Windows + R, and in the Run dialogue enter the following address:

  • “%programfiles(x86)%Microsoft Visual Studio 12.0/Common7/Packages/Debugger/Visualizers”

2. Locate the address of the Windows 10 debugger. Usually, it is the following location. (Press Windows + R, and in the Run dialogue enter the following address:)

3. Locate location where debugger of Windows 10 is installed. Usually this location is:

  • “%programfiles(x86)%Windows Kits/10/Debuggers/[x86 or x64 or arm]”

4. Now create a folder named “Visualizers” in the addresses of all available debugger packages (x86 or x64 or arm). You will need administrative privileges.
5. Copy the .natvis file from the installation folder of Visual Studio 2013 to these newly created folders.
6. Restart all Windows 10 kits debuggers.

Microsoft has said that a future version of Windows 10 kits will include updated versions of .Natvis files that are compatible with Visual Studio 2015. So make sure you keep an eye for updates.

RELATED STORIES YOU NEED TO CHECK OUT:

How to remove the ‘SLU_Updater.exe’ pop-up message

Any sort of pop-up that asks you to download something shouldn’t be trusted. Usually, you are dealing with deceptive messages that scam websites use to access data on your Windows 10 system or trick you into paying for third-party software.

Either way, you should be extremely careful as most likely you are experiencing a malware attack.

One such particular case is the SLU_Updater.exe pop-up message.

Therefore, if you just received the SLU_Updater.exe pop-up, you should quickly decide what to do next. Of course, you shouldn’t download anything on your computer. What you need to do is initiate a full scan and remove the malware which is playing with your nerves.

And here is how you can achieve that.

How to remove the SLU_Updater.exe malware

Apparently, the update pop-up is associated with the program Stagelight by Openlabs. So, erasing the SLU_Updater.exe file should be possible if you uninstall the already mentioned software from your computer.

In order to do so, follow these steps:

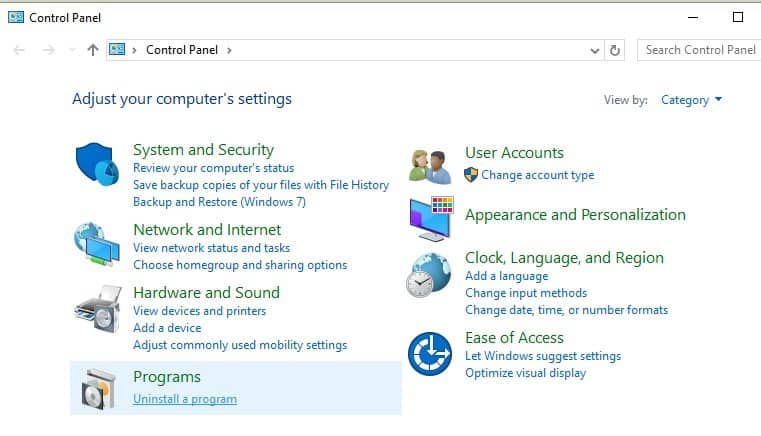
  1. Press the Win+X hotkeys and select Control Panel.
  2. In Control Panel, switch to Categories and click on Uninstall (under Programs).The exclusive semaphore is owned by another process
  3. Find the Stagelight program and remove it.
  4. If you cannot remove the program, try to stop its processes first – access Task manager and under Processes tab end any process that might be related with this program.
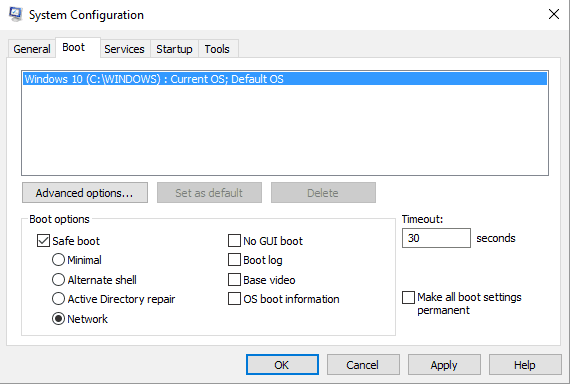
safe mode with networking

Hint: If you just cannot remove the program, try to complete the steps from above through Safe Mode – press Win+R hotkeys and type msconfig and then press Enter; from the next windows switch to Boot tab and check the Safe Mode check box; save your changes and restart your Windows 10 system.

If you are still receiving the SLU_Updater.exe pop-up, after uninstalling the Stagelight by Openlabs program, initiate a scan. You can use default antivirus software from Microsoft, or you can choose to run a more automated software that will eliminate the issue.

For this purpose, we advise any user to approach the best antivirus software for Windows PCs you can find now.

Either way, make sure you complete a full scan – just wait for as long as it takes (the scan will run depending on how many files are stored on your device). In the end, choose to remove all the infected files and restart your computer.

Afterward, perform one last scan for making sure that everything is safe and secured now.

That should do the trick and you should now remove the SLU_Updater.exe pop-up message from your Windows 10 system. Make sure that your computer is always protected by antivirus or antimalware programs to avoid similar problems.

Also, Windows Firewall must be enabled and you should use web browsing protection too. And, of course, be careful when downloading and installing third-party apps on your device, especially when you navigate towards web pages that cannot be fully trusted.

Windows 10 bloatware: check what the release includes & what it removes

Everyone was waiting for Microsoft to release the Windows 10 Fall Creators Update on October 17. But, in case you didn’t know, you also have the ability to install it right now without even having to join the Windows Insider Program. Read below to find out how.

Windows 10 Fall Creators Update Bloatware Free Edition is not an official release from Microsoft

The Windows 10 Fall Creators Update Bloatware Free Edition is not an official release from Microsoft. Instead, it’s a special edition built using the MSMG Toolkit v7.7 and the latest Windows 10 Fall Creators Update RTM Build 16299.15.

The Bloatware Free Edition will remove a lot of unwanted extras from the operating system. Speaking of which, if you want to completely remove bloatware from your Windows 10 PC, check out this step-by-step guide.

Check out what the release includes & what it removes:

This release includes an integrated DirectX 9 and applied Metro skin to the Windows Photo Viewer.

Regarding what it excludes, the following features have been eliminated:

  • All the Metro apps except the Store, Xbox, and Sticky Notes
  • Third-party app links
  • Telemetry
  • Maps
  • Skype video app
  • Contact support
  • Windows Embedded Features (removes packages related to Custom Shell, Device Lockdown, Keyboard/Registry Filter)
  • Cortana
  • Home group
  • Geo location
  • Quick Assist app
  • Mixed reality
  • Windows Defender
  • Take a Test

Once you installed the Windows 10 Fall Creators Update Bloatware Free Edition, you will have to enter your Windows product key in PC Settings – Updates & Security – Activation – Change Product Key to activate the release. You can use the operating system also without activating it.

The ISO also comes with the stable RAID Driver v15.2.0.1020, so it will be on your USB Flash disk once you burn the ISO to it for easier access.

This is useful for users who want to install Windows 10 on a RAID setup, and you can simply point to the USB Flash disk/RAID folder in order to load the IRST driver. This way, you will get the chance to see your RAID array.

You can now download the Windows 10 Fall Creators Update Bloatware Free Edition ISO.

RELATED STORIES TO CHECK OUT:

The Thread is Already in Background Processing Mode [Fix]

System errors, such as ERROR_THREAD_MODE_ALREADY_BACKGROUND can appear on almost any computer. This problem is related to the Windows platform, and you can easily recognize it by its The thread is already in background processing mode error message.

This isn’t a major error, and today, we will show you how to fix it properly.

How can I fix ERROR_THREAD_MODE_ALREADY_BACKGROUND?

1. Check your dsm.opt file

According to users, this error occurs after restarting the TSM Client Acceptor service. It seems that the cause of the problem is dsm.opt file. This file doesn’t support certain characters, and if you made any changes to it you might’ve caused the problem.

To fix the issue, you need to open dsm.opt file and remove the problematic entries. After doing that, you have to save changes and restart the TSM Client Acceptor and check if that solves the problem.

Several users reported that their dsm.opt file had several invalid TCPCADAddress entries. After removing them from the dsm.opt file, the issue was resolved entirely.

Several users reported that the option file was the problem in their case, and after commenting out VMSKIPMAXVMDKS=yes entry and saving the changes, the issue was resolved.

2. Check your file name

According to users, this error occurs with InfoPath and SharePoint Library. Apparently, the issue can appear if your file name contains any illegal characters. If you’re having this problem, you should check your file name for any illegal characters and remove them.

Many errors can occur with illegal characters in file names, so be sure your file name contains only alphanumeric characters. If there are any special characters, remove them and check if that solves the problem.

3. Clear the InfoPath cache manually

By default, InfoPath saves its cache automatically on your PC. However, sometimes certain issues can occur; the only solution is manually removing the cache. To do that, follow these simple steps:

  1. Press Windows Key + R to open the Run dialog and enter %appdata%. Press Enter or click OK.
  2. Navigate to the MicrosoftInfoPathFormCache2 directory and delete all files from the directory.

After doing that, the cache will be successfully cleared and the problem should be resolved.

If you don’t want to delete the cache manually, you can do it using a single command. Simply open the Run dialog like we showed you in the previous steps and enter Infopath /cache clearall. Now press OK or Enter, and the cache will be removed automatically.

4. Recreate ThinApp packages

This error also appears while using VMware and ThinApp for Horizon. Users reported that recreating the ThinApp packages and choosing the Manage with Horizonfixed the issue for them, so be sure to try it.

Keep in mind that this solution applies only to the users that are using VMware. You can skip this solution entirely if you’re not using this tool.

5. Check your antivirus software

Antivirus tools are necessary, but sometimes third-party antivirus software can interfere with your system and cause this and other errors to occur. You need to check your antivirus configuration and disable all problematic features to fix the problem.

Finding the problematic feature isn’t always simple, especially if you’re unfamiliar with antivirus software and computer security, so you’ll have to use trial and error.

Alternatively, you can disable your antivirus software entirely and check if that solves the issue. In some cases disabling the antivirus doesn’t work, so you might have to remove your antivirus.

We must mention that antivirus tools often leave certain files and registry entries behind that can still interfere with your system. To completely remove your antivirus, we advise you to download and use a dedicated removal tool. Many antivirus companies offer these tools for their software, so be sure to download one for your antivirus.

After removing your antivirus entirely, check if the problem still persists. If not, you might want to install the latest version of your antivirus or switch to a different antivirus tool.

6. Enter Safe Mode

Safe Mode is a special segment of Windows that runs with default drivers and applications, so it’s perfect for error troubleshooting. To enter Safe Mode, you need to do the following:

  1. Open the Start Menu and click the Power button. Press and hold the Shift key and choose Restart from the menu.
  2. Choose Troubleshoot > Advanced options > Startup Settings. Click the Restart button.
  3. Once your PC restarts, a list of options will appear. Select any version of Safe Mode by pressing the appropriate key.

Once you enter Safe Mode, check if the problem still appears. If not, it’s most likely that one of the third-party applications is interfering with your system and causing this error. To fix the problem, you must remove any recently installed or updated applications and check if that solves the issue.

7. Keep your system up to date

Windows 10 is a solid operating system, but just like any other one, it also has a few bugs. Microsoft is frequently releasing new updates and addressing these bugs, so if you want to keep your PC bug-free and stable, it’s advised to keep your system up to date.

In most cases, updates are downloaded automatically in the background, but sometimes, you can skip an update due to certain errors. To fix this issue, you can check for updates manually by doing the following:

  1. Press Windows Key + I to open the Settings app.
  2. Once the Settings app opens, navigate to the Update & security section.
  3. Click on Check for updates button.

If any updates are available, Windows will download them in the background and install them once you restart your PC. After updating your operating system, check if the problem still appears.

The thread is already in background processing mode error message can cause problems on your PC, but we hope you managed to solve it by using one of our solutions.

Windows Media Player disappeared after update? Here’s how to get it back

It is already known that the upcoming Windows 10 Fall Creators Update will get rid of some of the oldest programs in the Windows ecosystem, such as Paint. However, it appears that list might be longer than we expected. Windows Insiders are already testing the Fall Creators Update and, after receiving the KB4046355 update, discovered that Windows Media Player is no longer available.

After the update the WMP is completely gone, the C:Program Files (x86)Windows Media Player” folder only has a “wmp.dll” file. Currently on build 16299.0.

Right now, we do not have any official information from Microsoft but we are waiting for an announcement. However, it is not hard to understand why they decided to remove it, since there are many other alternatives including third-party players.

How to reinstall Windows Media Player

Windows Media Player users might have been scared by the news, but it appears that Windows Media Player is not gone forever. While it is true that it will not come installed by default in the upcoming Windows 10 Fall Creators Update, there is a way to get it on your computer once again.

Here is what you have to do:

  1. Go to the Settings app.
  2. Open Apps > Apps & features and then select “manage optional features”
  3. Once you are there, select the “Add a feature” option.
  4. Scroll down all the way to the bottom of the screen and you should find Windows Media Player.
  5. The program will be listed as an optional feature. Select it and click the install button.
  6. In less than a minute, the installation should be complete and you will be able to use Windows Media Player once again on your computer.

RELATED STORIES TO CHECK OUT:

KB4041689 marks the end of support for Windows 10 version 1511

If you’re still running Windows 10 version 1511 on your computer, perhaps it’s time to upgrade your OS. Microsoft recently pushed the last Windows 10 version 1511 update to the public, marking the end of support for the OS.

Update KB4041689 brings a series of bug fixes to Universal CRT that blocked executable files from running, patches memory corruption issues, and adds many security improvements to various Windows components.

KB4041689 changelog

  • Addressed issue where the Universal CRT _splitpath was not handling multibyte strings correctly, which caused apps to fail when accessing multibyte filenames.


Addressed issue where the Universal CRT caused the linker (link.exe) to stop working for large projects.


Addressed issue where the MSMQ performance counter (MSMQ Queue) may not populate queue instances when the server hosts a clustered MSMQ role.


Addressed issue with the Lock Workstation policy for smart cards where, in some cases, the system doesn’t lock when you remove the smart card.


Addressed issue where, when using Conditional Access with Azure Active Directory, authentication fails.


Addressed issue with form submissions in Internet Explorer.


Addressed issue where messages that should be in a non-English language display in English in Internet Explorer.


Addressed issue where USBHUB.SYS randomly causes memory corruption that results in random system crashes that are extremely difficult to diagnose.


Security updates to Microsoft Windows Search Component, Windows kernel-mode drivers, Microsoft Graphics Component, Internet Explorer, Windows kernel, Microsoft Edge, Windows Authentication, Windows TPM, Microsoft PowerShell, Windows Wireless Networking, Windows Storage and Filesystems, Microsoft Windows DNS, Microsoft Scripting Engine, Windows Server, Device Guard, and the Windows SMB Server.

Windows 10 version 1511 end of service

As we already stated at the beginning of this article, KB4041689 is the last update that Microsoft released to Windows 10 version 1511. In other words, devices running this OS version will no longer receive monthly security and quality updates.  If you continue using Windows 10 version 1511, your computer will no longer be protected against the latest security threats.

Upgrading your PC to the latest OS version available is extremely important. In this manner, you can stay one step ahead of hackers and avoid malware and ransomware attacks.

To continue receiving security and quality updates, we recommend upgrading to Windows 10 Creators Update as soon as possible. For more information on how to install the Creators Update and fix possible download issues, check out the articles below:

Command Specified Offset Data Error: 5 Ways to Fix it

System errors, such as ERROR_OFFSET_ALIGNMENT_VIOLATION, can cause Command specified offset data message to appear.

This message can be problematic, and it cause  BSOD errors and crashes. Speaking of Blue screen errors, we have a great guide on BSOD causes that you should check out.

Today we’re going to focus on the offset data message, so without further ado, let’s get started.

What causes The command specified a data offset that does not align to the device’s granularity/alignment?

  • In some instances, your antivirus can interfere with your PC and lead to this error message.
  • Missing updates will sometimes cause this issue.
  • Problems with Windows Update components can cause this problem.
  • Sometimes third-party startup application can result in this error message.

How can I fix Command specified offset data error?

1. Check your antivirus

  1. Open your antivirus settings.
  2. Next, locate Core Shields and disable them all.
  3. After doing that, check if the problem is gone.

Keep in mind that these are just a general guidelines, and the steps will different depending on the antivirus software that you’re using.

2. Make sure that Windows is up to date

  1. Press Windows Key + I to open the Settings app.
  2. Once Settings app opens, navigate to the Update & security section.
  3. Now click on Check for updates button.

If any updates are available, Windows will automatically download them in the background and install them once you restart your PC. After updating your system, check if the error message still appears.

3. Reset Windows Update components.

  1. Press Windows key + X and choose Windows Powershell (Admin).
  2. Enter the following commands one by one:
    net stop wuauserv
    net stop bits
    net stop cryptsvc
    cd %SystemRoot%\System32
    ren catroot2 catroot2_BackUp
    cd..
    ren SoftwareDistribution SoftwareDistribution_BackUp
    net start wuauserv
    net start bits
    net start cryptsvc
  3. After all commands are executed, close Command Prompt.

4. Perform a Clean boot

  1. Press Windows Key + R and enter msconfig. Press OK.
  2. System Configuration window will appear. Navigate to the Services tab and check Hide all Microsoft services option. Now click on Disable all.
  3. Navigate to Startup tab and click on Open Task Manager.
  4. When Task Manager opens you’ll see a list of all startup applications. Select the first entry on the list and click on Disable button. Repeat this step for all applications on the list.
  5. After disabling all startup apps, close Task Manager and go back to System Configuration window. Click Apply and OK to save changes.
  6. Restart your PC to apply changes.

After doing that, check if the problem still appears. If not, you need to repeat the same steps and enable applications and services one by one or in groups.

Keep in mind that you need to restart your PC after enabling a group of apps or services. After you find the problematic application you can keep it disabled, remove it and Command specified offset data error will be gone.

4. Perform a System Restore

  1. Press Windows Key + S and enter system restore. Choose Create a restore point from the menu.
  2. System Properties window will now open. Click on System Restore button.
  3. When System Restore window appears, click on Next. Check Show more restore points and select the desired restore point. Click on Next to continue.
  4. Follow the instructions on the screen to complete the reset.

After completing the reset, check if the issue still persists. In most cases System Restore should be able to revert any recent changes and problems, so be sure to try it out.

5. Reset Windows 10

  1. Open the Start Menu and click the Power button. Press and hold the Shift key and click on Reset.
  2. List of options will appear. Click on Troubleshoot > Reset this PC > Remove everything. You might need to insert an installation media during this step, so be sure to have it ready.
  3. Choose your version of Windows and select Only the drive where Windows is installed > Just remove my files.
  4. You’ll see a list of files that reset will remove. Once you’re ready to start click on Reset button.
  5. Follow the instructions on the screen to complete the reset.

After resetting Windows 10 check if the issue still persists. If not, install all your applications and move files from the backup.

Command specified offset data is a system error and it can prevent you from installing certain applications. This isn’t a serious error, and you should be able to resolve it by using one of our solutions.

In case the problem is still there, we suggest using BSOD Viewer to diagnose crashes and further analyze the problem.

What solution did you use to fix this issue? Let us know in the comments below.

Sony’s reluctance to bring Minecraft cross-play to Playstation “not going away,” says Xbox chief

Back at E3 2017, Microsoft made headlines when they announced that Minecraft’s Better Together update would enable cross-play multiplayer between Xbox One, Windows 10, Nintendo Switch as well as mobile platforms. But unfortunately for PlayStation gamers, Sony declined to play ball, defending their refusal to open up cross-network play by the necessity to protect younger gamers.

In the following months, Microsoft said that it has been in discussions with Sony to enable cross-play on the Playstation 4 version of Minecraft, but things aren’t looking good so far. In a recent interview with GameSpot, Xbox Chief Phil Spencer shared that he’s unsure if Sony will ever have a change of mind about it. He explained:

“I have a real struggle making comments about their motivation or timelines. I know there is a certain view that says if my friends have this console, they can’t play with people who buy another console. That’s a reason they go buy my console,” he said. “That reason is not going to go away. So we’re putting Minecraft out there as one of the biggest games on any platform and allowing people to play together regardless of what device they bought. I don’t think everybody is taking that same approach to the ecosystem. So I’m never going to call anything a lost cause but I think some of the fundamental reasons and certain scenarios, they’re not really going away. So I don’t know what would change.”

For Spencer, crossplay multiplayer is positive for gamers, game developers as well as the video games industry as a whole. “If it’s better for gamers, I have a hard time thinking why we shouldn’t go do this, especially when you’re trying to make the gaming business a bigger business; grow it, get more games, create more opportunity,” he explained. But Sony, which has the best-selling console of this generation may have no interest to play nice with other platforms, for now at least.

In the meantime, if cross-platform multiplayer does matter to you, then the Xbox One remains the better choice. In addition to Minecraft, several Microsoft Studios titles such as Gears of War 4 or Forza Horizon 3 already support cross-play between Xbox One and Windows 10, and the fighting game Killer Instinct even supports it between Steam, Windows 10 and Xbox One. Do you think Sony will have to change its stance at some point, or do you think the company is more interested in keeping PS4 players in a walled garden? Let us know below.

The target device has insufficient resources to complete the operation [Fix]

ERROR_DEVICE_NO_RESOURCES is a system error and it can appear on almost any PC. You can easily recognize this error thanks to its The target device has insufficient resources to complete the operation message, and today we’re going to show you how to fix it.

How to fix ERROR_DEVICE_NO_RESOURCES?

Fix – ERROR_DEVICE_NO_RESOURCES

Solution 1 – Check for updates

Windows 10 is a great operating system, but it’s not bug-free. Some compatibility issues and bugs can occur once in a while, and in order to prevent them from appearing it’s advised to keep your Windows up to date. Updating Windows is rather simple, and in most cases Windows 10 will automatically download and install the necessary updates. However, due to certain problems you might skip an update. To ensure your PC is up to date, we strongly advise you to check for updates manually. This is rather simple and you can do it by following these steps:

  1. Press Windows Key + I to open the Settings app.
  2. When Settings app opens, go to Update & security section.
  3. Click for Check for updates button.

Windows will now check for updates. If any updates are available, they will be downloaded in the background and installed once you restart your PC. Once your PC is updated, the error should be resolved.

Solution 2 – Check your antivirus

Even though antivirus software is a necessity, it can sometimes interfere with your system and cause this and other errors to occur. If you’re using a third-party antivirus software, you might want to check its settings. Sometimes certain features can prevent specific operations from running, and to fix the problem you need to find and disable the problematic features. This isn’t as easy as it sounds, especially if you’re not familiar with your antivirus or computer security.

If disabling the problematic feature is too complicated for you, you can try disabling your antivirus software entirely. Even if you disable your antivirus, your PC will remain protected thanks to the Windows Defender.

If disabling the antivirus doesn’t fix the problem, your last option is to remove it. Keep in mind that antivirus tools tend to leave certain files and registry entries behind even after you remove them. These files can also interfere with your system, so it’s important that you remove them. The best way to do that is to use a dedicated removal tool. Almost all antivirus companies have dedicated removal tools for their software, so be sure to download one for your antivirus and use it to remove all leftover files.

If removing the antivirus fixes the problem, you can try switching to a different antivirus application or install the latest version of your antivirus software.

Solution 3 – Run Windows Update troubleshooter

According to users, you might be able to fix this problem simply by running Windows Update troubleshooter. Improperly installed update can cause this error to appear, but you can fix that by running Windows Update troubleshooter. This is relatively simple and you can do it by following these steps:

  1. Open the Settings app and navigate to Update & security section.
  2. Navigate to the Troubleshoot tab and choose Windows Update from the right pane. Click on Run the troubleshooter button.
  3. Follow the instructions on the screen to complete the troubleshooting process.

You can also troubleshoot Windows updates by doing the following:

  1. Press Windows Key + S and enter control panel. Choose Control Panel from the list.
  2. Once Control Panel opens, click on Troubleshooting.
  3. Click on View all.
  4. Scroll all the way down and click on Windows Update.
  5. Click on Next to start the troubleshooter.
  6. Follow the instructions on the screen to complete the process.

Several users reported that running the troubleshooter fixed the problem for them, so be sure to try this solution.

Solution 4 – Remove a problematic update

Even though it’s important to keep your PC up to date, sometimes certain updates can cause this and other problems to appear. To fix the problem you might want to try removing any recently installed updates. This is rather simple and you can do it by following these steps:

  1. Open the Settings app.
  2. Navigate to Update & security section and click on Update history.
  3. Click on Uninstall updates option.
  4. Installed Updates window will appear. Look for any recent update and double click it to remove it.

After removing the problematic update, check if the problem still appears.

Solution 5 – Enter Safe Mode

Safe Mode is a special segment of Windows that runs with default drivers and applications, so it’s perfect for troubleshooting. To enter Safe Mode, do the following:

  1. Open the Start Menu and click on Power button. Now press and hold the Shift key on your keyboard and choose Restart from the menu.
  2. Choose Troubleshoot > Advanced options > Startup Settings. Click the Restart button.
  3. Once your PC restarts a list of options will appear. Select any version of Safe Mode by pressing the appropriate key.

Once you enter Safe Mode check if the problem still appears. If not, it means that one of disabled applications is probably causing this error. To fix it, you need to find and remove the problematic application from the PC. In most cases the cause is usually a recently installed application, so be sure to remove those applications first.

Solution 6 – Perform System Restore

If this error started appearing recently, you might be able to solve it by restoring your PC using System Restore. This is a useful feature that will restore your PC to the previous state and fix any recent problems. We have to warn you that this feature might remove any recently saved files as well, so we recommend to back up your files just in case. To perform System Restore, do the following:

  • READ ALSO: Windows Update issues after installing Windows 10 Creators Update [Fix]
  1. Press Windows Key + S and enter system restore. Choose Create a restore point from the menu.
  2. System Properties window will appear. Click on System Restore button.
  3. Once System Restore window opens, click on Next.
  4. Check Show more restore points option and select the desired restore point. Click on Next to proceed.
  5. Follow the instructions on the screen to restore your system.

System Restore is a quick and simple way to fix computer errors, so if you’re having this problem, be sure to try this solution.

Solution 7 – Reset Windows 10

If other solutions can’t fix this problem, you might want to consider resetting Windows 10. We have to warn you that this process will remove all installed applications and files from your system drive, so be sure to back them up. You might need a Windows 10 installation media to perform the reset, so be sure to create it with Windows Media Creation Tool. To reset Windows 10, you need to do the following:

  1. Open the Start Menu, click the Power button, press and hold the Shift key and choose Restart from the menu.
  2. List of options will now appear. Choose Troubleshoot > Reset this PC > Remove everything. During this step you might need to insert Windows 10 installation media, so be sure to have it ready.
  3. Select your version of Windows and choose Only the drive where Windows is installed > Just remove my files.
  4. Now you’ll see a list of changes that reset will perform. Click the Reset button to start.
  5. Follow instructions on the screen to complete the reset.

After resetting Windows 10, all your files and apps will be removed from the system drive. Now you just have to restore your backup and check if the error appears again. This is a drastic solution, so you should use it only if other solutions can’t fix the problem.

ERROR_DEVICE_NO_RESOURCES and The target device has insufficient resources to complete the operation error message can cause some problems, but they aren’t serious errors. These errors are relatively simple to fix, and you should be able to fix them by using one of our solutions.
READ ALSO:

Mozilla Firefox ends support for Windows XP and Windows Vista in 2018

Yes, it’s finally come to this. Windows XP is arguably the most popular Windows operating system that had a run for nearly two decades. Even today, I see small enterprises and educational institutions use Windows XP. In the meanwhile, the Windows Vista had its fair share of trouble and was dismissed for good. The news here is that Mozilla has decided to end support for Windows XP and Vista starting from June 2018.
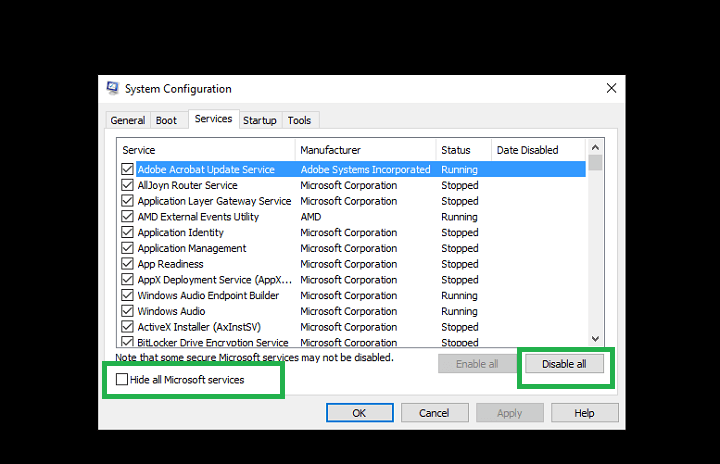
firefox-independent-mozilla

Next year Firefox will reach the ‘end of life’ (EOL) on the Windows XP and the Windows Vista. On an interesting note, both the operating systems themselves are nearing the end of life. However, earlier the older operating systems were put into Extended Support Release last year and the expiry, in this case, was September 2017. This time around the company has confirmed that the ESR will be the last and Mozilla will finally pull the plugs on its browser for both the operating systems.

“As one of the few browsers that continue to support Windows XP and Vista, Firefox users on these platforms can expect security updates until [June 2018]. Users do not need to take additional action to receive those updates.”- Mozilla announced.

We think that the nine-month warning is fair enough and this should ideally compel the users to upgrade to a latest Windows version. Unsupported operating systems are vulnerable to all kind of threats be it from the malware or other exploits. The worst part, however, is that Microsoft will not be issuing patches and security fixes. That being said Mozilla has also pulled the plug on other operating systems as well, so Windows is no exception.

In the meanwhile, Mozilla is arming itself with the Firefox Quantum which uses a new CSS which according to the company makes the new browser twice as fast as its predecessor. The Firefox Quantum has also garnered rave reviews and perhaps will help people switch back to Firefox.

RELATED STORIES TO CHECK OUT:

RAM is Not Detected? 4 Ways to Recognize it

Many users reported that new RAM is not detected on their PC, which can be problematic. RAM is a basic component of any computer, and your PC can’t work without it.

To fix this issue, first, you need to check your RAM type and make sure that you’re using compatible modules.

Fixing this issue isn’t as hard as you think, and today we’re going to show you how to fix it properly.

Why is my RAM not detected?

  • You have exceeded your operating system’s RAM limit.
  • Your motherboard can’t handle more RAM memory.
  • The memory isn’t compatible with your motherboard.
  • The maximum RAM limit isn’t properly set on your PC.

What can I do if my RAM is not detected?

1. Check Windows OS RAM limits

  1. Press the Cortana button on the taskbar.
  2. Enter the keyword system in the search box.
  3. Select to open the System tab shown in the snapshot directly below.
    PC won't accept RAM
  4. Windows 10 users can also select About your PC to open further OS details as below.
    PC won't accept RAM
  5. The listed system type specification tells you whether your platform is 32 or 64-bit. Also, note the Installed RAM spec that highlights the usable RAM amount.

You’ll need to upgrade a 32-bit platform to a 64-bit OS to ensure that all your system’s RAM is accepted. A 64-bit Windows 10 or 8 upgrade will ensure at least 128 GB RAM is accepted.

The Pro edition of Win 10 supports up to 2 TB (terabytes) of RAM. Note that your desktop or laptop will also need to 64-bit CPU to upgrade to a 64-bit OS.

The 64-bit Windows 7 platforms have lower RAM limits. The 64-bit Windows 7 Basic accepts 8 GB RAM only. You can add up to 16 GB RAM to Win 7 Premium.

2. Check Motherboard RAM restrictions

  1. Check your motherboard manual.
  2. Alternatively, enter the motherboard’s model number in a search engine to find a manufacturer support page for it.
  3. Then you can open a page on the manufacturer’s website that might provide further details pertaining to how much RAM your motherboard supports.

This is always a good rule to follow, with any hardware, so always make sure that everything is fully compatible.

3. Check RAM compatibility

  1. Check out this web tool with which you can find compatible upgrades.
  2. Enter your model and check the compatibility list.
  3. If it’s not compatible, remove the module and return it to the vendor for a replacement.

4. Adjust the maximum RAM setting

  1. Press the Windows key + R hotkey and enter msconfig in Run’s text box.
  2. Press the OK button to open the MSConfig window in the snapshot below.
    PC won't accept RAM
  3. Select the Boot tab on the System Configuration window.
    PC won't accept RAM
  4. Press the Advanced options button to open BOOT Advanced Options as shown below.
    PC won't accept RAM
  5. Deselect the Maximum memory option there if it’s selected.
  6. Click OK to close the BOOT Advanced Options window.
  7. Press the Apply button, and restart the Windows OS.

We hope these steps helped you with the RAM not detected issue on your PC. Maybe now Windows will recognize all your laptop’s or desktop’s RAM.

Just make sure you check your Windows and motherboard system specifications before adding another RAM module to a desktop.

If the problem is still there, we have a great guide on what to do if the PC is not using all RAM, so be sure to check it out.

Mail App Error 0x8500201d: How to Fix it

If you’ve recently encountered error code 0x8500201d with the Mail app on Windows 10, this article is for you. This error occurs when the Outlook mail account fails to sync your emails with the mail app.

The error usually shows up when you click on Sync. The error message reads as, Something Went Wrong; We can’t sync right now. Error Code: 0x8500201d. Keep reading to find out how to fix things.

How do I fix sync error 0x8500201d?

1. Re-enable Mail syncing.

  1. Open the Mail app. Go to Accounts, and select the account that’s giving you the problem.
  2. On the Account settings window, click on Change mailbox sync settings.syncing
  3. Change the Syncing option to OFF.
  4. Close and restart the Mail app.
  5. Go to Accounts, select the same account, and click on Change mailbox sync settings on the Account settings window.
  6. Change the Syncing options to ON and then restart the Mail app.

The first troubleshooting solution you need to try to resolve mail app synchronization error 0x8500201d on Windows 10 is disabling and then re-enabling the mail syncing process.

2. Perform a clean boot

  1. Click on Start, and in the search bar, type msconfig.
  2. From the search results, select System Configuration.
  3. Open the Services tab.
  4. Check the Hide all Microsoft services checkbox, and click the Disable all button.hide all microsoft service
  5. Next, go to the Startup tab, and click the Open Task Manager button.
  6. Right-click on all start-up items and click on Disable to disable them.
  7. Close Task Manager.
  8. Click the OK button on the Startup tab of the System Configuration window to save the changes.

Performing a clean boot can be useful in identifying the cause behind error code 0x8500201d. Usually, the problem stems from some third-party application or startup processes. Disabling all start-up processes and then re-enabling them one at a time can help pinpoint the source of the error.

Once the process is complete, restart the computer. See if the error persists. If not, start each application/service one at a time. As soon as the problem reappears, you will have identified the culprit.

If this doesn’t work for you, you can try the next solution.

3. Remove & re-add your account

  1. Open the Mail app. Go to Accounts, and select the account that’s giving you the problem.
  2. On the Account settings window, click on Delete accountdelete account to fix Mail app error 0x8500201d.
  3. Close & restart the mail app.
  4. Click on Settings from the bottom left corner of the screen.
  5. Choose Accounts, and then Add account.add account
  6. Enter your email account credentials and add the account.
  7. Close and restart the Mail app again. Go to Accounts, and select the new account.
  8. On the Account settings window, click on Change mailbox sync settings.
  9. Disable contacts sync.

Hopefully, this will resolve Mail error 0x8500201d. If not, try the next step.

4. Remove your account

  1. Open the Mail app. Go to Accounts, and select the account that’s giving you the problem.
  2. On the Account settings window, click on Delete account.
  3. Now, add a new account.
  4. Close and restart the Mail app again.

If the previous solutions didn’t work, you can remove the current account and add a new one to fix Mail app error 0x8500201d in Windows. Or, you could try contacting Microsoft Support.

Besides, do check the best email clients to use in Windows.

Tell us which fix worked for you in the comments section below.