Windows Update Something Went Wrong [SOLVED]

Some users have posted about a Windows Update: Something went wrong error on support forums. When that error occurs, the Windows Update Settings tab displays a Something went wrong error. One user’s forum post said this:

I found an issue in my Windows Update setting that says “Something went wrong. Try to reopen Settings later.” Fyi, I’ve tried to fix this problem by watching certain videos that are supposed to help me. However, things getting worse… I still can’t update my Windows to the latest version.

Consequently, users can’t download and install Windows updates via Settings because of that error. This issue can occur on Windows 11 and 10. If you need to fix the Windows Update Something went wrong Windows 11/10 error, check out the potential resolutions below.

Why is my Windows Update saying something went wrong?

The Windows Update: Something went wrong error can often occur because the Update Orchestrator Service needed for updates isn’t configured right. That service should be enabled and running with an automatic startup type. So, you might need to check that service to fix this error.

However, this error can also be due to a corrupted Windows Update database. In this case, you would need to reset Windows Update components.

Aside from that, you might need to repair corrupted system files or even a user profile to resolve this issue. System File Checker, System Restore, or even Reset this PC are some of the built-in Windows tools you might then need to fix the Something went wrong error.

How do I fix Windows Update something went wrong?

1. Run the Windows Updater troubleshooter

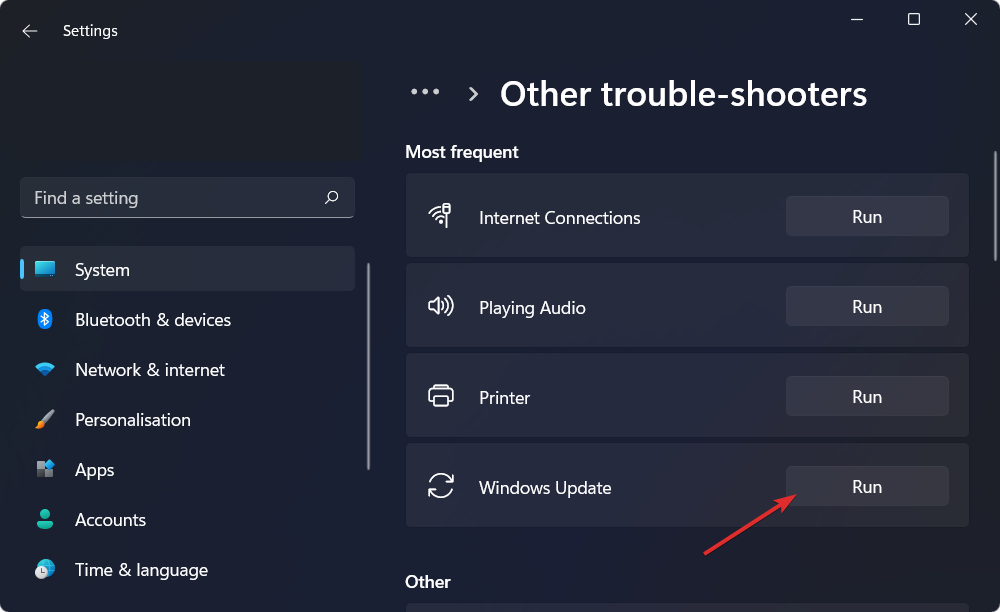
  1. To launch Settings, press the Windows and I keys at the same time. Click the Troubleshoot option, and then on Other trouble-shooters.
    Other trouble-shooters navigation option Windows Update Something went wrong Windows 11
  2. Select the Run option for opening Windows Update.
    The Run button Windows Update Something went wrong Windows 11
  3. Apply any potential resolutions the troubleshooter suggests.

2. Check if the Update Orchestrator Service is enabled

  1. 1. Launch Run by pressing the Windows + R hotkey.

  2. 2. To open Services, enter services.msc in Run’s text box and click OK.

    launch services in run
  3. 3. Double-click Update Orchestrator Service to open the properties window for it.

    click on orchestrator service
  4. 4. Select the Automatic option on the Startup type drop-down menu.

    click on automatic
  5. 5. Click Start if the service isn’t running.

    start
  6. 6. Press the Apply and OK buttons to save the new service settings.

    click apply
  7. 7. Open the Start menu and click Power, followed by Restart. The Something went wrong try to reopen settings later error in Windows 10/11 will be fixed.

    click on restart
  8. Another quick fix for this error is to manually enable the Update Orchestrator Service. It is responsible for keeping the Windows Update tool working and it’s possible that it was accidentally disabled at some point.

3. Run an SFC scan

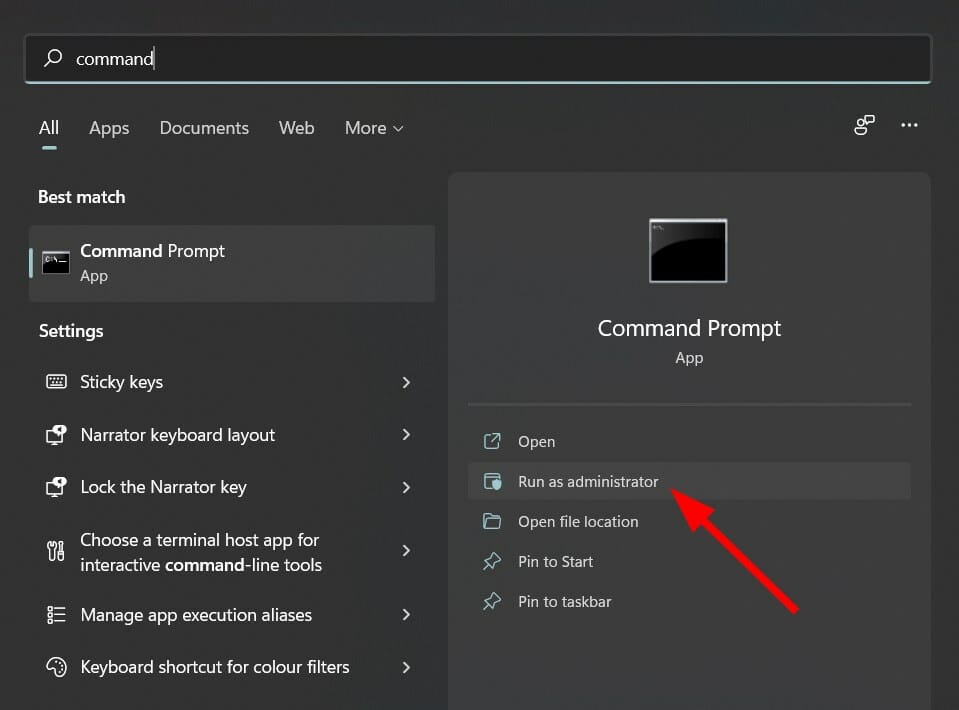
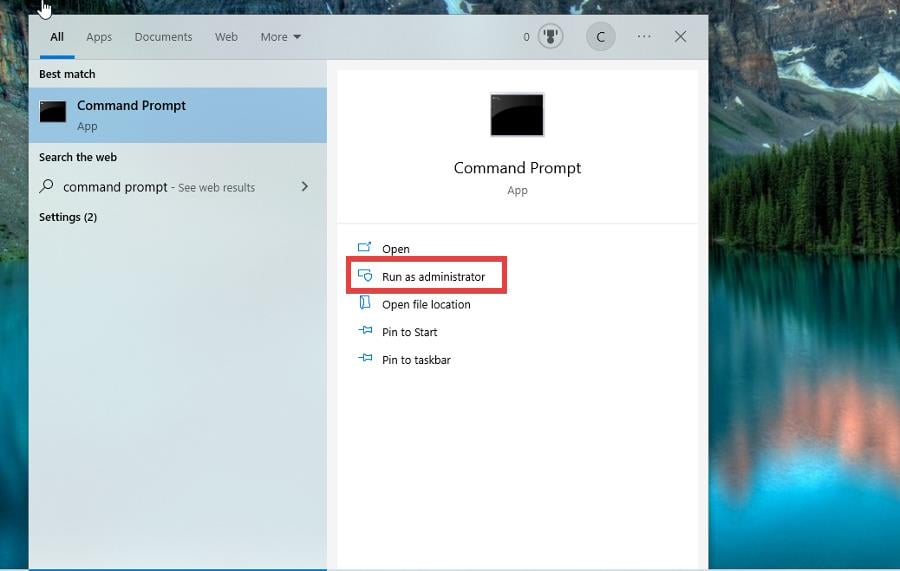
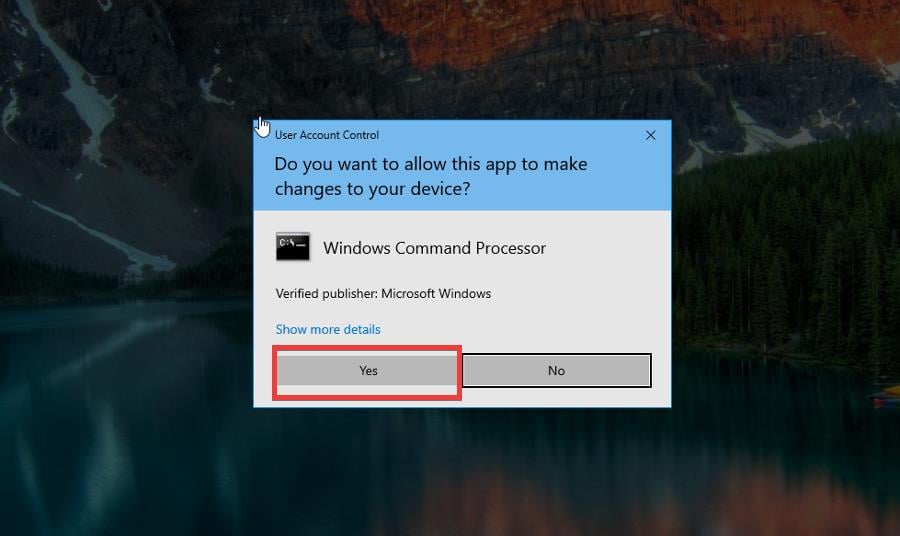
  1. Open the Windows search box by pressing the Windows + S hotkey. Enter Command Prompt in the search text box then click the Run as administrator option shown directly below.
    The Run as administrator option Windows Update Something went wrong Windows 11
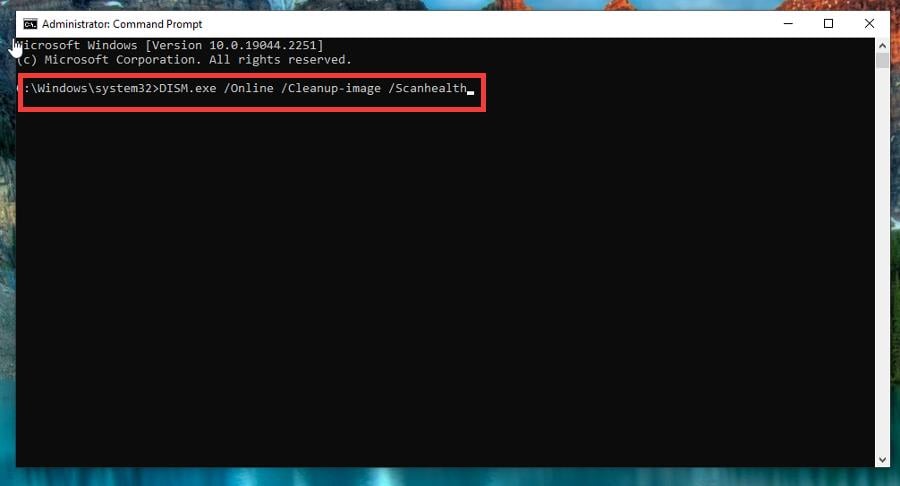
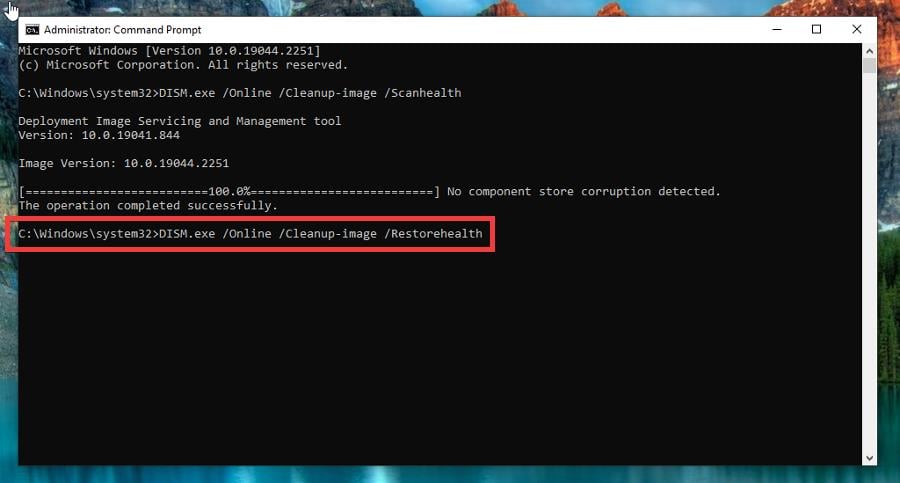
  2. Then type in this command and hit Enter: DISM.exe /Online /Cleanup-image /Restorehealth
    The deployment image command Windows Update Something went wrong Windows 11
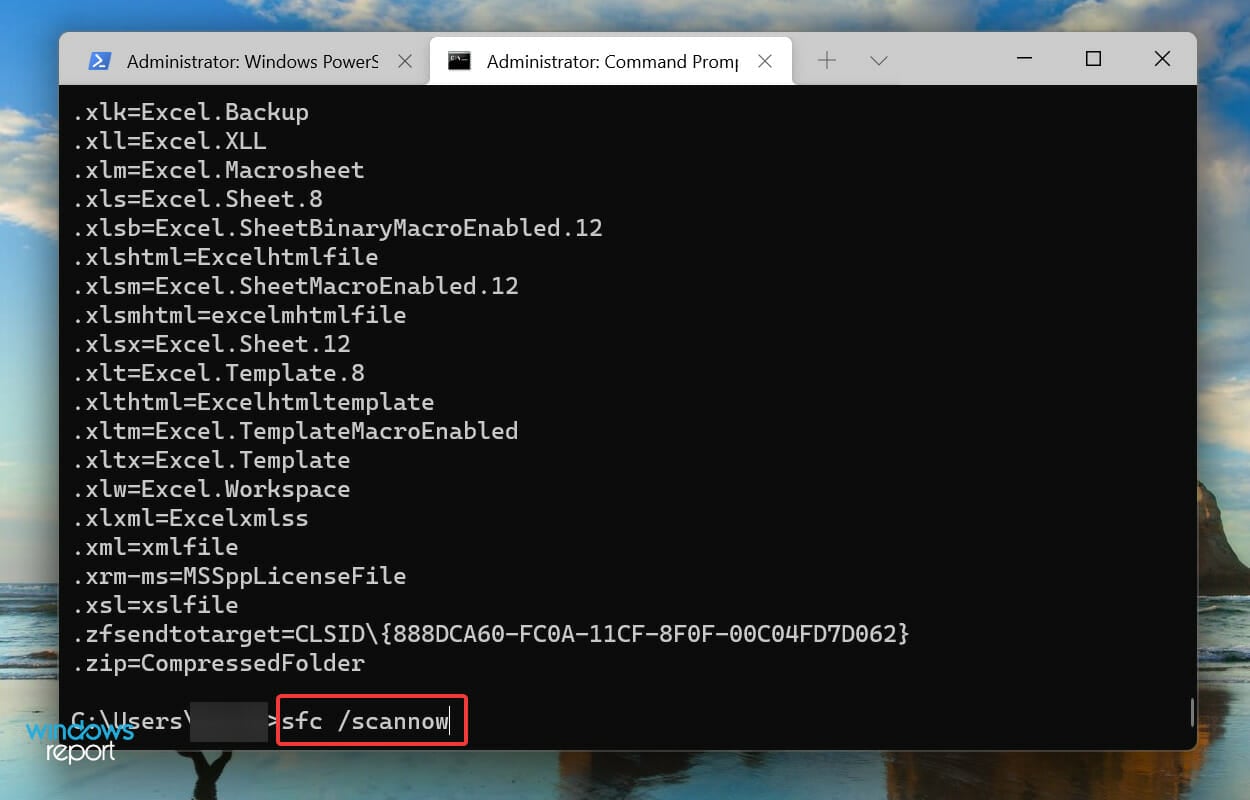
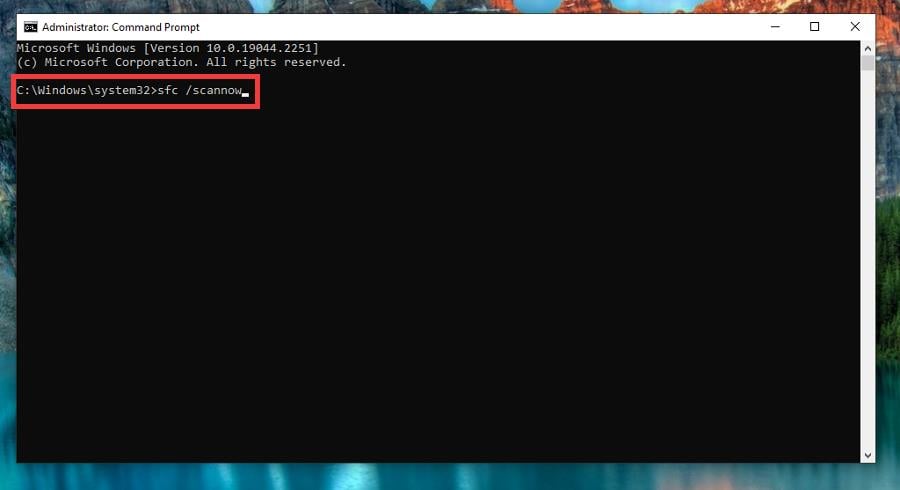
  3. To initiate a system file scan, input the following command and press Enter: sfc /scannow
    The sfc commandWindows Update Something went wrong Windows 11
  4. Wait until the SFC displays an outcome in the Command Prompt window.

You can also try a specialized system repair tool that automatically scans your PC and repairs any error related to corrupted files, missing DLLs, or BSoDs.

4. Run a Chkdsk scan

  1. Open the Command Prompt as outlined in the preceding resolution. 
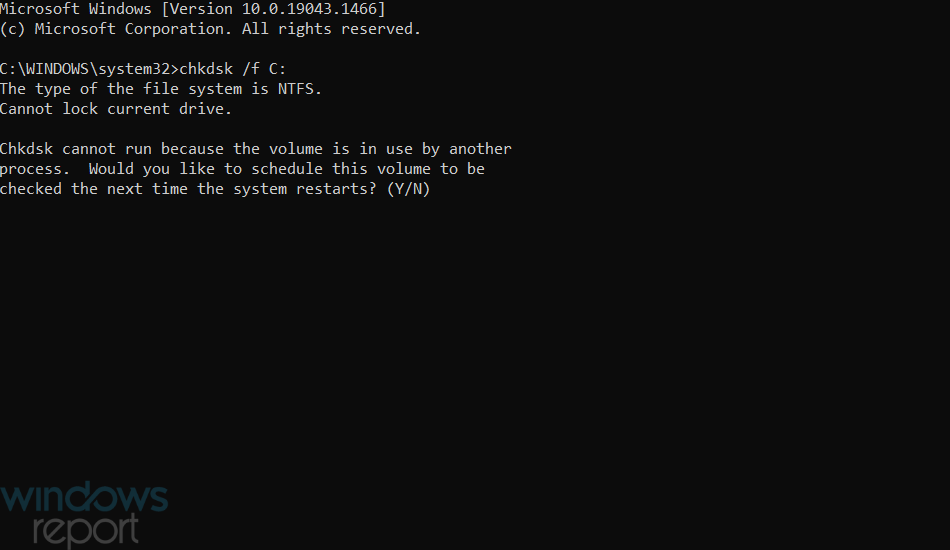
  2. Enter this disk command, and press the Return key: chkdsk /f C:Chkdsk command Windows Update Something went wrong Windows 11
  3. Press the Y keyboard key to confirm.
    Chkdsk confirmation message Windows Update Something went wrong Windows 11
  4. Restart Windows to initiate the chkdsk scan.

5. Rename the SoftwareDistribution and Catroot2 Folder

  1. Open the Command Prompt with elevated rights as covered in the first three steps of resolution three.
  2. Input these four different commands pressing Enter after each:
    Net Stop bits
    Net Stop wuauserv
    Net Stop appidsvc
    Net Stop cryptsvc
  3. Rename the SoftwareDistribution folder by inputting this command and pressing Enter: Ren %systemroot%SoftwareDistribution SoftwareDistribution.bak
    The Ren SoftwareDistribution.bak command Windows Update Something went wrong Windows 11
  4. To rename catrook2, enter this Ren command and press Enter: Ren %systemroot%system32catroot2 catroot2.bak
    The Ren catroot2.bak command Windows Update Something went wrong Windows 11
  5. Input and execute these four separate Command Prompt commands:
    Net Start bits
    Net Start wuauserv
    Net Start appidsvc
    Net Start cryptsvc
  6. Restart Windows from the Start menu.

6. Edit the Registry

  1. Press the Windows + X hotkey, and select Run on the menu.
    The Run option Windows Update Something went wrong Windows 11
  2. Type this text into Run’s Open box and click OK: regedit
    The regedit command Windows Update Something went wrong Windows 11
  3. Then go to the UsoSvc key at this registry location: Computer\HKEY_LOCAL_MACHINE\SYSTEM\CurrentControlSet\Services\UsoSvc
  4. Double-click the Start DWORD shown directly below.
    Start DWORD Windows Update Something went wrong Windows 11
  5. Delete the current value, and enter 2 in the data box.
  6. Then press OK to exit the window.
    The OK option Windows Update Something went wrong Windows 11
  7. Repeat steps four to six for the Start DWORD at these registry key locations:

HKEY_LOCAL_MACHINE\SYSTEM\CurrentControlSet\Services\WaaSMedicSvc
HKEY_LOCAL_MACHINE\SYSTEM\CurrentControlSet\Services\wuauserv

7. Roll back Windows to a restore point

  1. Bring up the Run tool. Type this command in the search box and click OK: rstrui
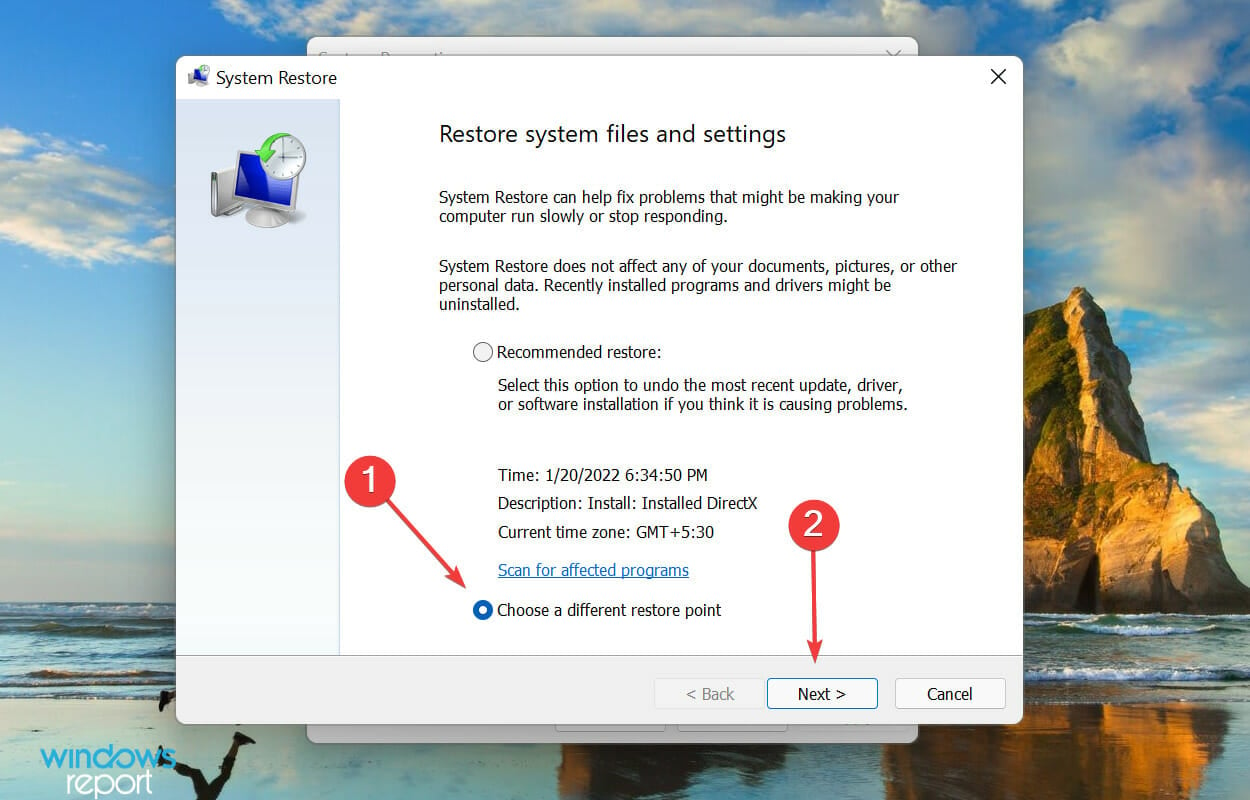
  2. Select Choose a different restore point if that option is available, and click the Next button.
    Choose a different restore point option Windows Update Something went wrong Windows 11
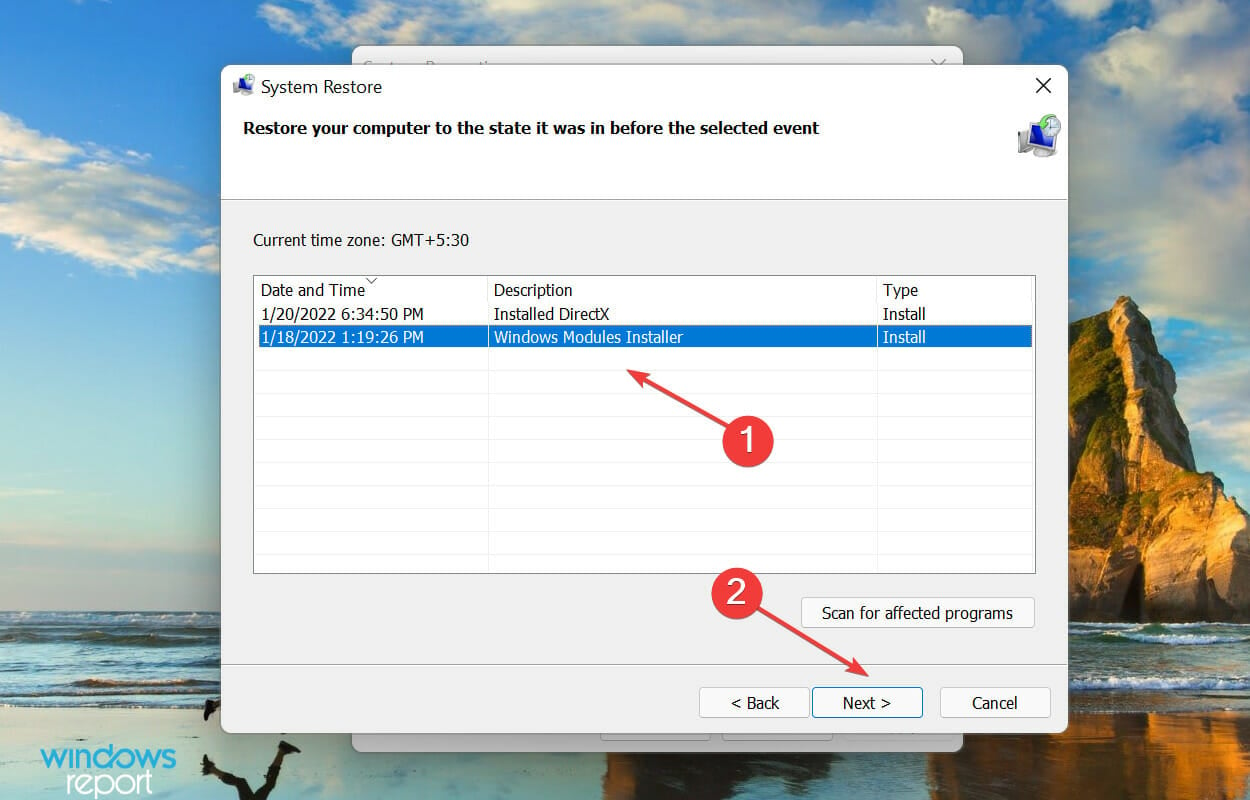
  3. Then select a restore point that predates the Something went wrong error on your PC if you can. Alternatively, select the oldest date available.
    The Next button Windows Update Something went wrong Windows 11
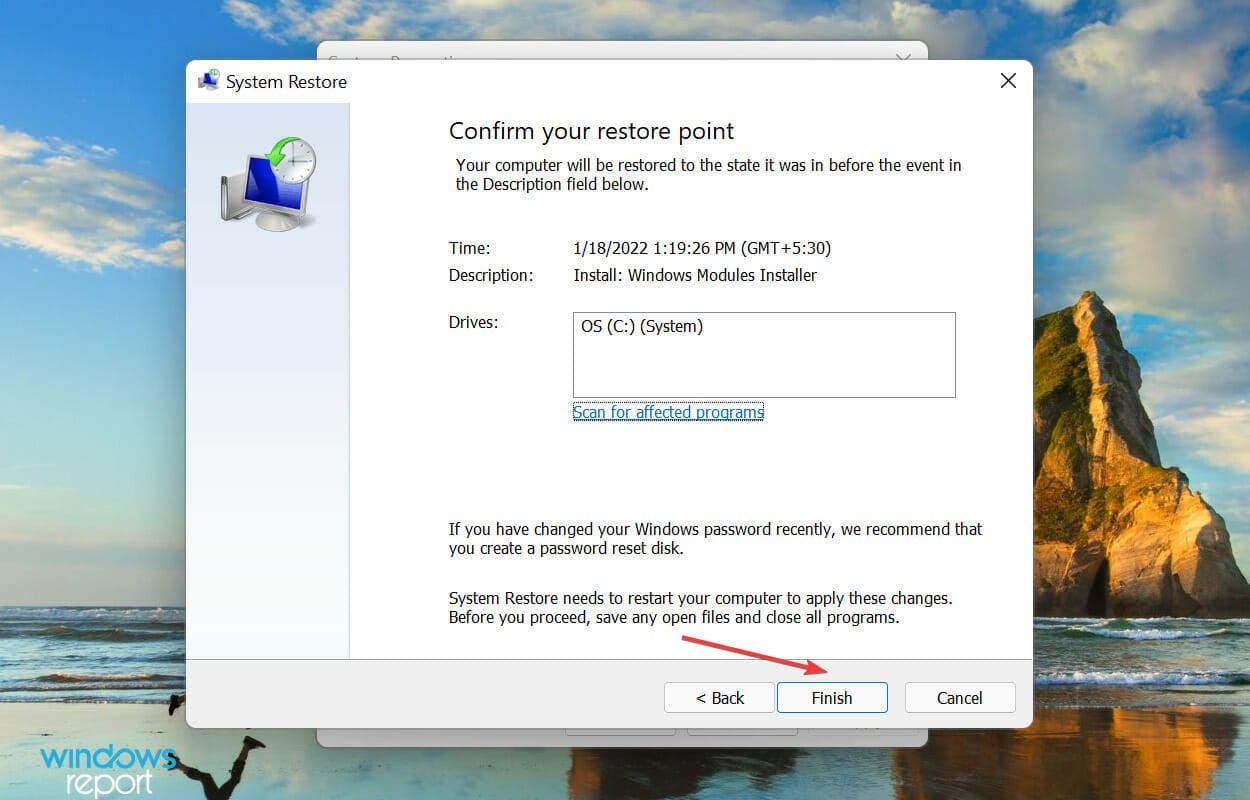
  4. Select the Next and Finish options to roll back Windows.
    The Finish button Windows Update Something went wrong Windows 11

8. Reset Windows

  1. Press the Windows + I key combination. Click Recovery on the Settings app that opens.
    The Recovery option Windows Update Something went wrong Windows 11
  2. Press the Reset PC button.
    Reset PC button Windows Update Something went wrong Windows 11
  3. Select Keep my files in the Reset this PC window.
    Keep my files option Windows Update Something went wrong Windows 11
  4. Click the Cloud download or Local reinstall option you prefer.
    Reinstall options
  5. Press the Next button, and select Reset to finish.
    Reset button Windows Update Something went wrong Windows 11
Note icon NOTE
You’ll need to reinstall any software that didn’t come pre-installed with Windows 11/10 after resetting the platform. Therefore, this is the last resort resolution if none of the other potential fixes resolve the Something went wrong error.

Can I manually install Windows updates?

You can manually download Windows patch updates from the Microsoft Update Catalog and install them. Doing so, however, probably won’t resolve the Windows Update: Something went wrong error. Nevertheless, you can manually update Windows 11 or 10 in that way like this.

  1. Open the Microsoft Update Catalog homepage.
  2. Enter a KB Windows update code in the search box, and click the Search button.
    The search button Windows Update Something went wrong Windows 11
  3. Click the Download option for an update.
    The Download option Windows Update Something went wrong Windows 11
  4. Right-click the download link and select Save link as on the context menu.
    Save link as option Windows Update Something went wrong Windows 11
  5. Choose the folder to download to, and select the Save option. Click File Explorer’s taskbar button shown below, and open the folder you saved the update package in.
    The magnifying glass button Windows Update Something went wrong Windows 11
  6. Double-click the update’s MSU file to install.

Note that you can only download and install patches, not build, updates via the Microsoft Update Catalog. You can, however, still, update Windows 11/10 to the latest version without Settings with the Media Creation Tool. Our Media Creation Tool review provides further details for that utility.

Can I fix the Something went wrong error with third-party repair software?

Possibly, but much depends on the repair software you’re utilizing. As Windows’ built-in repair tools can feasibly resolve this issue, you might not need third-party system repair software. Our Windows 10/11 repair software guide provides the full low-down on the best third-party repair utilities.

There’s a good chance you’ll be able to fix the Windows Update: Something went wrong error by applying the potential resolutions above. The second resolution for checking the Update Orchestrator Service settings is especially widely confirmed to fix that error.

Yet, we can’t promise those resolutions will fix the Something went wrong error for all users. You can get further troubleshooting guidance from Microsoft’s Windows support service if needed. Enter a description for the error on the Contact Microsoft Support page and click Get Help to do so.

Sometimes, Windows Update errors with codes starting with 0x can be tricky. For more detailed steps, check out this article about Windows Update error 0xxxxxxxxxx.

You can chat about the Windows Update: Something went wrong error in the comments section below. If you’ve found any other fix for that error not mentioned above, let us know about it there.


How to Reactivate Windows After a Hardware Change [2 Steps]

If you have recently bought a new computer or made other significant changes to your system configuration, for example, you’ve replaced the motherboard; You may need to reactivate your copy of Windows.

We’ve all been there; your processor has served you for years, but it has reached its end days, and it’s time to upgrade to a new CPU. When you do so, Windows may not recognize it as part of your PC hence the need to reactivate.

Why does my PC need a hardware change?

So, your PC is struggling to run the programs you need. It’s working harder than it should be and slowing down. You’ve got a choice: either get a new PC or upgrade your current one. 

If you’re down on your luck and can’t afford a new device, a few hardware changes are your best bet. Other reasons include the following:

  • Hardware failure – The most common reason for a hardware upgrade is the failure of the existing hardware to keep up with the demands of today’s computing environment. For example, if your computer is slow, a new processor, memory, or graphics card could bring about significant performance improvements.
  • Expandability – Another reason to upgrade your PC’s hardware is if you want to add new components such as additional memory or hard drives. If you are running out of memory on your current system, an upgrade can solve this problem for good.
  • Upgrading outdated components – Upgrading hardware is a great way to improve the performance of your computer without having to buy a new one. For instance, you may need to upgrade your graphics card to be able to run modern games at acceptable frame rates and resolutions. 
  • Compatibility – As new operating systems continue to upgrade, they may no longer be compatible with your computer. This can happen if you try to run a newer operating system on a computer that is too old. For instance, most old PCs can’t run Windows 11 because of the stringent system requirements.
  • Damaged components –  If a part is damaged, then it may not be able to perform the tasks that it was designed to do. You’ll need to replace it to continue using your device typically.

How can I reactivate Windows after a hardware change?

1. Use the Activation troubleshooter

  1. First, you must link your digital license to your Microsoft account. The Microsoft account linked should also be an administrator account.
  2. Hit the Windows key and select Settings.settings windows 11
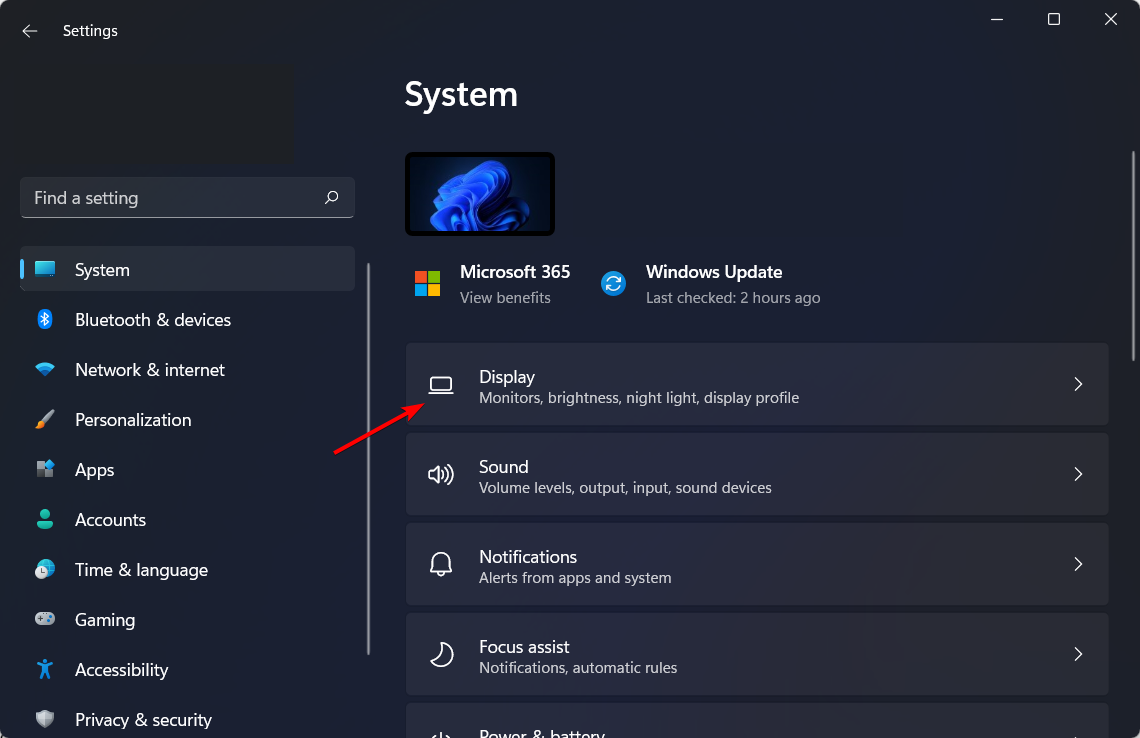
  3. Click on System and scroll down to Activation.
  4. Select Troubleshoot, and you should see the following message: Windows can’t be activated on your device.
  5. Click on I changed hardware on this device recently, then select Next.
  6. Type and enter the credentials associated with your Microsoft account.
  7. Mark the This is the device I’m using right now checkbox and click Activate. 

This method will only work if you link your Microsoft account before the hardware change.

2. Use the Product key

  1. Hit the Windows key and select Settings.settings windows 11
  2. Click on System and scroll down to Activation.
  3. Select Change Product Key, then enter your Product Key.

If you don’t have the digital license and the Product Key, you must purchase them from Microsoft.

Is the Windows key tied to the motherboard?

Windows product keys are, in most cases, tied to the computer’s motherboard. Unfortunately, this changes the motherboard on your PC; you’ll need to purchase a new Windows activation key.

It’s important to note that this rule doesn’t apply to all versions of Windows. With newer versions, you can easily reactivate Windows after a hardware change if you have a digital license linked to your Microsoft account.

If you are still experiencing problems after trying both methods, you should contact Microsoft support.

It is also important to note that not all hardware changes warrant a Windows reactivation. So the question: Do I need to reinstall Windows when changing the motherboard? May not always be a definite yes.

You may also encounter another issue where you can’t reactivate Windows because the servers aren’t available. If so, don’t hesitate to refer to our detailed guide on how to fix this problem.

Also, check out other common Windows activation errors and their solutions, so you never struggle with such issues.

Please let us know if you have been able to reactivate Windows again if you are facing this issue in the comment section below.

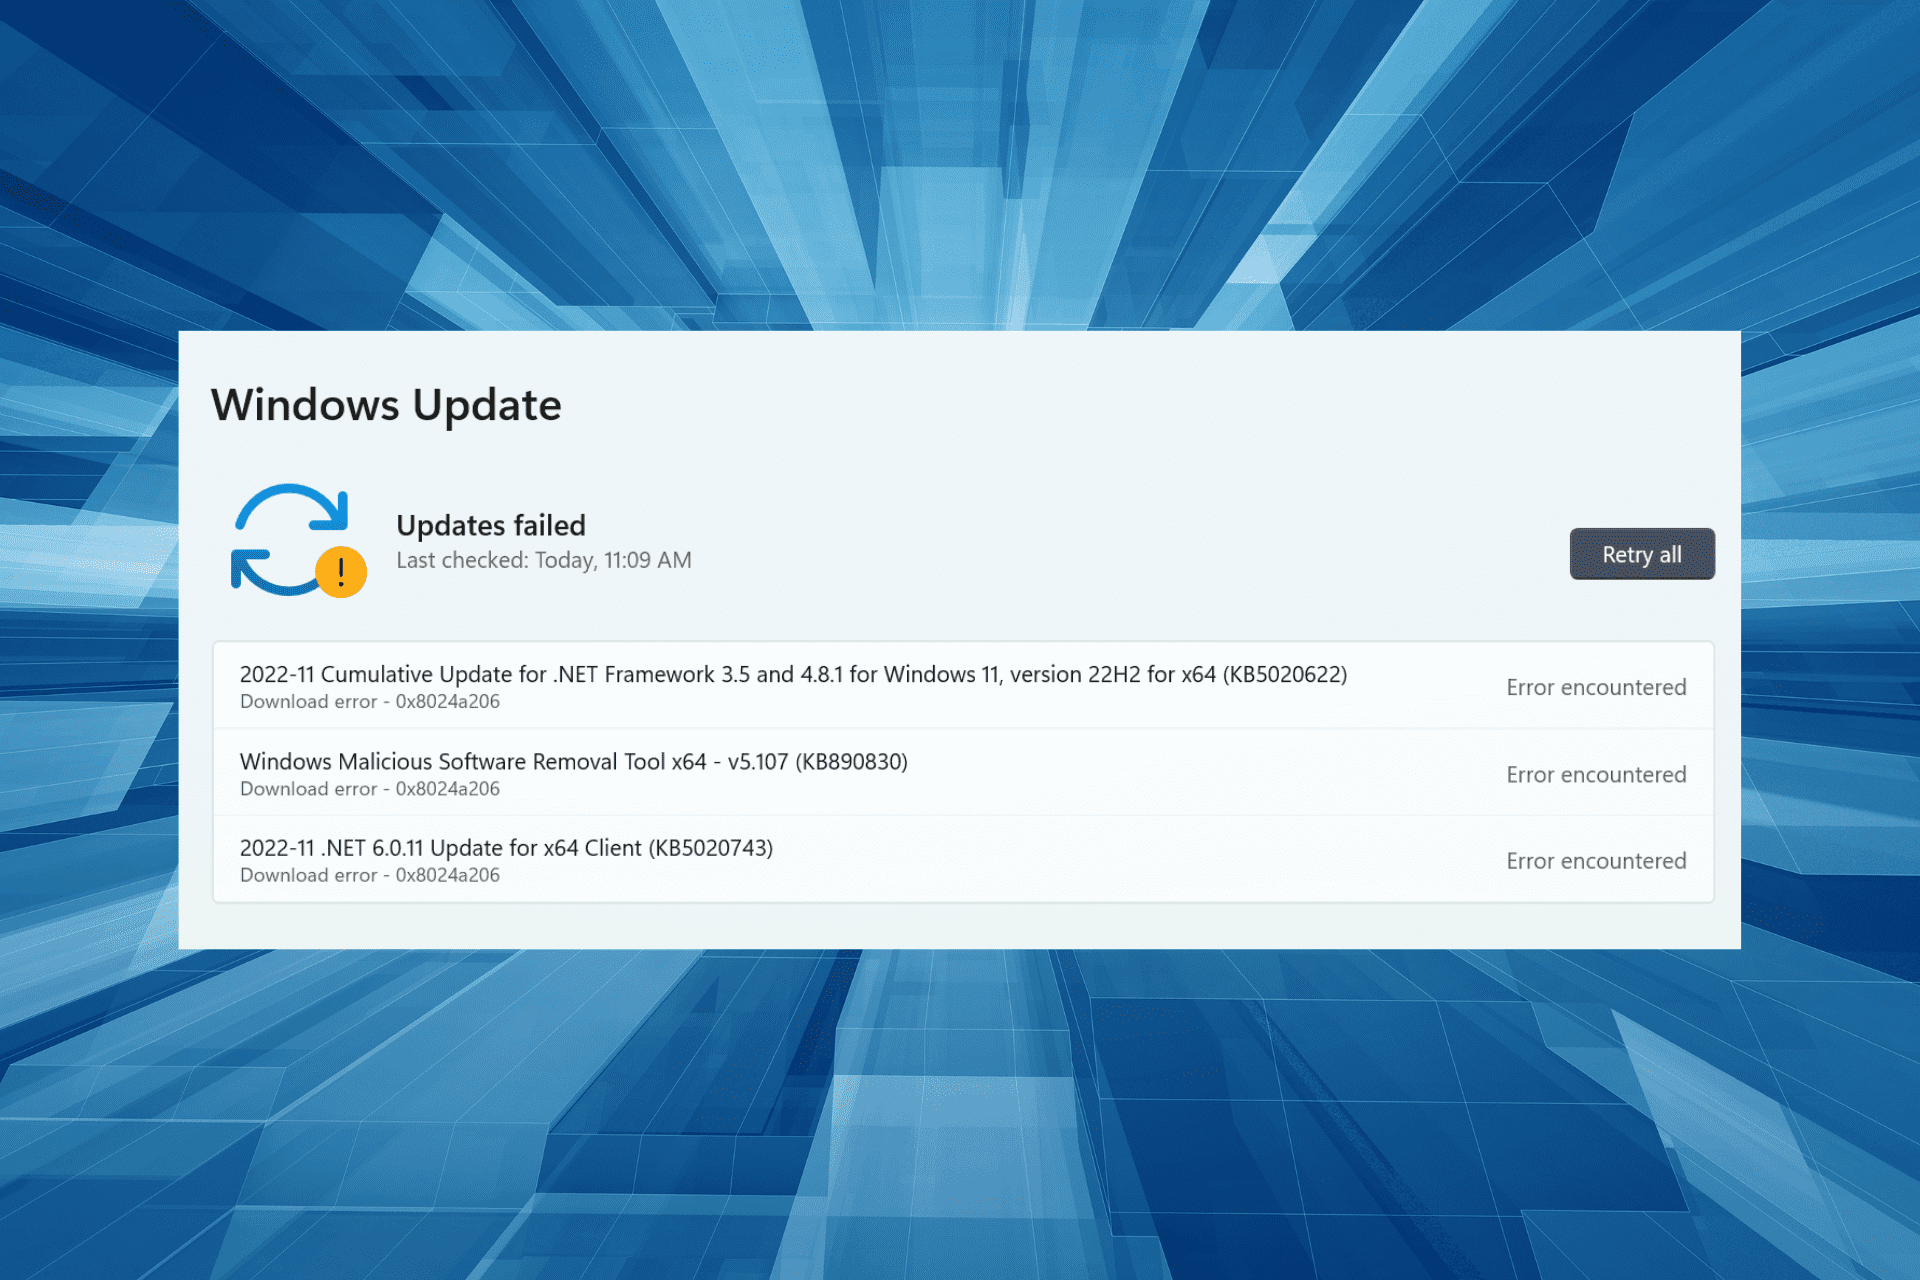
Error 0x8024a206 (Windows Update): Fixed

Updating Windows is key to good computer performance and ensuring security. But many users reported getting Windows Update errors in Windows 11, the 0x8024a206 error being the most common.

The download error – 0x8024a206 in Windows 11, also present on the previous iterations, can be encountered with any update and is usually due to corrupt update components, issues with the Internet, or even antivirus.

So, let’s find out how to fix it on Windows 10 and Windows 11 devices. The steps to fix error 0x8024a206 are very similar, regardless of what OS you are using.

How can I fix the Windows Update download error 0x8024a206?

Before we head to the slightly complex solutions, here are a few quick things you can try:

  • Run the Windows Update troubleshooter, a built-in utility, which will automatically identify and eliminate the underlying cause triggering the error.
  • If you have any third-party antivirus or security software installed, disable them all, and verify whether the error is fixed. If so, we recommend you switch to a more reliable antivirus to eliminate the 0x8024a206 error and other conflicts.

If none work, move to the fixes listed next.

1. Retry the update

  1. Restart the computer.
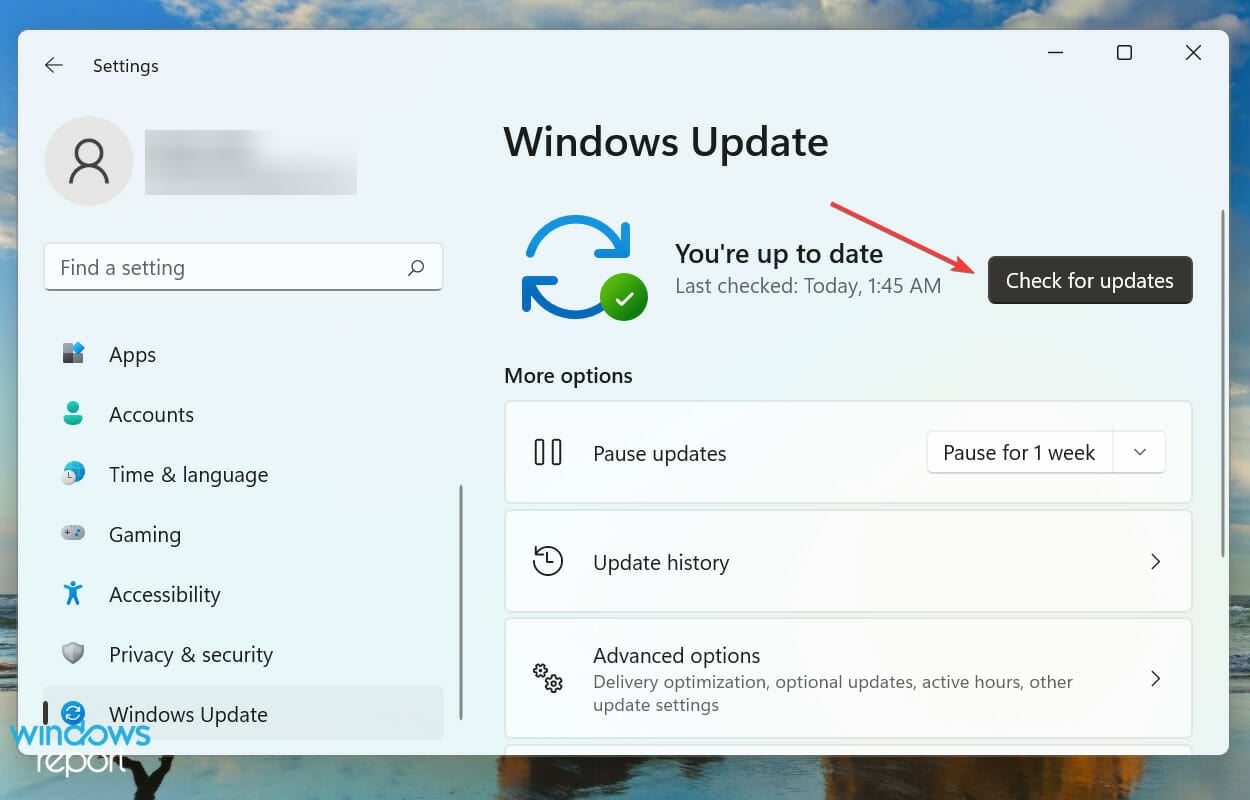
  2. Now, head back to Windows Update in Settings, and click on Retry (Retry all in case there is more than one).retry to fix 0x8024a206 windows 11
  3. Once the updates are downloaded, restart the computer for the installation to complete.restart

That’s it! This is the simplest way to fix things when you get the 0x8024a206 error in Windows 11 or 10. But it won’t always work, in which case, you can try the solutions listed next.

2. Reset Windows Update components

  1. Open the Notepad, and paste the following code into it.

@ECHO OFF
echo Simple Script to Reset / Clear Windows Update
echo.
PAUSE
echo.
attrib -h -r -s %windir%\system32\catroot2
attrib -h -r -s %windir%\system32\catroot2.
net stop wuauserv
net stop CryptSvc
net stop BITS
ren %windir%\system32\catroot2 catroot2.old
ren %windir%\SoftwareDistribution sold.old
ren "%ALLUSERSPROFILE%\Application Data\Microsoft\Network\Downloader" downloader.old
net Start BITS
net start CryptSvc
net start wuauserv
echo.
echo Task completed successfully…
echo.
PAUSE

2. Now, click on the File menu, and select Save.save file

3. Enter Reset.bat (or any other name with a .bat extension) in the File name field, and click on Save.save

4. Next, close the file, head to the location where it’s stored, right-click on it, and select Run as administrator.batch files to fix 0x8024a206 windows 11

The commands would be automatically run, and the Windows Update components would reset. Once done, check if the 0x8024a206 error in Windows 11 is fixed.

3. Manually download the update

  1. Head to Windows Update in Settings, and copy the KB (Knowledge Base) number for the update throwing the error.kb number
  2. Go to Microsoft Update Catalog, paste the KB number in the search field, and hit Enter.search
  3. Click on the Download button next to the one that matches the architecture.download to fix 0x8024a206 windows 11
  4. Next, click on the link that appears in the new window.link
  5. Finally, run the downloaded setup, and follow the on-screen instructions to complete the process.

When faced with an update error, you can always manually install updates from the Microsoft/Windows Update Catalog. This also works in the case of Windows 10 error 0x8024a206.

If the update doesn’t download manually and the 0x8024a206 error persists in Windows 11, follow our last solution.

4. Perform an in-place upgrade

  1. Go to Microsoft’s official website, and download the ISO file for Windows 11.download ISO
  2. Now, run the ISO, and click on Open in the prompt.open
  3. Locate and launch the setup.exe file.setup.exe
  4. Click Yes in the UAC prompt.
  5. Click Next in the Windows 11 setup.next to fix 0x8024a206 windows 11
  6. Next, click Accept to agree to the Applicable notices and license terms.accept
  7. Finally, verify that the setup window lists Keep personal files and apps, click on Install, and wait for the repair process to complete.install to fix 0x8024a206 windows 11

If nothing else worked, an in-place upgrade should fix the Windows 11 error 0x8024a206 and get Windows Update running.

Solutions to the 0x80073701 update/install error, a similar issue, may also work in this case. So make sure to go through them.

We hope you managed to fix the error 0x8024a206 on your Windows 10 or 11 device. Do not forget to tell us which fix worked in the comments below.

Panda Security up to 30% For This Black Friday Sale

This year has had its fair share of cyberattacks and malware reports which has necessitated users and organizations to take it a notch higher to protect themselves.

With most users having purchased new devices and upgraded to the latest OS, they are more vulnerable to malware. Well, you don’t have to be part of this group because here comes Panda Security bearing gifts.

Panda is a 100% reputable company that offers the latest technology in managing cyberattacks and blocking malware, spyware, viruses, and others in real-time.

If you have been eyeing good antivirus software, Panda Security is the best in the market and what’s even better is that now, you can get it with up to 30% discount.

What are the best available Panda Security plans?

Good question. Panda Security has your needs covered this Black Friday. 

Four package plans are currently discounted; Essential, Advanced, Complete, and Premium. The Premium package is an all-in-one package with at least 14 features. The other three plans all have the basic offers such as;

  • Real-time protection for Mac and Android
  • Free VPN (150MB/day). Secure and private Internet browsing
  • Wi-Fi protection against hackers
  • Scanning of external devices for infection prevention
  • For the Essential package, you will be saving up to $47.99  as it is now going for $19.20 annually.
  • The Advanced package is now going for $22.80 annually down from $56.99.
  • The Complete package is now at $34.40 down from $85.99.
  • The Premium package has dropped from $133.99 to $53.60.

All packages come with a free one-month trial if this will be your first time trying out the Panda Security software.

Remember Panda Security is compatible with Windows devices, iOS, Android, and many more. It also offers additional firewall protection for Windows devices so hurry up and take advantage of this offer with only a few hours left until the end of the sale.

Needless to say, you will be making great savings with these never-been-seen-before prices.

Panda Antivirus

Protect your PC against all types of malware threats with Panda Antivirus software.

Which Panda Security package will you be purchasing? Let us know in the comment section below.

GoPro not Showing Up on PC: 3 Simple Ways to Fix it

What happens if your GoPro is not showing up on your PC? This is all you need to know.

GoPro cameras are great for action photography. They are versatile cameras with various mounts that users can attach to things.

GoPro users often utilize GoPro App to transfer recorded videos from their cameras to Windows 10 desktops.

However, Windows 10’s GoPro App for Desktop doesn’t always recognize a connected GoPro camera. Then the camera doesn’t appear in the app, and an error message might even pop up.

These resolutions might fix GoPro App for Desktop when it doesn’t recognize a connected camera.

Why is my GoPro not showing up on my computer?

From the experience of different users, we gather that a range of factors will inhibit the camera from showing on your PC. On top of this list, we have the following elements.

  • Cable problems – This is more common than you think. It could be a faulty cable or a cable that is not properly attached.
  • USB port issues – You should try a different port, as the one you currently use may be faulty.
  • Driver issues – In some cases, problems with your USB drivers may be responsible. Outdated or bad drivers always tend to trigger PC errors.

While other minor issues may trigger this problem, those mentioned above are the most dominant. The solutions below will come in handy, especially if GoPro files, pictures, or videos are not showing up on the computer.

How can I fix GoPro if it’s not showing up on PC?

Before going into the solutions, you must do the following as a control check.

  • Check that the camera is on and contains an SD card. If you connect a switched-off camera, you should not expect it to be detected.
  • Also, try connecting the camera with an alternative USB cable if you have one. You should see a GoPro logo on the camera display when it’s plugged into a laptop or desktop and turned on.
  • Try an alternative USB port to rule out the possibility of a wrong port.

1. Run the Hardware and Devices Troubleshooter
2. Reinstall USB Controller Drivers
3. Check the Camera’s Card Folder Title

1. Run the Hardware and Devices Troubleshooter

  1. Connect the GoPro camera to a PC.
  2. Press Windows + I to open the Settings app.
  3. Click on Updates & Security.
  4. Click on Troubleshoot in the left pane, then click Hardware and Devices on the left and choose Run the troubleshooter.
    gopro not showing up on pc

If GoPro is not showing up on your PC, running the troubleshooter is often effective.

2. Reinstall USB Controller Drivers

  1. Right-click on the Start menu and select Device Manager.
    gopro not showing up on pc
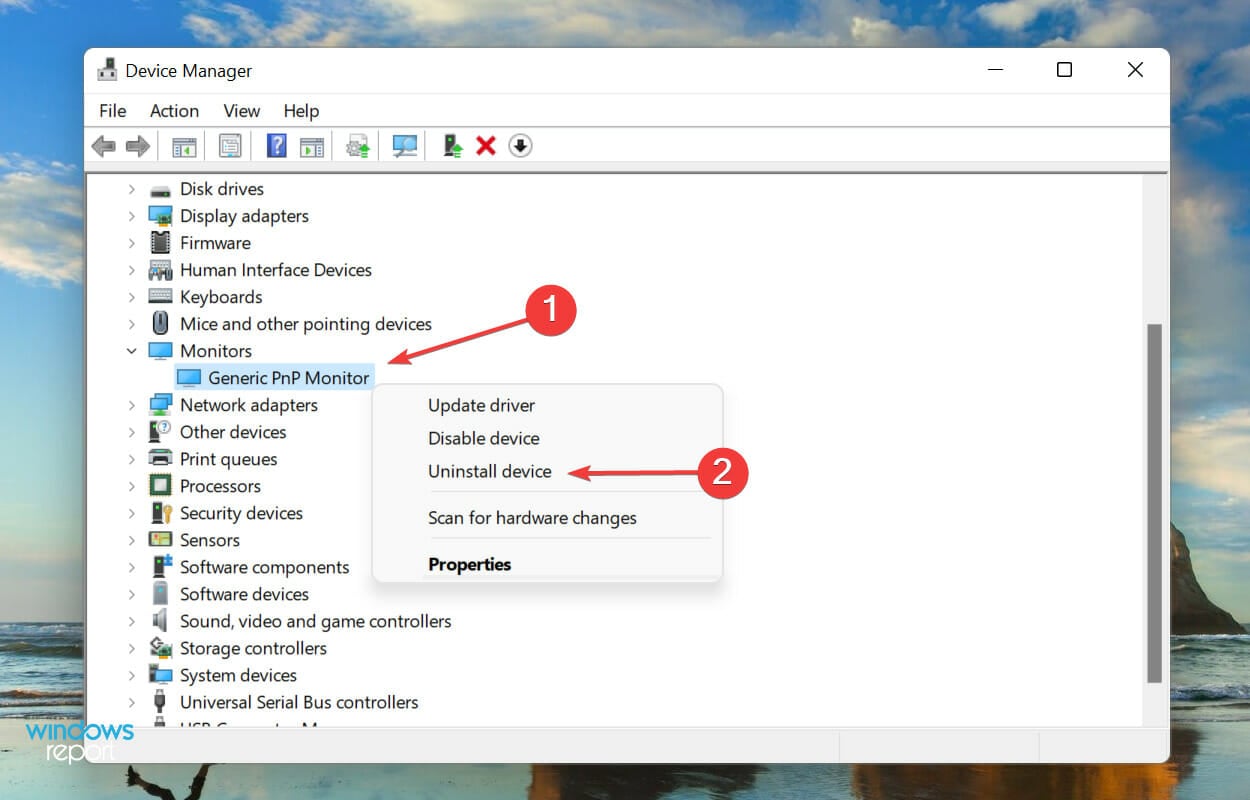
  2. Expand Universal Serial Bus controllers, right-click on the affected USB driver, and select Uninstall device.
    gopro not showing up on pc
  3. Click Uninstall to confirm your choice.
    gopro not showing up on pc
  4. Click on the Scan for hardware changes icon and restart your computer.

3. Check the Camera’s Card Folder Title

GoPro users can’t transfer photos with GoPro App for Desktop when they’ve edited the folder title on the camera’s SD storage card. The folder name for the camera’s SD storage card should be 100GOPRO. Users should change the folder name to 100GOPRO with a micro SD card adapter if it isn’t.

These three solutions should be your best bet if GoPro is not showing up on your PC. However, remember to go through the controls before you try these solutions.

Also, as a great alternative, you may transfer photos to a PC with a micro SD card adapter. Additionally, a USB hub is another alternative device for sharing photos. Users can connect numerous USB-C card reader devices to laptops or desktops.

One, or more, of the above resolutions will probably ensure that GoPro App for Desktop recognizes your camera once more.

How to Fix the Windows 10 & 11 Activation Error 0xc0020036

Numerous users have posted on the Microsoft forum about activation error 0xc0020036. That’s an activation error that can arise for some users after installing new Windows 10 build updates or during game installations.

When that issue arises, you might need to reactivate Windows 10 after a new build version has been installed. And while doing that, the 0xc0020036 error will pop up.

How can I fix Microsoft Store error code 0xc0020036?

1. Re-enter the product key

  1. Click the Type here to search button to open that utility.
  2. Enter cmd in the Type here to search box.
  3. Right-click the Command Prompt to select a Run as administrator option, which will open an elevated Prompt window.
  4. Type this command into the Command Prompt, then press the Enter key: wmic path softwarelicensingservice get OA3xOriginalProductKey
wmic path command Windows 10 Activation Error 0xc0020036
  1. Note down that key, or you can copy it to the clipboard with the Ctrl + C hotkey.
  2. Next, press the Windows key + R keyboard shortcut.
  3. Enter ms-settings:activation in Run, and press the OK button.
  4. Click the Change product key option.
  5. Thereafter, input your product key.

2. Clear the product key

  1. To do so, open an elevated Command Prompt window.
  2. Input this command and press Enter: slmgr /upk
    slmgr /upk command Windows 10 Activation Error 0xc0020036
  3. Then input the following and press Enter: slmgr /cpky
  4. Close the Command Prompt, and restart Windows.
  5. Re-enter the product key as outlined in the previous solution.

3. Scan system files

  1. Open the Command Prompt’s window as an administrator.
  2. Then input the following and hit Enter: DISM.exe /Online /Cleanup-image /Restorehealth
  3. Next, initiate a System File Checker scan: sfc /scannow sfc /scannow command Windows 10 Activation Error 0xc0020036
  4. Once done, restart Windows if the scan repairs files.

Error 0xc0020036 can also be due to corrupted system files, which the System File Checker can resolve.

4. Edit the registry

  1. Open the Run accessory.
  2. Input regedit and click OK to open the Registry Editor.
  3. Open this key in the Registry Editor:
    Computer > HKEY_LOCAL_MACHINESYSTEM > CurrentControlSet > Services > sppsvc.
    The sppsvc key Windows 10 Activation Error 0xc0020036
  4. Double-click the Start DWORD for the sppsvc key.
  5. Select Hexadecimal as the Base format.
  6. Then enter 2 in the Value Data box to replace any other value there.
    The Edit DWORD window Windows 10 Activation Error 0xc0020036
  7. Click the OK button to exit the window.
  8. Close the Registry Editor.
  9. Click Restart on your Start menu.
  10. Then try reactivating Windows 10.

5. Run an in-place upgrade

Note icon NOTE
Note: We recommend creating a restore point before initiating the upgrade.
  1. Look for the official Windows 10 Download tool.
  2. Select Run. You need to be an administrator to run this tool.
  3. On the License terms page, if you accept the license terms, select Accept.
  4. On the What do you want to do? page, select Upgrade this PC now, and then select Next.
  5. The process should fix the issue.

Your files and apps will not be affected by this upgrade.

Those are some of the resolutions that might fix error 0xc0020036. They’re not guaranteed fixes for all users, however, so you might still need to get in touch with Microsoft support to reactivate Windows 10.

Microsoft’s Global Customer Service page provides a full list of regional numbers for the big M’s support service.

Before you leave, we also have a guide on a 0x803fa067 error on Windows 11, which is pretty similar, so don’t miss it.

Let us know which of the methods worked for you in solving this activation error by leaving us a message in the comments section below.

Microsoft Store Special Offers [Xbox, Laptops, Pc Games]

Christmas is over but Microsoft still has many of its deals and sales, so you can check them out, with deals from both the Microsoft Store and Microsoft’s partners.

The Redmond giant is especially emphasizing Xbox and Surface deals along with lower subscription fees for Xbox Live and discounted mixed reality hardware. In addition, Windows 10-powered PCs and notebooks are also up for grabs at substantially lower prices.

Below are the best deals we’ve selected by category. In case you want additional insight on all available deals by Microsoft, make sure to check out the Microsoft Store.

⇒ Check the latest deals from Microsoft

Best Microsoft Store deals in 2022

Laptop deals

If you want to buy a new Windows 10 laptop this year, waste no time and get one now from Microsoft. The company is offering many nice discounts on laptops.

You can save up to $350.00 on laptops. Here are just a few deals:

  • HP Laptop 15 Intel Core i5 10th Gen, $399
  • HP Laptop 15 Intel Core i3 10th Gen, $299
  • HP Laptop 15 Intel Core i7 10th Gen, $499

Surface deals

There are nice discounts available for Surface devices as well. Check out this buying guide for more information.

Xbox Christmas deals

If you’re an avid gamer, now it’s time to upgrade your gaming gear and grab some new titles to play in 2020. You can now save up to $100.00 on all Xbox consoles and bundles.

Go to Microsoft’s Xbox page to learn more.

Microsoft Store accessories

The Redmond giant is also offering a plethora of interesting deals on portable speakers, earbuds, headphones, mesh Wi-Fi routers, and other items. For more information, go to Microsoft’s deal page.

Keep in mind that deals are subject to change. Sometimes, some of the deals listed in our guides may no longer be available by the time you hit the buy button. So, hurry up and grab them while they’re hot.

You can read the original report below.

Xbox deals and discounts

  • Save $60 on Xbox One S 500GB Console – Starter Bundle + 2 Free Select Games of Choice.
  • Save $60 Xbox One S 500GB Console + Free Game and 1-Month Game Pass
  • Xbox Game Pass for $1
  • Get $10 off 3-month and 6-month Xbox Live Gold memberships.
  • Up to 50% off games

Microsoft Surface deals and discounts

  • Save $329 on Surface Pro + Black Type Cover Bundle (256GB SSD, 8GB RAM).
  • Save $229 on Surface Pro + Black Type Cover Bundle (128GB SSD, 4GB RAM).
  • Save $199 on Surface Laptop + Harman Kardon Invoke Speaker Bundle.

PC Deals

  • HP laptop only $299 (15.6-inch HD touchscreen, Intel Core i3-7100U, 8GB memory/1TB HDD, up to 8 hours battery life).
  • Dell Inspiron 13 for $399 (13.3-inch Full HD touchscreen, Intel Core i3-7100U, up to 4GB memory/1 TB HDD).
  • $150 off Dell gaming laptop (15.6-inch Full HD display, Intel Core i5-7300HQ, 8GB memory/1TB HDD, NVIDIA GeForce GTX 1050 graphics).
  • Save $500 on Dell XPS 13 (13.3-inch Full HD touchscreen, Intel Core i5-7200U, 8GB memory/128GB SSD, Thunderbolt 3 port).

Windows Mixed Reality

  • Save up to $100 on Windows Mixed Reality Headsets.
  • Save $100 on Lenovo Explorer Windows Mixed Reality Headset with Motion Controllers.
  • Save $100 on Acer Aspire Nitro 5 AN515-51-5594 Gaming Laptop + Acer Windows Mixed Reality Headset with Motion Controllers

These are just some of the deals you can expect from Microsoft on this holiday promotion, but there are so much more. The only thing left is to compare the prices with alternative retailers, save enough money, and wait!

Meanwhile, tell us what deal caught your eyes in the comments section below!

0x8024a203 Windows Update (We Couldn’t Install This Update): Fix

Are you trying to install a new update for your Windows 10 or Windows 11 PC and getting the Windows Update error 0x8024a203? Unfortunately, you aren’t alone, as several users running Windows on their PC are encountering this issue.

Thankfully, in this guide, we have curated a list of solutions that will fix this update error. So, with that said, let us jump right in.

What is the error 0x8024a203?

The Windows Update error 0x8024a203 occurs when users try to install the latest version of the OS. The full error message reads: We couldn’t install this update but you can try again (0x8024a203).

Because of this error, after a full 100% download of Windows 11, the installation goes back to 41% and ultimately shows you a blue screen of error.

Below are some of the causes of this issue:

  • Faulty system files: The major cause of the we couldn’t install this update 0x8024a203 error is broken system files. These files are important for the installation of your updates. You need to repair the corrupt system files with a dedicated tool or the built-in file repairers to get past this error.
  • Disable Windows components: Some services and components are important for installing updates. You need to restart these components to fix this issue.
  • Minor system glitches: Sometimes, the Windows Update error code 0x80204a203 on Windows 11 21H1 can be down to some minor issues on your PC. Running the Windows update troubleshooter should fix this.

How can I fix the Windows Update error 0x8024a203?

1. Use a specialized tool

When handling system files, it is always a good idea to employ the help of specialized repair tools. This type of software will streamline the repair process by automatically scanning and replacing any broken files they encounter.

2. Run the troubleshooter

    The first thing you should do when you come across a Windows update error such as the error code 0x8024a203 is to make use of the in-built Windows troubleshooter program.

    It is pretty easy to use, and by following the mentioned steps, you will be able to not only detect the issue with the Windows 11 update but fix it as well.

  1. 1. Open the Start menu.

  2. 2. Search for Troubleshoot other problems and open it.

    troubleshoot other settings
  3. 3. Hit the Run button next to Windows update.

    windows-update-troubleshooter windows 11 not updating after restart
  4. 4. The troubleshooter will begin the diagnosis.

  5. 5. Apply the recommended fixes.

  6. 6. Restart your PC.

3. Use the Reset Windows Update Tool

  1. Download the Reset Windows Update Tool.
  2. Install it on your PC.
  3. Right-click on the app icon and select Run as administrator.
  4. Select your preferred language by entering the number and pressing Enter.select language reset tool
  5. Press Y to accept the terms and conditions of the tool.agree terms
  6. Press 2 to select the Reset the Windows Update Components option and hit Enter.reset window update components

Using the Reset Windows Update tool, you can fix the underlying problems that prevent your Windows 11 PC from installing the latest updates.

In our case, you can use the above steps to reset Windows update components and resolve issues such as Windows 11 update error 0x8024a203 that isn’t letting you update your system.

4. Run the System File Checker tool

  1. Open the Start menu.
  2. Search for Command Prompt and run it as an administrator.cmd admin
  3. Type the below command and hit Enter:sfc /scannowsfc-scannow
  4. Your PC will start scanning and, in the process, will try to fix the issue.

If a corrupt system file is present in your system, it can prevent Windows 11 from installing the latest updates.

So, run the System File Checker tool and let it fix the issue triggering the Windows 11 update error 0x8024a203.

5. Restart essential services

  1. Press the Start menu.
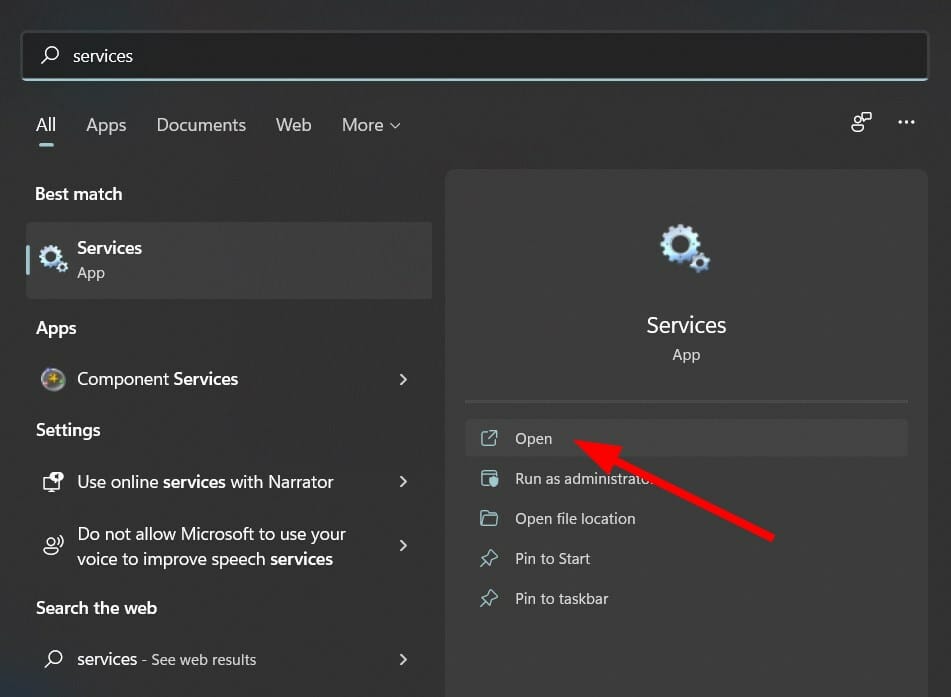
  2. Search for Services and open it.windows services
  3. Locate Background Intelligent Transfer Service (BITS) and double-click on it.background intelligent transfer services
  4. Under the Startup type, from the drop-down menu, select Automatic.startup type automatic
  5. Click Start, Apply, and OK.
  6. Perform the same steps for Windows Update services.

For Windows Updates to perform their operations, they rely on several Windows services. These services must run in the background for the updates to get installed.

Following the above steps, you can tweak the critical Windows update services options and possibly fix the issue.

6. Clear the temporary folder

  1. Press the Windows key + R buttons to open the Run command.
  2. Type %temp% and hit Enter.
    temporary command on run
  3. Press Ctrl + A to select all files.
  4. Press the Delete button on your keyboard or right-click and select Delete.delete temporary files

We hope this guide helped you fix the Windows 11 or Windows 10 update error 0x8024a203 and that you can install the latest Windows updates on your PC.

Are you facing the update error 0x80073701 on Windows 11? Then, check our detailed guide to fix it quickly and effectively.

Feel free to let us know which solutions worked for you in the comments below.

Posted in Fix

Windows 10 has Lost Activation: 3 Methods to Get It Back

At times, your PC will report that Windows has lost activation and needs to be activated again despite it is already activated.

This happens across the various versions of Windows 10 regardless of whether Windows was pre-installed or obtained through an upgrade. In this guide, we will show you the best ways to regain your activation.

Why is Windows 10 asking me to activate it again?

Below are some of the reasons Windows 10 might have lost activation:

  • An incorrect activation key: Your PC will suddenly seem to invalidate your Windows license if you have been using an invalid key. For example, volume license keys are meant specifically for corporate systems and may work temporarily and then fail in personal machines.
  • Hardware changes: A major hardware upgrade, like replacing your gaming motherboard, might cause this issue.
  • Windows reinstallation: Your PC may forget its licensing after reinstalling Windows.
  • An update: If Windows 10 lost activation after an update, there might be issues with the update.

What can I do if Windows 10 has lost activation?

1. Reactivate your Windows

  1. Press the Windows key, type cmd, and choose Run as administrator under Command Prompt.
    cmd admin windows 10 lost activation
  2. Type the command below and hit Enter: wmic path SoftwareLicensingService get OA3xOriginalProductKeywmic
  3. This will reveal the original product key. Copy it.
  4. Now, press the Windows key + I and select Update & Security.
    update and
  5. Next, click Activation in the left pane.
  6. Select Change the product key, and type the previously copied product key.
    change product windows 10 lost activation
  7. Finally, click on Next to activate.

If a Windows 10 update caused Windows to lose activation, you need to reactivate it from the settings app.

2. Run the Activation Troubleshooting Utility

  1. Press the Windows key + I and select Update & Security.
    update and
  2. Click Activation in the left pane.
  3. Finally, click the Troubleshoot link.
    troubleshoot

If you are getting an activate Windows 10 error message, but it’s already activated, you should run the Activation troubleshooter. This will diagnose the issue and show you how to proceed.

3. Sign in to your Microsoft account and activate Windows 10

  1. Sign in to the admin account linked with your Microsoft account
  2. Press the Windows key + I and select Update & Security.
    update and
  3. Now, click Activation in the left pane and select Troubleshoot.
    troubleshoot
  4. Next, click I changed hardware on this device recently.
    i changed
  5. Finally, choose Next if the troubleshooter returns the error Windows can’t be activated on your device.

If your Windows 10 license is linked to the digital license/digital entitlement on your device, you will have to sign in to your Microsoft account and then reactivate Windows using the troubleshooter.

This is for situations where the problem arises after a considerable hardware change, such as changing the CPU or motherboard.

If your PC still claims that Windows needs activation again after trying all the above solutions, contact Microsoft’s official support team, and explain your situation to them.

They are usually very helpful and will verify if your product key is genuine and allocate you an ID to help you reactivate Windows 10.

There you go. These are a couple of solutions that you can try if Windows 10 lost its activation.

Similarly, if Windows 10 won’t activate after reinstalling, check our detailed guide to fix it quickly.

Feel free to let us know the solution that helped you fix this issue in the comments below.

4 Amazing Mini PC Deals Waiting For You

In case you missed the dozens of Black Friday Mini PC offers, you still have one more chance in the name of today’s seasonal Mini PC deals.

Now, to save your time, we have analyzed the market, and here are the best 4 seasonal Mini PC deals. Here they are.

4 Mini PC Deals to catch this 2022

Mini PC AMD Ryzen

  • Ryzen CPU 4 cores, 8 threads
  • Vega Graphics 8
  • 16GB RAM
  • 512GB SATA SSD
  • Capable of 4K at 60fps
  • Issues with DisplayPort

This model comes with Ryzen CPU and Radeon Vega 8 graphics so it’s more than capable for all multitasking purposes and multimedia.

Regarding memory, there’s 16GB of DDR4 RAM and 512GB M.2 SSD. As for ports, you can find USB-C, USB 3.1, USB 3.0, HDMI, DisplayPort, and a 2Gbps Ethernet port.

Despite its small size, this mini PC can handle 4K resolution at 60Hz on three displays simultaneously, so it’s the perfect option for all types of users.


Beelink Mini PC SEi8

  • i5-8279U up to 4.1GHz
  • 16GB RAM
  • 512GB NVMe M.2 SSD
  • 4K support
  • Two HDMI ports
  • Minor issues with freezing

Beelink Mini PC SEi8 offers Intel i5-8279U 8th generation CPU, and it can achieve speeds up to 4.1GHz As for the storage, you can find 512GB SSD which should be enough for basic needs.

The PC has 16GB DDR4 RAM at 2400MHz, so it can handle multitasking with ease. There’s an Intel Iris Plus Graphics 655 available, meaning that the device can handle 4K content with ease.

As for connectivity, there are two HDMI ports, four USB 3.0 ports, a Type-C port, and a 1Gbps Ethernet port.


Beelink U59

  • 11th generation Intel CPU up to 2.9GHz
  • 16GB RAM
  • 512GB SSD
  • 4K at 60Hz
  • Dual HDMI ports
  • Loud fan

If you’re looking for a powerful mini PC, this model might be what you need since it comes with 11th Gen Intel processor up to 2.9GHz.

Regarding the memory, you can find 16GB RAM which is more than enough for all multitasking purposes. The storage is set at 512GB, so it should be enough for most users.

Connectivity options include dual HDMI ports, Type-C port, two USB 3.0 ports, an Ethernet port, and an audio jack.


Beelink Mini PC SER3

  • Ryzen 7 3750H 4GHz CPU
  • Radeon Vega 10 graphics
  • 16GB DDR4 memory
  • 512GB NVMe M.2
  • 4K support on 3 displays
  • No major cons

Beelink Mini PC SER3 comes with an AMD Ryzen 7 3750H 4.0GHz processor, and Radeon Vega 10 graphics, so it’s more than capable of handling multimedia.

There’s 16GB DDR4 memory that can be expanded and a 512GB NVMe M.2 for storage. The device is fully capable of handling 4K video on three displays simultaneously.

Connectivity options include dual HDMI ports, a Type-C port, two USB 3.0 ports, an Ethernet port, and an audio jack. As for ports, there’s four USB 3.0 ports, two HDMI ports, and an Ethernet port.

How to Fix The Connection to My KMS Server Failed

​​Sometimes when you are installing Office on your Windows machine your work is interrupted by a failed connection to the KMS server. The exact error message is The connection to my KMS server failed! trying to connect to another one… please wait….Here are some solutions for when this happens.

How do I fix connection to KMS server failed?

1. Check your Internet connection

  1. Open the Start Menu.
  2. Type in cmd.
  3. Double click on Command Prompt.
  4. In Command Prompt window, type ping google.com -n 25 and hit Enter.
kms server connection failure

​​Sometimes the error shows only because the internet connection is spotty. If everything looks good, you can proceed with the next steps.

If you’re having trouble accessing Command Prompt as an admin, take a look at this guide.

2. Upgrade your Windows OS

Oftentimes, functional problems arise with the KMS server when your Windows OS isn’t correctly licensed.

Having an original license not only ensures that your product is legit, fully functional, and reliable, but you also get regular updates that prevent bugs.

Besides, upgrading to the latest Windows version is one-time only, so your investment will pay off in the long run. We have a complete guide on how to upgrade to Windows 11 and it only needs a couple of minutes.

3. Check if the computer is activated

windows activated message in system
  1. On the KMS client, open the System control panel.
  2. Search for Windows is activated message.

If it is not activated, you need to do this first and then proceed to activate your Office copy. Still, having issues? Then see how to fix Windows activation errors.

Before activating your Office copy, we need to make sure that on the client computer, Windows is activated.

4. Check if you have more than 25 clients

  1. Open Command Prompt window as admin.
  2. Run slmgr.vbs /dli command to check if the threshold is met. Currently, the threshold is 5 for Server editions and 25 for everything else.

5. Check the client communicated with the host

​​On the KMS host computer, look in the Application event log for event ID 12290. Check this log for requests made by the client’s computer.

If there are no requests, it means that the client could not communicate with the host.

6. Open the right port

command prompt kms server activation error
  1. Run as administrator the Command Prompt.
  2. In the cmd window, enter slmgr.vb /dlv command.
  3. Look for Listening on Port.

Make sure that there are no firewall rules that block TCP traffic on the KMS port. The default port value is 1688. If you don’t know the port you can find that out on your host computer.

7. Configure DNS properly for multiple KMS hosts

  1. ​​Make sure the all the computers are on the same Active Directory Domain Services domain.
  2. ​​In the Active Directory Domain Service create a global security group.
  3. ​​Add each computer running KMS in the newly created global security group.
  4. ​Set permissions to enable updates by members of this new group on the DNS server.

When using KMS, the host computer must be discoverable in your local network. The first host computer automatically publishes its existence when it creates a SRV record on the DNS server.

The rest of the hosts cannot change or update SRC if the DNS server is not configured properly.

8. Newly added computers don’t increase the KMS count

  1. On the client computer, open the search bar.
  2. Type cmd.
  3. Right-click on Command Prompt and select Run as administrator.
  4. In the Command Prompt window type sysprep /generalize to reset the client computer ID. If that doesn’t work, try slmgr /rearm.

Sometimes client computers look identical to the host and therefore it doesn’t count them as separate.

Finally, if you are still having issues, you can switch to an AD-based activation by following the official documentation.

Can you have 2 KMS servers?

It is not recommended to have more than one KMS server for Windows and Office as it puts additional work into implementing and managing it properly.

If you have any other questions or suggestions, don’t hesitate to reach out in the comments section below.

5 Best Amd Ryzen Deals Available Now

AMD Ryzen processors are also on offer! So, if you were hoping to obtain one of these performance monsters cheaply, this is your chance.

Here is a summary of the top 5 AMD Ryzen deals as trending at this hour if you missed our AMD Ryzen Black Friday deals.

Note icon NOTE
Deals are subject to change. Sometimes, some of the deals listed in our guides may no longer be available by the time you hit the buy button. So, hurry up and grab them while they’re hot.

What are the best AMD Ryzen deals to get in 2022?

AMD Ryzen 7 3800X Processor

  • AMD Wraith Prism cooling solution
  • Compatible with AM4 motherboards
  • 8 CPU cores with 16 threads
  • Multiplier unlocked to allow full performance customization
  • The boost clock frequency cannot be applied to all cores

Equipped with 8 Cores and no less than 16 4.5 GHz Boost threads, the AMD Ryzen 7 3800X Processor is the perfect embodiment of industry-leading technology.

From connectivity to drives and graphics cards, this processor is built to deliver high performance by any record and it will satisfy even the most pretentious of users.

If you thought that’s impressive, you will be blown away by the processor’s customization options that grant you unprecedented control over performance.

There are up to 4 different profiles included that allow you to adjust anything and everything from active cores to graphics frequency and even fine-tune your favorite applications.

To top it all, there is a revolutionary cooling solution specifically designed to improve thermal efficiency.

AMD Ryzen 5 3600 Processor

  • 6 CPU cores and 12 threads
  • Wraith Stealth Cooler with excellent thermal performances
  • AMD Ryzen Master Utility to support customization
  • Integrated Radeon Vega Graphics
  • Issues with overheating during reboot

Just like its aforementioned sibling, this Ryzen processor is powerful and focused on performance.

Fueled by 6 CPU cores with 12 threads, the AMD Ryzen 5 3600 Processor makes no compromise when it comes to results.

Get twice the bandwidth thanks to its PCIe 4.0 technology and optimize your performances as your needs require thanks to the Master utility that fully supports customization and fine-tuning.

We simply cannot omit to mention the Wraith Stealth Cooler that is as powerful as it is stealthy delivering excellent thermal performance with near-silent acoustics.

AMD Ryzen 7 3800XT Processor

  • 8 powerful CPU cores with 16 threads
  • Compatible with 500 and 400 chipset series
  • Full overclocking support
  • 7-nanometer technology
  • BIOS update may be necessary

Ryzen processors have had an ongoing romance with gameplay for years now and that is due to a good reason – or several reasons, as a matter of fact.

geared with 8 PCIe 4.0 cores with full overclocking support and 36MB of GameCache, you are on your way to double the bandwidth and the graphics and enjoy limitless gameplay at a whole new level.

The processor may not include a distinct colling solution as its aforementioned siblings, but we guarantee you will not miss it thanks to the incorporated 7-nanometer technology that guarantees next-to-silent acoustics.

AMD Ryzen 9 3900X Processor

  • 12 CPU cores with 24 threads
  • Full overclocking support
  • Compatible with AM4 motherboards
  • Powerful Wraith Prism Cooler included
  • Not all cores can support boost clock frequency

The AMD Ryzen 9 3900X Processor requires little introduction. Boasting 12 cores and no less than 24 threads, this is the world’s most advanced desktop processor and every gamer’s dream.

More bandwidth, more speed, more graphics, and pretty much more of anything – that is what you can expect from this ultra-fast cutting-edge technology-based processor that is practically unrivaled.

Feel free to customize performance and direct it to the apps you need most while enjoying 4.6 GHz boost clock and never worry about overheating thanks to the revolutionary Wraith Prism Cooler.

AMD Ryzen 9 3900XT Processor

  • 12 CPU cores with 24 threads
  • Full overclocking support
  • 7-nanometer cooling technology
  • PCIe 4.0 optimized
  • Fan may generate a bit of noise

With 12 CPU cores running at clock speed of up to 4.7 GHz, the AMD Ryzen 9 3900XT Processor will show you all about compromise-free performance.

This award-winning processor provides full overclocking support, up to 70MB GameCache, and double the bandwidth and the graphics you know for a truly innovative gaming experience.


Those are the top 5 AMD Ryzen deals at this hour. Which one caught your attention? While you’re here, why not take a look at these great CPU and motherboard combos?

Feel free to share your choice with us via the comments section below.

5 Trending Mini Projector Deals for Sharp Images

If you had planned to grab one of the mini projectors on Black Friday but somehow missed the hefty offers, you should thank your lucky stars because the deals have been extended to 2022.

Here is what’s hot in the Mini Projector arena this season.

Note icon NOTE
Deals are subject to change. Sometimes, some of the deals listed in our guides may no longer be available by the time you hit the buy button. So, hurry up and grab them while they’re hot.

5 Trending Seasonal Mini Projector Deals

Mini Projector – 3600L Hompow

  • Can connect multiple multimedia devices
  • Easy to use and install
  • Portable device
  • The speaker could be louder

In short, this continues to break record after record thanks to its impressive projection power and its impressive portability.

It gives an impressive 3600-Lumen worth of brightness and displays sharp images at up to 60-200 inches diagonal.

It’s very easy to use, and it also uses a 2020 noise reduction which will make you feel you are in a real theater setting watching your favorite movie.


DeepLee Mini Projector

  • Portable and easy to carry
  • Built-in speaker
  • 300 hours lifespan
  • No Wifi connection

Absolutely amazing, this gives 16700K richer colors using its top of the pile 600 lumens LED brightness.

It supports 1080P and is bright even in pitch dark environments. Plus, its multimedia interface means it every one of your devices for a lovable big-screen display.

The DeepLee Mini Projector is quiet, small, compact, and has a very affordable price. It’s a great choice if you are looking for a mini projector.


DBPOWER Mini Projector

  • Compatible with multiple devices
  • Fantastic brightness
  • Noise fan suppression
  • The writing font could be bigger

This offers a brilliant projection display measuring 32-170 inches (from 1-3m projection distance) and is another fantastic mini projector.

But the biggest news is the lamp life: Its advanced LED lamp could last twice the time similar projector do.

This beautiful portable projector is easy to use and thanks to the fan reduction suppression you will benefit from an incredible experience.


AuKing Mini Projector 2020

  • Up to 55000 Hours
  • Full HD 1080P HDMI
  • Built-in Speakers
  • Only 1 HDMI port

AuKing Mini Projector is renowned for creating premium private cinemas and delivers one of the most immersive viewing experiences.

And it currently comes with a new cooling design which greatly reduces the fan noise. Plus, it’s now delivering about 55000 hours of lamp life.

All in all, is a great mini projector, in the price range, that will bring you good quality for anything you want to project using it.


CiBest Video Projector

  • 80% brighter
  • 2000:1 contrast ratio
  • 30-200-inch screen size
  • Quiet
  • Focus could be better

This model is 80% brighter than other models, and it supports full HD resolution as well as a 2000:1 contrast ratio. the projector is compatible with a wide range of devices including iOS devices.

Regarding playback, you can easily play any type of content without restrictions. The screen size varies between 30 to 200 inches, which is more than enough.

This is a great device, and it measures 7.87 x 5. 5 x 2.7 inch while weighing 2.25 lb, so you can easily carry it with you wherever you go.


There goes the trending mini projector offers on this Cyber Monday. Don’t be left behind again as these deals are expiring soon.

Steam Self Updater Keeps Popping Up: 5 Ways to Fix It

Steam‘s Self Updater is a handy feature that allows you to download and install the latest updates for your games automatically. It’s a handy tool, especially when you don’t have much time to waste. 

Lately, users have noticed that the Self Updater keeps popping up an unusual amount of times. Updates are a way for developers to fix bugs and add new features to their games and software. However, it can be annoying because it causes interruptions when playing. 

Why does Steam keep updating itself?

Here are a few of the most common reasons why Steam keeps updating itself:

  • Problematic update – If Steam encounters an error while trying to write an update, then it may keep trying to write that same update over and over again. This can happen if the file being written is corrupted or otherwise damaged.
  • Virus infection – If your computer has been infected by a virus, it’s possible that it is interfering with the Steam client trying to update itself. You should make sure you have a comprehensive antivirus program and that it is up-to-date.
  • Corruption of game files – It’s possible that one or more of your Steam files got corrupted and Steam can’t verify the integrity of your game files. It will therefore try to download a new copy of all files every time.

How can I stop Steam’s Self Updater from constantly popping up?

Before moving on to the slightly technical steps, try the following first:

  • Ensure you are running the latest version of the Steam client.
  • If there are any Steam-related background processes, close them from the Task Manager and try again.
  • Try restarting your Steam client.
  • Finally, try restarting your PC and check if the issue persists.

1. Set Steam auto-update time restrictions

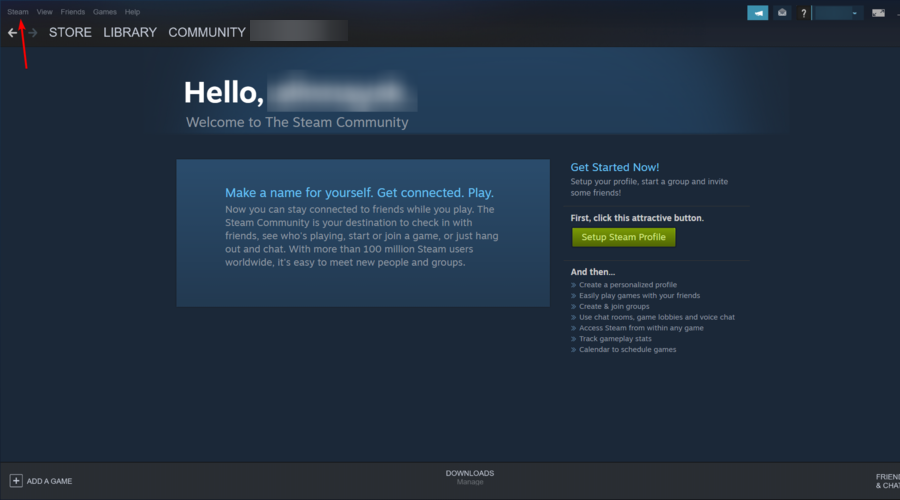
  1. Launch Steam.open steam from search box
  2. Click on Steam.navigate to steam settings
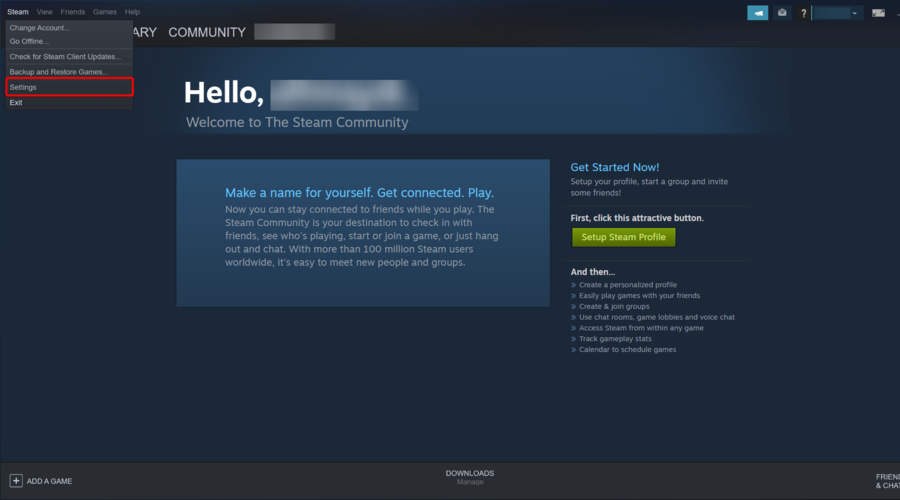
  3. Click and from the drop-down menu, select Settings.navigate to settings menu
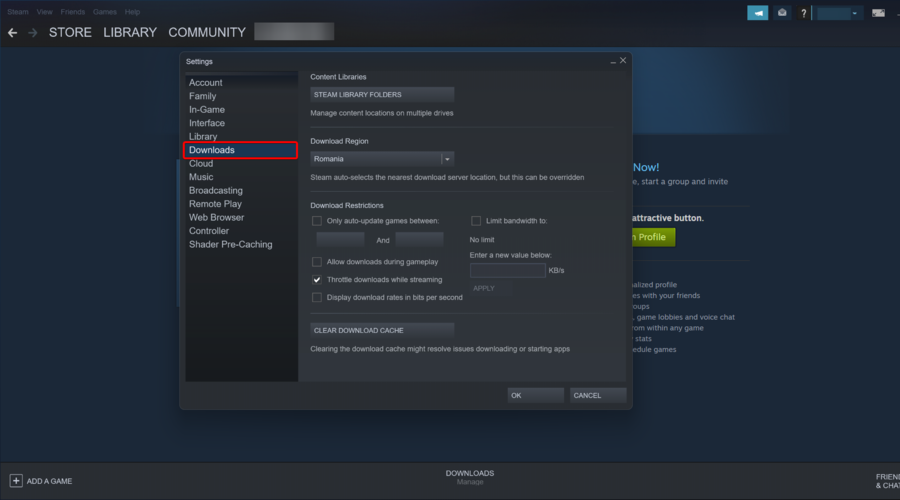
  4. Select Downloads.go to downloads
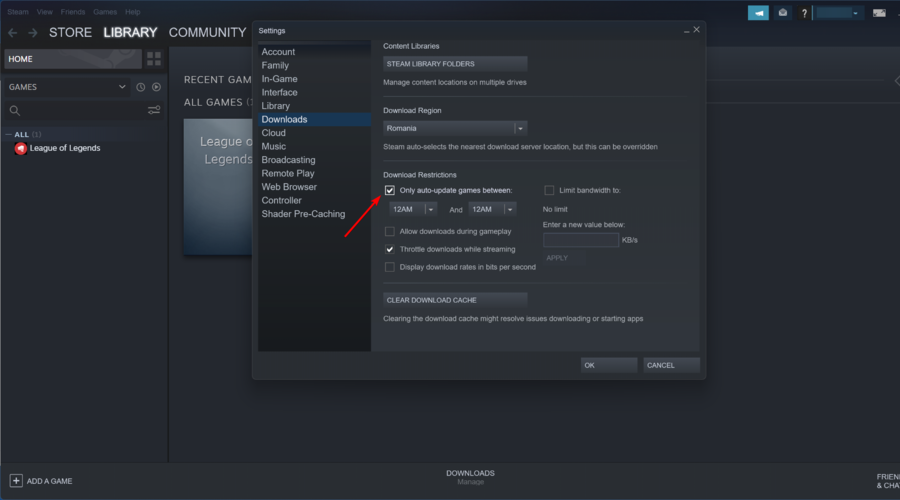
  5. Locate Download Restrictions and check Only auto-update games between checkboxes.
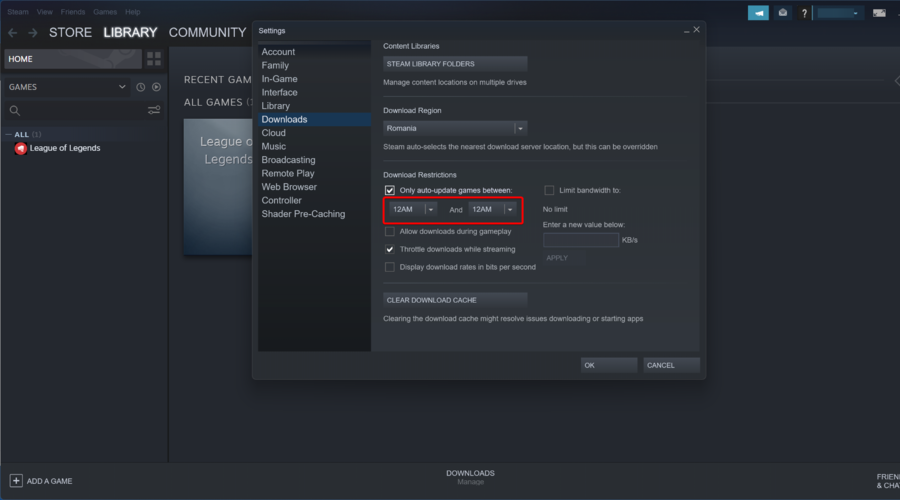
  6. Select a suitable time frame from the two drop-down time menus when Steam can auto-update to prevent disturbances while playing.

If you want to control when your games update to reduce the impact of Steam updates on your network and PC performance, you can restrict Steam’s auto-update feature to a specific schedule. This will bring the interruptions to a minimum.

2. Clear Steam cache

  1. Right-click on your Steam desktop app, then choose to Run as administrator.open steam from search box
  2. Navigate to the Steam menu at the top left corner, and click on Settings from the drop-down menu.navigate to settings menu
  3. Click on the Downloads tab from the left side of the Settings window.go to downloads
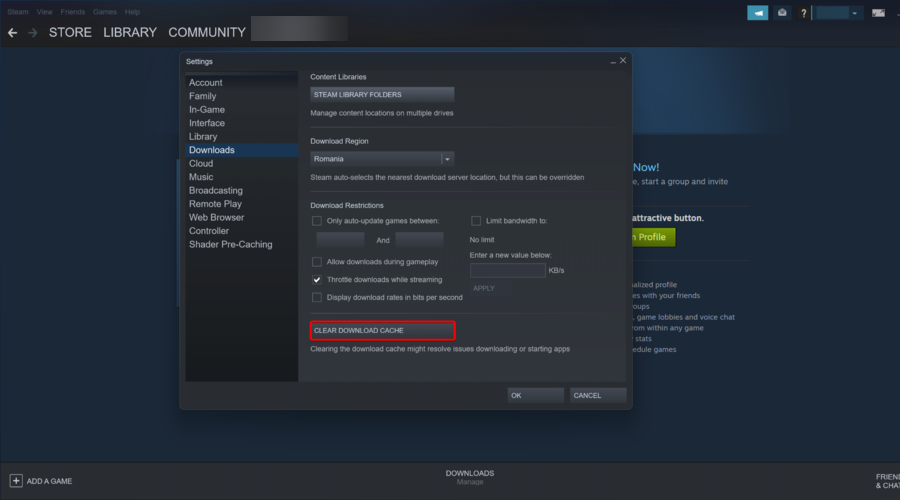
  4. Hit the Clear Download Cache button.
  5. A confirmation window will open. Click OK on that window to confirm.
  6. Select OK on the Settings window.
  7. Restart Steam after clearing the downloads cache.

3. Opt out of the Beta version

  1. Launch Steam, navigate its menu, and click on Settings from the drop-down menu.navigate to settings menu
  2. Next, under Settings, click on the Account tab on the left.
  3. On the right, go to Beta Participation and click on Change.
  4. Now, in the Beta participation dialog, select NONE – Opt-out of all beta programs from the Beta Participation drop-down and press OK to save the changes.
  5. Hit OK again to apply the changes and exit.

The Steam beta version is the testing version of Steam. It’s where all the new features and changes get tested before they’re released to everyone. The beta version of Steam should be used by advanced users only, as it may contain errors or crashes that can cause harm to your computer.

4. Rename the Client registry.blob file in the Steam folder

  1. Close Steam, and then go to the default location of Steam which is usually in the C: drive.
  2. Locate the Clientregistry.blob file in the Steam folder, copy this file, and paste it onto your desktop with a new name.
  3. Next, go back to the Steam folder, and delete the original ClientRegistry.blob file.

There’s no harm in deleting the ClientRegistry.blob file, as it is a cache file that may cause problems with Steam.

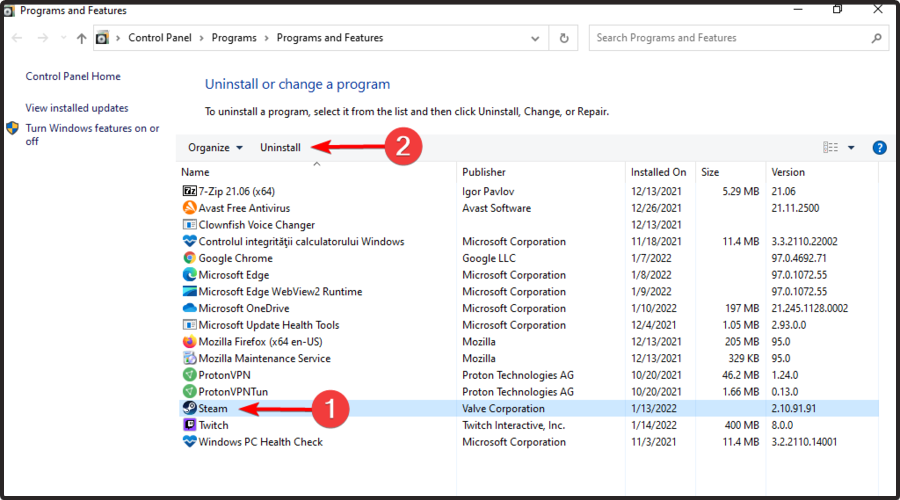
5. Uninstall and reinstall Steam 

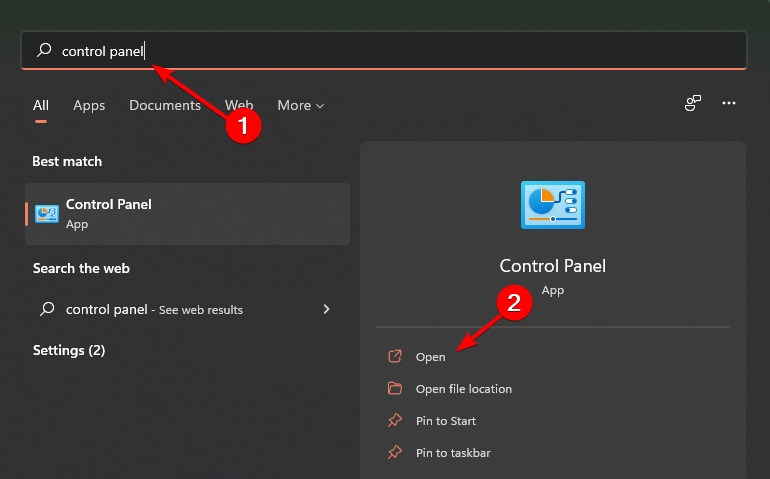
  1. Hit the Windows key, type Control Panel in the search bar and click Open.
  2. Select Uninstall a program under Programs.going uninstall program control panel
  3. Navigate to Steam, right-click and select Uninstall.
  4. Reboot your PC.
  5. Download and install the Steam client from the official website.

In another instance, some users complained that Steam is constantly running, so don’t hesitate to check out our detailed guide on how to fix this issue.

You may also encounter an issue where Steam lags, but we have adequately covered various fixes.

Let us know if you can get rid of the Steam Self Updater that keeps popping up in the comment section below.

4 Best Graphics Cards For Gaming In 2026

If you need a new GPU to power up your computer, look no further. You still have the chance to buy an excellent graphics card even if you missed the bus on Black Friday.

If you’re looking for graphics cards on sale this 2022, you’ve come to the right place, so let’s get started.

Note: Deals are subject to change. Sometimes, some of the deals listed in our guides may no longer be available by the time you hit the buy button. So, hurry up and grab them while they’re hot.

What are the top graphics cards deals to get?

ASUS TUF Gaming NVIDIA GeForce RTX 3080 V2

  • NVIDIA Ampere Streaming Multiprocessors
  • 2nd Generation RT Cores
  • 3rd Generation Tensor Cores
  • Great for overclocking
  • Military-grade Capacitors
  • Generates a lot of heat

If you’re looking for graphics cards on sale for Christmas, then this is the best model for you.

The card comes with NVIDIA Ampere Streaming Multiprocessors, delivering an outstanding performance and power efficiency.

2nd generation RT Cores are available, and you’ll get twice the throughput compared to the previous model. As for the clock speed, you can overclock the card up to 1815MHz.

NVIDIA GeForce RTX 3080 V2 OC Edition offers incredible performance, and it’s a great choice for high-end gamers and a great GPU for video editing.

EVGA GeForce RTX 2070

  • 8GB GDDR6 memory
  • Real-time ray tracing
  • 3-year warranty
  • Turing GPU architecture
  • Coil whine

This GPU features a real boost clock of 1770 MHz. It can power you through an intense and long gaming session. Not to mention that the GPU comes with a 3-year warranty for peace of mind.

The real-time Ray Tracing technology and the 8 GB of GDDR6 memory will work even for the latest titles. If you’re looking for 2060 graphics card for Christmas, you might want to get this model since is far superior.


EVGA GeForce GTX 1070 Ti

  • 8GB GDDR5 memory
  • EVGA OCX Scanner OC
  • DX12OSD support
  • EVGA Blower Exhaust Fan and white LED
  • Noisy when overclocked

EVGA GeForce GTX 1070 Ti is a powerful GPU that’s suitable for power-users. So, if you’re planning to overclock your system and put much strain on it, then this is the right graphics card to choose.

Key features include 8GB GDDR5, EVGA Precision XOC to apply the right overclock settings for you, a new 2.5 slot cooler, and very silent fans.


MSI VGA Graphic Cards RX 580

  • 1366MHz base clock
  • 8GB GDDR5 RAM
  • Overclock support
  • AMD FreeSync
  • All solid capacitors
  • Not suitable for 2K gaming
  • Can’t run latest games at maximum settings

If you need need a graphics card that won’t break your bank, this model might be what you need. It comes with 1366MHz base clock, and it has 8GB GDDR5 RAM, so it’s perfect for all types of multimedia.

Of course, overclocking it supported and you can get extra performance out of it. AMD FreeSync is supported, so no missing frames or screen tearing.

Thanks to the all solid capacitors, your card will remain cool even during the most intense gaming sessions, which makes it a perfect choice for less demanding gamers.

These are some of the best GPUs to purchase on Christmas. Don’t miss out on this chance and buy the GPU that best suits your needs.

If you’re wondering when will graphics card prices drop, we still don’t have any reliable information, and if you missed our Black Friday GPU deals, this might be a perfect time to get a new GPU.

What is your graphics card of choice? Let us know in the comments section below.


5 Best VPN Routers For Sale

VPN connections enable users to navigate the Internet more securely. They minimize data breaching risks and allow you to surpass ISP restrictions.

Setting up a VPN will also allow you to access the geo-restricted content on streaming platforms so you can enjoy your favorite show regardless of your physical location.

VPN routers are great for households with multiple devices because all of them will automatically be VPN-protected at all times, without the need for additional configurations.

Most VPN routers place no limit on the number of devices you can connect, as long as your network supports it, and if they do have a limit, it generally covers more devices than a VPN subscription service would provide.

Some VPN routers can convert public Wi-Fi networks to private Wi-fi sources. They are typically very easy to set up, so you can get a private connection anywhere, in just a few minutes.

We picked the best VPN deals available this year, take advantage of these limited offers and secure your connection at a fraction of the regular price.

What are the best deals on VPN routers?


There are plenty of good options available on the market. We made sure to select the ones that offer the best value for the money and are proven to provide high-quality and stable connections.

Be sure to pick a product that covers all your needs. All routers mentioned above have detailed descriptions in their Amazon listings, so make sure to check them out.

Please let us know which of these VPN routers is your favorite. Also, if you have suggestions for other similar tools, feel free to use the comment section below.

5 Best Deals on Mesh WiFi System to Enhance Coverage

Many of us have experienced Wi-Fi signal loss, disconnects, errors, invalid Wi-Fi IP address alerts, and many other issues. Wi-Fi connectivity and signal strength problems are some of the most frequent Internet issues encountered by Windows 10 users.

Today we want to fix the root cause of most of your wireless problems: poor Wi-Fi coverage.

The good news is that buying a reliable Wi-Fi mesh system is quite a bargain if you catch a good deal.

Why wait when you can get a useful wireless mesh right now? Scroll down to check the list.

Note icon NOTE
Deals are subject to change. Sometimes, some of the deals listed in our guides may no longer be available by the time you hit the buy button. So, hurry up and grab them while they’re hot.

What are the best deals on Mesh WiFi Systems?

NETGEAR Orbi Mesh WiFi System

  • Tri-band Wi-Fi
  • Works with multiple internet providers
  • Beautiful design
  • Satellites occasionally disconnect

This mesh WiFi from Netgear includes a WiFi Router and 2 Wall-Plug Satellite Extenders with speeds up to 2.2 Gbps to cover over 5,000 square feet.

Orbi is the highest performance Mesh WiFi system on the market, certified by an independent study.

The Orbi app allows easy set up to create a guest network, access parental controls, and run speed tests right from the app.

Also, check NETGEAR Orbi Ultra – fastest WiFi router and single satellite extender with speeds up to 3 Gbps over 5,000 sq. feet.

  • Can cover up to 5,000 square feet
  • Whole-house coverage
  • Dual-band connectivity speed
  • Can lose connectivity at times

This is an Intelligent Mesh System with easy setup through the Linksys app.

It is a Tri-band Wi-Fi ideal for home with 5+ bedrooms and a patio, maximizing WiFi range and speed for all your devices.

It provides nice coverage for the entire home place and you can also use it to connect to your existing modem.

ASUS Lyra Mesh WiFi System

  • Parental control
  • PC-Free setup
  • Versatile design
  • A bit difficult to set up

ASUS offers a 3 Packs Home Mesh WiFi System with free lifetime Internet Security by Trend Micro. It works well with Amazon Alexa and you can easily set up parental control, network management, and diagnostics.

A noticeable design with a vertical antenna that optimizes wireless signal while preserving a modern look to fit any living space.

Tenda MW6 Mesh WiFi

  • Entire home coverage
  • Easy to set-up and install
  • Can connect 90 devices
  • Poor customer service

Tenda MW6 Nova Wave is a 3 pack Wi-Fi Mesh System to cover 6,000 square feet and eliminate dead zones.

Better check out the available stock for this Mesh Wireless-Access Point system, fit for major modems and ISP’s like AT&T, Comcast, Time Warner, Verizon, Spectrum.

[Bonus] NETGEAR Nighthawk Mesh Extender

  • coverage up to 2500 square feet
  • Connects up to 50 devices
  • Patented fastlane3 (TM) technology
  • A bit expensive

This is a limited time deal you could benefit from today. NETGEAR offers a Tri-Band WiFi Mesh Extender that works with any WiFi Router.

You can use your existing router to create a network with One SSID/Network Name. The MU-MIMO feature enables simultaneous streaming of data to multiple devices.

Best Sound Machine Sales & Deals

Black Friday is finally here and there are a few amazing deals available for everyone. Particularly, if you intend to get yourself a sound machine, note that they are available for purchase at a discounted price.

A sound machine is quite essential as it helps create a relaxing environment that ultimately promotes good sleeping habits. Apart, from the white noise and other noise colors, the device also produces natural and ambient sounds like chirping birds.

Therefore, if you intend to revolutionize your sleeping habits, this is definitely the time to get the machine. You can get it at a steal through this year’s Black Friday deals on sound machines and keep in mind the following:

  • Volume – A noise machine is not supposed to be too loud. Actually, it is supposed to help you sleep. Prolonged exposure to loud noises from the gadget could affect your hearing ability. An ideal gadget should not exceed 50 decibels, especially if you have an infant in your household.
  • Customizable – The device should have the allowance for alteration to suit the user’s needs. Besides, people have different reactions to different sounds. Your pick should come with a couple of customizable noises, which will help out a lot.
  • Clean loop – The buyer should be aware whether it uses sound recordings or mechanical noises. If it is using recordings, then there is a high probability that it will face some glitches when looping. This is a major impediment as it will affect your sleep.

What are the best deals on sound machines?

All these items have special prices.


It is quite obvious that there are plenty of deals on sound machines. All you have to do is narrow down the list by singling out the specifications that you want yours to have.

Your set budget plays a crucial role, but you will definitely find one that suits your needs perfectly. Also, be sure to check out the product description for additional features that the device comes with. They vary from one device to the other.

Get yourself a sound machine today! Feel free to share the selection you made with us in the comments section below.

Best Cricut Maker Easypress Super Sale

The heating machine purchasing frenzy begins! There are so many on the market that finding the top-rated and functioning one becomes a challenging process.

But let’s cut the confusing search short and talk about Cricut. The Cricut EasyPress is a heat tool particularly intended for putting iron-on materials into your creative prints.

It produces professional iron-on effects in as little as 60 seconds. Iron patterns onto shirts, bags, pillows, flags, shoes, caps, and blankets, and it goes on.

The Cricut Mug Press allows you to imprint any image or pattern, making it ideal for a distinctive holiday mug present. It’s so fantastic that you can’t afford to miss it. Furthermore, they include print-specific ink.

This is a fantastic opportunity. We were able to get you the finest bargains on Cricut press machines from Amazon. Make sure to get yours before the clock runs out!

Note icon NOTE
All the prices and offers in this article are subject to change, so be sure to check the official product page to get the latest deal. If the product or offer you’re looking for is no longer available, you can try to find it on its official manufacturer page or get another one from our list.

What are the best Cricut heat press Black Friday deals?

All these items have special prices.

Cricut products, ranging from cutting and heating machines to crafting basics, make it simple to create for pleasure. It is suitable for friends and family, or even for a small company.

Consider the possibilities and how simple it is to accomplish this. You no longer need to look for the ideal heat press; you’ve just discovered it.

As the Holiday season approaches, this is a must-have for every craftsman, perfectionist, designer, or enthusiastic creator of creative and abstract stuff.

We would be more than thrilled to talk about your Cricut choices in the comment section below.

Windows 11 0xc1900101 (We Couldn’t Install Windows): Fix

Our readers constantly encounter the 0xc1900101 error code while using the Windows 11 Installation assistant. This occurs when they try to upgrade to the new operating system or perform a regular update on a Windows 11 device. 

The Windows 11 0xc1900101 error code is generic. Several reasons exist, including installing a third-party antivirus on your device or even having outdated BIOS firmware. 

Most users have reported that the error code appears when they are in the process of installing Windows 11 on their devices. The error would then halt the process at a certain percentage. 

It is worth noting that it will still occur regardless of the mode you use to install Windows 11 on your device. For instance, the error code affects the Media creation tool, ISO file, Windows Update, and Installation Assistant. 

What does the Windows 11 Update Error 0xC1900101 mean?

The 0xc1900101 Windows 11 update code on your screen indicates that the core system files are either corrupted or broken.

The immediate action to take when such a situation presents itself would be to create a system restore point before trying to resolve the issue.

When the error code appears on your screen, it will come with a prefix before it. Some of them include 0xc1900101 0x30018, 0xc1900101 0x20017, 0xc190010 –0x40021, 0xc1900101– 0x3001a, 0xc1900101 0x2000c and 0xC1900101– 0x4000D.

The error code will present itself in one of the following formats on your screen:

What causes the 0xC1900101 error code in Windows 11?

If your device lacks sufficient disk space, you will likely encounter the error code on Windows 11. It may also appear on your screen if there is a problem inside SATA or BIOS. 

Moreover, the bug is often related to outdated device drivers, corrupted system files, or problematic app installation. 

Therefore, there are quite a large number of common causes of Blue Screen of Death errors. It would help if you took good care of your device to avoid getting into such a situation.

However, the issue should not be a significant concern as we have compiled a list of simple methods you can use to eliminate this. Don’t fret!

Why is my Windows not updating?

There are a few reasons for update errors and issues. Here are some to note:

  • Internet connection problems – An update downloads files off the internet; without a good connection, this will not happen.
  • Insufficient disk space – Like we said, there will be downloaded files, and you need to have enough disk space to accommodate them; if not, the computer will not proceed to update.
  • Corrupted system files – It should go without saying that most activities are hampered once you have corrupted data. To avoid this, you must back up your data and create a restore point.
  • Incompatible antivirus programs – These have also hindered Windows updates and should be disabled or removed before proceeding with the update.

Let us now get to fixing the 0xC1900101 Windows 11 update error for you.

How do I fix the Windows 11 install error 0xC1900101?

1. Use the Windows Update Troubleshooter

  1. Press Windows key + I to open the Settings app. Then, select System and click on Troubleshoot on the left side of the window.
  2. On the right side, look for Other troubleshooters and click on it. Then, click on Windows Update and select the option Run the troubleshooter.
  3. The troubleshooter window will open. Wait for it to identify the problem that is preventing you from making the update.
  4. A window will pop up highlighting the issues and also indicating whether the problem has been resolved.
  5. Then, restart your device and check if the error has been resolved.

This is the best and easiest method that you can use to find out the reason preventing you from making the new operating system installation or up-gradation on your device. 

2. Clean up disk

  1. Press the Windows key + S key to open the search bar immediately, then type the code below and press Enter.
    cleanmgr
  2. Then, select the System drive and click on OK.
  3. Please be patient while calculating how much data can be erased from the disk.
  4. Click on Clean up system files.
  5. Then, choose the System drive and click on OK.
  6. Then, check all the boxes present beneath Files to delete option and click on OK.
  7. Use disk cleanup to wipe out junk. To confirm the action, click on Delete files.
  8. After completion of the removal process, reboot the PC.

When installing Windows 11 using the Media Creation Tool, it is essential to note that you need around 20 GB or 64-bit OS. Therefore, you should ensure that the local disk you wish to install the operating system has sufficient space. 

3. Remove all secondary devices and unplug all cables

If too many devices and cables are connected to your device while trying to upgrade your Windows, then the 0xC1900101 installation error code will appear.

You must disconnect all secondary devices and unplug all cables from your PC, such as printers, broadband, and soundbars. This will get you a step closer to resolving the installation error code. 

Moreover, if you are using a desktop, it is recommended that you unplug all the cables connected to your hard disk and clean off the dirt on it. 

Connect the cables back to your device. It is also essential to ensure that you eject and reconnect your device’s wired mouse and keyboard. 

Then, you should try installing the Windows update on your device using bootable media to see if it works. 

4. Remove recently downloaded applications

  1. Open the Control Panel.
  2. Then, select Programs and click on Programs and Features. 
  3. You will then be taken to a page where you can Change a program or Uninstall it. 
  4. Then, select the program that you recently installed and click on Uninstall. 
  5. The confirmation window will appear; click on Uninstall. 
Note icon NOTE
You are only allowed to uninstall applications that you installed using their executable files. 

On the other hand, applications downloaded from Microsoft can only be uninstalled using the following steps:

  1. Press the Windows+ X keys. Then, select Apps & Features.
  2. Scroll down to find the application that you recently downloaded and installed. Click on the application and select the Uninstall option.
  3. Verify that the Windows 11 0xc1900101 error is resolved.

Suppose you recently downloaded and installed a new program and the installation error code started appearing. In that case, you need to uninstall the application because it is most likely the one causing the issue. 

5. Update your faulty driver

  1. 1. Press Windows key + X key simultaneously to open the Power menu.

  2. 2. Select Device Manager from the list.

    device manager power menu
  3. 3. In Device Manager, expand each section to find the problematic driver. The Yellow exclamation mark next to a driver signifies that the specific driver is problematic or buggy.

  4. 4. When you find the faulty driver, right-click on it to bring up a set of options.

  5. 5. Select the Update driver option.

    windows 11 0xc1900101 update faulty driver
  6. 6. Then, click on Search automatically for drivers and let the system search for any pending updates online.

    windows 11 0xc1900101 update driver
  7. 7. If the above search finds any pending updates, they will be automatically downloaded and installed.

  8. 8. Finally, restart your device to save the changes made.

  9. An outdated or corrupted Windows will prevent you from installing a new operating system on your device. Updating your drivers should resolve the Windows 11 0xC1900101 installation error.

You can also use an automated tool to find and update all your drivers, even the corrupted ones. Outbyte Driver Updater is a specialized tool with a database of over 18 million driver files that is updated almost daily.

Outbyte Driver Updater

Keep all drivers up to date automatically and fix most of these errors.
Free Trial Download

6. Run the SFC command

  1. Press the Windows + X keys simultaneously to open the Power menu. Then, select the Run option on the list.
  2. Then, type cmd in the text box and click on OK.
  3. Press Ctrl+Shift+Enter to open Command Prompt as Admin. If the User Account Control dialog appears, click Yes to authorize the access.
  4. Then, key in the command below and press Enter.
    sfc /scannow
  5. Wait for the process to end, then restart your device and try to upgrade your Windows once more. 

If your device has corrupted system files or there are a couple of files missing on the operating system, then this may prevent a smooth, seamless up-gradation, 

Therefore, you must use the System File Checker to resolve the installation error code. 

7. Disable your network adapters

  1. Press the Windows + R keys to open the Run dialog. Then, enter the script below and click OK to open Device Manager.
    devmgmt.msc 
  2. Find and expand the Network Adapters section.
  3. Right-click on each entry and select Disable device using the context menu. Repeat this process until you disable all the drivers under this category.
  4. Then, restart your device to save the changes that you have made. 
  5. Retry installing the Windows update on your device using bootable media.

8. Clear CMOS

Tip icon Tip
It is essential to seek assistance from a professional technician when using this method. Any incorrect changes made to your BIOS will have significant adverse effects on your device. The process is tedious and complex.
  1. Switch off your device and disconnect all the power cords connected to your device. 
  2. Open the casing, and you will see a flat battery attached to the motherboard. 
  3. Remove the CMOS battery.
  4. Wait for approximately 5 minutes.
  5. Place the battery back at its original position and set the casing back with great care. 
  6. Don’t forget to attach all the cables back to their default locations.
  7. Start your PC and retry upgrading Windows again.

Resetting the BIOS on your device will surely help you get some headway with the installation error code. However, it is essential to note that this method is easier to perform on a desktop than on a laptop.

9. Check for disk errors

  1. Open Command Prompt as administrator.
  2. Then, enter the script below and press Enter:
    chkdsk C: /f /r /x
  3. Wait for the scan to end, then reboot Windows.

Specific and logical physical issues on your system drive can also cause the Windows 11 update error 0xc1900101. The CHKDSK utility will help you resolve the issue.

10. Create space on your disk

  1. Press the Windows + E keys simultaneously to launch the File Explorer, then click on This PC on the left column.
  2. Click Local Disk (C:), and see the availability of free space on the root drive.

Installing Windows 11 requires at least 16GB or more, just like any operating system. However, if your device does not have enough space, you can use the Disk Cleanup tool to clear all the junk and old installation files on your device.

Storage can prevent you from smoothly installing the new operating system. Freeing up some space will help you eliminate the installation error code. 

11. Upgrade in clean boot

  1. Press the Windows key, type in the script below, and press Enter to open the System configuration.
    msconfig.exe
  2. Select the radio button set before Selective startup. Then, uncheck the Load startup items.
  3. Move to the Services tab and click the checkbox present alongside Hide all Microsoft services. Then, select Disable All.
  4. Next, move to the Startup tab and click on Open Task Manager.
  5. Right-click on any program listed on the window that pops up and select Disable.
  6. Disable all startup programs similarly.
  7. Go back to the System Configuration window, click Apply, and then OK.
  8. Reboot Windows and try to download and install the update.

Sometimes, third-party applications and services conflict with the in-built ones, ultimately causing the system to go through unexpected challenges. Therefore, starting Windows in a clean boot can help you avoid such situations.

Clean boot allows you to start the system with basic components creating an enabling environment for the installation process.

12. Repair corrupted system files

  1. Click the search icon from the taskbar and type in the following code:
    cmd.exewindows 11 0xc1900101
  2. Then, press Ctrl + Shift + Enter keys simultaneously. If a User Account Control prompts, click on Yes to grant administrative privileges.
  3. Key in the following code and press Enter:
    dism/Online/Cleanup-image/Restorehealth
  4. After the DISM scan, run the following code on the same window:
    sfc/scannow Windows 11 0xc1900101
  5. Wait for the scan to end. Then, restart your device and try to install the update again to see whether the Windows 11 0xc1900101 issue has been resolved.

Accidental changes in the settings or registry can cause some system components to go missing or even become corrupted. 

The process is stopped when the system fails to access the necessary files while performing the update, and the error code appears. 

How can I fix installation error codes in Windows 11?

Performing a clean installation on your device might get you over the hump if none of the above methods worked. This is the only workaround available if you need to get Windows 11 on your operating system.

You must note that a clean install on your device will make you lose all the data, including the installed applications in the system drive. 

Why did Windows Update fail?

Your system files may have recently been destroyed or damaged, which is why Windows Update failed. Additionally, obsolete drivers may cause an update to fail.

But also, as we stated before, internet connection problems, insufficient disk space, and incompatible antivirus programs play a role.

Do not hesitate to perform a clean Windows 11 install on your device even without the assistant. If you experience Windows 11 installation problems, one helpful trick is to enable TPM in BIOS.

Moreover, feel free to use third-party repair applications that will help you deal with a wide range of Windows update difficulties, such as the 0xC1900101 installation error code on Windows 11.

Have you managed to fix the Windows 11 0xc1900101 error? Do not hesitate to share your experience with other readers in the comments section below.

5 Best Gaming Mouse Bungees Deals

When you’re happily gaming, it’s so easy to miss signs that you don’t have something essential. Gaming mouse bungees are famous in the gaming world, so how’s it that you don’t have one already?

Some great gaming mouse bungee deals are now waiting for you to correct that. They’ll make sure you will end up playing for hours on end without ever worrying about your mouse cable tangling.

Mouse bungees also provide a much more precise movement of your cursor, which could just take your gaming performance to the next level. That’s why it’s a great idea to look towards purchasing a gaming mouse bungee unless you clearly use a wireless mouse.

What are the best gaming mouse bungees on the market?

Razer Gaming Mouse Bungee v2

Razer Mouse Bungee v2

Razer Gaming Mouse Bungee v2 is an ideal accessory for gaming or even office use, if you want smooth comfort all around.

Compatibility is limited, yet if you are lucky enough to own a suitable mouse, you can fully understand why this device is considered one of the best gaming mouse bungee sets available.

Pros:

  • Compact design
  • Anti-slip grip
  • Great drag-free cord management
  • Rust-resistant spring arm

Cons:

  • Doesn’t allow usage with thicker cable
  • You need to give a little extra room for the cord in order for it to easily reach the bottom of your mousepad

⇒ Check price

ENHANCE Pro Gaming Mouse Bungee Cable Holder

ENHANCE Pro Gaming Mouse Bungee

One of the standout features of the ENHANCE Pro Gaming Mouse Bungee is the 7 LED Color Mode which provides customized ambient lighting to your gaming setup.

So, there is no need of a crazy design element to keep things interesting this time. However, the LED light goes to the default Blue color when you turn the power off. Therefore, you need to leave it at Blue or change the colors every time you boot your PC.

Pros:

  • 4 USB ports so that you can plug in different devices
  • LED light with different colors
  • Spring loaded cable support arm for improved mouse accuracy

Cons:

  • Some users describe plugging the webcam into one of the USB ports just to be immediately fried
  • Lights don’t work properly

⇒ Check price

Cougar Bunker RGB Mouse Bungee

Cougar Bunker Mouse Bungee

If you are a gaming enthusiast, we highly recommend the Cougar Bunker RGB Mouse Bungee. While this is a great mouse bungee ready to ensure no snagging of the cable, the additional features are the ones that make your day.

As its name suggests, it comes supplied with RGB lights that display up to fourteen fantastic lighting effects. There’s also a unique vacuum suction pad, which gives the bungee the highest levels of steadiness.

Pros:

  • BUNKER RGB patented design
  • Durable at only 105 grams
  • Two USB ports for powering of your peripherals

Cons:

  • Not compatible with thicker mouse cables

⇒ Check price

ENHANCE LED Gaming Mouse Bungee Cord

ENHANCE LED Bungee Cord

When you want accurate mouse work with full freedom of movement, a mouse bungee made from silicon seems ideal.

ENHANCE LED Gaming Mouse Bungee is extremely flexible and can move around with the movement of your mouse to provide permanent consistency.

Pros:

  • Silicone bungee arm
  • 4 USB 2.0 ports used to power peripherals like gaming mice, keyboards, and more
  • Impressive LED accents to match your mouse, headset, and keyboard’s lighting effects; they can be easily turned on or off
  • 3 year warranty

Cons:

  • Only a rubber feet at the bottom to hold it anchored in place

⇒ Check price

KLIM Mouse Bungee RGB Extension

KLIM Mouse Bungee

KLIM Mouse Bungee – RGB Extension for Mouse is designed to eliminate cable tangling at a rather modest price. Still, except for being decently priced, it has some features which will make you love it.

A USB hub + mouse bungee seems like a great scenario to combine two products without having to make any compromises to the functionality. That’s exactly what you could get by buying this 2019 product.

Pros:

  • Has a couple of handy USB ports
  • Retractable arm lets you use KLIM Bungee as a USB hub
  • Very well weighted
  • 5 year warranty

Cons:

  • Impossible to control the LED lights

⇒ Check price

Final words on gaming mouse bungees

As you can see, we ventured forth and dug through some great gaming mouse bungee offers. Now that you’ve checked our list, which one are you planning to buy?

Regardless of your choice, remember that these are limited-time deals. You should better hurry up!

BlackFriday 2023 Soda PDF Sale: Get it 60% + Extra 20% Off

Editing your PDF files doesn’t have to be hard, as long as you have the right tools for the task, such as Soda PDF for example.

The software is available at 60% + an extra 20% discount for this shopping season, so let’s see what it offers.

What is Soda PDF and how does it work?

Soda PDF is a beautifully designed PDF editing software that allows you to read PDFs and EPUBs with ease. The software also allows you to create PDFs from any files or directly from the scanner.

Speaking of PDF creation, you can combine multiple files and formats into a single PDF. It’s also possible to split a single PDF into multiple documents if you wish.

The software supports full editing, allowing you to easily rearrange elements on the page. You can even annotate pages with notes, comments, and other visual elements.

Speaking of editing, we have to mention that you can easily rotate, reorder, add or remove pages from any document, and create fillable forms. If needed, you can also compress the PDF file without affecting its quality.

Of course, file conversion is available allowing you to convert PDF to Microsoft Office files or images. OCR is available, allowing you to easily convert scanned documents into editable PDFs.

Lastly, with the E-Sign feature, you can easily sign documents or manage signatures in real-time.

Get Soda PDF for 60% + extra 20% off

Soda PDF

With Soda PDF you should be able to create, edit, and convert and PDF document like a pro.

Have you ever used SodaPDF? If not, be sure to get it with this great 60% + extra 20% discount.

6 Best Video Editing Software on Deals & Sales

Video editors are essential if you use to record lots of footage with your camera or if you are a blogger and content creator.

After you recorded a video, you can edit and refine the final output using video-editing software, export it to numerous file formats for playback on various devices, and share it on social media platforms

We did the heavy-lifting work for you and compiled this list of the hottest video editing software deals available this year. Scroll down to check them out.

What are the best video editor deals?

Adobe Premiere

If you are looking for a software solution that aims to meet all your video editing needs, then the latest edition of Adobe Premiere may be the perfect option for you.

Adobe‘s cloud hosting capabilities make it easy for your colleagues and teammates to collaborate on all your projects.

Integration with other Adobe products is also present, allowing you to unleash your creativity to the full extent.

With Adobe Premiere you can easily make all sorts of videos, and with its extensive features, it’s perfect for both home users and professionals.

Adobe Premiere

Bring your imagination to life with the best video editing tool that will support all your developments. Get the best deal now!
Free trial Visit website

Corel VideoStudio Pro

Corel VideoStudio Pro helps you create amazing videos with its simple to use editor which makes it perfect for all skill levels, from beginners to experts

It supports multi-camera editing, but also lets you import and edit your clips and share them easily with others.

The interface fully supports drag and drop, so it’s easy to navigate, and with tens of available effects, you can achieve some incredible results.

Let’s quickly look at its key features:

  • Easy to use
  • Templates and tutorials available
  • Tens of filters and effects to choose from
  • HD, 4K & 360 video editing
  • Color and lens correction
  • Batch processing
Corel VideoStudio Pro

Corel VideoStudio Pro

Catch your favorite moments on camera and edit them the way you like with this versatile software. Try it now!
Check price Get it now

Filmora

Filmora is one of the best video editing applications, and it’s suitable for first-time users and professionals alike.

The application supports features such as Keyframing, motion tracking, green screen, color matching, split-screen and more.

Additional features include the ability to adjust the brightness and the playback speed.

The music library is also present, allowing you to easily add music to your videos. Once you’re done editing your videos, you can then share and upload the resulting video to YouTube, and Vimeo directly from the program.

Filmora

Filmora

Stylize your videos to make them look amazing with this amazing video editing tool. Try it now!
Free trial Visit website

Cyberlink PowerDirector 365

Cyberlink PowerDirector 365 offers some great features, and you can use it to create professional videos, even if you’re a first-time user.

The application offers a plethora of effects, allowing you to make amazing videos. You can even make collages with up to 7 videos, and more.

Regarding compatibility, the app supports the latest video formats, and it offers more than 3000 effects and templates to choose from.

Cyberlink PowerDirector 365 is simple to use, fast, and powerful video editing software, so why not give it a try?

⇒ Get it now


Pinnacle Studio 25

Pinnacle Studio 22 Ultimate cyber monday

With the help of this advanced video editor, you can edit your HD and 4K video much quicker.

You can choose from over 2,000 video effects and pro-caliber tools, create animations with stop motion, as well as fix shaky footage and other video problems. Screen recording is also supported.

⇒ Get it now


Sony Movie Studio 13 Platinum

If you’re looking for video editing software on the cheap end, check out Sony Movie Studio 13.

This video editor comes with a user-friendly interface, but it features a series of powerful video editing features. For example, Movie Studio 13 offers 4K XAVC S file format support as well as touch PC support.

⇒ Get it now from Amazon

So, which one of these video editors are you going to buy? Let us know in the comments below.

4 Best Seasonal Blue Yeti Microphone Deals

Blue Yeti microphones don’t need any introduction. They’re the number one choice of professional musicians and audio professionals. If you’re planning to launch your own podcast network, this is the right microphone brand to get.

Well, honestly speaking, the price tag might keep some potential customers off. Of course, there are many cheaper alternatives on the market. The question is: Do they offer the same audio quality as a Blue Yeti microphone? In most cases, the answer is ‘No’.

The price tag should no longer stop you from getting the Blue Yeti mic of your dreams. After Cyber Monday, you can now purchase a brand-new Blue Yeti microphone for less than usual. Let’s dive right in and check out the hottest deals.

What are the best Christmas Bluet Yeti deals this year?

Premium Blue Yeti Nano

  • Supports sample rates up to 24-bit/48kHz
  • Cardioid and Omni pickup patterns
  • Perfect for podcasting, game streaming
  • None

We absolutely love the color of this microphone. It will definitely help you stand out, especially if you use it in your videos.

With this mic, recording audio has never been easier. The package includes the following items: the Blue Yeti Midnight Blue microphone, MicroUSB to USB cable, removable stand, boom arm adapter, and GalliumPi Cleaning Cloth.

The mic is great for podcasting, YouTube videos, Twitch streaming, Skype calls, and voice-over work.


Blue Yeti USB Microphone with Knox Gear Boom Arm

  • 30-inch desktop arm
  • 4-Port USB 3.0 hub included
  • High-res voice level metering
  • None

Another interesting deal is this Blue Yeti USB mic that comes with a Knox desktop arm and a USB Hub.

Use the single button on the mic to conveniently adjust mic gain, mute, and headphone volume, as well as the blend of microphone signal and computer sound in your headphones.


Newest Blue Yeti USB Microphone with 4 Pickup Patterns

  • 4 pickup patterns, 3 condenser capsules
  • Mac and PC compatible
  • High signal-to-noise ratio of 100dB
  • None

Agreed, Blue microphones are known for their rather expensive price tag but fortunately, there are some exceptions to this rule. For example, this Blue Yeti mic it’s affordable considering the fact that it’s brand new.

It features Cardioid, Omni, bidirectional, and stereo pickup patterns for more flexibility when recording. The adjustable stand comes in handy to optimize the recording process in relation to the surrounding sound.

The fact that the mic is plug and play so no complicated set-up is required is a definite thumbs up.


Yeti Studio Blackout All-In-One

  • All-in-one
  • iZotope Ozone Elements mastering software
  • Perfect to record vocals
  • Not plug-and-play

If you’re looking for a Blue Yeti microphone to record vocals with, then this all-in-one mic is the right choice for you. Whether you’re a singer, you want to record podcasts, or just YouTube videos, this mic has everything you need.

It also includes the PreSonus Studio One Artist Blue Microphones Edition recording software, allowing you to stack multiple tracks of vocals and instruments and edit your tracks to get the perfect vocal performance.

So, there are the hottest Blue microphones available on Christmas? Let us know which one you picked in the comments below.

7 Ways to Fix Screen Brightness Not Working In Windows 11

Today, we’ll show you how to fix screen brightness settings if they’re not working in Windows 11.

The most common reasons why you can’t adjust brightness are faulty graphics and monitor drivers, and corrupt system files. We’ll show you how to fix these and a couple of other possible culprits below.

Let’s get your monitor brightness exactly how you want it.

How can I fix the brightness slider if it’s not working in Windows 11?

We outlined every single step in the guideline below, but if you prefer video formats, check this out:

For more details, keep reading.

1. Disable Adaptive Brightness

How to disable adaptive brightness:

  1. Press Windows + I to open Settings.
  2. Navigate to System > Display.
  3. If available, toggle “Change brightness automatically when lighting changes” to Off.disable adaptive brightness in windows 11

Alternatively:

  1. Open Control Panel > Hardware and Sound > Power Options.power options control panel
  2. Click Change plan settings next to your active plan.
  3. Select Change advanced power settings.Change advanced power settings
  4. Expand the Display section.
  5. Set Enable adaptive brightness to Off for both battery and plugged-in modes.

If your brightness slider is grayed out or doesn’t respond, adaptive brightness might be enabled, especially on laptops with ambient light sensors. This feature can override manual adjustments and cause brightness issues in Windows 11.

Once disabled, restart your PC and check if brightness controls work normally.

2. Reinstall the monitor driver

  1. Right-click on the Start icon and select Device Manager.Quick Access menu
  2. Expand the Monitors section.Monitors
  3. Right-click on the Monitor and select Uninstall device from the context menu.Uninstall device to fix brightness not working windows 11
  4. Again, click Uninstall in the confirmation prompt that pops up.Confirm Uninstall

3. Update the graphics driver

  1. Open the Start menu and open Device Manager.device manager
  2. Double-click on the Display adapters entry.Display adapters
  3. Right-click on the graphics adapter and select Update driver from the context menu.Update graphics driver
  4. Select Search automatically for drivers.Search automatically for drivers
  5. Windows will now find the best available driver on the system and install it for the graphics adapter.

Alternatively, if Device Manager can’t find new drivers, you can use an automatic driver updater software like Fortect’s. This tool will automatically check for new drivers and install them onto your PC.

You can also check for the latest driver version in Windows Updates or manually download the setup from the official manufacturer’s website and install it.

4. Perform SFC and CheckDisk scan

  1. Open the Search menu, type Command Prompt and select Run as administrator.
  2. Type the following command and hit Enter:chkdskRun ChecDisk to fix brightness not working windows 11
  3. Execute the following command:promptRun prompt command to fix brightness not working windows 11
  4. Now, paste the following two commands and then hit Enter after each to scan and fix issues with the ieframe.dll file:
    • sfc /scanfile=c:\windows\system32\ieframe.dll
    • sfc /verifyfile=c:\windows\system32\ieframe.dllRun SFC for ieframe.dll to fix brightness not working windows 11
  5. Run the following command:assocRun assoc to fix brightness not working windows 11
  6. Paste the following command and hit Enter:sfc /scannowRun SFC scan to fix brightness not working windows 11

The above scans will identify problems with the ieframe.dll file and the other corrupt system files and replace them with their cached copy. After running the scans, check if the brightness slider is now working in Windows 11.

5. Update Windows 11

  1. Press Windows + I to launch the Settings app.
  2. Select Windows Update from the left side.Windows Update
  3. Click on Check for updates.Check for updates to fix brightness not working windows 11
  4. Click on the Download & install option in case any are found.Download & install

6. Perform a system restore

  1. Open the Start menu.
  2. Type Create a restore point and open it.Create restore point
  3. Click on the System Restore button.System restore to fix brightness not working windows 11
  4. Select the Choose a different restore point option and click on Next.Choose a different restore point
  5. Select a restore point from the list and click on Next to proceed.select Restore point to fix brightness not working windows 11
  6. Verify the restore point details, and click on Finish to start the process.Finish

The concept of System Restore is to take the system back to a state where the error didn’t exist. But you will have to choose a restore point created before you first encountered the error.

Although Windows automatically creates them whenever undergoing any significant change, you must learn how to create a restore point in Windows 11 manually.

7. Reset display settings to default

  1. Right-click on the desktop and select Display settings.display settings
  2. Scroll down to Advanced display settings.advanced display settings
  3. Click on Display adapter properties for your display.display adapter properties
  4. In the new window, click on the Color Management tab, then Color Management.color management
  5. Click Advanced and select Change system defaults. Reset to default settings here.change system defaults

How do I stop Windows 11 from lowering brightness?

  1. Press the Win + I buttons to open the Settings menu.
  2. Select System from the left side.
  3. Click on Display.display-select auto hdr not working windows 11
  4. Choose Brightness.
  5. Uncheck the Help improve battery by optimizing the content shown and brightness option.

Some Windows 11 PCs can automatically adjust the brightness levels of the screen based on the content being displayed.

Following the above steps, you can quickly turn this feature off and continue with your set brightness levels.

Brightness is just the top of the iceberg

Apart from being unable to change the brightness level, several users have reported that the screen dims automatically in Windows 11. The issue arises when certain features responsible for automatically adjusting the screen brightness malfunction.

Another problem some users seem to face is the flickering screen problem, which you can resolve by following this guide for the best solutions. If you are facing the black screen issue in Windows 11, we suggest you follow our guide for the most effective methods to resolve it.

Other brightness errors you may encounter include cases where the brightness option is missing entirely from Windows 10 Settings, or situations where adjusting brightness simply doesn’t work at all.

Some users also struggle with monitor brightness changing automatically, or find that the brightness control buttons on their device stop responding.

Summary

That’s all there is to the brightness slider not working problem in Windows 11. By reaching this part of the article, the error should be eliminated, and you would also know how to troubleshoot other issues with the display.

Now that the brightness settings are accessible and working learn how to change them in Windows 11. Then, tell us which fix worked for you in the comments below.

Get Hotspot Shield on Black Friday sale [40% Off]

VPNs are a great way to protect your privacy and secure your connection.

But, as you may know, not all VPN subscription plans are affordable. At least not monthly plans, which usually come without discounts.

However, certain VPN providers such as Hotspot Shield provide us with profitable deals every now and then, which could allow more users to purchase premium subscriptions.

What is the best Hotspot Shield discount?

  • Basic (free) – $0
  • Monthly plan – $12.99 per month
  • Yearly plan (save 38%) – $7.99 per month ($95.88 yearly)
  • 3-year plan (save 77%) – $2.99 per month ($107.64 every 3 years) + 45-day money-back guarantee

Hotspot Shield

Are you still waiting for the perfect deal on VPN subscriptions? Check out Hotspot Shield’s offers right now.

Although Hotspot Shield offers multiple plans, the monthly subscriptions are not discounted.

Choosing the Hotspot Shield 3-year plan would be far more profitable, especially if you’re after a long-time VPN commitment.

Why choose Hotspot Shield?

As you’d expect, there are certain differences between the different plans that Hotspot Shield offers. You can check the perks of each plan in the comprehensive table below:

FeaturesBasic
(Free)
PremiumPremium
Family
Zero-logging policyYesYesYes
EncryptionMilitary-gradeMilitary-gradeMilitary-grade
Maximum devices1 device5 devices25 devices (5 devices
for each family member)
Streaming accessLimitedNetflix, YouTube,
Disney+, Hulu
Netflix, YouTube,
Disney+, Hulu
SpeedUp to 2 MbpsUp to 1 GbpsUp to 1 Gbps
Servers/locationsOnly 1 (US)Over 3200 servers,
more than 115 locations
in over 80 countries and
35 cities
Over 3200 servers,
more than 115 locations
in over 80 countries and
35 cities
Data limit500 Mbs per dayUnlimitedUnlimited
Internet kill switchYesYesYes
Customer serviceSupport center24/7 live chat24/7 live chat
VPN protocolsHydra, OpenVPN,
WireGuard,
IPsec/IKEv2
Hydra, OpenVPN,
WireGuard,
IPsec/IKEv2
Hydra, OpenVPN,
WireGuard,
IPsec/IKEv2
Premium devicesLimitedRouters, Linux,
Smart TVs
Routers, Linux,
Smart TVs
Malware protectionNoYesYes
Smart VPNNoYesYes
Identity Guard
(id theft protection)
NoYesYes
1Password
(password management)
NoYesYes
Robo Shield
(spam call blocker)
NoYesYes

It’s safe to say that Hotspot Shield offers a wide variety of plans at accessible prices.

However, note that the differences between Premium and Premium Family are only related to the maximum number of devices you can use on the same plan.

Therefore, if you don’t plan on using Hotspot Shield on more than 5 devices, you may want to stick with the Premium plan.

5 Best Black Friday Deals on Wireless Headphones

Headphones are a great asset for every music buff, providing you with the sort of personalized listening experience that every music lover craves for.

If you missed Black Friday and Cyber Monday deals, don’t worry, flash sales can be found during the whole year, and we have already shown you some of the best Xbox wireless headsets. Speaking of which, here is a list of the best wireless earbuds deals that you can get today.

What are the best wireless headphones deals for 2022?

Bose QuietComfort 35 II

  • Three levels of world-class noise cancellation
  • Noise-rejecting dual-microphone system
  • Balanced audio performance at any volume
  • 20 hours of battery life
  • No customizable sound profiles

The Bose QuietComfort 35 (Series II) headphones are easily one of the best in the segment. It features a Noise-rejecting dual-microphone system for exceptional clarity while also allowing for a balanced audio output throughout the entire volume range.

Another highlight of the Bose QuietComfort 35 is that it comes integrated with Alexa digital assistant which means you can control your music or have your queries answered by Alexa via voice commands.

No doubt, a must-have for the holiday either for personal use or as a gift for the near and dear ones, especially when used with headphone amps with bass boost.


  • Smart noise-cancellation
  • Dual Noise Sensor Technology
  • Ultra-comfortable headphones design with adjustable metal sliders
  • 35 hours battery life
  • Can't use the Bluetooth while charging

The headphone boasts of 30 mm driver unit which Sony claims to allow for truly immersive listening pleasure.

The headphone also comes with an integrated microphone which allows for hands-free operation for answering calls or giving voice commands.

It supports Bluetooth and NFC connectivity, and it has a battery backup time of 35 hours. It also features quick charging and quickly access to your smartphone’s voice assistant. On the whole a great buy for the holiday season.


  • Apple W1 chip and Class 1 wireless Bluetooth connectivity
  • 40 hours battery life
  • Fast Fuel
  • Built-in microphone
  • May be too tight-fitting for some users

If you’re looking for Beats wireless headphones Christmas deals, then this model might be just what you need.

The Beats Solo3 is another high-performance wireless Bluetooth headphone on the market. These Beats headphones are compatible with iOS and Android devices.

The sound quality is a big plus, while the battery can provide up to 40 hours of playback from a full charge. It is also worth mentioning that the fast fuel feature for 5 minutes of charging gives you 3 hours of playback.

On the whole, an excellent product from Beats that lives up to the company’s reputation.


  • Oversized 40 mm dynamic drivers
  • Hybrid active noise canceling
  • 40 hour playtime
  • Built-in microphone
  • Can't charge and listen simultaneously

The Anker Soundcore Life Q20 headphones comes with hybrid active noise-cancelling technology, which means external distraction are a minimum.

You benefit from up to 40 hours of non-stop playtime in wireless active noise cancellation mode (at 60% volume), while in standard music mode you can have enormous 60 hours playtime.

It also features a lightweight and comfortable design, which means having it on is always comfortable, even for hours on end.


JBL Live 460NC

  • 40mm drivers
  • Premium sound
  • 50 hours battery life
  • Noise cancelation
  • Ambient Aware and TalkThru mode
  • Uncomfortable for some users
  • Built-in controls could be better

This model comes with 40mm drivers and delivers premium sound, and with the Adaptive Noise Canceling technology, you can focus on your favorite music without distractions.

Ambient Aware mode is also present, allowing you to focus on your surroundings better. A special TalkThru mode is available as well, which allows you to chat without having to pause your music.

The battery lasts up to 50 hours, and around 40 if you’re using noise cancelation, which makes JBL Live 460NC one of the best headphones that you can buy.

These are the five best wireless headphones for you to buy this Christmas. Unfortunately, our guide doesn’t include Apple wireless Earbuds Christmas deals, but we’re certain that these models will work perfectly with your iOS device.

Which wireless headphones would you buy from our list? Leave your choice in the comments section below.

5 Razer keyboard deals for all the gamers out there

Razer is one of the most recognizable gaming brand on the market and offers everything from gaming laptops to mouse and gaming keyboard and headphones.

While the Razer products offer above-average quality, the products are usually a little expensive.

If you had put your decision to buy a Razer gaming keyboard on hold just because of the price, here are the cheapest Razer keyboard deals.

What are the best Razer Gaming keyboard Black Friday deals?

Razer Huntsman Elite

  • Fastest keyboard action on the market
  • Intuitive and useful media controls
  • Top-notch quality hybrid switches
  • Custom profiles requires rigning in to the Razer app

The Razer Huntsman is, hands down, the best Razer keyboard you will find. It is equipped with on-board memory, software that gives you customization freedom, and the fastest switches.

Additionally, the keyboard utilizes the brand-new Razer Opto-mechanical switches that have a brand new design. It’s the first switch that resets at the exact same point, resulting in fast performance.

Razer BlackWidow Elite

  • Mechanical Keys
  • Full controllable individual key lighting
  • Built-in wrist rest
  • The multi-functional digital dial and Dedicated media controls
  • Magnetic wrist rest

The Razer BlackWidow Elite is the best gaming keyboard from the company yet. It comes with a multi-functional digital dial with dedicated media controls for a seamless gaming experience.

The mechanical keys are durable and offer 80 million keystrokes. Users can fully control the individual key light as well.

Razer Ornata Chroma

  • Mechanical-Rubber Dome Hybrid
  • Individual key lighting
  • Razer Synapse compatible
  • Ergonomic magnetic wrist rest
  • Keys get stuck

The Razer Ornata Chroma is a hybrid offering mechanical and rubber-dome keyboard trying to please gamers as well as casual users for typing.

Ornata is an all-black chassis packing a full-size keyboard offering individually backlight keys. The keyboard also includes a wrist rest. The keyboard can be configured with the Razer Synapse tool.

Razer Cynosa Chroma

  • Spill-resistant design
  • Razer Synapse compatible
  • Individually light keys
  • Fully programmable macros
  • Software doesn’t always load up

The Razer Cynosa is a low-cost alternative to Ornata and comes with a spill-resistant design. There is a 10-key anti-ghosting feature to execute up to 10 commands at the same time.

The keys are individually lit with 16.8 million color options and can be turned off. Customization is possible through the Razer Synapse driver tool.

Razer Turret Wireless

  • Wireless connection
  • Compatible with Xbox and PC
  • Magnetic mouse docking
  • The mousepad is a bit small

The Razer Turret Wireless keyboard is a one-in-all device designed to bring the immersive gaming experience everywhere, thanks to it’s retractable mousepad.

Additionally, the pad is magnetic in order to prevent the mouse from falling during usage. Additionally, the keyboard has up to 40 hours of battery life, which is more than enough.

Why settle for just the keyboard? Take a look at this great list of the best Razer gaming laptops and get your hands on the most powerful rigs out there.
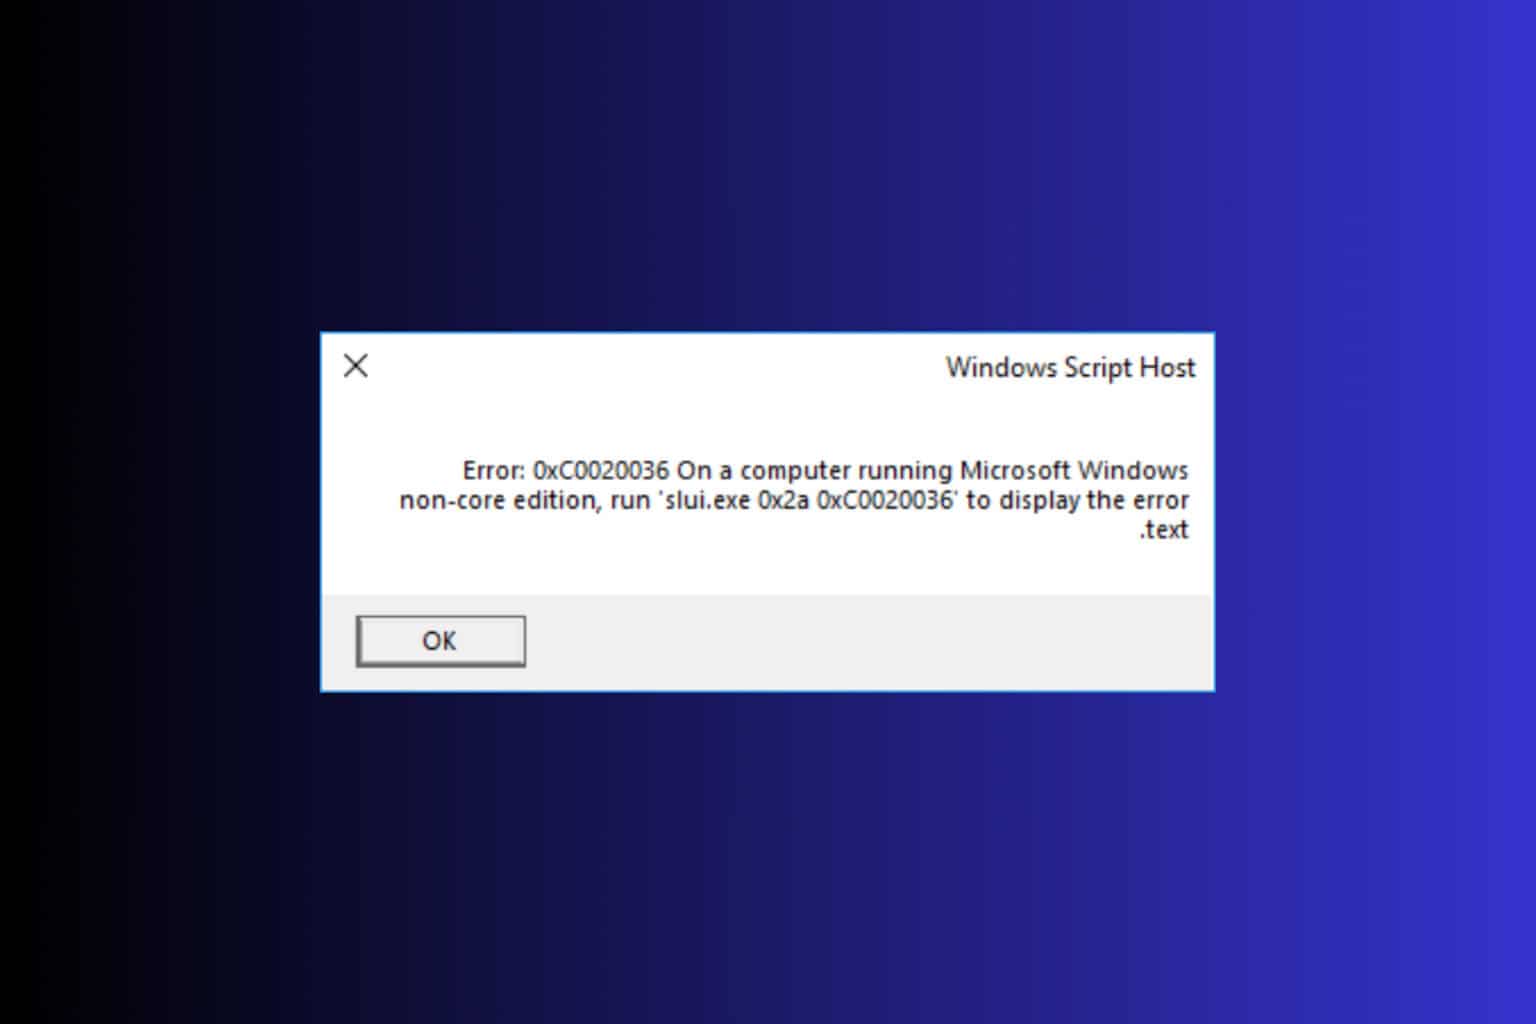
Found what you are looking for? Do let us know your favorite Razer gaming keyboard in the comments below.

How to Fix Windows 11 Start Menu Not Working (Quick Guide)

When the Windows 11 Start menu is not working, it may refuse to open, lag, or show no response to clicks. Whether it’s due to an update, a corrupt profile, or broken system files, follow these proven solutions to fix it quickly.

Fix Start Menu Issues in Windows 11

1. Restart Windows Explorer

Refreshing the UI can instantly revive the Start menu.

  • Press Ctrl + Shift + Esc to open Task Manager
  • Scroll to Windows Explorer, right-click it, and select Restart

2. Check for Windows Updates

Some Start menu bugs were fixed in recent Windows builds.

  • Press Win + I to open Settings
  • Go to Windows Update > Check for updates
  • Install all available patches and reboot

This is especially useful if you’re affected by a recent problematic patch. If the issue started after an update, you can try rolling back Windows 11 to a previous build for a quick resolution.

3. Use System File Checker (SFC) and DISM

Corrupt system files can break essential UI functions.

  • Open Command Prompt as admin
  • Run this command:
    sfc /scannow
  • After that completes, run:
    DISM /Online /Cleanup-Image /RestoreHealth

These tools scan and restore system integrity.

4. Use PowerShell to Re-Register Start Menu

This command resets the Start menu experience app.

  • Open Task Manager > File > Run new task
  • Type powershell, check Create with admin privileges
  • Paste this command:
Get-AppxPackage -AllUsers Microsoft.Windows.StartMenuExperienceHost | Foreach {Add-AppxPackage -DisableDevelopmentMode -Register "$($_.InstallLocation)\AppXManifest.xml"}

Then press Enter and reboot.

5. Sign in with a Local Admin Account

A corrupt user profile may be blocking the Start menu.

  • Go to Settings > Accounts > Other users
  • Click Add account and follow the prompts
  • Choose I don’t have this person’s sign-in information
  • Select Add a user without a Microsoft account
  • Assign admin rights and log in

Check if the Start menu works under the new profile.

6. Create a New Local User and Delete TileDataLayer

This method has a high success rate for broken Start menus.

  • Follow the steps above to create a new admin user
  • Press Win + R, type %LocalAppData%, and hit Enter
  • Navigate to TileDataLayer folder
  • Delete it (if present) — you may need to log in with the new user first

This resets cached tile and layout data. If you’re also having taskbar alignment issues, you can move the taskbar in Windows 11 to troubleshoot UI layout bugs.

7. Uninstall Problematic Windows Updates

Specific updates (e.g., KB5030219) are known to break the Start menu.

  • Press Win + I > Windows Update > Update history
  • Click Uninstall updates
  • Select the problematic KB and uninstall it

Several users reported this instantly fixed the Start menu.

8. Perform a System Reset (Last Resort)

If all else fails, reset Windows without removing your files.

  • Open Settings > System > Recovery
  • Under Reset this PC, click Reset PC
  • Choose Keep my files and follow the steps

This reinstalls core system components without deleting personal data. You can follow a detailed walkthrough to restore Windows 11 to factory settings.

Why This Happens

Start menu failures are often caused by:

  • Corrupt user profiles or layout files
  • Broken Windows components
  • Recent faulty updates
  • UI shell conflicts (like TileDataLayer or StartMenuExperienceHost issues)

These issues aren’t exclusive to Windows 11 , many users also faced a Start menu critical error in Windows 10 that shares similar causes and fixes.

FAQs

Is there a Start Menu Troubleshooter in Windows 11?

No official one, but running SFC, DISM, or PowerShell often solves related issues.

Can a Windows update break the Start menu?

Yes. KB5030219 and others have been known to cause Start menu bugs.

Does creating a new user fix Start menu issues?

Yes, it often works if the issue is tied to your user profile.

Will a system reset delete my files?

No, if you choose Keep my files during the reset, your personal data stays intact.

Conclusion

If your Windows 11 Start menu is not working, try restarting Explorer, checking for updates, running system scans, or creating a new user profile. These tested solutions fix most Start menu issues without needing a full reinstall.

5 best budget mouse bungees to buy [Cyber Monday]

Mouse bungees have become highly important in gaming. So if you prefer wired to wireless mice, these accessories are a life savior.

While not everyone has a sharp eye for a bargain, here we are with some great budget mouse bungees for you.

Before you pick any PC accessory or plan to buy one, it is essential to frame a budget in advance. Don’t you imagine that you’ll get a decent option only when spending more money?

Lucky for us gaming fans, there are plenty of mouse bungee deals out there. Instead of making you suffer through a long-winded comparison list, we are going to tell you some of them right away. Let’s get started!

Note: All the prices and offers in this article are subject to change, so be sure to check the official product page to get the latest deal. If the product or offer you’re looking for is no longer available, you can try to find it on its official manufacturer page or get another one from our list.

What is the best budget mouse bungee?

Generic Mouse Bungee Mouse Cord

  • Compatible with any corded mouse
  • Wire clip part that can be adjusted to meet various requirements of angle
  • The rubber feet on the bottom often comes off

This mouse bungee is nothing fancy but is likely good news for your bank account. Not all of you will appreciate that is made from plastic and metal parts, yet it does exactly what it’s supposed to do.

Moreover, you get to choose how much of your cord you want on or off the holder, so you get smooth and seamless mouse movement.

IOGEAR Kaliber Gaming ELEVATR Mouse Cable Manager

  • Sleek and simple design
  • Compatible with all types of mouse cables
  • Not so effective anti-slip base

This mouse cord management device does a great job for your very first bungee and its “Scorpion Tail” allows for any direction movement and prevents cable tangling.

So, it isn’t just for gamers, but it will also provide the best possible experience when working, or surfing the Internet.

Casethrone Drag-Free Mouse Bungee

  • Anti-Slip function thanks to the Heavy-Duty Stability design
  • A low-profile base that won’t take up much space
  • Stainless steel sturdy construction
  • Users complain that the mouse cables regress by themselves from time to time

Even if you’re trying to save some cash, you can still pick up a very effective mouse bungee. With the help of this Casethrone Drag-Free bungee model, the cord is not going to interfere with the mouse movement any longer.

To top it all off, it easily wins the aesthetic battle of the day in simplicity.

Cougar Bunker CGR-XXNB-MB1 Gaming Mouse Bungee

  • Ultra-compact base that takes minimum space on your desk
  • Rubber arm of high flexibility
  • Very lightweight product easily taken with you on the go
  • Sometimes refuses to stay stuck to the desk and users have to restick it

Cougar is popular for gaming PC cases, but the company has some interesting peripherals and accessories too.

If you play games at the highest level, yet you look for simplicity, Cougar Bunker CGR-XXNB-MB1 will be an excellent choice for you.

ROCCAT Apuri Raw Mouse Bungee

  • Gives unparalleled stability
  • Solid, yet the Perfect Flex arm offers a nice amount of flex
  • Weight specifically balanced to provide a low center of gravity
  • Lock-tight rubberized feet
  • Not at all unfriendly on your wallet
  • Tripod form factor won’t suit everyone’s taste

When price remains an imperative factor that you cannot overlook, choose this mouse bungee model.

ROCCAT Apuri Raw comes with an interesting approach to the stability problem often found with these accessories by having a much broader base supported by three feet for maximum stability.

All these mouse bungees perform the task of keeping your gaming area clear by guiding your mouse cable away during play. That’s precisely what you’ve wanted, right?

They can actually serve you with all sorts of features at great affordability, so you know your next move.

Samsung Qled Tv on Offer [Sale Season]

QLED is Samsung’s latest technology and comes as a combination of LED and quantum dot technology. It produces bright colors with unprecedented precision for an improved viewing experience.

QLED TVs provide picture quality that is extremely hard to beat these days. You can watch your favorite TV shows or desired movies like in the theater.

Here are the best Samsung QLED TV Black Friday deals you can get on the market this year, so check them out.

What are the best Black Friday Samsung QLED TV offers in 2024?

  • Dual LED
  • Quantum HDR
  • Quantum processor 4K Lite
  • Alexa built-in
  • No local dimming feature

The Samsung QLED 50-inch TV features an intuitive Smart TV interface that learns what you like and suggests exciting new content. 

This amazing device delivers over a billion shades of color that stay true to life without washing out at any brightness level, thanks to its quantum dot technology.

Quantum HDR brings out the detail and contrast by expanding the range of color and detail beyond what’s possible on HDTVs.


SAMSUNG QLED 65-inch

  • Direct full array 12X
  • Ultra viewing angle with anti-glare
  • 4K resolution
  • Quantum processor 4K
  • Only one HDMI 2.1 input

The Samsung QLED 65-inch TV makes available to you a 4K resolution picture, regardless of the source. The Quantum processor 4K automatically optimizes the picture for a more immersive experience.

Thanks to its real game enhancer feature, you can now experience enhanced gaming without making other manual adjustments.

The Active Voice Amplifier feature analyzes the ambient noise and clarifies the dialogue.


SAMSUNG QLED 75-inch

  • Quantum processor 4K
  • Motion rate 240
  • Ambient mode+
  • Quantum HDR
  • No instructions

The Samsung QLED 75-inch TV has a powerful processor that uses deep learning AI to transform everything you watch into exquisite 4K.

It minimizes the motion blur on the screen, for smooth action-packed movies and sports. It also features a system of dedicated warm and cool LED backlights to enhance the contrast details.

This QLED TV comes also with a built-in Alexa for you to only ask Alexa to change the channel, or search for movies and shows, and more.


  • Quantum processor 4K
  • Quantum HDR 4X
  • Ambient mode
  • 100% color volume with Quantum Dots
  • Tiring ads on menu bar

The Samsung QN75Q60RAFXZA flat 75-inch QLED 4K Q60 Series TV is an ideal choice for many of you. Well, if you like a rich color experience, then this QLED set will not disappoint.

The best thing about QLED technology is that the color balance is unchanged in different lighting conditions.

You don’t have to worry about the picture not looking good in daylight after setting it up for viewing after dark.


SAMSUNG 32-inch

  • 4K UHD processor
  • Modern design
  • Smart TV with universal guide
  • 100% color volume with Quantum Dot
  • No pedestal for stand

The Samsung 32-inch QLED is another great 4K TV with a powerful UHD processor and amazing Quantum Dot technology that brings color into your room.

You can use the simple on-screen Guide to find streaming content and live TV shows.

This 32-inch Samsung QLED TV comes with 3 HDMI ports, 1 Ethernet port, 2 USB ports, one digital audio output, and one composite input, perfect for all your needs.


To enhance your TV experience, you’ll definitely want to choose a great QLED TV.

To learn more about the differences between various technologies, don’t miss our OLED vs QLED vs NanoCel guide.

Our list of Samsung QLED TV Black Friday deals has given you the best products currently available on the market. Just let us know your final pick in the comments section below.

2 Best Intel Nuc Deals [Special Offer]

Intel NUC is a mini-PC that packs impressive computer capabilities. Most NUC computers are only 4×4-inch and you can use them for entertainment, gaming, and productivity purposes.

They’re also customizable allowing you to add some extra memory, increase the storage capacity, install a new OS and more.

Well, Intel NUC computers are rather expensive. High specs NUC devices have a price tag that usually go beyond $1,000.

So, if you want to know what Intel NUC computers you can purchase in 2022, read this guide to learn more.

What are the best Black Friday Intel NUC deals?

Intel NUC 8 Performance-G Kit

  • 8th Gen Intel Core i7 8705G
  • Radeon RX Vega M graphics
  • Supports up to 6 displays
  • Front and rear HDMI ports
  • Poor driver support

Intel NUC 8 Performance-G Kit (NUC8i7HNK)  is equipped with the latest 8th generation Intel Core i7 8705G for top-notch performance. The Radeon RX Vega M with speeds up to 4.1 GHz graphics cards brings full VR support.

This mini PC kit fits in a messenger bag or tucks out of sight in your home or workspace. 


Intel NUC 10 Performance Kit

  • Intel Core i7 (8th Gen) 8559U/ 2.7-4.5GHz
  • Intel Iris Plus Graphics 655
  • Intel Wireless-AC 9560
  • Kensington security slot
  • Noisy fan

You can use the Intel NUC Mini PC kits with 8th generation Intel Core i7 processors to stream movies, play your favorite games online without any lag and more.

The latest generation Intel NUC kit allows you to build the exact system you want.

We want you to have the best products and recommendations available on the Internet. So, which mini PC are you going to buy? Let us do know in the comments below.


Lte 4G Router : Don’t miss out these Deals

LTE (Long Term Evolution) is a technology standard for high-speed wireless communications delivered through cellular networks that were introduced in 2008.

A large number of telecommunications firms across the world have integrated LTE into their networks by building and updating LTE equipment on cell towers and in data center data centers.

Depending on their provider and the current network traffic levels, customers using an LTE network can expect significantly different connection speeds from one another.

We’ve compiled a list of some of the greatest LTE router offers you should look into before making a purchase.

What are the best LTE routers up for sale on Black Friday?

All these items have special prices.

A growing number of organizations are utilizing 4G LTE technology, either to establish a backup network connection or to acquire internet access when other options, such as cable and DSL, are not readily available.

It is the most reliable and quickest wireless network for smartphones and other portable devices. Greater connection speeds are made possible by LTE’s increased bandwidth, which also includes improved underlying technology for voice conversations (VoIP) and multimedia streaming.

In order to use LTE, all you need is a mobile device that supports it. This information is contained inside the device’s specifications.

Furthermore, not all gadgets with LTE in their specifications are trustworthy, since this term has sadly become a marketing gimmick that frequently misleads consumers.

For gamers who rely on 4G LTE as their primary Internet connection, faster connections bring up new possibilities for playing fast-paced games such as first-person shooters, exploring complicated game modes, and interacting with other players in multiplayer situations.

The majority of the routers currently available on the market are standard routers that have been merged with a 4G LTE modem. Some are available for less than $300 and may be able to be integrated into your current networks with relative ease.

Do you have an LTE router in your wish list that you’d want to add to your order? Please share your thoughts in the comments box below.

5 Best Wi-Fi Cameras Deals To Get Now

Being able to keep an eye on what’s going on home while you’re away is very reassuring. One way you can do that is by using a WiFi camera. You can quickly connect it to your phone or computer and see what’s going on at home anytime you want.

Christmas is here and we compiled this list of the hottest wireless camerasto buy today. Buying a Wi-Fi camera is an excellent investment for your home security.

What are the best Wi-Fi camera deals in 2022?

TETHYS Wireless Security Camera 1080P

  • Cloud data storage
  • Motion detection alerts
  • MIPC app to store all controls, features, and functions
  • Glitchy seems to disconnect often

If you’re looking for a Wi-Fi camera to use indoors, then take a look at TETHYS Wireless Security Camera.

You can use this device to capture 1080p panoramic scenes that work perfectly with Alexa.

The built-in microphone and speaker with noise reduction allow you to communicate with your family members at home.

Thanks to the night vision feature, you can see what’s going on in the room even in the pitch dark. You can save and playback the footage on Windows or take advantage of the Cloud storage it comes with.

Amcrest ProHD 1080P WiFi Camera

  • Records high-quality 1080p footage
  • Comes with an Amcrest View app that sends security alerts to your PC or smartphone
  • Sends live-stream footage to your devices
  • You need to use several apps to have it function properly

This wireless camera records high-quality 1080p footage with a wide 90° angle so that you see all the details that you need.

It also sends security alerts to your PC or smartphone via the Amcrest View app. Digital zoom is also supported allowing you to get a closer look at your surroundings.

The camera sends live-stream footage to your devices and you can also play the video back to analyze particular events.

Blink Outdoor HD Security Camera

  • Easy to set up
  • Voice commands (compatible with Alexa)
  • Records audio as well
  • Wireless, with long-lasting battery life
  • Only records upon motion detection

This HD security camera is a great tool that you can use both indoors and outdoors (it’s water-resistant).

The tool is easy to set up and completely wireless, with an expected battery life of up to 2 years. The picture quality is very good and clear, making it a great option to monitor your household.

PTZ Security Camera Outdoor

  • Waterproof
  • Two-Way Audio
  • Wireless
  • Up to 30m night vision distance
  • Some report having issue with the mobile app

An easy to setup camera that you can use outdoors, the PTZ Security starts recording upon motion detection.

It’s a great tool if you want to always be in the know because you can connect it to your mobile device and check your camera’s alerts on the go. 

wansview Wireless Security Camera

  • Night vision
  • Compatible with Alexa
  • Motion detection
  • High-quality picture
  • Difficult to connect to Wi-Fi

If you’re looking for a Wi-Fi camera to use indoors only, then take a look at wansview’s security camera.

You can use this device to capture 1080p HD scenes with no zero blind spots. You can record all this high-quality footage and save it to a secure SD card or in the cloud.

The built-in microphone and speaker with noise reduction allow you to communicate with your family members at home.

These are some of the hottest Wi-Fi cameras that you can get right now. Once again, prevention is better than cure. Installing a Wi-Fi camera at home is one of the wisest decisions you can take to enhance your home security.

Xp Pen Tablets: Grab The Best Deals Now!

Users in the recent past have shown a far higher inclination towards tablets, owing to the remote learning and work setting. To tap this growing demand, XP Pen is offering its products at discounted prices this Christmas.

XP Pen includes a wide range of tablets, along with the stylus for higher precision, at reasonable prices to cater to both students and professionals. You can connect the tablet to your computer, and start working on the assignments that were long due.

With heavy competition in the market, XP Pen has come up with products that are cheaper, more durable, and offer a plethora of features, be it graphics or drawing tablets. Apart from these, it offers a pressure range higher than other products in the same price bracket, making it one of the best investments.

Does XP-pen have Black Friday deals?

Yes! If you have been planning to purchase one, we did the hard work for you and have listed the best XP Pen tablets available at discounted prices in the Black Friday sale.

Which is the best XP-Pen cheapest tablet on Black Friday deals?

All these items have special Black Friday prices.


These are the best deals you will find on XP Pen drawing and graphics tablet this Black Friday. Buy the one that caters to all your needs and falls within your budget.

Do not forget to check our curated list of the best drawing tablets, in case the ones listed above don’t meet your requirements.

Tell us which XP Pen tablet you purchased this sale season or drop in a few other recommendations, in the comments section below.

Mfplat.dll Not Found: How to Fix It If It’s Missing

The Mfplat.dll file is an integral part of the Microsoft Media Foundation. Without that piece, you will not be able to enjoy multimedia content and the apps that run them, like Windows Media Player.

These files, in general, are the critical components of Windows 10 as they control how certain software executes, for example. This guide will show you how to address this missing file.

What causes missing Mfplat.dll files on Windows 10?

There are multiple reasons why a .dll file, let alone a specific one, would be missing on your Windows 10 computer. Below is a list of the most common reasons why Mfplat.dll is missing.

  • The Mfplat.dll file is missing from your computer: This is the most common reason above the others. To find it, you may have to perform a clean boot of your computer.
  • Malware may have infected your computer: For this reason, it’s very important that you download some anti-virus or anti-malware software to protect your computer.
  • The Media Feature Pack is missing on your computer: Without this software suite, many apps on Windows 10 won’t work; however, this only applies to certain versions of the OS.
  • Your Windows 10 computer is out of date: You will need to install the latest updates, however, this process has been known to cause its own set of problems.
  • An unstable update is causing the error to appear: Fixing an unstable build will require you to roll back the update, which may be missing from your computer.

How do I fix missing Mfplat.dll files?

Before getting into the more complex solutions, it’s essential to cover some quick and easy solutions that may fix everything.

  • Run both a virus and malware scan using the appropriate computer software to clean up everything.
  • Reinstall the offending program. Doing this will replace the missing Mfplay.dll file on your computer.
  • Performing a System Restore solves the error, but do this as a last resort. This will reset everything back to a previous version of Windows 10, so you’ll first need to learn how to make restore points.

1. Run DISM command on Command Prompt

  1. Search for the Command Prompt on Windows 10 and click Run as administrator.
  2. Select Yes if a User Account Control window appears.
  3. Type in the following and hit Enter on your keyboard: DISM.exe /Online /Cleanup-image /Scanhealth.
  4. Give your computer enough time to complete the scan.
  5. Next, type in the following and hit Enter again: DISM.exe /Online /Cleanup-image /Restorehealth.
  6. Give your Windows 10 enough time to finish. Once done, close Command Prompt.

Also, if you want a thorough scan of your system files, we recommend using a specialized tool such as Fortect, which will find any issues and repair them on the spot.

⇒ Get Fortect

2. Run the system file checker on Command Prompt

  1. Like the previous solution, search for the Command Prompt on Windows 10 and click Run as administrator.
  2. Type in the following command and hit Enter on your keyboard: sfc /scannow.
  3. Give the software time to finish the scan. Once done, restart your computer.

If the Mfplat.dll file is still missing or the problem persists, you can try using PowerShell instead. But first, bring up PowerShell on the Windows 10 search bar and run it as an administrator.

3. Download Media Feature Pack

  1. First, open File Explorer.
  2. Right-click This PC, and select Properties in the context window that appears.
  3. Check what edition of Windows 10 you have under Windows specifications.
  4. If the letter N is found at the end of the OS name, such as Windows 10 Home N, proceed to the next step.
  5. Go to the Media Feature Pack page on Microsoft’s website.
  6. Choose the latest version of the Media Feature Pack and click the Confirm button.
  7. Select the 32-bit or 64-bit package, whichever fits your computer best. In this guide, 64-bit Download was chosen.
  8. Run the file you just downloaded to install it. Once done, restart your computer to complete the process.
  9. Conversely, you can do the same with Command Prompt. Begin by searching for Command Prompt and run it as an administrator.
  10. Type in the following and hit Enter on your keyboard: dism /online /enable-feature /featurename:MediaPlayback

If your Windows 10 edition doesn’t have the letter N at the end, you cannot install the Media Feature Pack.

4. Enable Media Playback

  1. Search for the Command Prompt on your Windows 10 computer and run it as an administrator.
  2. Type in the following and hit Enter on your keyboard: dism /online /enable-feature /featurename:MediaPlayback
  3. Give your computer time to finish the action.

The Media Playback feature may be disabled, so you’ll need to enable it; however, this solution only works in conjunction with the Media Feature Pack. You do this in case the Media Feature Pack does not work.

5. Update drivers

  1. Search for the Device Manager and click the entry you first see.
  2. Expand Display Adapters and right-click the entry you see.
  3. Click Update driver, and select Search automatically for drivers in the following window.
  4. The drivers will now automatically install.

Are there other essential Windows 10 fixes worth learning about?

There are two particular fixes that you should know. The first involves what to do when the Windows Security app refuses to open.

Because it’s usually a corrupt system file or malware infecting your computer, we recommend running the System File Check here. And be sure to check out our guide on fixing video streaming problems.

Playback problems result from a faulty internet connection, hardware acceleration being enabled, or a poorly optimized website. Try turning off your firewall temporarily; that should work.

Feel free to comment below if you have questions about other video game problems or bugs. And please tell us if there’s a specific guide for a game that you’d like to see.