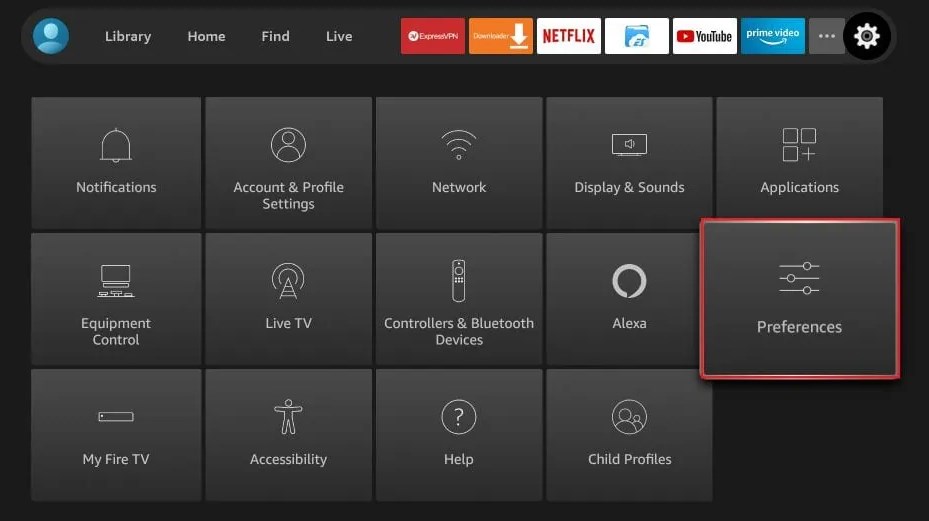
Press and hold the Home button on your Fire TV stick remote for a few seconds.
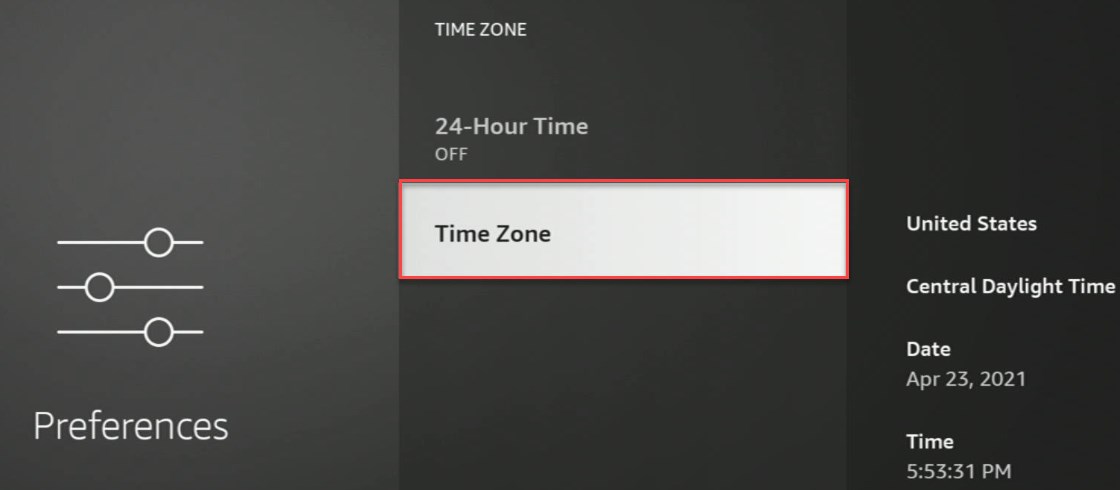
Next, select Settings and navigate to Preferences.
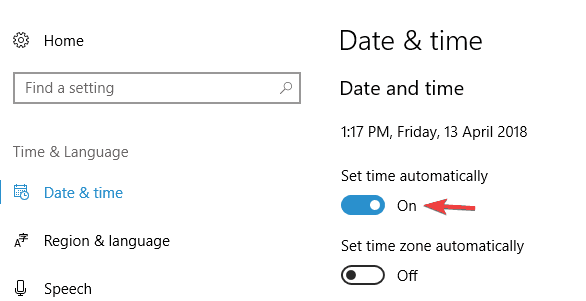
Select Time Zone and change it to Dublin.
Save changes.
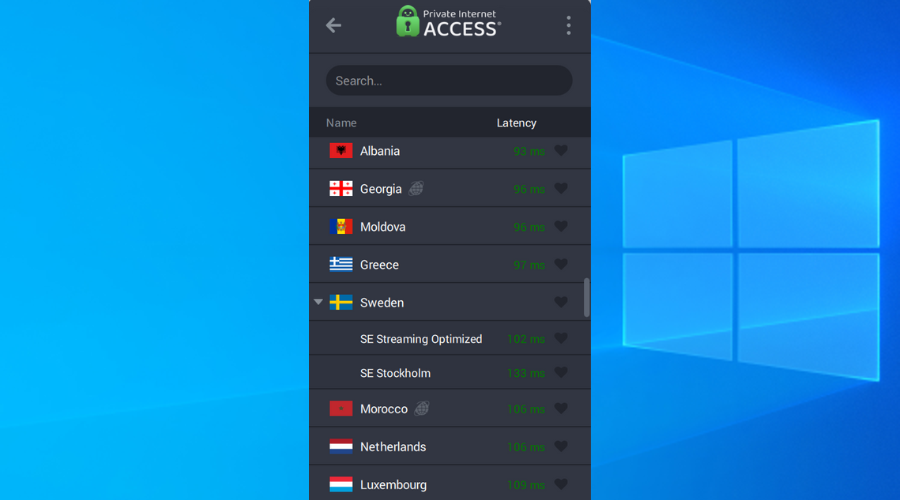
Certain VPNs are banned by Channel 4, so if you want to watch it abroad you’ll need to use high quality ones that support it.
That should do it. In case you’re an avid follower of Channel 4, these steps should come in handy.
Furthermore, if you have a different approach or workaround or maybe a question or two about the aforementioned steps, please tell us in the comments section below.
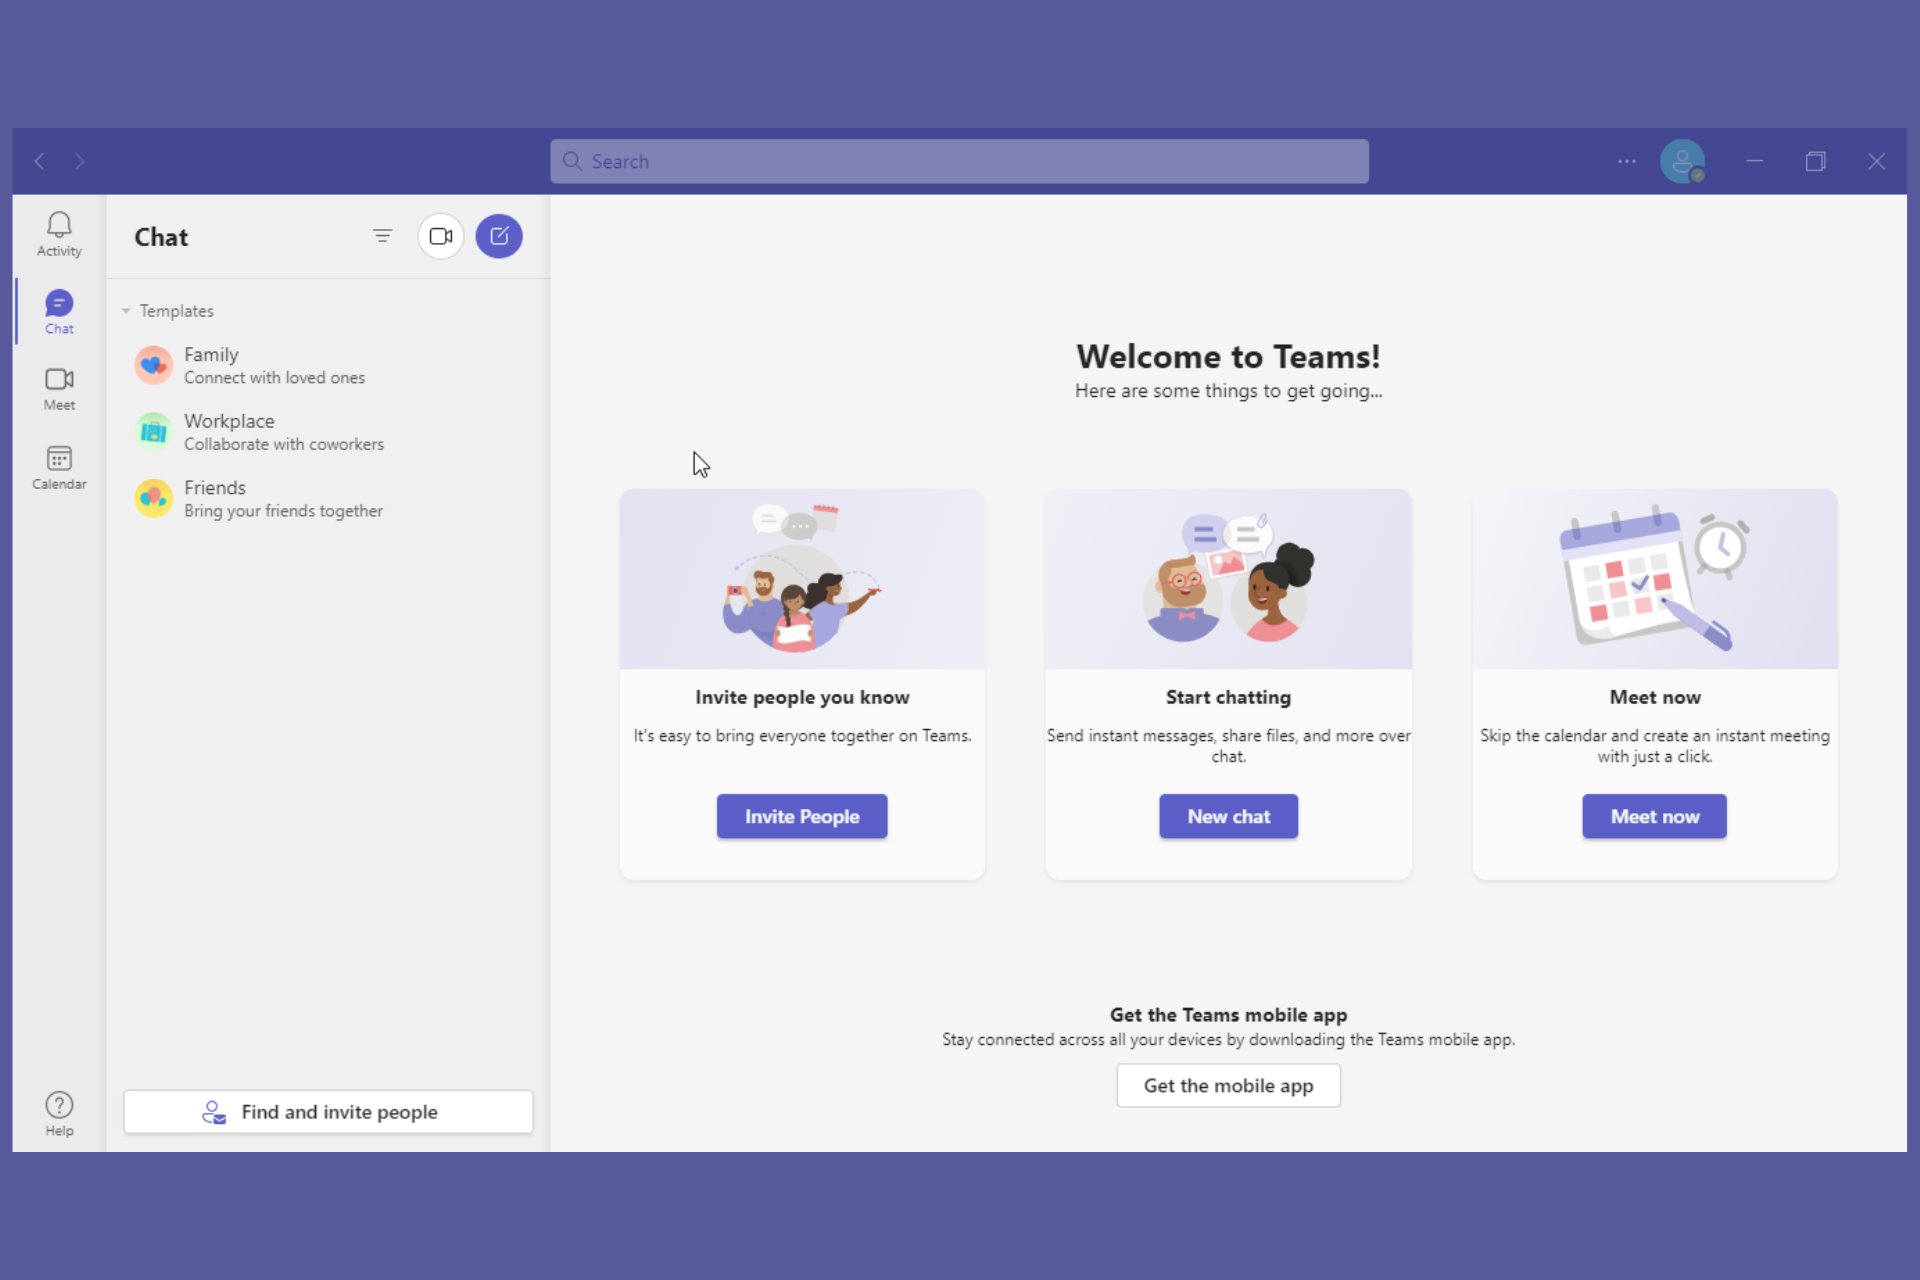
Imagine a situation where you have a scheduled call with Microsoft Teams. However, when you try to join the call, Teams throws an error or even more than errors from nowhere.
Many users have reported getting the Teams operation failed with unexpected error using this application.
It might be challenging to immediately establish where the error is coming from to fix it and get the app working for you. Fortunately, you can set it easily on your own. But before then, what are Teams?
Microsoft Teams is a messaging and communication application used in organizations. It allows real-time communication and collaboration, app and file sharing, meetings, and other forms of communication in a centralized location. This app will dominate everywhere, including the office, in due course.
Why am I getting an operation failed with an unexpected error in Teams?
Even though Microsoft has not given an elaborate reason for the operation failing with unexpected error in Teams, they issued a statement a while back explaining what might be causing this error.
According to Microsoft, the error might be caused by deploying Microsoft Teams with a broken connection to their internal storage. This broken connection leads to the error.
Even though Microsoft has so far gone ahead to try and fix the issue, you can still encounter it, especially when you are about to get into a call, send a message, or even share a file.
Quick Tip:
If you require a faster method to fix Teams right away, a temporary workaround is to run the app on a new browser, namely Opera.
This flexible browser works on Chromium codebase and it differentiate from others with light resource consumption, practical apps integrations, plus an Ad-blocker and free VPN support.
Opera
Resolve any functional issues on Teams with this browser suited for conferencing apps.
3. Enable Microphone and Camera permissions for the Teams application
Open Windows settings by pressing the Windows + I keys together.
Select Privacy from the settings menu.
Under App permissions on the left-hand side menu, click on Microphone.
Scroll down and enable the microphone on Teams under Choose which Microsoft Store apps can access your microphone.
Return to step three above and select Camera on the left-hand side menu.
Scroll down and enable camera on Teams under Choose which Microsoft Store apps can access your camera.
4. Sign out and then sign in again
Launch the Microsoft Teams application.
In the top right corner, click on your profile picture.
Click on Sign Out from the drop-down menu that opens.
Log back in using your Microsoft account details.
5. Update the Microsoft Teams application
After launching the Microsoft Teams application, click on the three dots at the top right corner of the application.
Click on Check for updates from the drop-down menu that appears.
If there are any updates, Microsoft Teams will check and install any updates while you continue to work.
How do I start using Microsoft Teams?
The first step to using Microsoft Teams is creating a Microsoft account. You will not be charged anything to make this account. After that, you need to download the Microsoft Teams application.
It is important to note that you can install the Teams application on mobile devices, Macs, and Windows machines. You can also access the application through a web browser. After installation is complete, you need to log in using the Microsoft account you created above.
Just like any other application, Microsoft Teams can fail at times. Its users might experience challenges when using the application, making it impossible for them to communicate or share files. Fortunately, errors such as the Teams operation failure with unexpected errors can be easily solved without any external help.
OpenVPN is an open-source VPN client and VPN protocol with immense popularity, thanks to high security and excellent connection speed.
You can separately download and install the OpenVPN client on all popular devices for free if you want to create a secure tunnel to the web.
Or, you can turn to a commercial VPN provider that adopts OpenVPN.
However, OpenVPN may stop working on Windows 10 computers, due to various issues. If you’re encountering this scenario, here’s what you need to do.
Speaking of scenarios, there are several errors that may appear when you have problems with OpenVPN, many users report issues when attempting to start up the app:
OpenVPN GUI not opening
Openvpnagent request error in Windows 7, Windows 10 or Windows 11
Connecting to the Management interface failed in OpenVPN
Meanwhile, others manage to launch it only to encounter severe disruptions afterward:
OpenVPNcrashing in Windows 10 or OpenVPN stopped working all of a sudden
OpenVPN connected but not working windows 10
DNS not working in Windows 10 with OpenVPN
TAP mode is not supported in OpenVPN
OpenVPN service is not available
Error attempting to connect to the selected server in OpenVPN
OpenVPN socket protect error
OpenVPN Windows Firewall not working
Below you will find easy-to-follow instructions that should help fix any of the above-mentioned errors and be able to browse the web through a secure OpenVPN tunnel.
How do I enable OpenVPN in Firewall on Windows 10?
In case you have OpenVPN connected but not working in Windows 10, you can enable it by changing a few settings in your firewall security.
Hence, these are the short steps on how to enable OpenVPN in your Firewall:
In the Start Menu, access Firewall settings.
Click on the Advanced Settings.
In the next windows, go to Inbound Rules.
Click on the New rule button.
Select the Program option and Next.
Go to Program’s path and choose OpenVPN.
On the Action window, select Allow the connection.
Let all the three options checked and click Next.
Set the name and description, and then click Finish.
At the same time, this step-by-step guide should resolve OpenVPN not working on Windows 11, so you can use the method on the newest OS version without problems.
How can I fix OpenVPN not working on Windows 10?
1. Add an exception to the firewall
Press the Win key, type firewall, and open Firewall & network protection
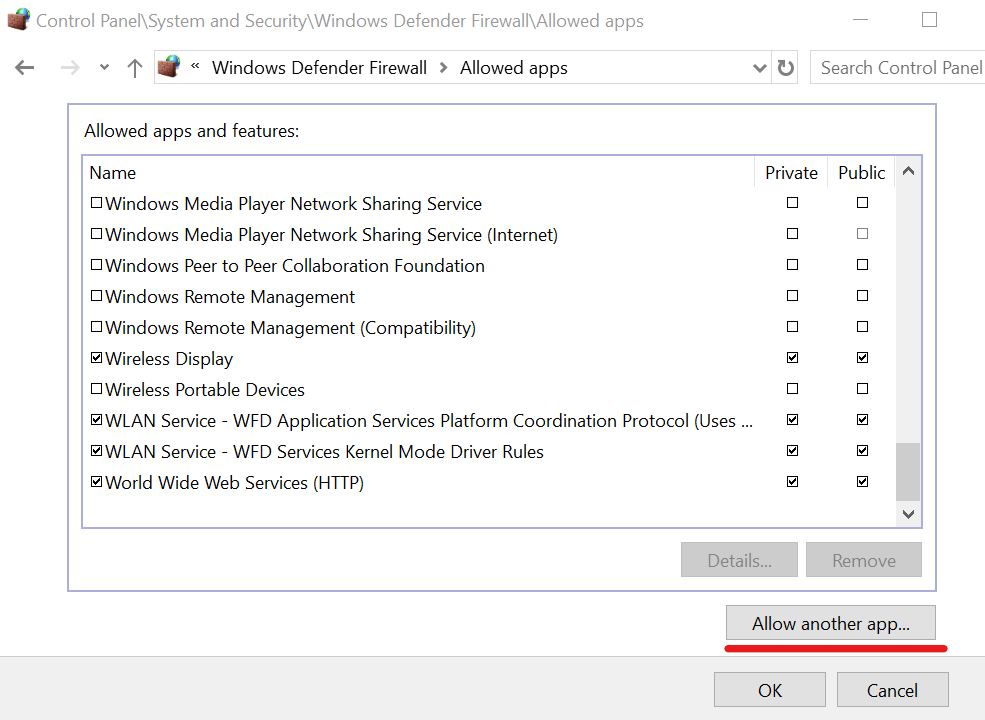
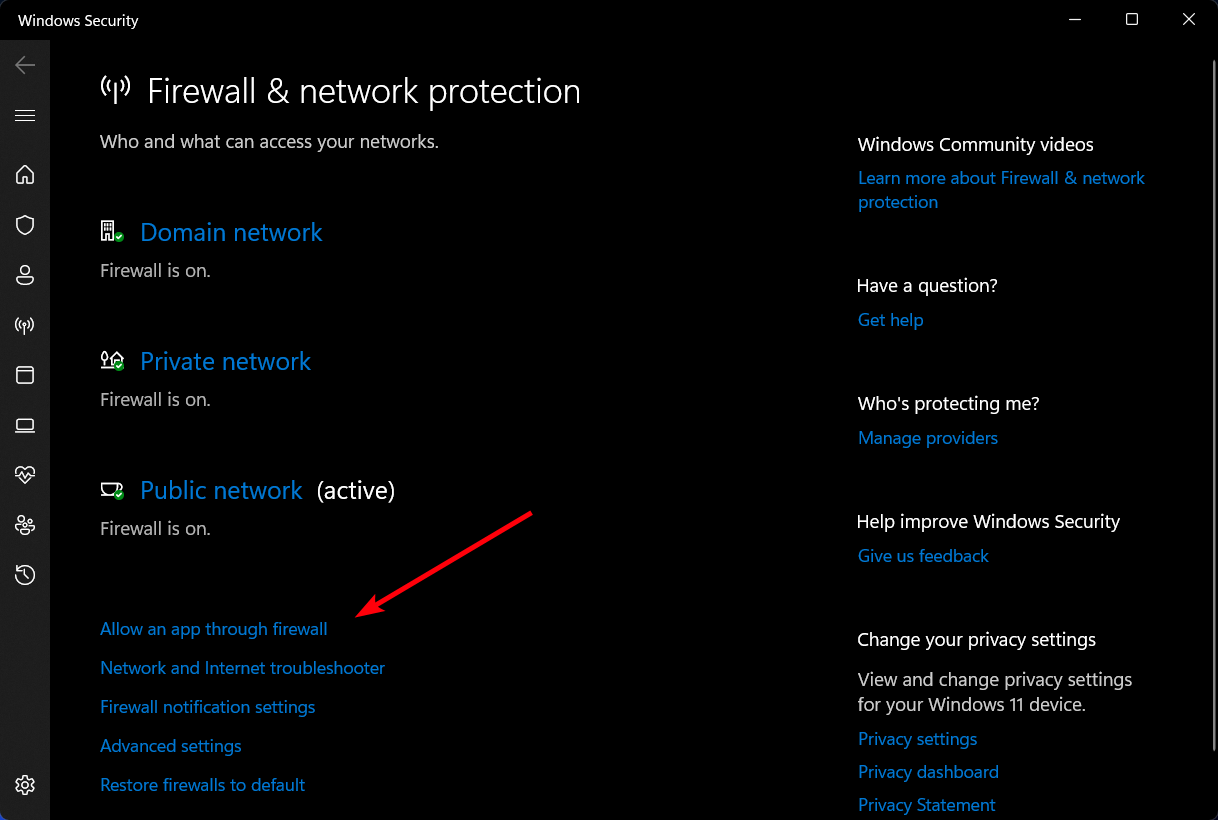
Click Allow an app through the firewall
Click Change settings (you need admin rights)
Search for OpenVPN in this list and check its boxes for Private and Public
If it’s not in this list, click Allow another app to browse and select it
It’s possible that your firewall didn’t whitelist OpenVPN when you installed the client. In that case, you have to manually add an exception for it in the system firewall.
If another application is responsible for your computer’s firewall, make sure to adjust the above settings accordingly.
To quickly test this theory, you can temporarily disable the firewall and check if OpenVPN works properly on Windows 10 now.
But don’t forget to turn it back on since you risk exposing your home network to vulnerabilities.
2. Use a reliable VPN client with OpenVPN support
If you’re trying and failing to get the OpenVPN to work on Windows 10, consider getting a commercial VPN app that supports the OpenVPN protocol.
And we can’t think of a better option than Private Internet Access. This software supports multiple protocols, including OpenVPN.
This VPN is compatible with all major operating systems and also has a manual configuration option for OpenVPN for those of you who want to add it directly to a supported router.
More about Private Internet Access
35 000+ servers in 80+ countries
Split tunneling functionality
Private DNS address on each server
Zero-logs policy
Bypass geo-blocking restrictions from other regions
Compatibility with any devices like Windows, macOS, Android, or iOS
Private Internet Access
Utilize this leading VPN software to set up OpenVPN on your Windows device for complete privacy.
Right-click the Start button and select Device Manager
Expand the Network adapters menu
Look for any TAP drivers, right-click and select Uninstall device
Open the Action menu and select Scan for hardware changes
The OpenVPN client requires a TAP driver to work properly. If its functionality is broken, it could be the reason why OpenVPN is not working on your Windows 10 PC.
However, you can easily fix this by uninstalling the TAP driver from Device Manager – it should get automatically reinstalled.
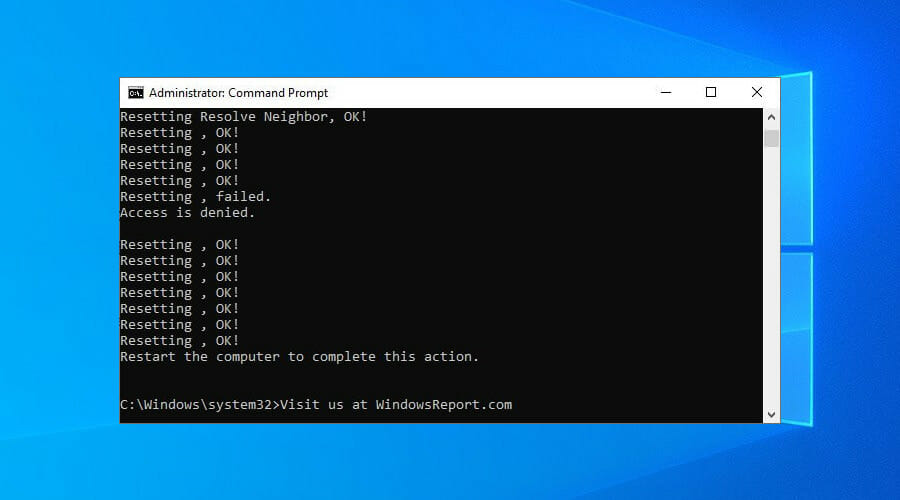
The DNS cache and Winsock configuration are responsible for your computer connectivity.
If they’re not initialized properly, it could be the reason why OpenVPN isn’t working on Windows 10.
To recap, if your OpenVPN configuration fails to work on Windows 10, you can fix this issue by adding an exception to the firewall and whitelisting OpenVPN in your antivirus.
You can also reset the TAP adapter, check if the DHCP service is running, as well as flush your DNS and reset Winsock.
But we suggest opting for a trustworthy VPN like Private Internet Access It has built-in support for the OpenVPN protocol, which means that you shouldn’t see any errors anymore.
Learn everything about OpenVPN to master this VPN protocol and client. Also, visit our VPN Troubleshooting Hub whenever you need a VPN quick fix.
Microsoft Word is one of the most popular text processors in the world, and millions of users use it on daily basis. Creating documents in Word is fairly simple.
Sometimes, you can forget to save your documents, so you might find search for the Word autosave location.
In order to prevent file loss, many users are using the autosave feature that will save your documents in specified intervals.
To turn on the autosave feature, you need to do the following:
Open Word and click on File > Options.
Now go to Save section and make sure that Save AutoRecover information option is checked. Here you can set the desired time interval for auto save.
Look for AutoRecover file location field. It will show you the location of the autosave directory. By default the location should be C:UsersYour_usernameAppDataRoamingMicrosoftWord. If you want, you can easily change the location by clicking the Browse button and choosing a different directory on your PC.
After you locate Word autosave location on your PC, you need to open Word, navigate to that directory, locate the file it automatically saves and open it in Word.
Keep in mind that this directory might be hidden on your PC, especially if it’s located in the AppData folder.
To quickly access this folder, you can simply paste its location into File Explorer’s address bar.
If you want to access the folder manually, just follow the path, but be sure to go to the View tab. Then, check the Hidden items option so you can reveal the hidden AppData folder.
After doing that, you’ll be able to access Word autosave location without any problems.
2. Check the AppData folder to find the Word autosave location
By default, Word’s autosave location is the AppData folder. There are several locations where Microsoft Word can save your files. Usually, the autosave location is one of these two: C:\Users\Your_username\AppData\Local\Microsoft\WordC:\Users\Your_username\AppData\Local\Temp
Newer versions of Word use a different location, and you can find all your unsaved files in here: C:\Users\Your_username\AppData\Local\Microsoft\Office\UnsavedFiles
There are different types of Wordfiles in these folders, and usually, these files will have a tilde or a squiggly line before the file name. Most of these files will have a .tmp extension and a 4-digit number.
For example, a Word document will look like this ~wrdxxxx.tmp. The temp document file will look like ~wrfxxxx.tmp, while the auto recovery file will look like ~wraxxxx.tmp.
Lastly, complete auto-recovery files will not have a .tmp extension and they’ll use the .wbk extension instead. After you find one of those files, simply open it in Word and save them.
3. Access Word autosave location using Recover Unsaved Documents
If you accidentally close Word or if it crashes for some reason, you can open the autosave location by using the Recover Unsaved Documents option.
It is built-in on Microsoft Word and helps you restore any files which you was not able to save before closing the app.
1. Open Microsoft Word on your PC.
2. Go to File in the top left corner of the UI.
3. Choose Recent from the list of options.
4. Click on Recover Unsaved Documents.
5. You can also navigate toFile>Info>Manage Versions>Recover Unsaved Documentsin order to access the autosave location.
6. After finding the automatically saved file, open it and choose the Save as option to save it.
4. Access Word autosave location through the document directory
Sometimes autosave location is set to the same directory where you save your file. However, autosave files are usually hidden and in order to see them, you need to follow these steps:
Open Word.
Click File > Open > Browse.
Navigate to the directory in which you saved the file.
Change File type from All Word documents to All Files.
Now you should see a backup file. The file will have Backup of in its name, so it will be easily recognizable.
Open the file and save it.
As you can see, Word sometimes saves unsaved files to the same directory in which your currently open file is stored in order to make it easily accessible.
If you didn’t save changes to your Word document, be sure to try this method.
5. Search for .wbk or .asd files to find the Word autosave location
Although Word automatically saves your files, sometimes it can be hard to find the autosave location. If you can’t find the location on your own, you might want to search for a specific file extension.
Word autosave files usually use .wbk or .asd file extension, and in most cases, the Word autosave directory will have these files in it. To search your system for these files, do the following:
Open File Explorer. You can do that quickly by pressing the Windows Key + E shortcut.
When File Explorer opens, go to the search bar in the top right corner and enter .wbk or .asd, and press Enter.
Windows 10 will now search your system for all .wbk or .asd files. If any files are found, simply right-click the file and choose Open file location from the menu.
This will open Word autosave location and you’ll be able to see all automatically saved files.
If you can’t find any .wbk or .asd files, be sure to search your system for .tmp files. Keep in mind that .tmp files aren’t strictly related to Word, so some of them might be a part of different applications.
For more information on what temporary Word files look like, be sure to check Solution 2.
Sony excited more than a few heartbeats when it announced that its gamers would be able to remotely play PS4 games on Windows PCs last November.
Now, with the advent of the PS4’s next big update — titled 3.50 MUSASHI, a riff off the venerable Playstation classic of yore — PS4 Remote Play with PCs is a possibility that will be made a reality sooner rather than later.
Remote Play allows users to play their favorite PS titles on any device, a critical requirement being a stable Internet connection with the recommended speed of 15 Mbps.
So, let’s find out all there’s about the idea of PS4 Remote Play in Windows, and the related critical information.
Can you use PS4 Remote Play on PC?
Yes, you can use PS4 Remote Play on PC by downloading the PS Remote Play app and setting it up on the device. Just make sure your computer meets the following requirements:
OS: Windows 10 or higher
Storage: 100 MB or more
RAM: 2 GB or more
Processor: 7th Generation Intel® Core™ processor or higher
Resolution: 1024 x 768 or higher
The process is quite simple, and the official website walks you through it. In case you were looking for a detailed walkthrough, here are the exact steps to follow in order for you to use PS4 Remote Play on a Windows PC.
How do I use PlayStation Remote Play on Windows?
Go to the Remote Play page for PS4, tick the I agree to the SIE application end user license agreement and Privacy policy, and click on the Download button.
Now, run the setup and follow the on-screen instructions to complete the installation process.
Once done, open Settings on your PS4 console.
Now, go to the Remote Play Connection Settings.
Tick the Enable Remote Play checkbox here.
Head back to Settings, and select the Account Management option.
Select Activate as Your primary PS4.
Now, select Activate.
The next step is to enable the use of Remote Play even when the PS4 is in Rest Mode. You can skip it, if you don’t intend to use the feature this way.
For this, go to PS4 settings, and select the Power Save Settings option.
Next, select Set Features Available in Rest Mode.
Enable Stay Connected to the Internet and Enable Turning on PS4 from Network from the options here.
Now, with the PS4 console turned on or in Rest Mode, as the configured settings may be, plug in the PS4 controller to the PC, and then run the PS Remote Play app.
Click on the Sign In to PSN option.
Now, enter the credentials for the SonyAccount used on the PS4 you set as primary earlier.
Click on Confirm and Continue to proceed.
Choose PS4 here.
Wait for the linking process to complete. It may take a few minutes the first time you set up Remote Play.
That’s it! You have successfully downloaded PS4 Remote Play in Windows 10, and have it set up. You can now start playing your favorite titles on the PC.
You can also stream and play PlayStation titles directly on a Windows PC by using PlayStation Plus without relying on your own console, and you can learn how to set that up in detail in our full guide to PlayStation Plus on Windows.
Can I join a PS4 party on PC?
Yes, you can join the PS4 party on the PC and many found the experience more pleasant when compared to the console.
For the party, you will need to set up Remote Play, as discussed in the previous section, and can then both set up a party or join one.
For a smooth voice chat setup from your computer, follow this guide to join PlayStation Party Chat on PC and coordinate with your team while using Remote Play.
PS4 Remote Play in Windows has proven itself to be useful for gaming experiences that do not hinge victory or defeat on the quality of a connection’s latency. As such, competitive FPS players aren’t likely to find this to be useful while lots of others will.
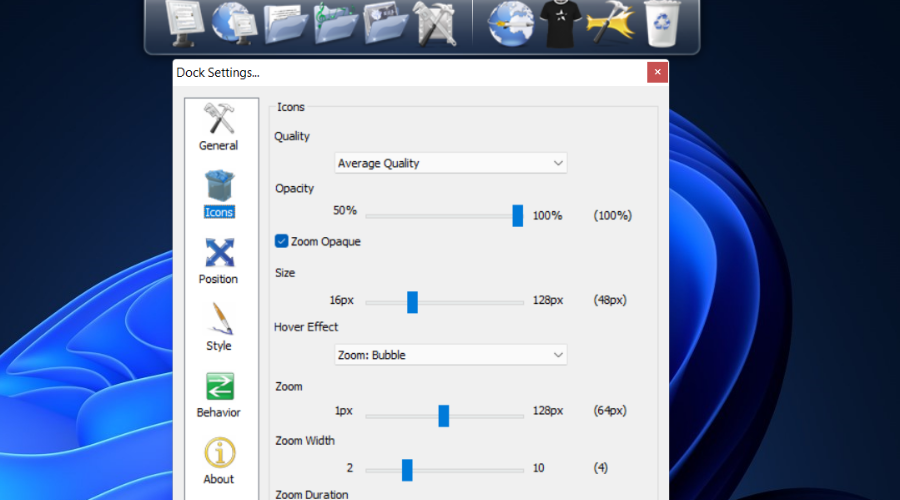
RocketDock is a program launcher/dock that sits on top of your screen.
When you install RocketDock, it will feature some default shortcuts, but you can easily modify it, and add whatever program or app you want.
The best thing about RocketDock is that it can save a lot of space on the Desktop, so if you have many icons, this can be a lifesaver. This makes it one of the best desktop application launcher apps on the market.
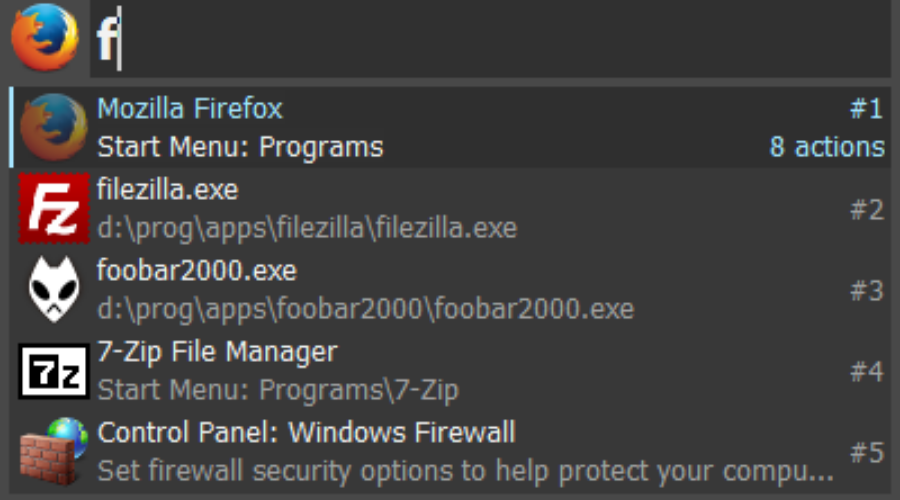
Launchy is ready to use as soon as you install it, as you don’t have to set up a single thing.
When you open the program, it shows just a search bar, along with a small Control Panel icon. So, just type in the name of the program you want to open, and suggestions will appear in no time.
Launchy doesn’t only open regular programs or apps, it also can search for old files stored in multiple folders, which can be more than useful.
Executor is a very simple program/app launcher for Windows 10 & 11, that allows you to access any installed program on an app on your computer, simply by entering its name.
It is placed in the taskbar, so all you need to do is click on it, type the name of the app you want to open, and it will be opened immediately.
Besides programs and apps, Executor also works well with URLs, so if you need to access a certain website quickly, just enter its address in Executor.
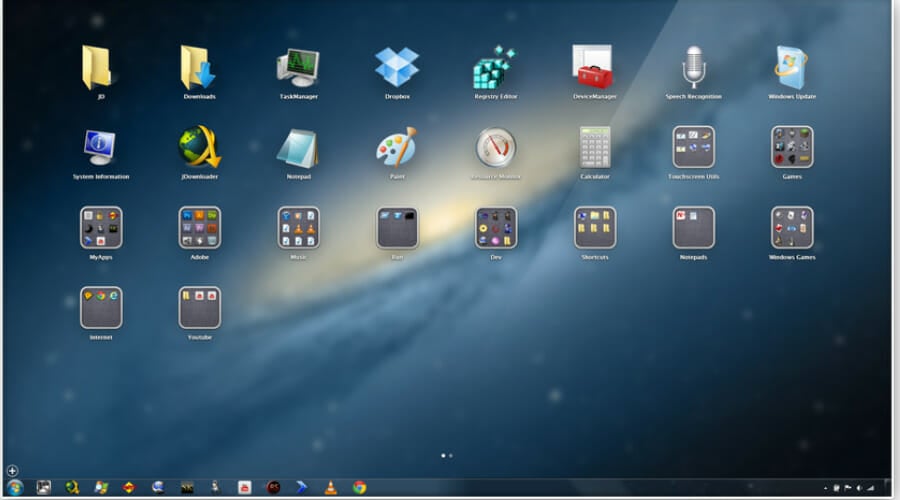
WinLaunch is based on the launcher from Mac OS X Lion. It starts minimized, in the background, and you activate it by pressing the Shift + Tab keyboard shortcut.
You can group shortcuts by groups, similarly to how it’s done in iOS; simply drag and drop one icon into another one to create a group.
You can create as many groups as you want, and make further customizations, like adding the name of the group. It’s a simple to use desktop application launcher, so be sure to try it.
Take a look at its key features:
Move icons from one group to another
Save shortcuts like you would have them on your mobile device
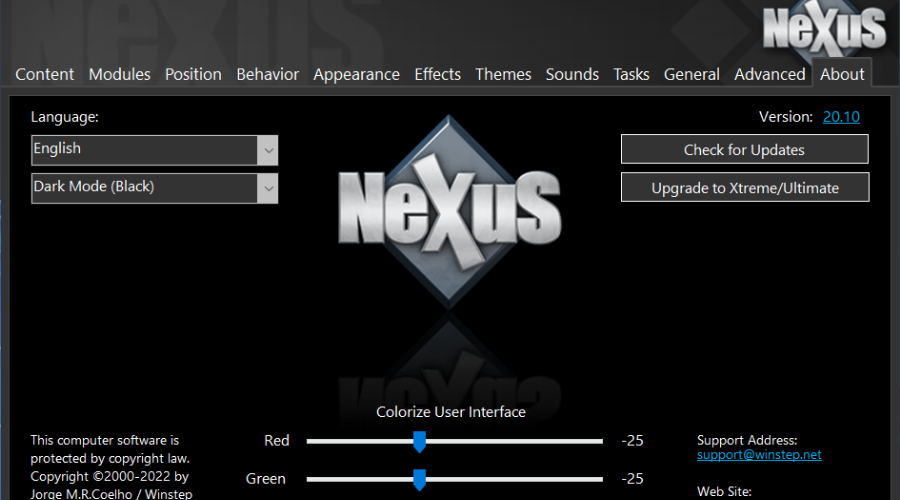
Even though functionality is probably the most important thing, Winstep Nexus Dock actually wants to charm you with its stunning looks.
It gives you the ability to set custom icons for your dock items. When it comes to usability, Nexus Dock is actually a quite simple tool to use.
It works on the drag and drop principle, so all you need to do to pin your favorite program or app is to simply move it on the dock with your mouse cursor.
Besides regular programs, Nexus Dock also supports files, folders, and other features. Everything has its own icon in the dock, so you won’t have a problem recognizing what’s what.
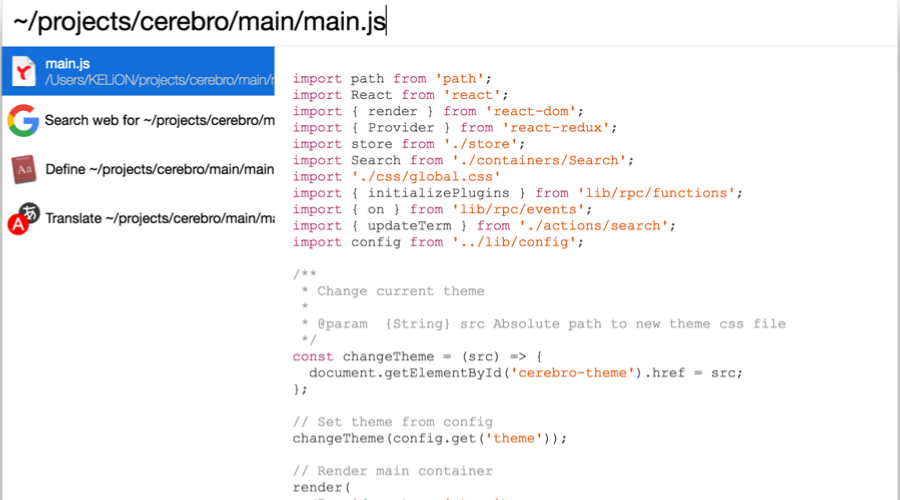
Keypirinha is an efficient and quick launcher app for Windows that opens any file or website immediately.
You can launch any applications, files, or URLs right from your desktop without any effort. The software can find every item in your system, plus launch a search for configured websites or dictionaries.
It’s also possible to do different mathematical operations or search environment variables, plus launch copied URLs directly from your desktop.
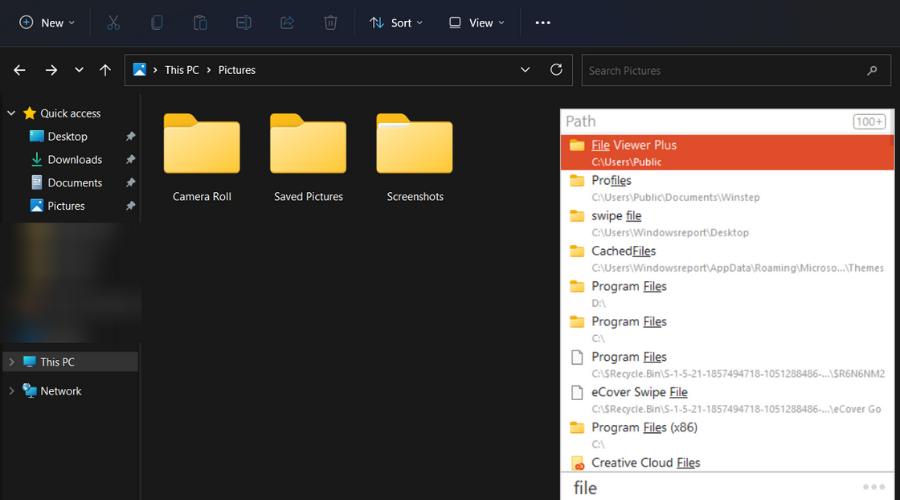
Listary is a helpful Windows utility created to find and launch any apps or files on your computer extremely fast.
You will find any files among millions of other ones using only a few keystrokes and Enter. The desired files are found and instantly shown on your screen.
Additionally, you can copy and move your files to any folder with context menu commands. Plus, it’s possible to open a file with a specific program.
Take a look at a few of its best features:
Great search feature
Copy and move your files to any folder with simple commands
A small tool that lets you open apps, files, and web searches from one search bar or hotkey to speed up workflows.
How do I choose the right launcher?
Look for instant indexing, custom hotkeys, plugin support, low RAM use, and reliable file and web search.
Will a launcher slow down my PC?
Good ones use minimal resources; disable heavy plugins and limit indexed folders to keep memory and CPU low.
How do I set hotkeys or custom commands?
Open the launcher’s Settings, assign a global hotkey, then add keywords or scripts/PowerShell commands and save.
That’s about it for our list of the best app and program launchers for Windows 10. All these launchers have something unique to offer, and each one of them can replace a certain Windows 10 feature.
We advise you to try some or all of them in order to determine which is the most suited for your Windows device.
So, if you’re not satisfied with how Microsoft did its job with some of the features, or you simply want to try some new solutions, the programs from this article are just a perfect fit for that.
Before you pick a launcher, round out your setup with tools that help you focus, automate tasks, and manage windows faster. Explore our curated list of must have options here: best Windows 11 productivity apps.
If you have tried any of the tools from our list above, share your experience in the comments section below.
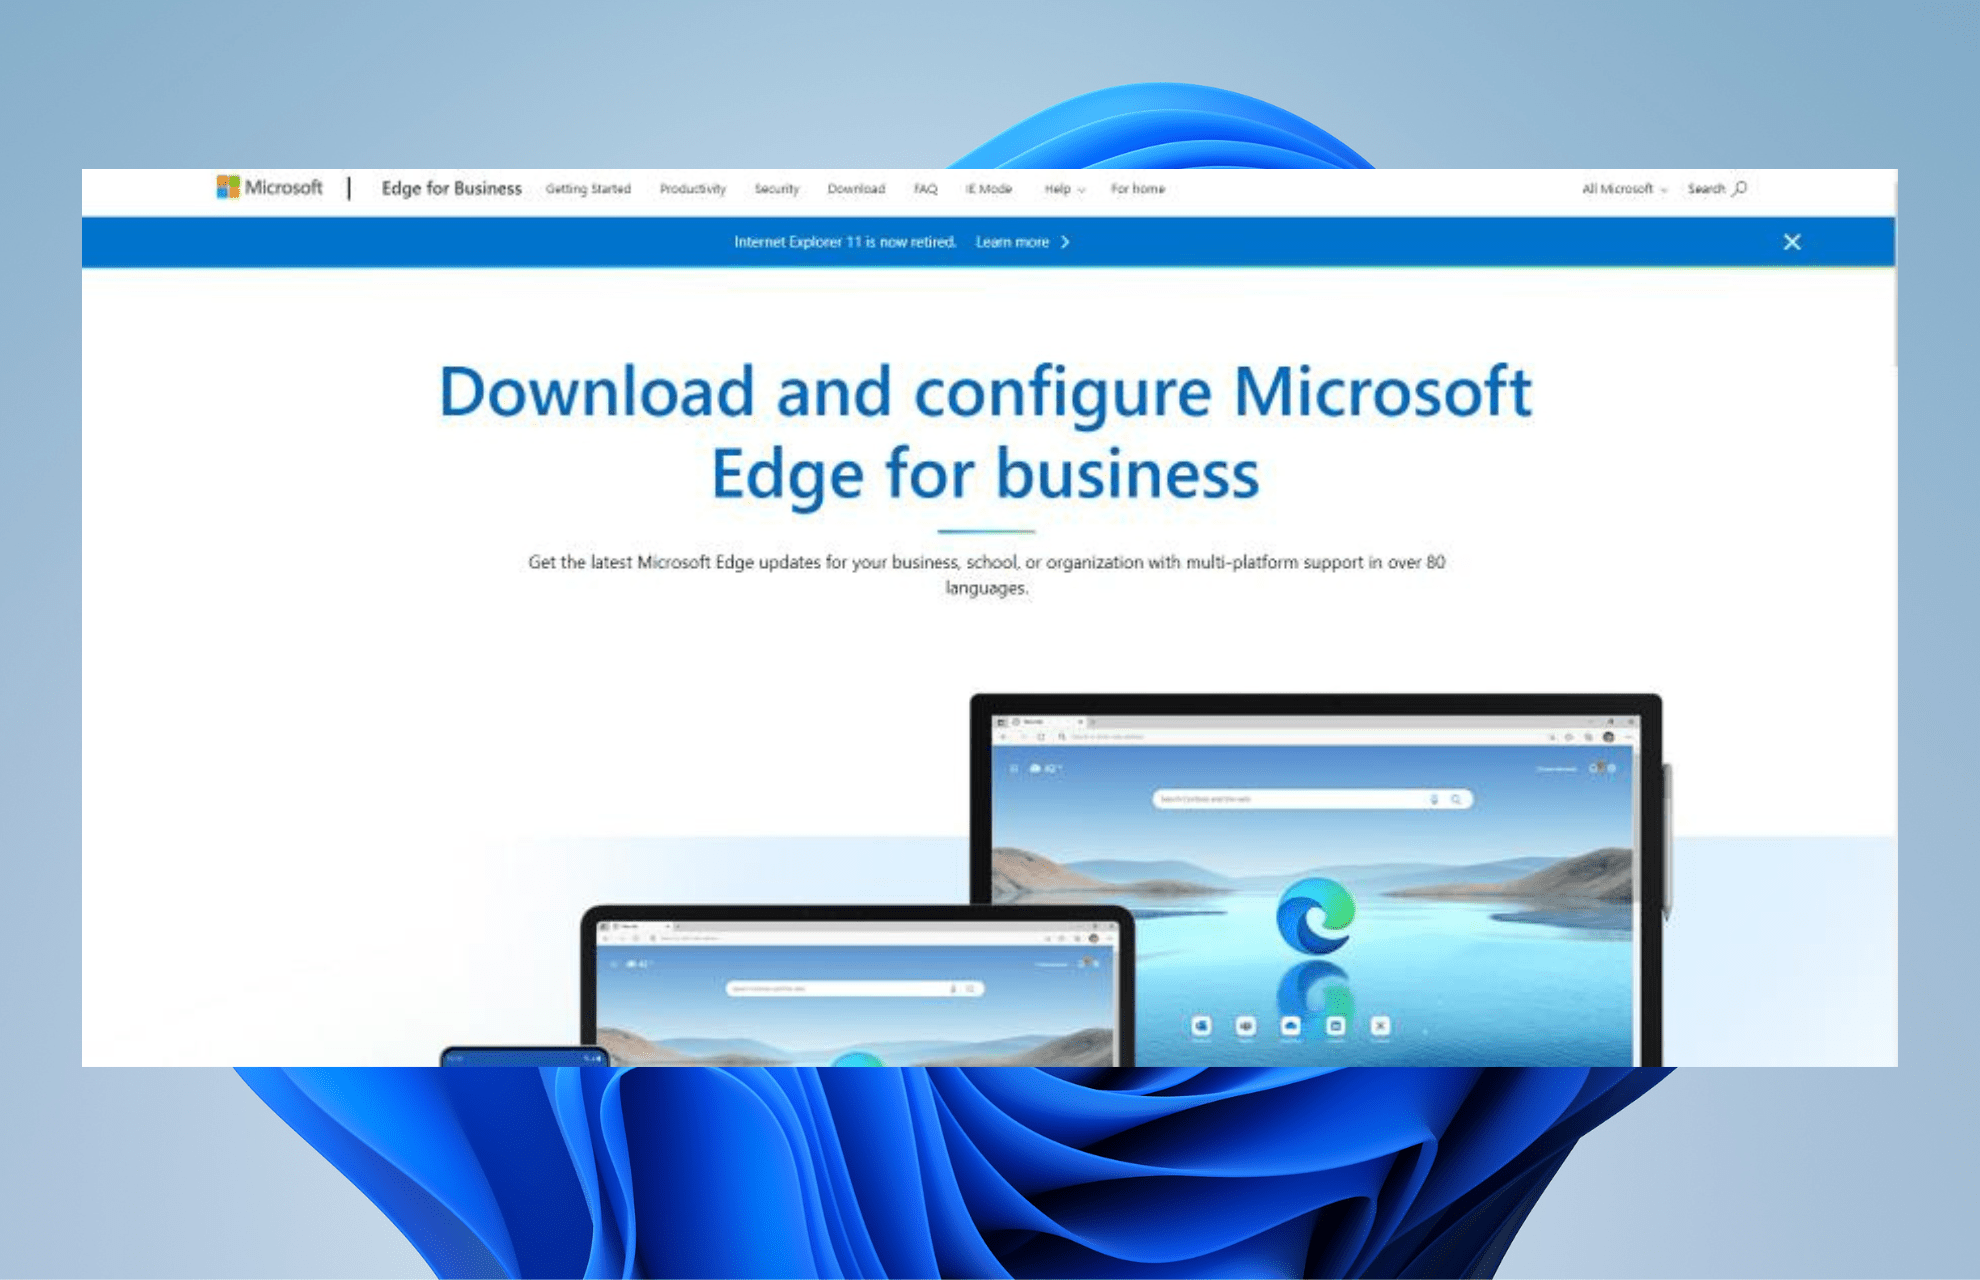
Like many other browsers, Microsoft Edge has different versions of it, like Edge Legacy and a business version which is what this guide will focus on. So, we’re going to show you how to install Edge for Business on Windows 10 and 11.
How do I download & install Microsoft Edge for business?
Scroll down and select one of the browsers to download. The one you select depends on how much RAM you have to spare. This guide will choose the 32-bit version.
Click Accept and download on the License Terms window.
After it finishes downloading, go to where file is located and double click it to begin installation.
A window may appear asking you if you want Edge to make changes on your computer. Click Yes.
At first, you may not realize that Edge for business has been downloaded as all you will see is a small window saying the Edge is being configured.
That configuration is changing your base Edge browser into Edge for business.
You can check if you have the right version by going to the Settings menu and seeing the date on Edge.
If the date matches the day you downloaded Edge for business, then you have the right browser.
Scroll down and select one of the versions to download. This guide will select 64-bit.
Click Accept and download to get the file.
Go to the file’s location and double-click it to begin the installation process.
Like the Windows 10 version, Edge for business will not download a new browser but change the already existing one.
You can go to the Settings menu and check the date. If it matches the day you installed Edge for business, you have the right browser.
Is downloading Microsoft Edge for business free?
Yes, it is. Microsoft Edge for business is completely free to download and use. It sees frequent updates as Microsoft constantly churns out new features.
As of this point, Edge and its business version are the only two browsers that Microsoft developed that see support. Edge Legacy is available on older computers, but has since had its support dropped.
What is the difference between Microsoft Edge and Edge for business?
Truth be told, there are almost differences between the base Microsoft Edge and Edge for business. You can use both and convince yourself that they’re the same browser.
Edge for Business has a small briefcase icon to differentiate when switching modes, but you can always remove it if you don’t like it.
Edge for business does, however, give system administrators more control over administrative settings at their workplace. It also allows users to choose which of each type of Edge to download.
But aside from more control, the features are the same across the two browsers. So, if you’re worried about losing Edge extensions, you shouldn’t be.
This guide will show you how to download Microsoft Edge for business on Windows 10 and 11.
Edge is currently based on the Chromium browser and is available on PC, macOS, iOS, and Android.
If you’re not a business user, we also have a guide on how to use the Edge offline installer on your PC, so don’t miss it.
Feel free to leave a comment below if you have any questions on other apps or if you recommend some. Also, feel free to leave comments about guides you’d like to see or information on other web browsers.
A journalist’s work is as complex as they get and photo editing takes a great deal of their time.
As the world’s most popular photo editing software, Adobe Photoshop is the natural choice for the job and it should not miss from any professional’s kit.
Its complex, yet easy-to-use toolset makes everyday edits like cutting, cropping, and corrections simple and accessible.
Speaking about accessibility, another important feature is its cross-platform functionality. This is just another way in which Adobe Photoshop makes itself useful.
Since journalists are always on the road (and they should if they are to catch a good story before anyone else), starting a project on the desktop and continuing it from the iPad comes in handy.
Adobe Photoshop can be used with other Adobe products and be integrated as part of the Creative Cloud. You can try it for free for 7 days.
Let’s quickly go through its key features:
Lens Blur and Improved Content-Aware Fill
Object Selection Tool (to create fast and precise selections)
Enhanced Transform Warp (to add control points anywhere or divide your image with a customizable grid)
Improved Properties panel with convenient Quick Actions
Modern presets (easier, more intuitive, and better organized)
Adobe Photoshop
Edit pics on the go and get impressive images that weigh more than a thousand words to compliment your story!
Grammarly is probably one of the best journalist writing apps. Its browser plugin corrects grammar mistakes and bad phrasing.
It is extremely helpful when you need to recheck a text written very quickly or when you need to edit somebody’s work. It also provides you with synonyms so you could diversify your texts.
This tool is the first on the list as a journalist needs, first of all, to write something from time to time and when this needs to be done in a short time – Grammarly is his best friend.
It is not so complicated to use it – Install it on your browser, restart the browser and you will have access to the best grammar-checking program available for free.
Other key features of Grammarly include:
Rephrase suggestions for premium users
Anti plagiarism tool
Tone adjustement support
Fluency assesment
Grammarly
Get a taste of accurate, stylistically appropriated, and plagiarism-free writing with Grammarly!
Whenever massive amounts of data are involved, it is best to present the information in an attractive way so that it is more digestible for the audience.
Since journalists deal with a lot of information, finding the right balance between text and visuals is crucial in order to captivate the public’s attention.
And there is nothing better equipped for this task than sleek, impactful, high-resolution images.
Adobe Stock brings an impressive collection of such beautiful images that every journalist should include in his or her toolset.
Adobe Stock is a great platform to help you get inspiring materials from world-established industry experts.
Let’s quickly look at its key features:
Diverse libraries of high-resolution, stock assets and images
Gorgeous, royalty-free imagery for high-impact storytelling
Beautiful HD and 4K footage for motion projects
Numerous pre-made, professionally-designed templates available
Full compatibility with other Creative Suite products such as Photoshop, Illustrator, and more
Royalty-free audio tracks and music
Adobe Stock
With Adobe Stock you will always find the perfect image to illustrate your article.
Digitalization has laid its stamp on journalism as well and the future of this industry may depend on cybersecurity. Truth is that there is so much information that you give out when online without knowing it.
To protect your privacy, it’s advisable to use Opera One. This browser is one of the most privacy-focused tools out there that even has an in-built VPN to make sure your location, IP address, and any other data that might be used to identify you are kept hidden.
As a journalist, you will need Opera One to research state propaganda and to file stories with non-state-controlled media without having to worry about the consequences of digging too deep.
Opera One will greatly facilitate your online research with numerous features while also keeping your identity anonymous.
Other key features of Opera One include:
Workspaces and tab islands
Built-in Ad and tracking blocker
Native AI and modular AI-ready design
Quick access to social media platforms
Opera One
Reimagine browsing and better your journalistic skills with the most powerful tool: faster, better, 100% private, and ad-free online research.
A journalist’s work is more than producing pretty pictures or performing countless hours of research.
It’s a mixture of many apparently isolated items that come together to create a unique, informative, well-documented story that captures attention.
And this calls for a tool that can centralize all those activities and allow for the different persons involved in the story-building process to collaborate in real-time and make things happen.
Monday.com does just that, it allows you to manage everything in one workspace. Monday.com is available under a subscription plan.
Let’s quickly look at its key features:
Planning, tracking, and delivering capabilities
Fully customizable visuals and templates
Seamless integration with popular collaboration tools
Automate repetitive tasks and focus on important matters
Visualization tools to better organize and convey information (views, maps, timeline, kanban, and more)
Being able to stay in touch with the people that matter is essential for a journalist. And sometimes, this implies a good amount of tracking down those important persons.
Used by 2,000,000+ professionals around the globe, Hunter is well-known for its excellent capacities and lets you find email addresses in seconds.
What’s more, it has plenty of add-ons and countless integrations on which you can rely to complete your detective-grade research and create compelling stories.
Let’s quickly look at its key features:
Domain search to help you obtain the email addresses behind any website
Powerful email-finding tool with efficient search filters and top scoring
Email deliverability checker tool
Extensive library of add-ons (Chrome extension, Firefox add-on, and CRM integrations)
Another software that can be a great asset in any journalist’s toolbox is EverNote. It offers solutions for quick note-taking and it also doubles as a task manager.
With a simple and friendly user interface, Evernote lets users quickly take notes, create notebooks and task lists.
You can use it as your main note-taking tool as it is suitable both for desktop and mobile. Activate the safe sync option and start right where you left off, regardless of the device.
The tool has a generous set of pre-made note templates. You can pick your favorite from categories such as creative writing, planning, travel, trackers, and more.
Evernote lets you organize your notes under different names, add tags and add them to specific notebooks.
It also has an easy-to-use search function that is able to find your notes based on titles and keywords. It uses OCR so it can also identify words within the images in your notes.
It offers quick and easy solutions to share your work with peers and offers support for popular third-party productivity apps such as Google Drive, Slack, and MS Teams.
Evernote has a free plan that you can use to get started and try out the app. Even though limited in certain areas such as the number of synced devices and maximum note size, it offers a good glimpse of what the product has to offer. The premium version is subscription-based.
Other key features of Evernote include:
Supports document scanning
Can connect to Google Calendar
Customizable home window
Evernote
Create a simple workspace with this writing and task management tool.
When working in journalism, before you get started with any article, you’ll need to gain access to information, and the fastest way to contact someone is via email address.
This is easier said than done, especially when someone’s work email is hard to find, or not publicly displayed at all.
That is precisely when a tool like GetEmail.io can come in handy, since it completely scans any website and finds all the email addresses displayed on it, regardless of email domain.
More so, even if the email of a particular person is not readily available, it will generate one based on the other work email addresses that are on the site.
Features:
Affordable price plans
Easy access via a web browser
Works with all email addresses, regardless of domain
Great for getting email addresses that aren’t publicly displayed
So whether you are a novice en route to becoming the next CNN reporter or a fully professional journalist, you will need some of these tools to polish your work.
We all know that staying protected while online is of paramount importance, especially in these dangerous and uncertain times we are living in, and having a good antivirus is a must.
If your mind is made up and you have decided to go with Microsoft’s Defender, but you’re not sure how to get your hands on it, we’re about to lend a helping hand.
How to download Microsoft Defender on different OSs?
Don’t worry, we’re not going to present you with some sort of complicated process that would involve you spending hours in front of your PC.
In fact, downloading this software is as simple as accessing the right page and clicking on the highlighted download button.
1. How to download Windows Defender for Windows 11
Windows Defender is an anti-malware tool that should come pre-installed on Windows 11. In case it is not already installed, you can manually download and install it from the official Microsoft Store website.
1. Open the Microsoft Store app on your PC.
2. Type Microsoft Defender Preview in the search box and press Enter.
3. Click on the result to open the app.
4. Press on the Get button.
5. Microsoft Defender will start downloading.toc
Thus, if you are looking for Microsoft Defender for Windows 11, all you have to do is head on over to the official Microsoft Store page and click the Get button.
If you are not in the United States, the Get button will be missing for you, as this preview version is only available to people located in the above-mentioned countries, for the time being.
Simply staying vigilant and not clicking on certain links you consider not trustworthy is not enough most of the time, so relying on protection software is a must.
But with all the antivirus solutions out there, choosing one that will suit your every need, without taking away any aspects of your online freedom or slowing your device’s performance, can be a real challenge.
Lately, more and more users have opted for TotalAV as their main security option. It’s an ideal choice for modern users concerned about their privacy.
It will come in handy if you actively use the internet for shopping, banking, work, or communication, and it’s compatible with Windows, Mac, and Android devices.
Where do I download Microsoft Defender for Android?
Open the Play Store.
Search for Microsoft Defender.
Tap the Install button.
Can I get Microsoft Defender for iOS?
The answer is yes, you can. It’s not a complicated process, so all you really have to know is where to look for this software.
Deployment of Microsoft Defender for Endpoint on iOS can be done via Microsoft Endpoint Manager (MEM) and both supervised and unsupervised devices are supported.
However, keep in mind that dnd-users can also directly install the application from the Apple app store.
FAQ
Is Windows Defender free to download for Windows 11?
Yes, it’s built into Windows 11 and doesn’t require a separate download.
How do I check if Windows Defender is active on Windows 11?
Go to Settings > Privacy & Security > Windows Security to confirm it’s enabled.
Can I download Windows Defender on other versions of Windows?
Yes, it’s available for Windows 7, 8, and 10, but Windows 11 has it pre-installed.
Do I need third-party antivirus if I use Windows Defender on Windows 11?
No, Windows Defender provides full protection, but you can choose third-party software if needed.
For those who prefer to disable Windows Defender on Windows 11, you can follow this detailed guide on how to disable Windows Defender to ensure a smooth experience with your preferred antivirus.
There you go. That’s how you download Microsoft’s Defender software to help better protect your devices from all sorts of incoming threats.
Has this article been helpful to you? Let us know in the comments section below.
Not only does this error appear on Windows devices, but it also occurs on smart TVs and smartphones.
What does it mean This title is not available to watch instantly?
When users want to watch their favorite series, movies, or TV shows, they search for them on the Netflix app on the Windows system. Instead of streaming the video, it simply threw an error message on the screen.
This does not allow users to watch the video they wanted to stream and asks users to try watching another title.
This is quite frustrating for all the users; meanwhile, even Netflix is working on this issue and promised to resolve it.
However, we researched a lot on this error and got some interesting solutions for assisting users and getting this error fixed in this article below and continue watching their favorite shows/movies.
How do you fix This title is not available to watch instantly on Netflix?
1. Restart your system
To restart the Windows system, right-click on the Start button and navigate through Shut down or sign out and select Restart.
This will restart the system and once the system starts, sign in with your user account credentials.
Sometimes the issue might be with the system you are using and not the application. So, try restarting your Windows system a few times and see if this error gets fixed.
2. Reinstall the Netflix app
Press the Windows key on the keyboard and type Netflix.
Next, you need to right-click on the Netflix app from the search results.
Select Uninstall from the context menu.
For confirmation, click Uninstall from the prompt window on the screen.
Now, open the Microsoft Store app on your system.
Type Netflix in the search bar and select the Netflix app from the results.
Click the Get or Install button on the Netflix page in the Microsoft Store app.
This immediately starts downloading and then installing the application.
After it is installed successfully, you can try launching the Netflix app.
After launching, you can sign in and start using it without any errors.
Press the Windows and I keys together to open the Settings app window.
Select Apps from the options shown on the left side.
Open the Installed apps page by clicking on it on the right side.
Now you need to scroll down the Installed apps page and locate the Netflix app.
Once you locate it, click on the three horizontal dots icon and select Advanced options from the list.
Scroll down the page to the Reset section, click Reset if you want to clear the whole app, and delete the data along with it.
You can click Repair if you want to simply repair the Netflix app once without any data associated with the app.
After it is done, close the Advanced options page and try using the Netflix app.
Some users have resolved this issue by using a VPN to bypass the region restriction problem while watching any videos that are not available for your country.
As obsolete versions of Windows no longer receive support from Microsoft, users are forced to upgrade to Windows 10, respectively 11.
There are countless reasons why the latter option is preferred, so many users are treating it as the default anyway.
Of course, migrating to a new OS isn’t all that simple, since you first have to make sure that your hardware can handle it.
While Windows 10 is optimized to run on older systems, it is better to be safe than sorry.
The first thing that may come to mind would be to simply go online and check out what are the minimum system requirements for Windows 10 as well as for Windows 11.
Keep in mind that these slightly change over the years. As hardware gets more affordable and accessible, the prices also fluctuate, therefore newer machines will be equipped with more powerful components.
Since Microsoft said that they’ve decided to continuously update Windows, more features will be added, thus it might affect the system requirements.
How do I use a Windows 10/11 compatibility checker?
To make things easier for you, here is a list of the current system requirements:
While that is indeed a good way to start, there are certain aspects that need to be observed in order to see if your new hardware is fully compatible with Windows 10 or 11 as it was with Windows 7.
Using a Windows 10 compatibility checker is fairly easy and self-explanatory. Microsoft has one, and it is known as the Update Assistant or the Media Creation Tool.
This tool is extremely easy to acquire and use, as you will see from the steps below.
Keep in mind that this is the same set of steps that you need to take when upgrading your PC from Windows 7 to Windows 10.
The only difference here is that you don’t have to go all the way with the process.
How do I check my computer for Windows 10 compatibility?
If you are looking to upgrade your OS to Windows 10, you can use Media Creation Tool from Microsoft. It is compatibility center also known as Update Assistant.
Media Creation Tool can scan your PC and evaluate whether it can run Windows 10, and then it can also help you install it.
2. After the download is finished, launch the program.
3. On the License terms page, select Accept.
4. On the What do you want to do? page, select Upgrade this PC now.
5. If the program detects that your PC is too old to run Windows 10, it will send you a notification, and stop right there. If you don’t get any notification, it means that the system is compatible and that you can upgrade to Windows 10 without worries.
6. Follow the on-screen instructions to upgrade to Windows 10.
Another thing you should remember is that if you want to use the Media Creation tool to upgrade to Windows 10, you will need to also have a Windows 10 license key at your disposal, in order to activate it.
Do you find these methods of checking system compatibility useful? Let us know what other methods you use in the comment section below.
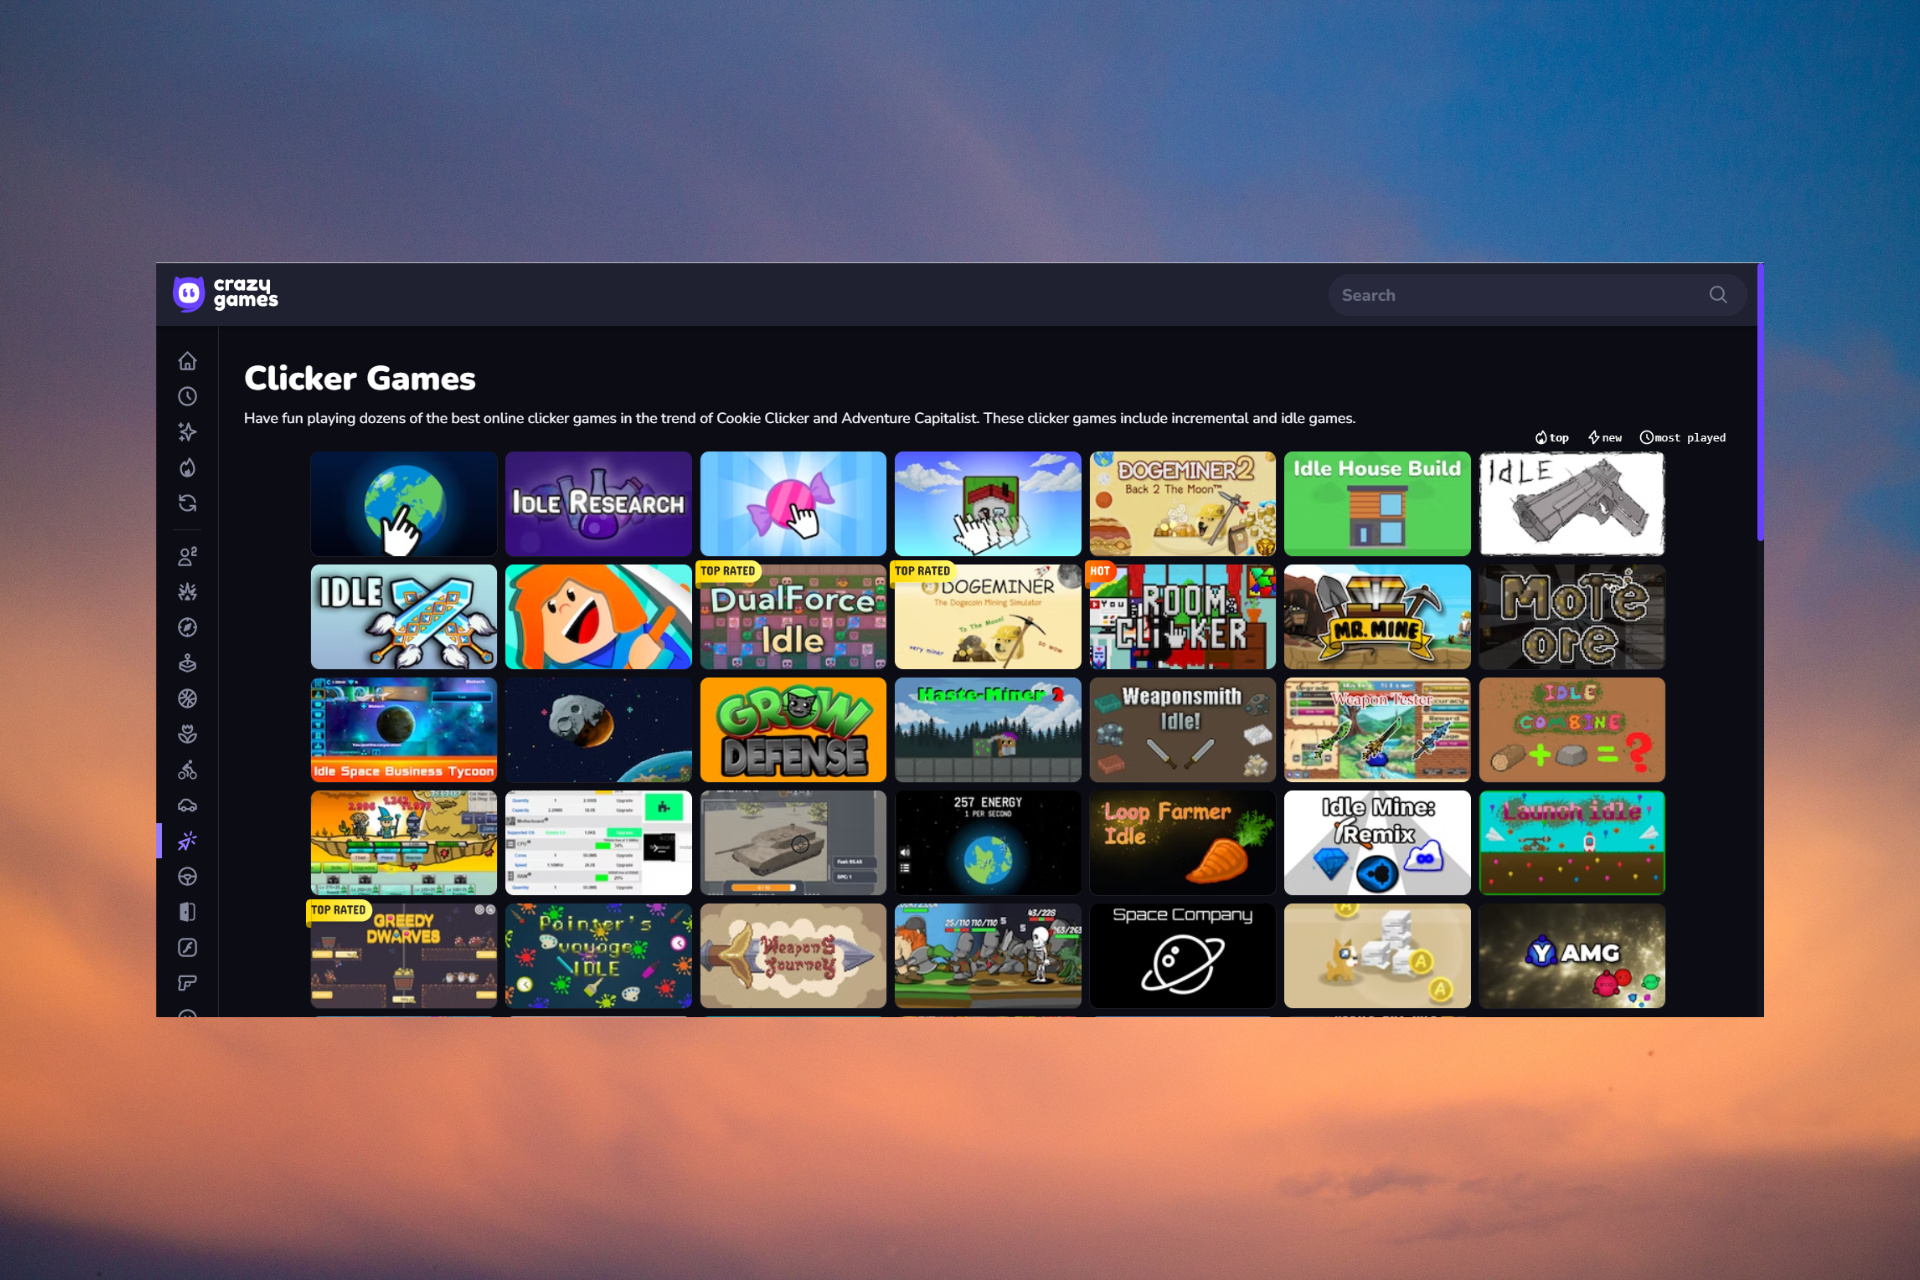
If you want a game that requires almost no effort to play, then you might want to consider trying out clicker games.
These types of games are available on all platforms, but in today’s article we’ll show you how to play clicker games in your web browser, so let’s get started.
What is the best clicker game ever?
That is a subject for a long debate between gamers because there is a clicker game out there for any age and preference.
For instance, for us, one of the best clicker games ever made was Adventure Capitalist. For others, Clicker Heroes or Cookie Clicker are the best.
There are tons of clicker games on different subjects and themes so if you like the genre, you will definitely find the best one for you.
Quick Tip:
Playing games in your web browser is simple and fun, but do you have the right tool for the job? If you’re a gamer, we suggest that you try out Opera GX.
This is the best clicker games browser because it comes with Twitch integration, GX Corner for best game deals, and a built-in VPN with unlimited bandwidth to speed up the website loading time.
Opera GX
Unleash a reign of destruction and mayhem with your mouse in clicker games on this browser!
Click on Start new If you already have an account, choose Log in.
The game should now start.
Clicker games are great if you’re looking for something simple to play, and we hope that you’ll manage to find a perfect clicker game for you after reading this article.
Instagram is a popular social media app for business and non-business folks alik
. Owned by Facebook, Instagram can get addictive without you even realizing it. And if you ever wondered whether you could view your Instagram profile visitors, the answer is both no and yes.
Just like any other social media app, your profiles may get more visits from random users than actual followers you have.
How can I see who viewed my Instagram profile?
That being said, in this article we explore a few ways to show you how to see who views your Instagram profile.
1. See who views your Instagram profile via Stories
You can find out who views your Instagram profile through the Stories feature. If you posted a recent Story in the past 24 hours, all you have to do is click on it and you will see who viewed it.
There is a good chance that the person who viewed your Story also viewed your profile.
1. Open the Instagram app on your phone.
2. Tap on your Profile icon lined up in the bottom left corner.
3. You should see the list of users who have viewed your story/highlights.
4. You can block any user with whom you don’t want to share your stories anymore. Tap the menu button next to the user’s profile and select the Hide Story option.
2. See who views your Instagram profile via Business Accounts
If you are a business or running an official account, you can switch your regular Instagram account to Business Account.
Switching to business accounts allows you to access Instagram analytics to better understand your audience.
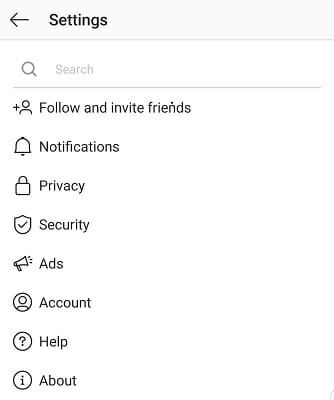
From your Instagram profile, tap on Profile.
Select Settings.
Tap on Switch to Business Account/ Professional Account.
Select Whether you are a content creator or a Business.
Once the transition is complete, you can access valuable insights about the users visiting your profile, including the visitor’s location, age, gender, and time of activity.
That said, the insights don’t reveal the names of the users who have visited your profile.
So, switching to a professional account is only useful if you want more insights about your audience and not looking to find the individual users.
Instagram, by default, does not allow users to view who visited their profile due to privacy reasons.
Even if that is the case, you can use the Stories/Highlights section to get a brief idea about who may have visited your profile.
Hearts of Iron IV (HOI4) is a grand strategy game that you can play solo or in multiplayer. Your objective is to pick the military force of any nation engaged in World War II and lead it to victory.
The elaborate game is available for Windows, macOS, and Linux. Regrettably, a lot of users report Hearts of Iron 4 lag in multiplayer mode.
This unfortunate event can hamper the game’s quality and become incredibly stressful for many players out there.
If you’re looking for a simple way to solve the lag issue in Hearts of Iron 4, use a VPN.
The first thoughts you should consider are poor server connection or bad Internet connection. So it’s possible to score high ping levels while playing HOI4 for a number of reasons.
Firstly, the server location of the game is far from your region. That may cause laggy performance and disturb your game sessions.
Another factor is a poor network connection and unstable Wi-Fi signal that can disconnect you and cause much lag or freeze the game.
What are the best VPNs to fix Hearts of Iron 4 lag?
NordVPN is undoubtedly a legitimate leading VPN software that can be used to reduce gaming lag or ping.
You can best use this privacy on your PC in order to improve the game ping difficulties in Hearts of Iron IV. Mainly, you can choose verified servers to connect to many locations and benefit from high-quality gaming.
With double protection support, it’s also possible to change the IP address twice and therefore increase online security.
In addition, there is unrestricted content no matter where you are. You have the SmartPlay feature that lets you see any type of content from around the globe.
How can NordVPN help you with HOI4 lag:
No internet data leaks
Extremely fast servers in 60 countries
Kill switch functionality
Double protection for your IP address
Unrestricted content for games worldwide
NordVPN
Conceive your battle strategies without interruptions or lag using this effective VPN tool.
An alternative way to fix HOI4 late-game lag is by using CyberGhost VPN. A product of Kape Technologies, this VPN service works great when it comes to repairing packet loss on your PC.
CyberGhost VPN is compatible with Windows, Mac, and Linux, so it doesn’t matter where you play the game.
It provides anti-hacker protection and exclusive DNS servers to make your gameplay better by securing your DNS queries.
How can CyberGhost VPN help you with HOI4 multiplayer lag:
You can make use of some workarounds that will boost your gameplay and change your game experience into memorable times with friends.
This is what you can do in order to increase your speed in HOI4 multiplayer:
➡️ Modify graphic options to reduce lag
➡️ Use Map Mods to increase game performance
➡️ Turn off the day/night cycle to reduce lag
➡️ Use a speedy VPN with multiple server locations worldwide
➡️ Remove effects like Fog of War that requires extra resources
To conclude, a fast and secure VPN app can resolve a number of gaming-related issues, including HOI4 lag.
It’s a practical solution when it comes to fixing network congestion and defending your router from hacker attacks.
If you can’t decide between the three options, we suggest going with Private Internet Access, thanks to its superior connection speed and top-of-the-line security features.
Whenever you stumble upon VPN-related errors, visit our VPN Troubleshooting Hub. Plus, you can join our gaming VPN area to find out how to reduce lag and fix packet loss in other games.
The famous Internet Explorer breathed its last on June 15, 2022. Microsoft Edge, which is a Chromium-based browser from Microsoft, was brought about by its successor.
Moreover, being a Chromium browser, you can do everything that you could do on the Google Chrome browser, even run its extensions on the Edge browser as well.
Microsoft Edge also comes with an advanced password manager. It asks its users to save the password when they try to sign in to a website.
Once you save your passwords in the Microsoft Edge password manager, it will automatically fill in the password on that specific website.
Users have the option to either enable or disable the feature at their will. In this guide, we are going to look at the steps that would allow you to enable the password manager and use the functionality in the browser.
Does Microsoft Edge have a password manager?
Microsoft Edge does come with a password manager. It stores all of your entered passwords, if allowed, in this password manager, and they are encrypted on a disk.
The password manager makes use of AES256 encryption and stores the encryption key in the operating system’s storage, which is the local data.
Attackers, even with admin rights or offline access, can get access to locally stored data, but the encryption prevents the attacker from getting the plain text password of the user who isn’t logged in.
On Windows, the storage area is DPAPI
On Mac, the storage area is the Keychain
On Linux, the storage area is Gnome Keyring or KWallet
Irrespective of the storage area used on these platforms, the Microsoft Edge password manager uses AES256 encryption to keep your crucial information protected.
You might have a doubt about why Microsoft Edge encrypts the data locally or stores the data elsewhere. This is because Microsoft Edge isn’t capable of protecting your data from threats that may compromise the entire device.
Quick Tip:
If the built-in browser password manager gives you trouble, you can try a free third-party alternative. We recommend Dashlane for its simple yet secure way to protect all your passwords.
Dashlane brings additional layers of protection by being the industry leader in security. Easily save every password for every site, autofill names, and bank credentials without any fears.
How do I enable the password manager in Microsoft Edge?
1. Using Microsoft Edge
Launch the Microsoft Edge browser.
Click on the 3-dot menu icon.
Select Settings.
From the left side, click on Profiles.
Select the Passwords option on the right side.
Toggle on the Offer to save passwords option.
After you turn on the Offer to save passwords option, Microsoft Edge will offer you to save passwords every time you enter a password for that specific website.
2. Using Registry Editor
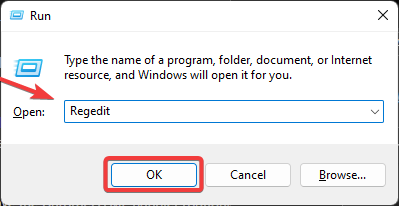
Press the Win + R keys to open the Run dialogue.
Type the below command and press Enter. regedit
You can create a Registry backup in case things go south by clicking on the File menu and selecting the Export option.
Now, in the Registry Editor, navigate to the below path. HKEY_LOCAL_MACHINE\SOFTWARE\Policies\Microsoft\Edge
If the Edge key is missing on your PC,
Right-click on the Microsoft key.
Select New > Key.
Rename this key as Edge.
Select the Edge key and right-click on it.
Choose New > DWORD (32 bit) Value.
Name the newly created value as PasswordManagerEnabled.
Double-click on the PasswordManagerEnabled value.
To enable the Microsoft Edge password manager, type the Value data as 1, and to disable it type the Value data as 0.
Press OK.
Restart Microsoft Edge.
This is a much lengthier process to enable the password manager, but it is still one of the ways via which you can do the needful.
Open a website that you aren’t logged or signed into.
Enter your username and password on the website.
A new pop-up message will appear at the top-right asking you if you would like to save the credentials for the future or not.
Click the Save button.
Log in with the entered credentials and your username and password are now saved in the password manager.
Microsoft Edge password manager vs LastPass
Microsoft Edge password manager
LastPass
The Edge password manager can be used from the Microsoft Edge browser on Windows and Mac.
LastPass is available on iOS, Android, Mac, Windows, Android Wear, and Apple Watch. Offers extensions for Google Chrome and Mozilla Firefox.
You need a Microsoft account to sync your passwords.
LastPass requires only a master password to access your passwords.
Microsoft Edge password manager is specifically meant to store passwords.
LastPass lets you keep Digital Records such as passports, driver’s licenses, WiFi Passwords, etc
Microsoft Edge password manager uses AES256 encryption.
LastPass makes use of AES-256 bit encryption with PBKDF2 SHA-256 and salted hashes.
Microsoft Edge password manager does not offer multi-factor authentication.
LastPass comes with multi-factor authentication.
It is clear from the above that the Edge password manager is simply a feature built inside the Microsoft Edge browser that offers its users the opportunity to save passwords so that they don’t have to type them again and again.
On the other hand, LastPass is a dedicated password manager and vault app, that also lets you save your digital records such as passport, driver’s license, Wi-Fi passwords, etc.
You can check out our guide on the best password manager for 2022, which you can use to safeguard your passwords and other data.
Also, if you wish to switch to a different browser, there are a ton available on the market. We have a dedicated guide that will help you choose the best browsers for your Windows PC.
If you are having the error code: STATUS_ACCESS_VIOLATION on Microsoft Edge, go through this article to get all the helpful information and solutions.
The number of browsers that use the Chromium source code is steadily increasing. With Chromium, you have no concerns since you are enjoying all the Chrome pleasures without being limited to the resource-hugging Chrome browser.
However, there is the fear that if a significant flaw was introduced into this source code, it would cause all browsers to become infected at once. And it seems that this is the case with the STATUS ACCESS VIOLATION error on Edge.
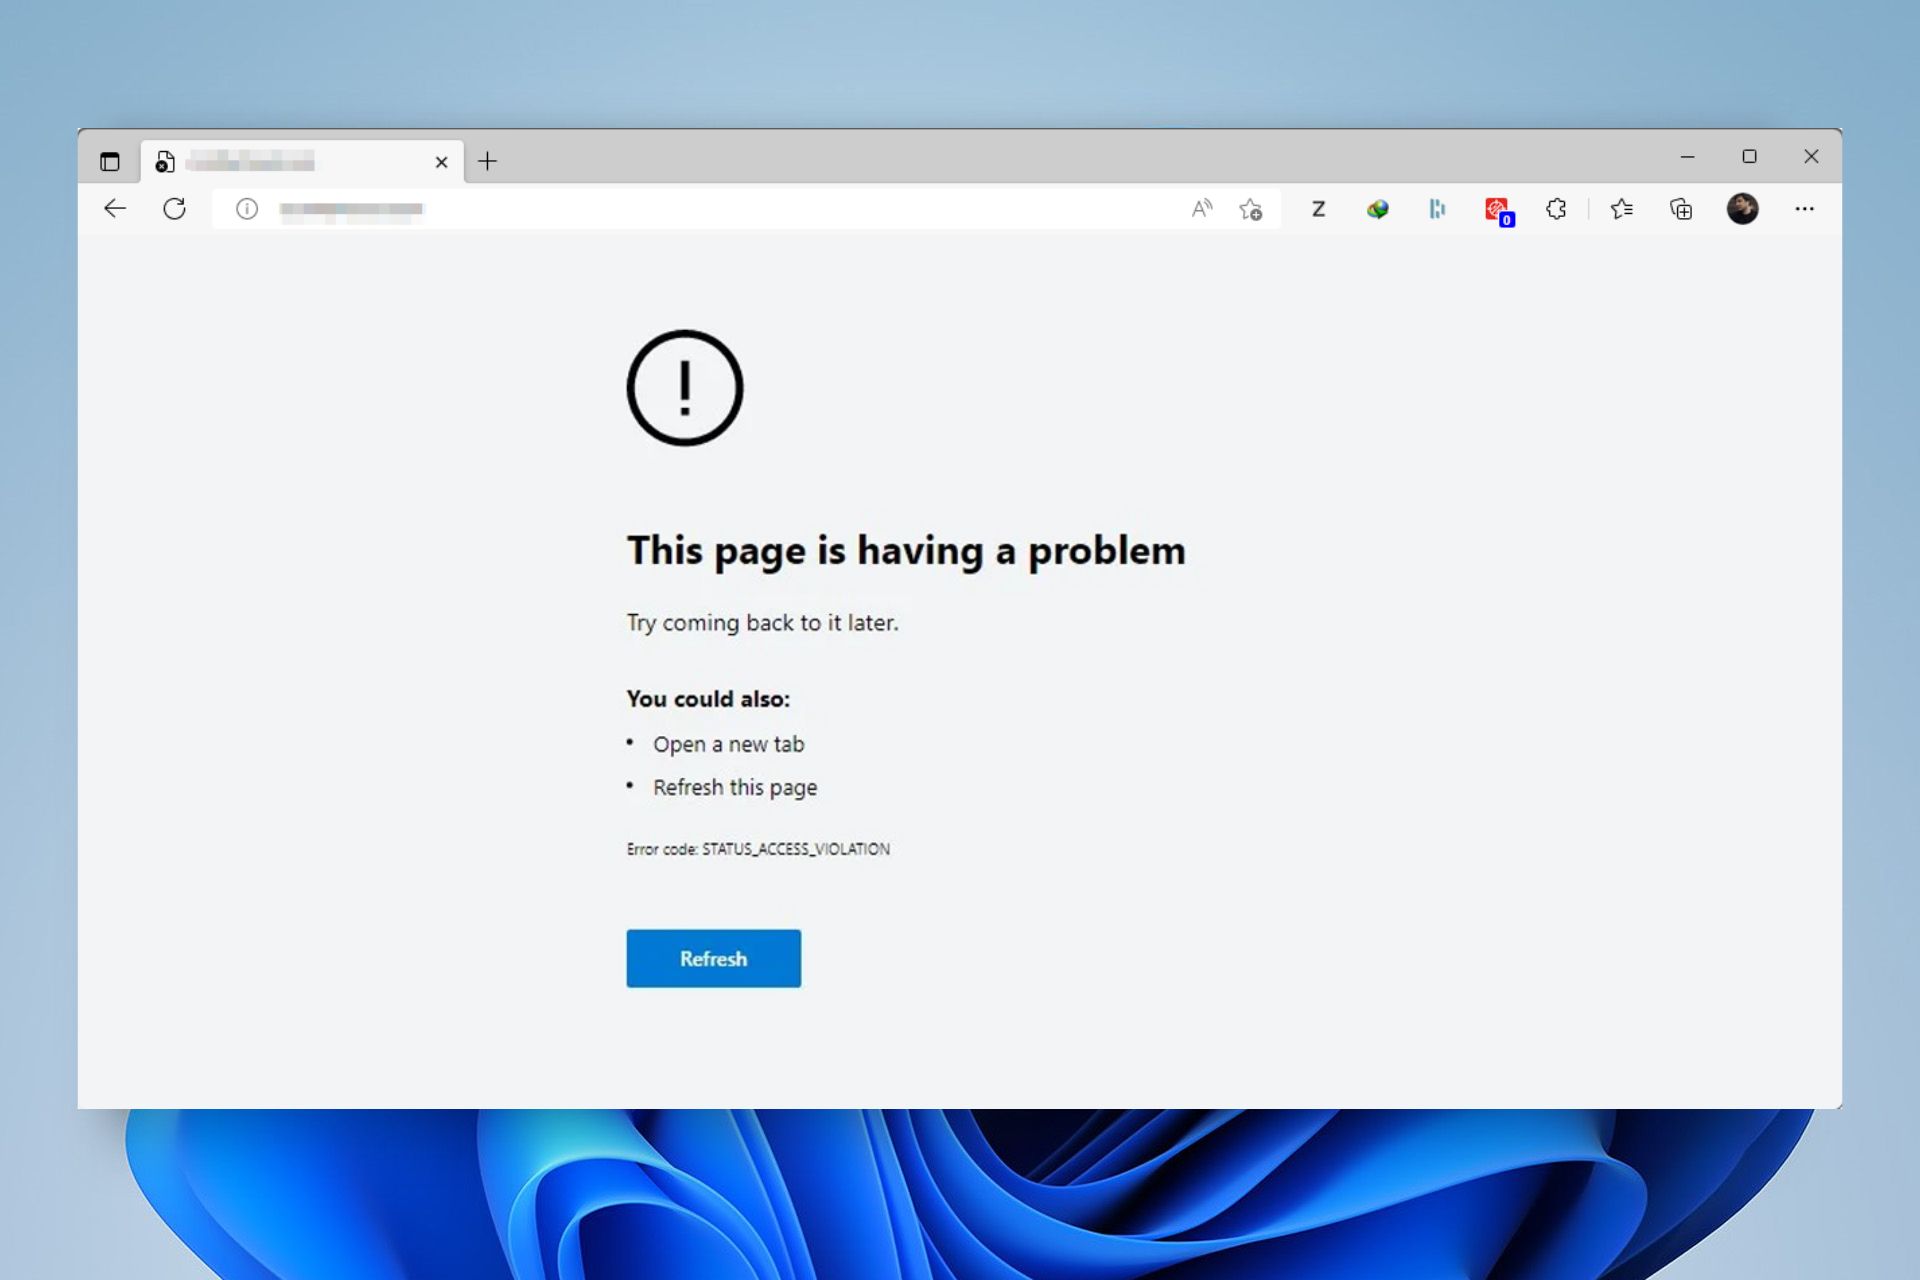
When this error appears, you may get the following message:
This page is having a problem.
Error code: STATUS_ACCESS_VIOLATION
Don’t worry. This is not a very critical problem. You can easily get rid of it.
What is this error code Status_access_violation?
The STATUS_ACCESS_VIOLATION is a browser error that usually appears on Chromium-based web browsers like Google Chrome, Microsoft Edge, etc. It happens when your browser tries to access memory with an unspecified program code.
The whole thing can happen due to following reasons:
Third-party extensions which are conflicting with some operations
Incompatible or outdated browser
Corrupted internal files
The good thing is you can easily solve this problem. In the next part of this article, you will find the steps to fix this problem.
Quick Tip:
Though this problem may not be unique to your Microsoft Edge, still, switching to another browser can be a good remedy. Opera One is known for using fewer additional extensions and avoiding incompatibilities.
Moreover, it brings some built-in features that are not found in many browsers, like an ad blocker and unlimited VPN for extra anonymity. Integrated apps like WhatsApp or sidebar access to Twitter and Instagram are a few other features that contribute to a refined experience.
Opera One
A Chromium-based browser with features that will deliver very smooth, errorless web browsing.
How do I fix the error code: Status_Access_Violation on Edge?
1. Rename the Edge executable file
Launch your file explorer and navigate to the following location: C:\Program Files (x86)\Microsoft\Edge\Application
Right-click on msedge and select the Rename icon at the top of the context menu.
Change the name to edge.exe and relaunch Edge.
2. Switch to the beta Edge edition
Microsoft also operates a Beta build in addition to the edition you may be using right now. BETA is mainly intended for testing experimental features; however, it may or may not be affected by problems that the stable release seems to have.
You should try this version before attempting other fixes. To get the beta version of this browser, visit the Microsoft Edge Insider website.
3. Update your browser
Launch your Microsoft Edge browser.
Go to the following location using the Edge address bar: edge://settings/help
Now, it will automatically check for the updates and install any available one.
When using Microsoft Edge, keep in mind that the browser scans for updates in the background at all times. Minor updates are loaded automatically and without prompting, but a significant upgrade, on the other hand, requires a browser restart.
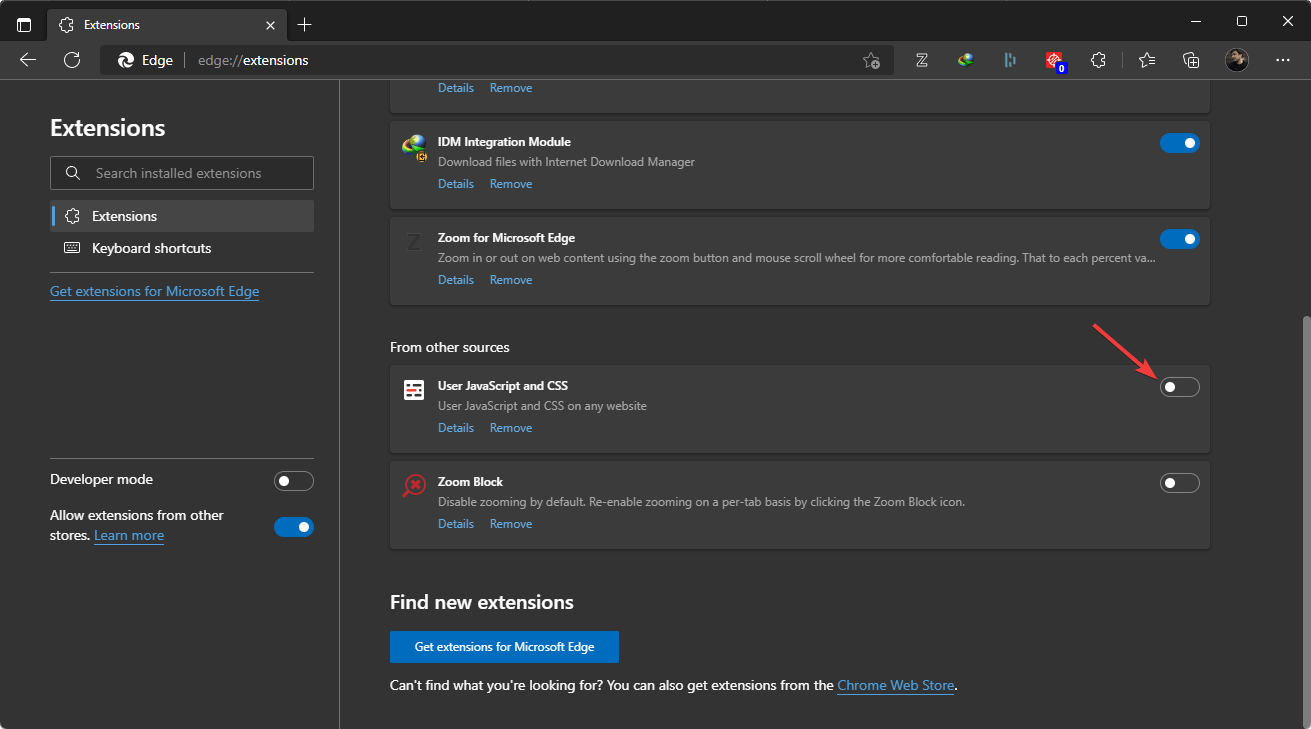
4. Disable your Javascript extensions
Launch your Edge browser.
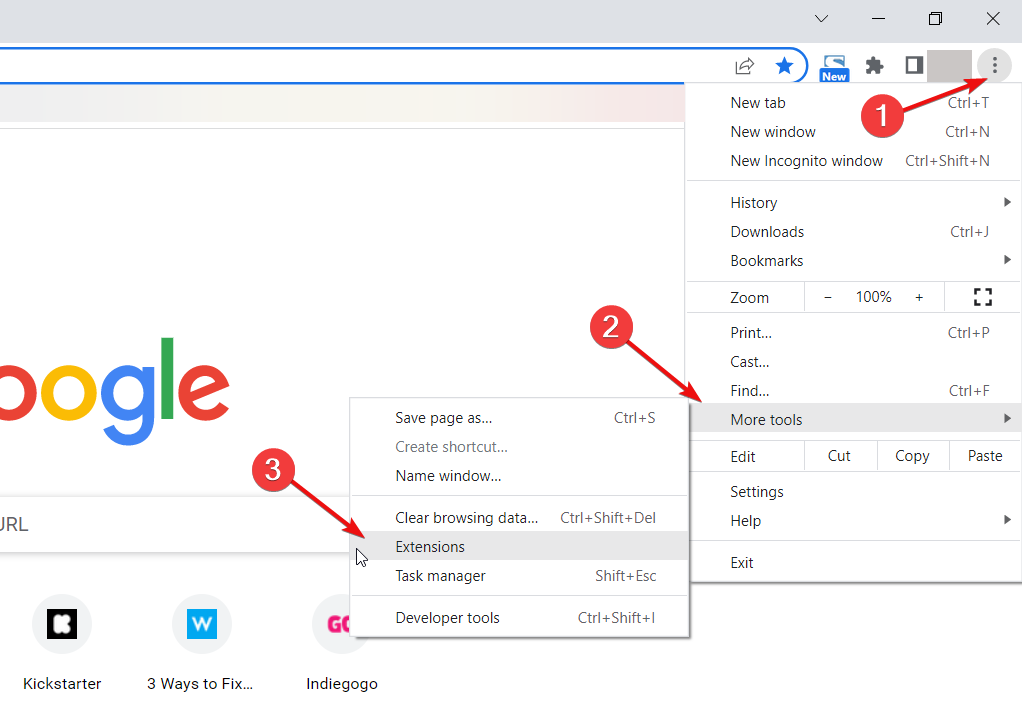
Click on the extensions icon and go to Manage extensions on Edge.
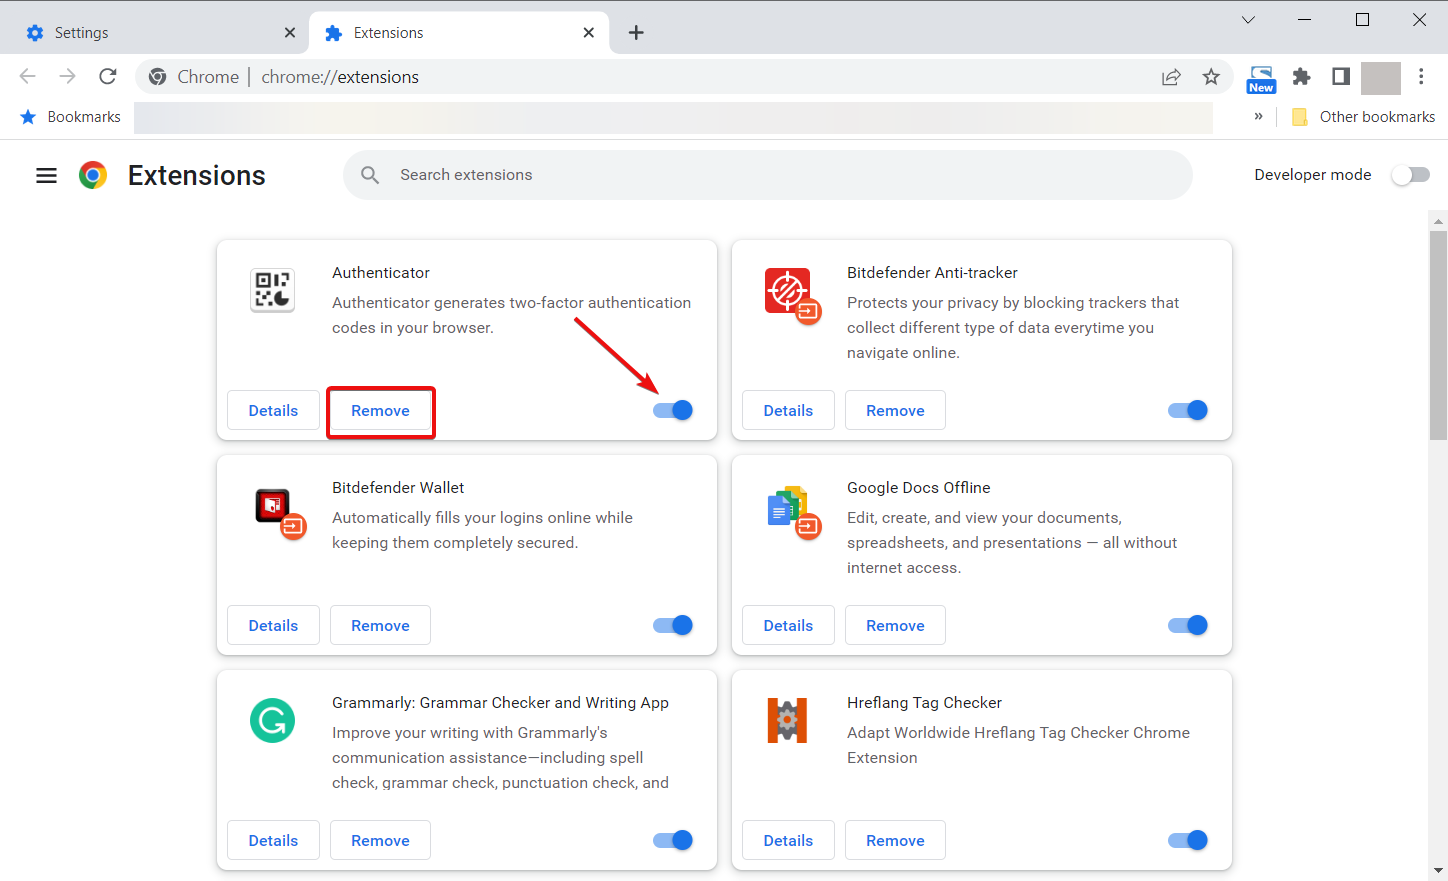
If you have any extensions that work with Javascript, make sure to toggle them off, then restart the browser.
If removing the extension fixed the problem, you shouldn’t attempt using any of the disabled browser’s alternatives because the issue does not seem to be caused by a specific extension but rather by a JavaScript add-on.
5. Disable your Edge browser renderer code integrity
On your desktop, right-click your Microsoft Edge icon, and from the context menu, select Properties.
Click on the shortcut tab, and under the target field, paste: –disable-features=RendererCodeIntegrity
Apply the changes you made and relaunch your browser from the desktop shortcut.
With that, we’ve come to the end of our guide on how to resolve the STATUS ACCESS VIOLATION error code in Microsoft Edge. We’ve presented five potential approaches that could work to your advantage.
In the normal way, you cannot uninstall Edge. However, there are very technical ways available to do it. Instead of that, we recommend you disable this browser. If you don’t like Edge, you can use other browsers like Opera One instead of fixing problems on it.
This article has featured the best methods to fix the error code: STATUS_ACCESS_VIOLATION on Microsoft Edge.
If none of these fixes work, you should consider using a different browser. The browser market is very saturated, and you will have many worthy alternatives to Microsoft Edge. Our guide on the best browsers should come in handy.
We love to read your comment and learn which of these solutions worked for you.
Windows 10 is a very complex operating system with hundreds of apps and processes running in the background. Some of them came pre-installed, others have been installed by you or whoever uses the PC.
In many cases, Windows keeps its files organized in certain folders. As a result, there is a folder for almost anything, from Windows Updates to Windows Apps.
The WindowsApps folder can be found in C:\Program Files and it contains all the applications and their respective data.
But a lot of users are complaining that this folder has a lot of different versions of the same app that occupy a lot of disk space.
I see a lots of versions of the same app in C:\Program Files\WindowsApps. These are apps that I don’t even have installed. Overall they are taking up about 10GB.
Deleting them through Disk Cleanup had no effect. Also, trying to get rid of them by uninstalling the apps in Windows Settings or in Powershell failed.
How can I get rid of WindowsApps files?
The process of deleting WindowsApps files and folders is quite simple. First, you’ll have to make sure that the administrator account is active or that you have the necessary permissions to delete those files.
The solution recommended by another user is to simply delete them in File Explorer with administrator rights.
The simplest way is to take ownership of the folder. If you don’t know how to do that, we’ve prepared a step-by-step guide that will help you through the process.
After you have administrative privileges, highlight the folders that you want to delete and press the Del key on your keyboard to send them to the Recycle Bin or hold the Shift + Del keys to delete them permanently.
You can repeat the process for all the unnecessary files and folders on your computer.
How to delete the WindowsApps folder
If you are looking to delete all the files in the WindowsApps folder, you can delete the entire folder.
For this, you need administrative rights to make the Delete option visible, and then all you have to do is click on it.
1. Press the Windows + E keys at the same time to open File Explorer.
2. Navigate to the drive that contains the WindowsApps folder.
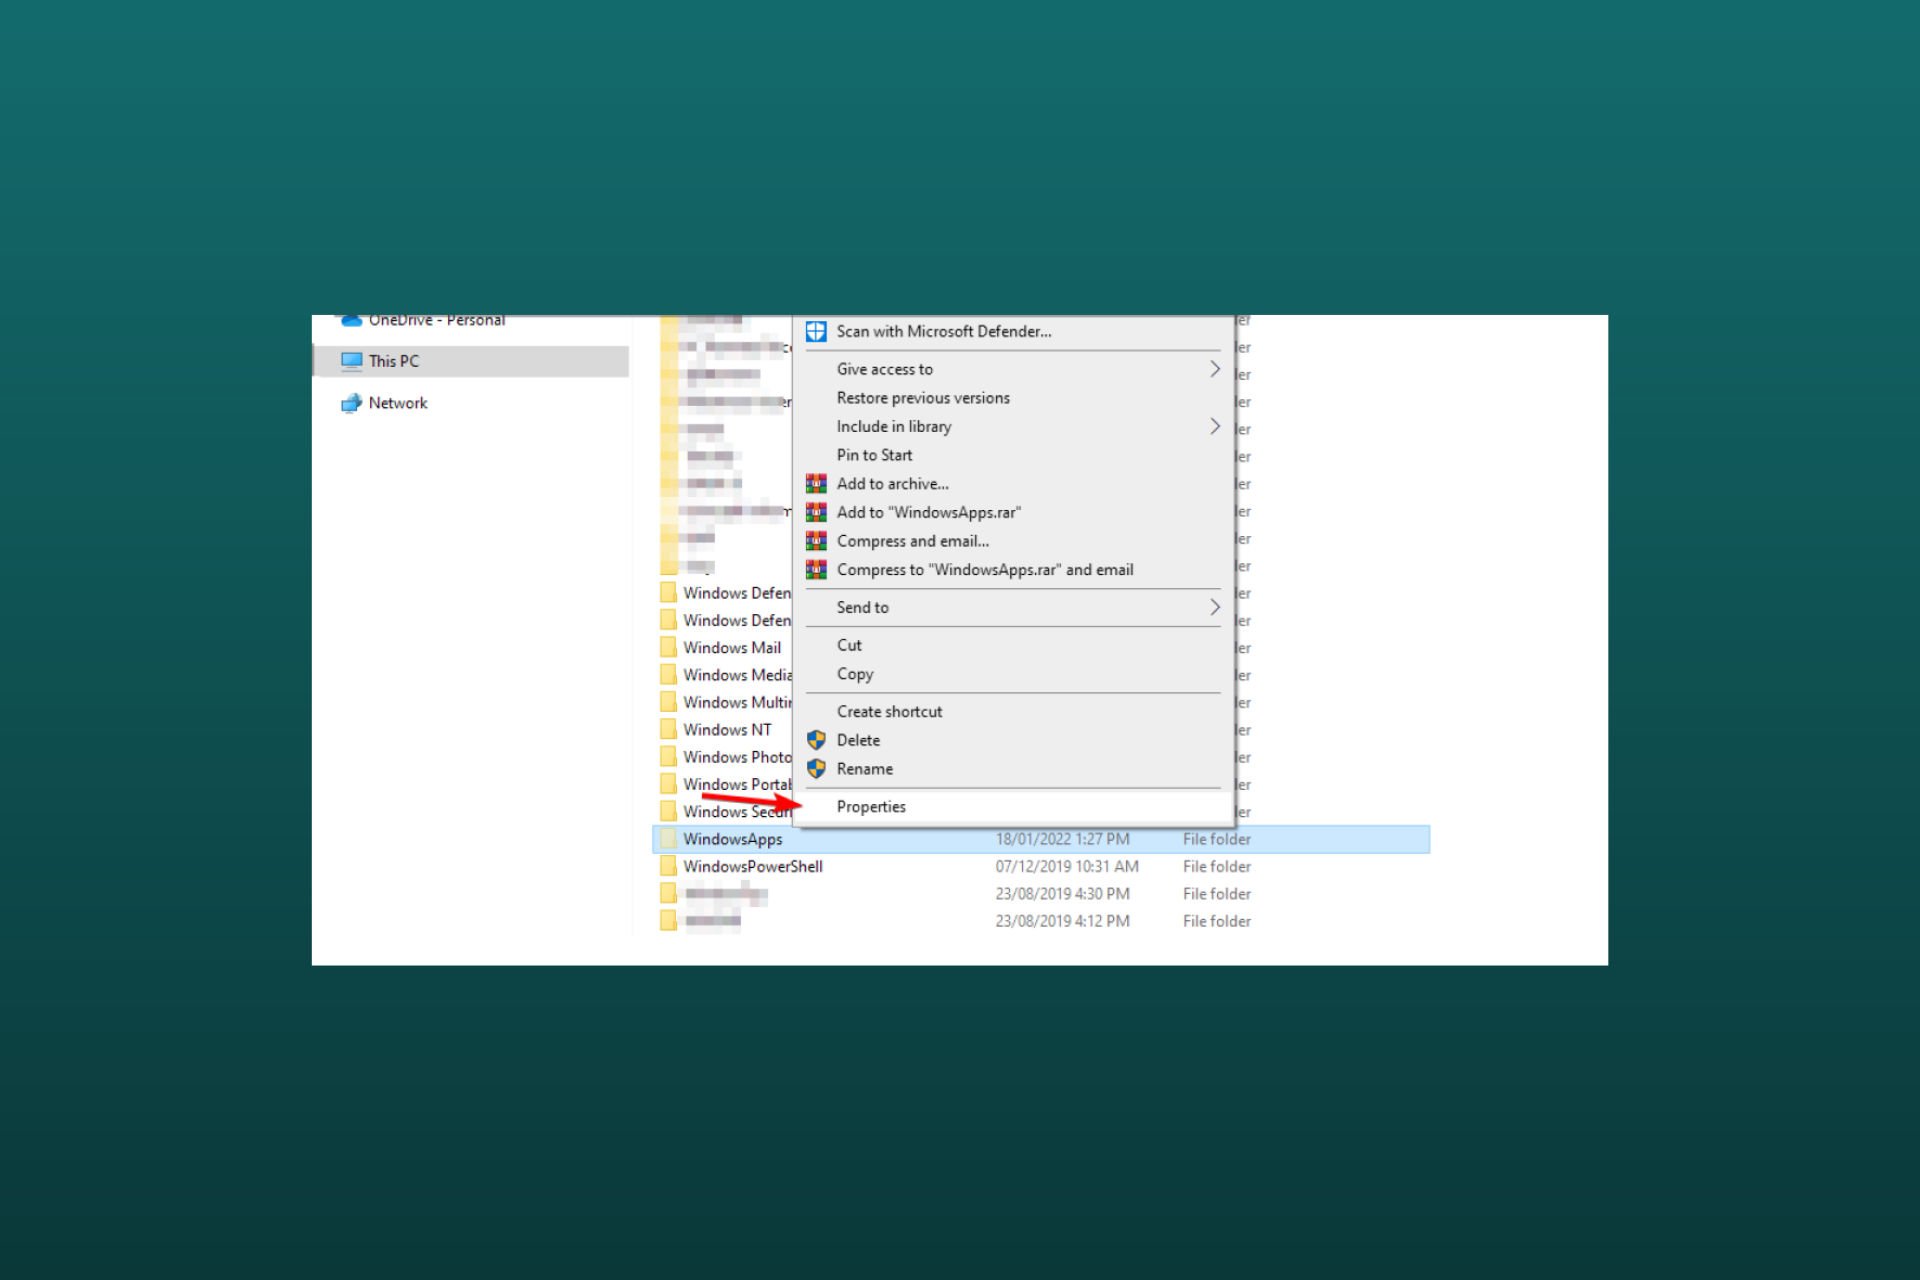
3. Right click on the folder and select Properties from the options.
4. Access the Security tab and then click on Advanced.
5. Press the Change button.
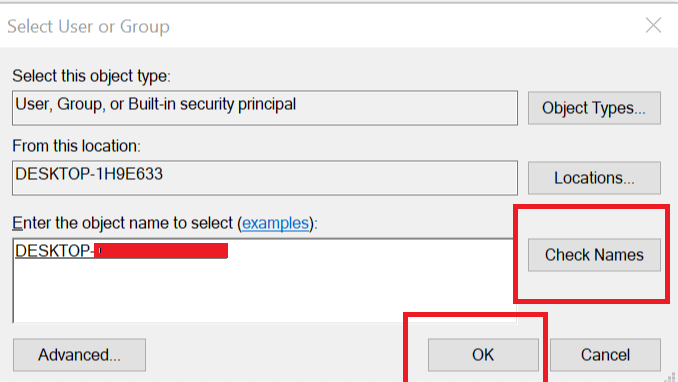
6. In the menu that opened, type down your admin account’s name or the email associated with it. Afterwards, click on Check Names and press OK.
7. Check the Replace owner on subcontainers and objects box, then click Apply and OK to apply the changes.
7. Go back to the Security tab, in the Advanced section, and click on Change permissions.
8. Press on Add, then click on Select a principal.
9. Type down your account name or its associated email adress once more, then validate the changes by clicking on OK.
10. Go to the Basic permissions section and check the Full control option.
11. Click OK and Apply to save the changes, then close the Properties window.
12. Now you can right click the WindowsApps folder and the Delete option will be visible. Click on it.
Continue with caution. Only delete the files and folders that you’re 100% sure are not used by you or any other user or aren’t necessary for other programs to work properly.
Only proceed with the steps above once you determined it is safe to delete the folder without any repercussions. But what if you can’t? Don’t worry, we got you covered.
Browser security is very important nowadays since there are many malware programs that can infect your computer through a poorly secured browser.
In order to prevent such unpleasant situations, you should use additional tools to enhance your browser’s security level.
There are many reliable antivirus programs for browsers that you can choose from. However, if you prefer a simple solution, you can also install a security extension on your browser.
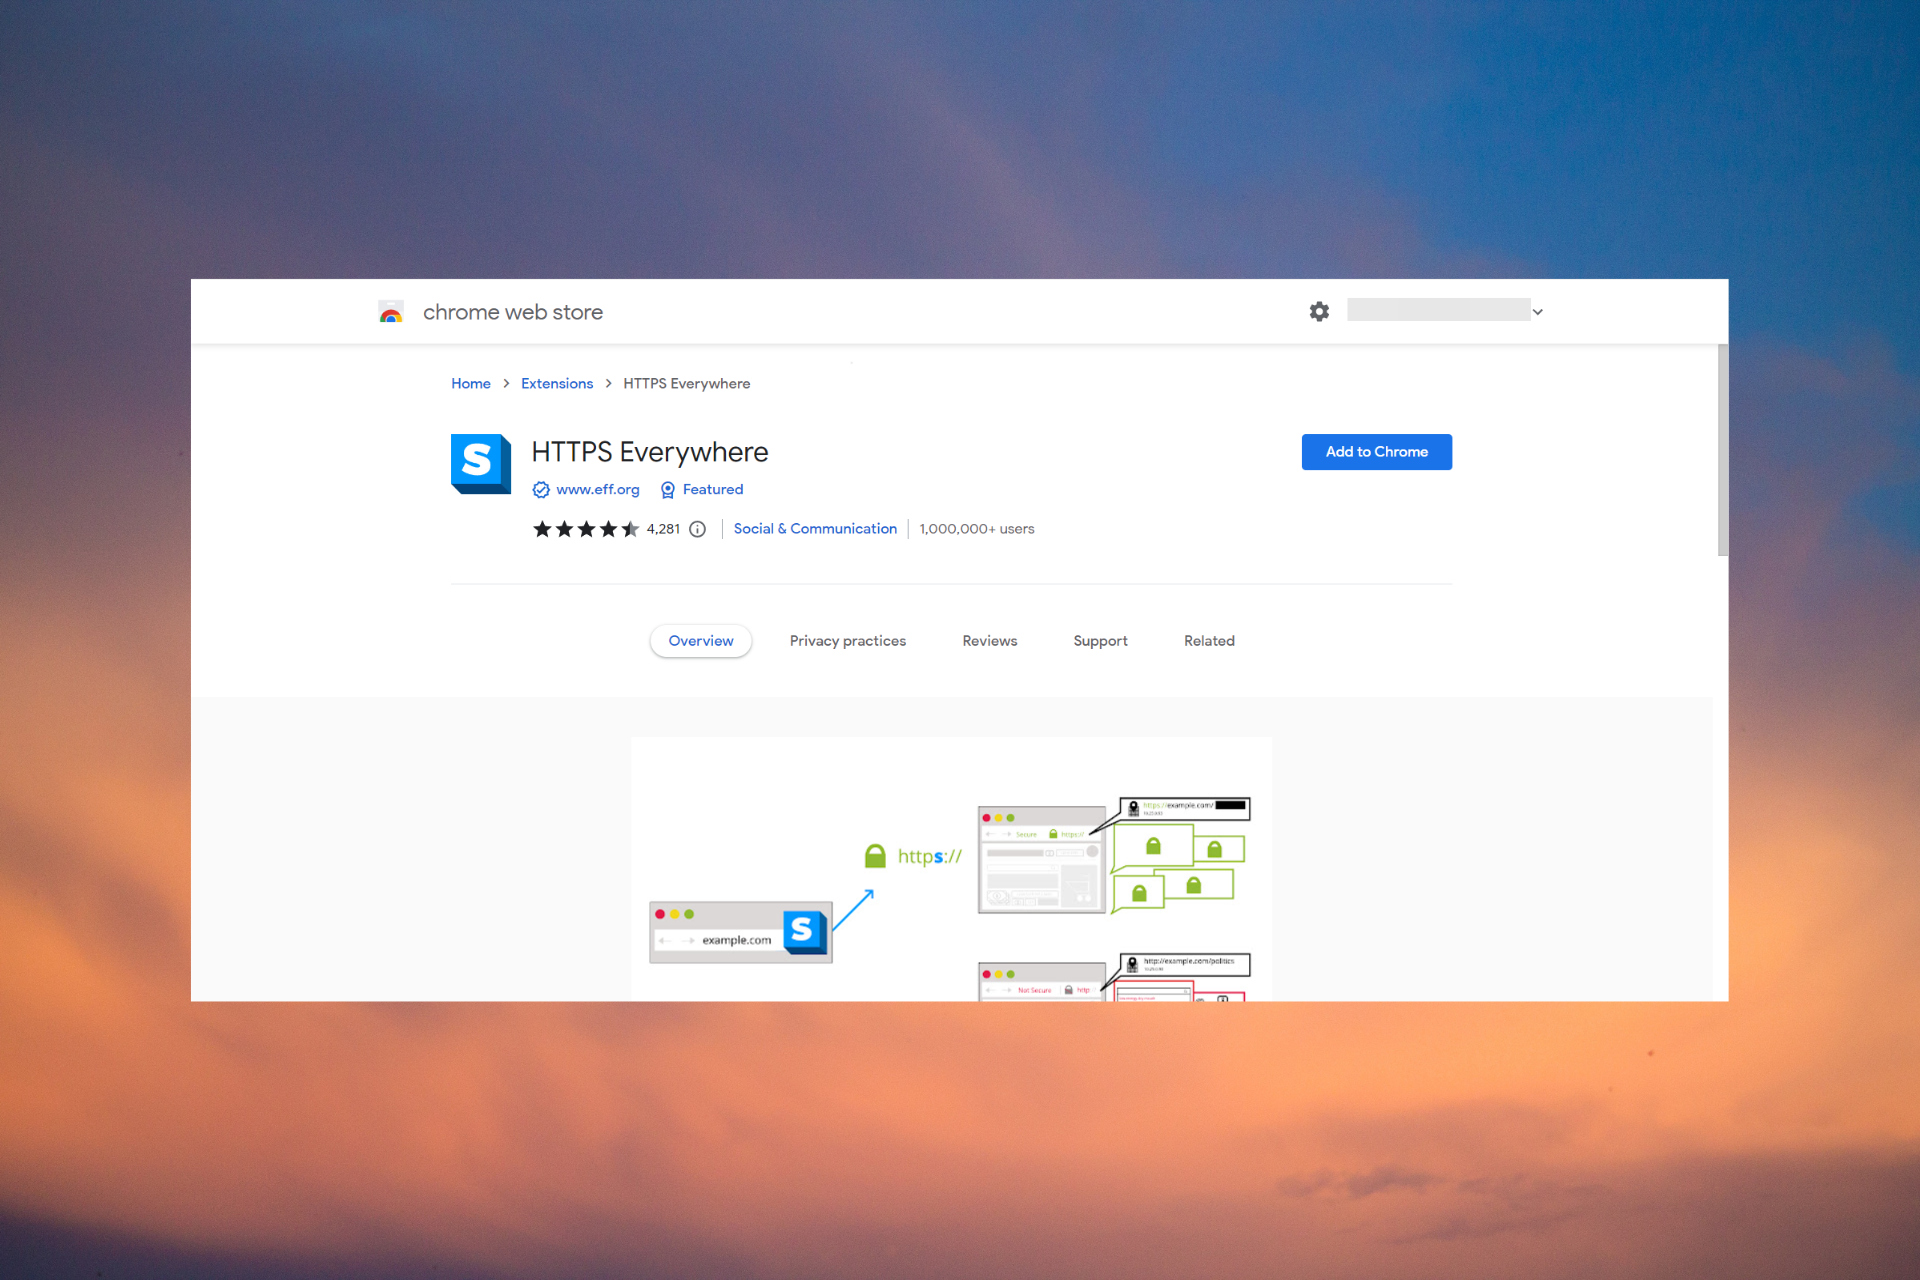
What is HTTPS Everywhere?
HTTPS Everywhere is an extension that automatically switches the website that you’re visiting from http to the more secure https.
In this manner, the extension protects you against surveillance and account hijacking attempts as well as some censorship.
HTTPS Everywhere encrypts your connection with many major websites, better securing your browsing experience, since there are many encrypted pages that link to unencrypted websites.
The HTTPS Everywhere extension uses special algorithms to rewrite the requests to these sites to HTTPS.
Quick Tip:
The Opera One browser already includes prevention mechanisms and informs you about unsafe pages by comparing the page to a database of known phishing and malware websites.
When you click on the lock in the address bar, Opera One will display the certificate’s issuer, kind of certificate, and if the issuer is publicly recognized and legitimate. Plus, it comes with a native AI.
Opera One
The native ad-blocker and free proxy VPN provide an additional layer of privacy and safety.
What happens when you visit a website using HTTPS?
When you visit an HTTPS website, it will communicate with your browser sending its SSL/TLS certificate for identification.
This is how a HTTPS website certificate looks like
Practically, it shows its passport to validate its authority. The browser verifies the information and acknowledges (or not) the data.
An HTTPS system also encrypts all the data that is transferred between the browser and the website.
This is a measure to protect the exchange of information that this way, it won’t be intercepted by any third parties.
Should I install HTTPS Everywhere?
HTTPS Everywhere is very useful because, as we’ve mentioned above, it automatically transforms any HTTP website into HTTPS.
However, this extension may cause websites to look weird or even break. If a shield button appears in the address bar, this means that Chrome has blocked the insecure portions of the page.
Sometimes, pages will look weird with their insecure portions removed. If this happens, you can disable the extension for that site using the button in the right-hand corner of the address bar.
But this reduces your security and privacy. As you can see in the picture below, HTTPS Everywhere doesn’t display images correctly.
HTTPS Everywhere is the result of joint collaboration between The Tor Project and the Electronic Frontier Foundation, the same NGO that criticized Microsoft’s aggressive upgrade practices and released the Privacy Badger 2.0 extension.
HTTPS Everywhere for Chrome is still a work in progress, but the extension is reliable and stable enough for everyday usage.
So, should you install HTTPS Everywhere? That’s really up to you but we would go anytime with security over graphic details.
However, most browsers nowadays enforce the use of HTTPS so you don’t really need this add-on for them.
HTTPS Everywhere will be deprecated this year because its functions have become redundant.
You can download HTTPS Everywhere from the Google Web Store. You can still use HTTPS Everywhere for Firefox, Opera One, and Safari.
Encountering the Server execution failed error on Google Chrome is quite annoying. Besides some incompatible Windows 10/11 updates that might cause it, the usual suspects are malicious software, PuPs, or something similar.
Chrome, Firefox and starcraft2 will not operate since updating to windows 10. Recieved server execution failed for Chrome also unable to uninstall Chrome to reload.
If you are one of the unlucky users who is currently facing this issue, don’t worry. This article has the solutions you will need.
Why am I getting server execution failed?
It is really hard to tell you what is causing the server execution failed error on your PC without close analysis. However, after doing some research, we have found the followings:
Incompatible version of the Chrome browser
Malware problem
Corrupted registry
Browser misconfiguration
Outdated version of Windows 10 or 11
You may find other reasons as well. But, the main roots of this problem are the things mentioned above.
Fortunately, you can easily get rid of this problem. We have prepared some methods that can quickly solve server execution failed error on Chrome.
The following fixes also deal with these issues as well:
Chrome server execution failed
Server execution failed
Chrome chrome.exe server execution failed
Server execution failed chrome.exe
Server execution failed
Quick Tip:
If this error is unsolvable, switching to another browser could be a viable solution. Opera One has everything Chrome has, but it’s better optimized and has many useful functionalities built in.
Opera One Browser is repellent to threats, thanks to its superior set of features, covering both security and privacy. Opera One comes with built-in Ad Blocker, VPN and AI, you can rest assured that your browsing experience will be faster and more anonymous.
Opera One
Avoid server execution failed errors and enjoy lightning-fast and secure browsing.
We recommend you open your antivirus security utility and run a full PC scan to see whether there are any viruses or suspicious applications in your system.
While the built-in security utility does provide the tools necessary to keep your PC protected at a basic level, dedicated applications are typically able to detect a larger number of threats and block them faster before they get a chance to cause serious problems.
When you pick your antivirus, make sure to look for an up-to-date utility that integrates multi-layered protection. This security method implements more than one type of shield, making sure your PC is protected on all fronts, leaving no weak points.
Another thing to consider is how many resources the AV requires. Thankfully, modern antiviruses are light and able to run in the background even if you have a lower-end PC.
2. Clean your registry
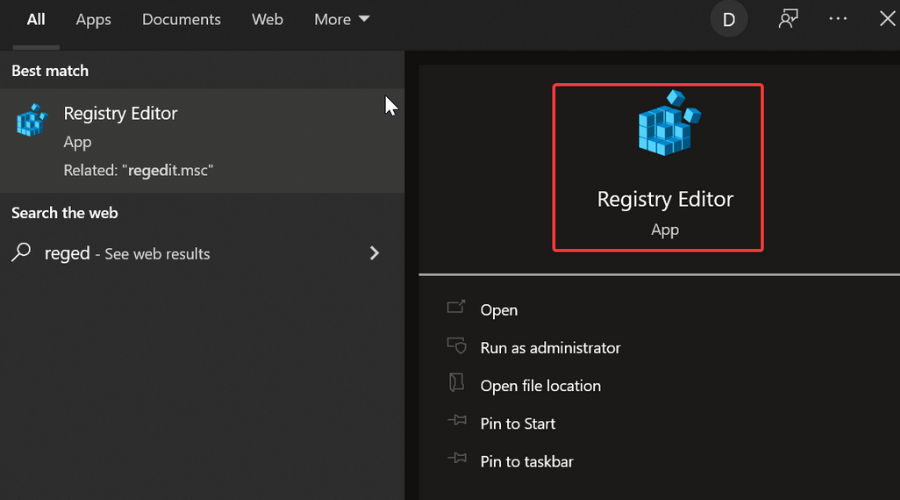
Type regedit in the taskbar and open the Registry Editor.
Expand the HKEY_LOCAL_MACHINE list.
Scroll down to Software and select Google.
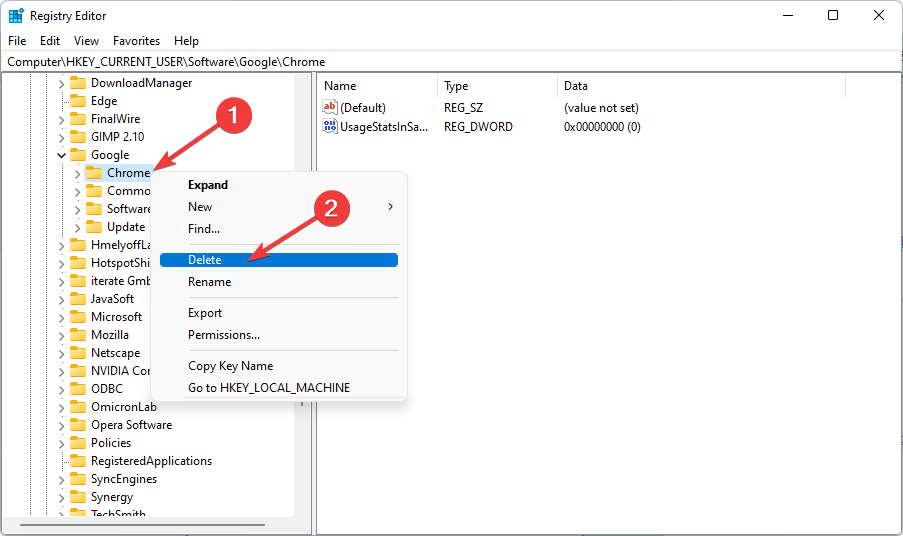
Right-click on the Chrome folder and select Delete.
Make sure you do not delete any other key. When the process is complete, try to run Google Chrome again.
If you want to make sure you clean your registry properly and don’t mistakenly delete anything that is to be kept, we recommend you use a dedicated PC cleaner utility.
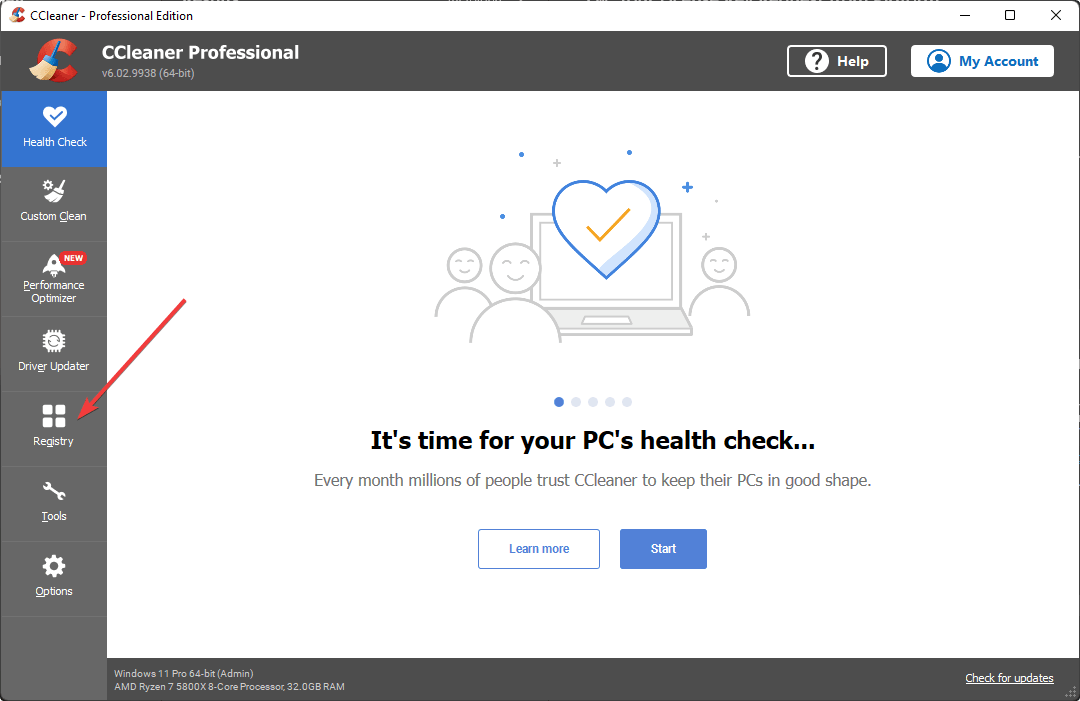
We recommend CCleaner because it has a dedicated Registry menu that scans your registry and is able to detect every entry that can be removed. It can clean your whole registry or specific folders within it.
After installation, launch CCleaner and then click on the Registry option and select Scan for issues.
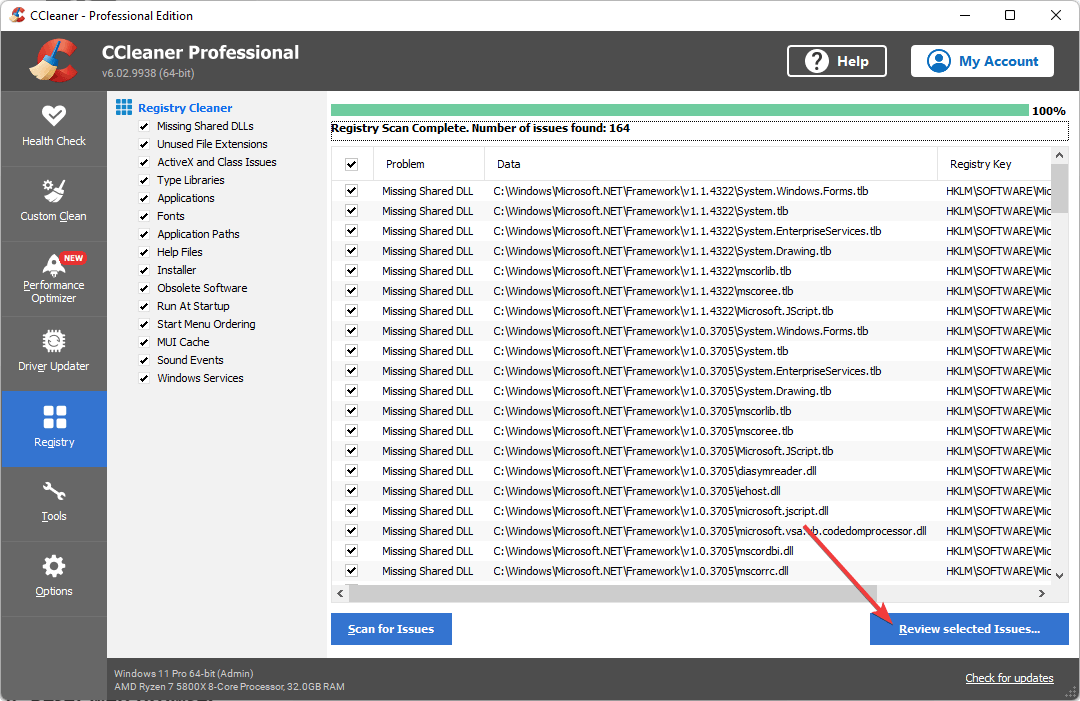
After CCleaner has finished scanning, click on Review selected issues. Follow the prompts to enable CCleaner to delete all the leftovers found and fix the Windows registry.
After you finish cleaning, check to see if you are still met with the server execution failed chrome.exe error.
3. Reset web browser
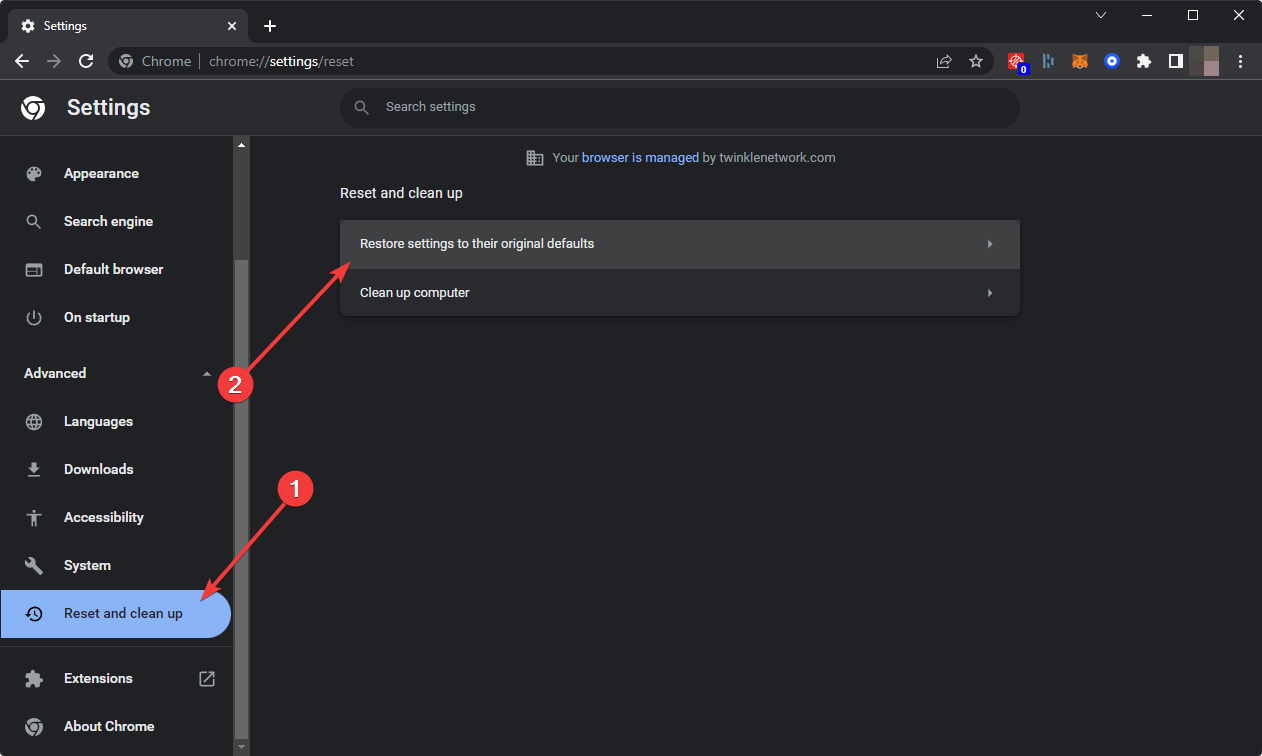
Open Chrome and type the following address in the address bar, and hit enter: chrome://settings
Expand Advanced, click on Reset, clean up, and then Restore settings to their original defaults.
Click on Reset Settings.
This method is ideal if you can open the browser. If you face the server execution failed error before properly opening Chrome; you can ignore it.
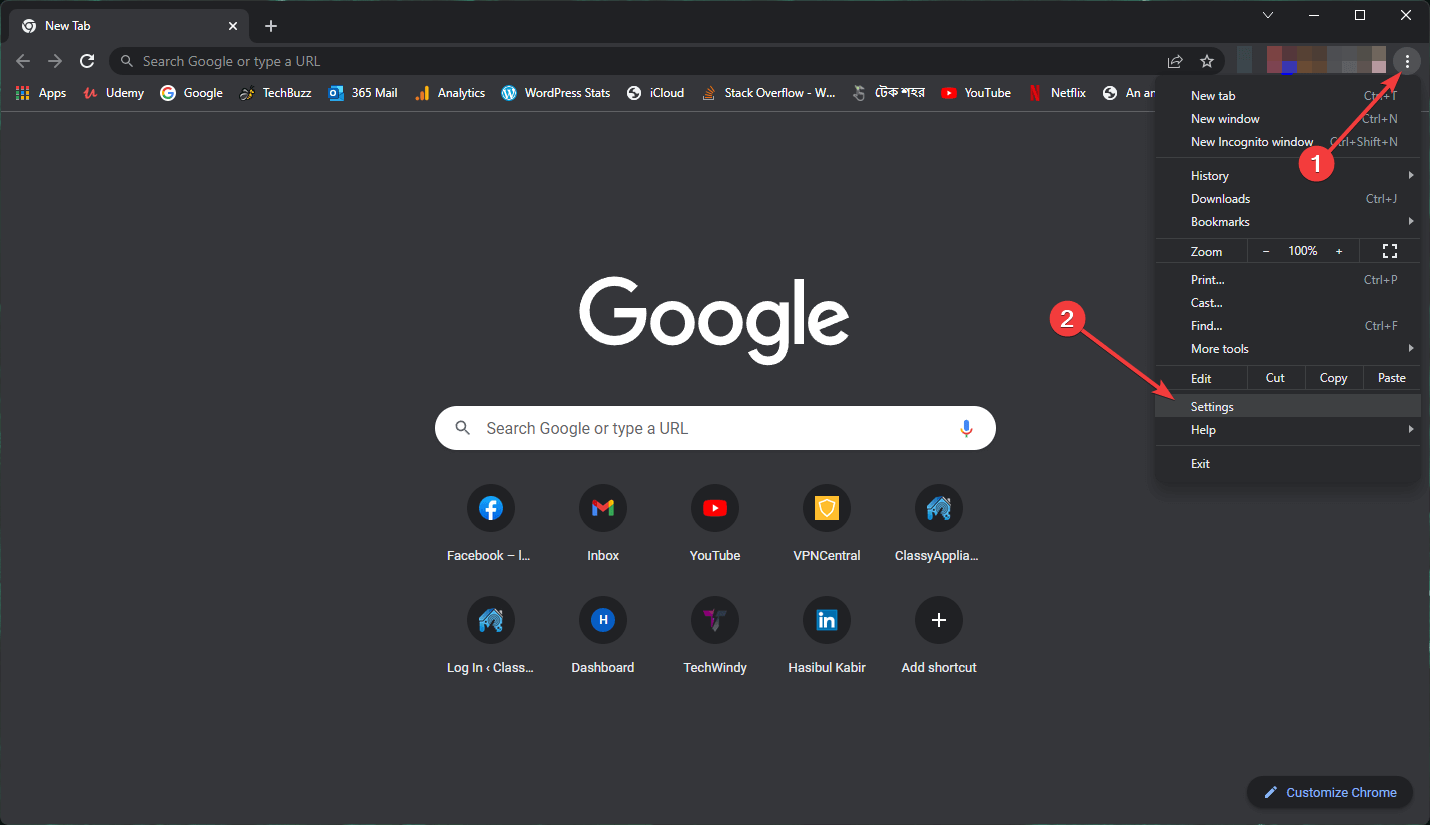
On Chrome, click on three vertical dots on the top right corner and Settings.
Go to About Chrome.
Chrome will check for the update and install any available one automatically.
Relaunch Chrome.
5. Run Windows Updates
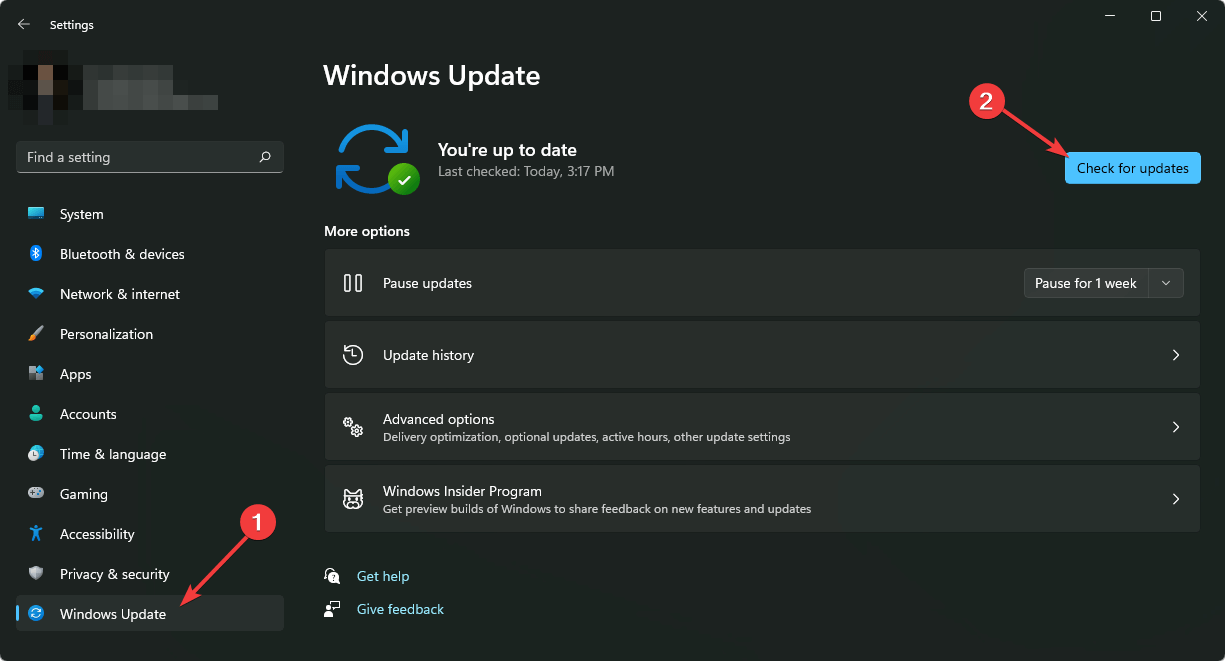
Press Win + I on the keyboard to open Windows Settings.
Go to Windows Update and then click on Check for updates.
It will automatically install any available updates.
Restart your PC if necessary.
The daily browser and computer usage can lead to common issues like this Server execution failed error on Chrome.
As we’re sure you know by now, it is not very difficult to overcome it, and it can happen to any user. It does not make Chrome any less of a good browser.
Please let us know more about your experience with this error. Which method did you decide to try? Also, for any tips or questions, make sure to comment below.
Discord is a popular online chat room that is used by gamers to communicate with each other. If you have ever used Discord, then you know how important it is to have a good connection. This is because if the network request is not working correctly, then it can cause all sorts of issues.
You are likely to get a message that indicates there was an error in sending data from your computer to the server. The server may have rejected this request for any number of reasons, such as network problems or firewall issues.
Once this happens, your communication is instantly dropped. You may be unable to connect to your friends or receive any messages or notifications at all.
Usually, users are accustomed to experiencing high CPU usage in Discord especially if they have old PCs or running too many programs simultaneously.
Why is Discord saying bad network request?
When Discord is saying a bad network request, you need to check if the problem is only with your PC or if it is also affecting other users. If it’s not working on others’ PCs, too, then your system must have some problem.
Some common reasons include:
Network error – The most common cause of this is that your internet connection isn’t stable, hasn’t been configured correctly or has been interrupted and needs time to recover. Discord has some network requirements, so ensure you have a strong internet connection.
Server problems – Sometimes, the issue is with Discord; their server is not connecting. You can verify from their status page to check if they are having downtime. Usually, Discord will give a timeline when things are likely to revert o normalcy.
Firewall settings – If you’ve recently installed a new antivirus program or updated an existing one, it might have flagged Discord as malware and blocked it from communicating with the server.
Now that you know the common causes, it becomes easier to troubleshoot using the solutions below.
How do I fix a bad network request on Discord?
1. Restart the Discord application
This might seem obvious, but it’s worth trying first. Sometimes, a simple restart is all that’s needed to fix your problem. This will force a new connection to the Discord servers and re-download any files that you’re missing.
If the issue persists after restarting Discord, go ahead and restart your PC. This will reset all of your programs and services to the default settings. It will also clear out any temporary files or corrupted settings that might be causing problems with your connection.
2. Check internet settings
Discord was designed to work with a good internet connection. So, if you’re having trouble with the application, you have to check whether you have enough bandwidth or if there are too many users on the same network.
If so, you need to limit the number of users or change from wireless to wired connection and see whether the error persists.
Make sure your antivirus isn’t killing the connection. Some antivirus software has been known to block certain types of traffic from reaching the Internet (like Discord).
If this is happening to you, try disabling your firewall or whitelisting Discord from being blocked by your antivirus software and see if it makes a difference.
Why is Discord so slow right now?
If you’re getting this error message frequently, you may want to check your internet connection and make sure no other programs are running in the background that could interfere with your computer’s functioning.
Other causes for the slow connection include:
Outdated app version – The first thing to check is that you’re using the latest version. Outdated versions can cause problems with performance and stability. Updates often contain bug fixes that can help reduce lag and increase performance across all areas of your device.
Old OS – If you have an older version of macOS or Windows installed on your computer, it could be slowing down the Discord app.
It’s happened to all of us before. You log in to your computer, click on an icon, and a little box pops up saying that some error has occurred.
The error may come up while playing a game, accessing a website, or trying to read an important email. However, the result will always be the same.
When you run into an error retrieving your data, it feels like your information is lost forever. You may be unsure of what to do next especially if you are unfamiliar with the site.
Users who have reported this issue seem to be from USCIS when they attempt to check the status of their immigration. Granted, the United States Citizenship and Immigration Services is a busy website and it is expected that sometimes things can go wrong.
Why am I getting encountered an unknown error retrieving your data?
Most people who get this message think that their accounts have been compromised but below are some possible reasons:
Your information is unavailable – Sometimes, nothing is wrong with your package, it just means that not all your information is available in the system.
Poor internet connection – One of the most common reasons is that your internet connection is weakened, which could be an issue with your internet connection or with the servers.
Firewall settings – Another cause might be if you have a firewall running on your computer. The firewall keeps you safe by monitoring and stopping unauthorized access to your computer, but it can also interfere with how our website works.
Now that you understand the reasons why you may have encountered an unknown error retrieving your data, below are some possible solutions.
Quick Tip:
Unknown error retrieving your data can also be caused by overlapping cached data or saved cookies. Switching to a browser that optimizes data usage might solve your problem.
Having a built-in ad blocker, Opera One operates with less information by not loading the ads and pop-ups. It also provides an unlimited VPN and a tracker blocker for your privacy, along with a native AI.
Opera One
Browse more and load less to avoid issues with this smart browser.
How do I fix encountered an unknown error retrieving your data?
1. Restart your browser/PC
Try restarting your browser. This will force your computer to re-establish its connection to the internet and close any windows that may have prevented the website from functioning earlier.
If this does not work, try restarting your computer entirely. Try accessing the website again and see if anything has changed.
2. Clear cache and cookies
When you come across an error message that says encountered an unknown error retrieving your data in your internet browser, all you need to do is clear your cookies.
Cookies are small text files that websites use to save information regarding your online preferences and history of where you have been on the website. While they are useful, sometimes they can easily get corrupted.
Hit the Windows button, type Windows Security in the search bar, and click Open.
Click on Firewall & network protection then select Public network.
Locate Microsoft Defender Firewall and toggle the off button.
In some instances, these solutions may not work at all and all you have to do is wait it out. Sometimes, it takes a bit of time for the website to consolidate your data and make it available to you.
If you feel that you have waited for a significant amount of time, you can try reaching out to USCIS. You can do so by submitting a case and selecting the type of feedback you’d like.
Hopefully, you now have a better understanding moving forward of what to do if you ever encounter this error.
You may also find the need to use VPNs on most of these sites so we suggest taking a look at some of our recommendations. We also have a new guide on Error updating the NVD data message, so feel free to visit it.
Feel free to share any other tips that have worked for you in the past down below.
Don’t know what to play on Game Pass? With so many games to choose from (literally hundreds) across just about every genre out there, it can be hard to know where to start. Thankfully, we’ve got you covered with these Game Pass recommendations for kids (and kids at heart). These are some of the best games on Game Pass that are not only suitable for kids, but games that they will love. Let’s dive into them.
Ben 10: Power Trip
Fans of the animated television series will get a blast out of Ben 10: Power Trip from Outright Games. The visual style and humor from the Cartoon Network show is intact here, and the game offers plenty of combat, puzzles and exploration—all playable cooperatively with a friend via local split screen. And there are 12 alien forms the player can transform into.
In this action-roleplaying game from the video game mavens at Double Fine Productions (responsible for such classics as Psychonauts and Broken Age), players take control of Wren and Reynold. These twins are on a quest to stop the evil Dr. Orel white from destroying Halloween forever, and to do it they will need to collect candy and special ability-bestowing costumes along the way in this sequel to the 2010 original Costume quest.
If you don’t know, this game is based on the long-running British animated TV show Peppa Pig. In the game, you get to create your own character and create your own story…with the help of your new friend Peppa Pig, of course. And all your other favorite characters from the show will be there too to make every playtime a new experience. Splash muddy puddles, help Daddy Pig find his glasses, follow the animal tracks in the forest, and more in this exciting adventure.
In this platforming adventure you play as a pair of Yarnys. What is a Yarnys, you ask? A Yarny is a small creature made of yarn. This follow-up to the original Unravel throws a whole new dynamic into the mix by putting you in control of two Yarnys on a simple but poignant quest to chase their spark. Unravel two was the winner of “Family Game of the Year” at the 2019 D.I.C.E. Awards.
So what do you think of our selections for best kids’ games on Xbox Game Pass? We hope this post helps you discover a new favorite. If you don’t already subscribe to Game Pass, you can sign up here. Learn more over on the Xbox Game Pass FAQ page. And don’t forget to check out our other “What to play on Game Pass” posts for other Game Pass recommendations.
Avast is great antivirus software, so it’s no wonder that many prefer it. However, the application has its share of issues as well.
Many users reported Unreputable browser add-ons detected errors in Avast, and today we will show you how to fix this problem.
Why am I getting Unreputable browser add-ons detected message?
As the message suggests, the reason for this error is that Avast has detected one or more problematic add-ons.
So, if you installed an add-on for your browser from an unreliable source, the antivirus identified something wrong with it.
What is the Avast browser extension?
Its complete name is Avast Online Security & Privacy and it’s a free browser add-on or extension that protects your browser.
The software can detect malicious and phishing websites; it also prevents potential intruders from accessing your data and checks your other add-ons.
If you installed this extension, there is even more reason to believe that it’s the source of this message.
Quick Tip:
In some instances, your web browser can be the cause of this problem, so you might want to replace it. Opera One is a great alternative that will automatically block ads and tracking cookies.
The browser is similar to Chrome, and since they share the same engine, Chrome extensions will work with Opera. The browser is also lightweight, and it can handle all types of multimedia with ease.
Regarding security, there’s a built-in VPN with unlimited bandwidth that should give you an extra layer of protection. Plus, this browser is smart since it comes with it’s own AI, be sure to give Opera One a try.
Opera One
Getting the Unreputable browser add-ons detected an error in Avast? Then, it’s time to start using Opera One!
How can I fix the Unreputable browser add-ons detected error?
1. Check the Avast log file
Check the following locations on your drive: C:\ProgramData\AVAST Software\Avast\report or C:\Program Files\AVAST Software\Avast\x64\DATAlog
Open the log file and try to find the problematic add-on.
Many of our readers reported that they couldn’t find anything useful in the log file. If that’s the case, move on to the next solution.
2. Disable problematic add-ons/extensions
Open your browser and check the Extensions menu. For instance, in Chrome, click the three vertical dots from the top-right corner, select More tools and then choose Extensions.
Locate the problematic extensions and remove or disable them.
We have shown you how to do that in Chrome, but the process is very similar in all the other browsers you may use.
After doing that, check if the problem is still there.
Usually, the Avast unreputable browser add-ons detected happens on Chrome and Firefox extensions.
If the issue is still there, you might want to remove the extensions and check if that solves the problem.
3. Disable the Browser Cleanup feature
Open Avast.
Navigate to Settings, select General and click on Troubleshooting.
Disable the Browser Cleanup feature.
Bear in mind that this solution will disable browser scanning altogether, but it won’t fix the core problem. Use this solution only if you’re certain that you don’t have any problematic add-ons installed.
The Avast Secure Browser is certainly not a virus, it is a browser developed by Avast to create a secure environment for banking and online transactions.
It’s a lot safer and faster than other browsers and comes with advanced protection against phishing, fingerprinting, and more.
The PlayStation 4 (PS4) is one of the world’s foremost game consoles. However, it still has a few error codes, such as SU-30746-0.
The PS4 system software update error SU-30746-0 (or system update loop) arises for some players when they turn on their PlayStation 4 consoles.
Instead of starting up, the PS4 displays this error message:
An error has occurred. SU-30746-0
Read on to find out how to resolve this issue once and for all.
What does the system software update error on PS4 mean?
Don’t panic; you don’t have to throw your console in the trash and purchase a new one. All errors have fixes that will restore console functionality.
Know that the System software update has failed (SU-30746-0 PS4 error code) can appear when your PS4 console has been unable to install the latest firmware update.
How do I fix the system software update error on PS4?
1. Update your system software
Use Safe Mode
Power off your PS4 if it’s on.
Next, press and hold the power button until you’ve heard a couple of beeps.
Back up your saved PlayStation game data to a USB device or cloud storage.
Save the system software for PlayStation 4 to a USB drive as outlined for resolution two.
Insert the USB drive that includes the system software for the PS4 into the console.
Start the PlayStation 4 in Safe Mode as outlined for the fixes above.
Select the Initialize PS4 (Reinstall System Software) option on the Safe Mode menu.
Then select OK to confirm.
How do I force update my PS4?
To force update your PlayStation 4 console, please refer to solution 1 in this guide and use Safe Mode.
That is the only way a forced update can be applied to your Sony gaming console, just in case you didn’t already know.
There you go. Now, you will be much better prepared for the next time your PS4 system software update results in an error and it’s frozen.
Throughout time, users have reported dealing with the following error codes:
System software update ps4 error SU-42118-6
PS4 system software update error SU-30746-0
PS4 system software update error SU-42481-9
PS4 system software update error SU-42477-4
PS4 system software update error CE-36329-3
PS4 system software update error CE-43461-8
We also covered SU-41350-3 error in one of our newer guides, so don’t miss it for more solutions.
Those are some of the best fixes for error SU-30746-0. If you still need other fixes, you can discuss the issue further with live chat on the PlayStation 4’s support website.
Some Internet Explorer and Edge users have encountered an error message that states: There is a problem connecting securely to this website. The security certificate presented by this website is not secure.
This invalid certificate issue can occur in any browser, albeit the error messages aren’t always the same. In this case, the error blocks you from opening the web page.
This can be very frustrating, but we have provided the best solutions in this article.
The issue occurs with several other programs as well, as shown below:
There is a problem connecting securely to this website (no option to continue) – This issue usually occurs if your clock isn’t set correctly.
There is a problem connecting securely to this website (Chrome, IE11, Edge) – The cause is usually your antivirus. Disable your antivirus or switch to a different browser to fix the issue.
There is a problem connecting securely to this website (Facebook, YouTube, Outlook, PayPal, Netflix, Wikipedia) – Sometimes, you might not be able to access a specific website due to this error. Add the website to the Trusted Websites section to fix that and check if that solves your problem.
The security certificate presented by this website was issued for a different website’s address – This problem arises when the domain name in the SSL certificate doesn’t correspond to the address in the browser’s address bar.
An application is preventing Microsoft Edge from safely connecting to this site Fortinet – This is another iteration of the same problem, but this time, peculiar to Fortinet.
The host name in the website security certificate differs – This may happen if the certificate you choose has an issue, but you have set up an IIS Site Binding to utilize HTTPS.
Below, we detail each of the solutions mentioned above, so you might want to go directly to the one that applies to your situation.
How can I fix There is problem connecting securely to this website?
1. Try an alternative browser
There is a problem connecting securely to this website message can sometimes be related to your browser, and if you want to fix it, it’s advised that you temporarily switch to a different browser.
If the issue doesn’t pop up, you should permanently switch to the other browser for the time being. On this note, we recommend trying OperaOne as your default browser.
Downloading Opera One takes only a couple of minutes, and settings it up is extremely easy. Besides, you can switch from your default browser to Opera One in only a few steps.
Namely, after downloading it, you can find a Synchronization option in the Settings area that allows you to import bookmarks, pages, and other data from your default browser.
Furthermore, you can customize the browser by adding icons, sidebars, workspaces, and bookmarks for easy access and a better-organized workflow. Unique features also include workspaces, tab islands and a built-in AI.
We should mention that Opera One comes with an integrated VPN to keep your online activity private. Since IP restrictions might cause the mentioned error, the VPN will hide your location, preventing the error message from appearing.
Opera One
Try this highly customizable browser today and enjoy an error-free browsing experience.
In some cases, the mentioned error appears due to your antivirus. Certain security settings can interfere with your system and cause this issue to appear, but you can fix that by disabling certain antivirus features.
We only advise that you do this temporarily until the problem is fixed. Or, better yet, use an antivirus that does not interfere with other programs.
3. Check your date and time
Right-click the clock icon on your Taskbar, and select Adjust date/time from the menu.
Disable the Set time automatically option. After a couple of moments, turn this option back on again.
Check if you can now access the web resource.
This will resynchronize your time and date. Once your date and time are set, the issue should be resolved.
This process is relatively simple, and you just need to disconnect your PC from the power outlet, open the computer case, and carefully remove the battery from your motherboard.
Once you remove the battery, replace it with a new one, and the problem should be resolved.
4. Add the website to Trusted Websites
Press Windows Key + S and enter internet options. Select Internet Options from the list of results.
Navigate to Security, choose the Trusted sitescategory, then click the Sites button.
Enter the URL in the Add this website to the zone section and click the Add button.
Once you add the website to the trusted list, save changes.
After you add the desired website to the Trusted Website zone, verify that the error message there is a problem connecting securely to this website is cleared.
Be sure to add only websites that you truly trust and not some random websites that you’re visiting for the first time.
5. Clear the SSL Cache
Press Windows Key + S and enter internet options. Select Internet Options from the list of results.
Now select the Content tab and click the Clear SLL slate button on that tab.
Verify that the error message there is a problem connecting securely to this website is cleared.
Clearing the SSL cache should erase corrupted certificate data and allow you to access the desired website.
6. Remove OpenDNS
Open the Control Panel.
Click on View network status and tasks.
Select Change adapter settings from the left pane.
Right-click on your adapter and select Properties.
Click on Internet Protocol Version 4 (TCP/IPv4) and select the Properties button.
Delete the listed DNS server address numbers and select the Obtain DNS server address automatically option.
Press the OK button to confirm the new settings.
Since you’ve effectively erased the OpenDNS server addresses, previously blocked sites might open.
This fix is applied mainly when browsing on corporate networks. OpenDNS is a service that enhances the Domain Name System on many corporate networks and blocks more legitimate websites.
You must first get an SSL certificate to remove the not secure warning from your website.
Several providers offer these certificates, including Namecheap, Bluehost, GoDaddy, etc. When someone uses a search engine, an SSL certificate you purchase and install will vouch for the security of your website.
You may buy certificates, like an OV (Organization Validated) SSL certificate, that show your visitors that the website and other material are trustworthy.
What are shared worlds? To quote the developer forum, “Shared Worlds are stored in the cloud and you can share them with any of your friends so they can host that world while you are not online.”
Users can own up to three shared worlds at a time.
Users can have 50 worlds shared with them at a time.
Any standard world can be converted to a shared world through the save/load menu.
Also, shared worlds can be copied to play as a standard world.
Only one person can host a shared world at a time.
Shared worlds are useful in that players can use them to share game saves with friends. And if you happen to own both a Steam copy and Xbox or Windows copy, you can use shared worlds to play the same game save across platforms. And there are other use cases for shared worlds as well.
Note that the shared worlds feature is currently in beta testing right now, and there are still bugs to be fixed before it gets a full public release. Grounded is available on Xbox Game Pass in Game Preview form, and will see a full release on September 27.
As the name implies, smooth scrolling is a recently introduced enhancing feature designed to improve scrolling on the best web browsers. This feature has been adopted by Mozilla Firefox, Google Chrome, Internet Explorer, Edge, and Opera One, among others.
This feature allows you to navigate a page smoothly, regardless of size. While it is now a basic feature on most browsers, many still find it difficult to use/enable.
This guide will show you how to enable the smooth scrolling feature on Windows 10 & 11 for some of the major browsers.
Why is my computer not scrolling smoothly?
As the name implies, the smooth scrolling feature on major Windows 10 and 11 browsers makes scrolling smoother. This feature makes it smoother and more coordinated, unlike the usual scrolling that feels choppy and stops abruptly.
With it enabled, it is easier to navigate pages of different sizes. Also, smooth scrolling on browsers like Chrome and Firefox eliminates stuttering scrolling. So, enabling the feature has many advantages.
Now that you’ve installed the extension, enjoy a better way of navigating your websites.
Speaking of customization, Opera One’s extensions can transform the browser entirely, allowing you to specialize it in whatever direction you want: streaming, gaming, writing in WordPress, etc.
It is an excellent browser to use if you want something modern and efficient.
2. Enable Smooth Scrolling on Microsoft Edge
Open the Run dialog box by pressing the Windows key + R.
In the dialog box, type systempropertiesadvanced and press Enter.
In the list of options, click on the Advanced tab.
Under Performance, click on the Settings… button.
Locate and check the Smooth-scroll list boxes.
Select Apply followed by the OK button.
Click OK again in the confirmation prompt to finish the process.
This is the simple way to enable smooth scrolling on Edge for Windows 10 and 11.
3. Enable Smooth Scrolling on Mozilla Firefox
Launch Firefox.
Type about:preference in the address bar and hit Enter.
Scroll down to the Browsing section and check the box for Use smooth scrolling.
After enabling the feature, you can try and reconfigure the browser’s settings to optimize the smooth scrolling function further.
To do this, go through the step-by-step guidelines below:
Type about:config in the Firefox address bar, and press Enter.
Click the Accept the Risk and Continue button when prompted.
Search for general.smoothScroll.currentVelocityWeighting in the search box.
Double-click on the entry from the results list, and set its value to 0.
Search for general.smoothScroll.mouseWheel.durationMaxMS and set it to 250.
Search for genral.smoothScroll.stopDecelerationWeighting and set it to true.
Lastly, search for mousewheel.min_line_scroll_amount and set it to 28.
Open your Chrome browser and input about:flags or chrome://flags in the address bar, and press Enter.
Type Smooth Scrolling in the search box.
Click the dropdown before Smooth Scrolling and select Enabled.
Now, click the Relaunch button to restart your browser.
Once this is done, you can enjoy an optimized, Smooth scrolling experience on your PC.
Should I enable smooth scrolling?
The advantages of the smooth scrolling feature on the major Windows 10 & 11 browsers are numerous. It also helps to eliminate some scrolling-related issues on your browser.
However, it is not without downsides. With the feature enabled, scrolling feels a bit slower but smoother. But on the balance of things, the pros outweigh the cons.
The smooth scrolling feature on Windows PCs improves user experience considerably. We have shown how to enable the feature on four of the most popular browsers available. So, you have all you need to use it.
Windows 11 has an option to use either dark or light mode on any application. Microsoft has a similar tool available for called the Rendering tool on Edge. The Rendering tool can “emulate dark or light schemes in the rendered page” allowing you to see what a website would look like
So, if you want an option to enable dark or light mode without using an Edge extension like Dark Reader, you can use the Rendering tool on Edge instead.
It is important to note that the Rendering tool on Edge is a web development tool meant to be used by web developers to see what a webpage looks like in different display options or for people with vision deficiencies, such as color blindness.
Developer tools in any browser are for testing only, so it is not possible to save any changes you make in this tool. You can only make changes and save the changes in your code only.
Enable Developer tools
Similar to the Rendering tab on Chrome, you can use the Rendering tool on Edge to see what a website looks like displayed in different color options.
Chris Heilmann, Principal Program Manager for Browser Tools at Microsoft, offered some helpful advice on how to force dark mode for websites where dark mode isn’t an available option.
If you have a web site that doesn't offer a dark mode, you can use the Rendering tool of Chromium based browsers (Chrome, Edge, Brave…) to force a dark mode. pic.twitter.com/Ou6CgzQK5X
1. Right-click on any website using your mouse and left-click Inspect. This option actually takes you to the “Elements” tab under Developer tools (DevTools), but you can always click the “Rendering” tab from there.
2. Go to the three-dot Edge Settings in upper right of an open Edge window. Click More tools > Developer tools.
3. Use the Ctrl + Shift + I keyboard shortcut.
4. Press F12 on your keyboard. You can always turn this keyboard shortcut off later in Edge settings.
Access Rendering tool on Edge
Now that DevTools is open in Edge, you should be greeted by the “Welcome” tab.
The next step is to open the Rendering tab. Here’s what you need to do.
1. Click the DevTools three-dot menu in the upper right.
2. Click More tools > Rendering.
3. Scroll until you find Enable automatic dark mode. Click the checkbox to enable automatic dark mode which sets the prefers-color-scheme to dark.
The change to automatic dark mode is instantaneous, so no need to refresh the webpage for the changes to take effect.
Microsoft recently released a new Edge Dev build, upping it to 106.0.1349.1. The build features the usual round of improvements, but also comes with three new features.
First up is a new capability that will allow users to filter history by date allowing you to easily trace back your steps. What’s more, users will also be able to nickname passwords for easy identification. And finally, there are also new policies from upstream and corresponding downstream changes. You can also check below for the reliability improvements and more.
Improved reliability:
Disabled pinning options in the menu for a specific website, if the website is already pinned to the taskbar
Improved smart history searches (e.g.: “videos from last week”)
Improved camera feature for websites on Android
Changed behavior:
Fixed an issue where certain address bar instant answers were unnecessarily truncated
Fixed Narrator announcements in Settings
Fixed various crashes
Updated a Policy, so when signed into Microsoft Edge with a work or school account (AAD), feedback is associated with account and organization
Fixed an issue where feedback cannot be sent from within the side pane
Fixed an error when attempting to generate a QR code on Android
Fixed a crash when changing profiles on iOS
This isn’t the only Edge news this week, Microsoft Edge Canary on Windows 11 and Windows 10 recently got a consistent dark mode for both Edge and window frame context menus. Microsoft Edge 105 also shipped to the Beta Channel.
The browser industry is a very competitive one. Aside from the well-known browsers for all devices, like Opera One, Chrome, and Firefox, there are still many excellent browsers.
In the heat of the competition, some browsers could not be continued. Among the many excellent browsers that were discontinued is the Flock browser.
This browser was well-known for its unique features and overall performance. Despite its unavailability, some users still want to know how it works.
This guide will take a closer look into how the Flock browser works, what makes it unique, and every other vital information about it.
What is the Flock Browser app used for?
Flock browser was first released in 2005, bringing many Web 2.0 features to the user interface.
The early versions were based on the Gecko rendering engine. But in 2011, the browser switched to the WebKit engine.
The browser was popular because it had a social media integration. With this, you could easily keep track of social networks or your webmail at any time.
Additional features included native sharing of content, the ability to preview online videos, a built-in RSS reader, a built-in blog editor and reader, and synchronization with web-based email.
The browser was available on all desktop platforms but was discontinued in 2011.
Who founded Flock?
The Flock browser was co-founded by Bart Decrem and Geoffry Arone in 2005. The browser was built on the Mozilla Firefox architecture focusing on social media and network integration.
Also, the founders hoped that Flock would improve the user experience. Hence, it packed many unique features.
Quick Tip:
Although the Flock browser was great due to its social media integration, other browsers, such as Opera One, can provide the same functionality.
Opera One has Instagram integration, allowing you to browse your feed and send messages while browsing other websites. It also features integrated messaging apps and a native AI.
Opera One
Get instant social media integration but with the added security layers of a VPN, thanks to Opera One’s clever build.
Immediately you download and install the Flock browser as a new user, it opens a page to log in and activate your favorite social media accounts.
If you have been using Flock for some time, you only need to close and reopen the browser, it will display the page. From here, you can log in and manage your social media accounts.
Is Flock Safe to use?
When it was active, the Flock Browser was very safe to use. It packed some excellent security features that protect users online.
However, with the ever-evolving internet and hackers finding new ways to attack, the same cannot be said about the browser since it was discontinued. This is because it is no more receiving security updates.
So you will be better off trying an alternative browser.
Is Flock Expensive?
The Flock browser is a free browser that costs absolutely nothing. Although it is no more available via official sources, you can still get the Flock browser apk and installer from third-party sites for Mac and Windows 10 PC.
How do you delete a Flock chat?
To delete your social media chats on the Flock Browser, you only need to follow the steps you use for the app’s web version. Flock does not have any special for the apps.
Instead, it only makes it easier to access and manage them.
The flock Browser was excellent in its time. But now, you might need to consider other frequently updated browsers with similar features for security reasons.
There is no doubt about it, Vivaldi is one of the best customizable browsers. Vivaldi themes offer many flexible customization options, along with many powerful features, and the browser has become even more versatile with the latest updates.
You can use the theme scheduling feature to make your browser change your favorite themes according to your needs.
Theme scheduling is exactly what it sounds like. It allows you to choose a few themes for your browser, which will automatically change when you’ve set them.
Joining our myriad of features and functionality, theme scheduling gives you the power to set your favorite theme to your preferred time as no other browser has ever done. After enabling a theme in the Settings, you can set its scheduling.
You can switch a theme whenever you want to match your current mood or time of the day.
So, for example, while you’re at work, you can set a bright theme or choose a dark theme when browsing the internet at home, with lights off.
Quick Tip:
Vivaldi browser has a lot of users who deem it better than Chrome or Firefox due to its great UI design and low resource usage.
However, what if we told you there’s a browser with a variety of customization options that’s also safer and tends to your privacy more than any other browser?
We’re talking about Opera One, of course. But this isn’t your regular, standard version of Opera One browser.
We are suggesting the gaming edition called Opera GX. While even the classic Opera One has personalization options, Opera GX takes things to the next level.
Yes, you can change your colors, wallpaper, and themes. Yes, you can even add multiple wallpapers at the same time. But you can also adjust things like transition animation and sound effects!
Opera
Ultimate control of your PC resources and the look and feel of your browser with Opera GX
How do I set up theme scheduling in the Vivaldi browser?
Open the browser, and go to Settings (a small gear icon in the lower-left part of the window).
Go to the Themes tab.
Scroll down to the THEME SCHEDULE section.
Tick the radio for the Manual Schedule.
Click the Add button.
Select two or more themes to schedule and move the timer as necessary.
There you go. Once you schedule your themes, the browser will automatically switch from one to another when the time comes.
You can choose between themes like Light, Subtle, Redmond, Dark, Human, Olive, and more. So basically, there’s a theme for everyone’s taste.
Where are Vivaldi themes stored?
The background images on Vivaldi are stored in the application. The steps to get to them depends on your operating system.
If you download any theme, it will be stored in Chrome storage in the browser folder. However, if you are wondering how to move them, there is no official way to do it. But you can use developer tools to do it.
Steam users report the Error joining multiplayer session message when trying to play certain games, such as Sid Meier’s Civilization V (Civ 5), Sid Meier’s Civilization VI (Civ 6), and Grand Theft Auto V (GTA 5).
If you’re one of these unfortunate gamers, here’s what you need to do to get rid of this error message.
Quick Tip:
Errors while joining a game can also be created by online browsing. We recommend using a browser that can limit the network usage so you encounter no such issues in your multiplayer experience.
In Opera GX not only you can limit network consumption of the browser, but you can also limit CPU and RAM usage. These features and more others serve only one purpose, to create an enticing gaming experience
Opera GX
Leave joining errors in the past with a new engaging gaming browser.
How can I fix the multiplayer session error in Steam?
1. Repair .NET Framework
Download the Microsoft .NET Framework repair tool, from the Microsoft Store.
Select the NetFXRepairTool.exe and download it
Open the downloaded file and follow the instructions on the screen (you need admin rights)
Once this is done, restart your computer
Launch Steam, your game, and try to join a multiplayer session
Some Steam games require .NET Framework to work properly. If you don’t have this software package installed, it could be the reason why you can’t join online sessions with other gamers on Steam.
However, the Microsoft .NET Framework repair tool should solve any problems related to this dependency, including missing libraries, failure to launch, or an outdated version.
2. Remove the Steam and game cache
Using your file explorer, visit the following address:
C:UsersYOURUSERAppDataLocal
Replace YOURUSER with your PC username
Select and delete the Steam folder
Also, select and delete your game folder in this location
Clearing Steam and game cache is a good way to fix multiplayer issues. If you know the other players, get in touch with them and ask them to do the same on their devices.
3. Use a premium VPN solution
If you want to use a VPN to not only avoid Steam multiplayer issues but also improve your ping by connecting to VPN servers closer to the host, consider investing in a premium VPN service.
The best VPNs for Windows 10 are services that have a large number of servers across the whole world.
This means that they are able to cover any type of connection and let you connect to your game with no issues, regardless of where you are.
Some VPNs have specific gaming features that help you connect to the best possible service for the game you are playing.
You can manually connect as well if there is a server you prefer, but the VPNs are able to detect the best configuration for you.
Just make sure to get a VPN with a strong privacy policy and additional secure network features such as a killswitch.
4. Disable your free VPN service
If you’re using a free VPN while playing on Steam, it could be the reason why you’re experiencing an error when trying to join multiplayer sessions: your IP address changed.
VPN servers might occasionally go down at random or become unreliable, causing you to get kicked out of your game or experience data loss.
It is difficult to tell how well a VPN paid service performs when it comes to gaming until you join up and try it for yourself, most of the providers offer money-back guarantee options or trials.
So, because it’s a free VPN service, you may experience data tracking from whoever controls the VPN and has the ability to see what you’re doing.
You can resolve this problem by turning off your free VPN before firing up Steam, and for good. It doesn’t seem healthy for your activity and private data to use a free VPN service nonetheless.
5. Deny folder permission
Go to Documents > My Games folder
Select any folders that resemble: packageddumps, moduserdat, logs, dumpgs
Right-click each folder and select Properties
Go to the Security tab and select your group of usernames
Click the Edit button
Select the first group or username and check the Deny box
Repeat the previous step for other user groups
Save changes
Restart your Steam games
The instructions above prevent Steam from creating game cache files in those folders, in order to fix the error when you’re trying to join multiplayer sessions.
To recap, if you’re encountering a Steam error message when trying to join your online friends in a multiplayer session, make sure to repair .NET Framework, remove the Steam and game cache, as well as manage permissions for cache folders.
You should also disable any free VPN you’re using. Instead, we recommend opting for a premium VPN service like Private Internet Access.
Our Steam area is dedicated to more awesome guides about this gaming platform, and you can also join our VPN Hub to find out how a VPN can make your digital life better!
You have received the Verify integrity of game files not working message. Let us walk you through all you should know. Steam is a popular online platform where users can play, create, and discuss games. Sometimes you may encounter errors when playing certain Steam games, such as random crashing.
This guide will show you how simple it is to follow a series of steps and solve the situation quickly. When this error occurs, some users see purple checkerboards; often, the weapon or the world models are missing, and sometimes they experience crashes when the game is loading.
If you are no stranger to this issue, don’t hesitate to apply the solutions we will suggest in this article.
Why won’t Steam verify the integrity of game files?
There could be several reasons why Steam needs to verify the integrity of game files. Here are some possible explanations:
Outdated game files – If Steam detects that the game files are not up-to-date, it will not verify the integrity of the files.
Game files in wrong directory – If the game files are not located in the correct directory, Steam may be unable to find them and, therefore, cannot verify their integrity.
Technical issues – Sometimes, Steam may experience technical problems that prevent it from verifying the integrity of game files.
PC requirements – If your computer does not meet the minimum requirements for the game, Steam may encounter this problem.
Corrupted game files – In some cases, the game files may be so corrupted that Steam cannot repair them.
Quick Tip:
Opera GX is a web browser outside the Steam desktop app. However, since Steam’s built-in browser works in the Steam overlay, Opera GX is easier to access and use its perks while playing.
In-game purchases and market functions, game invites through integrated Discord will perform better outside of the Steam client using Opera GX, as it will not get overloaded with cached files.
Opera GX
Avoid cache overload in the Steam client; use Opera GX for other actions you need to perform.
What can I do if verifying the integrity of game files is not working?
1. Clear download cache
Open Steam and select Run as administrator.
Next, click Steam at the top of the window to expand the menu.
Select Settings.
Click Downloads on the left of the Settings window.
Then, press the Clear Download Cache button.
A confirmation window will open, so don’t hesitate to click OK.
Select OK on the Settings window as well.
Restart Steam to keep the changes.
This is an easy way to restore functionality when you receive the Steam verify the integrity of game files not working message.
Regardless of the integrity of game files, you can let Steam check into the problem. The cause of this type of issue is usually a bad cache, so follow the steps described above.
2. Reinstall the affected game
Press Windows + E to open your Windows Explorer, navigate to the common folder using the path below, and rename the game folder. C:\Program Files (x86)\Steam\steamapps\common
Open the Steam application.
Visit the Library section.
Verify your game list and choose the one that has issues.
Right-click on the game, click on Manage, then Uninstall.
Return to step 1 and revert the folder name to its original name.
Finally, find the game on Steam and click on Install.
This solution allows you to set the Steam mechanism to search into your steam-apps folder for any game that displays different errors. Its purpose is to check if there are any missing or corrupted files.
Whenever Steam finds any missing file, the application will automatically download that specific file and complete the game.
Open your browser and enter this line in the address bar: steam://flushconfig/
Then, in the new pop-up dialogue, click on Open Steam.
You will get another pop-up warning from Steam saying that the action will delete the download cache, and you will need to log in again, so click OK.
This will also restart Steam; you must enter your password.
Clearing the download cache will hopefully resolve the problem of verifying the file integrity of your games.
How to verify the integrity of game files without Steam?
You cannot verify the integrity of Steam game files without using Steam. Steam is the distribution platform for the game, and the only reliable way to verify the integrity of the game files is through the Steam client.
When you use Steam to verify the integrity of a game’s files, it compares the files on your computer to those on the Steam servers. If files are missing or corrupted, Steam will automatically download the missing or corrupted files and replace them with the correct ones. This ensures that you have a complete and functioning version of the game.
And that is as much as we will cover. So follow these simple steps and learn how easy and fast you can let Steam analyze the game that gives you errors and fix those issues.
Also, remember that Steam confronts them with an online source to verify the game files. That means you should have a steady and consistent Internet connection.
More often than naught, we uncover a website or a specific page of a website that we like all by mistake, and then we leave it after we are finished with it.
After some time, we can’t backtrack our steps to get to that website or page again.
Thus begins the arduous journey of looking through your history or bookmarks if you’re conscientious. However, if you’re the type with many bookmarks, you’re in for a search.
That is why bookmark managers exist; the best are available for multiple browsers. Because they are many, we’ve decided to compile a list of the ones we think are the best.
Chrome has a decent free bookmark manager; however, you may be tempted to improve on this. On the Web Store, you will find many options that are unique to what the native one offers.
In some ways, many of these are better than Chrome’s built-in Bookmark Manager, and we shall share the very best of them with you, including great open-source bookmark manager options and options for other browsers like Edge.
Evernote Web Clipper is the program you need if you’re looking for a bookmark manager that can be used in almost any imaginable form.
With it, you can save bookmarks through a Web browser extension, mobile apps, email, and desktop applications, access and manage bookmarks through a web-based interface, and more.
This tool is available as a browser extension, mobile app, desktop application, and more. In addition, it is compatible with multiple platforms and devices.
The bookmarks are saved on the cloud or the account, and if you get the premium version, you can benefit from a few extra tools.
If you are interested in just plain old efficiency, then Diigo is the bookmark manager that you need.
One of its key features is that it can collect articles and text snaps from the web and PDFs, which can be useful.
This app allows you to save and tag your online resources for easy access anytime, anywhere. In addition, all of your bookmarks are stored on the cloud, and you can add labels to bookmarks.
If you’re looking to revisit a long-lost website that you may have visited long ago, then Memex is an excellent extension and the best Firefox bookmark manager out there.
It brings new tools to your browser by enhancing the way you bookmark a page and search for entries in your browser history, and it improves the search speed for anything you are searching for.
The sidebar feature enhances how you add and manage bookmarks in your browser. Another perk is that it’s available for Google Chrome and Firefox.
Raindrop.io – Great organization and labeling features
If you’re the type with many bookmarks, finding something in them will still feel like finding a needle in a haystack.
That’s why a bookmark manager extension like Raindrop.io can be handy. It enhances your sidebar with tools that let you better organize and label your bookmarks with icons and tags.
Raindrop.io can be considered, in our opinion, the best Chrome bookmark extension, and you should try it.
This tool will make finding one entry among 500 others feel like a piece of cake. It is also available for Firefox, Opera One, and Microsoft Edge and is highly customizable.
Bookmark Ninja – Great support for PC and mobile browsers
Bookmark Ninja is a more peculiar entry in our list since it is a web app and not a browser extension, but it does offer support for all browsers you may have on your PC or mobile device.
You can also consider it a perfect alternative to a Chrome bookmark manager extension.
This web app is easy to use and offers support for handling and organizing many bookmarks with advanced tag management and an overall dashboard view.
Additionally, the UI is extremely clean, so using it isn’t confusing if you already have many bookmarks to organize.
With the help of this tool, you can share your bookmarks between all your devices, and it also features a Dark Mode to help you save energy.
You can use it for free; afterward, you need to pay a fee for a subscription.
We have discussed bookmark managers, which are the best way to organize your links. However, here are some other options you may want to try.
Pocket on Android/iOS – It helps you conveniently save anything from the internet in one place.
Emailthis – The tool will email all your links to you, giving you a choice to manage them using an email client.
Google Keep – A cross-platform note-taker on the web and also available as a standalone app.
Evernote – Offers a web clipper that makes you copy and save entire web pages.
In addition to that, we tested and managed bookmarks with AVG Secure Browser. Hence, we advise you to organize your web bookmarks and keep track of all your web pages efficiently.
We as humans love having keepsakes of everything we do and all the things we like, even when it comes to digital items.
That’s why the bookmark feature was probably implemented in browsers so that we can quickly revisit our pages of interest.
However, these bookmarks can pile up over time, so having a way of efficiently searching through them seems like something inevitable.
From our recommendations, choose the best bookmark manager that suits your needs. We’d like to hear more from you on this subject, so give us your opinion in the comments section below.
Wait for the download to complete, then launch the app and play.
Note that there are a few paid options, but with this app, you can play Tetris for free on your PC.
We will now show you how to play Tetris on a browser online.
Quick Tip:
Playing games online is simple, but do you have the proper browser for the job? For gaming, it would be best to use a gaming-oriented browser such as Opera GX.
Opera GX offers a GX Control feature that allows you to allocate your resources to your browser and ensure that other processes on your PC can run smoothly.
Opera GX
Play Tetris in an ultra-modern web browser created for gamers.
Once the game loads, press the Play game button to start the game.
Does Tetris have an end?
The player only finishes as many lines as they can before suffering an unavoidable loss; the game will not end with your triumph.
Since 1996, Tetris has established internal standards and requirements that publishers must follow to get a Tetris license.
You can now play away using any of the three recommended websites. Of course, these are not the only places to play the game online, but they are our favorite go-to’s.
You may also try out Tetris browser multiplayer on websites like Tetr. Note that using any of the best gaming browsers will enhance your Tetris experience.
As you can see, playing Tetris in your browser is incredibly simple. If you found this article helpful, let us know by leaving a comment below.
Let us explore Firefox dynamic themes and share all we know with you.
Mozilla Firefox is and will always be a grand adversary to Google Chrome. Its privacy-oriented focus, simplicity, and fantastic personalization features have slowly become a viable choice for the daily driver web browser.
As the cherry on top of the Mozilla Firefox revival, we offer you three excellent themes to improve the experience.
The dynamic theme is, by definition, a theme that vibrates with various colors and patterns instead of sticking with a single solid color or motif.
It’s a great way to enrich your browsing experience without losing focus on what’s important. The only issue is that these are still relatively scarce for Firefox.
Nonetheless, we found our way around the Add-on Store and brought out the three themes (they’re Add-ons) which should serve you justice. So make sure to check them out below.
Quick Tip:
Firefox is not the only browser familiar with dynamic themes. Opera GX does an excellent job on customizability that exceeds the basics and goes for esthetic like no other browser.
With an award-winning design, it gives the user complete control over looks. With plenty of colorful and dark themes already preinstalled, it comes with a great setting that forces web pages to go into dark mode for better night browsing.
Opera GX
Avoid eye strain with this great fully customizable browser.
The best way to make Firefox more appealing to the eye is by using add-ons. There are a lot of them. While we discuss some of the best Firefox dynamic themes in this article, you must note that many other fantastic classes of themes exist.
Browse through the add-ons store to have a feel of the many options you may try out.
Are Firefox themes safe?
Generally speaking, Firefox themes are safe. However, some of them may be engineered to serve malicious purposes. Therefore, we recommend installing only themes you trust in your browser.
This belongs to the group of Firefox dark themes and mimics the color of your Windows system theme. It works great with the latest Firefox release and is a unique little piece of software.
This theme is, of course, dynamic. It’ll change color on Address and Title bars and Tabs, too. So basically, most of your workspace in Firefox will resemble the accent color of a Windows theme.
It sits so well with the Windows background that one might assume that Firefox is the native Windows 10 browser and not Edge. But, of course, these are only aesthetic changes.
But as far as we tested Native Dark, the accent colors are relatively fine, and our only issue is with the vividly light accent color. The font is barely seen if your theme of choice is relatively bright.
Feature-wise, there are multiple tweaks you can take advantage of. For example, you can set a static mode with only one color or change the nuance between the Address bar and the rest of the interface.
This nifty theme for Mozilla Firefox takes the step up and changes the coloring of the browser following the site color.
It primarily focuses on website icons. If you open YouTube, the theme will switch to reddish color. For Twitter, it’ll turn blue, resembling the tweety bird icon. Facebook – dark blue. You catch the drift. Every site has a different color for the Title bar and tabs.
Sometimes it’ll have difficulty determining which color to use, so it’ll stick with the default theme pattern. However, it’ll work most of the time without any issues.
We liked the transition between the tabs; this is our go-to theme. It fits great if you’re multitasking to break the monotonous single-colored user interface.
Keep in mind that this theme is still developing, so it’s far from perfect. This means it’s sometimes slow to load or misses the saturation and hue of the website’s icon. But, of course, this shouldn’t be the dealbreaker.
The browser must be adequately themed for work or play as we spend an increasing amount of our lives on computers, and this extension does a superb job of that.
The gorgeous Solarized Theme, converted to Firefox utilizing its most recent APIs, is used by ZenFox. The overflow, download, and hamburger menus of a browser are examples of menus that follow the theme of the rest of your browser.
The Solarized Dark & Light Themes may be switched using four distinct techniques.
These include Time (change themes automatically at times of your choosing), Manual (toolbar button to alter themes upon pressing), System (automatically changes the themes around the OS light/dark theme), and Weather.
You may also select the accent color applied to the colors of the tab loading, tab line, and icon attention.
Zen Fox doesn’t ask for pointless permissions; all the code is available as open source on GitHub.