FIX: Raw-mode is unavailable courtesy of Hyper-V in VirtualBox

VirtualBox is great if you want to run a virtual machine on your PC, but many users reported Raw-mode is unavailable courtesy of Hyper-V error in VirtualBox.

Here’s how one user described the issue on VirtualBox forums:

Hi, I am getting the famous error when trying to boot a VM:
“Raw-mode is unavailable courtesy of Hyper-V. (VERR_SUPDRV_NO_RAW_MODE_HYPER_V_ROOT)”

In this article we’re going to show you the fastest and the simplest solutions for this error, so let’s get started.

What to do if Raw-mode is unavailable due to Hyper-V in VirtualBox?

1. Turn off Core Isolation feature in Windows Defender

  1. Open the Settings app. You can do that quickly by using Windows Key + I shortcut.
  2. Navigate to the Update & Security section.
  3. In the left pane, select Windows Security. In the right pane, select Device security.
    device security raw-mode is unavailable courtesy of hyper-v windows 10
  4. Select Core isolation details and disable Memory integrity option.
  5. After doing that, restart your PC to apply the changes.

2. Disable Hypervisor

  1. Open Command Prompt or PowerShell as an administrator.
  2. Now run the bcdedit command.
  3. List of data will appear. Look for hypervisorlaunchtype.
  4. If hypervisorlaunchtype is set to Auto, disable it by running the following command:
    • bcdedit /set hypervisorlaunchtype off
      bcdedit /set hypervisorlaunchtype off raw-mode is unavailable
  5. Restart your PC and check if the problem is resolved.

Want to use Windows Sandbox and VirtualBox simultaneously? Here’s how to do that like a pro!


3. Make sure that Hyper-V is disabled

  1. Press Windows Key + R and enter optionalfeatures.exe. Press Enter or click OK.
  2. Windows Features window will now appear.
  3. Locate the Hyper-V on the list and disable it. Click OK to save changes.
    hyper-v disable raw-mode is unavailable courtesy of hyper-v windows 10
  4. Restart your PC to apply the changes.

4. Make sure that virtualization is enabled in BIOS

enable virtualization BIOS raw-mode is unavailable courtesy of hyper-v windows 10

  1. Restart your PC and enter BIOS.
  2. Now look for Virtualization option and enable it.
  3. Save changes and restart your PC.

Note: Each version of BIOS is different, and in order to see how to properly find and enable Virtualization in BIOS, we advise that you check the manual.

There you go, four quick and simple solutions that will help you fix Raw-mode is unavailable courtesy of Hyper-V error in VirtualBox.

READ ALSO:

Looking for the best email drip campaign software? Here are our top picks

Because email is still used by the majority of people, using email to set up your drip marketing campaigns is still extremely useful when it comes to reaching your target audience/ potential customers. The drip marketing tactic is also called lifecycle emails, automated email campaigns, or marketing automation. This process involves the setting up of a system that allows you to quickly respond to any queries, and distribute relevant information to your customers. This process can be very useful for individual use as well, but it is especially important if you’re running a company that has to deal with thousands of emails per day. Hiring somebody specifically for the task of answering emails still isn’t practical because of the time involved in this process. For these reasons, in this article, we will explore some of the best software options that allow you to create efficient drip campaigns. Read on to find out more.

What’s the best tool to create effective email drip campaigns?

Drip

Drip - email drip campaigns software

Drip is a great software option that can help you in every aspect of CRM ( Customer Relationship Management), and it also allows you to create comprehensive and great looking email drip campaigns based on the data stored on your server.

Drip is compatible with a wide range of applications, making sure you never have to transfer information from the programs you already use. Drip seamlessly integrates with apps like Shopify, WooCommerce, Thrivecart, etc.

Here are some of the best features found in Drip:

  • Flexible API that can adapt easily to any business size
  • Ability to automate email campaigns based on your company’s database
  • Very powerful tracking code that gives you valuable information about your clients
  • Ability to set custom fields, create events, and add tags
  • Easily customize content based on what’s relevant on the web
  • Can generate comprehensive reports with detailed activity and usage statistics of your customers
  • Easily export reports to any application

Pros:

  • Easily understandable user interface
  • Great set of features for drip email campaigns

Cons:

  • Email templates are basic
  • HTML support for emails is not very efficient

Try Drip


Manage multiple emails accounts like a pro with these email clients!

SendLoop

SendLoop - email drip campaigns

SendLoop is another great software option that gives you all the tools you need in order to set up a professional email drip campaign.

Beyond being able to send automated emails, you will need to be able to gather objective and exact information about the way your clients interact with your website and products. This is where SendLoop excels.

This software can gather an incredible amount of data that then can be applied to the email campaign.

Here are some of the best features found in SendLoop:

  • Great Facebook app, and other plugins and code snippets with easy setup and usage
  • Can set up complex drip campaigns based on the collected data
  • Can import your existing HTML email templates to send messages
  • Great migration assistant – allows you to import email newsletter subscribers from MailChimp, Campaign Monitor, etc.
  • Great WordPress widget

Pros:

  • Easy to use and set up
  • Great service and support
  • Very exact email campaign settings

Cons:

  • Segmenting feature may be difficult to understand at first
  • GUI can be improved

Try SendLoop

Customer.io

Customer.io - email drip campaign

Customer.io is another great software option that can easily adapt to your company, and send comprehensive drip campaign emails based on the information gathered from the activity of your customer.

Because it is very important that your customers don’t feel like you’re spamming them as soon as they used your site, Customer.io allows you to set custom email sending targets spaced out in time depending on how your customers interact with your website/online store.

Here are some of the best features found in Customer.io:

  • Easily set up custom schedules
  • Real-time site monitoring with intelligent data gathering
  • Can be used free for up to 200 contacts
  • RESTful API – allows you to create, update and manage people and events from one application
  • Supports multiple languages – Ruby, Python, Go, etc.
  • Seamless integration with Segment, Zapier, and mParticle
  • Workflow automation with great timing settings

Pros:

  • Easy management of all data collected
  • Can easily create workflows that can be modified at any time
  • Great set of built-in email templates

Cons:

  • Can’t export data
  • Not very easy to manage onboarding
  • Docs are very technical and can become confusing for beginners

Try Customer.io 

Conclusion

In this article, we explored some of the best software options on the market that allow you to easily create, edit, and manage every aspect of your email drip campaign.

Please feel free to let us know what software option you chose and how it worked for you by using the comment section below.

READ ALSO:

Here’s how Microsoft’s redesigned Start Menu could look like

We all know by now the plans that Microsoft has for Windows 10 20H1 in terms of UI changes.

The overhauled Windows 10 UI to come in the Spring of 2020

With the accidentally leaked Windows 10 build 18947, a big part of the company’s changes to the Start Menu and Action Center were revealed.

If you like the new Microsoft will probably go with the new one and its Fluent Design elements.

Of course, the leaked version was in early stages, and you could expect many other changes to be implemented before its full release.

Just a month ago we showed you how Windows 10 could look like through the eyes of a concept designer, and now, another design of the Start Menu has surfaced up, this time by @Scoots37.

New Start Menu concept design with Fluent Design elements

new Start Menu concept design
This new design is based on the leaked build and is very close to what Microsoft wants to implement.

As with the original leaked design, the concept has split the Windows community in two: users who love it and users who hate it.

Check out a couple of opinions and concerns expressed by Windows 10 users:

I hate it and will not replace my old start

Nope, if this comes out without an option to revert the design imma hate it. Don’t need to mess around with the start menu. Remember Win8??

Most users share the opinion that the new design looks more like a mobile version, and the current version is much better:

Ugh. Now Windows is butt ugly like Android.

A UI only an iPhone fan could love.

Keep in mind that this is only a concept design, and Microsoft’s overhaul of the UI might look a little different.

What’s your take on the new design changes that are coming to Windows 10 next year?

Leave your thoughts in the comments section below and we’ll continue the talk.

Windows 10 ARM is almost ready to run on your Lumia 950

Earlier this year, a project to bring Windows on ARM to the Lumia 950 family was started by a group of dedicated developers.

The task of bringing the full version of Windows 10 designed for ARM chipsets to mobile phones that are supposed to run only on Windows 10 Mobile seemed almost impossible.

Windows 10 on ARM comes to Lumia 950

But with time and a lot of work, the team lead by Gustave Monce succeeded in adding more and more features and managed to make the majority of the phone’s sensors to work.

The new list of sensors that are working on Lumia 950 is almost complete.

Despite that, there are still things that don’t work properly, but the team said that all the functionality and fixes will be available in a future update:

Not too sure when we will release this yet, maybe in the middle of the month, maybe next month, I don’t want to make too many releases since we have no real update way

After things like Camera and the USB-C will be sorted out, the project will come to an end and you’ll be able to test it on your Lumia 950, if you so choose.

What do you think of this initiative? Would you be interested to try it out?

Power Bi added index error? Fix with these steps

Power Bi is a popular BI business analytics solution from Microsoft that allows you to visualize your company’s data. However, at times while using the Power Bi desktop or web client, you may encounter Power Bi added index error. This error usually occurs when the users try to refresh the data as reported in the Power bi community forums.

I am not sure how to debug these errors. Is there a log to view? Unless someone has any idea as to what it is. In the applied steps i deleted “reordered columns”, “kept errors”, “added index” then applied and closed. Still getting the issue. Any help would be great!

If you are troubled by this error, here is how to fix Power Bi added index error in Windows systems.

How to Fix Power Bi added index error

1. Check the Data Type

Power Bi added index error

  1. The Power Bi added index error can occur if the data types in each column are not defined correctly.
  2. To resolve it, go back to the table in Edit Queries and format the columns to a number or text.
  3. Make sure that the data type is defined correctly to avoid any error.

Disable focus mode in Power BI in 3 easy steps


2. Check the Error Log

Power Bi added index error

  1. If the issue persists, try checking the log to understand the error better.
  2. Look in the left Queries pane of the Edit Queries window.
  3. Here look for a new query that will have a dated log of the error.
  4. The error log works similar to other power queries in your client. You can simply step through it and see what is wrong.
  5. In the log queries, look into the Data view tab and check the fields with an Error tag in them.
  6. Click the error-tag to get more information.

Conclusion 

The Power Bi added index error usually occurs due to incorrect data type in the table columns. Follow the steps in this article to troubleshoot the problem in your Power Bi client.

RELATED STORIES YOU MAY LIKE:

Power BI Mobile’s revamped UI helps you access things easier

Power BI got a lot of updates recently, including URL parameters for paginated reports, a new set of capacity settings, and features like grouping and Analytics.

Power BI Mobile gets a revamped interface

Power BI mobile look redesignedNow, Microsoft has released the public preview of a new look for Power Bi Mobile:

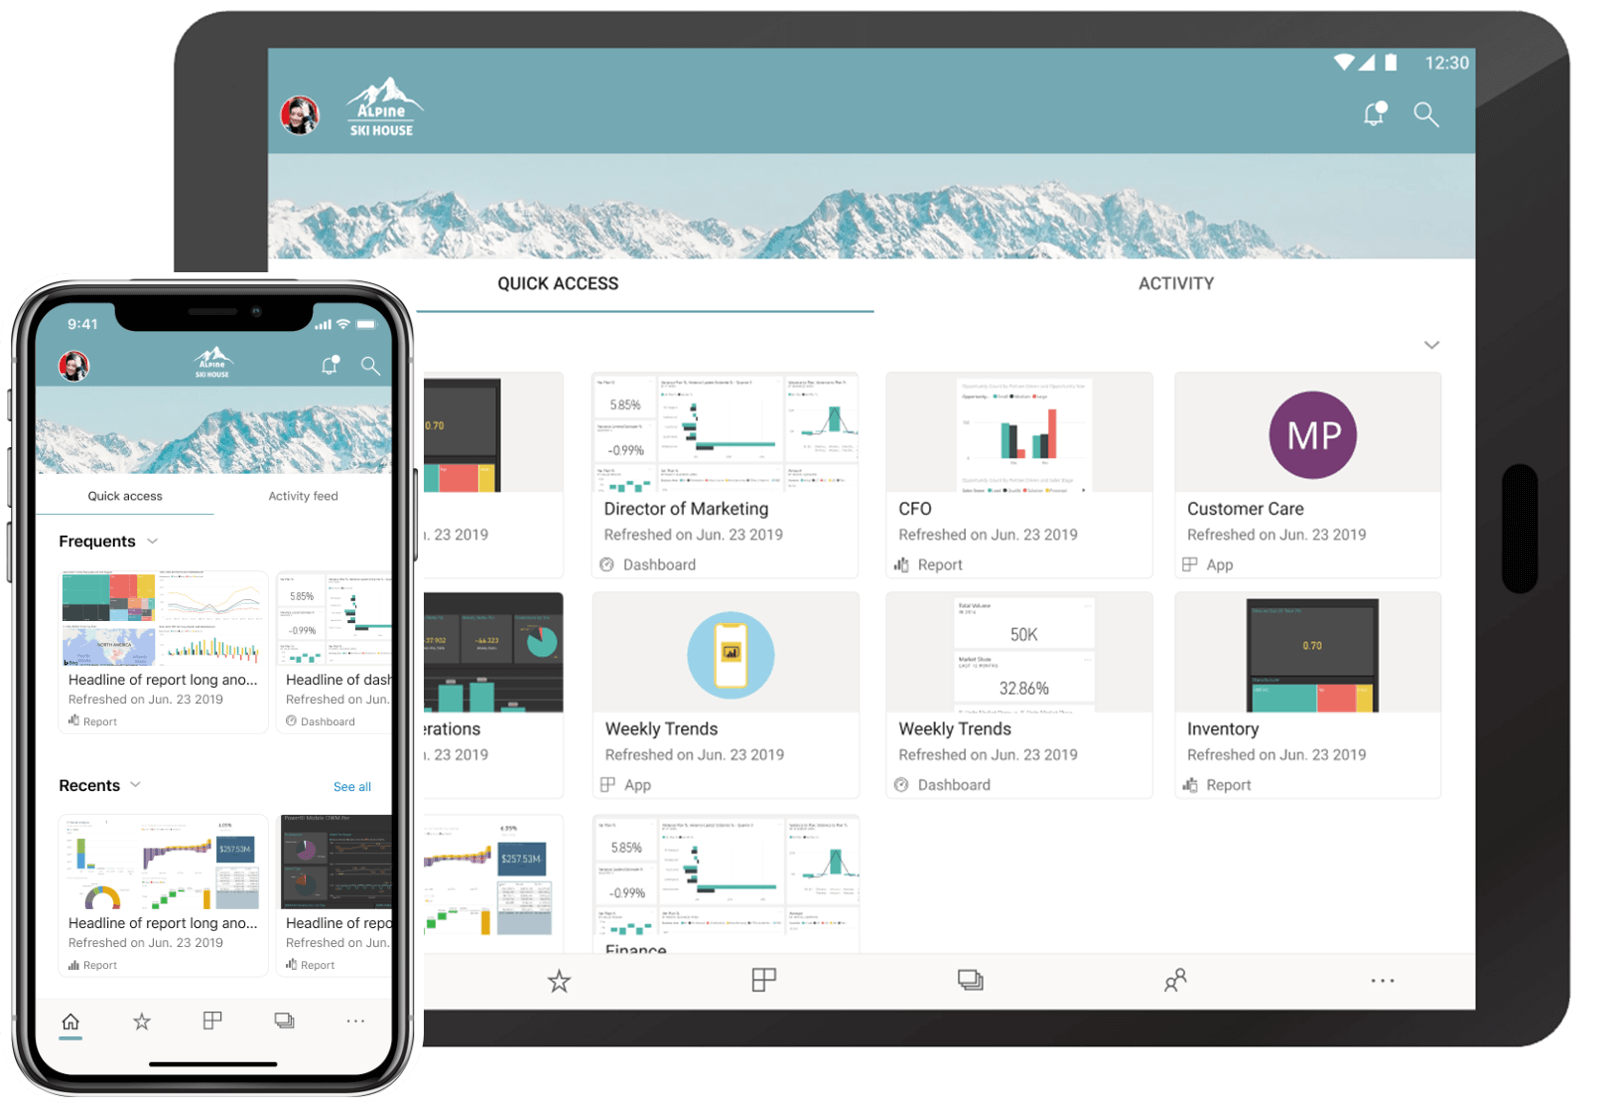
Today, we’re excited to announce the public preview of the “new look” now available on Power BI Mobile. We’ve refreshed our app and introduced new experiences, adding a home page that provides quick access to your commonly used content and includes your organization brand theme, and new navigation bars that give you an easy way of navigating through the app. With the new and refreshed experiences, it’s now quicker and easier to find what you need, when you need it.

All these new features aim to improve how users interact with their content on the go.

With the new look, the first thing that you’ll see at the top of the page will be your organization’s branding, so it will feel more like Power Bi.

New Power BI Mobile features for quick and easy access

Power bi mobile public preview new lookIn addition to that, the home page will now have two new tabs: Quick access and Activity.

In the Quick access tab you’ll find you’re most frequent accessed items in Power BI, so you’ll never have to look for them again.

You’ll see content cards and metadata for the content itself, like the last refresh time. In the Frequents section you’ll be able to look for your items and keep them organized by the number of times you viewed them.

Activity will keep you connected with events that are relevant to you from your Power BI account, through a feed. This way, you’ll stay up to date with the latest comments and activities.

This feature is not yet available, but Microsoft said that it will come soon and more info will be revealed with its release.

Finally, the re-built app navigation makes it easier to go through pages and items on mobile. There’s a new bottom navigation bar for that.

And also a new top bar that allows you to access the notification center and search for Power BI content.

If you’re interested in trying the new look of Power BI Mobile, you’ll have to manually opt-in by turning it on through the introduction banner, side panel, or app settings.

During the preview period, new capabilities will be added based on user feedback, and you can vote on new feature ideas.

READ ALSO:
How to Fix the Origin Access Error on Windows 10/11

A significant number of Origin users have reported seeing an error whenever they tried logging into Origin Access.

This error appears even if the Internet connection is running correctly. Some users have said they can even download files from Origin but still can’t log into Origin Access.

At first glance, this issue seems to be caused by a server-side error, but our team has searched for the best troubleshooting methods for this situation. Read on to find out what the methods are.

What can I do to avoid an Origin Access error while signing in?

1. Run Origin with administrator privileges

To make sure that the issue appearing while singing into Origin Access is not caused by a lack of permission on Windows 10, it is recommended that you follow these steps:

  1. Navigate to the location of your Origin launcher.
  2. Right-click it -> select Run as administrator.

Note: If you want to set these settings permanently, right-click the .exe file -> select Properties -> Compatibility tab -> tick the box Run this program as administrator -> click OK.

2. Make sure your system’s clock and date are correct

  1. Click Cortana -> type Control panel -> open it.
  2. Select the Clock, Language, and Region option -> Date and Time.
  3. Inside the Internet Time tab -> click on Change Settings.
  4. Make sure the Synchronize with an internet time server option is enabled.
  5. Click OK to close the time settings.

3. Deactivate any VPN software

Using VPN software when trying to connect to the Origin Access platform will cause an error to appear.

Please close any VPN software entirely and check if the issue is resolved.

4. Remove the Origin temporary file

  1. Right-click your taskbar -> click on Task Manager.
  2. Inside the Task Manager -> find Origin.exe and OriginWebHelperService.exe -> End task.
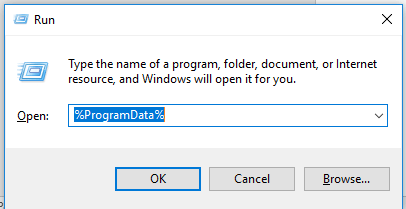
  3. Press Win+R keys on your keyboard -> type %ProgramData%/Origin -> Enter.
  4. Delete all the files and folders at that location but DO NOT delete the LocalContent folder.
  5. Open the Run dialog by pressing Win+R again -> type %AppData% -> hit Enter.
  6. Inside the folder -> delete the Origin folder.
  7. Click AppData the location link to open that folder -> open the Local folder -> delete Origin.
  8. Restart your computer and check to see if the issue persists.

5. Contact EA support to get help with the Origin Access error

If all the methods mentioned above have failed to solve the problem, then it is recommended that you contact EA Support.

  1. Visit the EA Support page.EA Help - Origin access error
  2. Select your country -> select Origin from the menu -> click Next.
  3. Select the platform you’re using and click Next.
  4. Choose the topic -> Next.
  5. Choose a contact option and ask for help from EA.

We would love to know if this guide helped you solve your issue and if you were able to connect to Origin Access normally.

If you have additional problems, check our guide for detailed EA anti-cheat service error solutions.

Let us know by using the comment section below.

Bing search box is back, this time on Windows 10 build 18970

Microsoft is not giving up on the Bing-powered search box in the Windows 10 lockscreen.

The Bing search box is still coming on Windows 10’s lockscreen

We’ve already reported a couple of months back that the tech giant is working on adding a new Bing search tool to the Windows 10 lockscreen with Windows 10 20H1 build 18932.

Now, the feature was spotted again in Windows 10 build 18970:

The Bing search box in the bottom left corner seems similar with the search box from the Taskbar and because of its positioning, the time and date have been move to the top left corner.

We don’t know very much about the new search box, as Microsoft didn’t shared any details about it.

Windows 10 users hate the idea of a Bing search box

The most interesting thing is if the search results will be displayed on the lock screen or you’ll have to login to see them. We’ll just have to wait and, hopefully soon, see how it works.

The Bing-powered search box on the Windows 10 lockscreen seen in build 18970 raised a lot of eyebrows in the Windows community, as the majority don’t like the implementation and use scenarios:

The old one on bottom is always better. Designers nowadays design just for the sake of change.

Maybe they are experimenting with an option to search the internet from the lockscreen? If so I can’t imagine the search box staying there. Either way seems a little pointless?

What do you think of a Bing search box on Windows 10‘s lockscreen?

Share your thoughts in the comments section below and we’ll continue the talk.

New Power BI update lets you add parameters to a URL

After receiving a new set of capacity settings to give more control to admins, Power BI‘s August update brought new features like grouping and Analytics.

Power BI gets URL parameters for Paginated Reports

Now, Microsoft has released a new update to introduce the support for URL parameters for paginated reports in the Power BI service.

In other words, report authors now have the ability to send commands to paginated reports in Power BI by just adding a parameter to a URL.

When you create a report parameter in Power BI Report Builder, you set a parameter name. If you want to use report parameters, you’ll have to add rp: in front of the parameter name for Power BI to recognize it in the URL.

For example, to set a report parameter in an URL, you’ll have to use rp:parameter=value.

Here’s how Christopher Finlan, Principal Program Manager for Power BI is describing the use of URL parameters:

So if I want to specify a value for the “Salesperson” parameter for my report in an app, I’d use the following URL: https://app.powerbi.com/groups/me/apps/xxxxxxx-c4c4-4217-afd9-3920a0d1e2b0/rdlreports/b1d5e659-639e-41d0-b733-05d2bca9853c?rp:Salesperson=Tiggee

If “Salesperson” was instead a multi-value parameter that accepted multiple values, I can use an & to add an additional parameter value to my URL like so – https://app.powerbi.com/groups/me/rdlreports/xxxxxxx-abc7-40f0-b456-febzf9cdda4d?rp:Salesperson=Tie+Bear&rp:Salesperson=Mickey

The new Generate Link feature easily integrates with URL parameters

Furthermore, Microsoft also announced the introduction of a new feature this week called Generate Link.

This feature aims to help with the discovery of the parameter names by generating a link of the current report with the parameter values appended to the URL.

Also, besides report parameters, you can set the export format of your report in the URL. Using the rdl: prefix will allow you to set the output format in which the report can be downloaded directly into the URL.

Here’s how it should look like if the output format is designated as PDF:

https://app.powerbi.com/groups/me/apps/xxxxxxx-c4c4-4217-afd9-3920a0d1e2b0/rdlreports/b1d5e659-639e-41d0-b733-05d2bca9853c?rp:Salesperson=Tiggee&rdl:format=PDF

If you want to learn more about URL parameters and see more examples, be sure to check Microsoft’s official documentation page.

READ ALSO:

Latest Office build adds new features in Excel and PowerPoint

Microsoft has released a new Office build for for Insiders in the Fast Ring.

The new Office version 1909, build 12026.20000, brings a lot of fixes and improvements, but also some new features for Excel and PowerPoint.

You can now use XLOOKUP and save slides as SVG files

Excel gets a new XLOOKUP function that comes as an improvement for the older VLOOKUP. It has the ability too look vertically, but also horizontally, which means that it replaces HLOOKUP, as well.

With XLOOKUP you’ll only need three arguments: lookup_value, lookup_array, and return_array.

As for PowerPoint, from now on you’ll have the ability to save an illustration or a slide as SVG.

Because SVG is a vector-based image that does not use pixels to render and instead uses vectors, you’ll be able to save charts, shapes, icons, or slides as a scalable vector graphic (SVG) for a cleaner and sharper image.

New Office v1909 build 12026.20000 brings a lot of changes

Here’s the full list of fixes and improvements to all the Office suite apps:

Excel

  • We fixed an issue which prevented CSV from appearing as a supported file type
  • We fixed an issue that occurred while working on a shared workbook when trying to save.
  • We fixed an issue when Excel only lists the first 16 addins located in the ‘\Excel\Add-in Manager’ registry values.
  • We fixed an issue where the function Frequency returns incorrect results.
  • We fixed an issue for Surface users where moving the mouse could be interpreted as a mouse click event.
  • We fixed an issue where the name of some fonts were not displayed correctly.
  • We have significantly improved the performance of filtering by color.
  • We fixed an issue which prevented keyboard navigation in the Find/Replace dialog box.
  • We fixed an issue where the keytip for Sensitivity was conflicting with another keytip.
  • We fixed an issue to prevent GeometryCommand from putting a non-connector shape type in the Geometry of a Connector.
  • We fixed an issue that caused a problem  when using dock/undock from multiple external displays.

PowerPoint

  • We fixed an issue which would affect the rotation orientation of a 3D Turntable.
  • We fixed an issue which prevented some hyperlinks from working if they contained special characters.
  • We fixed an issue to prevent GeometryCommand from putting a non-connector shape type in the Geometry of a Connector.
  • We fixed an issue that caused a problem  when using dock/undock from multiple external displays.

Project

  • We fixed an issue which could sometimes cause a crash after printing a Team Planner view.

Word

  • We fixed an issue where Japanese post card and greeting card related add-in resources are not found when the user takes action in the add-in wizard.
  • We fixed an issue where multi-byte characters in vertical text box are shown overlapped in reading view.
  • We fixed an issue where Word would occasionally crash in AListMarkerUtility.SetListDomAttributes.
  • We fixed an issue to prevent GeometryCommand from putting a non-connector shape type in the Geometry of a Connector.
  • We fixed an issue that caused a problem  when using dock/undock from multiple external displays.

Outlook

  • We fixed an issue which prevented HTML content from appearing for some POP3 users.
  • We fixed an issue to remove non-functional ‘Planner’ link from the overflow menu in the contact card when working in environments where it is not available.

Access

  • We fixed an issue where users could receive an “inconsistent state” error when using a shared database.
  • We fixed an issue which could cause the date picker to appear when it shouldn’t.

It’s worth mentioning that OneNote and Visio didn’t get any new changes. Also, there are no known issues with any of the Office apps.

The update should roll out automatically, but you can also manually check for updates to see if you’re on the latest version.

High CPU usage on the latest KB4512941? Cortana is to blame

After a brief time in the Release Preview ring, Microsoft released Windows 10 v1903 build 18362.329 (KB4512941) to Windows 10 users as an optional update.

At the time of release, KB4512941 did not have any known issues, but it seems like after installing it, a lot of users experience high CPU usage even when the PC is idle.

Windows 10 v1903 build 18362.329 causes high CPU usage for many

The cause of the high CPU usage seems to be Cortana, and here’s how some Windows 10 users are describing the issue:

After installing the below updates (KB4512941), the CPU usage is high and remains high even when the machine is idle.

I got a similar problem after Windows 10 update and this was because of ” BingSearchEnabled” which was set to 0.

I just updated from 1809 to 1903 and had the exact symptoms that you described. It was driving me nuts.

And here’s the OPs screenshot: high cpu usage cortana Windows 10 v1903

The problem with SearchUI.exe is caused by a Cortana bug that pops up when users have disabled the ability to send local searches to Bing.

How can I fix high CPU usage on KB4512941?

If you’re experiencing high CPU usage in Task Manager because of the SearchUI.exe process, you’ll be happy to know that there’s a fix.

Just open the Registry Editor, navigate to

Computer\HKEY_CURRENT_USER\
Software\Microsoft\Windows\CurrentVersion\Search

, and set the BingSearchEnabled value to 1.

If you can’t edit your Windows 10’s registry, read this handy guide and find the quickest solutions to the issue.


Can’t access the Registry Editor? Things aren’t as scary as they seem. Check out this guide and solve the issue quickly.


After that, restart your PC and the problem should be solved. Keep in mind that this is only a temporary fix.

Microsoft hasn’t acknowledged the problem and we’ll probably have to wait sometime for an official fix. Until then, be sure to try the previously mentioned one to keep things in check.

Have you encountered high CPU usage with the latest Windows 10 v1903 cumulative update?

Share your experience in the comments section below.

Windows Firewall is Blocking File Sharing: How to Allow it

File Sharing is an essential feature for users with multiple PCs in a Homegroup (Workgroup). Once it’s configured, the file exchange should work seamlessly. However, some users reported that Windows 10 Firewall is blocking File Sharing.

Ideally, after enabling File Sharing, your Windows Defender Firewall should allow the feature to communicate freely. But when problems appear, you need to allow file sharing in Windows Firewall manually. Keep reading to find out how!

How do I stop my firewall from blocking?

1. Enable File and Printer Sharing

  1. In the Windows Search bar, type Sharing and open Manage advanced sharing settings.
  2. Under Network discovery, select Turn on network discovery.
  3. Under File and printer sharing, select Turn on file and printer sharing.windows 10 firewall blocking file sharing
  4. Click on Save changes and reboot your PC.

The quickest solution when Windows Defender Firewall is blocking file sharing is to enable Network Discovery and File and printer sharing.

2. Allow File and Printer Sharing to communicate through Firewall

  1. In the Windows Search bar, type Firewall and open Windows Defender Firewall.
  2. Open the Allow an app or feature through Windows Defender Firewall.
  3. Click Change settings.
  4. Navigate to File and Printer Sharing and File and Printer Sharing over SMBDirect.
  5. Make sure to check both the Private and Public boxes next to these entries.windows 10 firewall blocking file sharing
  6. Click OK to save the changes and try sharing files on the local network again.

For those who want to enable File and Printer sharing over SMBDirect, adding a Windows Firewall exception to allow file and printer sharing should do the trick.

We hope this guide has solved things when Windows Firewall is blocking file sharing.

Before you leave, find out all about Network Locations in Windows and how these work.

If you want to share your experience with us or have any suggestions, feel free to contact us by using the comment section below this article.

How to fix Origin error code 9:0

Origin is one of the most popular game stores that allows you to play games and manage your purchases from anywhere. However, the platform is not immune to common errors just like other Windows apps. One such error is Origin error code 9:0 that occurs during update or installation. Several Reddit users have complained about the same in the community forum.

how do i solve error 9:0 during Origin update or installation?
So that seems to be a complete mystery. I just read an article from a major PC magazine that said, it is a major error, and nobody knows the solution.
If you are also troubled by this error, in this article we have shared a couple of troubleshooting tips to fix the Origin error code 9:0 in Windows.

How to fix Origin error code 9:0

1. Update NET Framework

Origin error code 9:0

  1. The Origin error code 9:0 can occur if the current version of your NET Framework installation is not compatible with the Origin client. Try to install the latest version of the Framework to resolve the error.
  2. Go to the Microsoft Download Center.
  3. Click the Download button. Run the installer and finish the installation. The installer may be required to download additional data to install the app.
  4. Once done, restart the computer.
  5. Try to install the Origin client or update it and check for any improvements.

If the issue persists, make sure that .NET Framework is enabled. Here is how to do it.

  1. Press Windows Key + R to open Run.
  2. Type control and click OK to open the Control Panel.
  3. Go to Programs > Programs and Features.
  4. From the left pane click on “Turn Windows Features on or off” option.
    Origin error code 9:0
  5. Locate and check “.NET Framework 4.7 Advanced Service” box.
  6. Click OK to save the changes.
  7. Restart the computer and check for any improvements again.

Origin won’t start games on Windows 10


2. Disable Antivirus Temporarily

  1. If your antivirus is preventing the Origin update client or the installer from installing on your system, it may result in Origin error code 9:0.
  2. If you have any antivirus software installed, disable it temporarily. You can disable the antivirus easily by right-clicking on the Antivirus icon in the System Tray.
  3. Also, try to disable the firewall if required. Run the installer again and check for any improvements.

3. Clear Origin Data Cache

  1. The bad cache can create an issue with the installation of the client or update installer.
  2. Press Windows Key + R to open Run.
    Origin error code 9:0
  3.  Type %Programdata%/Origin and click OK.

  4. In the Origin folder, delete all the files except the LocalContent folder. The LocalContent folder keeps your game data, so make sure you don’t delete it.
  5. Press Windows Key + R again.
    Origin error code 9:0
  6. Type %Appdata% and click OK.
  7. In the Appdata folder, delete the Origin folder.Origin error code 9:0
  8. Now go back to AppData folder and open the Local folder.
  9. Delete the Origin folder.

5. Uninstall and Reinstall Origin Client 

Origin error code 9:0

  1. Press Windows Key + R.
  2. Type control and click OK.
  3. Go to Programs > Programs and Features.
  4. Select Origin and click Uninstall.
  5. Reinstall Origin from the official website. Your game data won’t be deleted during the uninstall process.

RELATED STORIES YOU MAY LIKE:

Fix:2100 Detection Error on Storage Device (M.2)

You may get the 2100 detection error on the storage device M2 when trying to turn on your machine.

This is a common SSD error and can occur due to a faulty SSD or the improper installation of the drive in the M.2 slot.

Follow the steps below to fix it fast:

How can I fix the 2100 detection error on the storage device (M.2)?

1. Run Hardware Scan

  1. If you are using a Lenovo laptop, run a hardware scan to identify any issues with the SSD or any other system component.
  2. Launch the Lenovo Vantage software on your system.
  3. Click on Health and Support option.
  4. Scroll down and click on Run a Hardware Scan.SSD error 2100
  5. Click on the Run Quick Tests option.
    SSD error 2100
  6. Lenovo Vantage will execute the hardware scan. Wait for the test to conclude.
  7. On the result page, scroll down to the Storage section.
  8. If your SSD has passed the test with a green checkmark, then the issue is not with your SSD.
    SSD error 2100
  9. Check if any other major component has failed the test.

2. Check if the SSD is seated firmly

Another reason why the SSD error 2100 can occur is if the SSD wasn’t seated firmly in the M.2 slot. The SSD requires a screw to be seated firmly in the slot. However, the SSD manufacturers don’t offer any screw with the SSD.

If you haven’t properly screwed the SSD to the slot or if it wasn’t pushed down, the system may have difficulty accessing the drive resulting in this error. Make sure you open the back panel and remove the SSD.

Then reinsert the SSD into the slot and make sure it is properly placed and screwed. Restart the computer and check for any improvements.

3. Contact Support

If the SSD error 2100 started to occur after upgrading your Windows version or BIOS, contact Lenovo support or the SSD manufacturer if you installed the SSD.

The company should be able to replace the faulty drive with a new drive. You can also request data recovery in case your SSD is bricked and you cannot recover any data.

We can now conclude this detailed guide on how to fix the 2100 detection error on the storage device (M.2). The issue should now be gone for good, provided you follow our instructions.

Similarly, if SSD is showing RAW file system, check our detailed guide to fix it.

Were you able to fix this issue? Feel free to let us know in the comments below.

Is your 4K TV blurry while using Windows 10/11? Try this

In case you’re using your 4K TV as a monitor on your Windows 10 platform, you will see that the image is blurry. This is caused by the incompatibility of your Windows 10 OS with high-resolution monitors.

This causes the image to look very small, and if you change the DPI scaling to 125%, it will just make it worse. The way the applications can be seen on a 4K TV depends on the specific app you’re trying to use.

For these reasons, in today’s fix article we will discuss the best methods to make your 4K TV image look sharp on Windows 10. Read on to find out how to do it.


Here’s what you can do to fix the blurry image on your 4K TV on Windows 10

1. Update Windows 10 to the latest version

Some important updates regarding the DPI scaling of your Windows 10 OS have been released within the Creators Update version.

In order to fix the issue caused by the image being blurry on your 4K TV, you will need to update your OS. Follow these steps to do so:

  1. Click the Cortana search button -> type Windows Update -> choose the option Windows Update settings.Windows Update - windows 10 4k tv blurry
  2. Inside the Update window -> click the Check for updates button.
  3. Wait for the process of searching for updates finish and install any available files.
  4. Restart your PC and check to see if the issue is improved. If it’s not, please follow the next method.

WindowBlinds adds Windows 10 Creators Update support, high DPI improvements


2. Change high DPI settings for specific apps

desktops with mug - Windows 10 4k tv blurry

  1. Right-click on the executable file of your app -> click Properties.
  2. Inside the Properties window -> select the Compatibility tab.
  3. Click the option Change high DPI settings -> enable the Override high DPI settings behavior option -> press Ok.
  4. Press Ok again to close the Properties window and apply the settings.
  5. Check to see if this method fixes your issue. If it doesn’t, please try the next method.

3. Use the XPExplorer – Windows 10 DPI Fix app

screenshot - Windows 10 4k tv blurry
Note: This application will allow you to fix the blurry image on your 4K screen TV. In case you are worried that this app might contain a virus or another online threat, that is not the case.  Please follow this VirusTotal link analysis for the results.

  1. Download the XPExpolorer installer -> run on your PC.
  2. Adjust the DPI Scale settings to modify the quality of the image on your 4K TV.
  3. Press Apply for the settings to take effect.

Conclusion

We explored some of the best methods to deal with your 4K TV screen looking blurry while using it with a Windows 10 PC.

We hope you found this guide helpful. Please feel free to let us know if you did by using the comment section below.

READ ALSO:

Here’s how you can bring objects to front and back inside Paint 3D

If you’ve ever wanted to create a project in Paint 3D and you don’t know how to move 3D and 2D objects to the front and to the back of your scene, you came to the right place.

Paint 3D offers you all the tools you need to simply create complex scenes that contain both 2D and 3D objects. It is very important to understand how to move those objects to create the desired effects inside your Paint 3D projects.

In today’s how-to article we will explain how to achieve the desired effects in a 3D scene. Read on to find out more details.


Follow these steps to move objects to the front and to the back inside your 3D scene

Because the scenes created inside Paint 3D can be formed out of both 2D and 3D objects, it is important to know how to arrange them.

To get started, you will need to follow these steps:

  1. You can use the Doodle tool to create a 3D shape, or you can import a 3D shape in the FBX or OBJ format from other software.
  2. For this article, we explored the Microsoft Remix 3D webpage and we downloaded a 3D model of a Surface Pro laptop.
  3. To open it, visit the page mentioned above -> under the title Open this model in -> click Paint 3D -> then choose Open Paint 3D again in the pop-up.open 3D object in Paint 3D - Paint3D how to bring to front; paint 3d how to move to back
  4. Wait for Paint 3D to open the model -> and use the tools in the right side menu to resize it, move it, pan, etc.
  5. Open as many 3D objects as you want in this scene.
  6. In order to move the selected object to the front or the back of the scene, you will need to select the object -> click the Z-axis position to the left-side of your bounding box -> drag the object to the desired location.move 3D object back or to the front - Paint 3D how to bring to front; Paint 3D how to move to back
  7. While you’re dragging the selected object, a blue ”wall” will appear that will show you exactly where the 3D object is in relation to the other objects in your project. It will look like this:moving objects in space - Print 3d how to bring to front; paint 3d how to move to back

Want to change language in Paint 3D? Here’s how to do it


Conclusion

In today’s how-to guide we explored how to bring an object to the front of your 3D scene, and also how to move it back.

We hope this guide offered you a comprehensive answer to your question.

Please feel free to let us know if it did, or if you have any suggestions, by using the comment section below.

READ ALSO:

Fix Power Bi expression.errors in Windows 10/11

Microsoft Power Bi is a powerful interactive data visualization BI tool. While using the Power Bi desktop or web client you may come across some errors. One of the most common error is Power Bi expression.errors. The expression error usually comes with different error messages as reported in the Power Bi Community.

After numerous hours of researching this issue for 2 days, I am really stumped.
I have tried to create a simple function of either If or Switch and both return the above mentioned error.
I even created a sample based on the example supplied on MSDN for the IF Function, trying to use it both in the Power BI Desktop and/or Power Query for Excel 2013 (32 bit) environments. Without any luck.

In this troubleshooting guide, we have compiled a list of possible solutions to fix the Power Bi expression.errors.

Fix Power Bi expression.errors

1. Power Bi expression.error the name ‘if’ wasn’t recognized

Check the Power Query Syntax

Power Bi expression.errors

  1. This error usually occurs when there is an issue with the used power query syntax.
  2. If you are trying to use if-else query, make sure you are using the right power query syntax.
  3. Next, click OK. You will see the query editor.
  4. Now you can click on Add Rule and add more if needed.

Disable focus mode in Power BI in 3 easy steps


2. Power Bi expression.error a cyclic reference was encountered during evaluation

Check Two Tables for Dependency 

Power Bi expression.errors

  1. If you are working with two tables and the second table is dependant on the first table, then you join with Master PDB TEMP.
  2. What you can do is create a reference to MASTER PDB TEMP and editing Table 2 to the new referenced query.
  3. A new query should help you resolve the error.

3. Power Bi expression.error the name ‘left’ is not recognized

Use Power Query M


  1. Depending on the formula you are using, this error usually indicates that you need to use the Power Query (popularly known as M) in Query Editor.
  2. You can read more about the Power Query M formula language from the official Microsoft source.
  3. Microsoft Power Query offers a powerful data import experience with many features.

4. Power Bi expression.error the field already exists in the record

Check for Duplicate Names

  1. This is another common error and usually occurs if there are two entities with identical names in the table.
  2. For example, if you have a bucketed field and one of your field has an identical name, then Power Bi will show this error.
  3. Simply change the field name and check for any improvements.

5. Power Bi expression.error the name ‘format’ wasn’t recognized

Use Power Query Language 

  1. This error is similar to what we have discussed earlier in this article. This error usually occurs if you are creating a custom column in Query Editor with DAX syntax.
  2. What you need to do is use Power Query Language to write the formula in the Query Editor.

6. Power Bi expression.error the index is outside the bounds of the record

Check for Unallowed Characters

  1. The error, although not specific indicates that the file is outside the bounds of record.
  2. It usually means you have used characters that are not allowed. Check your table for column names that have any special character or upper case letters.

7. Power Bi expression.error value ‘preferred’ is not of the correct type

Uninstall ODBC Connector and Power Bi Client

Power Bi expression.errors

  1. This error seems to occur due to a conflict between Power Bi connectors like ODBC. It can also happen if the Power Bi client has developed a snag.
  2. To fix the error, uninstall any connection installed and also reinstall the Power Bi client.

RELATED STORIES YOU MAY LIKE:

Fix my projector won’t connect to internet with these 3 tips

The modern projectors from Epson and Panasonic come with WiFi functionality. It allows the users to connect their Windows computers and other devices to the projector wirelessly. While having the WiFi functionality can reduce the hassle of wires, at times it can also lead to projector won’t connect to internet issue. One of the users has shared a similar problem in the Reddit Community.

I have a laptop and am in a place with a good wifi connection. The connection is good and works until I connect my laptop to a wireless Epson projector. As soon as I do that, the connection to the internet doesn’t work anymore. If I disconnect my laptop from the projector, the wireless on my laptop works once again.

If your projector won’t connect to the internet, here are a couple of troubleshooting tips to help you resolve this issue.

Projector won’t connect to wifi

1. Projector Can Connect to the Only Device

Projector won't connect to wifi

  1. The Wireless projector can connect to only one device at a time. So, if your Laptop is connected to the internet via the wireless network, your projector won’t able to able to establish a connection with the Laptop.
  2. To establish a connection with your laptop when the laptop is connected to a Wireless network, you need to use the physical HDMI cable connection to display the output.

Projector won’t power on? Here are 4 quick solutions for you


2. Install Wireless Projection Software

Projector won't connect to internet

  1. Manufacturer’s like Epson offers proprietary projection software for their Wireless projector to help you set up wireless projection.
  2. In case you are having difficulty setting up wireless projection on your projector, do the following.
  3. Epson users need to download EasyMP Network Projection software. If you use any other projector, check if the manufacturer offers any similar software.
  4. After installing the software, launch it.
  5. Inside, you should find all the functionalities to send display content to any networked Epson EasyMP projectors from any IP Network.

3. Change the Router Encryption

  1. Another reason why your wireless projector won’t connect to WiFi can be due to incorrect router encryption settings. Try to access your router encryption setting and change it to WPA2.
  2. Launch any web browser on your computer.
  3. Enter the home address for your router and press enter. The home address looks something like this:
    192.168.1.1
  4. In the login page, you need to enter the username and password for the router. Check the user manual in case you haven’t changed the log in details manually.
  5. Go to the Wireless Settings tab.
  6. Click on “Basic Security Settings / Security Settings“.
    Projector won't connect to internet
  7. Under WiFi Security, select WPA2.
    Projector won't connect to internet
  8. Click Apply / Save to save the changes.
  9. Now try to connect your wireless projector the WiFi network and check for any improvements.

RELATED STORIES YOU MAY LIKE:

Yammer error 500? Troubleshoot with these fixes

Yammer is a popular enterprise social network service that helps the users improve engagement with the company employees in the organization through social networking. That said, Yammer error 500 has become a problem with many users complaining about the issue in the Microsoft community forums.

The first time every day I attempt to Invite a new user I get the following error.    This also happens other times in the day.
“This 500 error rarely happens, but even Yammer’s https don’t deliver sometimes.”
Anyone have any ideas as to why?    It is quite annoying especially when you have 20-30 people to invite and every few attempts the error comes up.

This error can occur due to many reasons. In this article, we have listed a couple of troubleshooting tips to resolve the Yammer error 500.

How to fix Yammer error 500

1. Try a different device

try a different device Yammer error 500
  1. If you haven’t already, try to access the Yammer app on your smartphone or tablet.
  2. This will help you to diagnose whether the issue is device-specific or accounts specific.
  3.  If the Yammer service works fine on other devices, you may have an issue with the Windows Yammer service. If not, the issue could be related to the account or Yammer service itself.

2. Try to access with mobile Internet

mobile internet Yammer error 500
  1. The Yammer error 500 can also occur if the issue is with your office network.
  2. To diagnose the issue, turn on the mobile hotspot on your smartphone.
  3. Connect your system to mobile hotspot and try to access Yammer.
  4. Check if you are able to connect to Yammer service.
  5. If it works, ask your network admin to take a look at the office network.

3. Change the web browser

  1. If you are trying to access the Yammer web client, try changing the web browser.
  2. If you use Chrome browser normally to access Yammer, try to use Firefox or Edge Chromium. We have recommendations on the best web browser for social media if you don’t have an alternate browser installed.
  3. Try to access the Yammer web client on a different web browser and check if the error is resolved. If yes, try to clear the web browser cache.

Another browser that you should try is Opera. This browser is built on Chromium engine, so it’s quite similar to Chrome, with few differences.

First off, this browser is privacy-oriented, so it comes with many features that will protect your online security. You have an integrated VPN to increase your security over personal data.

Some of the most notable features include embedded social media or messaging apps, enhanced online security, or productivity services like pinboards and workspaces.

Overall, if you’re looking for a secure and reliable browser simply choose Opera.

⇒ Get Opera

Clear Browser Cache Chrome

  1. Click the Menu icon (top right corner) and select Settings.
  2. Click the Advanced button to expand the section.
  3. Scroll down to Security and Privacy.
  4. Click on “Clear browsing data“.
    clear browsing data Yammer error 500
  5. Select a Time range (example: Last 24 hours).
    clear browsing data settings Yammer error 500
  6. Select other options such as “Cookies and other site data” and “Cached images and files” option.
  7. Click on “Clear Data”.
  8. Relaunch Chrome and check if the Yammer error 500 is solved.

Conclusion

The Yammer error 500 is a very common error code and can occur due to many reasons. However, by following the steps in this article you should be able to fix the error in your Windows computer. Do let us know if it worked for you in the comments.

FIX: Taptiles not working on Windows 10/11

Taptiles for Windows 10 is a popular puzzle game and is available on the Windows Store. However, several users have reported Taptiles not working Windows 10 issue in the tech community. You can find similar issues being reported in the Microsoft tech forums more often than not.

I have not been able to open Taptiles for 2 years now. I was hoping with the newest update to Windows 10, somebody might have fixed this problem. There is no longer a forum on Xbox where one can get help with this app so I’m hoping someone here might be able to give me some help.
When I first bought my computer, it had Windows 8.1 and Taptiles worked but shortly there after, Taptiles said I needed to update the app and from then on, I’ve never been able to open it. The splash screen shows on my computer for a few seconds and then disappears, taking the game with it.

If you are also troubled by this issue, here are a couple of troubleshooting tips to help you resolve Taptiles not working Windows 10 snag.

How to fix Taptiles not working Windows 10

1. Run Taptiles in Compatibility Mode

  1. If you haven’t already, try running the Taptiles game in compatibility mode in Windows 10.
  2. On the Desktop, right-click on the Taptiles game’s shortcut and select Properties.
  3. Click the Compatibility tab.
    Taptiles not working Windows 10
  4. Check the box “Run this program in compatibility mode for:”.
  5. From the drop-down menu, select the OS version.
  6. Click Apply to save the changes.
  7. Close the Properties window. Launch Taptiles and check for any improvements.

Where are my Windows 10 games stored? Here’s the brief answer


2. Run Windows Store Apps Troubleshooter

  1. Run the Windows Store apps troubleshooter from the Settings page to fix any issues with app.
  2. Click on Start and select Settings.
  3. Select Update and Security.
  4. Click the Troubleshoot tab.
    Taptiles not working Windows 10
  5. Scroll down and click on Windows Store Apps.
  6. Click on “Run the Troubleshooter” button.
  7. The troubleshooter will now scan the system apps for any issues and recommend appropriate fixes.
  8. Apply the fixes and restart the computer. Open the Taptitles games and check if it works.

3. Restart Taptile Game Manually

  1. If the Taptiles game opens and you are able to see the Dash option on the main screen, try to restart the game manually.
  2. From the Taptile’s main screen, click on Dash and select Menu.
  3. Select the Restart option in the lower right corner.
  4. Click on Continue.
  5. Taptiles will restart now and should open without any errors.

4. Uninstall and Reinstall Taptiles

  1. If the game has issues with the internal files that the Apps Troubleshooter cannot fix, you may have to reinstall the game from the Windows Store.
  2. To uninstall the app, click on Start and select Settings.
  3. Go to Apps > Apps and Features.
  4. Search for Taptiles app and click on it.
    Taptiles not working Windows 10
  5. Click on Uninstall. Click Yes if asked to confirm.
  6. After uninstalling the game, open Microsoft Store.
  7. Search for Taptiles and install the app.

RELATED STORIES YOU MAY LIKE:

FIX: Origin download failed error message

Some users have encountered the Origin download failed error message when trying to download their favorite games.

This issue has caused a lot of anger on the official EA forums. This is understandable considering that people pay for a service in order to get access whenever they want to.

Here is what one user had to say about this issue on the EA Answers forums:

My games won’t actually start downloading, they will get stuck in the preparing download phase, and then fail to download. I get a message saying my download failed, and that I should try in a few minutes.

After researching the online forums, we have compiled the best methods to apply to fix this issue. Please follow the instructions carefully so no new issues can arise.


Here’s how to fix the Origin download failed error message on Windows 10

1. Run the Origin client with administrator privileges

laptop on desk with apple - origin error download failed;origin download error check internet connection
It is very important that you make sure Origin is started with administrator privileges. Doing this will allow the software to gain access to create folders and write files on your PC.

To do so, you need to simply navigate to the Origin.exe file on your hard-drive -> right-click it -> choose Run as administrator.


2. Allow Origin through anti-virus and firewall

lock - origin error download failed; origin download error check internet connection
In order to fix the issue mentioned above, you will need to make sure that you added both Origin.exe and OriginClientService.exe to the whitelist of both your firewall and anti-virus software.


3. Restart your router and start a Network troubleshooter

To restart your router, you will need to either press the Reset button (if the model has one), or just unplug it from the wall socket, wait for 30 seconds, and then plug it back in.

Follow these steps to run the Network troubleshooter:

  1. Press Win+X keys on your keyboard -> click Settings.windows settings - origin error download failed; origin download error check internet connection
  2. Select the option Network & Internet -> click on Status.
  3. Under the Change your network settings section -> select Network troubleshooter.
  4. Follow the on-screen instructions to complete the process.

Destiny 2 failed to download configuration files? Try these methods to fix it


4. Check your file system partition format

laptop on desk with notepad - origin error download failed ; origin download error check internet connection
A large number of users have reported that they identified the reason for the Origin download failed error message.

It seems that the issue is caused by your download partition being set to FAT32. This format does not allow downloading of files larger than 4GB.

To solve this issue, set the download location of your games to another partition that is not formatted as FAT32.


5. Remove Origin from your hard-drive and re-install it

laptop on desk - origin error download failed; origin download error check internet connection

  1. Navigate to the Origin installation folder on your hard-drive. (default location is C: \Program Files (x86) \Origin).
  2. Right-click the Origin folder -> select Delete -> click Yes.
  3. Re-download the installer and follow the on-screen instructions.

We hope that now you are able to download your games normally.

Please feel free to let us know if this guide helped you solve your Origin download failed error by using the comment section below.

[wl_navigator]

Windows 10 news recap: Microsoft Edge classic to lose ePub support, even more Surface devices experience battery issues, and more

Welcome back to our Windows 10 news recap, where we go over the top stories of the past week in the world of Microsoft’s flagship operating system.

Microsoft Edge classic will soon discontinue support for ePub books

The classic version of Microsoft Edge is dropping support for e-books using the .epub format. Users trying to open e-books of this nature are presented with a notice that invites them to use the Microsoft Store to find alternative apps to open them in.

Microsoft Edge classic will soon discontinue support ePub books

Microsoft’s Sticky Notes app for Windows 10 is getting new localized names in select markets

The Sticky Notes app for Windows 10 now has its name localised in different languages to help users find it easier using terminology that they are more likely to use. As an example, it is called “Memo” in Italy.

Some Surface Laptop 2 and Surface Pro 4 devices also seem to be affected by battery issues

Last week it was reported the Surface Pro 5 and 6 devices were experiencing battery issues, now the issues extend to other Surface devices, including the Surface Laptop 2 and Surface Pro 4, according to user reports.

That’s it for this week. We’ll be back next week with more Windows 10 news.

5 cross-platform habit apps to change or boost your habits

Looking to break off a bad habit or acquire new ones? You might want to employ the service of habit apps. In this article, we are going to be reviewing some of the best cross-platform habit apps, for Windows, macOS, Linux, and other notable operating platforms.

Habit apps are special-purpose tools, designed to help you monitor your habits, by analyzing your behavioral patterns and routines. These tools are basically designed to facilitate the acquisition of new habits or more significantly, get rid of an existing one.

Essentially, habit apps are designed to make you more productive in your daily endeavors.

While habit tracking can be carried out with a paper diary, habit apps are much better, as the whole tracking process is automated, devoid of bias and generally more effective.

There are numerous types and kinds of habit apps today. However, many of these apps are relatively low in quality, and most of them host single support for either Android or iOS.

Nevertheless, there are still a few habit apps that host cross-platform support for multiple operating systems.

In the next section, we’ll be outlining five of the best cross-platform habit apps in the market. Read on!

Best cross-platform habit apps for detailed introspection

everydayCheck

everydayCheck best cross platform habit appseverydayCheck is a web-based habit app that allows you to create new habits and/or break off old ones. This tool, as a web-based platform, hosts cross platform support for all internet-enabled devices, including Windows PC, Macbook, Android and iOS smartphones (and tablets). Also, there are designated mobile apps for iOS and Android.

This habit app is very easy to use, as it provides you with a visual display of your progress, in your habit-forming or habit-breaking endeavor.

The app allows you to set goals and develop new habits that are vital to the realization of those goals.

Basically, everydayCheck can be said to be a productivity tool, as it seeks to help you gain control over essential habits or tasks.


These mind mapping tools will help you organize your thoughts and ideas better.


Notable features of everydayCheck include cross-platform compatibility, visual dashboard, reminders, browser extension, calendar, free trial, and more.

everydayCheck is available on a free trial for 30 days, after which you would be placed on a subscription rate of $12 per year.

Get everydayCheck Now

Y-Productive

Y-Productive best cross platform habit appsY-Productive is not a conventional habit app, but rather a productivity monitoring and enhancement program. It hosts cross-platform support for Windows and Mac computers.

The tool is an advanced habit tracker, which is designed to help you ward off distractive habits and focus squarely on productive tasks.

Y-Productive is an all-around personal productivity tool, specially designed to help you gain control of your habits, especially during working hours.


Boost your team productivity today with these automated checklist tools 


Basically, the tool, while blocking distractions, also tracks time spent on each project, productive or otherwise. And it ensures that you are provided with real-time feedback on your progress.

Other key features of Y-Productive include focus mode, website blocker, comprehensive behavioral analysis, productivity charts, task categorization, productivity reports, free trial and many more.

Essentially, Y-Productive, as a habit app, affords you the opportunity of analyzing behavioral patterns (especially work-related), to generate accurate reports on productive and less productive endeavors.

With this, you are afforded the opportunity of correcting your flaws, towards developing more productive habits.

Y-Productive is available at a license rate of €6 per month. You can also make an outright purchase at a price of €59 (lifetime license).

Get Y-Productive Now

Strides

Strides best cross platform habit appsStrides is a cloud-hosted goal and habit tracking platform, designed to run on all web-enabled devices. As such, it can be used on Windows, macOS, Linux, Android, and iOS (with designated app) devices.

With such flexibility, Strides stands out as one of the best cross-platform habit apps out there.

This web-based habit app affords you the flexibility of choosing from four unique options.

These options include:

  • Target tracker; enables you to set goals and work towards meeting those goals.
  • Average tracker; helps you determine your average or mean worth/value.
  • Milestones; helps you monitor the progress and pace of your workflow.
  • Habit tracker; helps you form and break habits.

Other key features of Strides habit app include on-track pace setup, progress bar, visual dashboard, tracker template, line charts, log notes, calendar, success rates, daily goals, streaks, online support, and more.

The Strides is offered for free, albeit with limited features. The full version – Strides Plus – is offered at a license rate of $5 per month.

Get Strides Now

Lifetick

Lifetick best cross platform habit apps

Lifetick is a popular habit tracker and productivity application. It is a cloud-based program, which can be used on all web-enabled devices, including Windows PC and Macbook, as well as Android and iOS among others.

Lifetick is a versatile productivity tool, designed for both individuals and teams. Typically, the tool can be employed as a study scheduler, training/fitness scheduler, and financial manager among others.

Some key features of Lifetick include charts, widgets, journals, S.M.A.R.T methodology, personal diary, unlimited goals, comprehensive reports, checklists, email reminders, custom branding, data export, and customizable data analysis among others.

Lifetick is available in three license editions. These include:

  • Individual Free option: $0
  • Individual Paid: $39 per Year
  • Teams: $10 per Month

All paid plans are subject to an initial 14-day free trial.

Get Lifetick

42goals

42goals best cross platform habit apps

42goals is a simple cloud-based habit tracker, designed to help tailor your habits towards achieving your goals. As an online tool, 42goals can be used on any OS platform, be it desktop/laptop (Windows, Mac, and Linux) or mobile (Android and iOS).

With 42goals, you can set daily goals, track progress, visualize achievements and share them with friends and family.

Basically, the web-based program helps you break off old habits and/or acquire new ones. Furthermore, 42goals keeps you regularly updated on your progress, via a visual dashboard.

With this, you are constantly reminded of what you seek to achieve and how close you are to achieving it.

Other notable features of 42goals include preset templates, intuitive user interface, charts, cross-platform support, technical (user) guide, CSV data export, group goals, email support and more.

42goals is available in three pricing variants: Free, Premium ($5 per month) & Corporate (by quote).

Get 42goals

Closing Note

Most of the top habit apps in the market today are specially designed for mobile platforms. However, in the midst of these smartphone-exclusive programs, there are few versatile ones, which are supported across multiple OS platforms.

These apps make up our list of best cross-platform habit apps.

Hence, if you are looking for a versatile habit tracker for your computer and smartphone/tablet, the above-outlined tools are the recommended ones for you.

RELATED STORIES YOU SHOULD CHECK OUT:

FIX: Integrity Violations Error on Windows 10/11

The Windows 10 OS comes with a System File Checker tool that allows you to check the system files for any corruption or serious problems and fix it. The System File Checker tool is particularly helpful if some Windows functions are not working. However, after running the System File Checker tool, some users have reported the Windows 10 resource protection found integrity violations error. Similar reports can also be seen in the Microsoft community forums.

I ran a system file checker scan and the results provided the following error message: “windows resource protection found integrity violations”.  I did look at the cbs log but cannot find out the problem.  Any ideas before I reimage the machine.

If you are also troubled by the Windows 10 resource protection found integrity violations error, this troubleshooting guide will help you resolve the problem.

How to fix Windows 10 resource protection found integrity violations

1. Run System File Checker Tool

  1. The error message hints at a possible corruption of some of the system files. To fix this you need to run the System File Checker tool again with some additional tools to fix the problem.
  2. Type cmd in the search bar.
  3. Right-click on Command Prompt option and select Run as Administrator.Windows 10 resource protection found integrity violations
  4. In the Command Prompt type, the following command and press Enter.
    SFC /scannow
  5. Wait for the System File Checker to scan your system for any errors.
  6. When the scan is complete, enter the following command one by one and hit enter.
    DISM /Online /Cleanup-Image /CheckHealth
    DISM /online /cleanup-image /scanhealth
    DISM /online /cleanup-image /restorehealth
  7. Once the repair process is over, restart the computer and check for any improvements.

12 best Registry cleaners for Windows 10 to use today


2. Fix Windows Updates Errors with DISM

  1. If the error occurred after updating your Windows 10 PC to the latest version, the DISM tool can help you to fix some Windows corruption errors.
  2. Type cmd in the search bar.
  3. Right-click on Command Prompt and select Run as Administrator.
    Windows 10 resource protection found integrity violations
  4. In the command prompt type the following command and hit enter.
    DISM.exe /Online /Cleanup-image /Restorehealth
  5. The above command uses Windows Update to provide the files that are required to fix corruptions. However, if your Windows Update client is already broken, then you need to use Windows DVD or Windows 10 Bootable USB Drive.
  6. If you are using a bootable UBS drive, use the following command instead:
    DISM.exe /Online /Cleanup-Image /RestoreHealth /Source:C:\RepairSource\Windows /LimitAccess
  7. In the above command, replace C:\RepairSource\Windows path with the location of your repair source (that is your bootable USB drive or Windows DVD).
  8. Once the repair process is over, type the following command and hit enter.
    sfc /scannow
  9. Wait for the System File Checker to finish scanning. Close the command prompt and run Windows Update again.

If the issue persists, try to perform a repair upgrade using the Windows ISO file. Simply download the Windows 10 ISO and mount it to your PC. Double-click on the mounted ISO and select Change what to keep option during configuration to repair Windows installation without deleting your files and programs.

RELATED STORIES YOU MAY LIKE:

There was a problem completing this request in Dropbox [FIX]

Dropbox is used by many people to share and store data online. However, the application is affected by many errors.

We covered many issues with Dropbox. Bookmark this article in case you need it later.

One of these issues is pretty severe. Quite a few users encountered the “There was a problem completing this request” error message in Dropbox.

So, people who encounter this error can’t do anything in Dropbox.

Fortunately, there are a few easy solutions available that will solve this issue in no time.

What to do if Dropbox fails to load

1. Clear cache

A simple solution to the “There was a problem completing this request” is to clear the temporary internet files.

Also, this is one of the easiest operations and here we will show you how to do this for Google Chrome.

  1. Click on the three vertical dots from the upper-right corner of the window.
  2. Go to More tools and select Clear browsing data.clear browsing data
  3. Select All time and check the first four boxes under the Advanced tab.
  4. Click on Clear data.clear data

2. Clear the space in the Dropbox account

The error “There was a problem completing this request” could appear if you don’t have enough space available in your account.

So, clear some space in your Dropbox by removing items you no longer need.

Moreover, even if you have enough space, the person you sent the file (or the files) might not. Contact the one you try to send data to make sure this is not the case.

3. Try another browser

Several users reported that changing your browser solved the issue. We recommend Opera Browser This is a very stable and user-friendly tool to surf the Internet.

Also, you will navigate without any concerns regarding your privacy, thanks to the free embedded VPN for safe surfing, downloading and streaming. There includes a discreet sidebar, built-in privacy features such as ad blocker, cookie blocker, and workspaces to manage tabs.

Opera offers a simple UI, Opera Turbo, and access to both Opera and Chrome extensions, all while consuming less memory than Chrome, Firefox, or Explorer.

⇒ Get Opera Browser

Conclusion

As this article shows, you can solve the “There was a problem completing this request” error message quite easily. Clear your browsing data or open Dropbox with another browser.

Also, we recommend UR Browser for its enhanced reliability. Open Dropbox with this browser to avoid such issues in the future.

Did our solutions help you? Did you solve the problem in another way? Do let us know in the comments section below!

Origin update error code 11:0: Here’s how to fix it

A large number of Origin users have reported encountering an Update error code 11.0 when trying to get the latest version of the software.

This issue can prove itself to be very annoying, especially if the missing update you’re trying to apply to Origin is stopping you from running the software normally. Seeing this error message also means that you won’t be able to buy new games, or go online.

Here is what one user on the EA Answers forums had to say about this issue:

Origin cannot update no matter what.  At first, I’ve opened and closed the app and tried to update it, and it wouldn’t work.  I also uninstalled it and reinstalled the latest version but it would always say “whoops- the installer encountered an error” and shows the error code 11:0.  Please help I cannot go online, buy new games, or update them because of this.

In this fix article, we will explore some of the best troubleshooting methods to deal with this issue. Read on to find out more.


Here’s what to do to fix the Origin update error 11:0

1. Clear Origin cache

laptop - Origin update error; origin error code 11.0
Note: To successfully apply this method, please first make sure that all running Origins software has been closed. You can do so by opening the Task Manager and searching for Origin.exe, and OriginWebHelperService.exe, and ending these tasks.

  1. Press the Win+R keys on your keyboard -> type %ProgramData%/Origin -> hit Enter.
  2. Delete all the files and folders in that location but do not delete the LocalContent folder.
  3. Press Win+R keys again -> type %AppData% -> press Ok.
  4. Delete the Origin folder found inside the Roaming folder.
  5. Navigate to the AppData folder by clicking it in the address bar -> open Local folder -> delete the Origin folder found at that location.
  6. Restart your PC and check to see if you can update Origin.

2. Run Origin as administrator

laptop on desk with notepad - origin update error/origin error code 11.0
Some users have reported that running the Origin with administrator privileges before trying to update the software solved their issue. To do so, right-click the Origin.exe file -> select Run as administrator.

Check to see if you can update your software normally. If you still can’t, please follow the next solution.


Is your Origin client having loading issues? Fix it for good


3. Check your antivirus and firewall software

lock - origin update error;origin error code 11.0
You will need to make sure that the antivirus software or Windows Firewall is not stopping Origin from accessing the web. It is recommended that you allow both incoming and outgoing connections for Origin.exe.


4. Move your install pathway to another partition

laptop with coffe - origin update error; origin error code 11.0
Some users have had success fixing the Origin update error code 11:0 by moving their installed games pathway to a partition that did not have a third-party antivirus software installed on it.

After you performed the above-mentioned solution, it is recommended that you also uninstall and reinstall Origin based on the same criteria (no antivirus on that partition).


Conclusion

In this article, we had a look at the best methods to try and fix the Origin code 11:0 update error.

Please feel free to let us know if this guide helped you. You can do so by using the comment section below.

READ ALSO:

FIX: Origin client won’t sign in on Windows 10/11

A large number of Origin users have reported that the Origin software won’t sign in. This issue can be extremely frustrating, especially if you can’t get access to the games that you paid for.

Here is what one user had to say about this issue on the EA Answers website:

Okay. So I’ve logged into my Origin account MANY times. But now it’s saying that I can’t because my origin isn’t in “online login” mode. And it’s not letting me log in. So does anybody have any solutions?

After long hours of researching hundreds of online forums for a solution to this error, we have identified some of the best-proven methods.


Here’s what methods to try if the Origin application won’t sign in

1. Change your PC’s proxy settings

  1. Click on Cortana search box -> type in Control Panel -> click the first option.
  2. Select Internet Options.internet options control panel - Origin won't sign in
  3. Inside the Connections tab -> click LAN Settings.
  4. Deselect the option Use a proxy server for your LAN.
  5. Click Ok and Apply -> restart your PC.

2. Check your firewall and antivirus settingslock on keyboard - Origin won't sign in

In order to make sure that your firewall or antivirus software is not stopping Origin from running properly.

It is recommended that you either add the Origin application to the whitelist in both these software options or close the software entirely and check to see if that fixes your issue.


Can’t add friends on Origin client? Here’s how you can fix that


3. Run Origin app with administrator privileges to fix origin won’t sign in

laptop on desk with user - Origin won't sign in
In some cases, the reason for Origin not being able to sign in normally can be caused by not running the application with enough privileges.

To try this method, you can simply navigate to the location of the Origin executable file on your hard-drive -> right-click it -> choose Run as administrator.

In case this method didn’t solve the login issue, please try the next method.


4. Check if your PC’s clock in synchronized with the real-time

laptop with clock on screen - Origin won't sign in
A wide range of conflicts can arise from not having your system’s date and time set to sync with an online clock.

Follow these steps:

  1. Press Win+X keys -> select Settings.
  2. Click on Time & Language.
  3. Select Date & Time.
  4. Make sure both the Set time automatically and Set time zone automatically options are enabled.

5. Reset the hosts file

laptop - origin won't sign in
Sometimes resetting of the hosts file can fix the problem with Origin client. Your hosts file can become altered by a certain application or a malicious user, and that can lead to various errors, so it’s advised to reset it to the default.

We already explained in detail how to reset your hosts file on Windows 10 in one of our previous articles, so be sure to check it out for detailed instructions.


Conclusion

We hope this guide managed to help you log into your Origin account without any issues.

Please let us know if it did by using the comment section below.

READ ALSO:

First person horror game Blair Witch launches on Xbox Game Pass for PC and console today

Blair Witch, a new horror game based on the popular film franchise is launching on Xbox One and Windows today, and it’s also available on Xbox Game Pass for PC and console right now. Blair Witch is the latest game from Polish game studio Bloober Team, which gained fame for creating a couple of popular psychological horror games such as Layers of Fear and Observer.

Blair Witch is a first person game where you’ll play a former police officer joining the search for a young boy that disappeared in the the Black Hills forest near Burkittsville, Maryland, which is the same location from the original The Blair Witch Project movie. You’ll be exploring the cursed forest with your dog and a flashlight, and it probably won’t be long before you start feeling fear and stress. Take a look at the gameplay trailer below to get better sense of what to expect.

It’s pretty great to see such a game launching on Xbox Game Pass on launch day, in addition to being a console launch exclusive for Microsoft. If you don’t have Xbox Game Pass, the game is a $29.99 purchase on the Xbox

Blair Witch
Blair Witch
Developer:
Bloober Team NA
Price:
$29.99

The Printer Doesn’t Print in Color: 5 Ways to Fix it

Printers are affected by various issues. One major problem we will address today is why a printer doesn’t print in color.

Fortunately, this problem is pretty easy to fix, unlike most other issues like a printer printing black shades.

Why won’t my printer print in color?

Below are some of the reasons you can’t print in color on your printer:

  • Faulty cartridge – If you can’t print in color from your laptop or desktop, it might be due to problems with the cartridge. Your printer should show an error message to notify you in this case.
  • Wrong drivers – Sometimes, this problem might be because you are using a faulty or outdated printer driver. The solution to this is to reinstall or update your drivers.

Now that we know the possible causes, let’s go to the actual solutions to fix this problem.

How can I fix my printer if it doesn’t print in color?

1. Check the cartridge

Many users reported that this issue appears because of a cartridge malfunction. Also, the printer might be out of ink. Usually, the device shows a notification if these situations occur.

To solve the problem, you should install a new color cartridge. If the problem persists, see the next solutions.

2. Set up your device to print color

If you installed the driver correctly, you need to confirm that your printer can produce color documents.

  1. Click on the Print button.print button
  2. Check if the option is set to Color.select color print

3. Update your print drivers

The issue with your printer might arise due to problematic drivers on your PC. Hence, this is how to update them right away:

  1. Go to Device Manager from the Windows search box.
    windows 11 device manager search
  2. Scroll down to find the print drivers and right-click on your driver.
  3. Now, select Update driver from the list to start the process.
    Update drivers Print queues
  4. Select the Search automatically for drivers and wait for the installation.

This process may or may not detect the suitable driver version for your printer, so you might consider a tailored driver updater solution to deal with this.

All you have to do is press the update button and the tool will run automatically to install the official print driver.

⇒ Get Fortect Driver Updater

4. Use the correct driver

If your printer doesn’t print in color, make sure you installed the correct driver for your device.

Search on the internet by typing the name of your printer along with the word “driver”. See if the result matches the driver from your computer.

Alternatively, go to the manufacturer’s support page to find out the driver for your printer.

5. Check the printheads

Sometimes, the printheads are clogged with old ink, so your printer might malfunction.

If that’s the case, you should clean these components.

Usually, printers have a special utility program to clean them. Afterward, try another document with color ink to see if this solution worked.

Printing color documents is one of the main features of a printer. So, not being able to do this operation is a major issue for many users.

As you can see, this problem can be solved in no time with a few easy solutions. If you are also facing other issues, like printer printing yellow instead of red, or printing incorrect colors, check our detailed guide to fix it.

Did our article help you fix the issue? What kind of color documents do you print? Do let us know in the comments section below!

How to see which apps are using your microphone in Windows 10

Windows 10’s May 2019 Update added a small but useful privacy feature. It’s now possible to see when apps are using your microphone, so you’re always informed when sound is being recorded.

Checking which apps have used microphone in Windows 10

You’ll see a microphone icon appear in the system tray once an app starts recording. It will remain present until all apps have finished recording. You can hover over the icon to see a tooltip with the name of the app.

To obtain an historical list of apps which have used your mic, open the Settings app. Click the Privacy category and then the “Microphone” page under “App permissions.”

Checking which apps have used microphone in Windows 10

The page is divided into two sections. First, you’ll see a list of all Microsoft Store apps which can access your microphone. You can use the toggle buttons to prevent individual apps from recording sound.

Below each app’s name, you’ll see the time when it last used your microphone. If no time is displayed, the app hasn’t recorded sound yet. Apps which are currently accessing your microphone will have “Currently in use” beneath their name in bright yellow text.

Checking which apps have used microphone in Windows 10

At the bottom of the page, there’s a separate section for desktop apps. Because desktop apps access your microphone through different methods, you can’t prevent them from using your device. You’ll only see a list of all apps which have recorded sound in the past. “Currently in use” will still display against apps which are recording now.

Microsoft warns that desktop apps can record sound without ever notifying Windows. Because they’re not subject to the sandbox restrictions of Microsoft Store apps, a desktop program can directly interface with your microphone hardware. This means malicious software could record without Windows being aware, so it won’t show up in the list or display the microphone icon in the system tray.

Microsoft 365 scores Pentagon DEOS contract while waiting on JEDI annoucement

Microsoft got a tangential win with the Pentagon recently where its contract partner General Dynamics convinced the United States Defense Department to use Microsoft’s 365 productivity software and solutions.

While not the $10 billion, multi-year white whale JEDI contract the company has been vying for, this new $7.6 billion agreement does put Microsoft and General Dynamics comfortably within the Department of Defenses’ zeitgeist.

Thanks to a rather obscured bidding platform called the GSA IT Schedule 70, the agency’s eBuy platform, this contract has been relatively shielded from the same sort of public scrutiny the DoD’s JEDI contract has undergone. Adding to the fact that Amazon oddly declined to bid for the contract, it appears it should have been a relatively easy sell for Microsoft’s contractors.

The new Defense Enterprise Office Solutions (DEOS) agreement would consist of GDIT, a subsidiary of General Dynamics Corp. and its partners, Dell Marketing LP and Minburn Technology Group LLC splitting the duties of transitioning the DoD to Microsoft 365 powered cloud-based solutions over the next 10 years with a option for renewal baked in during the 5 year of the contract, according to reports from the Washington Business Journal and Bloomberg.

“DEOS will streamline our use of cloud email and collaborative tools while enhancing cybersecurity and information sharing based on standardized needs and market offerings,”  DOD Chief Information Officer Dana Deasy said in a statement.

More specifically, Microsoft 365 software and services will be dished out to over 3 million DoD employees and customers over the next 10 years. Brian Herman, an official with the Defense Information Systems Agency spoke with SiliconANGLE and explained that the department plans to migrate 1.5 million users to Microsoft’s productivity suite within the first 18 months of the contract which includes use of Office 365’s productivity suite, various messaging and chat services, content management tools, analytics software, collaboration interfaces and more.

According to Herman, the real heavy lifting will come from just moving personnel off the DoD’s aging custom Enterprise Email System and onto more modern communication tools.

Despite the odds weighing heavily in Amazon’s favor for awarding of the DoD’s JEDI contract, this recent DEOS agreement validates Microsoft’s commitment to security as requirements for the contract included a DoD Impact security Level 5 and 6 clearance, to which only Amazon and presumably Microsoft software have managed to pass.

Ideally, Microsoft could leverage the use of Microsoft 365 to revamp and produce an even more vertically integrated bid for the JEDI contract over the next few weeks while solicitations are on hold during its watchdog review.


Outlook.com is getting a new Groups feature

Microsoft has started rolling out a new Groups features in its Outlook.com webmail, which should be familiar for those of you already using Office 365 groups. By adding contacts to a group, you’ll be able to send them messages, share files, schedule events on a group calendar, and more, and it’s worth noting that you can add group members using other emails services than Outlook.com

This new feature is available in the left panel of the Outlook.com web app. If you’be been invited to different mutiple Outlook.com Groups, there’s also a “Follow in inbox” option which will send all group conversations and calendar events in both the group mailbox and your personal Outlook.com inbox.

ConsumerGroup.gif

We are rolling this out worldwide on Outlook.com and expect all users to have access by the end of August 2019 with expanded support to create a group in mobile in Fall of 2019, the company said yesterday in the blog post announcing the new feature. You can learn more about how to get started with Outlook.com Groups on this support page.

Lost Windows 10/11 after installing Ubuntu [FIX]

Both Windows 10 and Ubuntu have their cons and pros. This is why many users decide to get both operating systems on their computers.

However, people encountered several issues when trying to get them on the same machine. Users reported that they lost access to Windows 10 after installing Ubuntu.

This is a major problem for many users and today we will show you how to solve this issue.

What to do if you can’t access Windows 10 after installing Ubuntu?

1. Make some changes in the GRUB loader

  1. Insert the installation disk to boot with Windows.
  2. Select Recovery, and then select Command Prompt.
  3. Type the following commands:
  • bootrec /FixMbr
  • bootrec /FixBoot
  • bootrec /ScanOs
  • bootrec /RebuildBcd

4. Reboot the operating system.


Encountering dual boot problems in Windows 10 and Linux? We prepared this guide for you!


2. Set up partitions

If the method above didn’t work, try to set up your partitions. Open again the Command Prompt.

Enter the commands below. These command lines will select the first disk along with a list of all the partitions from this disk.

  • diskpart
  • sel disk 0
  • list vol
  1. Search the volume item with the Fs column FAT32 (you should format the EFI partition under FAT32).
  2. Type the command “sel vol x”, where “x” is the volume number of your EFI partition.
  3. Choose a letter for this partition. It is worth mentioning that this letter must be different from those already chosen for other partitions.
  4. Type this command to assign the letter: “assign letter=z:”
  5. After the success message appears, type “exit” to quit DiskPart.
  6. Type this command in Command Prompt: “cd /d z:EFIMicrosoftBoot“, where “z” is the letter for your new partition.
  7. Type the following command to repair the volume: “bootrec /fixboot”.
  8. Backup the old BCD with this command: “ren BCD BCD.backup”.
  9. Create a new BCD with the following command: “bcdboot c:\Windows /l en-us /s z: /f ALL”. Here, Windows is on “c:”. Replace if necessary.
  10. Reboot.

Conclusion

As you can see, this is a serious issue that requires some technical operations.

Nevertheless, if you follow our step-by-step instructions, you will solve the problem in no time and you will recover your Windows 10.

Also, it is worth adding that this issue appears if you don’t include the Windows 10 entry in the GRUB loader when you installed Linux.

Did our solutions work for you? Do let us know in the comments section below!

RELATED ARTICLES YOU NEED TO CHECK OUT:

Fix: The Specified Account does not Exist on Windows Server

Sometimes while trying to connect to a specific server on your Windows server machine, the request may fail with an error.

One such error is the specified account does not exist, verify the username ad try logging in again. If the problem continues, contact your system administrator or technical support.

This error can occur due to many reasons, including faulty Windows updates, as reported by other users. Follow the steps in this article to troubleshoot the specified user does not exist error in Windows Server systems.

How can I fix the specified account does not exist error?

1. Check for NAS for Permissions

the specified user does not exist

If the error is occurring while trying to set up backup to disk folders in backup exec, you may want to check if the appropriate permissions are given to the folder on the NAS.

Similar to EMC, you need to specify folder permissions on the NAS folder itself to make it work without any errors.

Check the resources related to Exec Backup to check for the required permissions.

2. Specify the User for the Service

the specified user does not exist

One of the obvious yet common mistakes people do is not specifying the username for the service accounts in the form of a domain/username where you had the username.

When the server fails to find the username for the account, it will show the specified user does not exist error.

To fix this, check if you have specified usernames for the service accounts and then check for any improvements.

3. Delete and Create a New Account

the specified user does not exist

If the error on the login level, you may want to create a new user account with administrator rights.

Make sure you use a different variation of your first name to create the new account. Using the same name as the old one may not resolve the issue completely.

After creating a new account and signing in, make sure to add yourself to some groups in AD to access to necessary things.

If the error occurs again, remove your account from all the non-essential groups one by one and try to login in between. The issue can be due to one of the groups that you are a member of.

4. Clear Windows Password Vault

the specified user does not exist
  1. If you save all of your credentials with Windows Password Vault / Credential Manager, try to remove all the credentials related to the server.
  2. Now try to log in again, and the Windows server will ask you to enter the password. Make sure you don’t select the save password option this time.
  3. Manually entering the credentials should help you resolve the specified user does not exist error.

We have reached the end of this guide on how to fix the specified account does not exist error. In the same vein, if you are dealing with the specified log session does not exist error, our guide will help you fix it.

Do let us know the solution that helped you fix this issue in the comments below.

What are the best cross-platform encrypted messaging apps out there?

Are you looking for the best cross-platform encrypted messaging app for your devices? Windows Report has got you covered.

Cross-platform chat app allows you to send/messages on your devices (whether mobile or desktop) on supported Operating Systems such as Windows OS, Mac OS, Blackberry, Linux, iOS, Android, Nokia Symbian and more.

If you have any of the cross-platform chat apps installed on your device, you will be able to reach your communication with your contacts even while on-the-go without restriction.

On the other hand, Windows Report team has compiled this definitive list of the best cross-platform & encrypted messaging apps just for you.

Check out these versatile cross-platform encrypted chat tools

Whatsapp Messenger

Whatsapp Messenger best cross platform encrypted messaging appsWhatsapp Messenger is the most popular cross-platform chat app with more than 1.5 billion users worldwide. WM allows you to communicate with your contacts securely via the internet.

It was originally designed for mobile devices but now available on desktop devices.

In addition, Whatsapp Messenger allows users to send unlimited media files such as images, audio, and video messages. Also, this app allows you to make a video or audio call from your devices.

Nevertheless, Whatsapp Messenger is free to use on any platform making it our best cross-platform & encrypted messaging app.

Download Whatsapp Messenger on Windows | Windows Phone | Web | Mac | iPhone | Android Phone 

Skype

Skype best cross platform encrypted messaging appsUnlike Whatsapp Messenger which is ideal for personal communication, Skype is a cross-platform chat app which is designed for the business community.

With Skype, you can send private messages, send/receive any kind of media files, make a video call, create groups, schedule calls, create polls and more.


Avoid government blockage of instant messengers with these VPN solutions.


In addition, Skype is free but only requires a Microsoft account which is also free as well. However, other Skype features such as Skype phone number and call credits are available on a pay-as-you-go basis.

Besides that, Skype utilizes encrypted messaging protocols which ensure that your conversations on the platform are highly secure.

Download Skype on Windows| Windows Phone | Linux | Mac | Android |

Telegram

Telegram best cross platform encrypted messaging appsTelegram is an instant messaging cross-platform app which is easy-to-use, super-fast and free. With Telegram, you can send unlimited messages, audios, images, videos, and other file types.

In addition to the basic messaging functionality, Telegram allows you to create groups with up to 200 people.

Interestingly, Telegram comes with a “Secrets Chats” feature which automatically self-destructs messages from both participating devices. Therefore, a Telegram user can send any form of secret chat messages or media files to other users securely.

Just like other cross-platform apps on our lists, Telegram is fully supported on various OS such as Windows, Windows Mobile, iOS, Mac, Linux, Android, etc.

This definitely makes Telegram one of the best cross-platform & encrypted messaging apps.

Download Telegram on Windows | Windows Phone | Web | Mac | Linux | Android | iOS

Viber

Viber best cross platform encrypted messaging appsViber is one of the best cross-platform & encrypted messaging apps which allows you to make free calls, send messages and media files to your contacts from anywhere in the world.

It is a cross-platform app which is readily available for all kinds of platforms whether mobile, desktop or even tablets.

In addition, Viber allows you to sync your messages, call history, and contacts across all connected devices. Also, you can transfer calls from your mobile devices to your desktop devices.

Moreover, this cross-platform app allows you to animate your conversations with stickers and GIFs from the Viber library without cost.

Furthermore, Viber allows you to delete seen (or unseen) message which is one of the unique features of encrypted messaging apps. With Viber, you can stay on top of conversations with your contacts or group chat members.

Download Viber on Windows | Windows Phone| Mac | Linux | Android | iOS | Nokia

WeChat

WeChat best cross platform encrypted messaging appsWeChat just as its name implies is one of the best cross-platform chat apps in the world which allows you to communicate with your friends and family across the world for free.

This cross-platform chat app made in China allows you to send SMS/MMS, media files, as well as make voice and video calls, and play games.

Furthermore, WeChat comes with a real-time location functionality which enables users to toggle whether they want other users to know their location or not.

Besides that, conversation history and media files shared on the platform are highly secured although WeChat admits to compliance with Chinese data regulations.

Download WeChat on Windows | Windows Phone | Web | Mac | iOS | Android 

Line

Line best cross platform encrypted messaging appsLine app allows you to bridge the gap of communication with your friends and family at any location in the world. This cross-platform app allows you to engage in real-time conversations with your contacts from your PC, tablet, or even mobile devices.

With Line, you can make real-time voice & video calls with your friends without having to purchase credits. Also, you can share media files such as images, videos, audios as well as location and contacts with your friends.

Besides that, Line comes with several Line games such as Line Disney Tsum Tsum, Line Rangers, Line Pokopang, Line Bubble, and more; hence, you can easily have fun while using this cross-platform chat app.

Furthermore, Line has a dedicated Store which allows you to buy items for Line games that you download.

Download Line on Windows | Windows Phone | Mac | iOS | Android | Nokia

Conclusion

In conclusion, cross-platform & encrypted messaging apps allow you to engage in secure communications with your contacts from any devices whether PC, mobile, or tablet.

Do you have any question regarding any of the above-mentioned cross-platform chat apps? Or do you know of any app which did not make our definitive list?

Let us know by commenting below.

RELATED STORIES YOU SHOULD CHECK OUT: