What to do if Printer Won’t Print Yellow [Quick Fix]

Color printers are great, but some users reported that their printer won’t print yellow color. This issue mostly has to do with the ink level but can be something else as well. If you are also troubled by this issue, here are a couple of troubleshooting tips to make your printer print yellow.

What can I do if the HP printer isn’t printing yellow?

1. Check the ink level

Clean Printheads to print yellow why won't my printer print yellow
  1. Start with checking the ink level in your cartridge. You can check the Ink Level by touching the ink drop icon on the printer display.
  2. Since you have a problem with printing in Yellow color, check Yellow or Magenta ink level. If its ink level doesn’t appear, it could be an issue with either Yellow or Magenta cartridges.
  3. Two fix the issue, you can try to perform Clean Printhead. Here is how to do it.
  4. On your Printer display, go to Setup and Tools.
  5. Under Tools, select Clean Printhead.
  6. Now try to print a document with Yellow color and check if the printer is printing in Yellow.
  7. If it does not work in the first attempt, repeat the Clean Printhead process several times and check for any improvements.

If you didn’t print anything for a while, there is also a chance that yellow ink hardened somewhere on the way to the printhead on in the printhead itself. Cleaning the printhead should fix this problem but note that the process consumes more ink than the one required for printing.

2. Fix print quality issues

  1. Make sure you are using Genuine ink cartridges.
  2. Allow automatic servicing to complete if you changed and installed a new cartridge.
  3. Check the paper size and type if it is appropriate for the job or printer.

Check the printing settings

  1. Open the application from where you are trying to print.
  2. Click on File and select Print.
    Print Properties - Change Preferences why won't my printer print yellow
  3. In the Print window, open Properties.
  4. Click on Preferences.
  5. Now try to set the Paper Type according to your needs.
  6. Set Print Quality to normal or draft modes.
  7. Set Paper Size to as per your need.
  8. Click OK to save the changes and try to print again.

3. Assign a color management profile

  1. Click Start and select Settings.
  2. Click on Devices > Printers and Scanners.
  3. Click on your Printer and select Manage.
    Manage Printer Properties Windows 10 won't my printer print yellow
  4. Now click on Printer Properties in the Manage your device window.
  5. Click the Color Management tab.
  6. Next, click on Add to see the list of available color profiles.
  7. It will appear on the Add Profile Association box. Select Diamon Compatible 9300k G2.2.icm.
  8. Again click on Add button and click OK to save the changes.
  9. Print the file again and check if the application is able to print the document with the yellow color.

4. Clean the cartridges

clean cartridges printer won't print yellow
  1. Open the HP Director software and click Help.
  2. Open the Contents tab, and click the listing for your all-in-one printer.
  3. Click on Maintain your HP PSC or Officejet.
  4. Click on Work with Print Cartridges.
  5. Now click on Clean the Print Contracts.

5. Check Microsoft Generic Drivers for Printers

  1. Press Windows Key + R to open Run.
  2. Type devmgmt.msc and press OK to open Device Manager.
  3. Expand Printers Queues.
    Fix Printer wont print yellow - Update Driver
  4. Right-click on your Printer and select Update Driver.
  5. Select Let window search and download drivers automatically.
  6. That’s it. Windows will download if a new driver is available.
  7. Reboot the system and check for any improvements.

There you go, few quick and easy solutions that you can try if your printer won’t print yellow. Feel free to try all our solutions and let us know which worked for you.

You might also be interested in reading our guide on what to do if the ink cartridges are full but the printer is not printing.

Let us know in the comments below if our solutions fixed the yellow ink not printing issue on your printer.

Xbox Companion App closes soon after launch [SOLVED]

The Xbox Companion App, previously Xbox App for Windows 10 brings a new set of features such as party chat, messaging and retains the old and loved Game Bar feature. That said, some users have reported an issue with the app that forces it to close abruptly as soon the user launches it.

One user shared his concerns with the error on Microsoft Answers.

Hello,
I just upgraded to Windows 10 from Windows 8.1.  Things worked as expected with the included Xbox app for the first few days.  However, for the last day or two, the app has crashed immediately upon launch, with no error message displayed.

Find how to fix this error by following the steps below.

Why does my Xbox app keep closing?

1. Run Xbox App Troubleshooter

  1. Click on Start and select Settings.
  2. Go to Update and Security.
  3. Click on Troubleshoot tab.
  4. Scroll down to the bottom and click on Windows Store Apps.
    Run Windows Store Apps Troubleshooter
  5. Click on Run the Troubleshooter button.
  6. Windows Store App Troubleshooter will scan the system and suggest some fixes.
  7. Follow the on-screen instructions and check if that resolves the error.

2. Reset the Xbox App

  1. Click on Start and select Settings.
  2. Go to Apps.
  3. Click on Apps and Features.
  4. Now search for Xbox App and select the app.
  5. Click on Advanced Options.
    Xbox Apps - Apps and Features
  6. In the new window, scroll down and click on the Reset button.
    Xbox App Reset - Xbox Companion App
  7. When asked for the confirmation, click on Yes.

We’ve written extensively on Xbox App crashing issues. Check out these guides for more information.


3.  Uninstall and Reinstall Xbox App

  1. Right-click on the Start button and select PowerShell (Admin).
  2. In the PowerShell window type, the following command and press enter.
    get-appxpackage *Microsoft.XboxApp* | remove-appxpackage
  3. This will uninstall the Xbox app from your computer.
    Uninstall Xbox from PowerShell
  4. Now go to Xbox Companion App page on Microsoft Windows Store, here, and install the app.
  5. Launch Xbox Companion App and check if the app is working now.

4. Other solutions to try

Xbox Companion App Update

  1. Disable EVGA PrecisionX. It is an overclocking tool for the graphics card, however, some users have reported that tool can create conflict with the Xbox app. If you are using the tool, try disabling EVGA PrecisionX and check for any improvements.
  2. Click on the Battery Icon in the taskbar and set the Performance to Best Performance.
  3. Check for Windows and App Updates.

RELATED STORIES YOU MAY LIKE:

Arabic Typing Software: 5 Best to Use in 2026

Writing in Arabic on your Windows 10 PC has never been easier. You can choose from a wide range of applications that help you write Arabic effortlessly. In this article we will explore some of the best software options that can help you with that, and , at the end of this article, we will also look at the built-in Windows 10 keyboard language layout options. Read on to find out more.

Type Arabic with ease with these typing tools

Lipikaar

Lipikaar - arabic typing software

Lipikaar is a great software that was designed specifically to make typing Arabic on your PC as easy as writing any other text.

Because of its powerful algorithms and easy to understand user interface, Lipikaar is very accurate, offering you the possibility to type even the most complicated Arabic words with ease.

This software is based on Unicode (universal standard for representing text in different scripts), and that makes it compatible with any Windows application that support the same standard.

You can use this software with Microsoft Word, Excel, Powerpoint, and even Internet Explorer (or any other internet explorer of your choosing).

This software was designed for professional use, and besides Arabic, it can help you write in a variety of languages. Some of them are: Hindi, Marathi, Oriya, Punjabi, Malayalam, Sanskrit, Nepali, Urdu, etc.

You can also try the tool online to see how it matches with your needs. You can try it out by clicking here.

Download Lipikaar

Arabic Keyboard

Arabic Keyboard - arabic typing software

Arabic Keyboard is a simple yet effective way to write Arabic on your Windows 10 PC. This software is completely free and doesn’t even use ads.

Here are some of the best features found in the Arabic Keyboard:

  • Fast times of response
  • A great accuracy of text processing
  • Can be used to search the web
  • Contains the hard to find Arabic dialect “Al-Harakat”: Fatha, Dammah, etc.
  • Can send SMS, Email, etc.
  • Support for all special characters known
  • Great multi-line support with the ability to scroll down and up for easy typing

Download Arabic Keyboard from the Microsoft Store 

UWP Arabic Keyboard

UWP Arabic Keyboard - arabic typing

This software is a light-weight option that allows you to type Arabic on your Windows 10 PC with its great virtual keyboard system.


Looking for the best multi-language dictionary for Windows 10? Here are the best options.


This app transforms the keyboard layout from Latin lettering to Arabic, allowing you to type words quickly and efficiently.

Download UWP Arabic Keyboard from Microsoft Store

Easy Arabic Typing

Easy Arabic Typing - arabic typing

This software allows you to write in Arabic inside Microsoft Word documents, and also to make posts on social media. Easy Arabic Typing is the completely free-to-use software and can be downloaded with ease.

Here are some of its best features:

  • After the download and installation of this software is completed, you can use all its features without being connected to the internet
  • Ability to suggest alternative words based on the context – backspace key
  • Can be used to type in Microsoft Word, Excel, email, Twitter, etc.

This tool can also be used online by visiting this website.

Download Easy Arabic Typing

The built-in Windows 10 tools that allow you to write in arabic

Windows-10 - Chinese Typing/ Arabic Typing software

Another great option for people that don’t want to install other software on their PC, is to use the built-in Windows 10 languages packs.

You can easily find the menu that deals with these settings by clicking on the Cortana search box and typing in ‘Keyboard Language’, and choosing the first option that appears in the list.

Then you can simply search for the Arabic language in the list, install it, and then apply it as a default language.

It is worth mentioning that you can switch between the primary and secondary typing language by using the Left Shift + Alt keys on your keyboard.

Conclusion

In this article, we explored some of the best software and built-in Windows 10 options that allow you to easily type in Arabic.

We would love to know what option you chose from this list and how did that work out for you. Please feel free to let us know in the comment section below.

RELATED STORIES YOU SHOULD CHECK OUT:

What to do if Windows 10/11 deleted iTunes Library

The iTunes Library should not be affected when the user upgrades Windows with the new version. However, at times it can happen that you upgrade your Windows 10 to the latest version and iTunes library is deleted.

Learn how to retrieve your files with the steps below.

How do I restore my iTunes library on Windows 10?

1. Restore Recycle Bin

  1. Check your Recycle Bin folder for the available files.
  2. Open the Recycle Bin app by searching in the Windows search bar.
    iTunes Library Restore from Recycle Bin
  3. Find the file in the Recycle Bin, right-click on the file and select Restore.
  4. This should reset the deleted files on your computer.

2. Restore the Previous Version

  1. Open the File Explorer and navigate to the location where the iTunes library was stored or the music folder.
  2. Right-click on the folder and Properties.
  3. Open the Previous Versions tab.
    Restore Previous Version iTunes Library
  4. If a Previous Version is listed, select it and click on the Open button.
  5. Here you will find the shadow copy of your data. Copy the file or folder from this window to the location where you want to save the files.
  6. Close the Properties window.

Restore Default Library on iTunes

  1. Launch iTunes.
  2. Right-click on your Library Folder and select Restore Default Libraries.
  3. If you are lucky, this procedure should restore your files.

Looking for the best software to fix your iTunes library in Windows 10? Here are the best options.


3. Restore Purchased Items from iTunes Store

  1. Go to the Devices tab by clicking on Edit > Preferences.
  2. Make sure you check the “Prevent iPods, iPhones, and iPads from Syncing Automatically” box.
  3. Connect your iPhone or iPod to iTunes.
  4. Click on File and select Devices.
  5. Select “Transfer Purchases from Your device name“.
    Restore from iTunes Store
  6. You need to authorize to complete this process. This should restore all of your iTunes purchases to the iTunes library. However, this won’t include if you have any files ripped or downloaded from the internet.

4. Use Data Recovery Software

  1. If nothing seems working, you can make use of third-party data recovery software to recover deleted files. You can use apps like PhoneRescue and Stellar Phoenix Photo Recovery for this job.Data Recovery Software Restore iTunes library
  2. On Stellar Phoenix Photo Recovery you need to launch the app and select the hard drive that the iTunes library before it got deleted.
  3. Let the program scan the hard disk for any recoverable items.
  4. Wait for the scan to complete and the software will show all the recoverable data.
  5. Select what data you want to restore and click on the Restore button.

If you want to know more about the data recovery apps, we have a detailed article on the best data recovery software for Windows.

RELATED STORIES YOY MAY LIKE:

Your phone app won’t connect to phone [TECHNICIAN FIX]

Your Phone is a nice little handy Windows 10 app that helps the users to make most of their PC and mobile phone. While the app itself offers good functionality, it is only when it works and most of the time I had a hard time getting it working. Users have reported that they are unable to make the Your Phone app work in Windows 10 as the app is not able to connect.

With the steps below, you should be able to fix the connection issue with the Your Phone app.

Why the Your phone app won’t connect?

1. Disable Metered Connection

  1. While Your Phone and Your Phone Companion will connect to each other, you won’t receive any notification on your PC from your phone if you have metered connection turned on your PC.
  2. This restriction is in place to limit the data usage to avoid unexpected data use by the service.
  3. To turn off the metered connection, click on Start and select Settings.
  4. Click on Network and Internet.
  5. Select WiFi and click on Manage Known Networks.
  6. Select your current active WiFi network and click on Properties.
    Disable metered connection Your Phone Fix
  7. Scroll down to Metered Connection section and turn off “Set as metered connection” using the toggle switch.
  8. Launch Your Phone app on your PC and try to connect and check if the app works without any issues.

Note: Turning off metered connection means Windows OS will download updates for the OS automatically.


Did you know that you can recharge your phone with laptop in Sleep Mode? Learn how now.


2. Disable Battery Saver on PC

  1. If you like your laptop battery to last longer you probably have the battery saver feature enabled all the time. However, when enabled, Windows will try to limit access to any other app to offer more battery life.
  2. To turn off Battery Saver, click the Action Center icon on the taskbar ( right bottom) and turn off Battery Saver.
    Disable Battery Saver in Windows 10
  3. Do the same with your phone as well. Pull down the notification bar and tap on battery saver icon to disable it.
  4. Try to connect to your Phone app and check for any improvements.

3. Reset Your Phone App

  1. Click on Start and select Settings.
  2. Click on Apps.
  3. Under Apps and Features, search for Your Phone app.
  4. Click on Your Phone and select Advanced Options.
  5. Under Apps Permission, make sure Background Apps is enabled.
    Background App permission enabled Your Phone
  6. Scroll down and click on the Reset button.
    Reset Your Phone App
  7. When asked for confirmation, click Yes.
  8. Reboot the system and check for any improvements.

RELATES STORIES YOU MAY LIKE:

Posted in Fix

Windows Defender Deleted my Files: How to Recover Them

Windows OS comes with built-in antivirus protection called Windows Defender. If configured to detect and remediate threats on your device, Windows Defender Antivirus will quarantine suspicious files. As a result, many reported that Windows Defender deleted the files.

However, at times Windows Defender may remove files that are not necessarily a threat. If you are sure that the files deleted by Windows Defender are not a threat or have a use for them, then you may want to restore the removed files/folders.

How do I stop Windows Defender from deleting files on Windows 10?

1. Restore Quarantine Items

  1. Launch Windows Security, select Virus and threat Protection, and click on Protection history.
  2. Select Quarantined items from the Filters dropdown menu to view the files that have been deleted.protection history
  3. Now look for the item you want to restore and click on Restore.
  4. Later, you can navigate to Virus & threat protection settings, go to Exclusions, and whitelist files to prevent Windows Defender from clearing them again.

If you were wondering how to recover files deleted by Windows Defender in Windows 11, a quick solution is to find and restore them individually via the built-in antivirus.

2. Restore Quarantine with Command Line

  1. Press Windows + R to open Run, type cmd, and hit Ctrl + Shift + Enter.
  2. Paste the following command and hit Enter:cd C:\Program Files\Windows Defenderrun command prompt restore files windows defender Windows 10 defender deleted my files
  3. Next, type the following command and press Enter:dir *.exe
  4. Run this command:mpcmdrun -restore -listall
  5. This will list all the quarantined items in your system. Now enter the following command and hit Enter to restore all quarantined items to their earlier storage path:mpcmdrun -restore -all

If Windows Defender deleted the files, you could recover them all at once via the Command Prompt. This is the preferred option for many, but remember not to restore any file you are unsure about as it could be a legit threat.

Before you leave, do check the most Windows-friendly antivirus solution and get one today to get rid of such issues.

For any queries or to share which file got deleted by Windows Security, drop a comment below.

7 best Nepali typing software to type naturally on your PC

The most used script of Nepal is Devanagari, which can also be found in India and other parts of the southern part of Asia. There is one script that is called Khas, which is considered to be the oldest, and also Newari, Limbu. Because of the variety of languages found in Nepal, it is hard for people to create writing software for this language, but we found some great options. The options we will explore in this article can be used both online or as downloaded software. Read on to find out more.

Best software options for writing in Nepali on PC

Lipikaar

Lipikaar - arabic typing software/ Nepali typing

Lipikaar offers you a variety of typing languages -Hindi, Bengali, Punjabi, Tamil, Arabic, Nepali, etc.

In this article, we will focus on the features found in Lipikaar that allow you to easily type on your Windows PC in the Nepali language. This software was built specifically to be very easy to use and also fast.

You can use it to type in different software on your PC, like Microsoft Word, Excel Sheets, or even use it to type emails in the browser of your choosing.

You can try out Lipikaar with a 3-days trial period, which gives you access the entire range of capabilities. If you want to use the software after the trial period has ended, you can buy the software and activate it.

If you want to check out how Lipikaar works, you can try the online version first. Check out the official Lipikaar webpage.

Download Lipikaar 

Google Input Tools

Google Input Tools - typing Nepali

A great online software option from Google is called Input Tools. This very useful tool allows you to write in a wide range of languages, can be accessed from anywhere in the world with an internet connection.


Looking for the best dictionary extension for your browser? Here are our top picks.


Using Google Input Tools gives you an advantage over the other software options we presented in this article because of the size of the word database that they work with, and also the team that worked in the development of this tool.

Try Google Input Tools

Unicode Nepali

Unicode Nepali Converter

This website is extremely useful if you need to write Nepali, and also in case you want to translate some text between languages as well.

This is the 5th versions of the online software, and it has been upgraded with the ability to insert images, tables, etc.

Try Unicode Nepali

Easy Nepali Typing

Easy Nepali Typing

This is another great online software that allows you to easily write in Nepali from the comfort of your own PC, and without the need to install anything.

Try Easy Nepali Typing


Learn new foreign languages with these Windows 10 apps

Nepali Keyboard from Branah

Nepali Keyboard - nepali typing software

This online software is another great tool that gives you all the tools you need in order to easily write in the Nepali language on your Windows PC.

Try Branah Nepali Keyboard

Nepali Unicode by Ashesh

Nepali Unicode by Ashesh - Nepali typing software

You can also use this tool to write in Nepali on your PC, and then easily copy and paste it into an online social platform, Microsoft Word, PDF, or any other text application on your PC.

This tool not only allows you to write in Nepali but can also transform Romanized Nepali into Nepali Unicode. You can also choose to keep some words in English (or un-transformed in Nepali) by encasing the specific word/words into curly brackets (Ex.'{mobile}’).

Try Nepali Unicode by Ashesh

Windows 10 built-in Nepali writing options

KB4489885, KB4489878 , Nepali writing software

There is also a way to use the native language settings found in Windows 10 in order to write in Nepali. Next, we will explore a way to download the fonts and keyboard layout needed in order to do so, even when offline.

1. Click on the Start Menu > Settings
2. Choose Time & Language > then click on the Region & language option
3. Under Languages, click on ‘+ Add a language’
4. Scroll to the right and choose नेपाली Nepali
5. Click on नेपाली (नेपाल) Nepali (Nepal)

After you finish these steps, your PC will automatically download all the files needed in order to set up Windows to write in Devanagari Nepali Unicode.

You will also need to switch the input method to Devanagari. Here is how to do it:

Presuming that your input method was set to English, near the clock in your taskbar, you will find an option that reads ‘ENG’ (Shortcut: Windows Key + Space). Clicking on that button (or using the keyboard shortcut), will make a menu pop up that will allow you to choose the Nepali keyboard layout.

After this step is completed, you are now ready to write in Nepali Unicode in any application found compatible with Windows 10.

Conclusion

In this article, we explored some of the best software options that can be found online in 2019 that allow you to easily write in Nepali.

If you want to download a software that has more capabilities and can be run offline, you can download Lipikaar. If you prefer to quickly access a Nepali typing software without needing to download anything, you can explore the online software options we presented in this article.

Another option is to use the native Windows language and keyboard option we presented at the end of this article. No matter which of these options you choose, you will surely have no problem with writing in Nepali on your Windows 10 PC.

We would love to know what your experience was when trying out this software. Please feel free to let us know if you any suggestions or remarks, by using the comment section below.

RELATED STORIES YOU SHOULD CHECK OUT:

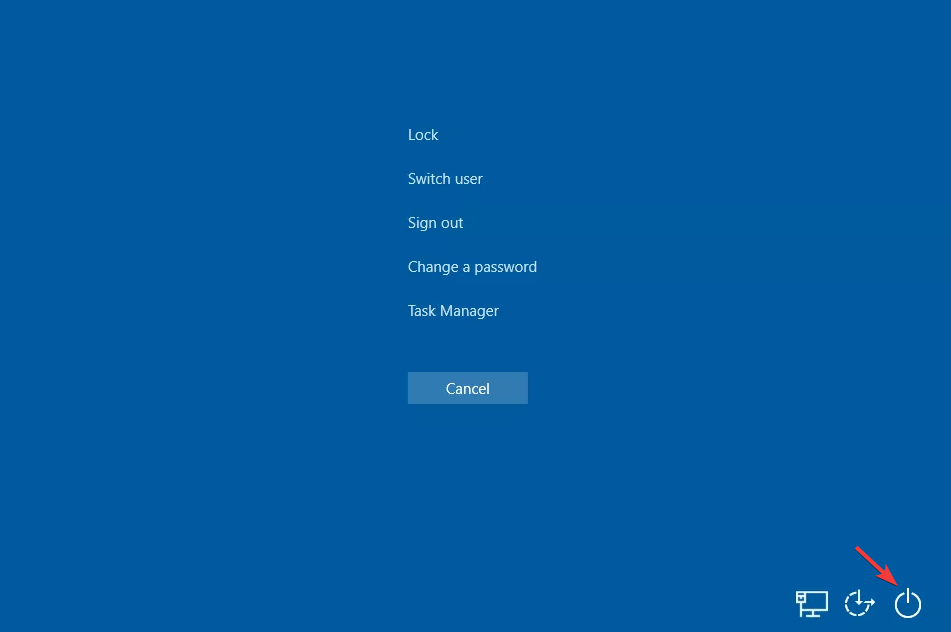
Windows 10/11 Login Screen Shows Deleted User [Quick Fix]

Windows 10 allows you to create and delete user profile as per your need, but what to do when Windows 10 login screen shows deleted user? This can be an annoying issue, and in today’s article we’ll try our best to fix it for good.


How to remove a user from login screen on Windows 10?

1. Remove the user account Using netplwiz

  1. Press Windows Key + R to open Run.
  2. Type netplwiz in the Run box and press OK to open the User Accounts window.
  3. In the Users tab, check if the username you want to delete is listed. If yes, select the user name and click on Remove.
  4. Next, go to the Advanced tab and check the box for “Require users to click CLT-ALT-DEL” under Secure sign-in section.
    Delete User Account windows 10 login screen shows deleted user
  5. Click on Apply and then OK to save the changes.
  6. Go to the User tab.
  7. Uncheck the box for “User must enter a user name and pass to use this computer”.
  8. Click Apply to save the changes.
    Disable Secure Sign in windows 10 login screen shows deleted user
  9. A new pop-up window will appear asking you to enter the username and password. Simply click on Cancel button.
    Cancel Automatically Sing in login screen shows deleted user
  10. In the User tab again, you will see that the User must enter a user name and pass to use this computer box is automatically checked.
  11. Click again on Apply to save the changes.
  12. Exit NetPLWIZ.
  13. Reboot your system and on the lock screen check if the deleted username appears again.

2. Remove the Username and Profile Manually

  1. Open the File Explorer and navigate to the following location:
    C:\Users
  2. Under Users folder, right-click on the profile you want to remove and select Delete. Close the File Explorer window.
  3. Press Windows Key + R to open Run.
  4. Type regedit and press OK to open the registry editor.
  5. In the Registry Editor, navigate to the following location:
    HKEY_
    LOCAL_MACHINE\SOFTWARE\Microsoft\Windows NT\CurrentVersion\ProfileList
  6. Expand the Profile List section. You should see many entries under this key.
    Check Entries for Profile Regedit windows 10 login screen shows deleted user
  7. Click on each key and check the Data value for ProfileImagepath until you find the key associated with your user profile.
    Delete User Profile Regedit windows 10 login screen shows deleted user
  8. Right-click on the Key and select Delete.
  9. Restart the system again and check if the user account is removed from the lock screen.

3. Delete Profile from the Control Panel

  1. Press Windows Key + R to open run.
  2. Type control and press OK to open the Control Panel.
  3. In the Control Panel go to System and Security > System.
  4. Click on Advanced System Settings from the left menu.
  5. Under User Profiles section click the Settings button.
    Delete User Account from Control Panel windows 10 login screen shows deleted user
  6. Now select the user profile you want to delete and click on the Delete button.
Note icon NOTE
To delete any user account, you must be logged in as Administrator. Also, you cannot delete the account you are logged in with.

There you go, three simple solutions that might help you if Windows 10 login screen shows a deleted user. If these solutions worked for you, feel free to let us know in the comments section below.

Microsoft news recap: Microsoft Teams crosses 13 million daily users, flagship Microsoft Store in London opens, and more

Microsoft news recap is a weekly feature highlighting the top Microsoft news stories of the past week. Sit back, grab some coffee, and enjoy the read!

Microsoft officially opens London flagship Store

Microsoft’s long-anticipated Microsoft Store in London has opened this week.

Microsoft Teams crosses 13 million daily active users

At Inspire 2019, Microsoft announced that its Microsoft Teams business communication service has crossed 13 million daily active users, beating its competitor, Slack.

Microsoft’s new Azure Kinect DK camera is now available to buy online

The latest Kinect camera from Microsoft is now available from the Microsoft Store. Called the Kinect DK camera, it is aimed at developers, so those playing on Microsoft’s game console, Xbox One, will not benefit from it.

Coles supermarkets in Australia to modernize with the help of Microsoft’s Azure cloud technology

An Australian supermarket, Coles, is using Microsoft’s Azure cloud services to modernize. The supermarket aims to improve workflow, business operations, and the customer experience, by utilizing Microsoft’s Azure services.

Microsoft Azure

That’s it for this week. We will be back next week with more Microsoft new .

Windows 10/11 Profile Not Deleted Completely [Expert Fix]

Creating and removing or deleting a profile in Windows 10 is easy. It allows the users to give access to other users on the same computer by restricting their access and also removing the access when required. However, at times when trying to delete a profile, the profile may not be deleted completely and leave some folders, etc.

One user shared his problem with the Windows 10 profile on Microsoft Answers.

I’ve followed Method three of the MS help article 947215. I’ve gotten to the system properties user profile dialog box. on it I see the profile that I want to delete but the delete button is grayed out…

Follow the steps below to delete the Windows 10 profile for good.

Remove the user account from control panel

How do I delete a user profile in Windows 10?

1. Remove the User Profile As Administrator

  1. To remove any user profile, you need administrator access. Another thing to note here is that you cannot remove the user profile you are logged in with. So, if you want to remove one of your primary profile, you need to create a different profile with administrator rights and then try to remove the corrupted profile.
  2. Login to your PC with the administrator account. Make sure the account you are trying to remove is not the one you are logged in with.
  3. Press Windows Key + R to open Run.
  4. Type netplwiz and press OK to open the User Account window.
  5. Under user for this computer section, you can check all the user profiles in the system.
  6. Select the user profile you want to remove and click on Remove.
  7. You should see “Are you sure you want to remove the select profile” window click Yes.

 Your user profile might get corrupted and thus hard to delete. Learn how to deal with that here.


Delete Users Profile value Regedit

2. Remove the User Profile using Regedit

  1. Open the File Explorer and navigate to C:\Users.
  2. Now right-click on the corrupted profile and select Delete.

  3. Press Windows Key + R to open Run.
  4. Type regedit and press OK to open the Registry Editor.
  5. In the Registry Editor navigate to the following location.
    HKEY_LOCAL_MACHINE\SOFTWARE\
    Microsoft\Windows NT\CurrentVersion\ProfileList.
  6. Under the Profile List, you will see several entries. Click on each entry and check the ProfileImagePath data. If it matches with the corrupt user profile then delete it.
  7. Right-click on the profile and select Delete.

3. Delete User Profile from System Properties

  1. Press Windows Key + R.
  2. Type sysdm.cpl and press OK to open System Properties. 
  3. Go to the Advanced tab.
  4. Click the Settings button under the User Profile section.
  5. Now select the user profile that you want to delete and click on Delete.

Let us know if the procedure worked for you in the comments area below.

3 best tools that use waterfall model for Unified Modelling Language

The Unified Modelling Language also is known as UML is a system that was designed to more efficiently visualize and represent complex software structures. It even goes as far as creating incredibly complex software systems with ease. You can create both diagrams that show the structure of the system or the behavior of the system. UML software also allows you to use standardized UML shapes to create your diagrams, allows you to export your data into different programming languages, and can also import models from already existing code. The diagrams you create by using UML software are specifically built in order to make the entire process of using a modeling language very easy. The market offers you a wide range of UML software options but it is very hard to choose one of them because of their particularities. Depending on the nature of the UML software, you can use it either online or by downloading software to your Windows 10 PC. In this article, we will explore some of the best UML software found on the market in 2019.

UML software to create waterfall-type models

Gliffy

Gliffy - UML Tools waterfall model

Gliffy is a great online UML tool that allows you to create comprehensive diagrams for both systems behavior and structures.

This software is stored entirely in the cloud, so it allows you to access it from anywhere in the world, with just an internet connection.

Another great advantage of using an online UML tool is the fact that you don’t need to download anything, so if you have issues with your hard drive storage space, it won’t be affected by Gliffy.

It has a built-in option to review diagram drafts by using the comment function.

Even though Gliffy offers you a good range of features that can easily create diagrams, is easily understandable and easy to use, it is not recommended that you use this software for creating code.

Saying this doesn’t mean that Gliffy can’t take programming, but there are better options available on the market that can help you with that.

Gliffy has also released a plugin UML tool that is perfectly compatible with Jira, and Google Suite, but also Google Drive. No matter if you choose the online tool or the plugin, Gliffy can help a lot.

One of the best features found in Gliffy is the incredibly wide range of shapes available to use. This feature allows you to skip the process of constructing each diagram. You can choose your template, and then customize it to your needs.

When you start the software you can choose from the range of modeling languages available. Once you choose, you will automatically get access either to all the tools required for the option you selected.

Gliffy can be used for free as well, offering you 2 MB of cloud space to be able to store your created diagrams, allows you to export 5 models, and can import diagrams in GON, Gliffy, and gXML formats.

You can also export diagrams to the native ‘Gliffy’ format, and then easily share it with others by generating a download link.

Another option to export and share your diagrams is by using the ’embed’ features on platforms like HipChat, Slack, WordPress, etc.

The paid version of Gliffy gives you the power to import diagrams with the Microsoft Visio format (VDX), and you can also export to common images formats like JPG, PNG, SVG.

One of the most useful features of the paid version is the ability to export your project directly to Google Drive.

This allows you not to worry about losing your files, and also to access them from anywhere in the world with just a few clicks of the mouse.

Download Gliffy 

MagicDraw

MagicDraw - Uml tools waterfall model

MagicDraw is another great UML tool that was designed specifically for professional modeling. The power contained under its user-friendly UI can help you achieve professional-level results no matter how complicated the structure of your diagram is.

This software doesn’t only contain tools that support UML. You can also use the equivalent for modeling operating systems (SysML), Business Process Model and Notation (BPMN ), and also the UPDM architecture framework (DoDaf/MODAF).

Some other very important and useful tools found in MagicDraw gives you the ability to use OCL to set specific boundary condition notations, and XMI to easily export diagrams to other software without risking to lose any of your data.


Looking for the best block diagram software? Here are the best options.


MagicDraw is based on three programming languages – Java, C++ (in different dialects), and also C#. You can import a wide range of files formats – XMI metadata from software like Eclipse and IBM’s Rhapsody, CSV, ReqIF, DoDAF, and CA Erwin Data Modeler.

You can also choose to save and print your project in different image formats – BMP, PNG, JPG, EMF. Because of MagicDraw’s wide range of features, you can even perform reverse engineering and round-trip engineering.

MagicDraw also has the ability to convert UML diagrams into code compatible with Java, C++, C#, XML Schema, CORBA IDL, and can also transform the same type of code into UML diagrams.

The UML software from MagicDraw has the ability to check your project for errors and show you a notification about them. This way you will never lose touch with the issues found in your projects, and you can prioritize them accordingly, depending on the issue severity.

Another very useful option is that you can compare diagrams in a side-by-side view to identifying any problems.

Download MagicDraw

Star UML 3

StarUML - software waterfall model

Star UML is another great software option that allows you to create waterfall model diagrams for complex software architecture modeling.

As in the cases of the previously presented software, this tool offers you the possibility to choose from a wide range of pre-made customizable diagrams – Entity-relationship Diagrams (ERD), Data-flow diagrams(DFD), etc.

Another very important aspect of this software is that it supports UML 2 metamodels and diagrams – Class, Object, Use Case, etc. This feature offers you all the latest tools available in 2019.

Here are some other useful features found in Star UML 3:

  • Supports retina display – all icons, diagrams, text, and icons have high definition quality and can be easily exported to high-dpi images (PNG and JPEG)
  • Great third-party extensions with a full-featured extension manager
  • Quick edit feature that allows you to create elements instantly
  • Supports code from Java, C#, and also C++
  • Extensions, APIs, keymaps, etc. – can be written in HTML5, CSS3, JavaScript, Node,js modules
  • Great exporting options for your project – HTML Docs, PDF, etc.

You can find a great range of extensions for your UML 3 software, by visiting this page.

If you feel that you need some help understanding what Star UML 3 is all about, you can visit the official support page.

You will find a useful forum, official online documentation, the FAQ page, and you even have the option to send your new feature idea to the Star UML team.

Download Star UML 3 

Conclusion

In this article, we explored some of the best UML software on the market, that allows you to either build complicated software architecture from the bottom up or to create very easy to understand diagrams.

If you need a fast and easy to use UML software, and only need the basic diagram building tools, then the best choice for you would be Gliffy.

On the other hand, if your computer has great processing power, you have experience with using UML tools and need professional-level tools and features, then the best option for you is clearly MagicDraw.

Let us know in the comment section below if you have any suggestions.

RELATED STORIES YOU SHOULD CHECK OUT:

Cross Platform Benchmark Software: 4 Best for Advanced Insights

Benchmark software allows you to take note of your system’s performance. Using the software, you can compare the performance before and after the hardware upgrade or two systems with a different set of configurations. The laptop and smartphone manufacturer mostly use benchmarking tools to test the performance of their product before launch. However, as an end user, you can find the area for improving the performance of your device by putting your PC through stress testing. While there is no dearth of benchmarking software for any platforms, having a cross-platform benchmarking software makes the task much easier. It removes the hassle of having to use different benchmarking tools on each platform respectively. In this article, we take a look at the best cross-platform benchmarking software to test the performance of your Windows, Mac, and Linux computers. Some of the software also supports mobile platforms such as Android and iOS.

Best cross-platform benchmark software for veterans and rookies

Geekbench 4

Geekbench 4

  • Price – Free trial / Premium
  • Supported Platform – Linux, Windows, and macOS

Geekbench may not be the most feature-rich benchmarking software out there; however, it is one of the best cross-platform benchmarking software that you can use on Windows, Linux, and macOS systems.

The software is designed to quickly measure processor performances irrespective of the configuration of the processor. You can use it to measure dual-core as well as multi-core workstations without any issues.

Using Geekbench is easy as well. You can start the benchmarking process using the pre-selected configuration options. If not, you can customize the settings a little bit to meet your requirement.

One interesting feature of Geekbench is the online database it has on offer. The software stores the benchmark results of all the devices in the cloud and allows you to compare your PCs hardware performance with other systems with similar or better configuration.

You can use the information to understand the changes required to make your PC perform better.

Geekbench comes in multiple versions. It starts at $9.99 for a single user single platform license, or you can get the multi-platform single user license for $14.99 and the ultimate Pro version for $99.99.

Purchase the software from the official website as the version on steam is often late in receiving latest updates.

Download Geekbench 4 

CINEBENCH

CINEBENCH

  • Price – Free
  • Supported Platform – Windows and macOS

CINEBENCH is not your day to day benchmarking software, but a fully featured stress testing tool that will evaluate your system’s performance and score it accordingly. Unfortunately, it is only available for Windows and macOS users.

The software is a whopping 0.5GB in size which and available from the official Appstore for both the platforms.


Avid gamers interested in your PCs true capabilities, this is the benchmark software for you.


CINEBENCH uses the 3D engine found in the Cinema 4D to measure the CPU rendering performances across the platforms accurately. It is a handy tool for the system administrator to make system purchase decisions by evaluation system performance and user requirement.

If you are a hardware reviewer, CINEBENCH offers everything you need to measure the performance of all the new hardware that hits the market and compare it with the earlier version of the hardware.

CINEBENCH uses a much-complicated text scene than its predecessor. It also uses Intel’s Embree raytracing technology and advanced features on modern CPUs from AMD and Intel making the rendering process twice as fast.

Note that CINEBENCH does not test your systems GPU but exclusively tests CPU performance only. For GPU benchmarking check our next recommendations.

Download CINEBENCH 

Novabench

Novabench

  • Price – Free
  • Supported platform – Windows, macOS, and Linux

Novabench is another cross-platform benchmarking software that allows you to perform the test, compare, optimize and repair your system. It is available for all the three major computer platforms, and you can use the fully functional personal version for free.

There are three primary functions of this software. It allows you to run the benchmark on your computer. The performance results then can be used to compare your system with other results online to spot potential problems. And of course, the ability to tune, upgrade or repair your computer depending on the outcome.

Unlike CINEBENCH, Novabench offers both CPU and GPU benchmarking feature. Using the software is easy. After launching it, click on Start Tests.

Novabench will run the test and display the result with system information. It will allocate a different score for CPU, RAM, GPU, and Disk (with reading and writing speeds), showing a clear picture of what part of the system is underperforming.

Clicking on View performance charts and comparison button will show Total score, CPU score and GPU score with a chart.  You can compare the results with other users online to evaluate and improve system performance.

Download Novabench 

UNIGINE

UNIGEN Benchmarl

  • Price – Free
  • Supported Platform – Windows, macOS, and Linux

Since MSI Afterburner is not available for non-Windows machines, UNIGINE’s benchmarking software is the next best thing you can use to stress test your computer to measure the GPU performance. It is a cross-platform app and available for all the three major operating systems.

Using the software, you can conclusively determine the stability of PC hardware including CPU, GPU, Power support and cooling system under stressful conditions to diagnose the issues in advance.

For overclockers, UNIGINE offers the Advanced version of the benchmarking tool. But, for personal use, the basic edition of the UNIGINE benchmarking software provides all you need to stress test your system to unleash its full potential.

Download UNIGINE Benchmark


Conclusion

Depending on your understanding of the computer and its functioning, you can use the cross-platform benchmarking software listed in this article to understand your system’s performance better. Also, if the system needs any upgrades to extract maximum performance out of the CPU and GPU.

However, as noted earlier, do not use the software for overclocking CPU unless you fully understand its functioning and the consequences of an ill-advised overclocking.

RELATED STORIES YOU MAY LIKE:

How to fix weird printer noise [QUICK FIX]

Most of the modern day printers are silent and don’t make unnecessary noise even when the printing process is on, but few users reported weird printer noise while printing.

This can happen due to many reasons, one of the reason being cartridge misalignment. If you are also troubled by this issue, here are a couple of troubleshooting tips to fix this issue.

How can I fix weird printer noise?

1. Perform a hard reset

hard Reset HP Printer weird printer noise

  1. Turn off your printer, disconnect the power cord from the rear of the printer.
  2. Next, remove the power cord from the power outlet.
  3. Wait for a minute or two and then plug the power cord back into the outlet.
  4. Now plug the power cord back into the printer.
  5. Turn on the printer if it does not start automatically.
  6. Wait for the printer to become idle and silent again.
  7. Now try to print any document and check if the printer is still making the grinding sound.
  8. If the issue exists, check the printer for hardware issues in the next step.

Printer not working after power outage? Fix it with this simple trick!


2. Check for hardware issues

Printer making weird noise - check for hardware issue

  1. Turn on the printer if it is not already on.
  2. Open the top cover of the printer and verify that the carriage moves to the center of the printer.

  3. If the carriage moves, then unplug the power cable from the back of the printer.
  4. Check inside the printer for any broken parts.
  5. Close the top cover of the printer.
  6. Now check your printer manual for removing the carriage safely. You can mostly remove the carriage from the right side of the printer.
  7. Remove the rear access door or the automatic two-sided printing accessory, and check for any paper jams or if something else is obstructing the carriage and remove any paper or anything else if found.
  8.  If required, replace the rear access door accessory or the automatic two-sided printing accessory. Close the top cover.
  9. Plug the power cable back into the printer.
  10. Turn on the printer and replace the cartridges if possible. If the noise still exists, it could be a paper feed issues.
  11. If the carriage does not move, then it is a carriage stall issue.
  12. If the issue persists, you may want to take the printer to the HP service for more information.

3. Contact HP support

Contact HP Printer support Weird printer noise

  1. If your printer is under warranty you can contact HP support.
  2. Go to the HP support page.
  3. Enter the product number or select to auto detect.
  4. Scroll down to “still need help? and complete the form to select your contact options”.
  5. Scroll down and click on HP Contact options and select on Get phone number.
  6. Use the case number and dial the service. HP service should be able to help more with the issue.

There you go, a few solutions that you can try if your printer is making a weird noise. Feel free to try all of our solutions and let us know which one worked for you.

RELATED STORIES YOU MAY LIKE:

Benchmark tests show Intel CPUs use 4 times more energy than AMD CPUs

The never ending (although silent) battle between AMD and Intel continues, and will probably go on for a very, very long time. Going blow for blow doesn’t seem to suffice for any of the competitors.

With that in mind, a new Blender benchmark graph slightly shook the Windows community as it shows the total energy used by both Intel and AMD CPU‘s for a specific task.

CPU battle: What processors use more energy? AMD or Intel?

Here’s the OP’s screenshot:CPU energy usageThis info quickly filled the forums with controversy, as AMD and Intel fans debate the use scenarios for certain CPU‘s and how could this new benchmark results affect them.

Here’s what one user is saying:

I think in specific use cases this could be a superior benchmark. I’d imagine server owners in particular would like this benchmark, as it shows a realistic estimate of consumption vs. finishing a task at hand.

While this is half true, you’ll have to understand a couple more things to get the big picture:

Servers are sold in large part on energy per task, but this benchmark here is somewhat misleading because you can decrease the energy per unit of work by decreasing total performance (since power consumption increases faster than clockspeed)

Don’t forget that despite a very high efficiency, ARM CPUs haven’t had much success in the server world.


Overclock your Intel CPU in just a couple of simple steps. Check out this useful guide and find out how you can do it!


This somewhat surprising result has it’s rooted in the manufacturing process. While most of the CPUs from Intel are 10 nm or above, AMD CPUs are working with 7 nm processors for a while now.

Basically, that means that AMD is using smaller transistors and packing more stuff into the same place/smaller place. This leads to higher core count, lower heat/power consumption, and higher clock speeds.


Looking to overclock your AMD CPU? Take a look at this list with the best overclocking software tools available today!


If these results will have an impact in the future of CPU manufacturing or not, it remains to be seen.

Who’s your bet: AMD or Intel? Leave your answer along with any other questions you may have in the comments section below and we’ll continue the talk.

HERE’S SOME MORE JUICY CPU INFO THAT YOU MIGHT NOT KNOW:

Microsoft is blocking the Windows 10 May 2019 Update on Surface Book 2 devices with Nvidia GPUs

After fixing three separate issues on July 12, Microsoft is now putting yet another block in place for some consumers hoping to upgrade to the Windows 10 May 2019 Update. This time, it is owners of Surface Book 2 13″ and 15″ models with Nvidia GPUs  who are impacted (via Windows Central.)

The issue is well documented on Microsoft’s support page, which explains that after updating to the May 2019 Update, certain apps, and games on the Surface Book 2 that need the power of the Nvidia GPU might close or fail to open. The dedicated GPU might also occasionally disappear from device manager. As a result, the company is placing what it calls a “compatibility hold” on Surface Book 2 devices with Nvidia dGPUs until the issue is resolved.

If you happened to have already upgraded to the Windows 10 May 2019 Update and are experiencing issues with the dedicated GPU on your Surface Book 2, Microsoft has a workaround: The company recommends to open the device manager, and restart the Nvidia GPU, or select the “Scan for hardware changes” button in the Action menu or on the toolbar.

It is not recommended that you manually update to the Windows 10 May 2019 Update with the “Update now” button or the Media Creation Tool until the issue has been fixed. No word from Microsoft yet on how long it will take for this issue to be resolved, but the company is working on a resolution and says it will “provide an update in an upcoming release.”

How to install and use Foobar2000 VST plugin [EXPERT GUIDE]

Foobar2000 is a very useful and powerful audio player that can be customized with a VST plugin. The VST (Virtual Studio Technology) plugin allows you full control over the applied audio effects.

This software is extremely efficient when it comes to audio and video decoding, allowing you to customize the way this software works and sounds. Besides the VST plugin, you can also apply a wide range of other modules/plugins in order to get access to additional features.

Even though its modular structure gives Foobar2000 one of its biggest advantages, it can become overwhelming to manage all the plugins and each of their capabilities. For this reason, in this article we will look at different aspects of using Foobar2000 with the VST plugin. Read on to find out more.

How to install Foobar2000 VST plugins? Installing a VST plugin for Foobar2000 is quite simple and you just have to download Foobar2000 VST 2.4 adapter and Kjaerhus Audio VST pack. To install the plugins, open the Foobar2000 settings window and add the plugins to the Components section.

How can I install Foobar2000 VST plugins on Windows 10?

How to download and install Foobar2000 VST plugin?

  1. In order to download the Foobar player, you will need to visit the official Foobar2000 download page. Then click on the download button under the Latest stable version section.download foobar Foobar2000 VST plugin
  2. Save the executable file on your hard-drive, and then open the installer.
  3. Go through the entire installation process, and then click Finish.
  4. Download the Foobar2000 VST 2.4 adapter.foobar2000 vst download
  5. Next, you need to download the Kjaerhus Audio VST pack.
  6. Open Foobar2000, then click on File from the top menu and select Preferences.foobar2000 preferences how to install VST plugin foobar
  7. Drag and drop the first archive you downloaded (foo_vst_0903.zip), into Foobar2000 components list.
  8. Click the Apply button, and restart Foobar2000.
  9. Extract the files from the Kjaerhus Audio VSTs archive.
  10. Inside Foobar2000, click on File > Preferences > Advanced > Components > VST Plugins > Add.VST plug-ins preferences Foobar2000 VST plugin how to insatall
  11. Double-click on one of the .dll files extracted from the Kaerhus Audio archive > click Apply > restart Foobar2000.

How to use the VST plugin?

  1. In order to view the VST window, you need to click on File > Preferences, and under the Playback tab, you will find the DSP Manager.DSP manager Foobar2000 VST plugin install
  2. In the Available DSPs list, you will be able to find the .dll file you installed previously (Step 11). In my case, it is a file called GAC-1.GAC-1 enable Foobar2000 VST plugin
  3. In the Active DSP list, click on the three dotted lines to see the VST.GAC-1 settings Foobar2000 VST plugin
  4. If you followed the steps above correctly, you should be able to see this type of window after clicking the dotted lines.GAC-1 main window Foobar2000 VST
  5. All done! Now you are ready to edit and customize every aspect of your audio experience on Foobar2000.

In this article we showed you the best way to set up Foobar VST plugin on your PC. The process might be a bit lengthy, but as long as you follow the instructions carefully, you shouldn’t have any problems. Please feel free to let us know if this guide helped you in the comments section below.

READ ALSO:

How to recover Guest account on Windows 10 [QUICK GUIDE]

Windows 10, much like previous versions of Windows, offers the provision to create a guest account. That way users can log in to the system and use the same but won’t generally have administrator status. A Guest account can also be seen as sort of a temporary arrangement for someone you know to have access to your PC.

In Windows 10 guest account is viewed as a security threat and is the reason it is disabled by default. All of this also makes it imperative that you have the means to recover all the info created via the guest account.

Now with the guest account itself gone, recovering the info created using the account might seem daunting. However, on the contrary, it’s as easy as it can get. Here are the steps.

How can I recover Guest account on Windows 10?

1. Use Windows Explorer

Navigate to the guest folder under local disk to recover guest account on windows 10

  1. Click on Start > Windows Explorer. Alternately, you can also press Windows key + E from the keyboard.
  2. Click on This PC from the options on the left and double click on Local Disk (C:).
  3. Open the Users folder.
  4. In the Users folder, there should be another folder named Guest. Double click on it to open the same.
  5. Consent to any authentication window that might open up seeking user permission.
  6. Under the Guest folder, navigate to the My Documents folder as well.
  7. Look for the files that you are looking for and copy them to a safe location.
  8. Repeat the same process with every other folder under the Guest folder to recover files present therein.

Want to quickly manage user accounts on your PC? Try using net user command!


2. Use Command Prompt

Enable guest account to recover guest account on windows 10

  1. Launch Command Prompt window. Do that simply by typing cmd in the Cortana search box and selecting from the search result.
  2. In the Command Prompt window, type net user guest /active:yes and press Enter.
  3. Click on Start.
  4. Click on your Account Name from the option on the left of the Start Menu and select Sign out.
  5. See if you can access the Guest account.
  6. If yes, log in and retrieve the files you need.
  7. If not, follow the method described in the first step above to gain access to the files saved under Guest account.

That’s it. The methods described above should be enough to recover the info stored under Guest account. Meanwhile, here are some related articles that you might want to go through.

READ ALSO:

Try opening this project again Microsoft Photos error [EXPERT FIX]

Microsoft Photos in Windows 10 allows you to create videos using your photos. It is a little handy feature as long as it works, which it does most of the time. However, at times you may face some errors while using the Microsoft Photos app. Users have reported about Try opening this project again, The project didn’t open. wait a few moments and try again error while trying to open their project.

One user shared his concerns on Microsoft Answers.

I am trying to create a video in Microsoft Photos.  Everything was going well until I was unable to open the video project anymore.  It says “Try opening this project again.  The project didn’t open.  Wait a few moments and try again.”
Been waiting and trying to open again for the longest time and still could not open it.  How do you fix this?

Learn how to fix the error by following the steps below.

Why won’t my Microsoft Photos project open?

1. Terminate and Reset Microsoft Photos App

  1. Click on Start and select Settings.
  2. From the Settings menu, click on Apps.
  3. Click on Apps and Features tab.
  4. Now search for the Photos app and click on it.
  5. Click on Advanced Options.
    Advanced Options - Photos Apps
  6. Scroll down and click on the Terminate button. It will kill all the process related to the Photos apps and help you fix any problem related to the app.
    Terminate Photos Apps to fix Try to open this project again
  7. Now try to open the project again and check if the error is resolved.

Tired of Microsoft Photos being lackluster in video and photo editing tasks? We’ve got a few worthy alternatives.


If the issue persists, try to reset the Photos app. Here is how to do it.

  1. Go to Start > Settings > App > Apps and Features.
  2. Click on the Photos app and select Advanced Options.
  3. Now scroll down and click on the Reset button. When a dialog pops-up click on Yes.
    Fix Try to opening the project again by Resetting Photos app
  4. Resetting the Photos app will delete any preferences and sign in details associated with it.
  5. Again repeat the steps to Reset the Photo app. Make sure you do it twice before accessing the project again.
  6. Close the Settings window and open the Photos app. Open the project and check if the error is resolved.

2. Re-install and Register Photos App

  1. Press Windows Key + R to open Run.
  2. Type cmd and press OK to open the command prompt.
  3. In the command prompt, copy and paste the following command and press enter.

    PowerShell -ExecutionPolicy Unrestricted -Command “& {$manifest = (Get-AppxPackage *Photos*).InstallLocation + ‘\AppxManifest.xml’ ; Add-AppxPackage -DisableDevelopmentMode -Register $manifest}”
  4. Wait for the command to execute and complete successfully.
    Reregister Photos app with command prompt
  5. Now open the Photos app again and check if you are able to open the project without any error.

RELATED STORIES YOU MAY LIKE:

Remix3D shuts down in 2020, download your 3D models now

Microsoft is planning to shut down its popular Remix3D.com service very soon.

Microsoft watcher WalkingCat announced the news on Twitter. WalkingCat actually found evidence that Remix3D will end on the 10th  of January next year.

The notice recommends Windows users to download their 3D models as soon as possible so that they don’t lose them.

Shutdown_Banner:”We will be retiring Remix3D.com on January 10, 2020 and all user content will be deleted. Please download any of your 3D models that you want to save. “,Shutdown_Banner_WebBlends:”Microsoft’s 3D content service is changing. “

No word on Paint 3D

However, the notification is not available to users yet. Most importantly, users are now concerned about the fact that how this decision will impact the future of Paint 3D. The company has not shared any details regarding Paint3D yet.

Previously, Microsoft decided to deprecate the default Windows 10 paint application. This decision was followed by huge criticism that forced the company to change its plans. The tech giant confirmed that the Paint app will continue to be part of the Windows 10 OS.

New 3D model upload will be unavailable starting August 7

Furthermore, Microsoft stated in the FAQs of its support website that the Remix3D.com site would not allow Windows 10 users to upload new 3D models starting August 7.

Moreover, you will also lose access to your Remix3D.com accounts. The tech giant made it clear that the Remix3D.com site will be closed on January 10, 2020. Hence, all links from Microsoft apps to the site will stop working.

The Remix3D.com service was initially launched with the release of Windows 10 Fall Creators Update. It is an online community where users can store their 3D models to use them in Windows Mixed Reality devices along with the 2D apps.


In love with 3D images? Get one of these 3D design software for beginners and advanced users


People are not giving up on Remix3D

Apparently, Windows 10 users are not happy with this decision and they are wondering why Microsoft wants to retire the service just a few weeks before launching the Minecraft AR app.

Why on earth would they retire this when they are about to launch a Minecraft AR app, seems like they could work well together.

Moreover, others think this is the right decision from Microsoft because Remix3D only got worse with the passage of time.

What do you think about this decision? Do you think that Remix3D service is useful? Comment below.

RELATED ARTICLES YOU NEED TO CHECK OUT:

Windows 11 Can Only be Installed to GPT Disks [Fix]

Anyone attempting to install Windows 11 is likely to have come across the message claiming, Windows can only be installed to GPT disks. The issue is quite simple to tackle, and a few quick tweaks are all it would need to set things right here.

For the uninitiated, GPT or GUID Partition Table is, in reality, a partition structure and is the more advanced one. No wonder newer operating systems, such as Windows 11, will only get installed on disks with the GPT partition structure.

What to do if Windows can only be installed to GPT disks?

1. Use Diskpart

  1. Insert the Windows installation disk or the USB stick if the installation media is in a USB drive.
  2. Reboot your PC.
  3. When the Windows 10 installation window appears, press Shift + F10 to launch the Command Prompt window.
  4. Type the following command and hit Enter: diskpartdiskpart to fix windows can only be installed to gpt disks windows 11
  5. Execute the following command to view the available disks, their size, and partition style: list disk
  6. Identify the non-GPT disk that you will now have to reformat. Reformatting will remove all files from it, so you might want to back them up beforehand.
  7. Run the following command where X represents the number allotted to the affected disk: select disk X
  8. Paste the following command and hit Enter:clean
  9. Run this command: convert gpt
  10. Close Command Prompt and continue with Windows installation. When asked to identify the disk where you wish to install Windows 10, select the one you have just formatted to GPT.

When Windows 11 can only be installed to GPT disks, a quick fix is to rely on DISKPART, a built-in tool, to change the disk partition style to GPT.

2. Use Disk Management

  1. Press Windows + X to open the Power User menu, and select Disk Management.disk management
  2. Right-click on the partition and select Delete partition or Delete Volume.delete partition
  3. Repeat this step until you have deleted all partitions on the disk.
  4. After all, partitions have been deleted, right-click on the disk and choose Convert to GPT Disk. The option to convert to GPT disks becomes available only after all partitions have been deleted.
  5. After the disk has been converted to GPT, right-click on it and select Create partition. Create a few or as many as you desire.
  6. Install Windows in the partition of your choice.

That’s it! If Windows can only be installed to GPT disks in Windows 11 or the previous iteration, you may also go with Disk Management to convert the disk to GPT.

And once you have installed the latest iteration, check the best security settings in Windows 11 for a safer experience.

For any queries or to share what worked for you, drop a comment below.

How to turn system icons on and off in Windows 10

System icons are any icons that are displayed in the system tray; the system tray is located on the right of the Windows 10 taskbar. Just in case you don’t know what or where the taskbar is, the taskbar is located along the bottom of your Windows 10 display by default. The only time you won’t see the taskbar is when you are using an app or browser in fullscreen mode. If you need help with taskbar settings, how to change the taskbar position in Windows 10 is a helpful guide.

The system icons that you will usually see in Windows 10 include Clock, Volume, Network, Power, Input Indicator, Location, Action Center, Touch keyboard, Windows Ink Workspace, Touchpad, and Microphone. These system icons can change based on what Windows 10 version your PC is running and what apps and programs you have installed. Sometimes, apps and programs that you allow to run in the background will also appear in the system tray. You will need to change the settings within individual programs to remove their icons from the system tray.

Microsoft turns on all system icons by default on the assumption that most people will look to use them at one time or another. However, there is a way to toggle them on or off depending on your preference. It doesn’t make sense to be distracted by unnecessary icons in the system tray. Turning system icons on and off in Windows 10 is easy, just follow these steps:

1. Go to Settings (keyboard shortcut: Windows key + i).
2. Go to Personalization.

3. Go to Taskbar.

4. Go to Notification area, choose Turn system icons on or off.

5. Turn system icons on and off in Windows 10.

It’s important to note that if you turn off the Location system icon, you are not turning off the location for your PC. Learn how to change the privacy settings of your Windows 10 PC. Personally, the only icons I need in the system tray are Clock, Power, Network, and Action Center. Changing the number of icons in your system tray can greatly reduce distractions when you are looking to be more productive in Windows 10.

Microsoft backs off on pulling Internal Use Rights for Partners after all

Apparently, Microsoft didn’t want to face the hornet’s nest of complaints from partners at next week’s Inspire conference, as it has backed off and now says there will be no changes to the Microsoft Action Pack subscriptions available to partners after all.

As noted by Mary Jo Foley, this morning Microsoft’s head of channel Gavriella Schuster posted a note on the Microsoft Partner Network site, backing off on the earlier changes:

Your partnership and trust matters to us. Given your feedback, we have made the decision to roll back all planned changes related to internal use rights and competency timelines that were announced earlier this month. This means you will experience no material changes this coming fiscal year, and you will not be subject to reduced IUR licenses or increased costs related to those licenses next July as previously announced.

We listened to you, and we have acted.

About a week ago, Microsoft quietly announced changes to the Microsoft Action Pack subscription, which has granted partners “internal use rights” for years for Microsoft software and services. Those changes were to have eliminated the rights, which allowed partners to use the software and services for free within their own organizations. As recently as yesterday, Microsoft was sticking to its guns on the changes, but this morning they had a change of heart, apparently.

At least Inspire will be a bit less contentious!


Microsoft’s new Azure Kinect DK camera is now available to buy online

Microsoft’s new Kinect camera, the Azure Kinect DK, is now widely available to purchase from the official Microsoft Store website.

The Azure Kinect DK is very much the next gen entry in the Kinect series with superior tech and functionality. As its name suggests though, it’s targeted at developers rather than gamers and the average consumer.

This new Kinect camera will not work with existing Xbox consoles and will unlikely work with Xbox Project Scarlett. This device is not designed for Just Dancers.

The Azure Kinect DK boasts a 1MP depth camera, a 360˚ microphone array, a 12MP RGB camera, and an orientation sensor. It’s currently retailing for $399 and is currently only available for developers in the United States and China. Other regions are expected to be supported in the near future.

Many expected Microsoft to bury the Kinect brand after it stopped manufacturing the Xbox One/Windows 10 generation last year so its reveal during Mobile World Congress 2019 in February came as a big surprise.

Are you impressed with the Azure Kinect DK and do you think you’ll get one for one of your upcoming projects? Share your thoughts with the community in the comments below and then follow us on Twitter for more Microsoft news.

Valkyria Chronicles 4 Complete Edition video game launches on Xbox One consoles

A special Complete Edition of the Valkyria Chronicles 4 video game is now available to buy and play on Microsoft’s family of Xbox One consoles.

This version of Valkyria Chronicles 4 comes with the base game and all of its downloadable content (DLC) that had been released post-launch. For those that already own the main game, a Valkyria Chronicles 4 DLC Bundle has also been released that contains only the DLC.

Here’s the official game description for Valkyria Chronicles Complete Edition:

Valkyria Chronicles 4 takes place in the same timeframe as the original Valkyria Chronicles, but focuses on Squad E of the Federation. Commander Claude Wallace and his childhood friends set out to fight for freedom in this desperate war, but bone-chilling blizzards, waves of imperial soldiers, and the godlike powers of the Valkyria stand between them and victory.

Are you a fan of the Valkyria Chronicles video game series or will this be your first time playing one of them? Let us know in the comments below and then follow us on Pinterest for more Xbox content.

Valkyria Chronicles 4 Complete Edition
Developer:
SEGA
Price:
$49.99


Valkyria Chronicles 4 DLC Bundle
Developer:
SEGA
Price:
$24.99

Minecraft Earth needs more players for its closed beta testing

Microsoft’s upcoming Minecraft Earth video game has been accepting close beta applications since May but it looks like more are needed as the official Minecraft YouTube channel today published a new video promoting the testing period.

The video shows the viewer what the Minecraft Earth app does on iOS and Android smartphones, detailing how it can be used to get resources and build Minecraft creations in the real world. Check it out below.

Interested gamers with a smartphone running at least Android 7 or iOS 10 can apply to partake in the closed beta here. All applications will receive a unique Minecraft skin which can be used in the main Minecraft games.

No specific release date for Minecraft Earth has been given yet, however, the closed beta is said to be starting in select locations soon.

Are you interested in playing Minecraft Earth or are you over the whole augmented reality mobile game craze? Share your thoughts with the community in the comments below and then follow us on Pinterest for more Minecraft content.

This game doesn’t allow recording on Windows 10/11 Xbox App

The Xbox Game Bar is a game recording utility in the Windows 10 computers that allows the users to record gameplay from the game that you run through the Xbox app. One can easily access the game bar by pressing Windows Key + R.

However, some users have reported that they are unable to access the Game bar by pressing the shortcut key and instead get the This game doesn’t allow recording error message. One user shared his concerns on the dedicated subreddit.

“This game doesn’t allow recording“|
What is this, I have taken screen shots before how come I can’t anymore is this only happening to me or more? I’m on win 10 pc.

In order to solve this for good, check the steps below.

Why this game does not allow capturing on Xbox App?

1. Enable Game bar game recording

  1. Click on Start and select Settings.
  2. Click on Gaming and select Game bar.
  3. Under “Record game clips, screenshot, and broadcast using Game bar” turn on the game bar recording option by toggling the switch.
    Make sure game bar recording is turned on
  4. Close the settings page and press Windows Key + G to open the game recording option.
  5. Try to click the record button and check if the error is resolved.

Record your gameplay smoothly even on low-end PCs with these tools.


2. Download Game DVR Config File

  1. Close the Game DVR or Xbox app if running on your Windows system.
  2. Now go to Github page for GameDVR_config file.
  3. Under Assets, click on GameDVR_Config.exe download link to download the file to your computer.
  4. Double-click on GameDVR_Config.exe file to run the program.
  5. Now right-click on the downloaded GameDVR_Config.exe file and select Run as Administrator. This will open a Game DVR Config window.
  6. Check “Force software MFT (16 FPS + VBR)” box and close the window.
    Enable Force Software MFT
  7. Right-click on the Taskbar and select Task Manager. 
  8. In the Processes tab, look for “Broadcast DVR Server“.
  9. Right-click on Broadcast DVR server and select End Task.
  10. Close the Task manager and open the Xbox app again.
  11. Now press Windows Key + G to open Game bar.
  12. Click the recording button and check if the “this game doesn’t allow recording” error is resolved.

3. Other Solutions to Try

Workarounds to fix Game bar error

  • Make sure you have the latest update installed for the Windows OS which usually also includes patches and bug fixes for apps like Game bar etc.  You can check for the update by navigating to Settings > Start > Update and Security > Windows update.
  • End Broadbact bar server from the Task Manager. Type Task Manager in the search and select it. In the Process tab, look for Broadcast bar server (bcastdvr.exe) process and then select End Task.
  • Close the task manager and restart the game. Open Game bar by pressing Windows Key + G and try to record the gameplay.

RELATED STORIES YOU MAY LIKE:

Sorry this video cannot be edited YouTube error [EXPERT FIX]

YouTube has an on-site video editor that allows the youtube creators to re-edit their videos for adding notations, card, music, etc and then publish on their channel.

However, some users have reported Sorry this video cannot be edited YouTube error when trying to edit their videos. Here’s what one user shared on the dedicated subreddit.

Sorry, this video cannot be edited.
I am trying to use the “remove song” feature and it keeps giving me this error

Follow our instructions below to fix the issue now.

Why can’t I edit my YouTube video?

1. Check if the Previous Edit is in Progress

Check Video Edit Progress Youtube

  1. One common cause of this error is the previous edit that is still in progress and the user tries to make a new edit. When the user clicks on edit, YouTube shows the Sorry this video cannot be edited error.
  2. First thing you should do is check if you made any recent changes to the YouTube video and if the processing is completed. You can only edit the video again once it is completely processed.

Stream, upload, or edit YouTube content effortlessly with these browsers.


2. Use Old YouTube Studio

  1. If the error is occurring on the newly revamped YouTube studio, try to go back to the old YouTube Studio and then edit the video. Users have reported that they were able to fix the error using the old YouTube studio app. Here is how to do it.
  2. Login to your YouTube account.
  3. Click on your Profile (top-right corner) and select YouTube Studio.
    Edit Video in Old YouTube Studio
  4. From the left pane, click on the Creator Studio Classic tab.
  5. YouTube will ask you for a reason, you can either give a reason or simply click on the Skip button to proceed.
  6. This will take you to the old YouTube Studio.
  7. Select your video and click on Edit. Check if the error the Sorry this video cannot be edited is resolved.

3. Delete and Reupload the Video

  1. If nothing seems working, you may have to delete the current video and re-upload it. However, doing so will also delete any views and stats for the video as well.Re-upload Video to fix the error
  2. This is usually important if you receive any copyright strike and you are unable to edit the video. In such a situation, you may need to make the video as private or simply delete and re-upload the edited version.
  3. It can also be a temporary issue. Users have reported that they were able to edit the video again and the error message went away by itself after a week or two. So, if it is a temporary issue that has affected your account, you may want to wait for a few days after making the video private before trying to re-edit and re-upload the video.

RELATED STORIES YOU MAY LIKE:

FIX: Windows 10/11 Firewall is blocking Skype [SIMPLE GUIDE]

Windows Firewall comes pre-installed with the Windows OS and offers extra layer protection again malware and other threats. However, at times this protection program can create issues with VoIP services like Skype.

Some users have reported the Windows Firewall is blocking skype application or some functionalities of the app on the Microsoft Answers forum.

My firewall is blocking some features of Skype. What do I have to do to allow access so I can use Skype?

Fix this by following the steps below.

How do I allow Skype through my Firewall on Windows 10?

1. Add Skype to Exception List in Firewall

  1. Press Windows Key + R to open Run.
  2. Type firewall.cpl and press OK to open Windows Firewall settings.
  3. From the left click on Advanced Settings. This will open Windows Fender Firewall with Advanced Security window.
  4. In the new window, select Inbound Rules option.
  5. From the right pane click on “New Rule” option.
    Inbound Rules - New Rule Skype Firewall
  6. In the  Inbound Rule Wizard, select “Program” option and click Next.
  7. Select “This program path:” and click the Browse button.
    This Program Path - Skype Firewall
  8. Navigate to your Skye installation folder which by default should look like this: C:>Program Files (x86)>Skype>Phone
  9. Select the skype.exe file and click Next.
    Skype exception list - Allow the connection
  10. In the next page keep all the option as it is and click on Finish.
  11. Note that you can only add Skype to exception list if you have Skype classic installed. If you have installed Skype from the Windows Store, you won’t able to access the required .exe file.
  12. Close the Windows Defender Firewall window and check if the error with your Skype application is resolved.

Learn what exact program or port is blocked by Firewall in this dedicated guide.


2. Change Network Location Awareness Properties

  1. Press Windows Key + R to open Run.
  2. Type services.msc and press OK to open the Services window.
  3. In the Services window look for Network Location Awareness Properties.
  4. Right-click on Network Location Awareness and select Properties.
  5. For the start-up type, select the drop-down menu and set it to  “Automatic Delayed”.
  6. Click Apply and OK to save the changes.
    NLA Properties Delayed Restart - Skype Firewall issue
  7. Close the Services and check if you are able to connect to your Skype account.
  8. Changing the Network Location Awareness Properties will help if the issue has occurred due to a slow connection between the SQL servers etc.

3. Issues with Third-party firewall

  1. If you are using a third-party Firewall then you need to make changes accordingly. Since there are so many antivirus and firewall programs, you need to find the right settings to add Skype to the exception list by the searching for your  Firewall program.
  2. For Malwarebytes users, you can find the appropriate option in the Settings tab.
    Add Skype to Exception List Malwarebytes
  3. Go to Settings and click on the Exclusion tab.
  4. Click on Add Exclusion, select “Exclude an application that connects to the internet” and clicks Next.
  5. Then select the Skype application and make necessary changes depending on your requirement.

RELATED STORIES YOU MAY LIKE:

Stay away from July Patch Tuesday updates to avoid black screen issues

Microsoft already released the July 2019 Patch Tuesday updates for different versions of Windows 10. Well, the company recently acknowledged the updates are affected by frequents black screen issues.

The official support page confirms that the issue affects all Windows 10 versions, including Windows Server v1809 and Windows Server 2019.

The good news is that only a small number of devices are affected by this issue.

We are investigating reports that a small number of devices may startup to a black screen during the first logon after installing updates.

Many users complained about these problems on different forums. Once Windows 10 users installed the recent updates, they got a black screen during the first logon.

When someone asked on Reddit:

Does anyone have the black screen problem?

Other Redditors quickly confirmed they experienced the same problem:

Yep, currently trying to do a system restore point


Windows 10 May Update is also plagued by black screen issues. Check out this post to learn more about this problem.


Patch coming soon

Microsoft is currently investigating the reports. The company has not shared any details about the root cause behind the issue.

At the moment, it is too early to say when the hotfix will be available. However, we expect Microsoft to roll out the patch in a few days’ time.

Meanwhile, you can try a temporary workaround until a permanent fix is available. Redditors used the system restore feature to restore their systems to an earlier stable build.

As a quick reminder, this is a time-consuming process but there is an easy way to deal with this issue.

If you are experiencing similar issues after installing the Windows 10 July 2019 updates, you can follow these steps:

  1. As soon as you see a black screen, press and hold Ctrl+Alt+Delete keys on your keyboard.
  2.  Once you are navigated to the login screen, click the Power button available at the right bottom and select Restart.

Your PC should now start without any issues. It seems like the recent updates are plagued by many other issues. Microsoft warned its users against a bunch of other problems as well.

Have you experienced any such issues on your system? How did manage to get rid of them? Comment down below to help others.

Don’t forget to bookmark this page in case you’re getting other black screen issues:

Windows 7 KB4507449 brings more issues than fixes

This month’s Patch Tuesday updates brought a few bug fixes and enhancements to Windows 7 users.

Windows 7 KB4507449 is now availabel to all Windows 7 Service Pack 1 and Windows Server 2008 R2 Service Pack 1 users.

Keep in mind that you need to install the latest servicing stack update (SSU) on your Windows 7 PC before downloading KB4507449.

As a matter of fact, the SSU will help you to mitigate potential issues experienced during the installation process. The latest servicing stack update i.e KB4490628 will be available automatically via Windows Update section.

Alternatively, you can visit the Microsoft Update Catalog to download it.

Surprisingly, the KB4507449 changelog comes with a single fix. It improves the overall security of the OS and some individual built-in modules.

KB4507449 improvements and fixes

General Security updates

Update KB4507449 specifically addresses major issues introduced by the previous KB4503277 update. This update brings a series of general security updates for Windows Kernel, Windows Storage and Filesystems, Windows Server, Windows Shell, Microsoft Graphics Component and Windows Input and Composition.

KB4507449 known issues

Fortunately, KB4507449 brings a single known issue to the table. Microsoft acknowledged the fact that the company is currently working with McAfee to resolve an issue with McAfee security products.

The bug affects the systems running McAfee Host Intrusion Prevention (Host IPS) 8.0, McAfee Endpoint Security (ENS) Threat Prevention 10.x and McAfee VirusScan Enterprise (VSE) 8.8.

Please note that after installing KB4507449, your system may completely fail to respond at startup. It is also possible that the startup process is slower than usual.

Microsoft is currently investigating the issue and promised to release a patch very soon.

Download KB4507449

KB4507449 is available as an automatic download. Go to the Settings menu to check for the latest updates. You also have the option to download the update manually on your system.

RELATED ARTICLES YOU NEED TO CHECK OUT:

Inspire 2019: Microsoft Teams crosses 13 million daily active users

Microsoft has revealed new usage data about Microsoft Teams today ahead of its Inspire partner conference, taking place July 14-18 in Las Vegas. A little more than two years after its initial launch, Microsoft Teams has now crossed 13 million daily active users and 19 million weekly active users, and it’s the first time that’s Microsoft is sharing daily and weekly active usage metrics.

Earlier this year, Microsoft announced that Teams was now being used by more than 500,000 organizations worldwide, including 91 Fortune 500 companies.

Teams app remains one the fastest growing apps Microsoft released in recent years, and it’s slowly but surely catching up to Slack which is currently in use with 600,000 organisations. Microsoft Teams is now available in 52 languages across 181 markets, and it’s included for free with Office 365 Business and Enterprise subscriptions. Microsoft also made Teams free to use with a personal MSA account to compete with Slack’s free tier, though this free version of Teams aimed at small-to-medium businesses has some limitations to get users on board with the paid version.

How to create an email alias for your Outlook.com account

Are you in need of a second email address? You don’t have to create a whole new email account. Instead, you can add an alias to your existing Outlook.com inbox. You can send and receive email using the alias and have it show up in your regular inbox, without switching account or using multiple mailboxes.

To get started, head to the Outlook.com web interface. Click the Settings icon in the top-right and then click “View all Outlook settings” at the bottom of the Settings pane.

Screenshot of adding an alias to a Microsoft account

An overlay window will appear containing Outlook’s settings. From the navigation menu, click Email > Sync email. Scroll down the page to the “Email aliases” heading and click the “Manage or choose a primary alias” link.

Screenshot of adding an alias to a Microsoft account

You’ll now be redirected to your Microsoft account and may have to verify your identity with a Microsoft Authenticator prompt. You’ll then land on the “Manage how you sign in to Microsoft” page of your Microsoft account settings. Here, you can see all the existing aliases attached to your account.

Screenshot of adding an alias to a Microsoft account

Under “Account aliases,” click the “Add email address” link to add a new alias. You can either add an entirely new address (provided it’s available), or choose to link an existing email address to your Microsoft account. Type the address and click “Add alias.”

Screenshot of adding an alias to a Microsoft account

The email address will be added to your account immediately. Emails received to the address will show up in your Outlook.com inbox. You can also choose to send mail from the alias using the dropdown menu next to the “From” field in the Outlook.com editor. This works in the Outlook desktop client too – restart Outlook to see your alias appear as an option in the From menu.

Screenshot of adding an alias to a Microsoft account

You’re now ready to start using your alias. Optionally, you can convert it to the default email address for your account (the one which is used for outgoing mail by default) by clicking the “make primary” link back on the “Account aliases” page. Otherwise, continue using your mailbox as normal and select the alias as the From address when you need to send email from it.

Microsoft isn’t relenting on cutting off internal user rights for Microsoft Partners

Earlier this week, just a week before Microsoft’s annual Inspire Partner conference, word got out that the company was cutting a long-standing perk for partners as part of an annual Microsoft Action Pack subscription available to them. For years and years, partners were able to gain “internal use rights” for software from Microsoft, meaning that with an Action Pack you could use the software to run your business. The idea apparently was to make it easy for partners to be running the Microsoft software they were helping to sell.

Some partners were quite incensed by the change in policy, which is to take effect at the beginning of Microsoft’s next fiscal year on July 1, 2020. In response to the complaints, company execs held a Partners only AMA webcast, attended by some 230 partners, according to a post by Mary Jo Foley outlining details of the webcast. According to Foley, “Microsoft officials held fast to their stance, saying the company had to make some trade-offs in order to deliver on other priorities, such as making it easier for partners to connect with more users, partners and sellers.”

Details of the costs and benefits of a Microsoft Action Pack are locked behind Partner Network gauntlets, but a 2014 post by RedmondMag, detailing a 44% rate hike in the costs of the Action Pack, revealed that for 10 licenses, partners would pay $475 per year. This included “full licenses for Windows desktops and servers, as well as other server products, such as SQL Server, Exchange Server, SharePoint Server and Lync Server…  internal-use seats of Office 365, Dynamics CRM Online and Windows Intune and Windows Azure usage credits…. (and) technical support, developer tools, marketing campaign materials and services and $100 in Bing advertising credits for the subscriber and $500 for the subscriber’s customers.”

So, for example, taking these 2014 numbers, a small business joining the Partner program could get full licenses for Windows, Office, and a number of server products, Office 365, Intune, and Azure credits (the post doesn’t detail how much credit was included), and technical support and other perks for 10 seats, for a price of less than $4/mo per seat. That’s an amazing deal, and it’s not beyond reason to believe that at least some companies realized that becoming a partner and subscribing to an Action Pack was an extremely cost effective way to get Microsoft products, regardless of any “partner” work they did (getting into the Partner program has some criteria, but it’s not that hard).

For whatever reason, Microsoft has decided to pull the plug on this perk of the program, and after next year partners are going to have to rethink their product licensing. For Microsoft, that may be the point, to cull out partners that are in the program for the cheap software as opposed to helping the company sell software and services more effectively.

We expect to hear some more about the kerfluffle at Inspire, but don’t expect Microsoft to back down on this one.

Can’t Unpin From Taskbar: 4 Ways to Permanently Fix it

The Taskbar has always been one of the most loved features of the Windows platform, but many users reported that they can’t unpin items from Taskbar.

This isn’t the only issue, and many reported that Taskbar is not working on their PC, but today we’re going to focus solely on pinning issues.

Not being able to unpin apps can be a problem, and in today’s article, we’ll show you how to fix it.

Why can’t I unpin from Taskbar?

  • The damaged software installation will cause issues with the unpinning feature.
  • Problems with the registry can cause issues with pinning apps.
  • Tablet Mode on Windows 10 can sometimes cause problems with Taskbar.

How do I permanently unpin something from my Taskbar?

1. Uninstall and re-install the app

  1. Click on Start and select Settings. Then choose  Apps.
  2. Select the app and click on the Uninstall button.
  3. Now install the application again.
  4. Try to unpin the app from the taskbar by right-clicking on it and selecting the Unpin from taskbar option. However, if issues persist, try the next method.

2. Run script file

  1. Open Notepad. (Simply type Notepad in the Cortana search box and select from the search result).
  2. Copy and paste the following four lines of text.
    DEL /F /S /Q /A "%AppData%\Microsoft\Internet Explorer\Quick Launch\User Pinned\TaskBar\*"
    REG DELETE HKCU\Software\Microsoft\Windows\CurrentVersion\Explorer\Taskband /F
    taskkill /f /im explorer.exe
    start explorer.exe


  3. Click on Files on the top left corner and select Save.
  4. In the Save As dialog box, set Save as file type to All Files.
  5. Choose any file name of your choice but provide it with the extension .bat.
  6. For instance, it can be like Unpin from taskbar.bat.
  7. Double-click on the batch file you just created for the commands to take effect.
  8. Reboot your PC.

If you can’t remove icon from Taskbar on Windows 10, running this little scrip can help.

3. Unpin from Start menu

  1. Click on Start.
  2. The app you wish to unpin from the taskbar should also be there on the Start menu as well.
  3. Right click on the app and select More and choose Unpin from taskbar.
  4. The app should be gone from the taskbar. If not, try the next method.

4. Switch to Desktop mode from Tablet mode

  1. For those who aren’t aware of the same, the concept of Taskbar is relevant only in the Desktop mode.
  2. So if you have the Tablet mode enabled on your PC, toggle it off to invoke Desktop mode.
  3. To toggle off Tablet mode, click on Notification center at the bottom right corner and disable Tablet mode.

This should be all you need to do if you are unable to unpin an app from the taskbar.

In case you want to learn more, we have a great guide on how to hide the Taskbar, so you might want to check it out.

Speaking of Taskbar and apps, we also have a guide on what to do if unpinned apps keep coming back on Windows 11, so don’t hesitate to check it out.

What methods did you use to fix this problem? Let us know in the comments below.

How to see the diagnostic data Windows 10 is sending to Microsoft

With the Windows 10 April 2018 update, Microsoft finally reduced some of the secrecy around its Windows 10 telemetry collection. You can now view the diagnostic data which your PC is sending home to Microsoft, although it won’t necessarily be easy to understand.

First, you have to explicitly enable diagnostic data viewing from the Settings app. Open Settings and navigate to Privacy > Diagnostics & Feedback. Scroll down the page to the “Diagnostic data viewer” section.

Enabling Diagnostic Data Viewing in Windows 10

Under this heading, turn the toggle button to the on position. Diagnostic files will now be retained on your device, so you can view them. This will consume additional space – Microsoft estimates up to 1GB – as diagnostic files are normally removed after they’re uploaded to the cloud.

Although you’ve enabled telemetry viewing, the Settings app doesn’t provide a way to actually access the files. Instead, you’ll need a separate app, “Diagnostic Data Viewer,” from the Microsoft Store. Click the “Diagnostic Data Viewer” button to open a link to the Store. Click the blue “Get” button to download the app.

Screenshot of Windows 10 Diagnostic Data Viewer app

Once the app has installed, click the blue “Launch” button on the Microsoft Store page to open it. Alternatively, search for the app in the Start menu.

The app has a simple two-pane layout. On the left, you’ll see a list of all the diagnostic files on your device; on the right, the contents of each file appears when it’s selected. If you’ve only just enabled diagnostic viewing, there may not be many files to show – it will take time for diagnostic logs to be created and stored on your device.

Screenshot of Windows 10 Diagnostic Data Viewer app

You can filter the diagnostic data using the filter button at the top of the interface, next to the search bar. This lets you choose to view a specific category of telemetry information, which might be helpful when investigating a particular problem on your device.

Unfortunately, you may find the diagnostic data hard to interpret, unless you’re already fairly familiar with Windows internals. The data is presented in its raw JSON format. If you were hoping for a readable breakdown of what’s being sent, you’re still out of luck. The telemetry contains a wealth of your data about your device and the events occurring on it, but the lack of explanation may leave you none the wiser when it comes to understanding what Microsoft is collecting.

Word Document Small on Screen: How to Restore Normal Size

A number of users have reported that whenever their Word document is too small on screen when they open it. This issue seems to affect all versions of Microsoft Word, so this indicates that the problem is local.

In this article, we will explore a quick way to fix this annoying error. Read on to find out more.

Why is my Word document small?

Listed below are some of the reasons your Word document might be small on screen:

  • Wrong settings – Sometimes, the Microsoft Word app might be set to open minimized. This leads to the small window you see when your open any document. You need to change the settings to allow Word to run a maximized window.
  • Closing Word minimized – If you closed Word in a small window the last time you used it, it will open in that size when you open another document. So, ensure you maximize it before closing the document you are working on.

Now, if you are wondering how you can fix the default window size for Word documents, proceed to the next section of this guide.

How do I get my Word document back to normal size?

1. Change settings from the properties window

  1. Click on the Cortana search button, type in Word, right-click it and select Open file location.Open file location Word - Microsoft Word Opens small window
  2. This will open the folder in which your Microsoft Word is installed.
  3. Right-click the Microsoft Word icon and select Properties.
  4. Inside the Shortcut tab, click on the drop-down menu next to Run, select Maximized, and click OK.
    Run maximized Word - Microsoft Word opens small window
  5. Check to see if this fixes your problem. If it doesn’t, please follow the next method.

2. Maximize the window before closing Word

  1. Open your Word Document normally.
  2. Drag and drop the edges of the Word document to the desired size (or maximize it by clicking the Maximize button).
    maximize
  3. Close the document.
  4. When opening the document again, it should have remembered the size that the window had before it was closed.
  5. If this doesn’t solve your issue, please follow the next method.

3. Use the Ctrl key on your keyboard

  1. Open your Microsoft Word document.
  2. Resize the window to the desired size by dragging and dropping the edges of the window, or by selecting the Maximize button (see Method 2 step 2).
  3. Press and hold the Ctrl key on your keyboard and close the Word document by clicking the X button in the upper right corner of your screen.
    close word document small on screen
  4. Re-open the Microsoft Word document to see if the issue is solved.

In this article, we explored the best ways to deal with the problem caused by Microsoft Word opening in a small window, no matter what settings you applied to it before closing the document.

Similarly, if you can’t zoom word documents for some reason, check our detailed guide to rectify it.

Please feel free to let us know if any of these methods helped you solve your issue by using the comment section below.