FIX: Error Code 0x87e0000d on Xbox One and PC [Expert Guide]

The Error 0x87e0000d is commonly experienced on Xbox one and PC when installing games from Microsoft Store. It could be a temporary bug, caused by system file corruption or Xbox live server issue.

This guide offers you solutions for fixing this error in all the scenarios that may cause it to show up.

How do I fix error 0x87e0000d on Xbox One and MS Store?

1. Reinstall Windows 10 default apps with PowerShell

  1. Press Windows + R to launch the Run
  2. Type in PowerShell without and press Enter.
    • This will launch Powershell with elevated privileges.
  3. In Powershell, type
    Set-ExecutionPolicy Unrestricted
    fix error code 0x87e0000d by reinstalling apps with powershell

    and then press Enter or Y to change the policy to Unrestricted.

  4. The next step is to re-install all the built-in Windows software. Do this by typing
    Get-AppXPackage -AllUsers | Foreach {Add-AppxPackage -DisableDevelopmentMode -Register "$($_.InstallLocation)AppXManifest.xml"}

    in Powershell.

  5. Finally, restart your device and confirm the fix.

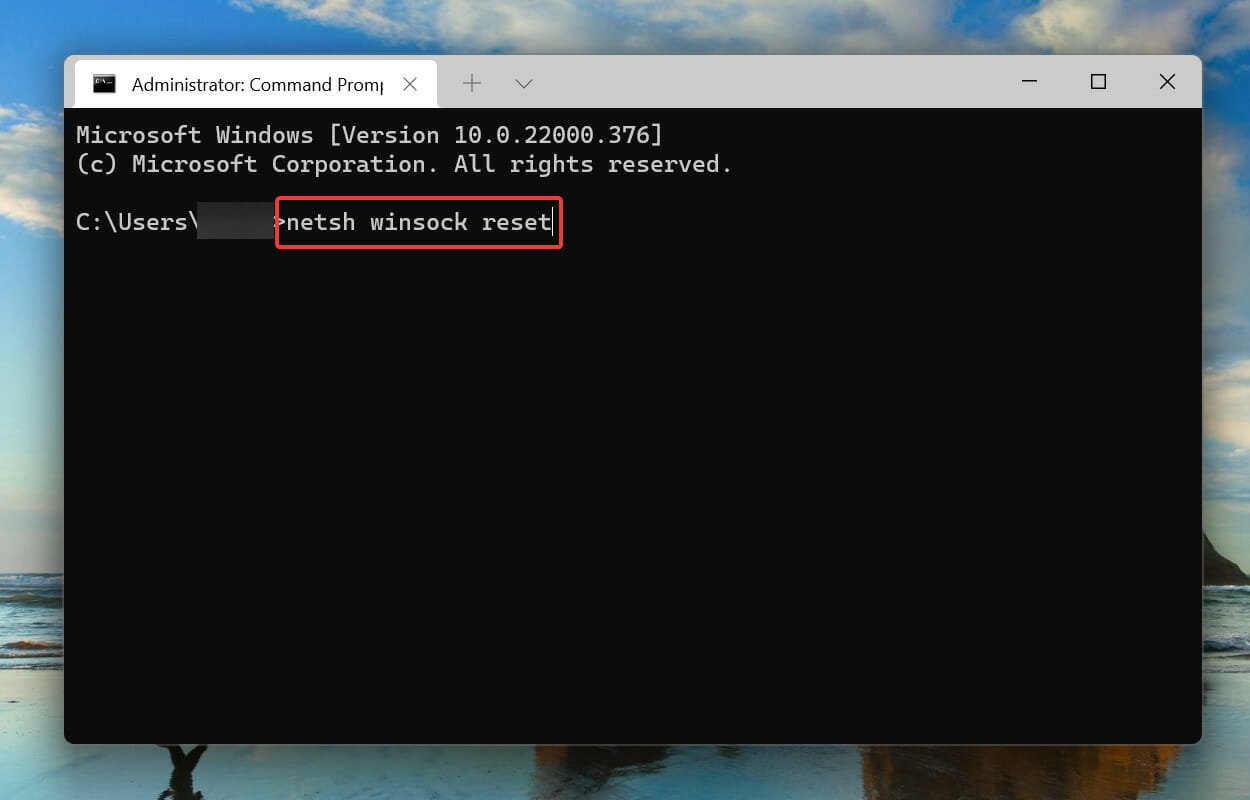
2. Restart Game Services error 0x87e0000d xbox one and microsoft store by restarting game service

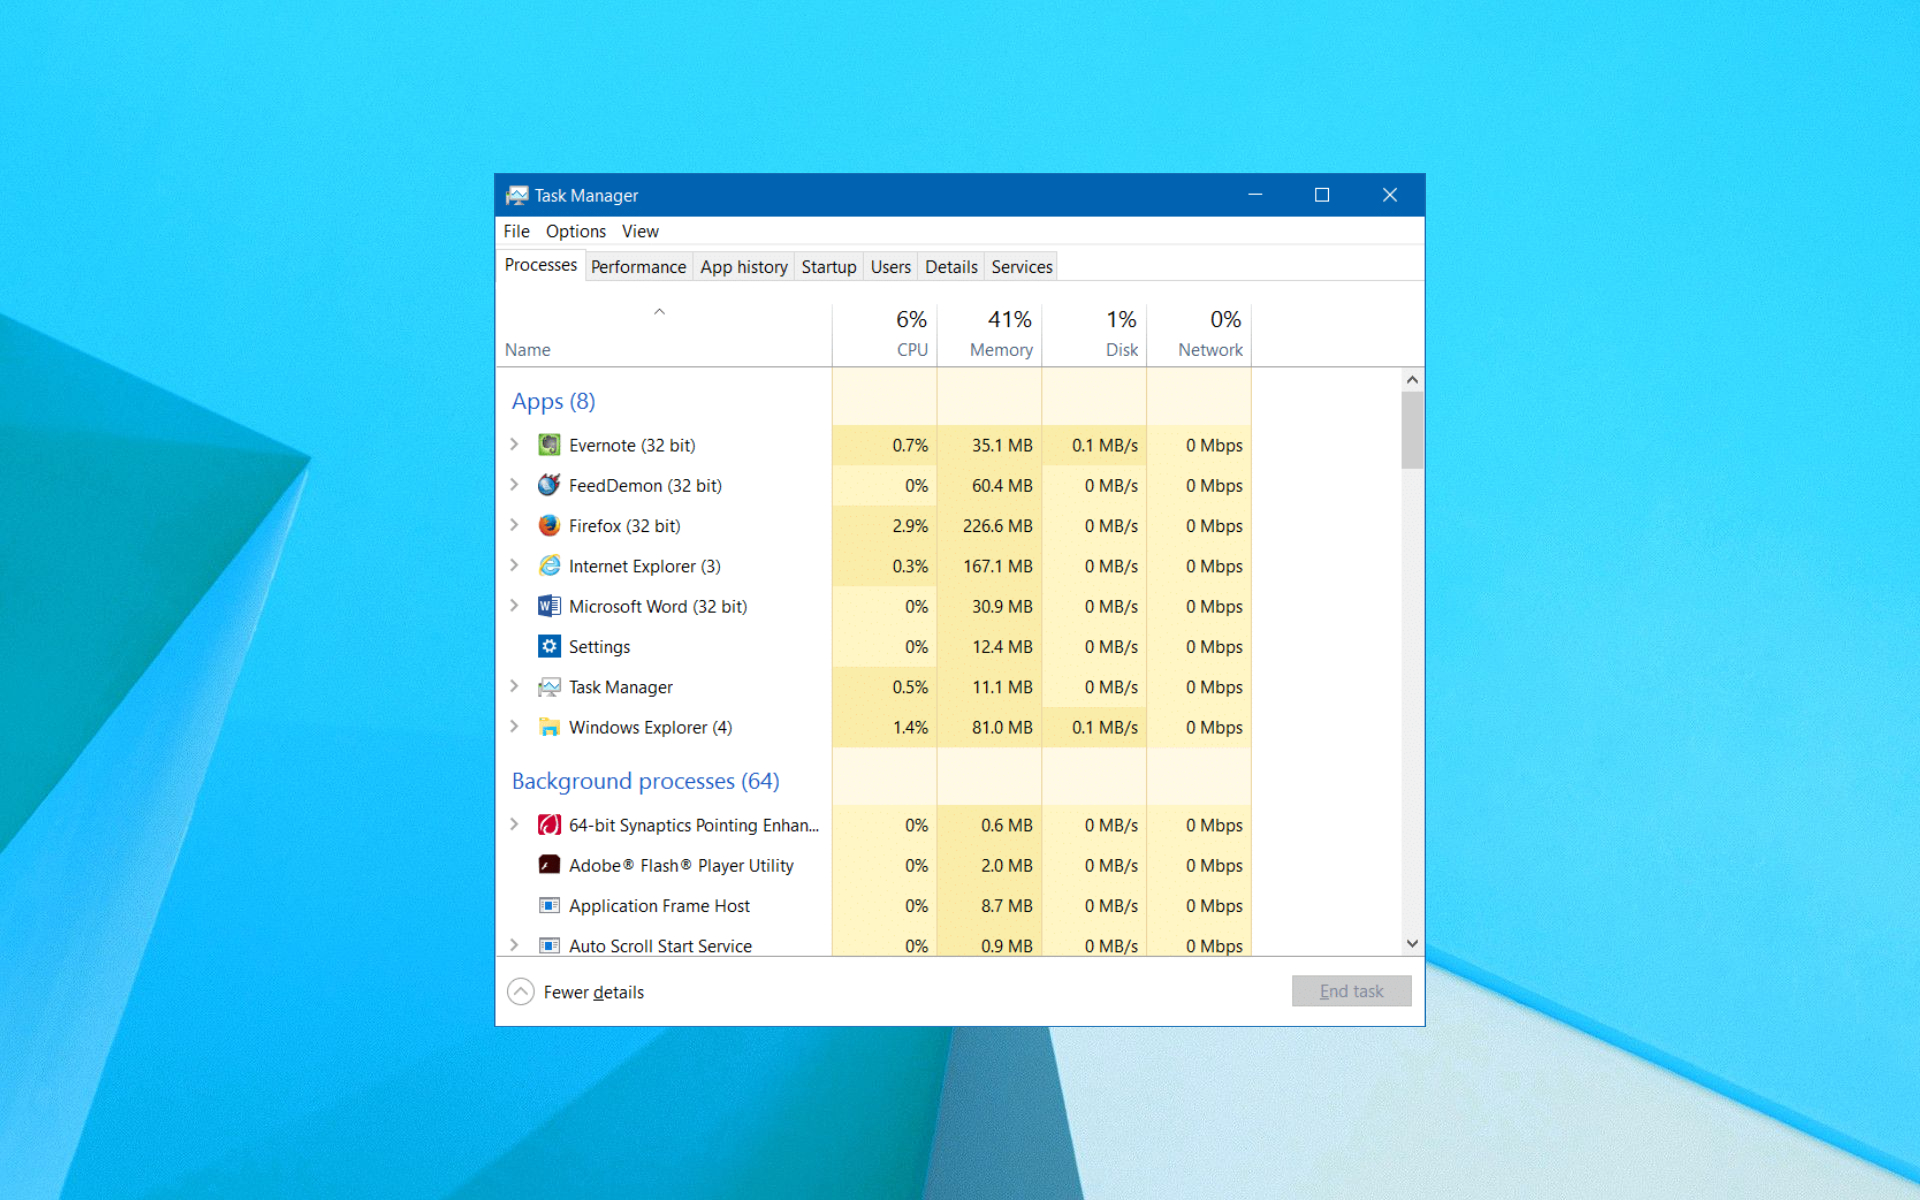
  1. Open your task manager by pressing CTRL + ALT + Del and selecting Task Manager.
  2. Next, navigate to the Service stab.
  3. Locate and restart the XblGameSave service by right-clicking on it and selecting restart.

3. Install the game in Offline Mode (Xbox One)

  1. Open the Guide Menu by pressing the Xbox button on your controller once.
  2. Next, go to Settings > System > Settings > Network.
  3. Click on the Network Settings menu and choose Go Offline.
  4. Restart your Xbox One console.
  5. Now, after this, try to recreate the error by repeating the action that caused the 0x87e0000d error.
  6. If it persists, reverse the steps to turn off Offline mode.

4. Reset your Xbox One console

  1. Press the Xbox button to launch the Guide Menu, then go to System > Settings > System > Console Info.
  2. Select the Reset Console option, and then access it by pressing A.
  3. Click the Reset and keep my games & apps option and allow the process to run.
  4. Next, restart the console when the process runs successfully.
  5. Relaunch the game and confirm the fix.

5. Repair the error 0x87e0000d Xbox One with a power cycling Procedure

  1. Power on your Xbox console.
  2. Press and hold the Xbox button for ten seconds (or until the front LED stops flashing).
  3. Next, let go of the power button and then unplug the console from the outlet.
    • Leave the console in this state for a couple of minutes.
  4. Restart your Console and watch out for Xbox animation to confirm power cycling.
  5. Try to recreate the action that caused the issue.

6. Fix the error code 0x87e0000d by clearing your Windows Store cache

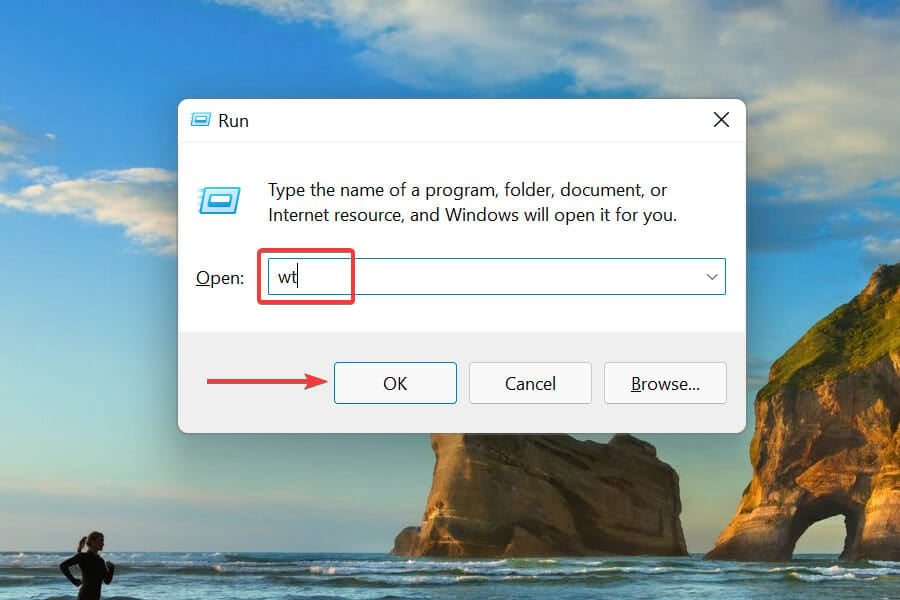
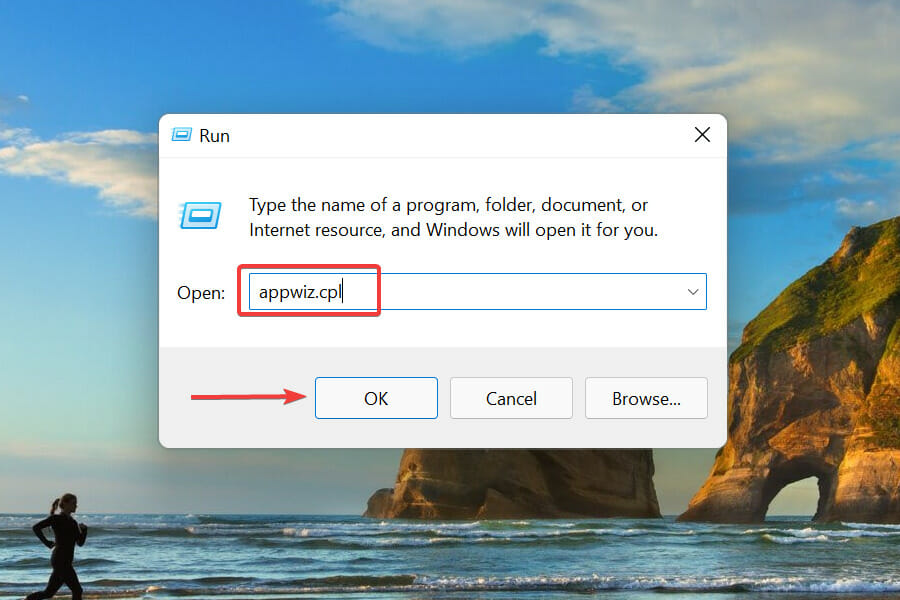
  1. Press the Windows key and then press R to trigger the Run dialog box.
  2. In run, type the following command and hit Enter.
 wsreset.exe
clear windows store cache to fix the error code 0x87e0000d

The Error: 0x87e0000d is very rear. Often than not, it is a network issue. One of the above methods should help fix the issue. If it persists, an external software used for repairing windows should suffice.

Let us know if you are aware of any other fixes for this issue and share them with the other users by leaving us a message in the comments section below.

Laptop PC Can’t Find Bluetooth Headphones: 4 Fixes to Use

Bluetooth is a vital feature in Windows that allows users to wirelessly connect many devices, including printers, earphones, headphones, and speakers. But many reported that their laptop couldn’t find Bluetooth headphones.

Facing issues enabling Bluetooth in Windows is one thing, but it becomes particularly concerning when you cannot connect to a particular device. So, let’s find out why your PC can’t find Bluetooth headphones and the solutions for it.

Why is my Bluetooth headphone not showing up?

Here are some of the reasons why Bluetooth is not finding devices:

  • Device not compatible – If the Bluetooth headphone is not compatible with the iteration you are running, it may not show up when trying to establish a connection.
  • Incompatible or outdated driver – If the installed driver is outdated or incompatible, you will have trouble connecting devices or even using Bluetooth.
  • Incorrect mode set – Your headphones need to be set to Pairing Mode when connecting to the laptop, and if that’s not the case, there will be issues.

What can I do if my laptop can’t find Bluetooth headphones?

Before you go ahead and make slightly complex changes in a bid to fix things, here are a few quick tips that might work:

  • Make sure the Bluetooth headphone you are trying to connect to is in the range of the laptop.
  • Restart both the computer and the headphone, and then try establishing a connection.
  • Verify that Pairing Mode is enabled on the headphone before trying to connect it to the laptop.
  • If the headphone is paired and connected with another device, such as a mobile phone, make sure you disable Bluetooth.
  • Update Windows
  • Check if you can connect the headphone to another computer. In case it doesn’t, the problem lies with the headphone themselves.

If these don’t work, head to the solutions listed next.

1. Pair the device again

Note icon NOTE
If you have ever connected the Bluetooth headphone, start from the first step. If this is the first attempt, you can skip the first three and start from the fourth step.
  1. Turn off your headphones and hold the Power button for at least 5 seconds to reset the list of paired devices. Once it begins to flash, it is ready to pair.
  2. On your laptop, press Windows + I to open Settings, click on Bluetooth & devices and then choose View more devices.view more devices
  3. Next, click the ellipsis next to the device that won’t work and select Remove Device.remove device to fix laptop can't find bluetooth headphones
  4. Now, head back to Bluetooth & devices and click on Add device.add device
  5. Choose Bluetooth, wait for the device to appear, and then connect.bluetooth

If Bluetooth is not detecting devices in Windows 10 or 11, a simple option would be to re-add them. This will eliminate any

2. Update the drivers

  1. Press Windows + R to open Run, type devmgmt.msc, and click OK.device manager
  2. Expand the Bluetooth category, right-click on the adapter, and select Update driver.update driver to fix laptop can't find bluetooth headphones
  3. Select Search automatically for drivers.search automatically for drivers

Using the latest and compatible drivers is critical for the effective functioning of the Bluetooth adapter, and in case you run into issues, install the most recent Bluetooth driver. You can also check the manufacturer’s website directly for an updated version.

If you want another excellent option, you can use a professional tool to scan and install the correct driver for your device automatically.

3. Run the dedicated troubleshooter

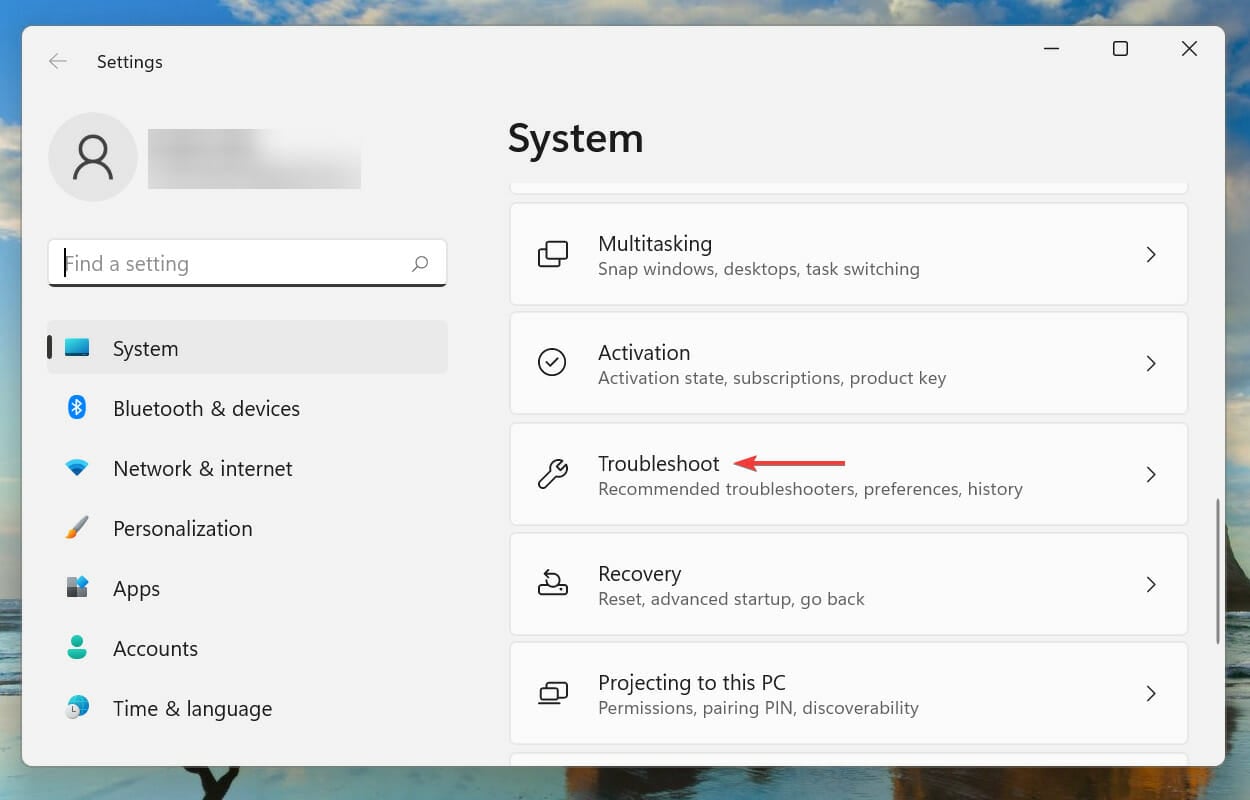
  1. Press Windows + I to open Settings, and click on Troubleshoot in the System tab.troubleshoot
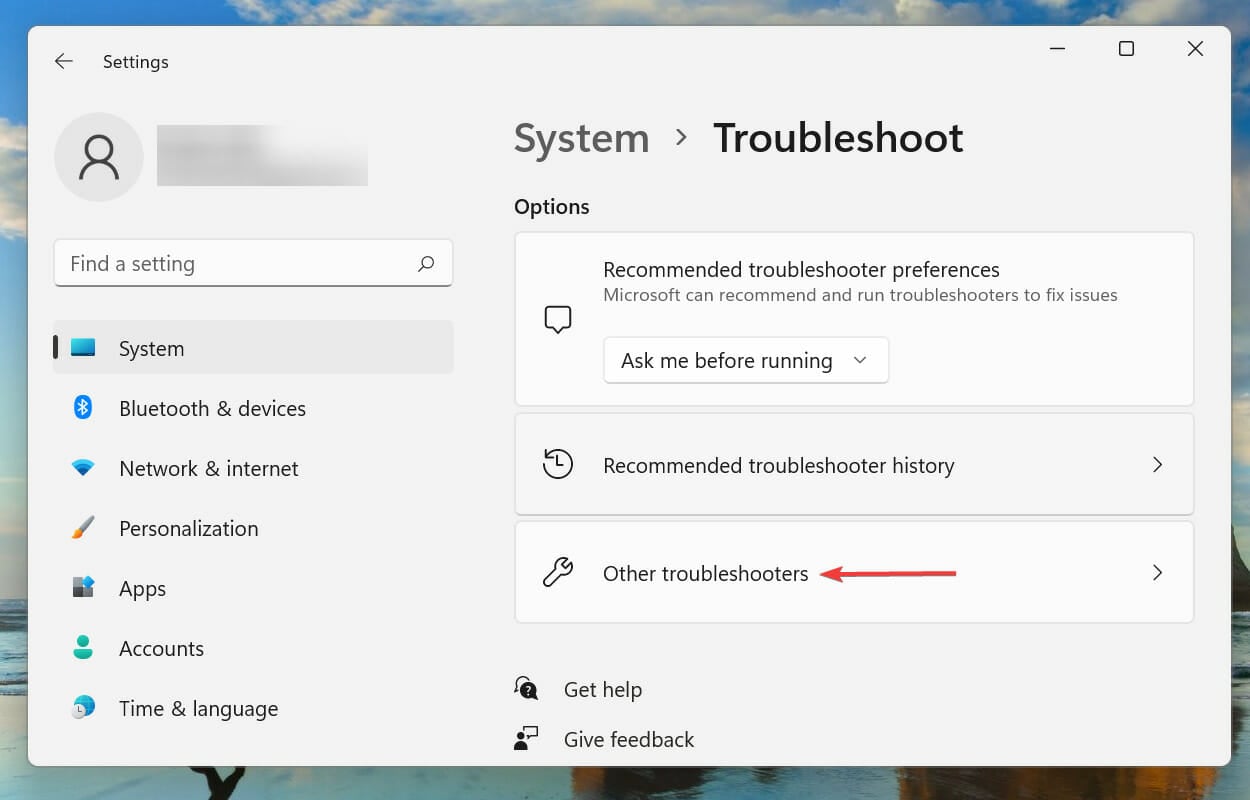
  2. Click on Other troubleshooters.other troubleshooters
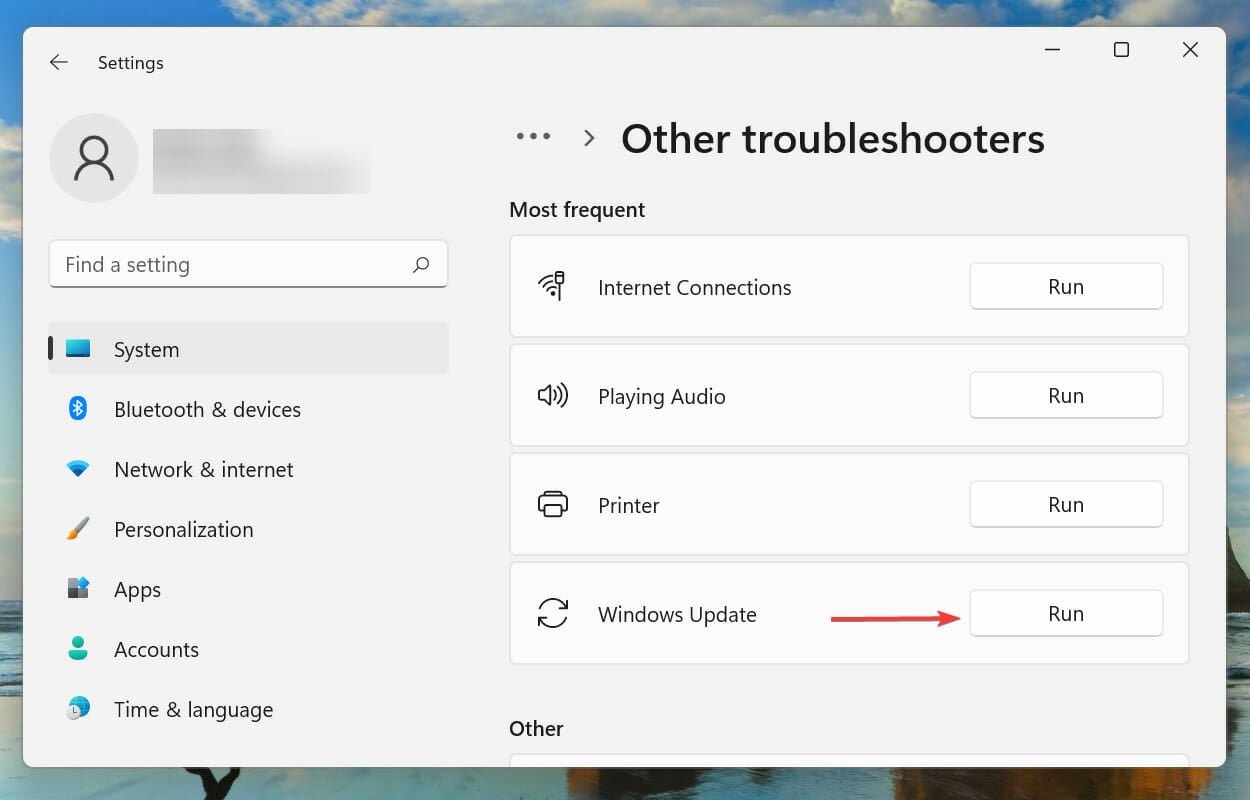
  3. Now, click on Run next to the Bluetooth entry to launch the troubleshooter.run to fix laptop can't find bluetooth headphones
  4. Wait for it to identify the problem, and then follow the on-screen instructions to complete the process.troubleshooter

Running the dedicated troubleshooter should do the trick if you can’t find Bluetooth headphones in Windows 10. Also, run the Hardware and Devices troubleshooter if you can connect, but the PC does not recognize Bluetooth headphones as audio.

4. Make sure the critical services are running

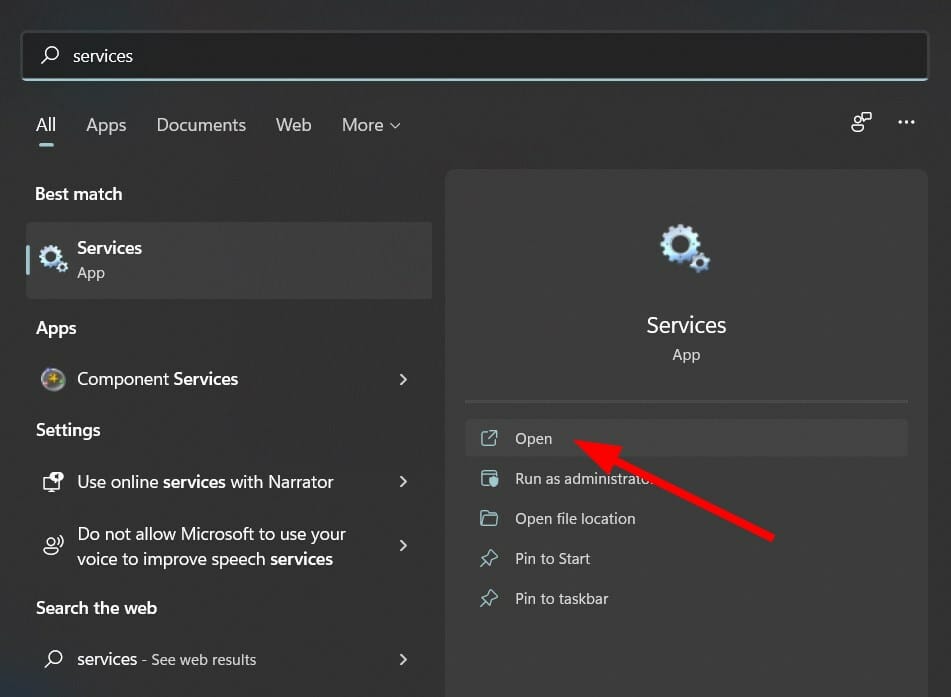
  1. Press Windows + S to open Search, type Services in the text field, and click on the relevant search result.services.msc
  2. Locate the Bluetooth Support Service, right-click on it, and choose Properties.properties
  3. Select Automatic from the Startup type dropdown menu, click on Start under Service status to run the service, and click OK to save the changes.start to fix laptop can't find bluetooth headphones
  4. Now, restart the computer for the changes to come into effect.

That’s it! If your laptop can’t find Bluetooth headphones, enabling the Bluetooth Support Service should fix things. If it still doesn’t work after you follow all the solutions here, chances are the problem lies with the headphone, and you should contact the manufacturer.

Once you have resolved the problem, check the best headphone software for enhanced audio.

If you have any queries or fixed things using a solution not listed here, drop them in the comments section below.

Microsoft Store Deals: Up To 70% Off

Microsoft is joining in on the trend of having an extension of the seasonal sale, and this year they included pretty much anything you need. This includes laptops, games, subscriptions, and more.

A lot of these offers are quite substantial, so not taking advantage of them is a real shame.

So, if you’re looking to add some new hardware to your kit, or are just looking for a good deal on pretty much anything Microsoft-related, then go ahead and check out our links below.

What are the best Microsoft deals that I can take advantage of?

Surface deals

cxvxcvxcv

The Microsoft Surface is a series of touchscreen-based personal computers and interactive whiteboards designed by Microsoft. They are made to be an excellent hybrid between the power of a laptop and the portability and interactivity of a tablet.

Some of these products are now on sale, some of them with an incredibly large discount depending on the specs you choose.

Surface deals

Laptop deals

laptops

Regular laptops are also on sale, and they are from quite a large selection. These include everything from regular work laptops to cutting edge gaming laptops. A lot of these laptops also come from well-known brands in their fields as well.

Thus whether you are looking to get work done faster, or are just looking for a smoother gameplay experience, take a look at these top Microsoft laptop deals.

Laptop deals

Desktop deals

tridentx_1_1_2

Those of you that don’t trust portable devices in terms of performance are probably the ones dedicated to the good old desktop PC.

Well, Microsoft has some desktops for sale as well, so if you want to do a little hardware upgrade without breaking the bank, now is definitely your chance.

Desktop deals

Mobile deals

Mobile deals

If you’re a busy person, then you probably need a good mobile phone that goes everywhere you go and can do anything you need it to do. Luckily enough, mobile phones are on sale as well, and some of the entries are at quite the discount indeed.

Mobile deals

App deals

apps.55725.13845840946728393.c9303b3e-0c25-45d0-9a64-6a89b431c9d7

If you have all the hardware that you need but are looking for some upgrades in the software department, then you should check out these Windows 10 app discounts that are now available.

These include one-time payments as well as subscriptions, so get them while they are still valid.

App deals

Accessory deals

accesory

A good smartwatch or a new pair of headphones is surely something you’ve been thinking of buying for some time now.

Well, Microsoft has plenty of such accessories up for the grabs, so if you want to get your hand on the latest chance, now’s your chance to do so.

Accessory deals

Xbox console deals

xbox deal

Microsoft didn’t forget their console gamers, so they included Xbox deals this year as well. These include deals on bundles, limited edition consoles and more.

So, if you want to restock on your Xbox gaming supplies, now’s the chance to do it without throwing too much money out the window.

Xbox console deals

Xbox digital game deals

Fifa 20

If you’re going to buy a brand new console, you might as well expand your gaming library with a few new titles as well.

Microsoft is offering up all of the most recent and popular Xbox games at a discount price, so now’s a good chance to play that game you’ve only watched streams of.

Xbox digital game deals

Xbox accessory deals

xbox accessory

If you already have a console and all the games that you may ever need, then all that is missing is to add all the Xbox accessories that you need.

These include an extra controller for multiplayer titles, some new headphones, a good racing wheel stand, and more.

Xbox accessory deals

Conclusion

These are the top Microsoft deals at this hour. We recommend that you hurry up and take advantage of them, as these offers may expire anytime from now.

8 Best Audio Enhancers to Boost Your Audio Quality

Find below the best audio enhancers that offer everything you need (and maybe more) while still being very easy to use.

With them, you can: remove background noise, add effects, configure output quality, and much more.

● Top Picks: (more details below)

SoftwareFeatures
Boom 3D3D surround sound and a powerful equalizer.
Adobe AuditionProfessional editing and noise reduction tools.
SOUND FORGE Audio Cleaning Lab 4Advanced noise removal and restoration.
FxSoundEnhanced audio quality without distortion.
FidelizerOptimizes Windows for better audio performance.
AudacityFree and versatile sound editing software.
Bongiovi DPSVirtual surround sound with customizable settings.
LALAL.AIClear audio enhancement and karaoke capabilities.

What is the best audio enhancer to use?

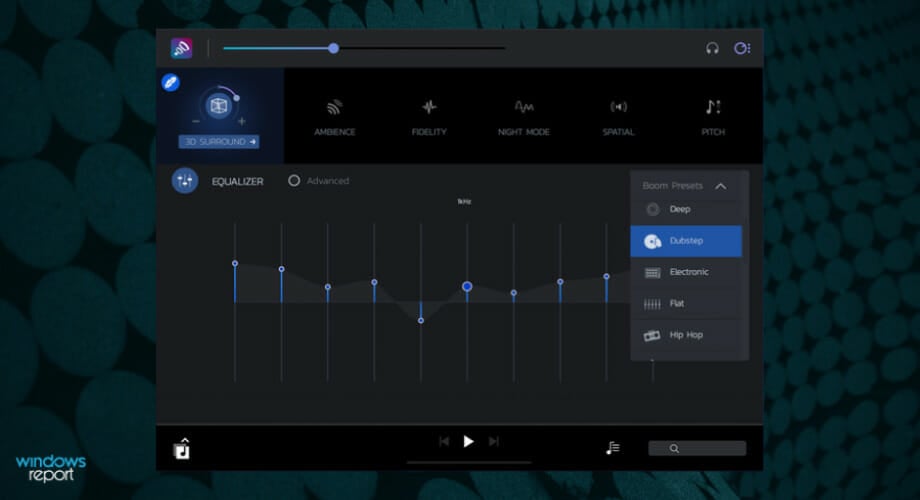
Boom 3D – Best audio enhancing for speakers and headphones

audio enhancers for Windows

Boom 3D for Windows is a powerful app, developed by Global Delight Apps. The original program was designed for Mac and iOS and has achieved insane success, gathering over 40 million users around the globe.

The app is easy to use – even easier than the good old Winamp – and powered by a patent-pending algorithm of 3D Surround Audio Engine that will recalibrate the acoustic senses of the users.

This feature alone would be enough to qualify Boom 3D as the best sound enhancer that you can install on your PC today, but of course, there is a lot more to it.

A clever 31-band equalizer for smooth audio, Boom 3D for Mac and Windows includes a variety of settings that have been thoughtfully created to complement various genres and unique listening preferences.

Speaking about headphones, Boom 3D is the first ever to bring system-wide audio enhancement functionality and let the users play all content in Surround Sound on any headphones, from any player, any media, or any streaming services.

Let’s quickly look at its key features:

  • Powerful equalizer with presets that you can use by default, or create your own
  • Great set of effects that you can combine with the equalizer in order to get a clearer sound
  • You can also choose what kind of headphones you have if you use some

Adobe Audition – Professional Audio Workstation

Maybe most of you heard of Adobe Audition as being a professional audio workstation, that is true but it can however also be used as a personal audio enhancer and of course, it’s really good at it.

This software is great all around and it is used by many professionals around the world. It comes with a lot of features and functions that will enhance the audio quality of your system.

Adobe Audition lets you clean up, restore, and edit both audio and video files with ease. The Essential Sound panel allows you to achieve professional sound quality.

Not only that but if you are into podcasting this software can easily help edit your recordings and make sure you deliver the best sound quality there is.

Some Key Features:

  • Noise reduction
  • Free sound effects
  • Audio mixing and mastering
  • Record podcasts
  • Multichannel audio workflow
  • Viewing, zooming, and navigating audio

Adobe Audition is part of the large Adobe tools family and such can be acquired through the Adobe Creative Cloud, or as single software if you prefer so.

Adobe Audition

Enhance any audio file with this powerful tool from Adobe.
Check Price Visit Website

SOUND FORGE Audio Cleaning Lab 4 – A feature loaded option

audio enhancers for Windows

SOUND FORGE Audio Cleaning Lab is one ultra-powerful tool that perfectly suits your audio-enhancing needs, and is the best audio enhancer for MP3.

As its name hints, the software focuses its capacities on cleaning and restoring your audio files. And it does so easily with smart, 1-click solutions, neat presets, and intuitive controls all backed up by an impressive, cutting-edge toolbox.

From noise reduction to recording optimization, there are countless features to support audio enhancement, all elegantly wrapped in an intuitive workflow to make things easier for you.

You may use the Video Sound Optimizer to improve speech recordings and minimize background noise, wind noise, and sibilance. This utility has a broad range of presets for reducing all sorts of noise and giving you a theater surround experience when watching movies.

The third edition of this all-purpose application has outstanding workflow features, new effect presets, and iZotope’s strong cleaning and mastering plug-ins.

Let’s quickly look at its key features:

  • Digitization capacities to support transferring audio from analog media to your PC
  • Noise reduction, cleaning, and restoration tools
  • Recording functionality (up to 96 kHz)
  • Import, export, and back up your audio files (in any format, including MP3, WAV, and FLAC)
  • Spectral Cleaning Spectral display, plus video sound optimizer
  • 360+ presets to automatize cleaning tasks
  • Templates, interactive guides, and efficient search function to optimize your workflow

Sound Forge Audio Cleaning Lab 4

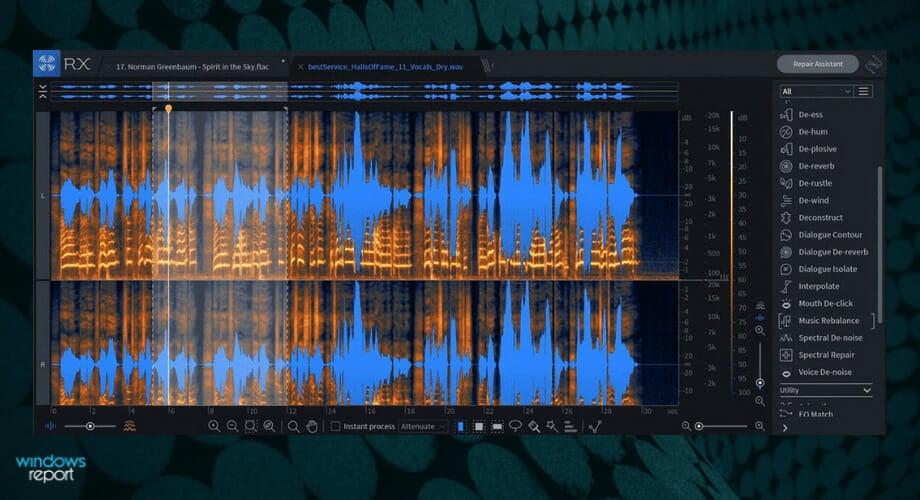
With RX 8 Elements you can effortlessly address typical recording difficulties including clipping, humming, clicks, and other undesirable background noise.
Free trial Visit website

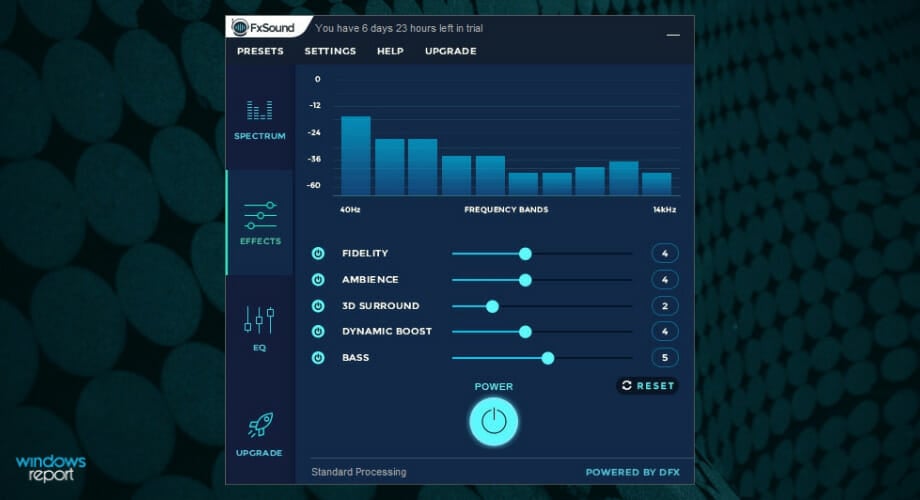
FxSound – Boosts without distortion

audio enhancers for Windows

FX Sound is a marvelous equalizer if we are speaking about low-res output. It will help you model any audio format so it could sound good even from a 100-years old jukebox that can be connected to a PC.

With precisely built presets for any imaginable sound environment, you can instantly switch between listening to music, gaming, and streaming video.

Make sound and visual perceptions one with the visualization utility, which allows you to feel your music in a new and exciting way.

The software is optimized for any output hardware type, so you can enjoy a real EQ process with the resources you have.

Let’s quickly look at its key features:

  • Full EQ with customized effects
  • Volume boost without distortion
  • Presets for different genres
  • Fully compatible with Windows 10

Despite its simplicity, FxSound is a powerful tool that got a lot of good reviews from users.

The audio enhancer is available for free from the official website, and you also can switch to a more powerful version after trying it.

⇒ Get FxSound

Fidelizer Audio Enhancer – Multiple preset audio profiles

audio enhancers for Windows

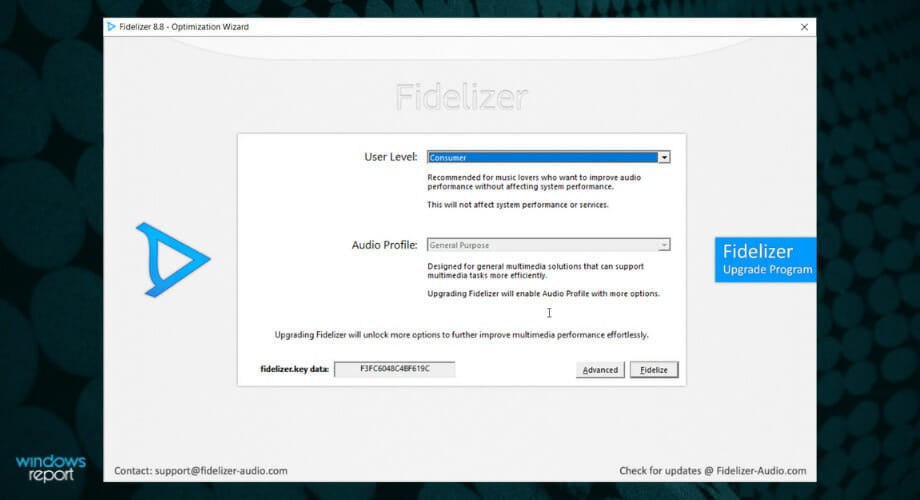
Fidelizer transforms your Windows 10 PC into a perfect sound oasis by optimizing the system and its multimedia platform.

This awesome system enhancer comes in 2 versions: a Premium Plus version and a Premium Pro version.

Fidelizer Pro has been rebuilt with permanent improvements, including additional audio profiles, the ability to disable services, make system configuration adjustments, and run on startup.

Fidelizer Plus is an upgraded version that has greater core improvements over the free version, more audio profile choices, and better compatibility for Windows 10/Server 2016.

Let’s quickly look at its key features:

  • Isolates core affinity of the non-audio process and reduces its priority, so it won’t hinder audio-related processes
  • Seven audio profiles are available to choose from
  • A full installation user guide is available
  • Improved product’s effectiveness on Windows 10

This tool is compatible with all audio software available on the market, such as Spotify, YouTube, and others.

⇒ Get Fidelizer Audio Enhancer

Audacity – Multi-platform

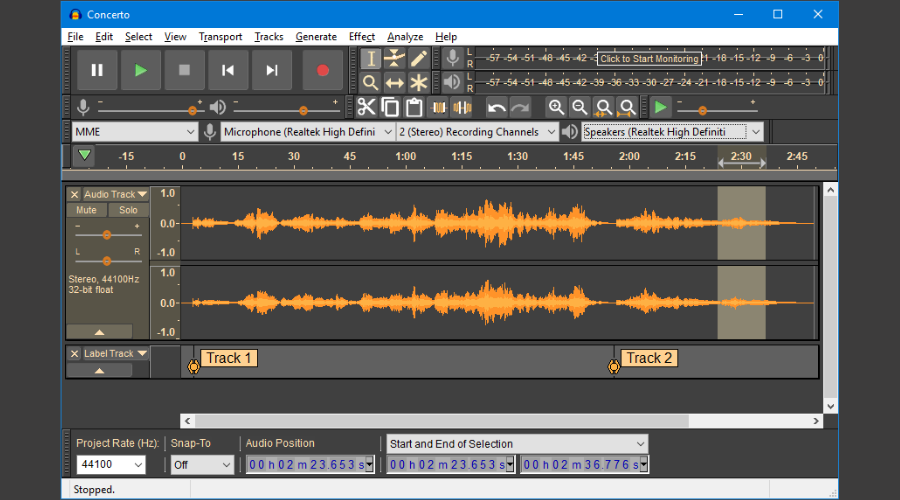
Audacity is a free cross-platform, open-source audio software. This app is very easy to use and even though its looks might seem from a past era, it is quite powerful and up to date.

This software can enhance your audio quality and not only that but it is offering a range of features great for sound editing, effects, analysis, and more.

Audacity supports 16-bit, 24-bit, and 32-bit samples. Sound with different sample rates is automatically converted in real-time, but of course, all this is under your control in the Quality Preferences setting.

The app is also great if you want to record or digitize recordings from other media. Audacity is also compatible with professional audio plug-ins.

So not only do you get a free audio enhancer for your day-to-day needs but you get professional audio software that is also free and open source.

The main features include:

  • Recording
  • Effects
  • Import and Export
  • Accessibility
  • Sound Quality
  • Analysis

Overall this tool has been around for a long time and it only has gotten better over the years it is worth trying it out even if you are not a professional or looking to be power user for it.

⇒ Get Audacity

Bongiovi DPS for Windows 10 – Offers Virtual Sound

Bongiovi DPS is an impressive audio tool that transforms listening into an ecstatic journey.

By constantly adapting the incoming audio signal to match your audio system’s capabilities, Bongiovi DPS can listen to the sound the way humans do.

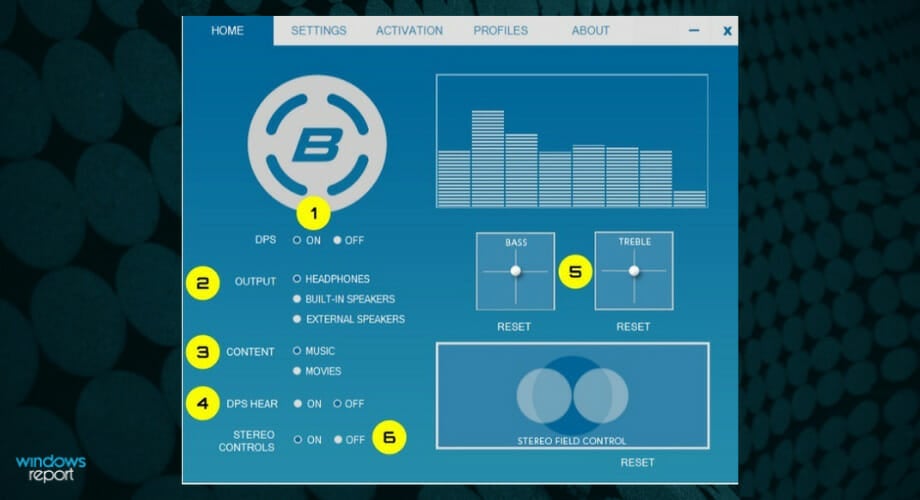
Because the audio signals for music and movies are so diverse, the DPS processor has two distinct settings. In addition, depending on the use case of your profile, different modes (such as Normal and Extreme in gaming profiles) are also included.

Another great distinctive advanced future is the V3D Controls. You may personalize your virtual surround sound listening experience with this function. For example, click and drag the circles in the Stereo Image box to raise or reduce the surround effect. Pretty cool and mind-blowing.

Let’s quickly look at its key features:

  • Output Selection – choose the type of device on which you are listening
  • Content Selection – the DPS processor has two different settings because the audio signals for music and movies are very different
  • DPS HEAR – this feature lowers the volume to a safer listening level for headphones while maintaining audio clarity
  • Bass and Treble – easy-to-use bass and treble controls allow you to create a perfectly customized tone.

The tool keeps the essential sounds to you at a consistent volume level. This strategy allows the selected sounds to become more audible than everyday noise.

⇒ Get Bongiovi DPS

LALAL.AI – Best for enhancing audio quality

If you have some noisy recordings and you want to clear them out, there is no better alternative than LALAL.AI. You just upload up to 20 audio files right into the web app and after the AI tool processes them, you get crisp audio, without any noise.

However, LALAL.AI is a lot more complex than that and you may perform a lot of other tweaking on your audio.

For instance, let’s say that you want to make a karaoke version of AC/DC’s Thunderstruck. You upload the song and the tool provides you with the instant option to separate vocals and music.

First, you will get a 1 minute preview to listen to both parts and then you can process the whole file and download the song without vocals.

But that’s not all, because LALAL.AI can separate only the drums or the electric or acoustic guitars, piano, strings, or whatever instruments you might have in that song.

The only problem is that with the free version, you get only 10 minutes of audio processing, although it’s enough to play around with a few tunes and see if you want to go for a paid plan.

LALAL.AI even provides an API that you can integrate with your audio software whether you’re a sound engineer or mastering your own songs at home.

The tool is extremely simple to use by anyone because the UI is modern and all the options are straightforward.

Let’s review some of its most important features:

  • Quick upload of up to 20 tunes for batch processing
  • Fast AI engine processing
  • Identifies all the sound elements in a song and singles them out with a single click
  • Available for Windows, macOS, Linux, Android and iOS
  • Dedicated API for software integration

These were some of the best available audio enhancers for Windows, and you can choose any for improved audio quality, apart from editing and a bunch of other features.

Also, while you are at it, find some quick ways to increase the volume on a laptop.

Do not forget to tell us your pick from the list in the comments section below.

Fix “Double NAT Detected” on Xbox One [Expert Guide]

If you have an Xbox One, you may have encountered the dreaded Double NAT detected error and wondering how you can fix it. We’re not going to lie, the fix is not exactly easy to apply, especially if you lack patience and are not tech-savvy.

However, we’ll do our best to make sure our instructions are clear and well-received. If you follow our instructions, at the end of the article you should have an Open NAT, which is ideal for Xbox consoles.

What is Double NAT?

A Double NAT situation spawns whenever you find yourself behind two private networks, technically speaking. If your ISP insists on using proprietary router devices, and you add a second router, you’re probably behind a Double NAT.

This may sound sophisticated, but trust us it isn’t. We’ll try to simplify it a little: basically, each router creates its own private network.

Your Xbox One is connected to the second router, most likely. However, your second router is on the network of the first router, which has different ground rules. So, you could say your Xbox One has to get past two firewalls in order to access certain services.

While having a double NAT sounds bad, it actually means a bit more security for your setup. But you don’t care much about security, you just want to play on your Xbox One, don’t you?

We’ll teach you how to get rid of the Double NAT detected error in no time.

Before we start, we have to clarify something. Many suggest that a VPN can get you rid of your Double NAT situation, but there’s a lot of confusion regarding that subject.

A consumer-grade VPN such as Private Internet Access will do nothing in your situation. You’d actually have to use a VPS, or configure your own VPN server and forward a bunch of ports, which is needlessly complicated for what you’re trying to achieve.

How to fix double NAT on Xbox one

1. Set gateway to Bridge mode

    1. Type your default gateway address in a browser
  1.     2. Log into your router/modem

  2.     3. In your router’s configuration menu, look after a Bridge Mode option

  3.     4. Enable Bridge Mode

  4.     5. Restart your gateway and Xbox One

  5. If you did everything accordingly, the double NAT curse should’ve been lifted from your Xbox One. We have a bunch of mentions about this method, though.

    For once, make sure you access the router that’s closer to the Internet. Enabling Bridge Mode on the router you’ve connected your Xbox One to will do nothing to aid your situation.

    However, most ISP-assigned routers lack this Bridge Mode feature. If that’s the case, you may want to call your ISP and ask them if they can do that for you. Usually, they’ll be glad to help you and it doesn’t involve them sending a crew over.

2. Remove your ISP router

Physically remove your router’s ISP from the network, or whichever one of them has a weaker performance. Unplug the cable from your router’s WAN port, and plug it into your own router.

Connect your Xbox One to the newly Internet-enabled router, and you should no longer see the Double Nat error.

Note that some ISP providers are quite insistent with their routers/modems, so you might not be able to just yank it out and expect things to work. If that’s the case, go back to step 1.

Furthermore, if you have fiber optics Internet, your personal router may not have a built-in converter. This also means that you can’t just remove the ISP router from the picture.

3. Set your router to AP mode

  1. Navigate to your router’s (not gateway) address in a browser
  2. Log into your router’s management page
  3. Locate something resembling your router’s operation mode
  4. Change it from Router to AP (Access Point)
  5. Restart your router and Xbox One

An Access Point (AP) is essentially used to extend the wireless range of a network. Depending on the model of your router, setting it to AP mode may also allow you to connect to it through an Ethernet cable.

However, note that this option could disable certain features on your router. For instance, QoS, NAT, and Parental Controls may no longer be available, so you’ll have to live with that.

Summing it up

All things considered, if you get the Double NAT detected error on your Xbox One, don’t fret, as there is hope for you yet. Double NAT usually appears whenever there is more than one router on a network.

While getting rid of the least powerful router is the most obvious choice of action, it might have some drawbacks. However, replicating our suggested fixes above could definitely get you rid of the pesky Double NAT error on your Xbox One.

And, for the last time, using a consumer-grade VPN will do nothing to help your cause.

[wl_navigator]

3 Best Oculus Rift Deals You Can’T Miss [Top Picks]

If you’re looking to buy a new Oculus Rift VR headset, read this quick buying guide to learn where you can get the hottest deals.

Note: Deals are subject to change. Sometimes, some of the deals listed in our guides may no longer be available by the time you hit the buy button. So, hurry up and grab them while they’re hot.

Which are the best Oculus Rift deals?

Oculus Rift S PC-Powered VR Gaming Headset

  • Lets you play hundreds of games available in the Oculus store
  • Rift S stays securely and comfortably in place thanks to the Fit wheel
  • Improved optics deliver bright, vivid colors and reduced screen-door effect
  • Next-generation lenses and a sharper display
  • Updated Oculus touch controllers
  • A Facebook account will be required to use this hardware

The Oculus Rift has become a staple of VR hardware, becoming almost synonymous with the term itself.

It features advanced optics for full immersion, it is comfortable to wear, and the latest model comes with next-generation controllers for more freedom in the digital world.

It is perfectly capable of transplanting your movements in the VR world, no matter which direction you are facing or what your start position was.

Oculus Quest All-in-one VR Gaming Headset

  • Oculus Insight tracking system instantly reflects your movements in VR
  • Oculus Touch controllers precisely recreate your hands
  • Oculus Quest lets you play standing or sitting
  • Makes it easy to meet up with friends in VR
  • Easy to unpack and install
  • Some may not like the Facebook link

When you call a product all-in-one, you truly expect it to be capable of doing everything in a given context.

Well, the Oculus Quest All-in-one VR Gaming Headset is a VR headset that needs little help in achieving what you desire: a gateway to a VR world.

Just set up the device with your Oculus mobile app and Oculus Quest has everything you need to explore VR, without any more additional setups or installations.

Oculus Go Standalone Virtual Reality Headset

  • Spatial audio drivers are built right into the headset, providing dramatic, immersive sound
  • Meet up in VR with friends and fans from around the world
  • Catch live sports, concerts, or just your favorite TV show
  • Crystal clear optics and state-of-the-art 3D graphics
  • Effortless control
  • Can't read USB thumb drives

Oculus Go is a standalone device. Keep in mind that PCs or consoles are not required or compatible.

You can find many free apps on the store to download once you get your device. You don’t need to be connected to the internet all the time as once downloaded, many apps or games can work offline.

In the sharing menu, you will find the following features: full-resolution, undistorted, single-eye, full-layer-support 2D screenshots and video capture for VR apps.

Sadly, these are the only models available, but you can get some great accessories for them, such as:

So, which Oculus Rift package are you going to buy? Let us know in the comments below.

Oculus Rift is a type of VR headset. For more models, check out this guide featuring the best VR headsets on the market.

How to Uninstall a Windows 11 Update [3 Ways]

Keeping your system up to date is crucial, but sometimes a bad update might come along and cause all sorts of issues with your PC.

Since the update process is automated, you can install one of these updates without even knowing, and when that happens, you’ll have a problem to deal with.

In that case, the best course of options would be to uninstall an update, and in today’s guide, we’re going to show you the best ways to do that.

Can I cancel a Windows 11 update?

It’s not possible to cancel a Windows 11 update that has started downloading, so you’ll have to go ahead and install it.

However, it’s possible to block updates by modifying your settings or changing the group policy.

How can I uninstall an update on Windows 11?

1. Use the Update history menu

    You can manually uninstall unwanted automatically installed updates from the Windows Updates Settings menu.

    All you need to do is navigate to this menu and uninstall the specific update from the list of installed updates.

  1. 1. Press Windows key + I on your keyboard to open the Settings app.

  2. 2. Choose the Update & Security option.

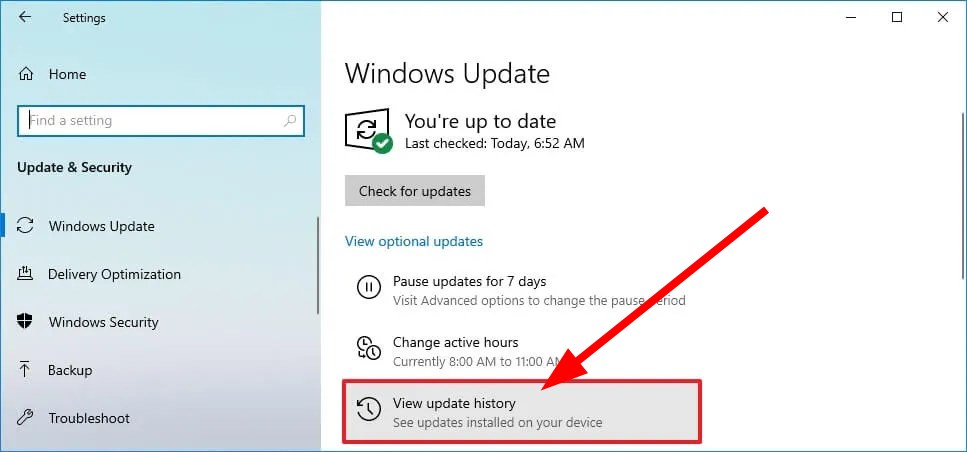
  3. 3. Navigate to the Windows Update section and select Update history from the menu that opens.

    updates history windows 11
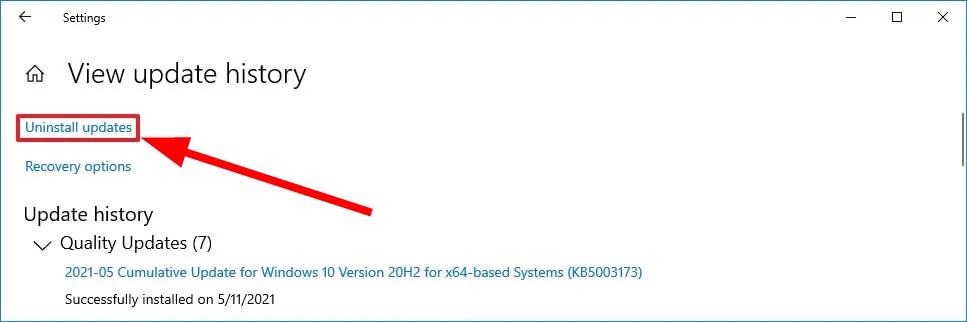
  4. 4. Now click on Uninstall updates.

    how to uninstall update in windows 11 settings
  5. 5. Locate the update you want to remove.

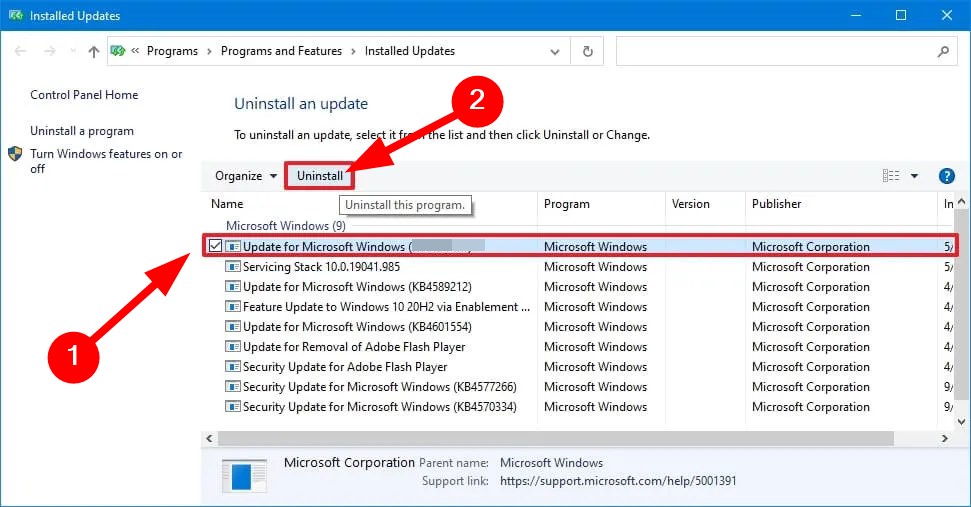
  6. 6. Click on the Uninstall button next to that update.

    how to uninstall windows 11 update button
  7. 7. Wait until the removal process is complete.

2. Use the Terminal

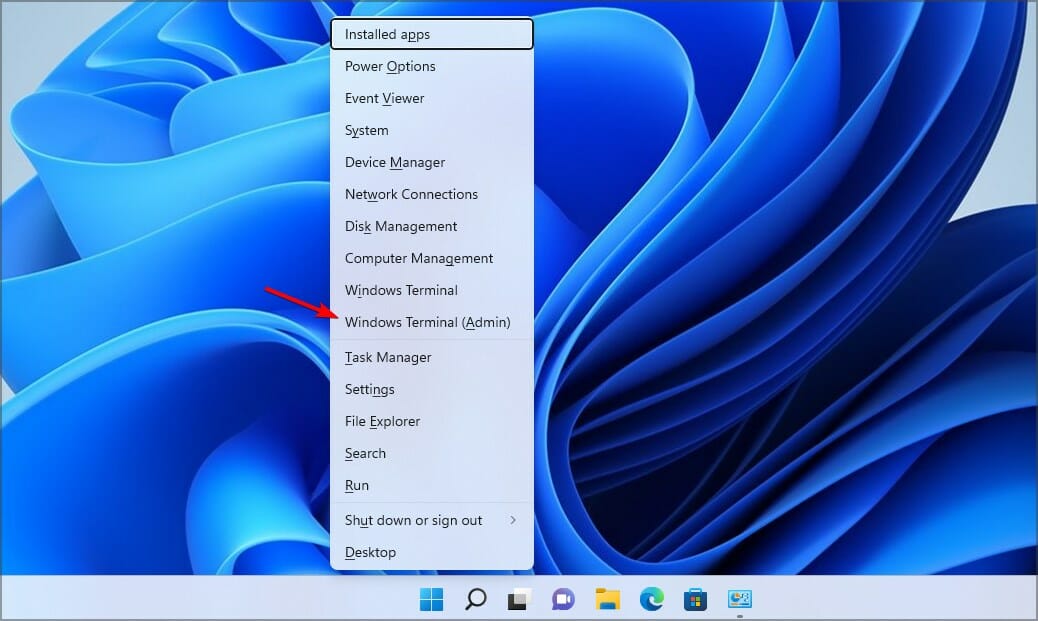
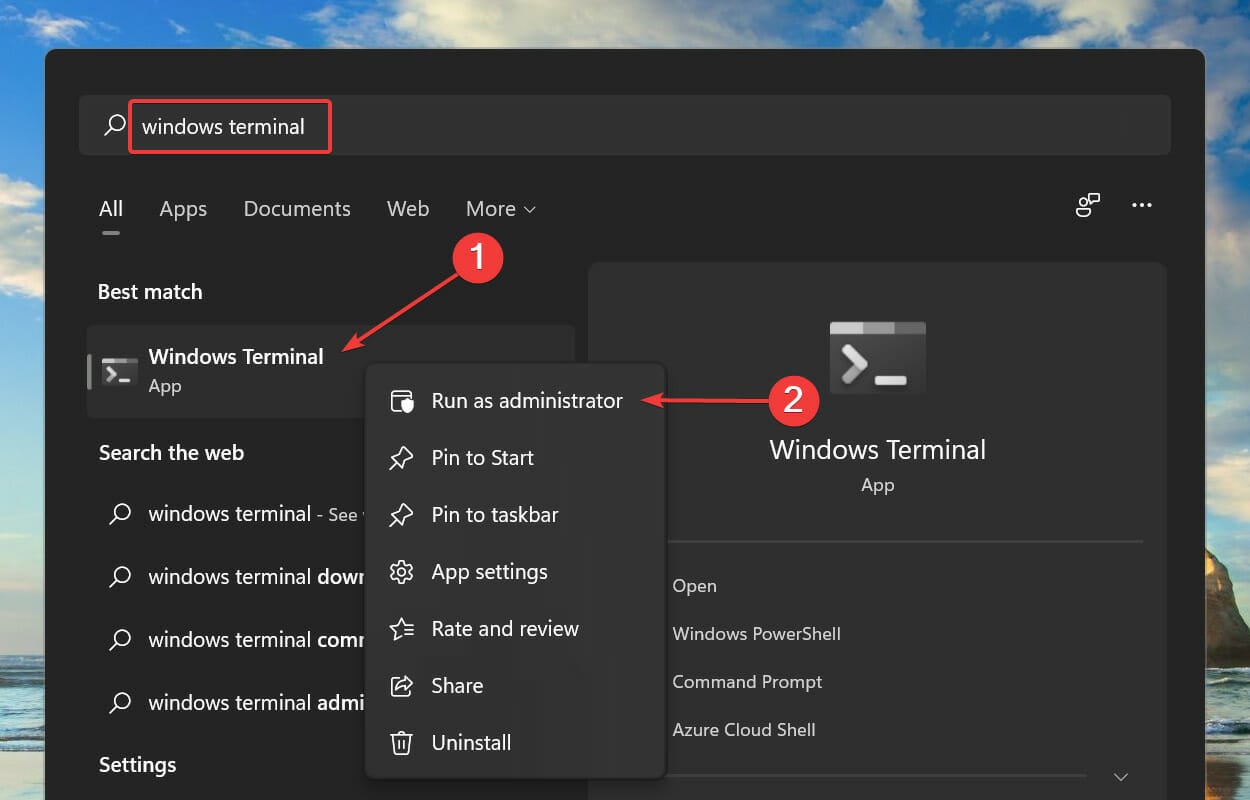
  1. Press the Windows key + X and choose Windows Terminal (Admin).
  2. Enter the following code: wmic qfe list brief /format:table
  3. This will list the recently installed updates.
  4. Enter the following command to remove the update: wusa /uninstall /kb:5006363
  5. When the confirmation dialog appears, click on Yes.

Follow the instructions on the screen to complete the process.

For errors related to the Windows Update Standalone Installer while uninstalling updates, check how to fix WUSA install errors from a network share.

Note icon NOTE
In Step 4 make sure you change the KB number so that it matches the update you’re trying to remove.

3. Go back to the previous build

  1. Press the Windows key + I to open the Settings app.
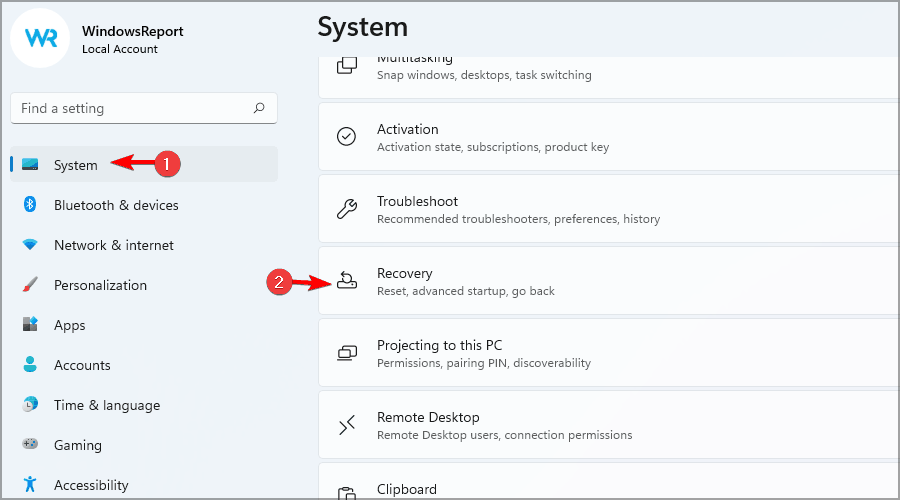
  2. Navigate to System and then select Recovery.
  3. In the Advanced startup click on Restart now.
  4. When asked for confirmation click on Restart now.
  5. Next, navigate to Troubleshoot and select Advanced options.
  6. Select Uninstall updates and then go to Uninstall Latest Feature Update.
  7. Follow the instructions on the screen to complete the process.

You can also follow this detailed Windows feature update rollback guide to reverse a recent system upgrade safely.

Can I uninstall Windows 11 after 10 days?

It’s possible to roll back from Windows 11, but this feature is available only for 10 days. If you don’t manage to do it then you’re stuck with the latest version.

You can always perform a clean install, but if you decide to do that, make sure to back up all your files.

As you can see, it’s pretty simple to uninstall an update on Windows 11, and if you encounter any issues with updates, be sure to try one of our solutions.

If a specific update is causing problems on your PC, you should read our guide on how to block Windows 11 updates to prevent them from installing.

What method do you use to remove updates? Let us know in the comments section below.

Microsoft rumored to skip The Game Awards over Activision controversies

Microsoft may very well miss The Game Awards 2022 according to a rumor leaked by Windows Central’s Jez Corden. It’s no secret the software giant is being watched with a fine-tooth comb after announcing its intention to buy Activision Blizzard in early 2022.

Microsoft is the latest to have its feathers ruffled by the Federal Trade Commission which is expected to file an antitrust lawsuit of its own to potentially block its $69B acquisition.

As anti-trust concerns continue to mount Microsoft may be choosing to subdue its presence in the gaming industry until the acquisition is complete. Not attending The Game Awards 2022 would do just that and possibly prevent anyone considering not approving the merger deal from having more ammunition. Microsoft’s potential moonwalk away from the Game Awards is not the first time a move like this has been attempted to shield perceptual blowback.

Sony is believed to have tried something similar with its 2022 PlayStation Showcase cancellation to prevent Microsoft from highlighting its competition’s arguably stronger position in the market.

For now, though, it’s just rumors and Corden admits the situation could go either direction now.

Via Gamerant.com

4 Best Music Production Software for PC [Cyber Monday Deals]

Music software can still be purchased at high discount prices during the entire year. We have picked the very best offers out there to help you make smart shopping fast!

They say that fans are the reason the music industry exists. Those fans want to hear your music of the best quality. Take advantage of these music software deals now!

What are the best music production deals this year?


MAGIX Premium Edition 2023

  • Drag & drop song production
  • Mixing and mastering with professional effects
  • Pro audio engine & multicore support
  • Includes: mastering tool Ozone Elements, 8 new coreFX effects
  • Nothnig noticeable

With the new MAGIX Music Maker 2022 Premium Edition, you can produce songs and beats with ease.

The drag & drop feature allows you to combine thousands of sounds and loops only with your mouse or standard/USB keyboard.

Thanks to this music-making software you can now create your custom version by selecting sounds, instrument effects, or other features directly from the Store.


PreSonus AudioBox 96

  • Studio One Artist recording and production software (DAW)
  • Comes with the Studio Magic Plugin Suite
  • Audio Box USB 96 audio/MIDI interface with cable
  • HD7 studio monitoring headphones
  • The software can be difficult to set up initially

With this complete PreSonus AudioBox 96, you can start recording today!

This package is based on the AudioBox USB 96 audio/MIDI interface and award-winning Studio One Artist recording, plus the production software.

PreSonus AudioBox 96 Studio is great for creating multitrack recordings, or live recordings, podcasts, and much more.


Akai Professional MPK Mini MKII

  • USB powered MIDI controller with 25 mini MIDI keyboard velocity-sensitive keys
  • 4-way thumbstick
  • 8 backlit velocity-sensitive MPC-style MIDI beat pads
  • FX-8 360-degree knobs
  • Hard to configure

This MIDI controller (Musical Instrument Digital Interface) is a great piece of equipment for a beginner musician. Once you set up the software and plug it in, you can unleash your creativity with the sounds loaded onto the pads.

MPK mini’s Complete Music Production Starter Kit helps you easily to put into practice your musical idea. It includes MPC Beats software, 6 virtual instruments, and an expansive sample collection.


Propellerhead Reason 10

  • 2 new powerful synthesizers & 3 new instruments
  • Full VST plugin support
  • 3+ GB of drum samples and loops
  • A rhythmic modulation effect
  • Can't master with the Cloud's algorithms

This is a great offer at the moment you should check out. This music software stands out for its phenomenal sound quality and great features.

You can create, compose, mix and finish your music, and also record live instruments as well as vocals if you have an audio interface.

This is a complete version of the software and includes software updates. Grab the offer quickly!


Keep in mind that seasonal deals are valid for a limited time only. Take your time to decide what music software to purchase, but act quickly otherwise the offer may no longer be available by the time you hit the buy button.

Best Weebly Deals To Grab Today

Creating your website is probably the most crucial and important part of a business nowadays.

Your website is basically the way you present yourself to the entire world, so a good one will bring you more views and more revenue.

Thus, if you aren’t too good at creating websites, but know exactly what you want it to look like, website creation and hosting service is what you need.

One such service is Weebly, which offers a wide variety of plans for pretty much everyone to enjoy. You can use it to create a regular website or even an online store.

Additionally, you can customize every aspect of how your website will look and behave, without the hassle of needing someone with programming skills. This includes fonts, text placement, images, animations, pages, and subpages, and more, all without knowing how to code at all.

Thus, if you’re looking to make yourself and your product is known to the world, a service like Weebly is just what you need.

Weebly 2022 offer:

Take advantage of these awesome offers and purchase this website creation and hosting service for a very nice price tag.

⇒ Check Weebly live offers now

If you’re interested in other software deals, check out our dedicated page.

0x800f020b Windows Update Error: Fixed

Many users migrated to the Windows 11 operating system after its official unveiling. Windows 11 has the same base as the Windows 10 OS but brings some nifty features and changes, predominantly on the user interface.

Even after all these new features and changes, the one thing that remains constant, much like in older Windows versions, is the presence of bugs and errors.

Unfortunately, Windows users are not shielded from errors. Several users are experiencing different types of Windows update errors.

Just like other Windows update errors, this error 0x800f020b pops up without displaying any reason. It occurs when you try to update your PC.

This is where this guide comes into the picture. Because in this post, we will share with you some practical solutions you can apply and possibly fix the Windows update error 0x800f020b.

With that being said, let us jump right into it.

What is the Windows update error 0x800f020b?

windows 11 update error

As already mentioned, similar to other Windows update errors, the update error 0x800f020b doesn’t have any specific reason to pop up.

For some users, this error comes up when trying to update their Windows PC normally. Whereas for others, it shows up when they are trying to update their printers, especially Xerox and HP printers.

In most cases, users start experiencing this Windows 11 update error 0x800f020b due to already existing printer software, specifically HP and Xerox.

But some users have reported that they did not have any printers connected or printer software installed on their Windows 11 PC and still came across this issue.

In this guide, we will discuss the solutions that would help both users with the printer software installed on their PCs and users experiencing this problem out of the blue.

Why does Windows Update fail to install?

Windows Update fails to install because of broken or corrupt system files. This corruption can affect the files needed to install the update.

Also, it might be because you have not enabled the Windows Update service. This detailed guide shows how to fix the Windows Update error.

How can I fix the Windows 11 update error 0x800f020b on my PC?

1. Run the troubleshooter

  1. Open the Start menu from the Taskbar.
  2. Type in Troubleshoot other problems and open it.troubleshoot other settings
  3. Click Run next to Windows update.windows update troubleshooter
  4. The troubleshooter will begin the diagnosis.troubleshooter
  5. Apply the recommended fixes.
  6. Restart your PC.

For issues related to software or Windows updates on your PC, you can rely on the in-built Windows Troubleshooter. It lets you detect and possibly fix the error during the process.

It is easy to use, and the above steps explain everything clearly. So, before you go ahead with advanced solutions, it is better to run the Windows Troubleshooter and see if it can resolve the Windows 11 error 0x800f020b.

2. Clear Windows update cache

  1. Open the Start menu.
  2. Search for Services and open it.windows services
  3. Locate Windows Update and double-click on it.windows update service
  4. Click the Stop button to stop Windows Update services.stop windows update services
  5. Now open the Run command by pressing Windows + R buttons together on your keyboard.
  6. Paste the below address path and hit Enter.%windir%\SoftwareDistribution\DataStoresoftware distribution folder
  7. Delete all files inside this folder.delete software distribution folder files

The above steps will help you clear all the cache files related to Windows Update. However, because of some corrupt files, it may conflict with the Windows update installation. As a result, Windows 11 update error 0x800f020b is displayed.

3. Clear temporary folder

  1. Press the Windows + R buttons to open the Run command.
  2. Type %temp% and hit Enter.
    temporary command on run
  3. Press Ctrl + A to select all files.
  4. Press the Del button on your keyboard or right-click and select Delete.delete temporary files

4. Reconnect external devices

This error code 0x800f020b is mainly associated with printer devices that are externally connected. So, it would be better to troubleshoot the externally connected devices.

We suggest you disconnect your printers from your Windows 11 PC, wait for some time, and then reconnect them again.

You can also try restarting your Windows 11 PC before you again try to install Windows updates on your PC. Often, this trick helps fix this error. If this doesn’t help, hop on to the next solution below.

5. Download Windows 11 update manually

  1. Head to the official Microsoft Catalogue website.
  2. Enter the KB (Knowledge Base) number of the Windows update in the search bar you wish to download and press the Search button.windows 11 update error 1
  3. You will see a list of available update packages associated with the entered KB number.list of updates
  4. You can get more information such as Installation Resources, Package details, and Languages supported about the update by clicking on the update’s title.update details
  5. After identifying the correct update, hit the Download button.download the update
  6. Right-click on the download link and hit the Save link option.save link as
  7. Choose the download directory and press Save.download directory
  8. Open the folder where you have downloaded the Windows 11 package.
  9. Double-click on it to run.open the update
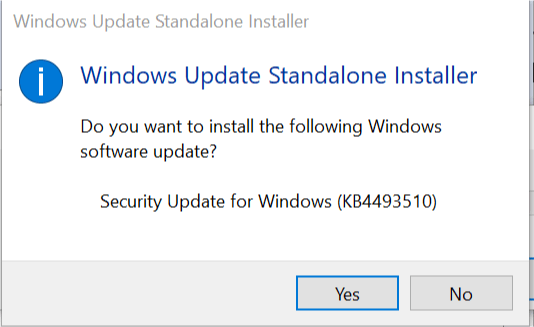
  10. After a few seconds, press the Yes button on the Windows Update Standalone Installer pop-up to begin the installation.Windows Standalone Installer - Do you want to install update
  11. Restart your PC.

If the in-built Windows Updater is showing you errors even after trying all the above solutions, then you can try the option to install Windows 11 updates on your PC manually.

This method fixes not only this error code 0x800f020b but also other Windows update errors you may encounter.

6. Perform a clean boot

  1. Open the Start menu and search for msconfig.
  2. Open System Configuration.system configuration windows 11
  3. Tap on the Services tab.services
  4. Check the box for Hide all Microsoft services.hide all services
  5. Press the Disable all button.disable all services
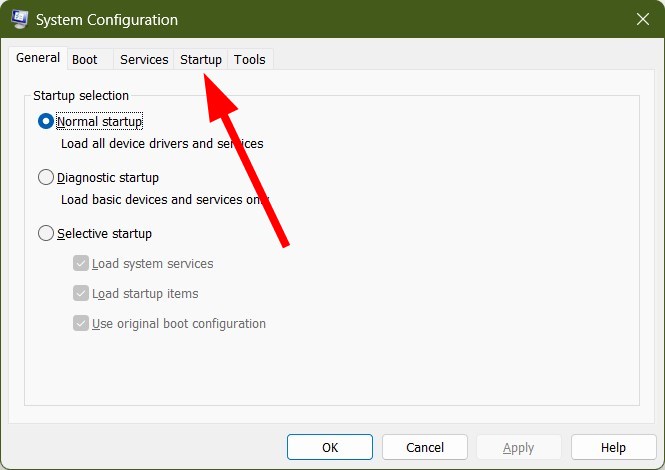
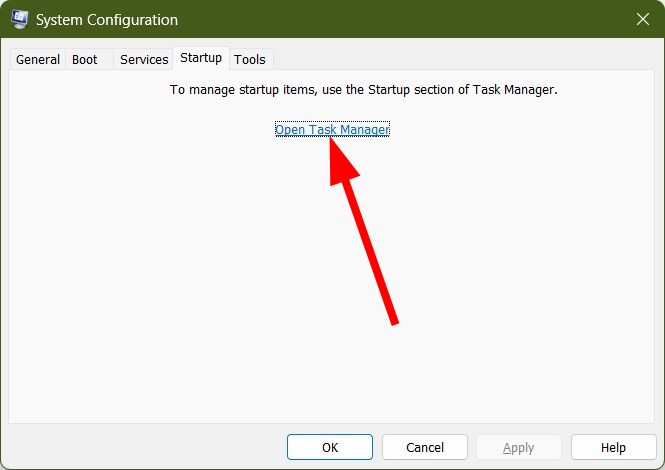
  6. Now switch to the Startup tab and click on Open Task Manager.
  7. Disable each startup item, one by one.
  8. Close the Task Manager.
  9. Click OK on the System Configuration window.
  10. Restart your PC.

When your PC restarts, you will have a clean boot environment. You can check now if the Windows update is installed with no issues or not.

7. Use Show or hide updates

  1. Download Show or Hide Updates Troubleshooter (wushowhide.diagcab) from the official website.
  2. Open the troubleshooter.
  3. Click on Advanced.advanced hide updates
  4. Check the Apply updates automatically option and hit Next.apply repairs automatically windows 11 update error
  5. Select the Hide updates option.hide updates
  6. Now from the list of updates, select the problematic updates that could potentially be the reason for Windows 11 update error 0x800f020b.check problematic updates
  7. Click on Next.
  8. Close and try updating your PC.

8. Stop the Print Spooler service

  1. Press Windows + R to open the Run command.
  2. Type the below command and hit Enter.services.mscservices run command
  3. Locate Print Spooler service.
  4. Click on Print Spooler service and select the Stop the service option.stop print spooler
  5. Open the Run dialog again.
  6. Type the below command and press Enter.regeditregedit run command
  7. Click on Yes if a prompt asks you for permission.
  8. Paste the below address in the search bar of the Registry Editor. HKEY_LOCAL_MACHINE\SYSTEM\CurrentControlSet\Control\Print\Environments\Windows x64\Print Processors\winprintwinprint
  9. If you could locate the problematic driver, rename it to anything else.
  10. Open back the Services window and restart the Print Spooler service.
  11. Open the Run dialog again.
  12. Type the below command and press Enter.control admintoolscontrol admin tools
  13. Select Print Management.
  14. Under Custom Filters, double-click on All Printer.
  15. Right-click on the problematic printer and choose the Delete option.
  16. Try updating your PC and see if this helps.

How can I fix the Windows Update error 0x800f020b on Windows 10?

The solutions we presented for Windows 11 can be used for Windows 10 as well, with very slight modifications. The steps are mostly the same.

Why is it necessary to download Windows 11 updates?

In short, you should keep your Windows 11 PC updated with the latest available update version. New updates bring new features and bug fixes that solve various underlying problems with the older version of the driver.

Windows automatically checks for new updated drivers and updates for your copy of the operating system. Moreover, security updates are so important that they protect your PC from the latest viruses and malware.

However, there are optional updates that you shouldn’t worry about. As in our case, if the printer drivers are still troubling, you can disable them, as shown in solution 7.

There is no need to install a printer driver to use it. Instead, you can use your printer by attaching its USB cable to your PC and letting it detect it as an external device.

How do I force Windows 11 to update right now?

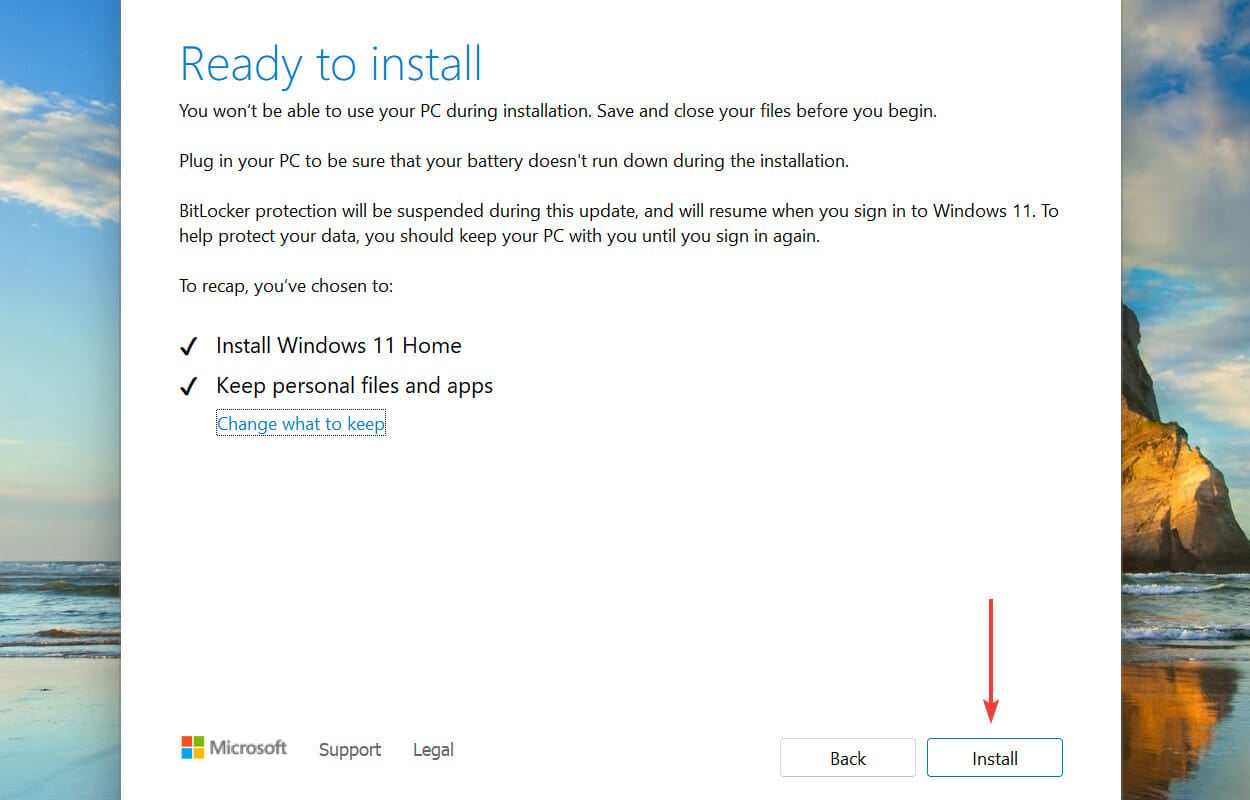
To force Windows 11 to update to the latest version, you might need to download the Windows 11 Installation Assistant from the official website.

Running this software will help to install your PC to the latest build available at the time. The software doesn’t need any particular process.

You need to download it and run it, and you need to confirm a few actions.

The windows 11 update error 0x800f020b can be frustrating, as it can stop you from installing essential updates. Thankfully, it is an error that can be fixed, as shown in this guide.

If you are facing the 0x800703f9 update error on Windows 10/11, check our detailed guide to fix it quickly.

Let us know in the comments below which of the methods mentioned above helped you fix the Windows 11 update error 0x800f020b.

What is Remsh.exe and How to Fix its High CPU Usage

There are multiple user reports that claim that from nowhere a new process, remsh.exe started to appear on their Task Manager, and also has high CPU usage. There is also debate about whether one should get rid of it or not.

In this guide, we will give you a proper guide on how what is remsh.exe and how you can fix the high usage issue associated with it. Let us get right into it.

What is remsh.exe?

Remsh.exe is available on a few Windows 10 machines. It was introduced with Microsoft KB4023057 update for Windows 10 versions 1507, 1511, and 1607.

Regarding this Microsoft has stated that only certain builds of Windows 10 Versions 1507, 1511, and 1607 require this update. Devices that are running those builds will automatically get the update downloaded and installed through Windows Update.

So, for those who have questions regarding what is remsh.exe? or if is it malware, the answer is no. Remsh.exe is not malware but in fact a file by Microsoft itself. Remsh.exe file was introduced to certain versions of Windows 10 to address the update processes in Windows 10.

However, the remsh.exe file is susceptible to being used in the phishers scheme because of its requirement for certain Windows 10 versions. You can check the legitimacy of the file by following the steps in the next section.

How can I verify the signature of remsh.exe?

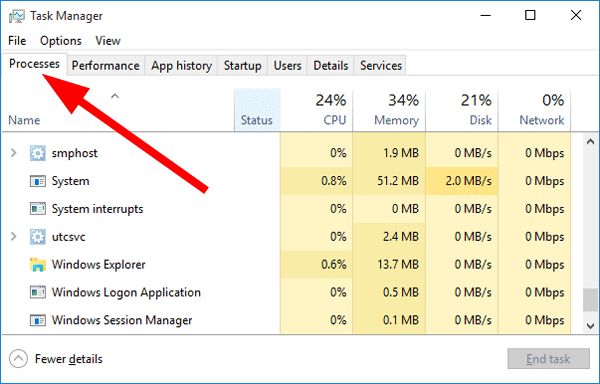
  1. Press Ctrl + Shift + Esc to open Task Manager.
  2. Click on the Processes tab.
  3. Locate the remsh.exe process, right-click on it and select Properties.
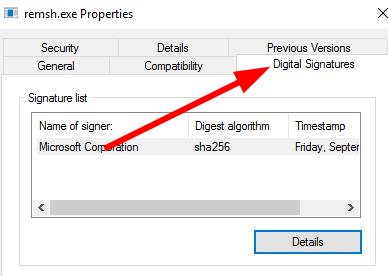
  4. Go to the Digital Signatures tab.
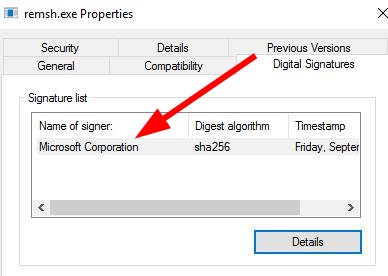
  5. See the Name of the signer and check if it corresponds with Microsoft or not.

If it does, then it is safe, and if it does not, then it is malware. You can run a malware scanner or any other antivirus software to remove the file from your PC.

We have a list of some of the best and tested antivirus and malware scanners that will help you check if the remsh.exe file on your system is legit or not.

Now let us check out how can we fix the high CPU usage error with the remsh.exe file in the below section.

How can I fix the high CPU usage issue with remsh.exe?

1. Uninstall the Windows Update KB4023057

  1. Press the Win + I buttons to open Windows Settings.
  2. Click on the Update & security option.
  3. Click on View update history.
  4. Hit the Uninstall updates option.
  5. Locate the KB4023057 update.
  6. Click on KB4023057 update and select Uninstall.
  7. Follow the on-screen prompts to completely remove the update from your PC.
  8. Restart your PC and see if this resolves the error or not.

This solution is primarily for users on Windows 10 since the remsh.exe high CPU usage has been reported by Windows 10 users. In case you are on a newer version, i.e., Windows 11, then you can check out the other solutions.

2. Disable startup applications

  1. Press the Win + R keys to open the Run dialog.
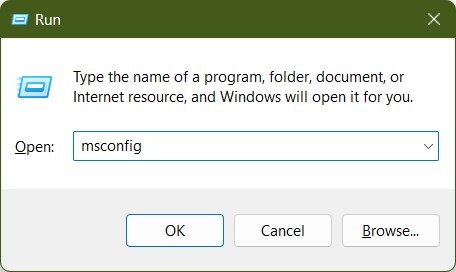
  2. Type msconfig and press Enter.
  3. Click the Startup tab.
  4. Click the Open Task Manager link.
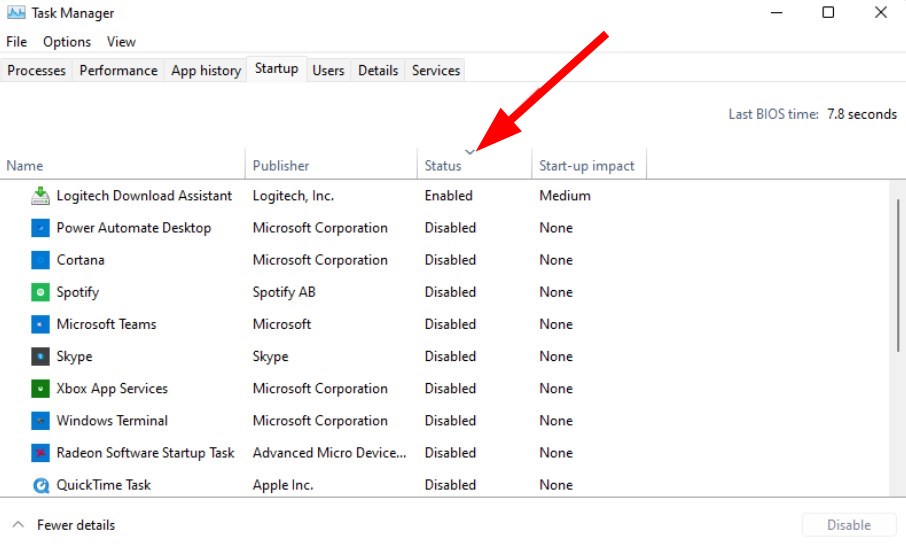
  5. Click on the Status row title twice to view enabled tasks.
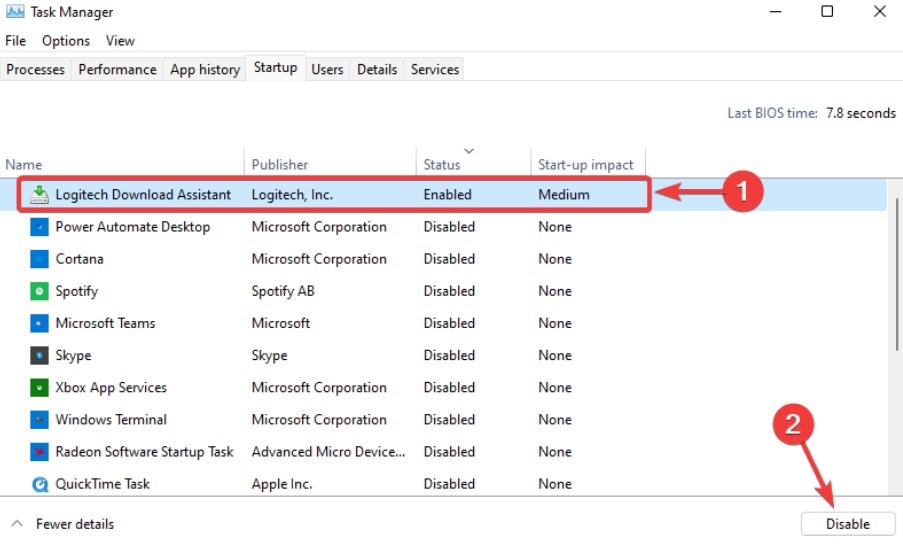
  6. Locate the applications that are Enabled, and Disable those that you don’t want starting at Windows startup.

3. Use Autoruns to disable remsh.exe

  1. Download the Autoruns tool from the official website.
  2. Extract the ZIP file.
  3. Open the Autoruns.exe file.
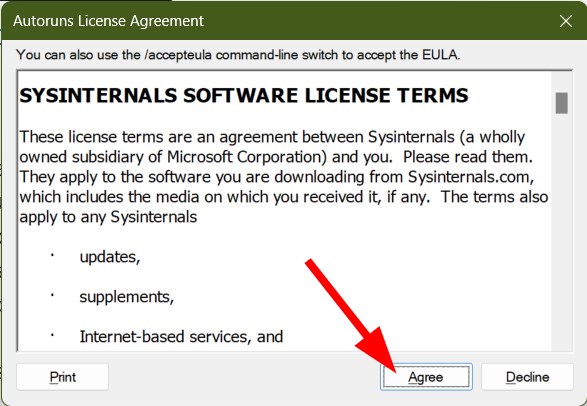
  4. Agree to the terms.
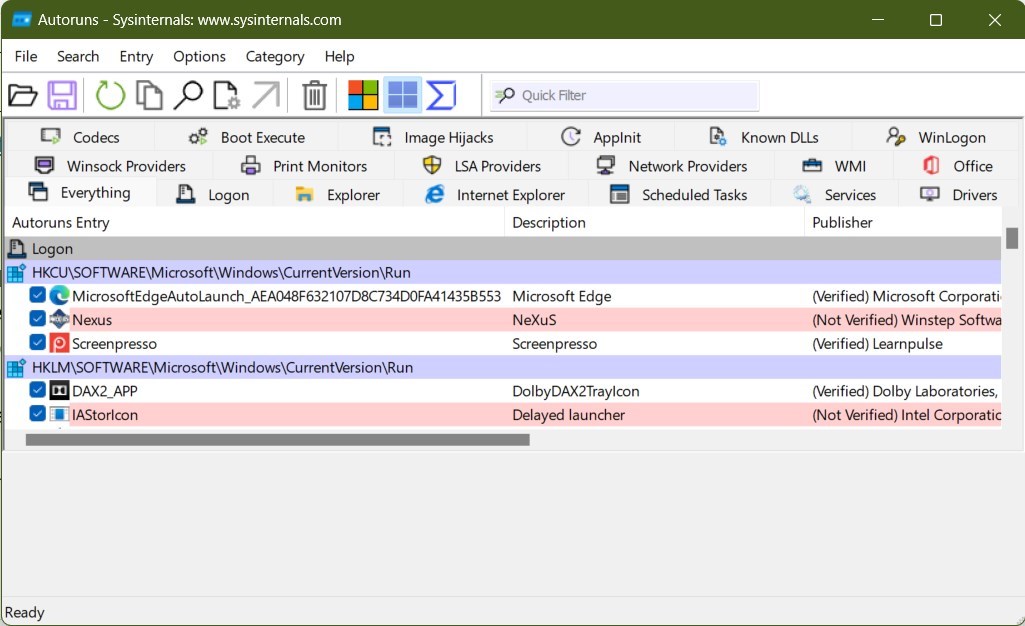
  5. The list of Autoruns will populate, wait for it to get complete.
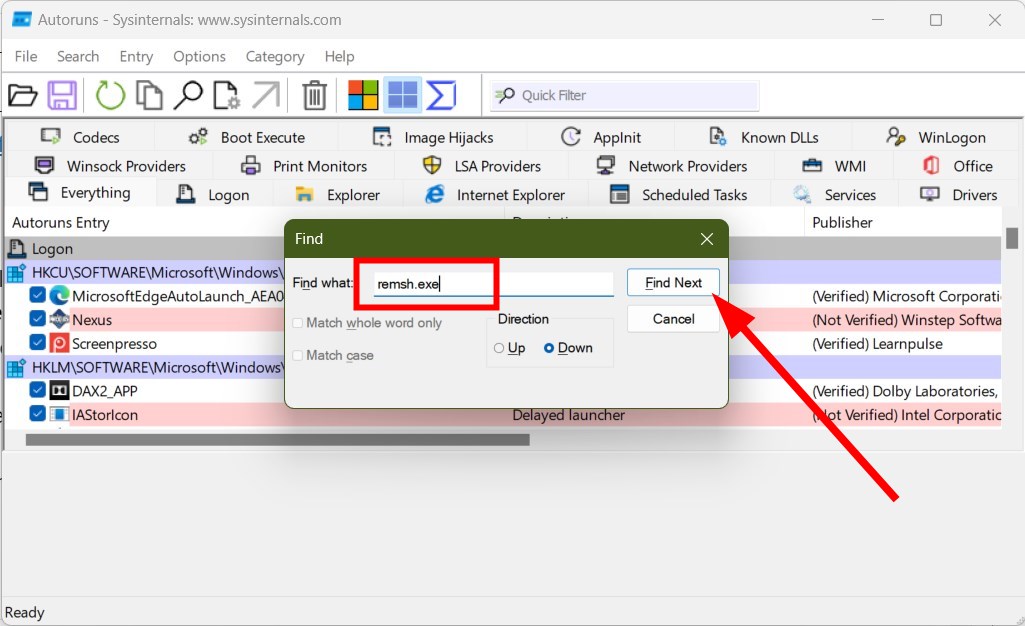
  6. Press Ctrl + F to bring the Search function.
  7. In the search box, type remsh.exe and press the Find Next button.
  8. Right-click on the highlighted entry and select Delete.
  9. This will remove the startup key associated with remsh.exe from your PC.
  10. Close Autoruns.
  11. Restart your PC and check if this fixes the high CPU usage because of the remsh.exe issue or not.

Autoruns is a freeware provided by Microsoft that allows you to know what processes will run after your PC boots up.

Here, you can use this tool to locate the processes associated with the remsh.exe and delete it so that it does run during the startup and gets rid of the high CPU error.

For other solutions to fix the high CPU usage error, you can refer to our guide, which lists some of the most effective solutions to resolve the problem.

You can also try disabling all the unwanted background processes running on your Windows PC. This has also helped users fix the issue.

Let us know in the comments below if you liked this comprehensive guide on what is remsh.exe file and how you can resolve the high CPU usage problem associated with it.

How to Connect Xbox One to a Windows 10 PC [Expert Guide]

Microsoft is working hard to connect both PC and Xbox One gamers on Windows 10, and in order to achieve that, Microsoft gave us the option to stream from Xbox One to our Windows 10 PCs. This is an interesting feature; if you haven’t used it before, we’ll show you how to connect Xbox One to Windows 10.

Xbox One streaming feature allows you to enjoy your favorite games on any Windows 10 device, as long as it’s on the same network. Although this option sounds amazing, you should know a few things before you start streaming to Windows 10.

How to Stream Xbox One to Windows 10?

Before you can start streaming, you need to enable streaming on your Xbox One console. To do that, follow these steps:

    1. On your Xbox One, go to Settings > Preferences.
  1.     2. Check Allow game streaming to other devices.

  2. After you’ve enabled streaming to other devices on Xbox One, you need to make sure that both devices are on the same network. In order to achieve the best results, it’s advised you use wired Ethernet connection. Using Ethernet connection for both Xbox One and PC isn’t mandatory, but it provides you with the most stable connection and the best performance.

    In terms of hardware requirements, you’ll need a Windows 10 device with 1.5GHz processor and at least 2GB of RAM. As for additional requirements, you only need to sign in to Xbox One app on Windows 10 using your Xbox One gamertag and you’re good to go.

    Now you need to connect Xbox One to your Windows 10 PC and in order to do that, you need to do the following:

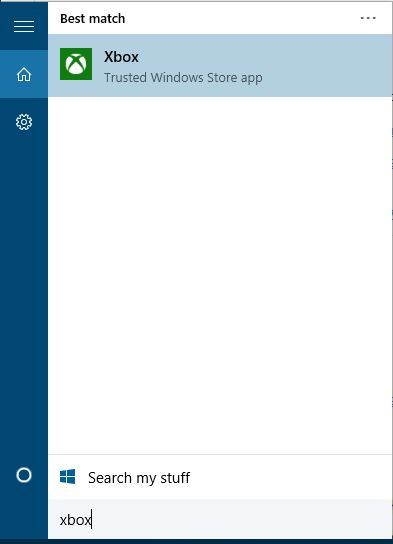
  3.     1. Press Windows Key + S and type Xbox. Select Xbox from the list of results.

  4.     2. When Xbox app starts, click the Connect button on the left panel.

  5. 3. Your PC will scan for available Xbox One consoles on your network. After the scan is complete, you should see MyXboxOne available on the list.

  6.     4. If your Xbox One isn’t automatically recognized, you’ll see Add a device window and you’ll be asked to enter your Xbox One’s IP address. To find your console’s IP address just go to Settings > Network > Advanced Settings on your Xbox One.

  7. 5. Click the Connect button.

  8. 6. Now connect your Xbox One controller to your PC using the USB charger cable. If you want to play wirelessly on your Windows 10 PC, you’ll need to use Xbox Wireless Adapter for Windows.

  9.     7. Now you just need to click Stream button and Xbox One will start streaming to your Windows 10 PC.

As you can see, connecting and streaming from your Xbox One to Windows 10 is simple, although you might experience a few minor network-related problems occasionally.

If you see System Error code E106 on Xbox One upon startup, read this guide to learn the solutions.

We Couldn’t Connect to the Update Service: Solved

We couldn’t connect to the update service. We’ll try again later, or you can check now. If it still doesn’t work, make sure you’re connected to the Internet.

This error prompt is displayed when the Update cannot be completed – it can be an Internet connection error, a corrupted system file, a limited disk space, or a similar malfunction.

How can I fix the We couldn’t connect to the update service error?

First, make sure your internet is working and disable proxies and VPNs. Those could interfere with the update process. If these actions do nothing, keep reading:

1. Check disk space

  1. Press Windows + E, then go to This PC from the left side.this-pc couldn't connect to update service
  2. Check that there is at least 10 GB of free space left, and then try to reapply the update operation – as already described above.hard-disk couldn't connect to update service

Sometimes, if the free space left on your hard drive is limited, the Update cannot be applied so that you can receive the We couldn’t connect to the update service. We’ll try again later, or you can check now error message.

2. Run the Windows Update Troubleshooter

  1. Press Windows + I, then go to Update & Security.update-security nmi hardware failure windows 10
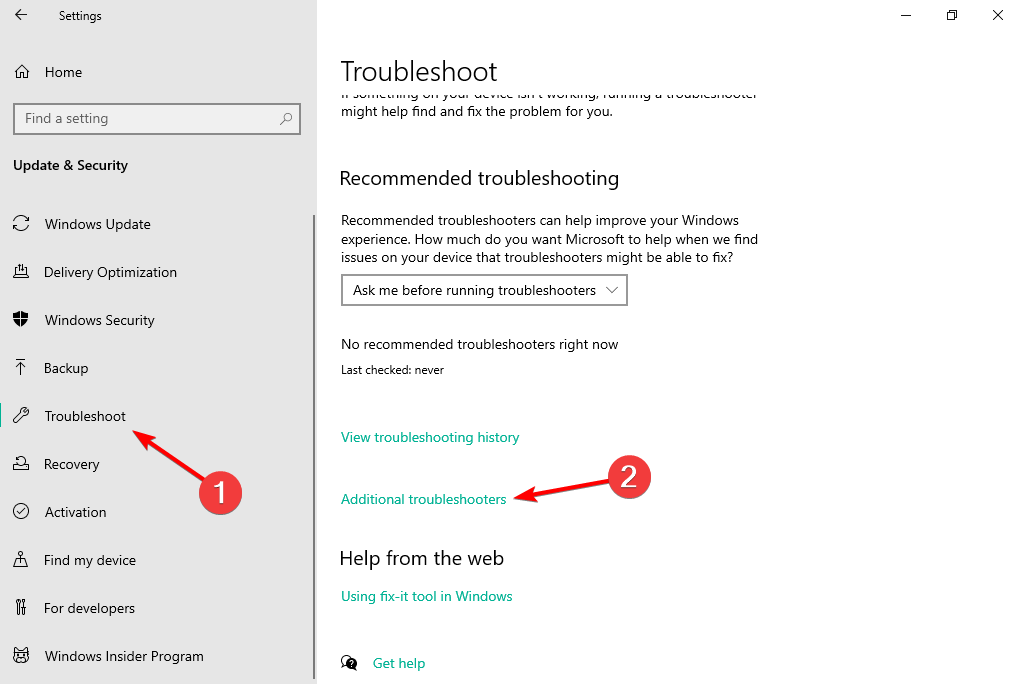
  2. Select Troubleshoot from the left menu, followed by Additional troubleshooters.troubleshoot-aditional can't remove bluetooth device windows 10
  3. Find the Update troubleshooter, click it and select Run the troubleshooter.update-run couldn't connect to update service

A scan will be initiated to look for system errors that might interfere with the update operation. The same troubleshooter will then try to fix everything automatically.

3. Fix corrupt system files

  1. Press Windows, then type cmd and choose the Run as administrator option under the result.cmd-run-admin 0x80070002 windows update
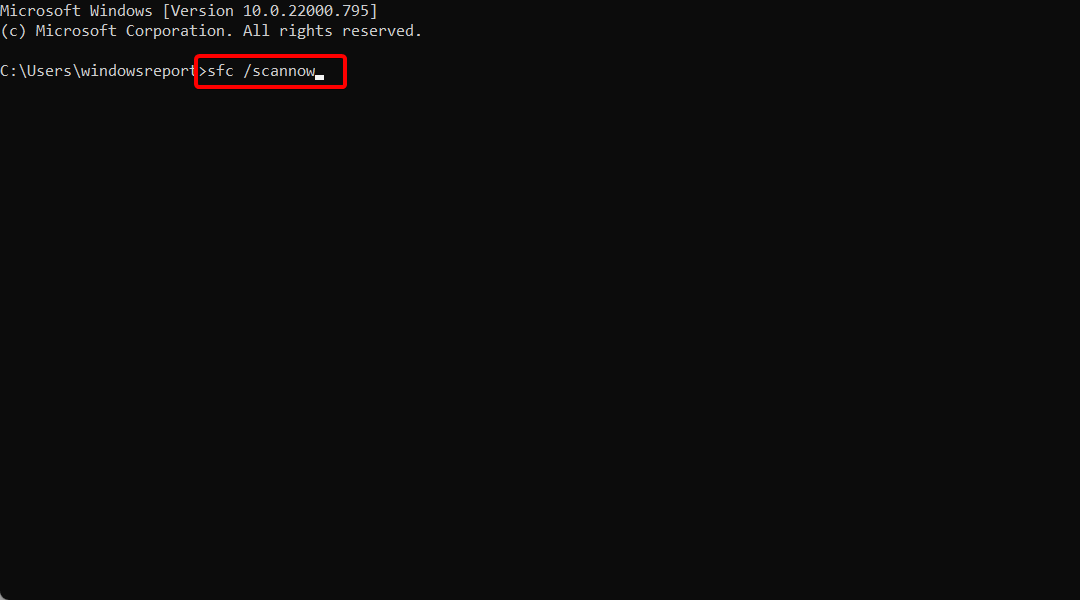
  2. Type or paste the following command and press Enter: sfc /scannowscannow 0x80070002 windows update
  3. The scan will start – the process will take a while, depending on how many files are stored on your device. If there are issues, the scan will try to fix all the problems automatically.
  4. Restart your PC, and then retry the update operation.

With this scan, you can manage to fix corrupted system files and other essential errors and malfunctions that might block the Windows 10 update service.

If you’re having trouble accessing Command Prompt as an admin, you better look at our dedicated guide to see what you can do.

4. Check the disk for corrupted sectors

  1. Press Windows, then type cmd and select the Run as administrator option.cmd-run-admin 0x80070002 windows update
  2. In the Command Prompt, type the following command and press Enter: chkdsk c: /rchkdsck couldn't connect to update service
  3. Wait while this process is running, and restart your PC.
  4. Try to restart the update.

When was the last time you initiated a defragment operation for your C drive? Or when was the last time you checked for errors within your hard drive?

If you are currently experiencing this, We couldn’t connect to the update service. We’ll try again later, or you can check now update error. A good idea will be to verify the integrity of your hard drive.

5. Disable third-party antivirus tools

If you are using third-party security solutions, you should temporarily try to disable the antivirus protection. For example, the Windows update might be blocked by the antivirus software.

So, disable these programs and then retry the update process. Don’t forget to re-enable your security programs in the end, to be able to secure your files and the existing Windows system.

6. Install the Update manually

  1. Please find out the update version number by pressing the Windows + I keys, then selecting Update & Security.update-security nmi hardware failure windows 10
  2. Go to Windows Update, and click on Advanced Settings.advanced-opt couldn't connect to update service
  3. Select Update History.
  4. Then access the Microsoft official webpage to find the latest updates.

If the Windows update is still blocked or the flashing process cannot be completed appropriately, you should try installing it manually.

Find your particular Windows 10 update, download it on your computer and install it by following on-screen prompts.

7. Restart the Windows Update service in Windows

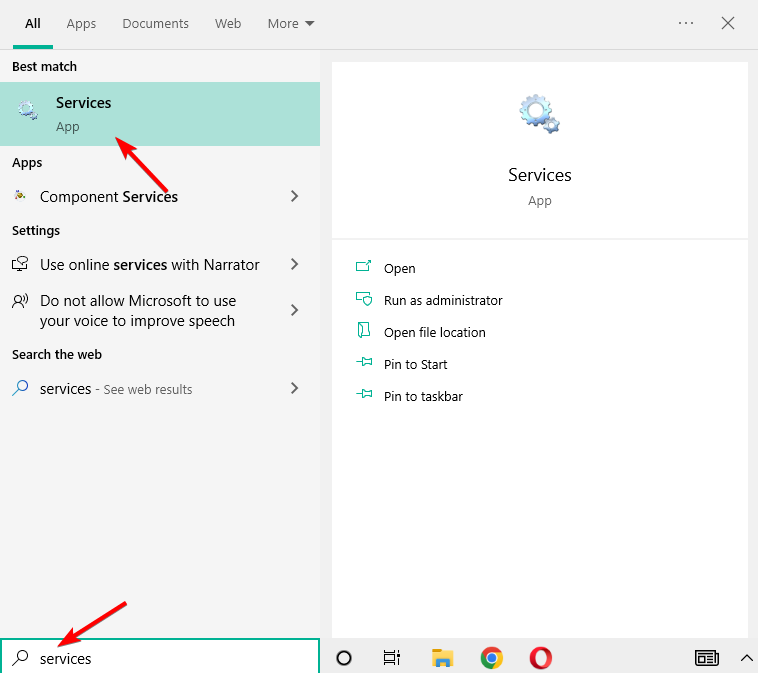
  1. Press the Windows key, then type services and open the first result.serices-w10 0x80070002 windows update
  2. Look for the Windows Update service, right-click it and choose Restart.restart-windows 0x80070002 windows update

8. Tweak registry

  1. Press Windows + R on your keyboard to open the Run dialog.
  2. Type regedit, and press Enter. registry editor
  3. If prompted by User Account Control (UAC), click Yes.
  4. In the Registry Editor, navigate to HKEY_LOCAL_MACHINE\SOFTWARE\Policies\Microsoft\Windows\WindowsUpdate\AU.
  5. If the AU key does not exist, right-click on WindowsUpdate, select New > Key, and name it AU.
  6. Locate UseWUServer within the AU key and double-click it to edit its value.
  7. Change the value from 1 to 0.change value
  8. Restart your PC and try updating Windows again.

The Windows Update couldn’t connect to the update service error usually appears if the required services aren’t running, and we wrote in-depth on what to do if Windows Update Services are not running.

If Windows Update is not working, the services are the most likely cause, but your Internet connection could also be the problem, so make sure your connection is stable and working correctly.

For more solutions, we recommend you look at our post on what to do if Windows Update is not showing/missing a button on Win 10/11.

If you know another workaround that might fix this issue, don’t hesitate to share it with our readers and us – you can do that easily by using the comments field below.

Update KB5007651: Download & Install Error [Fixed in 4 Ways]

Many users reported update error 0x80070643 while trying to install the KB5007651 update. No, this update won’t brick your PC, but it will make it harder than usual.

There’s no official response or workaround from Microsoft for the time being, but that’s not a reason to worry. We completed a couple of solutions that might help you fix this issue.

This isn’t the only update issue that you can encounter. In fact, many users reported that There were some problems installing updates messages on their PC. But hopefully, this guide will help you with that.

Why does the KB5007651 update fail to install?

Before trying to get rid of the update error 0x80070643, it’s worth considering the more likely causes of the issue:

  • Third-party antivirus software conflicts – Antivirus software might conflict with the Windows Update service.
  • Missing, outdated, or corrupted .NET Framework installation – Updates fail to install because .NET Framework is corrupted or missing, or you might need to install a newer version.
  • Corrupted system files – You might have to repair corrupted system files causing the issue.
  • Damaged Windows Update components – Some Windows Update components might be corrupted or incorrectly configured.
  • Corrupted Windows Defender definitions – Error 0x80070643 can also arise because of corrupted Windows Defender definitions.

With these in mind, we will explore the most reliable solutions you may apply.

How can I fix the KB5007651 install error?

1. Run SFC and DISM scans

1.1 Run an SFC scan

  1. Click on the Start menu, type command, right-click the Command Prompt option, and select Run as administrator.
    kb5007651
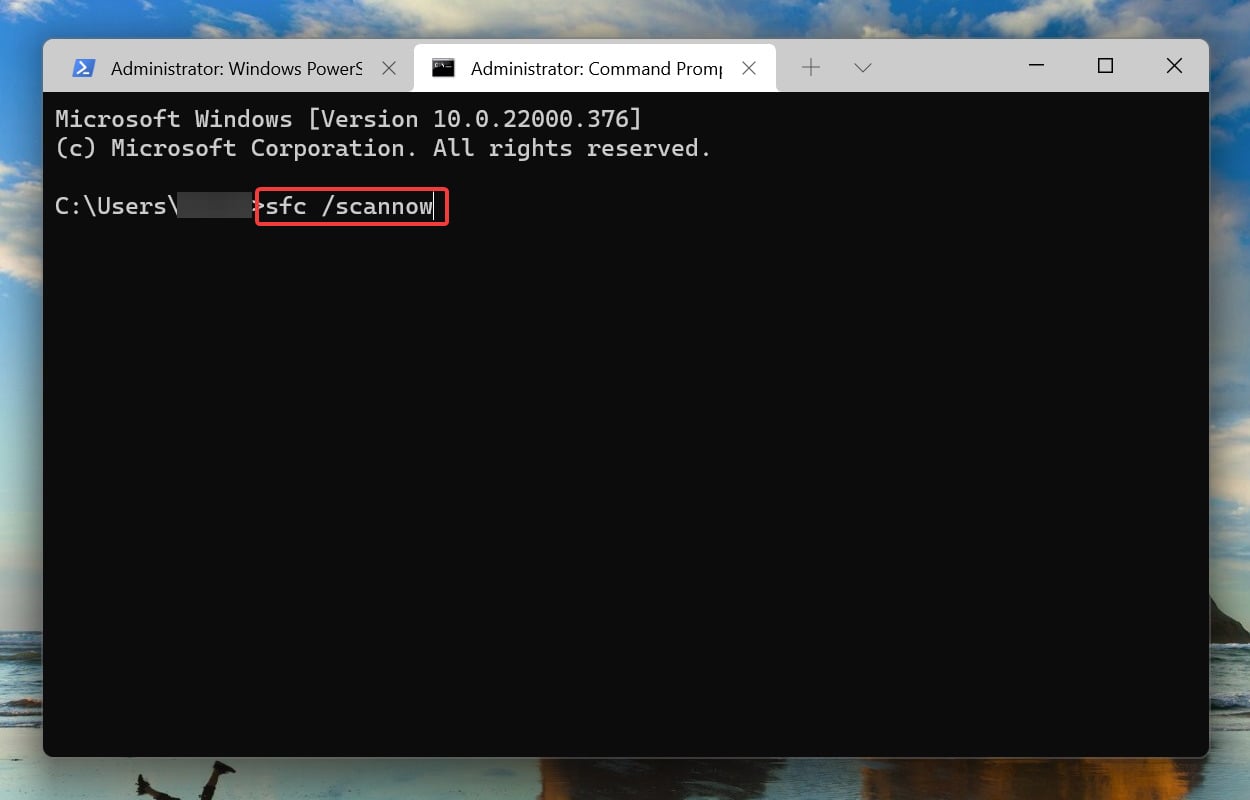
  2. Type the following line of script and hit Enter.
    sfc /scannow
  3. Exist the Command Prompt.

If you want a faster and simpler scan, we recommend using a specialized tool to scan and repair most types of issues on your computer.

1.2 Run the DISM scan

  1. Click on the Start menu, type command, right-click the Command Prompt option, and select Run as administrator.
    kb5007651
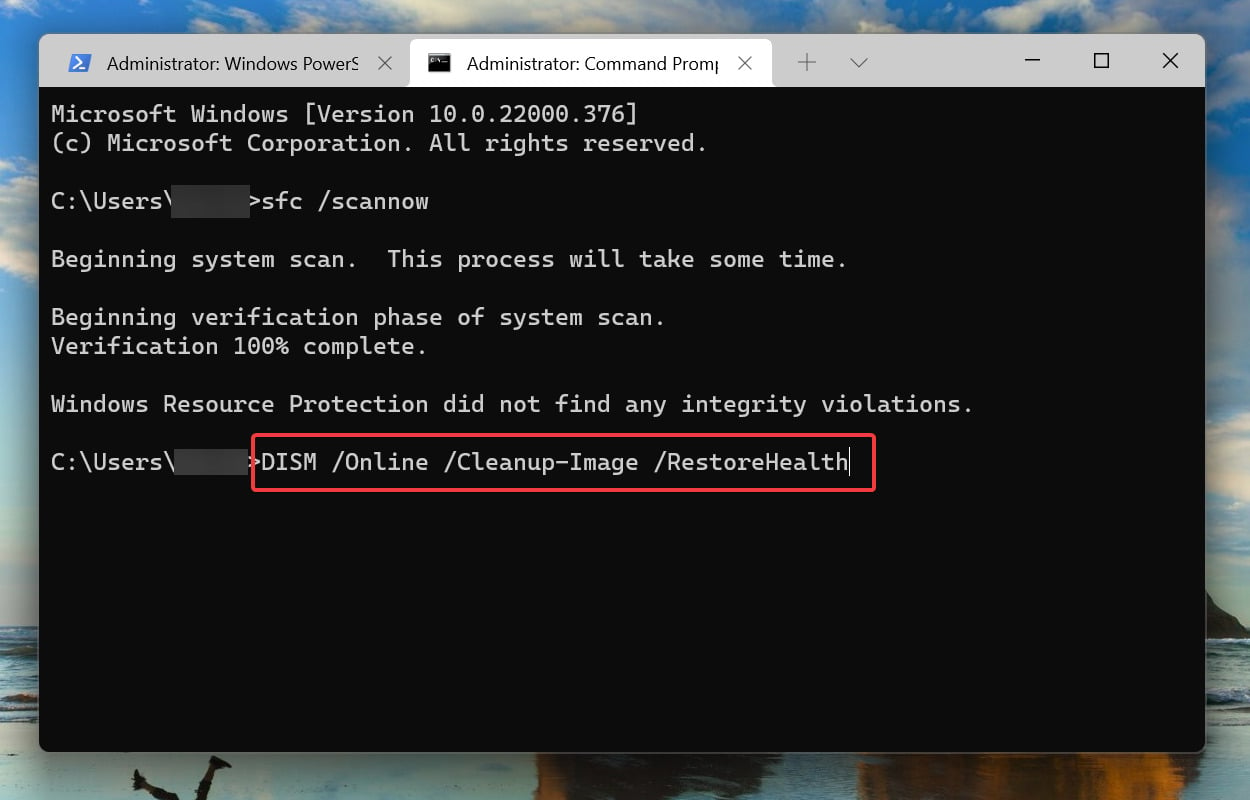
  2. Input the next set of commands, hitting Enter after each one:
    DISM /Online /Cleanup-Image /CheckHealth
    DISM /Online /Cleanup-Image /ScanHealth
    DISM /Online /Cleanup-Image /RestoreHealth
  3. Lastly, restart the computer.

2. Uninstall any duplicate updates

  1. Press Windows + R, type Control Panel, and hit Enter.
    kb5007651
  2. Click on Uninstall a program.
    kb5007651
  3. Select View installed updates on the left pane.
    kb5007651
  4. Finally, look for the specific KB number, right-click and select Uninstall.

3. Reset Windows Update Components

  1. Click on the Start menu, type command, right-click the Command Prompt option, and select Run as administrator.
    kb5007651
  2. Type the following scripts, hitting Enter after each one.
    net stop wuauserv
    net stop cryptSvc
    net stop bits
    net stop msiserver
  3. Open the File explorer by pressing Windows + E.
  4. Click on View, and tick Hidden files.
  5. Navigate to the following locations below and delete their content.
    C:\Windows\System32\catroot2
    C:\Windows\SoftwareDistribution
  6. Once again, open the command prompt with admin rights and run the following commands, hitting Enter after each.
    net start wuauserv
    net start cryptSvc
    net start bits
    net start msiserver
  7. Finally, restart the computer.

4. Attempt a KB5007651 manual download

  1. Click on the Start menu, type View update, and select the option to View your Update history.
  2. Here, it would be best if you noted the KB number for the failed installation.
  3. Visit the Microsoft Update Catalog website.
  4. Input the failed KB number and hit search.
  5. Make sure you download the correct version for your computer; this may be 32 or 64-bit versions.
  6. Finally, install the downloaded file, and restart your computer.

These four solutions should come in handy if you encounter the KB5007651 install error 0x80070643.

We have not made these solutions in any particular order, so you should try what seems most appropriate.

Do not hesitate to let us know which solutions also worked for you in the comments section.

Fix: “Check your disc” Xbox One error

Xbox One has a library of hundreds of different games, but some problems can appear on your Xbox One while trying to play your favorite game. According to users, they are getting Check your disc error message on their Xbox One, and today we’re going to show you how to fix this problem.

How to fix the “check your disc” Xbox One error?

1. Restart your Xbox One

According to users, this issue appears while trying to install a new game on your Xbox One. One of the simplest ways to fix this problem is to restart your console, and you can do that by following these steps:

  1. Press and hold the power button on your console to turn it off completely.
  2. After your console turns off, unplug the power cable from your console.
  3. Wait for 30 seconds or more and connect the power cable again.
  4. Press the power button on your console to turn it on again.

By restarting your console you’ll clear the temporary files and hopefully, that will solve the Check your disc error.

2. Clear Persistent Storage

    If you’re having a Check your disc error, you might be able to fix it simply by clearing the Persistent Storage. Xbox One automatically downloads content related to your Blu-ray discs, and sometimes this content might become corrupted and cause this and other errors to appear. To fix this problem you need to clear the Persistent Storage, and you can do that by following these steps:

    1. Press the Menu button on your controller.
  1.     2. Choose Settings > Disc & Blu-ray.

  2.     3. In the Blu-ray section select Persistent Storage.

  3.     4. Now select Clear persistent storage.

After clearing the Persistent Storage, the issue should be resolved. You can also prevent the download of Persistent Storage simply by unchecking Enable BD Live to improve Blu-ray playback option.

  • READ ALSO: Seagate external drive for Xbox One improves loading times and storage capacity

3. Insert your game disc again

According to some users, you might be able to fix this problem simply by ejecting and inserting your game disc again. We don’t know if this solution works but feel free to give it a try.
Some users are suggesting disabling your Internet connection and ejecting the disc, and you can do that by following these steps:

  1. On the Home screen scroll left to open the Guide.
  2. Select Settings > All Settings.
  3. Choose Network > Network settings.
  4. Select Go offline option.

After going offline, let the installation process fail due to a lack of Internet connection. After that happens, eject your disc, connect to the Internet and insert the disc again.

4. Clean your disc

This error can appear if your disc is damaged, and you might be able to fix this problem simply by cleaning the disc. To do that, hold the disc by its edge and be sure not to touch the top or bottom surface. Take a soft, damp cloth and clean it from the center to the edges. You can also take your disc to any store that has a disc polishing machine and ask them to clean it for you.

If cleaning the disc doesn’t work, you might want to consider a replacement. Before you replace your disc, we advise you to try it on your friend’s console and see if it works. If the disc doesn’t work on two different consoles, it’s most likely faulty so be sure to replace it.

Check your disc Xbox One error can prevent you from installing games, and to fix this error we recommend that you restart your console and clean your disc. If these solutions don’t work, feel free to try any other solution from this article.

READ ALSO:

Best Pc Components With Great Deals

What better idea would you have today than to build your computer? The following deals are gathered specially for those looking to build a PC for scratch, or simply wish to upgrade their gear while taking advantage of the weekend.

Even though the major deal season has just passed, some deals are still online, and below we’ve gathered the best ones available, mostly from Amazon.

Those looking to get even more insights about what deals are available this weekend can check our hardware tech deals page, where we’ve listed all types of components currently at a discounted price.

What are the best PC components deals?

➡ Solid State Drives (SSD)

SAMSUNG 970 EVO Plus SSD 2TB

  • 2TB storage
  • M.2 NVMe interface
  • V-Nand Technology
  • Expensive

The Samsung 970 Evo plus, is a great 2TB SSD that provides your PC with super-fast writing and reading of data.

The M.2 NVMe interface ensures that data transfers are very stable, and utilize the entire range of speed provided by your motherboard.

Samsung 970 EVO Plus SSD 1TB

  • 1TB storage
  • Samsung V-Nand technology
  • Integrated power loss immunity
  • PCIe Gen 3.0 x4 NVMe 1.3
  • Could be too small for some users

Samsung V-NAND SSD comes with a hefty discount, and those wishing to install an NVME SSD can rest assured with this option, as it’s one of the most sought-after on the market.

Being the smaller version of the previous device we recommended, it offers a smaller capacity of 1TB, which would be more than enough for more users.

Sabrent 1TB Rocket PCIe 4.0 SSD

  • 1TB storage
  • NVMe 4.0 Gen 4
  • PCIe M.2
  • Power management support for APST/ASPM/L 1.2
  • Not compatible with standard TB3 cable

This NVME 4.0 option, offering 1TB of fast switching data is one of the best on the market. The NVMe 4.0 Gen 4 and PCIe M.2 compatibility makes it great for any high-speed data transfers.

Added to that, you can also manage power levels with support for APST, ASPM, and L1.2.

Crucial MX500 1TB

  • 1TB storage
  • 3D NAND SATA
  • 2,5 inches
  • AES 256-bit encryption
  • 5-year limited warranty
  • Some users have had issues after using it for a while

Crucial’s MX500 is a budget option for those wishing to incorporate a 1TB SSD, without breaking the bank. This deal expires quickly, so make haste.


➡ RAM

Corsair Vengeance RGB Pro 32GB

  • 32GB (2 x 16GB)
  • DDR4 3200
  • Individual RGB LEDs
  • Full control with Corsair iCUE software
  • Lighting profile customization
  • Expensive

As the name says, this bundle is one of the most sought options when it comes to avenging those dreadful tasks. Running at 3200 MHz, this will break through most obstacles placed upfront.

G.Skill Trident Z RGB Series

  • 16GB (2 x 8GB)
  • 288-pin SDRAM
  • DDR4 3000
  • Vibrant RGB heatsink
  • 3000Mhz memory speed
  • More expensive than other models

Running at 3000 Mhz, this 16GB bundle from G.Skill has one of the lowest latencies of the DDR4 segment.

With this setup, your gaming PC will look amazing, while also offering you multitasking capabilities and gaming capacity without any worries.

Corsair Vengeance LPX 16GB

  • 16GB (2 x 8GB)
  • DDR4 DRAM
  • 3000 MHz
  • Solid aluminum heat spreader
  • Multiple colors
  • Customer service lacked in the case of some users

This Corsair Vengeance 16GB deal offers one of the lowest prices on the market. The DDR4 package bundle has high reading/writing speeds and at this price, is almost a steal.


➡ CPU

Intel Core i9-9900KF

  • 8 cores
  • 3.6 up to 5.0 GHz
  • 95W
  • LGA 1151 CPU socket
  • Intel Optane memory support
  • Pricey

Even though it does come at a higher cost, the i9-9900KF is an amazing CPU that runs on 8 cores and reaches up to 5.0 GHz when turbo-boosted.

It requires a 95W power supply, and uses an LGA 1151 CPU socket, with full Intel Optane memory support.

AMD Ryzen 7 5800X

  • 8 cores
  • 16-Thread Unlocked
  • 4.7 GHz
  • AM4 socket
  • 38MB cache
  • DDR-3200 support
  • Requires a powerful cooler

The AMD Ryzen 7 5800X is another beast of a CPU, allowing you to run the latest games at amazing speeds, and tackle a wide range of other tasks without problems.

The 16-Thread unlocked CPU with 8 cores can reach speeds of up to 4.7GHz and comes with an AM4 socket and 38MB cache.

AMD Ryzen 7 3800X

  • 8 cores
  • 16-Thread unlocked
  • Wraith Prism LED cooler included
  • 4.5 GHz
  • AM4 socket
  • DDR 3200 support
  • Some users are not satisfied with this CPU for gaming

The AMD Ryzen 7 3800X is another amazing CPU option from AMD which uses 8 cores and 16 threads, while also including a Wraith Prism LED cooler in the package.

This cooler ensures that the CPU’s temperature is kept under control while reaching 4.5GHz. The AM4 socket and DDR 3200 support ensure compatibility with most motherboards.

AMD Ryzen 5 3600X 

  • 6 cores
  • 12 Thread unlocked
  • Wraith Spire cooler included
  • 4.4 GHz
  • AM4 socket
  • Runs hot when idling

AMD’s answer to the mid-range market comes in the form of Ryzen 5 3600x, which is now sold by Amazon at an affordable price.

If you are looking for something to take care of the job properly but you don’t have the numbers for a higher tier, you can’t fail with this one.

Intel Core i7-9700K

  • 8 cores
  • Up to 4.9 GHz
  • 95W
  • LGA 1151 socket
  • 8 threads
  • Ensure that your z370 motherboard BIOS is updated before using

The i7-9700K CPU from Intel is another great option that is capable of tackling any sort of task you might test it with.

The 4.9GHz frequency is the top level of this CPU, using 95W and 8 threads to power this great hardware.


➡ Motherboards

ROG Maximus XIII Hero

  • Intel LGA 1200 socket
  • AI motherboard – overclocking, cooling, networking, noise cancelation
  • 14+2 teamed power stages rated for 90 Amps
  • Optimized thermal design
  • High-performance networking
  • Expensive

At the top of our list for the best motherboards with deals this year, we have the powerful ROG Maximus XIII Hero, which offers you more than enough power to power any sort of system configuration without any hiccups.

This motherboard features a set of AI-controlled elements, including AI overclocking, cooling, networking, and also noise cancelation.

ROG Strix Z590-E

  • Intel LGA 1200 socket
  • Full AI motherboard optimization features
  • 14 + 2 power stages with ProCool II power connector
  • VRM and aluminum I/O heatsink
  • PCIe 4.0 M.2 slot
  • Powerful gaming networking features
  • Not enough instructions for new builders

The ROG Strix Z590-E is a mammoth gaming motherboard that features an Intel LGA 1200 socket, full AI optimization features, and has 14 + 2 power stages for optimal performance.

The VRM and aluminum I/O heatsink ensure optimal temperatures across the system, and power optimization using the PCIe 4.0 M.2 slot, with amazing networking options.

ASUS ROG Strix X570-E

  • AMD AM4 socket
  • PCIe 4.0
  • Aura-Sync RGB
  • PCH heatsink, MOS heatsink, Dual onboard M.2, and water pump
  • Gaming networking features
  • Ensure your BIOS is updated before installing it

The ROG Strix X570-E motherboard from ASUS is another amazing device that will offer your system every last bit of power it needs to run any game and application at full speed.

The AM4 socket with PCIe 4.0 ensures amazing data transfer and power speeds, while the Aura-Sync RGB makes it look amazingly futuristic, and fits any gaming setup perfectly.

Other noteworthy mentions:


➡ GPUs (Graphic cards)

ZOTAC Gaming GeForce RTX 3080 Ti

  • 12GB GDDR6X
  • 384-bit
  • 19 Gbps
  • PCIe 4.0
  • IceStorm 2.0 Advanced Cooling
  • Spectra 2.0 RGB lighting
  • Expensive

Even though expensive, the GeForce RTX 3080 Ti from Zotac is one of the most powerful GPUs with a deal.

This powerful device will ensure that you can run any game at optimal FPS rates, and without any lagging whatsoever.

ASRock Radeon RX 6900 XT Phantom

  • 16GB GDDR6
  • PCIe 4.0
  • AMD RDNA2 Triple fan
  • Polychrome SYNC
  • 3 x DisplayPorts
  • Users reported price is exaggerated

The ASRock Radeon RX 6900 XT Phantom can provide you with countless hours of gaming at high-level graphics without worrying about your game lagging or having any visual issues.

Using 16GB GDDR6 memory, and connected through a PCIe 4.0 port, this device also offers 3 DisplayPorts for high-quality connectivity, and also HDMI capabilities.

Other worthy mentions:


➡ Power supply

EVGA Supernova 1600 G+

  • 1600 Watts output
  • 1.6 Kg in weight
  • 80 PLUS Gold certified
  • Fully modular
  • 100% Japanese capacitors
  • Double ball-bearing fan
  • EVGA Eco mode
  • Very loud

The EVGA Supernova 1600 G+ is one of the best power supplies available on the market at this point, which also includes a worthy deal.

The 1600 Watts output ensures more than enough power even for systems with high-end configurations, and the fully-modular design optimizes the way power is shared and used in your system.

Other notable mentions:


➡ Coolers


➡ Computer cases


This guide provided you with a wide range of components including high-end entries and tapering down to accessible prices.

All the products included in this list are great options, and your decision should come down to checking any specific features you want and the price range.

Make sure to share with us what hardware options you chose from this list by using the comment section below.

5 Best 2Tb External Hard Drives Deals

The new year is right upon us and so is the buying frenzy. With almost every tech item under the sun getting discounted, we present here a compilation of some of the best deals currently available on an external hard drive of 2TB capacity.

Best 2TB External Hard Drives to invest in this year

WD 2TB Elements Portable External Hard Drive

The hard drive comes with the legendary quality and reliability assurance that WD is known for. It comes with both USB 2.0 and USB 3.0 ports and allows for fast data transfer.

The hard drive is of the DDR3 SDRAM type and weighs just 8 ounces. It supports the NTFS file system and presents one of the simplest solutions for data backups.

⇒ Check price

Seagate Expansion 2TB Portable External Hard Drive

The Seagate offering is one of the more stylish solutions for external data storage. It is compatible with both USB 2.0 and USB 3.0 ports. Fast and efficient file transfers via SuperSpeed USB 3.0 are also one of the highlights of the Seagate hard drive.

It supports plug-and-play operation along with a drag-and-drop feature right out of the box. It is compatible with the NTFS file system and tips the scales at just 6.4 ounces.

⇒ Check price

Toshiba Canvio Advance 2TB Portable External Hard Drive

The Toshiba Canvio comes with several advanced features such as password protection for added security along with auto backup software so that you never miss out on important files. The hard drive otherwise supports both USB 3.0 and USB 2.0 connectivity.

It also has an attractive look to it thanks in part to its high gloss finish and is also available in several vibrant color options. Further, at 5.3 ounces, it also is among the lightest.

⇒ Check price

Editor’s Note: If you’re interested in other types of HDDs, check out our wide collection.

Silicon Power 2TB Rugged Portable External Hard Drive

The Silicon Power external hard drive isn’t just about external data storage but also surviving the elements as well. The hard drive boasts of military-grade protection again shock and water ingress. That however shows in its weight, which stands at 11.2 ounces.

The hard drive meanwhile supports the Fat32 file system and offers just USB 3.0 port connectivity. The hard drive also matches with both Xbox and PS4 and is hence an ideal choice for gamers.

⇒ Check price

WD 2TB Black My Passport Portable External Hard Drive

The WD My passport external hard drive comes with a host of features for added security and convenience. Those include automatic data backup features along with password protection and 256-bit AES hardware encryption to prevent unauthorized data access.

Also, at 5.9 ounces, it surely is on the lighter side and offers both USB 2.0 and USB 3.0 connectivity. Plus, it comes in an attractive shape and in several color options.

⇒ Check price

As you can see, there are plenty of viable options when it comes to 2TB external HDDs, and choosing the right one will depend on your exact needs, price range, and also capabilities.

Feel free to let us know which of these portable external HDDs you chose. You can do so by writing a comment in the section below.

6 Best Cyber Monday Antivirus Deals & Sales [100% Verified]

Installing reliable antivirus software on your Windows 10 computer is crucial if you want to block malware, viruses, and other cyber threats lurking on the internet.

If you’re on a budget, today is the best day to purchase antivirus software for your computer. Although the shopping season is over, many antivirus tools feature a really nice price tag, especially if you are on the lookout for flash deals. Scroll down to learn more.

What are the best antivirus deals to get in 2024?

TotalAV

TotalAV antivirus scan

TotalAV is a regular in Cyber Monday antivirus sales, usually with a steep first-year discount on its full suite. That suite gives you real-time protection against malware, ransomware and spyware, WebShield for phishing and malicious sites, and the tune-up tools, and in the higher plans a Safe Browsing VPN, an ad blocker and a password vault. One subscription covers your PC, Mac and phone.

  • Real-time protection against malware and ransomware
  • WebShield blocks phishing and malicious sites
  • Tune-up tools included
  • VPN, ad blocker and password vault in the higher plans
  • One subscription for PC, Mac and phone
TotalAV

TotalAV

For maximum protection against all types of malware, this tool is the best choice.
Free Trial Visit Website

Bitdefender

Bitdefender is perhaps one of the best antivirus programs in the world. It can block virtually all the cyber threats out there and successfully protect your computer.

Bitdefender comes in several versions, each suitable for particular cybersecurity needs. They include Antivirus Plus, Total Security, and Internet Security, each one adapted to convey the highest level of digital protection!

Bitdefender

Light on system resources but ruthless on cyberthreats – the perfect security combo is now available at a special rate!
Check price Visit Website

Avira

Avira Antivirus Server

With this award-winning security software, you can benefit from new anti-ransomware that stops even unknown programs before they attack.

If you want to bank, shop, pay & email with complete confidence, grab this amazing offer today!

Avira Internet Security Suite offers real-time protection against all online threats, unhackable passwords for all your online accounts, and automatic patches for security flaws.

Avira

The protection you know and trust is now available at a special price in a Premium package.
Check price Visit Website

Norton 360

The latest Norton antivirus version offers a wide range of features that protect your computer no matter the threats targeting it.

Norton has a very low impact on your system performance which makes it perfect for medium to low-end computers.

Norton 360

Advanced protection for all your devices at unbelievable rates you simply cannot miss!
Check price Visit Website

Panda

Panda offers big-time savings on its security packs for the extended Cyber Monday sales.

That discount can get you complete protection for an amazing price and includes:

  • Antivirus protection with Firewall for Windows devices
  • Free VPN
  • Cleanup Tool
  • Parental Control
  • Identity protection for online security while browsing, shopping, and banking
  • Ransomware cyberattacks and advanced threats protection

Panda

When it comes to protection, you cannot go wrong with the complete security suite Panda delivers with a super special discount!
Check price Visit Website

Kaspersky Standard

Kaspersky Standard is another useful antivirus to get on Cyber Monday.

You can use it to protect all your devices, including your PC, Mac, Android, and iOS devices with a single license and forget all about threats, known or emerging ones.

Kaspersky Standard

Unbreakable protection in an easy-to-deploy and simple-to-use package at unbeatable prices!
Free Trial Visit Website

This tool can stop all ransomware, viruses, phishing attacks so that your device remains safe at all times. There is also a dedicated financial security layer that secures your payments.

There you have 5 powerful antivirus solutions that you can download today.

What’s it going to be? Don’t be shy to share your pick with us via the comments section below.

Unityplayer.dll Was Not Found [Download & Fix]

A unityplayer.dll not found error is one that can arise for many games and software that need the unityplayer DLL file.

That error occurs when the DLL files are missing, and in this guide, we’ll show you how to fix this.

How can I fix the unityplayer.dll was not found error?

1. Update Windows

  1. Click the Start button.
    start button windows 11
  2. Select Settings on the Windows Start menu.
    windows 11 settings
  3. Click Windows Update (or Update & Security). Select the Check for updates.
    windows 11 check for updates
  4. Wait while Windows download the necessary updates.

After your system is updated The code execution cannot proceed because unityplayer.dll was not found error should be gone.

2. Use a third-party DLL fixer

A quick and easy method to find and fix DLL-related issues is to scan your system with DLL repair software.

Such tools verify your files and if it turns out they are corrupt or missing, these automatically replace them.

In this way will get rid of DLL errors, so you’ll be able to run your games and software without being interrupted by an error message.

These are specialized in solving other Windows errors as well, and can also help you free up space, fix your registry, and more.

Keep in mind that it’s entirely possible to fix this error without third-party tools, but dedicated software will make the job easier, as it can also help with long-term PC maintenance.

3. Run an SFC scan

  1. Press the Windows + S keys to open the search.
  2. Find Command Prompt by typing cmd in the search tool that opens.
  3. To open the Command Prompt, right-click it in the search tool and select Run as administrator.
    Run as administrator option unityplayer.dll
  4. Firstly, run this command: DISM.exe /Online /Cleanup-image /Restorehealth
    Deployment Image command unityplayer.dll
  5. Run a System File Checker scan by inputting this command and pressing Return: sfc /scannow
    windows sfc scannow
  6. Don’t close the Command Prompt until the SFC scan displays an outcome.

4. Run a Windows Security scan

  1. Press the Windows key + S and enter security. Select Windows Security from the list.
    security search on windows 11
  2. Select Virus and threat protection on the Home tab.
    Virus & threat protection unityplayer.dll
  3. Click the Scan options navigation option.
    Scan options unityplayer.dll
  4. Select the more thorough Full scan option.
    Full scan option unityplayer.dll
  5. Press Scan now to start the scanning.

You can also purge malware with many third-party anti-malware scanners. Luckily, you can easily find many great security tools to suit your needs.

5. Check if the unityplayer.dll file is in the Recycle Bin

  1. Double-click Recycle Bin on the desktop.
  2. Type unityplayer.dll within the search box for the Recycle Bin.
    Recycle Bin unityplayer.dll
  3. Right-click the unityplayer.dll file if you find it to select Restore.
    Restore option unityplayer.dll

After restoring it, check if the unityplayer.dll is still crashing.

6. Reregister the unityplayer.dll file

  1. 1. Press the Windows + S keys at the same time and enter cmd in the text box that opens.

  2. 2. Right click on the result and select Run as administrator.

    cmd run as administrator
  3. 3. Type in this regsvr32 command: regsvr32 UNITYPLAYER.DLL

    cmd command regsver32
  4. 4. Press the Enter key to reregister the DLL.

  5. 5. Click Power on the Start menu after reregistering the DLL.

  6. 6. Select the Restart option.

    restart option windows
  7. 7. After the computer restarts, check if the problem is resolved.

  8. If you cannot find the unityplayer.dll file, you should try to reregister it using Command Prompt. This is likely to fix the error and get your PC working properly again.

7. Reinstall the software the unityplayer.dll error arises for

  1. Right-click Start to select a Run option that’s on the Power User (Win + X) menu.
    Run option
  2. Input this Run command for the Programs and Features applet: appwiz.cpl
  3. Select OK to view the Programs and Features uninstaller utility.
    Programs and Features applet unityplayer.dll
  4. Then select the software for which the unityplayer.dll error arises.
  5. Click Uninstall and any confirmation options to remove the software.
    Uninstall option unityplayer.dll
  6. Restart your PC before reinstalling the software.
  7. Reinstall the latest version of the software you uninstalled.

Uninstalling software with Programs and Features often leaves behind leftover residual files. So, some users might prefer to remove programs with uninstaller utilities like CCleaner.

It’s a freeware PC cleaning utility that includes its own uninstaller. Plus, it has extra options for erasing leftover files and registry entries.

Note icon NOTE
If you need to fix a unityplayer.dll error for a game installed with client software, such as Epic Games, it might not be available for selection within Programs and Features. You can uninstall and reinstall such games within the client software you installed them.

8. Roll Windows 11/10 back to a previous date

  1. Press Windows key + R to open Run, and enter the following text in that app: rstrui
  2. Click OK to launch System Restore.
    Rstrui command unityplayer.dll
  3. If there’s more than one restore point available, select the Choose a different restore point option.
  4. Click Next to view available restoration points.
    System Restore window unityplayer.dll
  5. Select a system restoration point that predates the unityplayer.dll error on your PC. Alternatively, choose the oldest date you can.
  6. Click Next to go to the confirmation step.
    Confirmation option unityplayer.dll
  7. Press the Finish button to roll back Windows to the point selected.
Note icon NOTE
Note that restoring Windows removes software installed after a chosen restore point date. So, you might need to reinstall some programs after a system rollback. You can see what software a restore point affects by clicking the Scan for affected programs button in System Restore.

What is the unityplayer DLL file?

Unityplayer.dll is one of those shared Dynamic Link Library files that different software programs can access simultaneously.

This Unity game engine DLL file is needed for 3D content generation. Unityplayer.dll errors often arise for these games among others:

  • Among Us
  • Skyrim
  • Hollow Knight
  • Genshin Impact
  • Clone Hero
  • Camp Pinewood
  • Wasteland 3
  • Baldis Basics

A bad image error unityplayer.dll error means software and games that need that DLL file can’t access it. That DLL file may or may not still be on your PC.

If it’s still there, the unityplayer.dll file could be corrupted. Try entering unityplayer.dll in the Windows search box to find it.

How to download unityplayer.dll if it’s missing or not found

You can download unityplayer.dll file from various websites that include DLL file repositories. However, those are unofficial sources. Some of those sites might include malware DLL files. The DLLs available on some of them can also be outdated.

For that reason, it’s generally recommended to steer clear of most DLL download sites. If you choose to use any of these websites, do a bit of research and make sure that the website is credible and safe.

After downloading the unityplayer.dll, it’s recommended that you scan it with an antivirus utility. Then move the DLL file into the folder that includes the software the unityplayer.dll error arises for. Note that your downloaded DLL file version must match the 64 or 32-bit software version.

Regarding the location, the unityplayer.dll location is usually System32 or SysWOW64 folders with other DLL files. The System32 folder is for 64-bit DLLs and the SysWOW64 directory includes 32-bit ones. These are the paths for those folders:

C:\Windows\System32\
C:\Windows\SysWOW64\

FAQ

How can I prevent UnityPlayer.dll from going missing?

To prevent the error, ensure your game or app is properly installed, keep your system updated, and avoid interrupting the installation process.

Why am I getting the ‘UnityPlayer.dll Missing’ error?

This error usually occurs when the UnityPlayer.dll file is missing or corrupted, often due to an incomplete installation or system issue.

How do I fix the UnityPlayer.dll missing error?

Try reinstalling the game or app, updating your graphics drivers, or manually downloading the DLL from a trusted source and placing it in the correct folder.

Can I download UnityPlayer.dll from any website?

Only download UnityPlayer.dll from trusted sources like the official Unity website or the game’s official page to avoid malware.

You can chat about the unityplayer.dll not found error by adding comments below. Feel free to add relevant comments about that Windows 11/10 issue there.

For additional solutions on fixing DLL errors, check out this guide on fixing autorun.dll errors on Windows 10.

In case you still have this issue, read our missing Windows 11 DLL files guide for more information. We also have a new guide on assembly-csharp.dll error, so you might want to check it out.

If you’ve fixed the unityplayer.dll pdb error with a resolution not specified above, you’re most welcome to share it below.

Best Dex 3 Dj Deals To Grab

DEX 3 DJ software is a professional solution that enables every user to intuitively mix music, create karaoke music videos and produce qualitative live-music tracks.

This DJ mixing software created by PCDJ represents an innovative solution for 80.000 professional DJs and passionate people alike.

More so, the software has beat-grid automatic mixing and key detection to help you blend the tracks simply, both for live performance mixing or home-based tracks.

What are the best DEX 3 DJ deals for this Cyber Monday?

At this time of year, PCDJ has a beneficial offer and you can save 35% on DEX 3 software. It is feasible to profit from this discount and get this rich-feature mixing program with an audio, music video, and karaoke support.

The offer has much to offer, and you can expect qualitative services from DEX 3 at the price of $96.85 which was discounted from $149.

In addition, you can also get the DEX Red edition for easy-to-use mixing software and basic karaoke features. At the same time, you have available DEX 3 Limited edition as the perfect method to learn how to DJ like a pro.

Some of the DEX 3 DJ best features:

  • Key detection for harmonic mixing
  • Mixing audio and music videos alike
  • 80+ DJ controllers
  • Vinyl emulation option
  • BMP Sync with beat-grid
  • Over 4 full-featured DJ Decks

DEX 3 DJ

With this professional DJ mixing software, you can produce valuable audio tracks that will amaze your public.
Check price Visit website

FIX: Windows Activation Error 0x80041023 [4 Quick Ways]

Error 0x80041023 is a Windows activation issue that can arise for some users. That activation error can arise for users trying to upgrade from Windows 10 Home to the Pro edition, upgrade from an older Windows OS, or reinstall the platform.

The activation error 0x80041023 message states The product key you entered didn’t work (0x80041023). Consequently, users can’t activate Windows 10 when that error arises.

How can I fix Windows activation error 0x80041023?

1. Check you’re entering the product key right

  1. To to do so, press the Windows key + S keyboard shortcut.
  2. Type cmd in the search box that opens.
  3. Right-click the Command Prompt and select the Run as administrator option on its context menu.
  4. Enter this command in the Prompt’s window: wmic path softwarelicensingservice get OA3xOriginalProductKey
    wmic path command Fix Windows 10 Activation Error 0x80041023
  5. When you press Enter, Command Prompt will show you the product key.
  6. Note down the product key displayed.
  7. Enter that key in the Product key box.

2. Activate Windows 10 with the SLMGR command

  1. To do that, press the Windows key + R keyboard shortcut.
  2. Input cmd in Run’s text box.
  3. Press the Ctrl + Shift + Enter hotkey, which will open an elevated Command Prompt window.
  4. Then enter this command and press Enter (make sure to replace the corresponding words with your actual product key): slmgr /ipk <Windows Key>
  5. Input the following in Command Prompt and press Enter: slmgr /atoslmgr /ato command Fix Windows 10 Activation Error 0x80041023
  6. Restart Windows after activating the product key.

3. Get a new, valid key

If you’re reinstalling Windows 10, bear in mind that the key you activated the platform with before might be one-time use MAK key. If that’s the case, you can’t active a reinstalled platform with the same MAK key.

In which case, you’ll need to get a new Windows 10 activation key from MS Store or Amazon.

Tip icon Tip
Make sure you have a genuine Microsoft product installed. Otherwise, you won’t be able to get past the mentioned error.
Windows 10 Home

Windows 10 Home

Use only legitimate Windows 10 copies to get all the important product updates and avoid system errors.
Check priceVisit website

4. Are you trying to upgrade from an OEM license?

Activation error 0x80041023 will also arise for users trying to upgrade from Windows 10 Home to Pro with OEM licenses. Those OEM licenses are only intended for new PCs.

Thus, activation won’t work for Windows 10 Pro on a PC that originally came with OEM Windows 10 Home. In which case, you’ll need to reinstall the original Windows 10 Home and upgrade to the Pro edition via MS Store.

To check if your product key is OEM non-transferable, reinstall Windows 10 Home. Then open the Command Prompt. Input the following line and press Enter: slmgr /dli

Thereafter, a Script Host window will open that tells you your license type.

slmgr /dli command Fix Windows 10 Activation Error 0x80041023

If none of the above resolutions fix activation error 0x80041023, contact Microsoft support.

Microsoft’s Customer Service number page includes a list of phone numbers for various regions.

Let us know how you managed to resolve this issue by leaving us a message in the comments section below.

Bluetooth Headphones Not Recognized as Audio: 4 Fixes to Use

Bluetooth connections have been a seamless choice for many years. It gives the convenience of not needing to bother about cable management and also means you do not need to be exactly beside your PC to stay connected.

When you face difficulties establishing this communication, it becomes a drag. Let us explore possible causes and the best solution.

Why are my Bluetooth headphones not showing up on the output device?

While this is annoying, we gather that the same elements often trigger it. On top of the list are the following:

  • Outdated drivers – Most of the time, if the Bluetooth headset does not connect or disconnects, it is mainly because your Bluetooth drivers need to be updated.
  • Power Settings – Another culprit could also be your power-saving feature in your Windows 10 PC. Sometimes, this feature turns off Bluetooth to save as much power as it can, thus preventing you from properly connecting your headset.
  • Range – Bluetooth will not work beyond a certain distance. You should ensure you are not trying to connect to a faraway device.

These are the top culprits, and now we will show you the best solutions. These solutions will work if your Bluetooth headphones are not recognized as an audio device if they are connected but have no sound. They will also work for Bose Bluetooth and JBL headphones not recognized as audio via Bluetooth.

What can I do if my Bluetooth headphones are not recognized as audio?

Before you go into any of these solutions, you must make sure to do the following:

  • Bring the connecting device in range because the closer the proximity, the easier it is to establish a connection.
  • Restart your devices because this forces certain processes to shut down and increases the chance of your device functioning properly.

1. Set Bluetooth Service to Automatic startup

  1. Go to Start, type services.msc, and hit Enter.
    windows services
  2. Search for the Bluetooth Support Service, and double-click on it.
    bluetooth support service
  3. Select the General tab on the window’s upper side, go to Startup type, then change the option to Automatic.
    bluetooth support service automatic startup
  4. Select the Log on tab on the window’s upper side, select the option This Account, and enter your account details. Remove the passwords in the two boxes in the Log on tab, click Apply and close the windows.
    bluetooth account
  5. Reboot your device for the changes to take effect.
  6. Go on the Manufacturer’s website, look for the specific Bluetooth Headset drivers, and download them.
  7. Uninstall the current Bluetooth drivers and install the recently downloaded ones.

This should help if your Bluetooth headphones are not recognized as audio devices.

2. Run the Hardware and Devices Troubleshooter

  1. Press Windows + I to open the Settings app.
  2. Click Updates & Security.
    bluetooth headphones not recognized as audio
  3. Select the Troubleshoot option on the left pane, and on the right pane, select Hardware and Devices, then click Run the troubleshooter.
    troubleshoot hardware and devices
  4. After the troubleshooting process, close the window and reboot your computer.

This should help if your Bluetooth headphones are not recognized as audio devices.

3. Update Bluetooth drivers

  1. Right-click on the Start menu and select Device Manager.
  2. Locate the Bluetooth driver, right-click on it, and select Update driver.
    bluetooth headphones not recognized as audio
  3. Select Search automatically for drivers.

This should help if your Bluetooth headphones are not recognized as audio devices.

If not, you should try using an automated tool to find and install updates for all outdated drivers on your computer.

4. Use the Windows Store Apps Troubleshooter

  1. Click the Start menu, type control panel, and open the Control panel option.
    bluetooth headphones not recognized as audio
  2. Change View by from Category to Large Icons.
    control panel
  3. Scroll down, select Troubleshooting, then click on View all on the left pane.
    bluetooth headphones not recognized as audio
  4. Select Windows Store Apps and follow the on-screen instructions.
    https://i.imgur.com/IMy4Xio.png

That’s it, folks; you have four methods to fix issues if your Bluetooth headphones are not recognized as audio devices. And if you plug in and Windows asks you which device did you plug in, we have the answers in our article.

If you have any additional issues or questions regarding this subject, don’t hesitate to contact us using the comments section below. We will get back to you as soon as possible.

Your Xbox One Avatar is Not Updating? Try These Easy fixes

So you got a new Xbox One console and now trying to customize the profile by editing the Xbox avatar but is not updating? You are not alone, as several users have reported similar issues in the Microsoft community forum.

This error can occur due to several reasons, including corrupted Xbox apps as reported in the Microsoft tech community.

I just bought my xbox one s 2 days ago and since buying it I have not been able to access the avatar editor app it stays on the loading screen for a few minutes then goes to “something went wrong” i have talked to 3 different customer help support people about this issue and none of them were able to fix this issue please help!

Follow the steps in this article that can help you to fix Xbox One not updating issue successfully.

How do I fix the avatar editor not working on Xbox One?

1.  Perform a power cycle

avatar editor not working on Xbox One
    1. Some issues are temporary and can be resolved by performing a quick power cycle.
  1.     2. Go to the Home Screen and press the Menu button on the controller.

  2.     3. Select Settings from the menu.

  3.     4. Go to Power and Startup.

  4.     5. From the options “Turn Xbox off“.

  5.     6. Select Yes to confirm.

  6.     7. Wait for the console to turn off.

  7.     8. Unplug the cord that is connected to the power outlet.

  8.     9. Unplug other cords that are connected to your Xbox.

  9.     10. Wait for a minute.

  10.     11. Replug all the cords one by one.

  11.     12. Turn on Xbox One and open the avatar editor. Check if you can edit your avatar now.

  12. If the issue still persists, follow up with the other methods provided below.

2. Force quit/uninstall the editor app

Force quit the app

Can't edit avatar on Xbox One
  1. Before reinstalling the app, try to force quit the app.
  2. If the app is available on the home screen, highlight it.
  3. Press the Menu button on the controller.
  4. Select the Quit option if it is available.
  5. Once the app is closed, relaunch it and check for any improvements.

Reinstall avatar editor

  1.  If the issue persists, try to reinstall the app.
  2. Go to My Games and Apps.
  3. Select Apps.
  4. Select More (three lines) for the app and select Uninstall.
  5. Reinstall the app from the store and check if you can edit the avatar on your Xbox One.

3. Reset Xbox One to factory default

Can't edit avatar on Xbox One
  1. In case the issue is related to the console, factory resetting the Xbox One can help you fix the issue.
  2. There are two options to reset the console. Here is how to do it.
  3. Press the Xbox button on your controller to open the guide.
  4. Select System and then select Settings.
  5. Go to System > Console Info.
  6. On the “Reset your console?” screen, you have two options:
    Reset and keep my games and apps: As you can see, this option will not delete any game data or uninstall the games. It will reset the Xbox firmware without touching your data. Select this option first and reset the console.
    Reset and remove everything: As a last resort, use this option to completely erase all the data from the Xbox console. Choosing this option will uninstall all the apps and games.
  7. After resetting Xbox One to factory default, try using the avatar editor to check if the issue is resolved.

The Xbox avatar editor may stop working due to temporary issues with the app. You can easily fix the issue by performing a power cycle or reinstalling the app.

Do let us know which method helped you solve the issue in the comments.

Manage iPhone with iMazing 2, now 50% off this Cyber Monday

iMazing 2 is a good software variant for those wishing to properly manage their iPhones from afar. With the help of the app, Apple users can use their Mac or Windows PCs and perform simple or advanced tasks on their smartphone or their tablet.

As of today, thanks to the holiday season upcoming, the deal of iMazing 2 is the best one yet, with new users getting a 50% discount.

Those interested in a fully managed solution will benefit from data backups, saving text messages to their computer, transferring WhatsApp data, migrating pictures and videos to another device, and many more. Here’s the full breakdown of what iMazing 2 can do.

iMazing 2 most important features:

  • iOS backup – backup all of your iPhone or iPad data directly to a Mac or Windows PC device
  • Messages – export text messages (including iMessage) and access them from another device, using filters for message status, subject line or file type of attachments.
  • WhatsApp full data – using iMazing you can easily find group events (when someone joined a group for example), filter messages by their status (sent, delivered, read, deleted), find all sorts of attachments and many more. Works with WhatsApp business as well.
  • Photos – take control back from the cloud and have your pictures saved directly to your device. As a bonus, .HEIC files can also be converted to .JPEG when needed. All of these under a simple import procedure.
  • Music – if you hate using iTunes for managing music files, iMazing 2 can replace that and help you transfer music to any iOS device.
  • Ringtones – remember the days when you could set an audio file directly as your ringtone, without needing to purchase a special file? Well, they are back. Simply import the tune you want and save it as your ringtone.
  • Books – using the Books folder from iMazing, you can now simply drag & drop ePUB and PDF files to your iOS device.
  • Safari – become the web browsing geek you always wanted, by having full access to important Safari events, such as exporting your browsing history and transferring your bookmarks to any other browser.
  • Phone – keeps track of your conversation history and voicemail

And many more. For the full feature breakdown and a taste of their 50% discount deal, head over to iMazing 2’s official page:

⇒ Download and try iMazing 2

Lastpass Deals: Grab 25% Off [Discount]

LastPass is back on sale again, but with greater deals than last, we saw last year. You should take advantage of the discounted rates and head on over to their website.

They currently have deals on all the plans, the pricing is appealing. The sale has been running since November 2021. This is one of the best discounts on password manager apps out there right now.

LastPass has been providing users with a unique and secure experience for quite some time now. You guaranteed reliable and impeccable services from them. Therefore, there is no time like the present, to take advantage of the Christmas deals and get your hands on them.

Besides, they also ensure that their technology is up to date at all times. In return, they can keep your data safe by ensuring malware and cyberattacks remain at bay. Moreover, users can access it on literally any platform, for instance, Windows, Mac, iOS, and Chrome.

What are the best LastPass deals?

This year, LastPass prepared a 25% off deal for users that want to buy the Premium, Families, and Business plans. The Premium and Families both come with a 30 day free trial period, while the Business comes with a 14 day trial period.

For the Premium and Business plan, you will get to access them at a discounted rate of $3 and $4 per month respectively. On the other hand, the business plan is now available at $6 per month.

LastPass key features

The cost-friendly software is available for both personal and business use. It makes it easier, once you save your password here you can access it wherever you are at any time you please.

It is also available on all platforms. Also, you no longer need to keep filling in forms, LastPass stores your credentials and fills out the forms for you instead automatically.

Furthermore, you no longer have to worry about setting strong passwords or forgetting them. LastPass does all this for you ultimately enhancing convenience. Users can also use the software to store important digital records such as insurance cards and Wi-Fi passwords. This is because it keeps them secure and accessible at all times.

So, what are you still waiting for? These deals have a time stamp on them, so you need to take full advantage of the offers.

⇒ Get LastPass

However, these deals are subject to change. Sometimes, some of the deals listed in our guides may no longer be available by the time you hit the buy button. So, hurry up and grab them while they are still alive.

Did you hop on this deal? Share your thoughts with us on the Christmas deals in the comment section below.

Windows 11 Update Stuck at 100? Here’s What to do to Fix it

Ever since Microsoft announced that it would be releasing a new operating system – Windows 11 in the fall, users have become increasingly intrigued and interested.

Of course, in theory, this sounds very simple and should follow the classic upgrade path, but you need to make sure you meet all the minimum requirements and specifications on your PC to be able to run the new OS.

Once you’ve done this check, you go through the classic upgrade path and find that your Windows 11 update is stuck at 100%.

Why is my Windows 11 download stuck at 100?

Among Windows users, it is quite common for updates to get stuck when downloading in the background and installing.

A number of factors can influence these annoying stuck updates that seem to test the limits of impatient users. The power is in your hands, so you don’t need to worry.

Before you start the process of upgrading your operating system to Windows 11, you need to make sure there are no power outages and that you have a very stable Internet connection.

These are some of the most common causes of installation problems. This can be very frustrating, and if you’re also an impatient user by nature, then you start to get alarmed.

But there’s no need to worry because there are a couple of ways to check if the update has really stuck. Discover below the best ways to fix Windows 11 update blocking at 100%.

What can I do if my Windows 11 update is stuck at 100?

1. Check the SoftwareDistribution folder

  1. Navigate to the following path: C:\Windows
  2. Check for the SoftwareDistribution folder.
  3. Verify the size of this folder to see if your Windows 11 update files are being downloaded.

If you don’t know how the new operating system update is progressing and it looks like the installation is stuck at 100%, then there’s no need to worry.

You can easily check for any activity in the download folders to see if there is any activity. All you need to do is check the SoftwareDistribution folder.

This folder is responsible for temporarily storing Windows update files. You can look at the size of this folder to see if there is any millage, and if it continues to grow, then it means Windows update files are being downloaded.

There is also the distinct possibility that the update may hang for longer or even that the files are not installed, in which case you will need to clear the SoftwareDistribution folder.

2. Clear the SoftwareDistribution folder

  1. 1. Press Start, and type cmd.

  2. 2. Select Command Prompt, and run it as administrator.

  3. 3. Type the following commands, and hit Enter after each one: net stop wuauserv

    net stop bits

    net stop command
  4. 4. Navigate to C:\Windows\SoftwareDisrtibution and delete all the folders in there.

  5. 5. Open Command Prompt again, and type in the following commands one by one:

    net start wuauserv

    net start bits

    start wuaserv command
  6. This restarting and refreshing the downloads to ensure that the Windows 11 update doesn’t get stuck at 100%. On the contrary, it continues its quiet way in the background.

    All you need to do next is to relax and become patient, because the upgrade will eventually run, and you will be able to enjoy the new operating system provided by Microsoft.

    Thus, the upgrade to Windows 11 stuck at 100 issue will be a thing of the past.<

Useful tips for Windows 11 users

To make sure you have a smooth update process for the new Windows 11 operating system, there are some simple things to keep in mind.

First of all, your Internet connection is crucial to avoid any crashes and also make sure you don’t have any power outages.

Be patient, even if it’s not your strong point, because we assure you that it will take a while to enjoy the amazing features of the new OS.

If you’re curious to see what Windows 11 build 22000.51 has to offer, make sure you don’t miss our comprehensive article before testing it on your PC.

We’ve also got a detailed guide to the differences between Windows 11 and Windows 10 that you’d be well-advised not to miss, so you can easily weigh up the benefits.

We hope you managed to get rid of the Windows 11 update stuck at 100 issue on your device and managed to upgrade your OS.

Of course, for more suggestions or questions about the new Windows 11 operating system, please access the comments section below.

Gaming Mouse Cyber Monday: 4 Best Deals on Razer Gaming Mice

Razer being a PC game accessory maker makes almost everything from gaming keyboards to headphones and from gaming laptops to mice. Razer has some of the best gaming mice in its product lineup for competitive gamers.

Razer mice are equally practical for both gamers and working professionals with their swappable panels for different functionalities offering precise input and RBG lighting for a fun time.

In this buying guide, we have gathered the best deals on Razer gaming mice.

What are the best deals on Razer gaming mice?

Razer Viper Ultimate Hyperspeed

  • Extremely light
  • RGB charging dock
  • 20K DPI
  • Optical sensor
  • Chroma lighting
  • 8 programmable buttons
  • 70 hrs battery
  • The design might not be for everyone

The Razer Viper Ultimate Hyperspeed, as the name suggests, is an extremely light and versatile mouse that offers a great gaming experience no matter if you’re an amateur or a professional.

The RGB charging dock will keep your device at full battery constantly, while the 20K DPI ensures a precise and smooth gaming experience without any compromises.

You also get 8 programmable buttons to use as shortcuts, which can give you a definitive advantage against your gaming opponents.

Razer Naga Trinity

  • 16,000 DPI Optical Sensor
  • Up to 19 Programmable Buttons
  • Supports 16.8 million color combinations
  • Uncomfortable for small hands

The Razer Naga Trinity is a three-in-one mouse that comes with versatile swappable side panels offering a world of customization options along with precise input with a 16,000 DPI 5G Optical Sensor and equally great comfort for long gaming sessions.

The three swappable side panels – 12 buttons, 7 buttons, and a simple two-button panel can be used with different types of games. It can be programmed with 19 commands.

Razer DeathAdder Elite

  • 16,000 DPI Optical Sensor
  • 7 Programmable Buttons
  • Supports up to 50 million clicks
  • At times a left-click, is registered as a double-click.

The DeathAdder Elite is similar to Naga Trinity in looks, but the main difference between the two is the missing swappable panels in the former one as it comes with the traditional two-button layout. Then again it costs a lot less than Naga Trinity.

The DeathAdder also boasts a True 16,000 5G optical sensor the mechanical switches are rated for 50 million clicks. The Chroma lighting is customizable through the Razer Synapse driver tool.

Razer Basilisk

  • Can adjust the sensitivity through the dedicated DPI buttons
  • Supports 16.8 million color combinations
  • Comes with a 2-year warranty
  • Need to create an online account in order to use it

The Razer Basilisk is a practical mouse offering a comfortable feel, easy-to-use Synapse software, and an affordable price tag for a gaming mouse.

The Basilisk uses a 16,000 DPI 5G optical sensor for precise input and comes with a removable DPU clutch. The wheel resistance is customizable while the thumb rest offers much-needed comfort.

Razer Lancehead

  • High performance on gaming
  • Adaptive frequency technology
  • Highly precise laser sensor
  • The mouse needs to be charged every 2 days if used wireless

If you are looking for a performance wireless gaming mouse, then the Razer Lancehead offers excellent wireless connectivity with up to 24 hours of battery life on a single charge.

It uses the same 16,000 DPi 5G optical sensor for precise input and comes with nine independently programmable buttons.

That’s about it! Have you found your favorite Razer mouse deal yet? Do let us know your pick in the comments below.

Xbox One S Turns on But No Display is Showing: How to Fix

If Xbox One S turns on but no display is showing can be a big problem and prevent you from using your console properly. However, you might be able to fix this problem using one of these solutions.

Connecting your TV to your Xbox console can sometimes prove to be a difficult task, especially if your xbox is not showing on tv.

Unfortunately, this is one of the most frequent issues Xbox One and Xbox One S owners encounter after installing the latest updates or when starting their consoles.

If your TV screen often remains blank or black, we’ve got a series of quick workarounds for you. Follow the troubleshooting steps listed below to fix the connection between your TV and console.

How can I fix Xbox One S turns on but no display is showing? Try these solutions

  1. Xbox not showing on TV screen when you return Home
  2. Xbox One S no display screen when watching a Blu-Ray Disc
  3. Xbox not showing on TV screen after you turn on the console
  4. No picture on screen when you use an AVR
  5. No display screen after you install a system update

Xbox not showing on TV screen when you return Home

One way to fix this problem is to simply restart your console. This is incredibly simple to do, and in order to do it, you just need to follow these steps:

  1. Hold the Xbox button on the front of the console for 10 seconds to turn your console turn off.
  2. Press the Xbox button on the console to turn your console back on.

Xbox One S no display screen when watching a Blu-Ray Disc

Most likely, your console’s video output is set to Allow 24Hz. To fix the no display screen issue, you’ll need to turn this feature off:

  1. Press the Xbox button to go to the Home screen > scroll left to open the Guide.
  2. Select Settings > select All settings.
  3. Go to Display & sound > select Video options.
  4. Click Enable 24Hz > turn off this setting.

Xbox not showing on TV screen after you turn on the console

If you’re having this problem, there’s a small chance that your Xbox One isn’t properly connected. However, you can check if everything is working properly by doing the following:

  1. Make sure that both your TV and console are turned on and your TV’s input signal is HDMI.
  2. Check that the HDMI cable connection to your console and TV is secure.
  3. Make sure that the HDMI cable is connected to the console’s “out to TV” port.
  4. Cold boot your console (hold the power button for 10 seconds).
  5. Reset your display settings:
    • Eject any disc from the console
    • On the console, press and hold the Xbox button for five seconds
    • Press and hold the Xbox button and the Eject button until you hear a beep to turn on the console. Don’t let go until the second beep occurs.
    • Note that this action boots your console in low-resolution mode. Go to Settings to reset this setting.
  6. Plug the HDMI cable into a different HDMI port on your TV.
  7. Use a different HDMI cable to connect your console to your TV.
  8. Connect your console to a different TV.

No picture on screen when you use an AVR

  1. Turn on your devices in the following order, waiting for each device to fully power-up:
    • Turn on your TV.
    • Turn on the AVR once your TV is displaying a picture.
    • Turn on your console.
  2. Switch the input source of your AVR away from the console and then back.
  3. Restart the AVR.
  4. Set your TV connection to HDMI:
    • Return to the Home screen > scroll left to open the guide.
    • Select Settings >Display & sound.
    • Select Video output > TV connection > select the HDMI option.

No display screen after you install a system update

  1. Go to the Xbox One System Update Solution.
  2. Select I need to troubleshoot a system update error.
  3. Select I am experiencing a startup issue.
  4. Select Black screen (yes, select this option to troubleshoot blank TV screen issues).
  5. Follow the troubleshooting solutions offered by the tool.

We hope the solutions listed above help you to fix the blank TV screen issues you’ve encountered. If you’ve come across other workarounds, feel free to list the troubleshooting steps in the comments section below.

Xbox One S screen flickering

If you experience this problem, first, check your HDMI connection. Make sure that the cable is connected strongly on both sides. Also, try to use another cable. If that’s not solving the issue, power cycle your console.

To do that, press and hold the power button for 10 seconds, until the console shuts down completely, then power it on again and see if the problem is solved.

Xbox One S is stuck on a green screen

If you have this problem, first, try the solution from the previous solution to power cycle your Xbox.

If the problem persists, try to factory reset your console. To do that,follow the steps below

  1. Hold Eject and Sync buttons, and click the Power button.
  2. Wait until you hear two startup tones and you will see a menu with 4 options: Restart, Power off, Factory reset, and Update off of Flash Drive.
  3. Select the Factory reset. Choose whether you want to keep your installed games or not.
  4. Then Xbox One will boot normally. If you chose to keep them, all your games will be still stored on the game drive.

Xbox One X blank screen

If the screen is blank, there could be two possible problems. It might be a problem with the HDMI connection, in which case you need to verify cable connection and try to use another cable, or it may be a more serious problem with your hard drive.

If the hard drive goes bad, it might cause this problem and the solution is to try another hard drive on your console or try the hard drive you have on another device to see whether it’s a problem from the console or the drive.

Devices and Printers not Opening on Windows 10: 3 Solutions

Is your Devices and Printers not opening on your Windows 10 device? Here is all you need to know.

Devices and Printers usually display printers and other devices within the Control Panel. Here you can perform basic operations and organize these devices.

Hence it becomes a bit of a bother when you can not get access to this applet. We will discuss the causes and the best solutions in this guide.

Why is Devices and Printers not opening on Windows 10?

We were able to gather the causes of this problem from many users. Fro,m these findings, the following are at the top of the list of possible triggers:

  • Corrupt files – If you have a few corrupted or bad system files, you may experience this problem.
  • Disabled services – A few services like the Bluetooth and Print Spooler services may have been turned off. This can trigger this problem.
  • Problem with DLLs – A blank Devices and Printers applet might be due to missing DLLs. Registering DLLs is a resolution that some users have confirmed can fix Devices and Printers.

Haven discussed triggers, let us explore some of the most trusted solutions available.

How can I fix Devices and Printers not opening on Windows 10?

  1. Check the Bluetooth and Print Spooler Services are Enabled
  2. Run a System File Scan
  3. Open Devices and Printers in a New User Account

1. Check the Bluetooth and Print Spooler Services are Enabled

  1. Go to Start, type services.msc, and hit Enter.
    devices and printers not opening windows 10
  2. Double-click Bluetooth Support Service.
    devices and printers not opening windows 10
  3. Select Automatic on the Startup type drop-down menu, press the Start button if the service is stopped, and click Apply and OK.
    devices and printers not opening windows 10
  4. Repeat the steps above for all other Bluetooth services on the Services window, such as Bluetooth User Support, Bluetooth Audio Gateway, etc.
  5. Also repeat the process for the Printer Spooler service.

2. Run a system file scan

  1. Click Start, type command prompt, right click on the Command Prompt option, and select Run as administrator.
    devices and printers not opening windows 10
  2. Type the script below and hit Enter.
    DISM.exe /Online /Cleanup-image /Restorehealth
  3. Type the next script below and again hit Enter.
    sfc /scannow
  4. After the SFC scan, the Command Prompt window might state, Windows Resource Protection found corrupt files and successfully repaired them. If so, restart your desktop or laptop.

To make things faster and safer we recommend using a system repair tool specialized in scanning your system file integrity and solving any issues at hand.

3. Open Devices and Printers in a New User Account

  1. Press Windows + I to open the Settings app.
  2. Select Accounts, navigate to Family & other people, then click Add someone else to this PC.
    devices and printers not opening windows 10
  3. Click I don’t have this person’s sign-in information on the Microsoft Account window.
    devices and printers not opening windows 10
  4. Then click Add a user without a Microsoft account.
  5. Enter the user account details in the required text boxes, and then press the Next button.
  6. Thereafter, restart Windows and select to log in with the new user account you just set up.

Those are some of the resolutions that have fixed the Devices and Printers applet in Windows for many users. These resolutions may come in handy also if the Printer properties is not opening.

If you have another fix for Devices and Printers, feel free to share it below.

Microsoft’s wearables CyberMonday deal could save you $100

Microsoft has a new deal on Samsung Galaxy watches prepared for 2021’s Black Friday & Cyber Monday but the offer are still ongoing, just ready for the Christmas sales. You can save up to $100, depending on the wearable device’s model, and get this: the cheapest device starts at only $59.99.

Wearables have started to gain traction a few years back, as people started to get more interested in logging their physical activity or seeing their phone notifications without having to take the device out of their pockets.

So, if you’ve been considering investing in a Samsung Galaxy wearable, now is a great opportunity for you to do so. Note that at the time being, Microsoft just offers us a sneak preview of the deal.

The actual offer becomes available starting 11/19/2021. Thus, you have plenty of time to prepare yourself.

Samsung wearables discounted on Microsoft store

Samsung Galaxy Watch3 BT

Samsung Galaxy Watch3 BT is a popular Samsung wearable that helps you stay connected and track your day-to-day activities in a seamless fashion. And it has a premium, elegant design, as well.

This device can monitor many parameters, including SpO2, VO2 Max, heart rate, oxygen levels, and how many steps you take. In addition, you can use Samsung Galaxy Watch3 BT to access various apps via Bluetooth, display notifications, and access your multimedia playlists easily.

  • Military-grade durability
  • More than 50,000 watch faces
  • LTE connectivity
  • Auto-tracking for certain activities
  • Integrates Bixby voice feature
  • ECG not available

⇒ Samsung Galaxy Watch3 BT at Amazon
⇒ Samsung Galaxy Watch3 BT at Walmart

Samsung Galaxy Watch Active 2

Samsung Galaxy Watch Active 2 is a powerful smartwatch that lets you monitor your heart rate, sleep patterns, and workouts. It has a super AMOLED display placed on a thin frame, so it could fit even elegant attires if needed.

It can be charged wirelessly, and, more important, you can use your compatible Galaxy phone’s Wireless PowerShare feature to give Samsung Galaxy Watch Active 2 a quick boost.

The watch also comes with a built-in sleep tracker and the Calm app, which could help you lower your stress levels and restore your focus.

  • Helps you reach fitness goals with useful insights
  • Lightweight design fits various attires
  • Precise heart rate monitor
  • Built-in sleep tracker and Calm app
  • Endurance-optimized battery
  • No built-in blood pressure sensor

⇒ Samsung Galaxy Watch Active 2 at Amazon
⇒ Samsung Galaxy Watch Active 2 at Walmart

While both choices are excellent wearables from Samsung, it all comes down to how much you’re willing to spend and what are your needs from this type of tech.

It goes without saying that advanced users might prefer the Samsung Galaxy Watch3 BT, but if you don’t mind sacrificing a bit of functionality for a better price, then the Galaxy Watch Active 2 might be what you need.

Are you going to buy any wearables (smartwatches, bands) this Holiday deals or upgrade your existing ones? Tell us all about it in the comments section below:

Windows Update Error 0x800f0831 [SOLVED]

Windows 10, like the previous iterations, is prone to errors and ever since it was released, we have come across a bunch of them.

One of these is the 0x800f0831, a Windows 10 install error. Note that it is encountered while updating Windows and doesn’t allow the process to complete properly. We all know how important it is to keep up-to-date with the latest version of the OS.

When running an outdated version, you don’t just miss out on several new features but the PC is also exposed to threats and the chances of encountering errors are high.

Before we delve into the solutions, let’s first walk you through the underlying issues that may cause the install error – 0x800f0831.

What causes the install error 0x800f0831?

There are numerous underlying issues that are known to cause this Windows installation error. Some of these occur more frequently than others, and we have listed them in the same sequence:

  • Missing files from the previous update
  • Corrupt system files
  • Antivirus conflicting with Windows Update
  • Misconfigured VPN
  • Issues with the Windows Update service0x800f0831 high CPU in Windows 11

With a basic understanding of the problem, you are now in a far better position to proceed to troubleshoot the error. First, we recommend reverting any change that you made in the recent past on your Windows PC.

If that doesn’t fix the 0x800f0831 Windows 10 install error, execute the fixes listed here as given.

How can I fix the Windows Update error 0x800f0831?

1. Use a PC repairing software

If you require a faster and more effective method to bypass the 0x800f0831 Windows Update install error, you can use a specialized repair tool.

2. Run the Windows Update troubleshooter

  1. Press Windows + I to launch the Settings app, then click on Troubleshoot on the right in the System tab.Troubleshoot to fix windows 11 install error - 0x800f0831
  2. Click on Other troubleshooters.Other troubleshooters
  3. Next, locate the Windows Update troubleshooter and click on the Run button next to it.Run Windows Update troubleshooters to fix windows 11 install error - 0x800f0831
  4. Wait for the troubleshooter to diagnose the issue, and choose the appropriate repsonse, when prompted, to fix them.

Whenever you encounter an error in Windows, it’s recommended that you first look for a relevant troubleshooter. These are more than capable of fixing a wide variety of errors, both hardware, and software, and do not require much effort from your end.

3. Run the SFC and DISM scan

  1. Press Windows + S to launch the Search menu. Enter Windows Terminal in the text field at the top, right-click on the relevant search result, and select Run as administrator from the context menu.Launch Windows Terminal to fix windows 11 install error - 0x800f0831
  2. Click Yes on the UAC (User Account Control) prompt that pops up.User Account Control
  3. Next, click on the down arrow at the top, and select Command Prompt from the list of options. Alternatively, you can press Ctrl + Shift + 2 to launch the Command Prompt tab.Open command prompt tab
  4. Now, type/paste the following command and hit Enter to run the SFC scan:sfc /scannowRun SFC scan to fix windows 11 install error - 0x800f0831
  5. Once it’s complete, paste the following command and hit Enter to run the DISM tool:DISM /Online /Cleanup-Image /RestoreHealthRun Dism tool
  6. Wait for the scan to complete, then restart the computer and check if the 0x800f0831 Windows 10 install error is fixed.

Both the SFC and DISM are critical in detecting problems with the update process. The SFC (System File Checker) scan identifies corrupt system files, and if any are found, replaces them with their cached copy stored on the system.

The DISM (Deployment Image Servicing & Management) tool, on the other hand, looks for problems with the Windows image and can modify the installation media, if required.

4. Restart the Windows Update service

  1. Press Windows + R to launch the Run command. Type services.msc in the text field, and either click on OK or hit Enter to launch the Services app.Launch Services app
  2. Locate and double-click on the Windows Update service to launch its Properties.Windows Update
  3. Click on the Startup type dropdown menu, and select Automatic from the list of options.Set Automatic service status to fix windows 11 install error - 0x800f0831
  4. Next, click on the Start button under Service status, and then click on OK to save the changes.Start Windows Update service

After starting the Windows Update service, check if the 0x800f0831 install error is fixed.

5. Reset Windows Update components

  1. Press Windows + R to launch the Run command. Type wt in the text field, hold the Ctrl + Shift, and either click on OK or hit Enter to launch an elevated Windows Terminal.Launch elevated Windows Terminal to fix windows 11 install error - 0x800f0831
  2. Click on the downward arrow at the top, and select Command Prompt from the menu to open it in a new tab.Launch Command Prompt
  3. Now, type/paste each of the following commands and hit Enter after each to reset the Windows Update components and fix the 0x800f0831 Windows Update error.
  4. Execute the following two commands to stop the BITS and Windows Update services:net stop bits net stop wuauserv
  5. Next, execute the following command to delete the qmgr*.dat files:Del “%ALLUSERSPROFILE%Application DataMicrosoftNetworkDownloaderqmgr*.dat” Delete files
  6. The following commands will rename some critical folders. Though if you are attempting the reset the process for the first time, skip this step, and if the process doesn’t go through, try it the next time.Ren %Systemroot%\SoftwareDistribution\DataStore DataStore.bak Ren %Systemroot%\SoftwareDistribution\Download Download.bak Ren %Systemroot%\System32\catroot2 catroot2.bak
  7. Execute the following two commands to reset the BITS and Windows Update service:sc.exe sdset bits D:(A;;CCLCSWRPWPDTLOCRRC;;;SY)(A;;CCDCLCSWRPWPDTLOCRSDRCWDWO;;;BA)(A;;CCLCSWLOCRRC;;;AU)(A;;CCLCSWRPWPDTLOCRRC;;;PU) sc.exe sdset wuauserv D:(A;;CCLCSWRPWPDTLOCRRC;;;SY)(A;;CCDCLCSWRPWPDTLOCRSDRCWDWO;;;BA)(A;;CCLCSWLOCRRC;;;AU)(A;;CCLCSWRPWPDTLOCRRC;;;PU)
  8. Next, type/paste the following command and hit Enter to execute it:cd /d %windir%\system32Execute command
  9. Now, execute each of the following commands individually to re-register the BITS and Windows Update files:

regsvr32.exe atl.dll
regsvr32.exe urlmon.dll
regsvr32.exe mshtml.dll
regsvr32.exe shdocvw.dll
regsvr32.exe browseui.dll
regsvr32.exe jscript.dll
regsvr32.exe vbscript.dll
regsvr32.exe scrrun.dll
regsvr32.exe msxml.dll
regsvr32.exe msxml3.dll
regsvr32.exe msxml6.dll
regsvr32.exe actxprxy.dll
regsvr32.exe softpub.dll
regsvr32.exe wintrust.dll
regsvr32.exe dssenh.dll
regsvr32.exe rsaenh.dll
regsvr32.exe gpkcsp.dll
regsvr32.exe sccbase.dll
regsvr32.exe slbcsp.dll
regsvr32.exe cryptdlg.dll
regsvr32.exe oleaut32.dll
regsvr32.exe ole32.dll
regsvr32.exe shell32.dll
regsvr32.exe initpki.dll
regsvr32.exe wuapi.dll
regsvr32.exe wuaueng.dll
regsvr32.exe wuaueng1.dll
regsvr32.exe wucltui.dll
regsvr32.exe wups.dll
regsvr32.exe wups2.dll
regsvr32.exe wuweb.dll
regsvr32.exe qmgr.dll
regsvr32.exe qmgrprxy.dll
regsvr32.exe wucltux.dll
regsvr32.exe muweb.dll
regsvr32.exe wuwebv.dll

11. Now, paste the following command and hit Enter to reset Winsock:netsh winsock resetrun command

12. The last step is to restart the BITS and Windows Update service, so execute the following commands to do that:net start bits net start wuauserv

6. Disable VPN

  1. Press Windows + I to launch the Settings app, and select Network & Internet from the navigation pane on the left.Network and Internet
  2. Click on VPN on the right.VPN
  3. Next, click on the configured VPN, and select Remove from the options that appear.Remove VPN to fix windows 11 install error - 0x800f0831
  4. Click Confirm on the pop up.Confirm change

7. Enable .Net Framework 3.5

  1. Press Windows + R to launch the Run command. Type appwiz.cpl in the text field, and click on OK or hit Enter to launch the Programs and Features window.Launch Programs and features windows
  2. Click on Turn Windows features on or off from the left.Turn Windows features on or off
  3. Now, tick the checkbox for .Net Framework 3.5 (includes .Net 2.0 and 3.0), and click on OK to save the changes.select .NET Framework 3.5 (includes .NET 2.0 and 3.0) to fix windows 11 install error - 0x800f0831
  4. If required, follow the on-screen instructions to download the relevant files.

Now, restart the computer and check if the 0x800f0831 install error is fixed.

8. Perform an in-place upgrade to repair Windows

  1. Create a bootable USB drive for Windows.
  2. Connect the USB drive and double-click on it in the File Explorer to view its contents.Open USB drive
  3. Double-click on the setup.exe file.Launch setup
  4. Click Yes on the UAC (User Account Control) prompt that pops up.UAC box
  5. Then, click on Change how Setup downloads updates.Change how setup downloads updates to fix windows 11 install error - 0x800f0831
  6. Select the Not right now option and click on Next. We choose this option to keep the repair process as straighfortward as possible.Not right now
  7. Click on Accept.Accept terms to fix windows 11 install error - 0x800f0831
  8. Click on Change what to keep.Change what to keep
  9. Select Keep personal files and apps and click on Next.Keep personal files and apps
  10. Finally, click on Install to start the process.Install the OS to fix windows 11 install error - 0x800f0831

We also have a dedicated guide on how to fix the 0x800f0831 install error in Windows 11 that you can check out for more info.

Are there other Windows 11 installation errors?

There are various installation issues, apart from 0x800f0831, in Windows 11. To help you fix these, we have a dedicated set of guides that you should know about.

Also, note that there are a few elements that need to be set up properly before starting the OS upgrade process, or else you risk getting an error saying Windows 11 update stuck at 100%.

As you can see, if you ever encounter an installer error, just find the relevant guide, and get your system back up and running in no time.

That’s all there is to the 0x800f0831 installer error in Windows 11, along with the most relevant fixes for it. If these don’t work, you can reset Windows 11 to its factory settings.

Tell us which fix worked and your experience of Windows 11 thus far, in the comments section below.

Best Asus Gaming Laptop Deals To Get This Cybermonday

Black Friday & Cyber Monday have become synonymous with the yearly shopping season, and no one is more excited about it more than fans of gadgets and electronics.

Among these, the most eager to get the best deals are probably gamers, since they all know how just slapping the gaming label on something ups the price by a lot.

Well, Microsoft has a little surprise for them this year, since it will be including a very powerful and very promising gaming laptop in its yearly Black Friday & Cyber Monday sale. Although BF and CM are over, the laptop still can be found at a great deal during this Holiday season.


Get the latest deal for Asus TUF FX505DT-WB72

The Asus TUF series of gaming laptops is the company’s second response to all other big manufacturers that have their proprietary subdivisions, such as Dell’s Alienware

Their first subdivision, Republic of Gamers, is still going strong, but it seems that the year 2020 belongs to TUF, and the Asus TUF FX505DT-WB72 is among the most popular models.

What makes these laptops particularly great is not only the powerful interior components that can easily support this generation’s games but also the very durable and solid-looking exterior that looks like it can actually take a beating if you ever lose an online match.

  • AMD Ryzen 7 R7-3750H quad-core processor
  • Nvidia GeForce GTX 1650 graphics card
  • 15.6-inch full HD display
  • 8GB of RAM
  • 256GB SSD
  • Some gamers may prefer the 17.3-inch model

Of course, given this laptop’s popularity, it should come as no surprise if you find similar, or even better, offers on other retailer’s websites, so go ahead and check out the link below as well:

⇒ Asus TUF FX505DT-WB72 deals on Amazon

⇒ Asus TUF FX505DT-WB72 deals on Newegg

⇒ Asus TUF FX505DT-WB72 deals on the Microsoft Store


Keep in mind that Microsoft only released a peek of what’s to come during the Holiday season sales, so more and maybe even better offers may appear on their catalog, so make sure you keep a close eye on it.


Are you planning on stepping up your gaming with this powerful laptop, or have you set your eyes on something better?

Let us know by leaving your feedback in the comments section below.

[wl_navigator]

DPC Latency Checker: What Is It & How to Download & Use It

DPC or Deferred Procedure Call handles driver efficiency by prioritizing important tasks first and the unimportant ones at a later stage. When your PC is suffering from high DPC latency issues, you’ll have audio driver problems which would cause clicks, pops, other distorted audio sounds, or even BSOD errors.

In this case, you need to check the DPC latency issue by using a third-party tool. This is where DPC Latency Checker comes into the picture

What is the DPC Latency Checker?

You can choose the best tool based on the version of the Windows operating system you are currently using. For instance, if you are on Windows 7 or newer versions, then you should go for the LatencyMon DPC latency checking tool from Resplendence.

Otherwise, if you are using an older PC, then your best bet for narrowing down the DPC latency issue is by using the trusted DPC Latency Checker tool. However, do note that you can use this tool on newer Windows PCs as well. The tool has multiple benefits, which we will talk about below.

Using the DPC Latency Checker, you can get the information if any of the drivers on your PC is implemented improperly or causes excessive latency known as DPCs. This tool not only helps you know if your PC has latency issues but also tells you what is causing the problem.

Here are some of the benefits of using the DPC Latency Checker tool:

  • You get to know the interruptions in real time.
  • You get to know if your Windows system is configured properly.
  • The tool will also give you information if a particular computer system is suitable for streaming applications or not.

How can I download and use the DPC Latency Checker tool?

1. Download the DPC Latency Checker tool

DPC Latency Checker is a portable program that you can download and use via a USB flash drive as well. It is a tiny tool and does not require installation. The portable program feature allows you to simply use it on another device without needing to download it again on it.

While the official website does not work, you can make use of the third-party link to download the tool on your PC. Once you download the file, all you need to do is run the EXE file and that is it.

⇒ Get DPC Latency Checker

2. How to use DPC Latency Checker

  1. Launch DPC Latency Checker file; it does not require any installation.
  2. As soon as you launch the tool, it will start checking the latency.
  3. The Latency Checker will periodically update the internal data at a regular interval as displayed in Test Interval.
  4. Here are the details that you can get using this tool:
    • Current Latency: This indicates the maximum DPC latency measured within the last second.
    • Absolute Maximum: It represents the maximum latency measured since the tool was started.

You can hit the Reset button to clear this value. The bar graph shows the Current Latency value over time. Do note that each bar represents the maximum DPC latency that occurred within a second.

The most recent value is shown as the right-most bar. Every second, bars are scrolled from right to left and a new bar is added on the right-hand side. You can stop the latency analysis by using the Stop button.

How to analyze latency issues with DPC Latency Checker?

  1. Right-click on the Start menu icon and select Device Manager.
  2. Right-click on the device, and select Disable from the context menu.
  3. After disabling a device, run the DPC Latency Checker.
  4. Check if the excessive latency value disappears or not.
  5. If the excessive latency value is there then, disable another device from the Device Manager. Perform this step until the high latency value disappears from the Latency Checker tool.
  6. When the excessive latency value disappears from the tool, you have found the specific device causing the problem.

For users facing an audio latency issue on their Windows PC, they can check out our guide which gives you a bunch of solutions to resolve the problem.

We also have a guide that lists five effective solutions to resolve high ping, ping spikes, and latency issues on your computer.

Let us know in the comments below if you had any problems following the above steps to use the Latency Checker tool on your Windows PC.

5 Quick Fixes for Error Code 0x8b050066 on Xbox One

While launching a game you may encounter the 0x8b050066 error on Xbox One. It is a common error and Microsoft has provided an official troubleshooting guide for the same.

That said, several Xbox One users have reported similar errors in the Microsoft community forum.

I recently purchased The Long Dark disk and it won’t even begin installing. I  keep getting error 0x8b050066.So  I recently moved to a new apartment and don’t have internet yet, so I’m wondering if I need internet to install the game?

If you are also troubled by this error, here are a couple of troubleshooting tips to help you resolve the 0x8b050066 error on Xbox One.

How do I fix 0x8b050066 Error on Xbox One?

1. Check the  Xbox Live service status

0x8b050066 Error on Xbox One
  1. Before trying any other troubleshooting tips, make sure the Xbox Live service is up and running.
  2. You can check the Xbox Live services status from the official website.
  3. Wait for the service status page to load.
  4. Under the Services section, check if any of the services are down for maintenance.
  5. Scroll down to the Games & Apps section.
  6. Check if any of the game outages are reported.
  7. If there are reported outages, wait until the service is up and running and then try again.

2. Perform a power cycle

  1. Make sure the power Xbox One is powered on.
  2. Press and hold the Xbox button on the console. Keep it pressed for about 10 seconds.
  3. Release the button once the LEDs stop flashing.
  4. Once the Xbox One is powered off, leave it idle for a few minutes.
  5. Disconnect all the cables connected to the console including the HDMI cable as well as the power cord.
  6. After a few minutes, connect all the cables back to the console.
  7. Press the Xbox button again to power on the console.
  8. Once the console is fully powered on, try to install the game that was causing the error and check for any improvements.

Performing a power cycle will resolve any temporary issues with the console that is preventing the installation or blocking the game from being launched.

3. Install the game in Offline Mode

Game launch error
  1. 1. Press the Xbox button on your controller to open the Guide menu.

  2. 2. From the menu, navigate to Settings > System > Settings.

  3. 3. Choose the Network option from the Setting menu.

  4. 4. Under the Network menu, open Network Settings.

  5. 5. Choose Go offline option. This will put the Xbox One console in the offline mode.

  6. 6. Try installing the game and check for any improvements.

  7. Now launch the game again and see if the errors shows up again. If it does, go to the next solution.

4. Uninstall and reinstall your game

Xbox Game installation error
  1. Press the Xbox button on the controller to open the Guide.
  2. Select My games & apps option and then select See all.
  3. Choose Games or Apps.
  4. Highlight the game you want to uninstall and press the Menu button.
  5. Select Uninstall. To confirm the action, select the Uninstall all option.
  6. This will uninstall the selected app or game.
  7. Insert the game disc and reinstall the game.
  8. After the installation is complete, launch the game and check for any improvements.

Reinstalling the game or app will help you get rid of any corrupted files that are causing the game to crash.

5. Reset Xbox One

Xbox Game installation error
  1. Press the Xbox button on the controller to open the guide.
  2. Navigate to System > Settings > System and select Console Info.
  3. Select Reset Console.
  4. Select Reset and Kepp my games & apps. This will reset the OS and delete all potentially corrupted data without deleting your games and apps.
  5. Once the reset is complete, try installing the game and check for any improvements.

If the issue persists, you can factory reset the console by choosing the Reset and remove everything option.

The 0x8b050066 error on Xbox One can be resolved by following the troubleshooting tips in this article. However,  if there is a service outage, wait until the issue is fixed by the developers.

5 Best Portable DVD Players Deals [Top Picks]

We’re back with exciting news. We have put together some of the best offers you can find online on portable DVD players.

Even if video streaming services are quite popular these days, certain users still cherish their DVD collection. If you are one of them as well, there is no secret that many of the latest laptops don’t have disc drives.

That’s where portable DVD players step in. With their built-in screens, generous rechargeable lithium batteries that can be powered by your car charger or AC adapter, you may enjoy your favorite movies for longer on planes or trips that may last for hours.

So, if you are on the lookout for one, here you can find a few portable DVD players that you shouldn’t miss out on.

How to choose the best portbale DVD player?

Our team of expert testers, with a combined experience of 15 years, has tackled a variety of testing tasks for any device you could imagine.

Their experience comes into play as a very important element when choosing the products we described in this guide, and a large variety of factors have been taken into consideration.

The options that have been chosen offer great quality and cover the entire spectrum of price ranges, thus enabling everybody to find something that fits their needs both financially and otherwise.

What are the best portable DVD player 2022 offers?

HDJUNTUNKOR Portable DVD Player

  • Pure HD cinema level screen
  • Supports a huge array of multimedia formats
  • The only DVD player on the market that has two sets of operating systems
  • It supports max. 32GB USB and SD cards
  • It is fairly heavy (it weighs about 3 pounds)

On top of our list, you can find an interesting DVD player coming from HDJUNTUNKOR with no less than two sets of operating systems, one for daily viewing, another for onboard viewing.

Besides being the only model offering such an advantage, note that with a customized car bag, this portable DVD player does not need to be taken out of the headrest mount bag when used in the car, therefore significantly reducing the inconvenience during traveling.

As for the built-in break-point memory function, get ready to enjoy a DVD that will begin where you left off last time. Pretty convenient, right?

Portable DVD Player for kids with 14.1″ Large Swivel Screen

  • 270° rotation and 180° flip function
  • Two large 3-inch speakers
  • Break-point memory
  • Anti-shock function
  • Quite bulky

Let us tell you from the very start that this portable DVD player for kids is designed to support a wide range of formats, including DVD, CD-R (RW), DVD-R (+R), DVD-RW (+RW), CVD (SVCD), VCD (DVCD), CD, and more.

Its rechargeable battery ensures playing for 5-6 hours, a number that you’ll most likely find as being ideal for most of your trips.

Even more, there are many factors to consider when choosing the right portable DVD player for your little one and an anti-shock function is a must. Rest assured that it’s present here as well and will protect the disc and reduce video interruptions caused by shaking.

SUNPIN 11″ Portable DVD Player for Car and Kids

  • Lightweight and versatile player that supports various formats
  • Professional high brightness LCD screen
  • Double earphone jacks
  • Last Memory function
  • The car charger doesn’t have a long enough cord 

This is another DVD player that stands out if you’re looking for a model with a built-in 2500mAh rechargeable battery to play songs and videos for up to 5 and even 6 hours.

It rotates so that you can mount it in the headrest mount and those double earphone jacks are perfect if you want to keep both your kids relaxed and entertained on your family trip.

Moreover, the Last Memory function makes watching cartoons more convenient than ever by restarting them from the break-point.

DBPOWER 12-inch Portable DVD Player

  • High-capacity 2,500 mAh rechargeable lithium battery
  • Break-point memory function
  • Supports direct play of CD, DVD, CD-R/RW, DVD -R/+R, and more
  • AV output
  • Modest sound quality

With a bigger display and integrated twin stereo speakers, watching movies has never been easier than with this portable DVD player.

The swiveling display can be set to any viewing angle for convenience. The device also boasts up to 4 hours of video playback.

Then there is the break-point memory function as well that will let you start off with a video from the exact same spot where you had left.

ieGeek 11.5-inch Portable DVD Player

  • HD eye-protective screen
  • Upgraded battery capacity to 2500mAh
  • Clear, loud volume
  • Can be swiveled and attached to the car headrest
  • User manual not included

The compact build along with the ability to support 5 hours of operation on a single charge makes this portable DVD player the perfect entertainment source just about anywhere.

The 11.6-inch display allows for 360 degree of swivel action while the twin speaker is loud enough to fill your senses to the brim. The Resume function ensures you can start off from the point you watched last time.

As for the volume, the ieGeek portable DVD player comes equipped with two high-power speakers ideal for a clear, loud, and crisp sound.

Ready to get back to your old movie collection or simply planning to listen to music during an upcoming road trip? All of the portable DVD players we’ve recommended above can last for about five hours on a single charge, which is enough power to get through most of the journey.

Even more, if you like the idea of dual screen devices, then check out this list including the best dual screen portable DVD players.

Make an informed decision to enjoy movies, songs, pictures, and videos on the go, and let us know your final pick in the comments area below.